Paul Le Wol
-
Posts
1,062 -
Joined
-
Last visited
Content Type
Profiles
Forums
Gallery
Events
Everything posted by Paul Le Wol
-
Hi John, nice update! Looking forward to November. Wishing you well.
-
I bought a Higaki Kaisen ship. Today that would cost you about 213 USD plus shipping which to me is good. Bear in mind, I’m used to having to pay with Canadian mini bucks.😀
-
I recently bought a Woody Joe kit from zootoys.jp . It was a good experience. Their postal service handed it off to Canada Post who collected sales tax at the door. Came in just over a week. Painless
-
The mystery Zepher is a good looking boat. She must have been well cared for. Good luck with this build!
-
Wow Glen, this build is going to be spectacular!
- 156 replies
-
- 4
-

-

-
- Queen Annes Revenge
- bottle
- (and 1 more)
-
Hi Keith, I usually buy basswood from Sunward Hobbies in Toronto. They sell Bud Nosen Models wood who are in Two Harbors Minnesota. At the moment Sunward has BNM in stock
-
Hi Bill, thank you very much.. I’m not cutting my own strips. All of the AYC came from Joe at Modeler’s Sawmill . I have no idea how people cut these small strips as I’m having a hard enough time using them. Joe’s wood and service are first rate.
-
Thanks so much John!
-
Hi Rick, thanks very much!
-
Hi Glen, thank you so much!
-
Hi Keith, thank you. The hinges were made from 26 gauge wire. The paint was burned off and and then it was bent into an L shape. The long end was pushed through the hole and bent over. It was glued with E6000 glue to keep it from turning. I didn't like the way they looked. They were all different colors so I gave the whole wall another light coat of paint. The door knobs are steel pins with the heads reduced in size and then heated red hot. they came out a grey color. As usual by the time I do the last one I'll have it figured out
.thumb.jpg.bdc4d4e64d7cc3a8ec885047a15e802f.jpg)
-
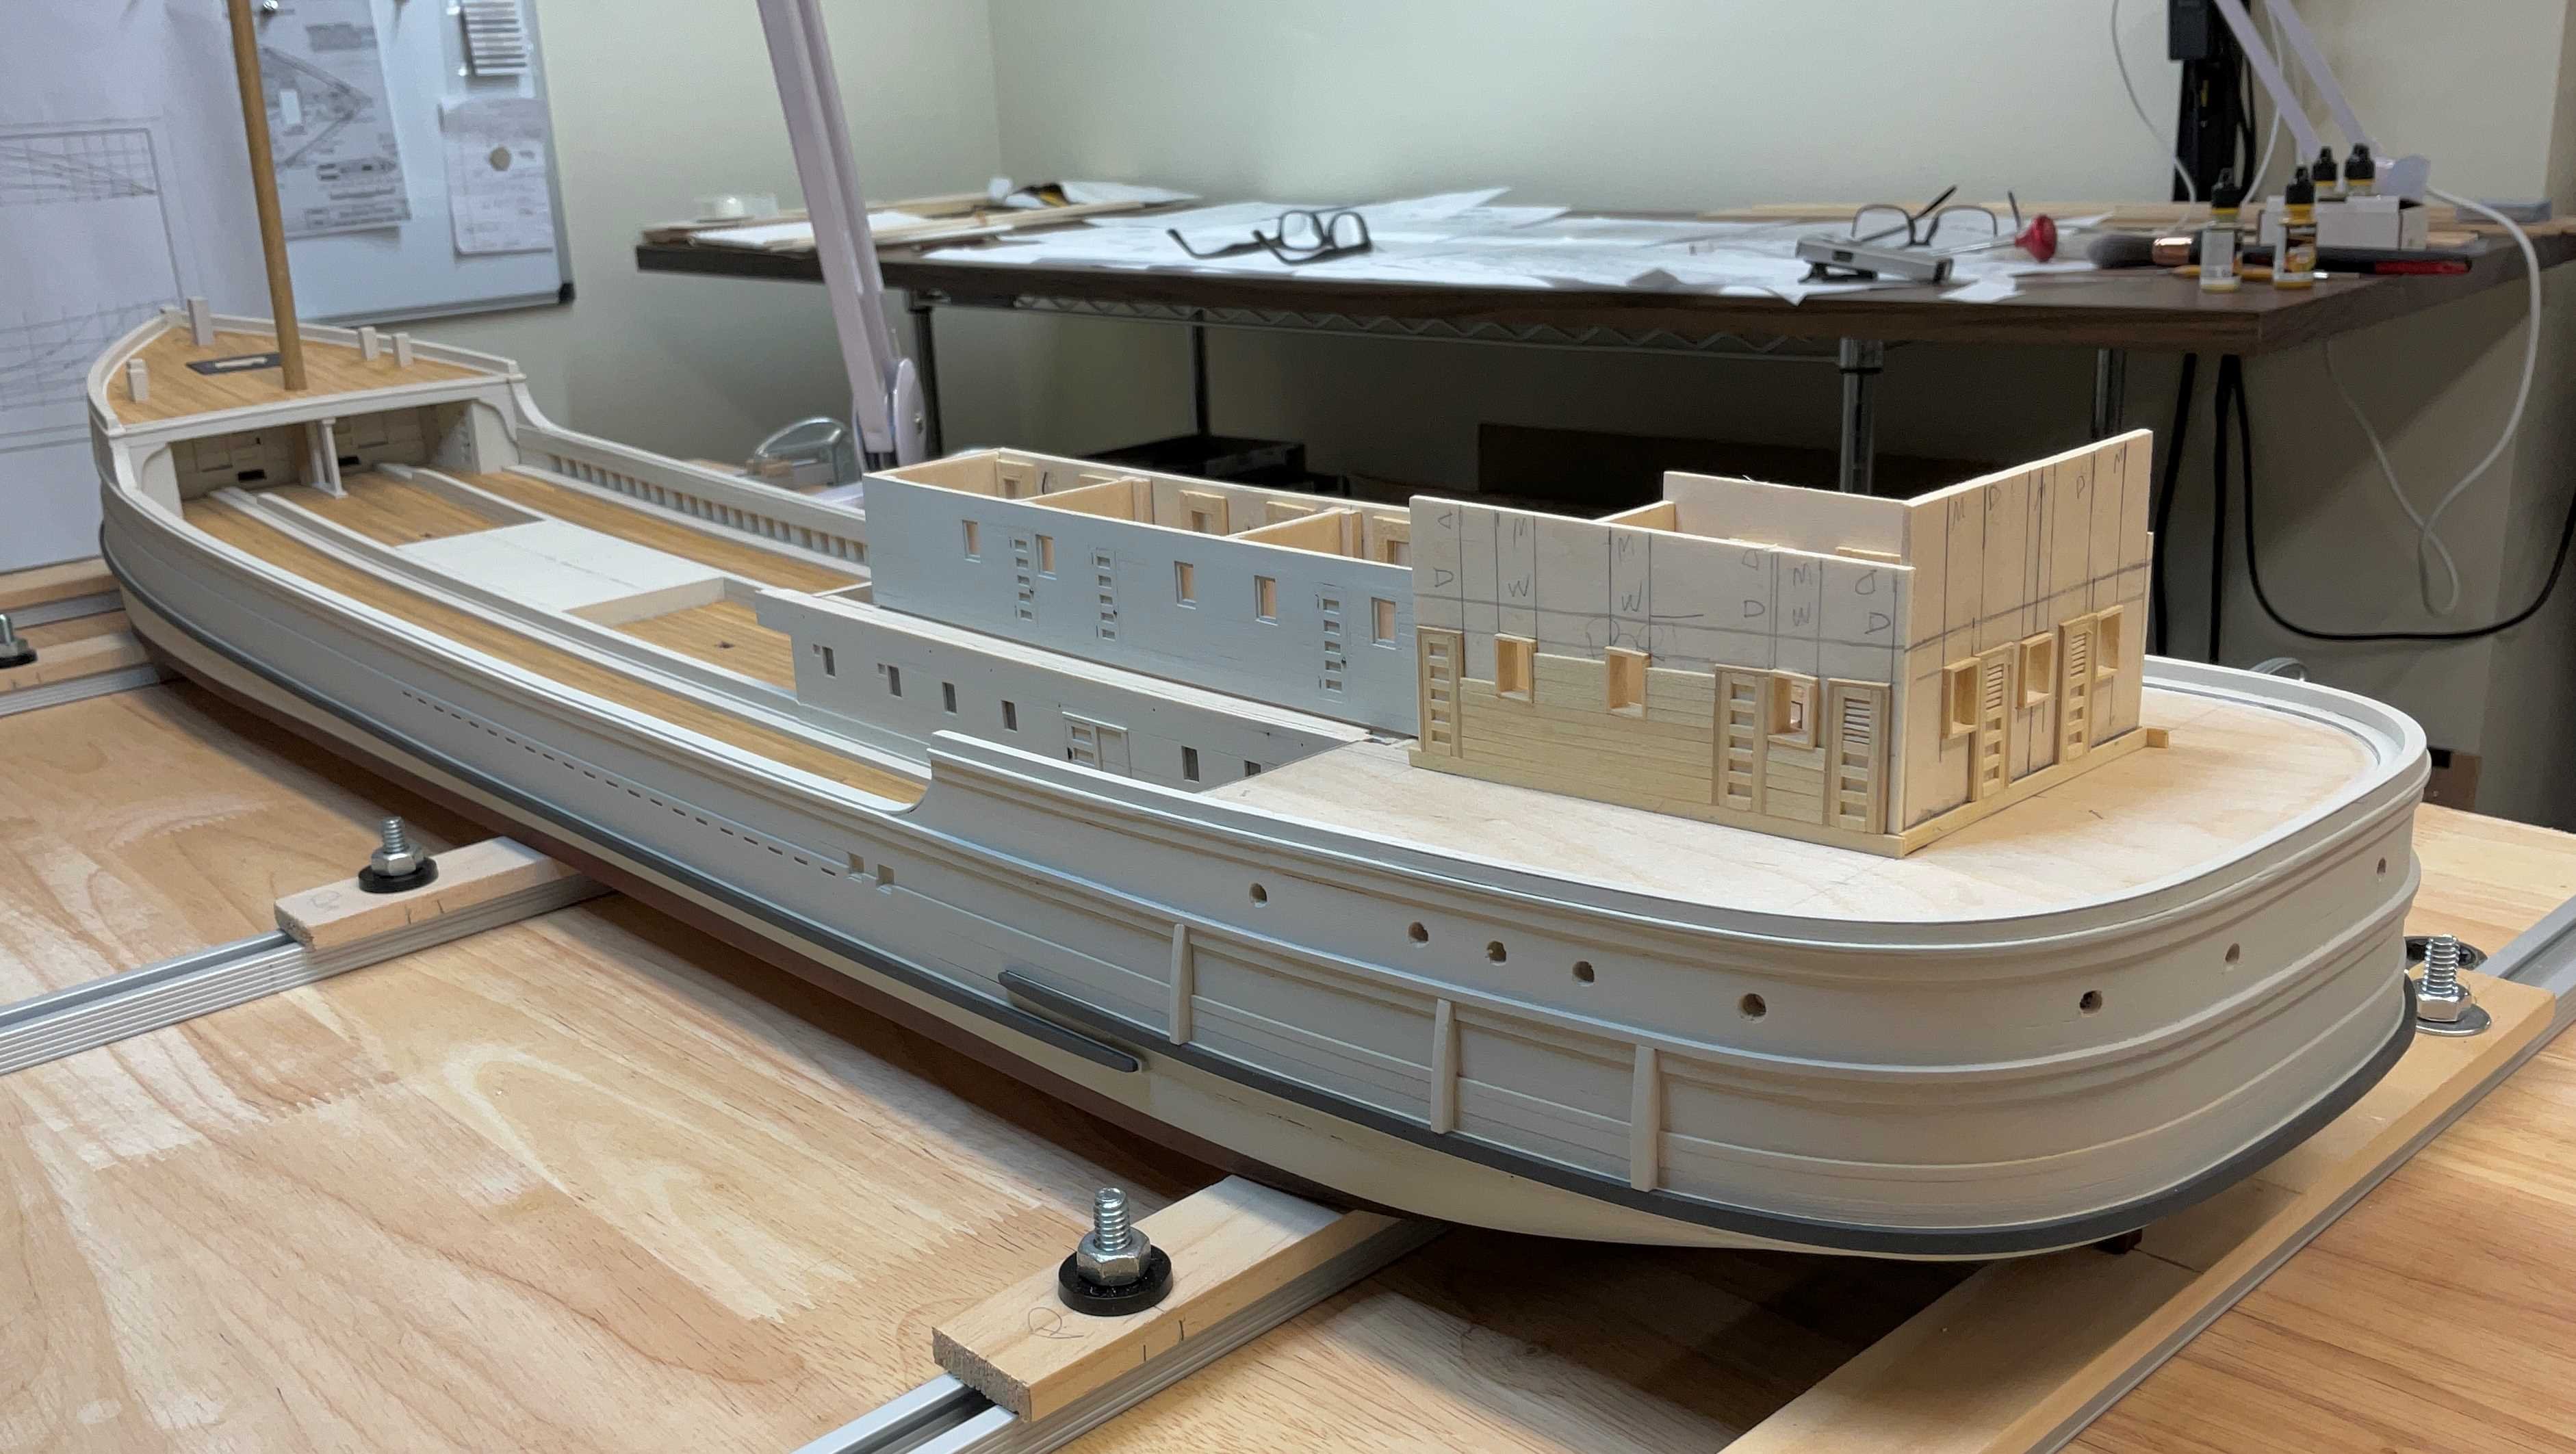
Hi Jacques, thank you very much. The walkway along the sides of the cabins will be planked. There is only about two feet between the cabin wall and the stanchions that support the boat deck. The cabin doors are 22.5” wide so not a lot of room. There is also a trough for the steering cable to lay in that runs just inboard of the stanchions. The rails are wire rope that runs through the stanchions. I guess they wanted every inch they could get for cargo
-
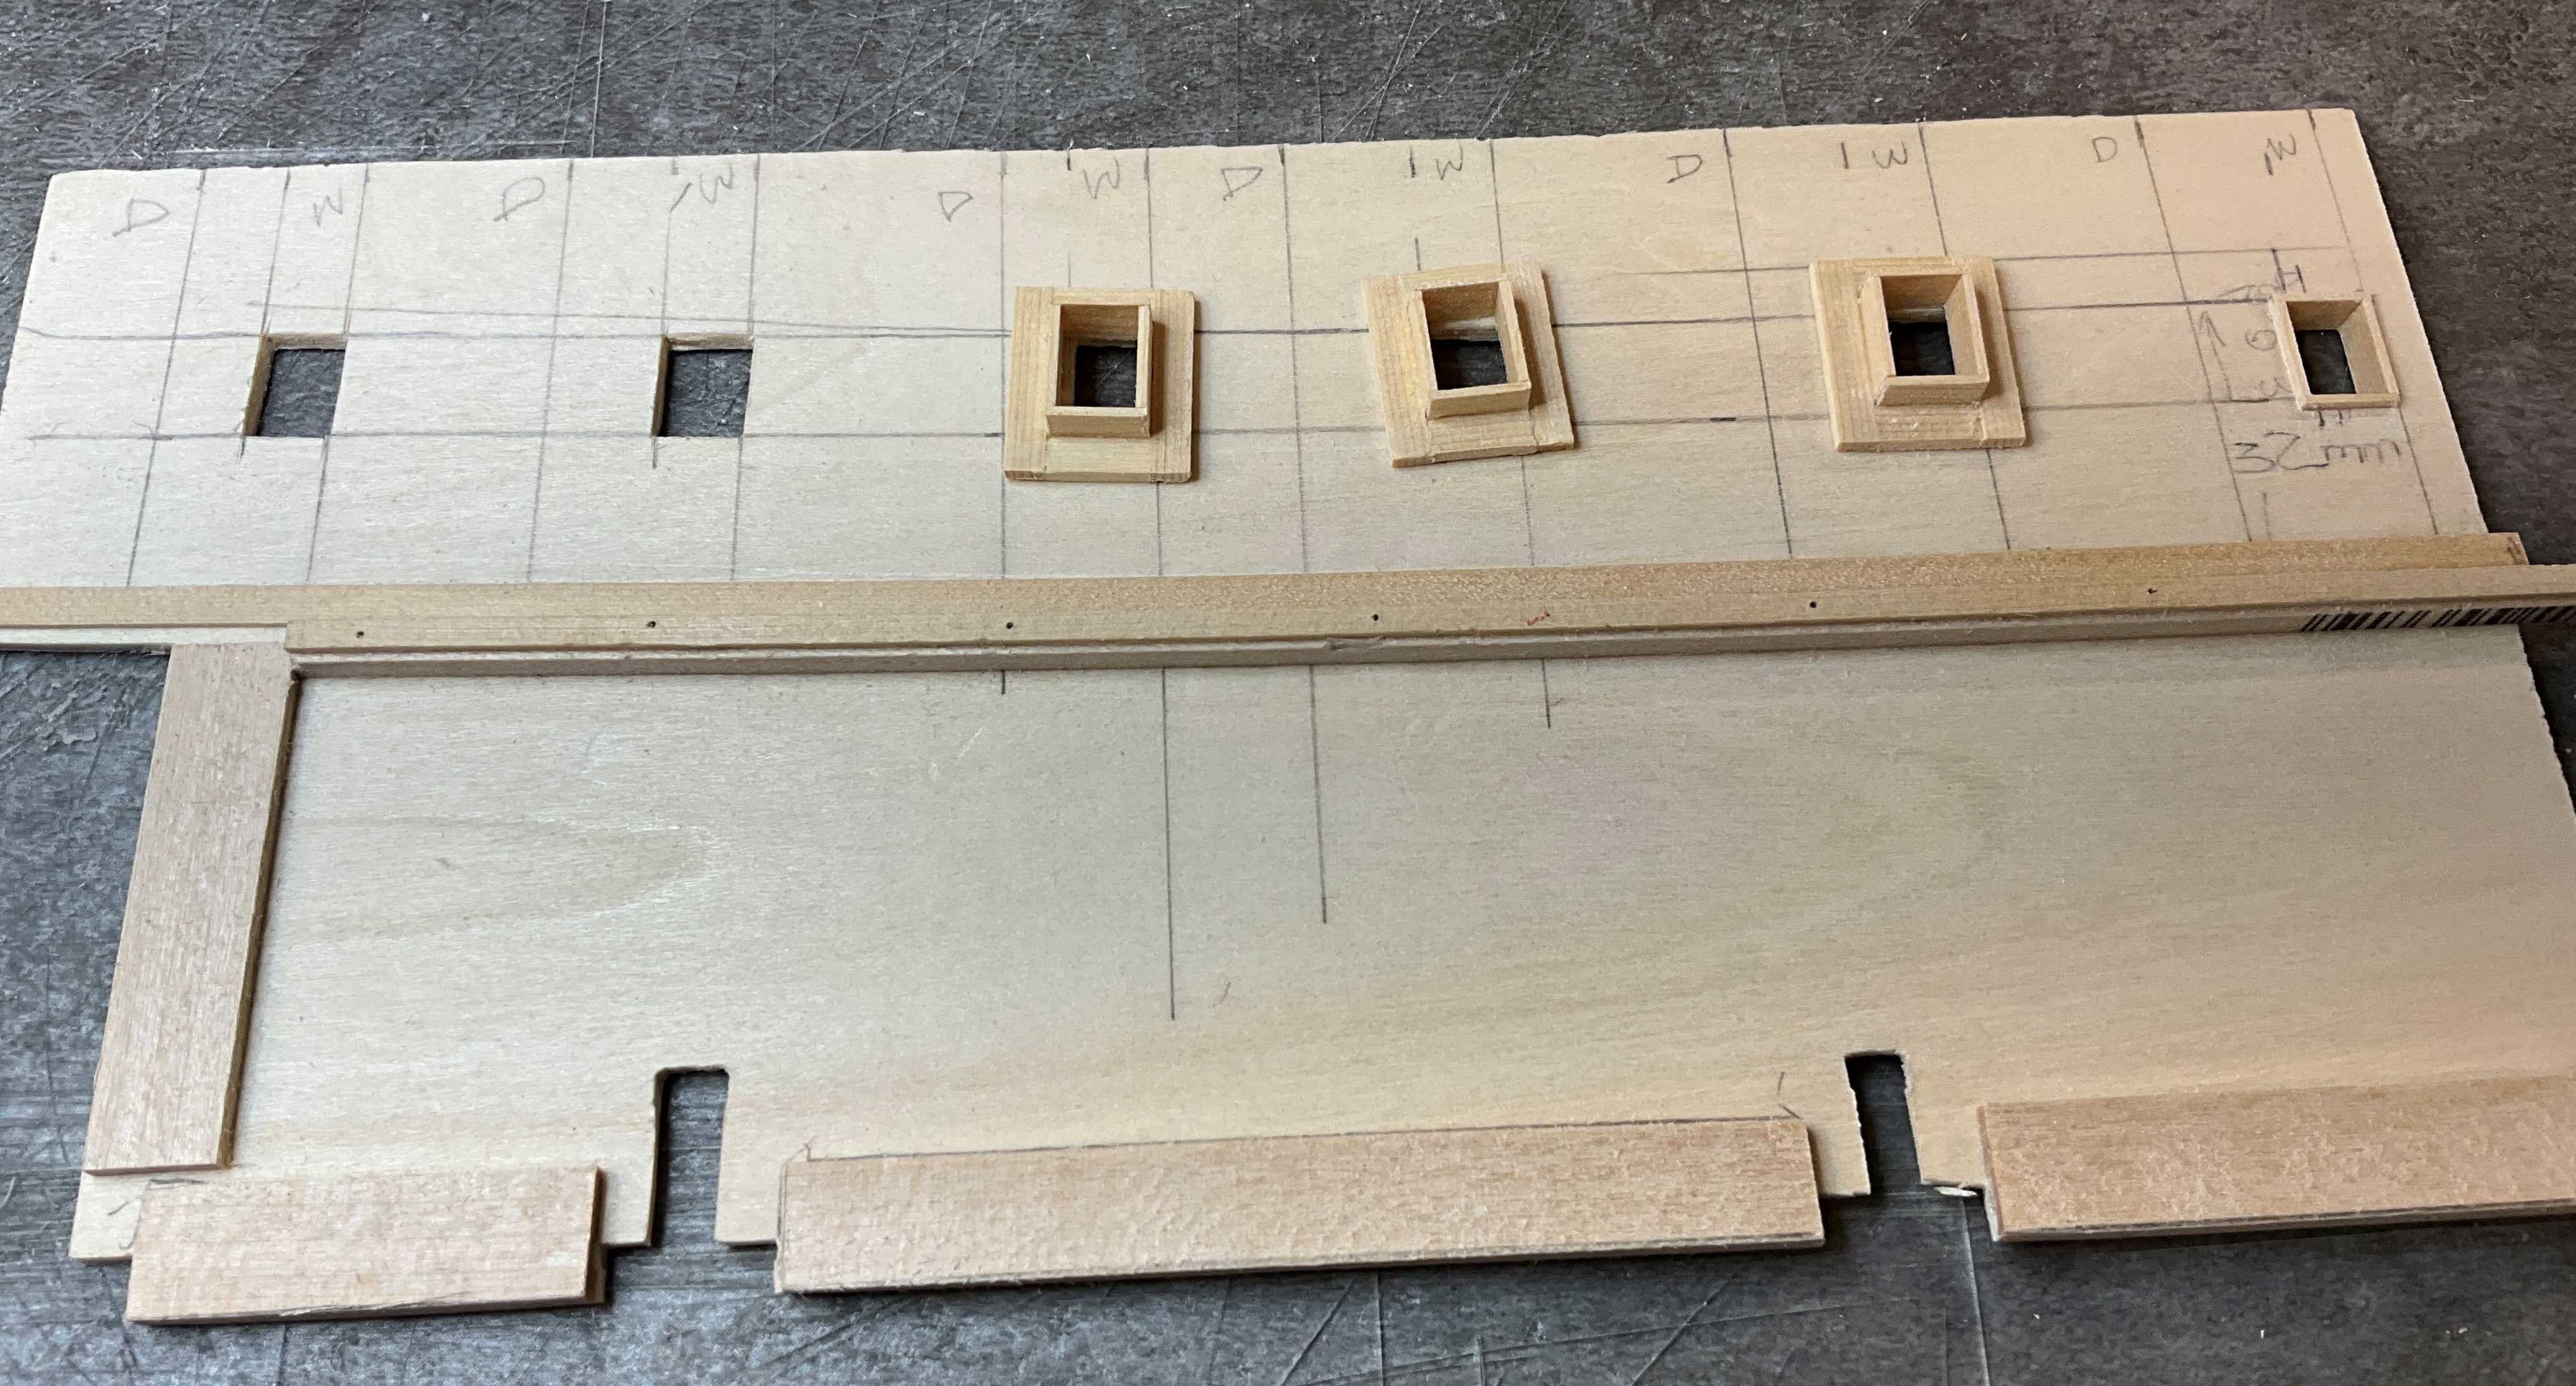
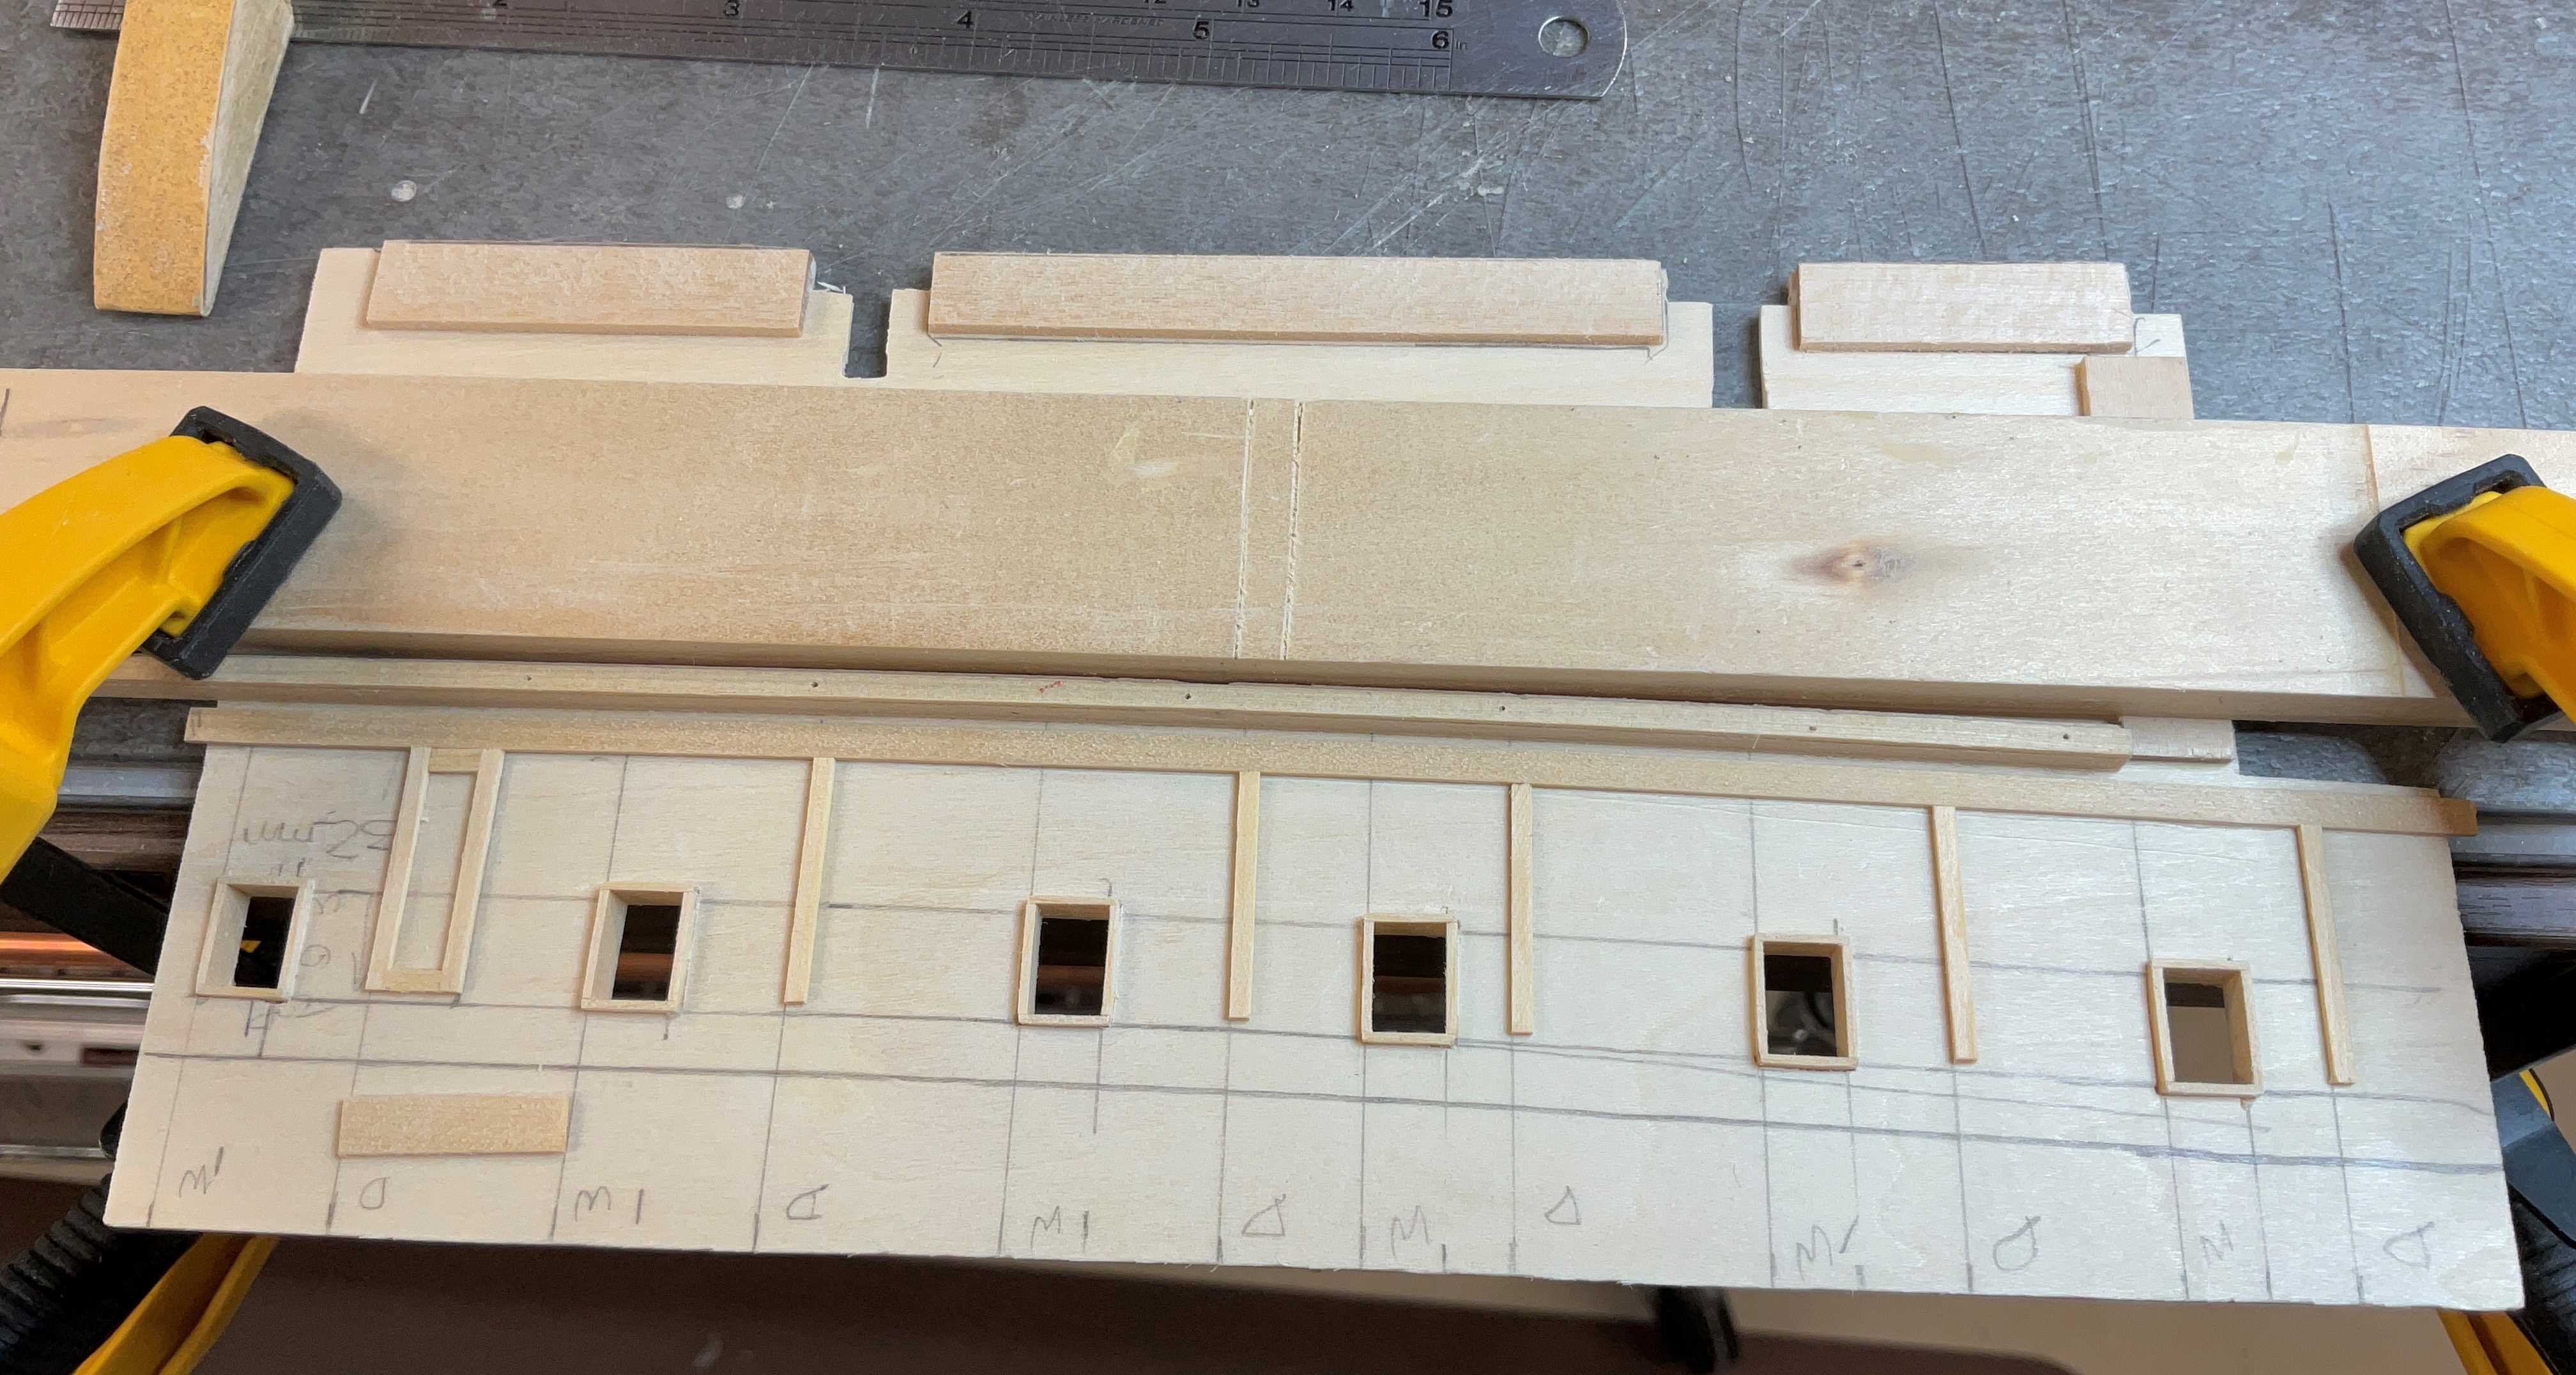
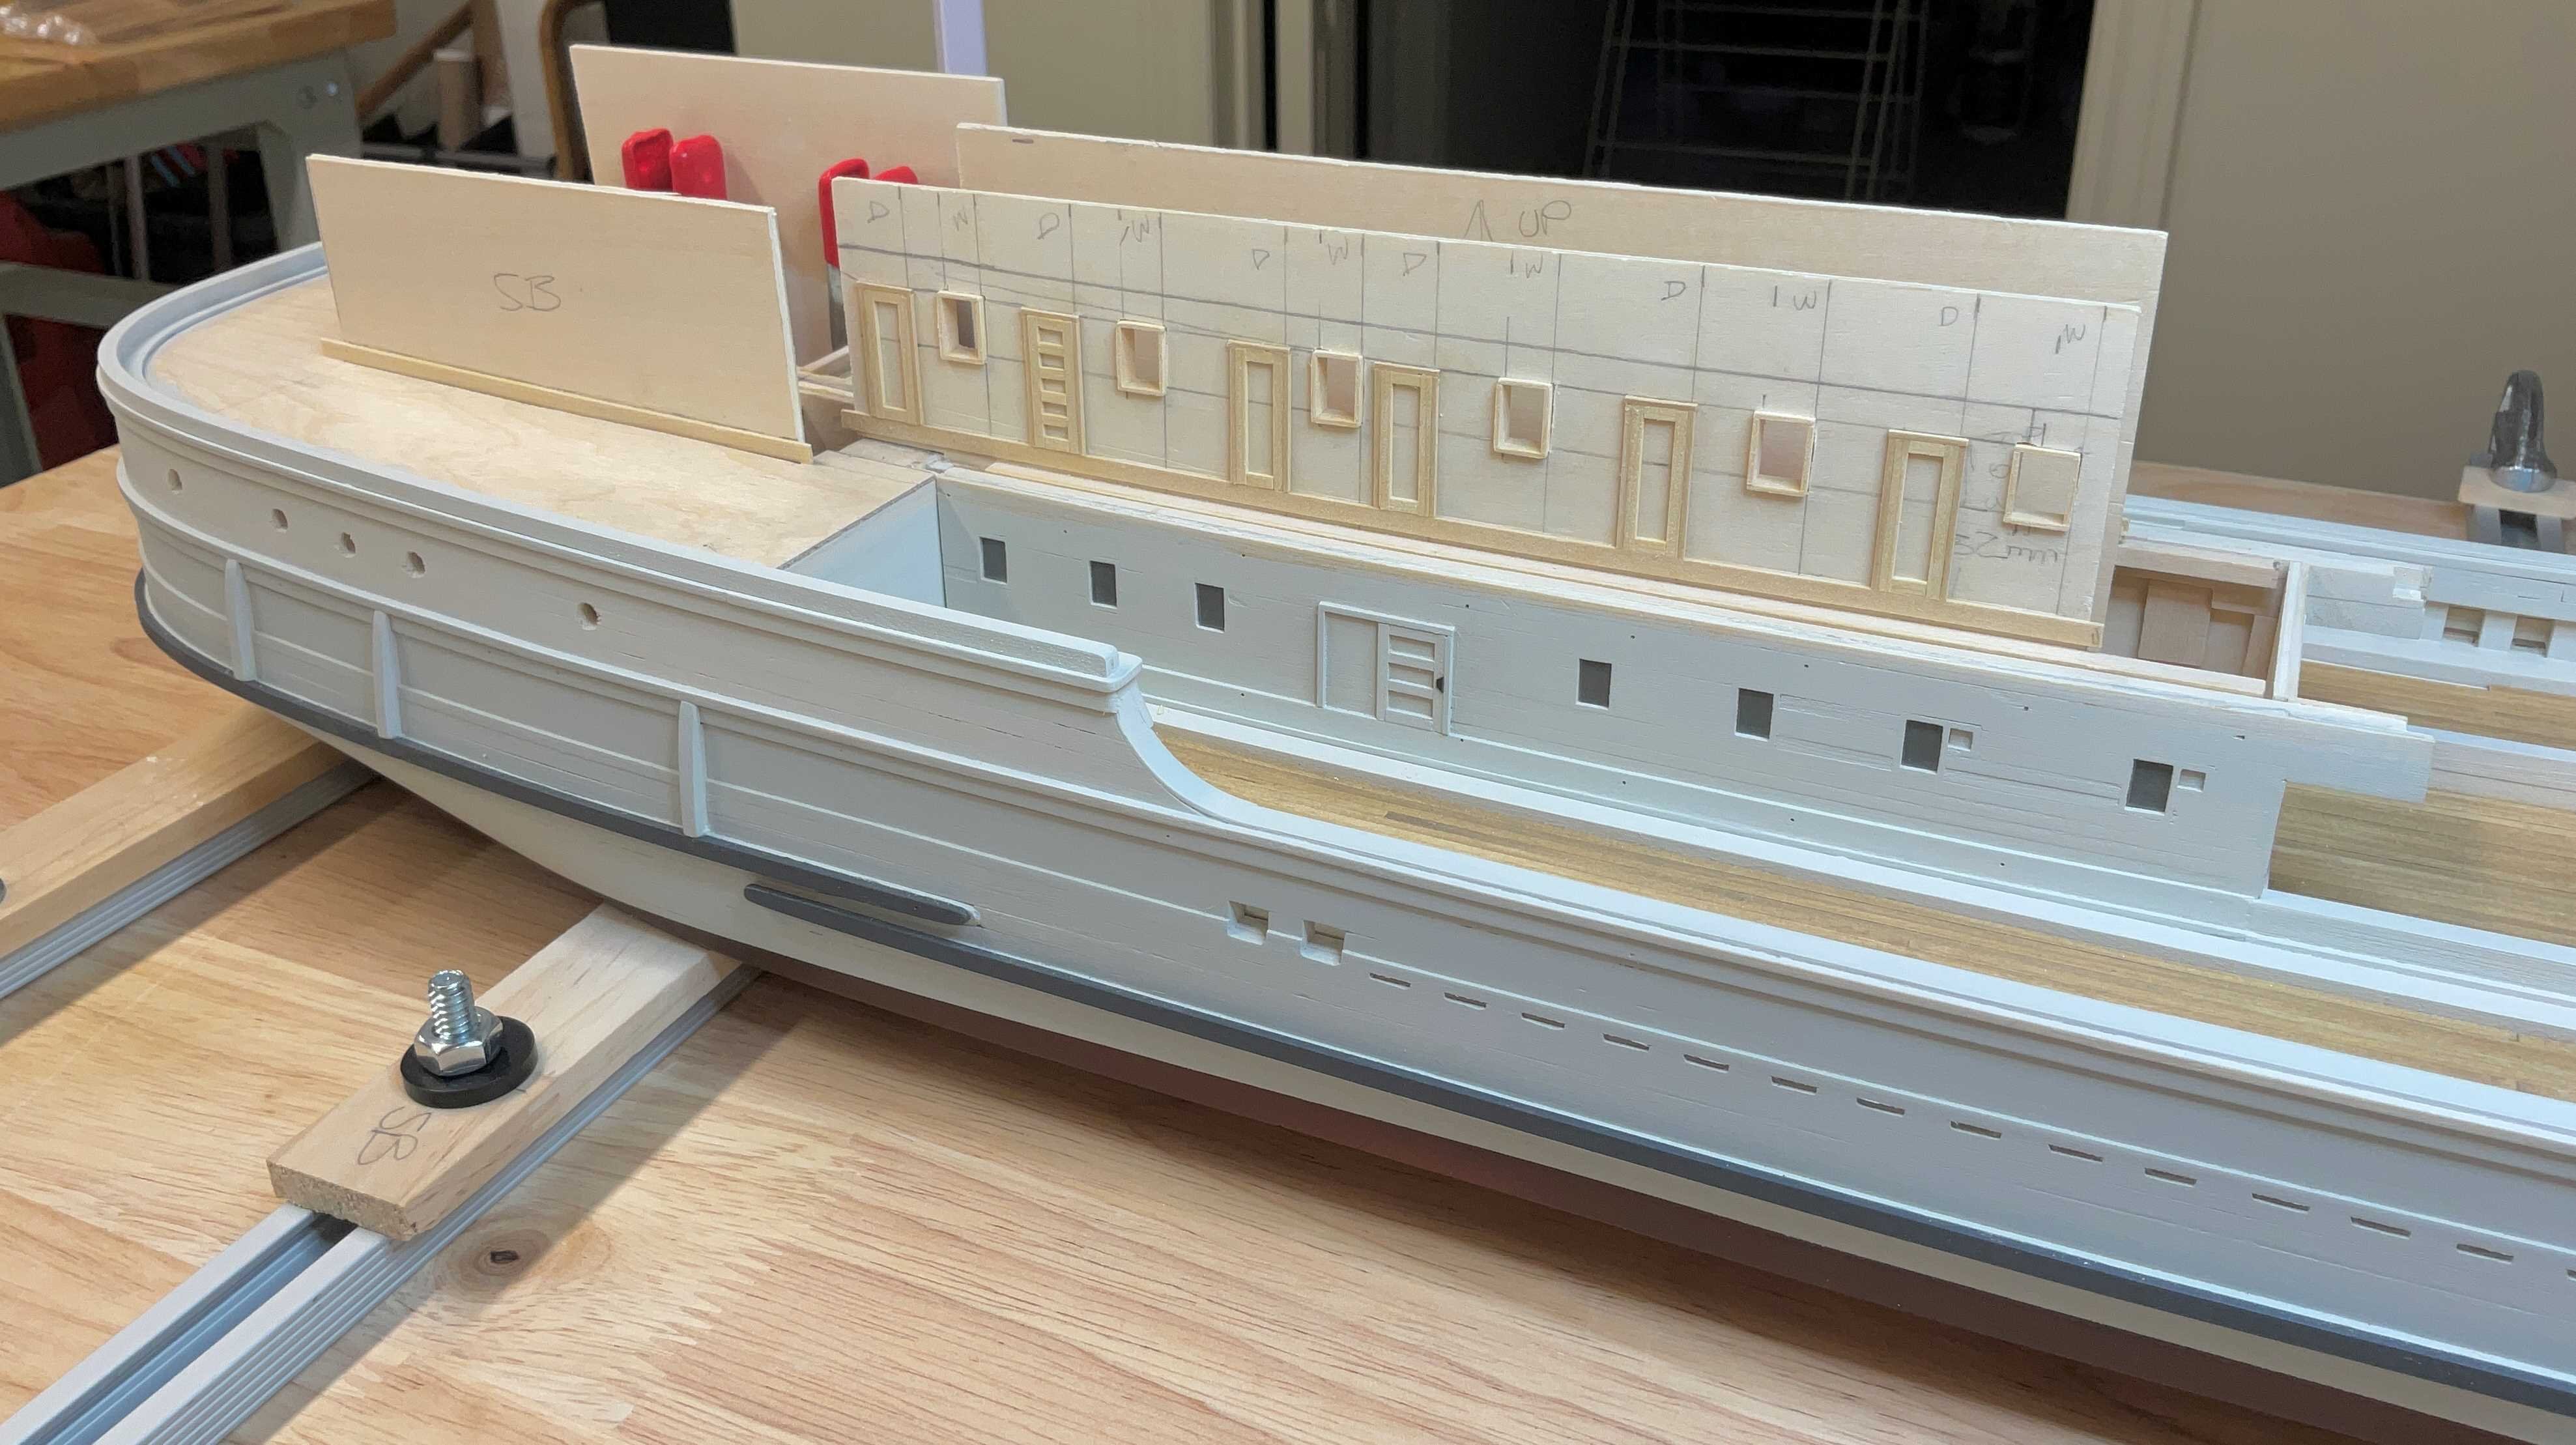
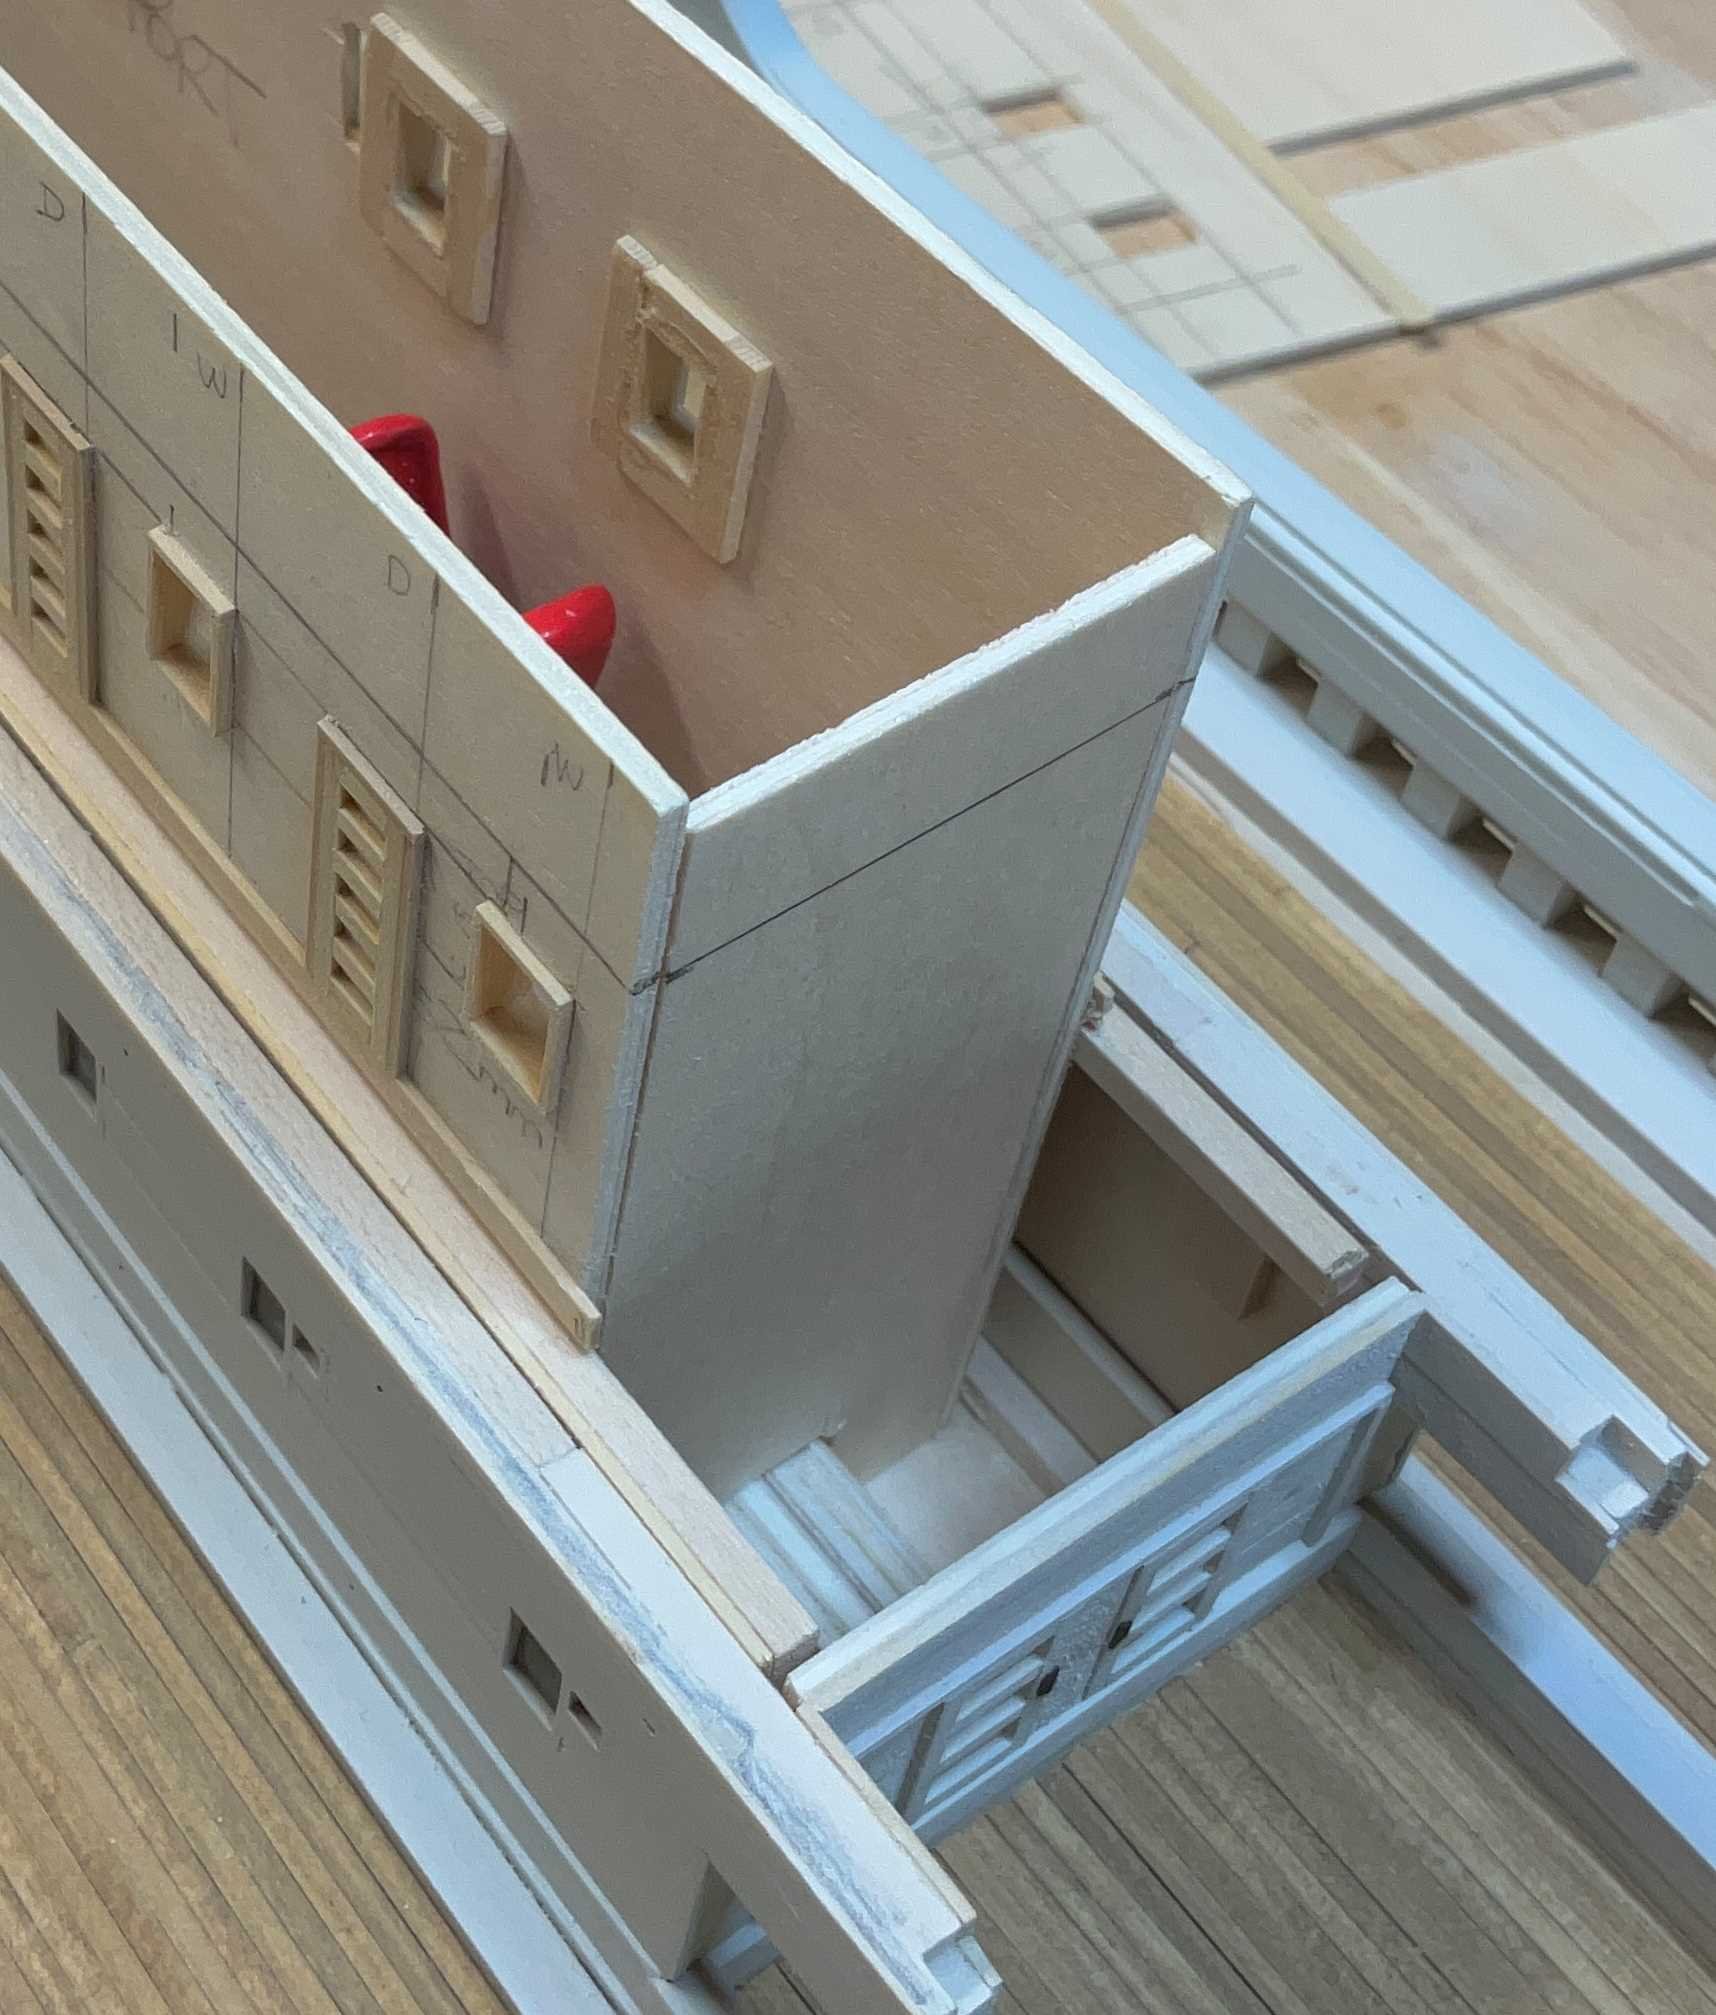
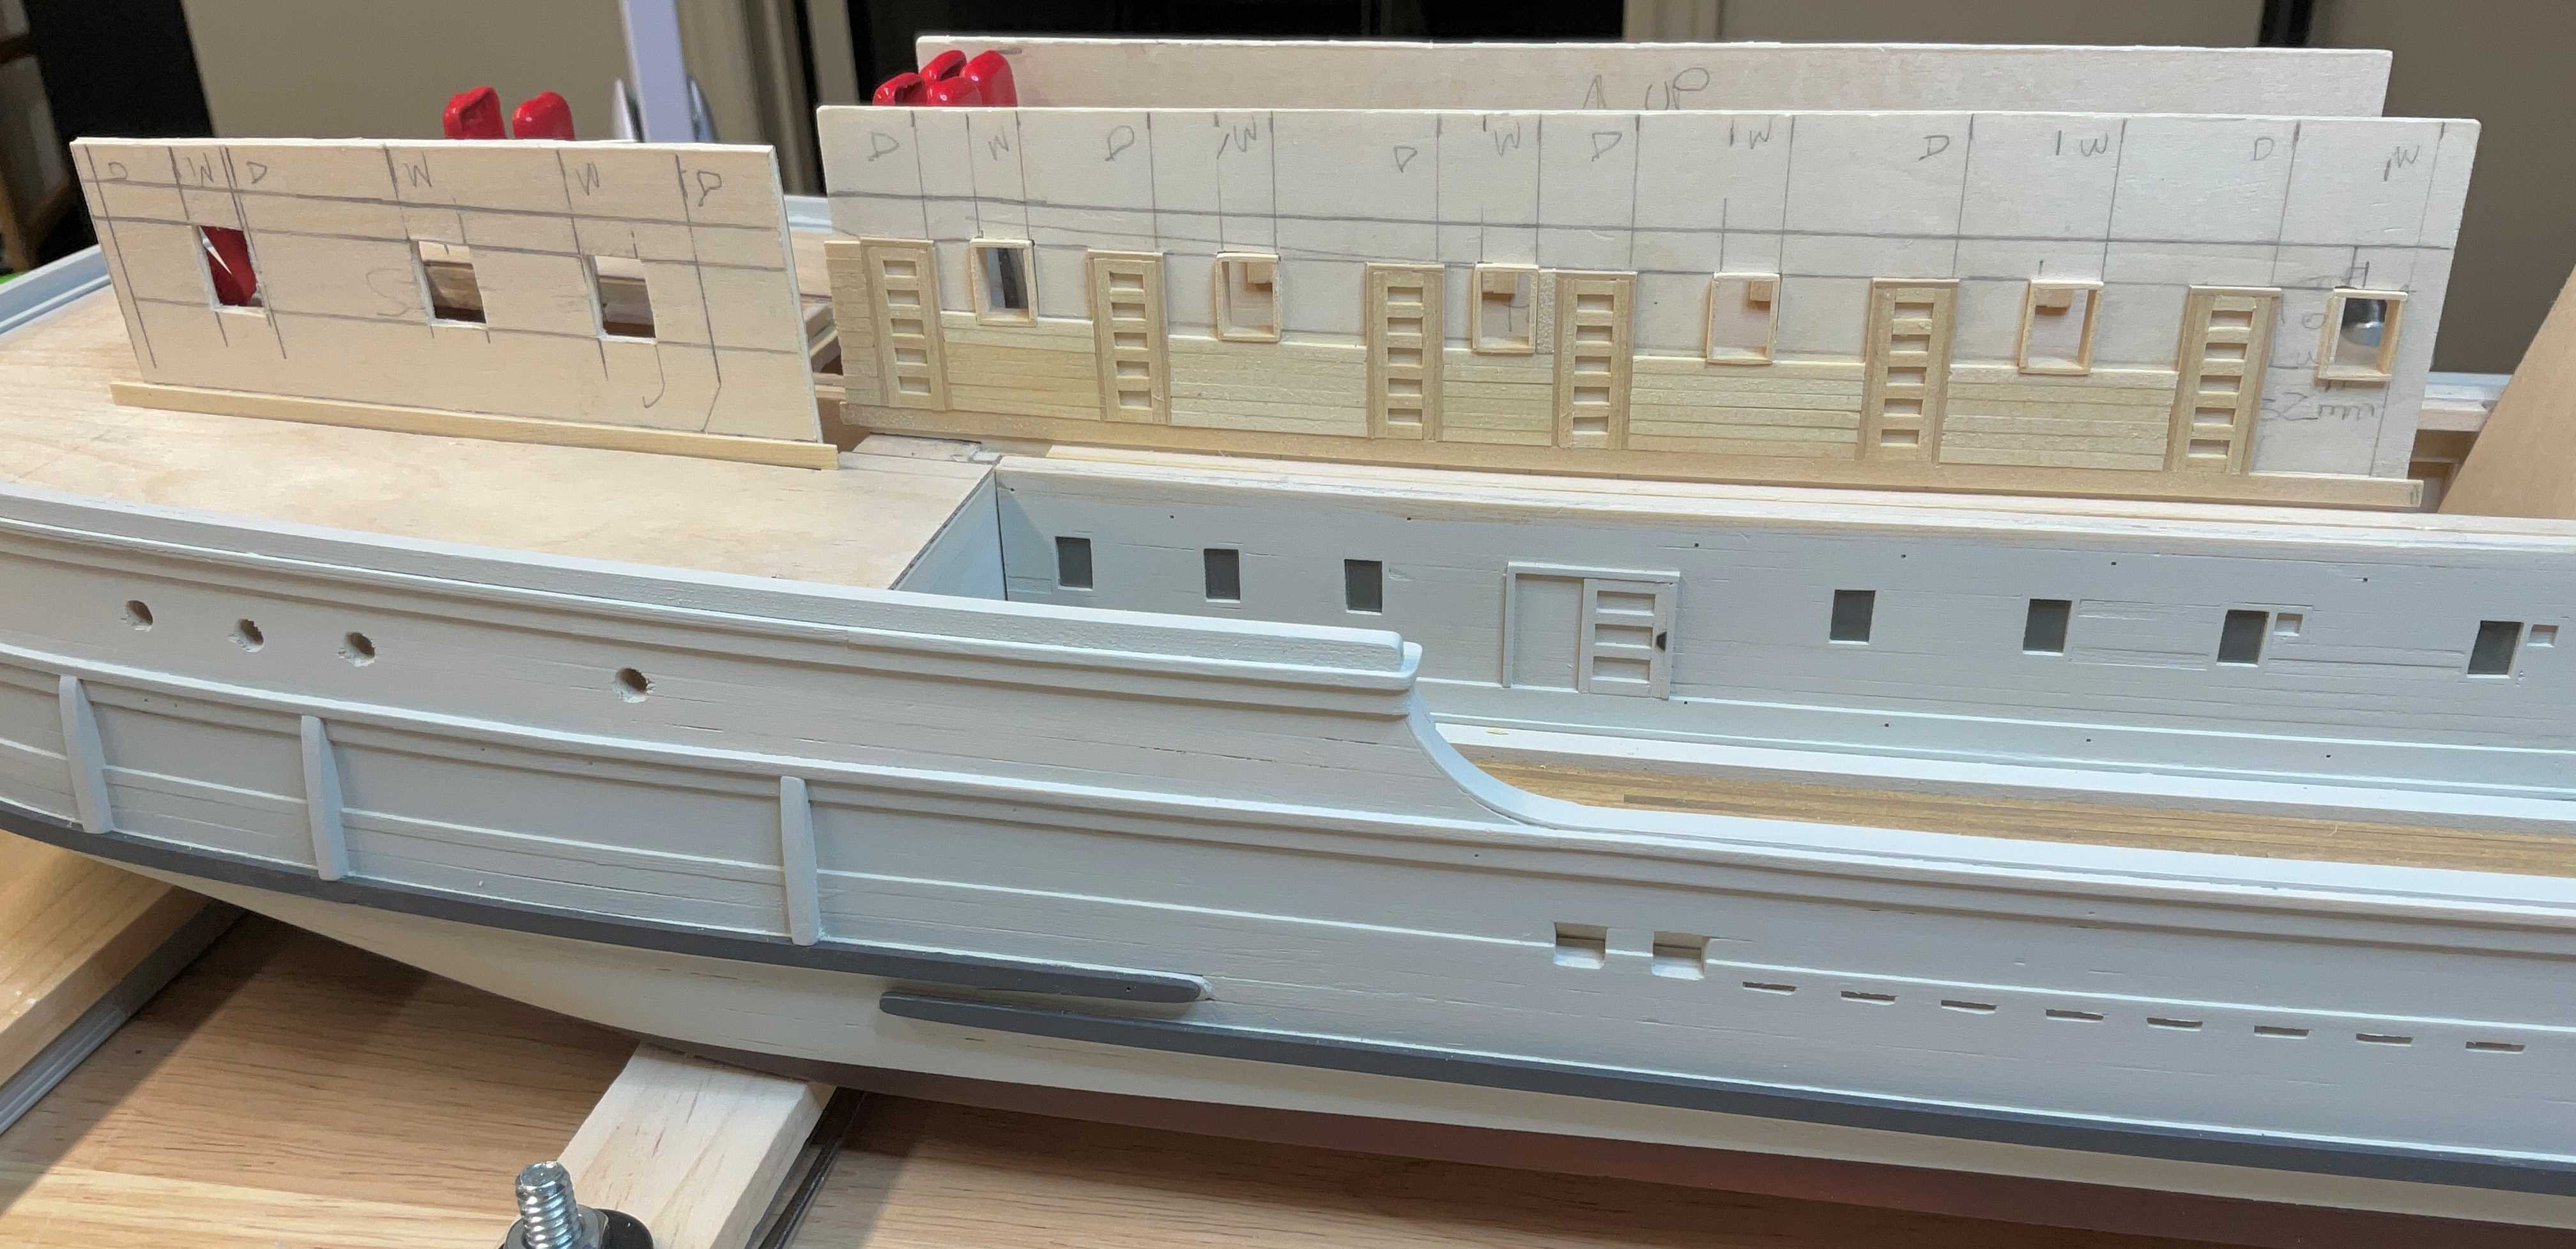
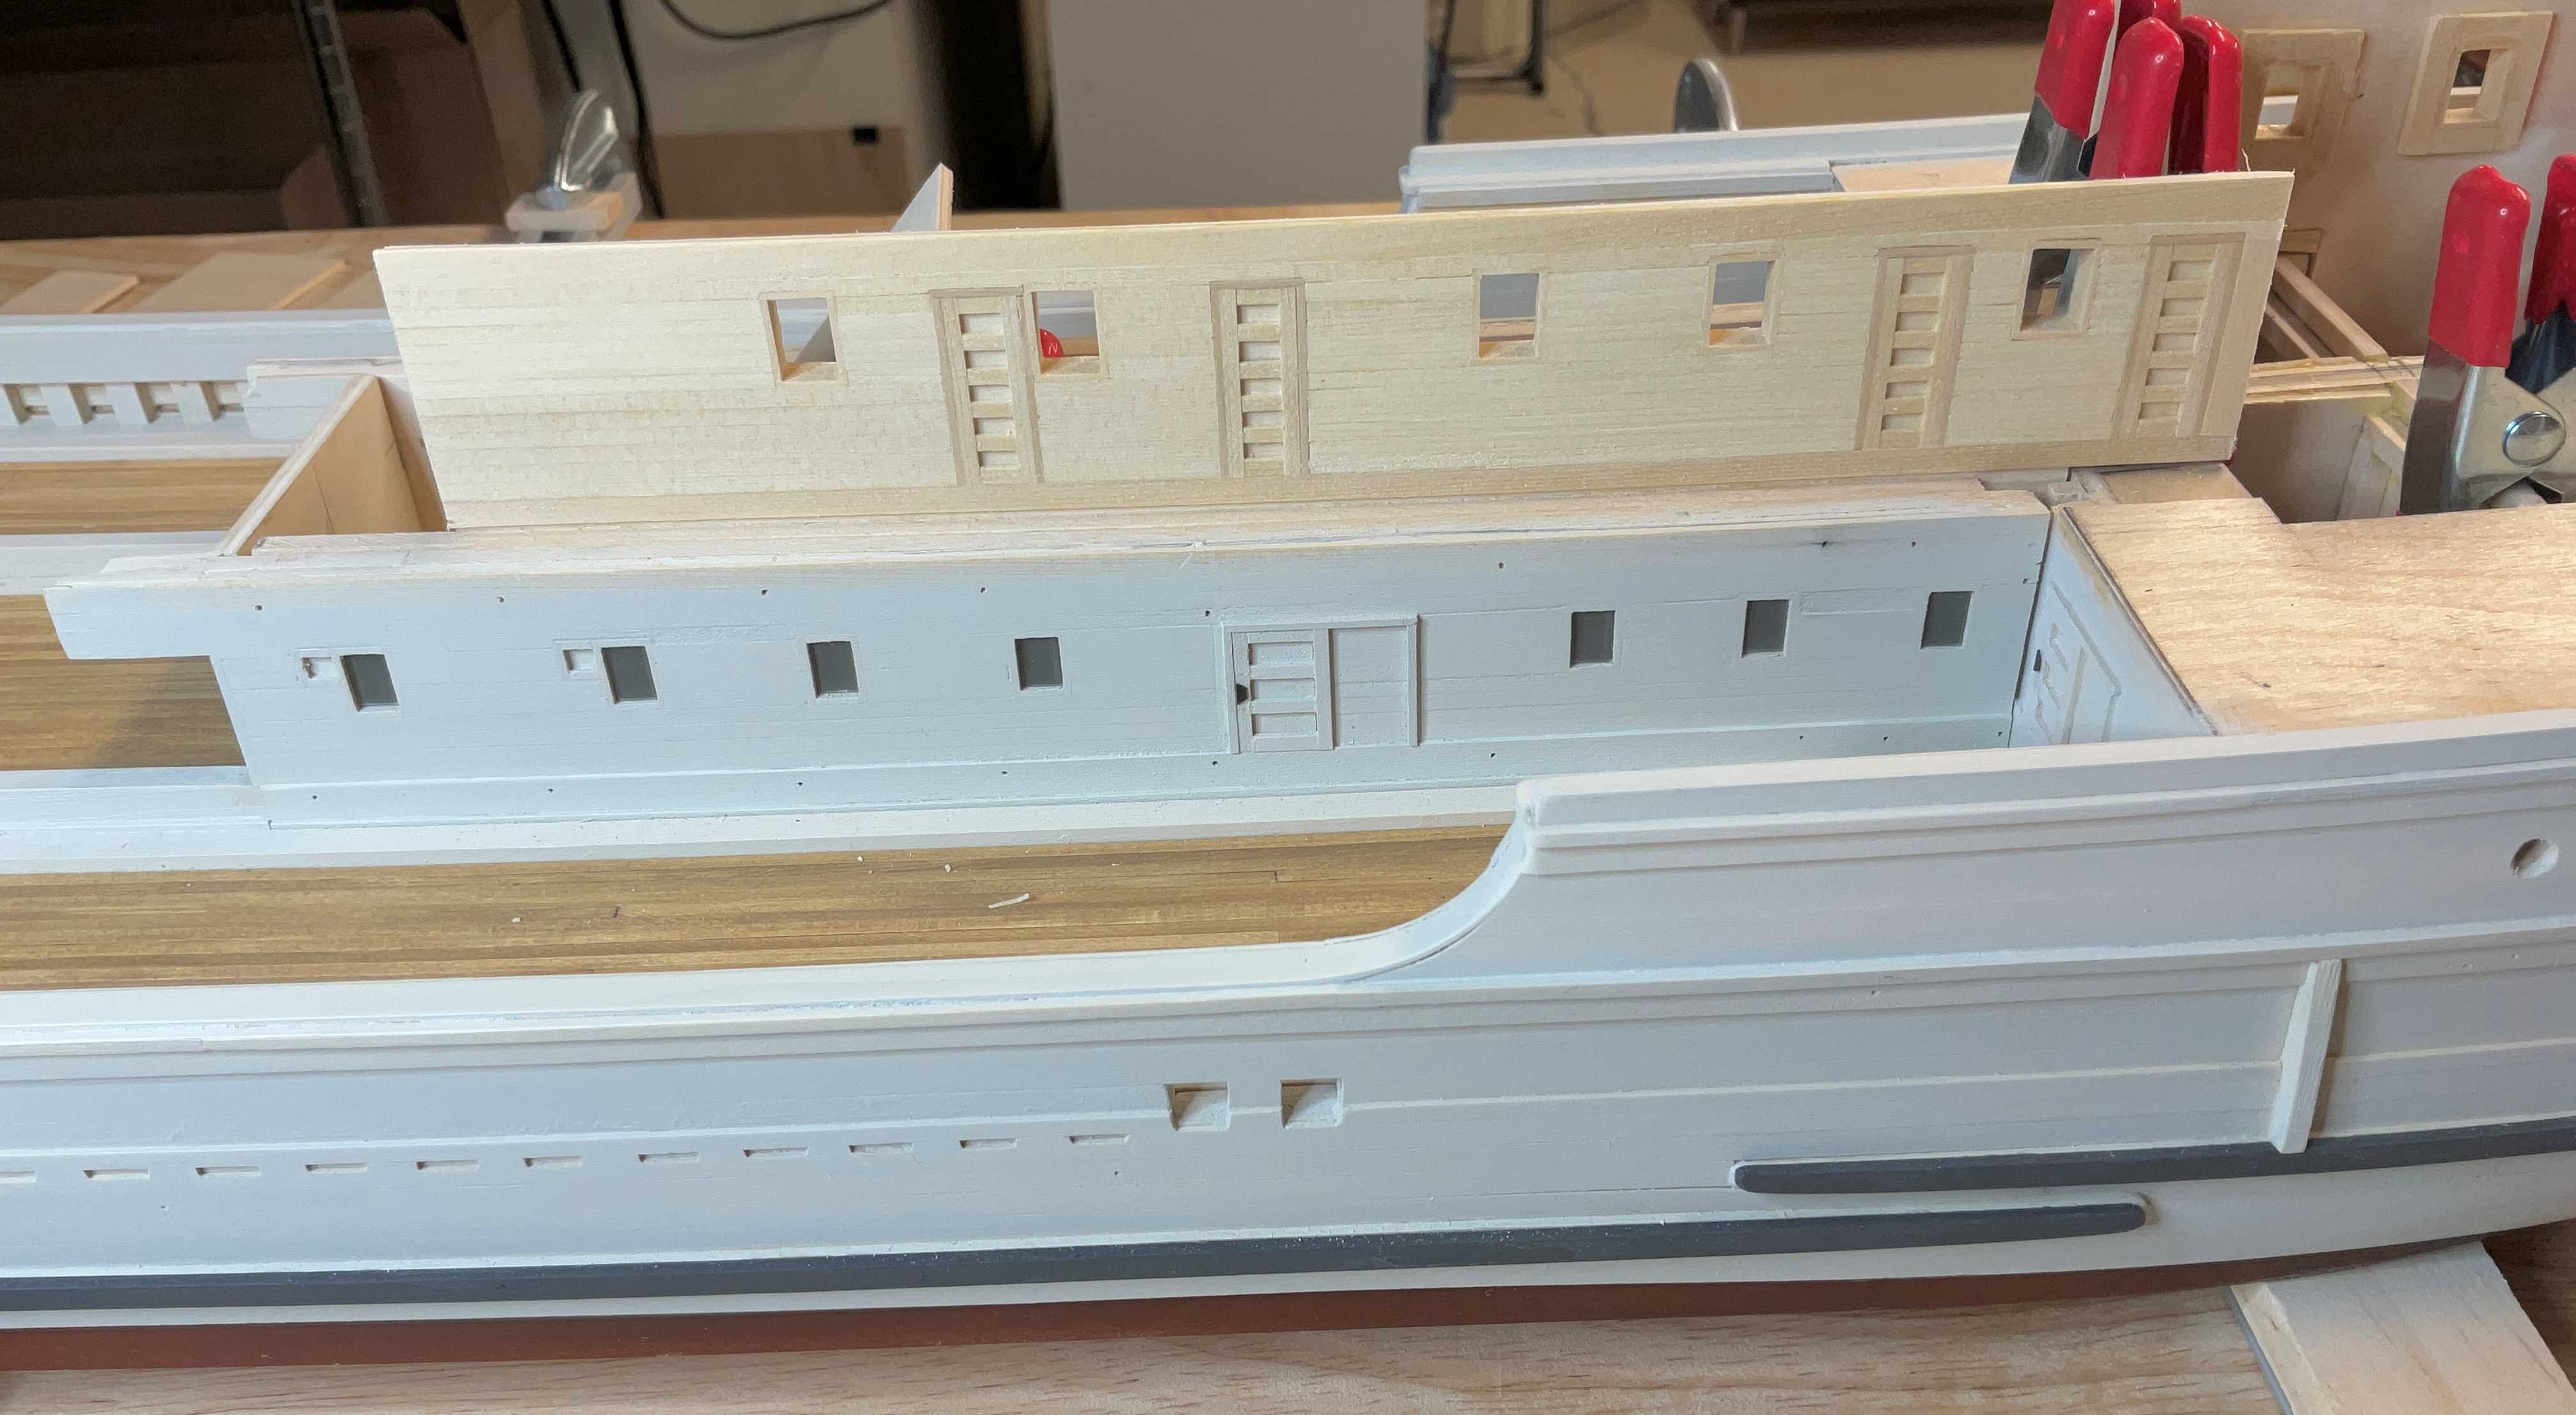
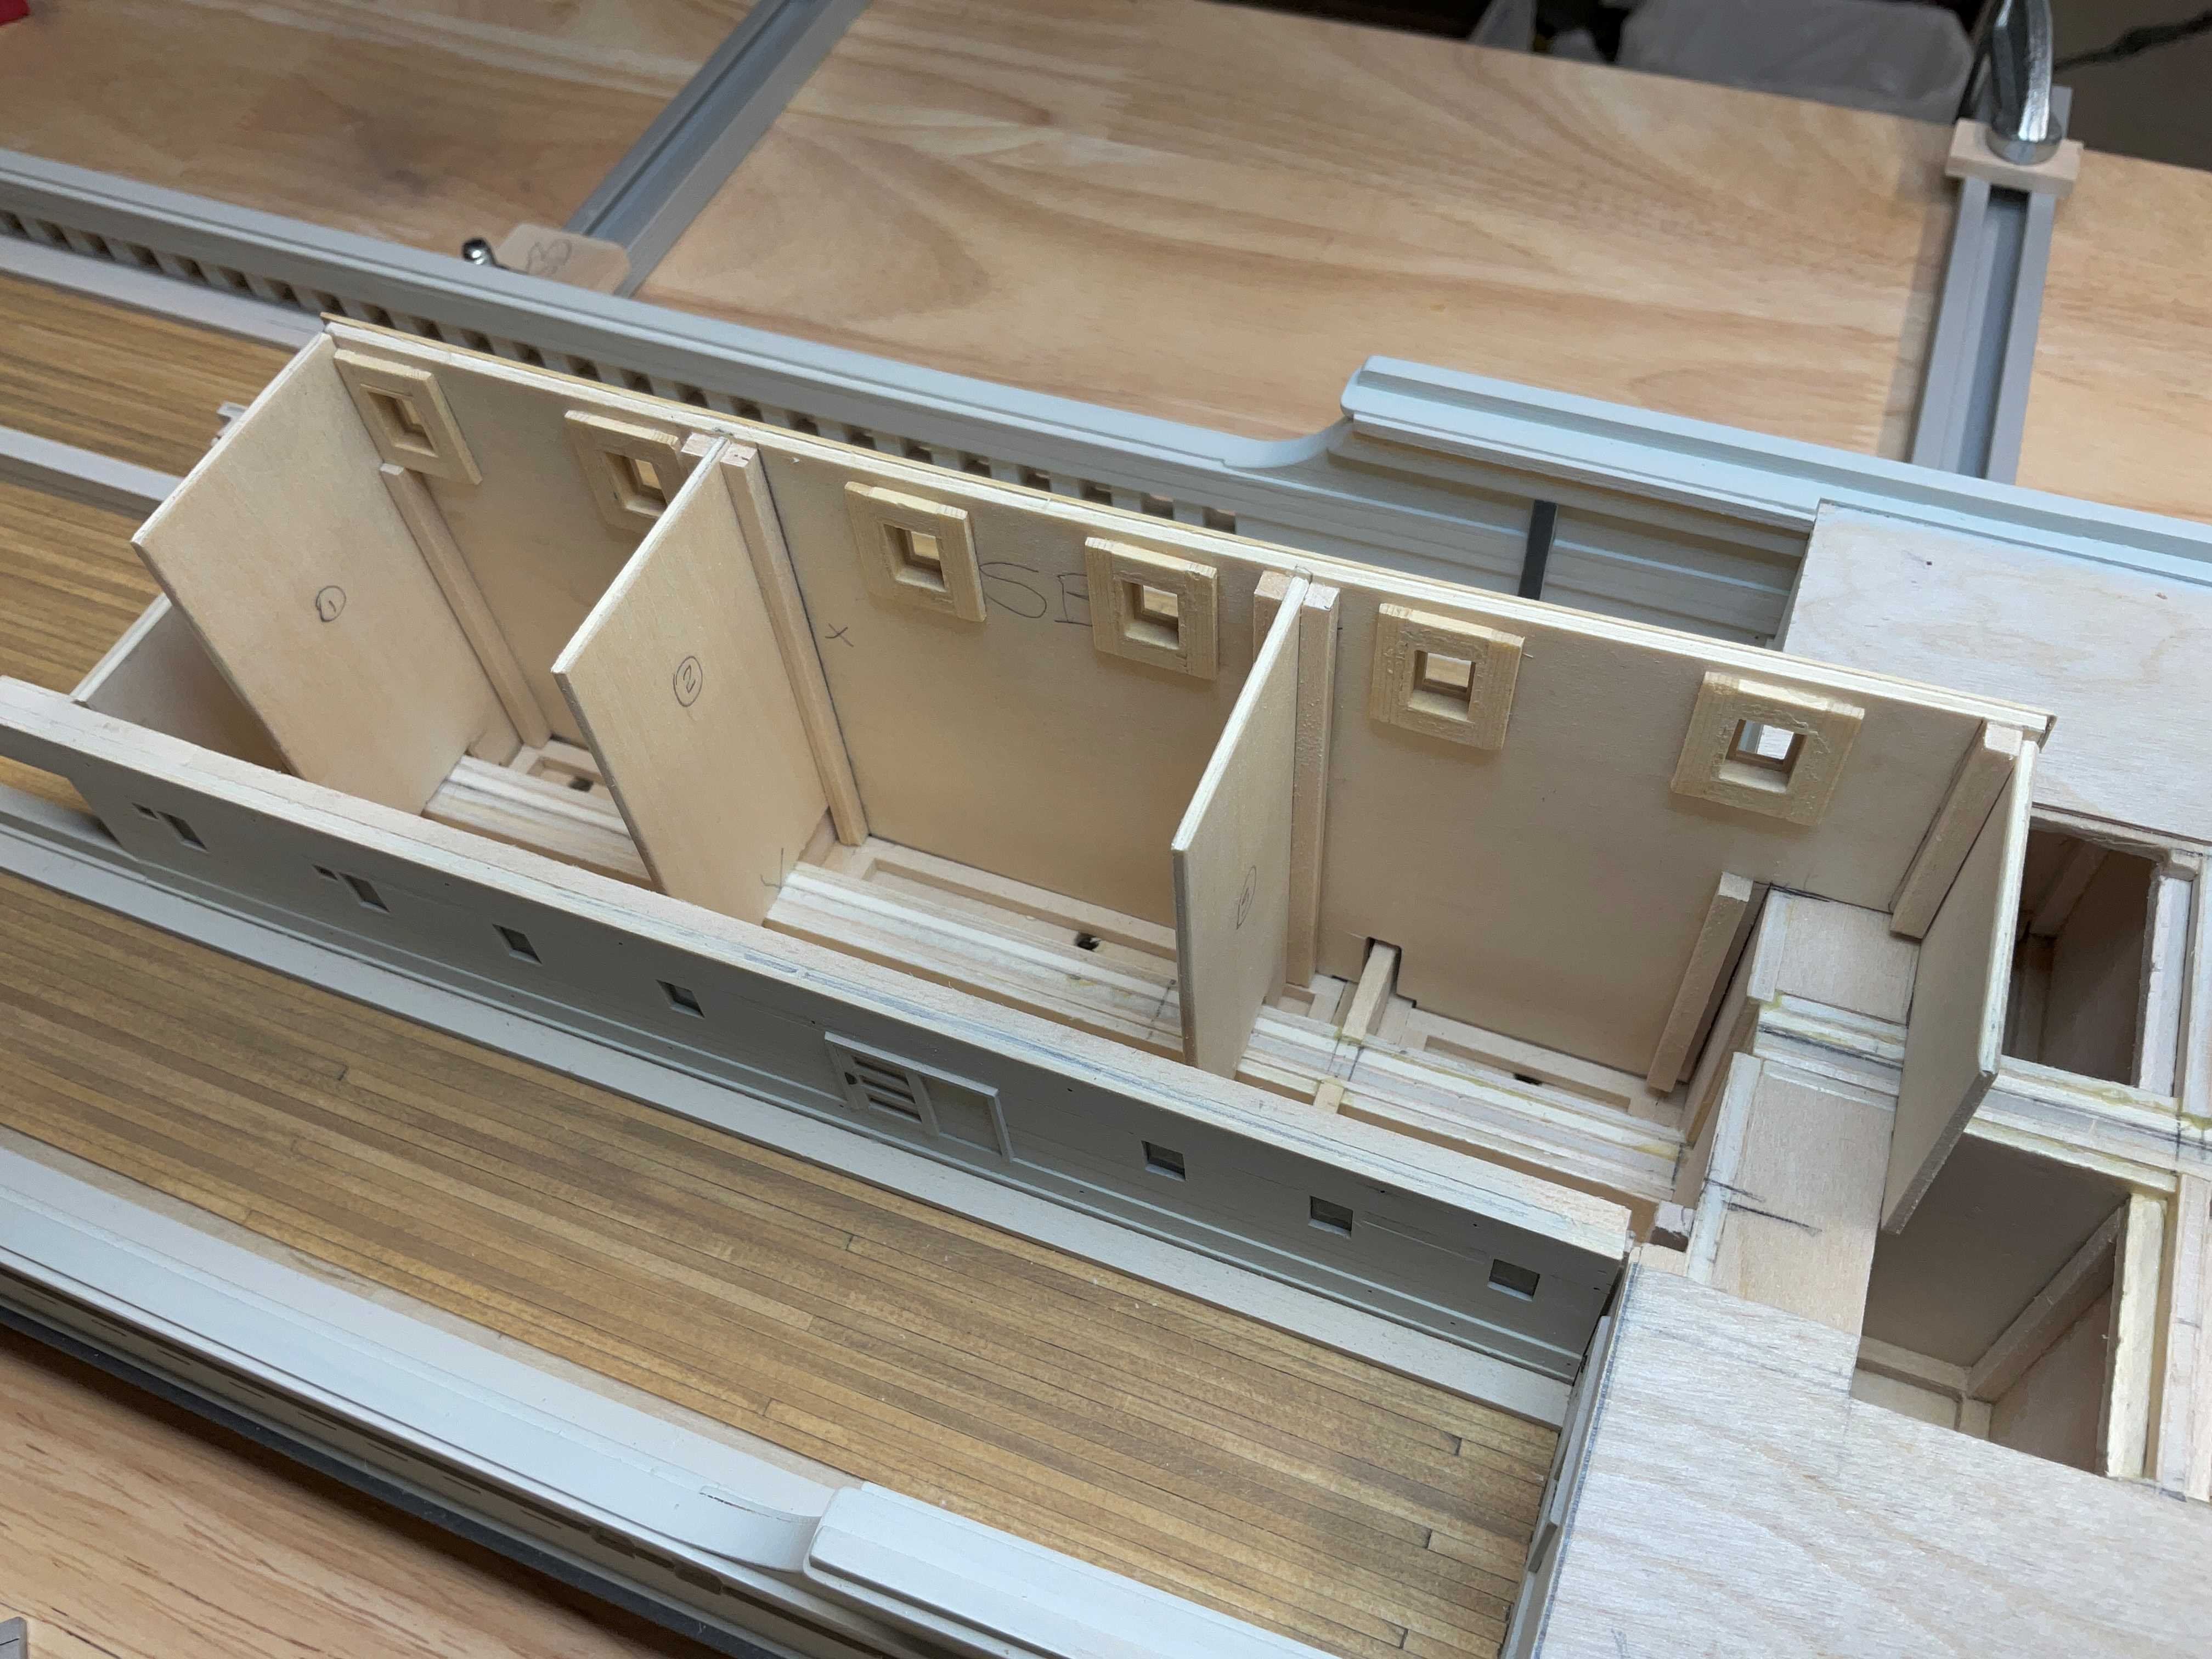
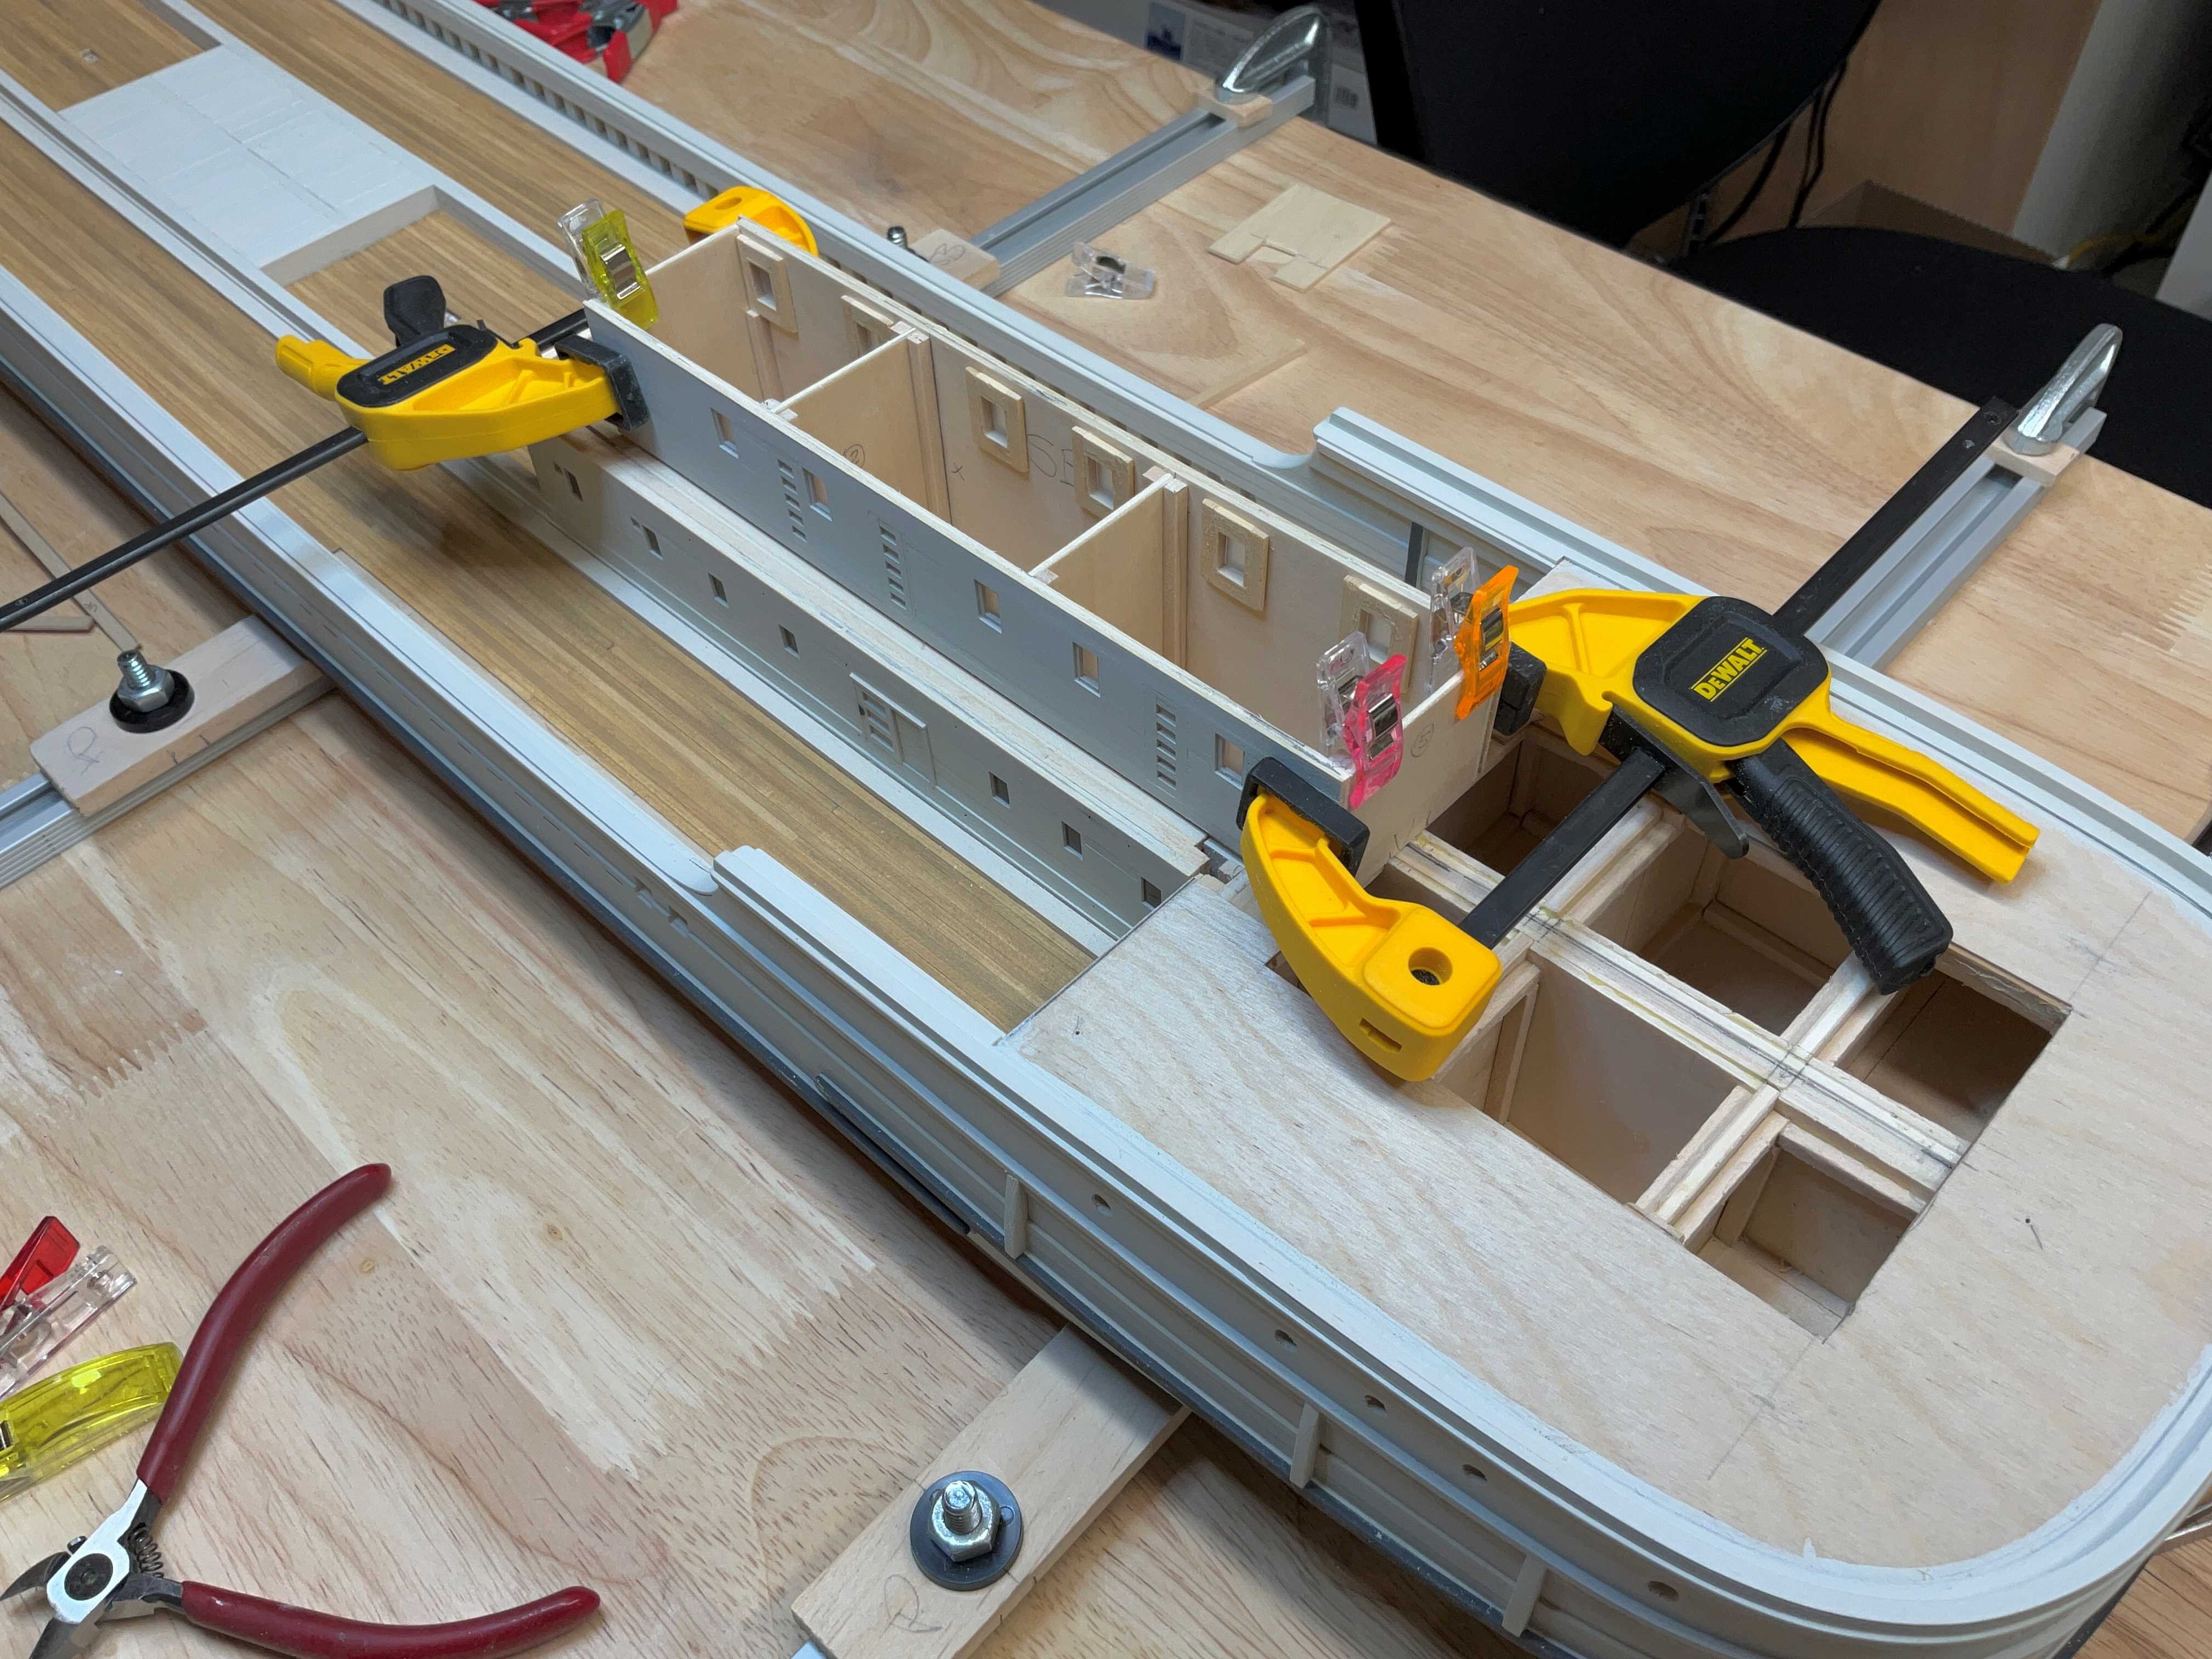
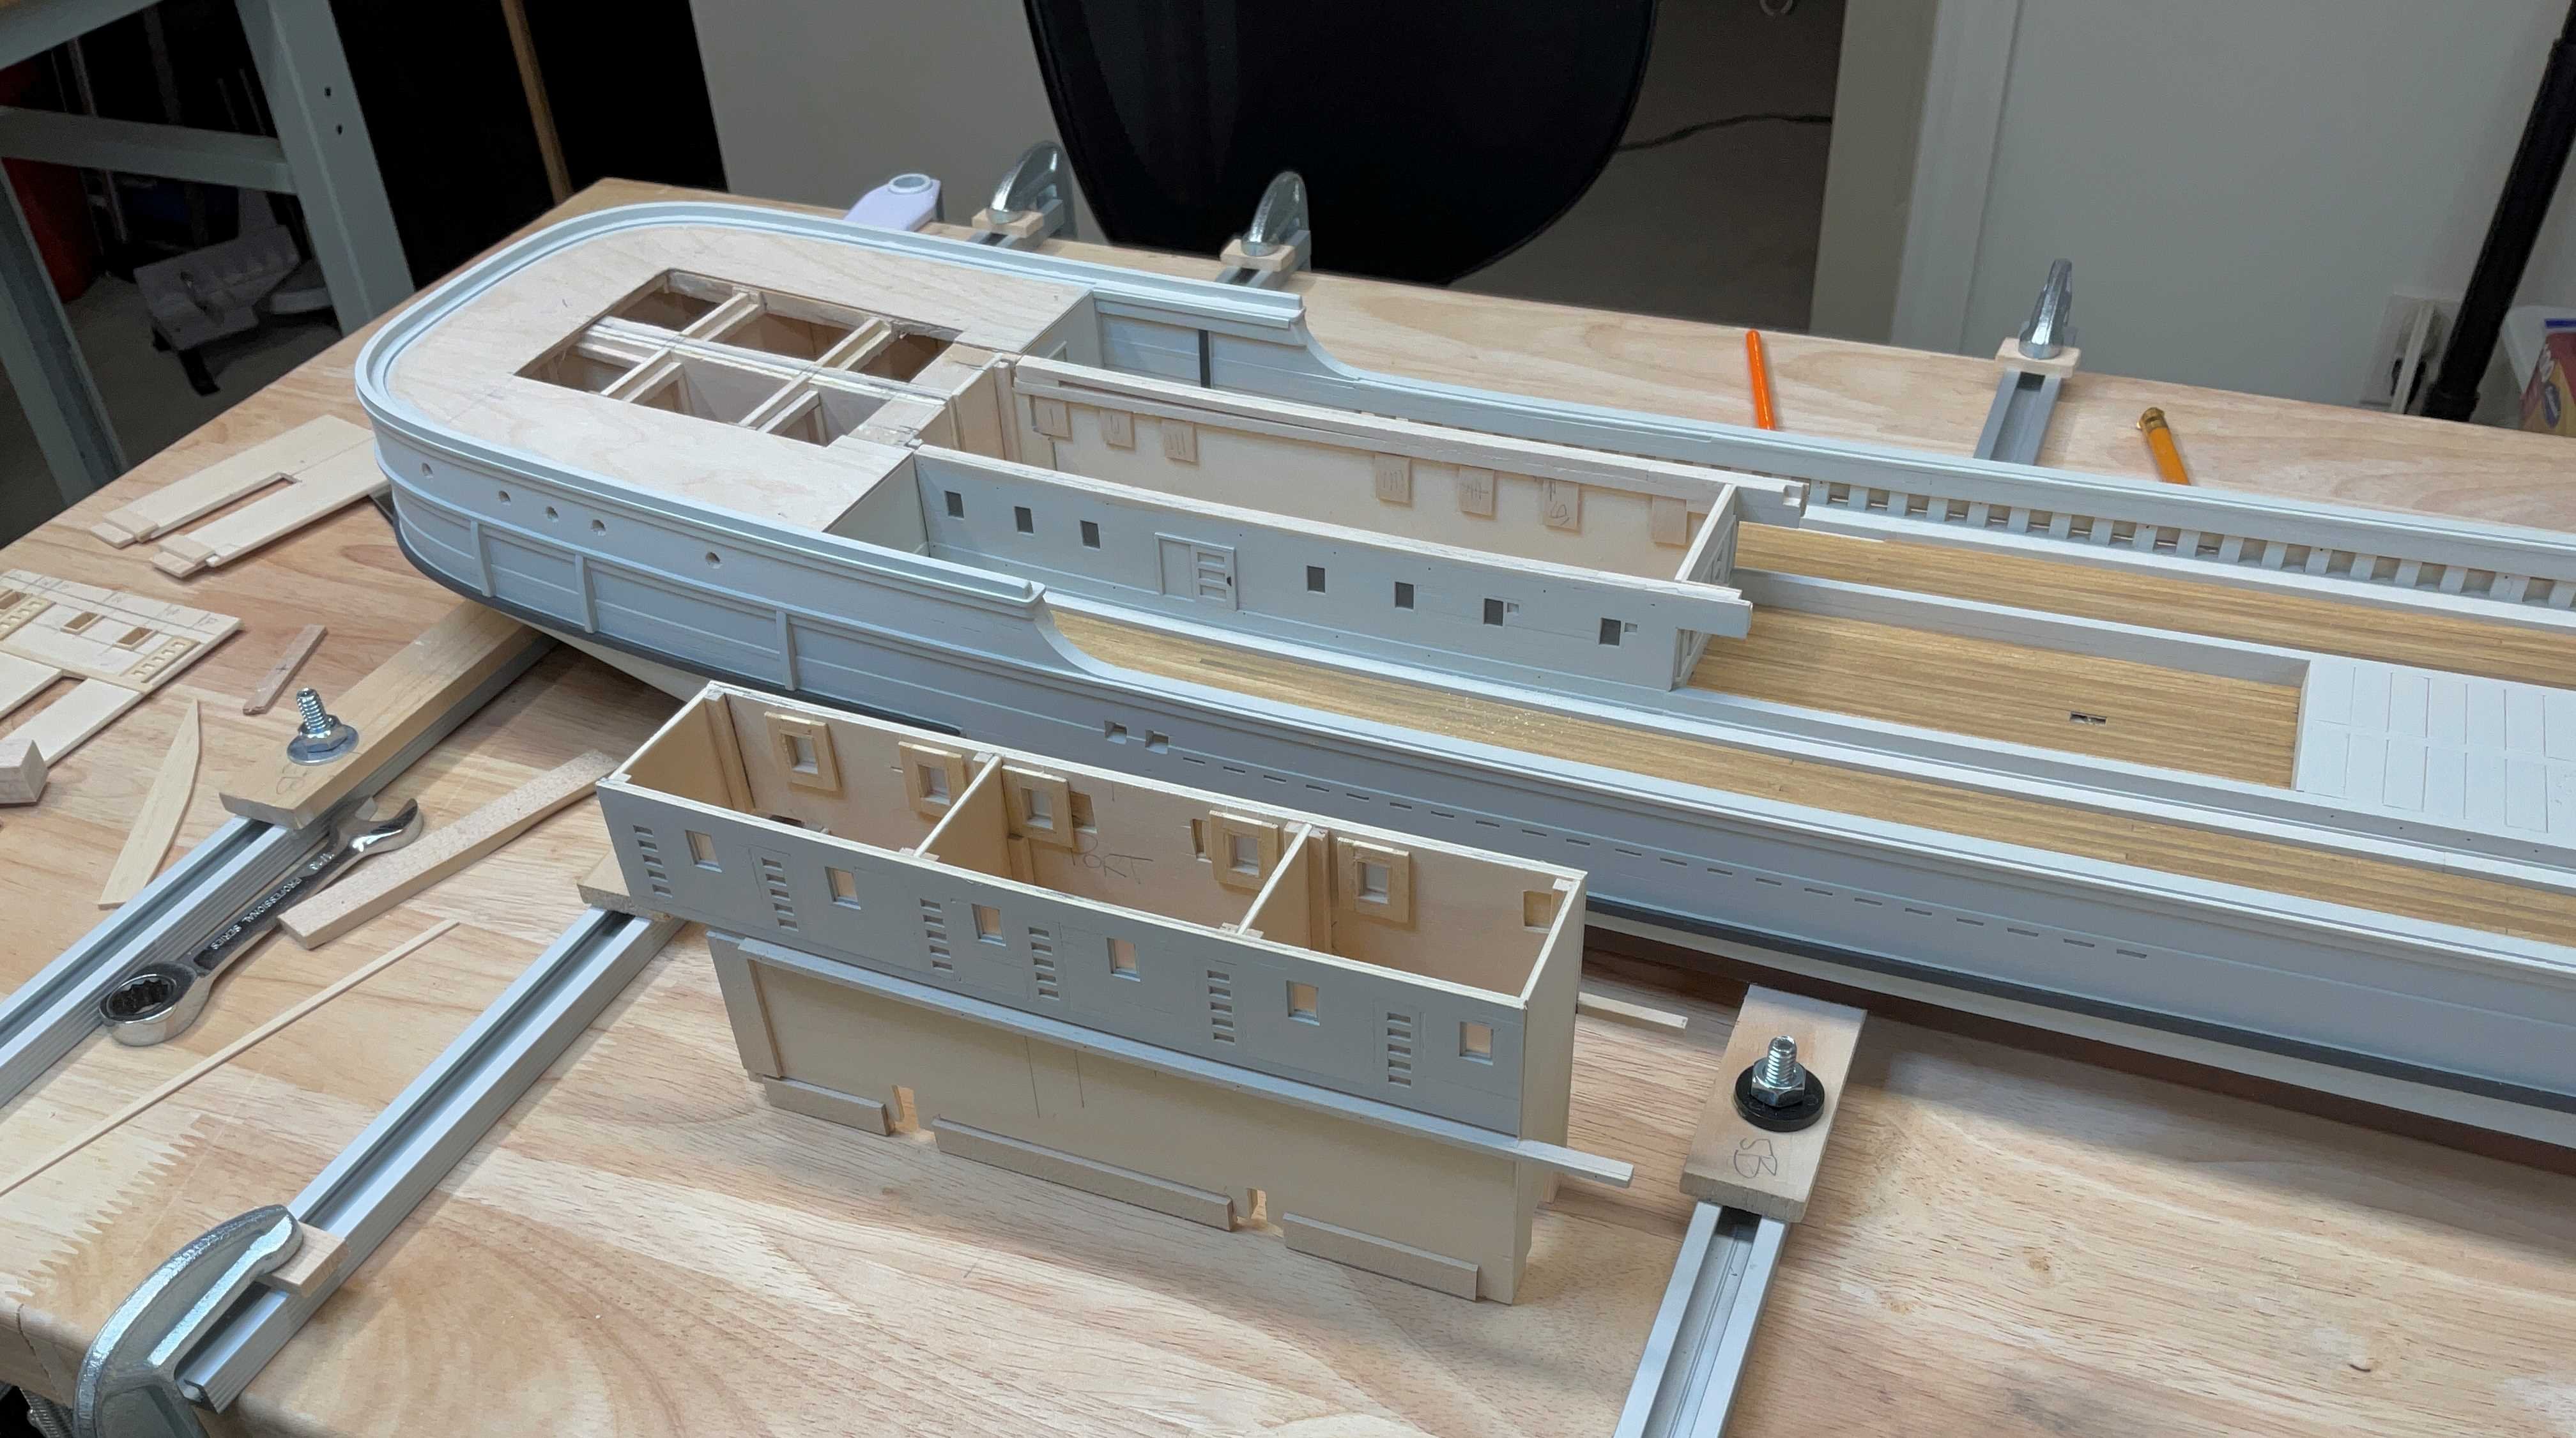
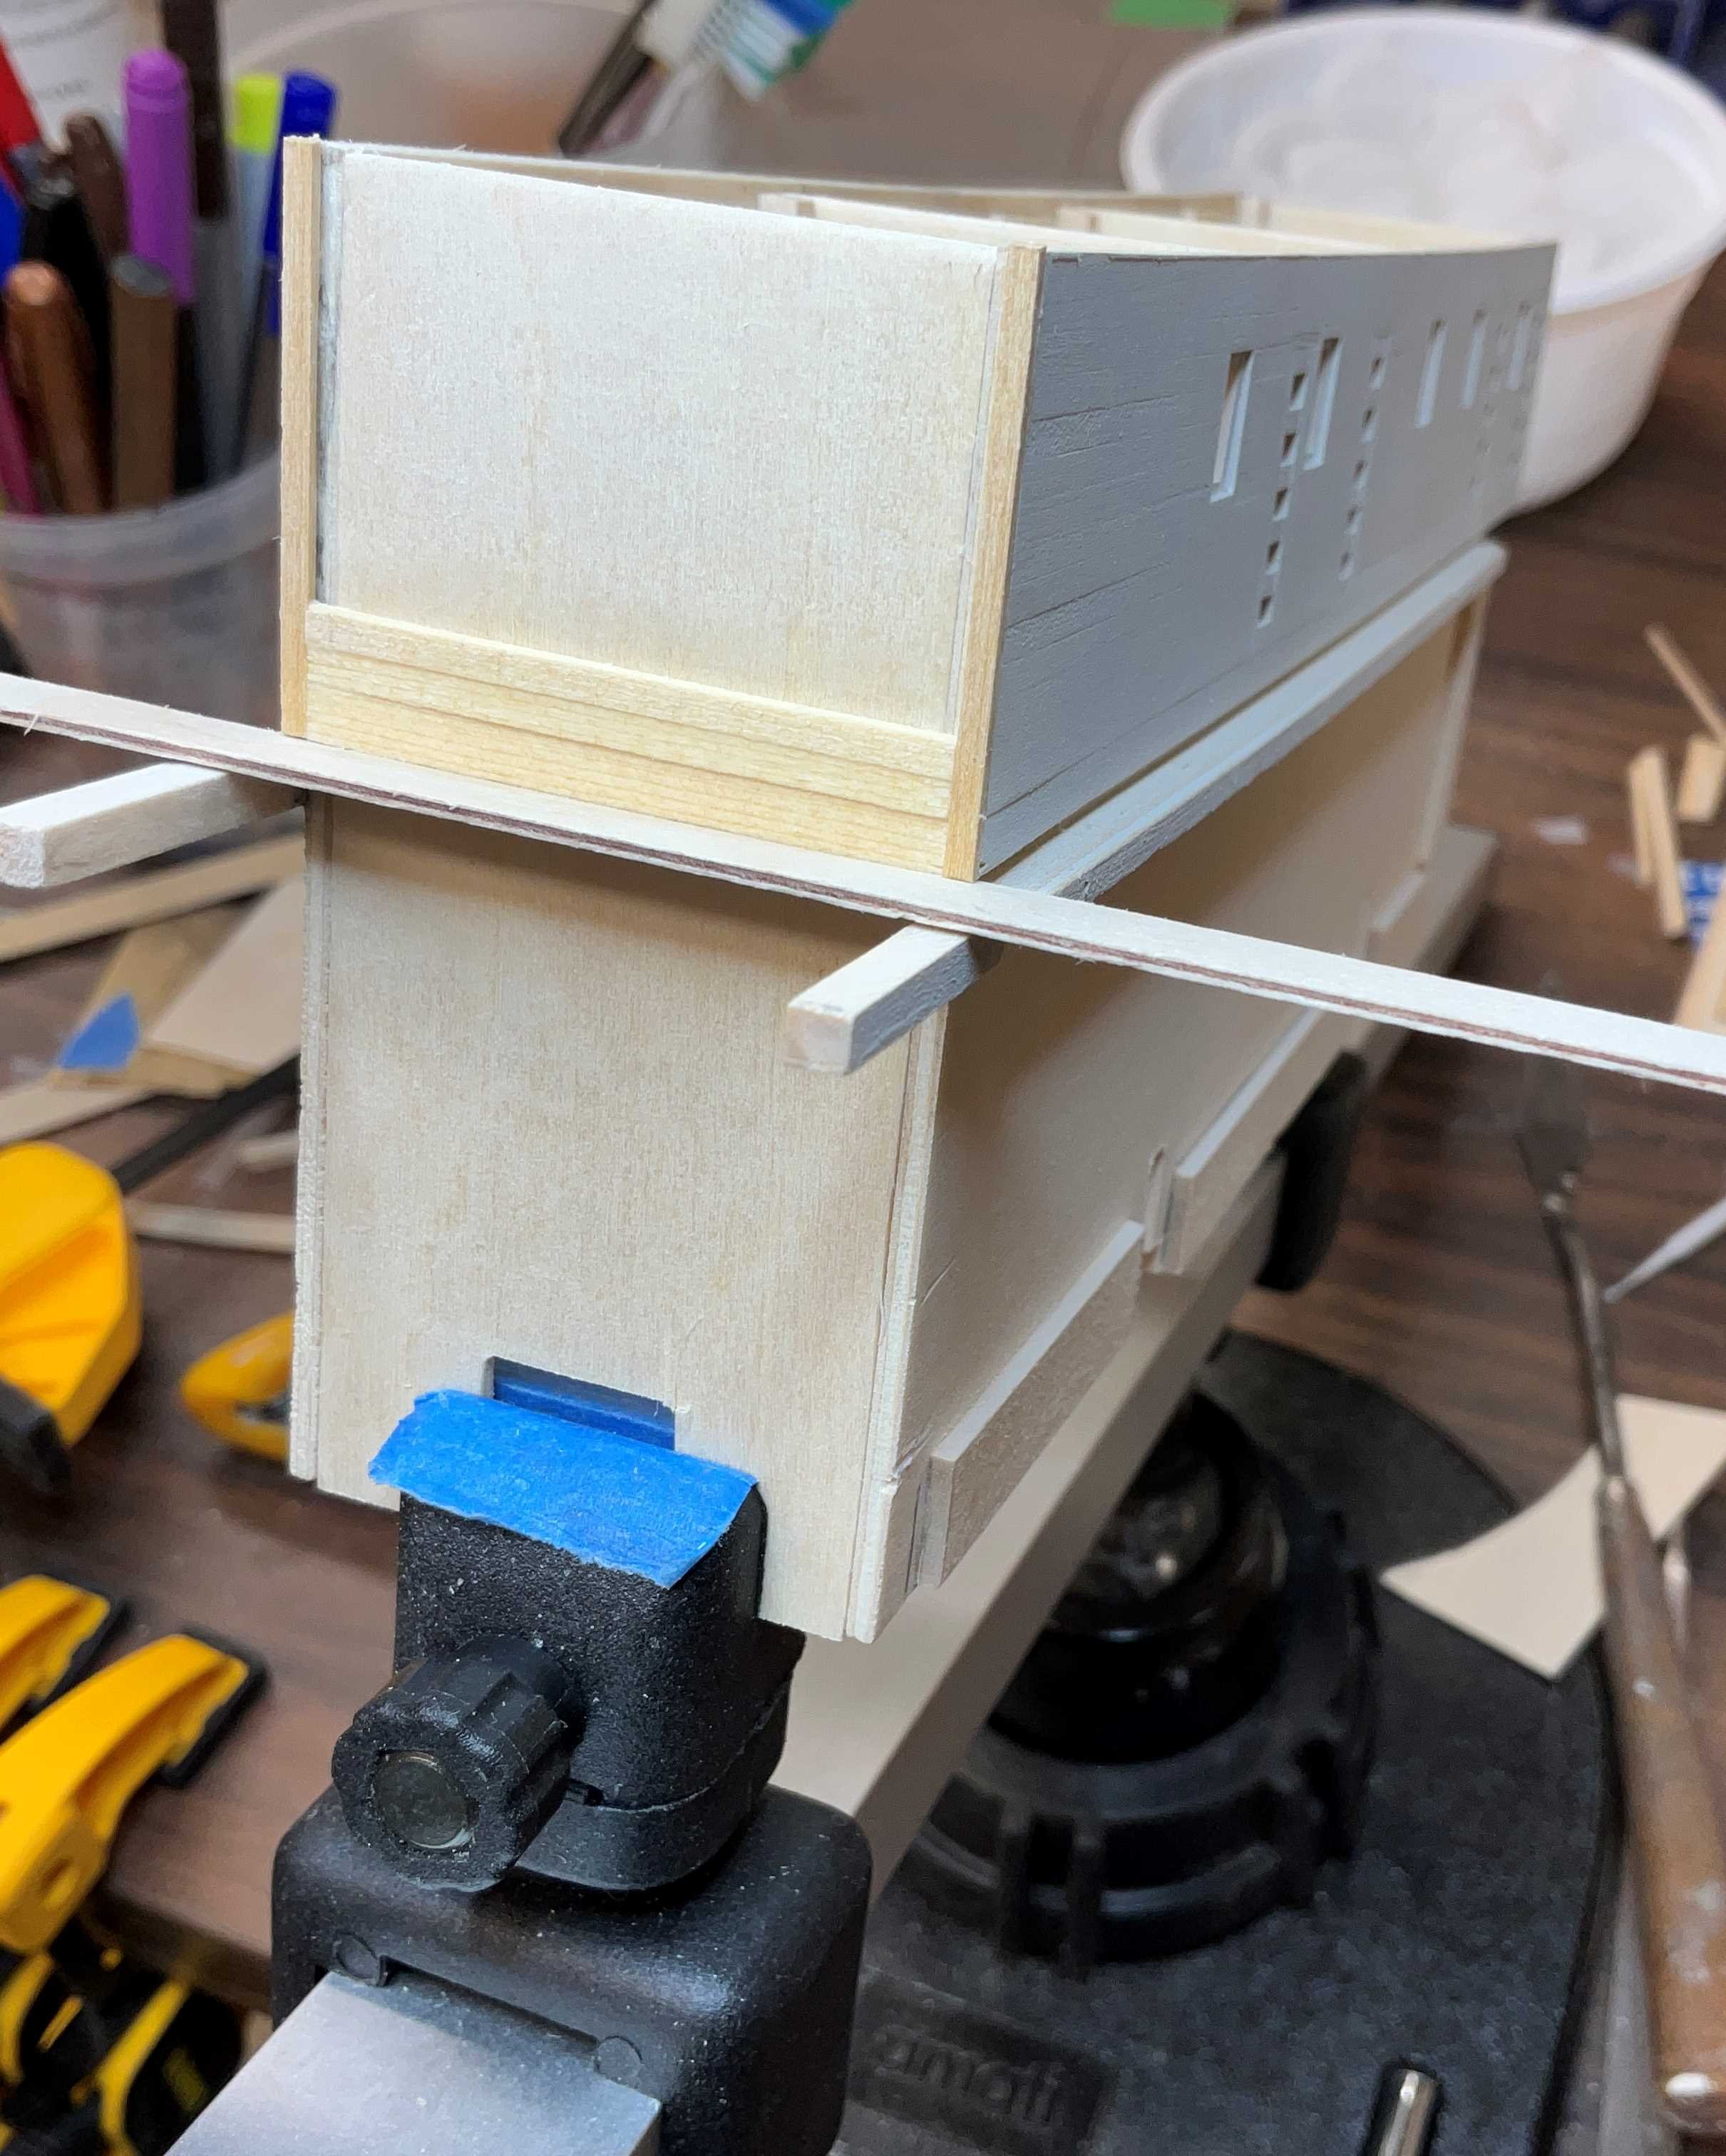
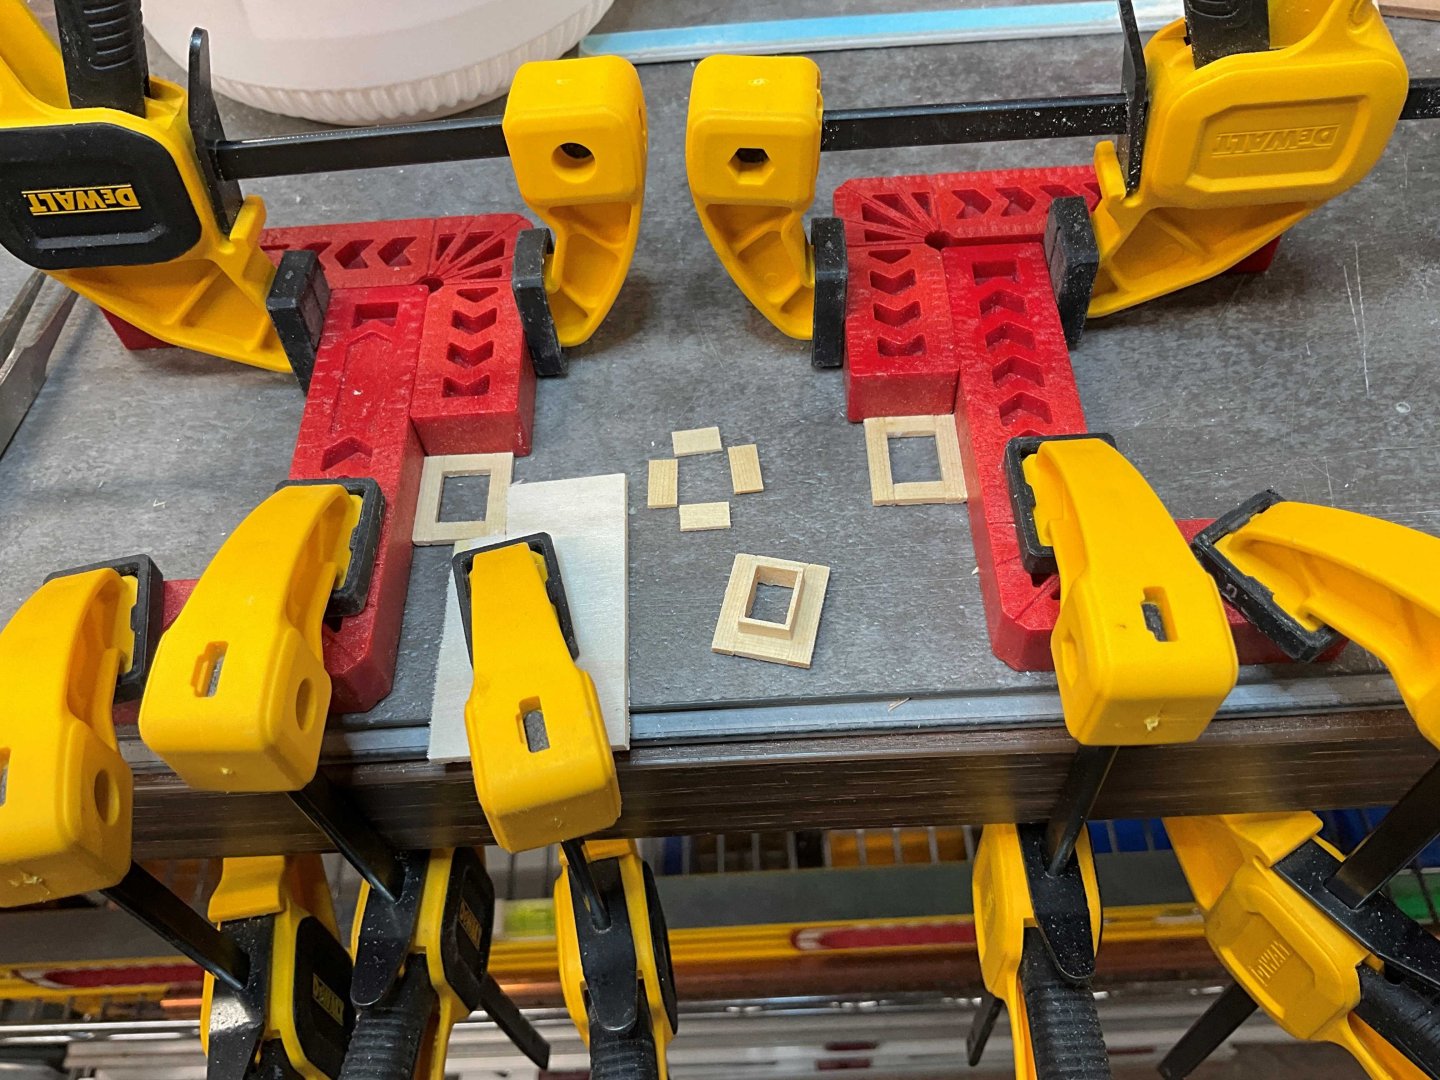
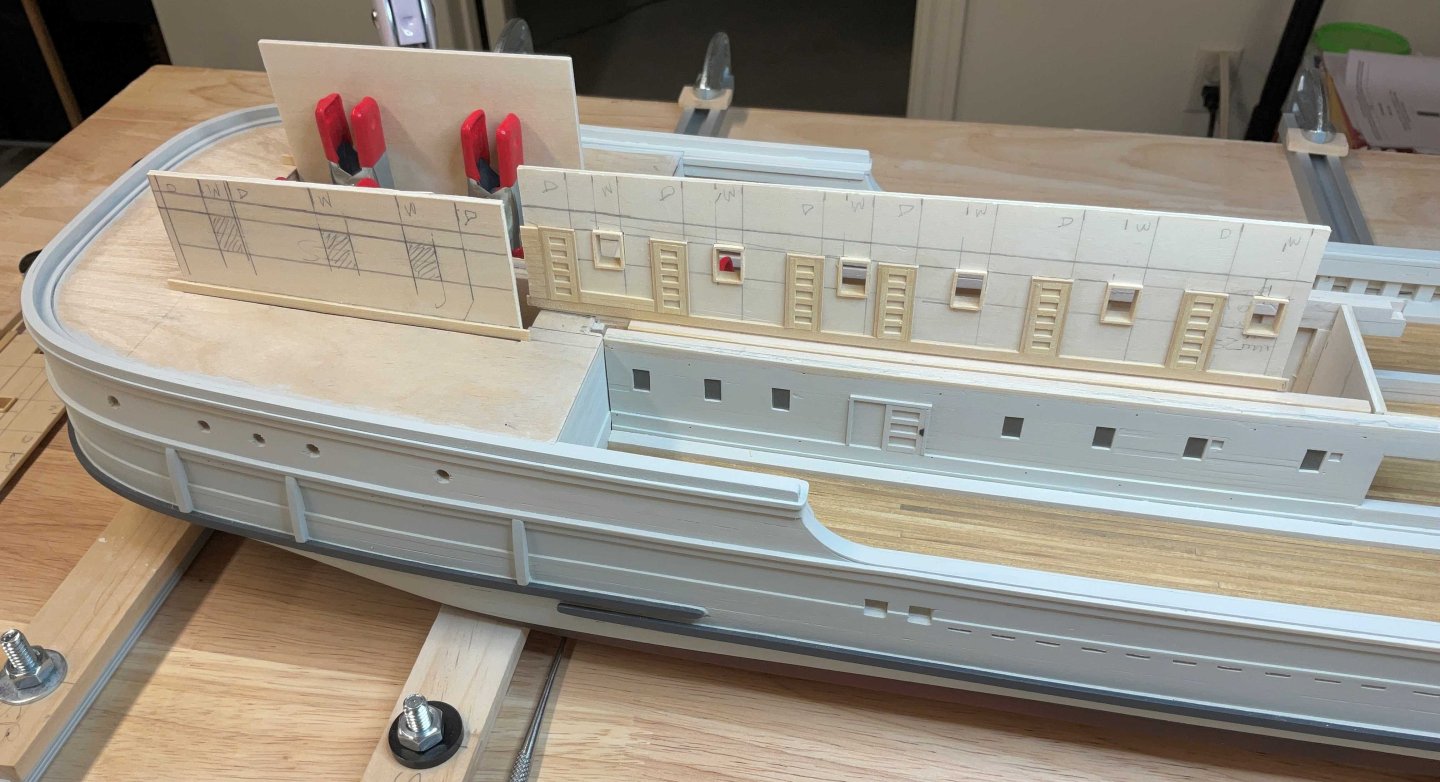
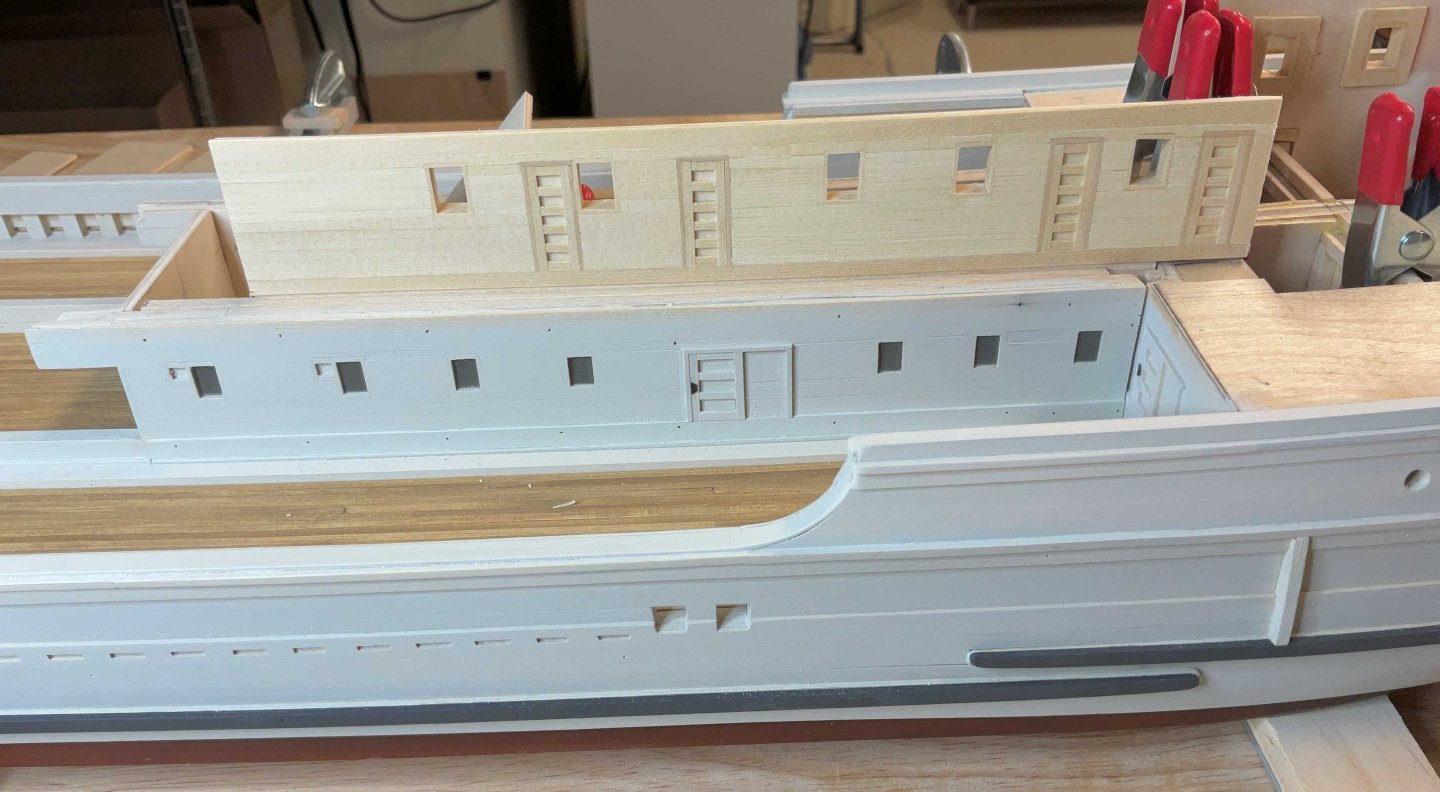
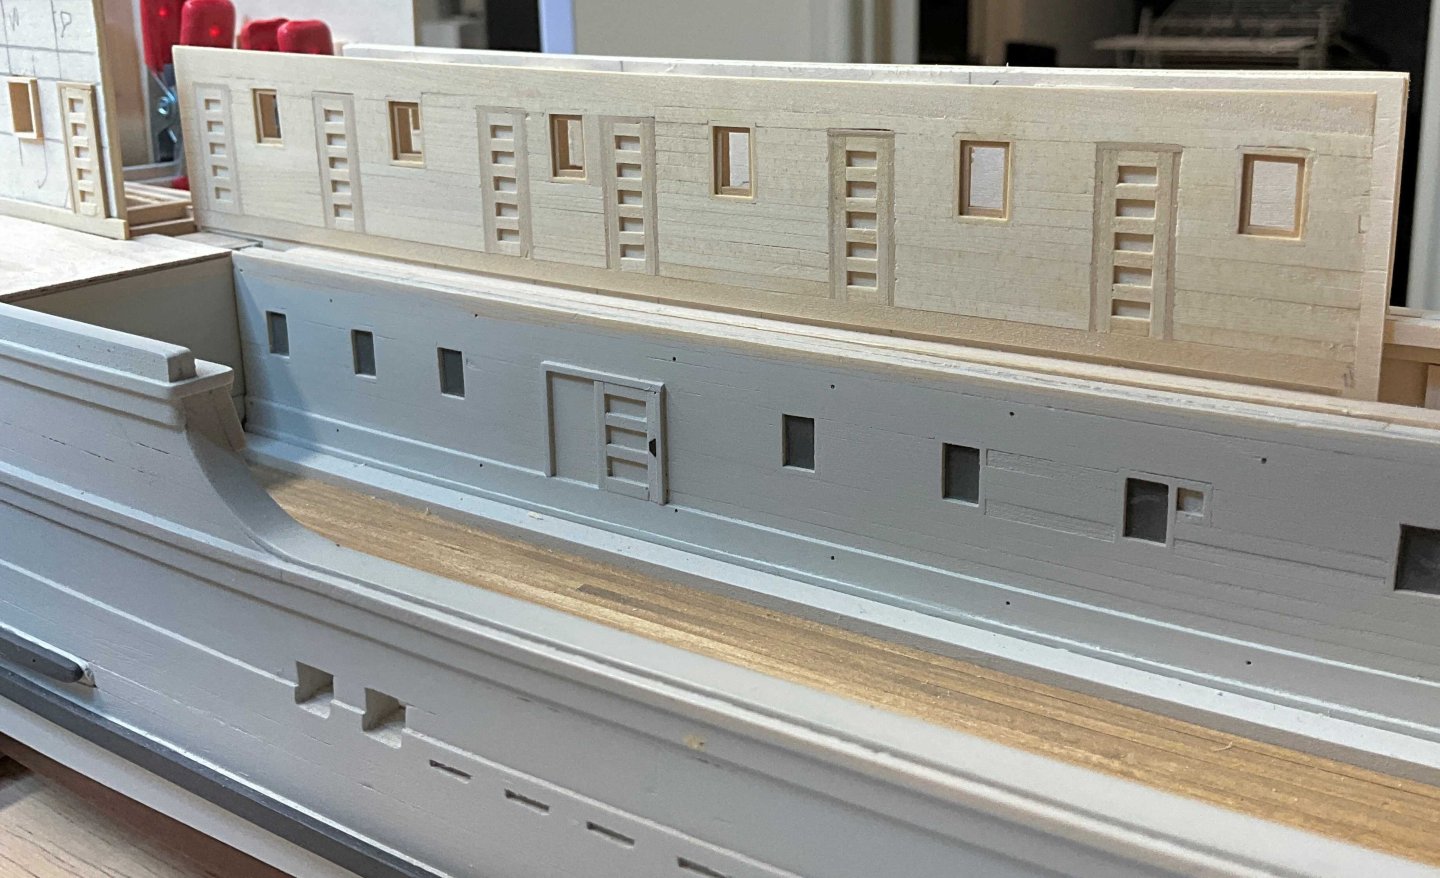
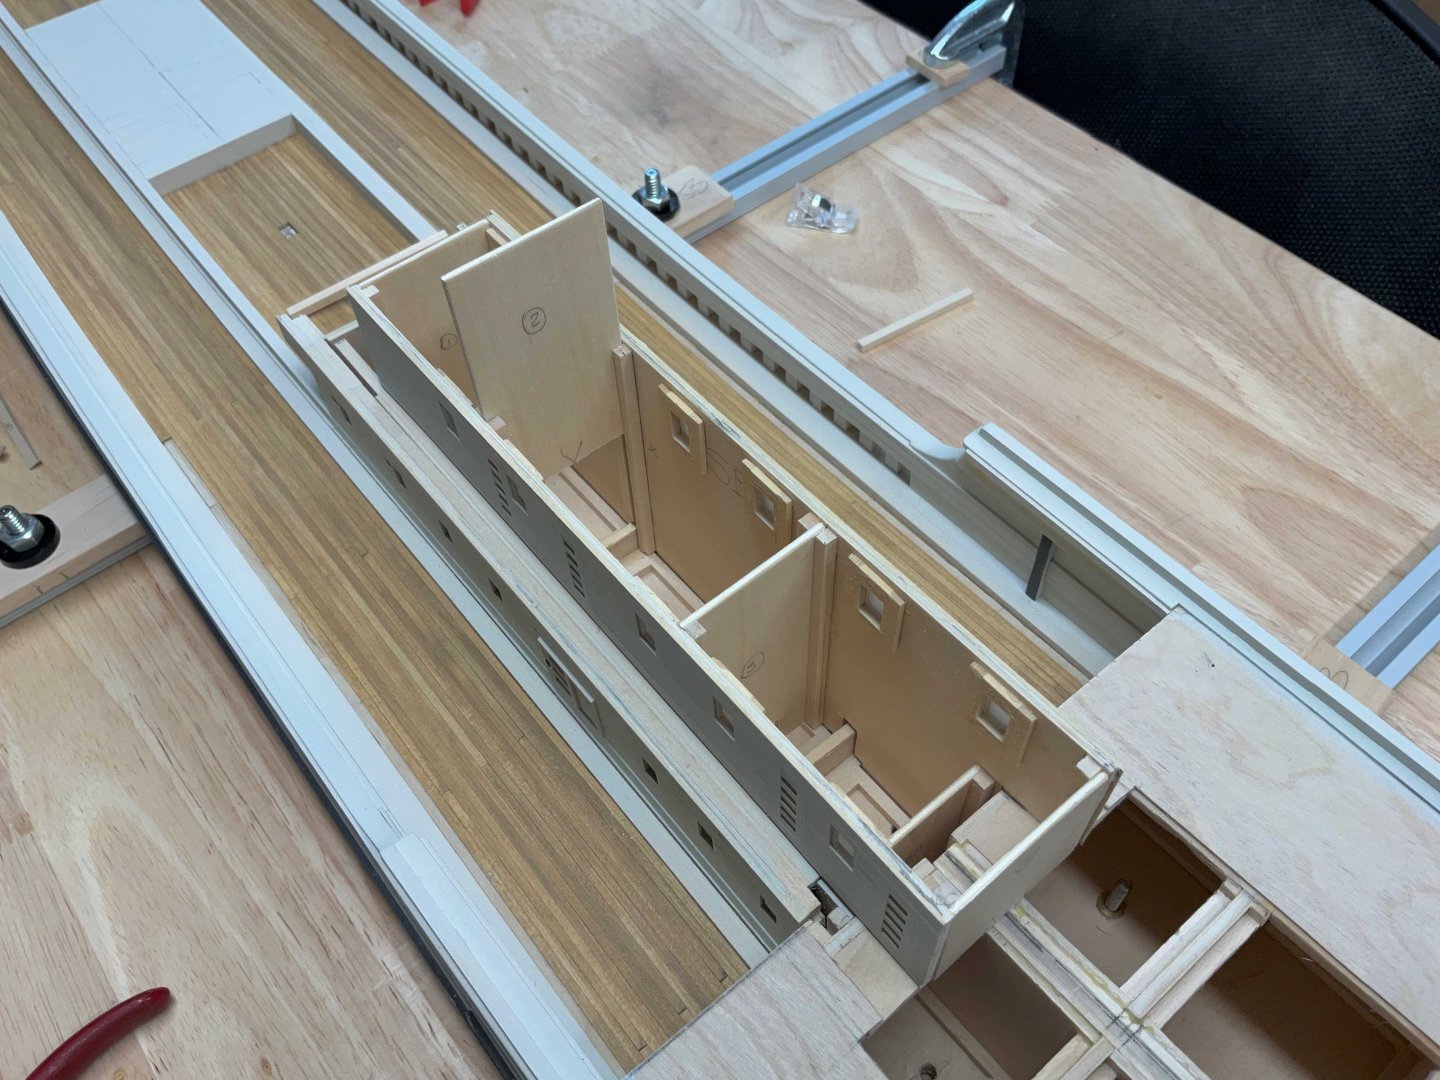
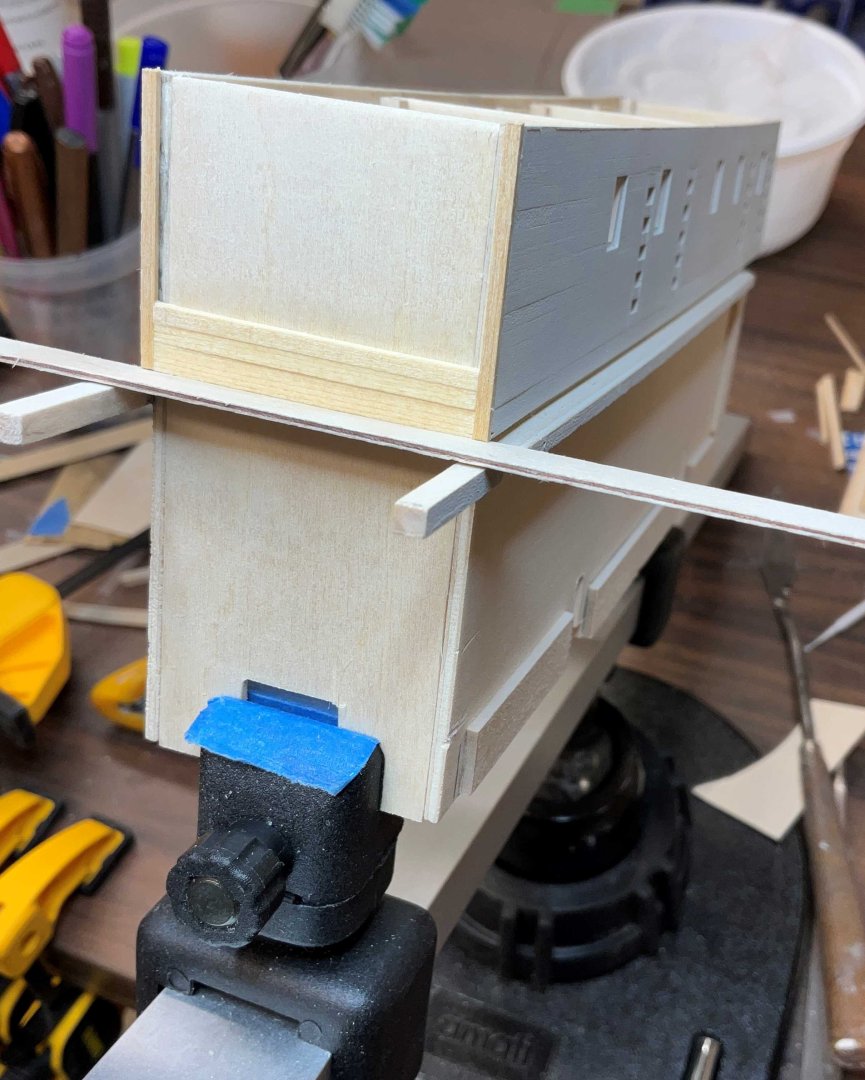
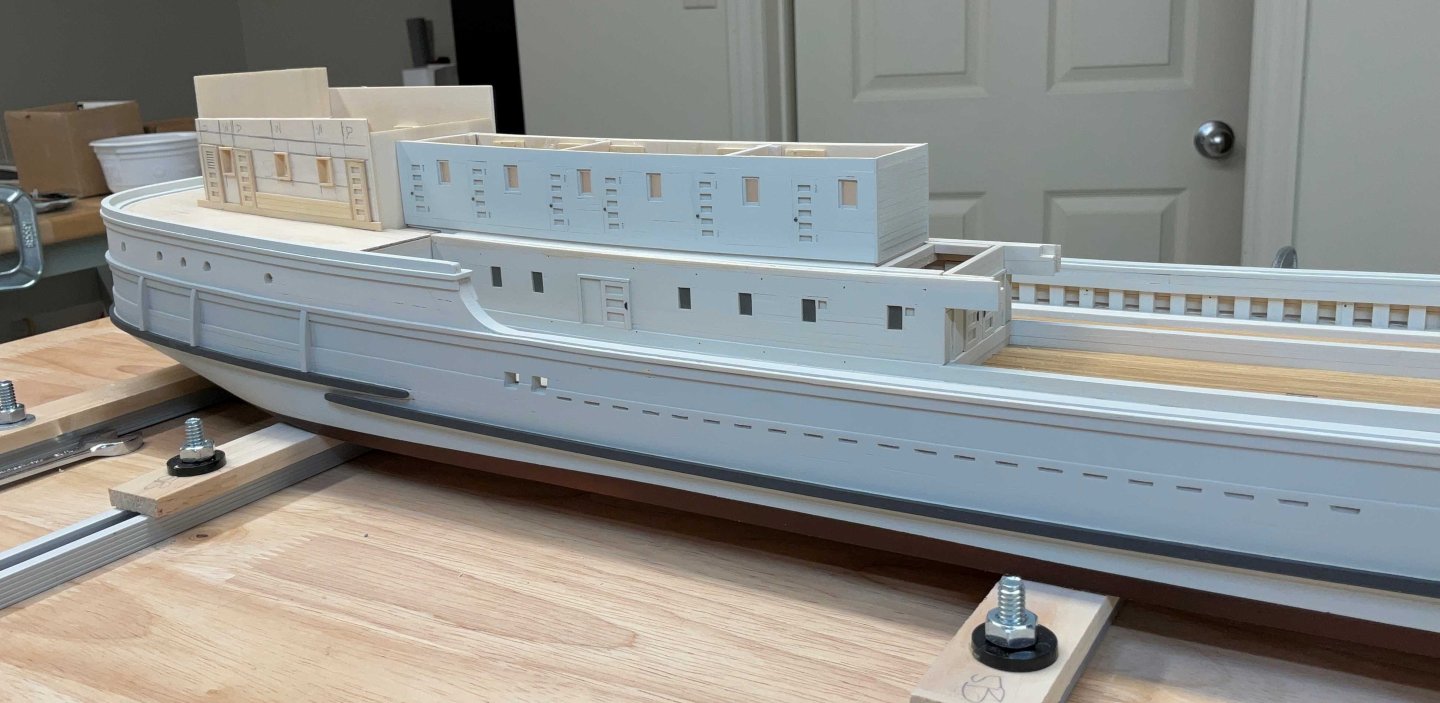
Hi Everyone, hope you are all well. Thank you for the Comments and Likes. I've been working on the cabins on the cabin deck. The frames that will be the finished opening for the windows were made from 1/16"x 1/8" and 1/32"x 3/16" AYC with the latter ending up being proud of the 1/16" plywood by about 1/16" The doors were then laid out with the stiles being 1/32"x 1/16" . The bottom rail is 1/32"x 5/64" and the rest of the rails are 1/32"x 1/16". The siding could now be applied and I started laying out the Aft cabins to get a rest from the siding. The forward and aft walls were made so that they could be dry fitted to keep things square Then came more siding. It is all 1/32"x 5/64". Once the walls were sanded the 1/32"x 1/32" boxwood window sashes were installed. Two pieces of 1/16" plastic were cut and placed into the the opening to keep the sashes about 1/32" back from the face of the siding while thinned white PVA was applied with a micro brush. When dry, the plastic was removed and the inside was glued. A couple of partitions were made to keep the side walls straight The two end walls were glued to the side walls while in place. When they were dry the partitions were glued to the side walls The structure was removed and the forward wall was sided Some paint and then the forward cabins were dry fitted back in place. Going to wait before gluing just in case they have to be removed again The aft cabins are underway. Hope to see you soon.


-
Roel, the overview photos are fantastic. Thank you for showing us your jigs for making the stairs and handrails
-
Keith, that is a great looking pump. You really nailed the color!
- 457 replies
-
- 7
-
-
-
- sternwheeler
- Hard Coal Navy
- (and 1 more)
-
Keith, she looks great! So much to look at in such a small space.
- 457 replies
-
- 5
-
-
-
- sternwheeler
- Hard Coal Navy
- (and 1 more)
-
Gary, good to hear from you!. Thank you very much.
-
Hi Tony, thank you for your Comment. You are very kind!
-
Good Luck with this project!

.jpg.067720a4bd984a42a2d585e977806703.jpg)