HOLIDAY DONATION DRIVE - SUPPORT MSW - DO YOUR PART TO KEEP THIS GREAT FORUM GOING! (Only 13 donations so far - C'mon guys!)
×


Thunder
-
Posts
582 -
Joined
-
Last visited
Content Type
Profiles
Forums
Gallery
Events
Everything posted by Thunder
-
I also remember having a book about the Mary Celeste which had a plan in it but unfortunately leant it to someone and it never got returned. I can't remember the author, unfortunately. There was also a tv program which showed the design.
-
Hi, Spotted this by accident when searching for something else and remembered your post.
-
Hi, have read all the Alexander Kate and Dudley Pope but much prefer the Richard Woodman's series of books on nautical of the same era.
-
From what I can see the Dusek Golden Hind looks more like the Mayflower where as the Mamoli Golden hind is more comparable to a three masted Revenge. Which is right I do not know.
-
Some Constructo kits sold at Cornwall Model Boats but not the Pandora.
-
yes, but if you look at it differently, if she hadn't of sank we wouldn't have her at all. She would of been broken up or rotted away.
- 91 replies
-
- 6
-

-
- deagostini
- vasa
- (and 1 more)
-
Unless there is a specific reason I would of expected the Fore mast to mirror the main. The Mizzen is a different story due to the crossjack and some of the rigging will lead forward rather than aft. If you know what specific items of rig they are I might be able to see in the anatomy of the ship book.
-
I know that all of Cook's ships were originally colliery brigs but Adventure and Resolution were converted to have a full head (similarly to Bounty) replacing the Cat type bow. It may be that this model represents Endeavour anyway.
-
I think Spyglass means that where the two parts of the gun port strips join is further back than on other builds. I am not sure as not built this but it seems crazy that this would not be designed to occur at a bulkhead position. His reference to the bows is in regard to the fact that if the joint was further forward then it would affect the termination of the gun port strip at the bow. However, your termination of the strips at the bow looks perfect. This means either: The gun port strips are some how too long Design of kit is poor and that join of the strips does not occur at a bulkhead position. Your forward bulkheads have been sanded too much giving a much sharper run in to the bow and hence less length of gun port strip required. However, doubt this as you would of noticed when fitting the false deck. Looking at your work, I would think number 2 above but anyway it is looking great so I would just carry on as you are.
-
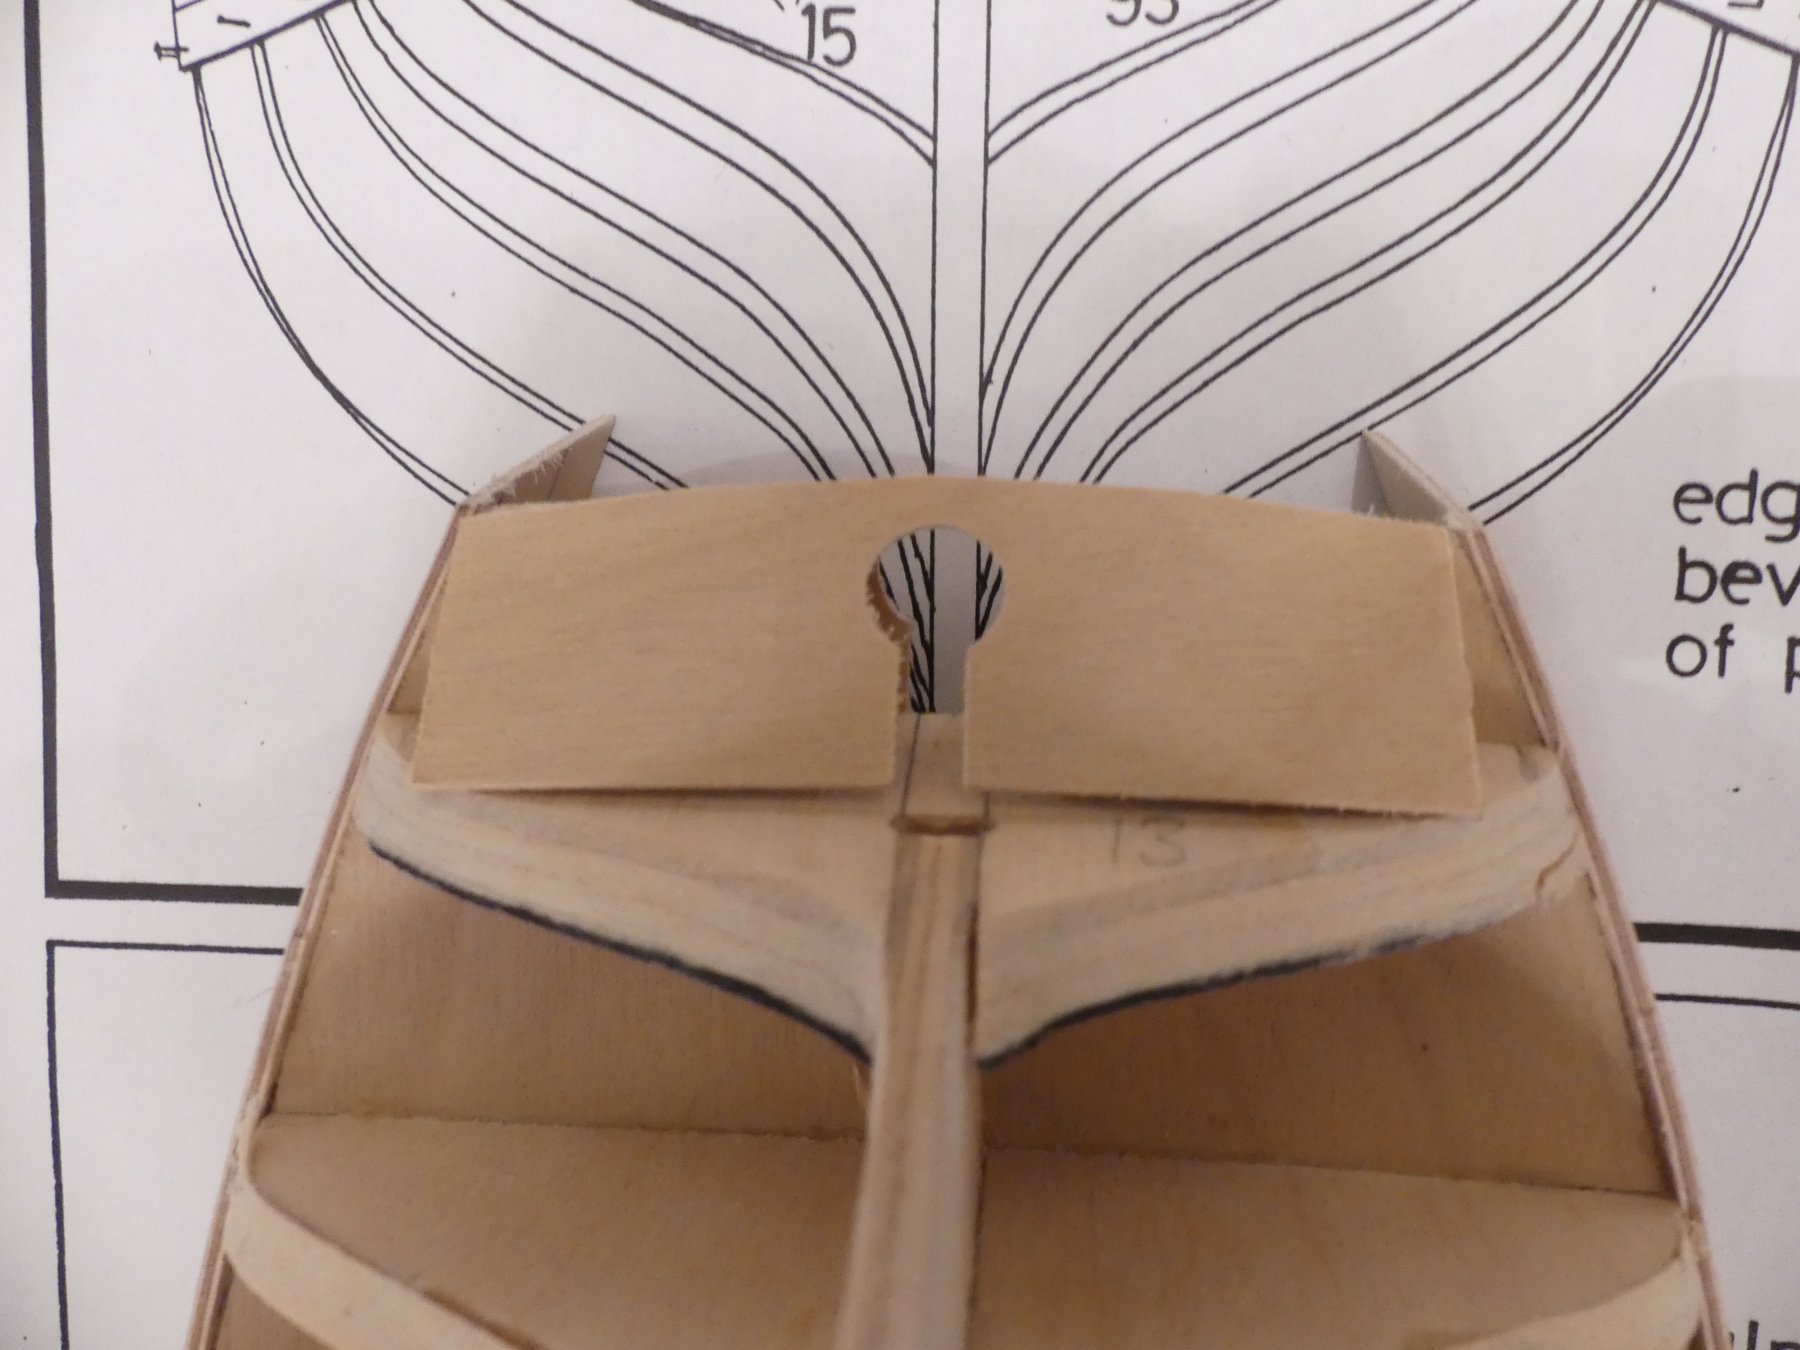
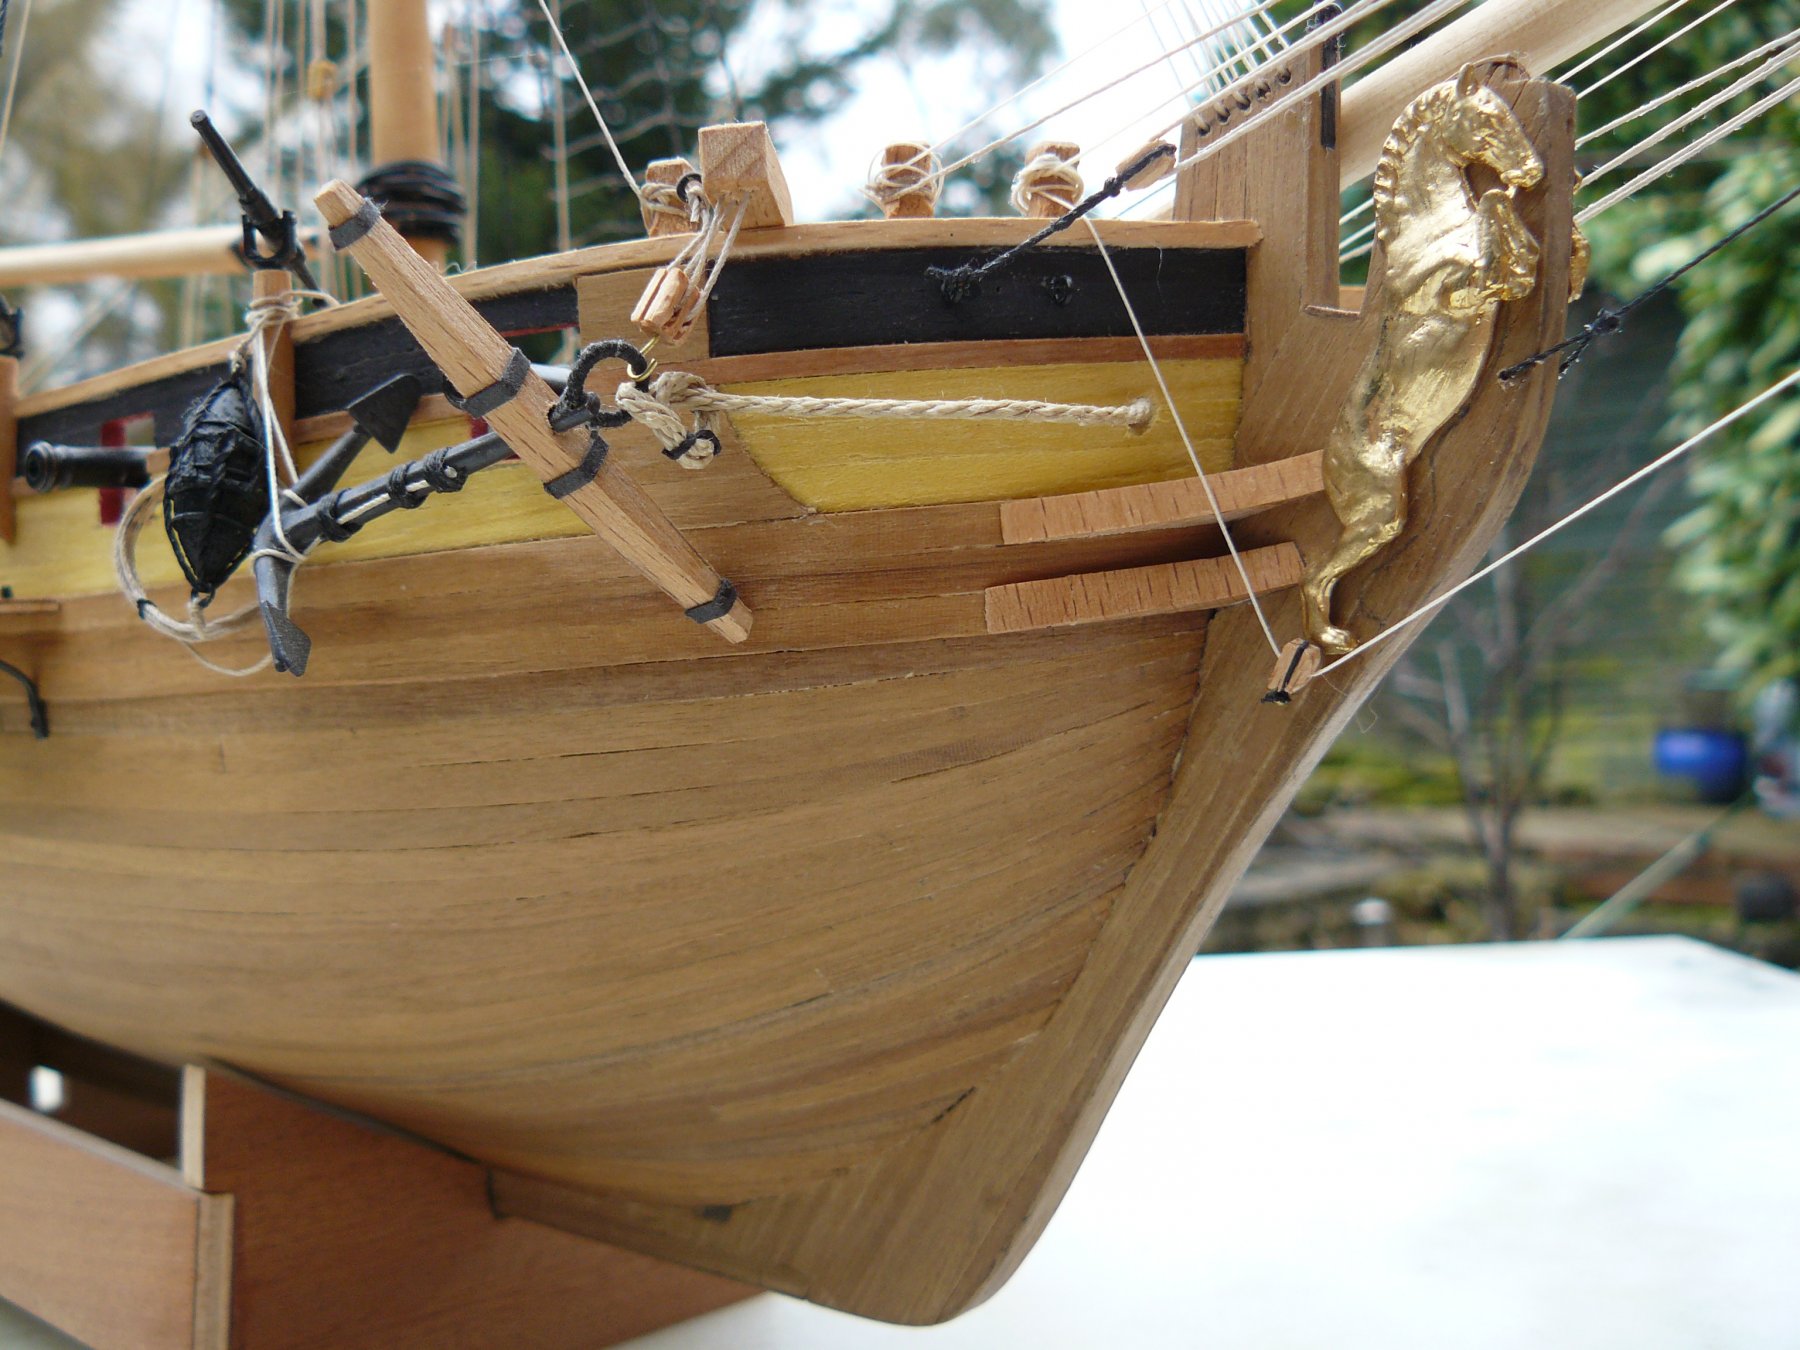
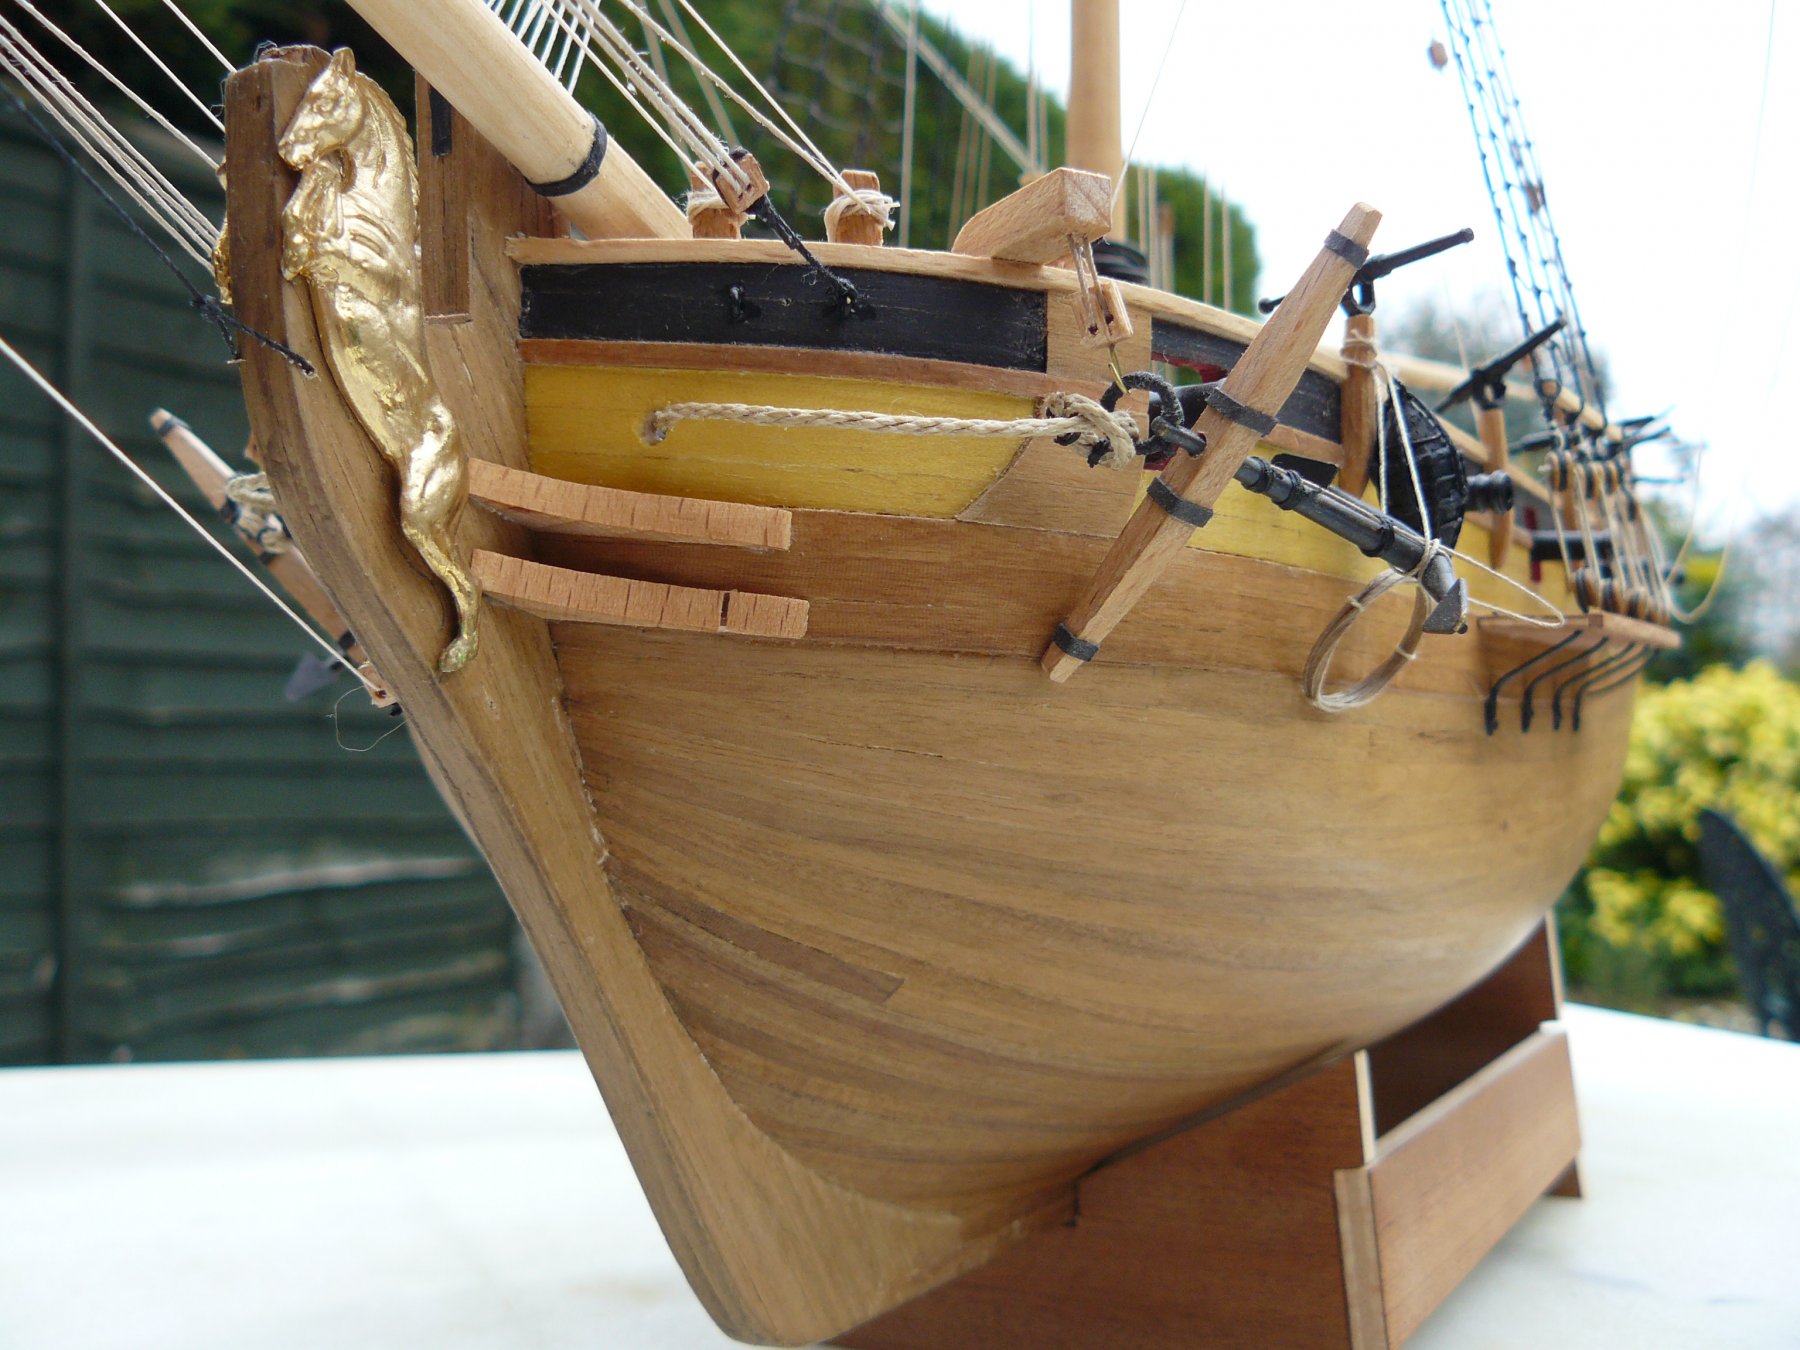
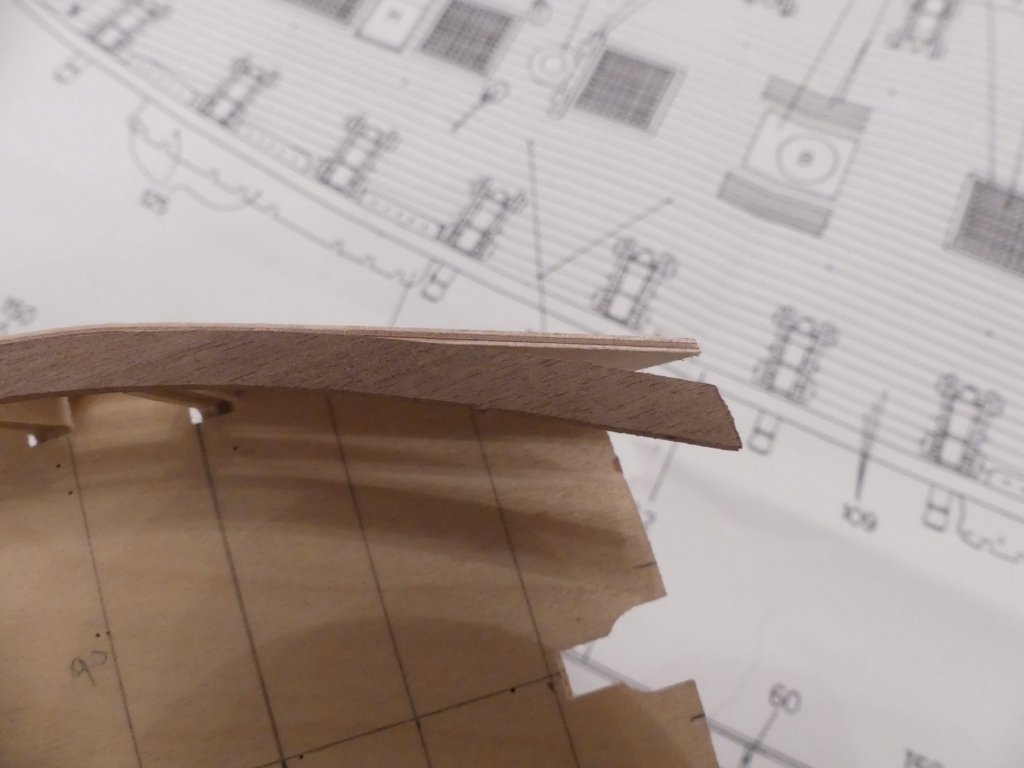
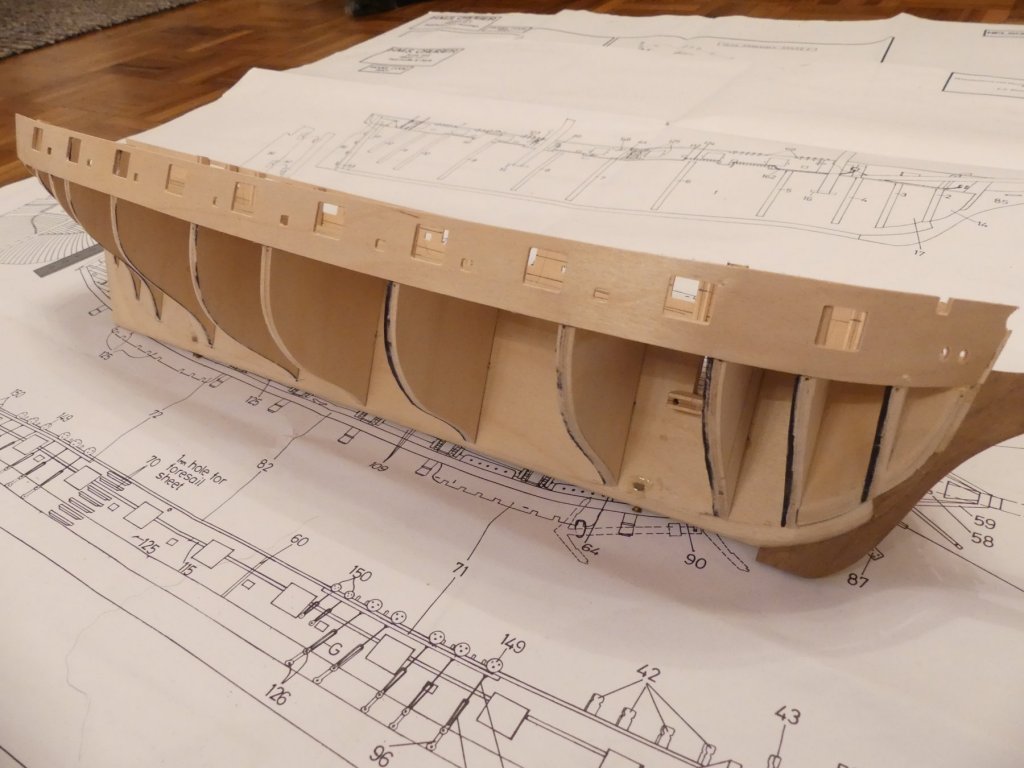
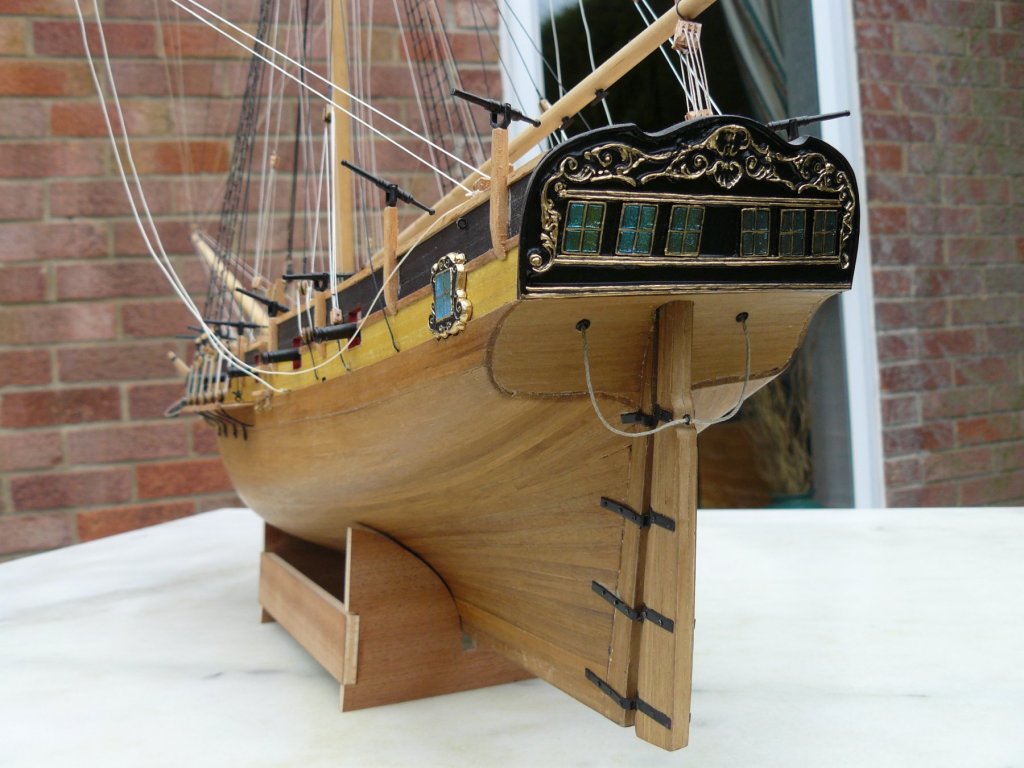
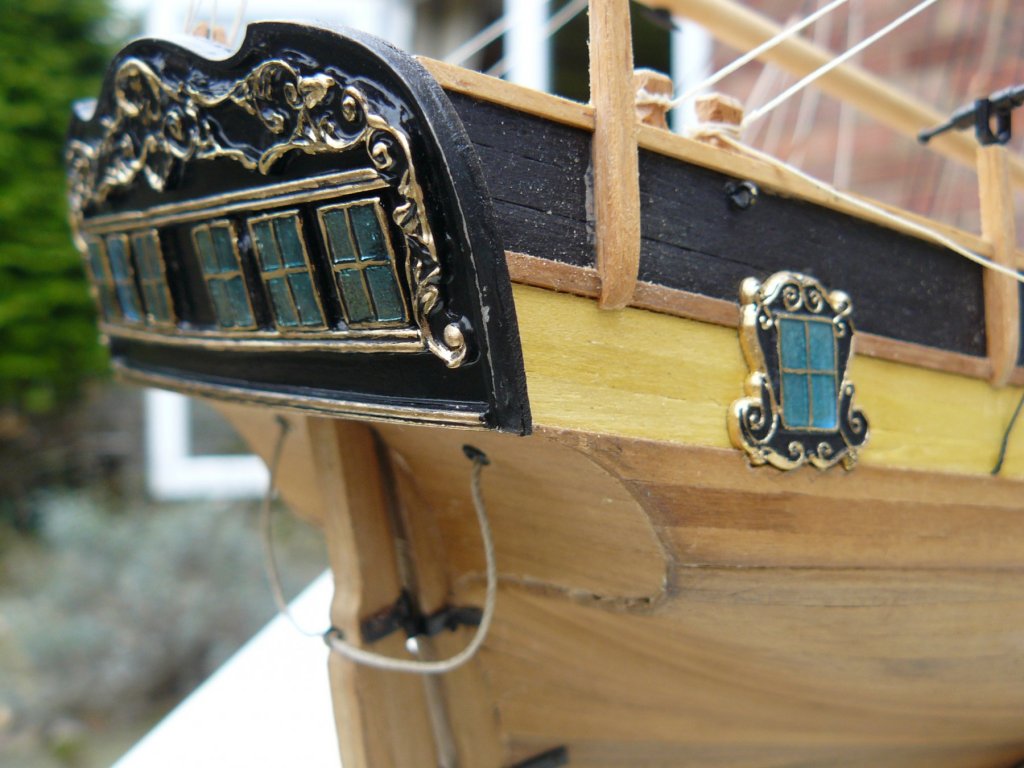
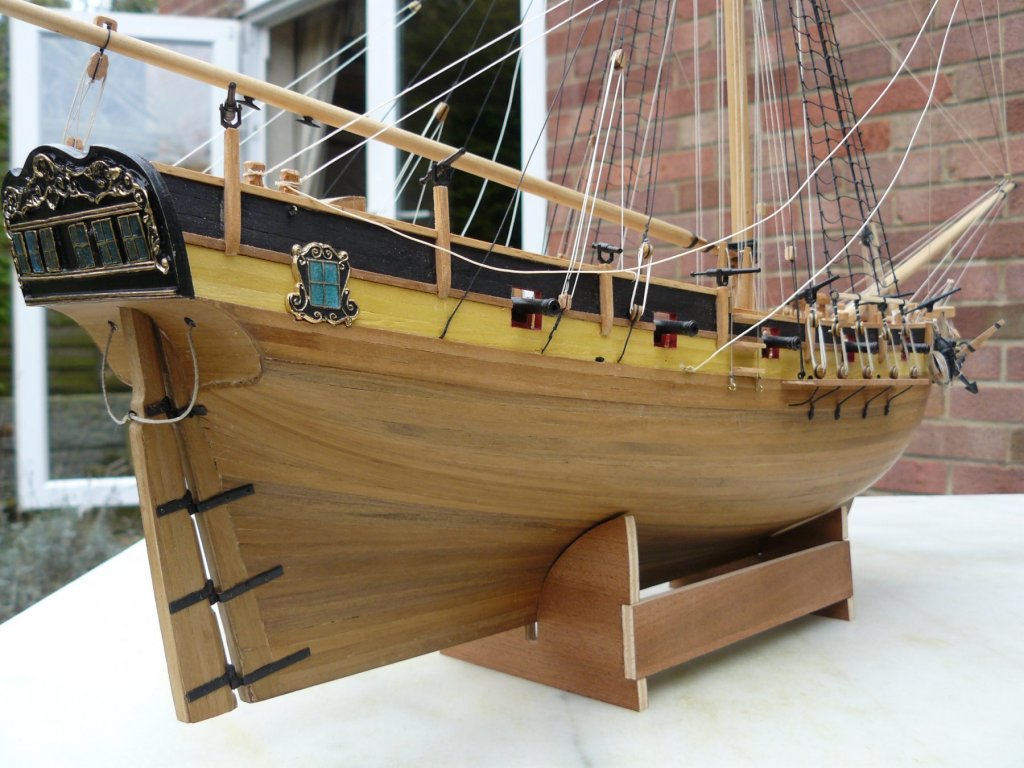
I have attached the stern Facia followed by the stern counter. Facia has been sanded down to match ply gun port strips. The triangular corners have been filled and shaped. Done so first planking can terminate up against the filler and second go over it.


- 102 replies
-
- 6
-
-
- cruiser
- caldercraft
- (and 1 more)
-
Hi, thanks Jason, Joe, I seem at least to have the same issues as others. I wondered if I was supposed to shape the rear bulkheads more but his would mean taking more of the stern facia and it would be getting very near to the edge of the chase ports. I noticed you have had to pack out the second from last bulkhead. I have just done that as well. These are simple things that they could of put right years ago after all it is a programmed c.n.c. machine that cuts these sheets. It also shows how useless or biased the kit reviews are. This can be damaging to the hobby as a new starter would of took this as an ideal kit judging by the Keith Julier review only to give it up as a bad job. I have the Diana on my shelf so thanks for the heads up.
- 102 replies
-
- 1
-
-
- cruiser
- caldercraft
- (and 1 more)
-
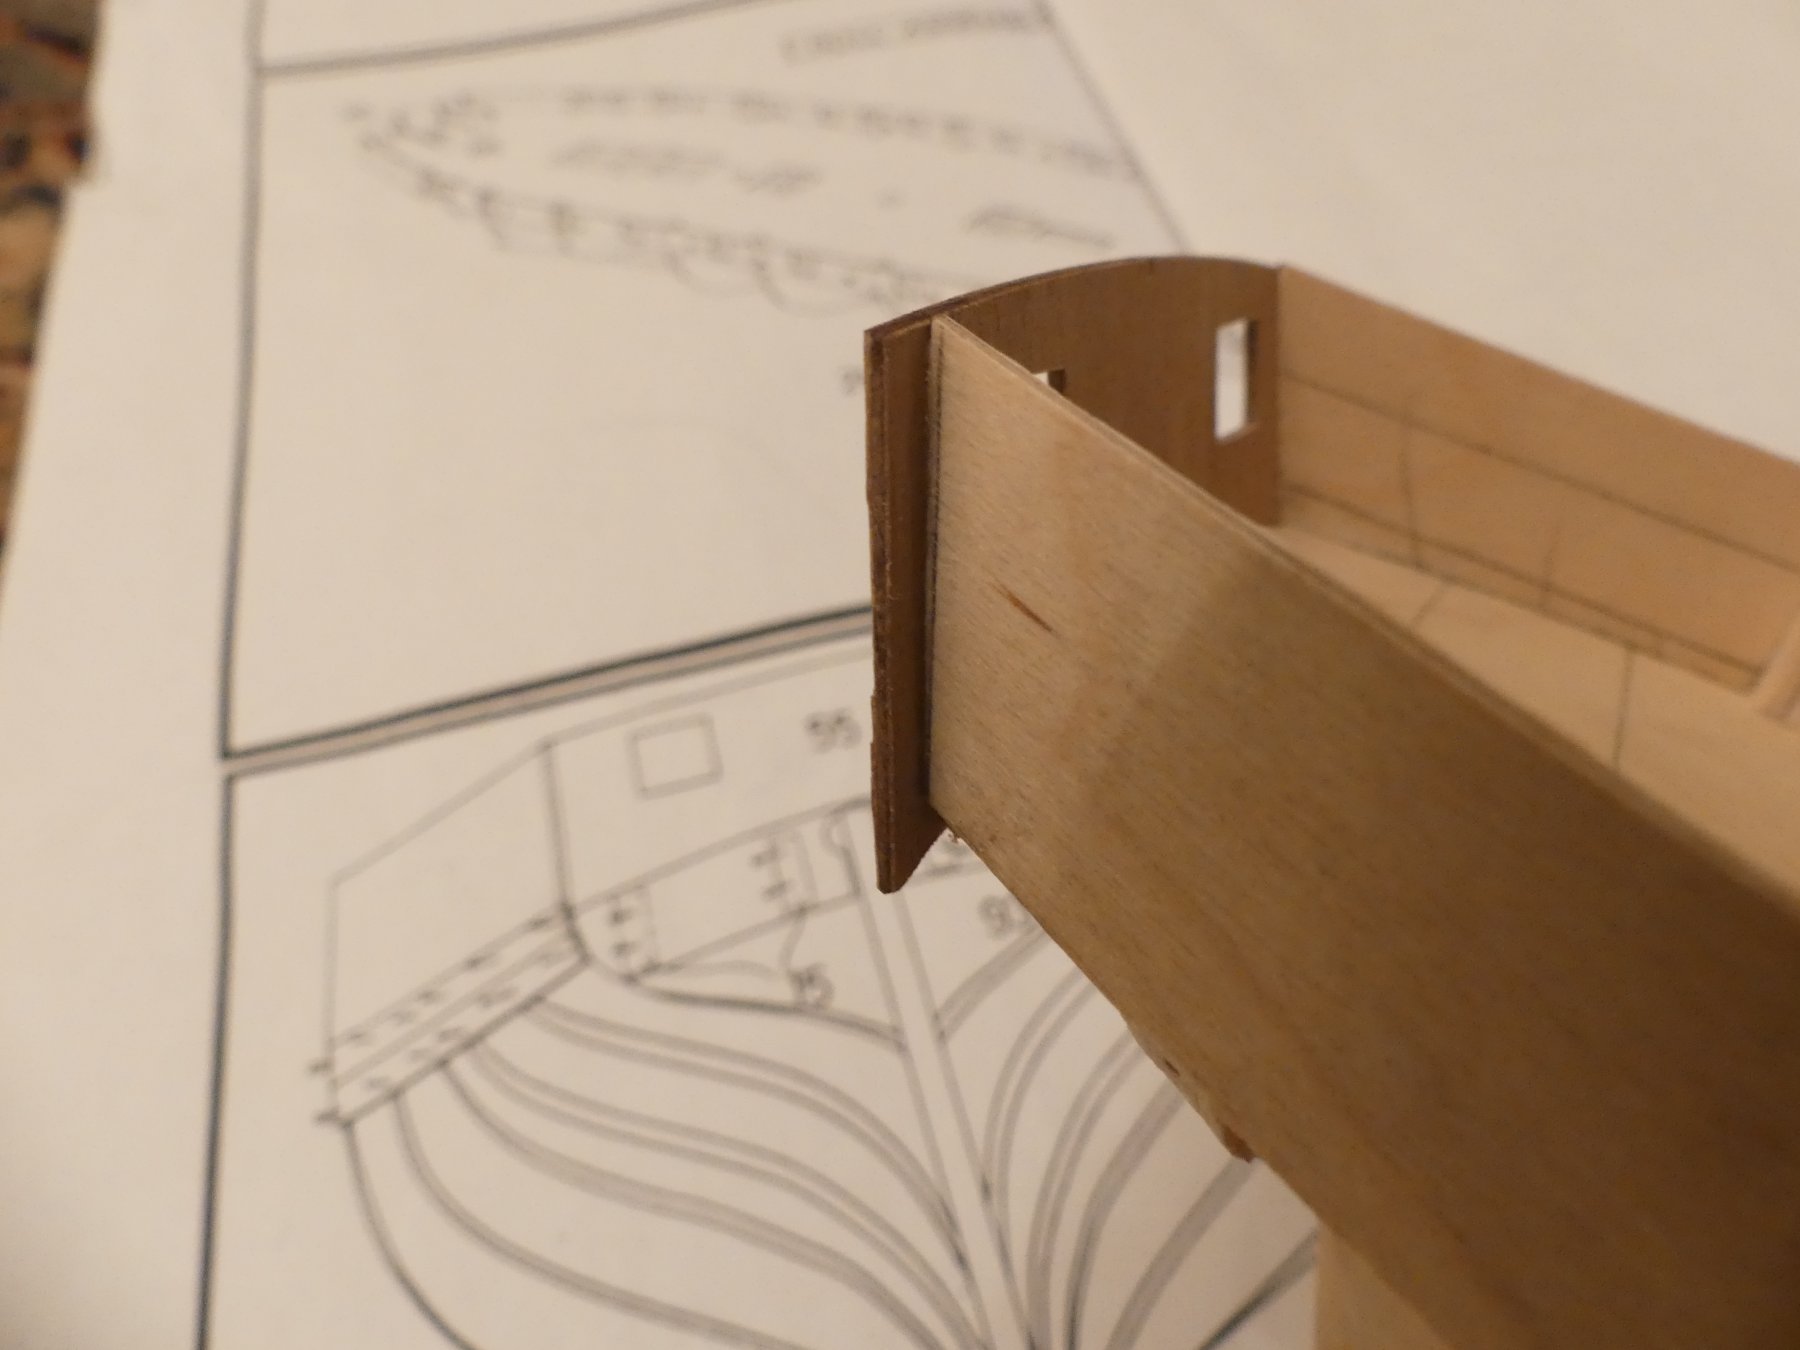
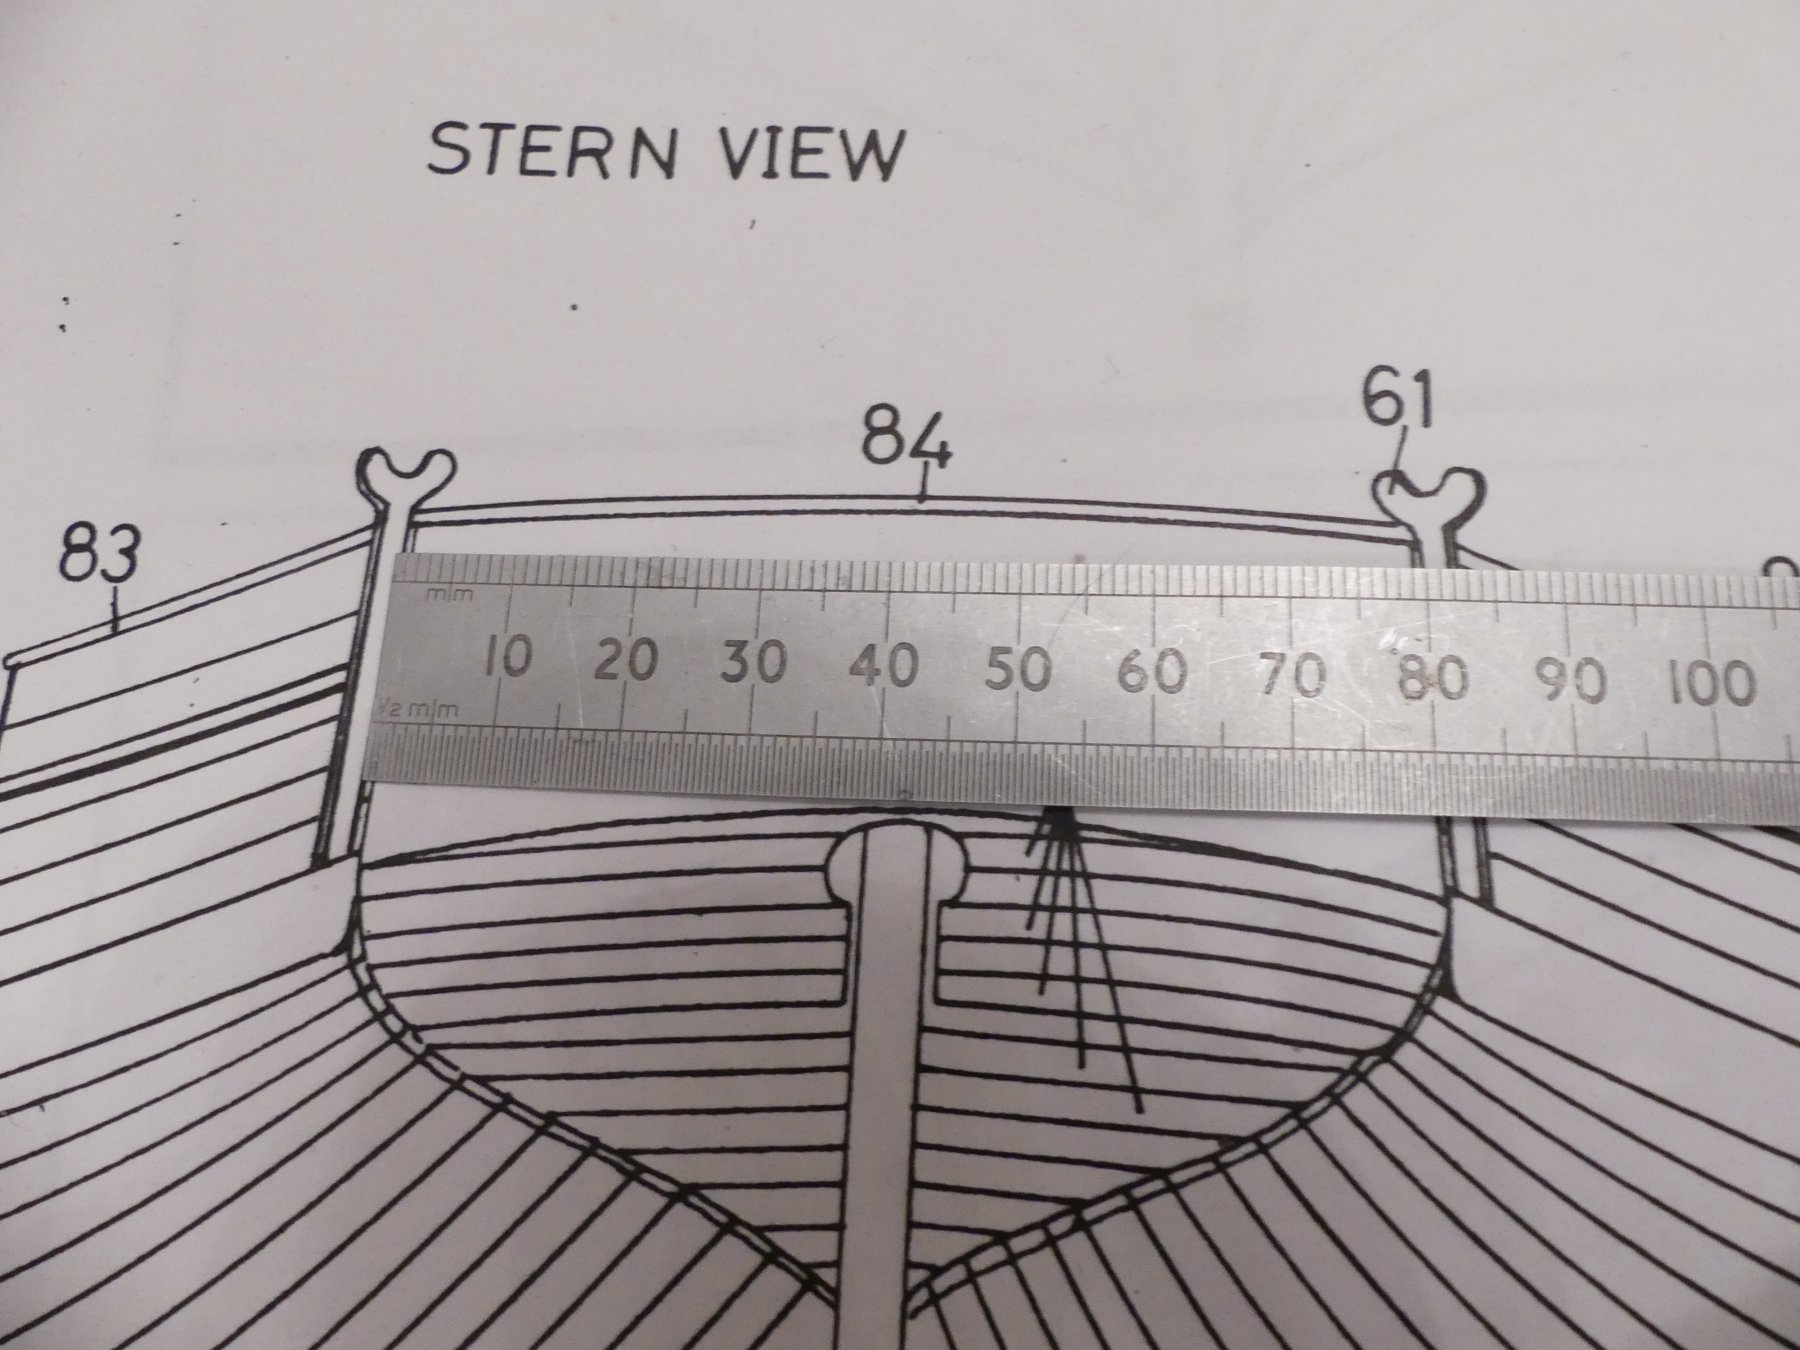
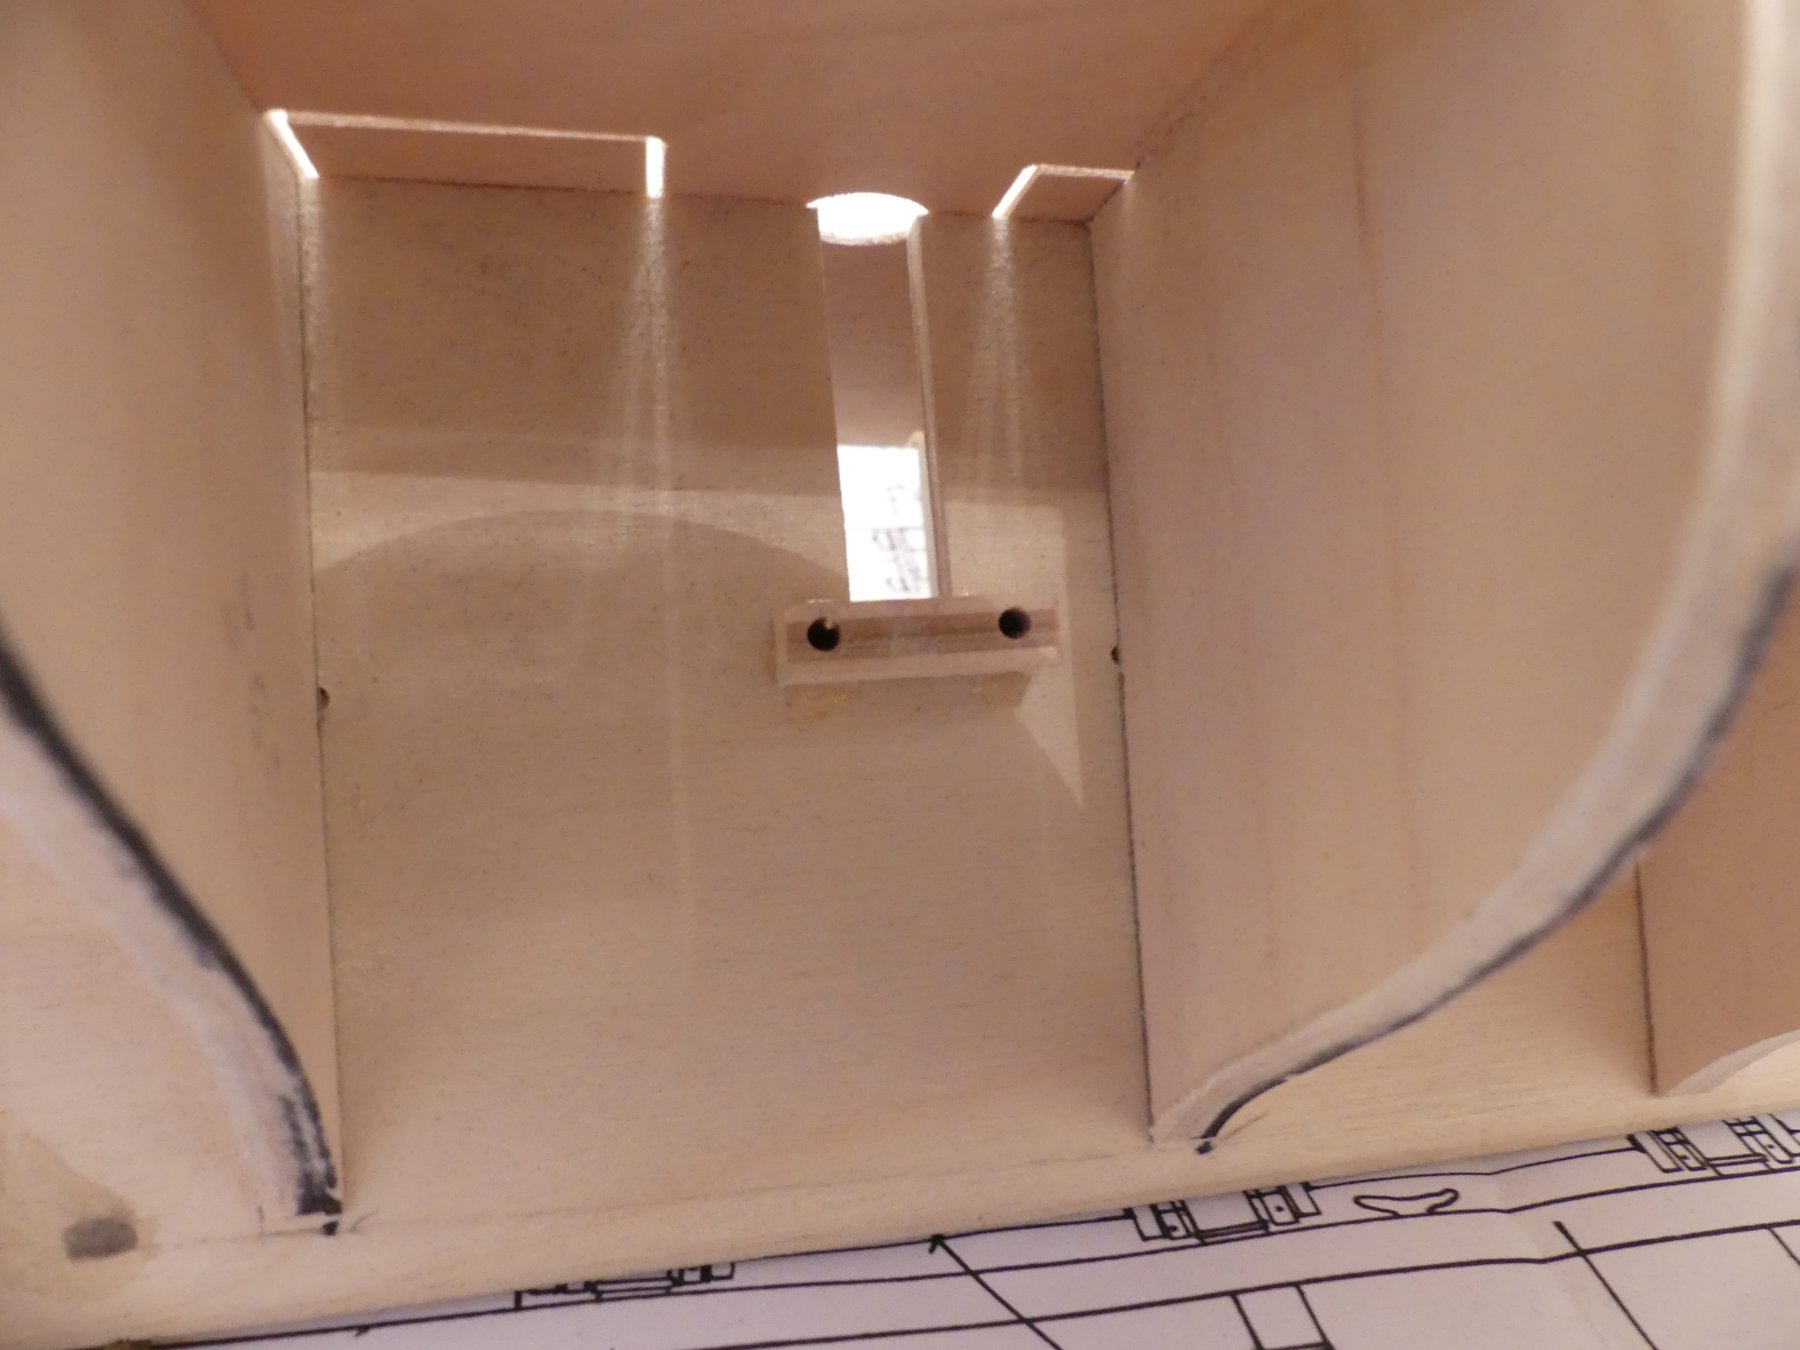
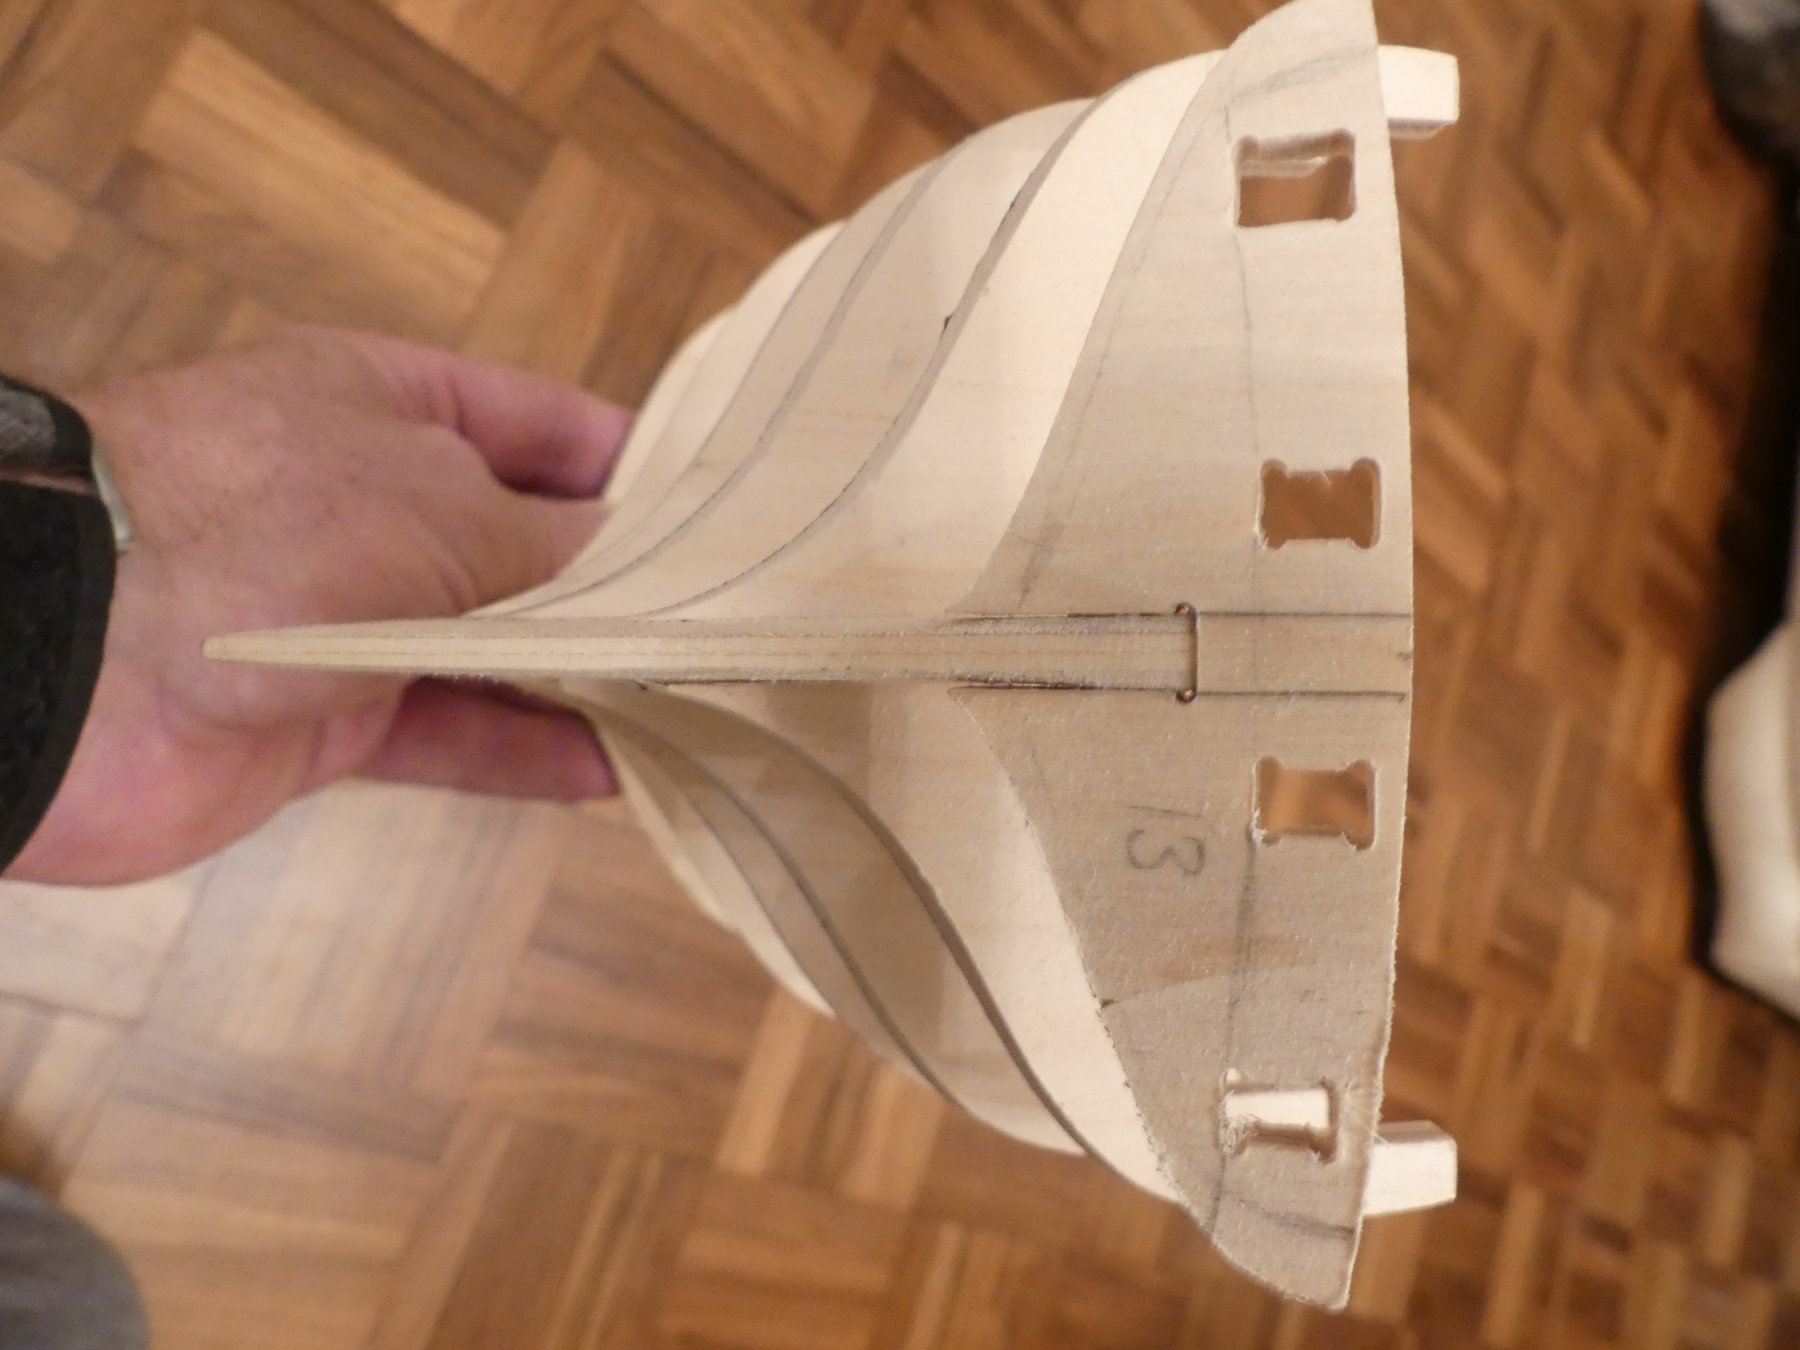
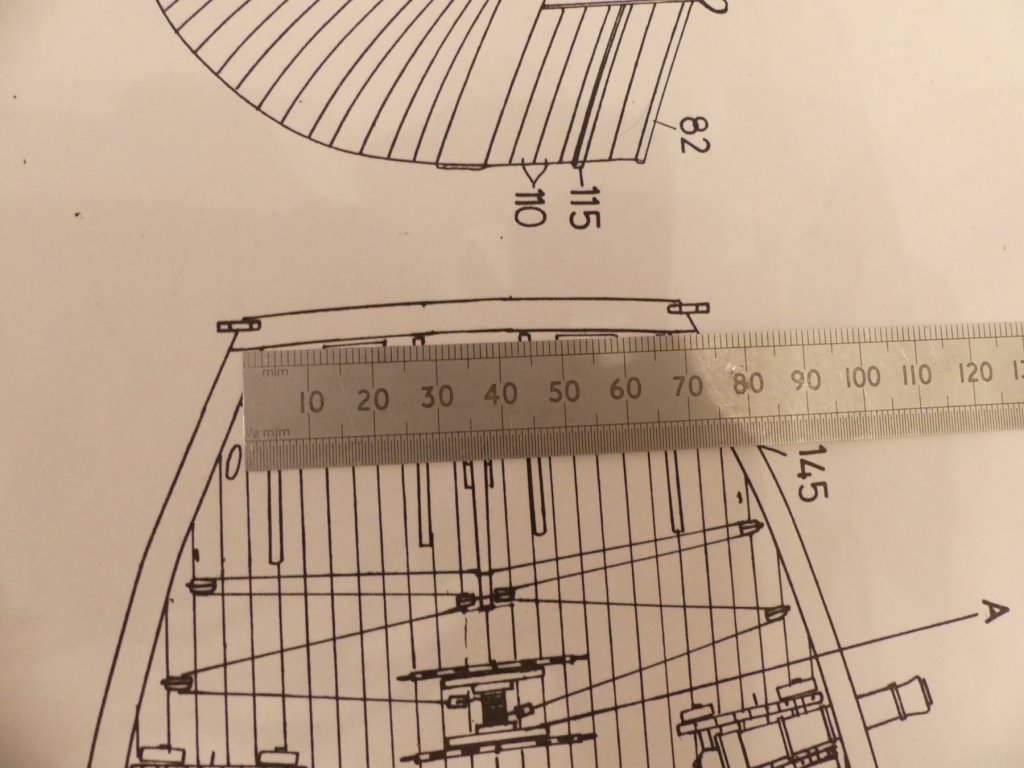
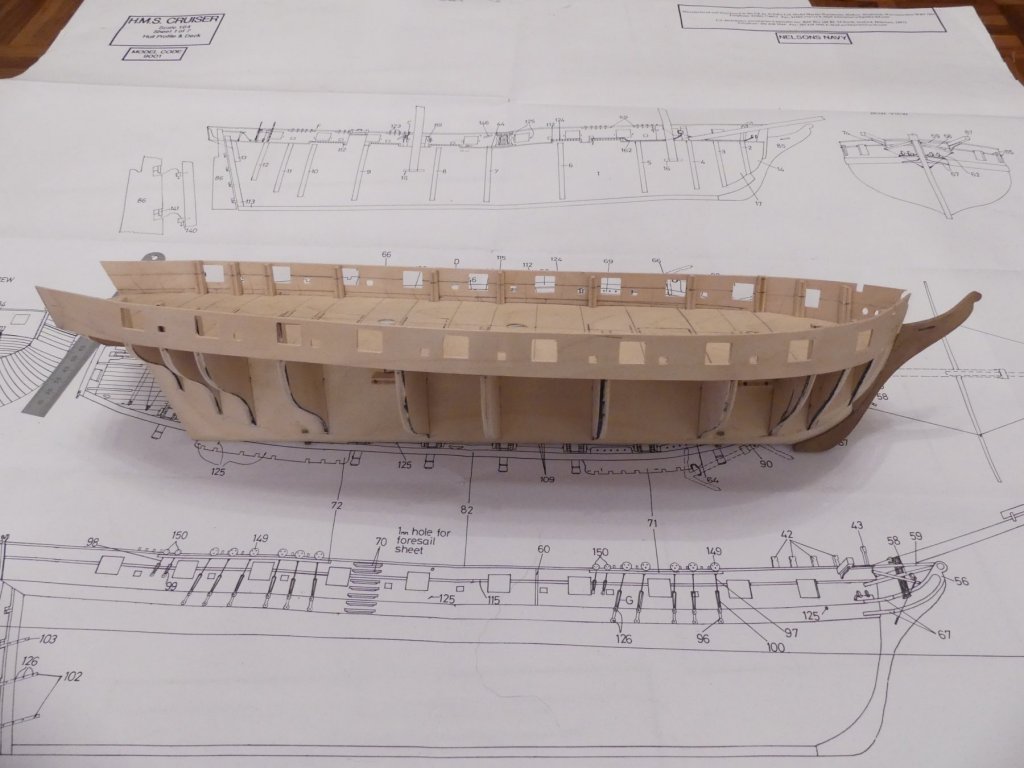
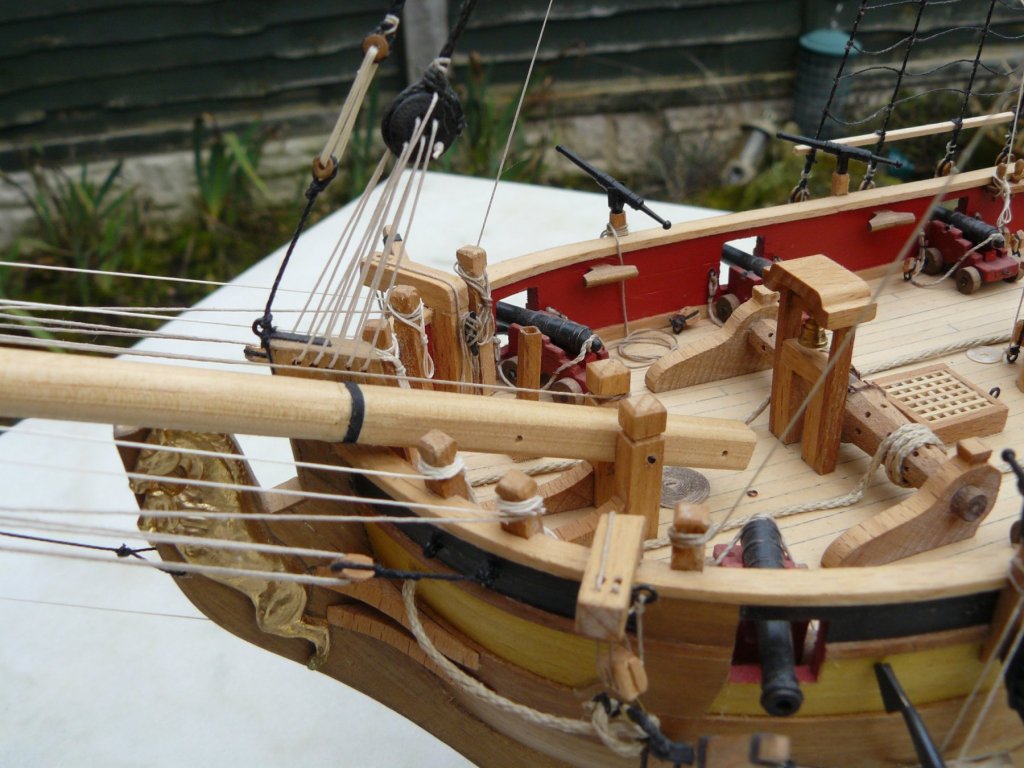
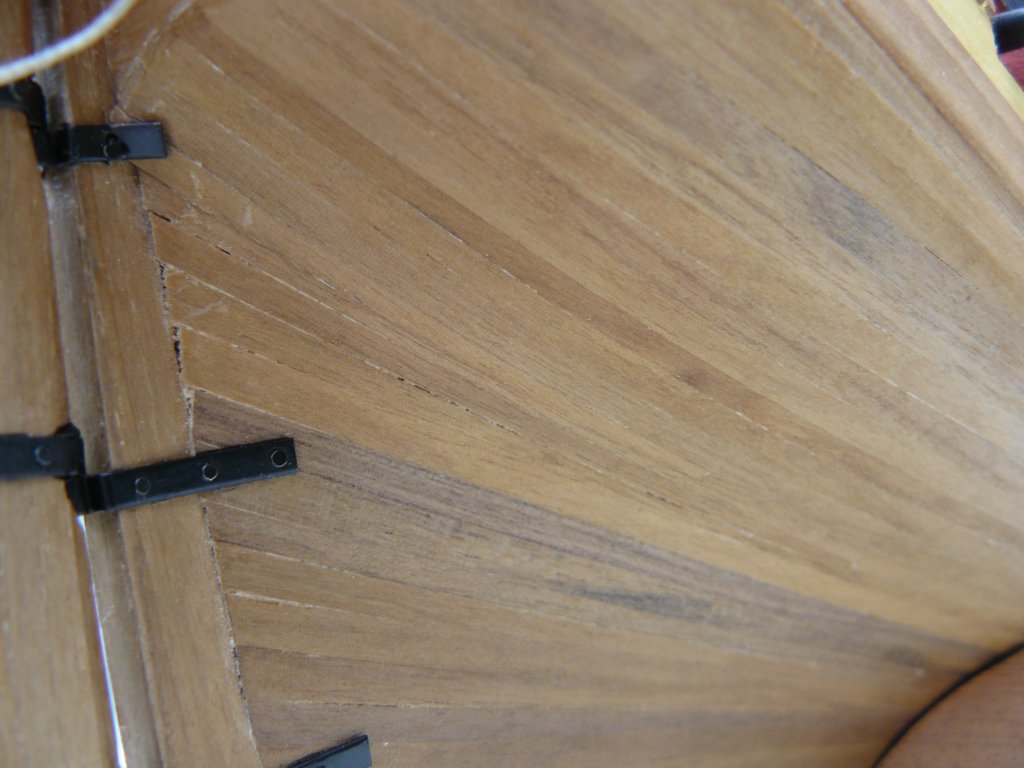
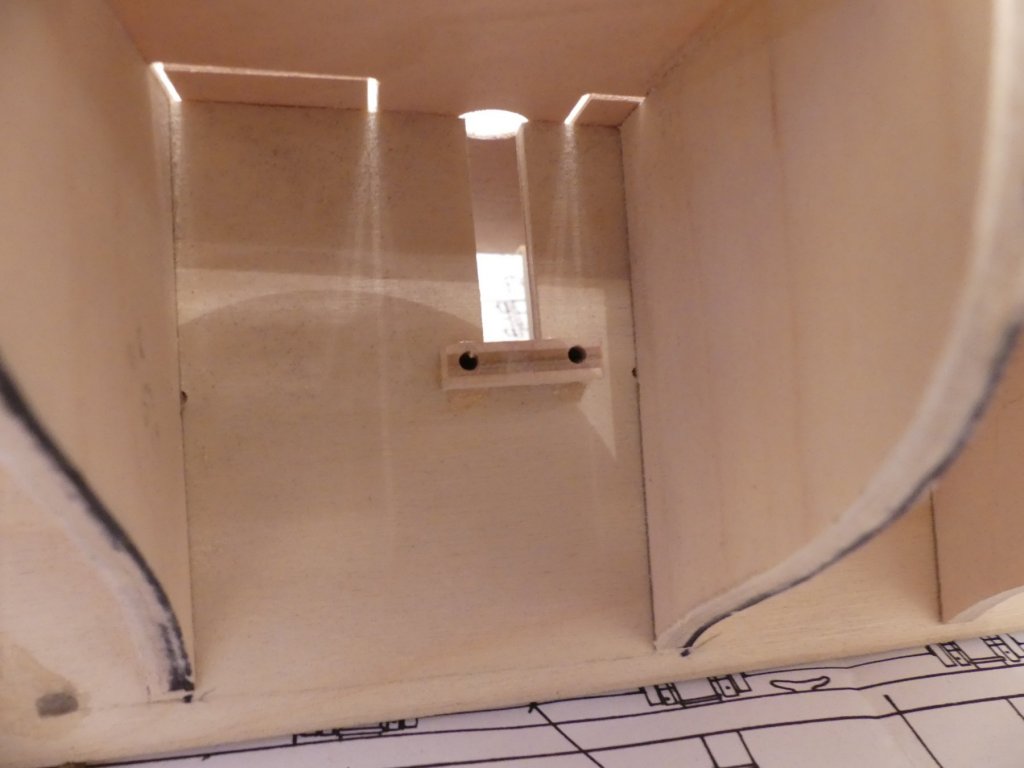
Now I have a real issue that I hope someone can help me with. I have cut out the bulwark capping strips to check the bulwark shape before gluing on the stern section. The stern fascia does not match the plans in shape or size. The bulwark capping do not match the shape and seem to have an strange inward curve just after the last gun port. I could take measurements for the same dimension off two drawings, however, there is 10mm difference between the two. This is the same issue as found on other Caldercraft models - very frustrating. I am not sure whether to bend in the gun port strips, try to bend the capping strip or replace the rear of it with a new section. Capping strips, and subsequently stern fachia dimension measured from plan. Supposed same dimension measured from rear. Stern Fascia and counter on drawing. Stern counter in reality giving two awkward small triangles that will require filling to give a landing for the planking.

- 102 replies
-
- 2
-
-
- cruiser
- caldercraft
- (and 1 more)
-
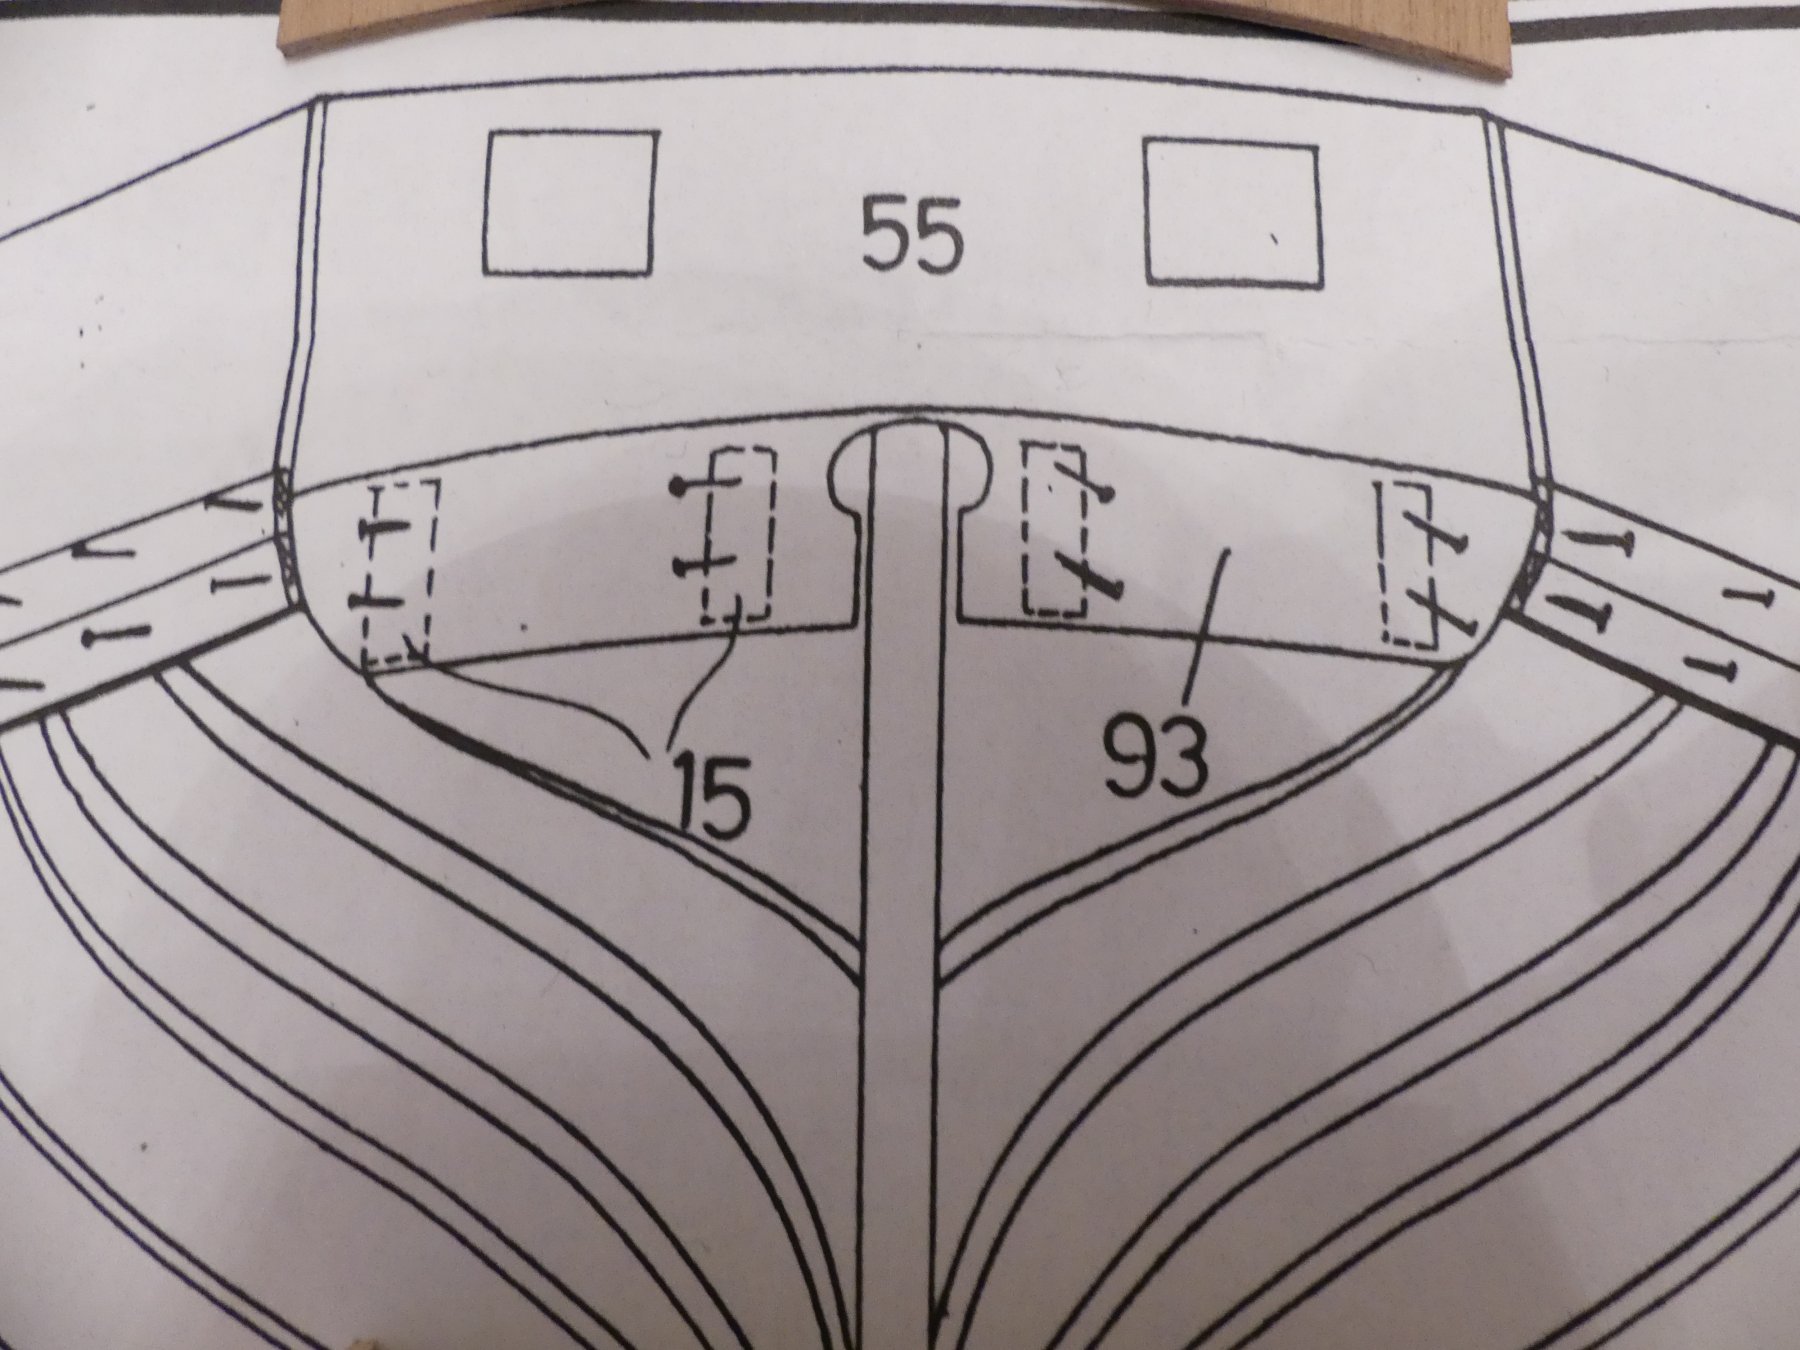
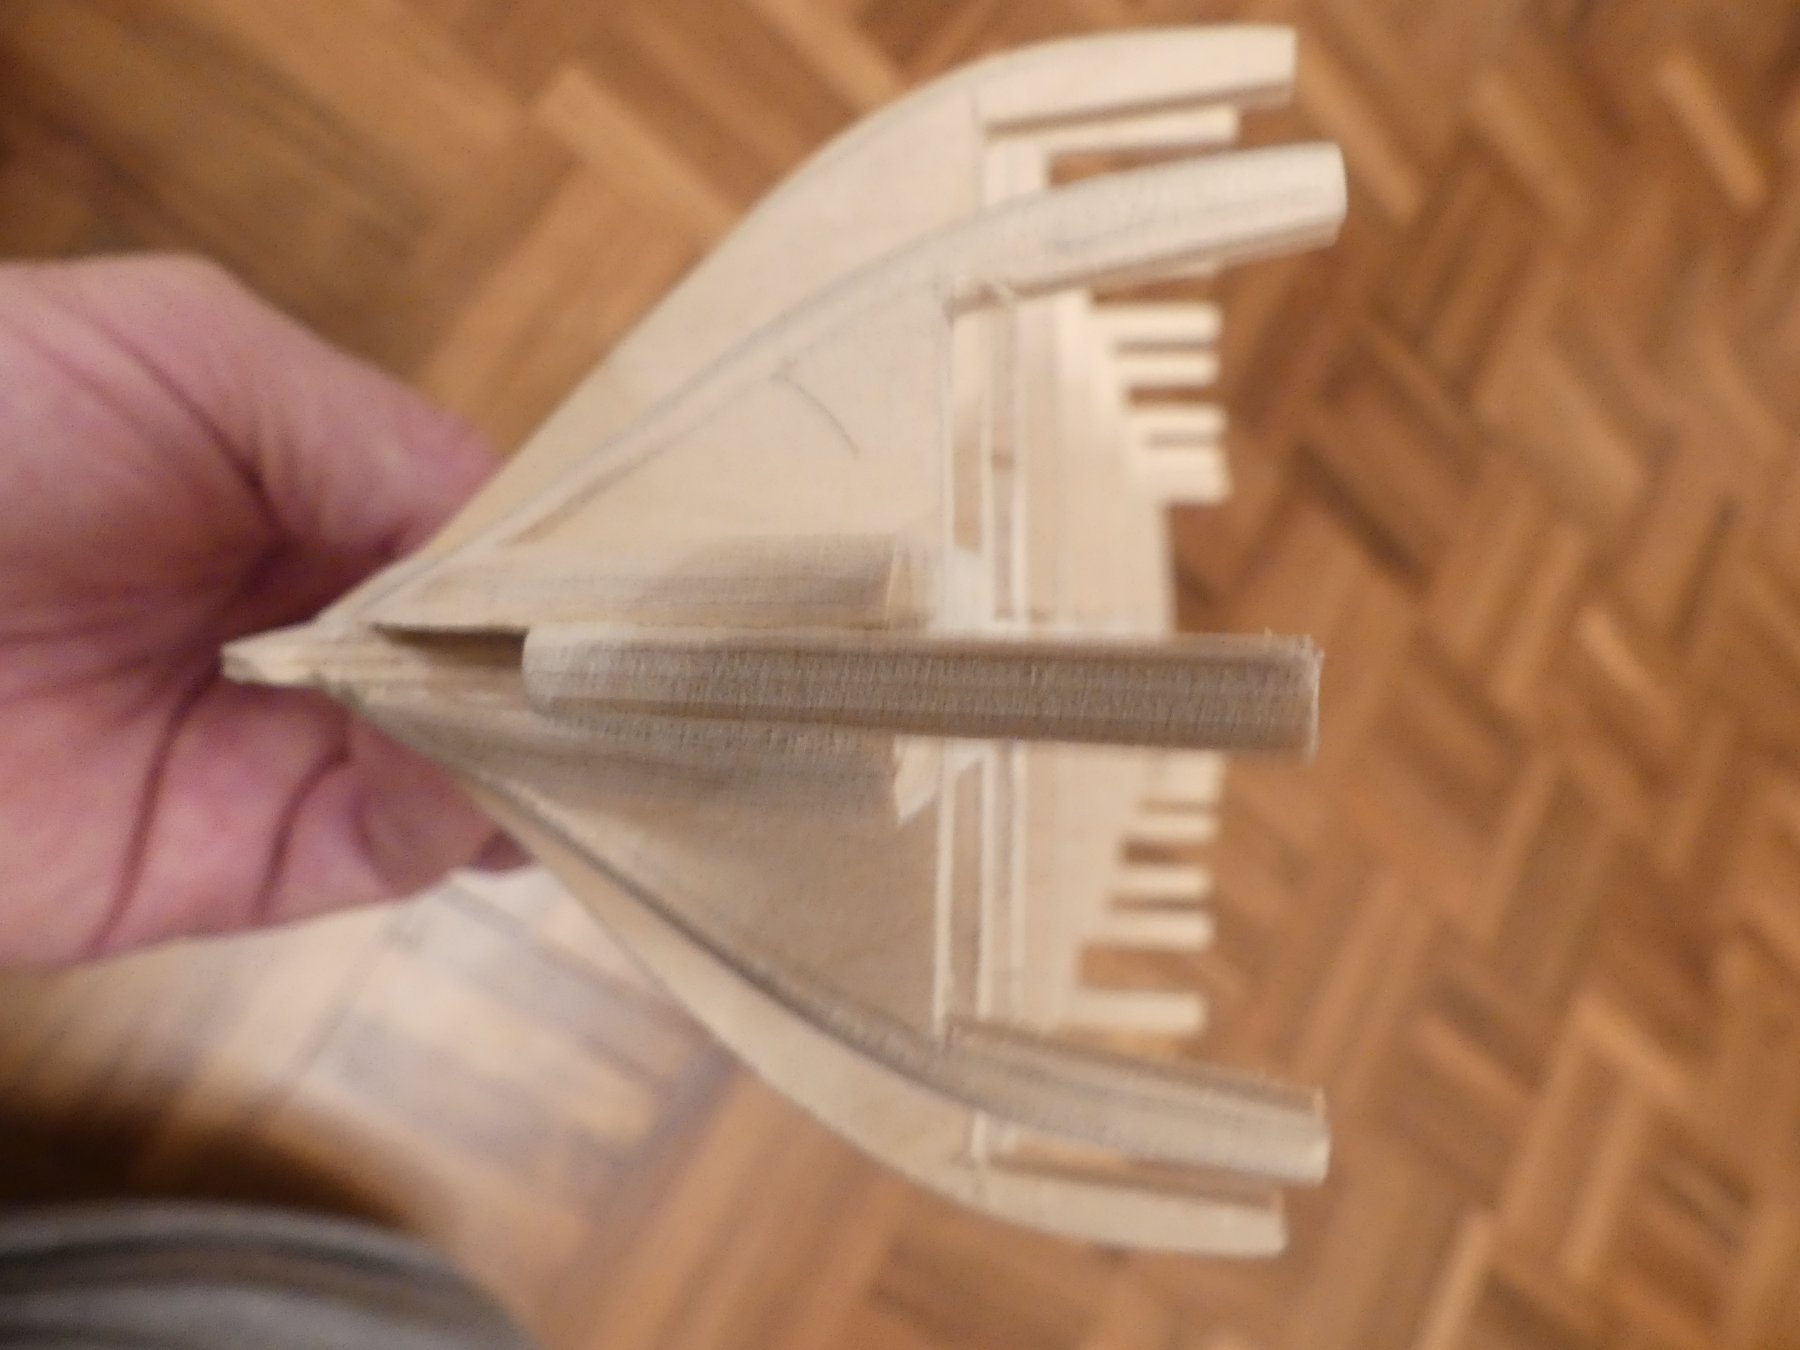
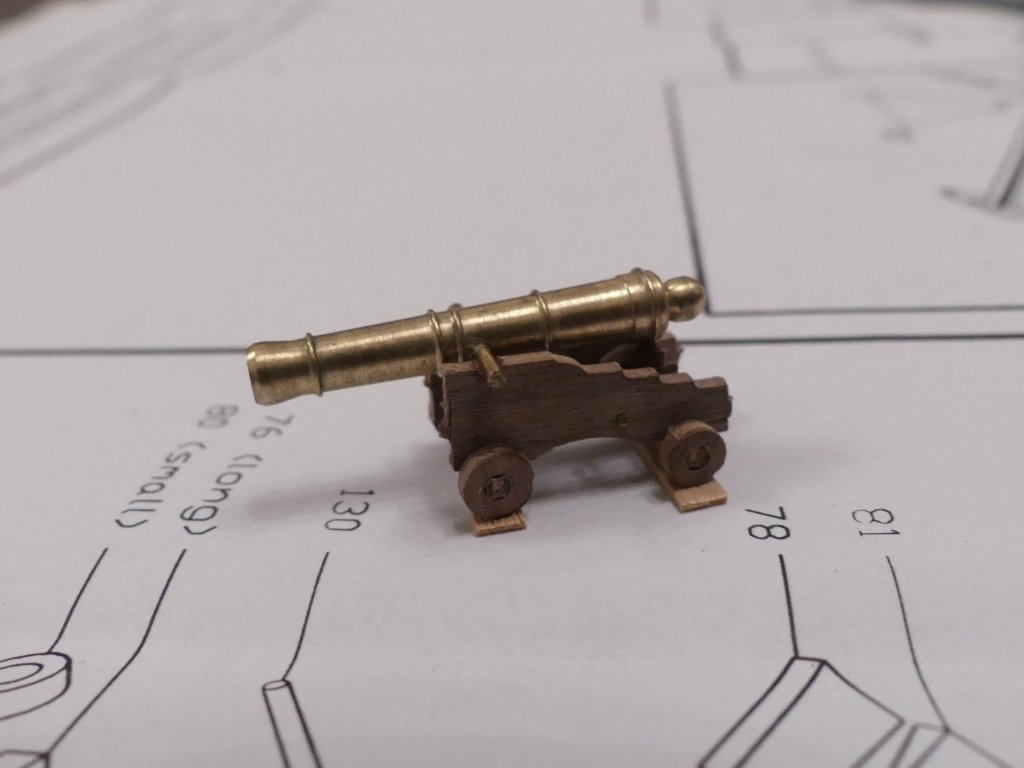
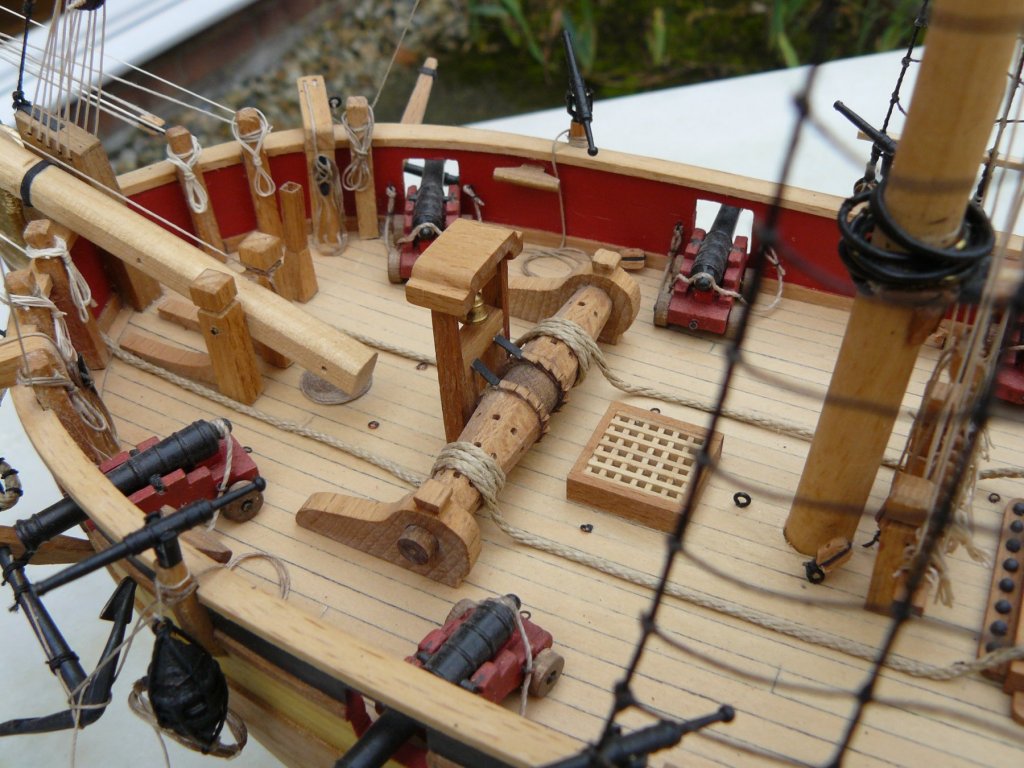
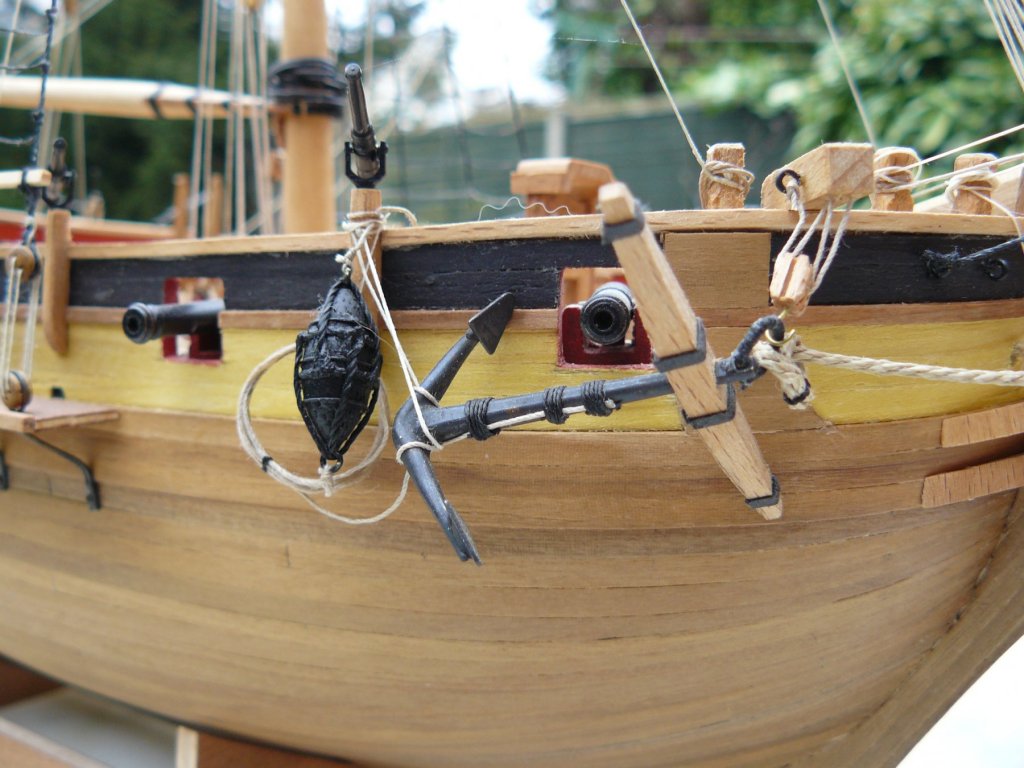
Bulwark / gun port ply strips in place. I took numerous measurements for this as the instructions say to place at top of bulkhead tabs but mine are at different heights. The lines show gun port mid position and deck height. I had real issues with getting a good curve, I soaked the strips for two hours but they still bent more easily at the gun port positions, I am hoping I can sort this out or they will have to come off again. Before clamping in position I double checked the gun port height by making up one cannon with strips of deck material under the wheels.
- 102 replies
-
- 1
-
-
- cruiser
- caldercraft
- (and 1 more)
-
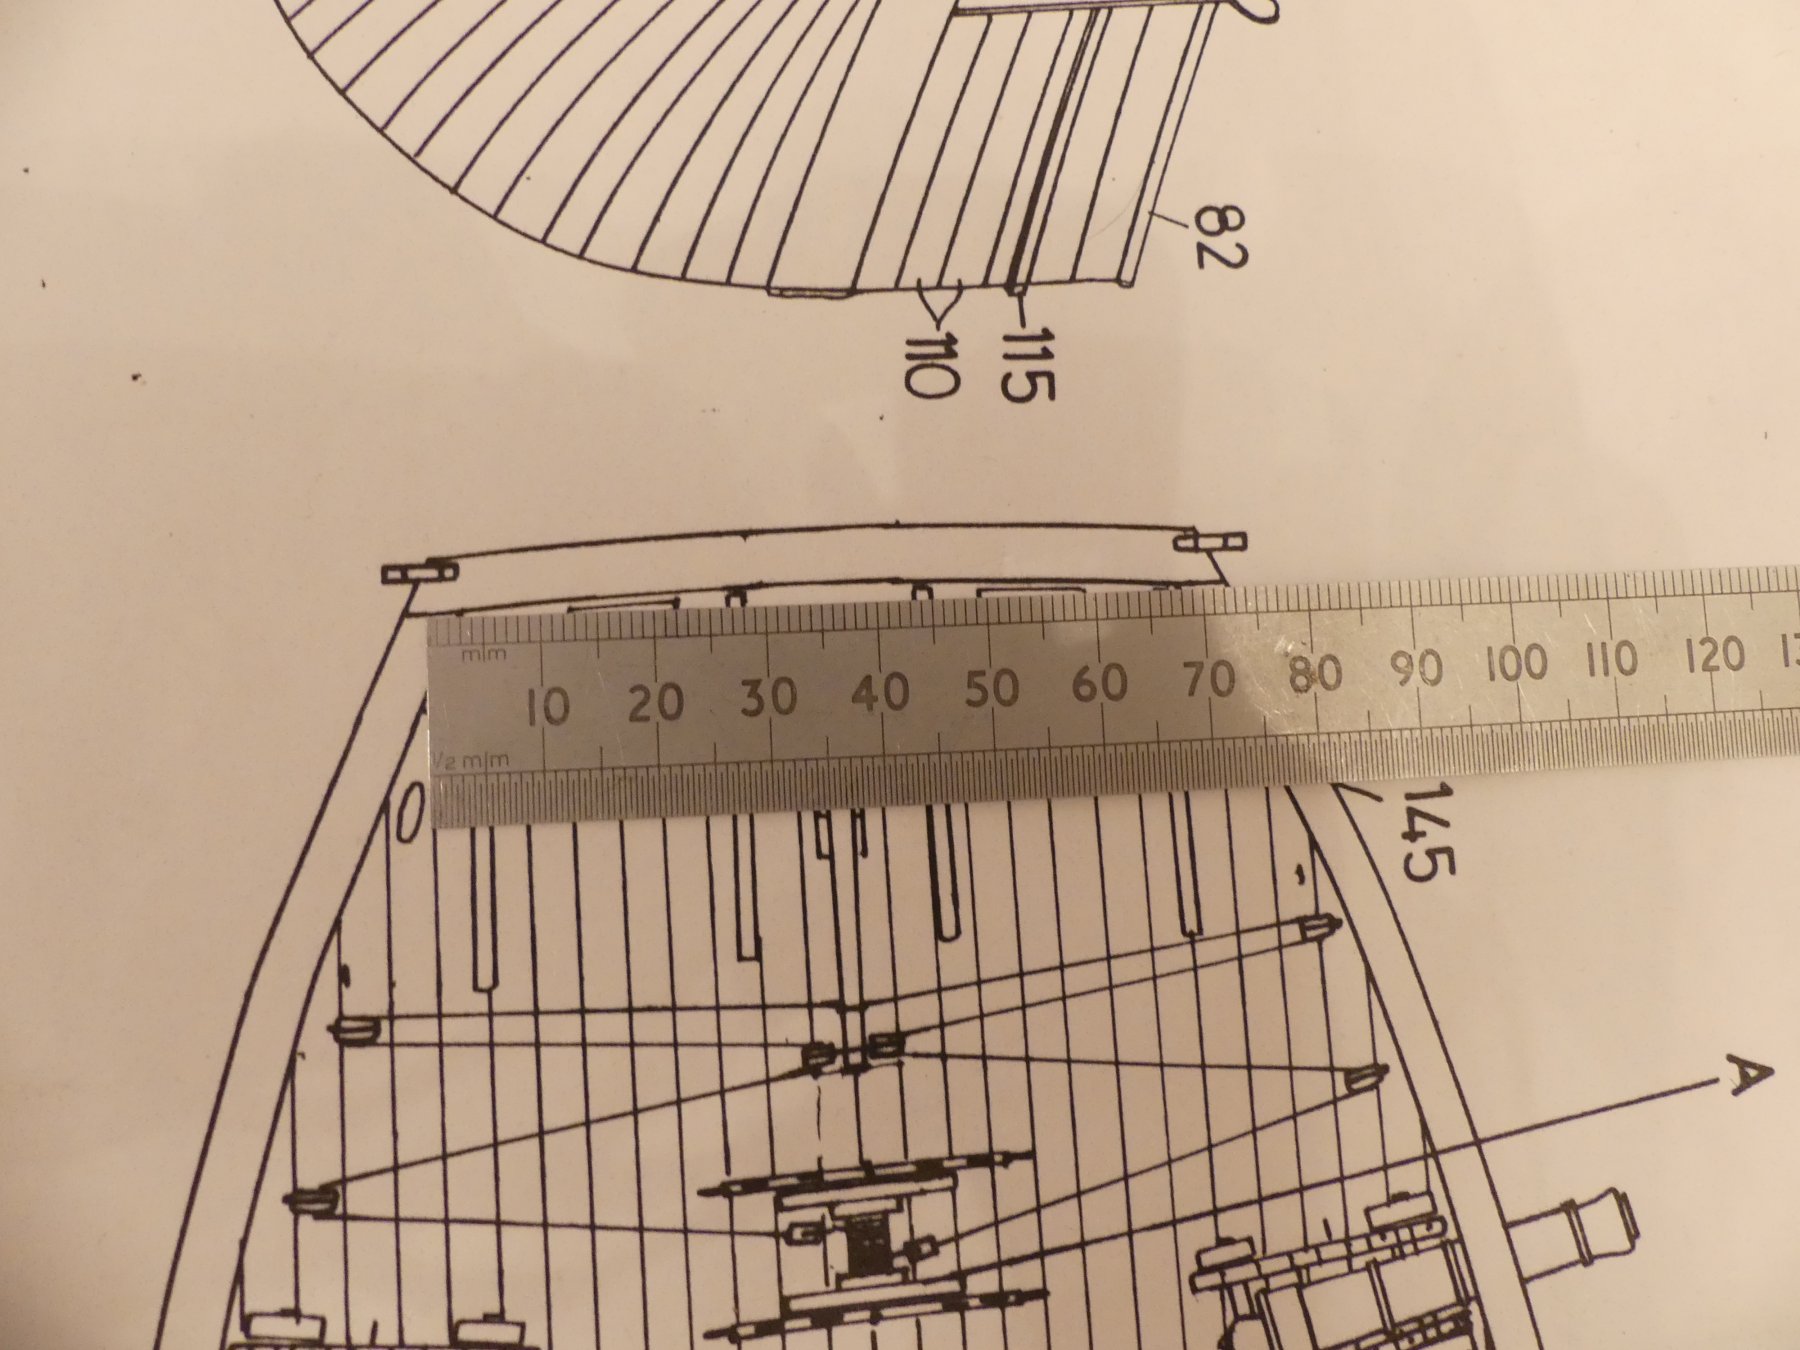
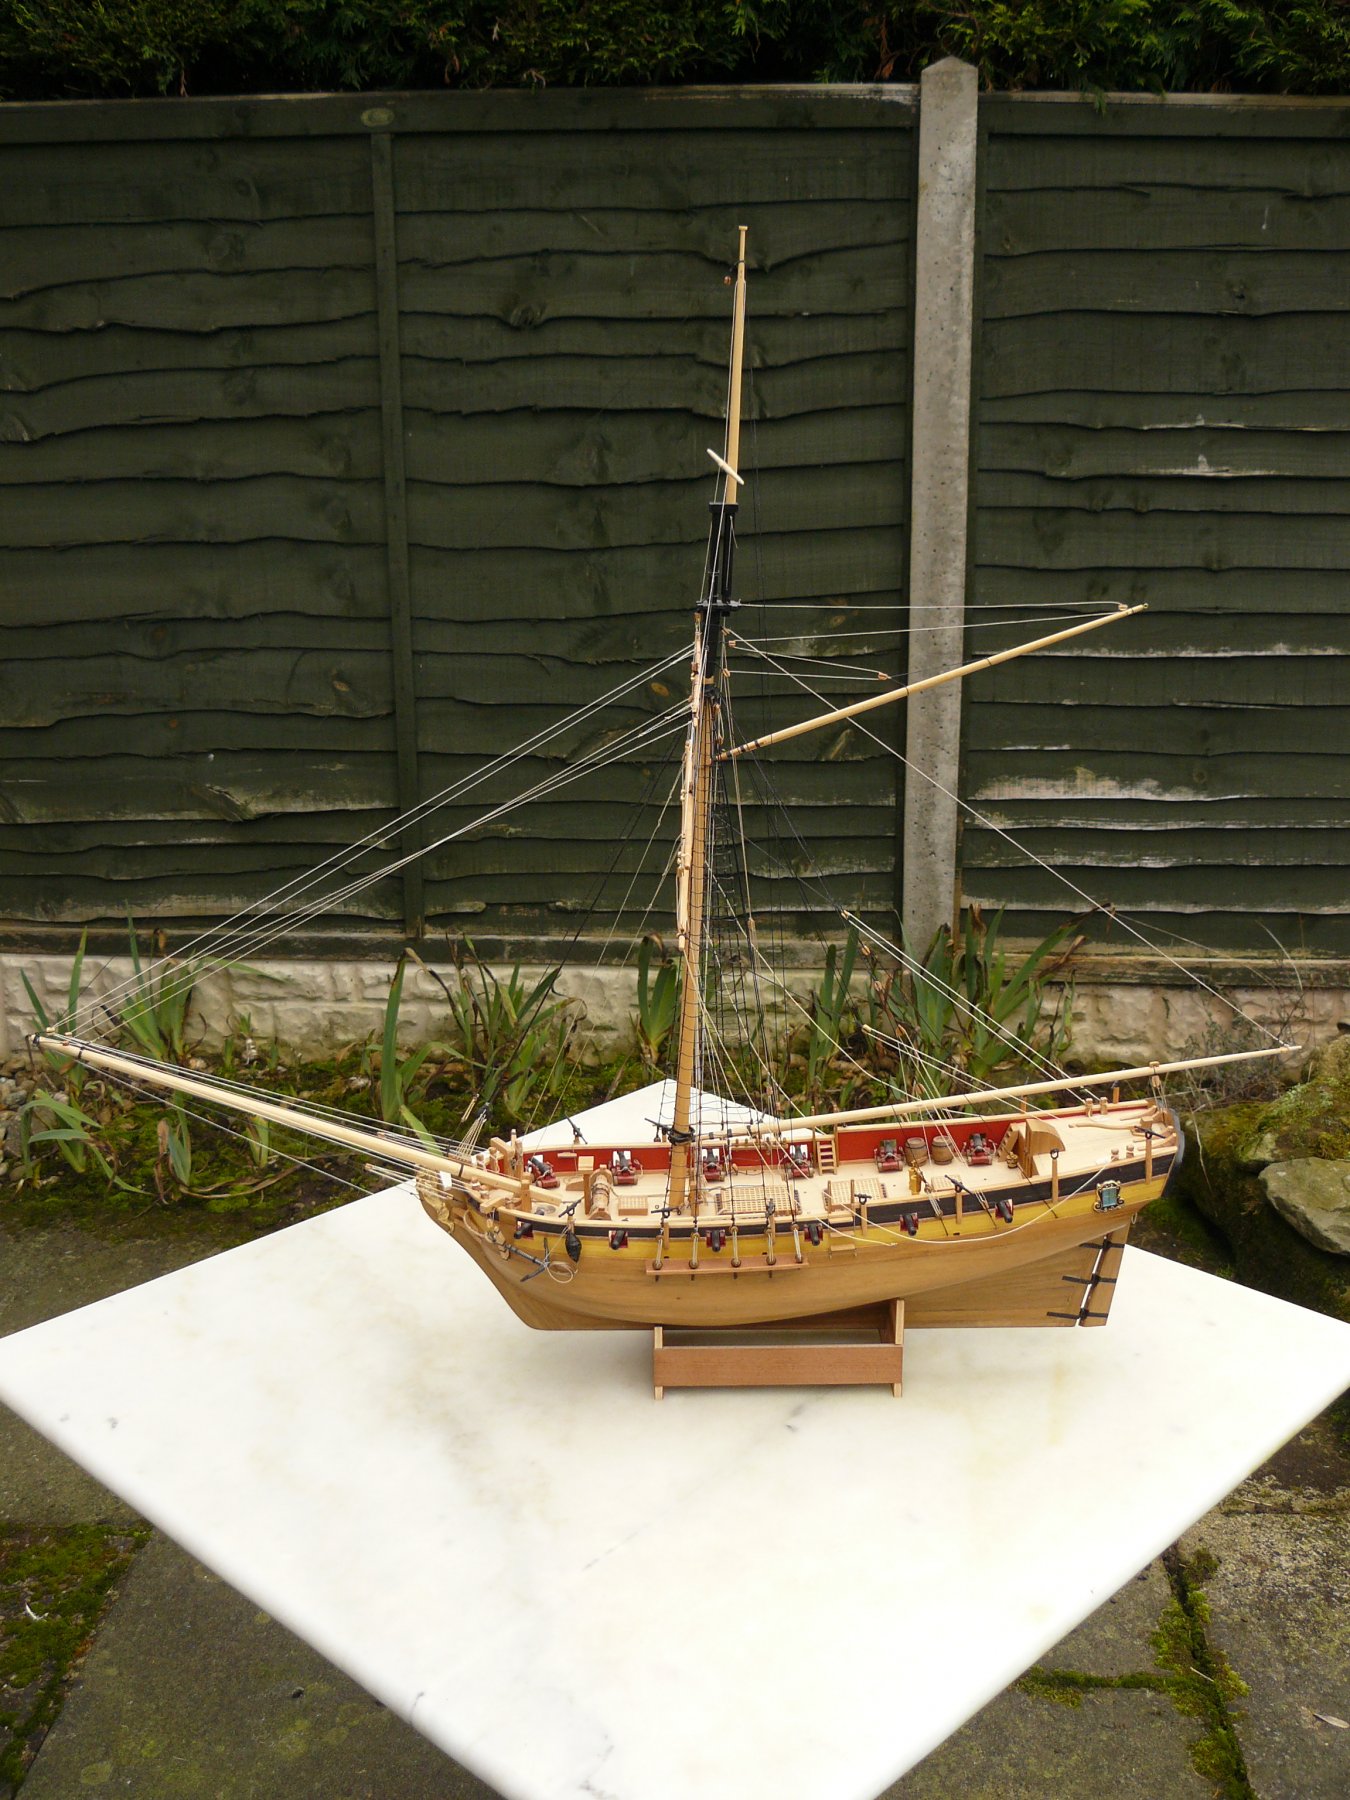
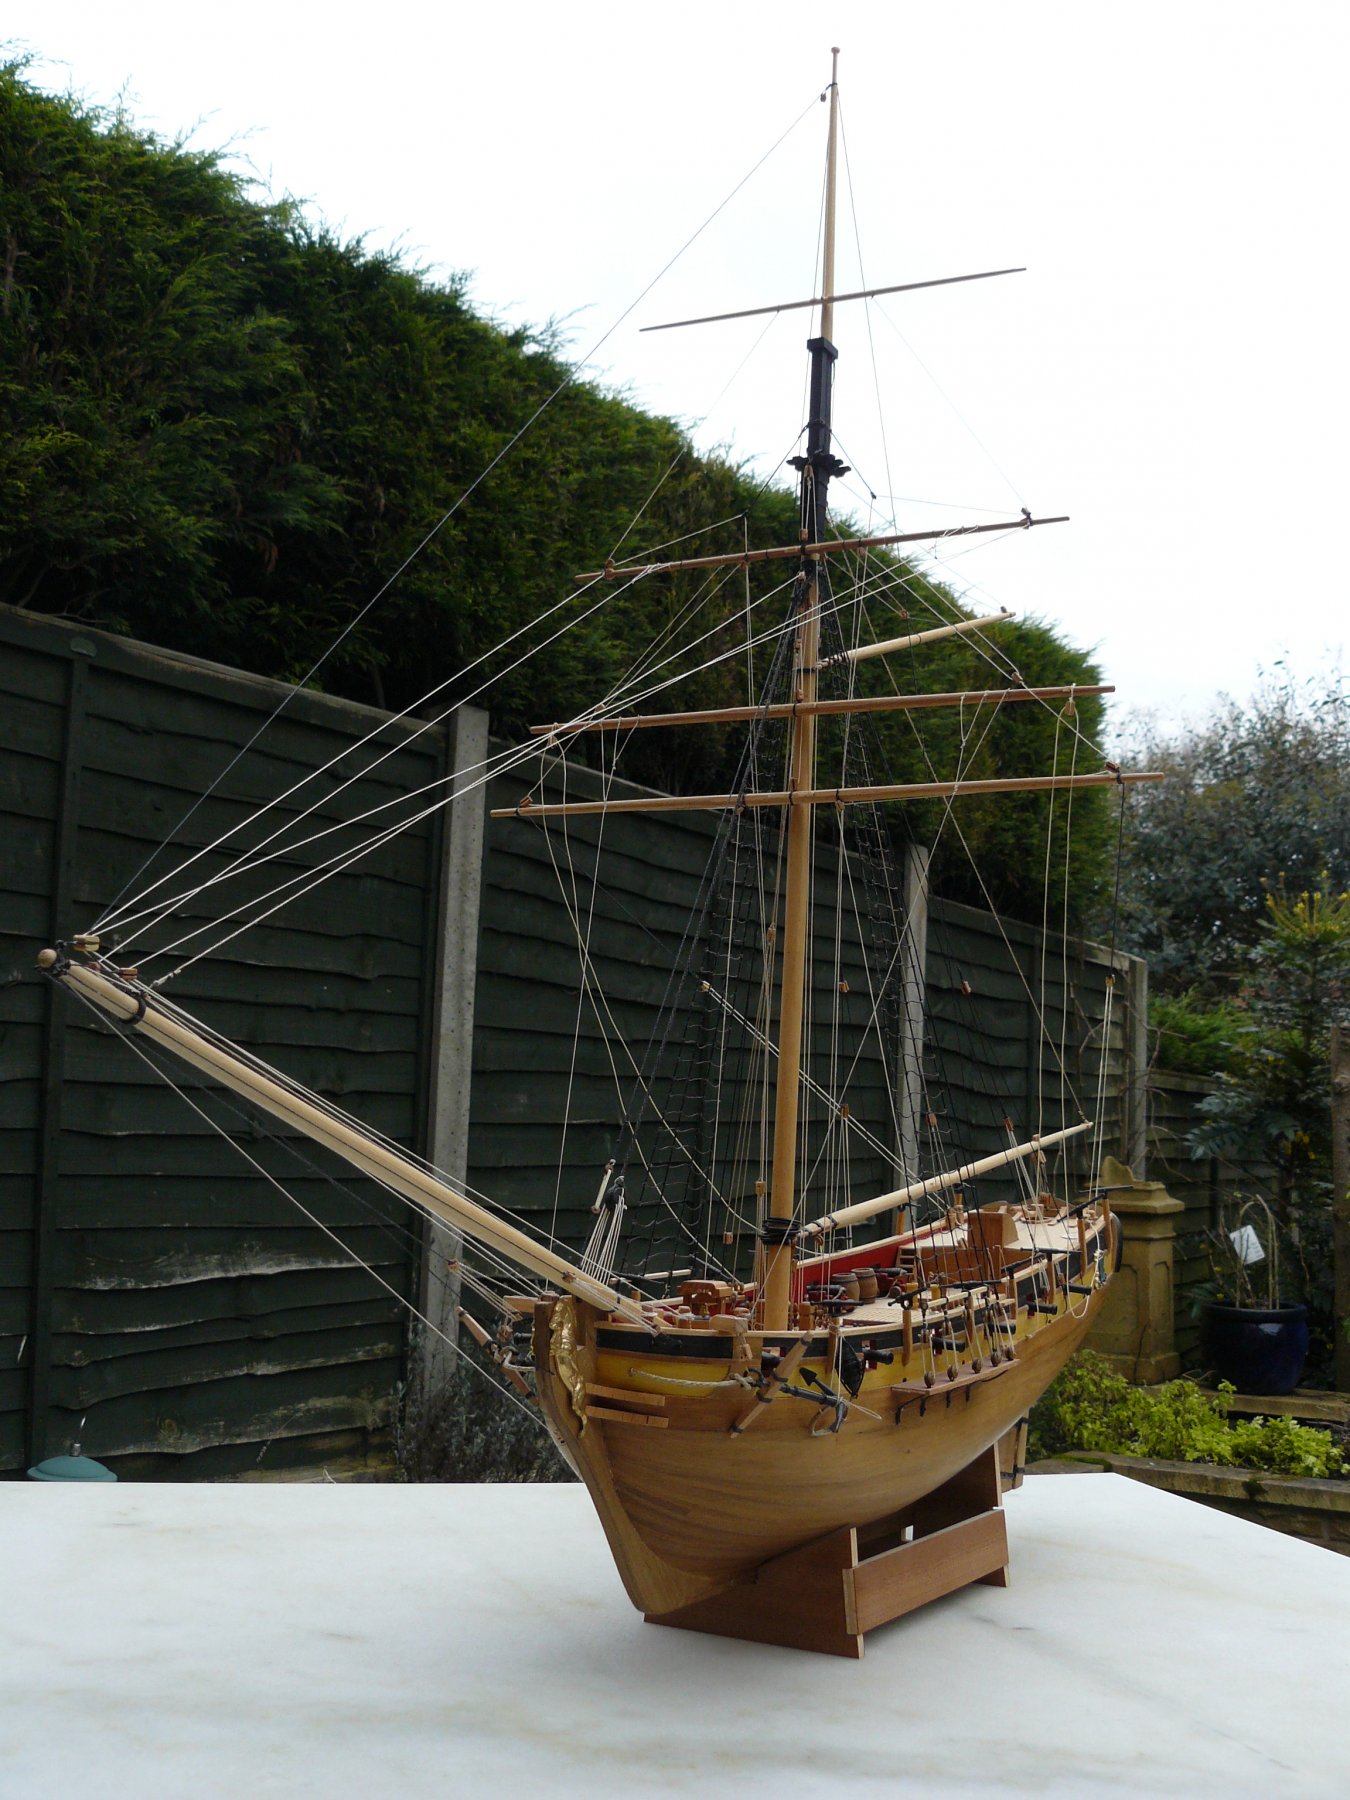
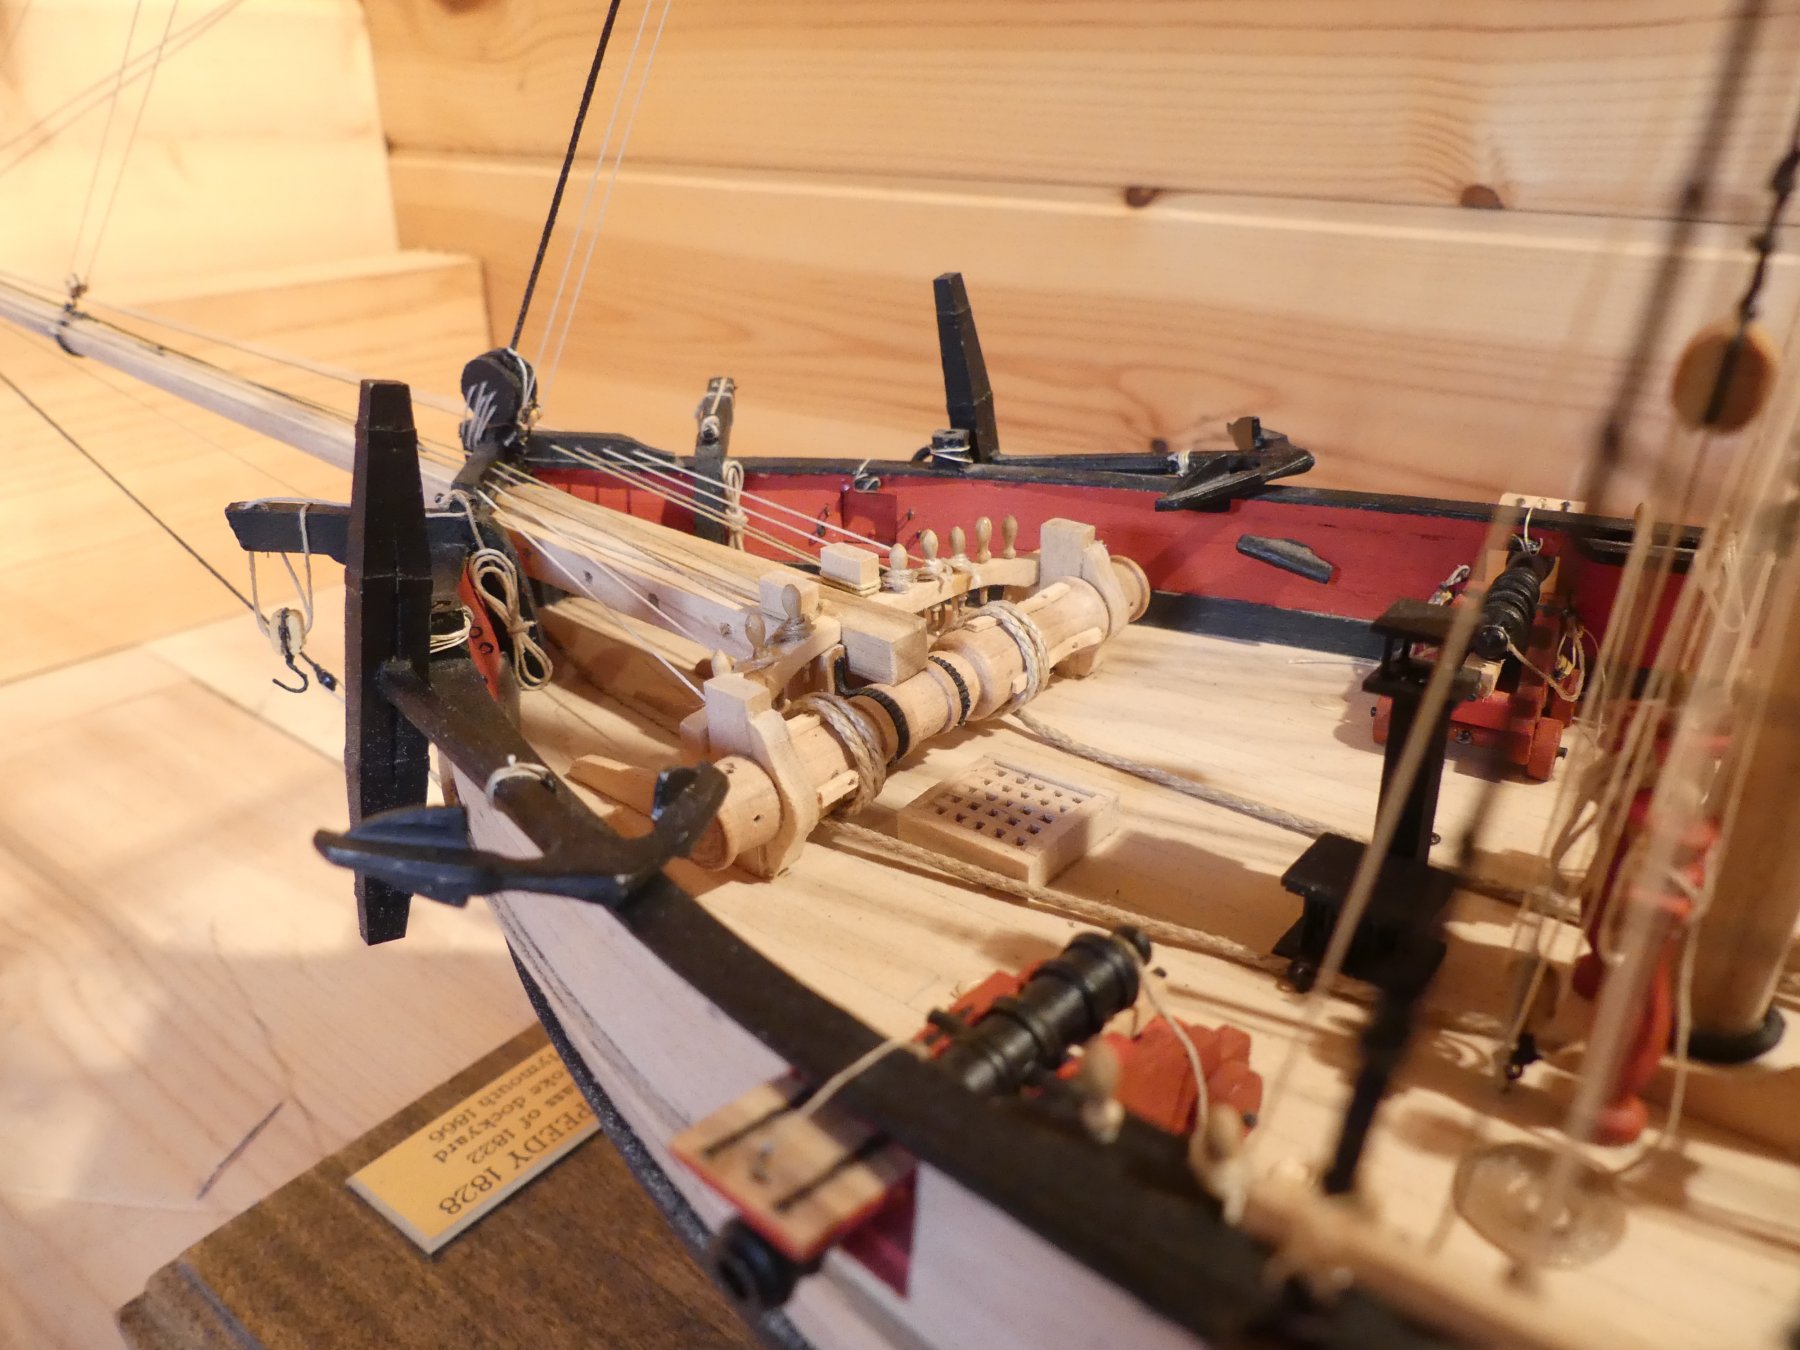
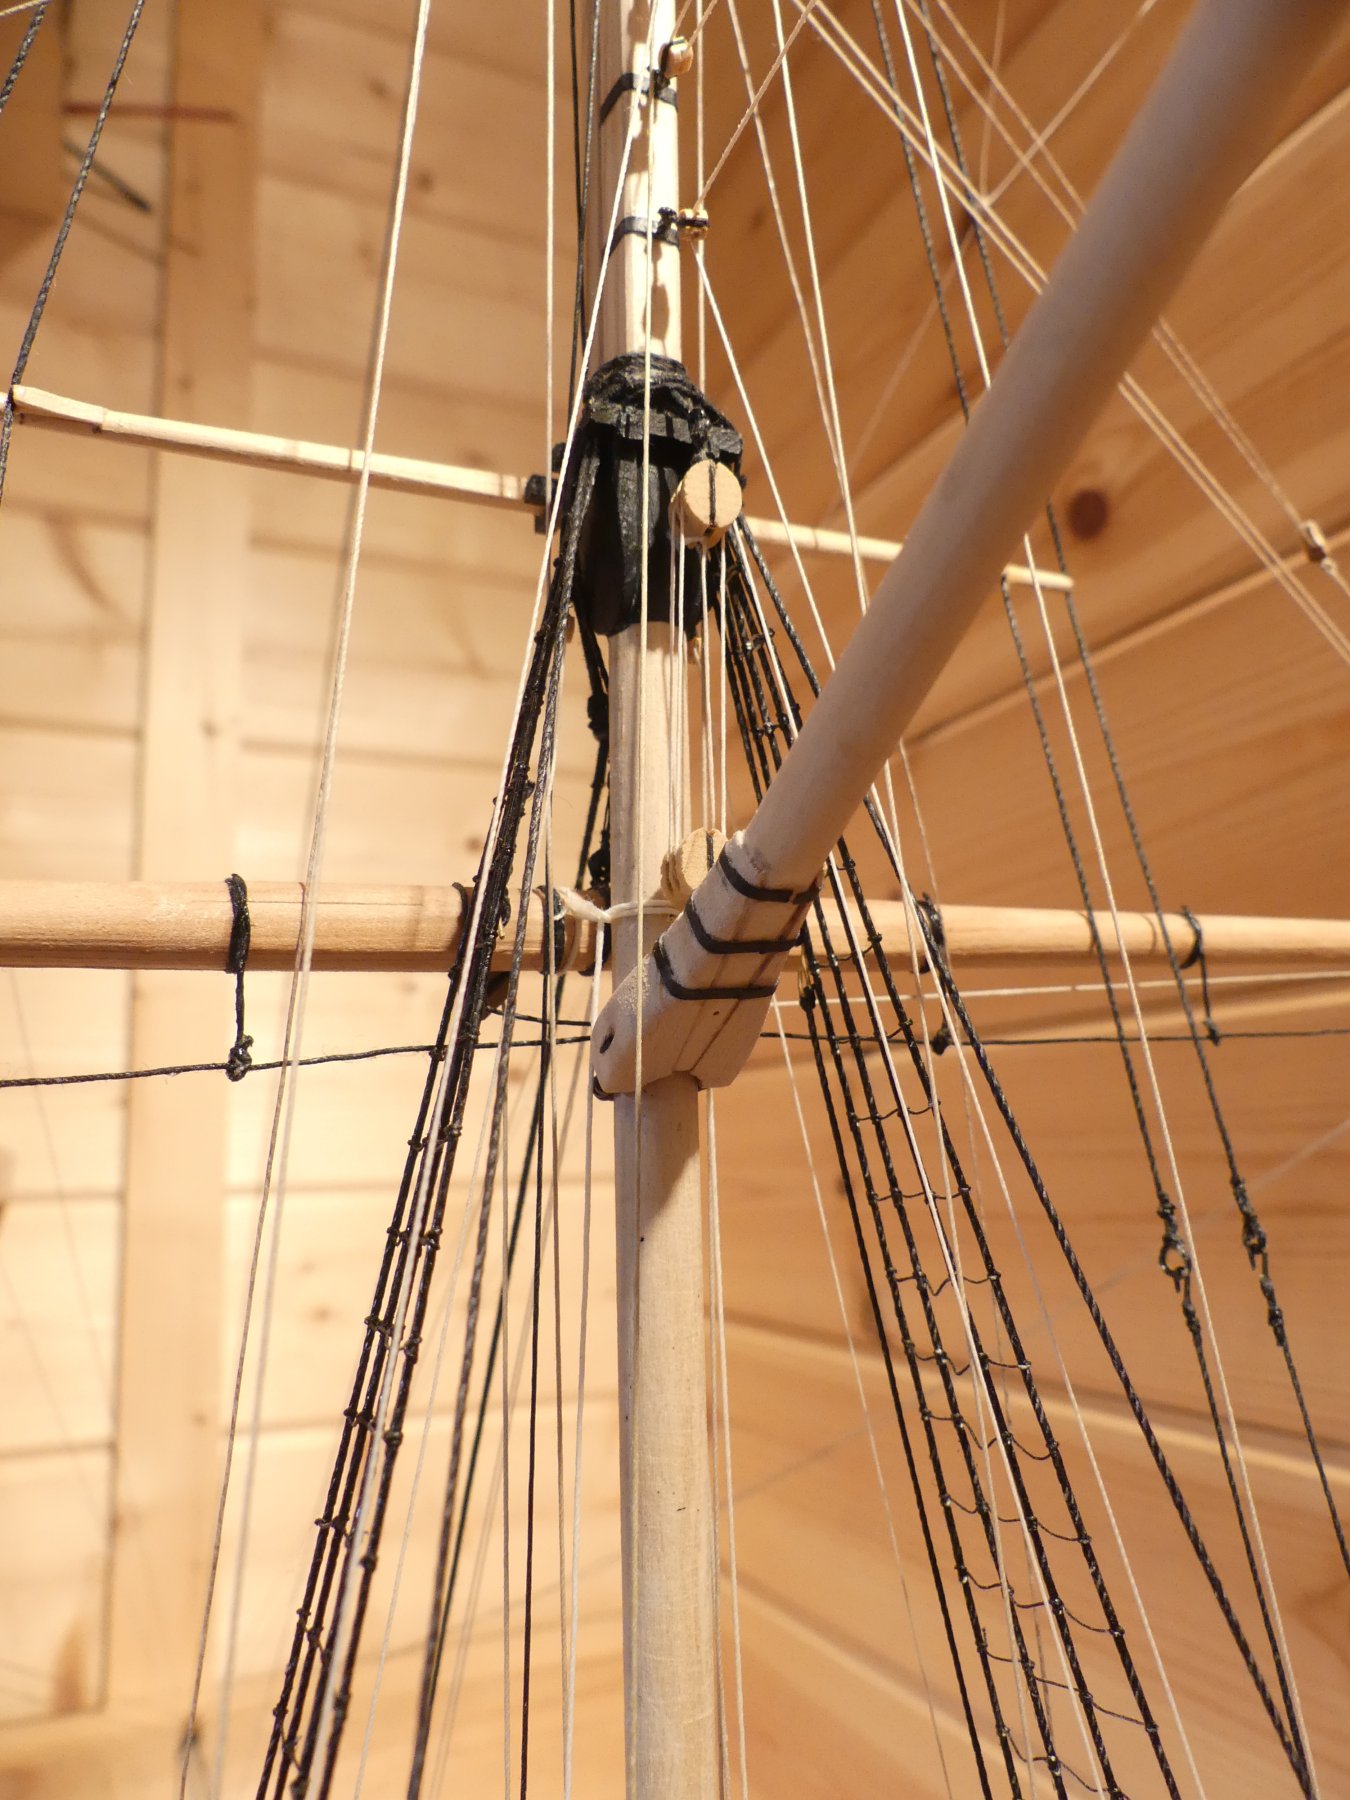
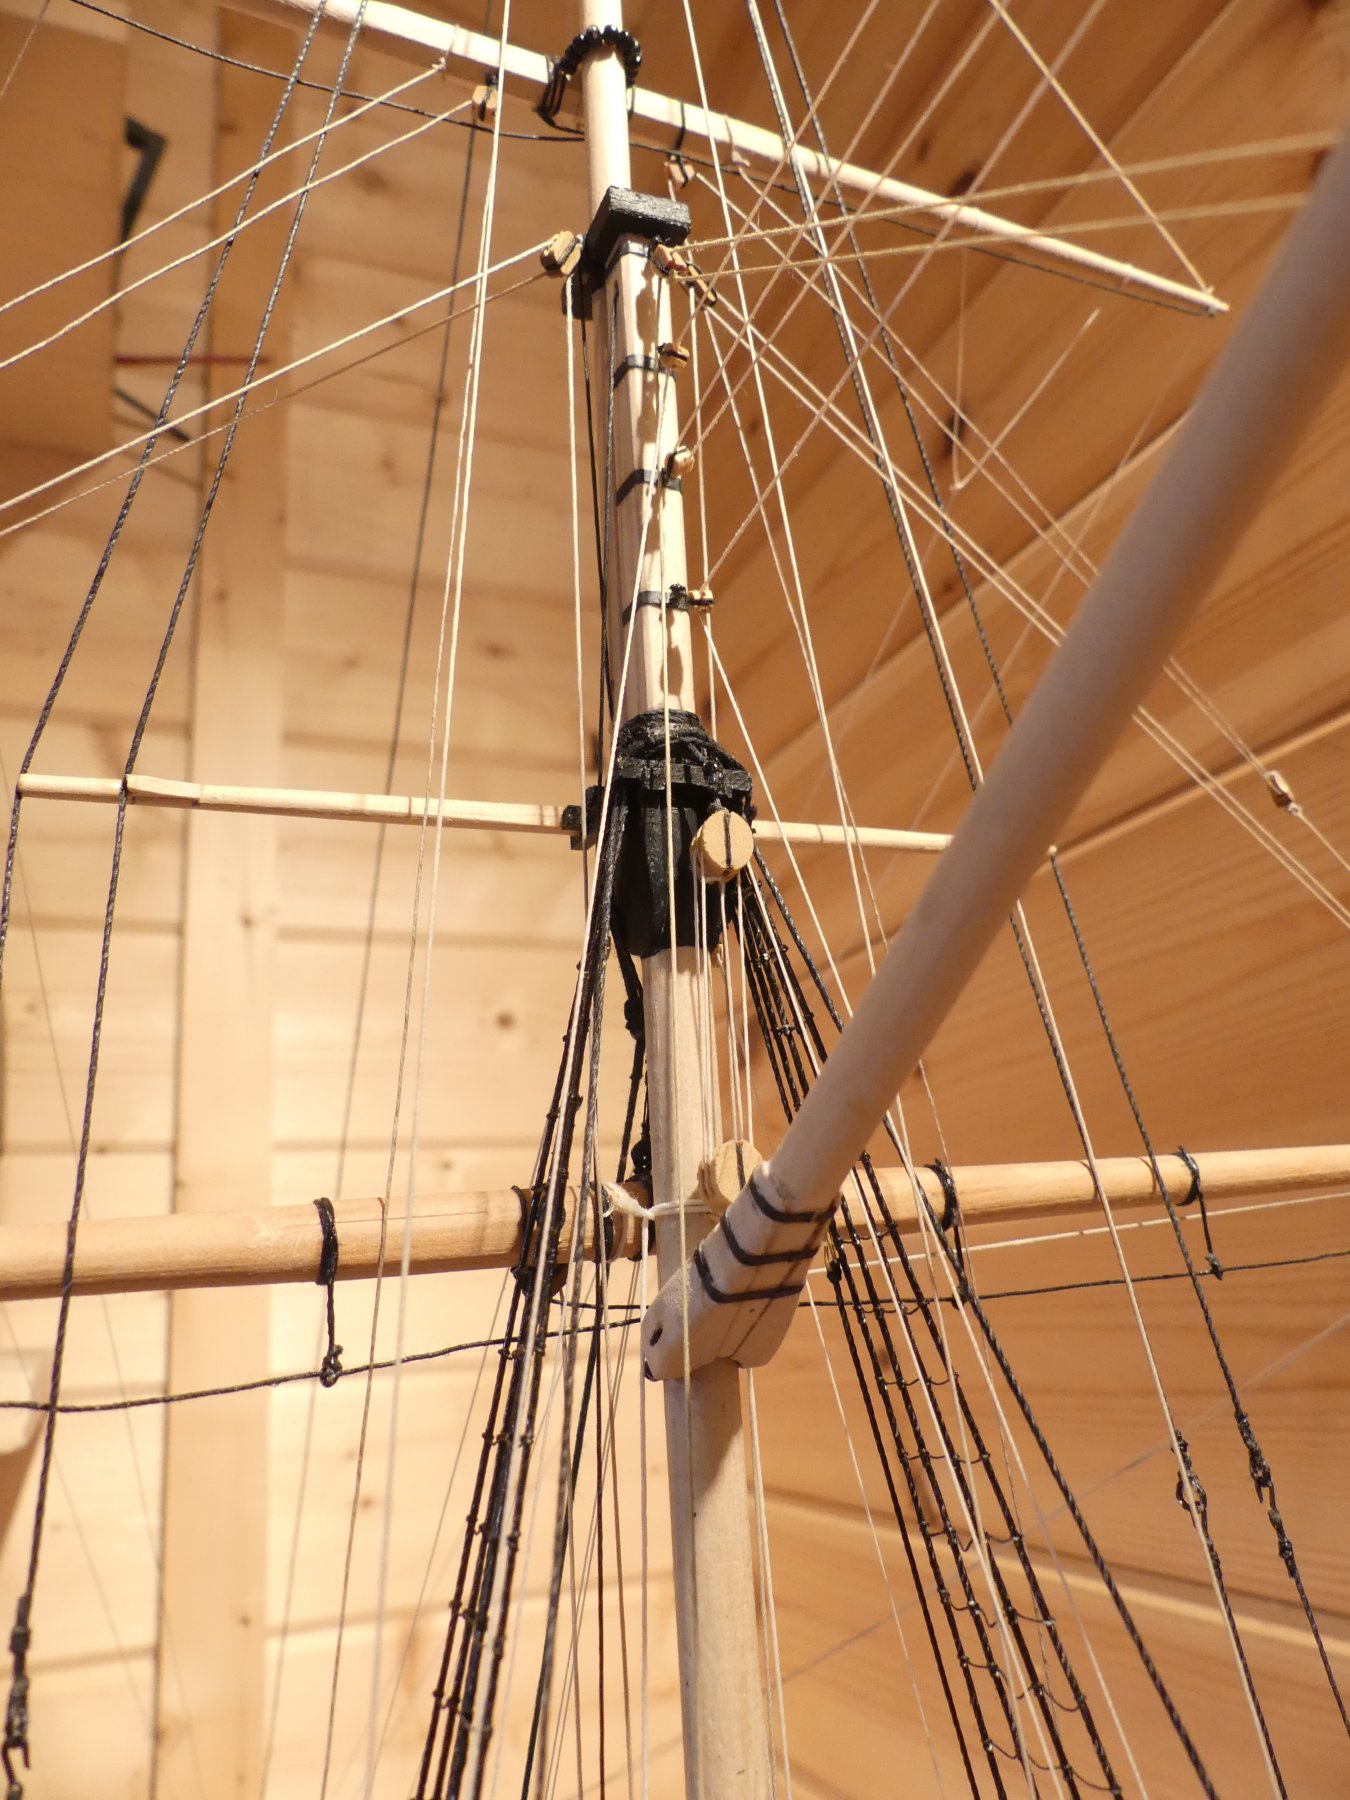
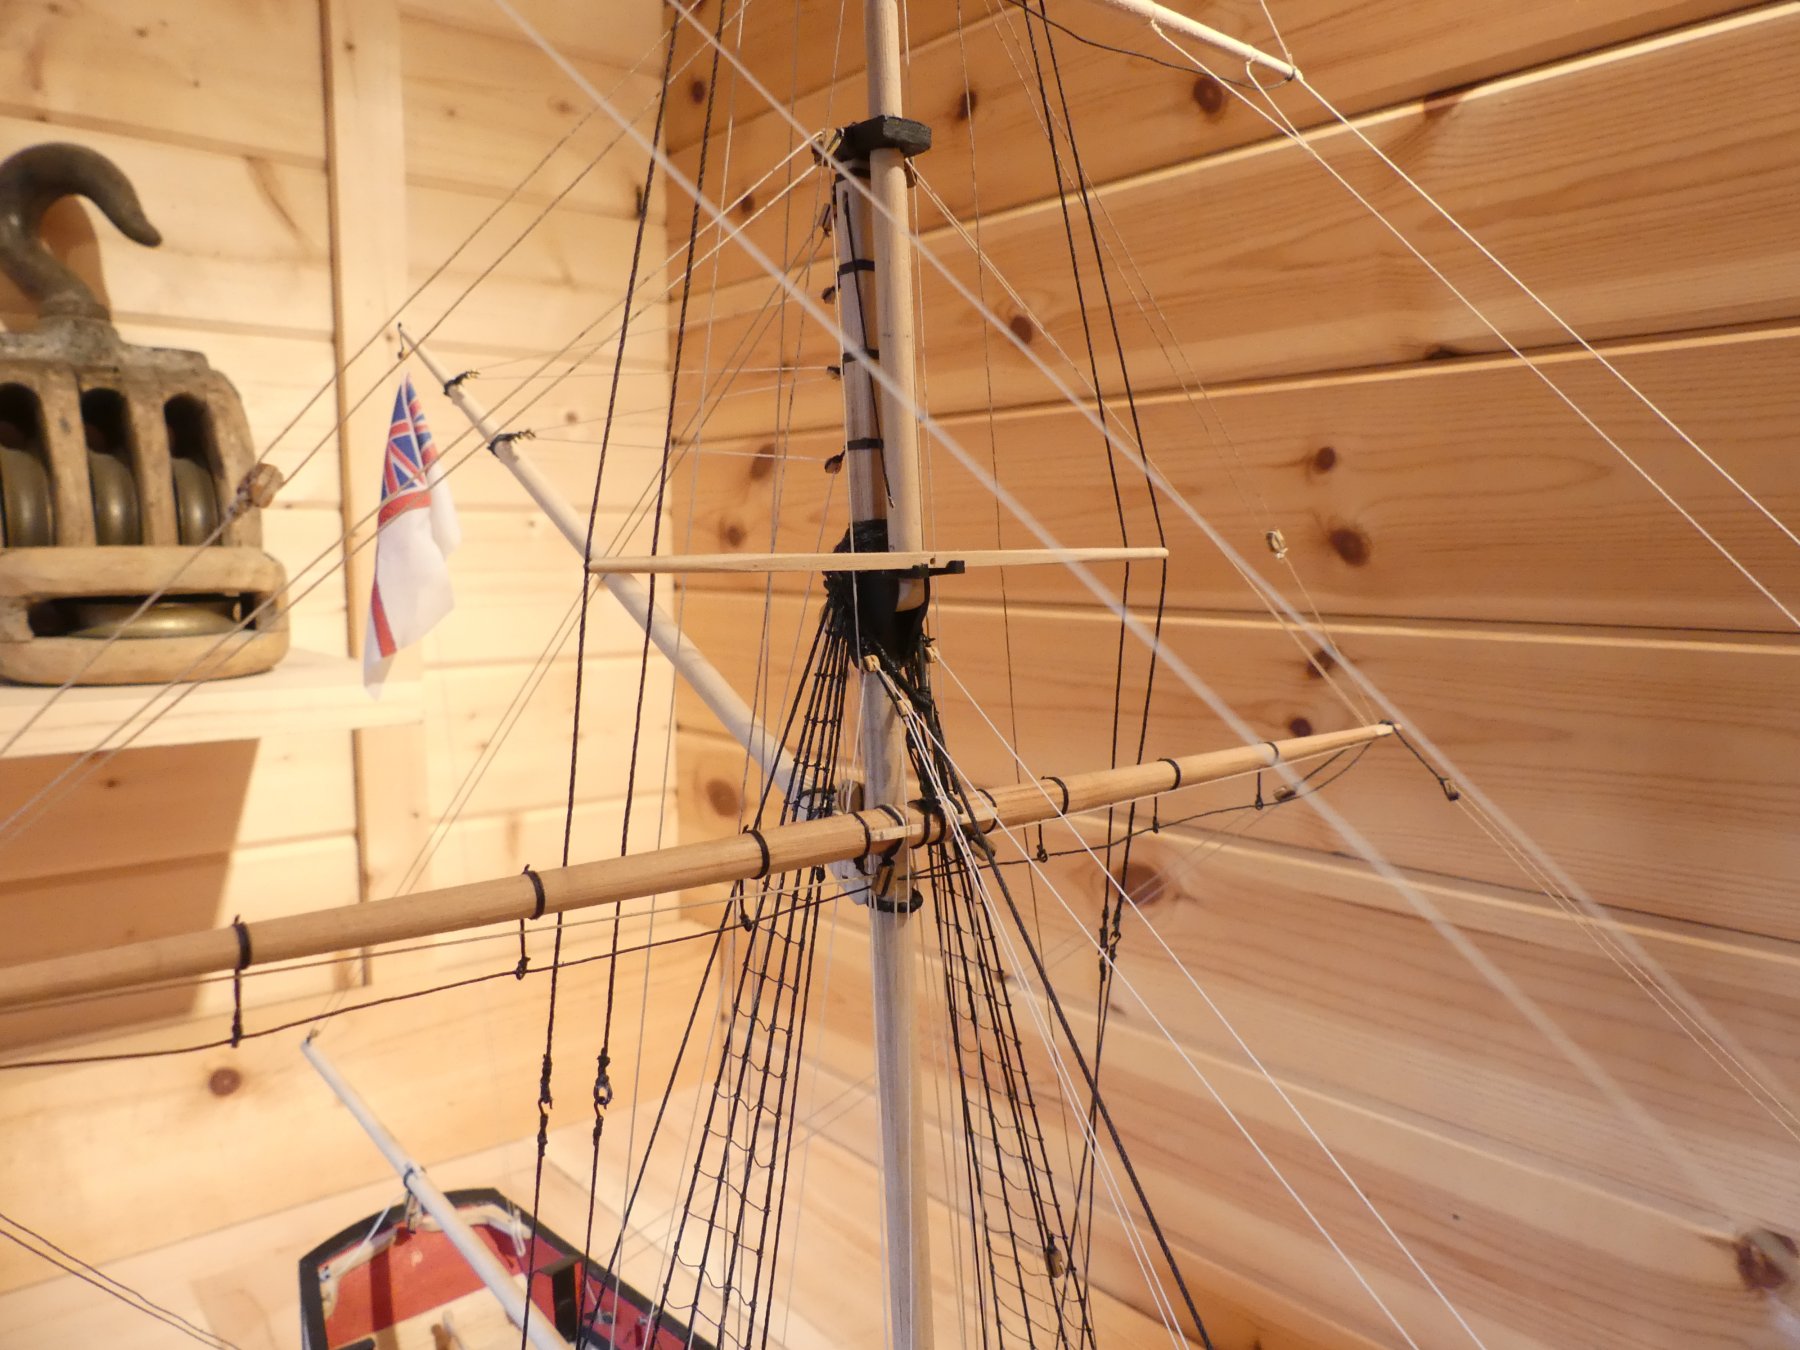
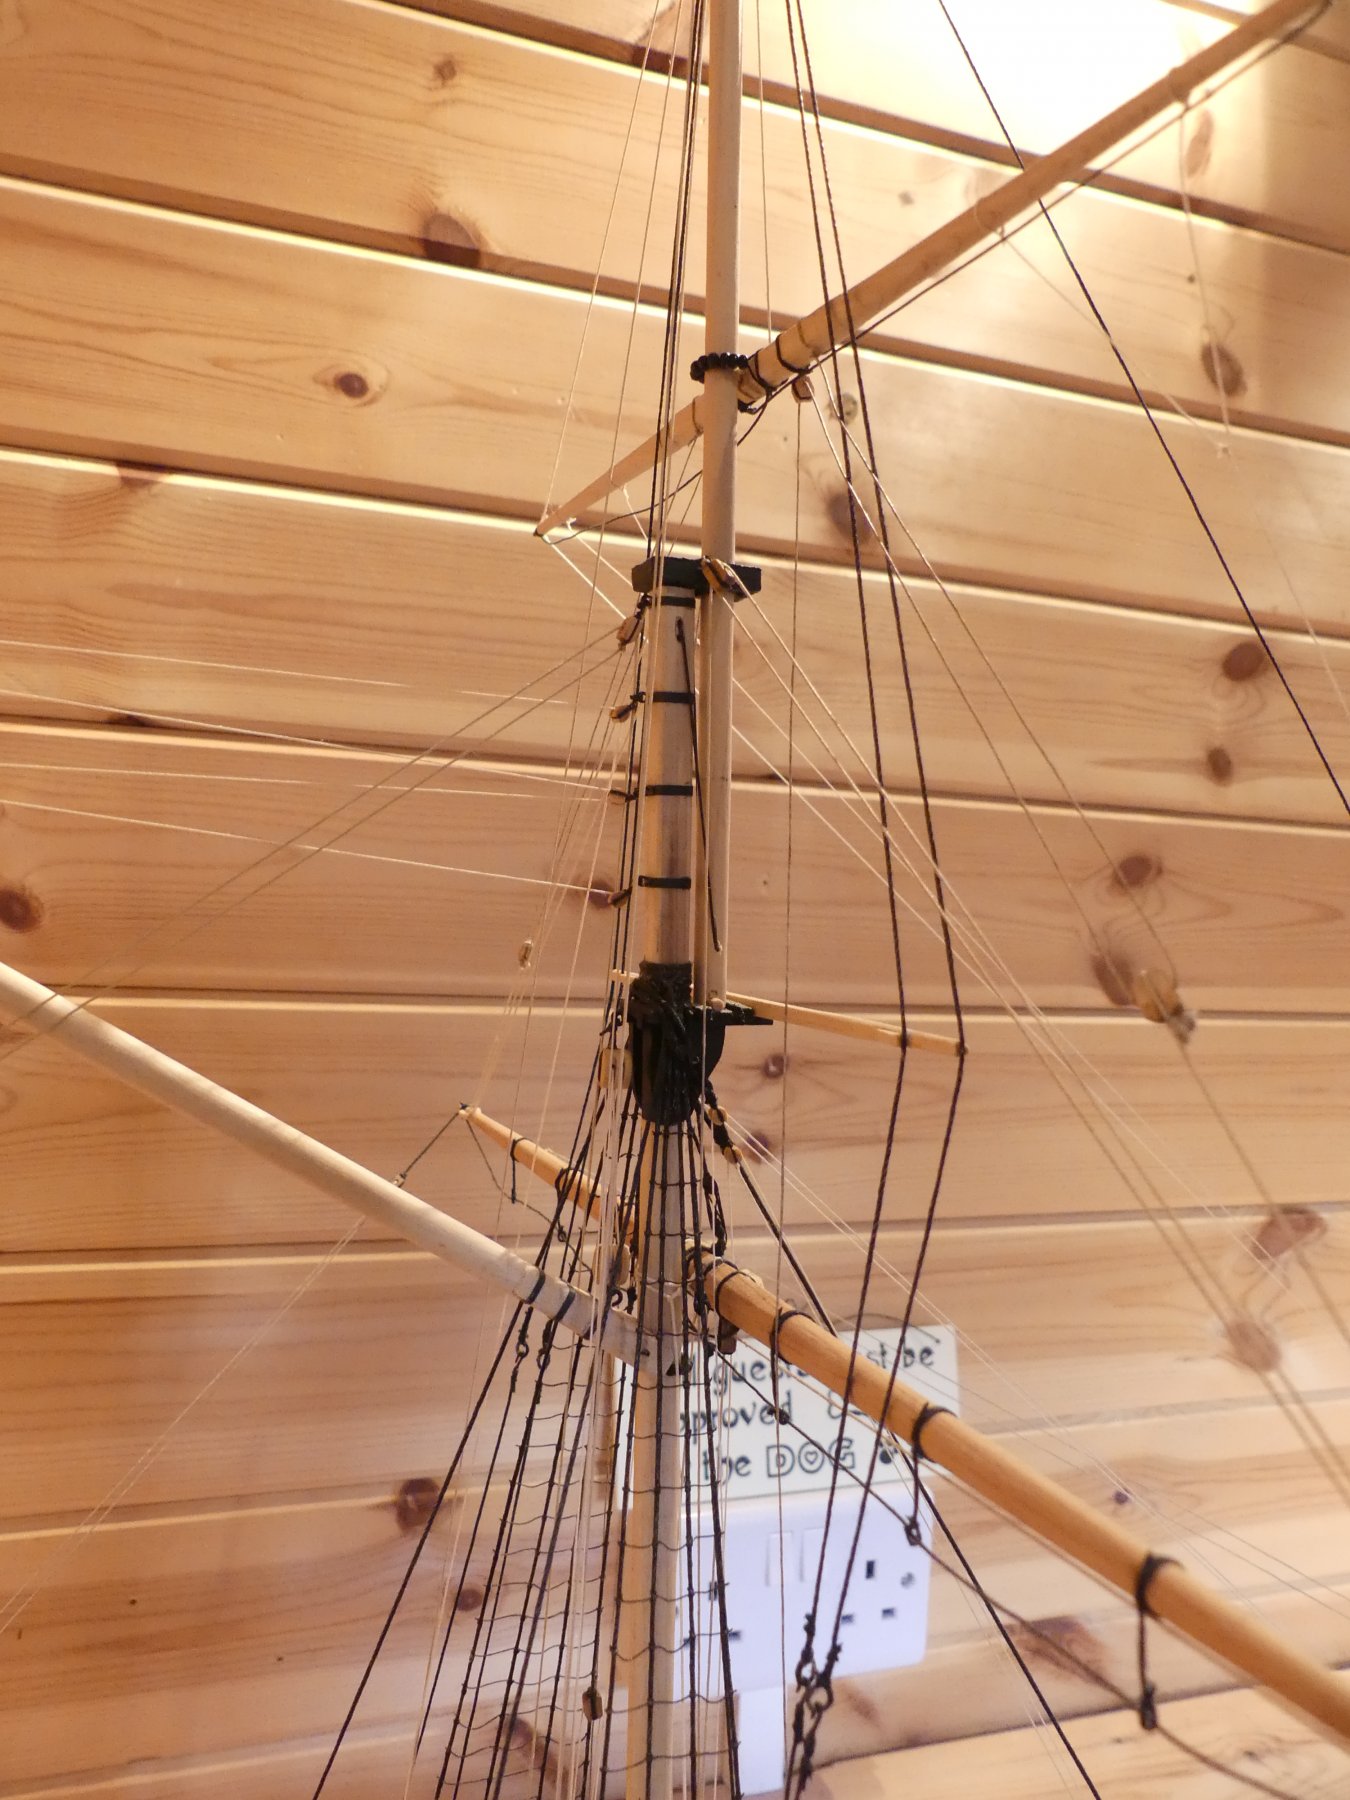
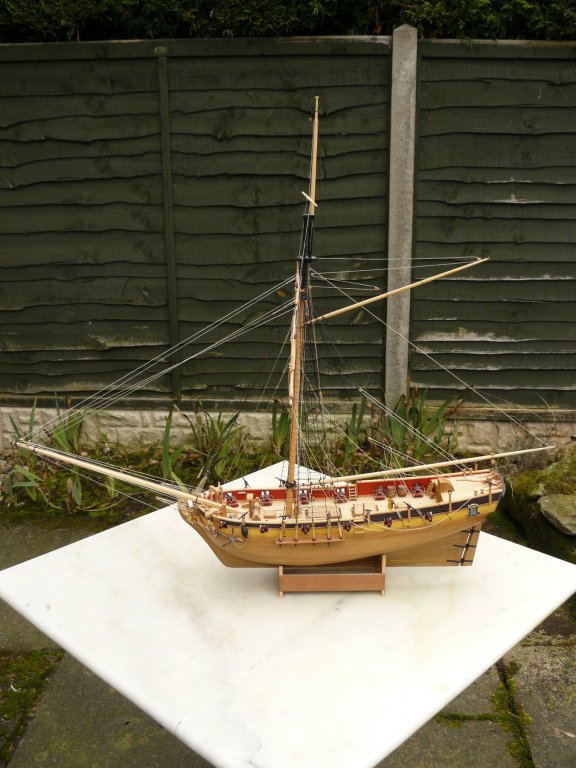
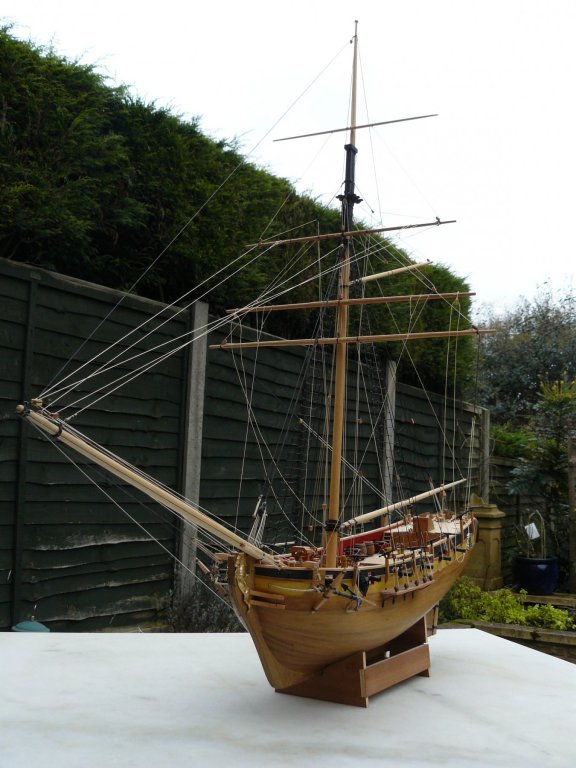
Final photographs, I used the dimensions for masts and yards from the anatomy of the ship alert and a combination of kit rigging plans and from the book. This shows the extreme height of the masts when built to the book which compares more with my more recent speedy. The top mast looks strange set behind rather than in front of the mast but this is how shown in Alert.


- 10 replies
-
- 6
-
-
- resolution
- corel
- (and 1 more)
-
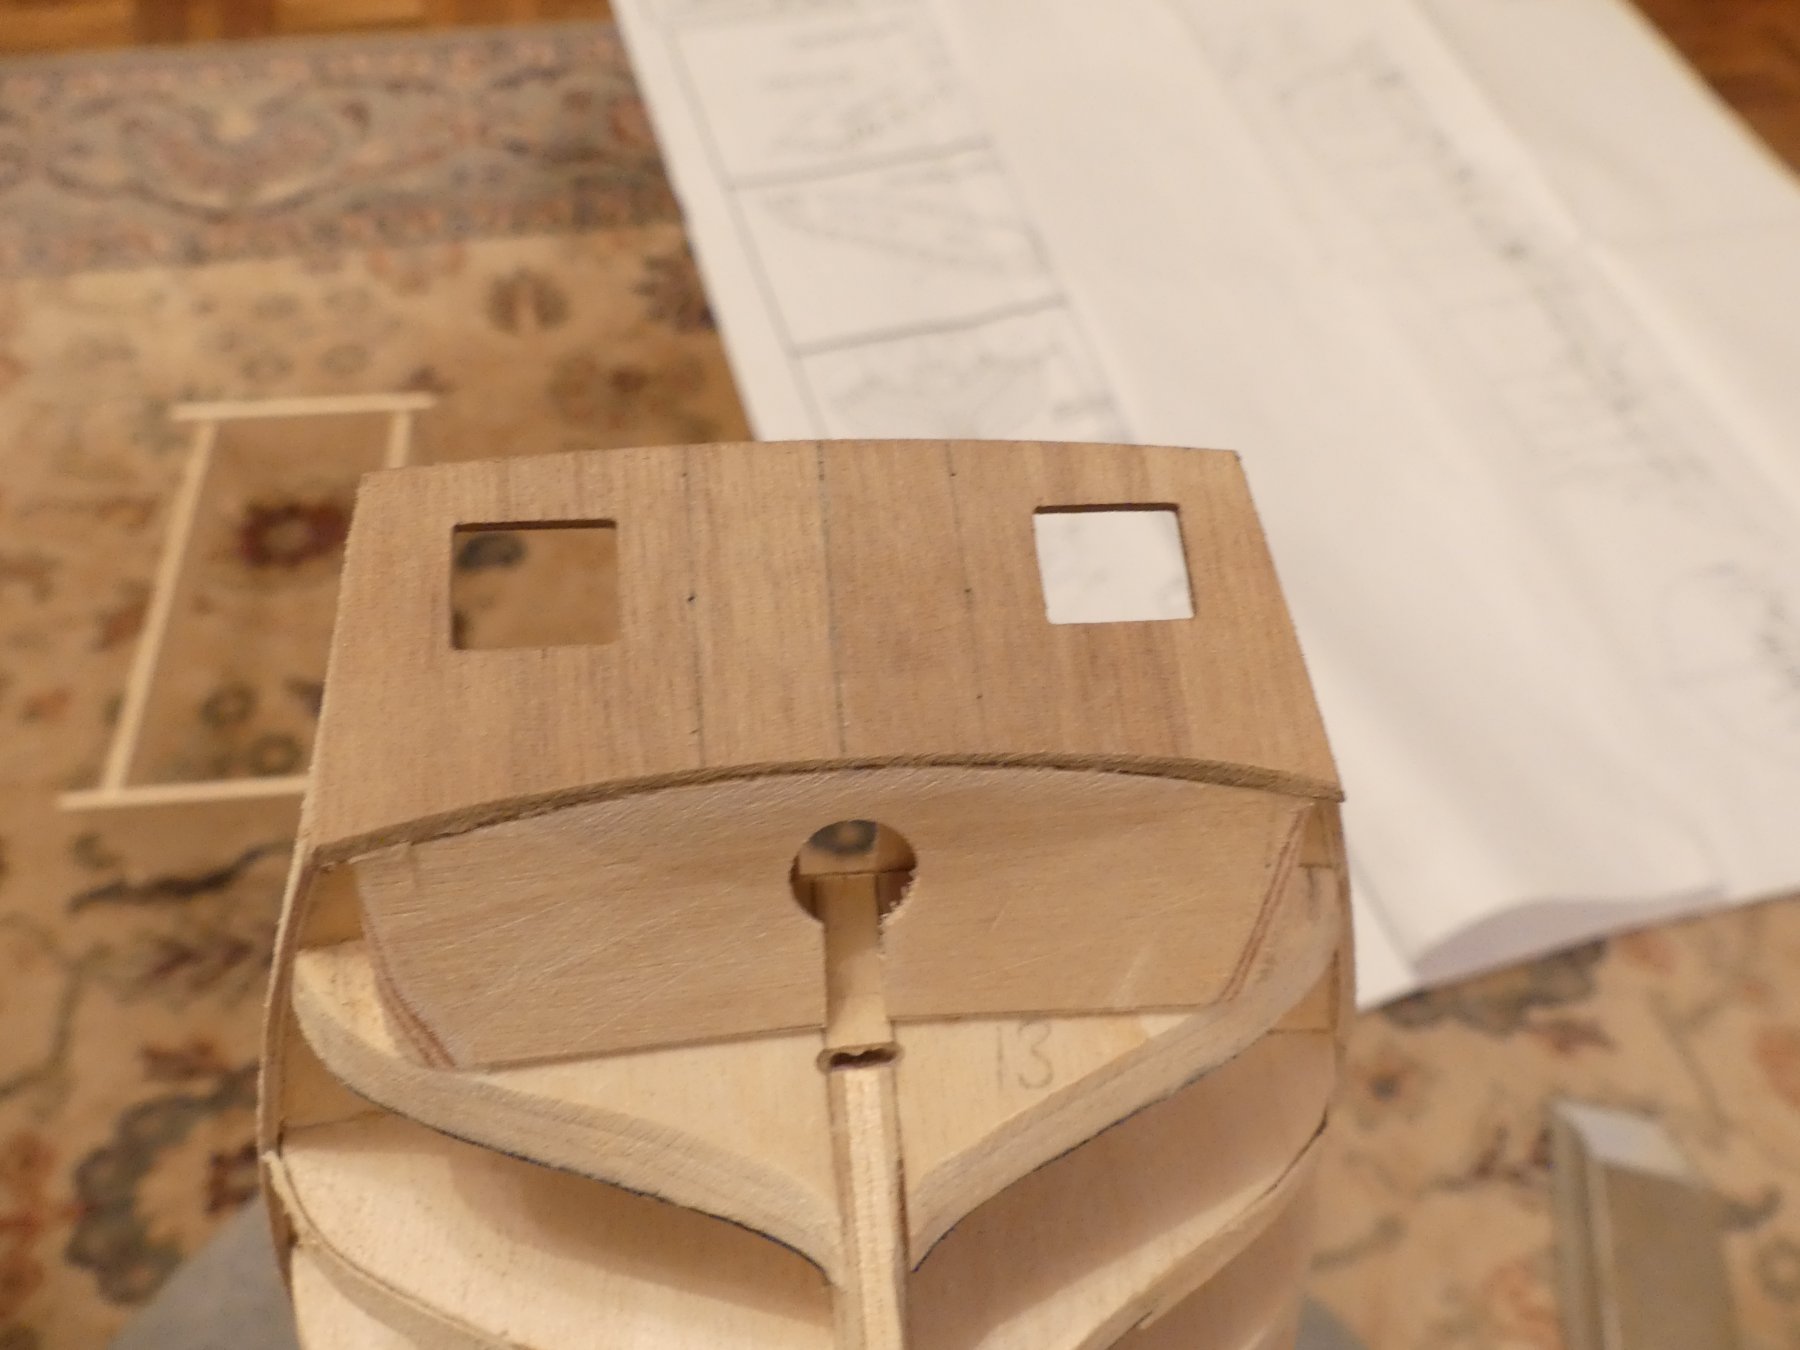
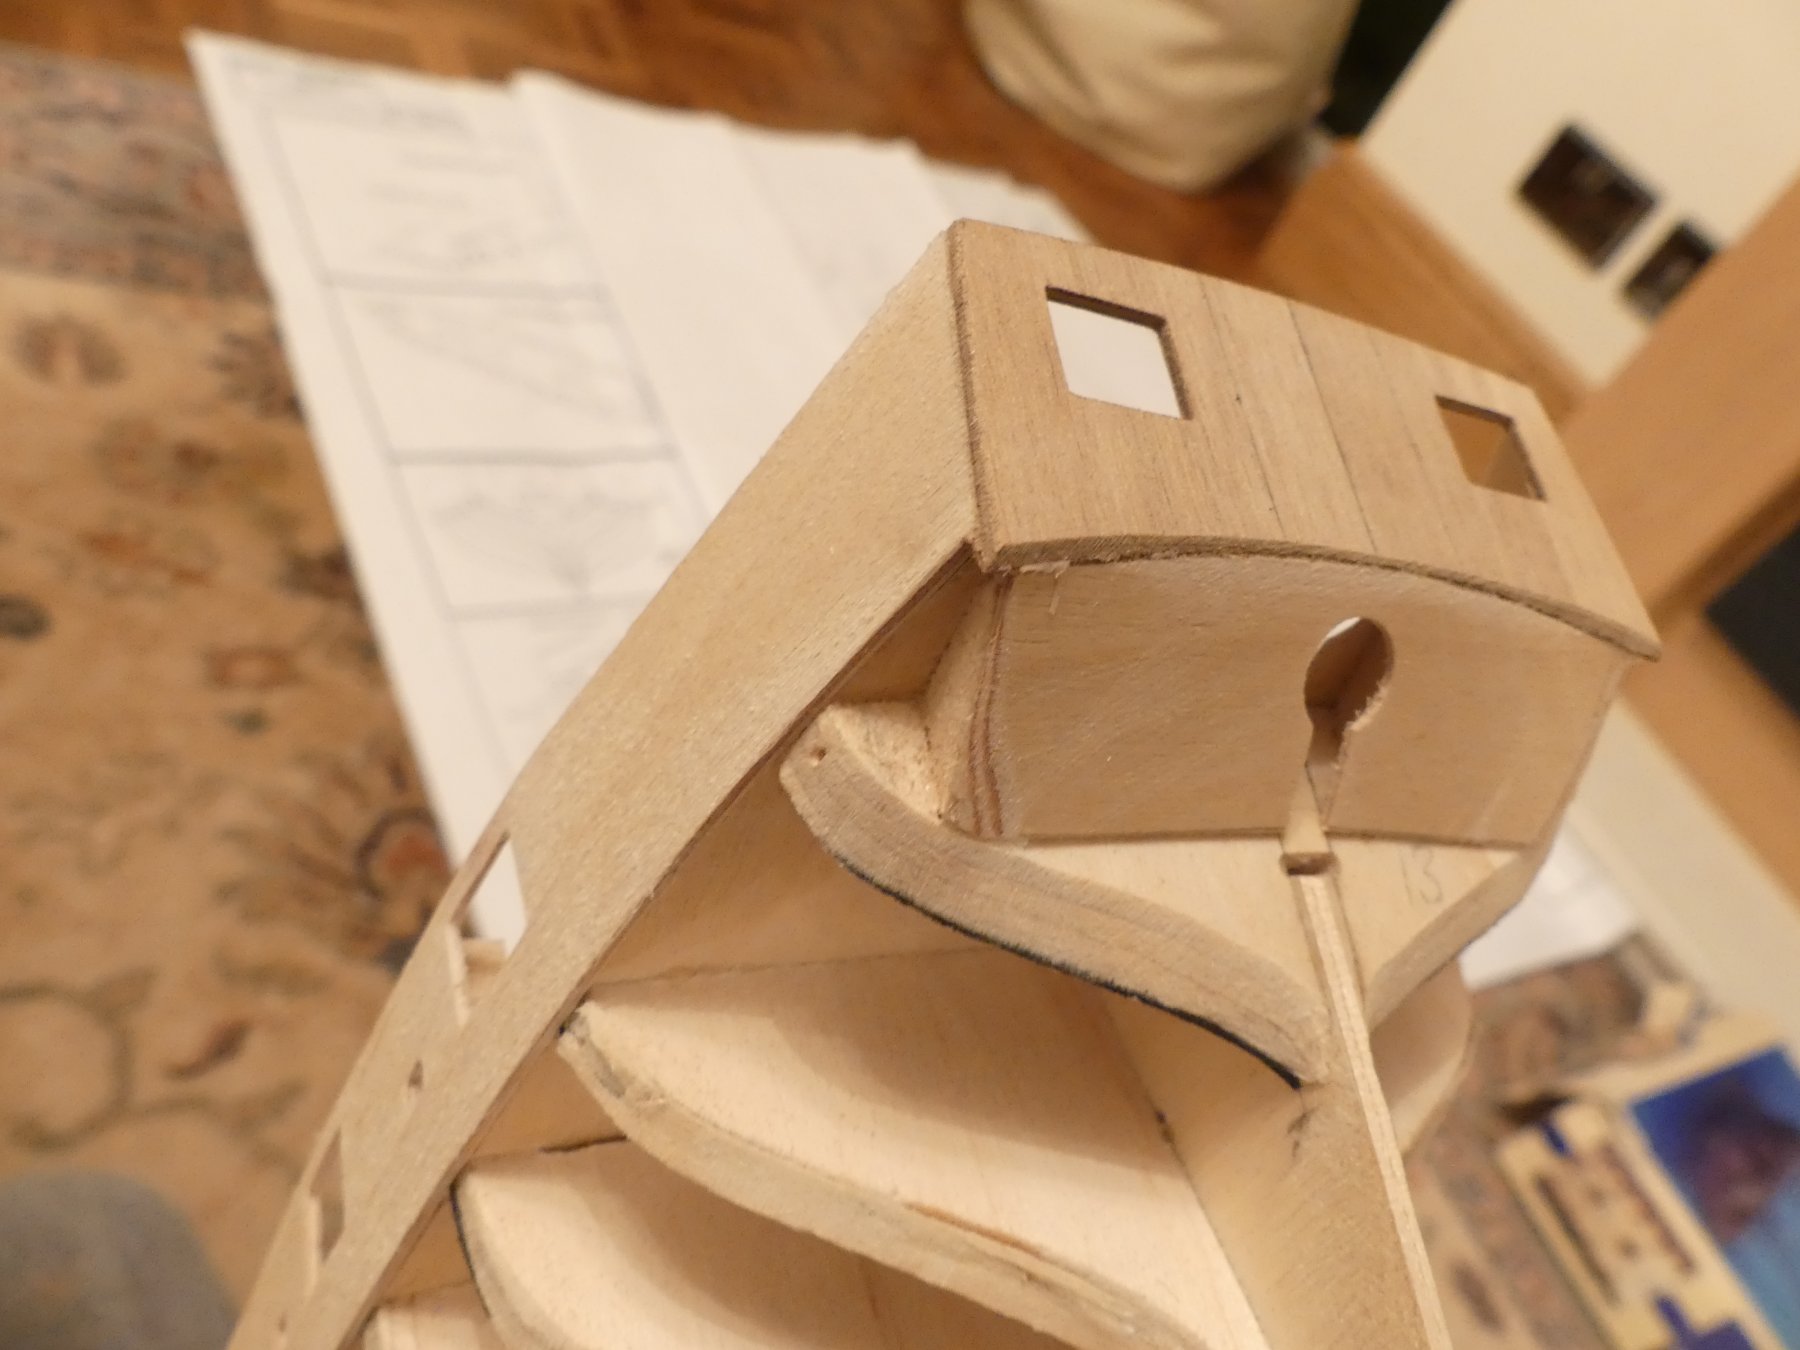
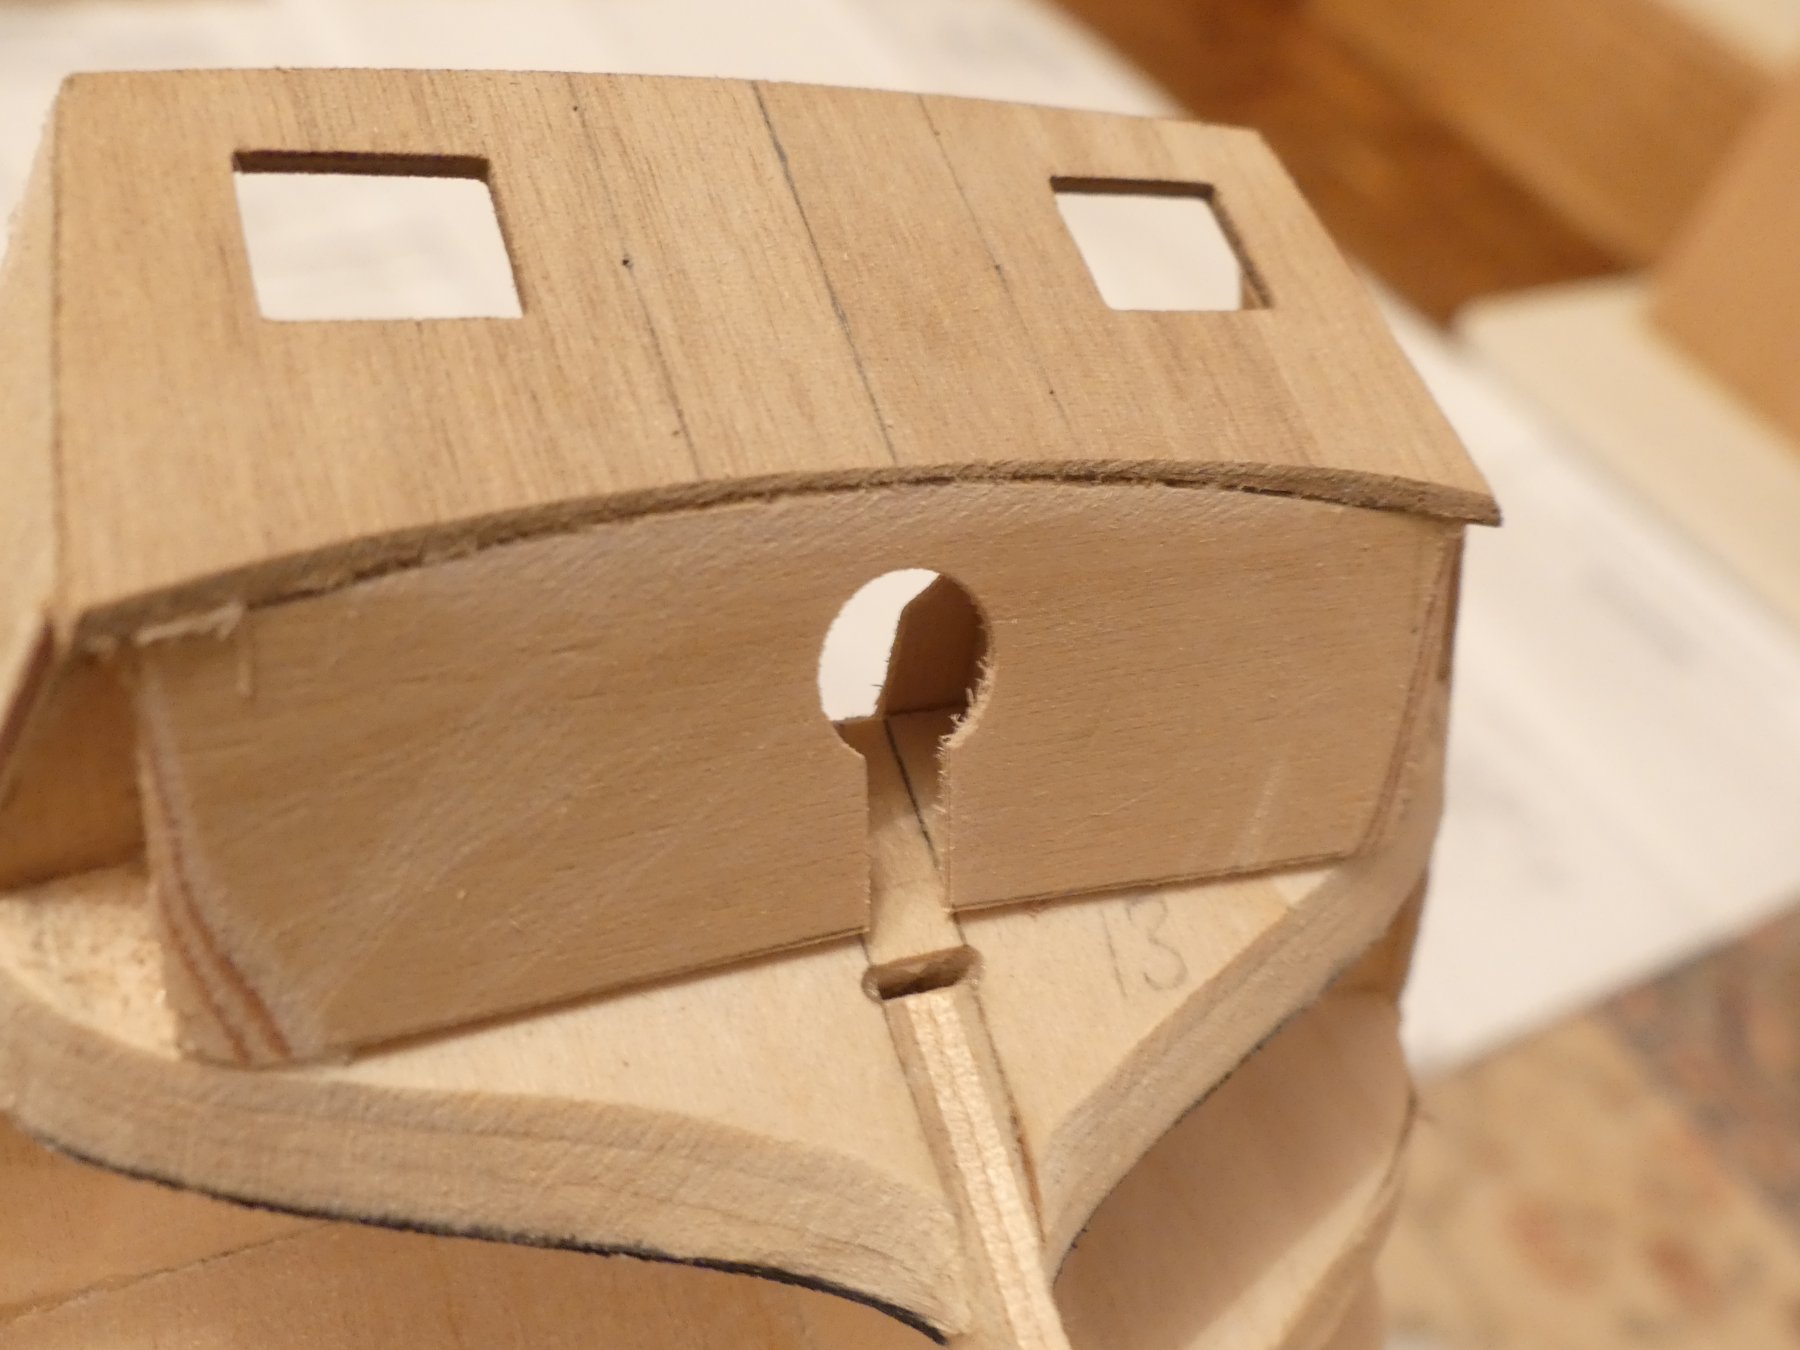
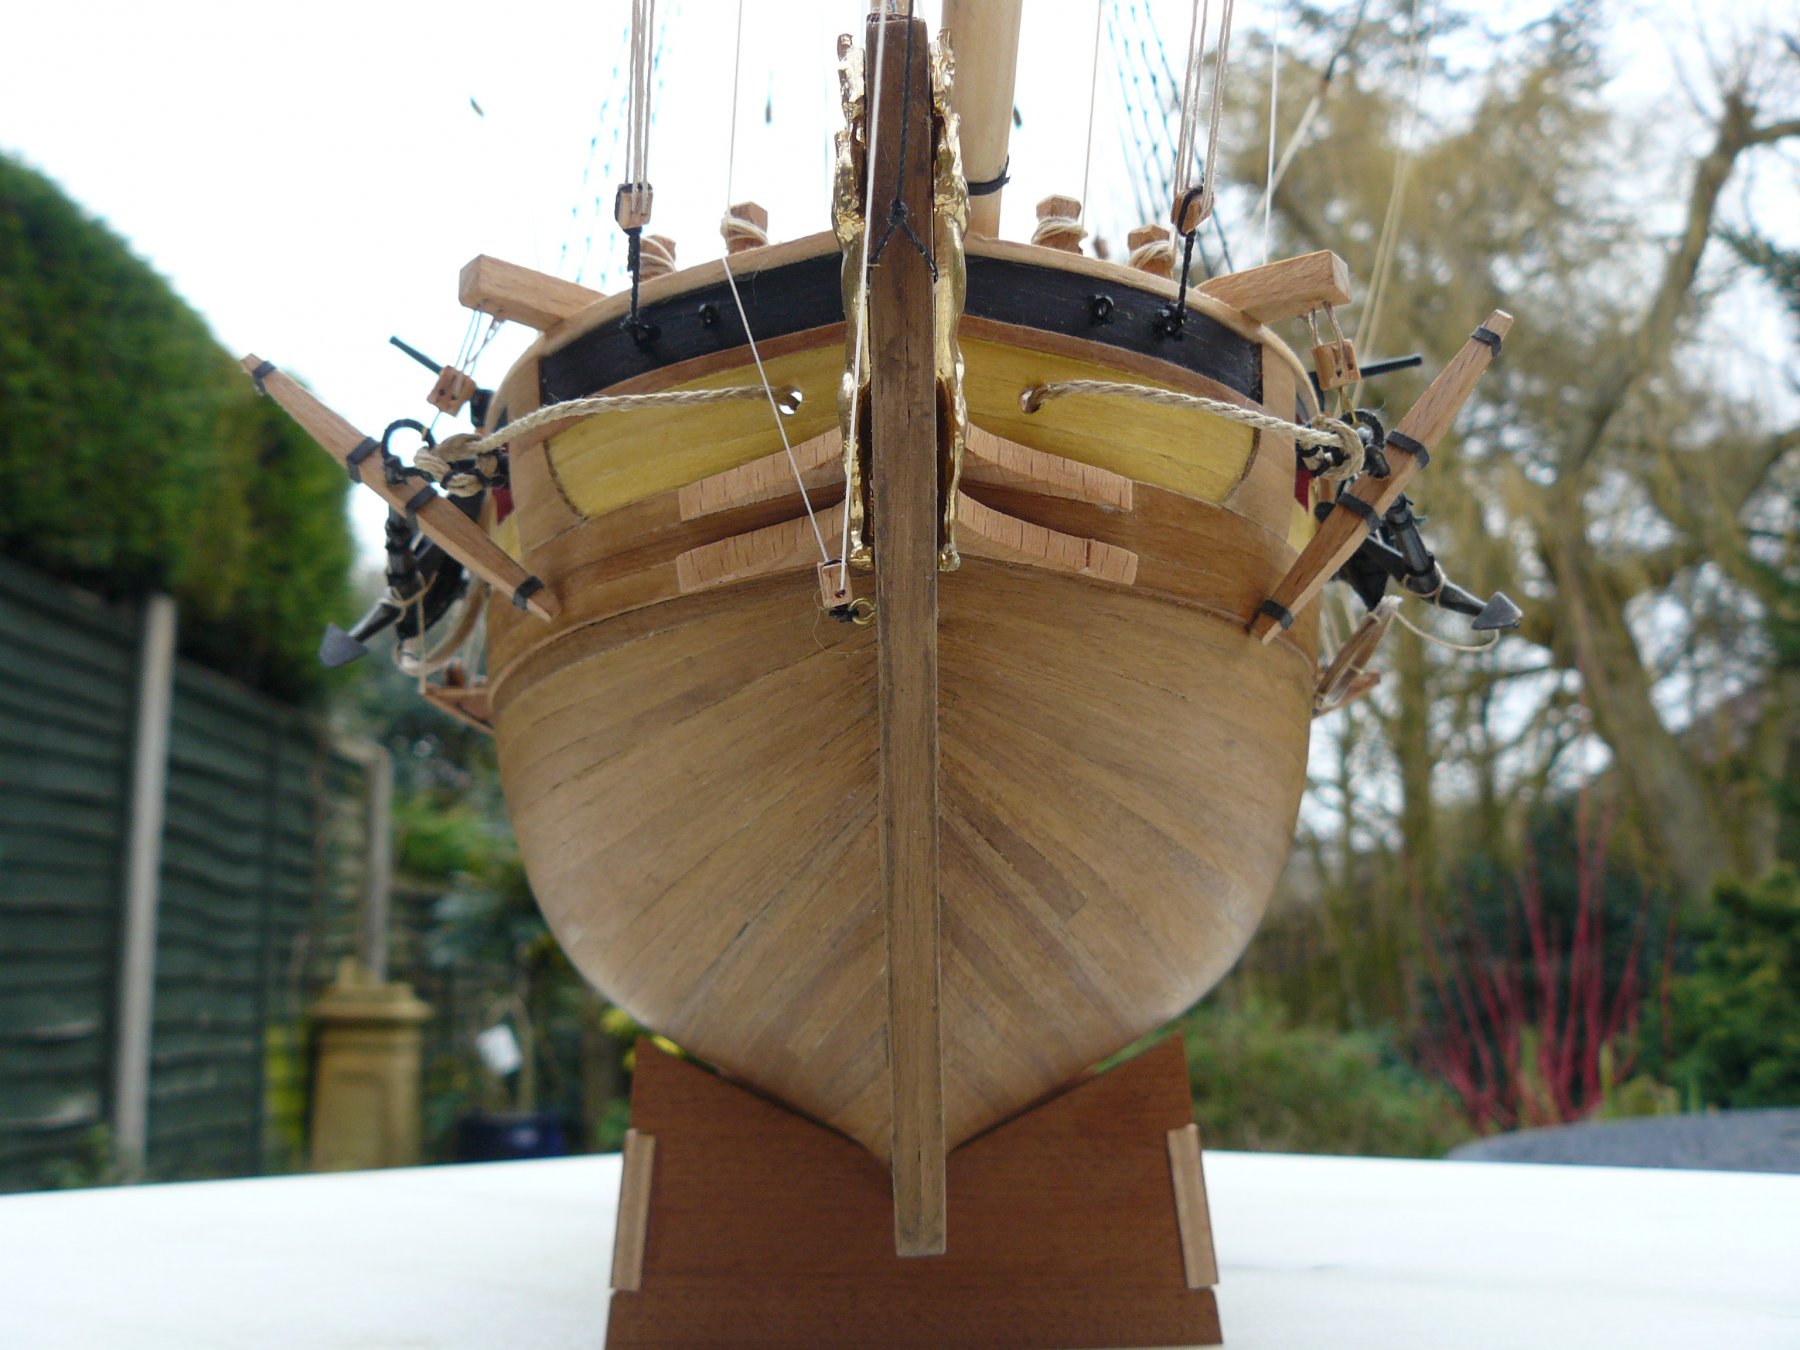
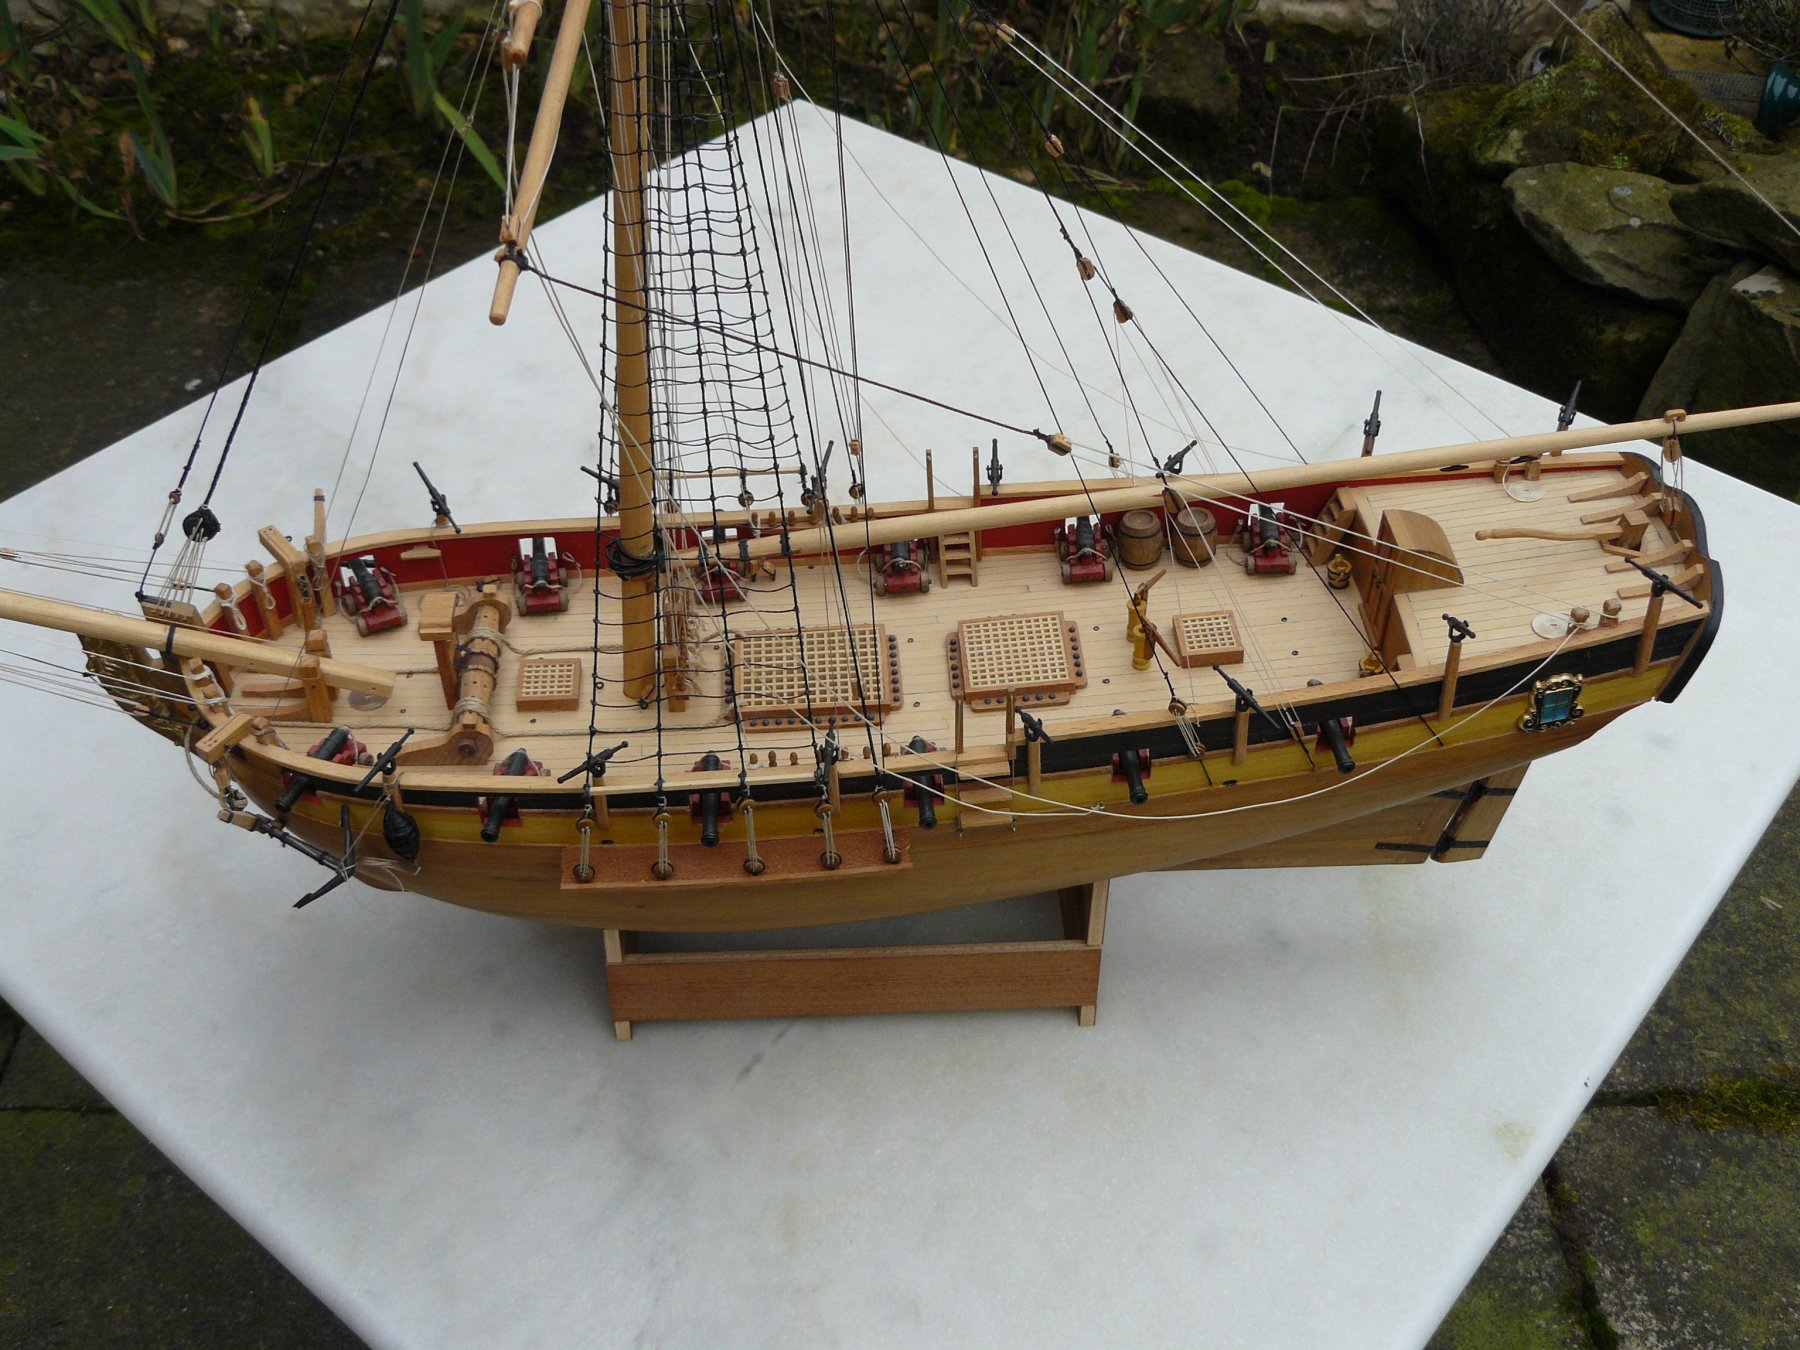
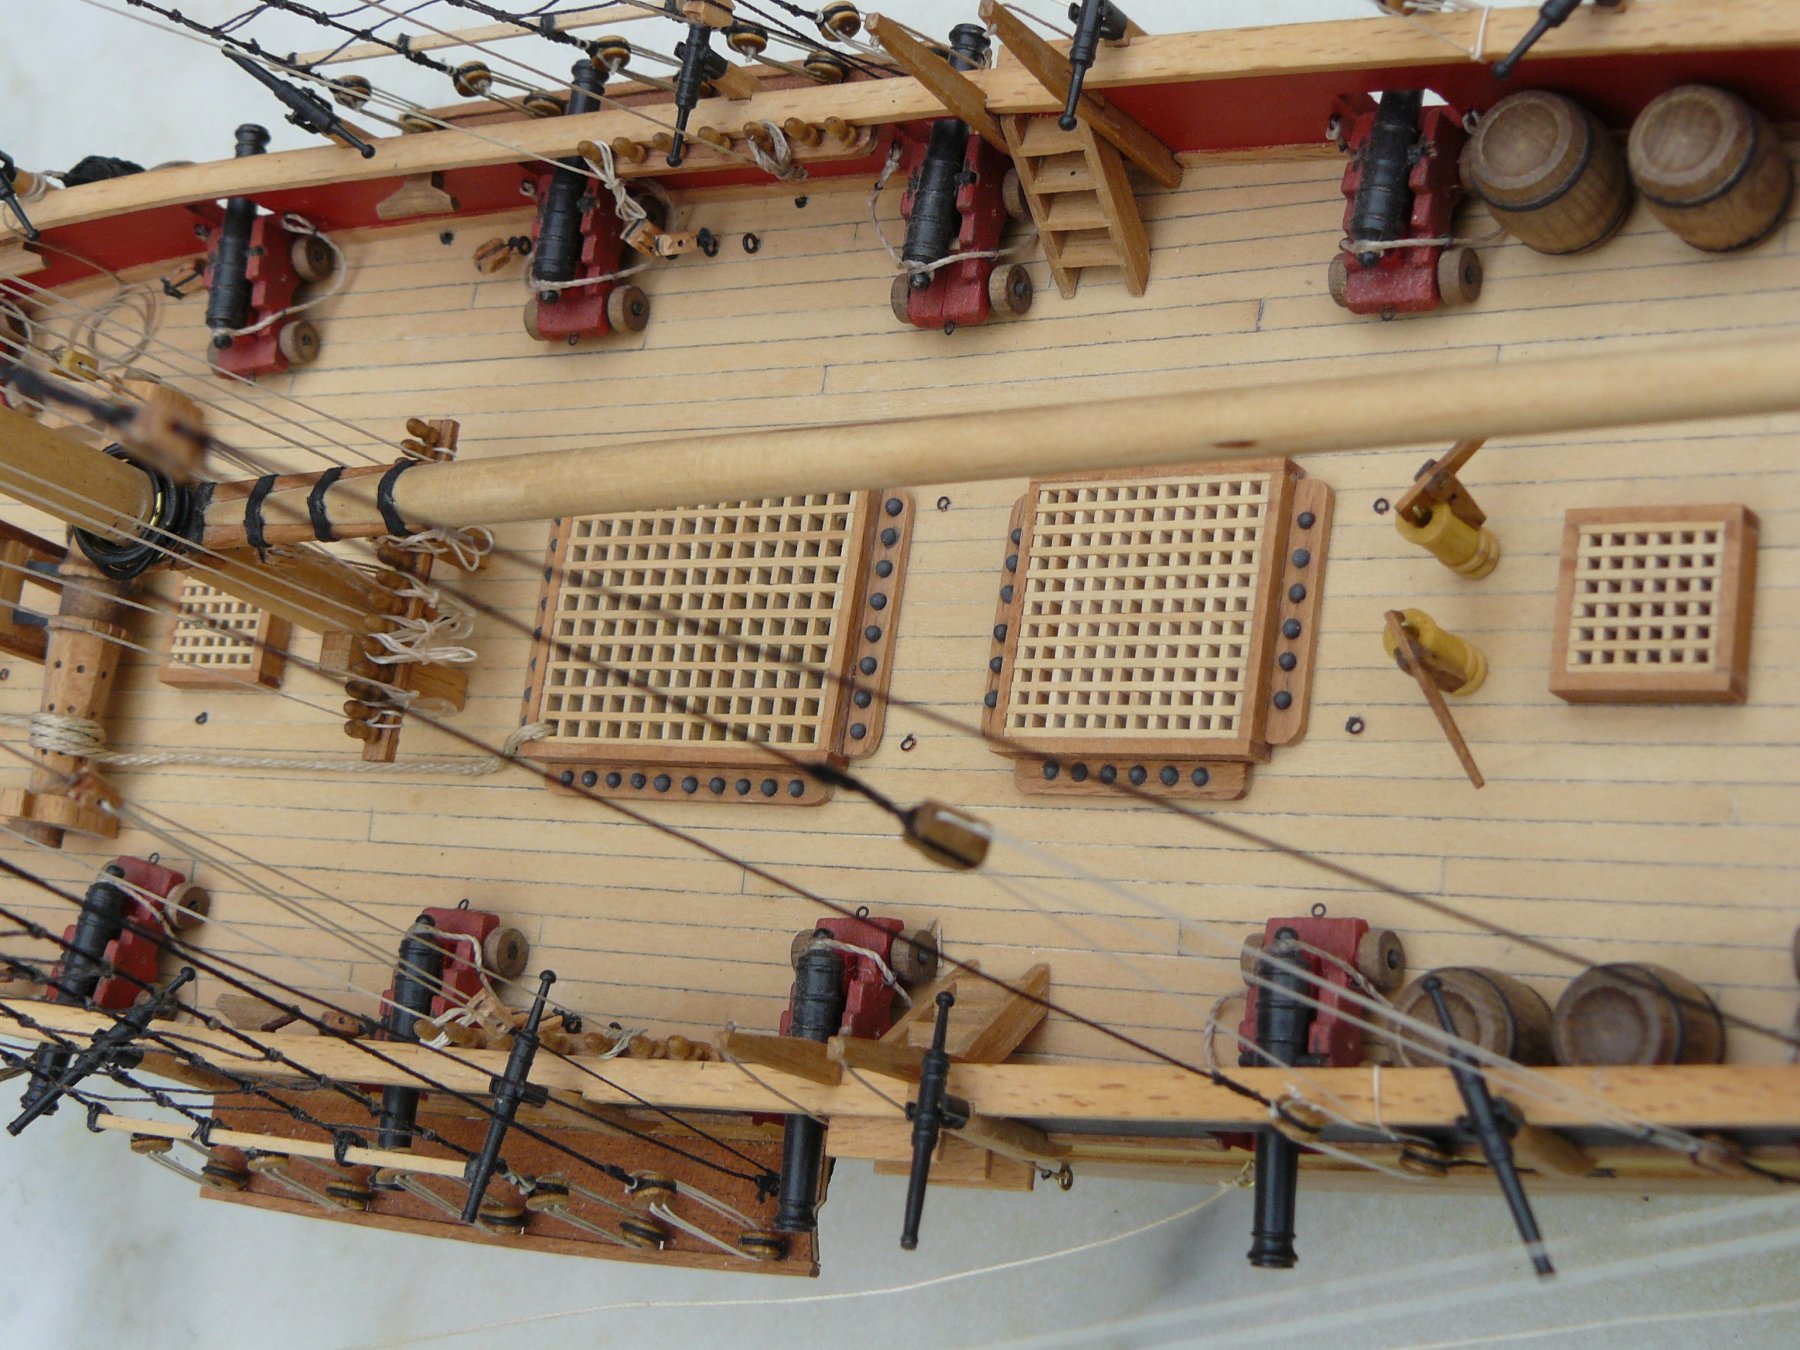
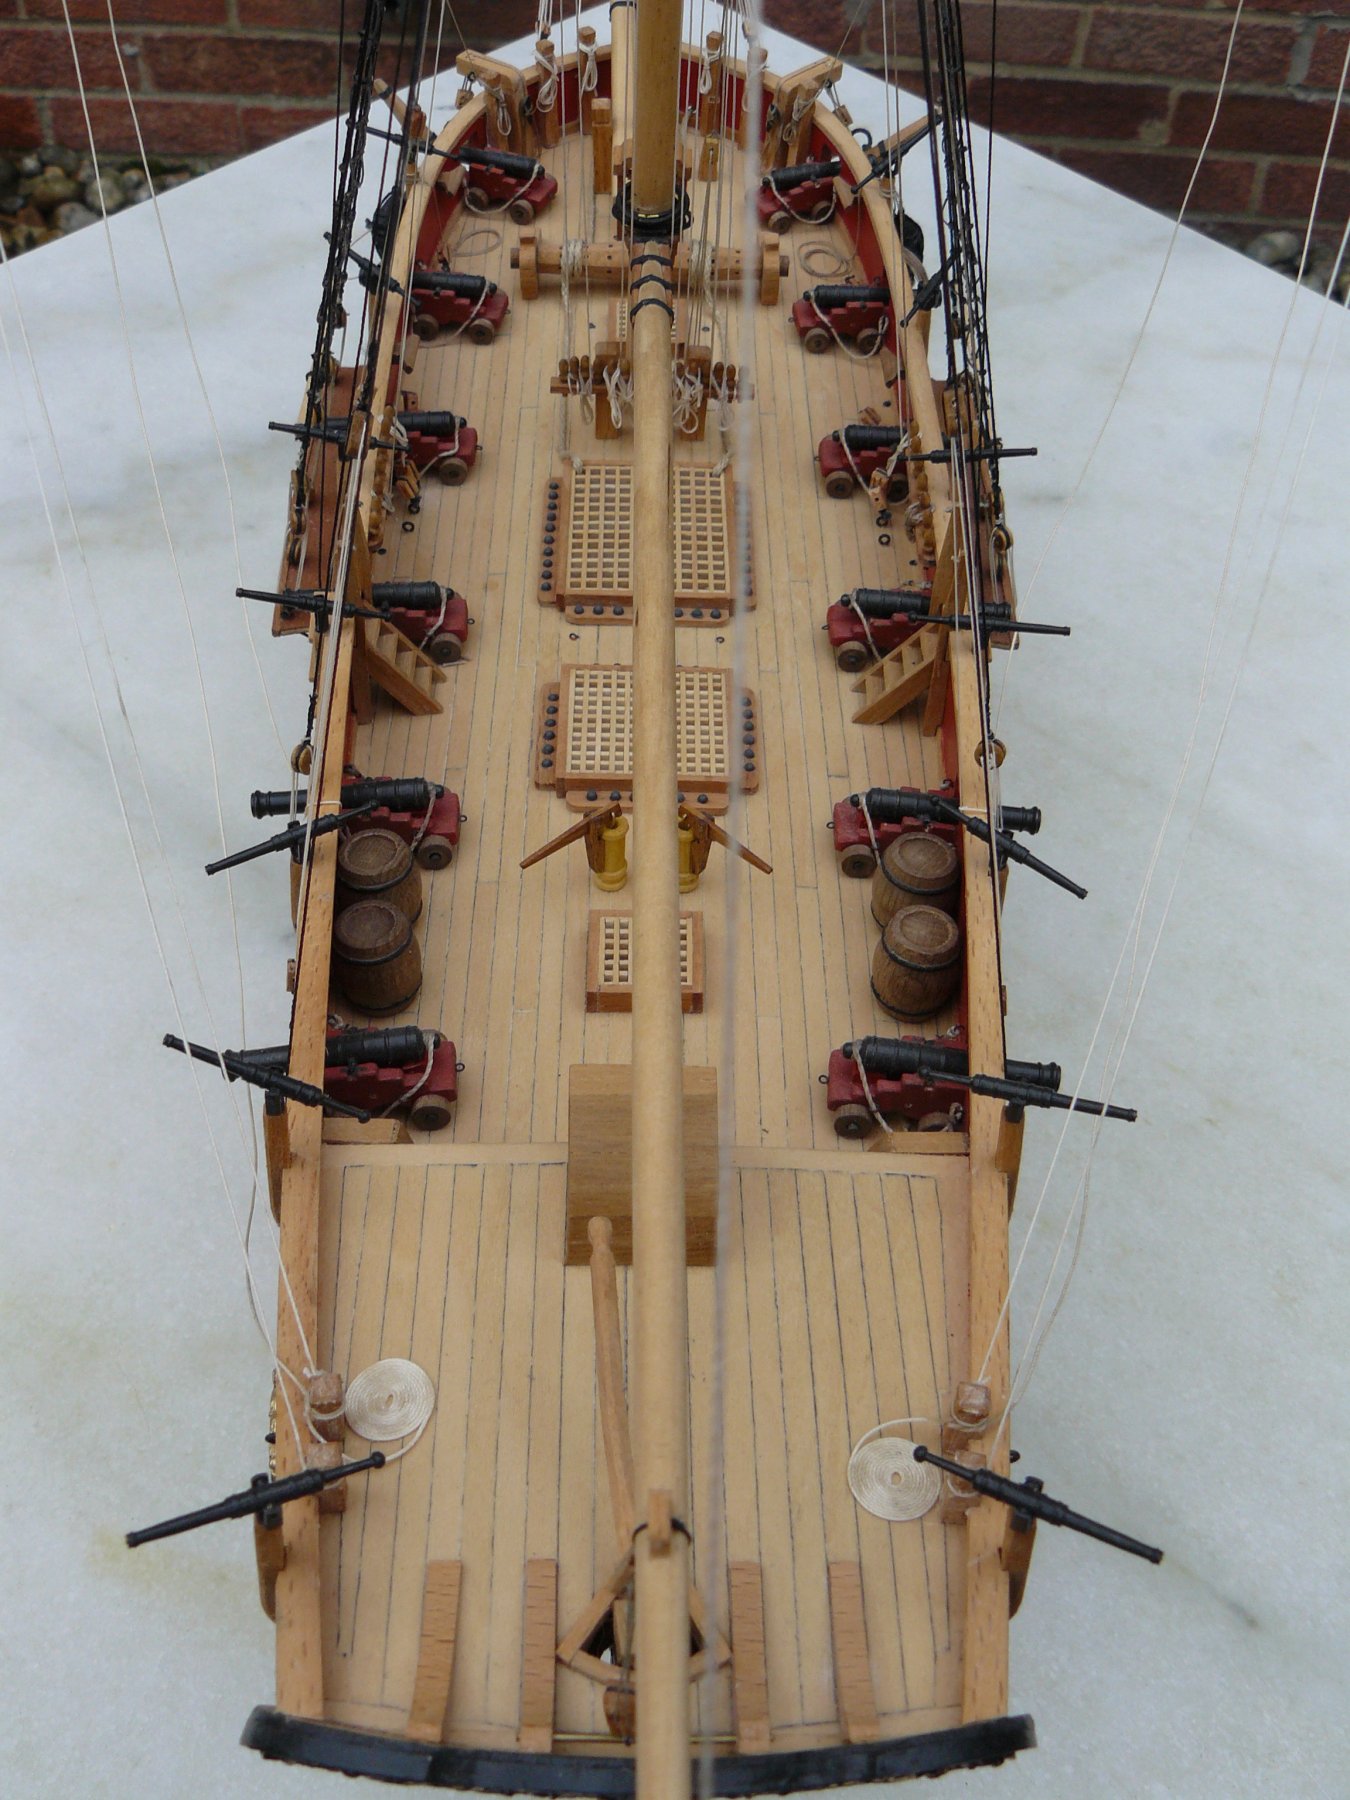
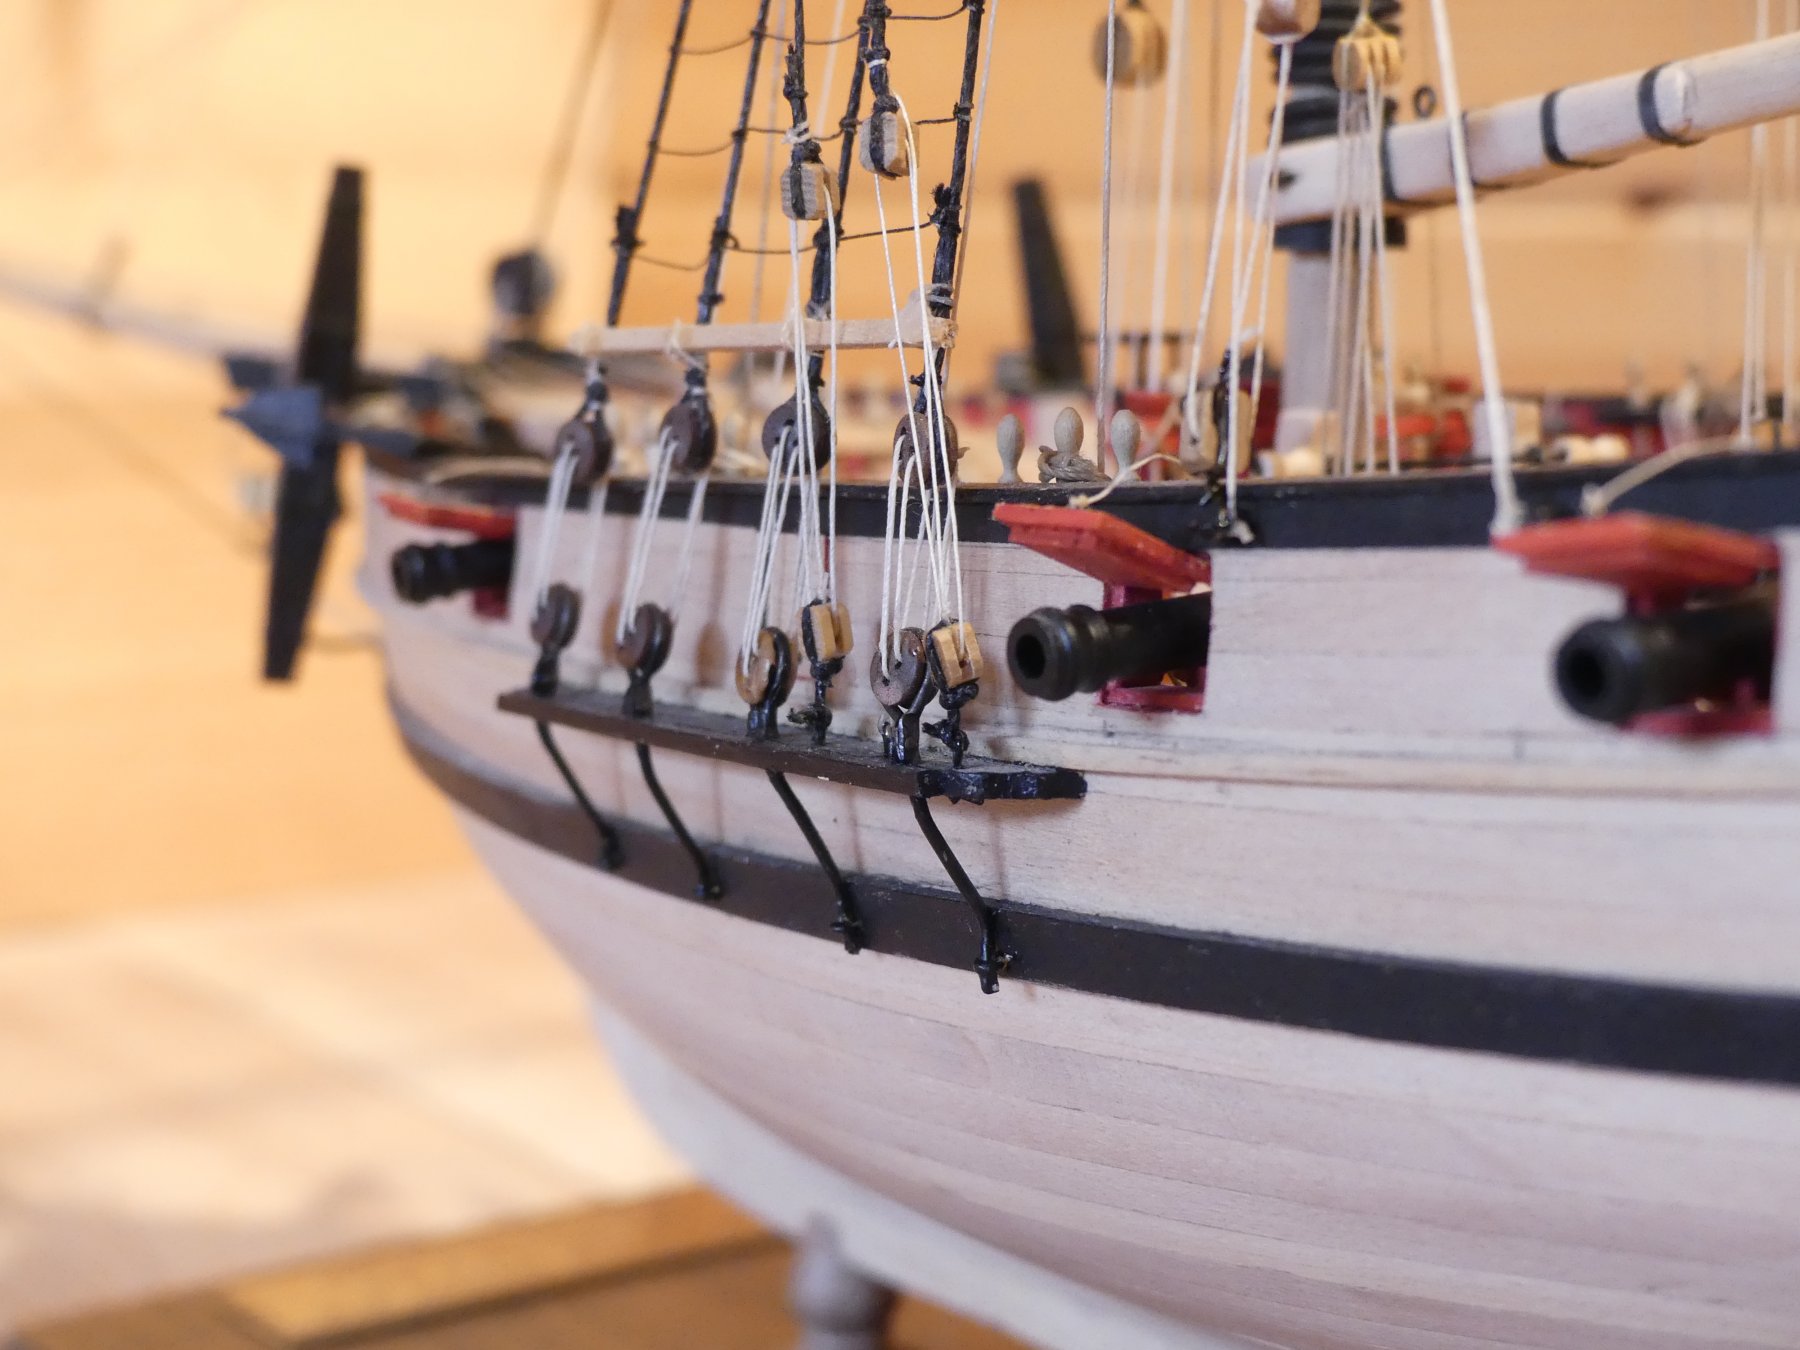
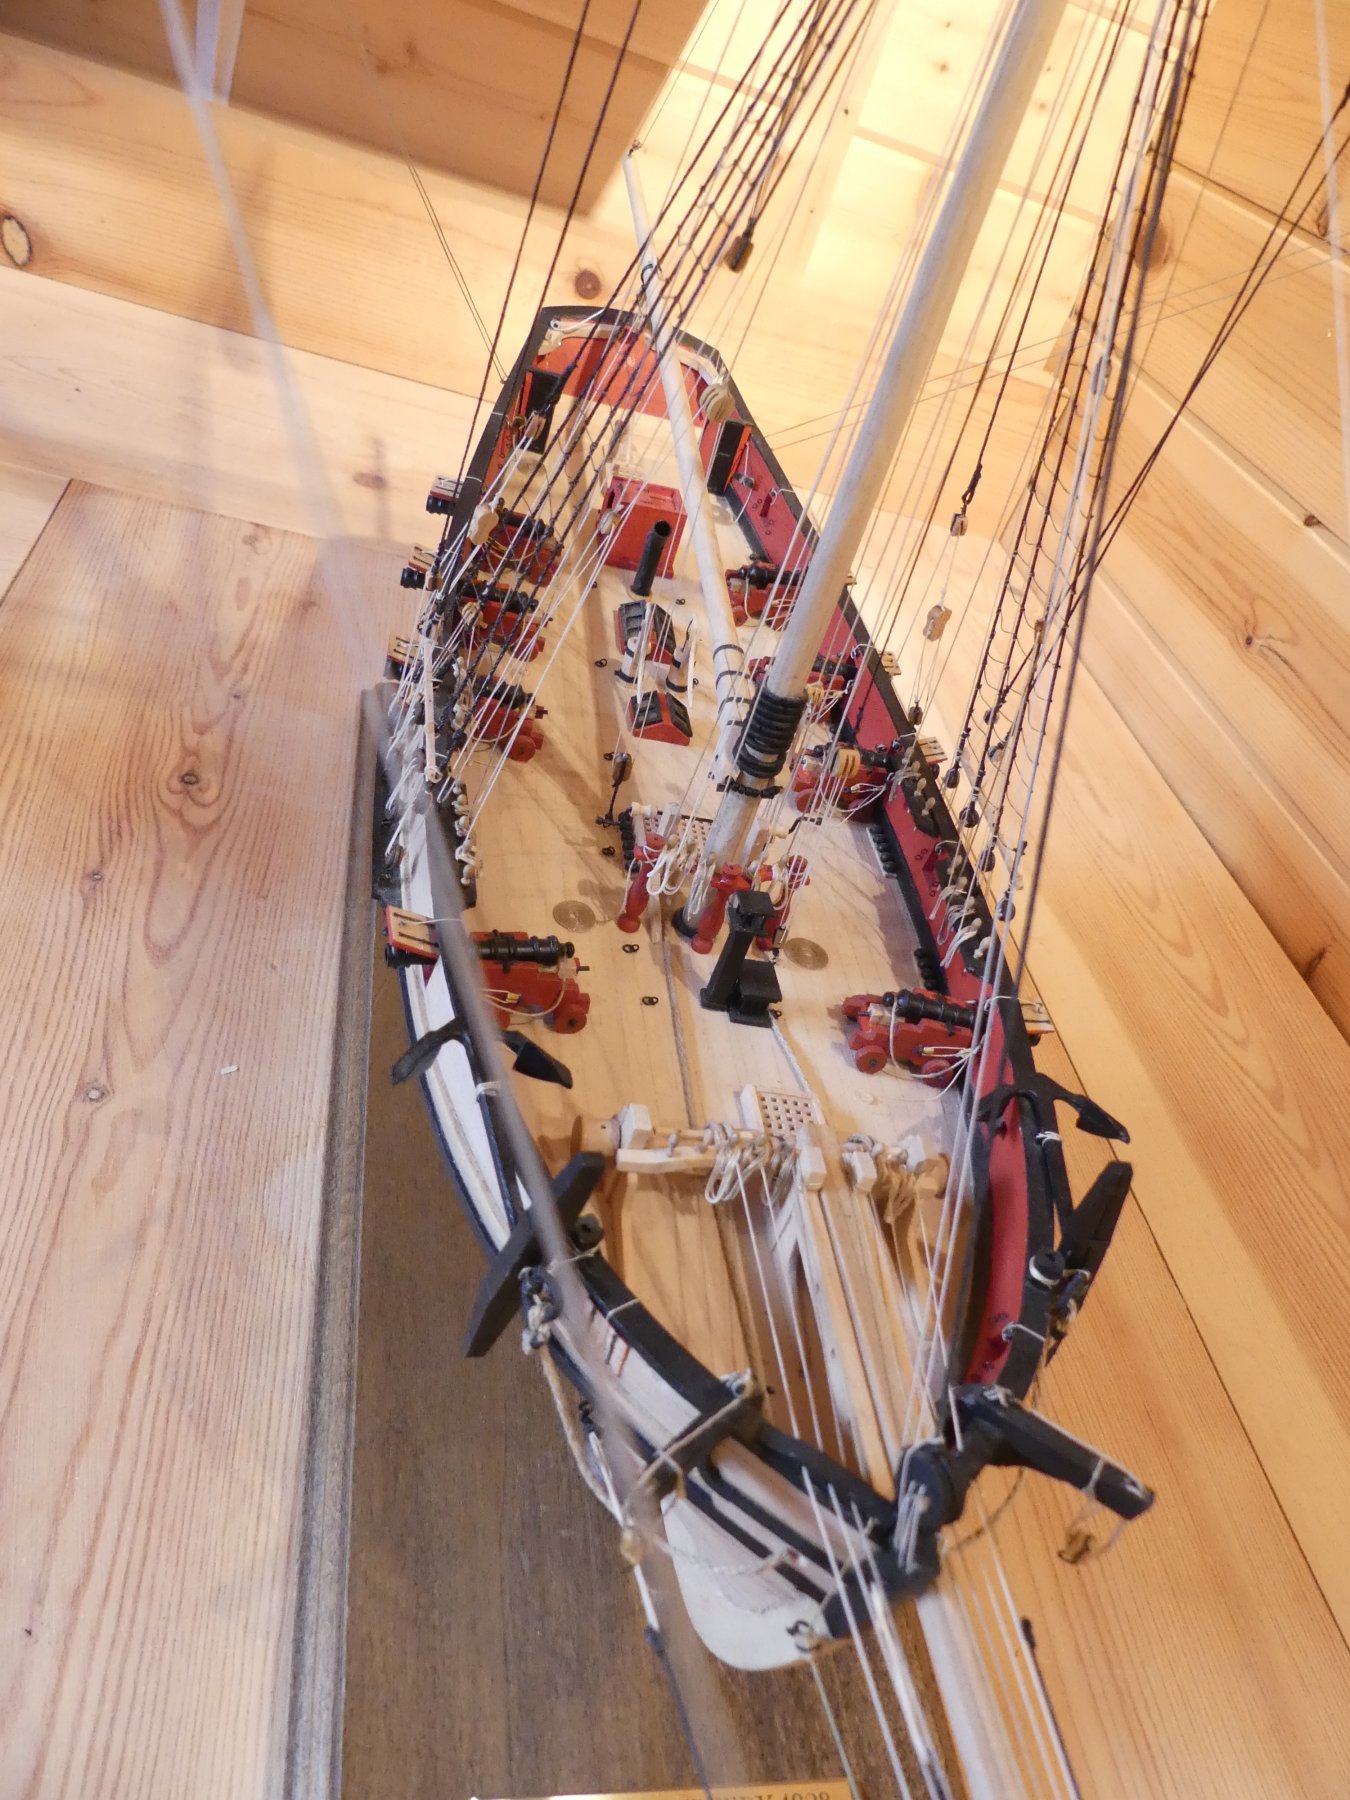
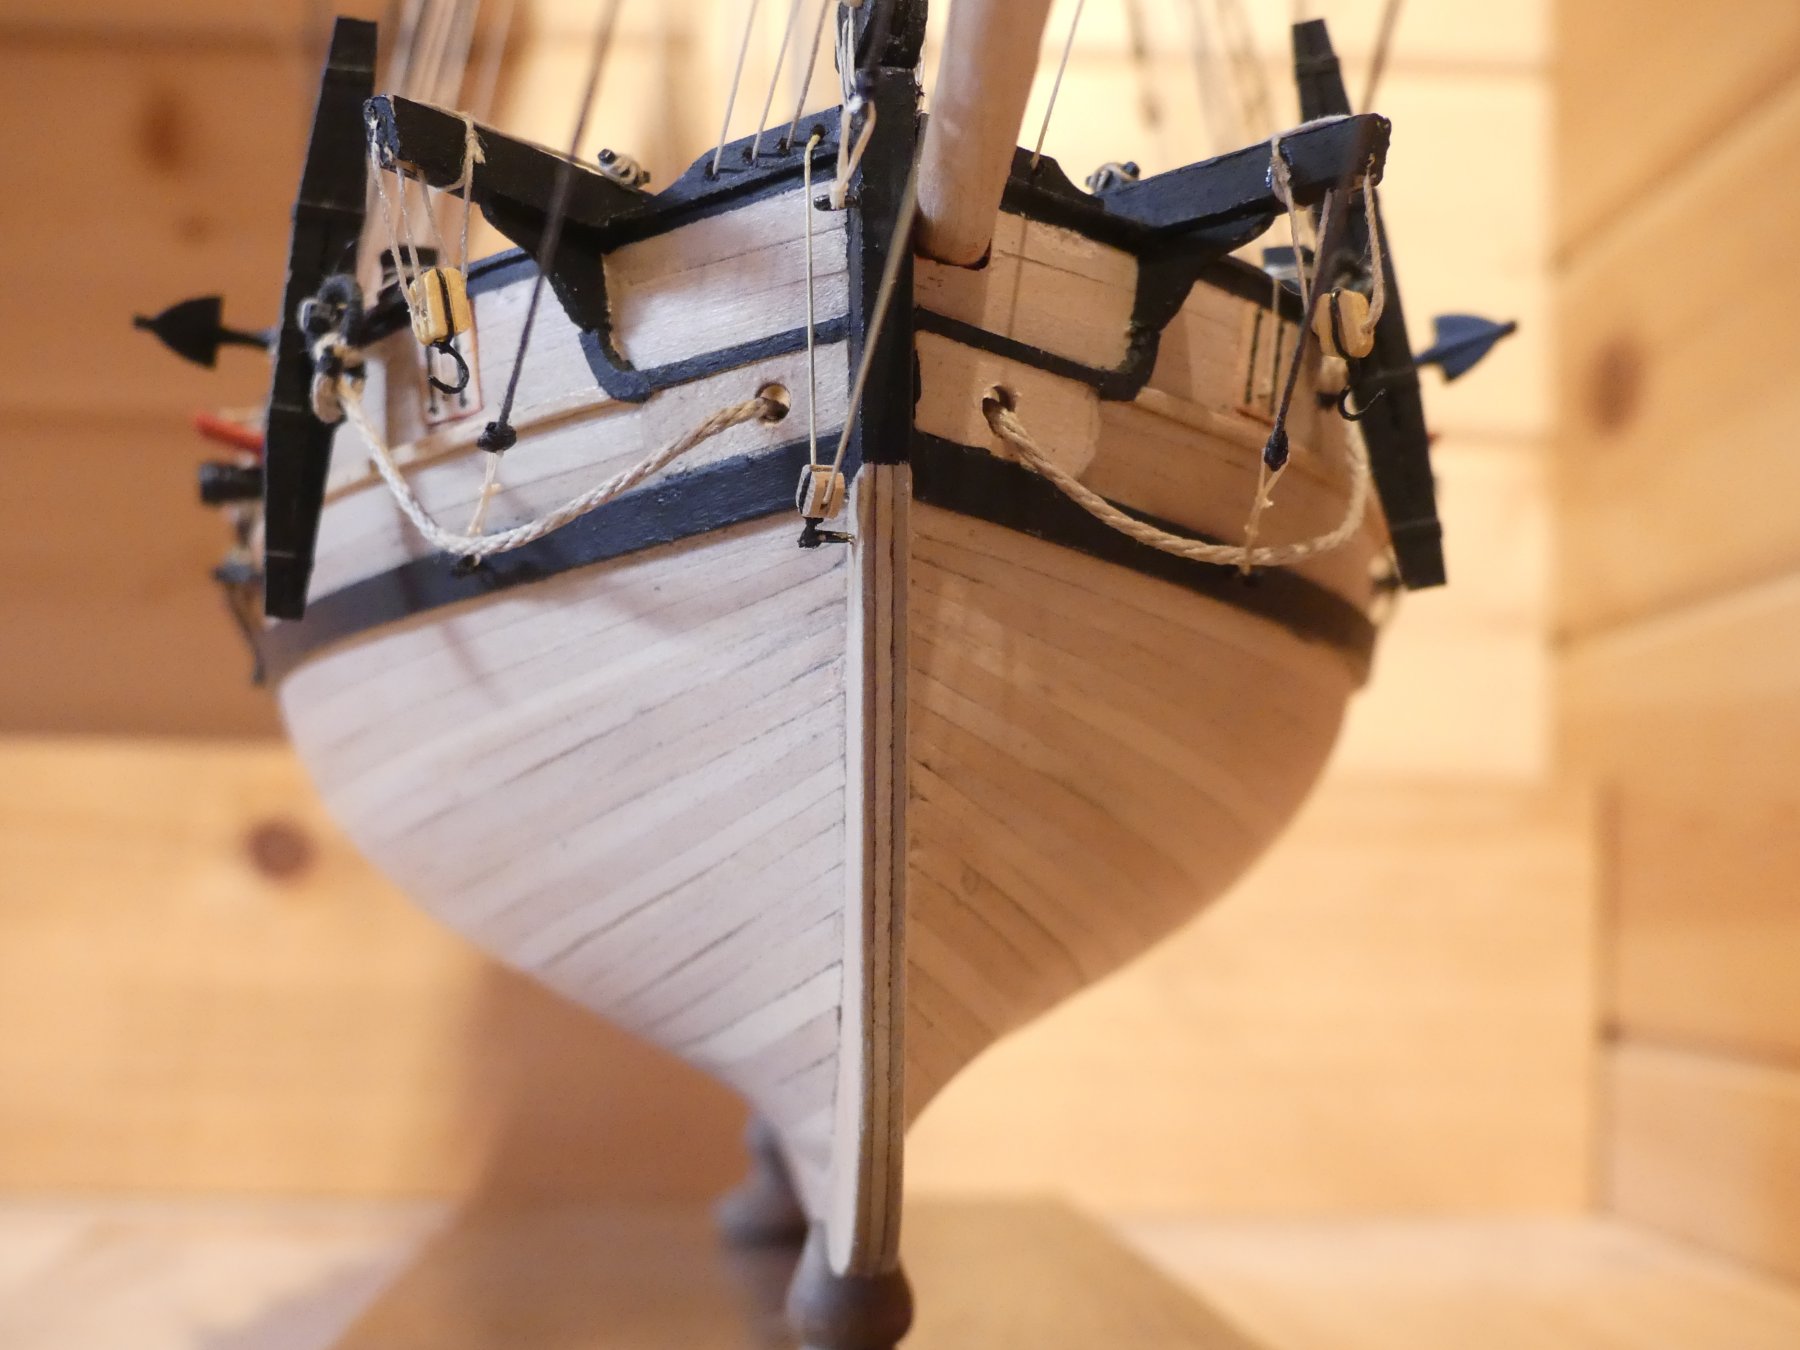
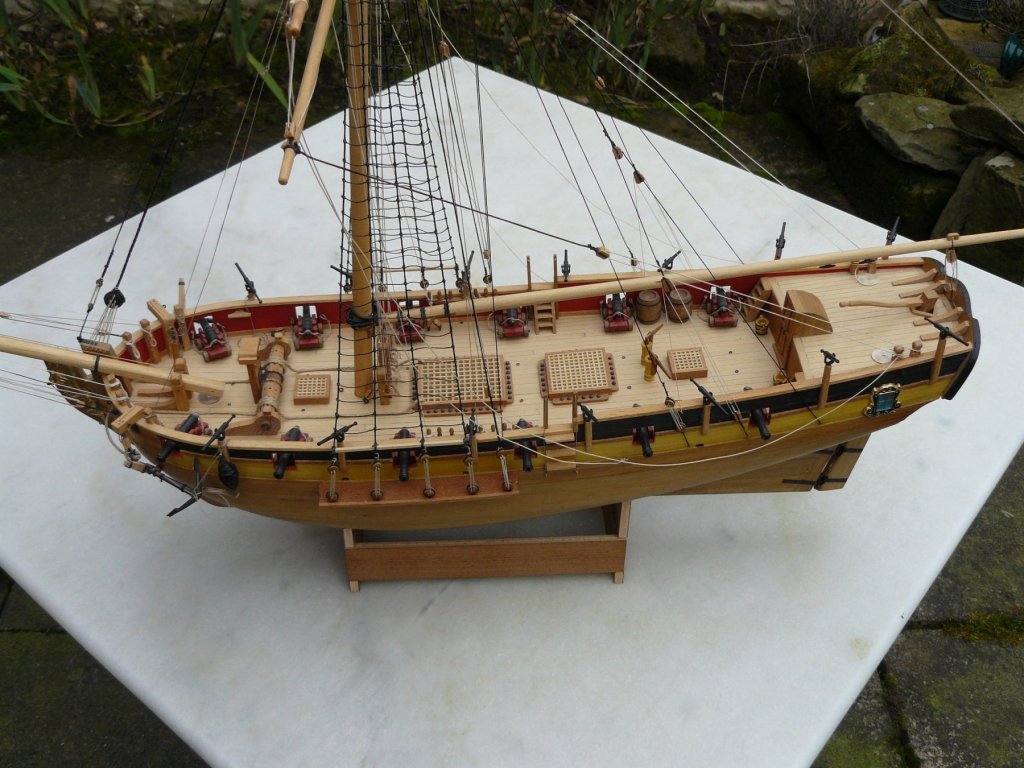
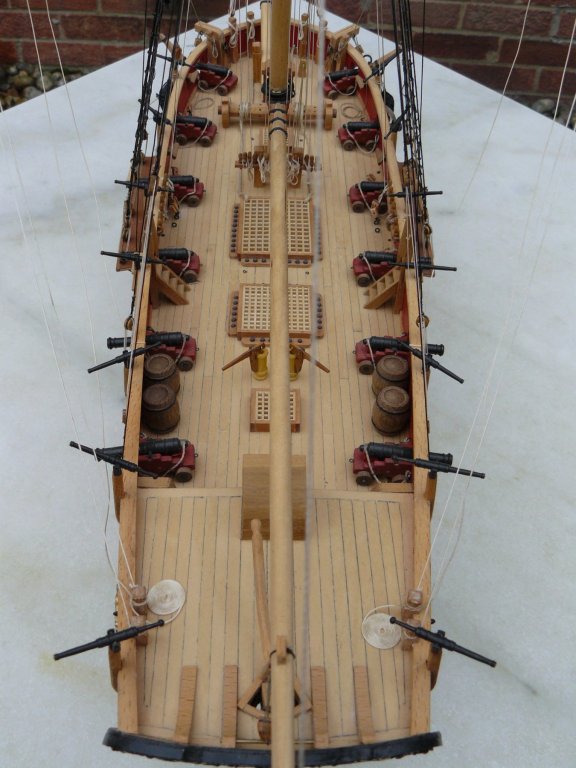
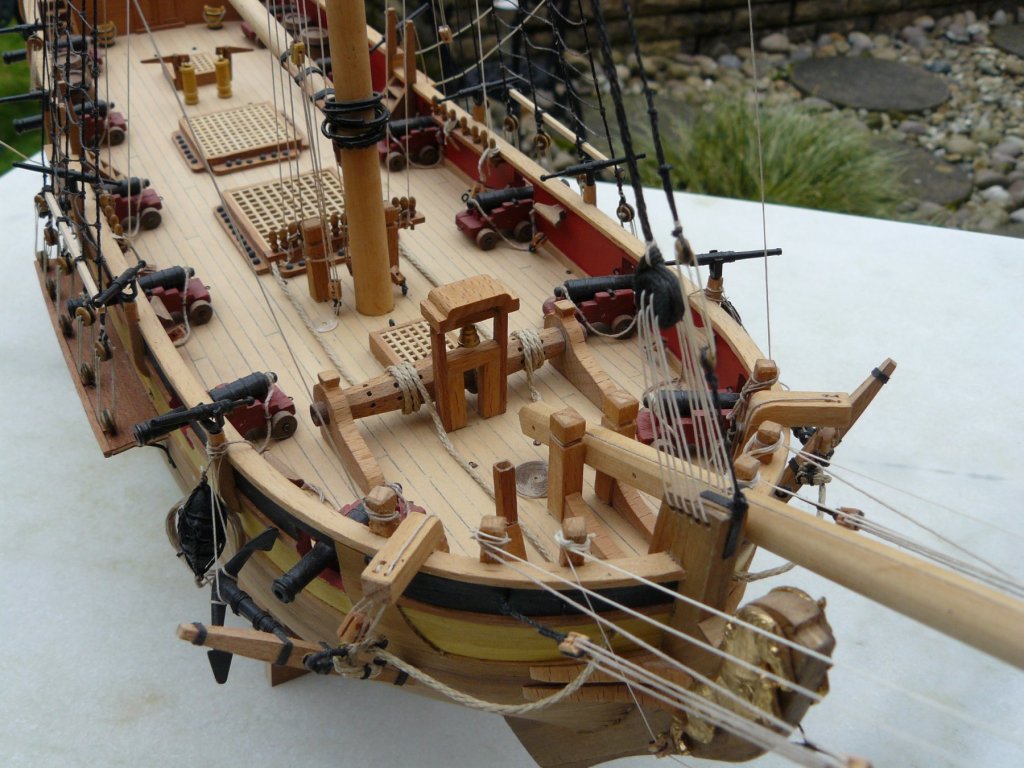
Finished deck details


-
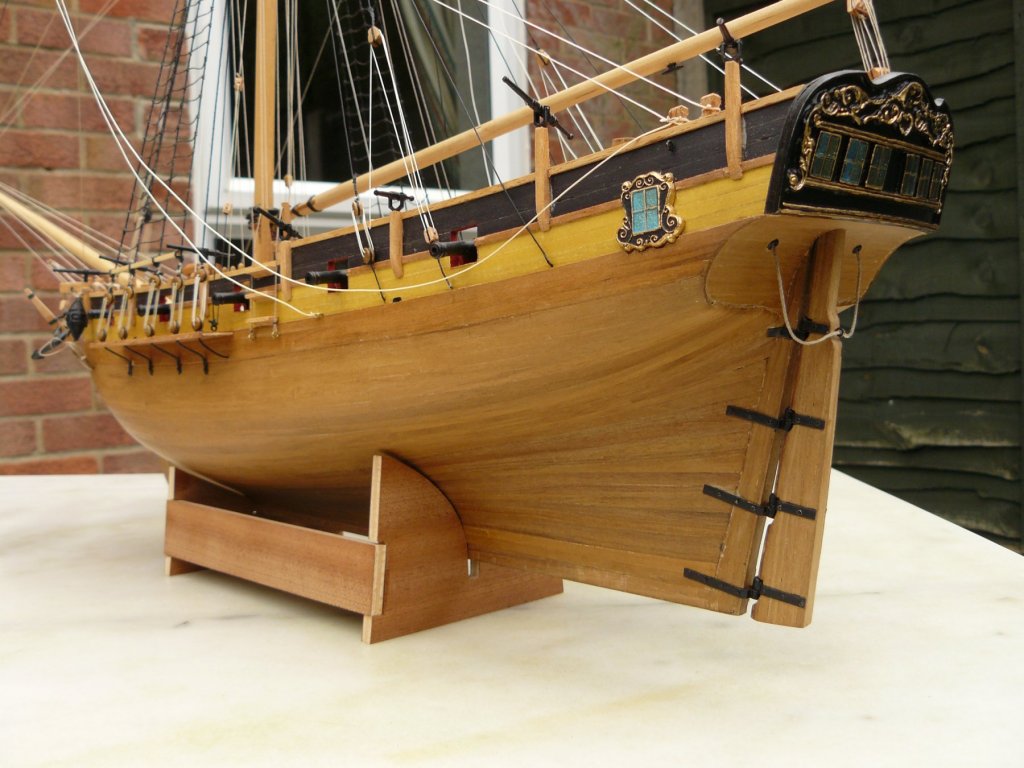
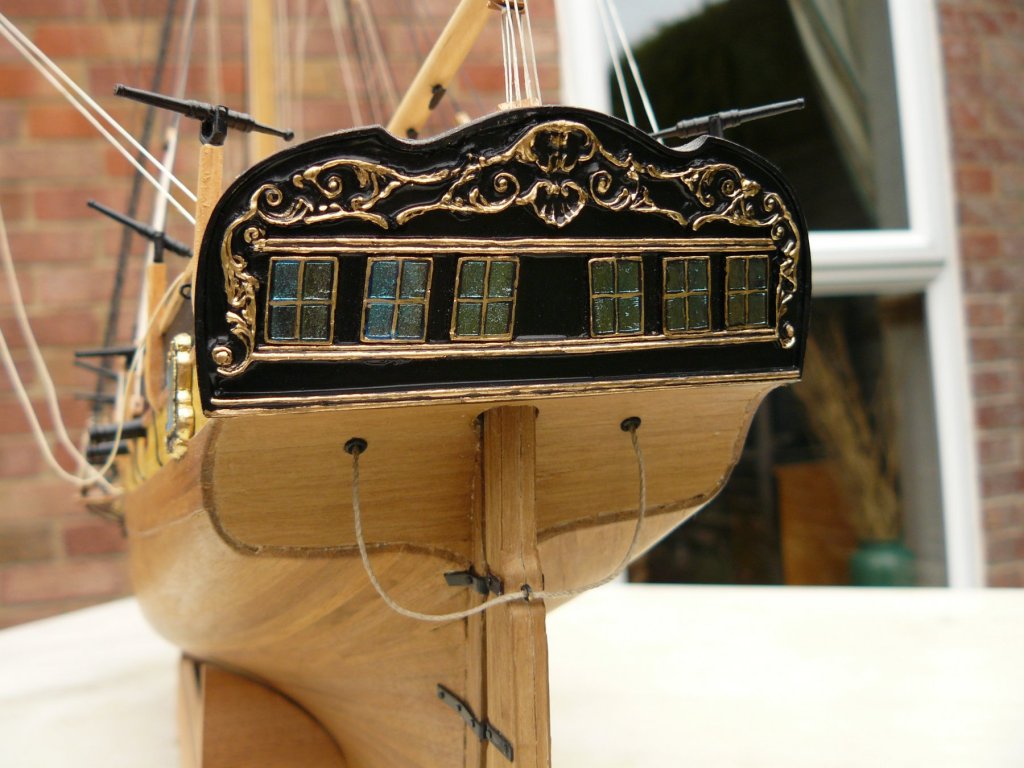
Jumped straight to hull complete - sorry Scratch building the stern gallery and quarter light badges would vastly improve this kit.


-
Thanks everyone especially Lou. I am a fair to middling builder and your work on the Providence shows you to be an accomplished builder. A difficult kit to view and not a lot of point as I may never see another. It was strange as having no materials for masts or yards but had all the rigging blocks. She is also only single planked which means you have to be careful. It really was more of a scratch build than a kit. The old wood was a joy to work with.
- 102 replies
-
- 1
-
-
- speedy
- model shipwright
- (and 1 more)
-
Easy bit before moving on. Mast support pieces glued onto the keel. However, glue alone will never hold these so each had two 1mm wood screws used to fit securely.
- 102 replies
-
- 1
-
-
- cruiser
- caldercraft
- (and 1 more)
-
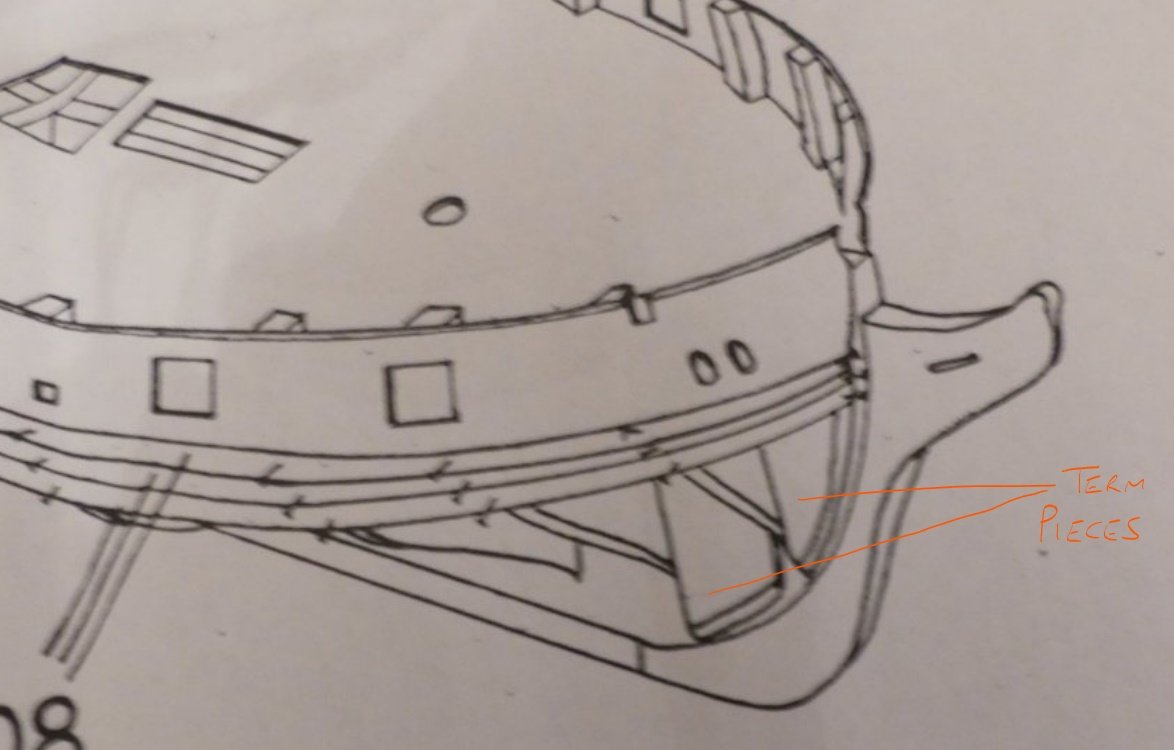
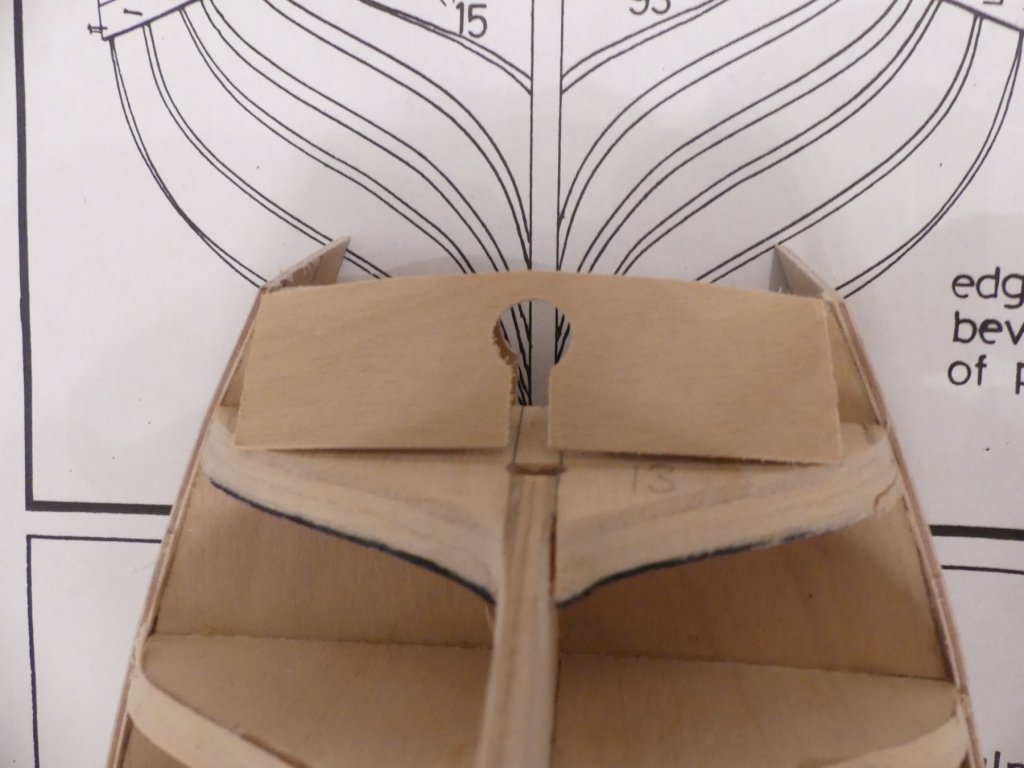
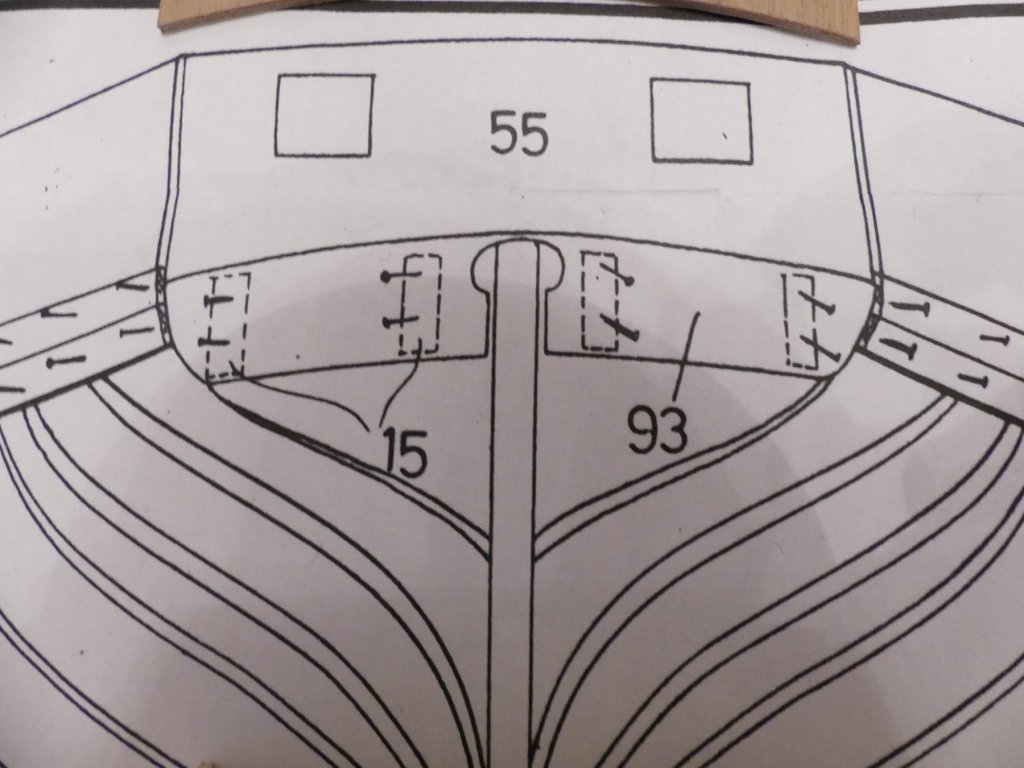
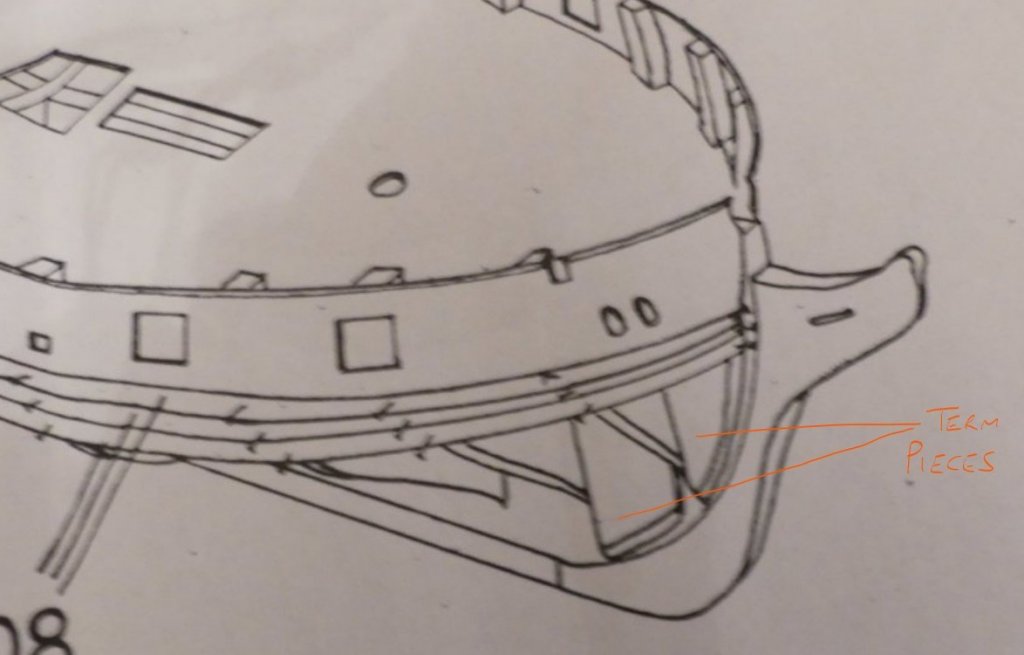
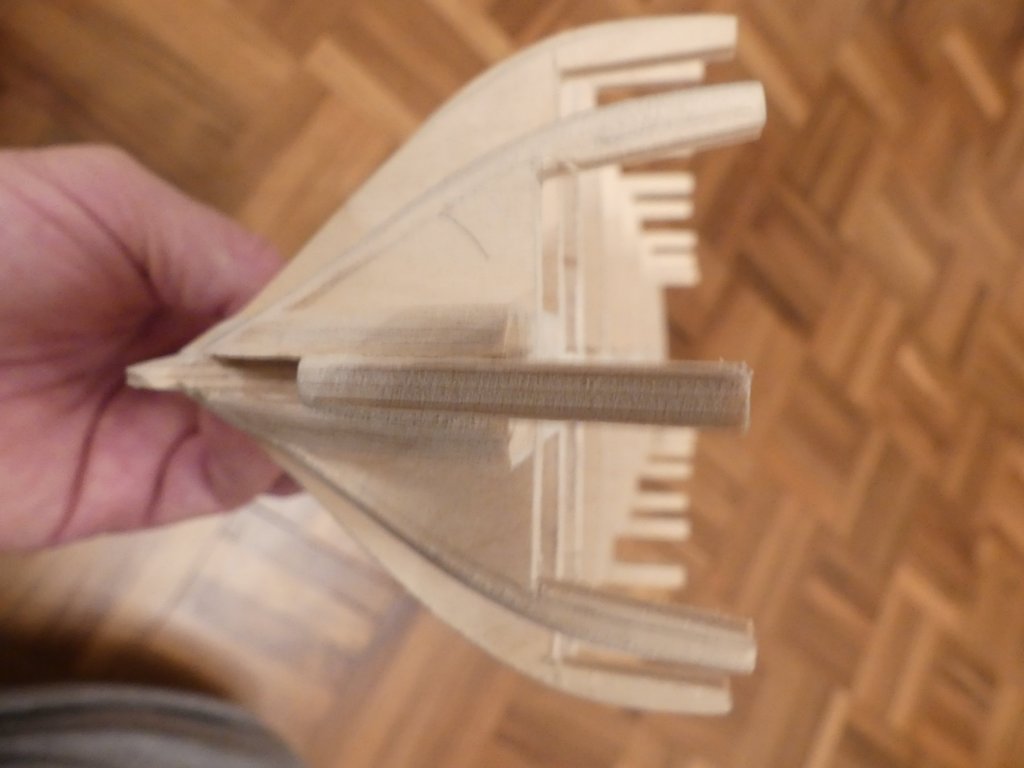
The next question is with the plank termination patterns between first two and to fore of first bulkhead. Drawing shows planking started but take notice of the plank termination pieces. Surely this will never work. I shaped to match the bulkheads.
-
Fairing of the bulkheads in progress a bow and stern. They were roughly sanded prior to gluing in place.

- 102 replies
-
- 1
-
-
- cruiser
- caldercraft
- (and 1 more)
-
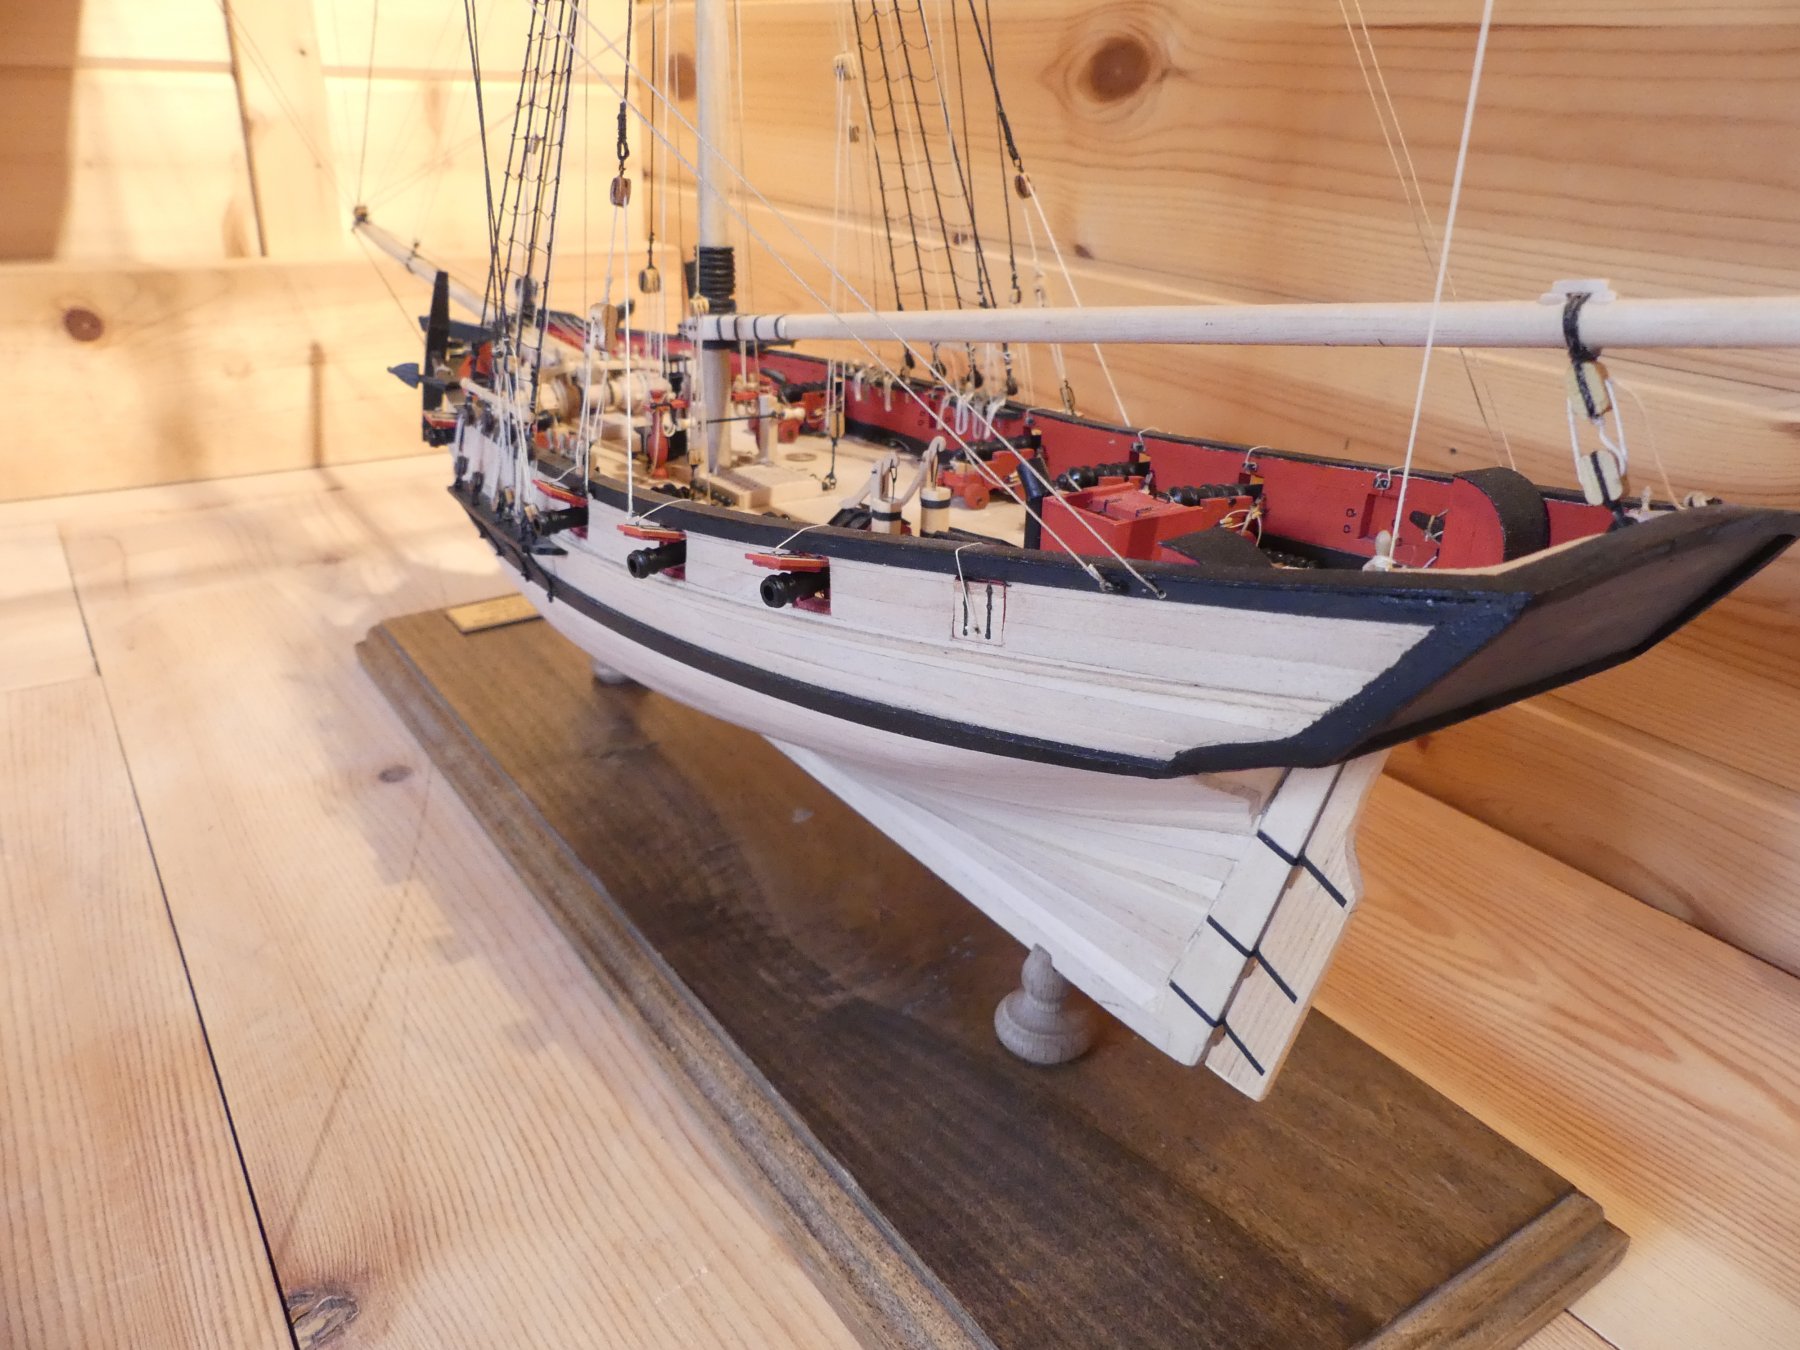
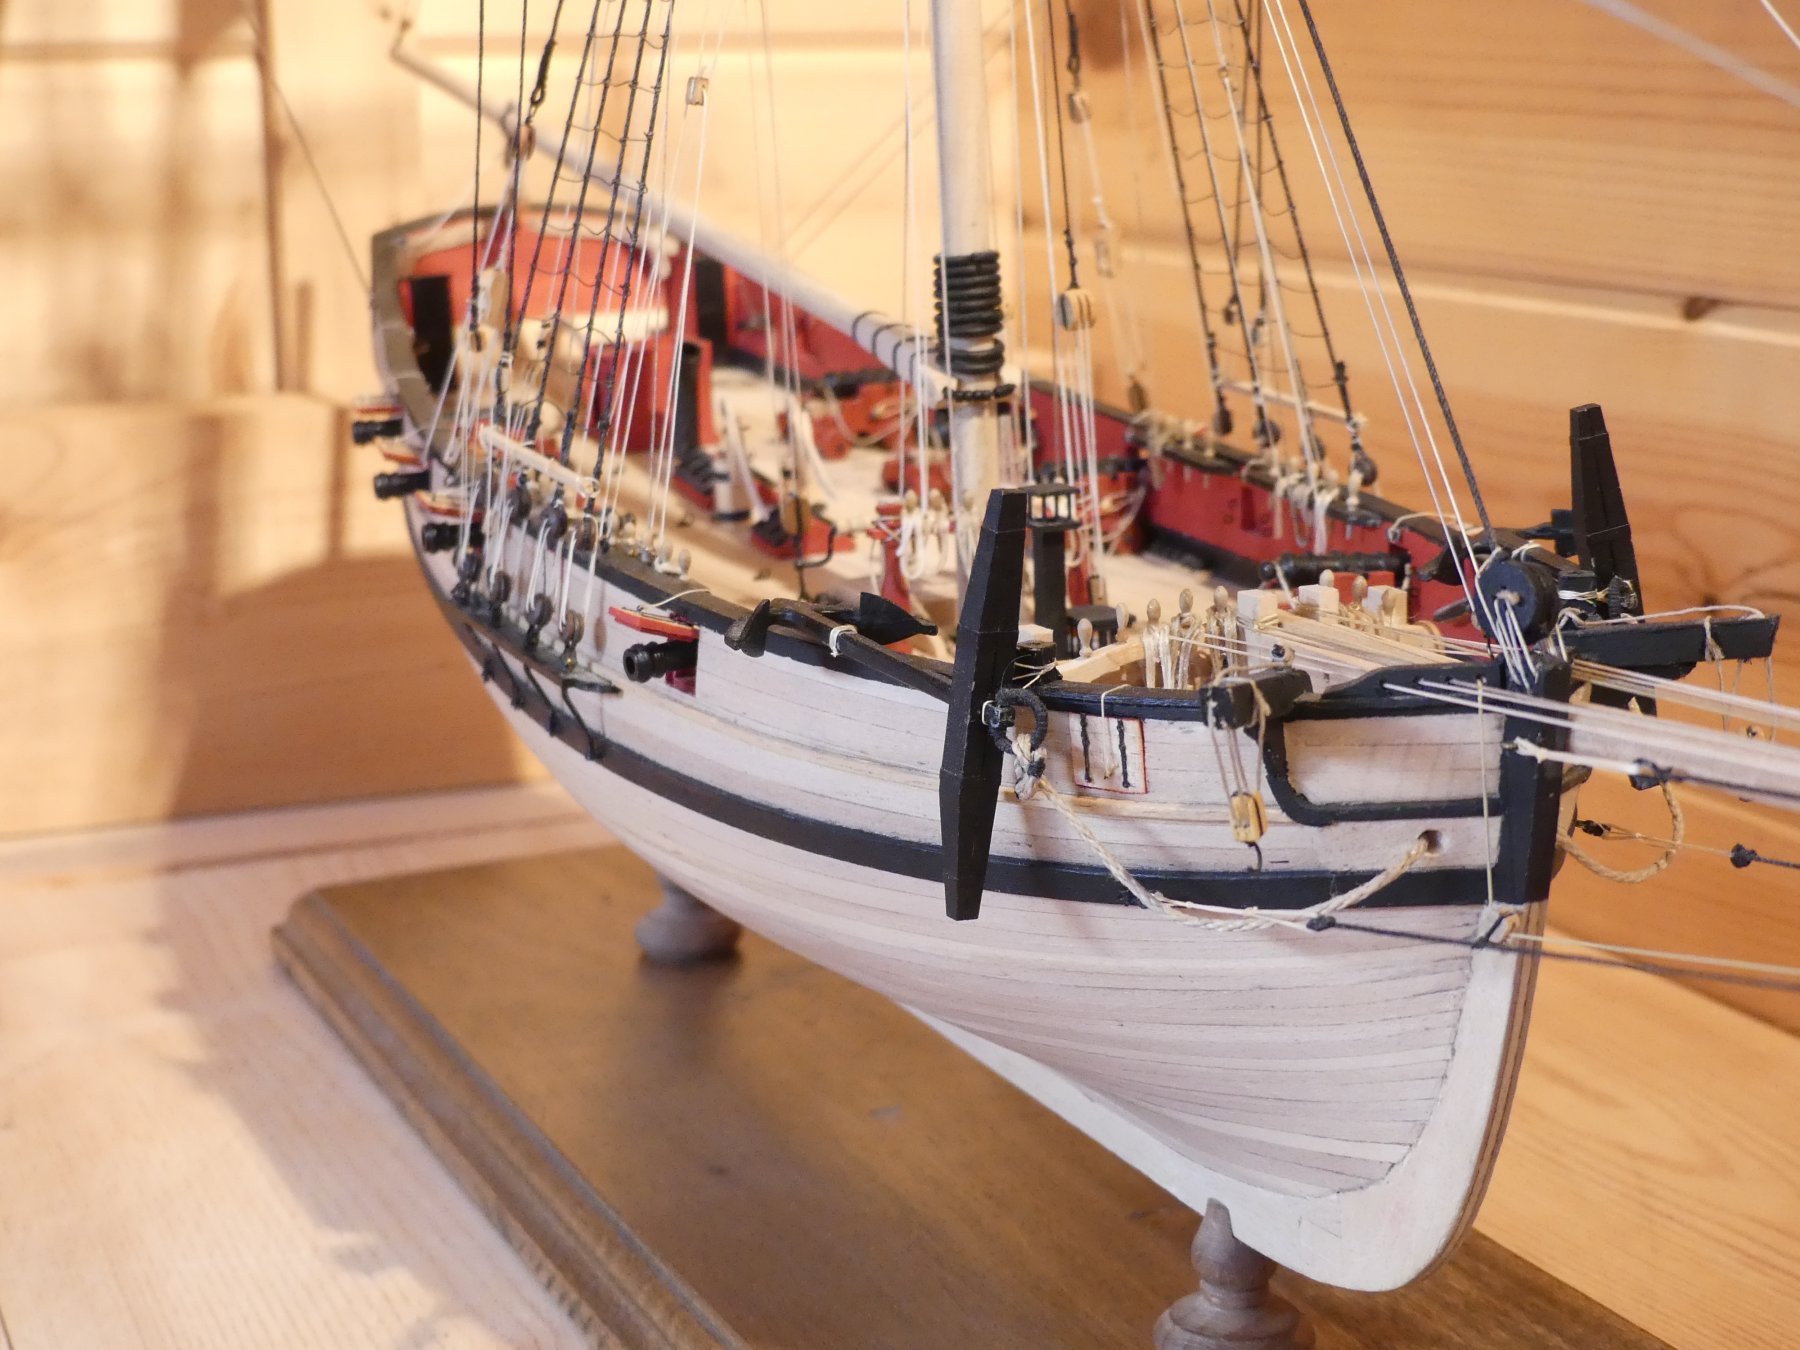
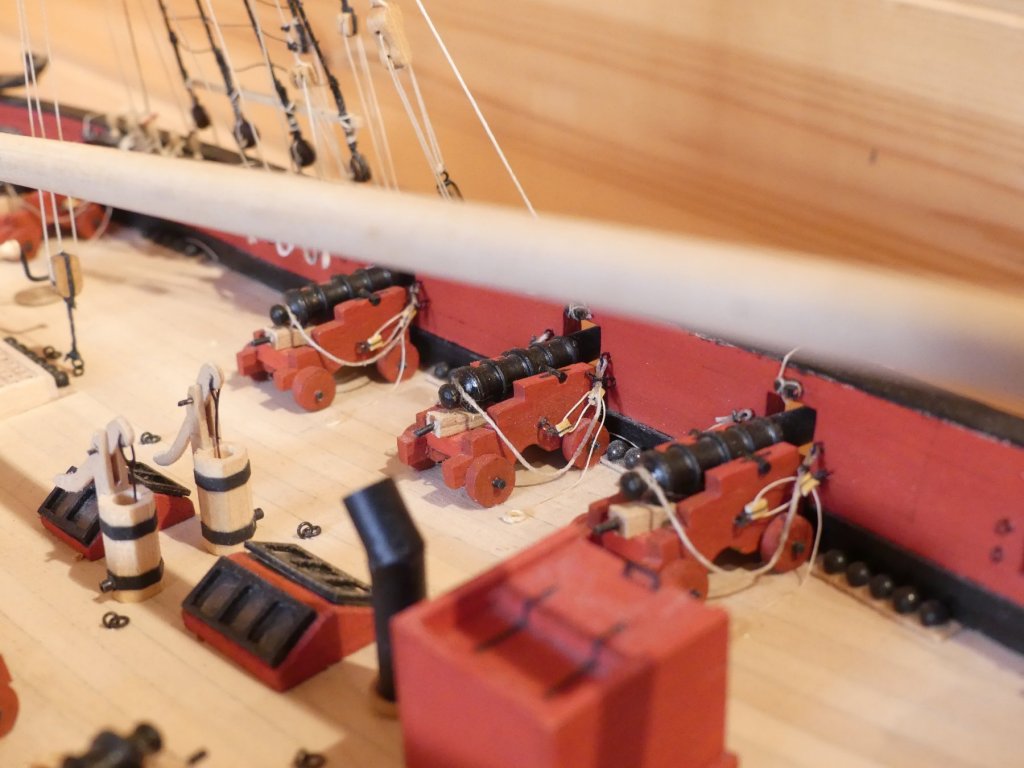
pumps and galley chimney were missing from the kit so these were scratch built from scrap. This was a really enjoyable build which had its issues along the way. the instructions and drawings were good. Rigging details good but some details m I believe to be incorrect. I felt lucky to have been able to find this kit. Considering 45 years odd old the timber and parts were in very good condition. As a kit, Chuck's is probably a lot better and very similar. As to where to display, when I asked the wife she said ' would make good kindling' I hope she was joking.!! So worst bit of doing the model - finishing it, I hate that feeling!


- 102 replies
-
- 10
-
-
- speedy
- model shipwright
- (and 1 more)
-
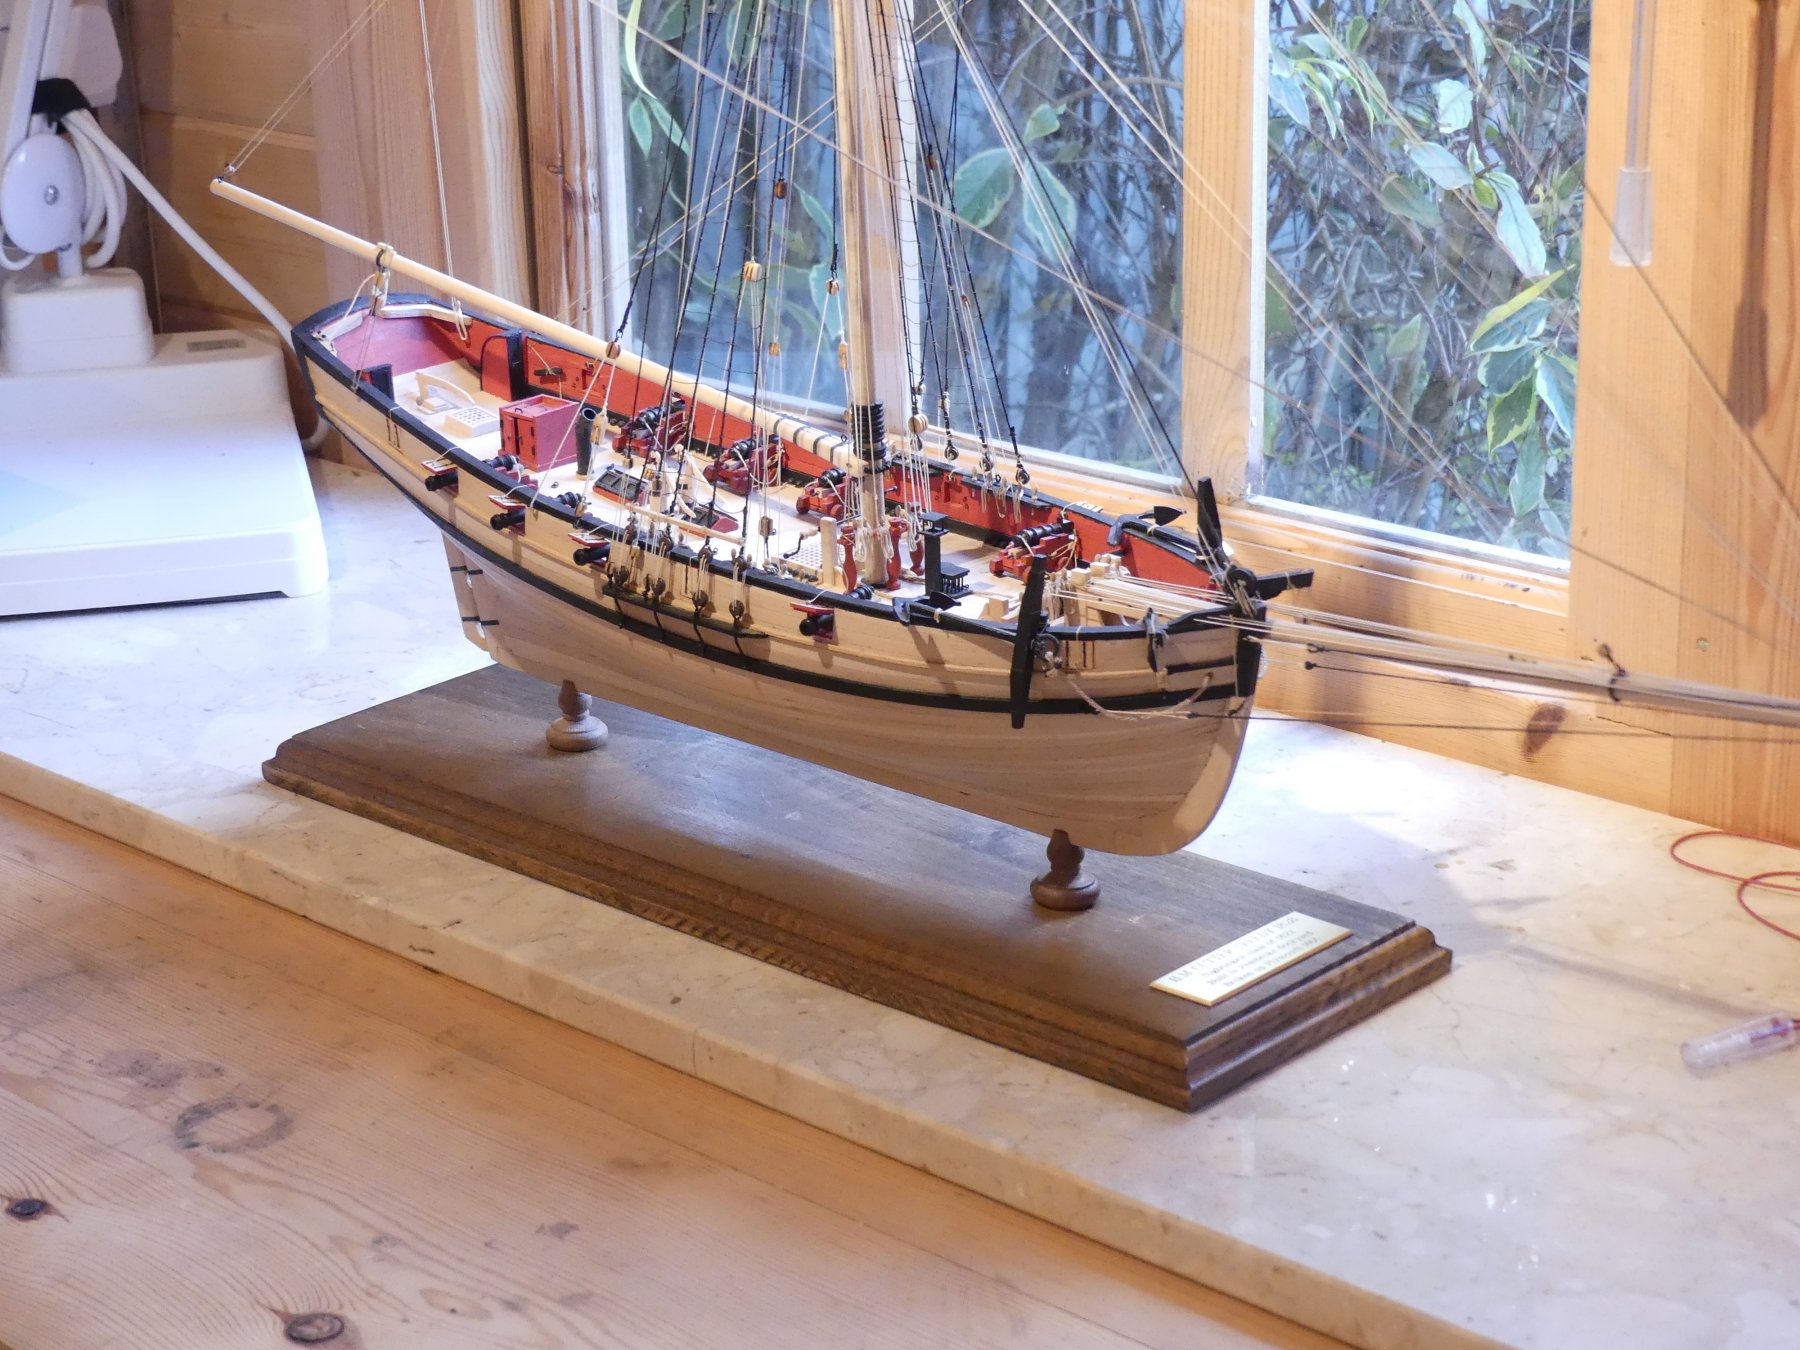
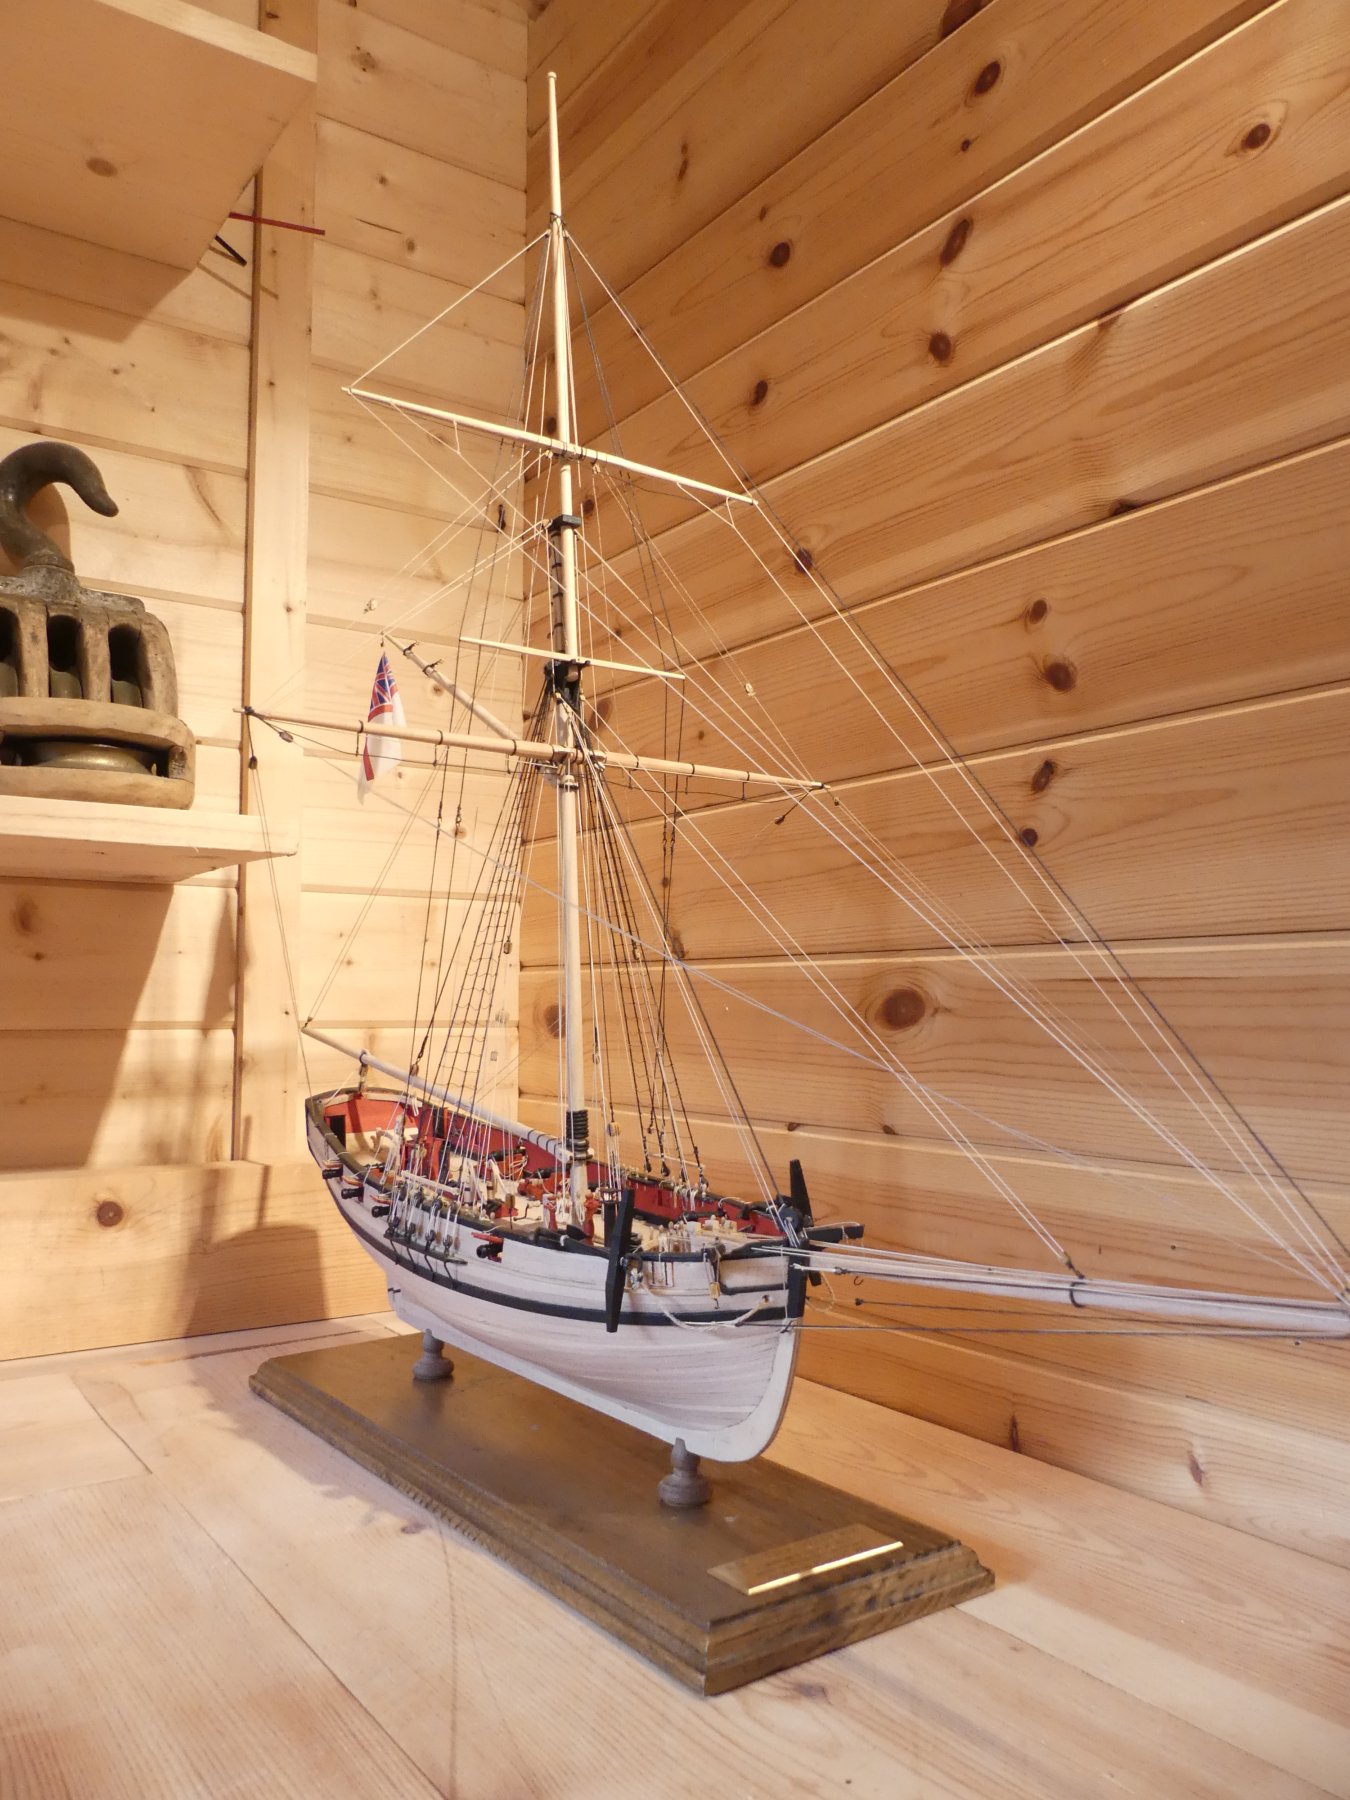
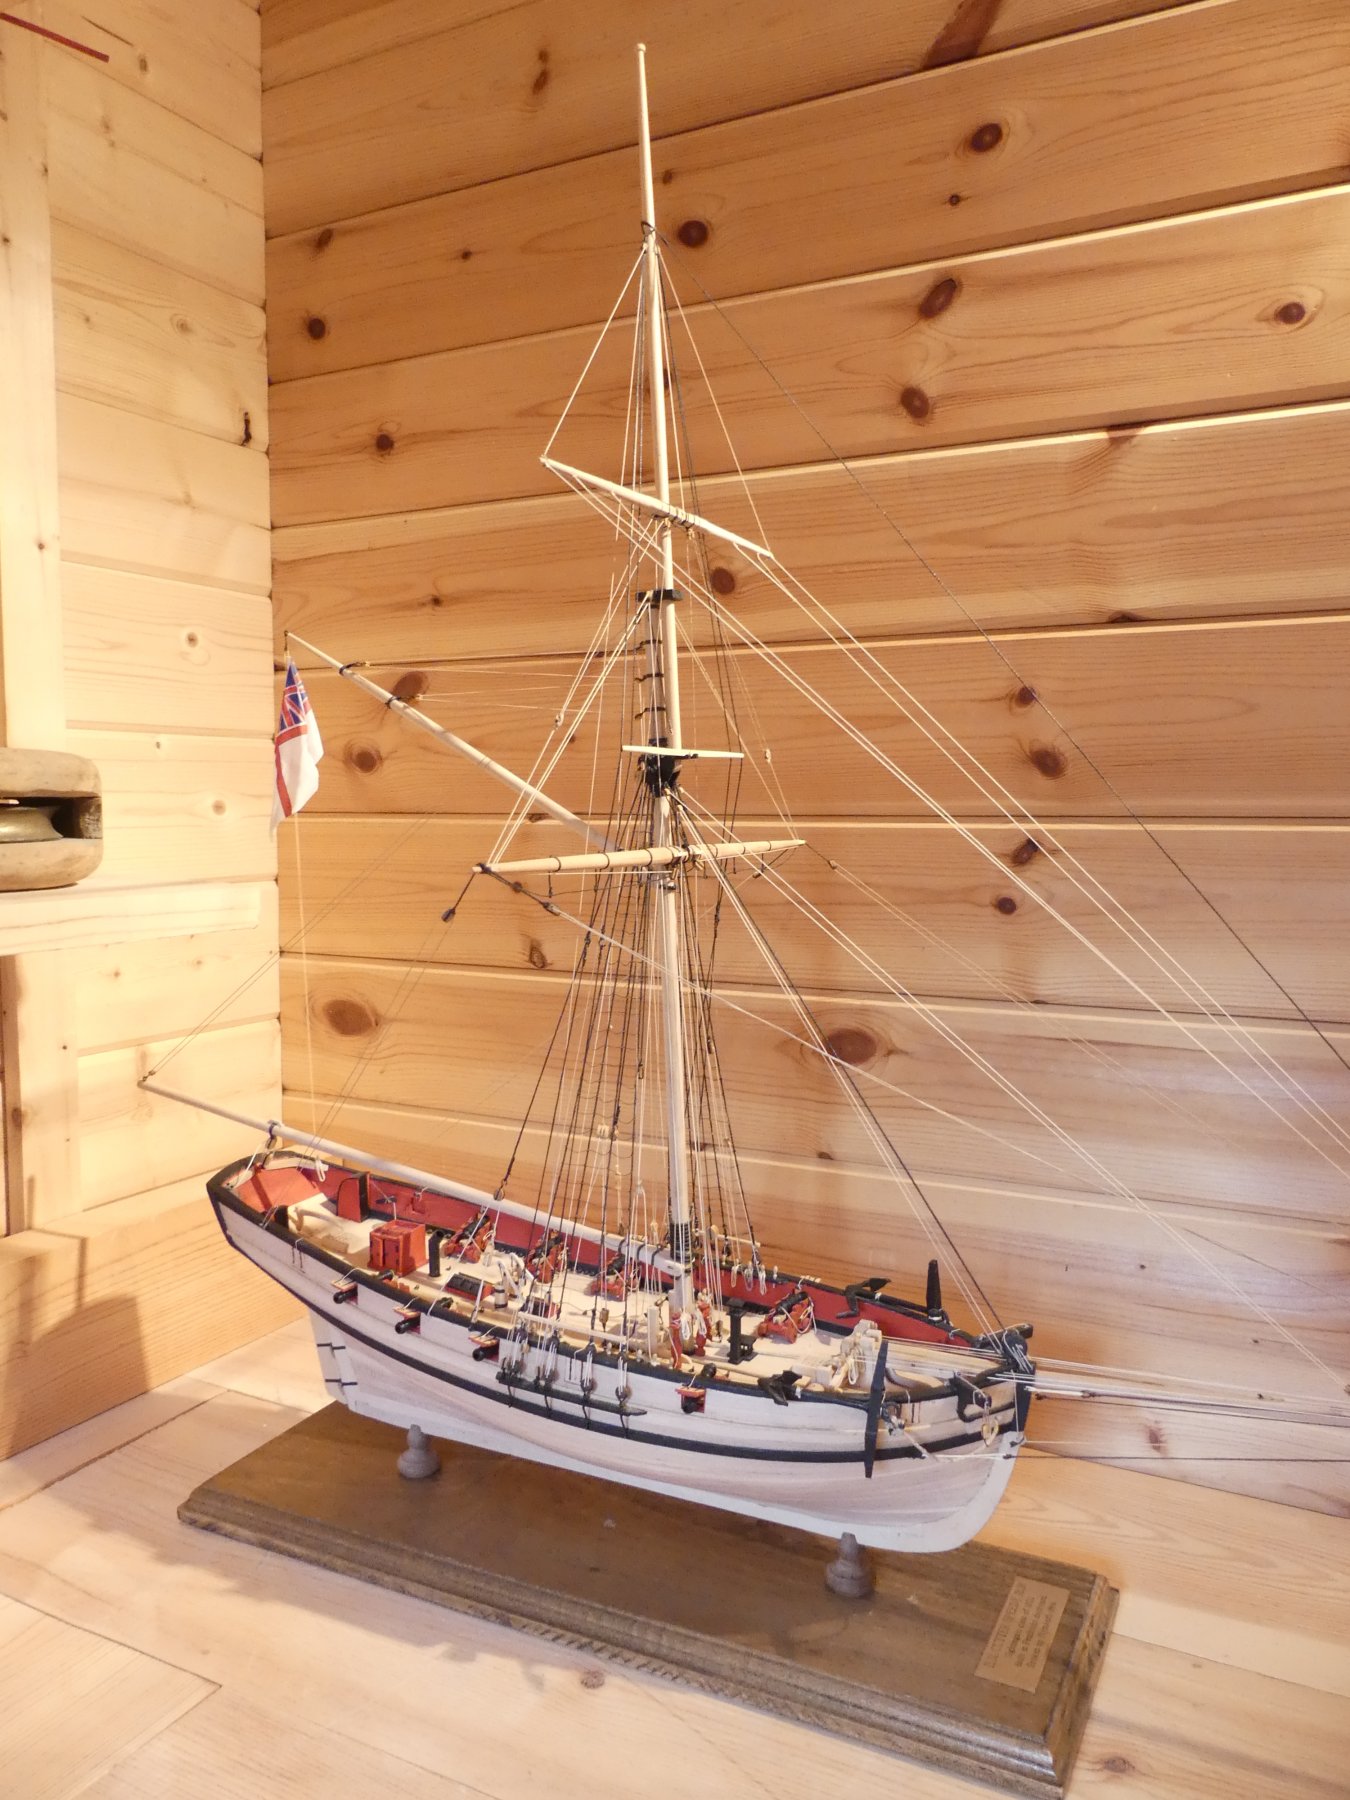
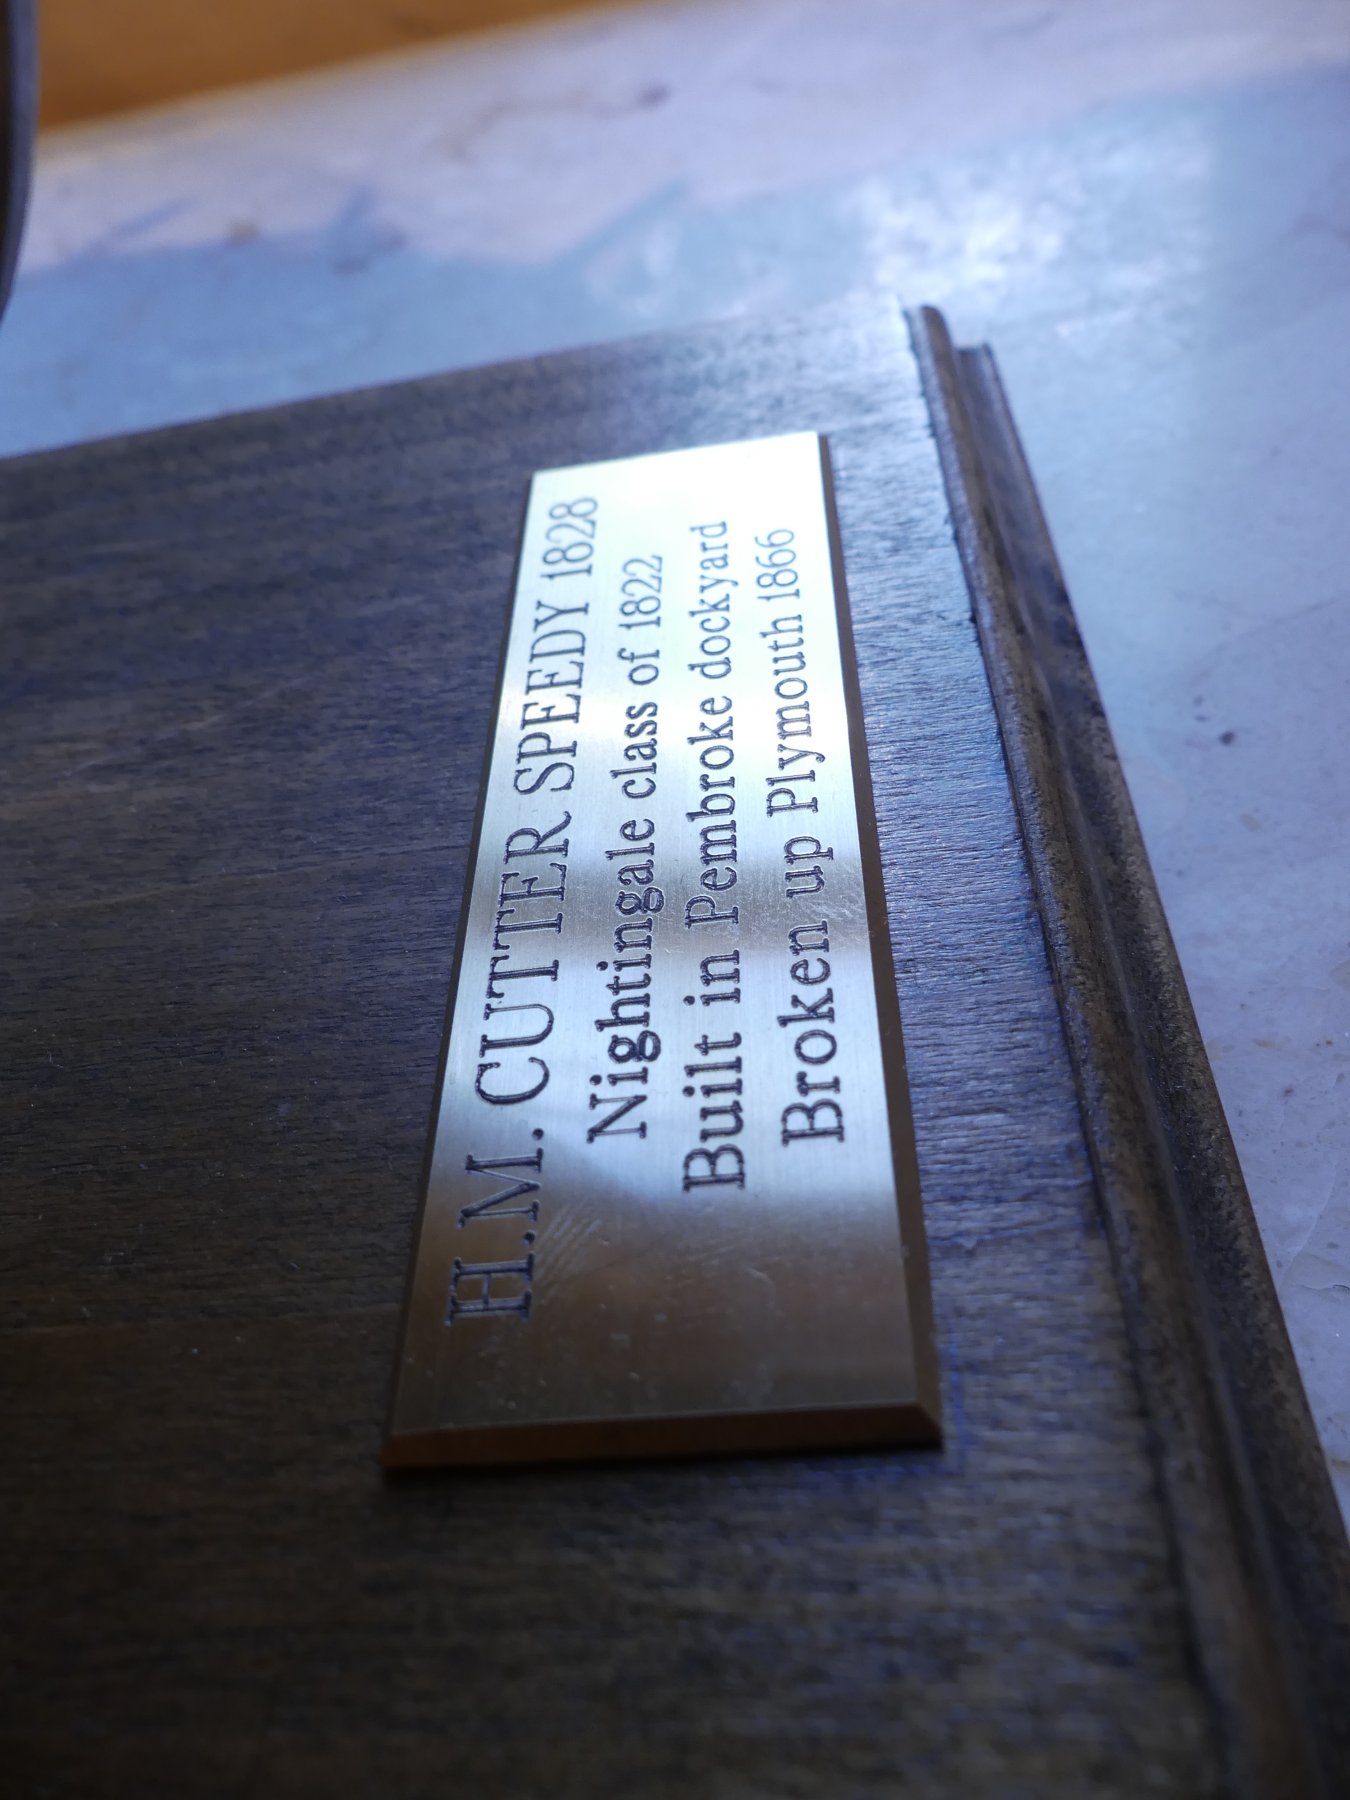
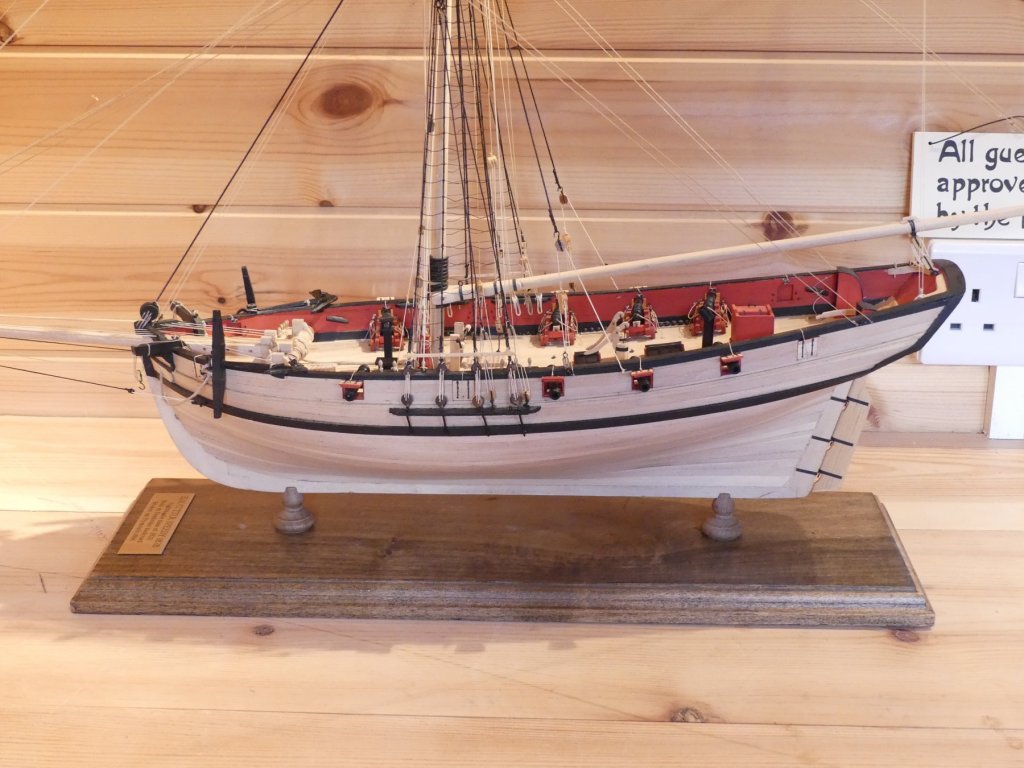
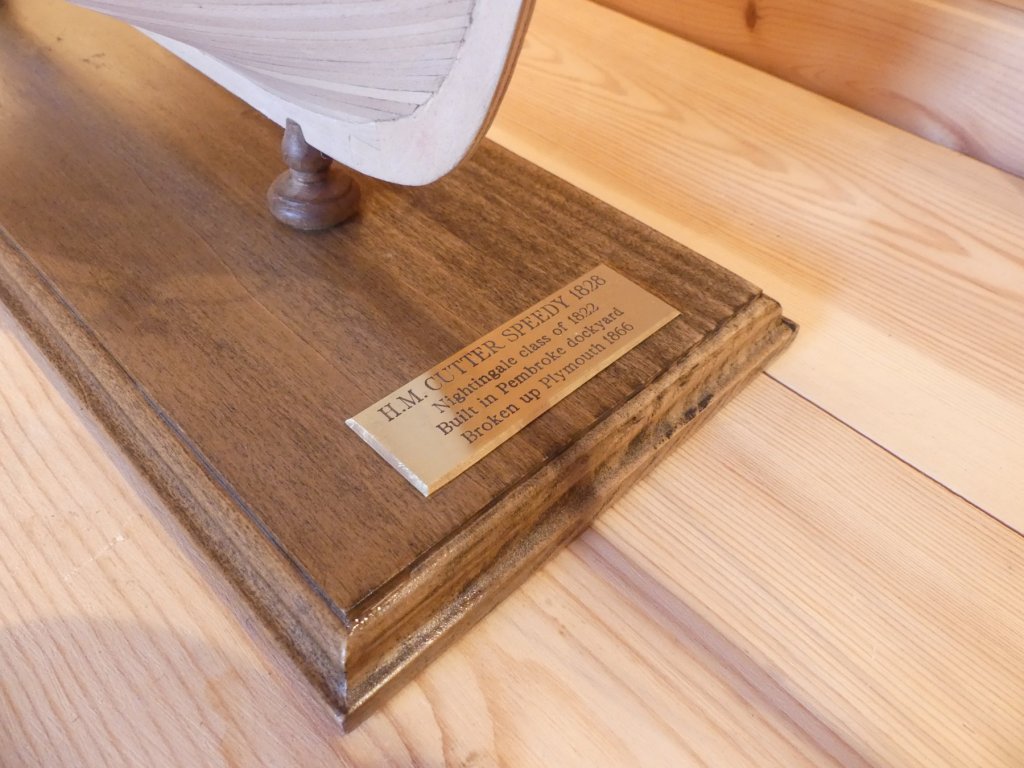
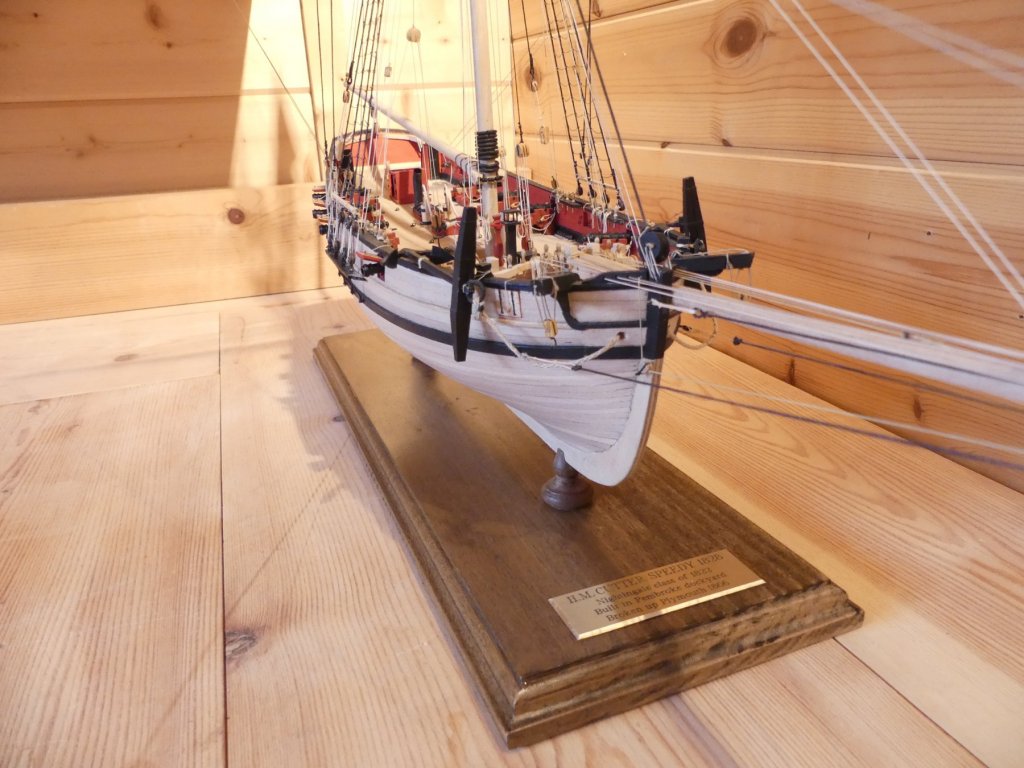
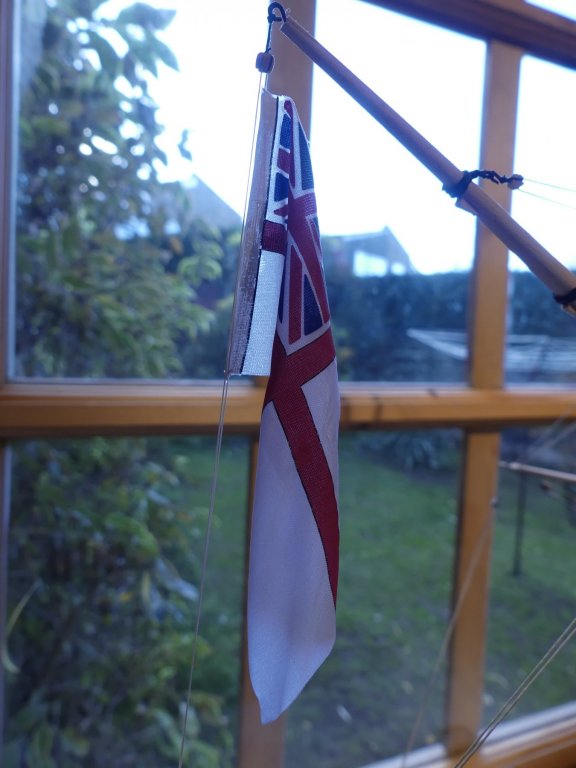
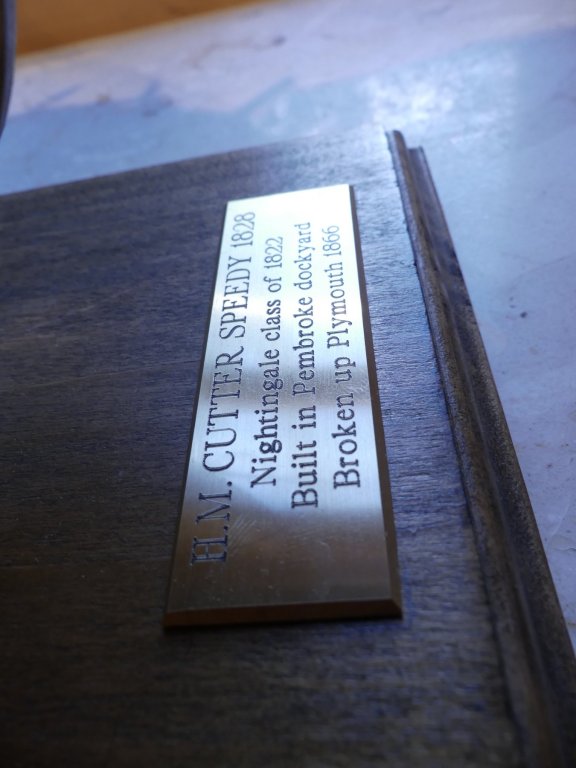
Flag and name plate installed onto the stand. The last two items required before I could declare her finished.
- 102 replies
-
- 2
-
-
- speedy
- model shipwright
- (and 1 more)