HOLIDAY DONATION DRIVE - SUPPORT MSW - DO YOUR PART TO KEEP THIS GREAT FORUM GOING! (Only 13 donations so far - C'mon guys!)
×


Thunder
-
Posts
582 -
Joined
-
Last visited
Content Type
Profiles
Forums
Gallery
Events
Everything posted by Thunder
-
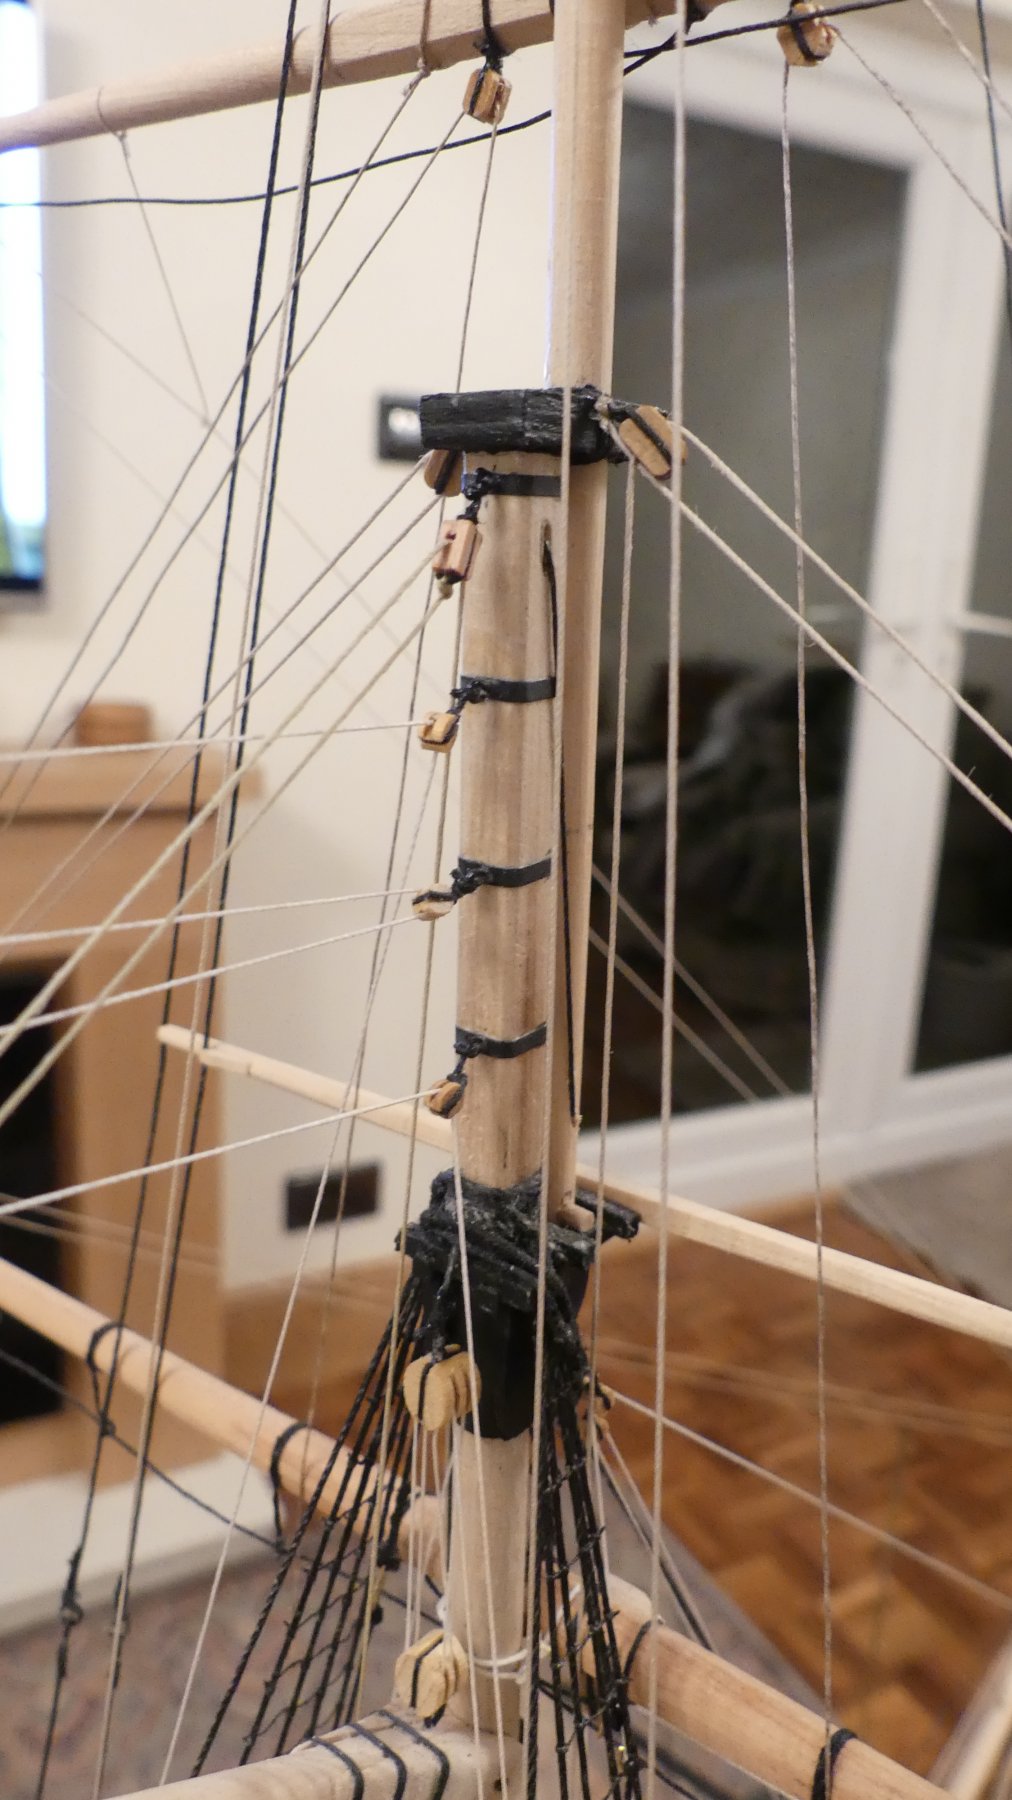
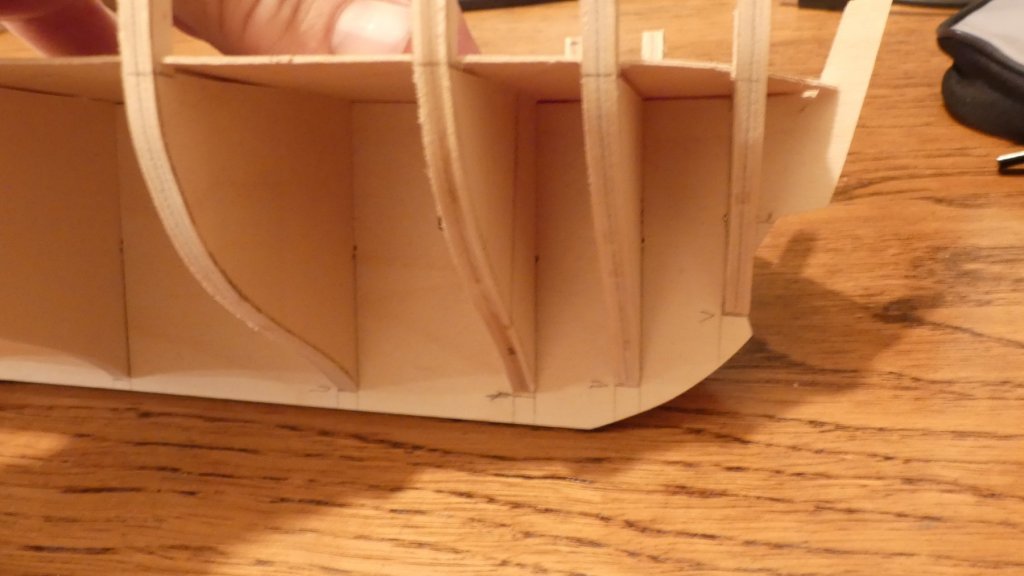
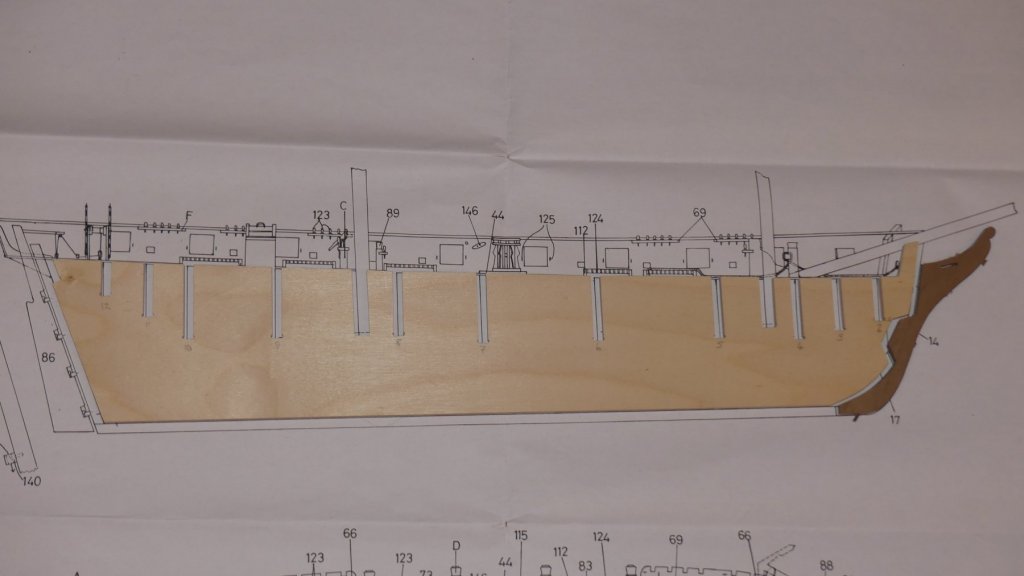
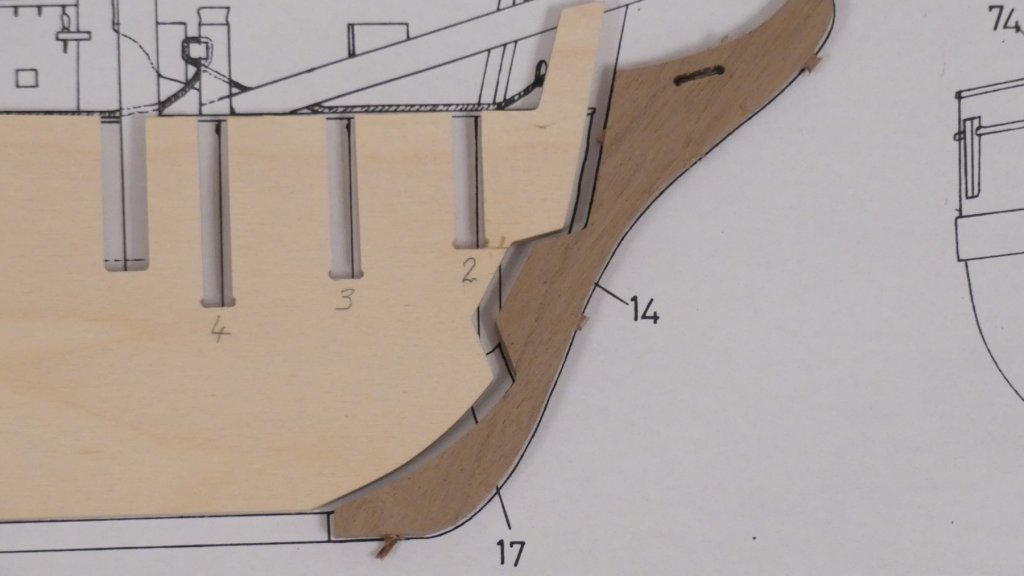
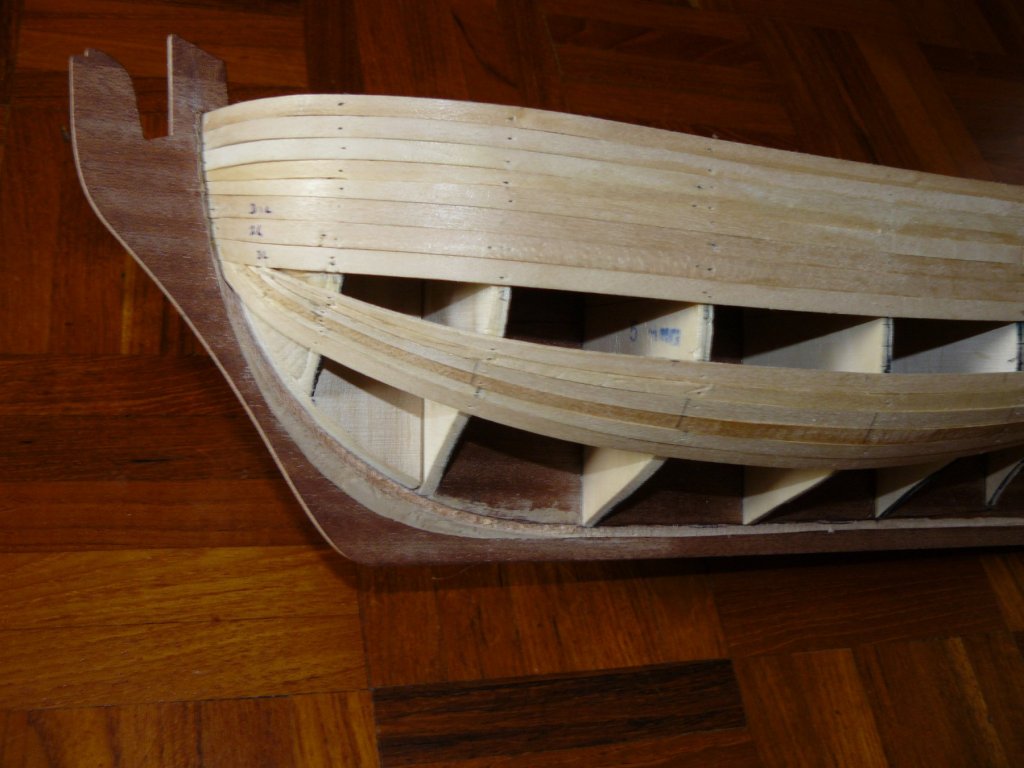
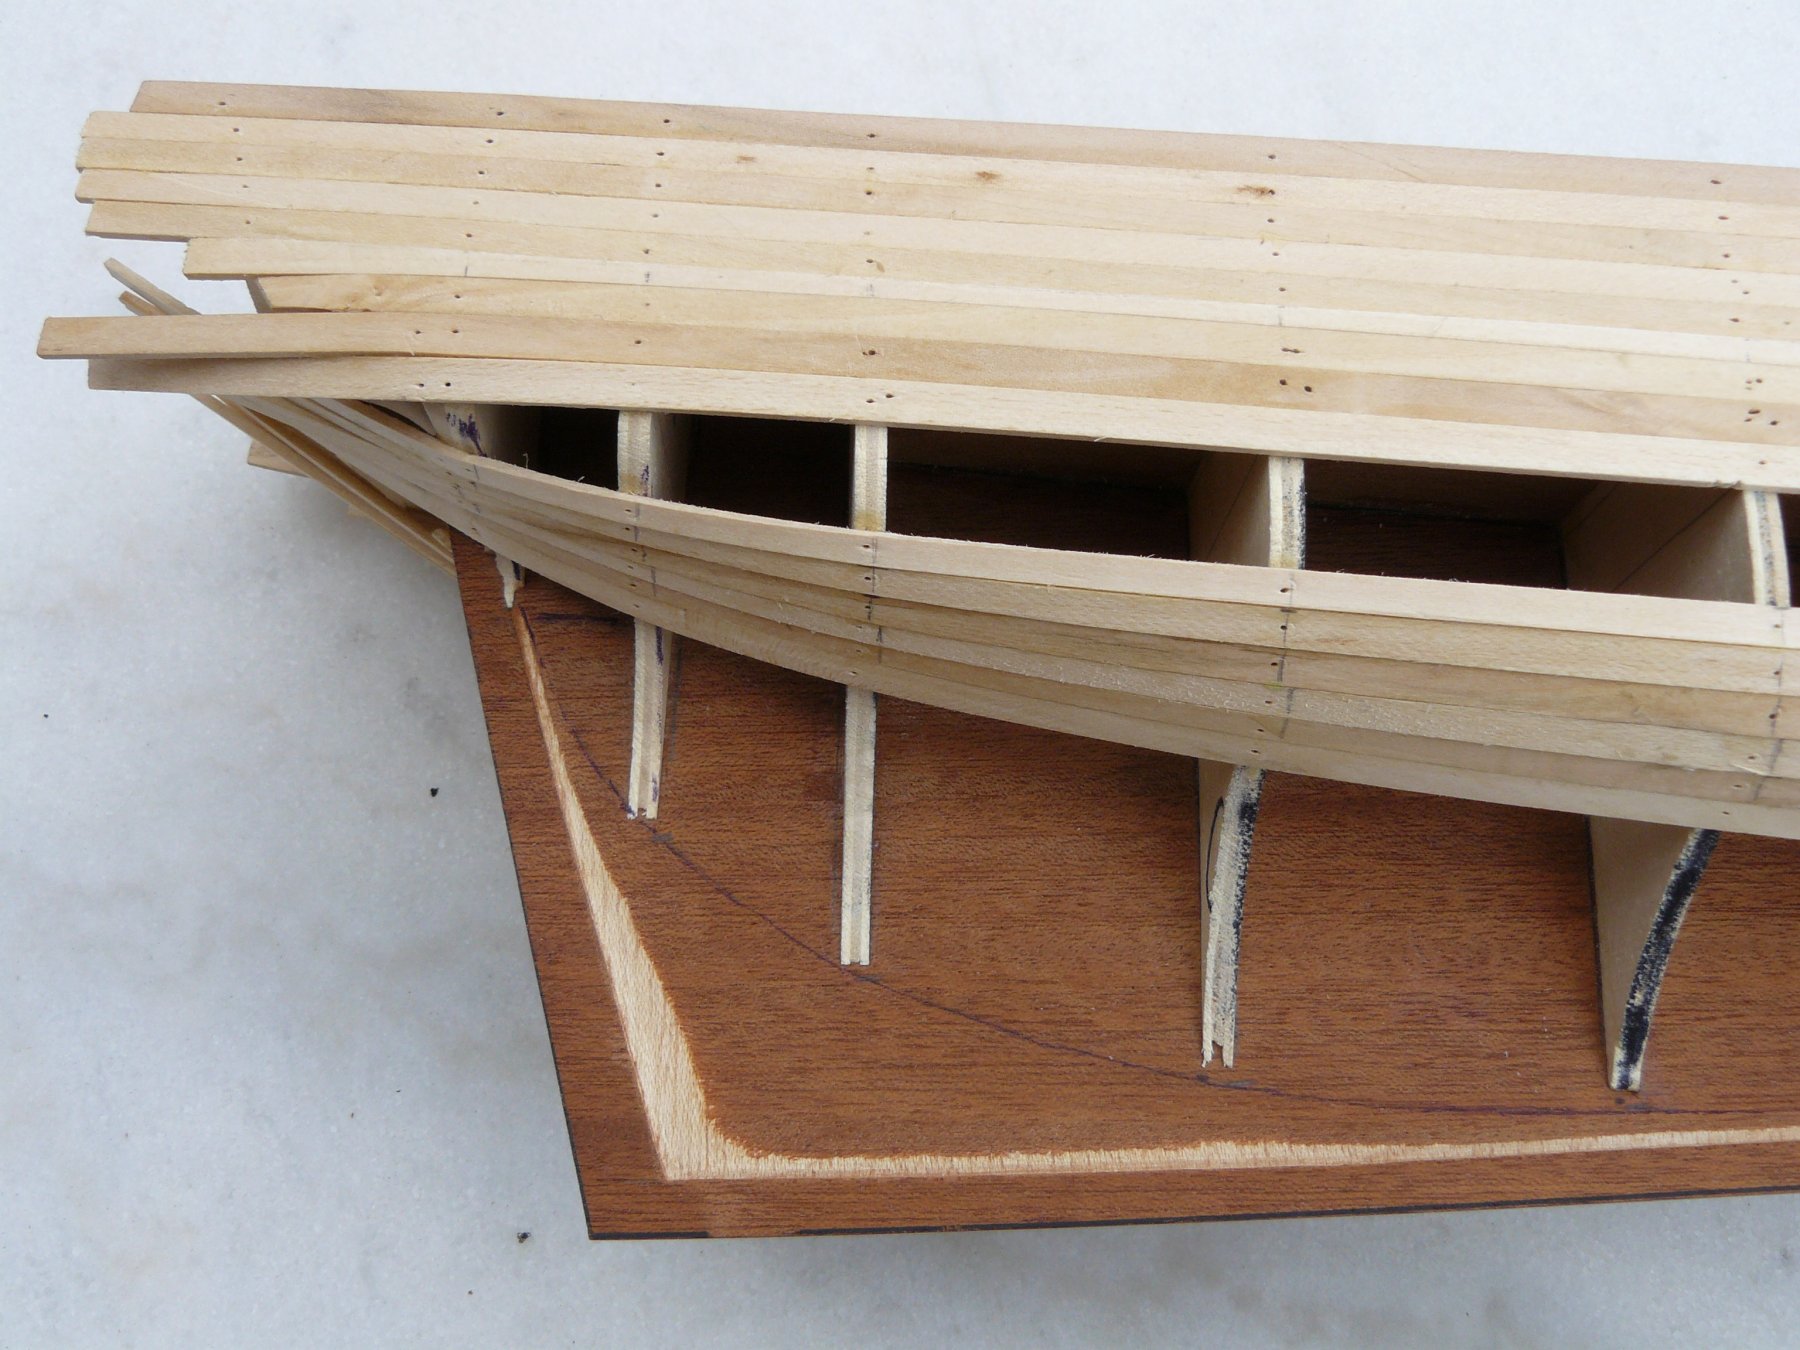
Now a question. I have never done a vessel with a bearding line like at the bows in this kit. Usually the bulkheads at the bow come down to leave you just enough space to cut the rabbet between the bulkhead and the walnut keel piece. In this kit there is a huge gap between the two. I have done as you would at the stern, i.e. thin the ply bulkhead down so that after planking there is no step between them and the keel. It just feels wrong doing that here. Bearding /Rabbet shown drawn on. Bulkheads again dry fitted with edges blackened to make sure I Do not loose the shape when 'trueing'.

- 102 replies
-
- 3
-

-
- cruiser
- caldercraft
- (and 1 more)
-
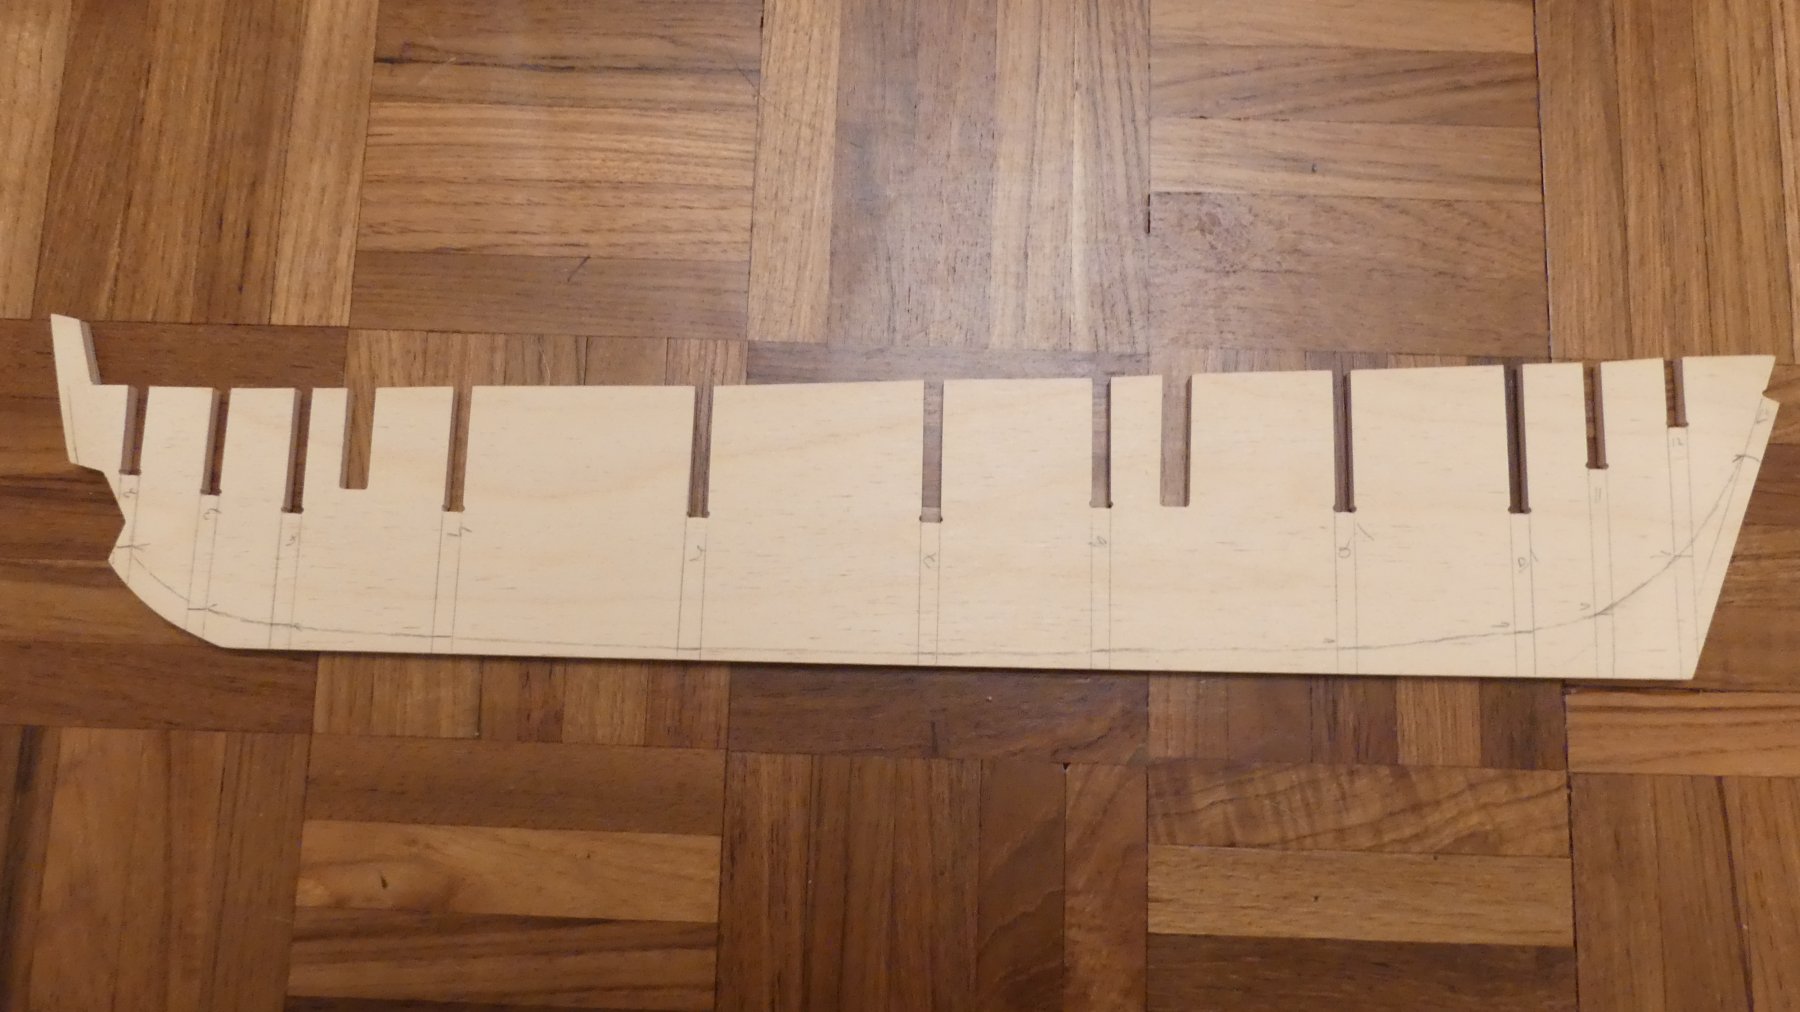
Next step I removed all the bulkheads from the plywood sheet, traced them onto some paper and then used his to check symmetry. Two at the mid position were out. Before modifying the two I checked each in position on the keel section. None fitted, all needed opening out to get them to fit. The two that weren't symmetrical were due to the central slot so these were rectified whilst opening the slot. Neither of these flaws were noted in the Keith Julier build. Photo shows bulkheads and false deck dry fitted. This allowed me to mark the points of the bearding line. You will also see that I have extended the line of the deck to the edges of the bulkheads and, taken from the now suspect drawings, the height of the bulkheads from the deck position. This seems to show that the bulkhead tabs, above deck level, are too high. However, the drawings do not shore the deck planking so I do not know if this has been accounted for.

- 102 replies
-
- 2
-
-
- cruiser
- caldercraft
- (and 1 more)
-
Hi Jason and Joe, thanks for dropping in. You can tell my the parts that they are for both ships as I have three mast holes on my false deck! They did try to tell me to buy the Mars or Jalouse when I purchased it but I wanted this as both of them were prizes rather than an English design. Also, her class was the largest ever produced. Those kits had just been released back then. From what I have done so far I think the lit could be improved with little effort. However, as mine is old they may of already done this. Joe, I have taken a good luck at your build. It seems you are not having the same issues as me with the bulkheads at the stern. I am concerned that I have over 'faired' mine but every time I look I think I should of done more. This is the area of the build I am always uncertain about. You will see what I mean in my next update.
- 102 replies
-
- 2
-
-
- cruiser
- caldercraft
- (and 1 more)
-
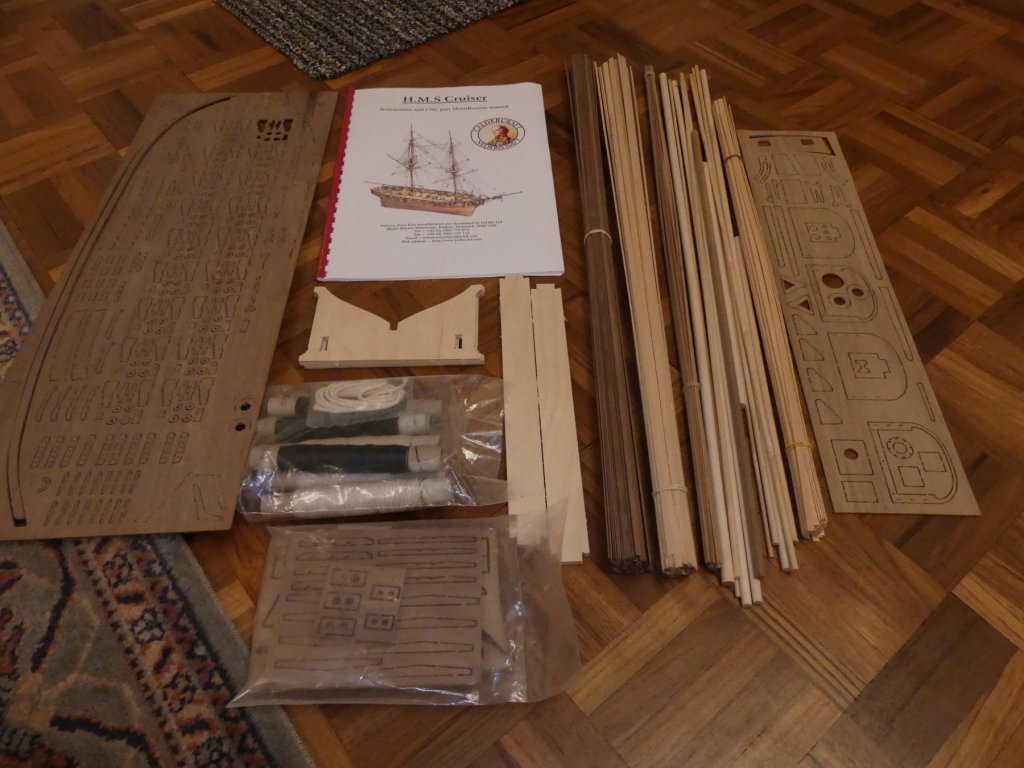
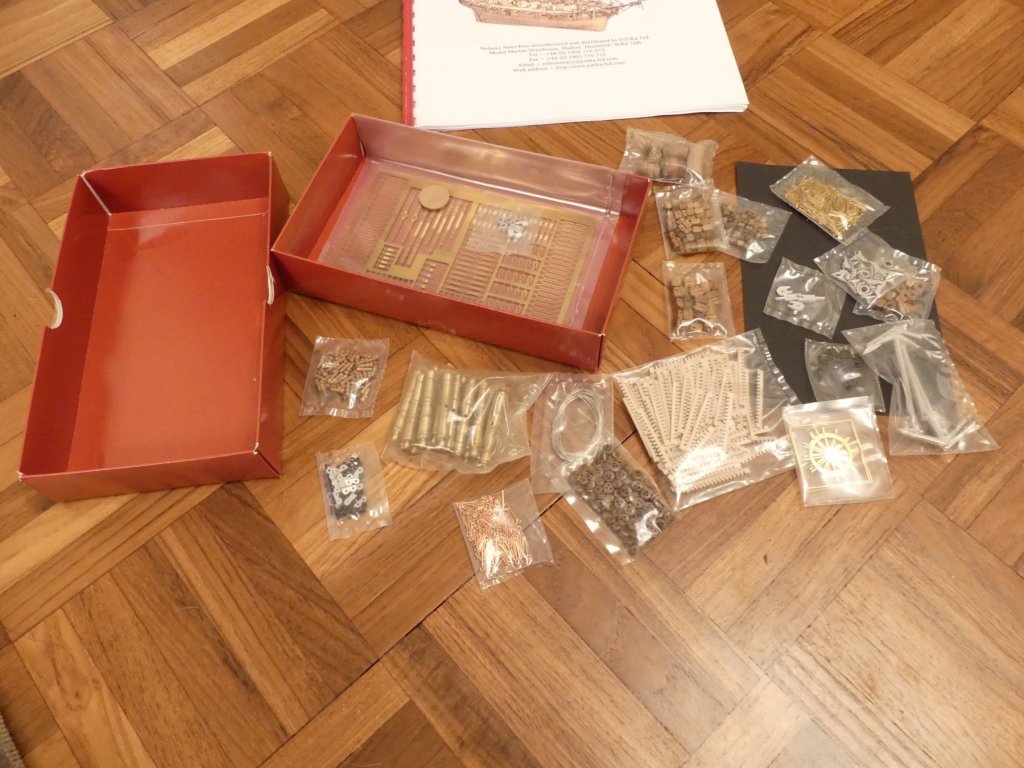
Hi, as requested photographs of the parts. I have realised that I have probably had this kit for probably 15 years. My wife brought it me after visiting the companies premises and having a tour. At the time Mars had just come out and they were developing Pickle. A few of the parts are not shown as the build has already started.

- 102 replies
-
- 5
-
-
- cruiser
- caldercraft
- (and 1 more)
-
Hi Lou, I notice you have this kit on your shelf. Perhaps you can do it more justice after you complete the Providence. It is not a kit that gets much coverage and perhaps is not historically accurate but is the most enjoyable build I have done.
- 10 replies
-
- 1
-
-
- resolution
- corel
- (and 1 more)
-
Hi, not really my type of subject but seeing your work has really opened my eyes. Kit looks really well presented and they really knew how to pack all the parts onto that ply sheet didn't they. Really in awe of your work and your stand is very impressive. Would also be nice in a diorama for when you are not sailing her.
-
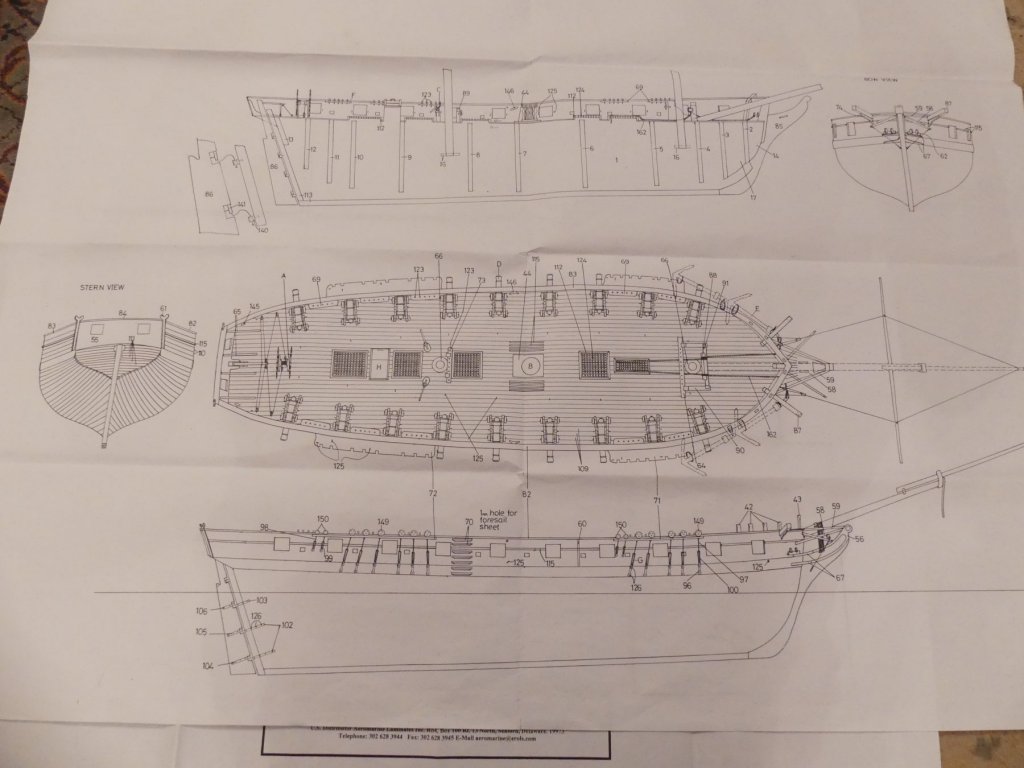
Main bulkhead removed and marked up ready for bulkhead fitting. I was actually getting into position over the drawing for marking on the bearding line, wale position etc. Then you can transfer out across bulkheads for fitting of planks in those positions from the start. Unfortunately difficult to overlay between drawings to do the marking of the wale position. It was at this point I noticed that the drawing shows the keel to be longer and bulkhead positions out of place. This picture shows the discrepancy at the bow. I hope this is not a sign of things to come. I do expect drawings to be accurate after all it is what we take measurements from. This was the issue with the Brig Supply. That model even had discrepancies for the same dimension between each drawing.
- 102 replies
-
- 5
-
-
- cruiser
- caldercraft
- (and 1 more)
-
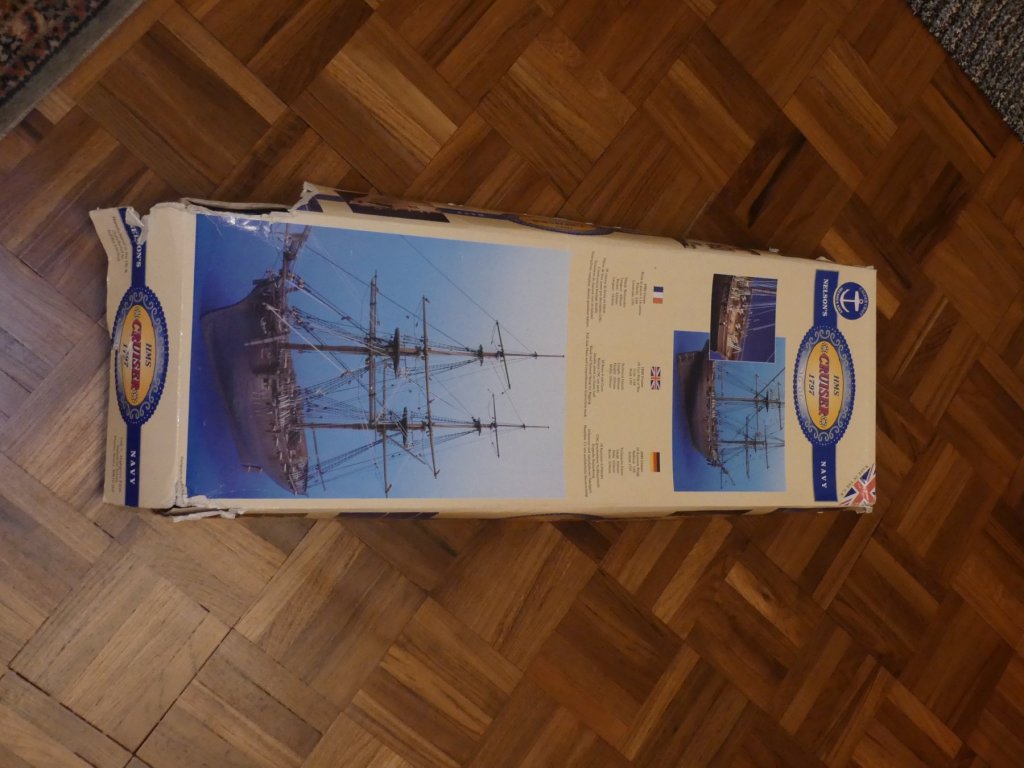
I have had this kit some time. The last few kits I have completed have been more like scratch builds so, especially with the review by Keith Julier, I thought this would be a nice relaxing quick build. Plan is to build, more or less, straight from the box. The Keith Julier review describes this as a new level of kit with no nasty issues described and everything fitting without any modifications required. So we will see. I was expecting a lot of these to be on here but a search has found very few examples. I also searched for Cruizer which turned up a few other examples. Out of interest there was a completely different class called Cruizer. This is my fourth build from Caldercraft. There was issues with HMS Supply so I am hoping this will be different. Kit has the usual set of caldercraft drawings and parts, I can photograph and post these if anyone is interested.
- 102 replies
-
- 3
-
-
- cruiser
- caldercraft
- (and 1 more)
-
Hi, I can tell by your electrical sockets you are based in the UK. You will find most of the active members on here are in the States or Australia. This means we post at different times and replies can be slow. I dropped into your log to look because I have brought an almost identical kit off ebay, The Rhoda Mary. I have noticed that if you complete kits that are not currently in vogue, or not normally available you naturally get less interest. Perhaps why the suggestion to drop questions in the technique area gets a better response. Incidentally noticed my kit has exactly same instructions which means they may be generic and so do not match your model. I am going to be interested what you do with the bulwarks as there seems to be no support for them other than they overlap below the deck level slightly. The plywood is very flexible, better than that in my current HMS Cruiser.
- 87 replies
-
- 4
-
-
- scottish maid
- artesania latina
- (and 1 more)
-
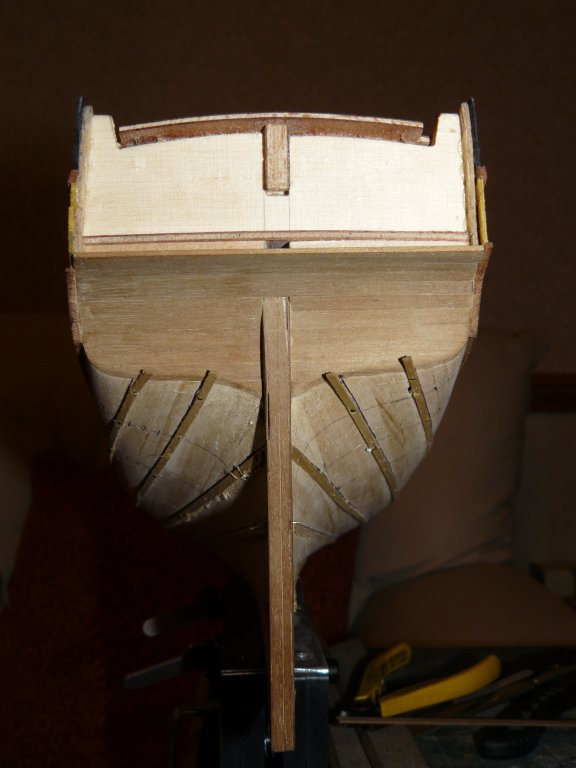
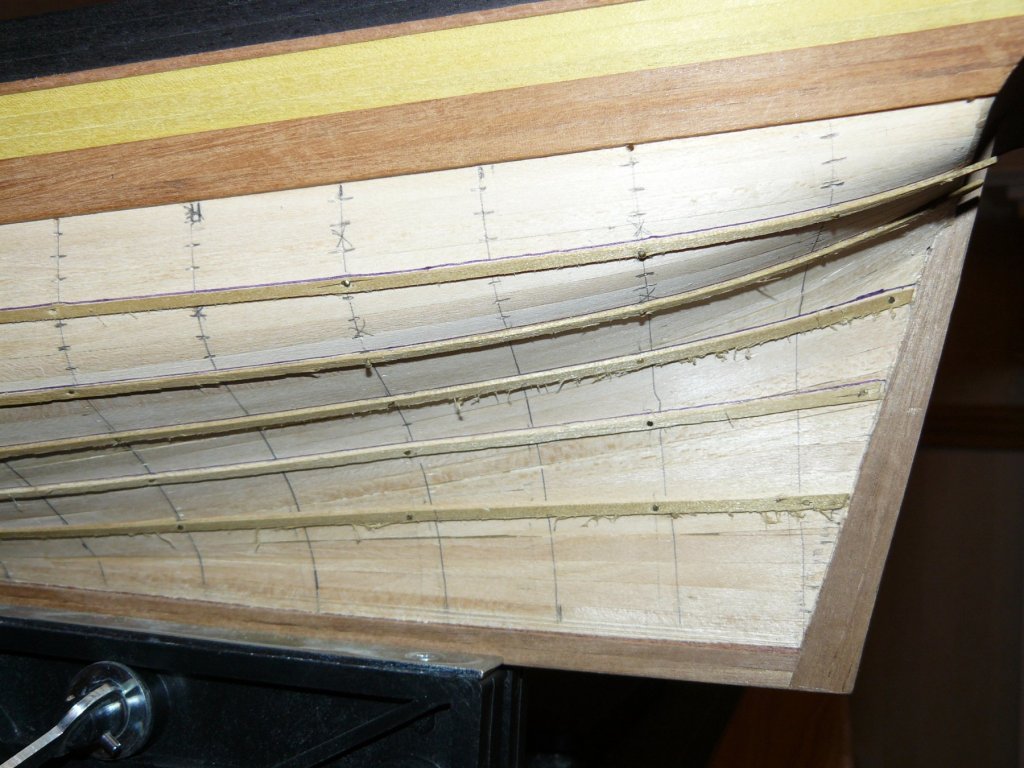
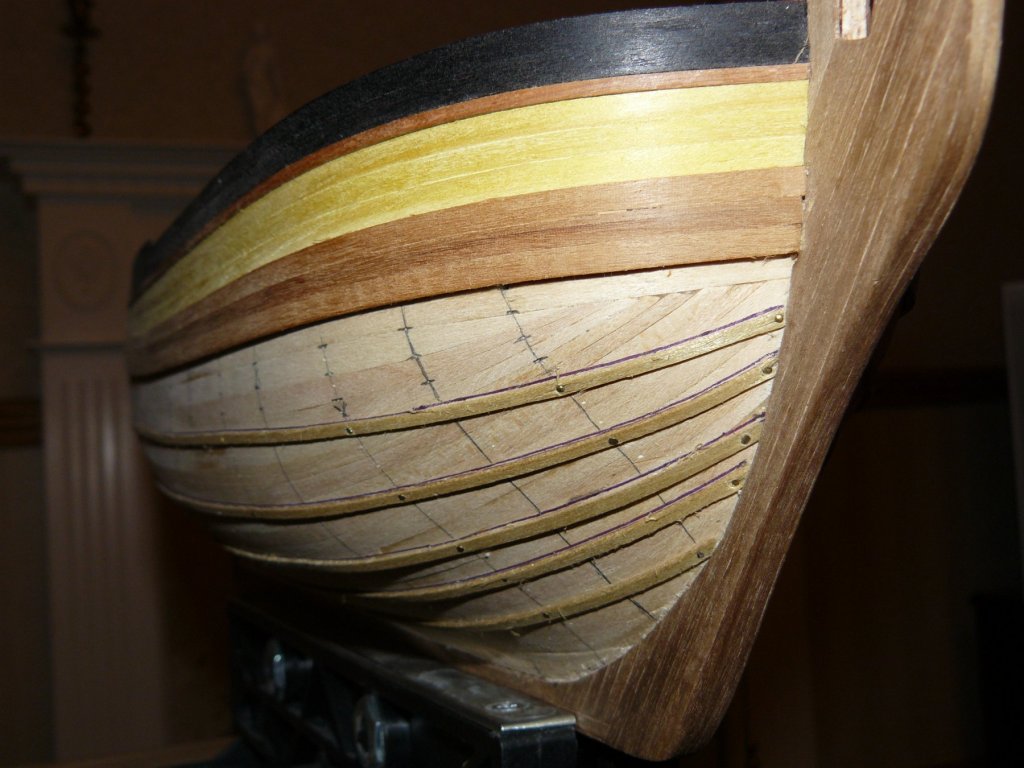
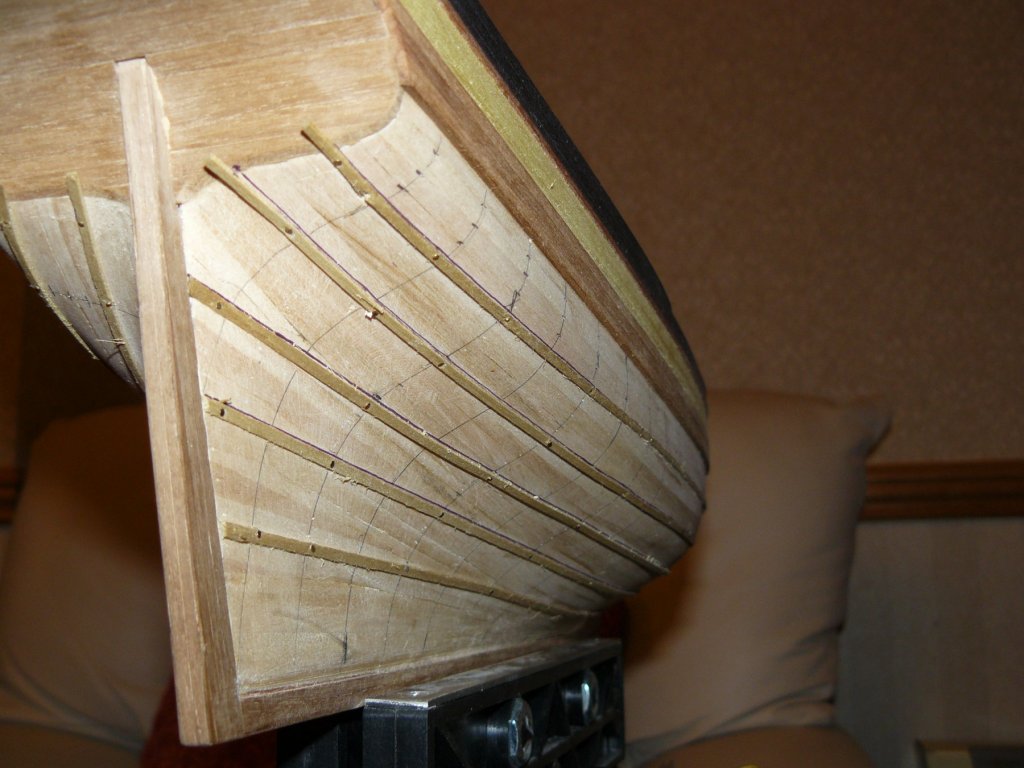
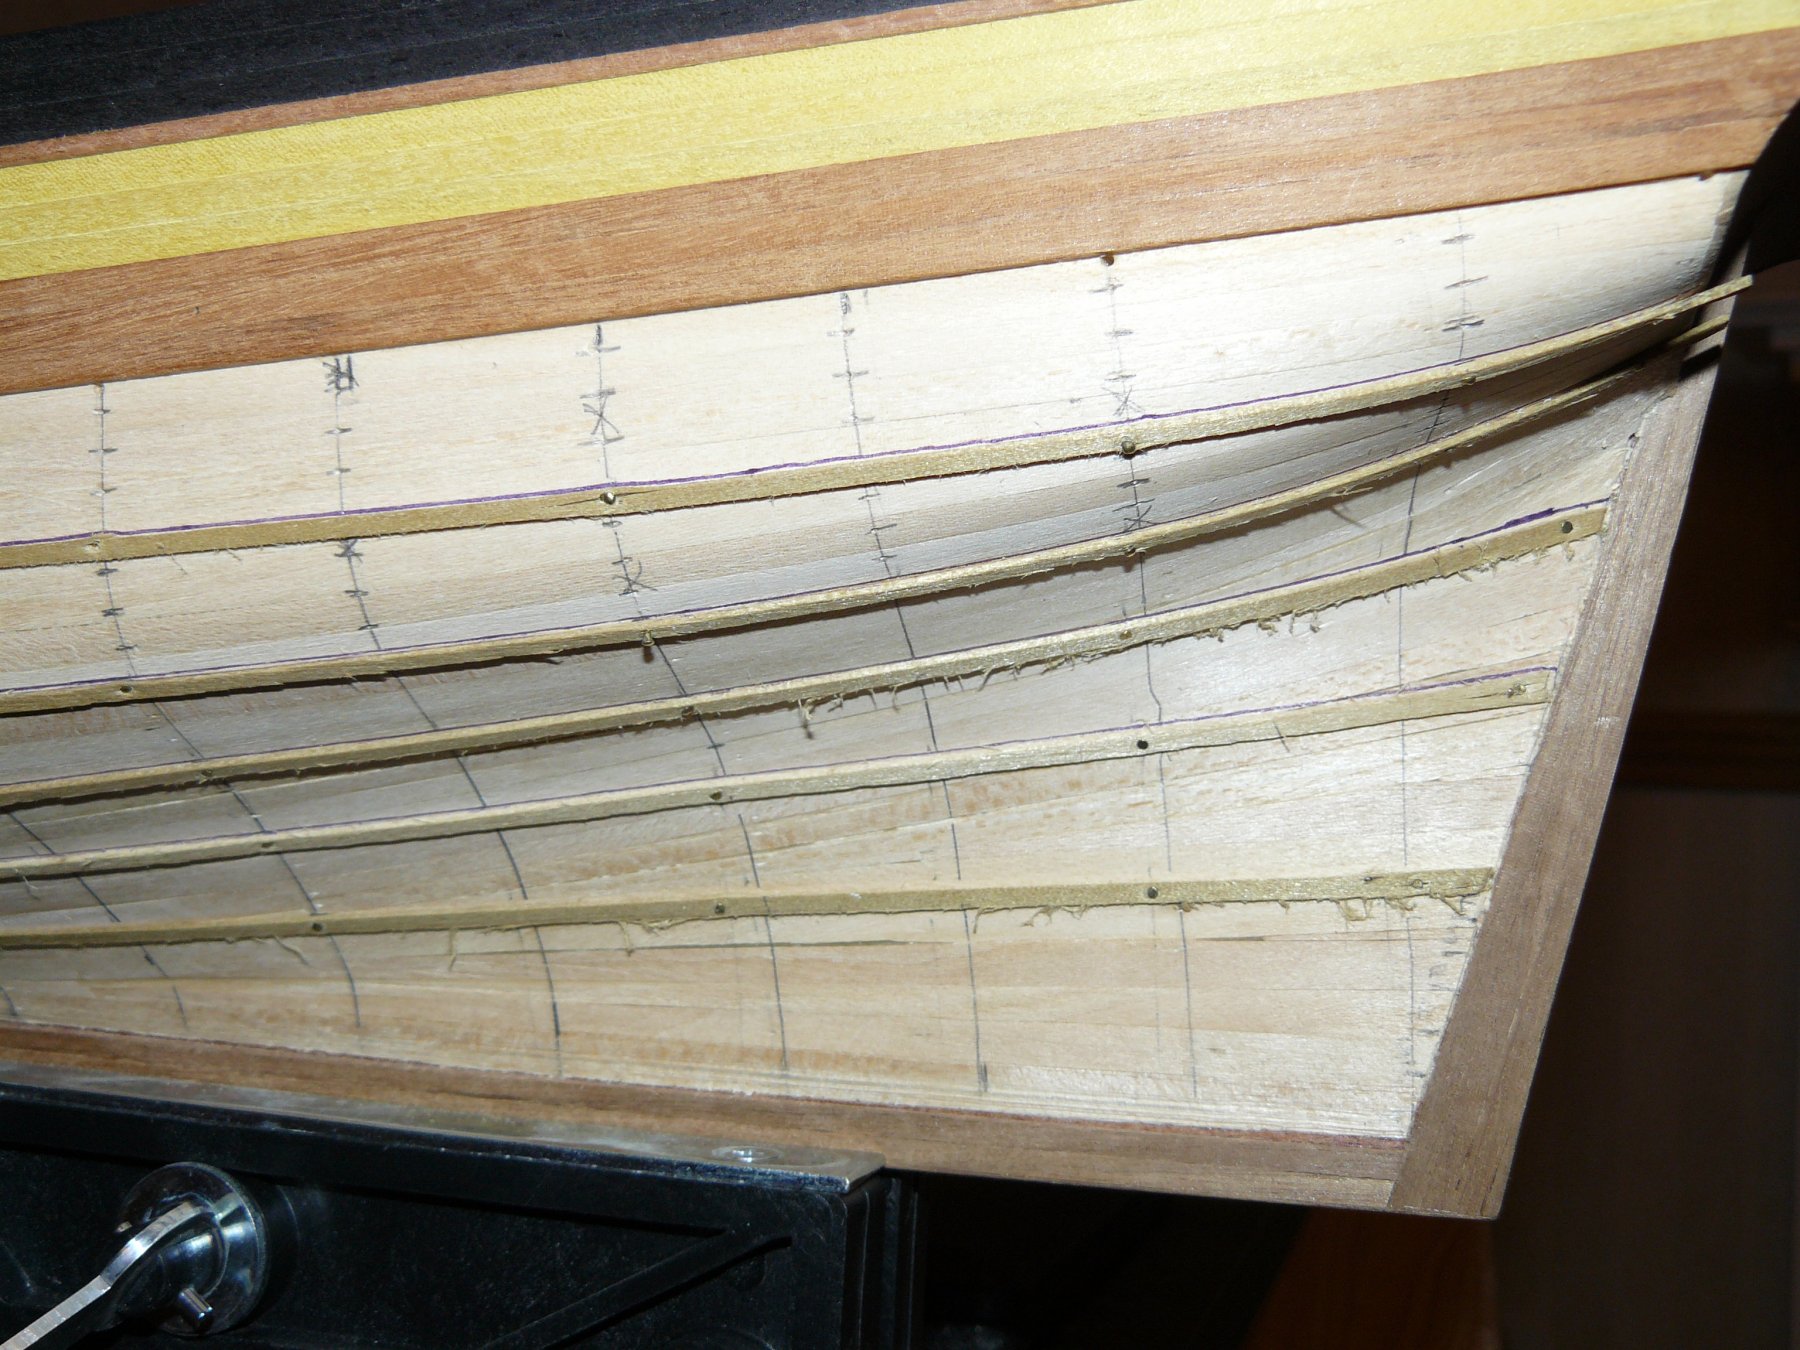
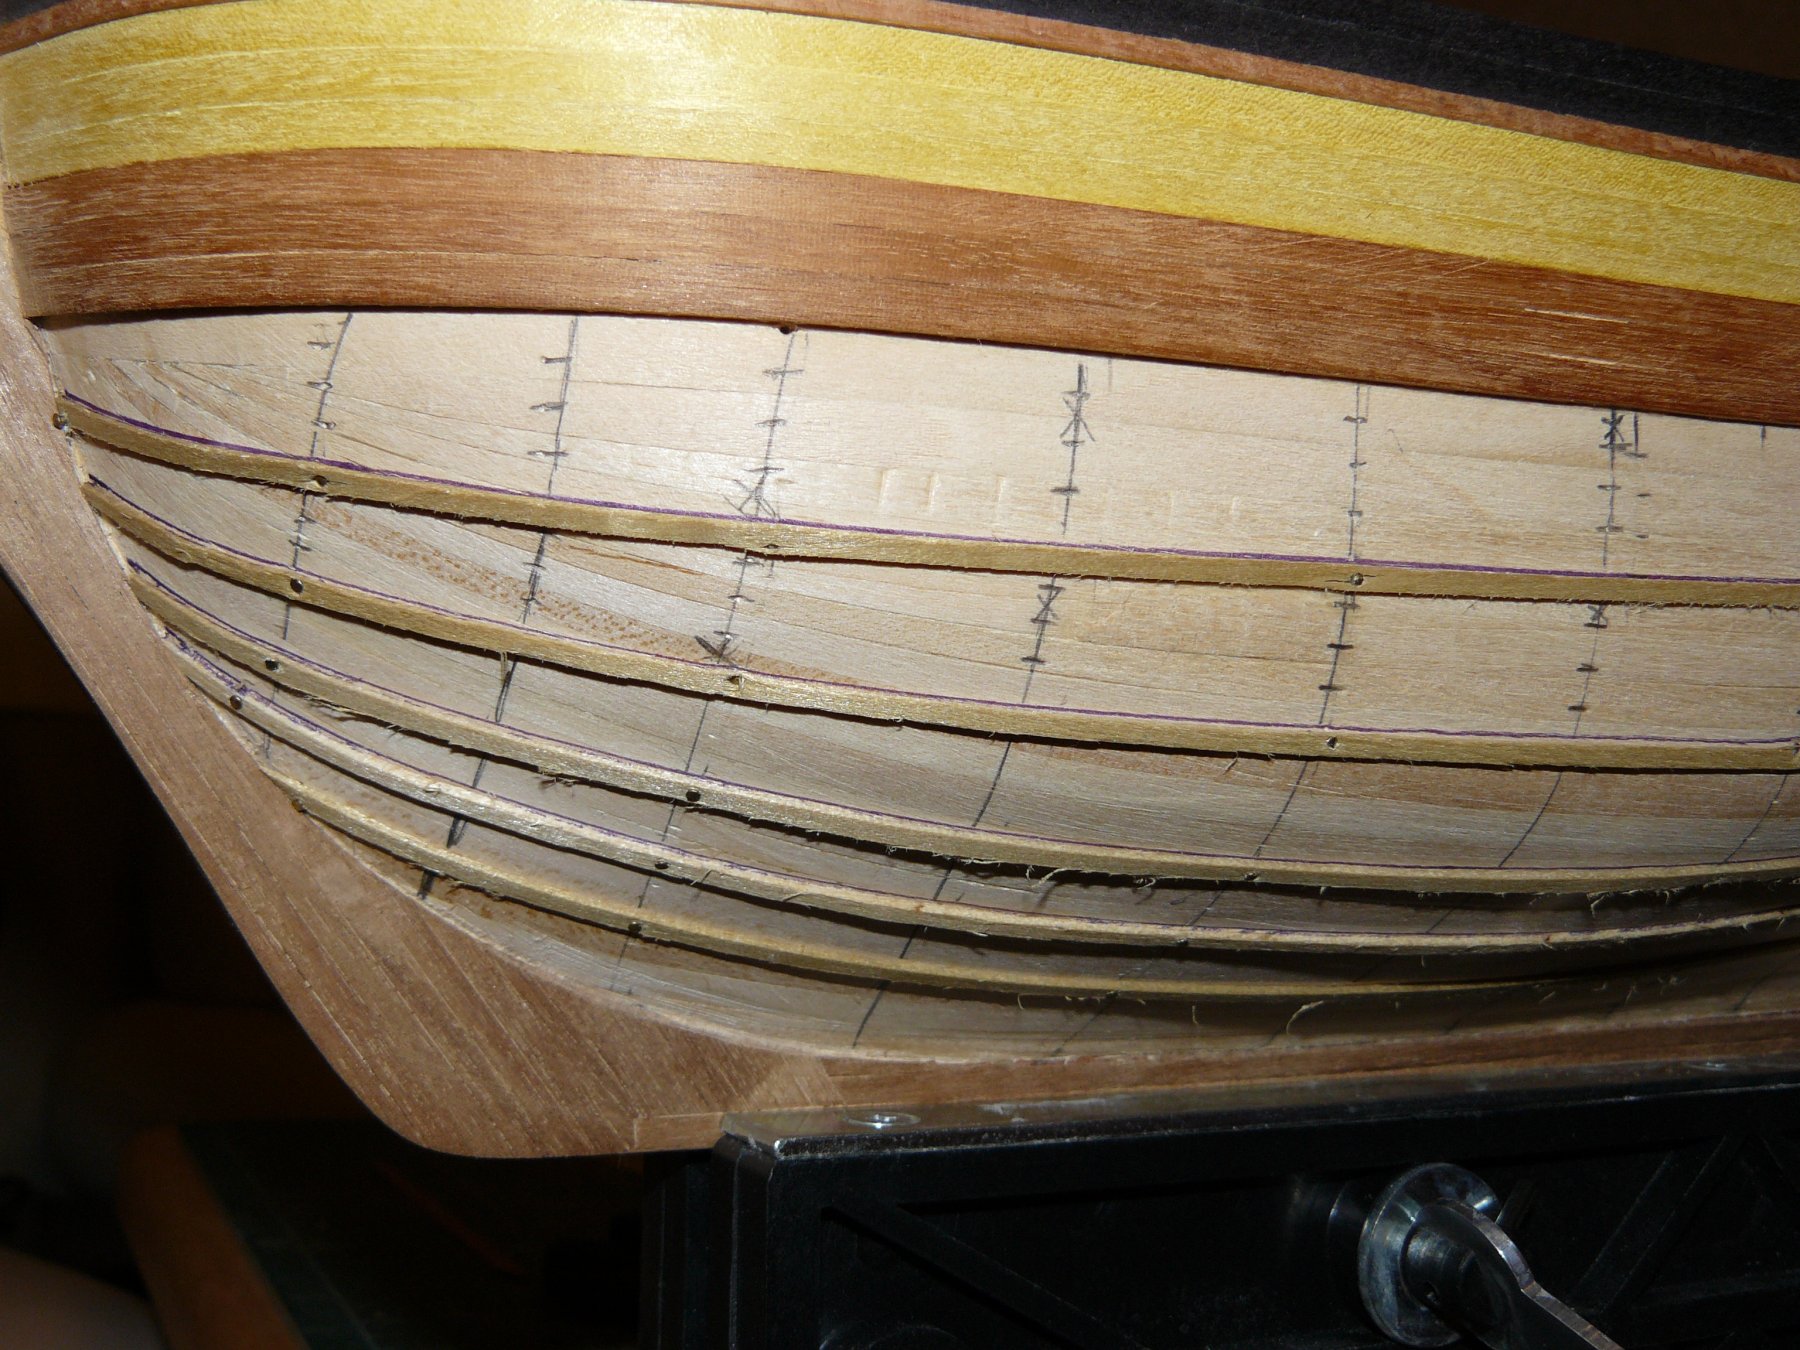
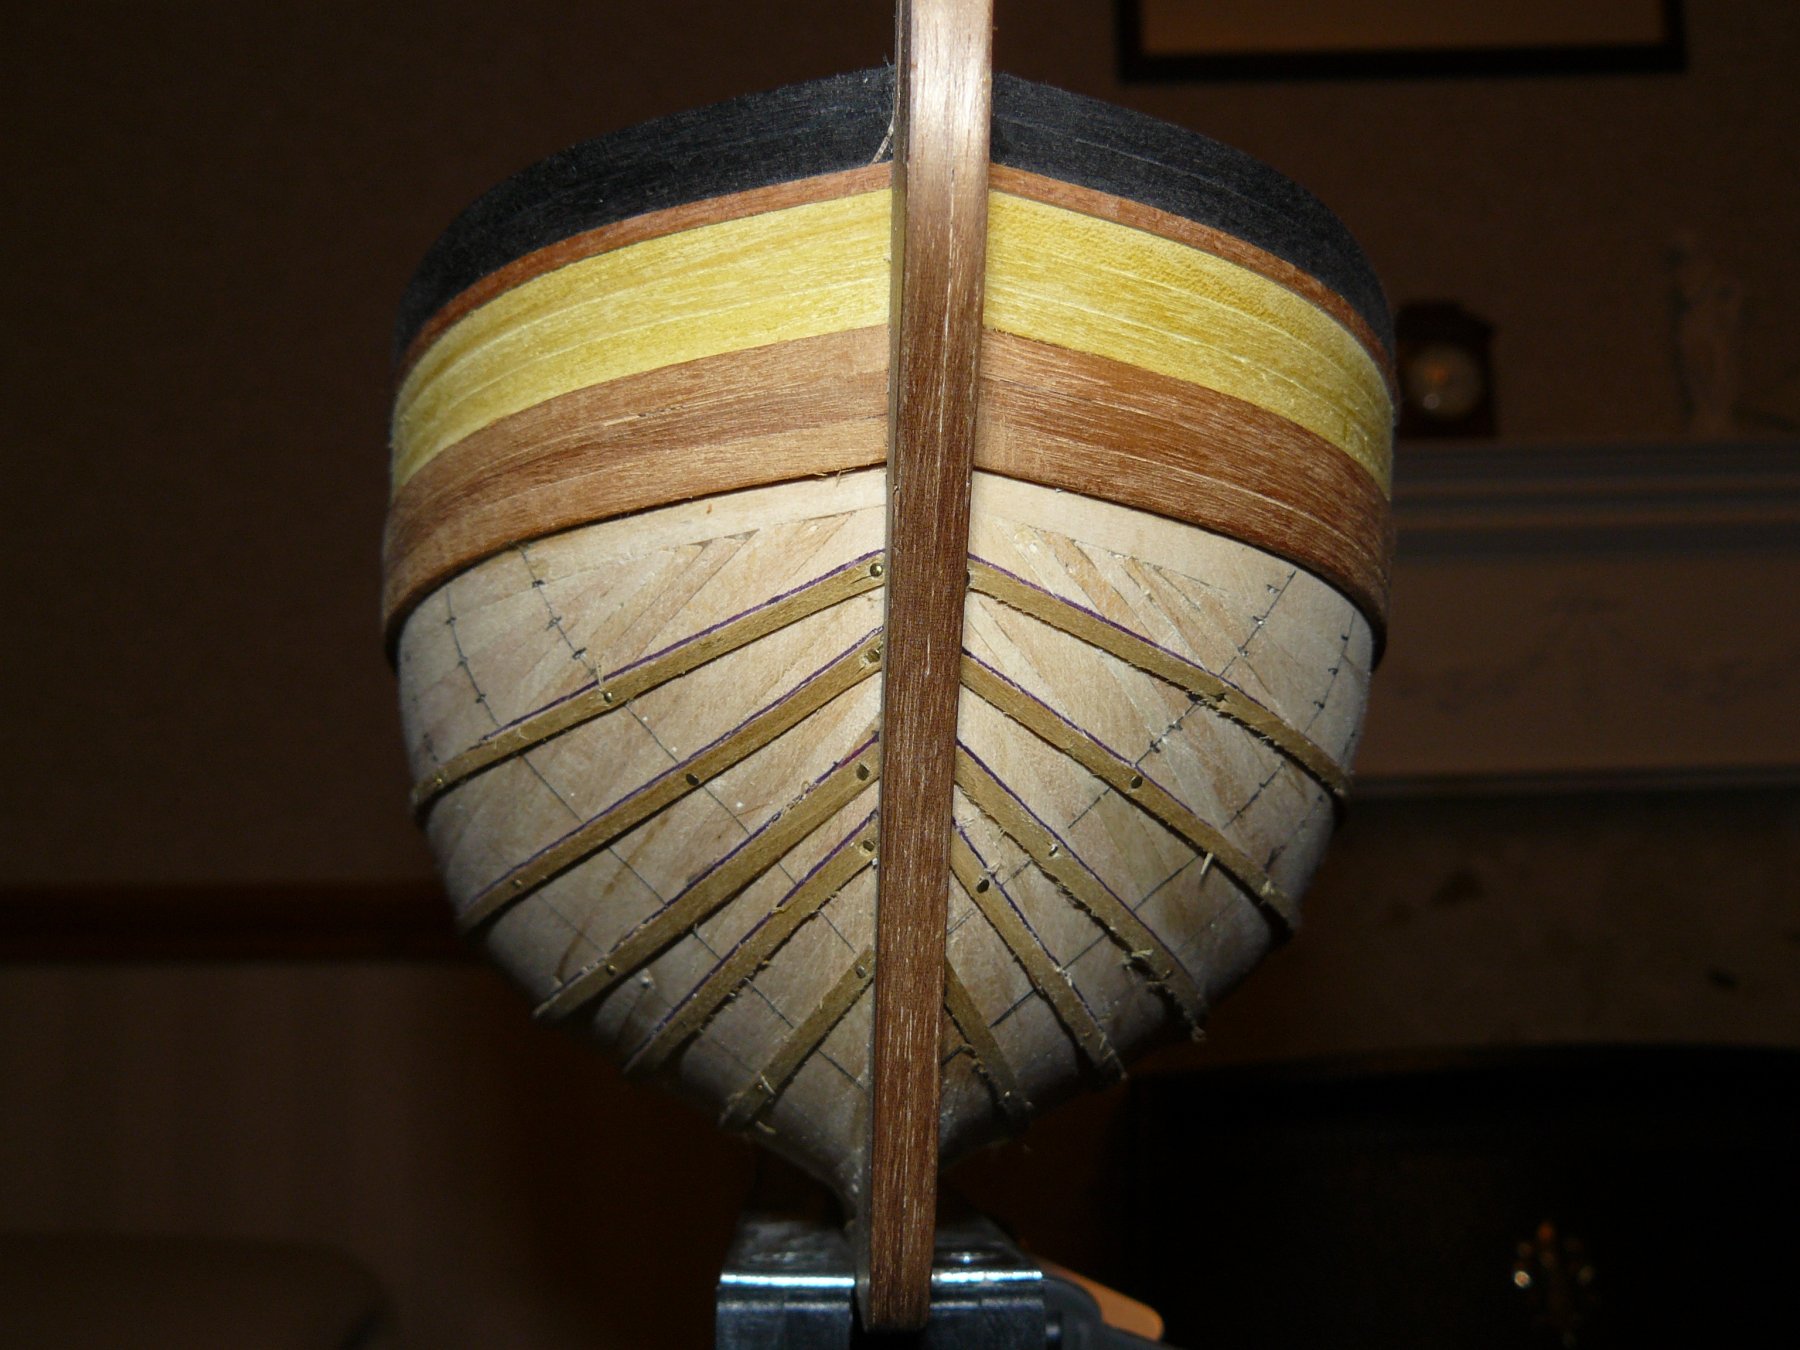
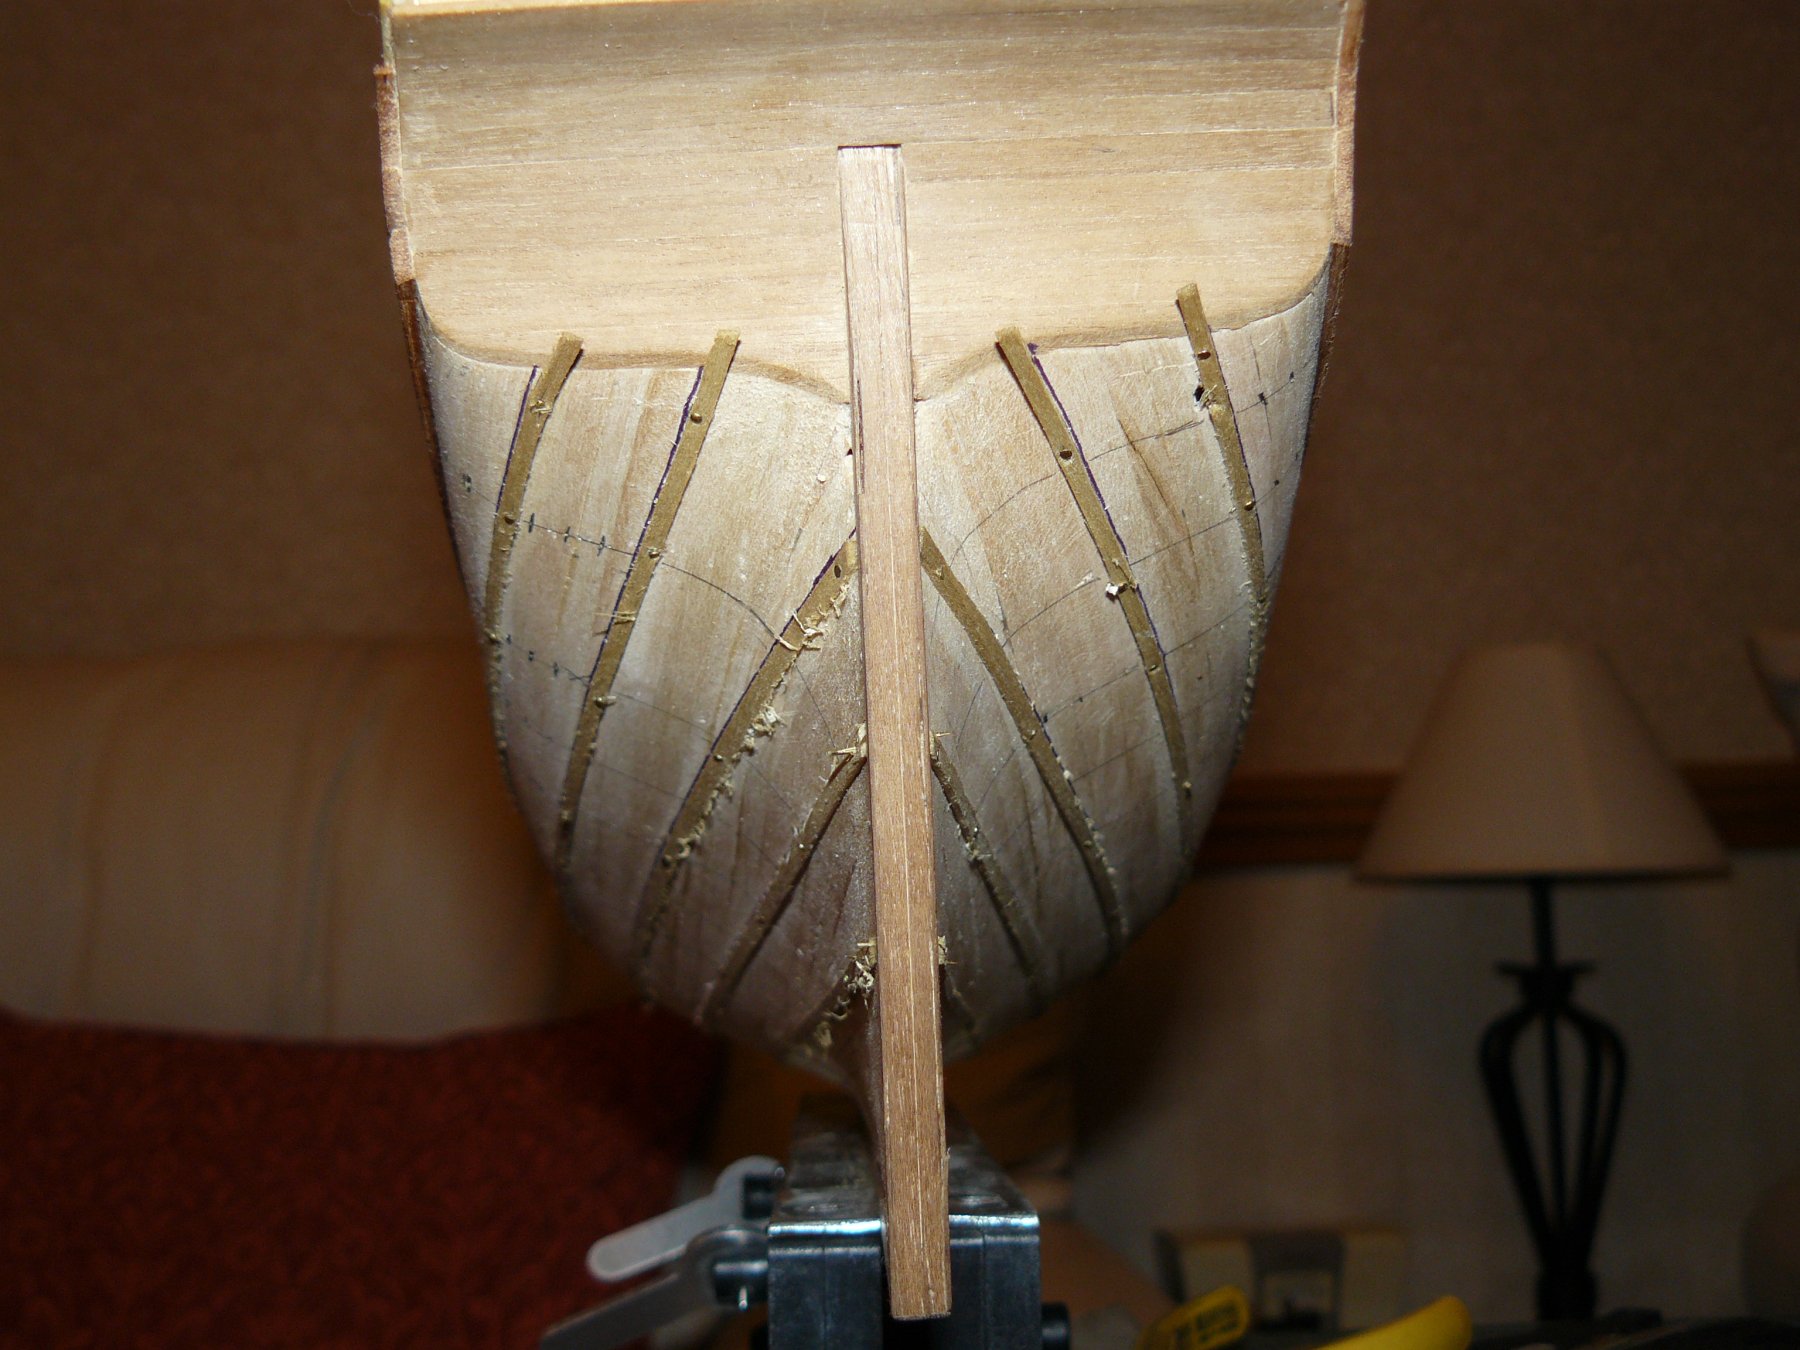
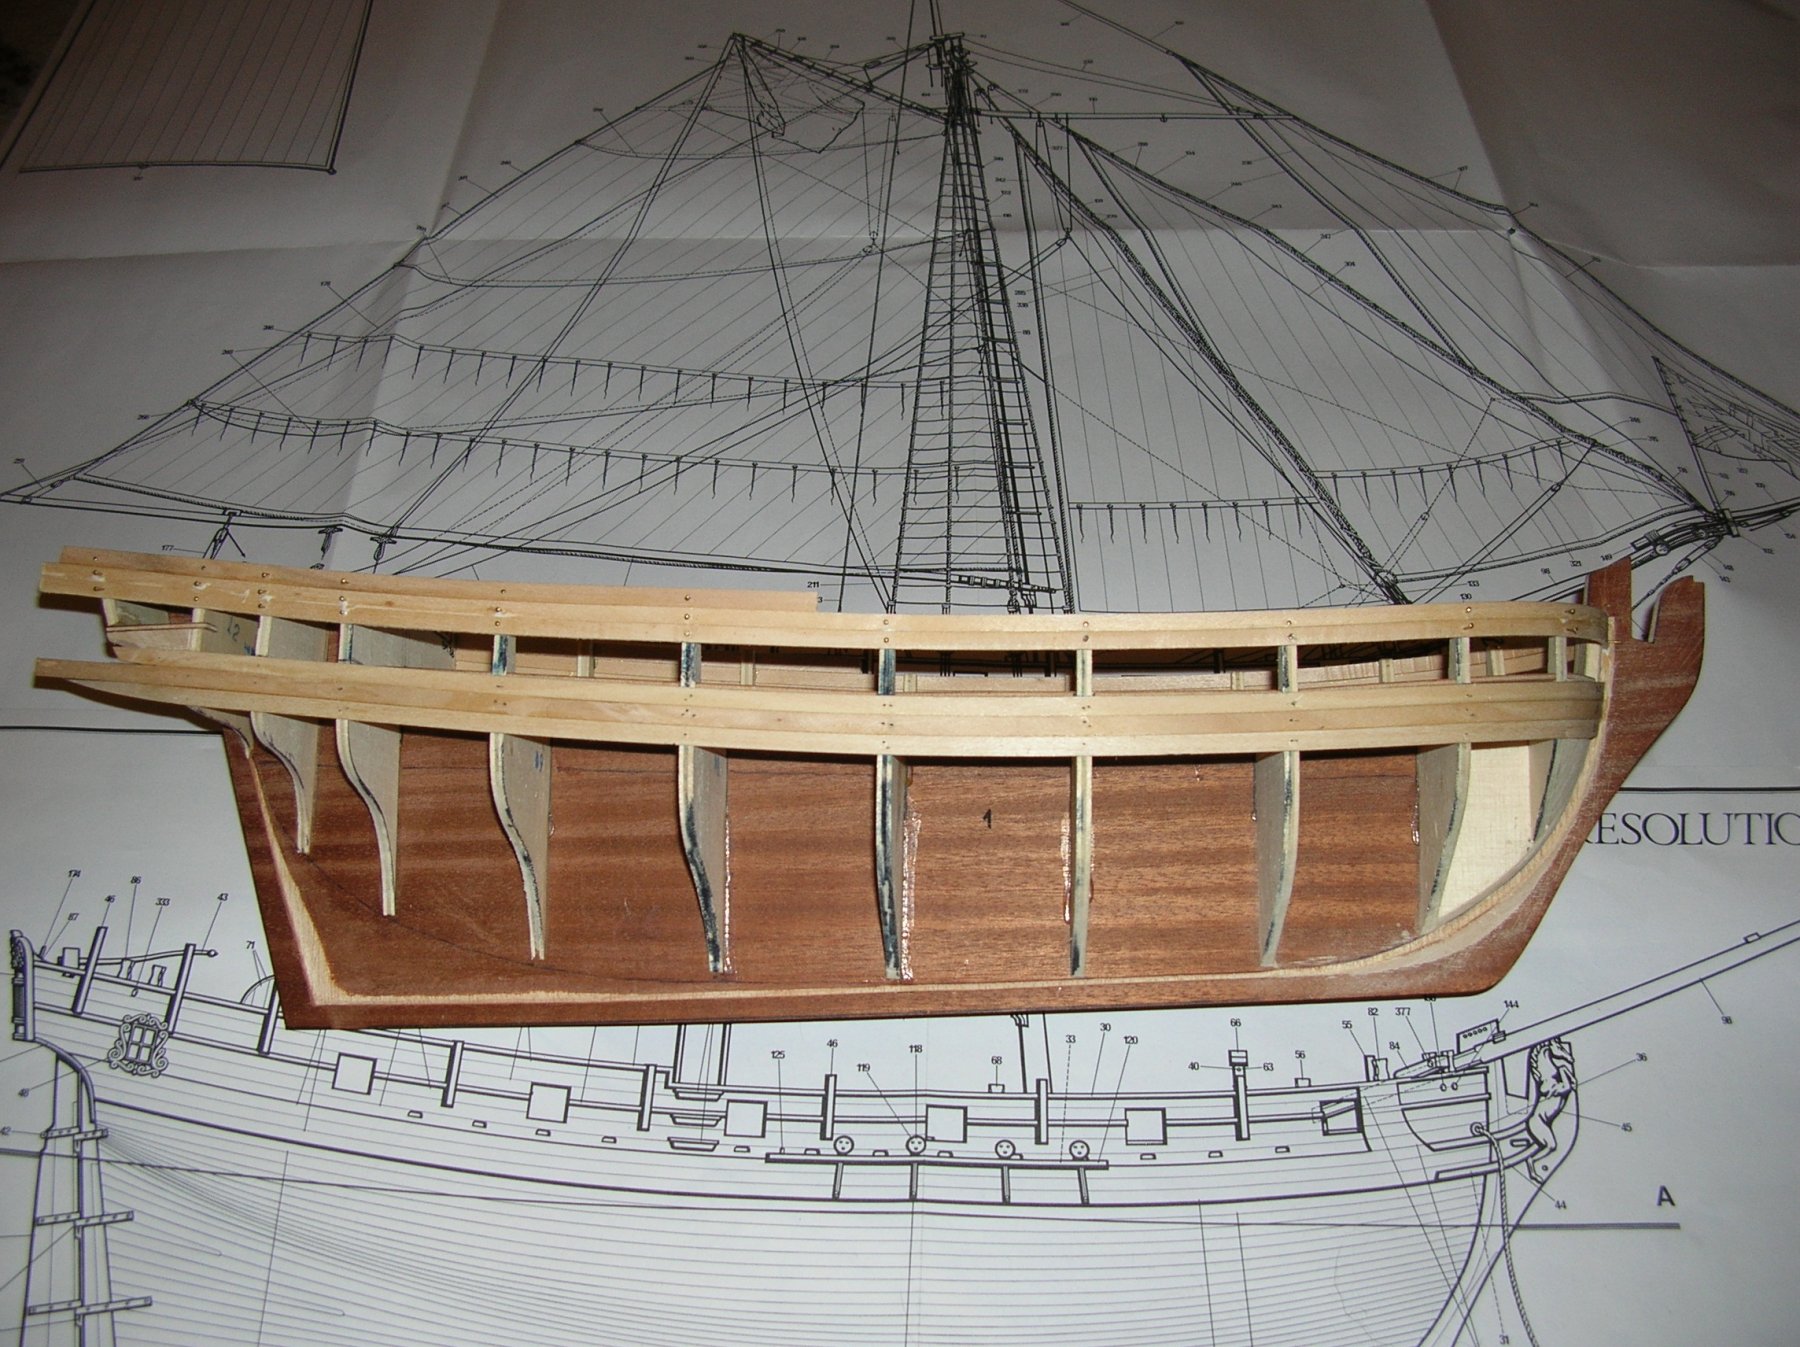
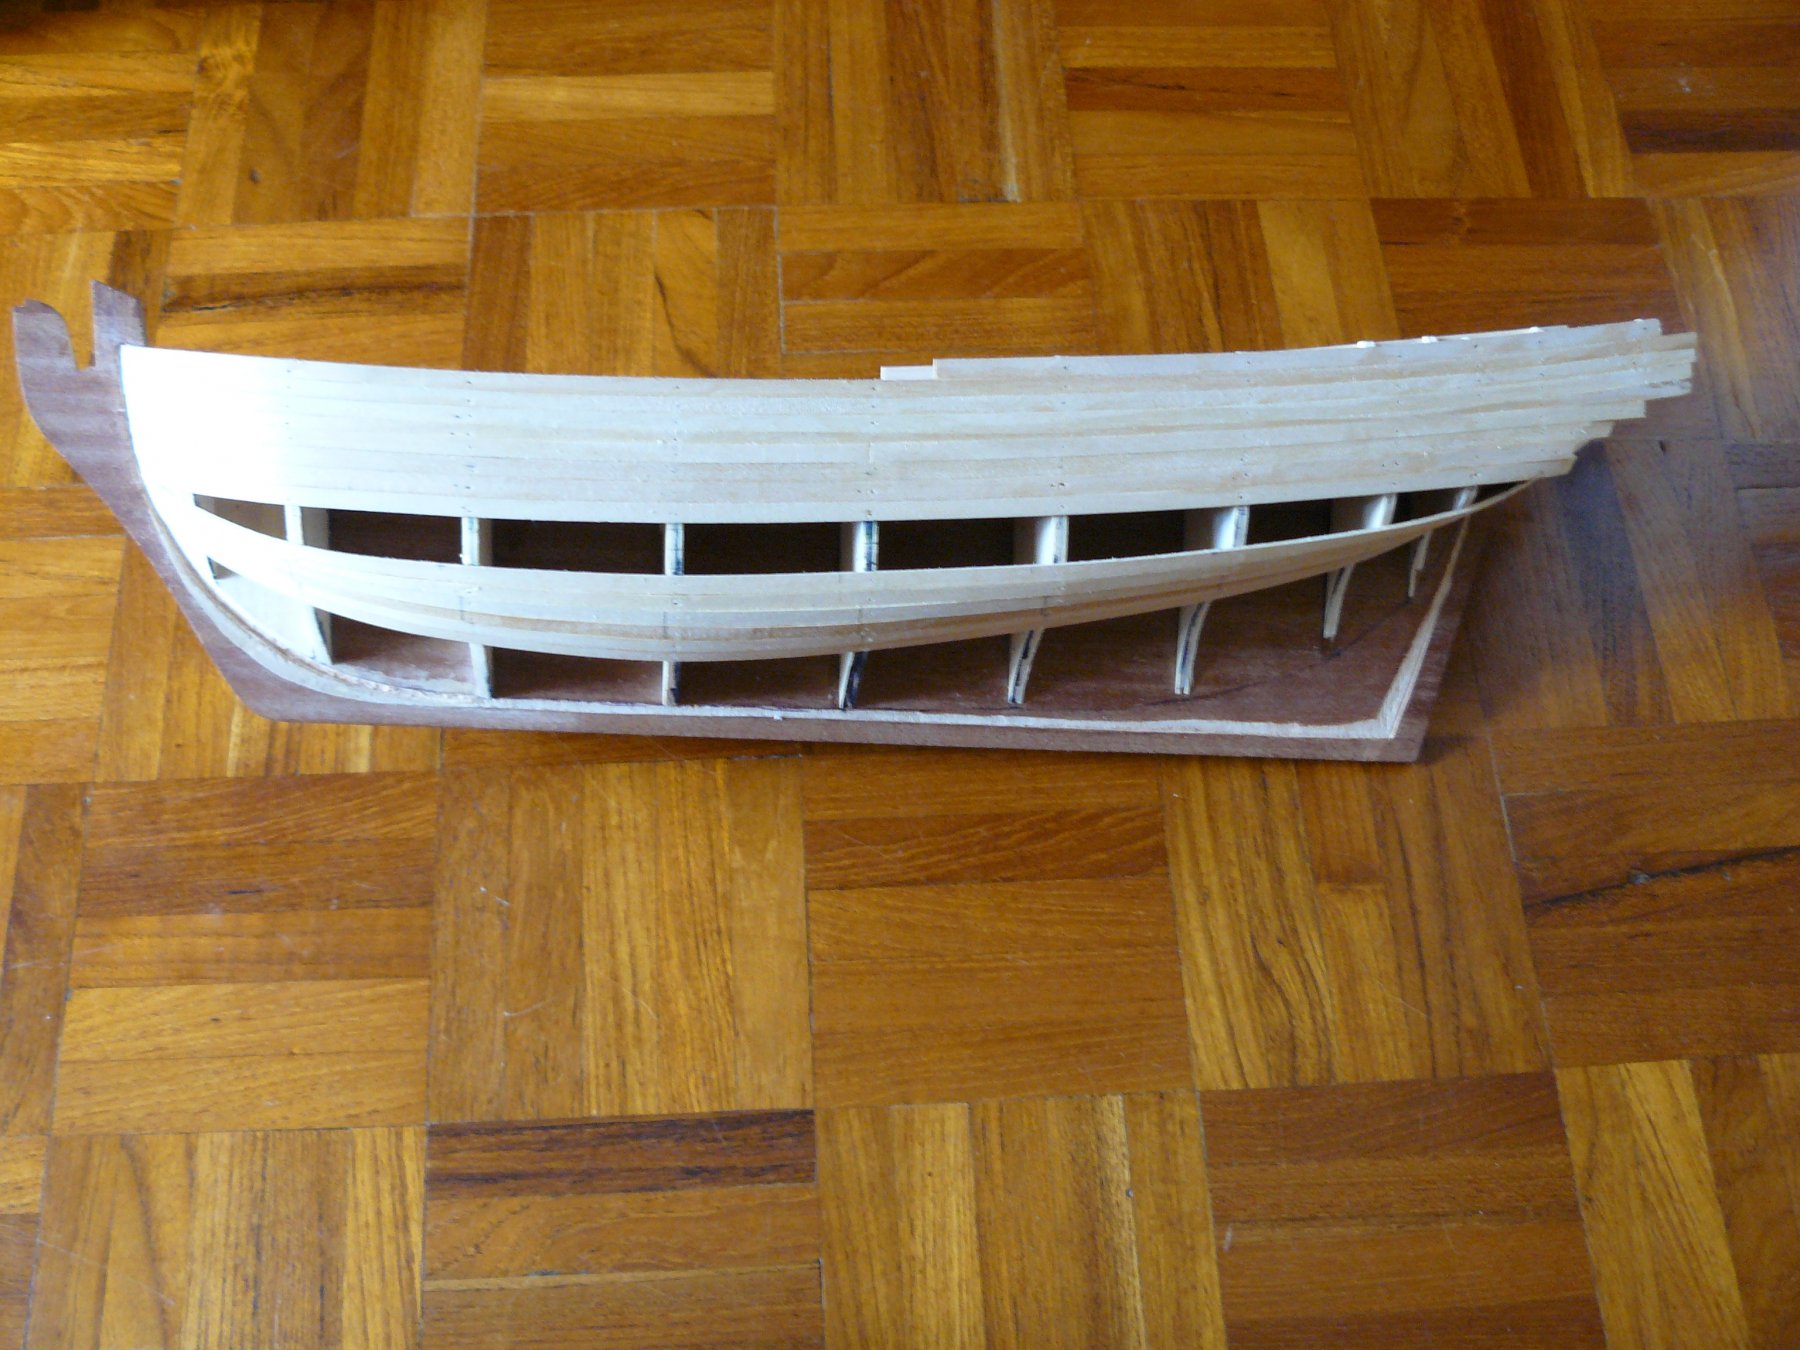
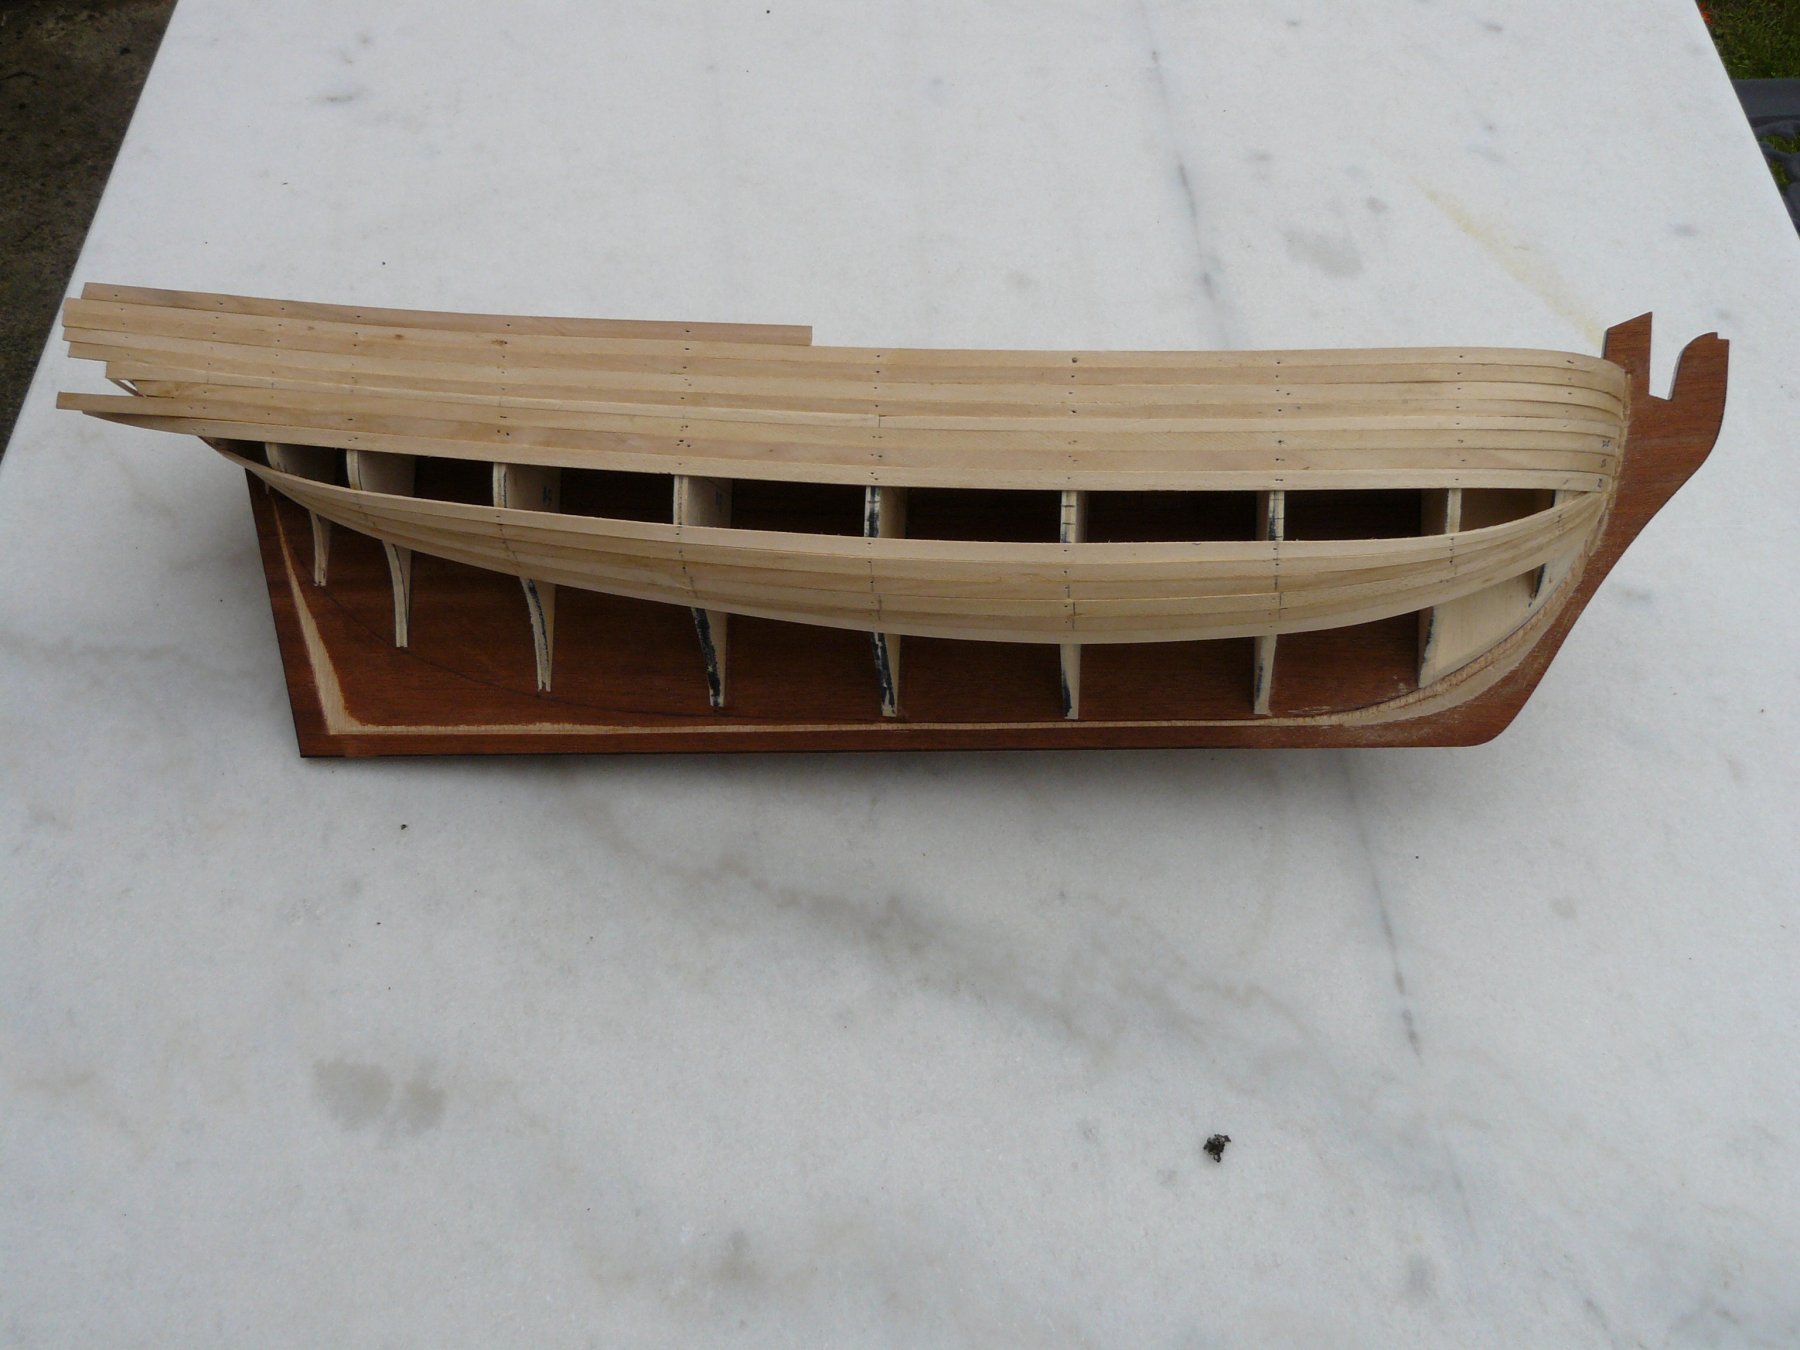
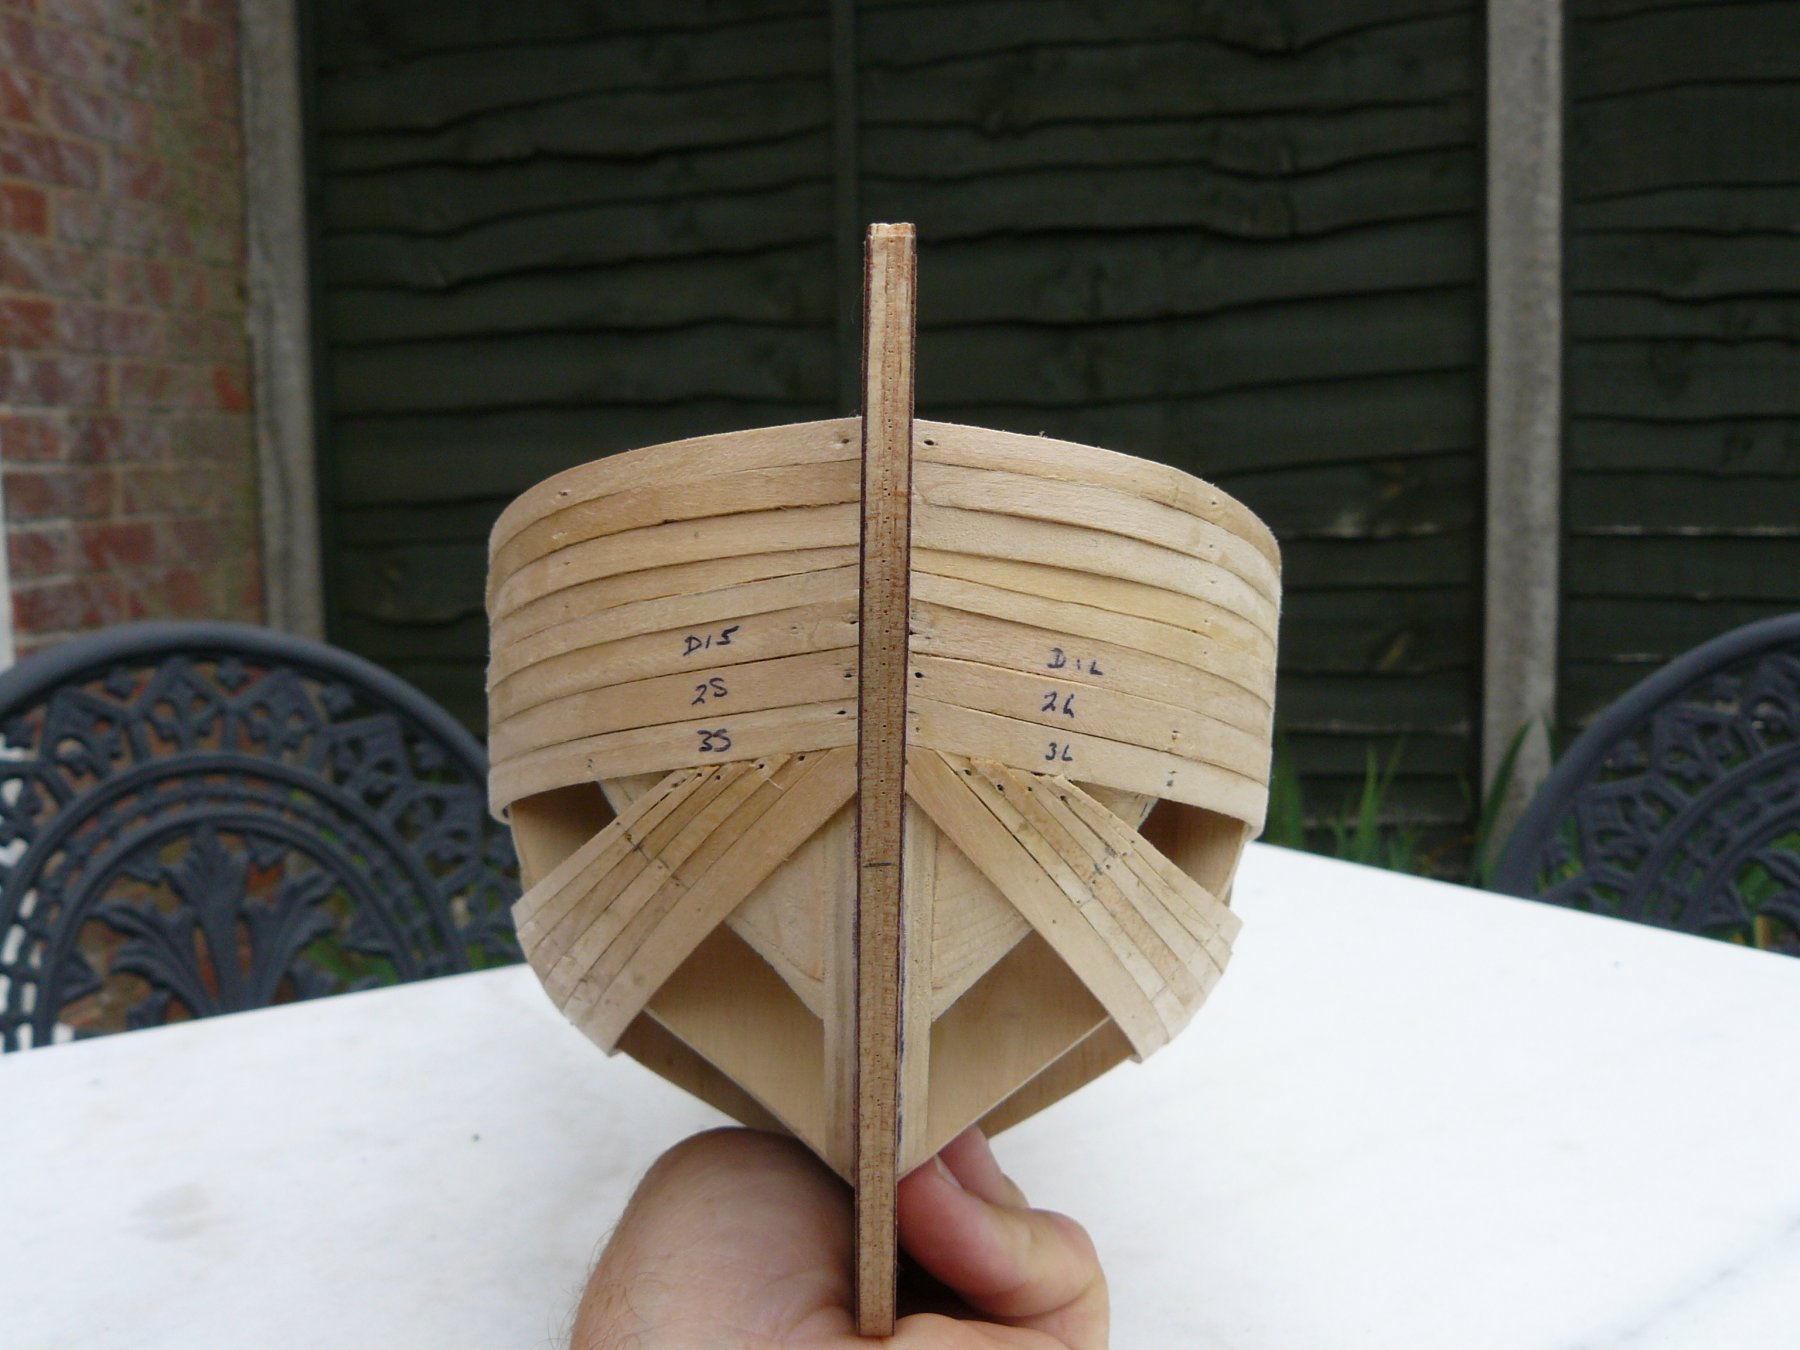
Hi Lou, Couldn't remember doing that so you will probably see the photo again in a minute! First planking completed. Wale added over the three marked planks of the first planking. Planking above this, up to the capping rail in Corel's pre coloured planking. Stern also second planked before continuing with the second planking below the wale. Lower hull divided up with the stringers. These were removed as the planking continued. Stern view Quarter view, first two sections show planking divisions, 'X' being planks terminated as scale length planks to be used. This view shows that I had overlaid the plywood keel with planks first. This was not part of the kit instructions but both covered the ply and gave the suitable edge (name avoids me) to run the planking down to. View from below showing symmetry, or not, of the stringers. More views of the same.


- 10 replies
-
- 2
-
-
- resolution
- corel
- (and 1 more)
-
I Agree with the Resolution, a great ship from my favourite era, perhaps a future project as Chris said he wanted smaller vessels first. A similar vessel from that era would be the Lenox which has Richard Ensor's book dedicated to it. Some great drawings to aid the modelling process. Perhaps the title of this topic should be changed in light of Chris's new employment status?
-
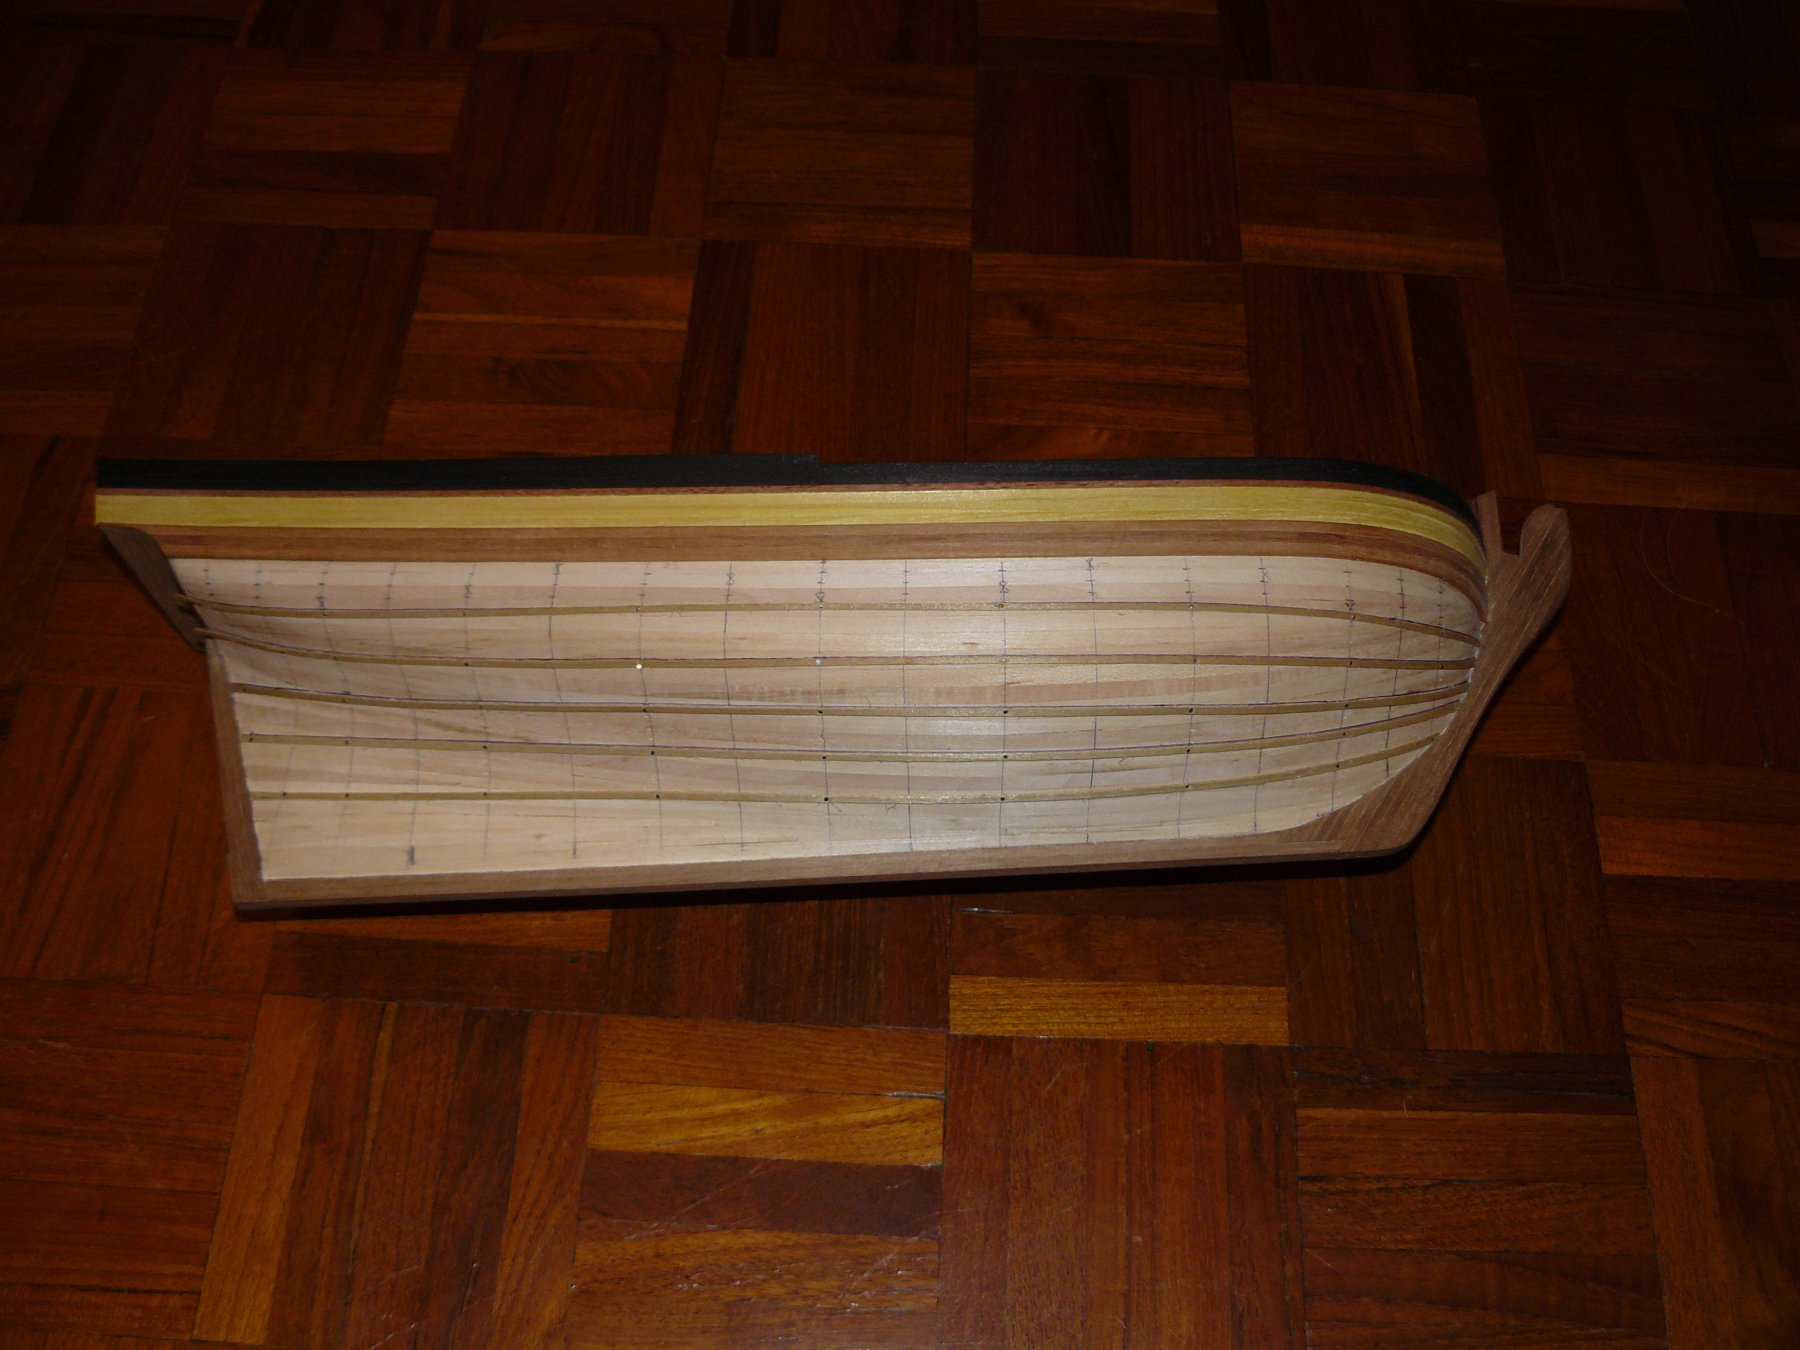
First planking in progress. Bulkhead trueing and fitting were easy with no alterations required or packing required. The keel came without the separate false keel, bow and stern post. I cut the rebates for termination of the planks and decided to cover the plywood edges later. Planking progressing on the Larboard side. Planking was alternatively laid to prevent warping of the hull. Starboard planking. close up of stern, I can see problems here! Larboard quarter view. I think the planks marked show the future wale planks. This kit was different in the fact that the wales were laid as thicker planks before the second planking instead of thin planks on top of the second. More accurate but harder to bend. Luckily planking previded was well capable of taking the bend. Bow view.


- 10 replies
-
- 1
-
-
- resolution
- corel
- (and 1 more)
-
Thank you for thinking my previous work was good, sometimes when you see other works on here I feel embarrassed to put mine on.
- 10 replies
-
- 1
-
-
- resolution
- corel
- (and 1 more)
-
Hi, I have just found these old photographs and this was actually only my second wooden plank on bulkhead build. However, even though the kit was a fabrication it was one probably my favourite build so far. I have just started the Caldercraft H.M.S. Cruiser which I thought would be an easy straight forward build but so far has been a bit of a pain.
- 10 replies
-
- 1
-
-
- resolution
- corel
- (and 1 more)
-
Corel kit described as an early 17th Century Cutter. Using 'The Sailing Navy List' this gives us the following possibilities: Cutter 1779-1797, 200 tons, 14 guns, 10 swivels , 70 men, foundered in the North Sea. Possible Brig rig. Another source has this vessel as under command of Lieutenant William Huggett. He was lost with the ship, ship was recorded as missing with all hands. Cutter 1798 14 guns, 10 swivels, 70 men no further information. (seems too similar to above) Cutter 1995-1801, 12 guns, 41 men. Hired ship, cutter, 1807 - 1814, 8 guns. Naval customs cruiser, cutter, Built Cowes 1831 Many of Corel's kits are taken from the Chapman collection. As none of the above could be considered correct to the kit description I thought I might find the answer here. Unfortunately the cutter in Chapman looks nothing like the kit. In fact the kit doesn't even look like a cutter. I.e. quarter badges, stern Gallery, bowsprit rig, beakhead. For me the closest fit I have found is from the book 'Sloop of War' by Ian McLaughlan. I think it is probably a made up vessel of a sloop similar in design and rig to ferret but not a cutter. This seems to be a theme with Corel's and some of the other Italian market kits. overview of the kit was that the materials were of very good quality with a good set of eight large drawings. This will be another short topic with photographs found.
- 10 replies
-
- 2
-
-
- resolution
- corel
- (and 1 more)
-
George, That's interesting, you have obviously done your research. I started this kit a few years back but did so whilst on holiday with no data to consult. It seems that I might have to restart. I assumed, with the masts having royals, that it was as originally built, at later rebuilds these were lowered but so was some of the top hamper of the hull. She was eventually altered again and the guns were reduced. What are you going to do with the missing engravings on the beak head / bow or were these removed on this rebuild as well?
-
Hi, I may be wrong but I thought that consensus of opinion was that the first wooden model you have shown above was proven to be inaccurate and that she did in fact have a square tuck. Seems very early in history to have a round tuck. If I get chance later I will look to see if I can find this review of that model. I know it was built much later on a commission for someone.
-
Finally, completion. All photographs between seem to be lost. I used the mouldings that came with the kit where possible as I am not at the stage of being able to do my own. Comparing with 'built to kit' dimension models she is of a finer run in and appears longer because of this. Gun port positions and the windows are placed to the book dimensions. I chose stub masts as I thought they, will the associated rigging, would prevent easy view of the detail. They are not glued in so I can change this later. Quarter badge window frames were done with the timber supplied and I wasn't happy. so I cheated a little on the other windows and used (horror) Plastic.
.thumb.JPG.6a022dbef39cacb0ed73d98a4ea9db9c.JPG)
.thumb.JPG.3cfb22f0106567a0425eabb62fbdf959.JPG)
.thumb.JPG.68702af7bc7675e74377f5afcfb1c74f.JPG)
.thumb.JPG.bcbc8b6afee44746711d86cbb5ee14a4.JPG)
- 11 replies
-
- 11
-
-
Big jump i'm afraid but I did say it was a short topic. First planking complete, false decks and deck beams in place. I have started marking the bulkhead positions on to the outside of the first planking along with the water line and wale positions. The wale positions will be the first second planks on as I hate to see planks crossing under the wales and emerging the other side as this could not happen in real practice. Makes second planking harder though. Ignore my kitchen I was in the process of re-wiring and fitting. Admiral not happy to come home and find me doing Caroline instead.
.thumb.jpg.8c4dcca63244515ec95cb4efe7b74081.jpg)
.thumb.jpg.b7e70cfc854baf16f8defed0c08142cc.jpg)
-
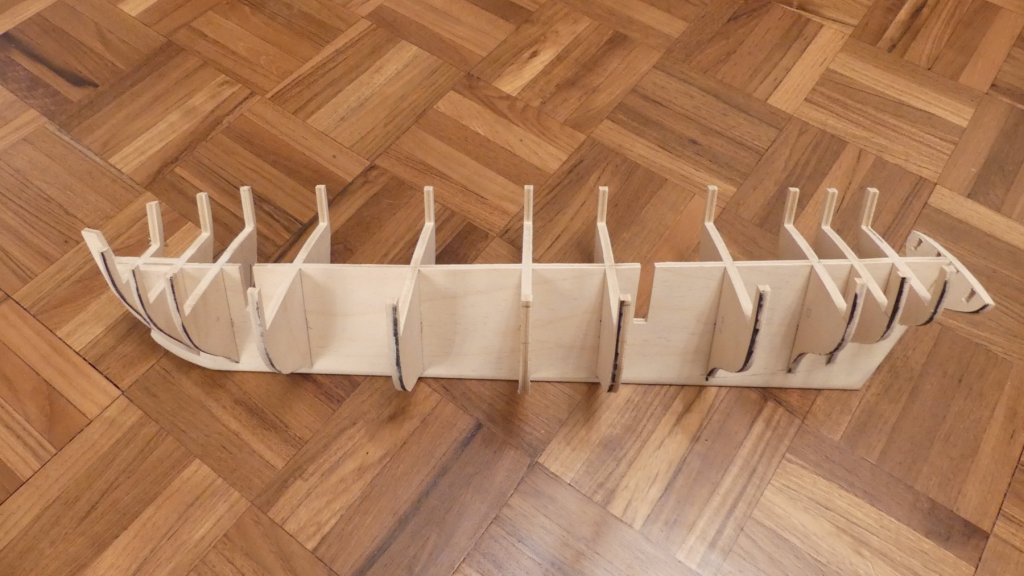
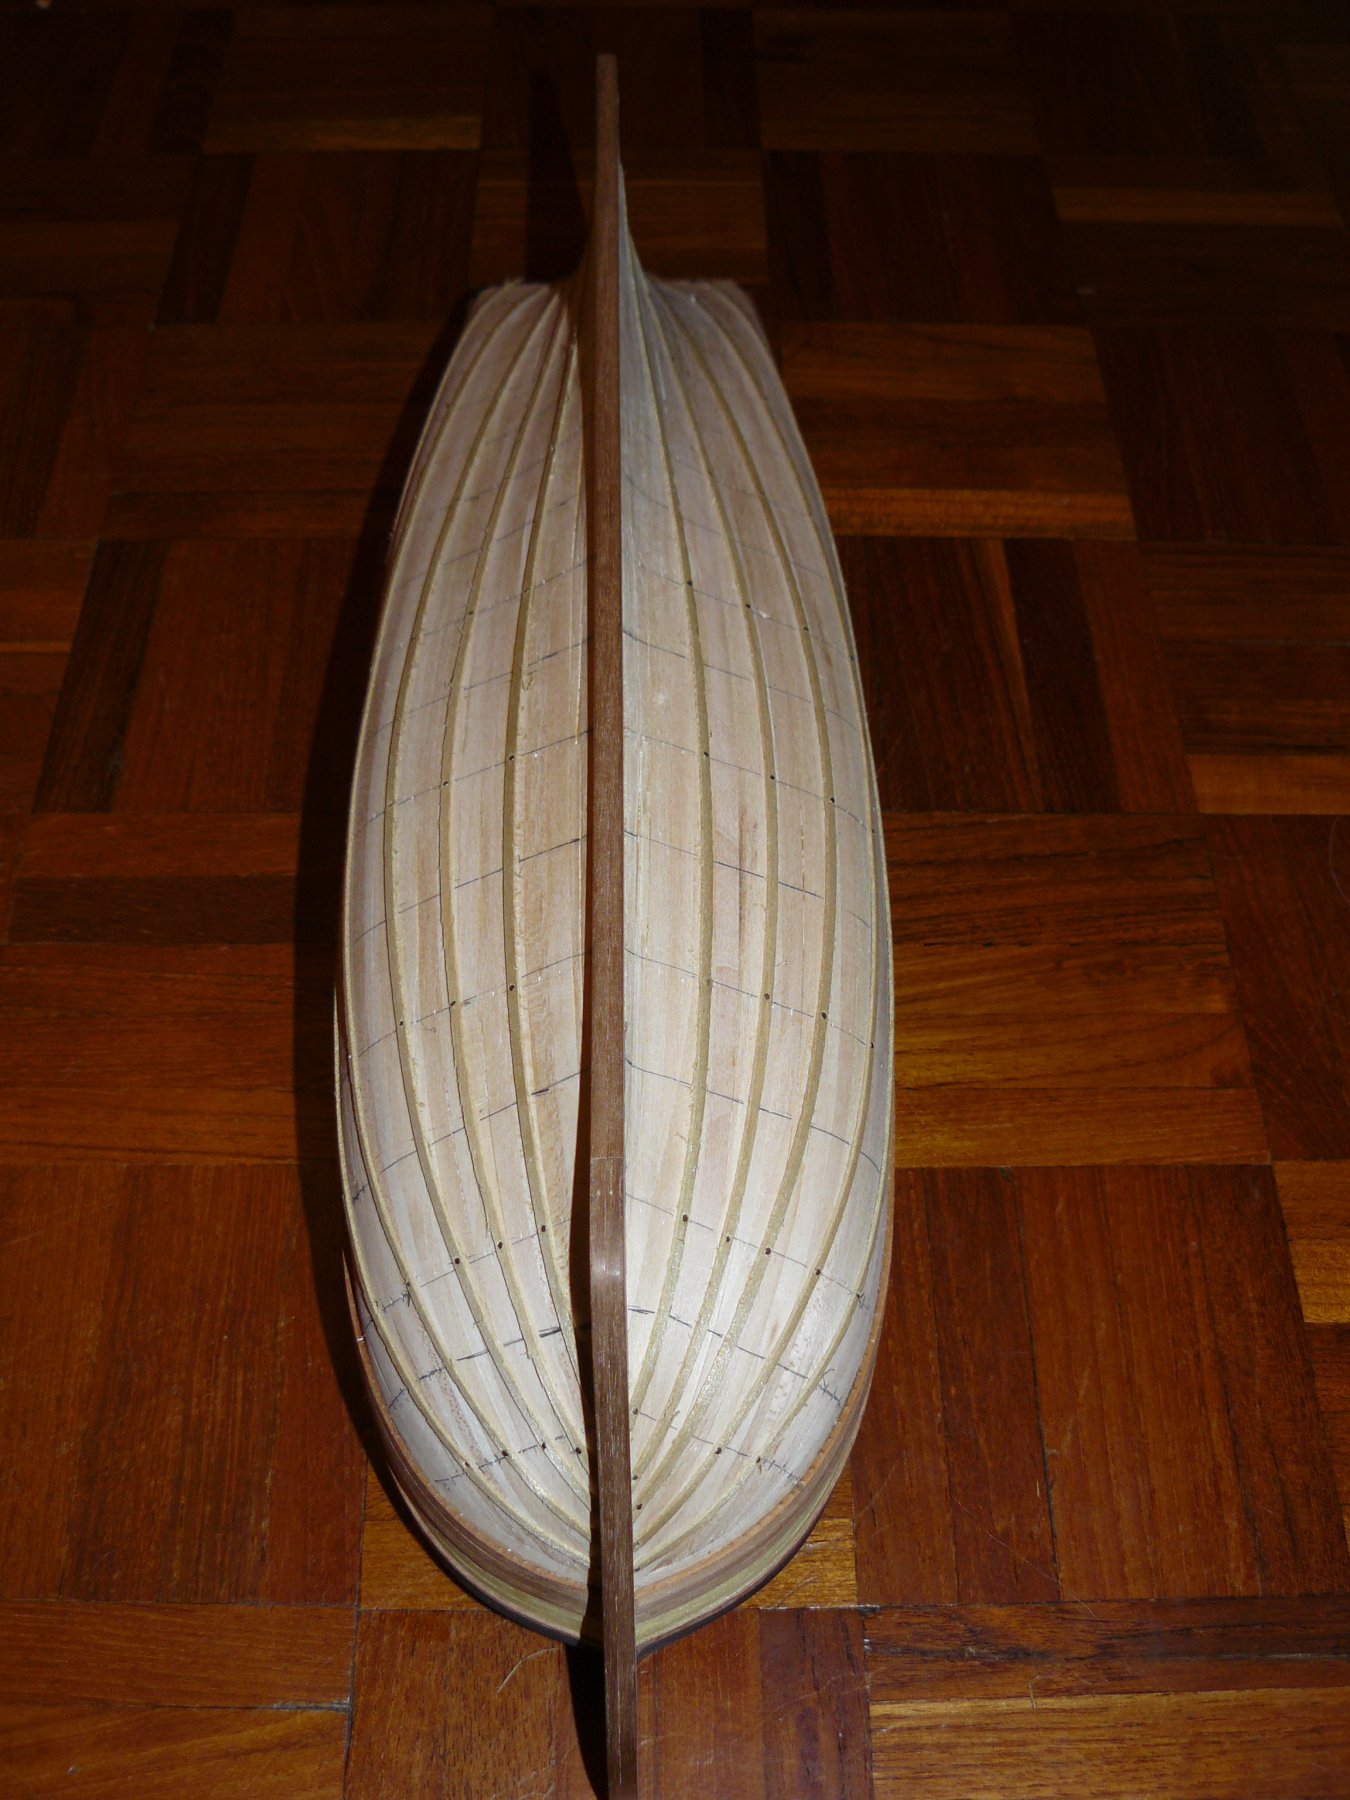
All Bulkheads shaped and re-dry fitted as a final check before fairing. There is an extra six bulkheads here over the kit design. This really made a difference when planking.
.thumb.JPG.c1737f96afe27b56ab1e2512da9e37f0.JPG)
-
Bulkheads in place on keel. The extra pieces of wood stuck to some of the bulkheads are where the originals were too small. These were filed down to the correct shape once all glue was completely dry. However, at this stage these are only dry fitted without re-shaping the bulkheads. You can see the amount that has to be taken off some of the originals and how they will match the bearding line.
.thumb.jpg.064665b05a83e3ec96f2fecc61e9acd5.jpg)
.thumb.jpg.16e81fdd1fcba3141d602a51478f9658.jpg)
-
Bulkheads were re-used were possible comparing shape at each location with those on the plans. Extra bulkheads made out of MDF sheet. Some of these were very different to the plans.
.thumb.jpg.6d6fae475900a4ec34073a15b0e26070.jpg)
.thumb.jpg.7dd2e46ae8474f13ac2fd3bc10d4b00b.jpg)
.thumb.jpg.4bc81c915b0ca9bc249c672314030398.jpg)
-
This is going to be a very short topic as I am just going to post some photographs I found of my build so I apologise for that in advance. I thought they may be of use to someone. Having the Anatomy of the ship series book I compared this to the kit. As many on here have probably found, the kit varies considerably from the plans. Not sure why they did this when the plans are available but this is common with kits. I printed the drawings out and altered their size until they best matched the keel size provided by the kit. I did work out the scale it became but not sure now, seem to remember 1:50. I removed the bow and keel sections so I could install the correctly shaped walnut parts in their place. I then marked on all the bulkheads as shown in the lines plan. Photo below shows this and the bearding line which has been shaped ready to receive the planking.
.thumb.JPG.a6f0326b095c209e7cc90d323ae4571e.JPG)
.thumb.JPG.7ba1f682ae6a9b31e5cc980dc43d2531.JPG)


.JPG.a6926f2706ece768b7694b9377fd98ed.JPG)
.JPG.cc04c9e289a841131683546f4209a1ad.JPG)
.JPG.051092c3b42c1ac8123f42e4ba84683b.JPG)
.JPG.b90cf39278a345cbc0dc39da4babf051.JPG)
.jpg.4b802b2925c590d088a91cb6ff0a27cf.jpg)
.jpg.f0eba35e5fff81e3a84ebb6b6f9f1a53.jpg)
.JPG.61b633e966553894c25aef336ff80df6.JPG)
.jpg.874f21f8938a5d186b4ffa04143adab0.jpg)
.jpg.d20290a23c08ab60899ed087067344a6.jpg)
.jpg.b799d219ac578ee6418299c378e90406.jpg)
.jpg.62ea5645be87a5d710c93ac5d3780fce.jpg)
.jpg.42bb8da78cd07ab391c03b2ca8e1244a.jpg)
.JPG.5c98981570eb93e250d6f083f0d3e0b8.JPG)
.JPG.a004bc21d169a141f7cbe0ba56a1f737.JPG)