HOLIDAY DONATION DRIVE - SUPPORT MSW - DO YOUR PART TO KEEP THIS GREAT FORUM GOING! (Only 20 donations so far - C'mon guys!)
×


Thunder
-
Posts
582 -
Joined
-
Last visited
Content Type
Profiles
Forums
Gallery
Events
Everything posted by Thunder
-
Hi, The flag was straight out of the box and just needed trimming. It wasn't on a sheet like that but on its own and was very clear. It was just very stiff and took a lot of soaking and shaping. My wife brought me the kit in the first few years we were married and we have been married 27 years so may of been an earlier version. Adrian
-
Hi, now you have lowered that bulkhead it may effect the run of your planking so they may need 'trueing up' again. the ones either side might need material adding.
- 82 replies
-
- 1
-

-
- artesania latina
- cutty sark
- (and 1 more)
-
Hi, This was a very enjoyable kit to build even though I new the history to be incorrect. Materials are very good. I didn't use the flag at the time but managed to make it look respectable on my Speedy build ( well I think so). It was one of my early builds so I didn't do the research to much later. One major difference between a cutter and sloop is the fitting of the bowsprit. The sloop is at a greater angle and fixed. The cutter runs parallel with the deck and can be hauled in to shorten its length. I am going to look forward to your build as I have so often thought of re-vamping mine. The first thing I would do is change the stern gallery and badge mouldings. Then I would re-rig as a sloop because I managed to do a bit of a cutter / sloop hybrid.
-
Arlington Court In Devon UK used to have a very good collection of ship models with a number of Prisoner of war models. It is a National Trust house and their website does not help much but when I last went, about 10 years ago it had room after room of ship models. Another reason a lot of museums have much smaller displays is that they have lost space to allow for disabled access.
-
Hi, I made up one of the cannons sat on some decking strip to double check the heights and to make sure the cannon would be placed central to the port. If you think yours is too low remember that you can plank it higher at that end but you may also have to do so for the gun port.
-
Plank Bender....
Thunder replied to dvlp47's topic in Building, Framing, Planking and plating a ships hull and deck
Hi, I have noticed that you live in Germany but the plank bender you have shown is 230V. Just check before you buy as I assume you are 110V in Germany. -
Plank Bender....
Thunder replied to dvlp47's topic in Building, Framing, Planking and plating a ships hull and deck
Hi, I have the model craft plank bender but find it only successful if you first soak the plank. I use it to shape the plank and dry it out at the same time. It has never worked when using un soaked planks and has the tendency to scorch it if you persist. It would be lovely to be able to spil the planks to get the right shape but unfortunately not really feasible with the timber strips provided in a kit as too narrow to start with. Buying timber in the uk, even if you only want to upgrade, is not easy and far too expensive for my budget. £564 for the diana kit and £250 more to change the second planking! I replaced the deck planking for £55 but it needs to go back as quality worse than what came in the kit. -
Plank Bender....
Thunder replied to dvlp47's topic in Building, Framing, Planking and plating a ships hull and deck
I often use the method of: taper plank as required for position to be fitted, either fore or aft. Soak plank in hot water clamp in required position till dry remove ( should retain shape) then glue and clamp in place The only down side is if the model does not have enough bulkheads the plank will look to be stepped rather than a gradual curve. This is where shaping with an iron wins. -
Chris, Due to lack of decent timber supplies in the UK would you be interested at looking at selling timber or timber replacement upgrades for other models. I only ask as I would love to replace for some of the kits I have already purchased and if you were able to purchase more it might be beneficial to you as you might get a better price from your supplier. If not can you reveal where you have obtained it from? Love this kit, wish I hadn't just finished a cutter. however, won't stop me buying in the future even though will be my third cutter! Adrian
-
Hi, both may be right depending on where on the hull the profile is for. Possibly A where the planks terminate at the stem and B along the lower keel.
-
Sorry didn't read correctly, I see you have spotted the issue yourself.
- 26 replies
-
- 1
-
-
- mantua
- royal caroline
- (and 1 more)
-
That planking looks great which makes my next comment hard to say. Don't some of the midships bulkhead tabs want cutting off after the second planking is complete? At least I'm sure that was the case when I built her. I hope I'm not right.
- 26 replies
-
- 2
-
-
- mantua
- royal caroline
- (and 1 more)
-
I think your planking started off really well. I think the main reasons you then started to struggle are more down to common faults in kit design. Firstly, especially for a single planked hull, those bulkheads are far too far apart. There is no wonder that at the more difficult part of the hull the planks have started to twist and become hard to make even. Secondly, the planks, on a real build the blanks might not only be tapered but be cut to shape from a much wider plank (think this is called 'spilling'). This means they would fit more naturally, we have to make do with the kit planks of all one parallel width. We then try to force to shape with the tendency for them to buckle. At the stem, did you cut a rabbet? when you chose to fit the stem early it would of been advisable to do this to snug the end of the planks into. I say all this but my planking has exactly the same faults. So don't knock yourself up. If it was double planked you wouldn't have the issues as you would sand it down, fill the dips and have a sound base for the second layer. Then I think you will be surprised how good you can plank.
-
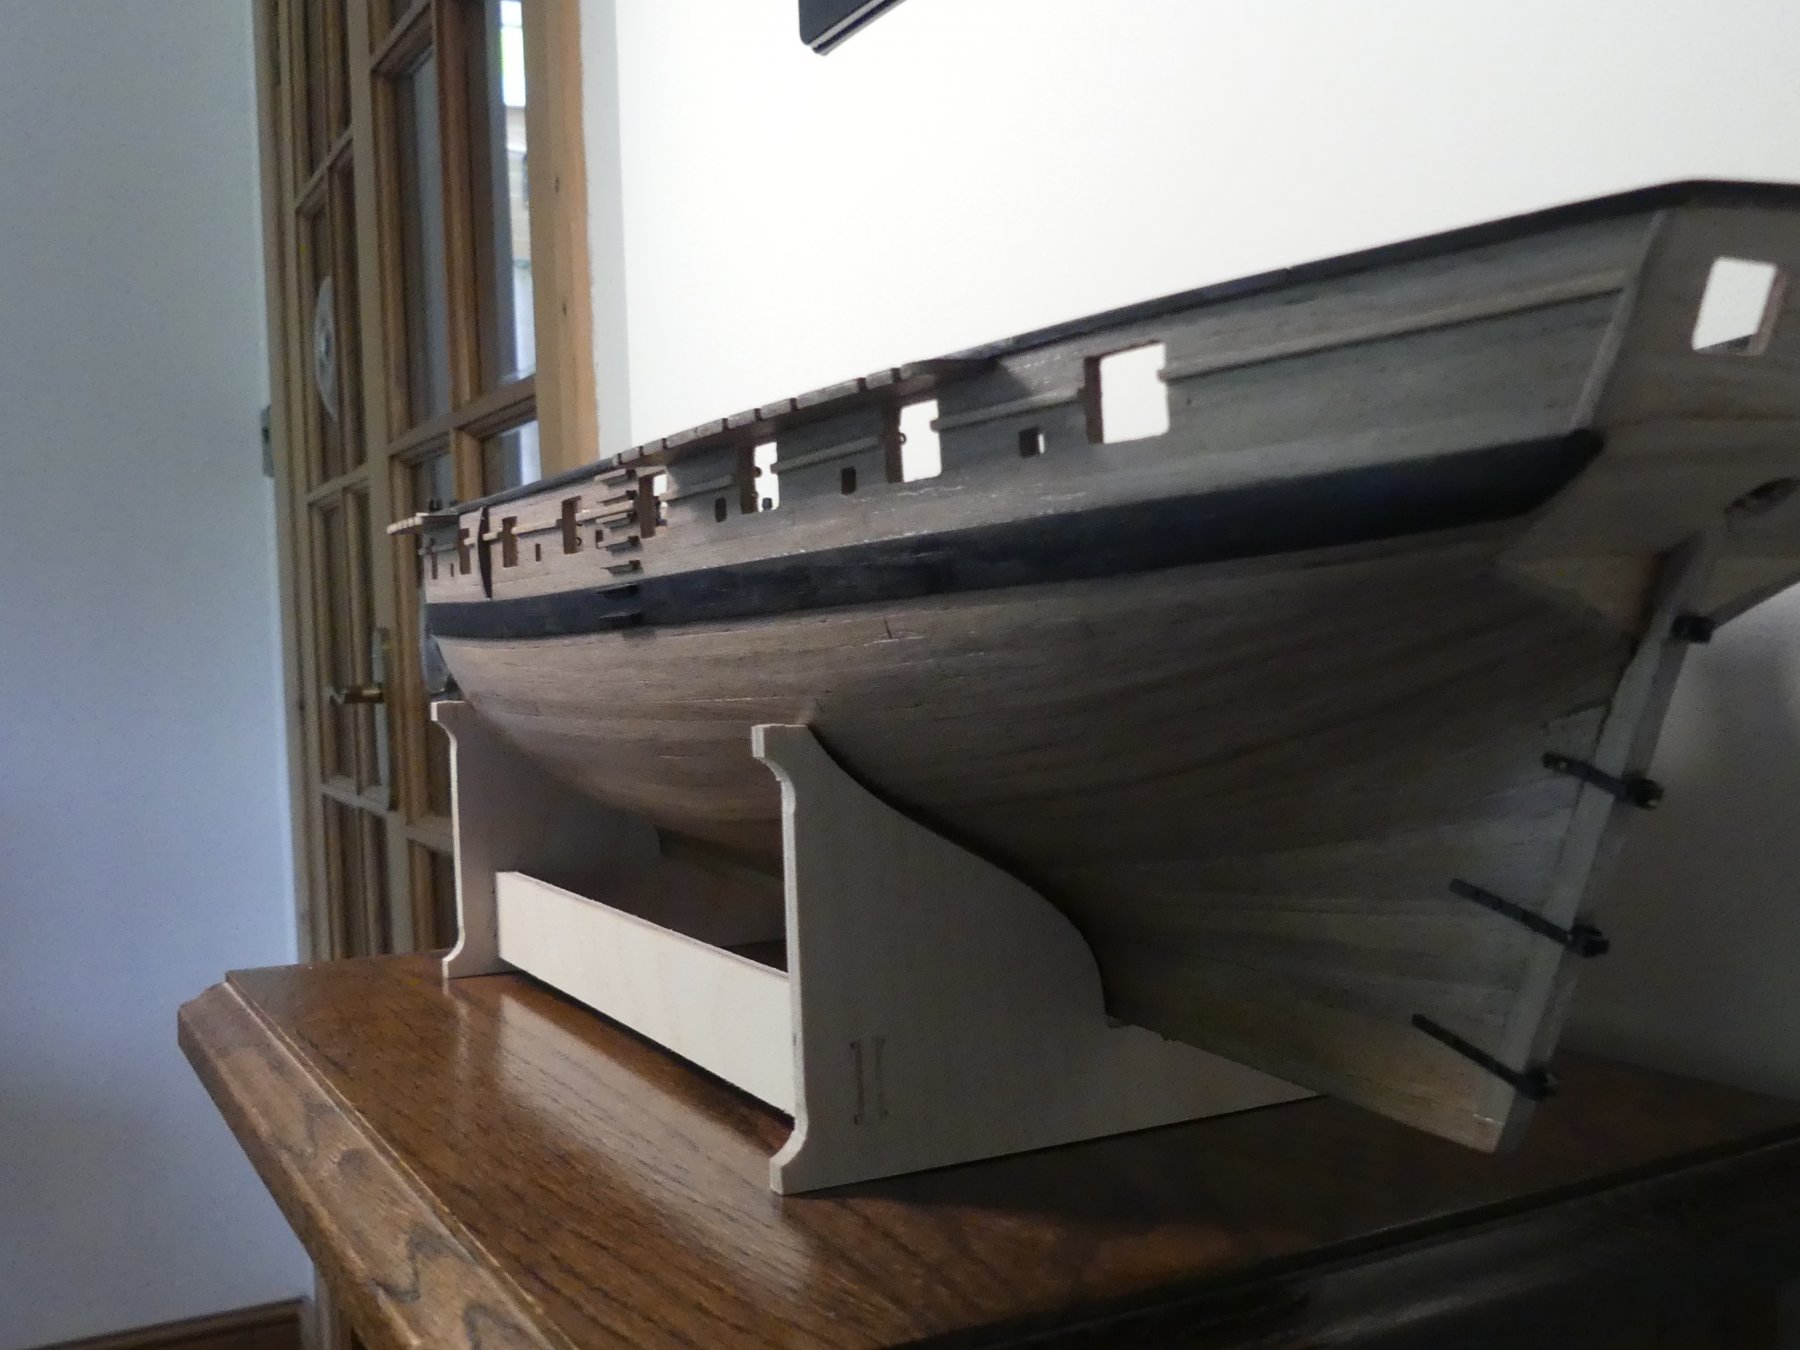
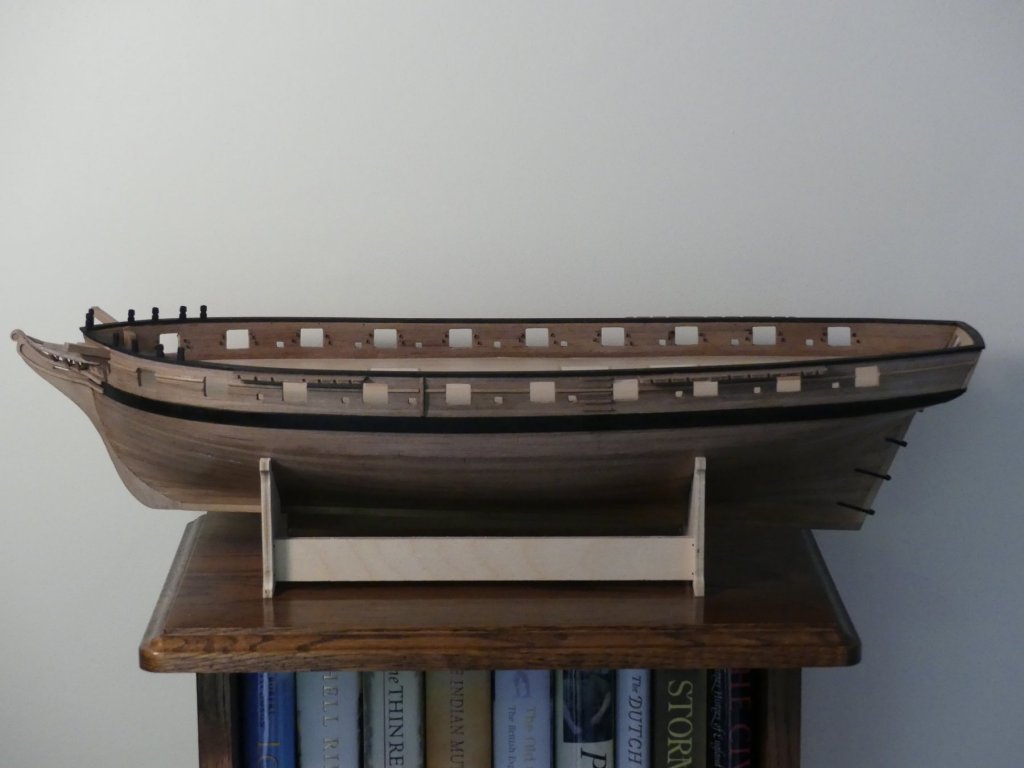
Hull nearly complete just some tidying up to do. I used Manns floor varnish to finish the hull and deck. I put this on another topic.

- 102 replies
-
- 12
-
-

-
- cruiser
- caldercraft
- (and 1 more)
-
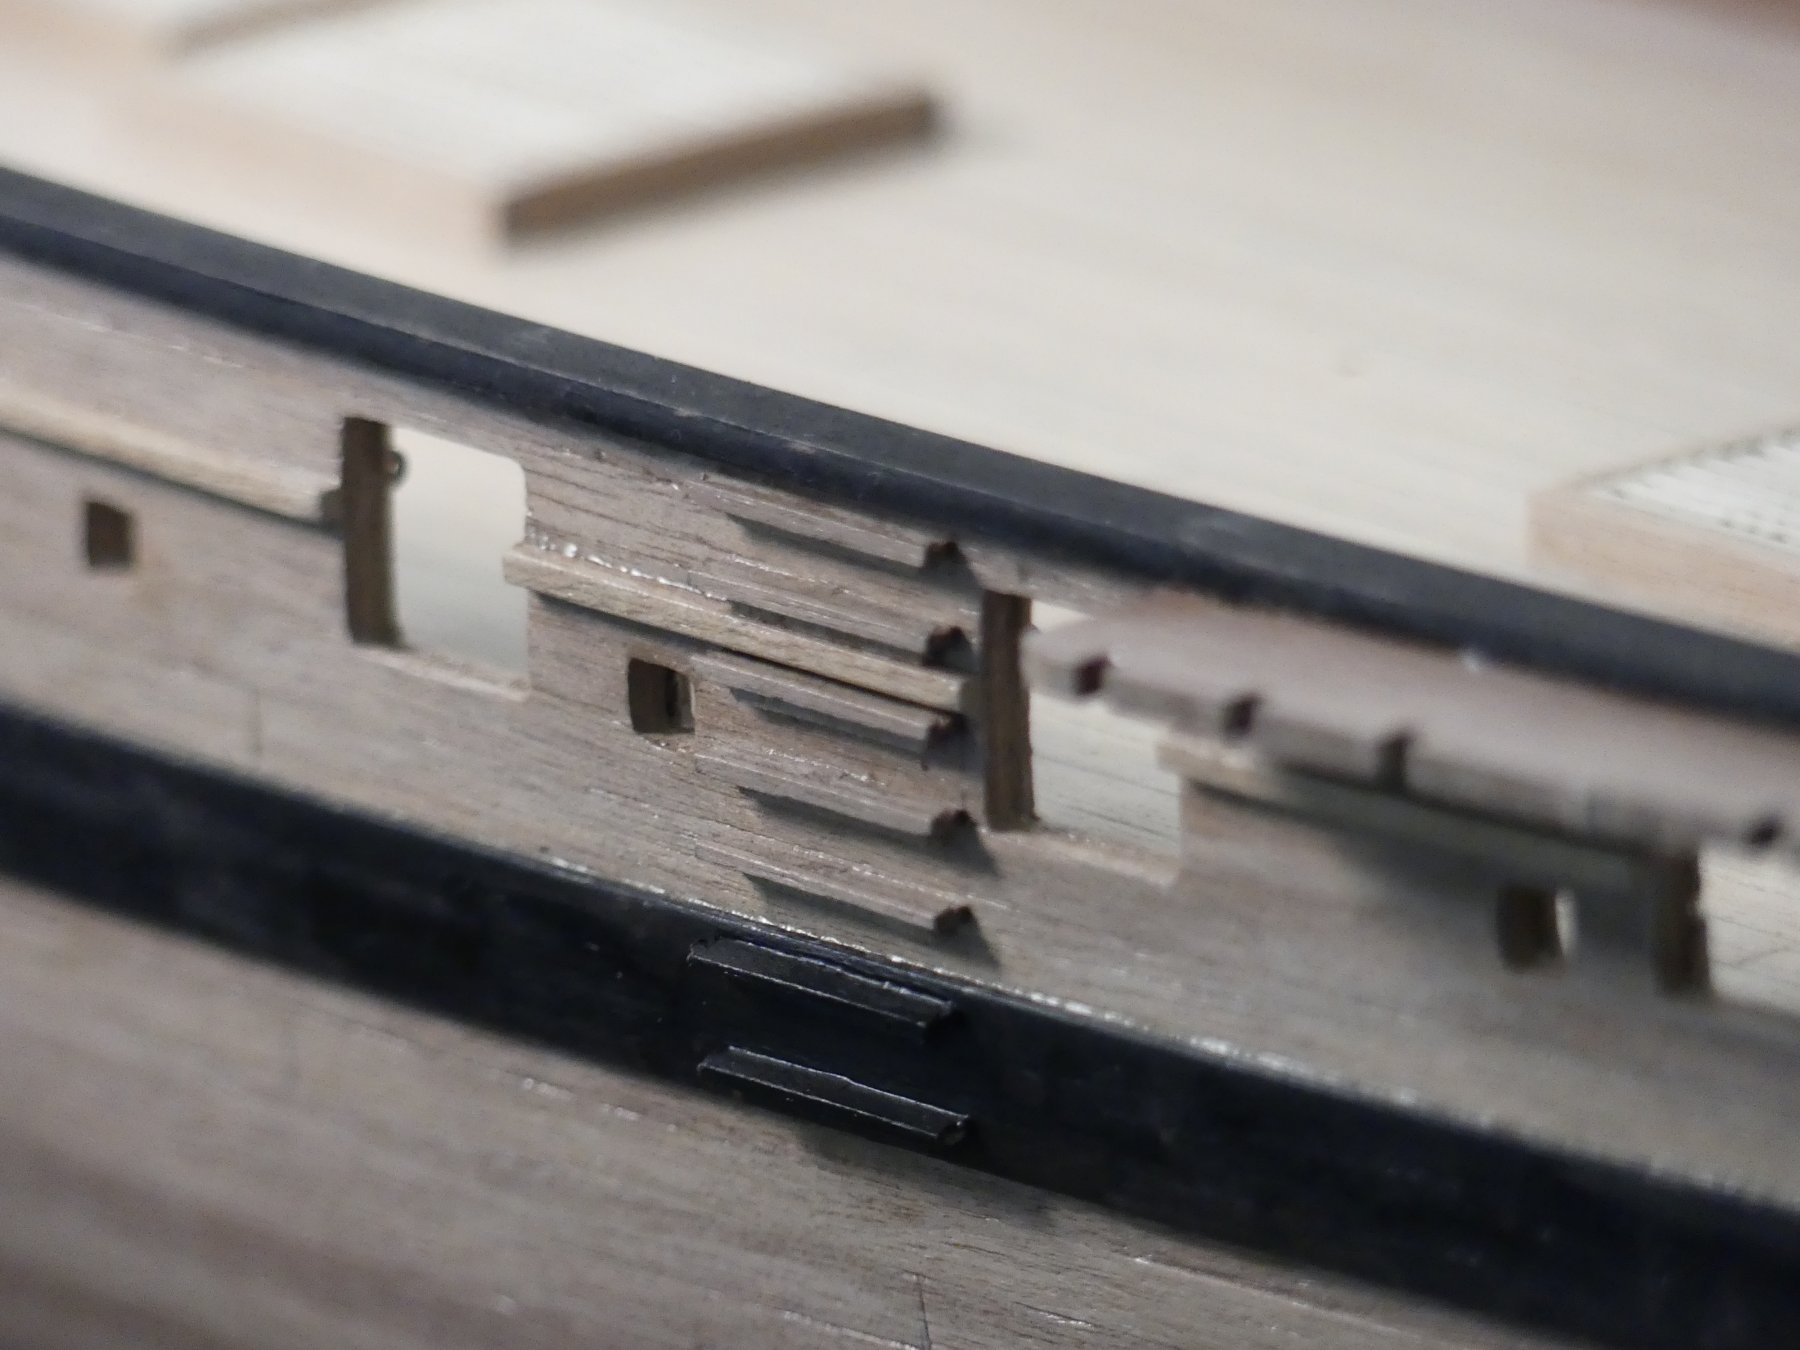
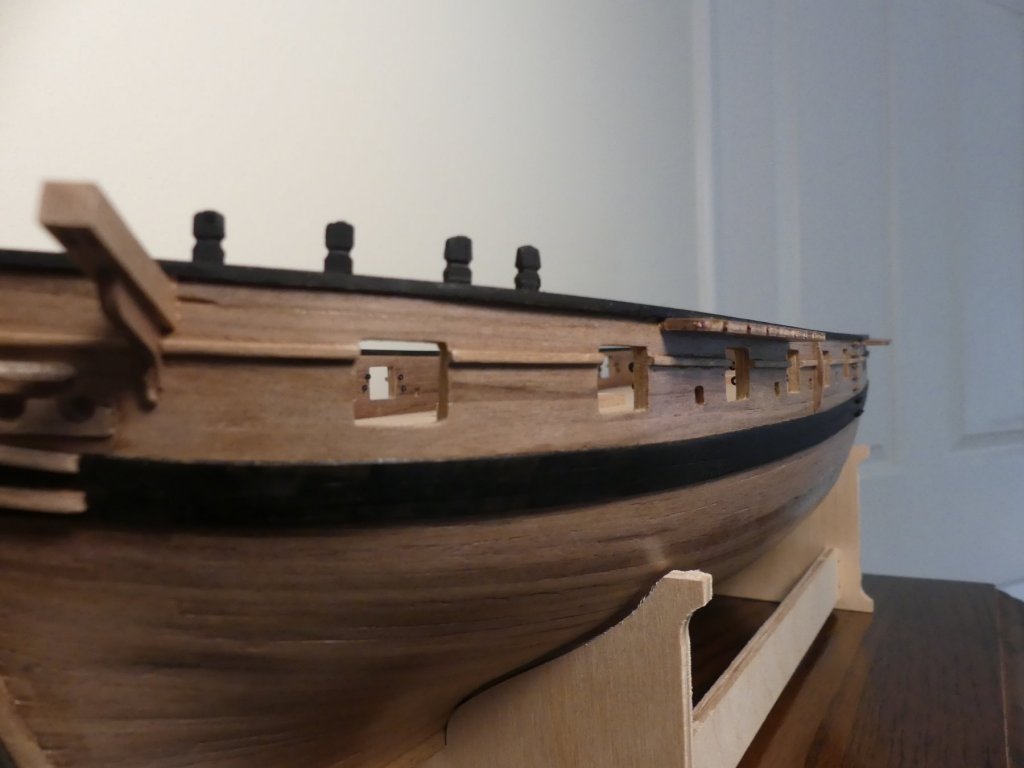
Rudder pintles added, rudder ready to be fitted but leaving off for now. Paint will need touching up. Hull entrance steps


- 102 replies
-
- 7
-
-
- cruiser
- caldercraft
- (and 1 more)
-
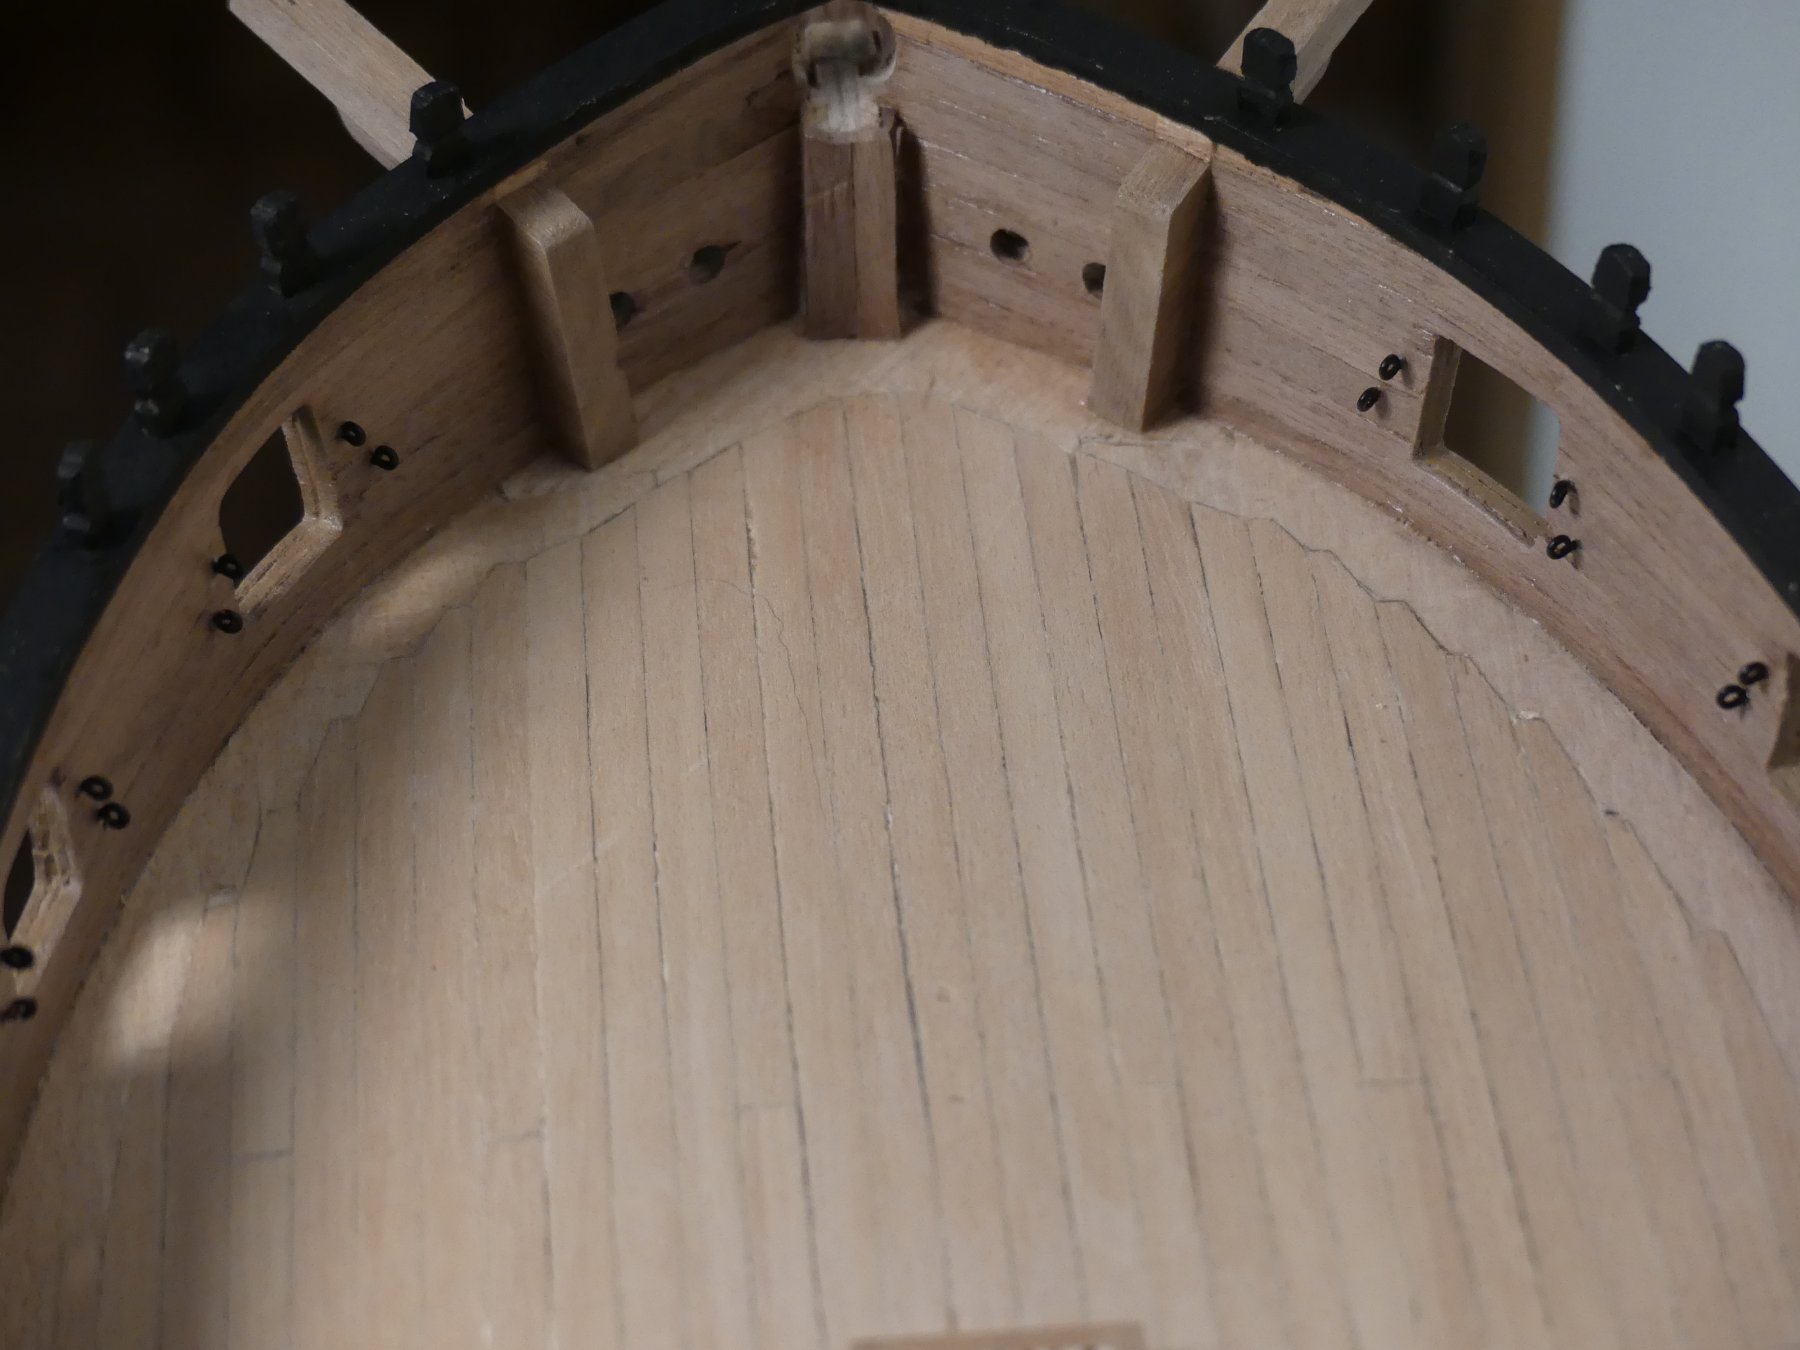
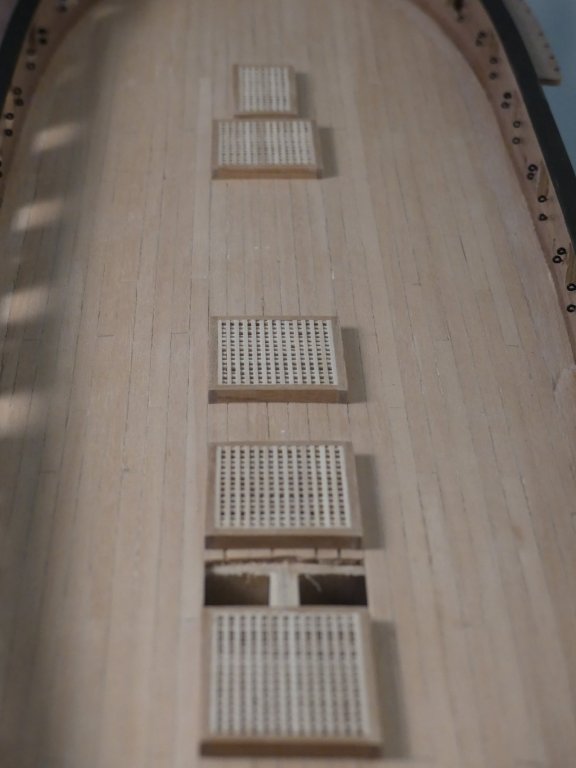
Gratings in place on the deck. None are these are true to size of the plan. I cut the deck back to the apertures on the false deck. Big mistake, not only are the grating parts provided insufficient in length to cover the holes the subsequent built size are not to plan. My advice would be to plank the deck completely and apply the gratings over the top. Not correct to real manufacture which is the opposite way round. The over issue is the small gap between the gratings and between them and the companionway. The planks are too small and to easy to keep breaking away. Hole for the companionway ( still visible above) is also too large. I have this ready to put in place and have had to run a plank round the bottom edge to make it wide enough to cover the hole.
- 102 replies
-
- 7
-
-
- cruiser
- caldercraft
- (and 1 more)
-
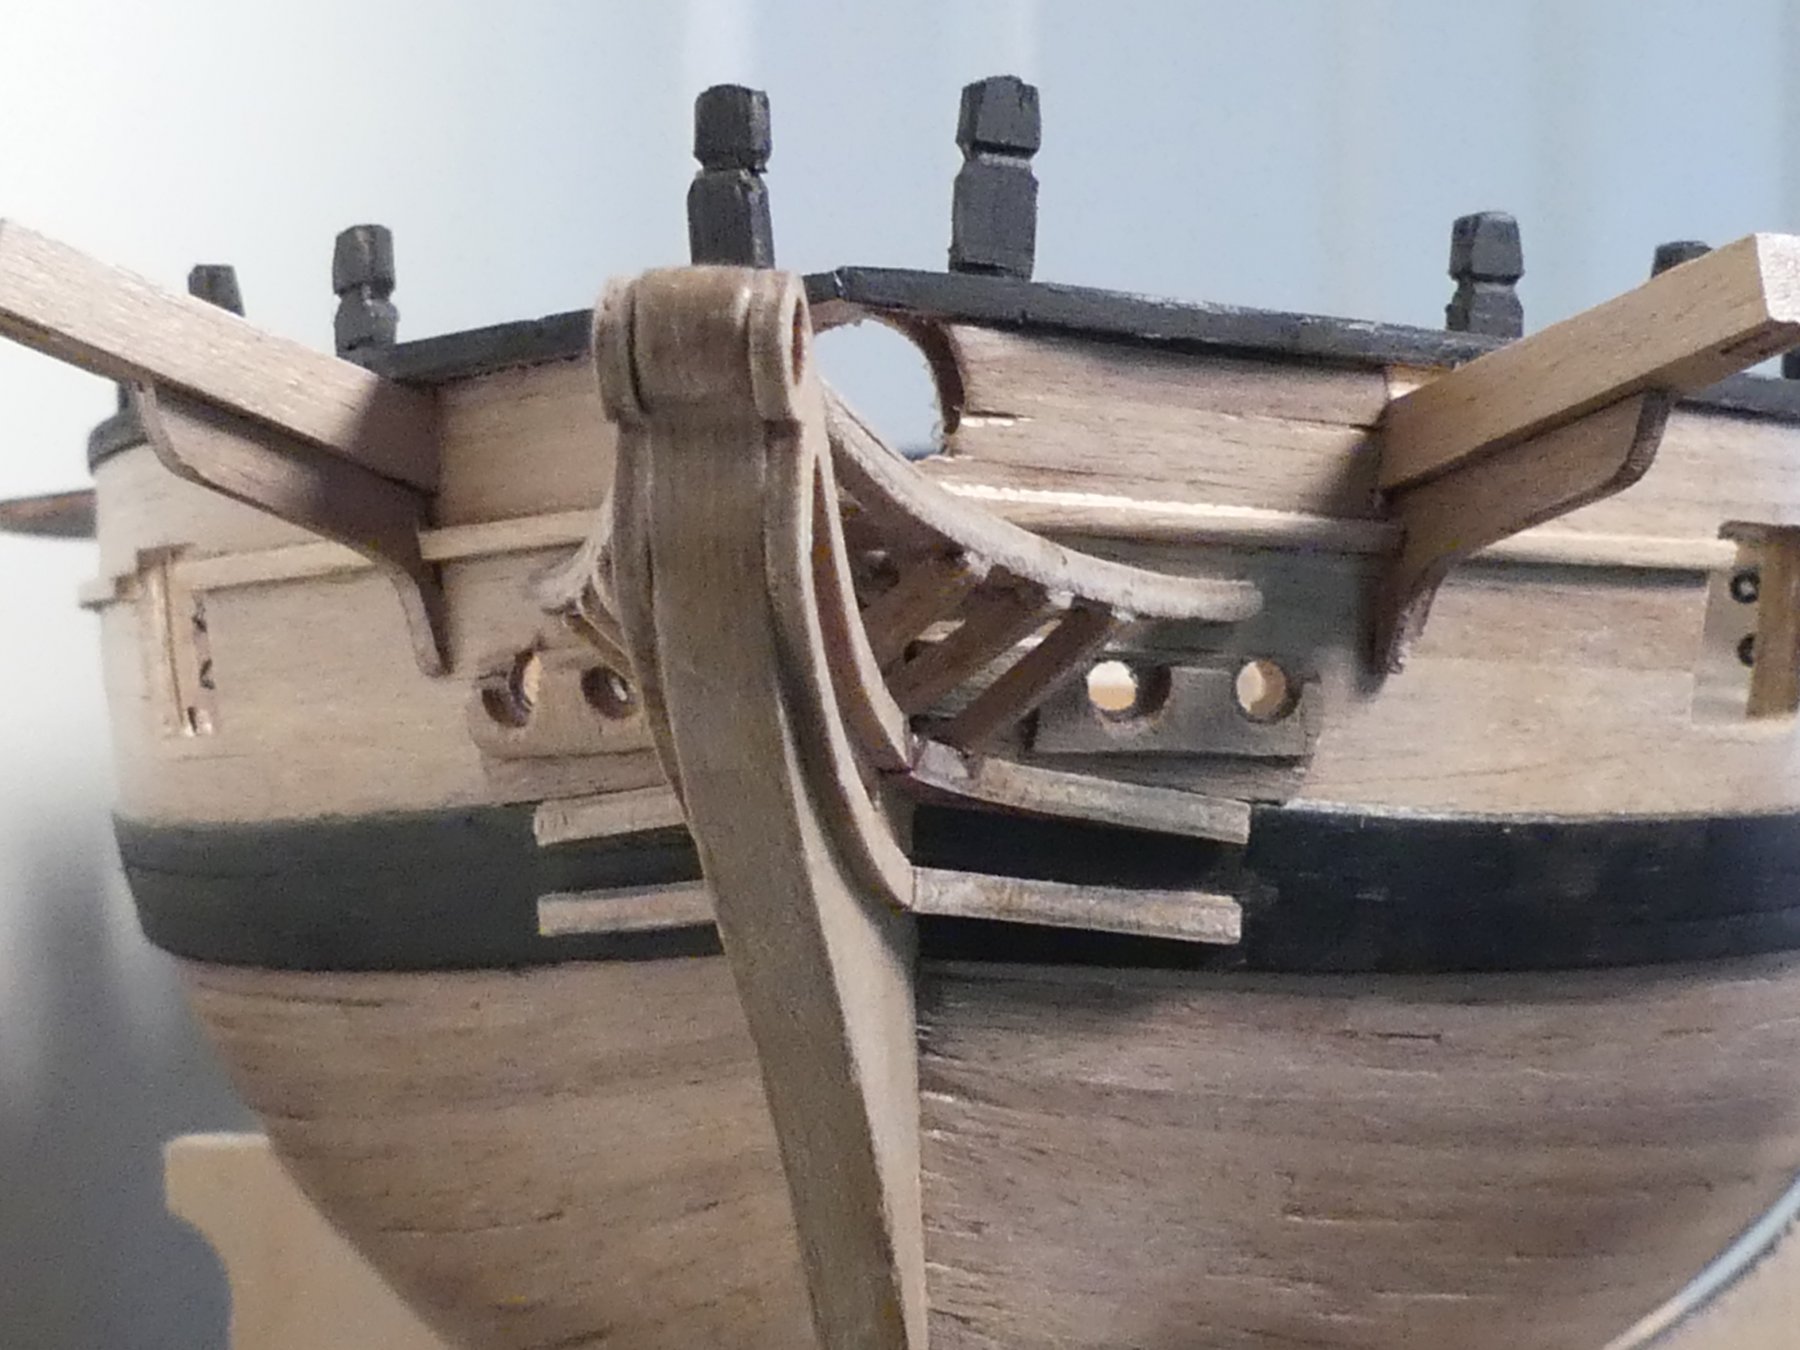
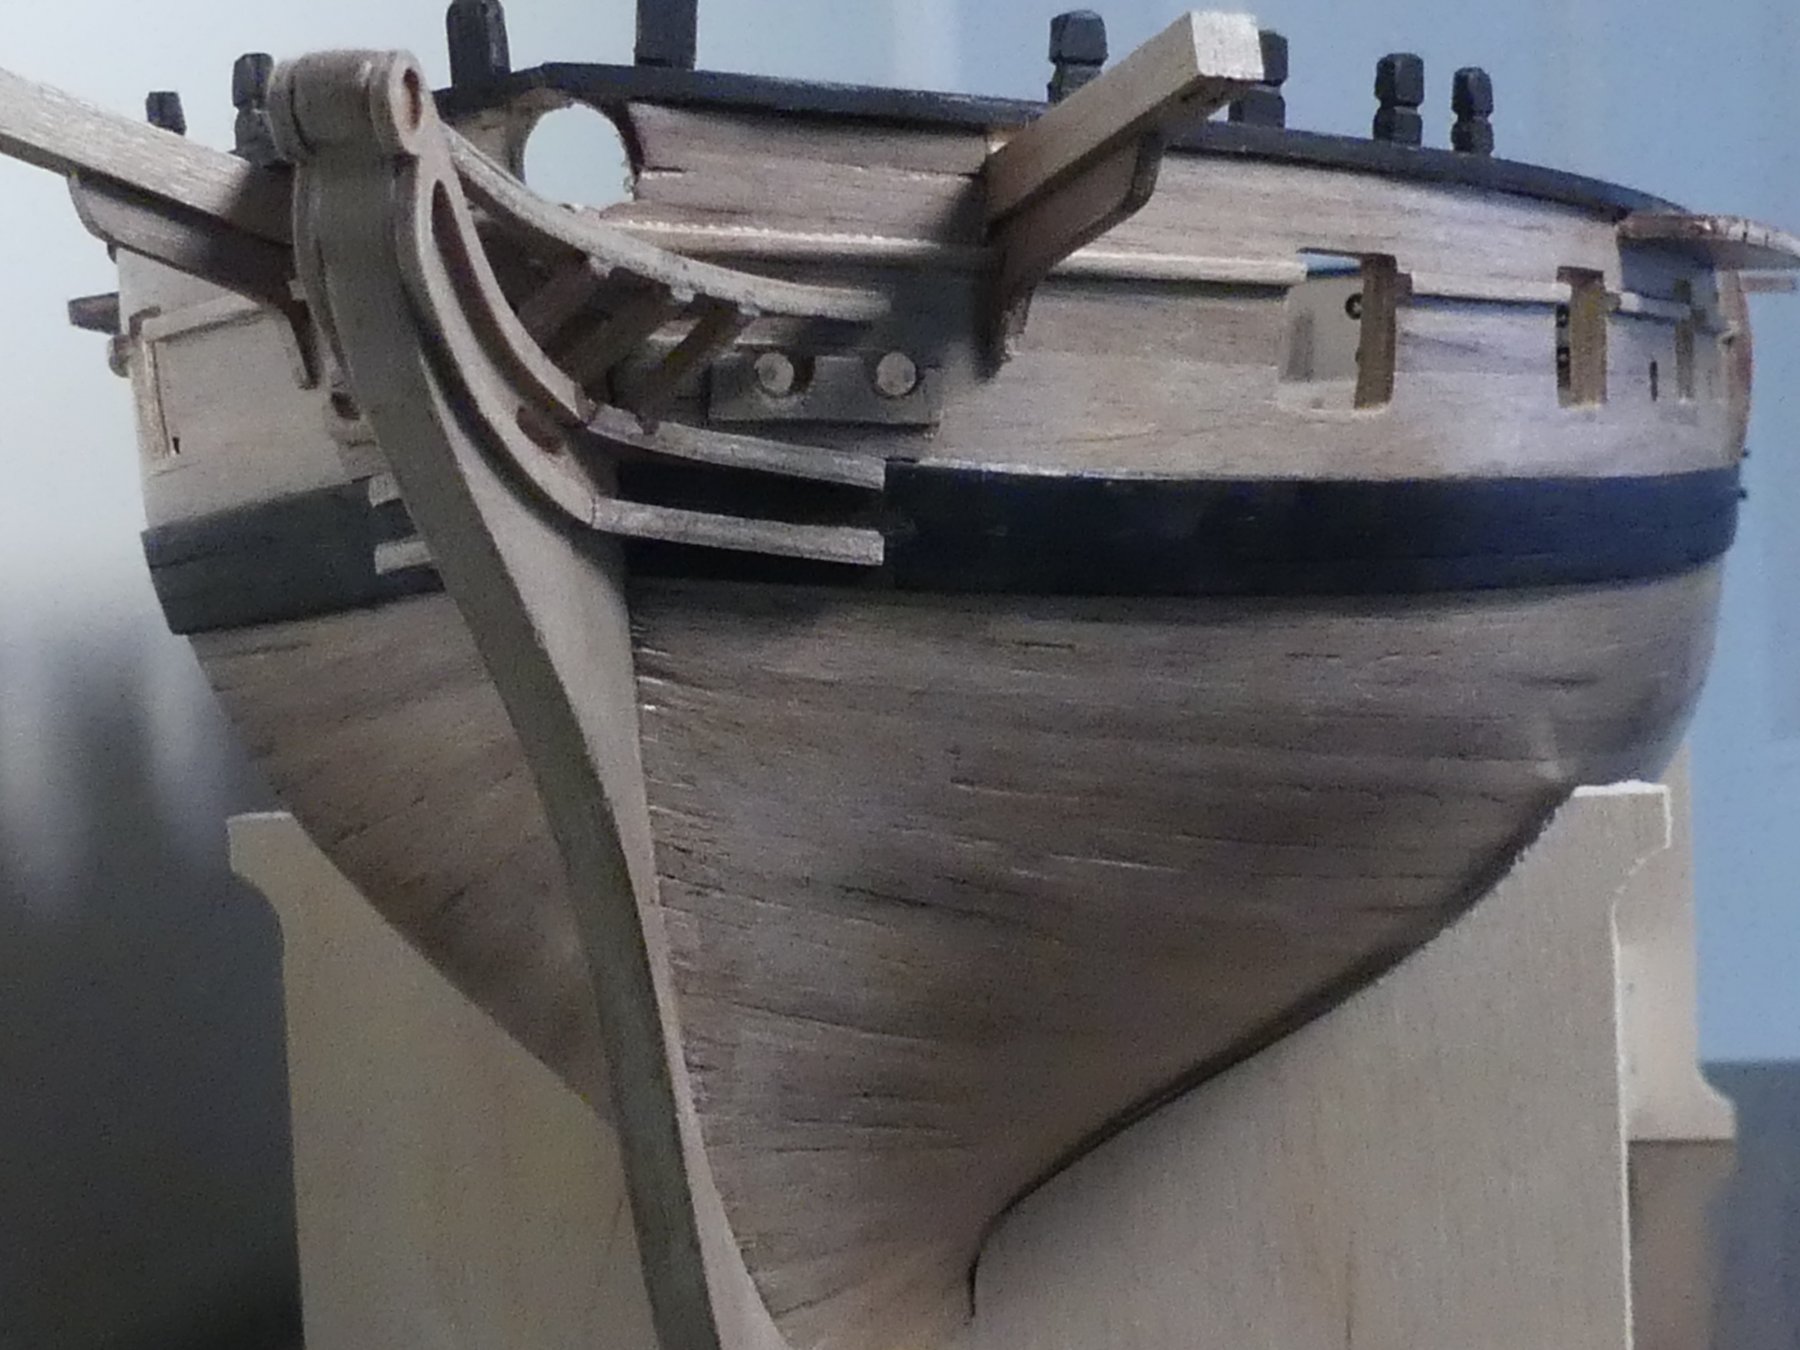
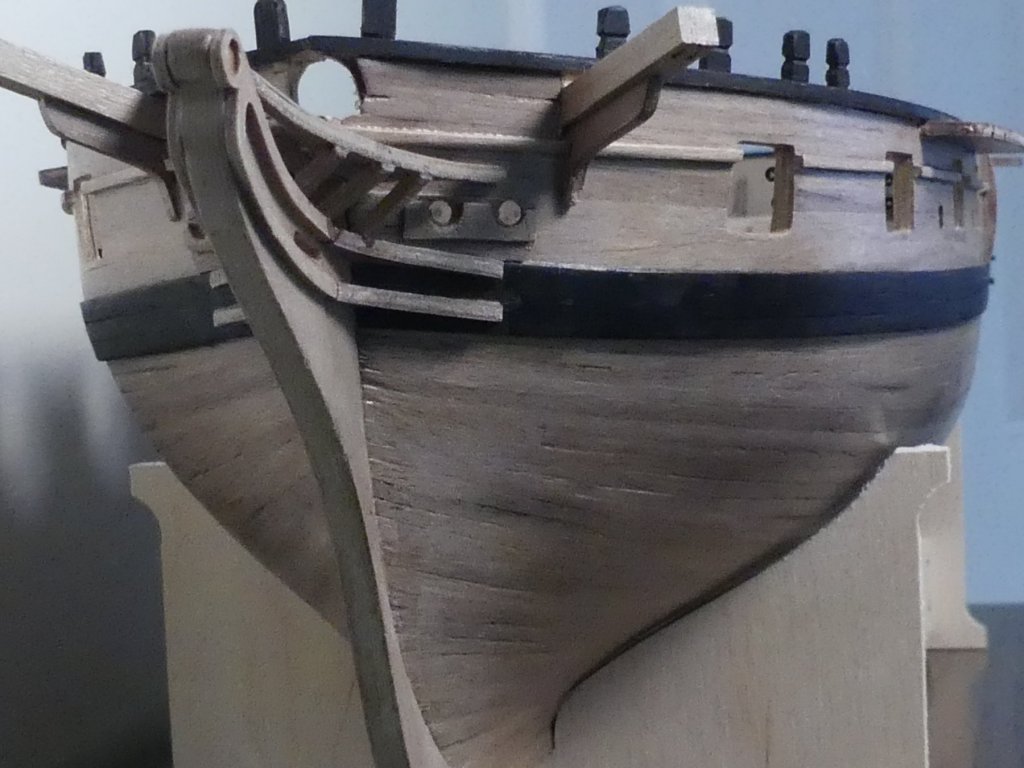
Lou, Thank you for taking an interest, Below is another view of the deck showing the nibbling strake and planking. Gun port eyebolt positions were drilled through a simple jig made out of two layers of scrap ply. The larger layer had the jig holes drilled through, the smaller layer is the exact size of the gun port. Has a planking screw through the centre so can be passed through the port and held from the outside whilst drilling for the eyebolts from the inside. Take a note of the hawse hole positions as predetermined by the kit. They are too far from the stem post. Any anchor cable would rub on the cathead brackets when running in a direct line too their access to the cable tier. If you look to the next photos of the outside of the hull you will see they are too far out compared to the cheeks. Funny our good the kit looks to you photograph it. View of headrails etc, Not much like the kit, I managed to shape the grating / marines walk by soaking for hours and then shaping with a hot iron.


- 102 replies
-
- 6
-
-
- cruiser
- caldercraft
- (and 1 more)
-
Have you not watched 101 Dalmatians? I thought they were plain but slightly pink. Love them, don't see these types of breed much any more only mongrels with poo in the name somewhere!
- 714 replies
-
- 4
-
-
- lady nelson
- victory models
- (and 1 more)
-
I am the reverse of this, I really struggle to hold the yard whilst dressing it so fit to the mast and then fit all blocks and finally sails.
-
Hi, Your cracking on with this, have overtook my Cruiser. I tend to agree, those pump handles are too fragile to work round. I'm intrigued by the 'sills' on the bottom edge of your gunports, are these in the kits plans, I have not noticed them before?
-
Very unusual bowsprit arrangement on the gallion, mounted as if intended to swivel!
-
What would be useful is if each person posting on this topic posts a picture of their first kit and: experience of wood working, other forms of modelling / crafts experience of first wooden build opinion of the kit tools and resources already acquired before build whether they would recommend as a first kit.
-
I will take a look to see how you are getting on. Where abouts in Derbyshire are you. I am almost slap bang on the Derbyshire / Staffordshire border.
-
Hi Edward, I see you made your choice of kit. Good choice I think. Look forward to seeing your build.
-
For my last two models I have used the Caldercraft Admiralty Varnishes at £2.18 for 18mL. Last year I brought samples of floor varnishes for renovating the lounge floor. To be honest I tried Manns Extra Tough, Bona Mega and Osmo Polyx high solid and none of them lasted more than a day with my mad border collies. However, The Manns and the Bona I have kept to trial on my kits. I am currently trying the Manns and have found no difference to the Admiralty varnish. It smells, looks and dries exactly the same, has the same consistency and when dry you cannot tell the difference. Samples of 100mL are available from the website below for £2.25. This is the same as paying 40p for the Admiral. Bona is £3.99 for 100mL and between the 2 makes you get Extra Matt, matt, silk matt, satin, gloss and high gloss. Primers can be purchased at 100mL as well. As soon as I have completed the deck on my HMS Cruiser I will post and give feedback on how well it has taken. https://www.wood-finishes-direct.com/product/manns-extra-tough-floor-varnish
-
- 4
-