HOLIDAY DONATION DRIVE - SUPPORT MSW - DO YOUR PART TO KEEP THIS GREAT FORUM GOING! (Only 13 donations so far - C'mon guys!)
×


Thunder
-
Posts
582 -
Joined
-
Last visited
Content Type
Profiles
Forums
Gallery
Events
Everything posted by Thunder
-
Thinking about it probably so could take down the mast and all rigging quickly under poor weather conditions.
-
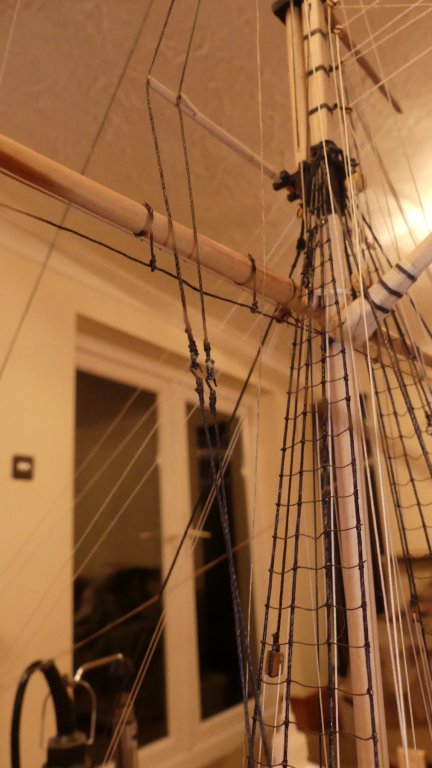
A shot of the rigging showing shrouds and ratlines completed. Also can be seen the tackles for the topmast shrouds and the tackle for the shifting backstay. View of the topmast shrouds passing over the spreader. Topmast shrouds with the unusual thimble and hook arrangement that effectively splits each into two halves. Does anyone know why this was done?

- 102 replies
-
- 6
-

-
- speedy
- model shipwright
- (and 1 more)
-
Another advantage would be to pick a vessel for both sides of the pond. Nonsuch could do this. Alternatively another Hero such as Pellew. The Indefatigable as a Razee would be unusual if drawings are available. Most of his early career ships were prizes of French origin making research more difficult. Perhaps a short list of your favourites on here for a vote would stick with your requirement for personnel interest and do the market research as well. We could all go on suggesting subjects forever!
-
Chris, You could always fill a gap min the market with a conversion kit. i.e. parts for 1765 version of Victory. Personally I love the smaller, less glamorous, ships of the Royal Navy. 5th and 6th rates of C1660 -1720 such as the Lizard or the Galley Frigate of 1702 as depicted in the book by Franklin or Fubbs and Nonsuch. Alert would be different to any other Cutter on the market. I would sell most of my kits in store for one of the above
-
Chris, Based on that information I will not be adding to my stock of kits waiting to be built. Instead I will hold fast until you release your first project. Good luck, Adrian
-
Just wondering if you had to paint them red or if it was done as part of the cutting process? Ouch!
-
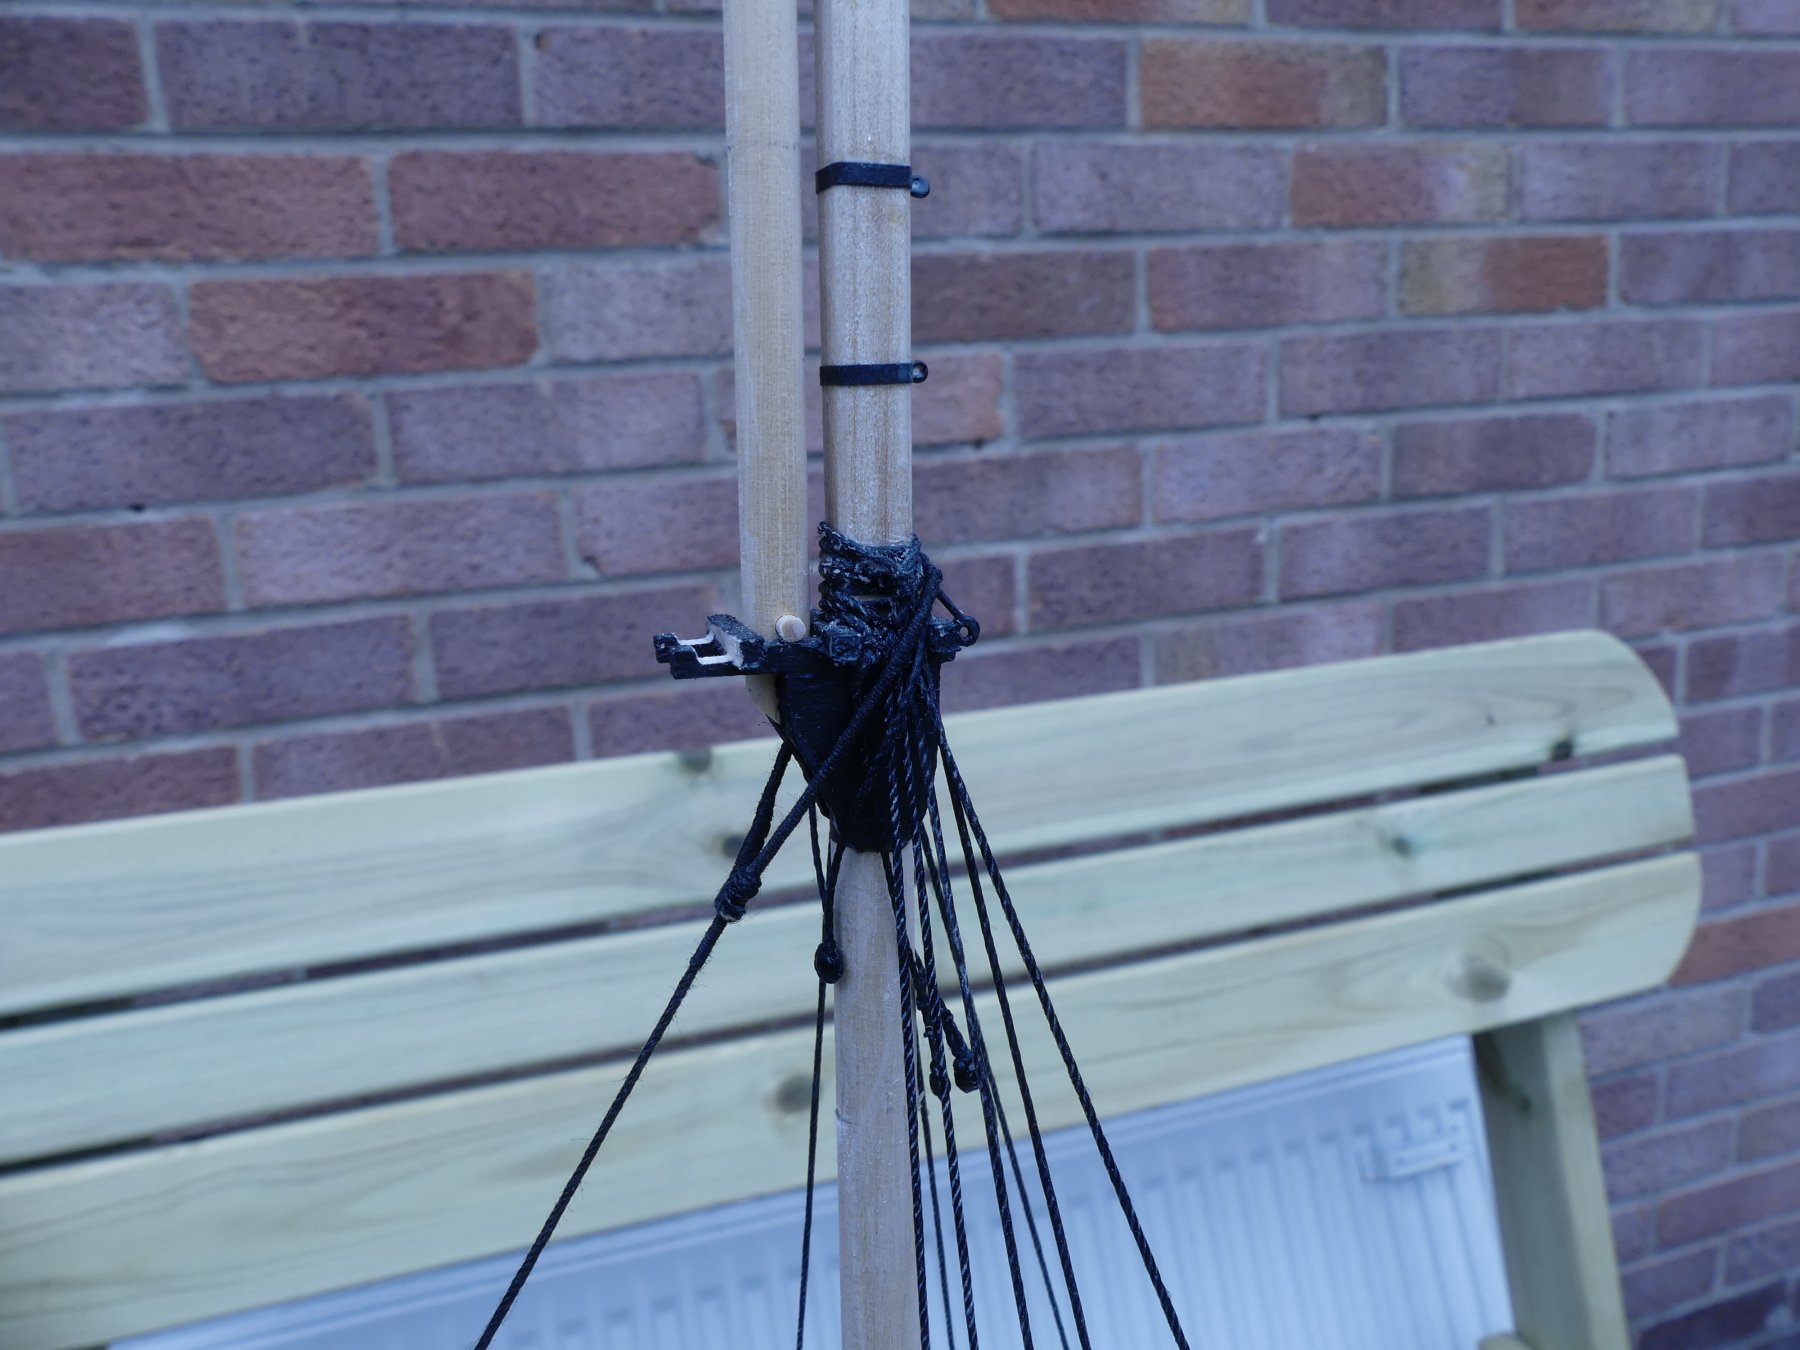
some close up shots of the Stay at mast head and stem. Also, a shot of ratline being rigged:


- 102 replies
-
- 8
-
-
- speedy
- model shipwright
- (and 1 more)
-
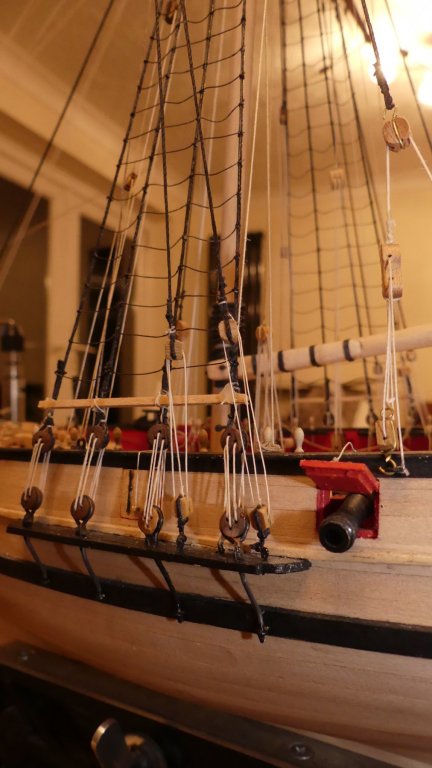
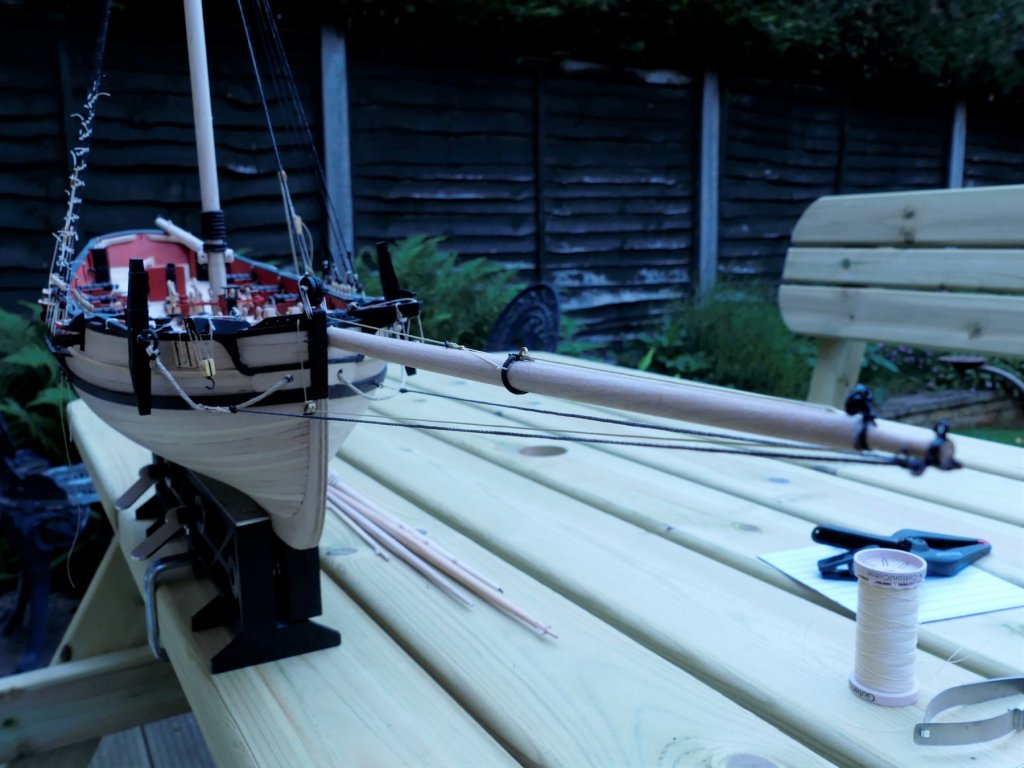
Apologise for the photographs in this part. I am well ahead with the rigging but not taken many photographs recently. As alone in a hotel with little to do thought I would add the photographs I took at the early rigging stage. Unfortunately camera was set up wrong so they are a little bit 'blue'. First photo shows the bowsprit fixed in place and the Travelling outhauler rigged. As you may be able to spot, the fore stay and shrouds are also rigged and the ratlines are started. Above you will also notice that the back stays are also rigged but the belays are not fully secured.

- 102 replies
-
- 7
-
-
- speedy
- model shipwright
- (and 1 more)
-
Snap was there week ending 19th of September.


- 574 replies
-
- 3
-
-
- cheerful
- Syren Ship Model Company
- (and 1 more)
-
Blimey, all this talk of different woods at your local timber store. I did the circuit of all the local stores near me in the UK for a piece of oak to use in the house. All I found was, pine, badly seasoned pine, knotty pine and a bit of teak.
-
I agree with Carl, a better poll would be by individual kit by manufacturer. If you do by manufacturer alone you are not recognising the fact that they have a range of kits to suit experience and budget. A poor feedback result for Sergal's Racehorse (it is really poor) might not compare to their Cutty Sark. perhaps if you had to give an answer for each manufacturer listed and this be poor, good or no knowledge, then you will get clear results on which are most popular and can get an accurate quality opinion based on actual experience.
-
Blimey, what do you need to do to get a gold! An amazing build well done, and I never comment unless seriously impressed. Perhaps could describe as a merchant ship brought into the Royal Navy for convoy escort protection? The problem with a lot of these kits is they seemed to go out of their way to take real plans and make the description as inaccurate as possible so that you cannot trace the original. Or as in the Unicorn and Royal Caroline, have a full set of plans and then not bother to use them for the model, very strange!
-
We used to use Loctite and had their representative come to site who described how best to use and keep it. Since then I have always kept it in a fridge apart from one for rubber that is kept in the freezer. I then put the small amount to be used on a tile and return the bottle to the fridge. I have kept it this way without it going off for many years. However, I have tried new bottles and doesn't seem any better. Just seems you have to hold things together for ages before it sets and then it is still easy to pull apart. I know the way I use or store it has not changed.
- 51 replies
-
- 1
-
-
- cheerful
- Syren Ship Model Company
- (and 1 more)
-
Hi, what manufacturer of CA do you use? I don't rate it any more and was coming to the conclusion that it had become 'watered down' here in the UK to either make production cheaper or for it to be safer. It no longer seems to have a strong bond or take quickly. I have always used Loctite, prism 406 if I can get it. We used to use this where I used to work and it actually held drive belts together on a beer bottling inspector for over a week till parts came. Now it won't even hold plastic.
- 51 replies
-
- 1
-
-
- cheerful
- Syren Ship Model Company
- (and 1 more)
-
Thanks Blue Ensign that is very similar to how I decided to do it. The only difference is that I wanted the stirrup to come down between the turns round the yard. It seems strange that all the books seem to skirt this point, James Lees included, though I must of read up on it some where to know it hung down the back. Strangely the McGowen Victory works seems to have them hanging central to the yard rather than down the rear. Tom would need even longer legs! I usually use wire for the stirrups, drill a hole on the underside, poke it in and glue it, then wrap it round. This is o.k. at smaller scales. Druxey, thanks for replying on the bobstay. I decided, as cutters run the bowsprit in and out, that a bobstay would not be practical and as the travelling outhauler would actually assist moving the bowsprit that I would rig this.
- 102 replies
-
- 2
-
-
- speedy
- model shipwright
- (and 1 more)
-
Have moved on since last post but before I upload the next stages I wondered if you could give some help regarding the stirrups for the foot ropes on the main yard. I have probably every rigging book you can buy but they all skirt over this minor detail which is how the stirrup is attached to the yard. Does it fall centrally to the yard or, as I previously thought, fix to the front of the yard, go over the top and hang down over the back? This will put them in the best position for standing at the back of the yard facing forwards.
- 102 replies
-
- 1
-
-
- speedy
- model shipwright
- (and 1 more)
-
Laying out plans in a smaller workshop
Thunder replied to alde's topic in Modeling tools and Workshop Equipment
If you live in anywhere but UK you might be able to purchase this: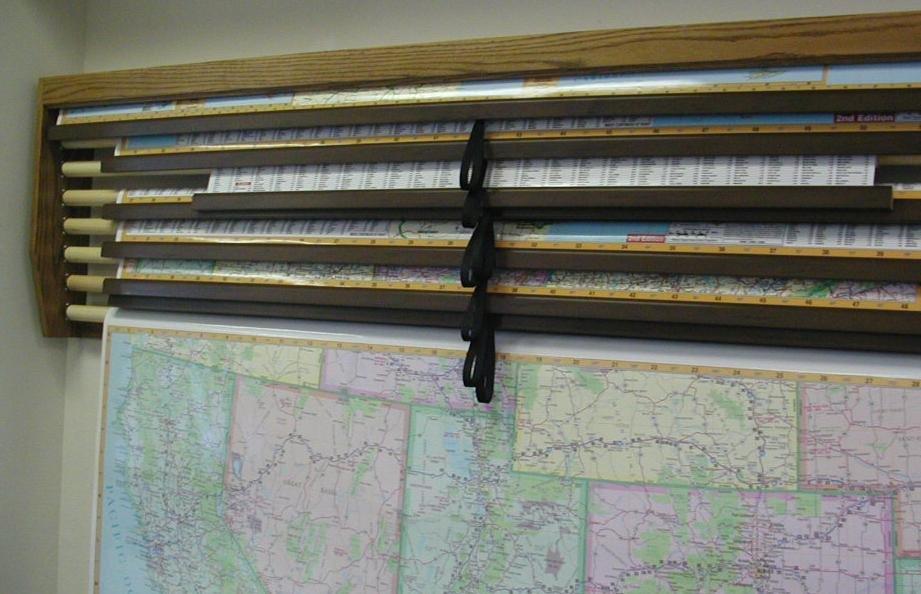
-
Laying out plans in a smaller workshop
Thunder replied to alde's topic in Modeling tools and Workshop Equipment
Bob, Something like this: The one I saw years ago was like the tubes you get at the top of a white board so was more compact.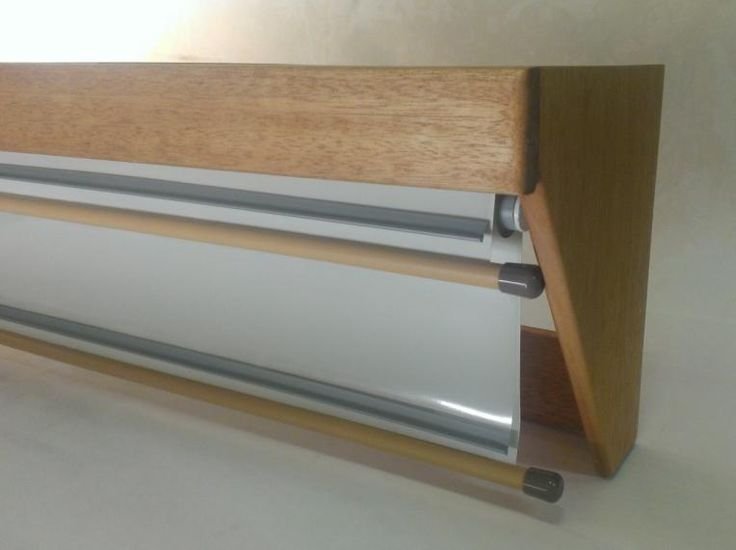
-
it depends on whether you want to follow original practice and methods or just want a neat job. I do the side planks first as I like to fit waterways and margin planks and then work out from the centre too these.
-
Laying out plans in a smaller workshop
Thunder replied to alde's topic in Modeling tools and Workshop Equipment
As usual search in UK only and what do you get - toilet roll holders!! Unfortunately the UK is a country that loves to buy cheap rubbish because they think its a deal and then too stupid to moan when it arrives broken! But never mind the Chinese love us. Unfortunately the cheap rubbish is going up in price and the quality items are not available here. -
Laying out plans in a smaller workshop
Thunder replied to alde's topic in Modeling tools and Workshop Equipment
Many years ago I saw a blind that was for drawings. You could insert multiple drawings and lower each as required as if it was a blind. I have never seen one somewhere I could purchase. Mine are usually slid under the lounge rug! They had been there months before the wife spotted them and that was when she was watching me do the cleaning!! -
I always buy the large bottles of Loctite and my preferred is Loctite's Prism 406. I do similar to others here and dispense some onto a tile and apply with a cocktail stick. A sharp tap on the bottle to make sure none is left in the nozzle and replace the top. in between use I put in the fridge. It is very rare that I do not get to use the whole bottle as keeping in the fridge stops it going thick.
-
Hi, is this a single planked hull? The quality of your planking certainly makes it appear so. Saying this is your second build, and this does not look like an easy kit, you have displayed a lot of skill so far. I love the lines of the hull and that planking is going to look great when sanded down.
-
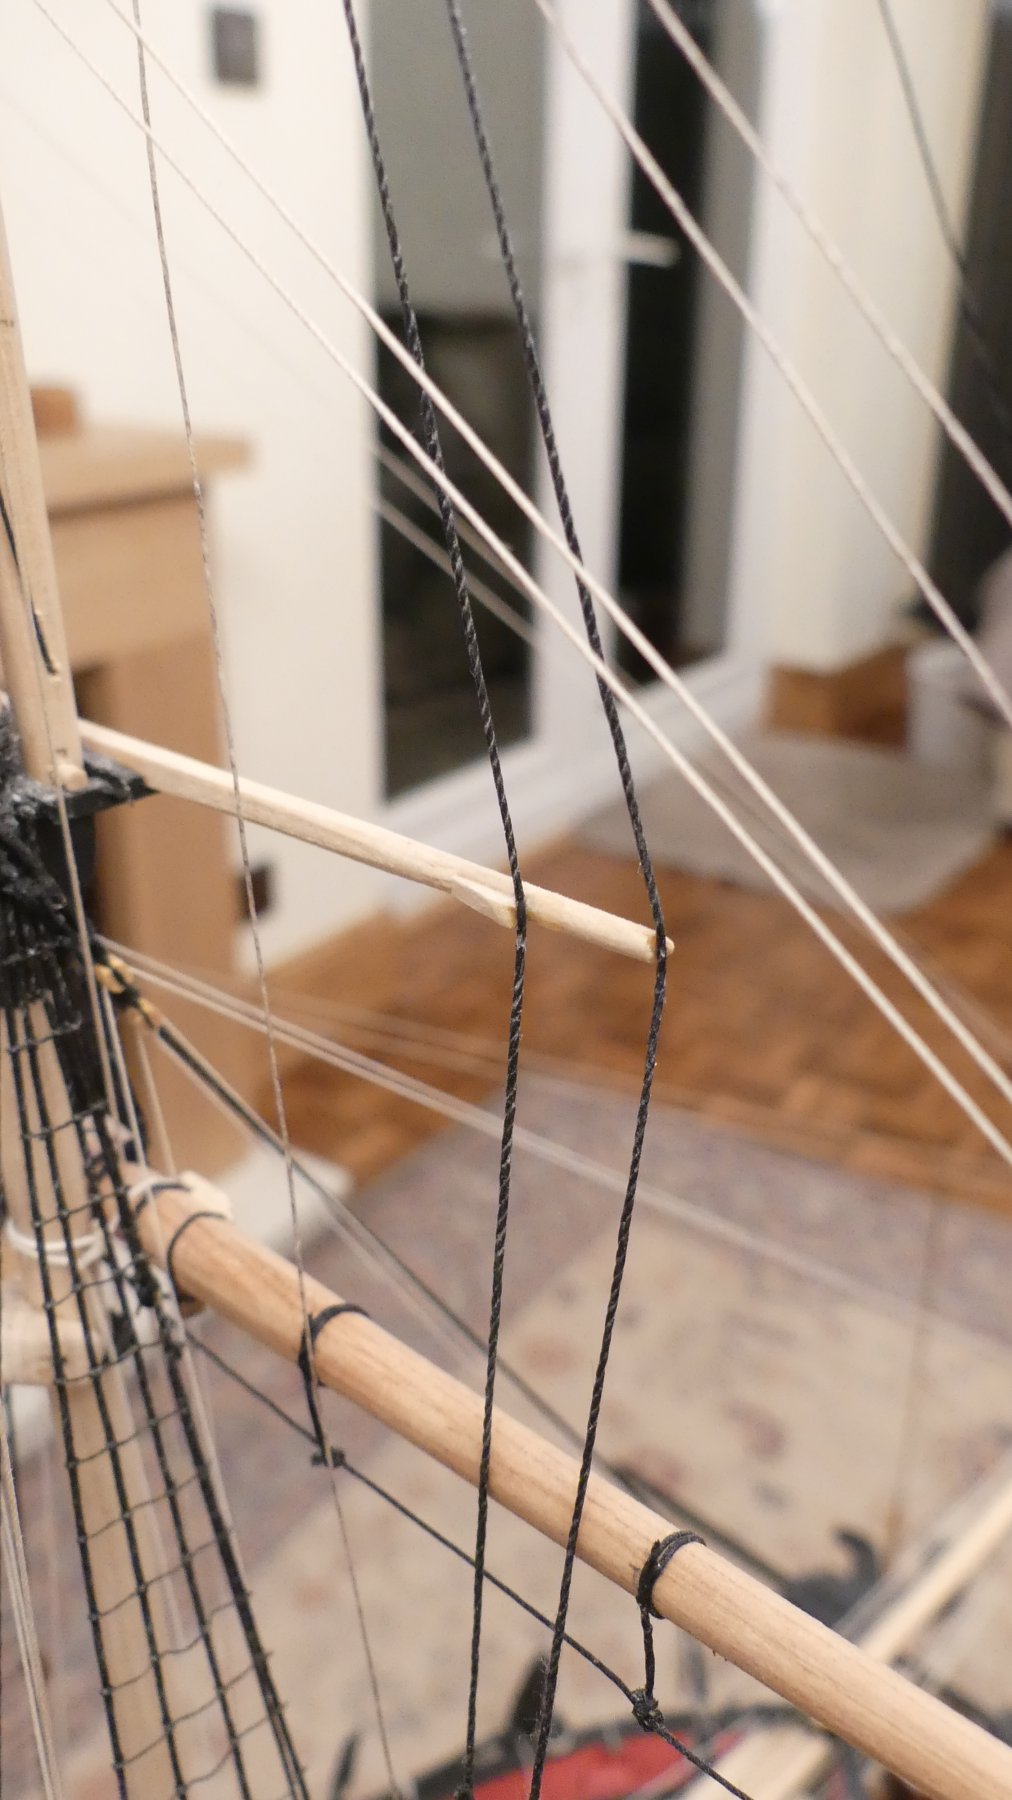
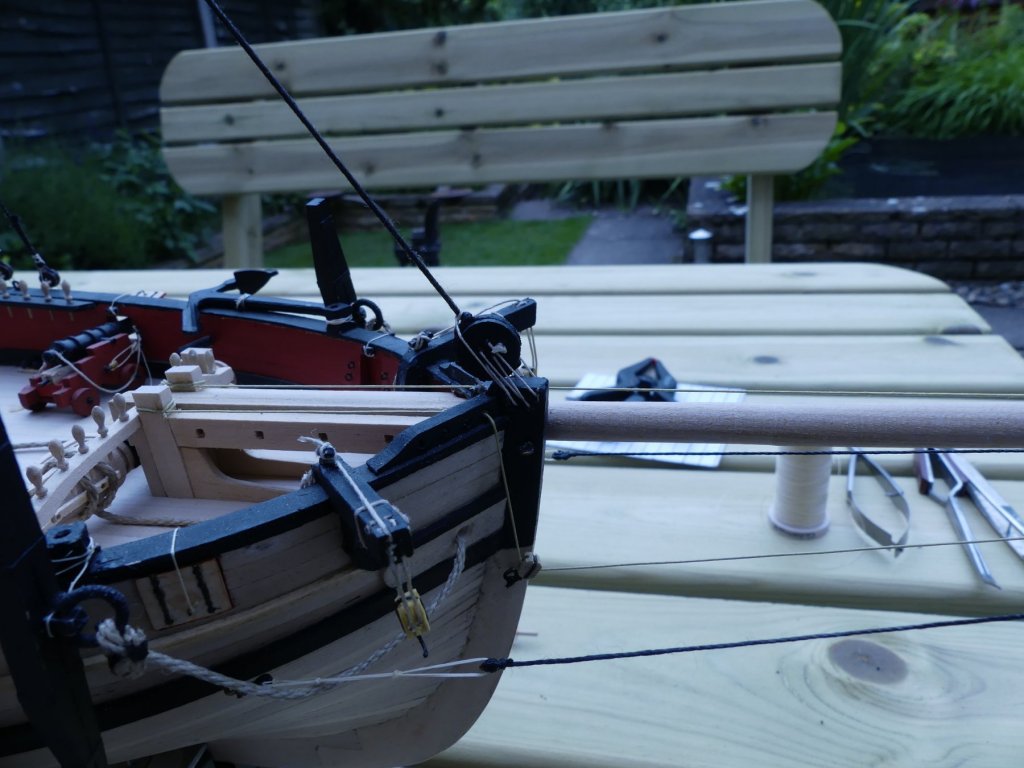
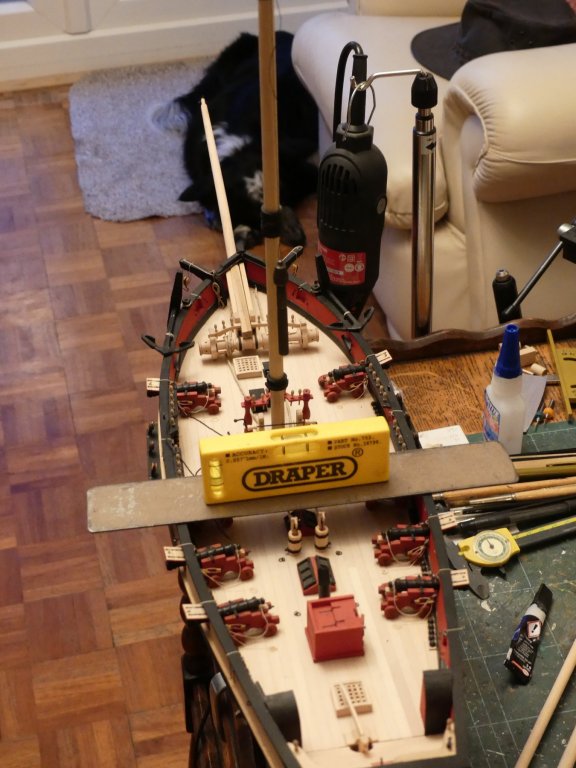
The Mast and bowsprit have now been stepped. The photograph below shows my method of making sure the mast is perfectly upright. I use a small pin vice as a plumb bob and a spirit level across the hull. Photo taken slightly from side so doesn't look like plump is in line with the mast. The booklet with the kit is very comprehensive with regards rigging and the sequence of completion so I thought I would not have to write my usual ' sequence for rigging the masts and yards'. However I hit a problem with the first item. Bowsprit bobstay rigging says to use black thread and then says to take from end of bowsprit, through a block, through fairleads and to pawl bits. My first query was 'tarred' rope through a block! My second was whether cutters had bobstays when they have the provision to bring the bowsprit in and out of the hull. Further investigation seems to indicate that he has somehow combined the bobstay with the Jib Outhauler. Jib outhauler would be in natural thread but rigs as he describes other than passing through a sheave at the end of the bowsprit and going to the jib traveller. Now I am really confused as what is correct for this vessel. 18th century rigs and rigging book does not really help, the Lennarth Petersson book seems to side with me. Casts doubts on the rest of the Bill Shoulder rigging supplied with the kit.
- 102 replies
-
- 6
-
-
- speedy
- model shipwright
- (and 1 more)
-
This is what I am using: http://datalocation.co.uk/data/CTM4001.pdf