HOLIDAY DONATION DRIVE - SUPPORT MSW - DO YOUR PART TO KEEP THIS GREAT FORUM GOING! (Only 20 donations so far - C'mon guys!)
×


Thunder
-
Posts
582 -
Joined
-
Last visited
Content Type
Profiles
Forums
Gallery
Events
Everything posted by Thunder
-
Would it be possible, as a smaller and more high range model producer, to provide upgrade wood choices to those requesting it. I would except that you could not stock all woods and so it would incur an extended delivery time and handling fee. The standard kits could be sold through the normal outlets as the method of providing your regular sales. It would prevent these piles of Walnut and Tanganika that I don't know what to do with other than throw away. Cherry, pear, box or beach for hull planking and maple, lime or box for the deck. You would have to limit choices to stop it getting silly. Incidentally I have just brought an old kit which strangely has Tanganika for the hull planking but Walnut for the deck! Not sure that is going to look right.
-
Completely agree regarding walnut being too dark, it also is not that nice a material to plank with. I would change it every time but it is getting replacement stock for the keel sections in other materials that has proved the problem. At least if you have to buy from a hobby stockist. I have never liked Tanganika for the decks and have kept some to plank the hull on one of my future models as the colour looks far more suited to that.
-
Hi, I am currently doing Cruiser which is essentially the same kit. Yours looks to be going together better so far. I have done a few logs which might show some of the problems I have had but you are already catching me up. The worst failing I am finding is that there is not enough bulkheads to properly hold the planking to the right shape. I am doing the second layer now and there is nothing to pin though to other than the first layer. This is just where the planks need pushing up together to prevent the small gaps between. Telling you this as you still have the chance to pack between the bulkheads.
- 31 replies
-
- 2
-

-
- snake
- caldercraft
- (and 1 more)
-
Wreck of Bonhomme Richard found off Yorkshire coast.
Thunder replied to uss frolick's topic in Nautical/Naval History
I always find the battle of Flamborough head an interesting story. Serapis, an outdated 44 gun two decked ship which due to its poor design struggled to open its lower deck ports in anything but calm water, and the armed vessel Countess Scarborough 20 placed themselves between the fleet they were protecting and the American / French fleet. Bon Homme Richard 42, Alliance 30, Pallas 30. Serapis and the BHR fought each other two a standstill with the CoS fighting the French vessels. Once the countess surrendered the Alliance joined in the fight against the Serapis and she was forced to surrender. Up to this point it was one of the most heroic single ship actions of all time for both sides. Depending on who writes the story depends on whether the French ships are disregarded, Serapis guns climb to 50, Bon Homme Richards reduce to 20 etc. Also the fact that the English merchant fleet got safely away is nearly always forgotten. John Paul Jones is also an interesting subject. How did he get to France and if it was as captain of USS Ranger why was she not involved? John Paul was a Scotsman, some accounts have him as a sailor on slave ships but found it unhuman. Either way accused of murder of a sailor and fled to America. Again accounts vary from self defence against a mutineer (so why flee) to an act of rage against a sailor whilst he was a Midshipman on an English Royal Navy ship. All this time on and still difficult to get an unbiased account. After the Ranger and Bon Homme Richard his service is unknown to me but eventually he joined Russia as could not get further service in the USA and became an Admiral. He retuned to Paris when no longer able to get service in Russia. His remains did not return to America till 1909. As for the Bon Homme Richard wreck. That coast is strewn with wrecks and due to the strength of tidal currents few survive unless they get covered in silt. Often, as with history, people see what they want to see and change the facts to suit. Perhaps timber analysis or the ships bell could prove either way. I didn't realise that the BHR had caught on fire, actually thought the Serapis did from grenade thrown from the BHR. -
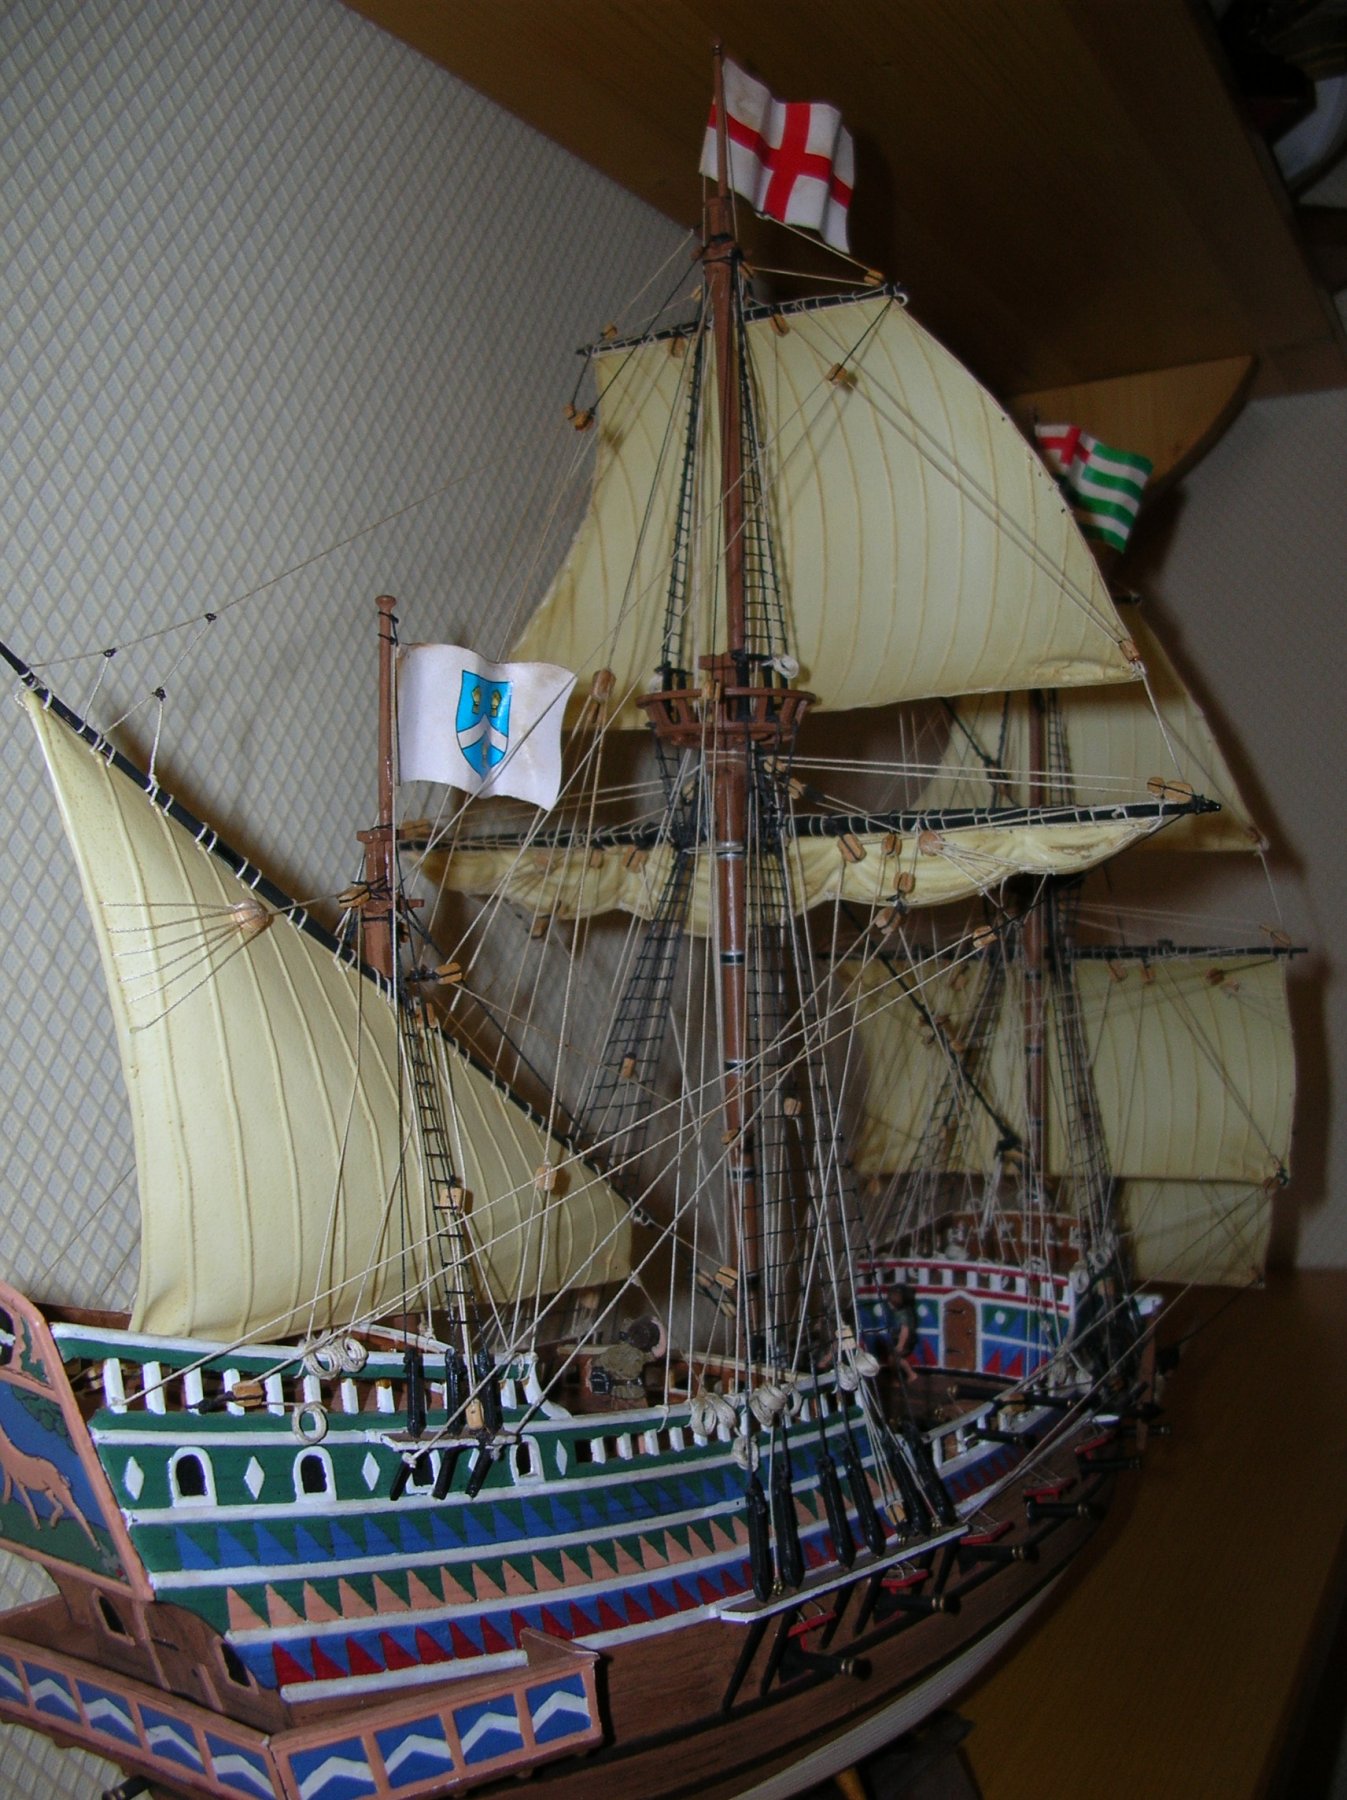
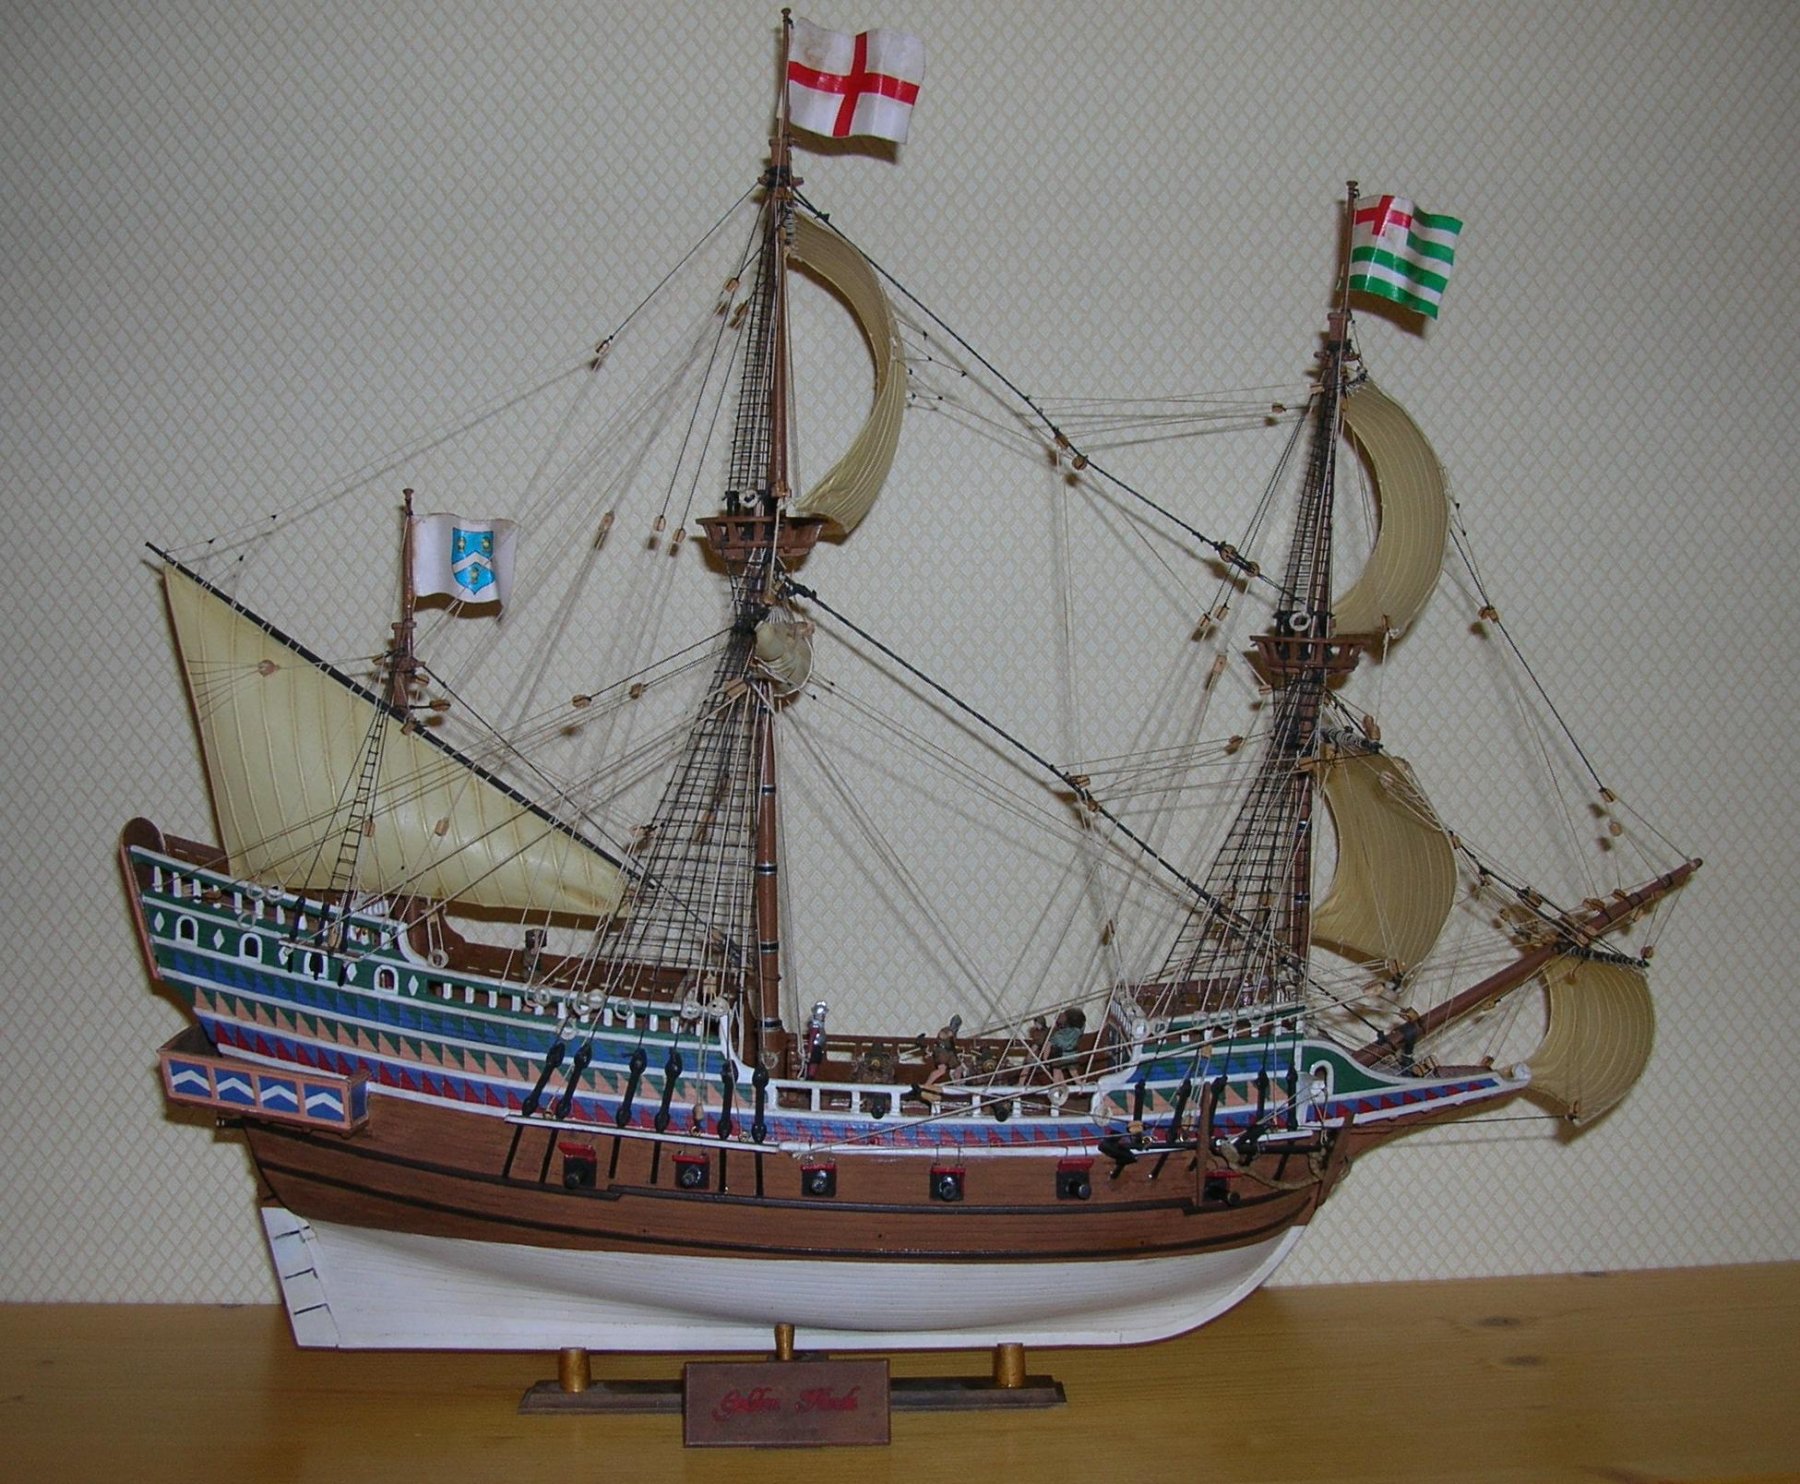
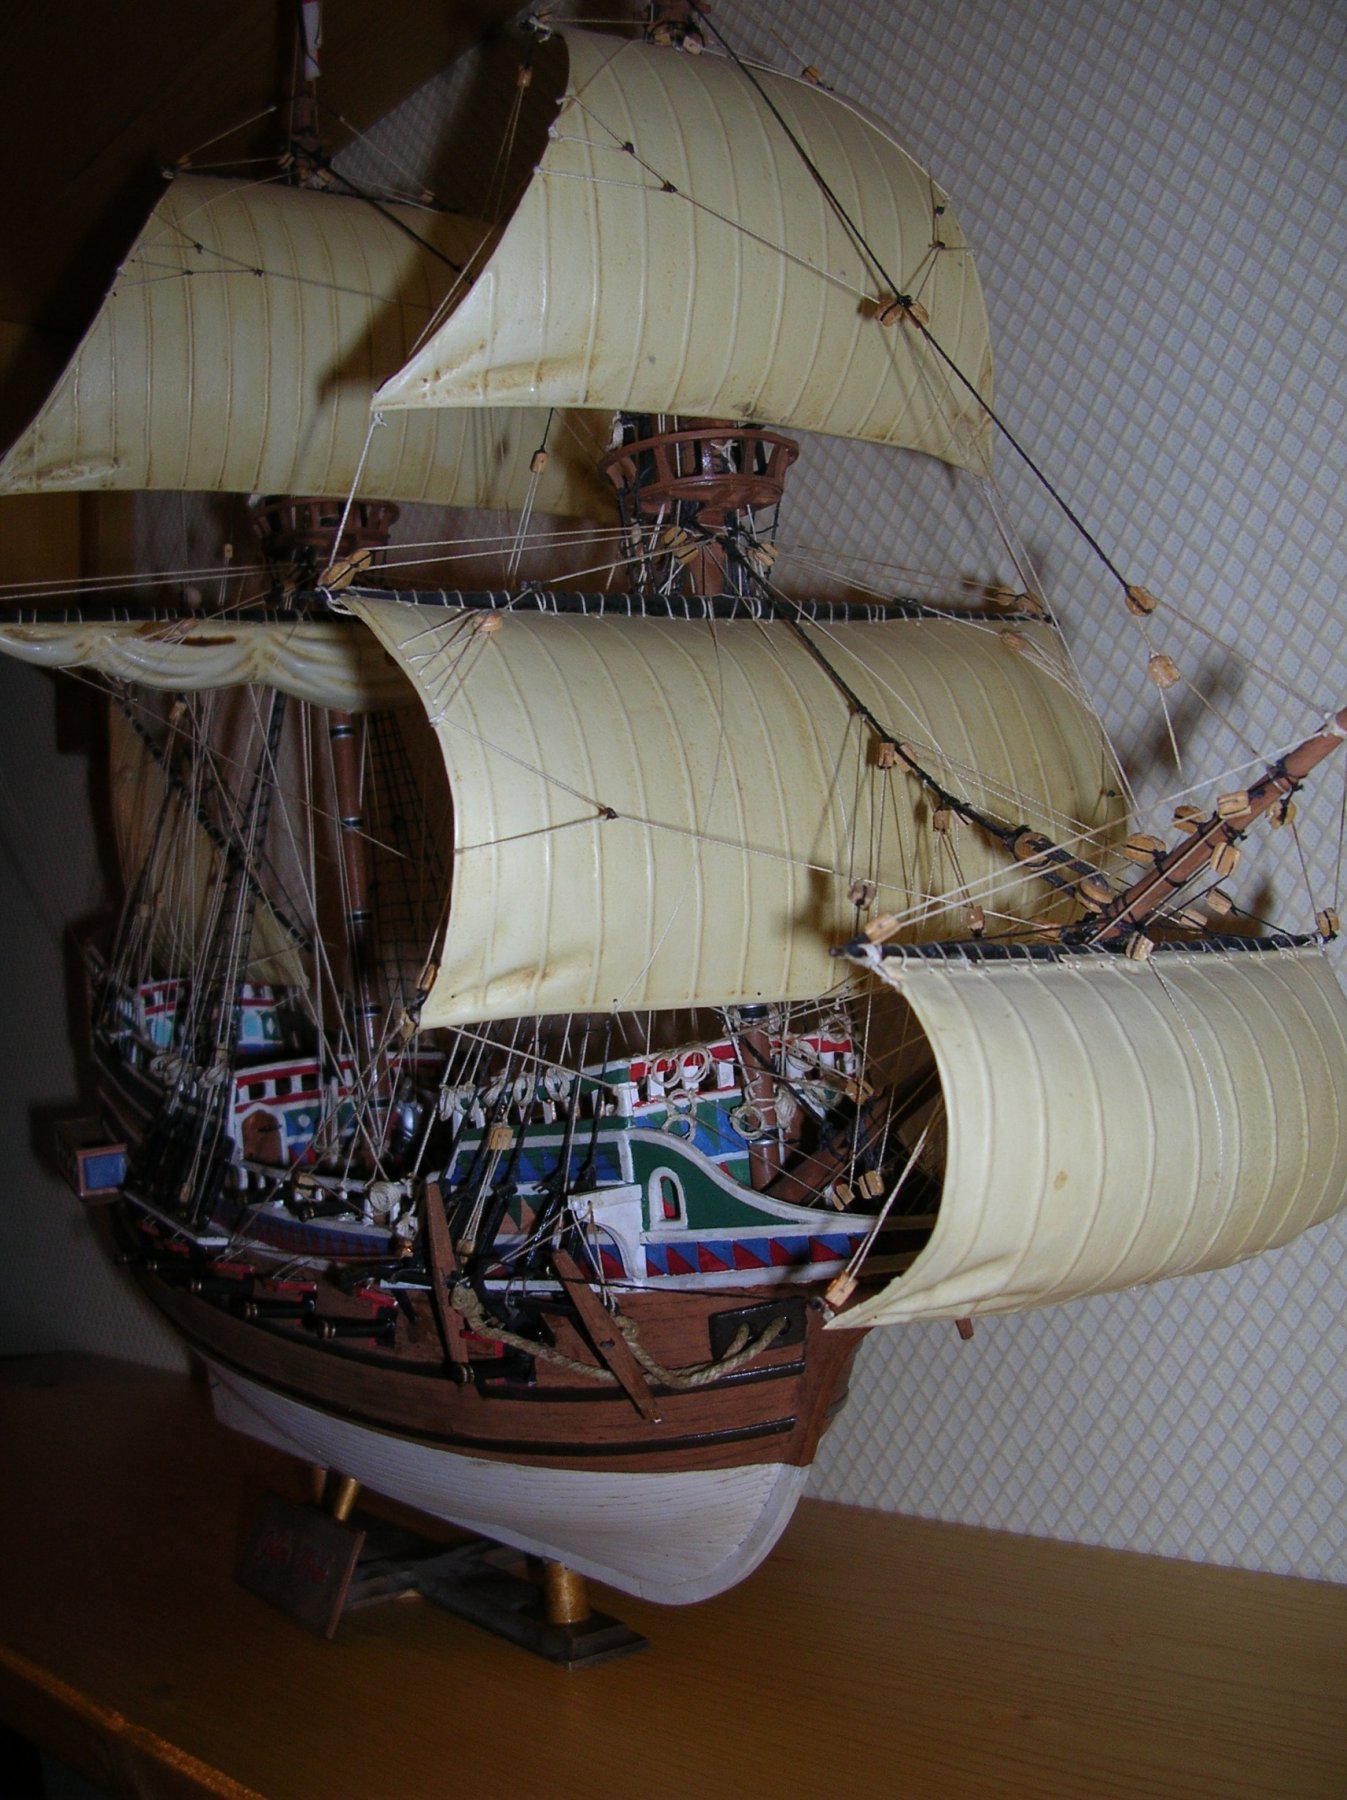
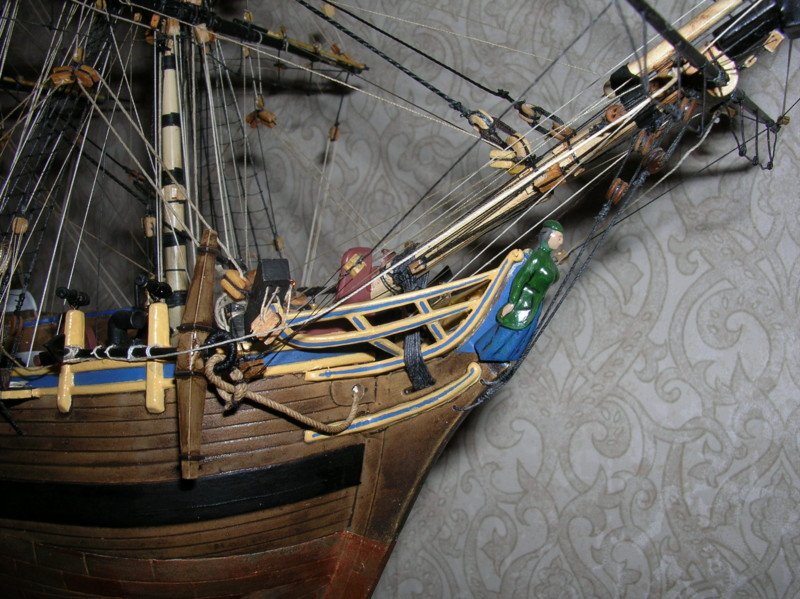
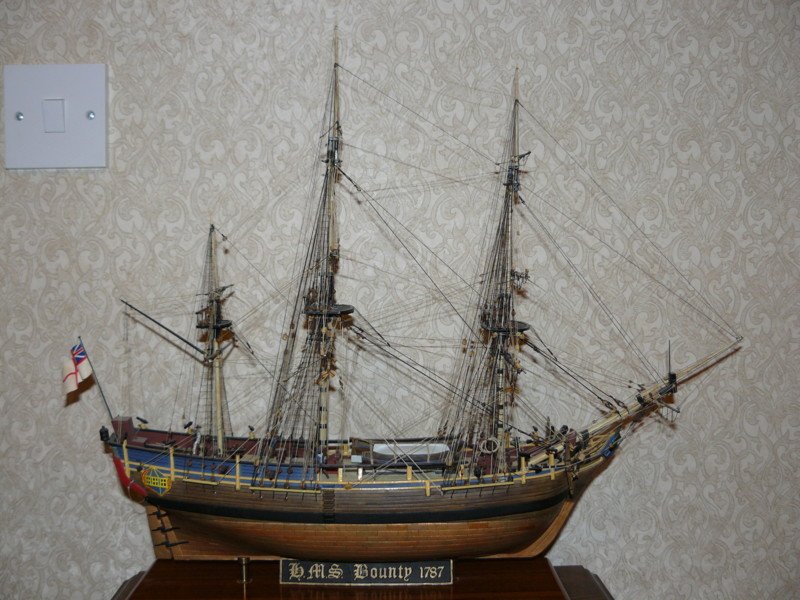
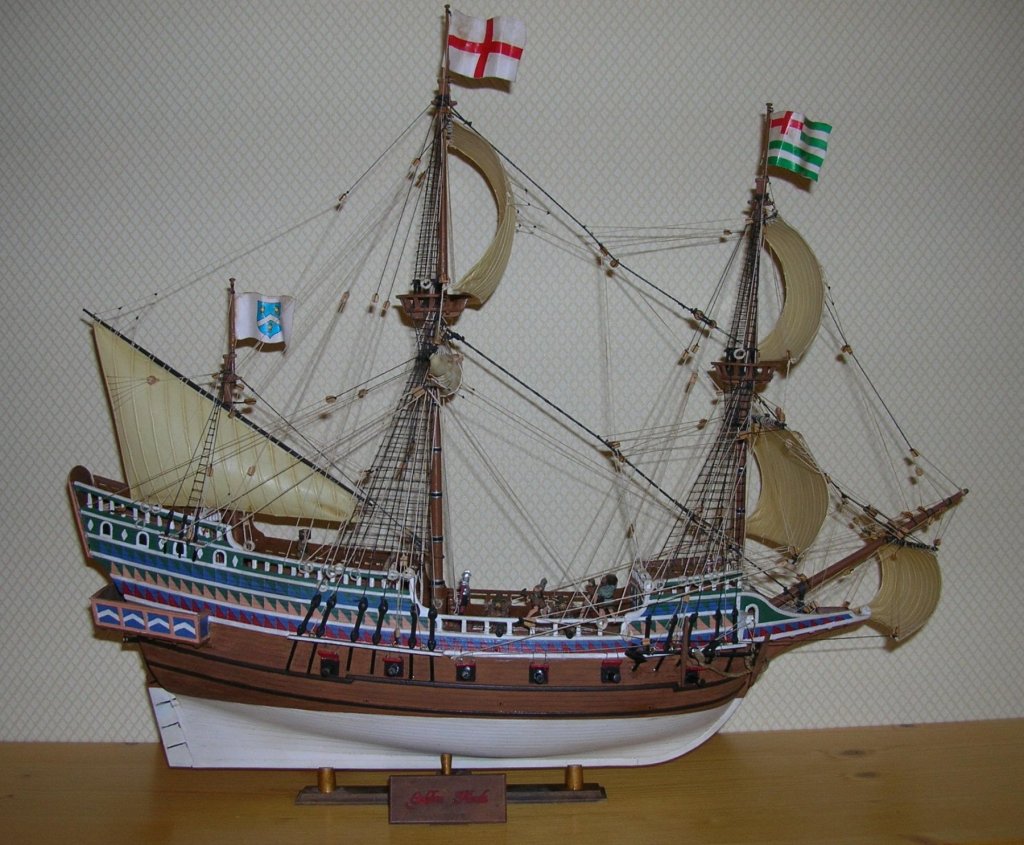
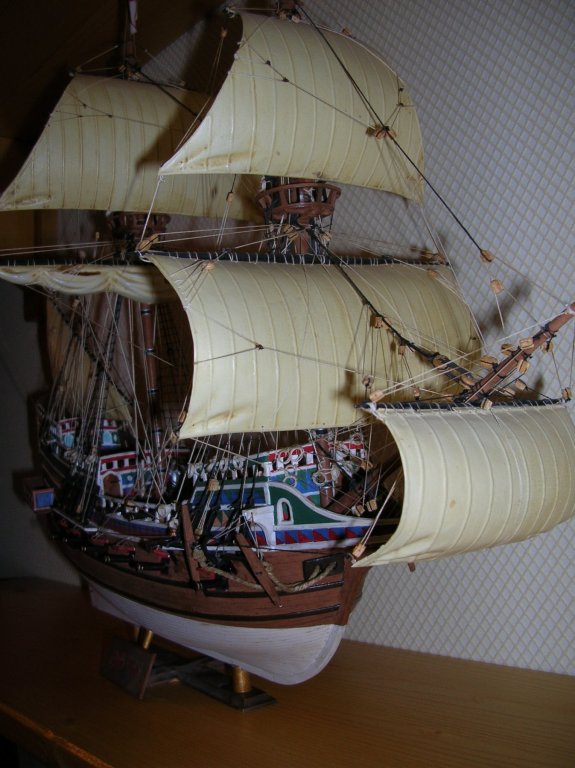
One thing of note is that the figurehead is often shown as wearing a red coat but in Bligh's log he is stating as describing it as a pretty women dressed in Green riding habit. I believe this was after he painted it to amuse the Tahitians. It may of just been plain yellow before. I have read so many works on him that I am unsure where I got this from it might of been 'Captain Bligh and Mister Christian' by Richard Hough. I have just read Bligh's biography by Rob Mundle, also a very good book but nothing much about the ship. For what it is worth below is my lowly Airfix kit. not so pretty is she with the Airfix mould!
-
Hi, Kit shown I built over 20 years ago, it is the Airfix Golden Hind. Used the vacform sails with bolt rope super glued around the edge. Sails painted base colour, followed by a wash of brown which settles in the creases and grain. Apply Second wash of brown paint but buff off raised areas, and where material would be strained, with a tissue just before it dries.

-
excellent job and all good practice for that second layer.
-
Looks exciting to me. The only issue I have is cutters are my favourite vessels and having built two and with Lady Nelson in stock I know I will want this as well. Alert is quite different to the other cutters available so perhaps the lady wife won't notice another.
-
Hi, just catching up with this build and got so far to page 4. Never have I read such an exceptional build from both the builder point of view and for all the support and discussions. This is an example of how this website works at its best. I had this kit brought me for Christmas and this topic could not be better, even it was a practicum, due to the discussion and research involved.
-
Thanks Paul, I do not have facilities to cut my own planks from stock but may be able to use originalmarquetry. What timbers have you used and what is the quality like.
-
The other two to remember are: Using the bulwark capping rails to check shape at bow and stern. When coming to positioning your wale make a check to ensure the position is correct so that the shroud chain plates will reach it. - I usually forget this one.
-
Phil, Does this come with ply sections to form the stern. If so just check them for size as I am a little concerned that your planks at the stern are touching down on the parts numbered 17. It is a while since I built this so you may be right but worth checking now whilst there is only one to modify. I love the first planking because it is now you really see the ship taking shape.
-
Hello Bruce, at least with a scratch build you will not be looking out for and correcting the kit mistakes. The only problem you may encounter is getting good quality materials in the uk, unless you have the equipment to produce your own strip material.
-
You think you would learn but if you look at my present build you will see that I have spotted that I have the same problem again.
-
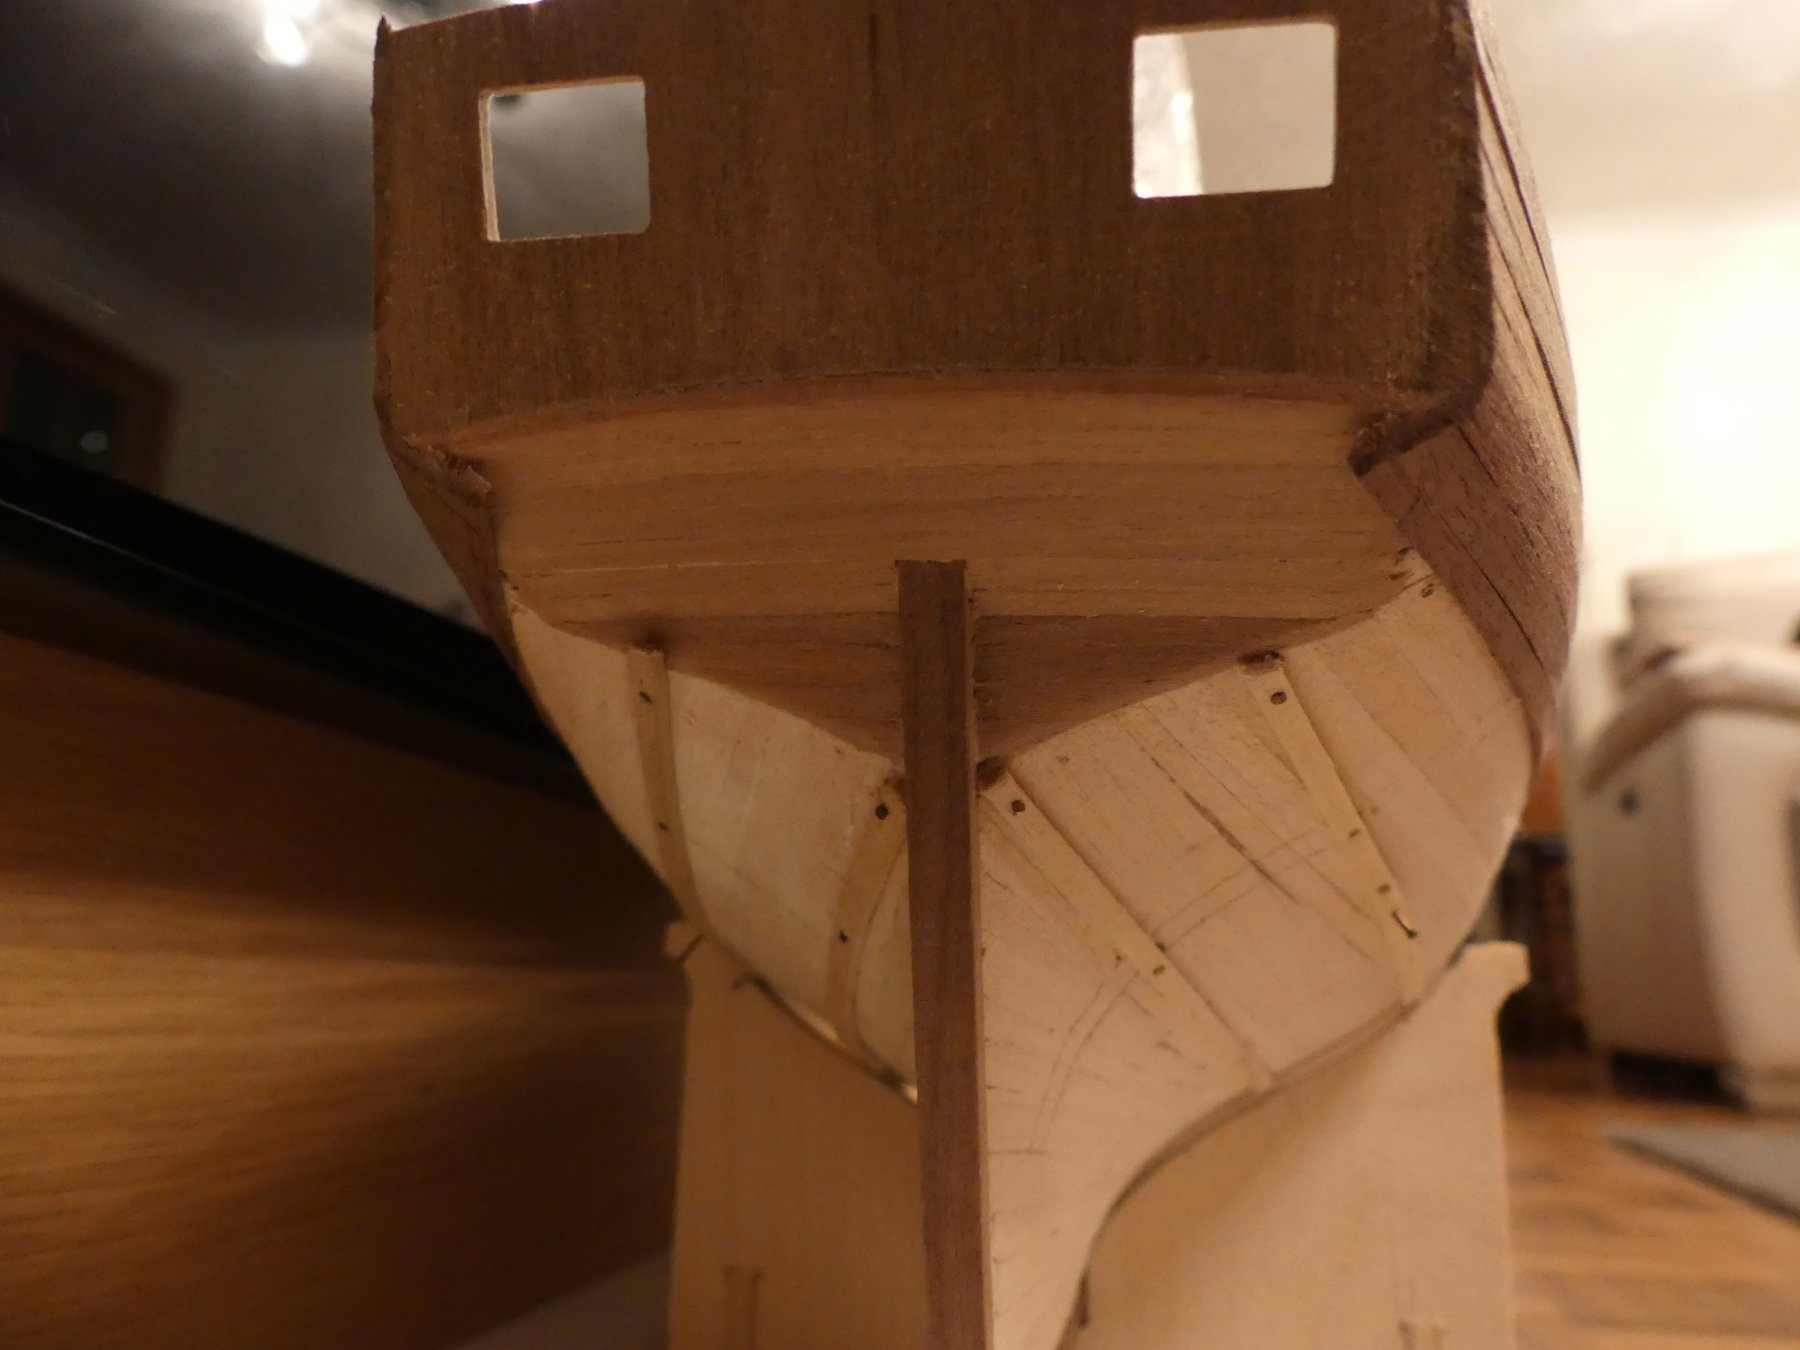
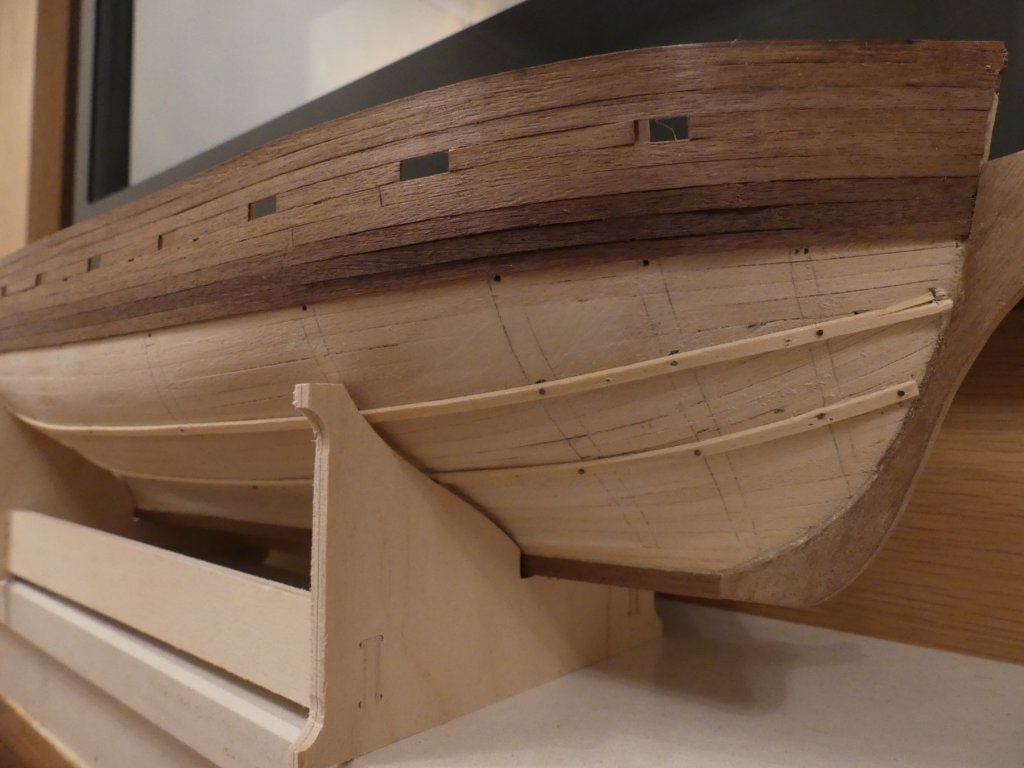
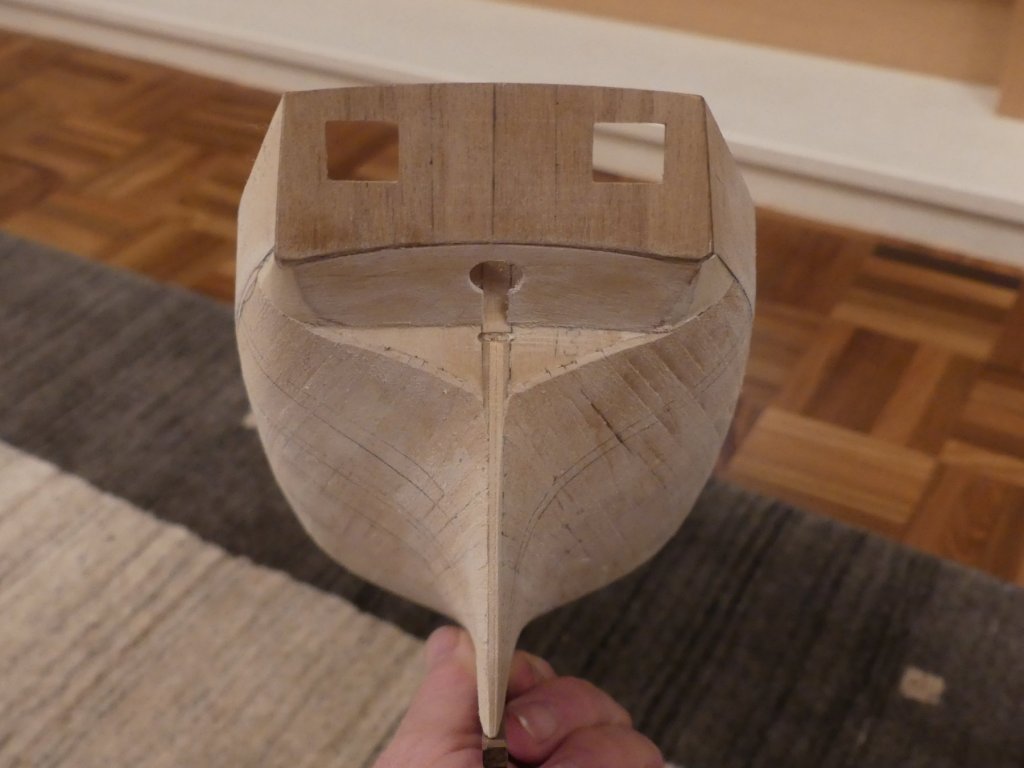
Hi, enjoying your build and wished I had spotted it earlier. Reason being that could of warned you about problems planking at the stern due a fault in the bulkheads. If you look at most builds you will see an inward curve / depression between bulkheads 9 and 10 before the hull shape swells out again. This is due to one of the bulkheads being incorrect. I had to pack out 11 to get the planks to run correctly. This really helps take away some of that angle that is making your planks splinter. I have attached a couple of photographs of how mine turned out. Unfortunately not found any of the first planking yet.
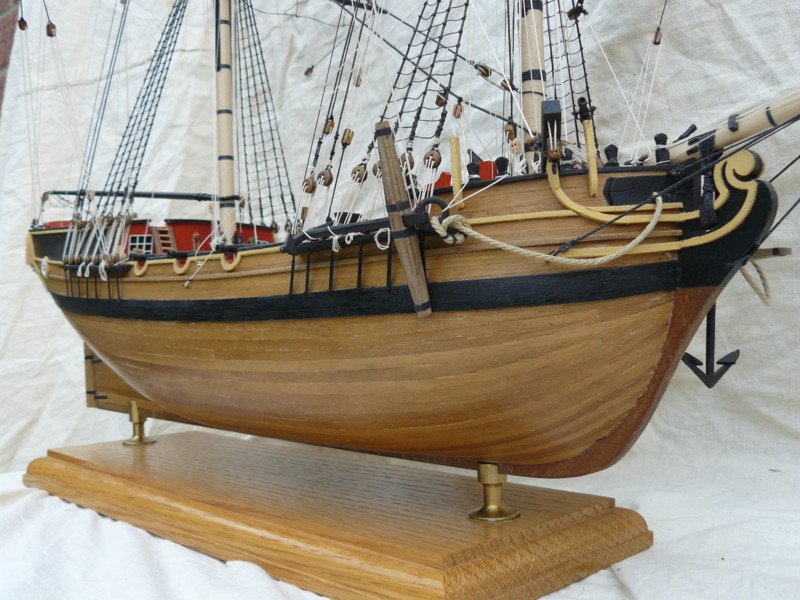
-
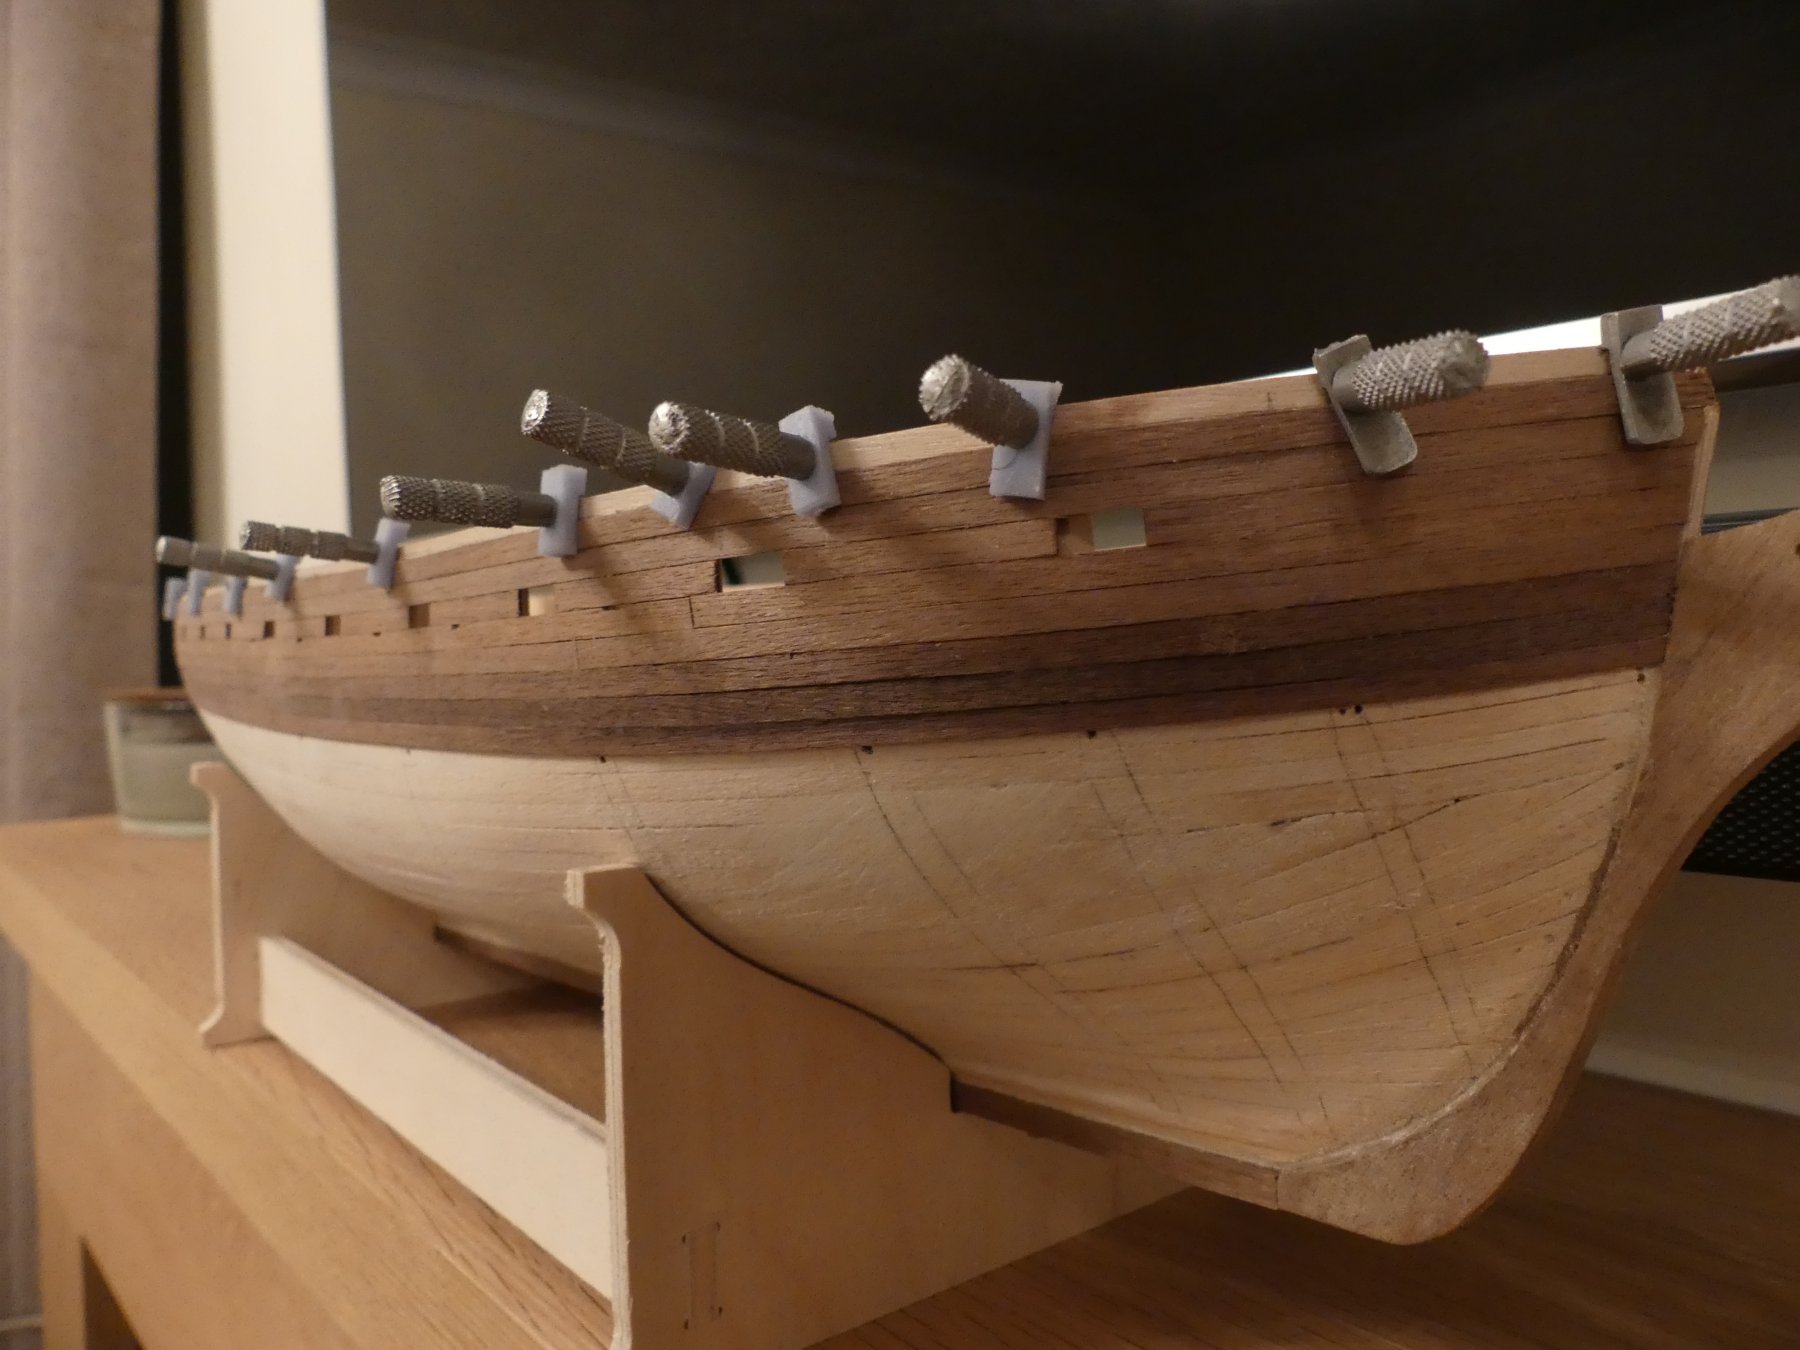
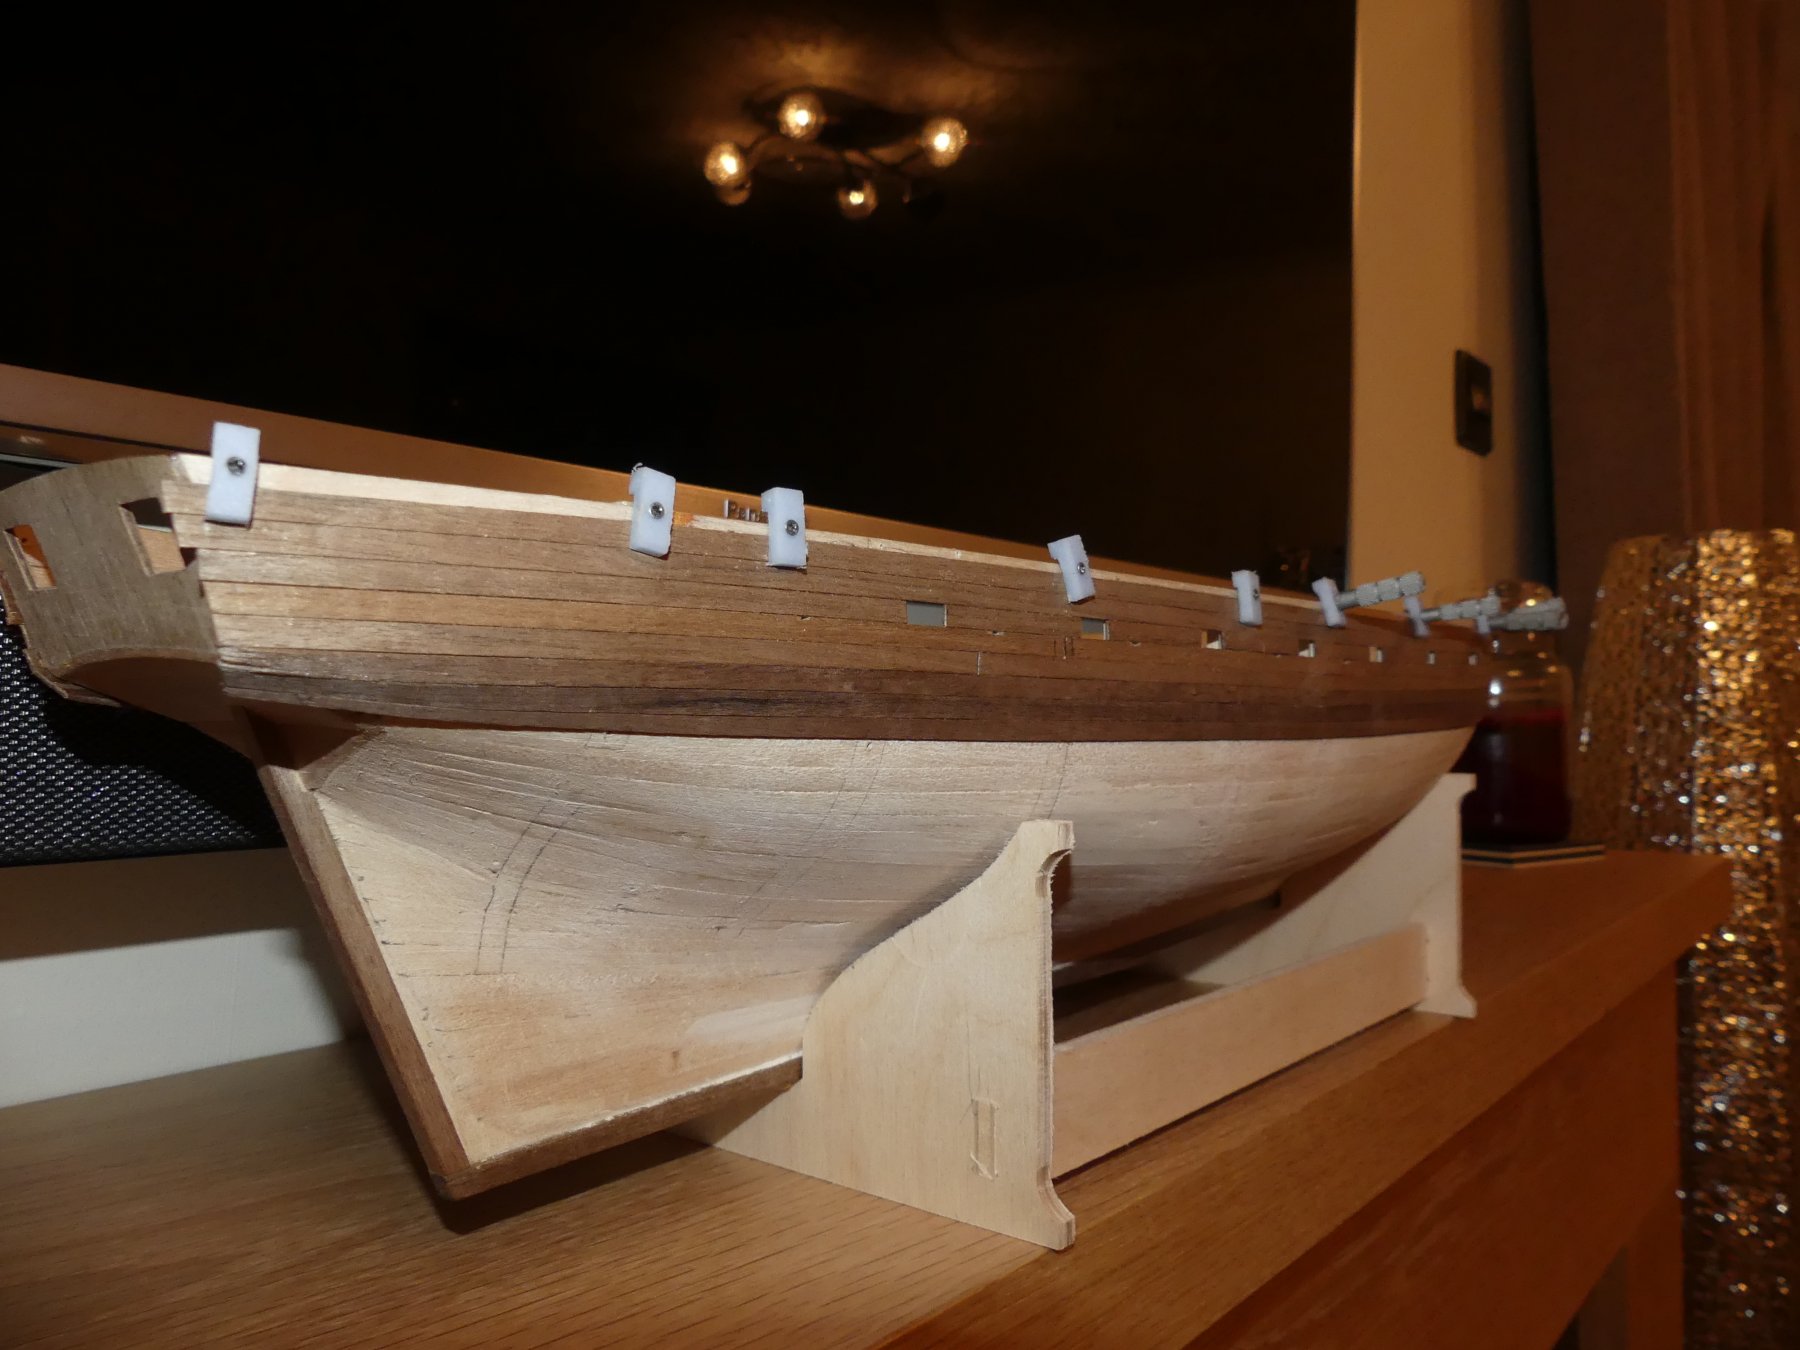
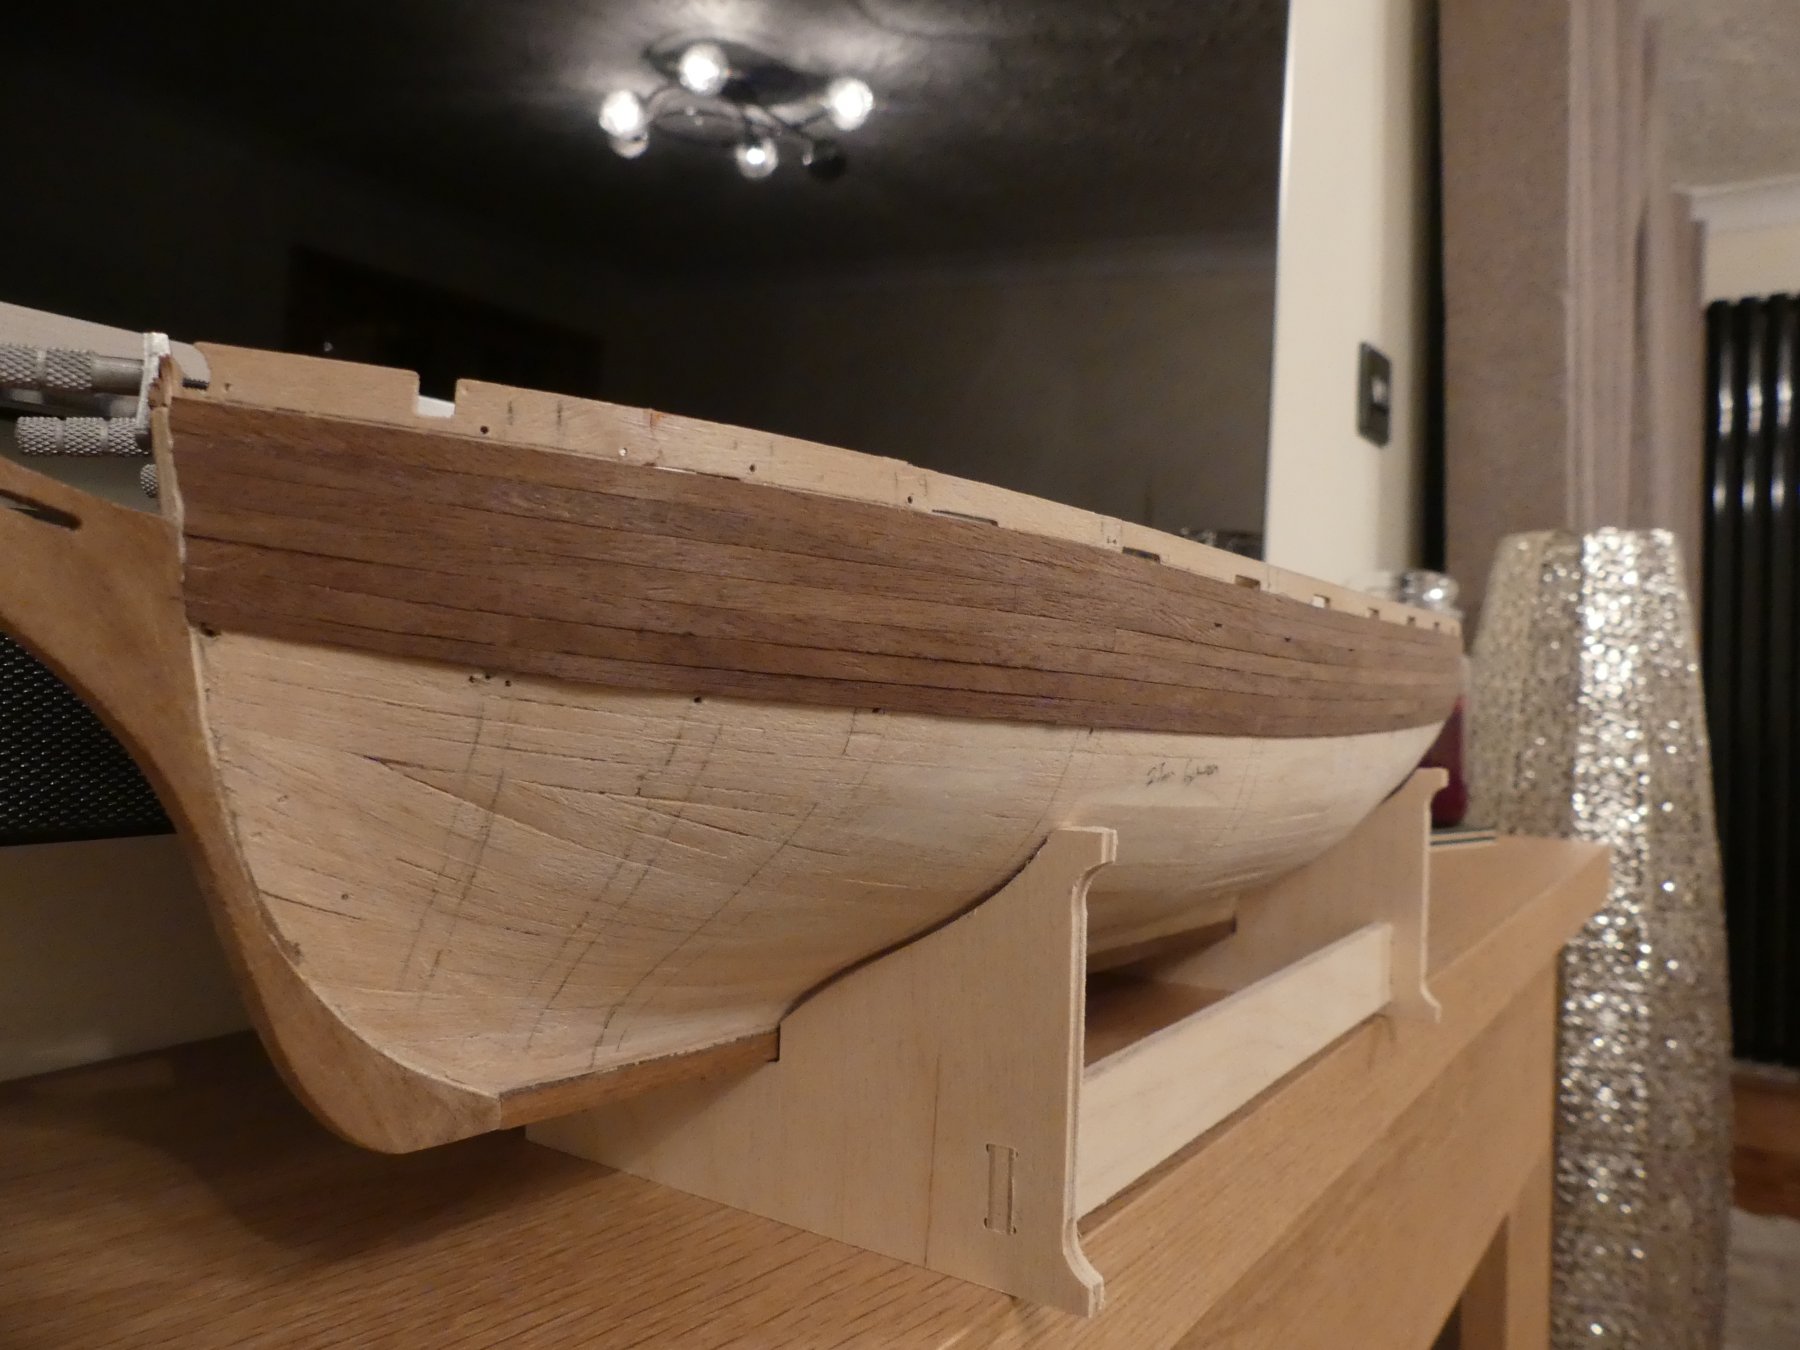
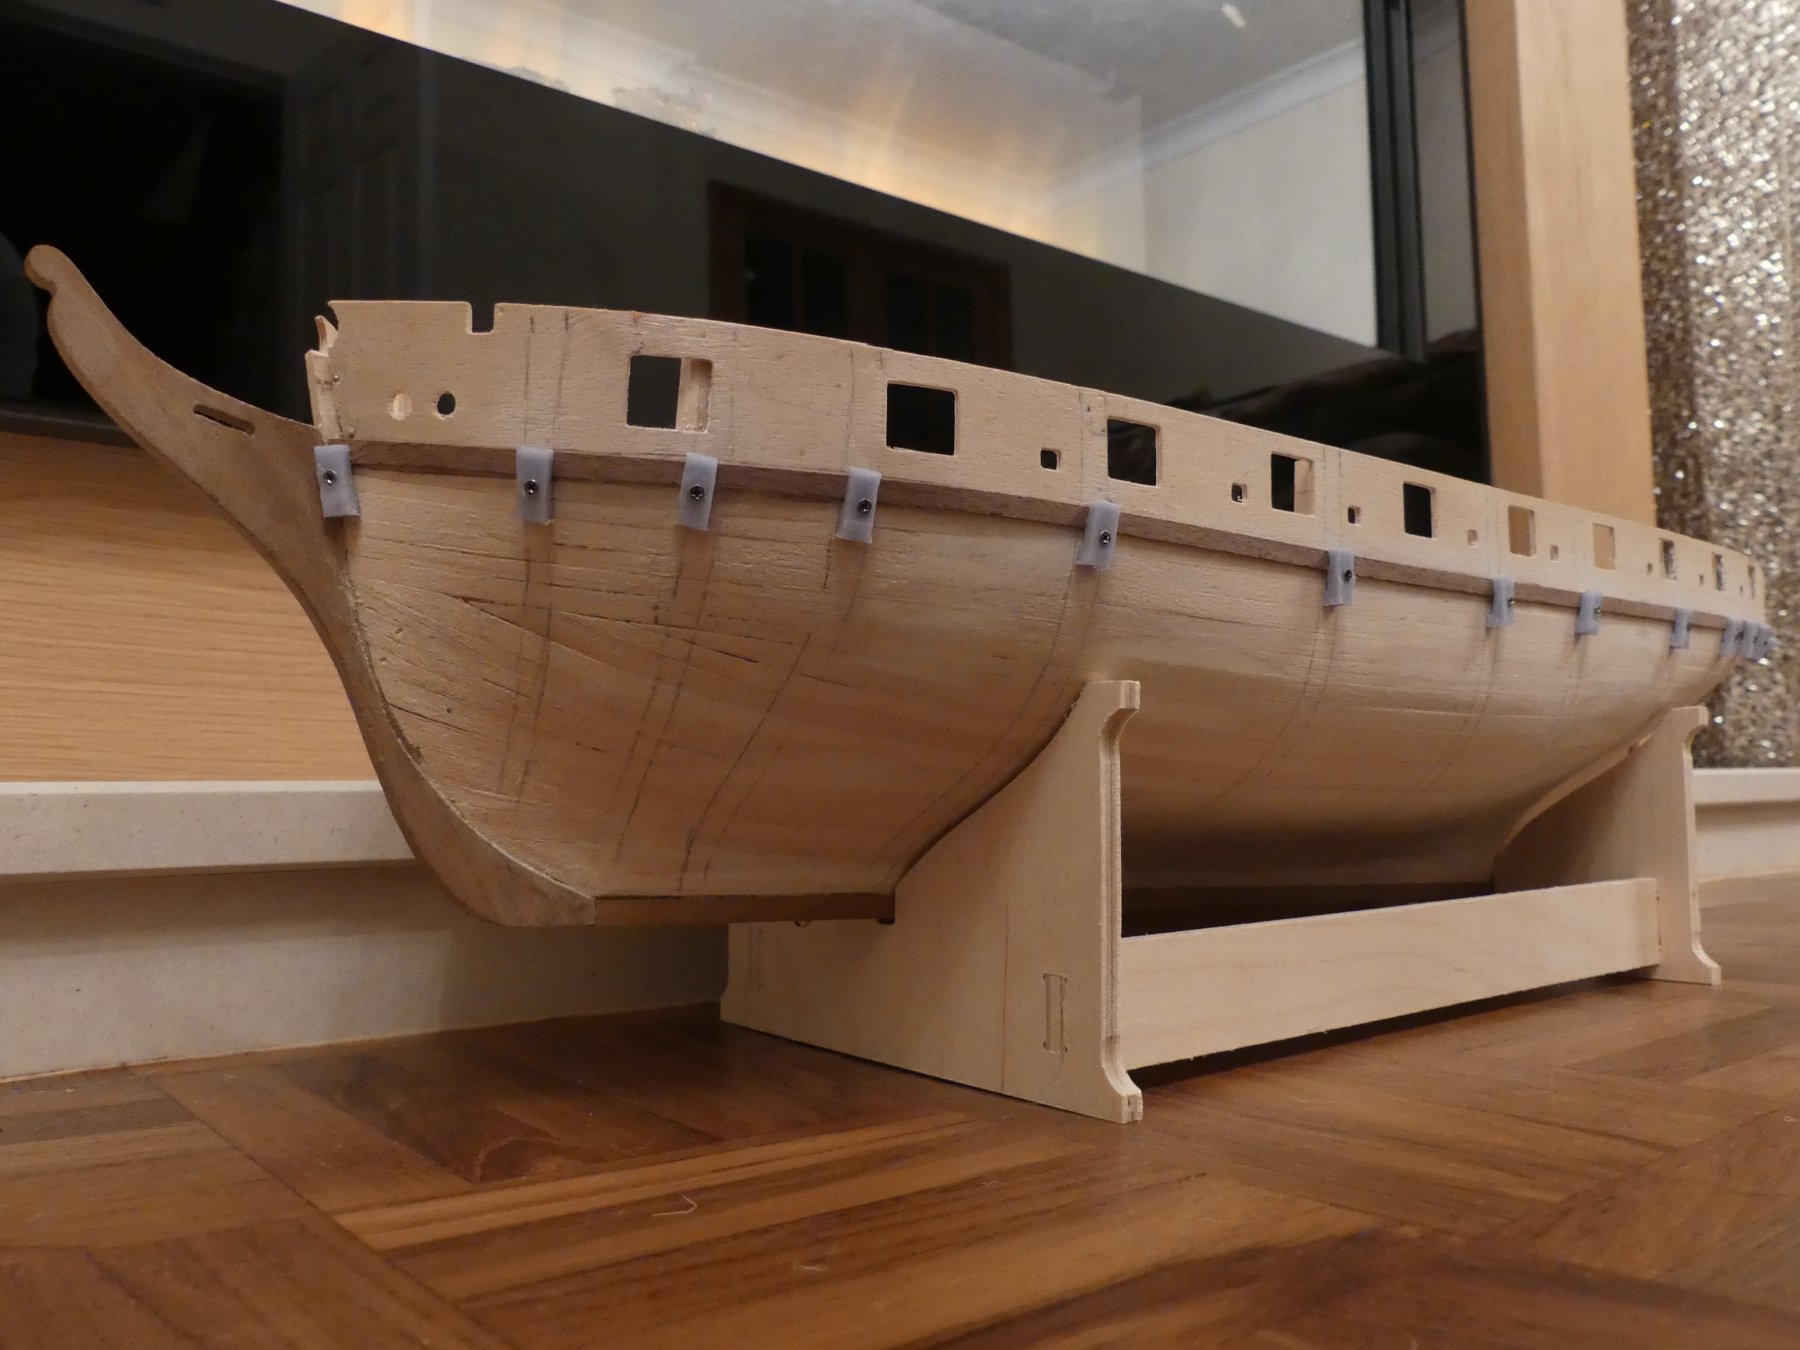
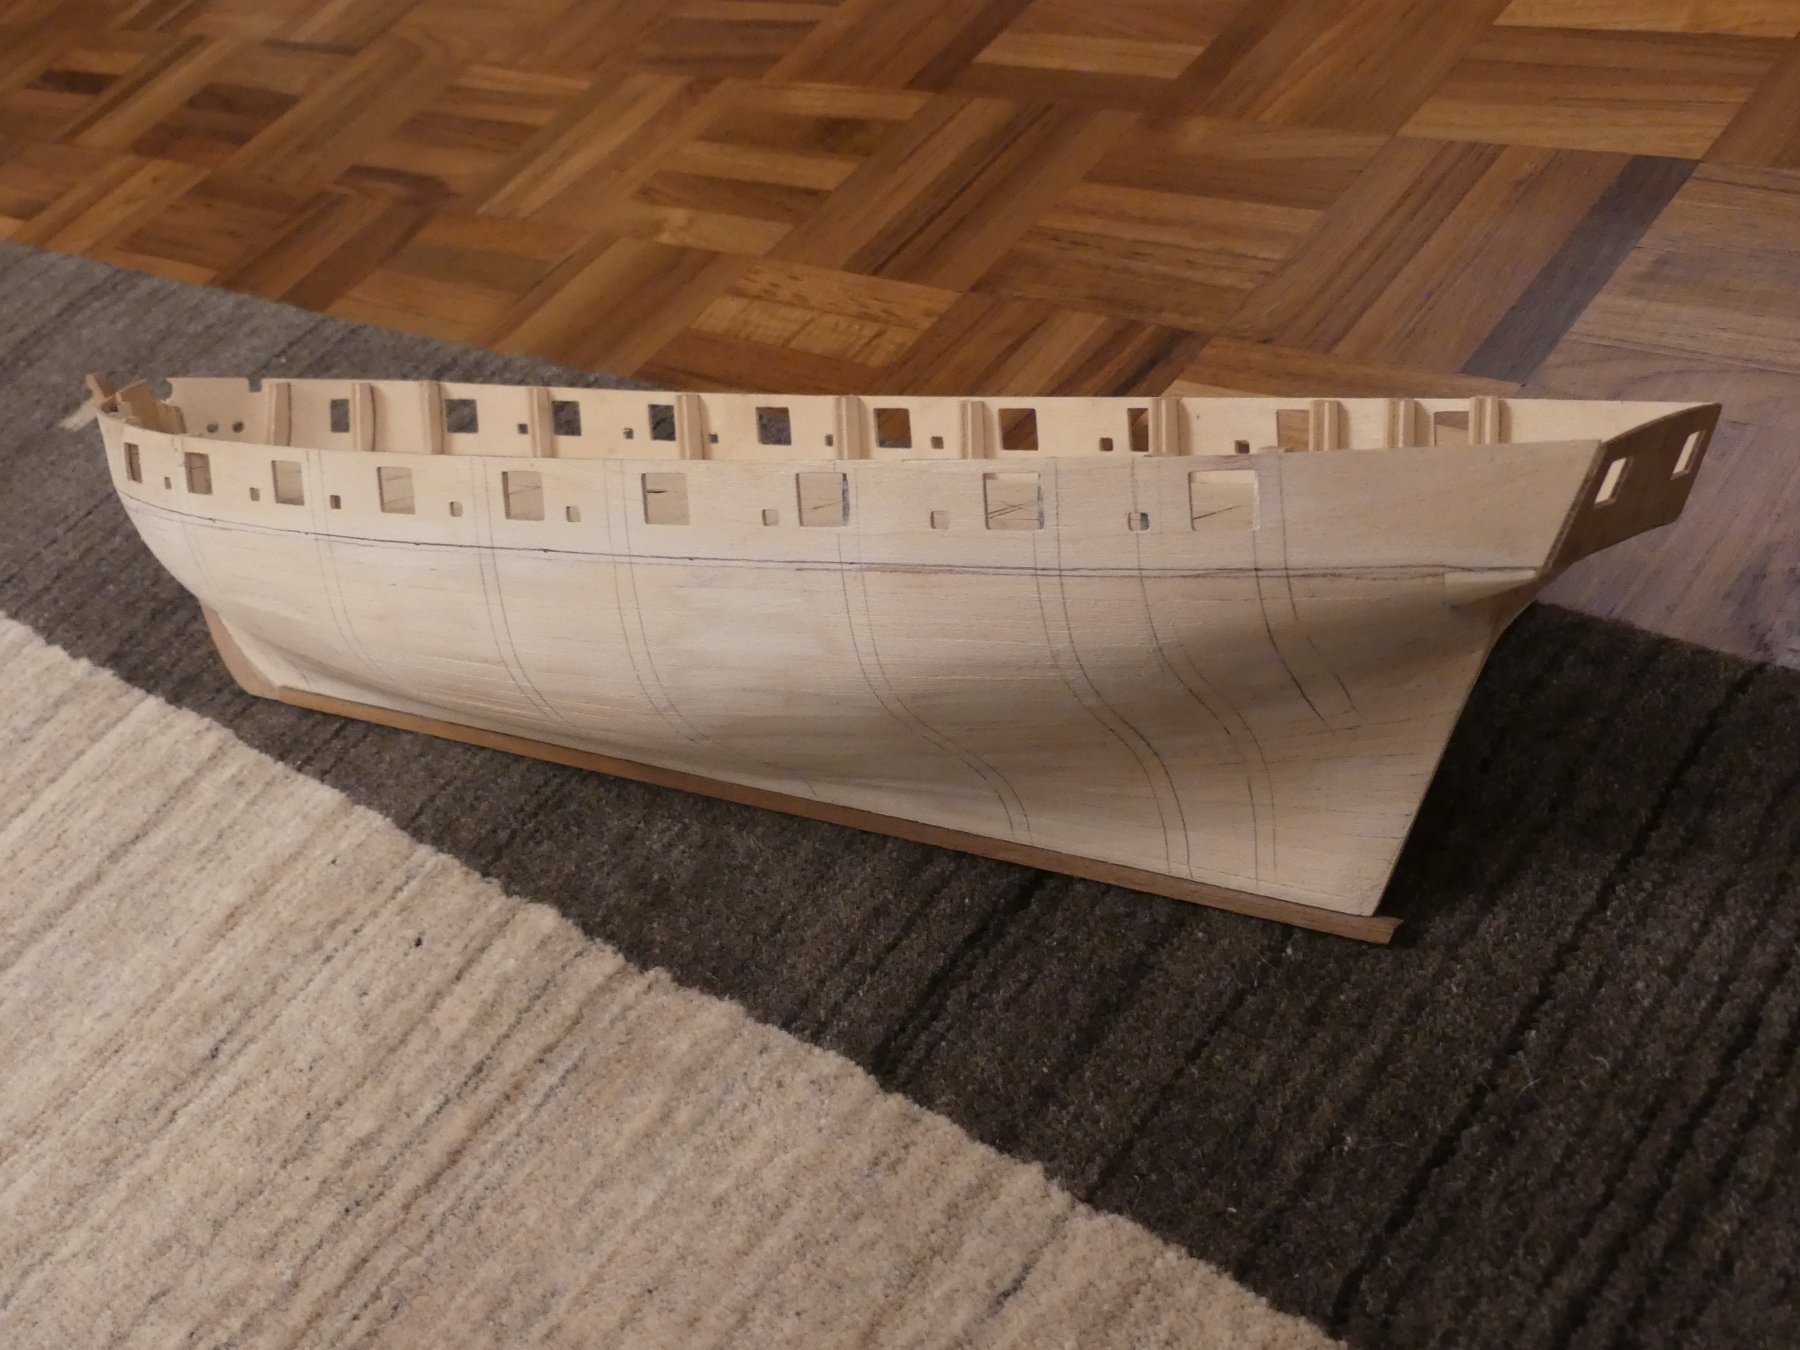
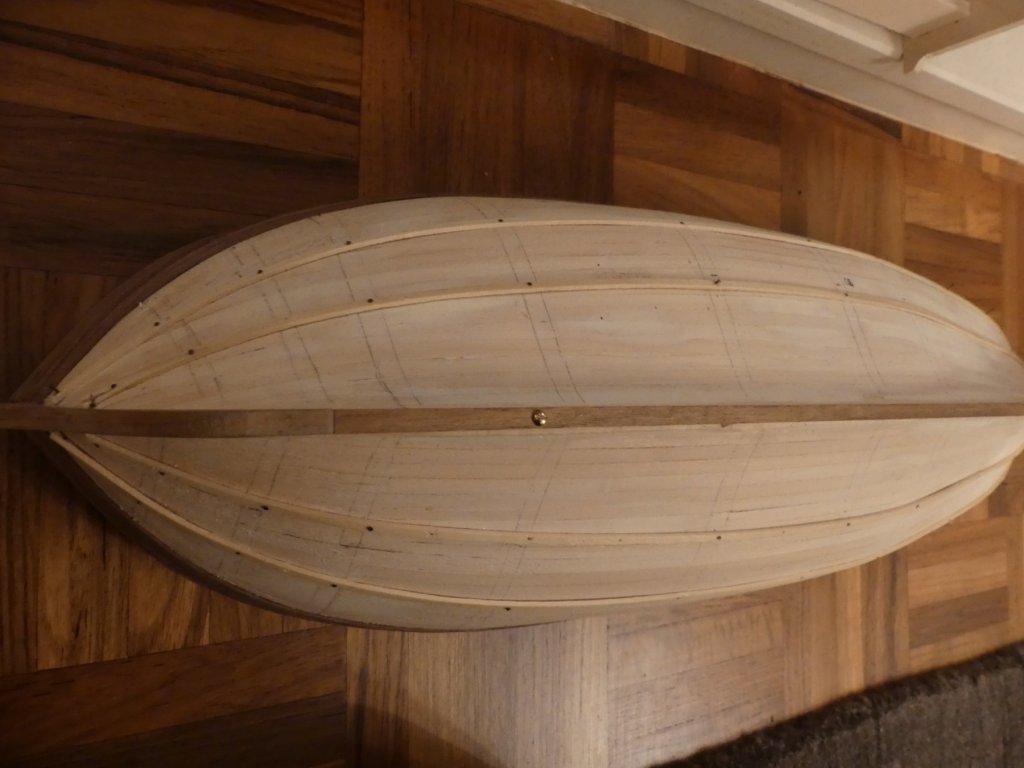
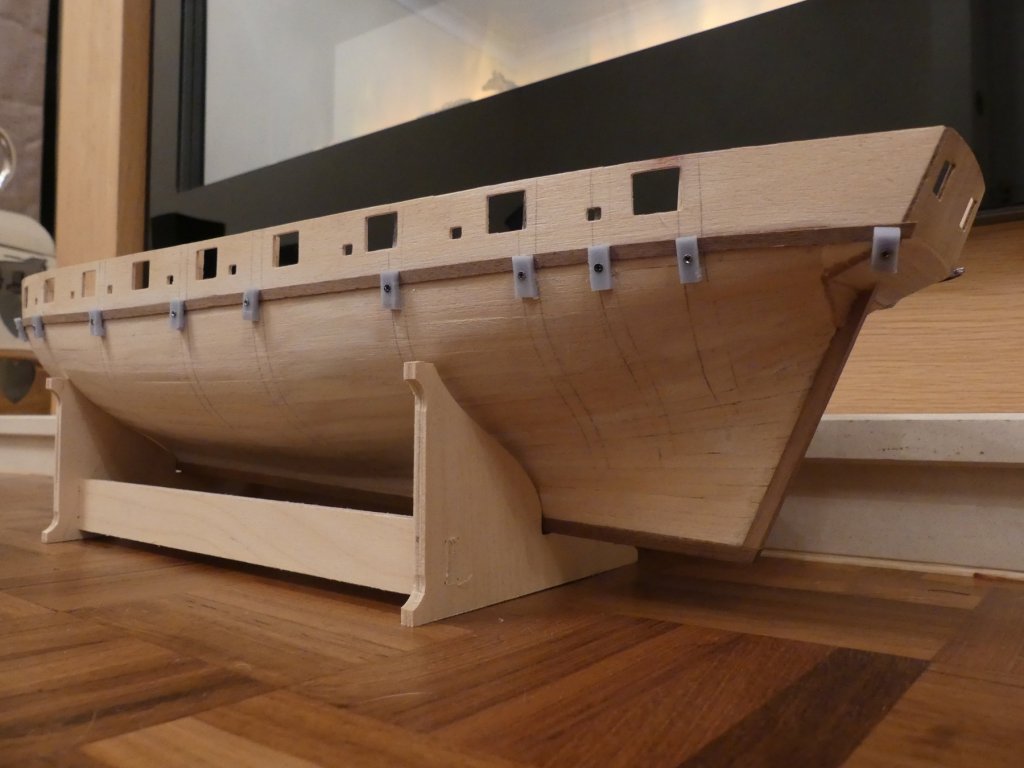
Planking from wale to bulwark capping rail completed. Next to divide the lower hull into sections. This has been done with the use of Ribbands. These are laid at the widest part of the hull at exact distances to match full plank widths. Ribband laid round to bow and stern as naturally a possible. The top ribband shows that the planks will be too narrow at the bow. Some drop planks will be needed in this area. The lower section at the stern indicates a few stealers will be required where as the top section will have tapered planks. I am going to have to do some calculations to see if this is practical. One think these ribbands did highlight is that bulkhead 8 is slightly too small. You couldn't see it when doing the first planking but obvious now. You can see this by looking at the ribbands to the far right of the above photograph. A good learning here. The brass screw head you can see is a BA thread pin that is through a nut set into the bulkhead under the planking for final stand mounting.

- 102 replies
-
- 2
-
-
- cruiser
- caldercraft
- (and 1 more)
-
Hi Jason, The two top planks that give the position of the main wale are untampered as are the planks fitted above the wale. As the wale planks are 3mm instead of 4mm I decided to start my tapering with the plank fitted directly beneath the two fitted at the position of the wale. where the planks are not broken by gun ports or to be hidden by the wales I have started to use scale length planks of approx. 140mm. I will be fitting the garboard plank next and then dividing up the rest of the hull into sections before planking each section. I tend to use Aliphatic resin as my glue of choice. It is very similar to PVA but dries more quickly, is waterproof and can be mixed with wood dust to make a filler. I have cut a rabbet and have tapered the stern down to 3mm so that once planked it should be the same thickness as the stern post. The second planking has been easy so far as the planks readily bend. So much so that I didn't pre-shape them. My concern now is that when I cut the bulkheads away above the deck level they will spring back to shape as there is nothing holding the gun port strips to the prow. I was considering wetting them and drying with my plank iron so that they readily take the shape of the hull before cutting the tabs away. As a trial I put a plank in place last night without glue, wet it, and then run the hot iron over it till it was dry. This morning it does appear to have taken on a degree of the bend. I suppose I will not really know till I cut them tabs away.
- 102 replies
-
- 1
-
-
- cruiser
- caldercraft
- (and 1 more)
-
Second planking started. I first used the darkest and poorest quality planks for the wale position as these will be covered. For the planking above the wales I first sorted any planks that were uniform in colour through out their length. I then chose from these the lightest for this section. When I reached the line of gun ports I followed kit instructions which was to use small sections between the gun ports. I was concerned about doing this and my thoughts were confirmed. The small sections tended to go on as small straight sections which lost the shape of the hull. Continued on both sides as whole lengths. I now have a huge concern. These planks were so easy to shape that I never soaked and pre-shaped them. My concern is that the stresses imposed will make the planks spring out once the bulkhead tabs are removed. I am now considering soaking them in situ and then letting them dry before removing the tabs. Would appreciate your thoughts.


- 102 replies
-
- 2
-
-
- cruiser
- caldercraft
- (and 1 more)
-
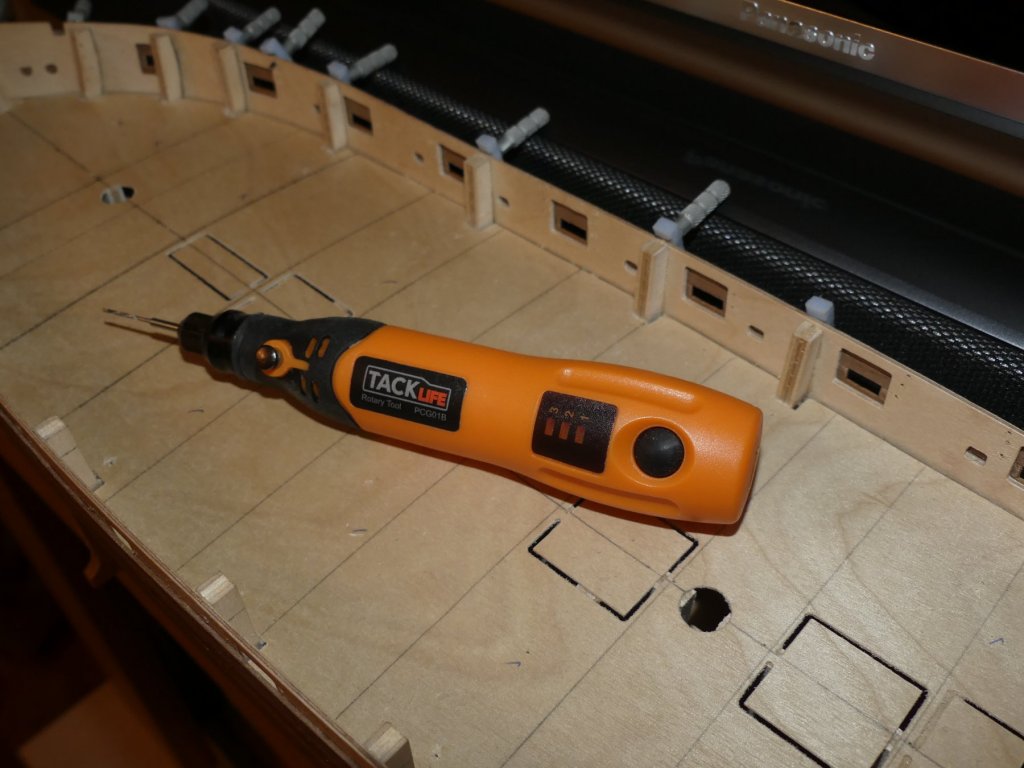
Photo below shows the little drill that I have used to predrill all holes before screwing in the planking clamps. This has proved great for the intended job but is lacking power for much more. I started the first planking with my usual pin vise but found the ply to be so dense I was really struggling. This little drill made the task so much easier.
-
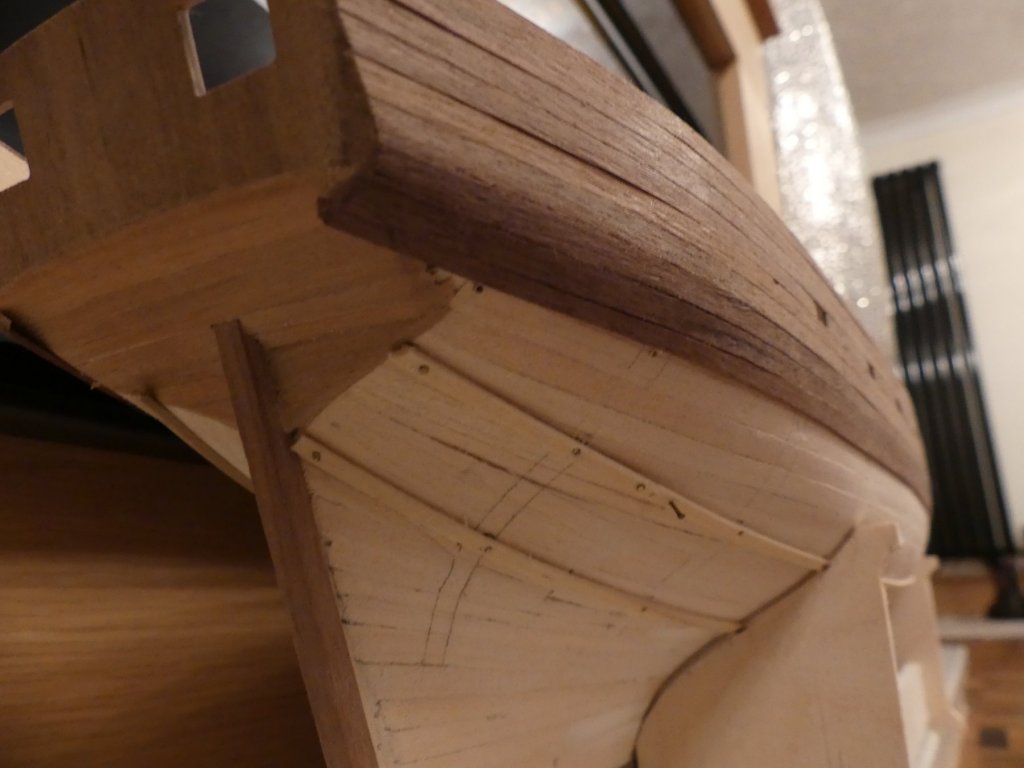
Hi B.E., I have started the second planking now which has highlighted the deficiencies at the bow. There is too much room between the walnut stem and the bow planking termination piece. This has led to a small sliver of the lighter pine showing. I thought I would get away with it but wished I had packed it out now. I created a Rabbet for the bow planking which has made it worse. Another thing evident after the first planking was the lack of bulkheads, it could have done with extras between the 4th and 5th, 5th and 6th,and 7th and 8th. There is nothing at the stern. Kit instructions say to start second planking at the top of the ply gun port strips. However, I always prefer to start at the main wale as I don't like to see planks passing under it. It does make planking harder as you cannot start the tapering process so early but we will see. Always find the wale planks difficult. It would probably be easier to lay them in the anchor stock style but I was feeling too impatient for that. Anyway they will be covered later by the second wale layer. Another reason for not starting at the top is that my ply gun port strips are slightly off. i.e. the Larboard is a tiny fraction higher. hopefully I can correct this later. It must be my vision though as I have done the same with the first wale plank. perhaps due to my right eye being weak due to previous injuries. The planking clamps are simple nylon 'L' shaped pieces cut from the label guides of a Krones high speed labelling machine, with screws normally used for laying model railway track. In awkward places, on the first planking, these screws are small enough to be put straight through the plank. They are identical to the ones used set into the commercially available thumb screw clamps. I also had the aid of a great little USB chargeable battery drill that I had for Christmas. I sent the first back due to the collets being the same size. Wish I kept it as the second one will not hold its charge.

- 102 replies
-
- 3
-
-
- cruiser
- caldercraft
- (and 1 more)
-
Hi, there were other reviews that he did that did not appear in the books but were published in the Model Boats magazine. You used to be able to view them on their website.
-
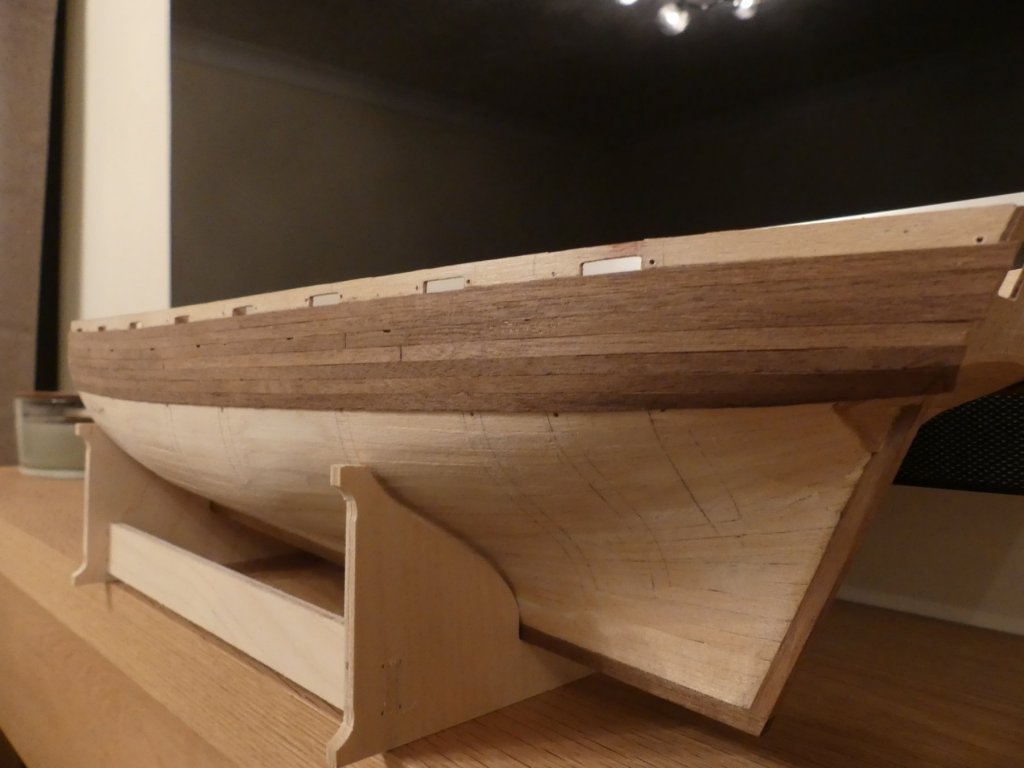
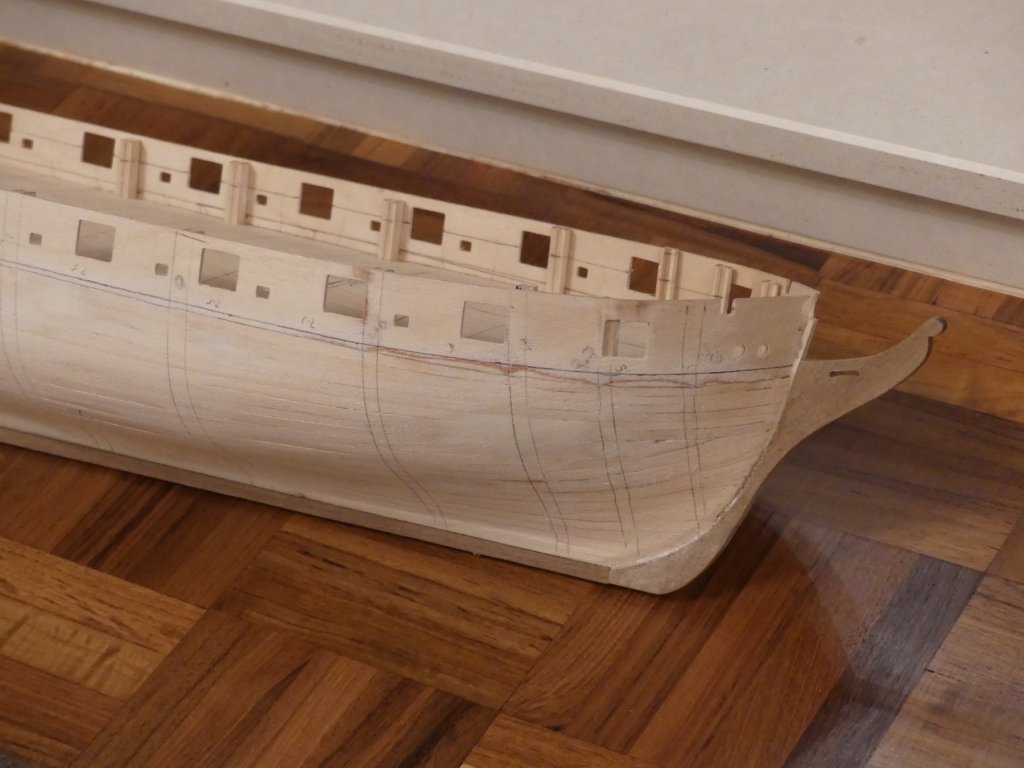
Once I got her ready for the first planking I put her aside. I new we were going away for Christmas. Just my wife, myself and our two border collies in a little cottage in Norfolk. We stopped near to a beach which has the biggest seal colony in the UK with 2050 seal pups born between Christmas and November. I new it would be quite with just the beaches and a pub within a minutes walk so took the kit with me. So below is the first planking complete.


- 102 replies
-
- 10
-
-
- cruiser
- caldercraft
- (and 1 more)
-
Shopping on eBay: A Primer for Newbie Ship Modelers (Parts 1 and 2)
Thunder replied to ccoyle's topic in Wood ship model kits
I have had some great deals on ebay but occasionally been totally ripped off. On the whole, if you do your home work, most sellers are good and if you encounter a problem are helpful. But I have had some that have lied to questions and sold kits knowing they have missing parts. I have also sold a lot of items and in my experience buyers are far worse. This includes time wasters, buyers that do so just for fun of not paying or complaining, removing parts and then returning and even one that has made threats because I wouldn't send an item even though he didn't pay. This one even left me negative and it didn't get sorted to another seller took out a legal injunction against him. Latest was someone buying furniture who then didn't want it because she was homeless! With the ebay fees it is often not worth the hassle. -
Hi, was wondering if the straight edge, which should be curved, had any char from the laser? If not it is likely that the timber was too small or not placed on the datums correctly and the laser ran over the edge. You have a small section on the RHS missing.
-
The windlass would have the anchor cable directly wrapped two turns round it. on larger vessels the capstan did this function where the rope around the capstan was the messenger. This was an endless rope that was tied to the anchor cables by young boys. the action was called nipping and the boys 'nippers'. The anchor rope was too large to go directly round the capstan. You would bring either into use for heavy tasks if needed.
- 714 replies
-
- 2
-
-
- lady nelson
- victory models
- (and 1 more)