


Thunder
-
Posts
537 -
Joined
-
Last visited
Content Type
Profiles
Forums
Gallery
Events
Posts posted by Thunder
-
-
Hi, is this a single planked hull? The quality of your planking certainly makes it appear so. Saying this is your second build, and this does not look like an easy kit, you have displayed a lot of skill so far. I love the lines of the hull and that planking is going to look great when sanded down.
-
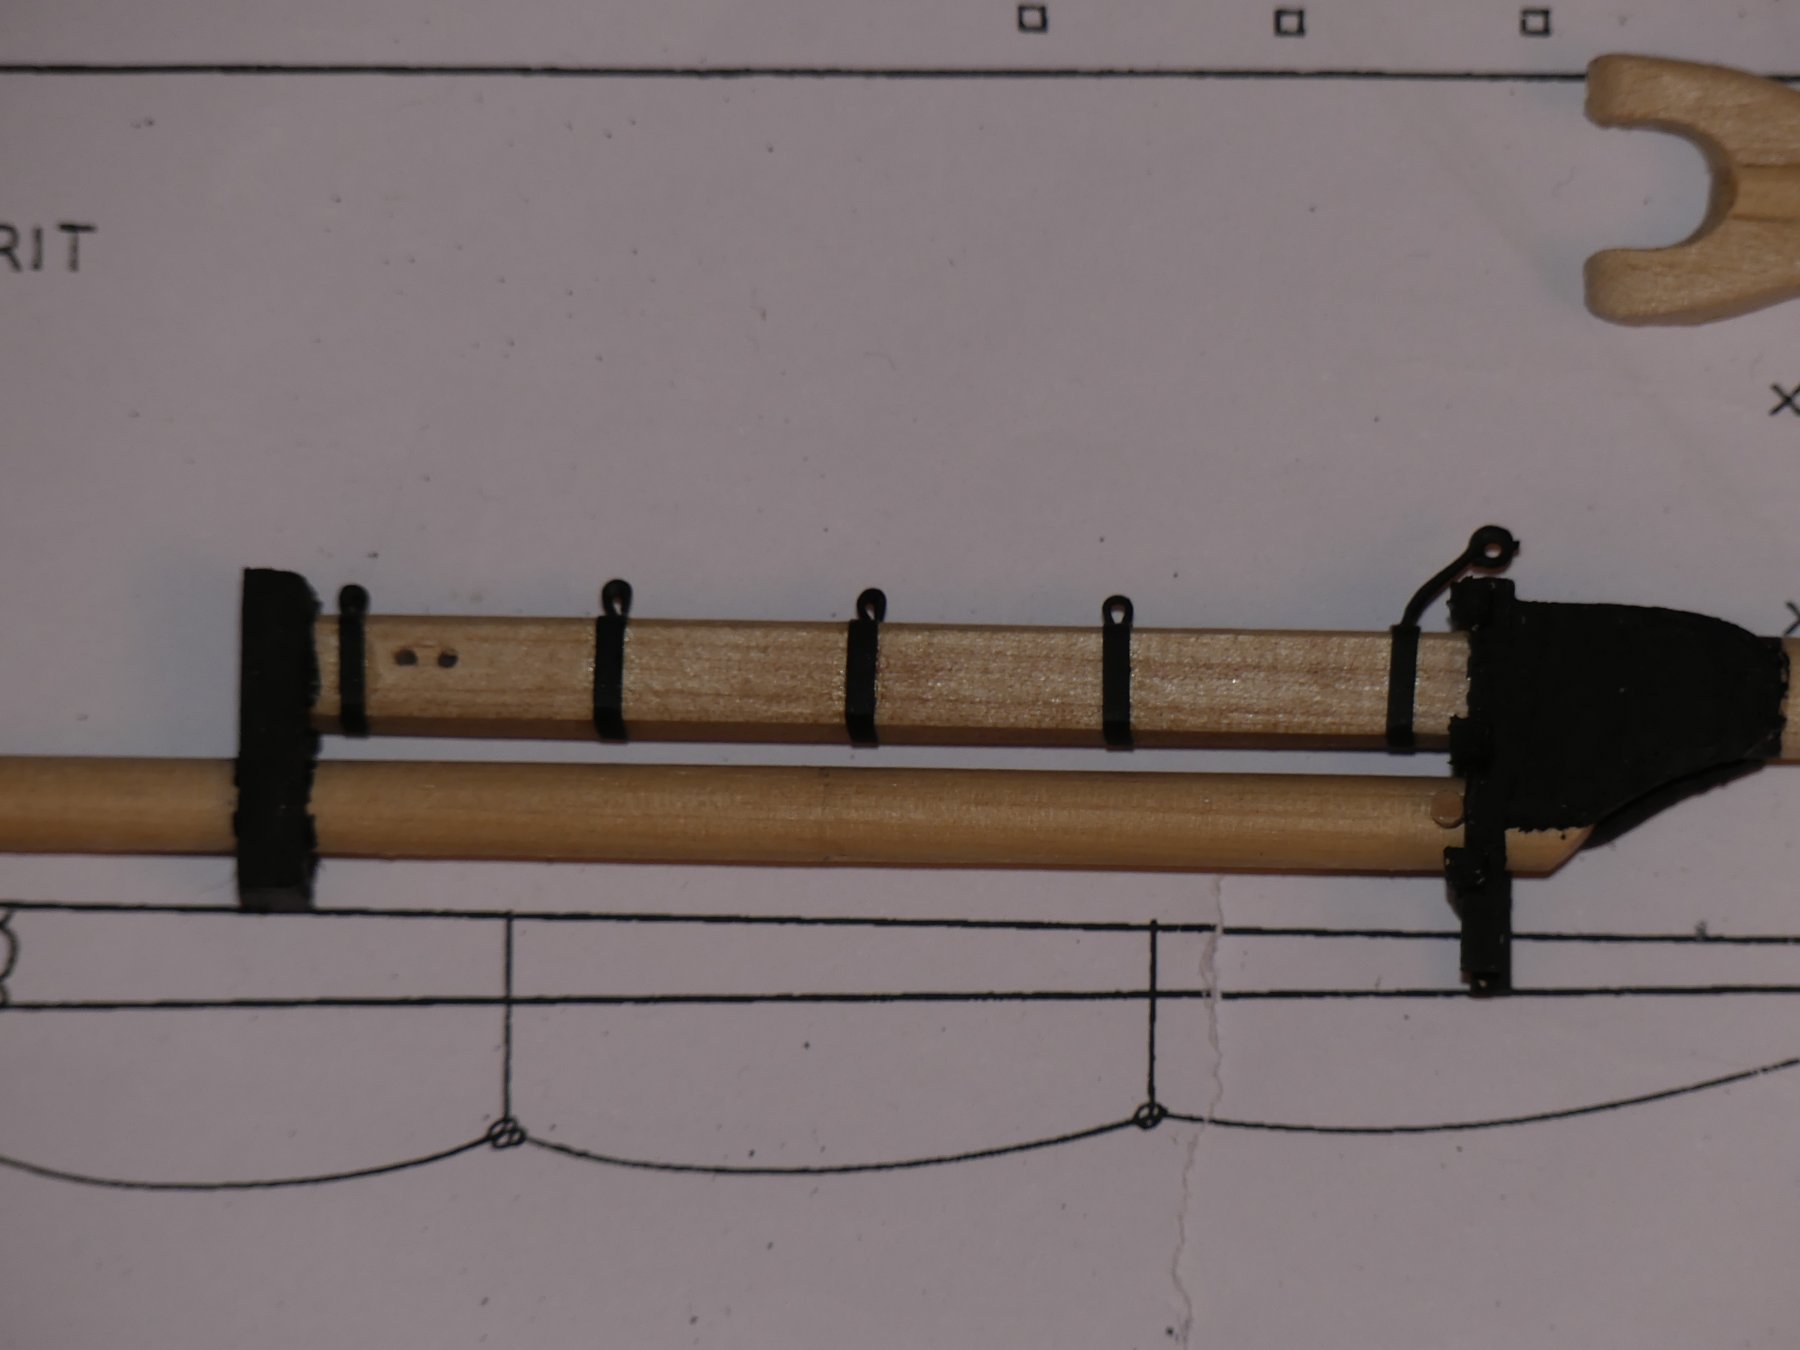
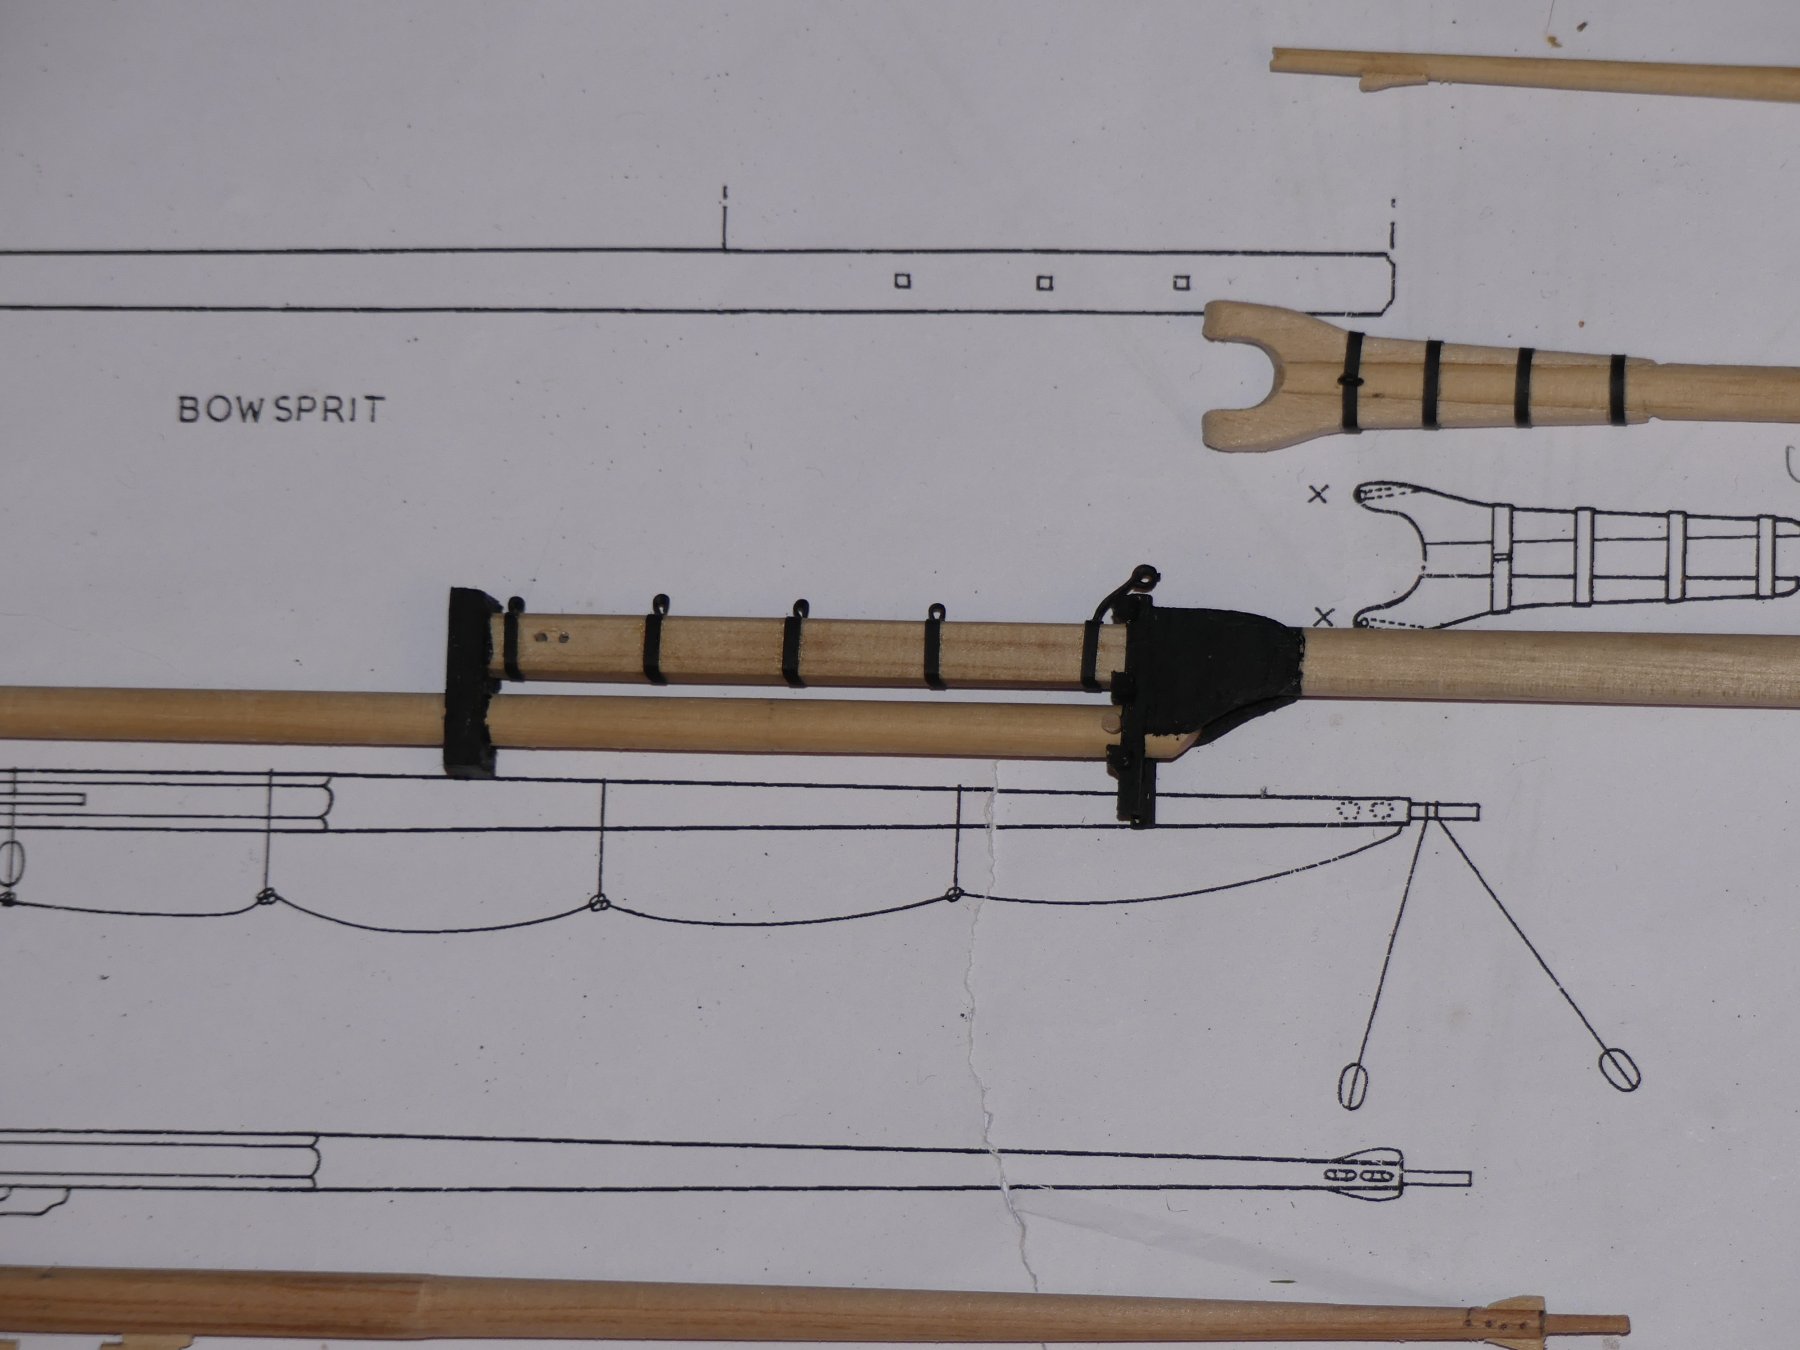
The Mast and bowsprit have now been stepped. The photograph below shows my method of making sure the mast is perfectly upright. I use a small pin vice as a plumb bob and a spirit level across the hull.
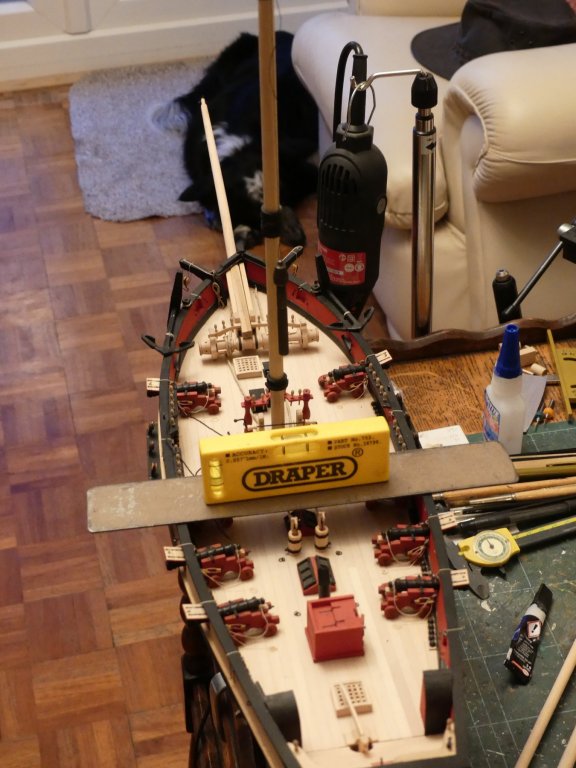
Photo taken slightly from side so doesn't look like plump is in line with the mast.
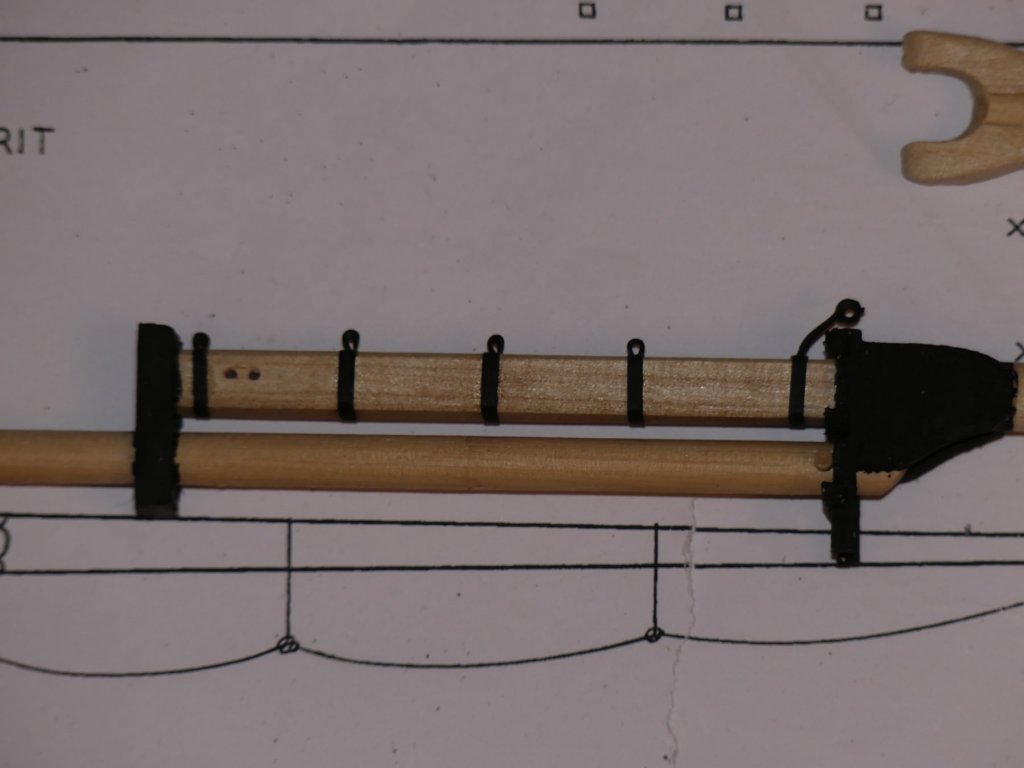
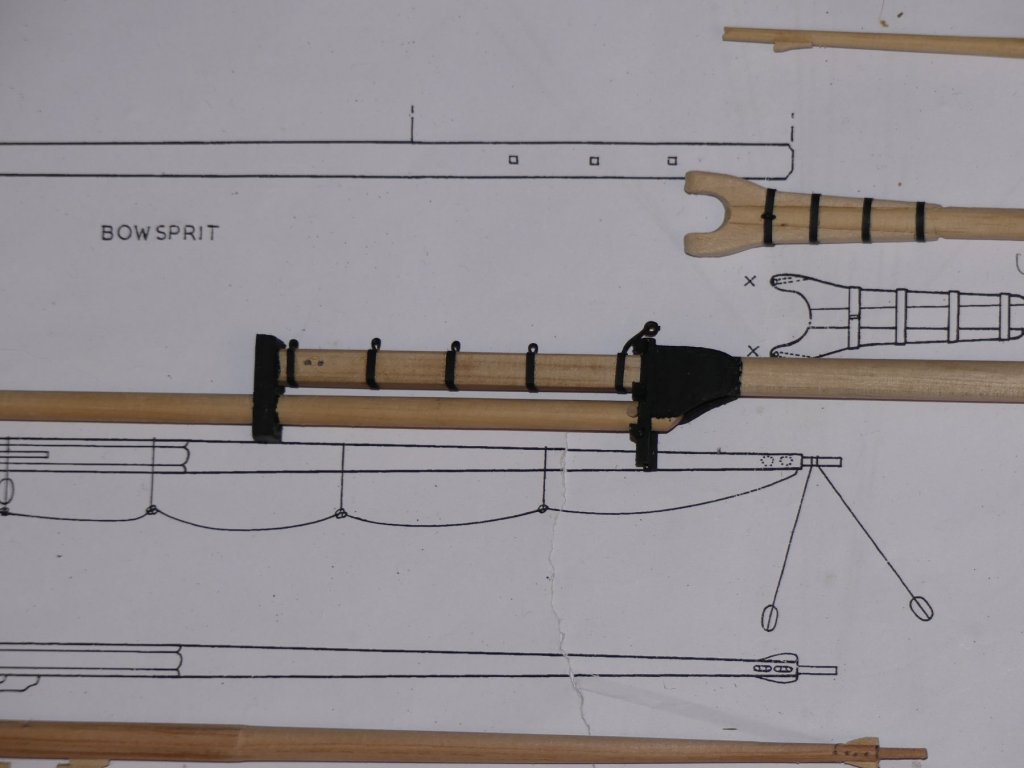
The booklet with the kit is very comprehensive with regards rigging and the sequence of completion so I thought I would not have to write my usual ' sequence for rigging the masts and yards'. However I hit a problem with the first item. Bowsprit bobstay rigging says to use black thread and then says to take from end of bowsprit, through a block, through fairleads and to pawl bits. My first query was 'tarred' rope through a block! My second was whether cutters had bobstays when they have the provision to bring the bowsprit in and out of the hull. Further investigation seems to indicate that he has somehow combined the bobstay with the Jib Outhauler. Jib outhauler would be in natural thread but rigs as he describes other than passing through a sheave at the end of the bowsprit and going to the jib traveller.
Now I am really confused as what is correct for this vessel. 18th century rigs and rigging book does not really help, the Lennarth Petersson book seems to side with me.
Casts doubts on the rest of the Bill Shoulder rigging supplied with the kit.
- lmagna, mcpwilk, Old Collingwood and 3 others
-
 6
6
-
-
Clean and precise, I don't think, These are all shaped by eye. Only very rudimentary marking out and measuring.
Thank you for thinking it though.
-
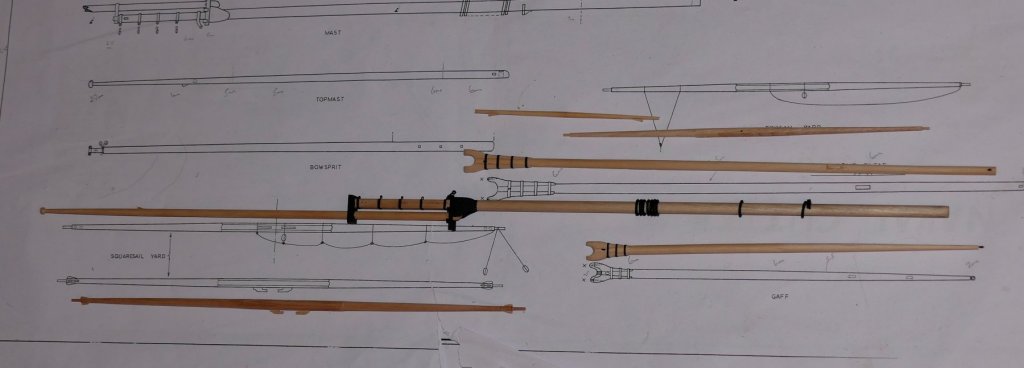
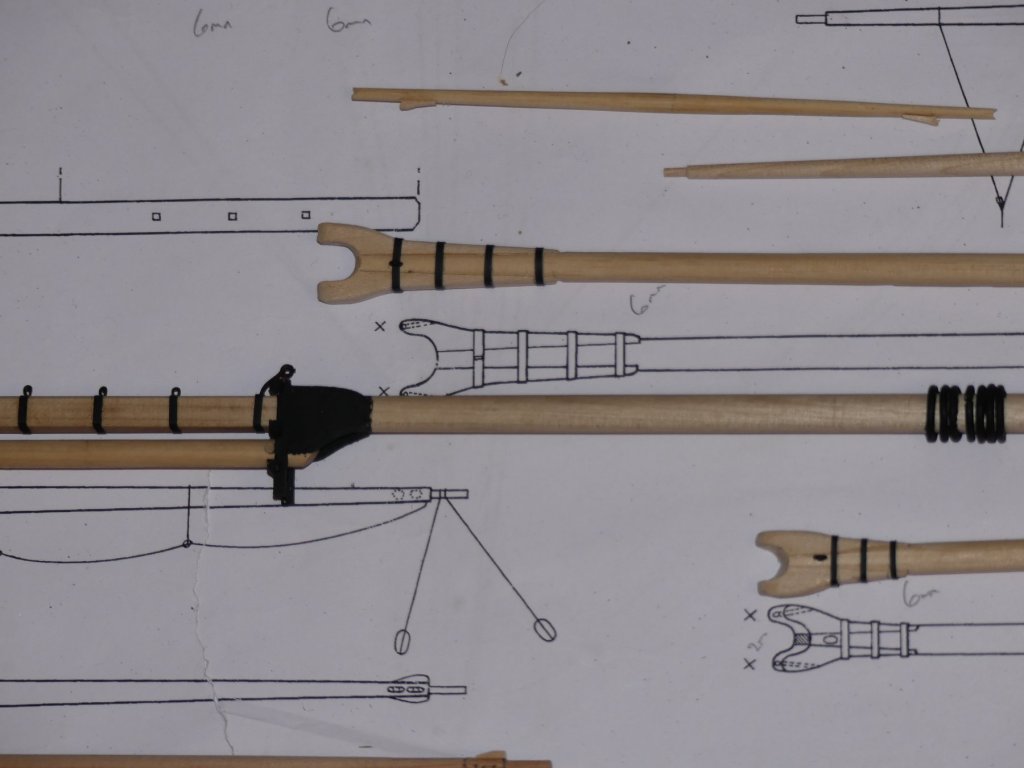
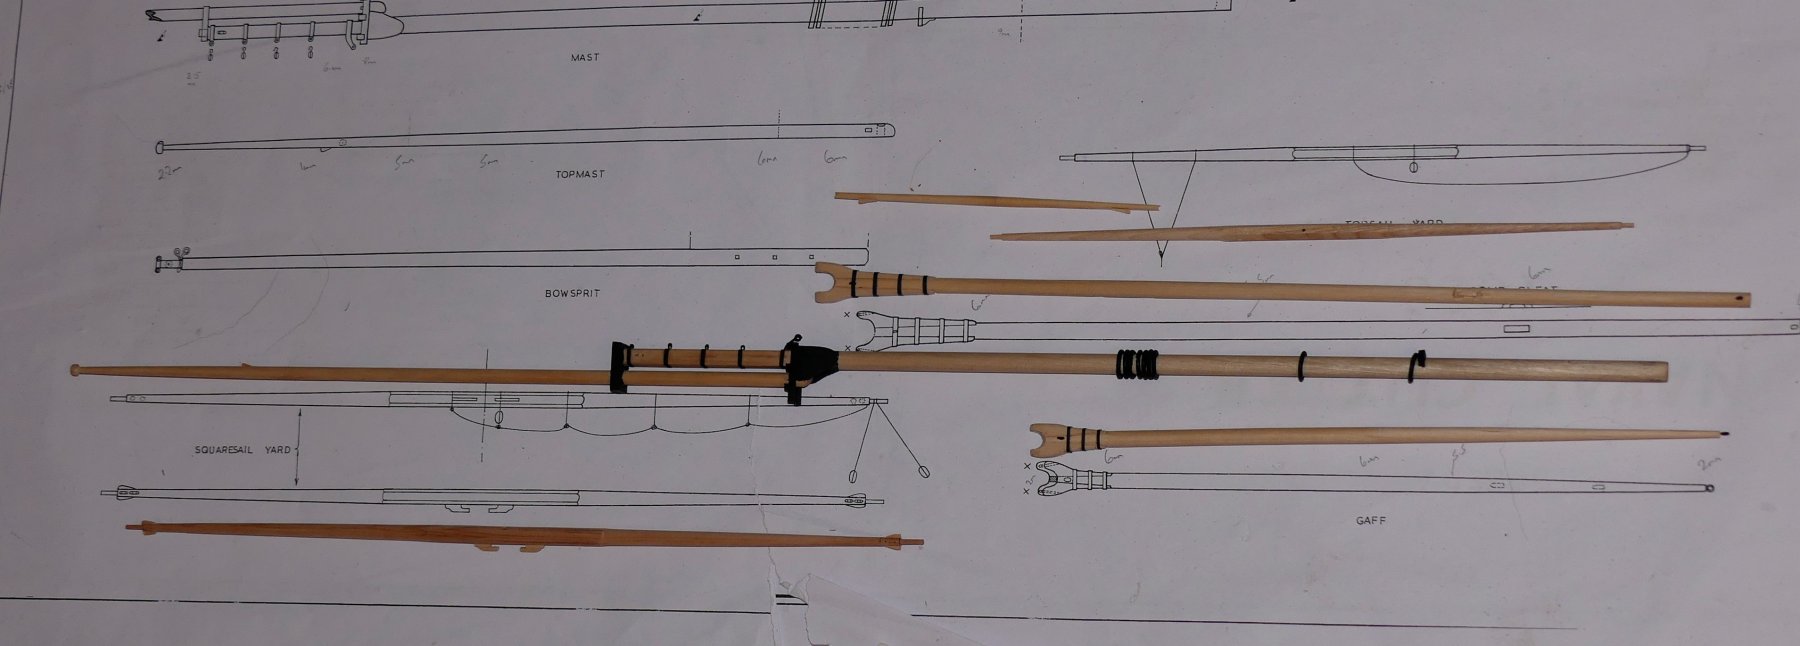
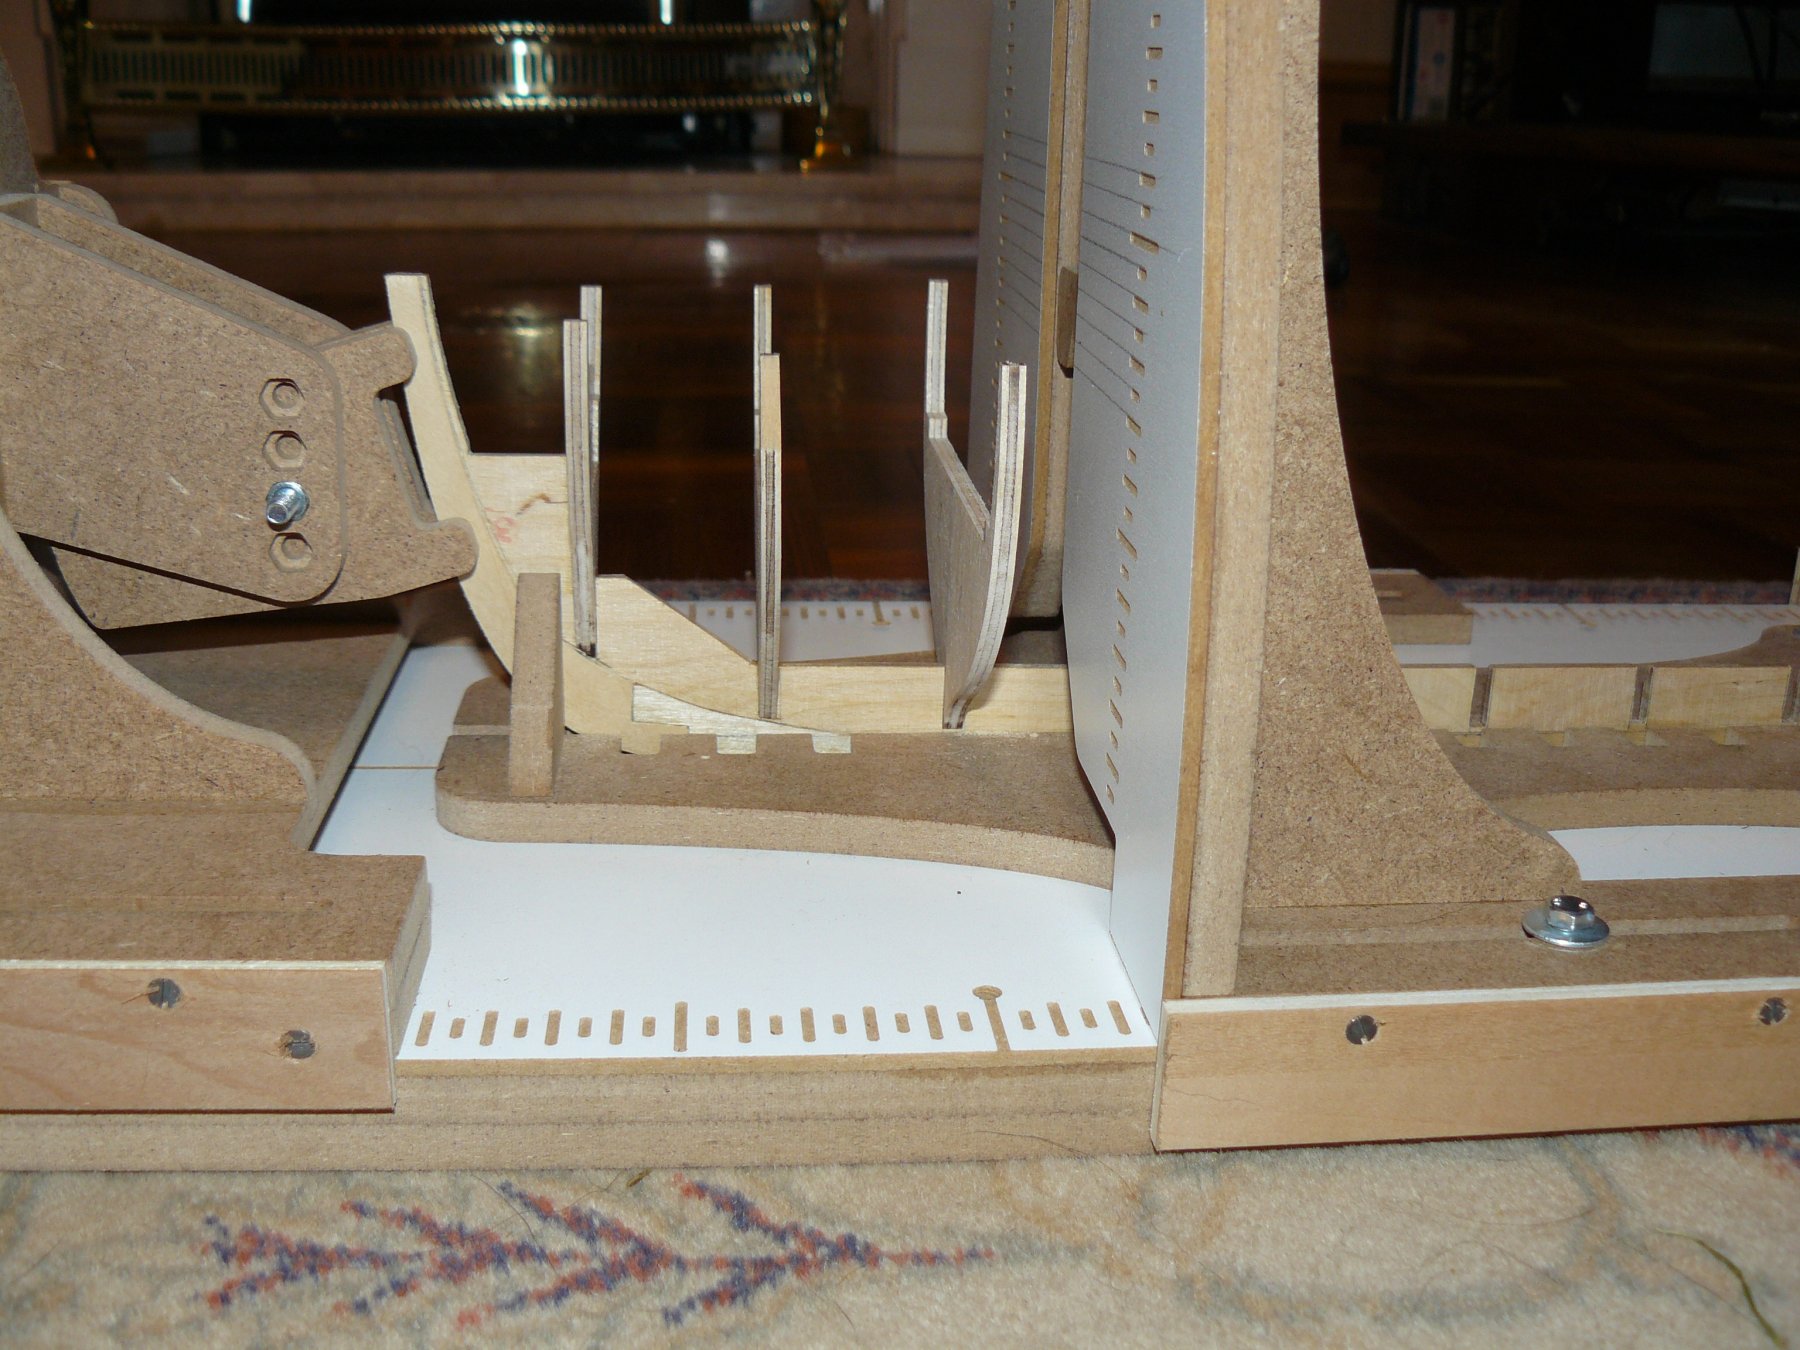
Masts and yards now made and ready for install
- Ryland Craze, GeorgeKapas, lmagna and 6 others
-
9
-
-
You may have to have similar thoughts when you get near to the margin plank and bulwarks. would they stick to 'it has to be 20ft' or would they hold the odd longer length plank in reserve so that they don't end up fitting a little odd piece in the corner. This was not an issue with my Supply but the curves of Pickle made it an issue when completing her decking.
-
You have to remember that, although it was important to have the planking look right, it had to be practical. Small lengths of plank would be very hard to fix securely so it would be unlikely to happen.
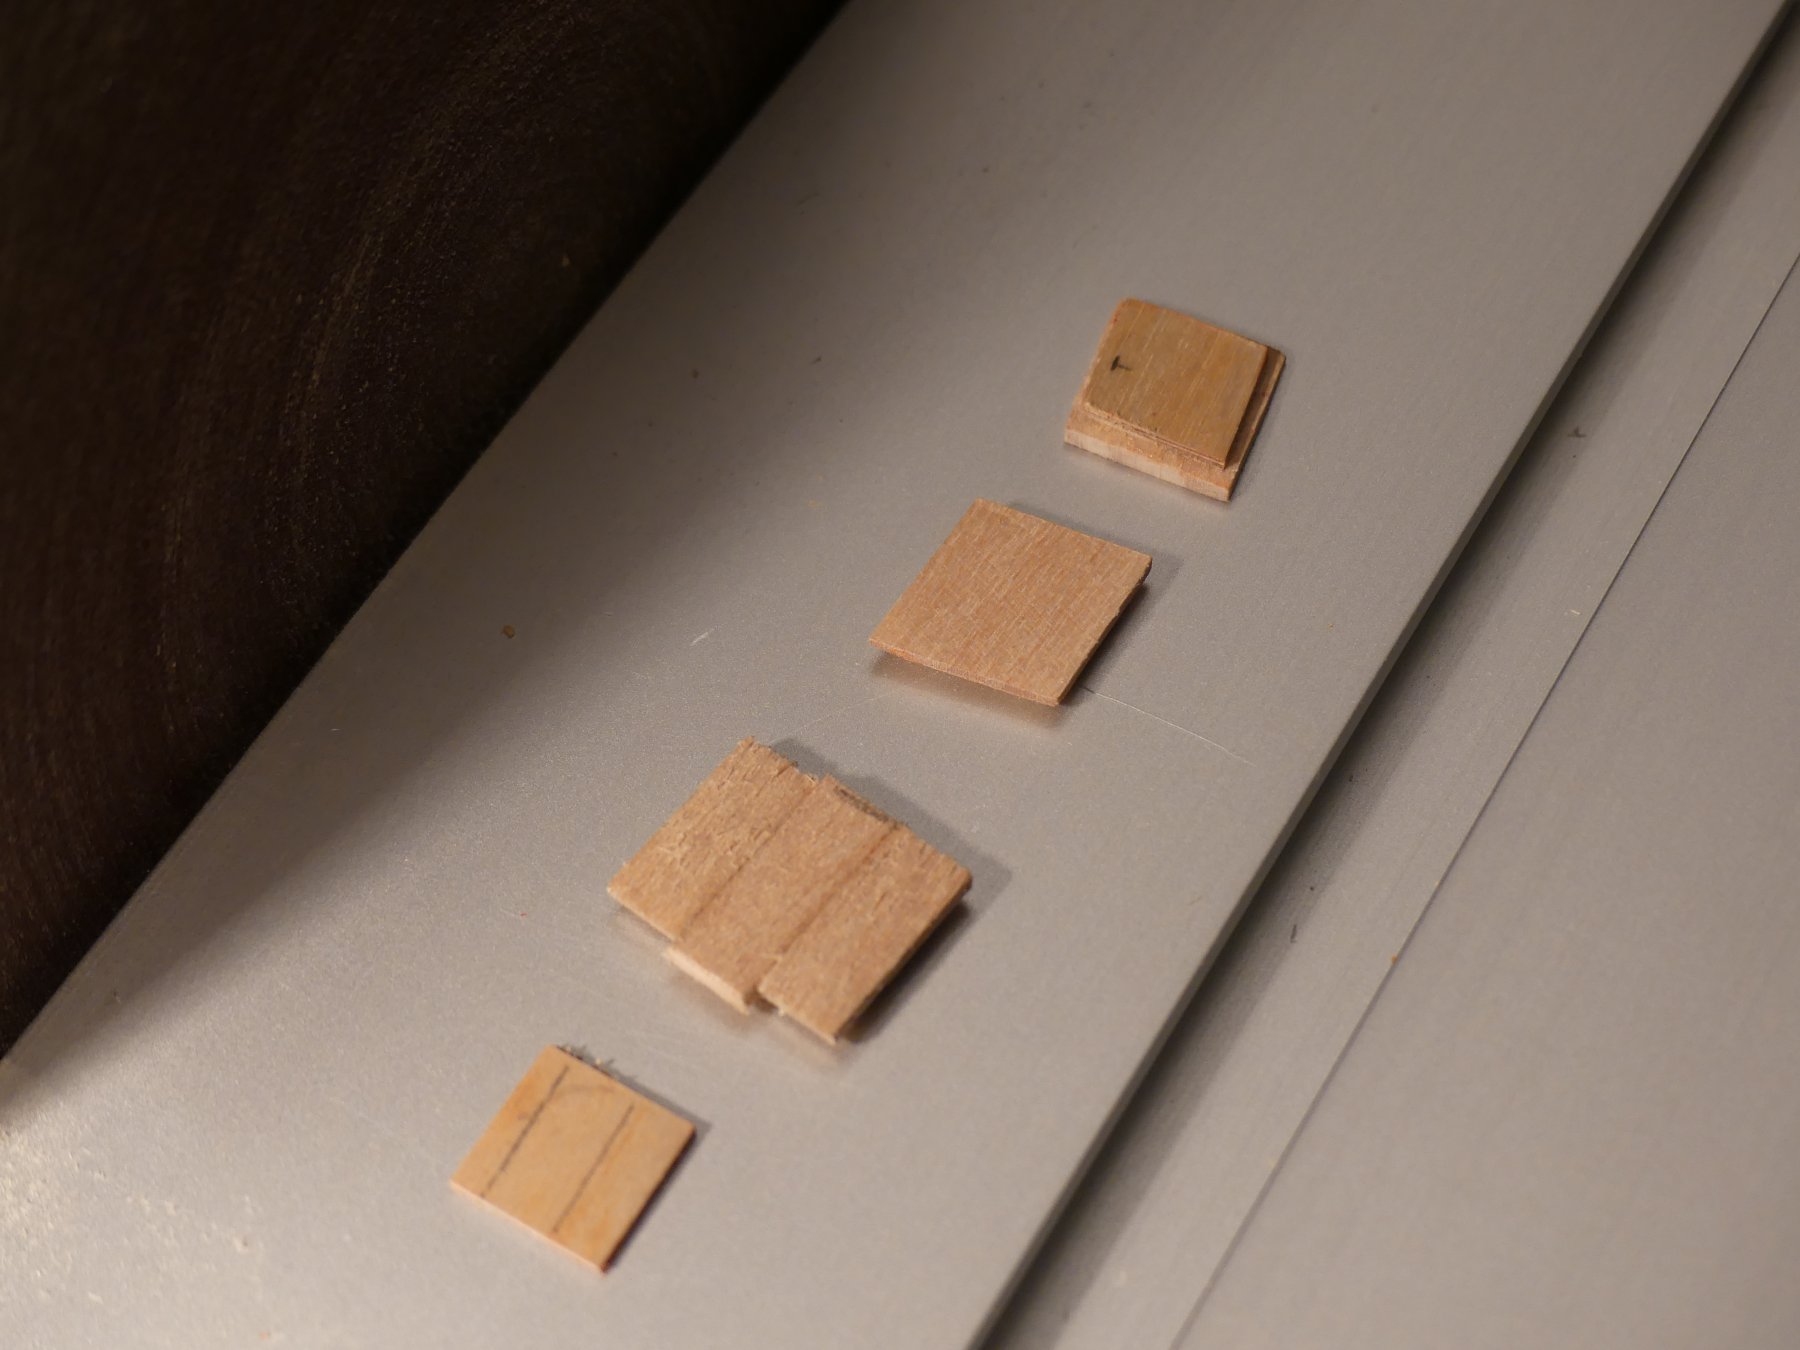
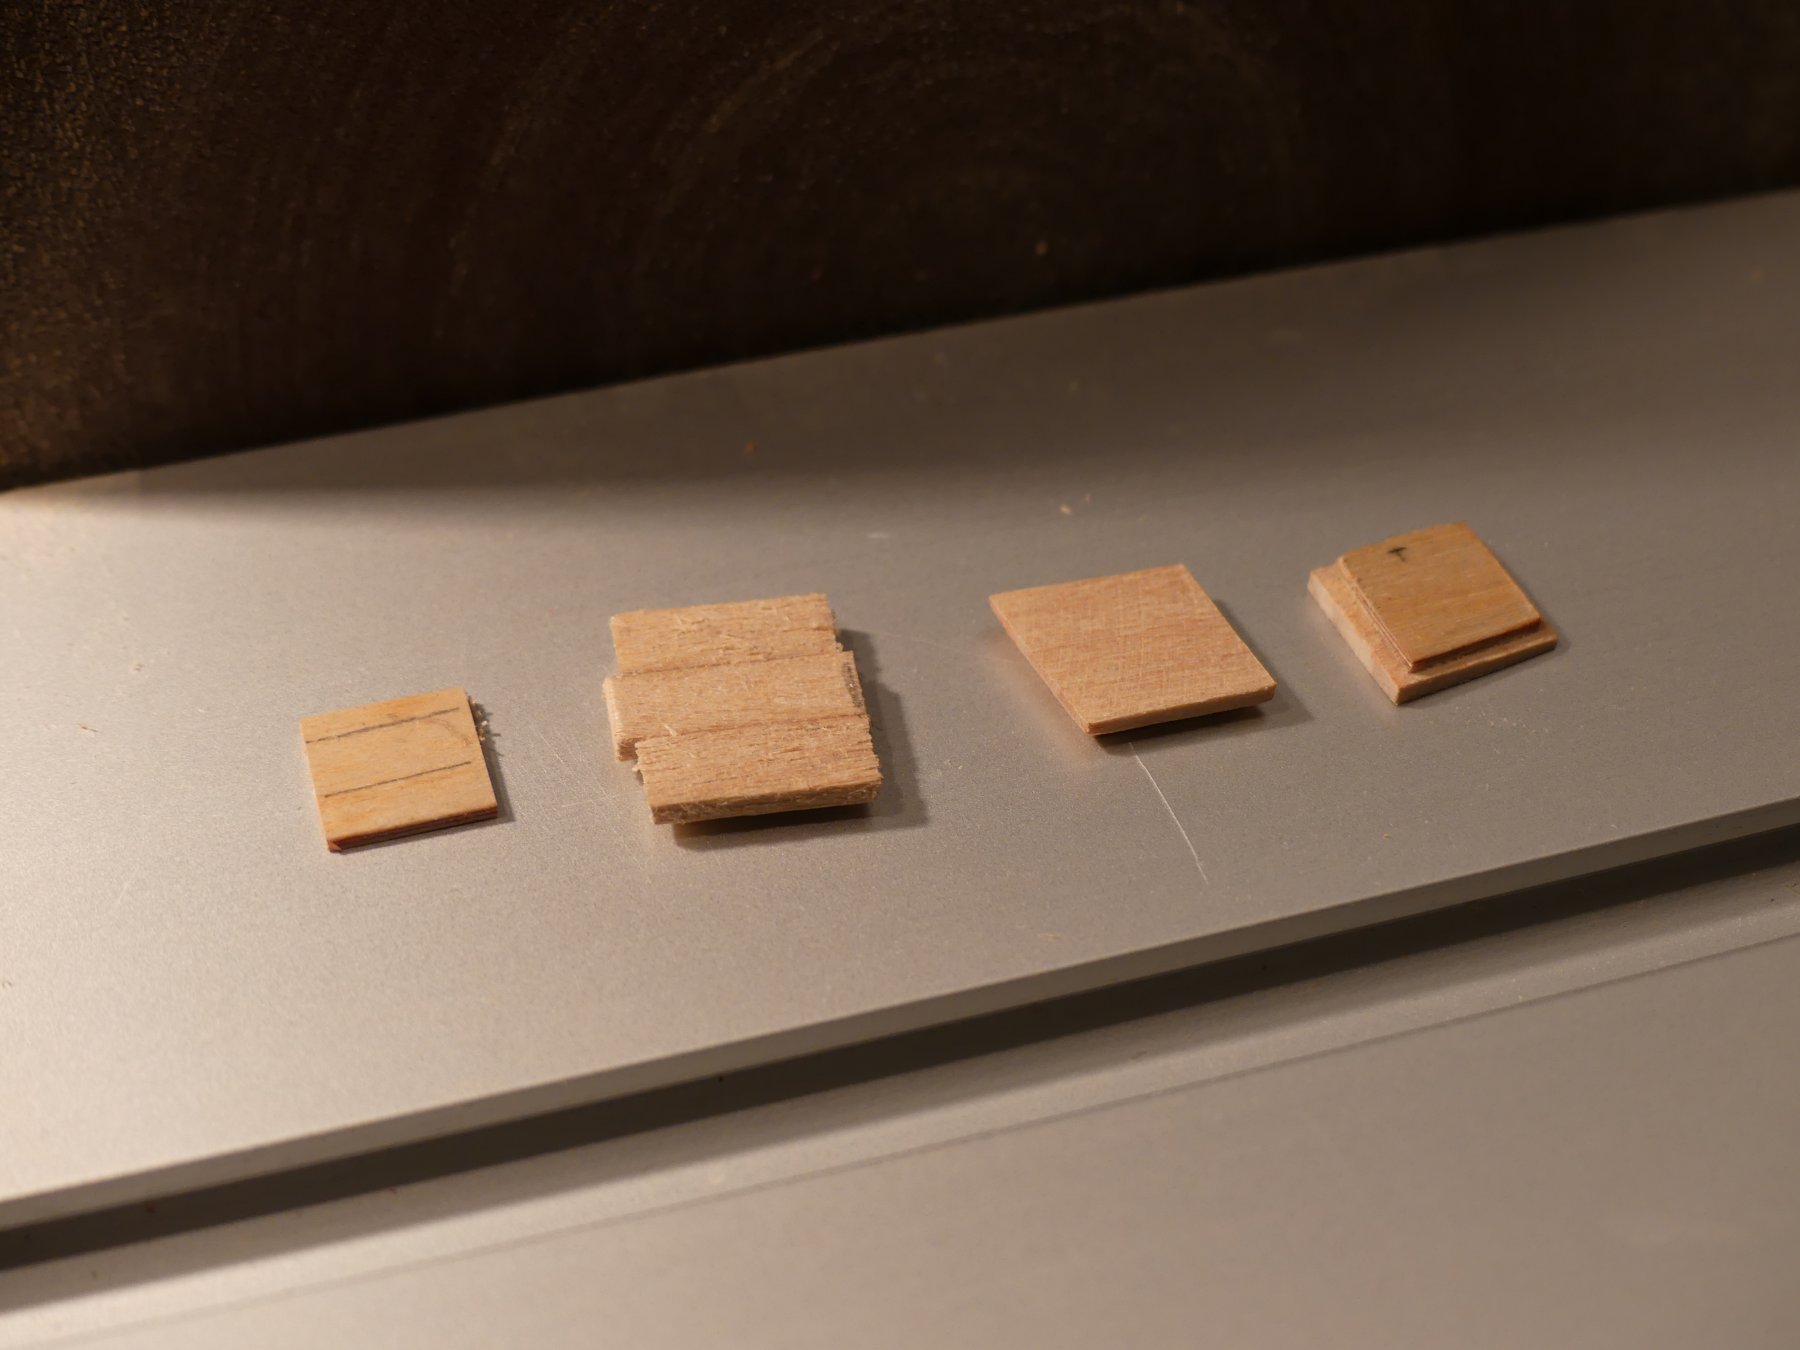
With your third plank is it that it is narrower? If cutting your planking to scale length before starting make sure they are all the same width. Otherwise cut to length as you go along and make sure that for one strip of planks that they are all cut from the same piece. They make all look the same width but those tiny differences will show and make it very difficult to get the planking to run parallel to each other.
-
-
I thought the same as you. As this ship spent most of her service in the pursuit of smugglers you would think the ability to mount bow chasers would be highly desirable. In Speedy's case I don't think you could move them into position let alone have space to fire one. Carronades on slides would be more probable.
-
Two more points to note with your model that effect the deck and that I encountered when I built her:
- I know that you are modelling her as built but just in case check your drawings. On mine the gun ports and cannon positions varied between the deck drawing and the hull profile drawing.
- The quarter deck is shown with a grating, ever since building I wish I had not put a grating there, it just seems so improbable to have a grating into the accommodation quarters.
-
Hi, I prefer to keep symmetrical but remember that you have to maintain either the 3 or 4 shift butt system, which ever you chose. I also often see that people lay the king plank and those either side with short pieces and butts showing. This may be correct but I just think that the carpenters of the time would of allowed for the fact that there was gratings etc. In real practice the gratings would have been done first and then the decking. Therefore, unless there was a very long distance between gratings, you wouldn't see any butts between planks. This would mean, that in your case, the king plank and at least the first three either side could be laid in one length.
What do others think?
- lmagna, Jack-in-the-Blue, Jobbie and 1 other
-
4
-
Yes, going to leave them empty, the records I have said she only had the eight guns. The bow gun ports would be unworkable so there couldn't of been any there anyway.
The wood seemed to hold its edge very well and was tight grained. Lucky it was that good as she is single planked. I was happy to get away with not using filler.
I have just purchased another very old kit, and it is a poor kit, but the wood, although not very 'pretty' is the most flexible I have ever come across.
- Jim Rogers, lmagna and coxswain
-
3
-
Lou,
To be completely honest, although I used the kit timber for the planking the only other items used are the cannons, cannon balls, dead eyes and belaying pins. Otherwise everything else is scratch.
- coxswain and Mirabell61
-
2
-
-
-
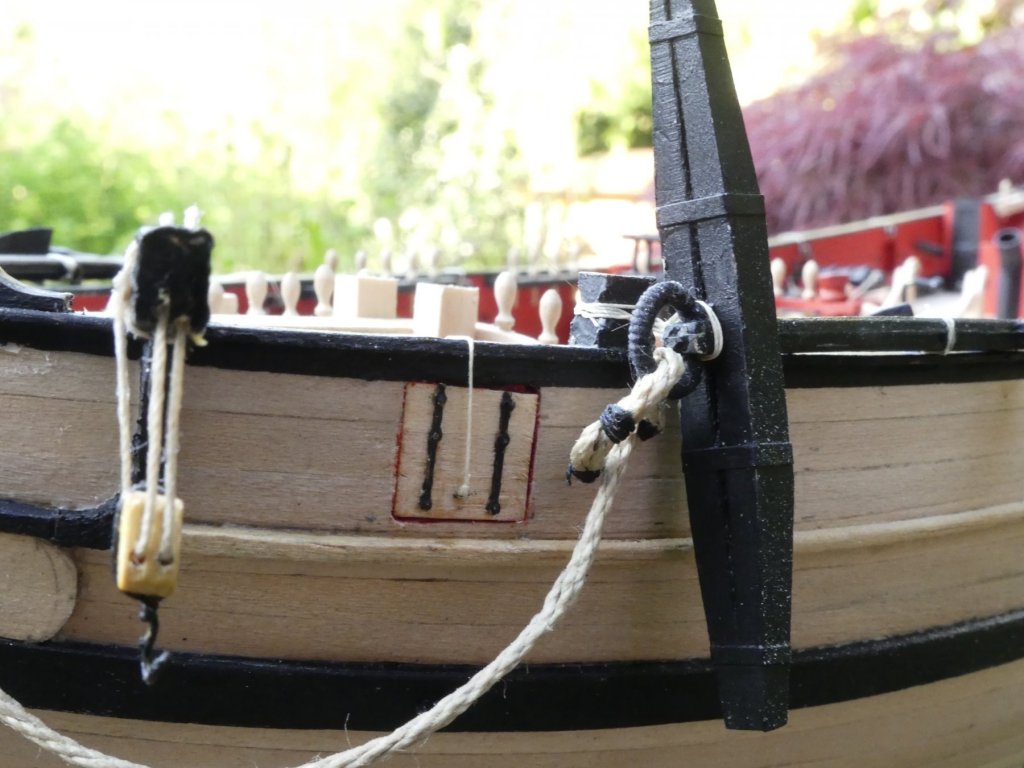
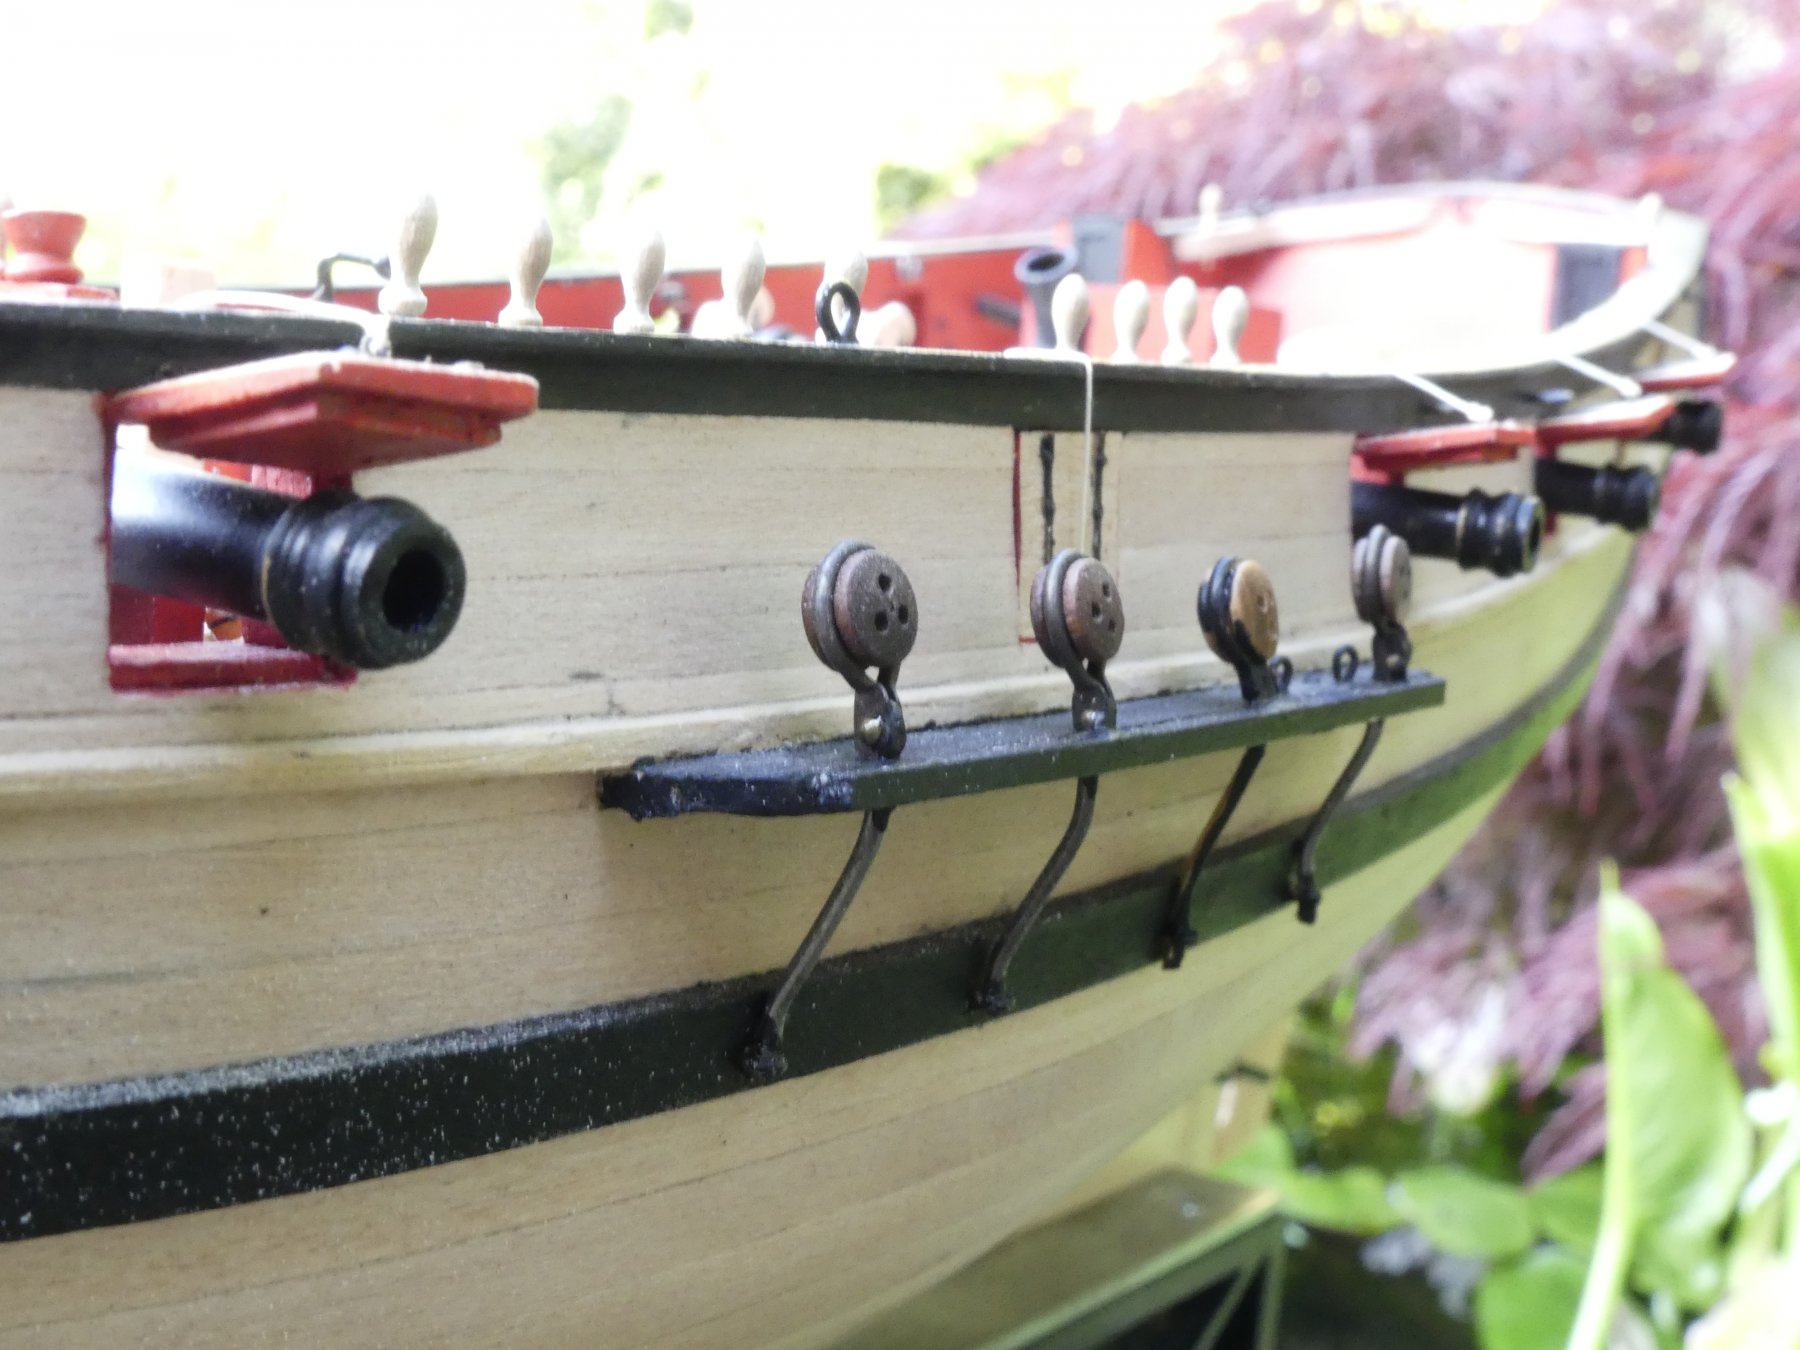
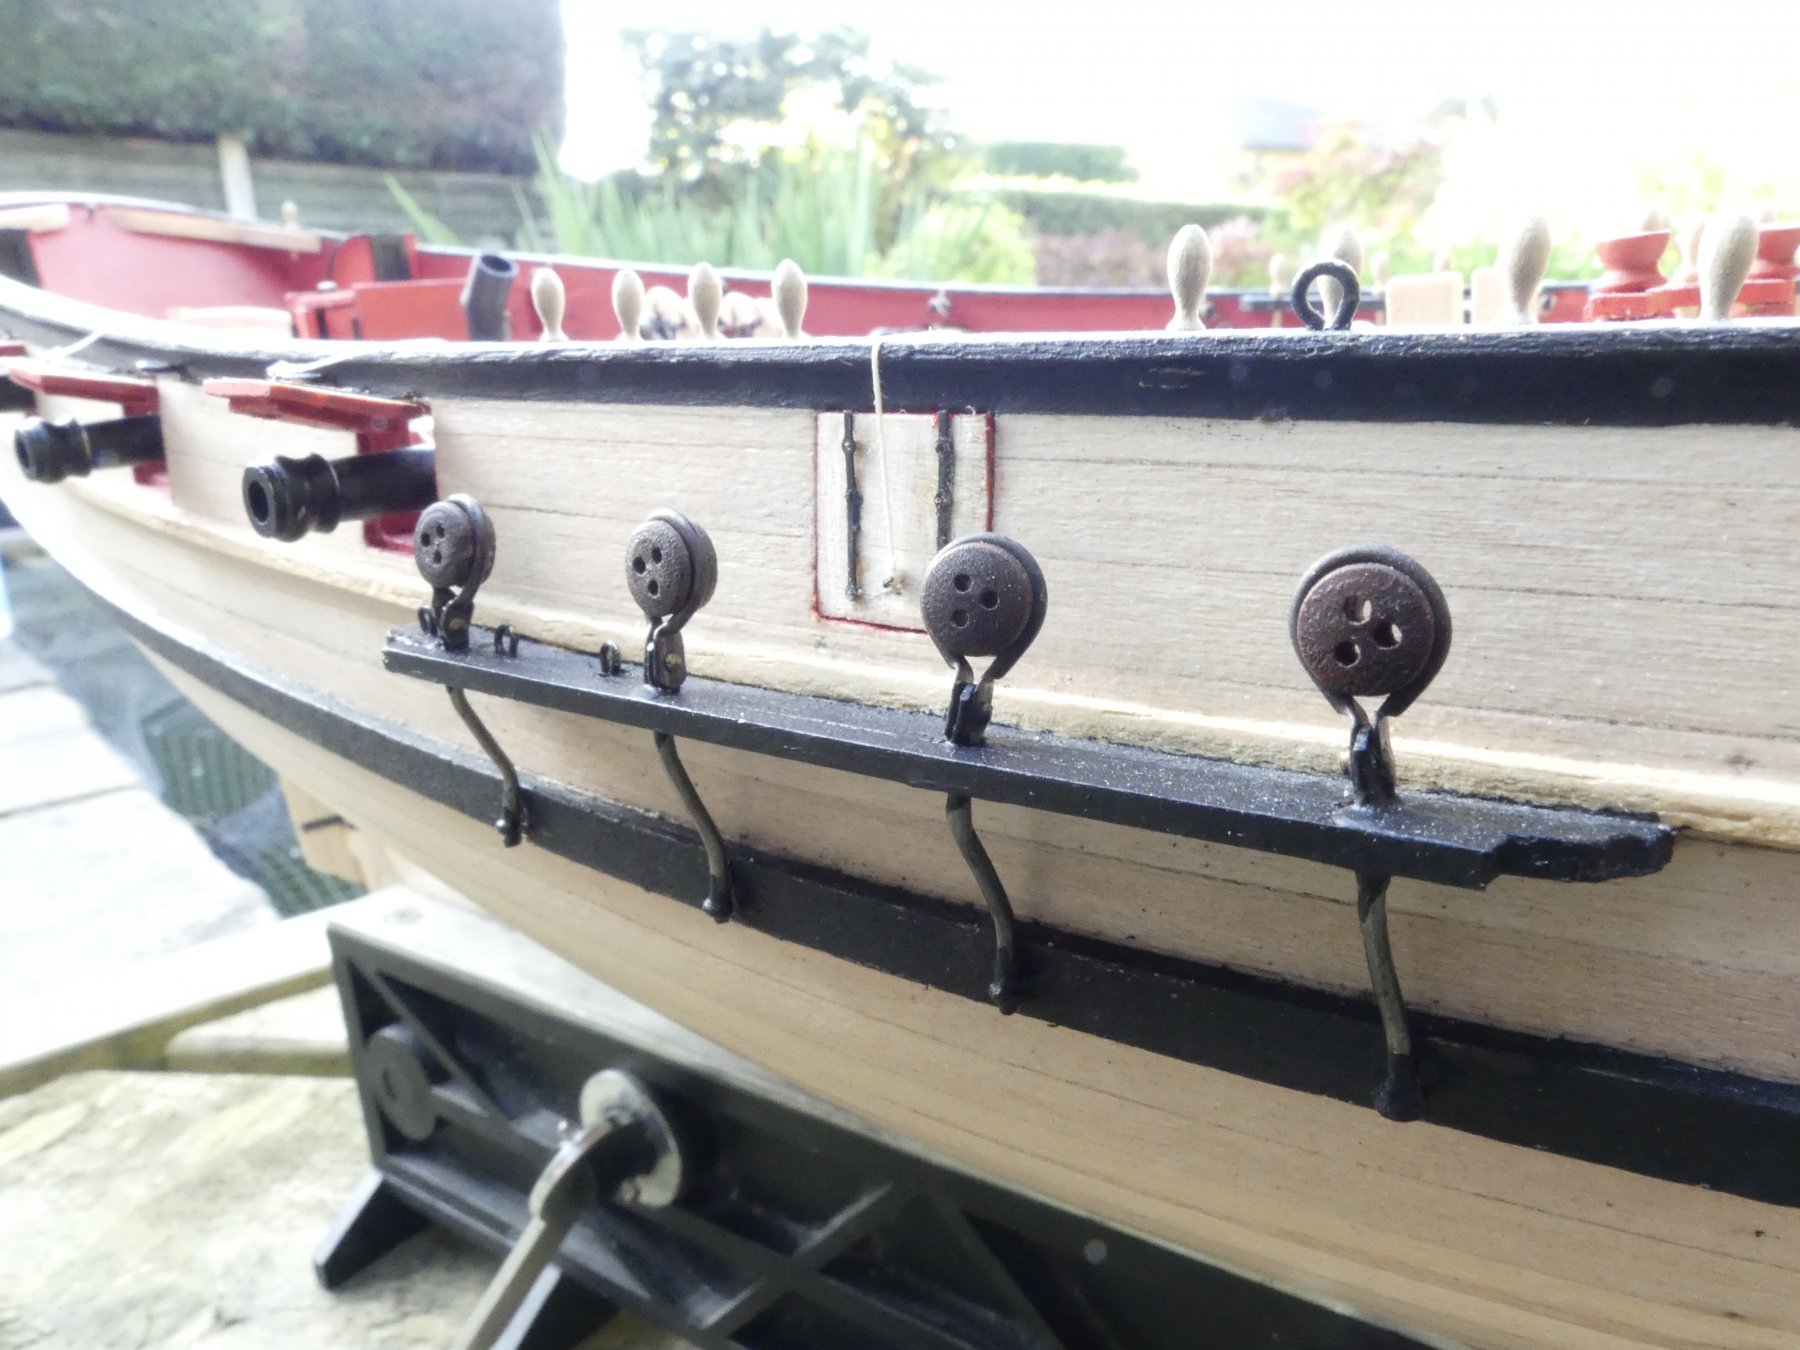
Chain plates and lower dead eyes in place. The dead eyes and strops were supplied with the kit but, although everything was supposedly made for the kit, they were too long so had to be cut back. This took away all the secure fixing so I am concerned if they will hold when coming to rig the shrouds.


One was missing, can you guess which one?
If they look like they are not going to hold I will have to clean off the paint and solder the leg to the eyelet they are passing through. Should of done that before painting!!
-
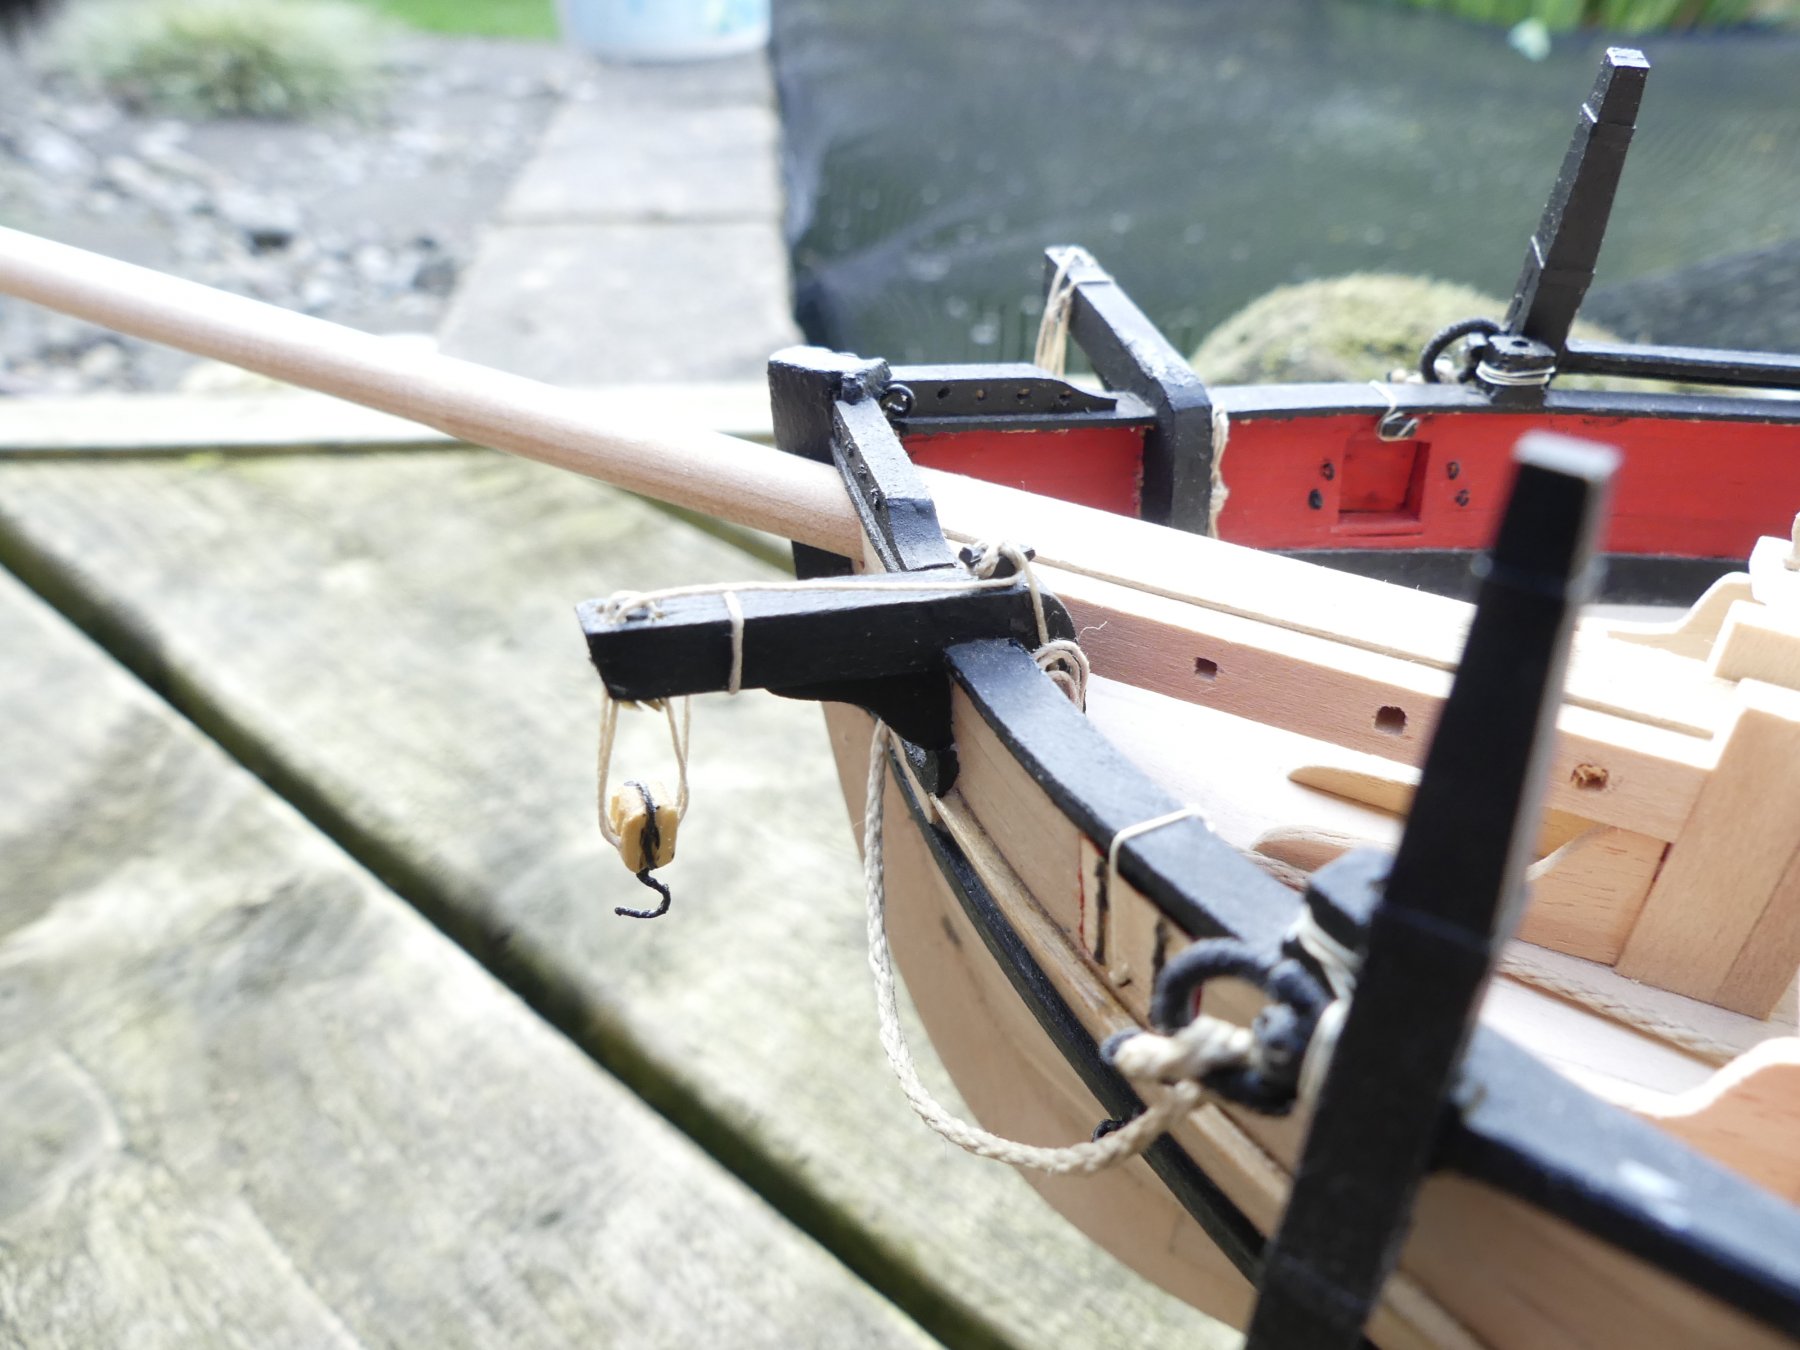
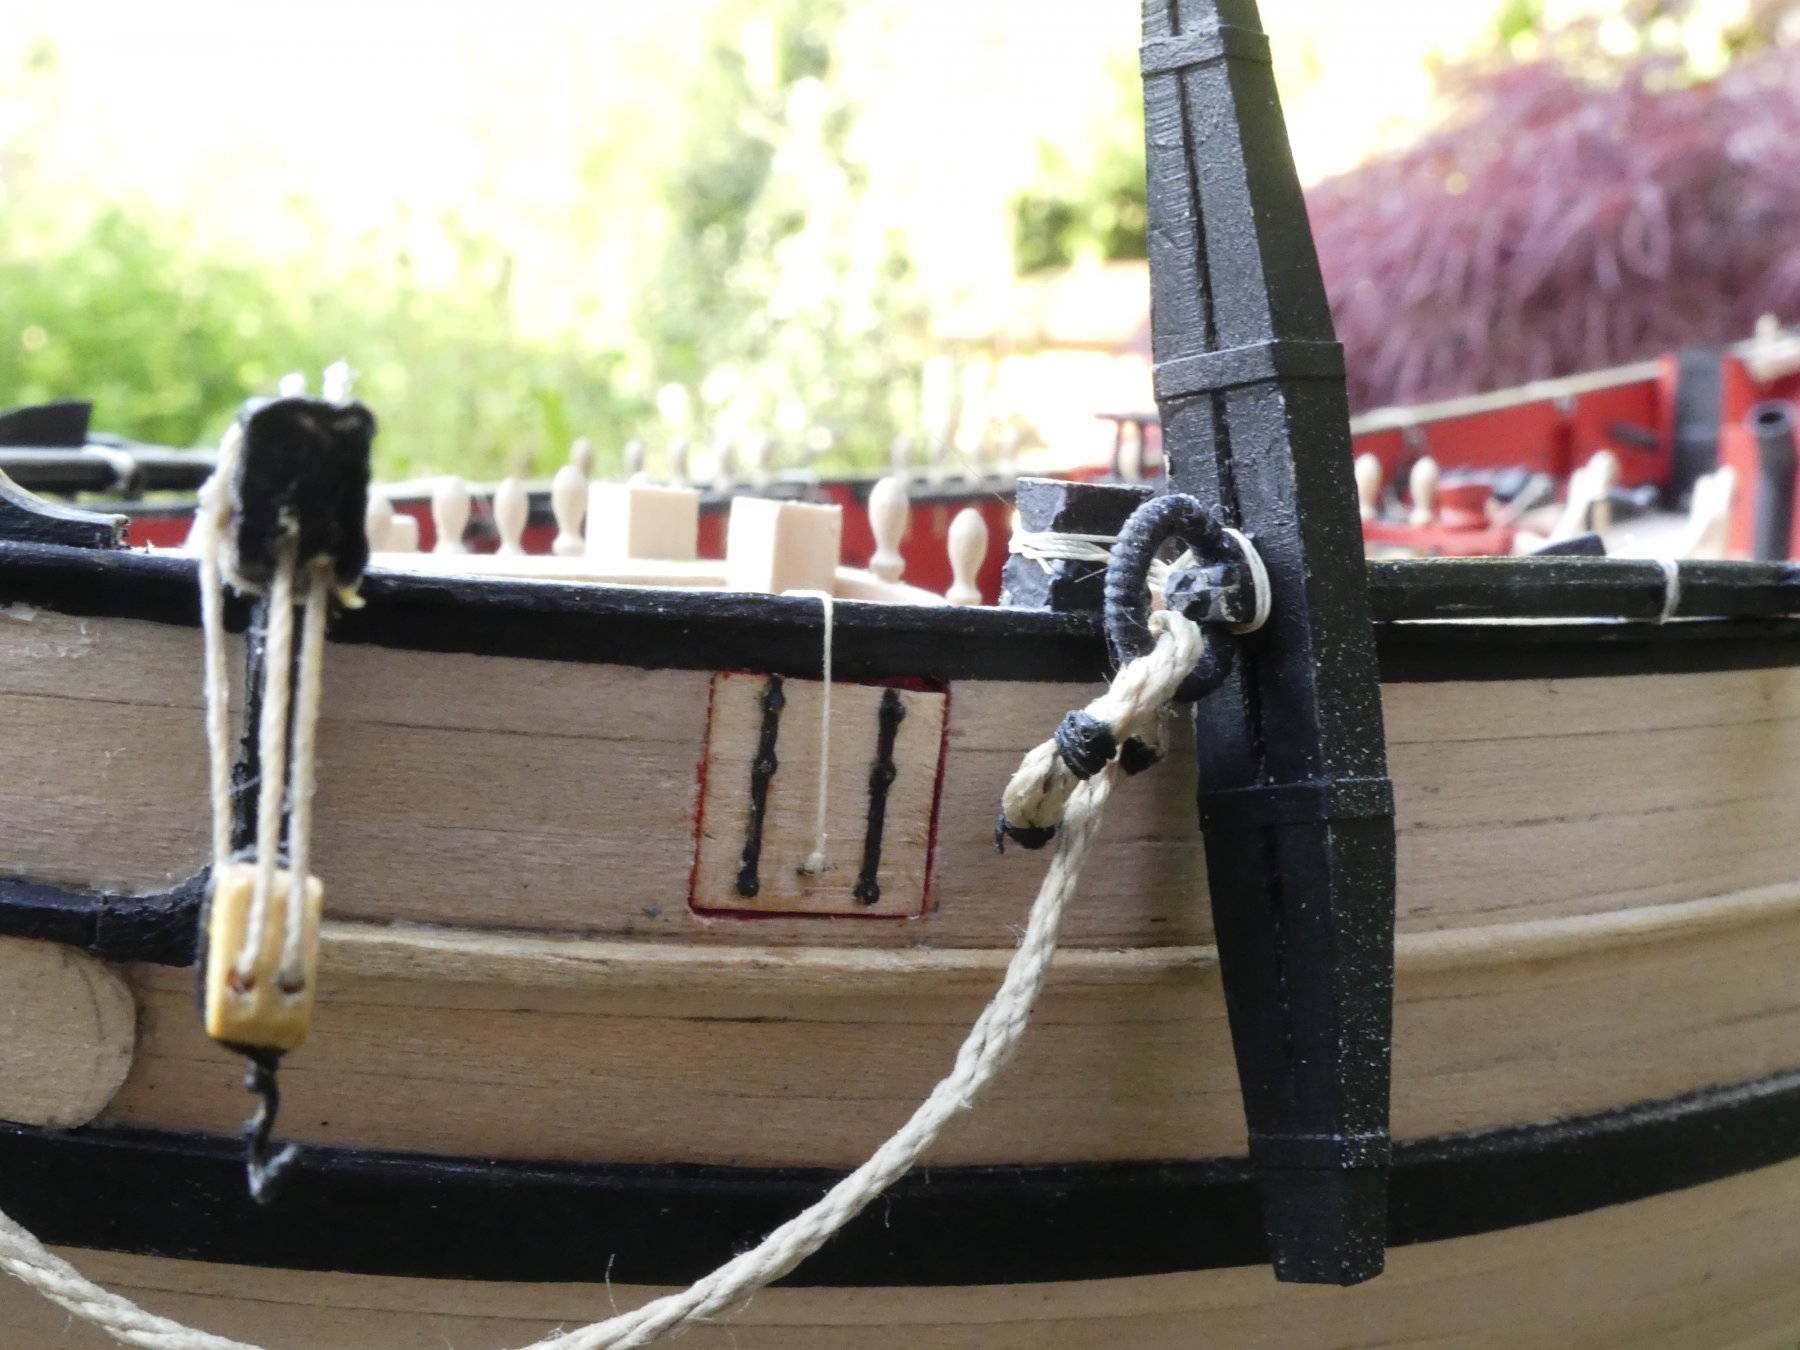
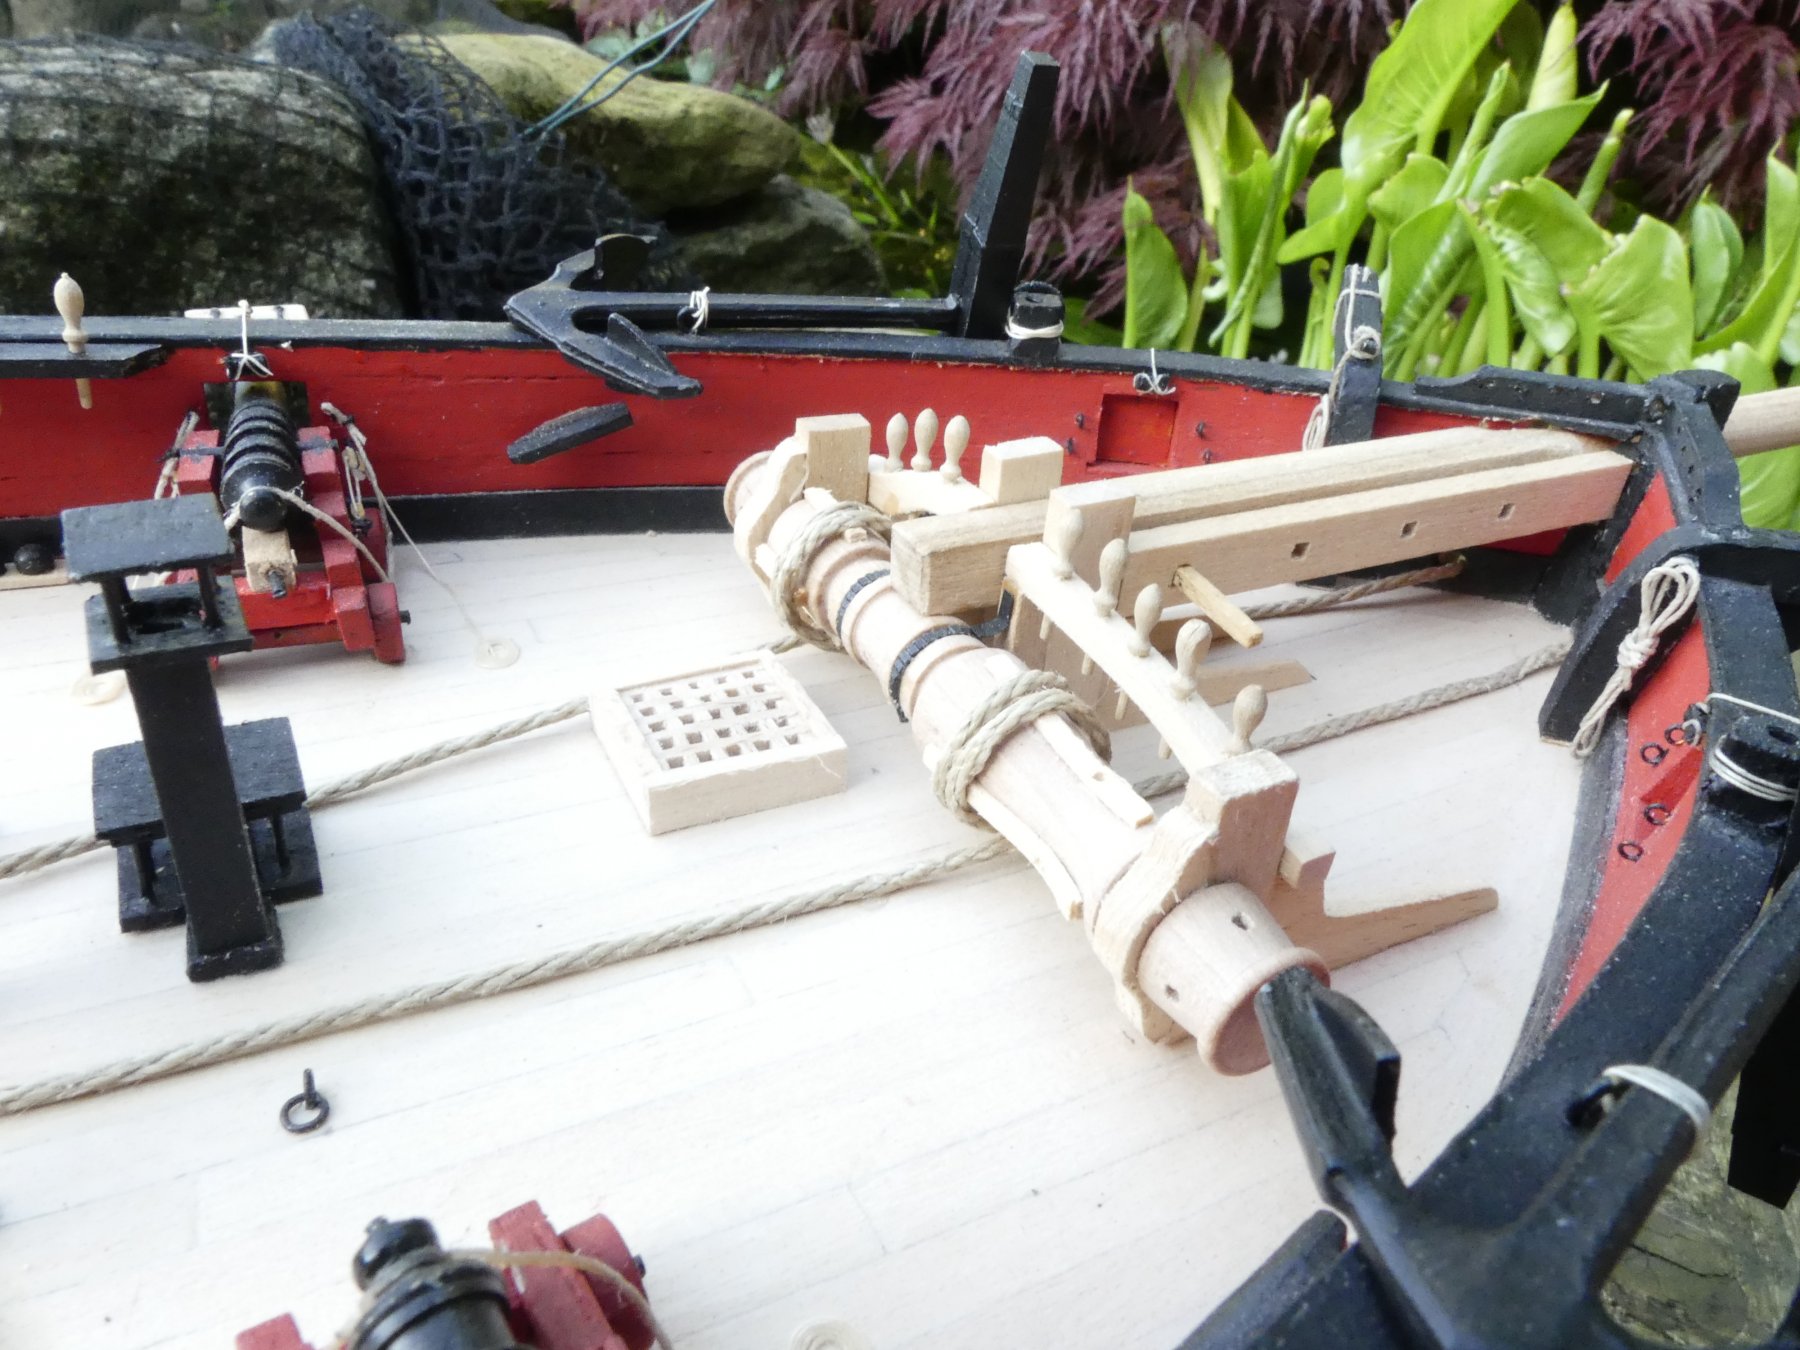
Anchors and anchor tackle / catheads in place. Anchors were missing from the kit so supplied from elsewhere. Stocks scratch built.

Wasn't till after I took this photograph that I found that the starboard side had been damaged.
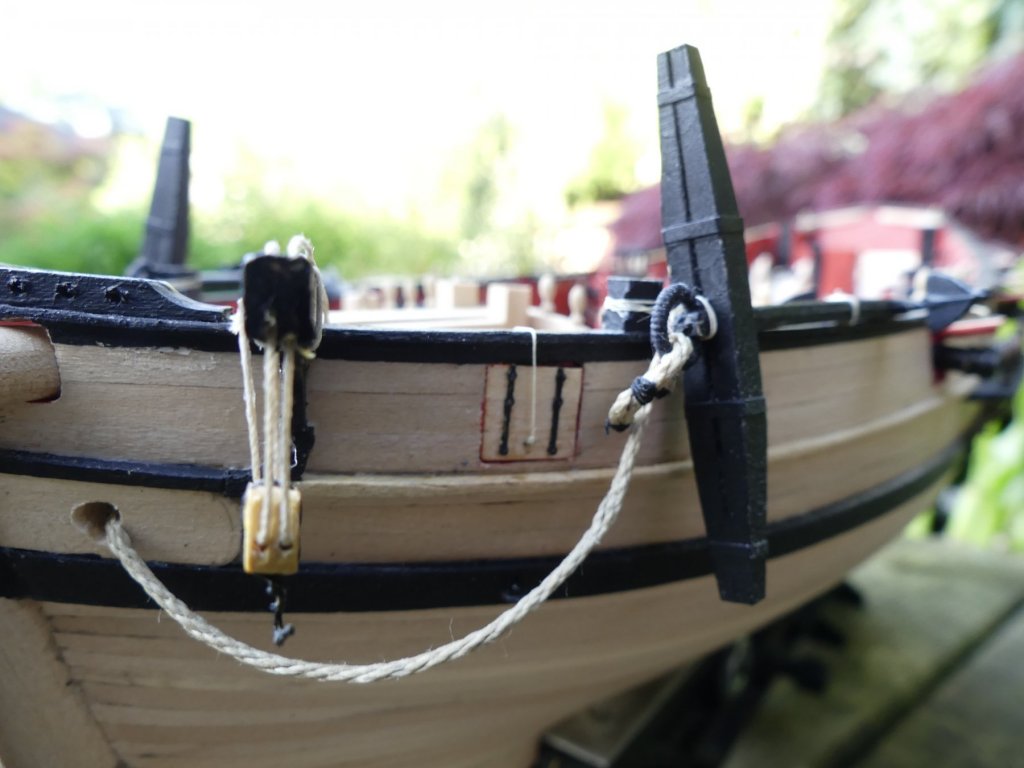
I also need to do something about the 'clover leaf' hawse hole. I wore the bottom of the hole with the section of anchor rope but it doesn't look right.
- hexnut, Mirabell61, John Allen and 4 others
-
7
-
Thank you Coxswain, it is good to know that someone thinks it has been a good build. The planking timber was very nice to work with if not a bit smelly!
-
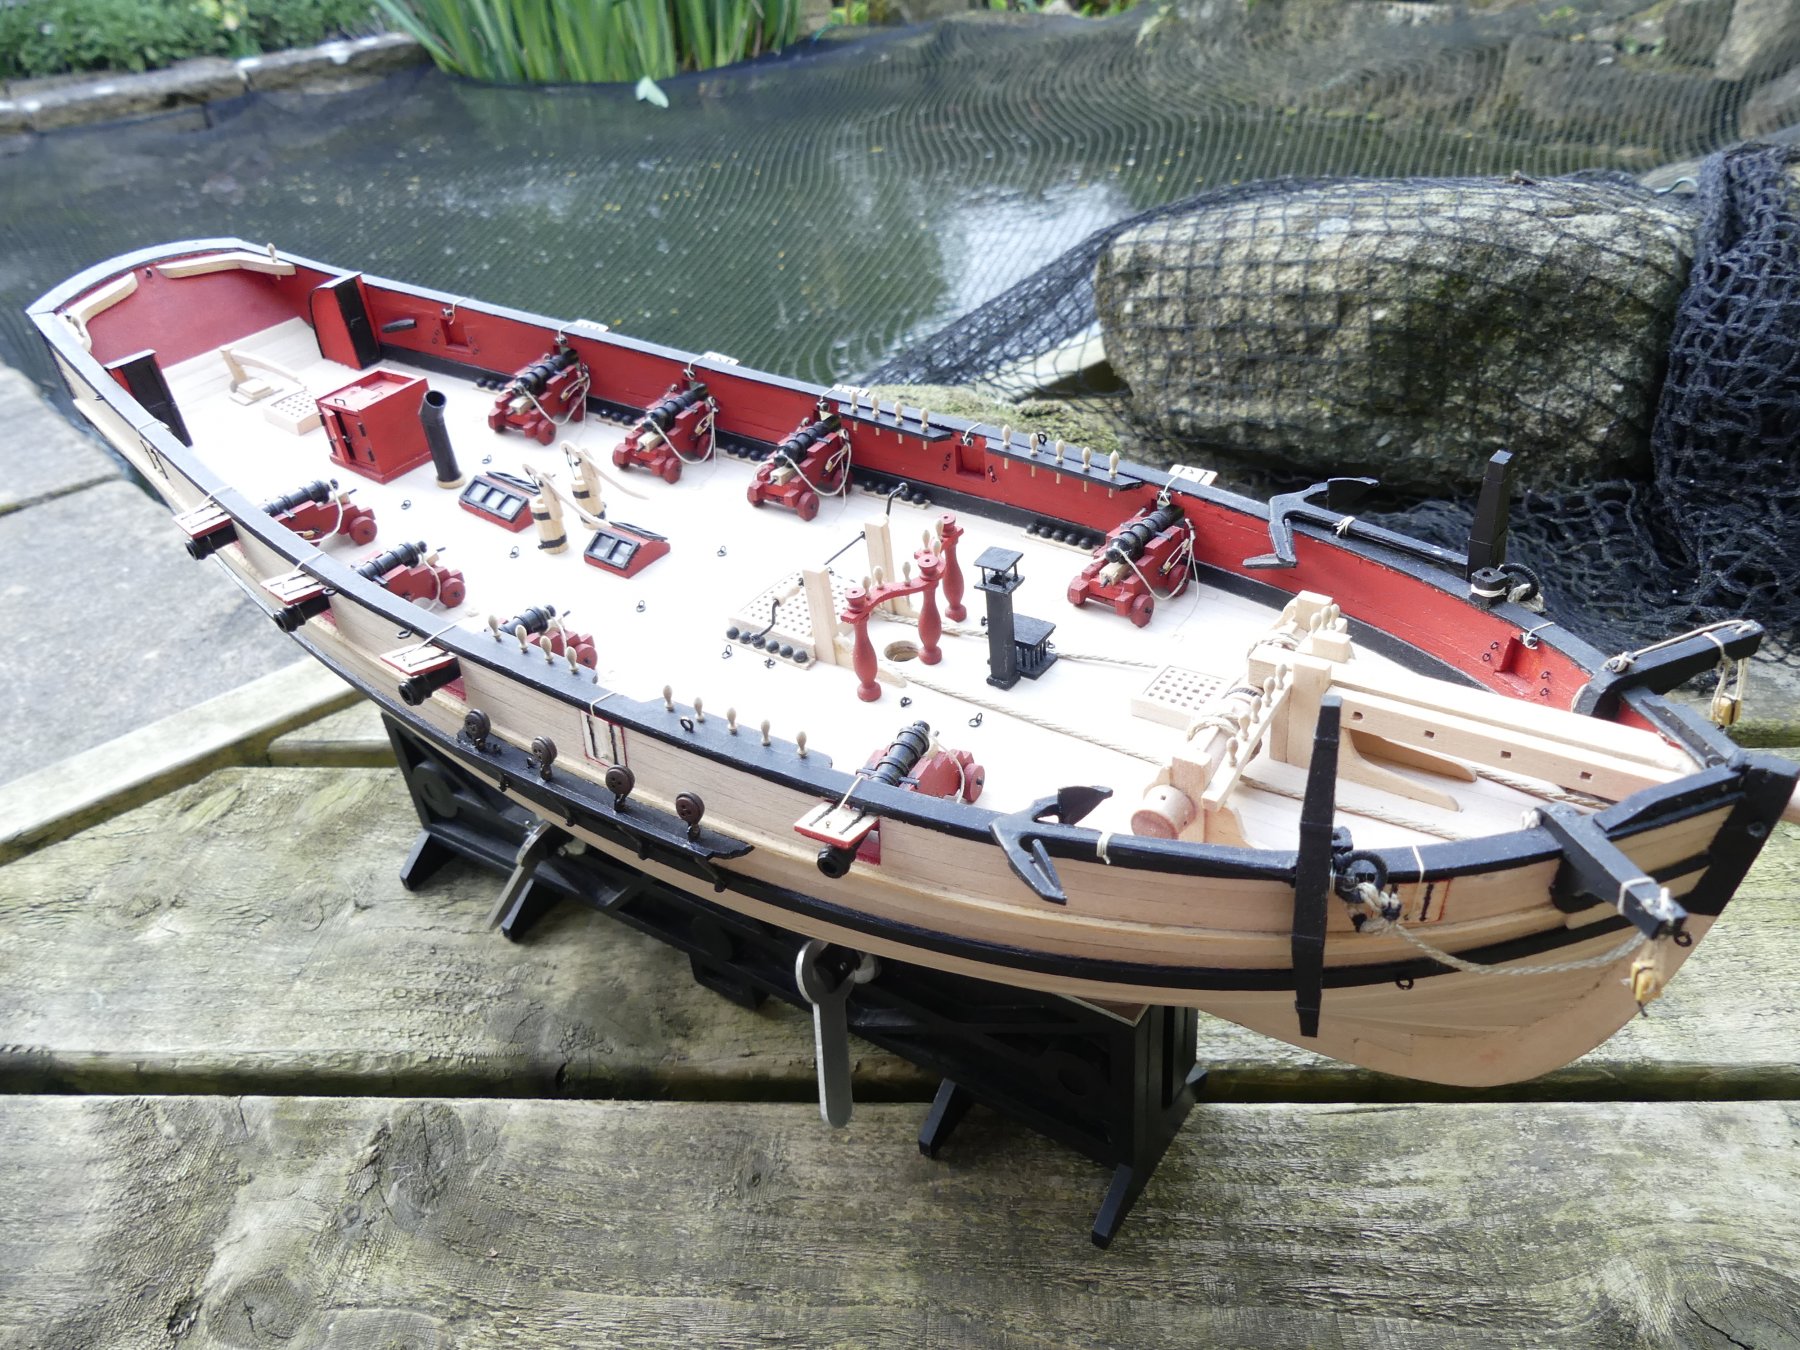
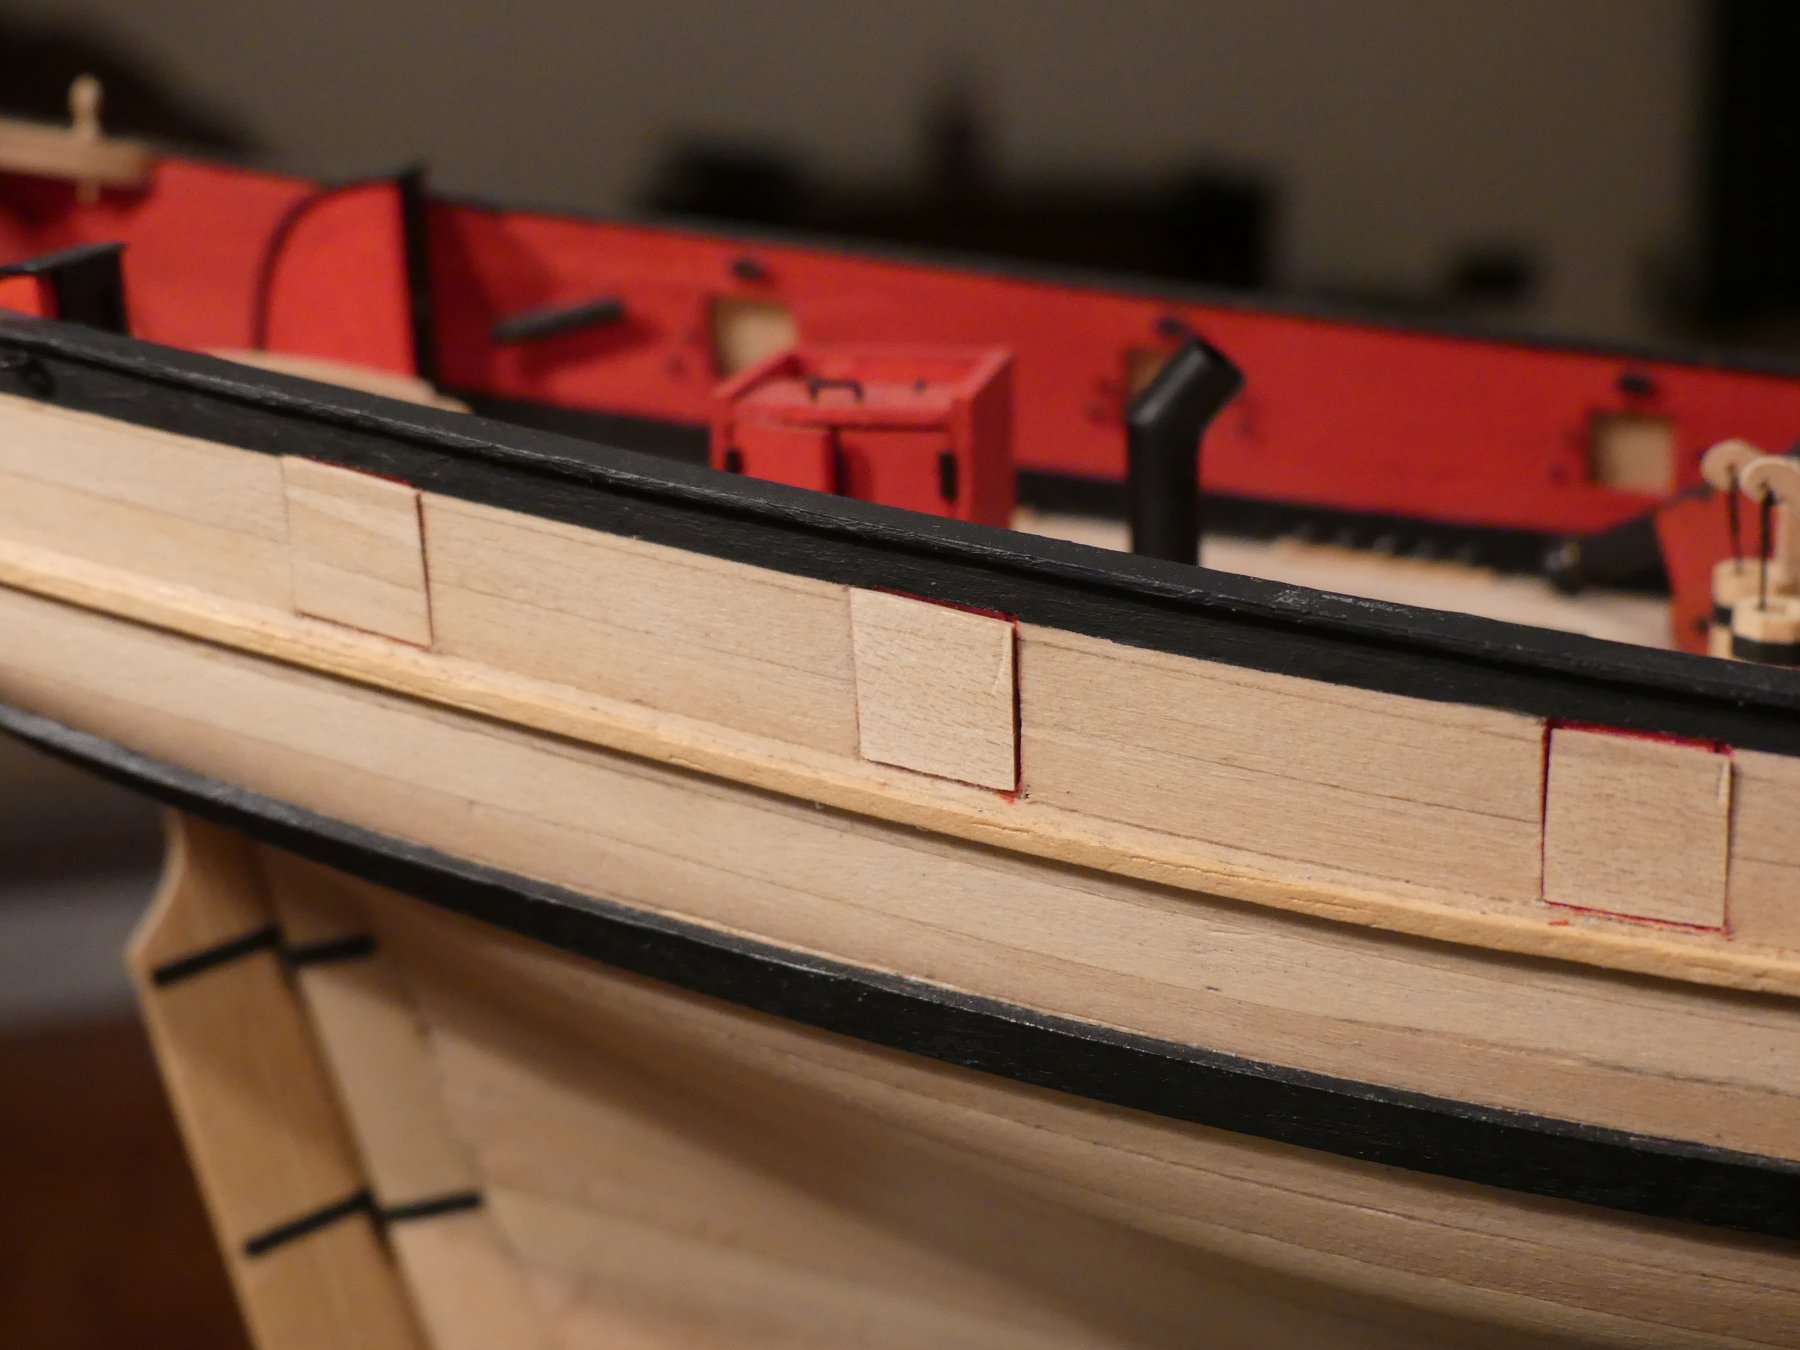
Now gun port lids. Read the instructions after making and it suggested two square sections. I made the outer section out of three pieces of plank. Each lid had to be made to suit the gun port as they are not square. The sides are parallel to the ships frames with top and bottom parallel to the waterline. Each then has three planks that are fixed to the internal layer in such a way as to match the hull planking in that location.
The effect of the lids being this shape means they do look a little strange when in the open position as they do not stick out square from the hull. However, looking at photographs of other, contemporary, cutter models this does seem correct.


Each gun port was fitted into place and then sanded flush with the hull.
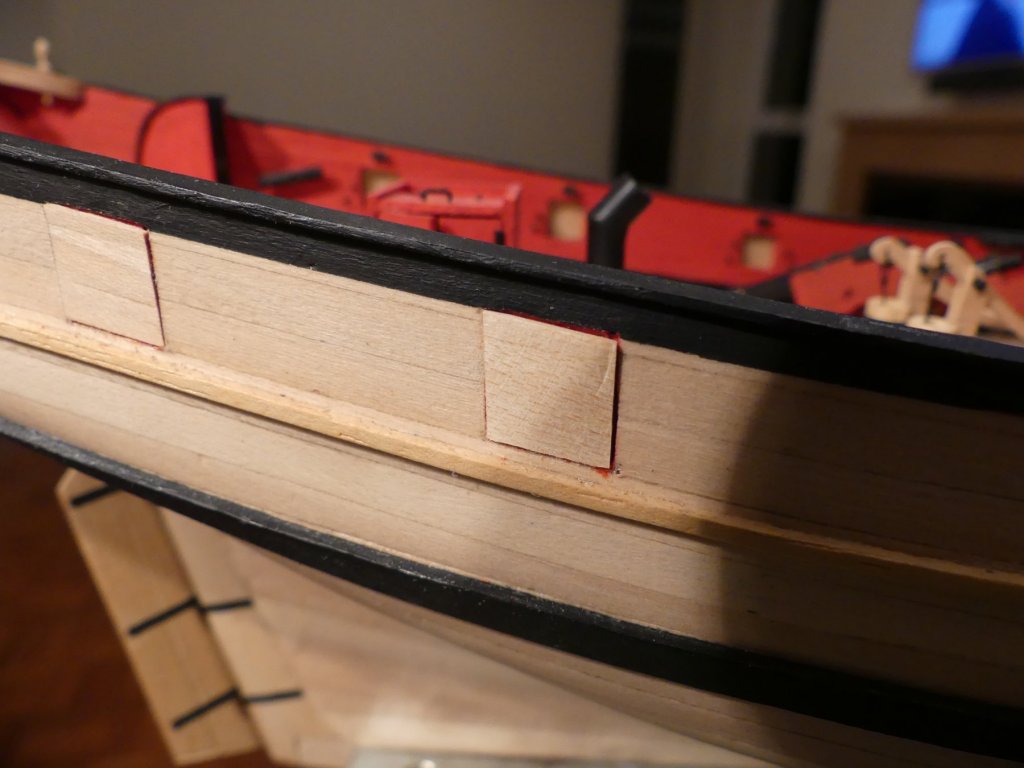
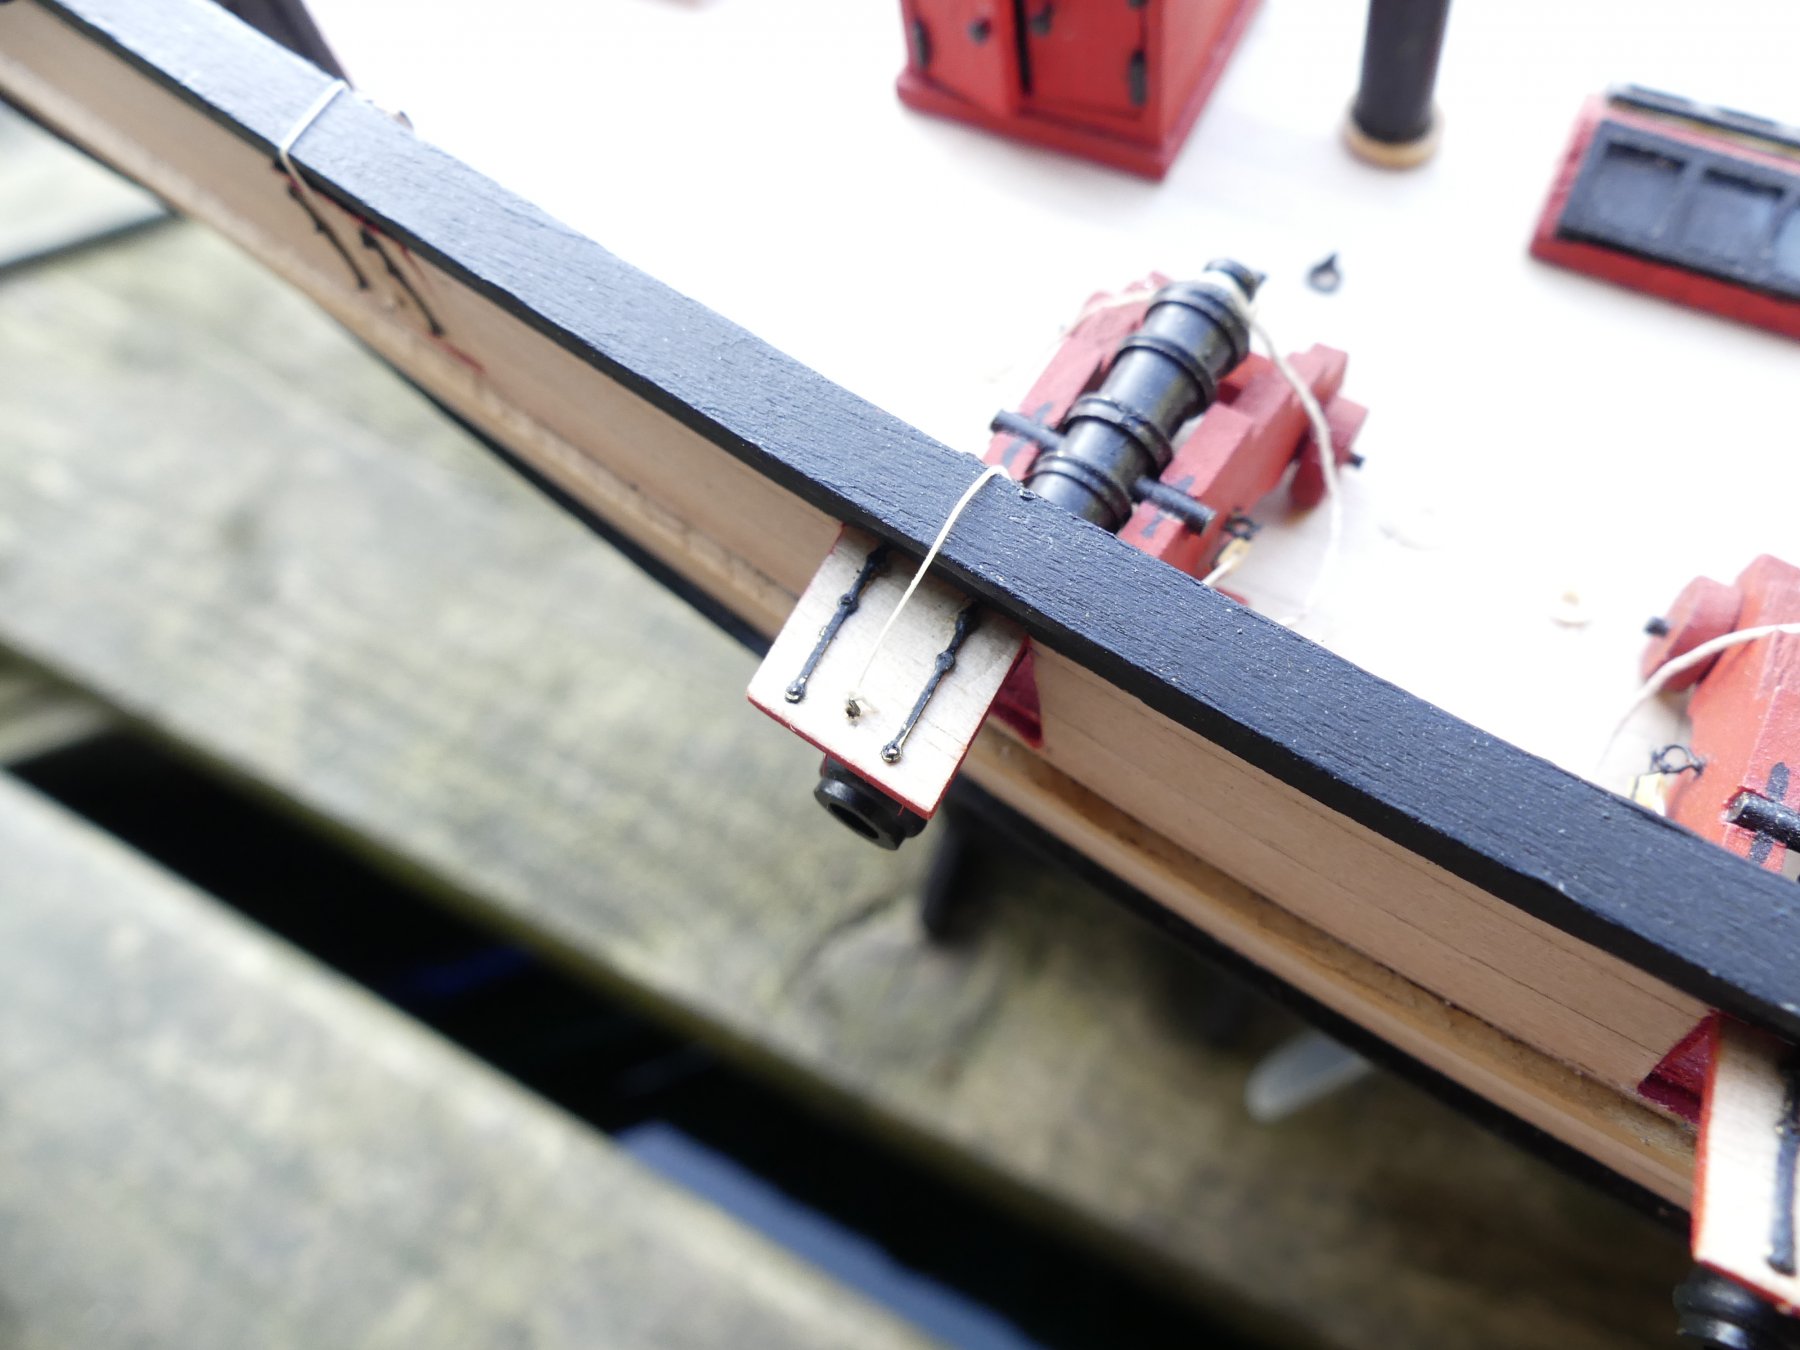
They were then fitted with the hinges taken from the etched sheet I had brought many years ago and tiny eyelets left over from a Caldercraft kit. Holes drilled in the hull to insert the ends of the hinges and rigged with ropes over the bulwark rai to the cleats fitted previously inside the hull.

- Old Collingwood, egkb, Jim Rogers and 6 others
-
9
-
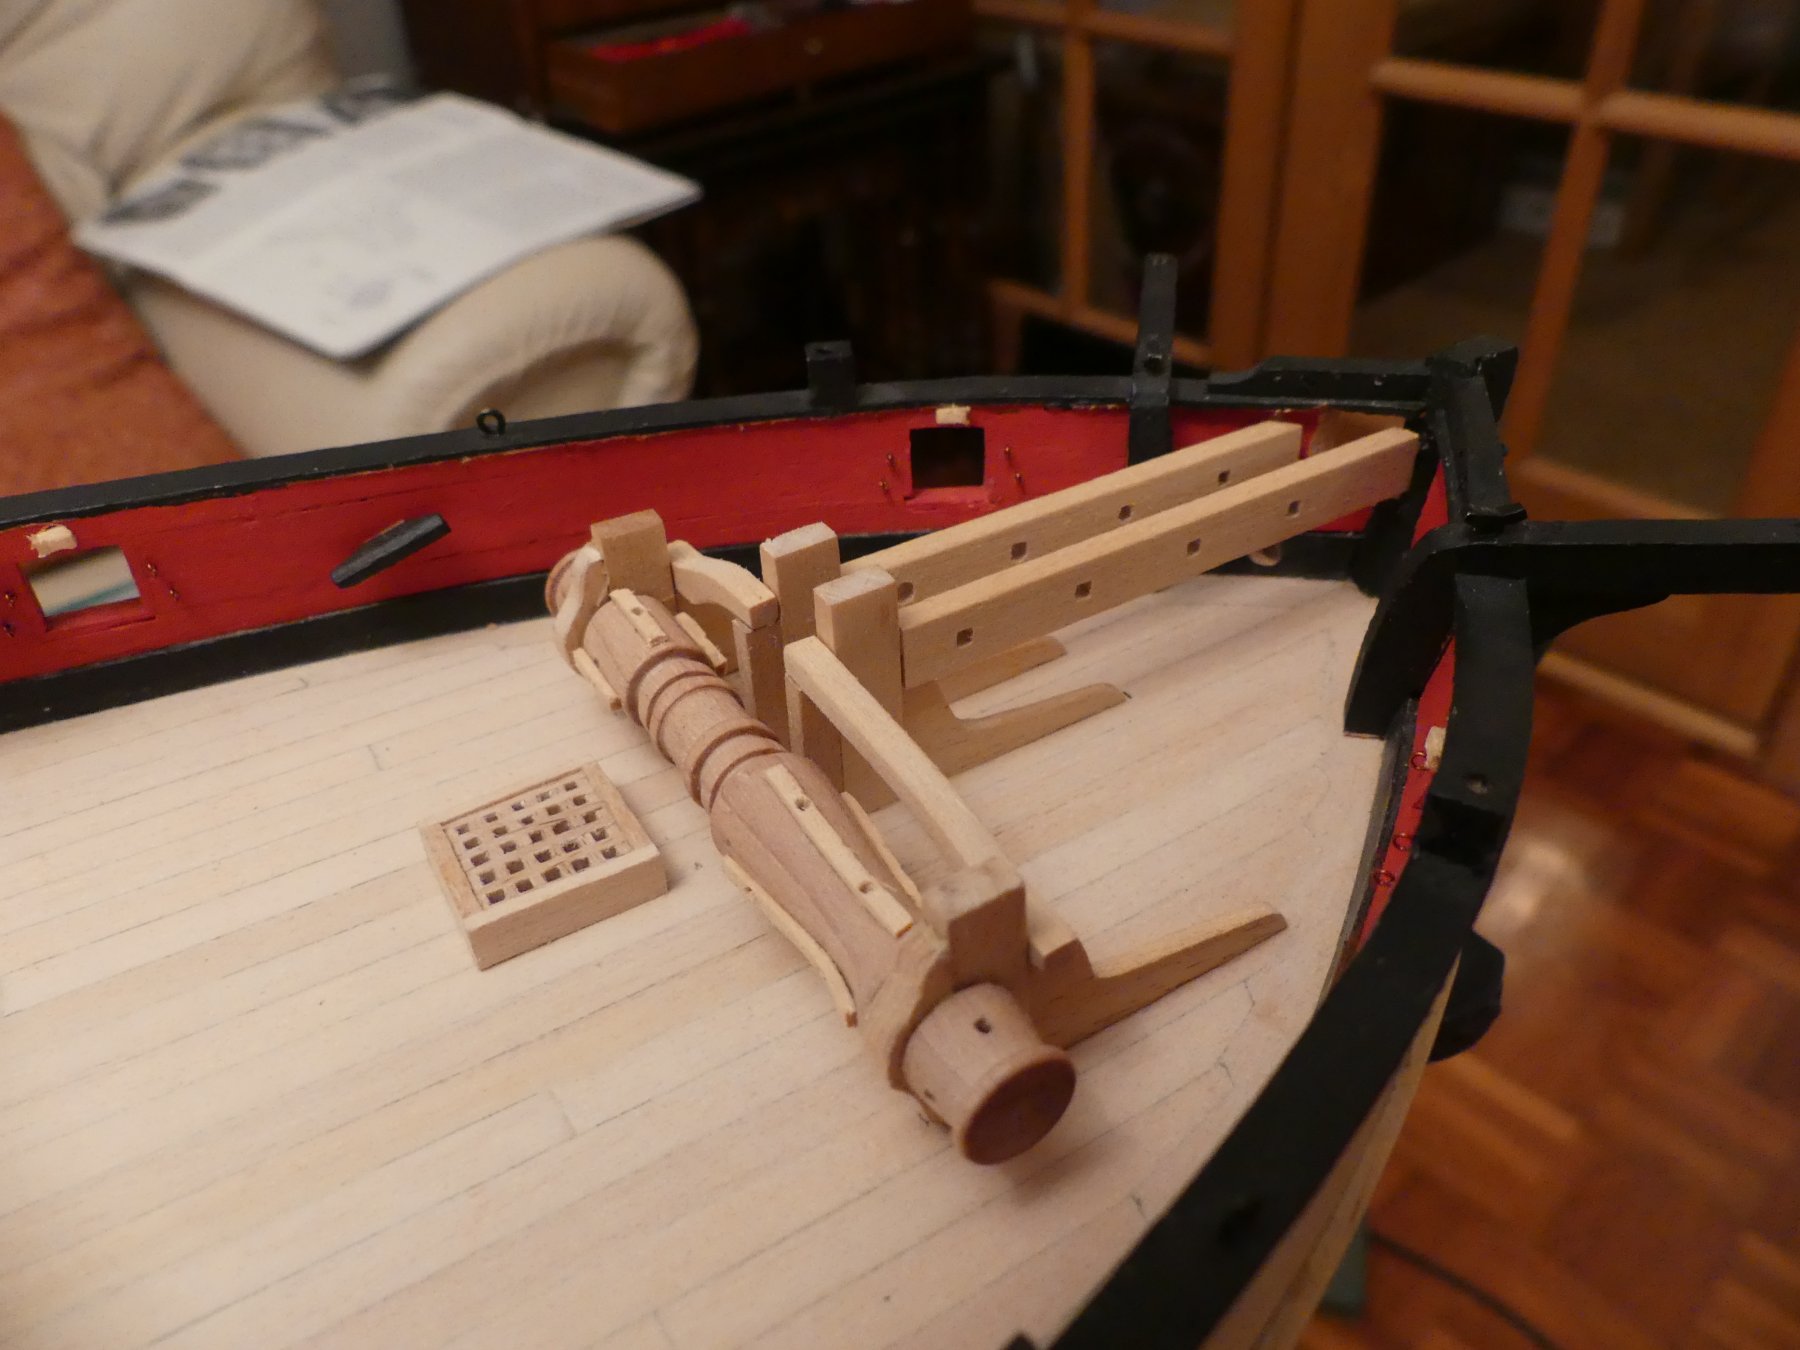
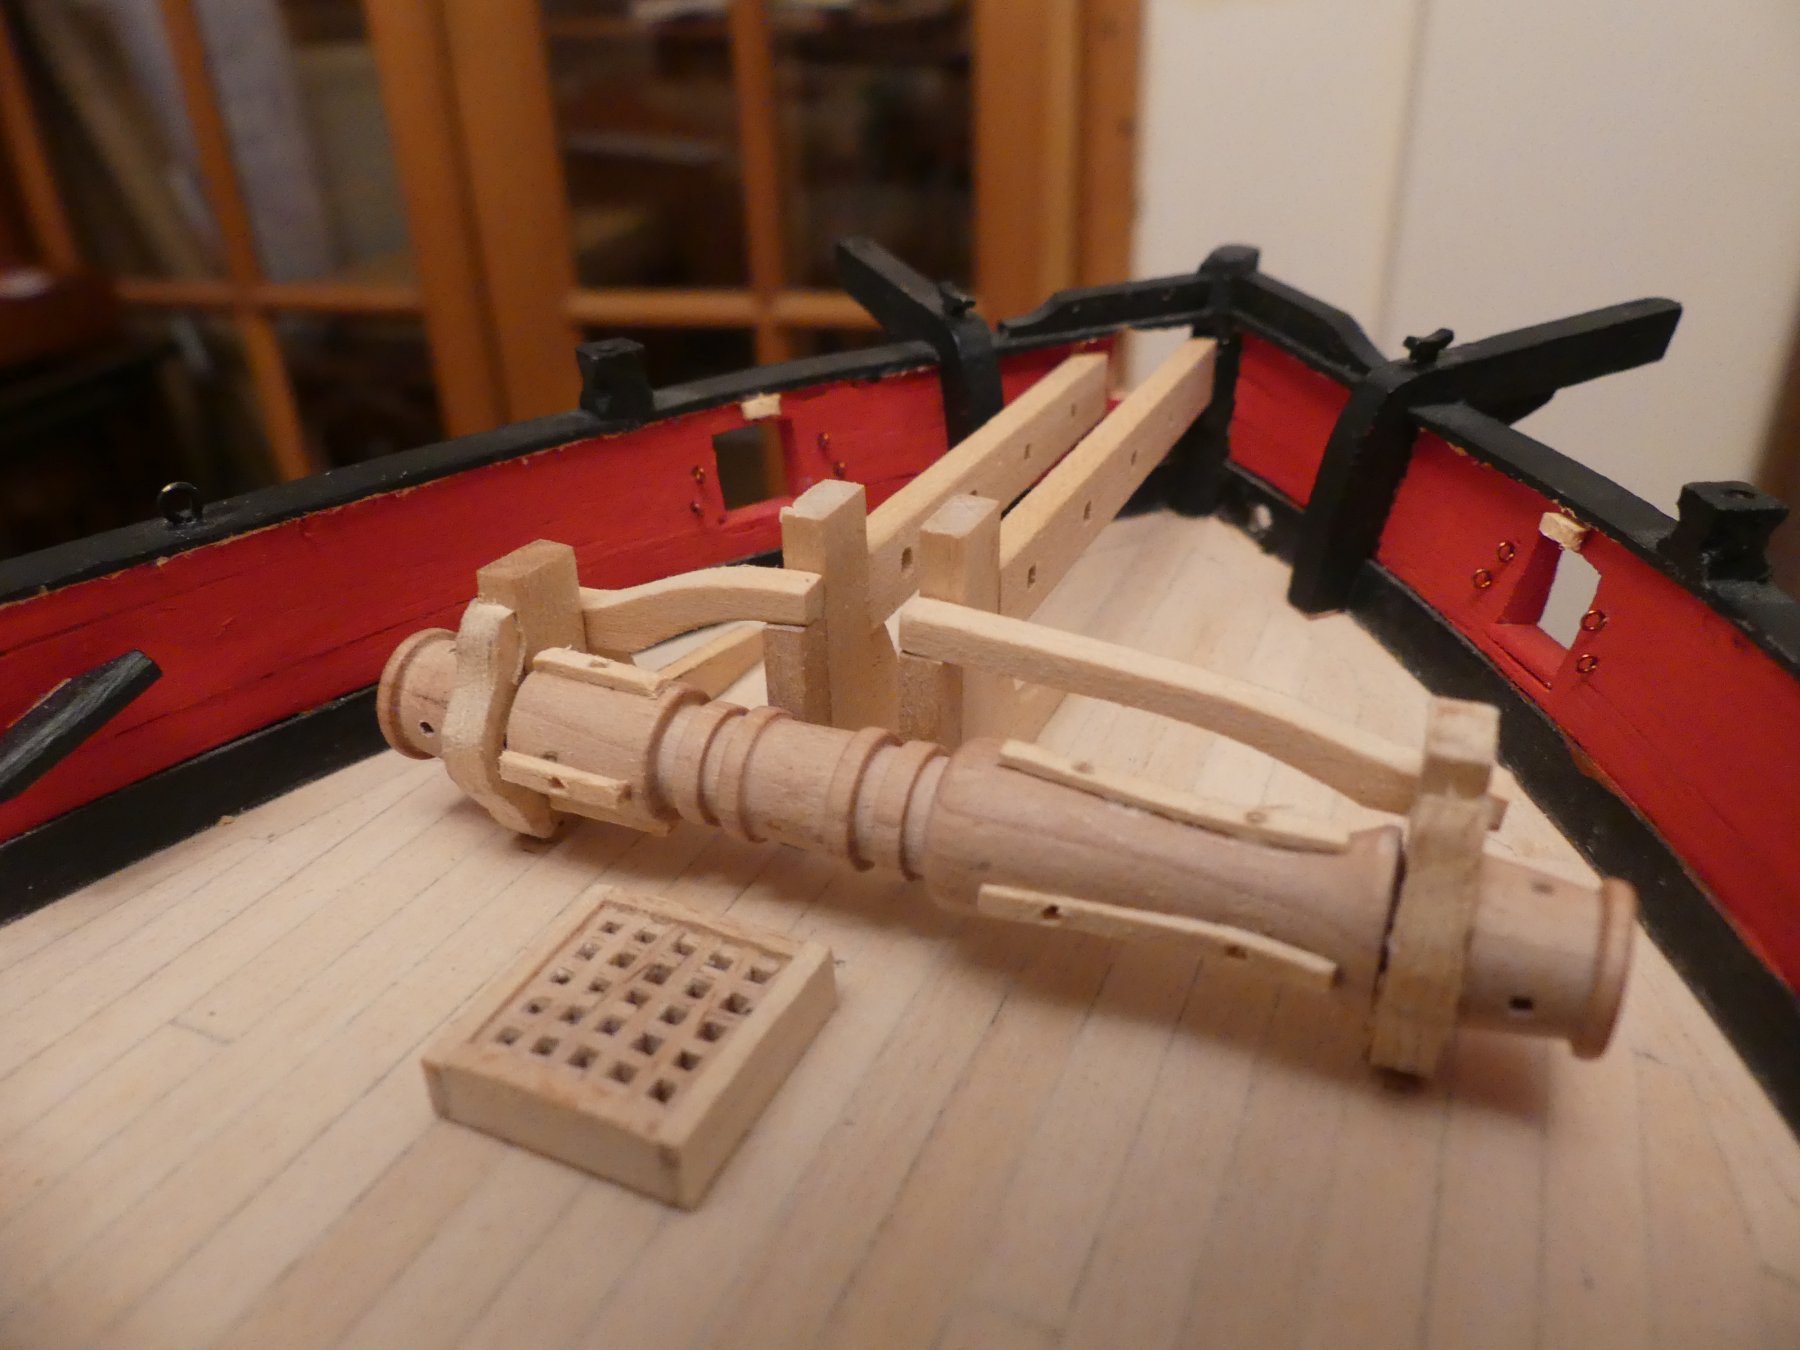
Cannons under construction and on the near completed hull.
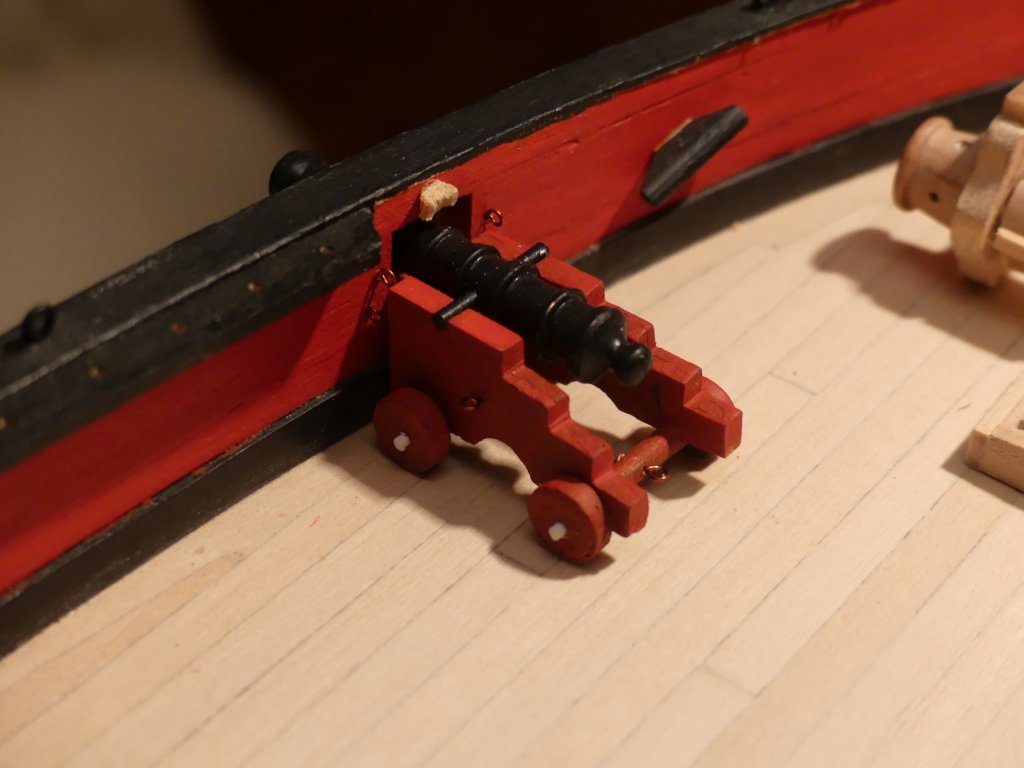
And here is three rigged. I would of expected carronades by this date but the book with the kit specifies cannon.

- hexnut, druxey, GeorgeKapas and 3 others
-
6
-
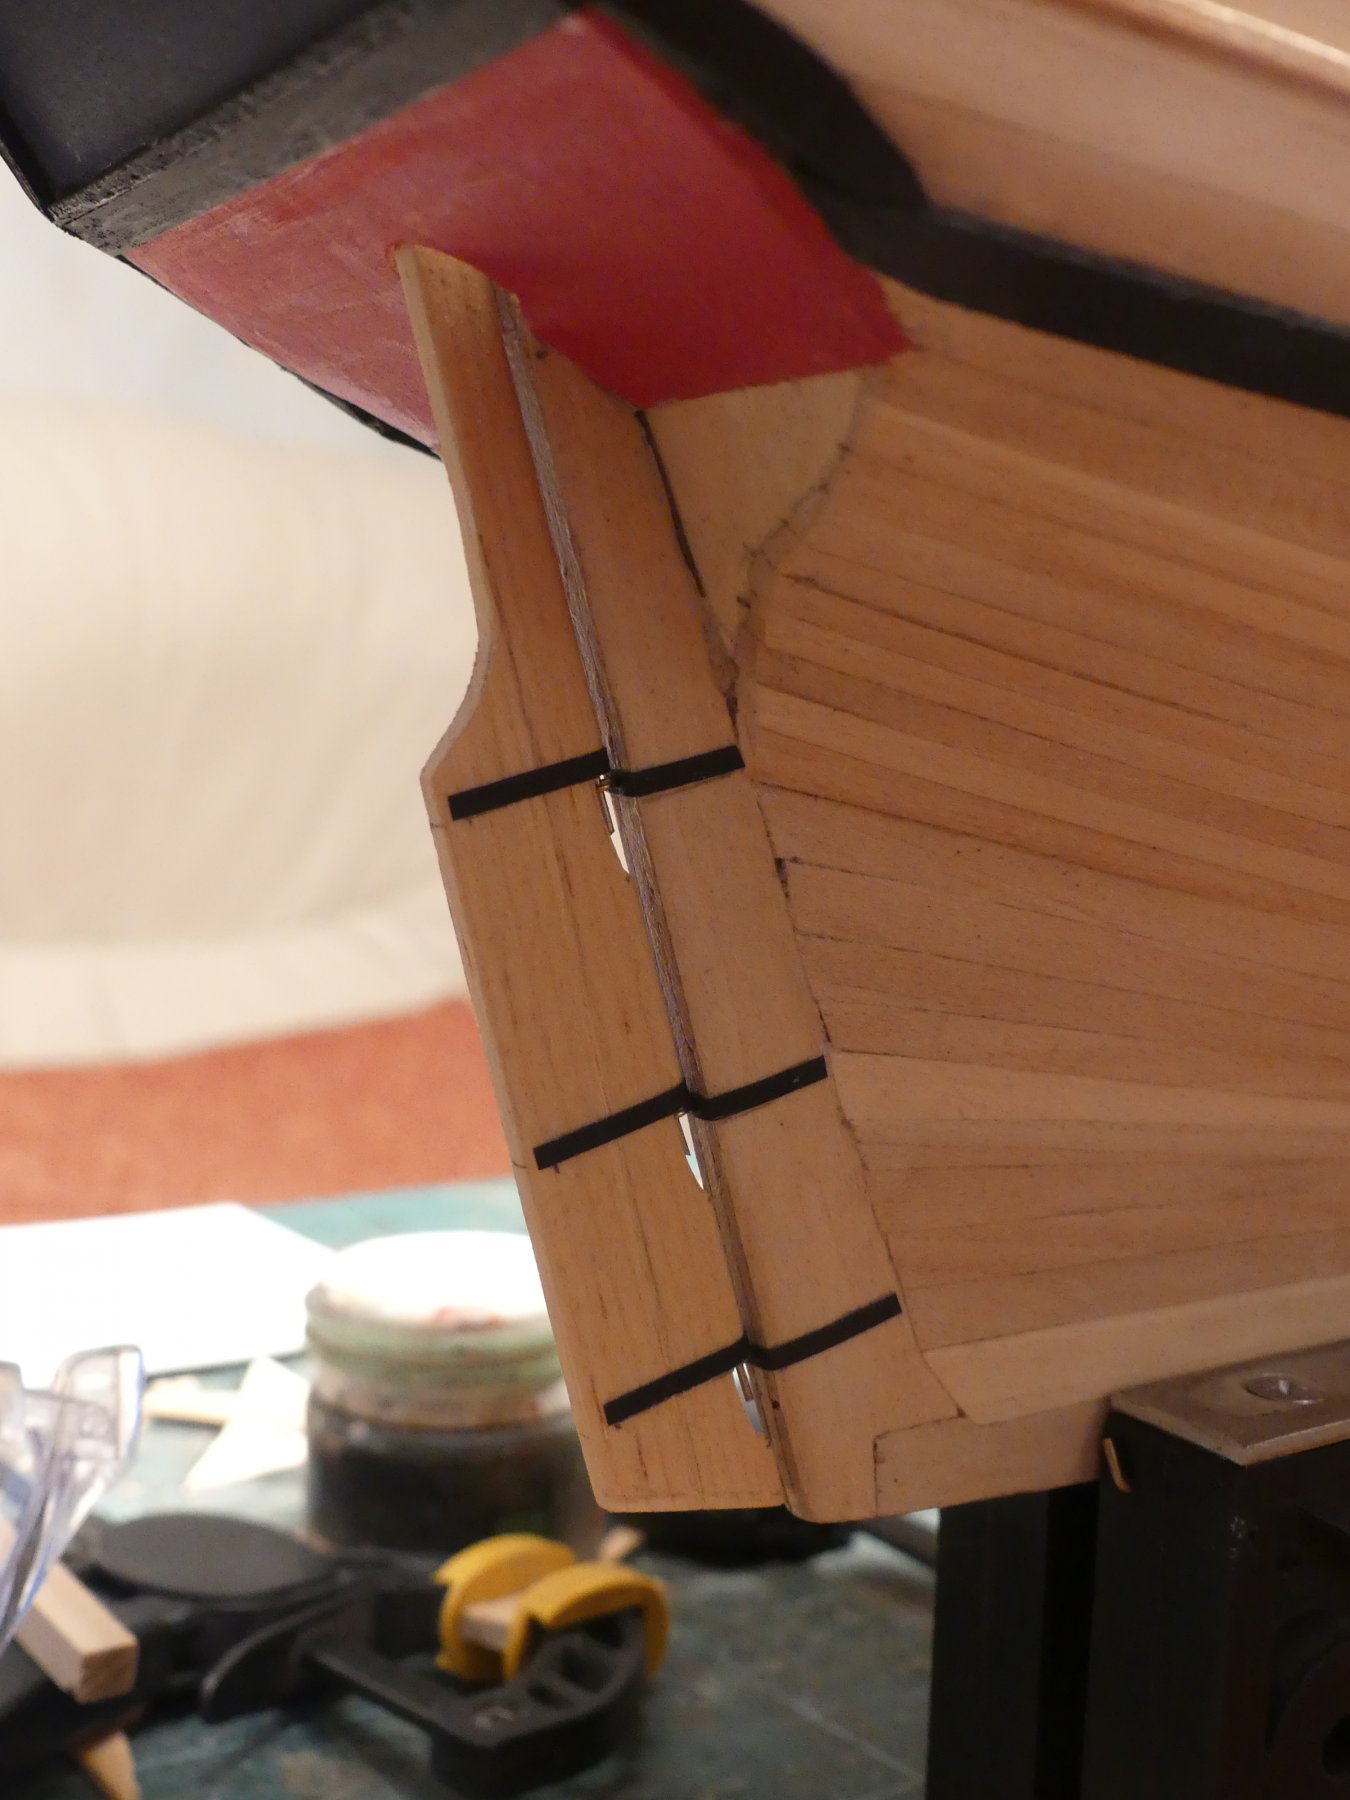
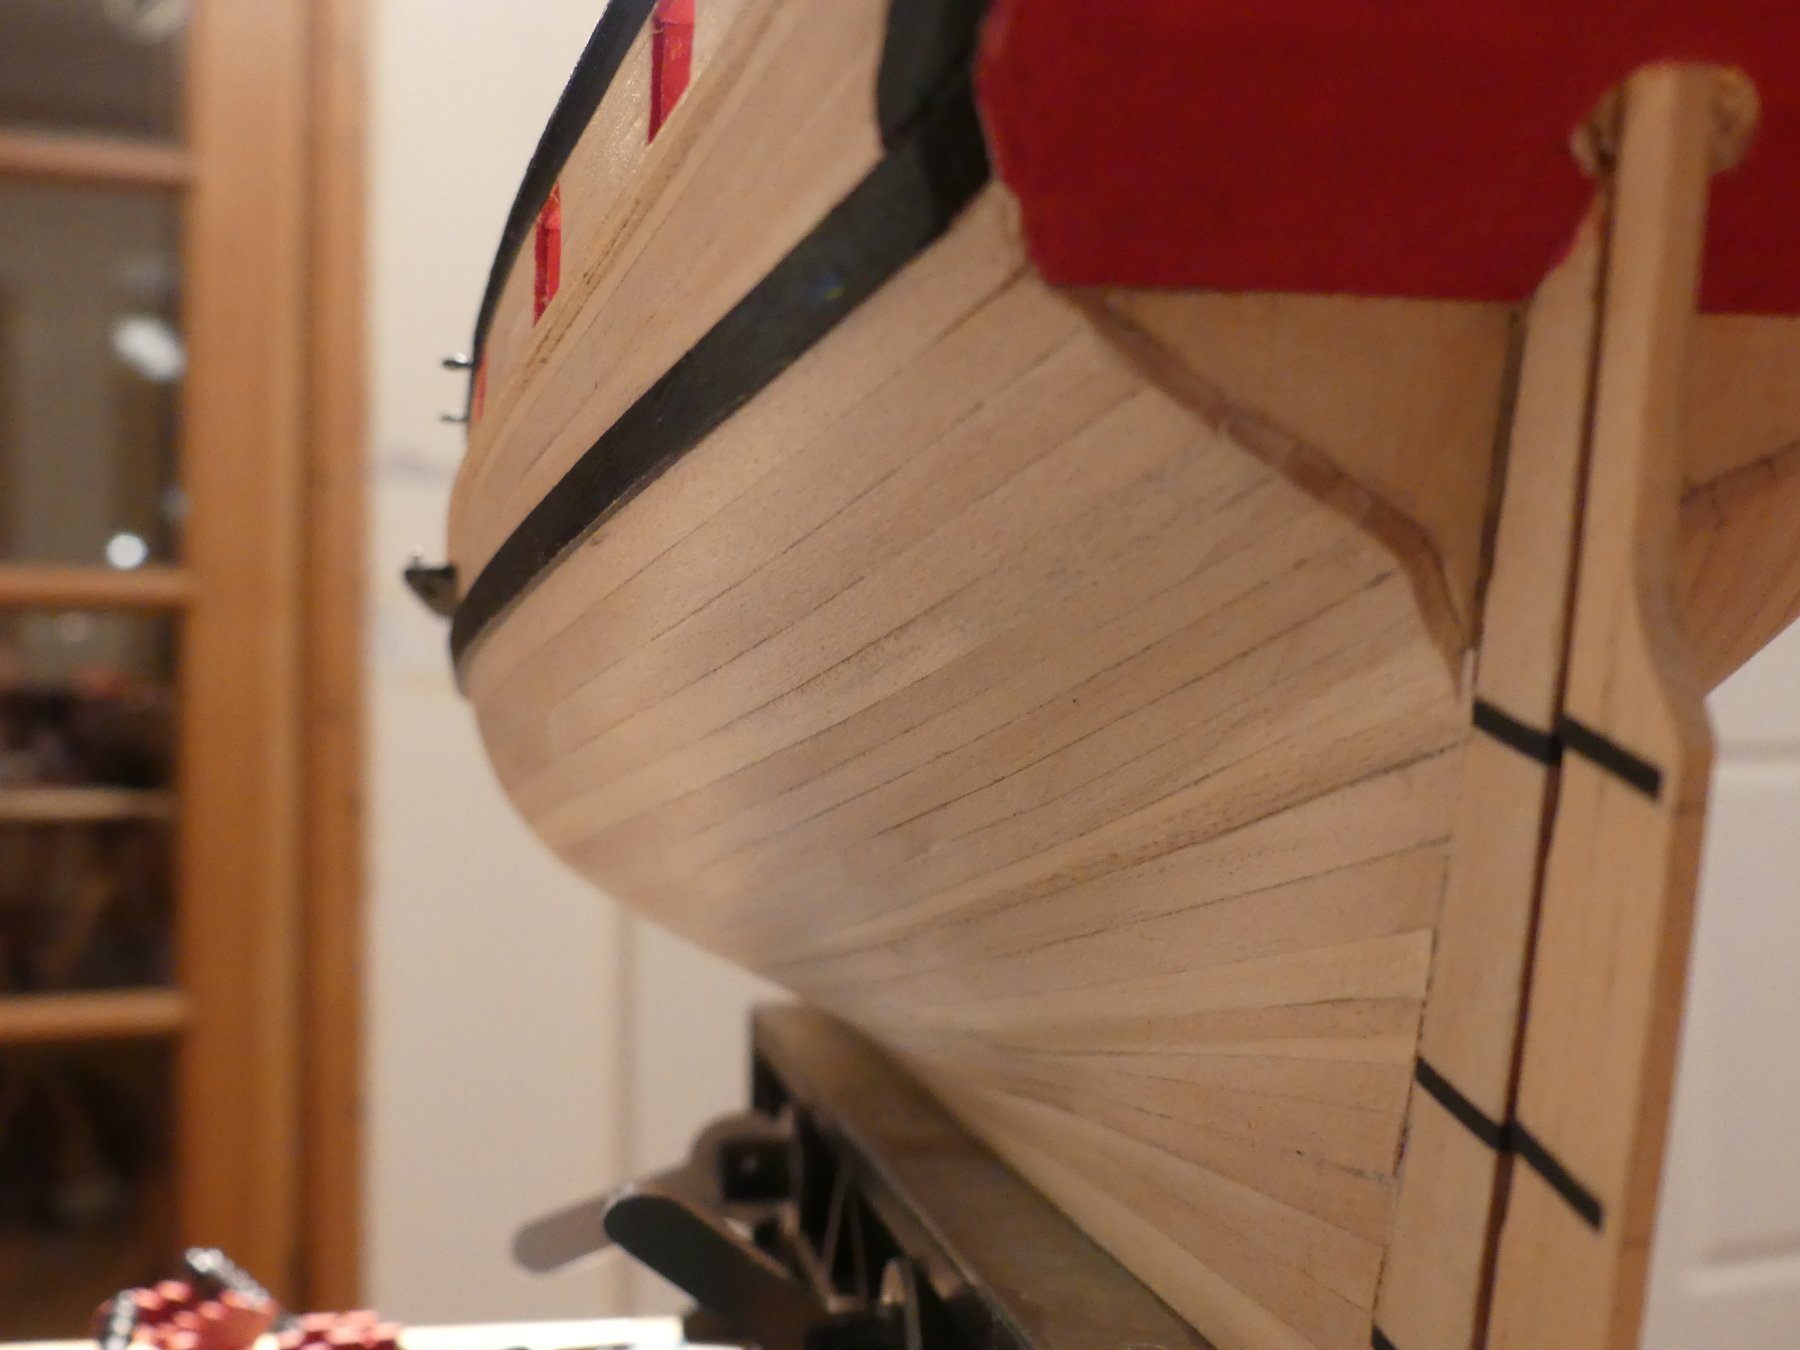
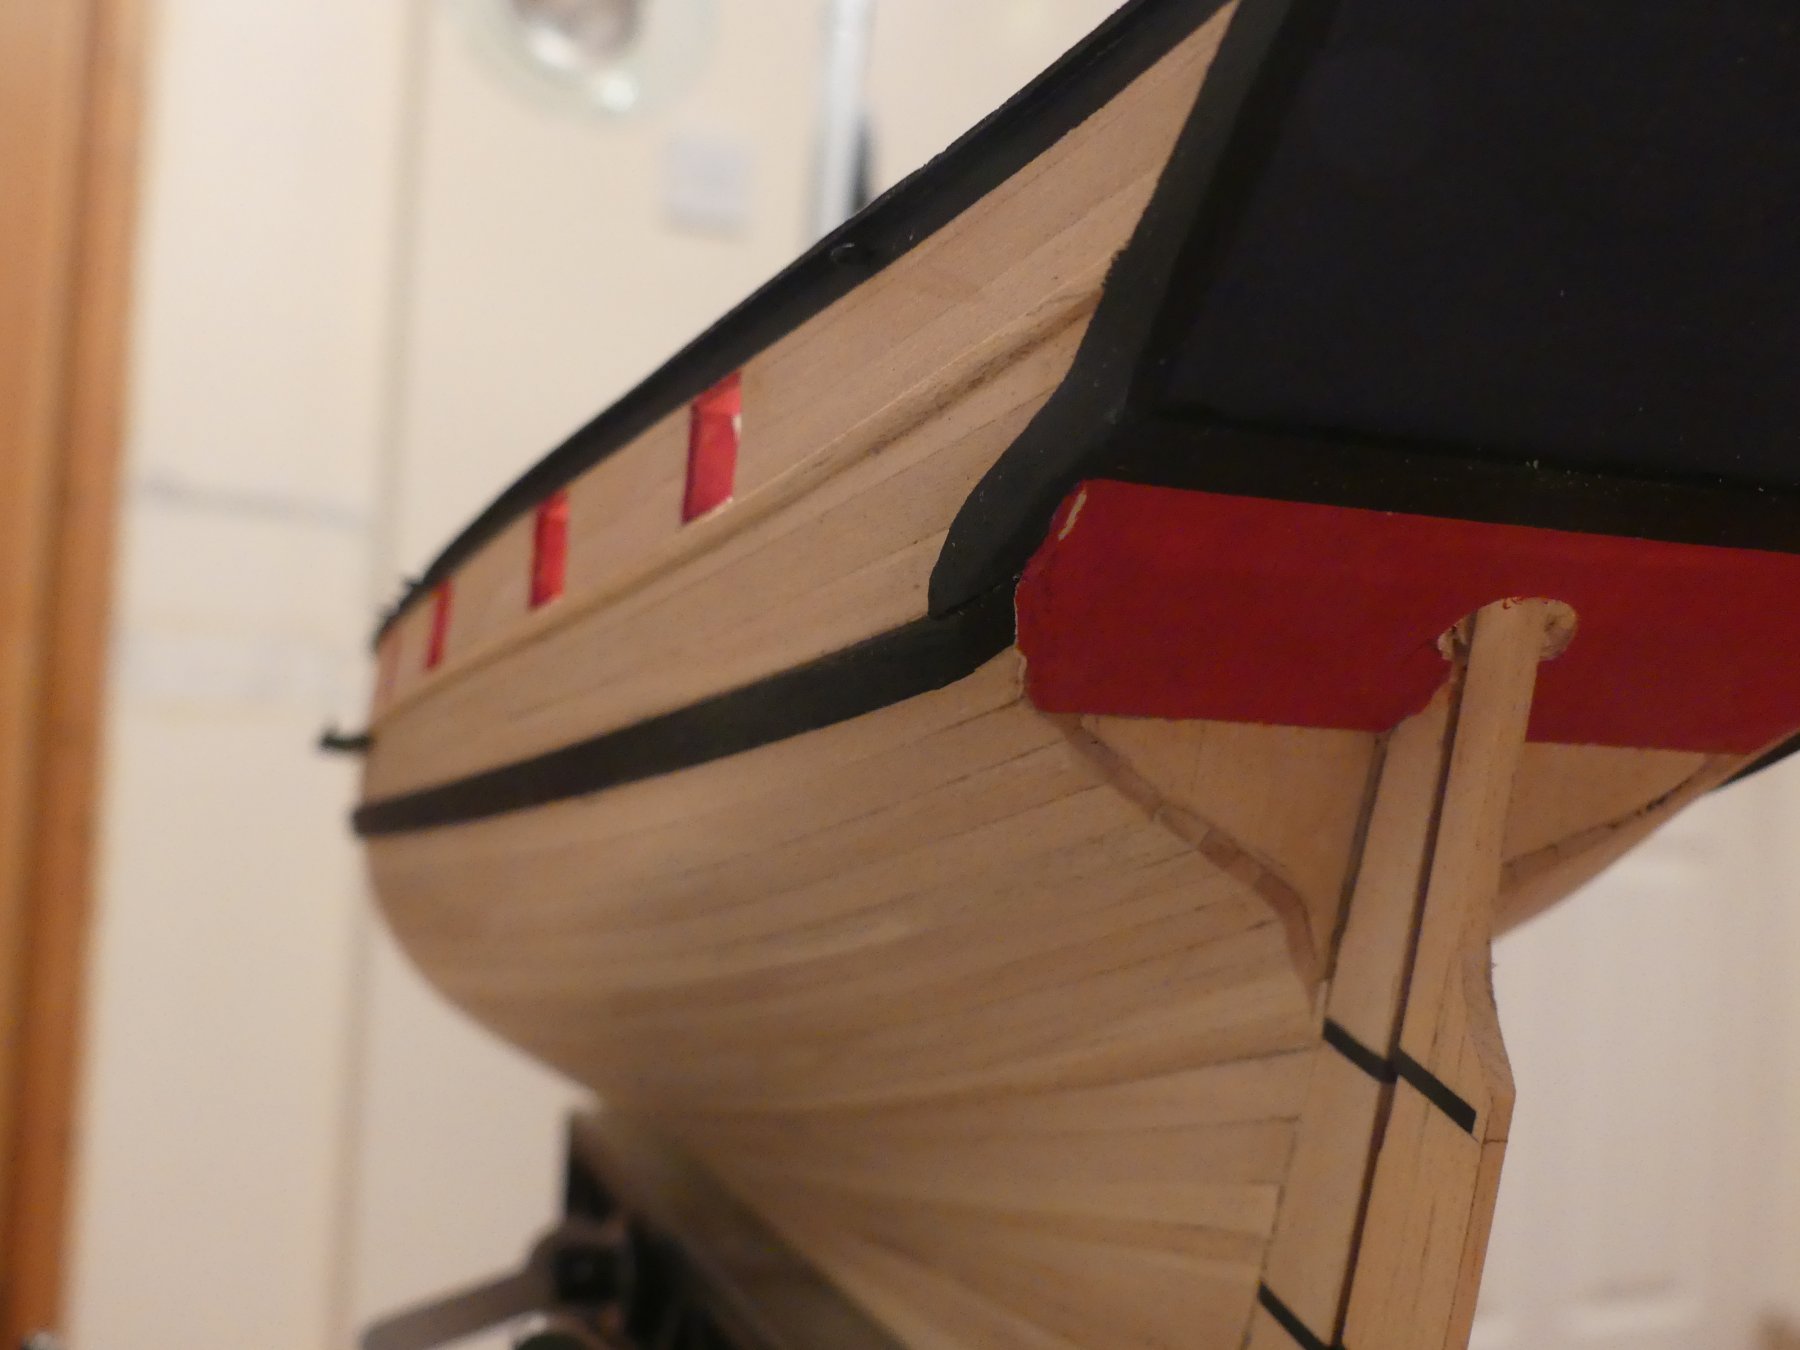
Now shots of the stern counters and rudder construction with some shots of stern planking.
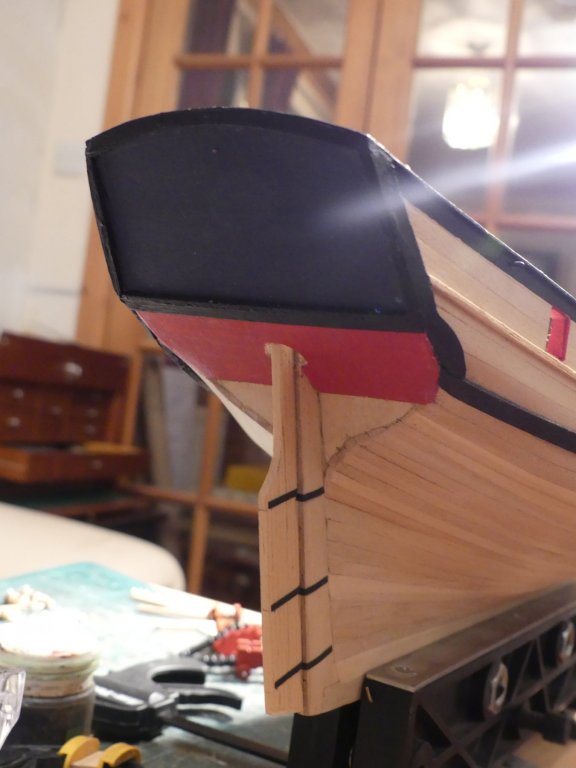
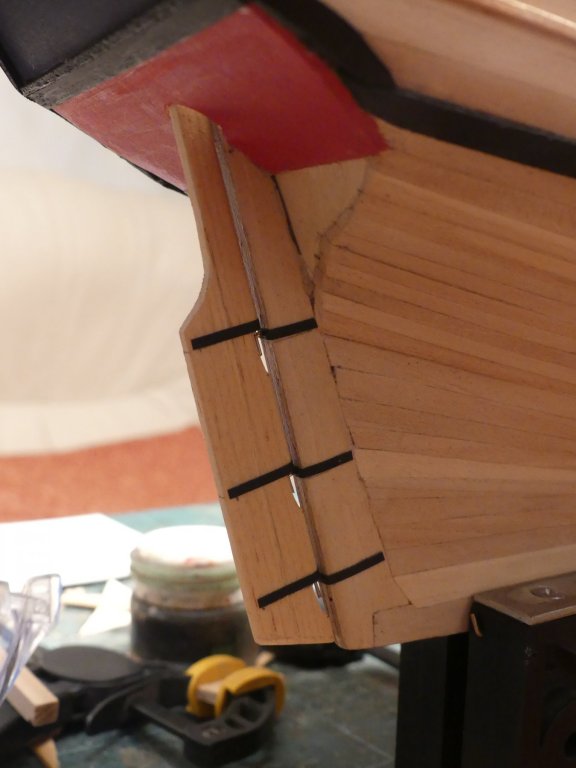
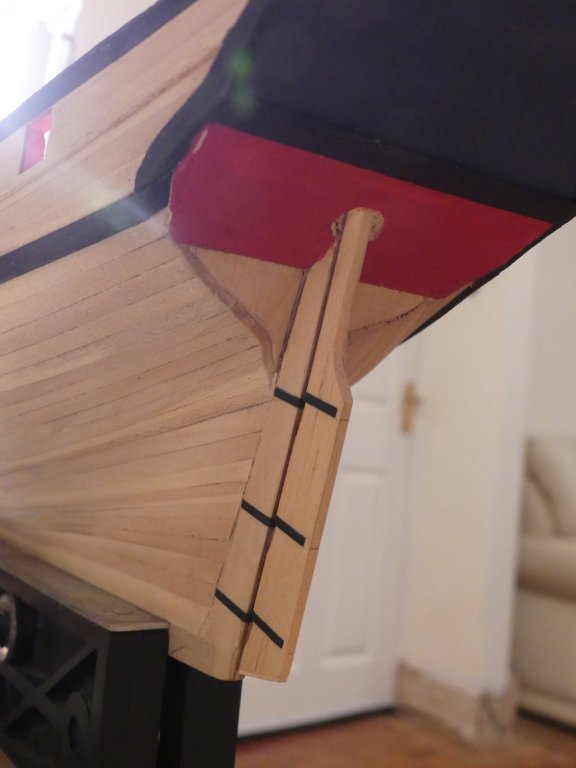


- druxey, John Cheevers, glennreader and 7 others
-
10
-
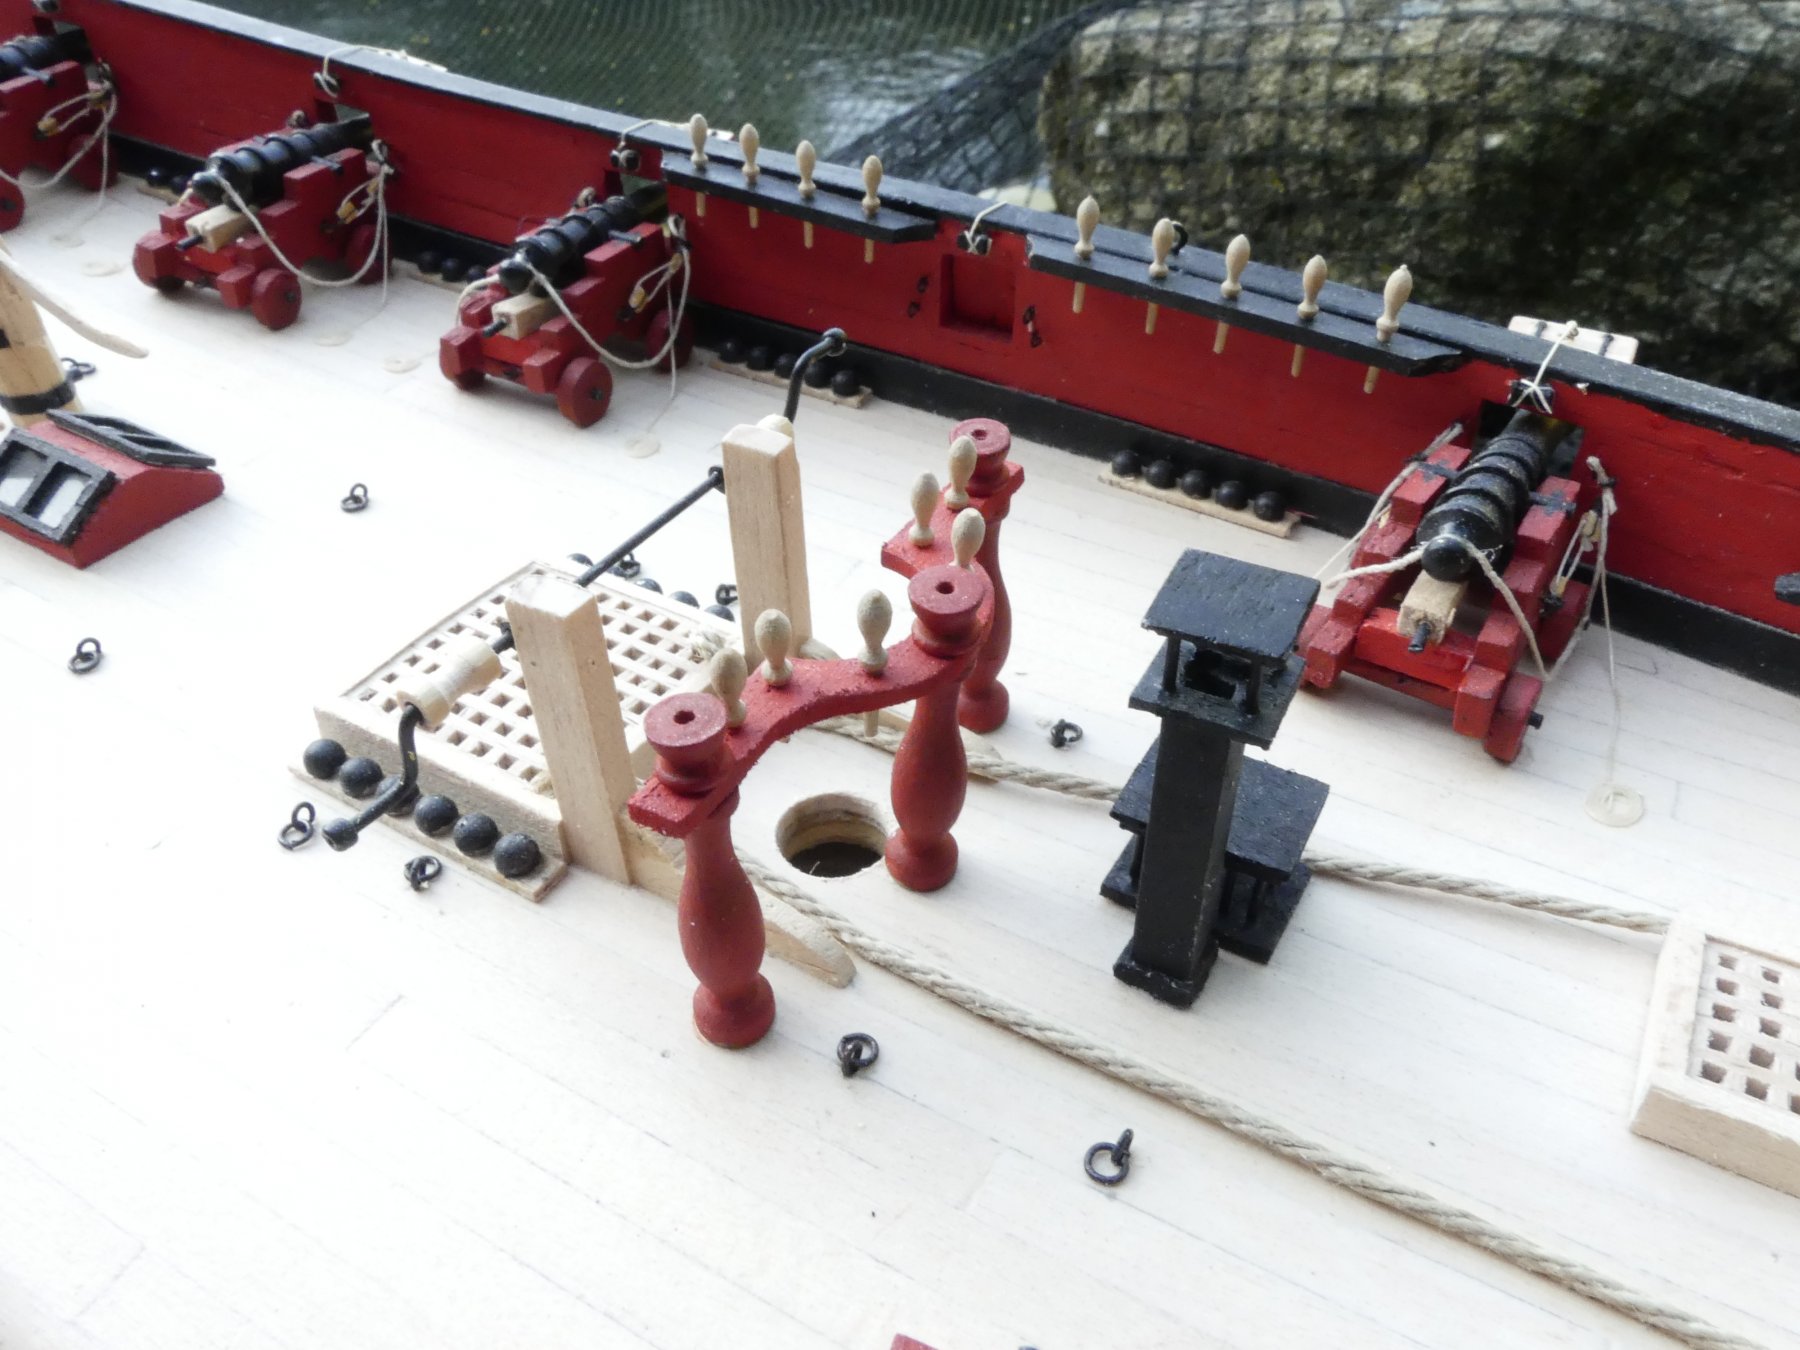
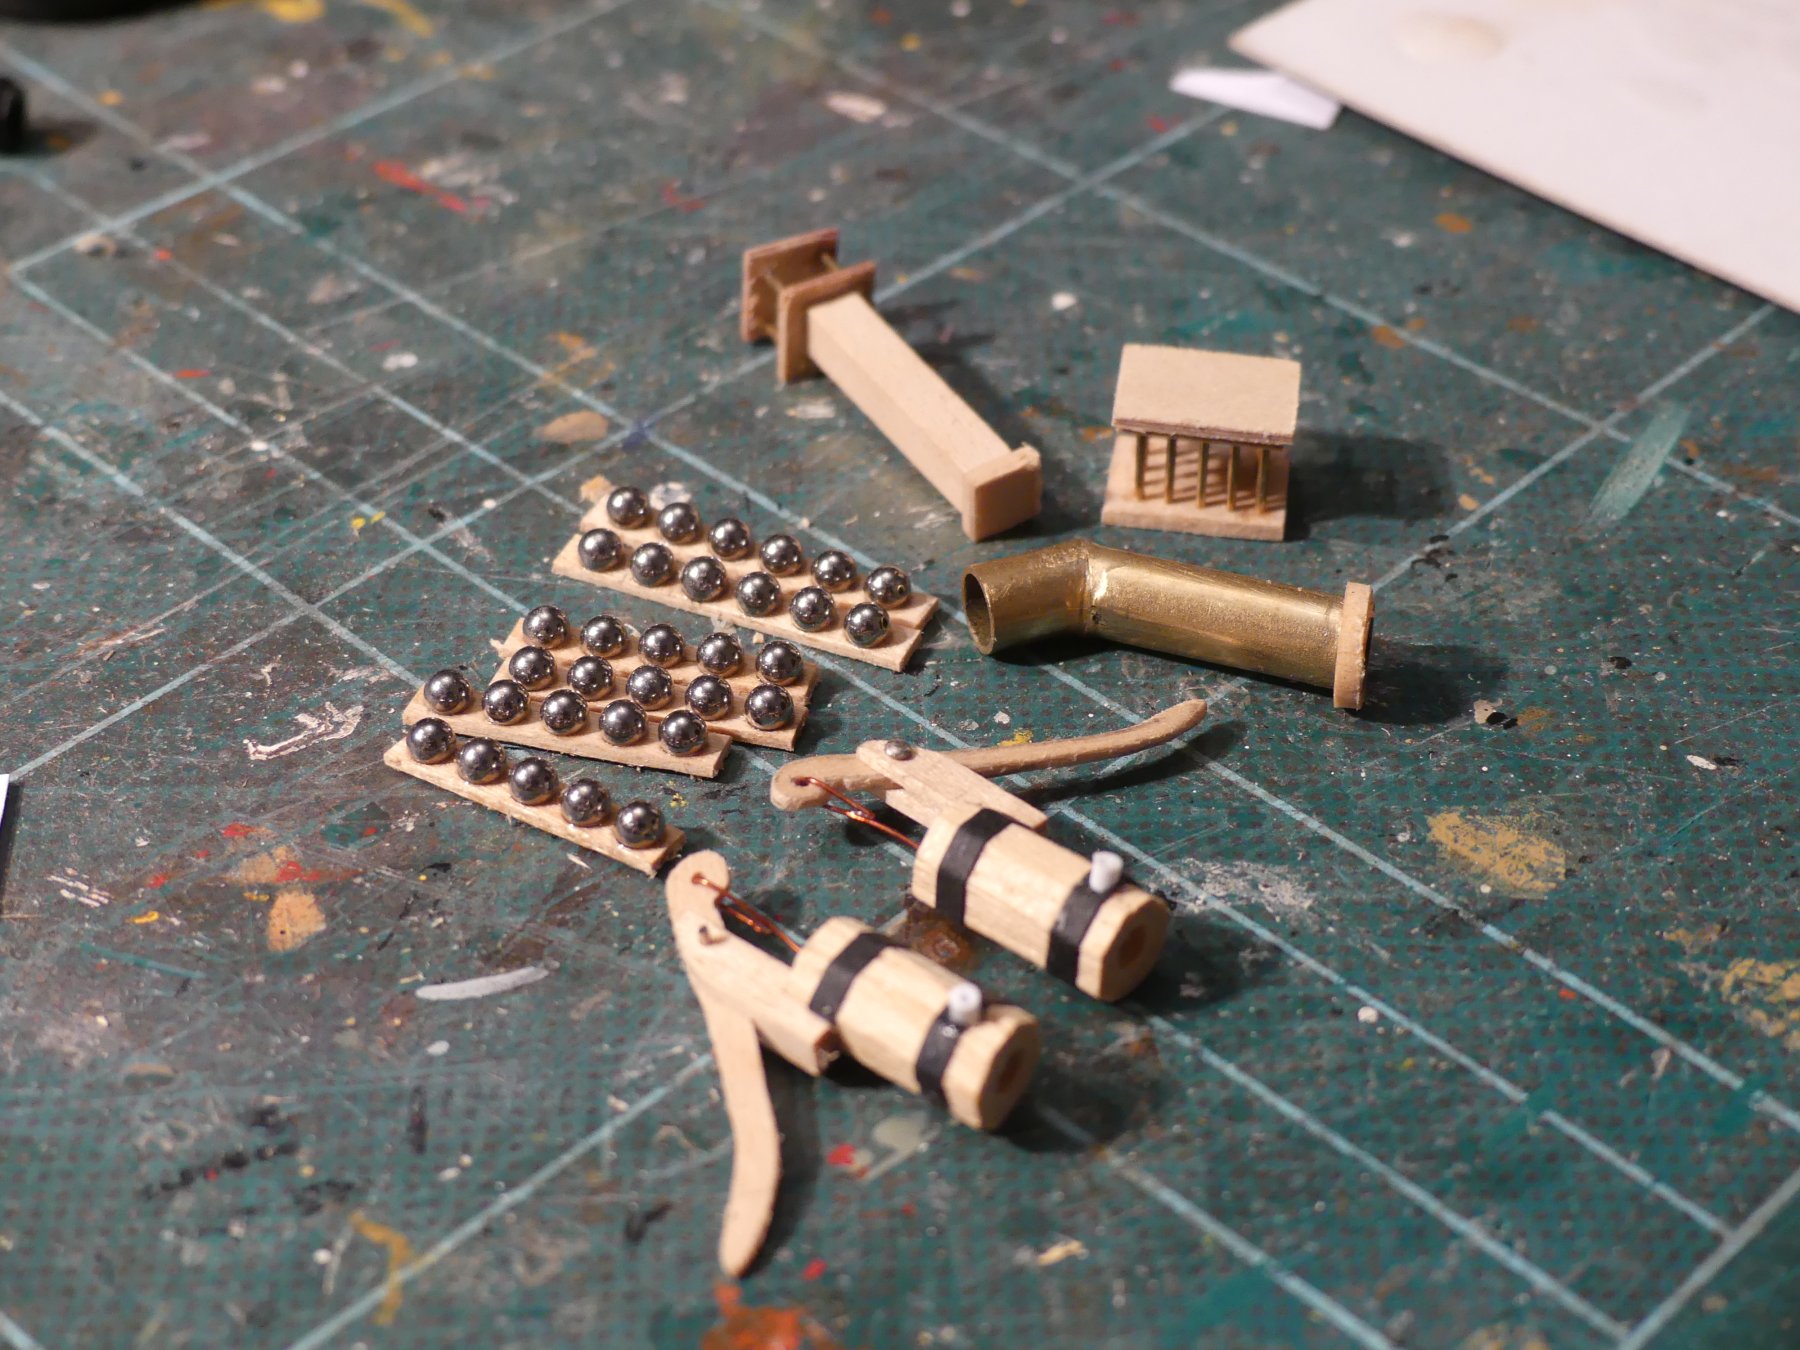
Some more of the deck furniture items under construction, two chimneys, hen coup and cannon ball racks, cannon balls provided all else scratch built.

-
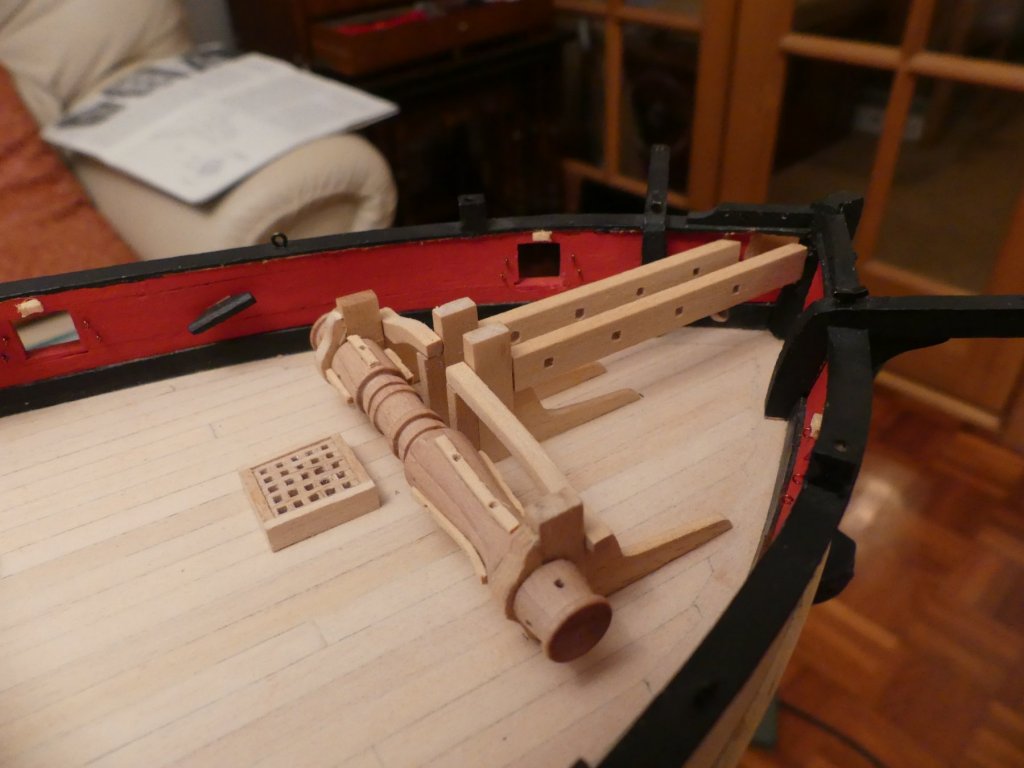
Well, I kept calling it a whip staff and no one picked me up on it. So, either no one is looking at the log, we all don't know what it is called or you are all just too kind to the forgetful model shipwright.
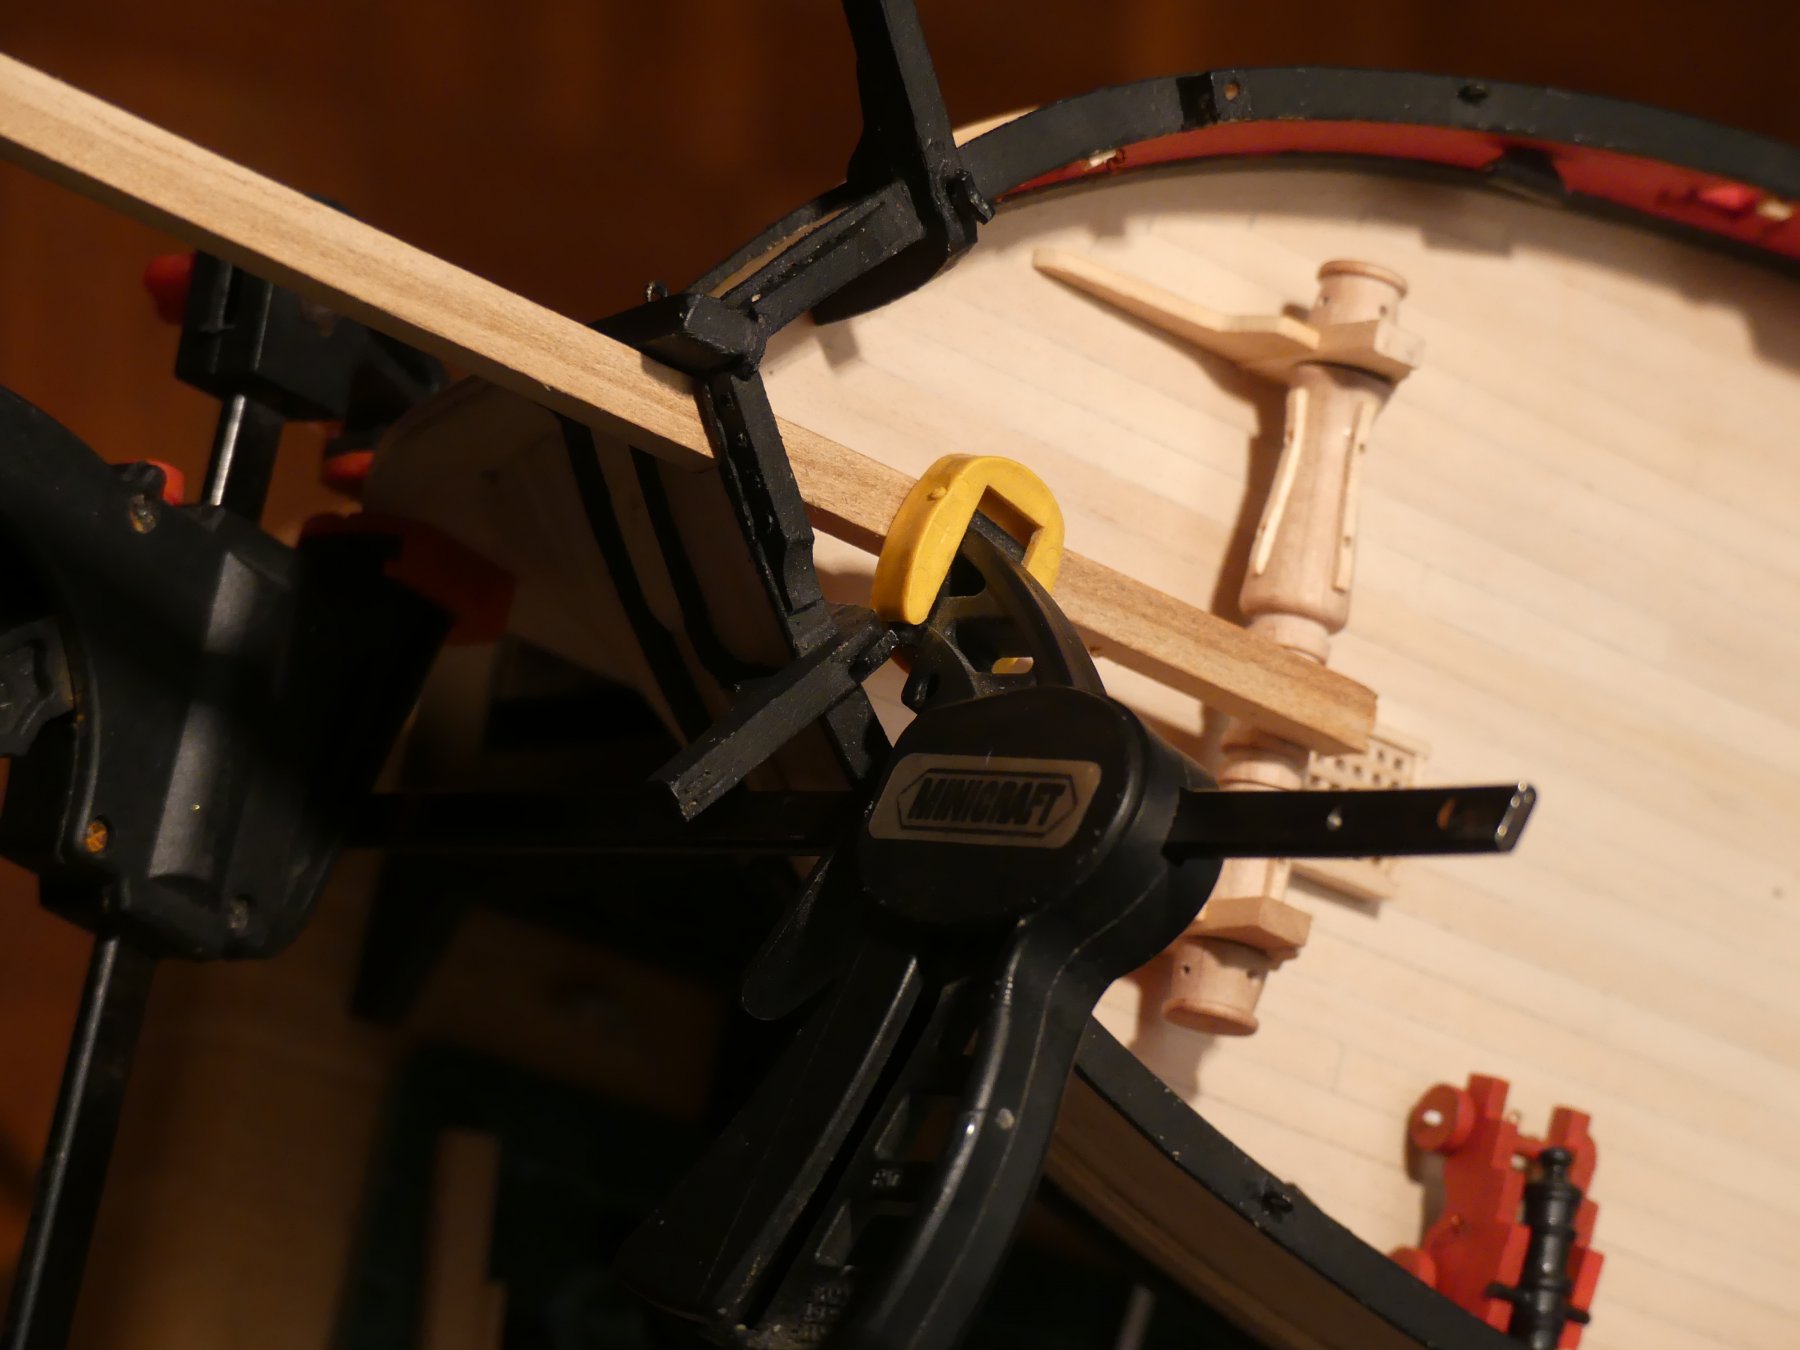
Anyway, progress with building the Windlass, windlass bitts and pawl bits.
First photographs show my effort to clamp it in place whilst the glue dries. One clamp is simply onto the keel to add a stop to prevent the second clamp from slipping. Bowsprit timber placed through the hull and on top of the windlass. Second clamp then pressing down onto the bowsprit timber.

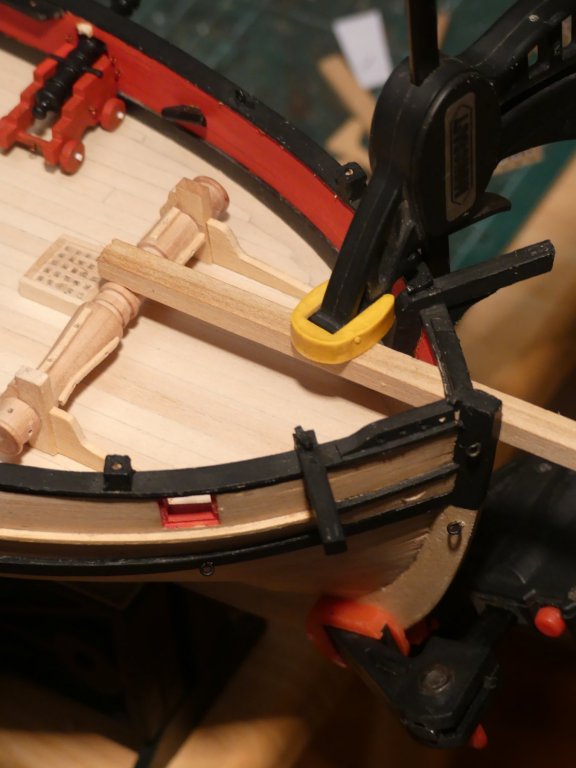
Pawl bits added.


Completed windlass with ratchet and pawls and the belaying pins in place.
- druxey, GeorgeKapas, Jim Rogers and 7 others
-
10


CA glues
in Modeling tools and Workshop Equipment
Posted
I always buy the large bottles of Loctite and my preferred is Loctite's Prism 406. I do similar to others here and dispense some onto a tile and apply with a cocktail stick. A sharp tap on the bottle to make sure none is left in the nozzle and replace the top.
in between use I put in the fridge.
It is very rare that I do not get to use the whole bottle as keeping in the fridge stops it going thick.