

DB789
-
Posts
345 -
Joined
-
Last visited
Content Type
Profiles
Forums
Gallery
Events
Posts posted by DB789
-
-
I know nothing about rigging techniques and reckon that I have a week to ten days work before the hull is complete. I chose the Fifie for a first build partly because the rigging looks much more straightforward than even Vanguard’s other trawlers Nisha and Erycina, and similar to Lady Isabella. Nonetheless I don’t know where to start with rigging her!
The instructions which are wonderfully step-by-step for building the hull don’t give any such help on the rigging techniques, although the plans are excellent.
Does anyone have any guidance on where to find some very basic / beginner guidance on how to rig a model boat and techniques? Such as how to tie a block on and put the thread through it, how to tie the sails onto the yards, what knots to use and how to tie them, what tools I need for rigging, etc.
I have trawled through the MSW forums and found lots of detailed and advanced comments but not a lot to get me started. Likewise some excellent videos on YouTube but mostly about rigging dead eyes, shrouds and ratlines which the Fifie doesn’t have (useful for my next build I hope, but not for this one).
Any advice would be hugely appreciated. Many thanks
Dan
-
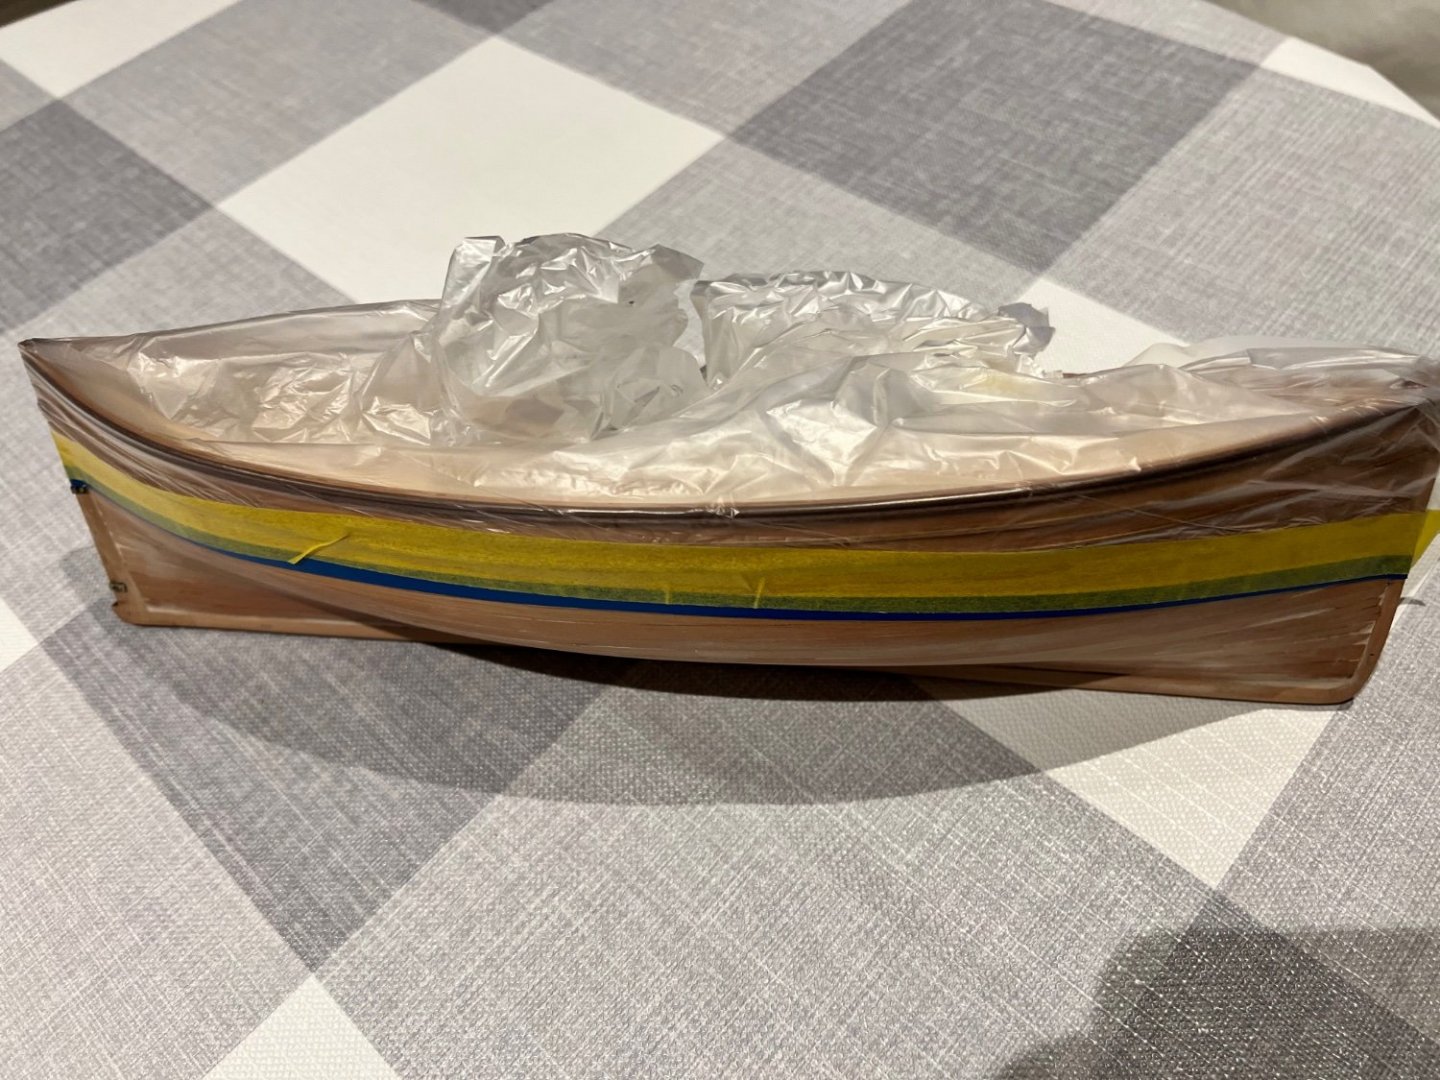
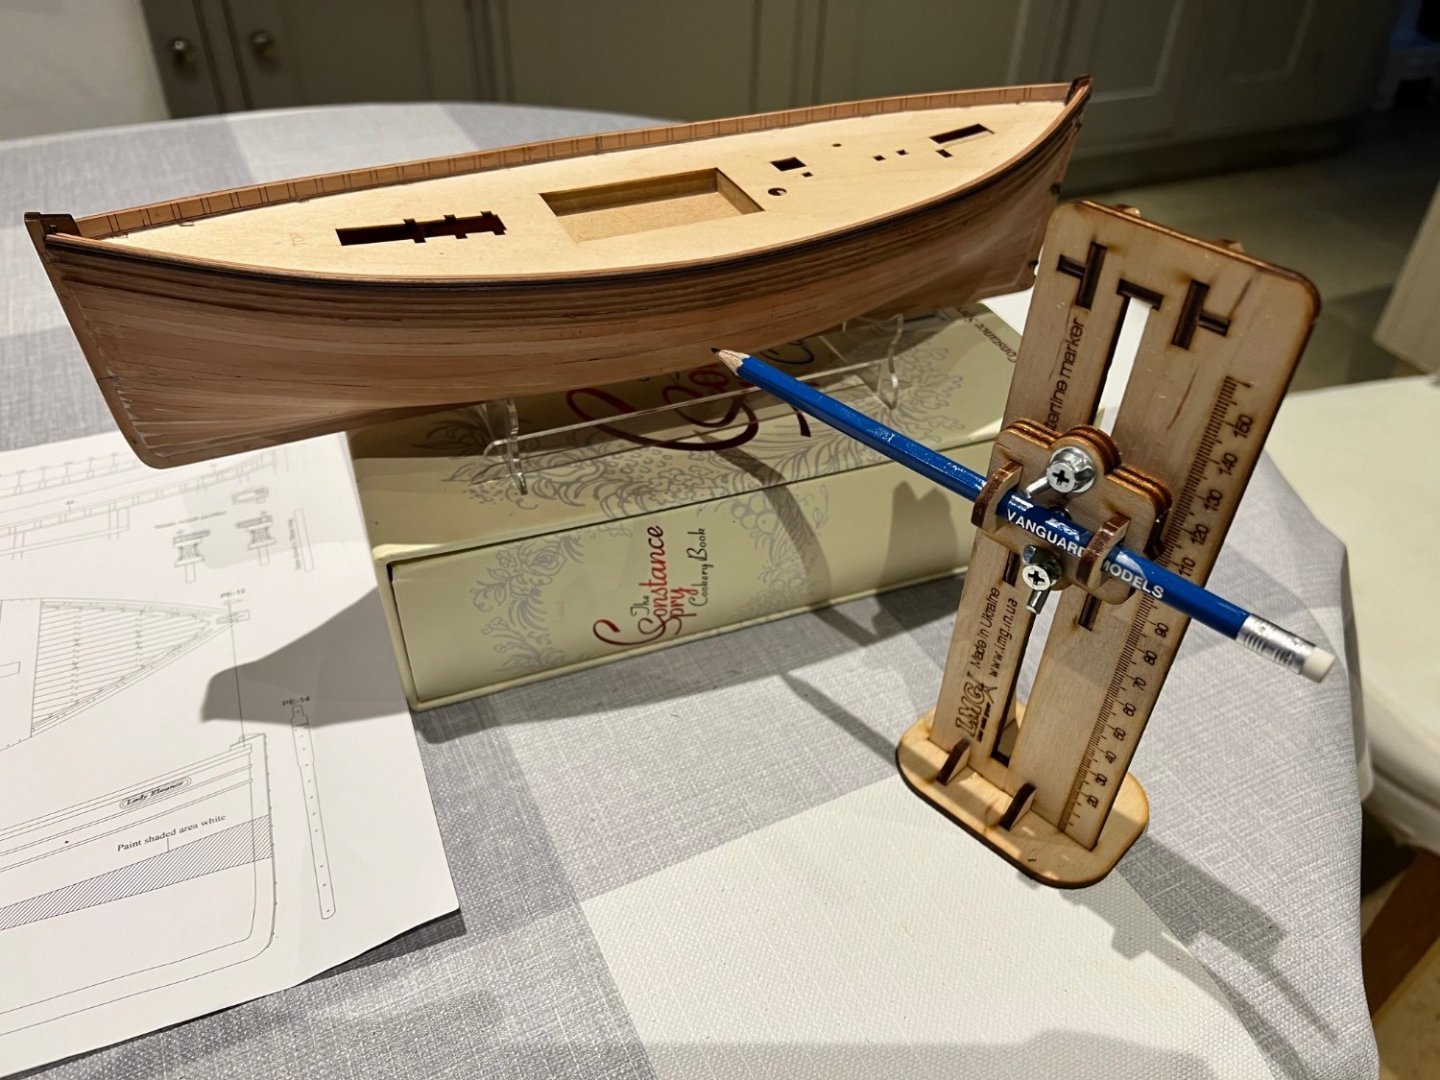
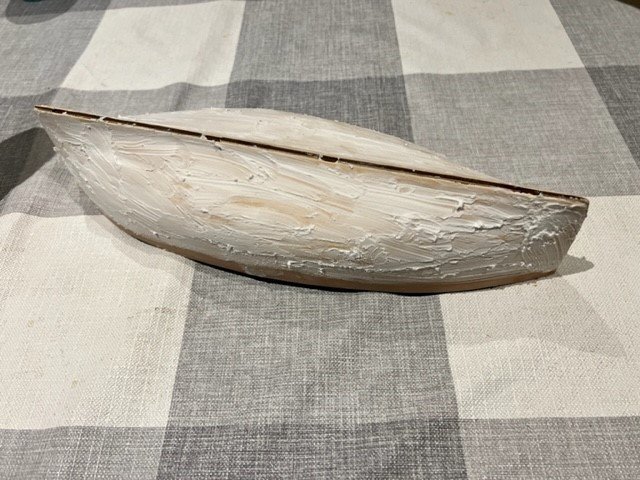
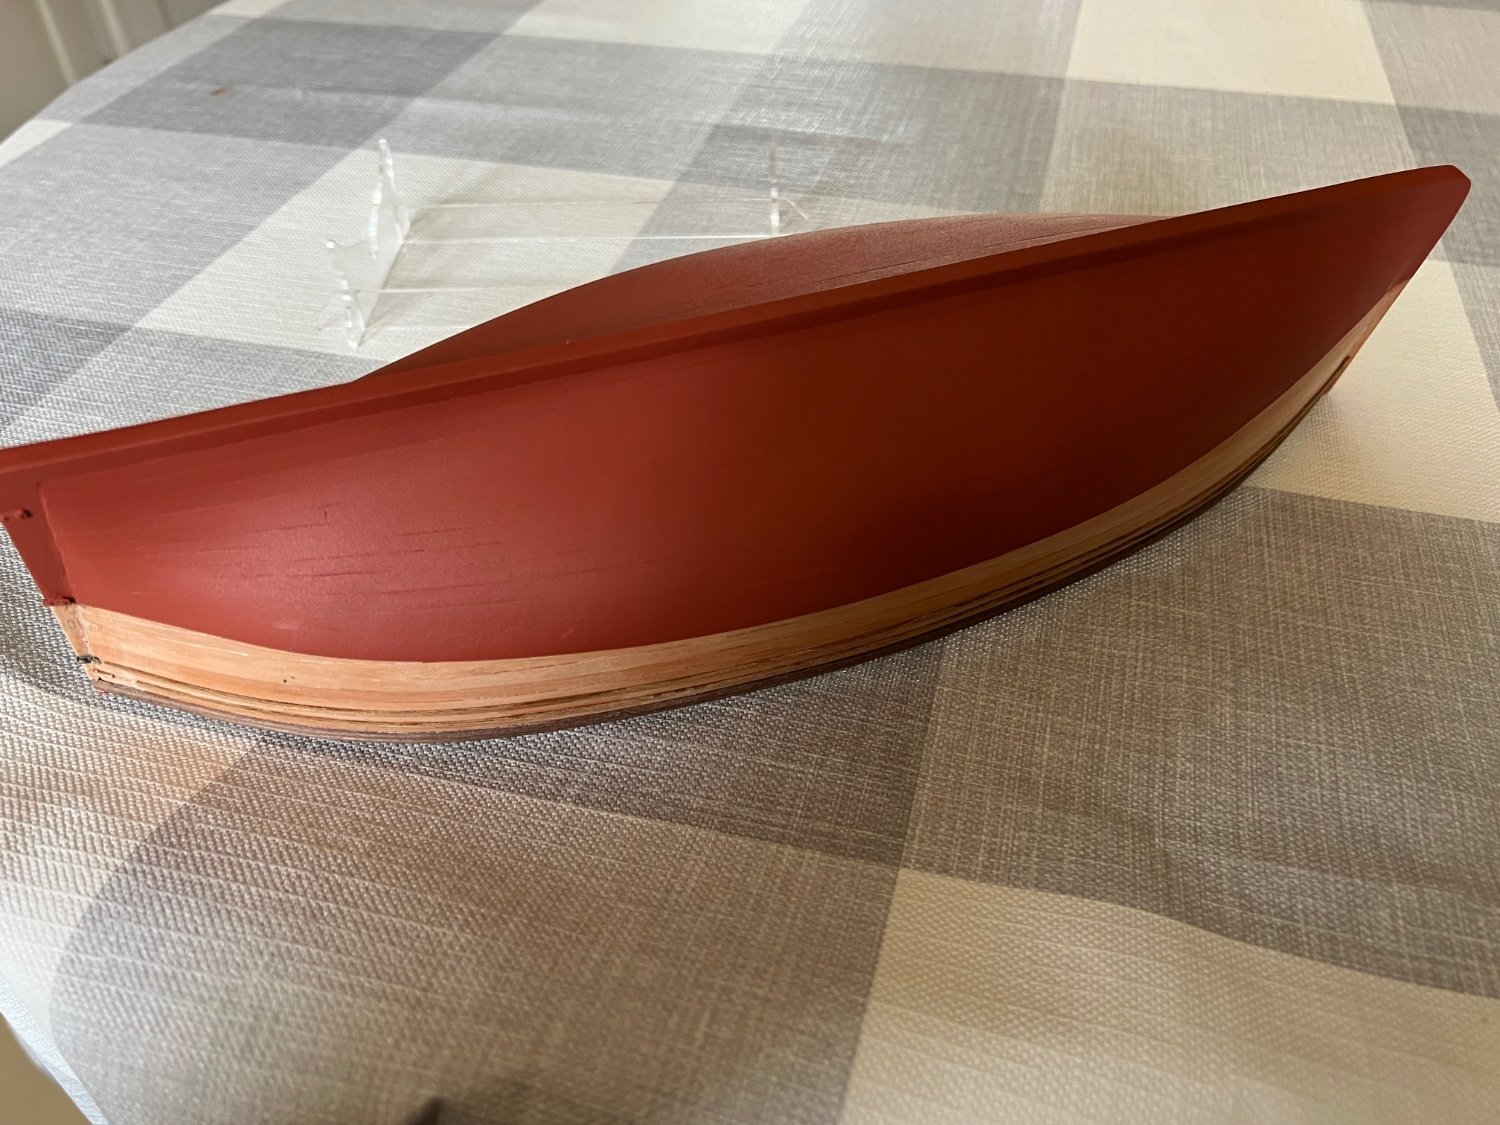
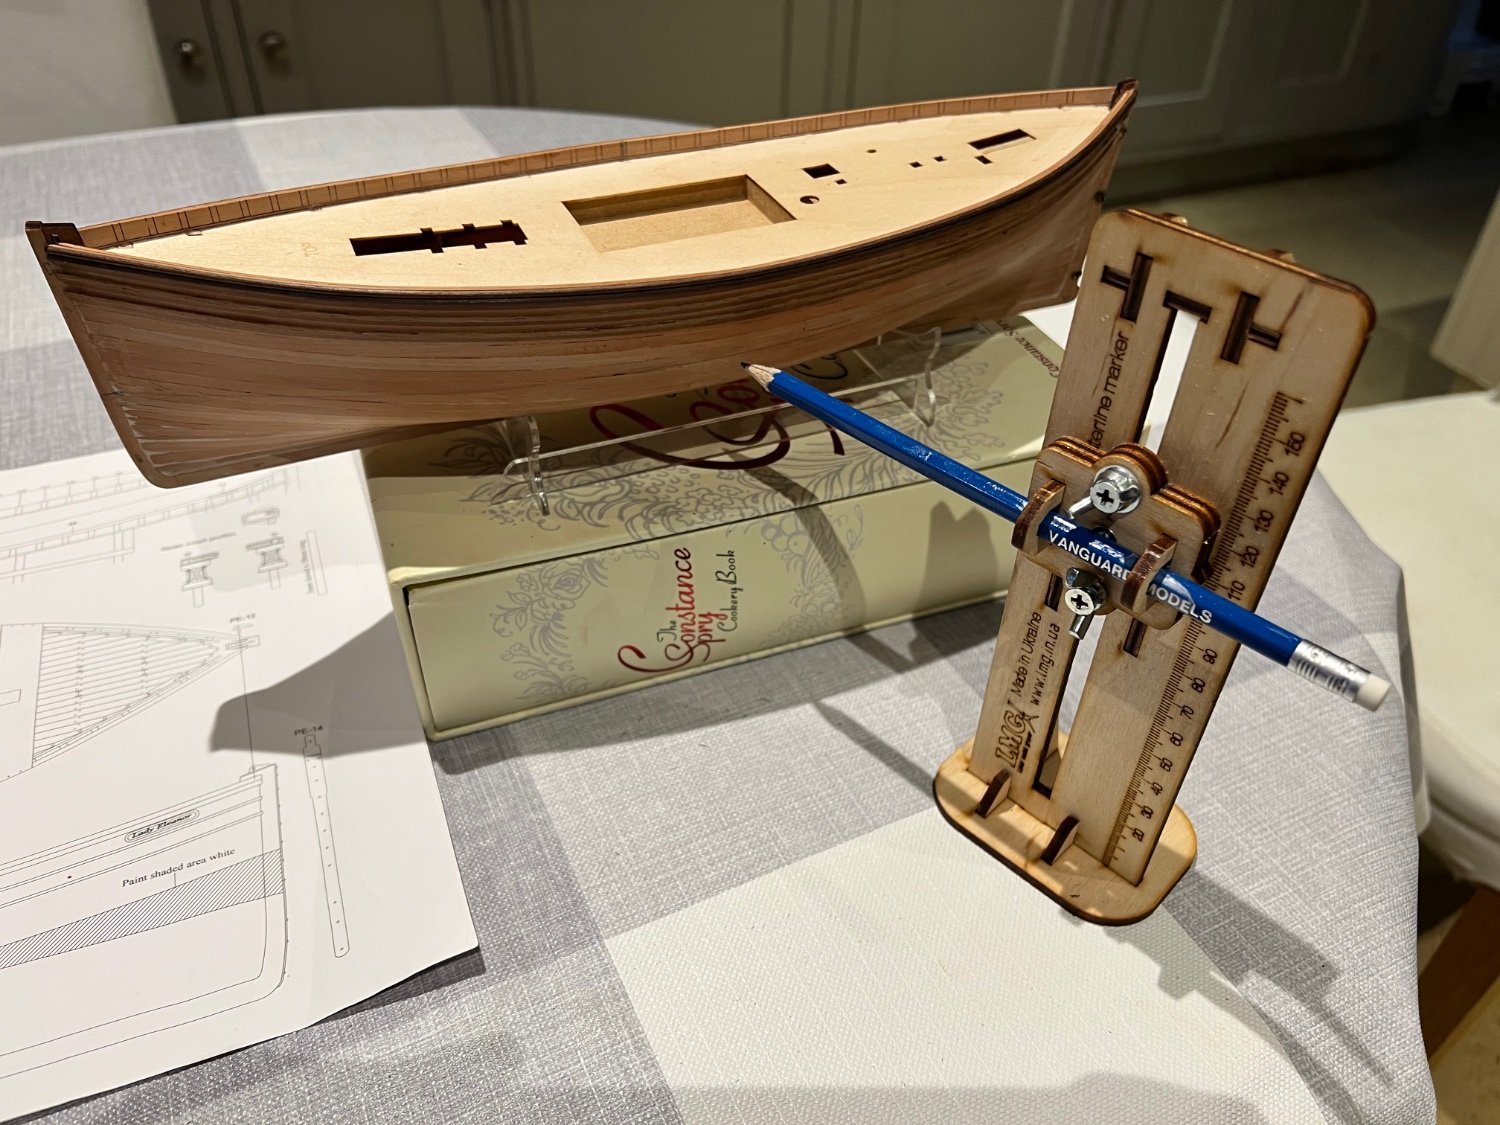
Waterline marked. Quite difficult to work out how the boat should sit in the stand for the waterline marking also and ensure the line is consistent on both sides.
I measured down from the top strake as per the plans at both bow and stern and positioned the boat accordingly on the stand, then used the waterline marker. The waterline comes at least 5mm higher amidships higher than the plans suggest it should. I’ve just stuck with this.
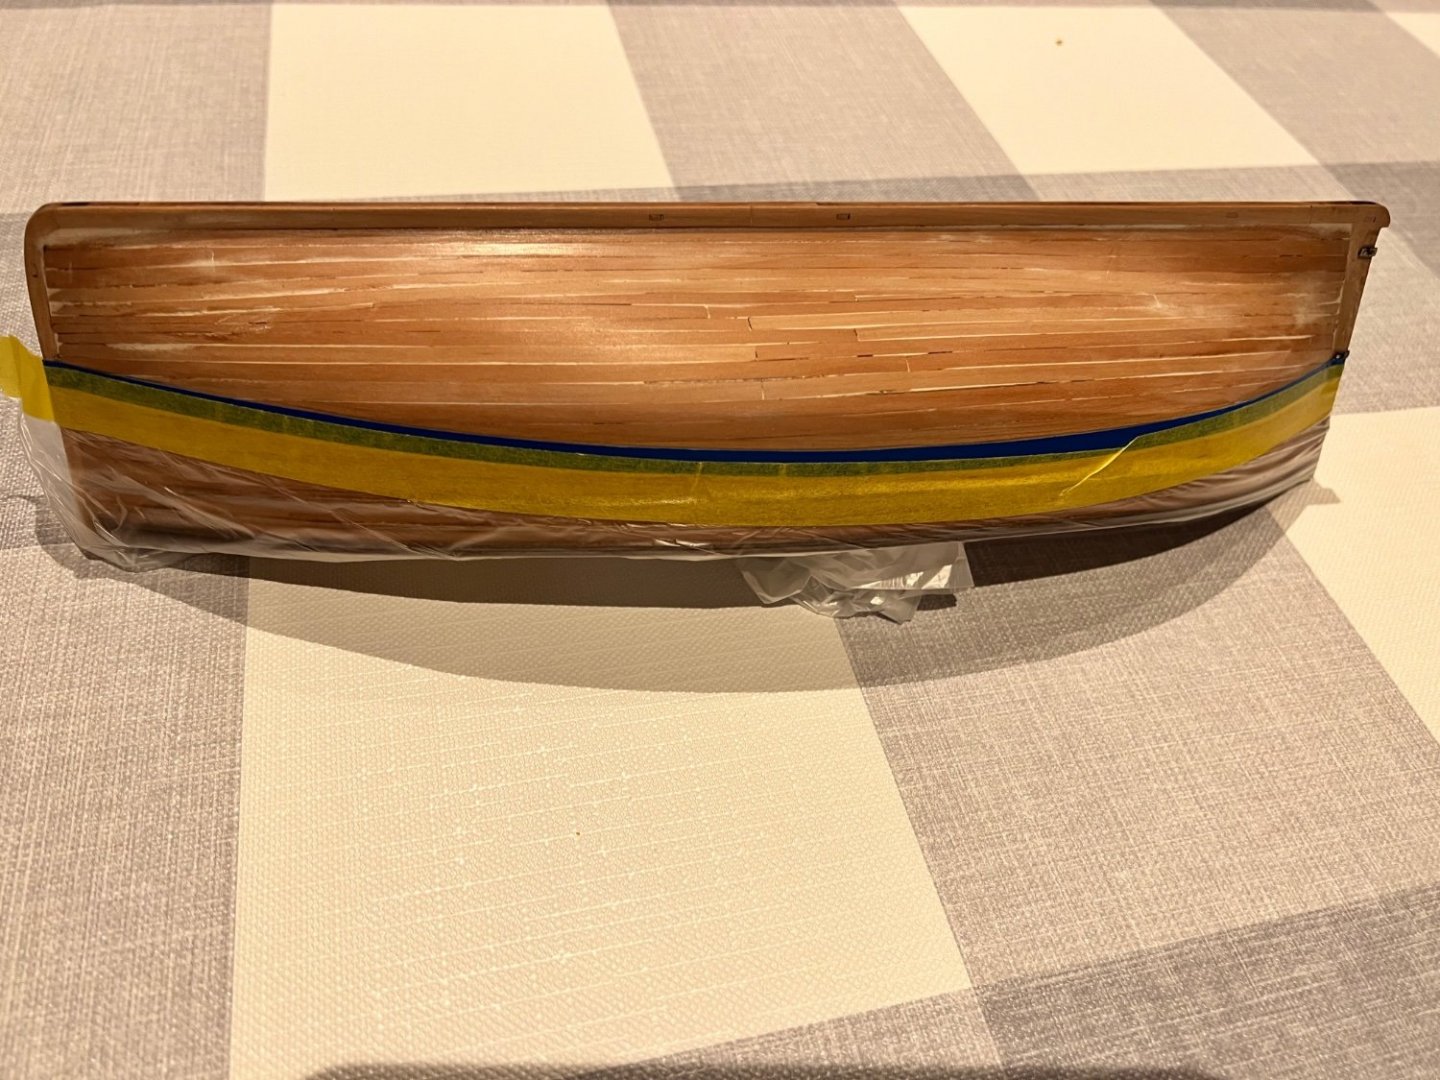
Then masked and painted in Plastikote red oxide primer. Filled a few cracks, sanded down and did a couple of coats. Waterline was good except small leakage around the bow, but this can be sanded a little and will be under the white ‘bootstrap’.
Leaving for at least 24 hours before marking out the white bootstrap line tomorrow.

- AJohnson, BobG, chris watton and 5 others
-
 8
8
-
Hi Richard,
Yes, I do have a Fifie build log - link below. Any advice would be hugely appreciated as I’m completely new to this.
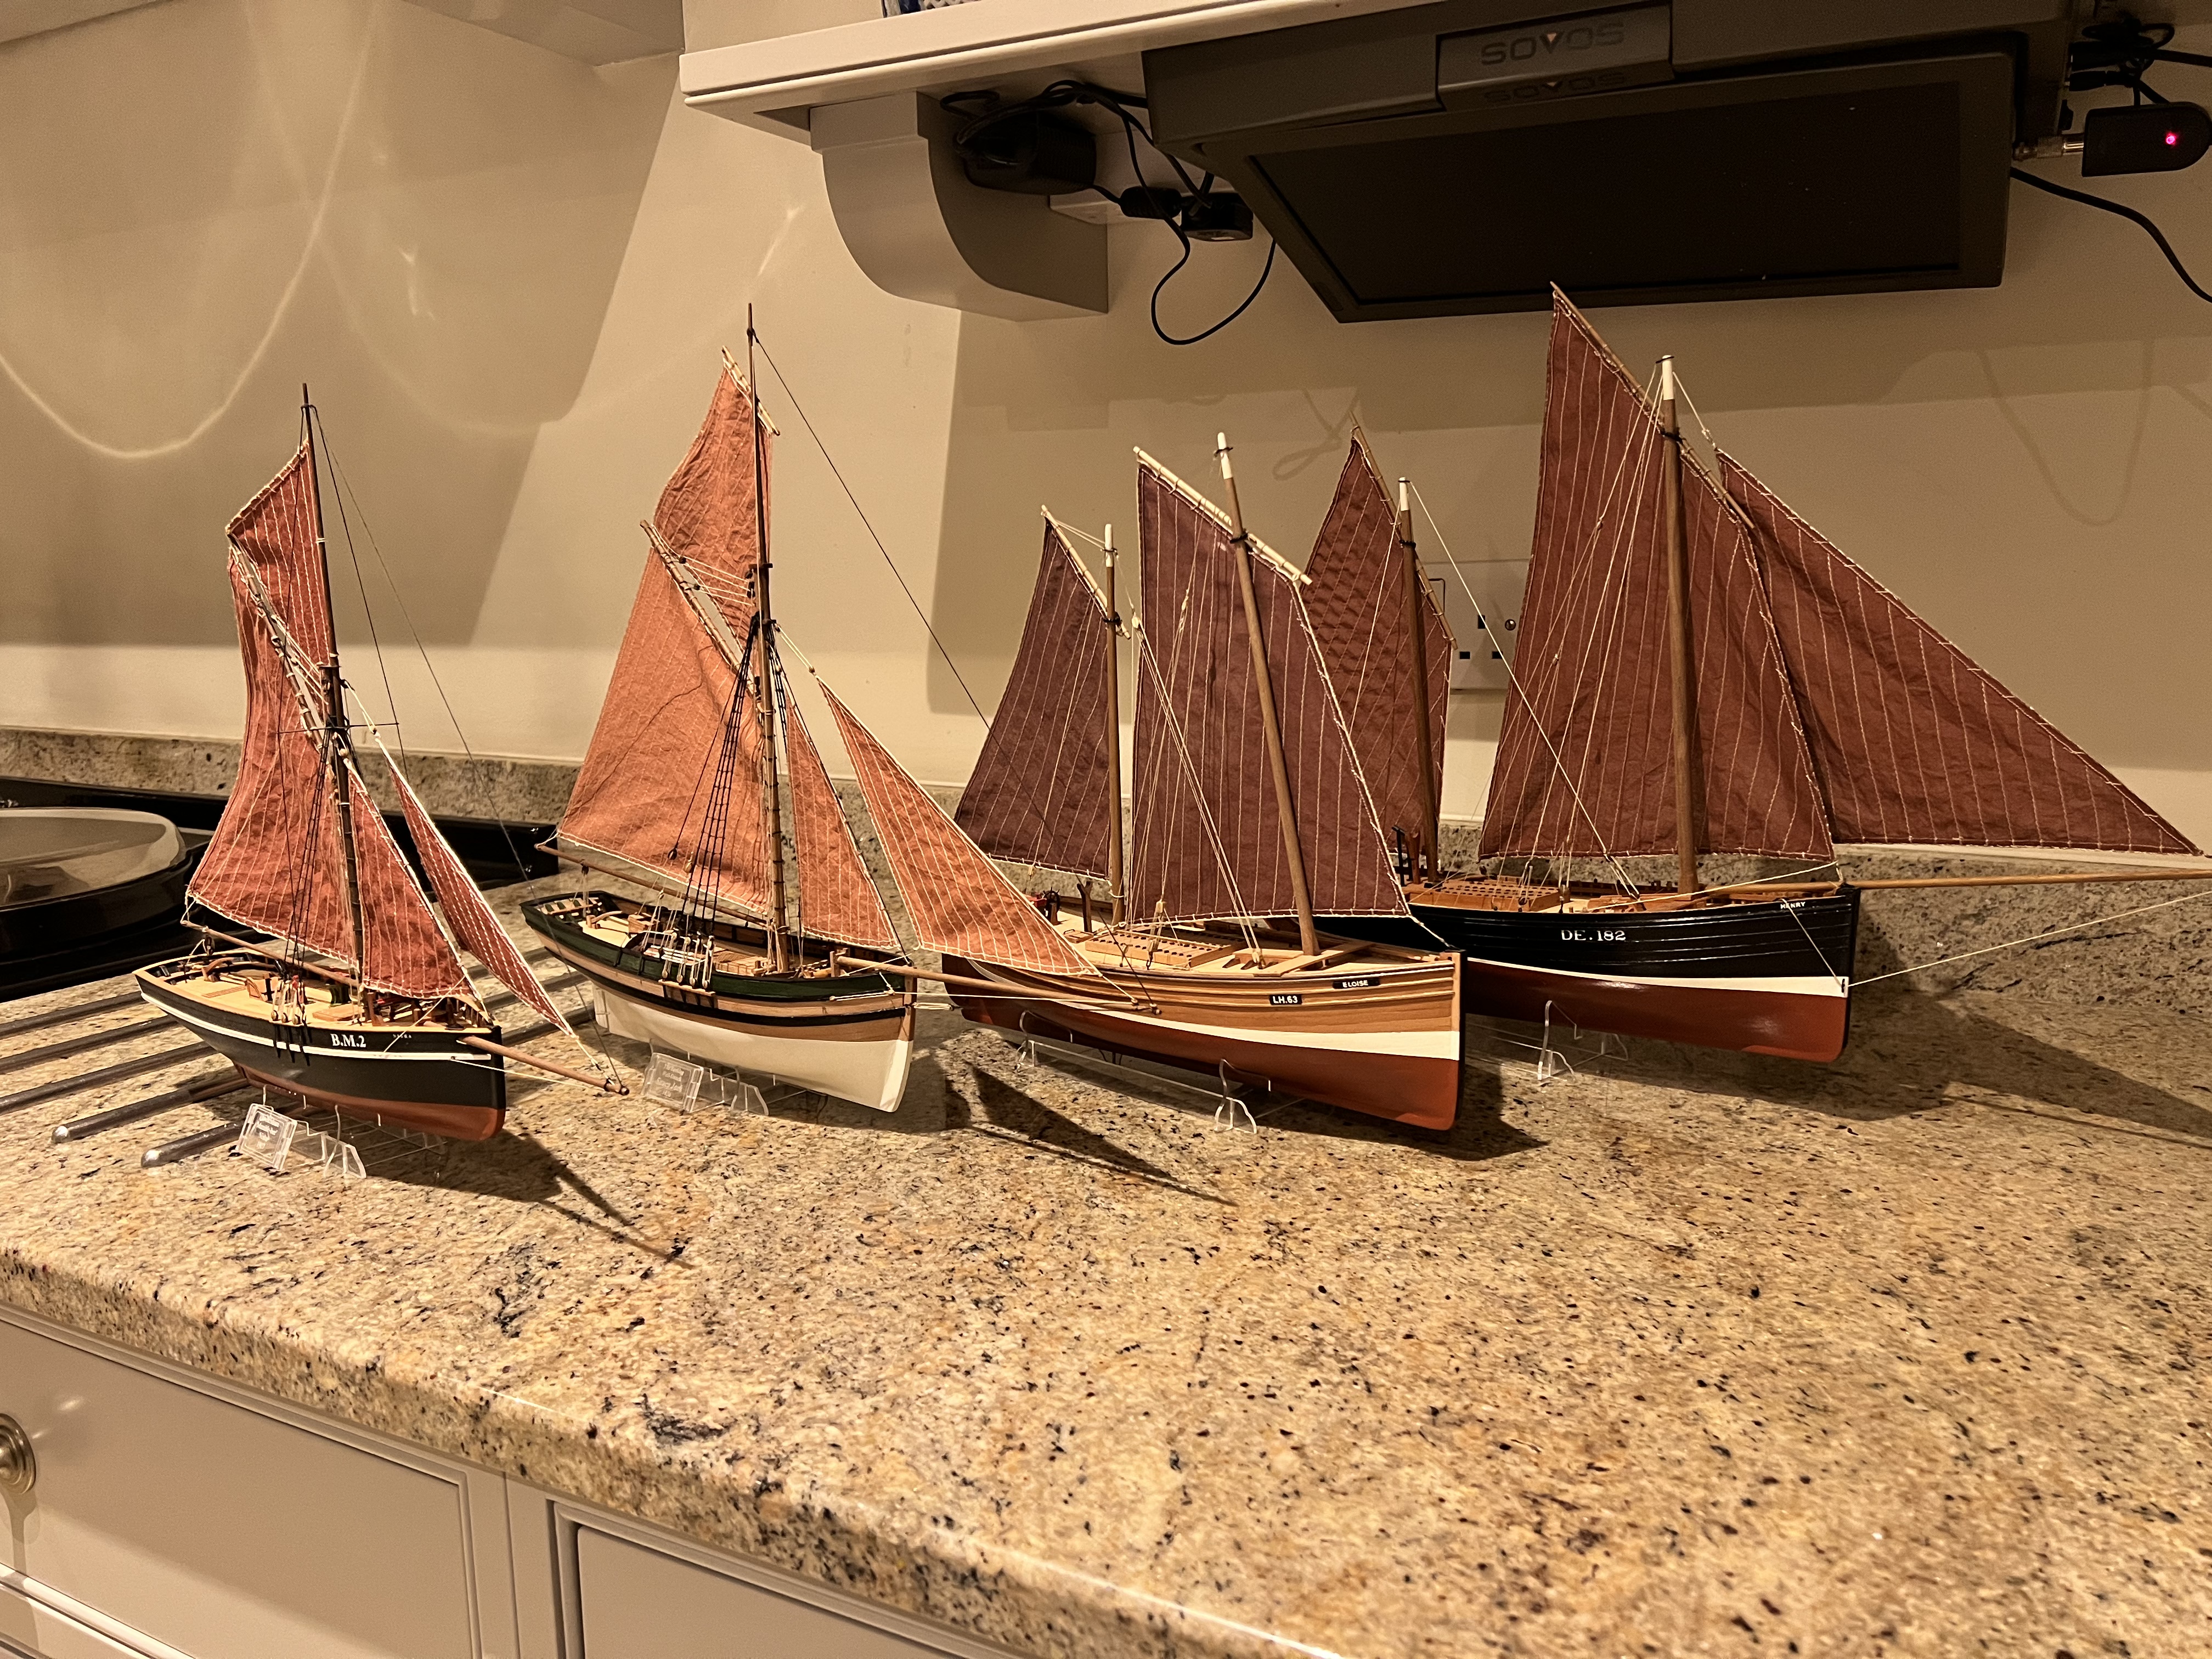
Thank you very much for the dye recommendation, the reddish brown you have achieved looks super. I’m not so keen on the ‘wine’ colour recommended in the instructions which is too pink and bright for my taste. I saw someone else using cocoa brown too but their sails came out much more brown than yours. Guess I need to get some and experiment on an old rag.
Dan -
Thank you! Good to know it’s not just me being hopeless then. Good idea on the CA applicator - I’ll make one of those. I’ve also ordered some other applicator tips from Cornwall Model Boats, see if those help too.
- chris watton and AJohnson
-
2
-
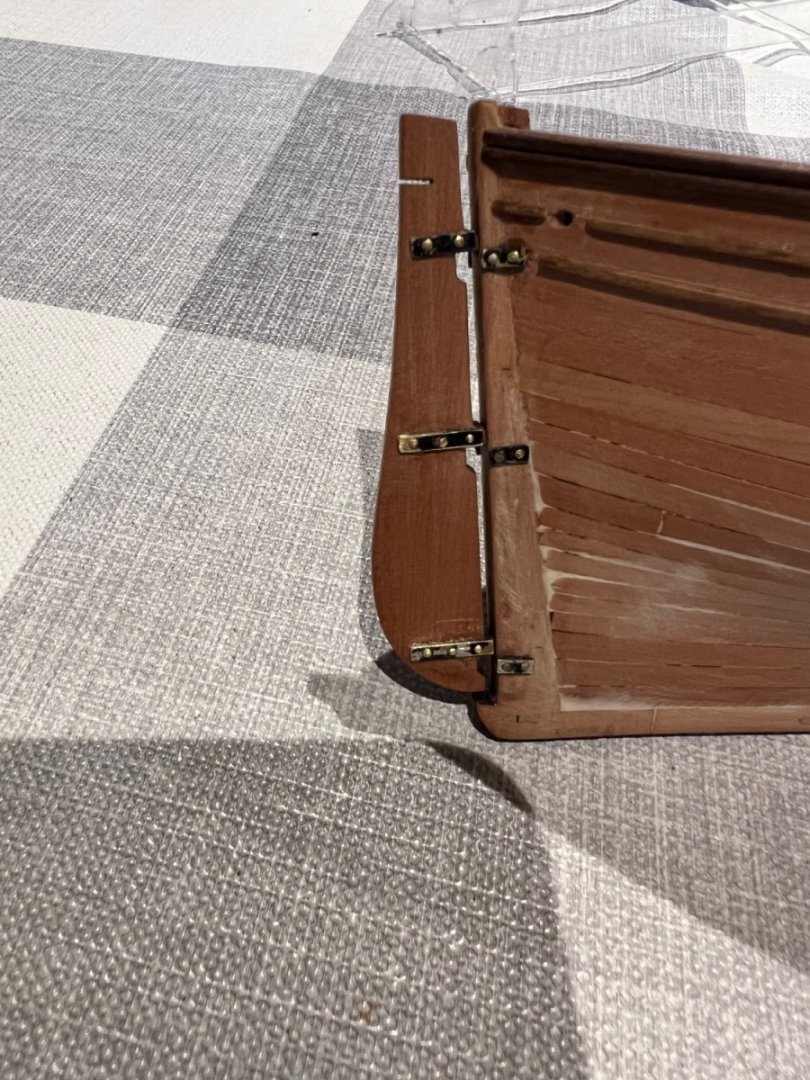
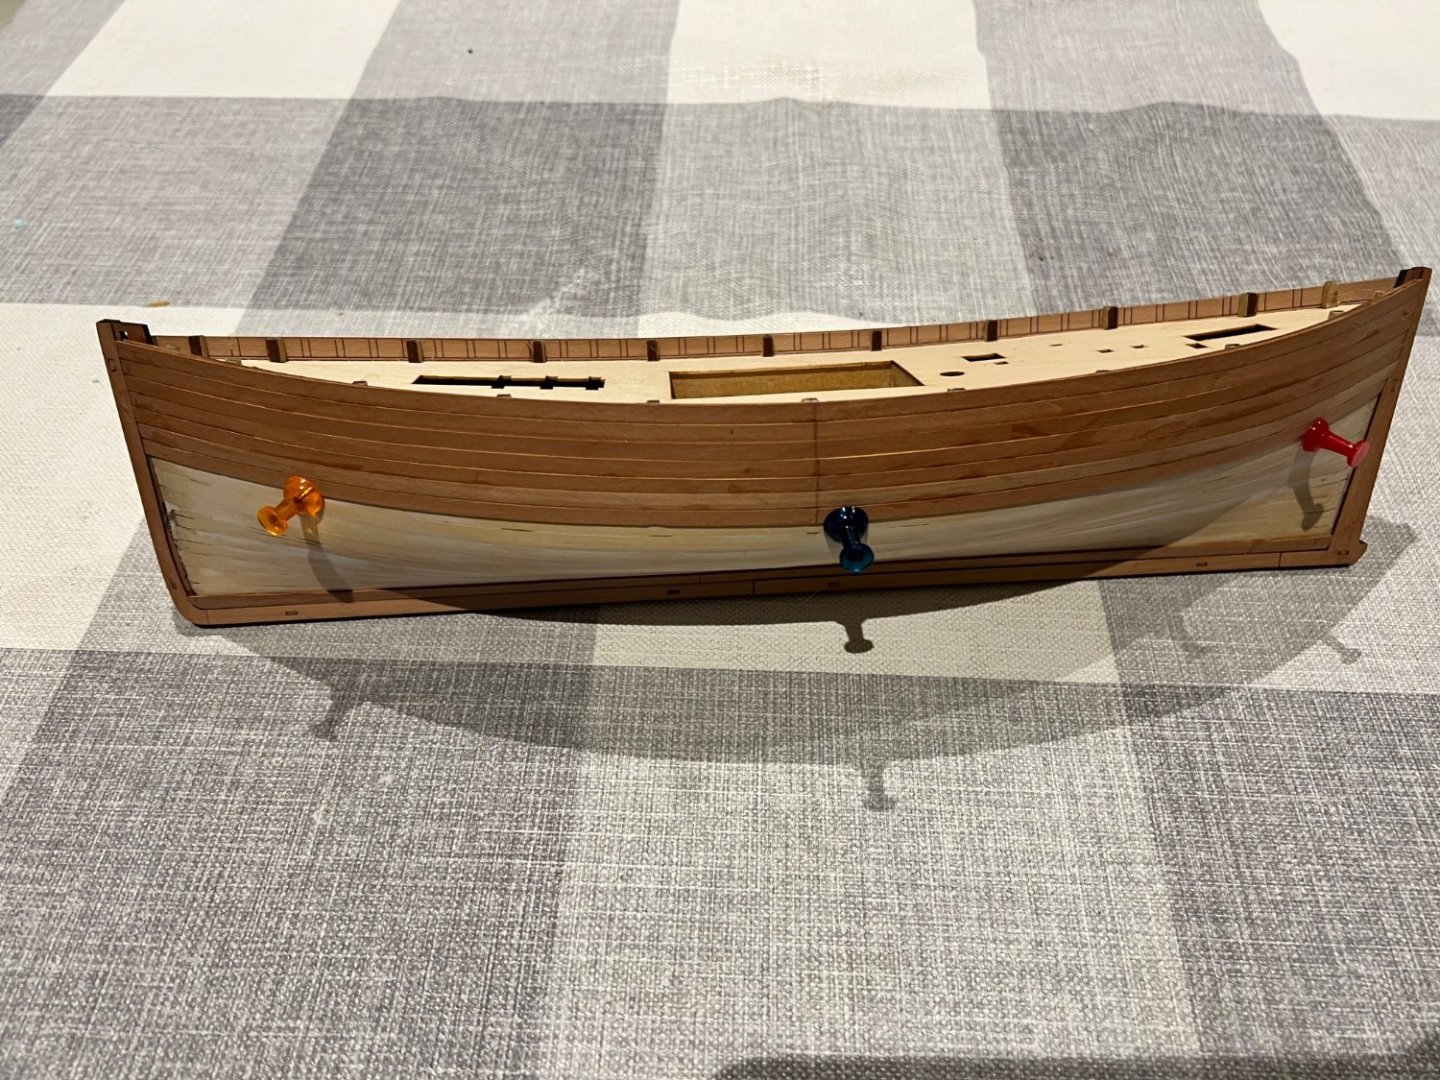
Rubbing strakes and rudder now fitted. Plenty of beginner mistakes here!
Firstly I drilled the holes for the rudder ropes at slightly different heights on each side. Can’t fill and redo one side as I don’t want to paint the upper hull plus the new and old hole would overlap and likely create more mess so I just have to live with it . This meant that the upper of the two 1mm walnut rubbing strakes crossed over one or other hole and I wanted to keep the rubbing strakes high as per the instructions (with hindsight I should have put them lower as Blue Ensign did in his build log). Instead I have cut a gap in the strake for the rudder holes which looks OK but not ideal.
Next I decided to pre-paint the PE rudder fittings (and most of the rest of the PE) with black acrylic spray paint, priming it with Tamiya grey primer first. This looked great until I used CA to glue the fittings on. I should have guessed that cyanoacrylate would dissolve acrylic paint. The dissolved paint prevented a proper bond between fitting and rudder and it ended up with lots of smeary black paint/CA mix all over the wood that had to be sanded off. I’ve tried sealing the painted PE with polyurethane varnish which has worked to a degree. Does anyone have any better ideas for either attaching painted PE without using CA or to seal the acrylic paint better so it doesn’t dissolve?
Furthermore I decided to cut the pins for the rudder fittings so I could have domed pin heads on both sides. This was very time consuming and fiddly and I needed CA to keep them in place, so yet more CA smeared where it shouldn’t be. Not sure my hands are small enough for this!
Lastly I used too much CA on the rubbing strakes so there’s now CA smeared on the upper hull. I’ve been trying to sand and scrape it off and have a bit more off than in the photos but still visible in places.
I clearly need a better applicator than just a glue bottle and bit of discarded plank for applying CA when I do have to use it!
Thanks again for all the support and advice.
Dan


- JpR62, Ryland Craze, nehemiah and 4 others
-
7
-
Finding this build log a great help. I’m building the Vanguard Fifie too (but not as well!). Thank you.
I really like the colour you have dyed the sails which seem more browny red than the quite bright red on the box art. Please could I ask what dye you used?
Thanks!
Dan
-
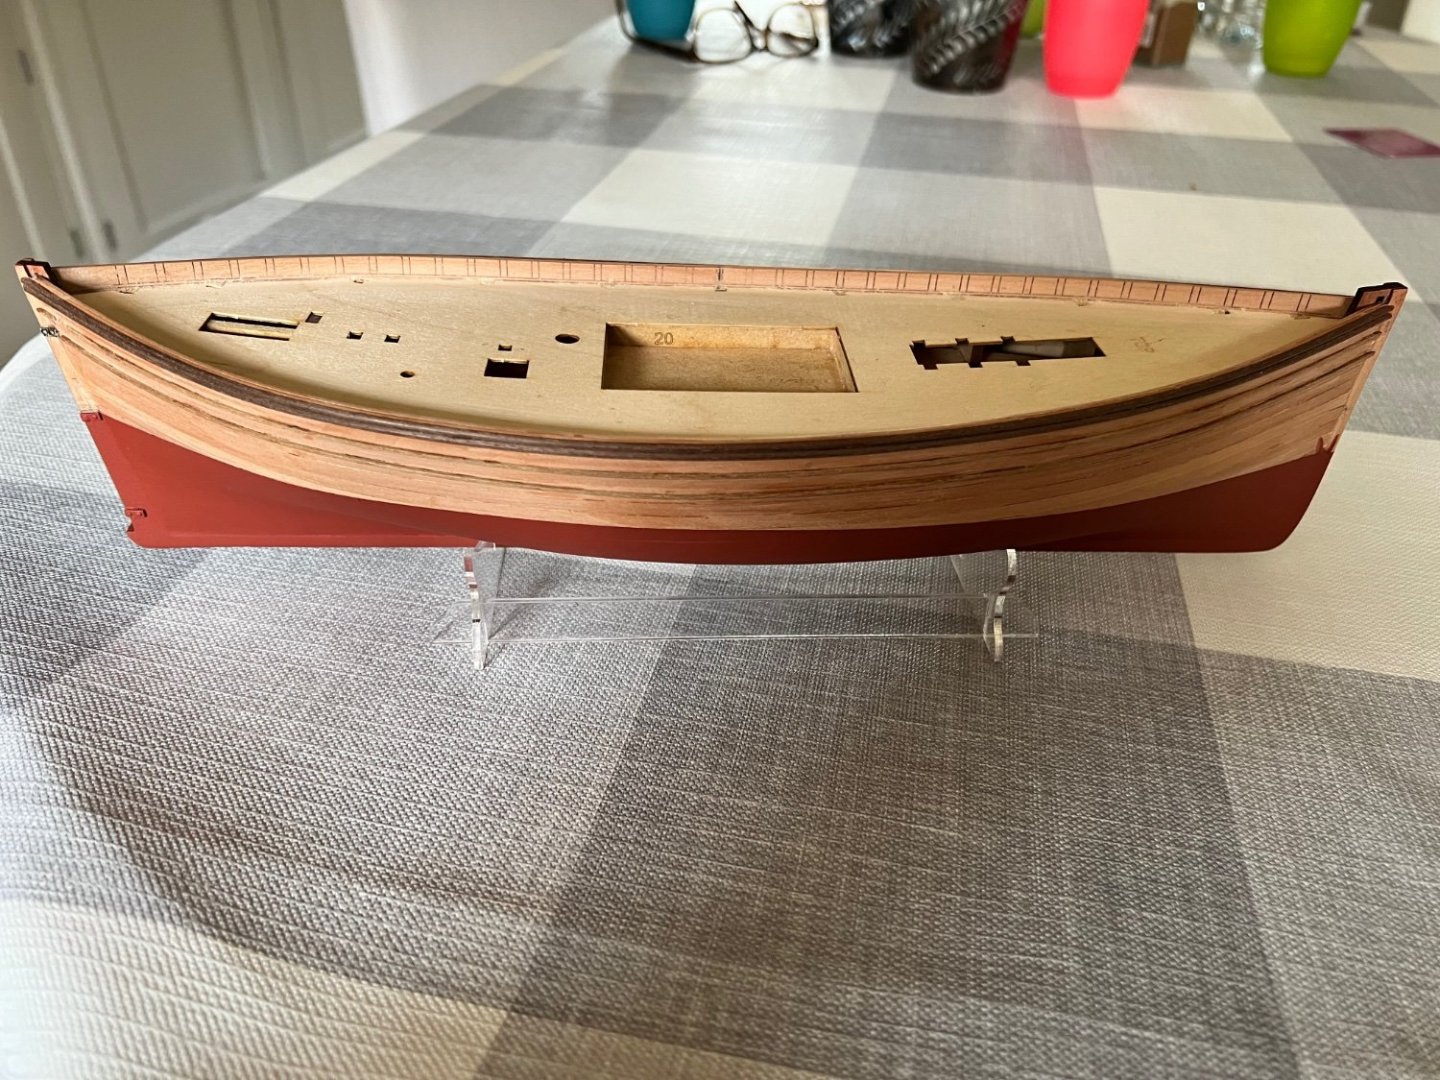
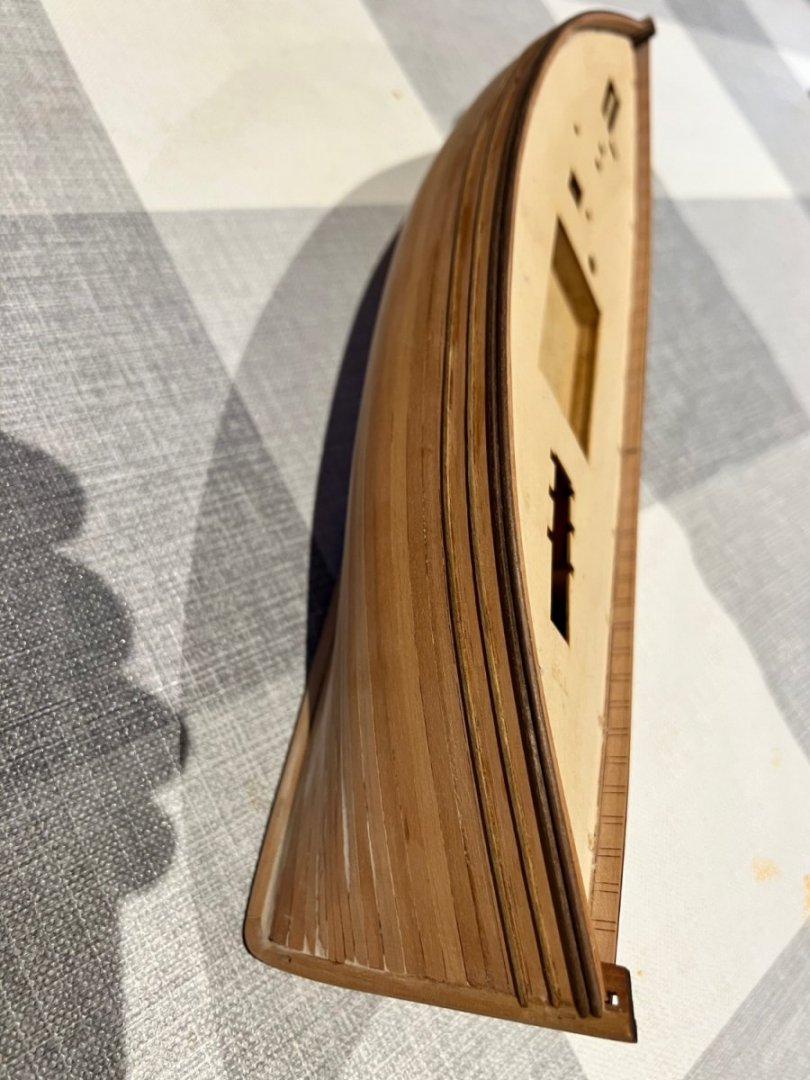
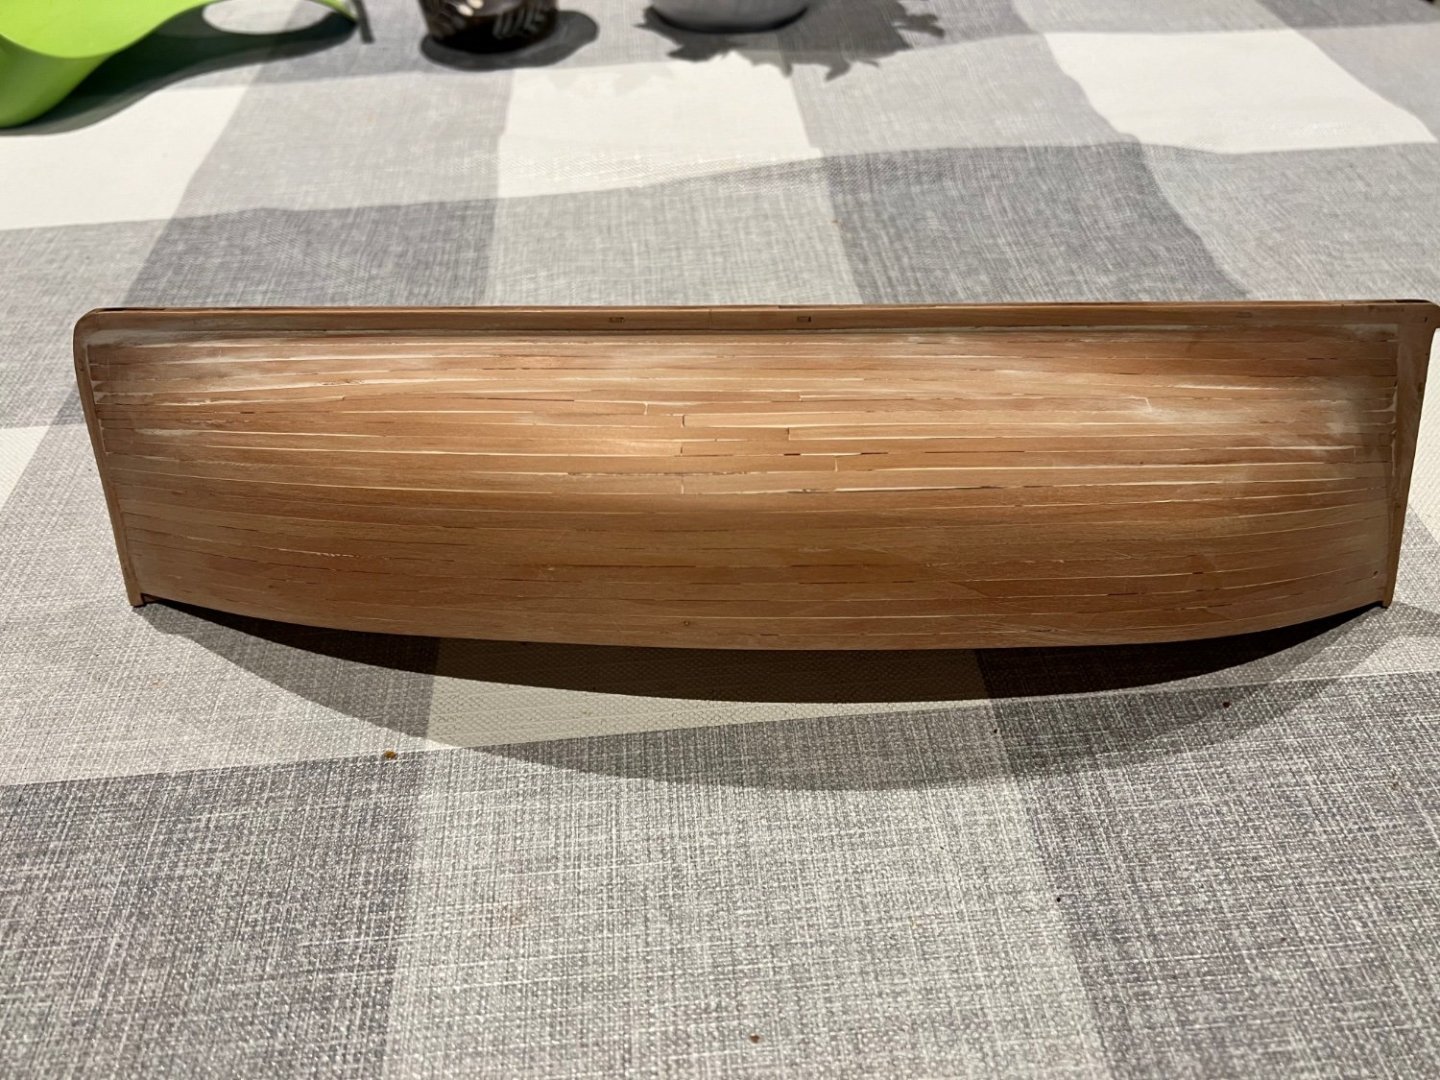
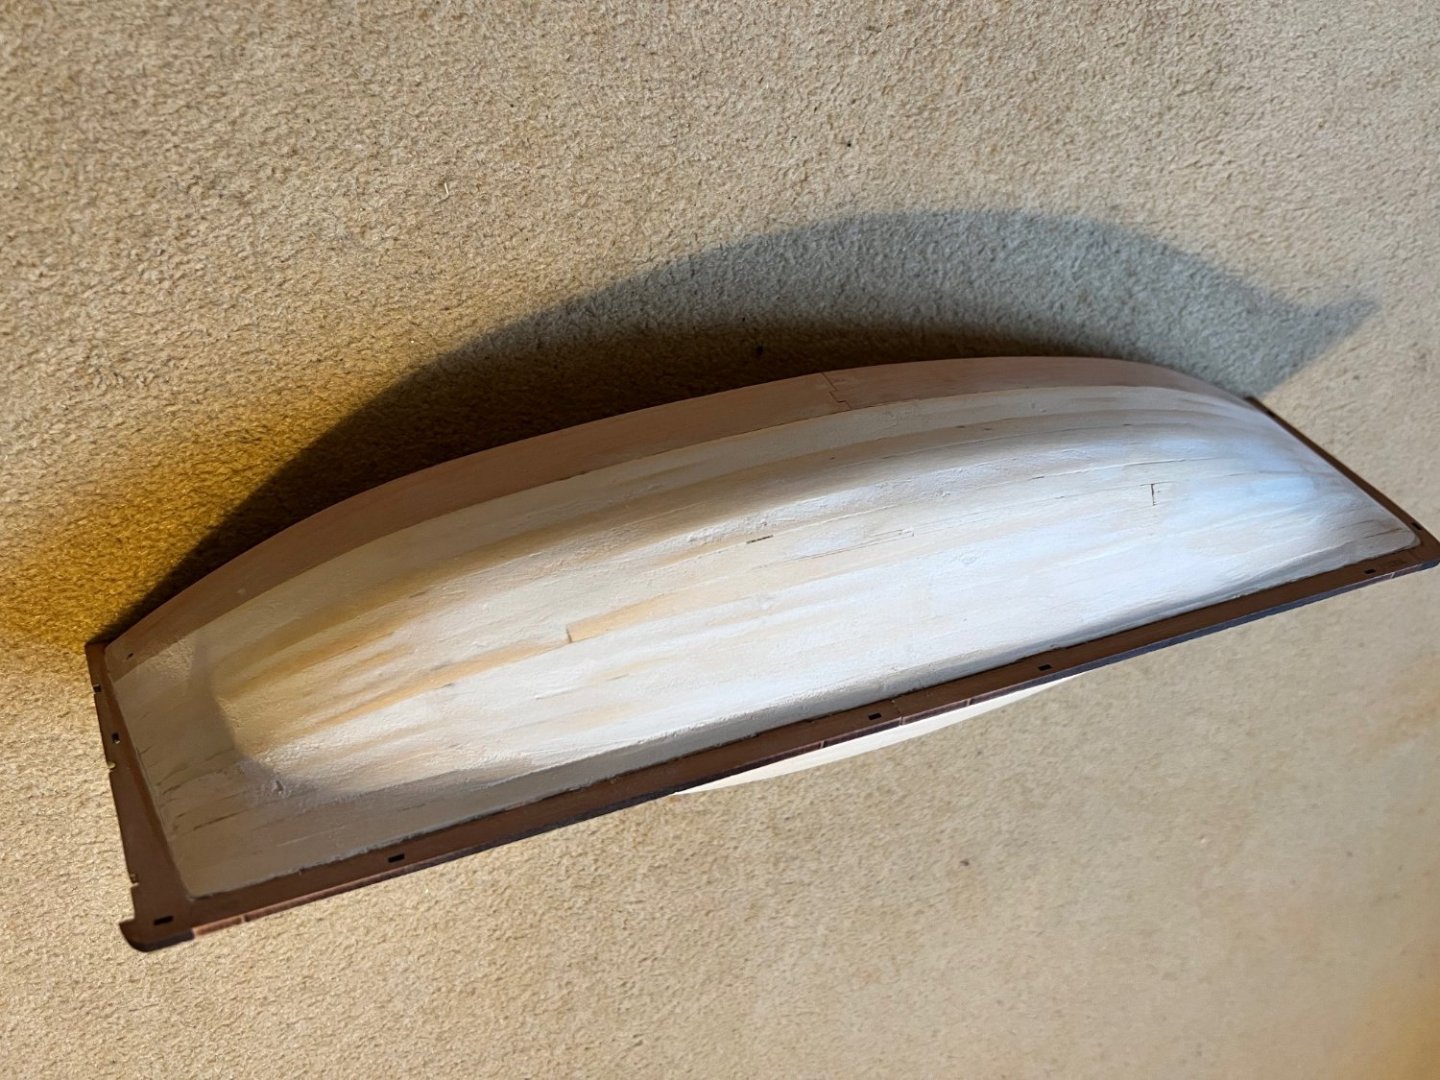
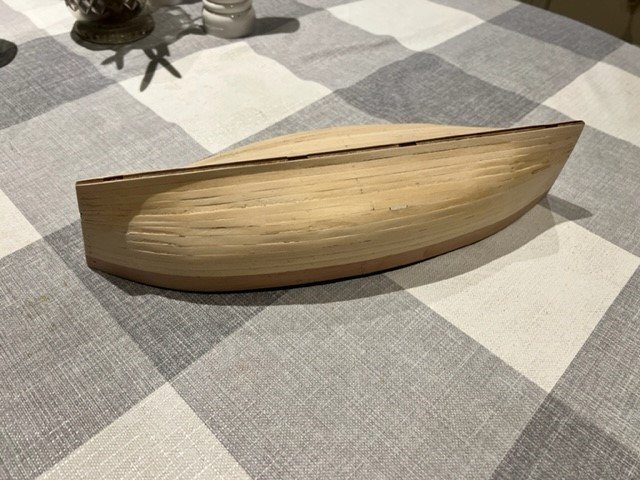
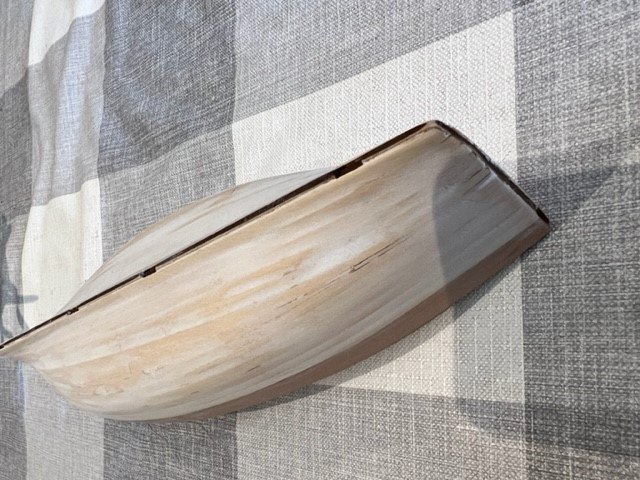
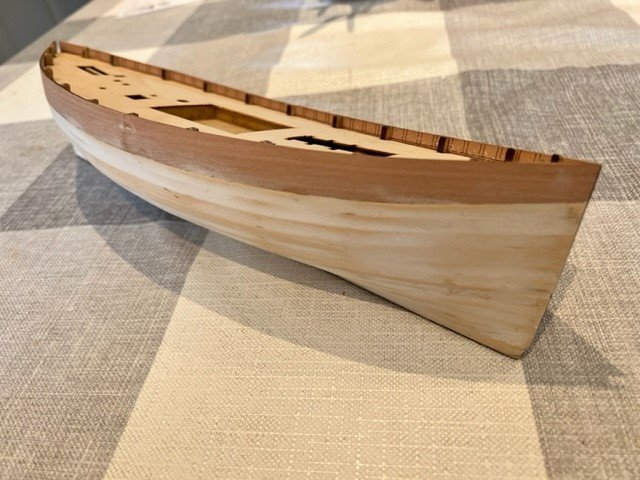
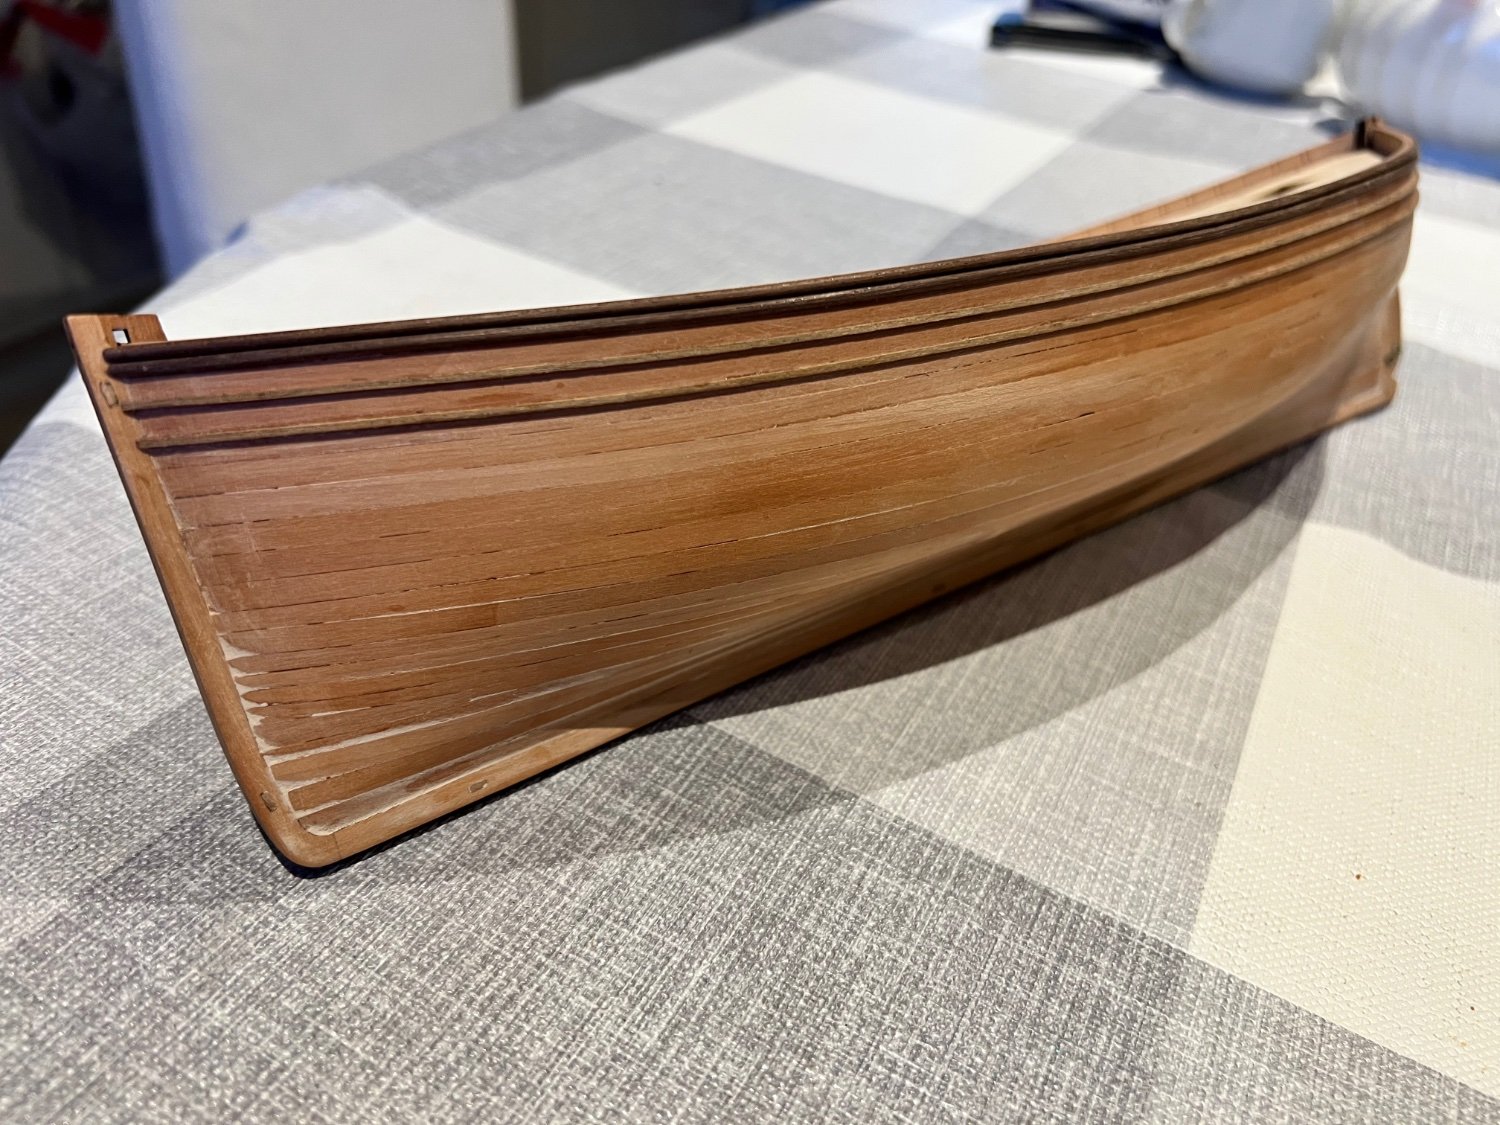
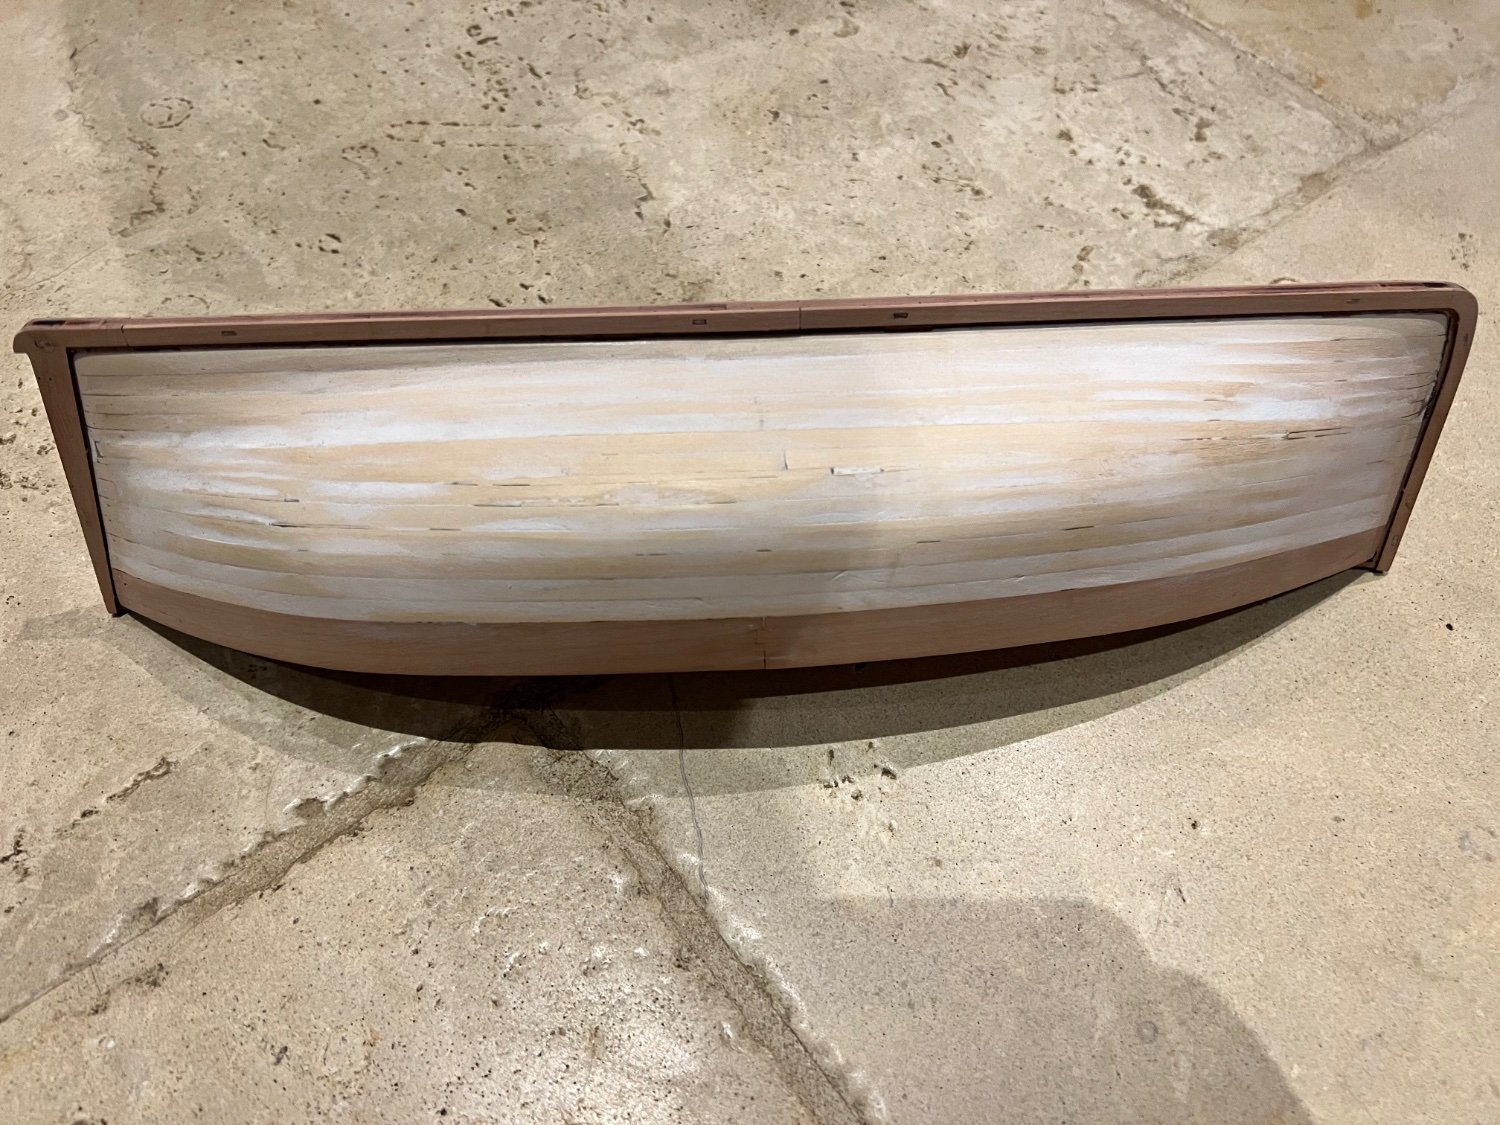
Thank you! Yes it feels so satisfying to completed the second planking. I’m going to leave her natural above the waterline if I can. Luckily there isn’t too much filler needed above the waterline and where I have needed it I’ve used a mix of pear wood dust from sanding and PVA as one of the build logs suggested.
-
Been busy with the second planking which went on a little easier than the first planking and have put together a jig (as per Chuck Passaro’s video) to aid with pre-bending which with a little water really helped. The last plank was a challenge again and ended up being added in sections on both sides.
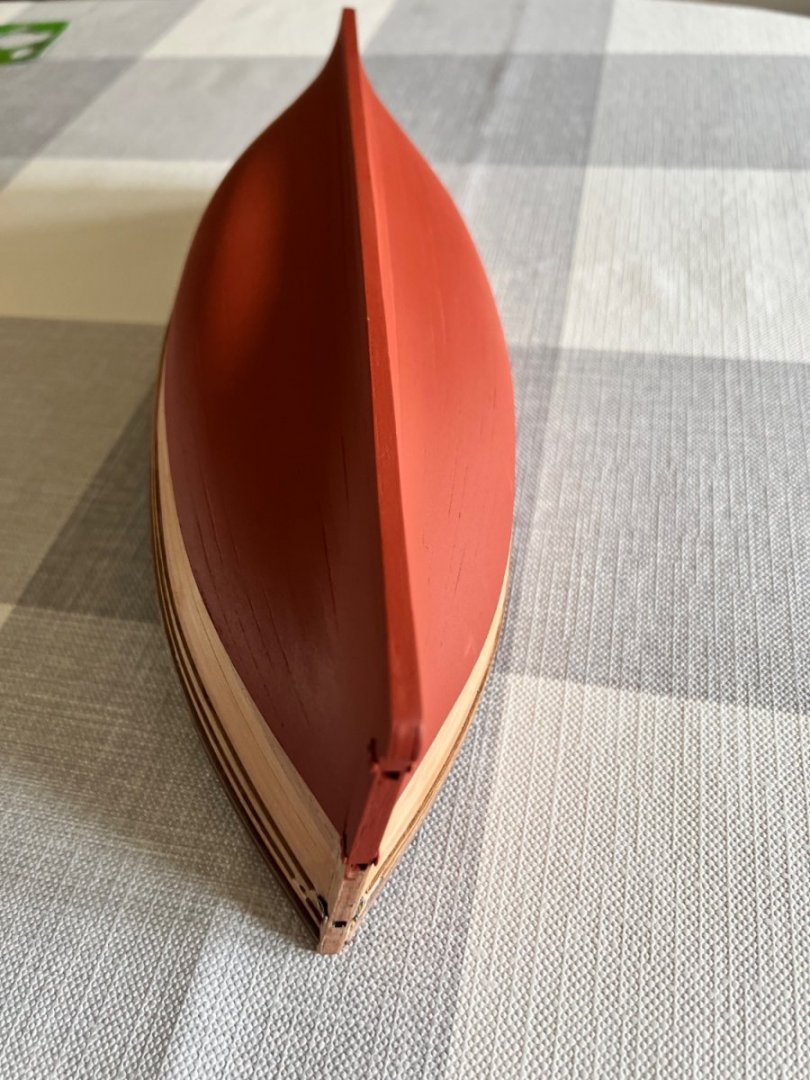
The biggest problem was the stern rabbets which seemed wide and deep enough but were not (entirely my fault not the kit’s as usual!) so the planking rests against the stern post, a bit messy but mostly below the waterline where I can use filler and will be covered in paint. Hope there will still be room for the rudder fittings.
I’m enjoying myself, but there’s plenty of room for improvement and almost endless amounts to learn. Thanks for all the help and advice it’s so helpful knowing there’s a support network out there for this!

- nehemiah, ccoyle, Jack-in-the-Blue and 6 others
-
9
-
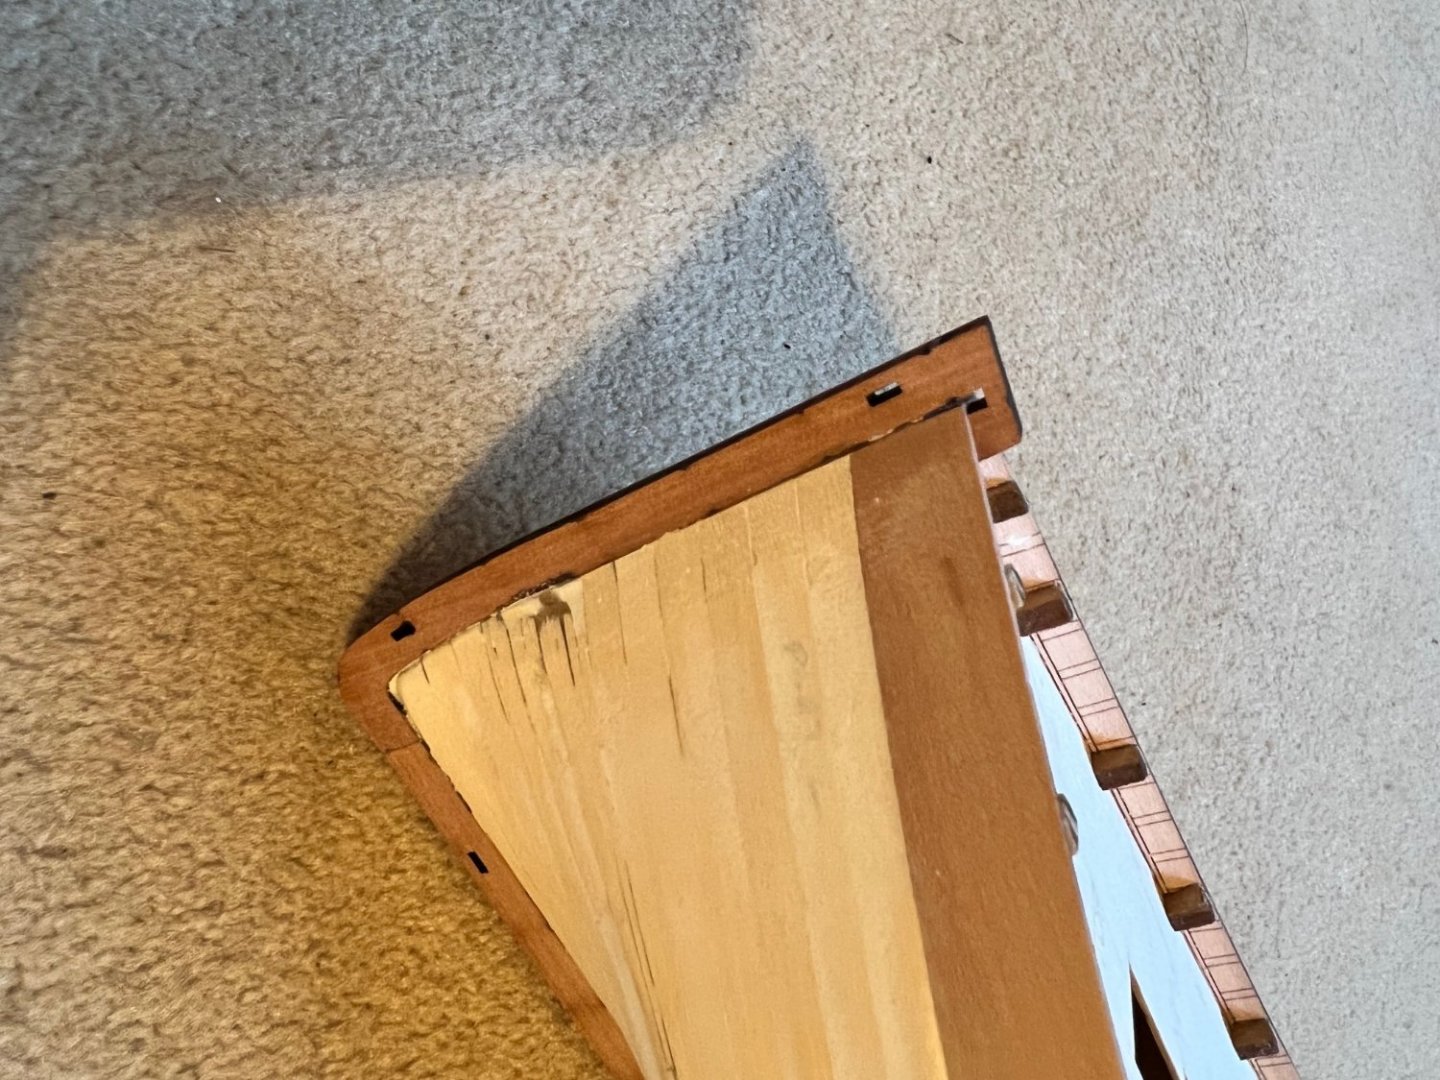
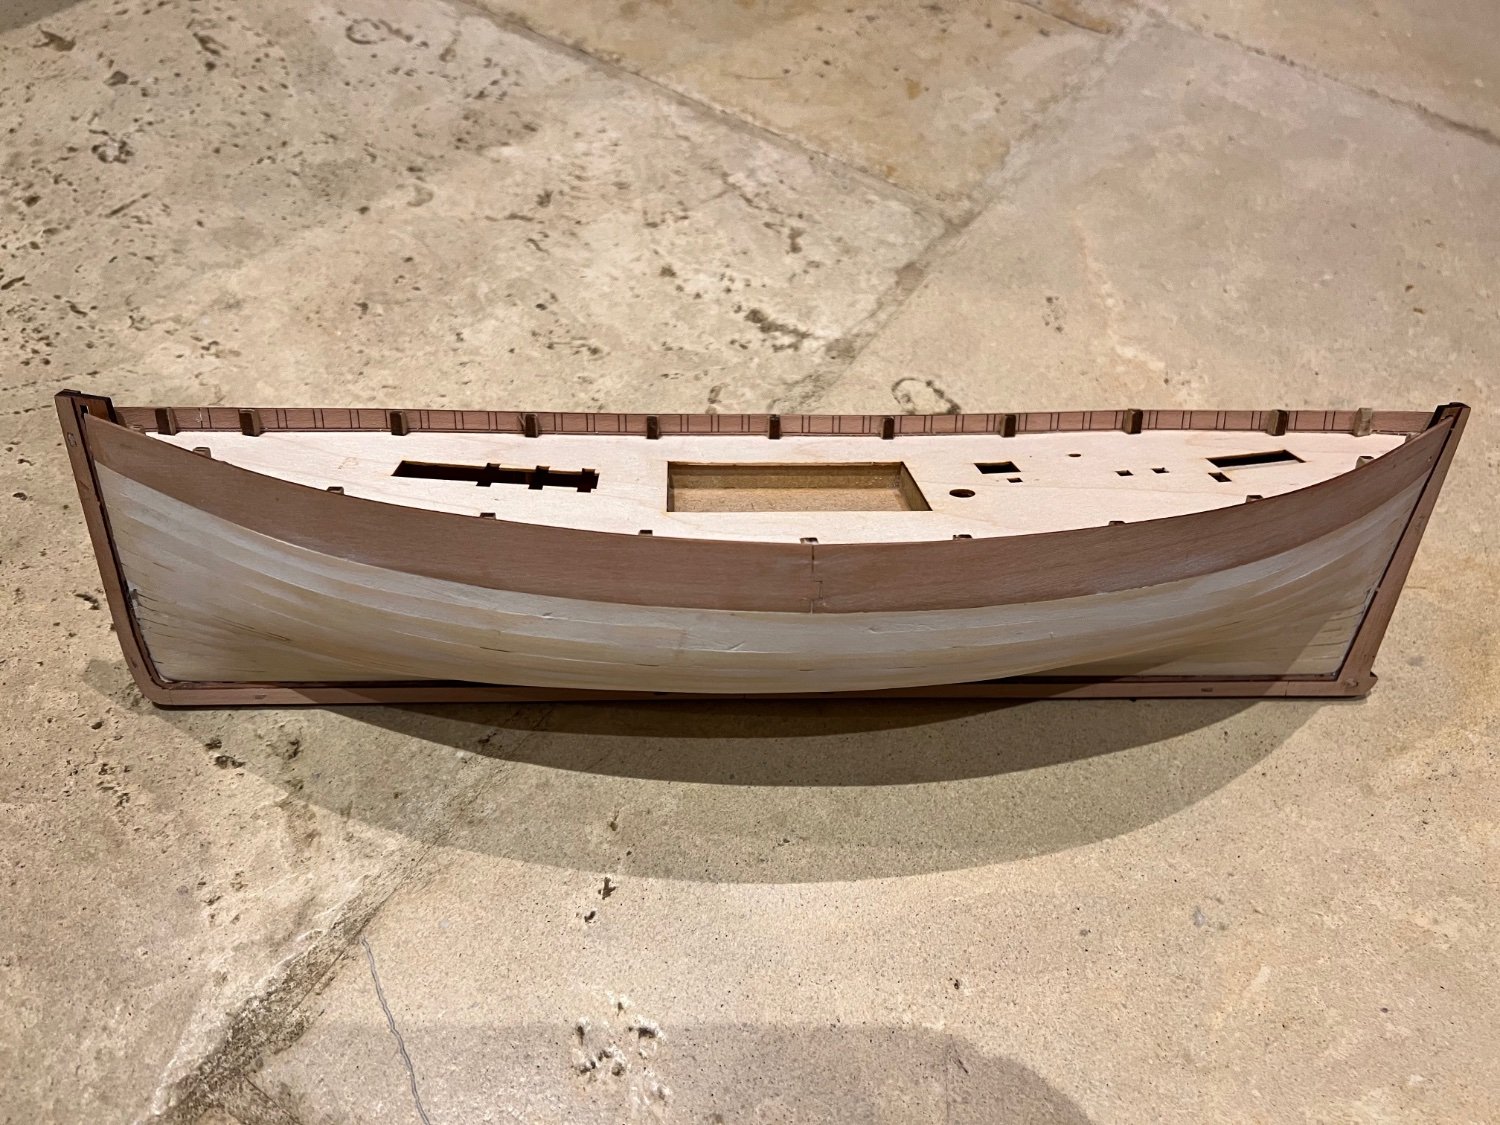
Andy, thank you very much for the advice. I hadn’t sanded the planks at bow and stern flush with the prow and stern post and would have missed that. I have now done so and sanded almost through the planks at bow and stern. In one case right through but supported by the bevelled infill piece below so not a problem. Your build log is a great help - thanks.
Rabbets now fitted with a sufficient gap for the second planking.

- chris watton, ct mike, Theodosius and 7 others
-
10
-
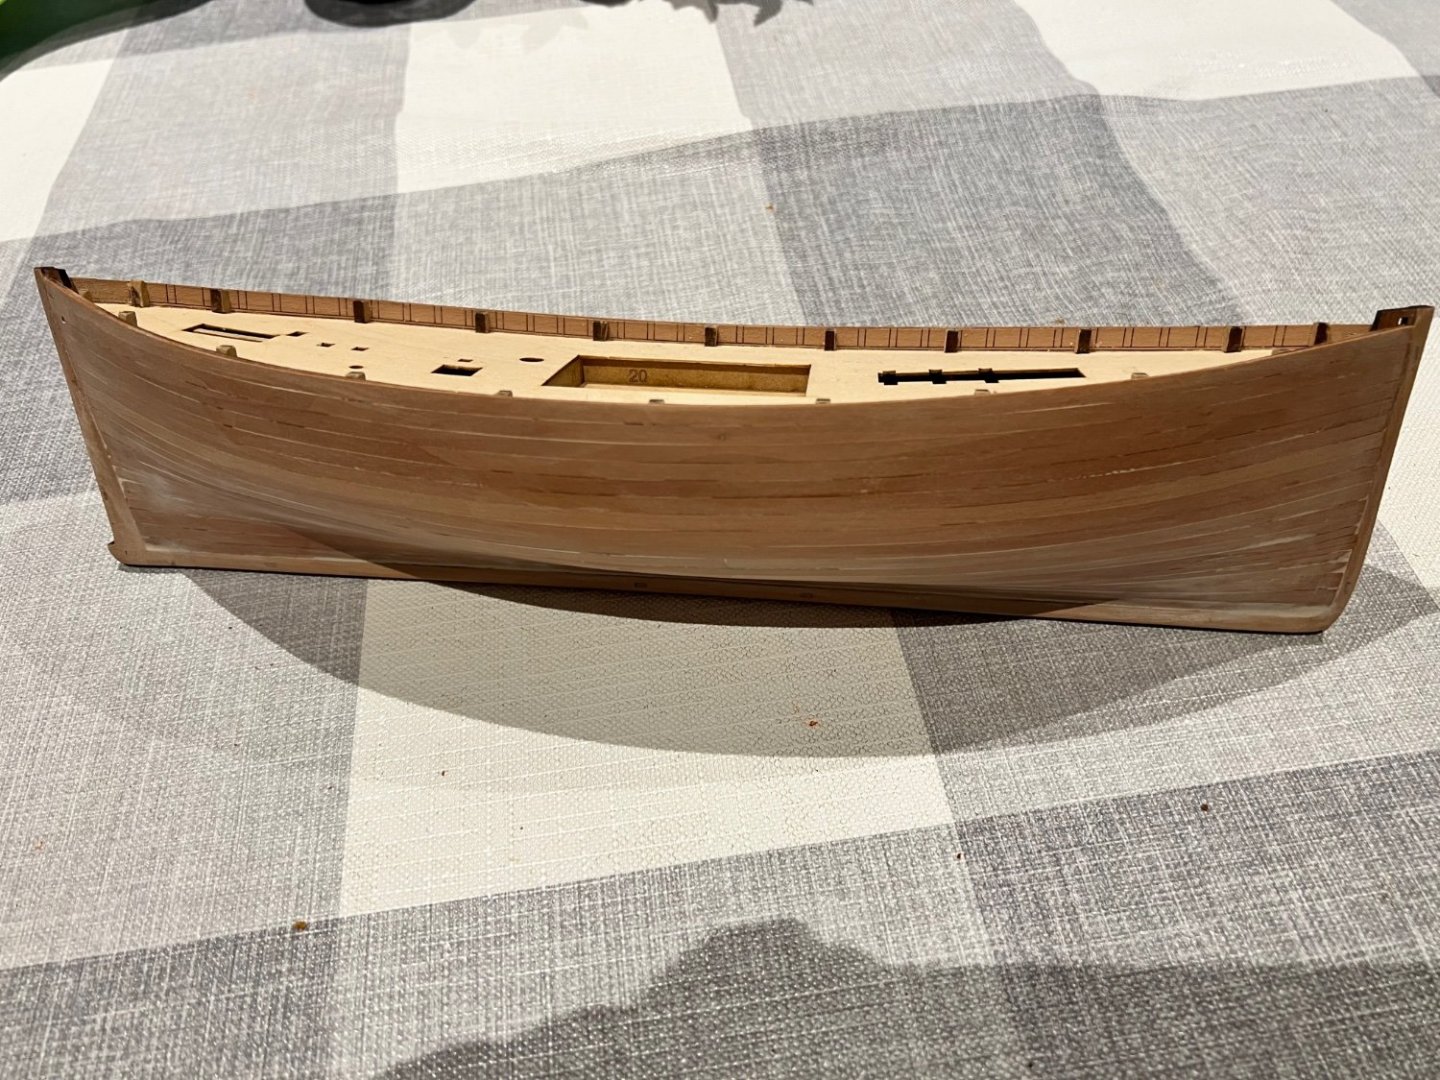
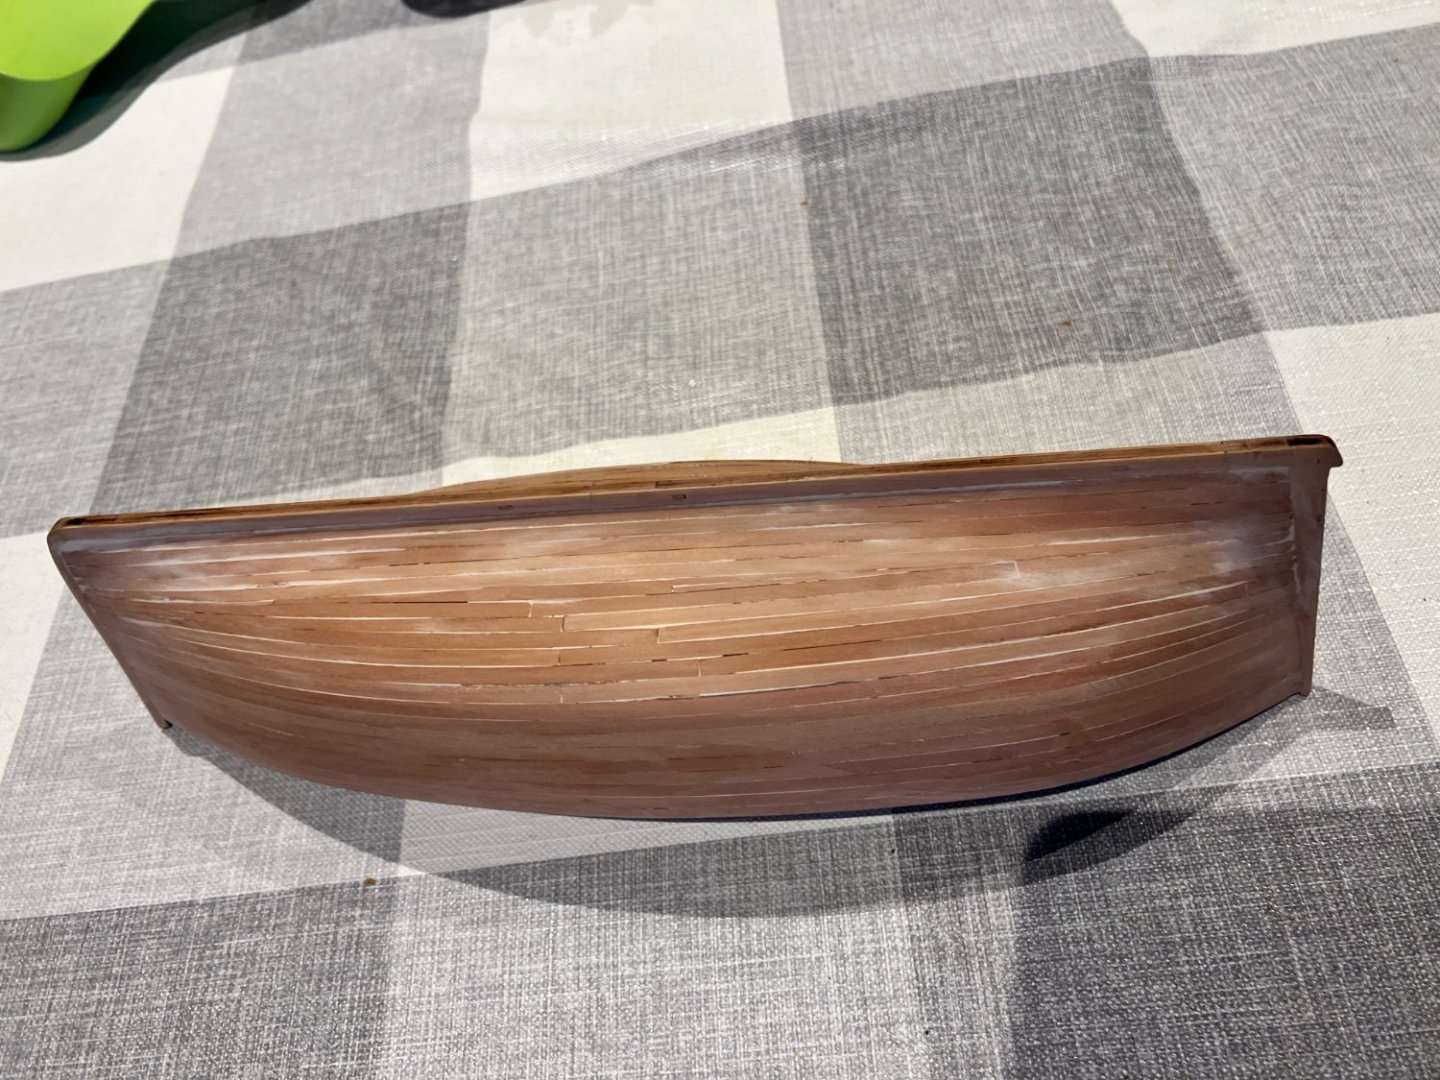
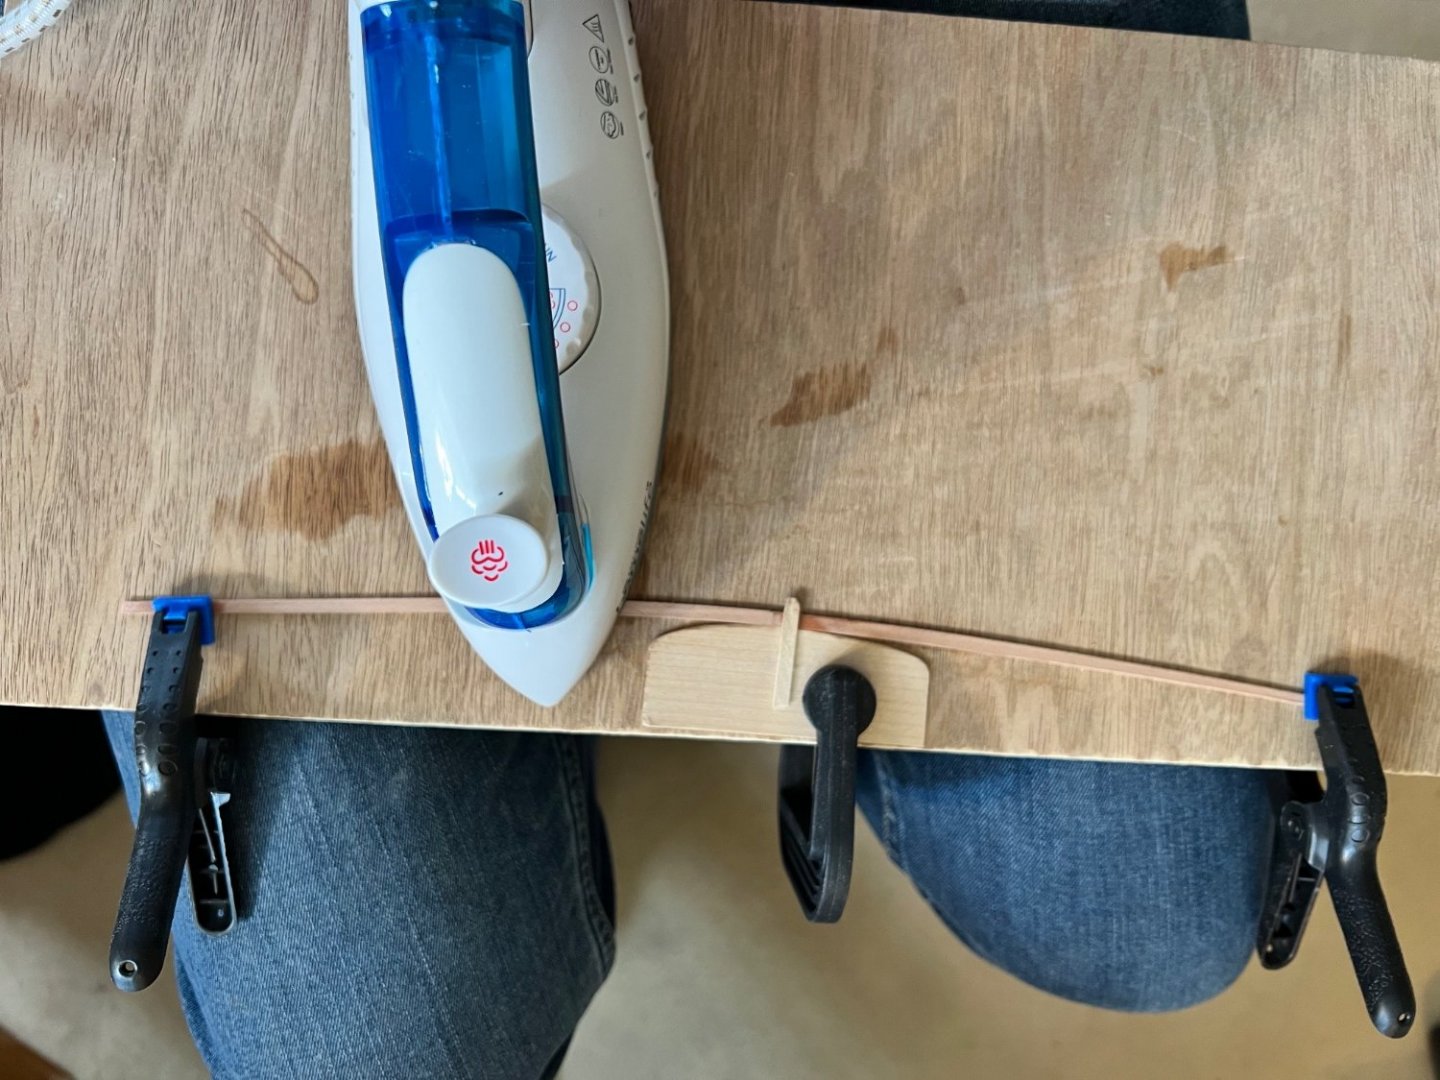
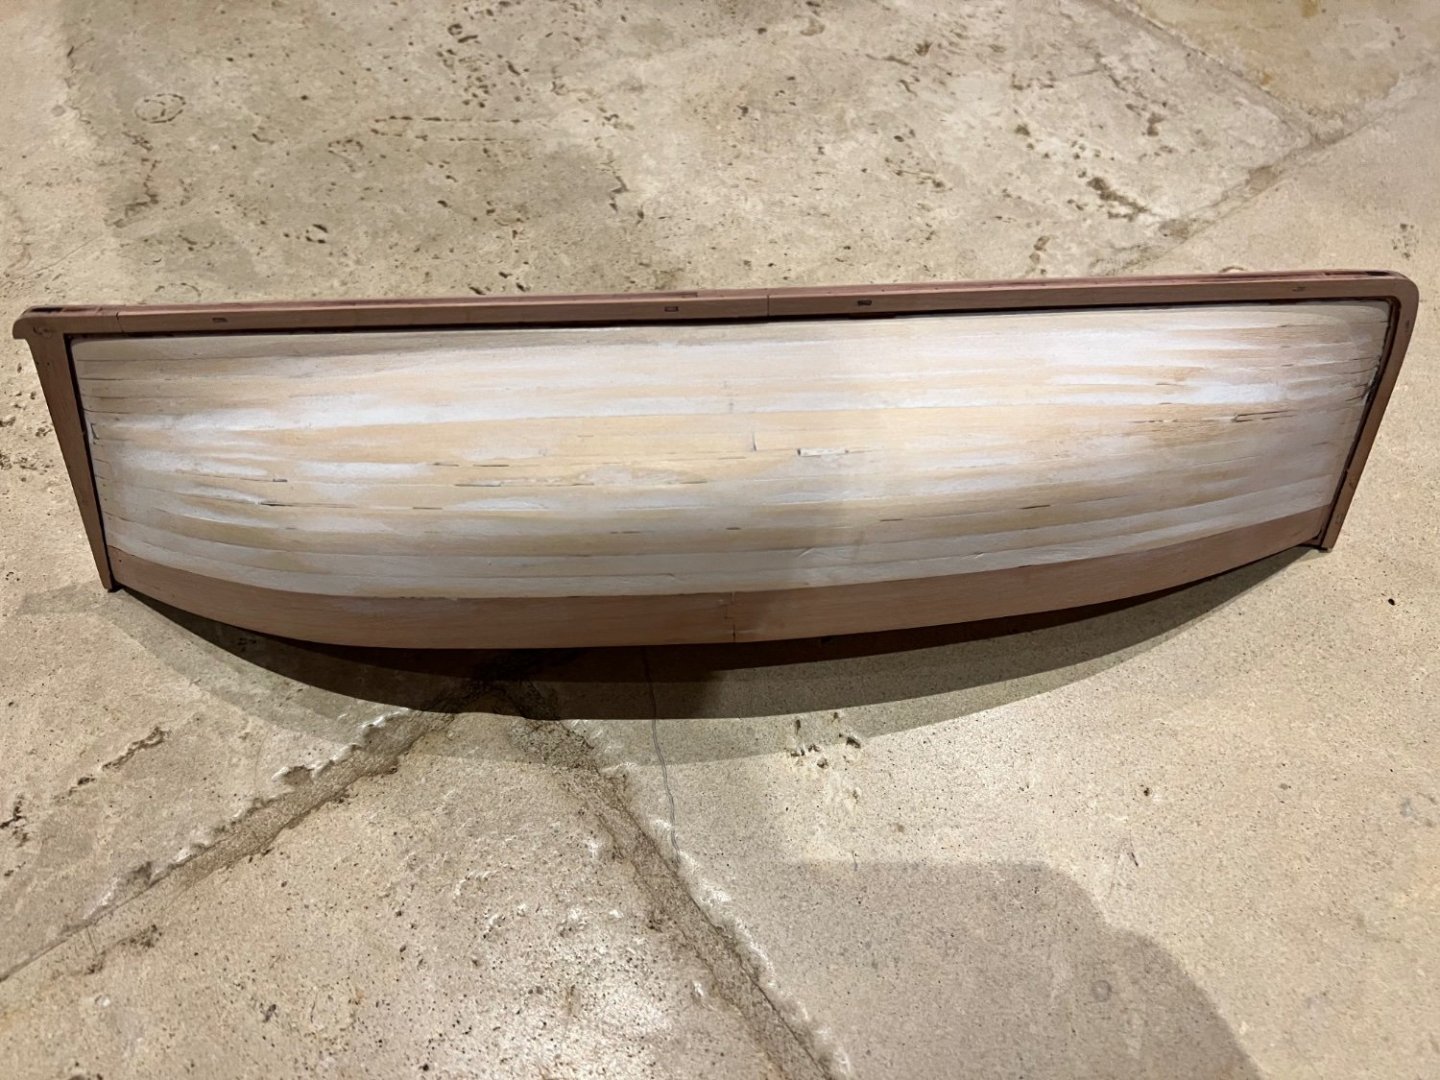
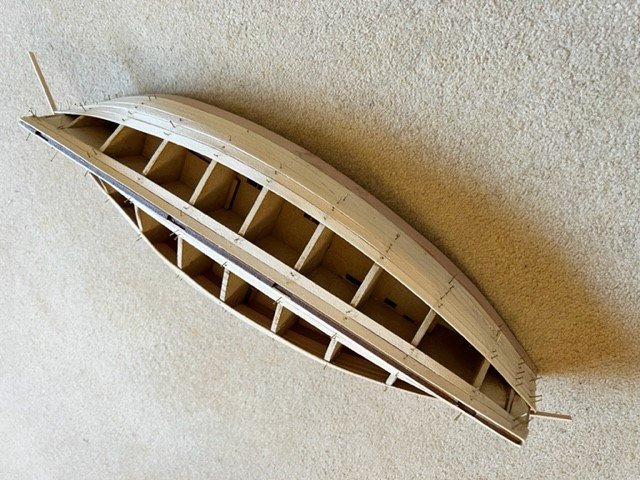
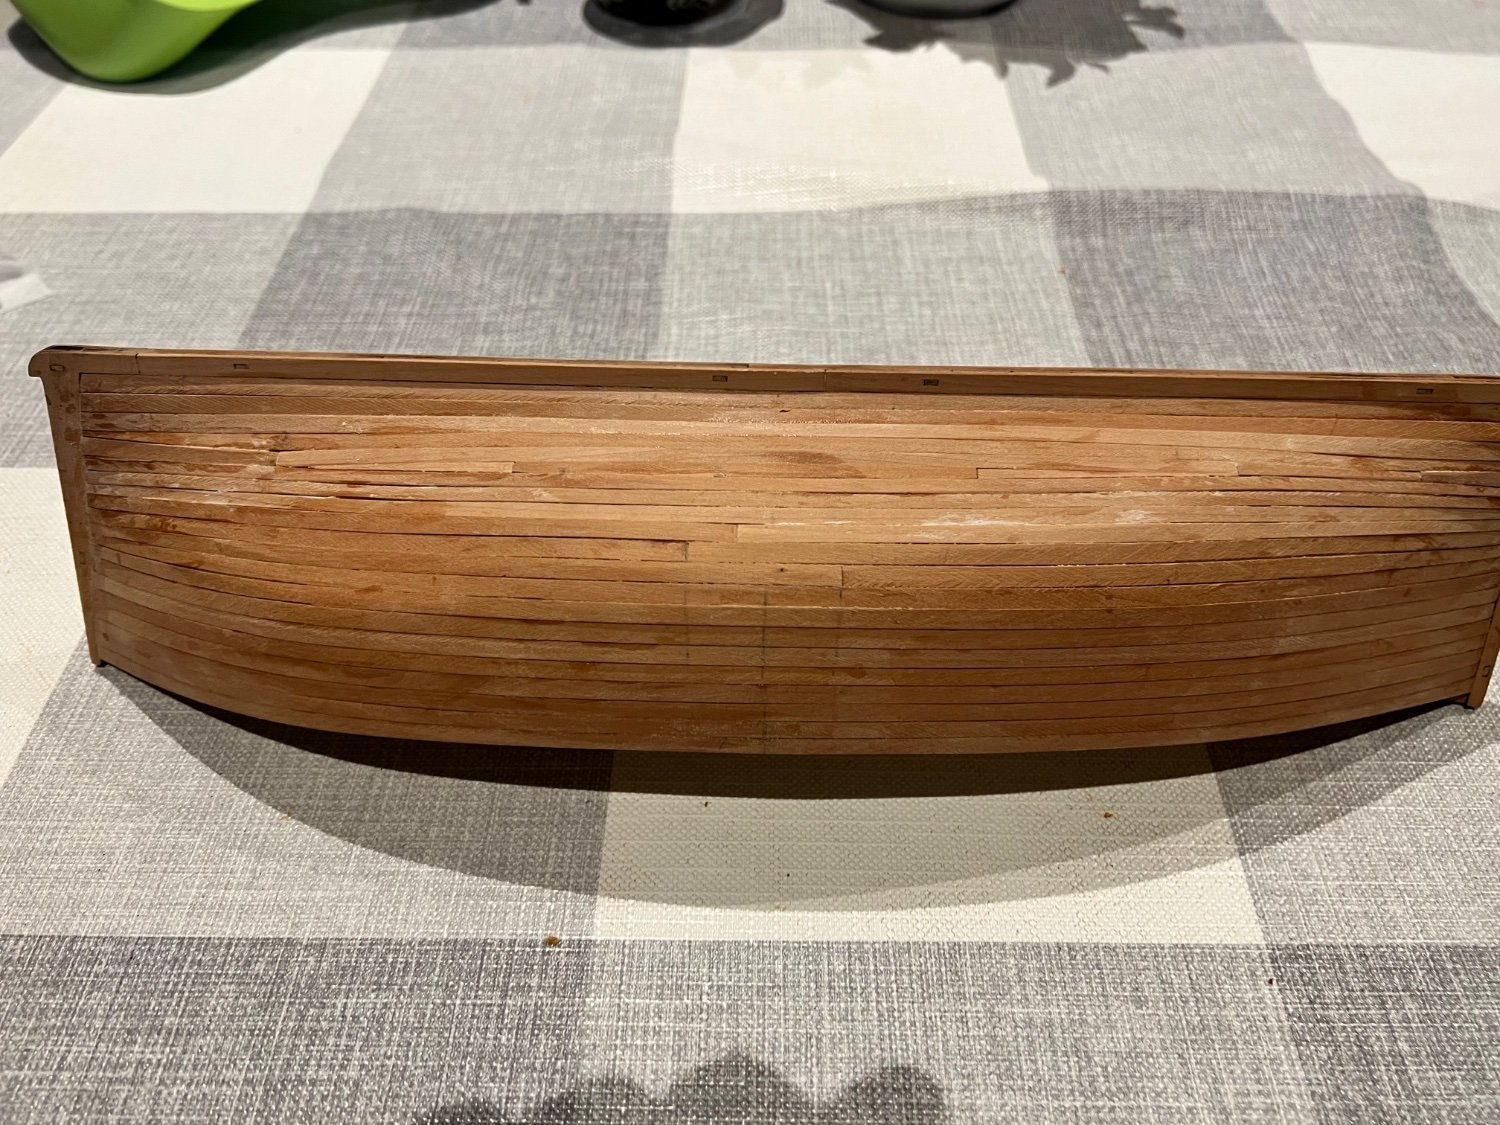
Planking was challenging (whilst still being a lot of fun). I didn't follow the kit instructions on how to plank, much to my regret and tried instead to line off and taper the planks. This proved to be too much for my beginner wood work skills and I couldn't cut the taper onto the planks with anything like the precision needed. The upwards bend at bow and stern meant that some of the planks did not sit naturally on the bulkheads (learning point for fairing next time) and in particular dried not straight around bulkhead 9 where the curve is sharper giving a slightly clinkered effect. I relied on bending the planks whilst wet and then clamping them, going forward I will try to bend them on a "jig" with an iron.
The final plank was a real challenge on each side and I ended up needing to fit it in three sections with some slivers filling gaps. The end result was much messier than I would have liked, but with liberal doses of filler and sanding I now have a flat smooth surface for the second layer of planks. So somehow got to the required outcome, but lots to improve on next time.
For the second layer of planks I am going to follow the procedure in the kit instructions to the letter.
- chris watton, ccoyle, yvesvidal and 7 others
-
10
-
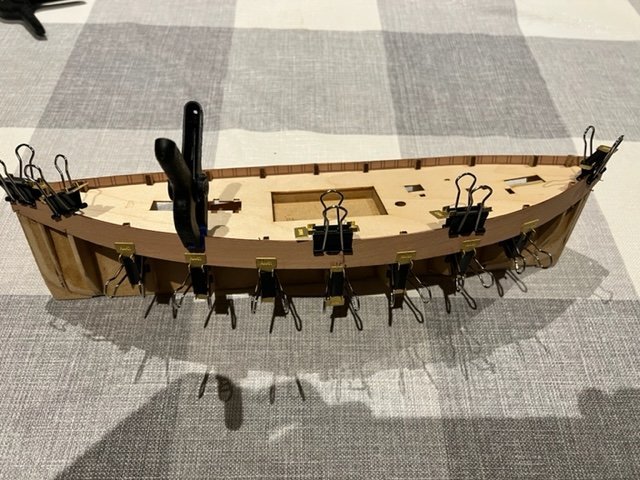
Getting harder. First two planks fitted on each side. I had to soak the planks, clamp them and leave them to dry before glueing and pinning them - as per the bulwarks - to get them to bend upwards at the bow and stern. I am going to create a simple jig for bending the planks more effectively based on Chuck Passaro's HMS Winchelsea video but don't have the clamps, board or iron I need yet.
Also, I have not started tapering the planks yet and think I can get at least one more plank on each side without doing so. Given how tricky fitting the first two planks has been I think I am going to use the lining off methodology for the planks between the top three untapered planks and the garboard plank at the bottom. Maybe I should fit the garboard plank next.
I have made a small mistake at the stern whilst fairing and have slightly tapered the stern end of the false keel. So the planks do not sit as neatly at the stern as they do at the bow and do not leave a 3mm gap for the stern post (too embarrassed to add picture of this until sorted out!). I think I can tidy this up when I fit the stern post and I will need a little filler. It is certainly a learning curve.
- nehemiah, JpR62, Jack-in-the-Blue and 5 others
-
8
-
Apologies for my slow reply.
Chris - thank you. I've used some of your pins and they went in perfectly without drilling or splitting the wood. This is a great kit - thank you very much!
Andy - thank you very much for the advice and encouragement.
I have fitted the bulwarks now and the port side is drying overnight. Planking next....
-
-
Hi Dion, do you have a build log? I'd like to follow your progress too.
I'm finding the other build logs essential reading alongside the excellent instructions that come with the kit. I am going to stick as closely as possible to the model as built in the instructions and not make any modifications as some have done. I need to crawl before I can walk!
Starboard bulwarks having been soaked in water are being bent to shape and left to dry.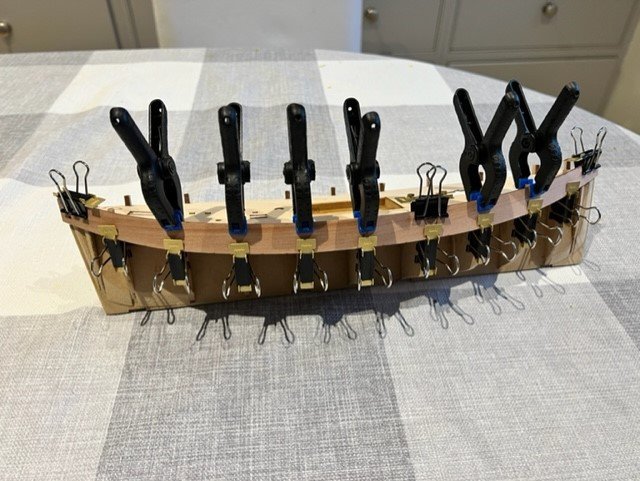
- Andyrew, chris watton, AJohnson and 1 other
-
4
-
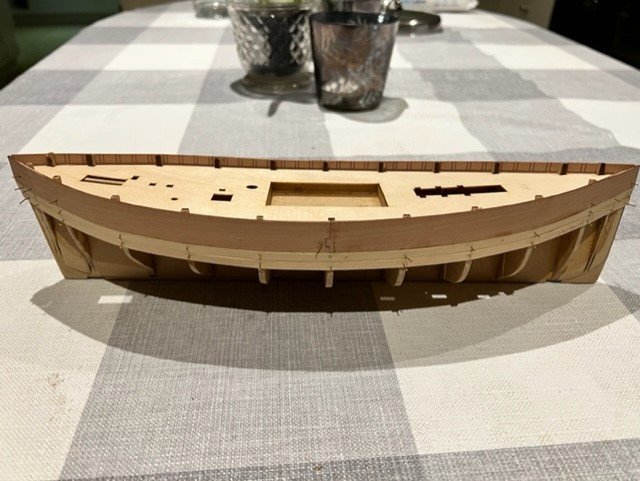
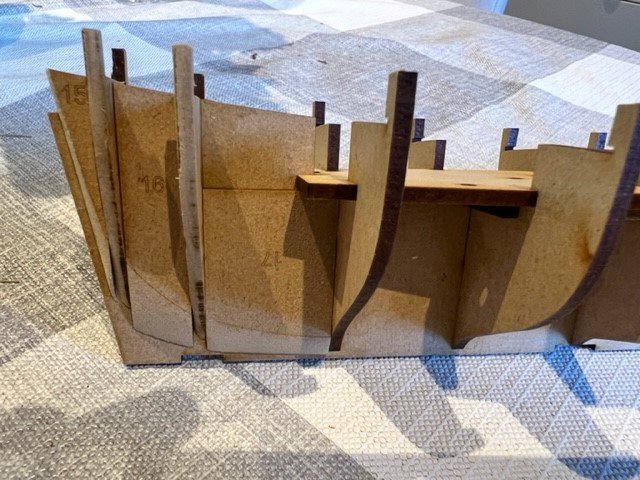
Thanks Nehemiah, great advice. I have faired the bulkheads much more and added the deck.
A limewood plank seems to flow nicely from bow to stern now, but we'll see when I attempt planking for the first time!
Bulwarks next....

- nehemiah, chris watton, Andyrew and 5 others
-
8
-
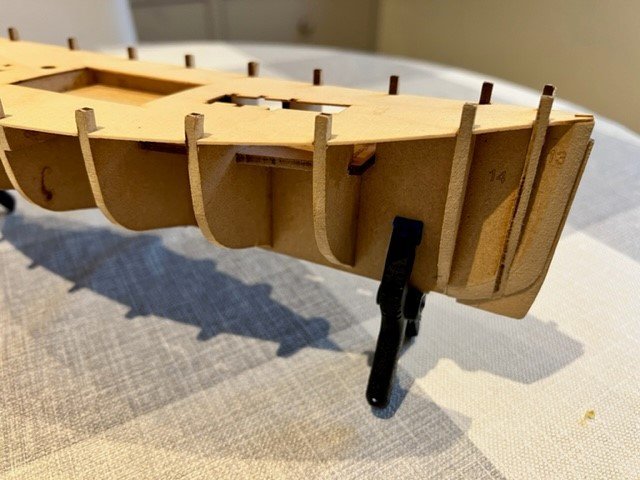
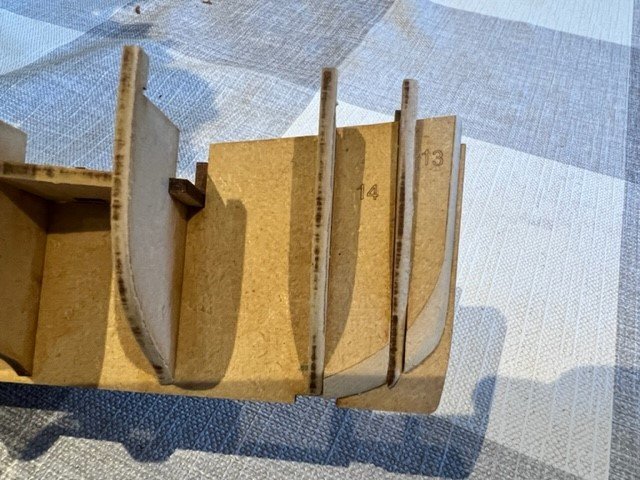
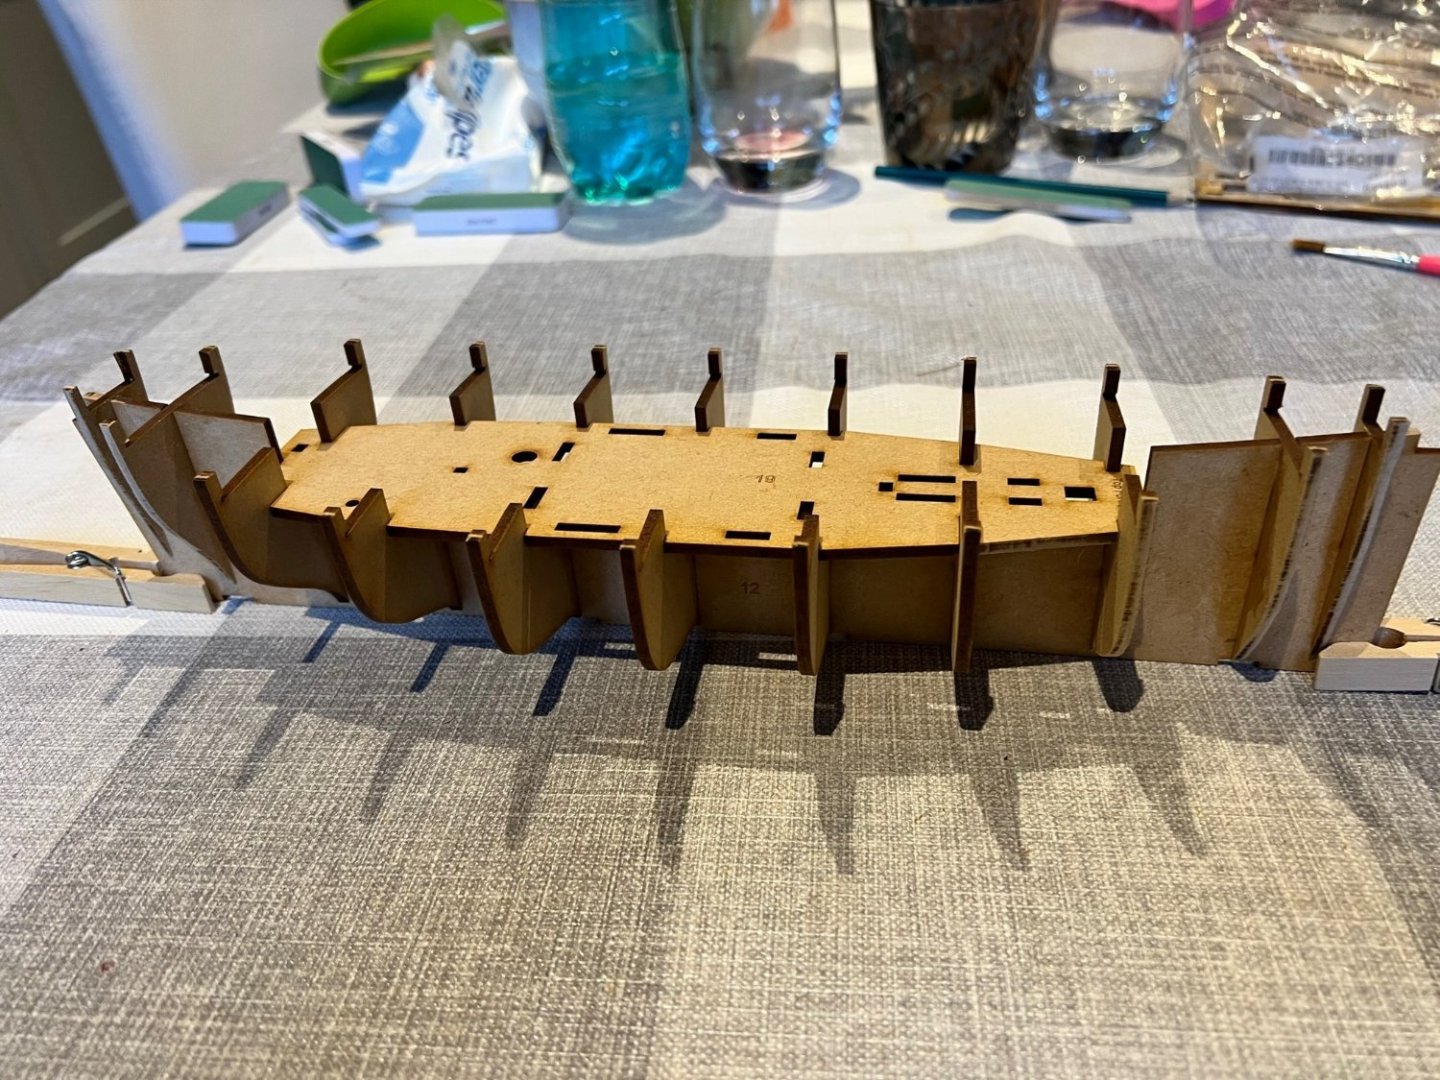
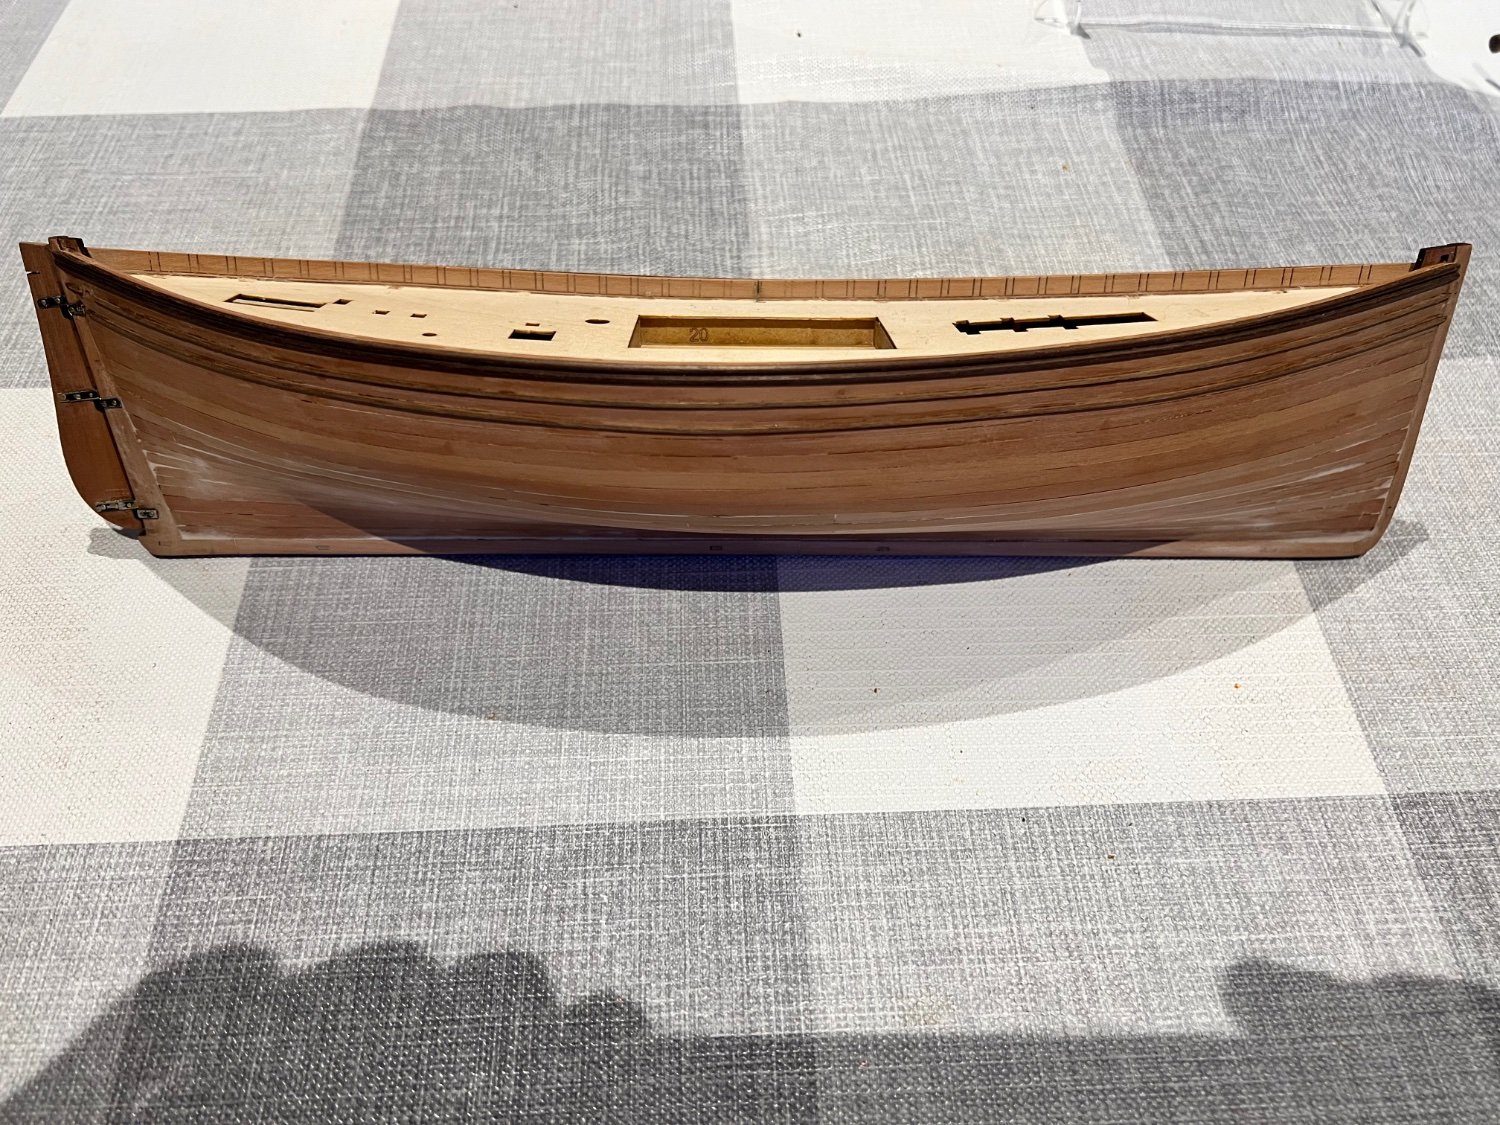
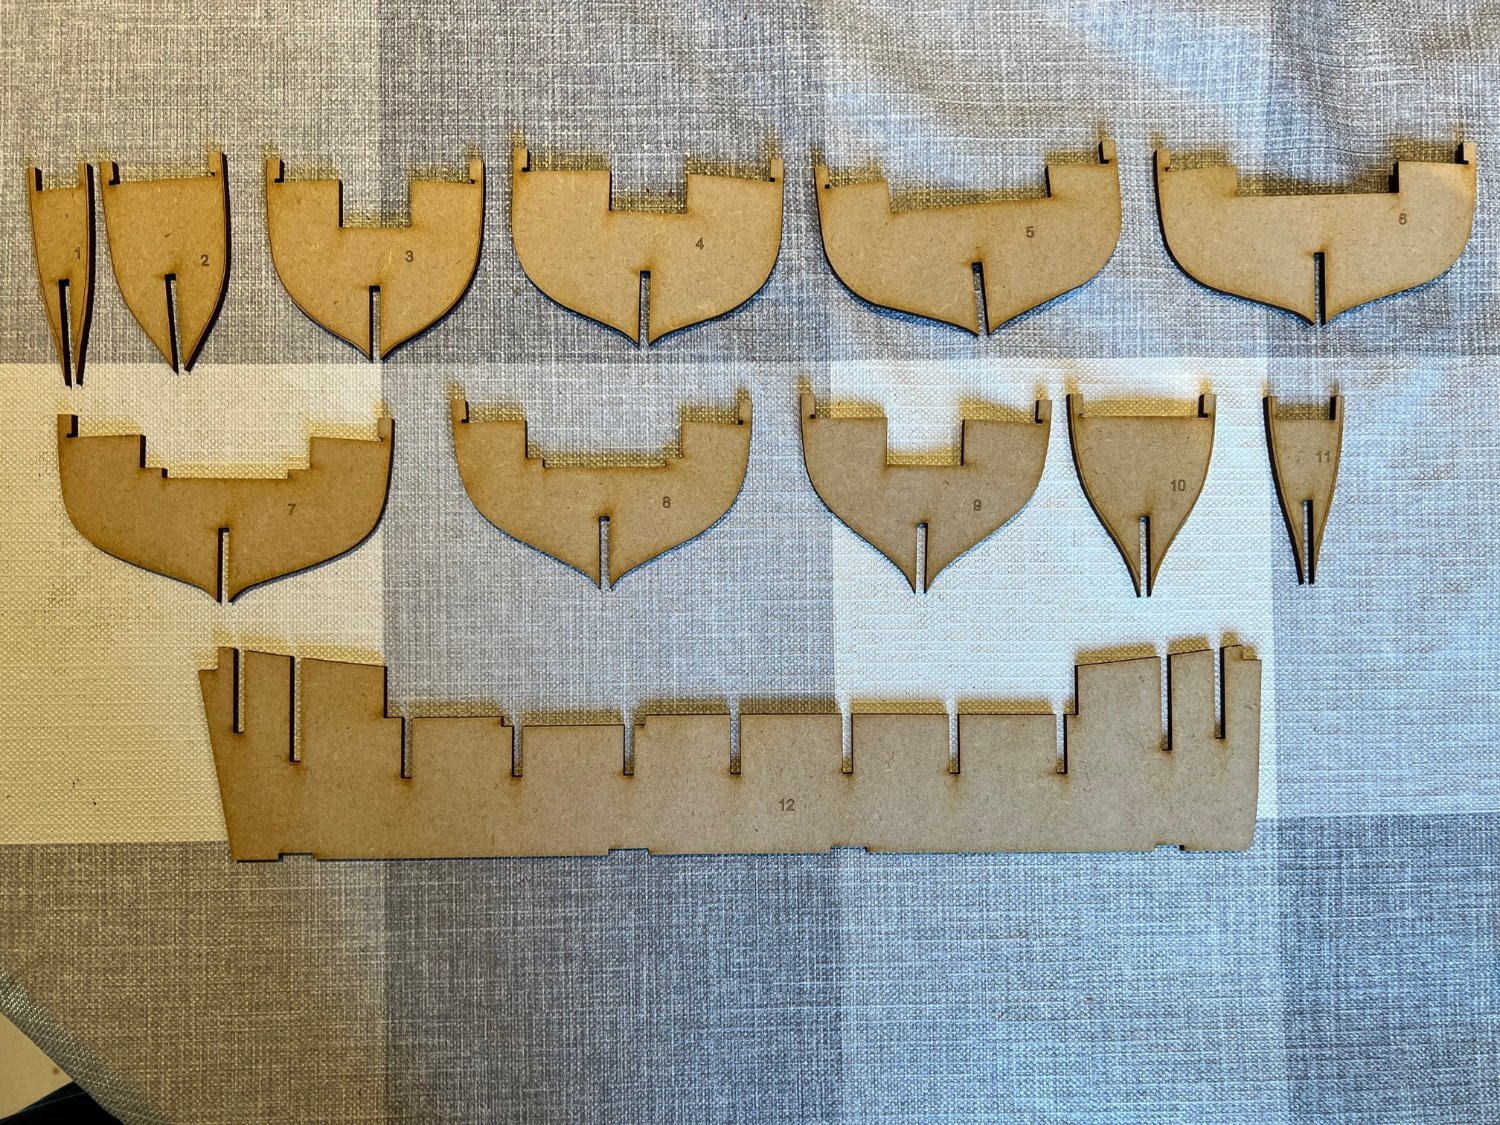
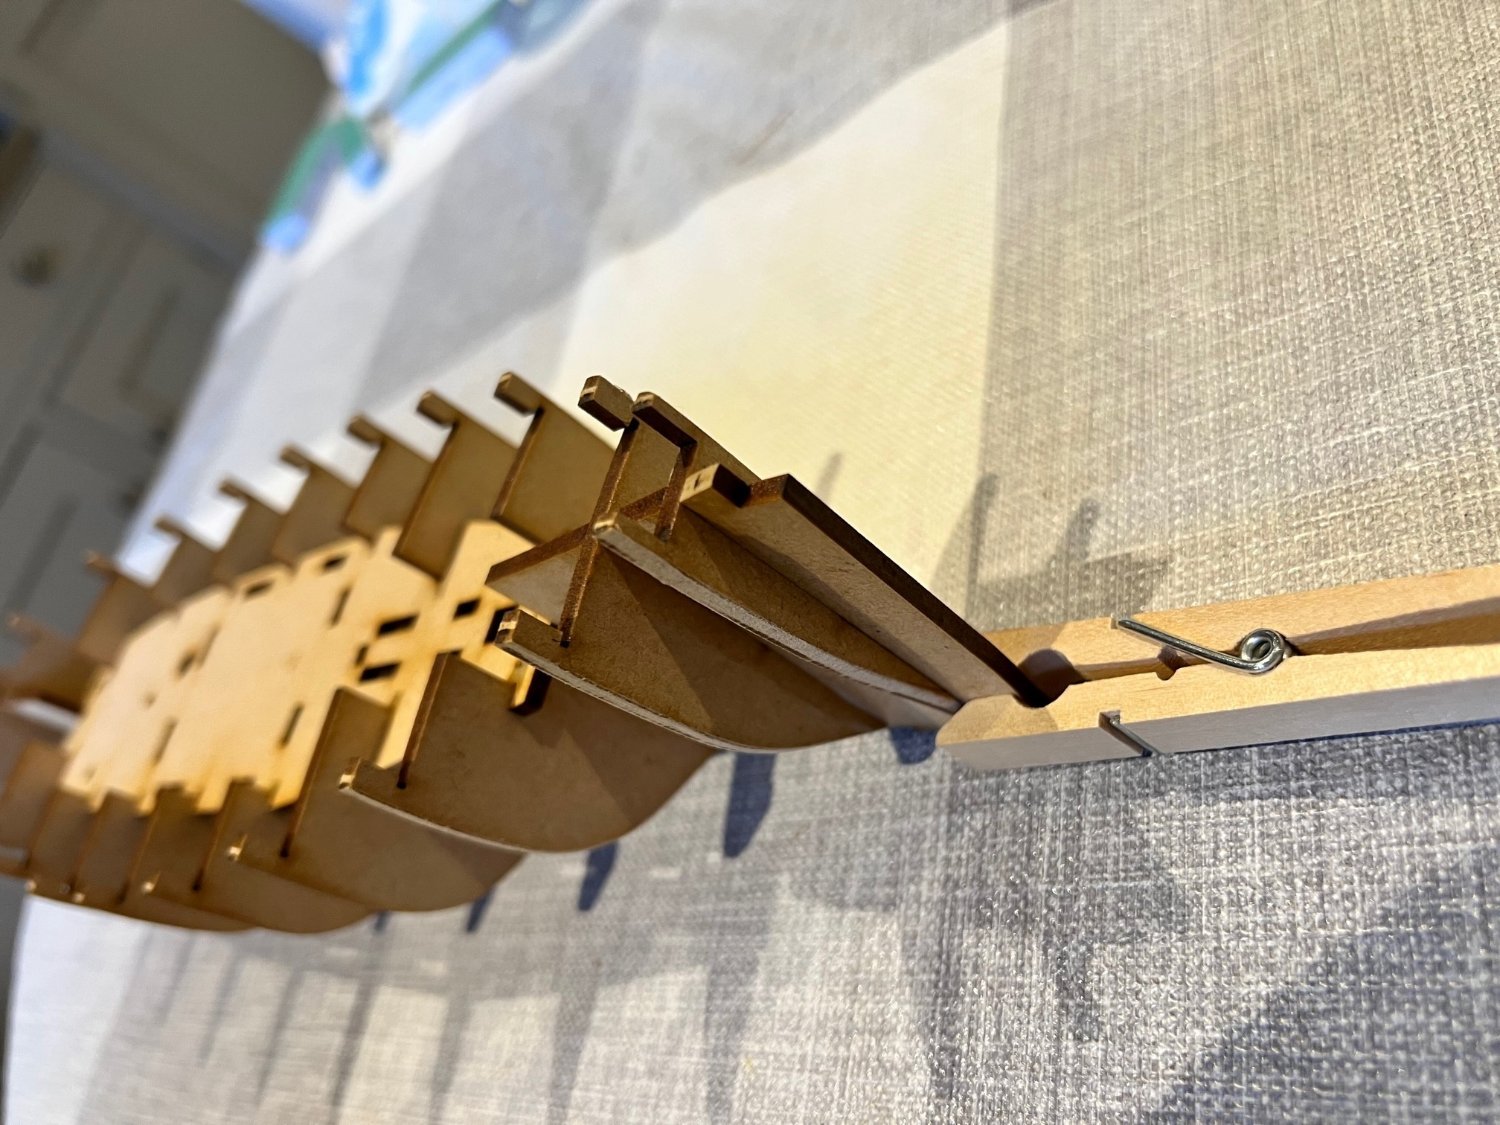
A little more progress today. Lower deck glued in. Infill parts have been bevelled and glued in at bow and stern. Fish hatch side walls installed.
Again very impressed by how well the parts fit together and align with little effort. Quality of the MDF is great too with no splintering when bevelled.
So far relatively straightforward - going to get a lot more complicated shortly with the bulkheads and planking!
One question - I have been using Titebond PVC and have not been diluting this down with water. Do I need to dilute it, the instructions suggest that I should? Many thanks
- Andyrew, AJohnson, chris watton and 4 others
-
7
-
This is my build log for the Fifie. I'm a beginner to wooden boat modelling and this is my first build.
Any advice or criticism is very welcome - I have a lot to learn!
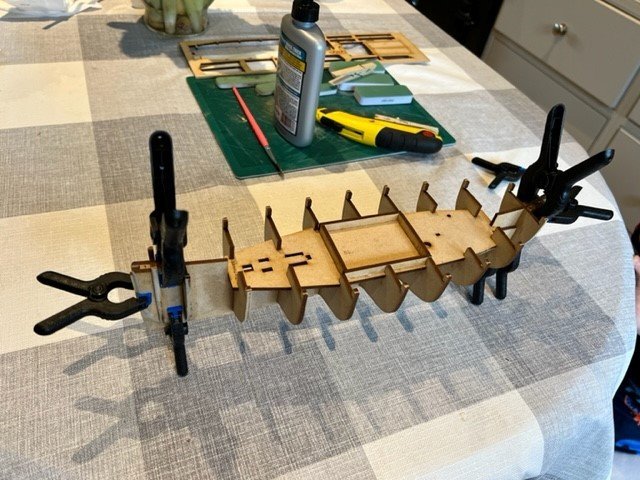
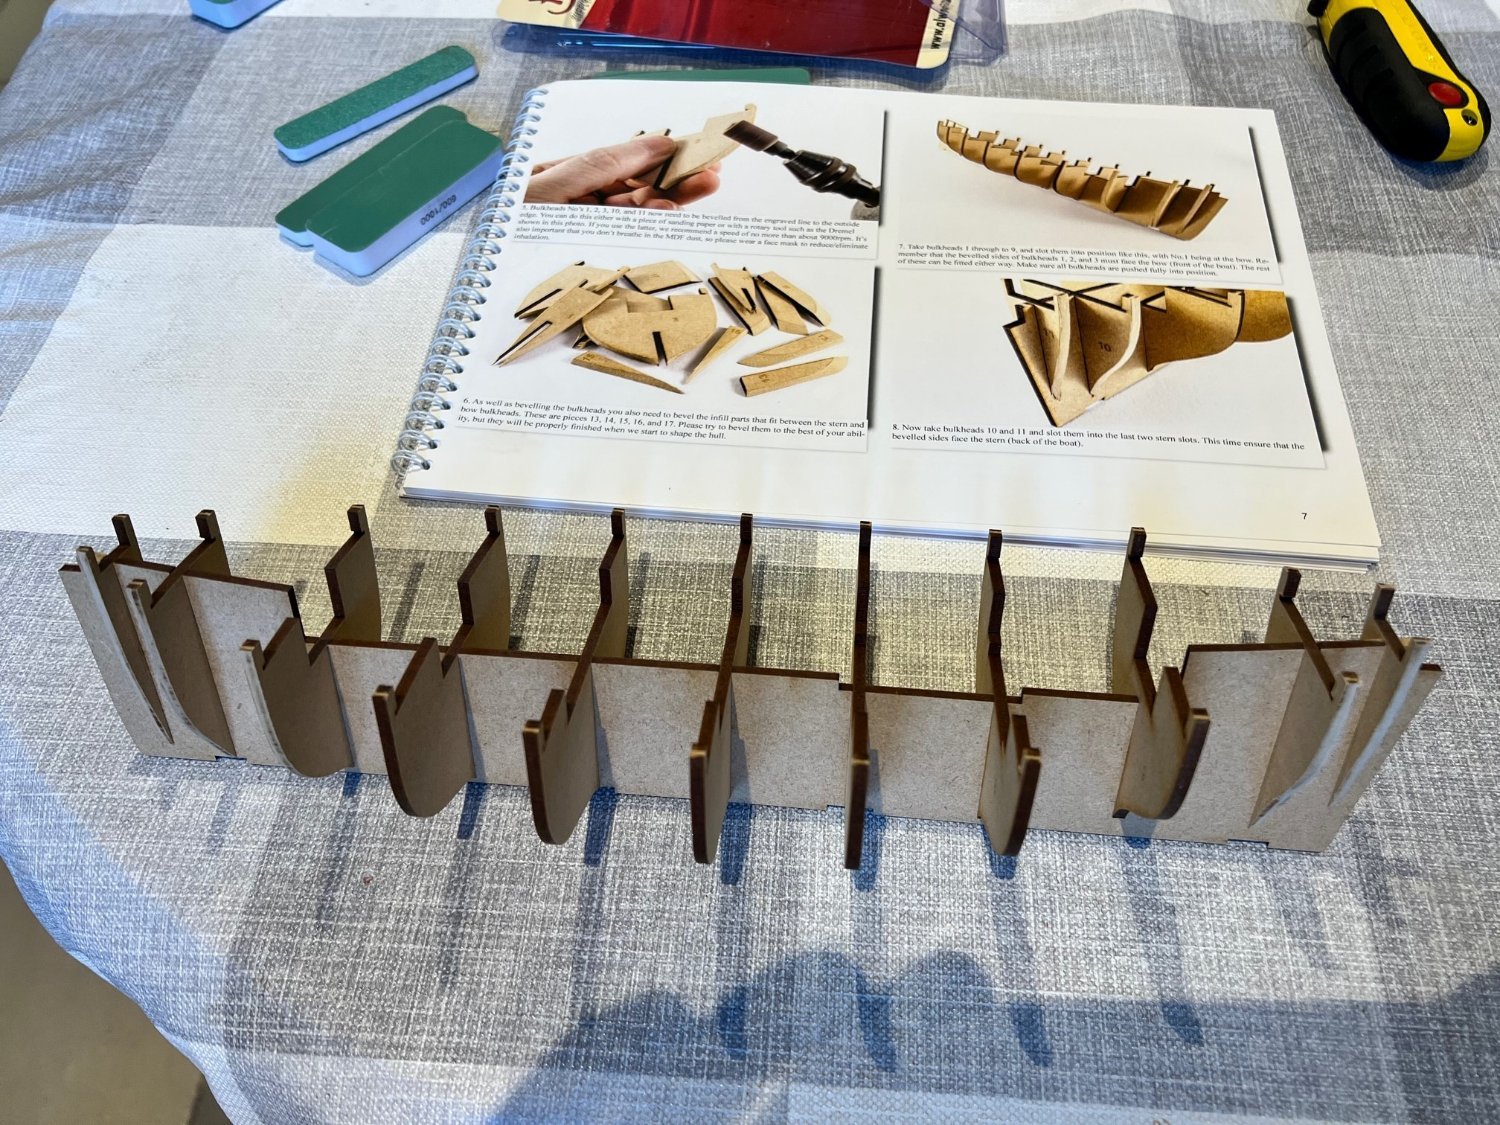
My first impressions of the kit is that the instructions and plans are excellent and highly accessible to me as a beginner. The parts are beautifully laser cut with only tiny tabs holding the parts in their wooden sheets. The materials feel very high quality too. So far I am hugely impressed by Vanguard and hope to make more of their models in the future.
So the build started today, the bulkheads have been bevelled and mounted on the false keel with the lower deck in place (unglued) to keep them aligned. Leaving it to dry overnight before progressing further.


- AJohnson, chris watton, Rik Thistle and 6 others
-
9
-
Thanks again for all the advice. I have had a good look at the options and have settled on Vanguard’s Fifie “Lady Eleanor” as my first model. As well as being an attractive little trawler, her hull looks to be a relatively straightforward shape for a first build and the rigging quite simple, as well as superb detailed instructions (having these available on the website was a huge selling point for me). I’m sure I’ll make lots of mistakes, but this looks like an good place to start.
I will post a build log, but it will be a very slow (and probably messy) build. I’m expecting most of the rest of the year - between kids and work I suspect i’ll only get 3-4 hours each week working on her.
- mtaylor, Keith Black, Gregory and 1 other
-
4
-
Thanks for such a warm welcome.
I need to have a look at all these and do some research. The Vanguard instructions certainly look ideal for me.- Gregory, mtaylor and Keith Black
-
3
-
Super - thank you both. I’ll have a look. I’m UK-based so I’ll see what is available here.
- Keith Black, Ryland Craze and mtaylor
-
3
-
Hi,
I’m a new member and looking to get started making wooden ships. I have limited experience - made some plastic models as a kid and more recently my only experience with wood - a Guillows RC balsa aircraft - completed but never actually flew as it came out too heavy.
I read the excellent guide to choosing a first model on MSW, but I think I need a model that is both very easy to start with and has a practicum / step-by-step guide to learn the skills. The practicums for the Sultana and Phantom look superb but I suspect that both models are too complex for me as a first build.
I’m thinking of starting with the Maristella Beginners Level 1 boats. Would anyone recommend these?
Many thanks for any help and advice.
Dan
- mtaylor, Keith Black, Ryland Craze and 1 other
-
4


Lady Eleanor by DB789 - FINISHED - Vanguard Models - 1:64 - Fifie
in - Kit build logs for subjects built from 1851 - 1900
Posted
Fantastic, thank you very much for the recommendation. It’s ordered on Amazon Prime, I should have it tomorrow.