Ferrus Manus
-
Posts
1,034 -
Joined
-
Last visited
Content Type
Profiles
Forums
Gallery
Events
Everything posted by Ferrus Manus
-
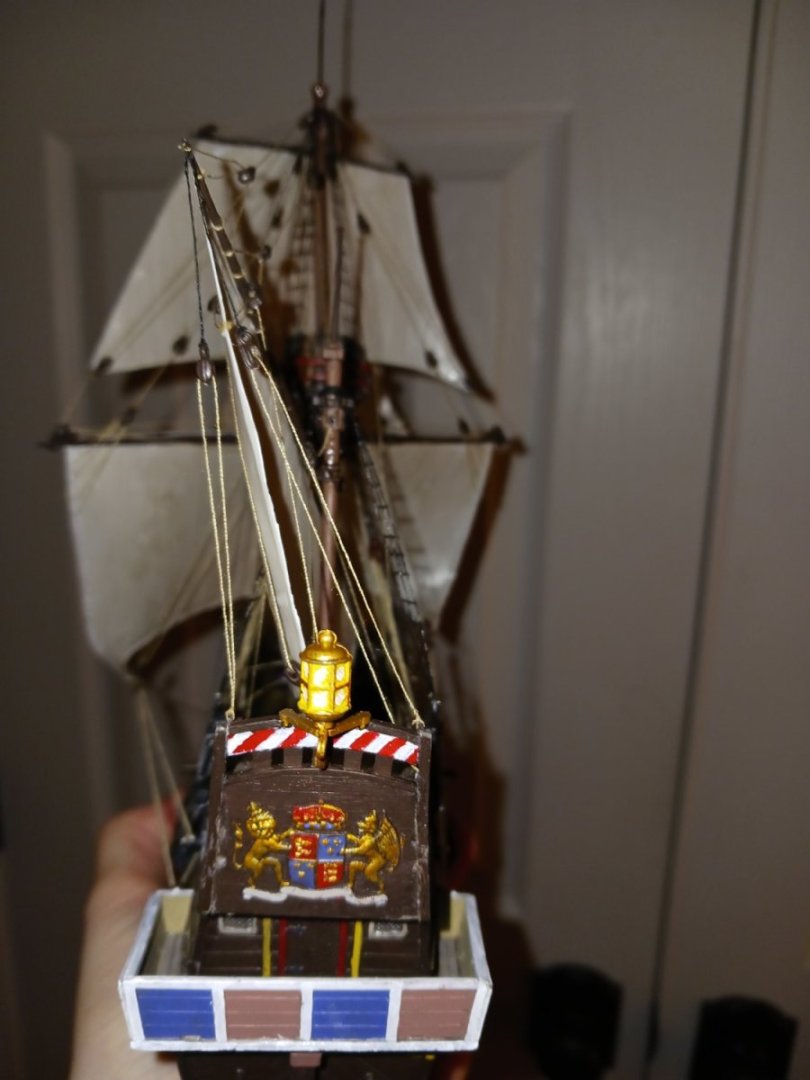
 Your gun carriages are far superior to the original pieces, and your lanterns will make wonderful additions to the galleon. Should you decide to remake the stern lantern, i would recommend it.
 -
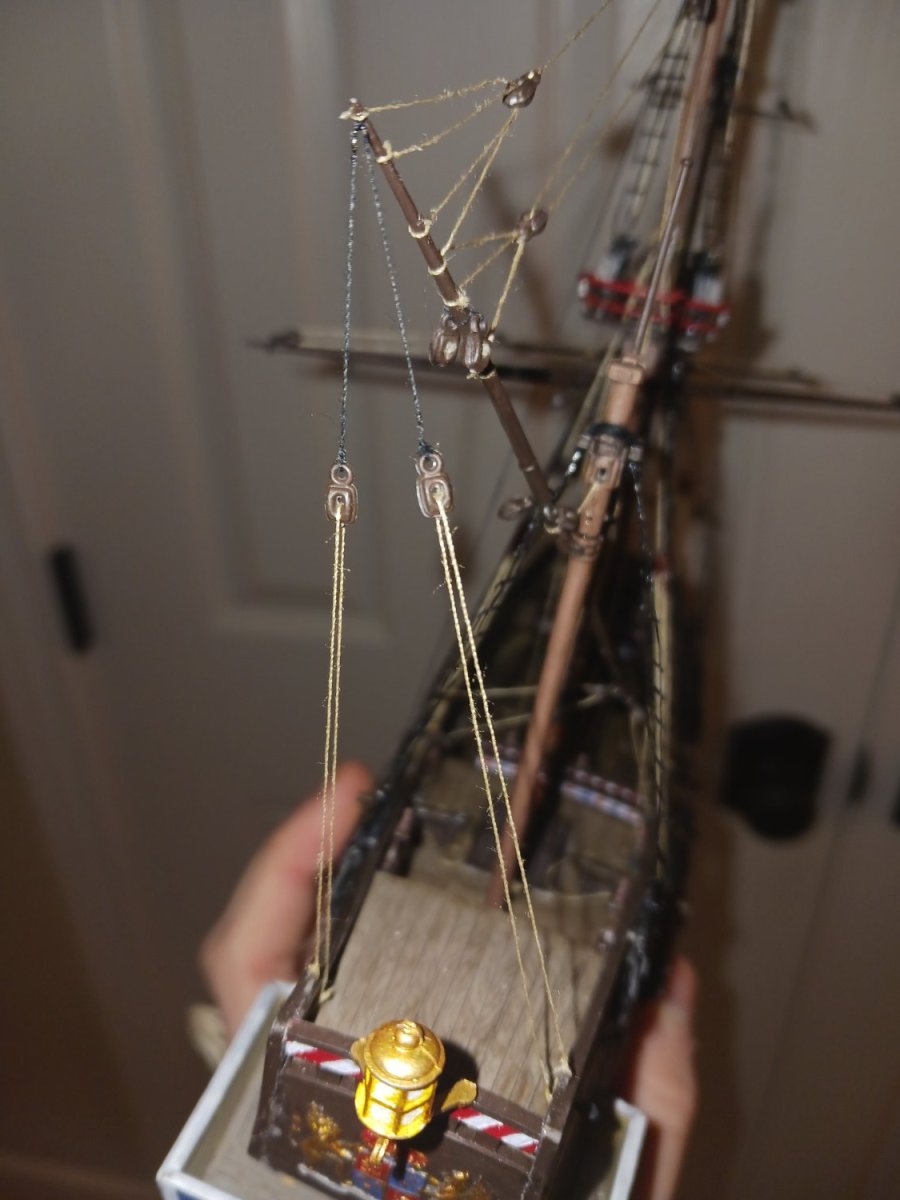
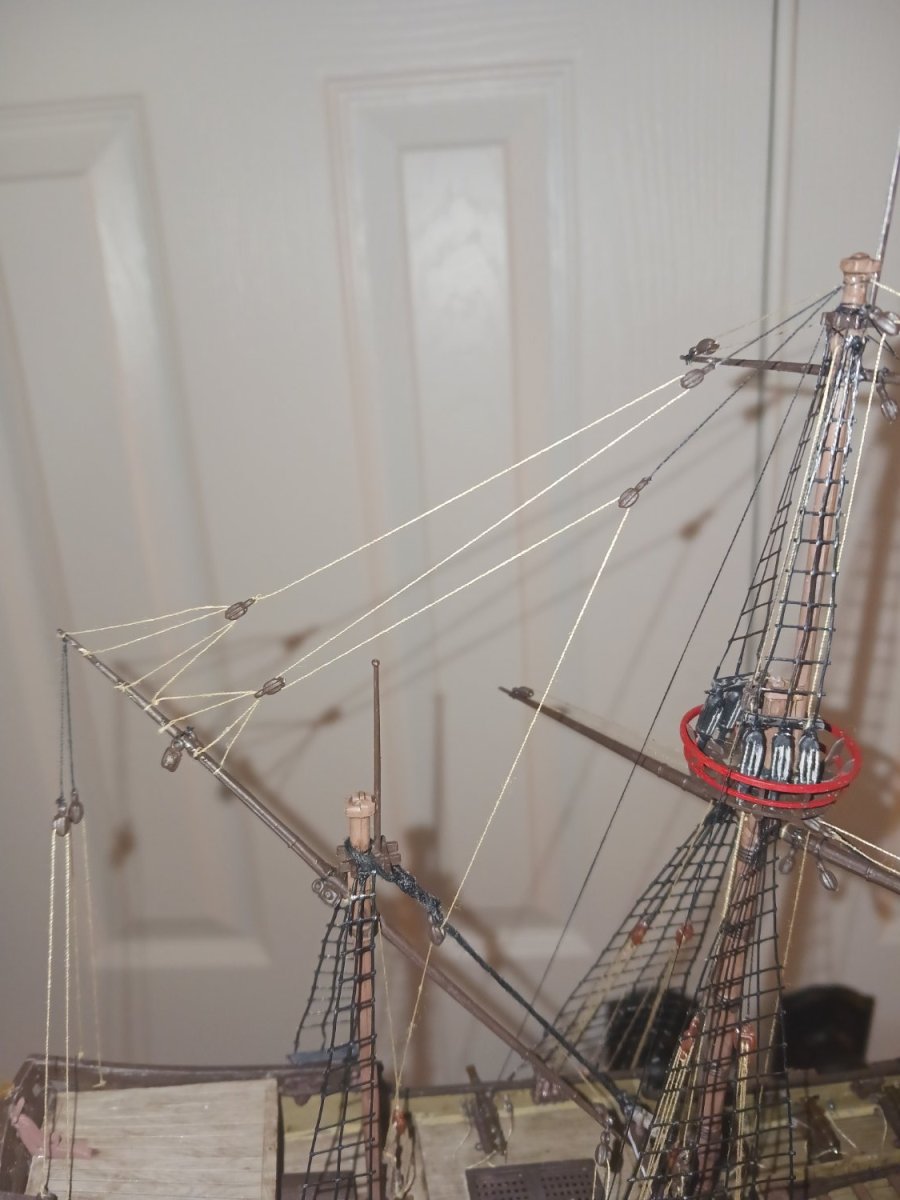
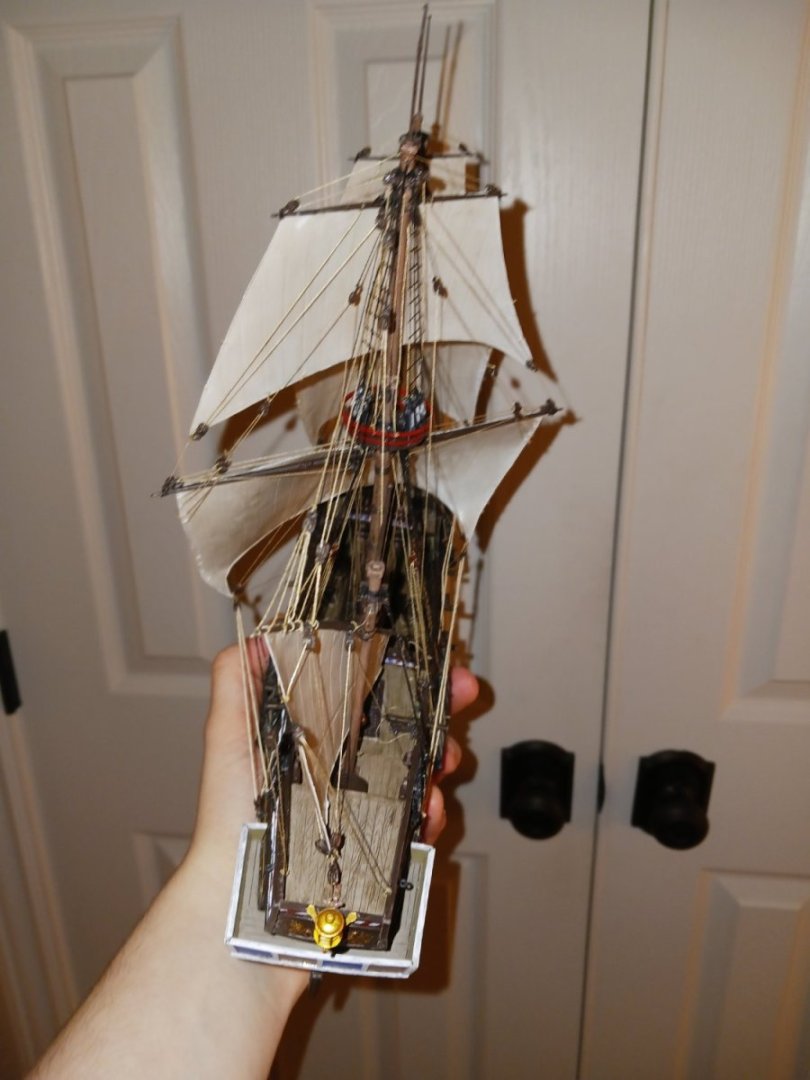
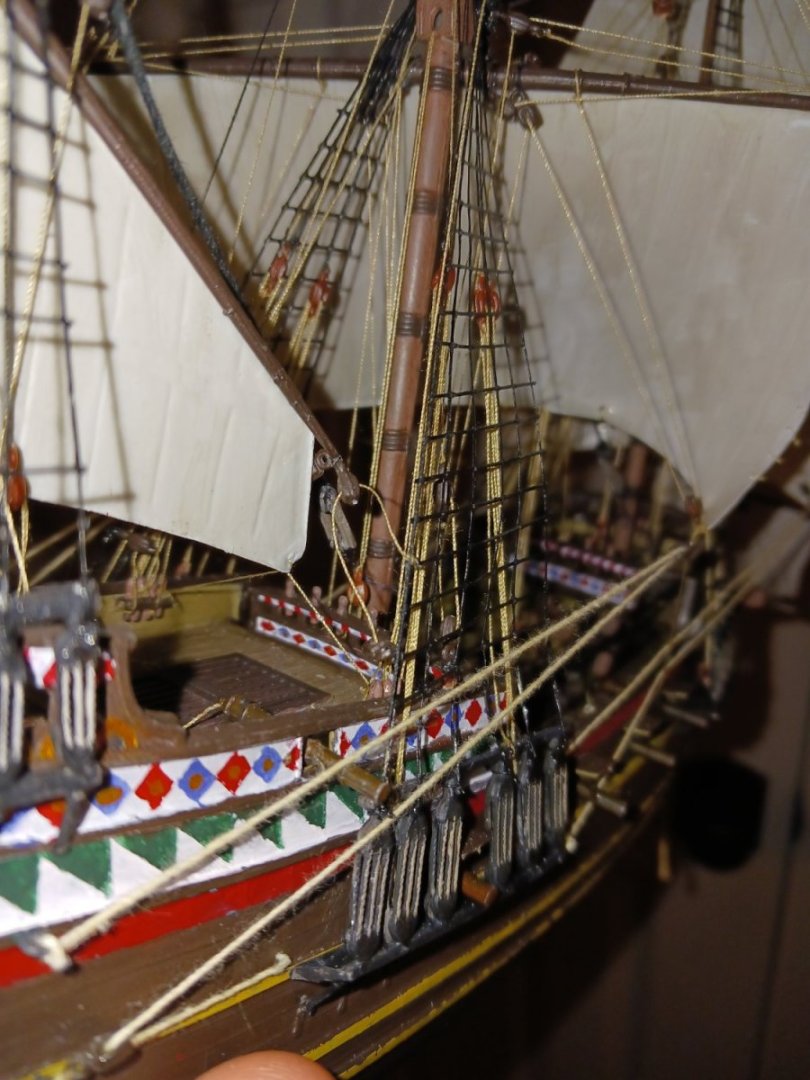
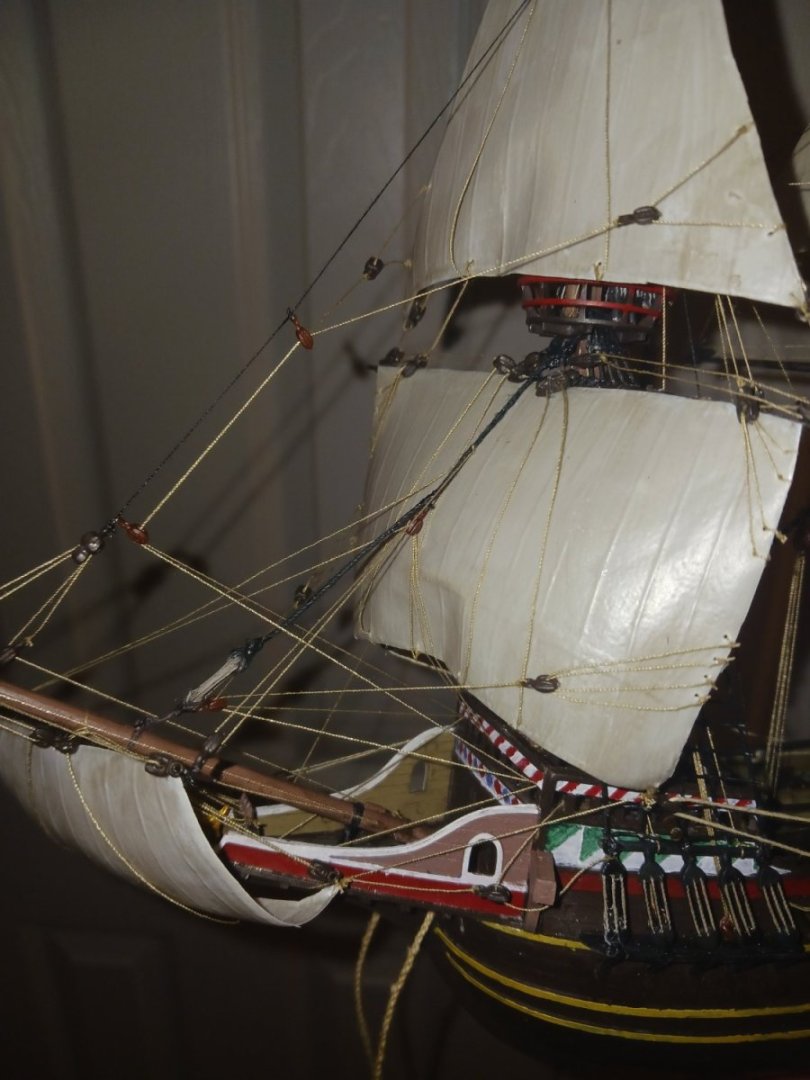
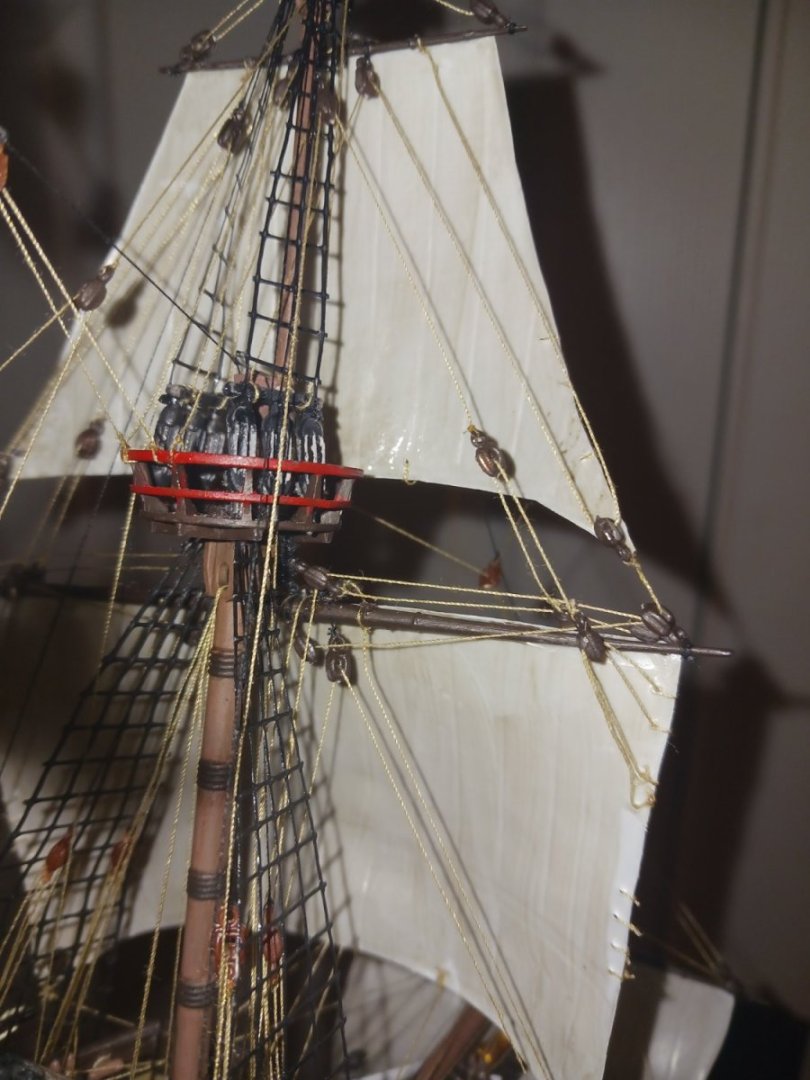
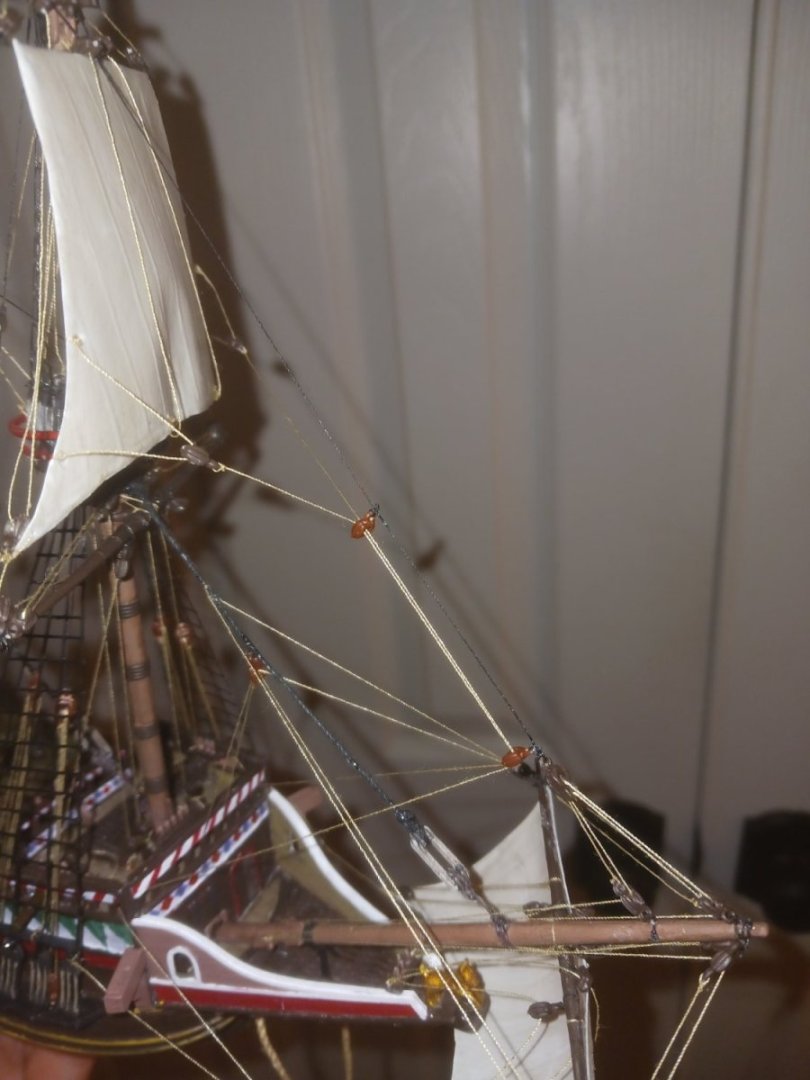
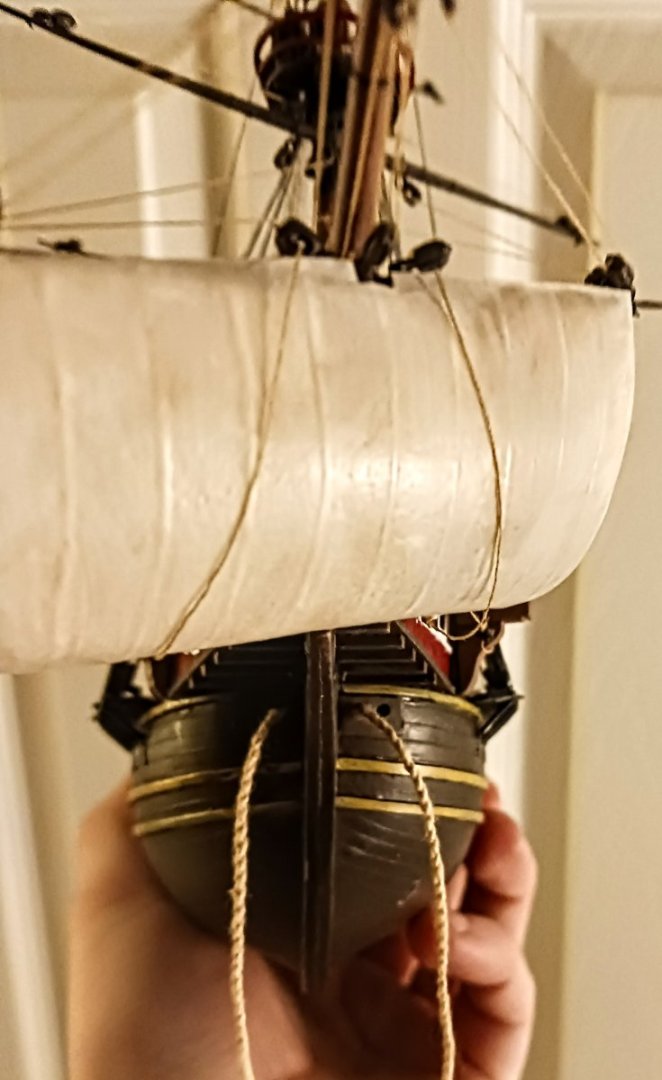
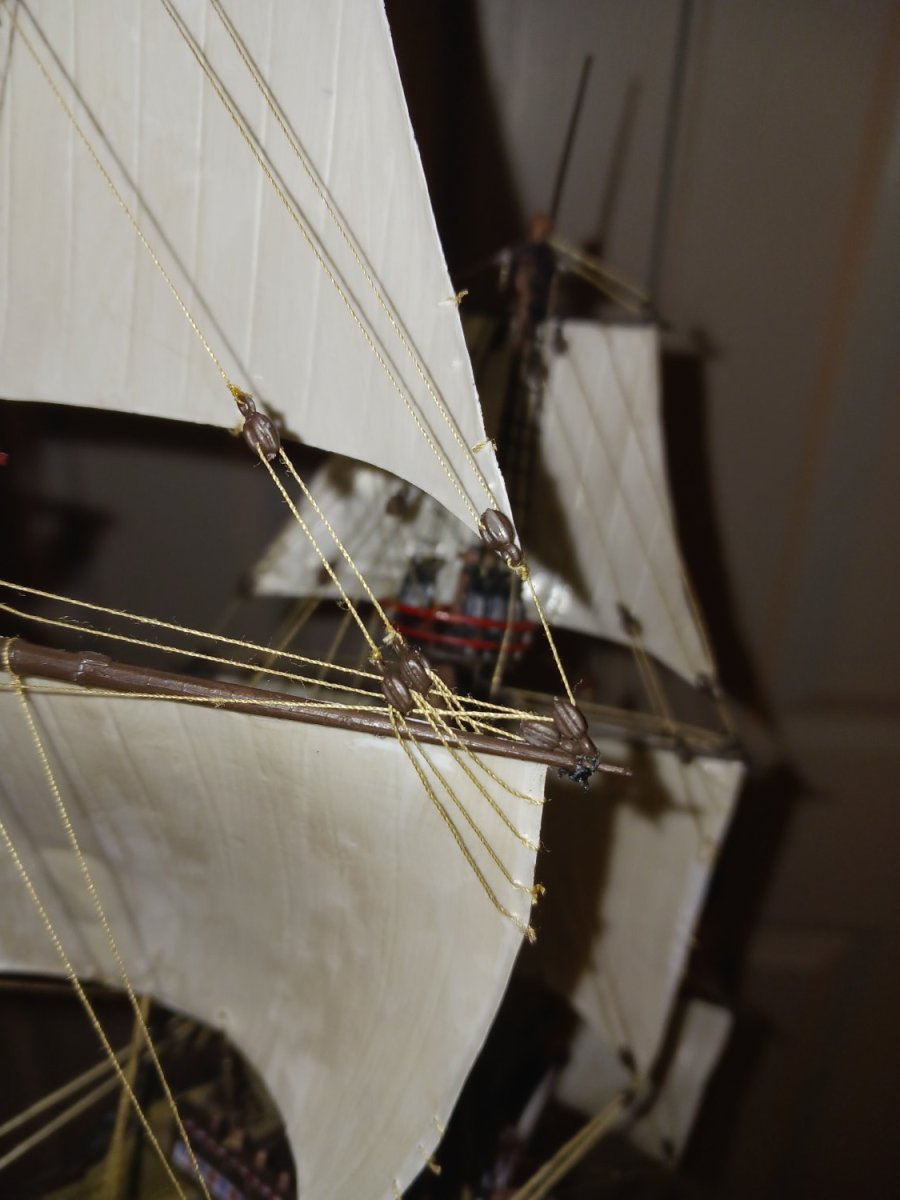
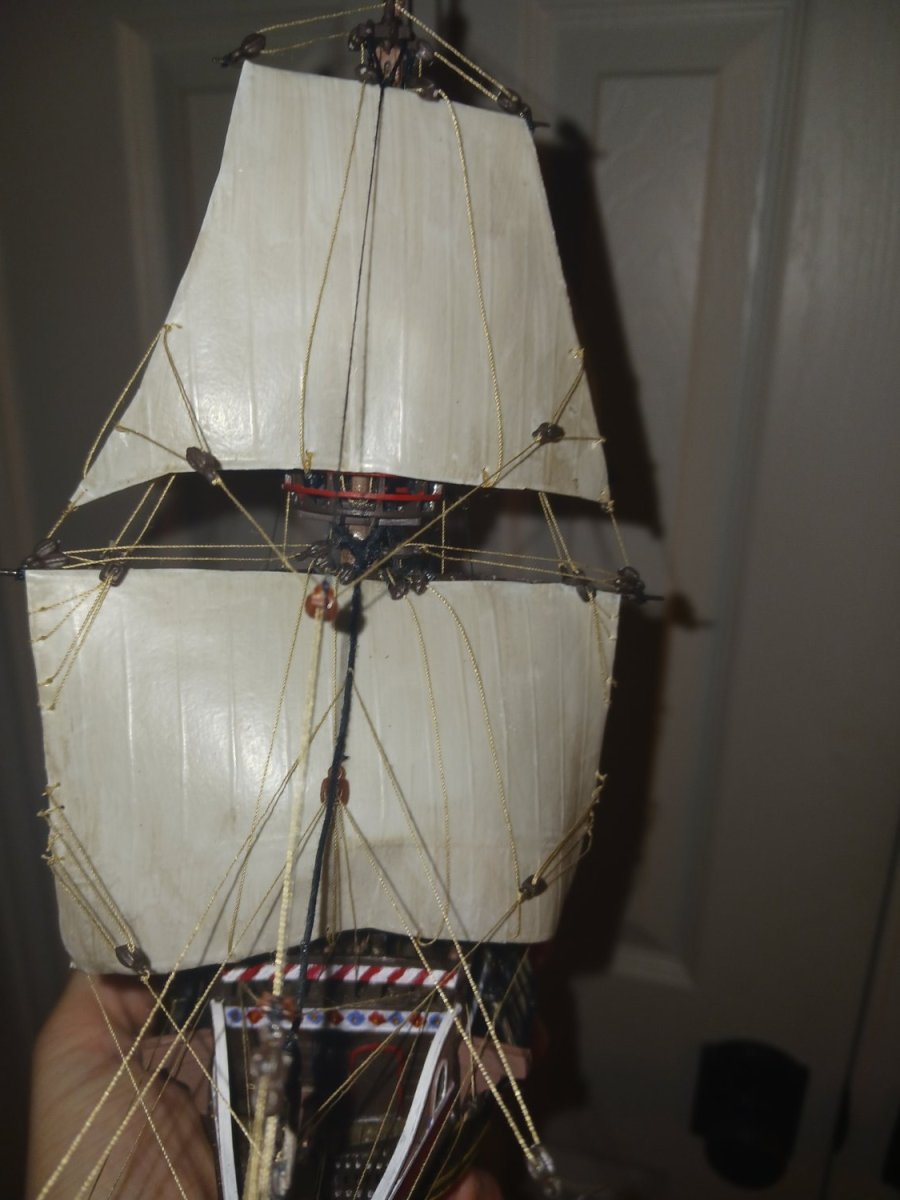
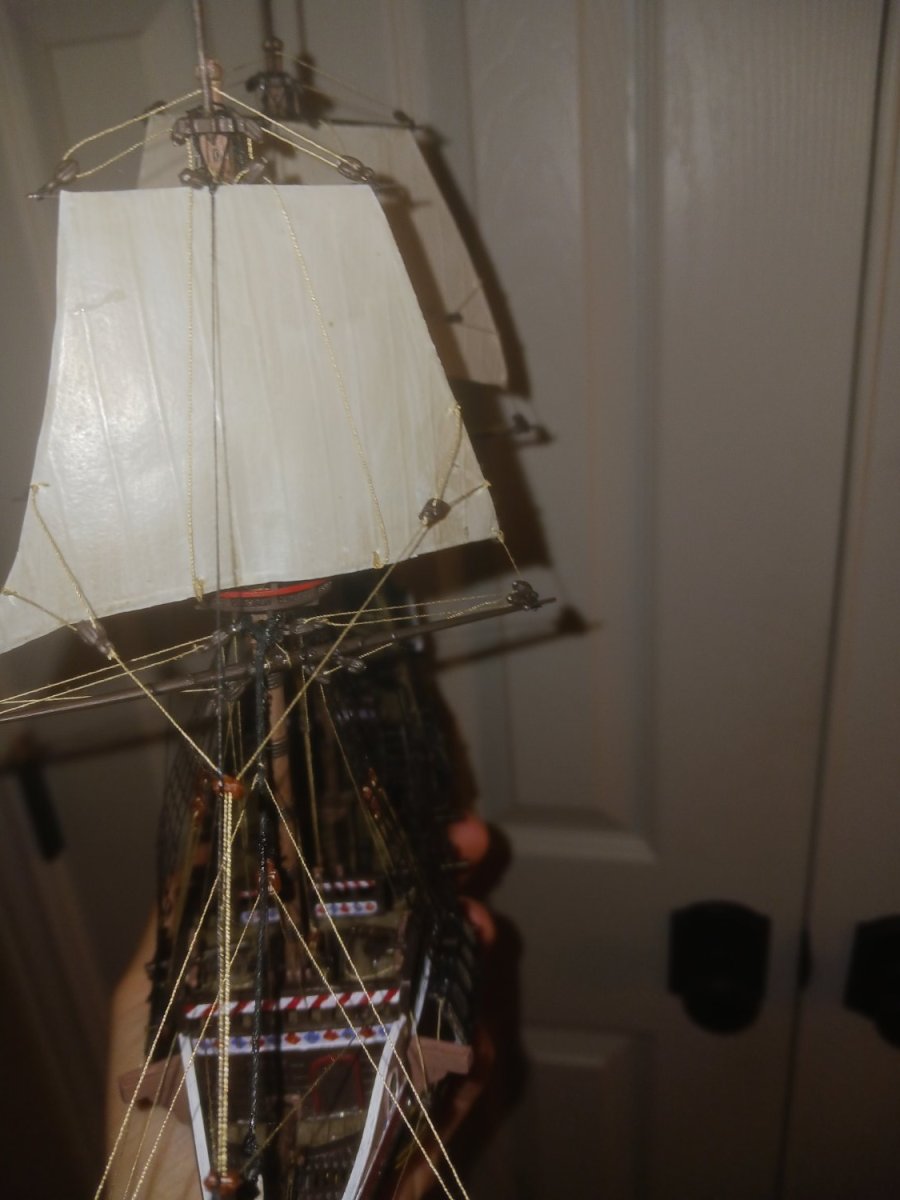
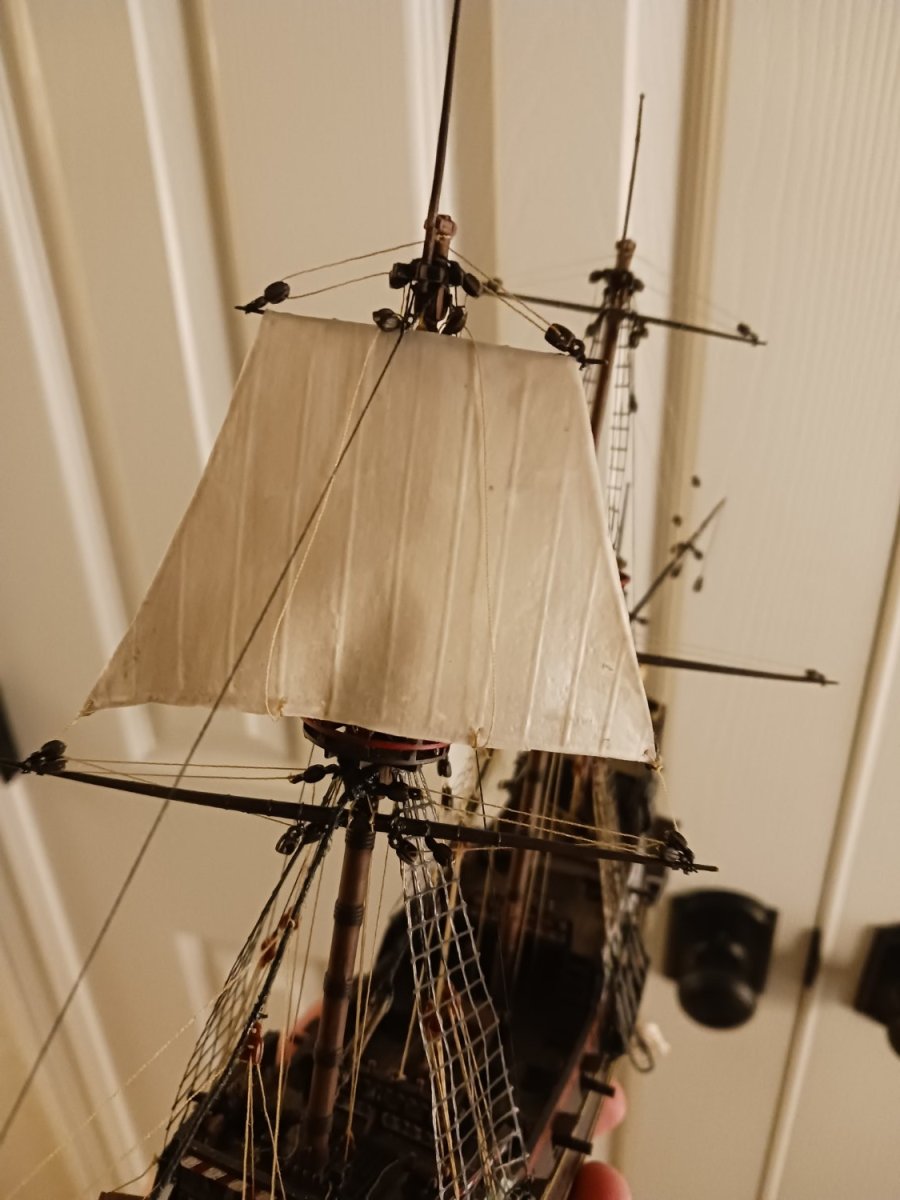
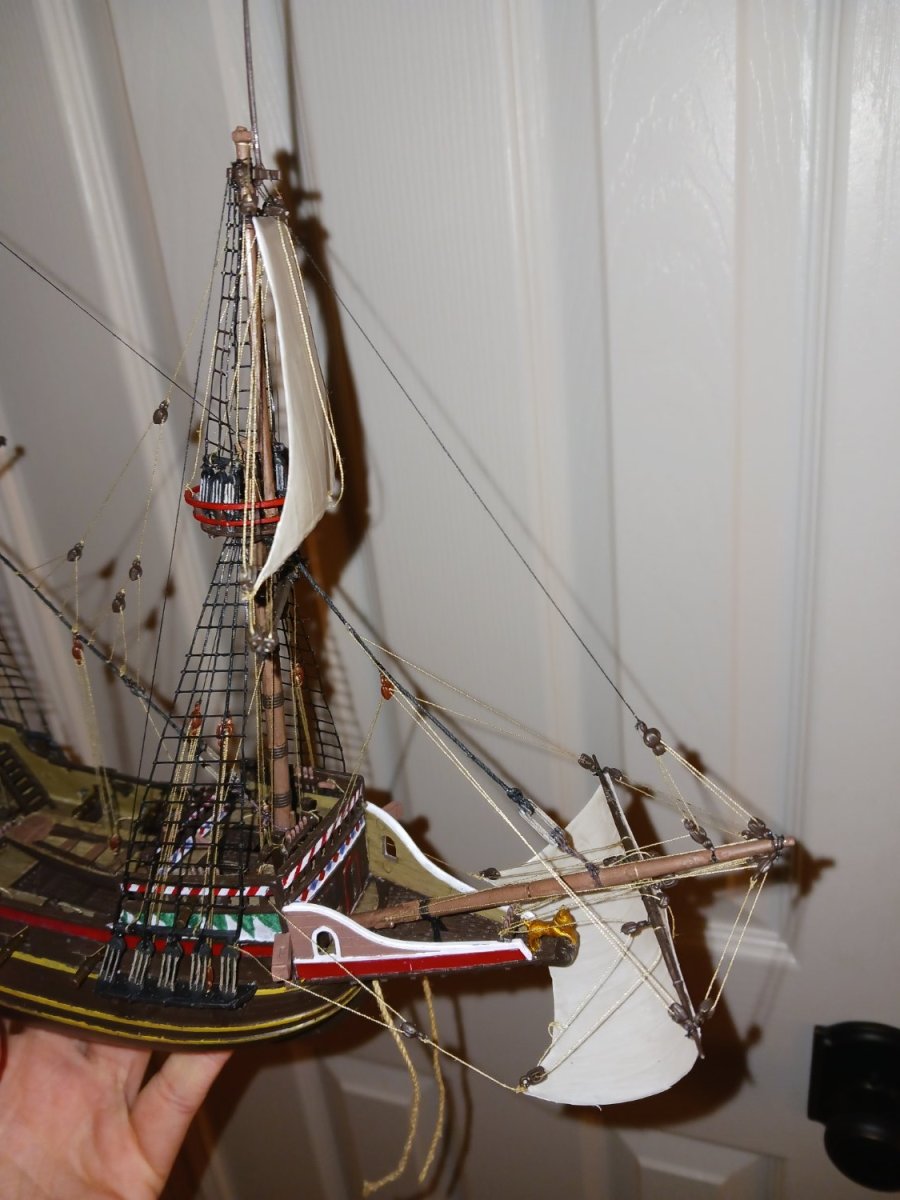
You probably expected me to do the lateen sail today. And, well, you'd be right. I rigged the clewlines (?) and the leechlines all in one line, just like is shown in many diagrams of ships around the same time. What i did not do is rig a set of crow's feet up to the mast, as other diagrams show. It's really one or the other. It seems as though this was around the time they began doing away with the aft spar to hold the lateen sheet line, instead moving the mizzen further forward and allowing the sheet to belay to the aft bulkhead. Everything is beginning to come together. I began reinforcing the notoriously fragile vacuform with plastic glue instead of super glue, because it actually penetrates the plastic instead of simply sitting on top. This drastically reduced the habit of the sail cracking when perforated. My biggest issue with vacuform sails is their habit of cracking to the edge of the sail when perforated, ruining the hole and requiring a repair. Using plastic glue to reinforce allowed me to make the holes closer to the edge of the sail where they would have been (in lieu of a bolt rope) and allowed me to make them bigger, to ease their acceptance of rope. The large diameter rope they gave me is ridiculously hairy, so i will try Steven's technique of singeing the thread.


- 137 replies
-
- 1
-

-
- Golden Hinde
- Revell
- (and 2 more)
-
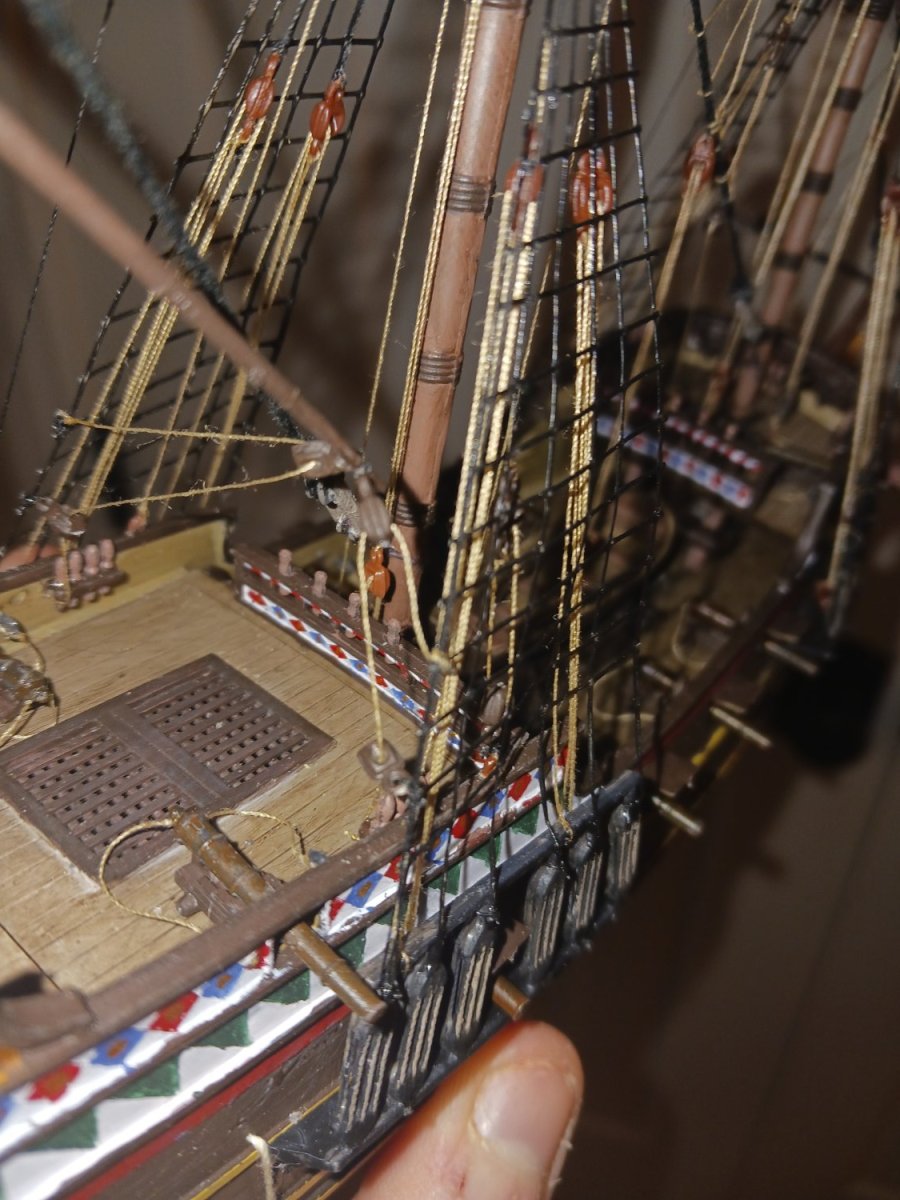
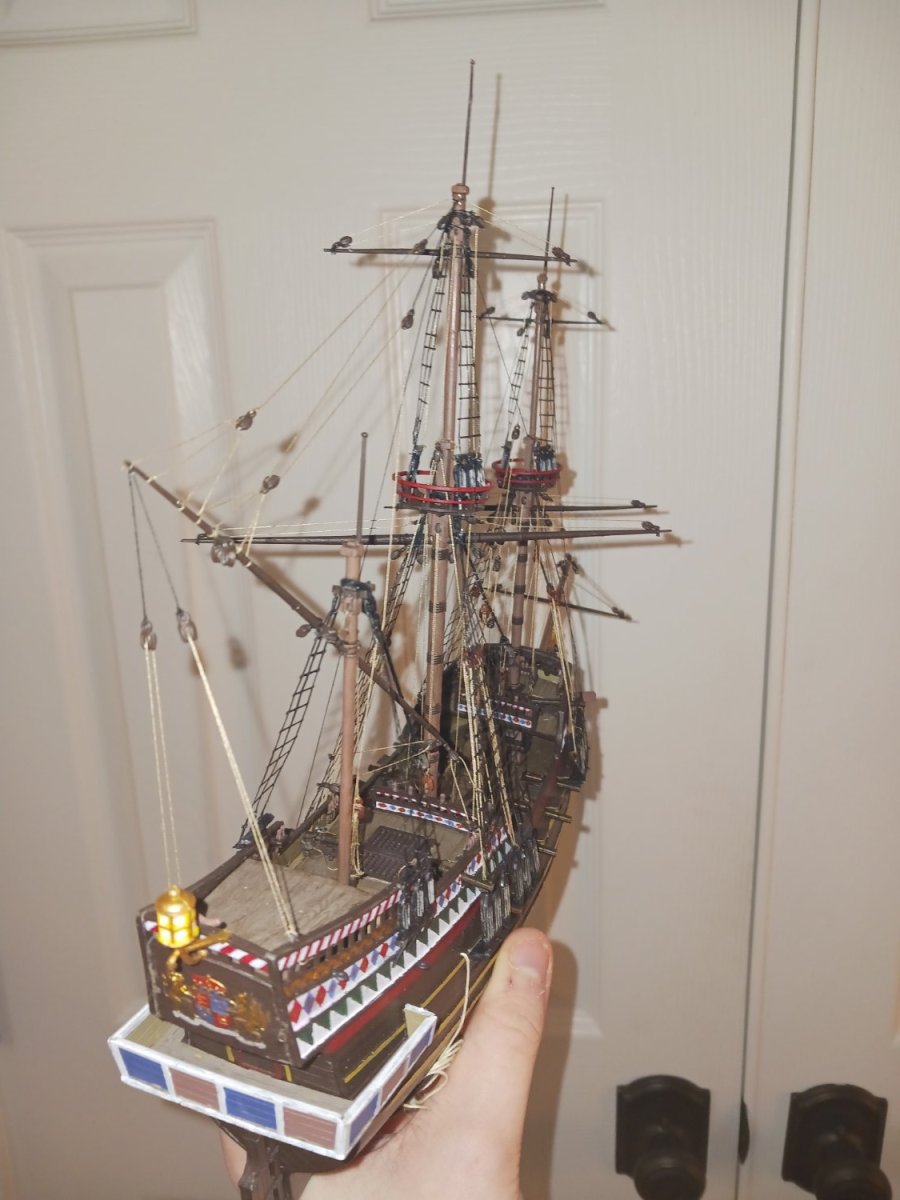
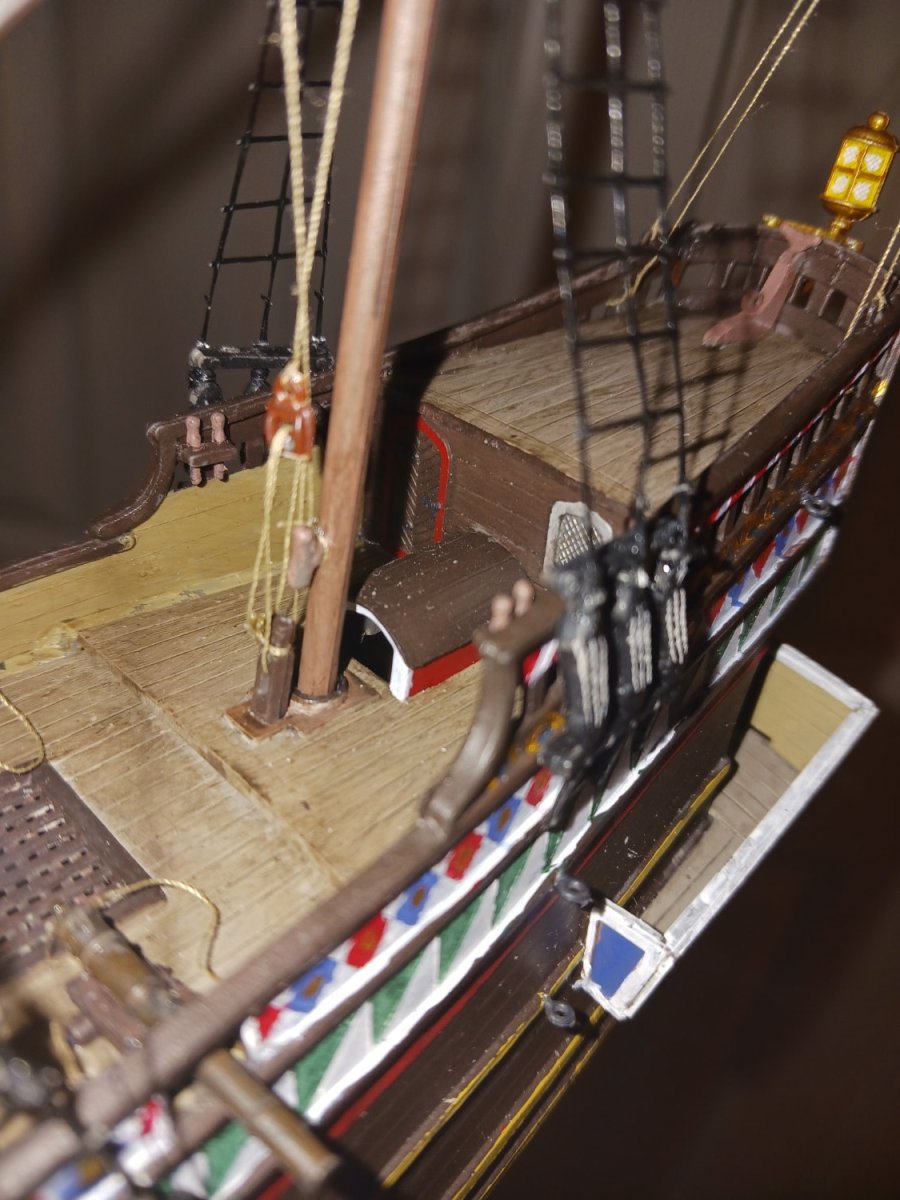
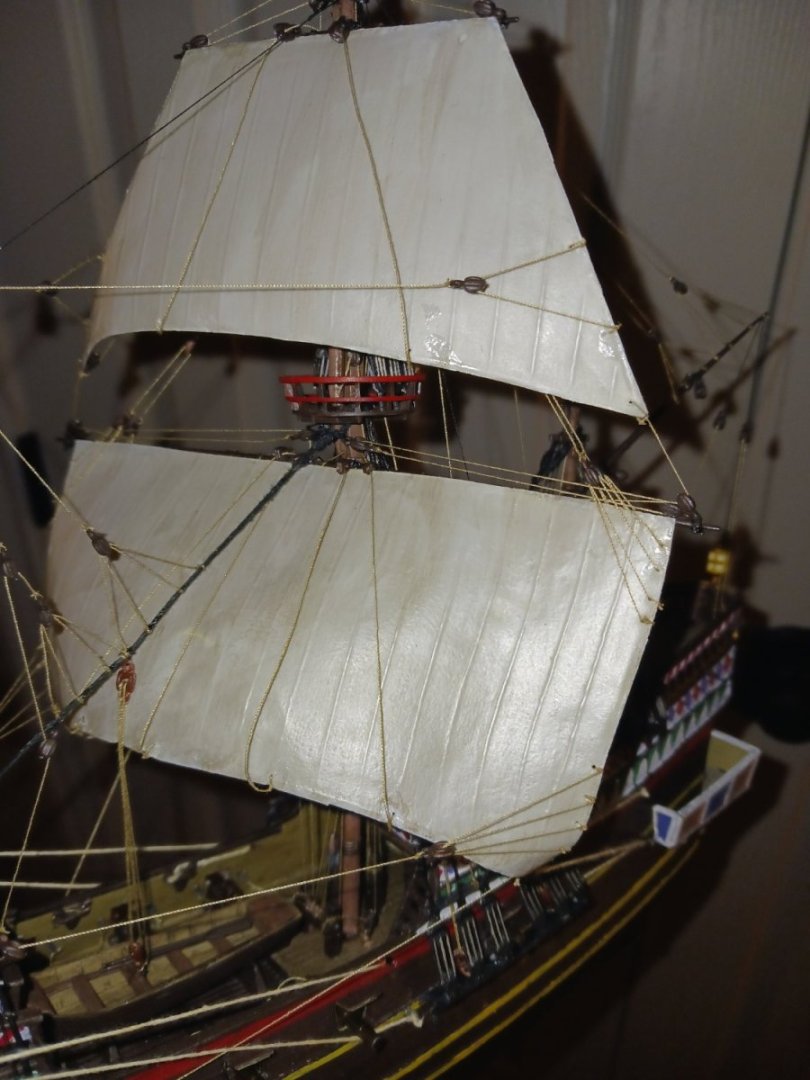
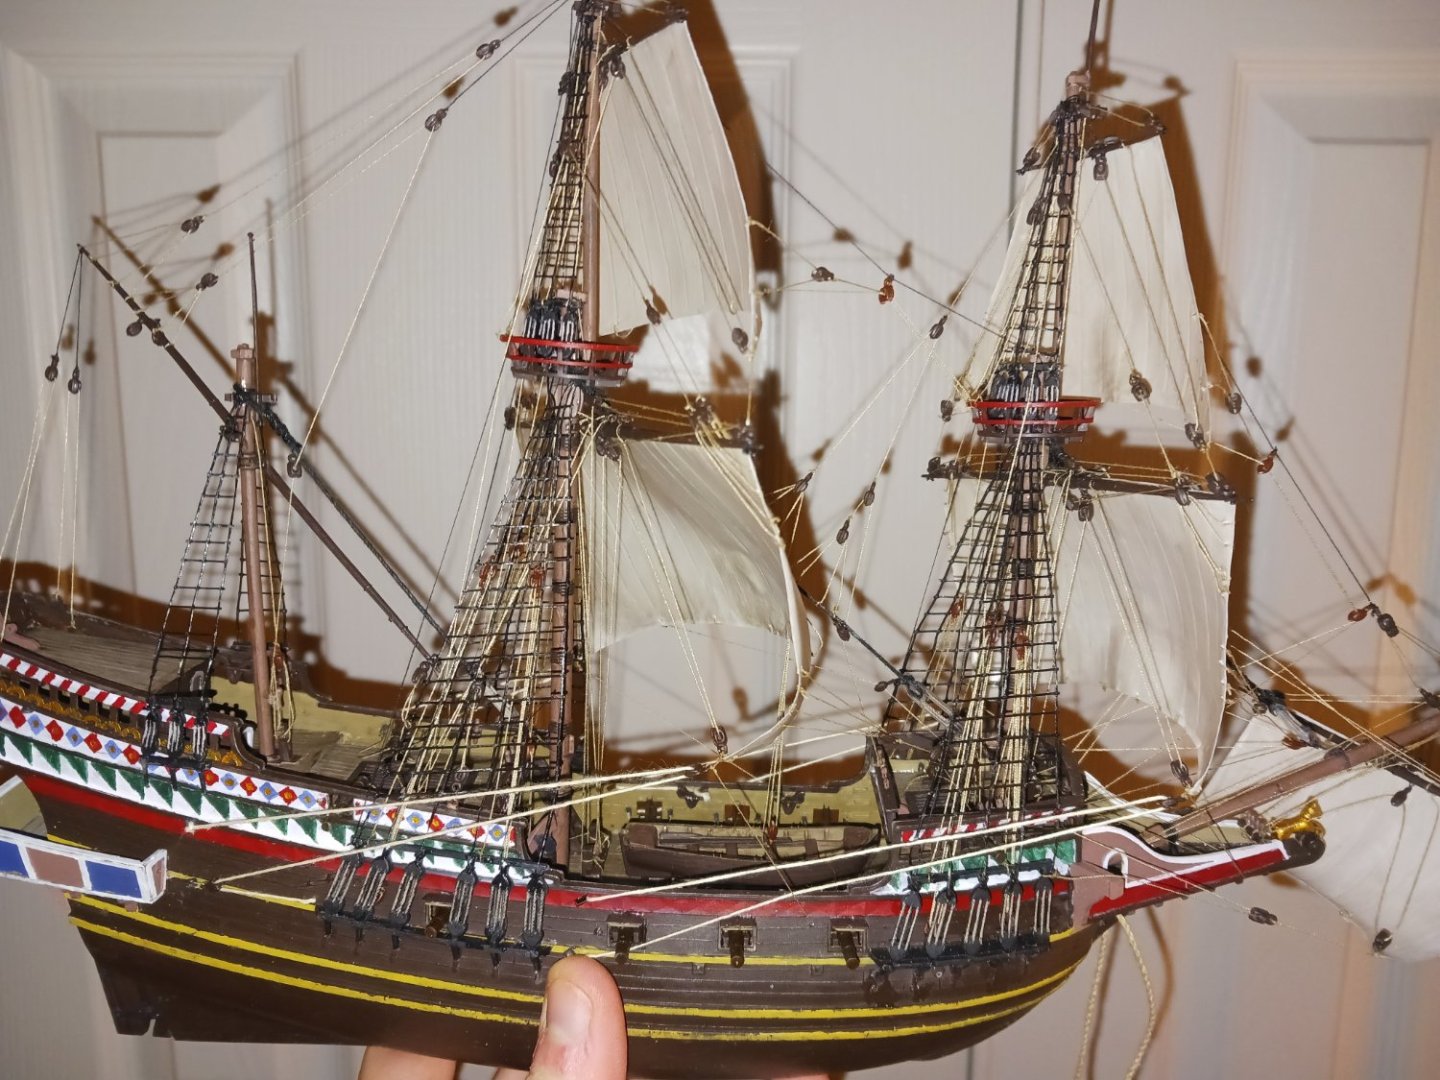
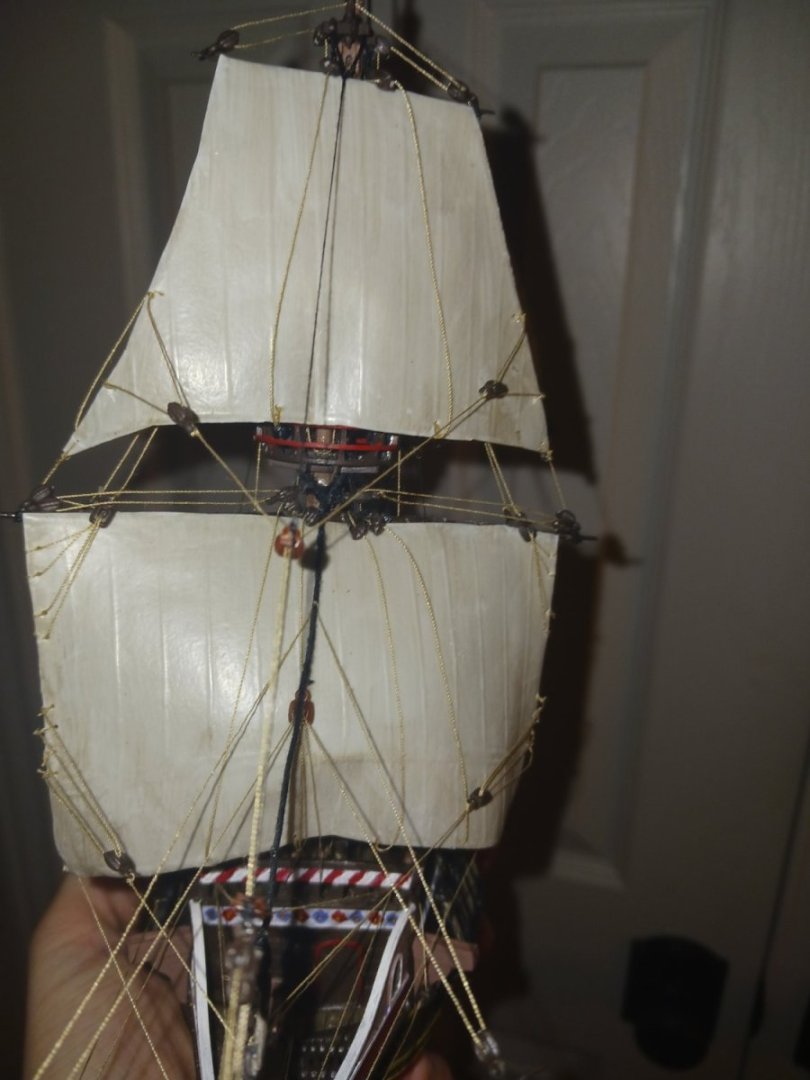
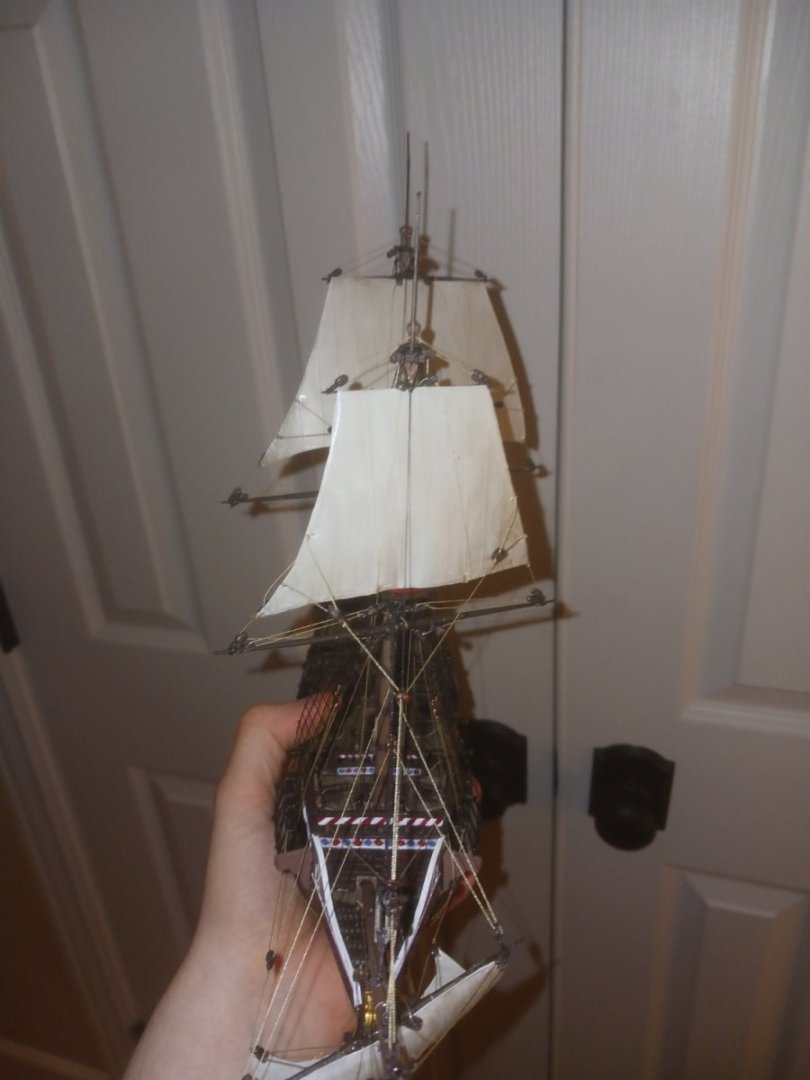
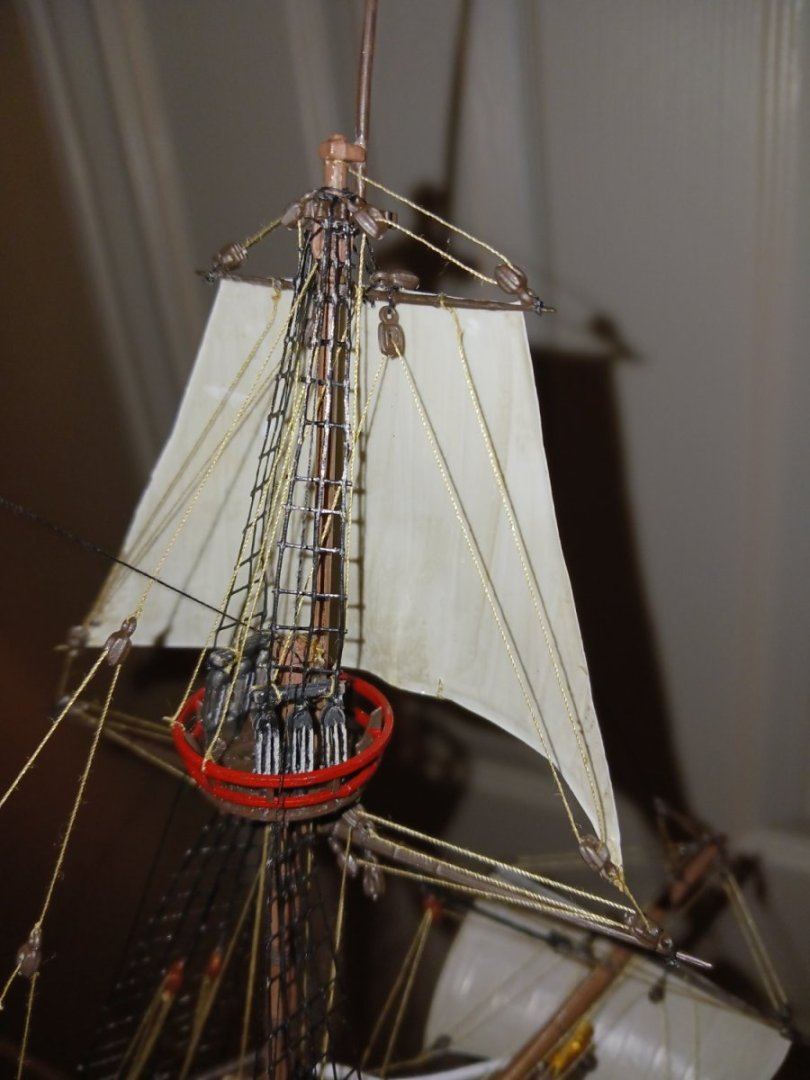
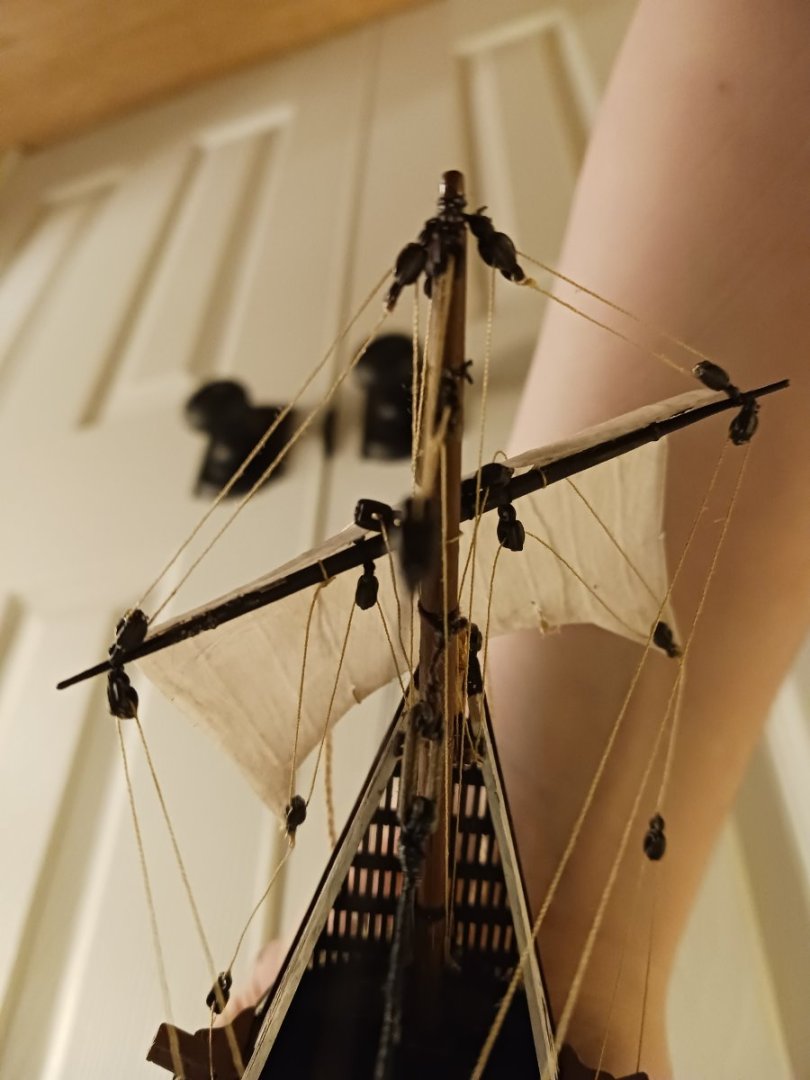
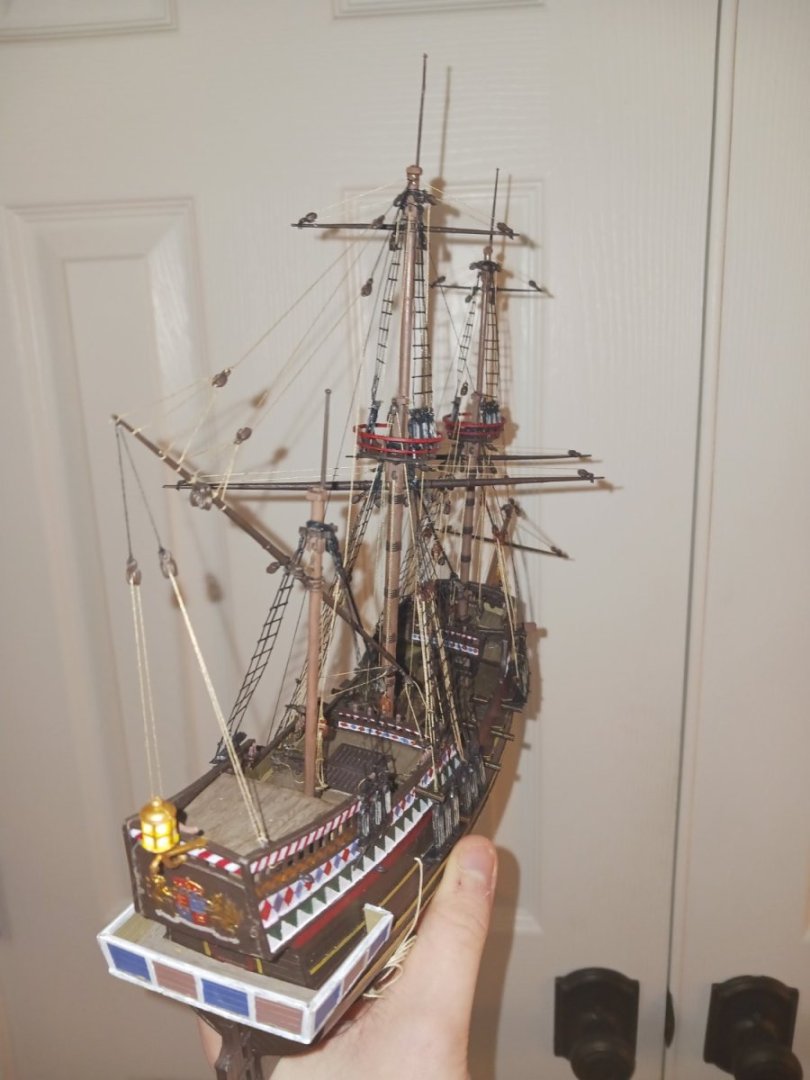
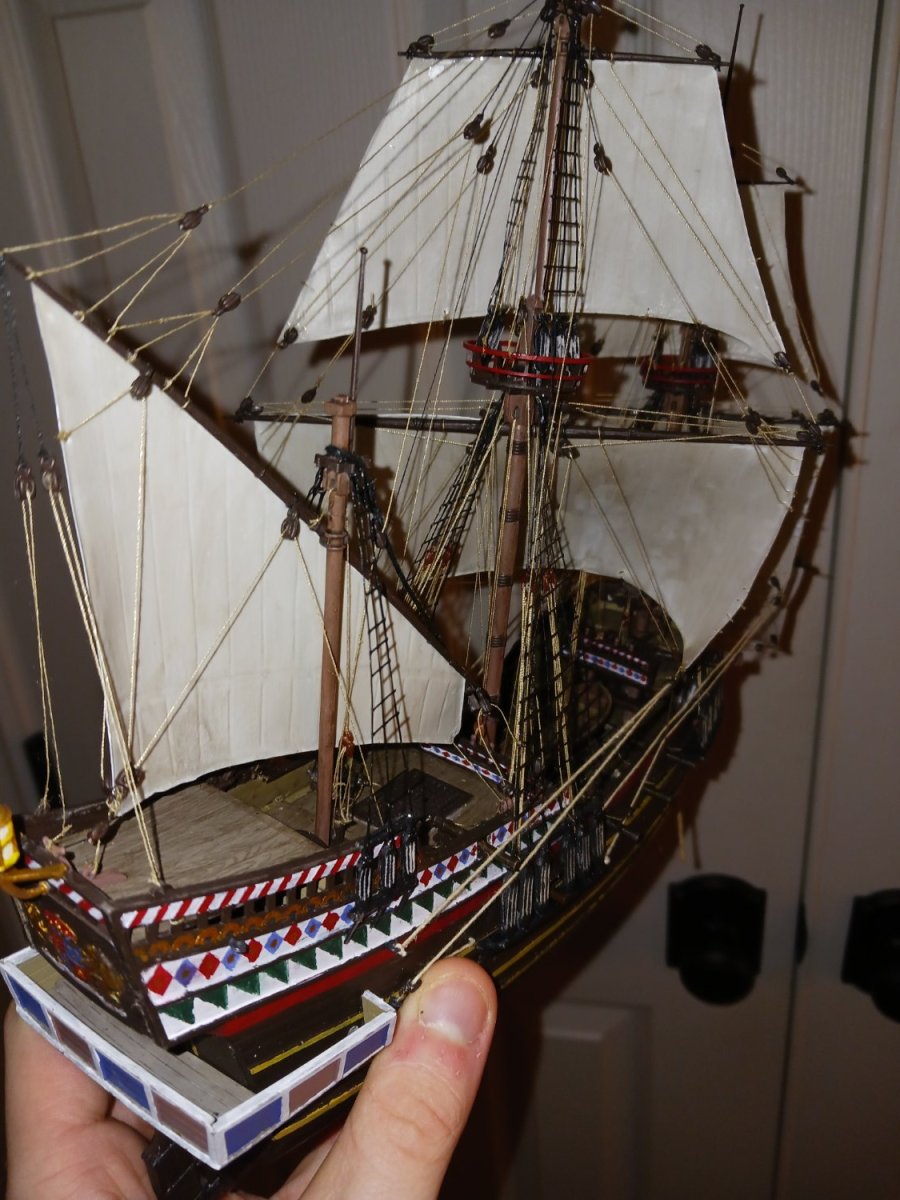
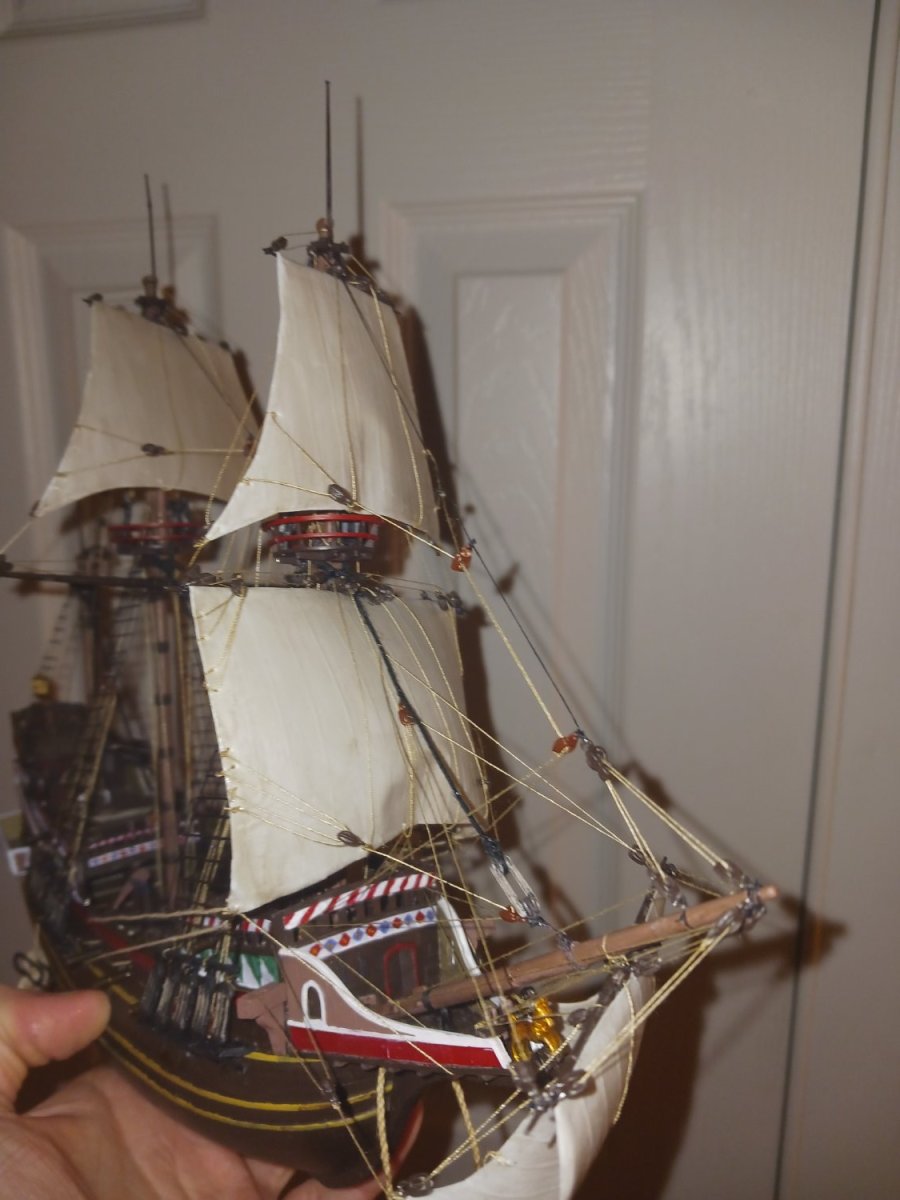
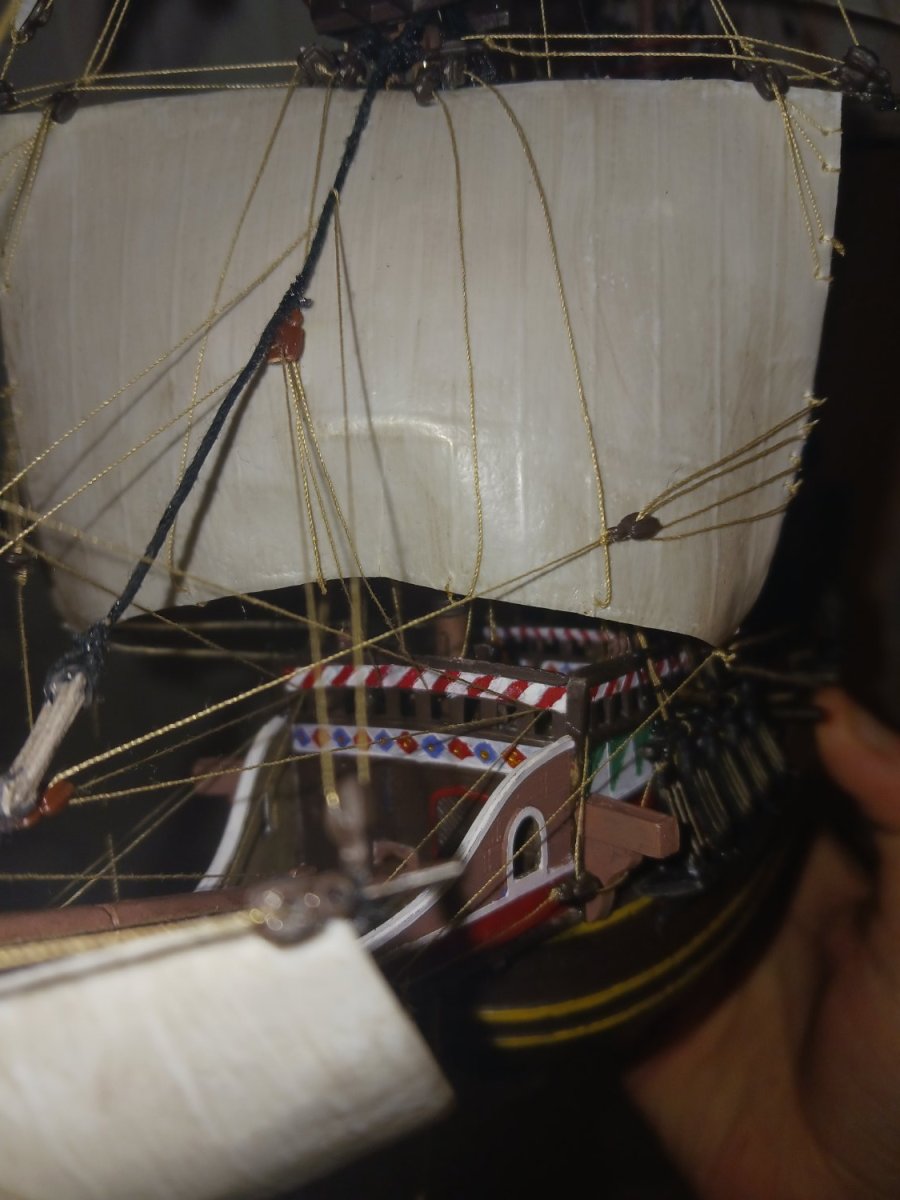
Today, i did the main course. It looks a little thin due to its lack of a bonnet, however, this makes sense considering its current tack. The lack of a bonnet would allow more air to reach the fore course, giving the vessel better propulsion. Man, Revell gave me some TERRIBLE thread. They literally told me i was on my own to find "household thread" for the standing rigging. The white large diameter thread is the only one they gave me. They almost expect you to have your own rigging thread. Luckily i do, because the model would look horrific with just that white thread. Horribly overscale for all but the largest diameter lines. The mainsail has a very small amount of denting at the center, but withheld its shape rather well. I was worried i would have another fluttering foresail. In the near-contemporary artworks i studied, the crews of galleons let the ship's sails (and especially the courses) billow out to a ridiculous amount, sometimes even lowering the yard to facilitate this. I attempted to recreate this by rigging the tacks and bowlines first, making them pull the sail up and out. All that is left to do is the lateen sail at the mizzen, the flags, anchors, and whatever else i forgot. In fact, when i do eventually finish the model, i might even put images of the finished product in my gallery.
.thumb.jpg.98b96bafd403063af776b8fc4ab73b81.jpg)

.thumb.jpg.e3128e91449452da1d14804f653fd707.jpg)
.thumb.jpg.1bfd5f43cfbd784a191f11e360b1d496.jpg)
- 137 replies
-
- 5
-
-
- Golden Hinde
- Revell
- (and 2 more)
-
The reason for the crow's feet could be that the "true" cringle would not be invented until later. This would require the lines to evenly distribute the strain until more modern methods of attaching ropes to sails could be achieved. Also, depending on the speed and direction of the wind, the fore course might not be getting as much wind as the main. This could explain the flutter. This is the Golden Hinde under sail. Notice how they really cheaped out on rigging elements, such as crow's feet. I do not know how to repair a vacuform sail dent, as most expert model shipwrights don't even give kit-supplied sails a second thought. I guess the sail will just have a permanent "flutter".
- 137 replies
-
- 1
-
-
- Golden Hinde
- Revell
- (and 2 more)
-
I doubt it. Drake chose men he personally knew and held in high esteem as his crewmen, experts in all crafts related to seamanship. A flutter in the wind would be no bother. Keep in mind that my camera accentuates every little flaw in my work. The dent looks much less egriegous in real life.
-
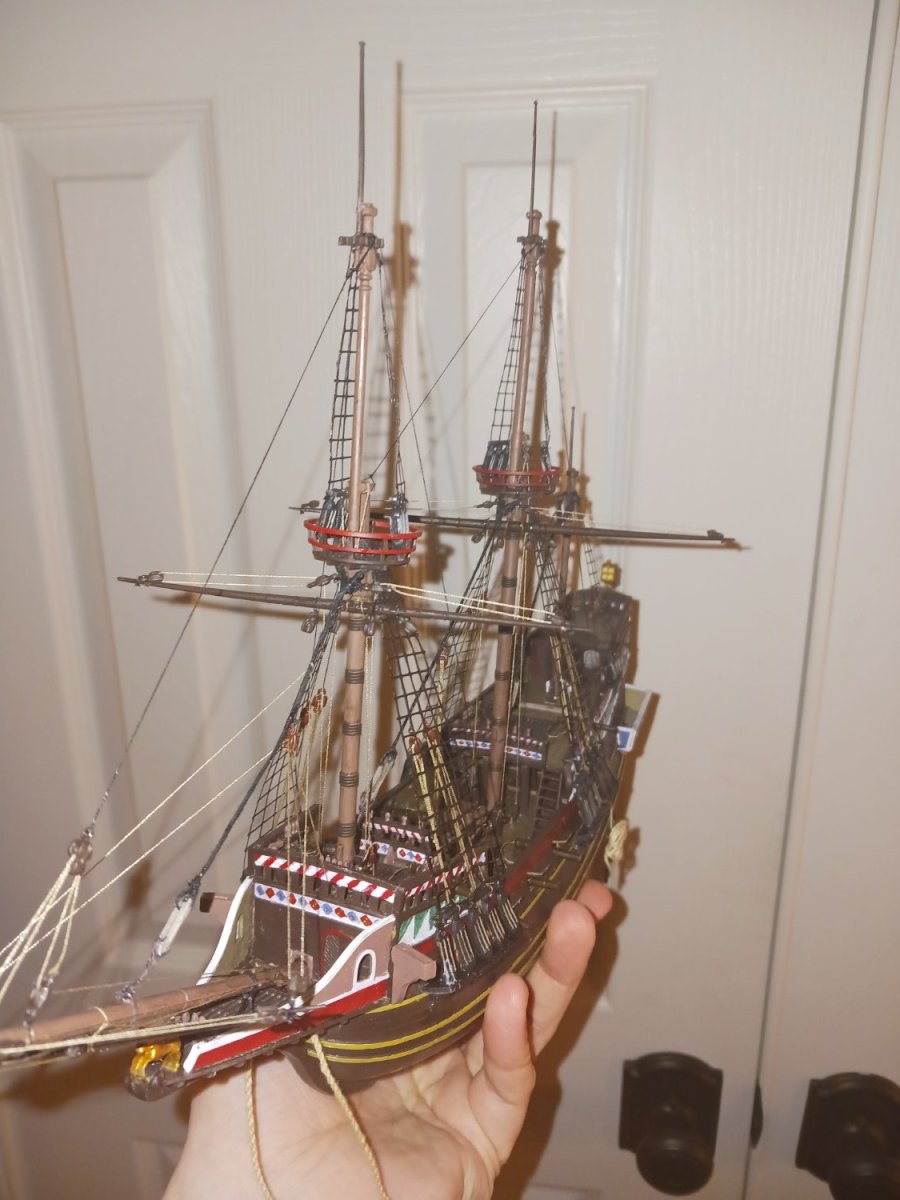
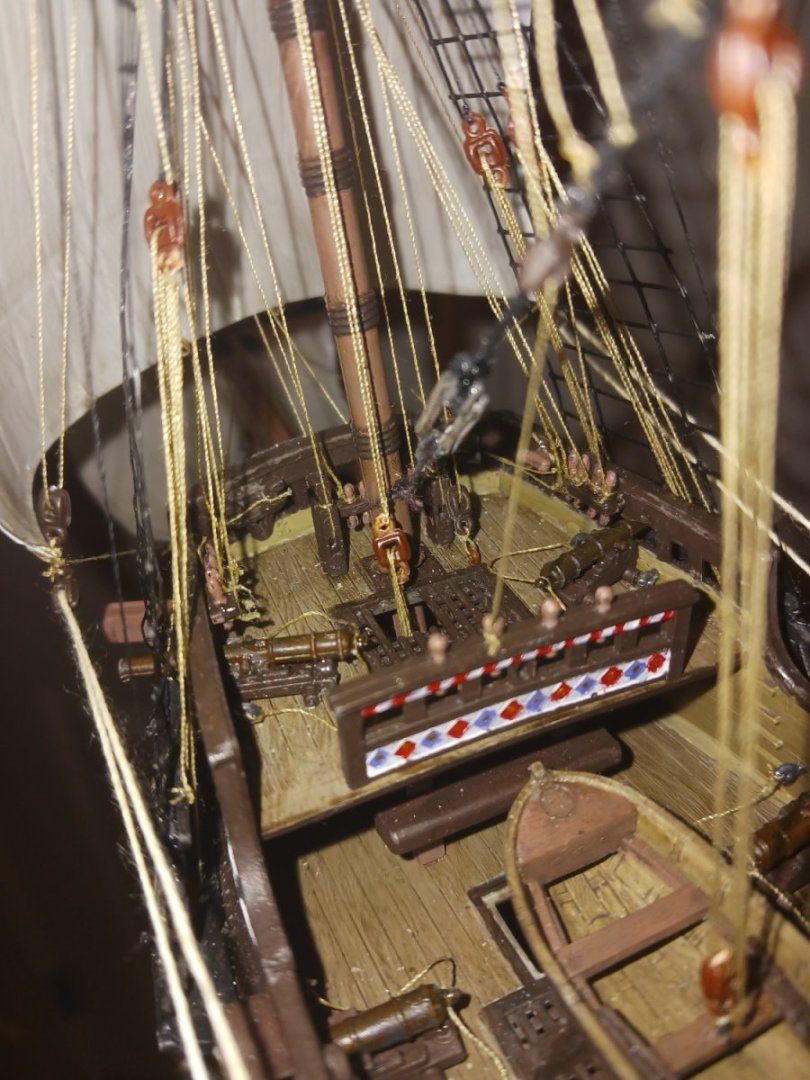
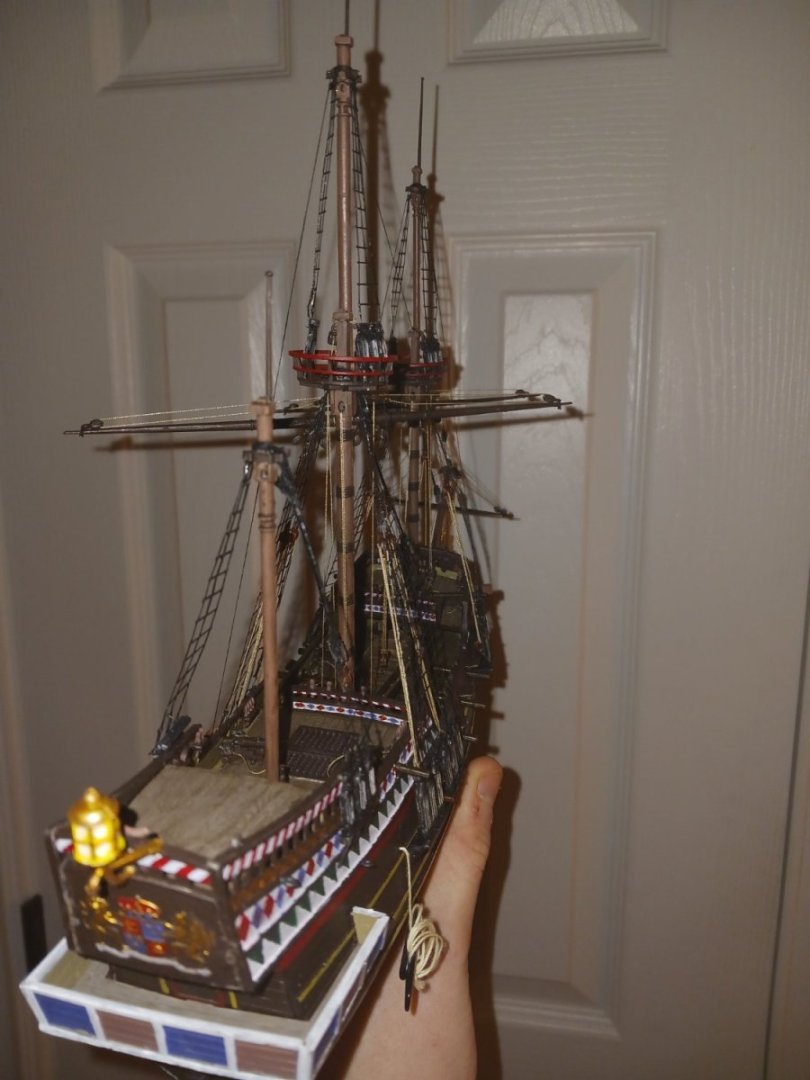
Absolutely unbelievable amount of detail, considering this is a model that could fit in the palm of your hand with room to spare.
- 739 replies
-
- 4
-
-
- Tudor
- restoration
- (and 4 more)
-
You might want to forego the name on the back. I doubt ships of the time would have had it. This model of yours is turning out near-perfect. Much better than i could ever do! You should consider painting the entire hull in the flamboyant English colors of the time. That would really look good and add a flair to your build. Keep up the excellent work!
-
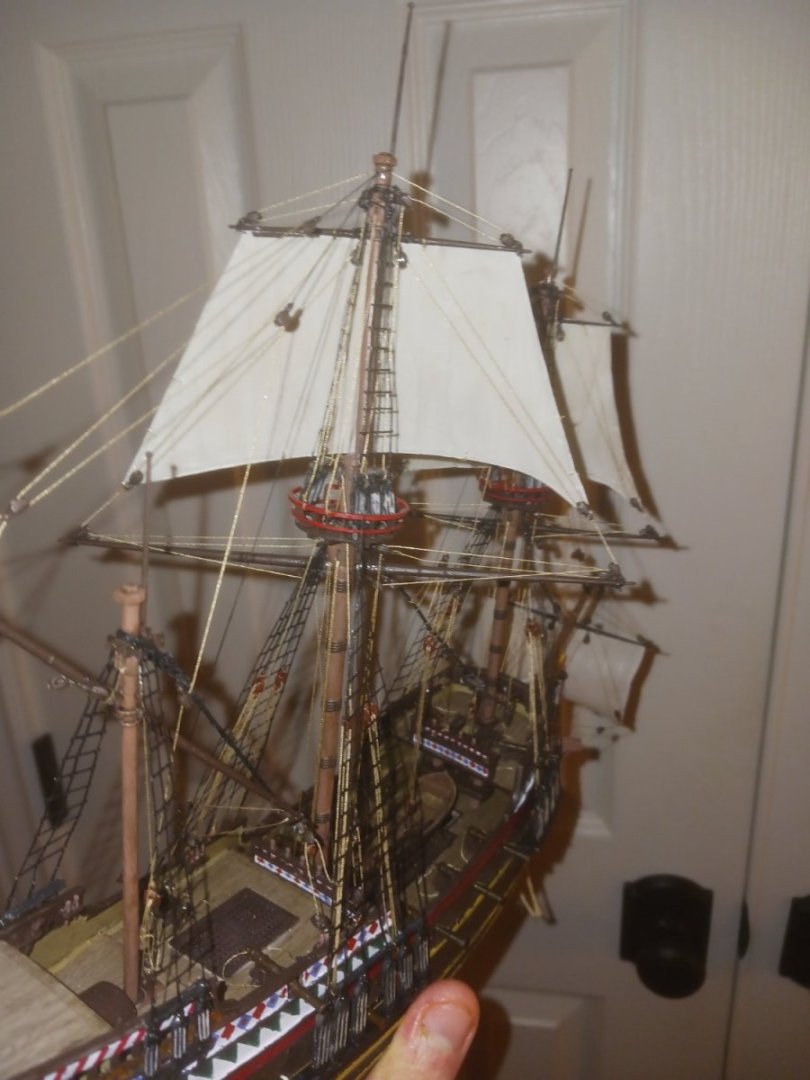
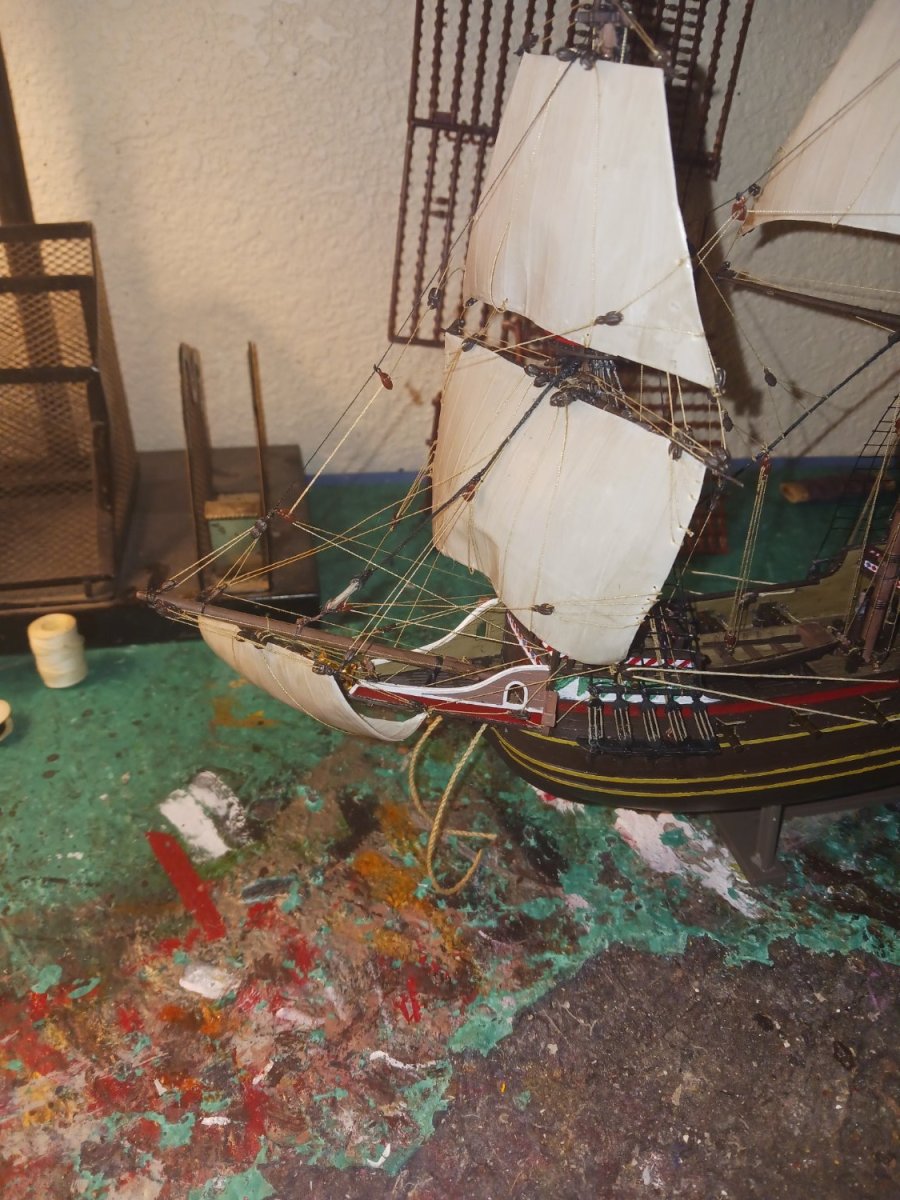
Set the fore course! Obviously, this sail took much more time and effort than the topsails, due to the sheer complexity of the sail. Unfortunately the sail came dented, and the vacuform material developed a memory of that dented position. However, it does not detract much in my opinion. It is believable: maybe the sail is fluttering or something. On a side note, the fore course is the only sail that clearly has a bonnet. I do not know why the main course was molded without one, maybe it did not possess one at all. I also developed an ingenious idea, a variation of what Baker did on his Pelican build. What i did for the leechlines on the sail was to temporarily superglue a block to the yard, attach a line from both blocks on the crow's feet through the block glued on the yard, intentionally broke off the loosely glued block, then rigged the halyard. This way, I ensured both sides were perfectly symmetrical, or at least so close that no one would be able to tell the difference. What baffles me is why such a complex mechanism would be invented to perform such a simple task. One issue i had was that Ye Olde Leechlines interfered with the function of the topping lifts. I did not loop them over the topping lifts because then, when the yard was lowered, the leechlines would REALLY get in the way, rendering the topping lifts unusable. This was not a great solution, but it was the only one i had. Experimental archaeology, am i right?? I then made up the rest of the sail: Now we're talking. This was the incredible detail i was looking forward to in this build. I am really quite impressed with my execution of the crow's feet and leechlines. I could do the braces for the foremast now, but i would like to save that for its own post. All i have yet to do is the main course, the mizzen lateen, and the finishing touches (anchors, flags, painting the stand) Leave a comment, swoon over the fore course, you guys know what to do 😉


- 137 replies
-
- 2
-
-
- Golden Hinde
- Revell
- (and 2 more)
-
That means a lot to me, Steven. I never thought i would do anything like this. I wanted to challenge myself and hold myself to the best standards. I wanted a model that would look proud on my shelf, and be a true-to-life replica of a legendary ship. You certainly have a fan in me, Steven. What build are you working on currently? In a few minutes, things are going to a WHOLE new level. Get ready... Fore course is set!
-
Be aware that some of the Zvezda San Gabriel's have a molding error in the starboard bow. There is a huge round hole that should not be there. Maybe you could send pictures.
-
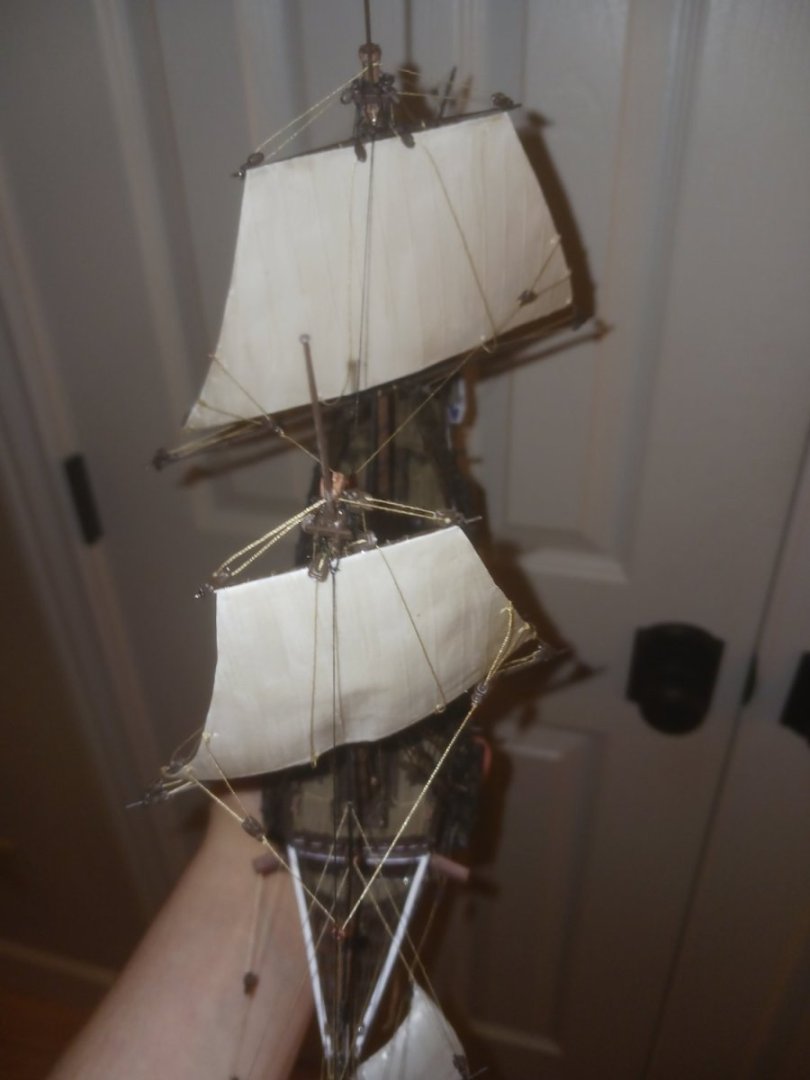
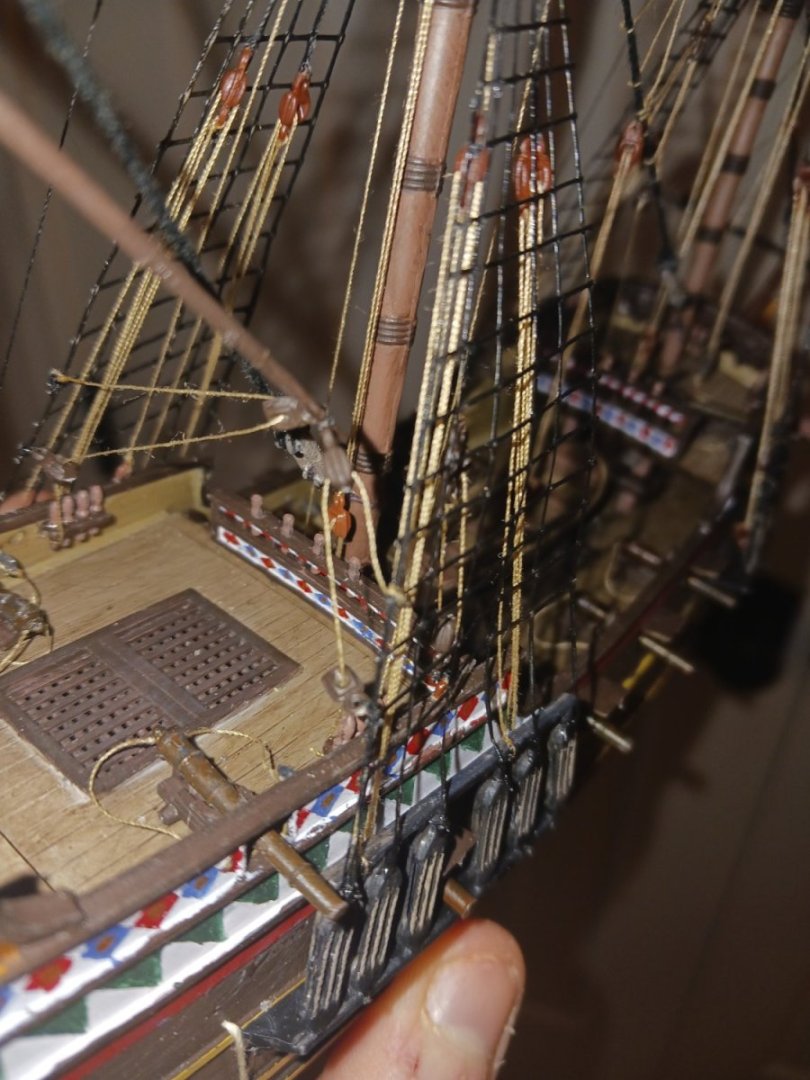
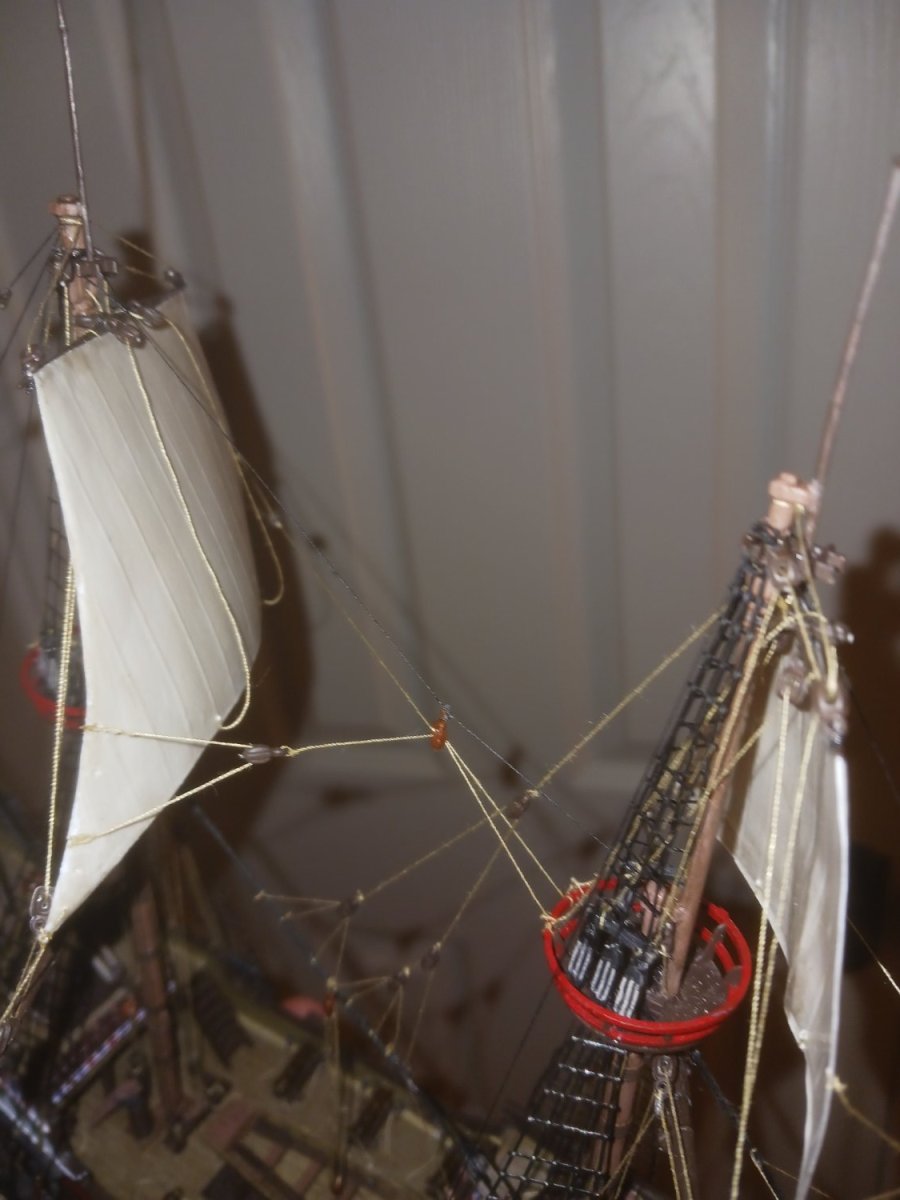
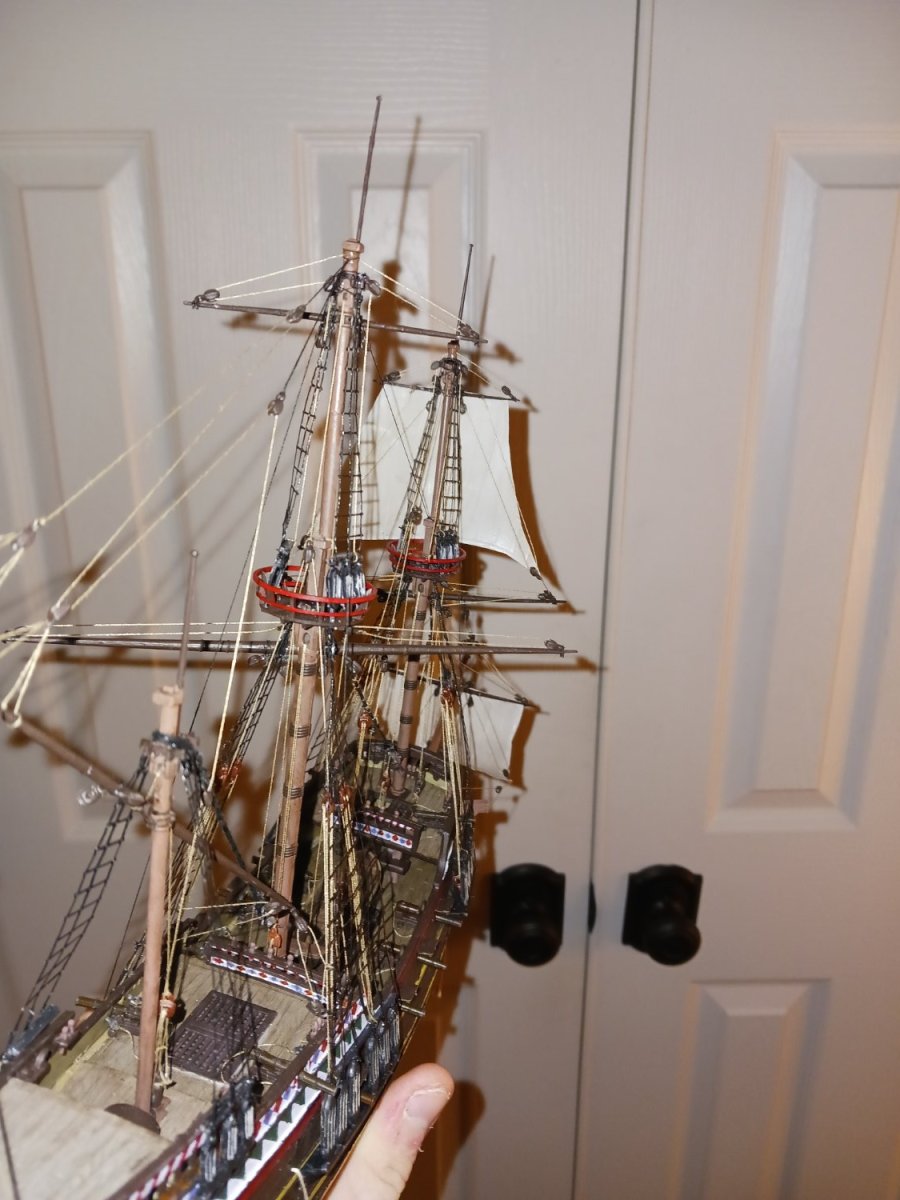
On the fore! On the main! set the tops'ls! Today i did the main topsail, and also i decided to do the bowlines now, instead of waiting. Since this vessel only has 6 sails, i figured i could get away with doing that and not wait. I also intend to do the courses in the same order in which i did the topsails, from fore to aft and not waiting on the bowlines. Doing the braces now instead of later would also likely not be too bad, as there isn't really any inboard work (no staysails, etc). The rigging has gone much faster than i expected it to, even though i am giving the ship much more detail than the plans suggested. I am now almost out of the blocks supplied by the kit. Note, anyone who has built a Revell ship knows that they give you FAR more blocks than they think you'll need, to account for lost or broken blocks. I am beginning to double up rigging lines on the pins, as there are far too many lines to belay one to a pin, even with many lines belaying at the masttop. This is a common Revellism, although i highly doubt they would have done that in real life. Oftentimes I am instructed to (and this is especially true with minor lines) belay two lines to the same pin on a rail. I had to do this quite a bit on my United States build. Although this was most likely never done, it must be done for the sake of detail. The lines belayed two to a pin will at least be the same type of line (i.e. both stbd. bowlines on the fore belayed to one pin, both port buntlines on the main course belayed to a pin, etc). I have a considerable surplus of single blocks, so at least i won't have to cheap out on those.


- 137 replies
-
- 2
-
-
- Golden Hinde
- Revell
- (and 2 more)
-
Well, guys, here we go. The pace is ever increasing, like a rocket gaining speed. The stress and pressure is also increasing exponentially. On another note, i can now officially make the claim that my build's rigging is more complex than that of Baker's build, as he did not include buntlines on the topsails. I will not do the bowlines or the braces until all other rigging is done on the sails. I learned that the standing parts of the course leechlines actually begin at the crosstrees instead of the topsail yards. This is helpful. The yard broke twice but i reglued it with no issues. This was the most fragile yard, so i am assuming this will not be an issue in the future. I like to work from the top down, because it is easier to run lines down to the deck when another sail (or sails) isn't in the way. That being said, i am trying to do one sail a day. This seems to work for me, as i am producing a satisfactory model so far. However, it is coming down to nothing going catastrophically wrong. Don't look away, now!


- 137 replies
-
- 2
-
-
- Golden Hinde
- Revell
- (and 2 more)
-
Well, the downward spiral continues. I ended up going with my gut and adding buntlines on the spritsail, because i have seen paintings of the massive Dutch galleons (shocker, am i right) vs. the Spanish ships during the Dutch Independence in the early 17th century. Most paintings of the ships show buntline cringles on almost every sail, but no buntlines. I guess they may have taken them off for combat, or something. But, at least in theory, the spritsail, as well as every other square sail, would have carried buntlines. So, i decided to add them onto the spritsail, and i intend to do the same rig on the topsails. The courses will both have four buntlines apiece; they will run up from the sail to a single block on the yard, over the yard, and down to a pin. This is the 16th century, and minor lines would not be standardized until the late 17th. I will reduce the amount of blocks used by foregoing the blocks on the underside of the fighting tops/crosstrees to accept the lines. I kind of wish i had made the vertical tilt more extreme, but, it still looks good either way. I am choosing to go with the very minor weathering on the sails for the Golden Hinde, as they were only on the first leg of their journey at this point. I just oiled them to a canvas tan shade. The sails would not be filthy and worn at this point, as she was an (almost) brand new ship.
.thumb.jpg.784e501510318e0e3f082318a27e852f.jpg)
- 137 replies
-
- 4
-
-
- Golden Hinde
- Revell
- (and 2 more)
-
This WAS supposed to be a chill-out build, but it quickly evolved (or de-volved) into a mad dash to put as much detail and as complicated of rigging (with the egging of Baker and Louie da Fly, of course), and this is the result of my emerging psychopathy so far: At no point did i ever even consider consulting the Revell instructions for this segment of the rigging. I knew what to do. I gave it the ol' Baker treatment, and vastly complicated the oversimplified rigging. I even went so far as to ignore what HisModel wanted me to do for the lateen peak halyard. The four (as of yet) unused blocks on the lateen will be for running the inhaul lines on the lateen sail, as shown in this diagram: http://freeshipplans.com/wp-content/uploads/2013/02/santa-maria.png Note the inhauls on the lateen sail. The blocks on my lateen yard are further apart, but the concept still stands. This build is absolutely eating up my supply of blocks. They gave me a hundred blocks, and i have used about two thirds of that. And i haven't even started on the sails yet, which will likely be just as many. I will have to dip considerably into my stash of Revell blocks to continue this build. Luckily, i have a considerable amount of single blocks, which is what most of them will be. All in all, there will likely be around 140 blocks in this build, maybe even more.


- 137 replies
-
- 9
-
-

-
- Golden Hinde
- Revell
- (and 2 more)
-
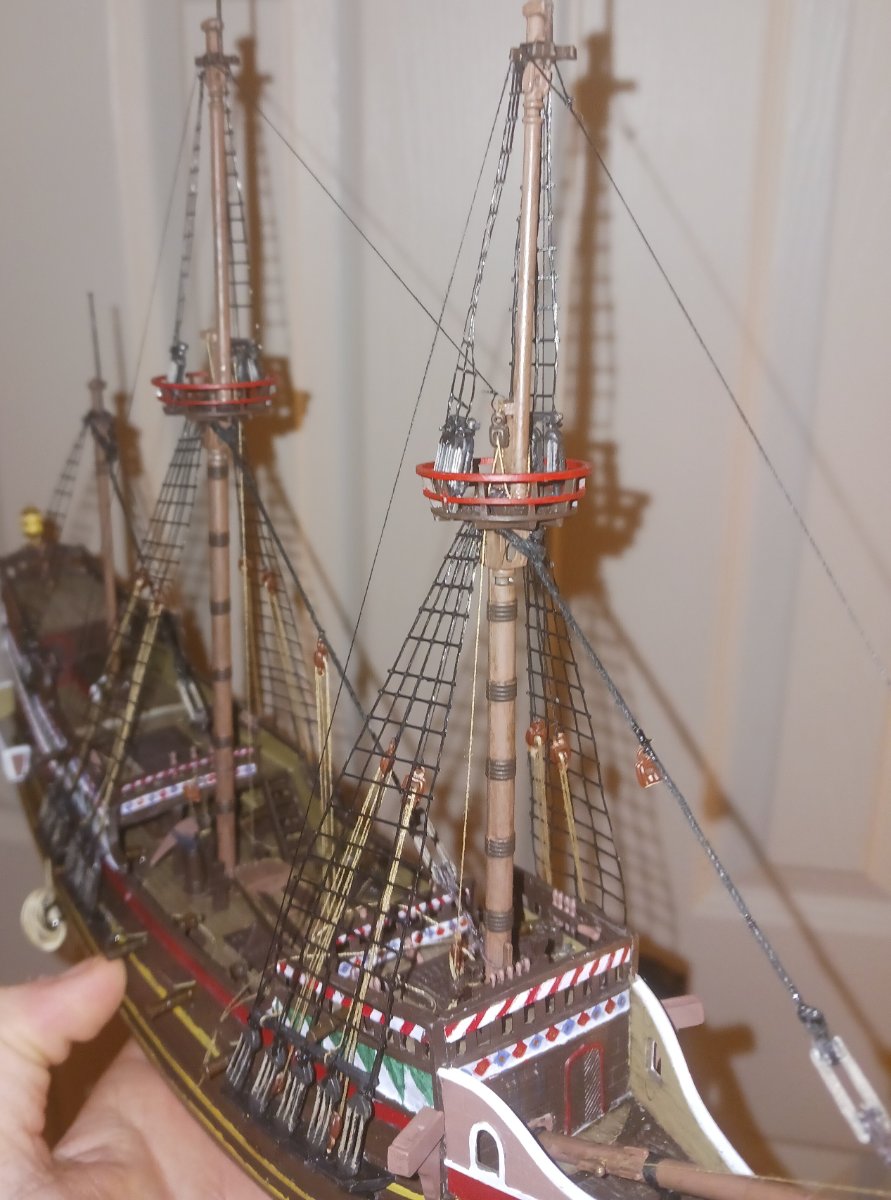
Today, i made up and mounted the fore and main course yards. You would be surprised how many blocks they require: They each have six as of right now, but they will eventually have either ten our fourteen, depending on whether or not i decide to use buntlines. The leechlines are another three blocks apiece, but none are directly attached to the yard. However, those will come later. I believe leechlines would only be appropriate on the courses, but i do not know whether to add two or four on each, or if they should be installed at all. Any advice would be helpful. However, that comes later on. I belayed the lifts through the sheaves on the stanchions and up at the top of the knight: The topsail yard halyards should be interesting, and i intend to use Baker's design for at least the fore halyard. What i do NOT intend to do is what the Revell instructions say.

- 137 replies
-
- 5
-
-
- Golden Hinde
- Revell
- (and 2 more)
-
@Louie da fly i saw a video of some tourist handling a Blue Ringed Octopus, and i freaked out. Miracle they weren't bit. I would rather stay far away from any country with spiders bigger than my face. If i remember correctly, an episode of Peppa Pig was banned in Australia for telling kids not to be afraid of spiders. Because in Australia, a lot of them can kill you.
-
Yeah, i know you're upside down. Is it Spider Season yet? What's the biggest monstrosity you've ever seen? James Cook must've been horrified. I guess they made it a penal colony for a reason.
-
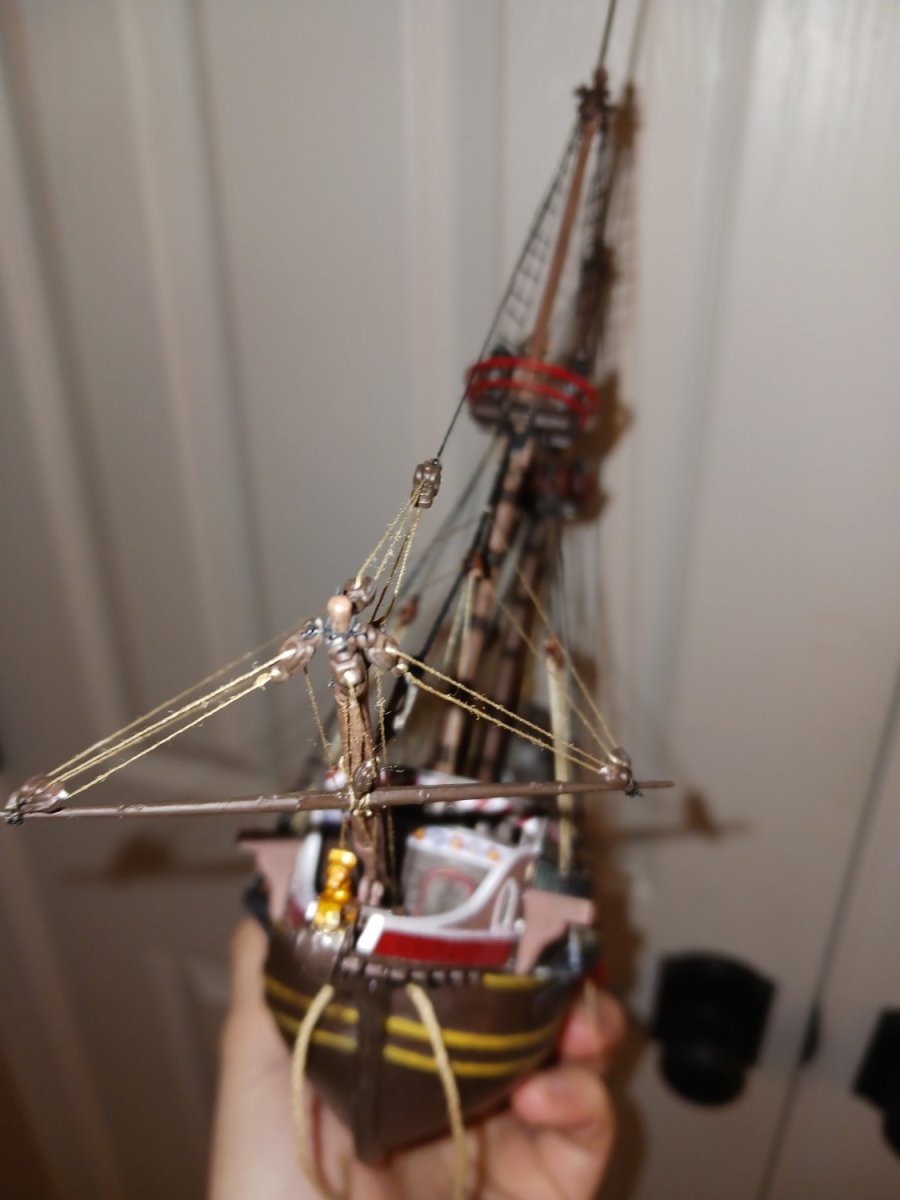
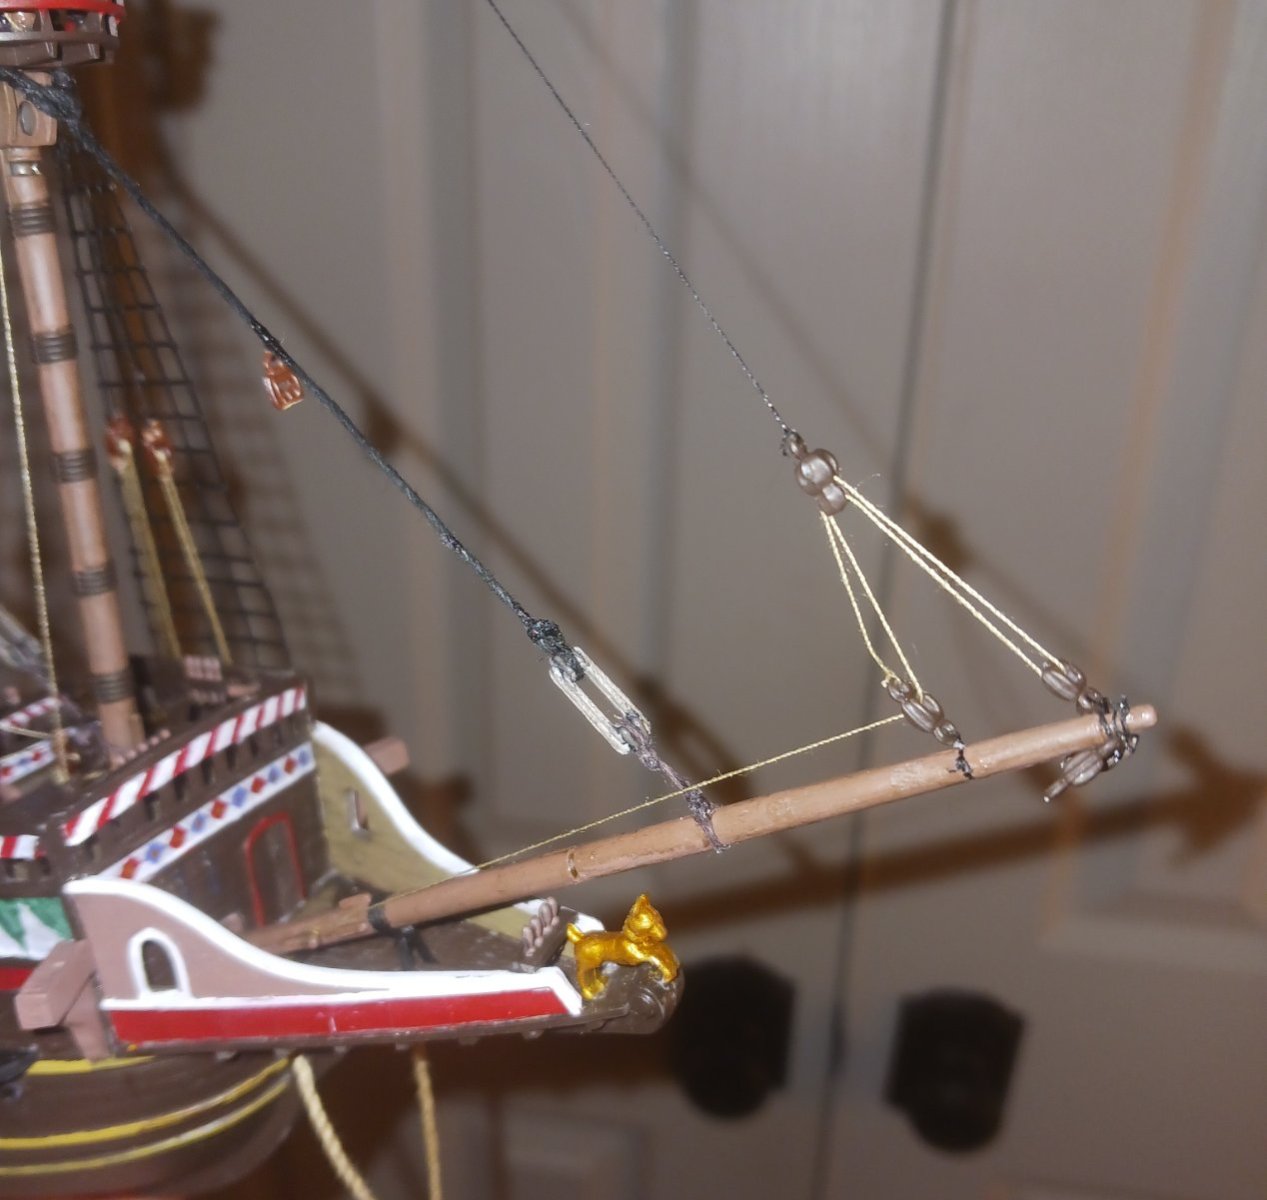
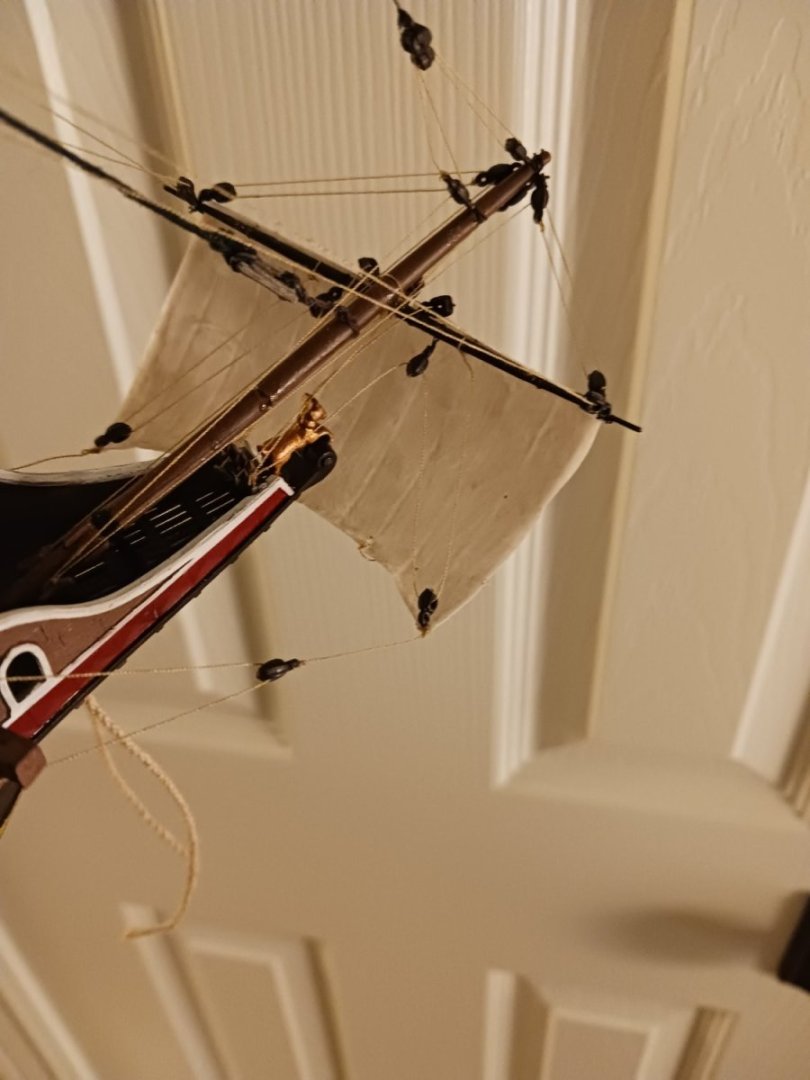
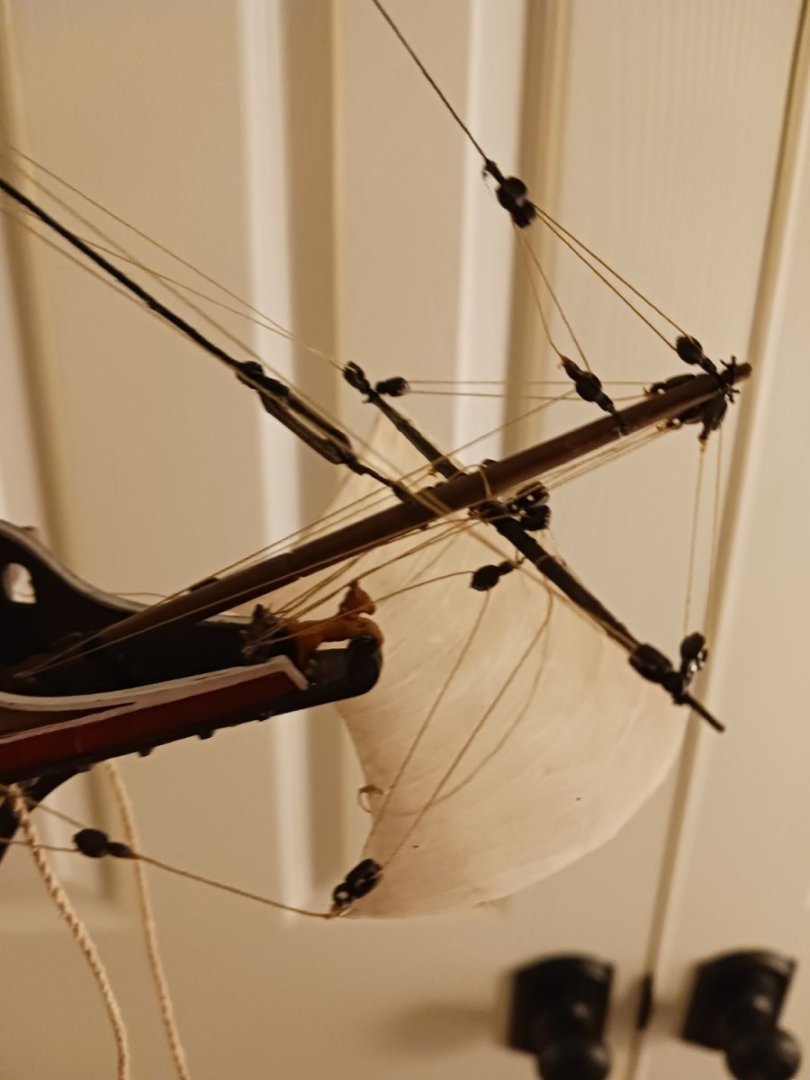
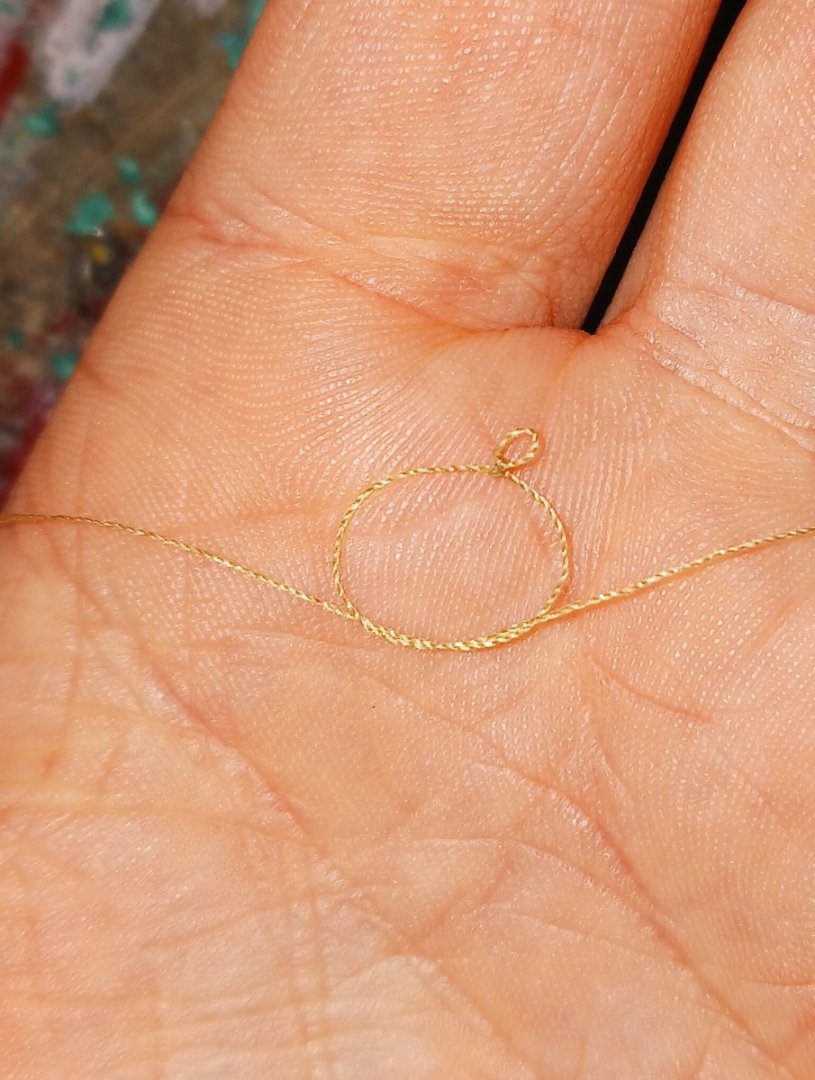
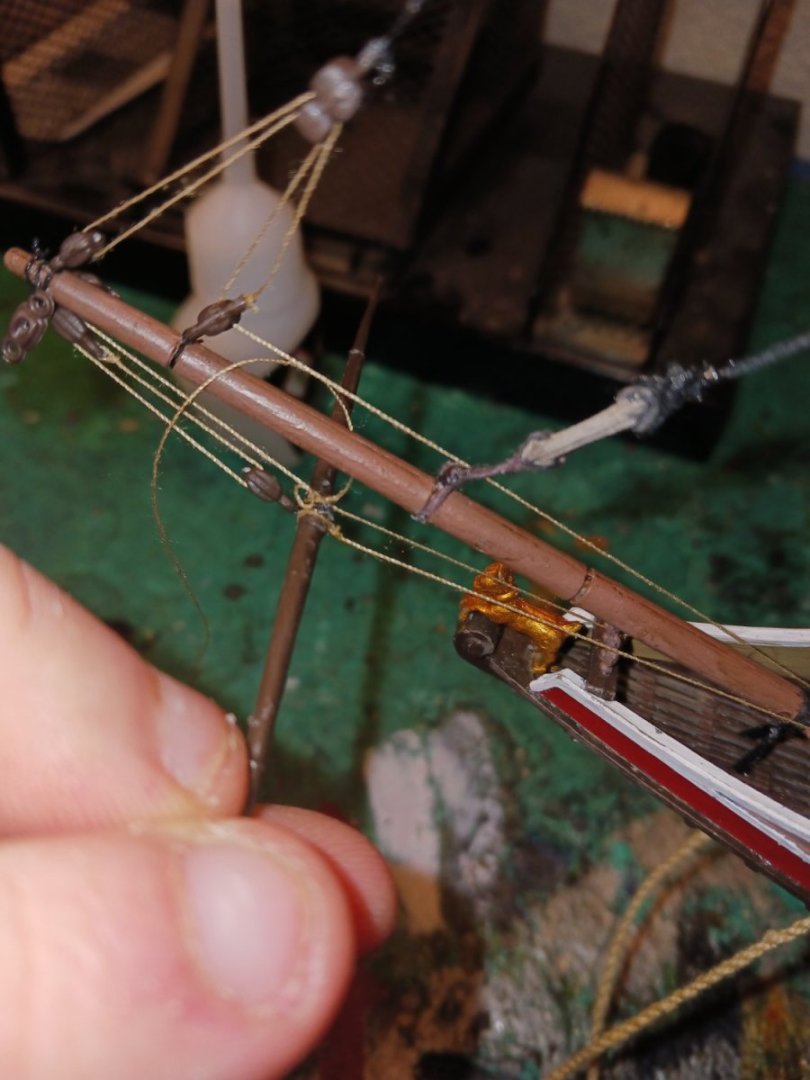
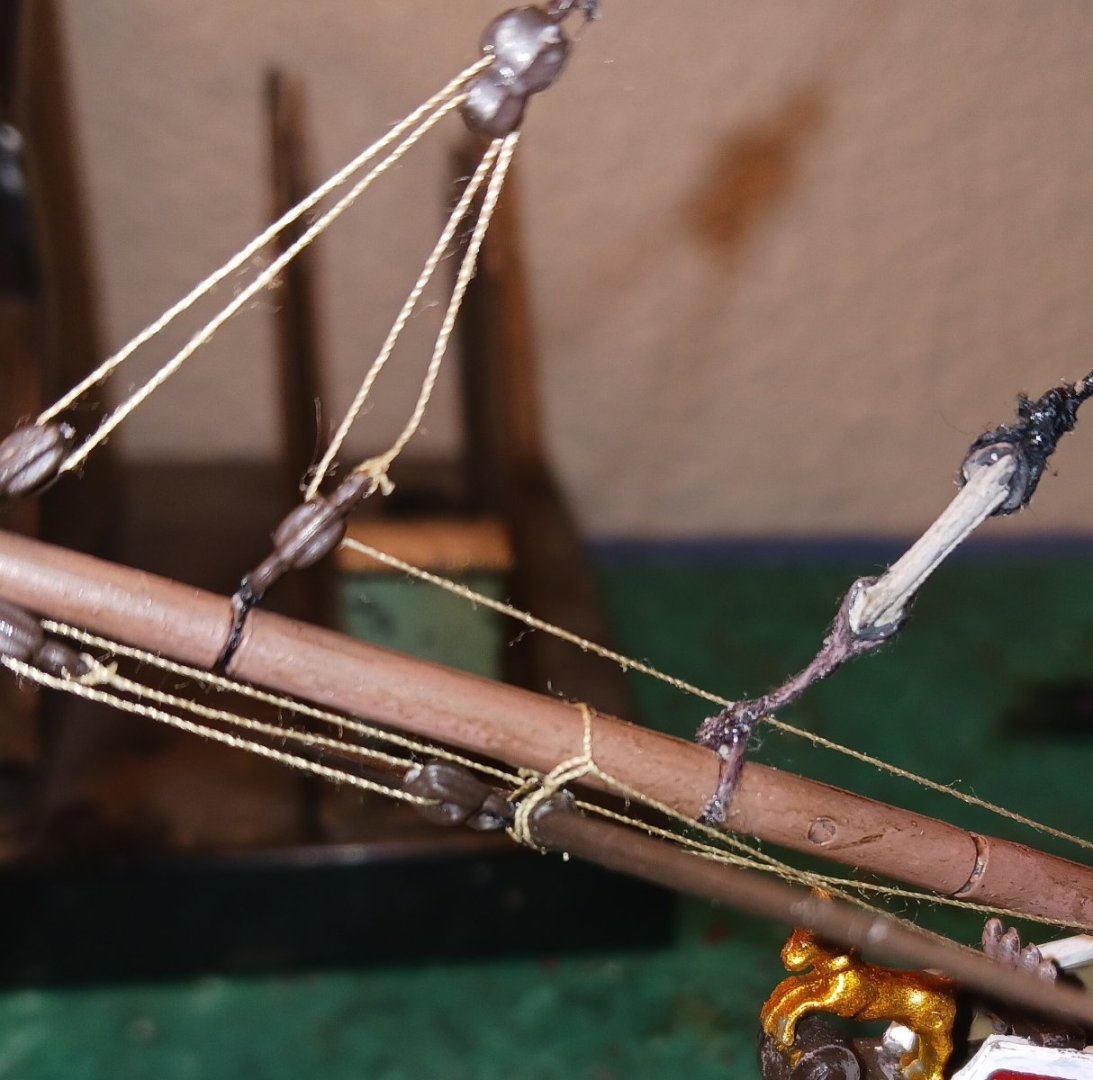
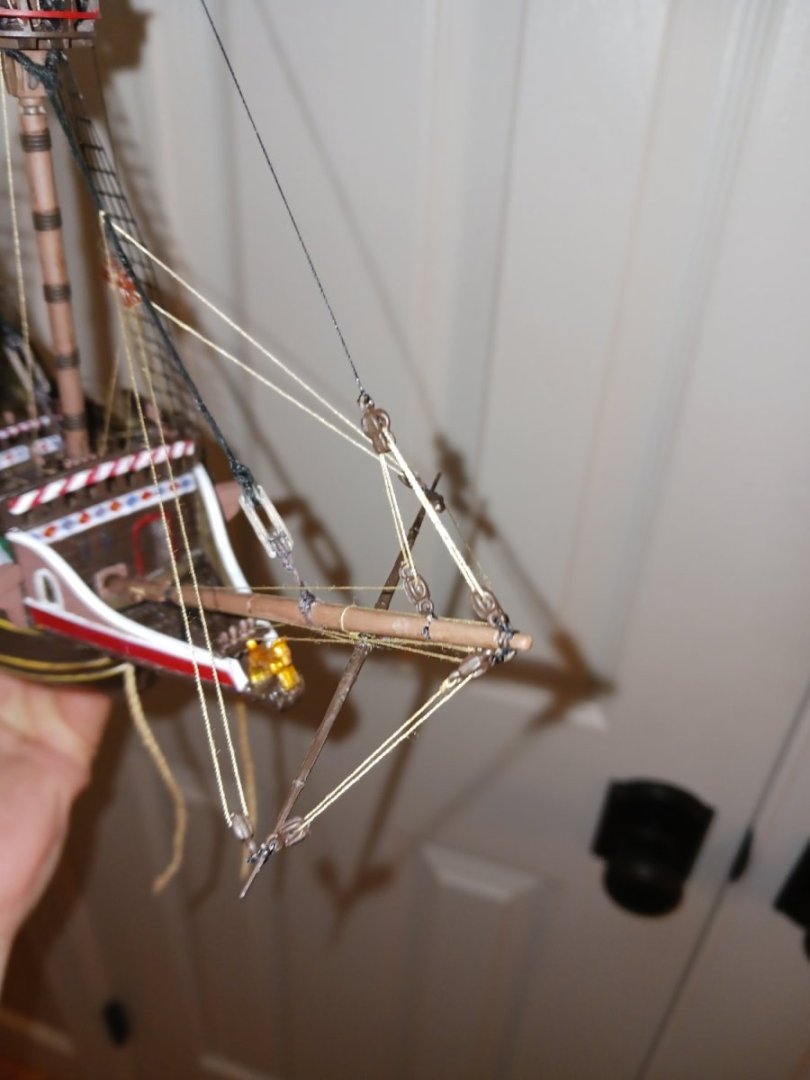
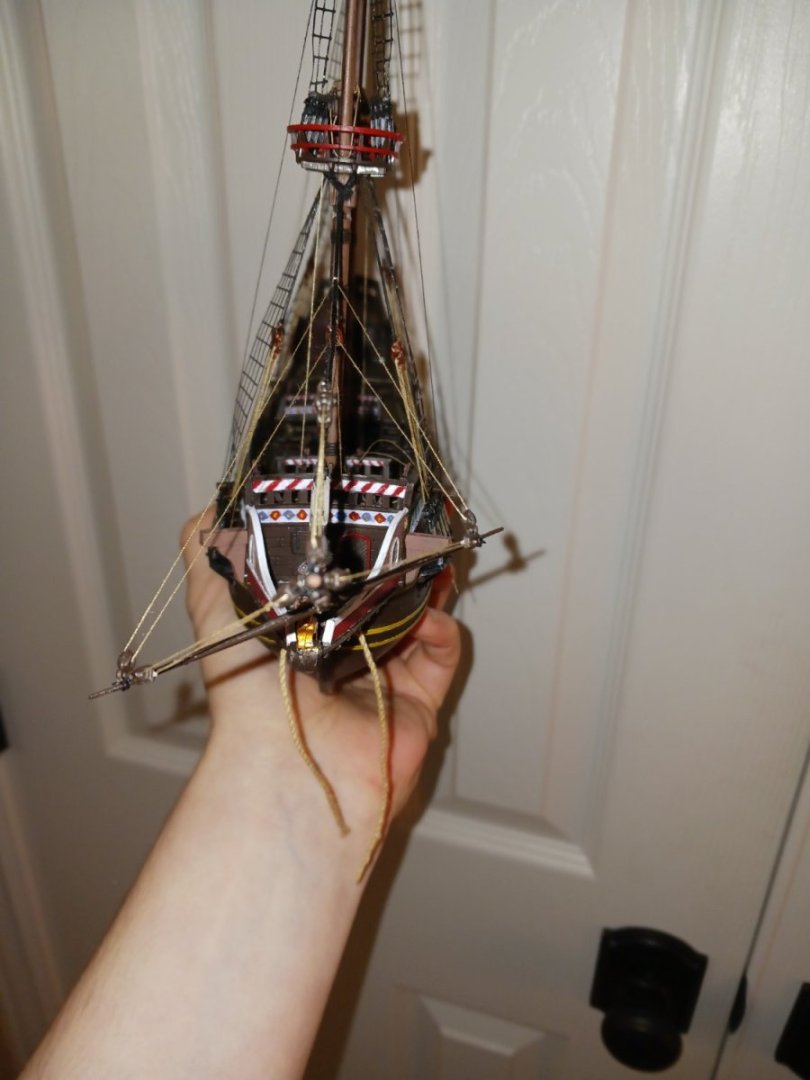
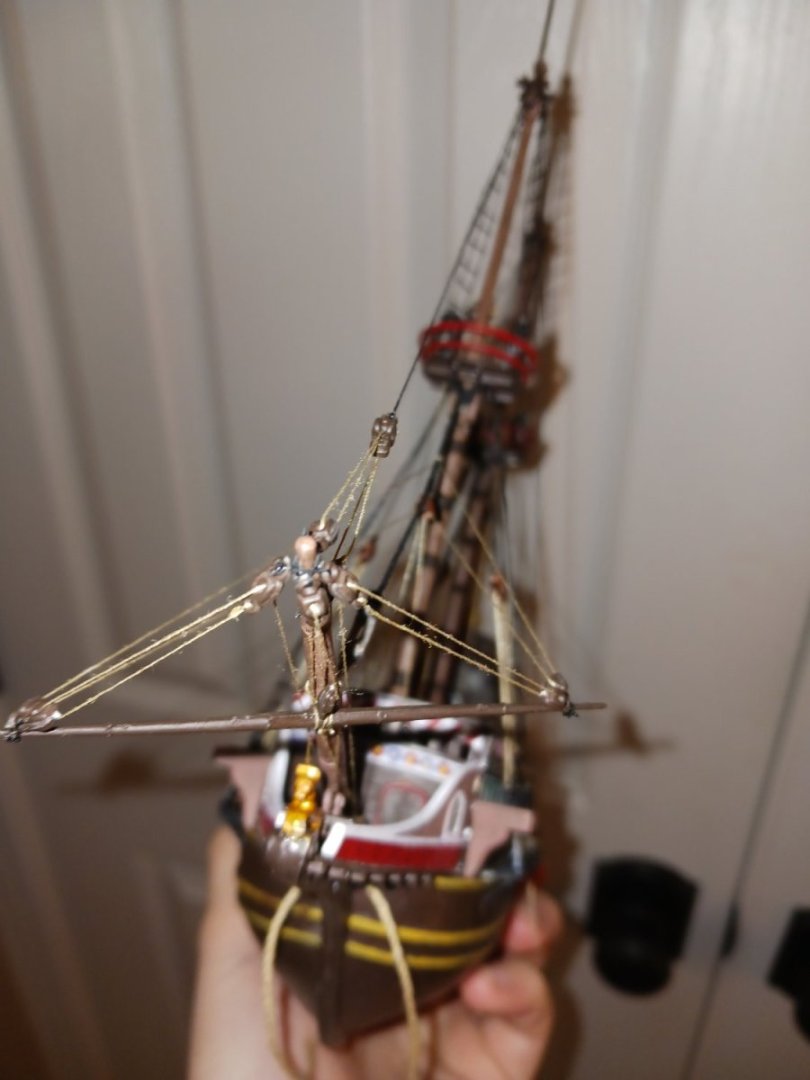
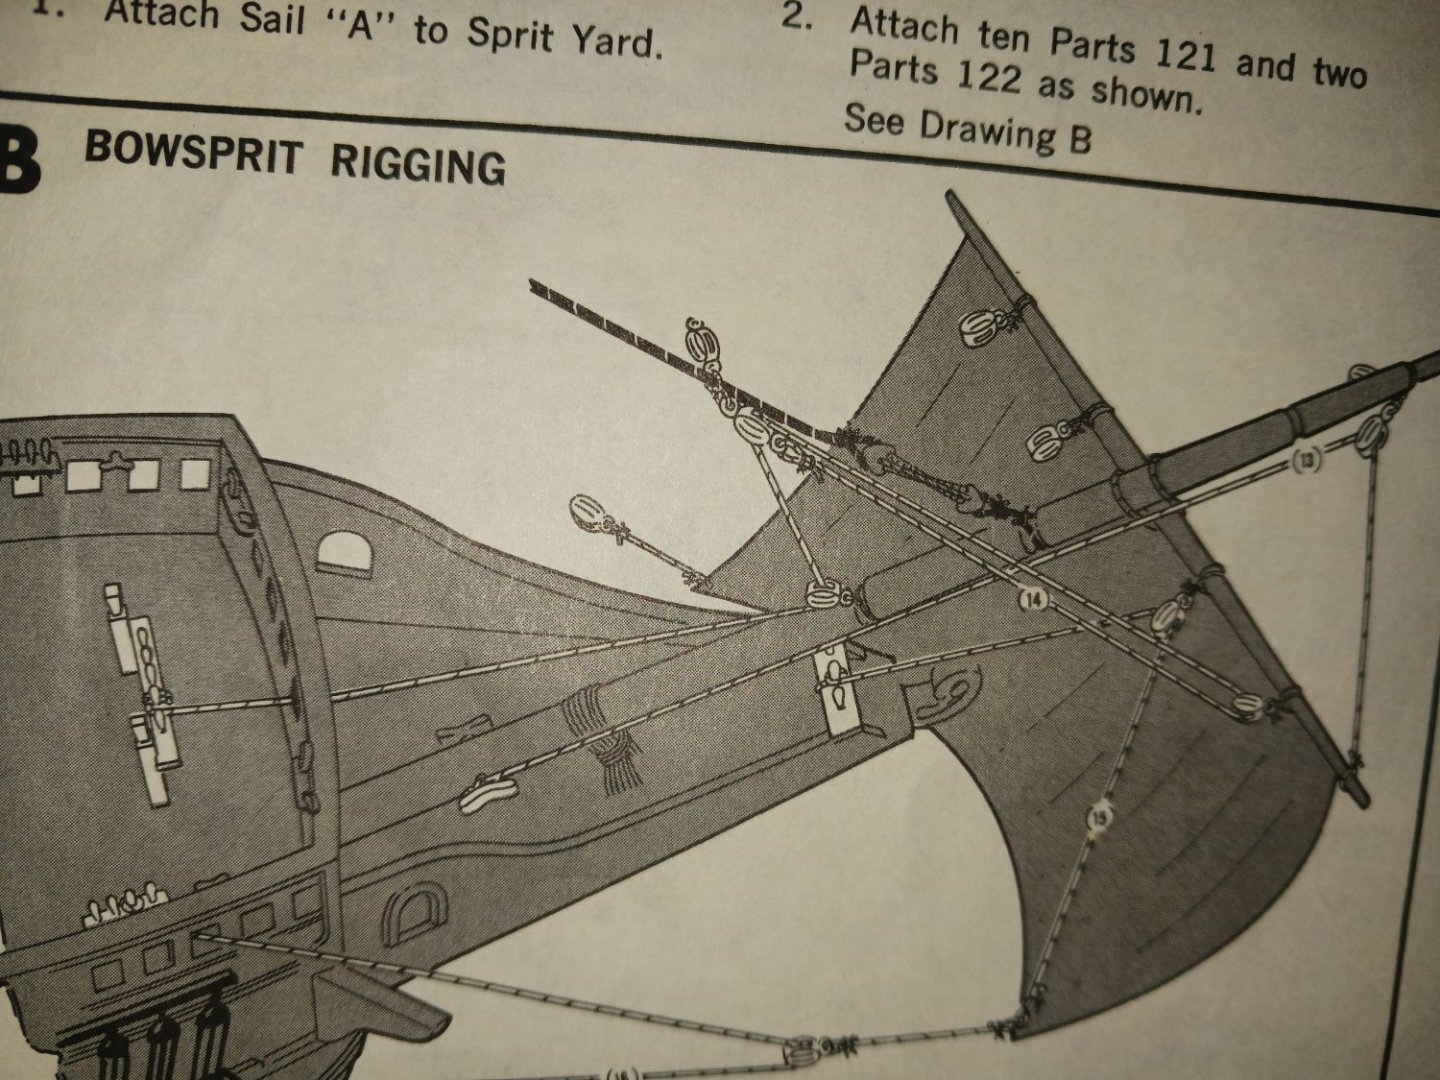
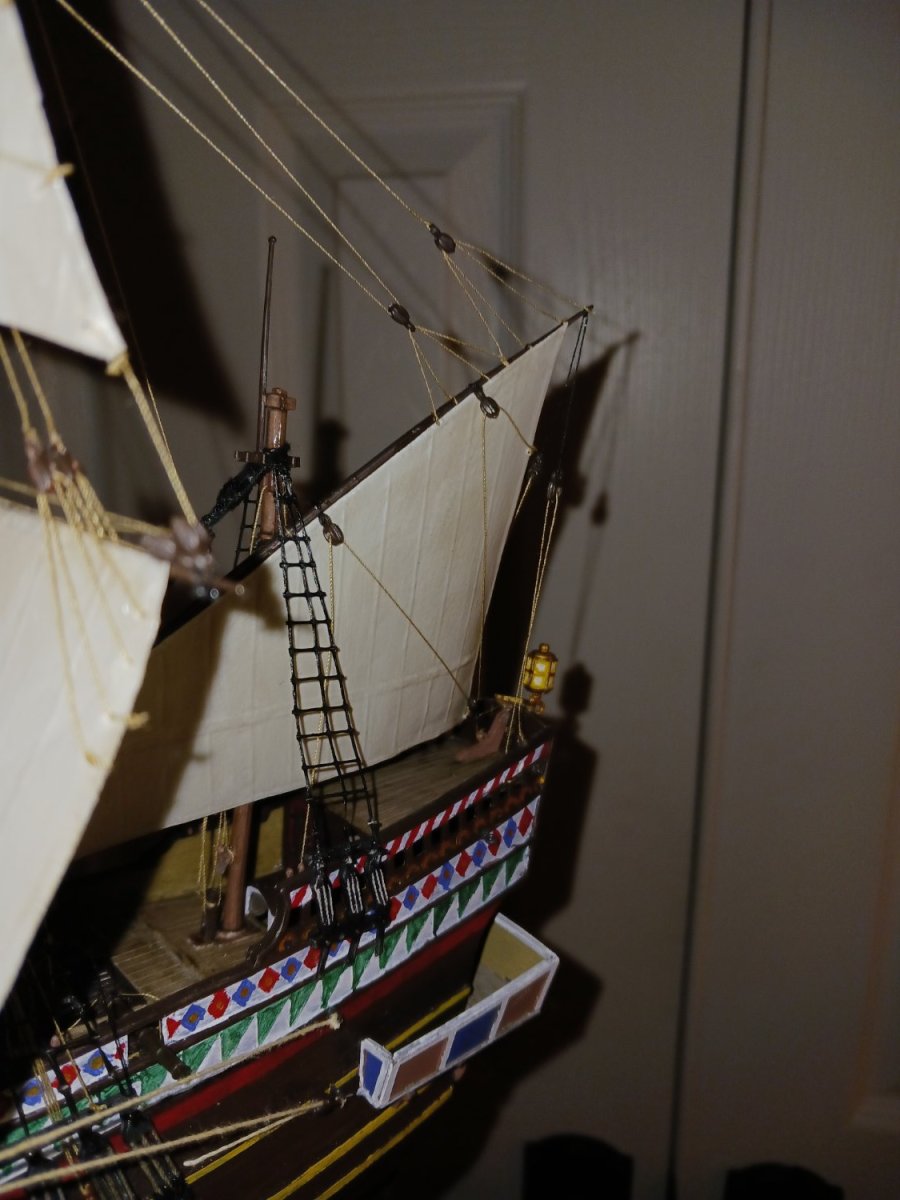
When not used, the spritsail yard was hauled into the beakhead of the ship and stored parallel to the bowsprit on the port side (where the bowsprit wasn't). You can see this if you go to Baker's Pelican build. In order to facilitate this, i had to not only make a halyard tackle but also an inhaul, as well as a parrel that could be adjusted to allow the spritsail yard to come off the bowsprit. First, i made a thimble: I then attached a line to the other side of the center of the yard, looped it around the bowsprit, through the thimble, and belayed it on the beakhead pins: Today, i kicked back off by making the lifts and braces for the spritsail yard: Revell wanted me to do the braces differently: Of all the galleons i've seen, i have never seen the braces rigged like this. I am pretty sure it's inaccurate, plus it doesn't look that great. So, i went with my gut, and rigged them the way i know i should. This spritsail is in use, however, i wanted to have all the rigging there to stow it if need be. I will be using the spritsail, which is why i have left two pins empty on the beak. The spritsail sheets will belay to the cleats inside the forecastle, i have no idea why they want to belay them on a pin.


- 137 replies
-
- 4
-
-
- Golden Hinde
- Revell
- (and 2 more)
-
@Louie da fly I do not own the book, but i have heard of it and have at many points considered buying it. I still might buy it. I do know it's basically the Holy Bible for people building the Soleil Royal. I think very highly of the book, what little i know about it. Is there anything i should know in particular? how good are the diagrams?
-
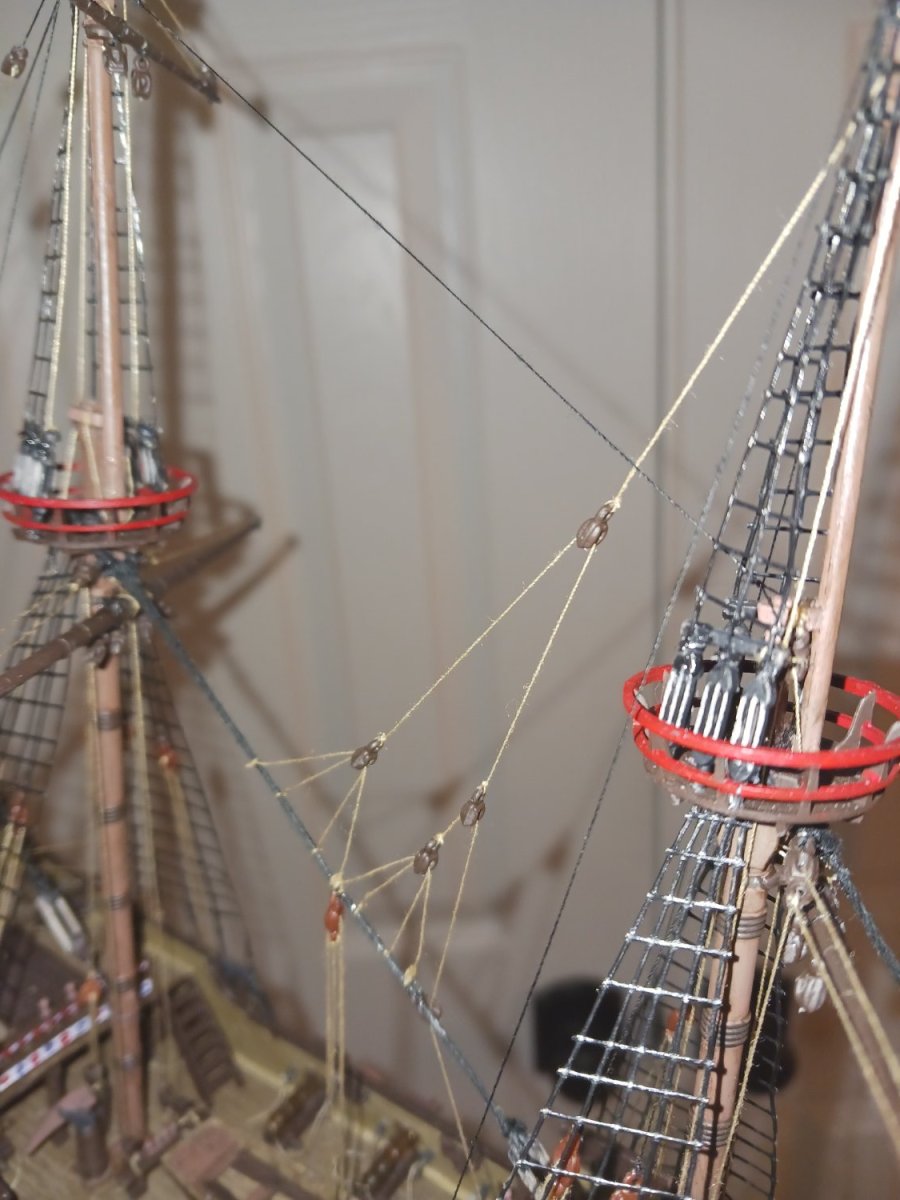
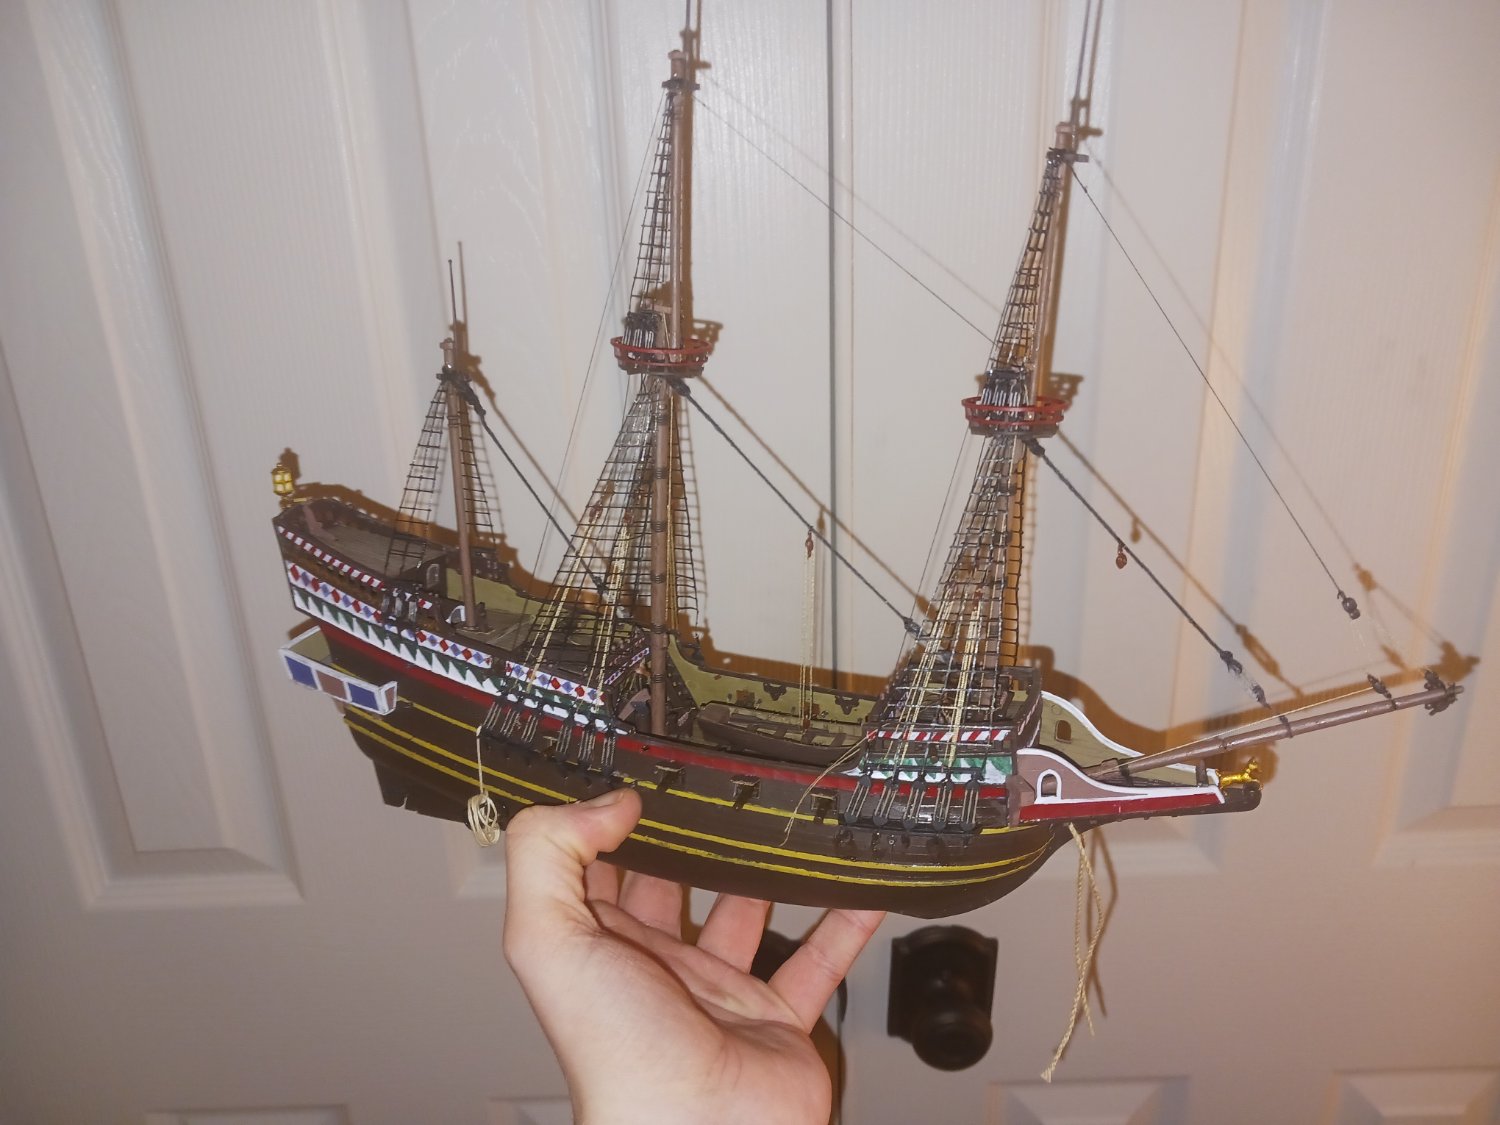
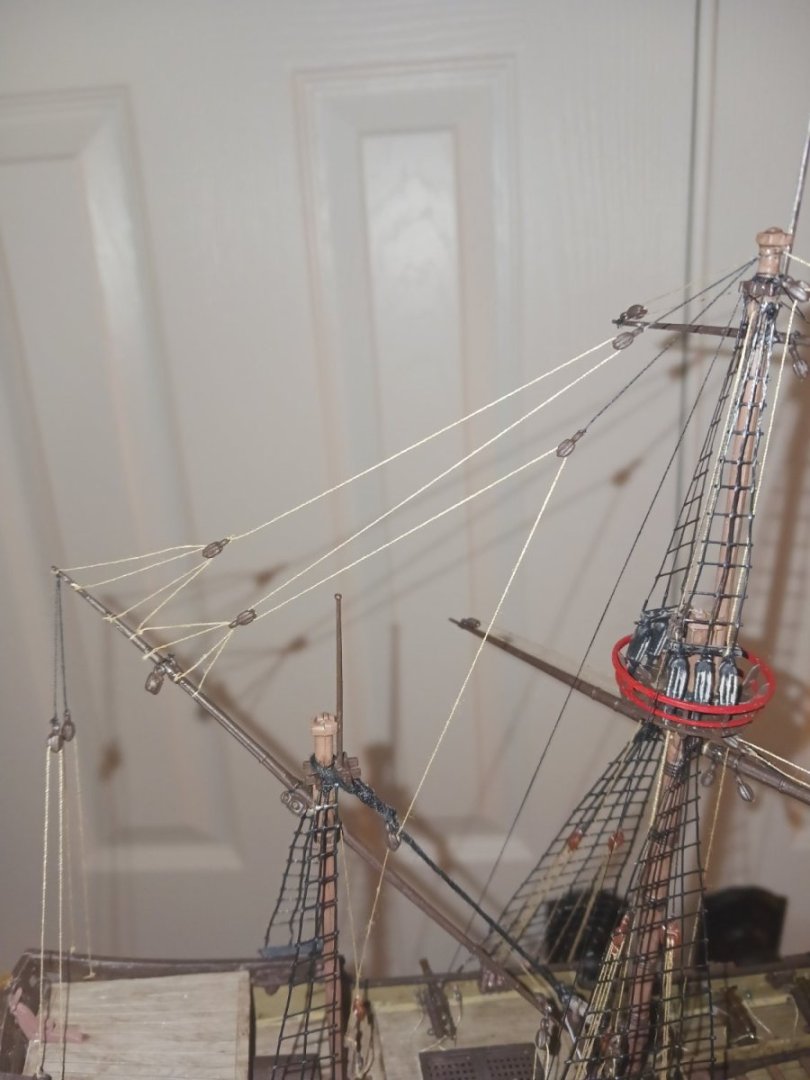
This week, i finished the topmast standing rigging. First, i did the research on a line whose purpose was to lower the topmasts on the ship. You see these appearing a lot more commonplace on later ships, especialluy in the 17th century. However, i elected to include them on the Golden Hinde. The line falls down to a block placed behind one of the knightheads, and belays to the knighthead. I did not want to use up a pin for these lines. Then, i did the rest of the standing rigging, including the backstays and the forestays for both masts. I also mounted blocks on the bowsprit. In the next post, i will start rigging the spritsail. I intend to avoid gluing the spritsail to the mast, instead using a parrel and several lines originating from the center of the yard. Given that Revell gave me a block specifically for use on the fore topmast stay, i don't know why they put next to no effort into the knightheads and couldn't bother to provide me with violin blocks. My other big gripe is that they molded the sheaves underneath the masttops incorrectly. I plan to get started on as accurate of a spritsail yard as i can.


- 137 replies
-
- 4
-
-
- Golden Hinde
- Revell
- (and 2 more)
-
Congratulations, @woodrat! I truly do ruin everything, don't i? It'll be fun. I can be here for moral support, because that's probably all i'm good for.
-
My dad served in the Air Force just after 'Nam. He was a flight mechanic for the F-111 fighter-bomber. His childhood was adventurous and full of excitement, even though he sometimes made poor decisions at the behest of his older brother. He is 60 years old. When you don't care if you die, life becomes a lot more freeing.
-
You could have gotten this kit, new, on store shelves, back when inflation wasn't really a thing. I am into newer music, but the music my generation listens to makes my ears bleed. I wish i had grown up when you did. The world was younger, people still cared about each other, life was simpler, and smartphones and social media weren't a thing.
-
Yep. With the temperament of an old man, doing an old man's hobby. How old are you, @Louie da fly?
-
@Baker look, dude. I don't have a life. All i have most of the time is my ships, and schoolwork.
- 137 replies
-
- 1
-
-
- Golden Hinde
- Revell
- (and 2 more)


.jpg.af2c39b935f2973af105c95e90fd35bf.jpg)


.jpg.2017f3710146df2069ea6b6c1d7cfece.jpg)
.jpg.e66c7a472db4afca324dd20e2716a5c1.jpg)


.jpg.be59d8a72aa725d27442dee2fc5f3e18.jpg)