MORE HANDBOOKS ARE ON THEIR WAY! We will let you know when they get here.
×


pompey2
-
Posts
511 -
Joined
-
Last visited
Content Type
Profiles
Forums
Gallery
Events
Everything posted by pompey2
-
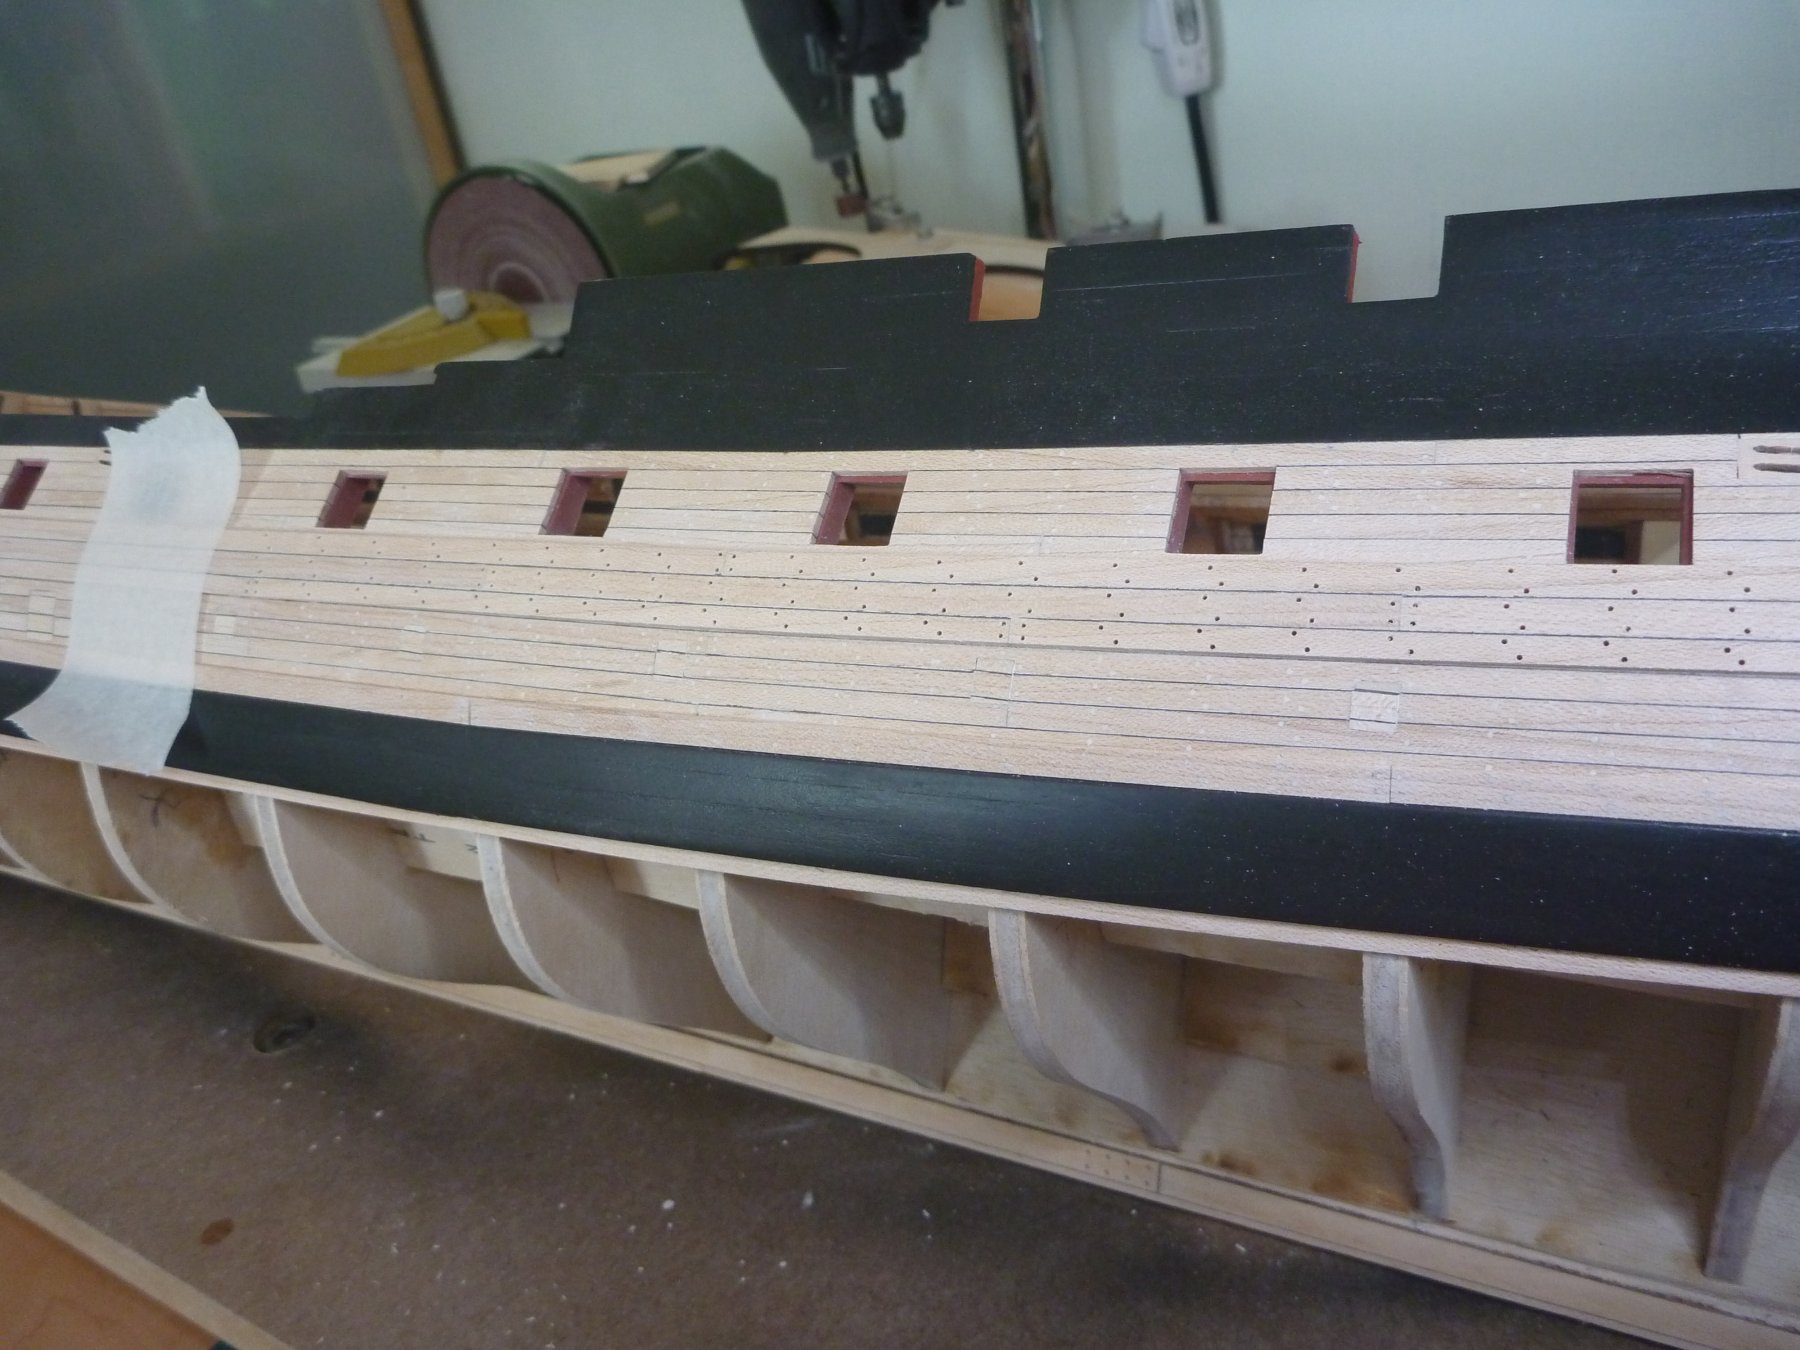
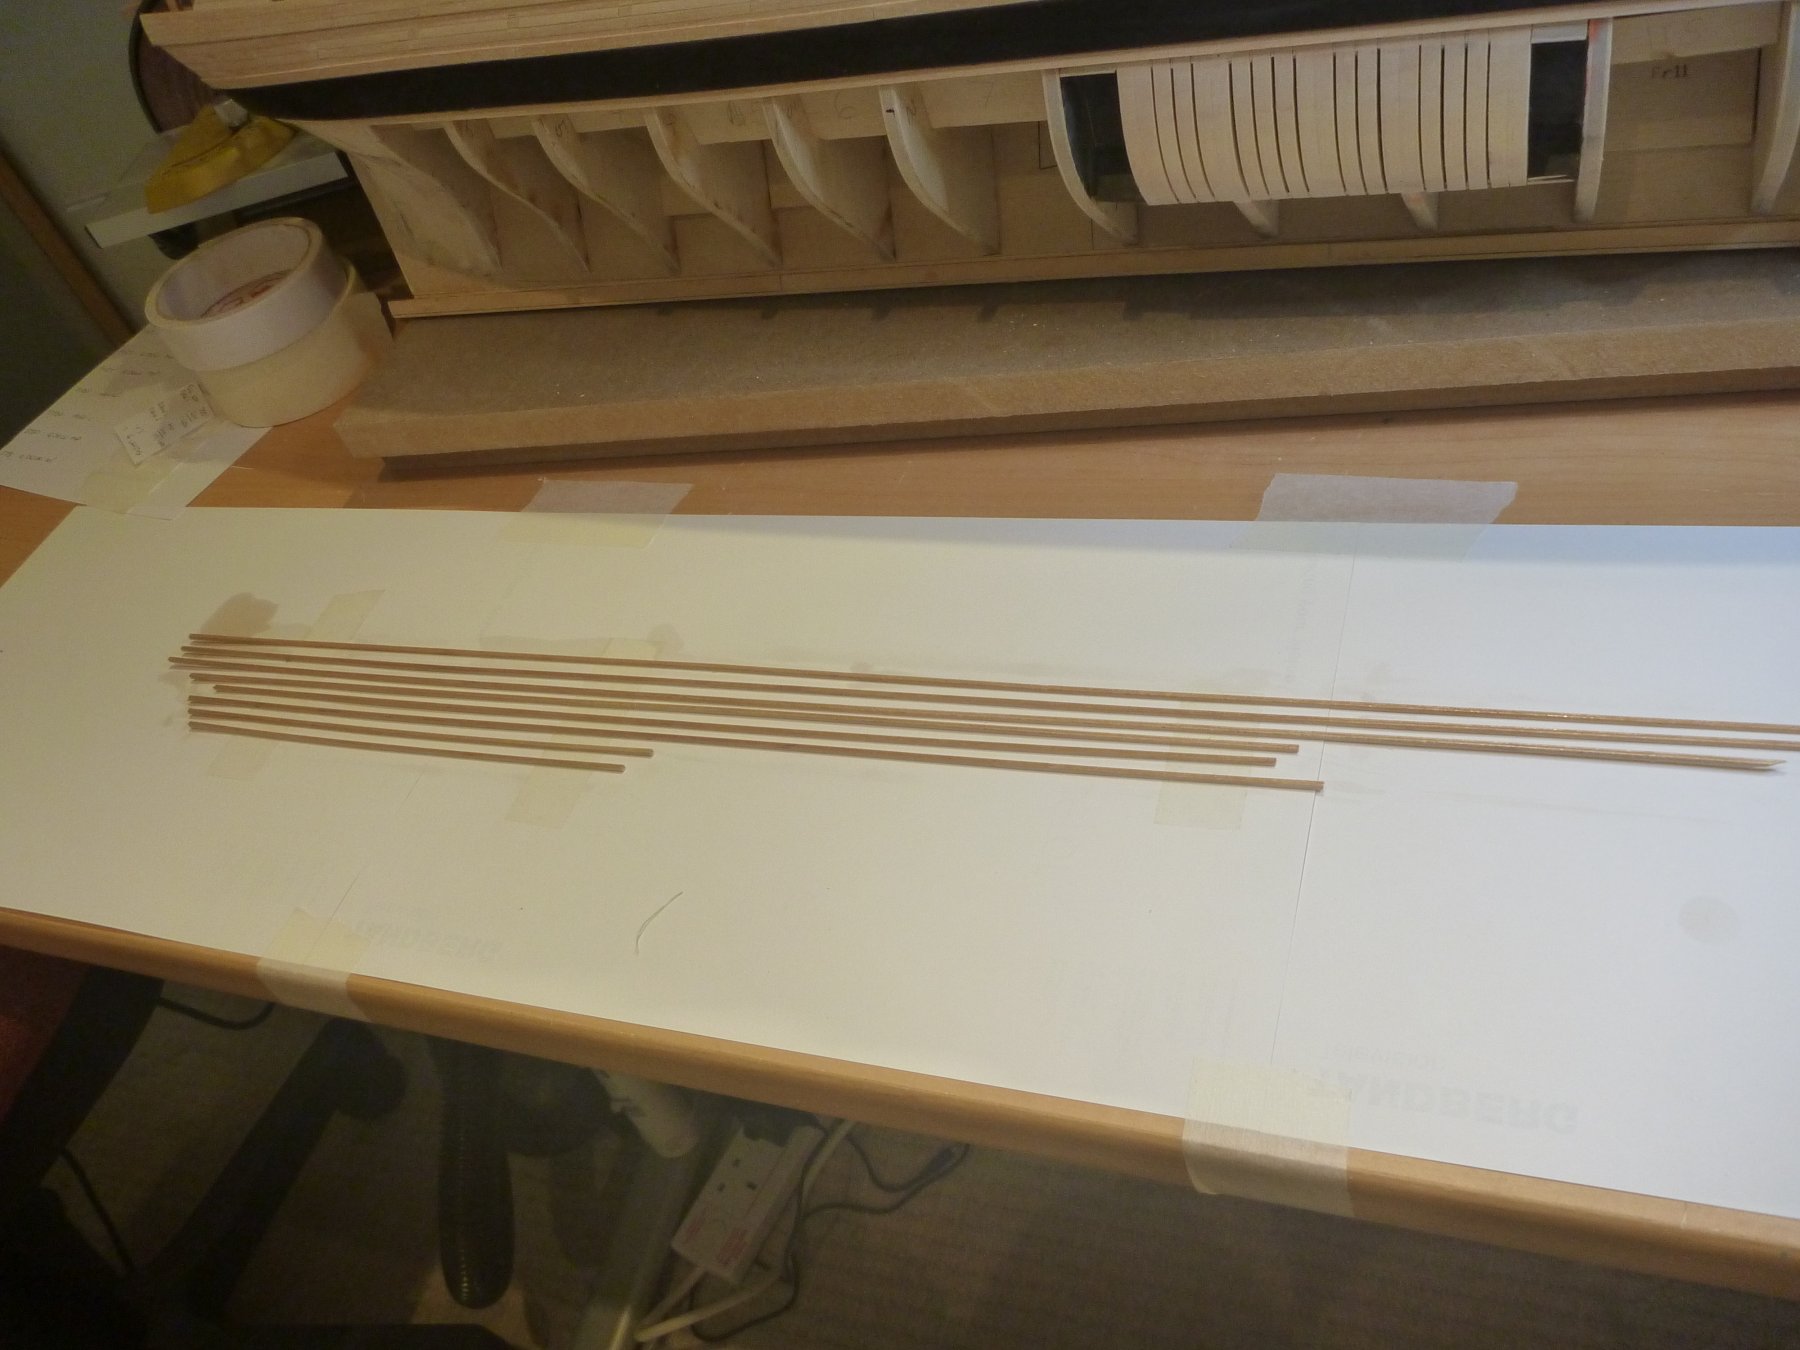
 And yet more- Here's the finished paint job. I have now moved on to the Channel Wales. They have been cut bent and glued on. Here I have masked the painted surfaces so that I can sand the Wales without a risk of marking the paint. Now, after sanding them down I am giving them the tree nail treatment. I used a piece of masking tape to mark the drill line as I went. Now the Channel Wales have been fully tree nailed, filled and sanded. You can also see here the Black Strake above the Main Wales, ironically not actually painted black. I put this on after the painting so that I could get a sharp paint edge. It is thinner than the Wale so I made them up fully, complete with tree nailing and sanding before fitting. Finally to bring me right up to date. These are the fancy profiles to go along the painted upper hull sides. I have used Chucks scraper, supplied with the kit, to make the shape. Here they are getting a coat of Danish oil before fitting. I will be using Danish Oil for finishing all of the bare woodwork. Thanks for dropping by Nick


-
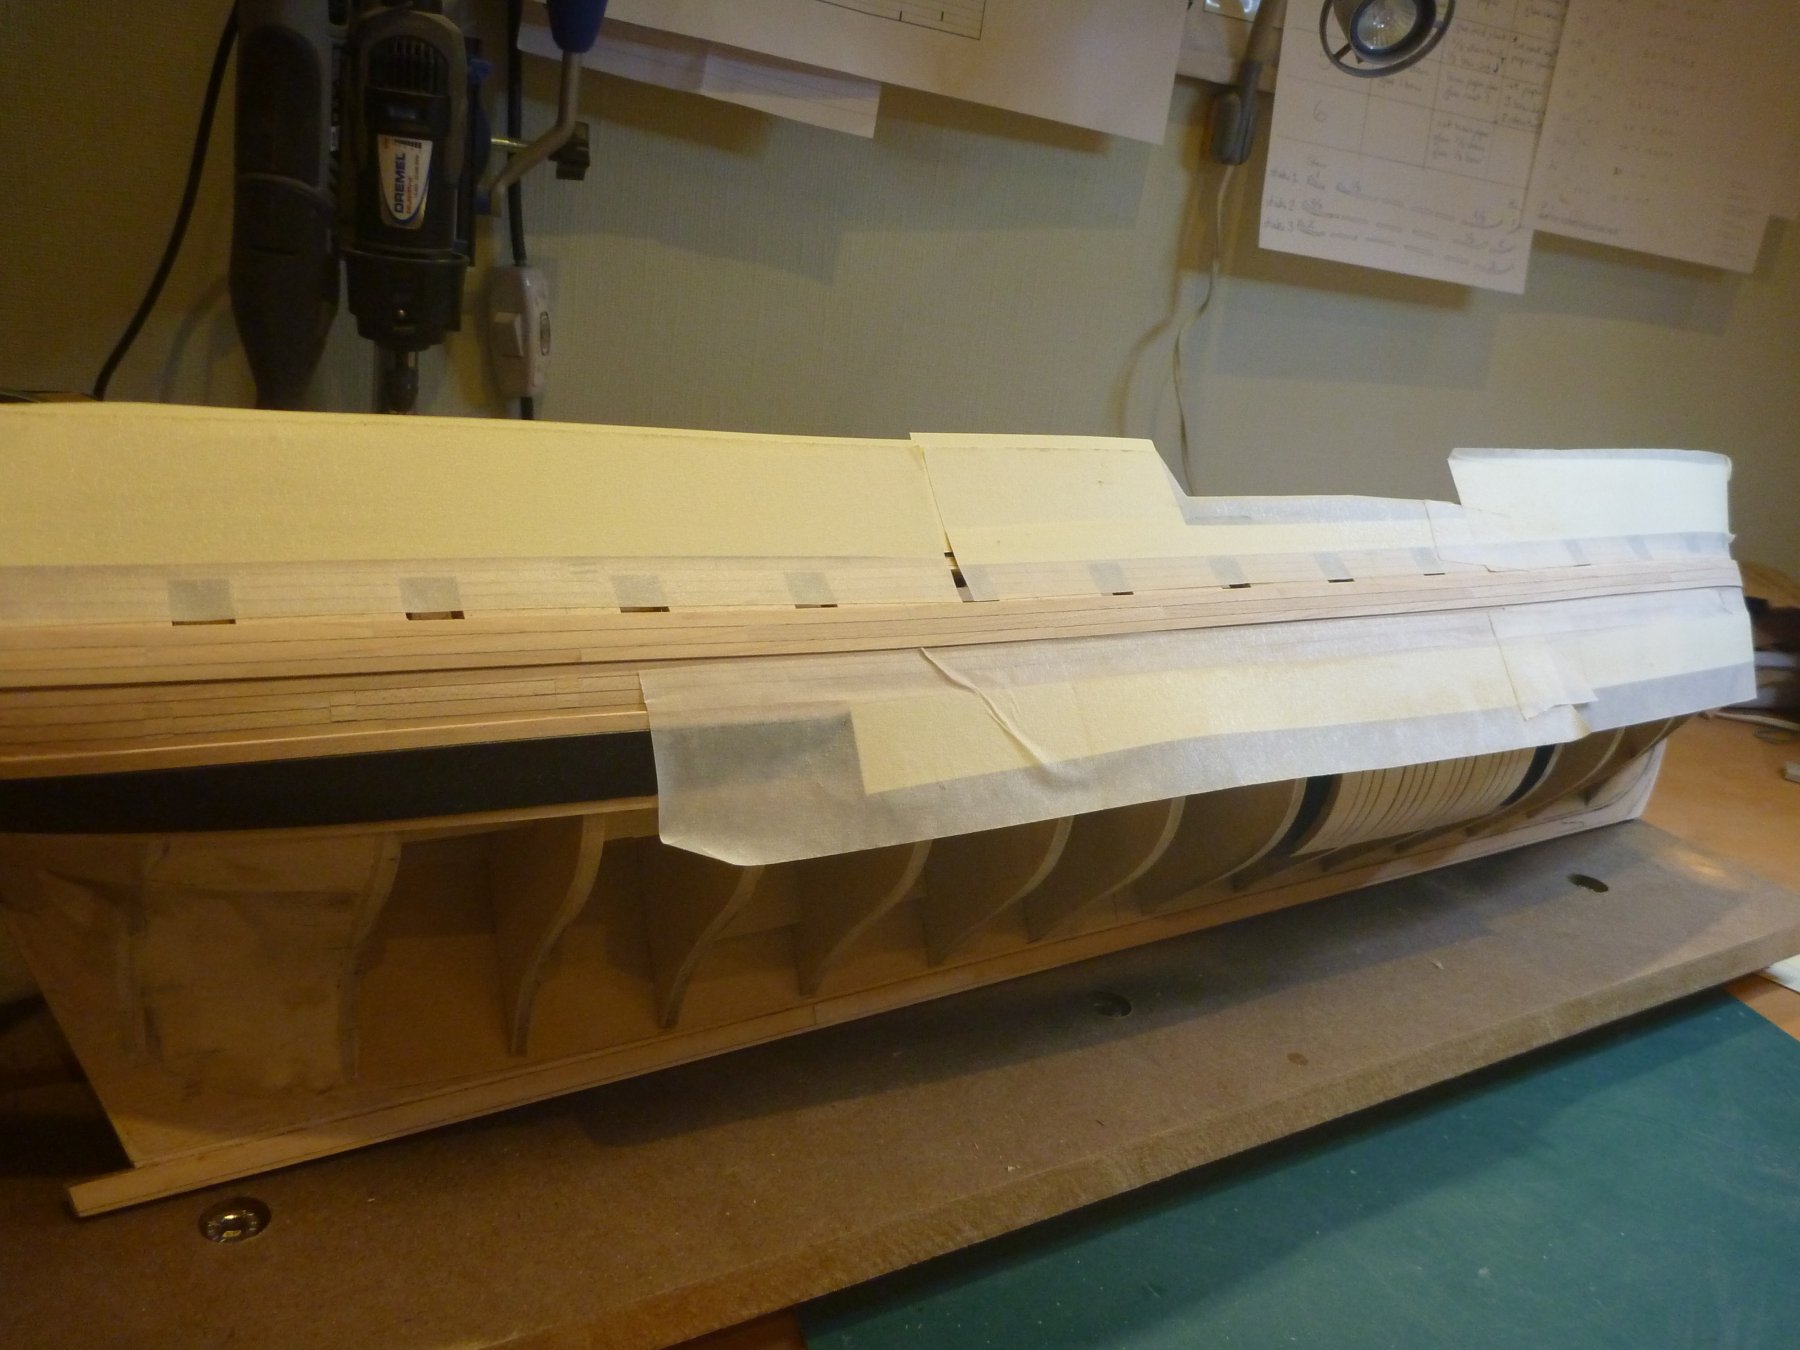
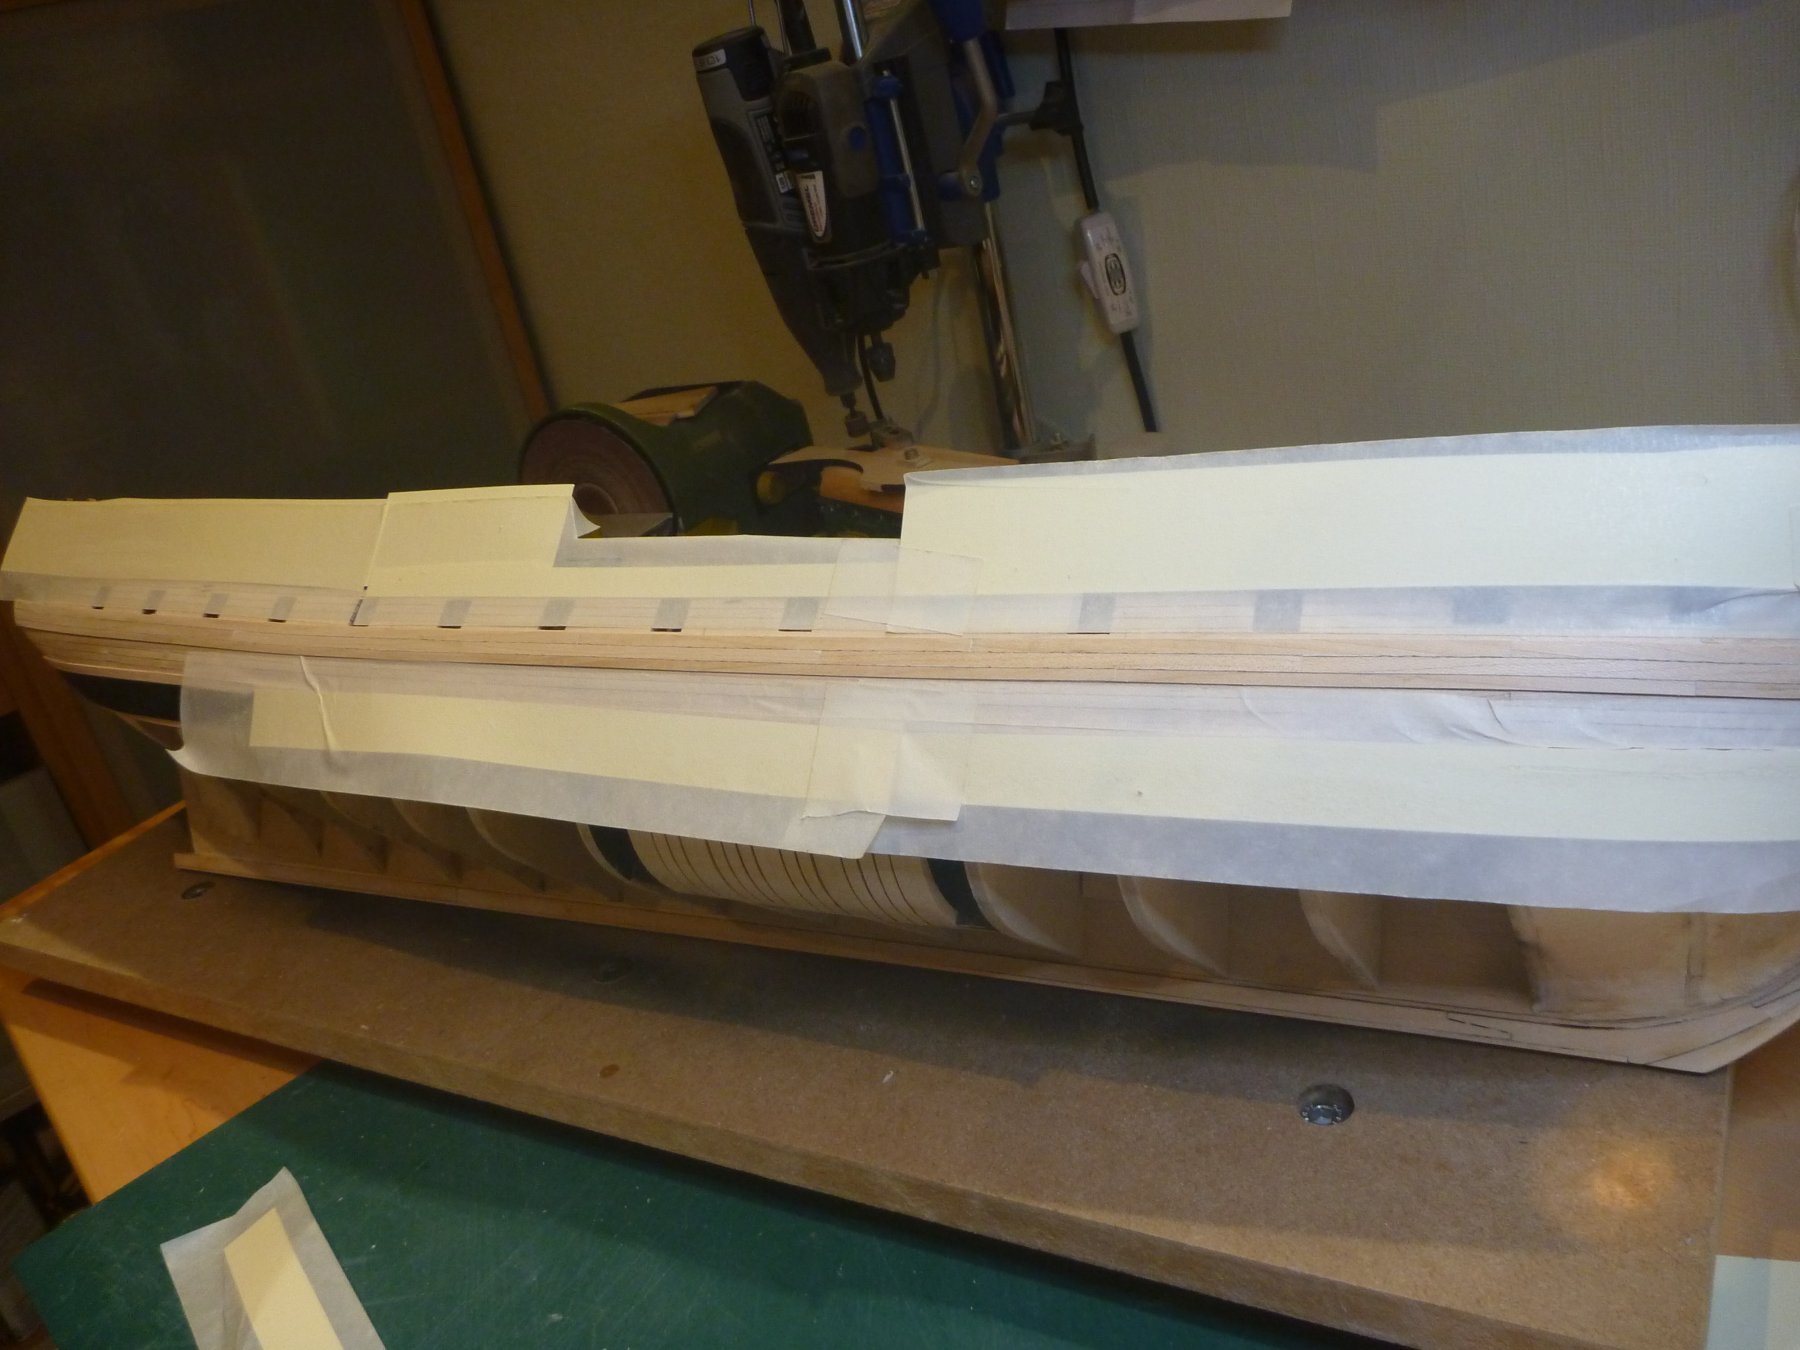
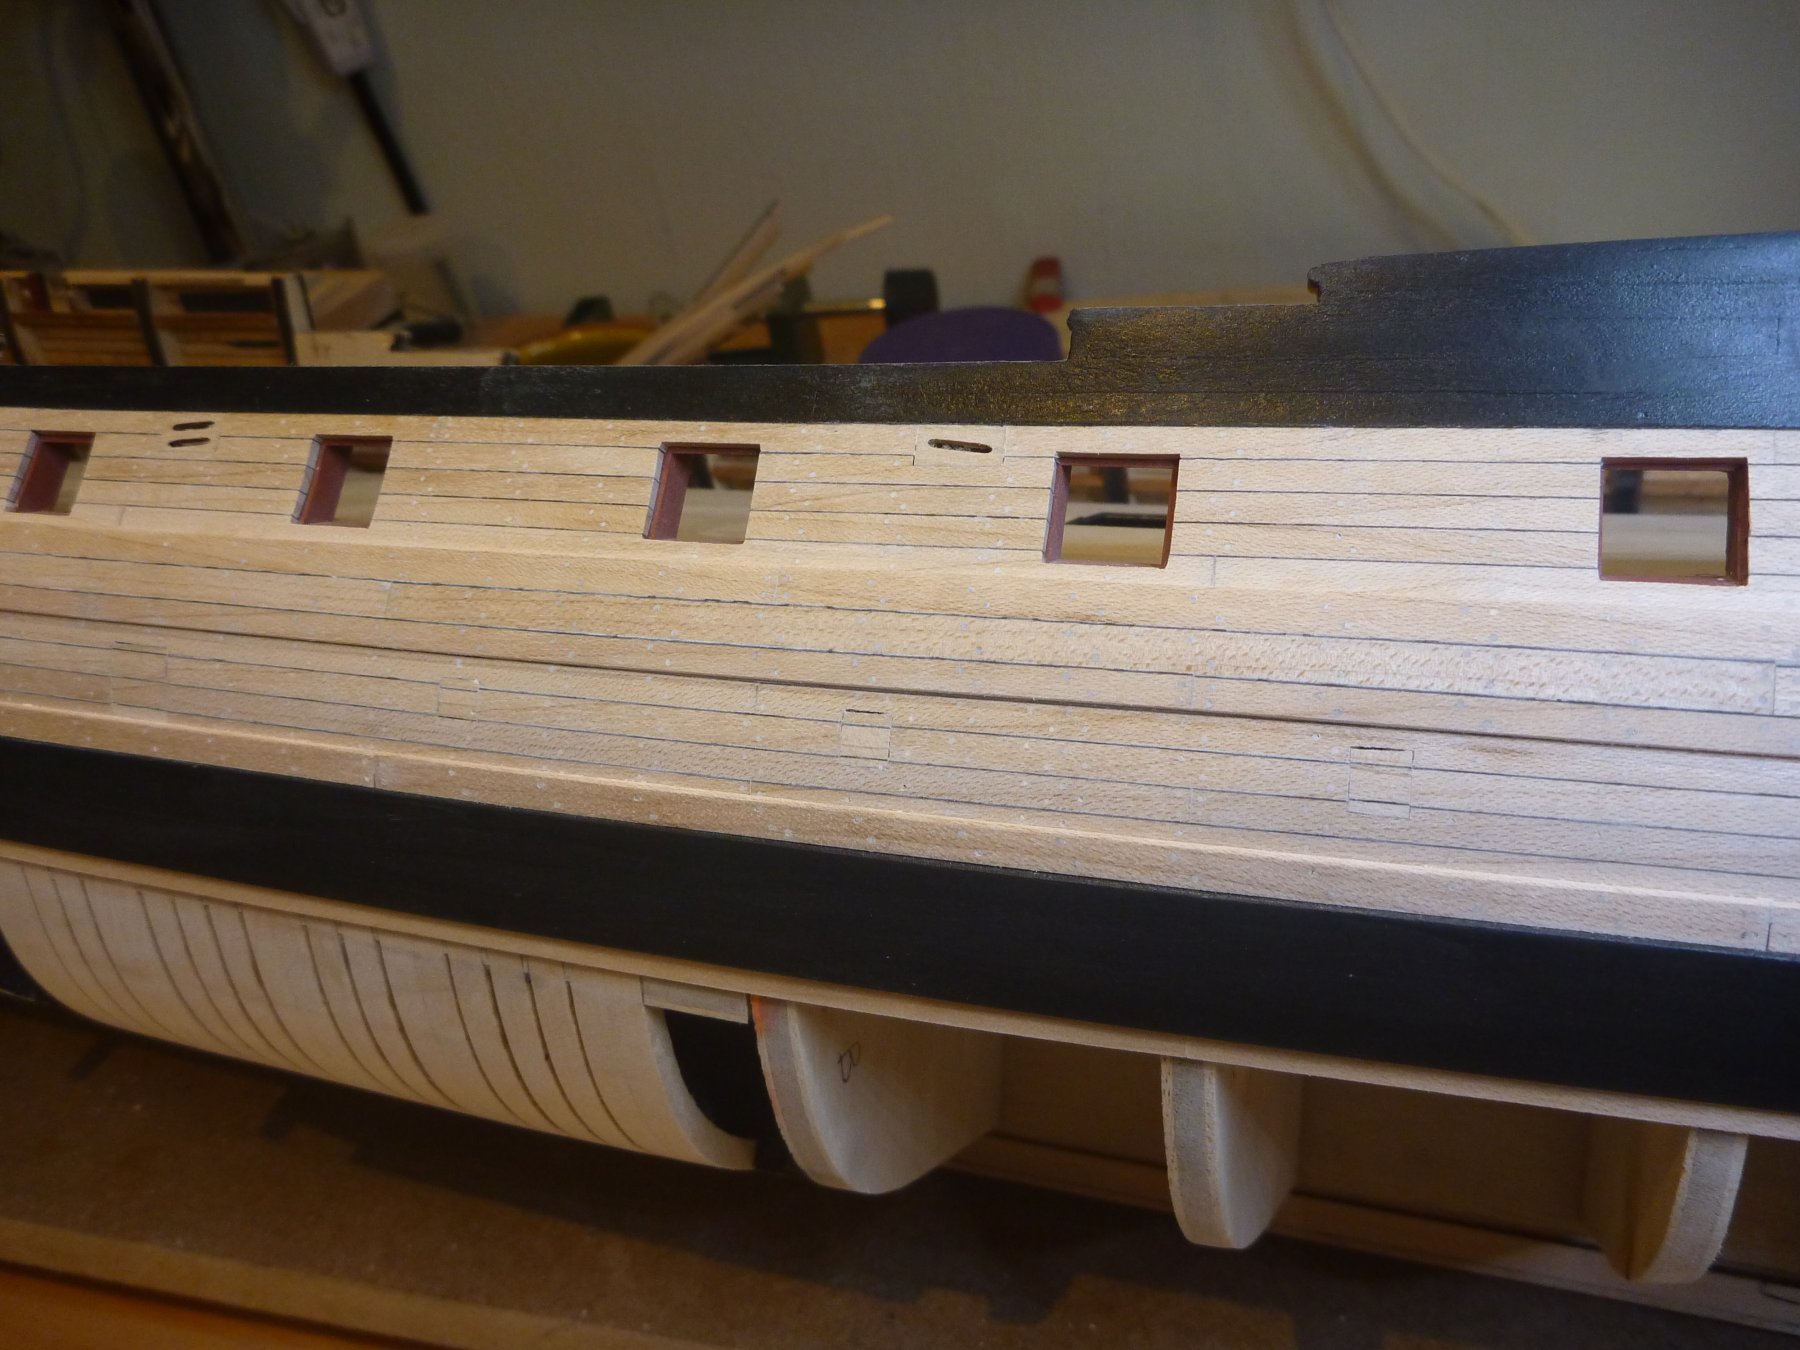
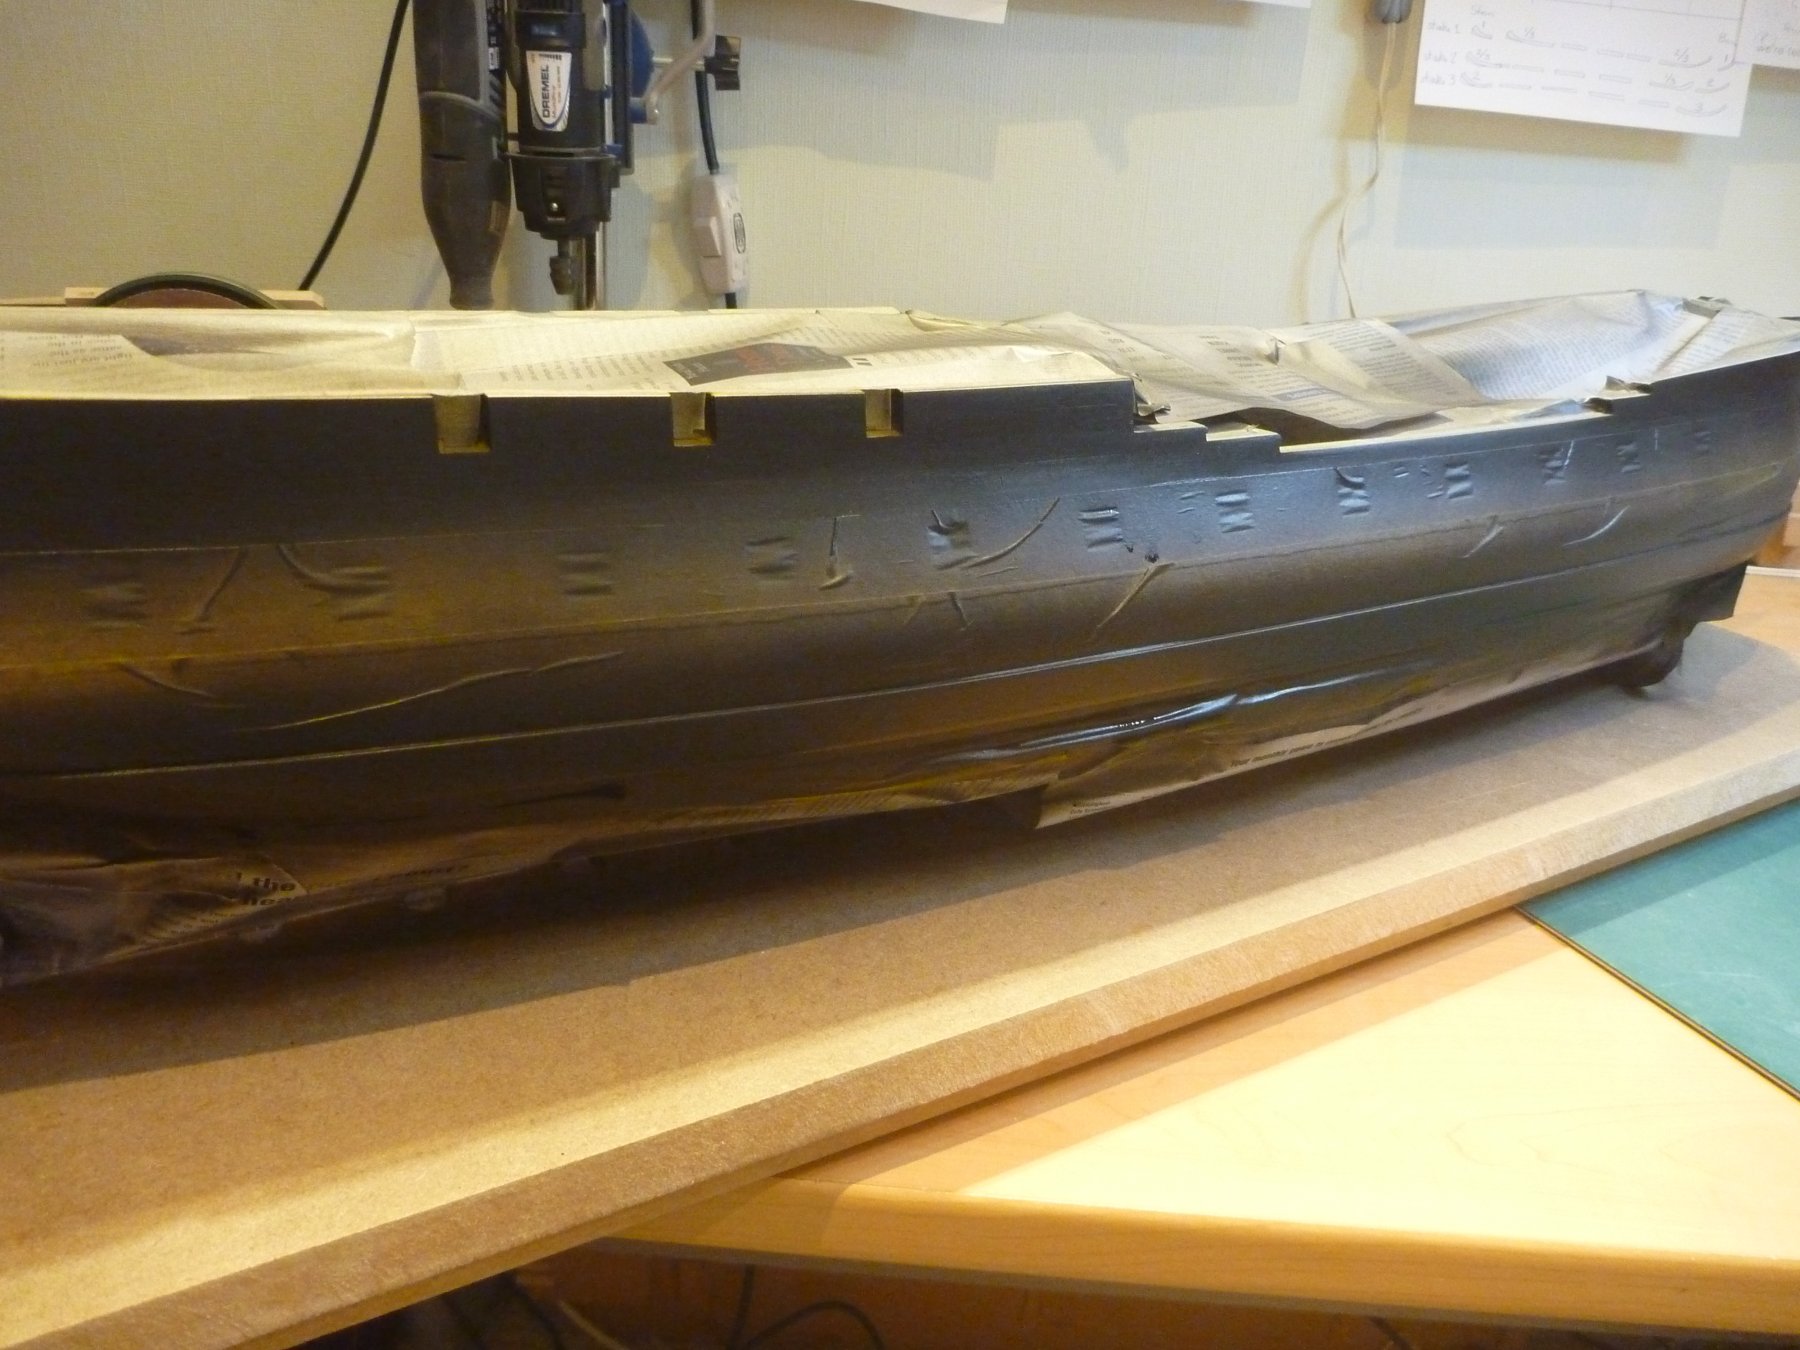
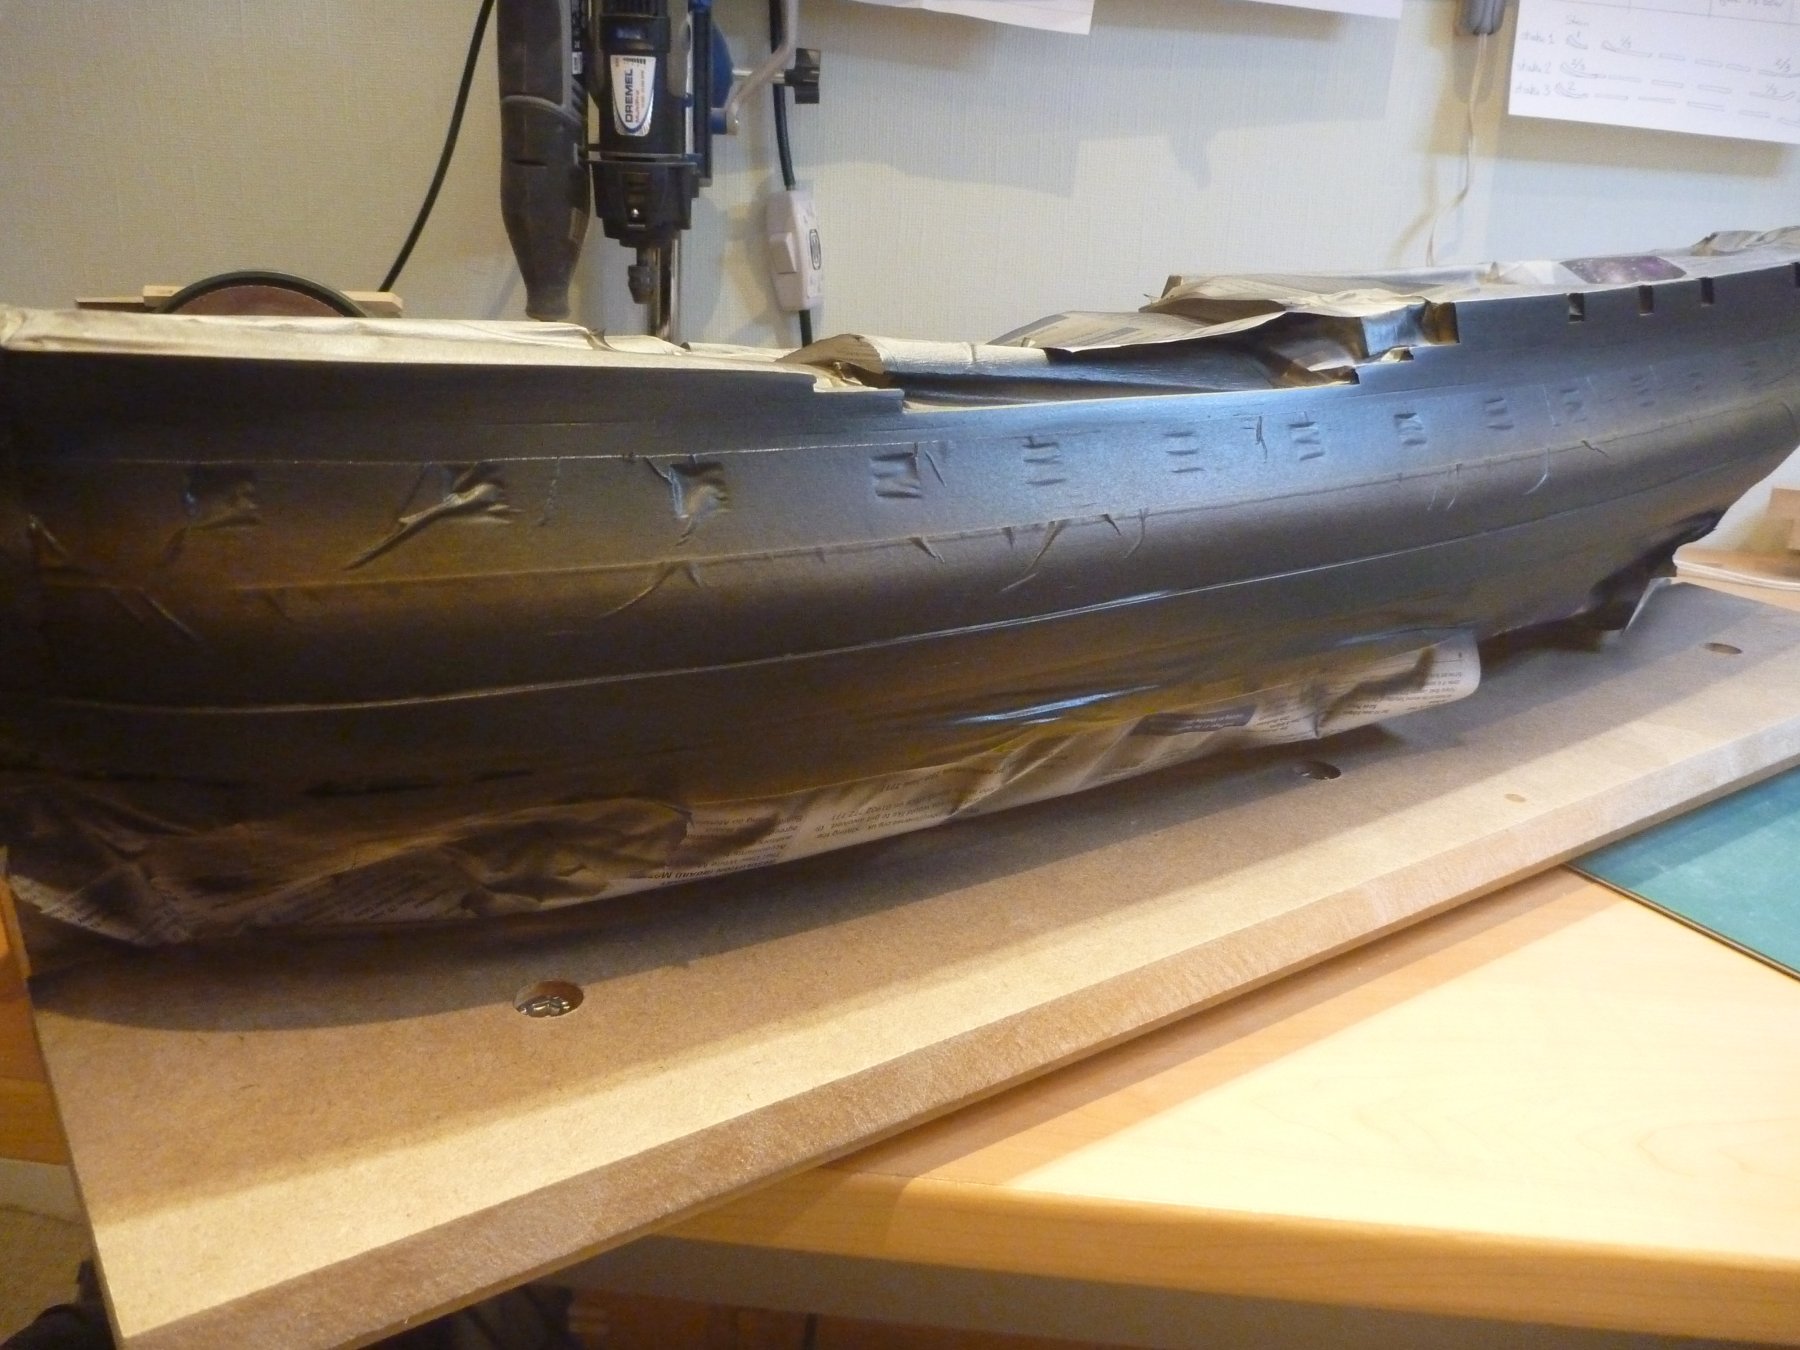
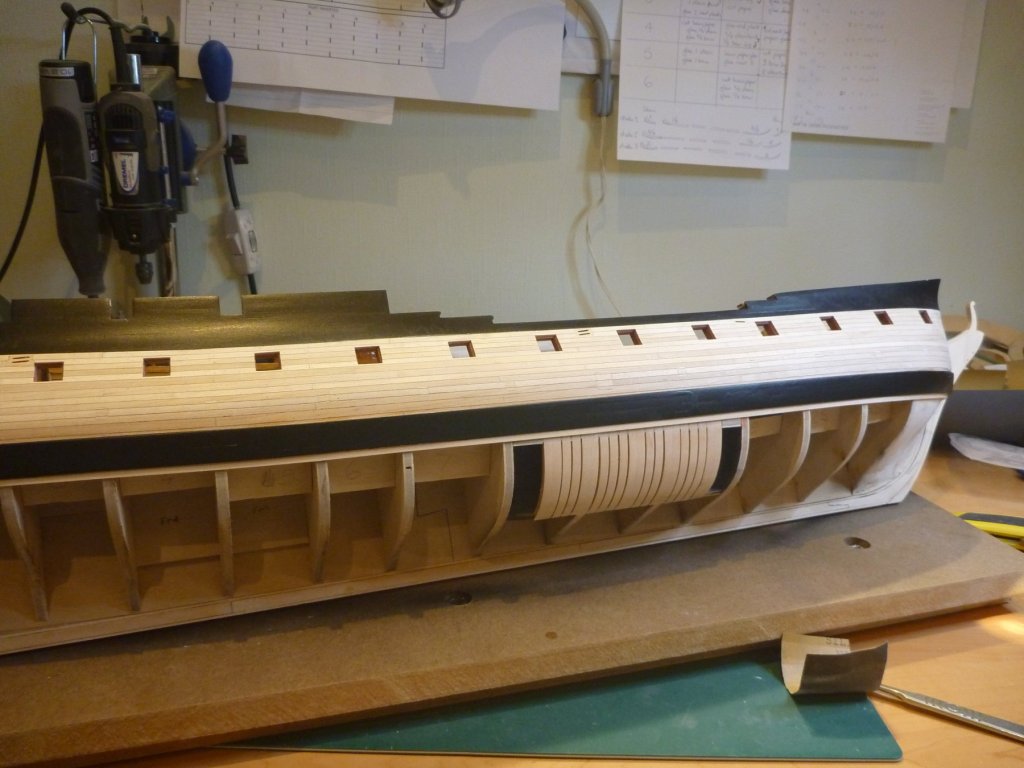
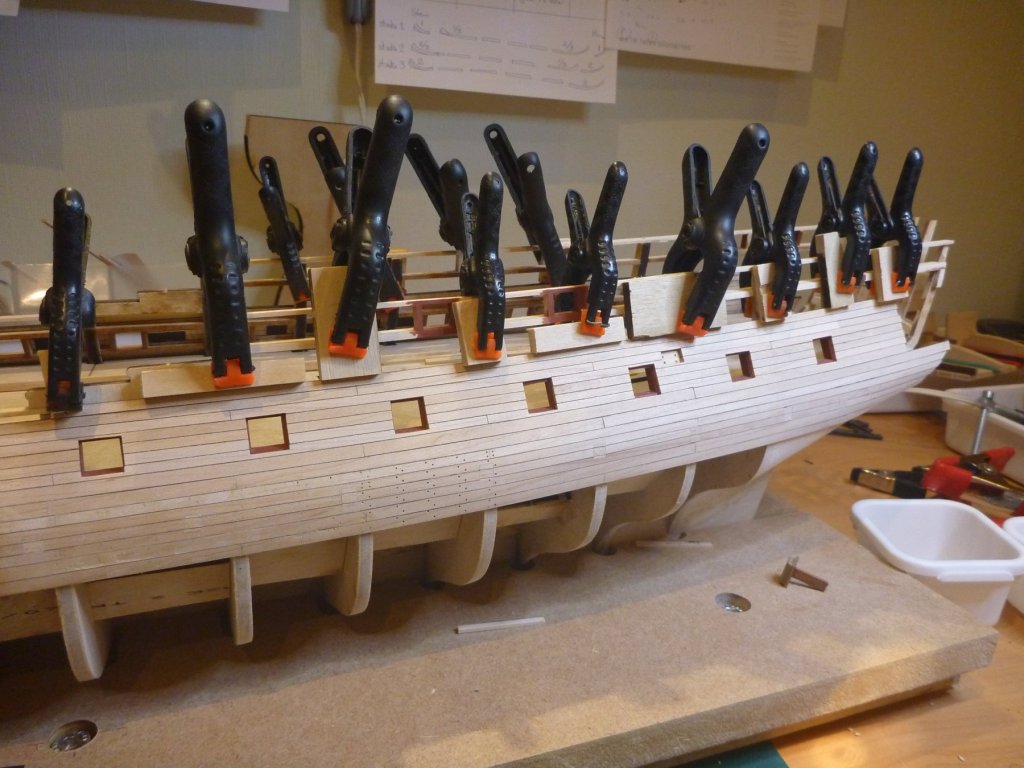
to continue- Main wale both sides now sanded back and a small radius sanded in top and bottom. Next job, remove some of the capping structure where it crosses the higher gun ports. Here's on done and one waiting, first carefully saw them out. Then a gentle sand back to shape. The paint gets a touch up a bit later. Now I can get prepared for some painting. I am giving the painted surfaces a coat or two of Shellac sanding sealer, then a very fine grit sanding. First time I have used this but I am pleased with how it worked out. Here you can see the Wale coated and the upper works. Bit of a jump forward. But hull masked and 20 coats of thinned (quite a lot) Admiralty dull black acrylic applied. I used an air brush. But I think that it will be the last time I do use the air brush. I have been finding that the many thinned coat approach gives a perfectly satisfactory finish with a brush. The Air brush is, to be quite honest a huge P.I.T.A. Extra masking, dedicated painting area, constant clean between coats, who needs it. Another shot from the bow.


-
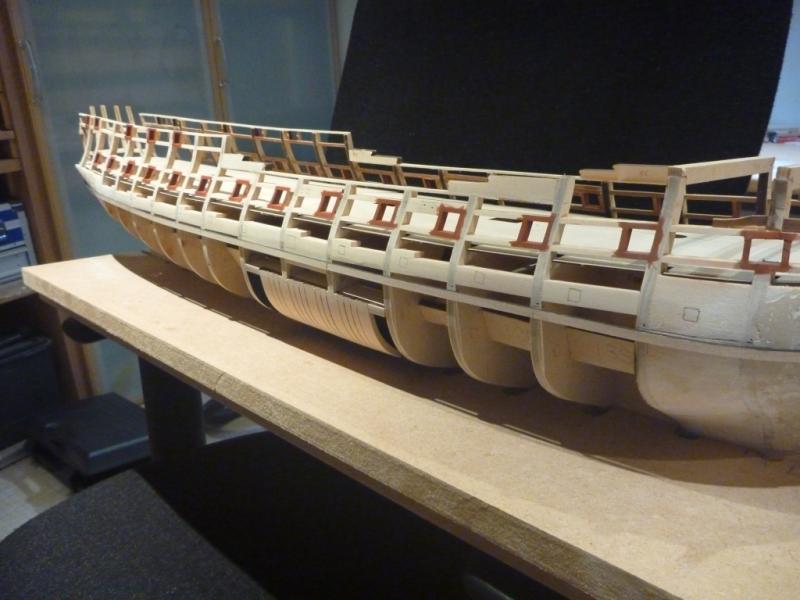
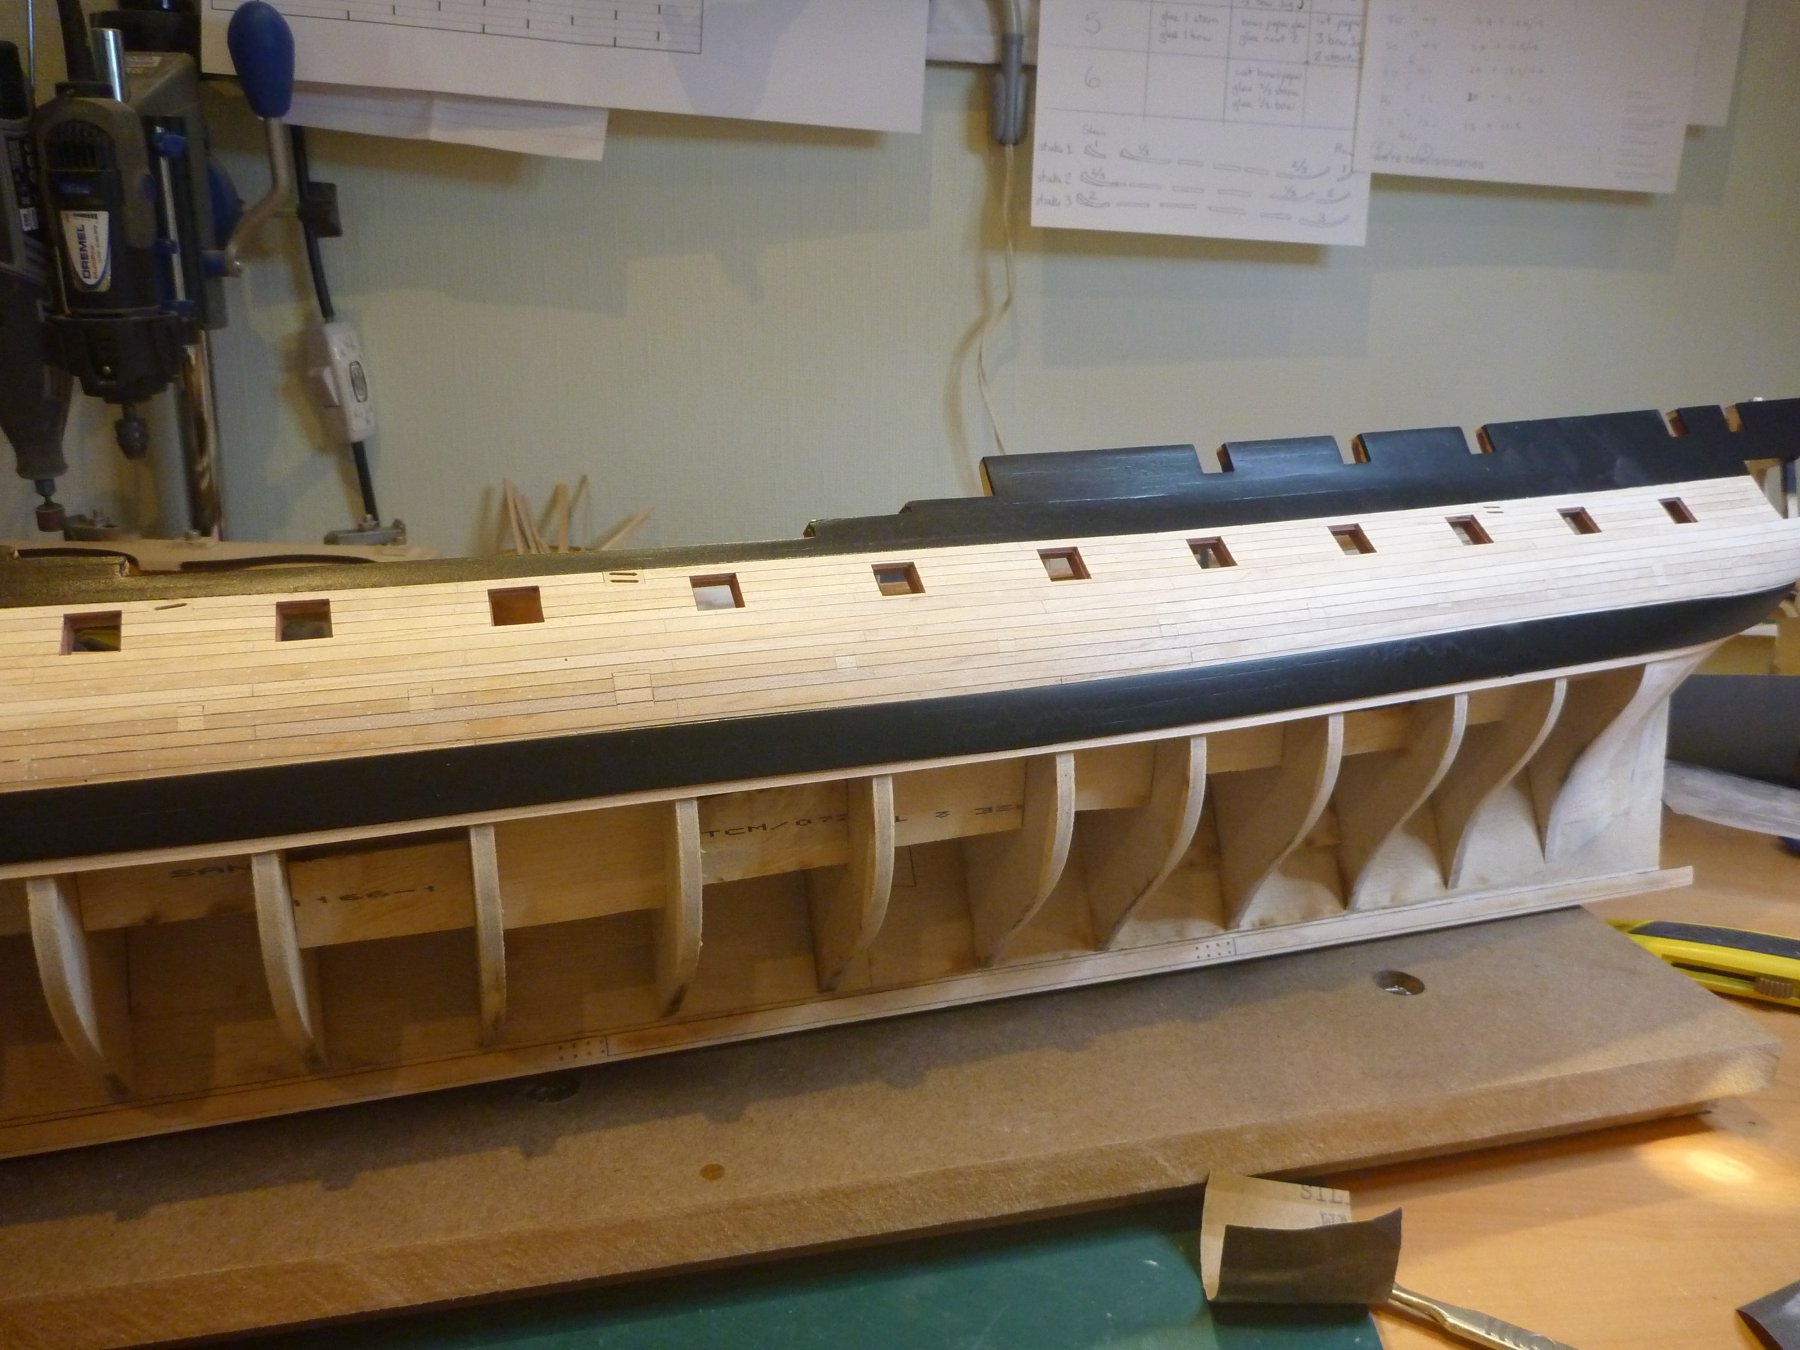
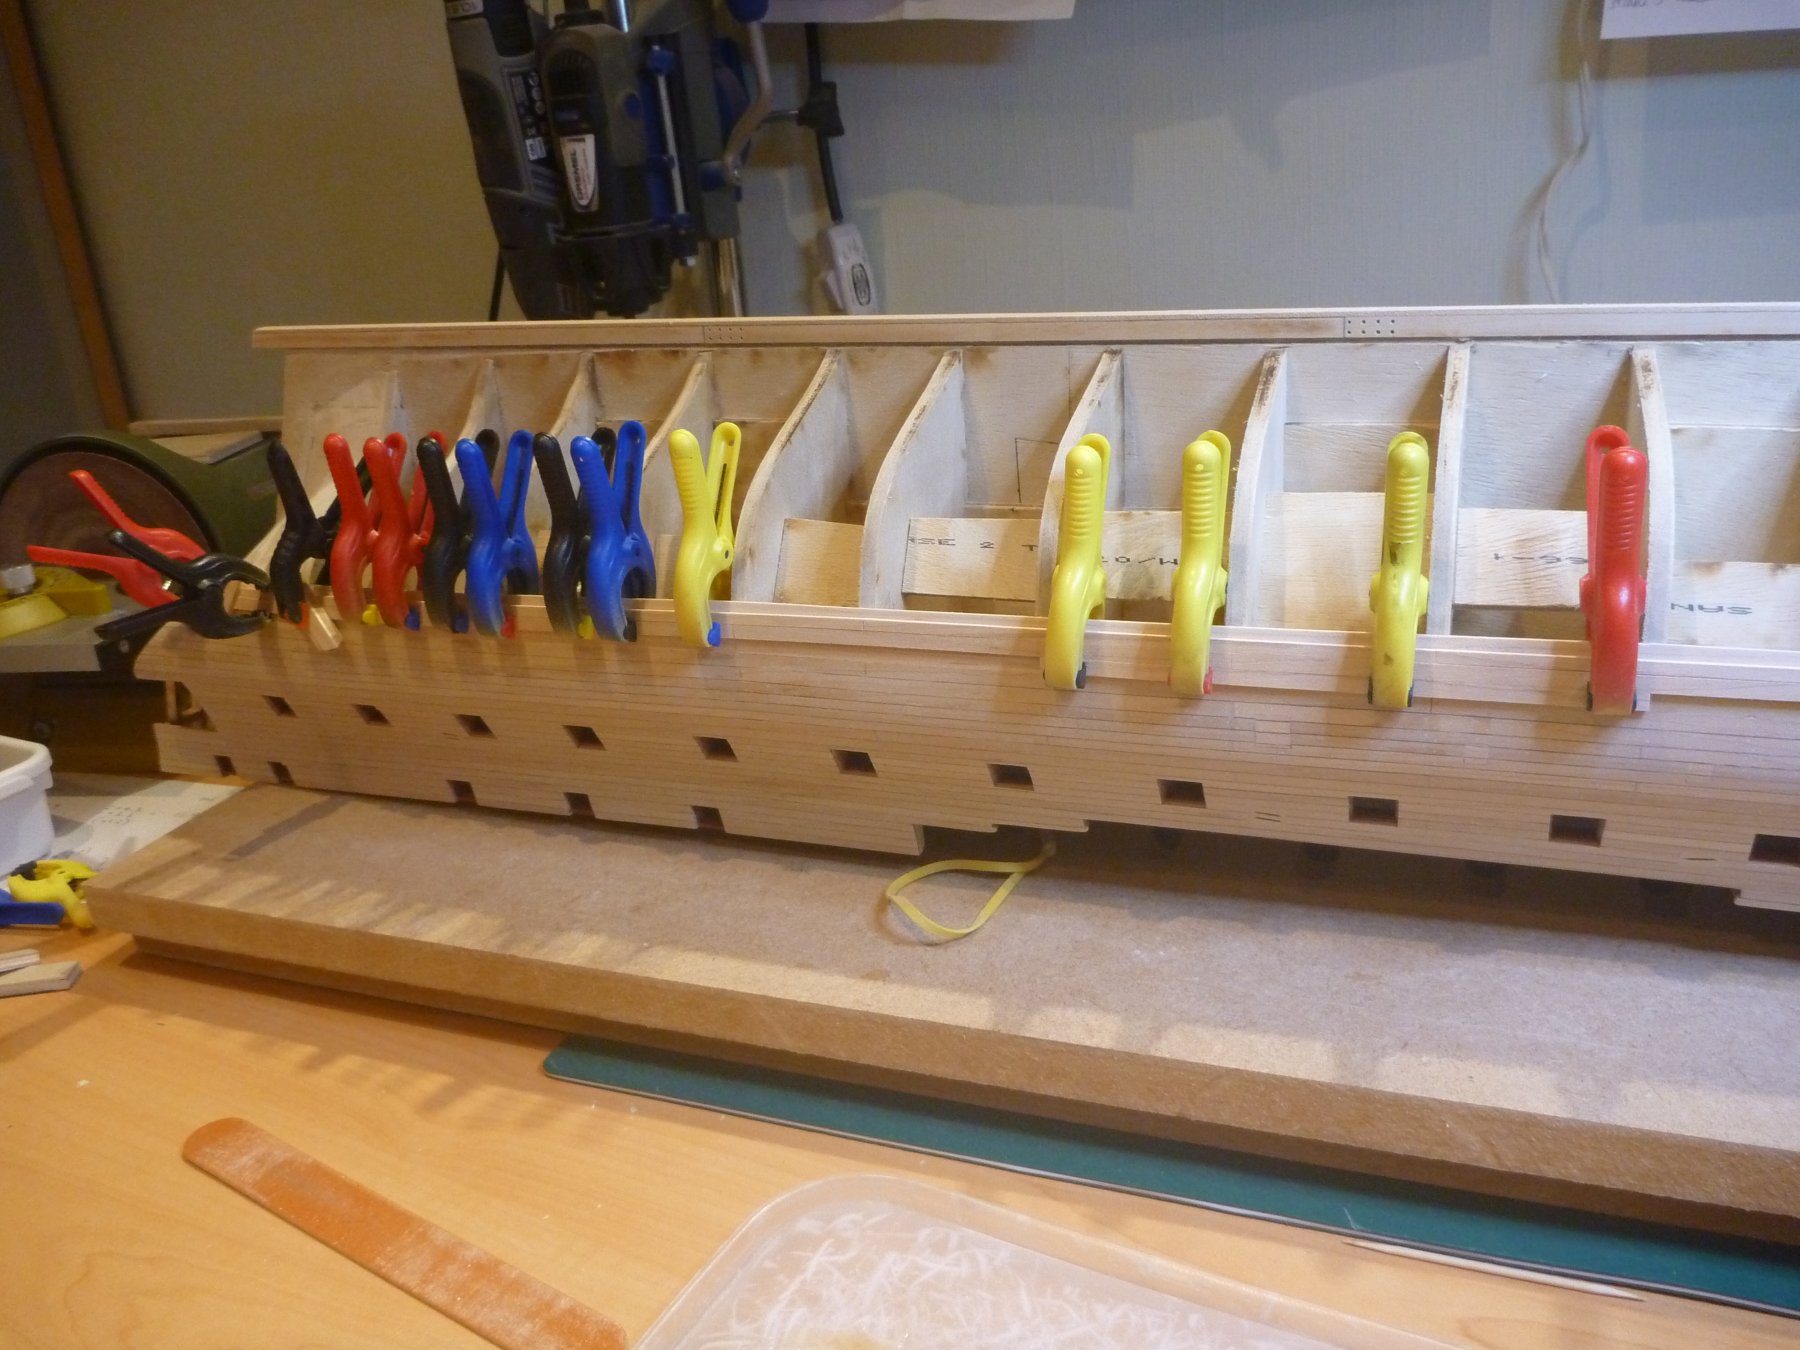
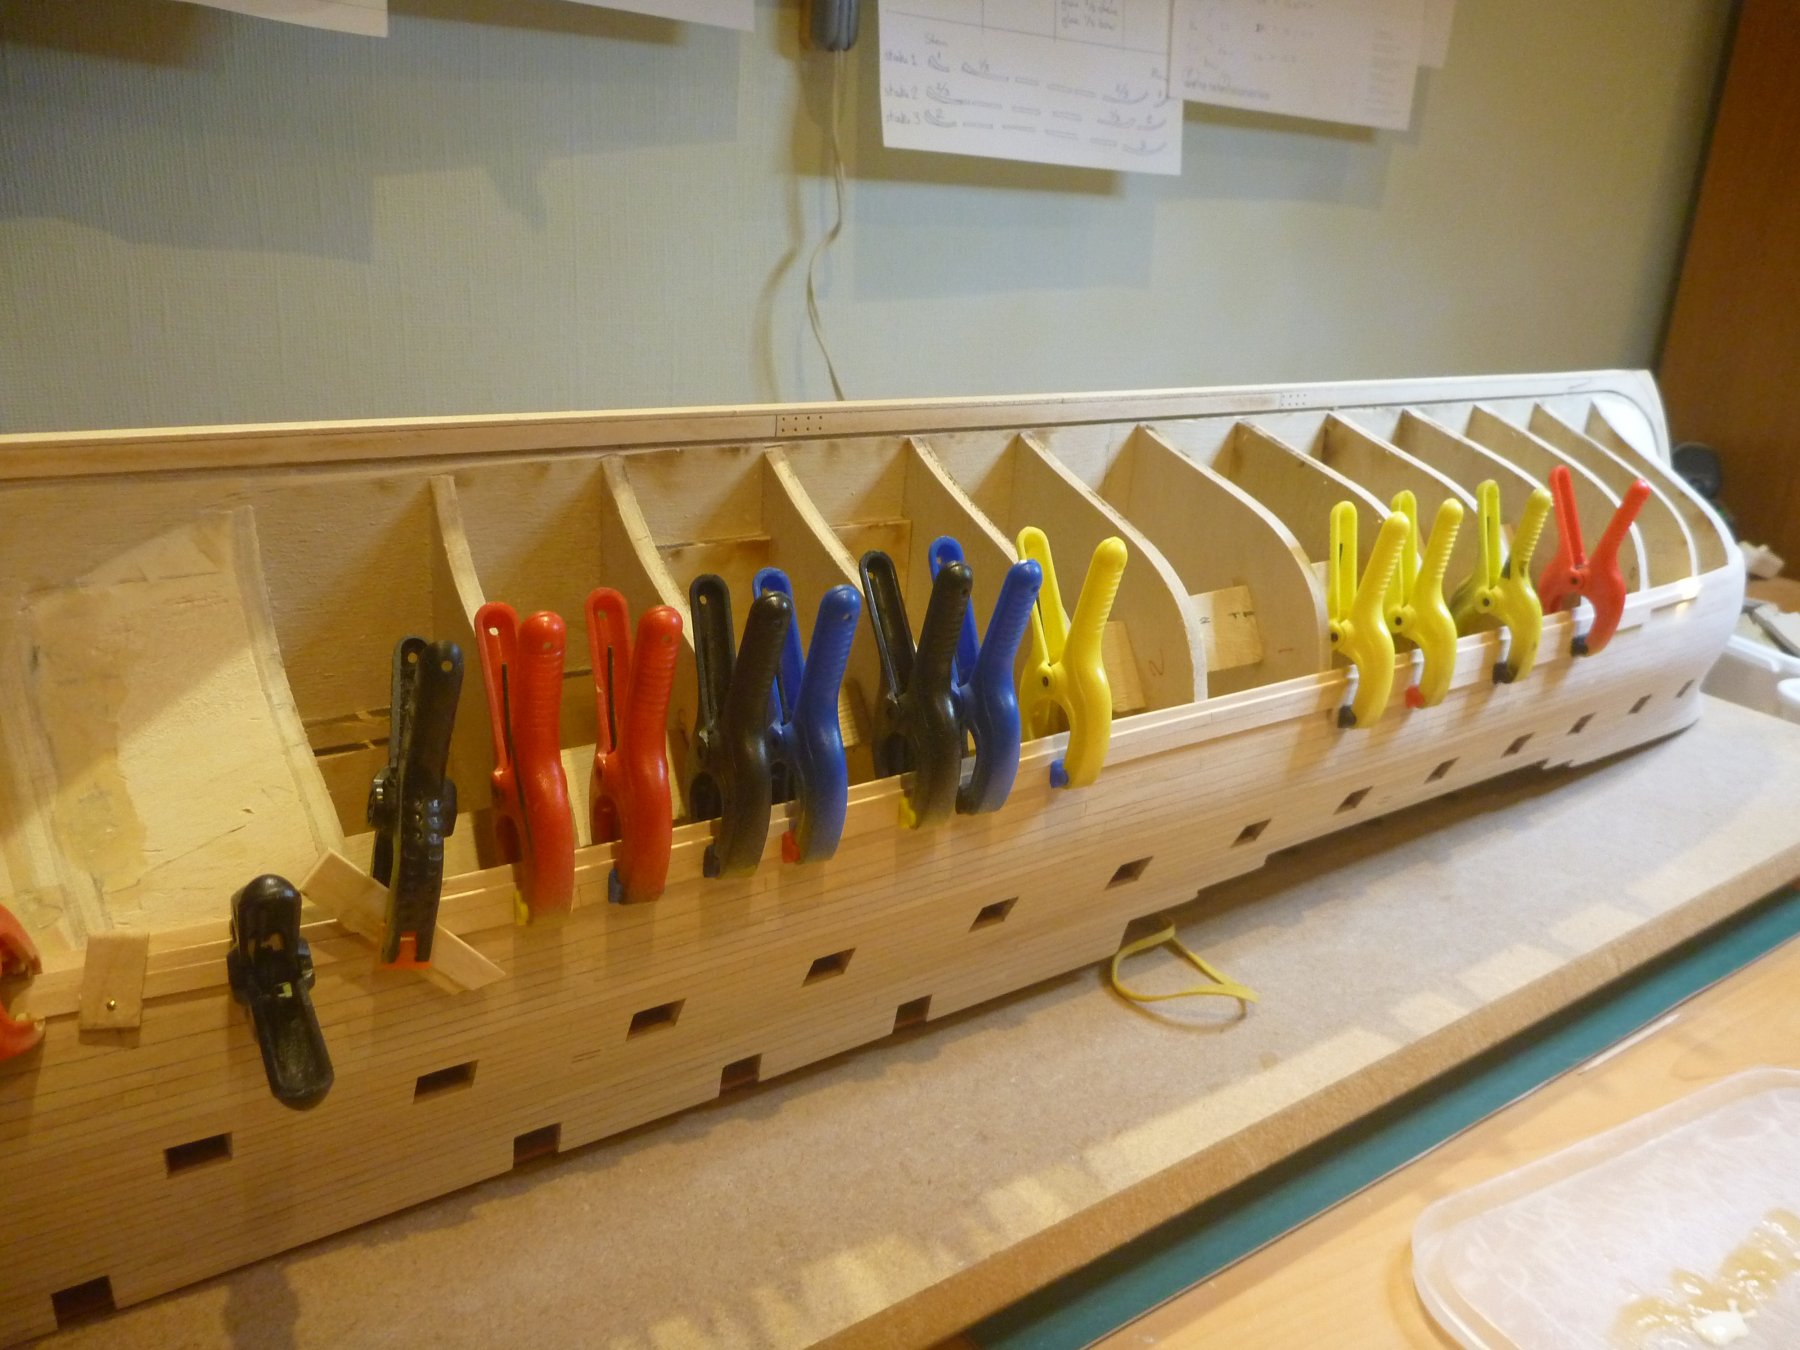
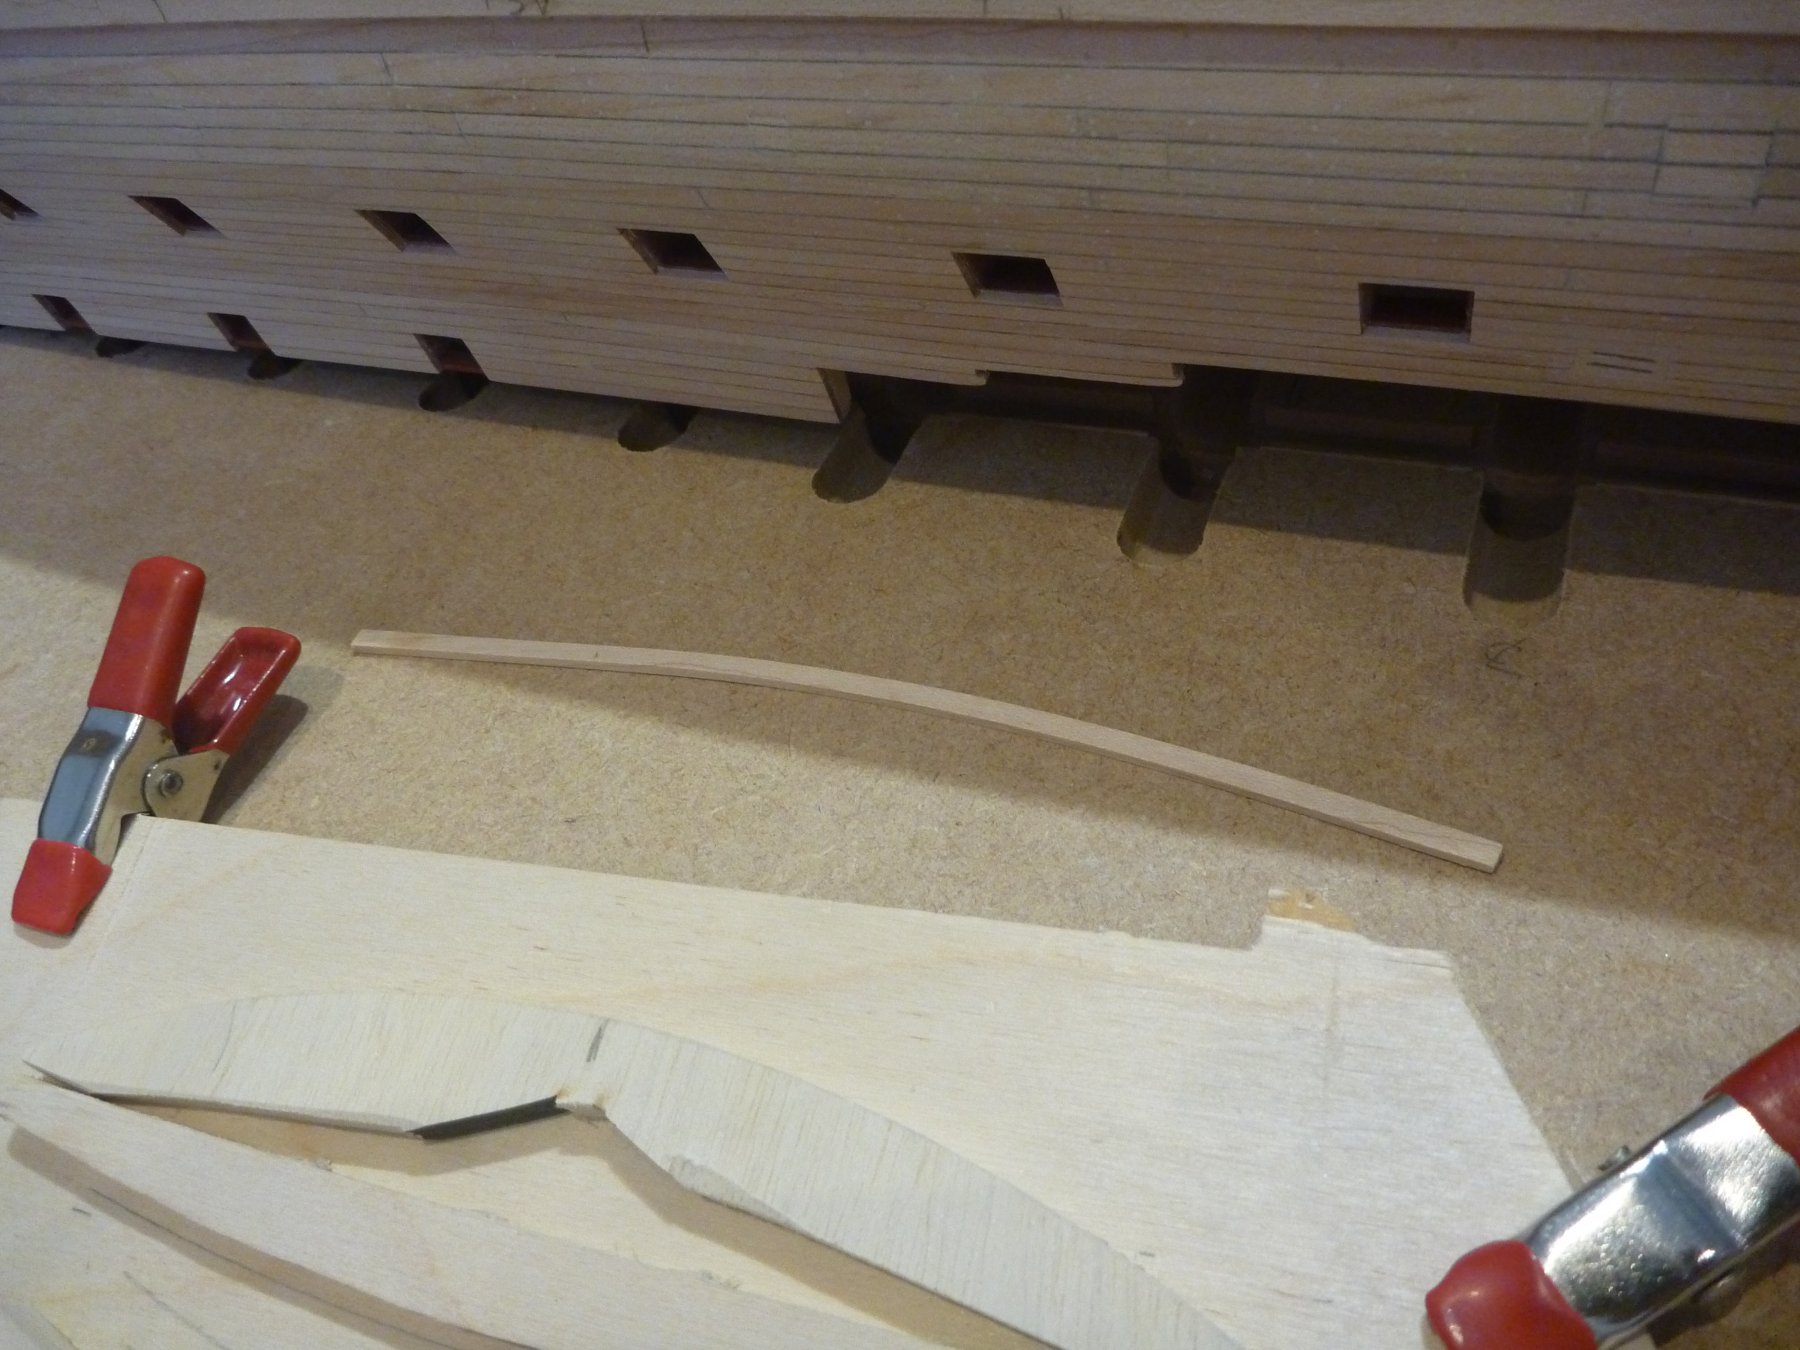
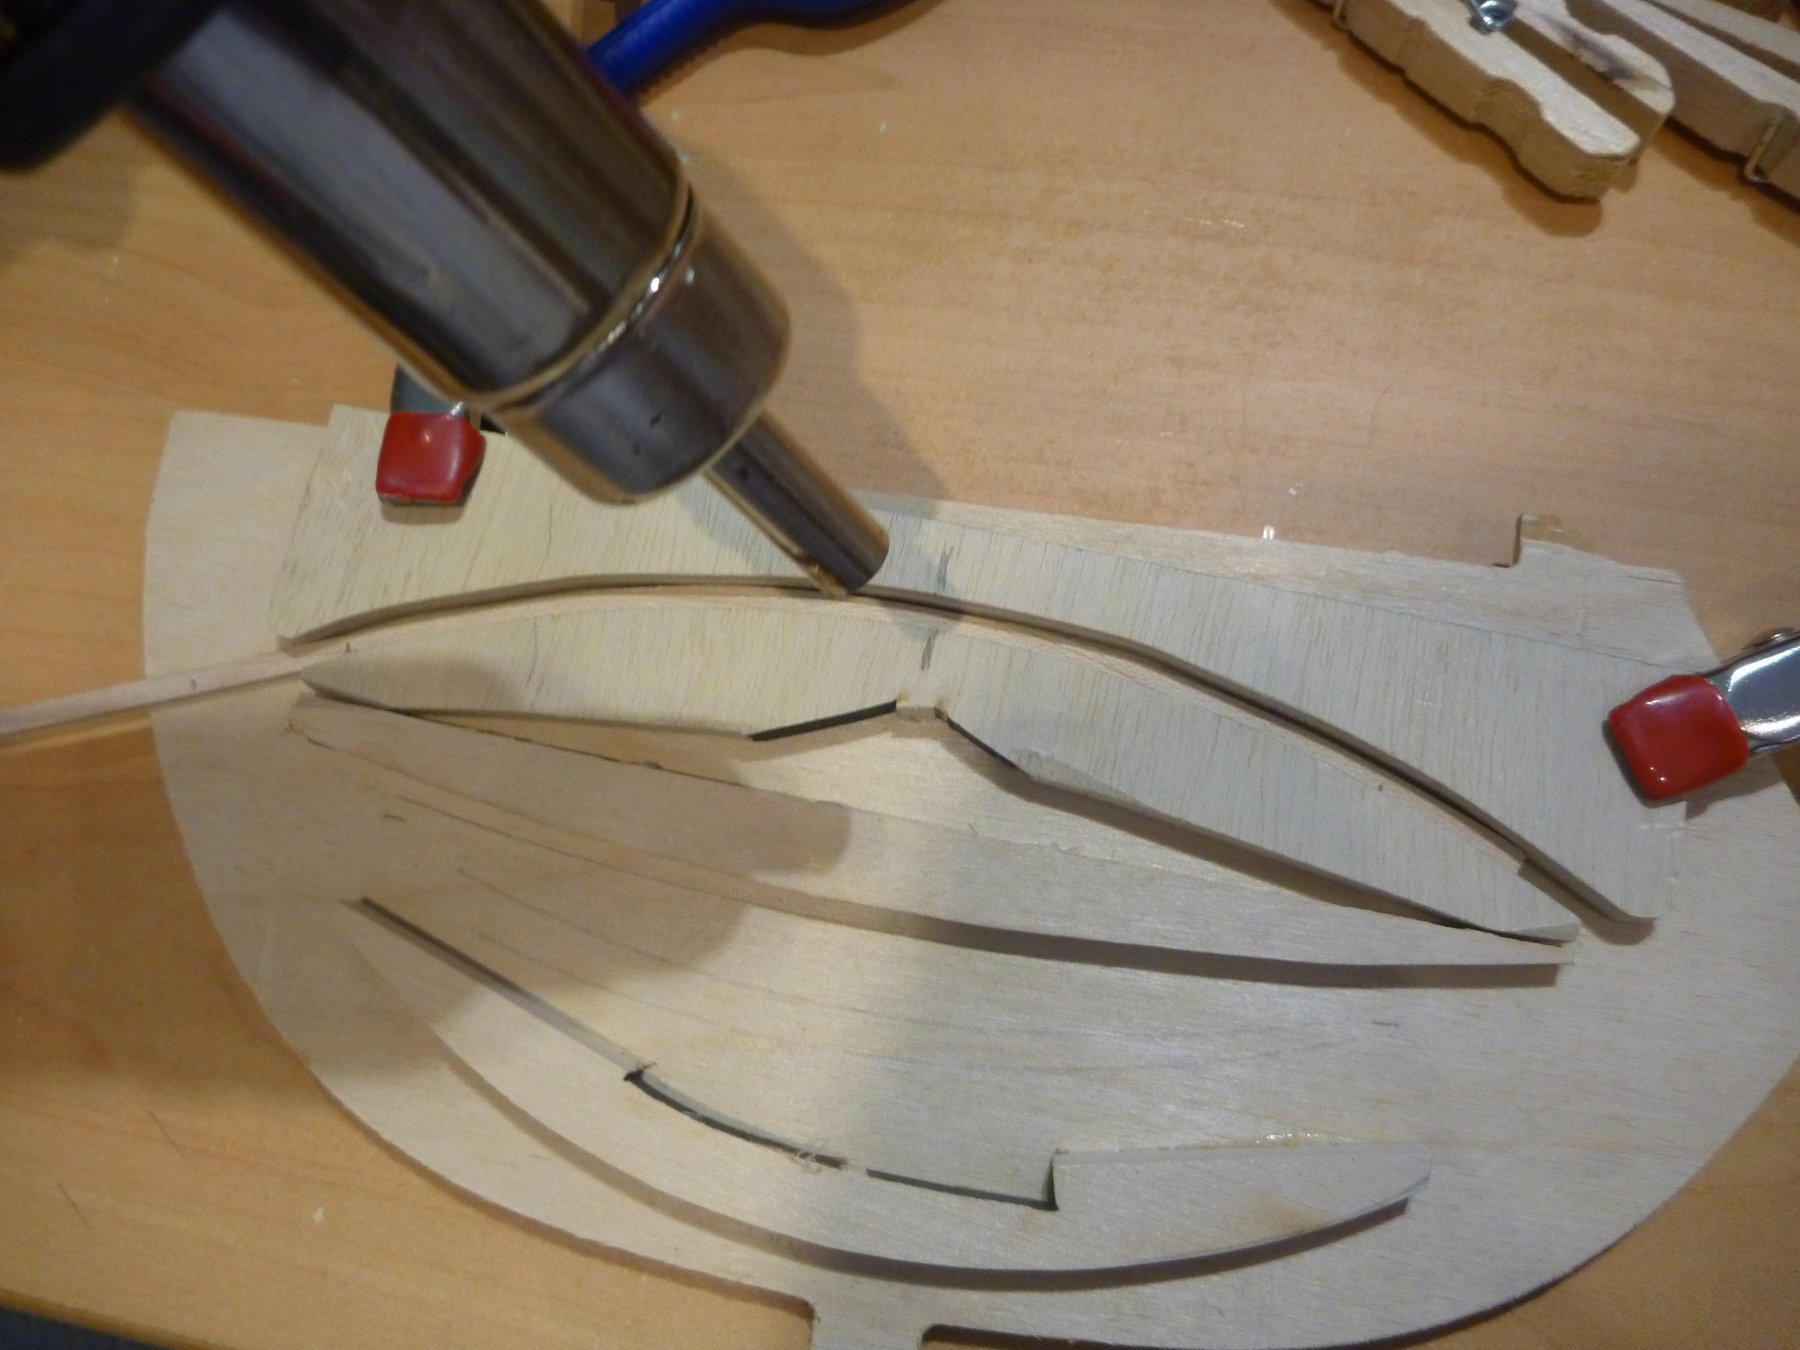
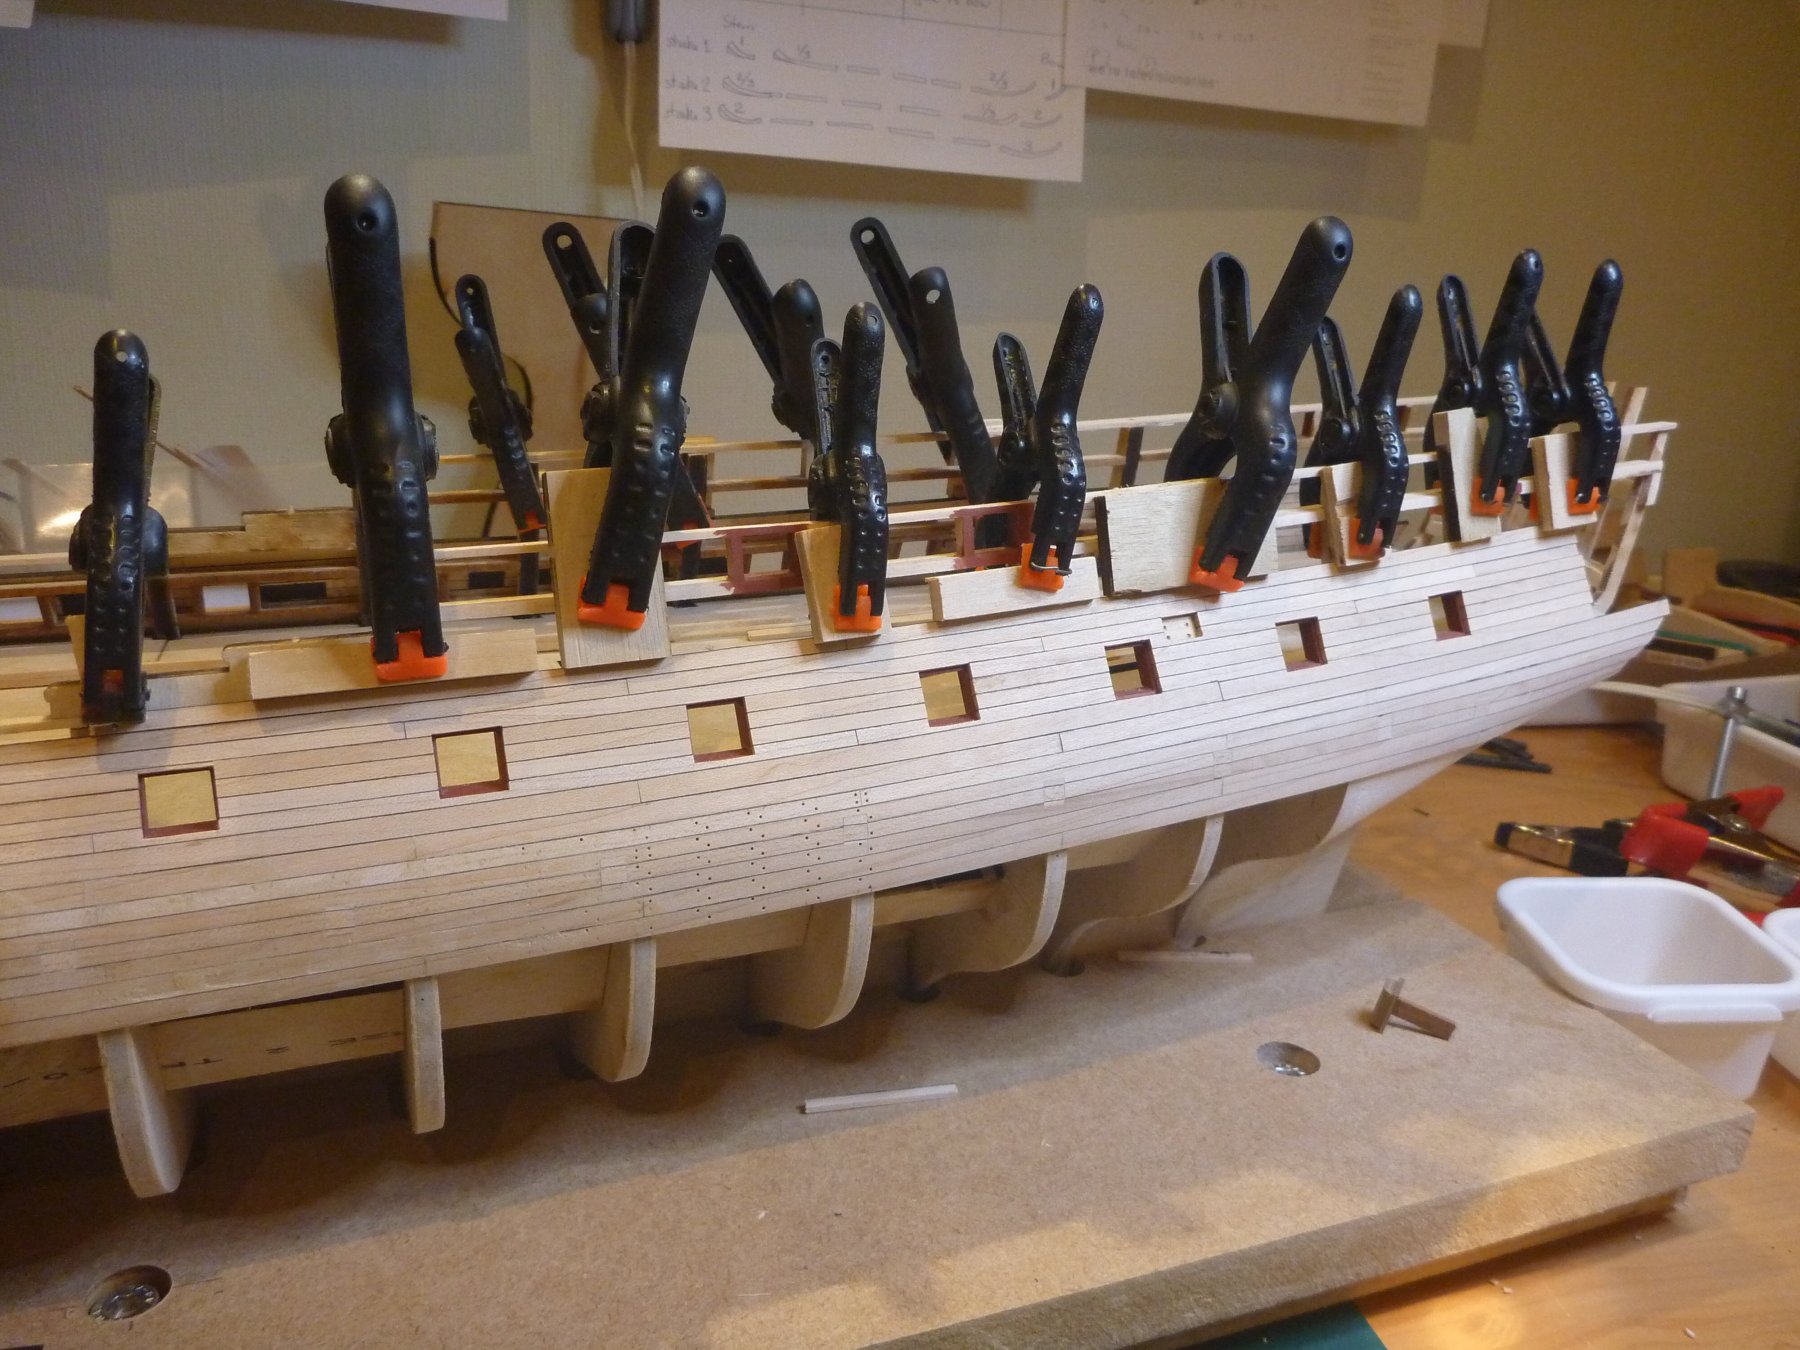
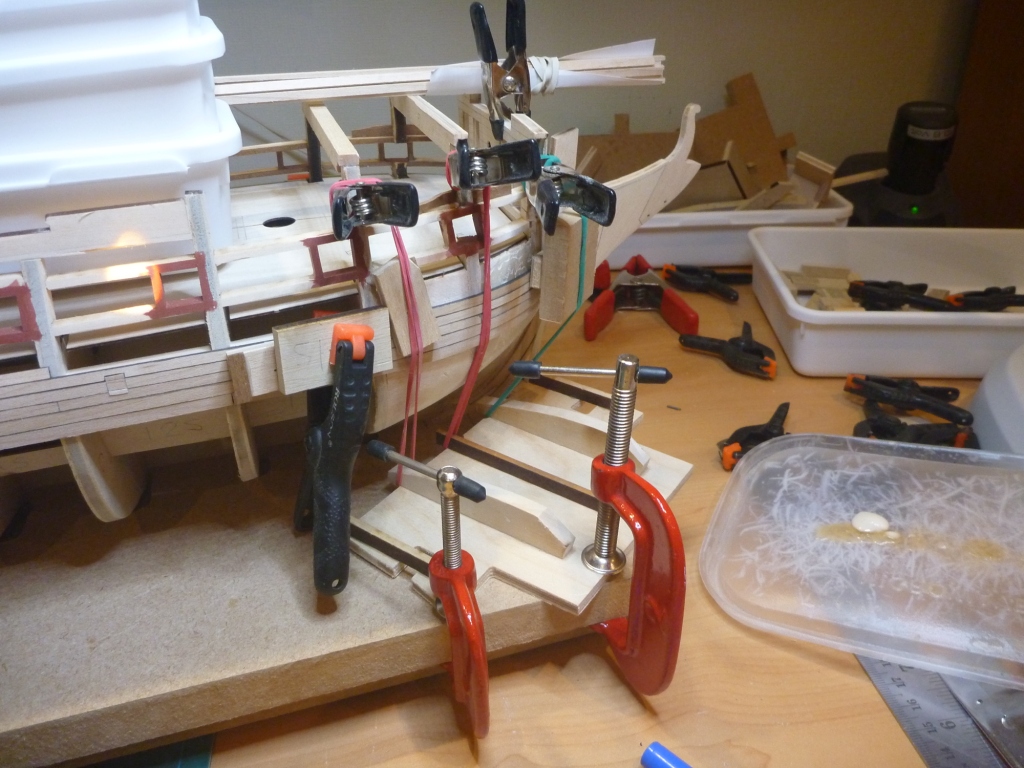
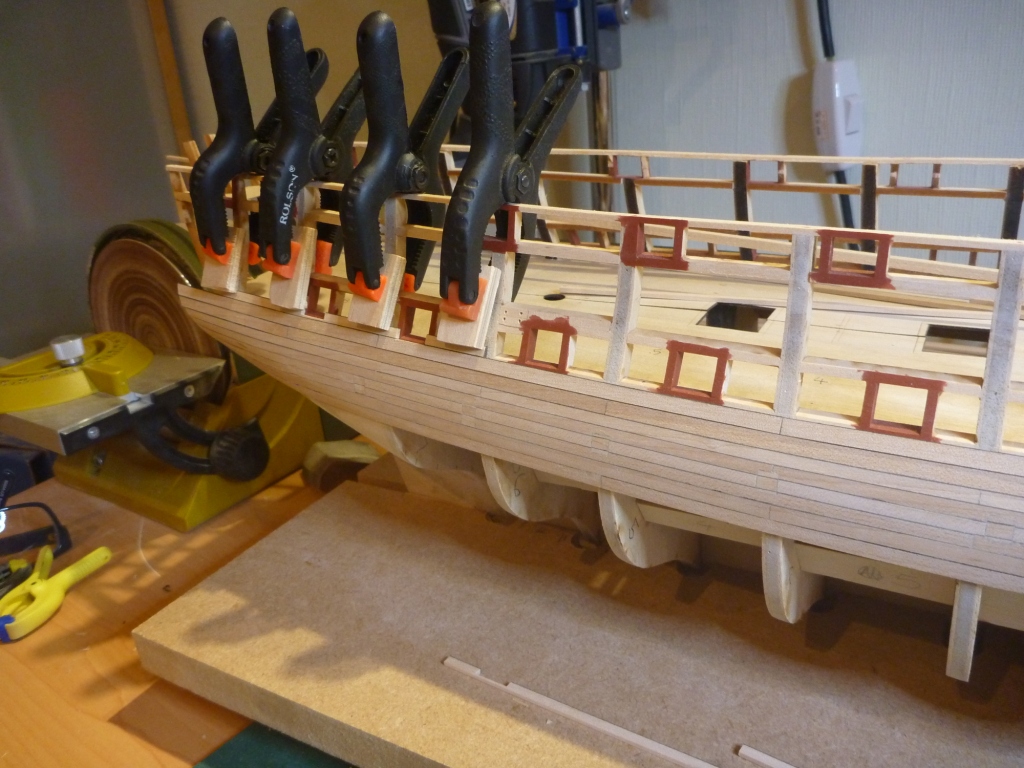
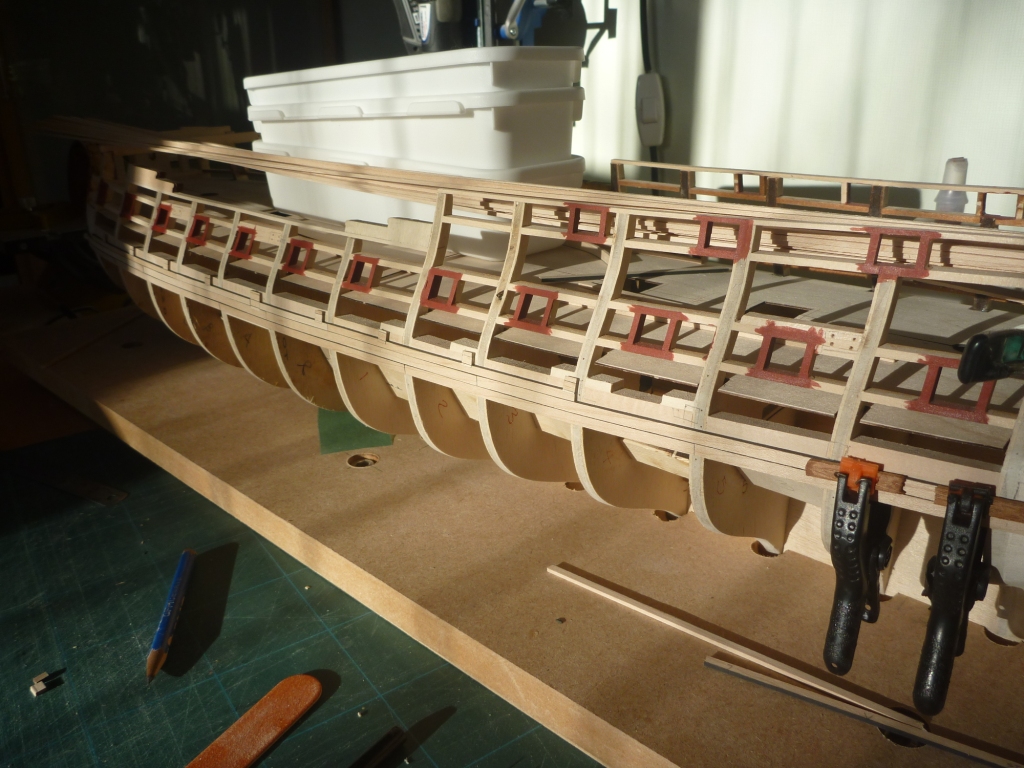
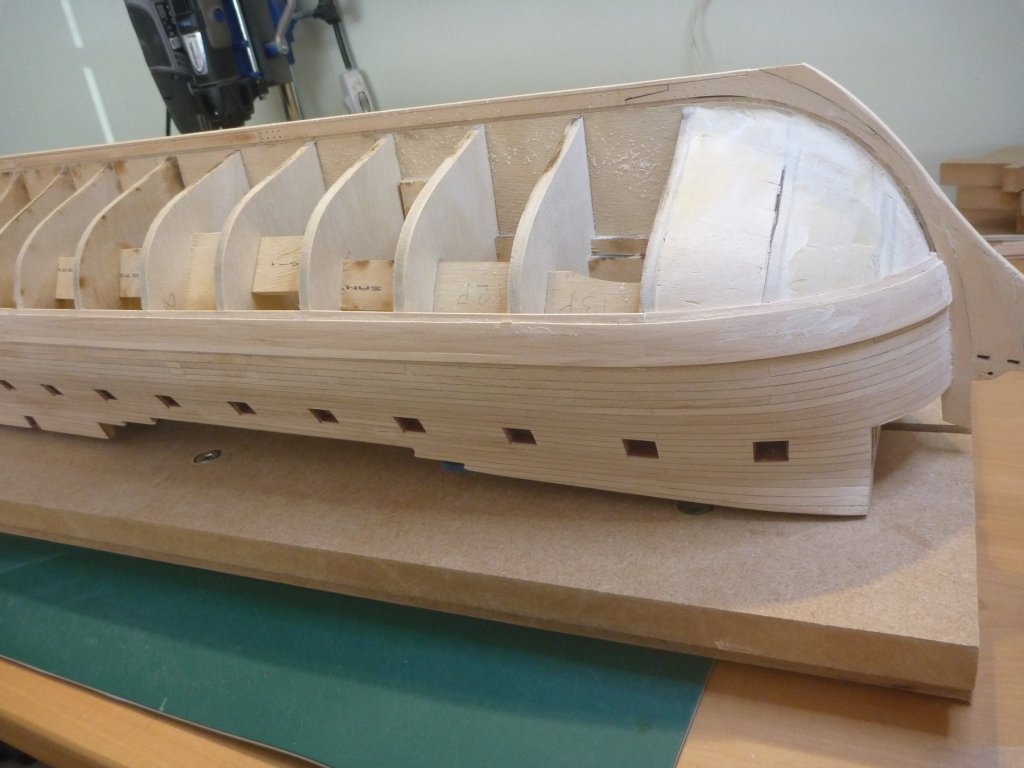
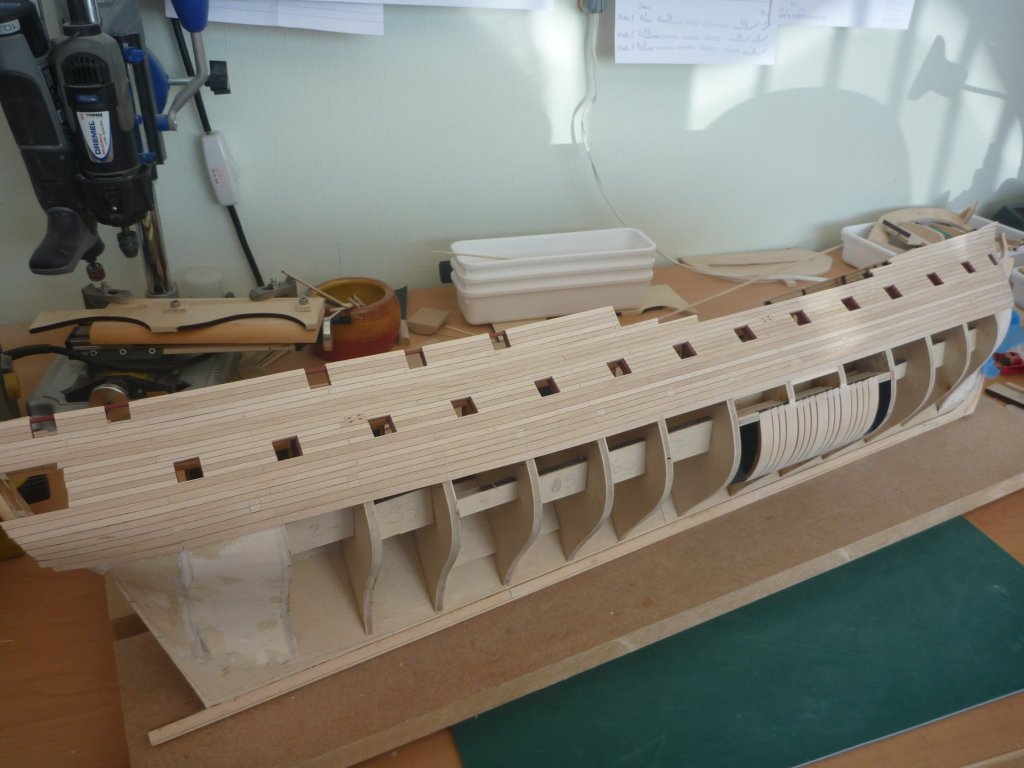
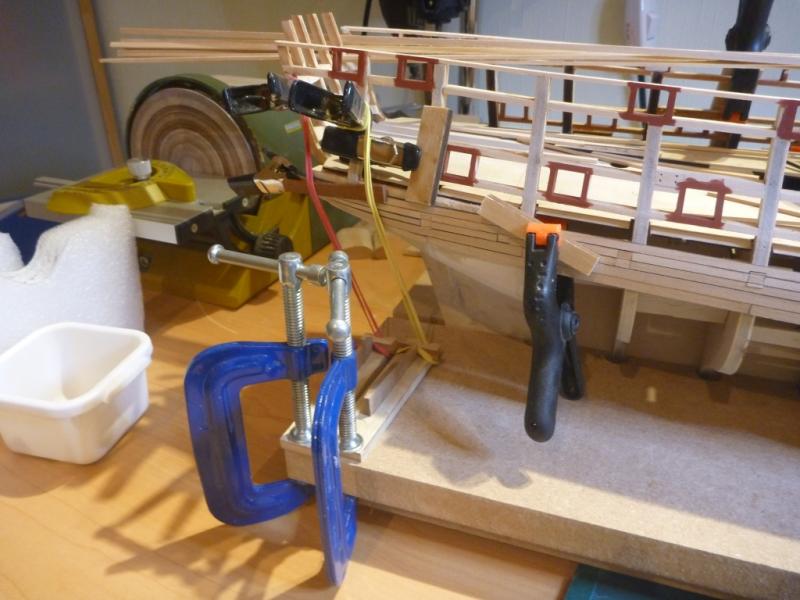
I'm afraid it's been a while since I updated my build log. But here we go with a few posts to bring it up to date. This where I had go to. All the above wales planking is now drilled for tree nails. And I then sanded back and rounded out the holes with an awl. Now they have been filled and again sanded back. Next thing was to add the main wales. For the strakes at the bow some special treatment is required. First I need to edge bend them. I have a jig with a couple of suitable radius guides glued on. Put in the plank and use my hot air gun to heat it up, then gently push in the loose outer guide and clamp in place. Once cool (I tend to leave for at least an hour but not really necessary) the plank comes out. There is always a bit of spring back but that was allowed for with the guide. Then I use the hot air gun to gradually work the required radius in for the planks position. This method allows me to constantly try and adjust till I'm happy, heat it up - flex or twist a bit by hand - try in place - repeat. Here is the wale at the bow finished. And at the stern. Because the wale will be painted I have been able to use a bit of filler to fill any small gaps etc. Nick


-
Hi tom My transformer was not in the base of the model but external, it was a plug in type so went into a wall socket via a remote control switching plug. The two (now quite thin) wires run under the base then up through the base adjacent the support cradle. I'm afraid the model is now in a cabinet so pictures not possible. In my current model I am using posts to support the hull which have a central mole to run the cables. Nick
-
Hi SOS Nicely related story, thanks. On the Acrylics front, I have just finished doing exactly what you asked about on my Confederacy. Two coats of Shellac based sanding sealer, light sanding, many, many coats of thinned acrylic. And I'm very pleased with the results so I would say no problem. Nick
- 1 reply
-
- 3
-

-
I ran 15 LEDs in my Caldercraft Victory. I ran the two supply wires out though the mounting base to a transformer and added a remote control. I buried a card with resistors in the hold and ran them as three parallel lines of 5 LEDs Rather than Gunports I took a different approach. At the foot of stairways, below skylight, behind cabin windows and in the three stern lamps. Nick
-
3D-printing for modellers?
pompey2 replied to Jean-Pierre's topic in Modeling tools and Workshop Equipment
3D printing, or Additive Manufacturing is really taking off now. There are now a huge range of metals that can be used, at work we are switching a lot of manufactured parts to AM. I recently saw an example of a 130 part Aero engine welded sub assembly converted to a single AM part. Our products often require a complex wire hole to be routed though a difficult shape. That involves drilling holes at odd angles, machining pockets that then get welded closed etc. A great candidate for AM, the path is now nicely swept and requires no post machining. But it get's better. This will really blow your mind. We are researching AM for the basic part with through hole (Stainless) Then a second AM process with an insulating medium to line the through hole. Then a third AM process with copper to put a conductor into the insulation. Hey presto no need to run a wire at all, it's all printed. It looks like AM dual materials is going to be a big one going forward. Nick -
Wood filler
pompey2 replied to michael101's topic in Building, Framing, Planking and plating a ships hull and deck
Michael There is one other thing to bear in mind. It depends on how you will clamp the planks. Some fillers are very hard and if you want to use small nails to clamp planks you might find them bending when going into the filler. Nick -
Bending with steam easily
pompey2 replied to a topic in Building, Framing, Planking and plating a ships hull and deck
I used to use steam But since finding the hot air soldering tools I have been converted. Here is a link with more details including my review https://modelshipworld.com/index.php?/topic/14646-bending-with-heat-only/ This cheap little unit delivers a 300 degree C (or higher if you wish) air stream in a focused nozzle. I find the advantages over steam are No preparation needed, just jump straight into a bend. Steam can only reach 100 C (in atmos), this thing can go a lot hotter, so time to bring a plank to a malleable state is seconds. You can keep revisiting the bend - put in heat, bend a bit by hand - hold out of heat a few seconds and try - return to heat and repeat as many times as necessary. It will edge bend and twist. The timber does not swell with the water/steam. It is quite safe even though it doesn't look it. the hot spot is within a millimetre or so of the nozzle. You can put a finger within a 1/4" of the side of the nozzle without discomfort. Sounds like I'm selling them But I would recommend taking a look, even just read a more detailed review. Nick -
I recall the rope walk in Chatham dockyard, I got to have a go. And the length of rope I made still hangs above my workbench. Nick
-
If, by story, you mean the story behind the subject ship then the Victory has to be right up there. Nick
-
Nice spot Harley, I think you're right. I don't think it will be a big deal so I don't propose making a change. I'm sure there will many more places I will mess up yet Thanks for taking the time Nick
-
Hi Richie. I am doing similar to your suggestion of a pencil, I use an awl / bradawl. A light push in, quarter turn and out leaves a nice clean hole. Nick
-
Loving the work on your bow fillers, very nice Nick
-
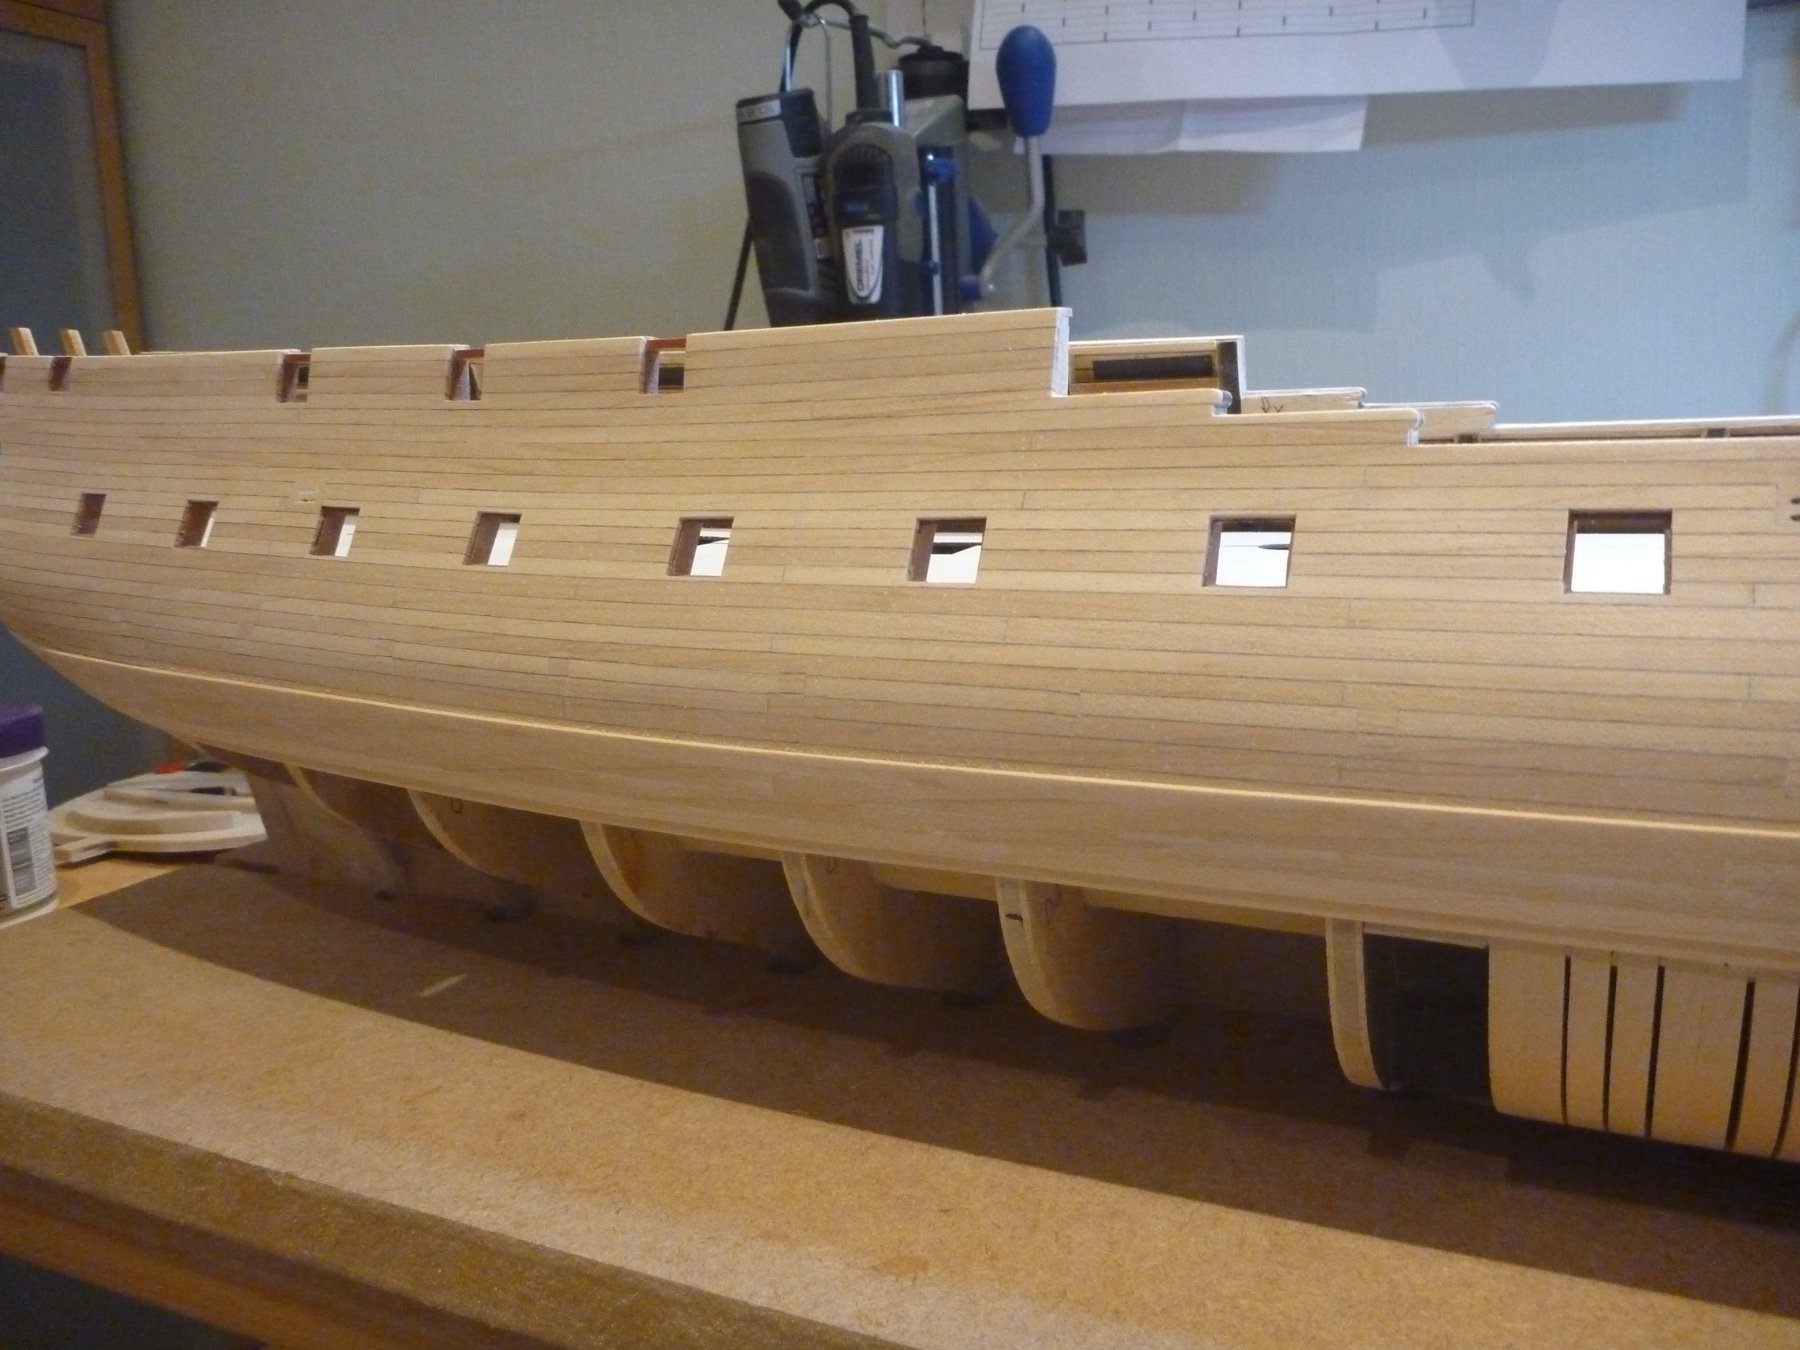
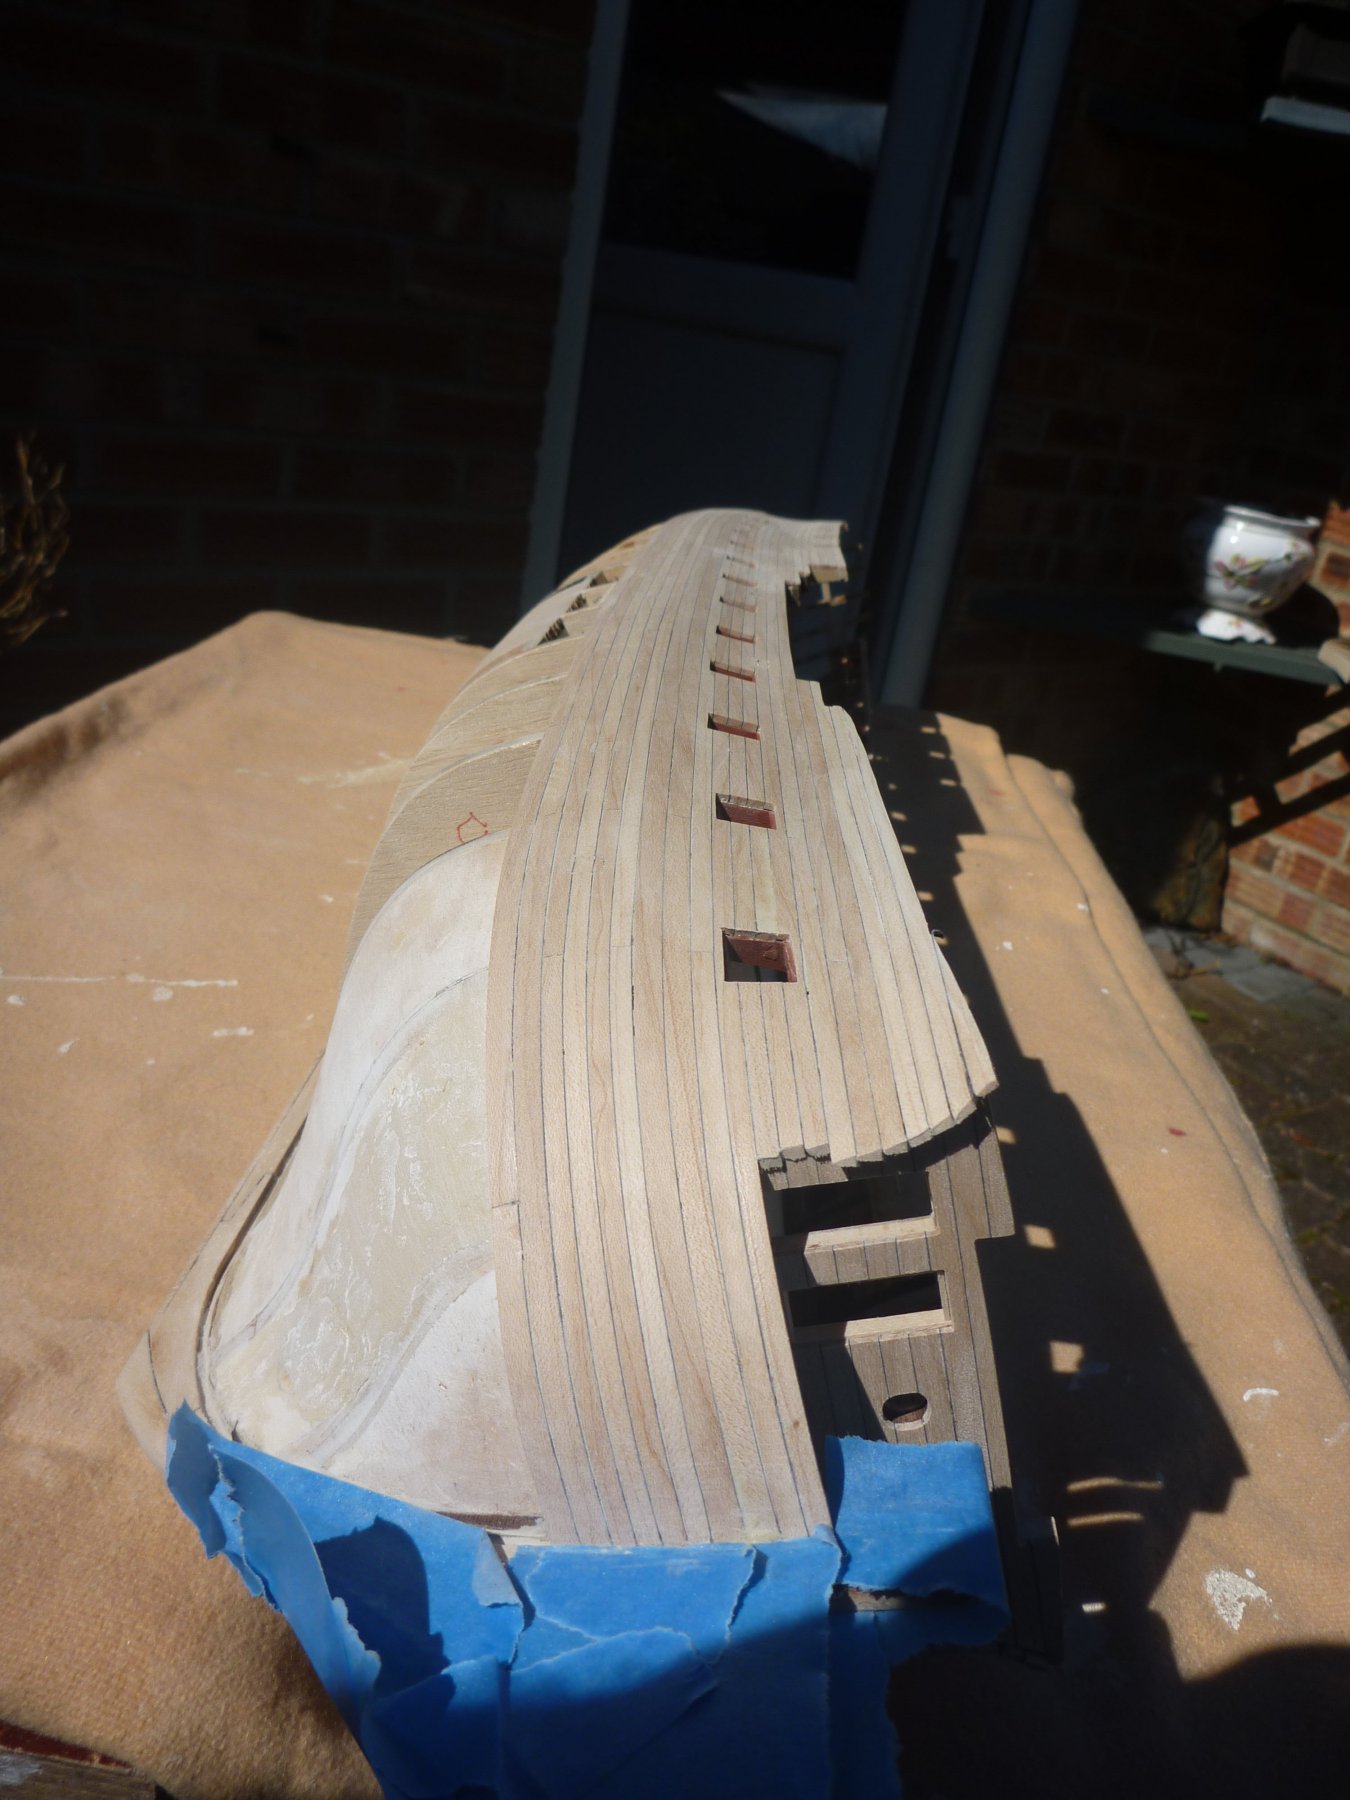
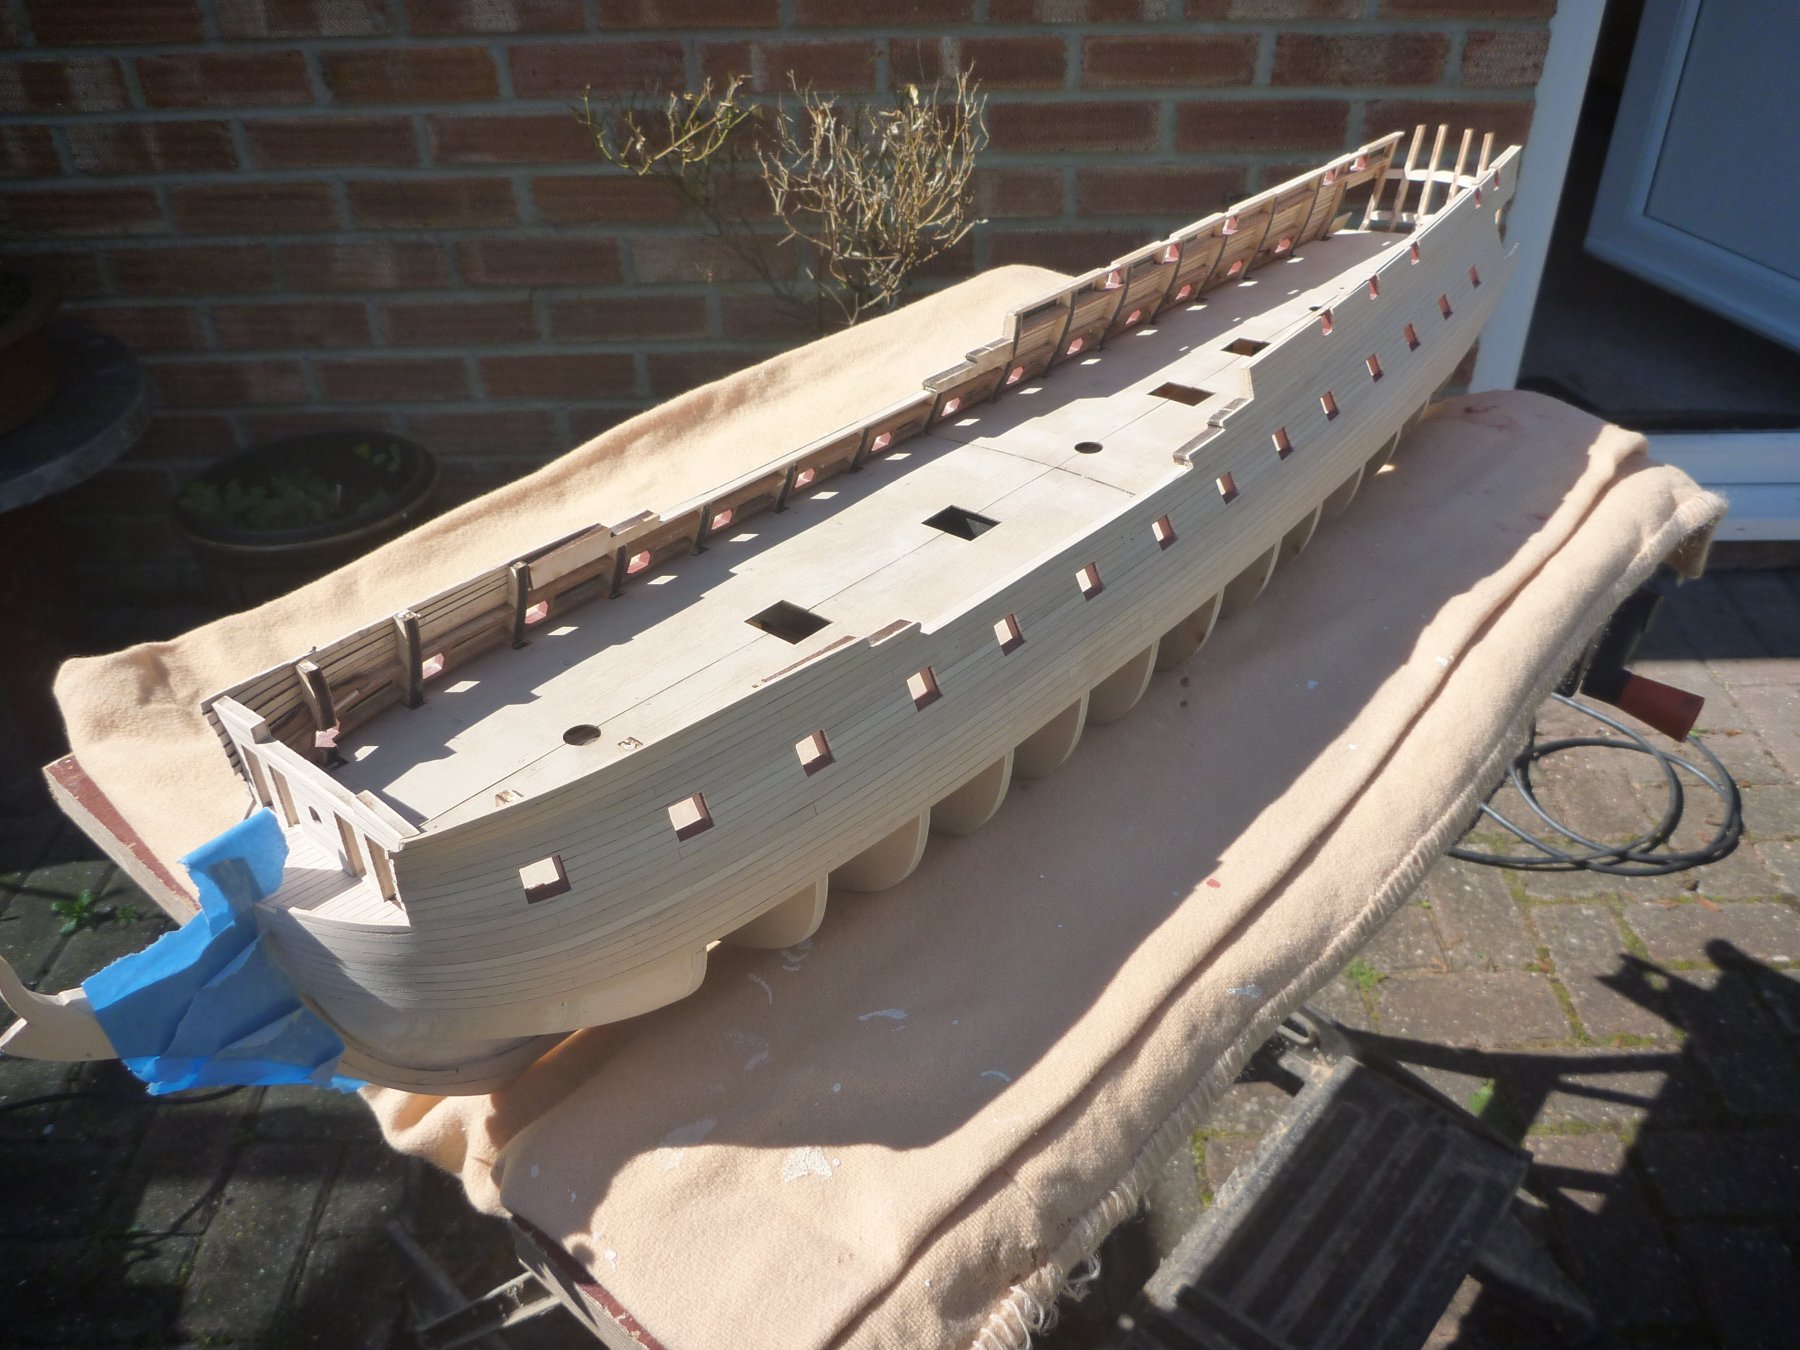
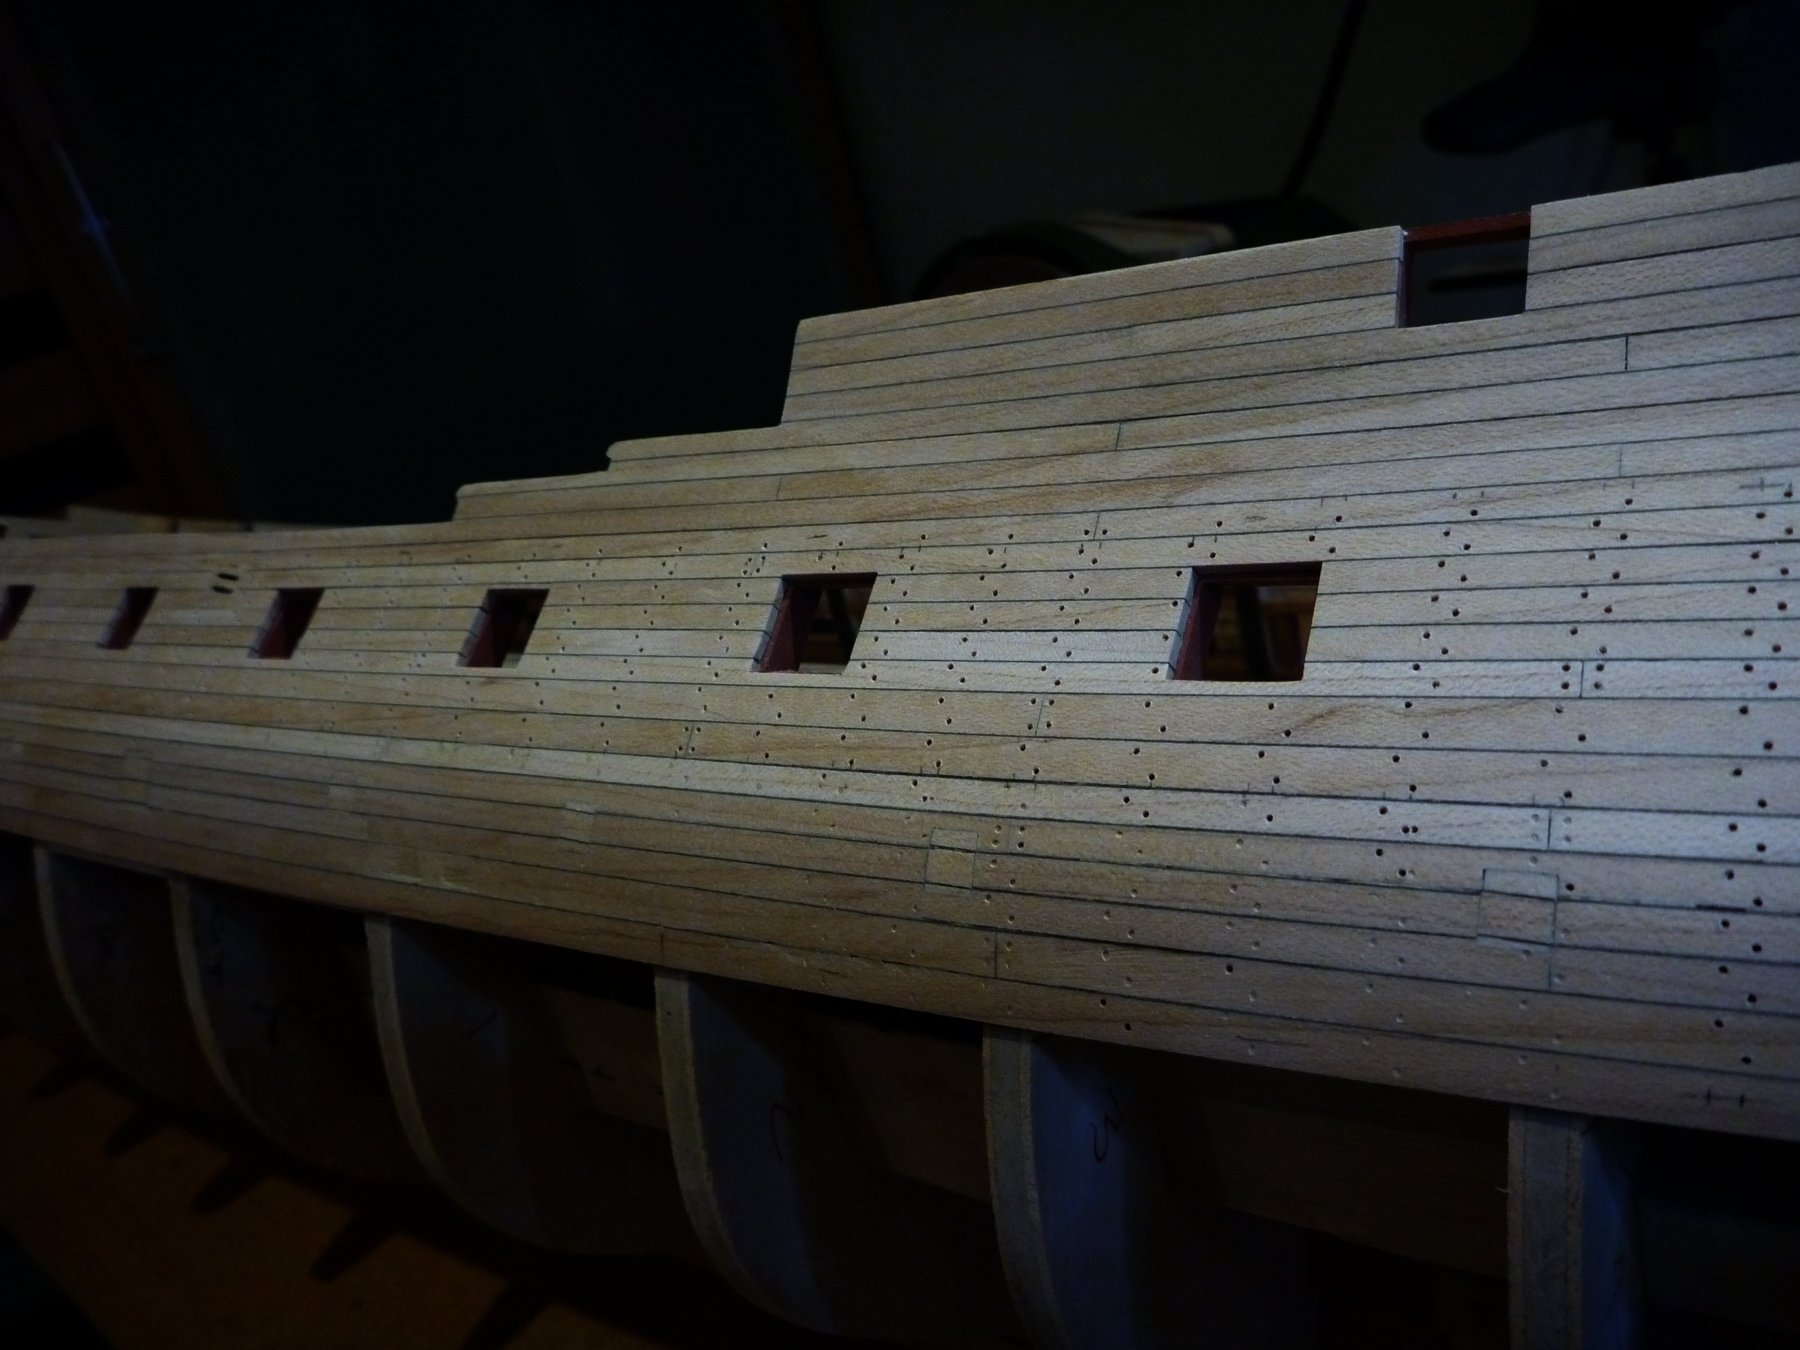
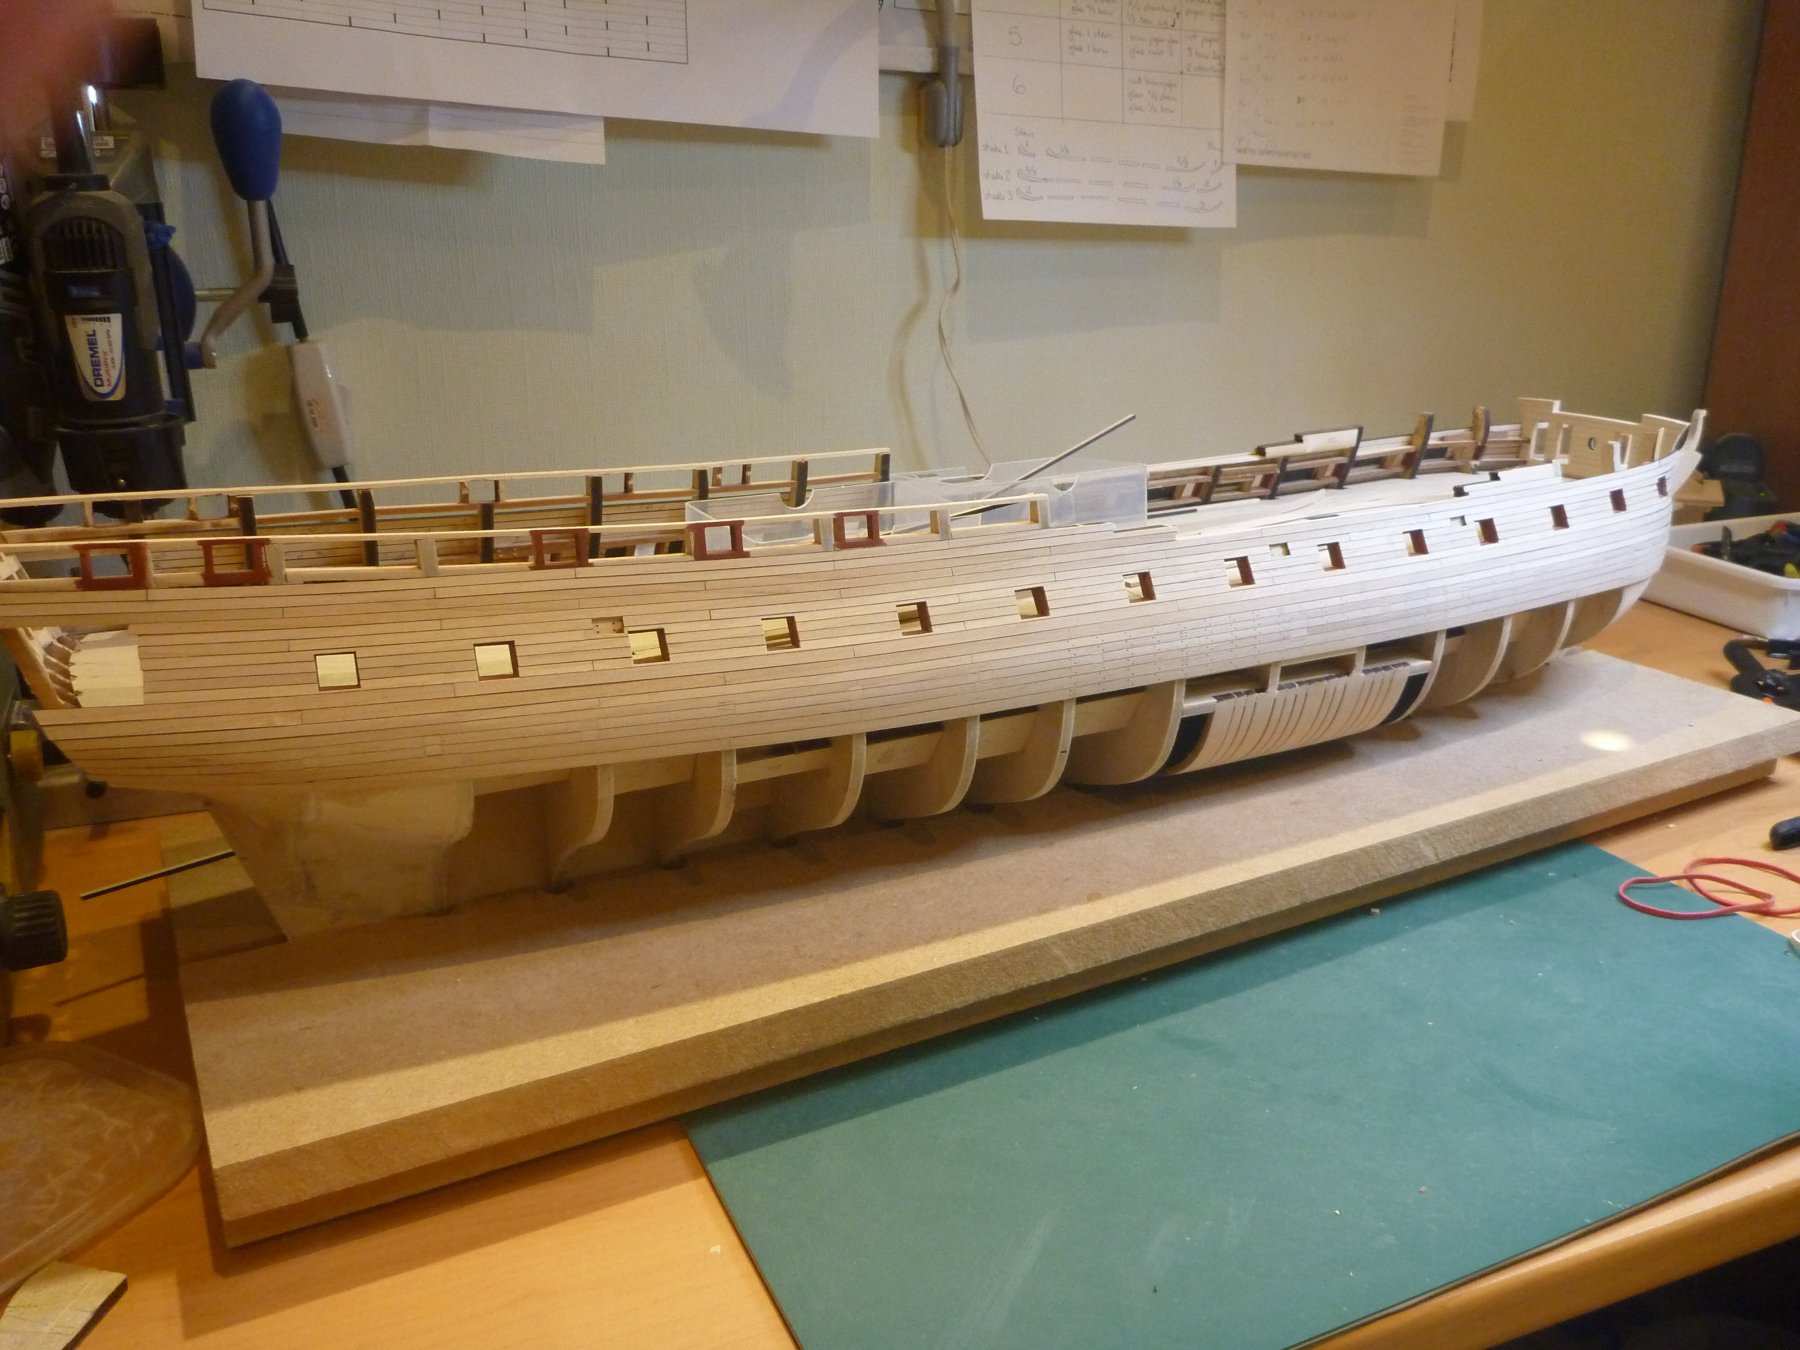
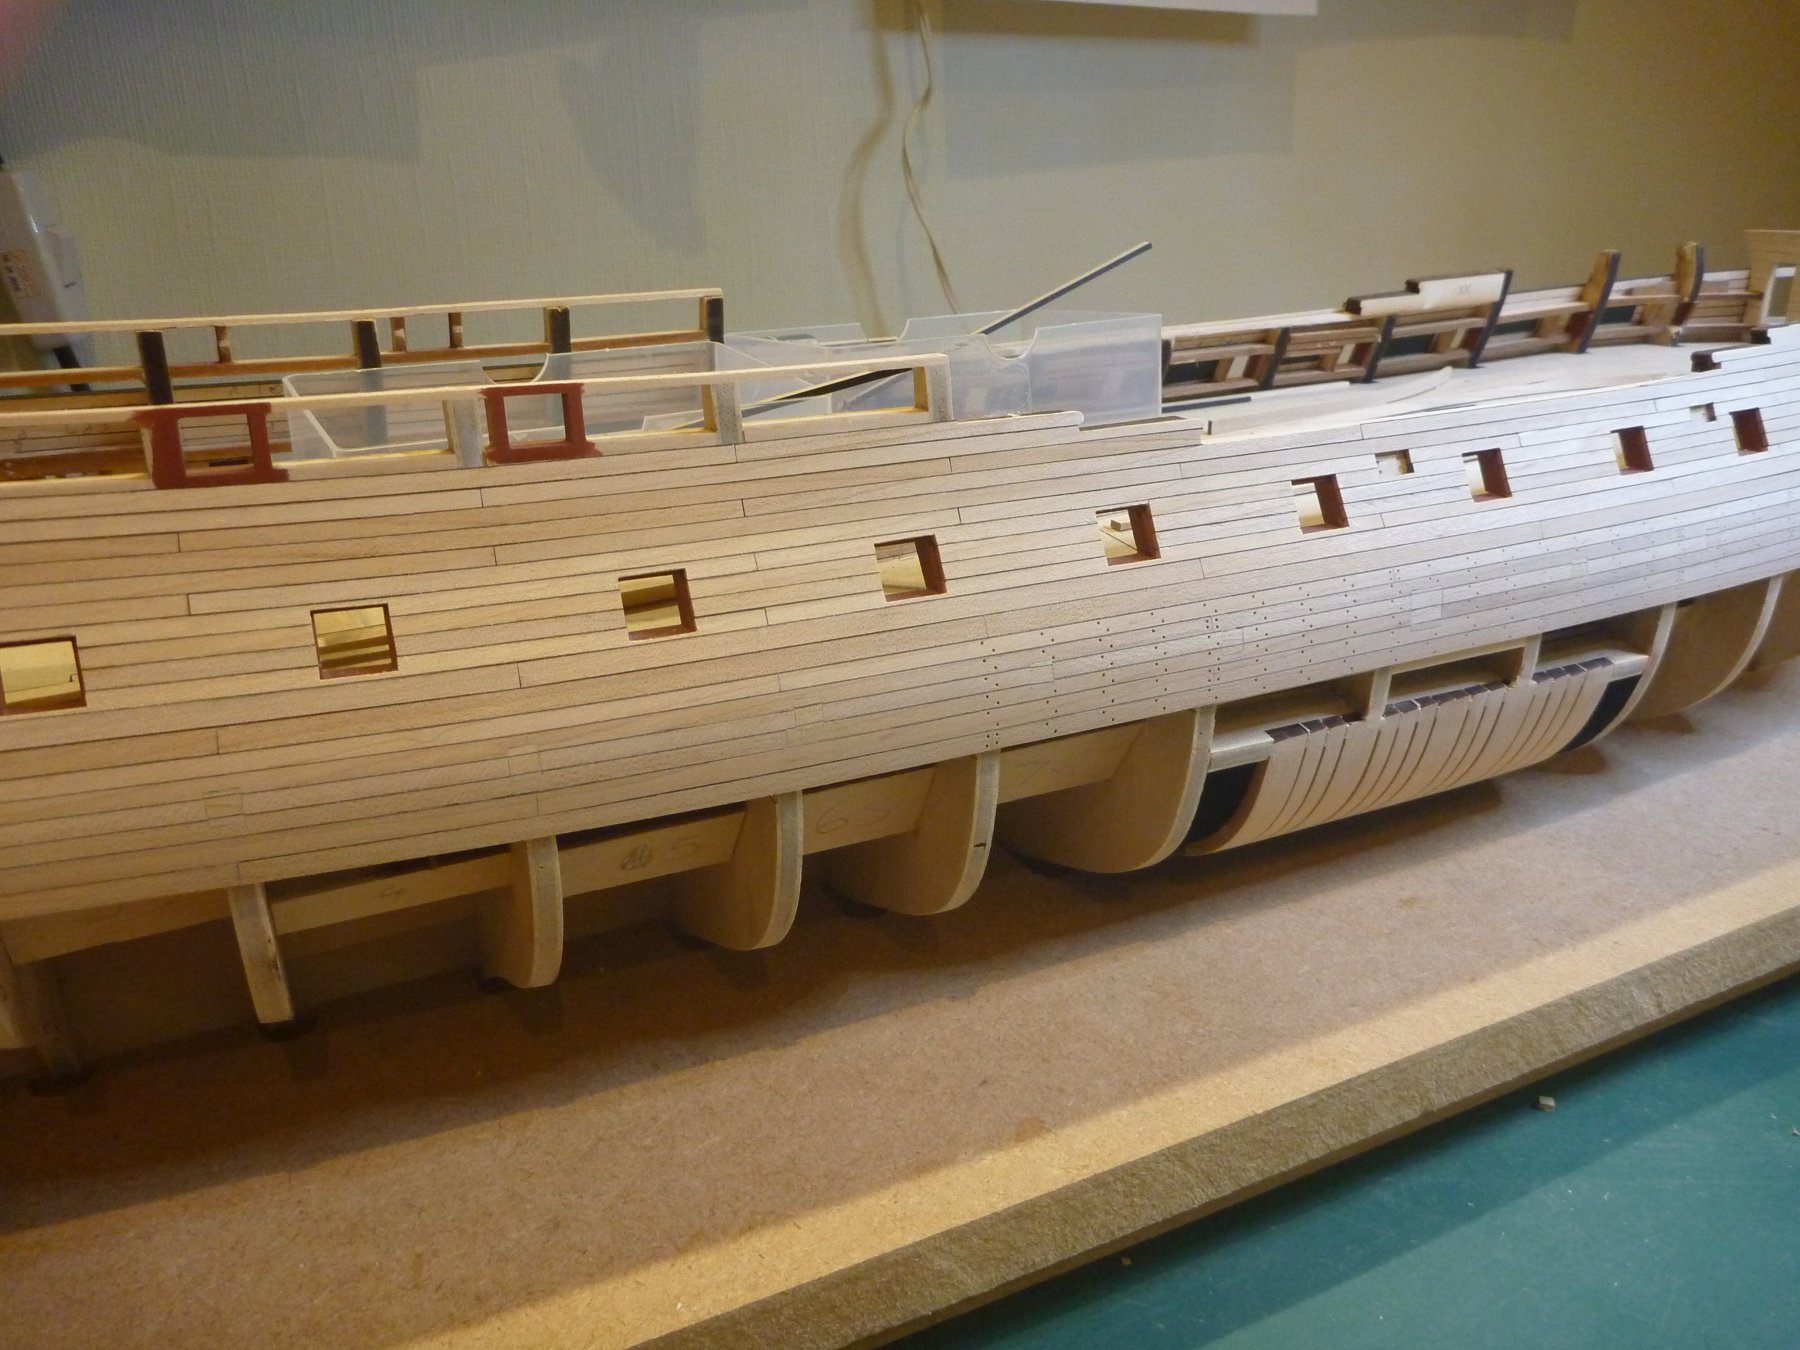
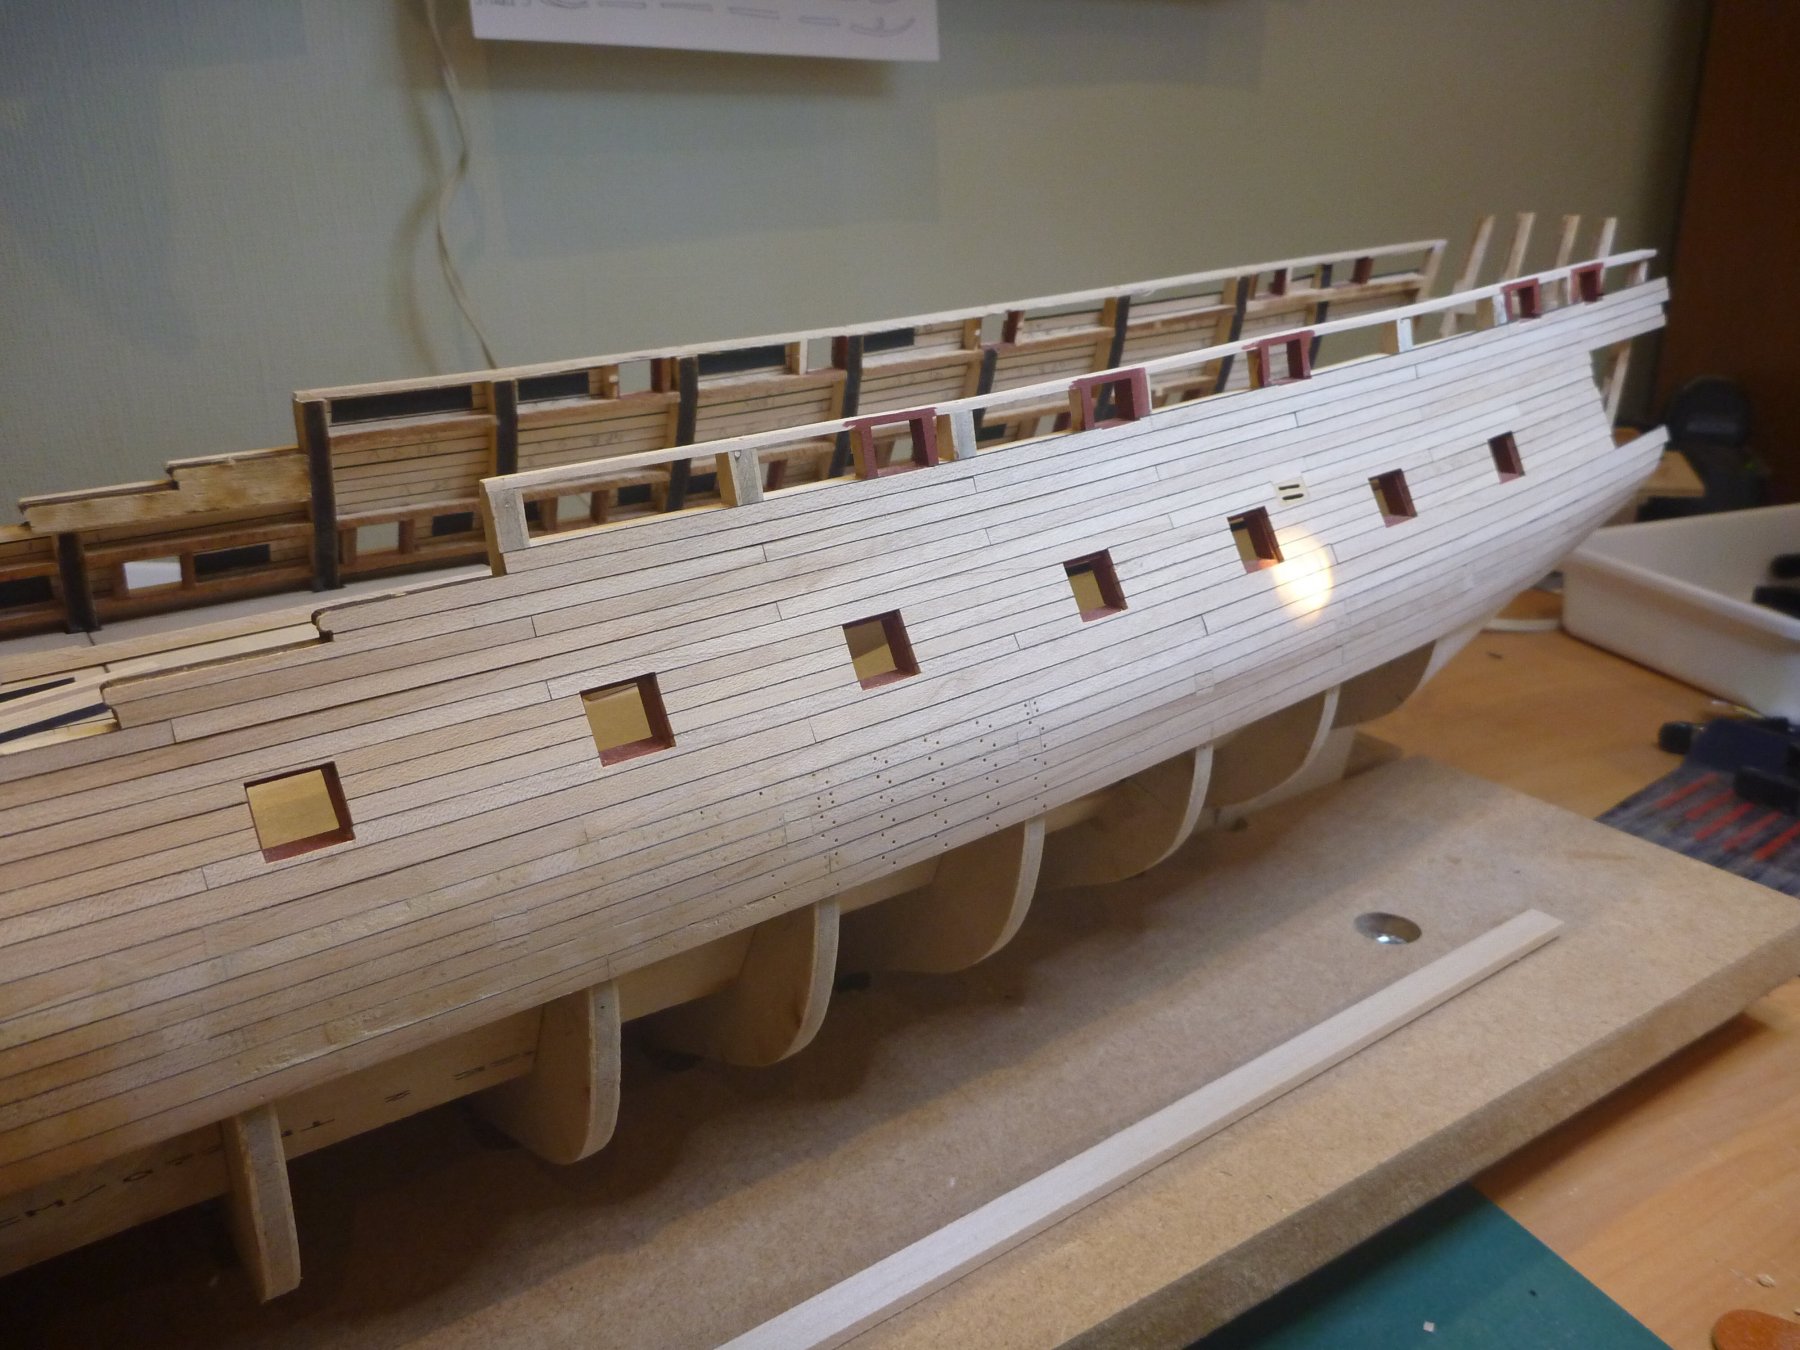
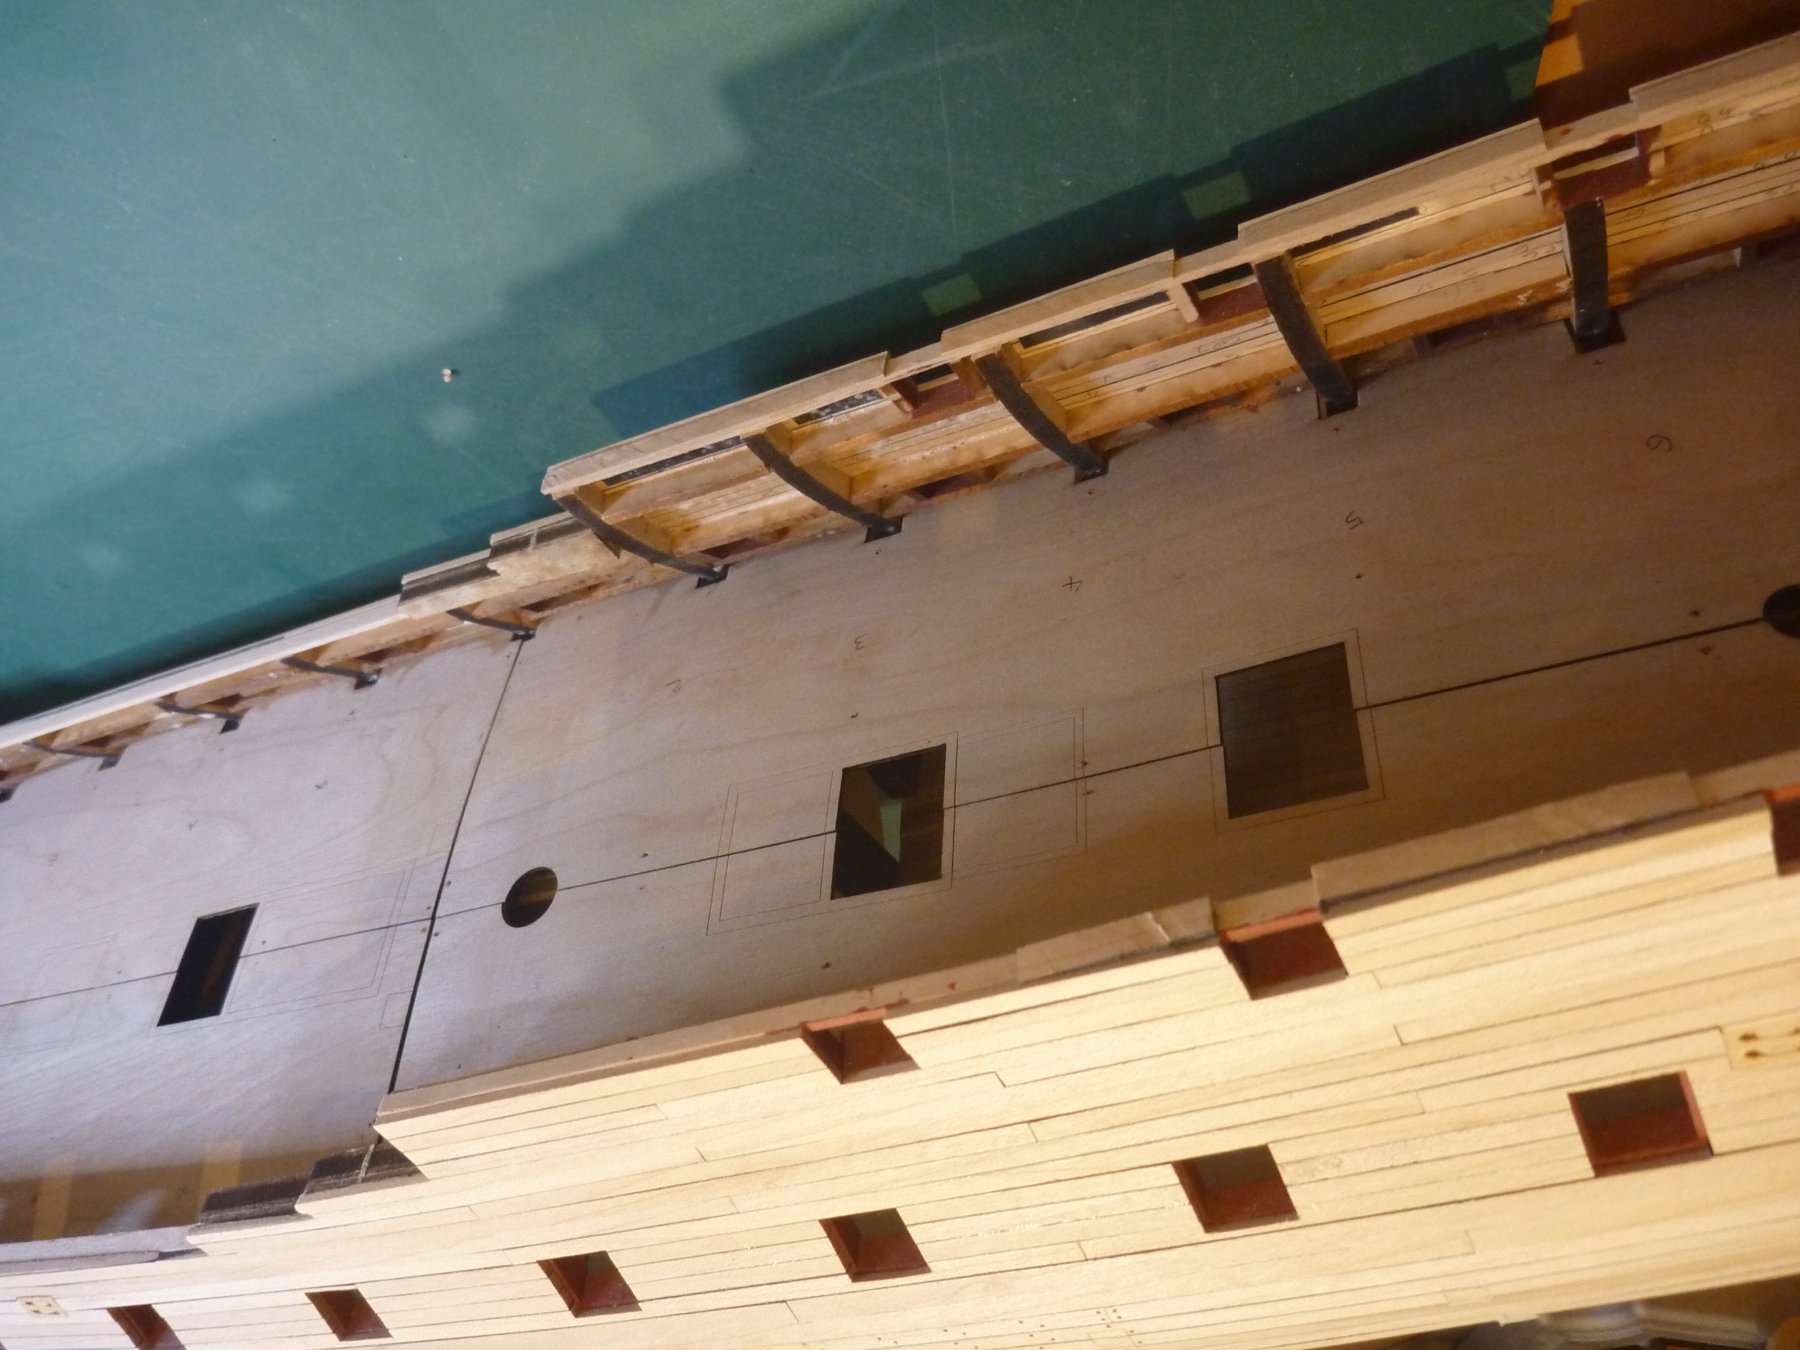
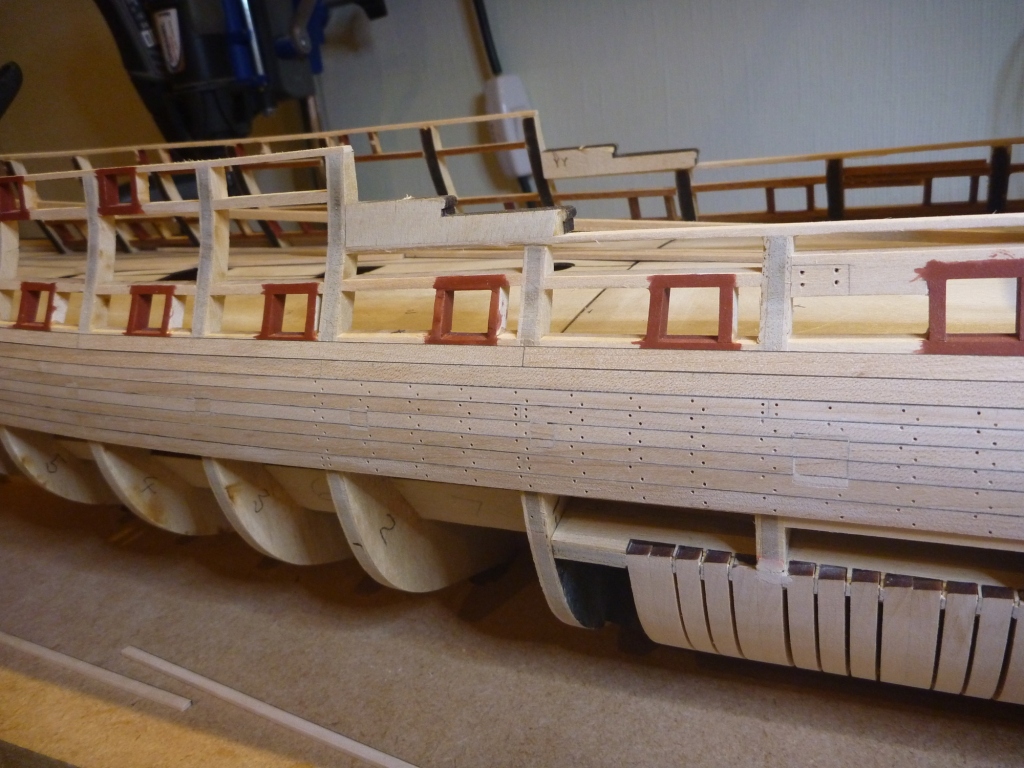
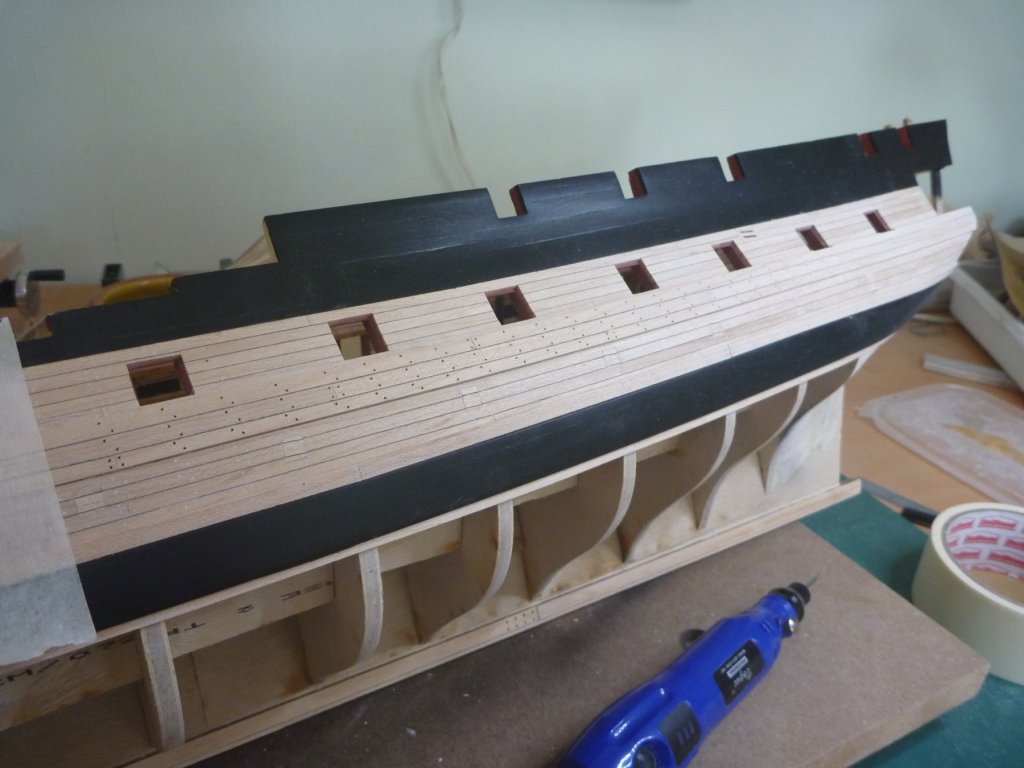
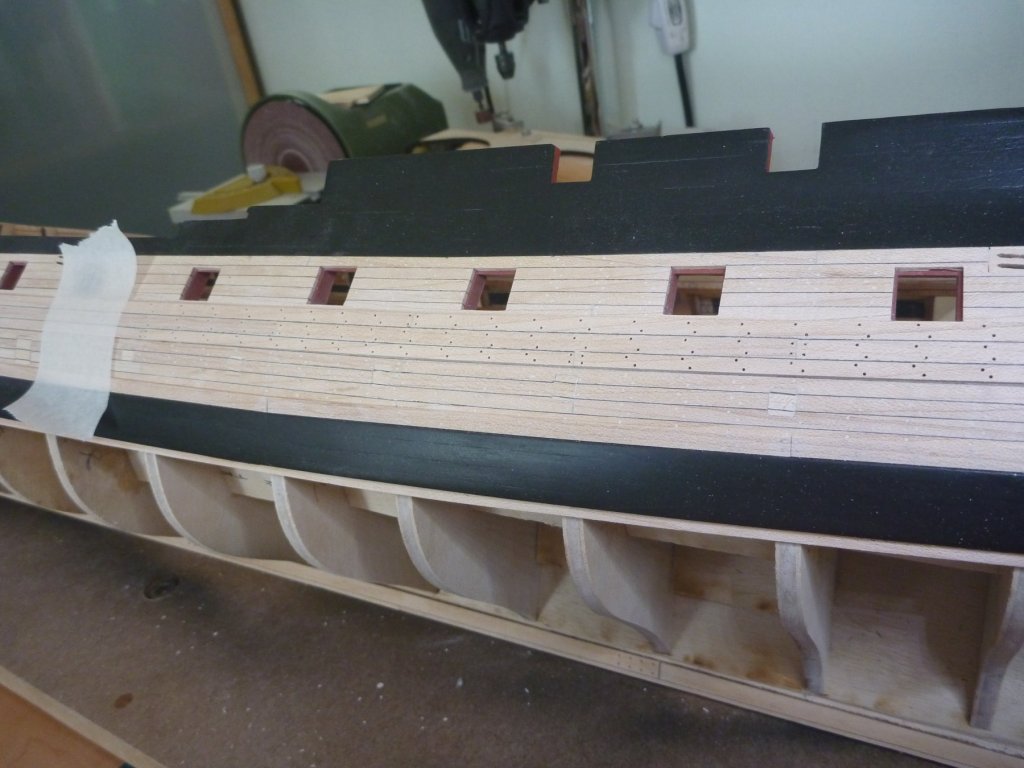
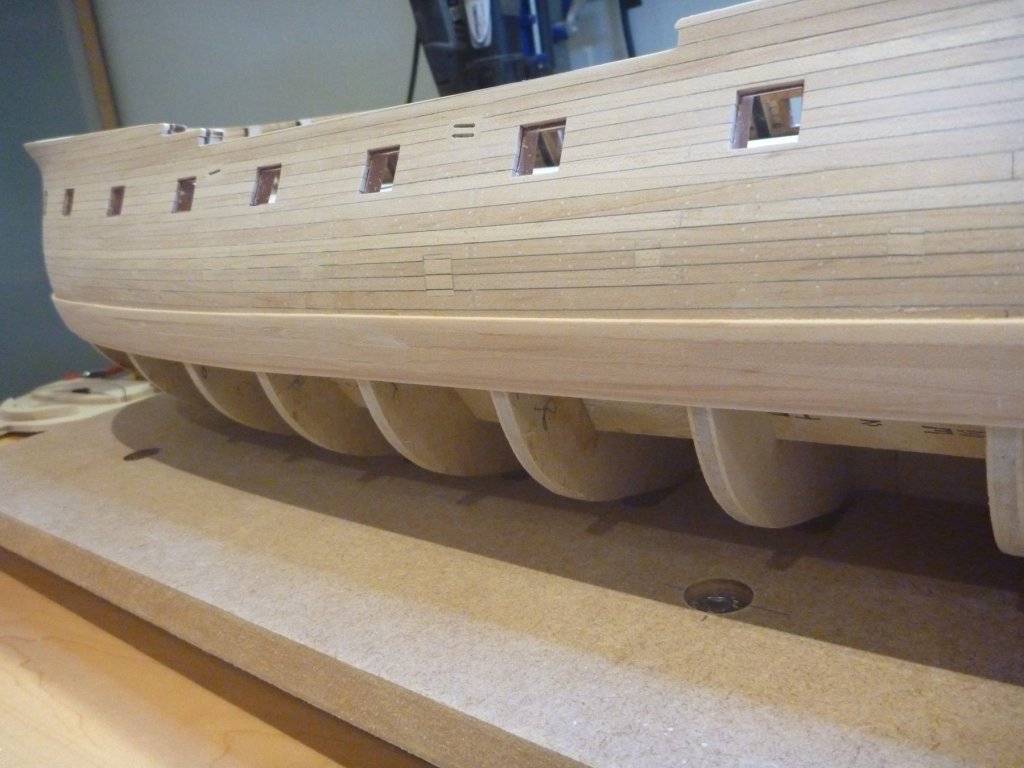
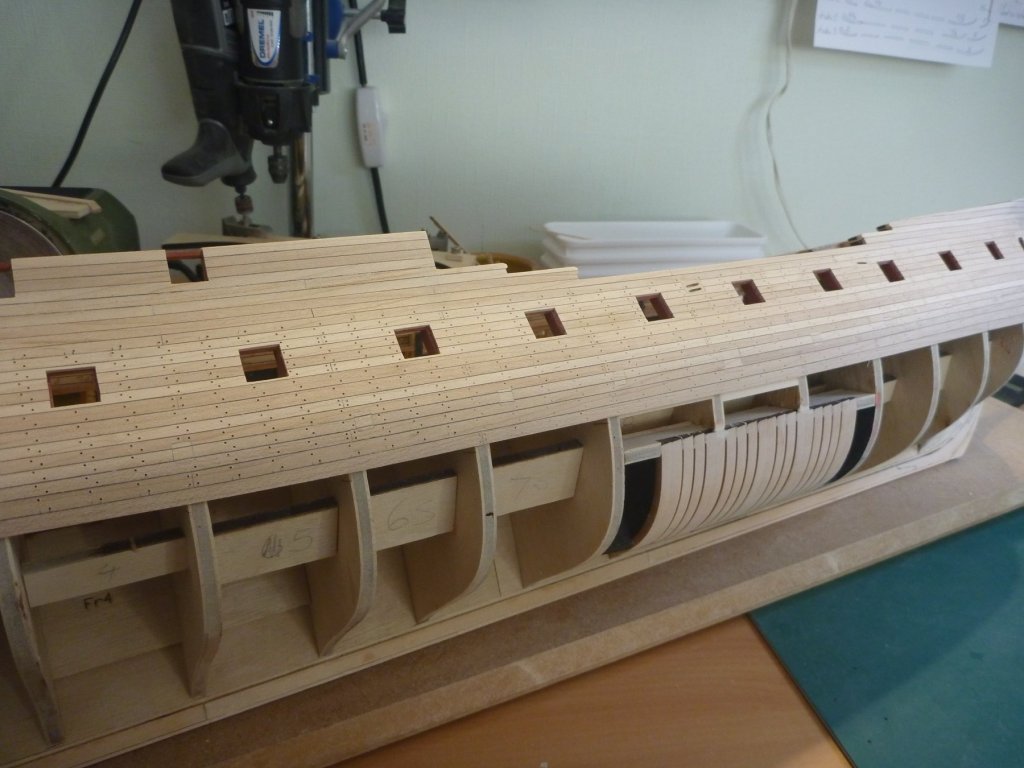
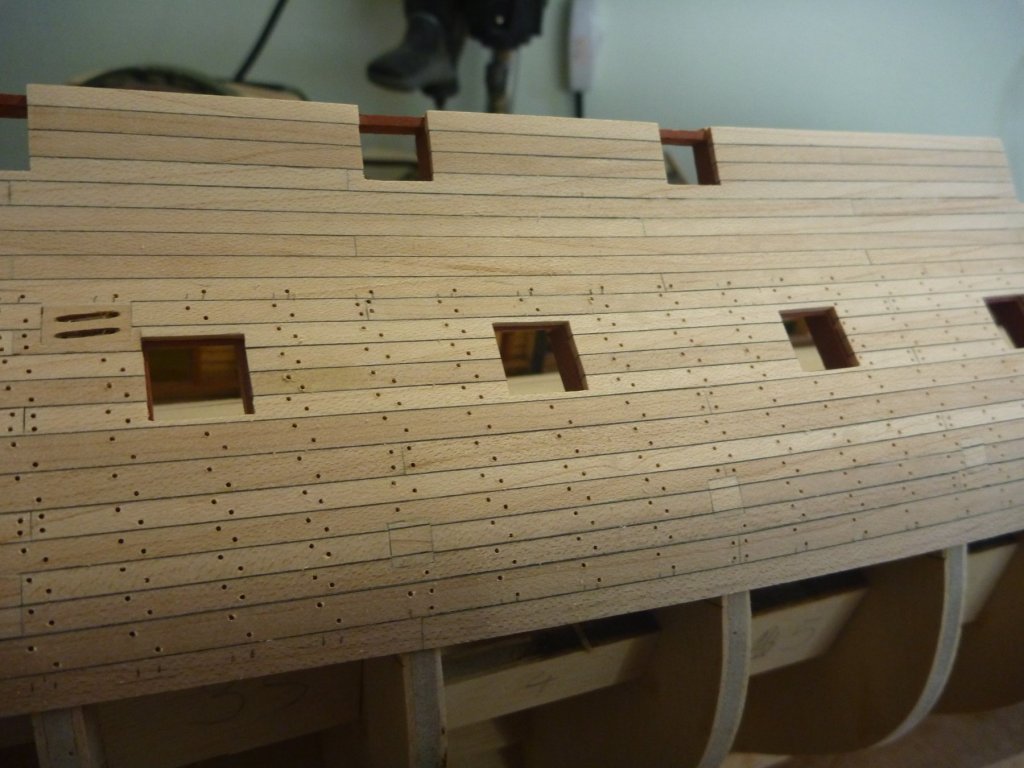
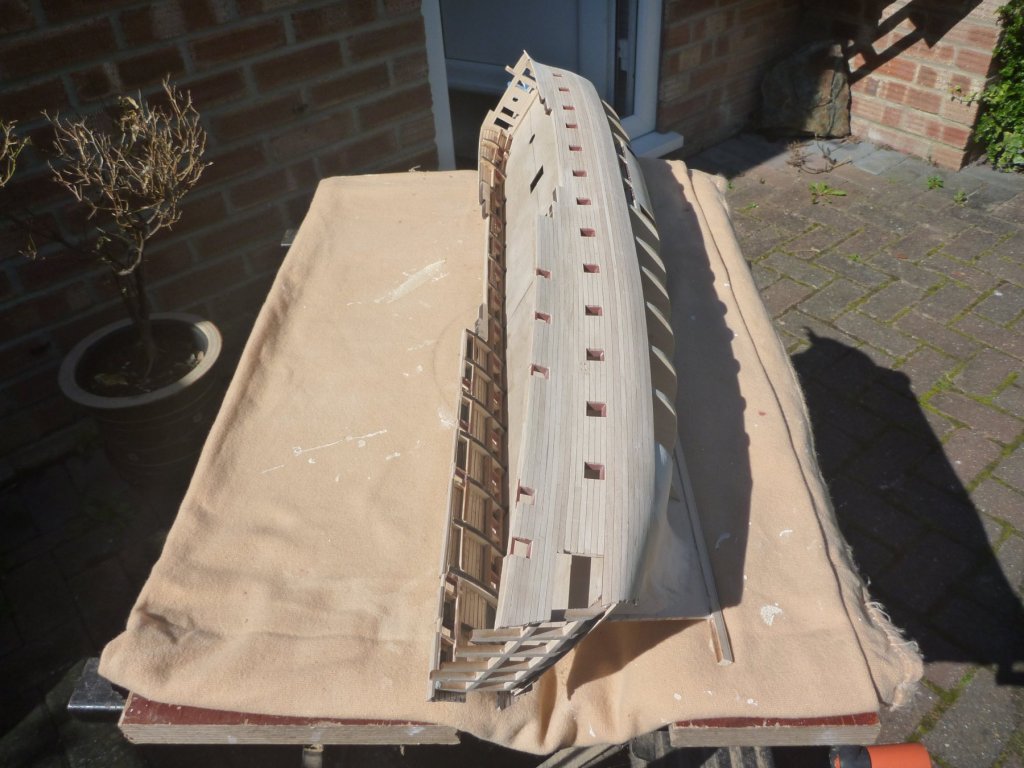
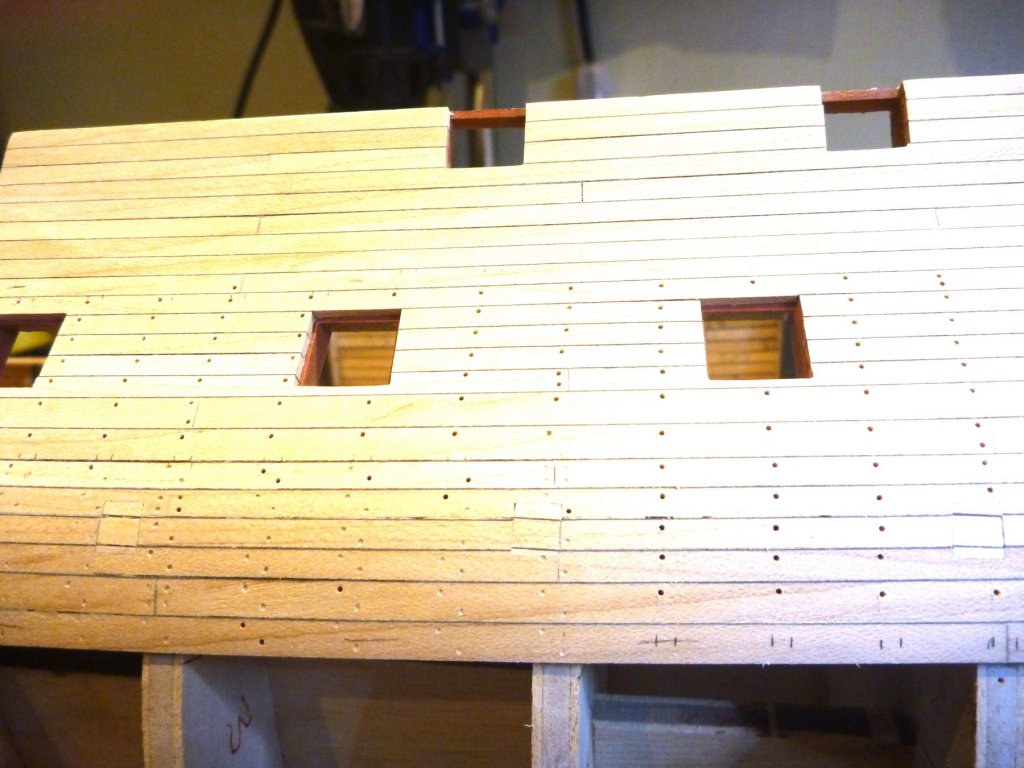
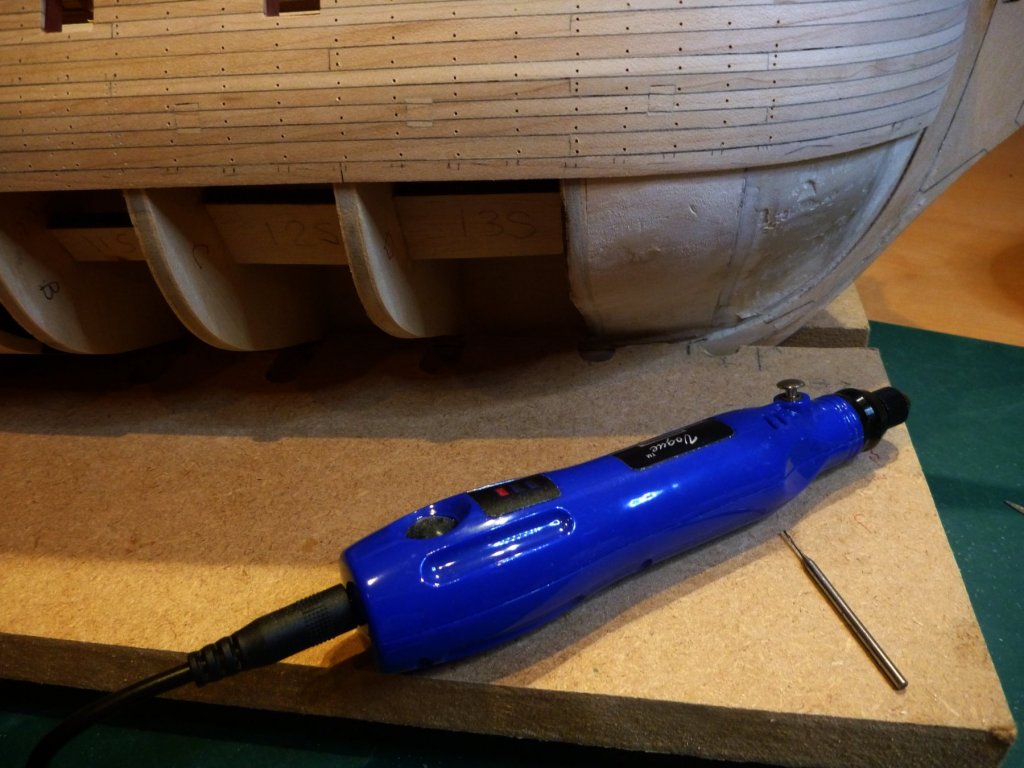
I've taken advantage of a bit of nice weather to get her out side for some full on sanding. And Port. I always leave strakes over length until after the majority of sanding has been done, you can see them here at the Beakhead Bulkhead. I find that there can be a tendency when sanding to 'drop off' the end edge, that then leaves an unwanted thinned section / radius. This way you can trim afterwards and keep a consistent surface. Similar on the end of the strakes at the stern. OK that's most of the heavy duty sanding done. I will do some more finer sanding later. So back inside. Here's a bit of a close up. I added simulated sheaves into the shells. But the sanding has taken off a bit of the radius so I have dug them out and will redo them later. I'm pretty pleased with the planking so far and loving the hard maple. Also happy with the results of the paper caulking, it gives a nice consistent line, especially after sanding. A shot on the Bow. Time to get onto tree nailing. I mulled over the decision a lot earlier on but decided to nail based on the look of Chuck's results. Here is a bunch of holes being drilled, I stopped short of the area's that will get painted, no point in wasting effort. Some of these were filled previously to check the look. I am finding it difficult to pick a filler to use, I only want a very subtle different shade not an obvious black dot. But what was really weird was my problem was the reverse of what I expected. I have so far bought three different natural/pine/light wood fillers and tried them out. But they are all really good matches to the maple. Two of them to the extend that you cant actually see the 'nails' unless you get really close. So I need to continue to look and find one a little off shade. Mind you the filler that is such a good match will have some benefits And continuing along (someone switched the lights out!!) I admit I was not looking forward to drilling thousands of very little holes at all. But thanks to MSW I read a post about a little drill, actually for manicures. So I hunted a through a big range on Amazon and picked one that is USB rechargeable, three speed and with a proper collett arrangement (many have just a pinch screw) It was quite cheap really, about £20. And I have to say it's a complete joy. Very light, you hold it like a pen so has loads of control. Takes my shanked drills, charge hold ages. I shot through the drilling, a full side was three evenings work, about 4 hours. Here is the item in question, the charging lead comes out obviously. That's me about up to date. Thanks for stopping by Nick


-
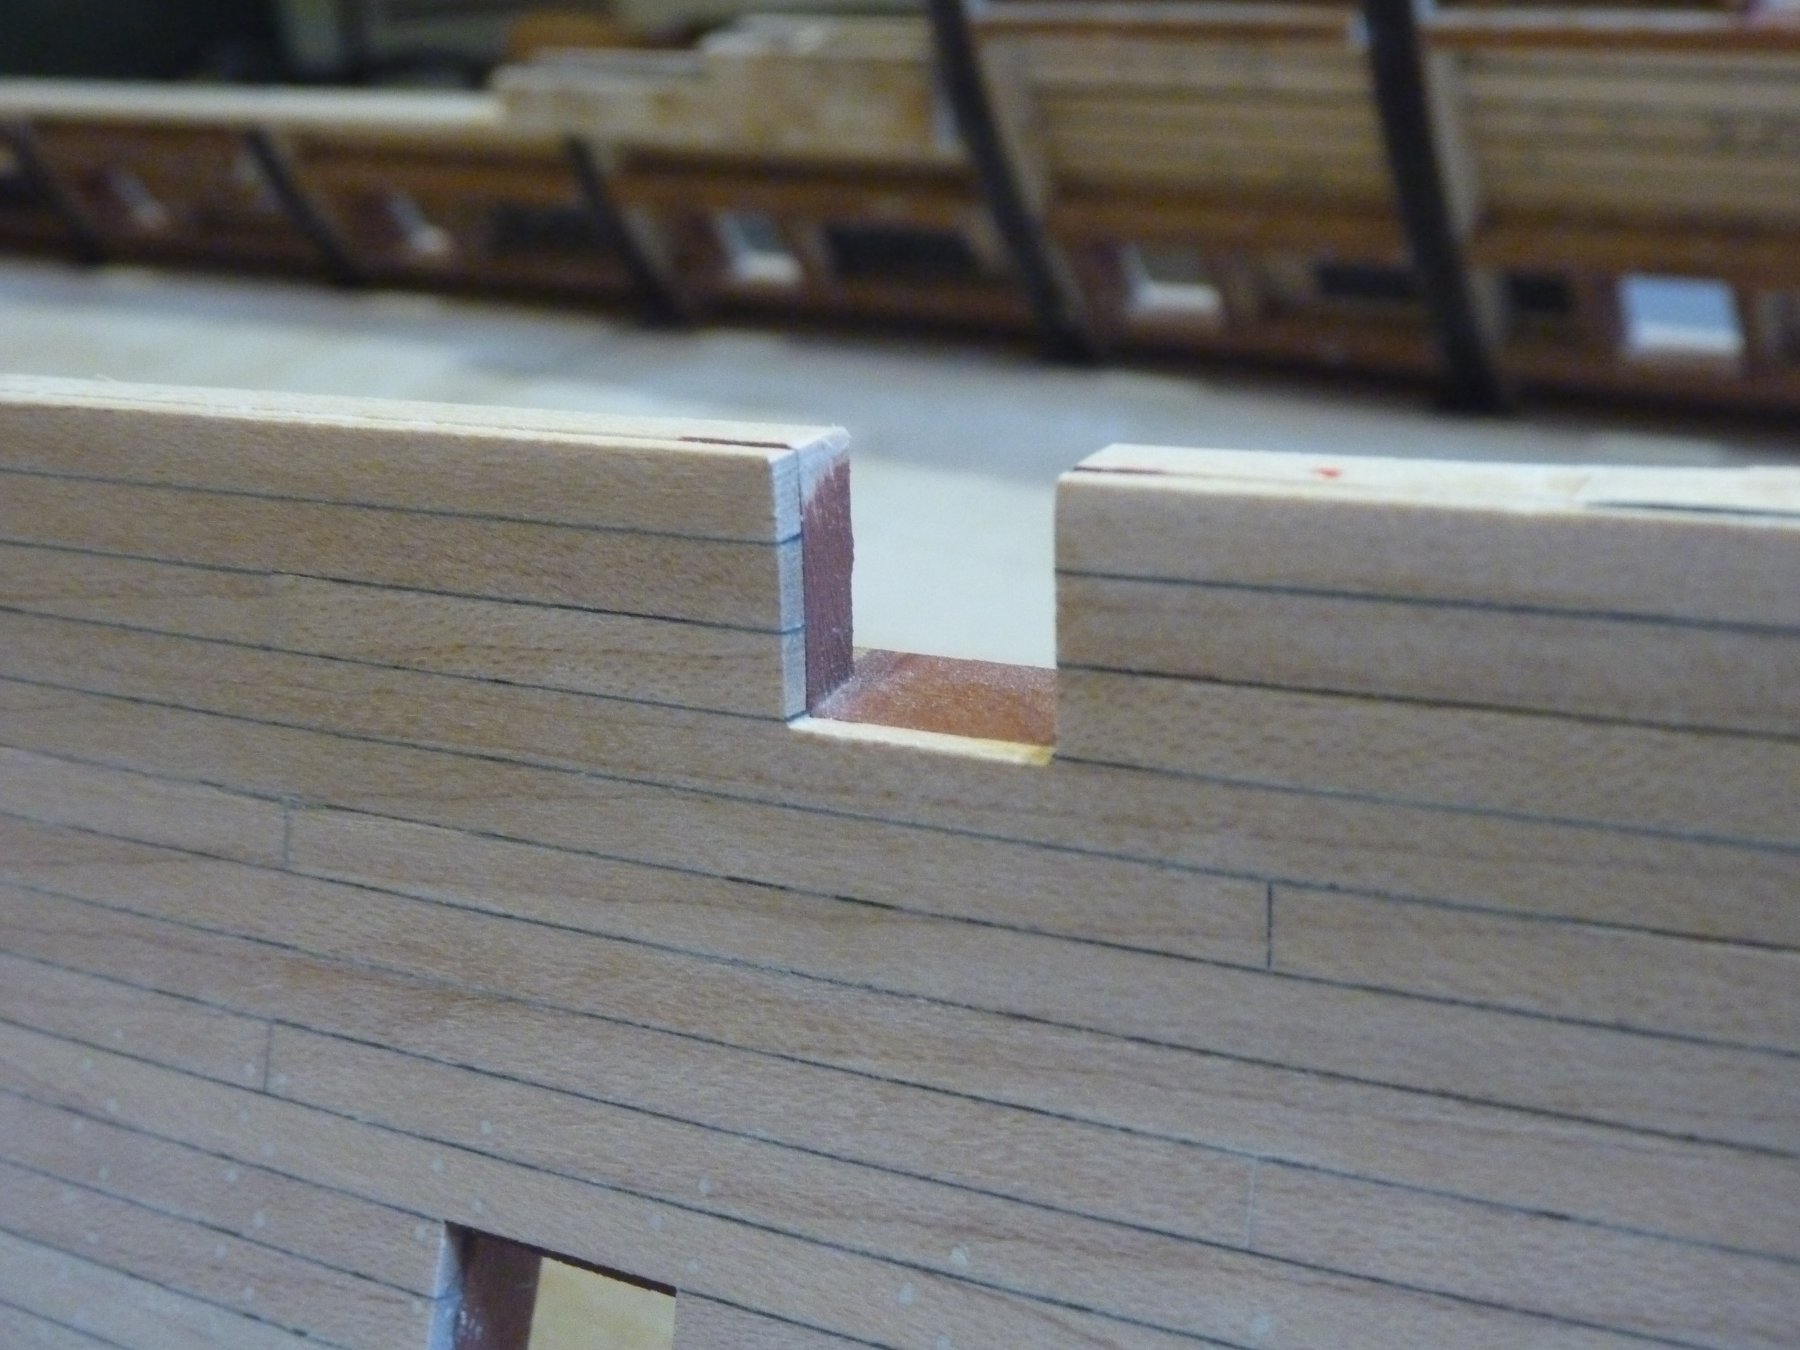
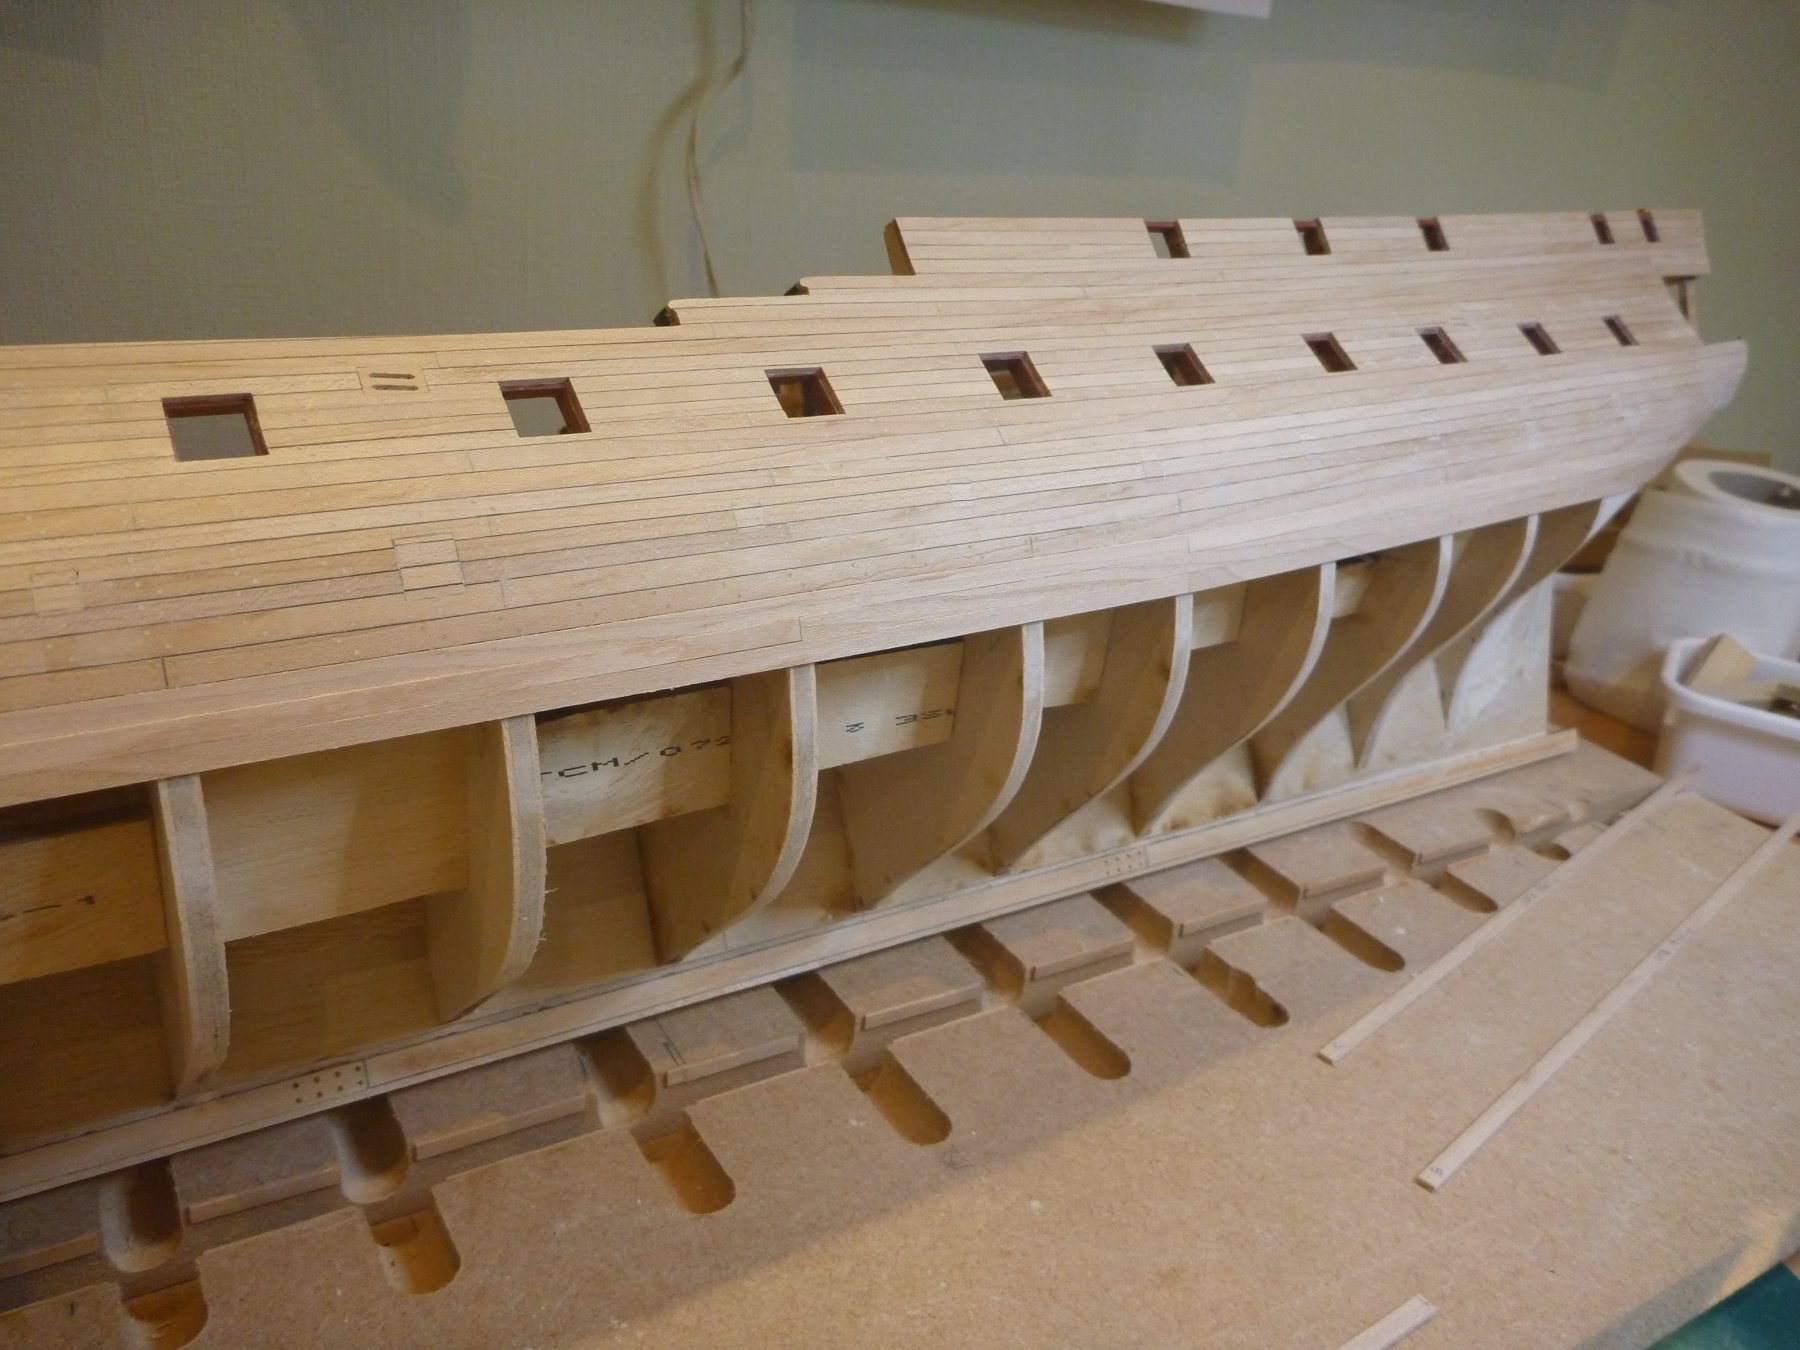
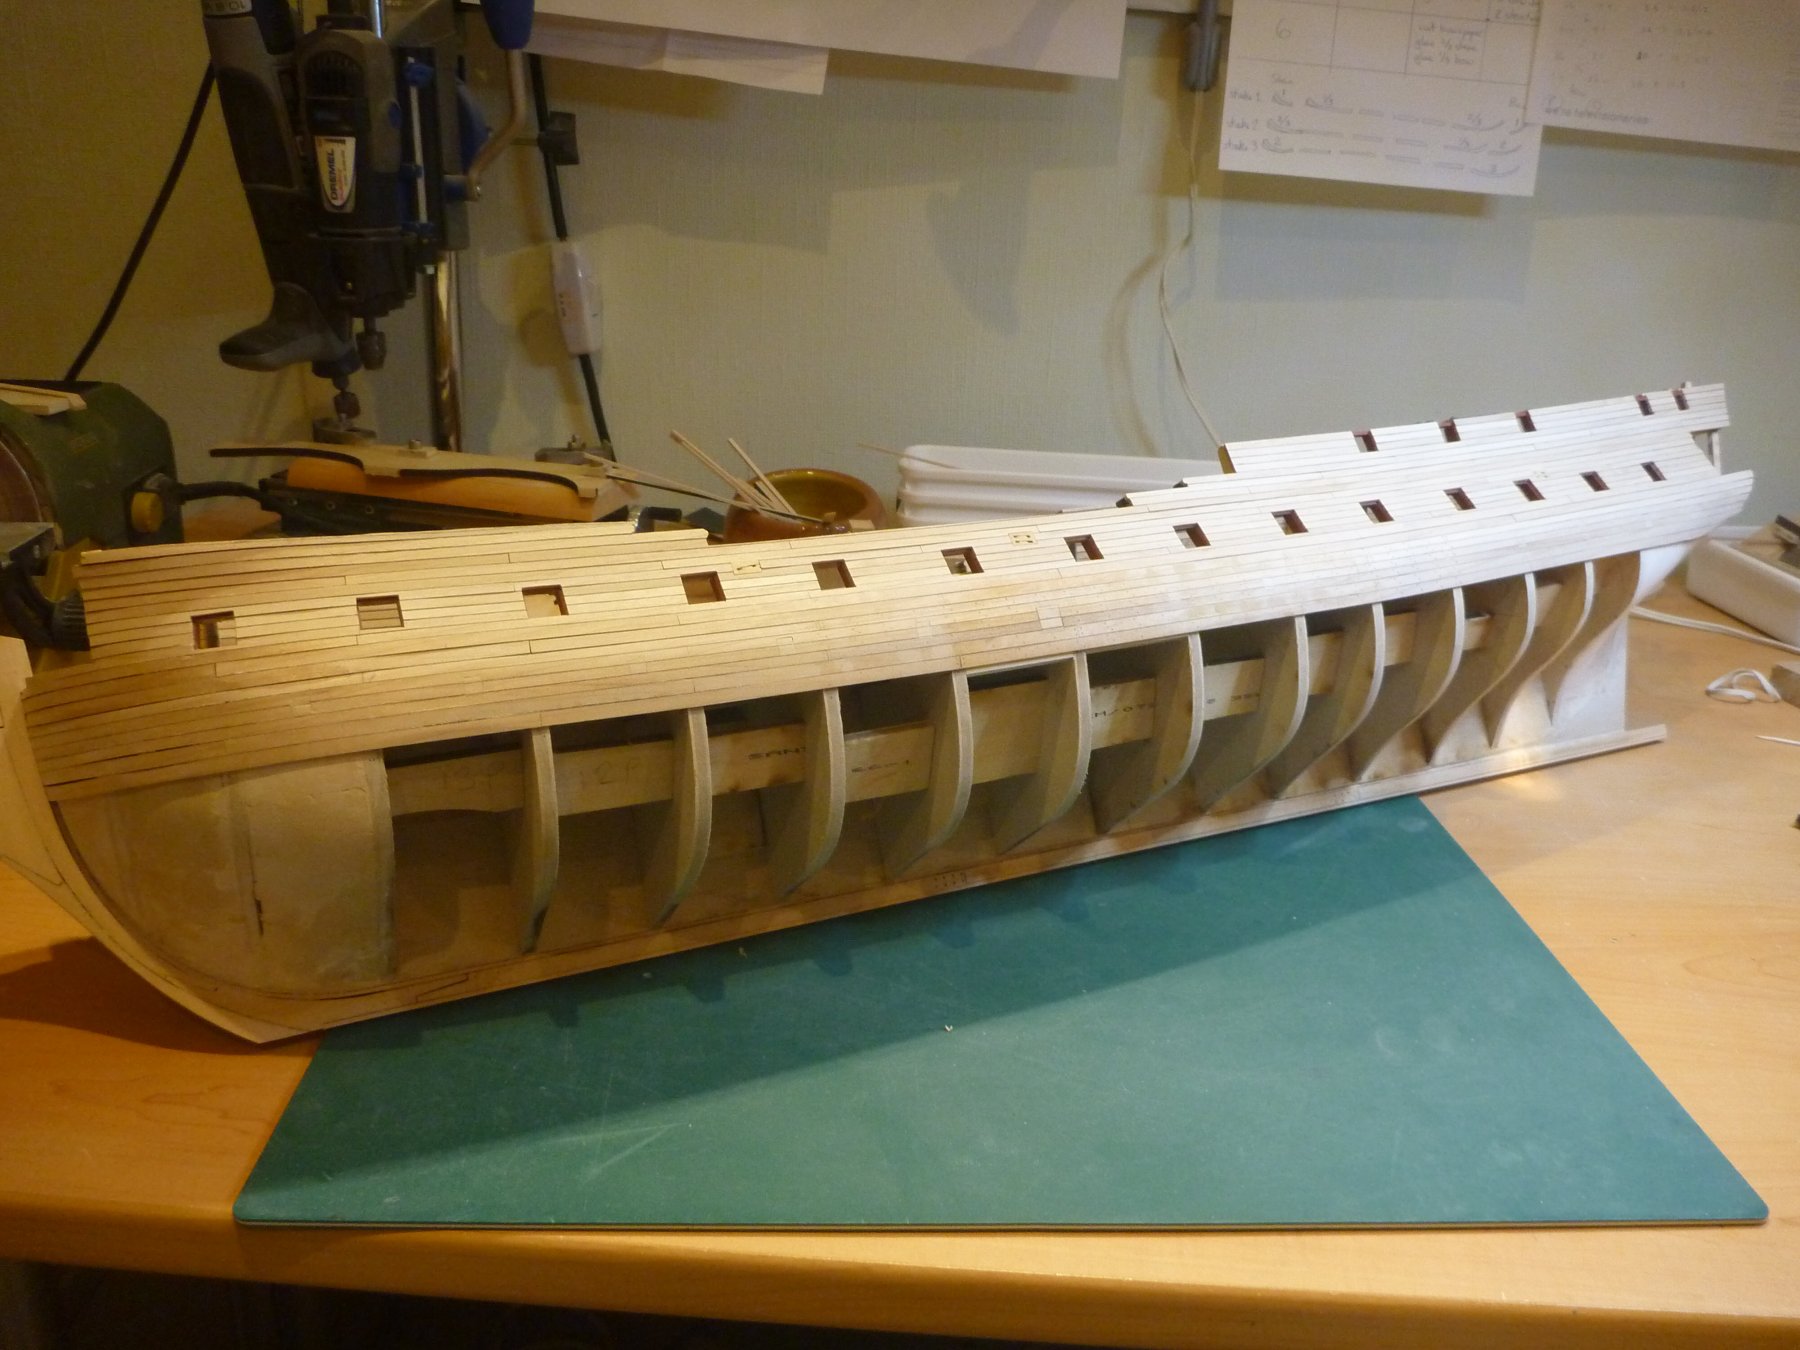
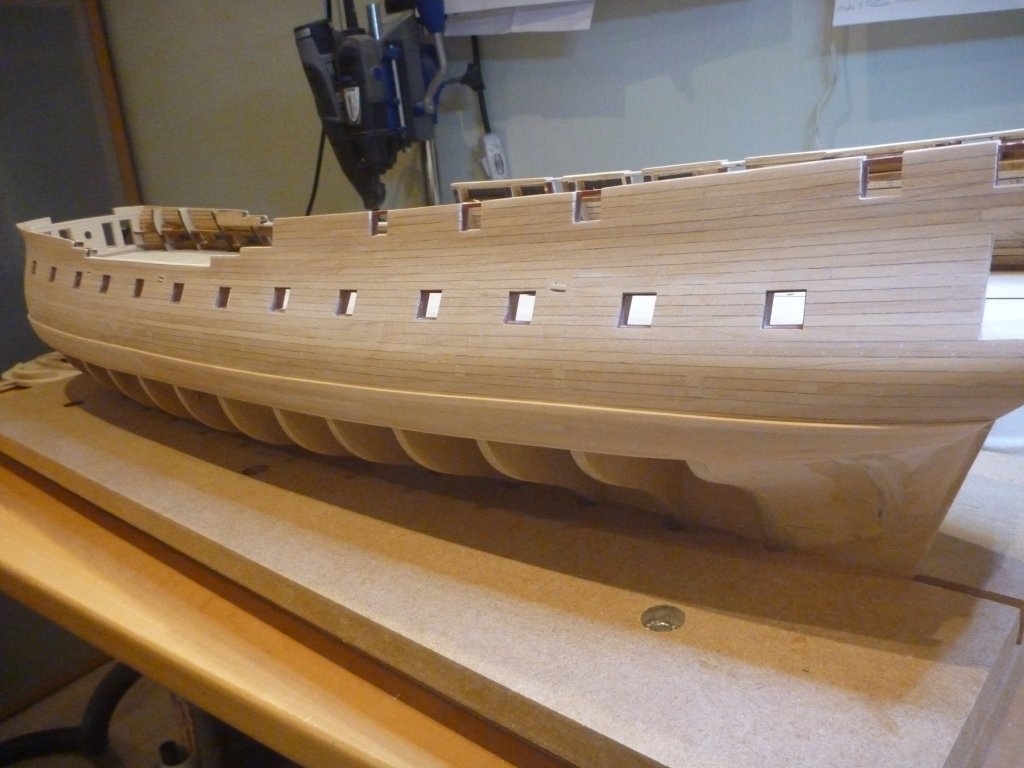
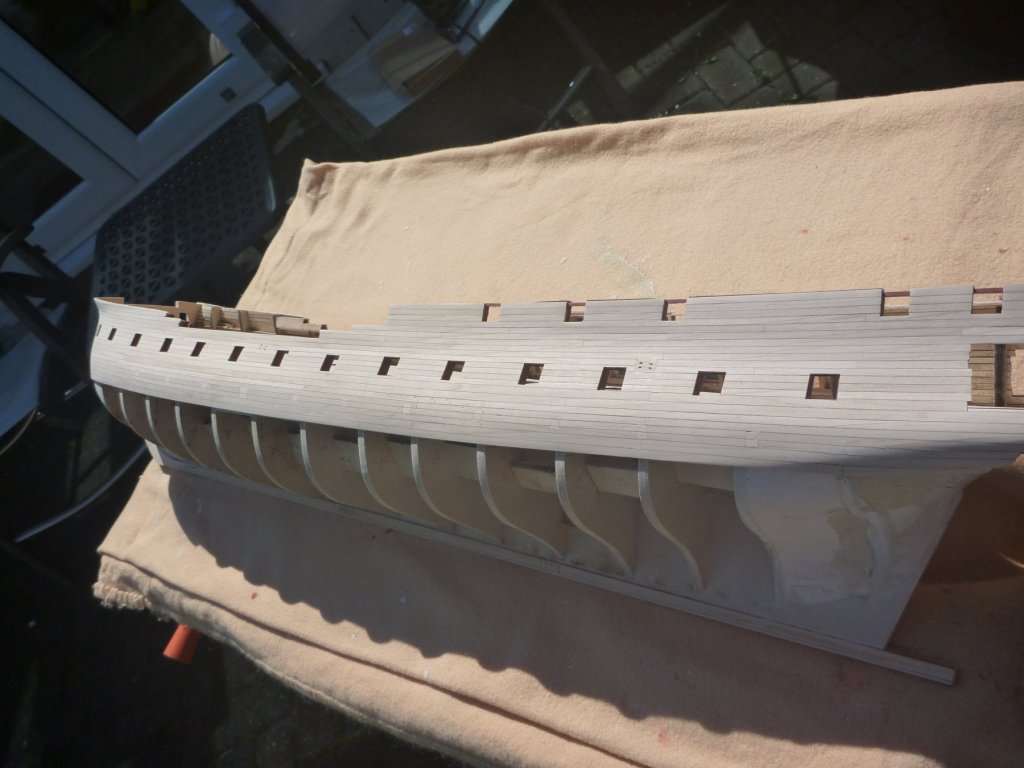
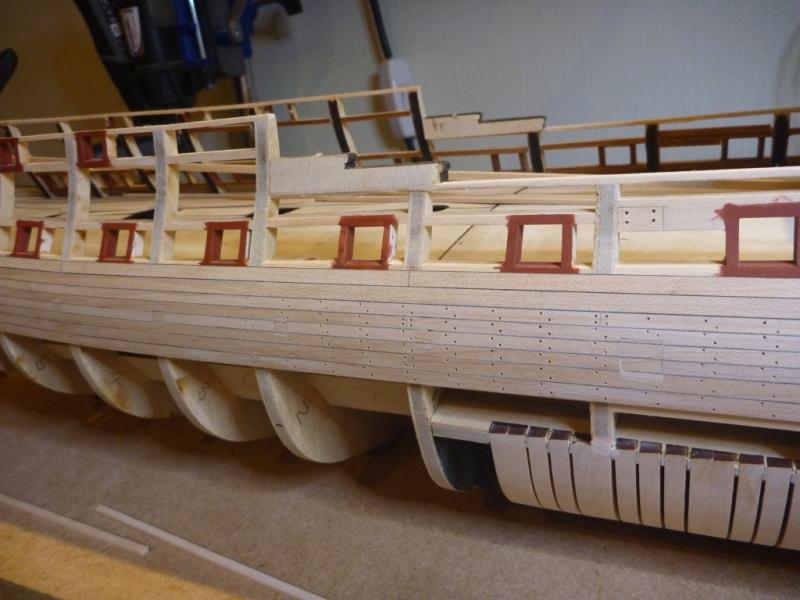
Time for an update i think. Now I'm up to the bottom of the gun ports and doing some trimming around them, leaving a small rebate. Progressed up and around the ports. I'm matching progress on both sides, here is the Starboard. I'm up to the Waist and you can see the gaps I've left for the sheaves. And a big closer in. Port side, started putting in the Sheaves. And the other sheaves looking forward. Getting towards the top of the Quarterdeck, cutting around Q-Deck ports, no rebate on these. Also added some stock to the tops of the rails so that I can sand them back down to match the top most plank. That's me now planked from main Whale upwards. Port.... And Starboard. Some high planks visible but they will get addressed next. Will continue on next post directly. Nick


-
Good to hear from you again Danny glad to hear you are beating it.
-
UK Supplies of good blocks and rigging line
pompey2 replied to JRB9019's topic in Masting, rigging and sails
Hi John I get your pain with buying extra parts to supplement a kit. But if you go with the kit blocks there are things you can do quite easily to improve them. I would very strongly suggest you look at making yourself a barrelling pot that will turn your square edged kit blocks into rounded smooth ones. It is a very simple thing to make, there are a variety of posts on the site with examples. Or if you are having trouble I can show you how I made mine. A small round plastic pot with a good lid, a piece of dowel and some trimmed pieces of sandpaper is all it needs apart from a dremel or similar to run it. Nick -
Hi Douglas. Great to see another Confed build. You seem to be off to a great start, lovely work so far. I will be sitting in to see how you are doing, hope that's ok Nick
-
Hi Michael It's nice to see you are making the Caldercraft Victory, I hope you enjoy it. I will be following along on your journey. Nick
-
Would it be practical for Admins, before emptying the trash bin, to scan and check there are no large topics that may well have been deleted in error? Don't want to overload Admins but a member might not realise he deleted his topic before it's too late.
-
Great job Bug and a fitting tribute to Augie
- 2,191 replies
-
- 7
-
-
- confederacy
- Model Shipways
- (and 1 more)
-
Absolutely gorgeous Bug, a real credit to you Nick
- 2,191 replies
-
- 4
-
-
- confederacy
- Model Shipways
- (and 1 more)
-
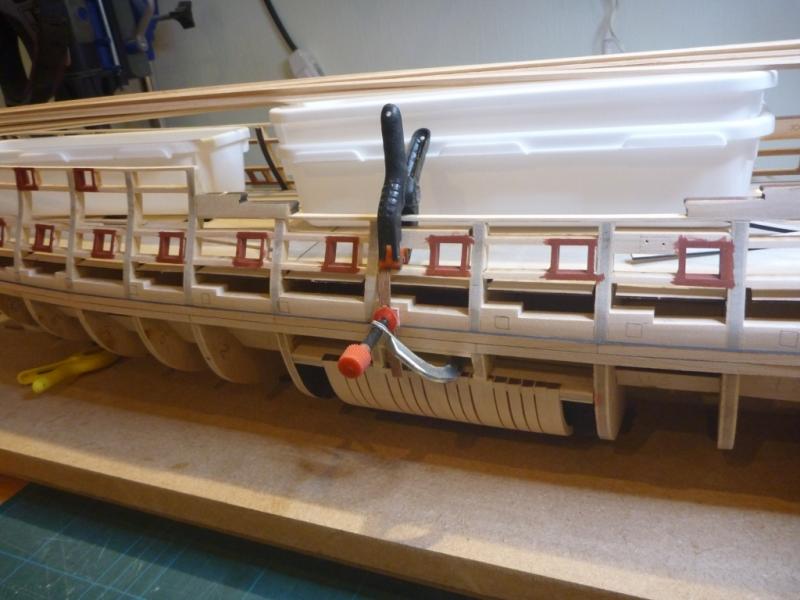
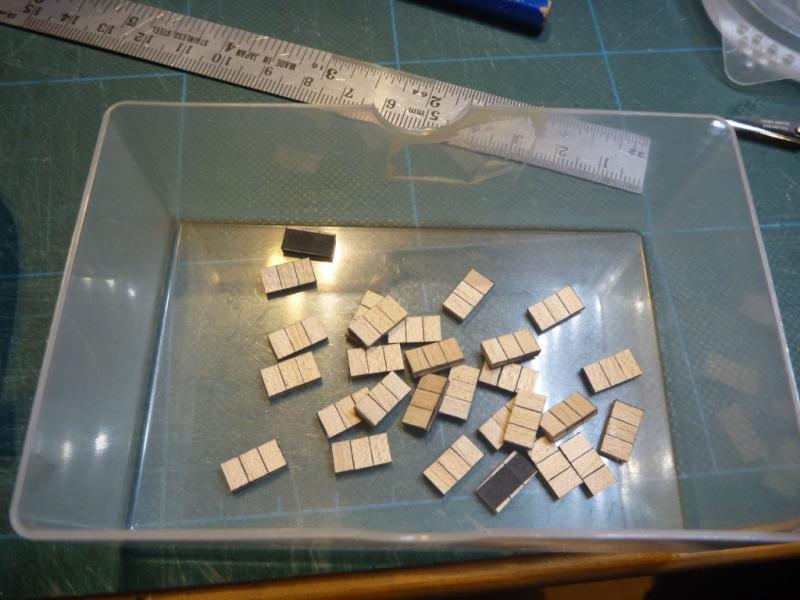
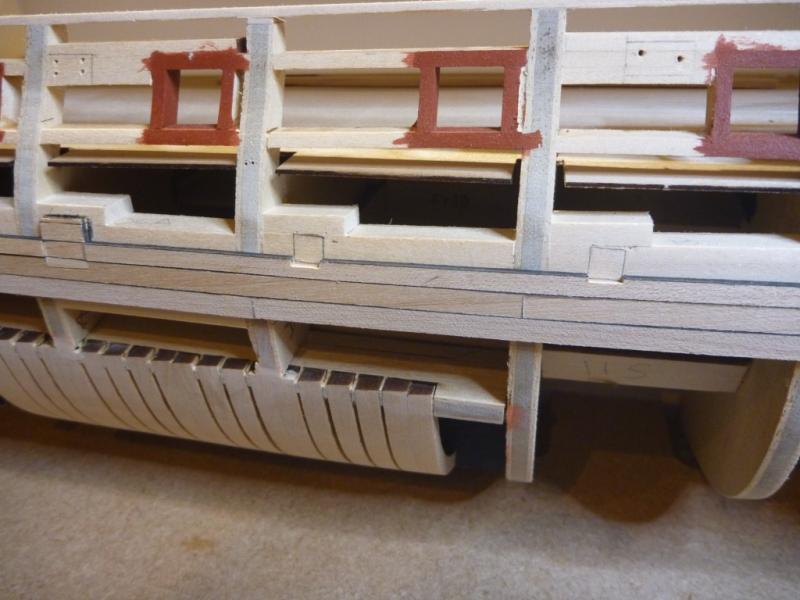
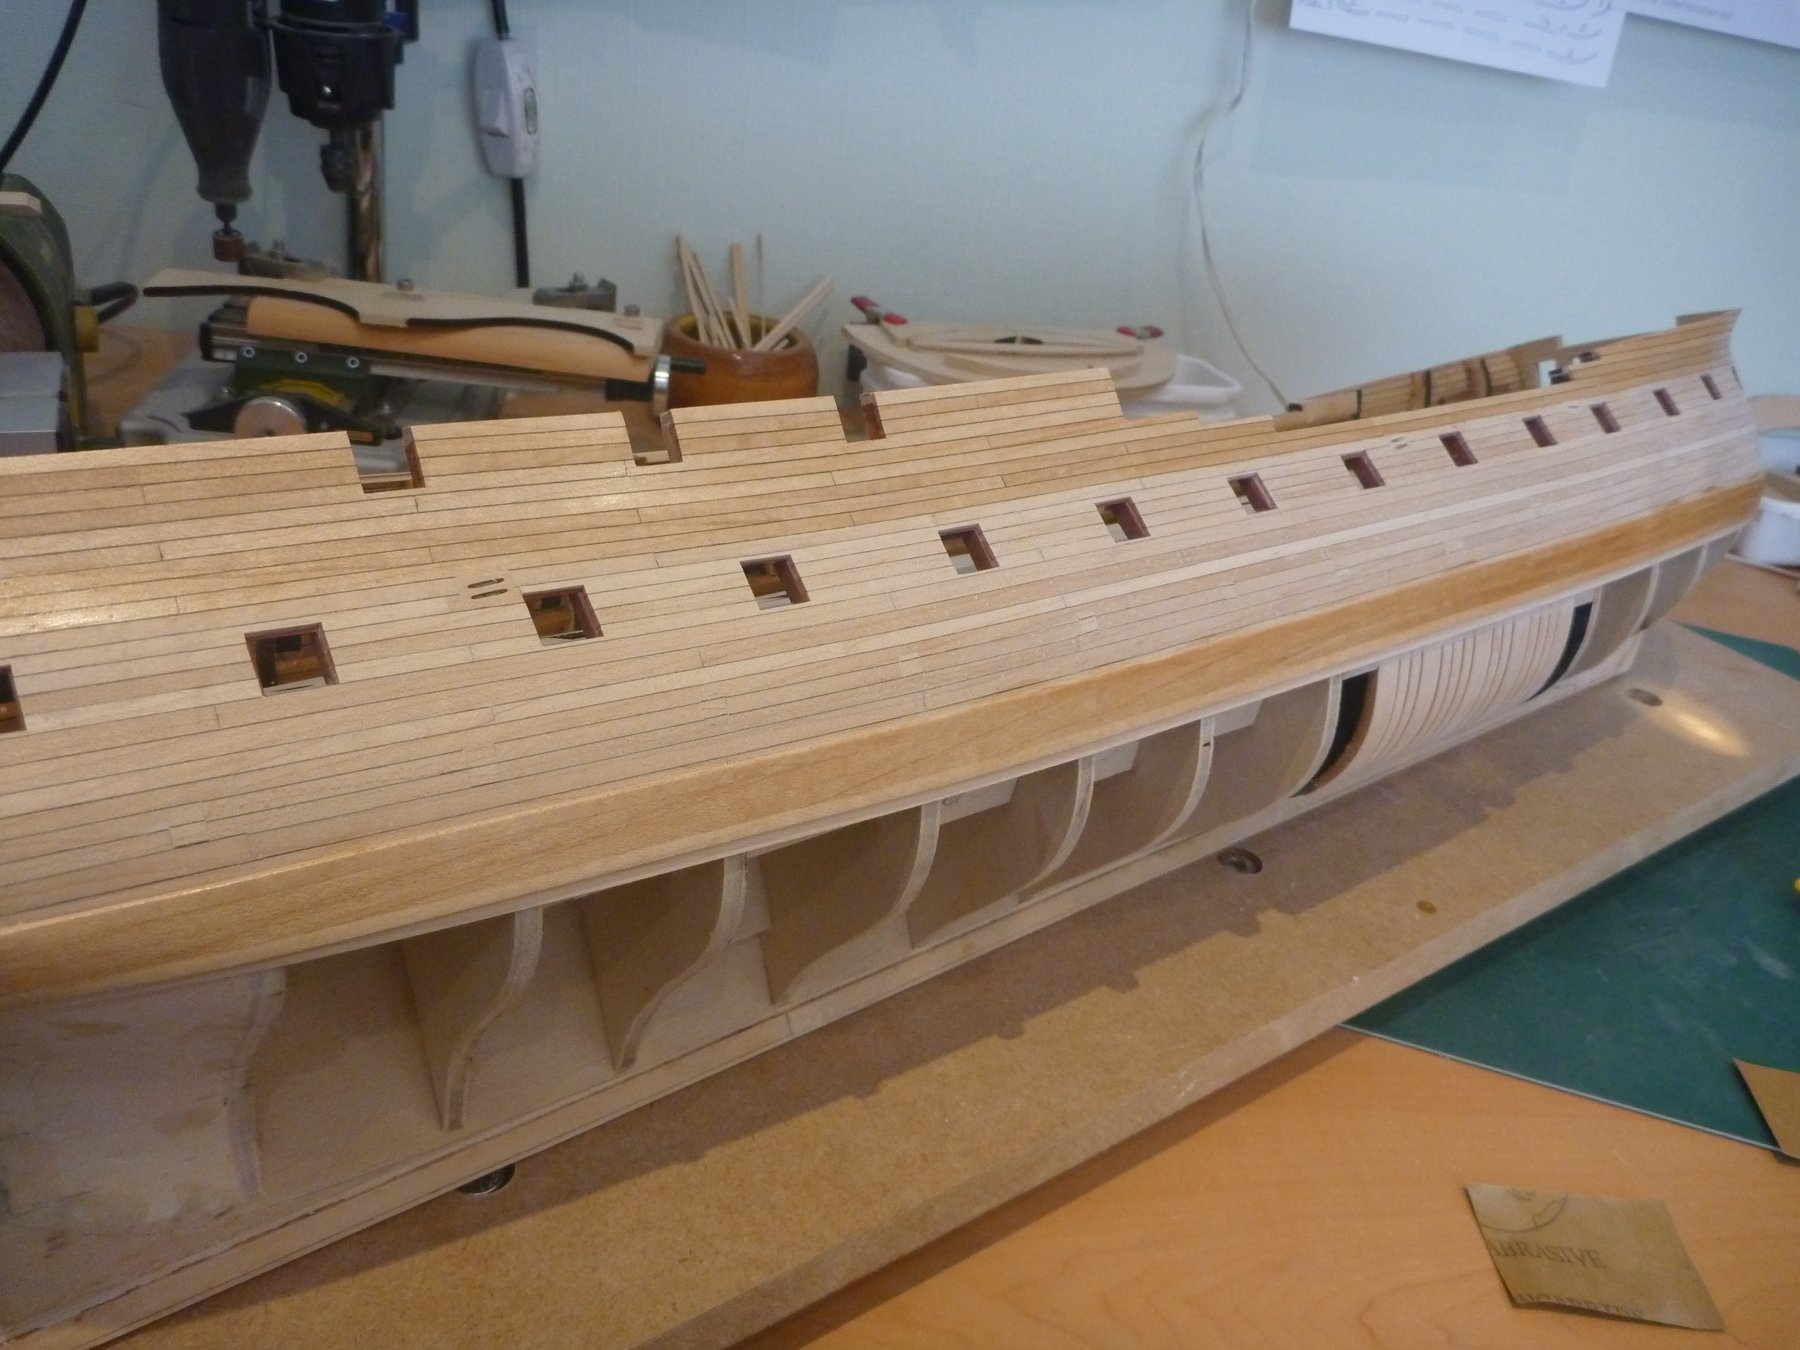
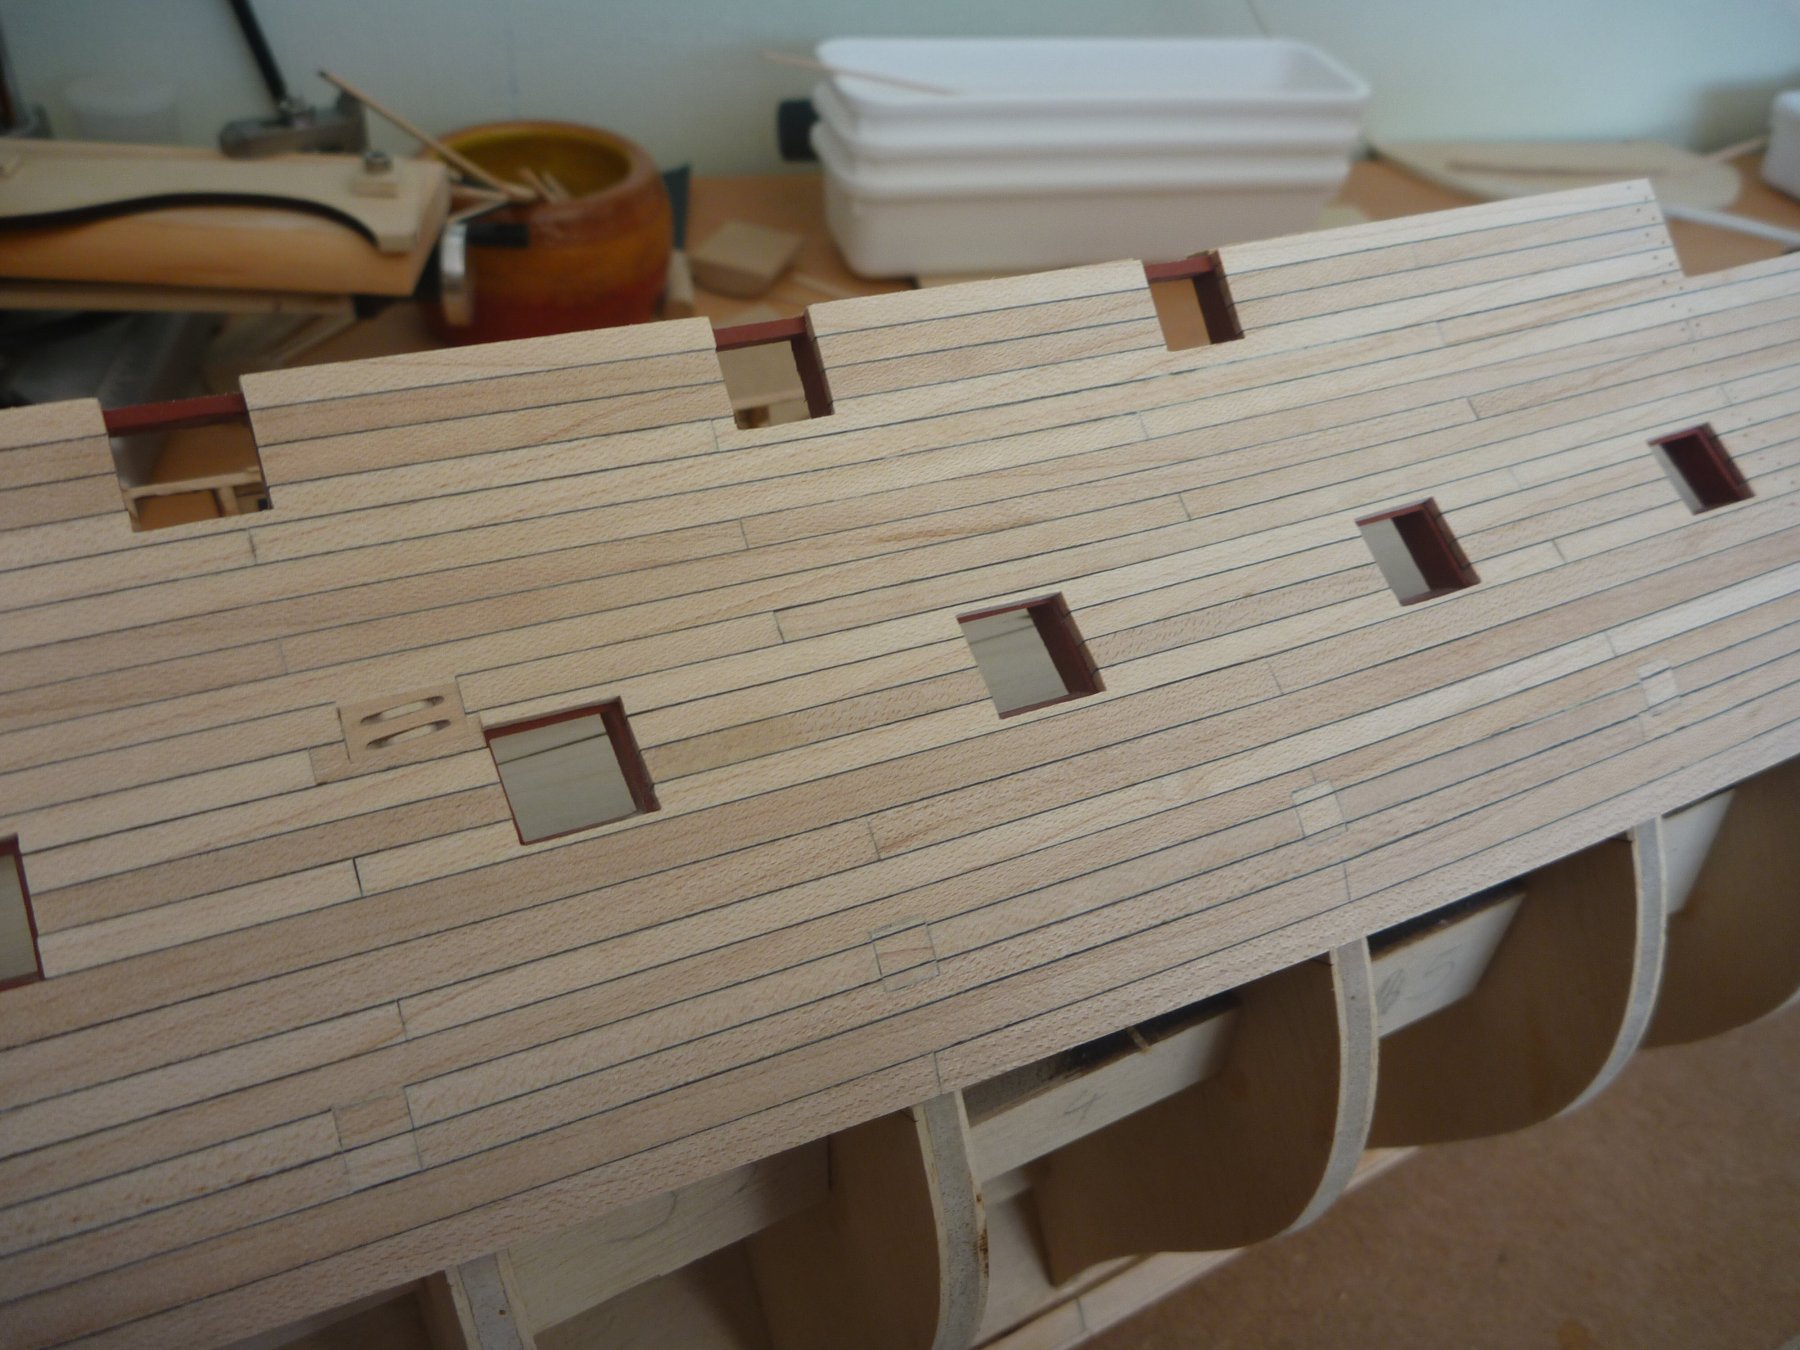
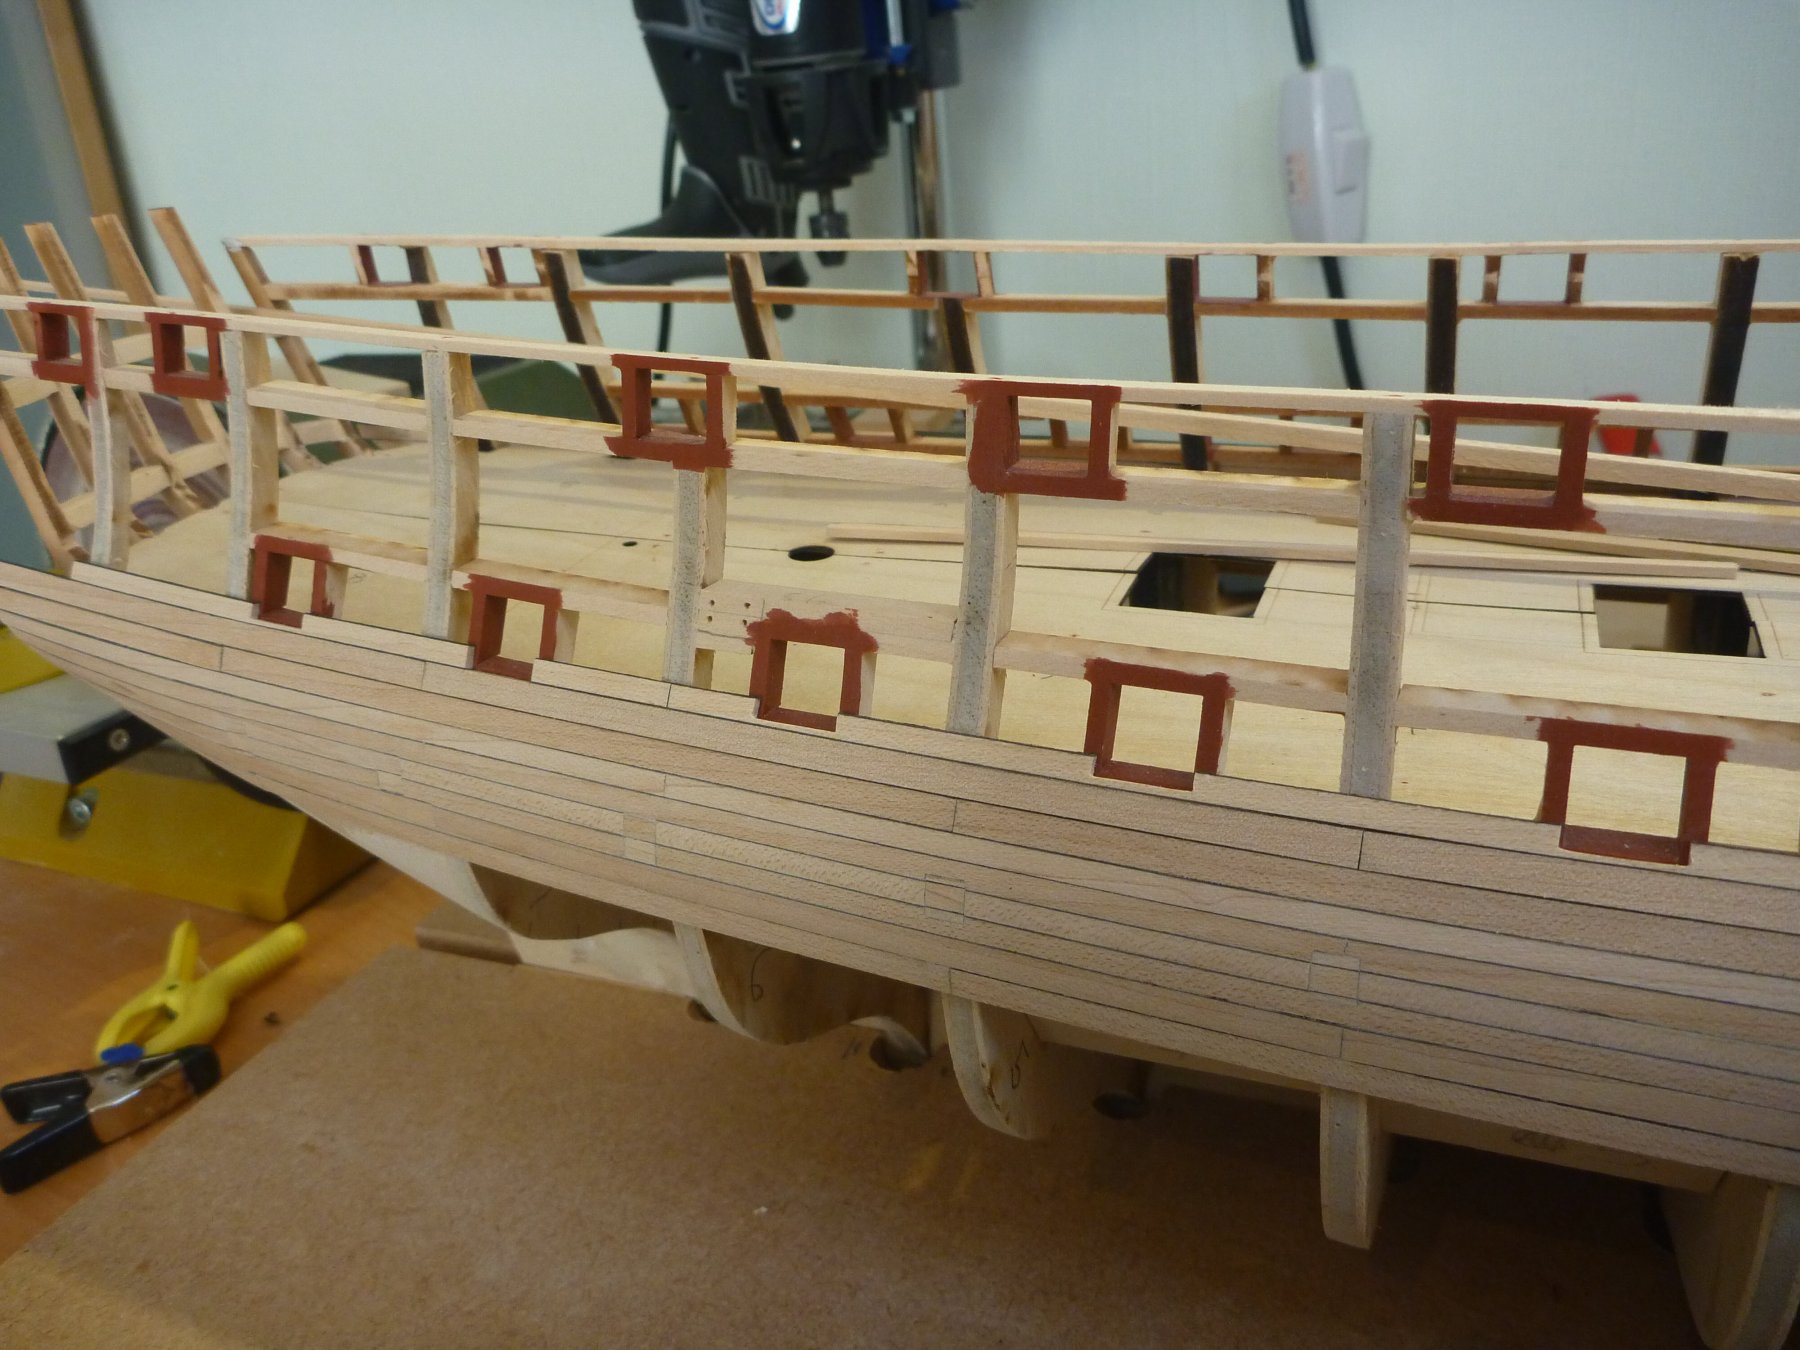
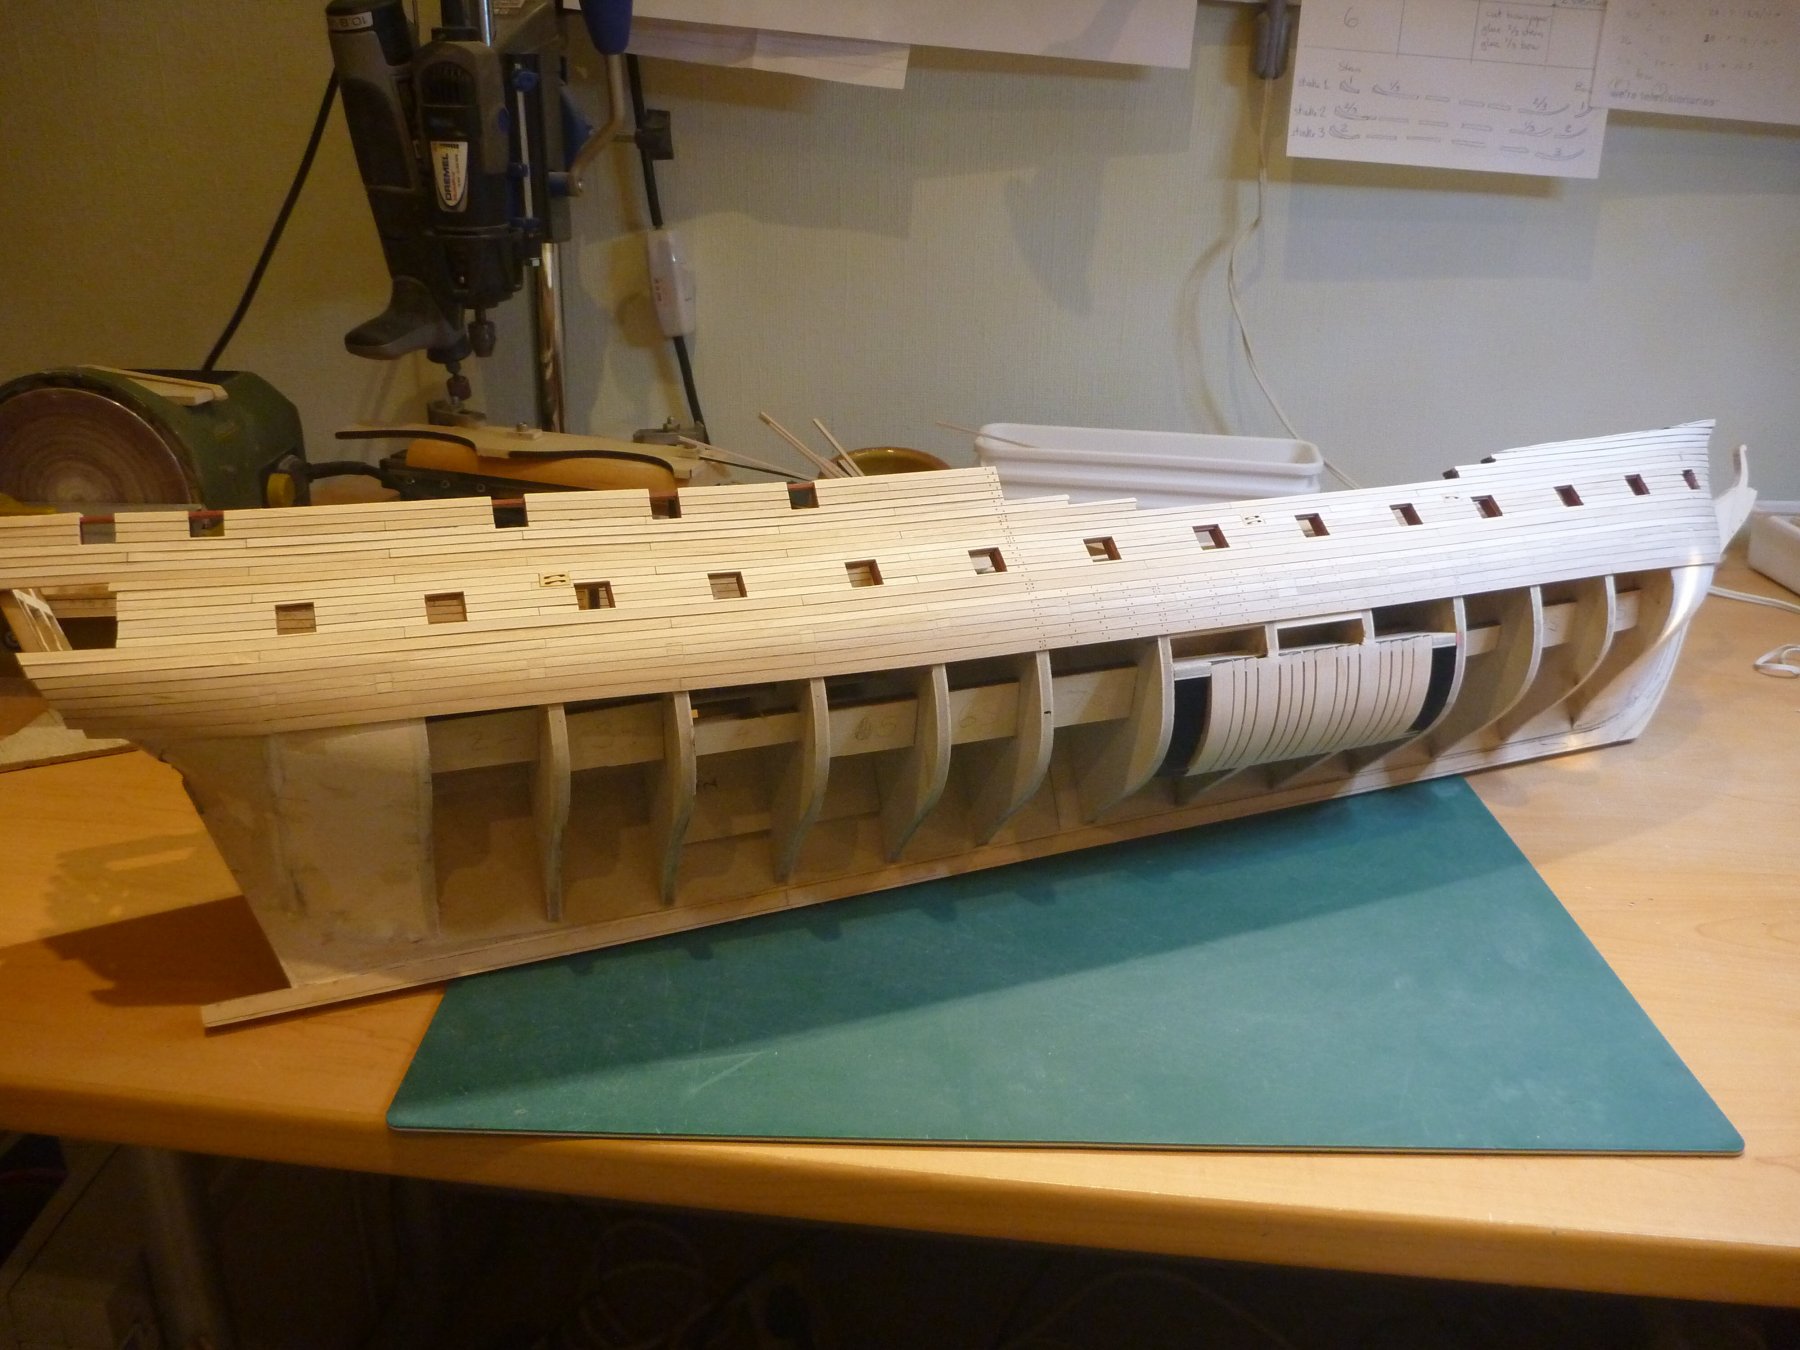
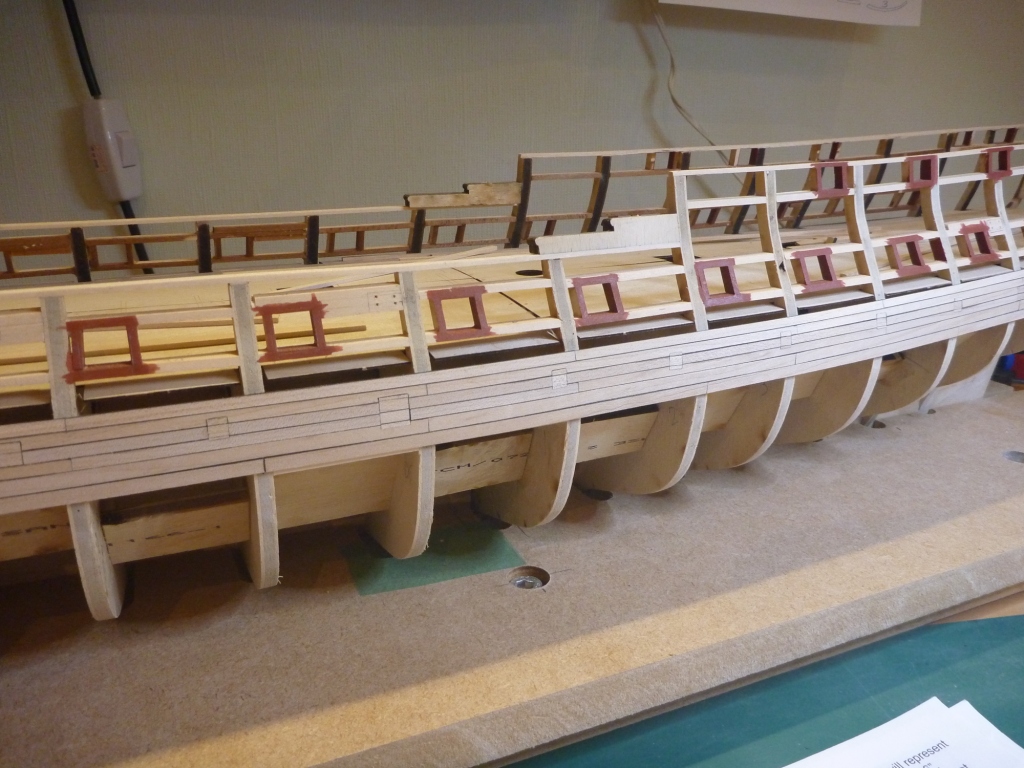
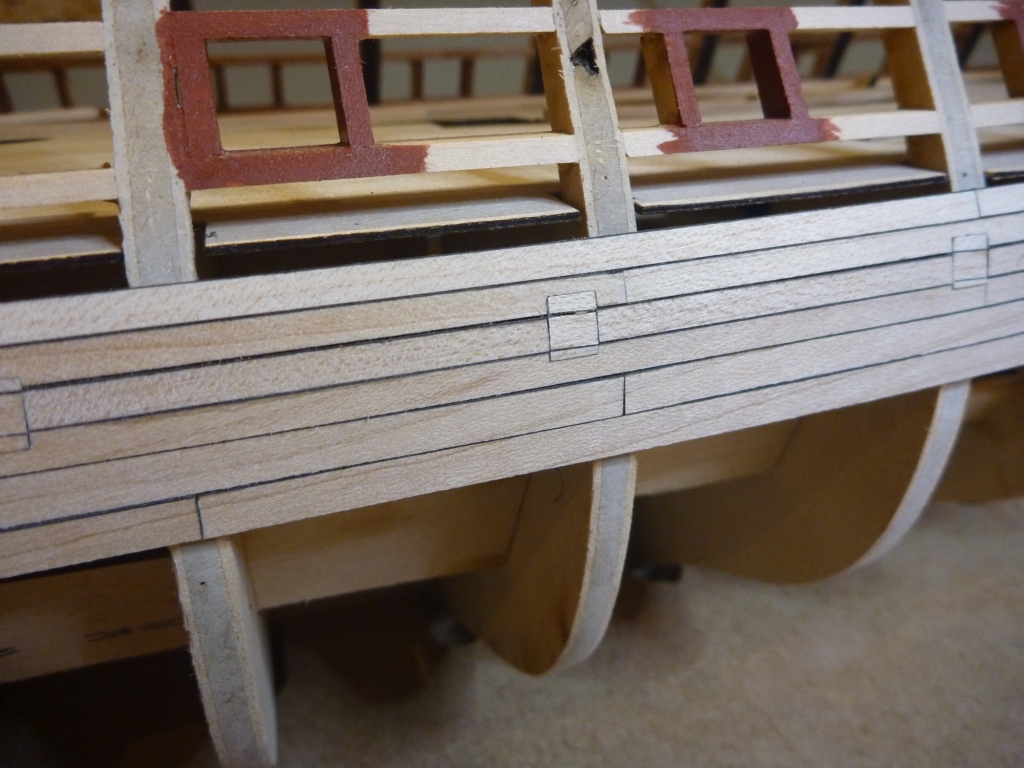
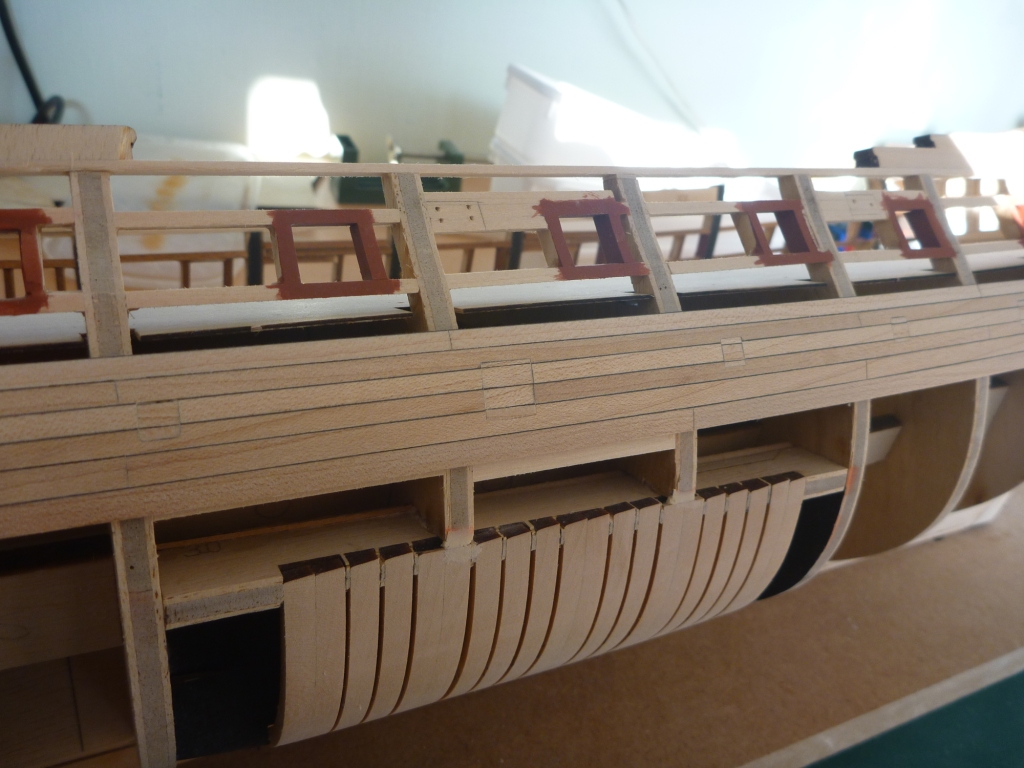
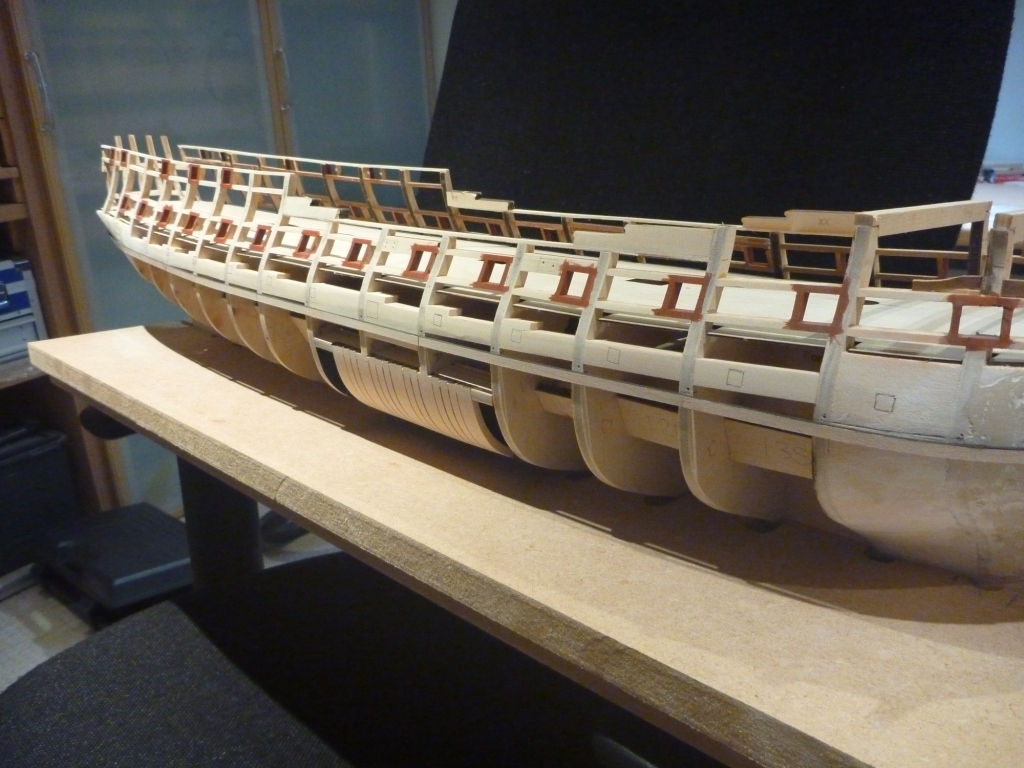
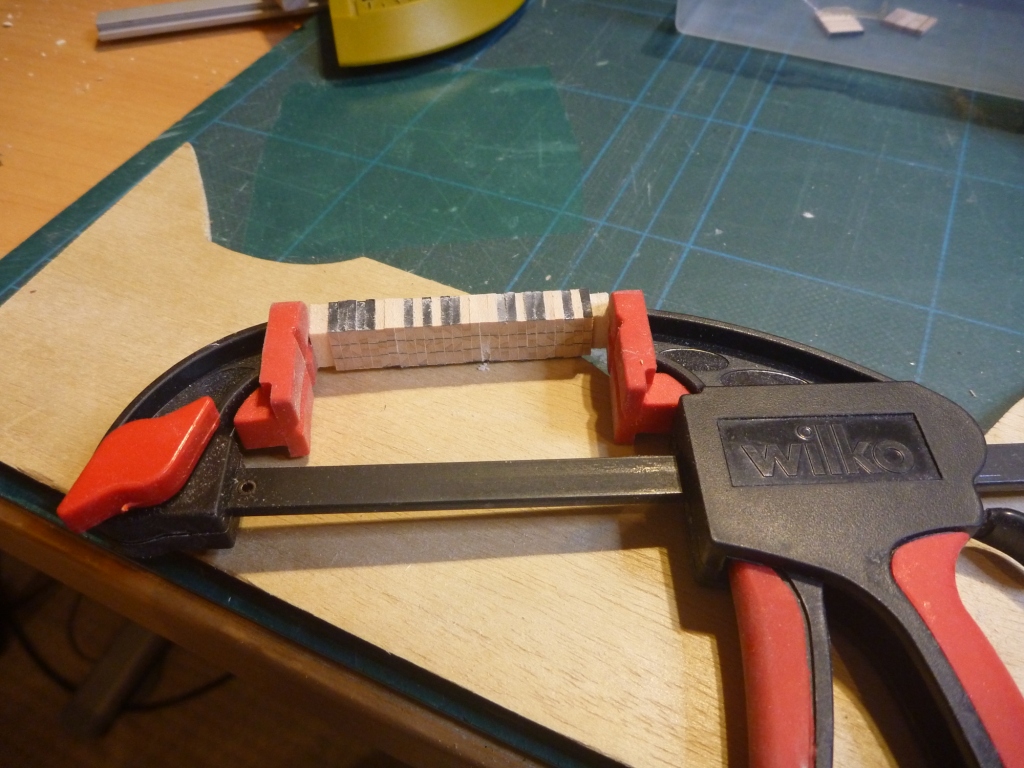
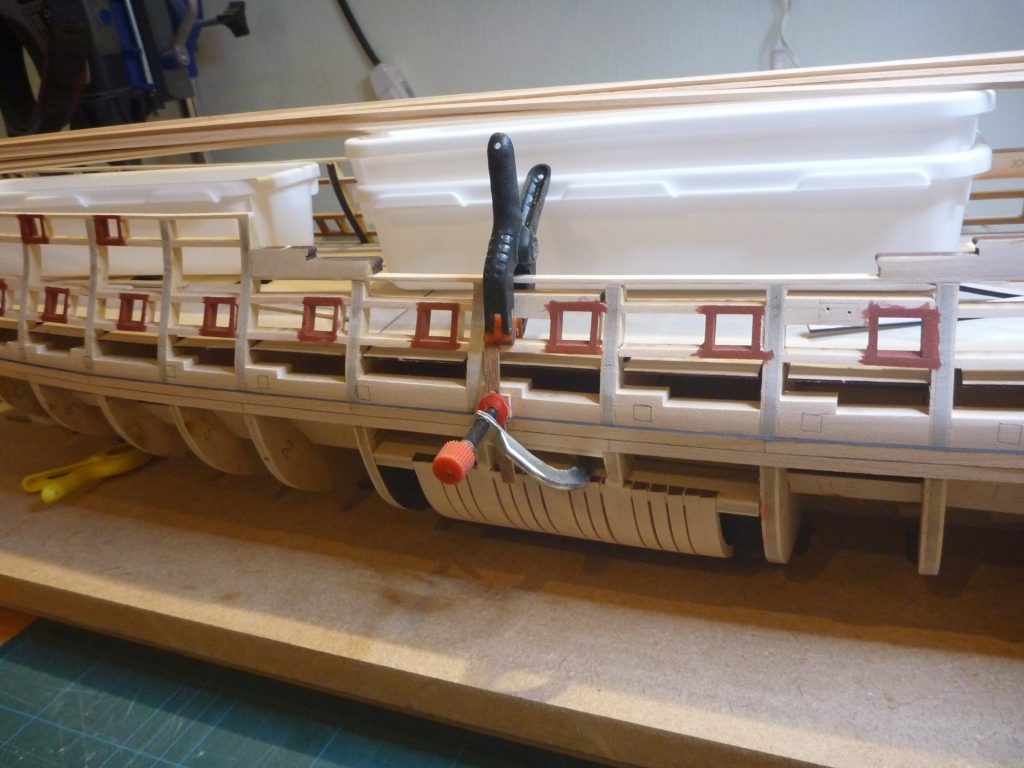
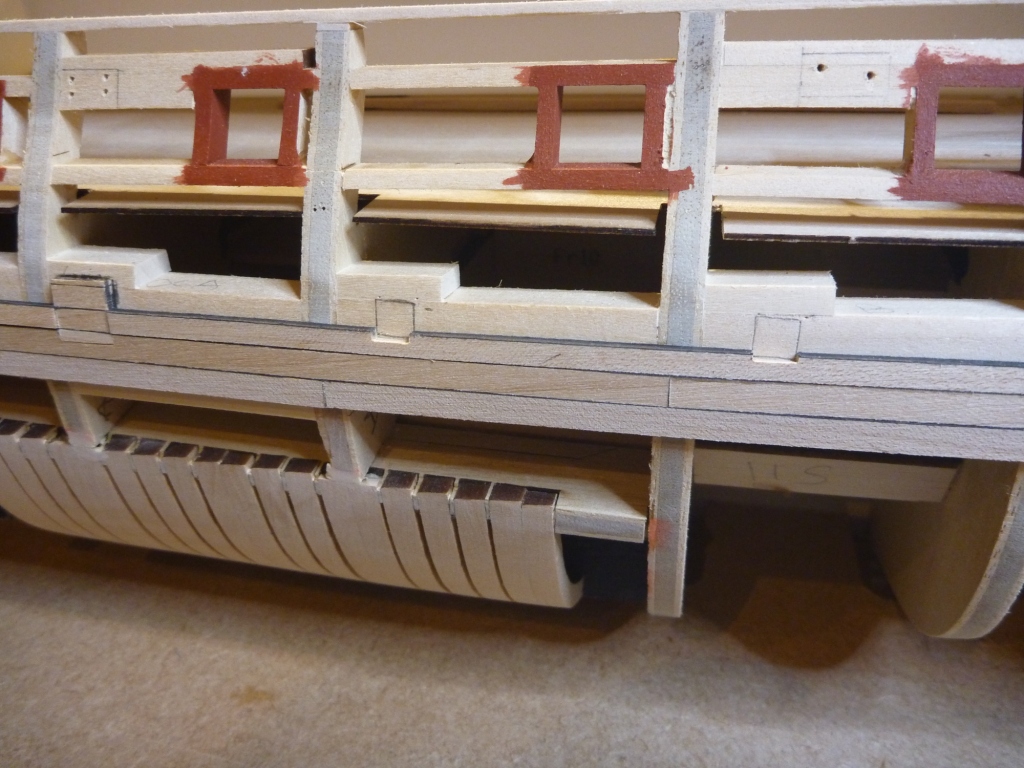
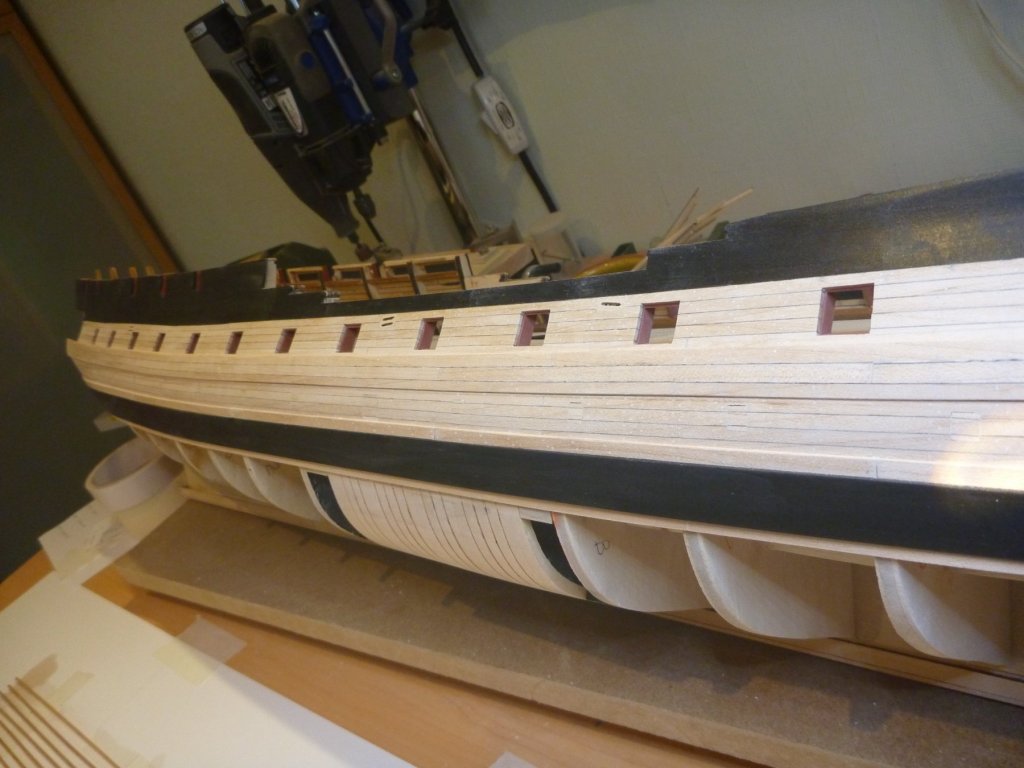
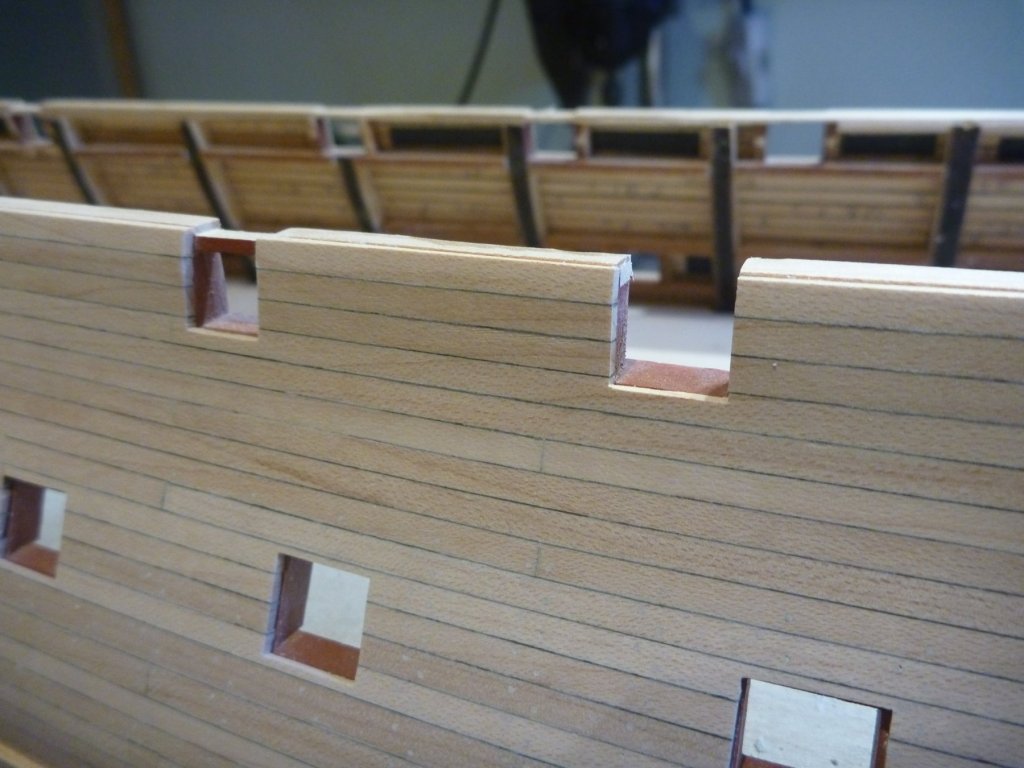
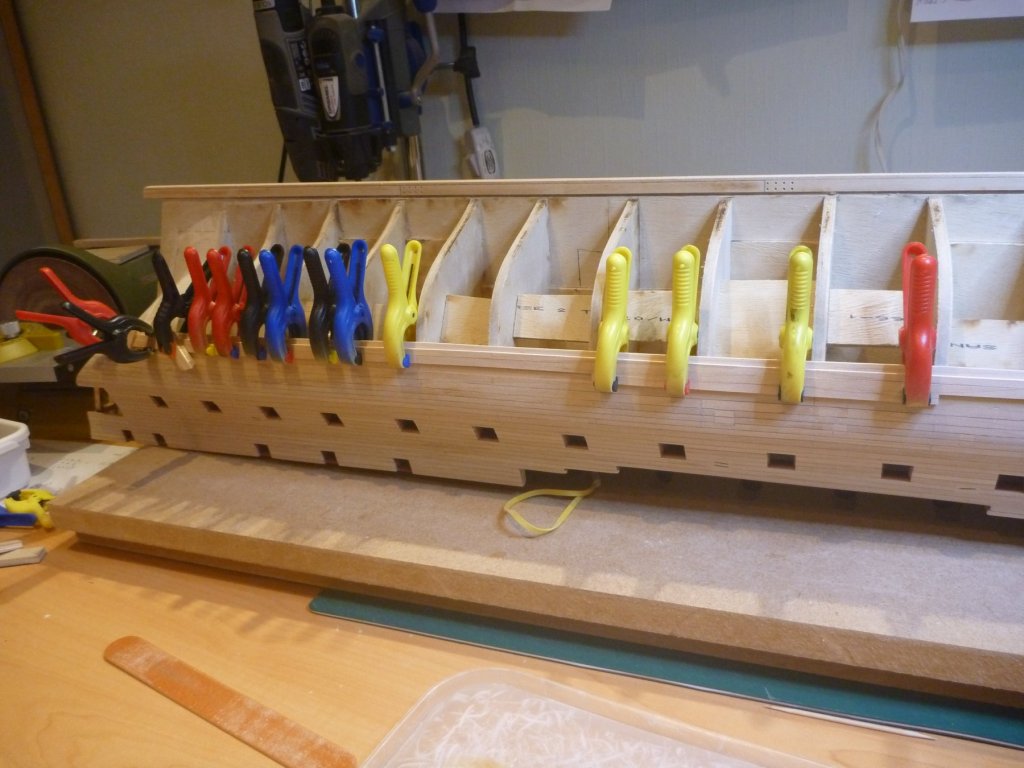
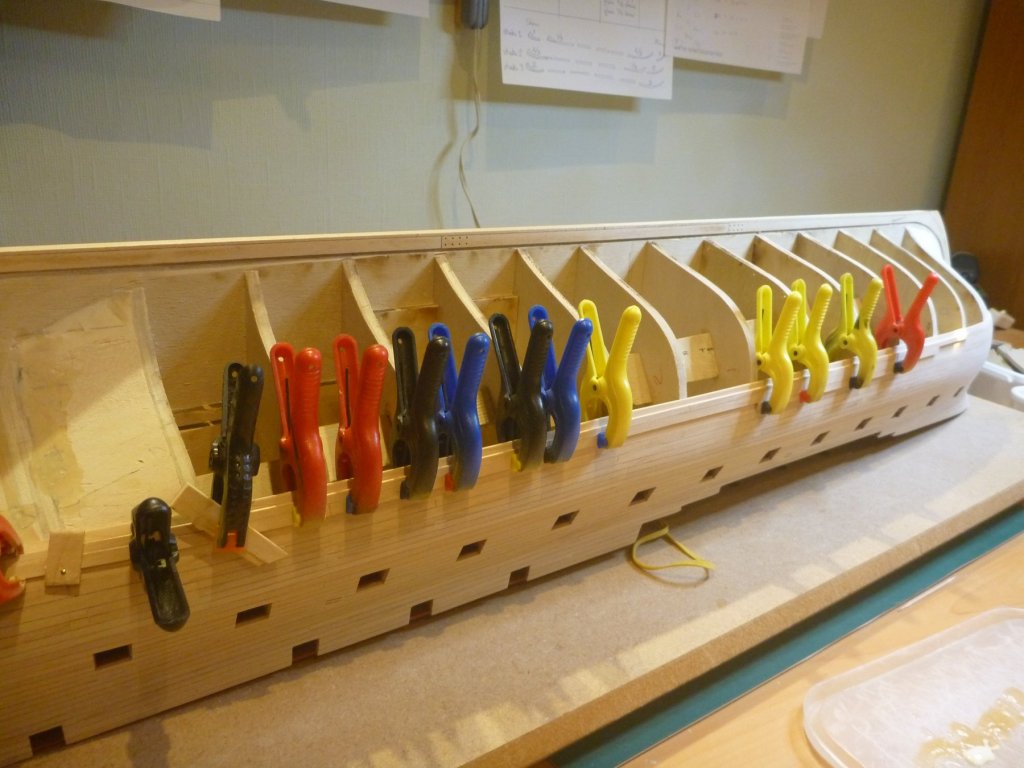
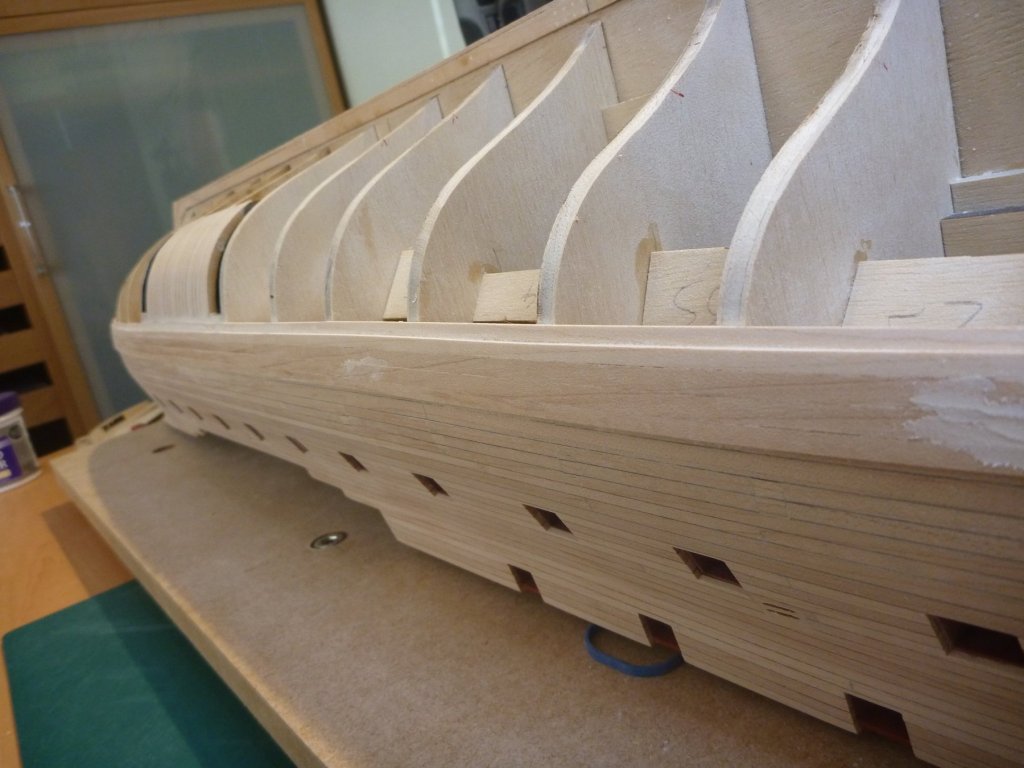
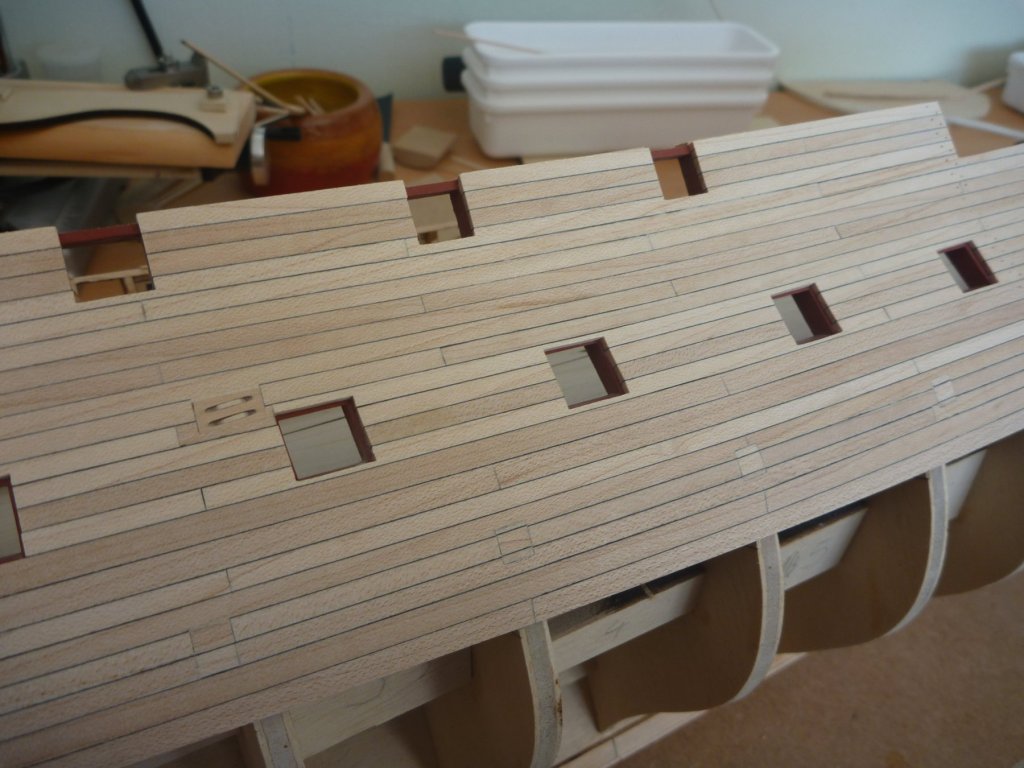
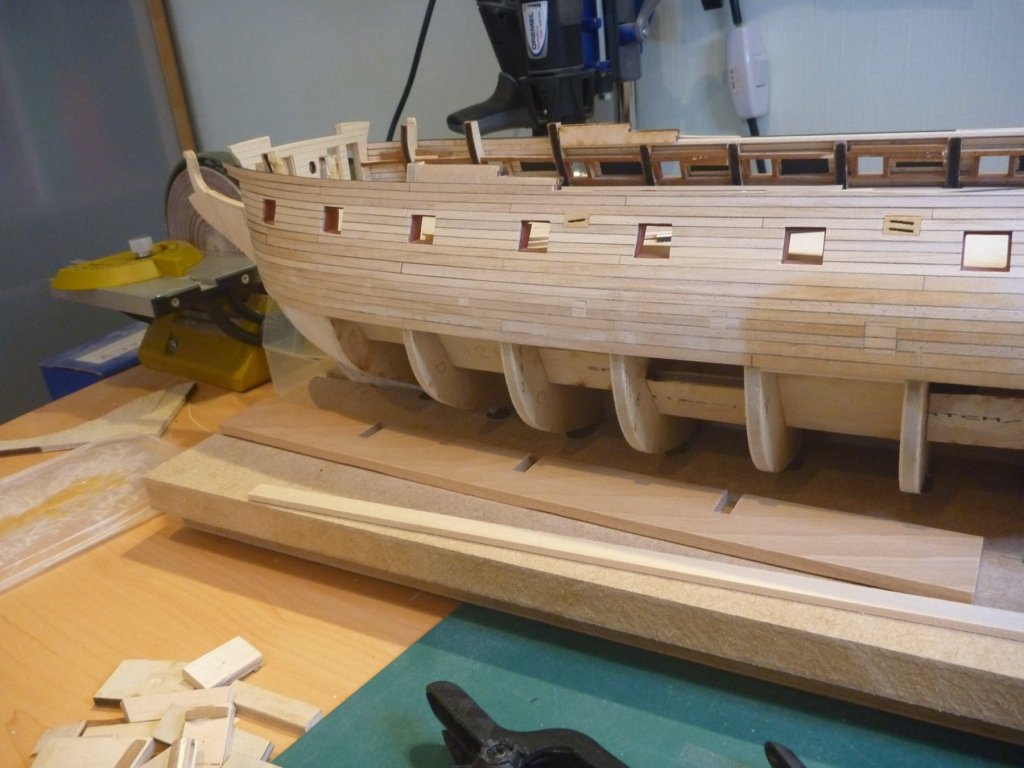
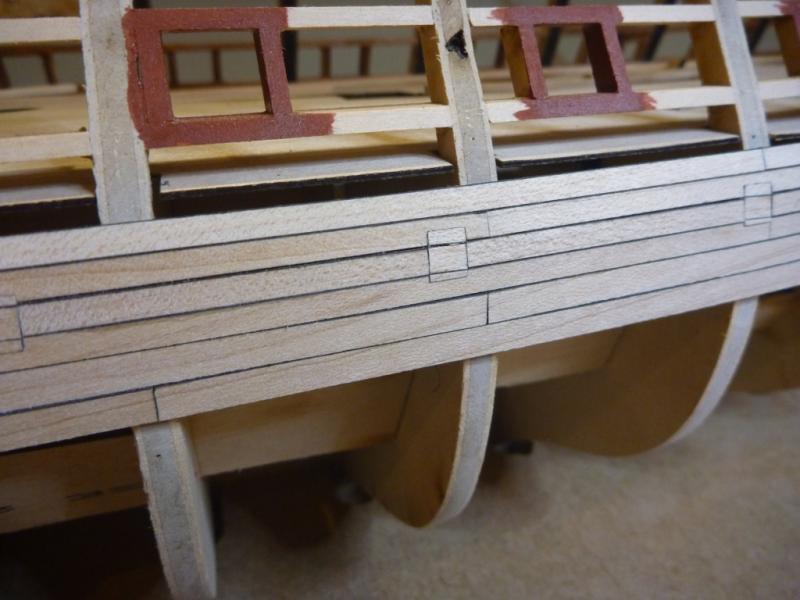
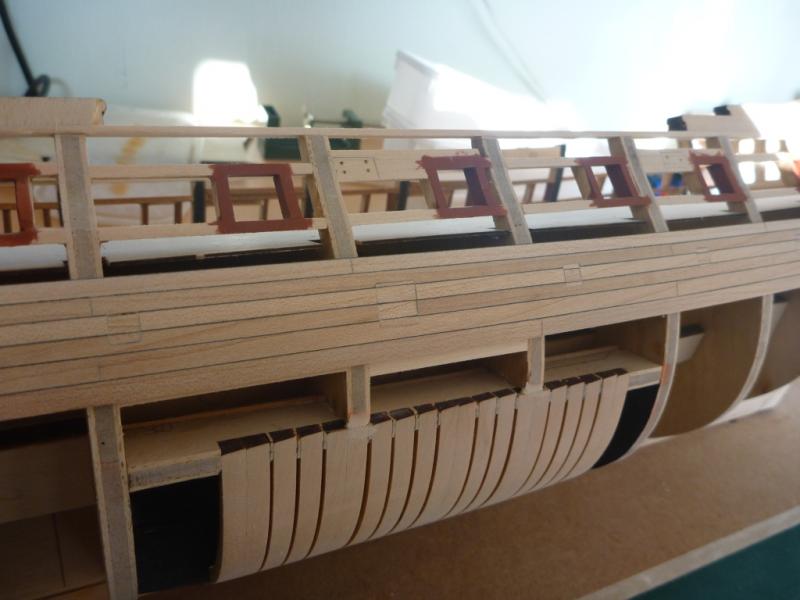
To continue. Here we are with the sweep lids now in place. I can now plank between them. Planking around the bow. And the stern. I am now past the sweep ports. Here's how they look once done, still need sanding. And a close up. Before continuing up onto the channel wales I gave the first set of strakes a rough sanding. I will do a finer sanding later as a whole. I'm now up to the gun ports and the last two strakes will be the first layer of the channel wales. The planks I'm using are a little wider than those in the instructions so I have had to play around with the number of strakes a bit. I've also done a first batch of tree nailing to confirm pitches and effect. Here they are, not filled yet. Next task is to plank around the gun ports, I have some ideas on how to do that. I will catch up when I have some more progress to show. Nick
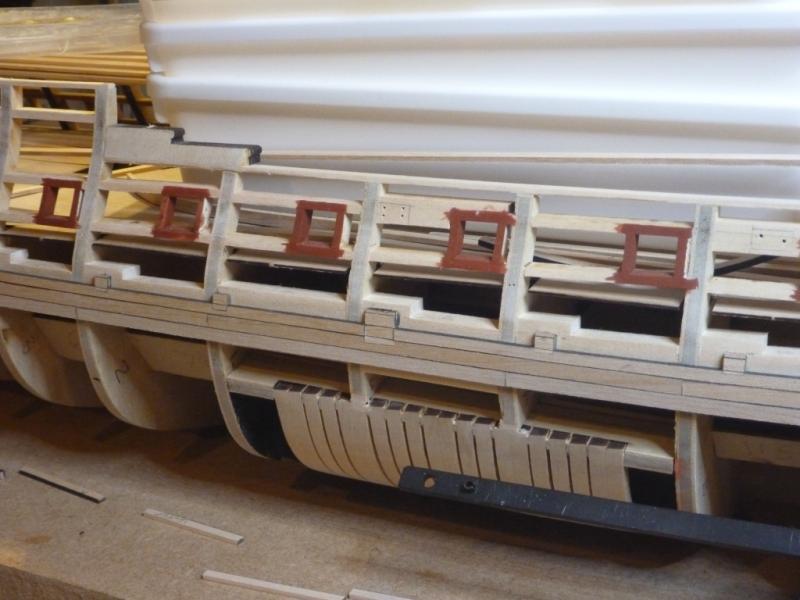


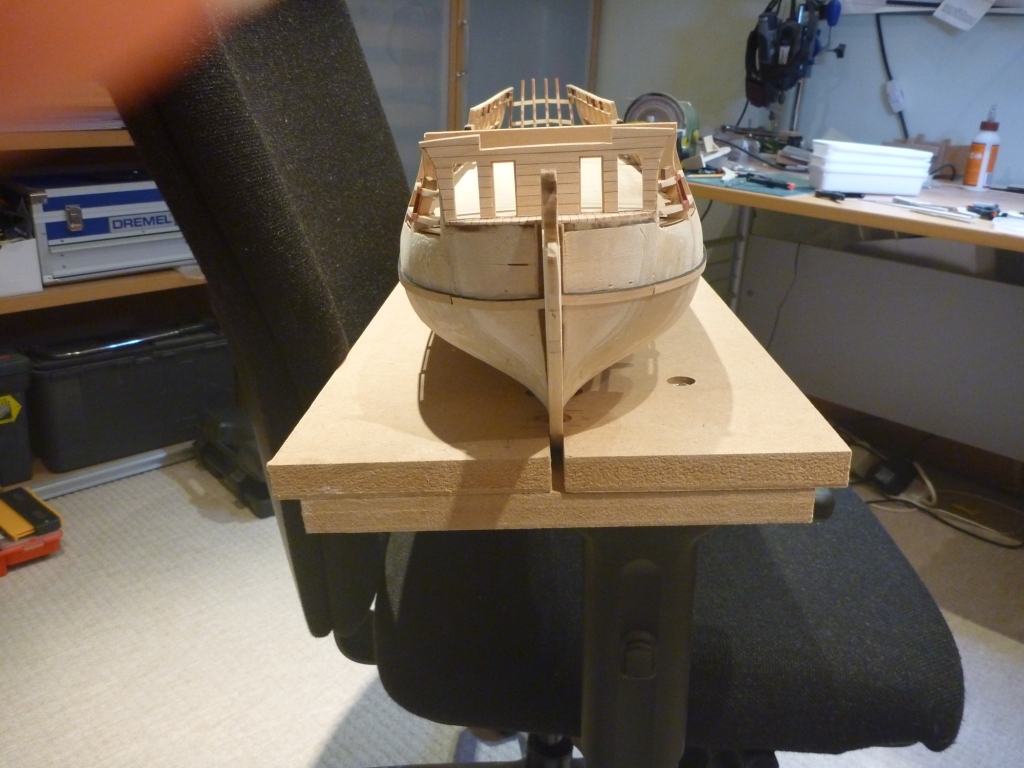
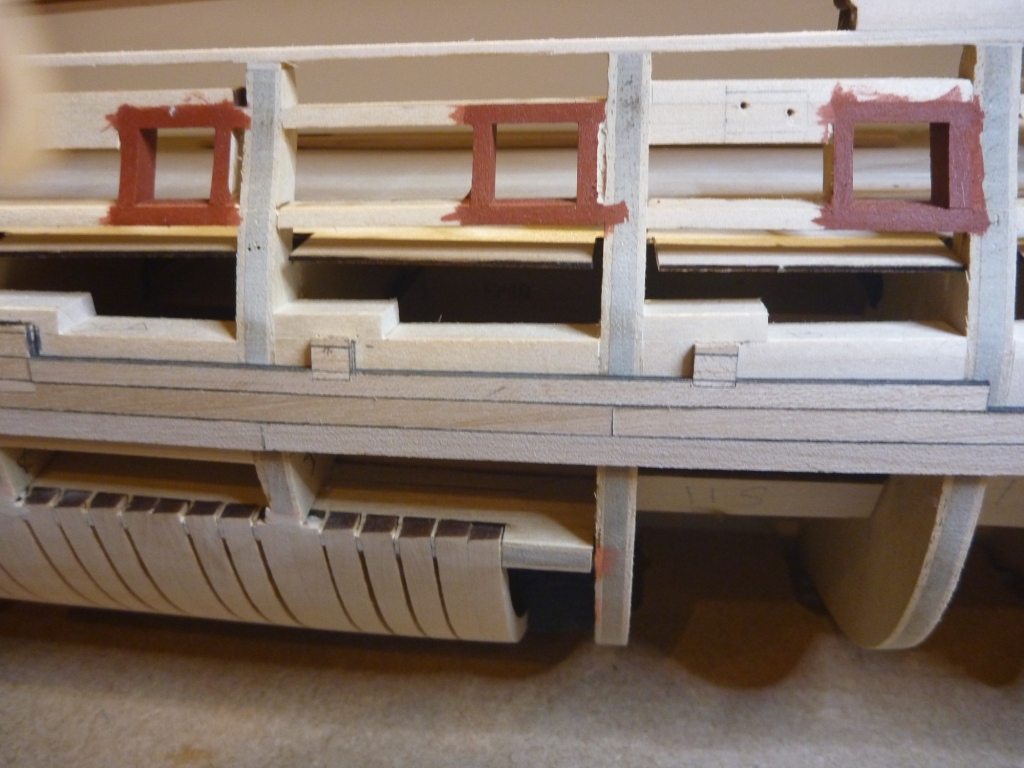
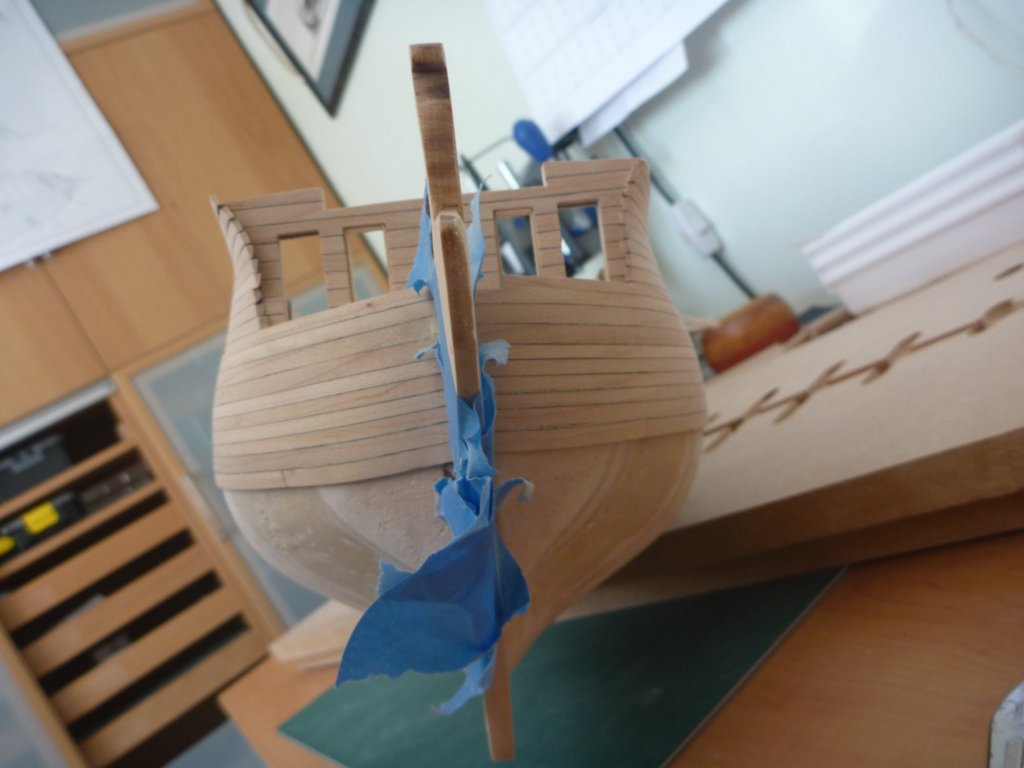
-
So to pick up the thread. A couple of views with the first strake now added. And one from the bow Thinking about the seep port lids. I think I will get a better fit by putting lids in place first and planking up to them. Leaving gaps and creating lids to fit afterwards seems harder to me. So to get them all a consistent size I made a batch up from three strips glued together. I cut them off the strips and here I have them clamped together and I'm bench sanding the side faces to size. And here they are ready to go. I will adjust top and bottoms to suit each position as I fit them. Continuing with planking up towards the sweep lids. Then as I reach the marked port positions I can cut out using the lid as a guide. Then trim the height and place the lid. Continuing planking and placing the sweep lids as I go.