MORE HANDBOOKS ARE ON THEIR WAY! We will let you know when they get here.
×

pompey2
-
Posts
511 -
Joined
-
Last visited
Content Type
Profiles
Forums
Gallery
Events
Everything posted by pompey2
-
 Wow, what a great read your site is Gerald. The ingenuity in your tooling is exceptional, as is the manufacture. Really lovely work. Nick
- 281 replies
-
- 1
-

-
- falls of clyde
- tanker
- (and 2 more)
-
Nice find Mike, that is one comprehensive site. Nick
-
Tools and Supplies for My "Shipyard"
pompey2 replied to daveward's topic in Modeling tools and Workshop Equipment
I use the bench magnifier as well as the optivisor, both have their place IMHO And the previous warning is a good one, both can suffer from catching and ripping off something on the model if care is not taken. For a first model you shouldn't need to consider bench power tools. However a dremel or similar is often invaluable. Drilling, sanding, grinding, turning - all possible. Nick -
Hi Paul Great to see your build log, another Caldercraft Victory is always welcome. Your Vic is looking great so far keep up the good work. I trust you are enjoying the hundreds of copper plates I think your 10 year estimate is a good one, I have been on m Vic for about 13 years (had a break in the middle) But I'm only a few weeks away from the finish line now. I will be looking in occasionally, best of luck Nick
-
I also use a fine wire brush (Brass wires) to clean the smaller files during and after use. Nick
-
Choice of paint
pompey2 replied to robbe33's topic in Painting, finishing and weathering products and techniques
Admiralty Paints from JoTika would be worth a look. They are formulated to match period paints and specifically for ship modeller's. They come in enamel and waterbased (Acrylic?) JoTika-ltd.com Nick -
I've been looking at / talking to a great German site you could try. Put this in Google translate to see it in english http://www.massiv-holz-werkstatt.de/ They have a huge range and the prices are very good. It looks like they export to a lot of places also. I expect to buy some Maple from them soon Nick
-
Hi Kevin She is looking magnificent, great work. I see you have left the Boomkins off for now. Let me say that is a good idea, wish I had done the same. I managed to break one off completely, they stick out at a very 'easy to catch' angle. It meant a bit of careful knighthead removal and replacement. I'm curious about one thing (hoping I haven't missed something) The extended eyes you have on the bottom of the Sprit Sail Yard? All the best Nick
- 1,319 replies
-
- 3
-
-
- caldercraft
- Victory
- (and 1 more)
-
Hell of a job you are doing Robert, she is looking great. Nick
- 527 replies
-
- 1
-
-
- caldercraft
- victory
- (and 1 more)
-
Could it be a mix up of Units of measure? Correctly choosing feet, inches, mm, cm could certainly throw out the results. Nick
-
Like many others I use watered down PVA (50/50) Dries invisible, and at a push can be undone. Nick
-
I find that good marking out is the key. Mark four equally spaced lines along the length of the dowel. Then use you chosen method to come down to those lines.
-
The majority of strakes will be pretty straight. If you edge bend a few of the easier ones then the need for spiled planks would be pretty minimal. Also you might find that after edge bending some you can do them all that way
-
Hi Rich Just been catching up. Your build looks great. All the smaller detailed stuff is great fun. Keep up the good work Nick
- 414 replies
-
- 1
-
-
- caldercraft
- victory
- (and 1 more)
-
Hi Robert I think my brass tubing was about that in diameter, check the inside diameter. The wiring was a tight fit and I used very special wires. I doubt that you will find normal wires to go through. The ones I used (from work) are Kapton coated wires, the Kapton is a good insulator so is applied very thinly. A search online should find you a local supplier. Nick
-
Work station clutter
pompey2 replied to Senior ole salt's topic in Modeling tools and Workshop Equipment
I was suffering from the exact same problem, lots of clutter. So I designed and built a trolley on castors that was custom built for my tools and would wheel under my work bench. It is normally just at my side so within easy reach. Here was my progress. Nick http://modelshipworld.com/index.php/topic/8928-design-and-build-a-custom-work-station/ -
Help with buying the Caldercraft HMS Victory
pompey2 replied to yangliyuan's topic in Wood ship model kits
Hi Kevin If you do get the HMS Victory by Caldercraft then you will find lots of help here. There are a number of build logs running. And you might want to explore the very good books available. Best of luck Nick -
Rigging tools how are they used
pompey2 replied to Telp's topic in Modeling tools and Workshop Equipment
Currently I'm at 1:72 on Caldercraft's Victory. Been doing the rigging for a while and I also use my various tweezers a lot. For blocks I CA the end of the line to form a needle, still need to hold the block with tweezers though. Nick -
Rigging tools how are they used
pompey2 replied to Telp's topic in Modeling tools and Workshop Equipment
Like Jack, I have these hooks. I use them quite a lot. The hook end is good for reaching into the rigging to snag and pull through a line. And the slot end work the same in reverse, it can be used to push a line through a tangle of other rigging. And a combination of the tool and tweezers is great for belaying round a pin. Of course making your own would not be too much of a challenge. Nick -
Proxxon TG125 Bench Disk Sander
pompey2 replied to pompey2's topic in Modeling tools and Workshop Equipment
I went ahead with the Proxxon and had it delivered yesterday. Looks pretty good, should do for me. Thanks Tony for the SAT Berlin steer. Their price was about 2/3 of the UK price. And their process and shipping was all fine. Thanks all Nick -
Hi Rob Sounds like a good idea. Plus if anybody notices a slightly different colour on two planks then you get to tell them it is the real thing. Looking good by the way, great to see you back uo to speed. Nick
- 295 replies
-
- 1
-
-
- victory
- caldercraft
- (and 1 more)
-
Hi Ian Your build is looking great, the planking especially. On the upper gun deck I opened up the clearances around the bulkheads to get it in. That worked ok but needed a lot of care making sure it was aligned properly before fixing. Cutting in half sound like a better bet. Keep up the good work Nick
- 191 replies
-
- 3
-
-
- victory
- caldercraft
- (and 1 more)
-
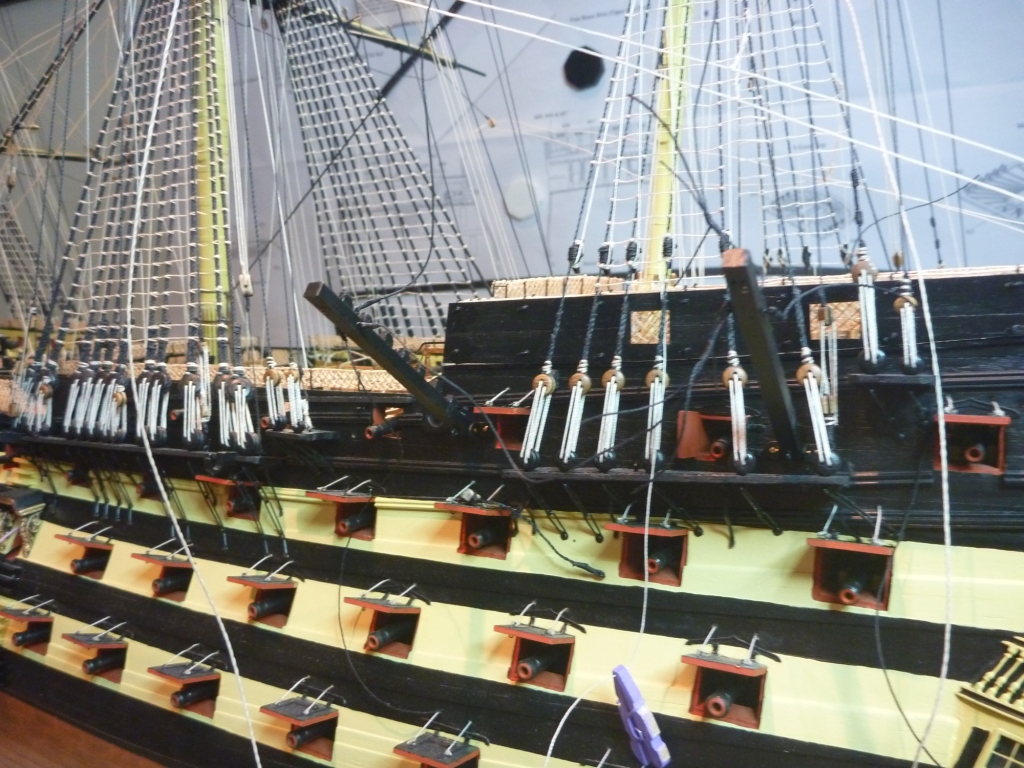
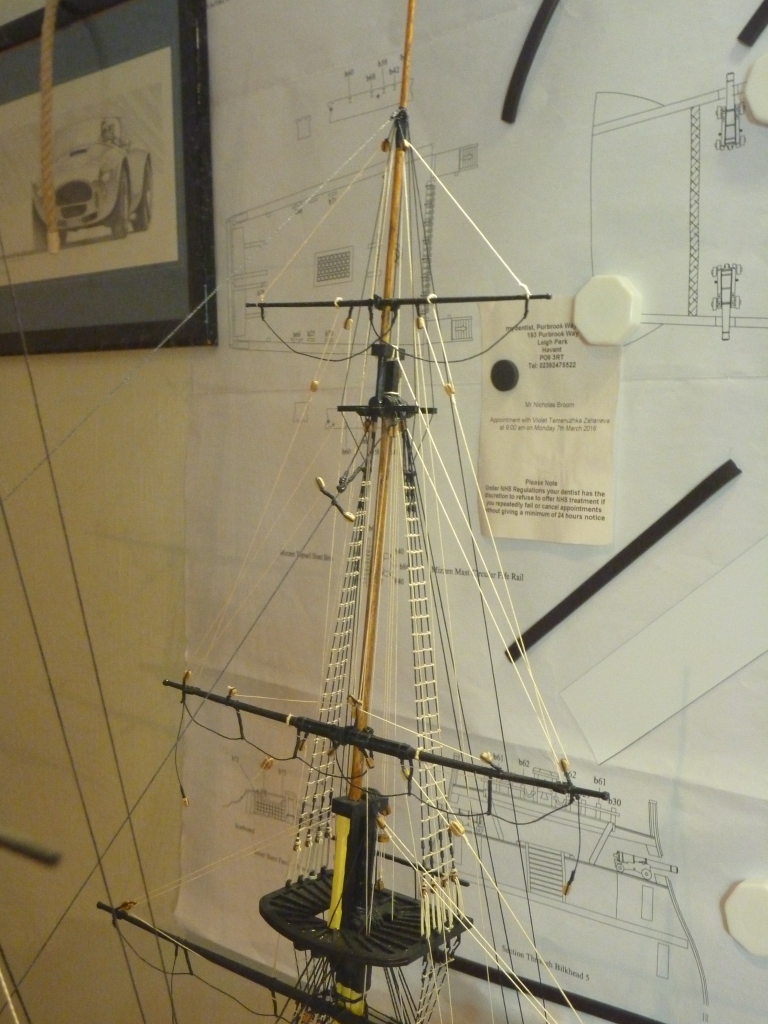
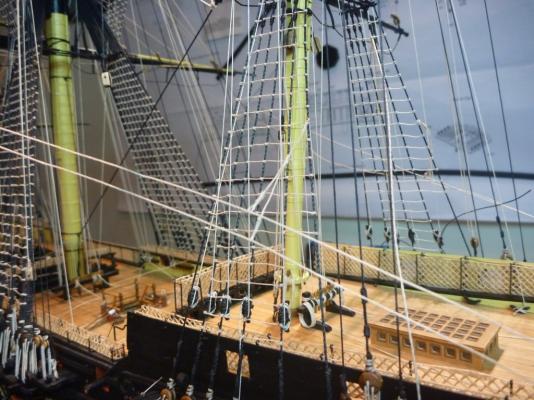
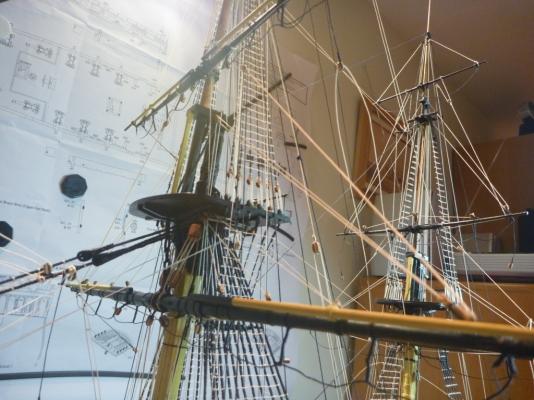
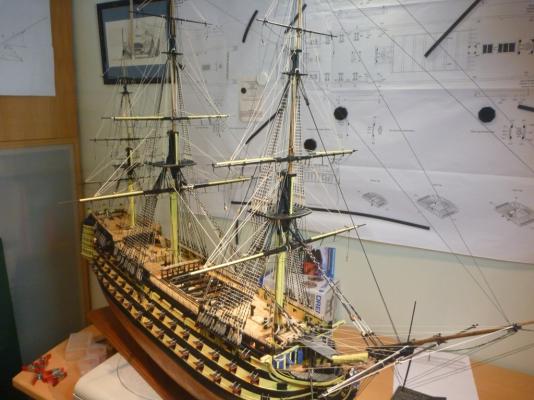
Finally I have decided to hang one or two of the ships boats from the Quarter Davits. That then leaves more space in the waist to allow a better view down into the Gun Deck. Also I like the way a boat on the Davits looks. So before I get into the next round of rigging I assembled and loose rigged both Quarter Davits. I had predrilled for the bracket pins a long time ago and they went on with no real problem by using a pin punch between the deadeyes. I have left some of the rigging adjustable so I can set up the boats later. And so onto the Braces. Because they are outboard of the hull and might get snagged I am rigging they loose at the moment. First the Fore Yard all run but then loosened off. Then the same for the Main Yard. tightened down the Main Yard Braces to allow me to make up and rig the lizards on each side, then slackened off again. That’s me up to date with photos, it’s getting a bit busy in there now. I really love the way a model starts to come to life as the rigging goes on. I have also rigged the Crossjack Yard with Braces now. And I’m starting to make up blocks and lines for hanging the Driver Gaff which is the next task. Thanks for dropping by Nick
- 84 replies
-
- 7
-
-
- finished
- caldercraft
- (and 1 more)
-
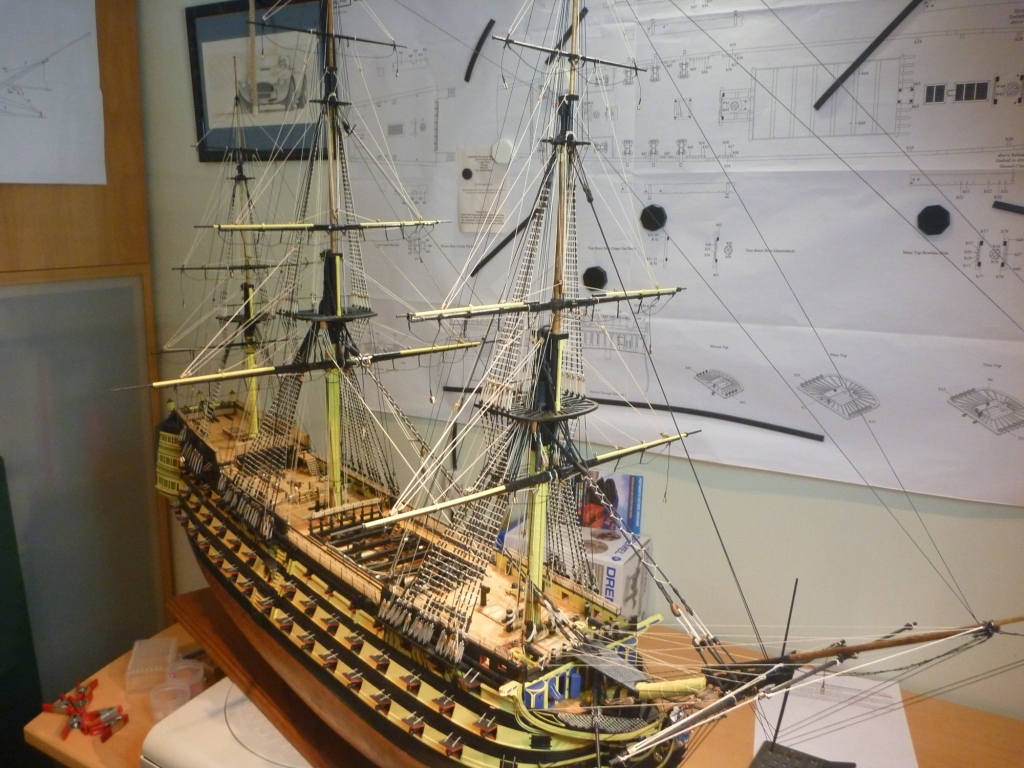
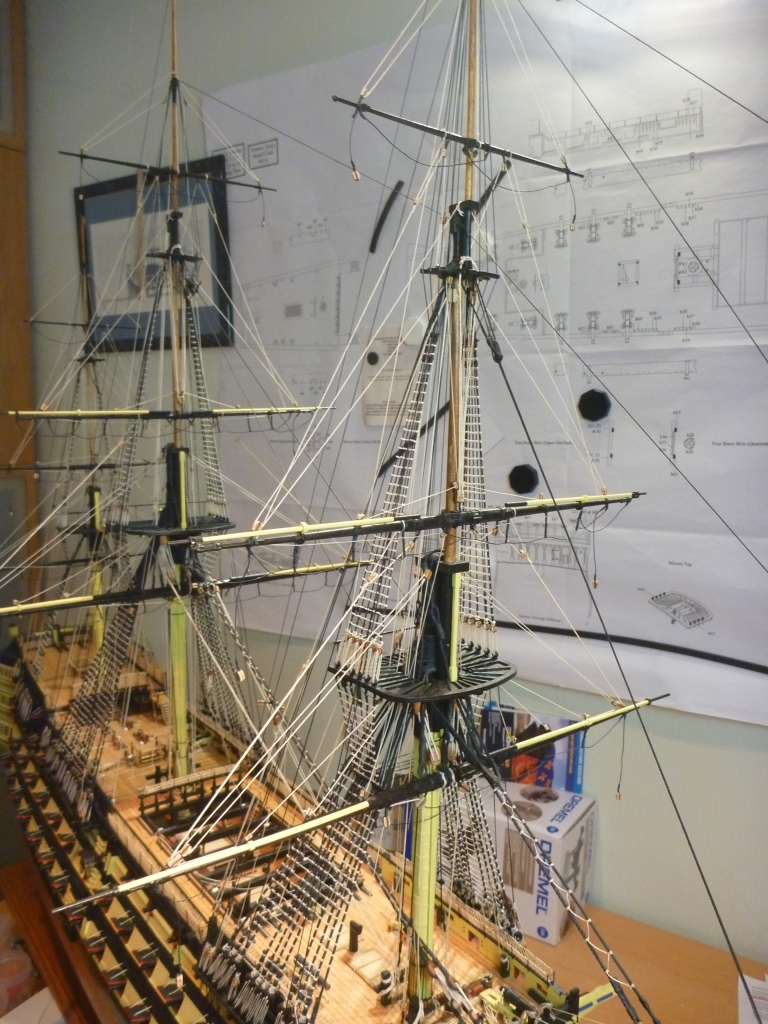
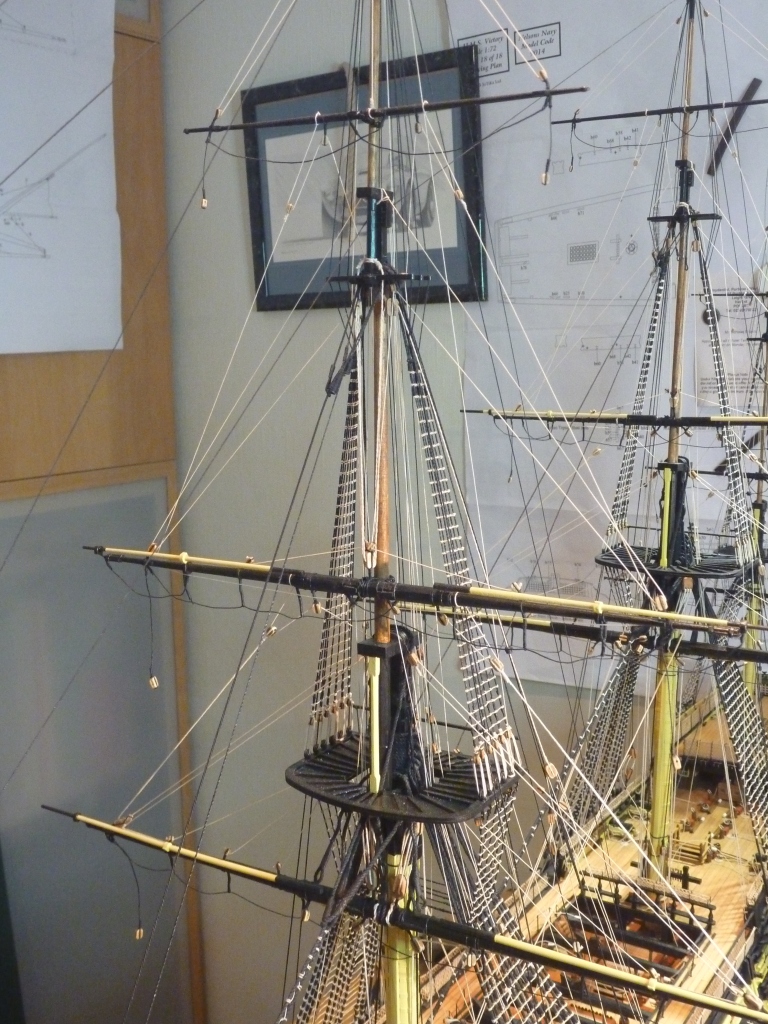
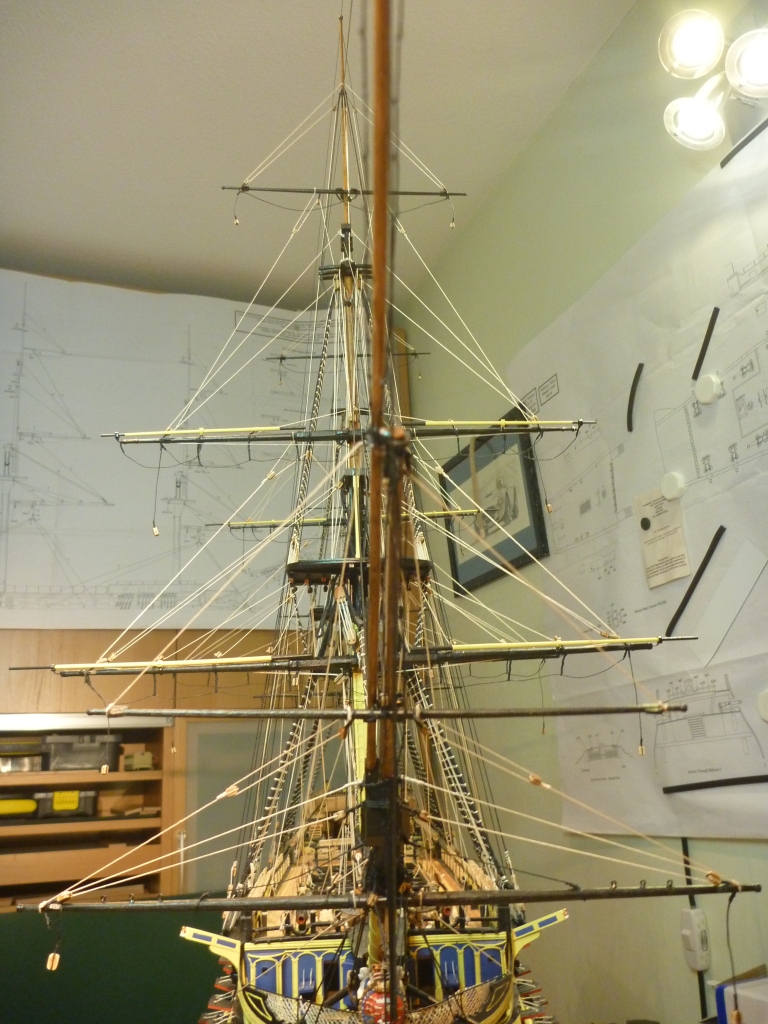
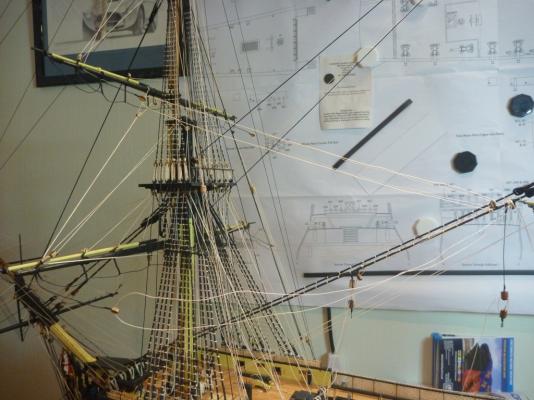
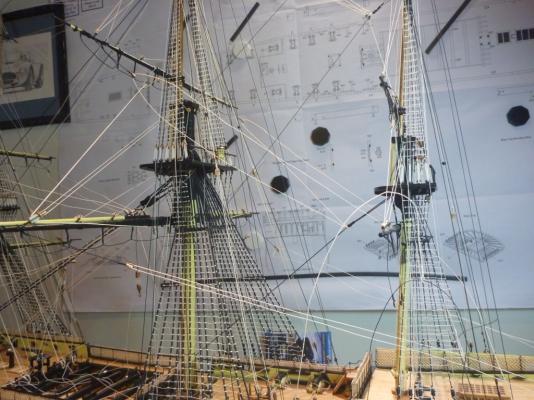
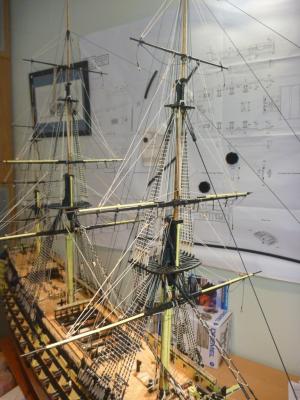
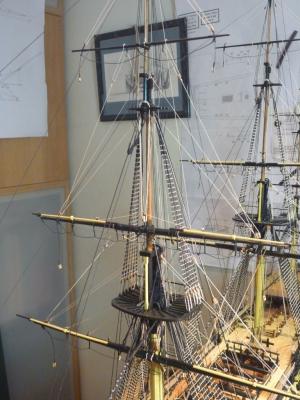
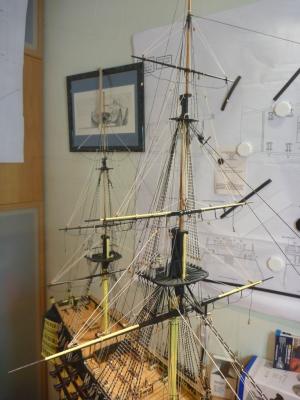
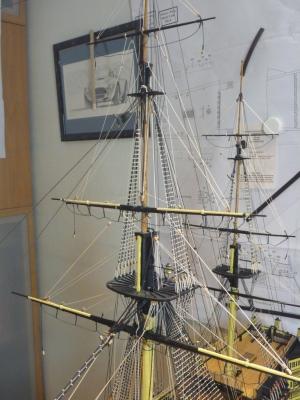
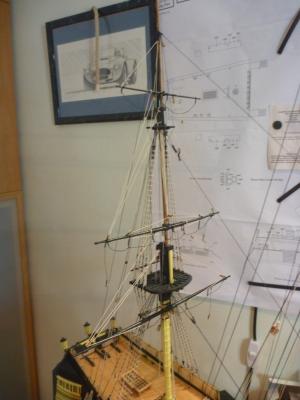
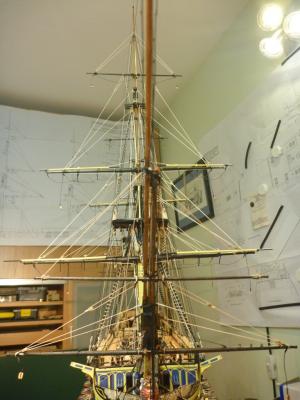
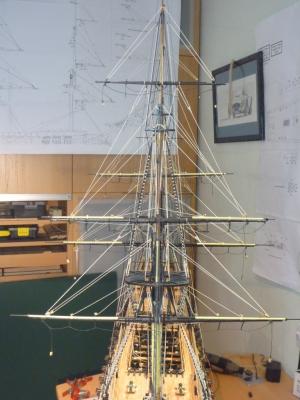
Now a round up of where I am. All the Lifts, Bunt, Leech, Sheet and Cluelines now done The Fore Mast The Main Mast And the Mizzen. And from forward And from above. And from the rear quarter. Still more to come on next post.

- 84 replies
-
- 5
-
-
- finished
- caldercraft
- (and 1 more)