
HOLIDAY DONATION DRIVE - SUPPORT MSW - DO YOUR PART TO KEEP THIS GREAT FORUM GOING! (Only 20 donations so far - C'mon guys!)
×


DocRob
-
Posts
1,261 -
Joined
-
Last visited
Content Type
Profiles
Forums
Gallery
Events
Everything posted by DocRob
-
 Thank you Walter, for now, I will hang in. My level of patience is generally very low, luckily my perseverance isn´t. Usually, I have to disagree with you about the succession of frustrations in modelling. To me, its mostly challenges, what defines a build and I like to challenge myself due to my projects and learn something new every day. The Cobra is a beast to build somehow. The main frustrating aspect is, preparing and finishing various sub assemblies over a long time and during the final assembly destroy them partly due to abrasion, CA spills, paint lifts, etc. The fact, the Cobra is made up like a real car doesn´t make things easier. The build is complex and tolerances are tight and even the slightest deviation sums up to disaster in the end. Cheers Rob
 -
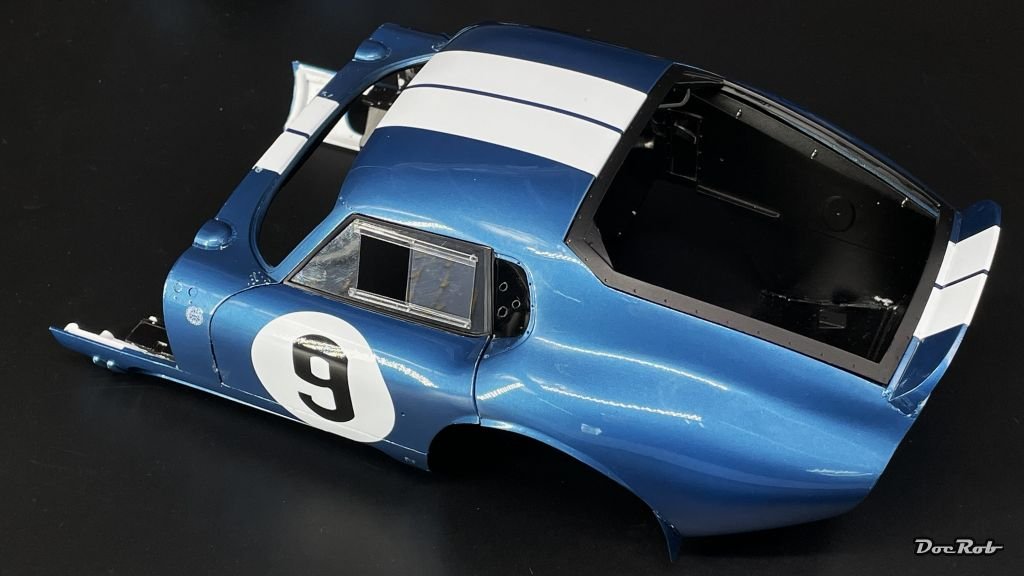
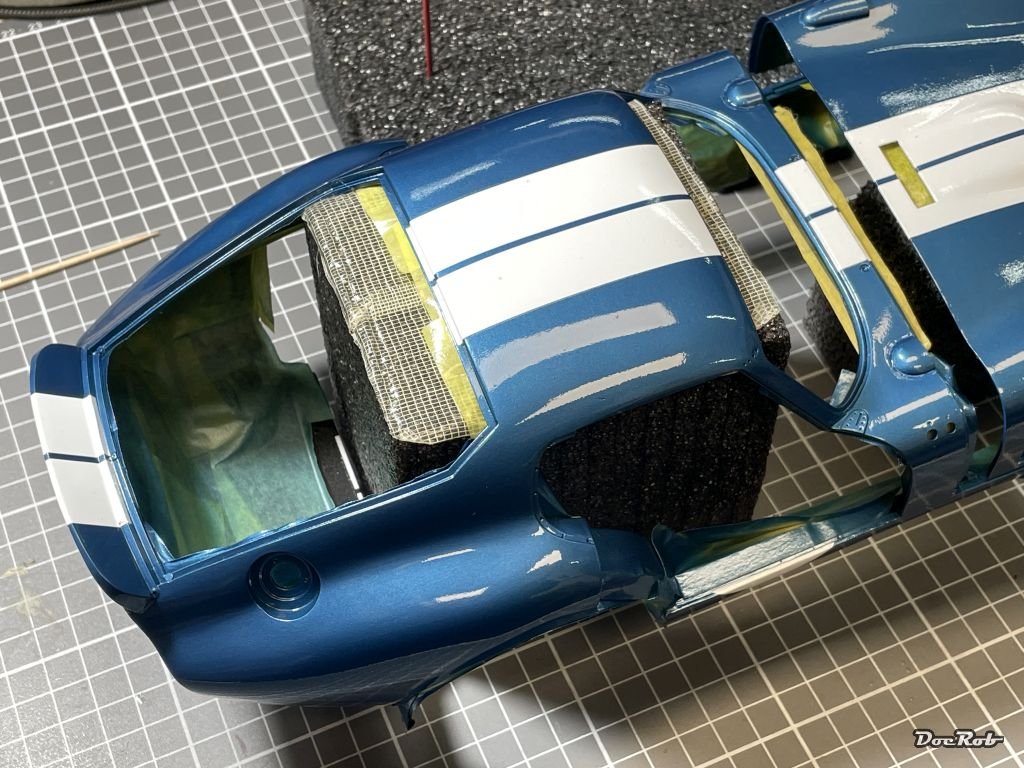
The picture may looks like pure happiness, but it isn´t. I feel overwhelmed by the Cobra right now. Test fitting results in damages and abrasion and when I glue the parts in place, they don´t fit like planned. To add to the miserable situation, I have lots of paint lifts and fogging on the paint from CA glue. I have two spots on the body, where I fingerprinted CA glue onto the body paint and lifted or distorted the finish. I´m more than a bit frustrated. This is the sequence of building where everything is supposed to fit but doesn´t. I have to grind resin away, to get a halfway decent fit for the doors. Most of the problems occur during fitting the inner body fairings. Nonetheless, the rear hatch and the doors with windows got installed. I´m now down to maybe 80% of my achieved look and my border of tolerance is nearing quickly. I hate to make corrections for flaws, but with the Cobra, it is necessary. Don´t get me wrong, the design of the kit is fantastic, I´m just not up to it. Cheers Rob
-
Thank you Egilman. You are right, I think. These Cobra Coupe´s were build up in haste and I guess, the whole bodywork wasn´t fitting perfectly and the finish was far from perfect. The windows were no exception for sure, and the real plexi is as vulnerable as my scaled down acetate parts and also scratch prone. But like so many times, I´m guilty of not being a rivet counter . I like to build my own reality with kits and with the Cobra, I´m looking for a fabric new finish. The side windows hopefully lay in a bit of shadow in the end . Cheers Rob
-
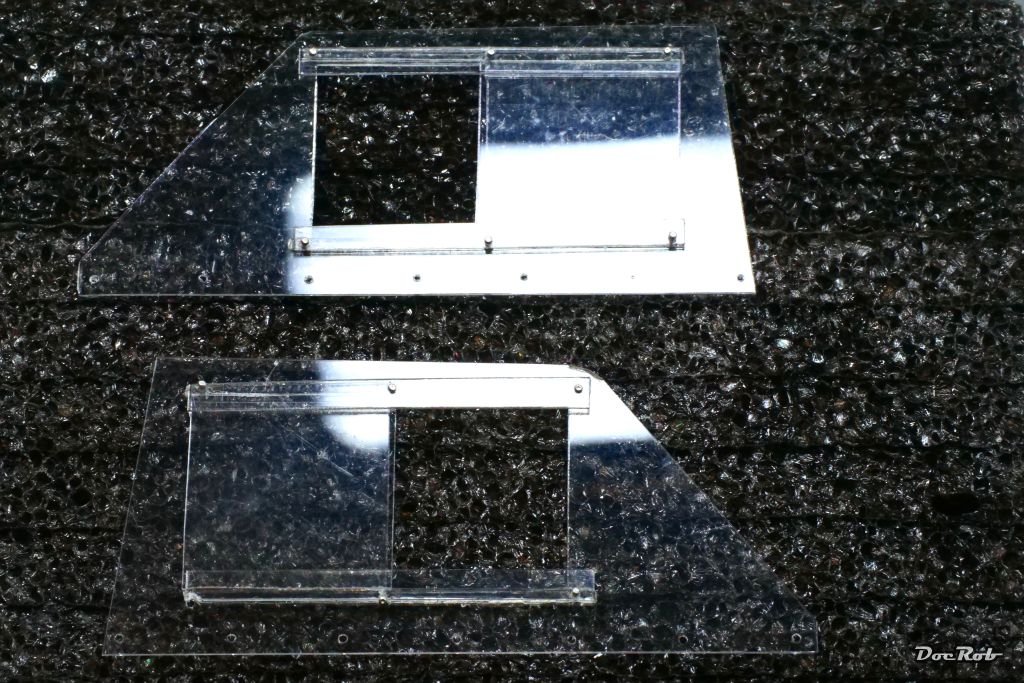
Thank you Craig and Alan. The only thig which got pushed, is myself out of my comfort zone and not the first time through the build . I really would have liked a simpler solution for the windows. Drilling the acetate produces burr, which needs to be removed. Don´t use PCB drill bits for this task, there will be even more burr. The classic HSS drill works best. Unfortunately, the windows have some scratches and the acetate strips are not very even, but I have to live with that. Sometime I wonder, why I was so scared, to pull through with the rigging job on my Duchess of Kingston build . Cheers Rob
-
A piece of art. Your Chebec looks fantastic and your log definitely shows, I´m not ready for this kind of kit, but I will follow yours with pleasure. Cheers Rob
-
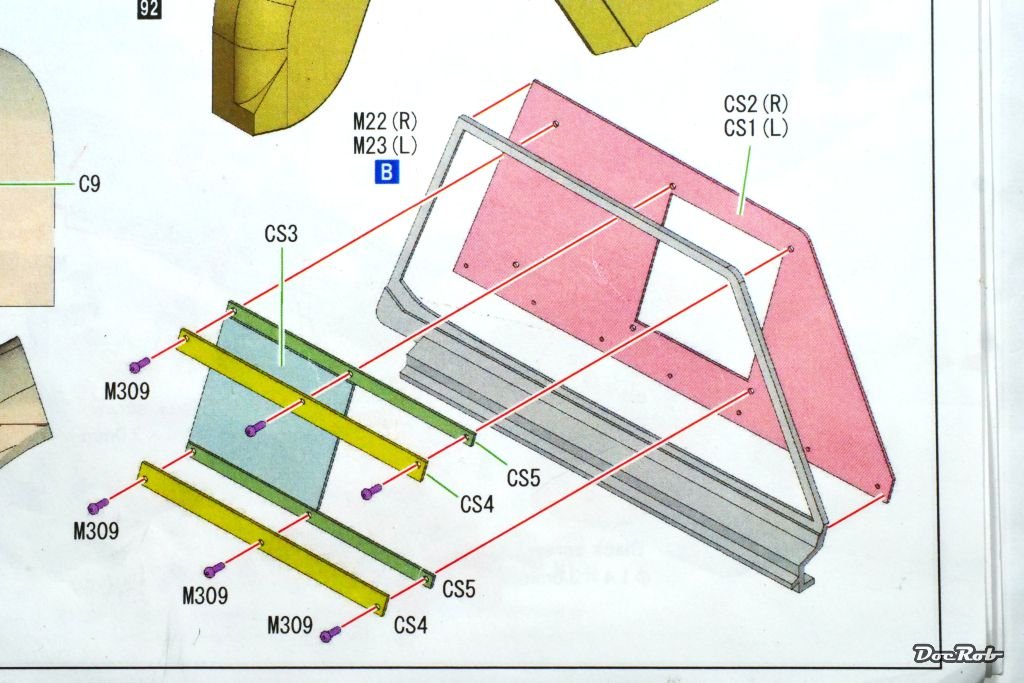
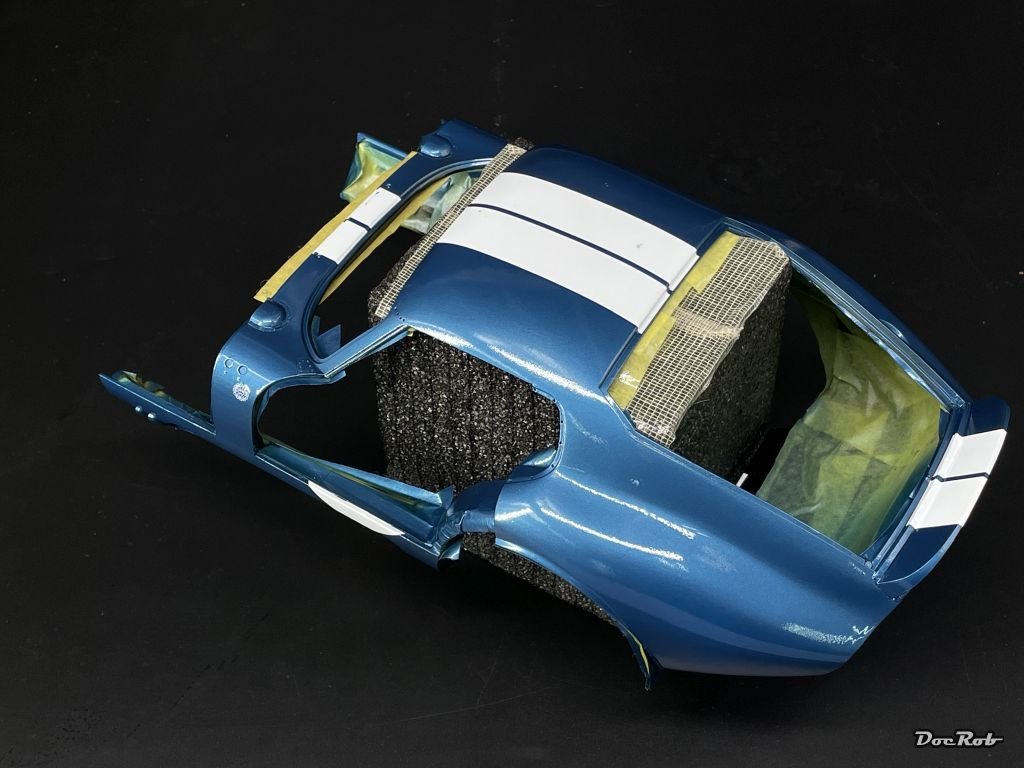
This build is like a rollercoaster ride sometimes. After checking my building sequence again (very important), I decided, it´s time to add the doors, which means, I have to deal with the side windows, a task, I really feared and I was right to do so. This is, how it should be done. After drilling all the holes for the rivets with a 0,7 mm drill bit, you cut all the window panes and fairings for the sliding window from a luckily pre printed clear acetate sheet. This proved to be not so easy, it was hard, to have all the strips look equal. I tried first to use my DSPIAE profile cutter, where the blade bet slightly with the long cuts and rendered the parts unusable. I moved on to use a steel ruler and a new scalpel blade then. But how to glue everything together and align the parts perfectly, for fitting in the rivets. I decided to improvise a bit. I skipped the spacers (CS5) and used 1mm wide double sided clear adhesive tape instead. To reach the sufficient thickness, I had to apply two strips onto each other. These strips with the CS4 parts were then glued onto the window pane, trying to fit the pre drilled holes. With the second strip in place, I re-drilled the holes again, now with a 0,6 mm drill bit through the adhesive tape and then inserted the rivets. Luckily the residues of adhesive tape in the holes fixed the rivets. Unfortunately, cutting and assembling must be made on a relatively hard surface and that lead to scratches. The result looks horrible, but I think, I have to live with that, re doing the strips would result in more scratches on the window panes and I don´t have spare acetate. The only upside, the windows actually slide . Cheers Rob
- 225 replies
-
- 11
-

-

-
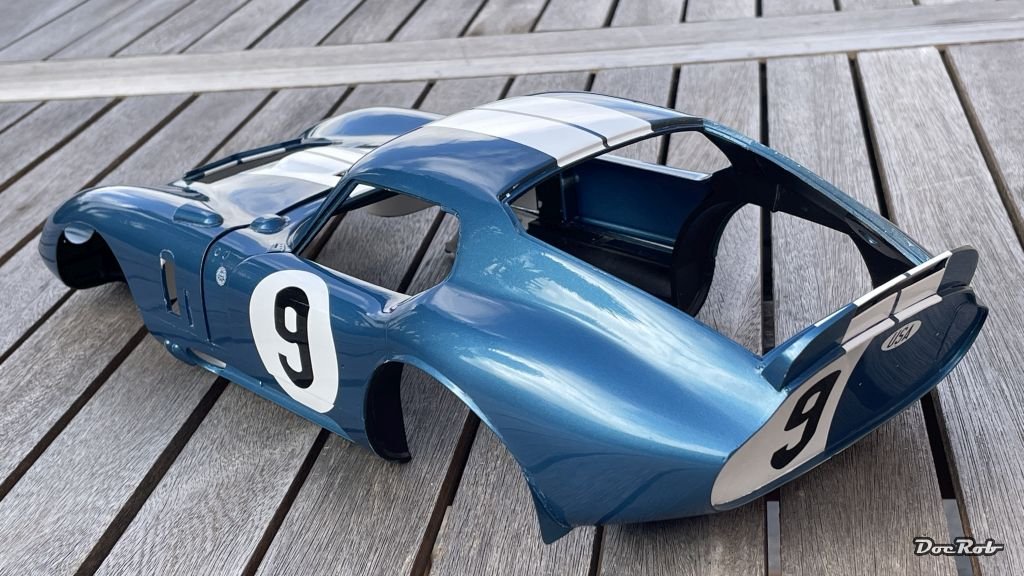
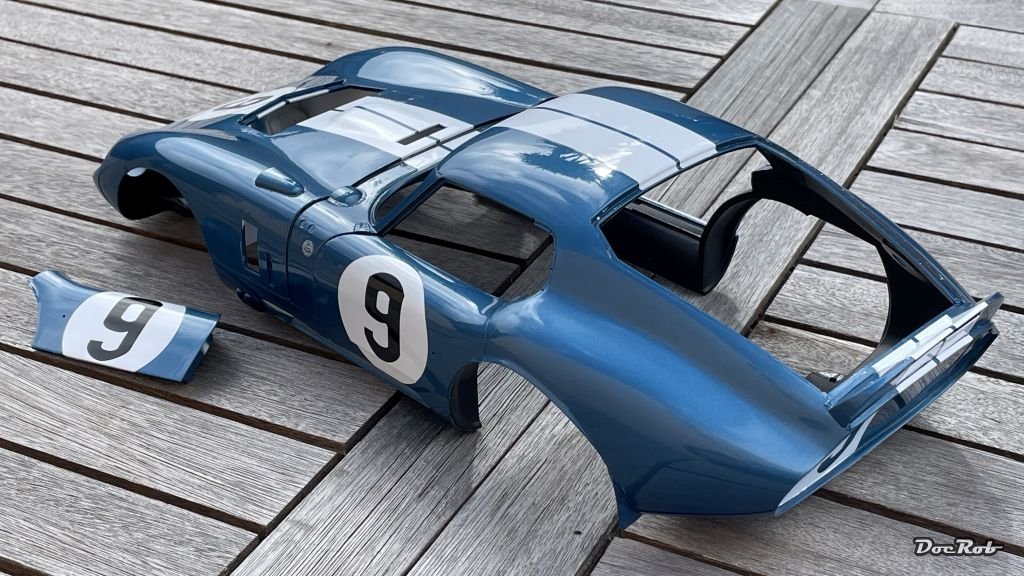
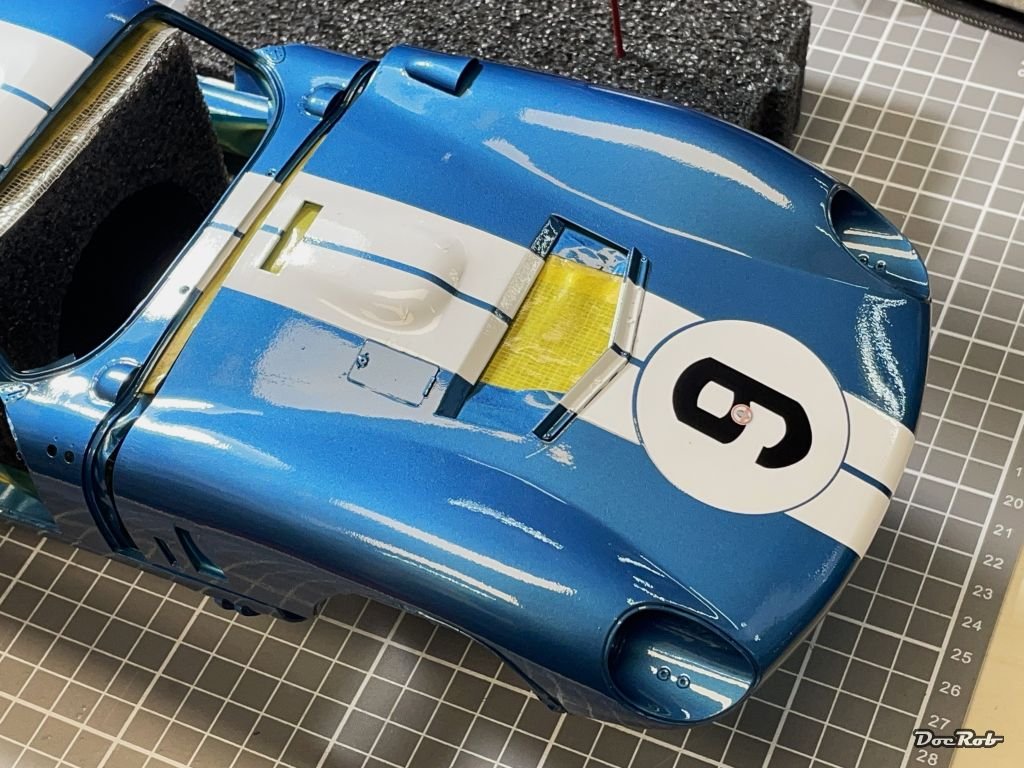
You got me there Egilman, I made it all up with some AI and Photoshop. This Cobra is fake . Earnestly, the grain of the flakes in the metallic color gave me creeps beforehand, as most metallic colors look way out of scale on car kits. The fear was unfound, the Number Five color is exceptional. Ok, I will build up some ladders now, to climb onto my overscale terrace table and enjoy the unobstructed view Cheers Rob
-
Thank you Ken, today I applied Tamiya´s polishing wax as a last coat and the shine became even brighter, right along my smile. But now, I turn to doors and windows, another daunting act. Cheers Rob
-
Hehe, I just prepared to Widows Kisses, perfect cold weather cocktails tasting like licking on an old silk curtain, which basically means, I´m out of order concerning transatlantic car polishing jobs. I´m sorry, but I would spin around your orbital buffer and not the other way around, Yves . Cheers Rob
-
Thank you Alan, some work went into the body indeed. I hope, I can pull through now, without harming the shiny surfaces. Cheers Rob
-
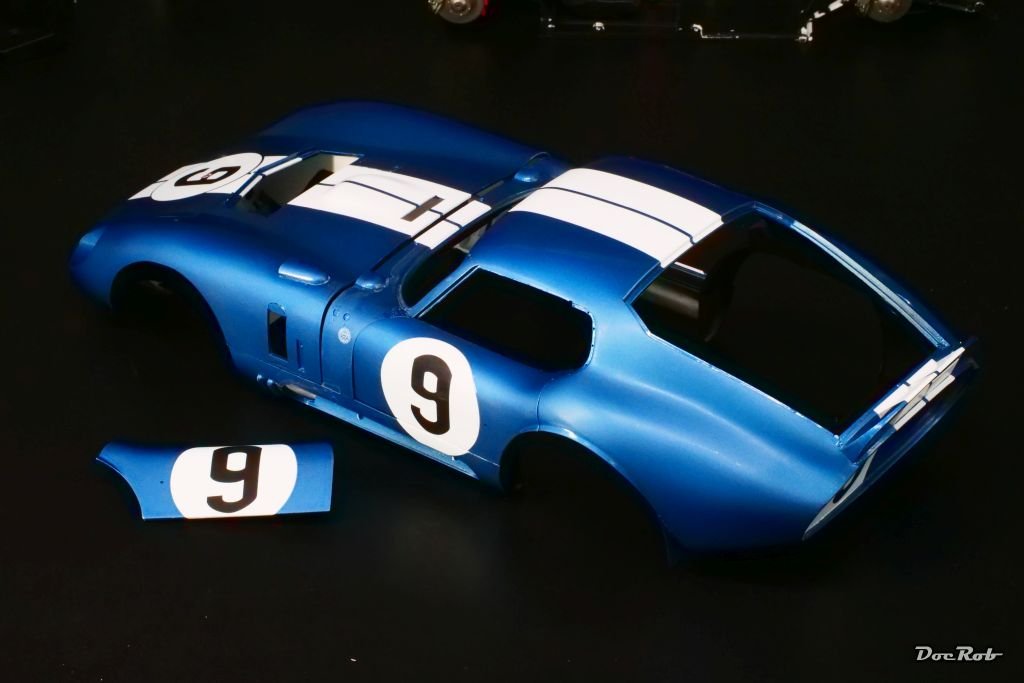
I am really happy now. Since about two month, I´ve been working on the Cobra´s body and now, the shell is ready so far. I put in a lot of elbow grease to achieve the finish, but like I said, it paid off and now, I have a squeaking mirror shine finish, only faltering the bright sunlight outside, to let it really shine. After the first and most intense 4000 grit wet sanding round, I let follow the 6000 grit and the 8000 grit wet sanding job, followed by the three Tamiya polishing compounds coarse, fine and finish. For now, I left out the final waxing, because I have to permanently handle the body and will apply it last. And now out onto the terrace, shaking some cocktails for my wife and me, to loosen the arms Cheers (litertrally) Rob

- 225 replies
-
- 12
-
-
-
Thank you Gary and yes, I do all the sanding by hand. The first round with 4000 grit was the longest naturally, taking about two hours, permanently checking, if there are still imperfections visible. It´s a thin line, getting an even surface and not sanding through on some corners, a task, I wouldn´t like to rely on with a machine. Polishing might be possible with my Proxxon micro drill, but the cotton bit easily catches on corners and there is a risk, dropping the body. Luckily the Cobra is a thoroughly curved lady, which makes sanding and polishing easier than with an 80`s brick style car. Cheers Rob
-
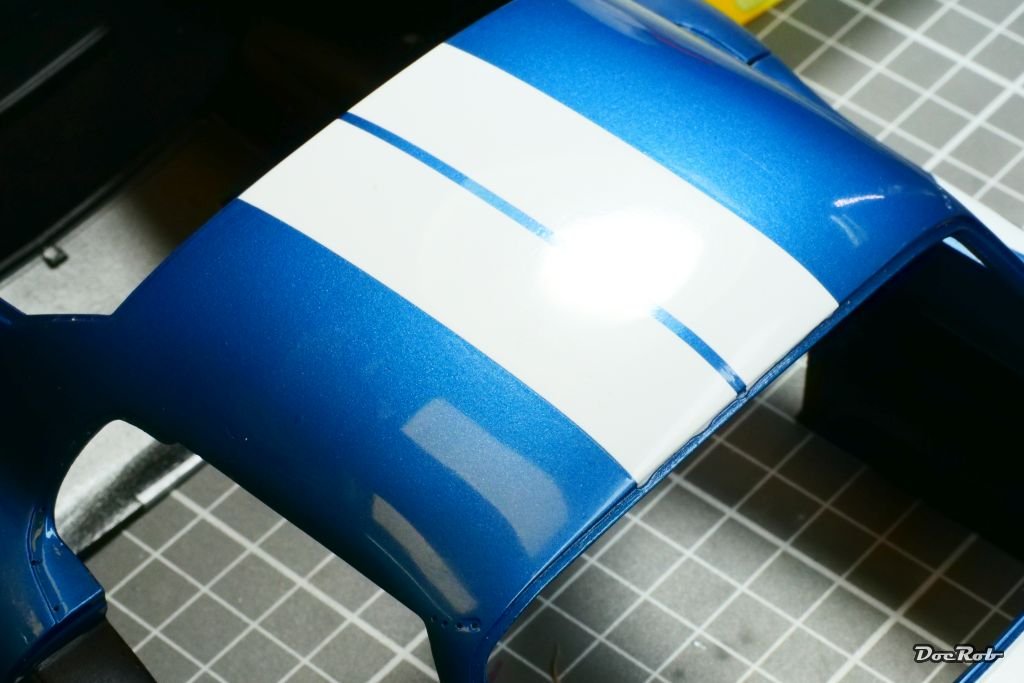
I´m not very experienced, when it comes to finishing car bodies and for a while, I debated with myself about leaving the clearcoat as it is. It looked very good and had a high sheen, but it was not perfect. Out with the sandpaper and polishing compounds. I started to wet sand the whole body with 4000 grit sandpaper, which made the surface nice and even, but also dull. Of course, I tested my approach first on a lower body part, than on the roof, using 6000 grit sandpaper next, followed by 8000 grit. Then I rubbed in the Tamiya polishing compounds from coarse to finish and added some Tamiya polishing wax last. Yep, looks good, not the slightest orange peel effect left and a high shine polish. When ready, I will take some outside pics in the sunlight, which show the effect better. Cheers Rob
- 225 replies
-
- 13
-
-
-
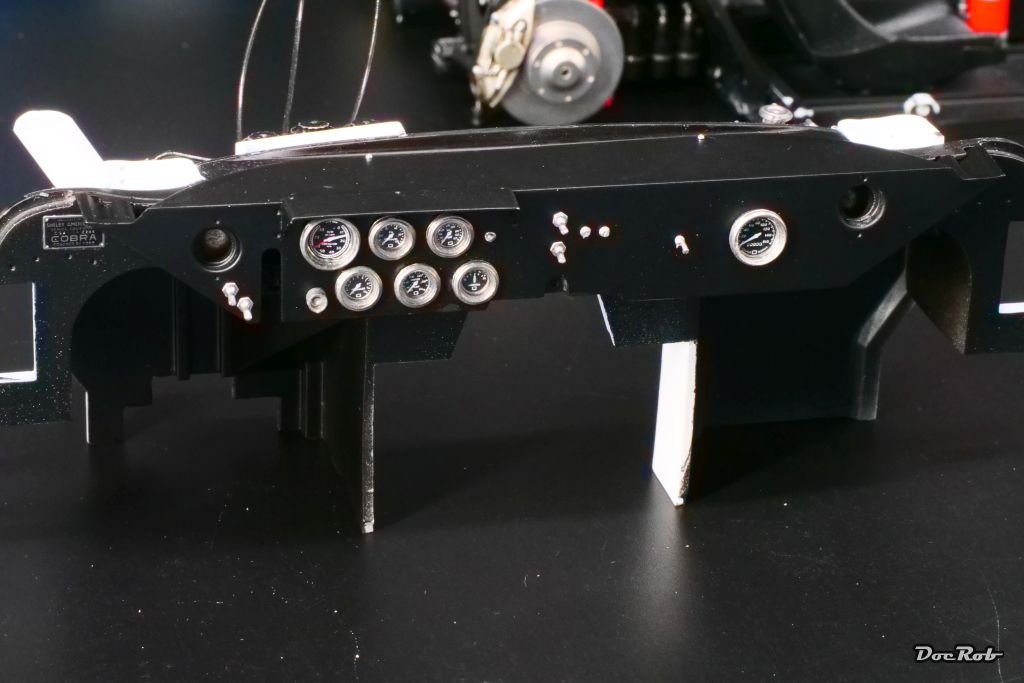
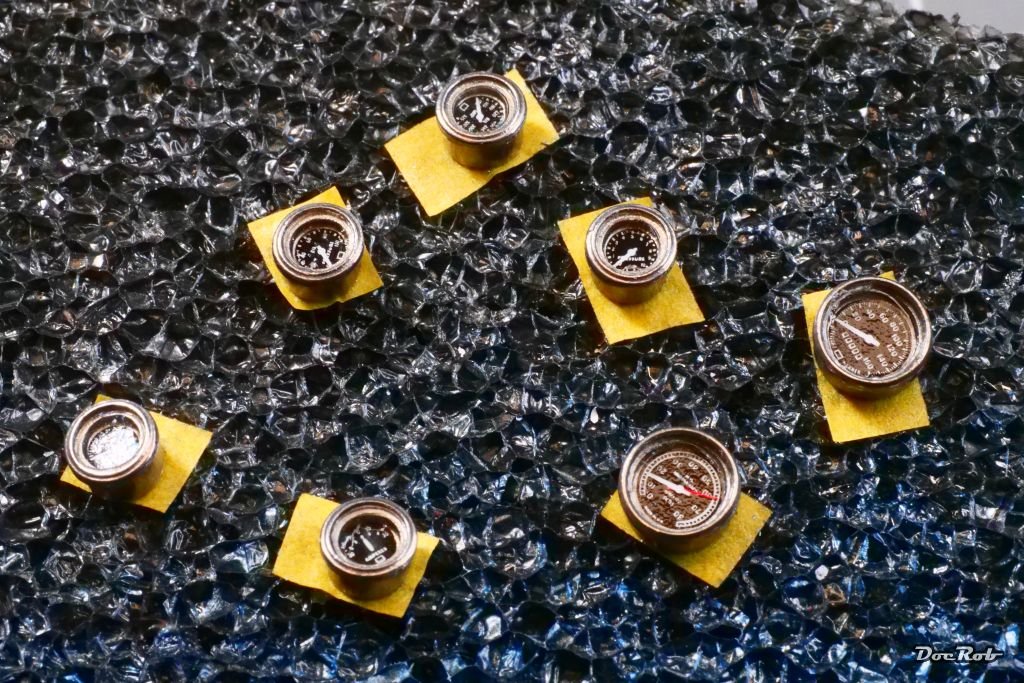
I assembled some more sub assemblies, before mounting the body onto the chassis. Foremost, I finished the dashboard. The dashboard got painted with Tamiya LP-5 semi gloss black and the instruments got decals into their tubs and a pre cut round clear acetate cover, which I glued in with Revell Contacta Clear and had no fogging issues. The instruments received tiny pieces of yellow Kabuki for identification. ...and where built into the dashboard later, accompanied with some toggle switches and rivets. Cheers Rob
- 225 replies
-
- 11
-
-
-
Thanks Craig, but no FB for me, even with this seemingly great group. Cheers Rob
-
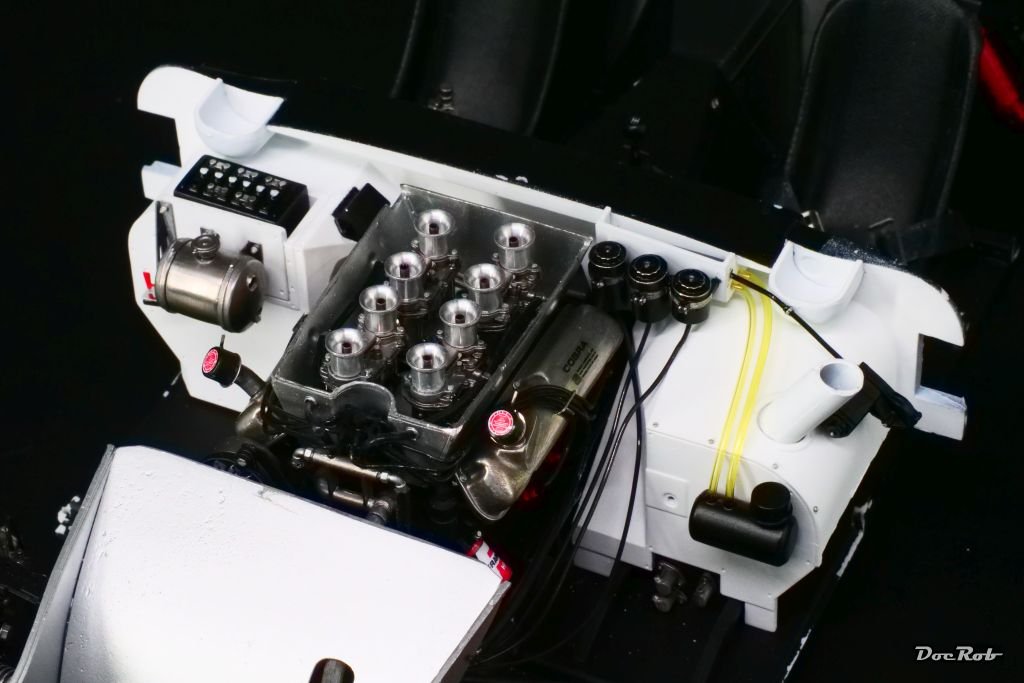
There is indeed a lot of components crammed into the engine area and everywhere else as well. Handling the kit and test fitting becomes more and more difficult because of that. I will stay with my poco a poco (little by little) approach and prepare more sub assemblies and try to not build myself into a corner. Sometimes, I think, I should have chosen an easier MFH kit as my first car kit from them. I assume, their F1 cars are a bit easier to build up, there are no doors, no openable hatches and bonnets, but now it is to late to complain . Cheers Rob
-
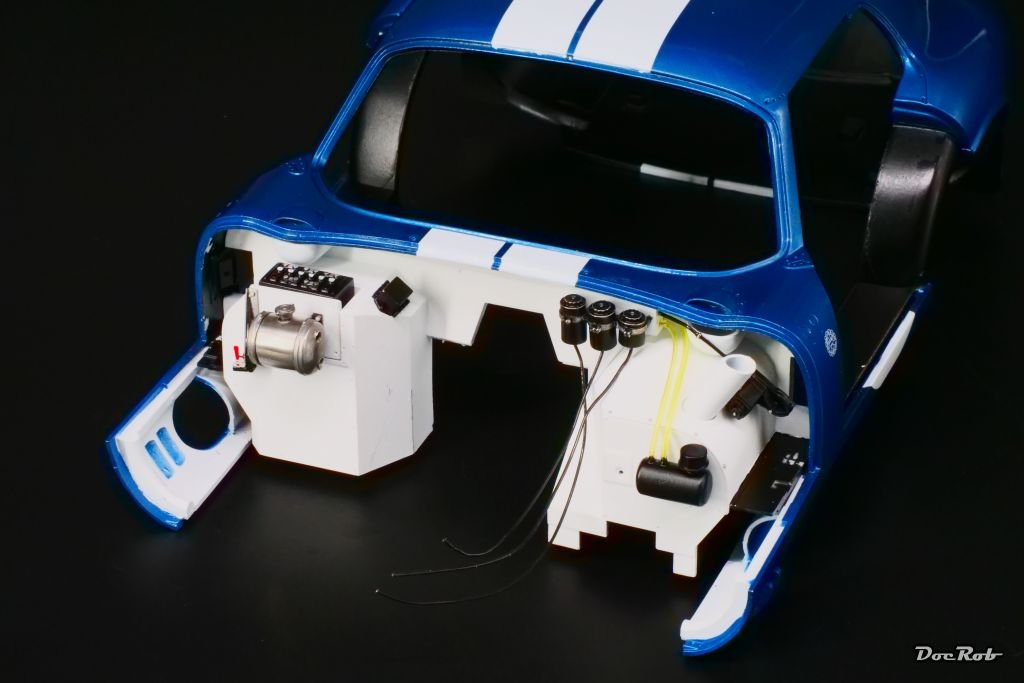
I used the curing time of the body parts to prepare the firewall. I installed all the components except for some electrical wiring and tubing and test fitted the whole thing into the body as well as onto the chassis. I hope, joining everything together later will work out. It becomes harder and harder to test fit and every test results in color abrasion or in knocking off some parts. Cheers Rob

-
I envy your figure painting skills, Greg. The figures are not only well painted, but they also blend perfectly into the style of your setting. Cheers Rob
-
With the ice sticks on them, I´m tempted to lick on these Mango yellow parts, Craig . They look absolutely beautiful, specially with that hard to apply yellow. It seems to be a fantastic brand. Great service with the parts, a hooray to Tamiya. Cheers Rob
-
Thank you Alan, I have to admit, the whole painting and finishing process with car bodies is relatively new to me and I´m really nervous with each stage. As a security blanket, I have a tiny sprue of 1/32 bombs, where I apply exactly the same colors and decals step by step as a dummy for testing effects of colors, get a feeling, how hot they are, if it´s better to apply light or wet coats or if they affect decals. The nervousness stays nonetheless as it becomes more and more difficult to repair damages later on. The drop of goo on my airbrush had skipped my attention though. Cheers Rob
-
Phew, I think, I have saved the Cobra from binning for now. After carefully sanding the splatter dots. first with 1500 grit, then 4000, 6000 and finally 8000 grit, there was one culprit left, the most visible unfortunately. I carefully dotted heavily thinned Tamiya LP-2 gloss white with a fine brush into the tiny crevice, building up the spot, until the color looked right. After drying the same sanding treatment like the others. After all was wiped clean, I applied two coats of Zero Paints lacquer gloss with about 50% of added leveling thinner and an hour of drying time in between. I think, I have a 95% solution achieved and later, when everything is properly cured, I will sand very carefully and polish until it´s an absolute high shine finish. Cheers Rob
- 225 replies
-
- 15
-
-
-
You wouldn´t like it with the splatter blobs, Gary . They are not huge, but they disrupt the look completely, somehow. Tomorrow, I will try to wet sand these blobs away with very fine grained sanding sponges. The last possibility would be a tactical one. If I can´t alter the situation, I need a good story. How about a barn find . Cheers Rob
-
Thank you Alan. Random accidents happen and it was clearly my fault, not checking the airbrush. That´s the other frustrating thing about it, I hate to make mistakes and prepare everything properly, to not let something like this happen. I worked for more than a month on body preparation, airbrushing, decaling and clear coating and had hoped to finish this stage yesterday. I did the at least to me very difficult thing and leaned back. Today, I jumped into the Atlantic and crawled hard for two kilometers, to let some steam off and maybe tomorrow, I will look for solutions. Cheers Rob
-
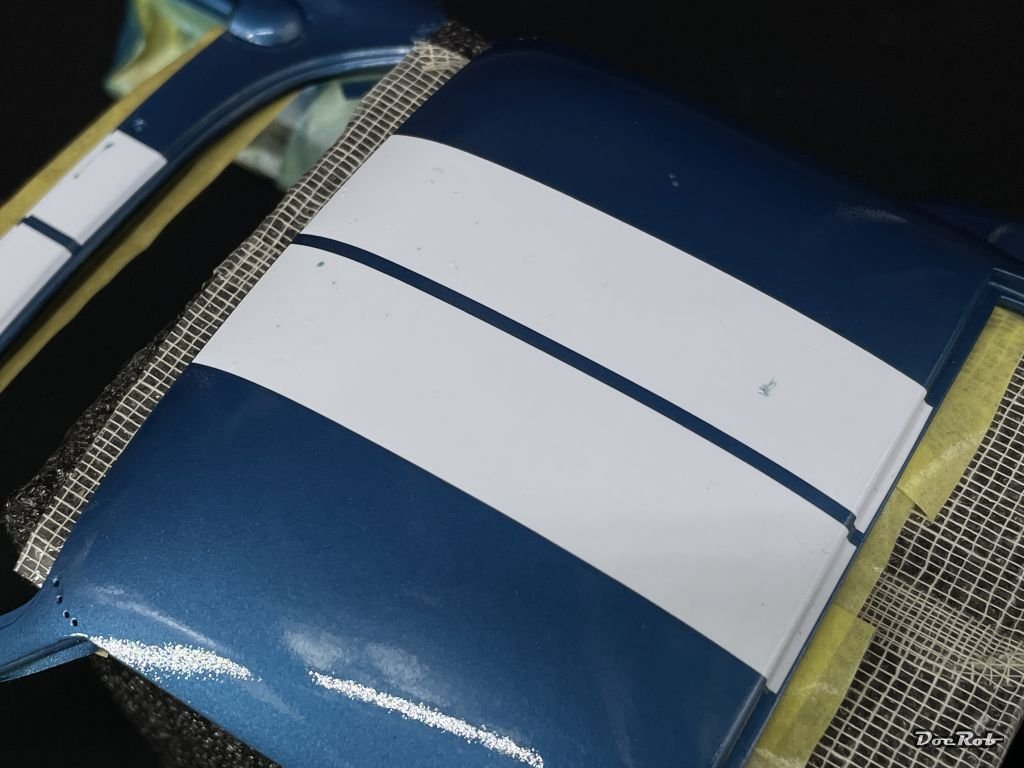
Have you ever had that modelling moment, where you wanted to rewind time for a minute? I had one today. After checking, if all the decals settled perfectly, I cleaned the body with soapy water, to get rid of any residues from the decaling phase. Then, I applied a first coat of Zero Paint clear gloss, with maybe 20% added leveling thinner. The first layer is only misted, to seal the decals in and due to rapid drying time (relatively high air pressure and low thinning ratio) reduce the risk of harming the decals with hot liquids. After about an hour, I applied the second layer of clear, this time more liberal with about a third of leveling thinner and after another hour, I applied the (planned) last layer thinned with ca. 50% of leveling thinner and sprayed on wet. So far so good, until, I took out the airbrush out of it´s holder, to blow the body color dry a bit and didn´t notice that some goo was on the front of the airbrush casing, which squirted onto my just finalized paintjob . Now, I´m really frustrated, as everything went well since days of prep work, until the final seconds. I was about to bin the kit instantly, as I absolutely hate these kind of mishaps. I usually prepare my work thoroughly, trying to think ahead of everything, but when something goes seriously wrong, I´m impatient, restless and uncompromising. I´m not sure what to do, leaving it as is or waiting (again) for the clear to dry completely and then carefully try to sand the dots away and re-clear, risking of ruining everything or finally binning the kit. Here are the pics, it looks not too bad, but it is not acceptable. The orange peel look is due to the lighting of some hundred LED´s, the paintjob itself is near perfect and will be perfect after polishing. The dots on the roof´s stripes are the worst, but there are some more. Cheers Rob
-
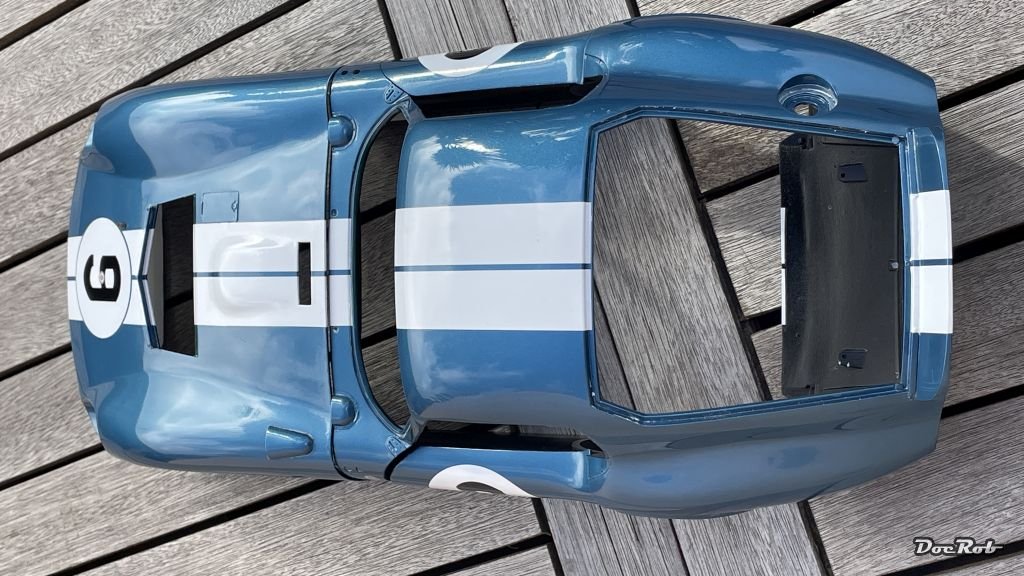
Thank you Yves and Craig, to be honest, the blue is the interpretation of my camera. Whatever setting I change, it just doesn´t show it correct or maybe the camera is right and my eyes are off . The color has a slight petrol tint, not that pure blue like on the pics. It nevertheless looks beautiful. Today, I checked the decalwork and added a few drops of Micro Sol here and there. Cheers Rob


