.jpeg.882f0a147f14858c9e673da7e13d8ebe.jpeg)
RossR
-
Posts
535 -
Joined
-
Last visited
Content Type
Profiles
Forums
Gallery
Events
Everything posted by RossR
-
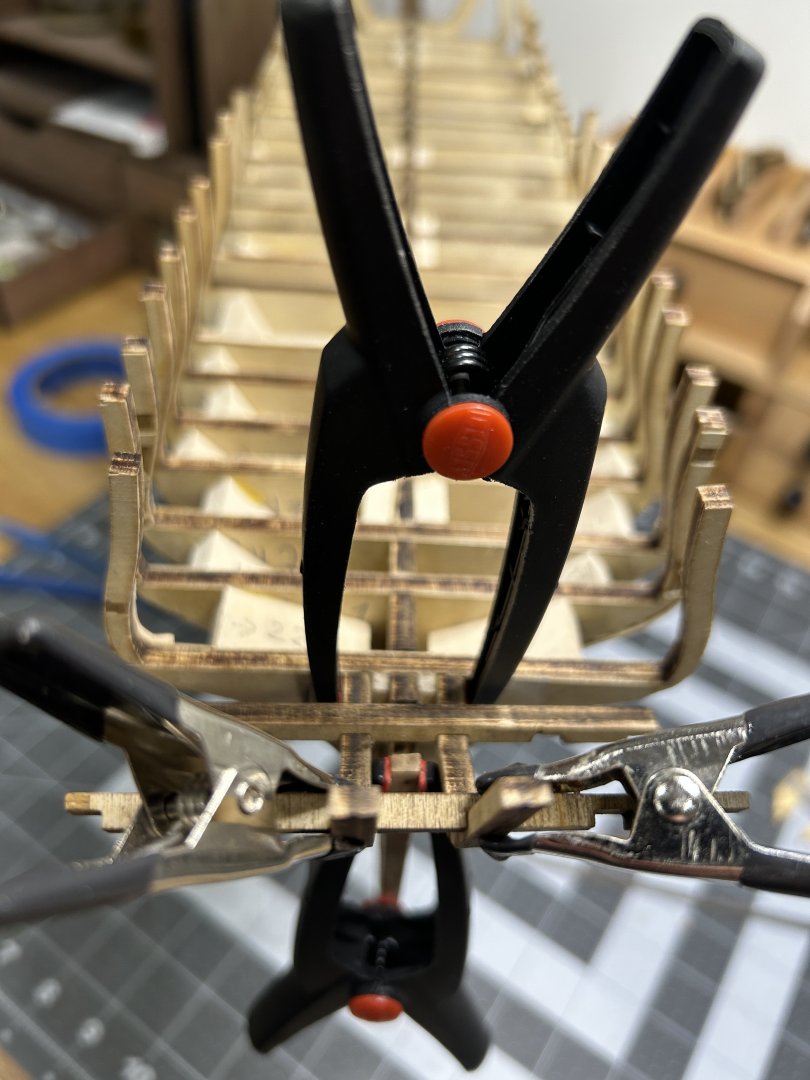
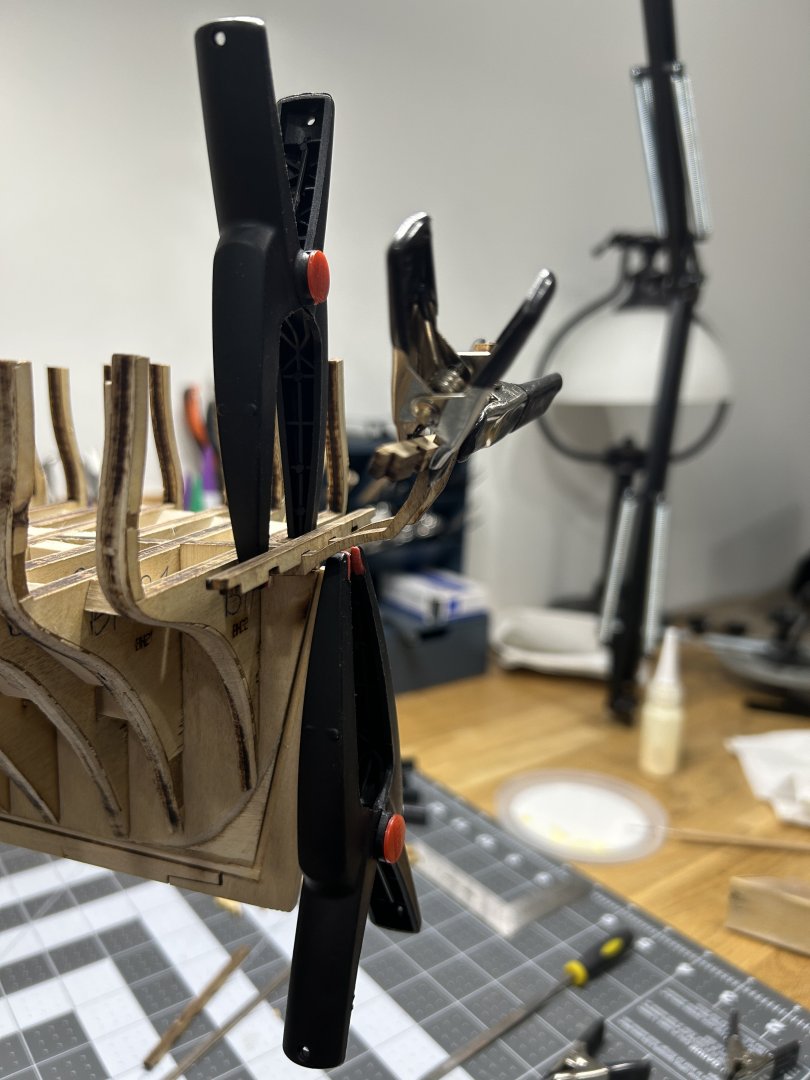
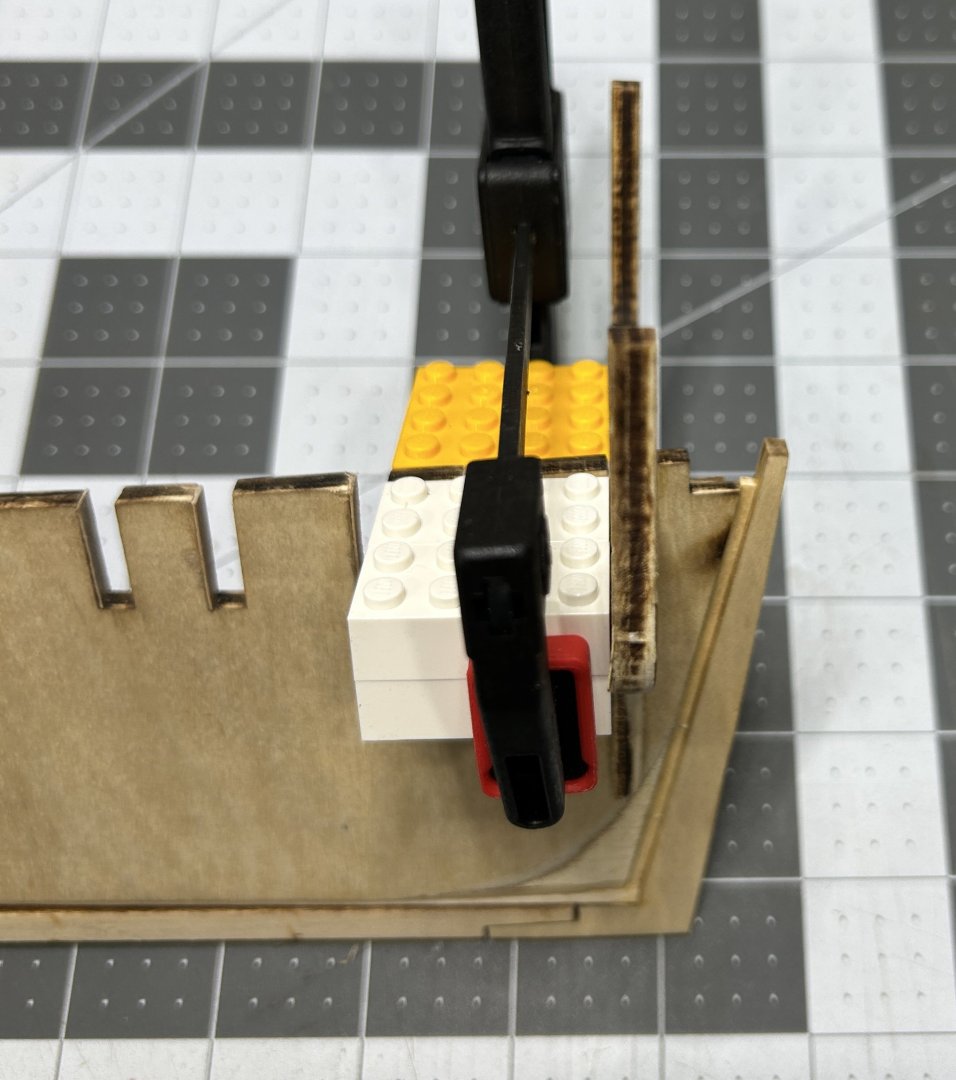
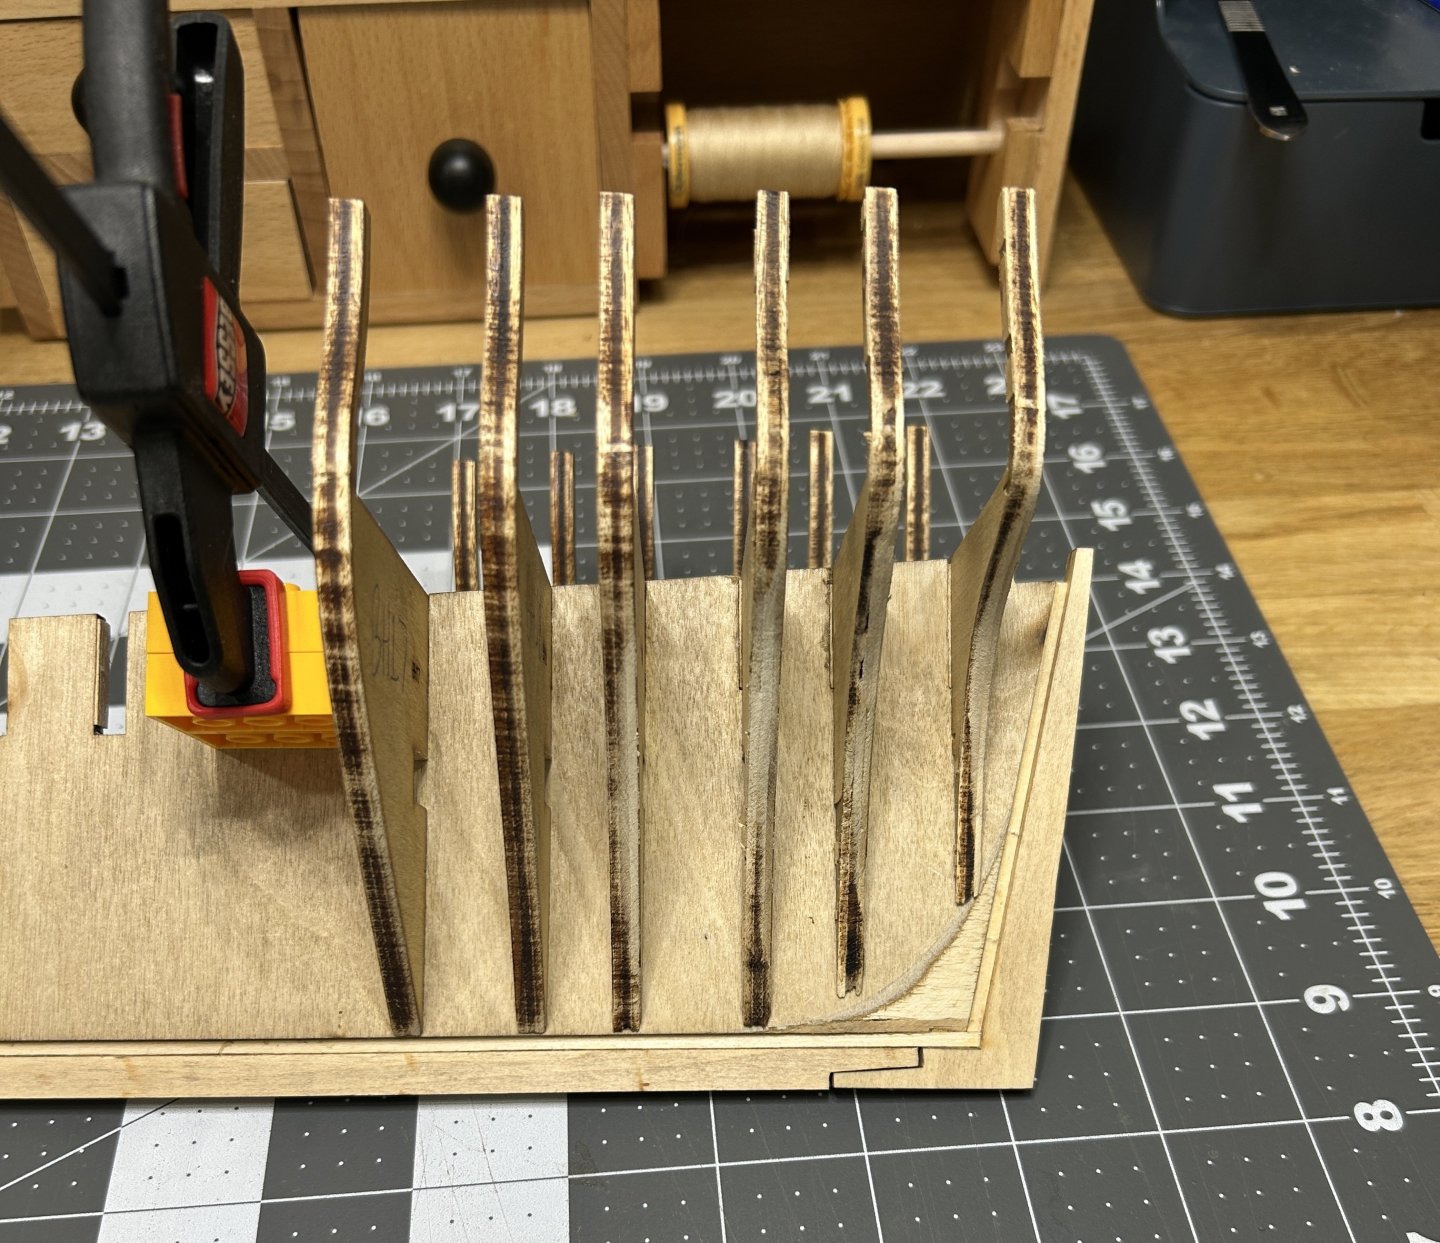
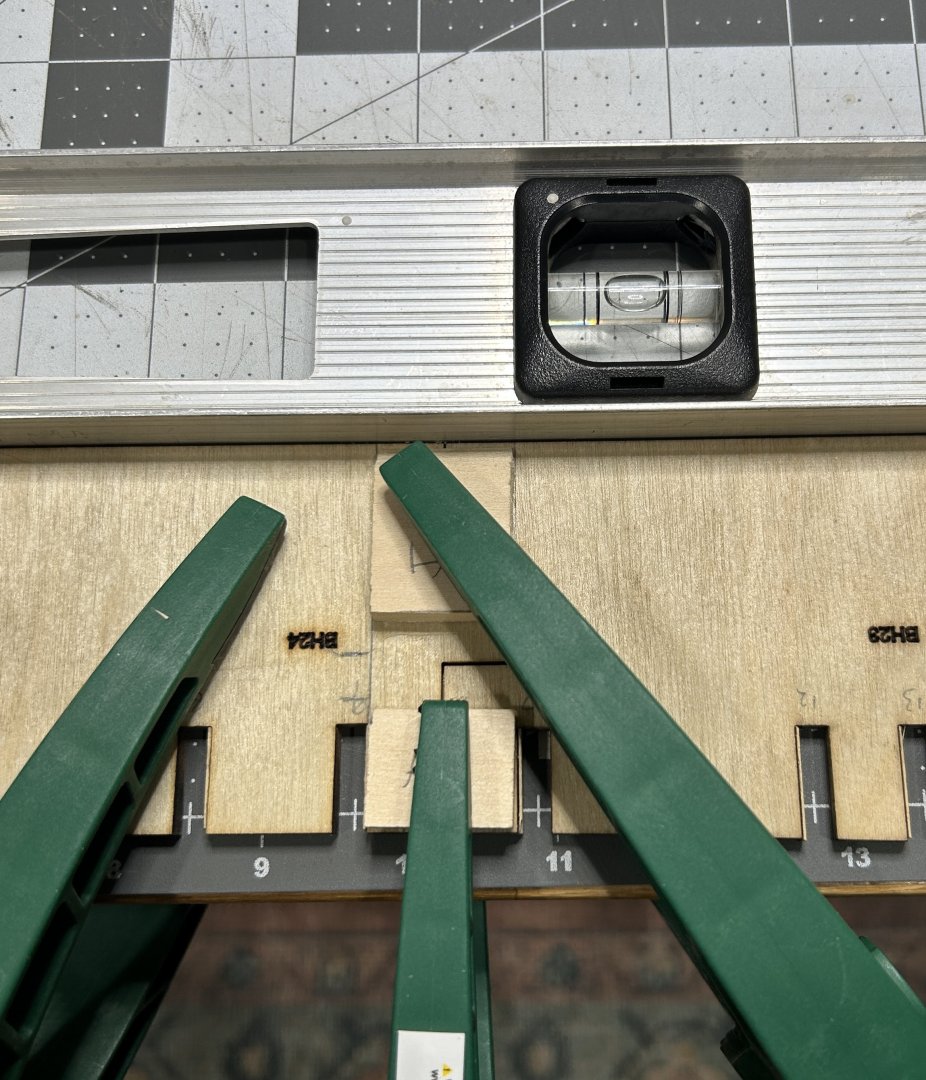
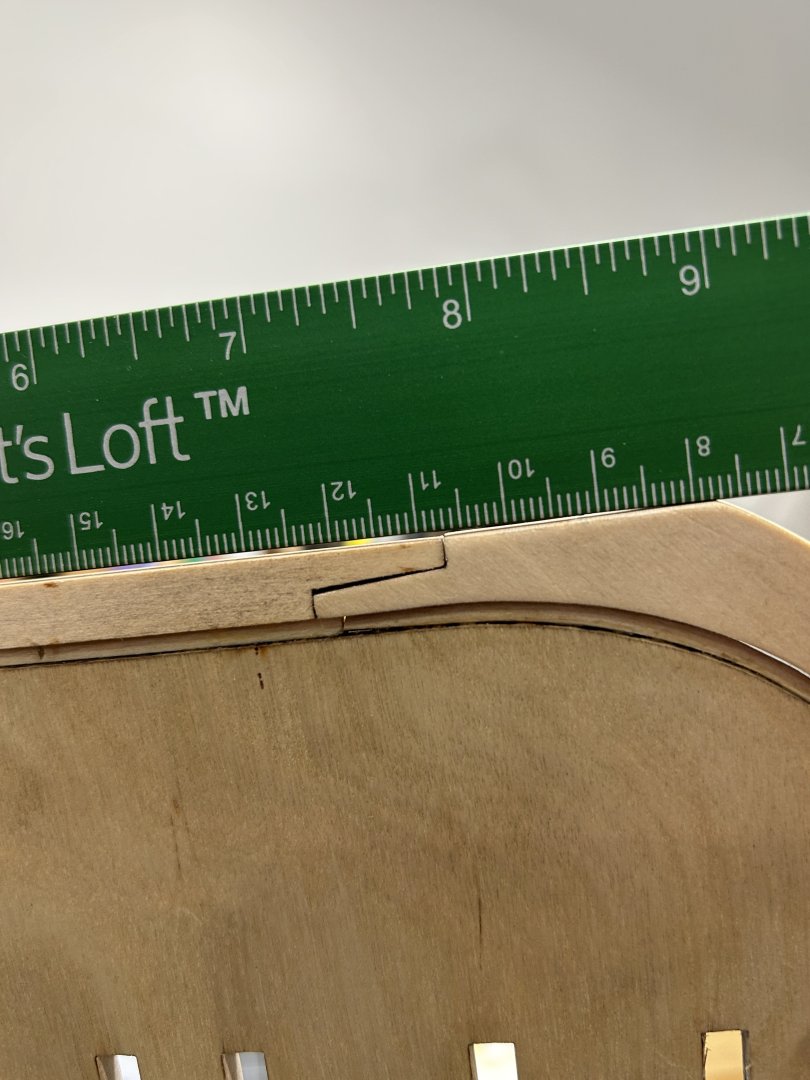
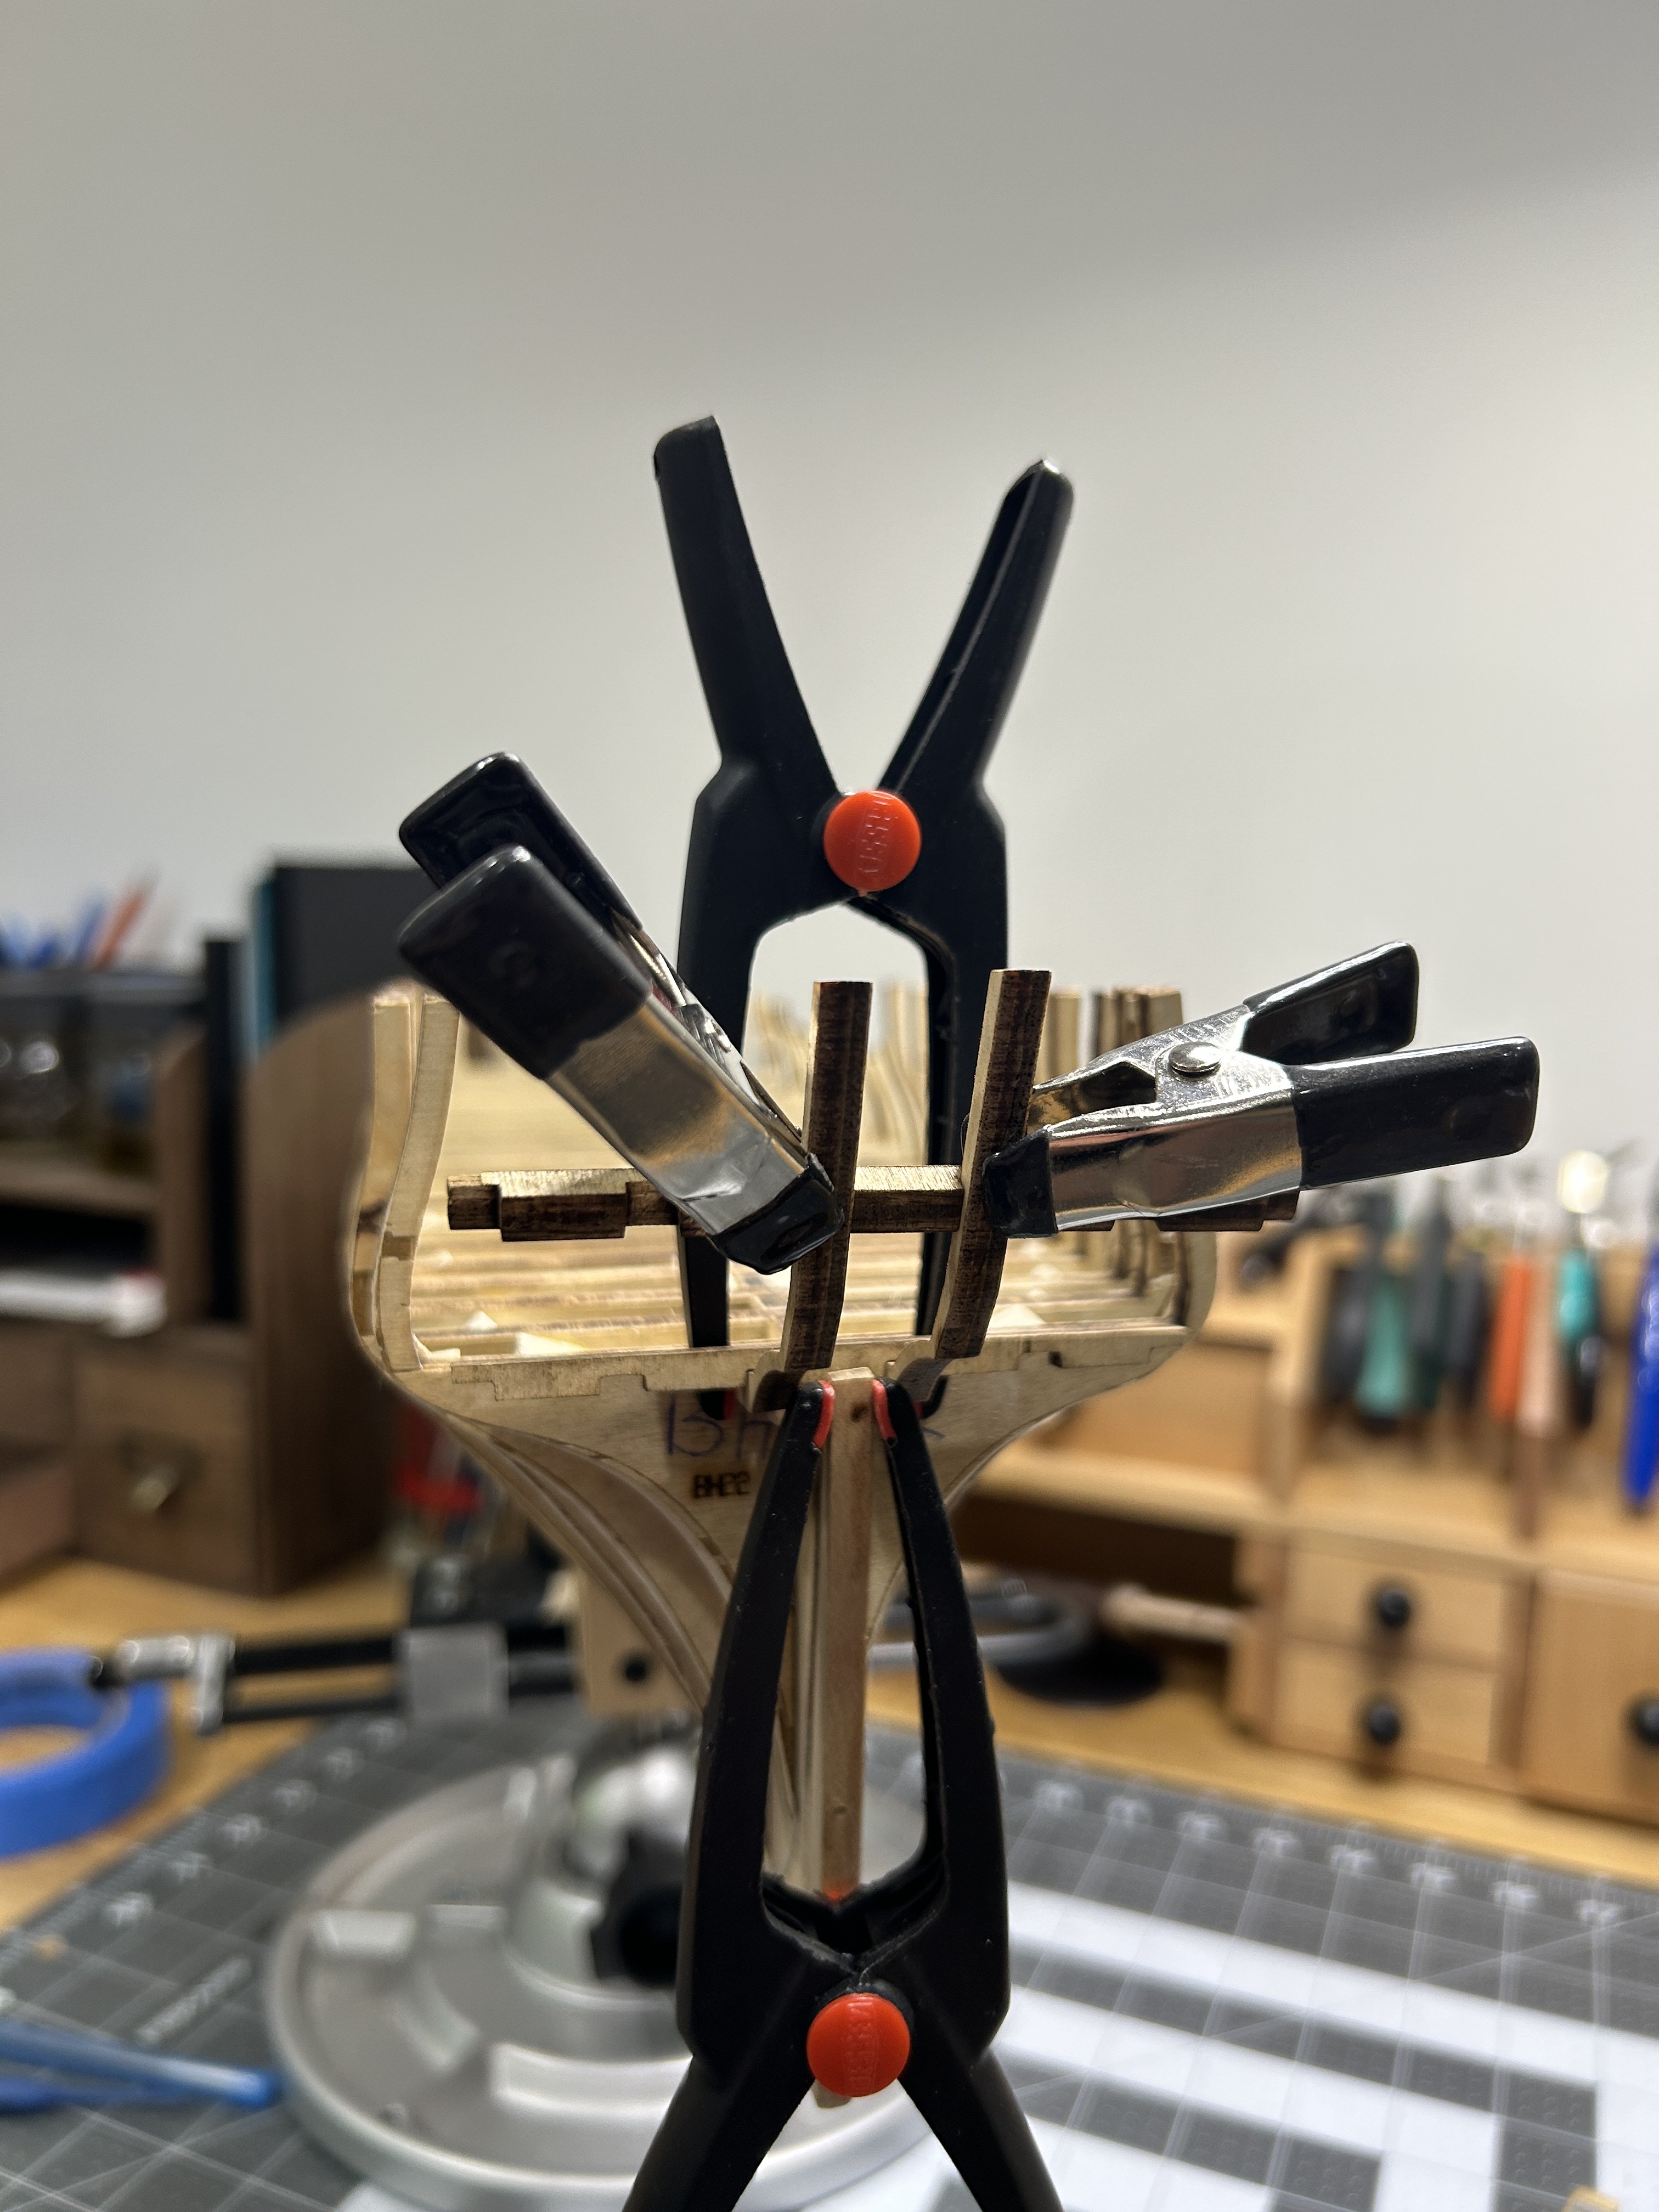
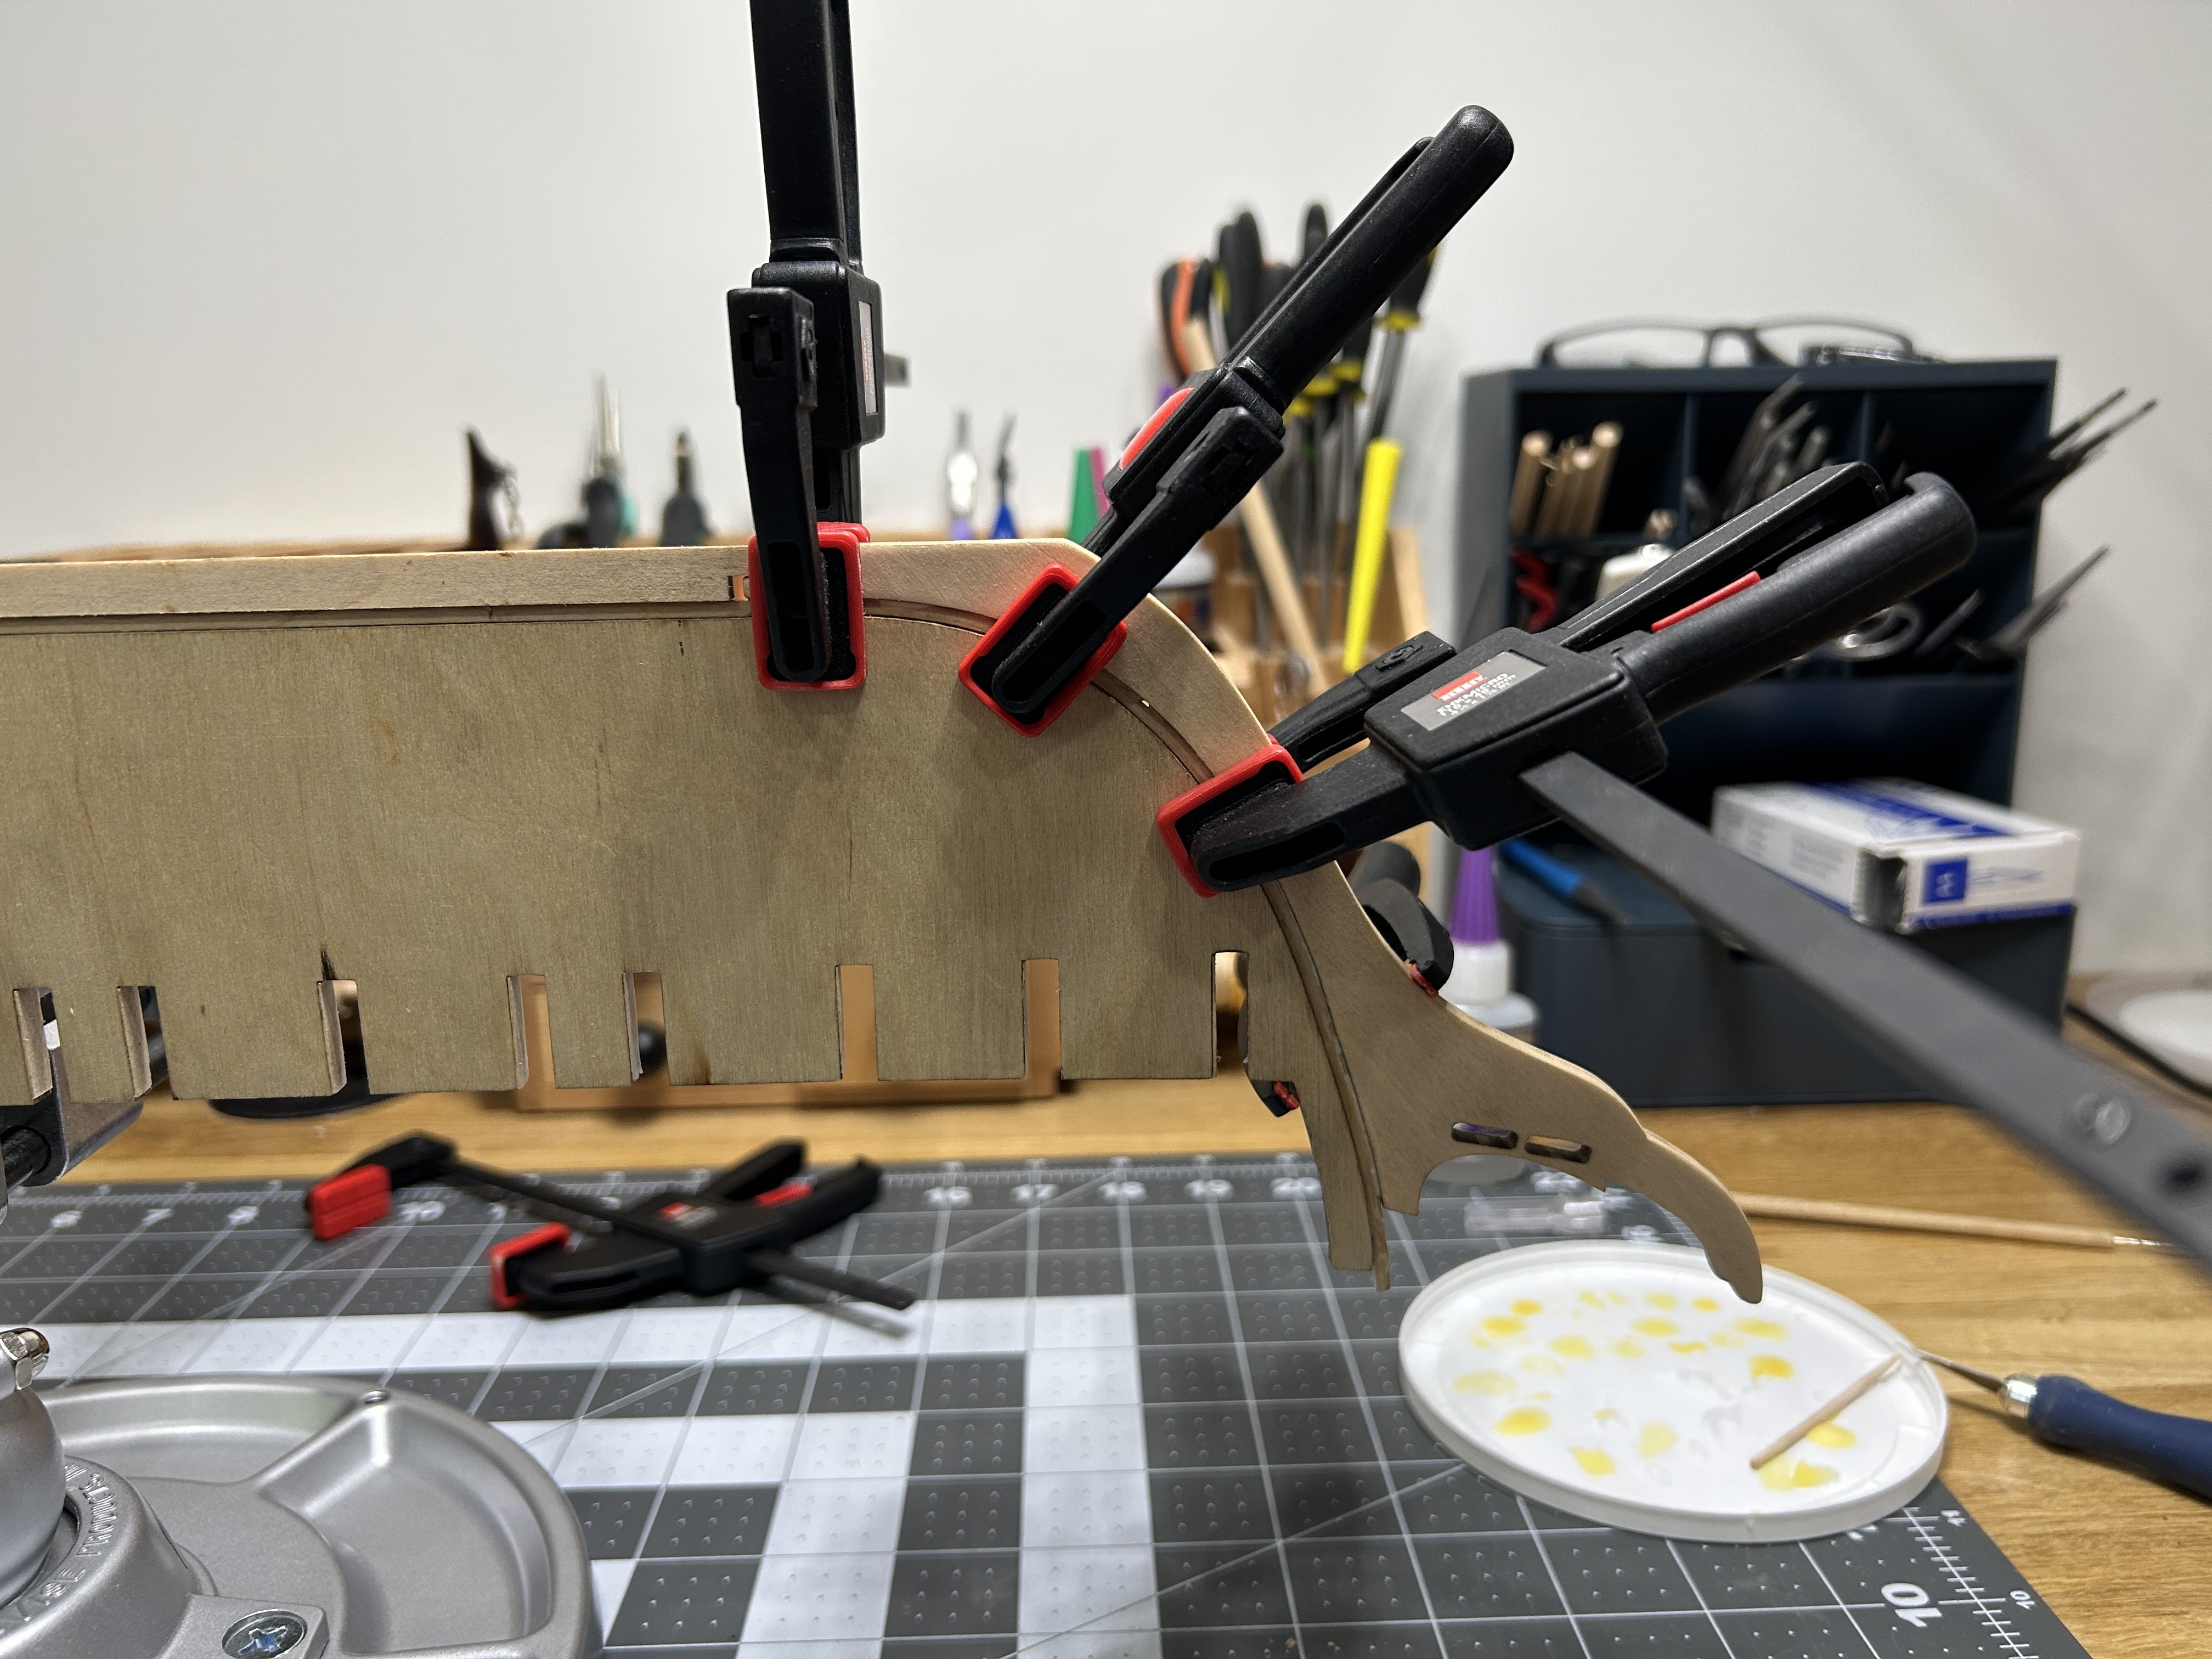
.thumb.jpeg.ffac2f8a24d212961a83eab4efb06a6c.jpeg) It has been awhile since I posted and progress has been slow. Summer got in the way a little bit. The framing of the gun ports has proven to be challenging. The deck is curved, so the gunport sills and lintels need need to follow that curve. I am not thrilled with the first side that I completed, but things are going better on the other side. I maybe remove the first side and redo it if things keep going well on the second side. I have become an expert at using alcohol to get PVA to dissolve. Here is a picture of the side I am not thrilled with and the start of the other side.
It has been awhile since I posted and progress has been slow. Summer got in the way a little bit. The framing of the gun ports has proven to be challenging. The deck is curved, so the gunport sills and lintels need need to follow that curve. I am not thrilled with the first side that I completed, but things are going better on the other side. I maybe remove the first side and redo it if things keep going well on the second side. I have become an expert at using alcohol to get PVA to dissolve. Here is a picture of the side I am not thrilled with and the start of the other side.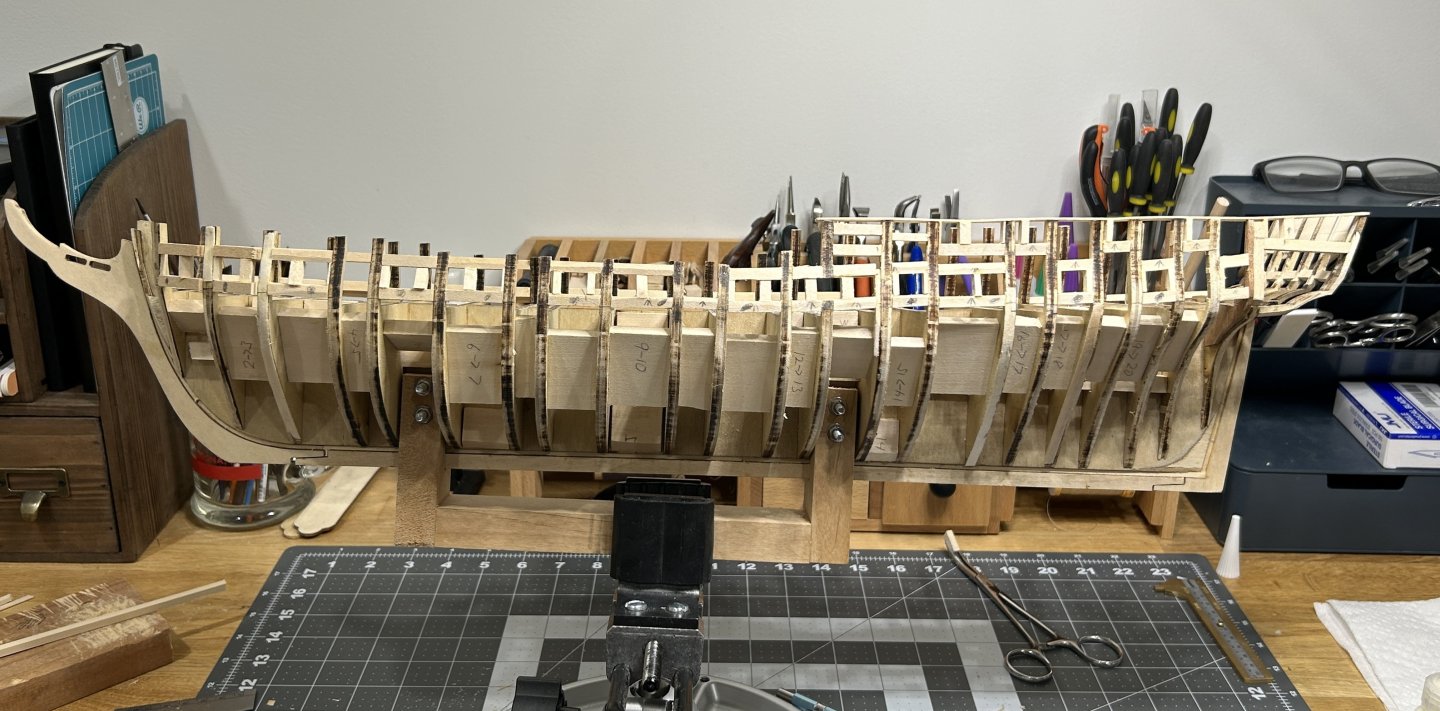

-
HMS Victory by ECK - OcCre - 1/87
RossR replied to ECK's topic in - Kit build logs for subjects built from 1751 - 1800
I have been away from the forum for a few weeks, and your progress is amazing. The gun port linings look fantastic. -
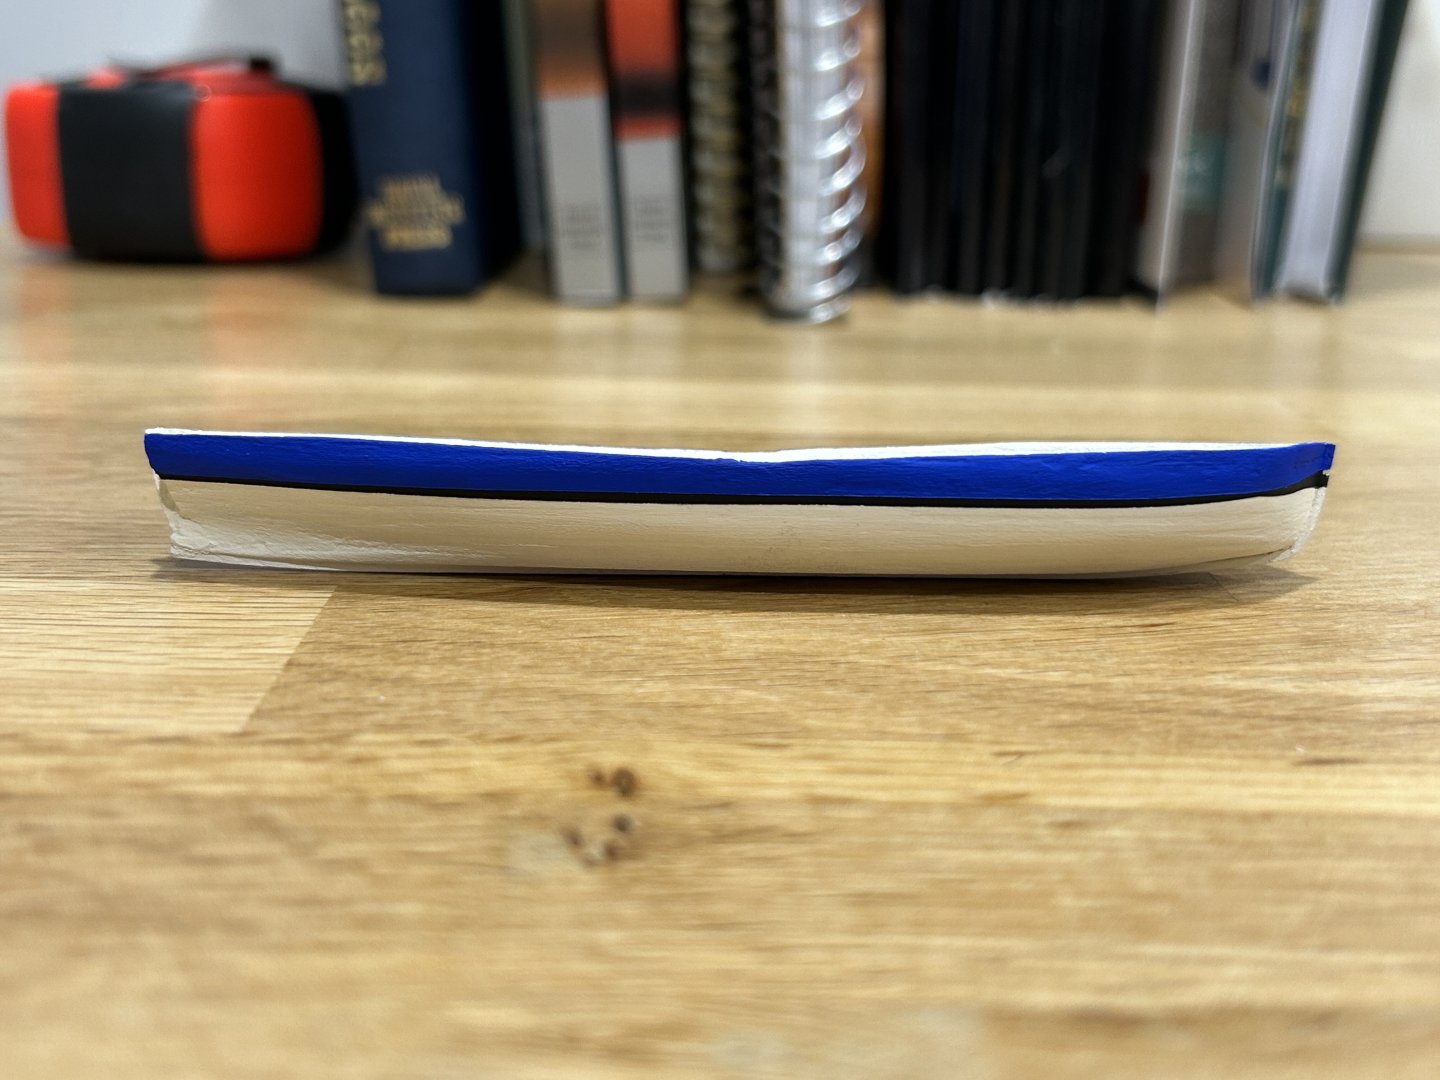
Thanks. I thought about sanding, but the planking material on this model is only 1/32 of an inch think, so I was worried I might sand though some parts if I sanded much at all. As it hangs on my wall and I am used to it, it bothers me less. Good luck on your planking.
-
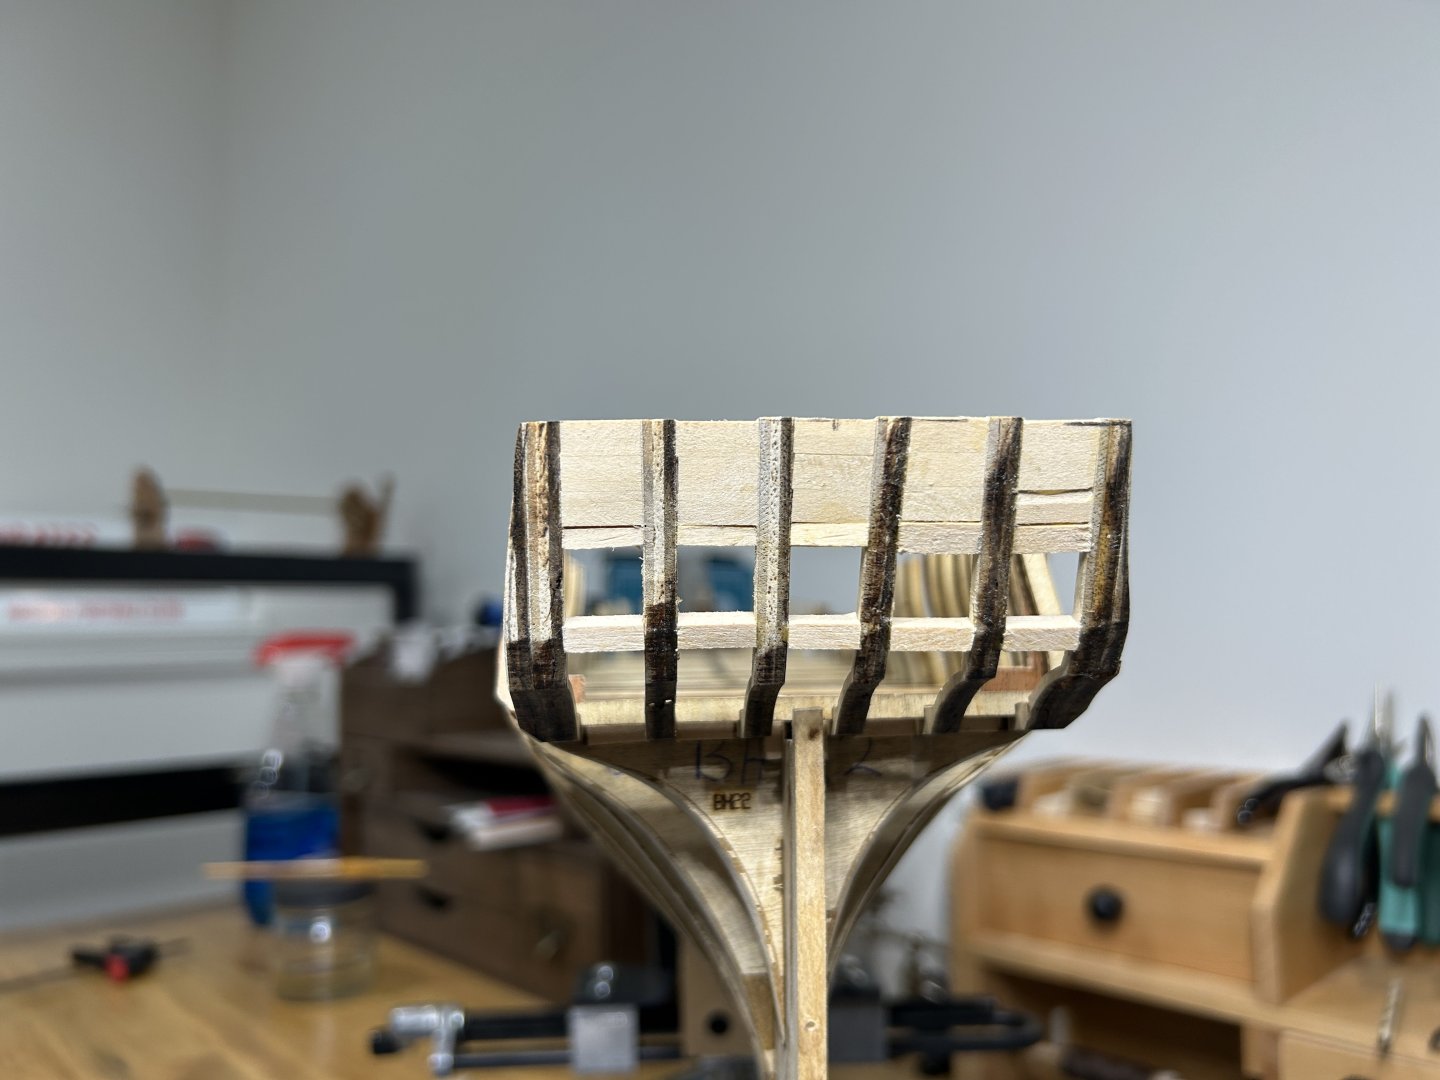
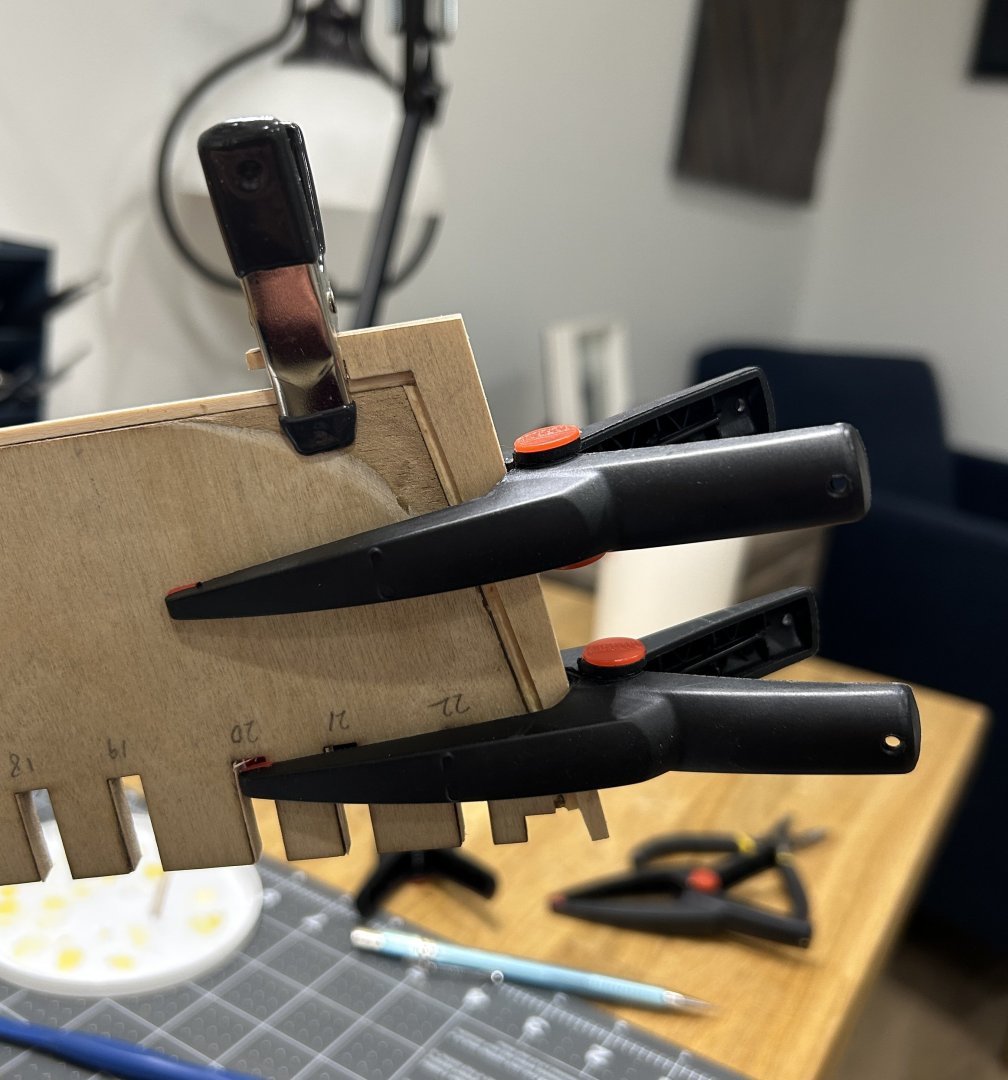
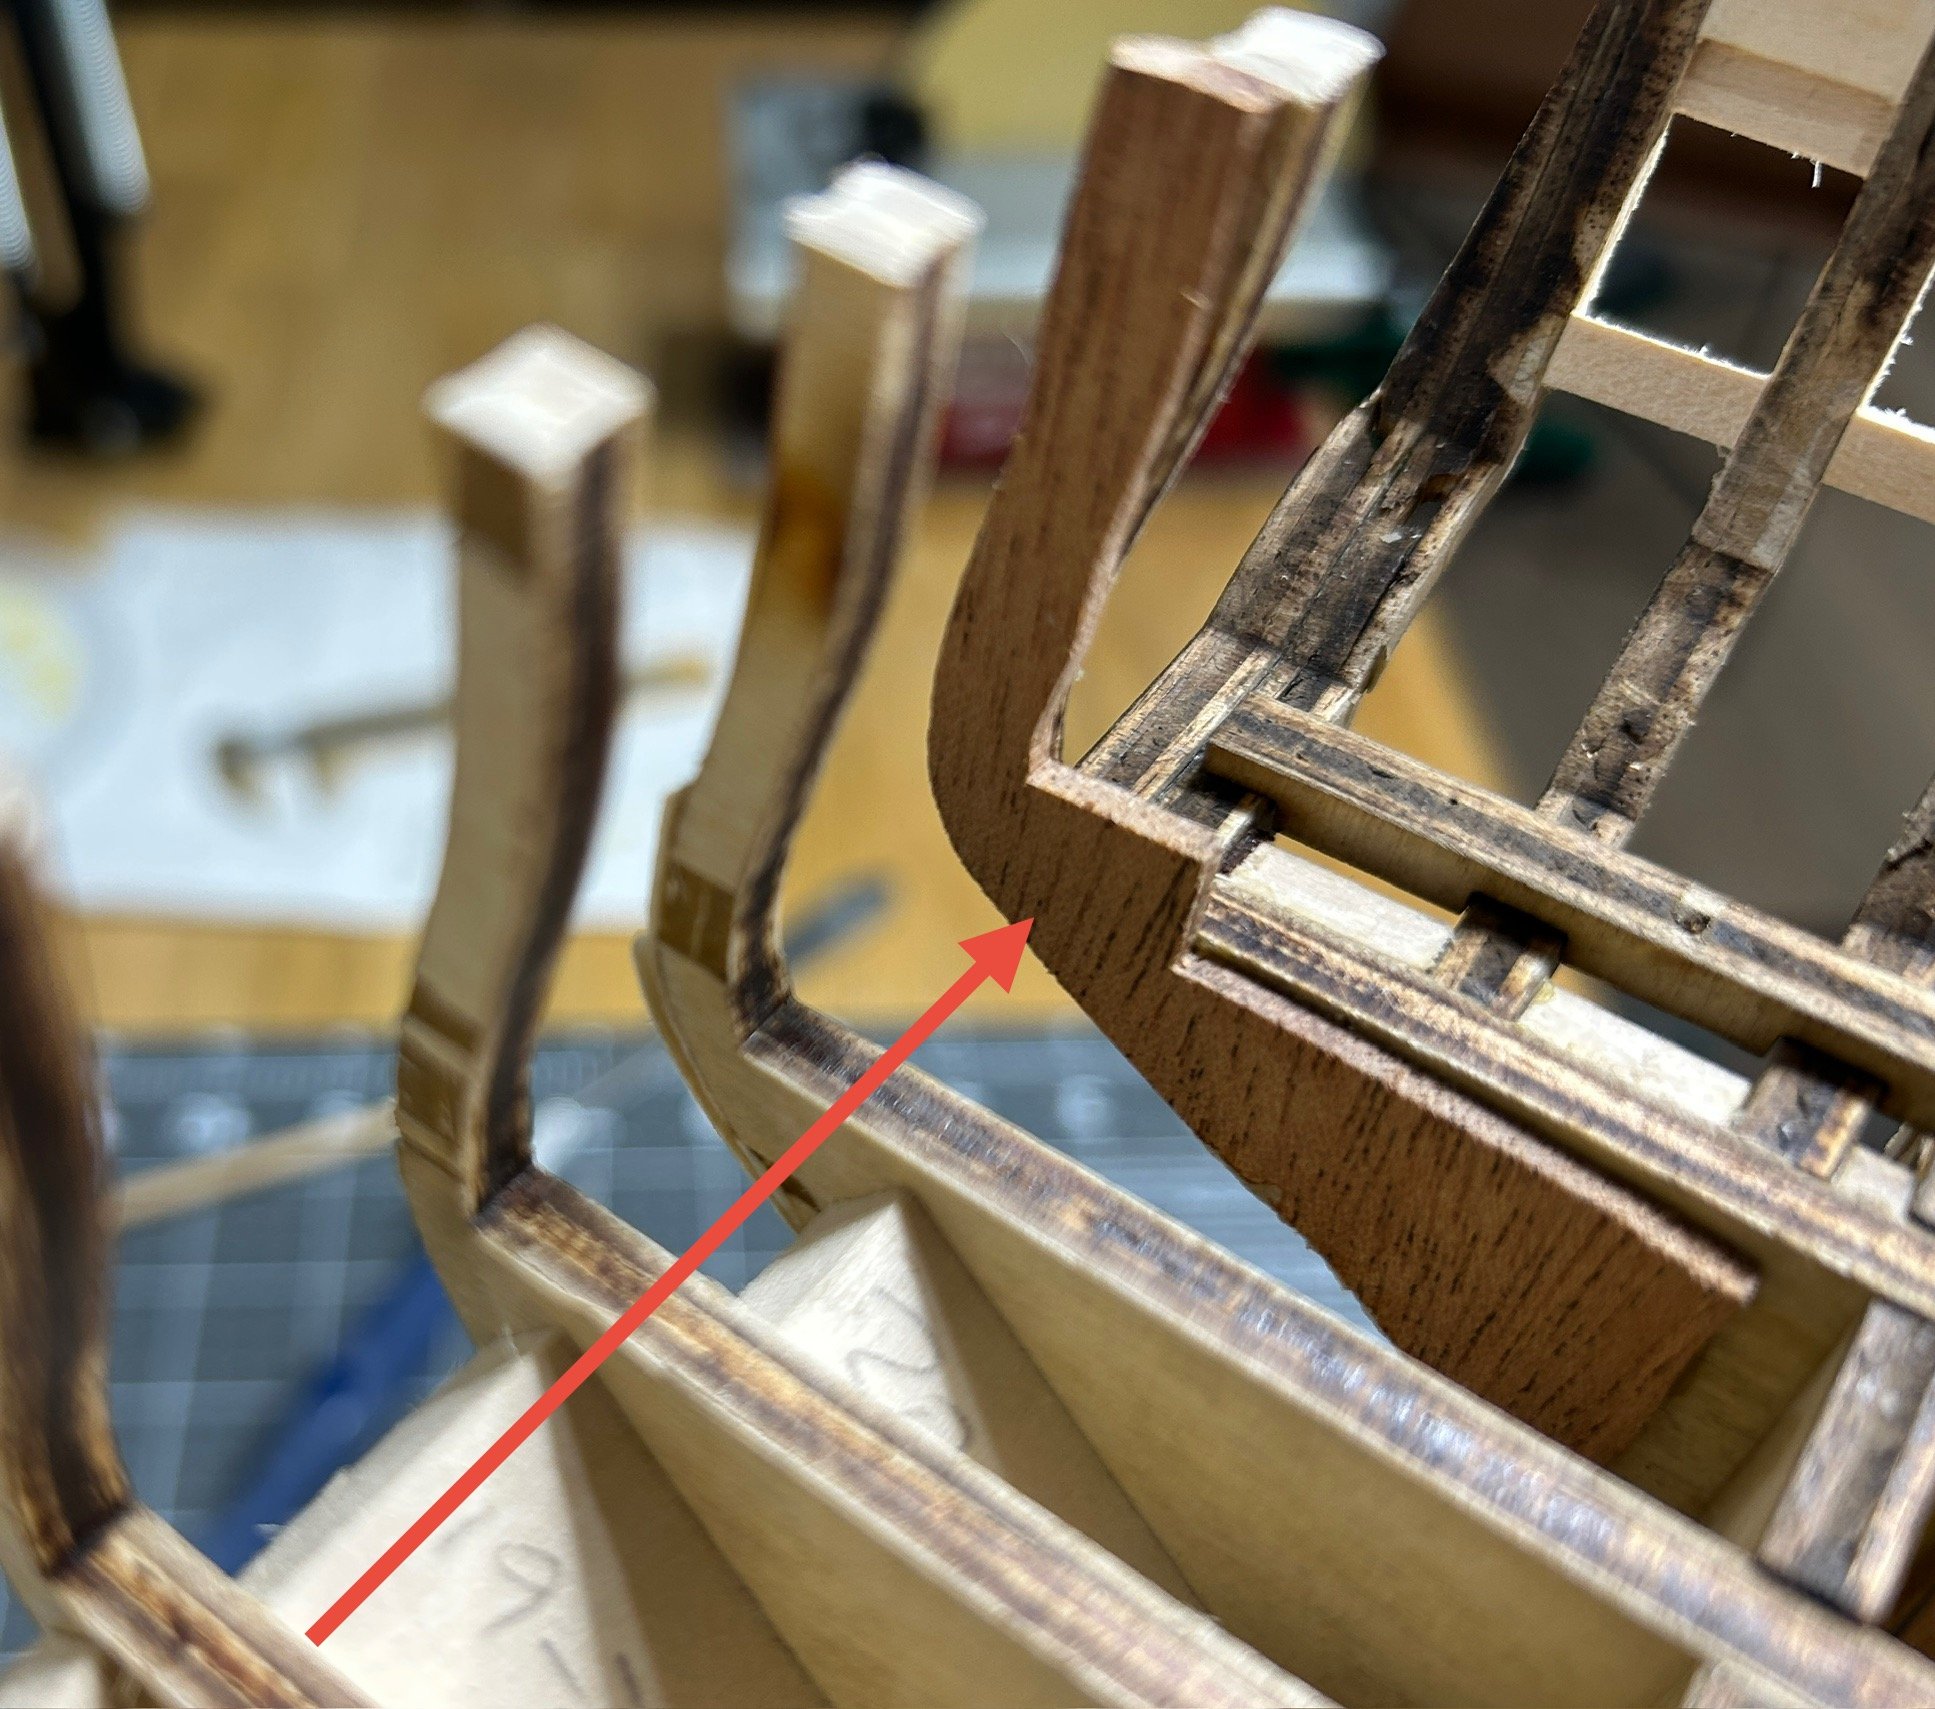
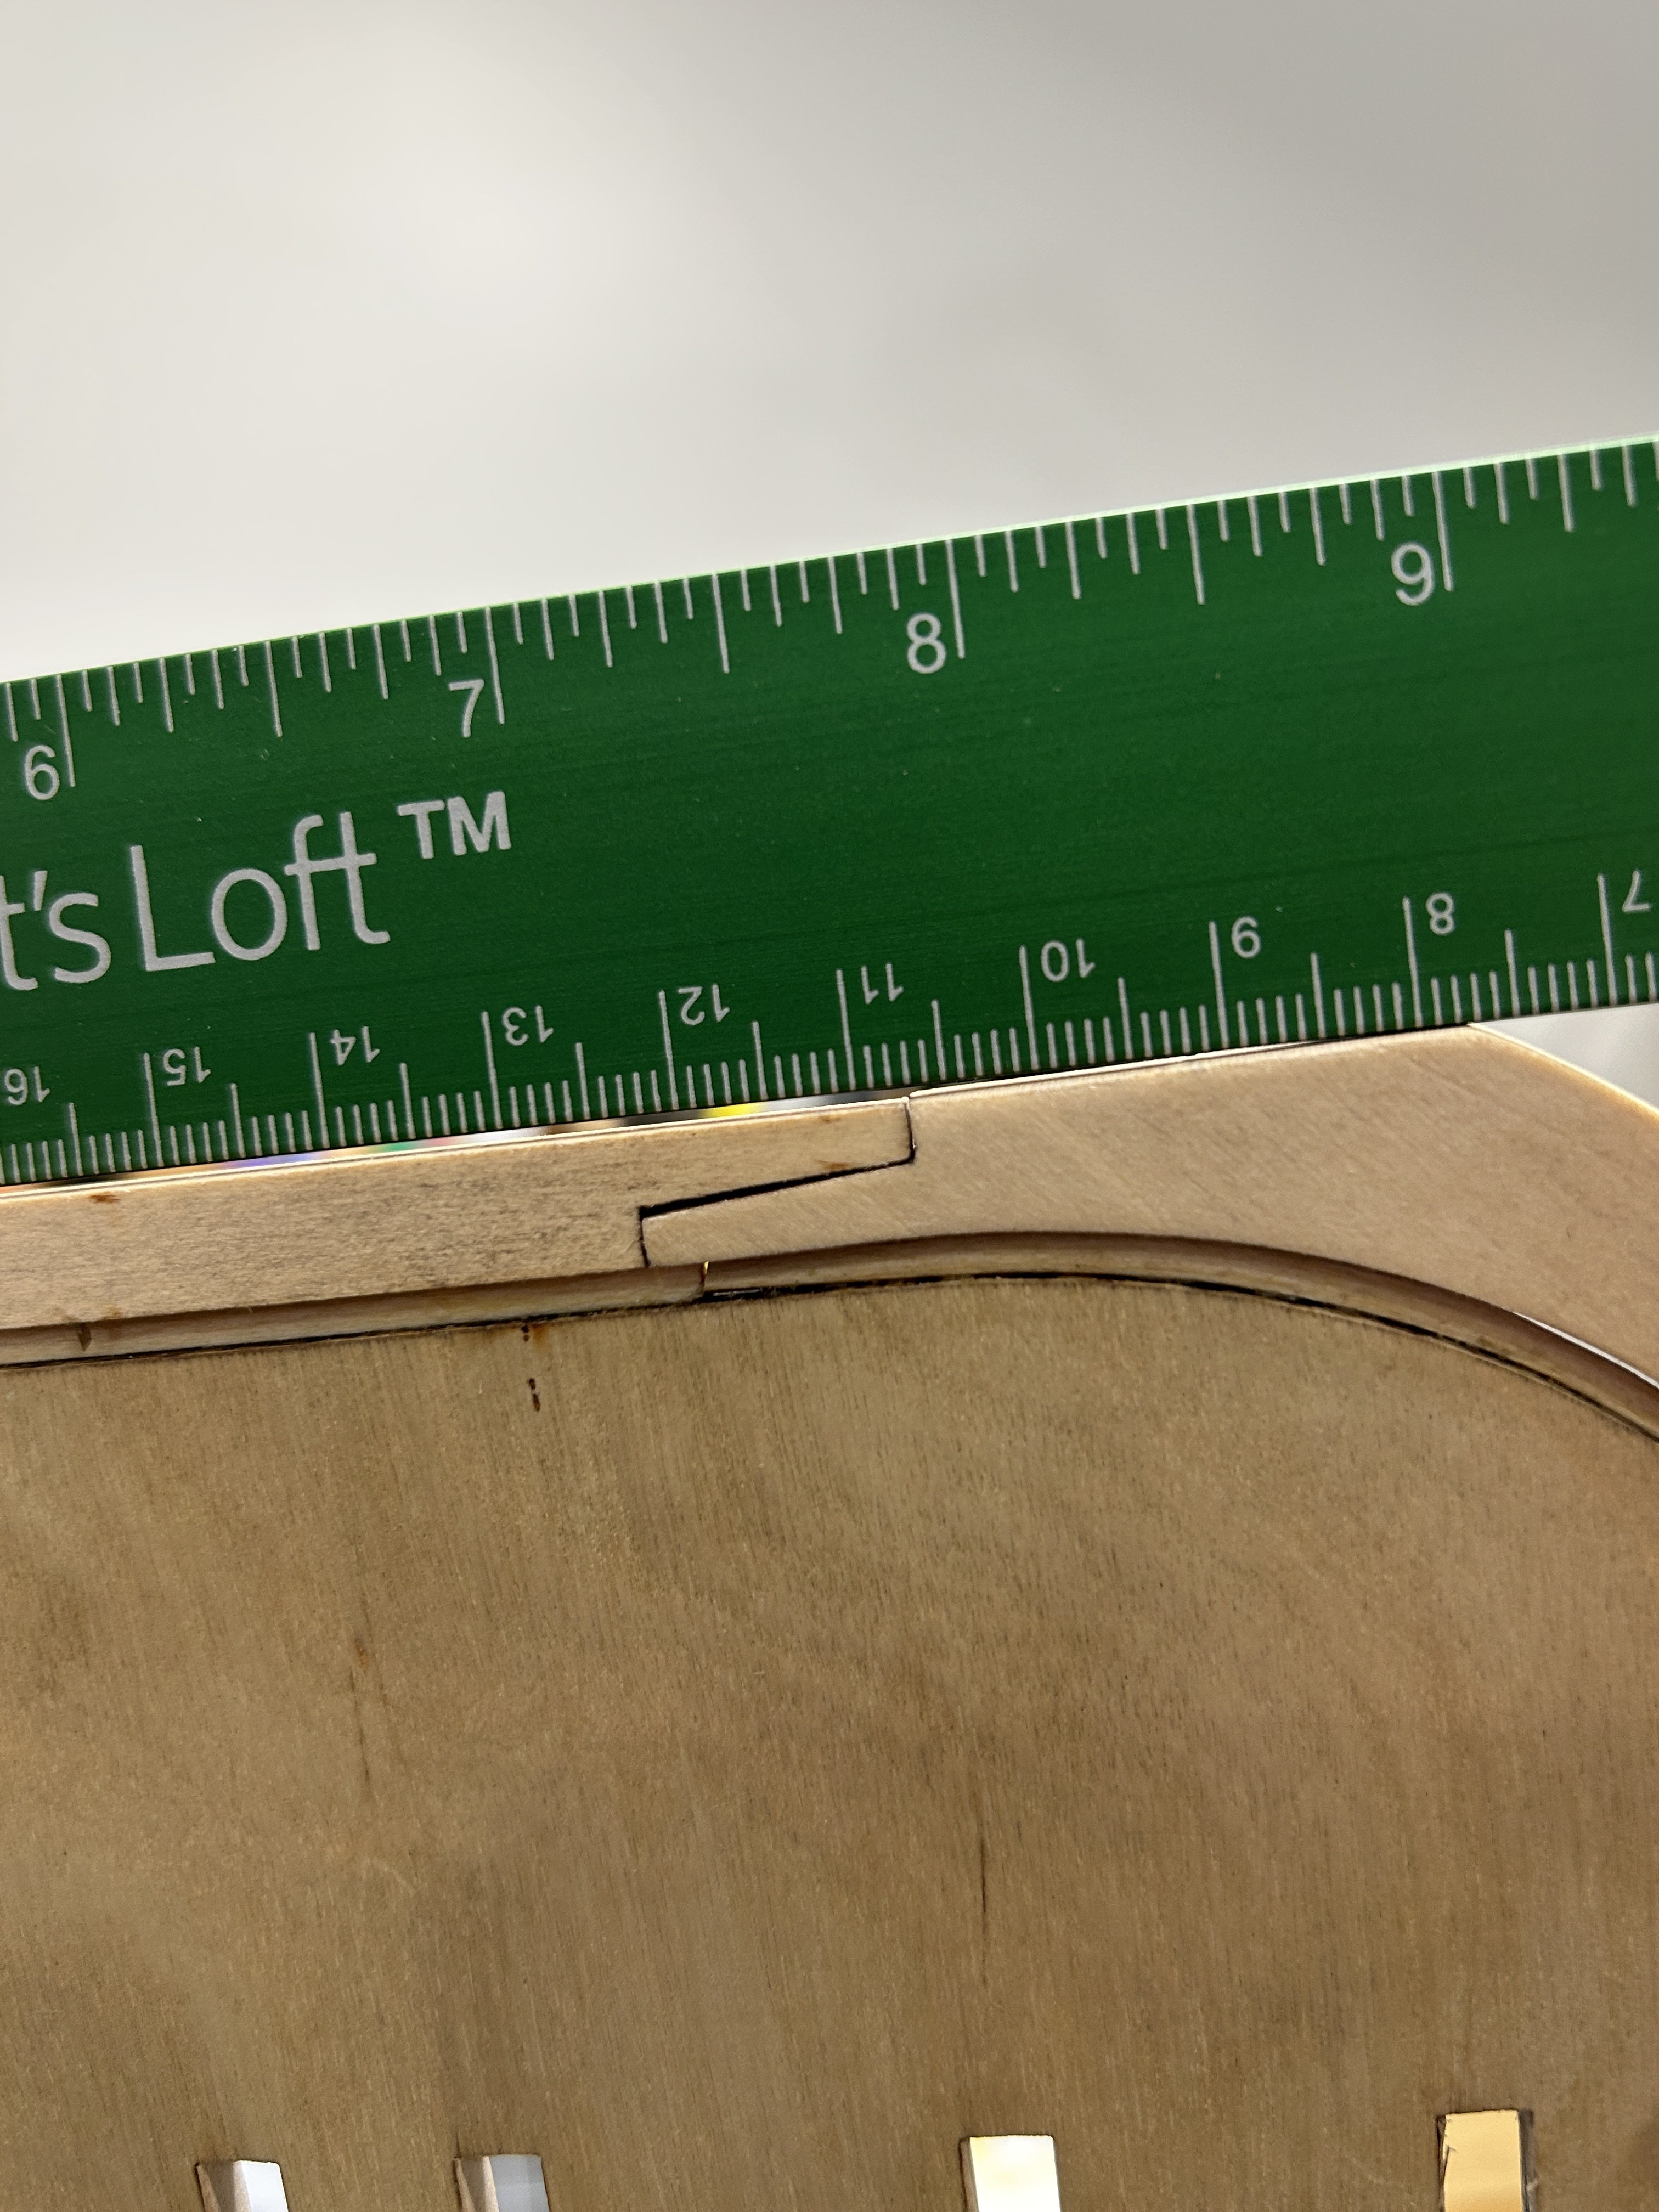
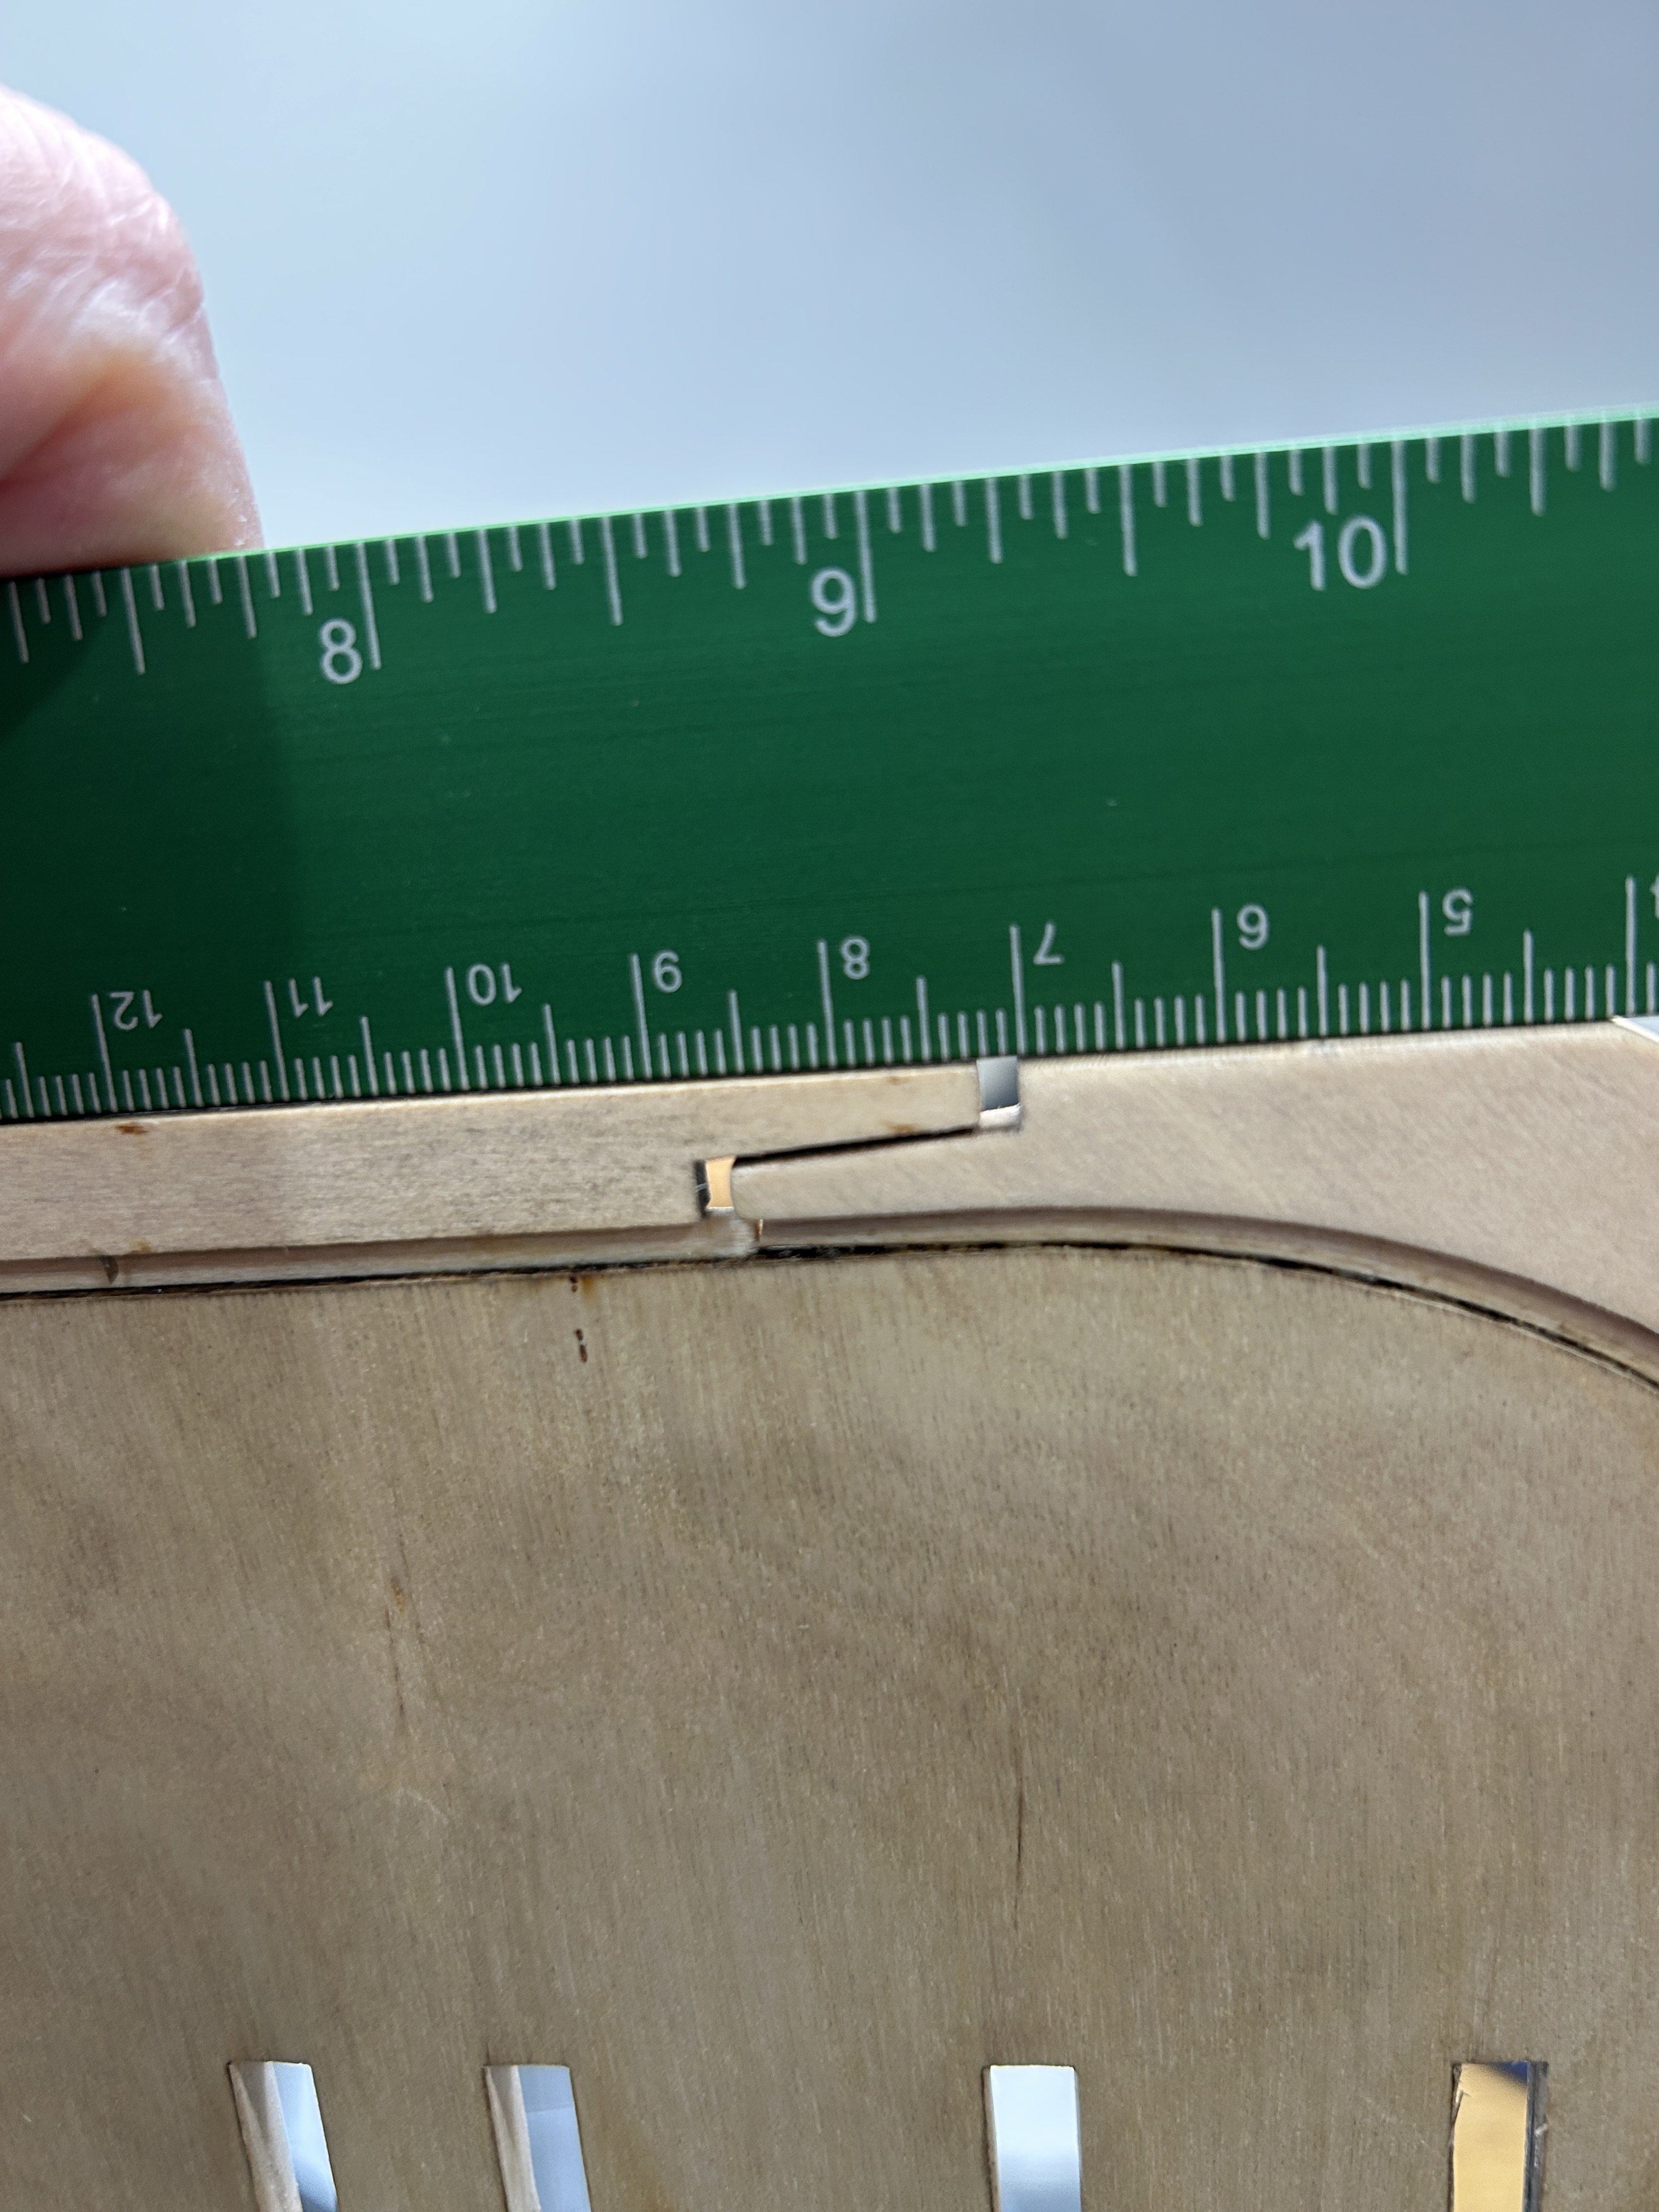
I have made some progress on the stern. I have managed to repair and reattach the frame pieces that broke. I also figured out that the problem I was anticipating with the arched frame for the windows on the stern. As I described in a previous post it appeared that the top of the arch would end up above the cap rail which would not be correct. It turns out that I misunderstood where the the sills were to be placed on the stern. I used alcohol to free the sills and then place them correctly. I also created some parts that will help re-enforce the bulkheads above the deck on the last bulkhead. I left some extra material at the deck level to help add some strength until the outer planking is complete. I will need to remove that material before the decking in installed. I use some 3/16 inch thick walnut. I am hoping the walnut is a little stronger than basswood. This part will also create the side of one of the gun ports. the 3/16 thickness was what I needed to have the side of the gunport in the right position. I still need to do a little more sanding and on the stern, but I have started to work on the placement of the gun port sills also. I will post an update on the sills soon.

-
The second issue I have with the stern is this piece that frames the windows. There is not a lot said about how this piece fits in the instructions. However, the images clearly show the top of this part below the top of the stern framing, however the stern framing doesn't seem to be high enough. I will be adding some additional material to make the stern taller to accommodate the window frame piece.

-
I have been working on the stern and as I was afraid of, the fragile nature of the stern framing are causing some difficulties. The frame pieces are cut from the same plywood as the bulkheads and the bulkhead former. I am not sure if it the quality of the plywood or the damage caused by the laser cutting process, but on some of the frames it seams as if the middle layer of wood is damaged, or maybe the heat from the laser damaged the glue. Either way it is really hard not to break these parts as they are being sanded and shaped. I have a similar issue with the the two aftmost bulkheads. I followed the instructions and used the provided template for shaping the stern after the window openings were framed. After re-gluing some of the stern frames that were de-laminating and fixing one that broke, I eventually shaped the stern to match the template My first issue is the last bulkhead is quite a bit narrower that the stern, so the planking will need to curve inward then back out. This seams odd, and the images in the instructions do not show that bulkhead that narrow. I am considering shiming it to make it wider, but is is so fragile I am worried I will break them when I shape them. Hopefully the gun port framing will add some strength.
.thumb.JPG.09f476be9e7f31c9d9cdfb14e72a369a.JPG)
.thumb.JPG.5b9a72bb2b8cb775c8ce5fe16008b84e.JPG)
.thumb.JPG.b14962425795e78a0006314cca3f7026.JPG)
-
Your work looks great. Very impressive.
-
I sympathize with your struggles. I am about to write a similar post about the stern in my USF Essex. good look with your cooling unit.
-
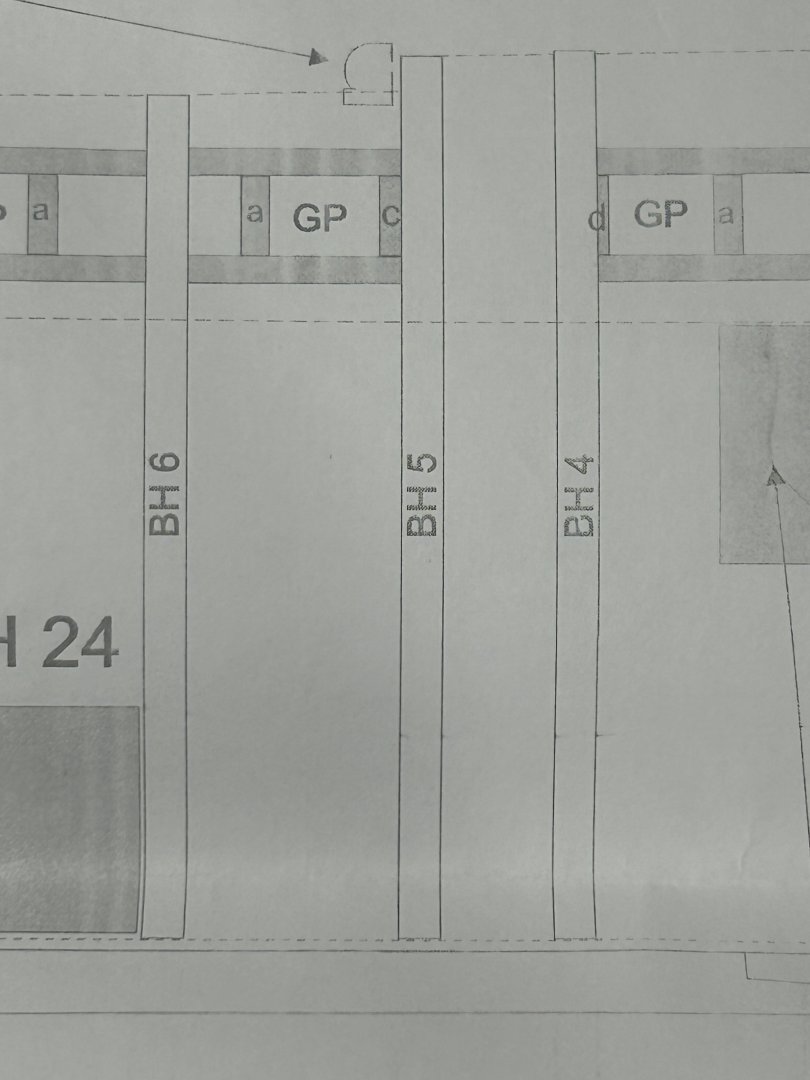
Thanks for uploading the drawing. Based on this and the image of the model on the cover of the Anatomy of the Ship book, along with the specific direction to keep the sides “straight up an down” in the instructions I will make the gunport sills parallel to the water line.
-
A quick clarification. I will definitely make the gunports rectangle and not as a parrellogram as they appear on the plans, but should the sills be parallel to the water line or slope upward as the approach the bow and stern follow the deck. Even if they are parallel to the water line each one will be progressively higher as they approach the bow and stern following the slope of the deck. Curious if any one out there has the USF Essex Anotomy of the Ship book and if that provides any guidance on this.
-
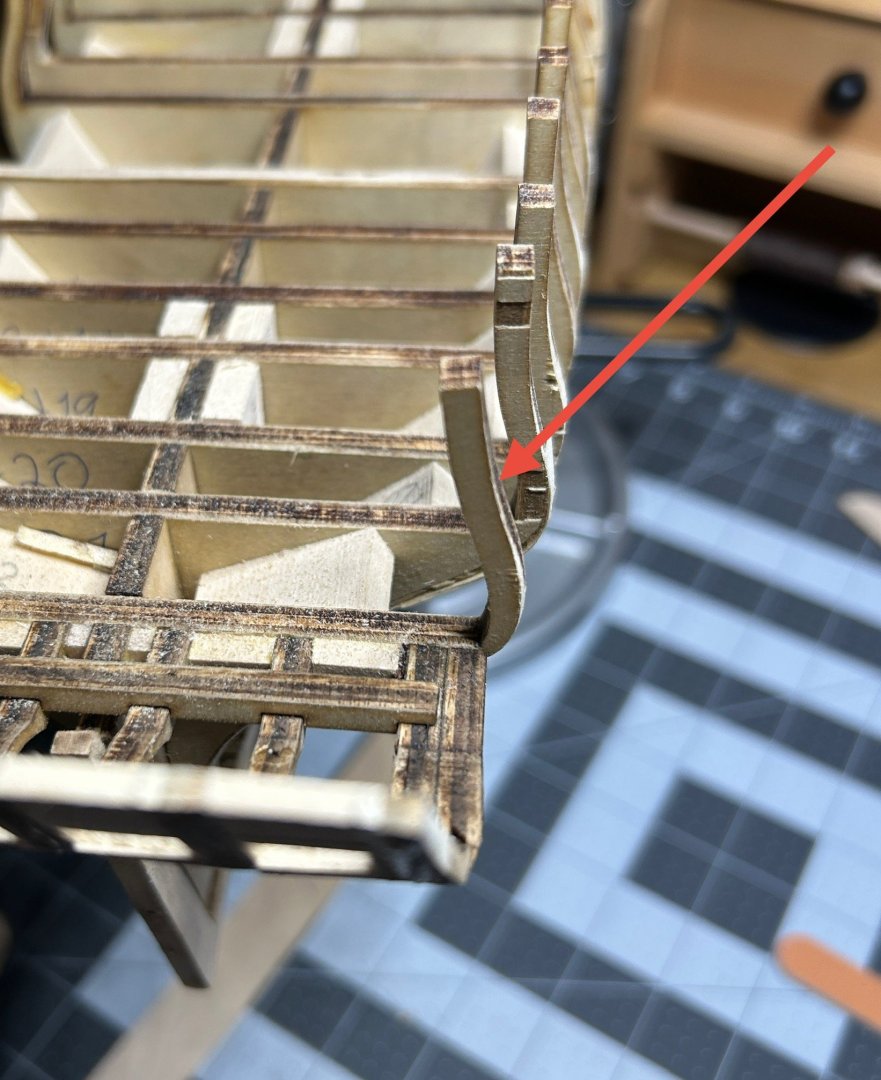
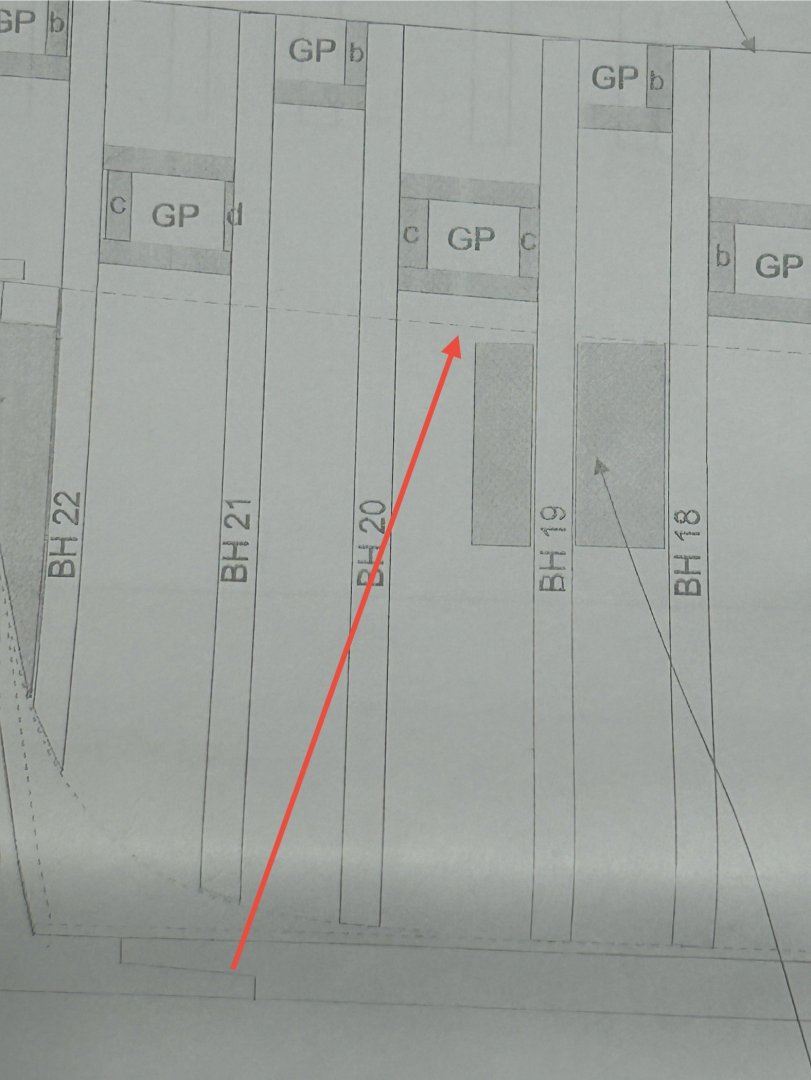
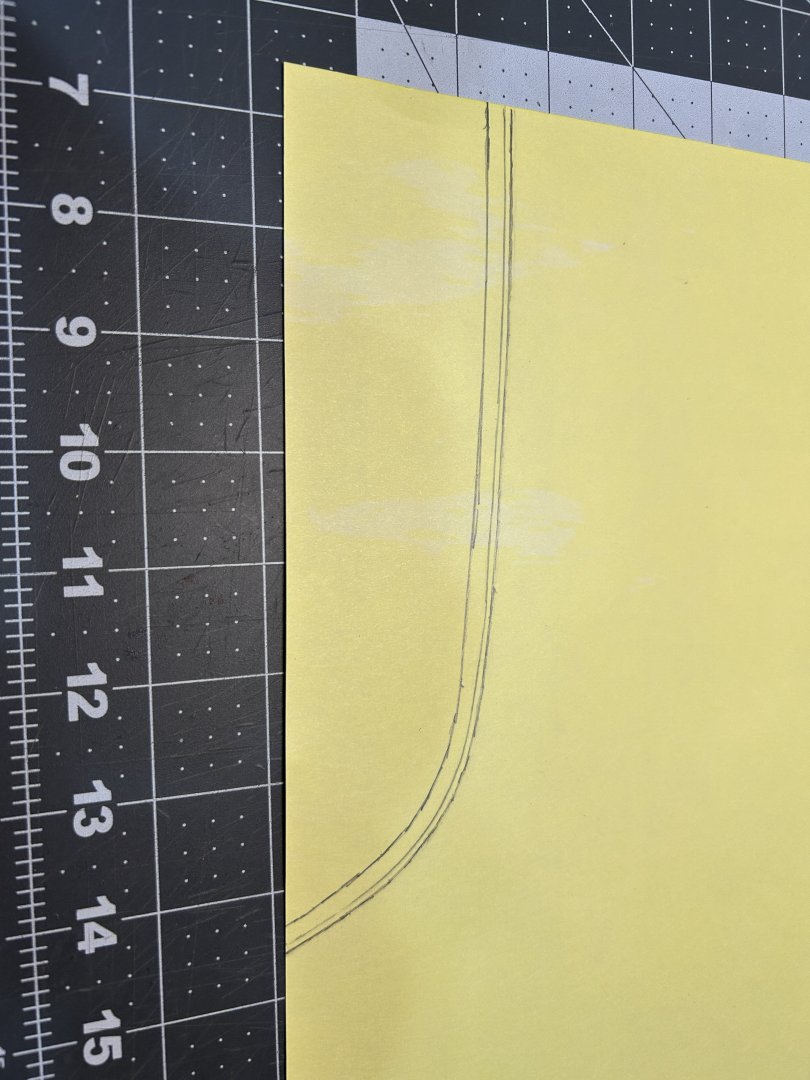
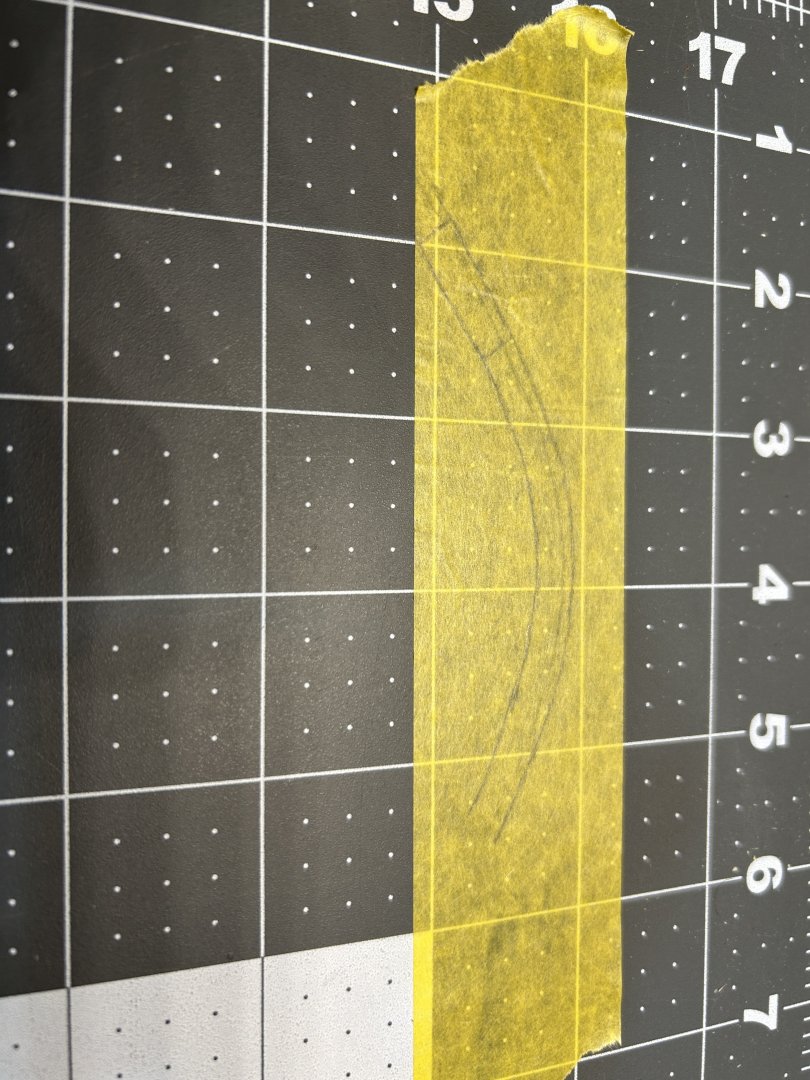
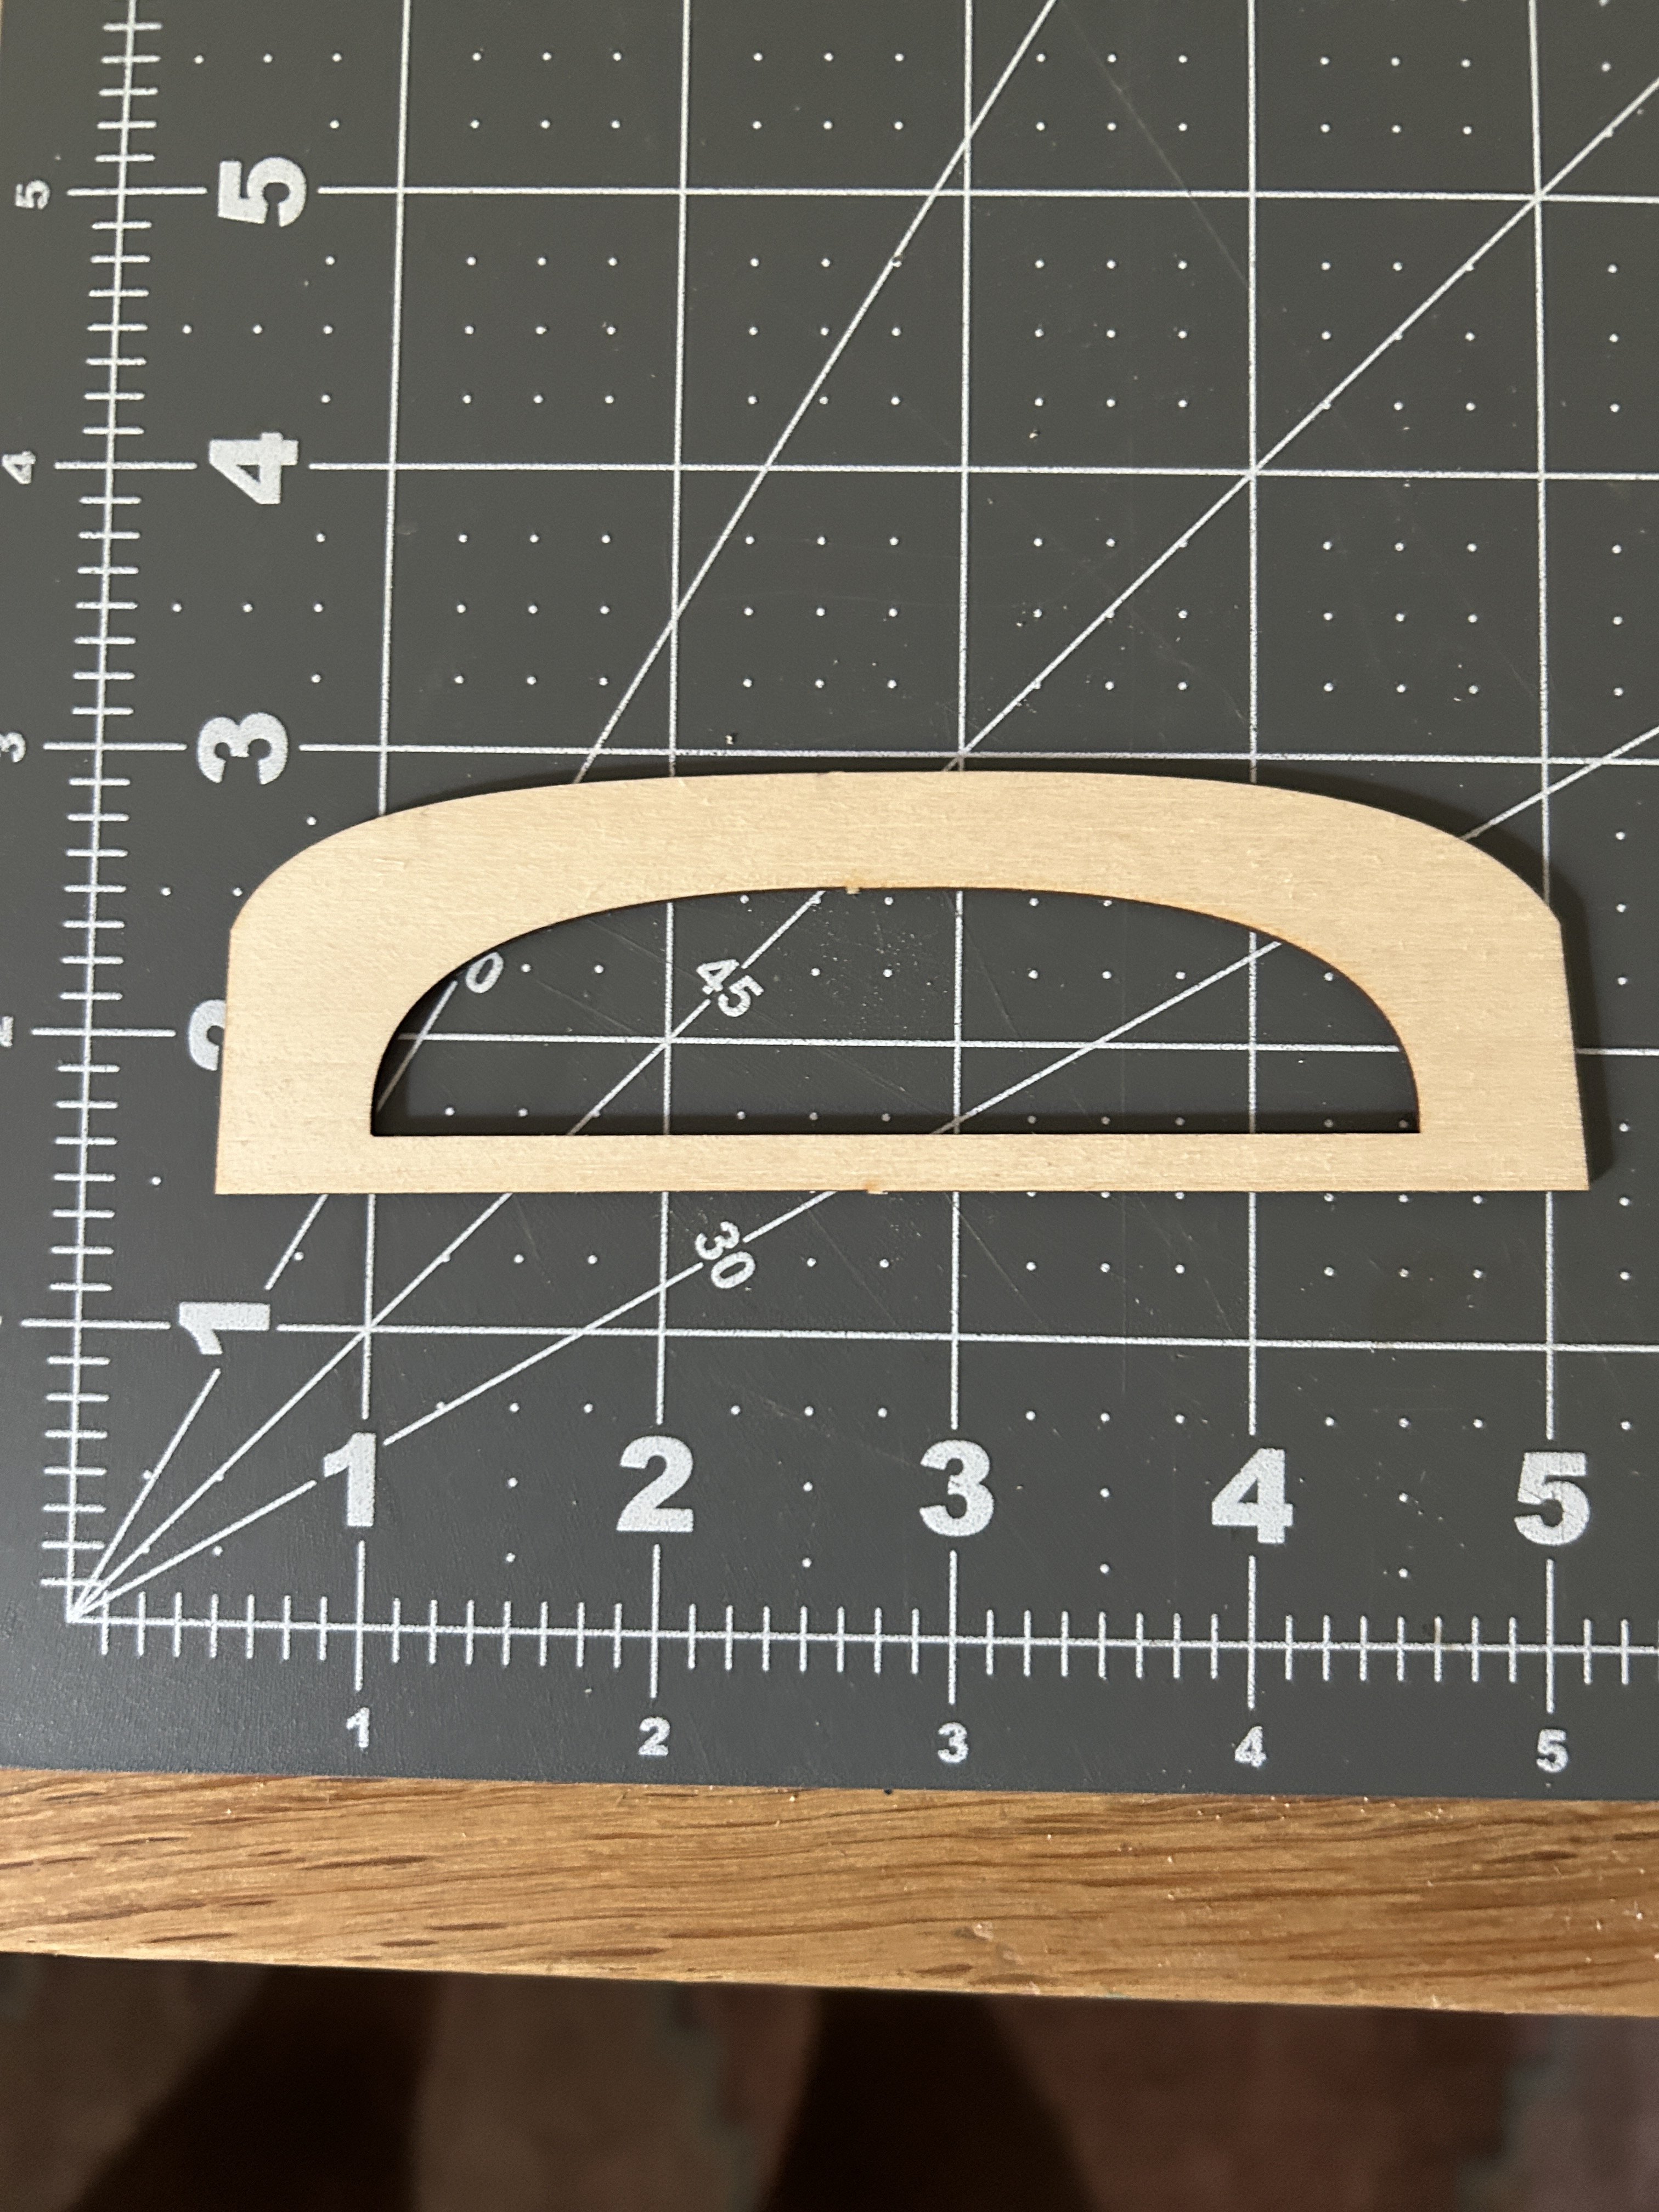
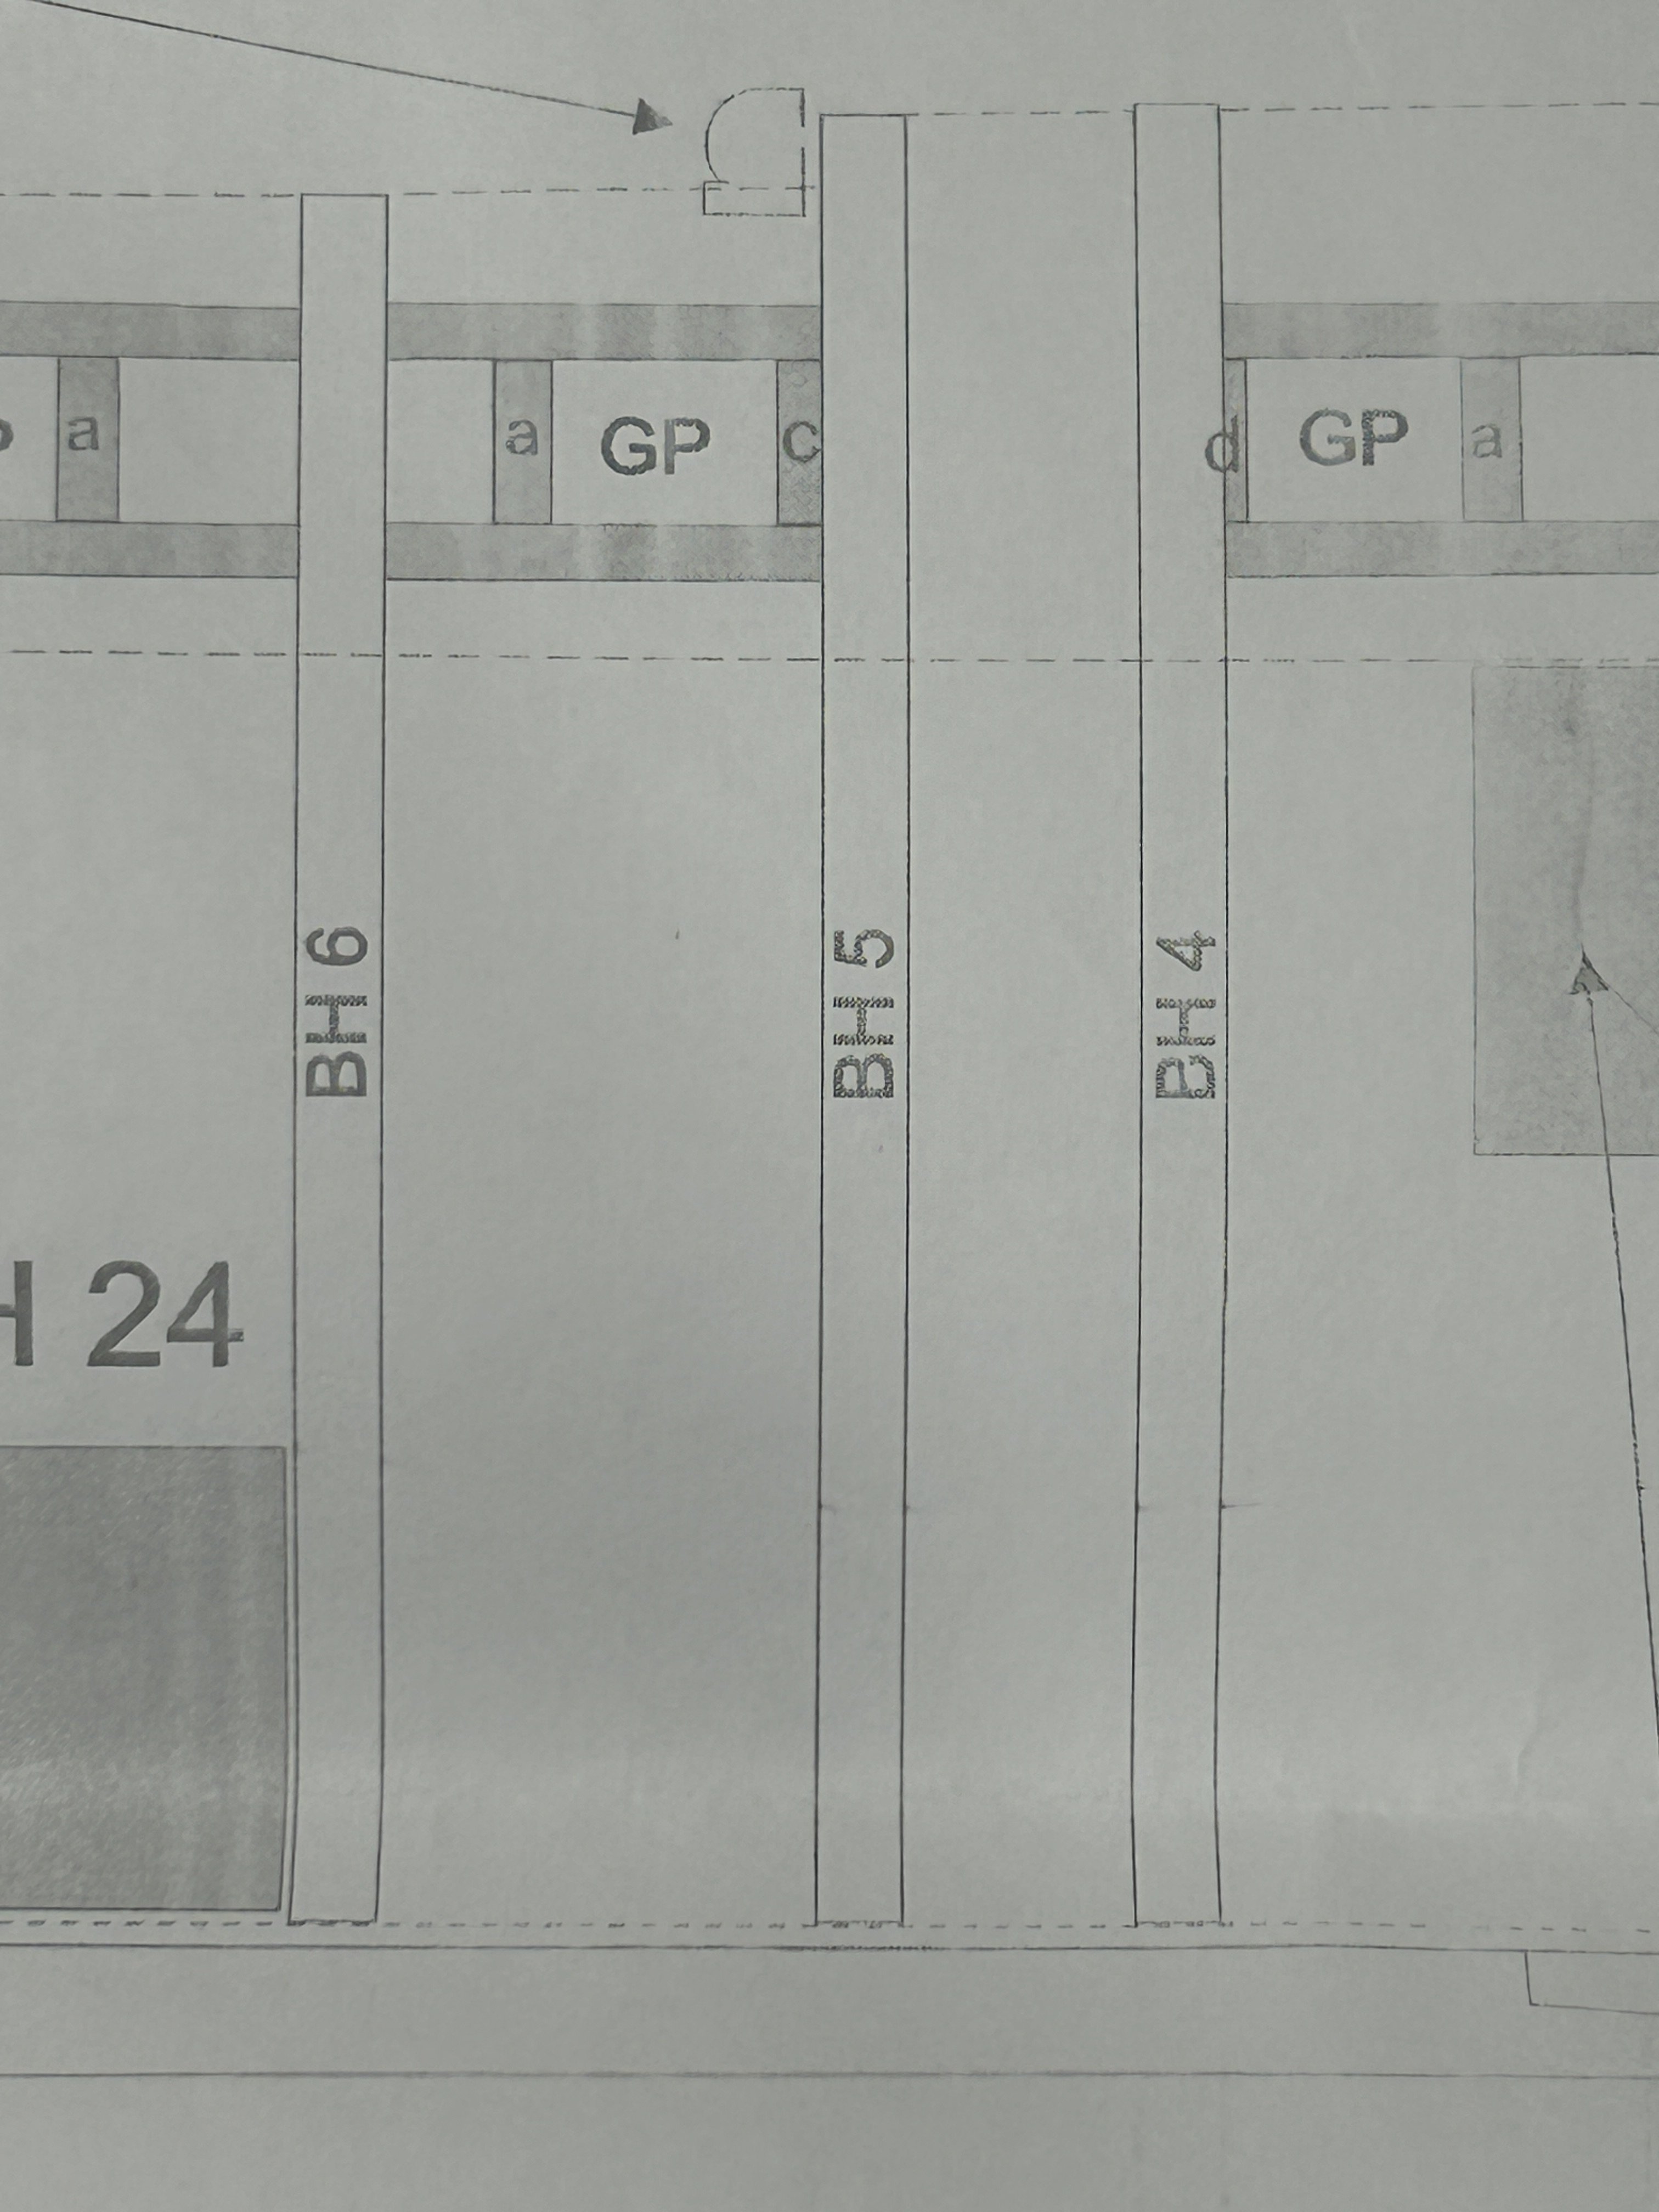
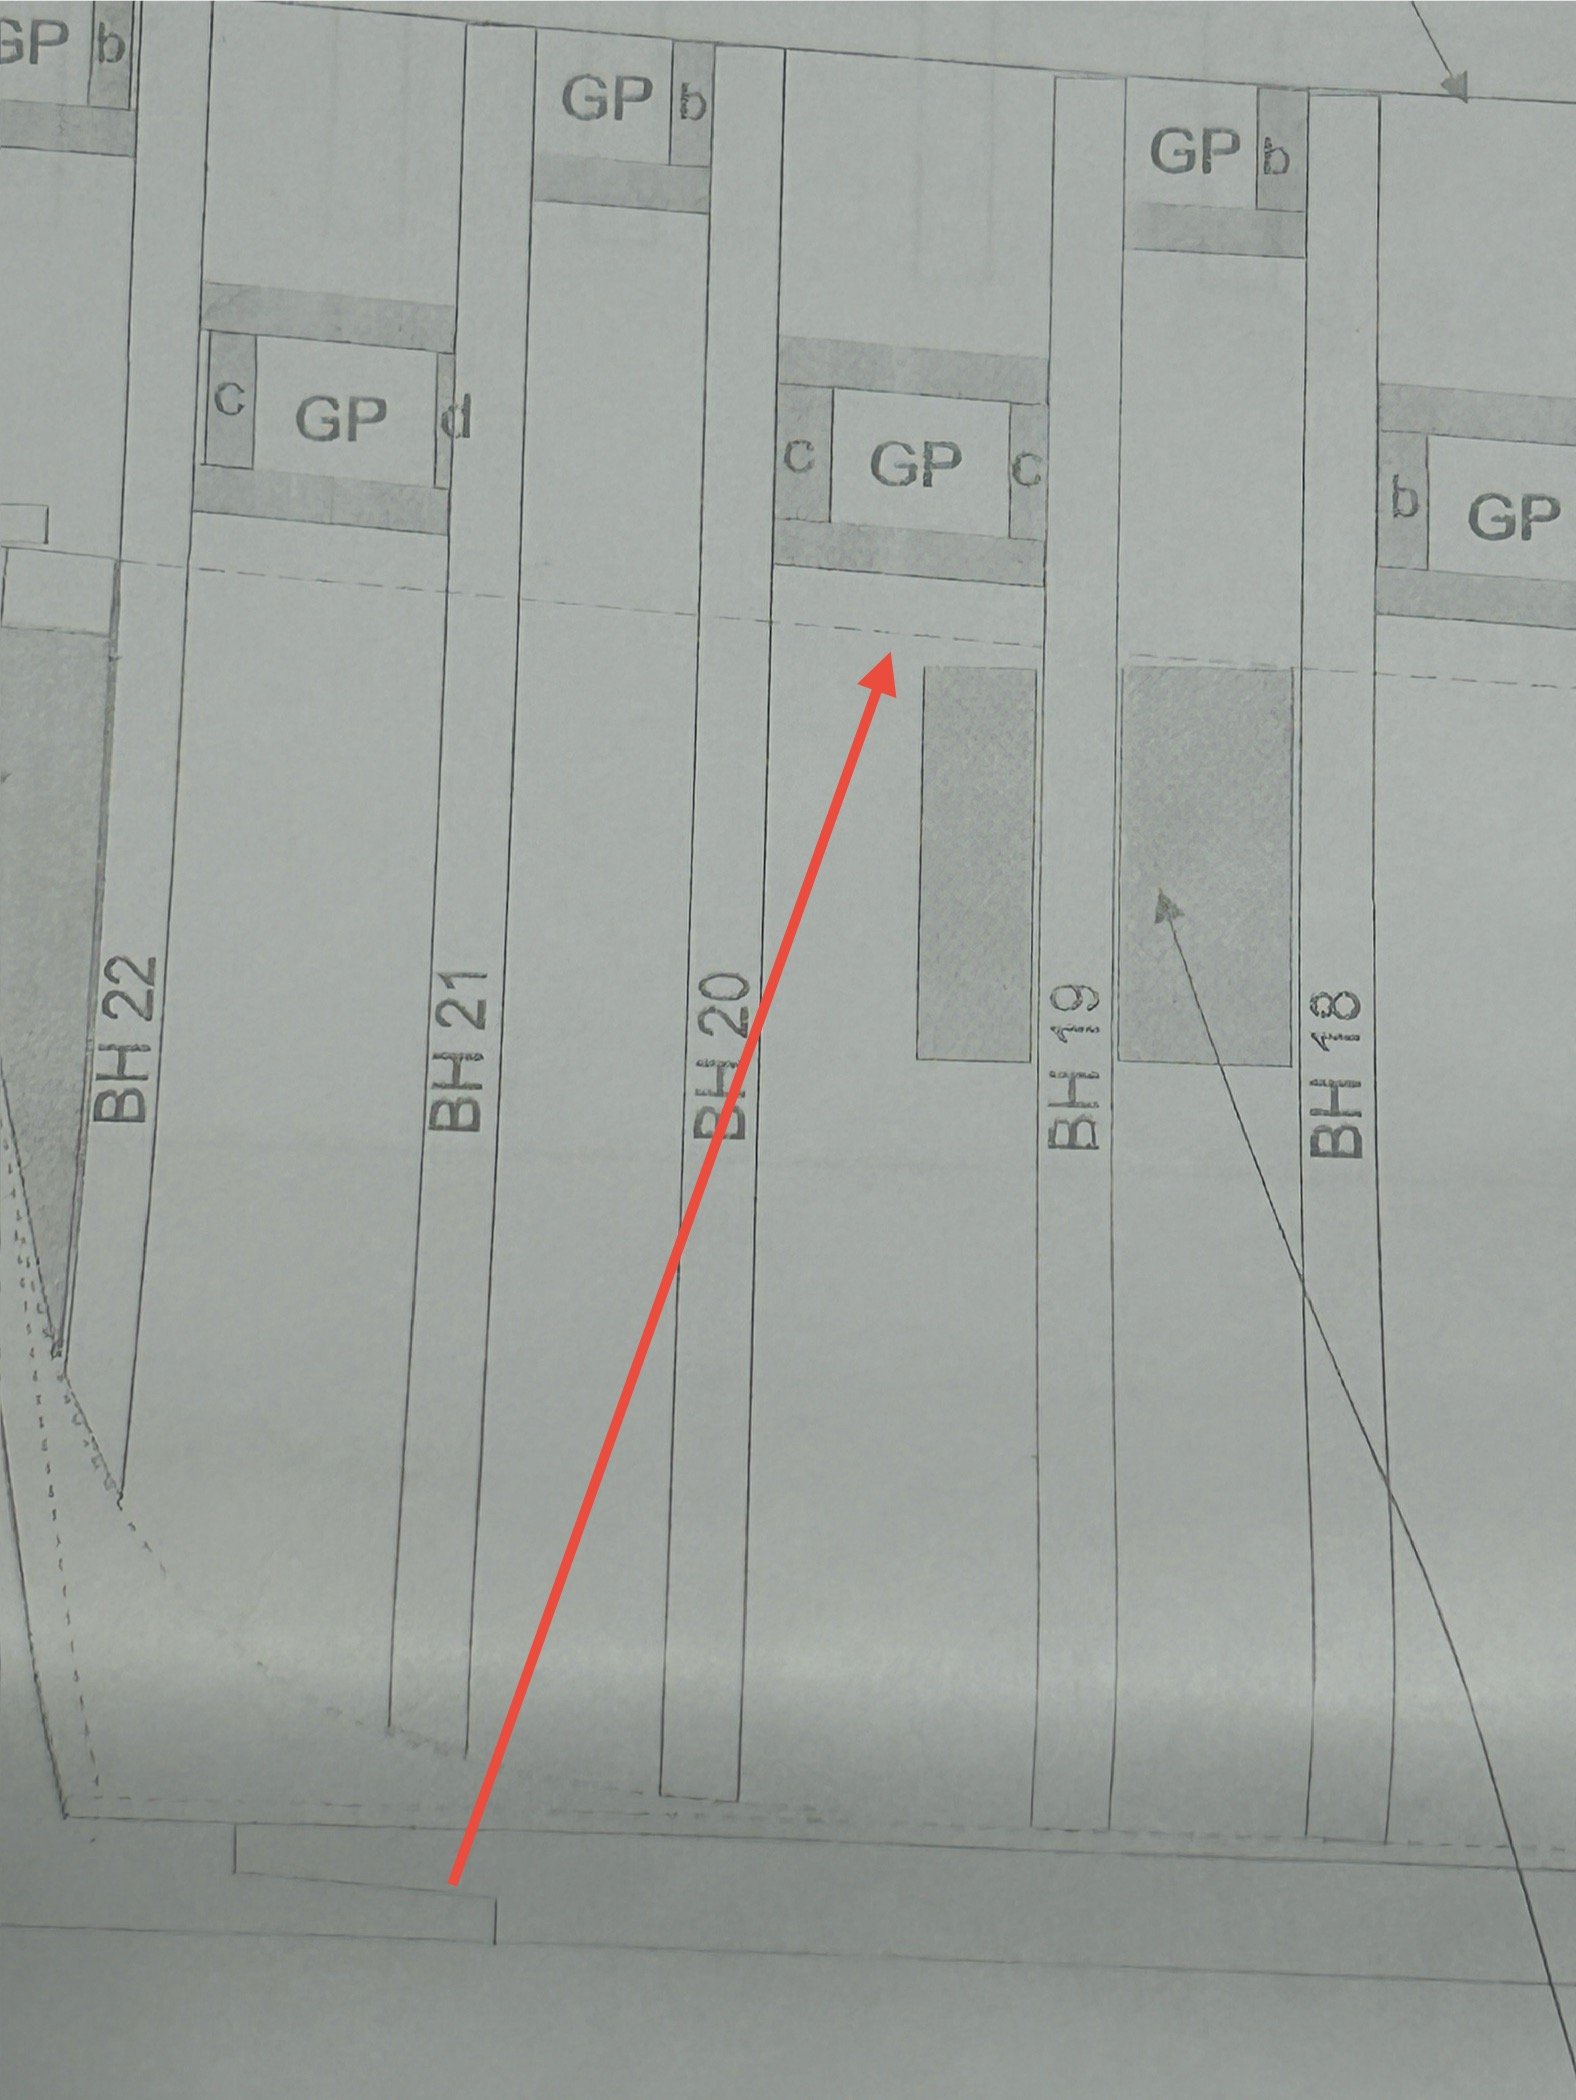
I am currently building the USF Essex. I am a few steps away from framing the gun ports, but I have been looking ahead at the instructions and plans for the gun port framing. I am 90% sure I know the correct answer, but I am a little puzzled by the instructions and plans as it relates to the gun ports. This ship has a deck that slopes up as you approach the bow and the stern. At midships the deck is flat at the sills and lintels of the gunports can be added 1/8 inch above the part of the bulk heads that will support the deck and the sides can be installed parrallel to the vertical portion of the bulk head and you end up with a rectangle shaped gun port. See image from the plans below. But as you approach the bow and stern, if the sill is placed along the line of the deck (as the instructions say) and the sides are installed straight up and down (as the instructions say), you will end up with a parrallelogram instead of a rectangle, The plans seem to show the the gun ports as parralellograms as they approach the bow and stern. See photo below. The arrow points to the line that represents the run of the deck. There are references in the instructions to building a plug to aid in the placement of the lintel and sides after the sill is installed. This would only be useful if the shape was consistently a rectangle. The kit also comes with laser cut parts to use for the gunport hatches and they are all rectangles. As I said at the beginning of this post I am 90% sure I know the right answer, which is to build the gun ports shapes as rectangles and not as they are shown on the plans, but I would love to hear if others agree with this approach. I will attempt to place the sill so that the center of the gunport sill is the proper height above the deck with the midship side higher that the middle and the bow or stern side lower than the middle. The gun port sill will be approximately parrallel to the water line. Please share your thoughts if you agree or disagree with my planned approach. Thanks.
-
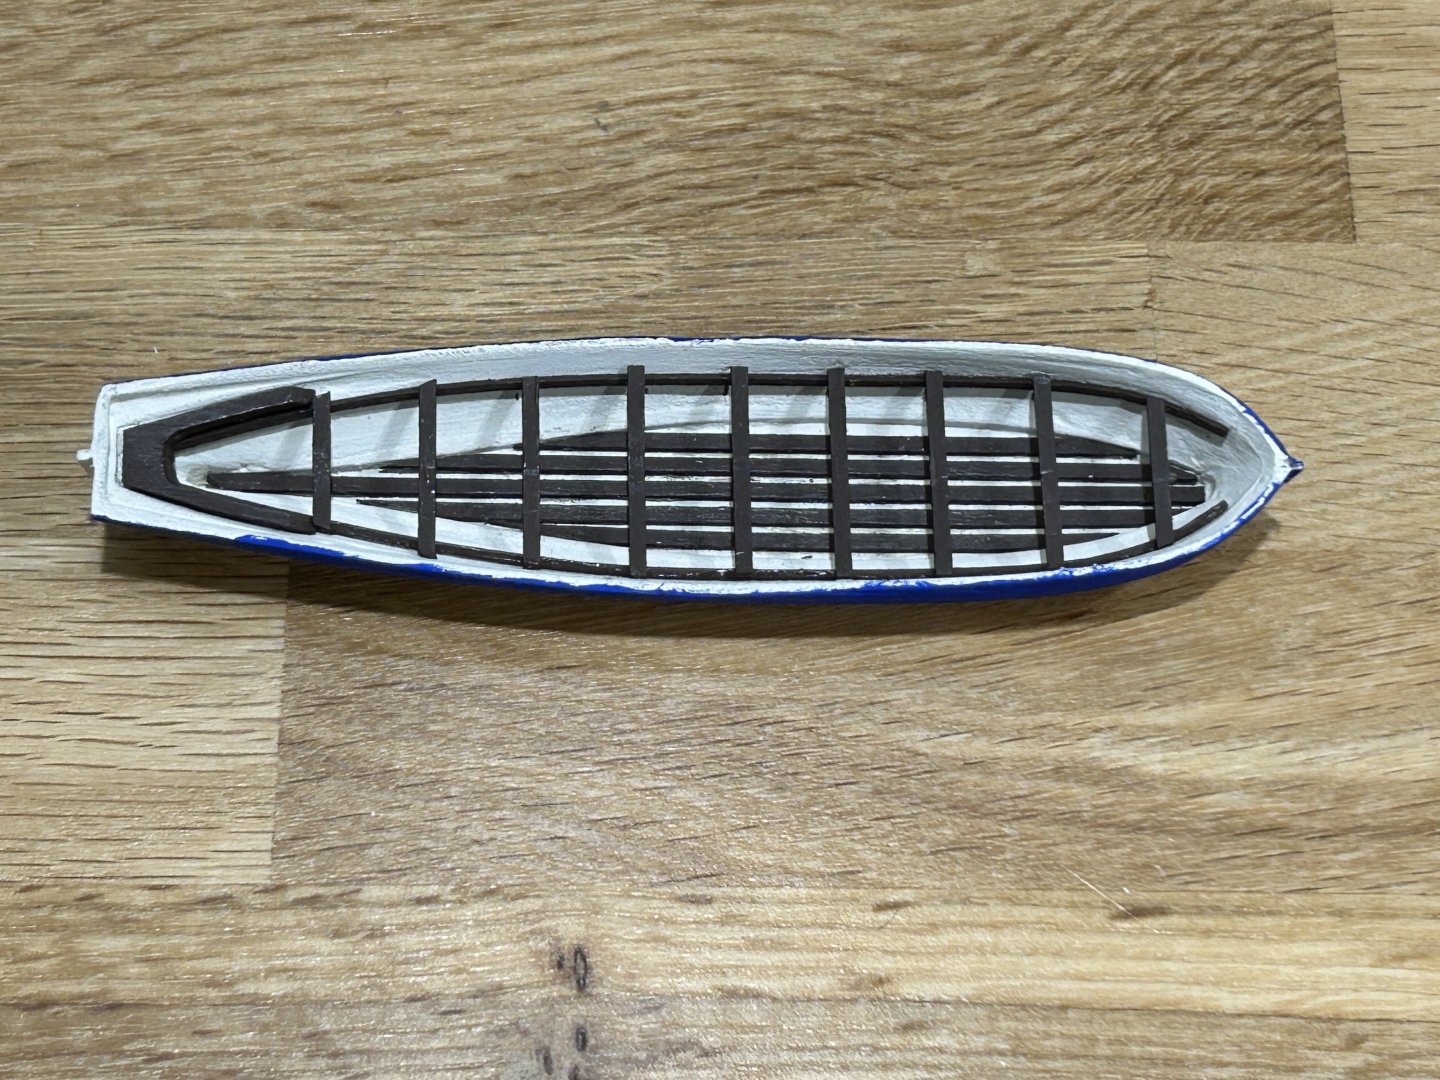
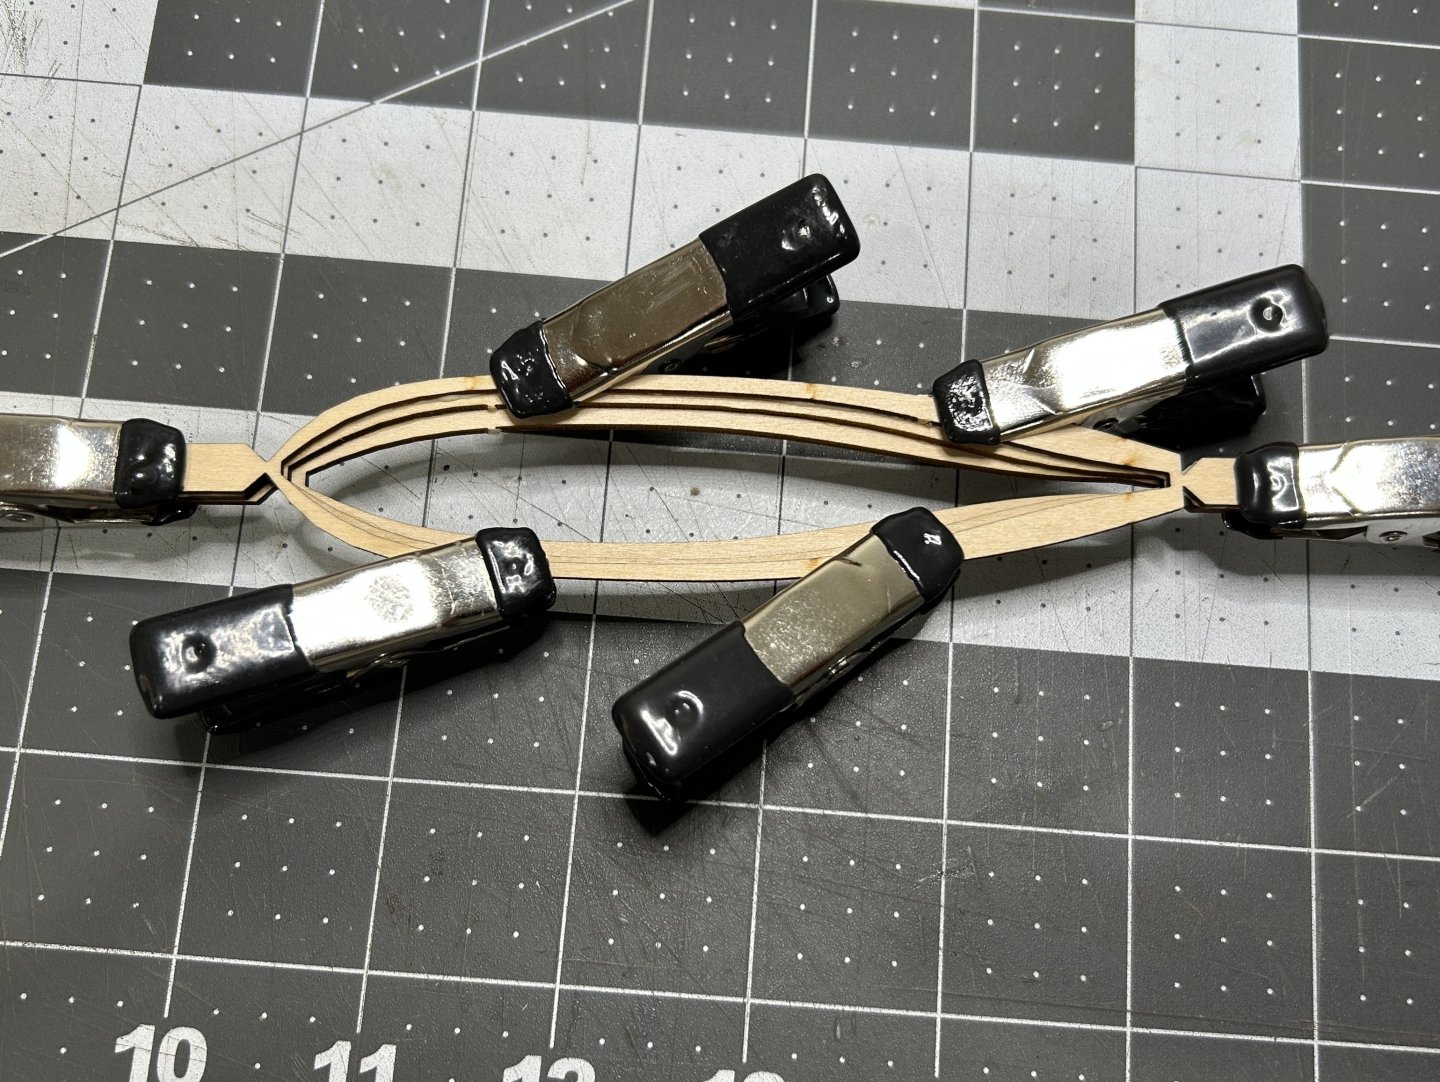
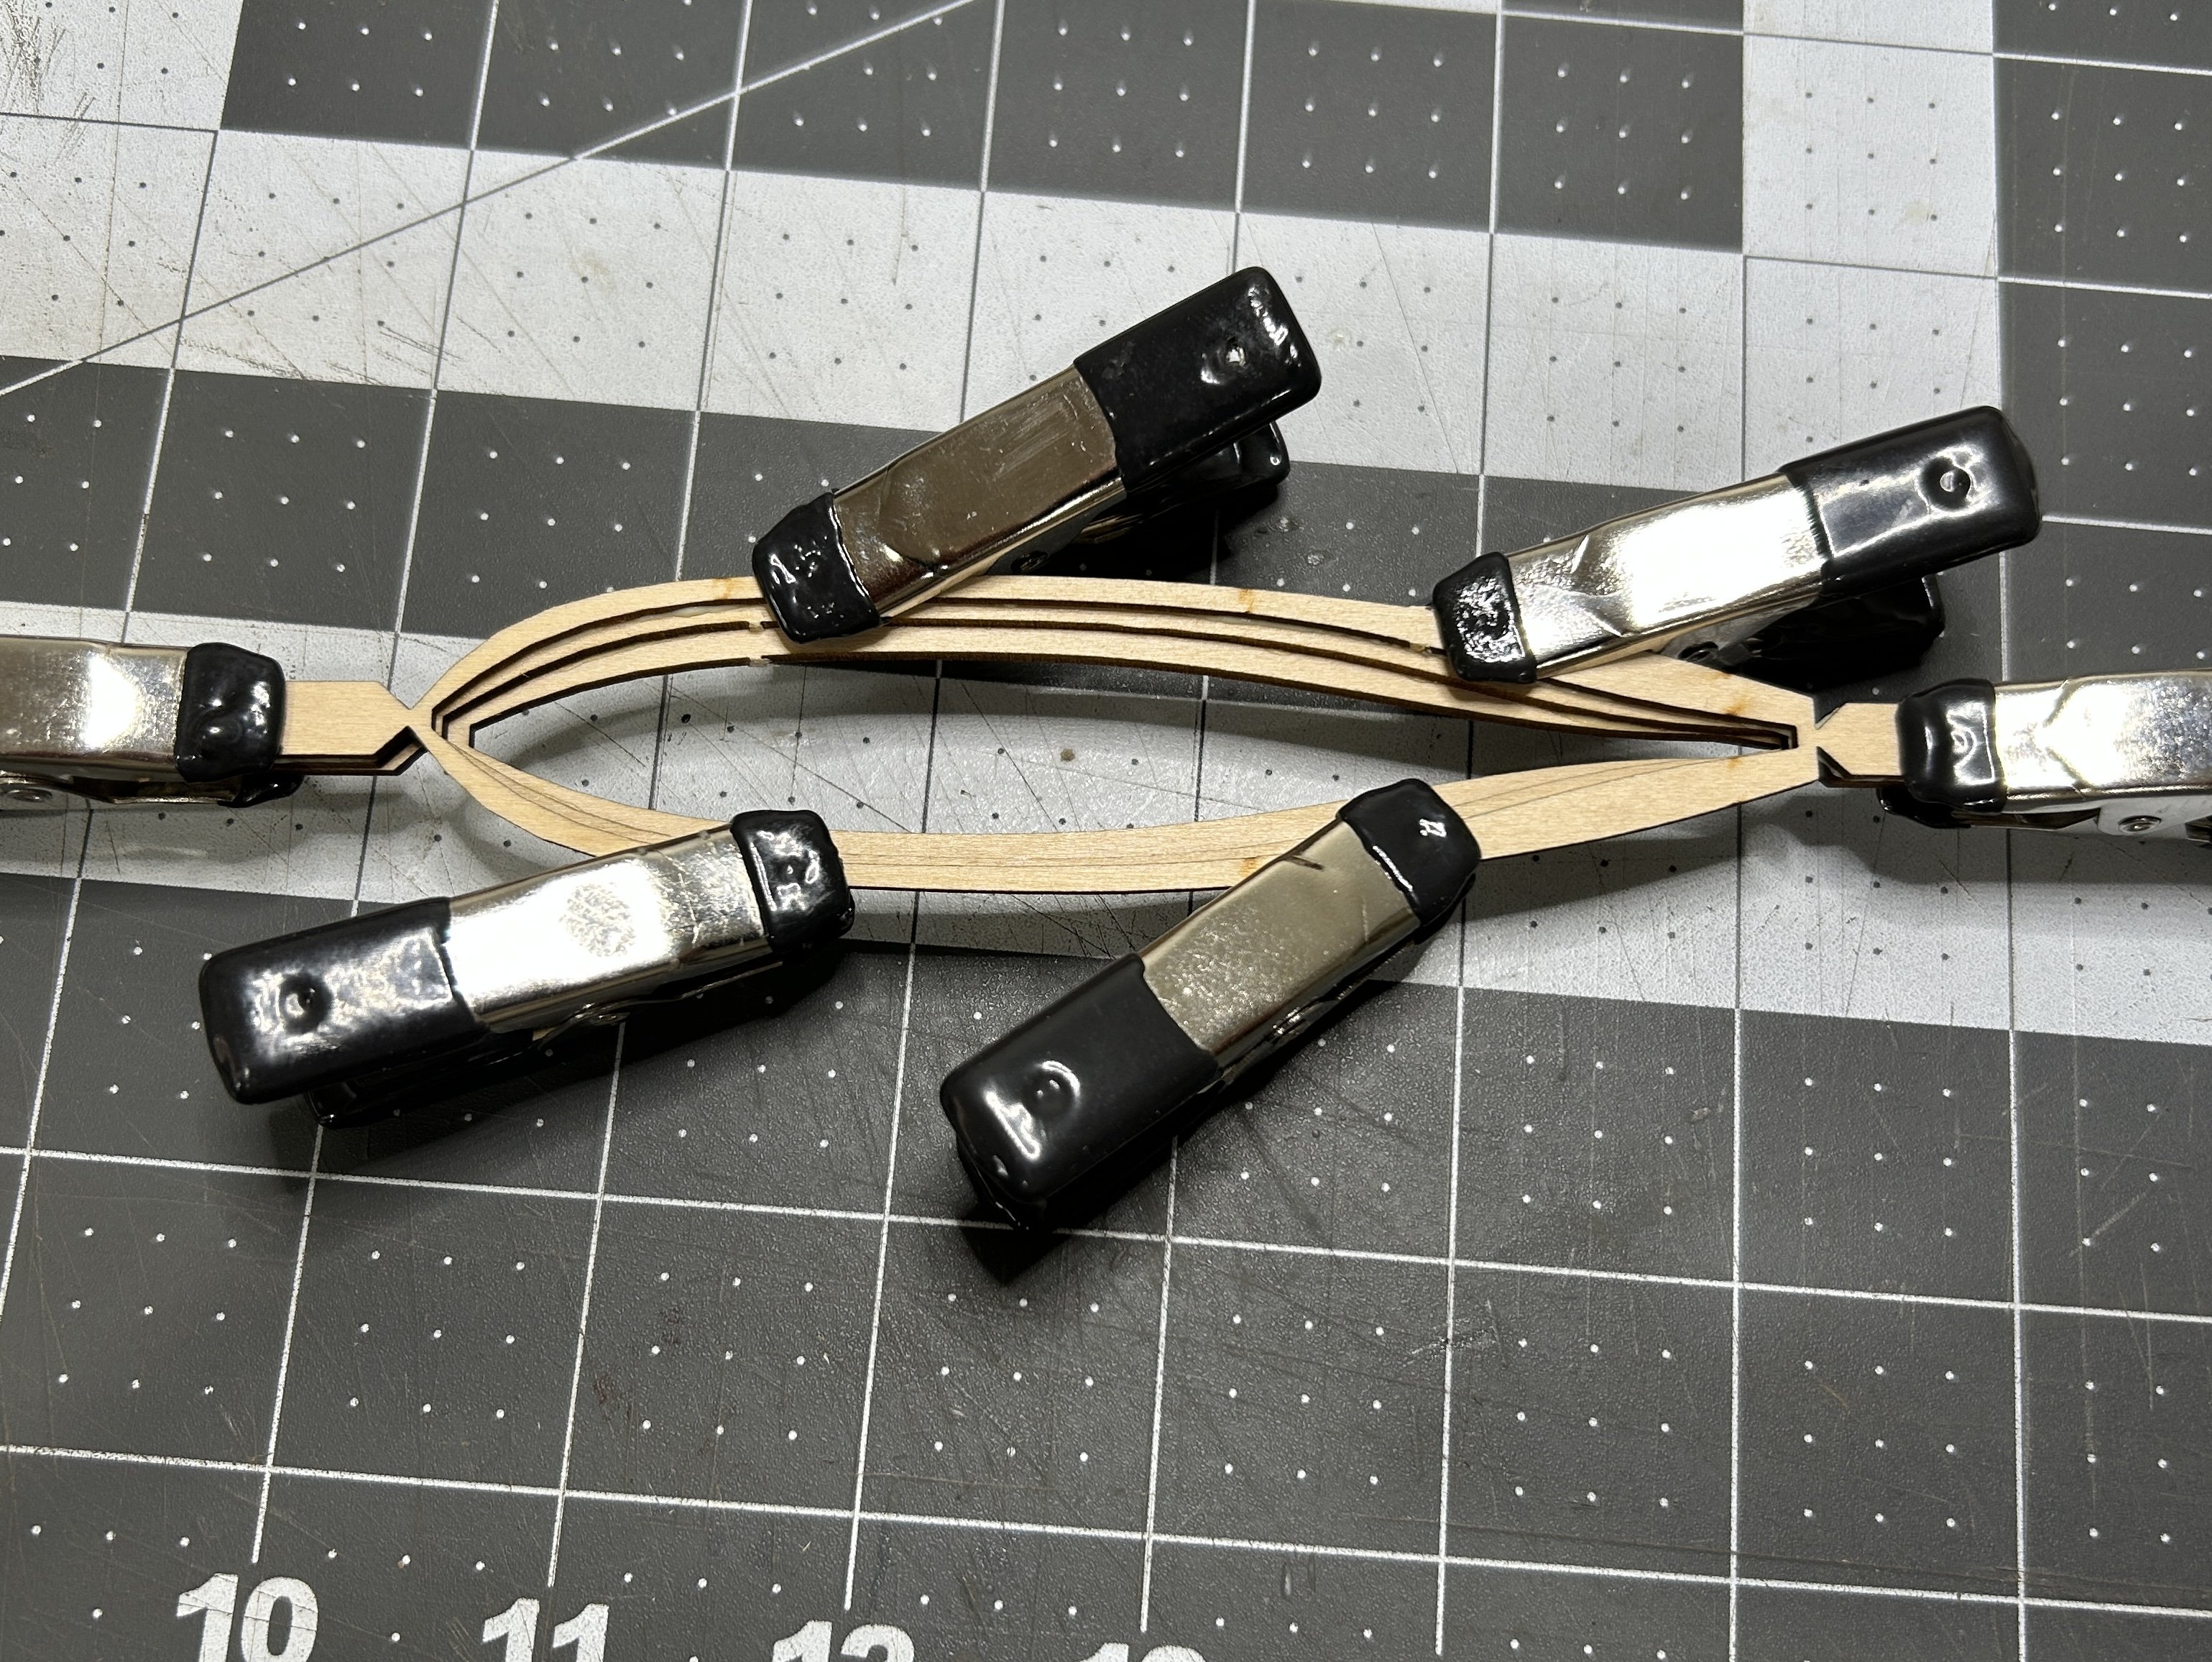
I have the bulkheads faired and have started to add the stern framing. I am very nervous about how fragile the stern framing will be until the the upper planking is complete. I have added the two innermost stern frames. While I was fairing the bulkheads I also did some more work on the boat. I added the floor, the bench and the thwarts. I still need to add the caprail and the rudder

-
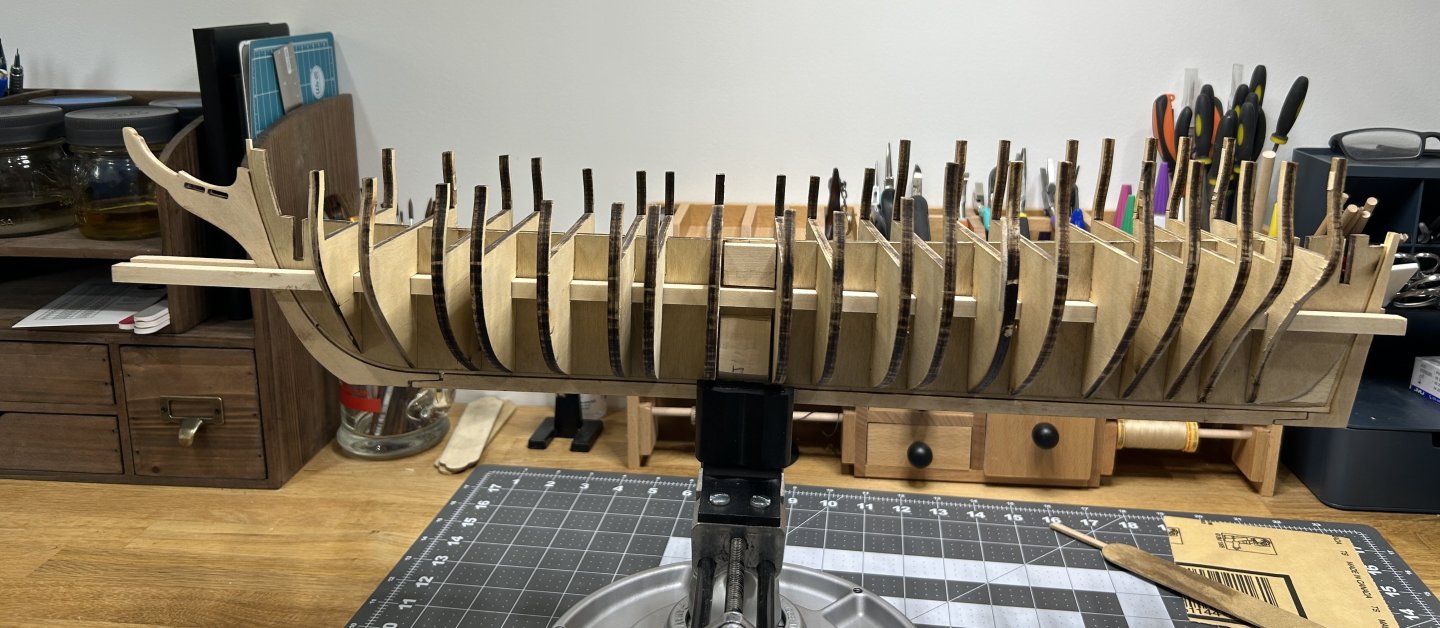
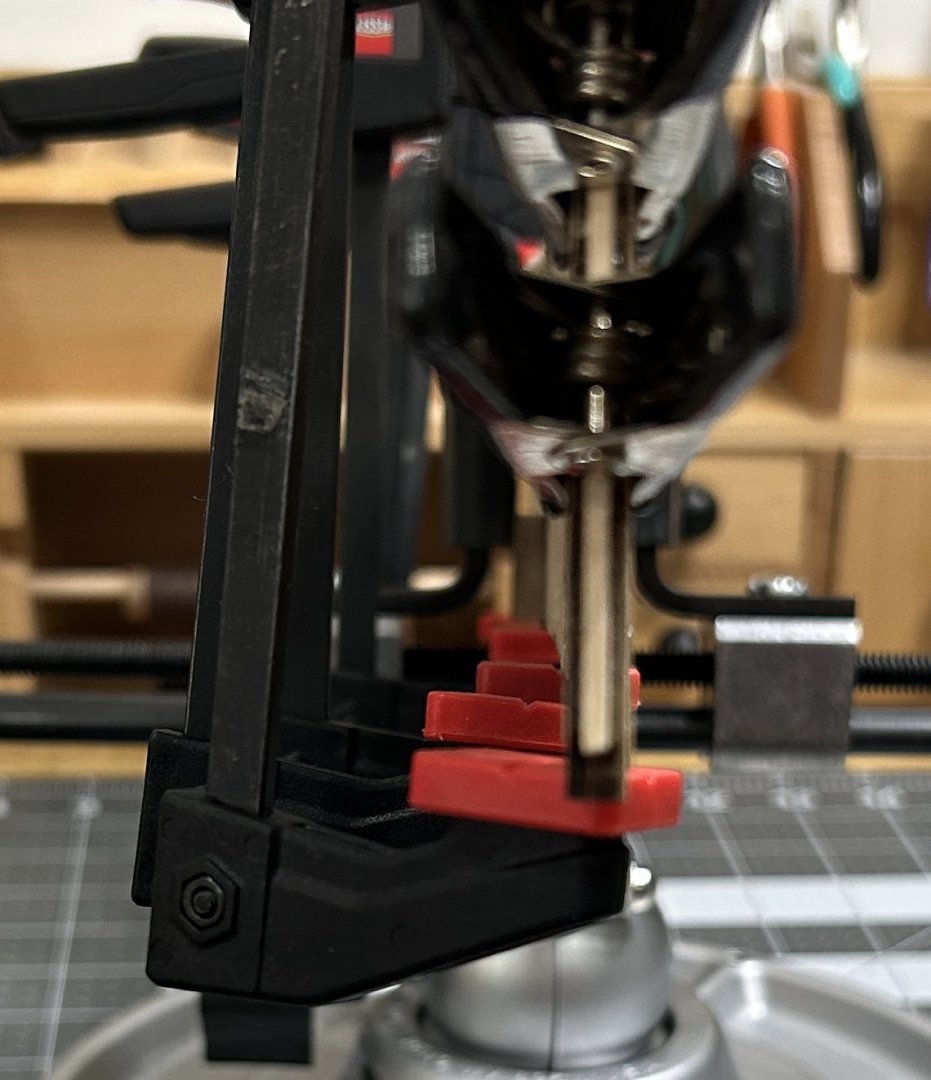
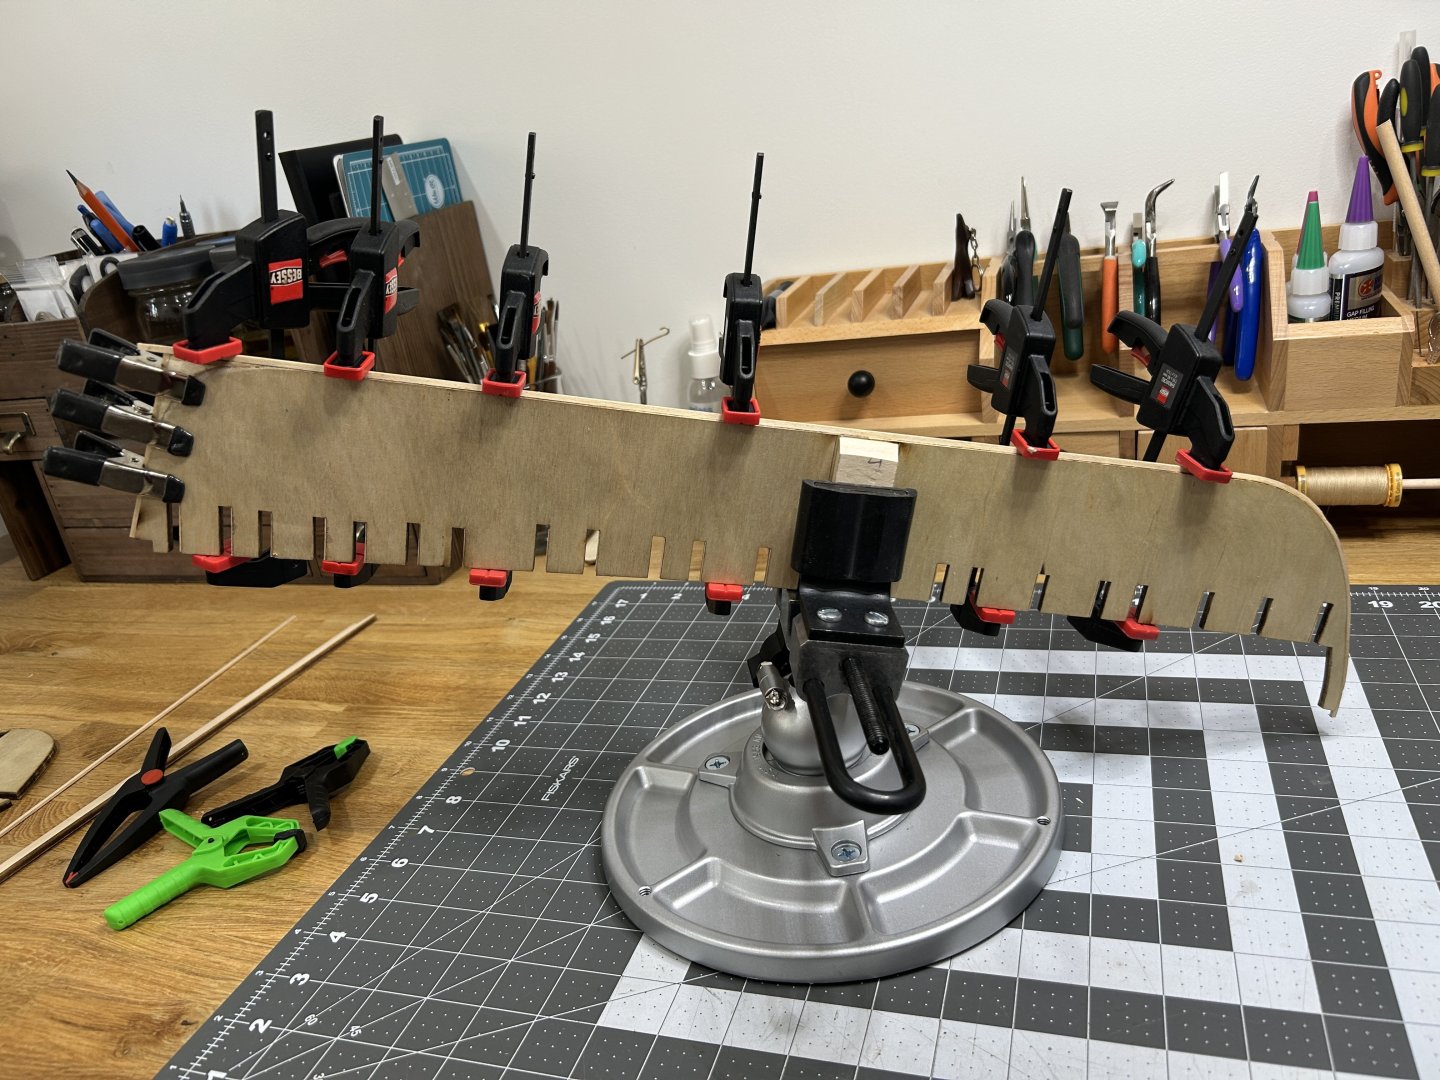
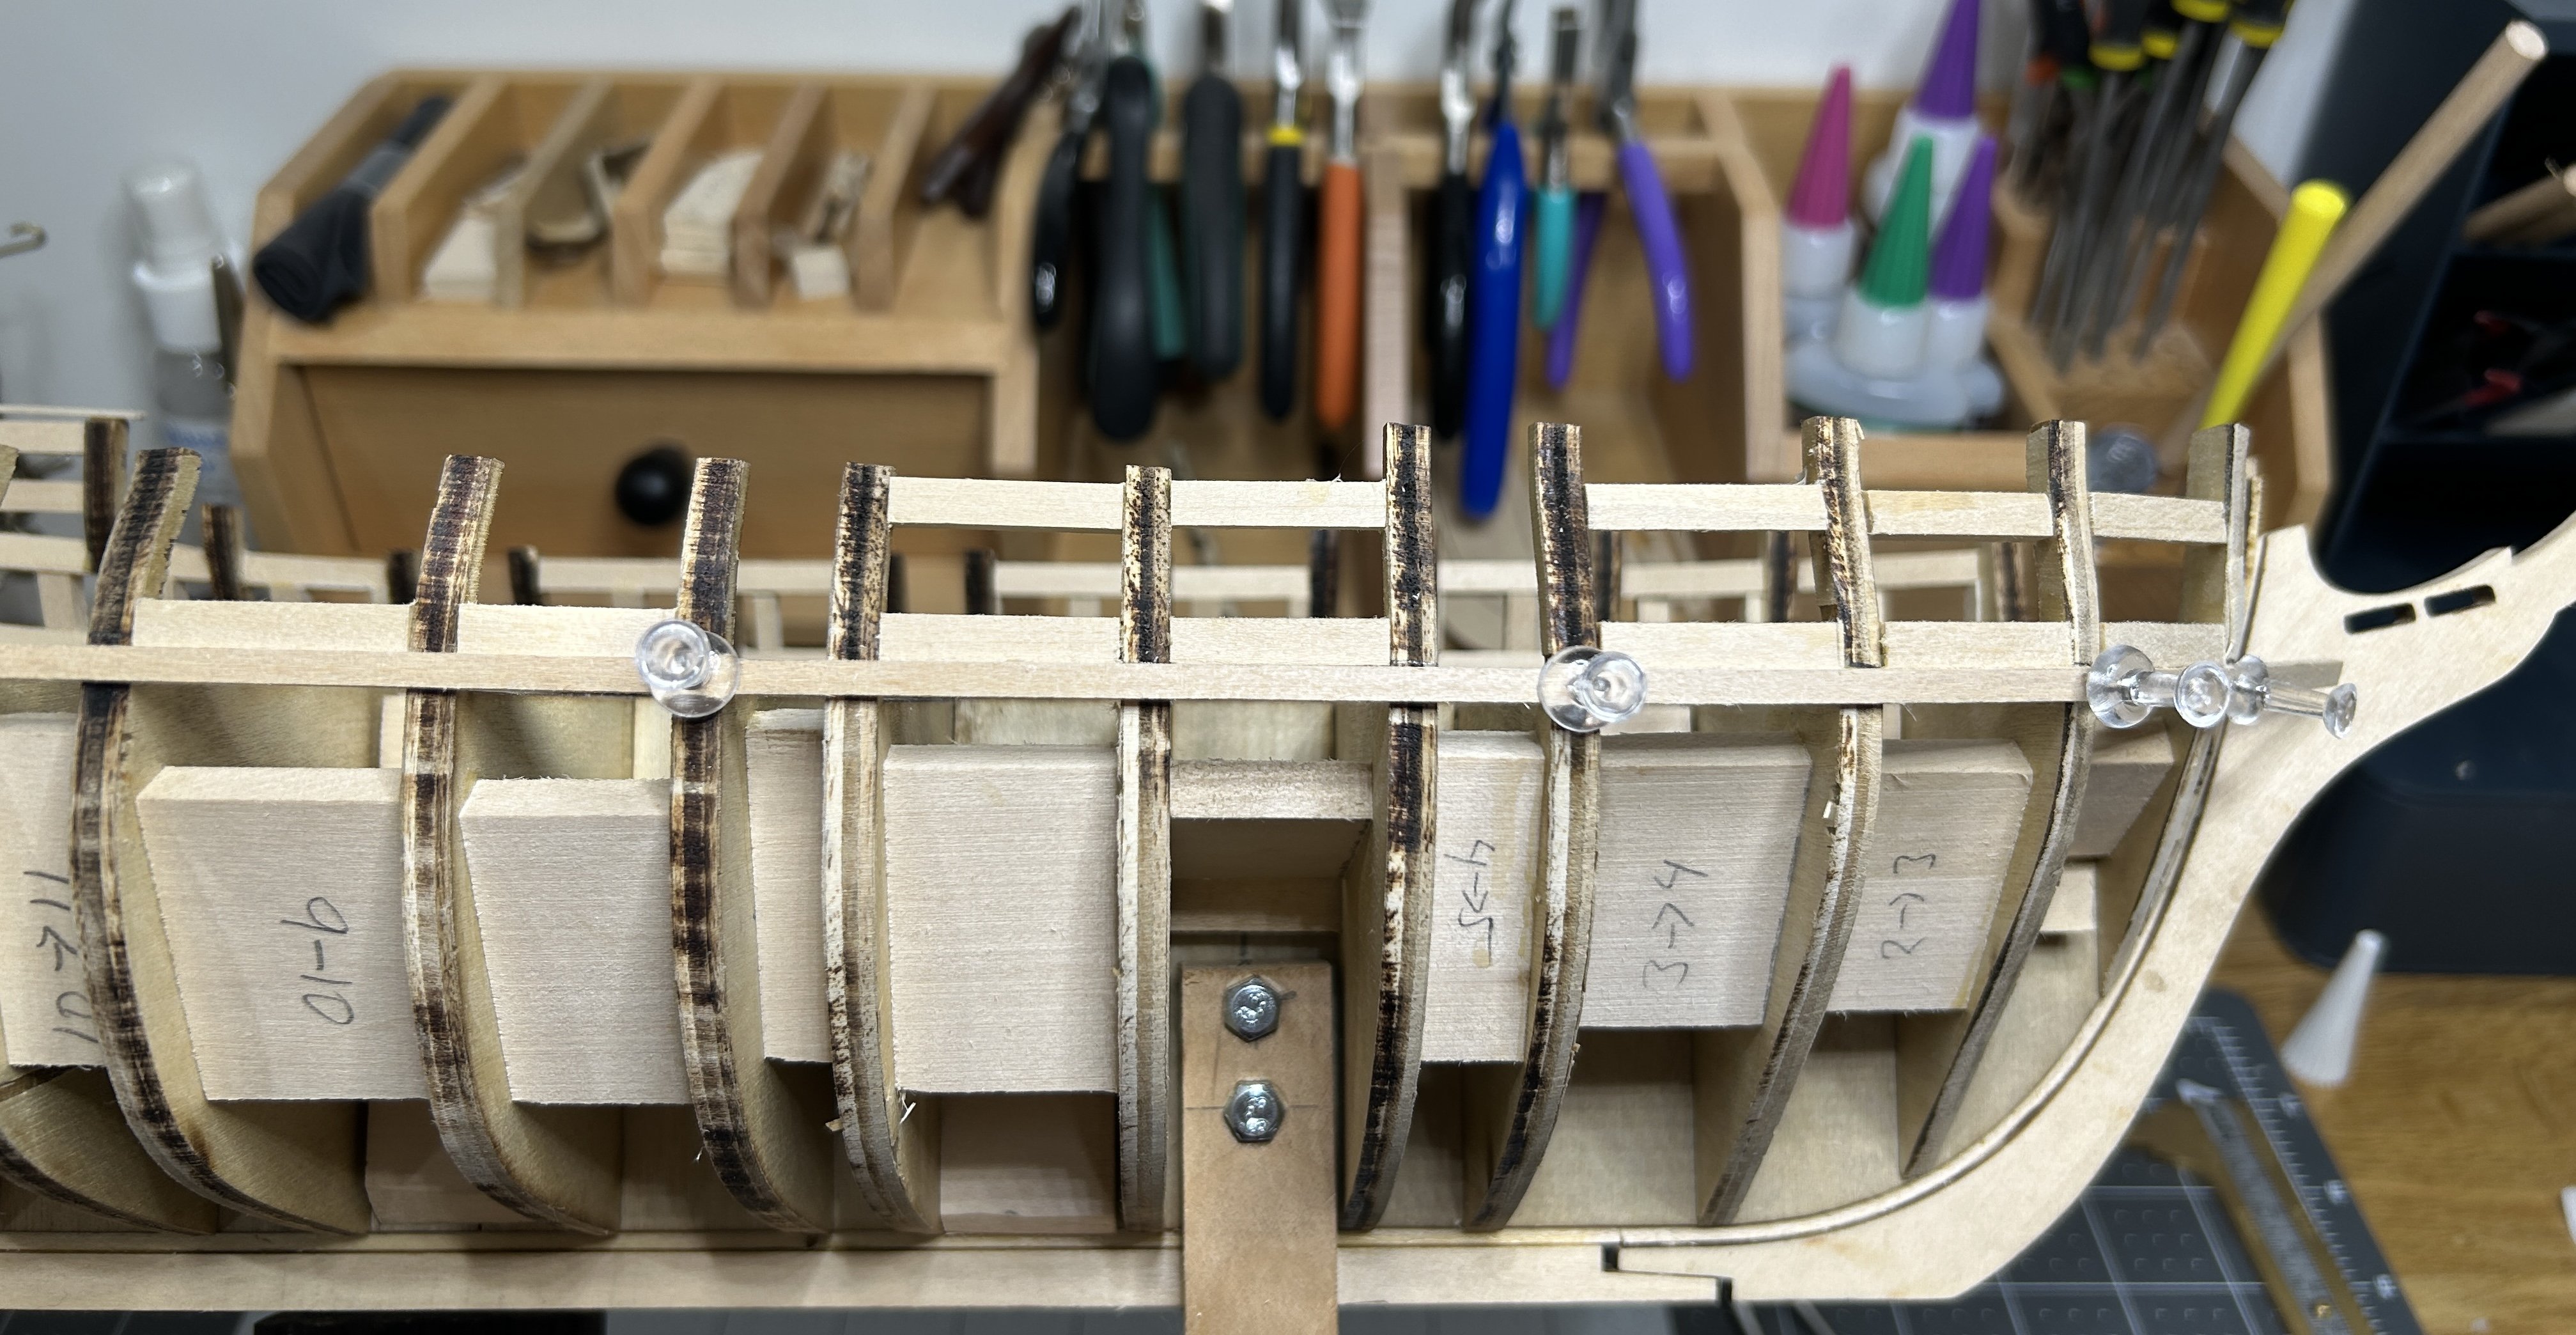
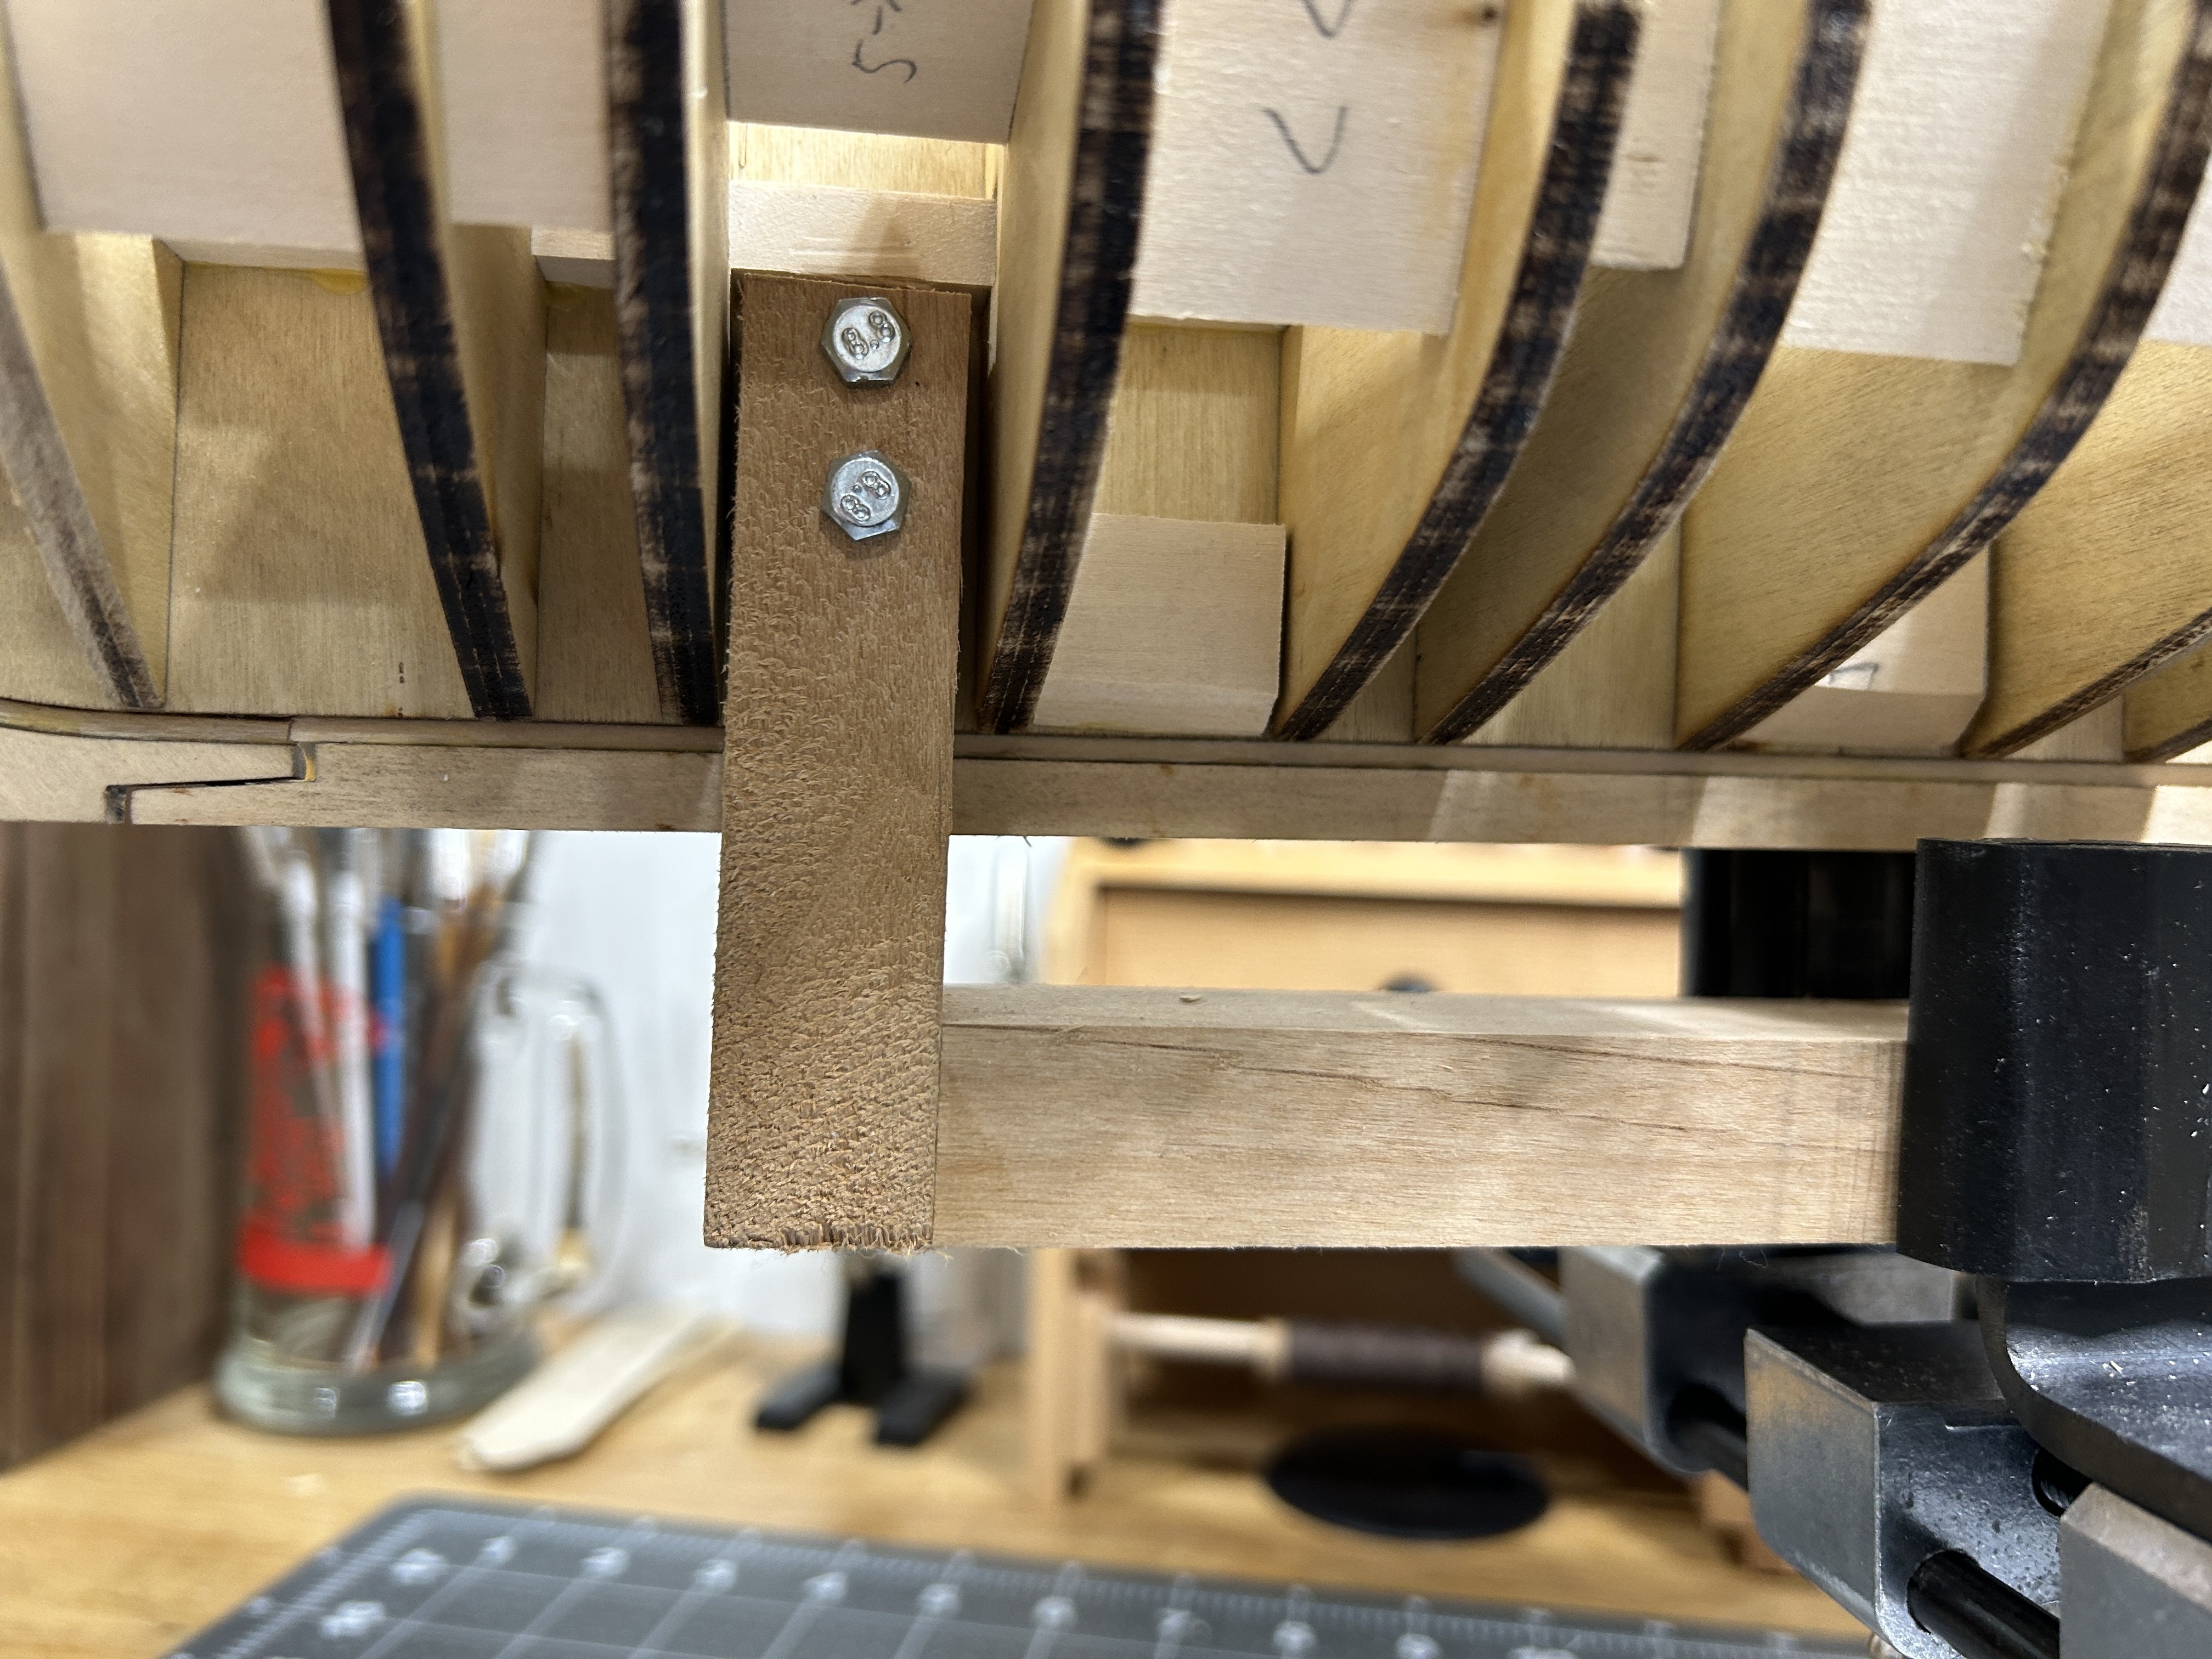
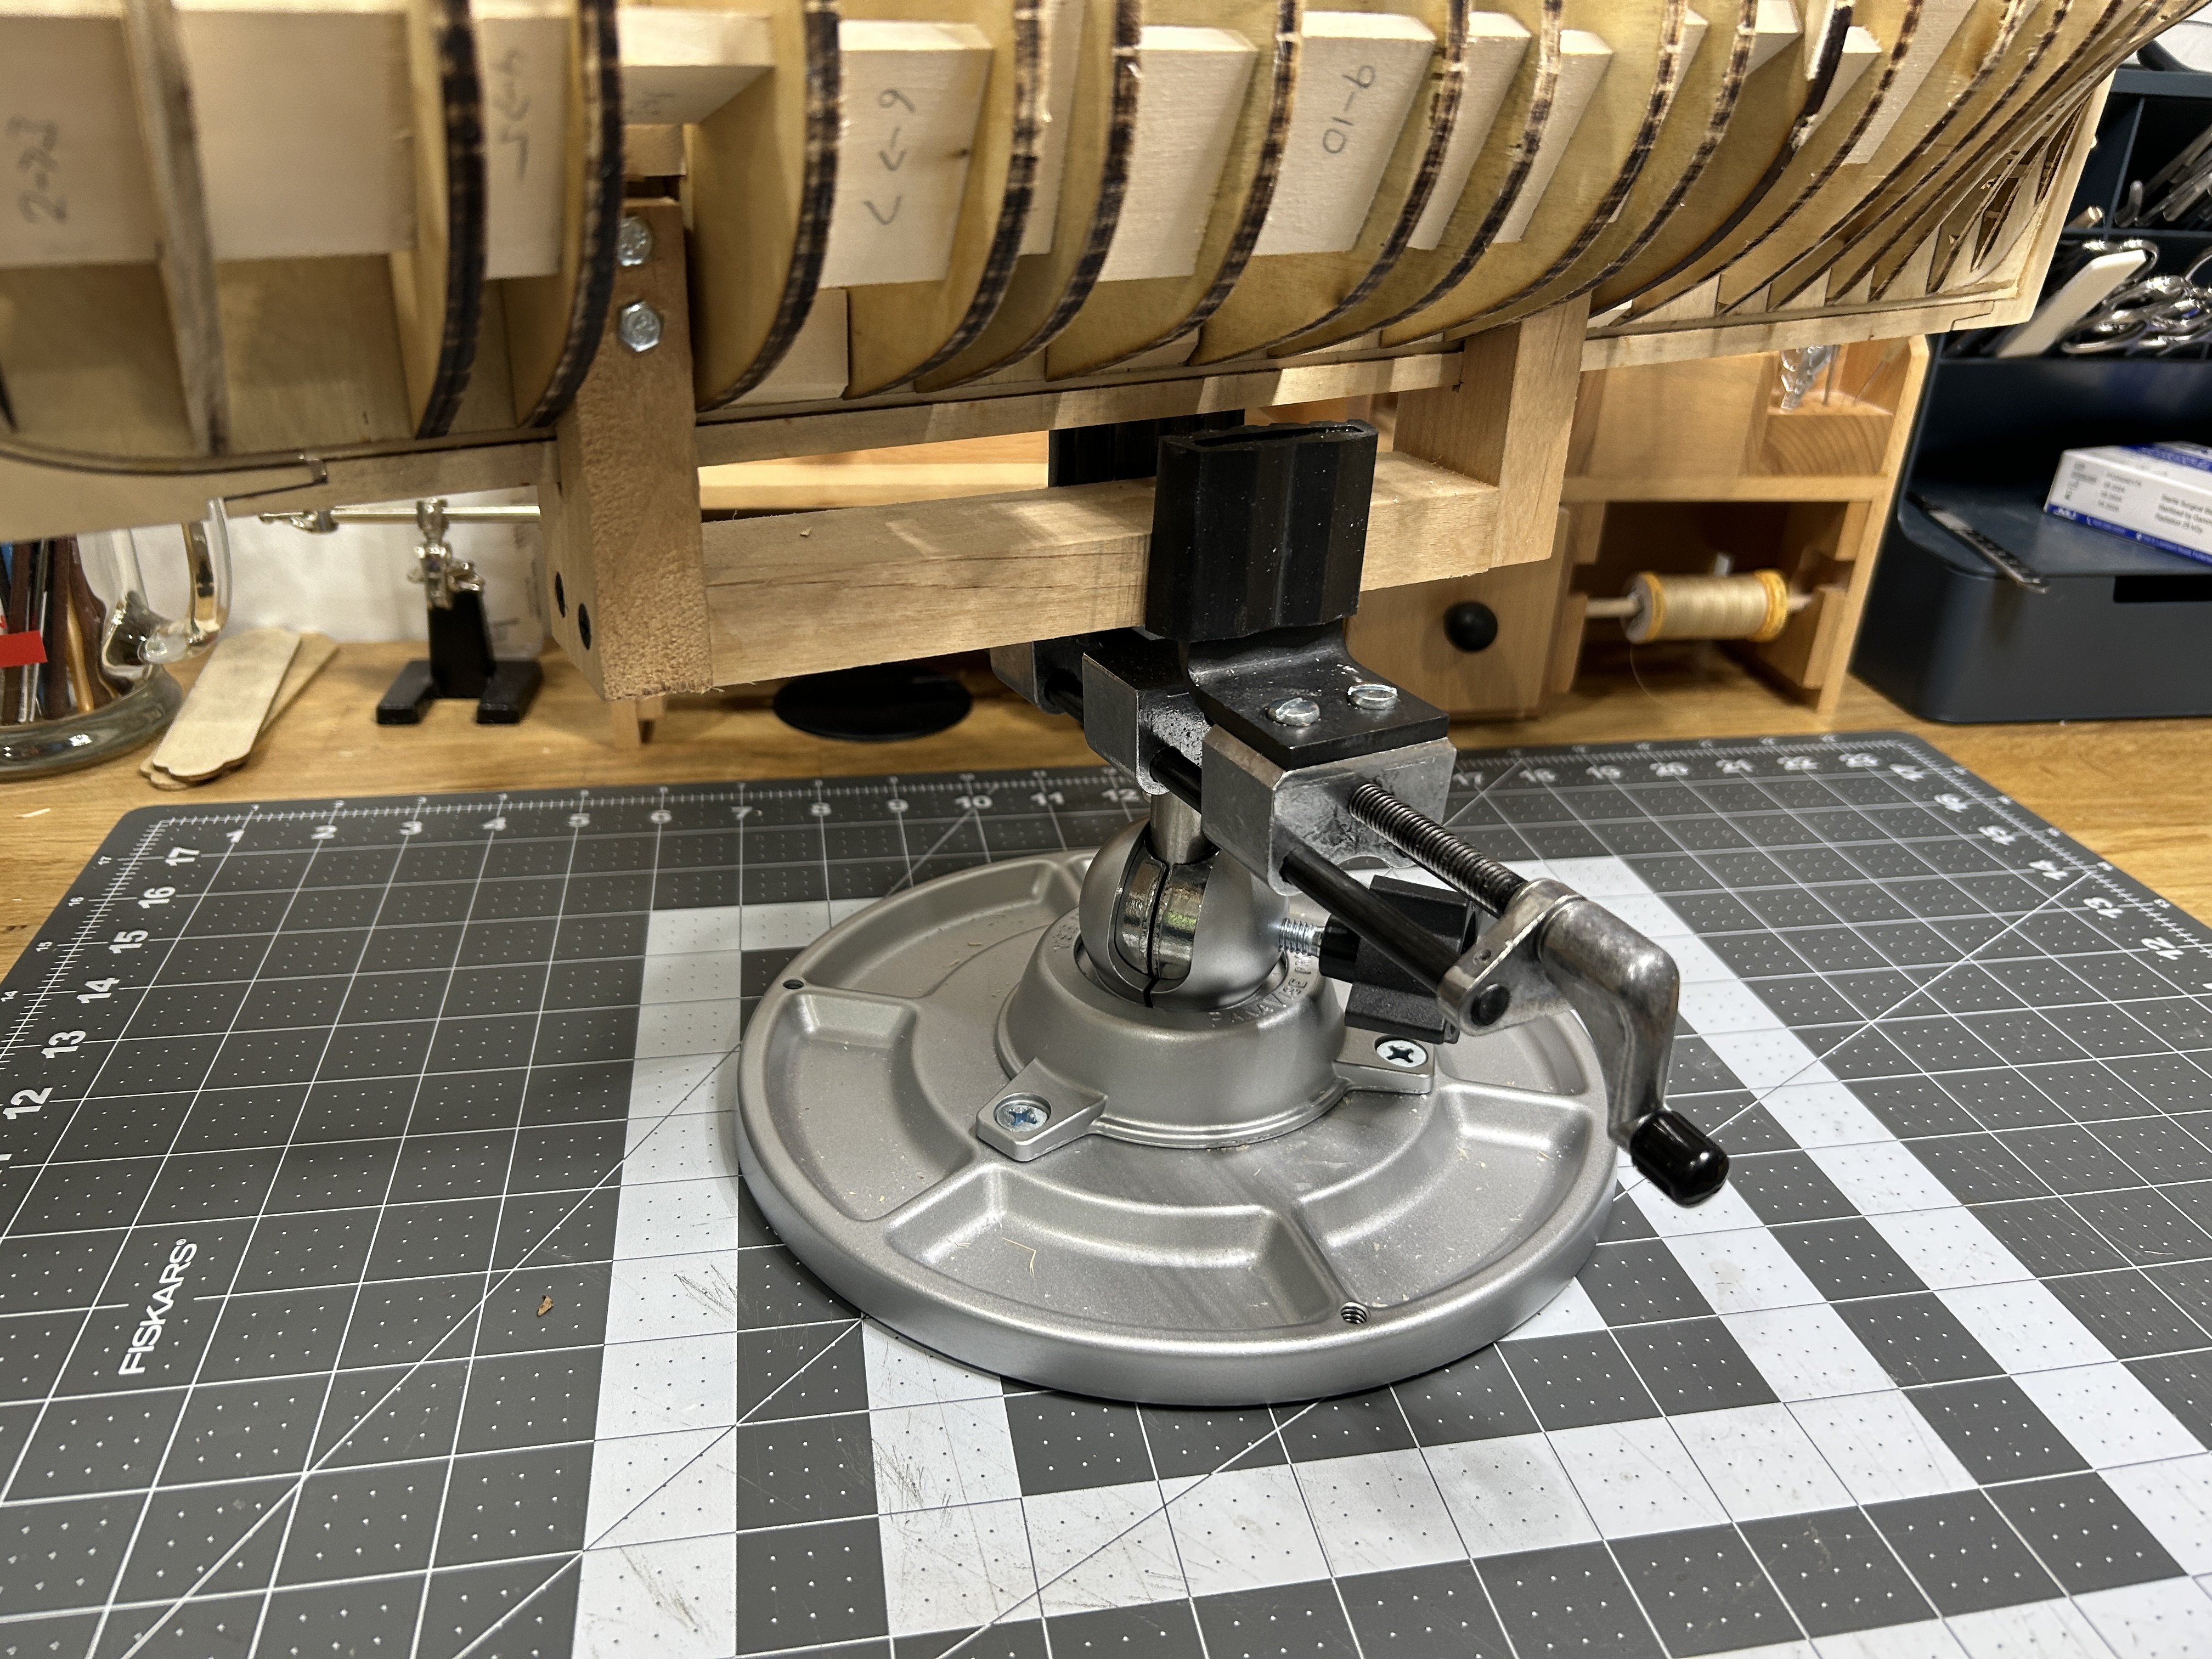
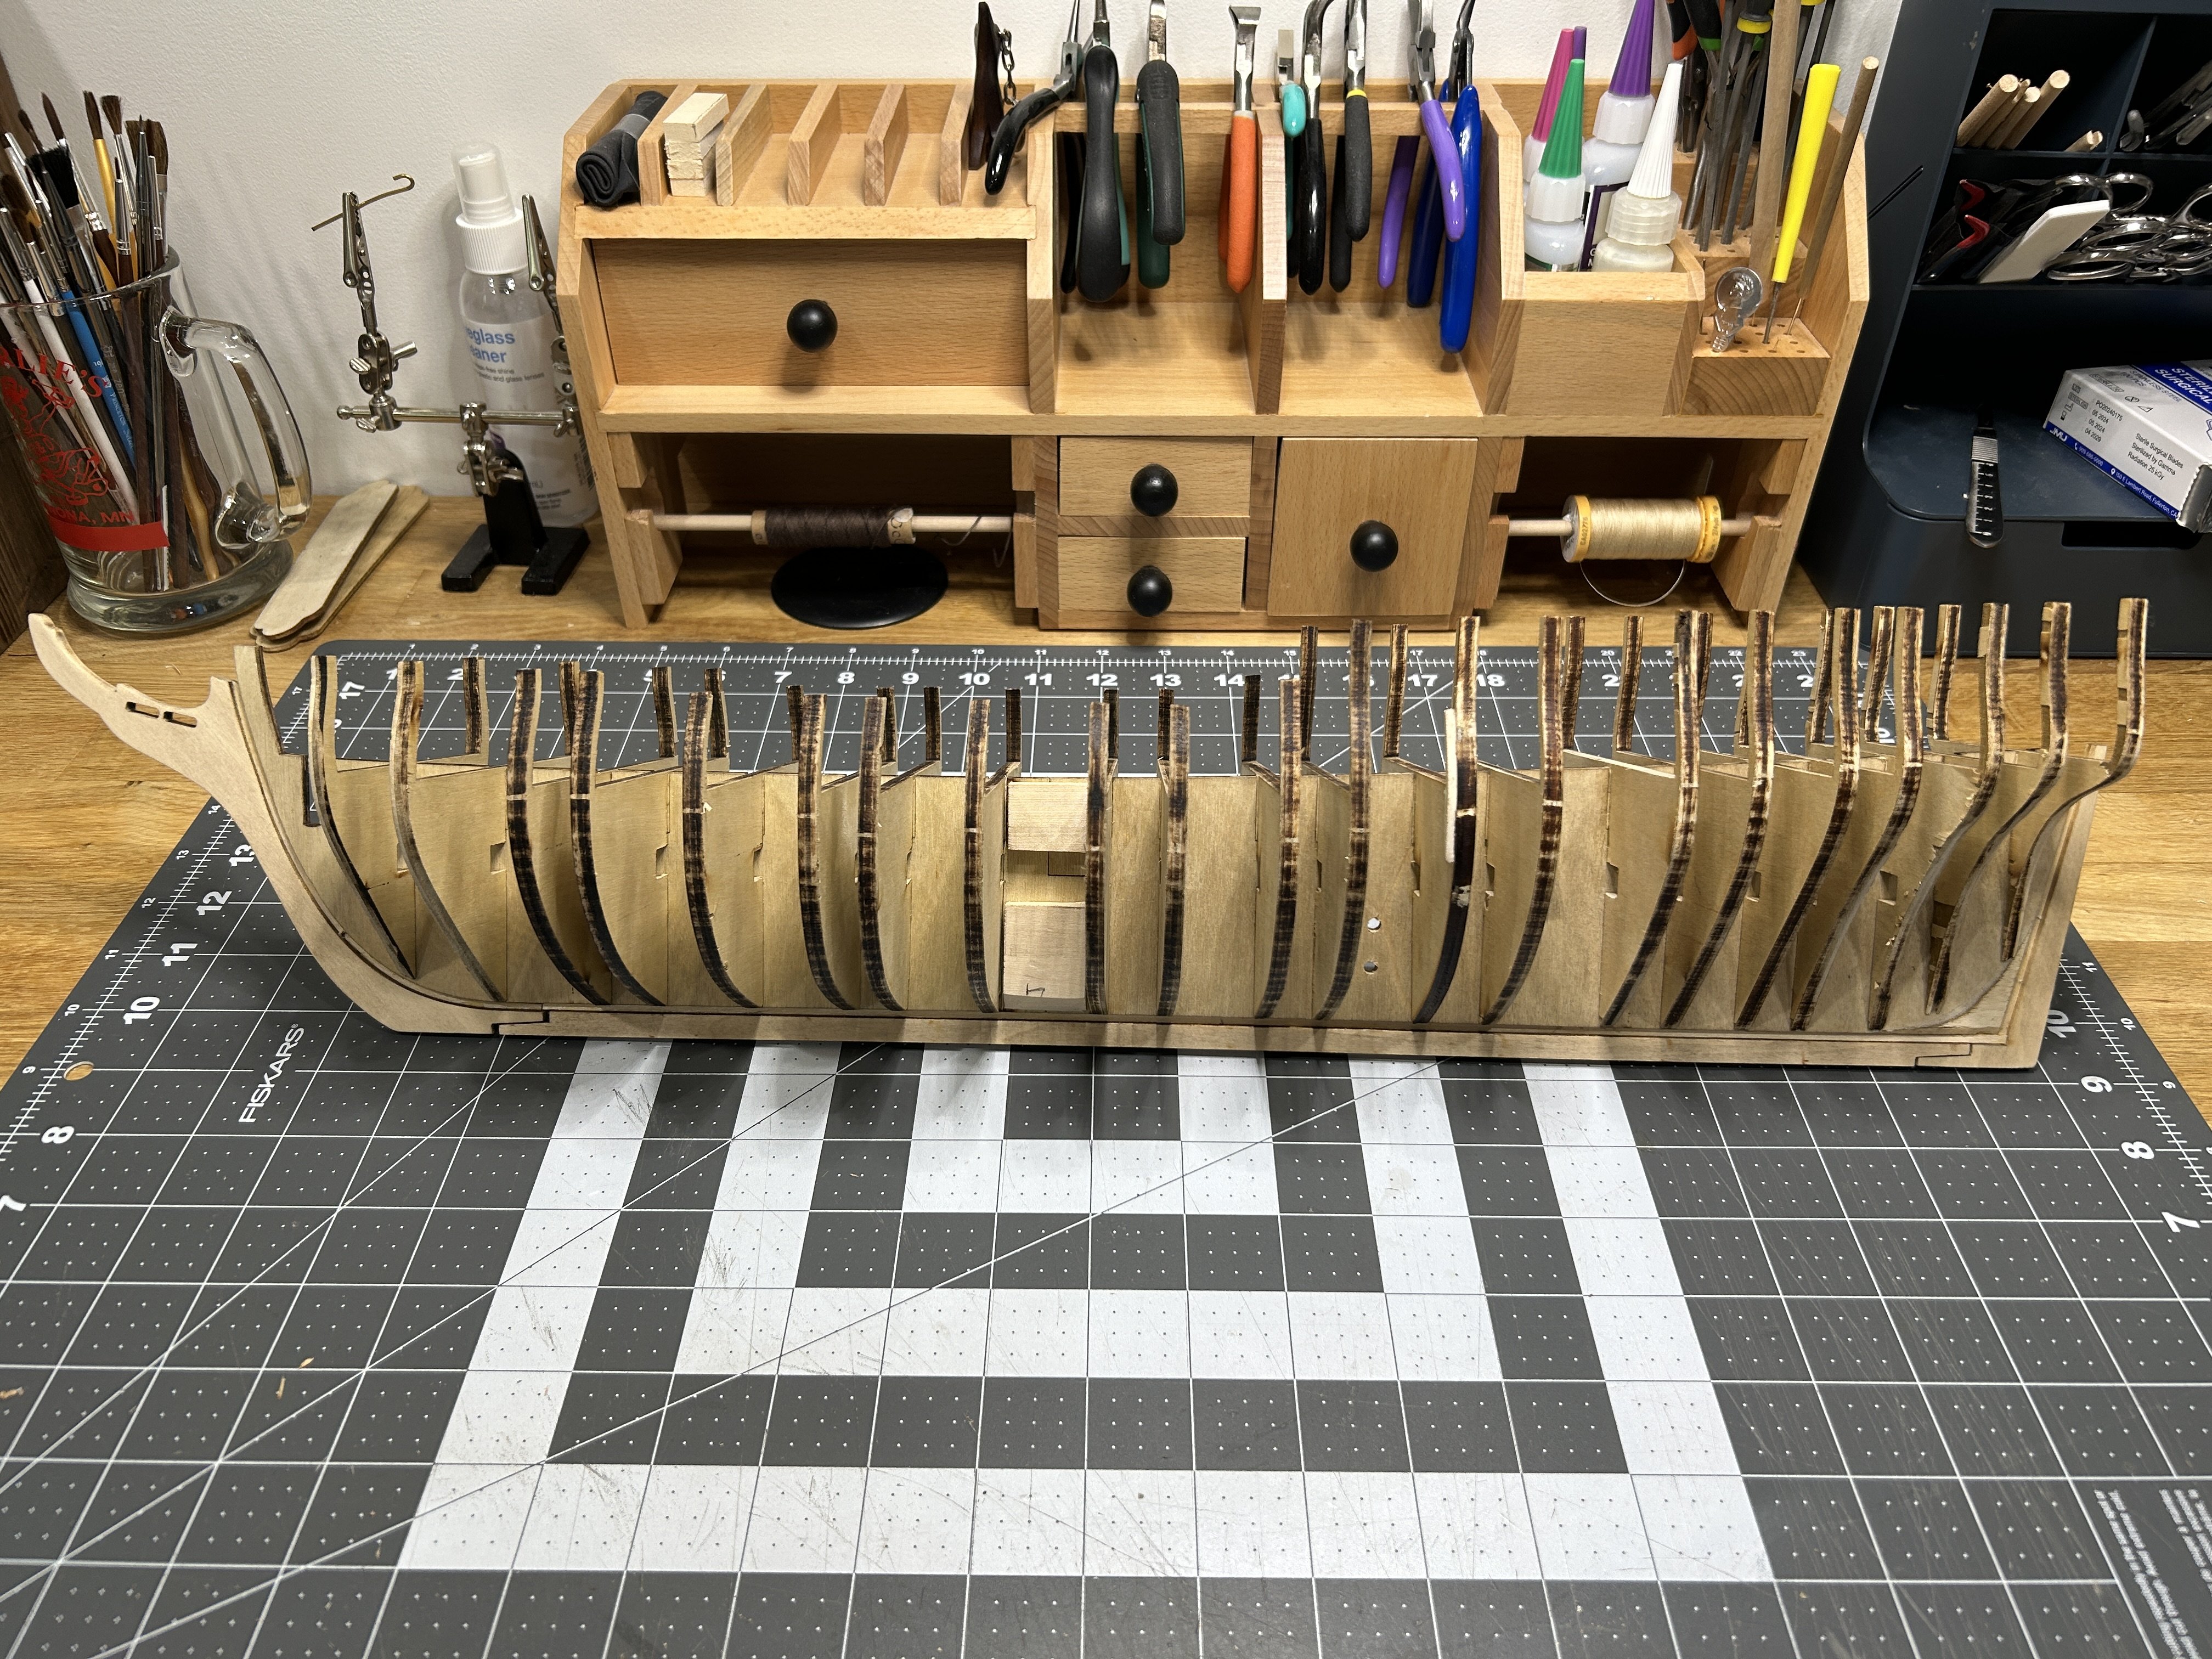
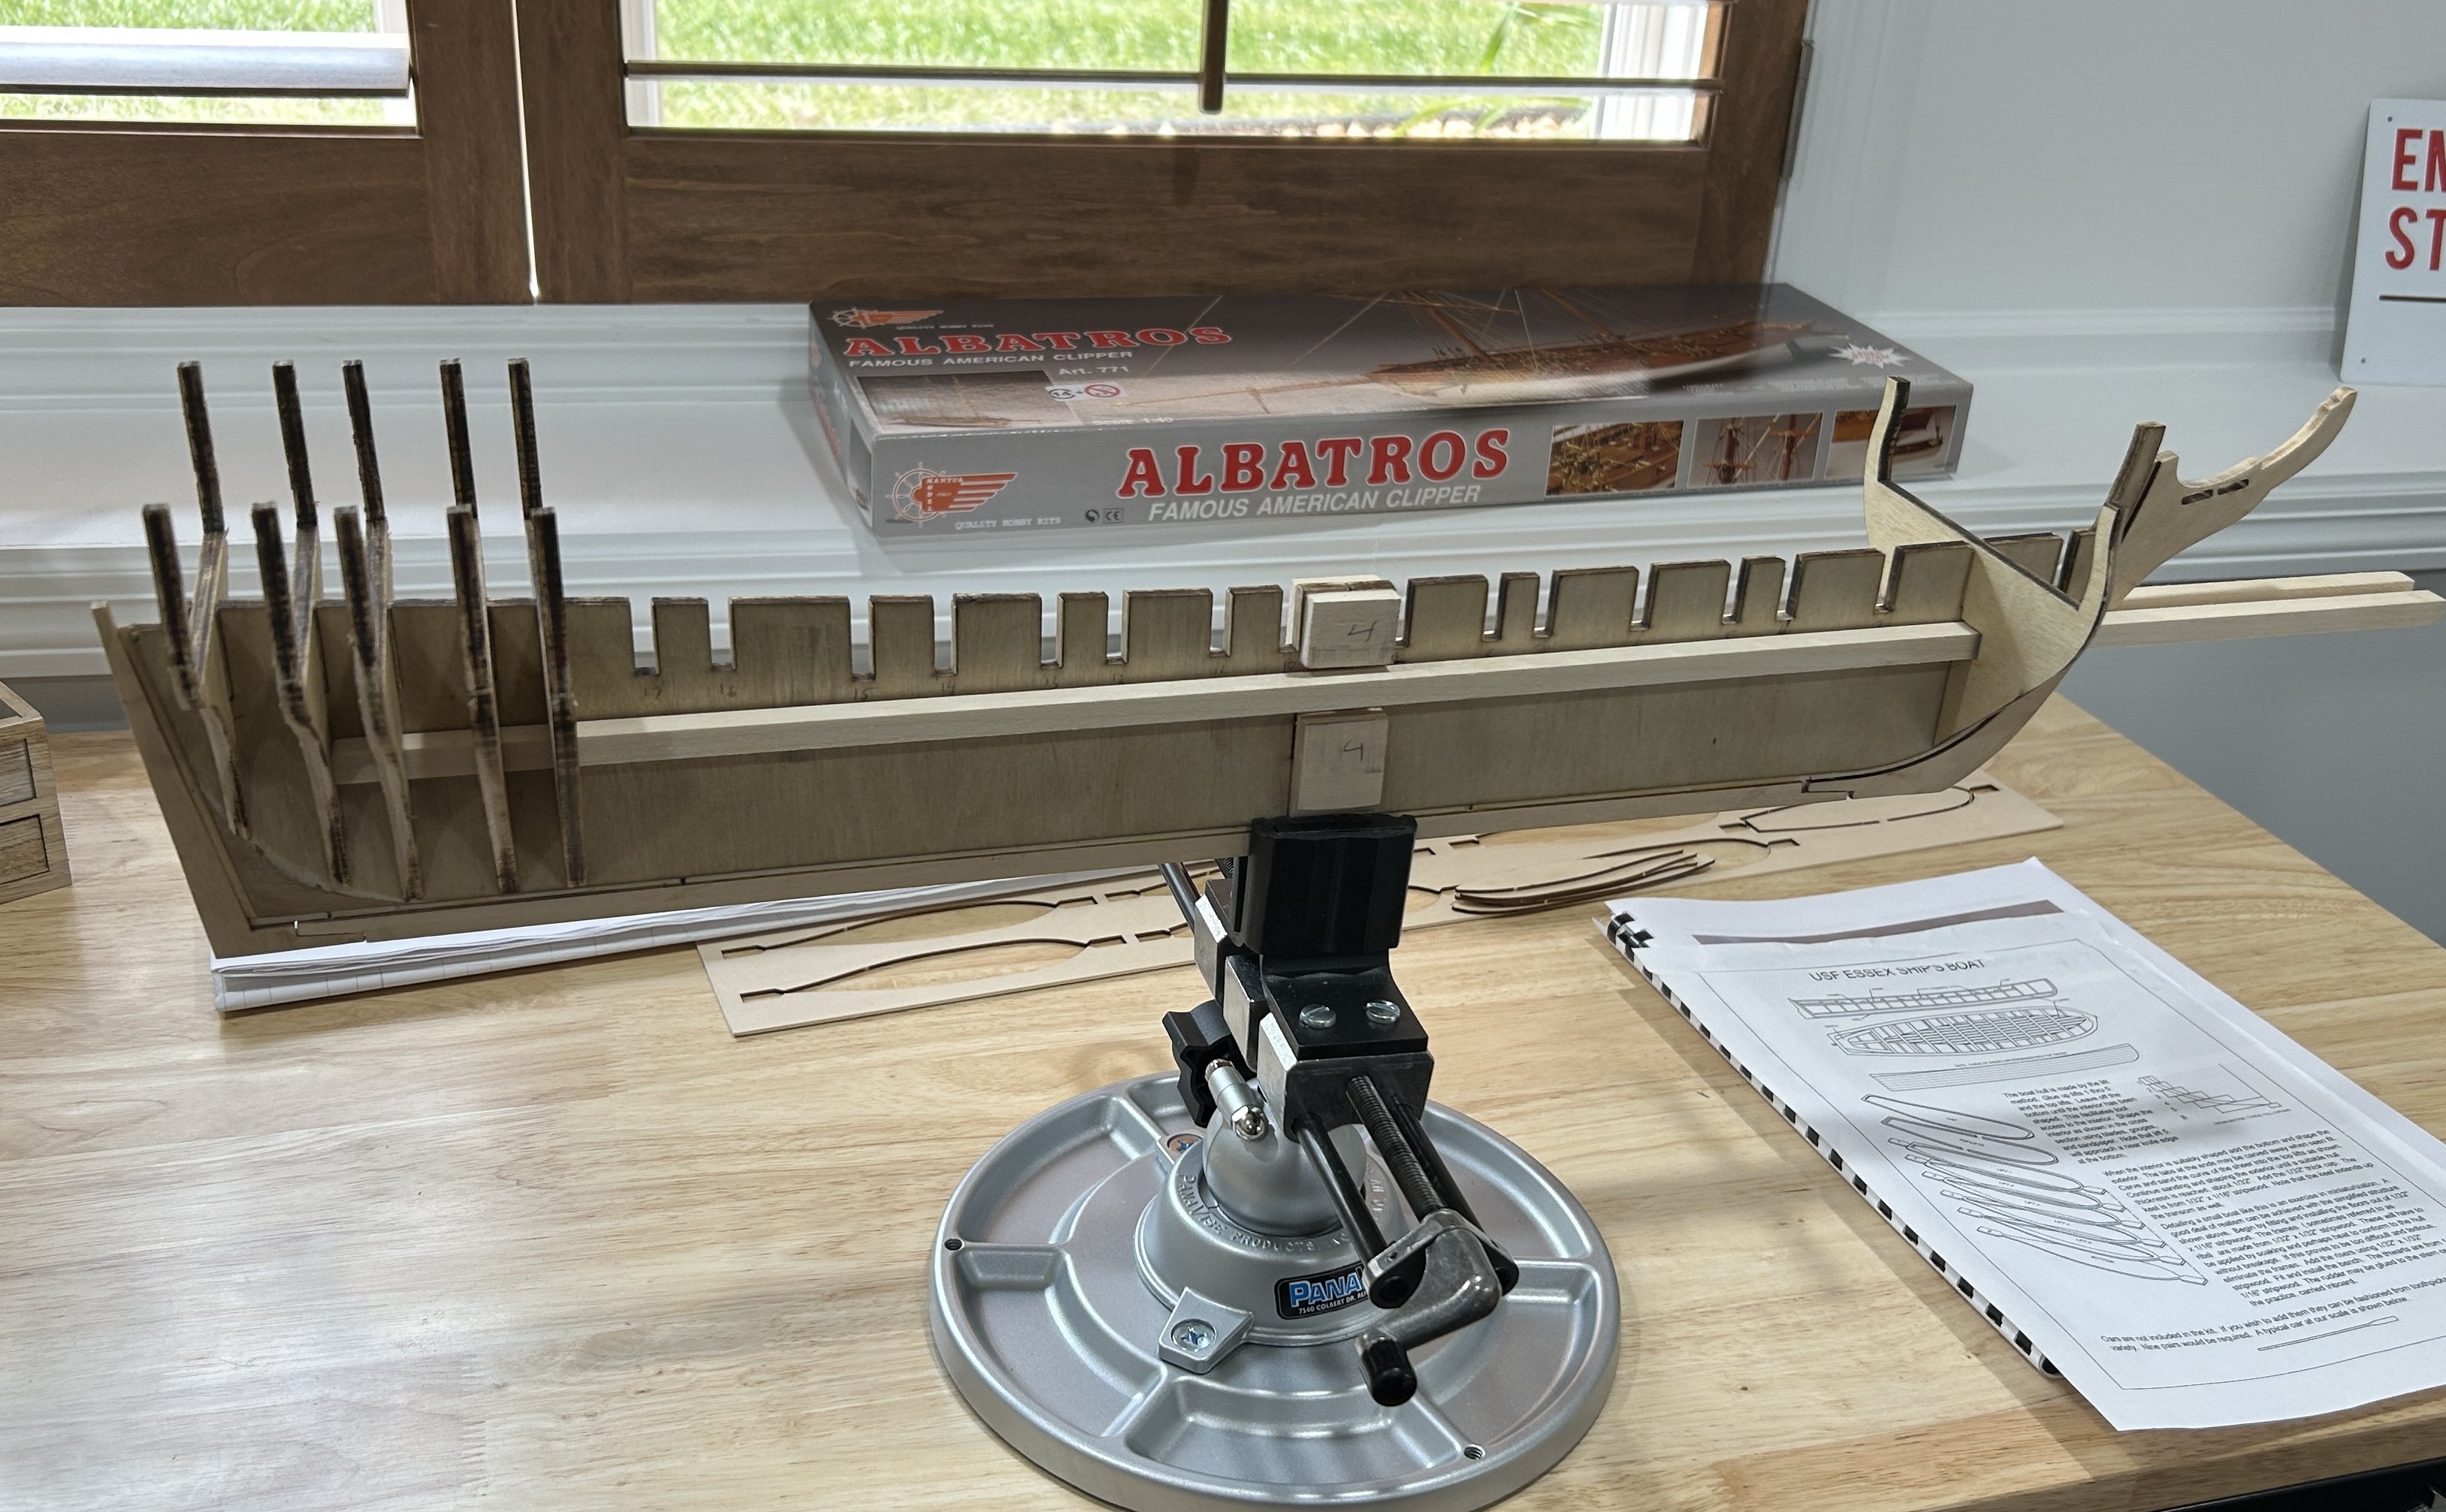
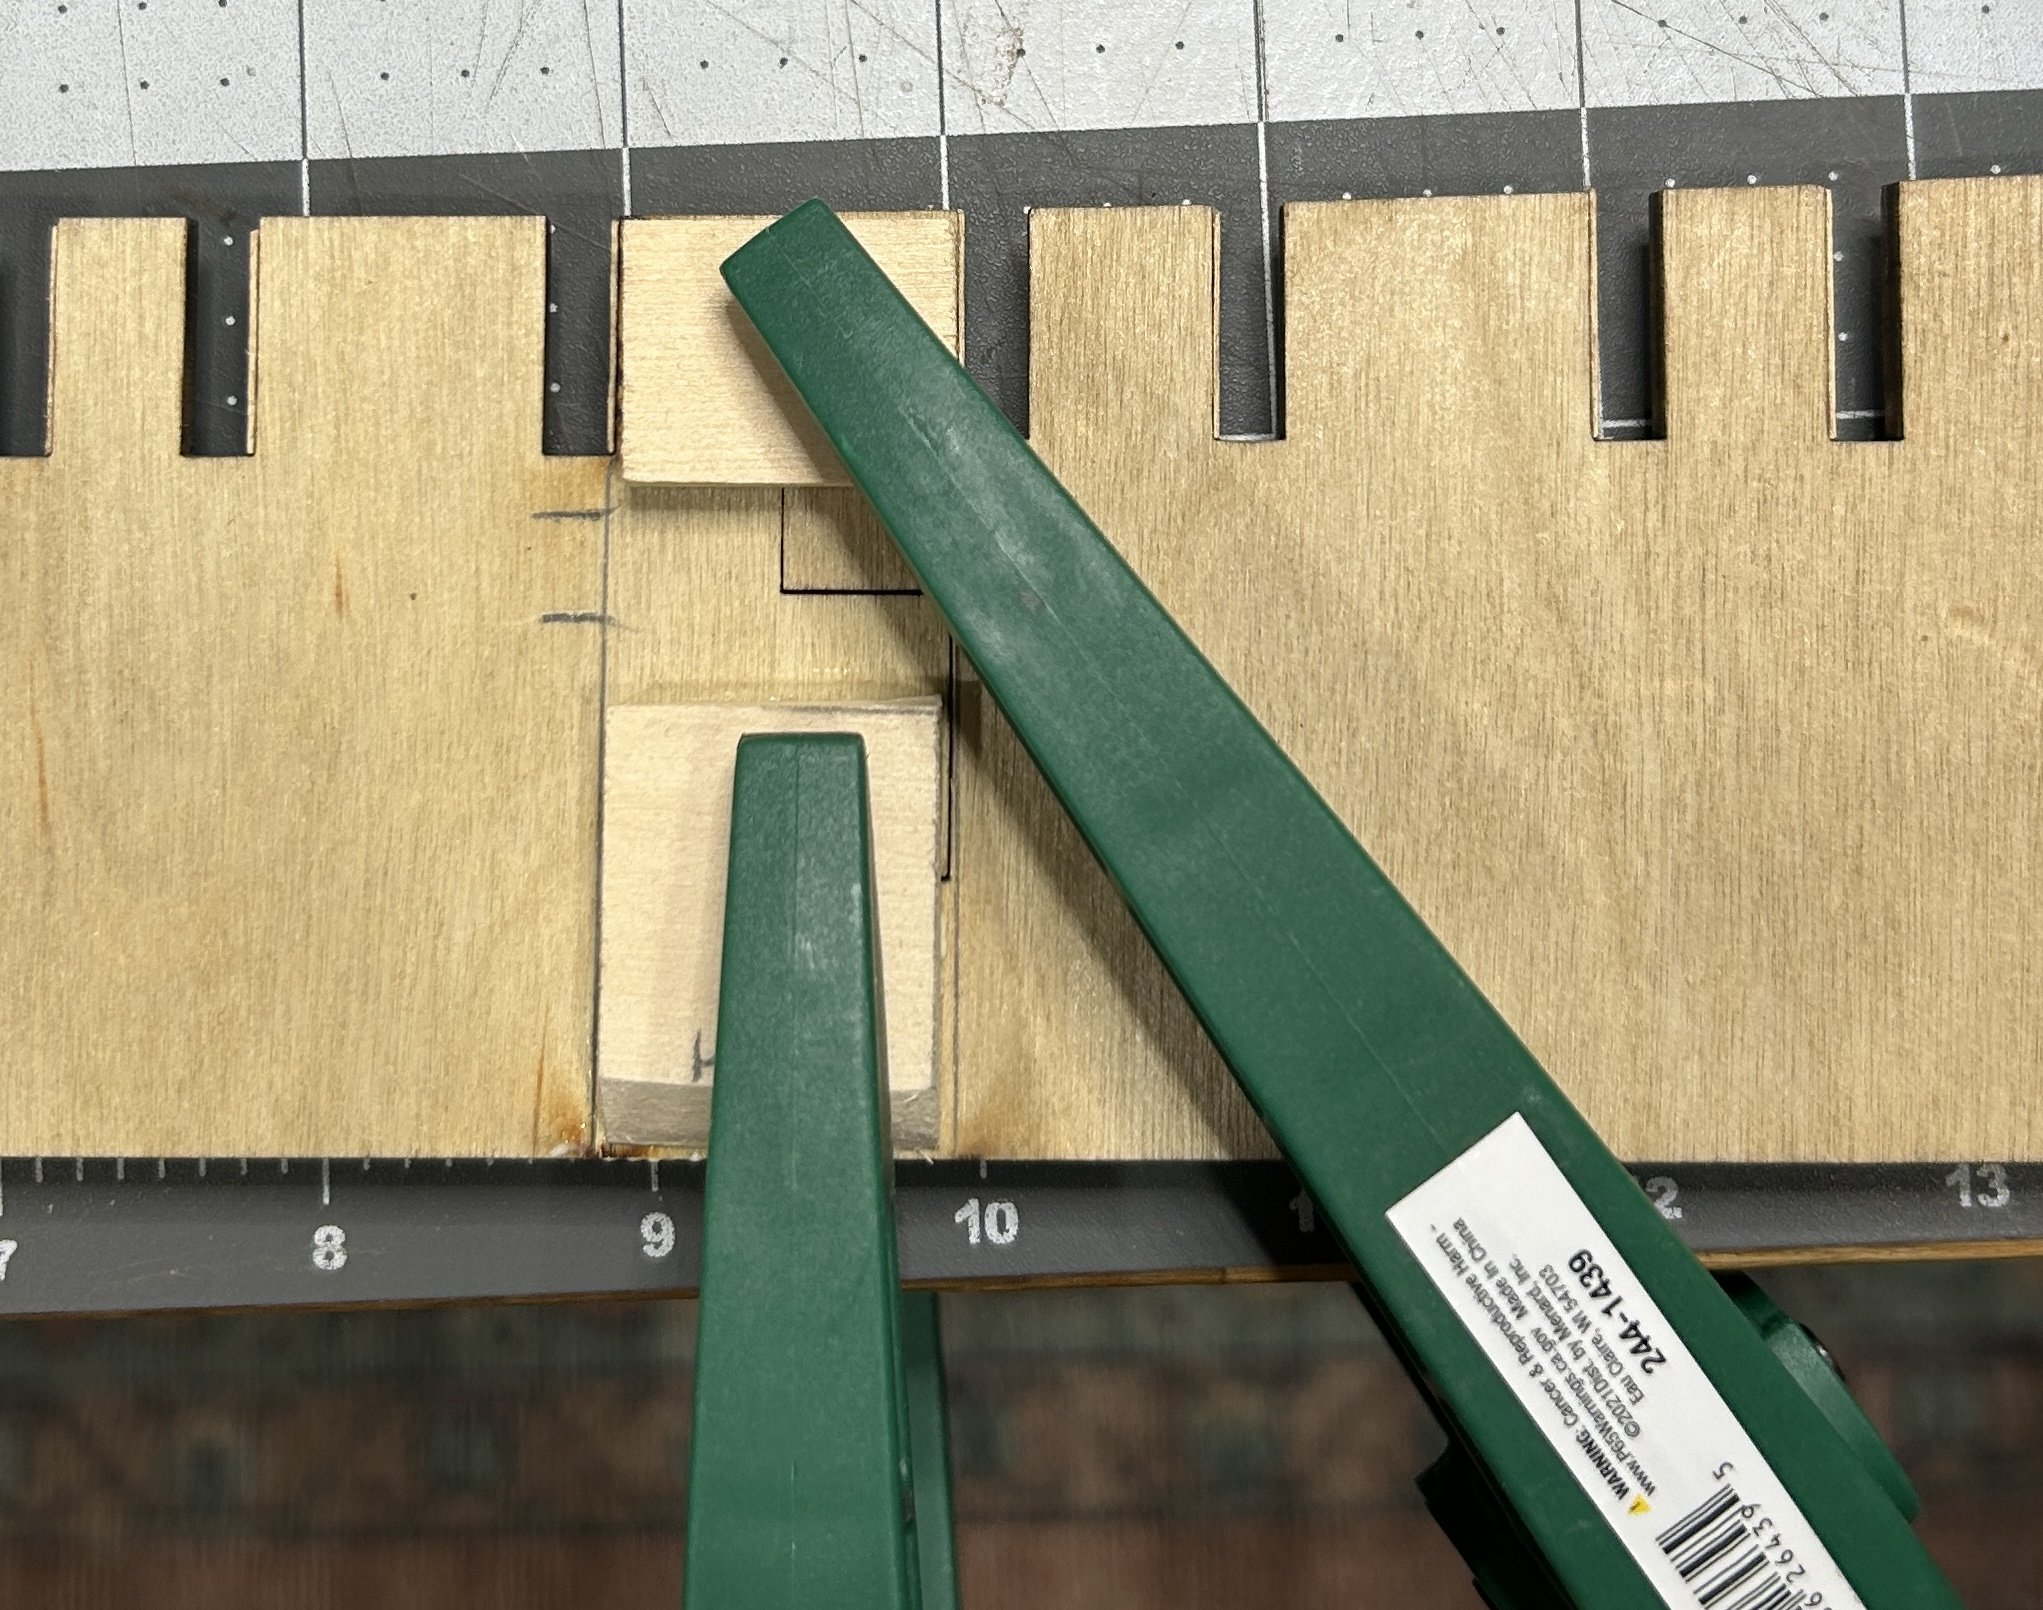
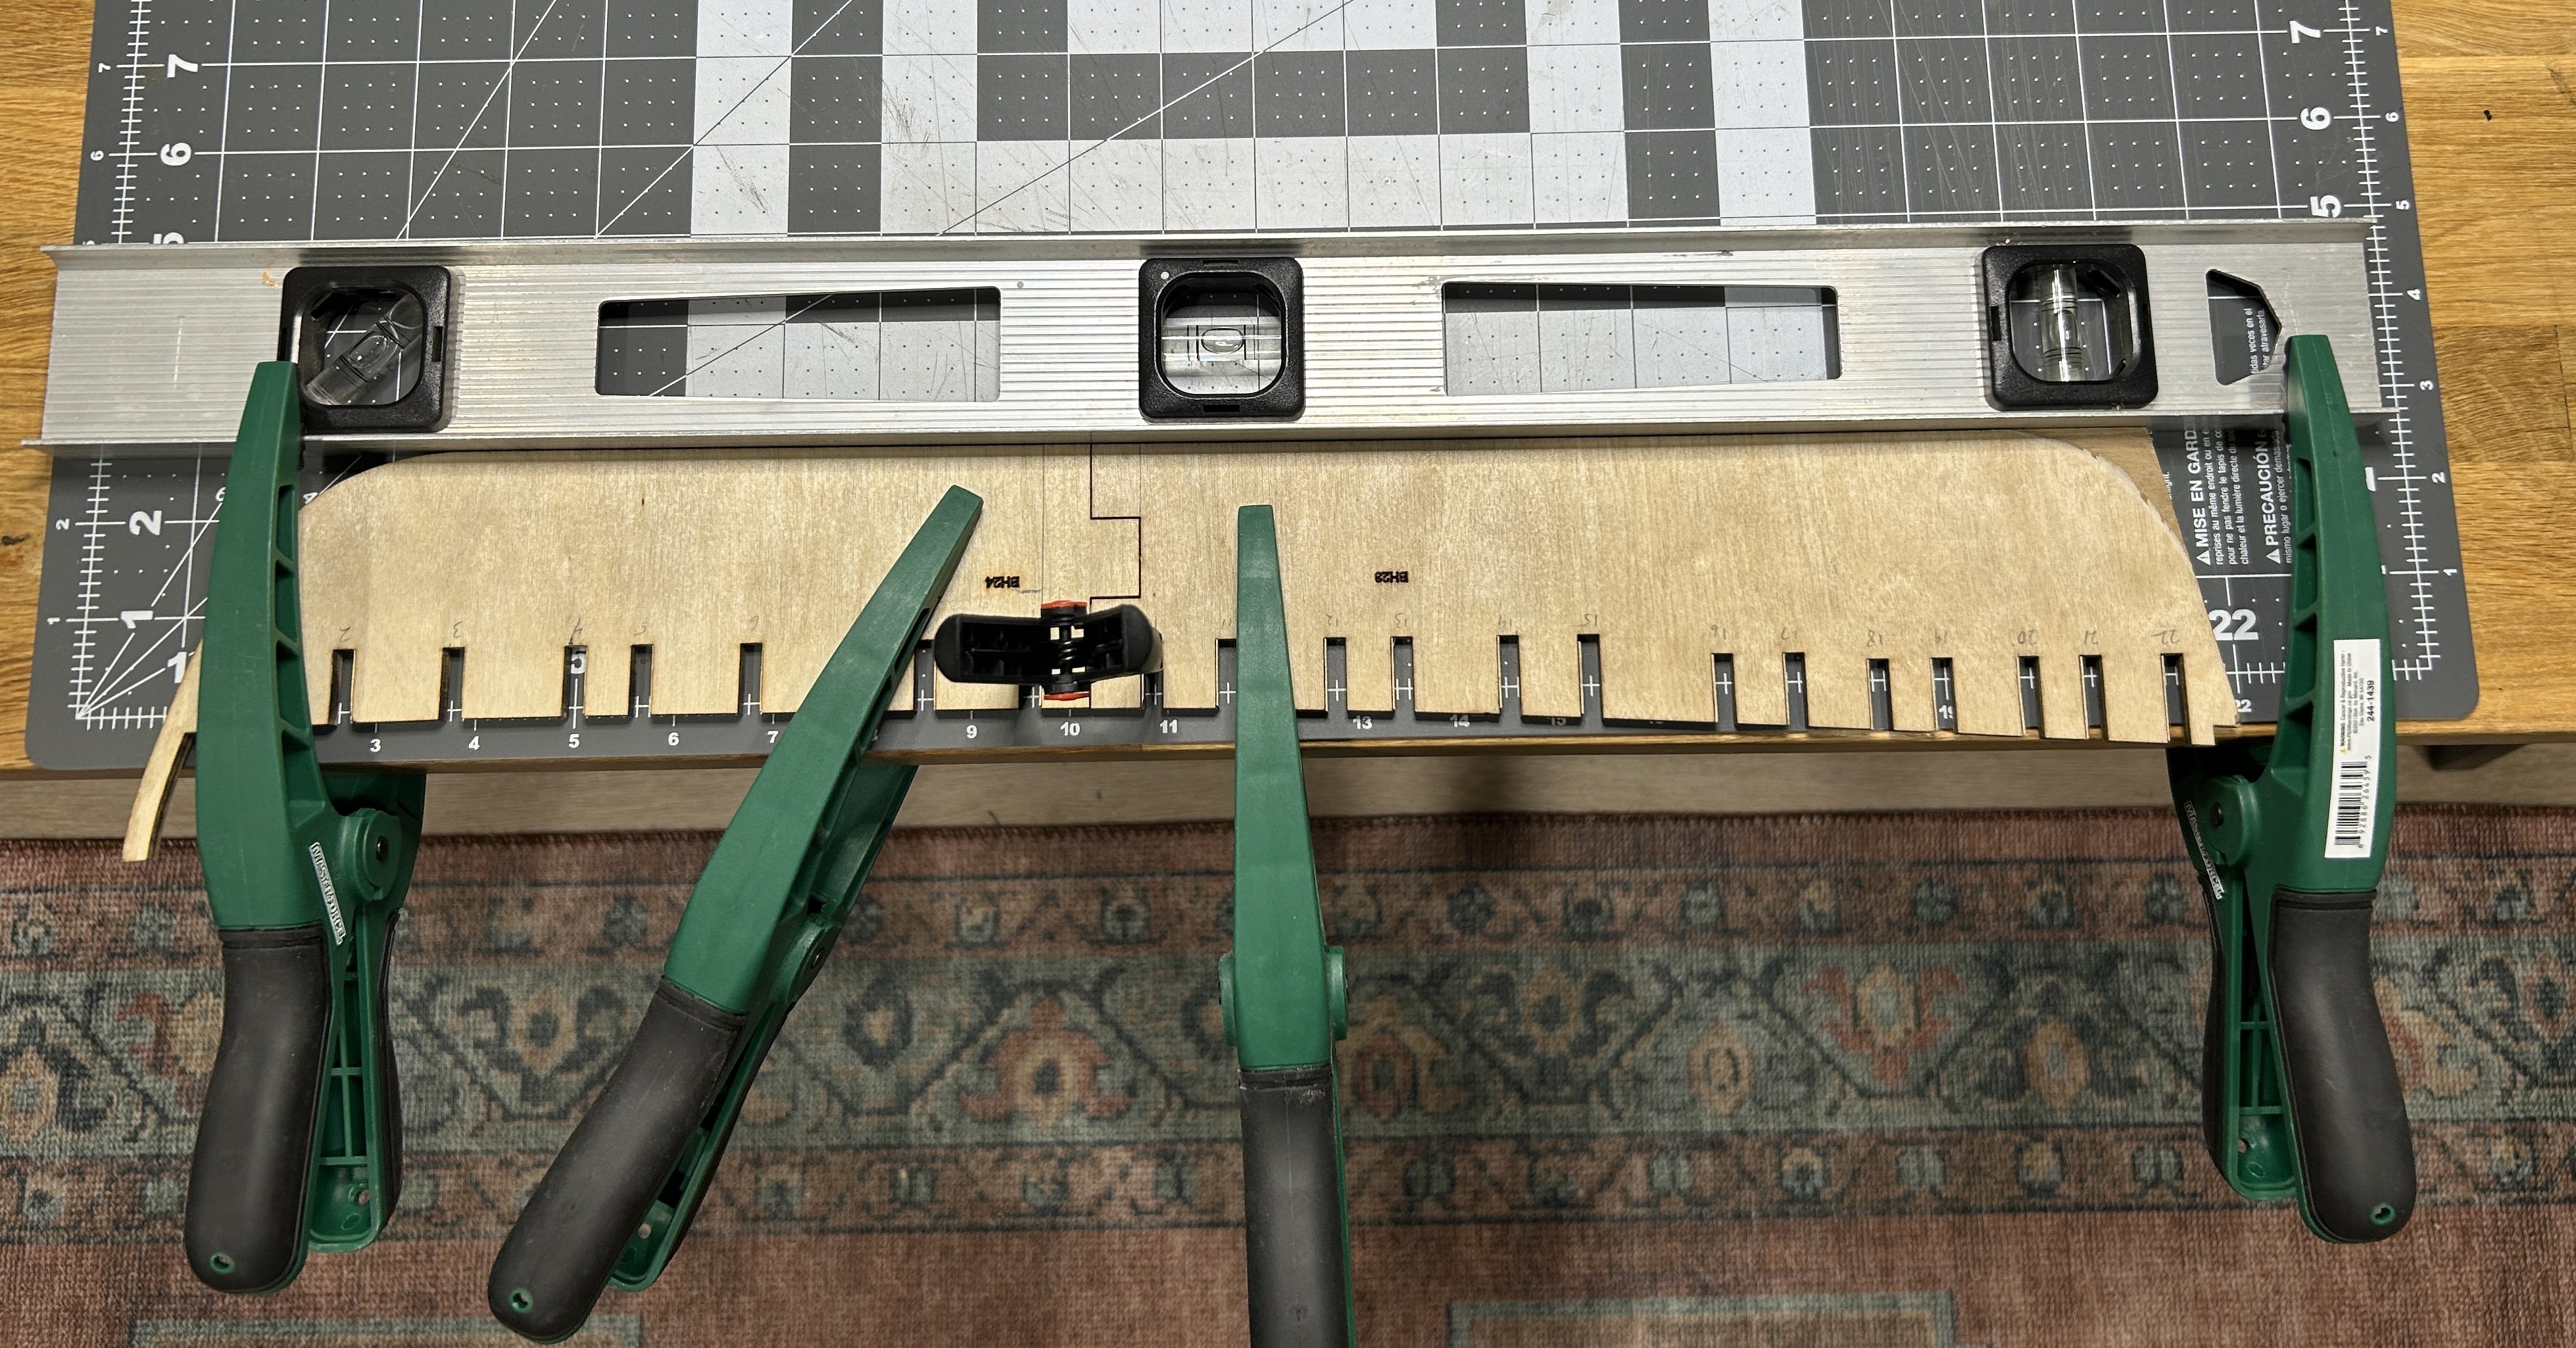
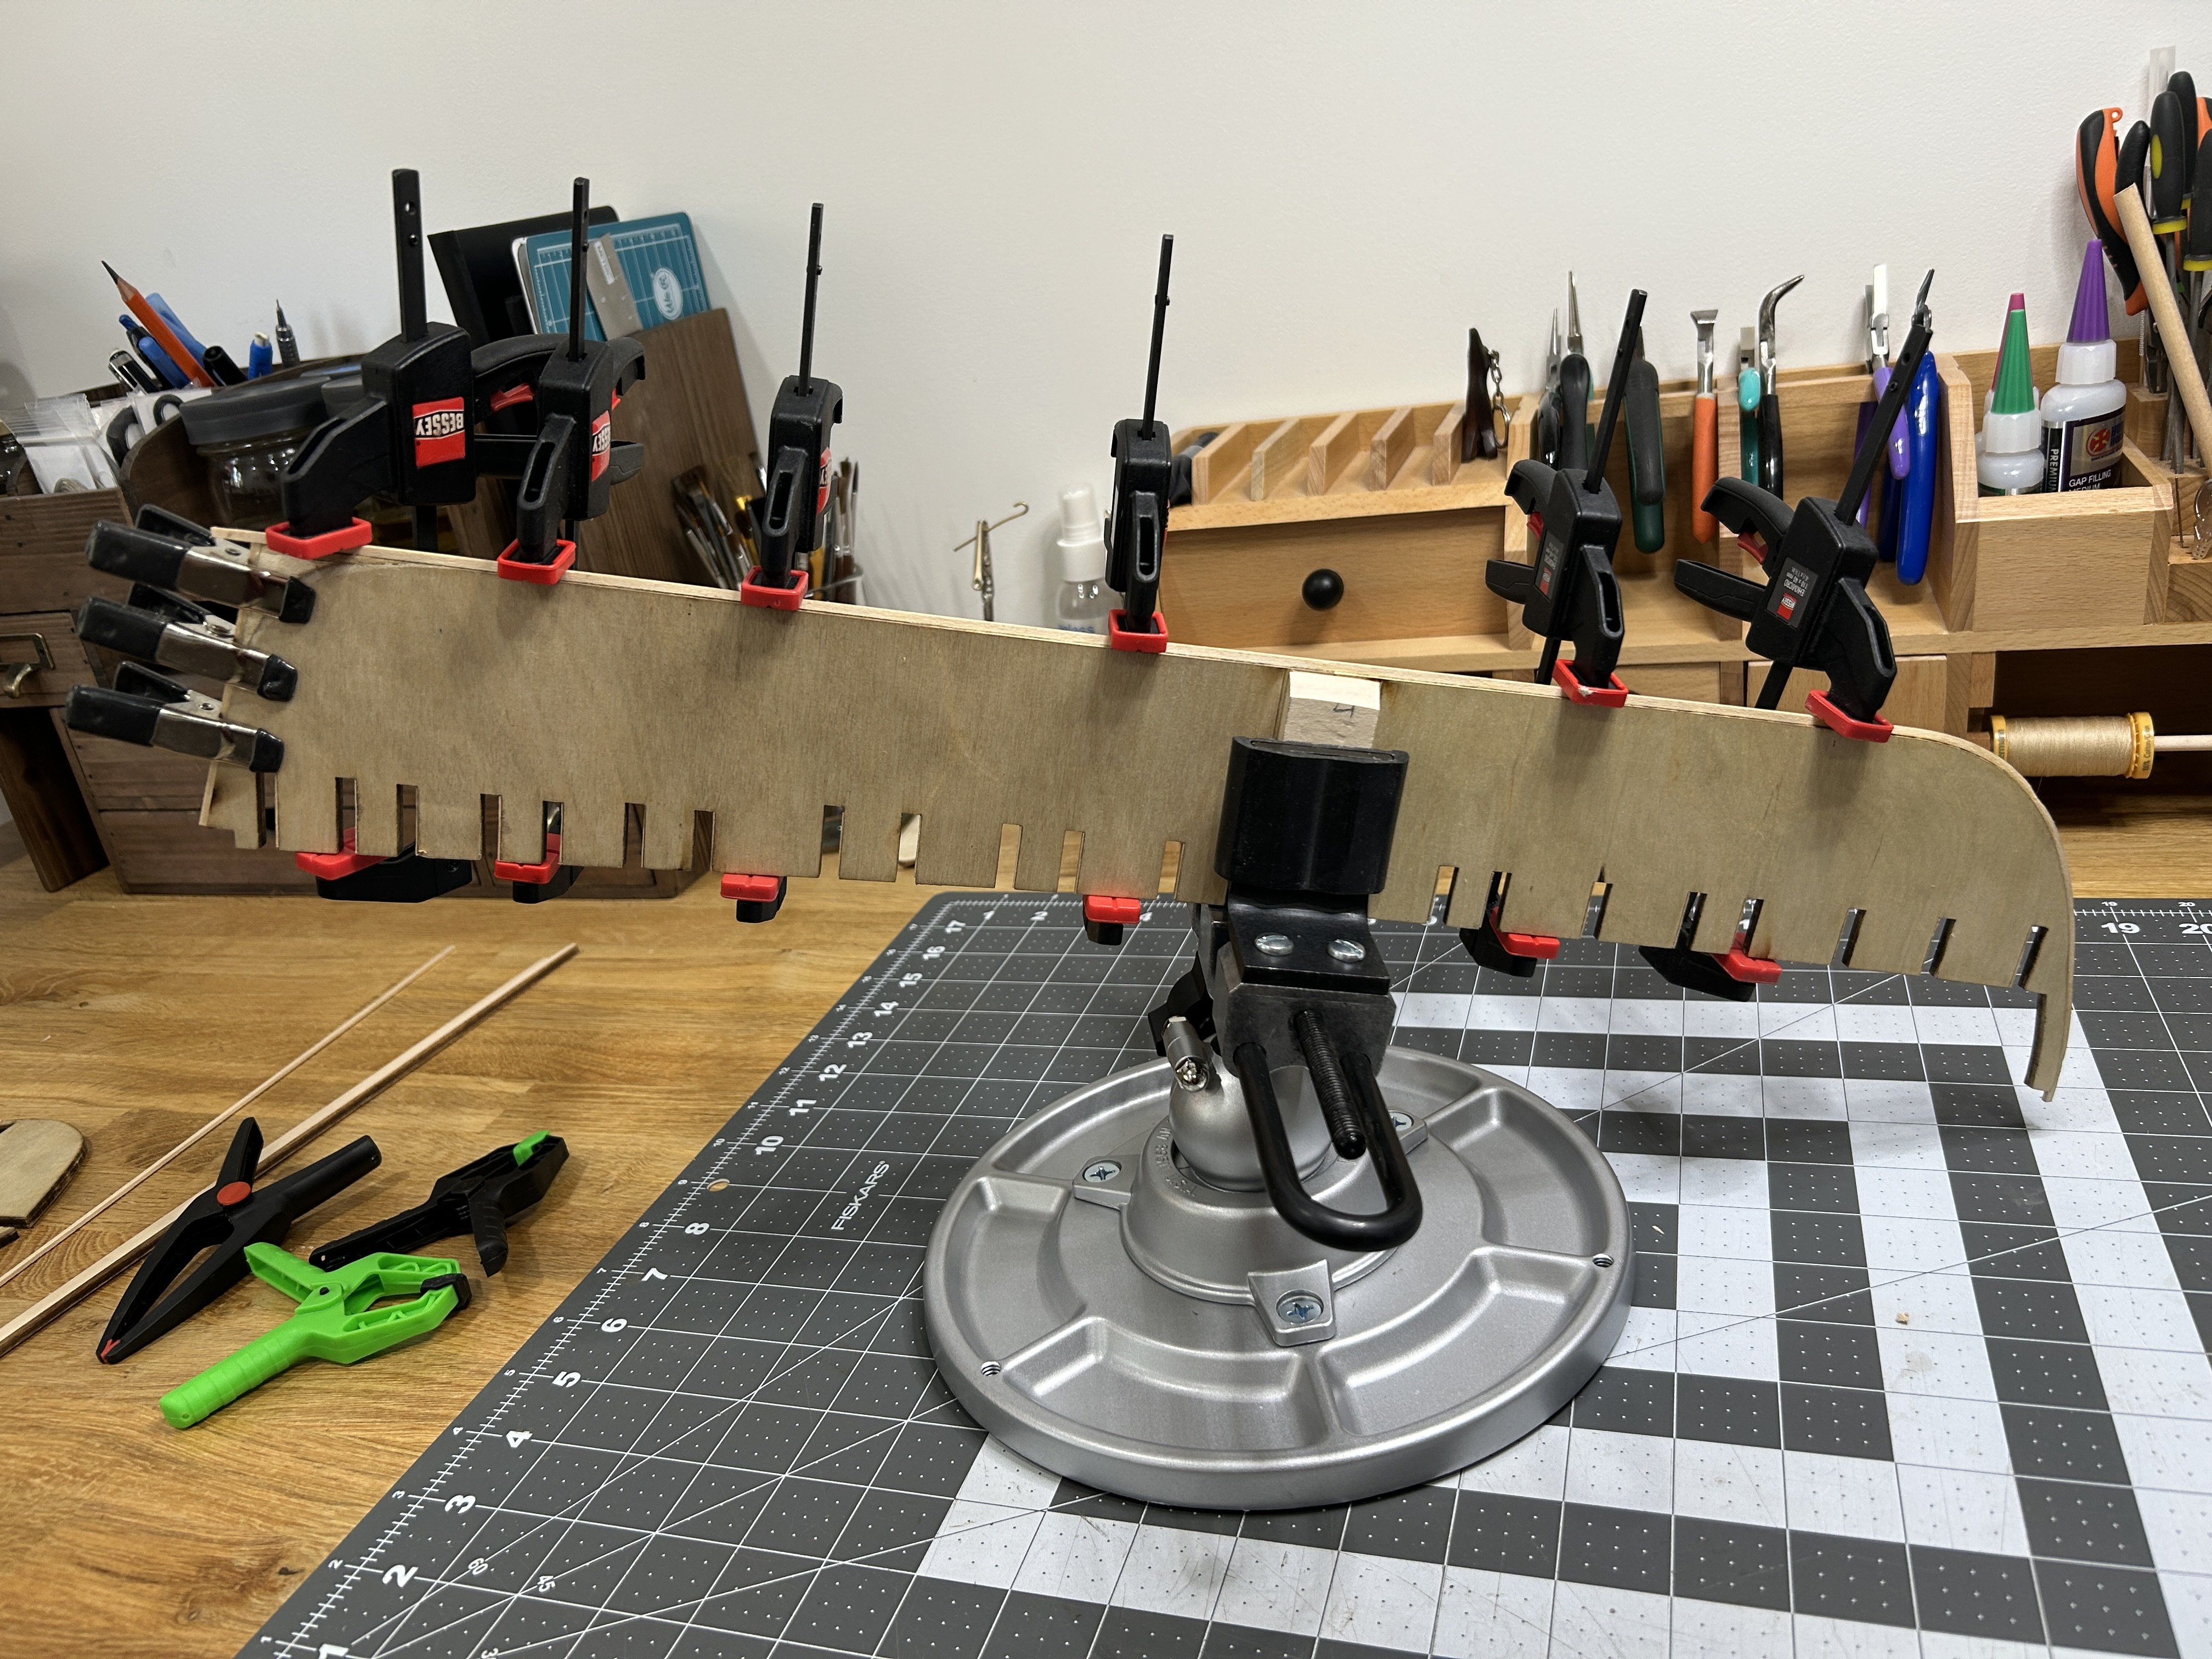
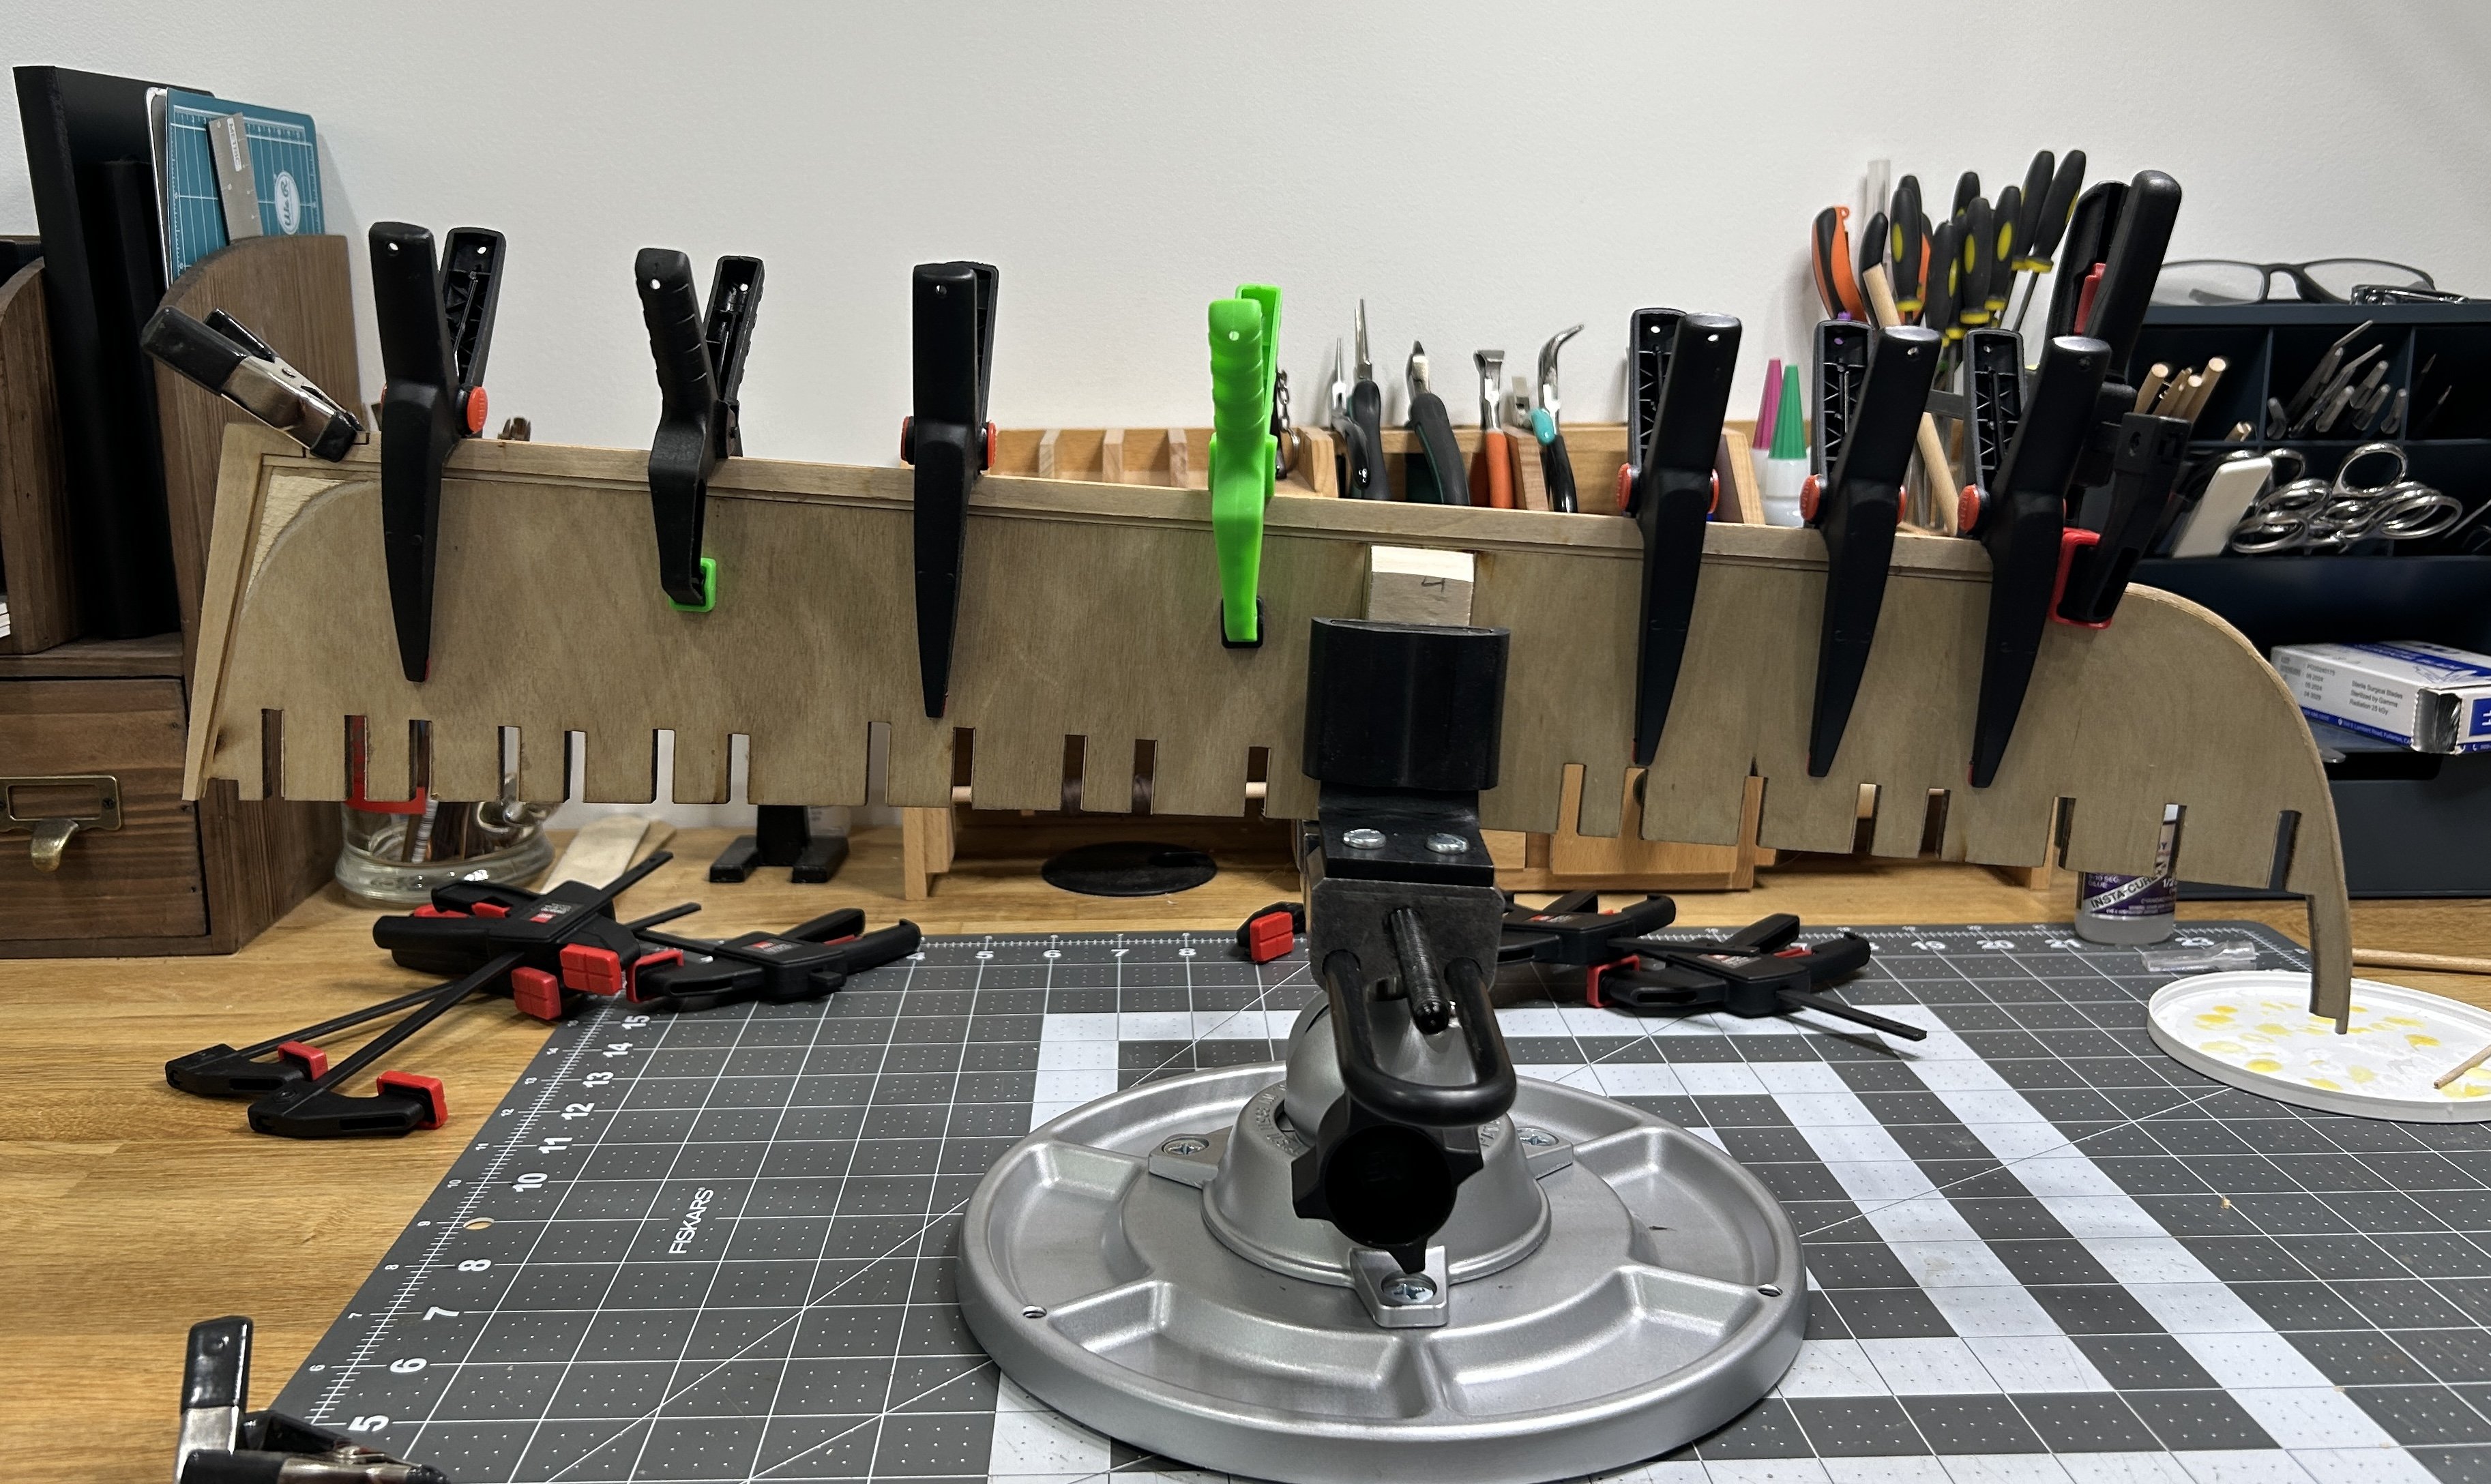
I have all of the braces between the bulkheads added as well as filler blocks for the masts and to accommodate pins if I decide to do a pedestal mount. The braces and fillers are from a sheet of 1/4 basswood I picked up at Joann Fabrics at their going out of business sale. With the braces and the large number of bulkheads on this model, I feel I will have a very sturdy framework for the ship. You will notice I purchased a swivel vise to hold the ship during this phase of construction. I purchased the vise at Menards for about $85. Menards had a few swivel vices to choose from. I bought one that used a suction device to secure it to the work bench, but the suction didn't hold. The rubber feet on this one grips the cutting mat very well and the base is heavy enough that even when I have the ship tilted it doesn't tip over. The base has holes that can be used to attach to your bench if desired. Being able to manipulate the ship as I added the braces made the work quite enjoyable. This will come in handy as I frame the stern, frame the gun ports and add the upper planking. I was quite nervous about clamping on the keel. Even though I pinned it to the bulkhead former, I felt there would have been too much stress on the bulkheads former to rabbet strip to keel joints. My solution was the build a wooden bracket out of the 1 x 2 wood that would attach directly to the front and back section of the bulkheads former and then clamp into the vise. I cut a slot into the vertical sections of the bracket and used 4mm bolt to attach it to the bulkhead former. This keeps any of the stress off the joints between the bulkhead former, rabbet strip and the keel. It also allows me to avoid clamping on the joint between the two pieces of the bulkheads former. Next up is the fairing the bulkheads. I expect to go slow. If I get a little done every day for 2-3 weeks that will fine. If I get bored or frustrated with fairing the hull, I will take a break and work on the ship's boat that I have started.


-
I have made some progress with the Bulkheads. I started by adding all but the most forward bulkheads. I then added the two strong backs. These pass through the second forward bulkheads through the third bulk head aft. They are 5/16 x 5/16 inch basswood. I didn't take a picture but I have added the forward bulkheads also, so all of the bulkheads are on. I will start adding the braces between all of the bulkheads next. I think with the strong backs and the braces I will have a very solid framework to plank.

.thumb.jpg.faf78bf6bab17286ed74933a1723fcc7.jpg)
-
Sorry if I missed it, but what is the reason for adding the ratlines every fifth one?
- 241 replies
-
- 1
-

-
- Vanguarrd Models
- Harpy
- (and 1 more)
-
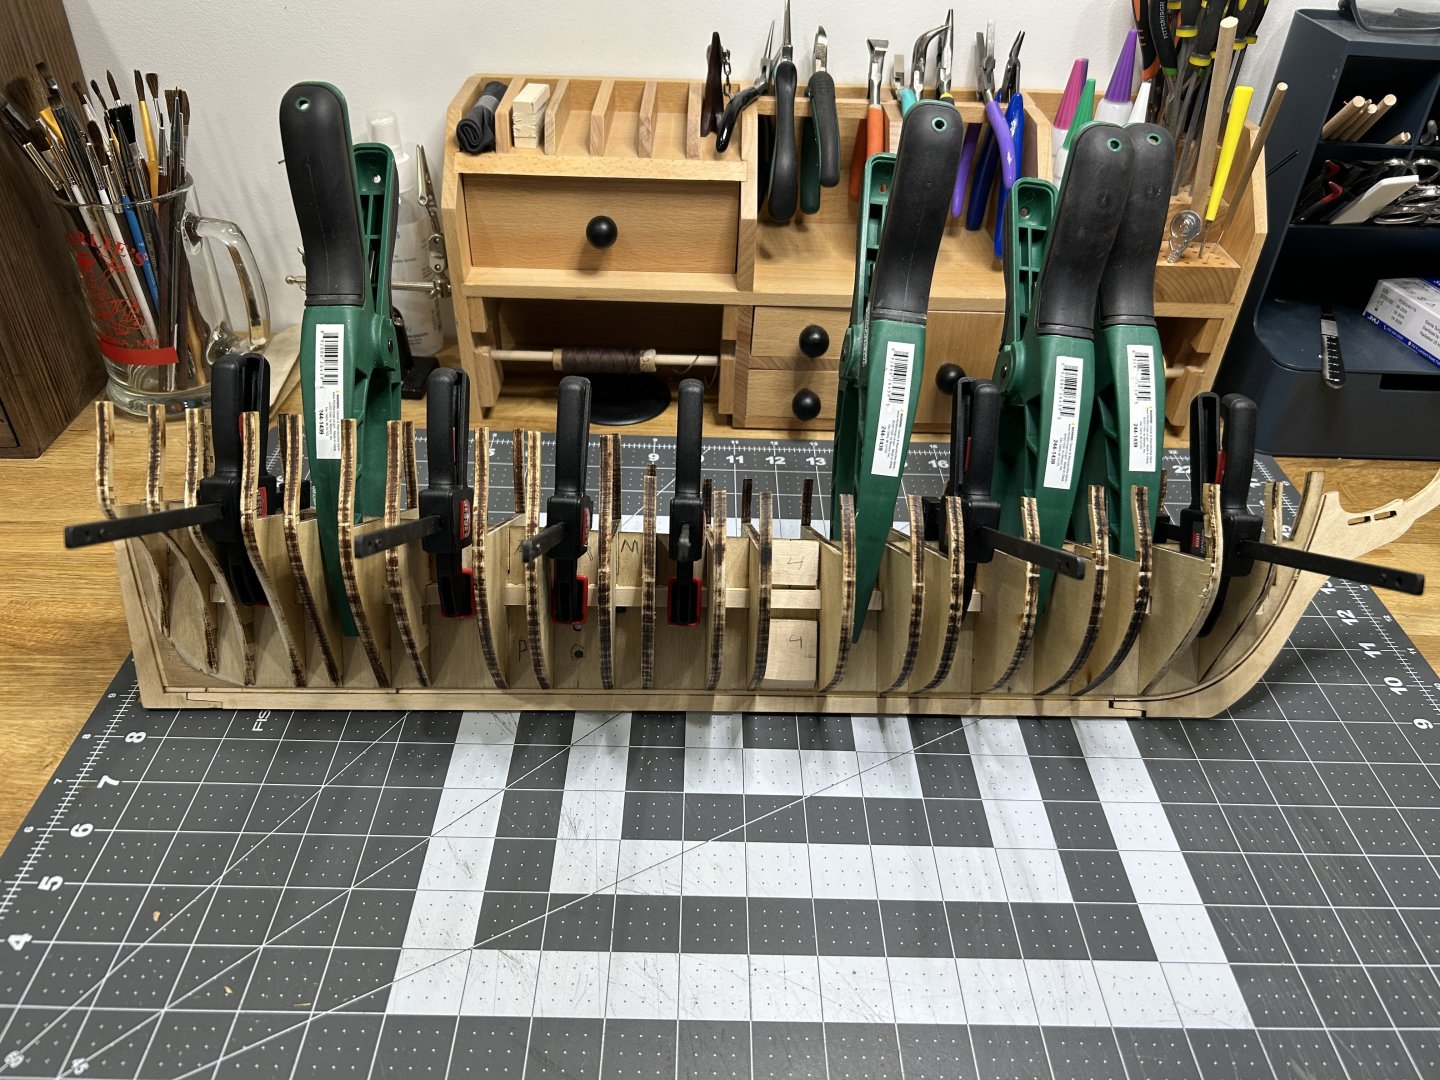
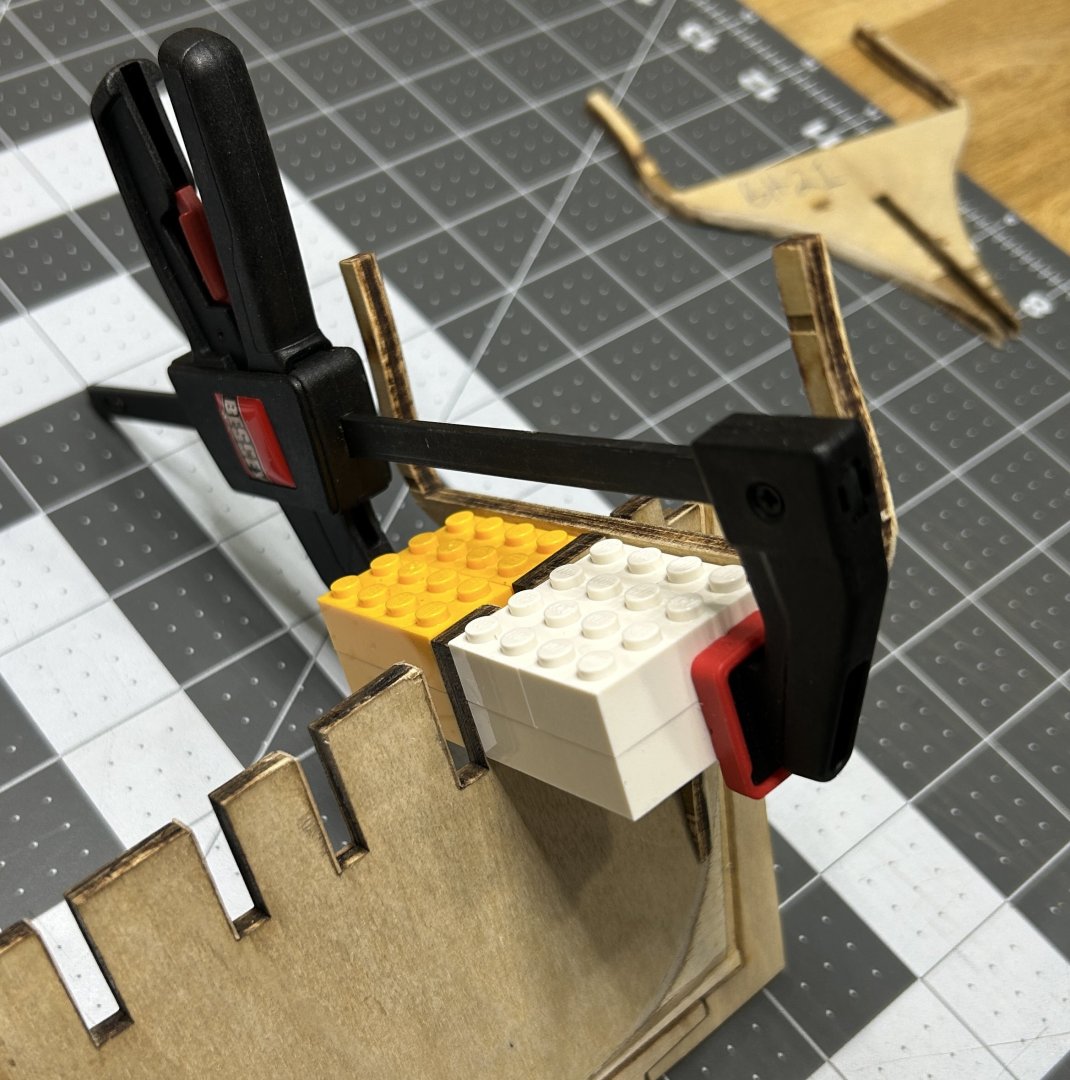
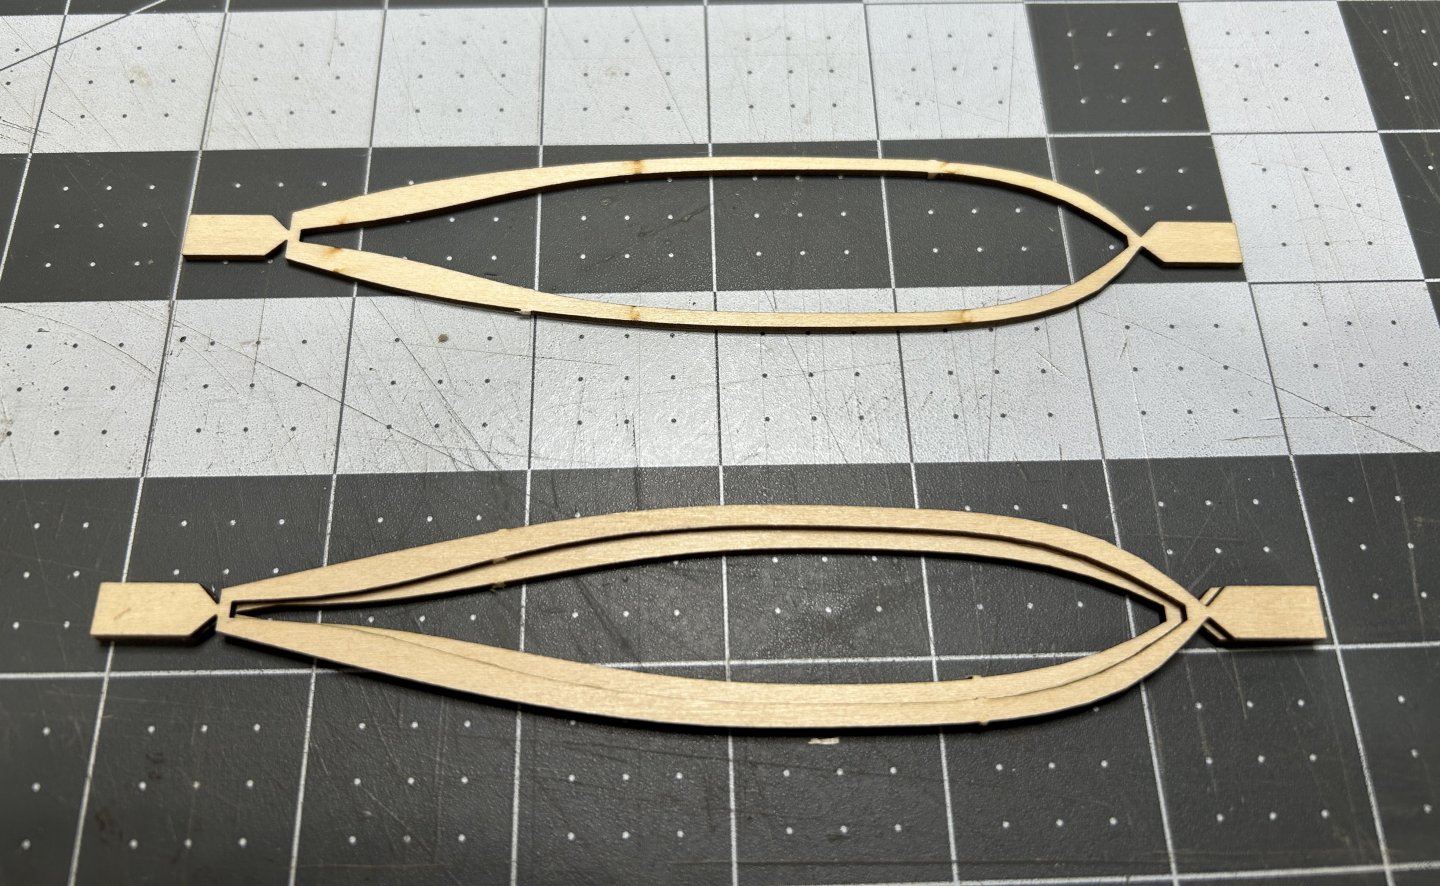
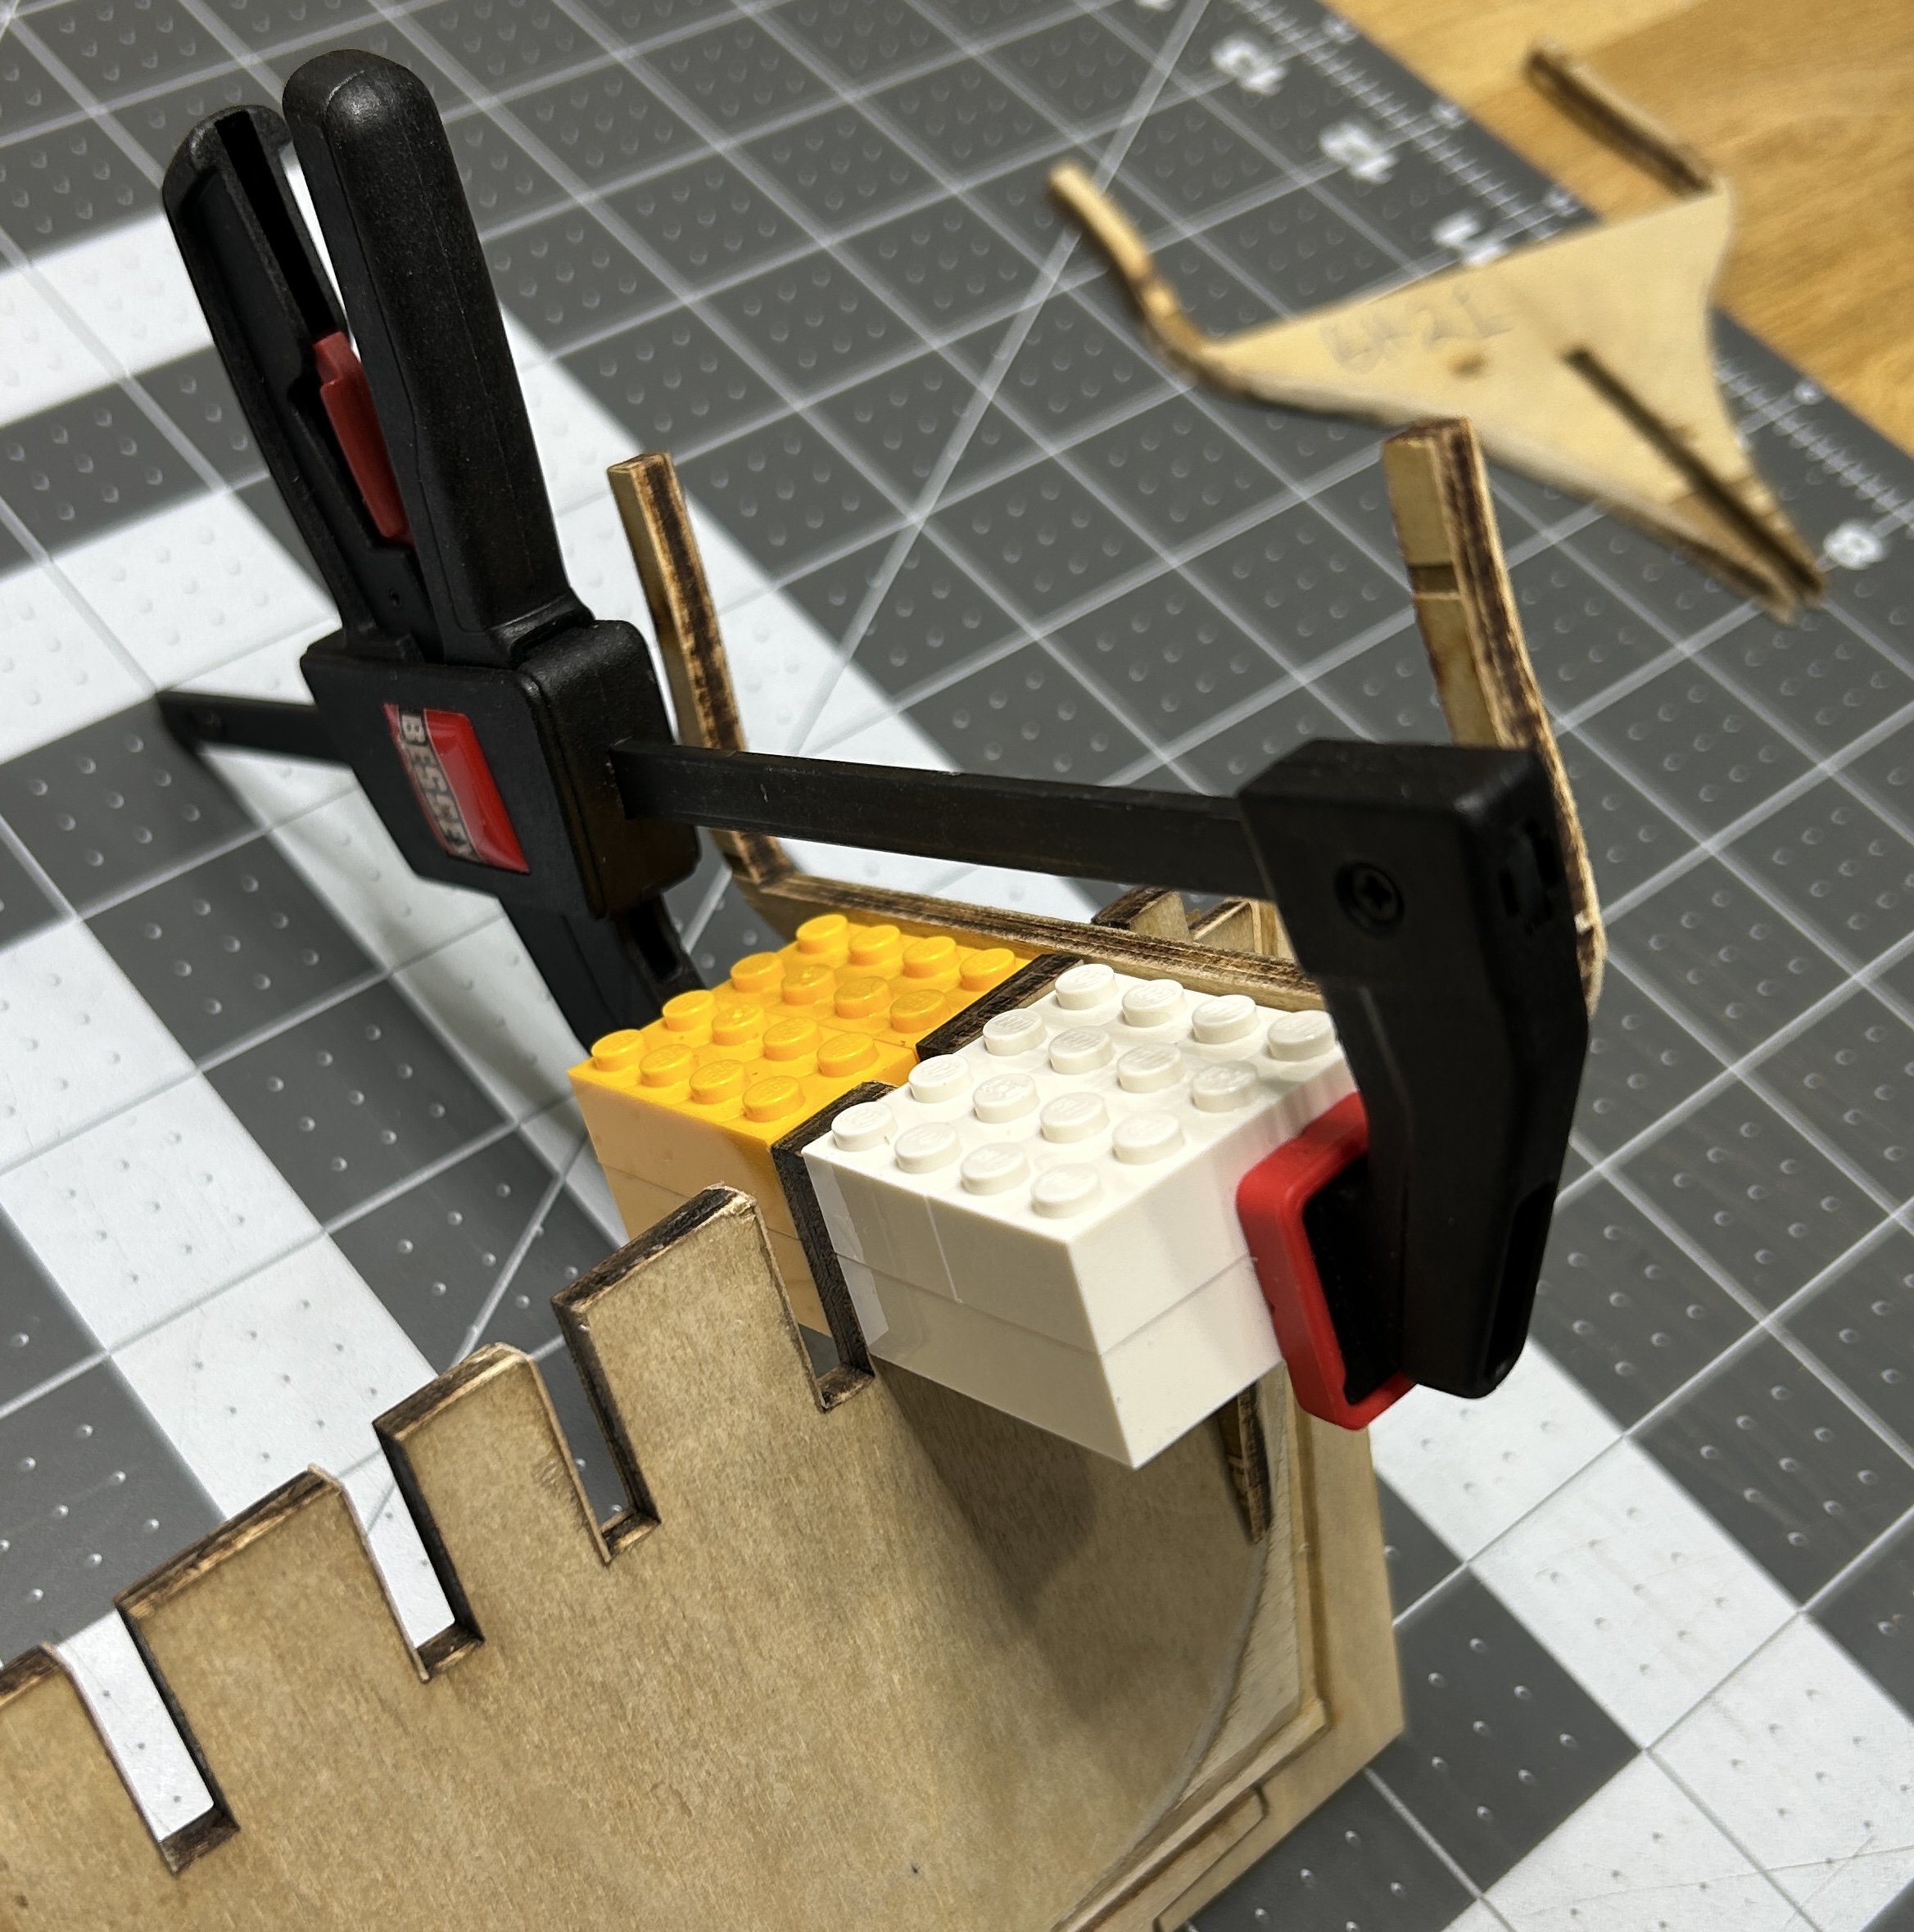
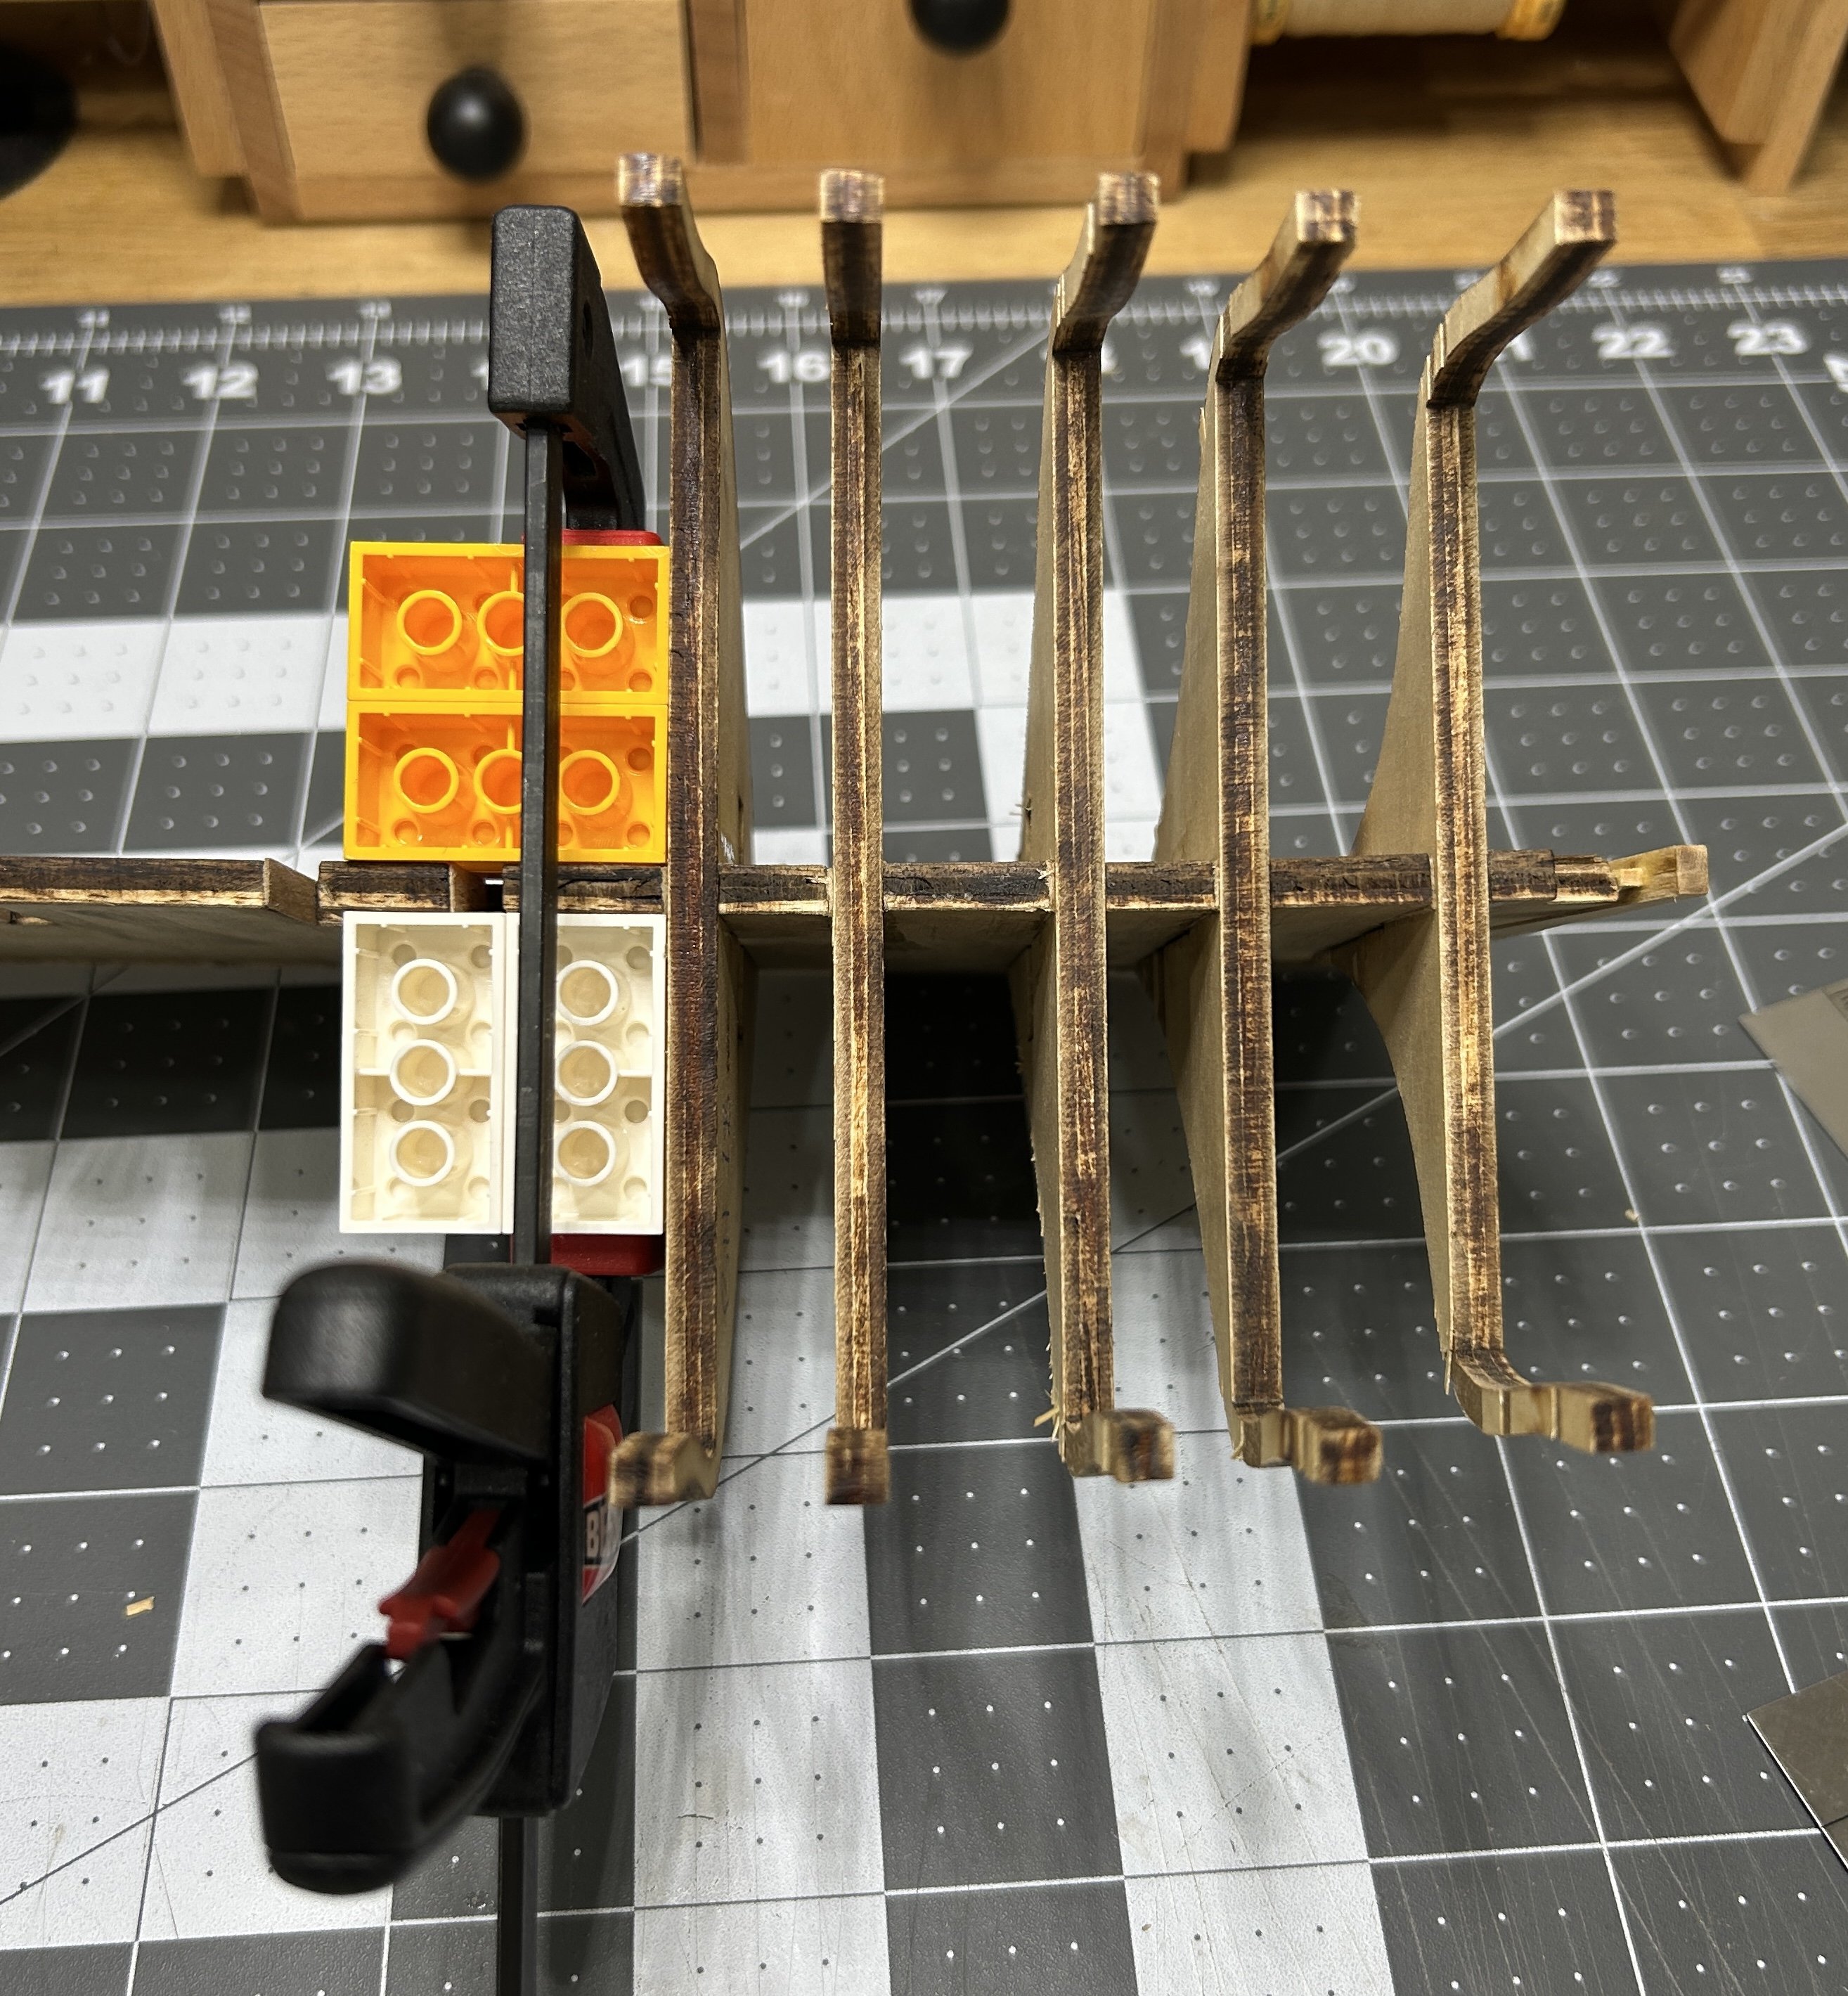
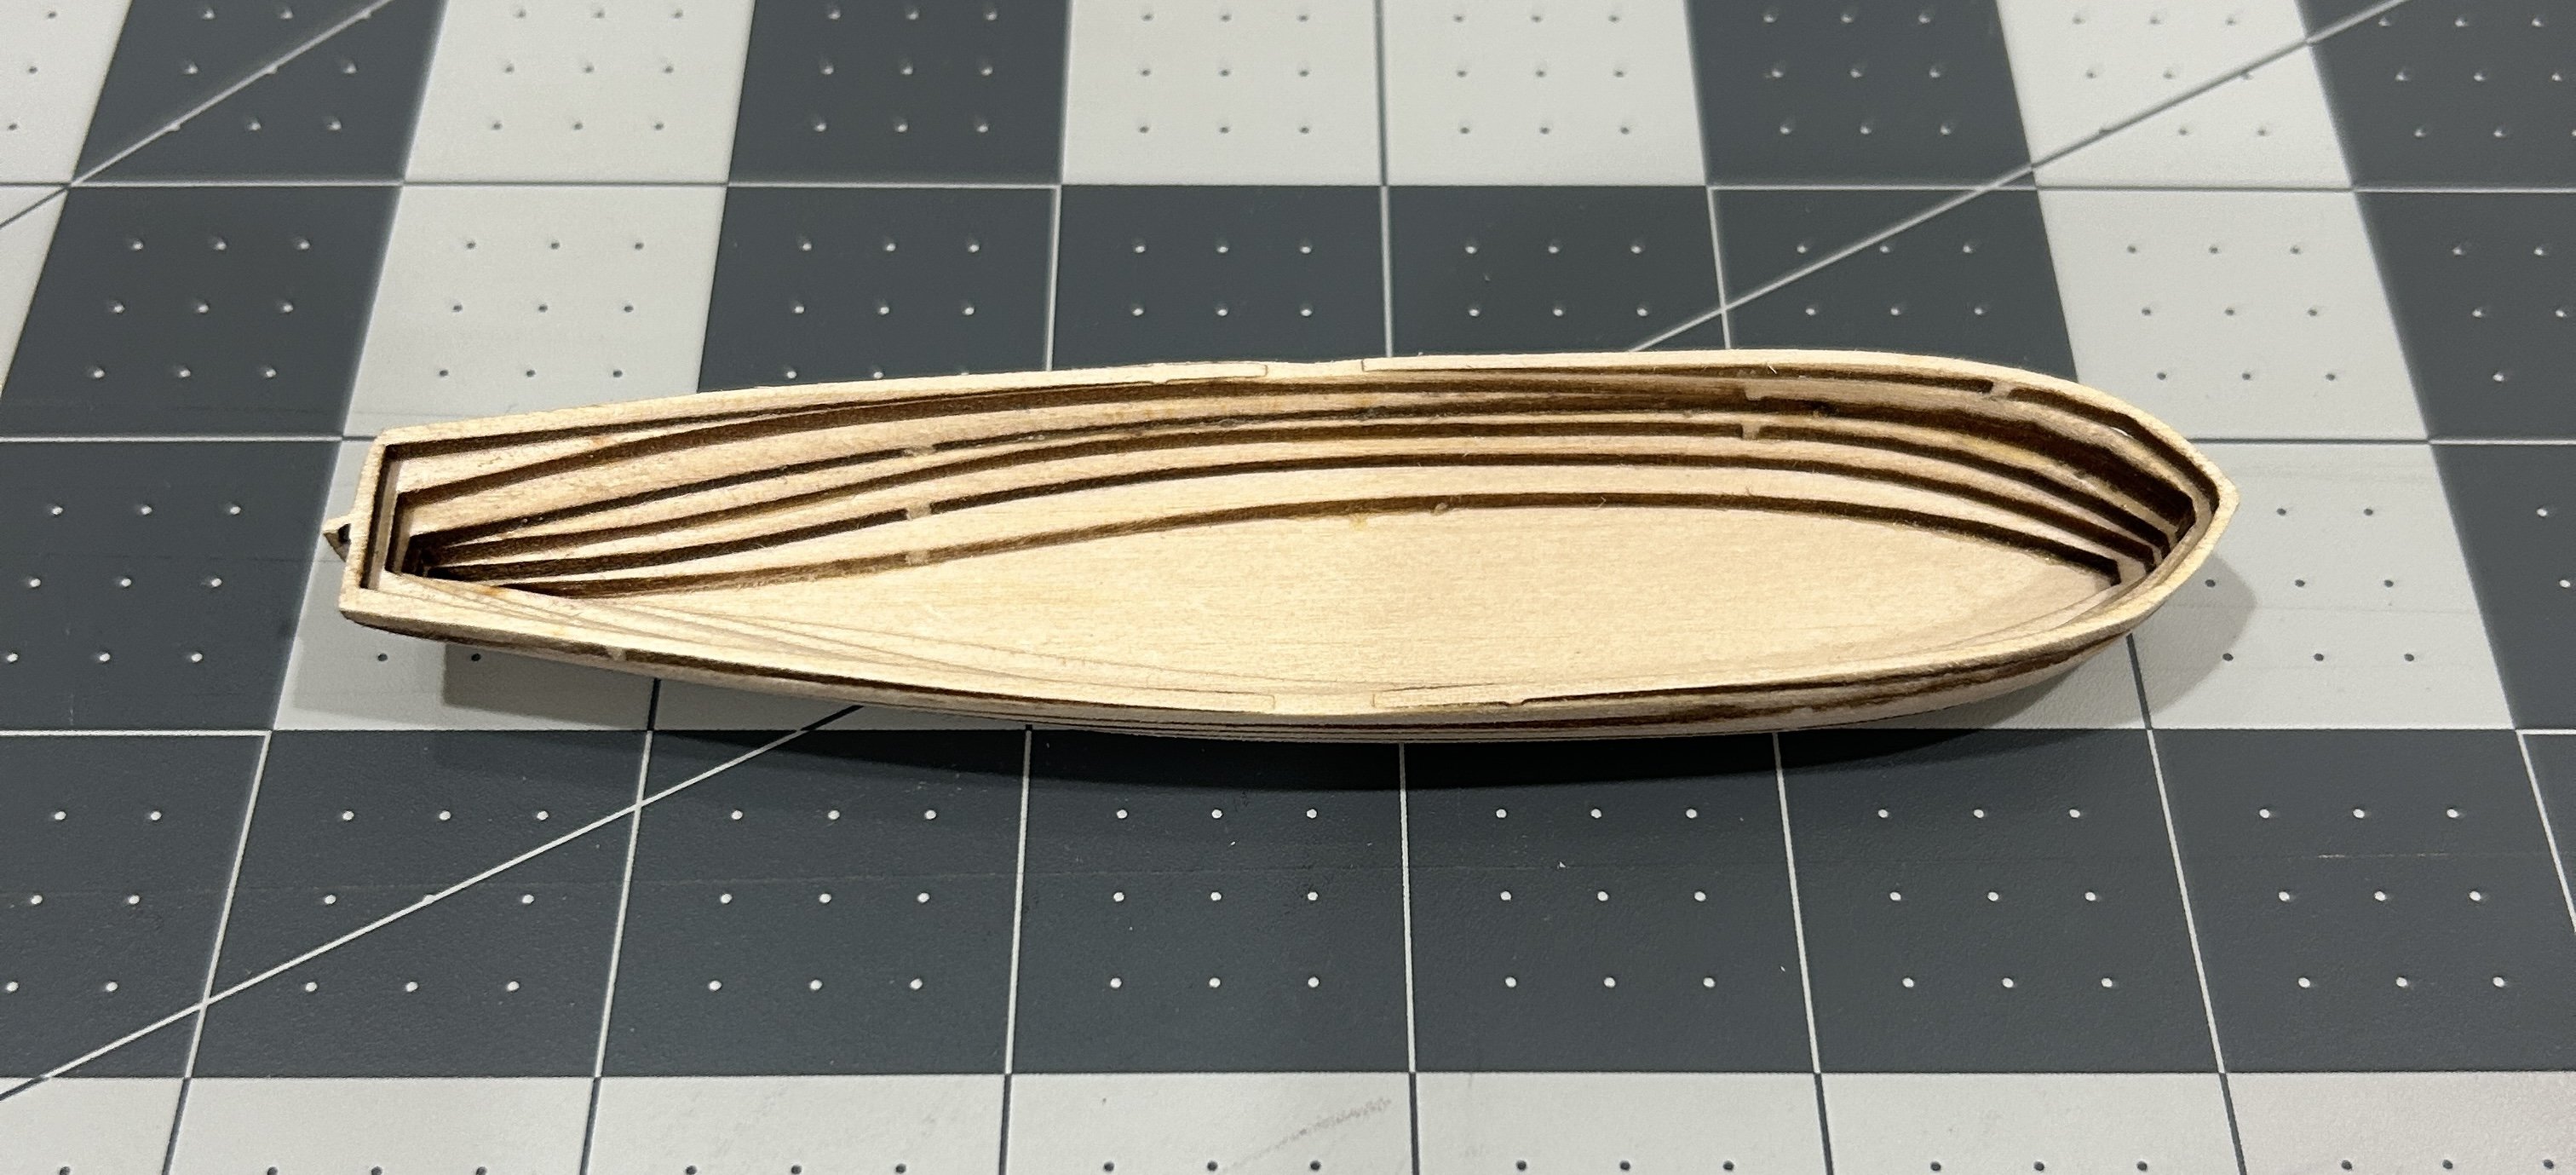
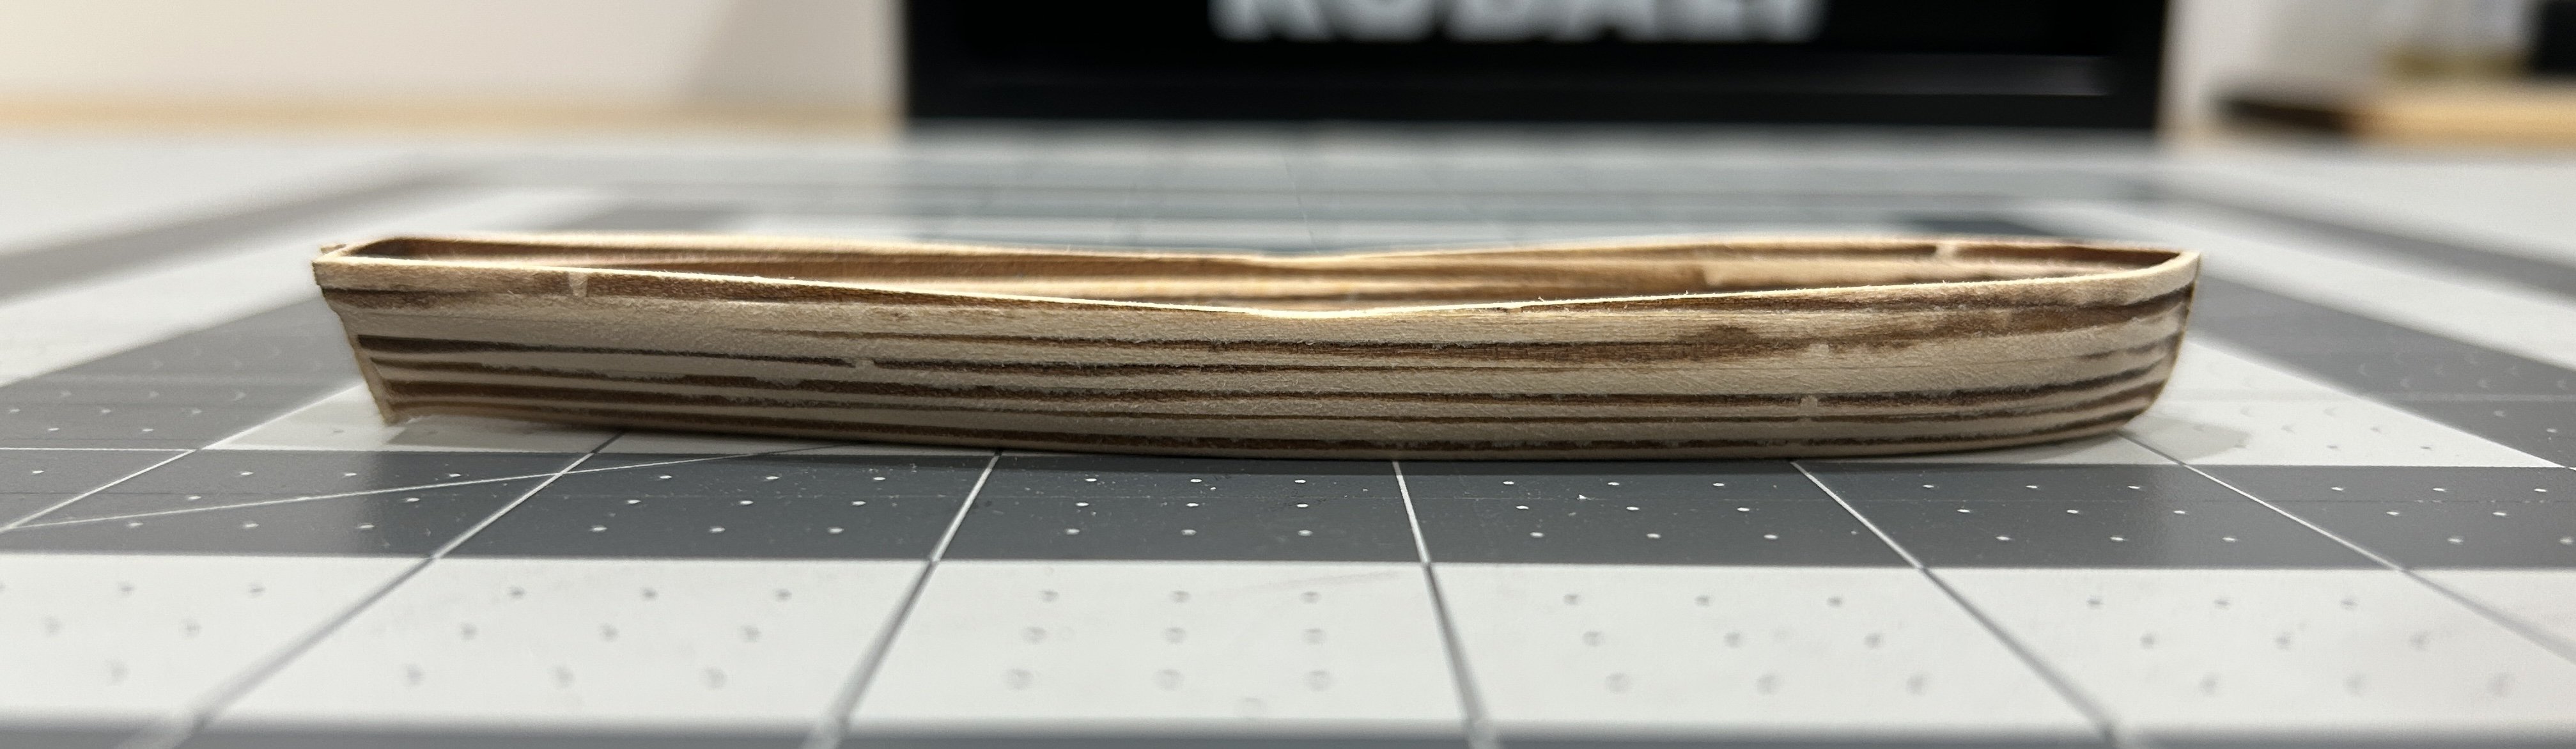
I made some progress on the bulkheads today. I started by dry fitting all of the bulkheads that have the cut out for the strong backs to make sure that the strong backs would go through all of the cut outs easily after they were installed. I need to do a little extra sanding on a couple of the bulkheads to widen the cut outs. I then started adding the bulkheads starting at the rear. I used Legos to keep the bulkheads square as the glue was a setting up. I checked the alignment of the strong back cut outs after every two or three bulkheads. I dry fitted the first bulkhead that the strong backs goes through to confirm that the cut outs all line up. I am about a third of the way through adding the bulkheads. While I was waiting for the glue to dry on the bulkheads I started to assemble the ship's boat. This uses the method of assembling layers of material to create a hull that is sanded smooth on the inside and outside of the hull. This was my first time building a boat using this technique. I am not sure I sanded enough on the interior, but I am pleased with the exterior of the hull. There is a lot of detail to add, and I will probably wait until I can focus 100% on the boat to finish it. Hopefully I can get all of the bulkheads installed this week.


-
I have glued the two pieces of the bulkhead former together and added some support pieces on both sides of the joint. I left a gap in the support pieces to accommodate the strong back on each side of the bulkhead former. The rabbet strip is 1/16 x 3/32 basswood. I preshaped the rabbet strip after soaking it in hot water for about 15 minutes. Getting it centered was a little challenging. I used a small drop of CA at the bow to get it started in the center and then used Titebond to secure the rest of the strip. At the stern I was successful with just Titebond. Adding the stern post, keel and stem is also a little tricky. I used only Titebond because I needed a little working time to ensure it was lined up even with the bulkhead former. The stern post and keel went on fine, but when I placed the stem against the keel, the bottom didn't create a straight line with the keel. To get the bottom of the stem and the keel to create a straight line I needed to leave a small gap between the keel and the stem. I will fill this in with some putty and it will be covered with cooper eventually. I also pinned the stern post, keel and stem to the bulkheads former to make it more secure. The bulkhead former and bulkheads are laser cut from plywood and they have a significant amount of laser char. More than I experienced with my previous Occre models. The stern post, keel and stem are laser cut from solid basswood and I was happy to see there was far less char and it was easily sanded off these pieces. I have almost all of the bulkheads released and the char removed. I will be starting to install them next.


-
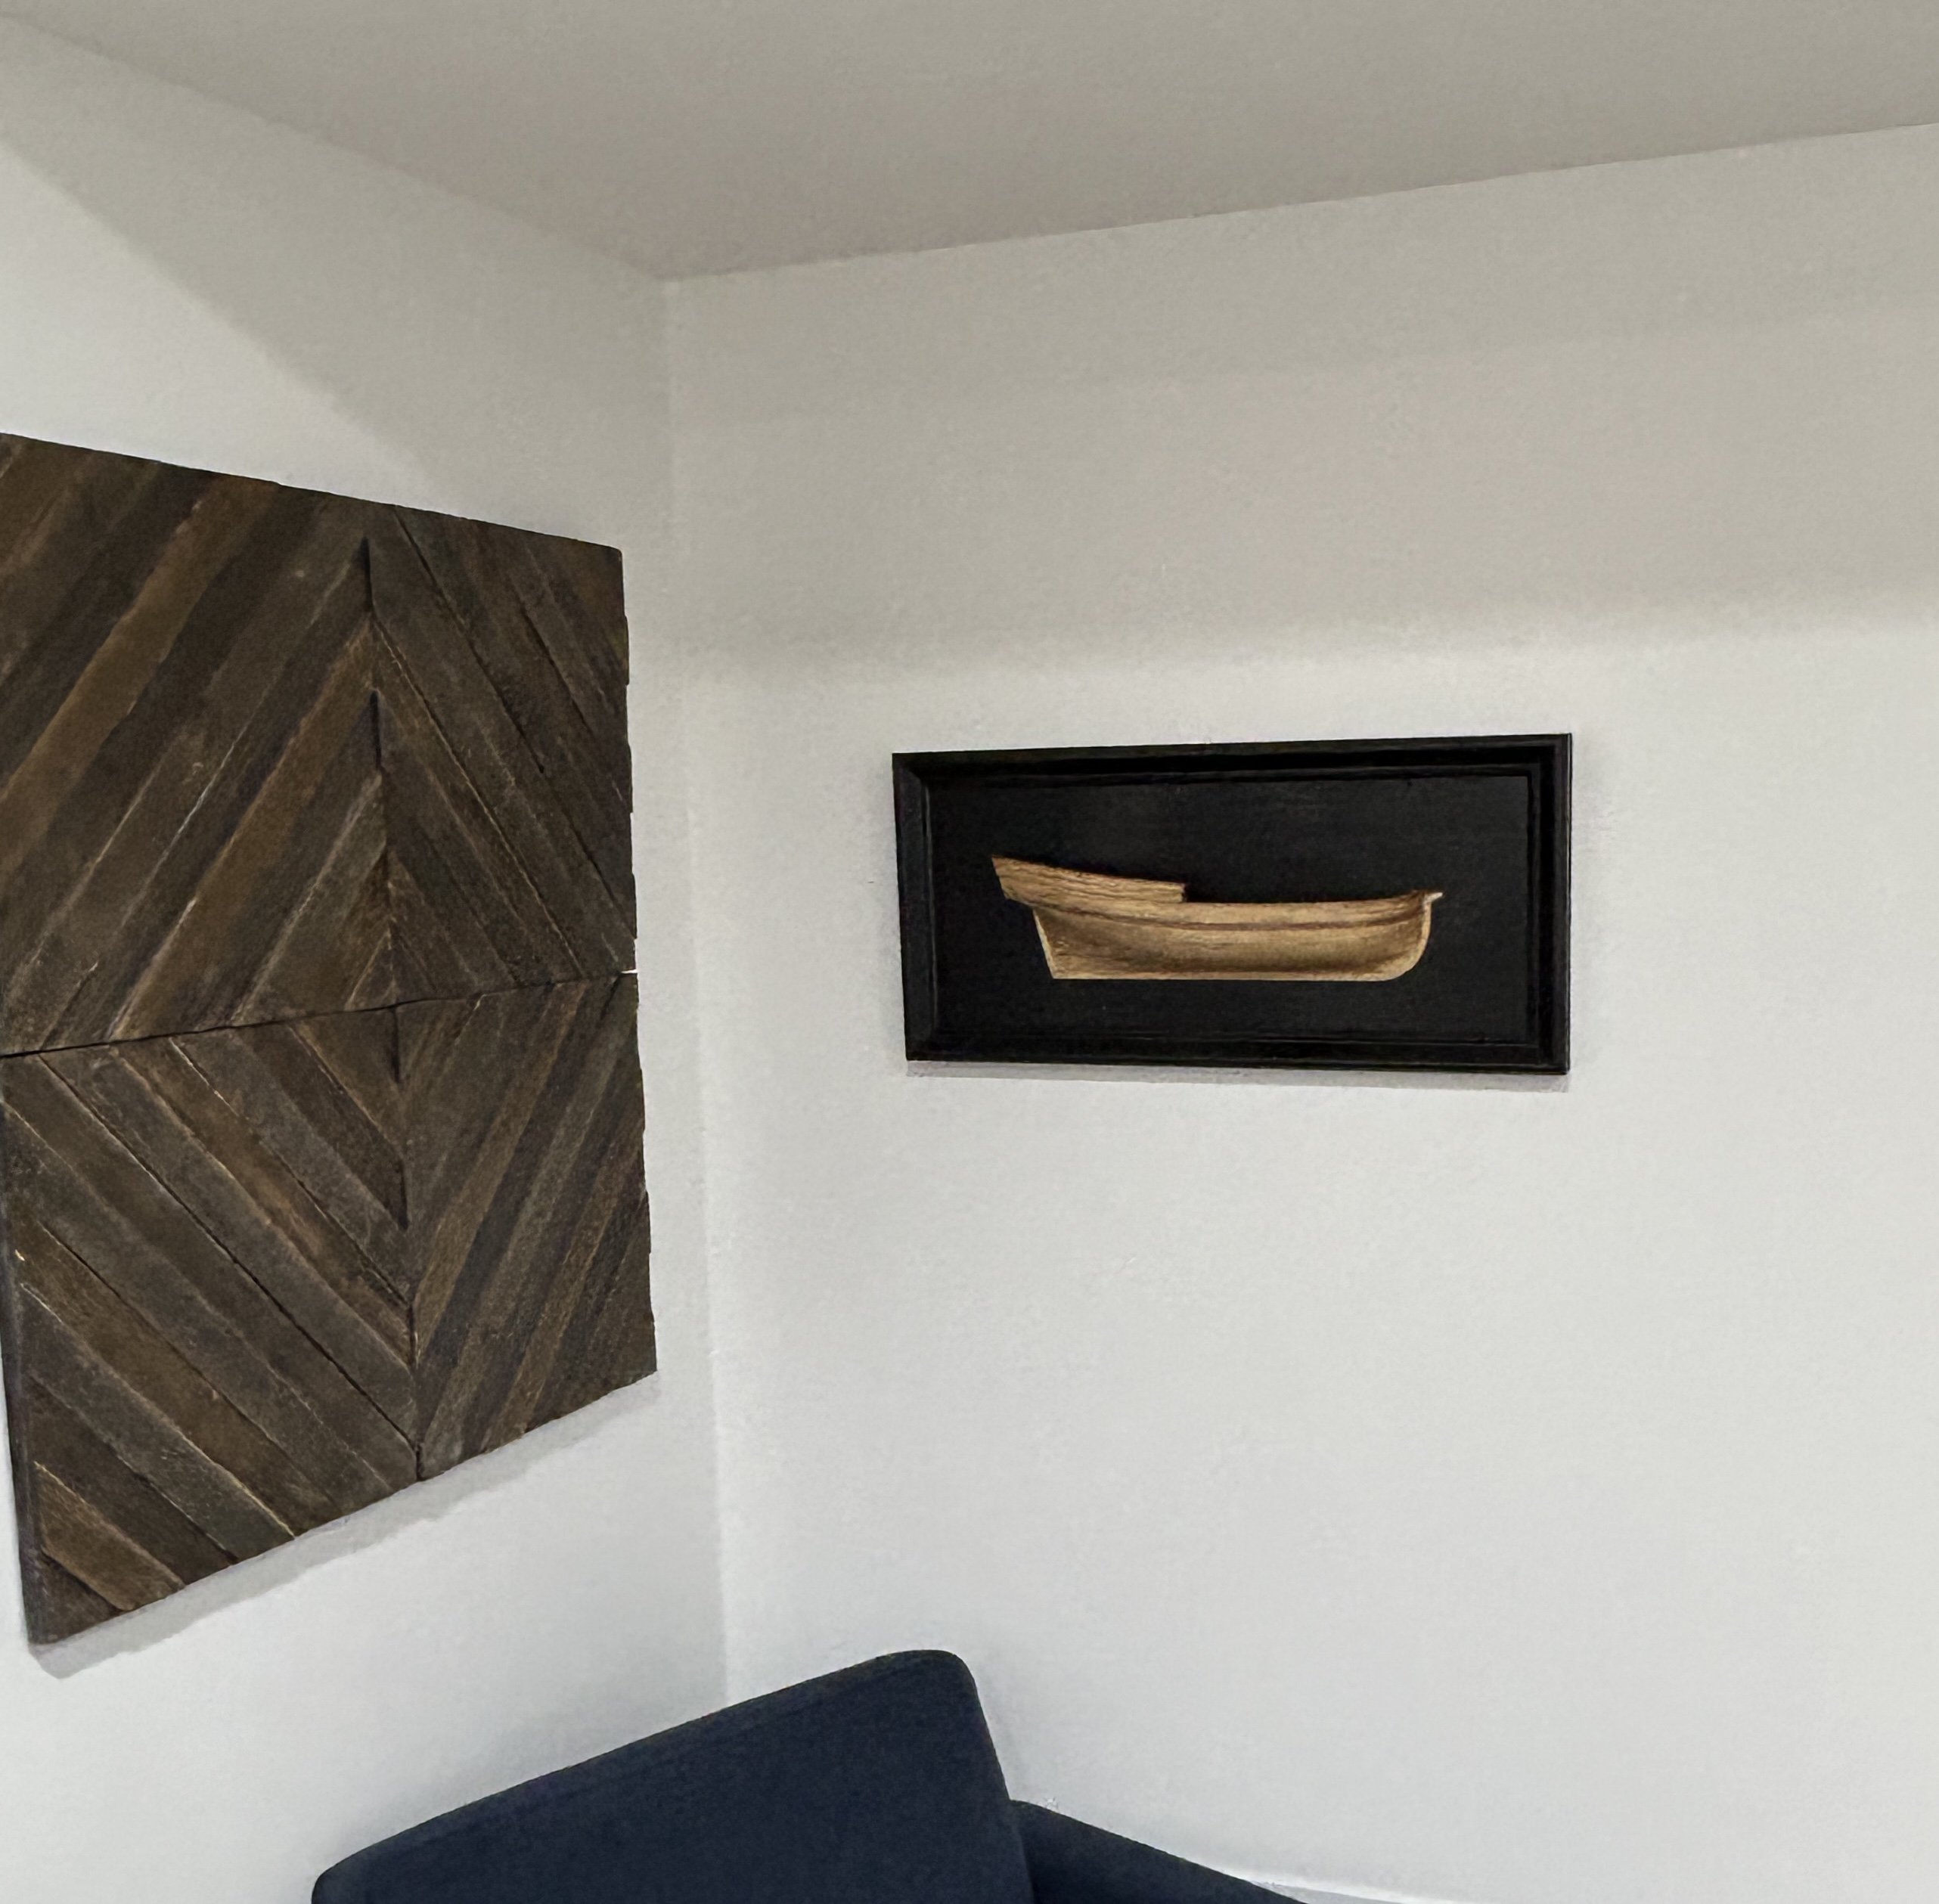
I had a very productive weekend in the shipyard. In addition to starting my USF Essex, I was able to get the frame added to the Half Hull and the background and frame painted black. I really learned a lot on this model. In addition to learning how to properly plank, I learned that I need to force myself to be patient at times. It is OK to take off a part and redo something, pre-stain and testing stain first to determine if you will like the result is worth the time, and I learned to use wood glue instead of CA even when clamping isn't possible. Thanks for the likes and comments.

-
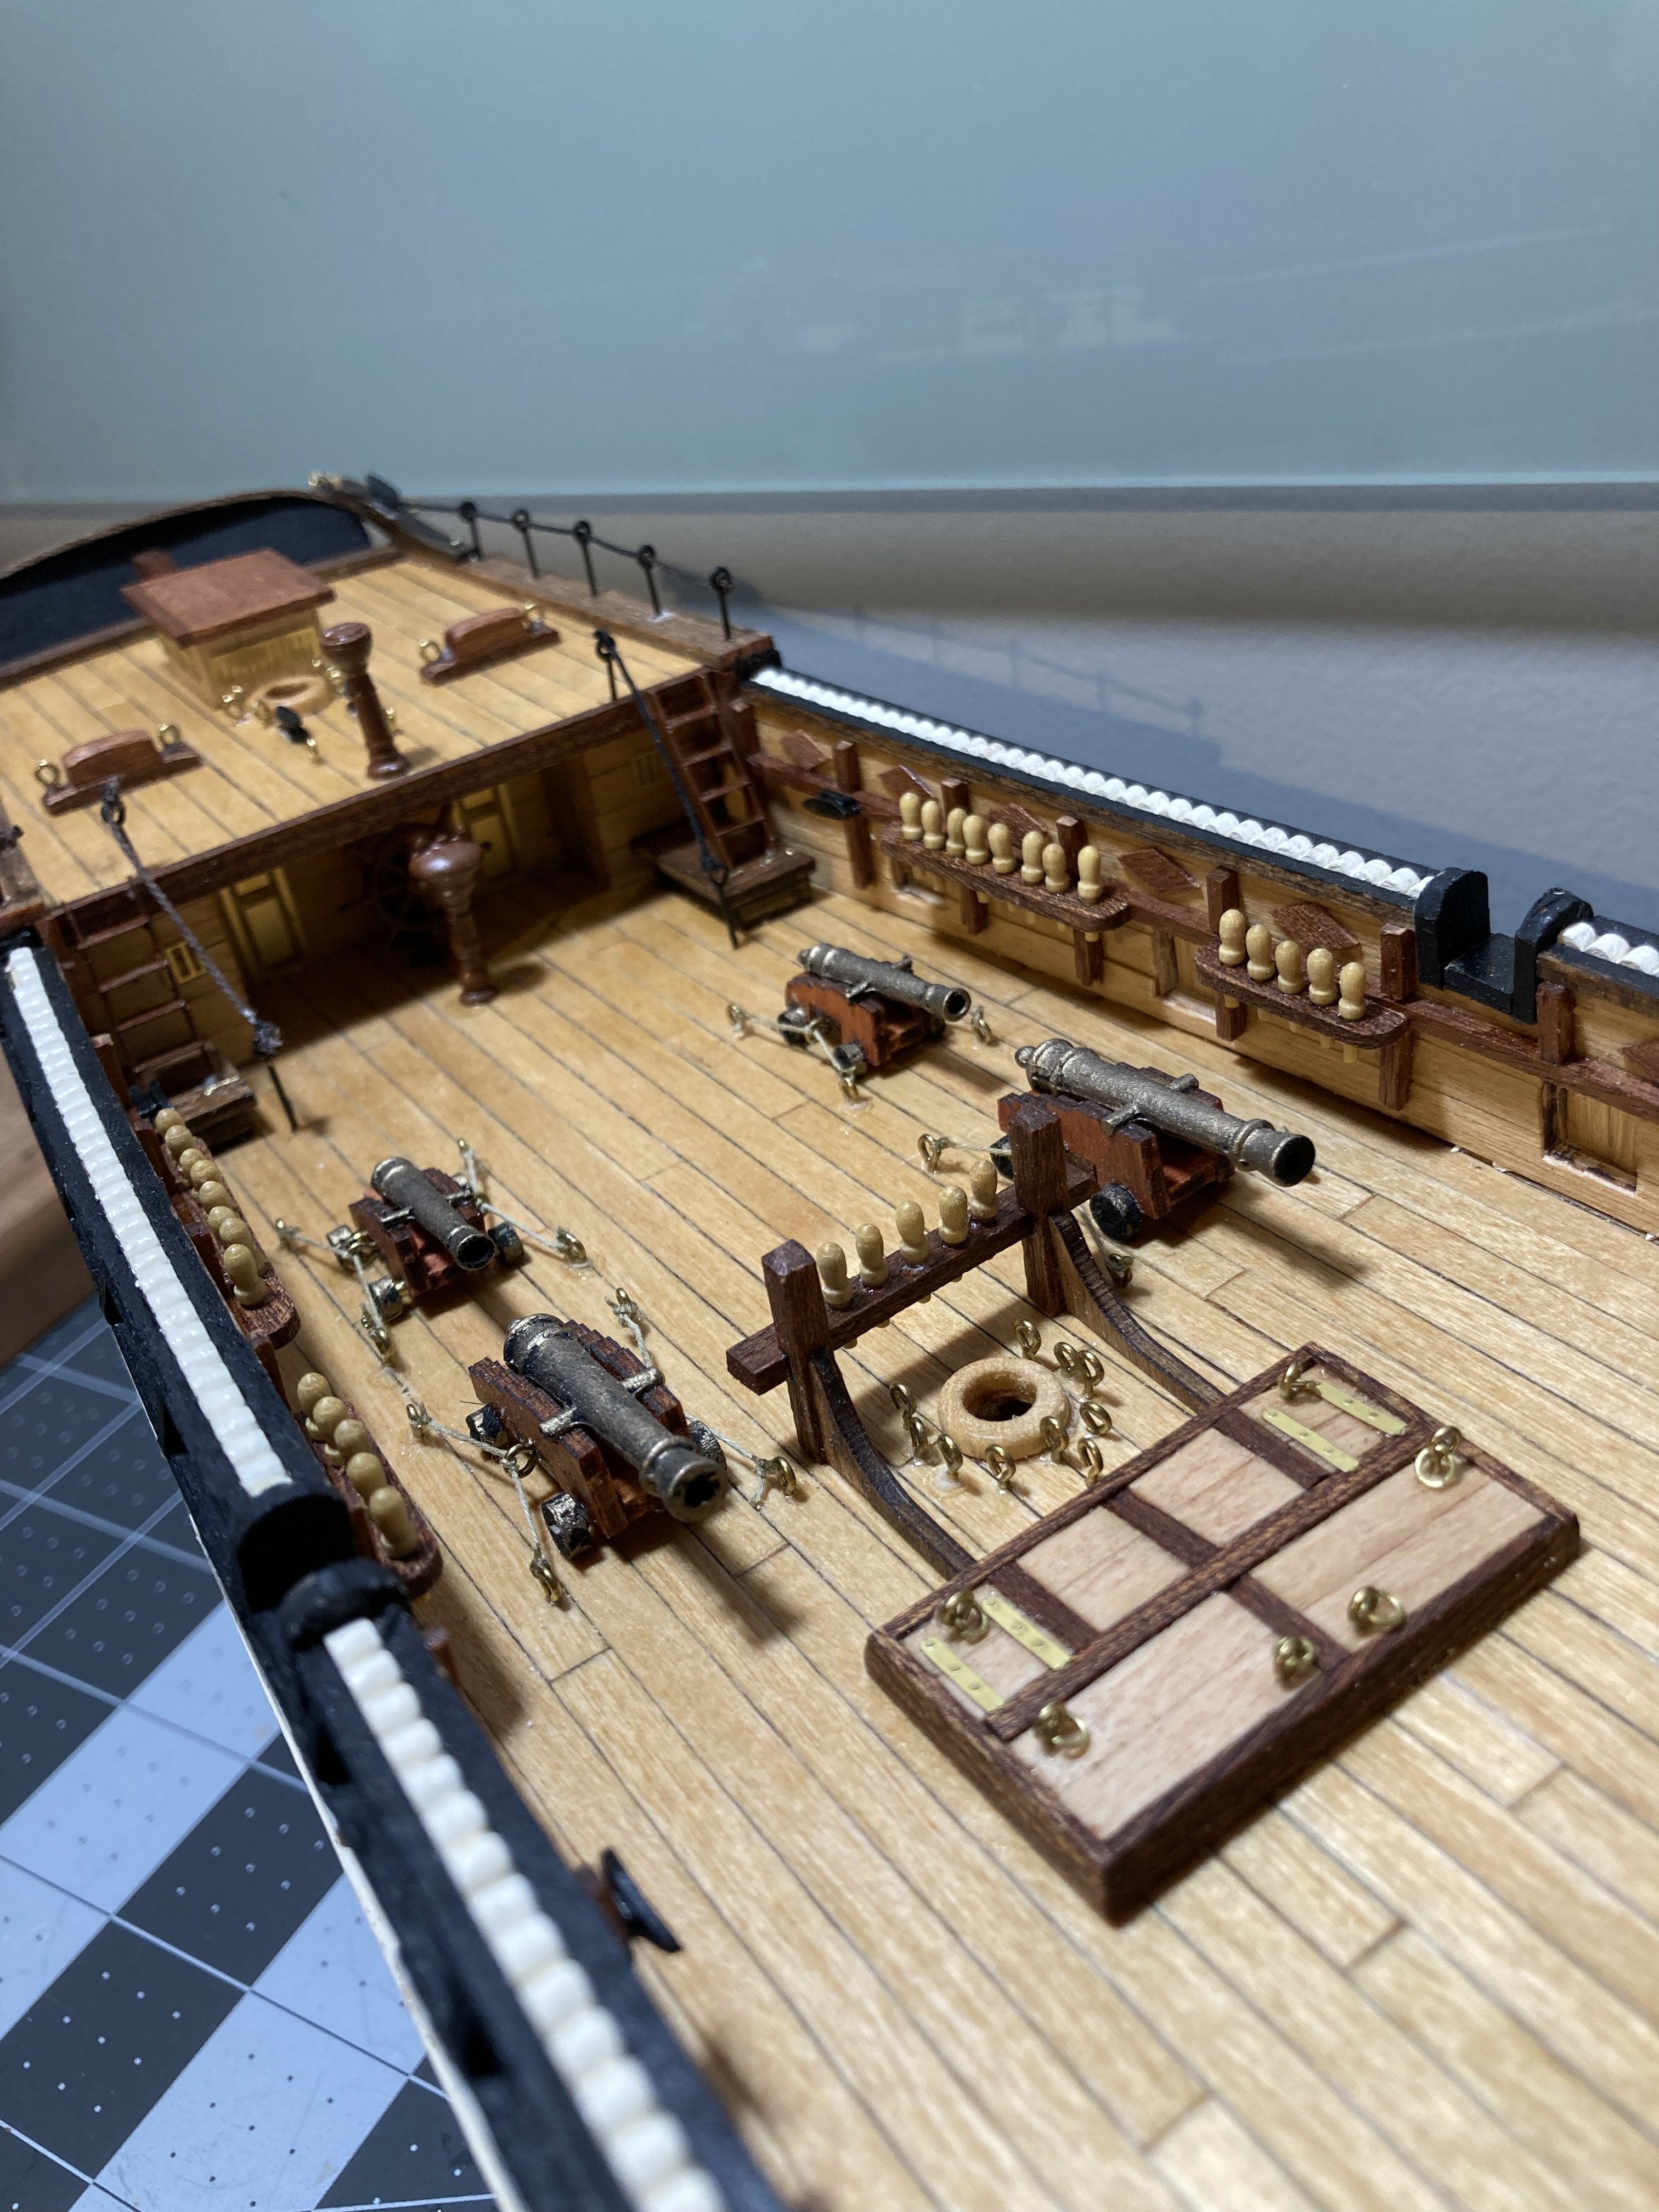
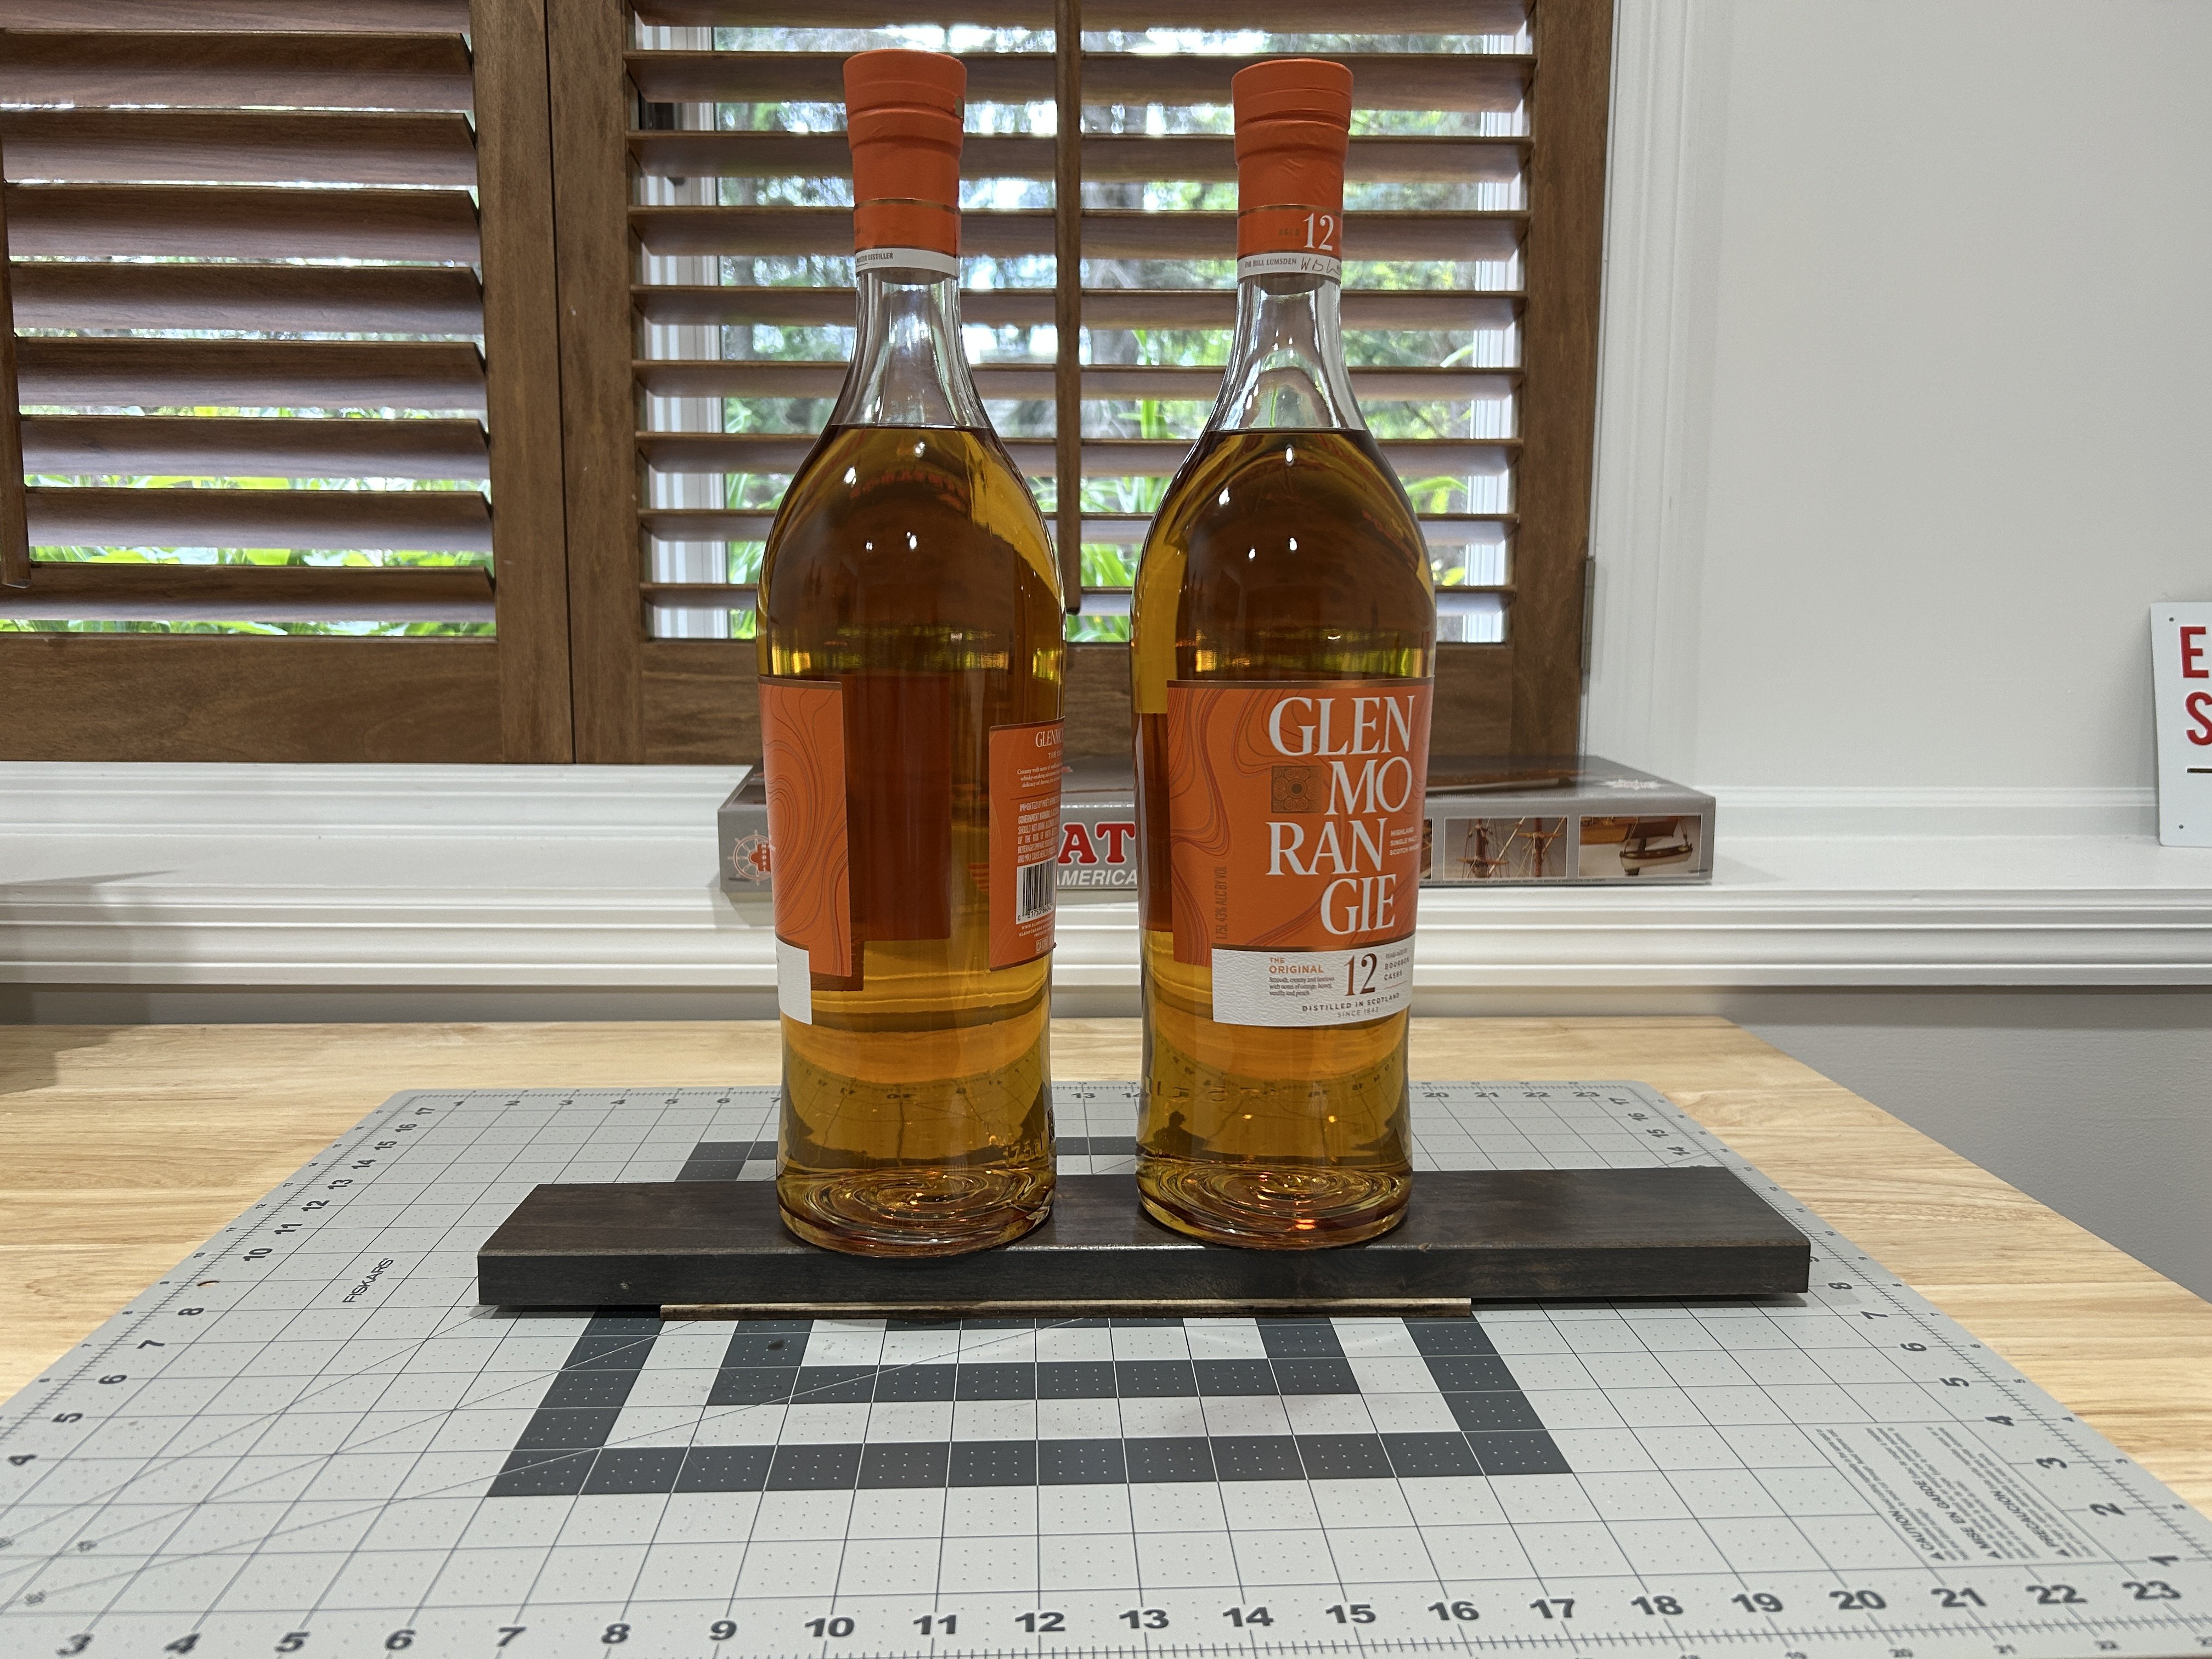
Until recently I assumed I would build my Syren next, but I think I felt a little burned out on rigging with my Frigate Diana so I decided to go with the Essex instead. I was drawn to this kit in large part from the details like the pumps, stove, and Binnacle. I am looking forward to building those items. I am also looking forward to building that allows the gun deck to be viewed though areas of the upper decks that are left open. The instructions say that each builder can decide what portion of the upper decks to leave open. I plan to leave as much as possible on one side of the ship open. I think I will plank as much as I need to to support the deck features that are placed along the center of the ship, and leave the area between those features and the margin plank open. I will leave the cannons off on the side of the ship that I left open As I get started, I am considering a few updates to the kit. I am considering upgrading the blocks (used mainly for the guns), and possibly looking into finding someone to 3D print the gun barrels. After opening the kit and going through all the parts, if there is one thing that is disappointing, it is the quality of the cast metal parts. The gun barrels will take a lot of time to file/sand smooth. I am a little familiar with the process of die casting parts from a former job, and it is clear that the molds that are being used for these parts have outlived their useful lives. If model shipways ever wanted to rejuvenate their lineup of models, replacing these metal parts with 3D printed parts would go along way towards making these kits more modern. The model isn’t designed to have any decks below the gun deck, but the instructions do show an option of cutting away parts of the bulkhead former and certain bulkheads and adding some sections of deck below the hatches in the gun deck. I am not sure how visable those decks will be, and I think I will skip this option. One other option that you won’t see if you look at the online instructions is the optional strongbacks. The bulkheads have been cut with a slot on either side of the bulkhead former to accommodate a 5/16 inch x 5/16 inch piece of wood glued along both sides of the bulkhead former to help keep it straight. I will add this option. This model has 22 bulkheads spread over about 20 inches, so on average less than an inch between bulkheads. This should provide a good framework for planking the hull. I will need to be patient and be sure to fair it properly. It took me at least two weeks on my NRG half hull, this model has two sides and more bulkheads, this process may take me a month. I do have more confidence in successfully fairing the hull and planking the hull after the NRG Half Hull. I can’t speak highly enough of this kit if you are struggling with planking. I will expand my planking skills on this model by using the edge bending technique with the 1/16 x ⅛ inch planking material that is supplied with the kit. The bulkhead former comes in two pieces. The aft section on mine had a slight warp in it so I soaked it in some hot water and used an iron for heat to attempt to flatten it. I put some weights on it to be sure it stayed flat. Those are 1.75 liter bottles of scotch. Part of my tariff protection stockpile. I found that the slots in the bulkhead former are all a little bit oversized, so I have added shims to the slots. I will need to sand a little bit to get a good snug fit. With 22 bulkheads, I will be spending a lot of time removing laser char so it might be awhile until my next post.


-
I have completed the planking and added the cap rail. I am really happy with the planking, but I a really disapointed in my staining results. My three previous kits were from Occre and they supply Lime Wood for the light color wood in their kits. I stains up really nicely, and I have not had to worry about using any sort of pre-stain product. Clearly the basswood needed something to help it evenly absorb the stain. I did some research online, and sounds like the only real solution involved a lot of sanding which is not really an option when using 1/32 inch material. I am glad I am learning this lesson on this model and not my Essex or Syren. Next up will be adding the frame and painting the background black.

-
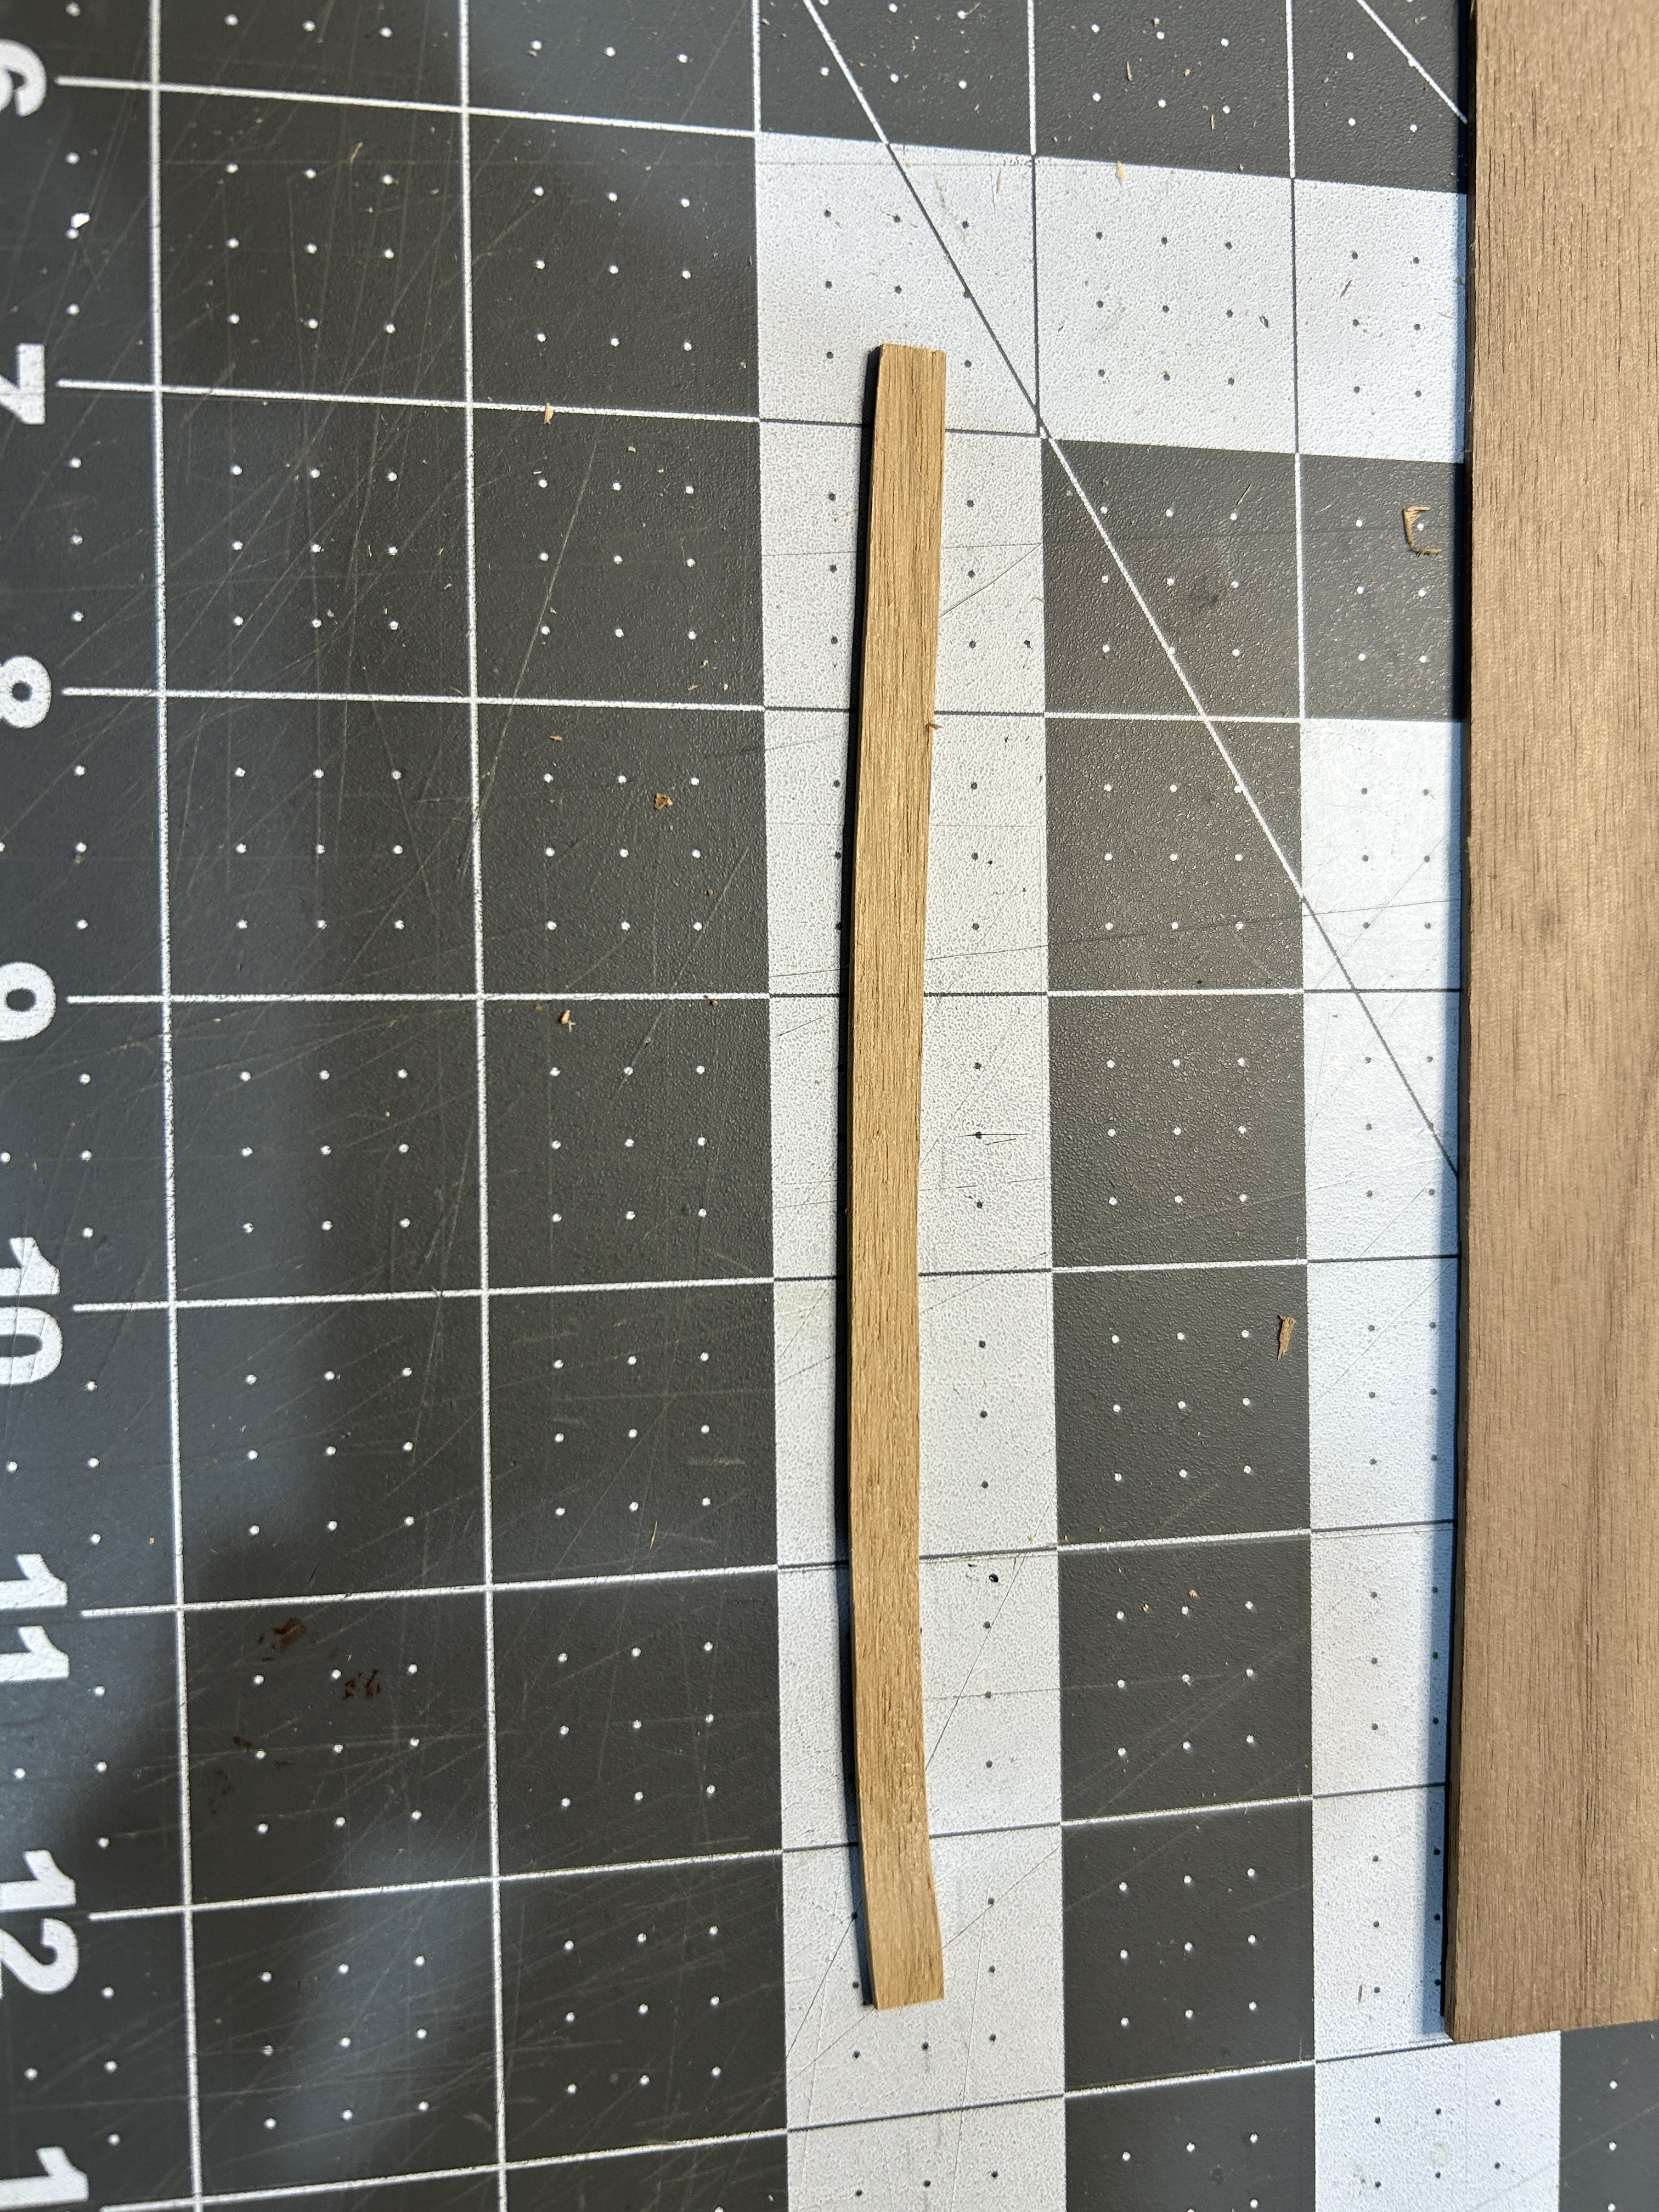
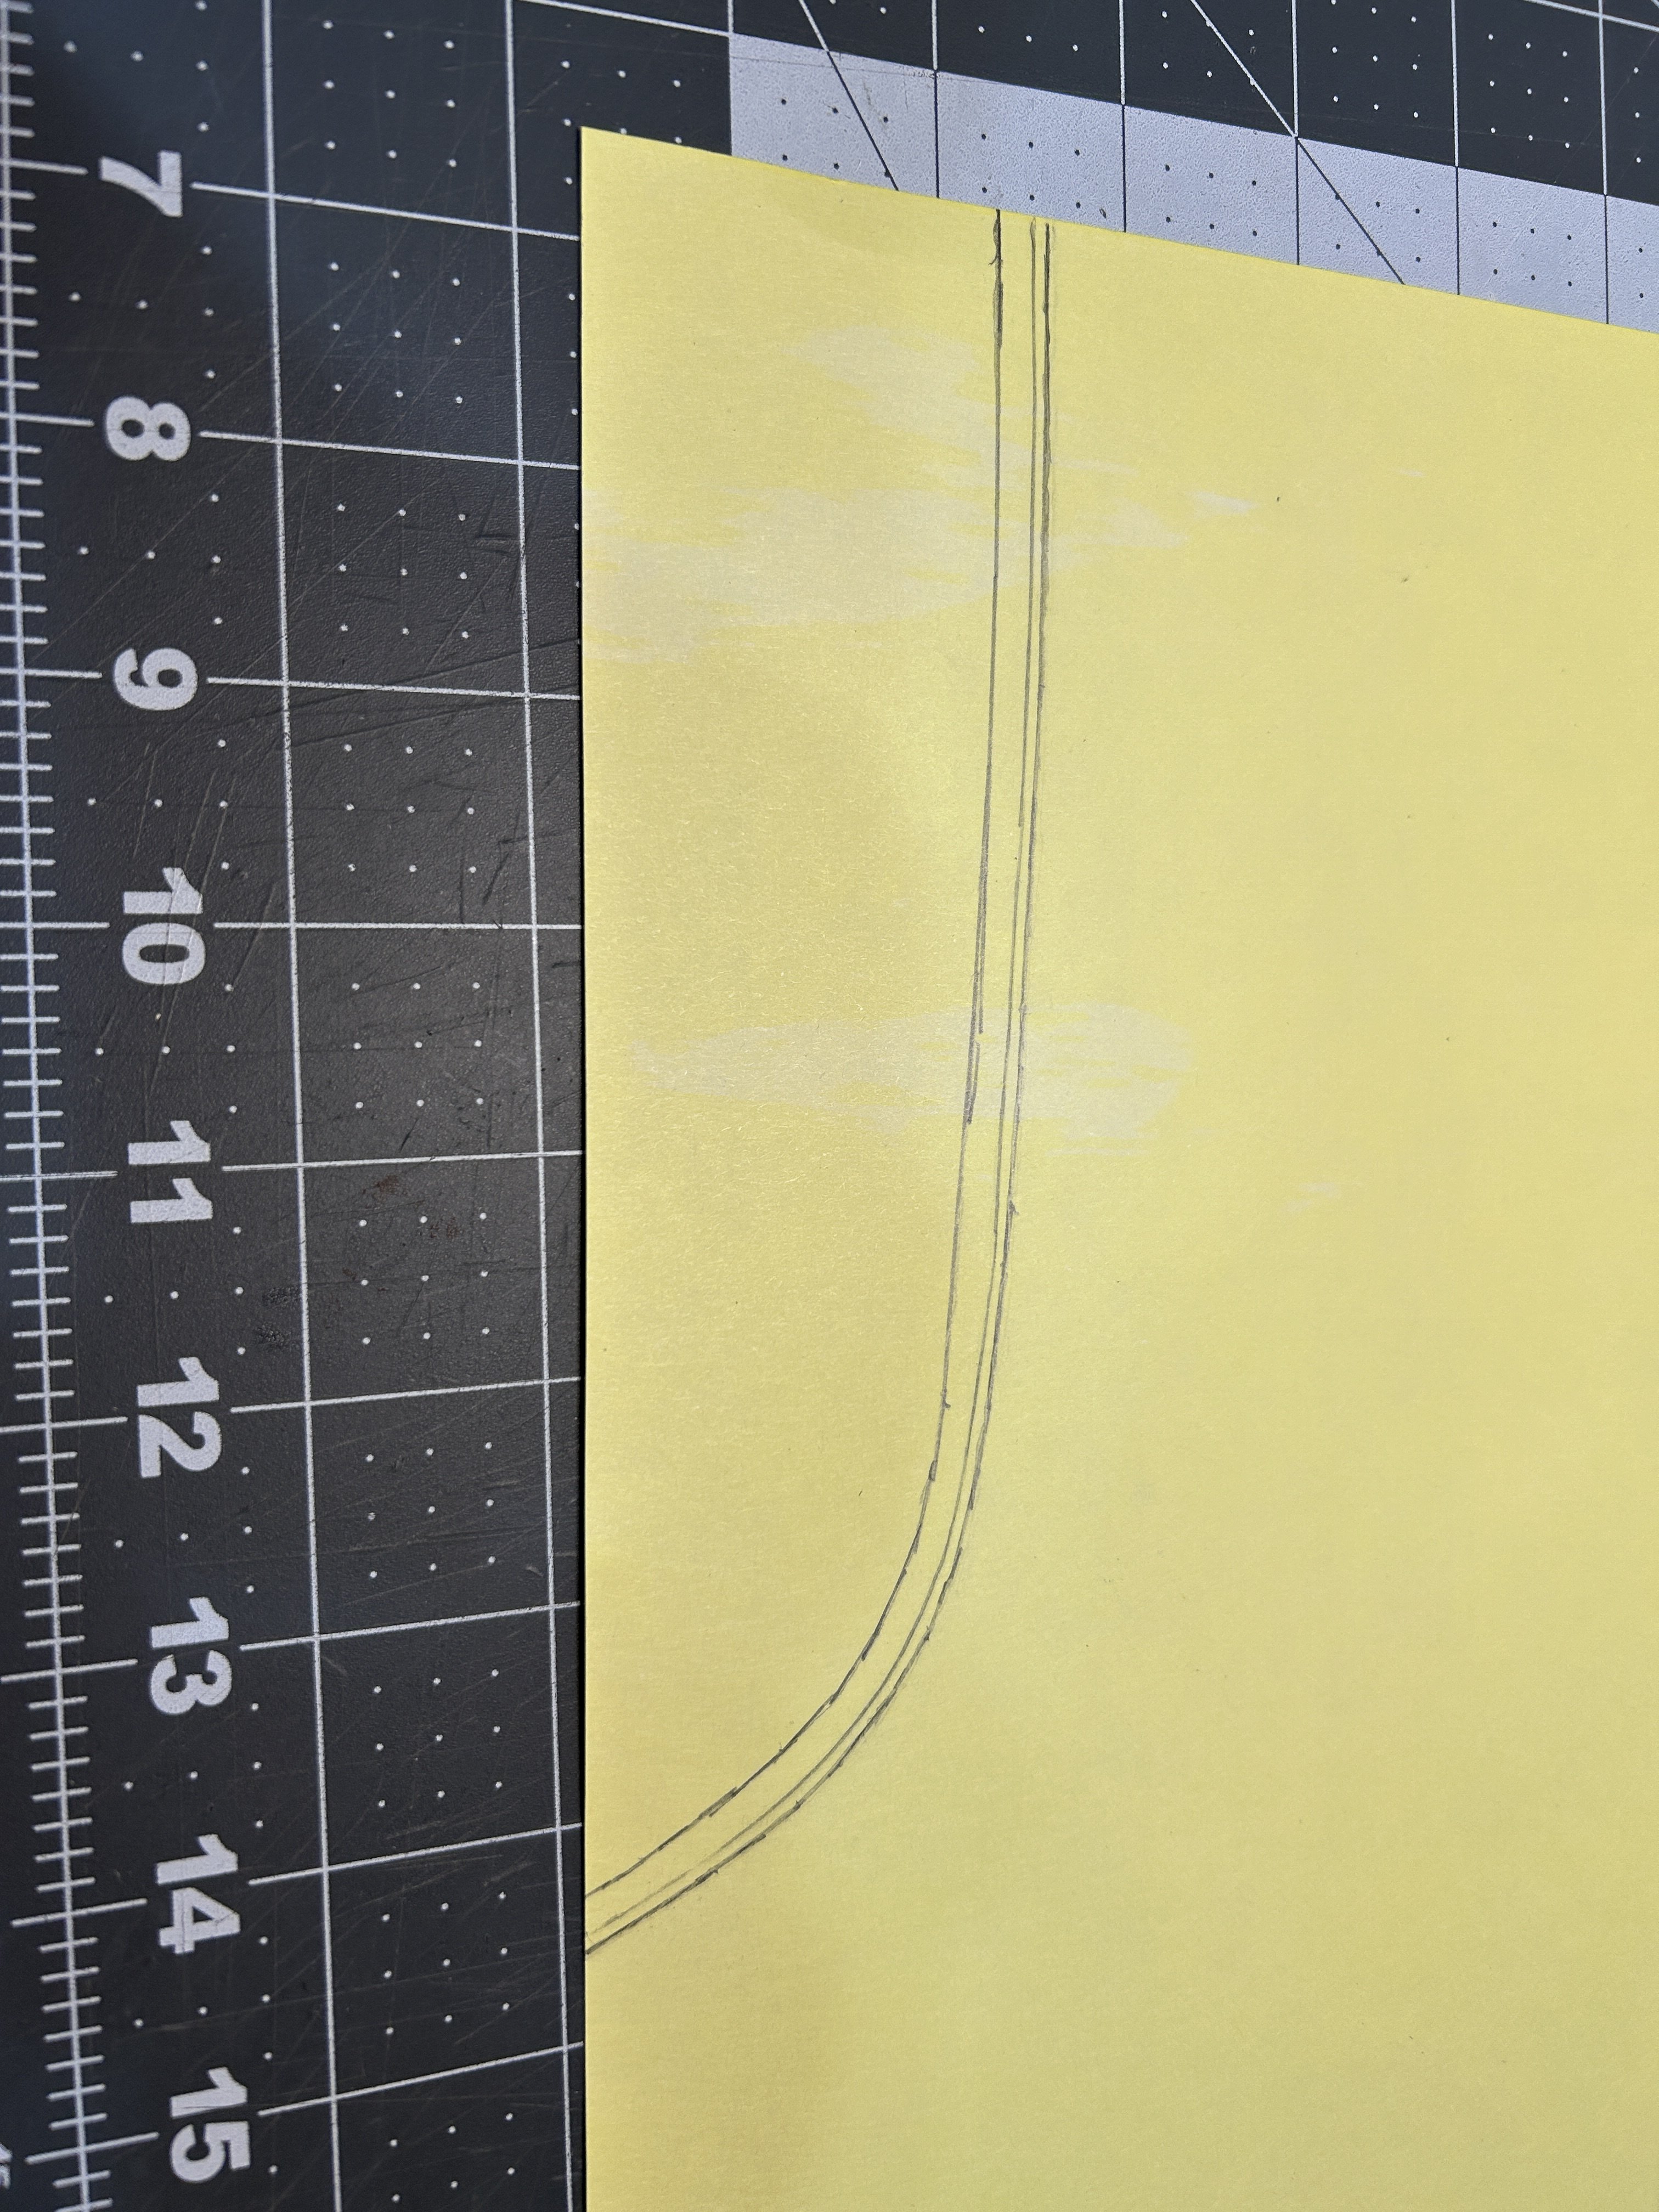
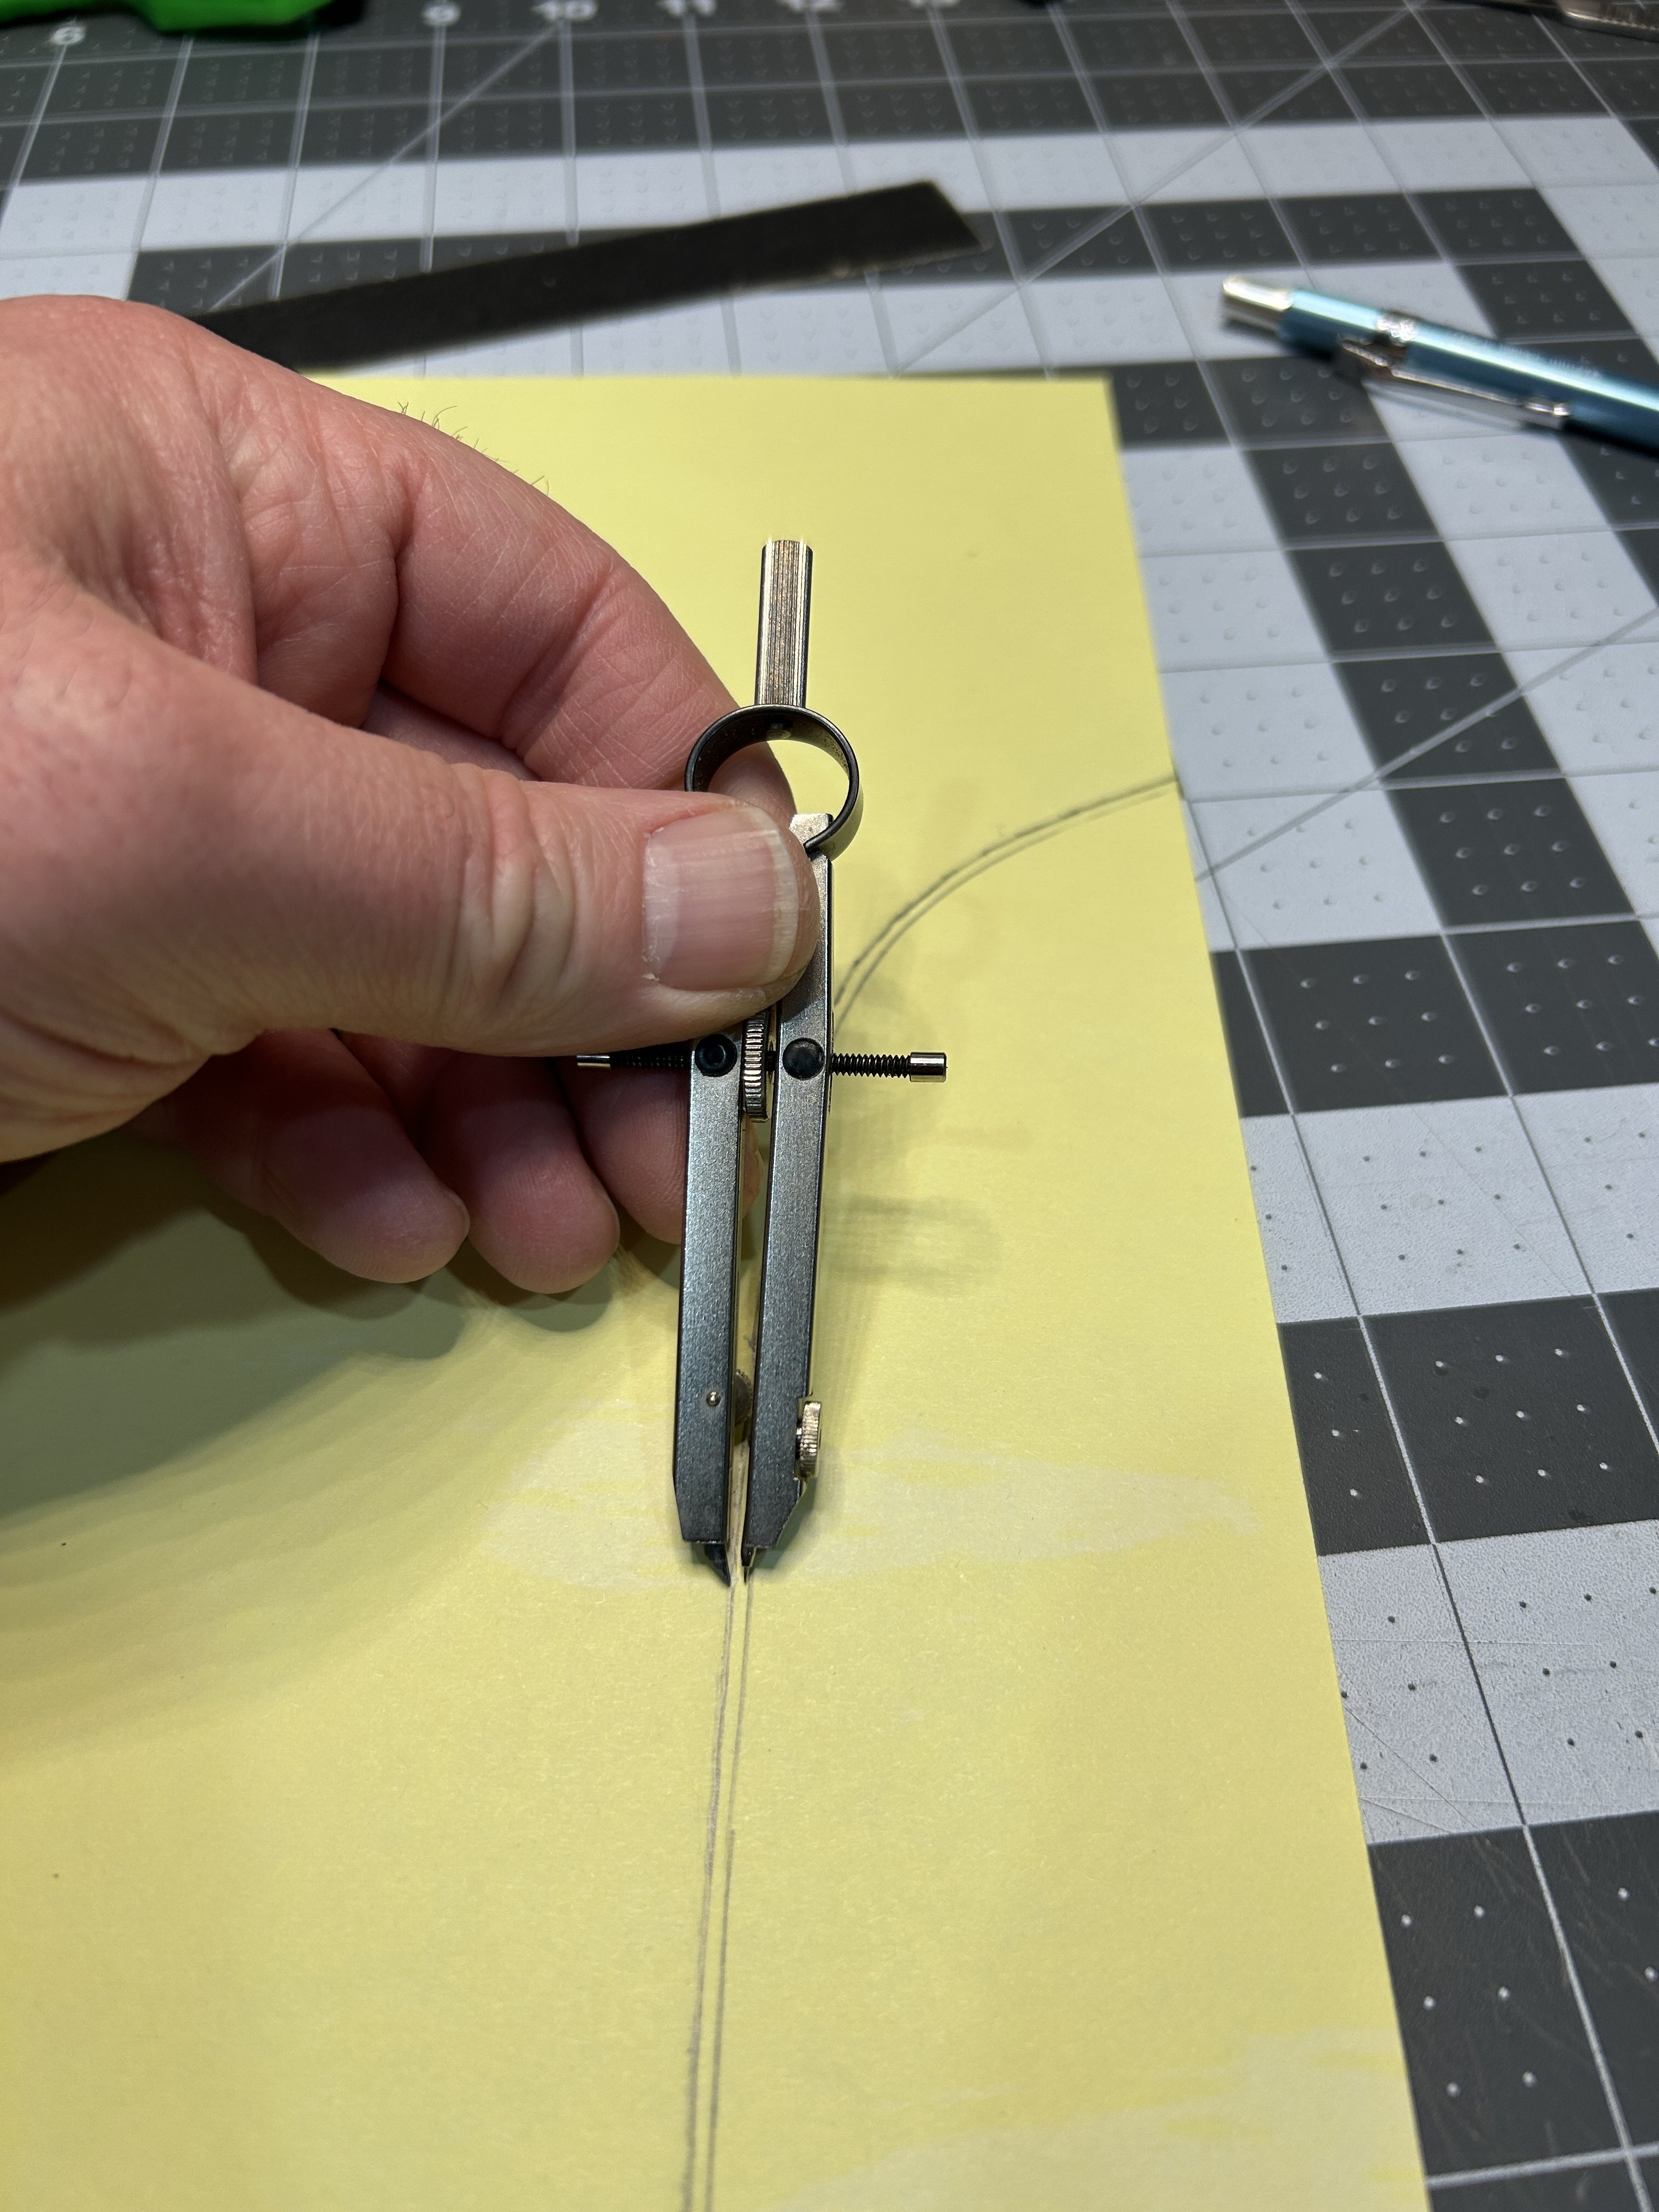
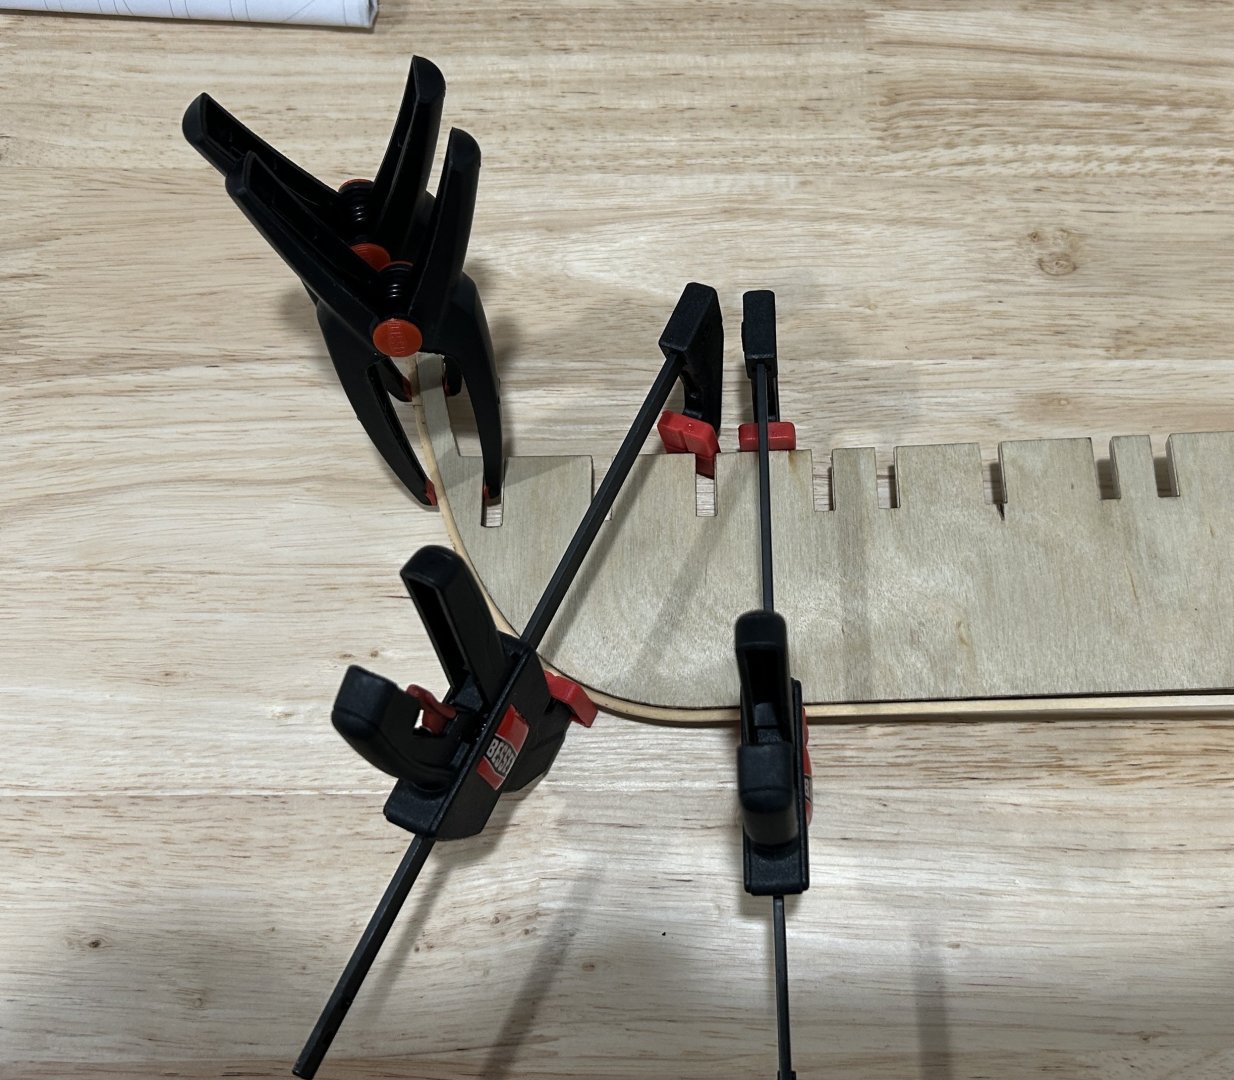
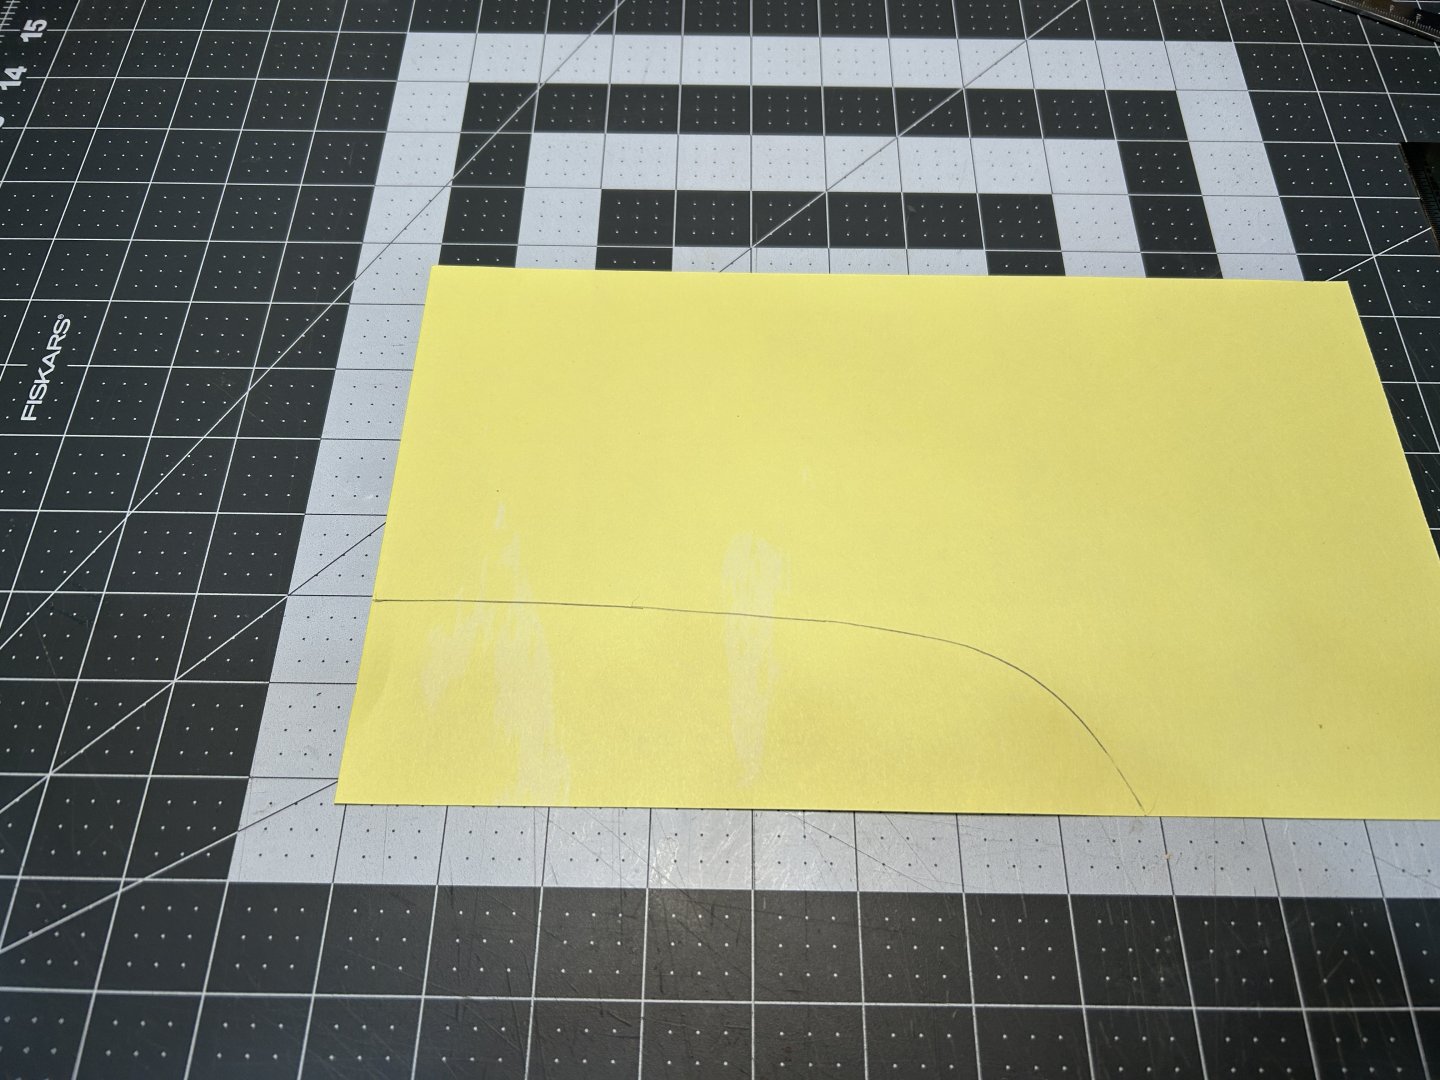
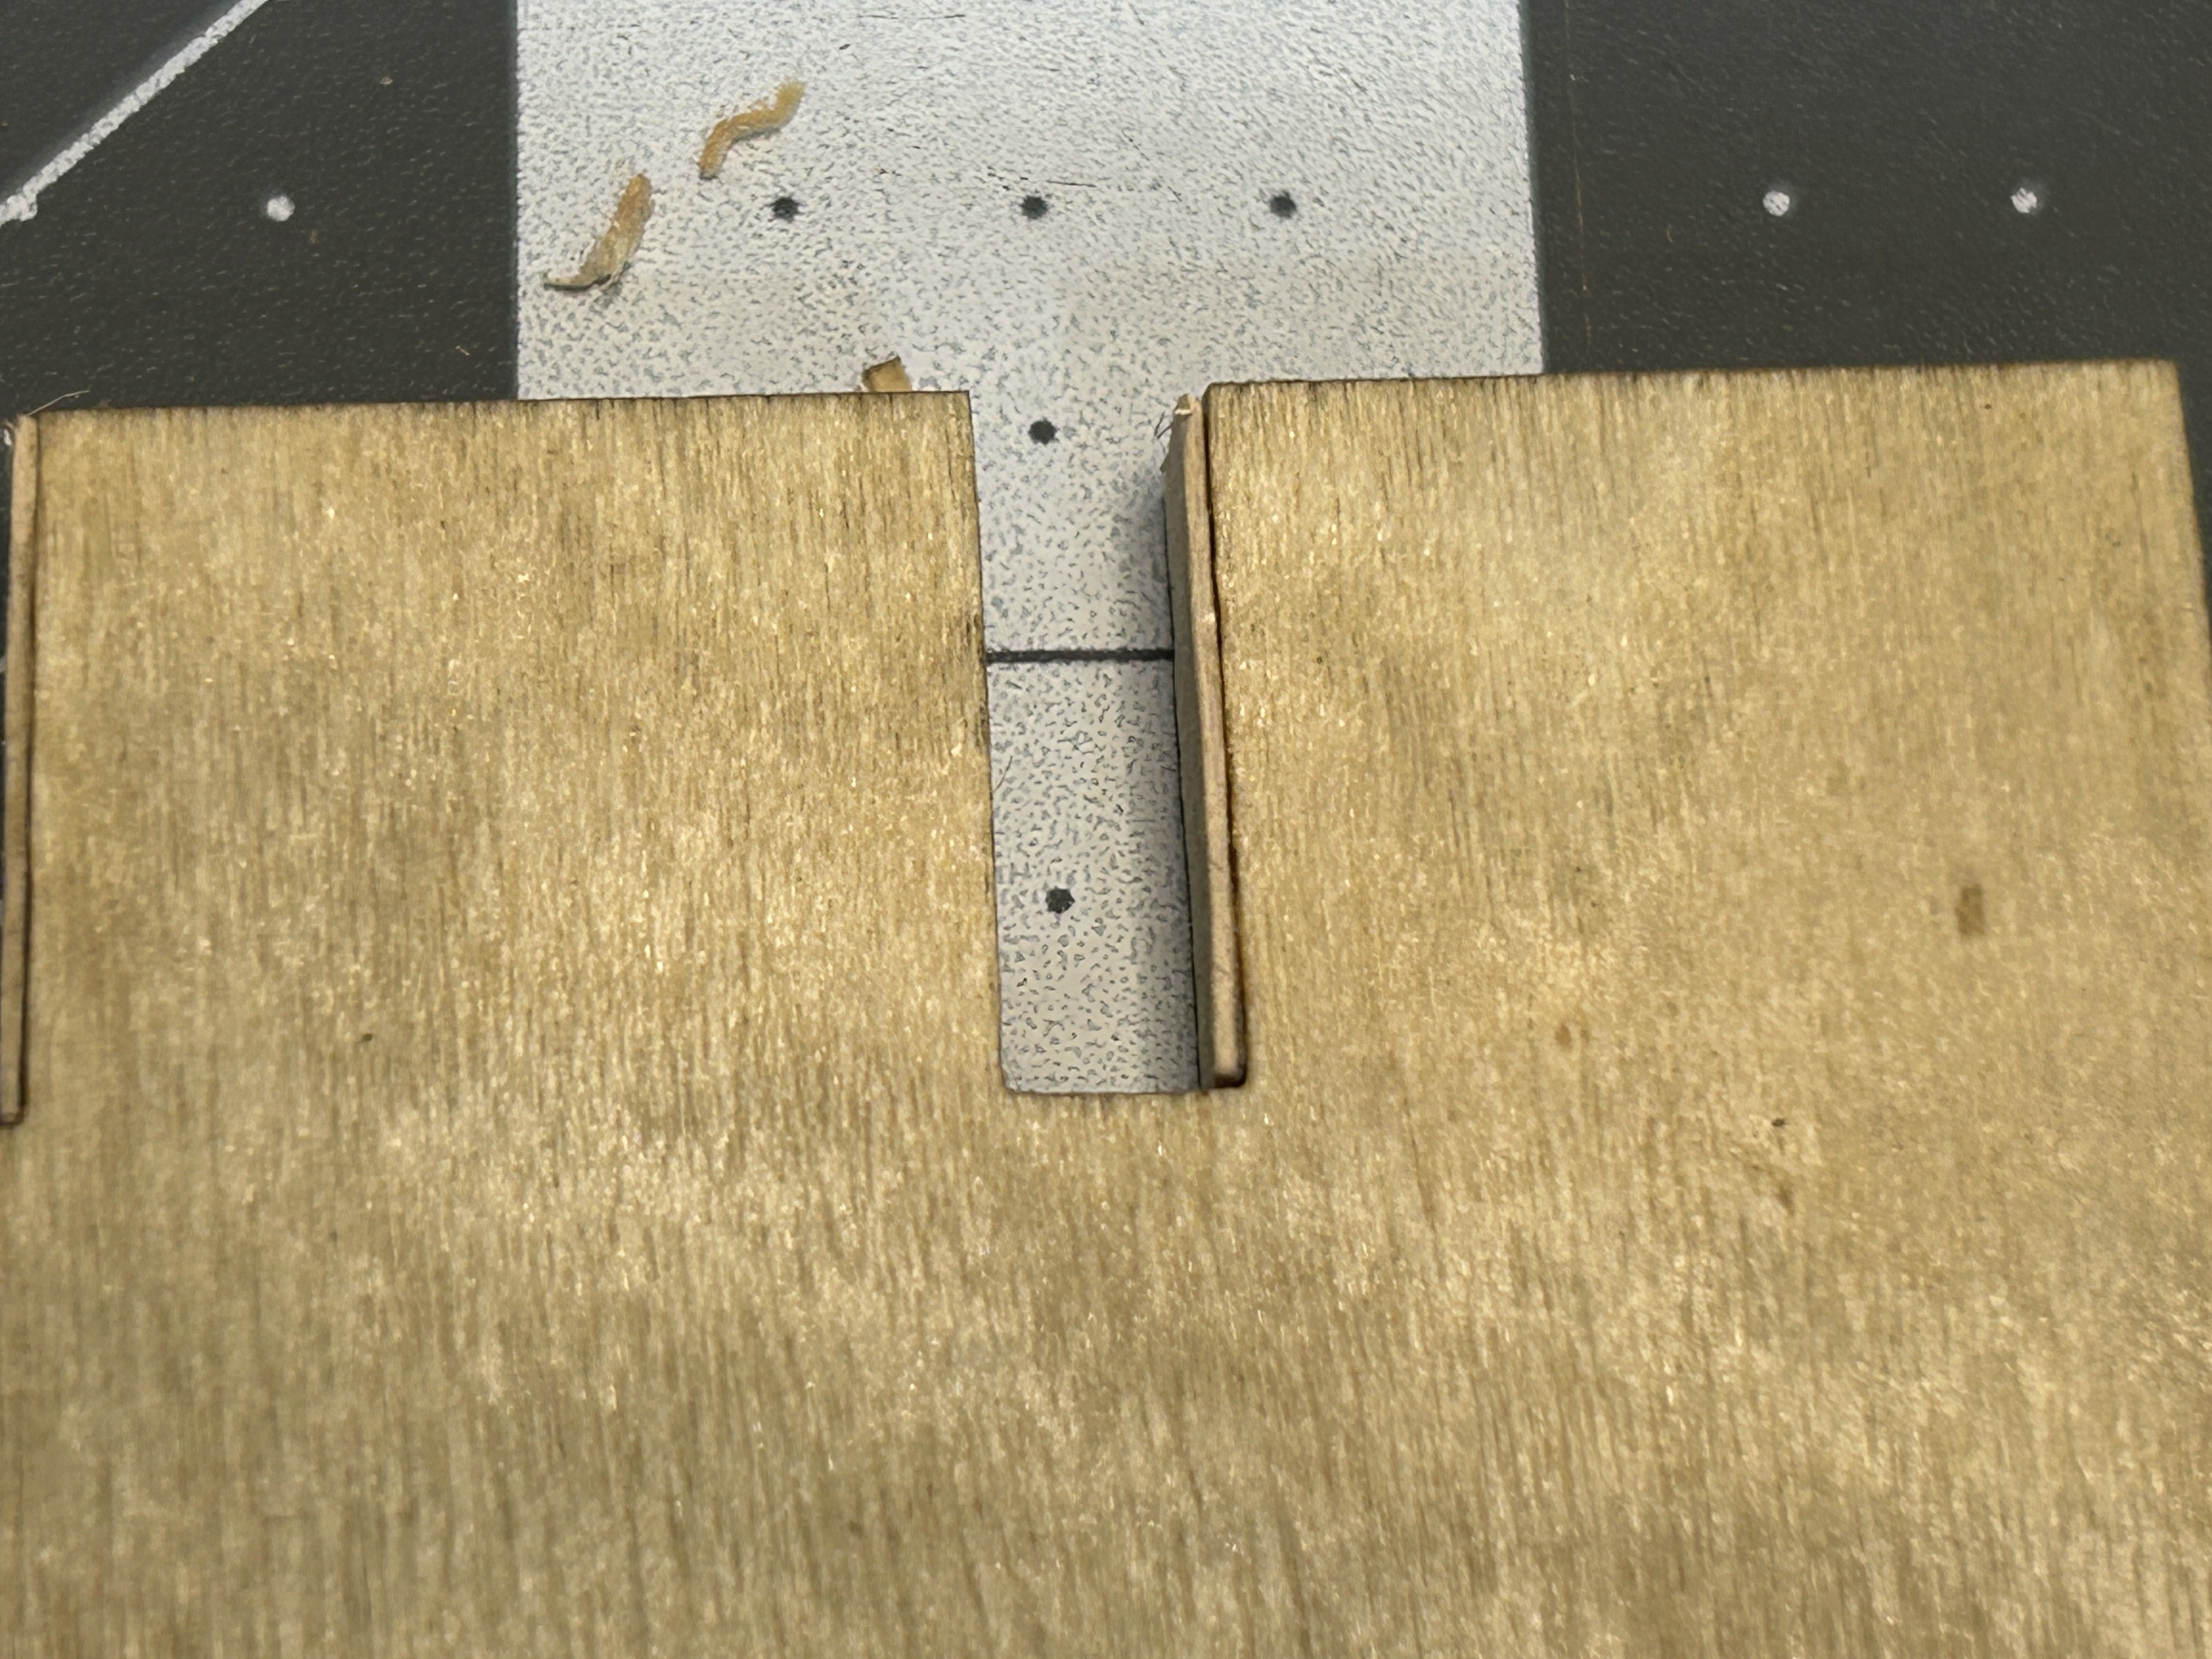
You may have noticed in some of my photos, the wale was installed using a darker colored wood. I decided to buy some walnut and use that for the wale, cap rail and any of parts that were colored black in the prototype. The wale will consist of 2 layers of 1/32 material. After installing the first layer for the wale, I was not satisfied with the result. I struggled to get a smooth edge. I decided to remove the first layer and create the first layer with a continuous strip of basswood to ensure a nice smooth edge. I used two 1/32 x 1/8 inch strips for the bottom layer. I will complete the wale with the walnut on the second layer. Here is the model with the first layer of the wale installed and all of the planking below the wale completed. Above the wale I decided to use 1/32 x 3/16 inch basswood strips instead of cutting the pieces out of the basswood sheets. To create the template for the cap rail, I used a piece of cardstock and traced the outside line of the rail. I then used a compass to create the the full width of the cap rail. Below is the hull with the cap rail installed. I used 1/16 walnut for the cap rail. I thought 1/32 material wasn't substantial enough for the cap rail. I used a hobby knife to cut the cap rail, but that was difficult with that thickness of walnut. I should have used my scroll saw instead. next I will plank the stern, add the second layer of the wale, and stain and varnish the hull.

.thumb.JPG.0f17c11ba09ba56227ee6669028f32a0.JPG)


-
Before my last post I checked your stock on the rope rocket just in case I needed to order one of the last ones. Glad to hear those will still be available. My plan is to try making my own rope after I retired and have more time.
-
Love to hear you have a plan. Looking forward to using more of your rope and fittings in the future. what about the rope rocket and servomatic.


.JPG.2f12e23c706f6312310c5050ccd88b41.JPG)
.JPG.9d07fe704ad4f3c78ff81423d347c02a.JPG)
.JPG.a63240217595d03d64cfe0ccd8769773.JPG)


.jpg.d280cee3b865550025a1ad7a0b01def1.jpg)


.JPG.dfd3c62a232406d9373a2d8be10e1bcf.JPG)