.jpeg.882f0a147f14858c9e673da7e13d8ebe.jpeg)
RossR
-
Posts
531 -
Joined
-
Last visited
Content Type
Profiles
Forums
Gallery
Events
Everything posted by RossR
-
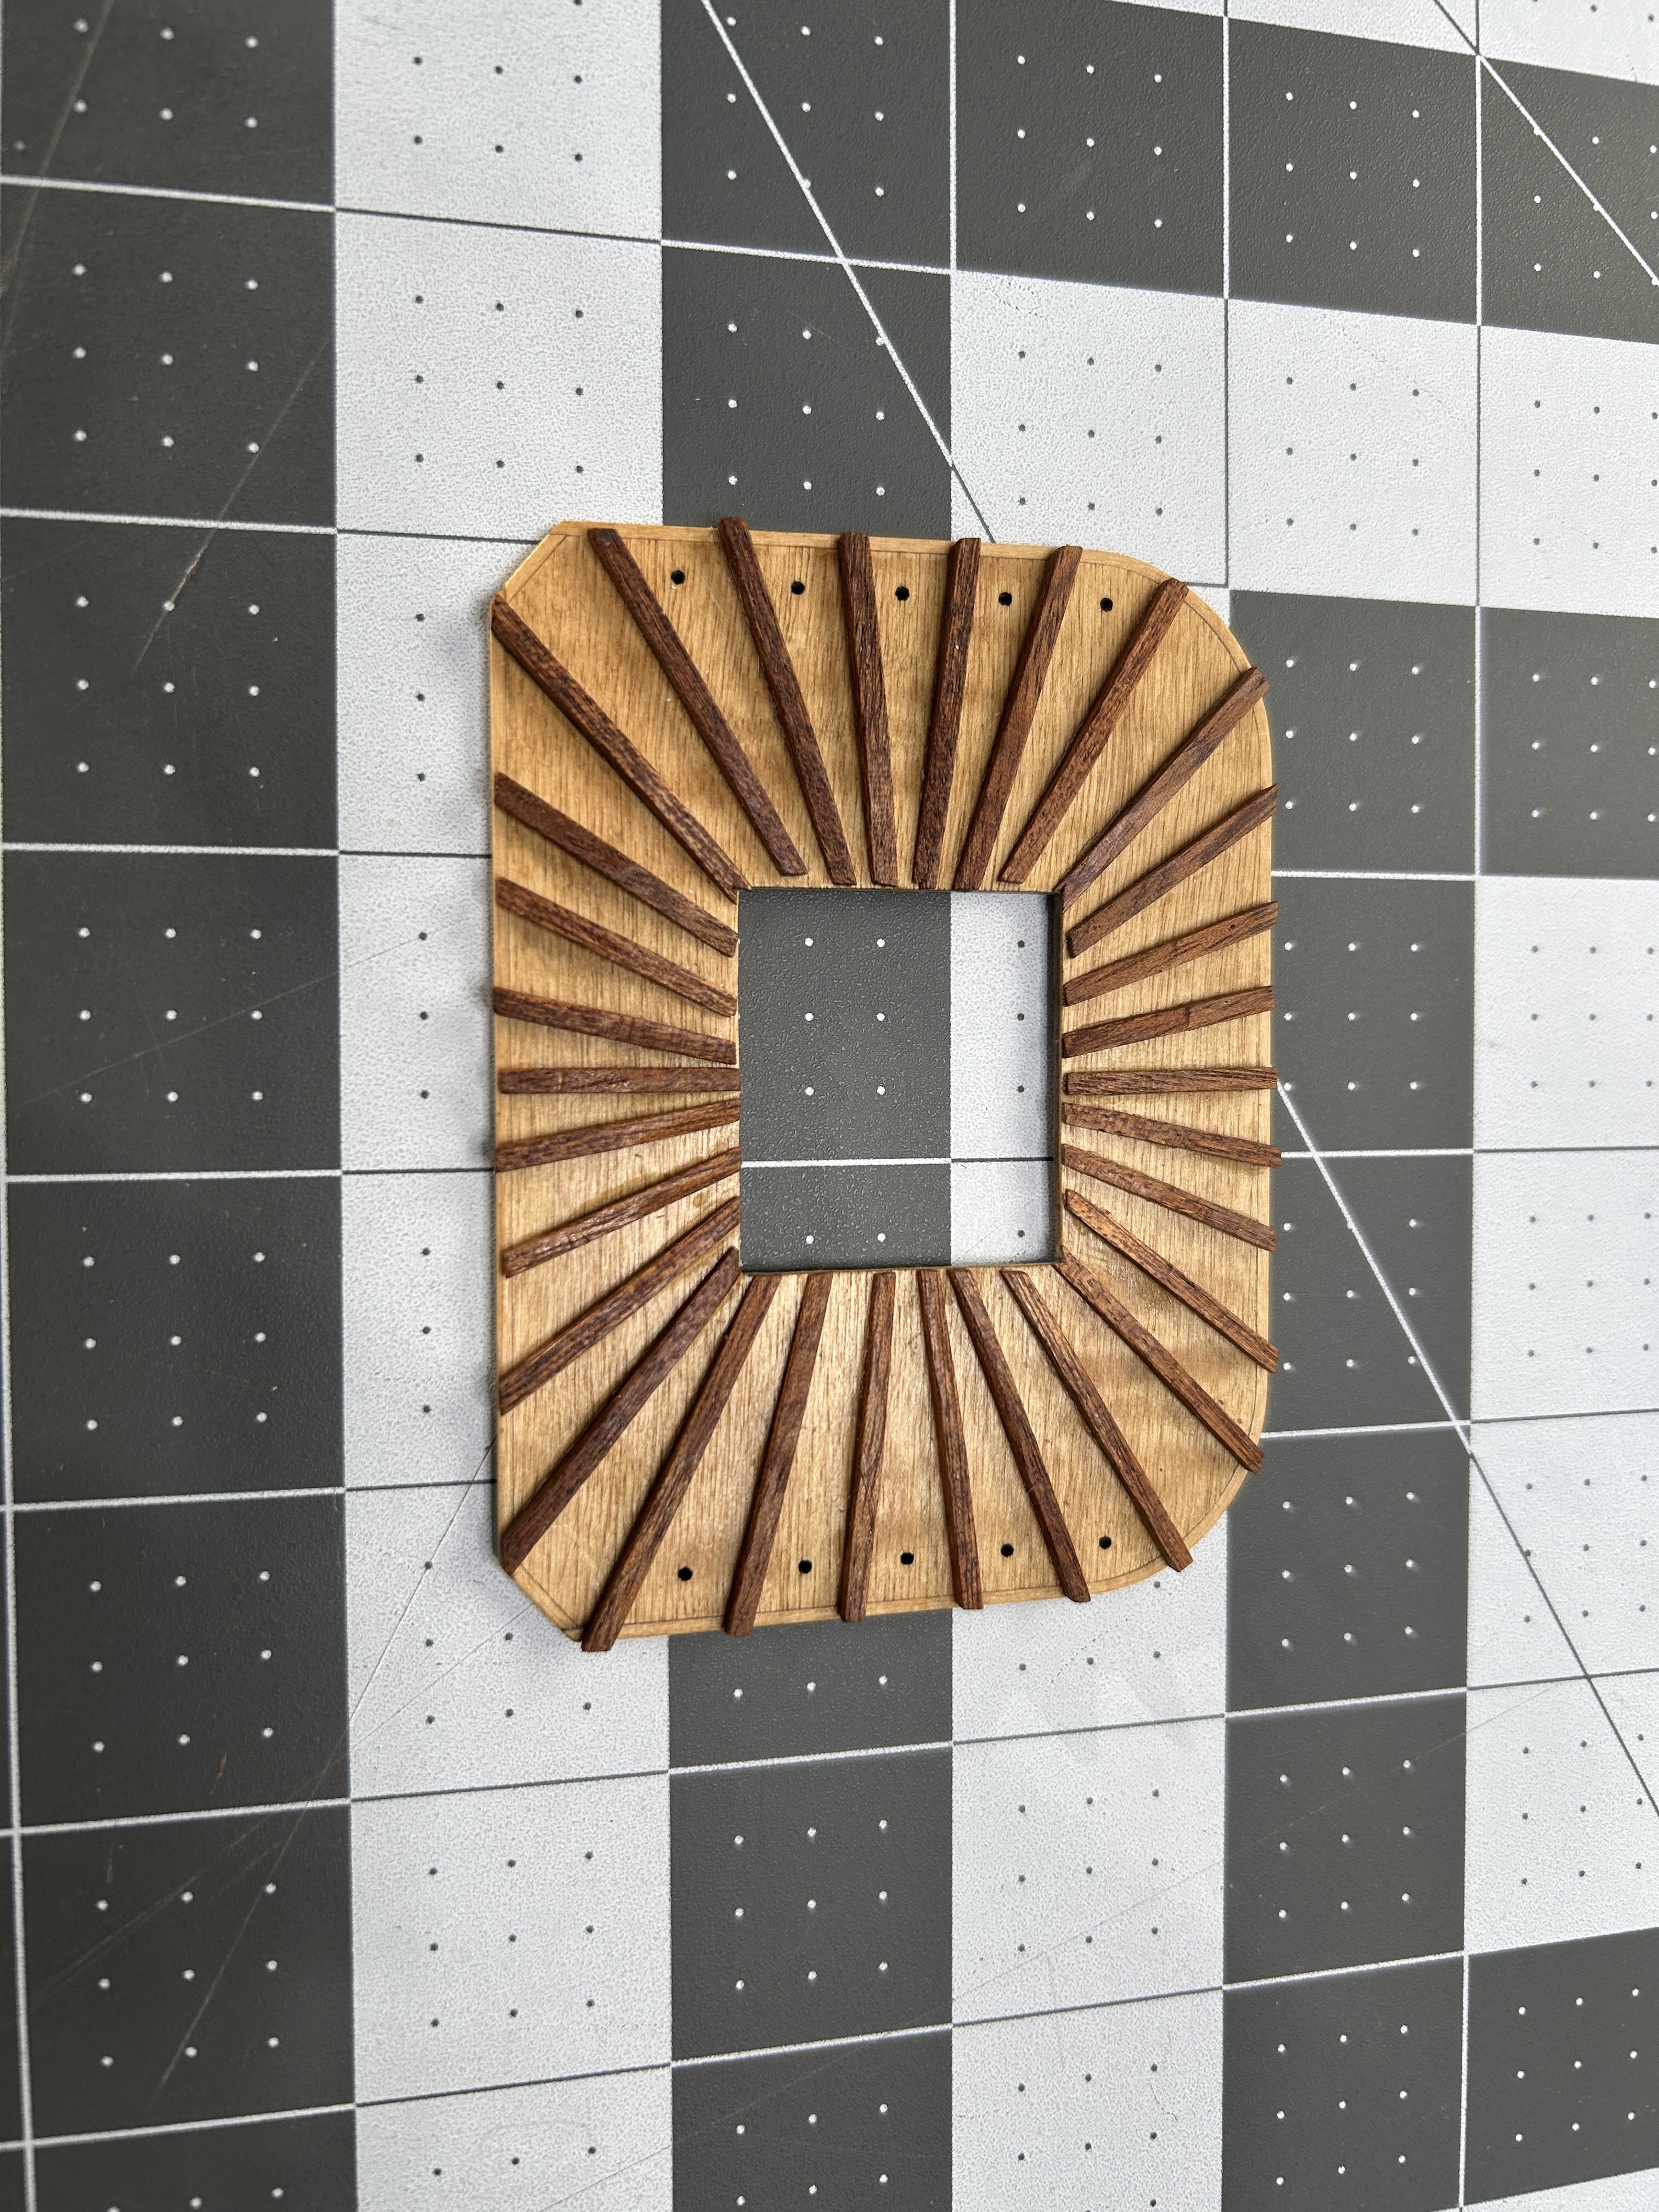
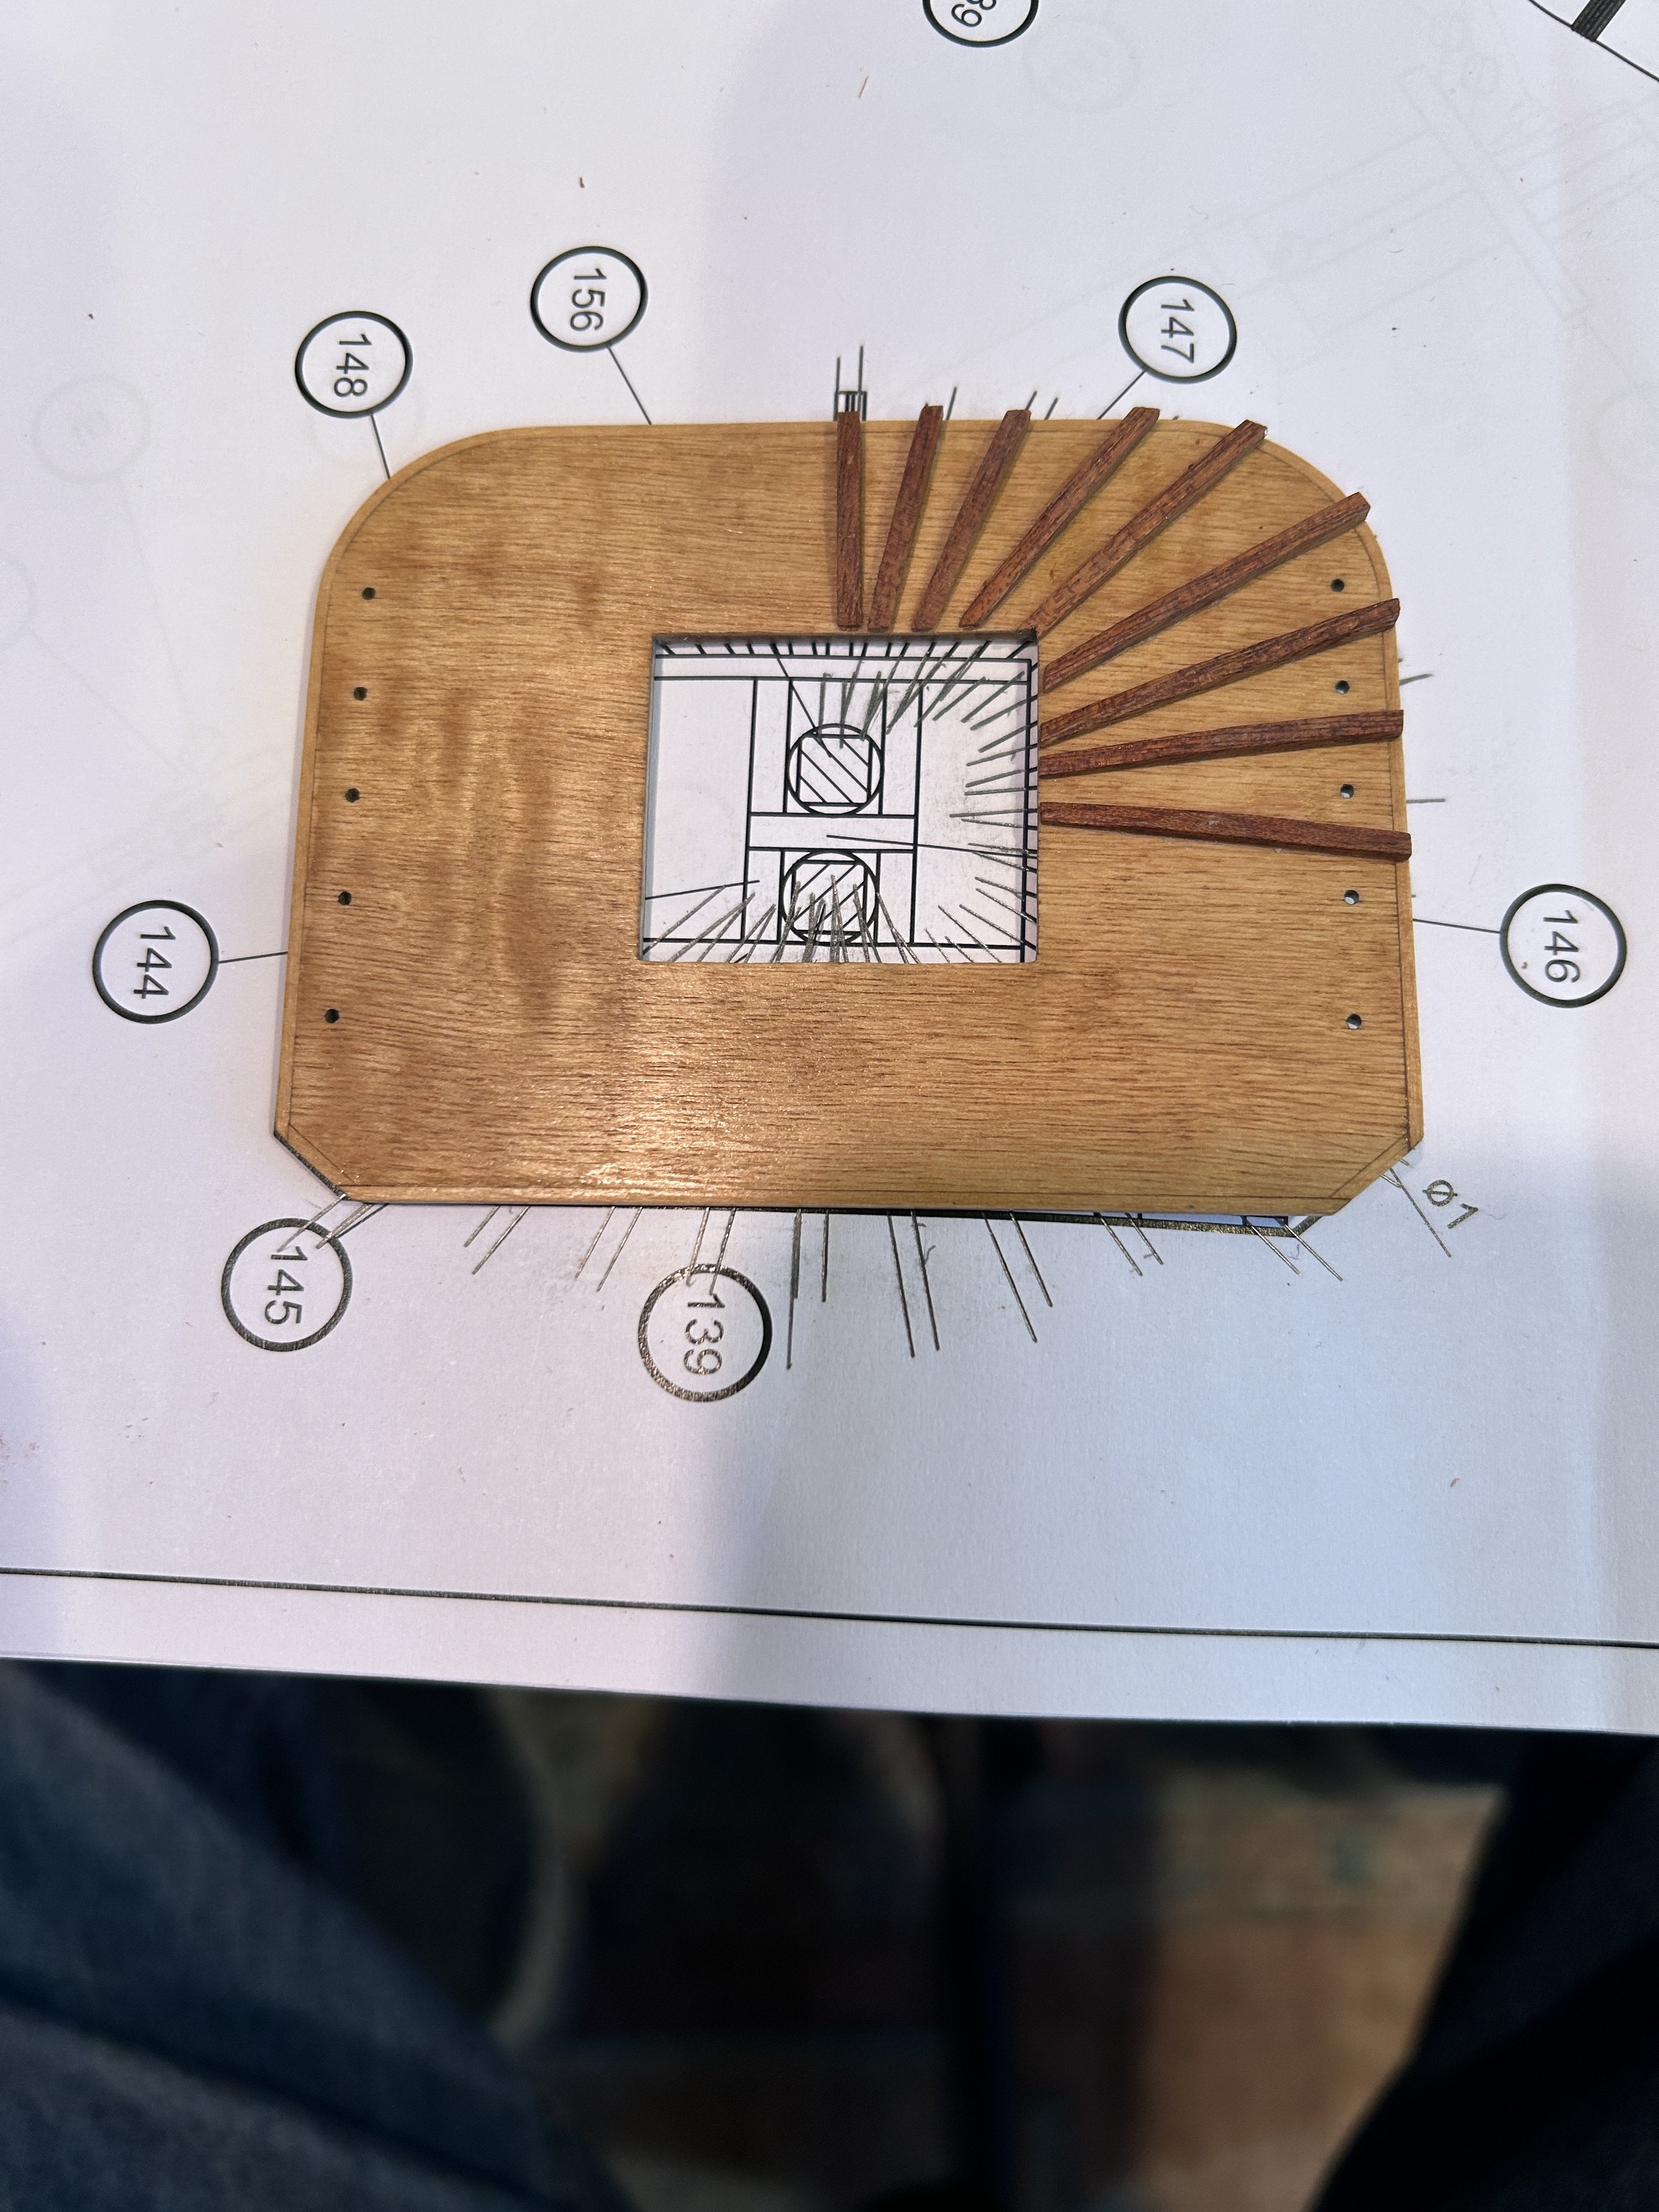
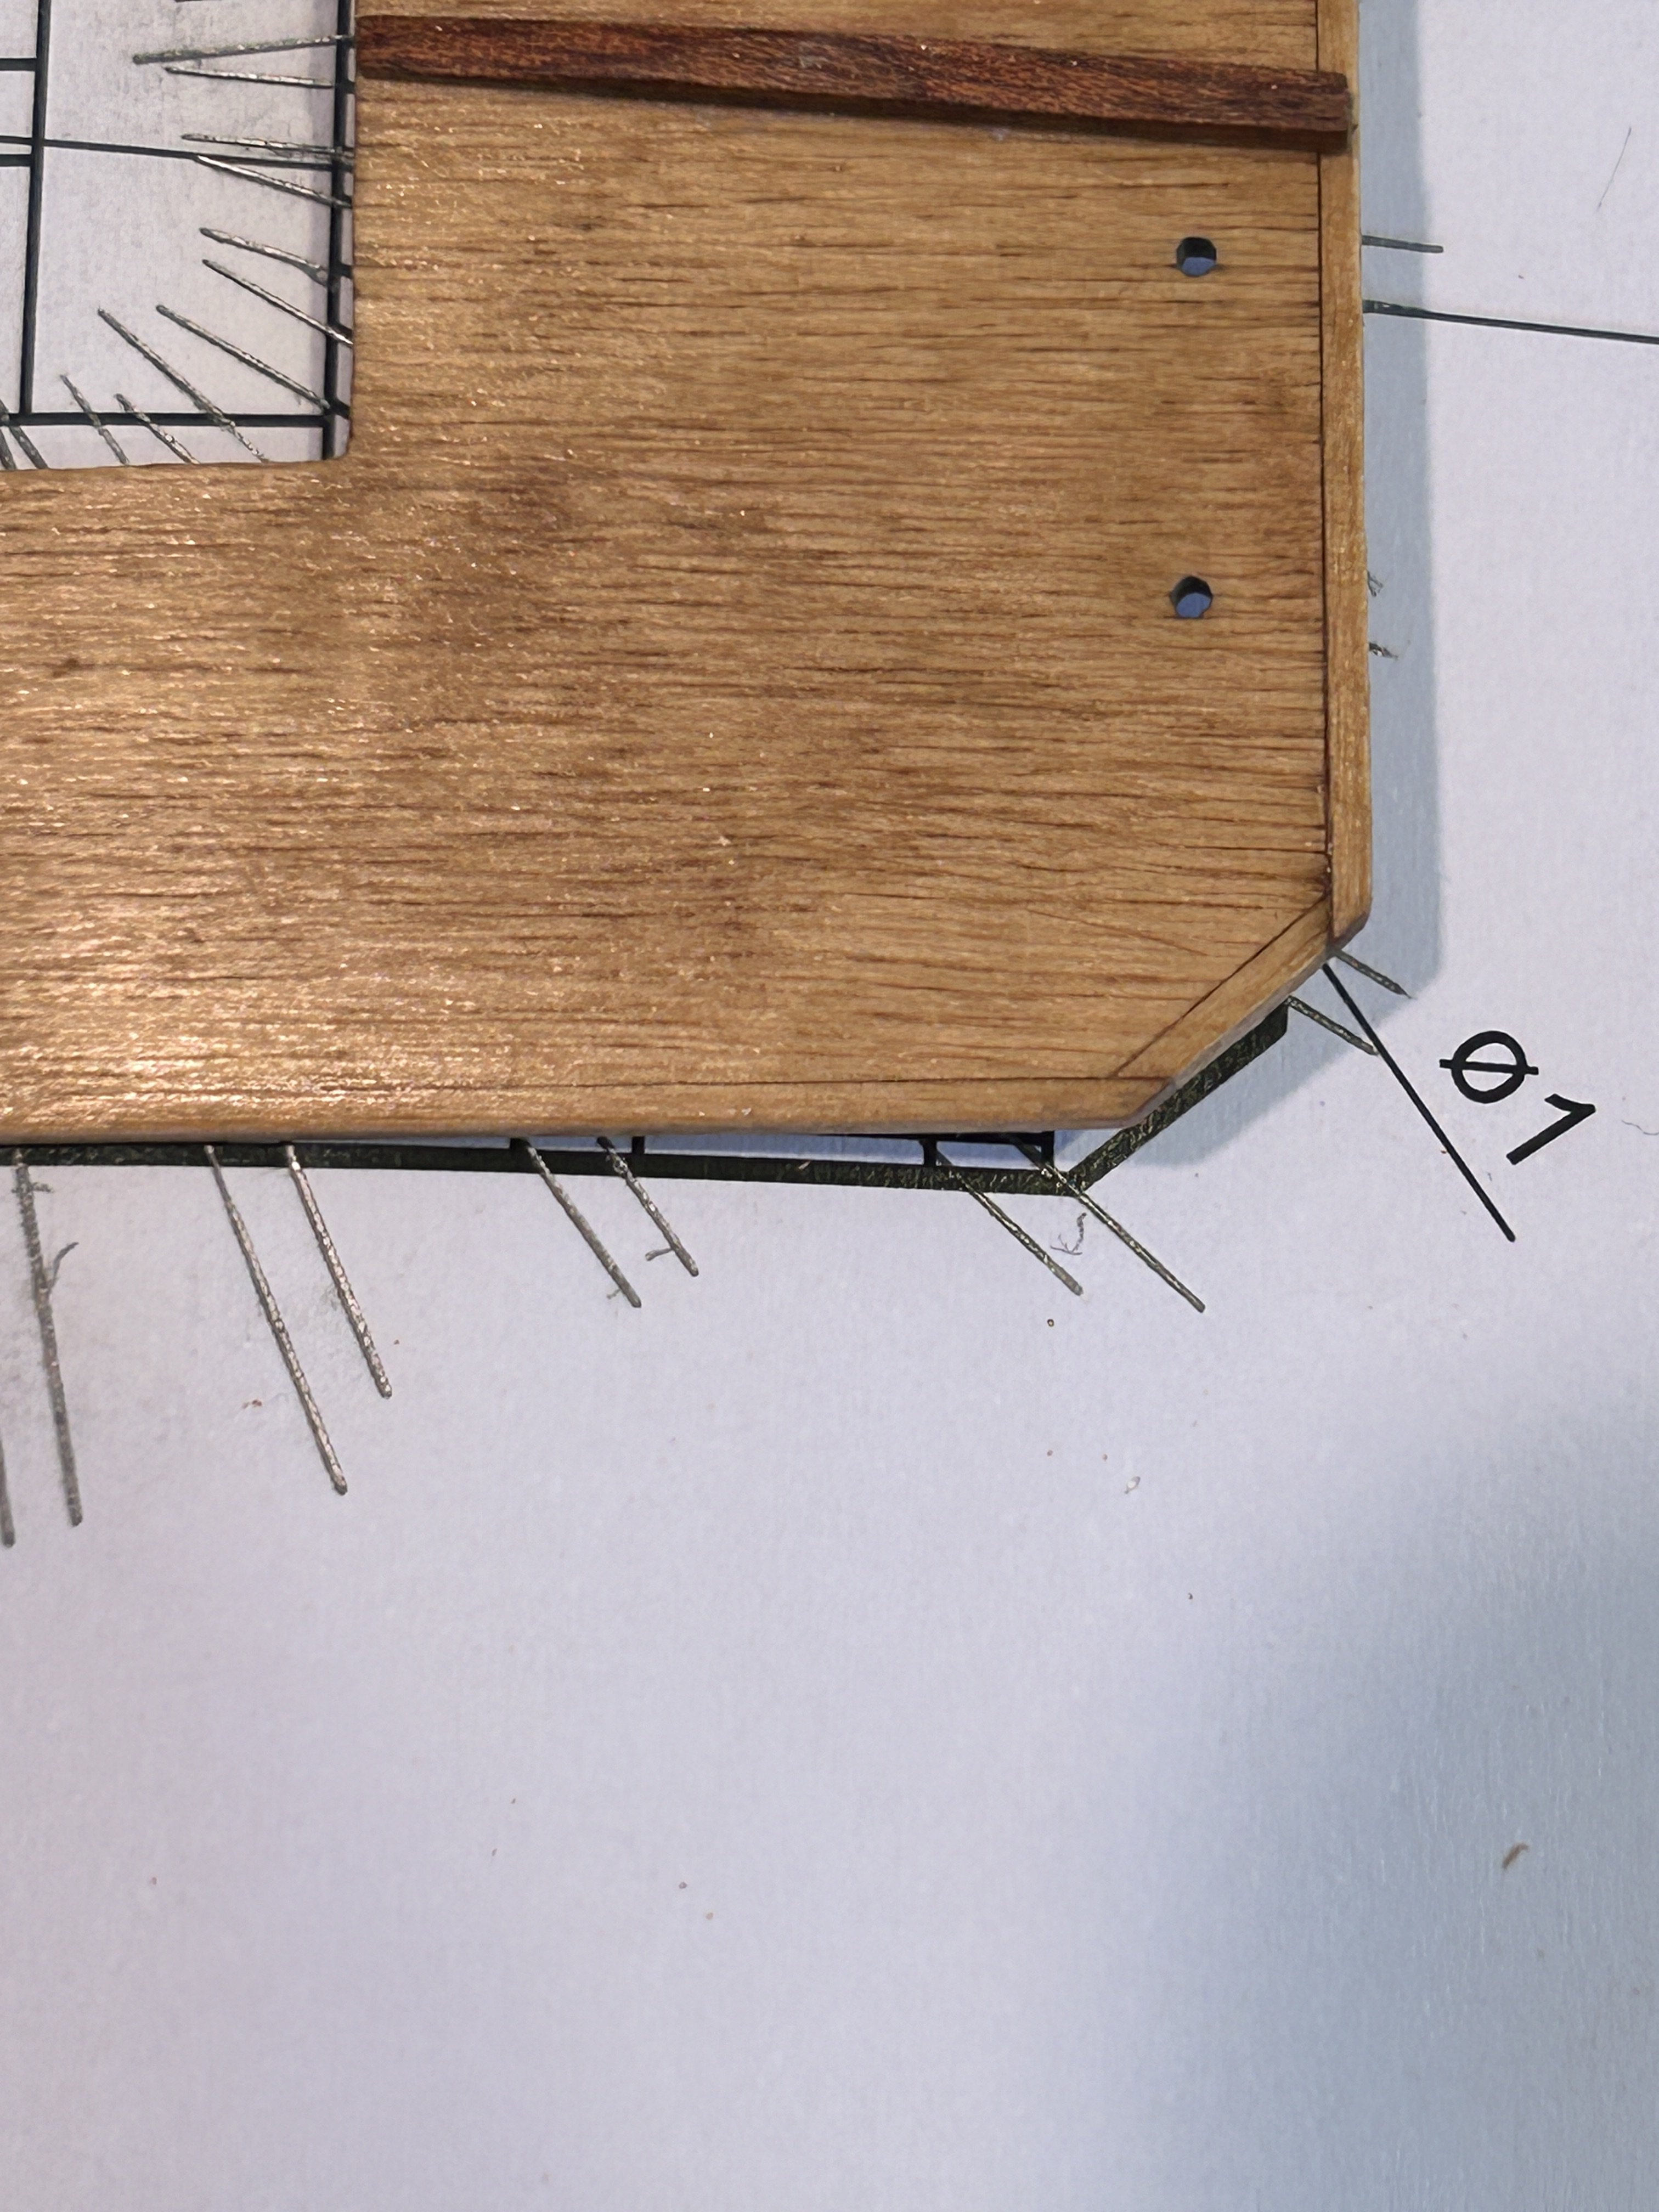
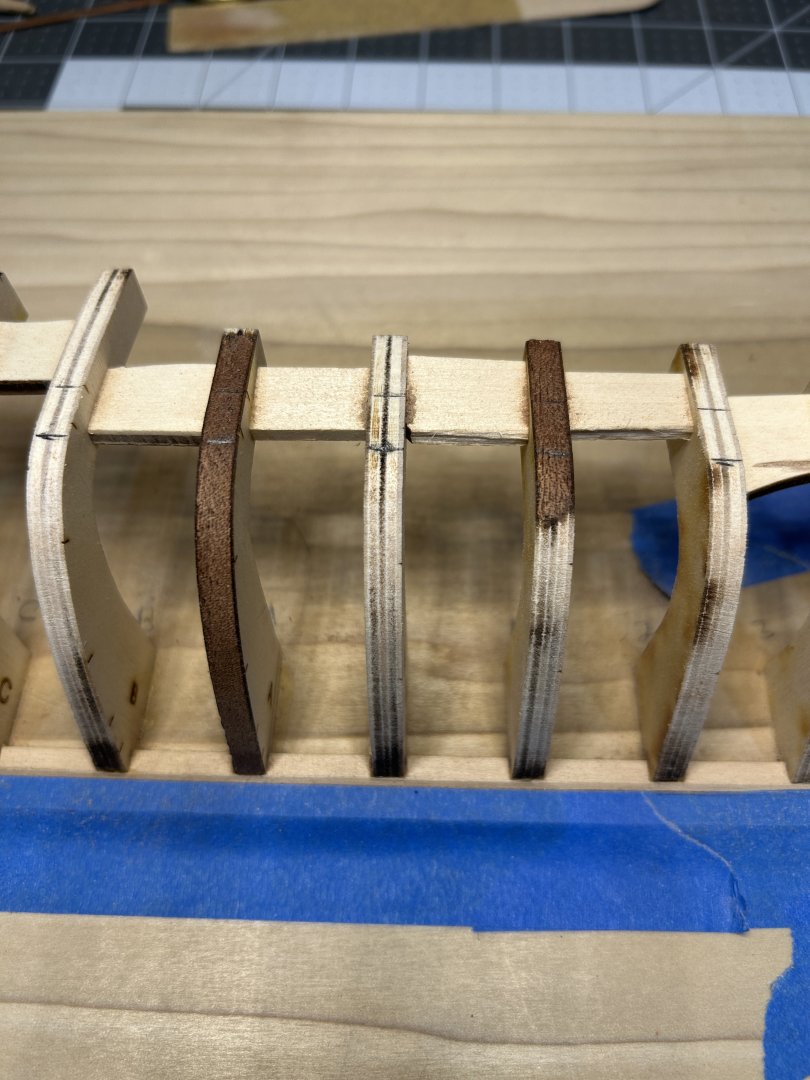
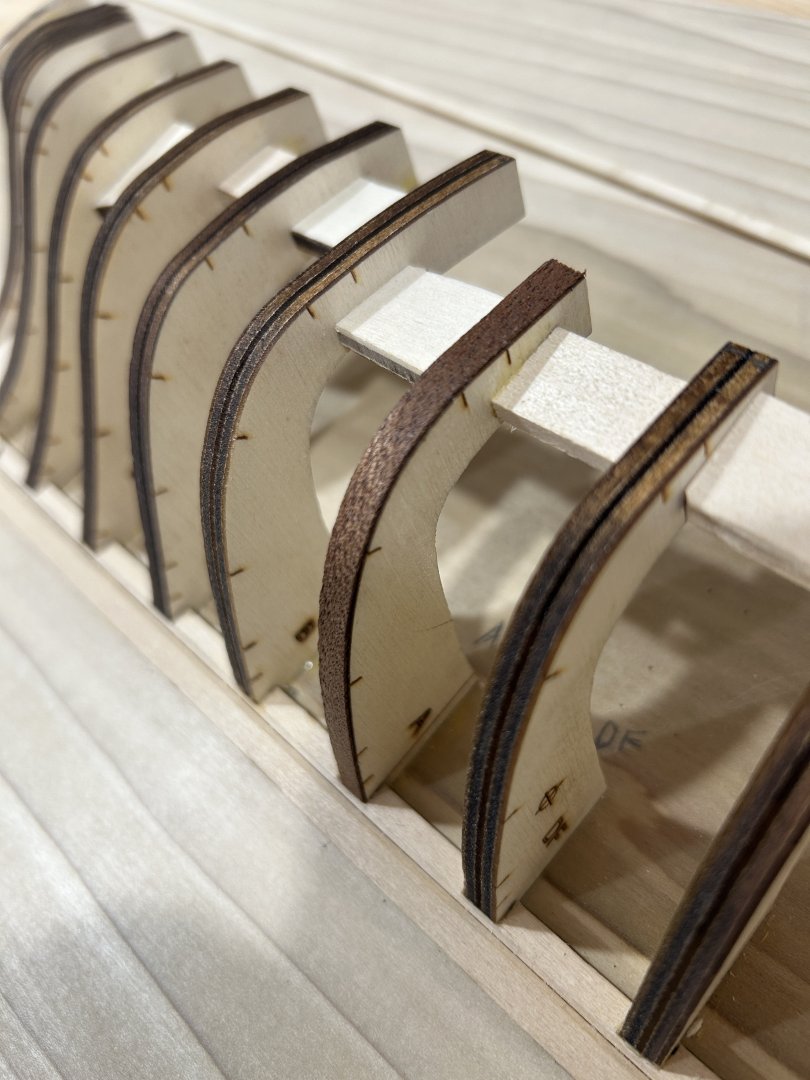
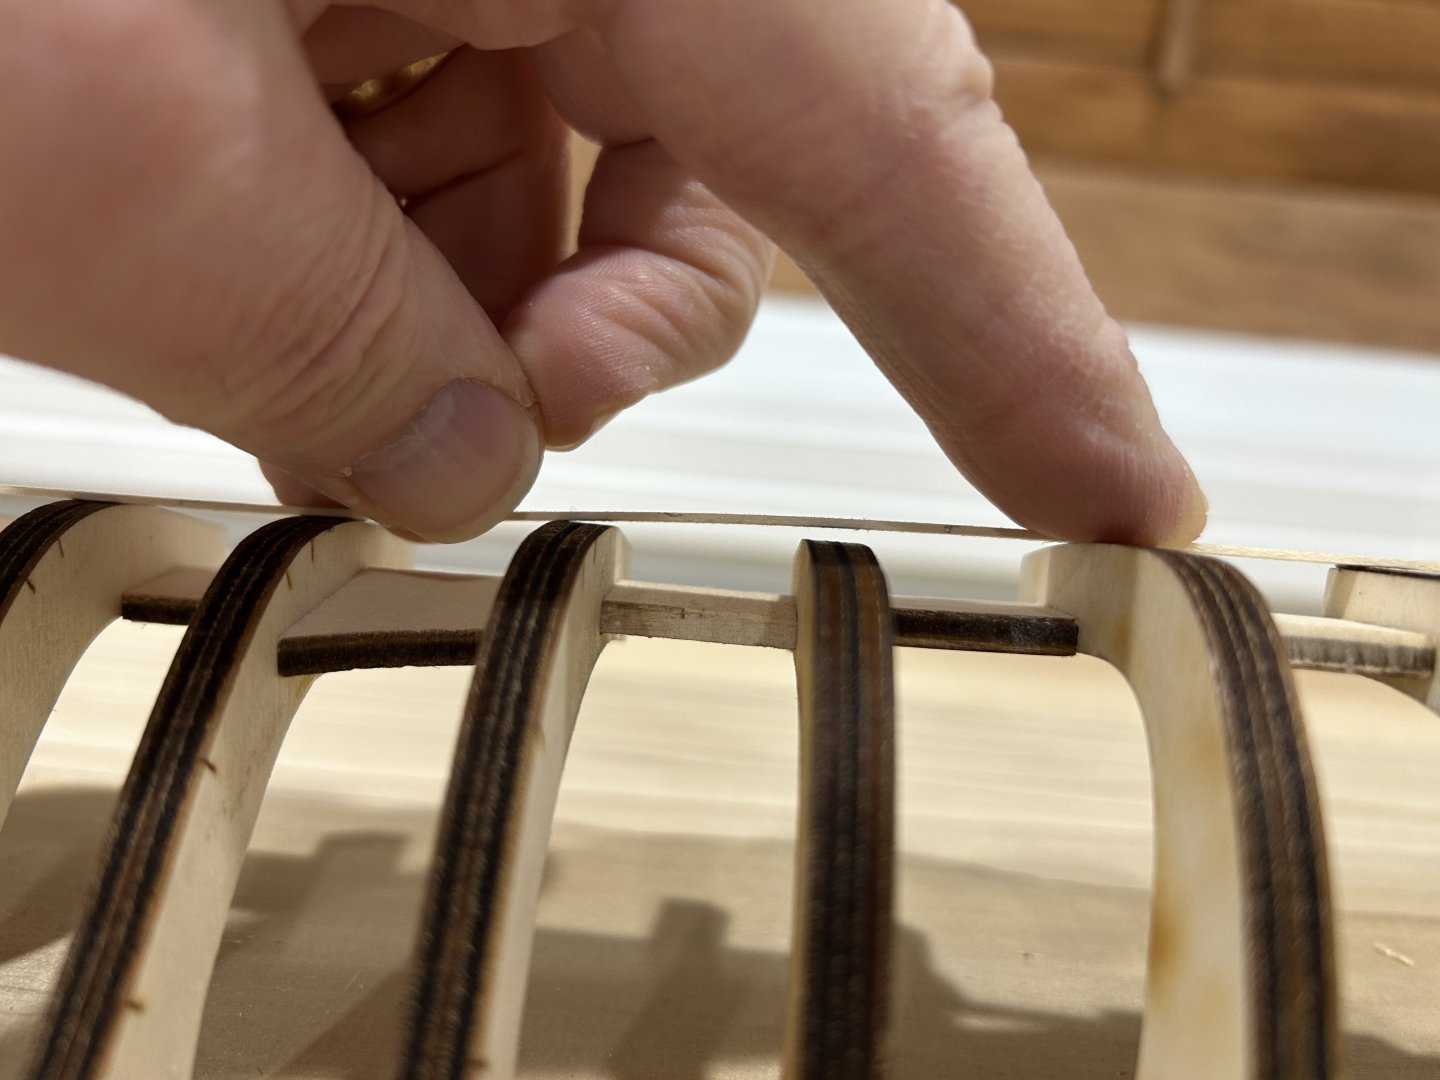
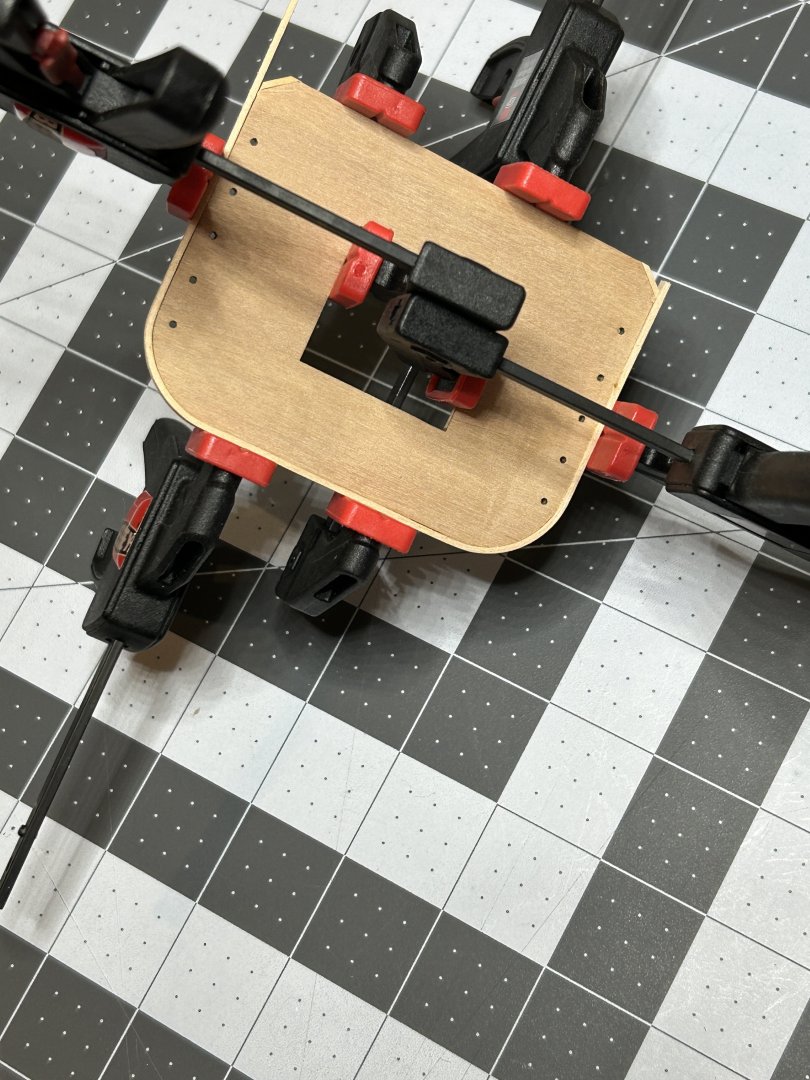
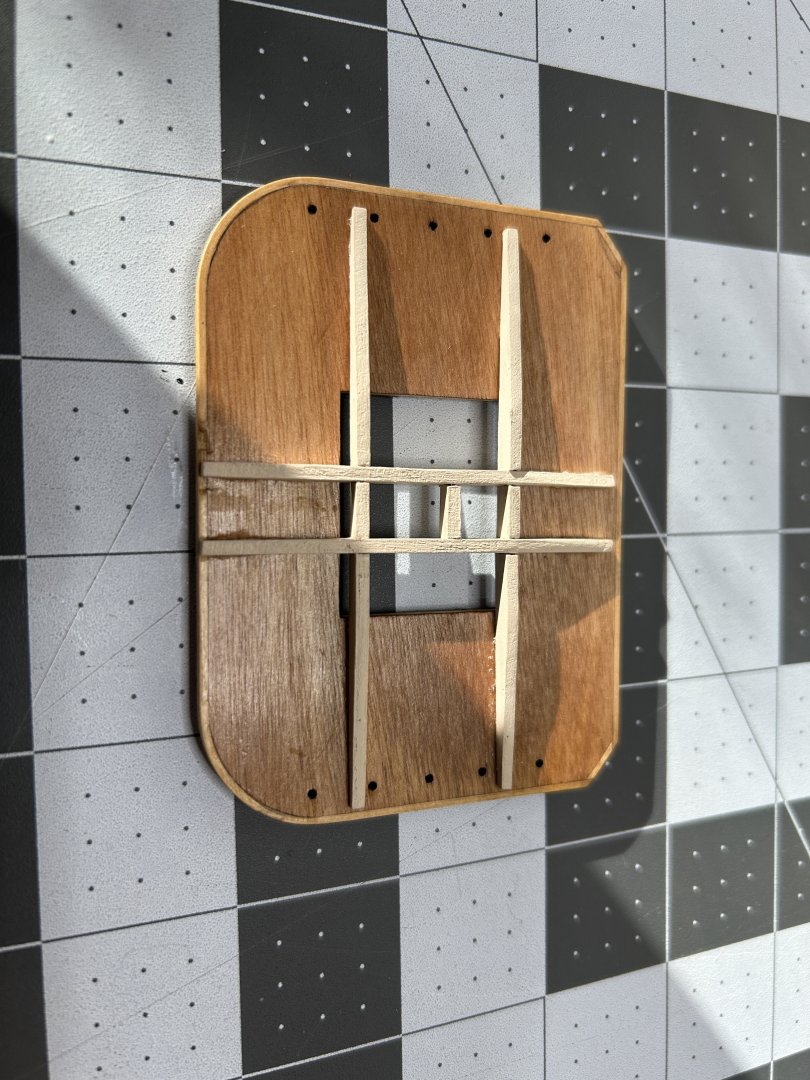
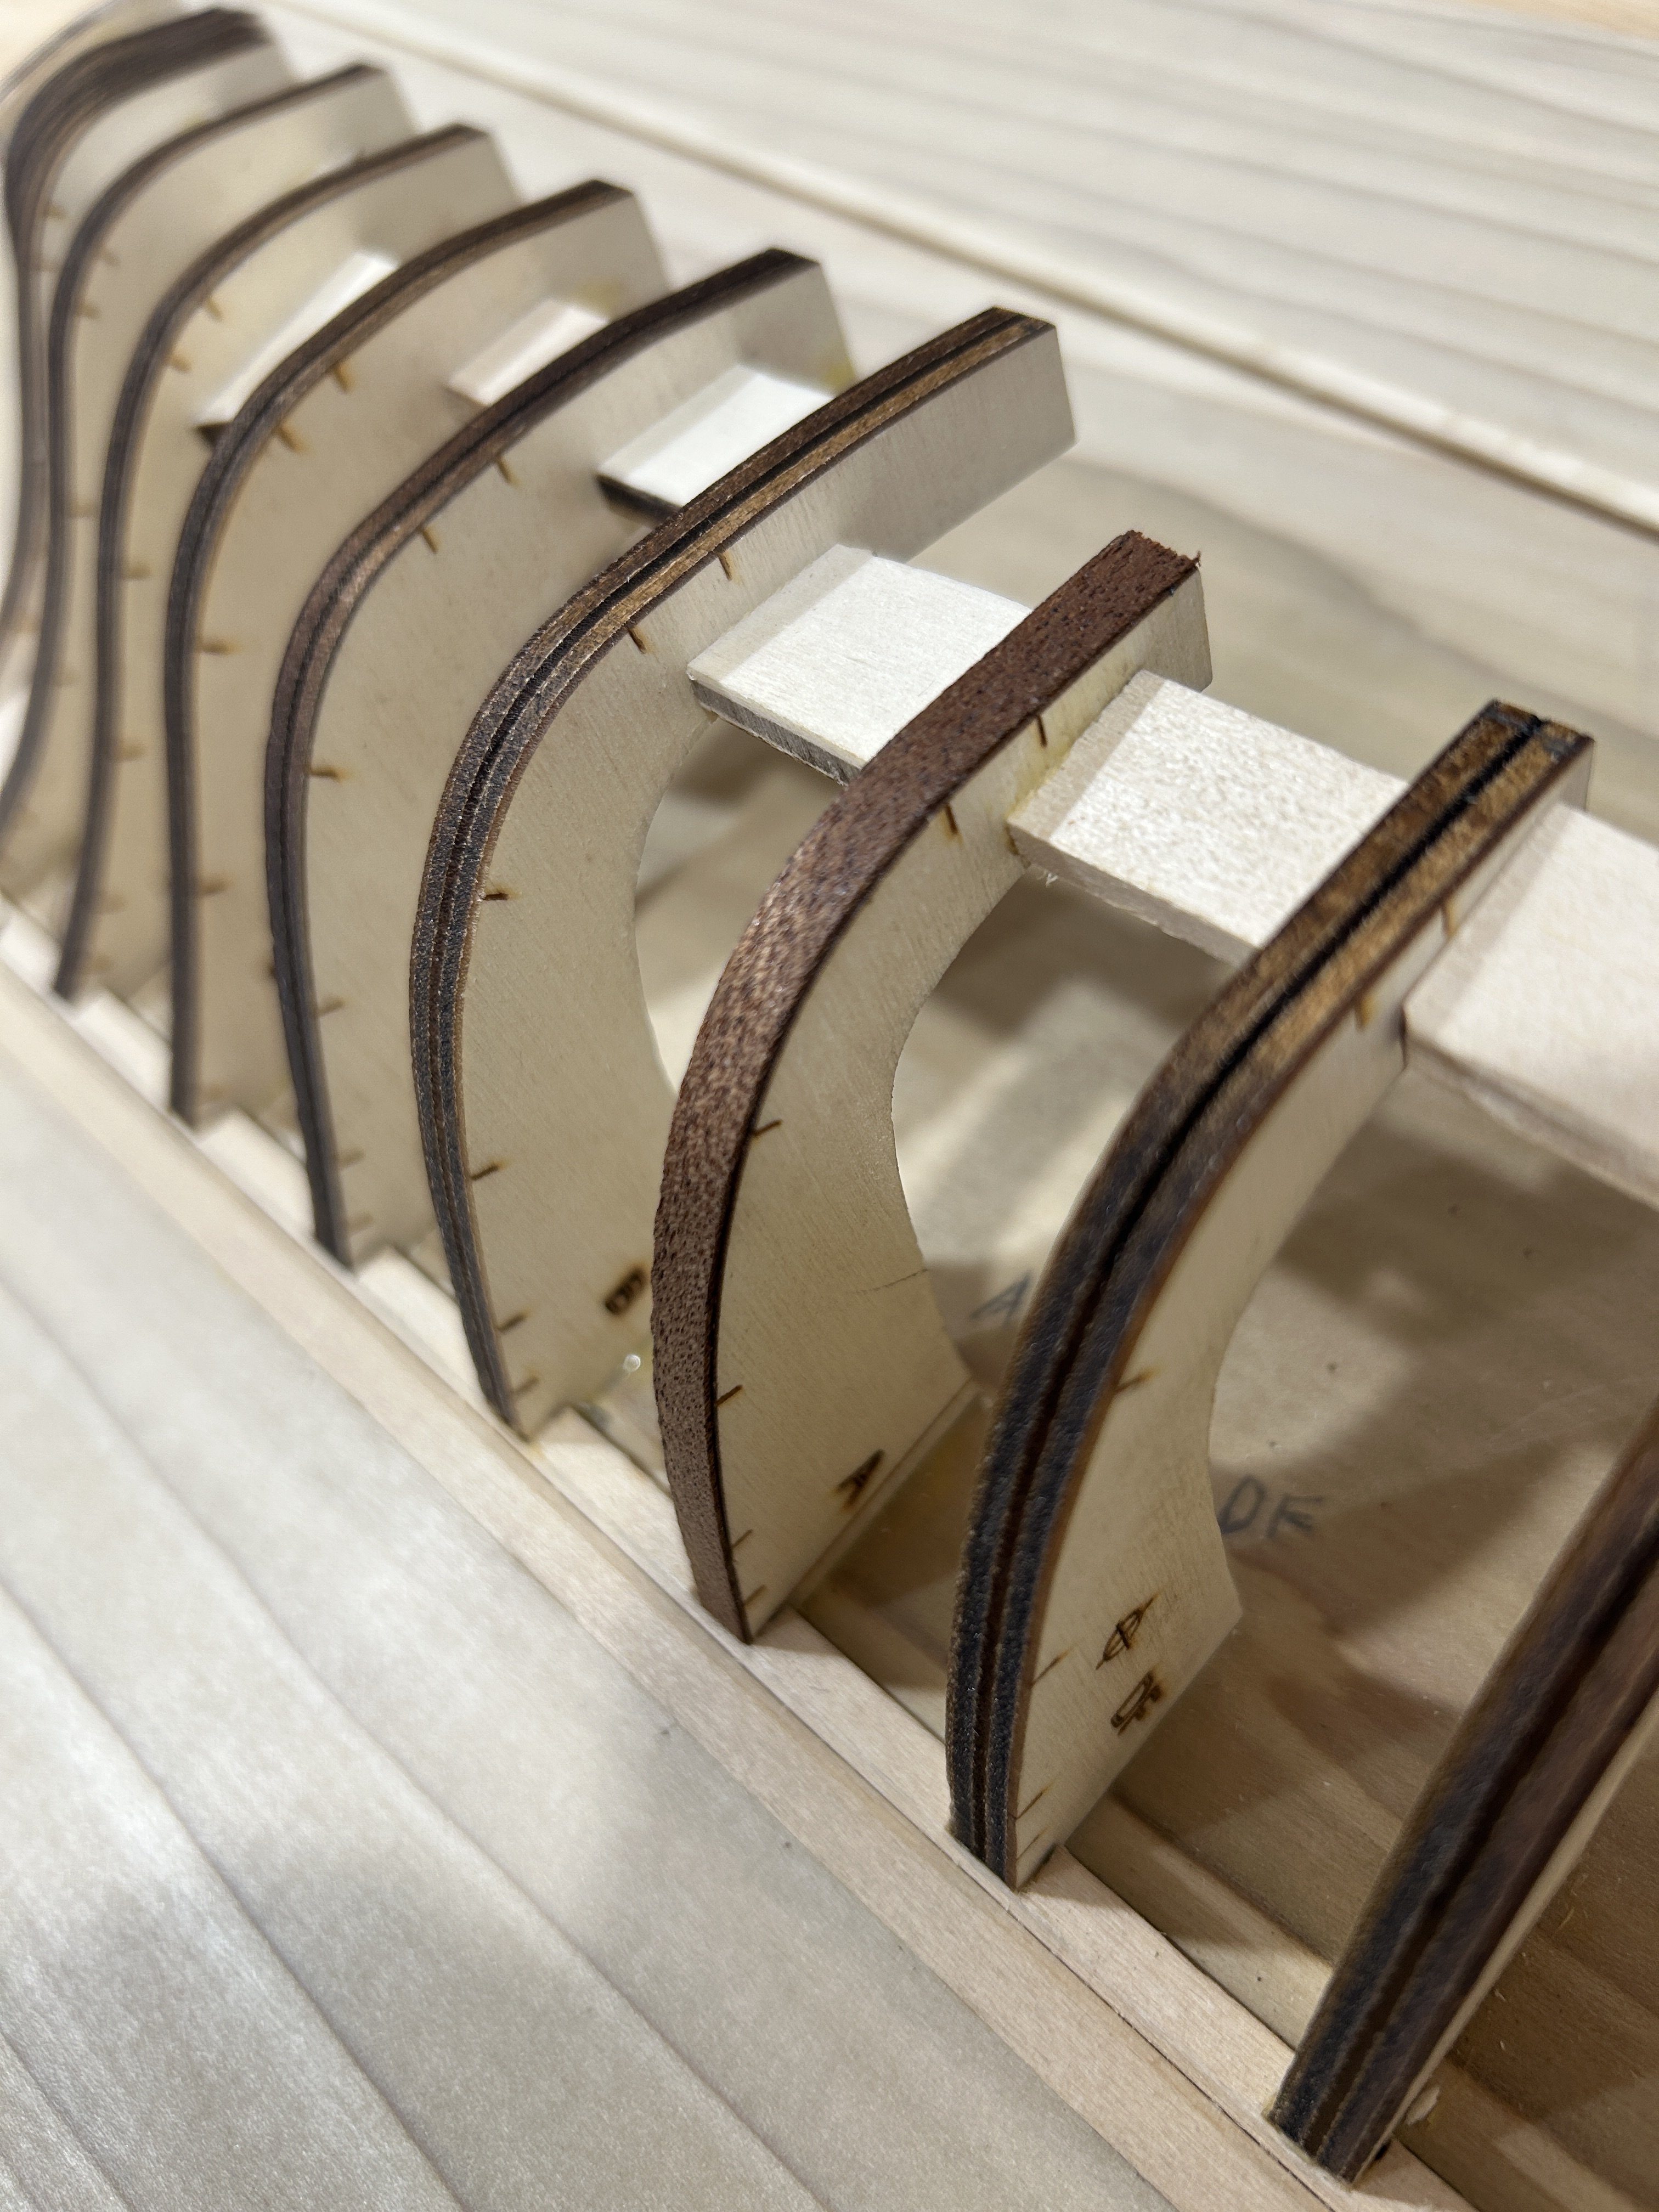
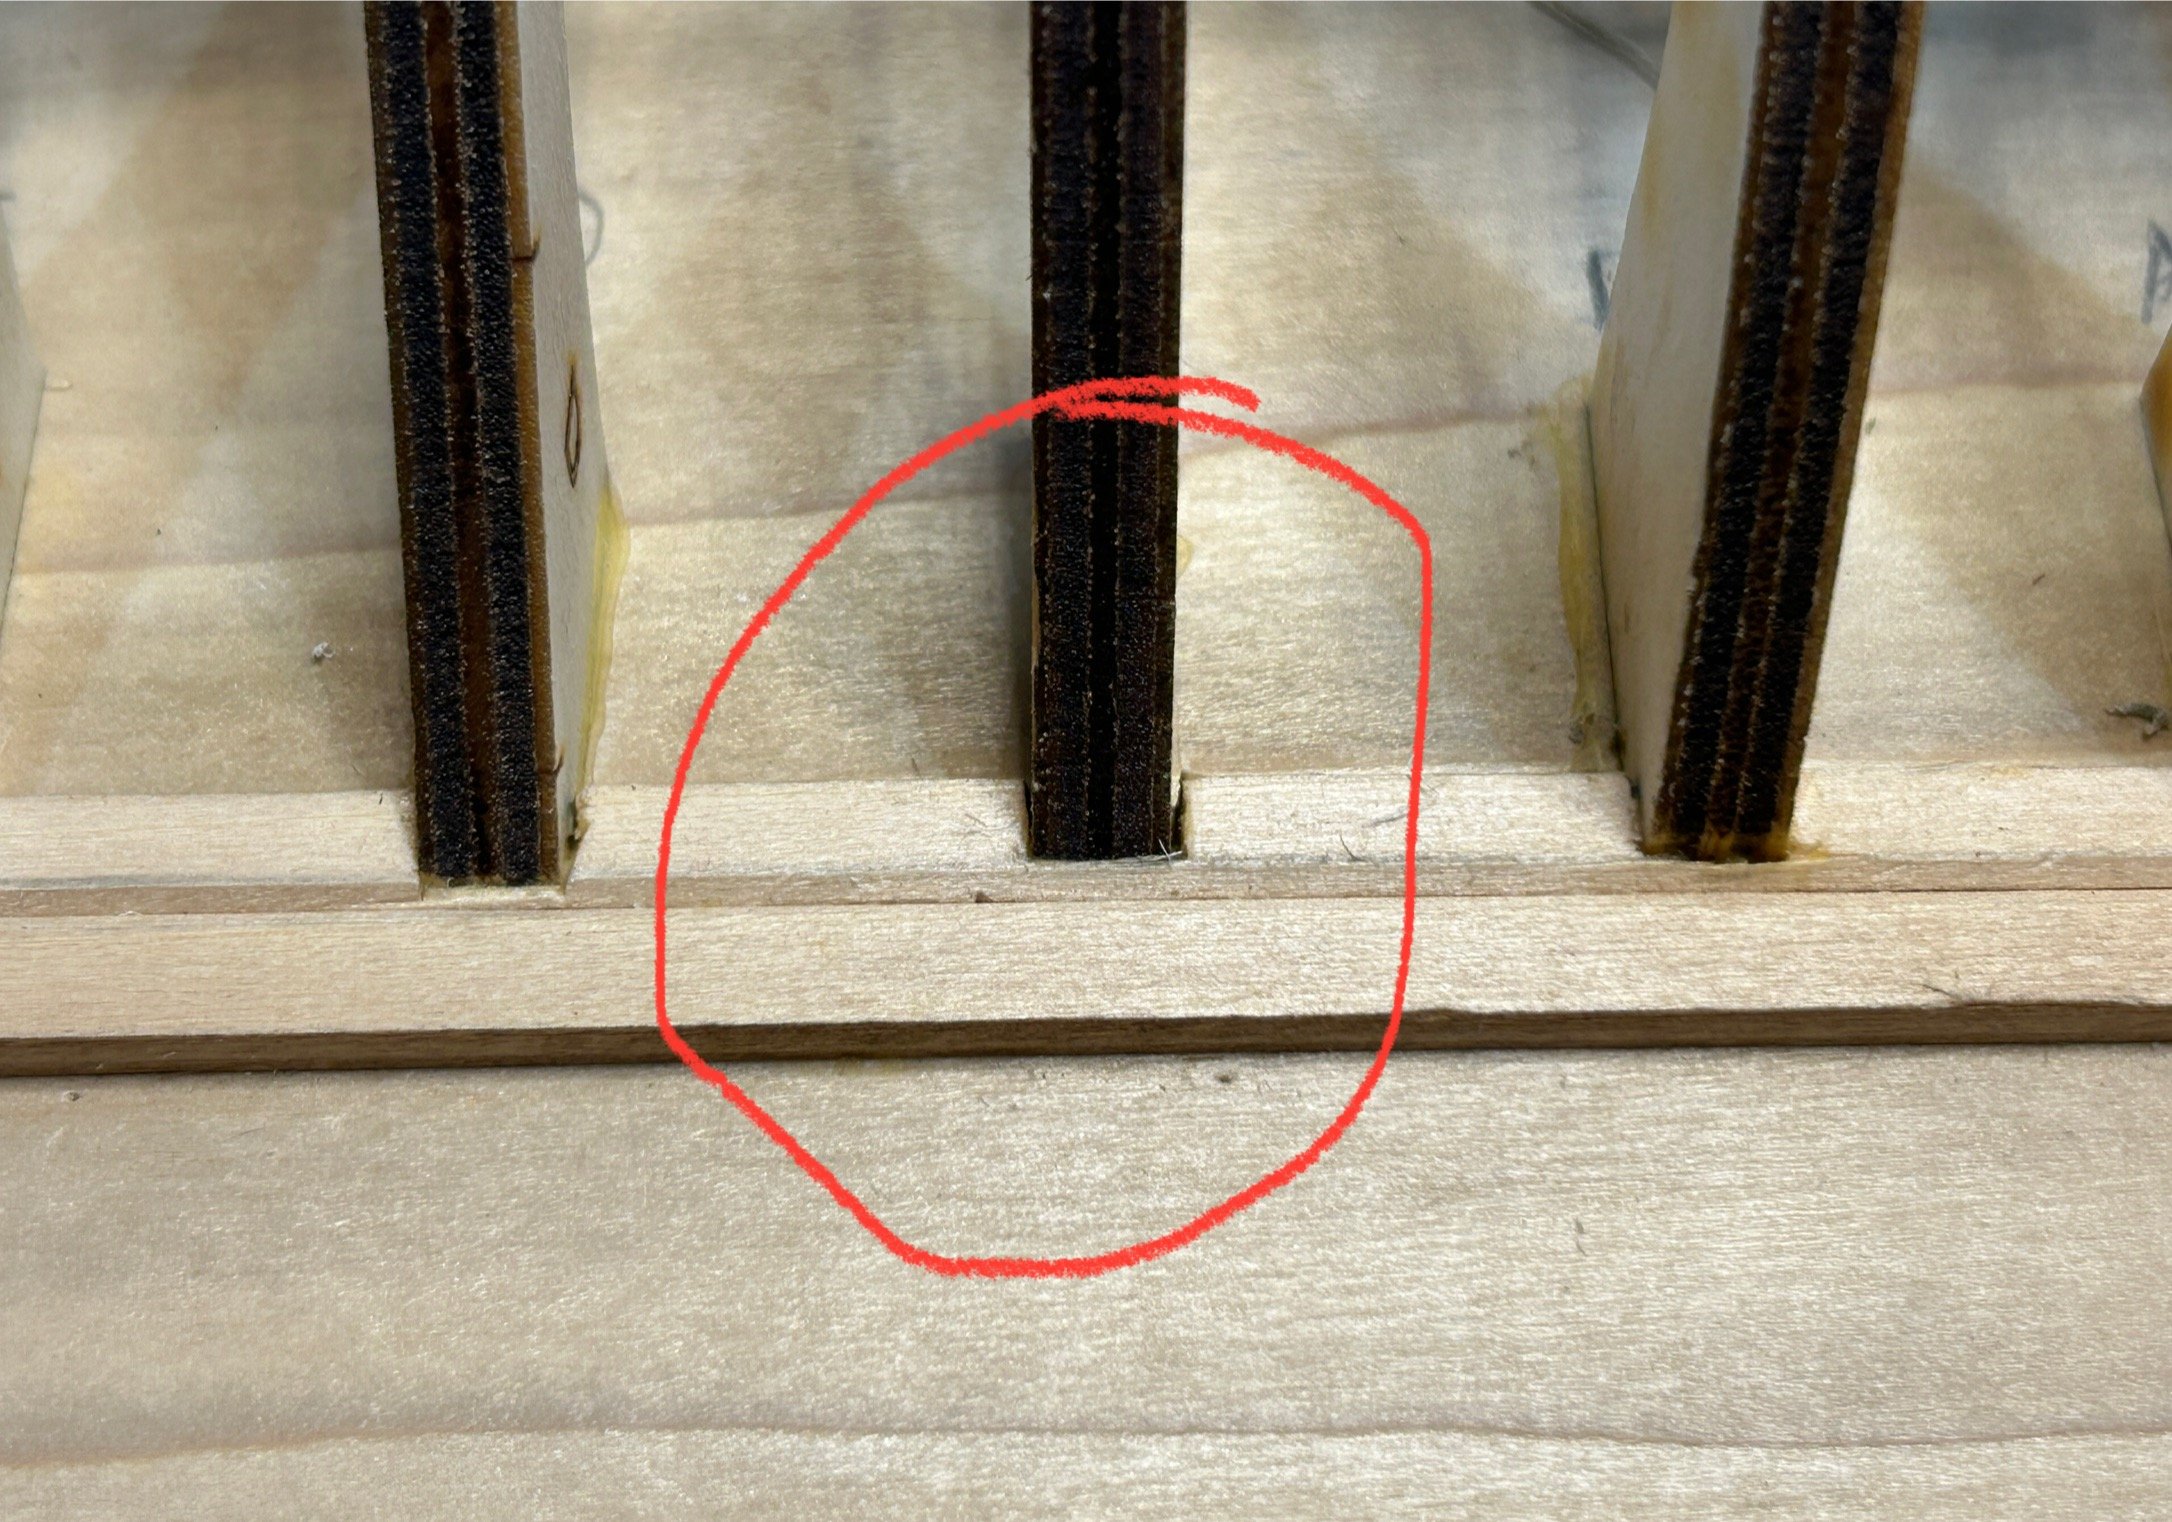
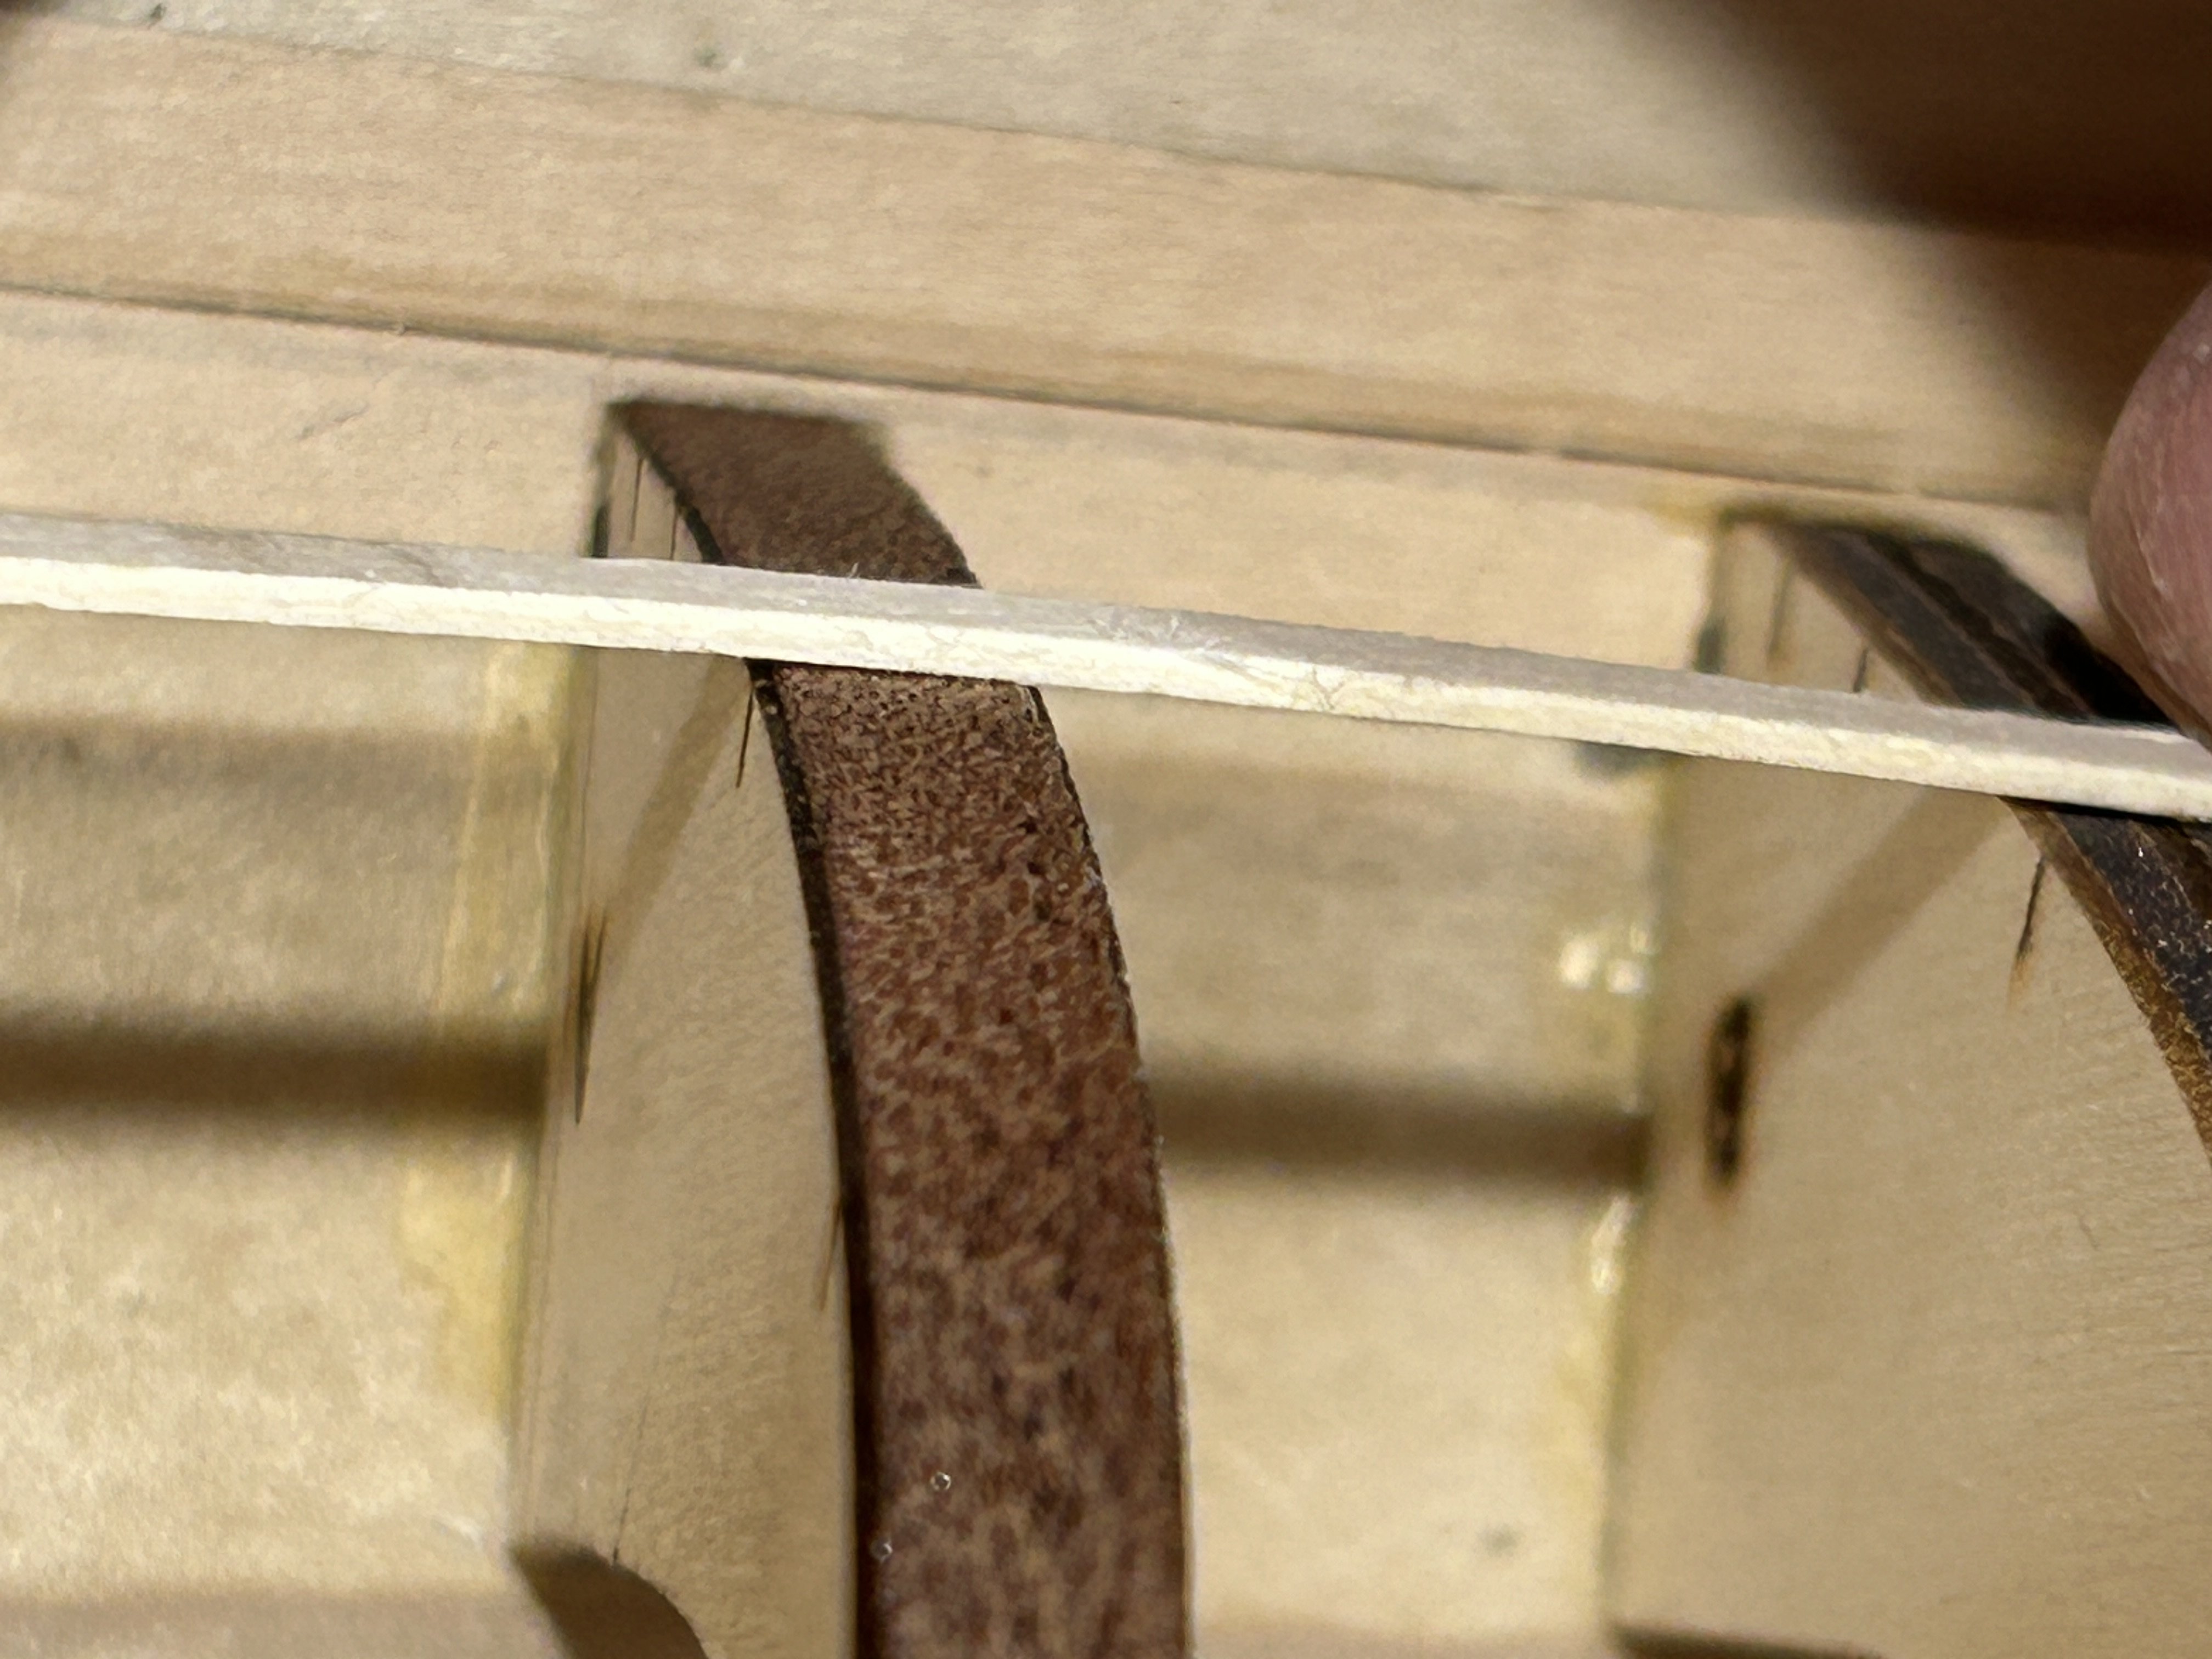
.thumb.jpeg.ffac2f8a24d212961a83eab4efb06a6c.jpeg) After gluing the keelson to the building board, I used some micro chisels purchased from Lee Valley Tools to deepen the notches that the bulkhead will fit into. I used a machinists square, legos and a few other items to keep the bulkheads square. I was a little skeptical of how good of a bond I would get to the building board since there was no downward clamping pressure where the two items met. I was pleasantly surprise at how secure the bond is. The kit came with laser cut pieces to glue between the bulkheads for added strength and stability. I found these were just a bit on the small side to use. At first I worried that it was because my bulkheads were not square, but I never ran into a situation when they were too big, so I decided they must just be a little too small. I used scrap wood to create the parts needed. It became obvious that some of my bulkheads would require shims. In at least one case it was because I didn’t make a deep enough cut in the keelson. I had some .6 mm sapeli left over from my Occre builds, and dimensionally it worked great. It is so flexible it fit around curve of the bulkhead easily. The only issue I ran into is the dark color made pencil marks difficult to see. Next up is fairing the hull.
After gluing the keelson to the building board, I used some micro chisels purchased from Lee Valley Tools to deepen the notches that the bulkhead will fit into. I used a machinists square, legos and a few other items to keep the bulkheads square. I was a little skeptical of how good of a bond I would get to the building board since there was no downward clamping pressure where the two items met. I was pleasantly surprise at how secure the bond is. The kit came with laser cut pieces to glue between the bulkheads for added strength and stability. I found these were just a bit on the small side to use. At first I worried that it was because my bulkheads were not square, but I never ran into a situation when they were too big, so I decided they must just be a little too small. I used scrap wood to create the parts needed. It became obvious that some of my bulkheads would require shims. In at least one case it was because I didn’t make a deep enough cut in the keelson. I had some .6 mm sapeli left over from my Occre builds, and dimensionally it worked great. It is so flexible it fit around curve of the bulkhead easily. The only issue I ran into is the dark color made pencil marks difficult to see. Next up is fairing the hull.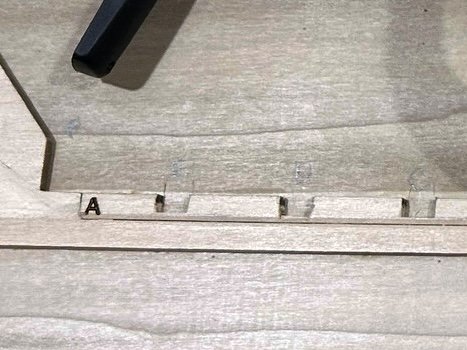


-
Thanks for sharing this one. Great idea.
-
Me too. Fine line between calming you just a little and calming a little too much, but I enjoy a little scotch while modeling occasionally.
- 332 replies
-
- 3
-

-
- Harpy
- Vanguard Models
- (and 1 more)
-
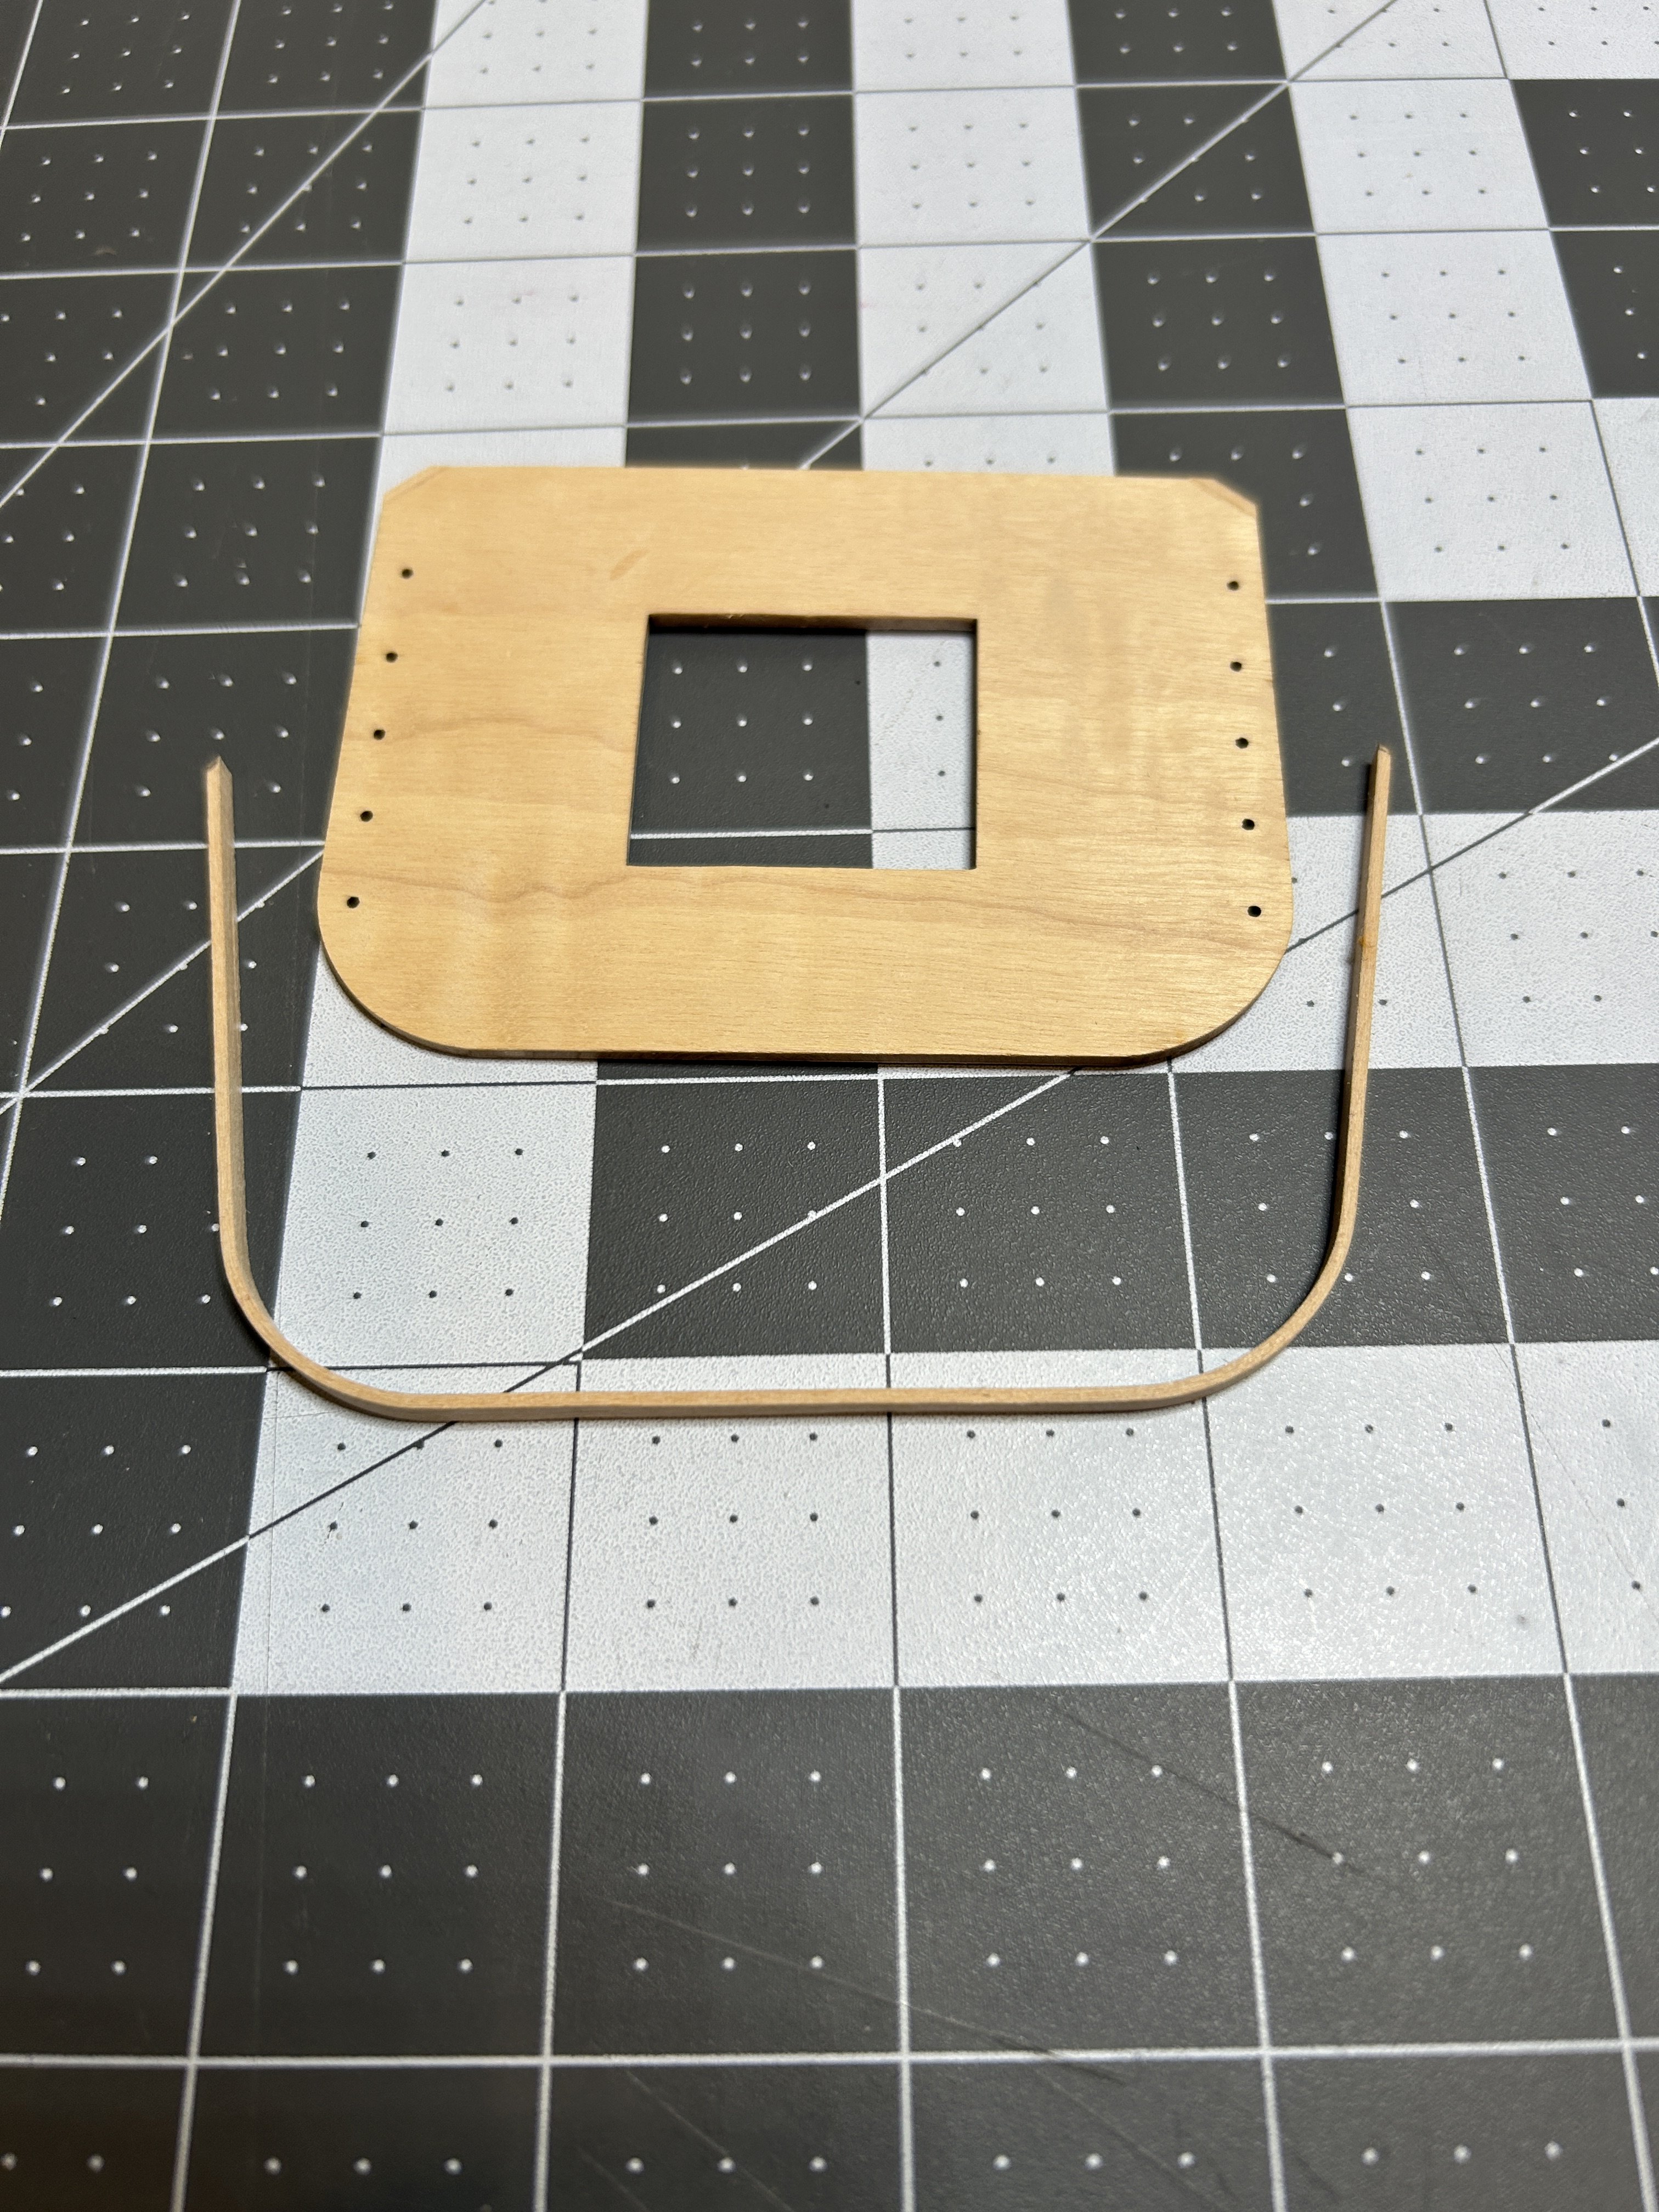
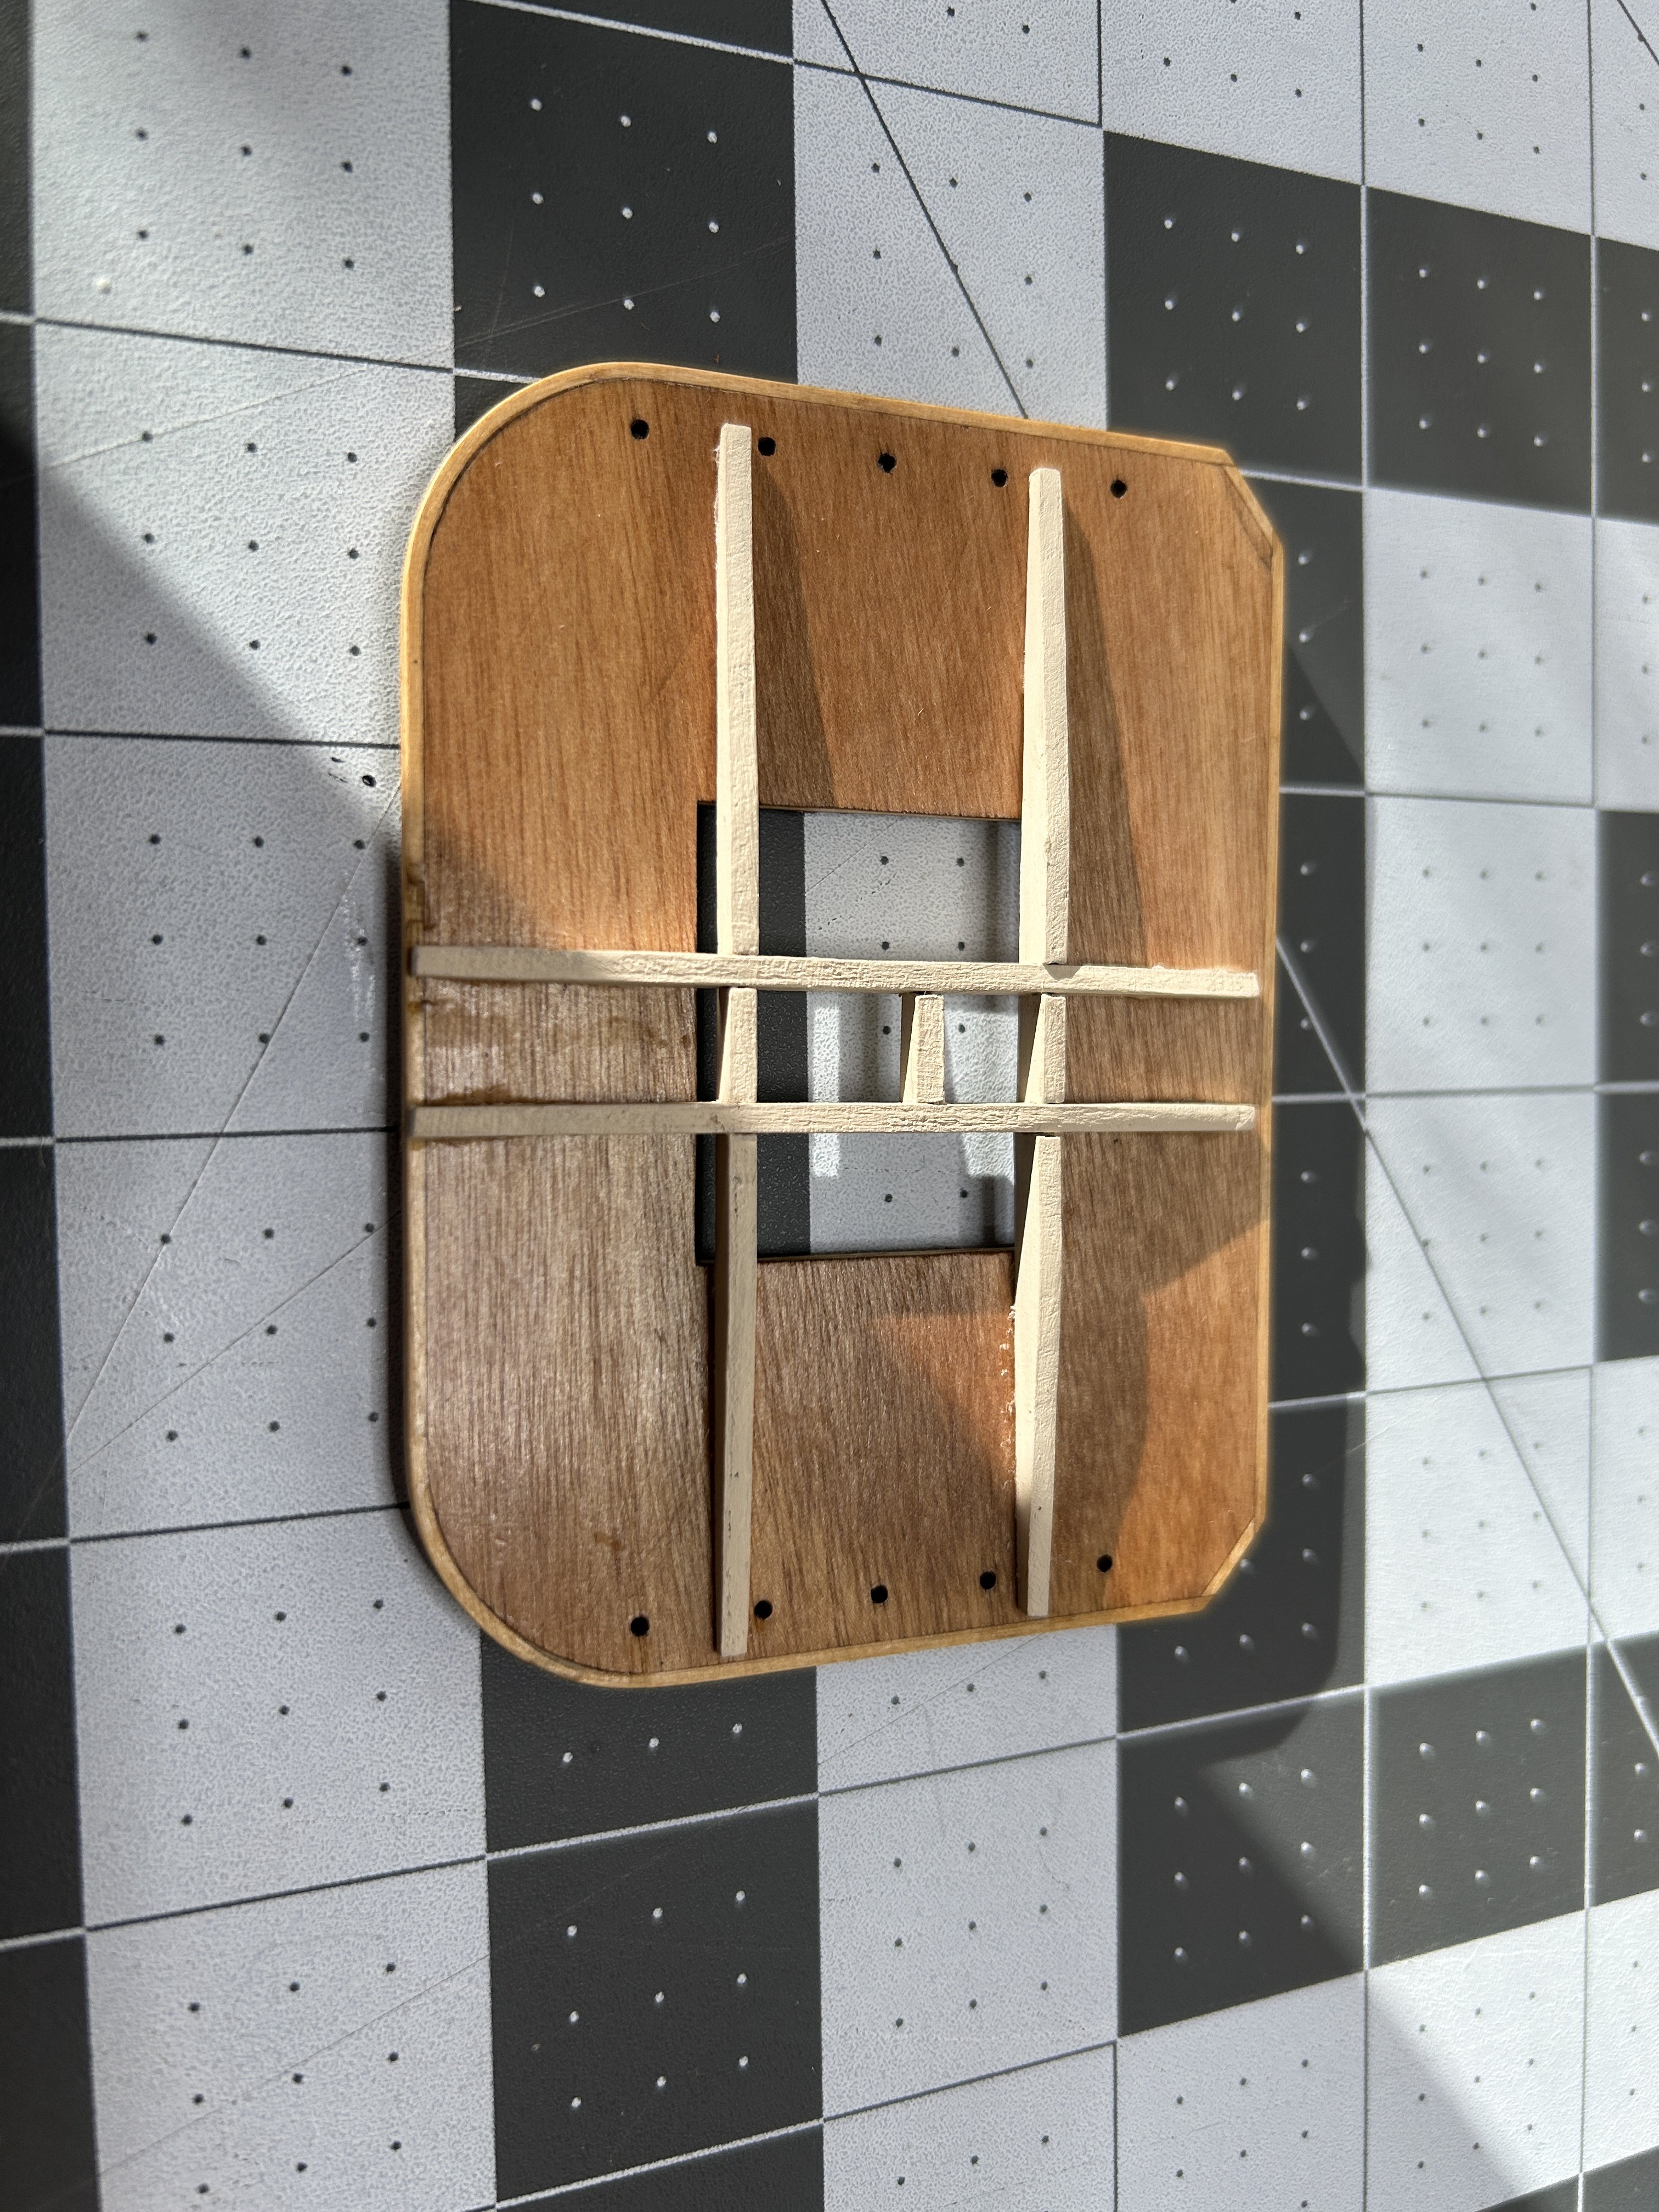
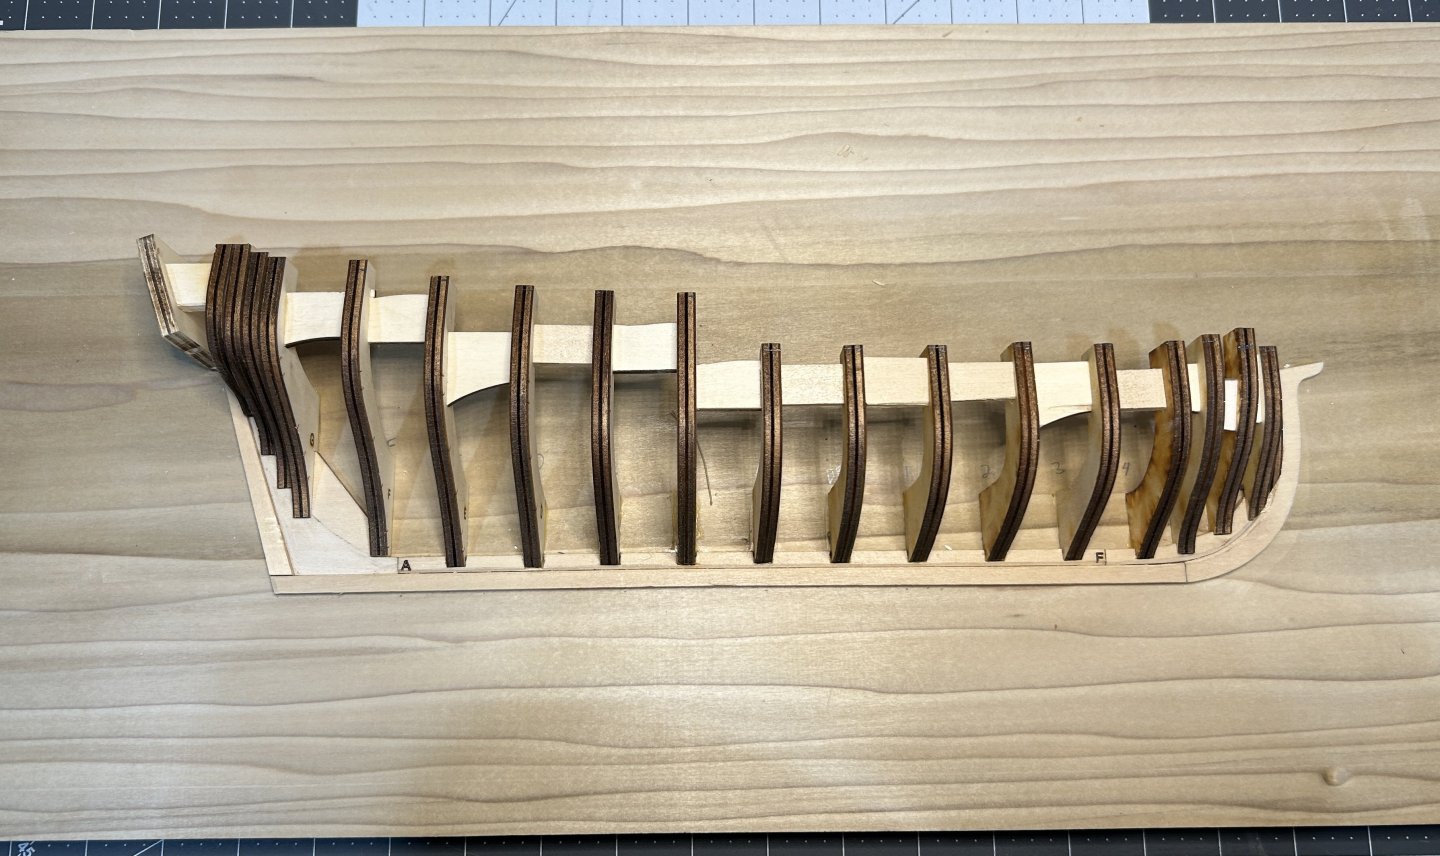
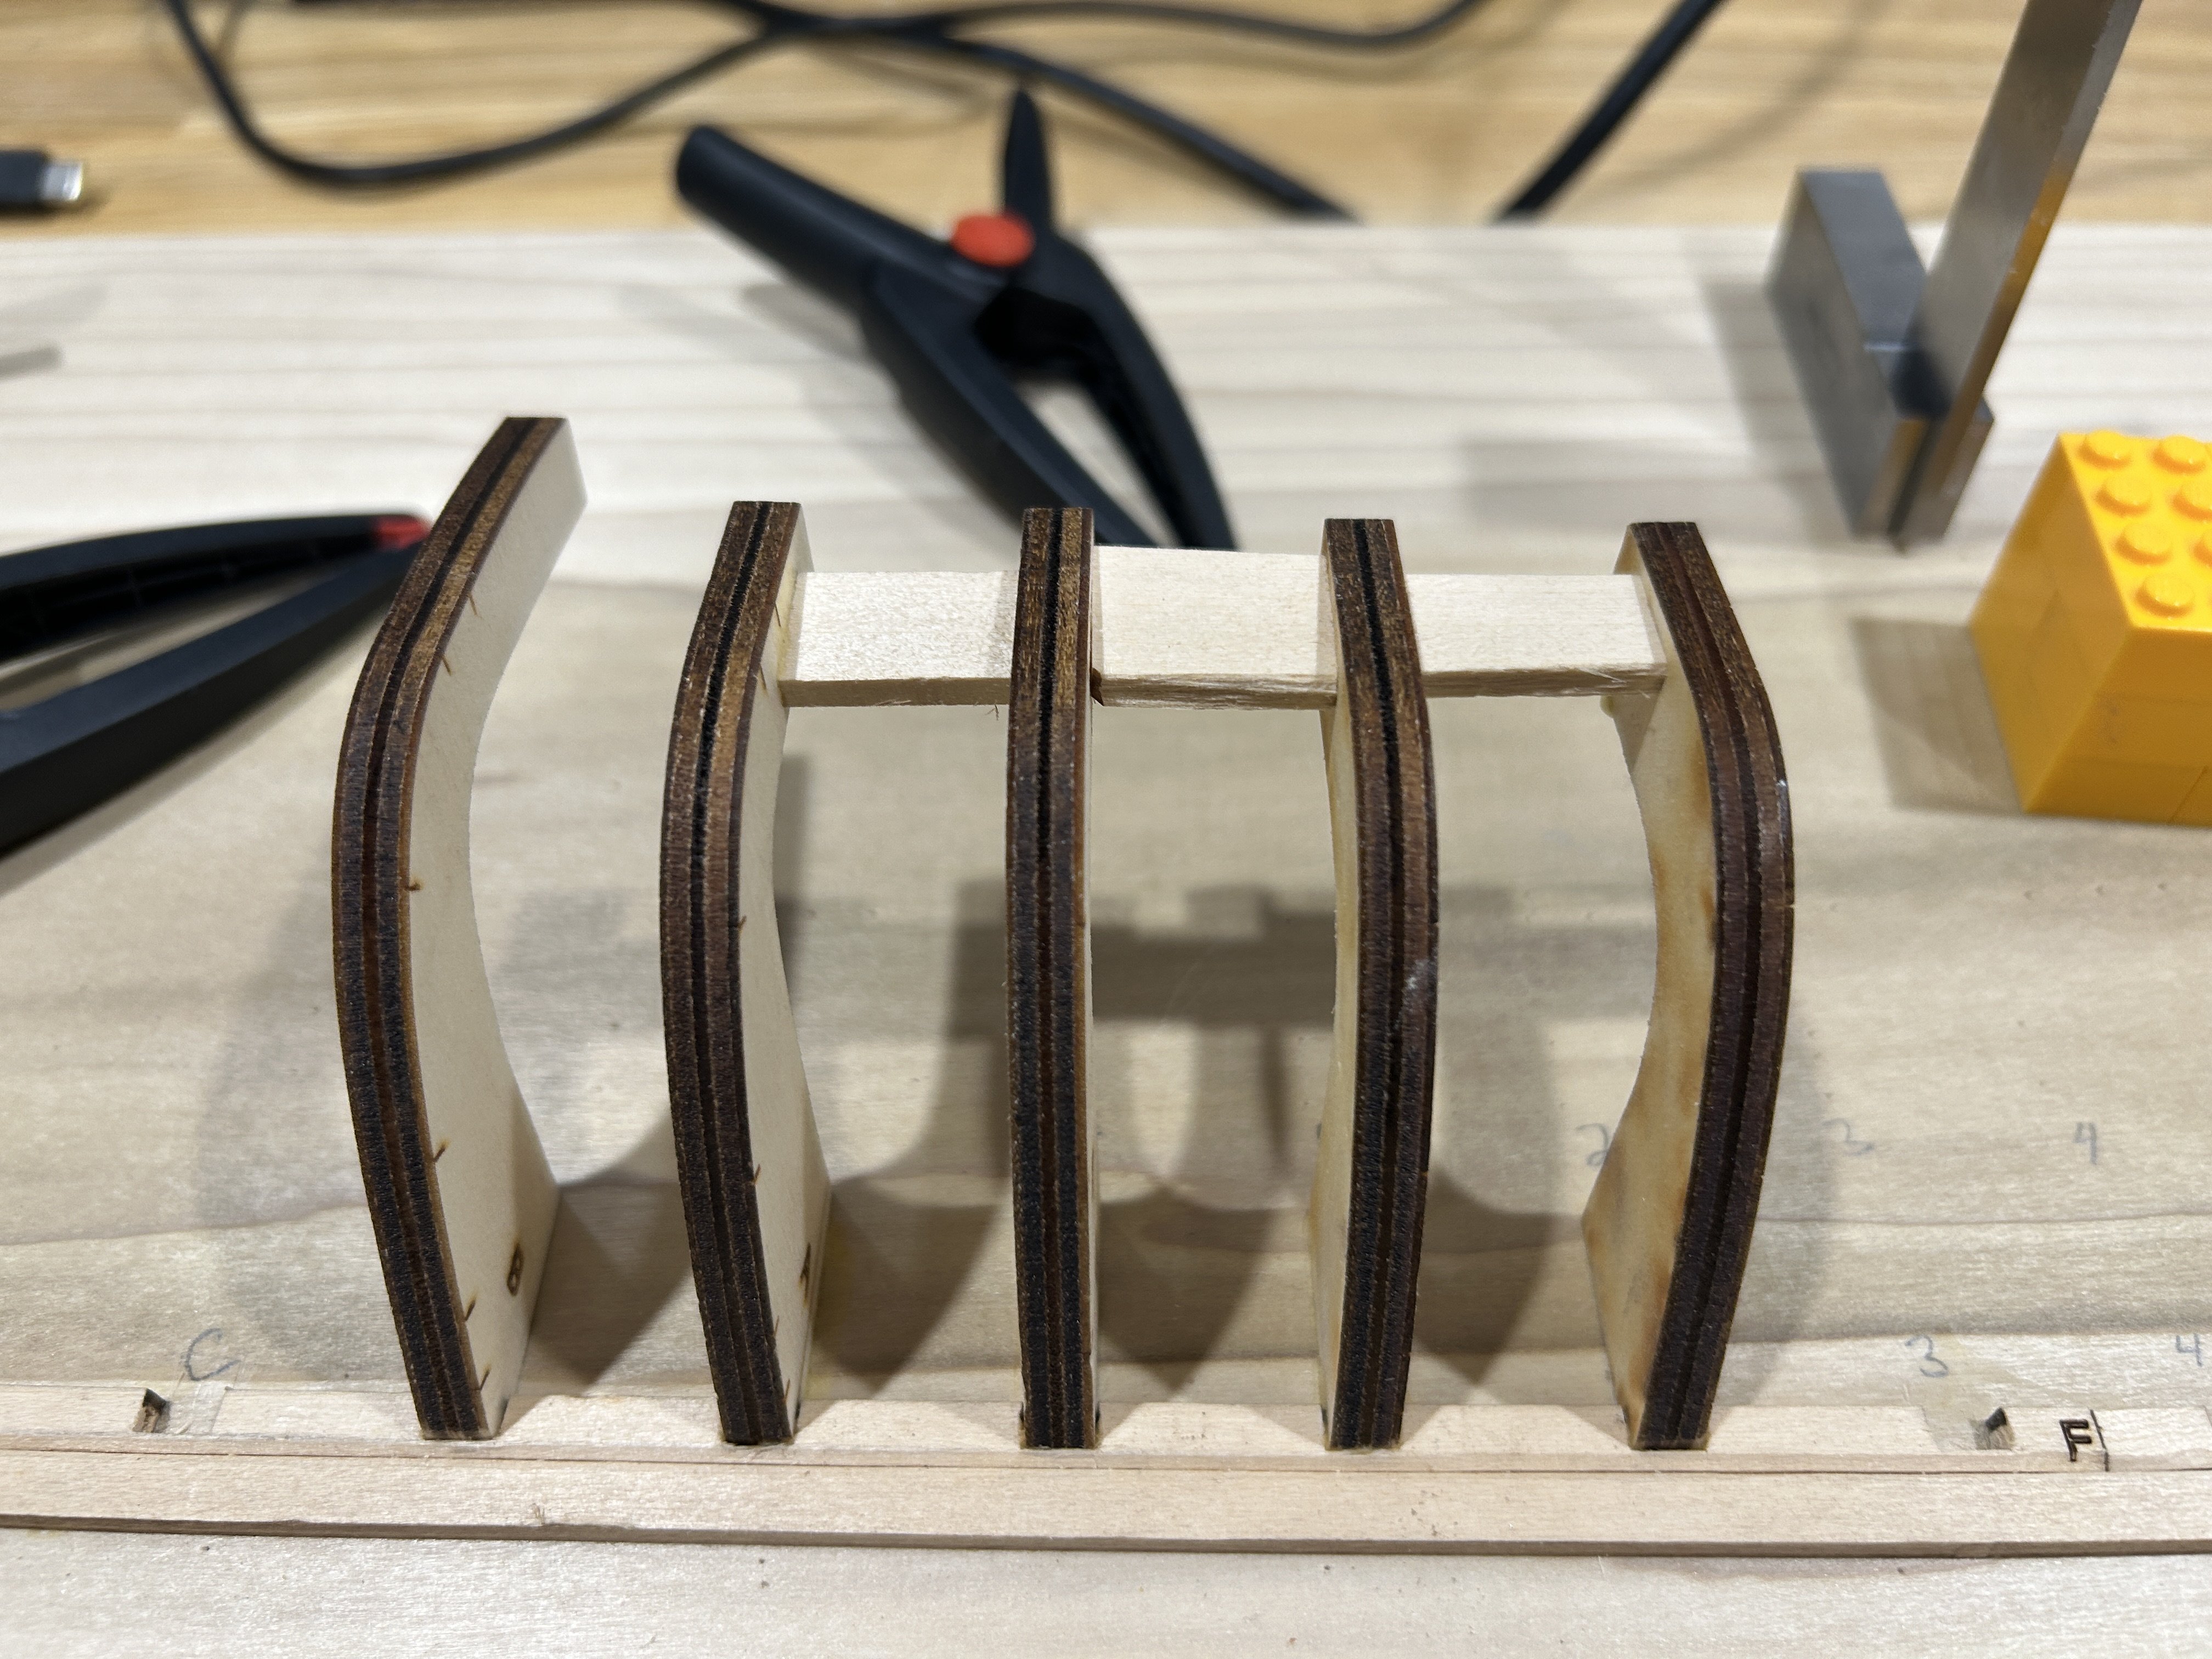
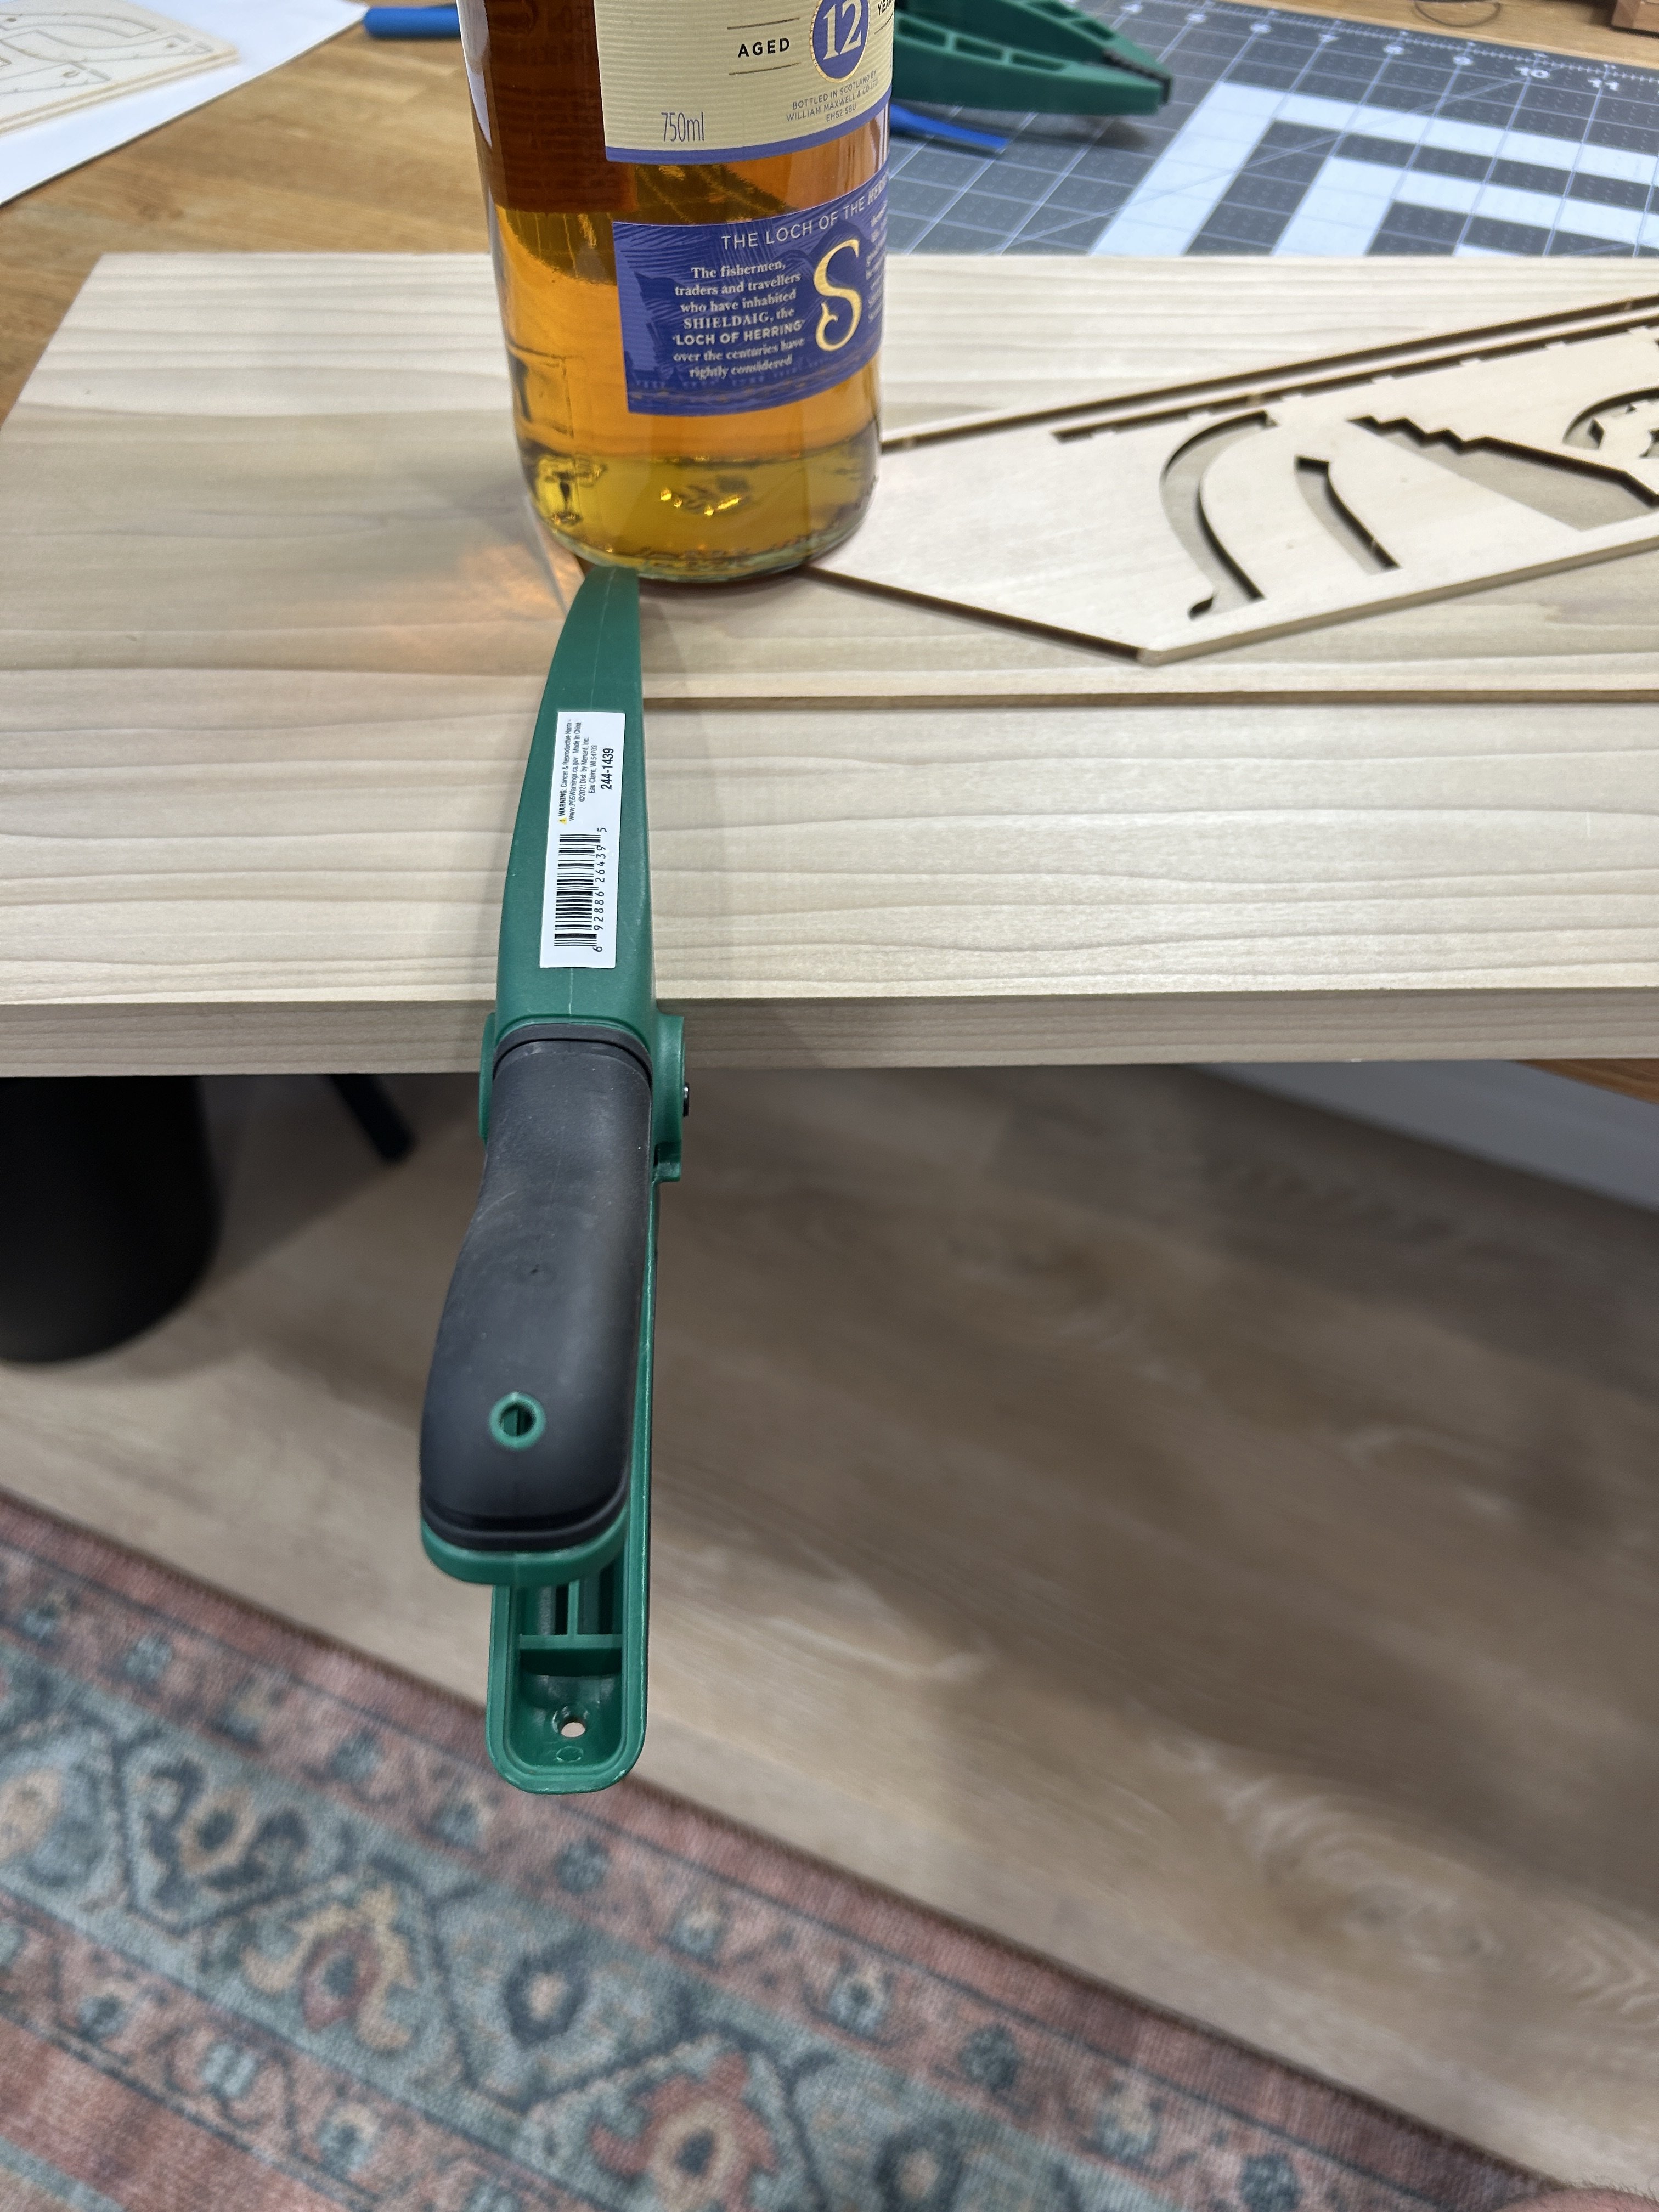
When I started building my NRG Half Hull, I didn’t know if I would do a build log on this one. After the NRG had a sale on this kit a couple of years ago there were a number of really well done build logs and I wasn’t sure If I would have much more to offer. I did take a bunch of pictures along the way, and now that I am a few weeks into it, I have decided to post a build log and share my experience. I don’t remember which build log mentioned this, but someone commented that they found building on the foam board suggested in the instructions difficult. I had the same concern, so I decided to build my model directly on a piece of poplar that will be the permanent board for display after the model is compete. The instructions have you glue the print to the foam board. Since my board will be the permanent display board I didn't want to glue the plan to it, but I needed to find a way to transfer critical points to the board I was using. I taped the plan to the board and used a small awl to transfer critical points to the building board. I then connected the dots to have some reference points for gluing the various parts to the building board. I then removed material from the keel, keelson, stem, deadwood and other related parts to create the rabbet. After creating the rabbet, I glued the parts to the building board using the small marks made with the awl to get everything placed properly. The board I used is big enough to accommodate a frame that I intended to add after the half hull was compete, so there was a significant distance to the edge and some parts of the model and clamping created some challenges. I was able to get creative with a bottle of scotch to get a strong bond to the building board. I used Titebond Wood Glue for almost everything on this model. I will cover attaching the bulkheads next.
.thumb.jpg.5827852c29b94c62e1cbbb014cf2f404.jpg)

-
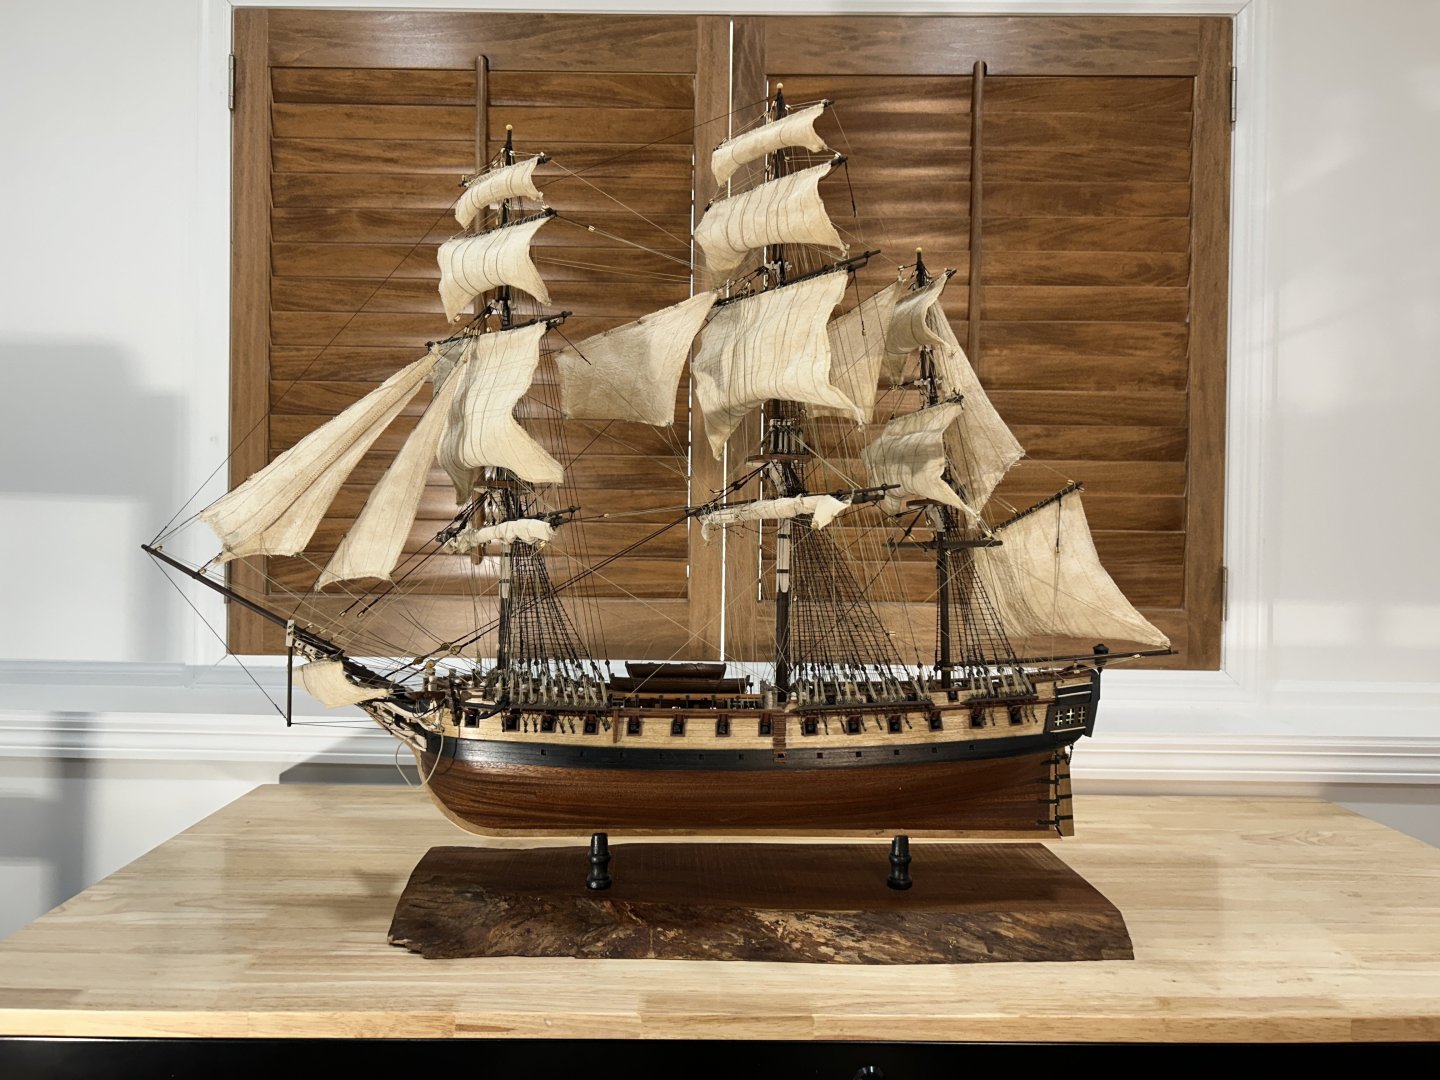
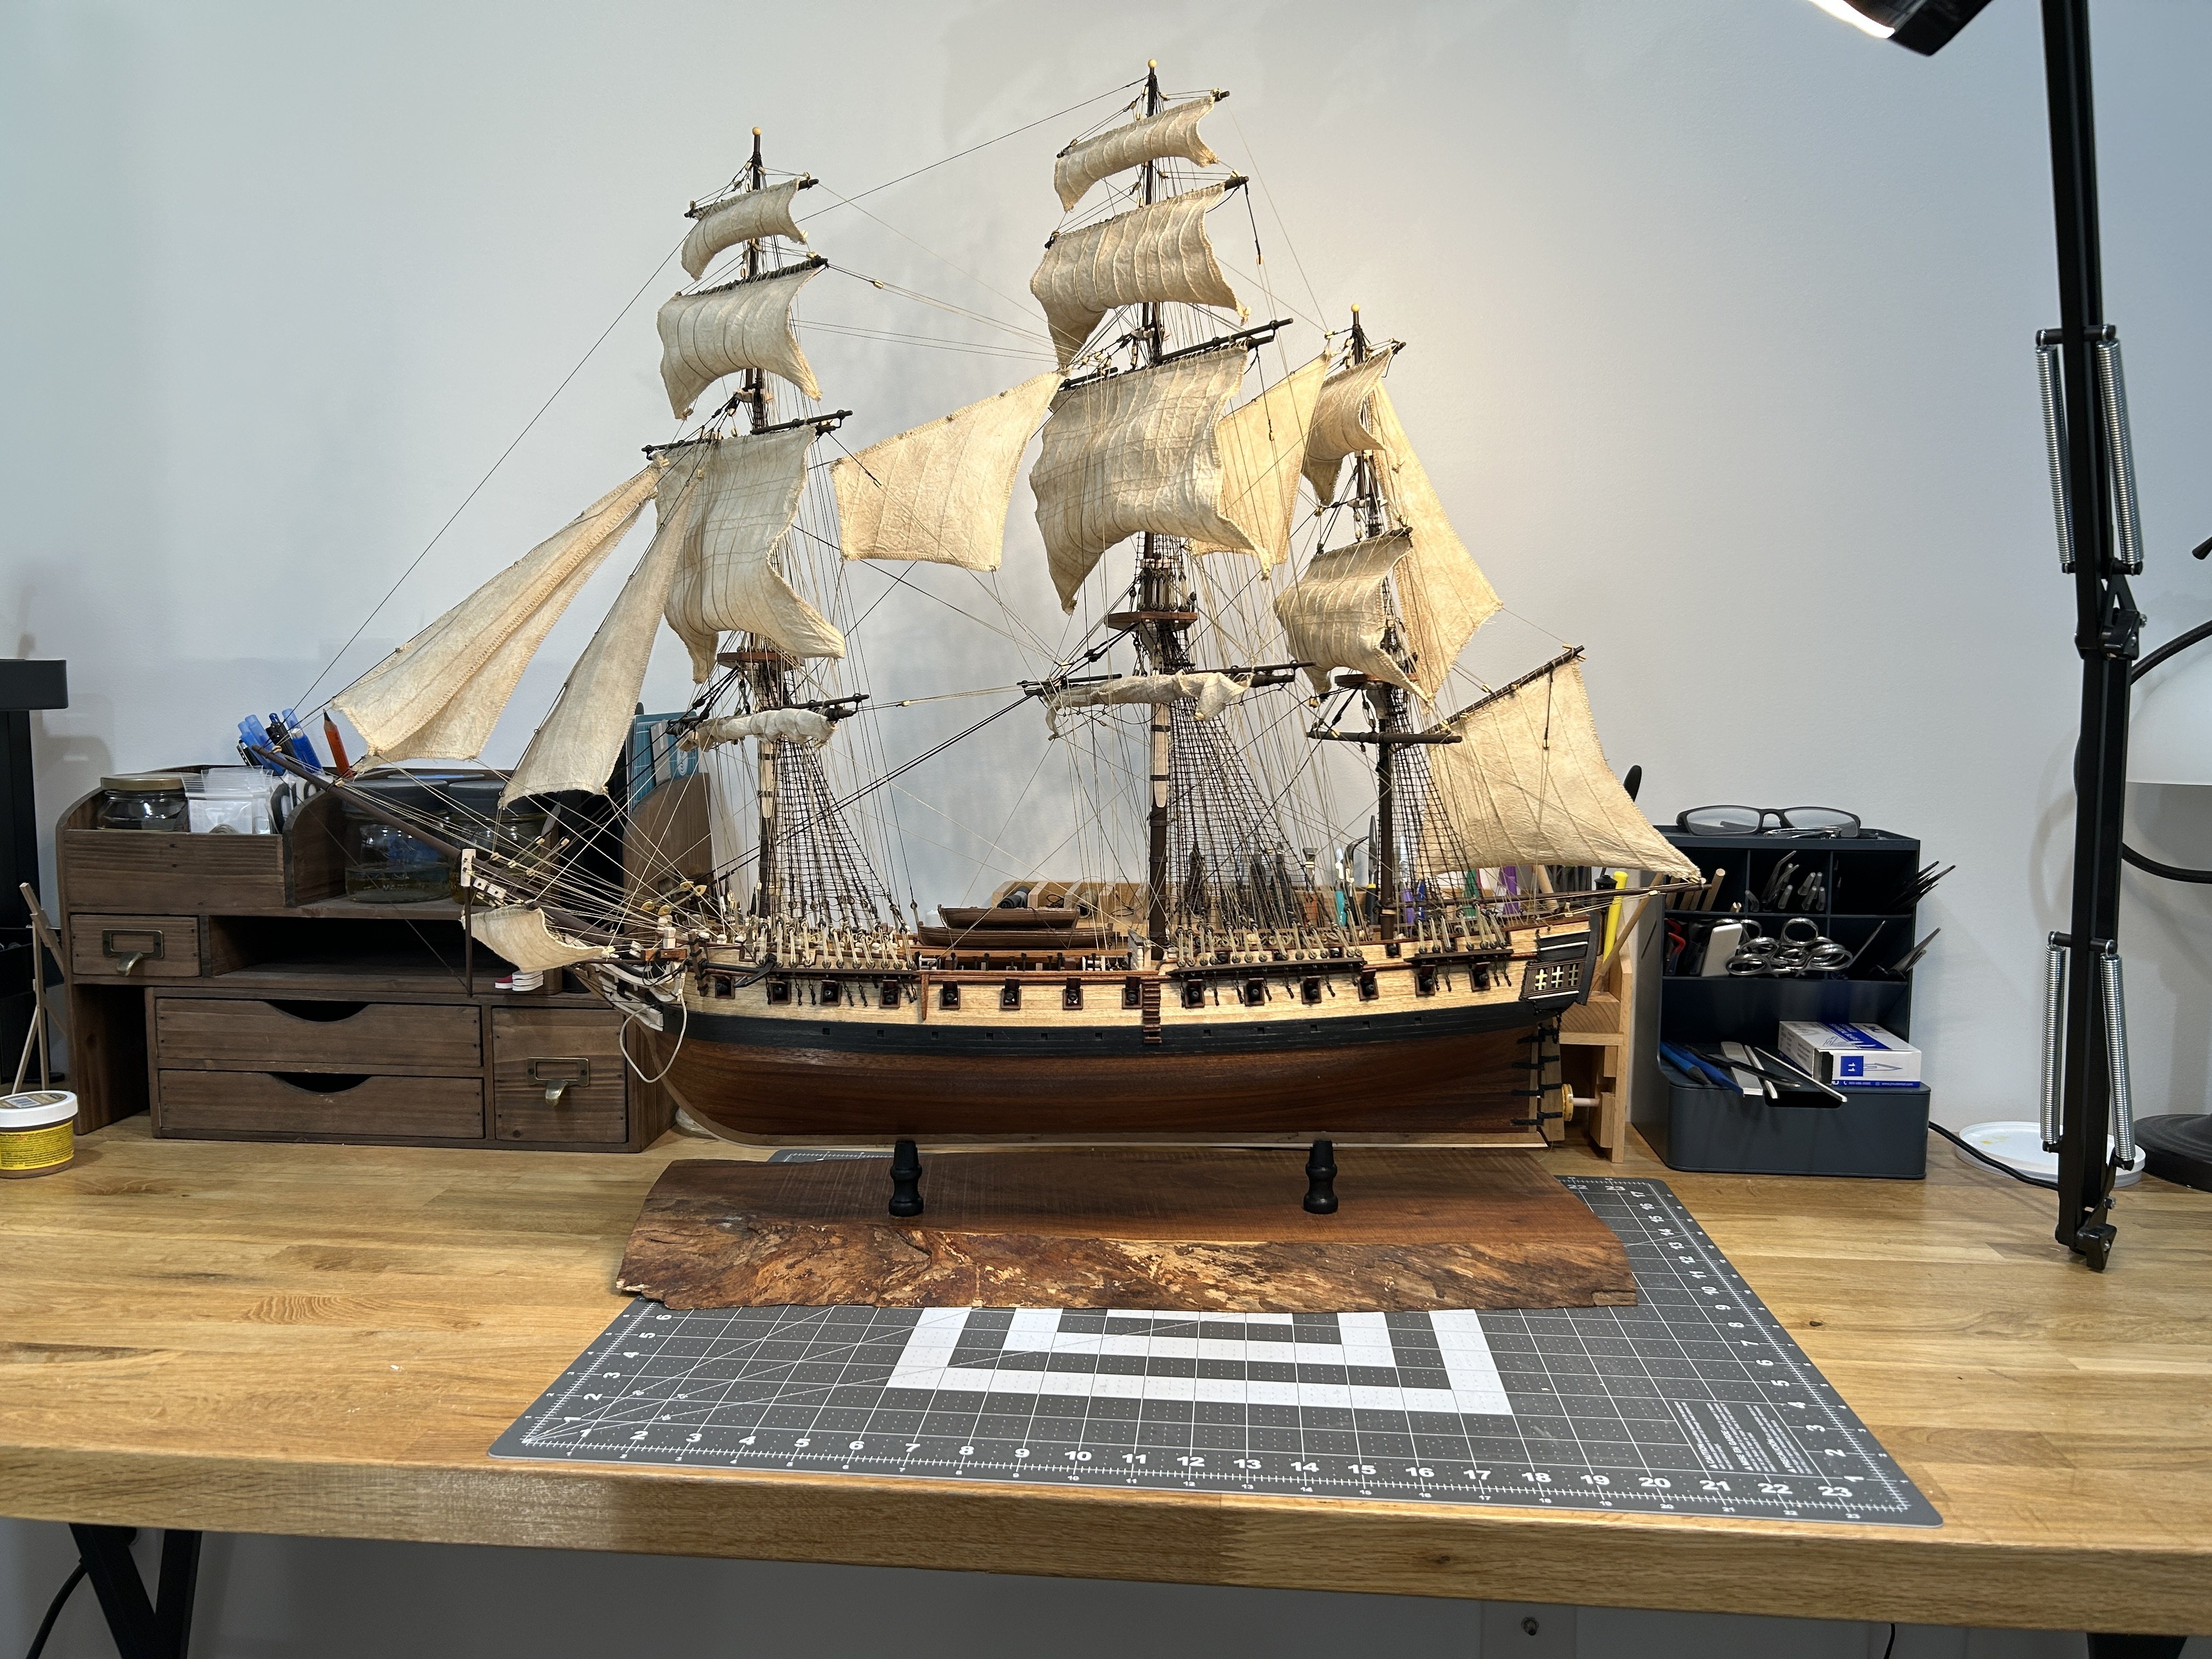
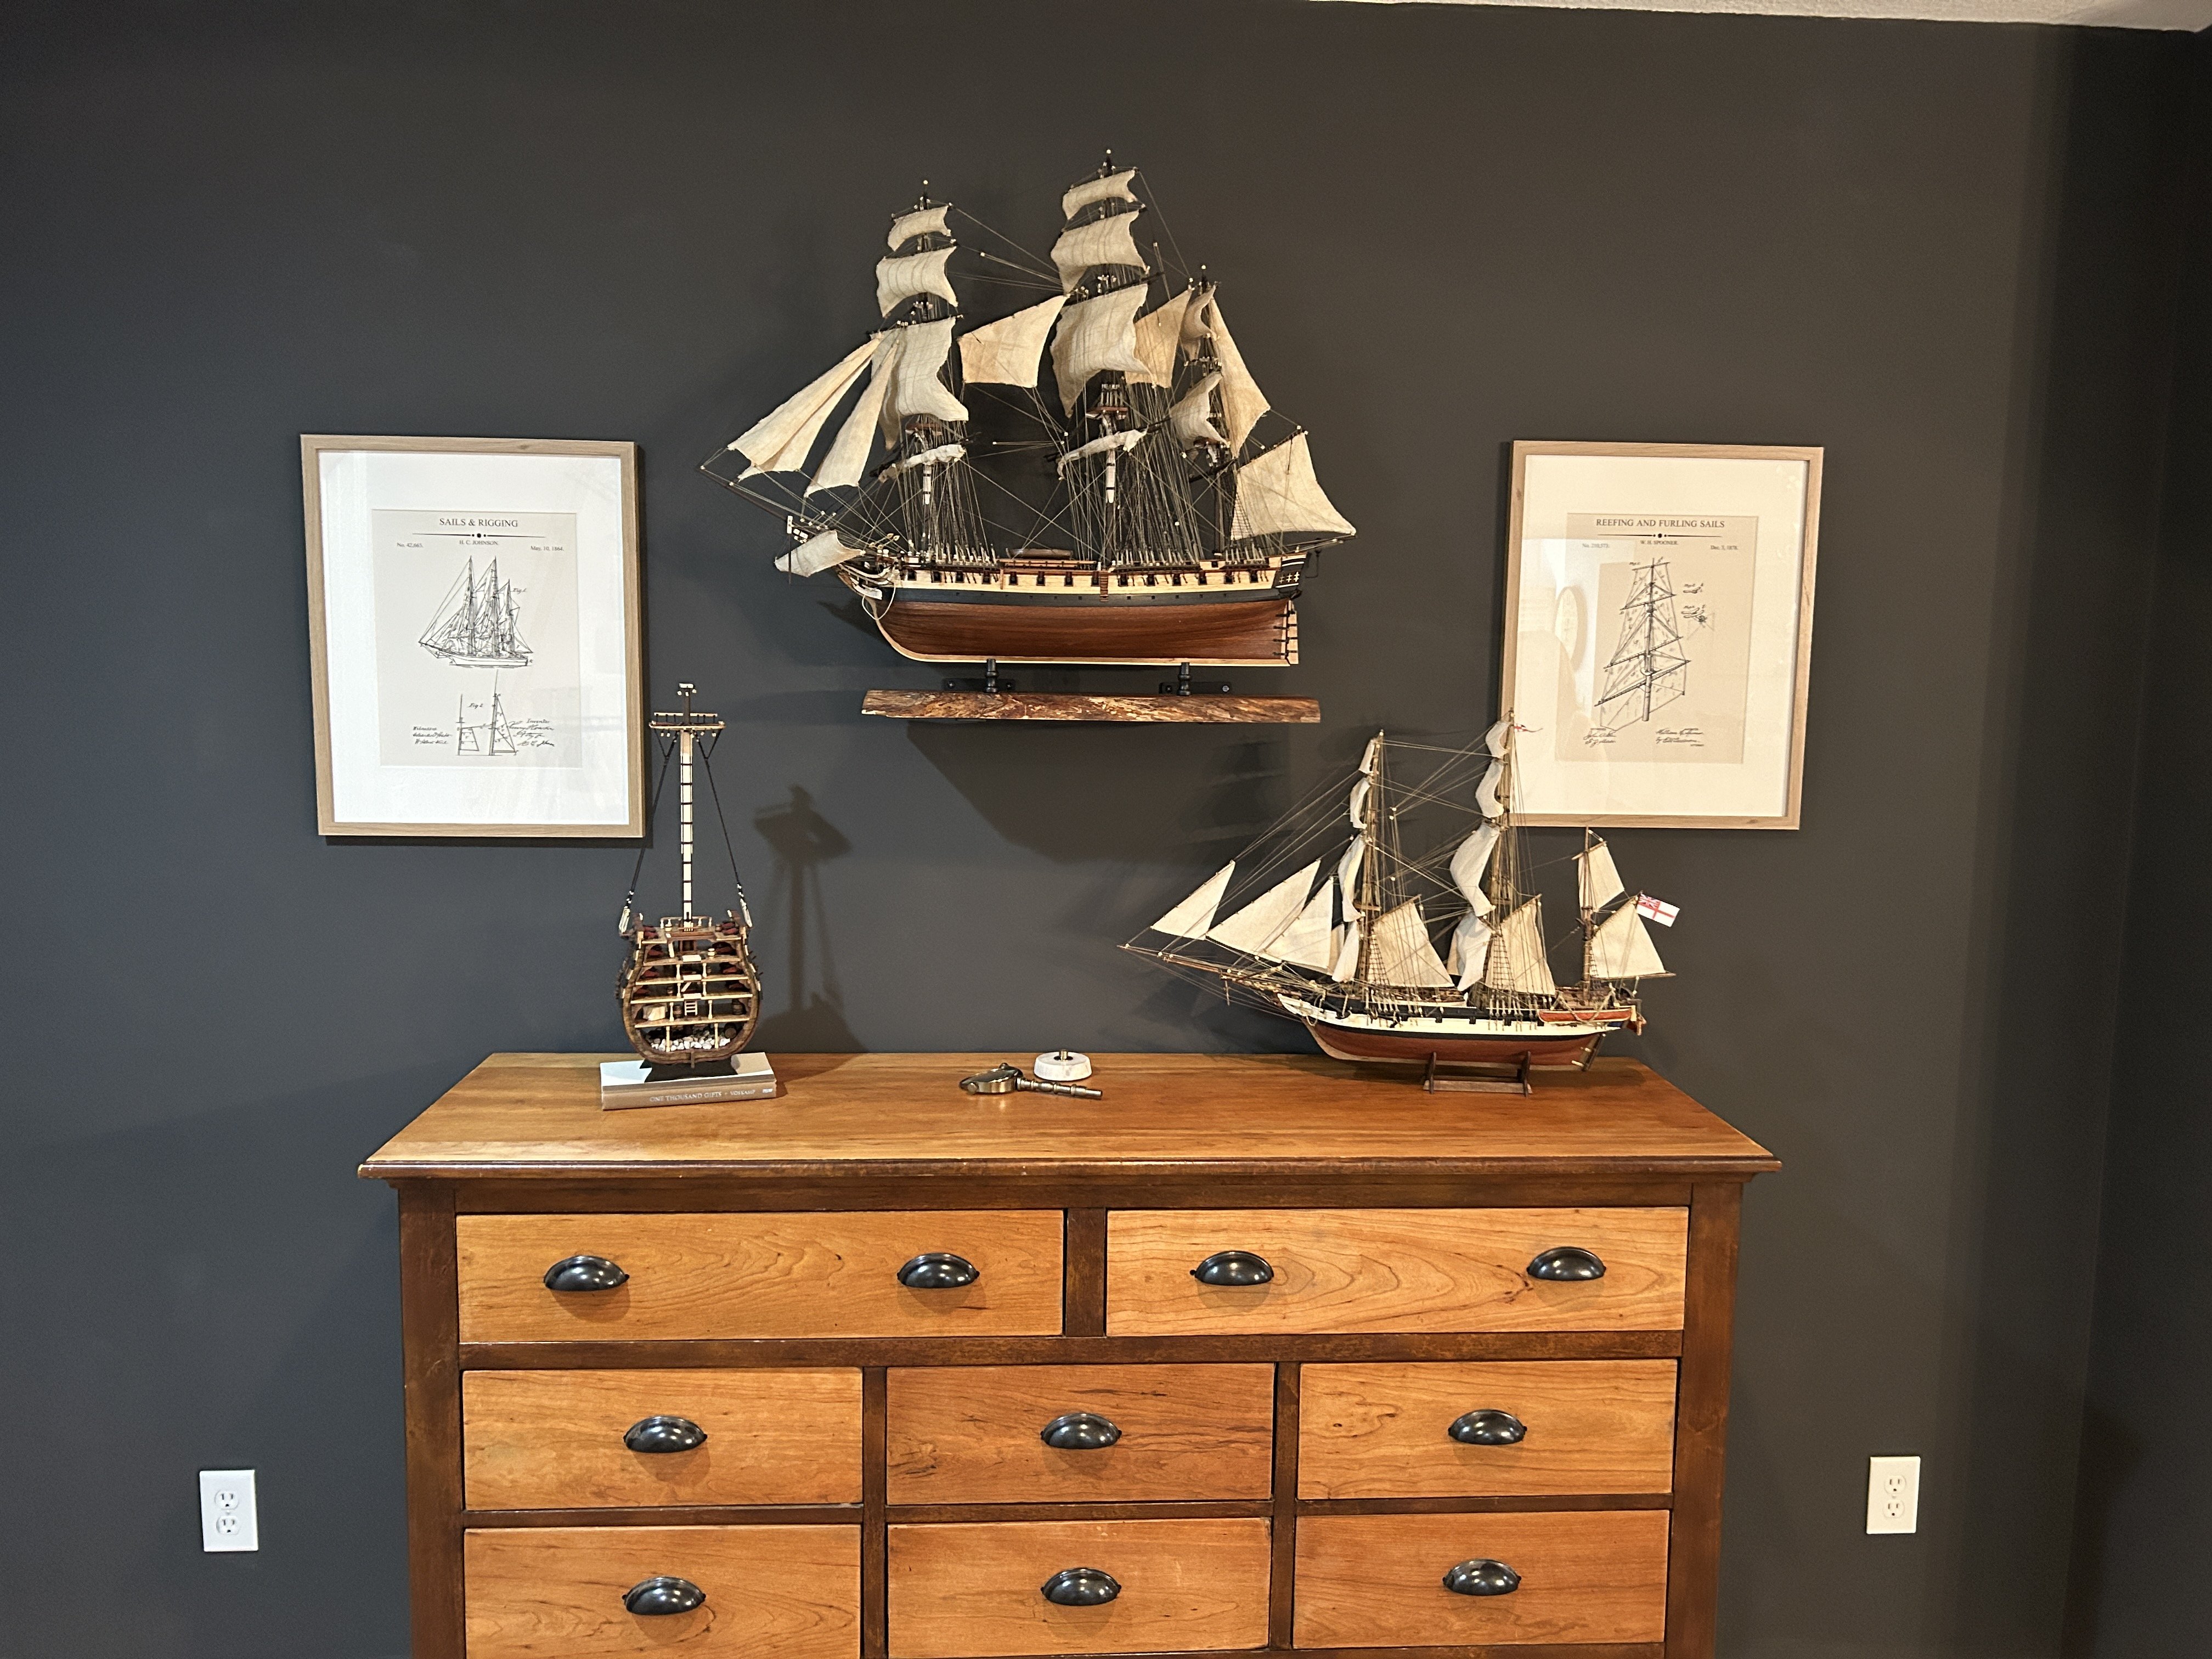
After two and a half years I have finally finished my Frigate Diana. It took me awhile to determine how I was going to mount the ship. This kit does not come with either a cradle for displaying the final model or for use during the build. I built a crude cradle to use during the build, but I wanted to mount the finished model on a couple of pedestals mounted to a piece of live edge walnut that I already owned. Unfortunately I didn't plan ahead. I should have drilled holes into the bulkhead former to accommodate long pins when I could flip it over. I didn't do that so I had to figure out a way to drill those holes from below with out flipping the model over. The base is 1 inch thick, and the pedestals are about 1.5 inches high I installed a 4 inch long 1/8 inch diameter threaded rod from the bottom side of the base though the pedestals leaving about 1.5 inches that are inserted into the bulkhead former. The bulk head former is slightly less than 1/4 inch thick, leaving very little margin for error. I did have a problem with one of the holes, luckily it was on the side that is not displayed. After being in this house for about 10 months so far, thanks to my wife we have found a way to display my models. At the bottom of the stairs to our basement we have a niche in the wall my wife wasn't sure what we wanted to do with. As an early Father's Day present she found a chest of drawers that had been refinished and we decided to use that chest as a way to display my models in the niche. The Frigate Diana's base is mounted directly to a couple of shelf brackets. I want to thank everyone that viewed, liked and commented on this build log. I really appreciated all of you interest. I have already started my NRG half hull, and will get a build log started and catch anyone who is interested in that project soon. After that I though I would build the US Brig Syren that is in my inventory, but I think I will go with the USF Essex instead. Hopefully I get that started in the next 30 - 60 days.


- 142 replies
-
- 16
-
-

-
Best White Wood Glue For Ship Building
RossR replied to OldeManToad's topic in Modeling tools and Workshop Equipment
Titebond will let go with some alcohol. I brush a little alcohol on the joint and it lets go in about 10 minutes. I have used Weldwood with good results. If you can use the thin CA without making a mess congratulations. I really struggled with the thin CA and threw mine away. I find my self using Titebond more and more instead of CA, but it is good to have a few options in your tool box. -
We are lucky to have people like you and Chris Watton to push the envelop and use new technology to advance our hobby. I recently purchased some of your printed blocks, the level of detail on the 3/32 and 2mm blocks is just incredible. I will be practicing stropping the 3/32 inch blocks for use in my next build, either the USF Essex or US Brig Syren. The belay pins look great. I will be interested in how the 3/16 pins work out.
-
Are you referring to the smell or performance. It definitely has a strong odor and good ventilation is advisable. curious if your planking has held up over the years?
-
I use a round wooden handle from a pin pusher. I am not positive, but I think for laminate countertops tops a roller would be used, but no clamps that I am aware of. I can’t speak to what cobblers do, no knowledge on that subject. Occre specifies the use of contact cement in their models for the second planking and has good video instruction on its use in the series of videos for HMS Beagle. I know a lot of kits would have thicker material for the second layer of planking, I am not sure if contact cement is best in those models, but if you building an Occre model with two layers of planking I would recommend following Occre’s instructions.
-
I see this comment from time to time. Contact cement is used for laminate countertops, and I have lived in houses with 50 year old countertops that show no sign of the glue letting go. it does have very specific applications and certainly isn’t useful for most modeling applications. If you have 100% surface contact, especially when one layer is as thin as Occre’s second layer of planking or two flat surfaces like decking on a plywood base, I think it is an good product to use. You do need to use it properly. Apply it to both pieces and wait for it to dry to a point of being slightly tacky when you touch it. When the two tacky pieces make contact you get a very strong bond.
-
Looking forward to following along when you do get started again.
-
I don’t know if I am more impressed with your quality or speed. The combination of the two is amazing. Great work.
- 73 replies
-
- 1
-

-
- Harpy
- Vanguard Models
- (and 1 more)
-
Using CA, I have had success, for example, my pin rails were glued to the bulwarks after the bulwark had a second layer of Shellac. The edge of the pin rails would have been left unfinished. The bulwark would have received two coats with a sanding with fine steel wool after each. I had one pin rail come off and need to be re-glued. I think as more layers or thicker layers of shellac are added you will have less success. Items with less surface area are more problematic, but that would be true if glueing bare wood to bare wood also.
-
There have been a number of very nice results from first time builders with this kit. I think you made a good choice. Good luck with your build.
-
looking forward to following along when you get back to the half Hull.
-
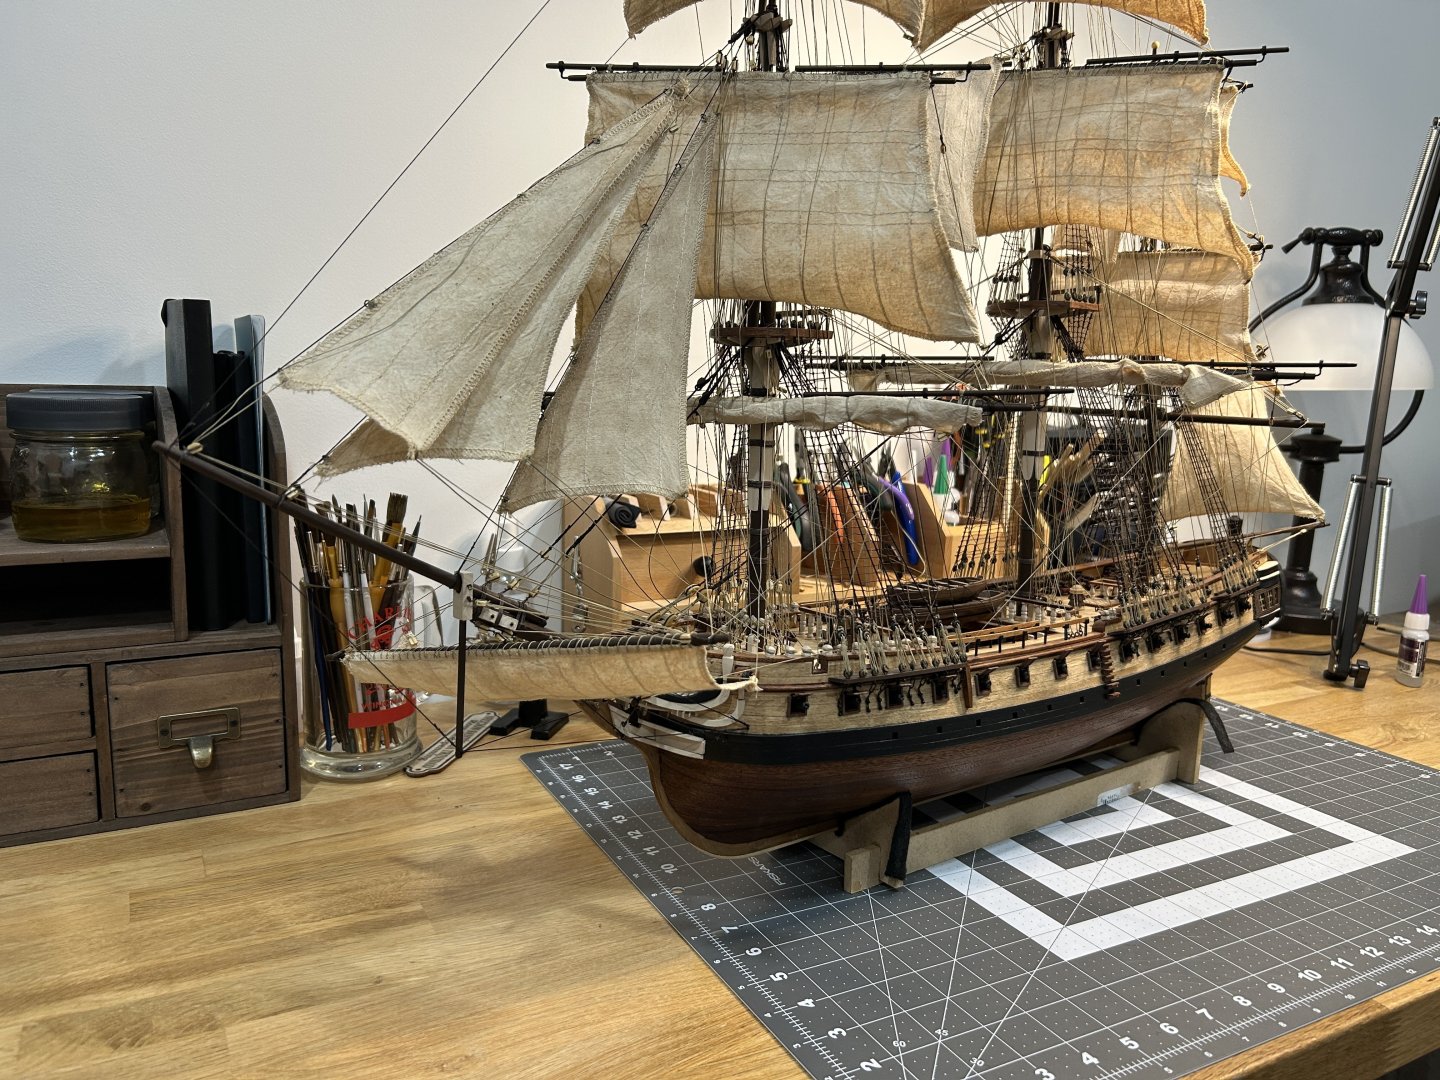
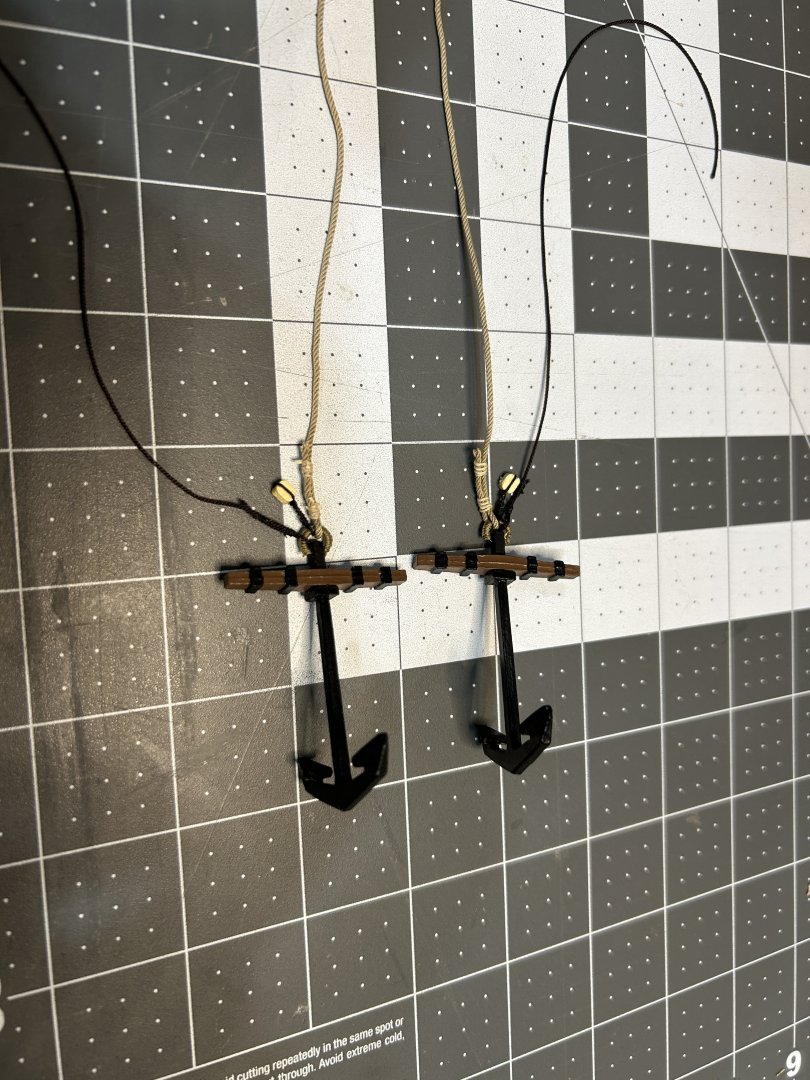
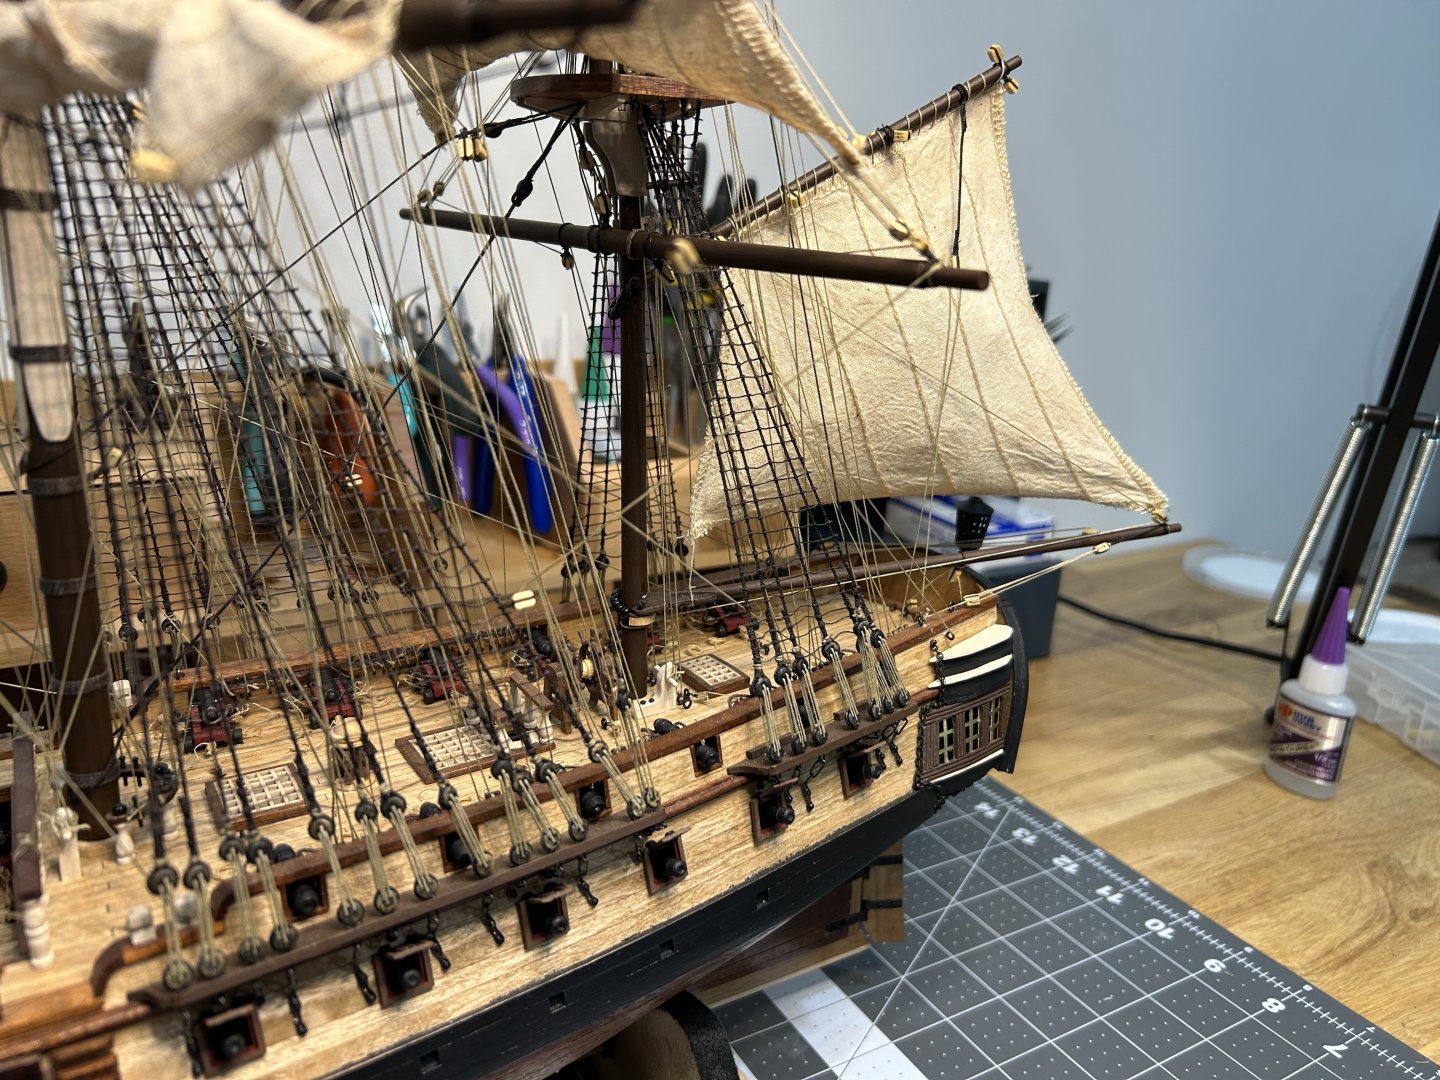
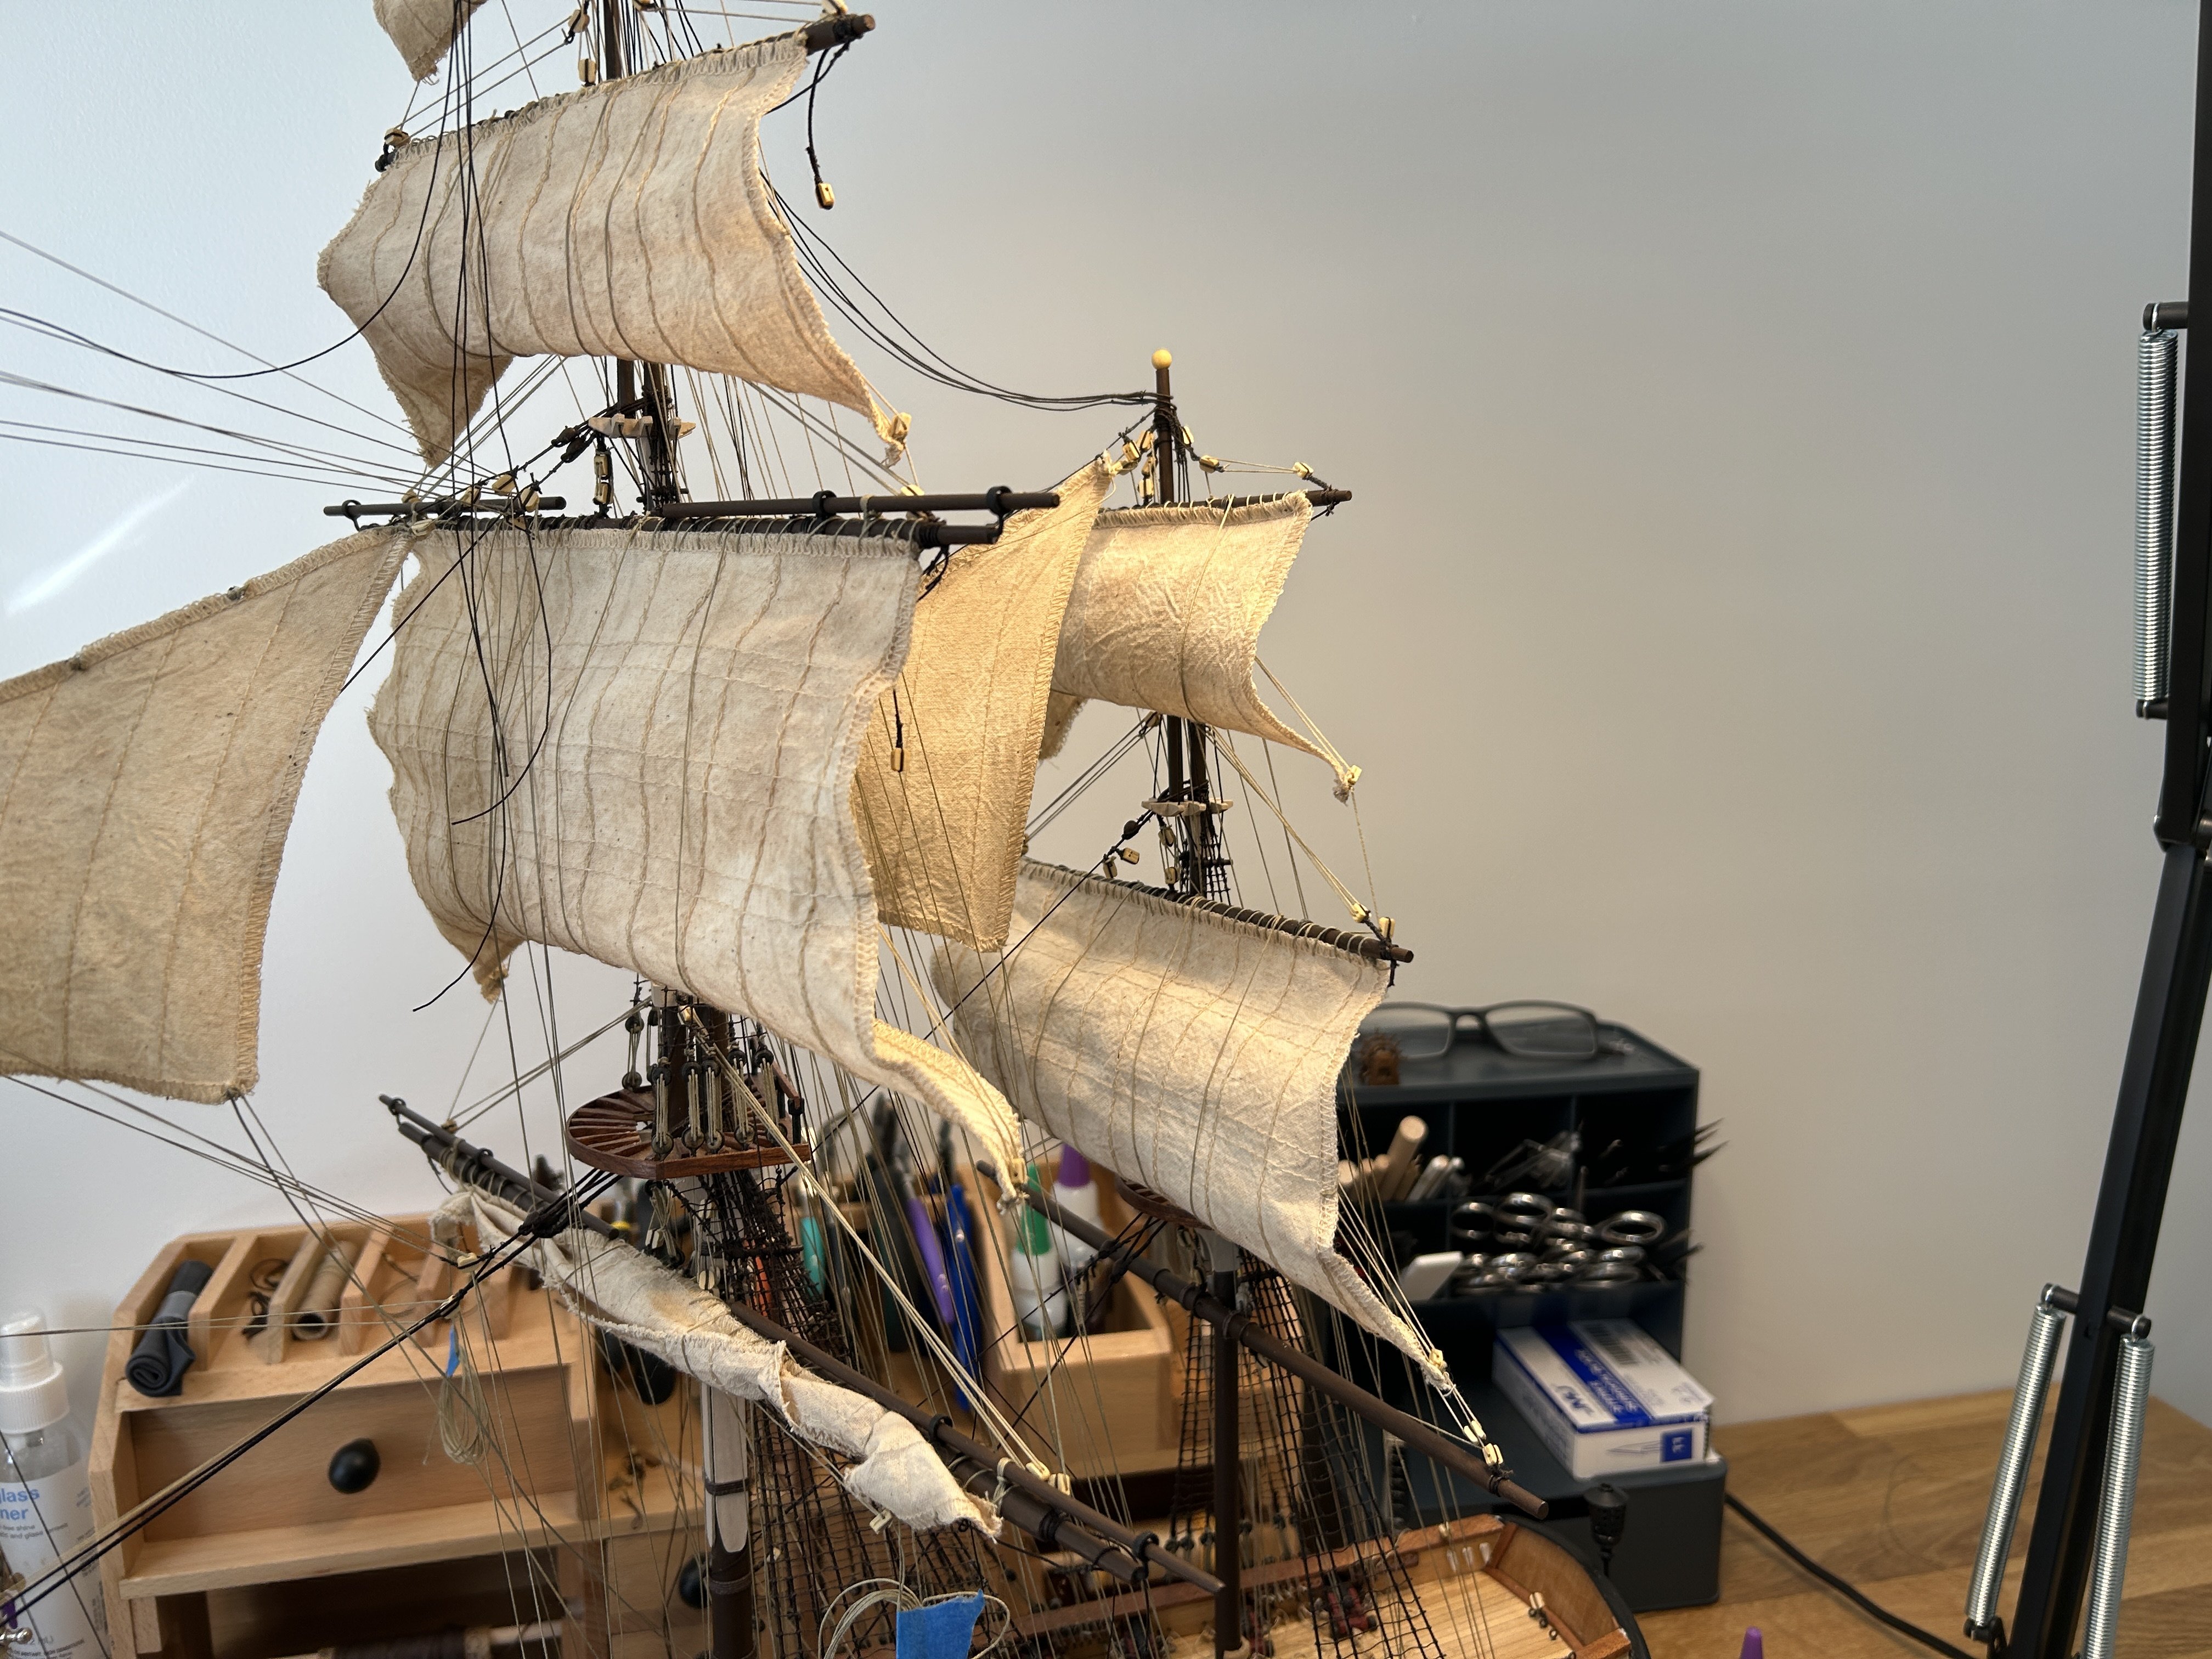
I have reached a milestone on the model today. I have added the driver topsail and the bow sprit sail. This completes the rigging on the ship. two items left. Adding the anchors and then adding a lot of rope coils.
- 142 replies
-
- 11
-
-
I really enjoy your build logs. Your work is always great,
- 73 replies
-
- 2
-
-
-
- Harpy
- Vanguard Models
- (and 1 more)
-
I made some more progress this last week. I have all of the braces completed along with the remaining back stays. Most important I have the driver completed also I have also prepped the anchors and they already to add to the model.


-
I love the result with steel wool, but hate the mess. I have tried other products like various grades of sand paper, and various brands and grades of “Scotchbrite” type products and the result is never as good as with steel wool. Has anyone found something less messy that produces a result like steel wool?
-
I use denatured alcohol from the hardware store with good results. If you live somewhere where Everclear (180 proof grain alcohol) is legally sold, that would probably be the best option. No additives would be present to prevent human consumption, just 90% alcohol. In Minnesota where I live it is not legally sold.
-
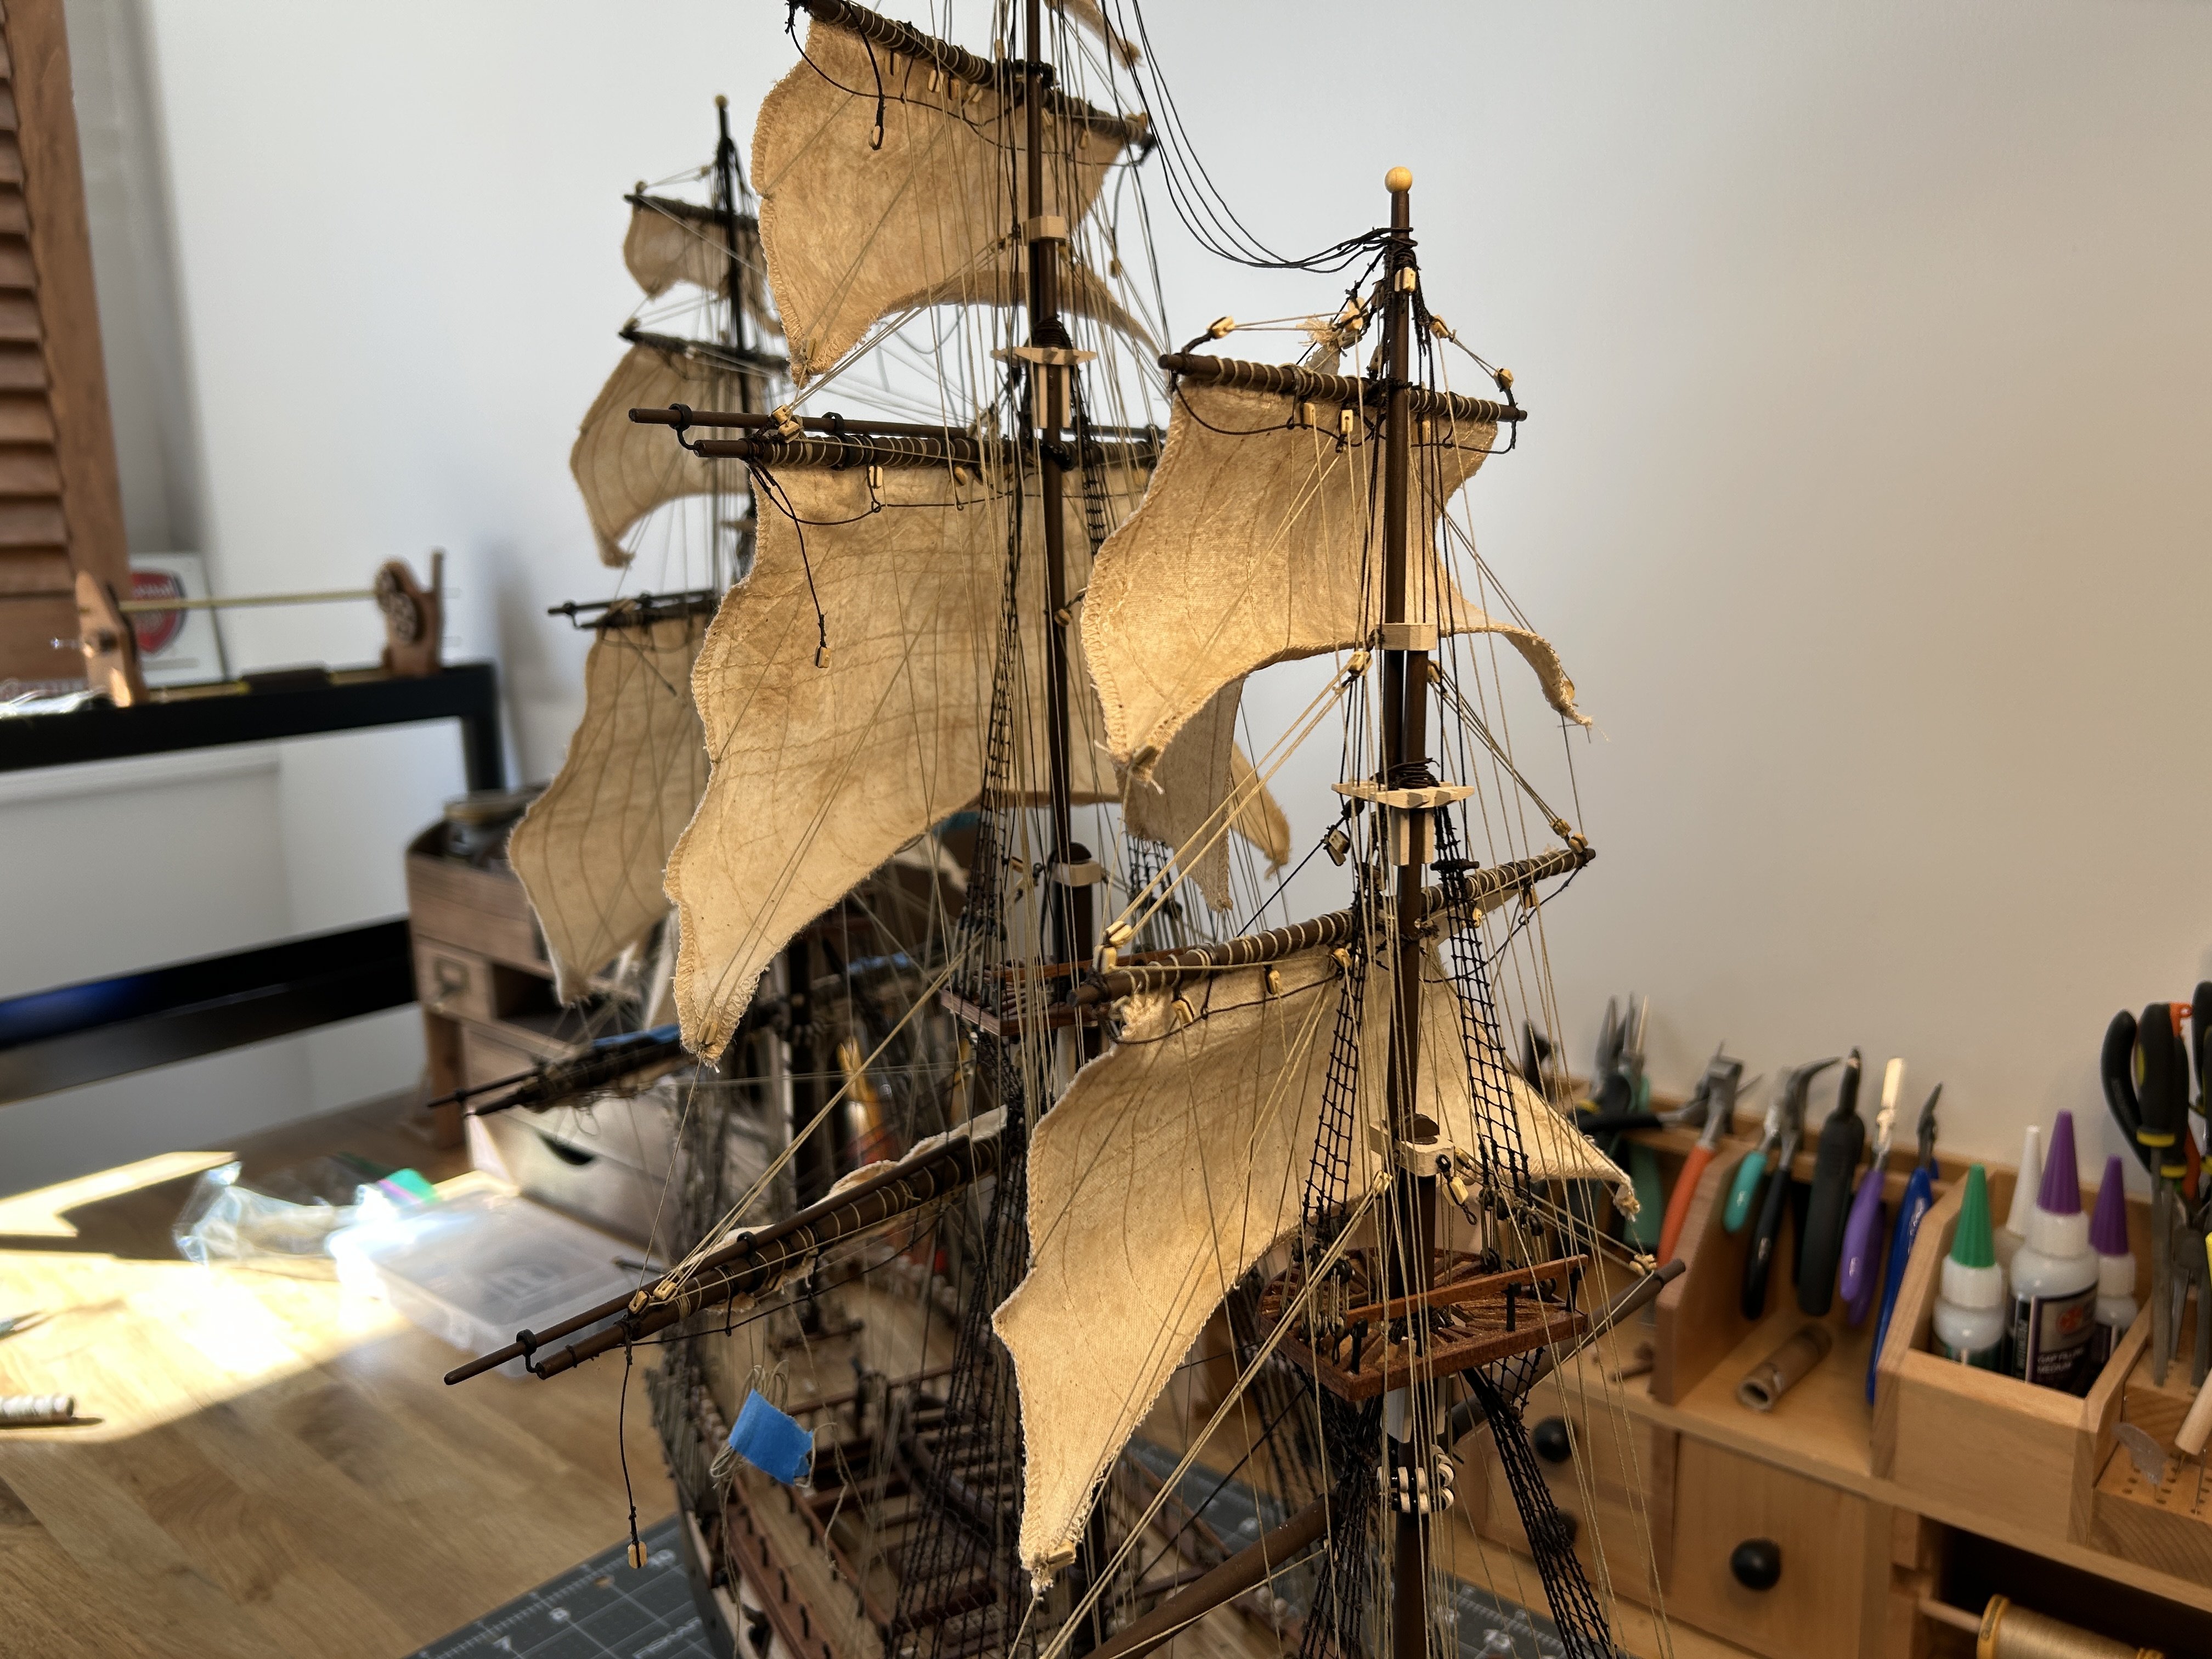
It has been quite awhile since my last post on this build. Since may last post my oldest daughter was married, I had a busy time at work, and I finished my other build. Now time to get back focused on the Frigate Diana. I have added the mizzen top sail and the mizzen top gallant sail. I should have the driver and driver top sail installed this week. I see the light at the end of the tunnel on finishing this project.


-
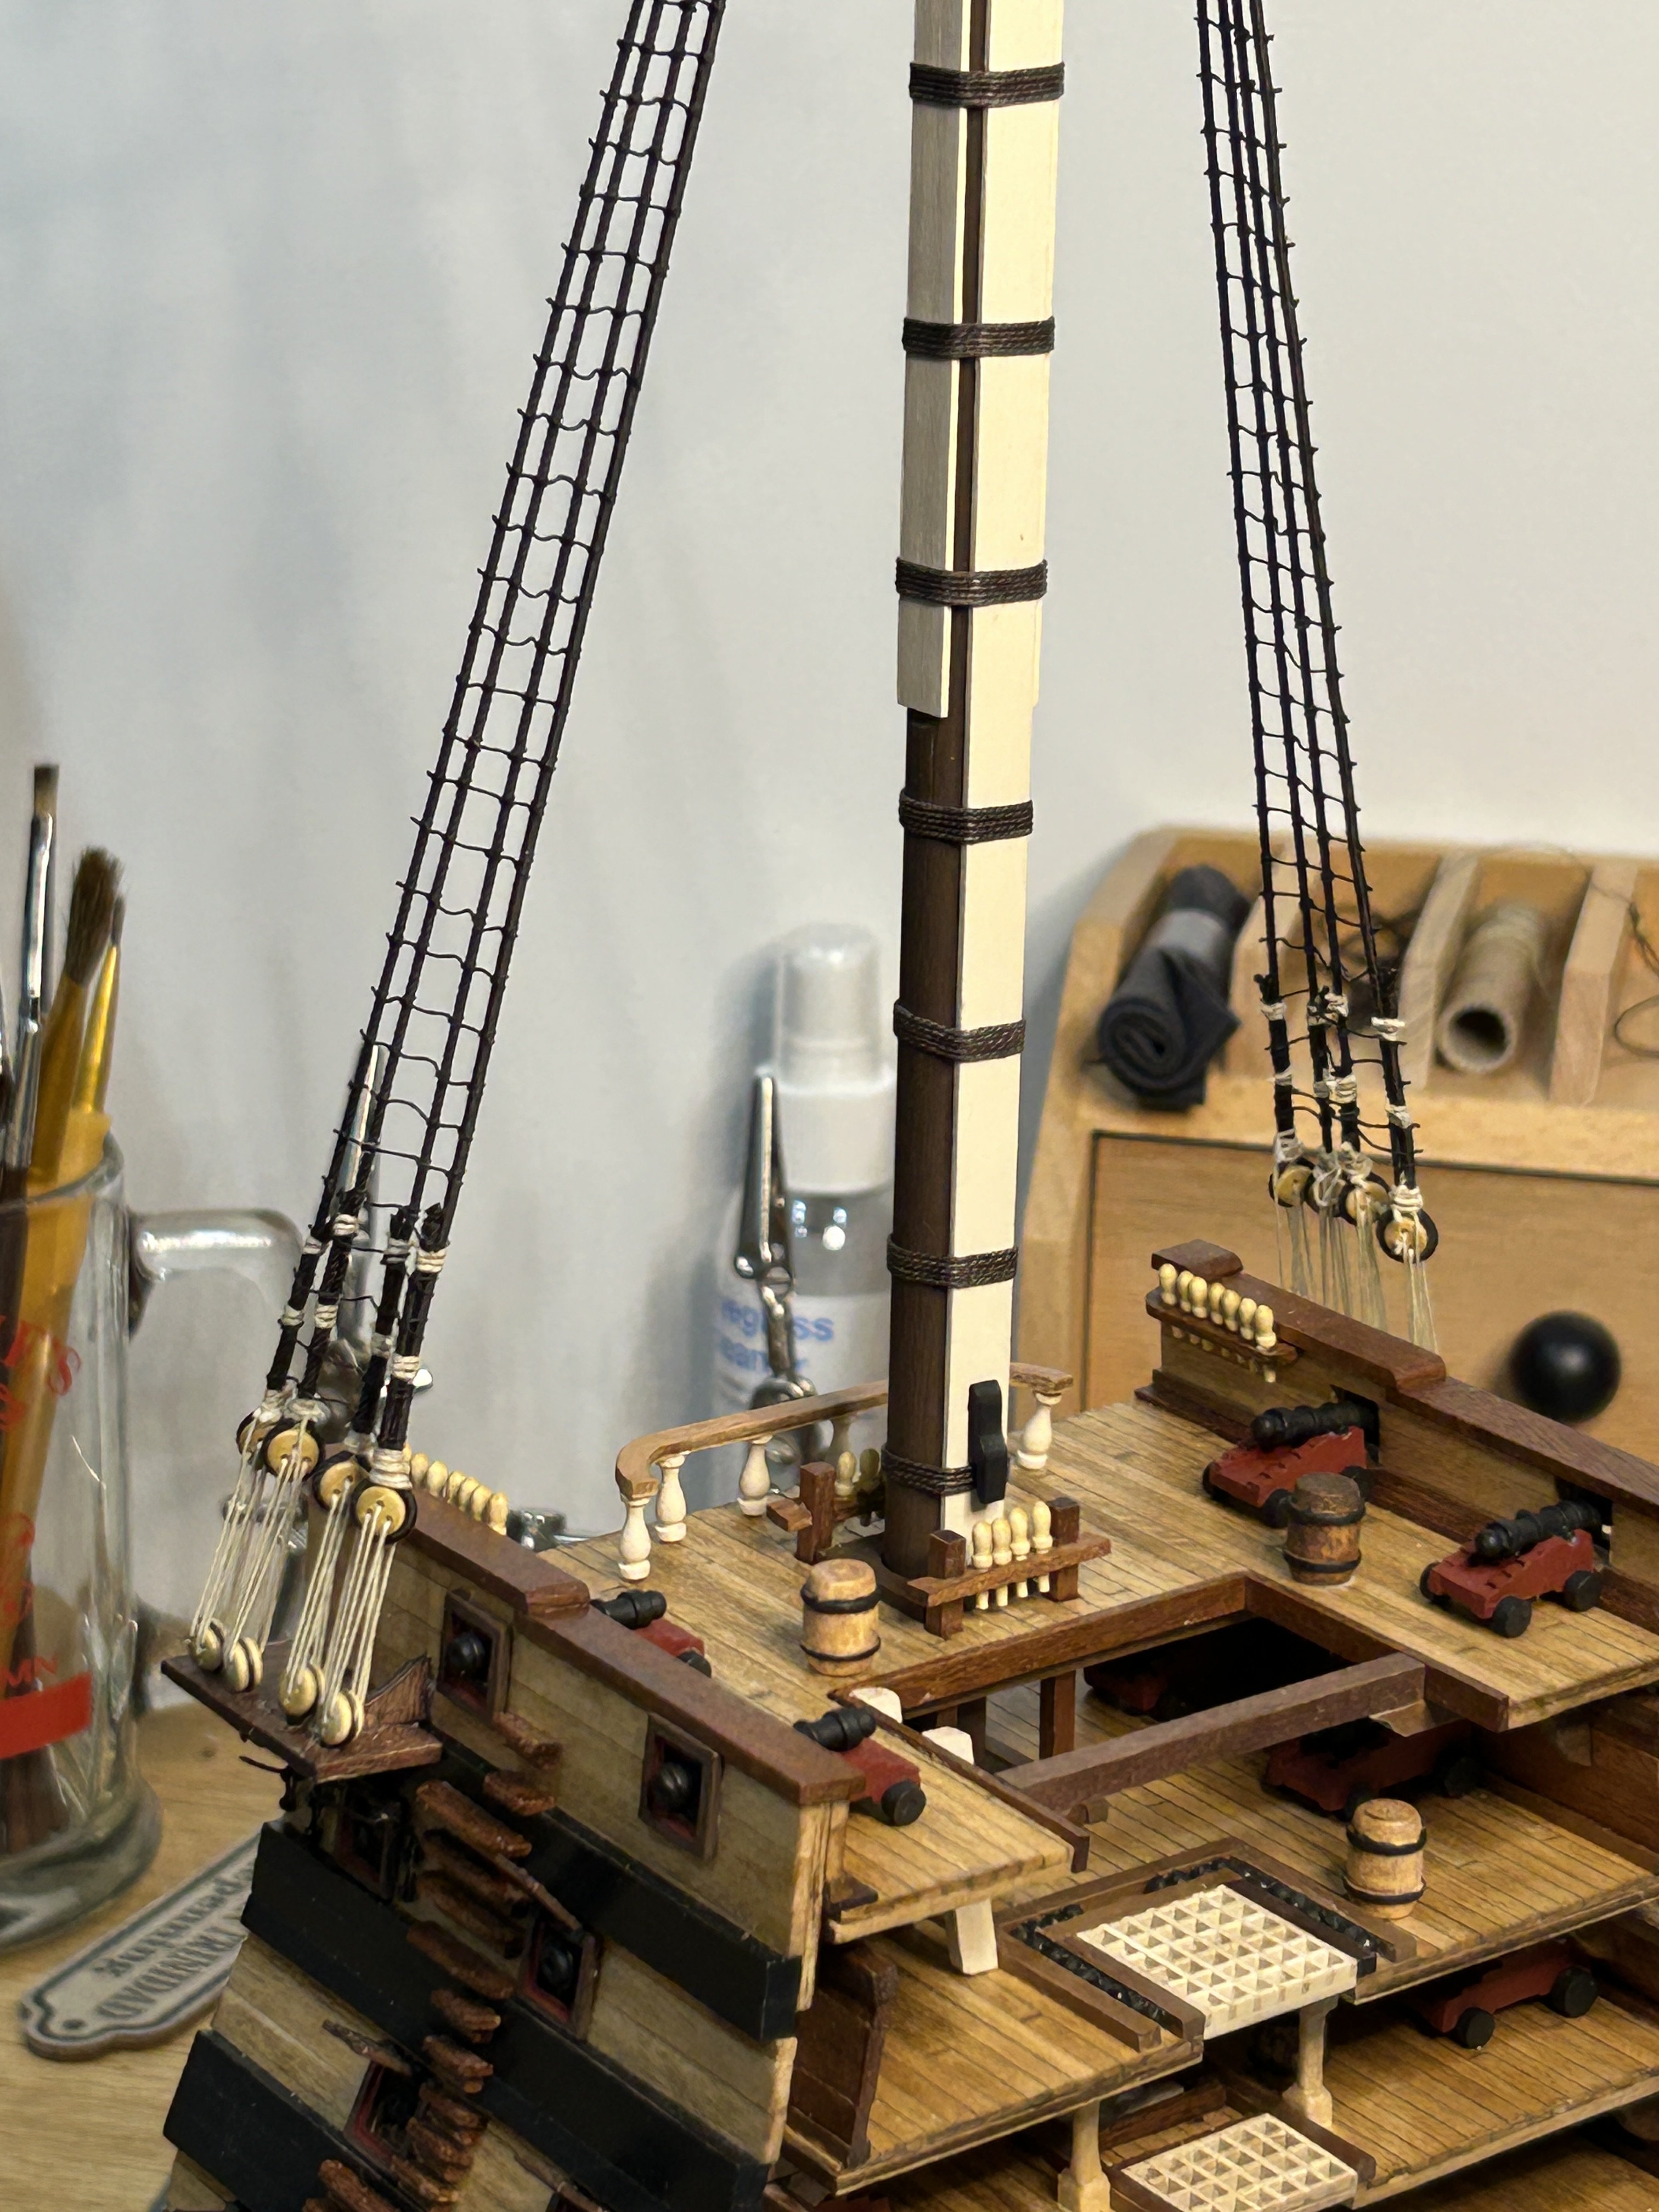
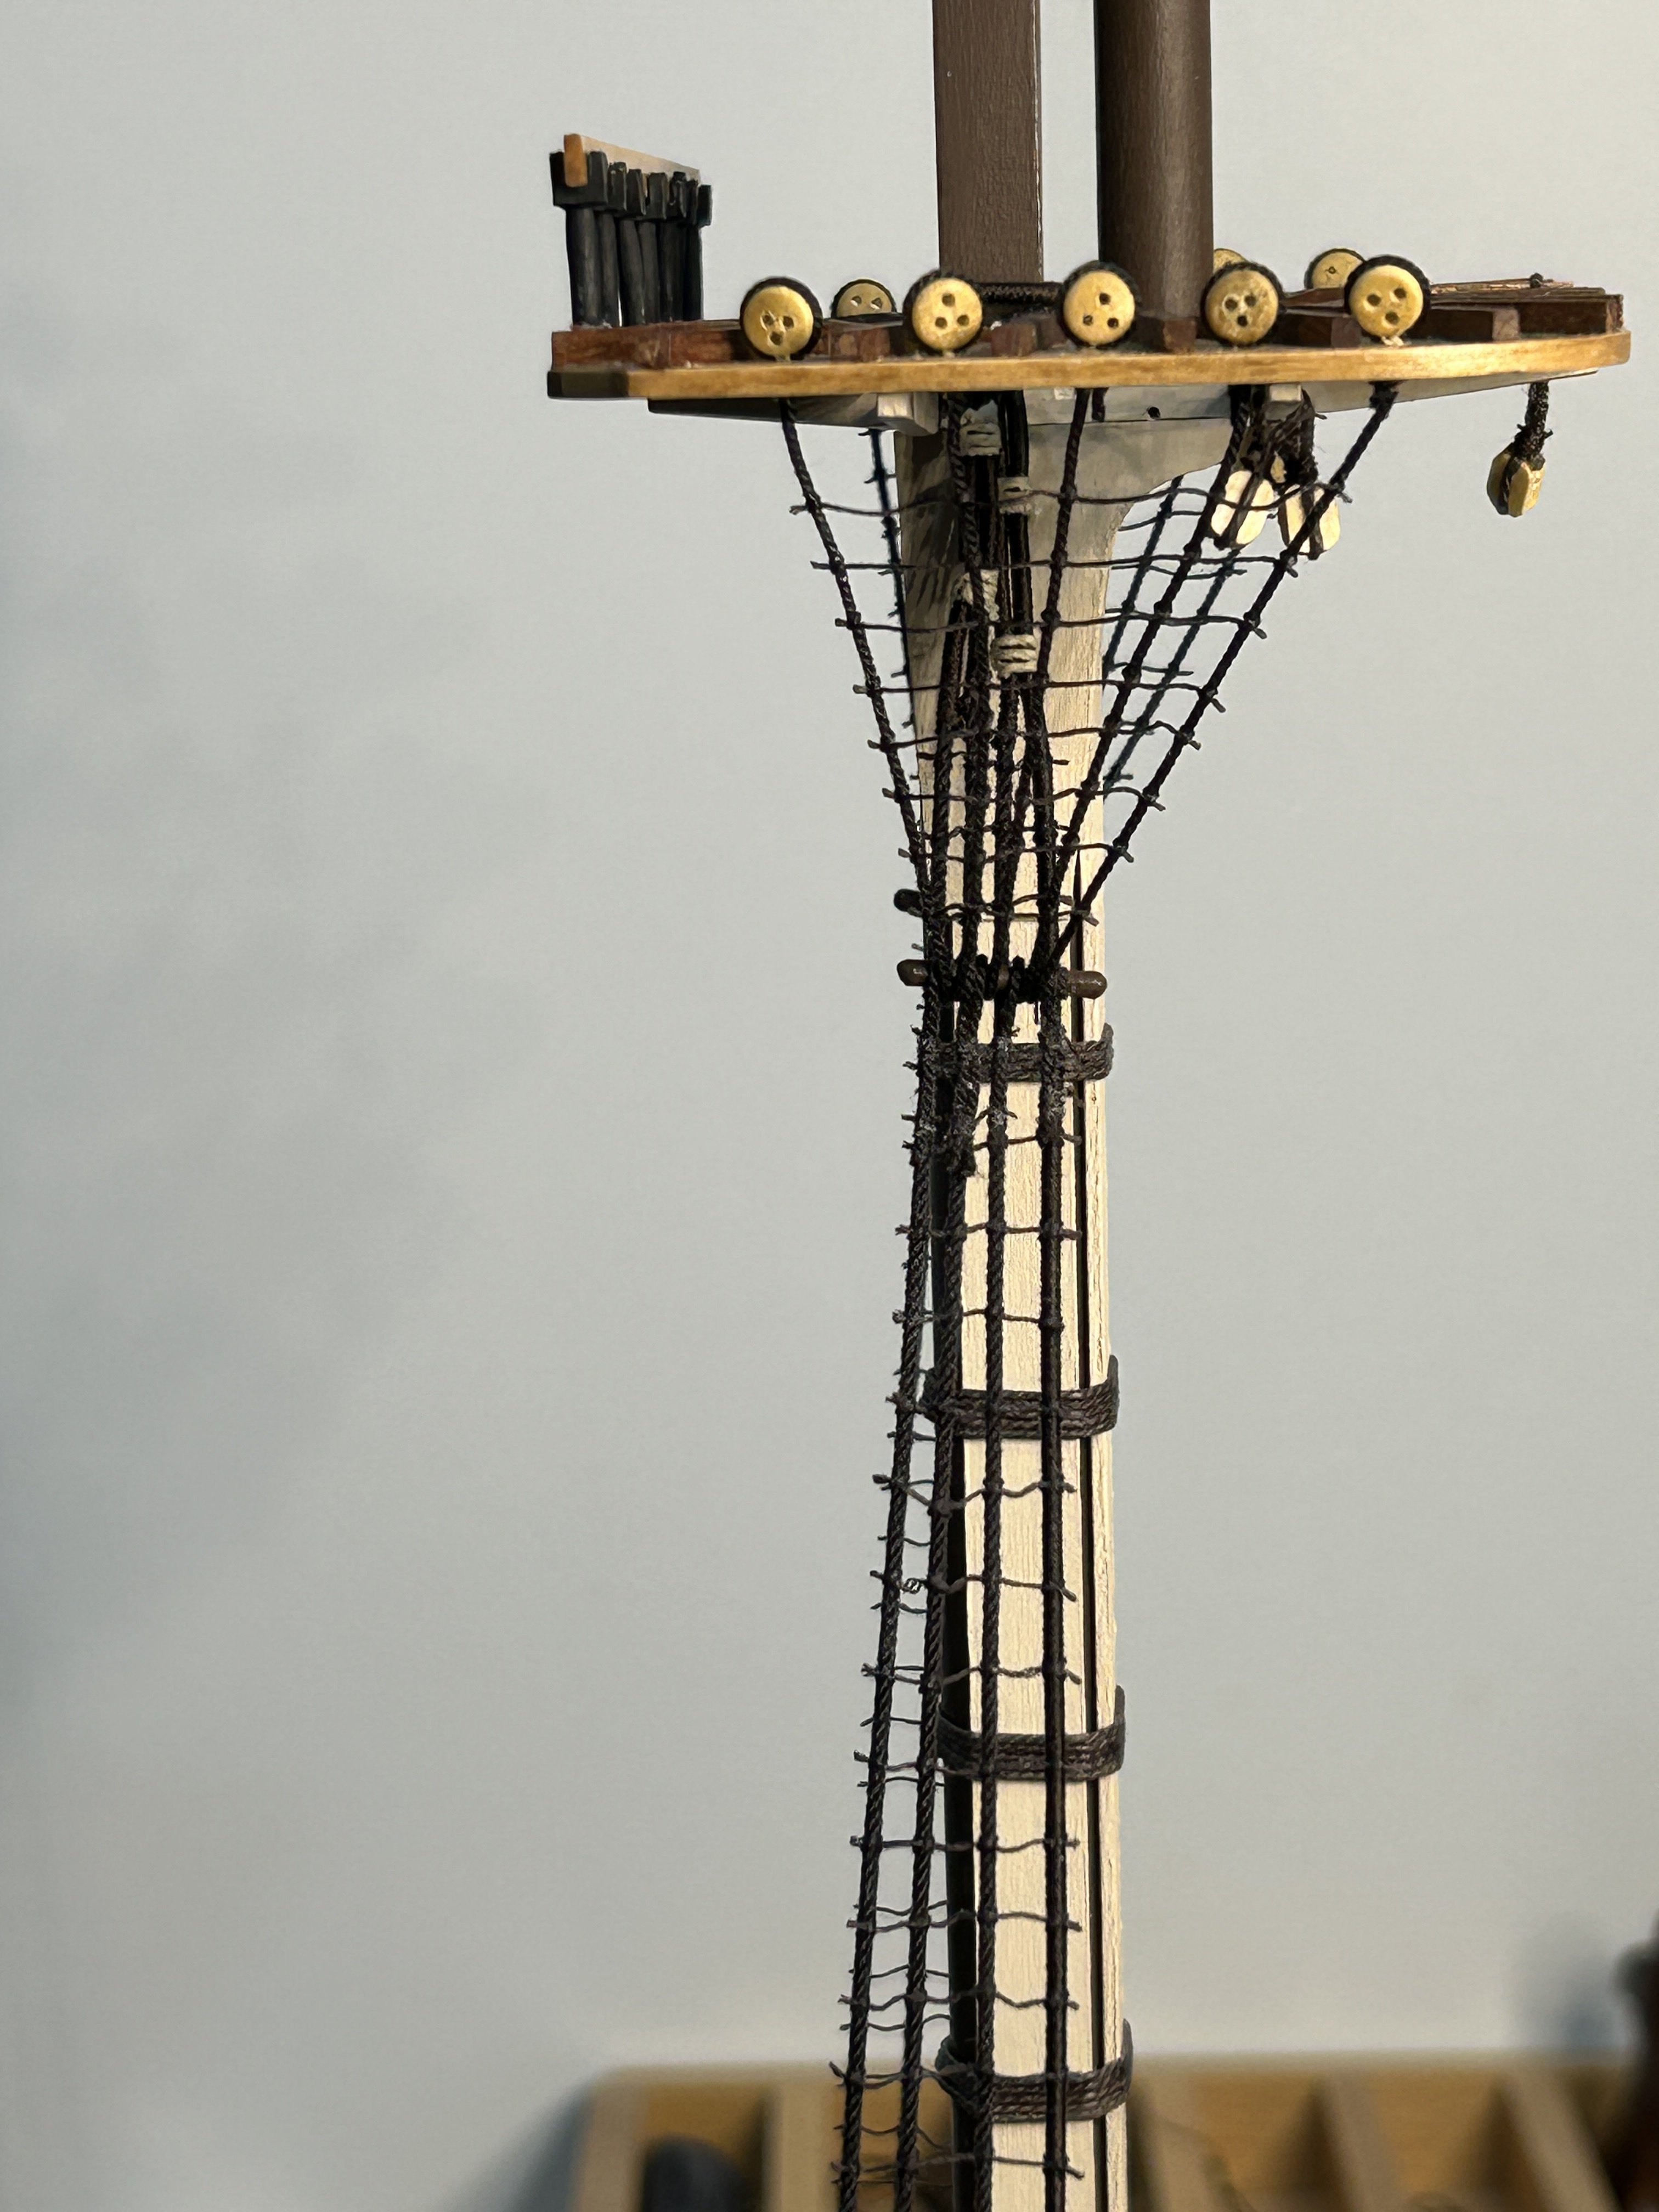
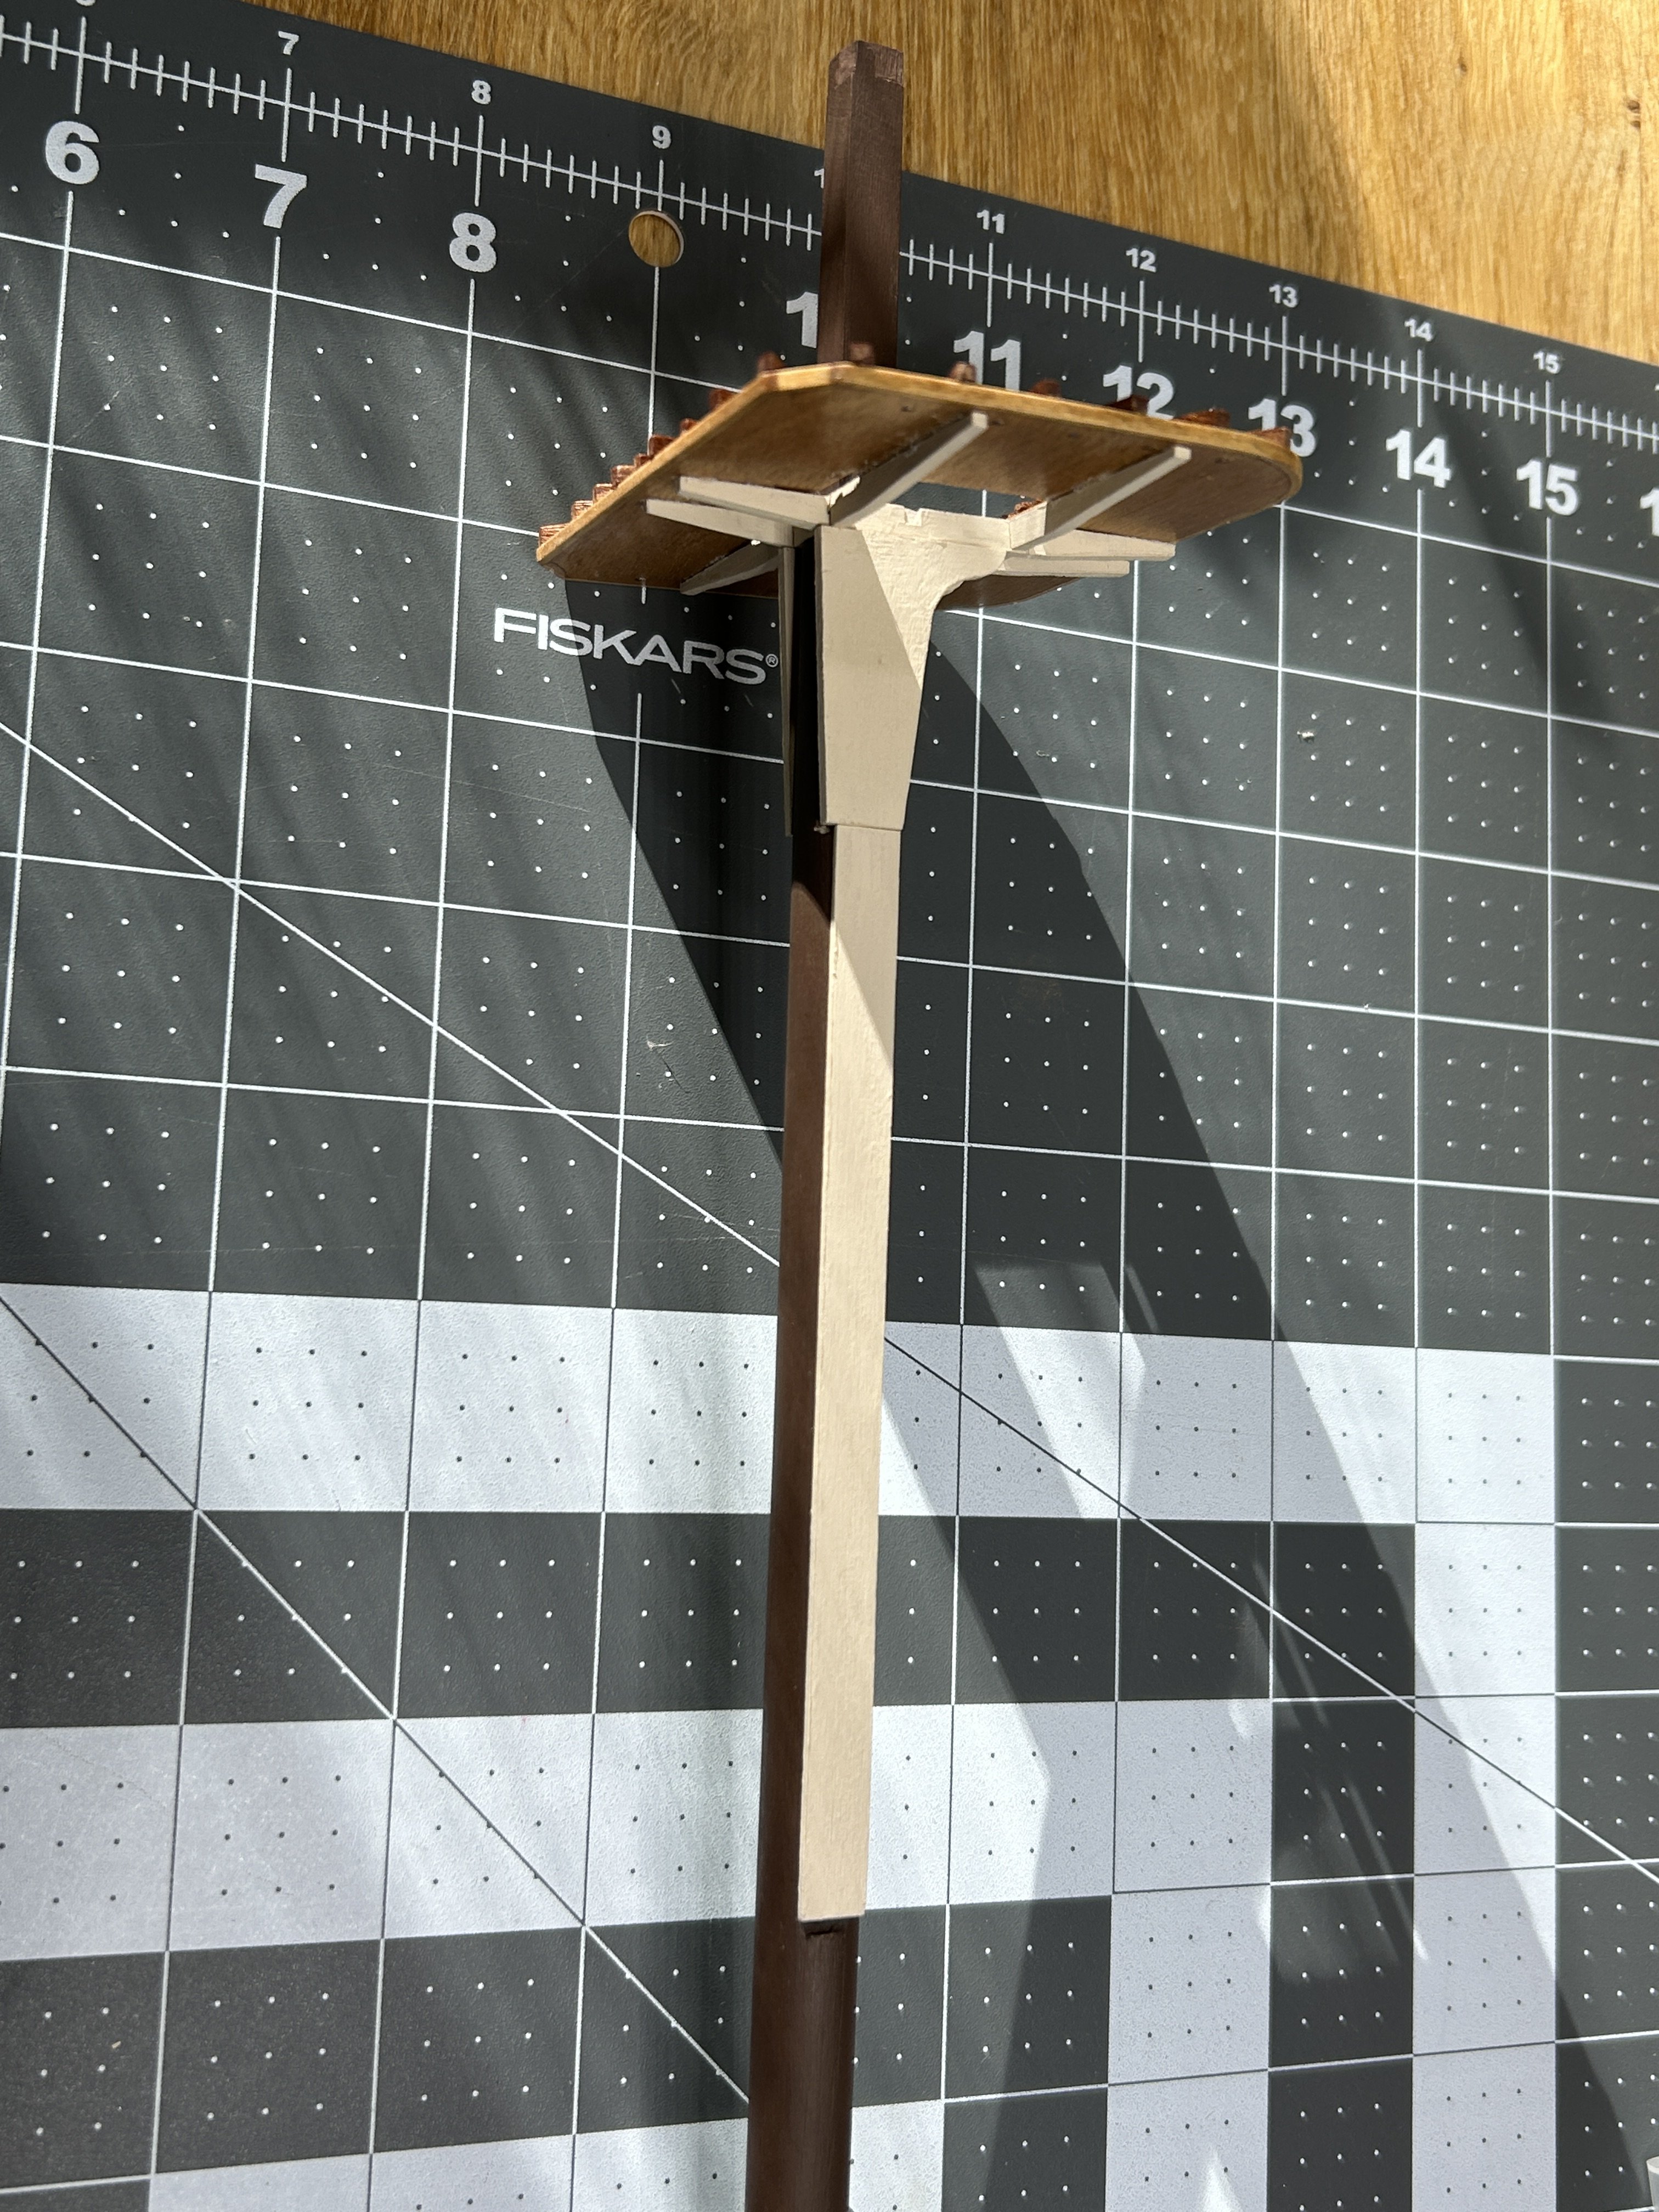
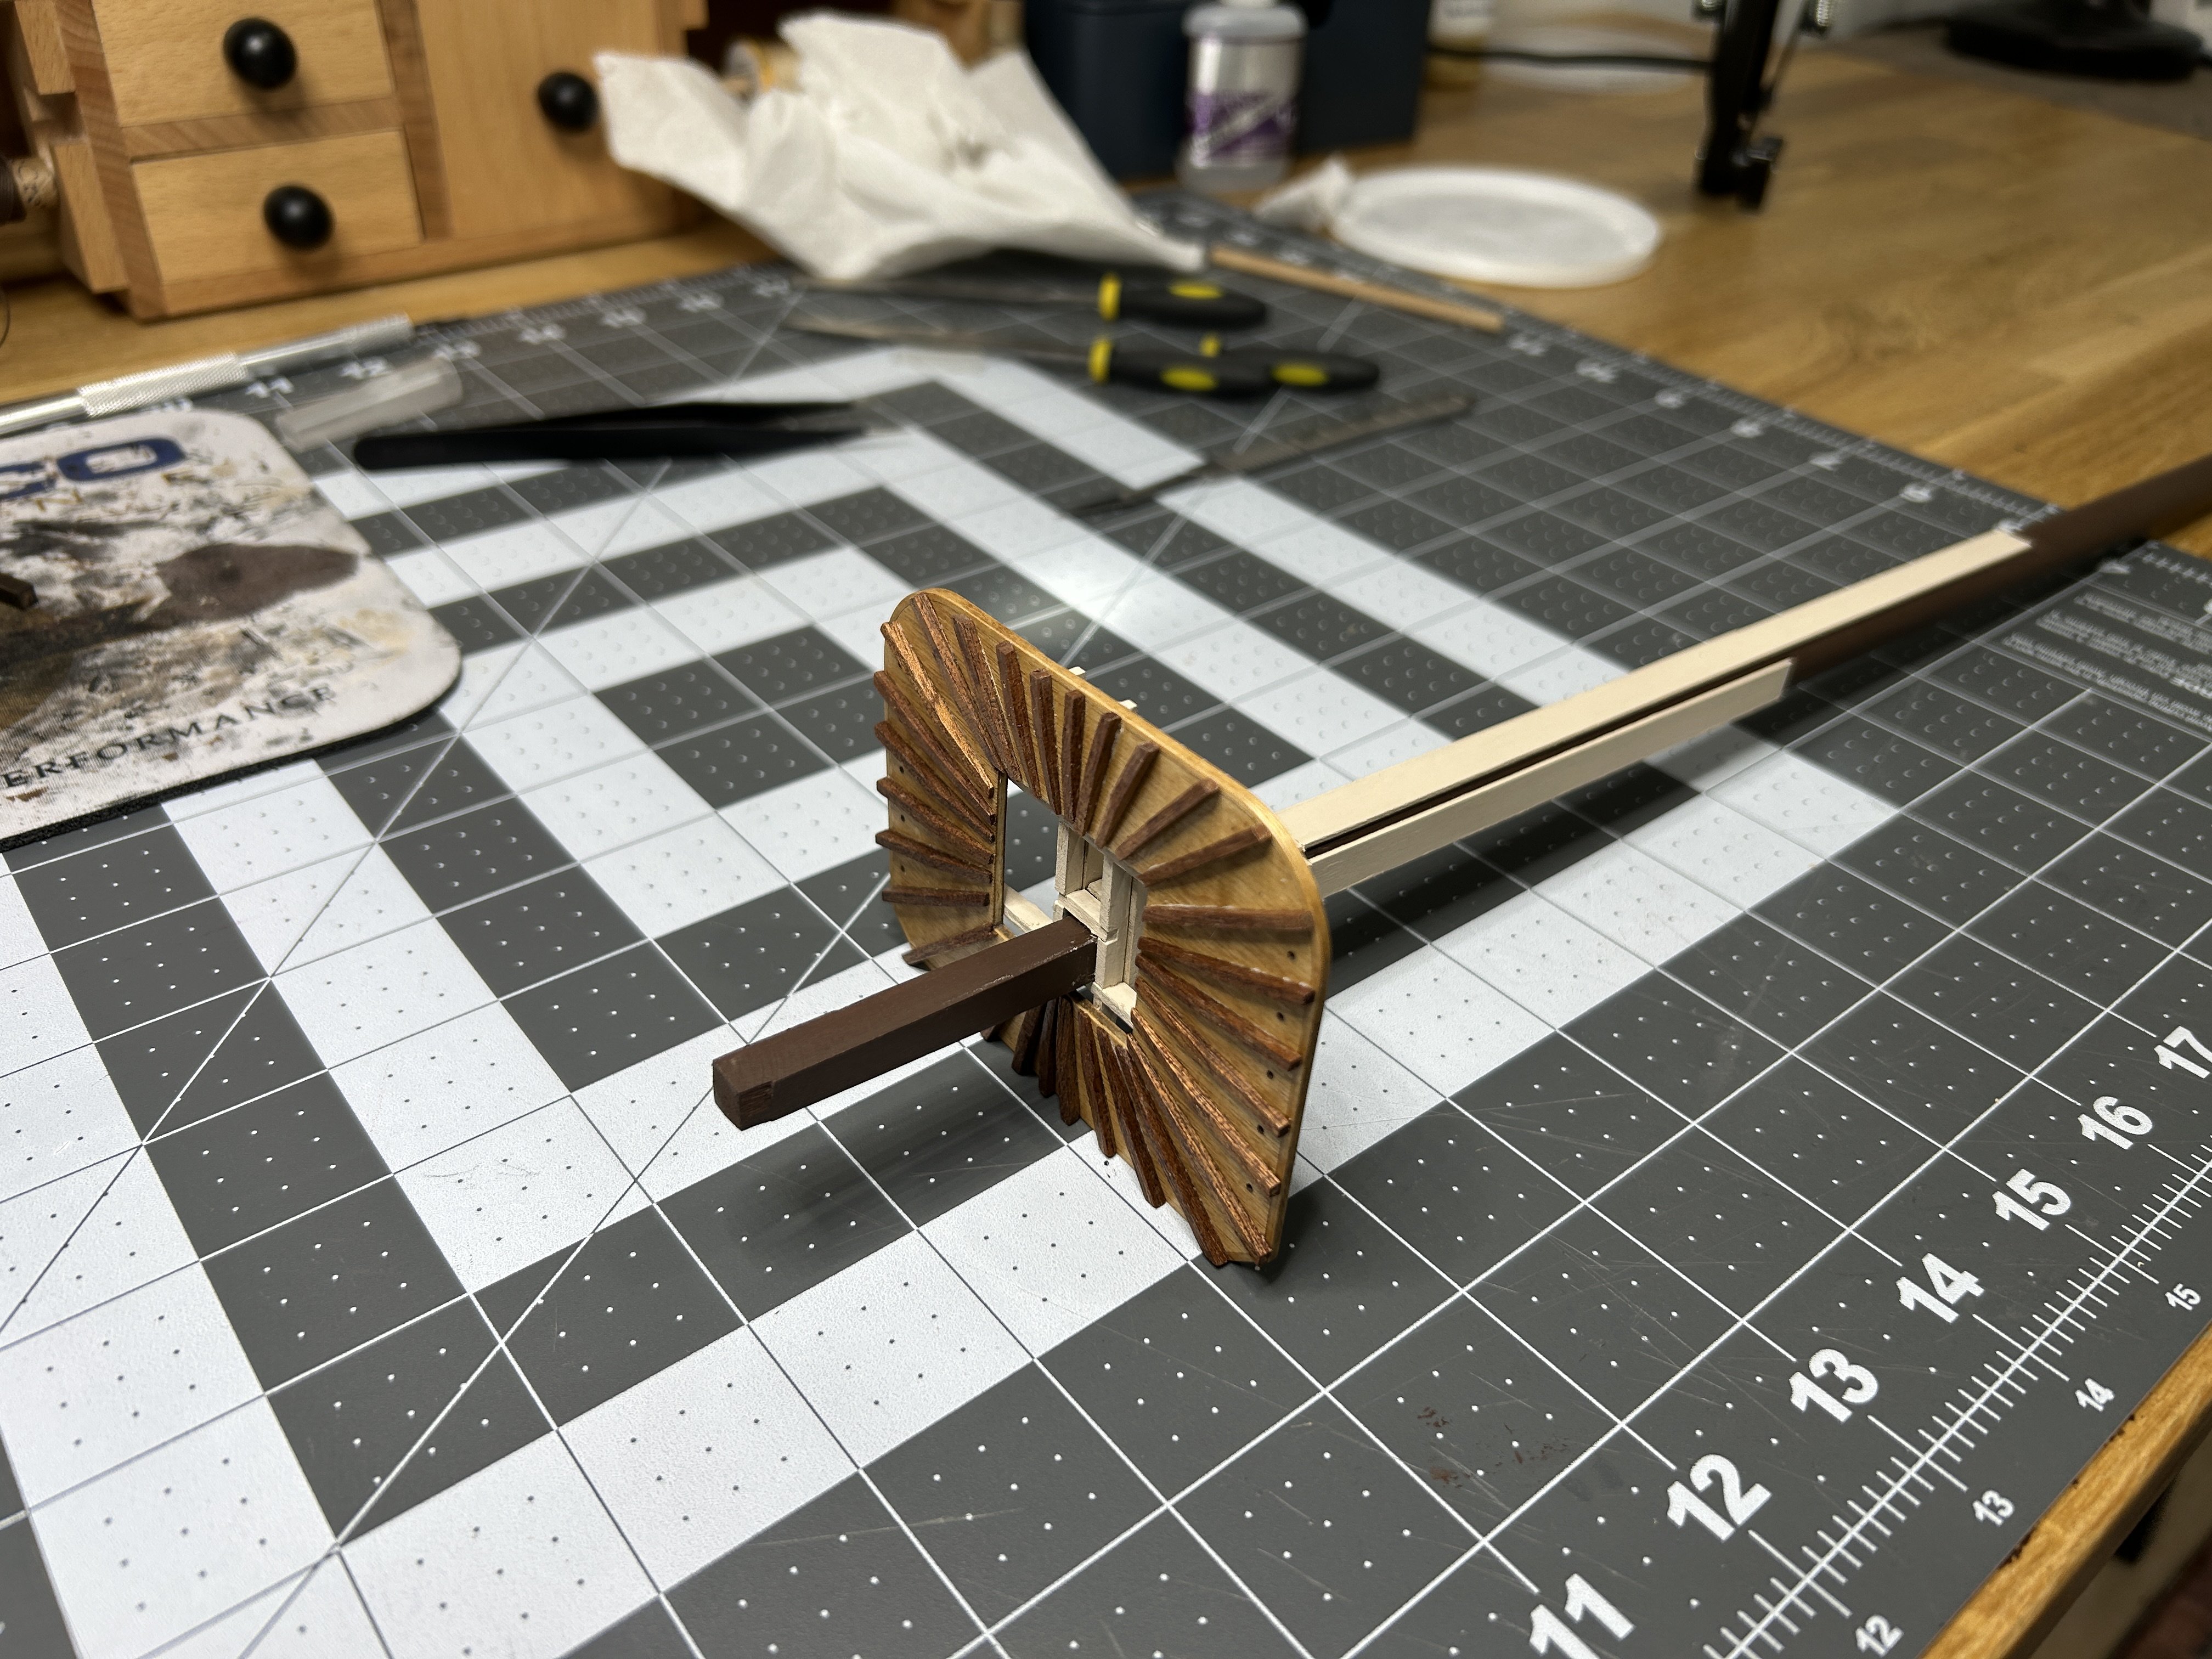
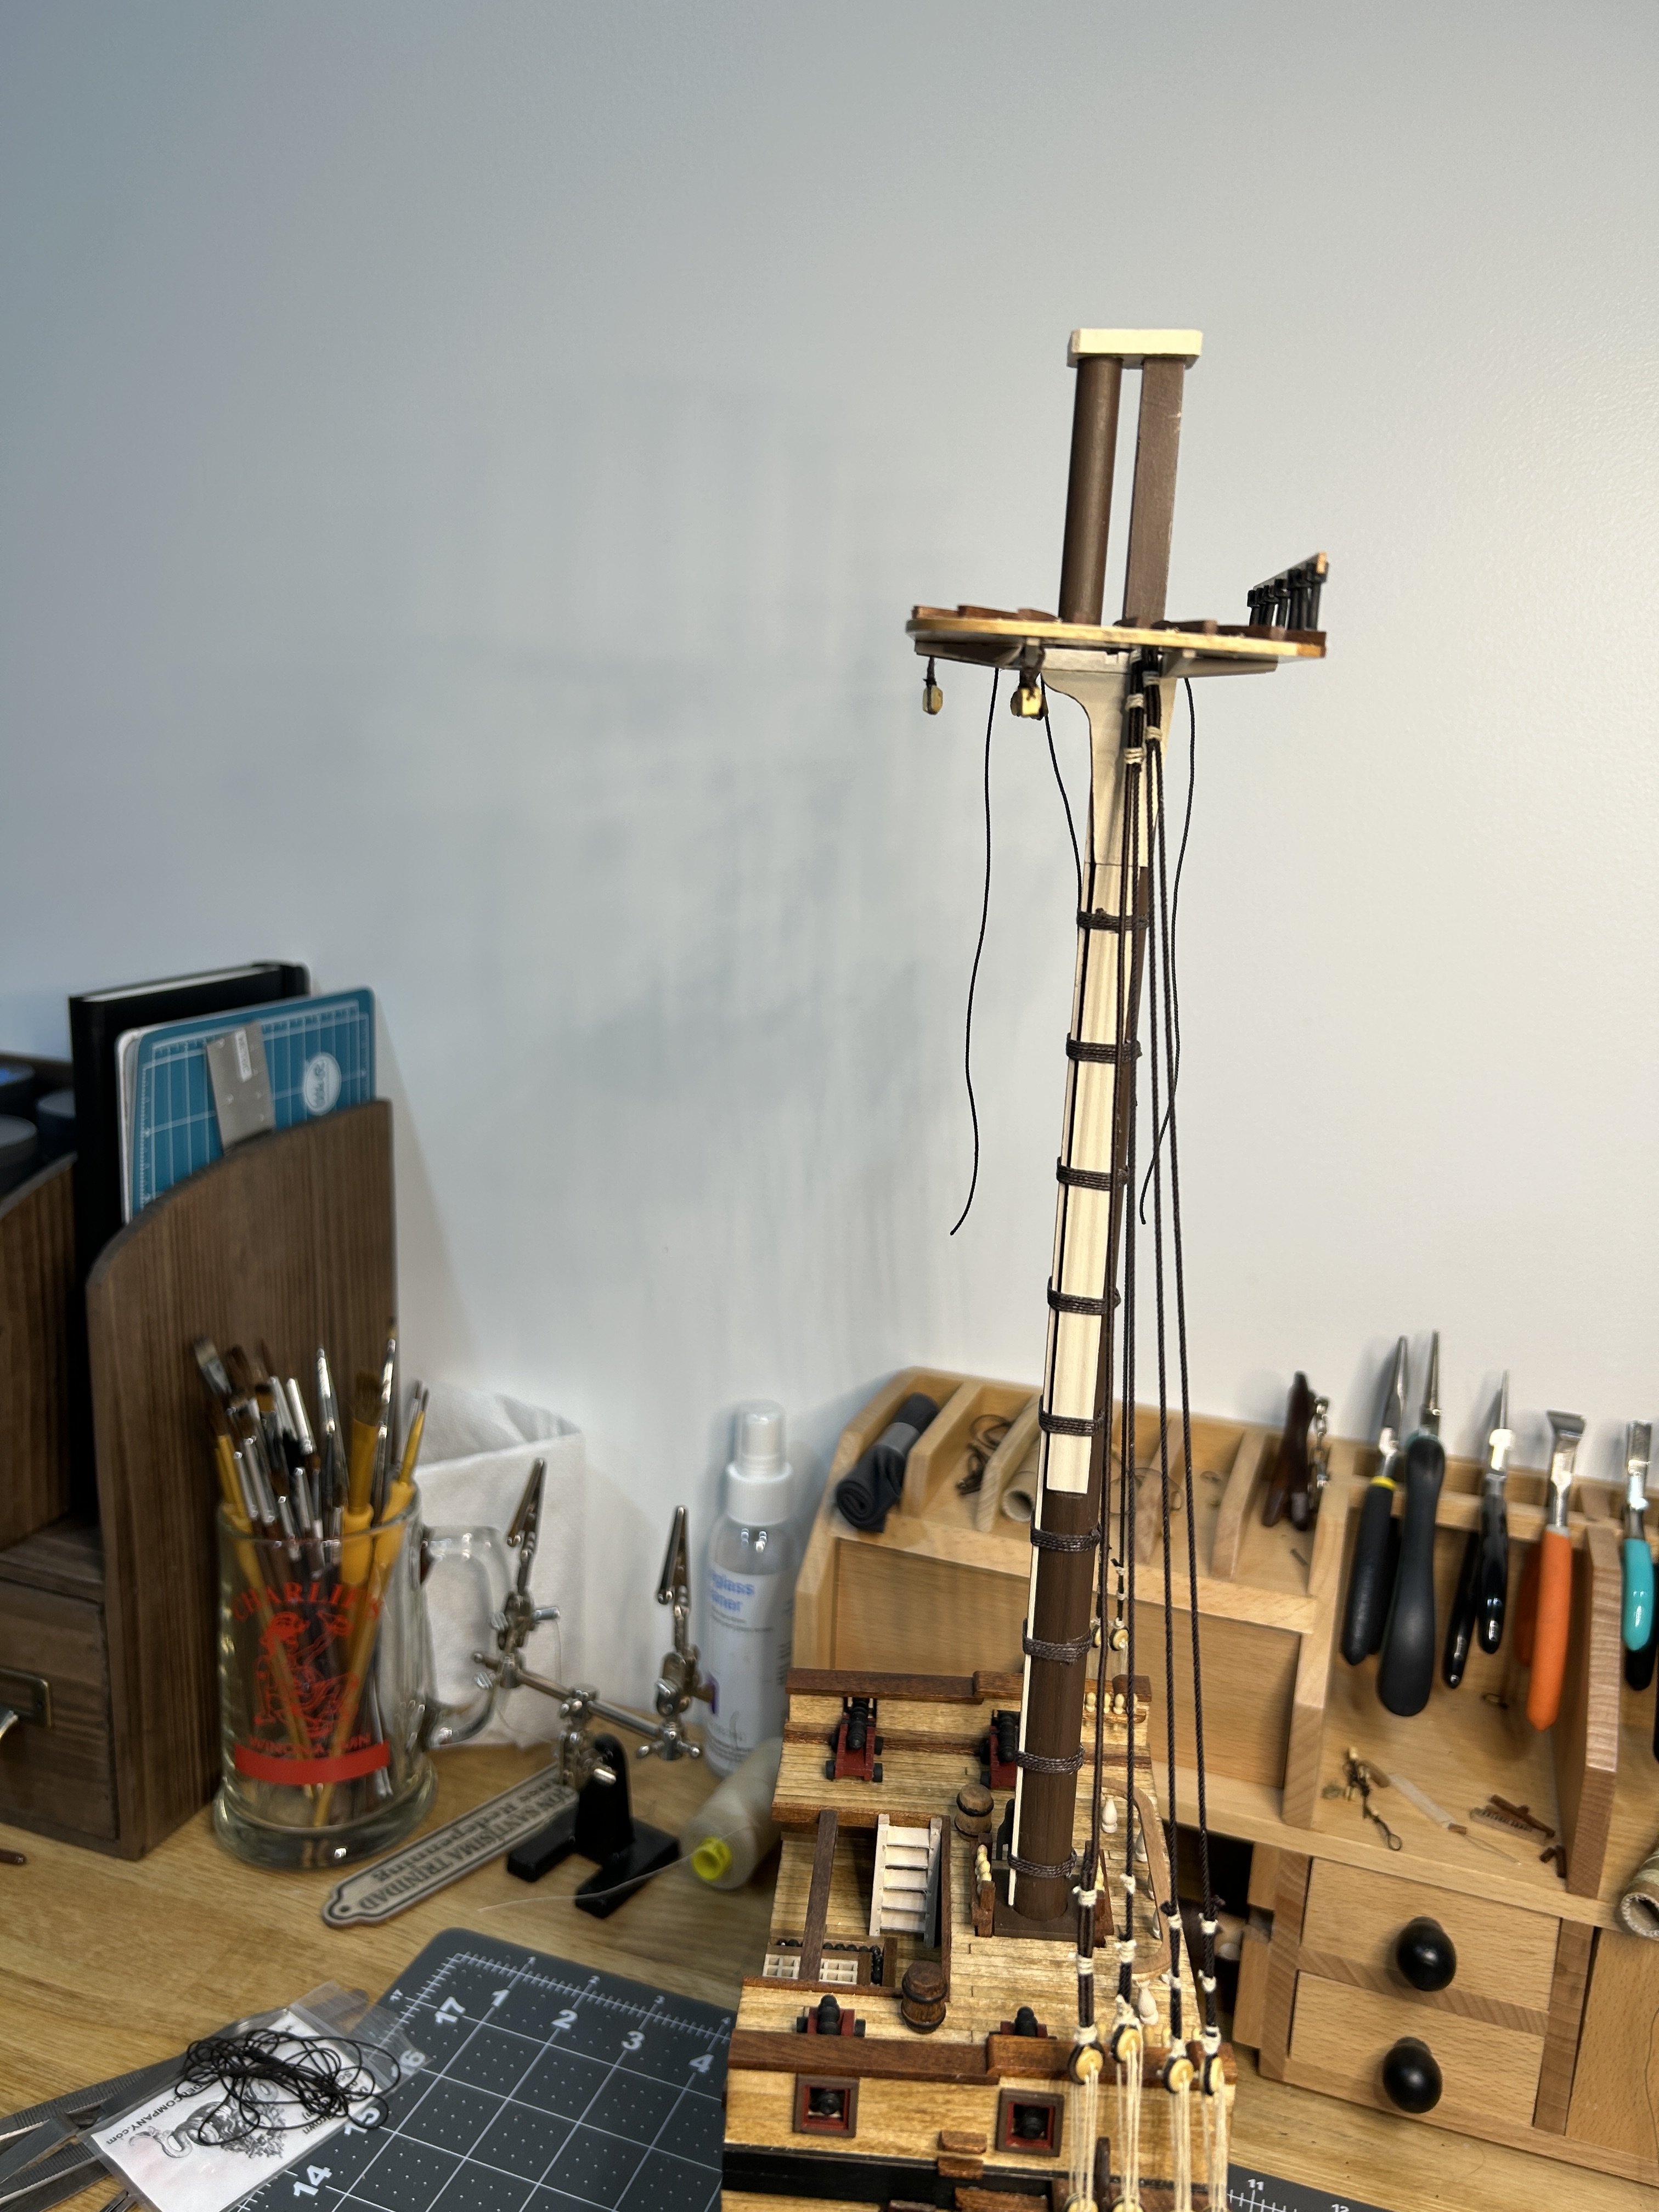
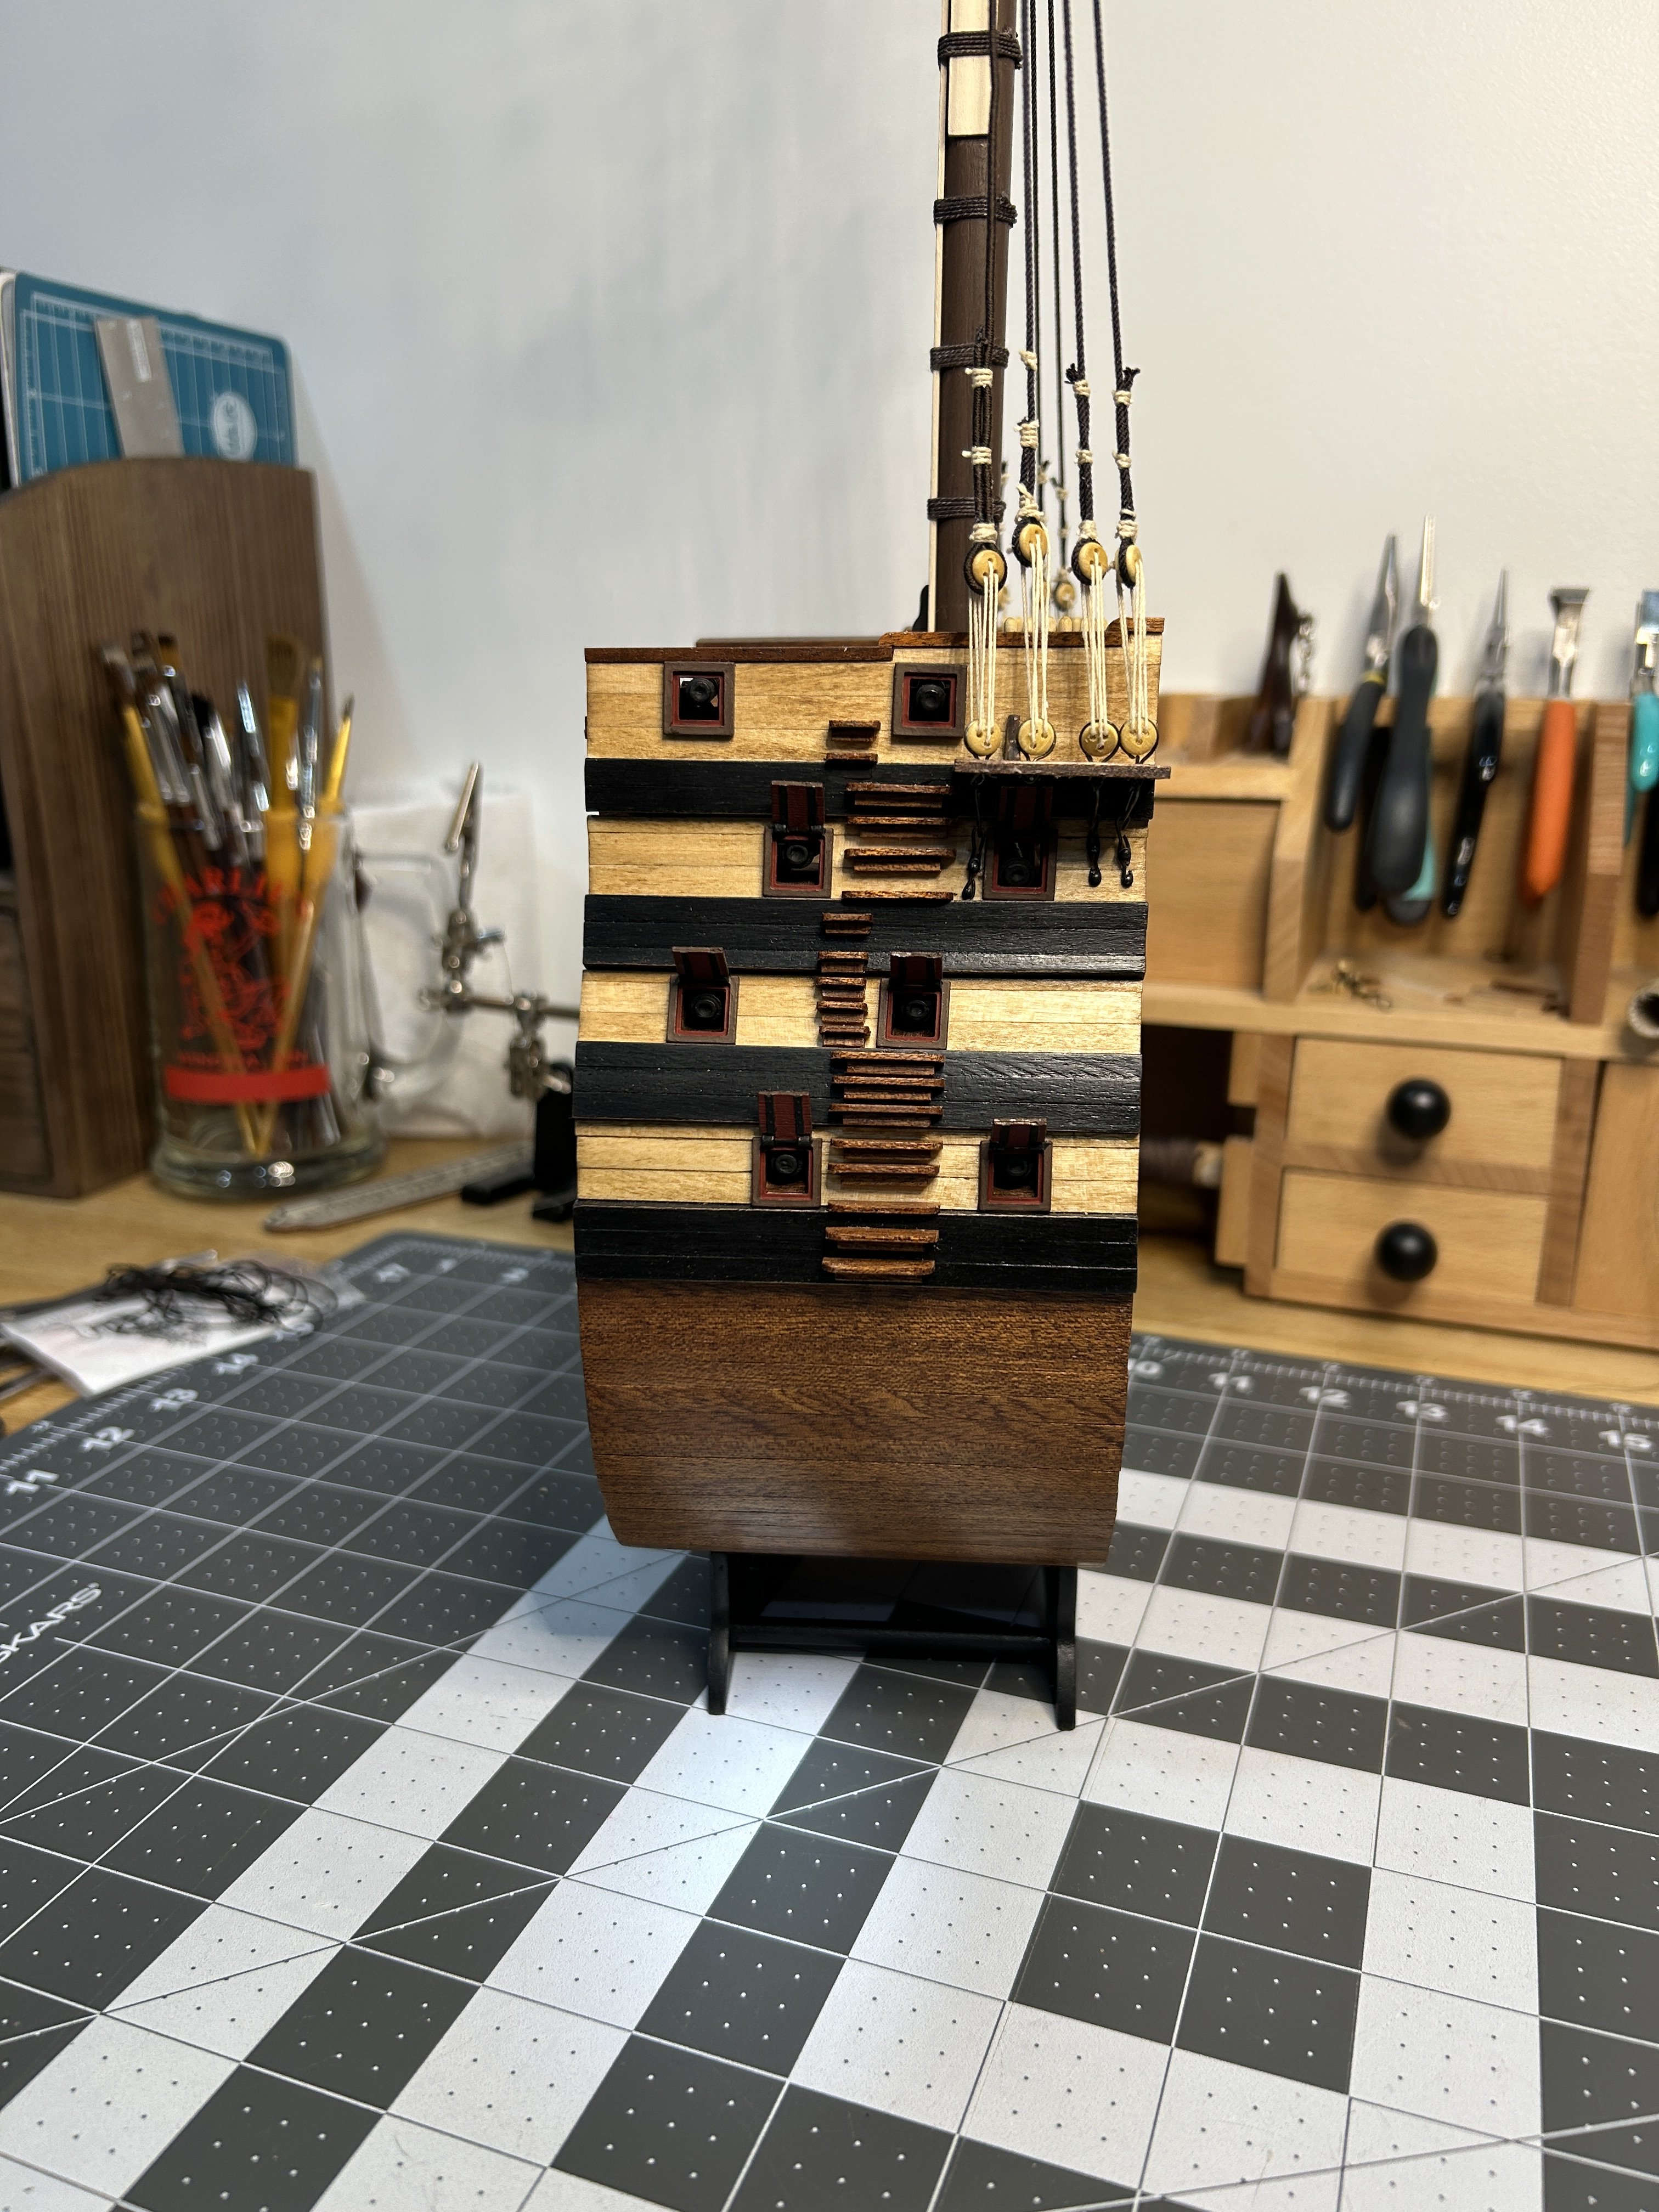
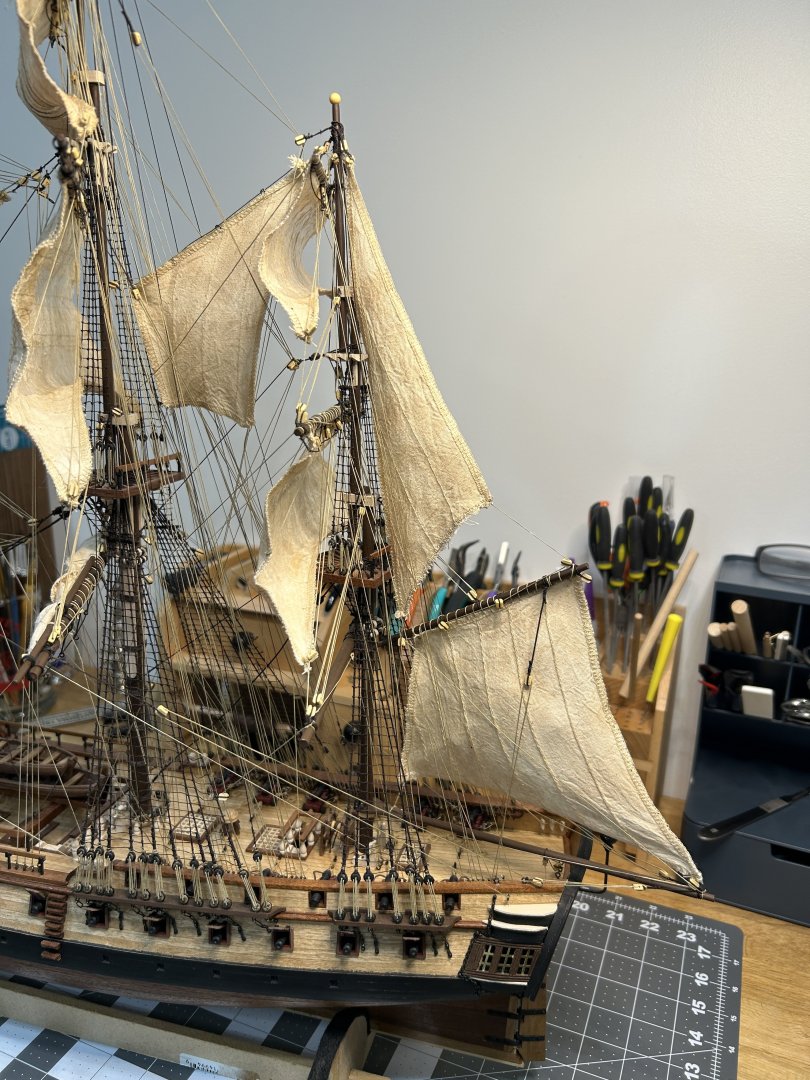
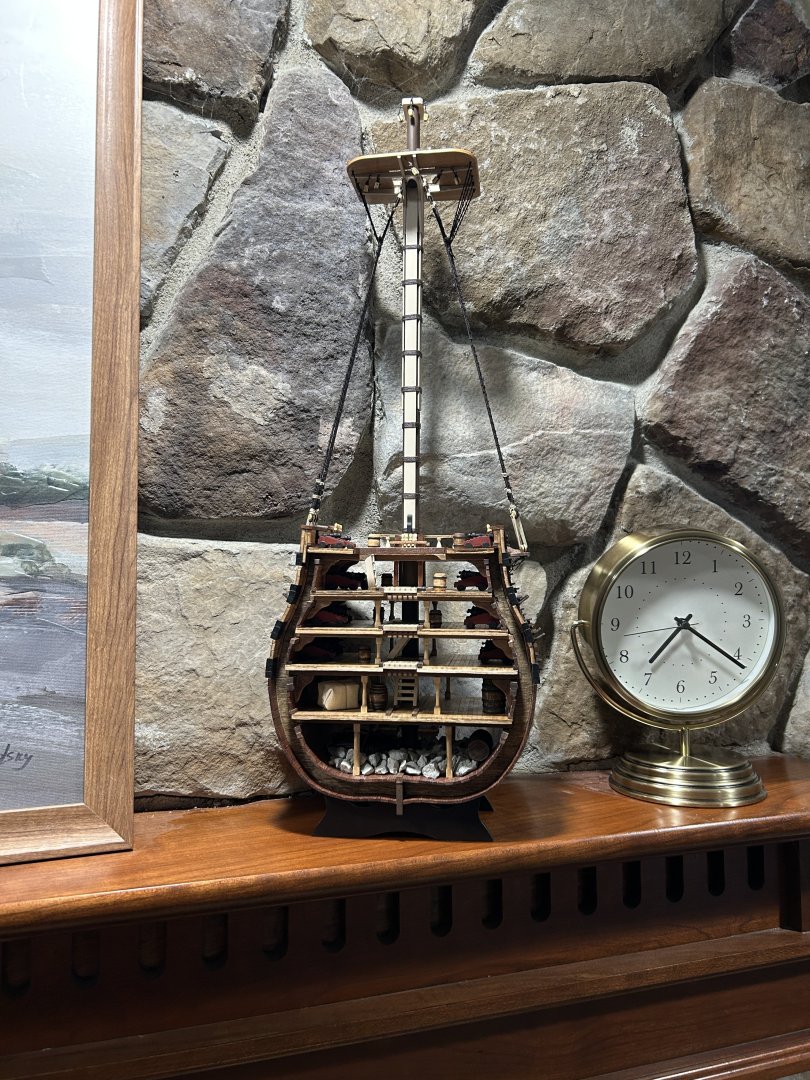
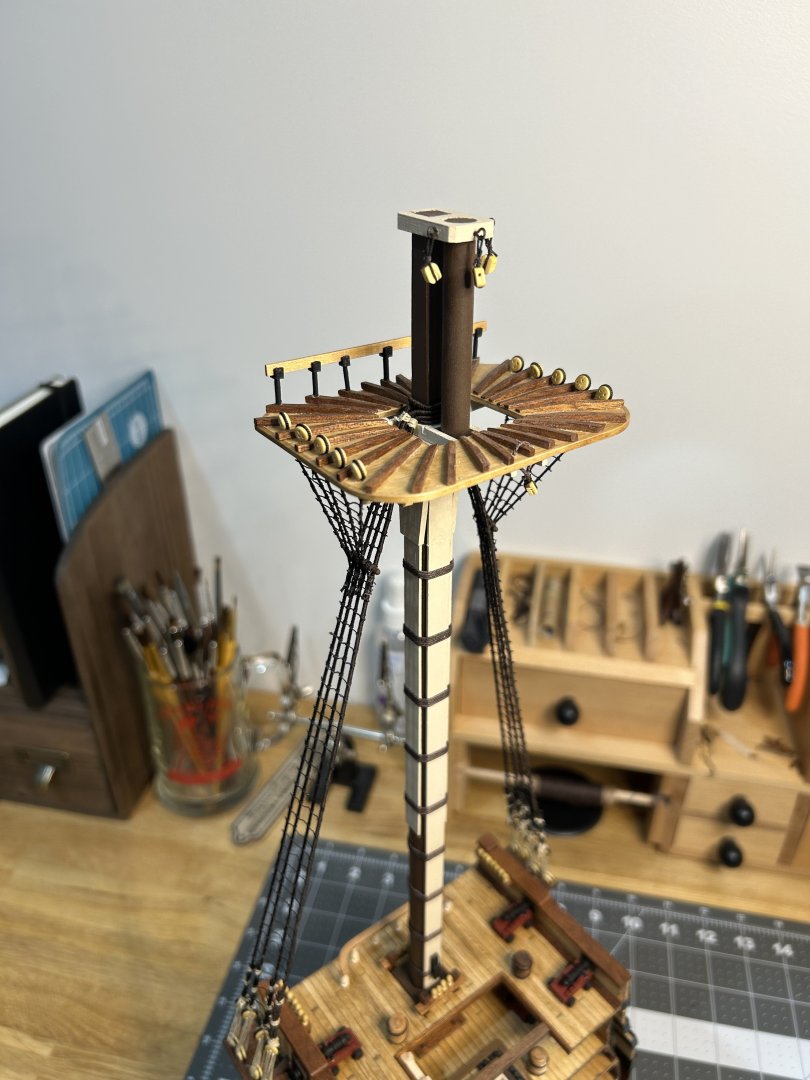
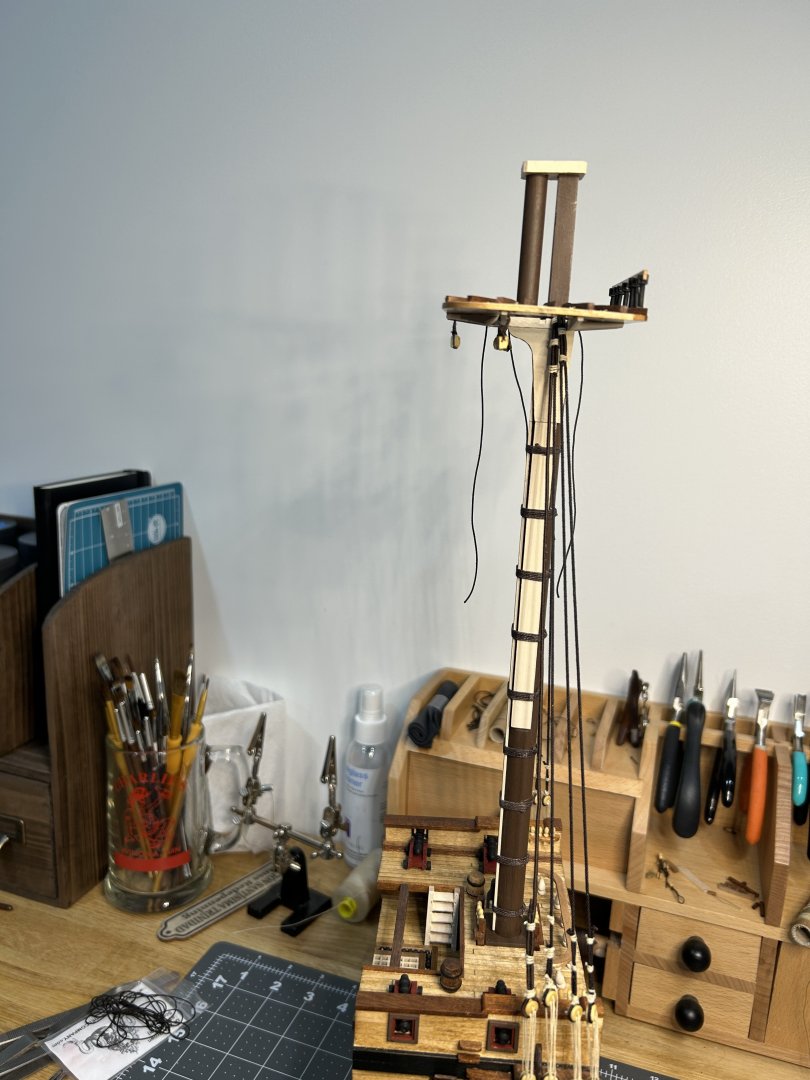
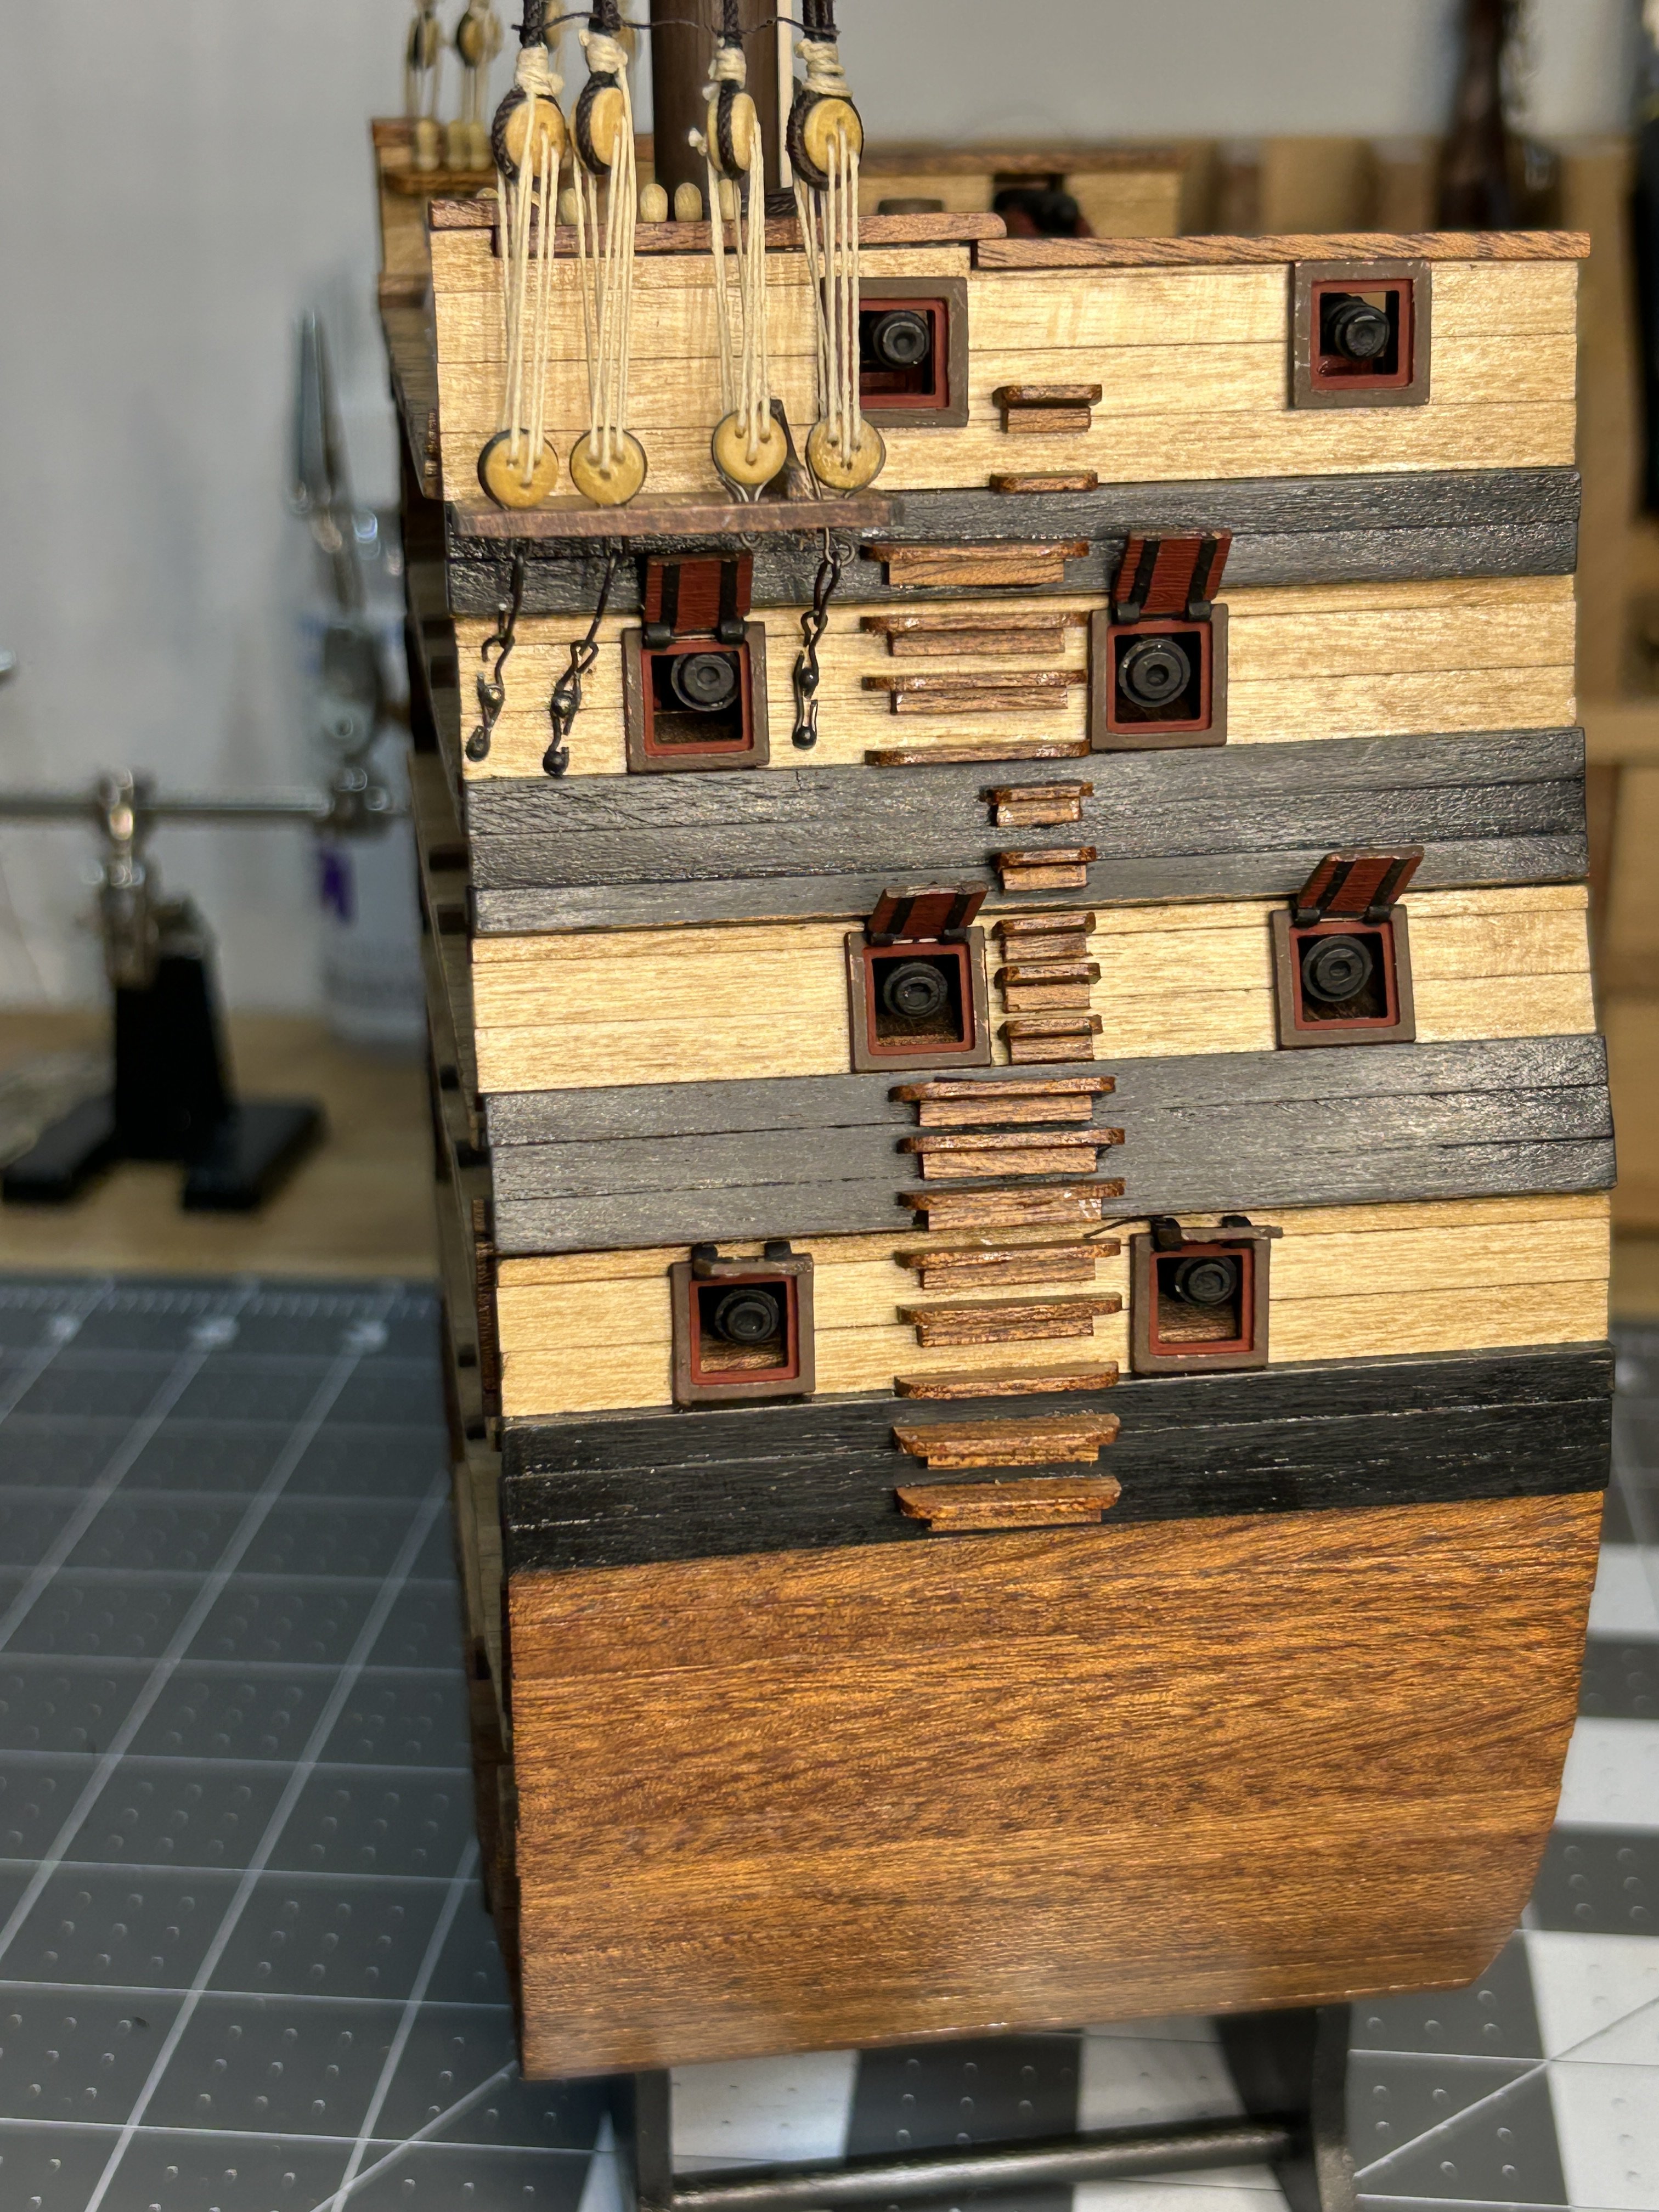
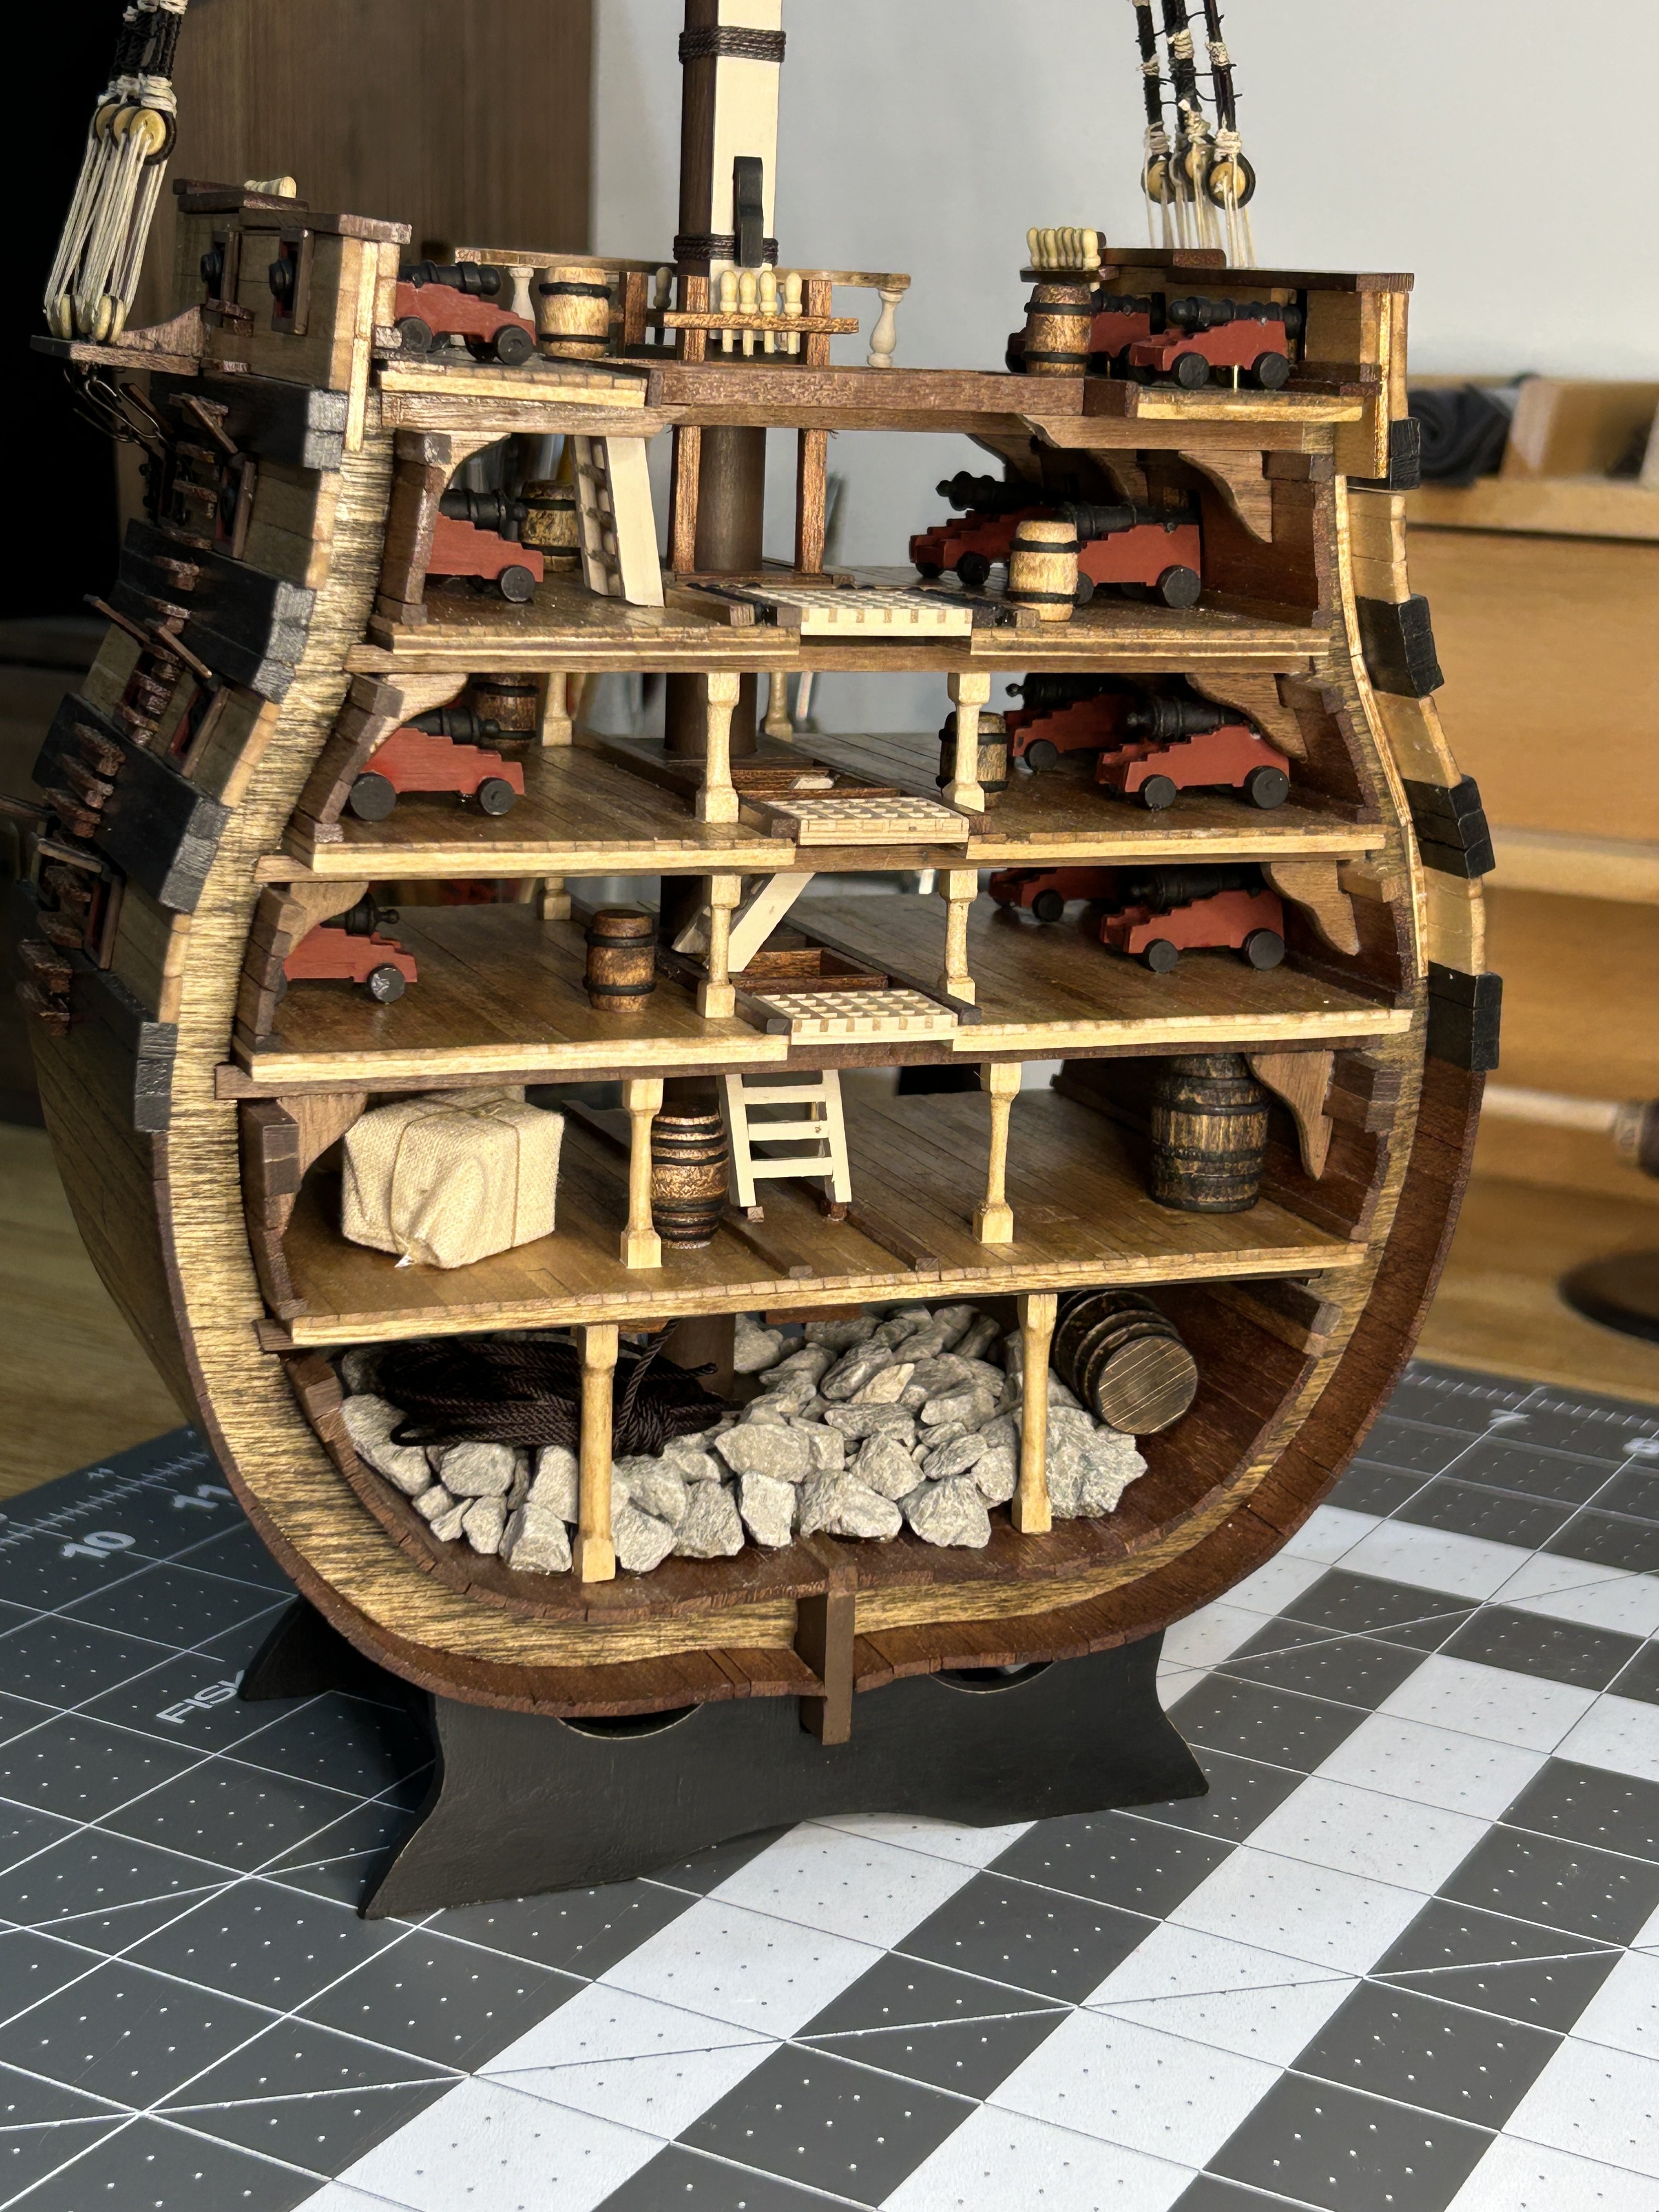
Tonight I finished my Santisima Trinidad Cross Section. As I mentioned in an earlier post I am only building the mast to the Cap on the main mast because of where it will be displayed. I am happy with how the futtock shrouds look. Even though it isn't exactly realistic with only four shrouds to connect 5 futtock shrouds to. It doesn't look as bad as I thought it might. Overall I am very happy with the results and my wife wants it displayed on our fireplace mantel which is a nice bonus. Next up will be finishing my Frigate Diana. I suspect it will be 4 - 6 weeks to finish that one, then I will start my NRG Half Hull.

.thumb.JPG.7420c7e05fd4618f721689ce15cefe07.JPG)


- 21 replies
-
- 9
-
-
- Santisima Trinidad
- OcCre
- (and 2 more)
-
I love the base you built. Looks fantastic.
-
I have had much better luck with a collet type vs a chuck. My chuck pin vise wasn’t very expensive, so a higher quality chuck may work better than what I experienced.
-
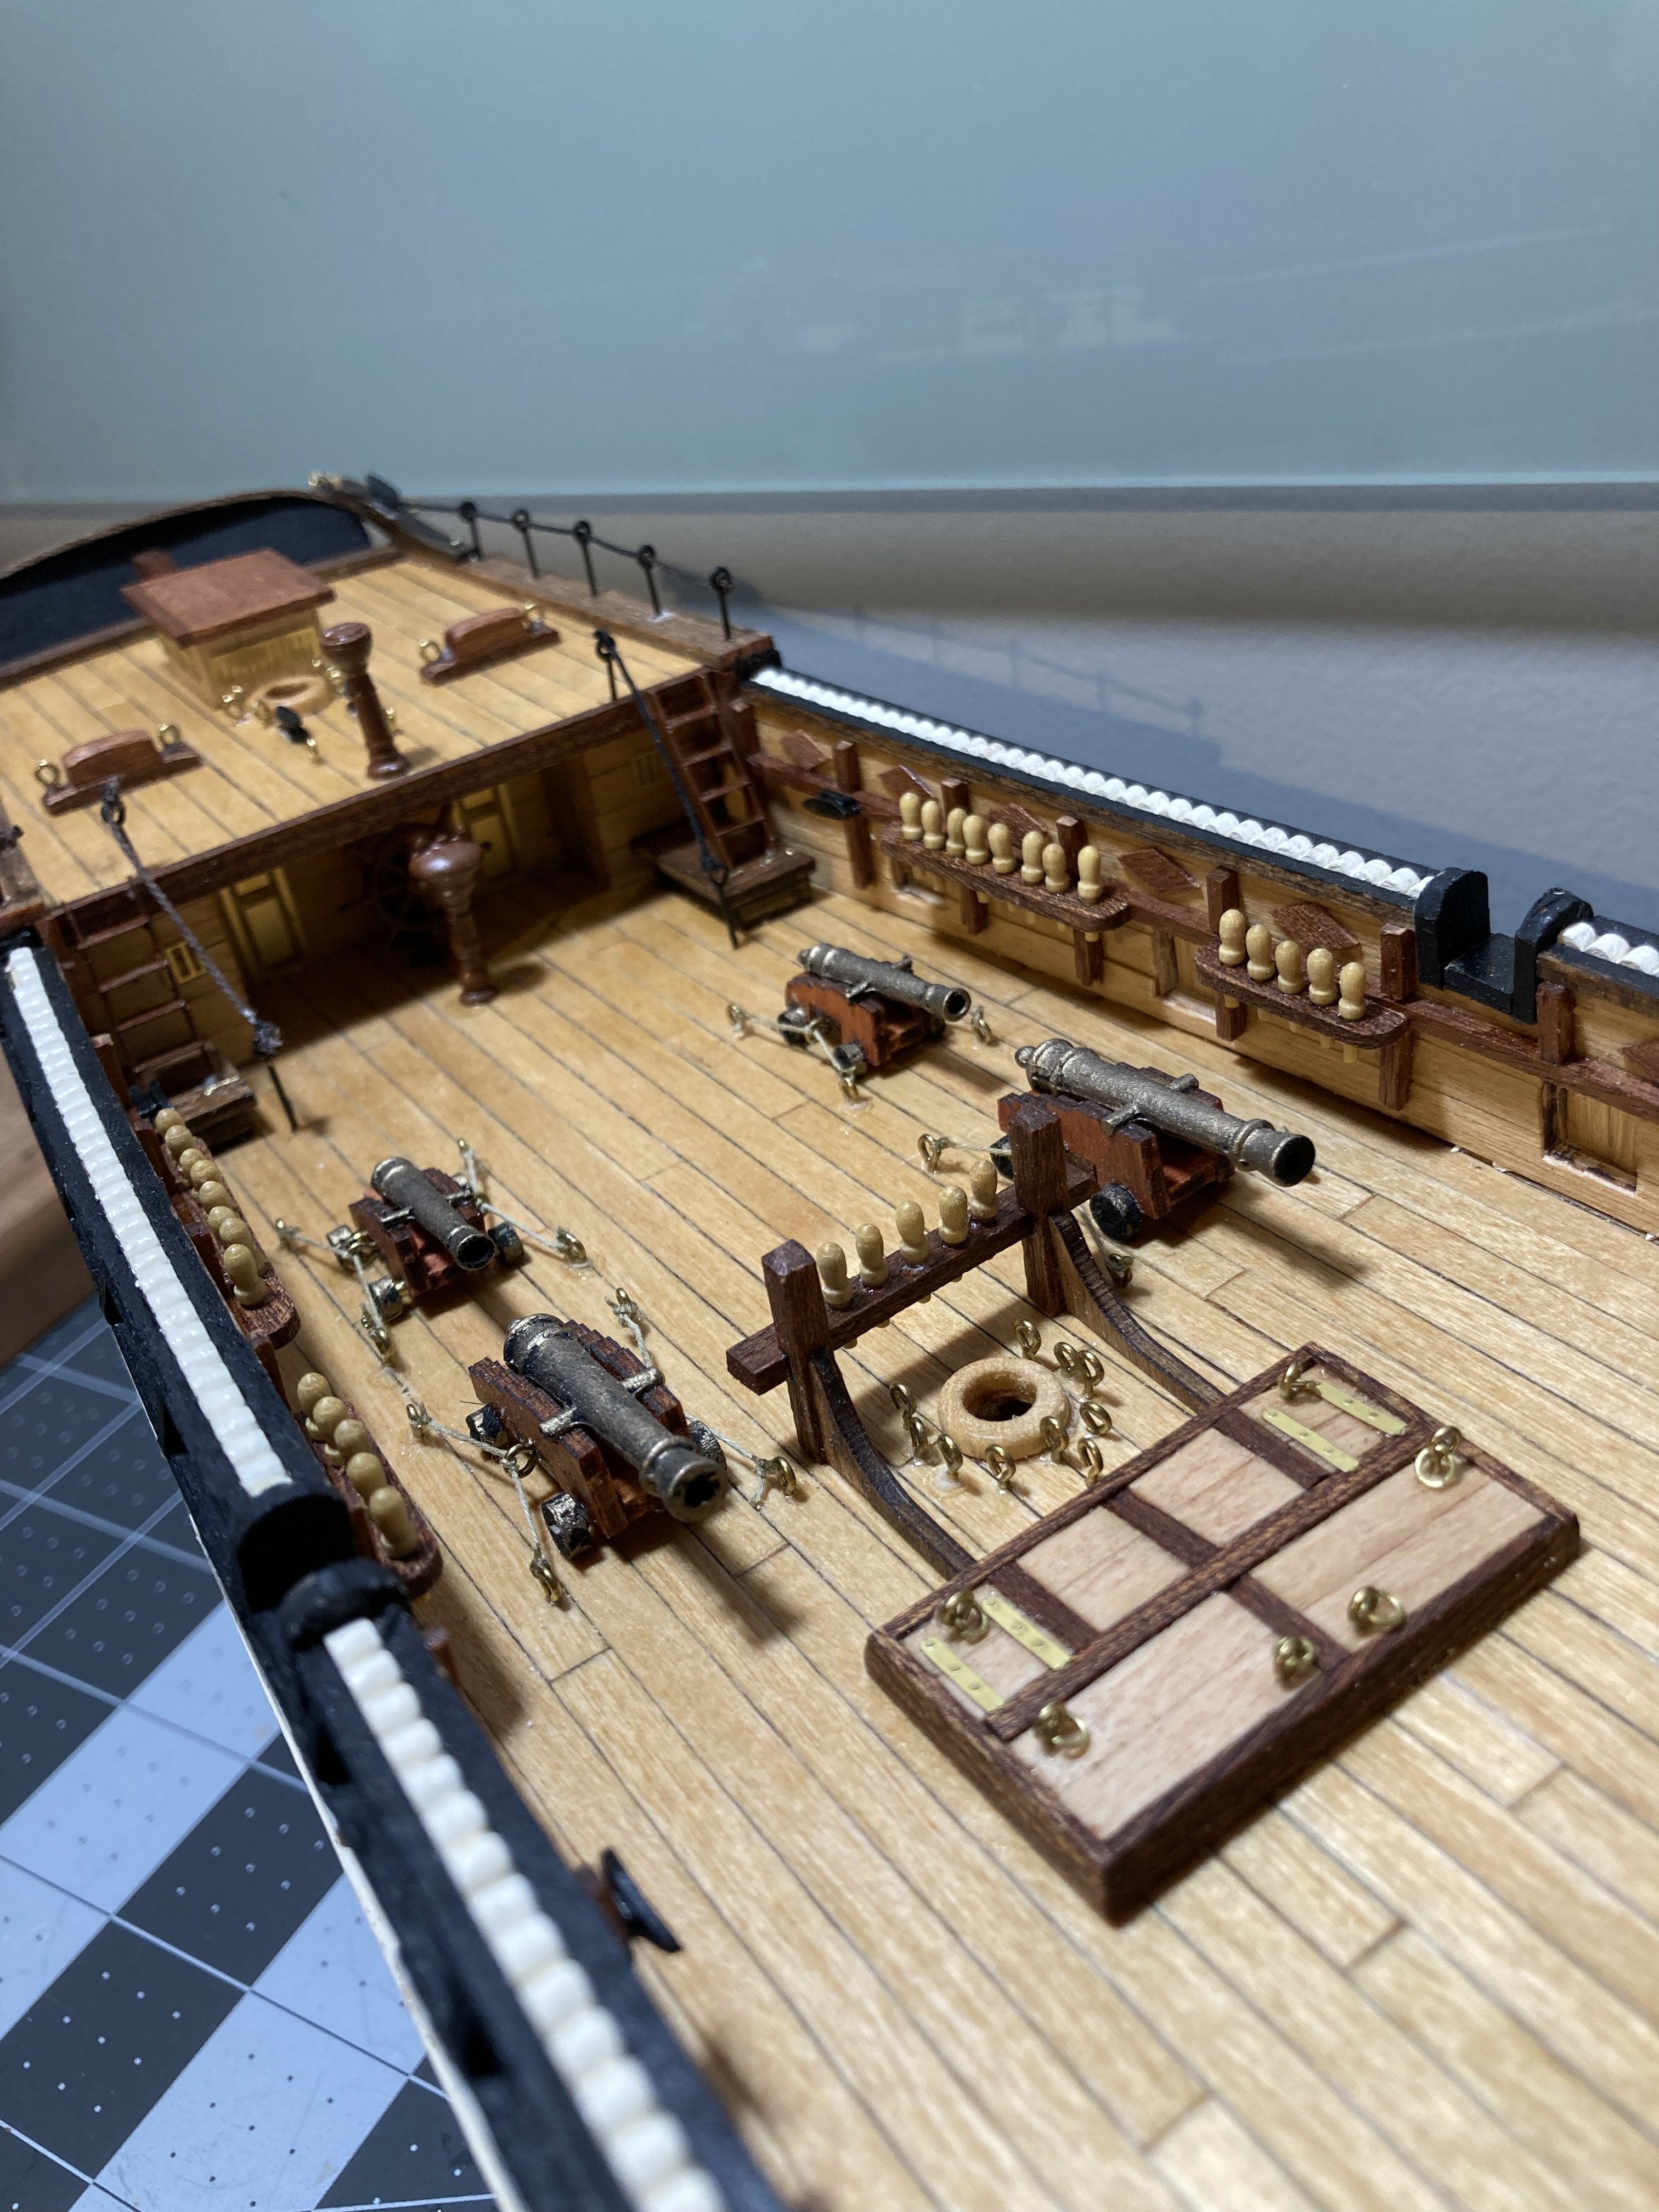
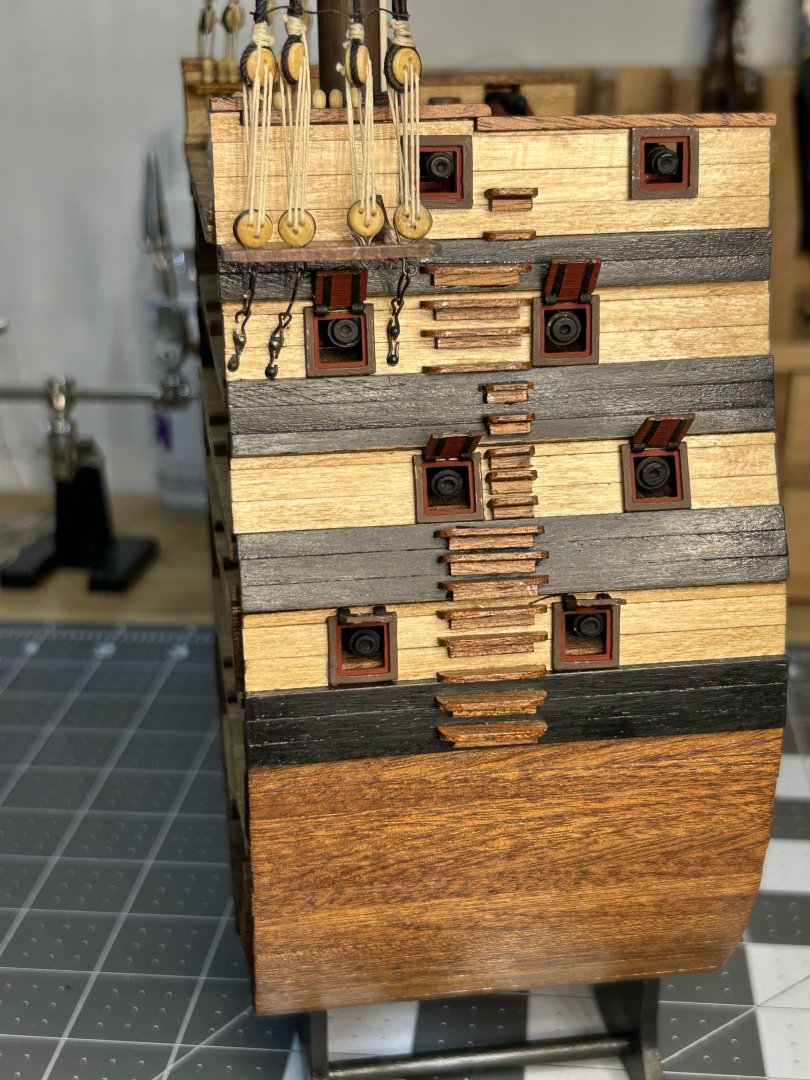
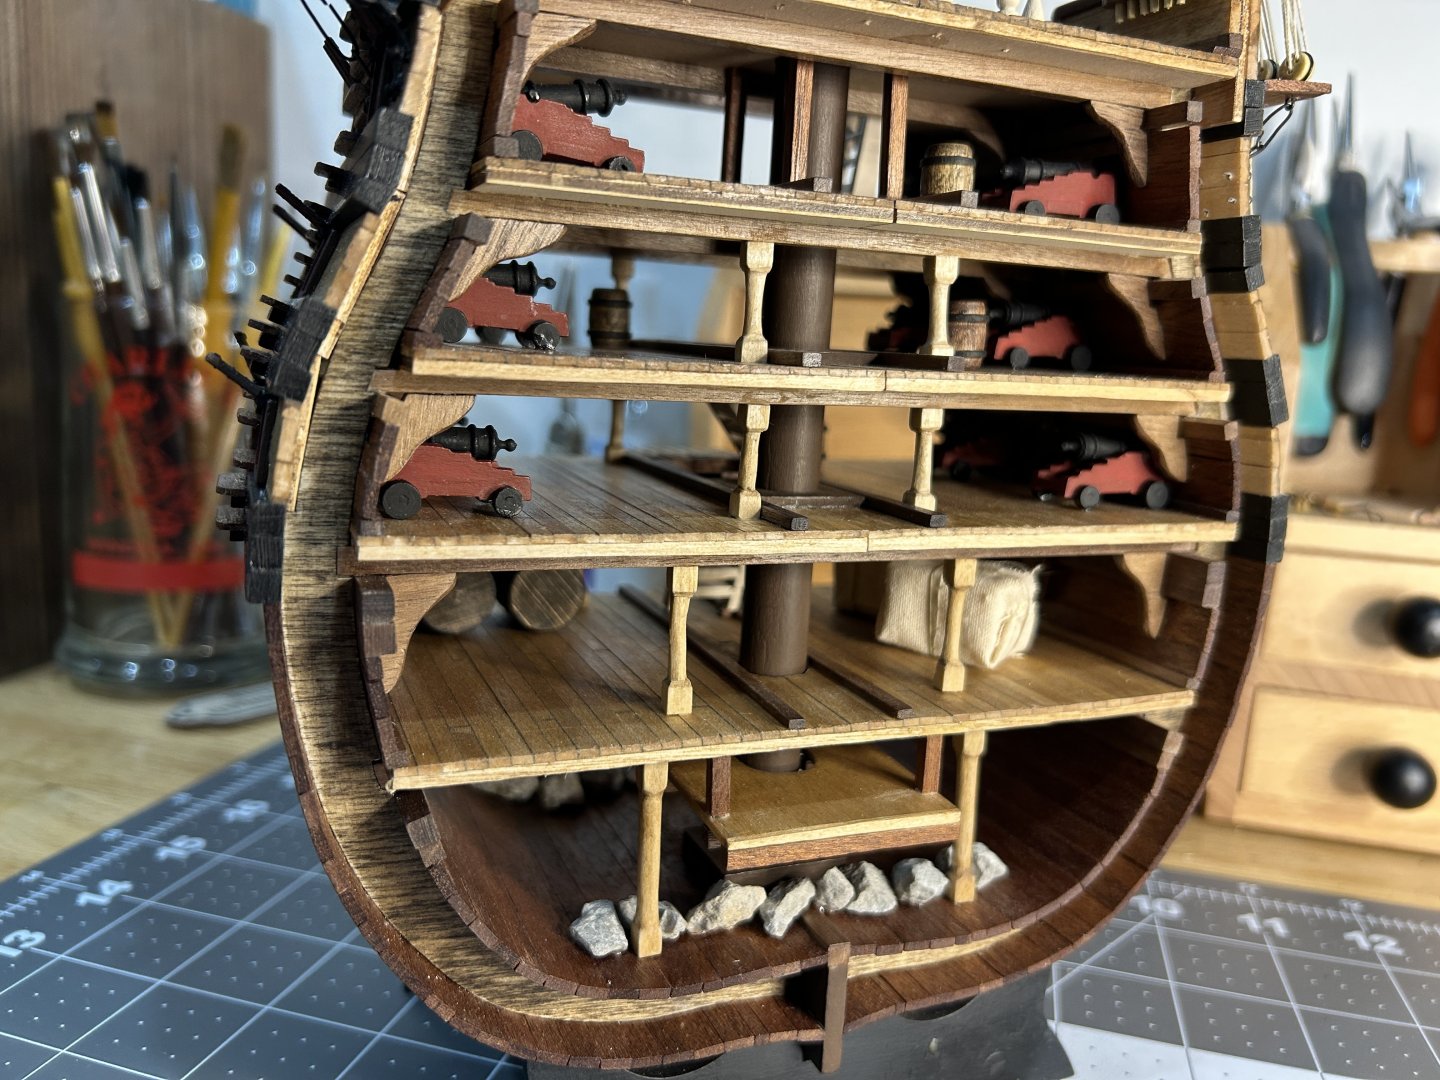
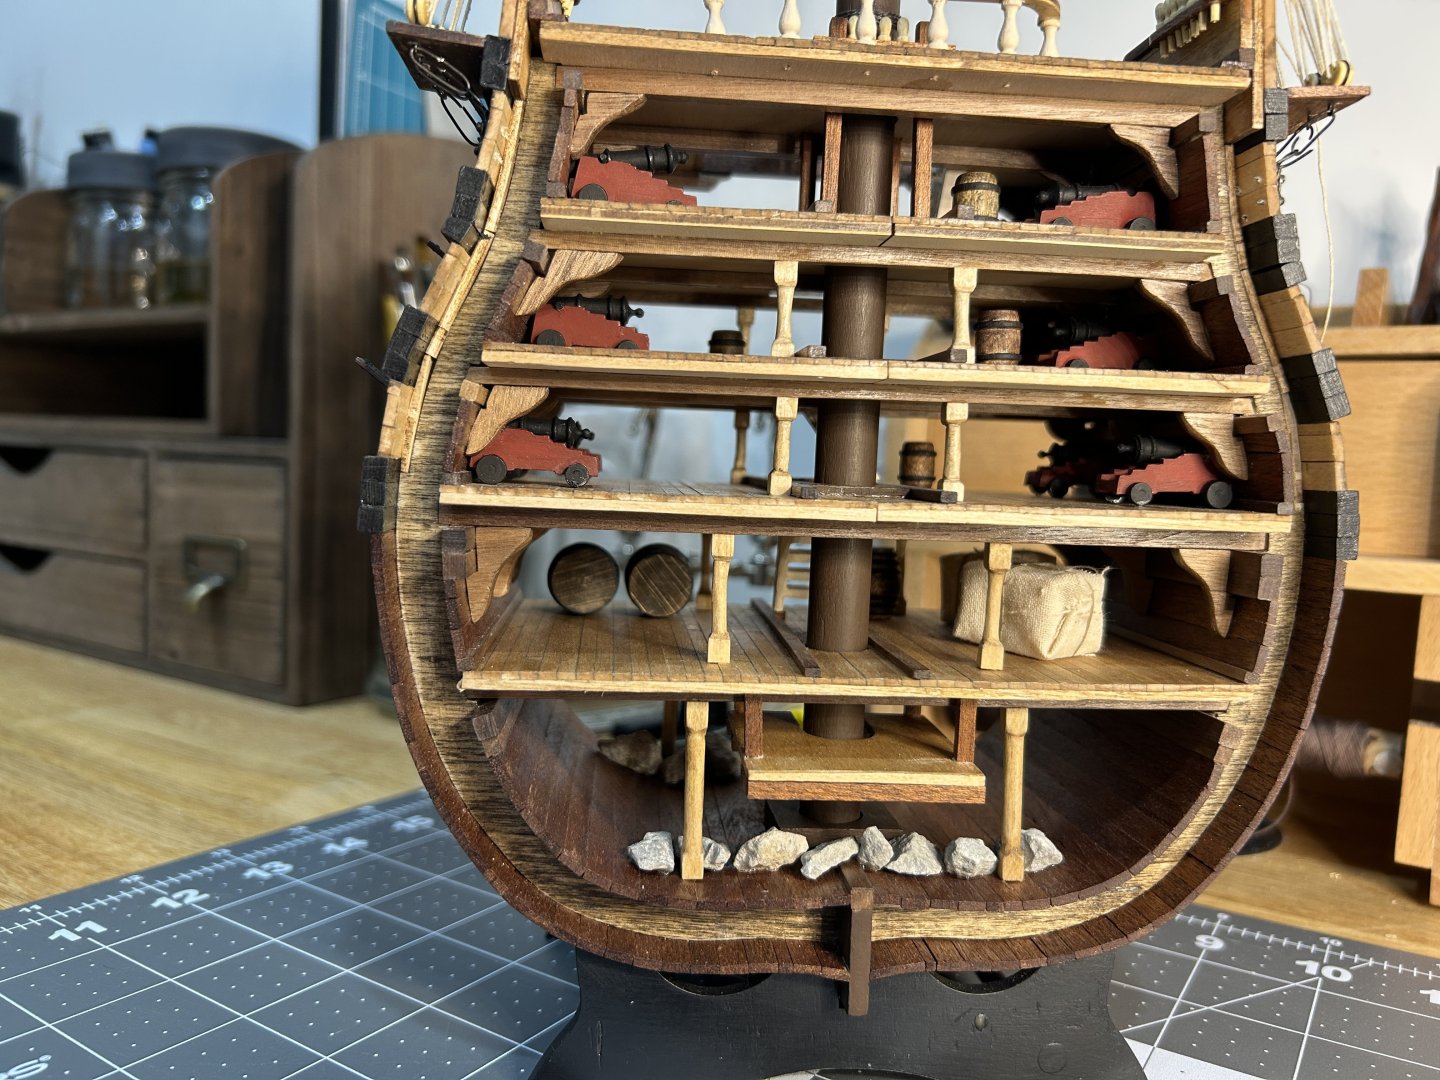
I have made some slow progress over the last month or so. I have secured most of the deck features both on the top deck and the lower decks. I have glued the ballast pieces that you see here to the bottom of the hold. I will add the remaining ballast after everything else is complete as it will not be glued in place. I assembled the main mast up to the cap. Based on where I plan to display this model, I am only building up to the cap on the main mast, without the main yard. For the top I added a piece of 1mm x 3mm limewood around the edge to conceal the plywood edge. Then I added the ribs to the top and the braces underneath the top. Then the main mast was assembled and the top was attached. Then the shrouds were attached. The first should is served for the entire length. Otherwise they are only served at the area that wraps around the mast. Next up will be the ratlines and futtock shrouds. I considered leaving the futtock shrouds off. The issue is the cross Section only has four of the main shrouds. I suspect the actual number would have been at least 12 and maybe more. I will have to condens the area were the futtock shrouds attach to the futtock stave compared to how the would be attached on a full model. This will not look realistic, but I think the model will look better with the futtock shrouds.


- 21 replies
-
- 6
-
-
- Santisima Trinidad
- OcCre
- (and 2 more)


.jpg.43692a5a2976f69ccaf3ce4b700597f3.jpg)


.JPG.13b41183d32e5fb99d0c98b2d357af3f.JPG)