.jpeg.882f0a147f14858c9e673da7e13d8ebe.jpeg)
RossR
-
Posts
531 -
Joined
-
Last visited
Content Type
Profiles
Forums
Gallery
Events
Everything posted by RossR
-
.thumb.jpeg.ffac2f8a24d212961a83eab4efb06a6c.jpeg) I have the US Brig Syren that he designed, and I couldn’t agree more about the instructions. They are great to read as just a general how to manual beyond just the ship they are written for.
I have the US Brig Syren that he designed, and I couldn’t agree more about the instructions. They are great to read as just a general how to manual beyond just the ship they are written for. -
Probably Caldercraft’s, but hadn’t decided for sure.
-
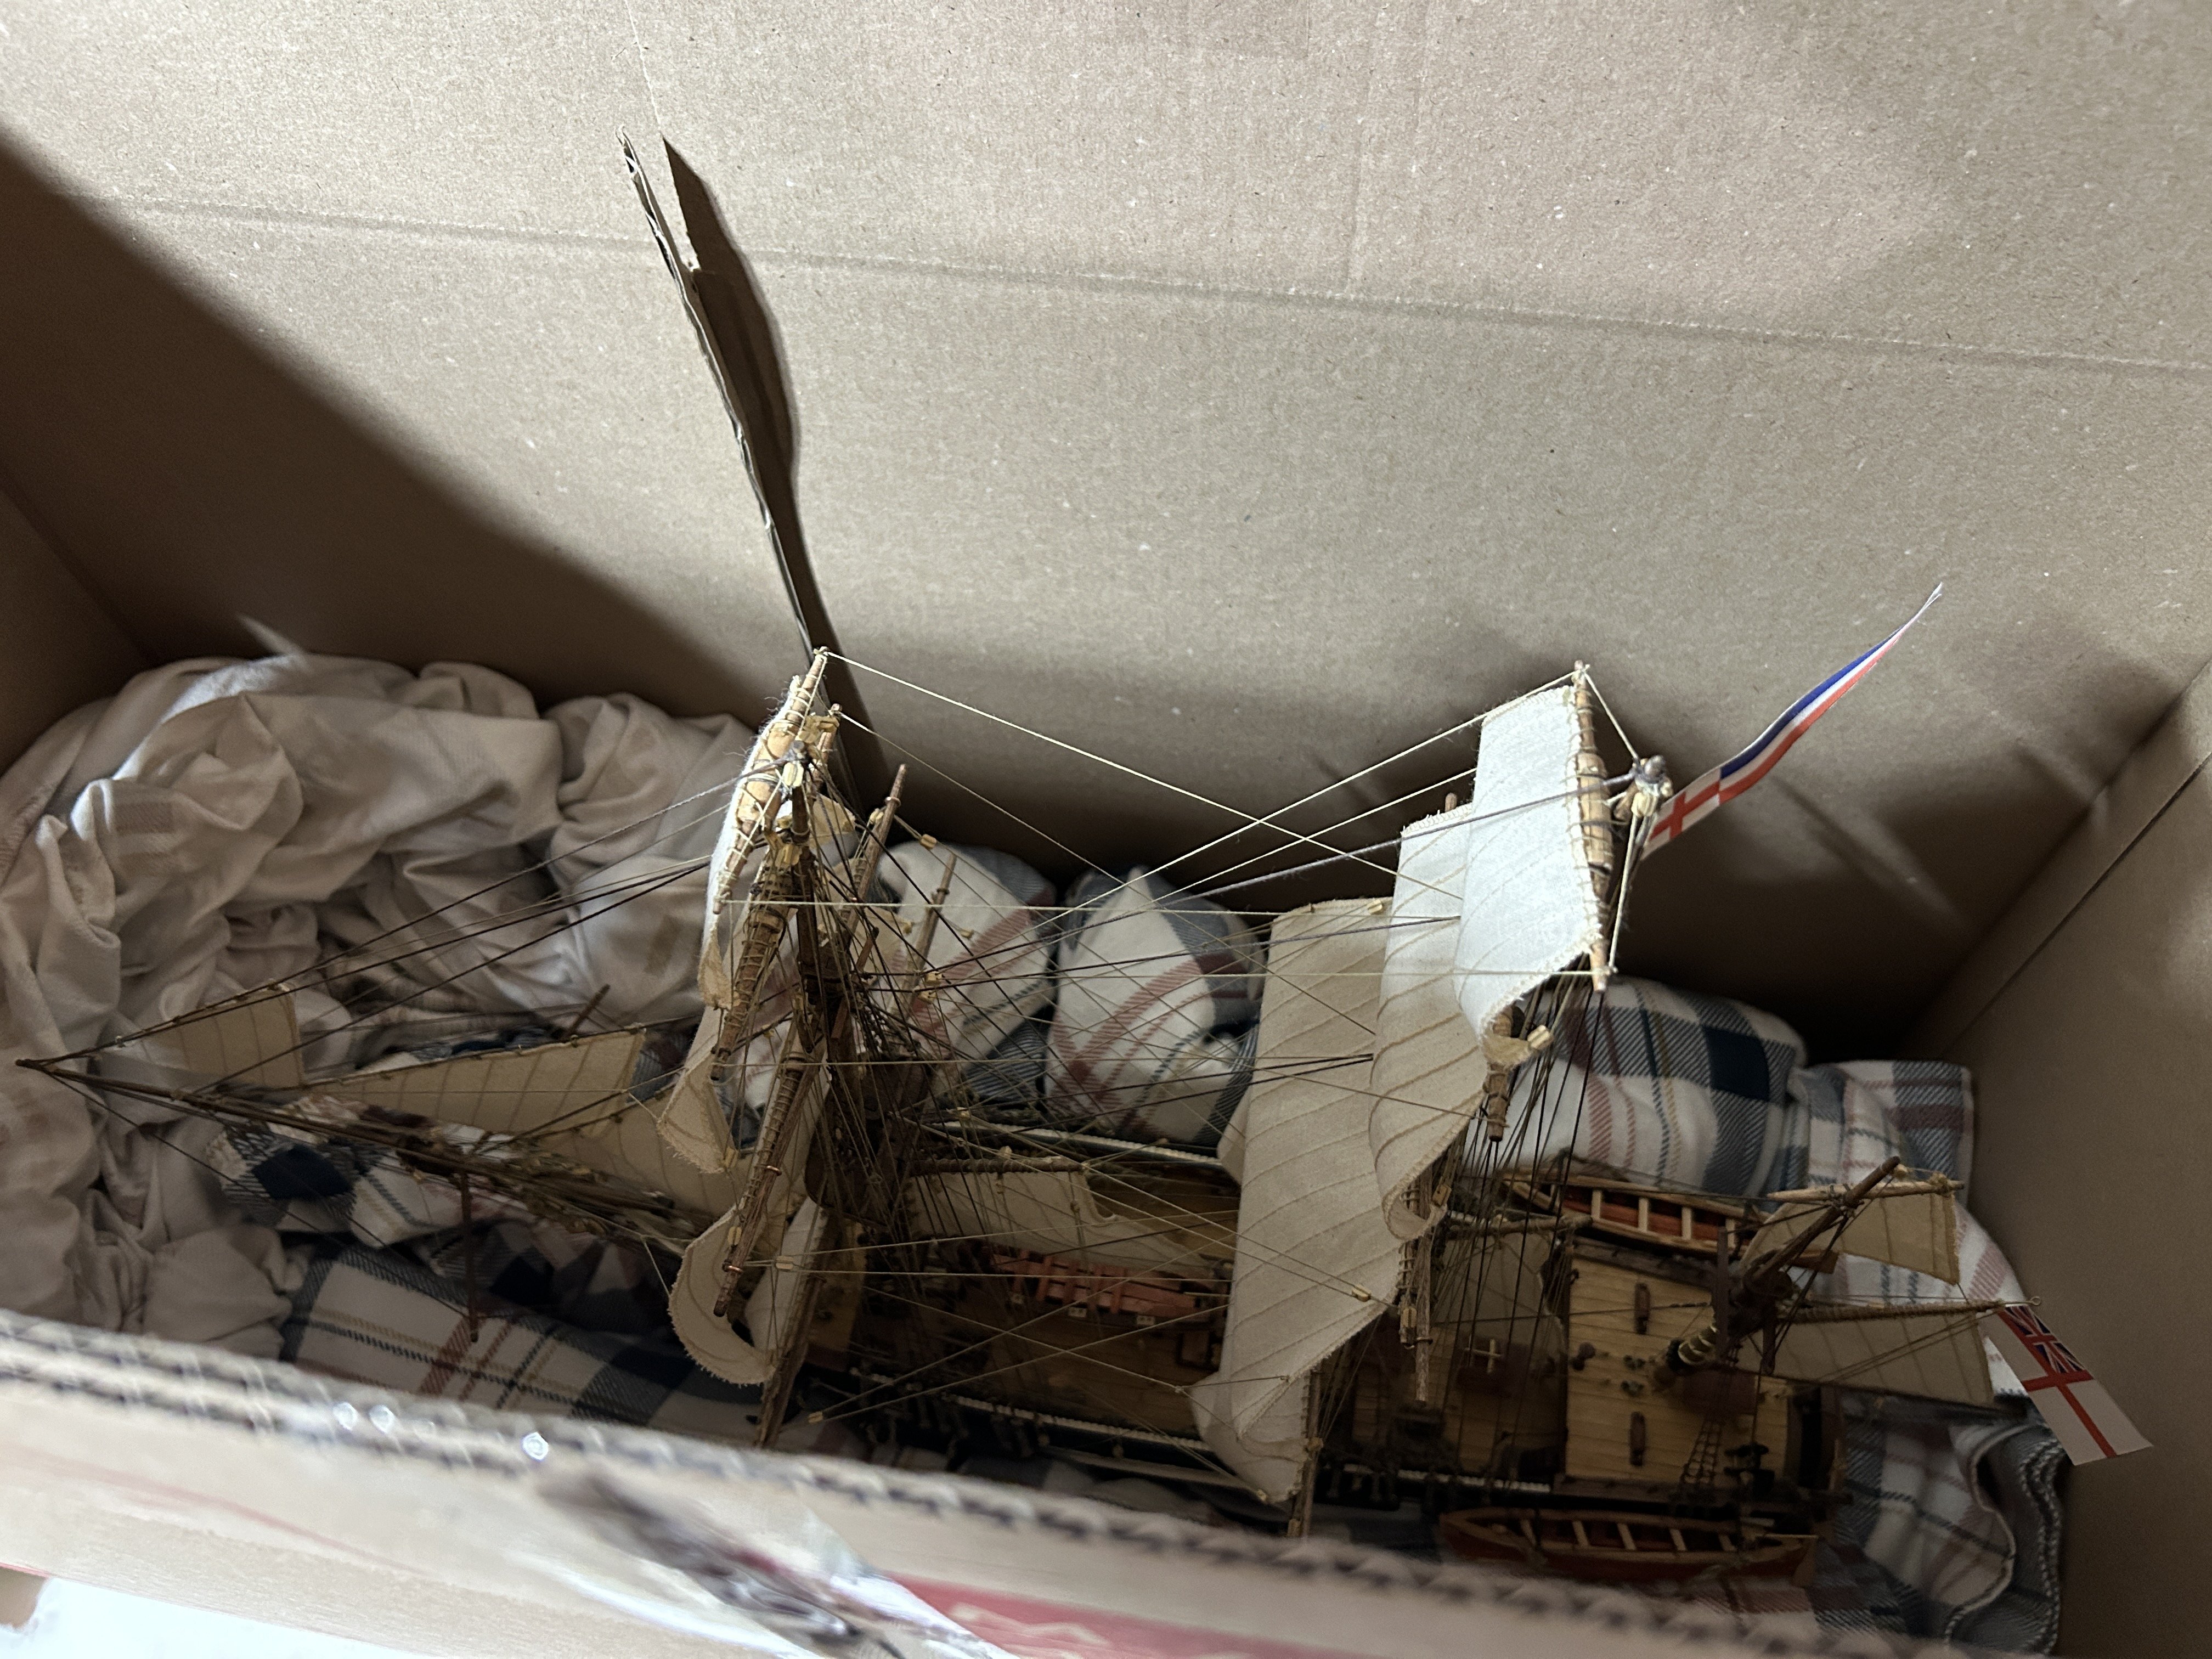
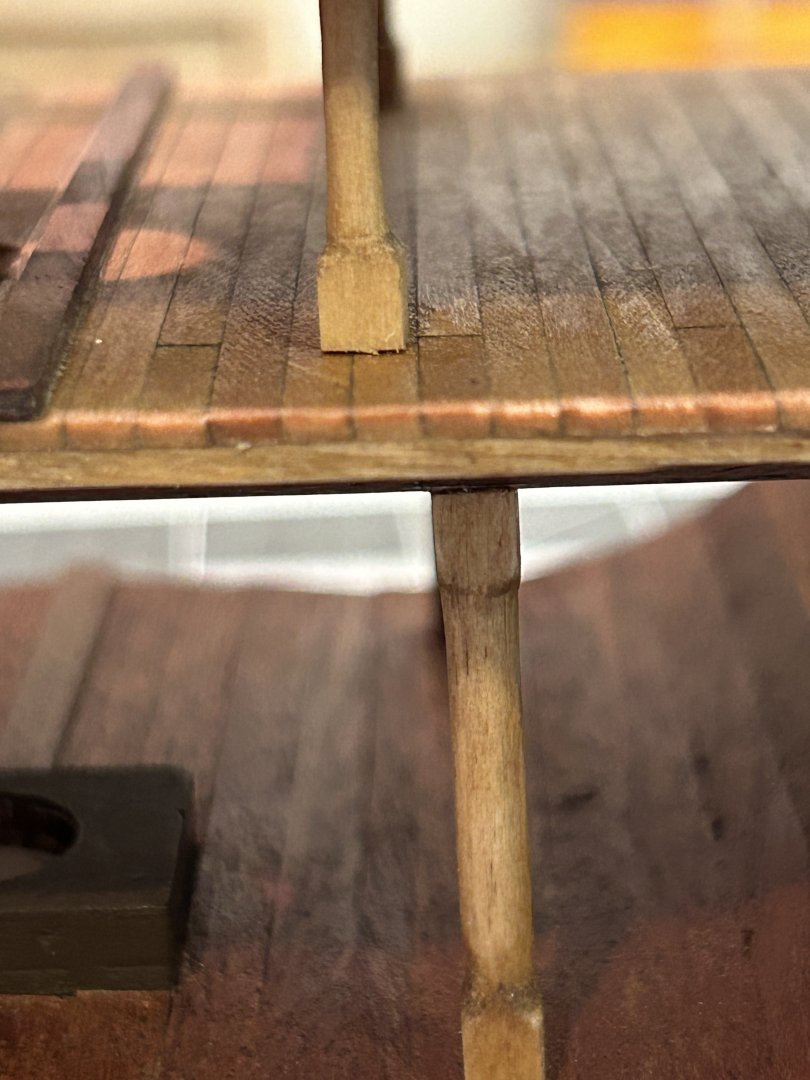
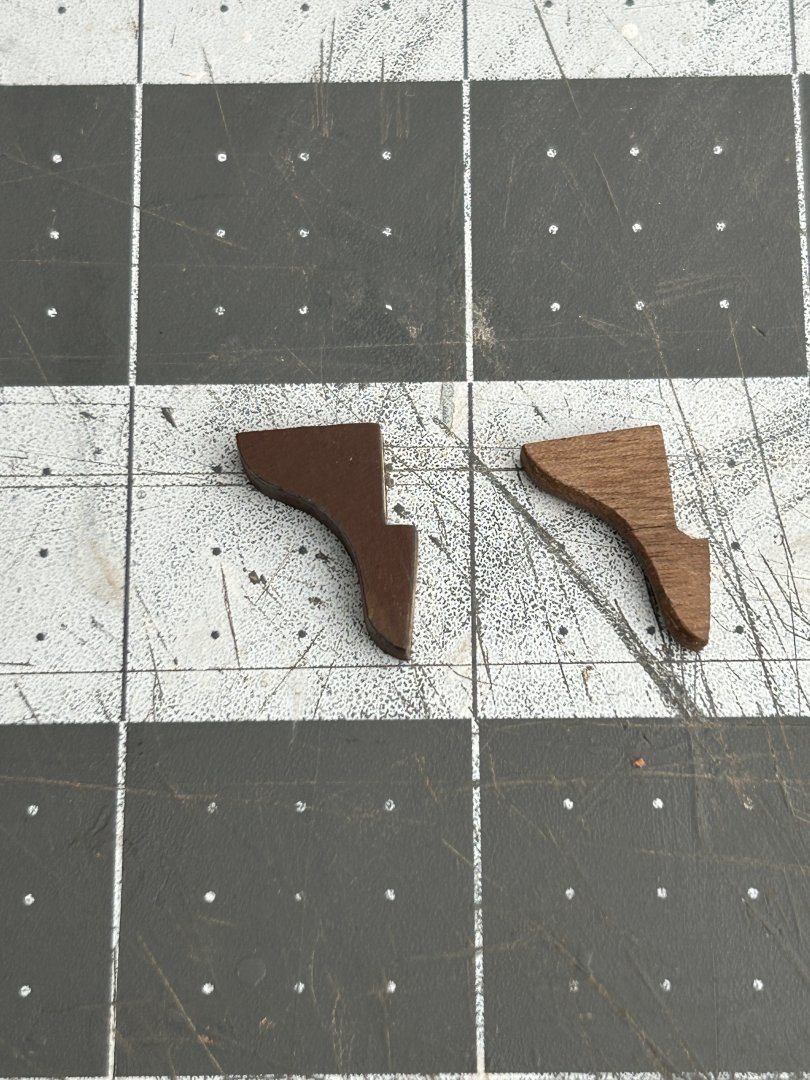
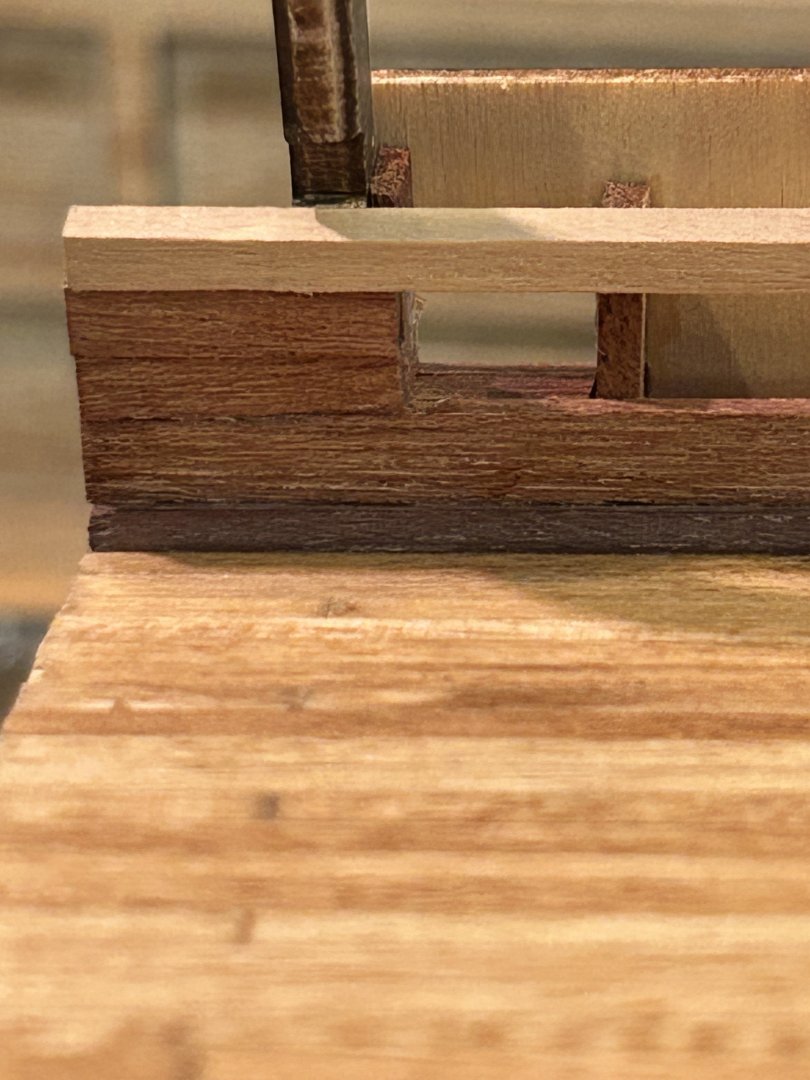
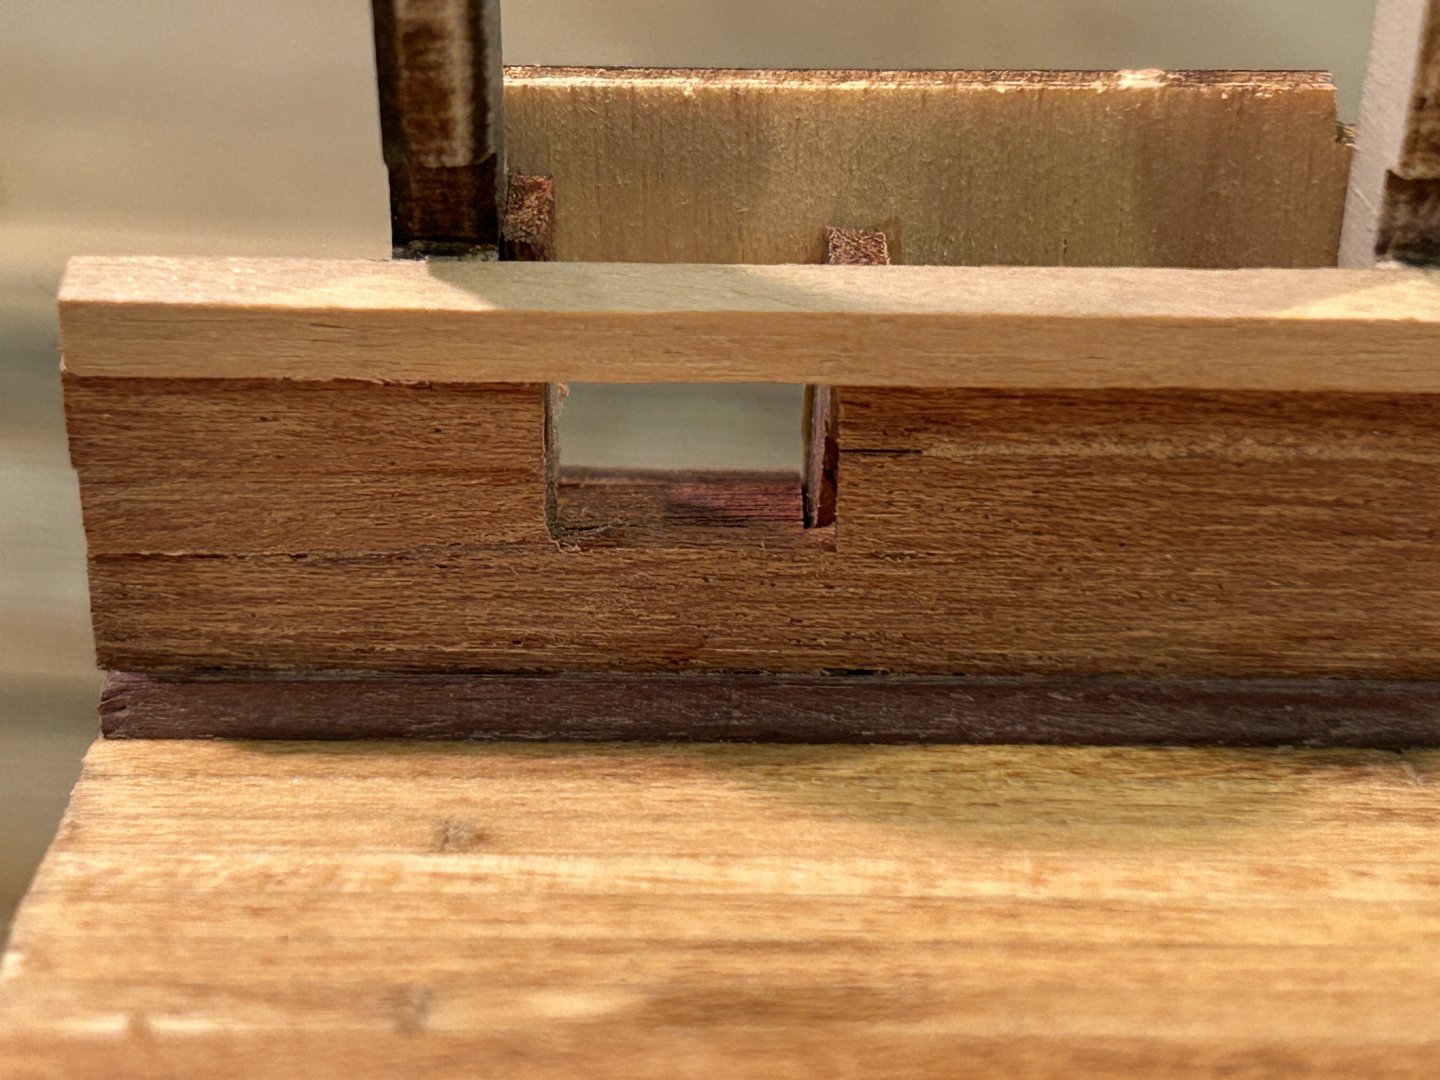
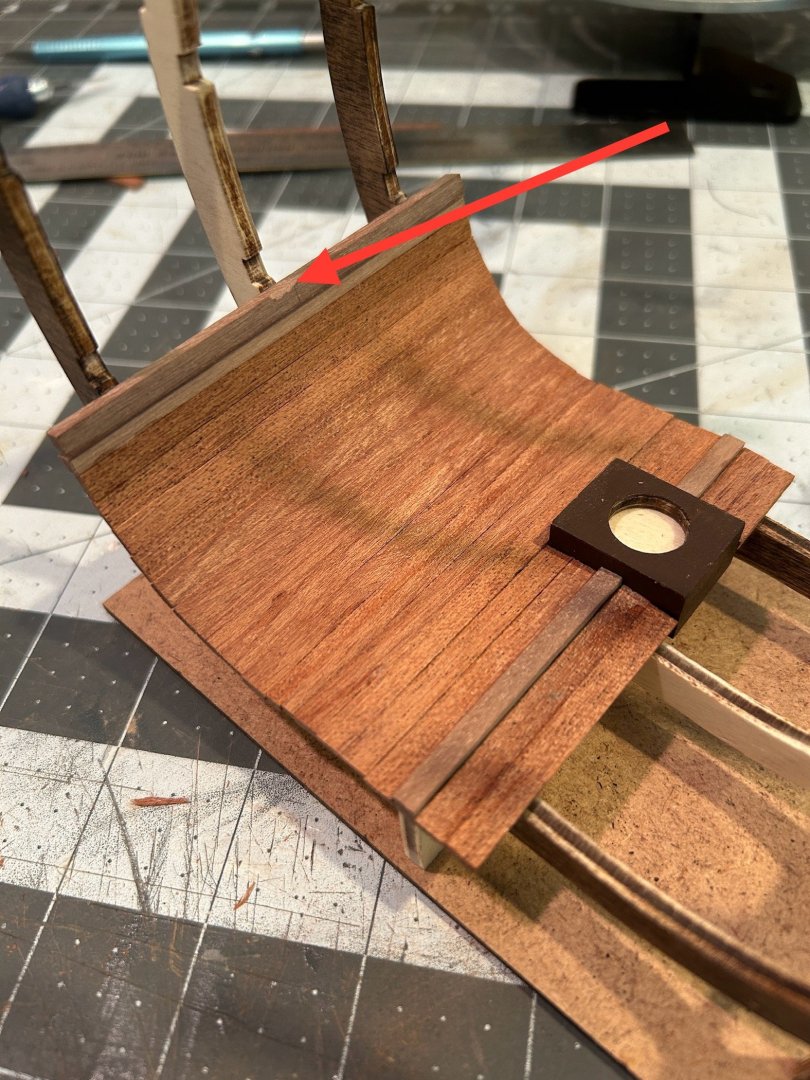
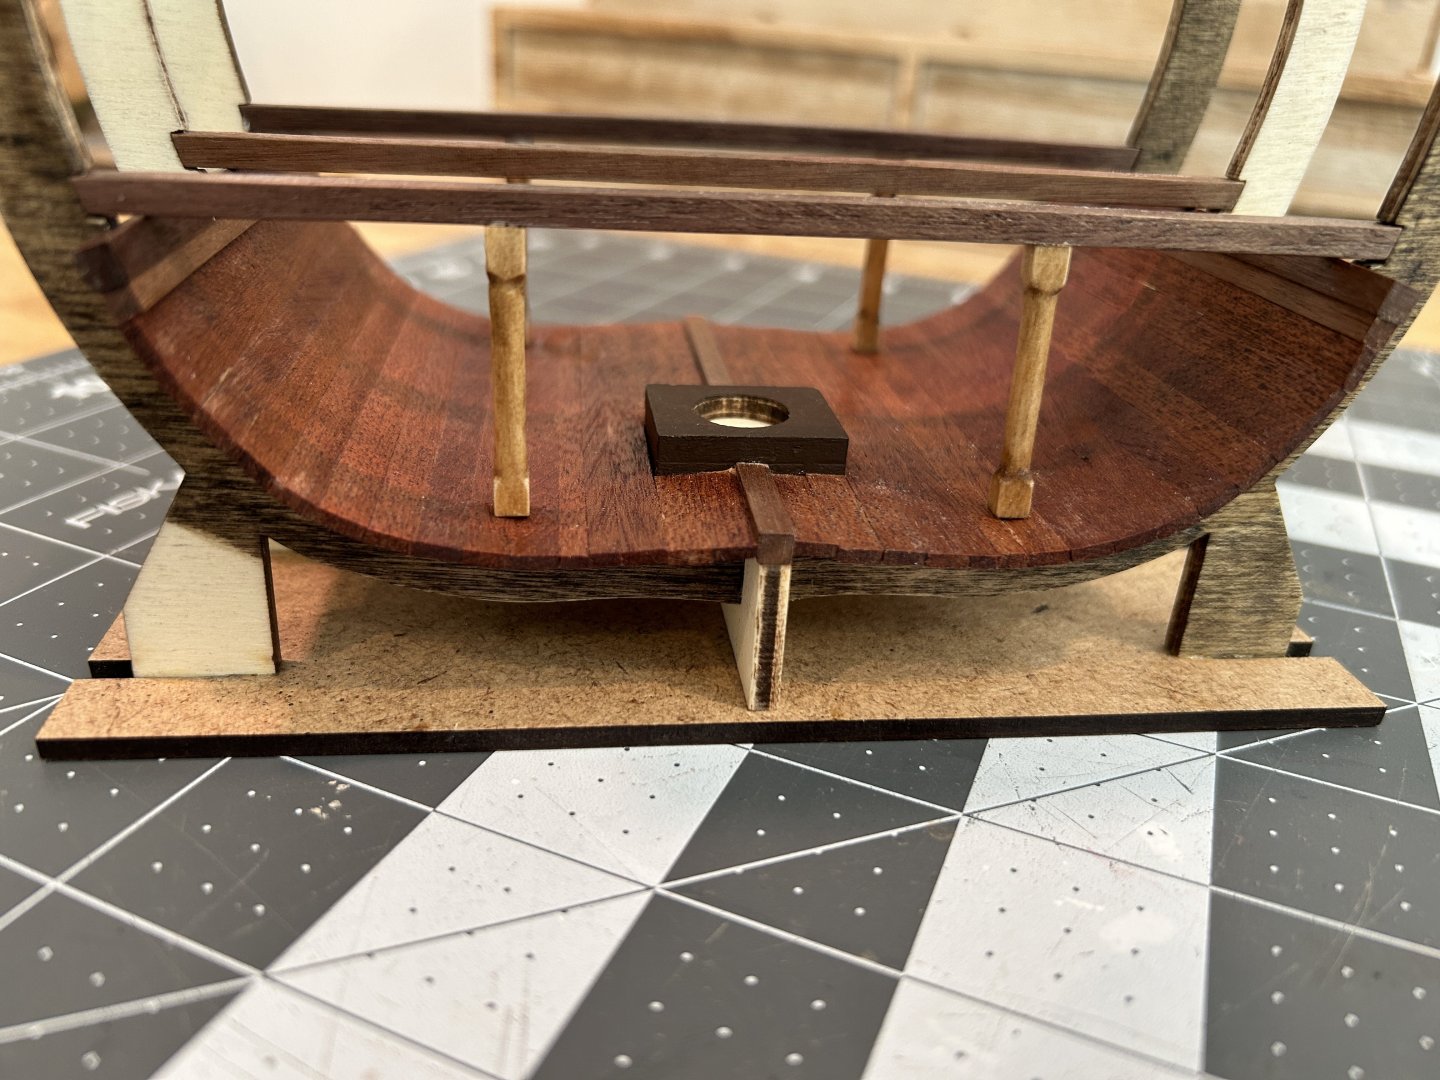
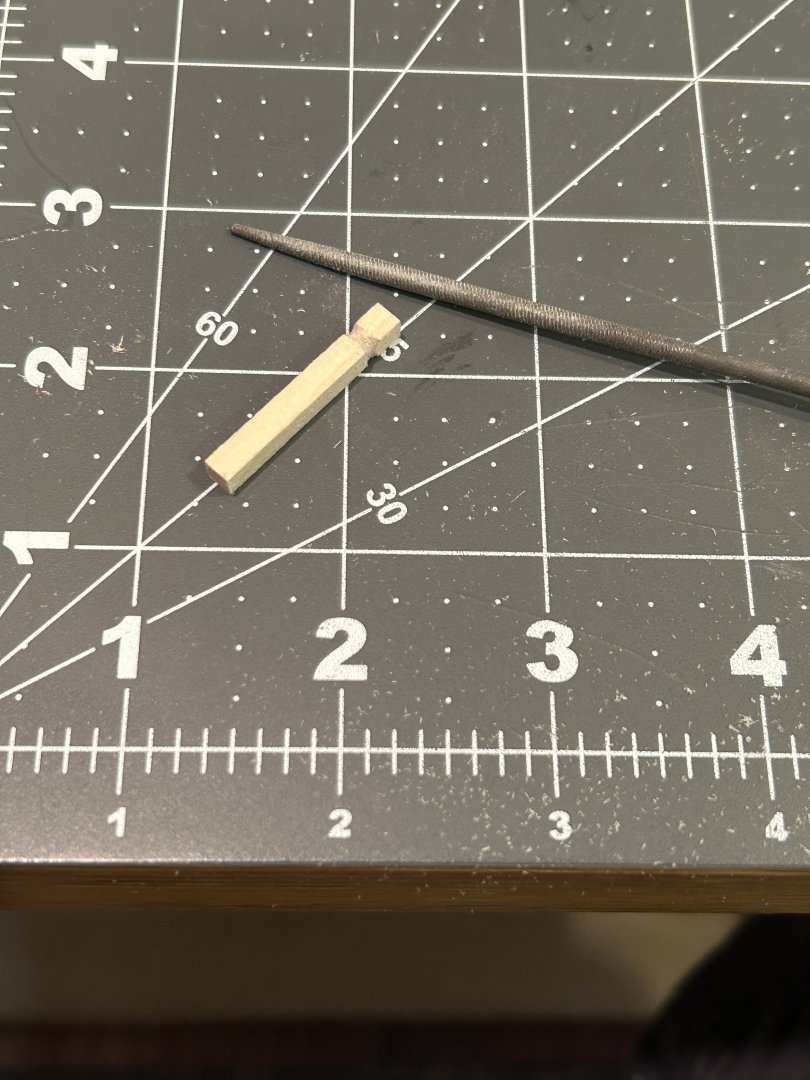
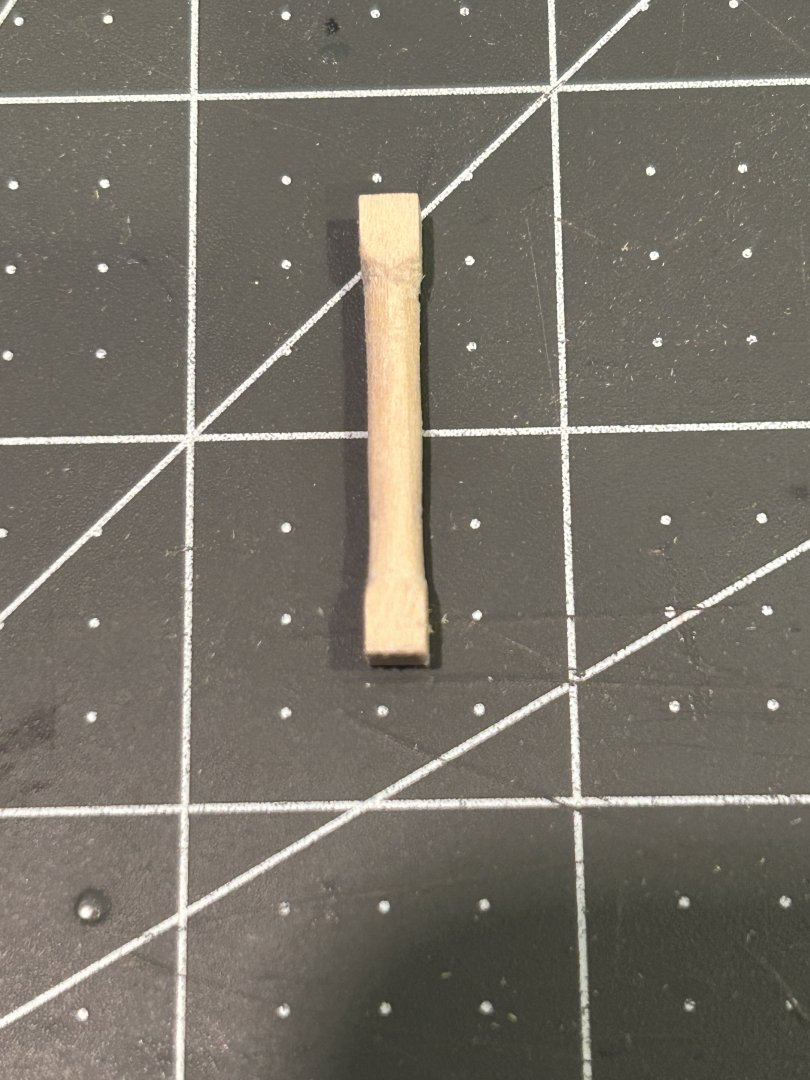
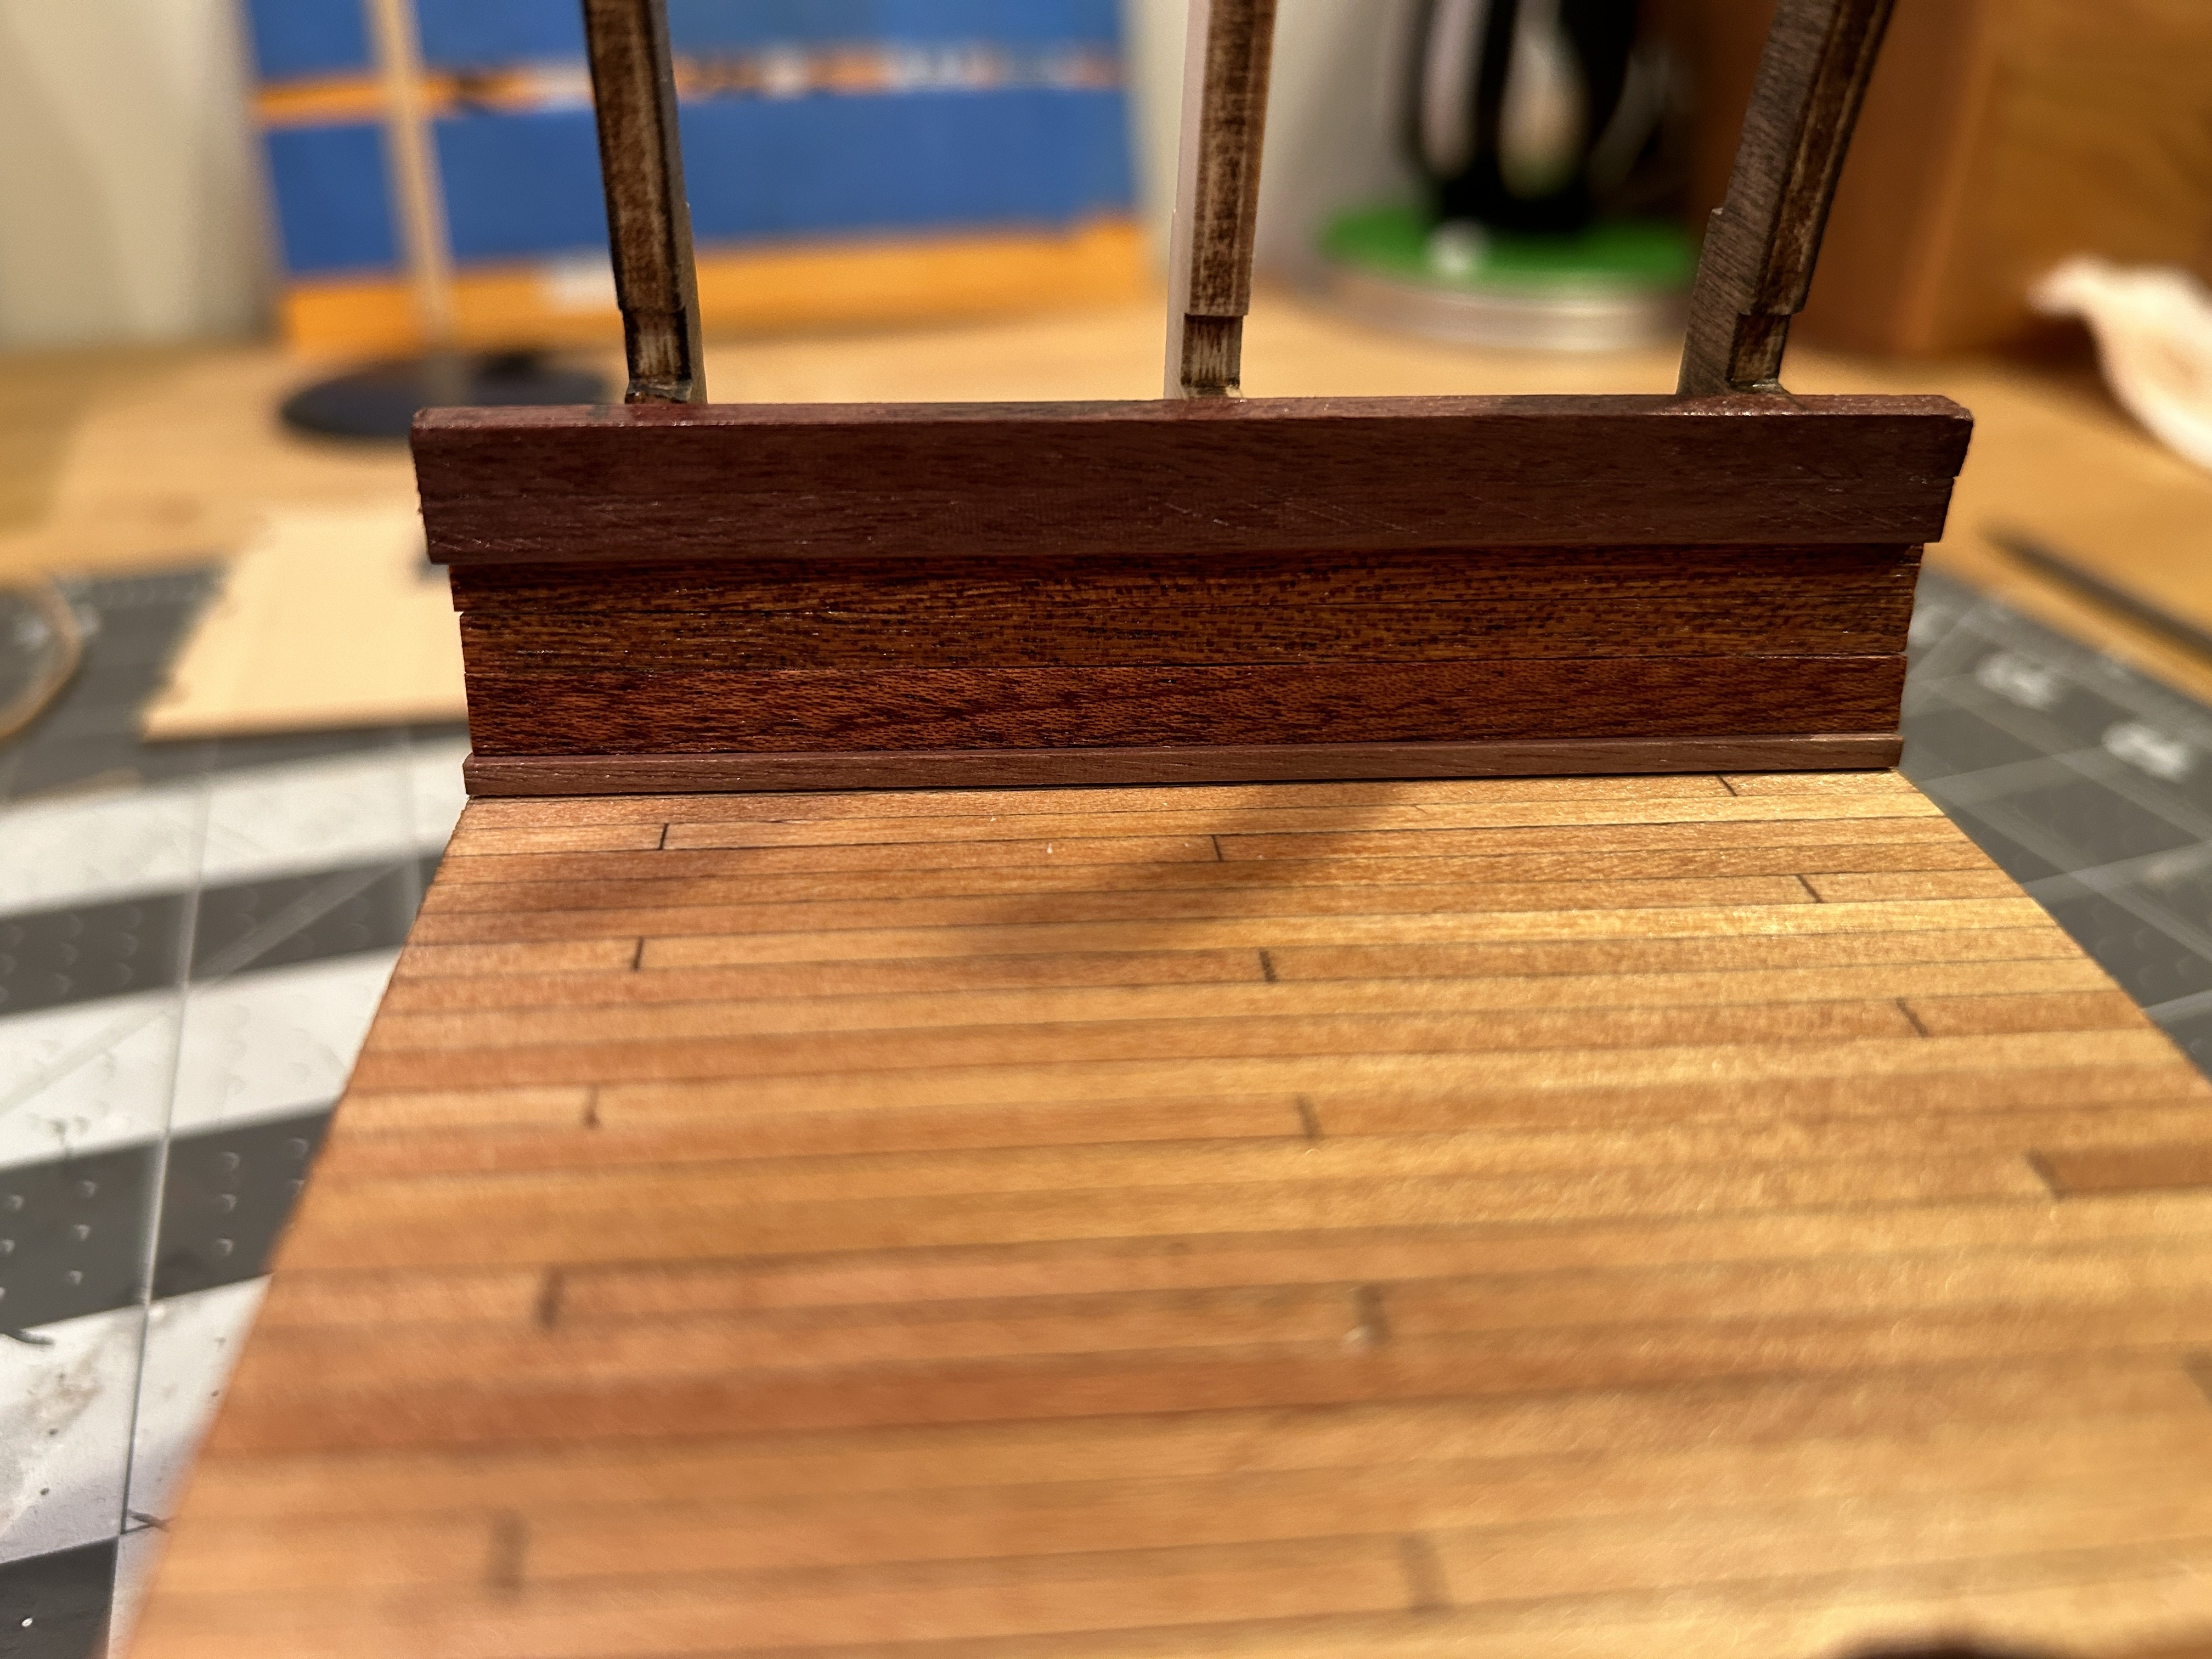
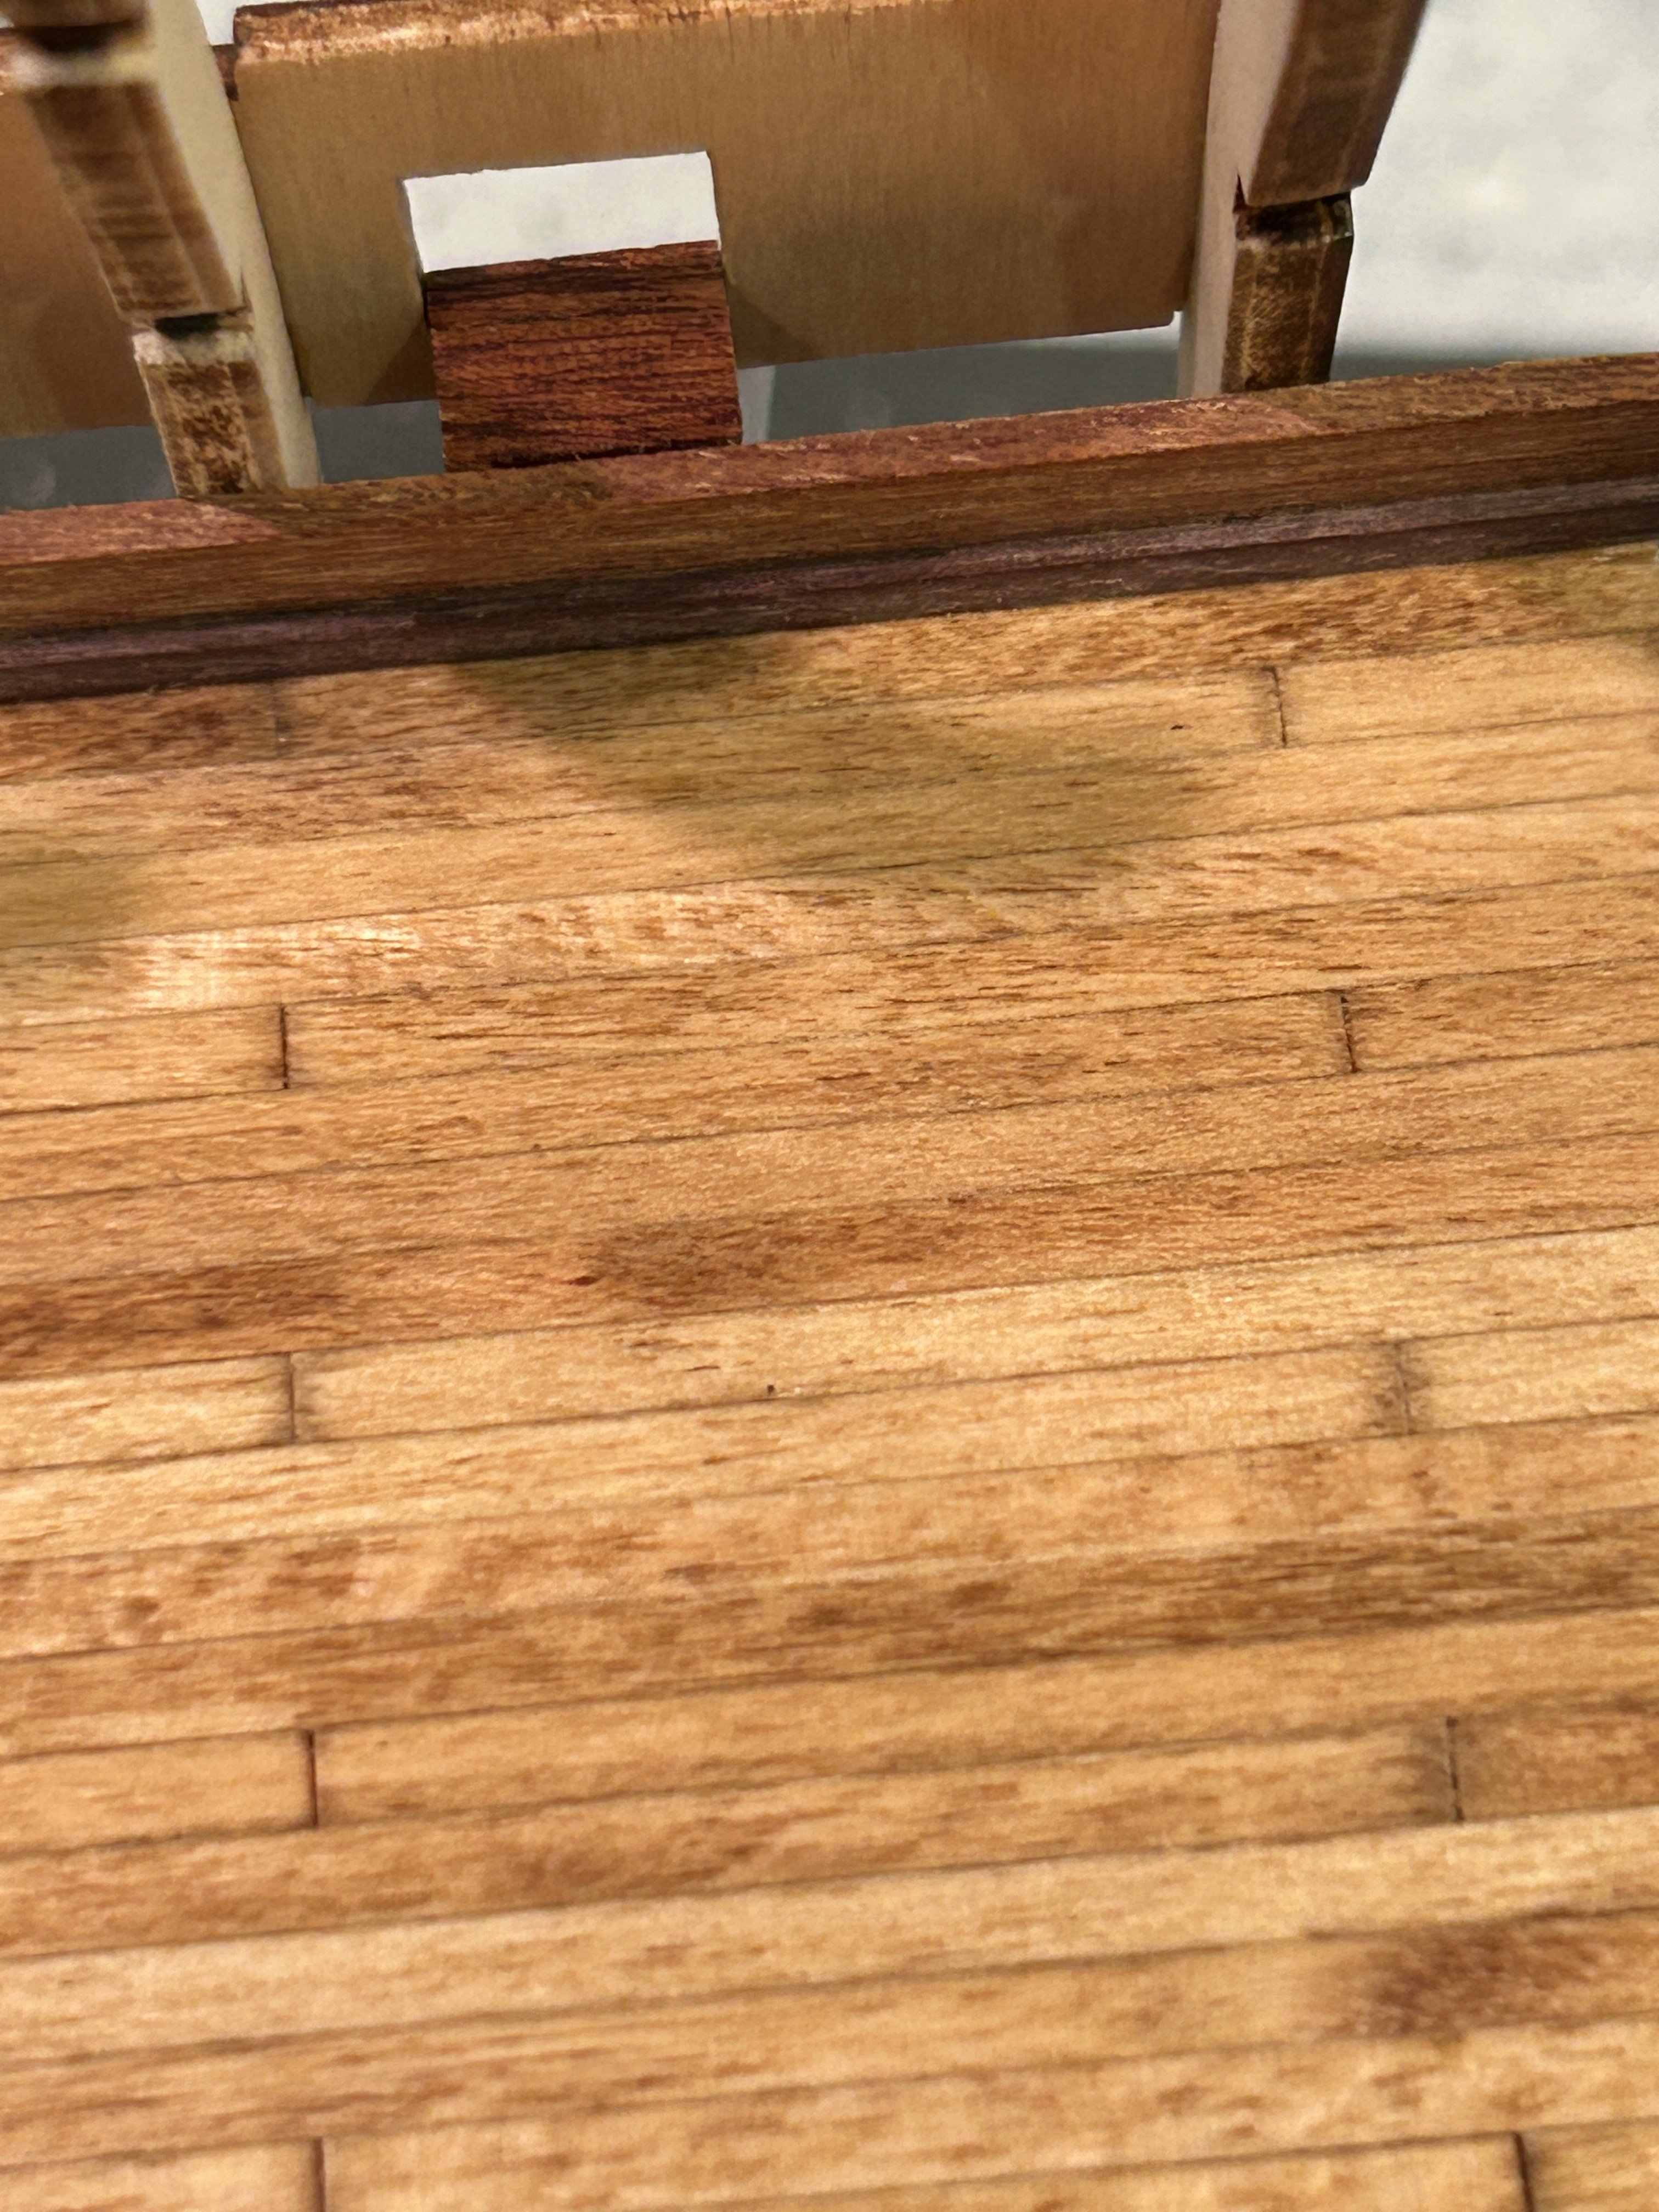
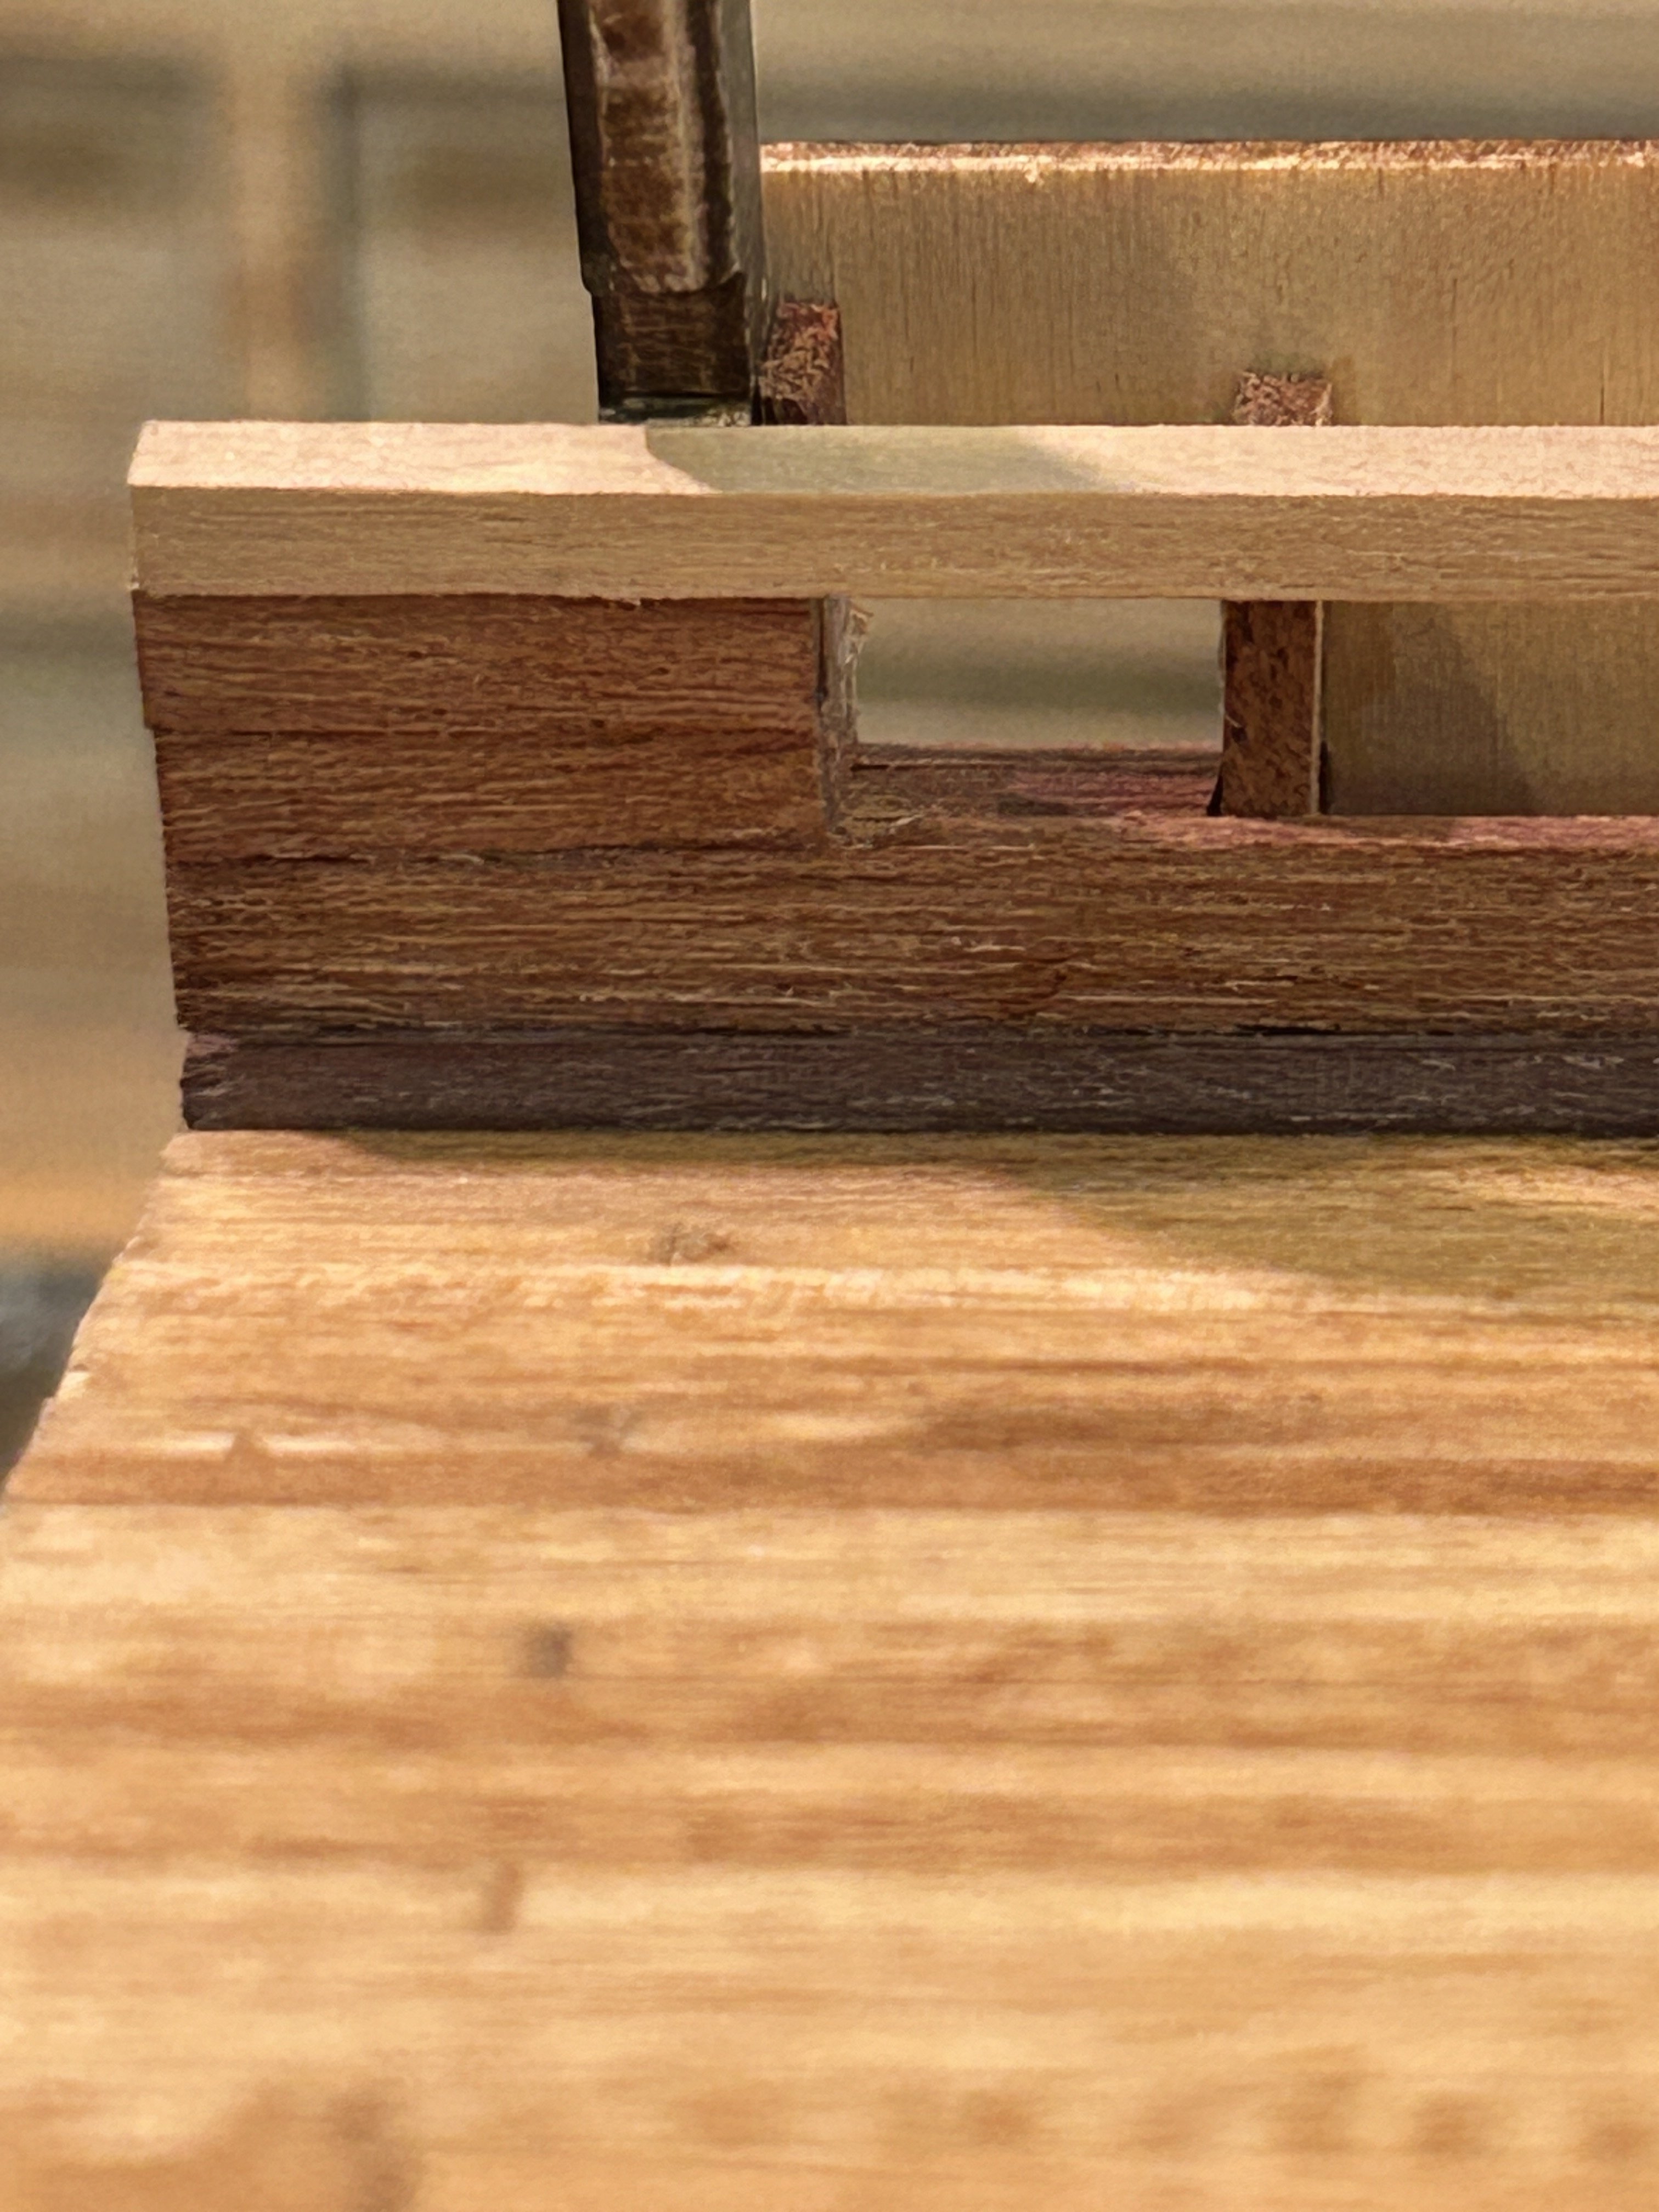
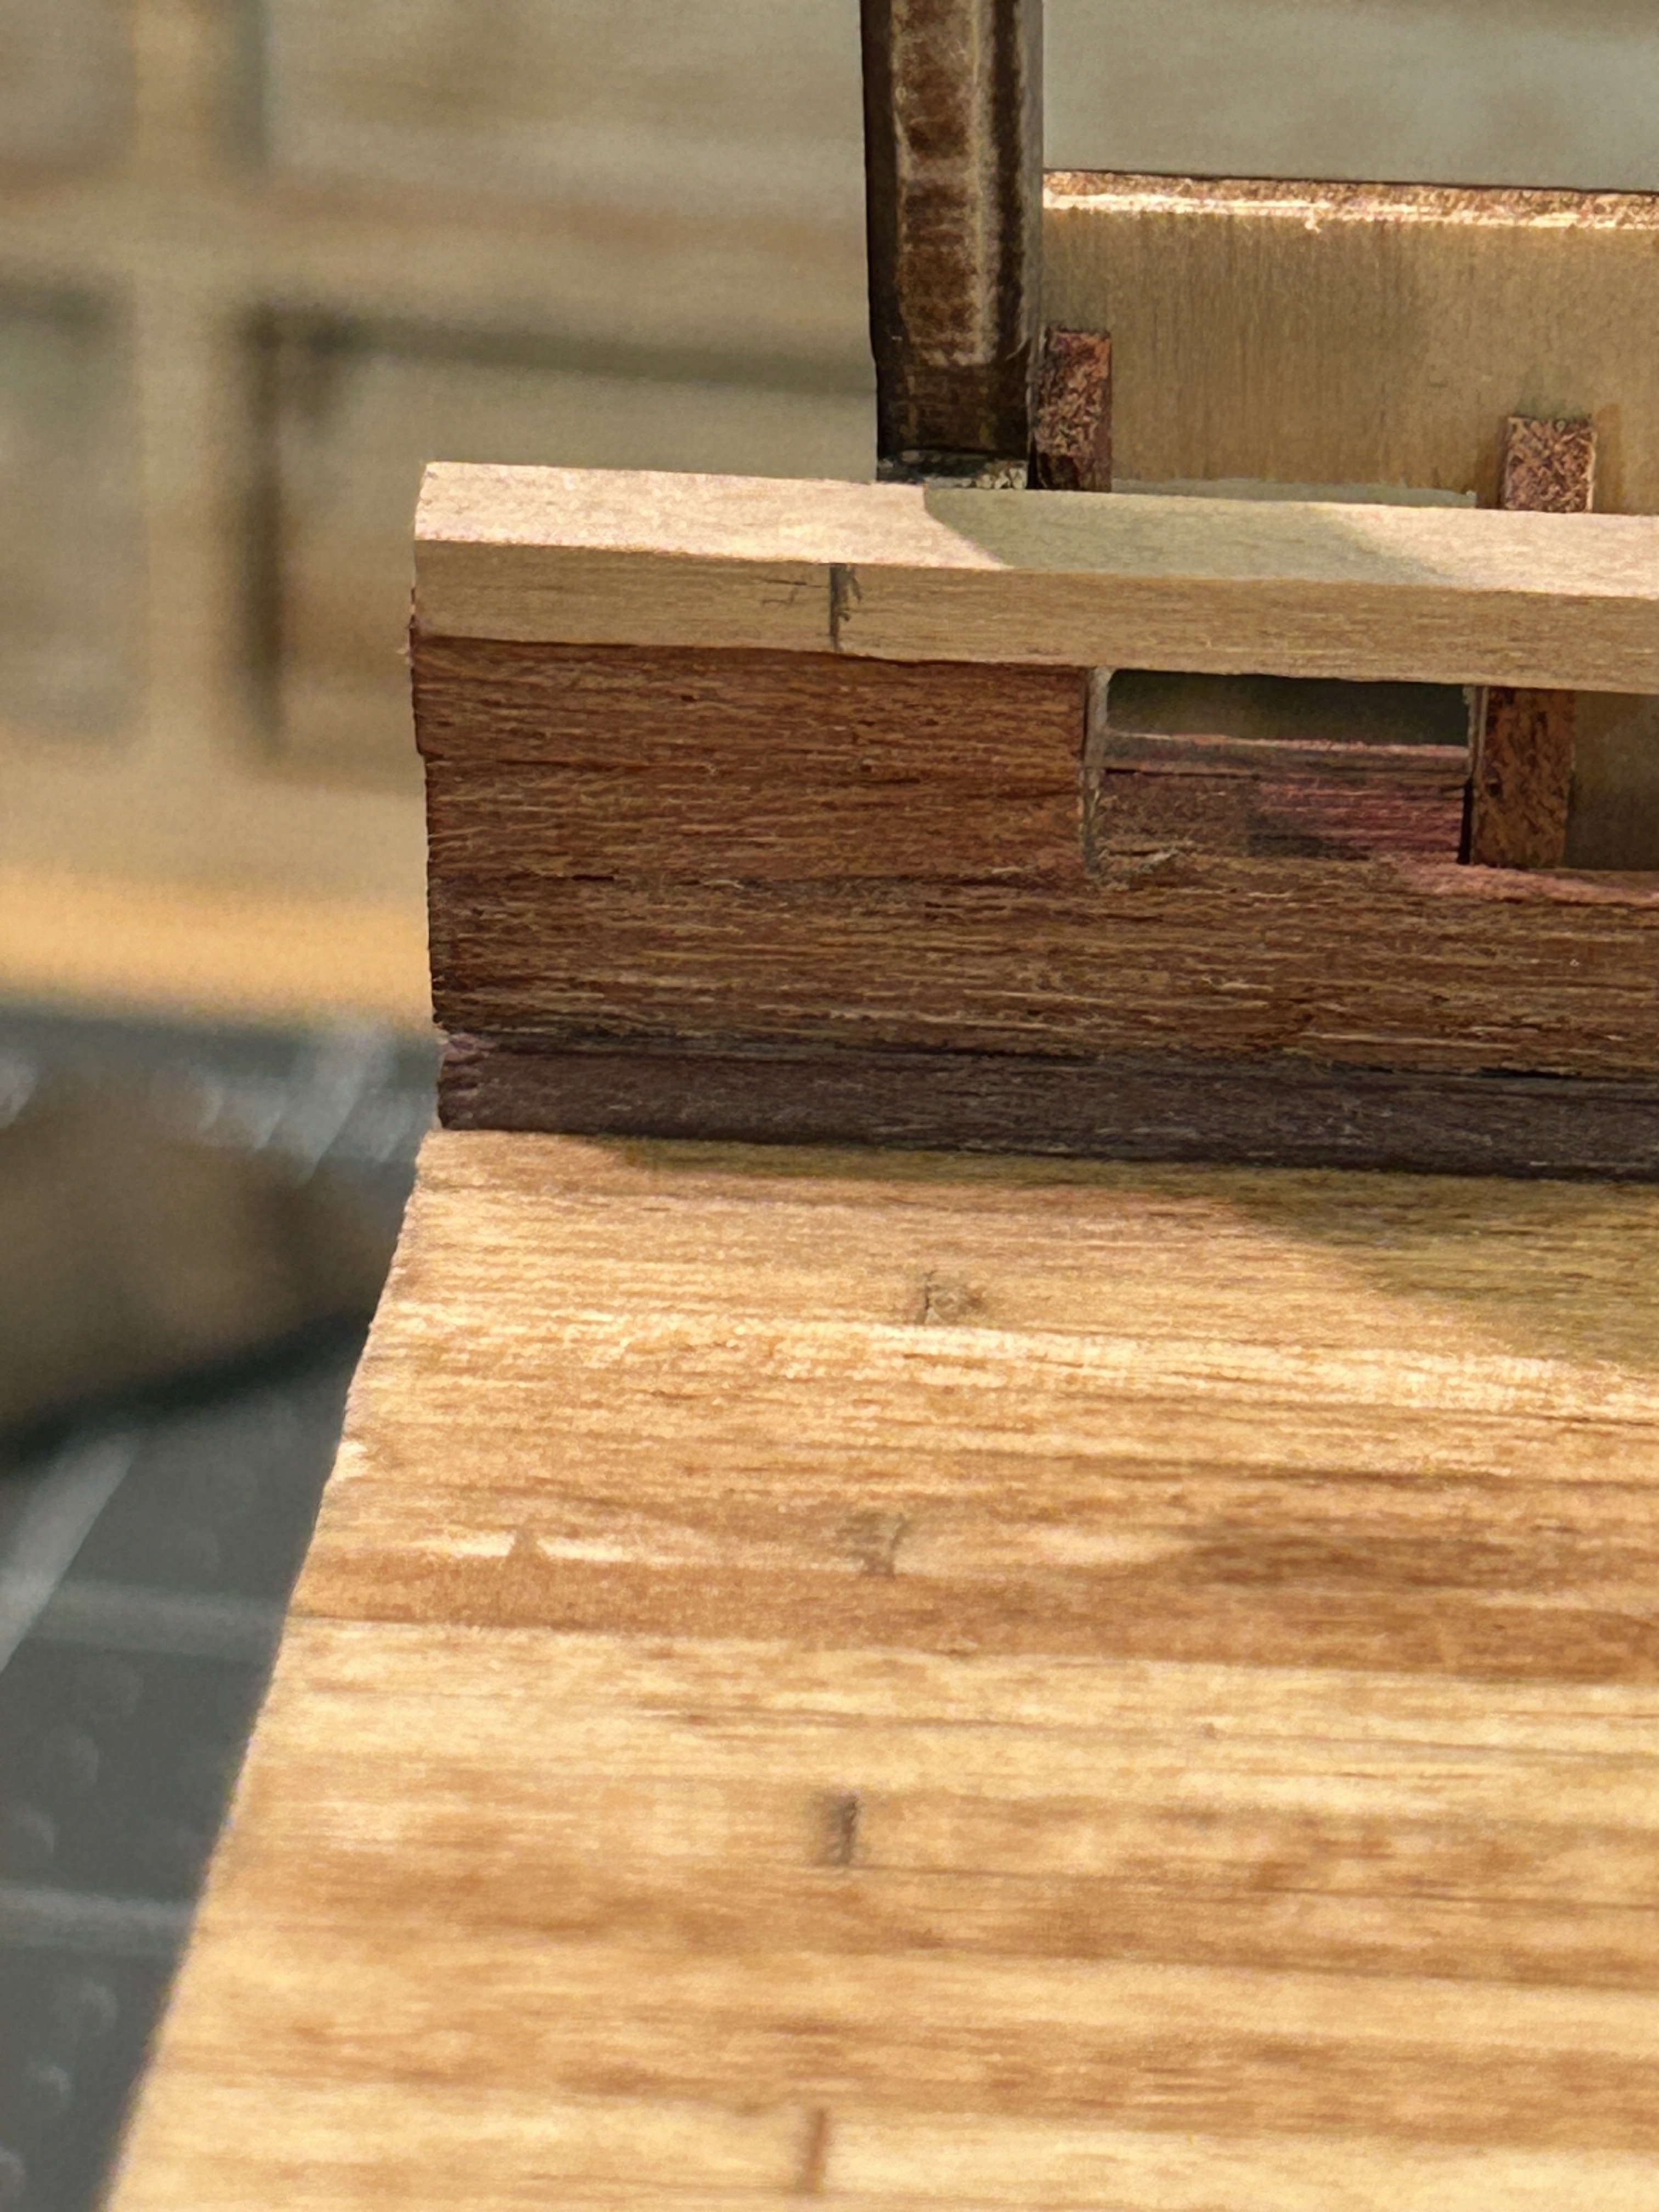
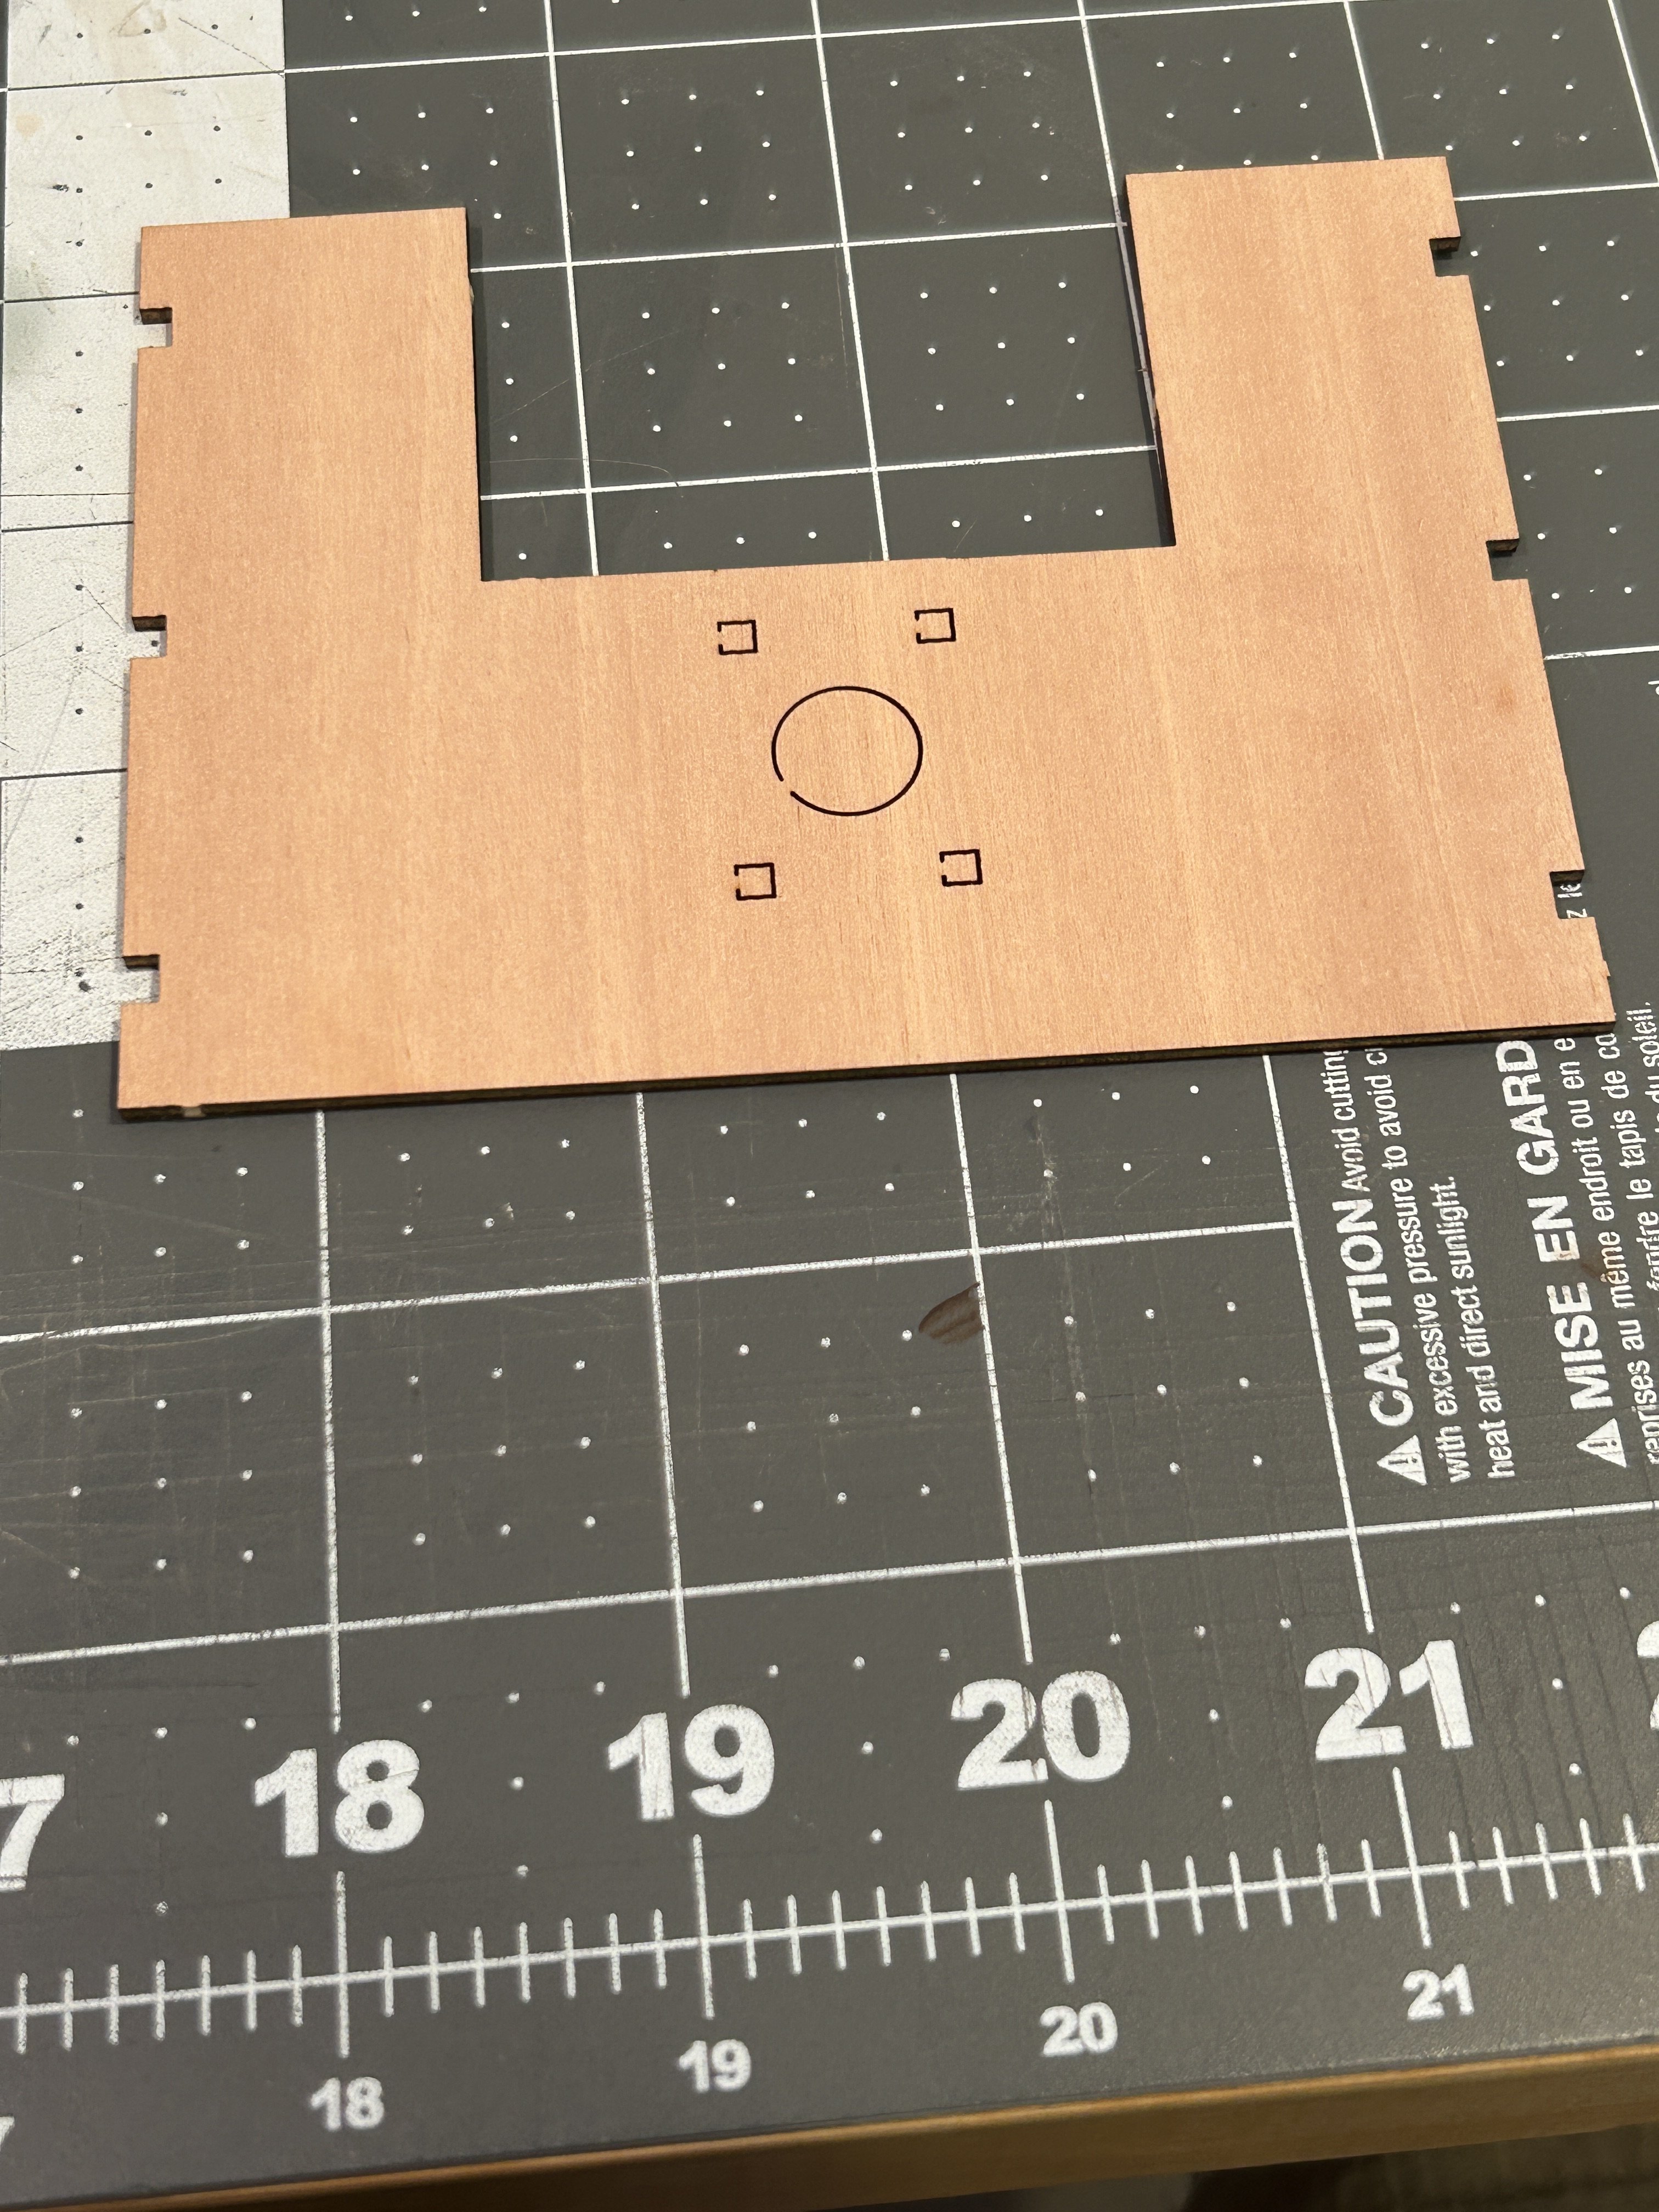
I continue to make progress on my Santisima Trinidad. I added the first deck. The decking is 1mm x 3mm lime wood glued to a laser cut plywood base. I use contact cement to attach the decking to the plywood. I don't think contact cement has very many fans on the forum, but for applications where tensile strength isn't a concern and you have 100% surface to surface contact I love it. Very narrow application, but in the right circumstance it works very well. If you are interested in how it is used check out the applicable posts in my Frigate Diana log. The lime wood is stained with Minwax Honey Oak stain. The interior planking above the first deck starts with a 2mm x 3mm African Walnut piece for the waterway. Then 2mm x 5mm Sapelli and then 2 pieces of 4mm x 4mm African Walnut. Two of the three pieces of Sapelli had to trimmed narrower than the 5mm to fit. Similar to the interior planking on the hold, before adding any of the deck features I added my two coats of shellac. I then moved on to the second deck. This one has two plywood pieces that make up the deck. Each is planked with the 1mm x 3mm limewood like the first deck. I wasn't paying close enough attention and I forgot to use a pencil to mark the outside edges of the planks before I glued them to the plywood base. After staining I am not too disappointed in the result. The seams between the planks collected more stain than the surface, so there is still pretty good definition of each plank with a dark line to simulate caulking. Below is a picture that compares the two decks. The bottom one has the pencil marks and the top one does not. On the edges of the plywood bases that will be exposed, I used some leftover 0.5mm Sycamore and glued a strip onto the edge of the plywood to cover the laminated edge. I am hoping to avoid any exposed plywood edges that are not painted. After installing the second deck. I had to add the support piece where the beams and interior planking meet. I believe this is called a knee. The laser cut pieces were from the same sheet as the frames, and I don't really like how they stained. I used Minwax Dark Walnut and the thin top layer of wood didn't accept the stain very well. I tried painting them a color that would match Sapelli planking, but was not successful. I decided to attempt to cut these out of a 1/8 inch sheet of African Walnut I purchased at a local hobby shop. I used an old Craftsman scroll saw my father gave me and a small drum sanding attachment on my Dremel. I am really happy with how these turned out and this has given me some confidence in fabricating other parts in the future. The one on the left is the laser cut version after painting and the one on the right is the one I cut of of 1/8 inch walnut. Next up was the interior planking above the second deck and lining the gun ports. Similar to the first deck the planking starts with a 2mm x 3mm waterway and then there is a strip of 2mm x 5mm Sapelli along the entire length of the cross section. Above that strip the gun ports need to be lined. The placement of the gun ports is determined by the laser cut part that is placed on the exterior of the frames. The bottom of the gun port is supposed to be lined with the cut out from the exterior plywood part. I didn't like the look of that, so I used some 1mm thick Sapelli that I had left over from somewhere. The sides of the gun ports are made from 2mm x 7mm Sapelli. Next are two rows of 2mm x 5mm Sapelli that need to be trimmed narrower than 5mm to fit. Then are 3mm x 3mm piece of African Walnut. I enjoyed fitting all of the interior planking to create the gun ports. I am really happy with my improved use of CA in this planking. On previous models I would have had glue stains everywhere. I have had to sand off a couple of spots, but not many. This model is my first extensive use of the Ultimation Slicer and Sander that I reviewed several months ago. Using these tools has made this build very enjoyable. I highly recommend these tools if you think you are interested. As I stated in my review, these are not cheap, but I really like them. Next up is the features on the second deck after I get the planking sanded and shellaced.

.thumb.JPG.1755703c38ee96fdd7797ce1f5a7d652.JPG)


- 21 replies
-
- 2
-

-

-
- Santisima Trinidad
- OcCre
- (and 2 more)
-
I Used to think when I retired I would want to build HMS Victory, but I am starting to think maybe the USF Confederacy might be a better chose. I will be following your build log. Thanks.
-
You might be able to shim the frame to build it up enough to work?
-
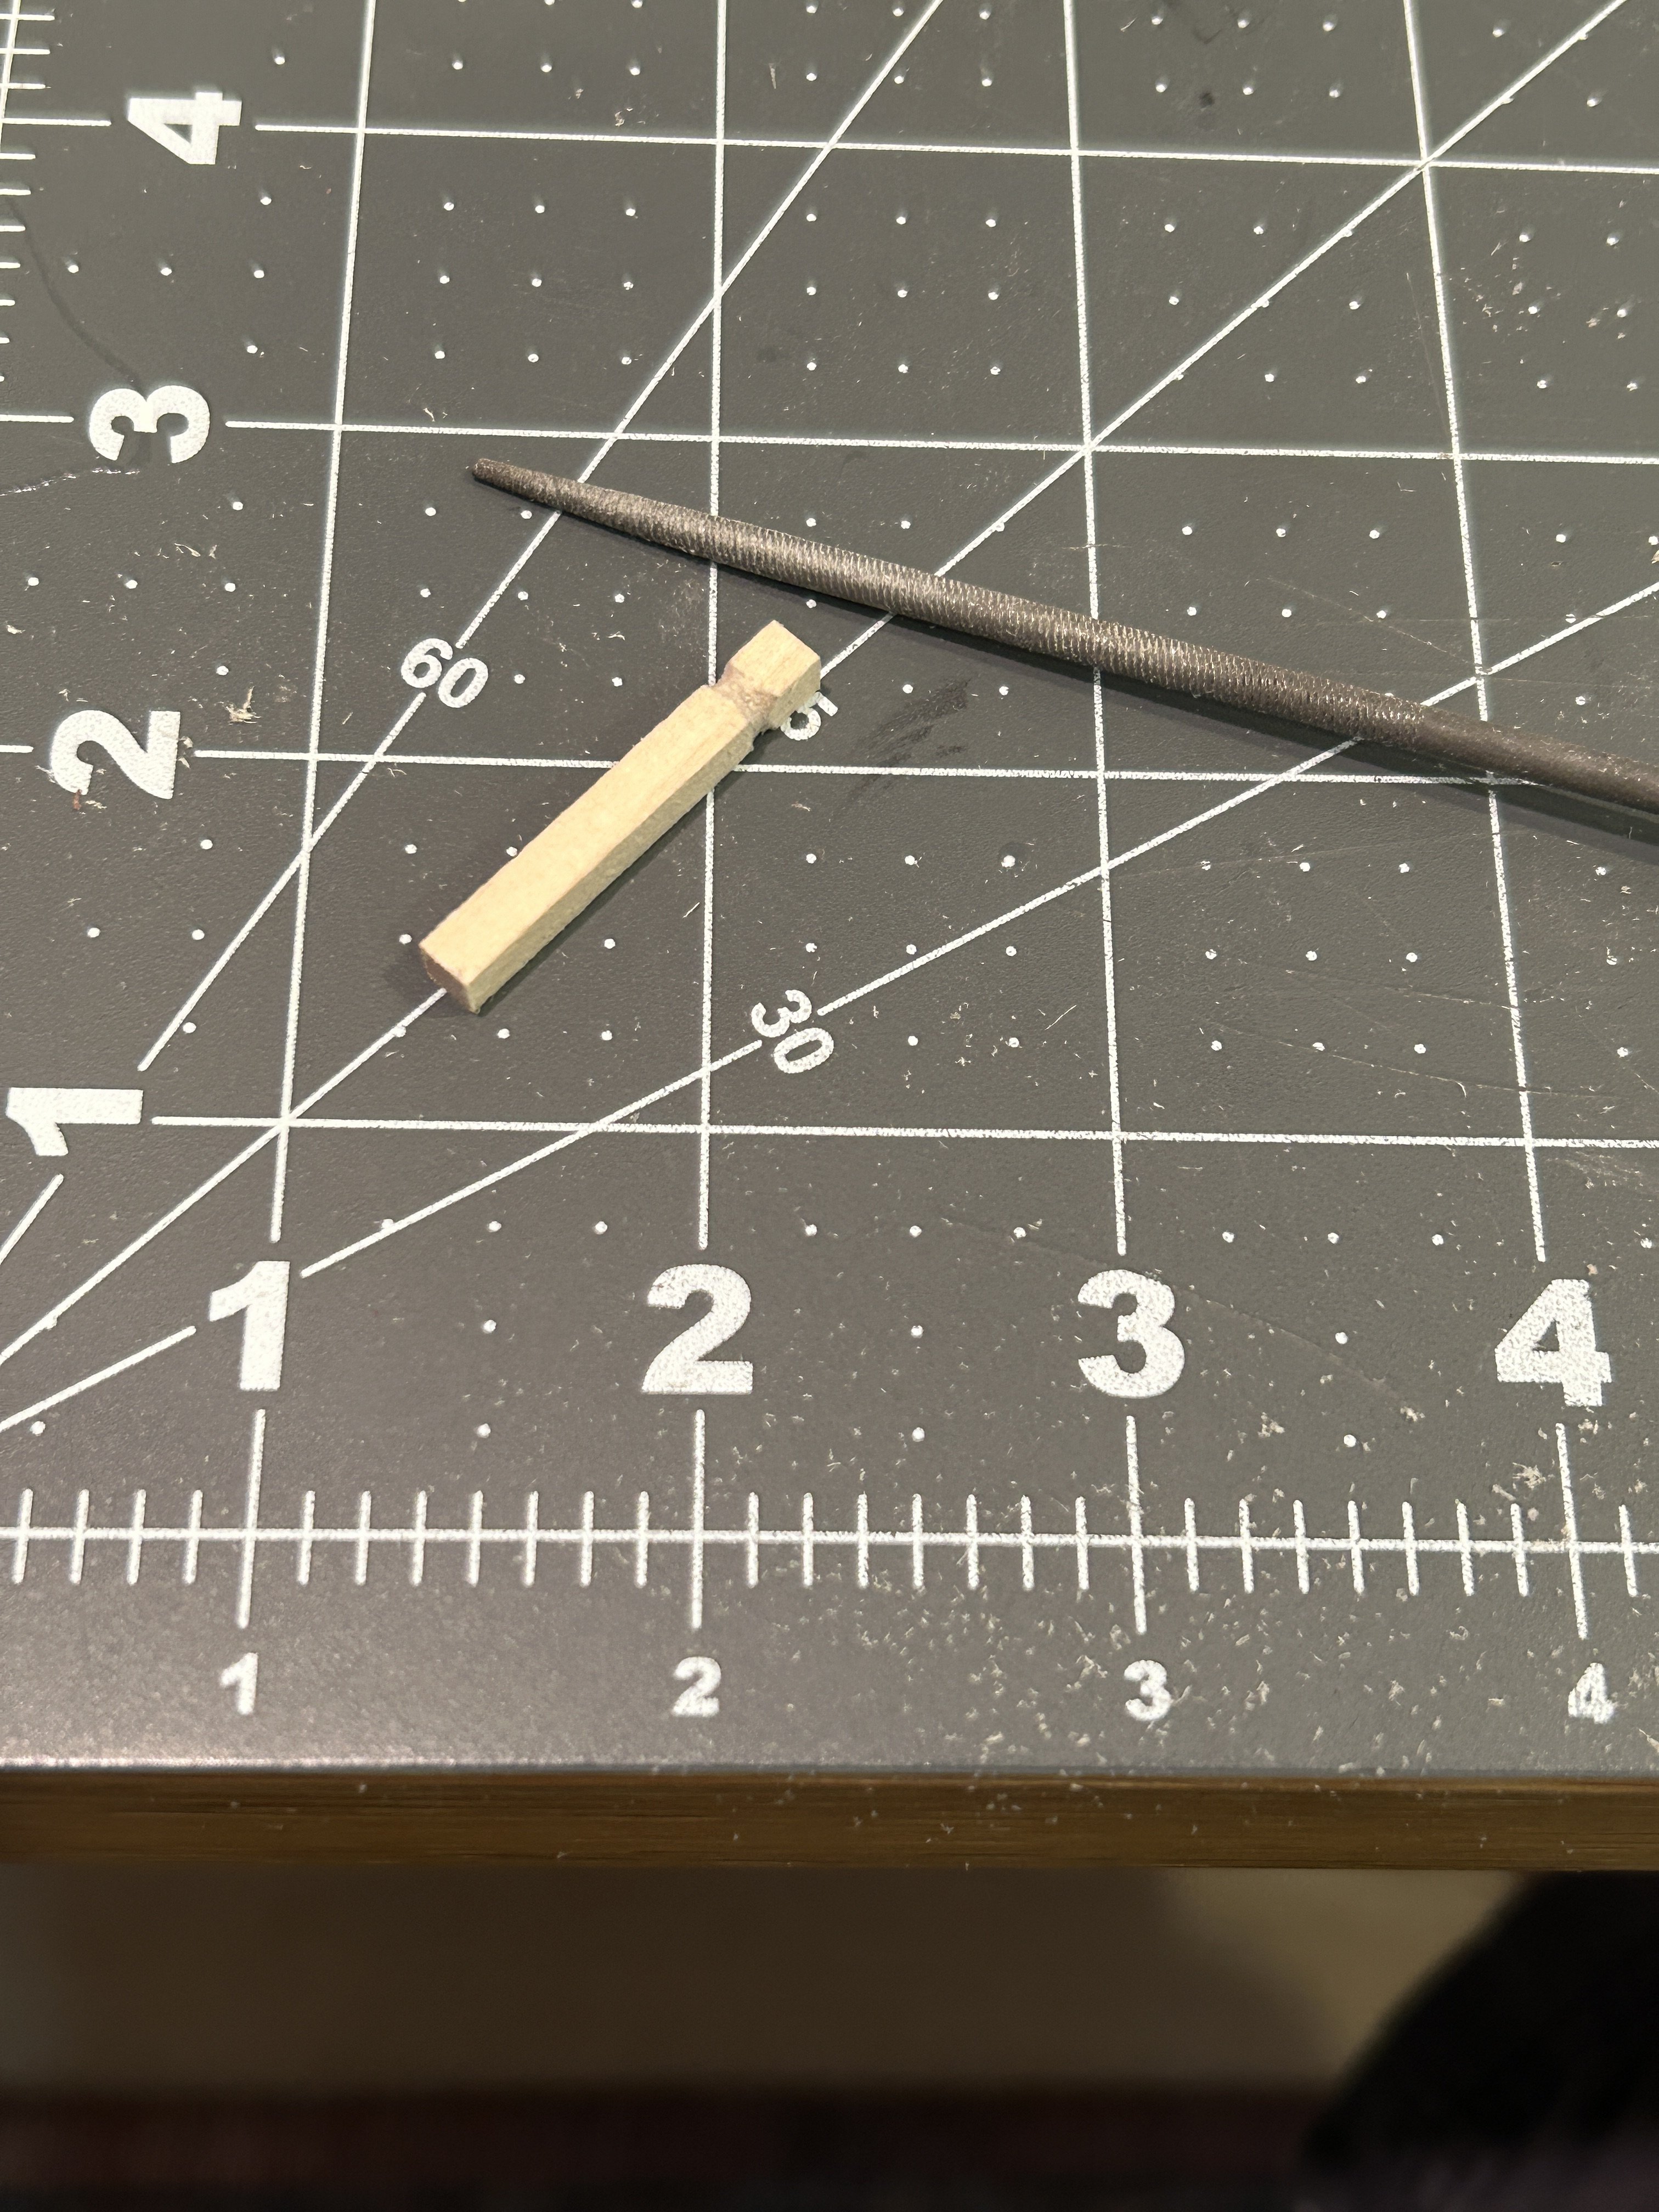
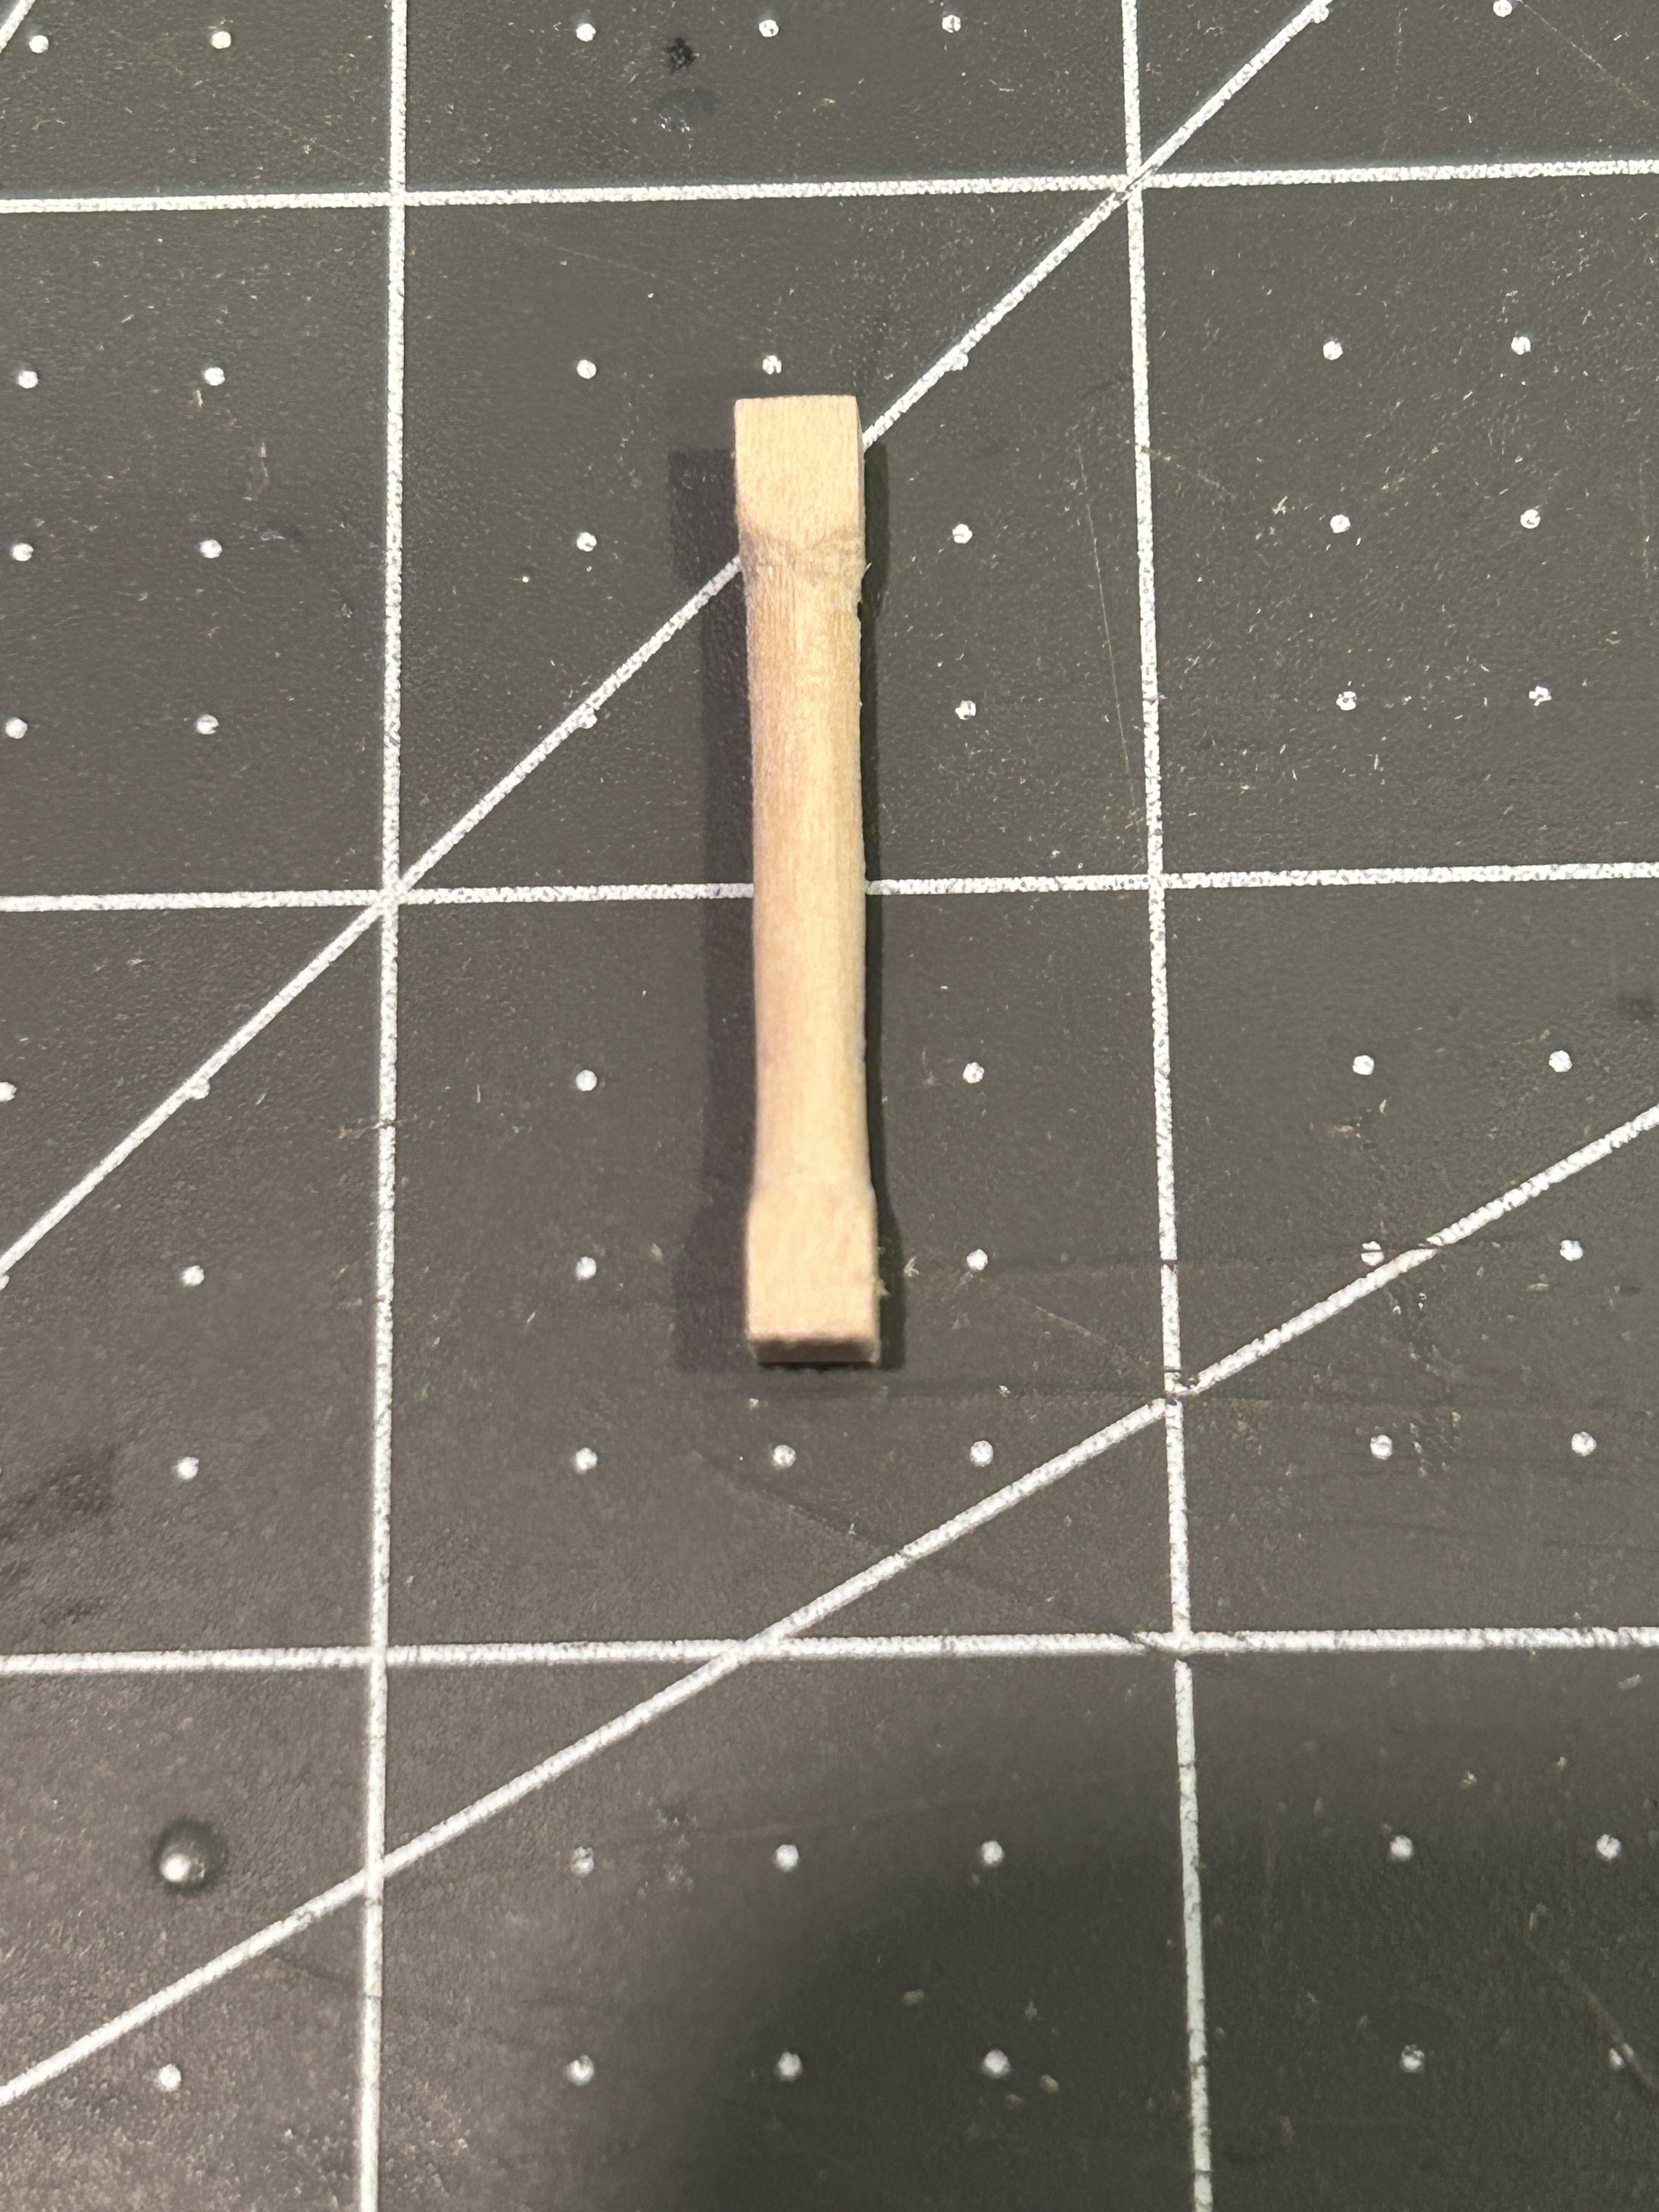
When I built my first model, my craftsmanship was not great. I did a little better on my second ship, but on this build I really want to focus on the craftsmanship that goes into the build. I really want everything to fit together well and I need to be more careful with the CA glue to minimize the glue stains. One of my concerns was in the instructions, Occre has the varnish being applied to the interior decking of the hold after the beams that support the next deck are installed. I like to use 2 coats of shellac with a sanding using steel wool after each coat. The thought of trying to sand the interior planking with the beams and the four posts in place seemed like it would be a struggle. The challenge that that created was the plank just below the beams is placed based tight against the beams and without being glued in place I had to figure out a way to clamp them securely while placing the plank. I didn't take any pictures of how I clamped the beams, but I will on the next level and post them then. The four posts that support the beams are fashioned from 4 x 4 mm lime wood. I used a round file to create the transition from the square to the round section. After knocking off the corners I use sandpaper and sanding sticks to round off the middle section. I generally don't use PVA if I can't clamp the parts in place, but for the posts that support the beams I used PVA because I didn't think I could get them in place with out getting glue all over, so I used PVA so I could easily clean up the excess glue. I used CA to attache the planks to the frames and as part of improving my workmanship I focused on not getting and excess CA on the visible part of the planking. I am pretty happy with how this turned out on this section. I also needed to cut two planks a little narrower than the 5 mm material supplied to get a nice tight fit. I am really happy with how it all fit together. The finish on the beams and the interior planking is two coats of shellac with a sanding using steel wool after each coat. I really like the finish I get using steel wool, but I hate how messy it is to work with. I have tried various grades of sand paper and Scotch Bright pads, and I just haven't found anything that creates the same finish, somewhere between flat and satin to my eye. I am curious if any other people that use shellac have any methods for getting a satin finish without using steel wool. It would be nice to avoid the mess. I think I am going to try to get the first two decks installed and then get back to my Diana for a while.
- 21 replies
-
- 4
-
-
- Santisima Trinidad
- OcCre
- (and 2 more)
-
Wow. Another fantastic model. I am amazed at the quality of your builds given the speed at which you build them. You accomplish in two months what would take me two years with incredible results.
- 66 replies
-
- 4
-

-
-
- Adder
- Vanguard Models
- (and 1 more)
-
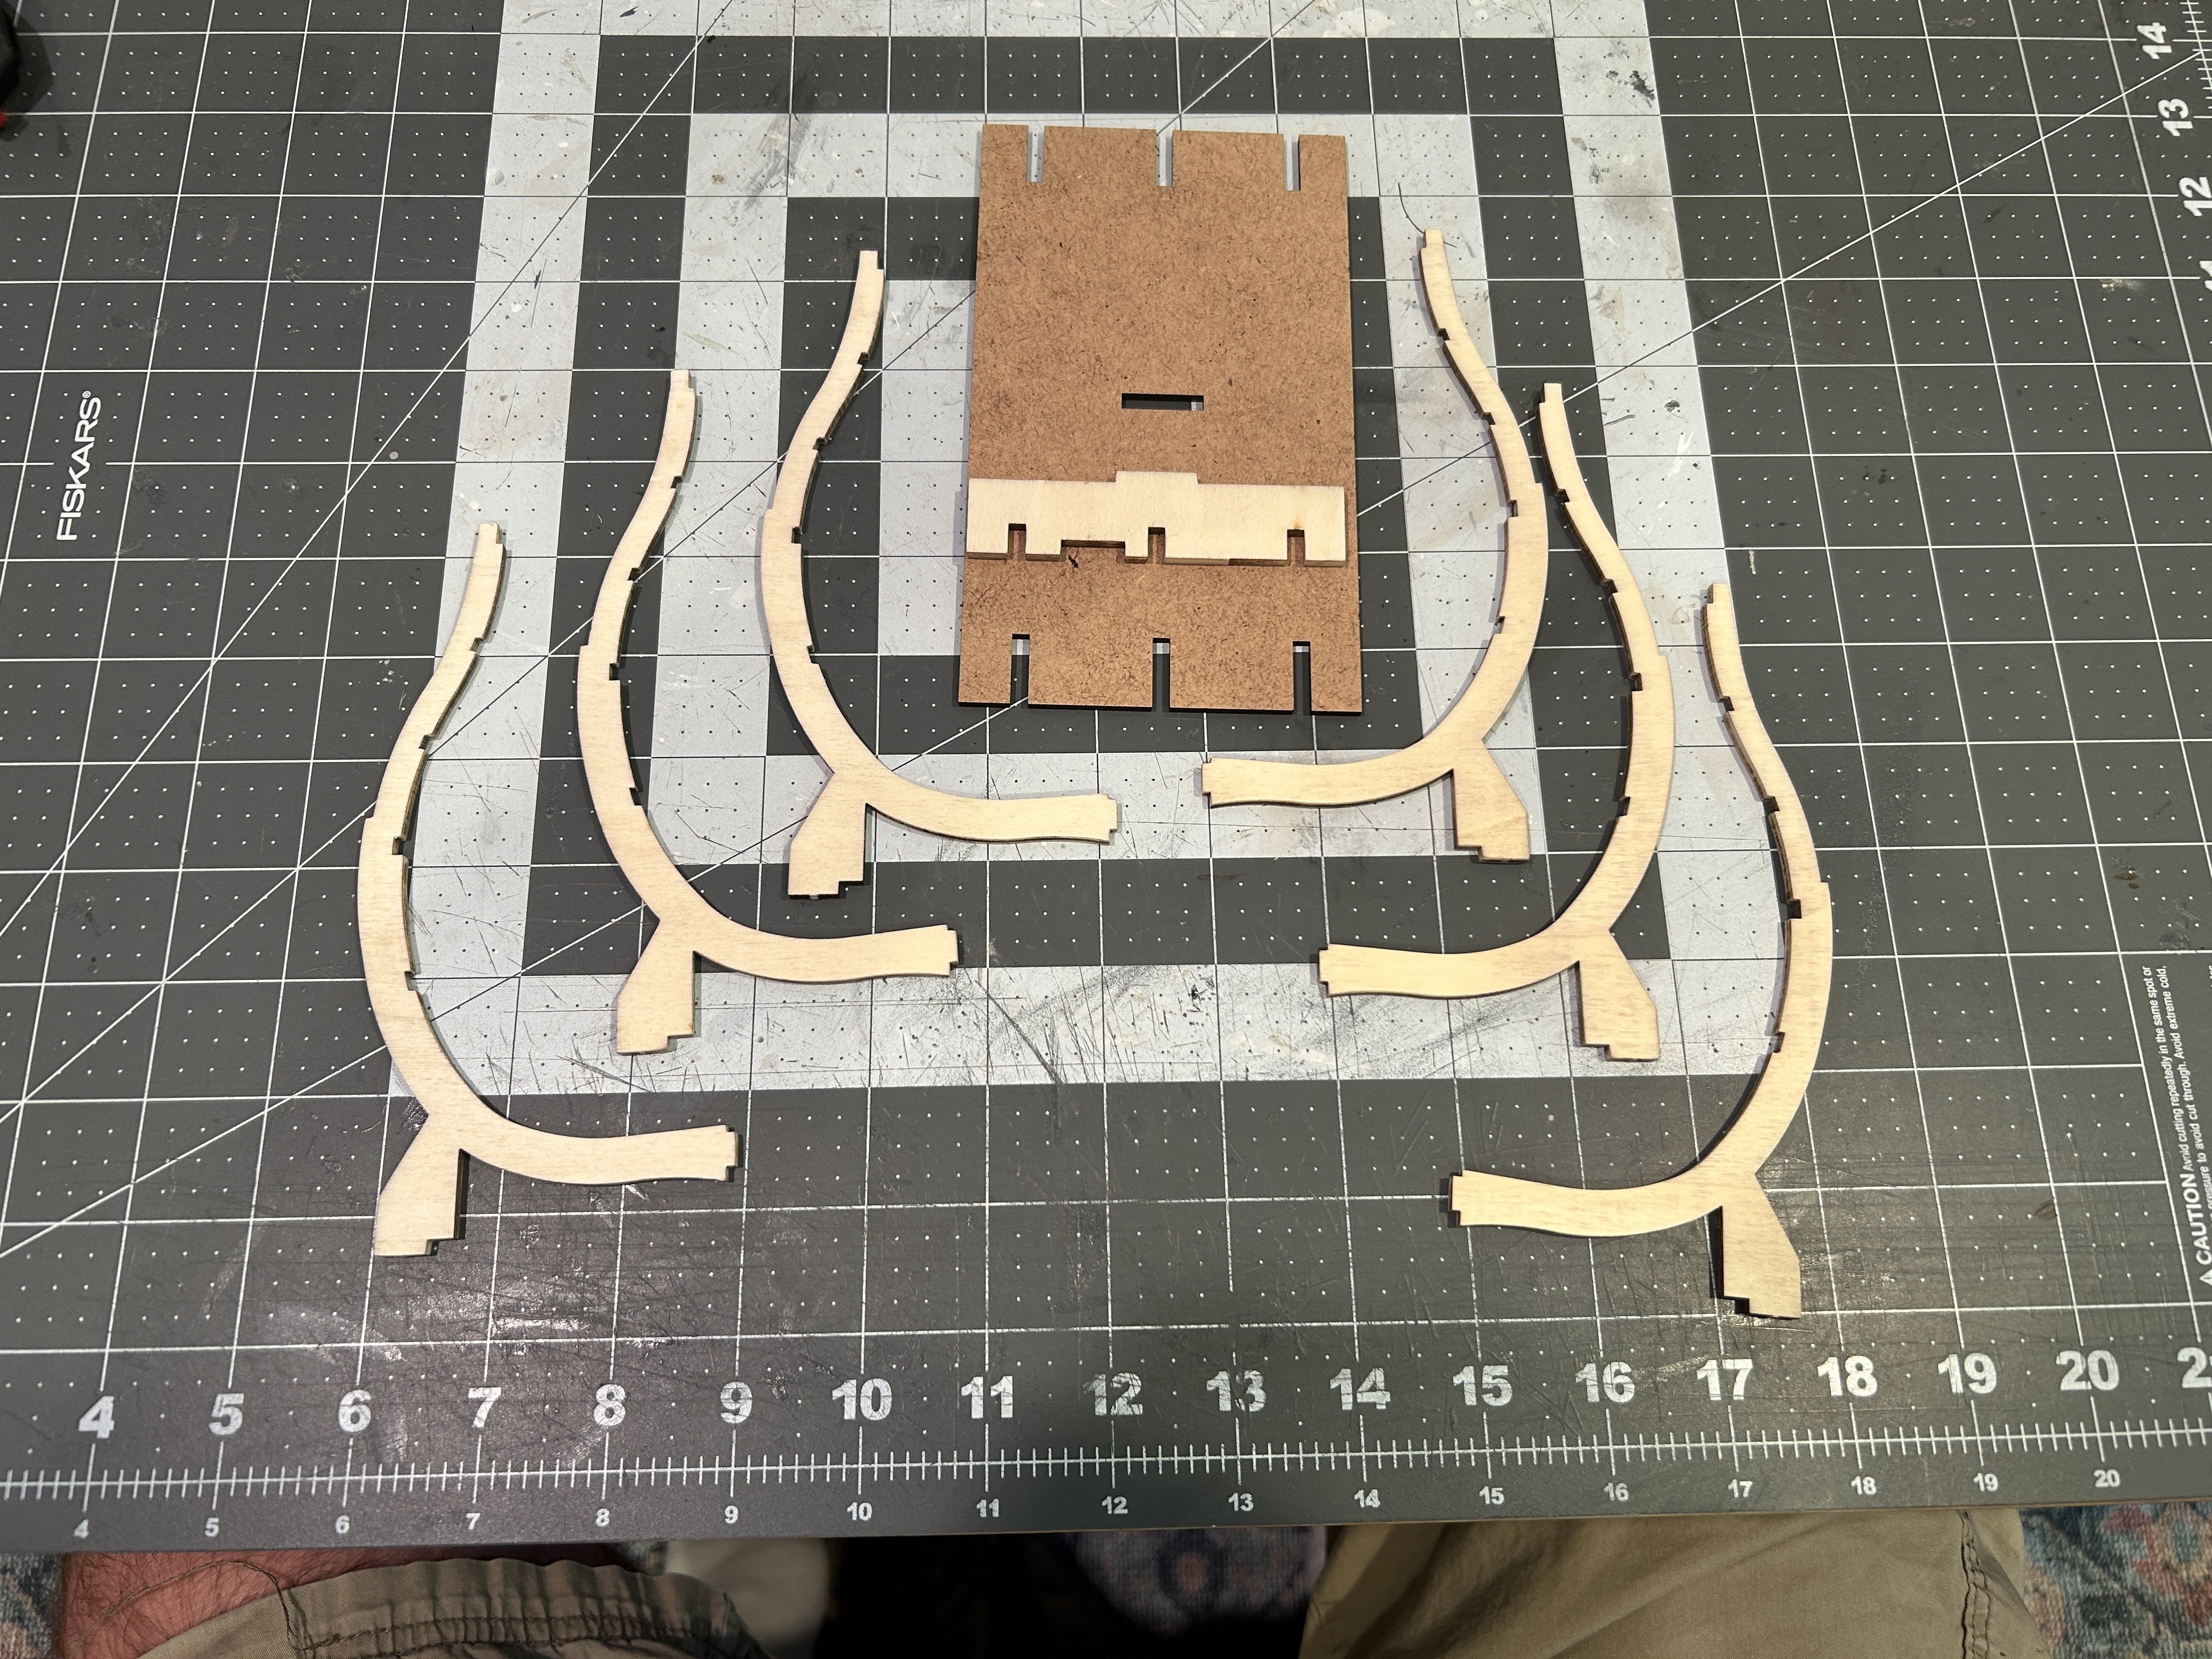
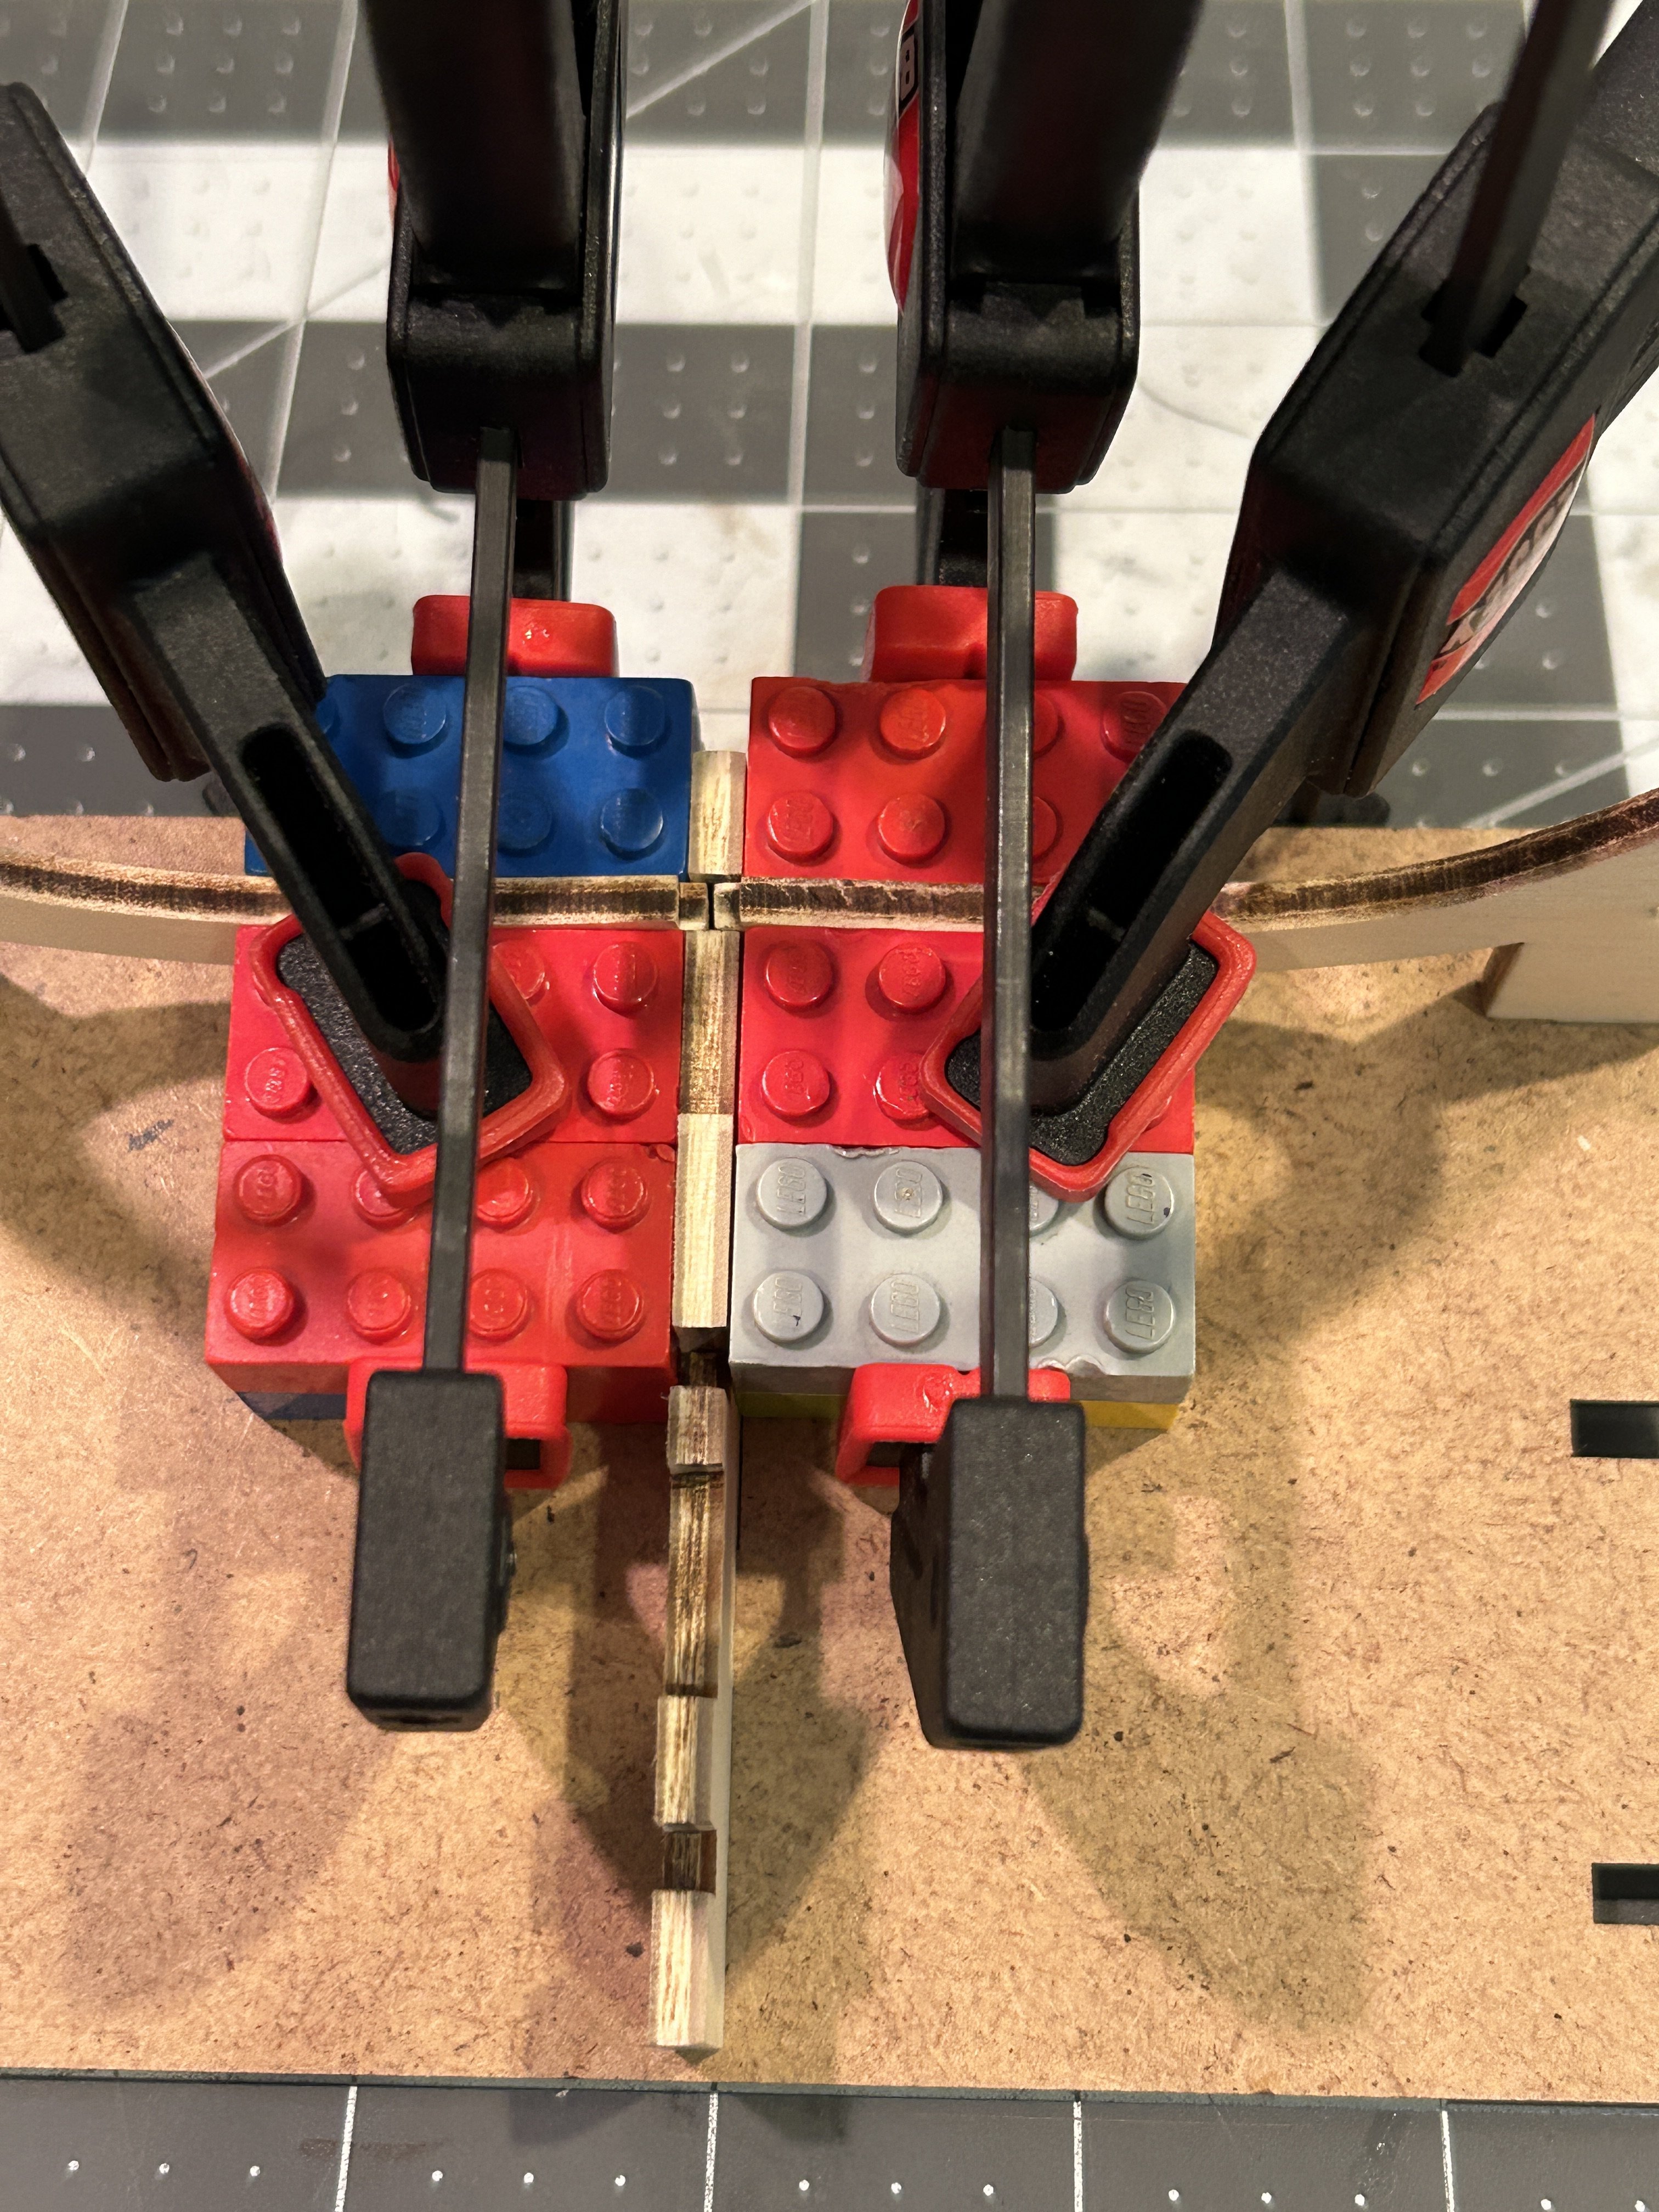
With a new shipyard, I decided to start a new model even though I am not done with my Frigate Diana. I will get back to the Diana soon, but I am getting started on my Santisima Trinidad. I feel like I am making some quick progress which is nice after feeling like the Diana was moving slow even before our move stopped work completely The Cross Section model is started on a building board that is not part of the final model. the "legs" of the frames are clued to the building board, but tab on the keel is only placed into the slot on the building board but not glued. the legs of the frames will be cut off when the interior planking is complete before the outer planking is added. The Occre instructions say to use the laser cut plywood piece for the upper deck as a guide to ensure that the frames are lined up properly when gluing the frames to the building board and the keel. Due to the loose fit of the parts I was very concerned that the frames would lean to one side. I decided to use my trusty Lego blocks and some clamps to make sure the two outside frames were square to the building board and to the keel, then I would use the laser cut plywood to ensure the the middle frame was properly spaced. After a lot of trial an error on some dry runs I settled on this for the two outside frames. The black clamps are holding the Lego blocks that are keeping everything square and the green ones are securing the frames to the keel. I used PVA for this due to the amount of time it took to get everything in place and that everything was clamped. My general rule of thumb is to use PVA when I can clamp effectively and CA if I need to hold it with my fingers. The middle frame was a little different. I used some string to keep the left and right frame snug in the keel slot and the green clamps to provide the downward pressure. I stained the outside of the the two outside frames since these will be visible on the finished model. I used a dark walnut stain. I actually mistakenly stained the inside of at least two of the frames also. I used the upper deck laser cut ply wood to ensure the middle frame was square.


- 21 replies
-
- 7
-
-
- Santisima Trinidad
- OcCre
- (and 2 more)
-
My shipyard is finally complete. I posted some pictures in the Shore Leave topic "So Where Do You Do Yours Then (Model Making That Is)". Next step on my current build involves blackening some brass parts, and my bottle of Birchwood Casey didn't make the move because the cap didn't want to stay on tight. Now that I have space I might get started on my next model until I get the replacement Brass Black.
.thumb.JPG.aa47daaa6ed8283d3fbfe3a5ba506a34.JPG)
- 142 replies
-
- 10
-
-
-
Your windlass looks fantastic. The mortises turned out great.
- 131 replies
-
- 2
-
-
- Medway Longboat
- Syren Ship Model Company
- (and 1 more)
-
Your half hull looks fantastic. You should be very proud.
- 82 replies
-
- 3
-
-
-
- half hull planking project
- half hull
- (and 2 more)
-
Working with blackend brass.
RossR replied to SiriusVoyager's topic in Metal Work, Soldering and Metal Fittings
I think your concern about damaging the blackened finish is justified. Sorry, I don't have a good solution to recommend. Is there any other way to attache your dead eyes to the wire that require less bending after the wire is blackened? -
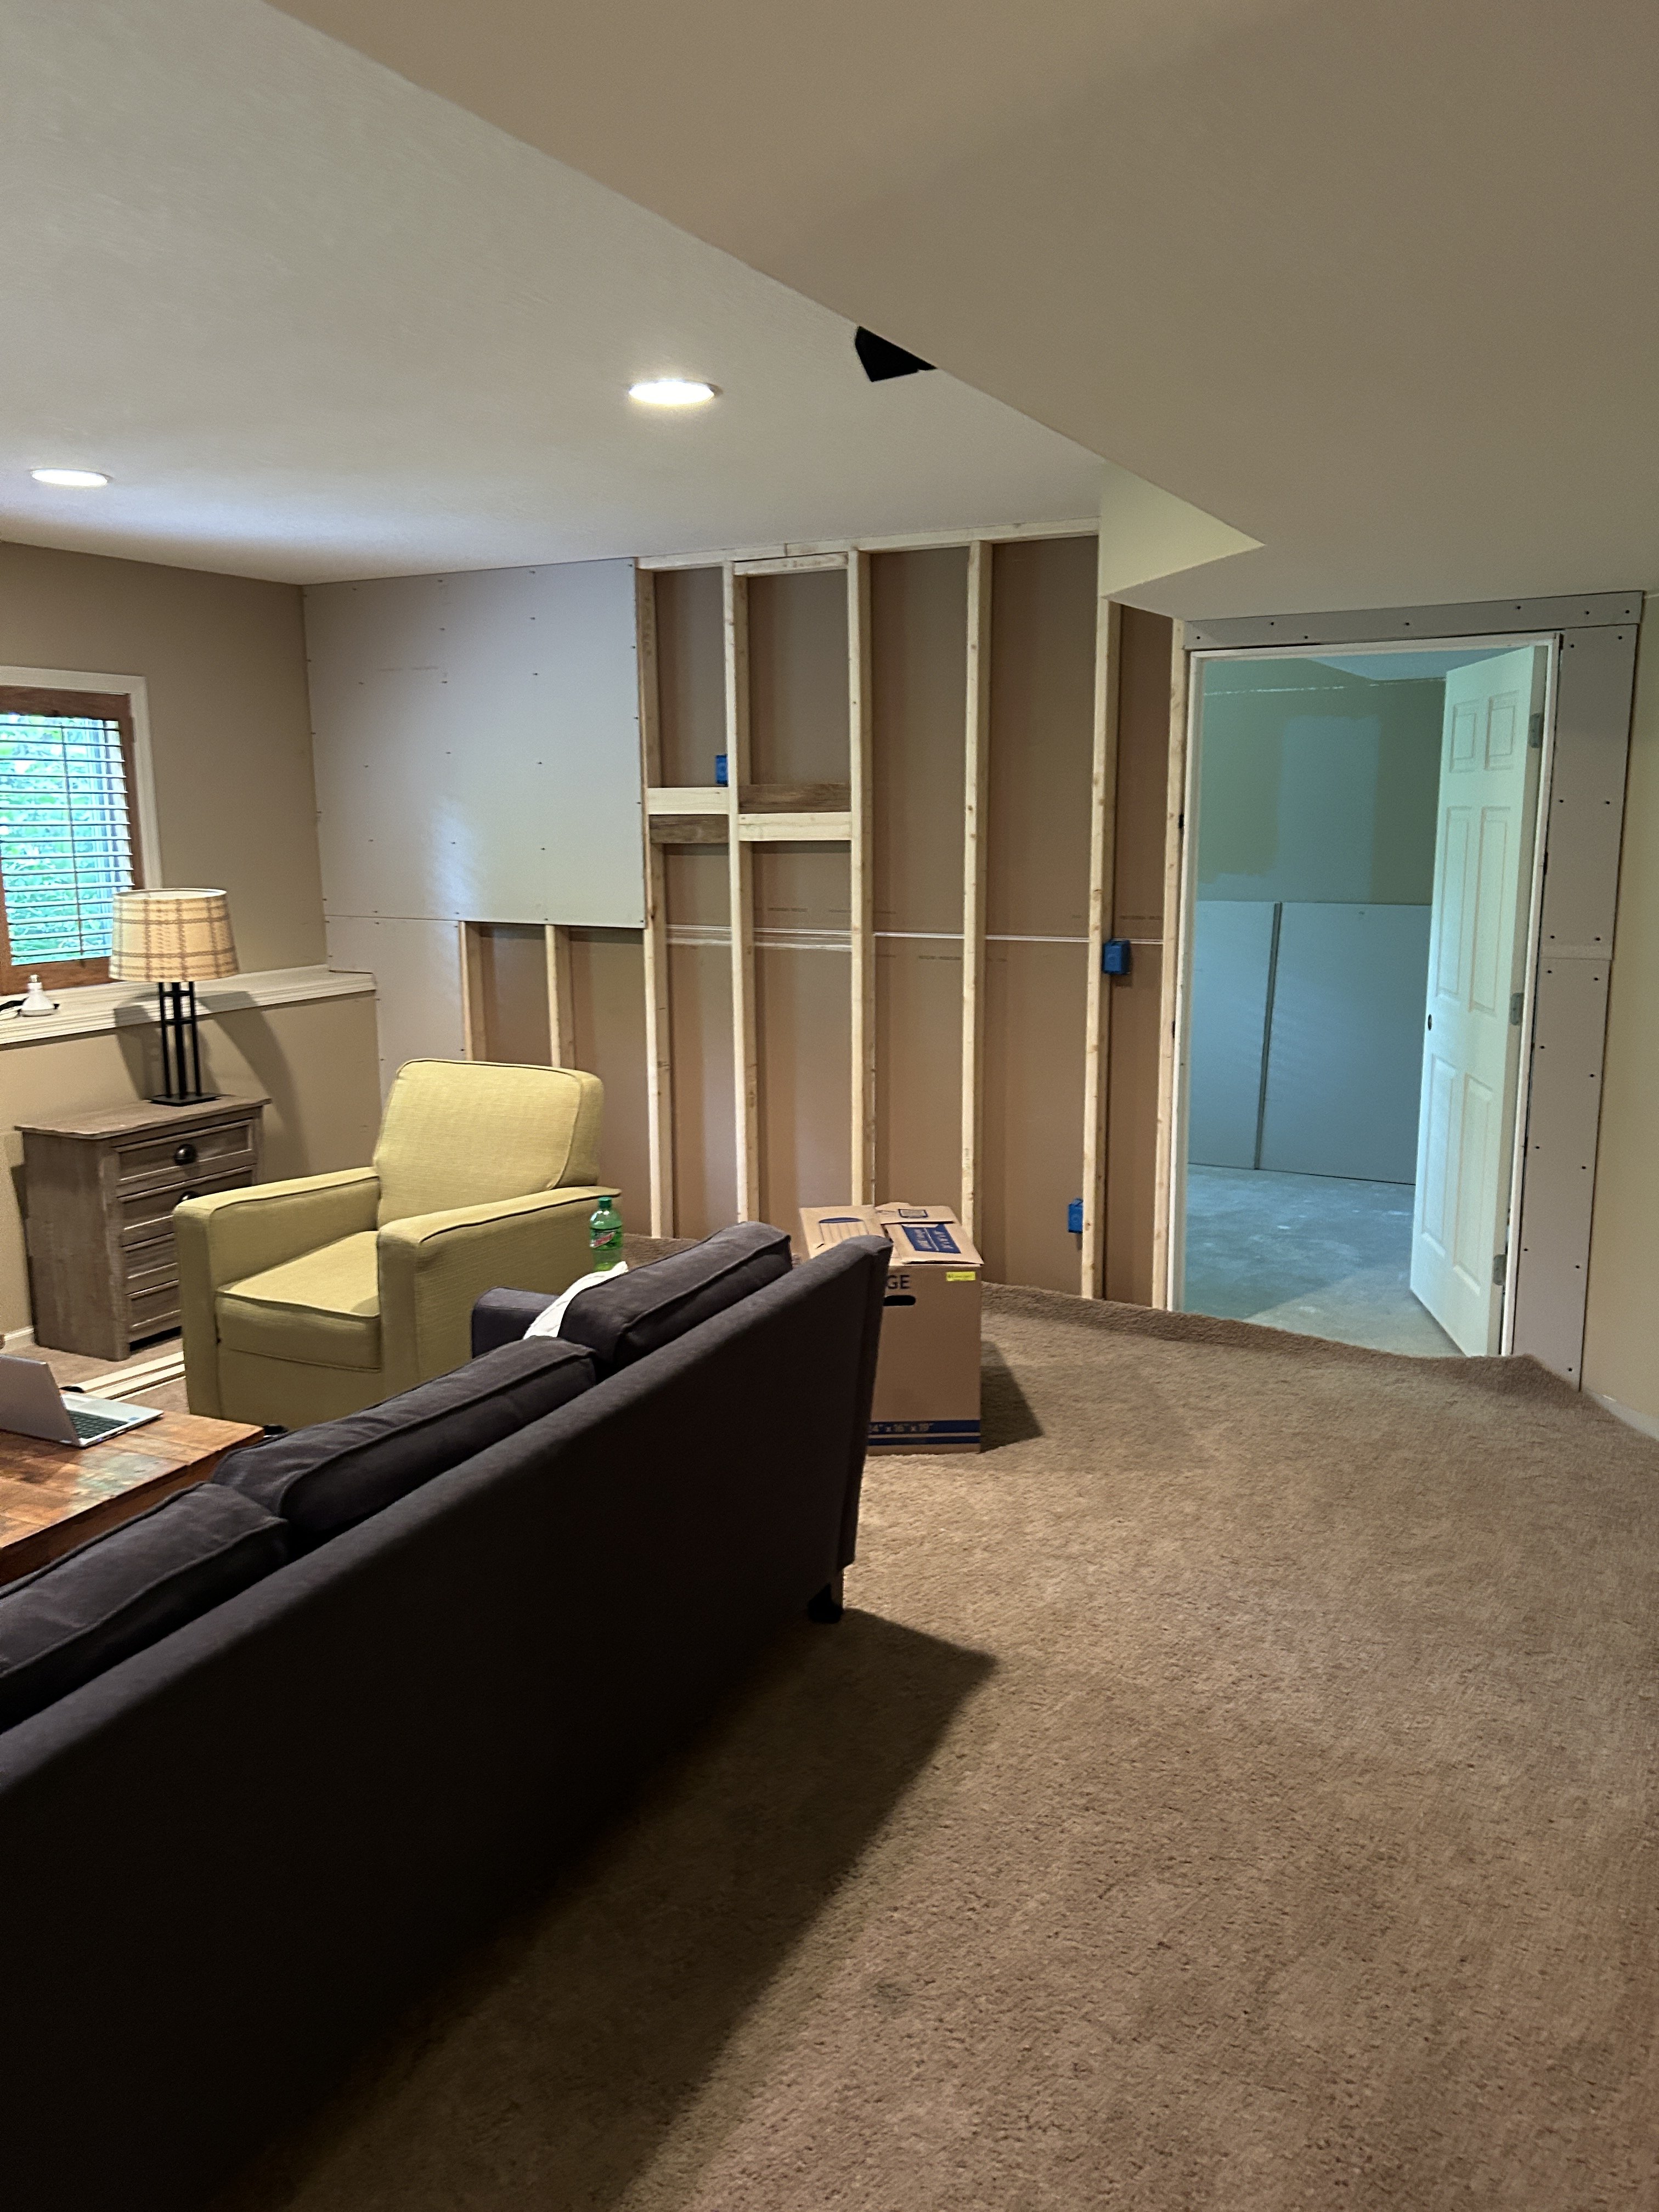
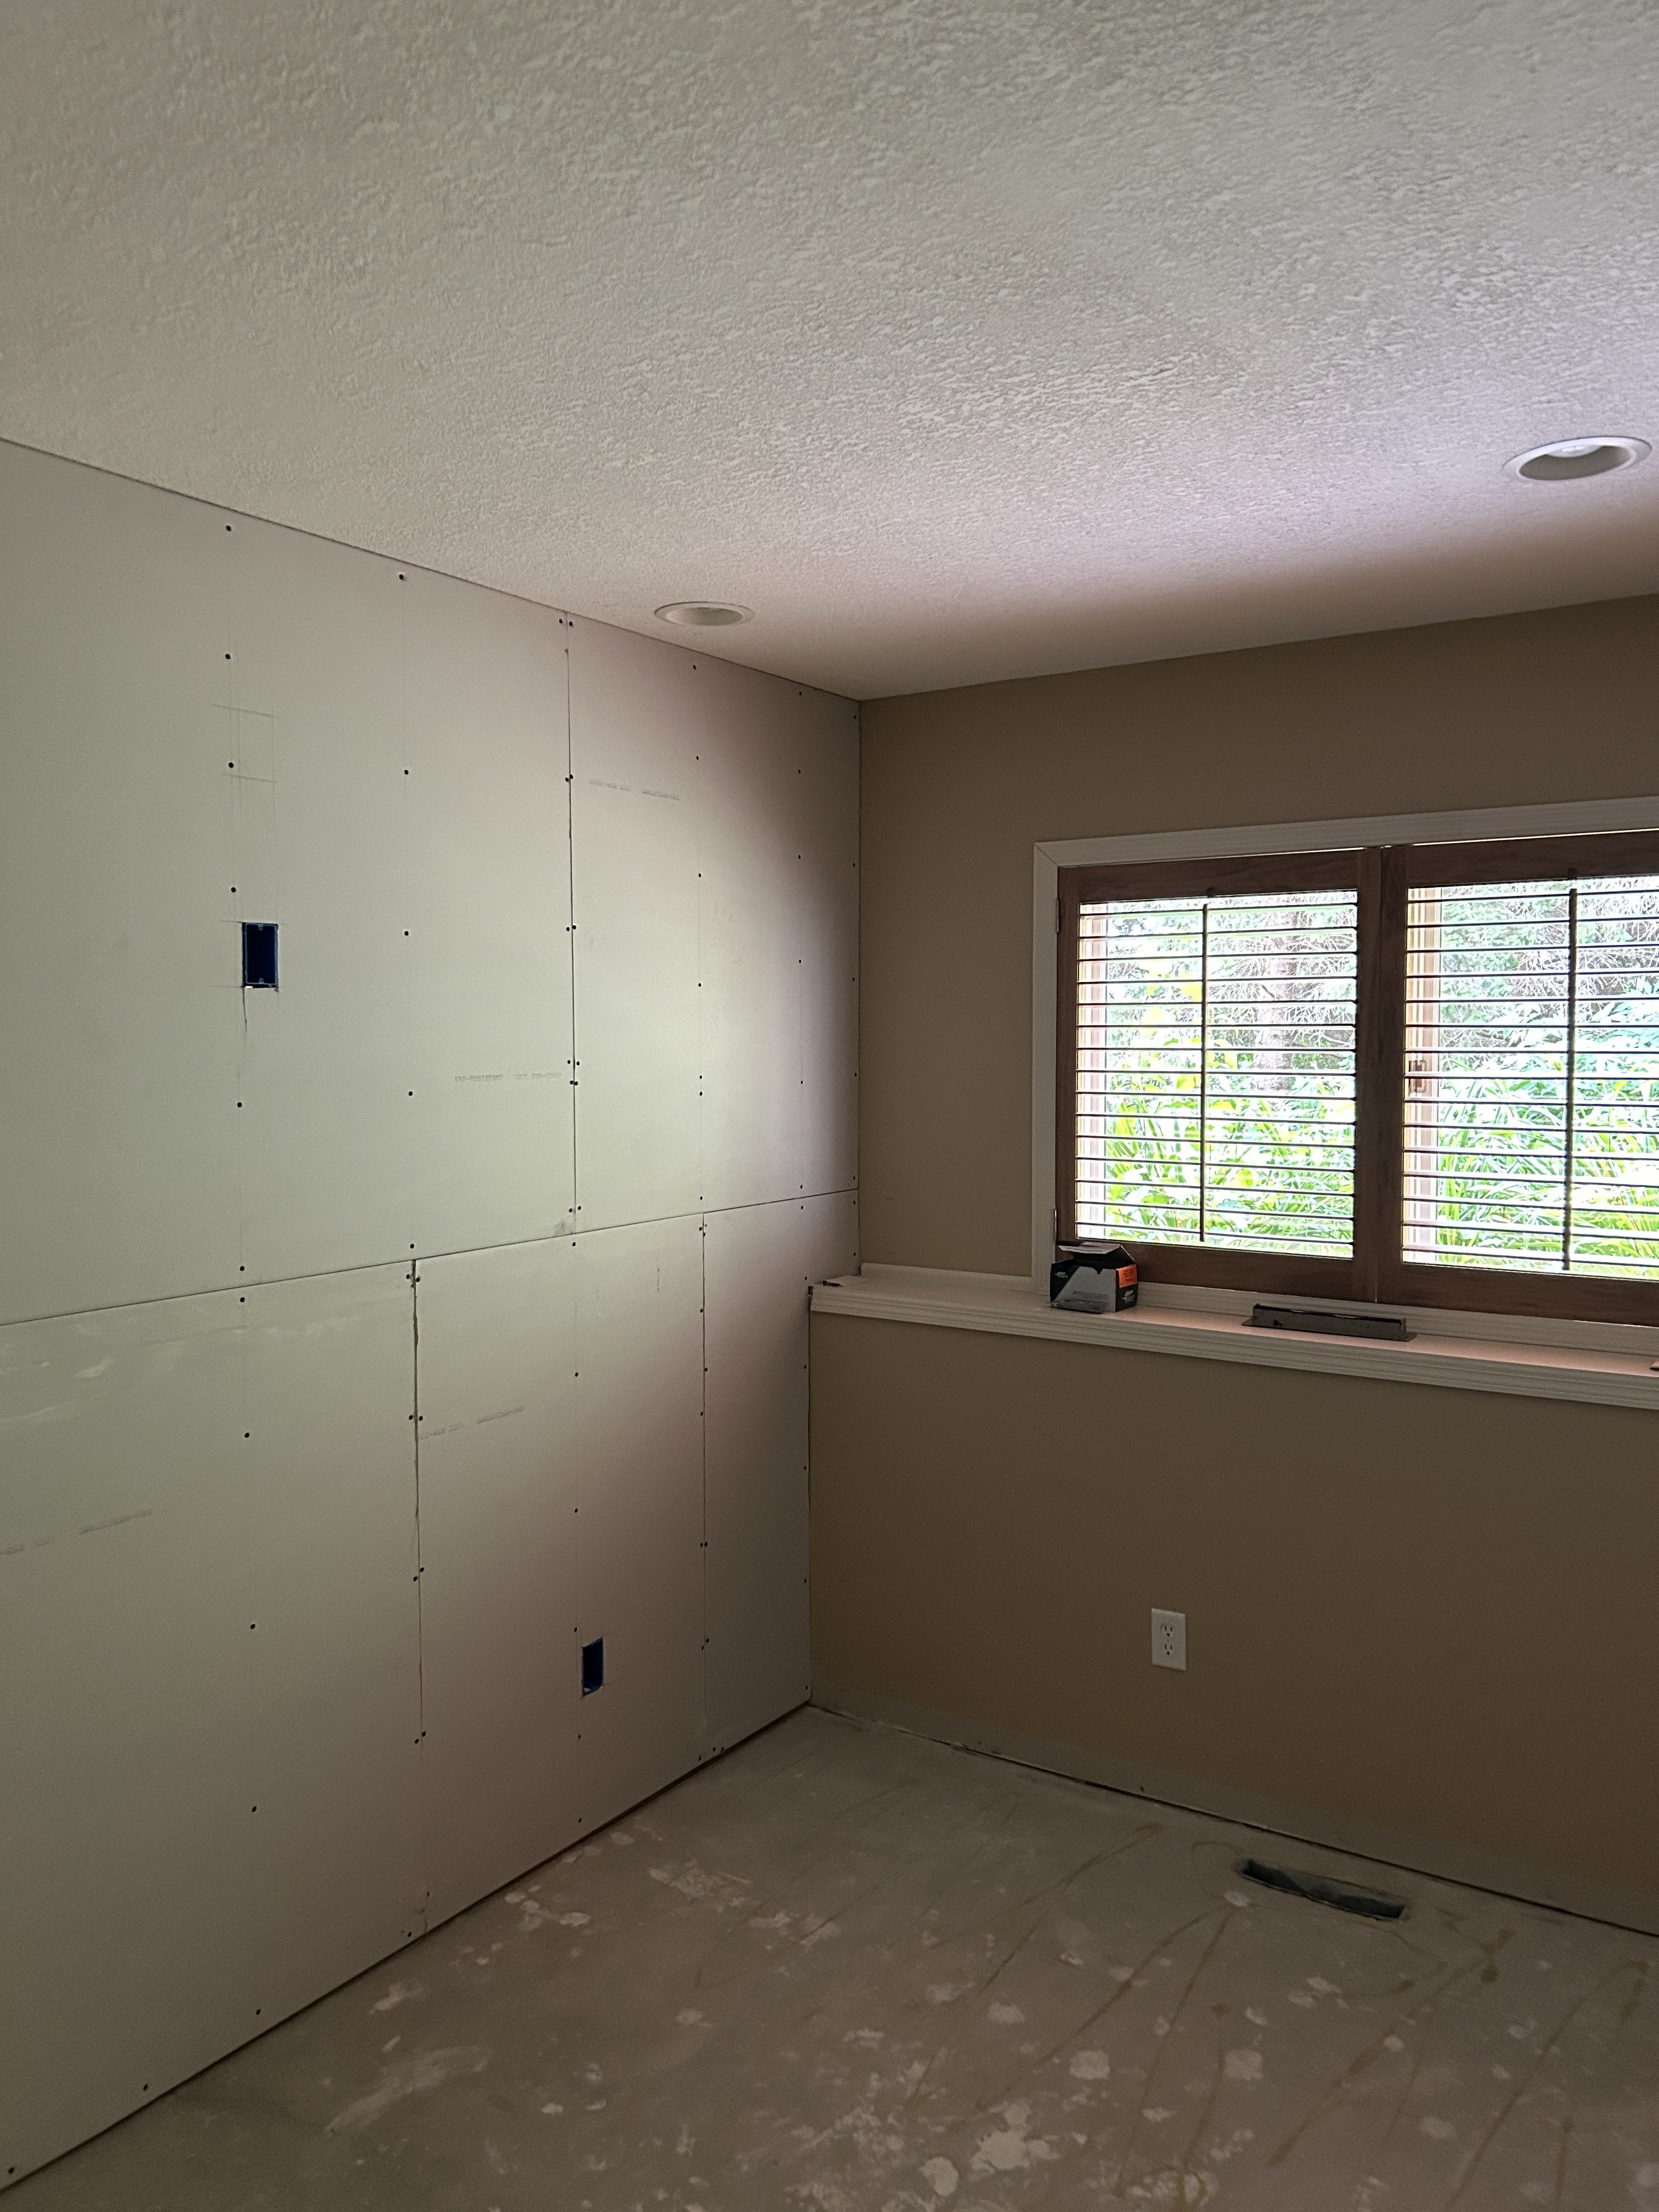
We have been in the new house for a couple weeks. I haven't unpacked my HMS Beagle (complete) or the Frigate Diana (in progress), but I think they survived the move with little or no damage. I think I lost a few rope coils on the Beagle, but those can be replaced easily. The move was only about 15 miles and I drove them myself after carefully constructing the correct size box and creating a soft bed for them to sit in. Now the part that is more fun. Instead of re-purposing a bedroom upstairs we decided to put a wall in an oversized basement family room to create a new shipyard. The room will be about 9 x 13. It will accommodate the two workbenches I had before plus I am going to add a tool chest that will house supplies and tools. There will be enough room left over for a comfy chair for times that I just want to sit and watch a soccer game on the TV. The wall is framed and partially sheet rocked. Waiting on an electrician to move some lights and install the outlets in the new wall. It will have a vinyl planked floor, so no more losing small pieces in the carpet. It will be a few more weeks before I am back to the build, but the end is in sight.


-
Glad to have you on the forum. There are many first time builds from Occre on the site, especially HMS Beagles.
-
Your work is fantastic. The job boom net is on another level. Makes me rethink what is possible. Thanks for sharing your build.
- 419 replies
-
- 2
-
-
- Victory Models
- Pegasus
- (and 2 more)
-
If you are a member of the NRG, there is a virtual session on Saturday on making sails with silkspan. They will probably have info on where to get it.
-
Thanks so much for providing so much detail on your process. This really makes the process clear.
- 82 replies
-
- 4
-
-
-
- half hull planking project
- half hull
- (and 2 more)
-
If you are building the Occre HMS Beagle follow the order in the instructions. I think they have it broken down to about twelve steps.
-
I use this magnifying light Menard's. It comes with a 3x and 5x glass. It isn't supper easy to change the lense, but I find for me the 3x is enough. The light has 3 brightness settings and can be changed from a warm to a cool color light. https://www.menards.com/main/lighting-ceiling-fans/indoor-lighting/lamps/desk-lamps/patriot-lighting-reg-apollo-integrated-led-magnifier-desk-lamp/tt0034/p-1539153039752-c-1531402259058.htm?exp=false
-
Life is getting the way. Progress on the ship has stalled. My wife and I are moving in early July and have some projects at the current house that are needed and we need to get packed. After the move it will take me a little time to get the new shipyard put together. I will post some picks of the work on the new shipyard when I get started. Hopefully I am back to the ship sometime in August.
-
I thinks most people use diluted PVA glue or diluted varnish. I have tried both and prefer diluted varnish. I found the diluted PVA doesn’t soak in as well.
-
Great model. Looking forward to seeing what’s next from you.
- 95 replies
-
- 1
-
-
- flirt
- vanguard models
- (and 1 more)
-
Beginner looking for advice on first kit
RossR replied to O-Nurse's topic in New member Introductions
I am going to give a different perspective on the cost. I have two hobbies. Golf and model ships. I spend $60 on a four hour round of golf ($15 per hour) and I spend $300 - $400 for a ship kit that I spend 500 - 1000 hours building (yes I am not very fast). Add $200 for some basic tools and that works out to less than $1 an hour. You certainly don't need power tools to build a kit. I have spent some money on some tool upgrades, but those are nice to have and not need to have items. The money an individual spends on tools can vary greatly, but there is no reason you can't get the basics for a couple hundred dollars. The only power tool I don't think I could get by without is a power drill that I use when tapering a dowel for a mast or yard.- 21 replies
-
- 10
-
-
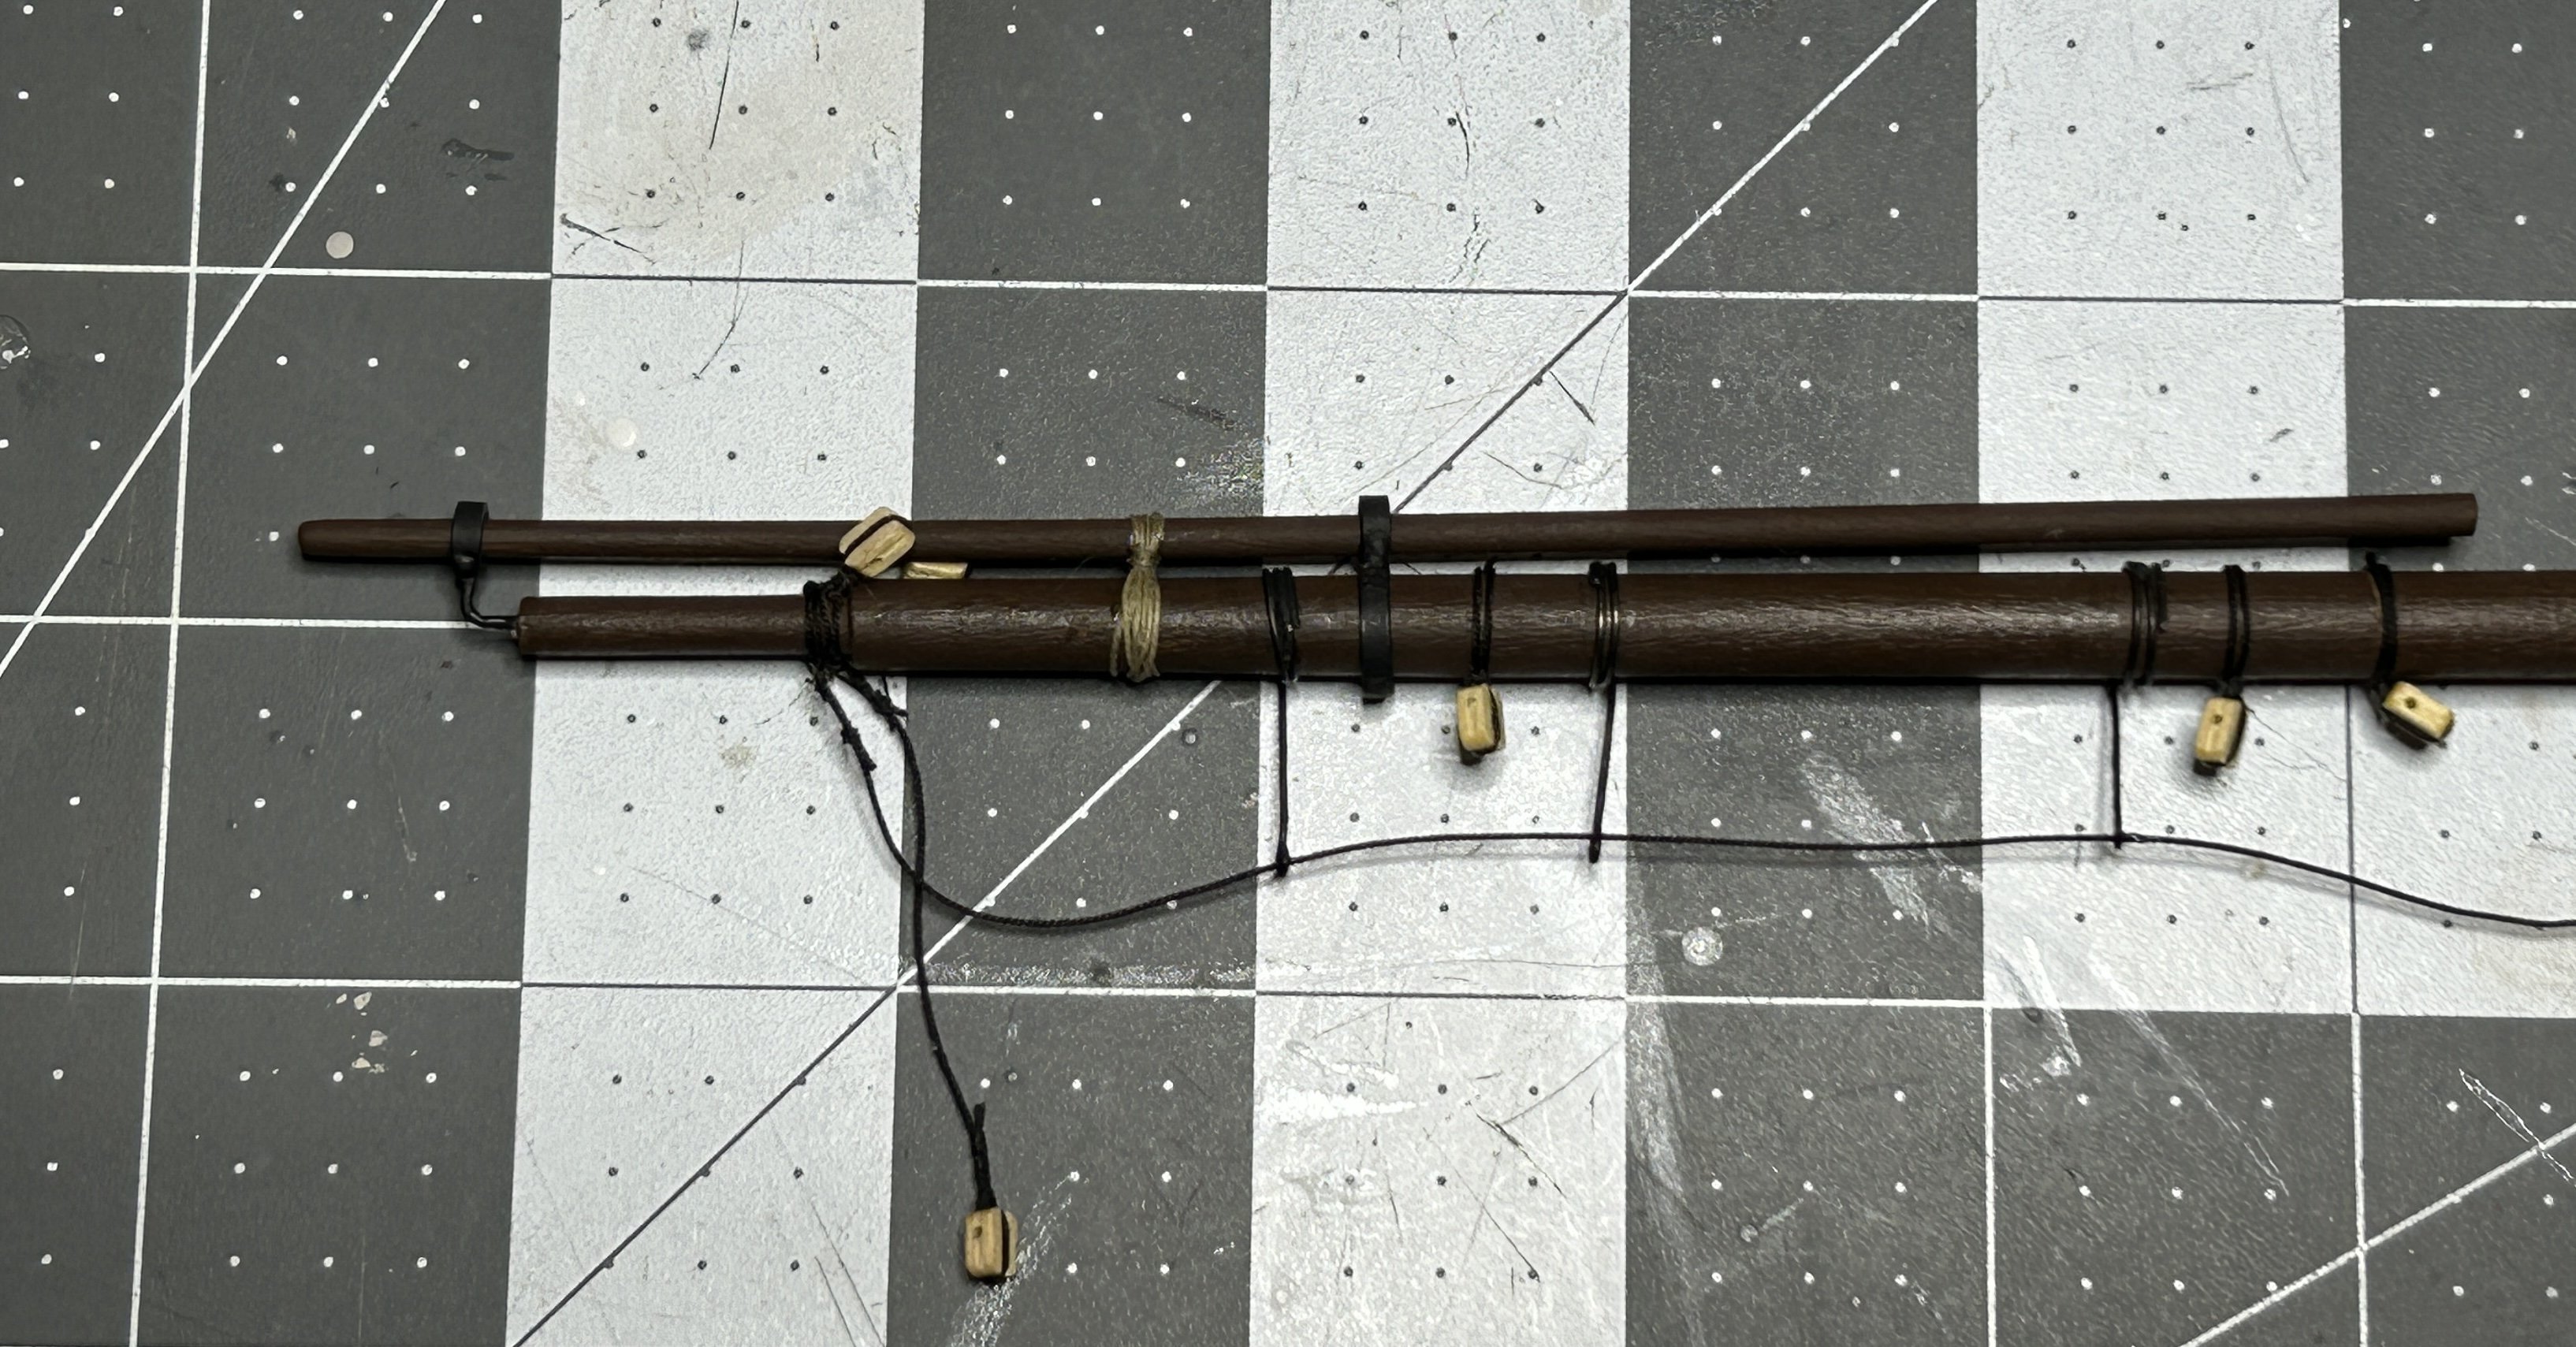
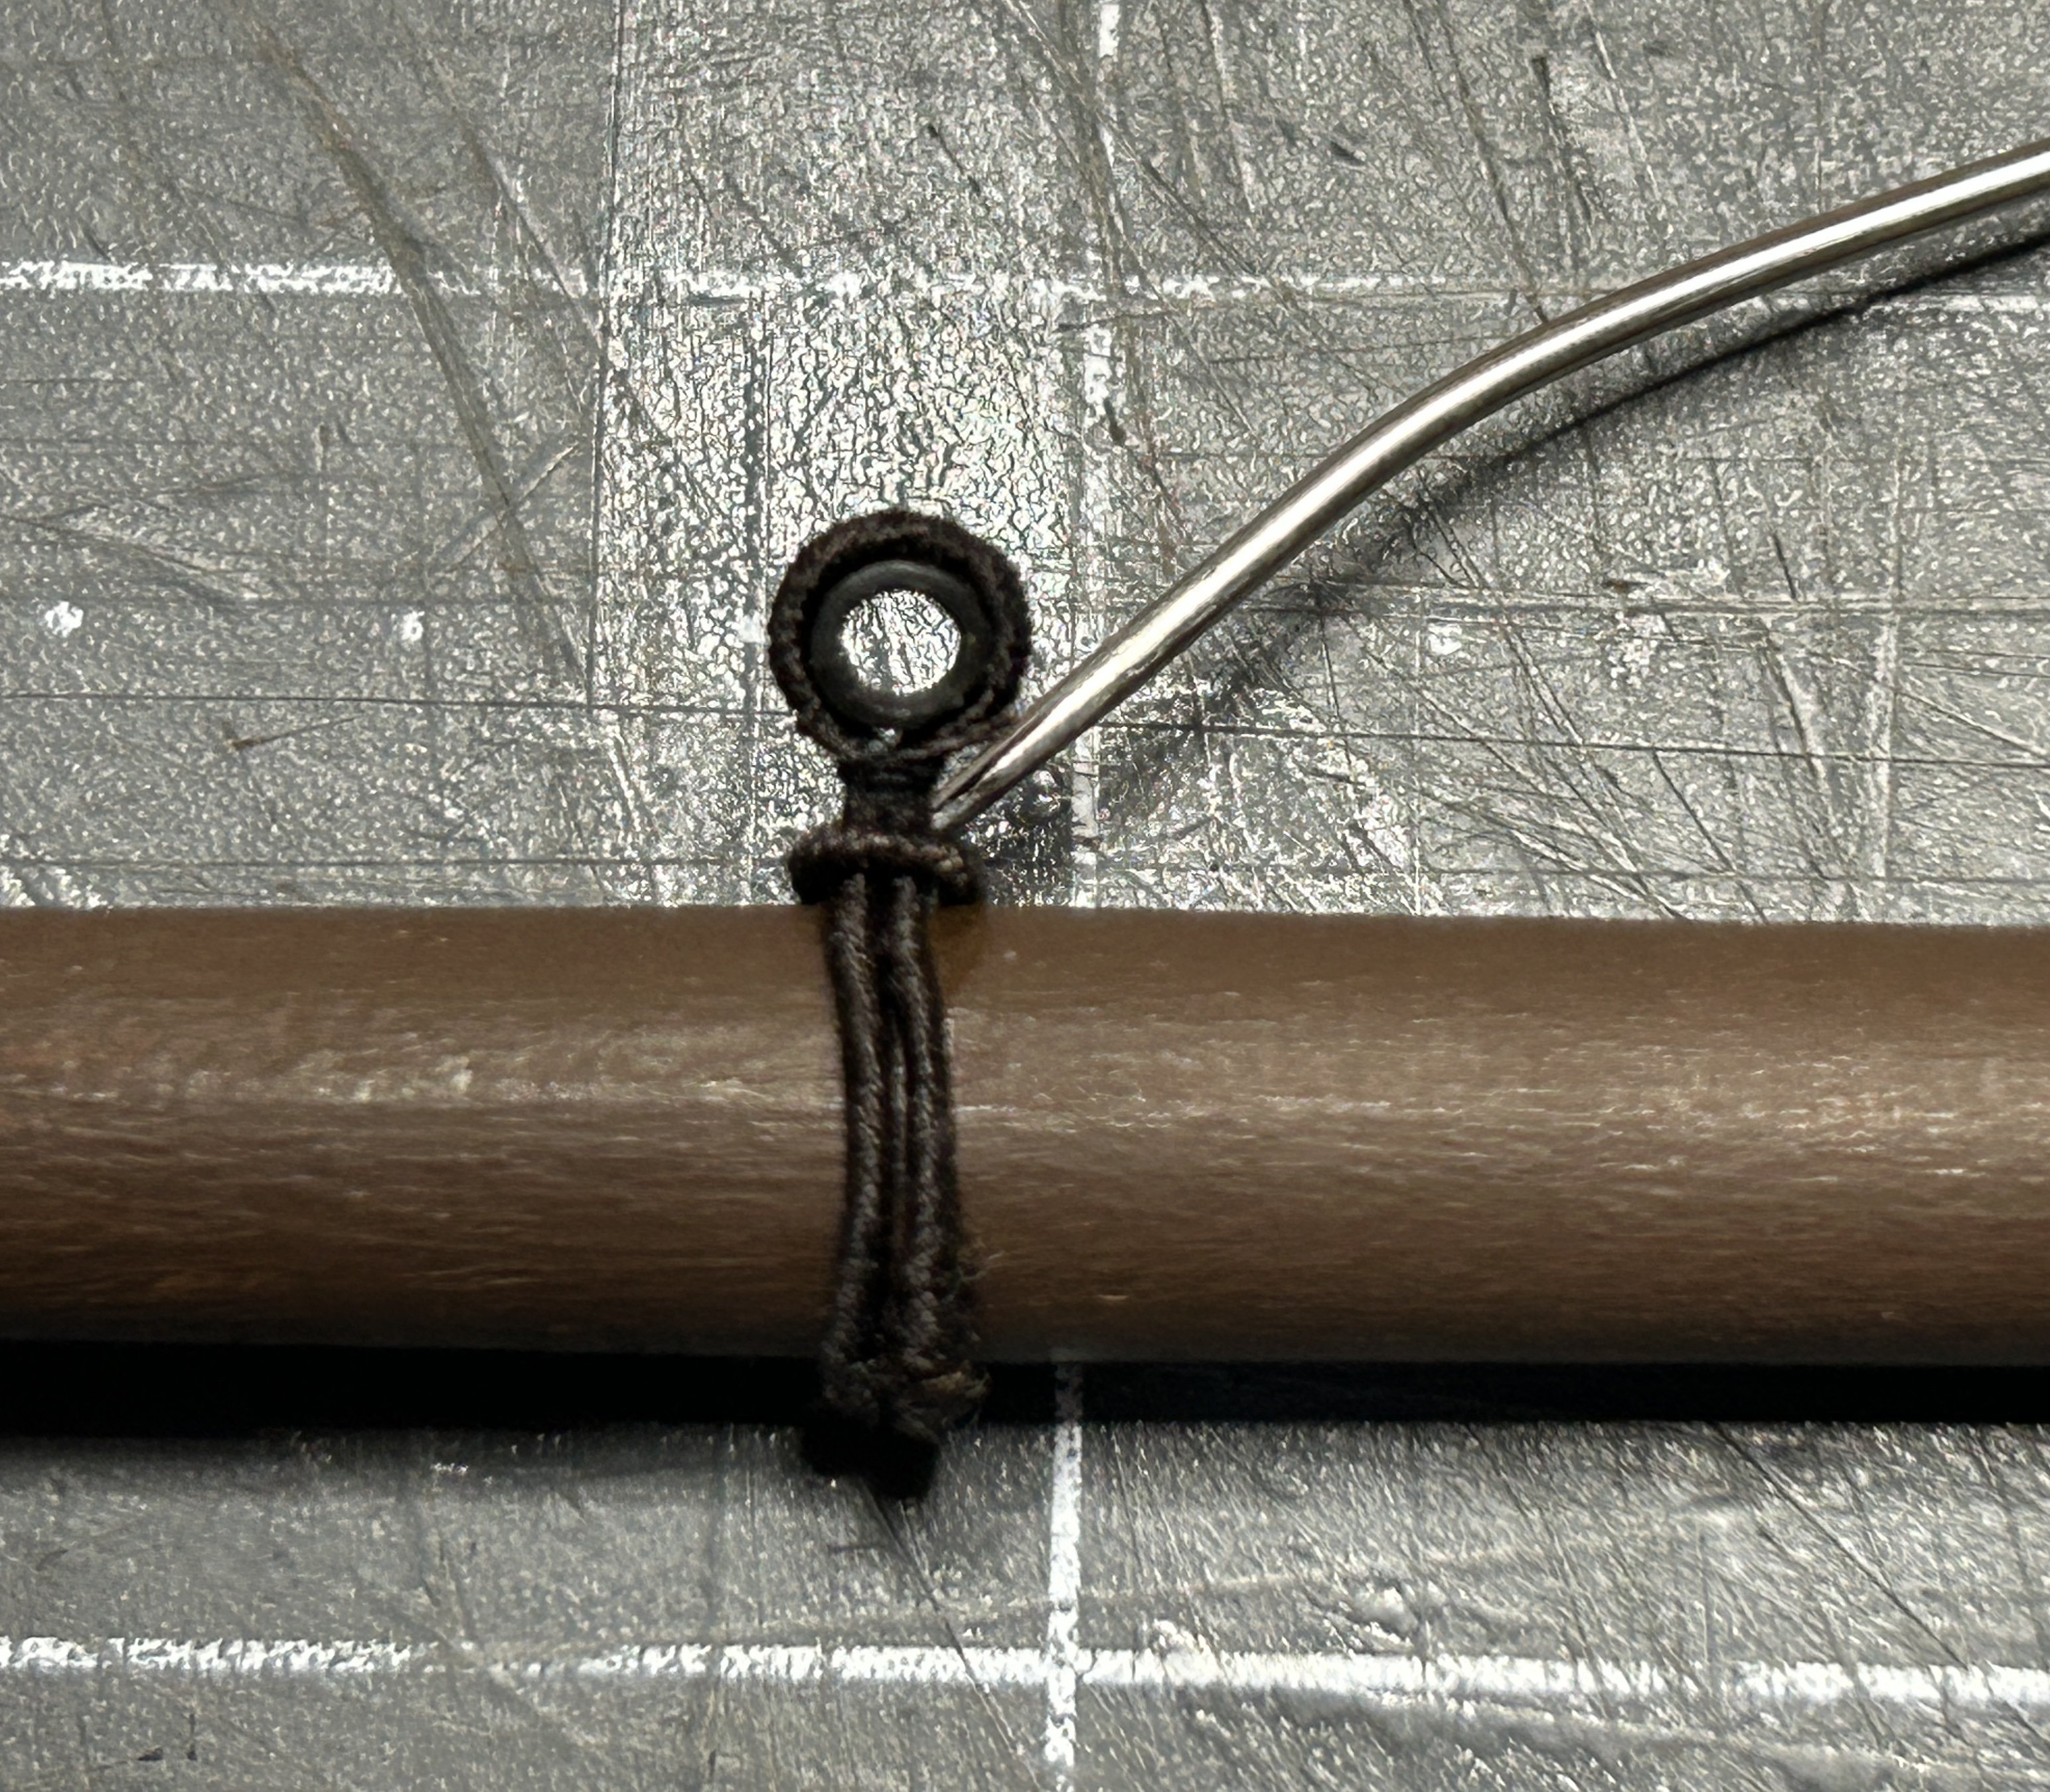
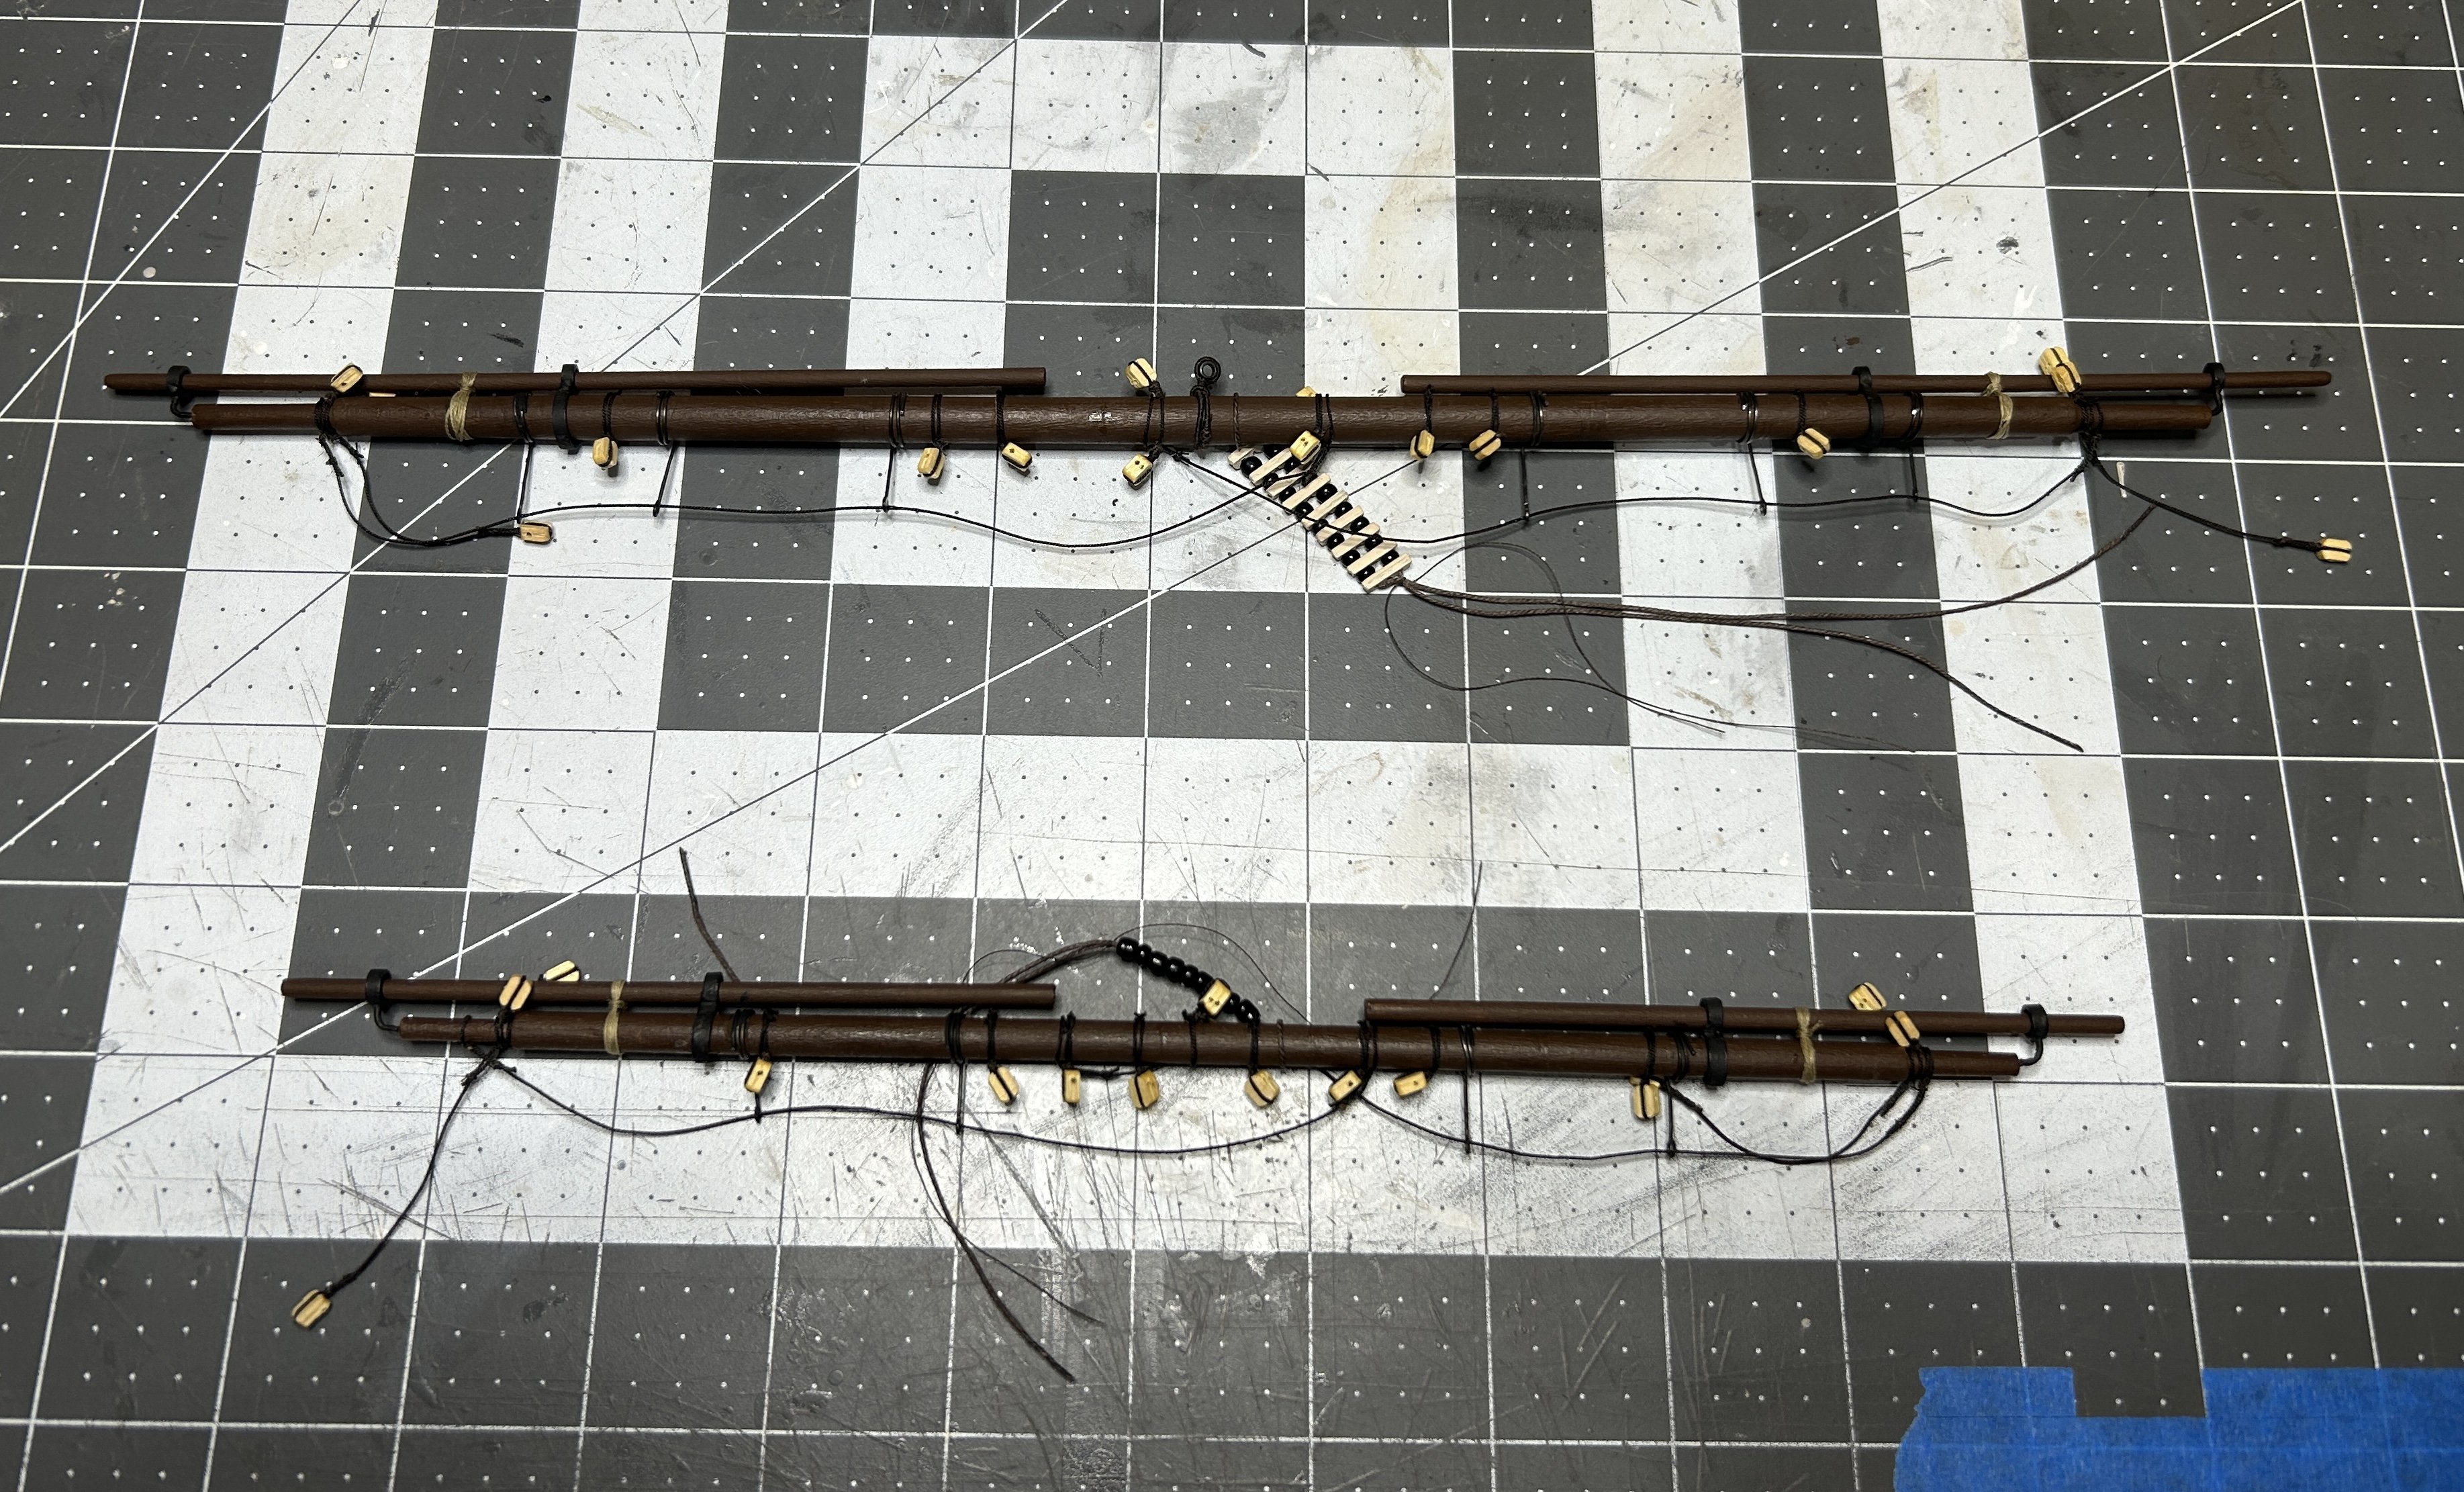
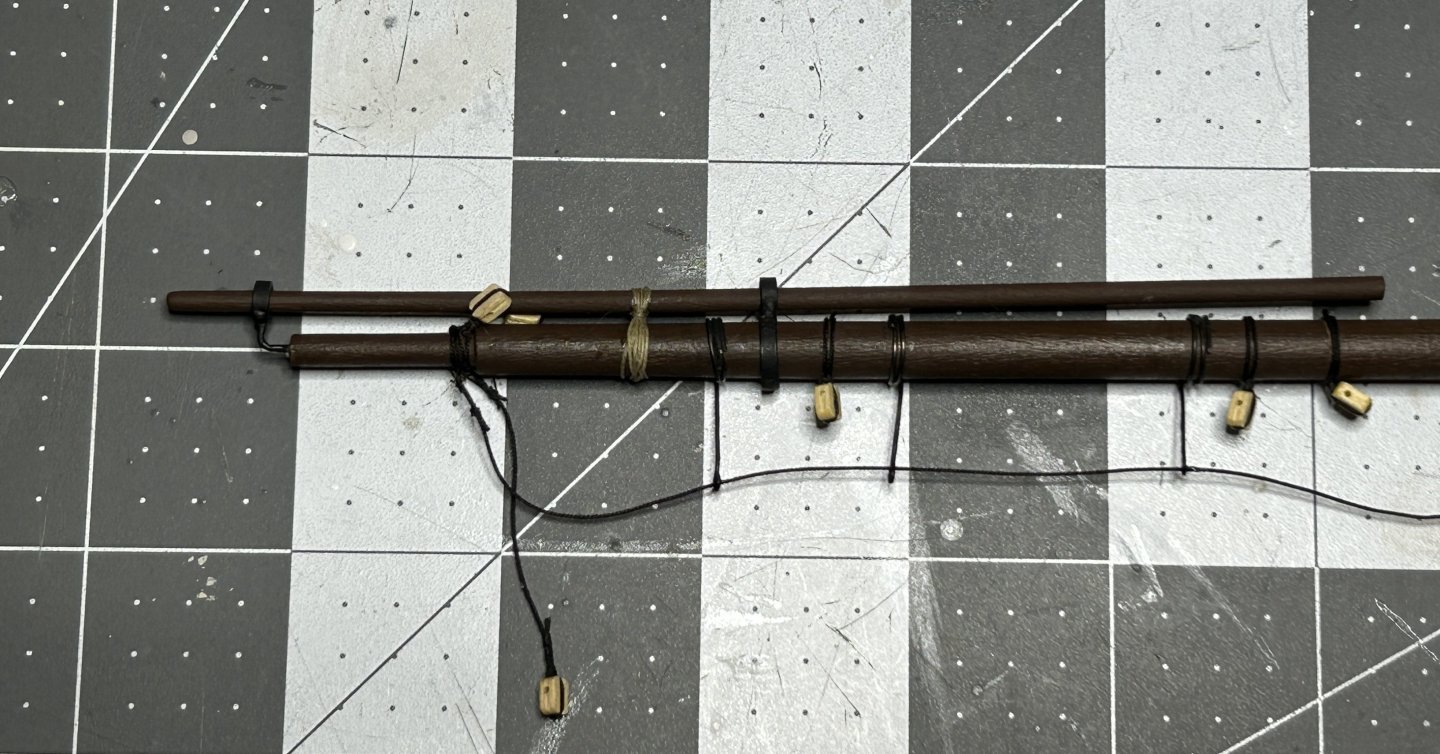
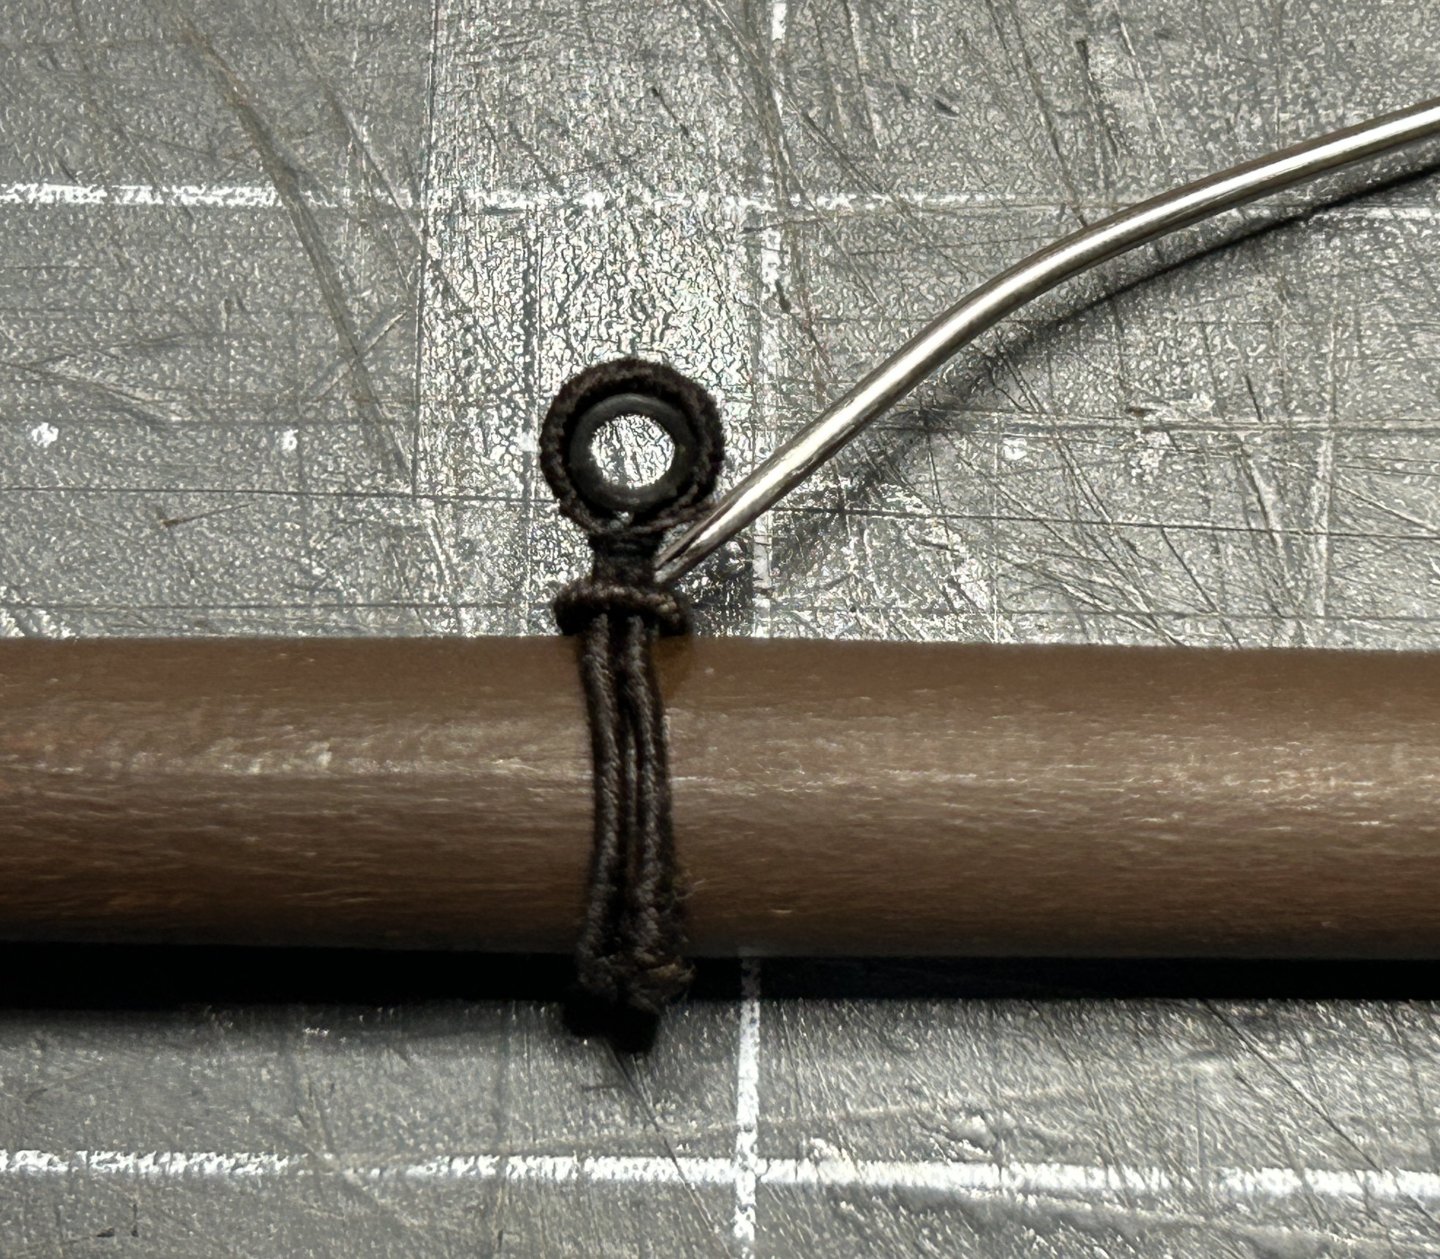
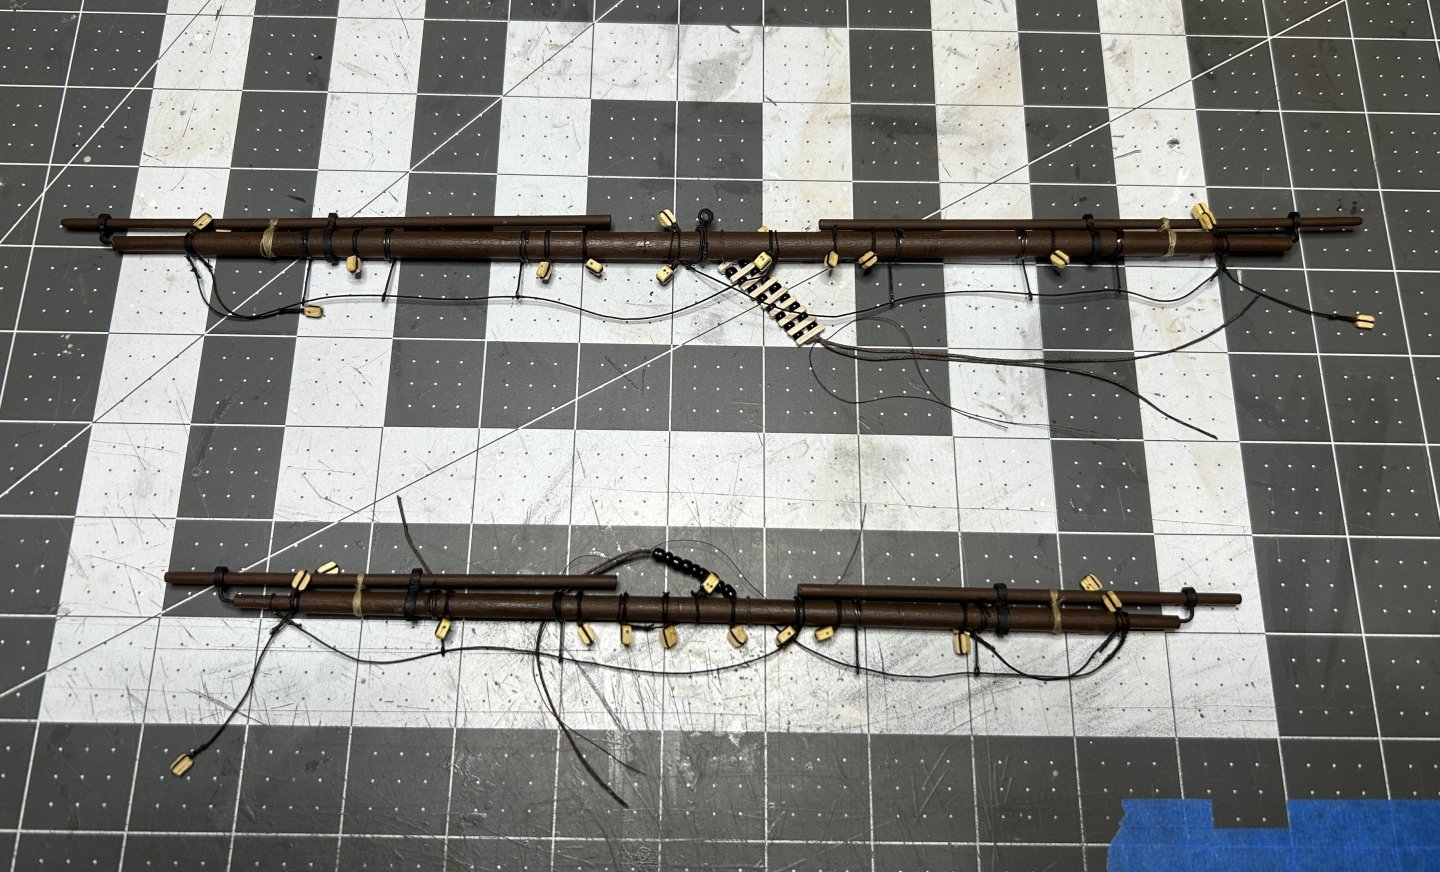
I have the main top yard and the main yard completed. These were similar to the top gallant yard except with the addition of the stuns'l booms. I deviated from the Occre plans a little with the brackets that hold the stuns'l booms. As I have on other components, I used the US Brig Syren instructions for the brackets. I used two pieces brass tubing for the inward bracket and a piece of brass tubing and a piece of brass rod for the outboard bracket. For soldering, I used a paste for the first time. It worked great with just the heat from a lighter. I also added a thimble to the main yard for sling. I this was one of my better splices. It is time consuming to manually serve the splice and it isn't perfect by any means, but I am pretty happy with the results. I also had a pretty good view of the northern lights the other night. I have the four yards for the fore mast left then time to start tackling the sails.

-
in my opinion using a pencil to simulate the joint creates a joint that is too visible. I like to cut the planks to length and use a pencil on the edge of the planks to create a slightly darkened joint that is far more subtle than drawing on with a pencil. If you choose to add the treenails, at 1/50 scale you can probably make them look good, but again I would stay away from pencil dots. There are some good examples of treenails made out of monofilament line on the forum. If you choose the jog or nibble the planks, I would look at the instructions for the US Brig Syren from Modelshipways. It can be downloaded from their website, but I think you can make a great looking model without if you don't want to tackle that on your first planked ship. If you are worried about cutting the planks straight check out the "worlds smallest mitre box" on the Micro Mark website. Works well with a razor saw. Good luck.
.JPG.029289ff4a581752d7eadfbdb949aecf.JPG)


.JPG.3d54bf916cd0ac21cd281e0b10eb529d.JPG)