.jpeg.882f0a147f14858c9e673da7e13d8ebe.jpeg)
RossR
-
Posts
531 -
Joined
-
Last visited
Content Type
Profiles
Forums
Gallery
Events
Everything posted by RossR
-
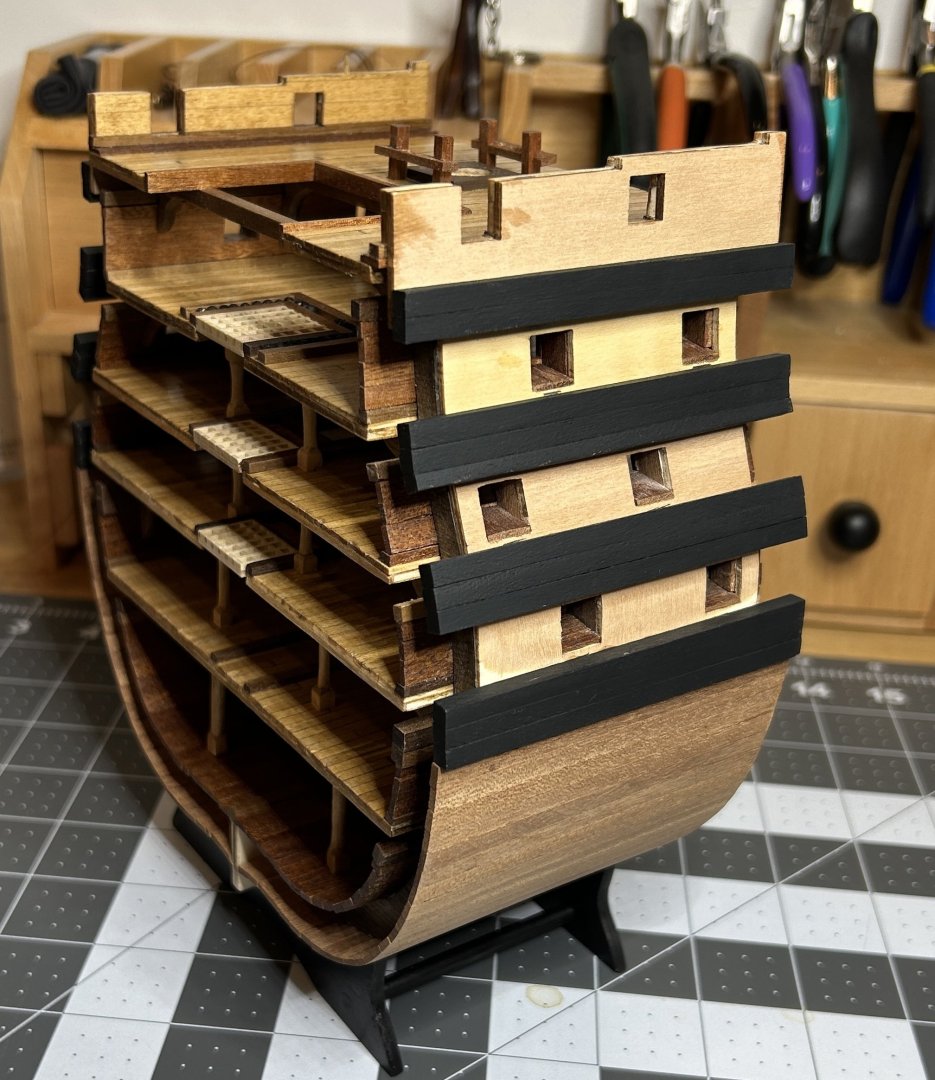
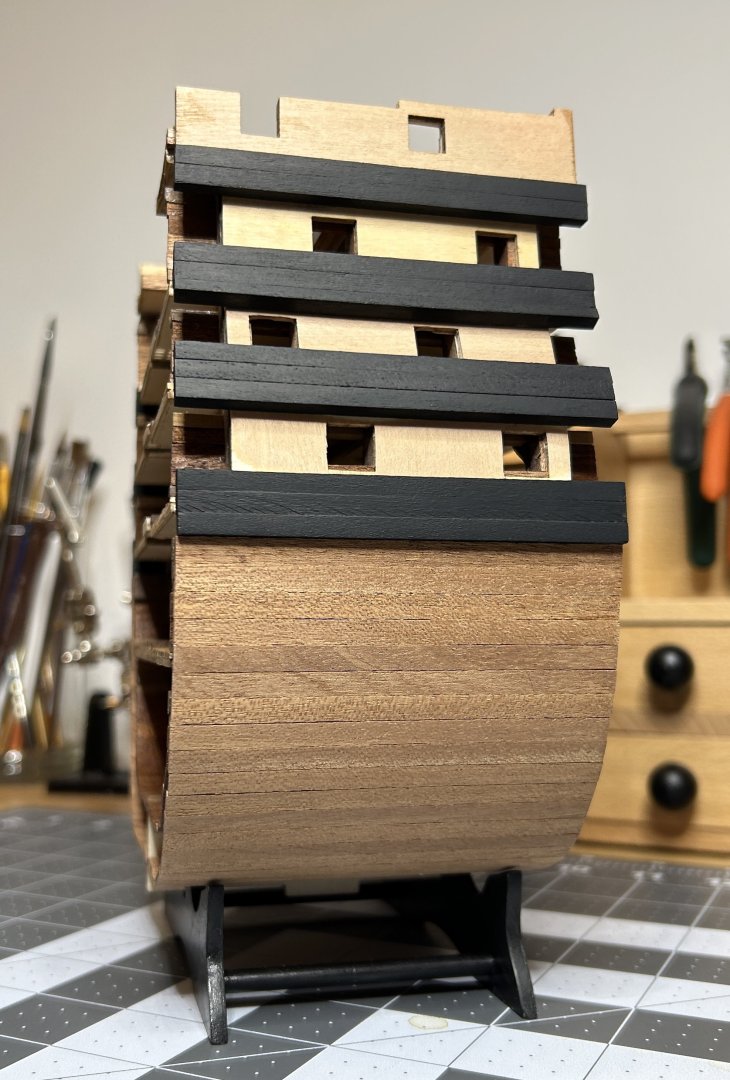
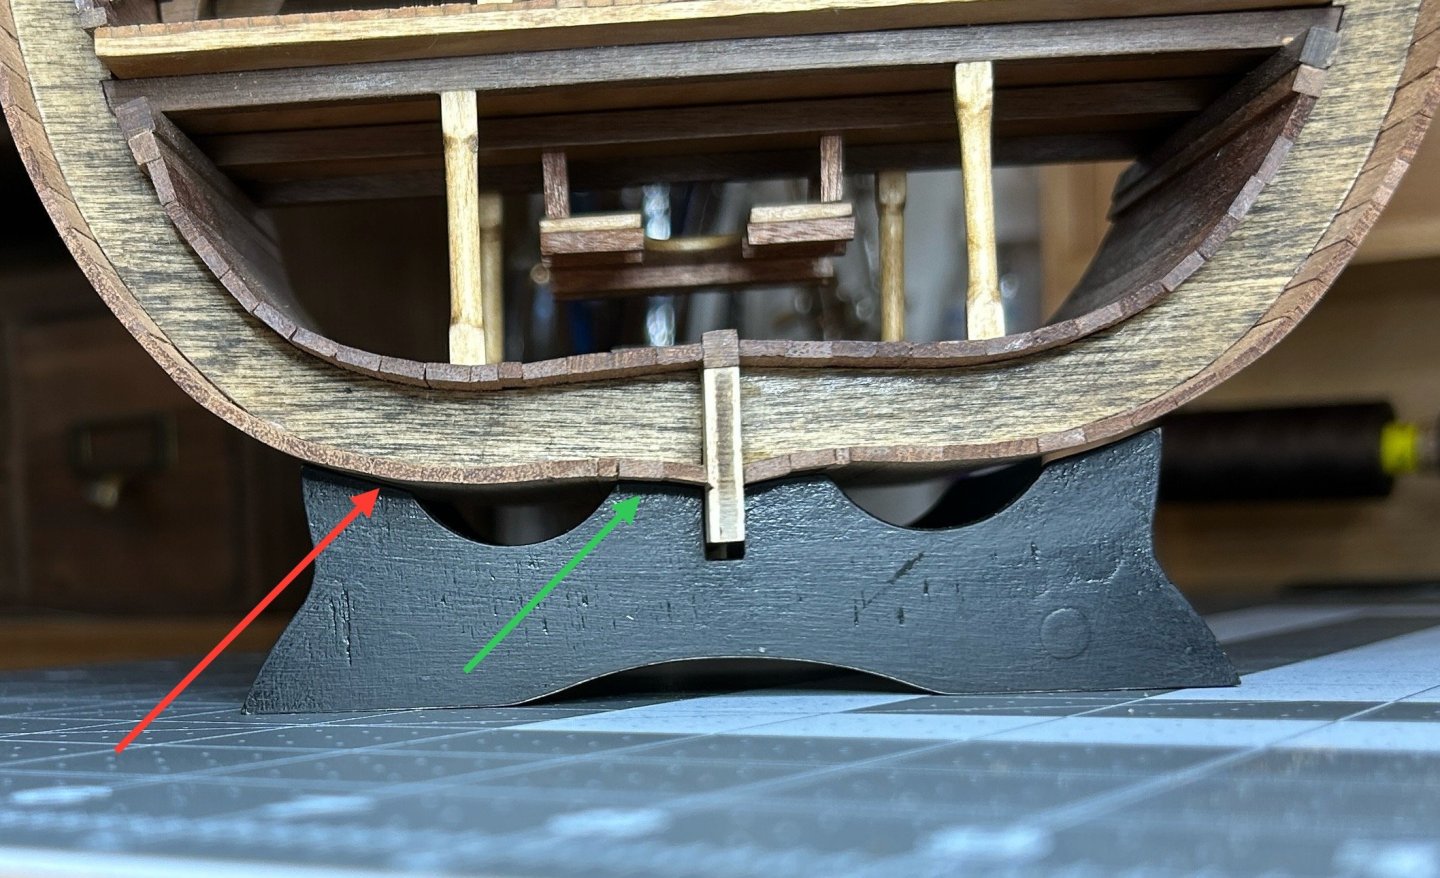
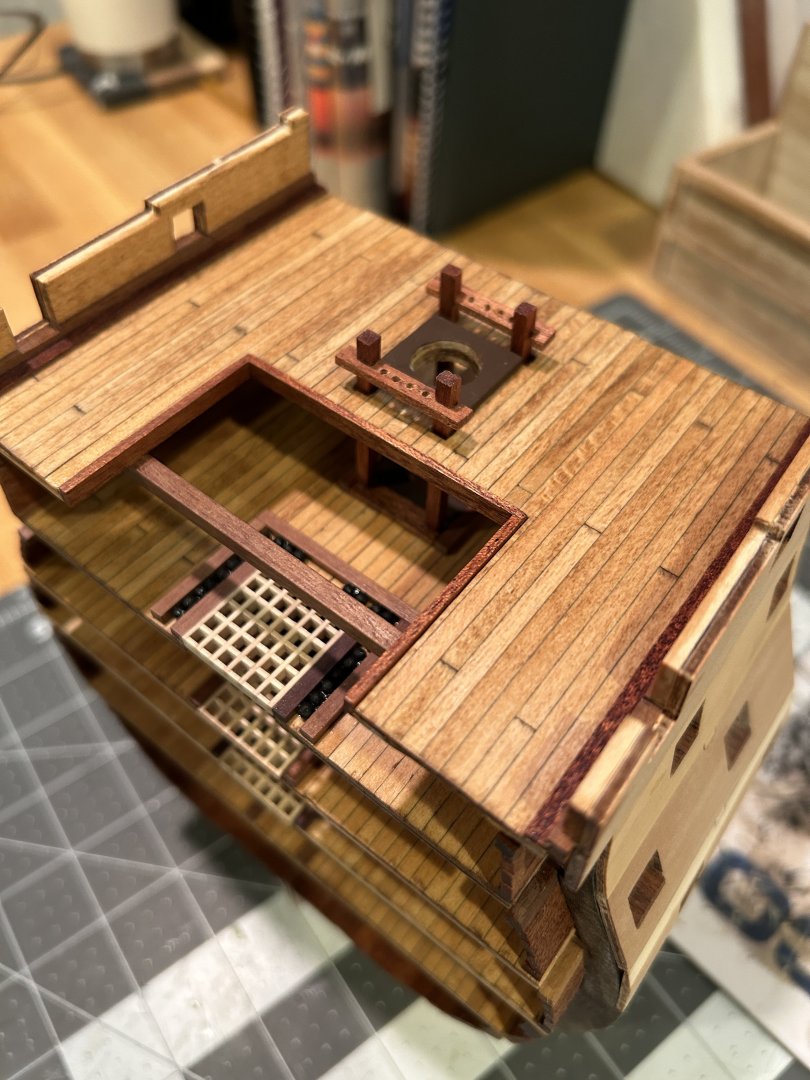
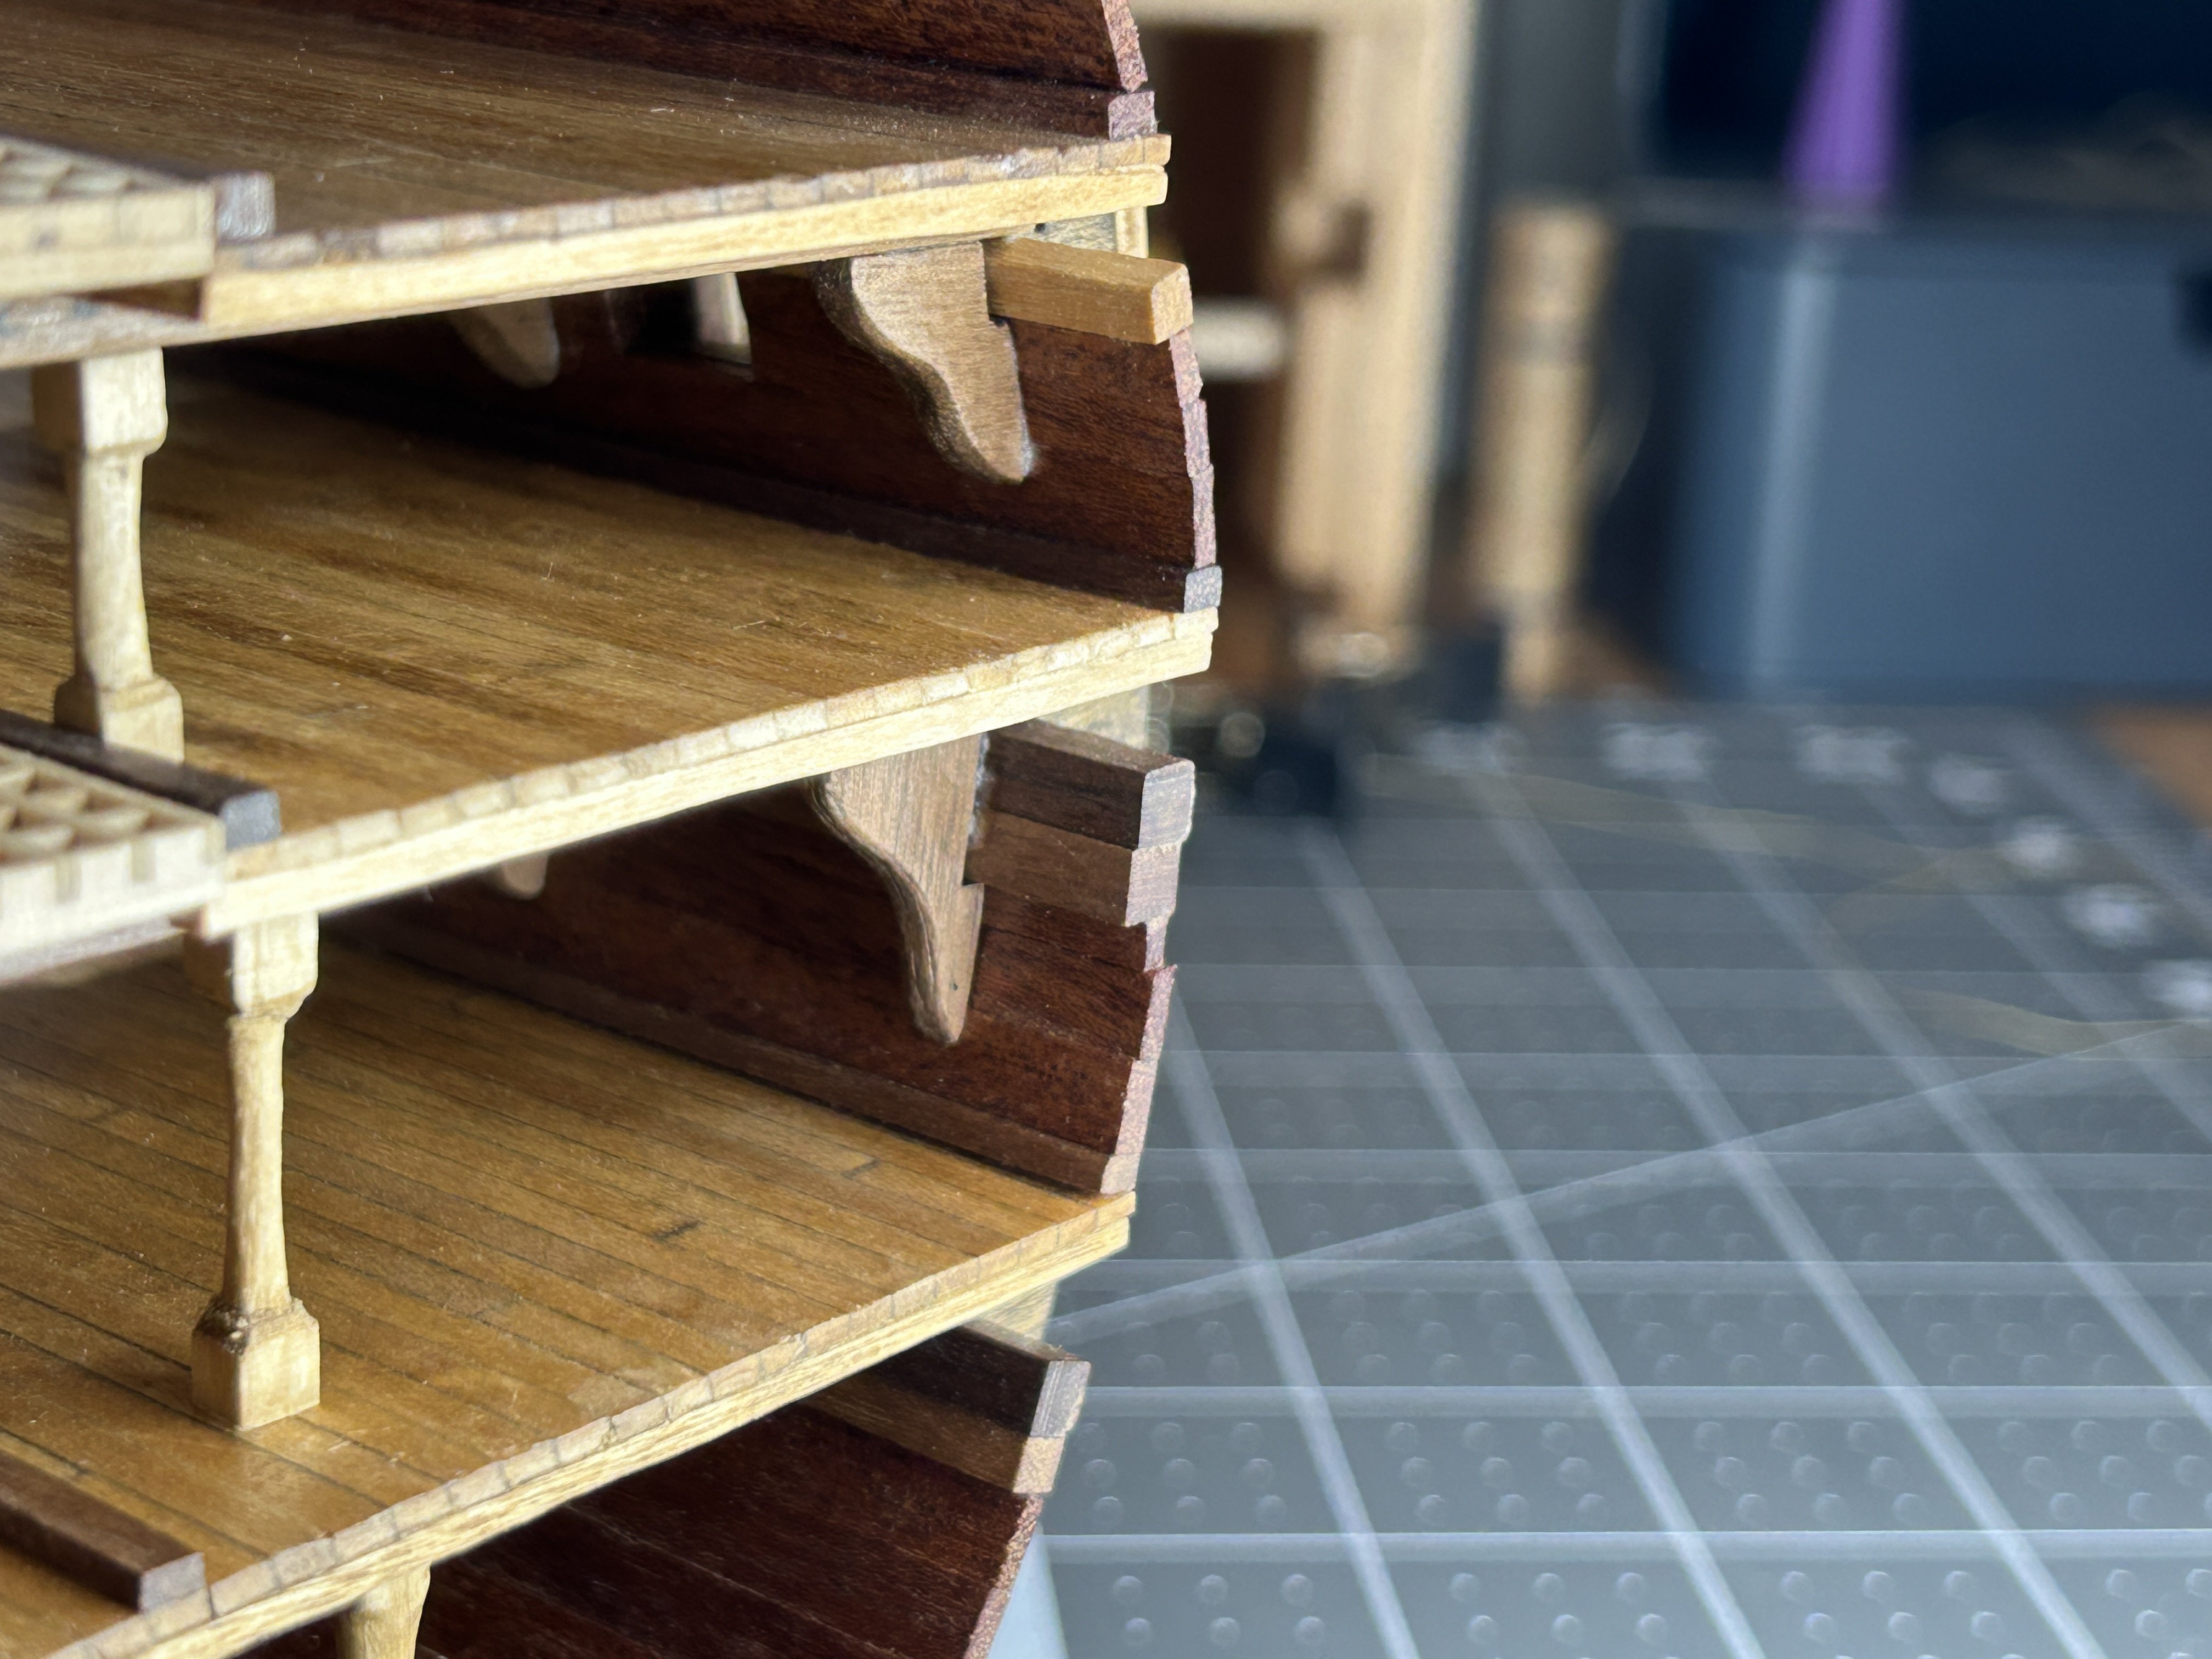
.thumb.jpeg.ffac2f8a24d212961a83eab4efb06a6c.jpeg) I have the four bands of 4x4 mm planking and the 2x5 mm Sapelli installed. The sapelli covers the lower part of the hull below the wales. the 4x4 walnut is painted black. I experimented with black stain, but settled on the paint. The planking around the gun ports will be lime wood stained golden oak, the same as the deck. All of the planking will get a couple coats of shellac when the planking is complete. The cradle needs a little adjusting to keep the model from rocking. There are gaps where the cradle meets the hull on the outside of the cradle (red arrow). I will sand done the inner contact points (green arrow) so the model settles onto the outer contact points. I will be taking my time on the planking around the gun ports and at some point I will get back to my Frigate Diana also, plus work is going the be busy the next 3 months or so with some special projects, so this may be my last post for awhile. thanks for all the views.
I have the four bands of 4x4 mm planking and the 2x5 mm Sapelli installed. The sapelli covers the lower part of the hull below the wales. the 4x4 walnut is painted black. I experimented with black stain, but settled on the paint. The planking around the gun ports will be lime wood stained golden oak, the same as the deck. All of the planking will get a couple coats of shellac when the planking is complete. The cradle needs a little adjusting to keep the model from rocking. There are gaps where the cradle meets the hull on the outside of the cradle (red arrow). I will sand done the inner contact points (green arrow) so the model settles onto the outer contact points. I will be taking my time on the planking around the gun ports and at some point I will get back to my Frigate Diana also, plus work is going the be busy the next 3 months or so with some special projects, so this may be my last post for awhile. thanks for all the views.
- 21 replies
-
- 4
-

-
- Santisima Trinidad
- OcCre
- (and 2 more)
-
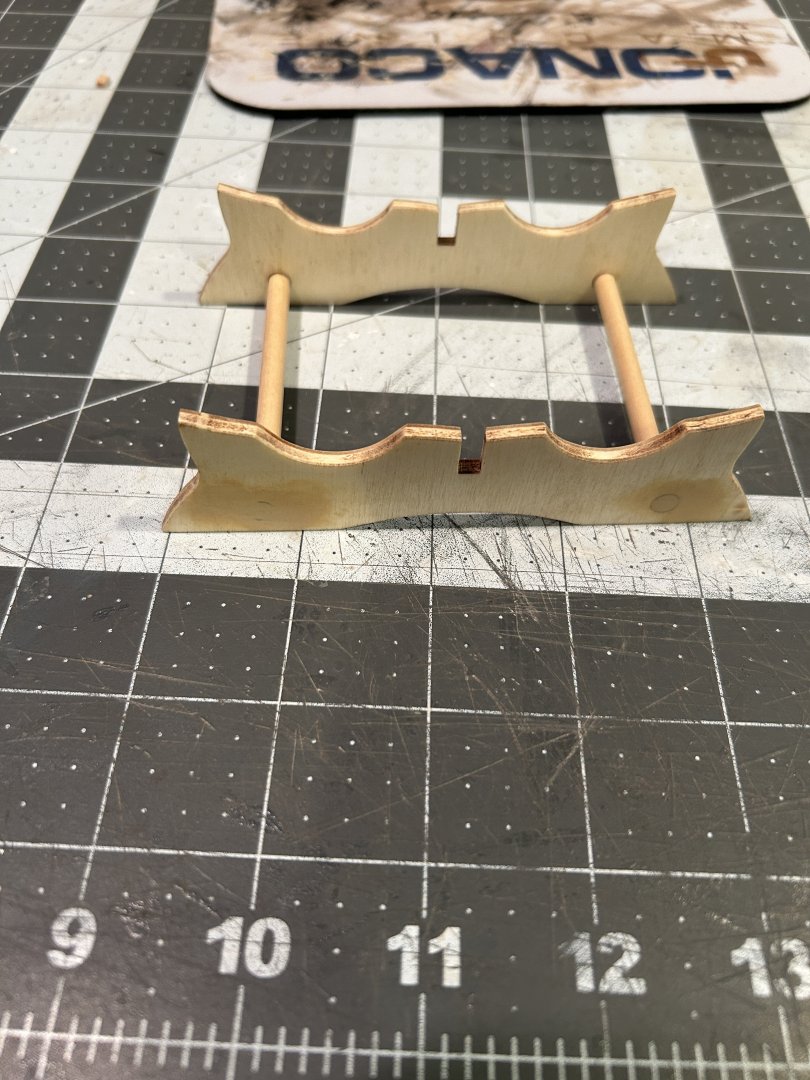
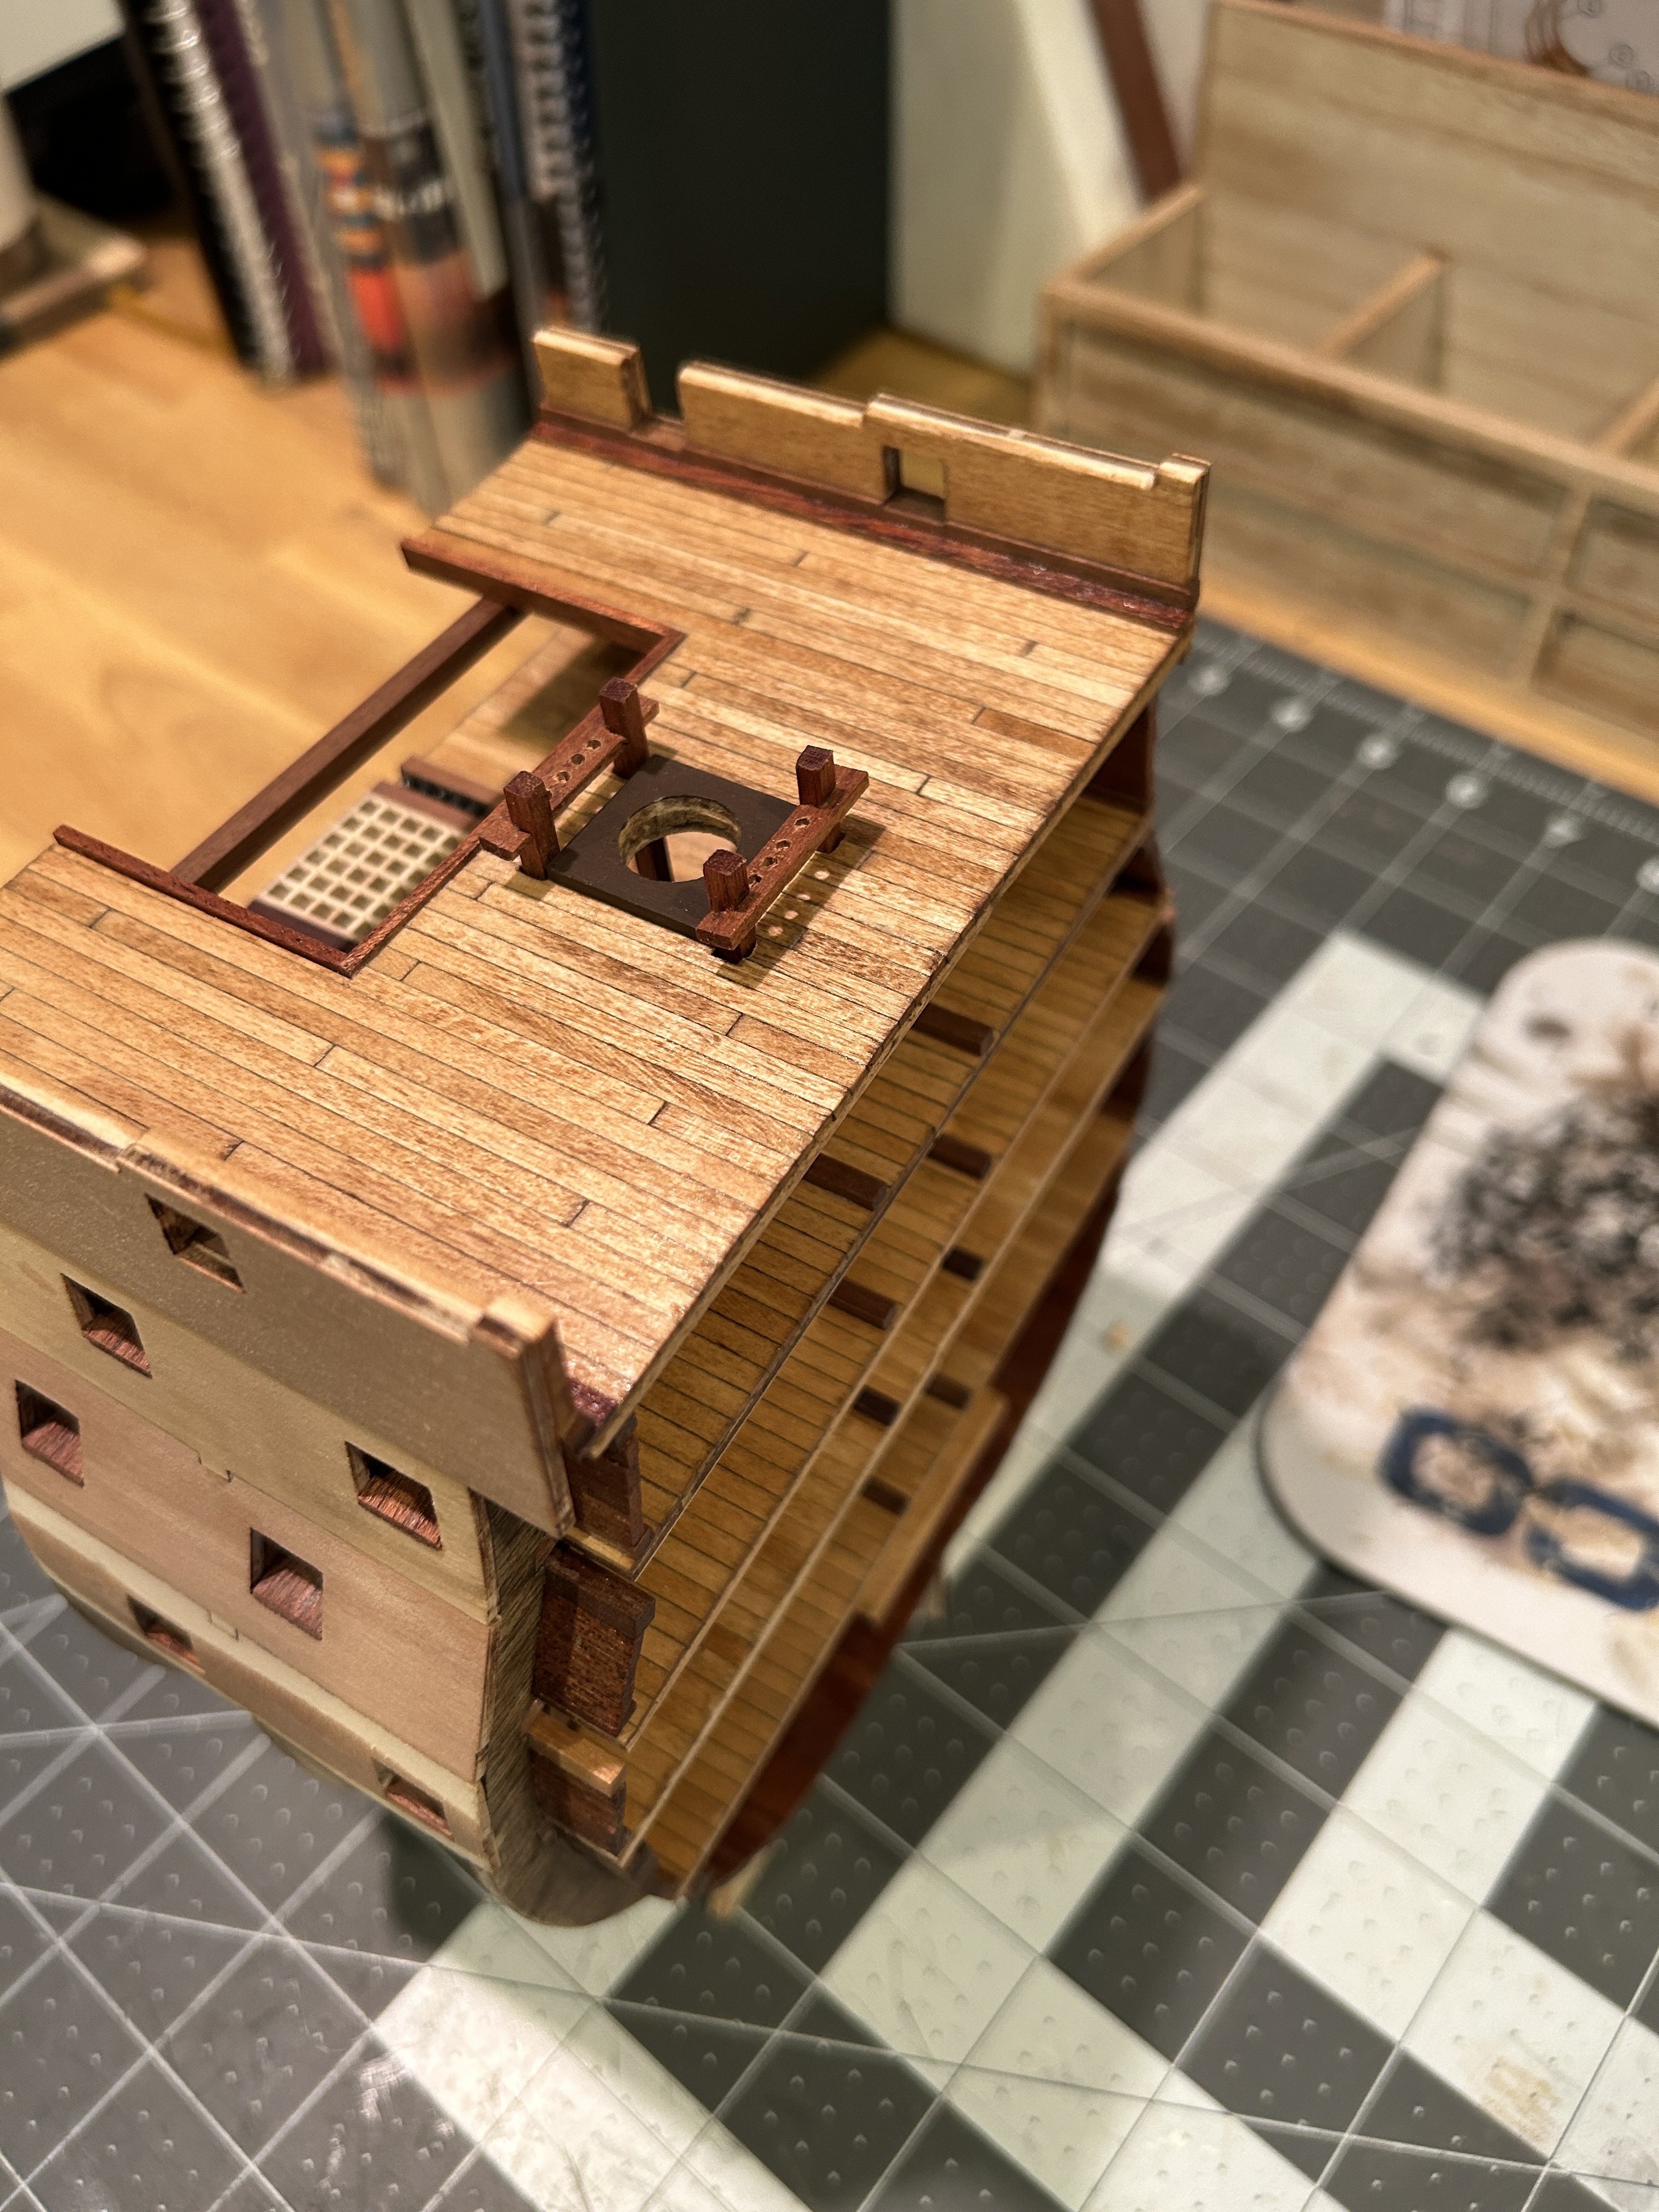
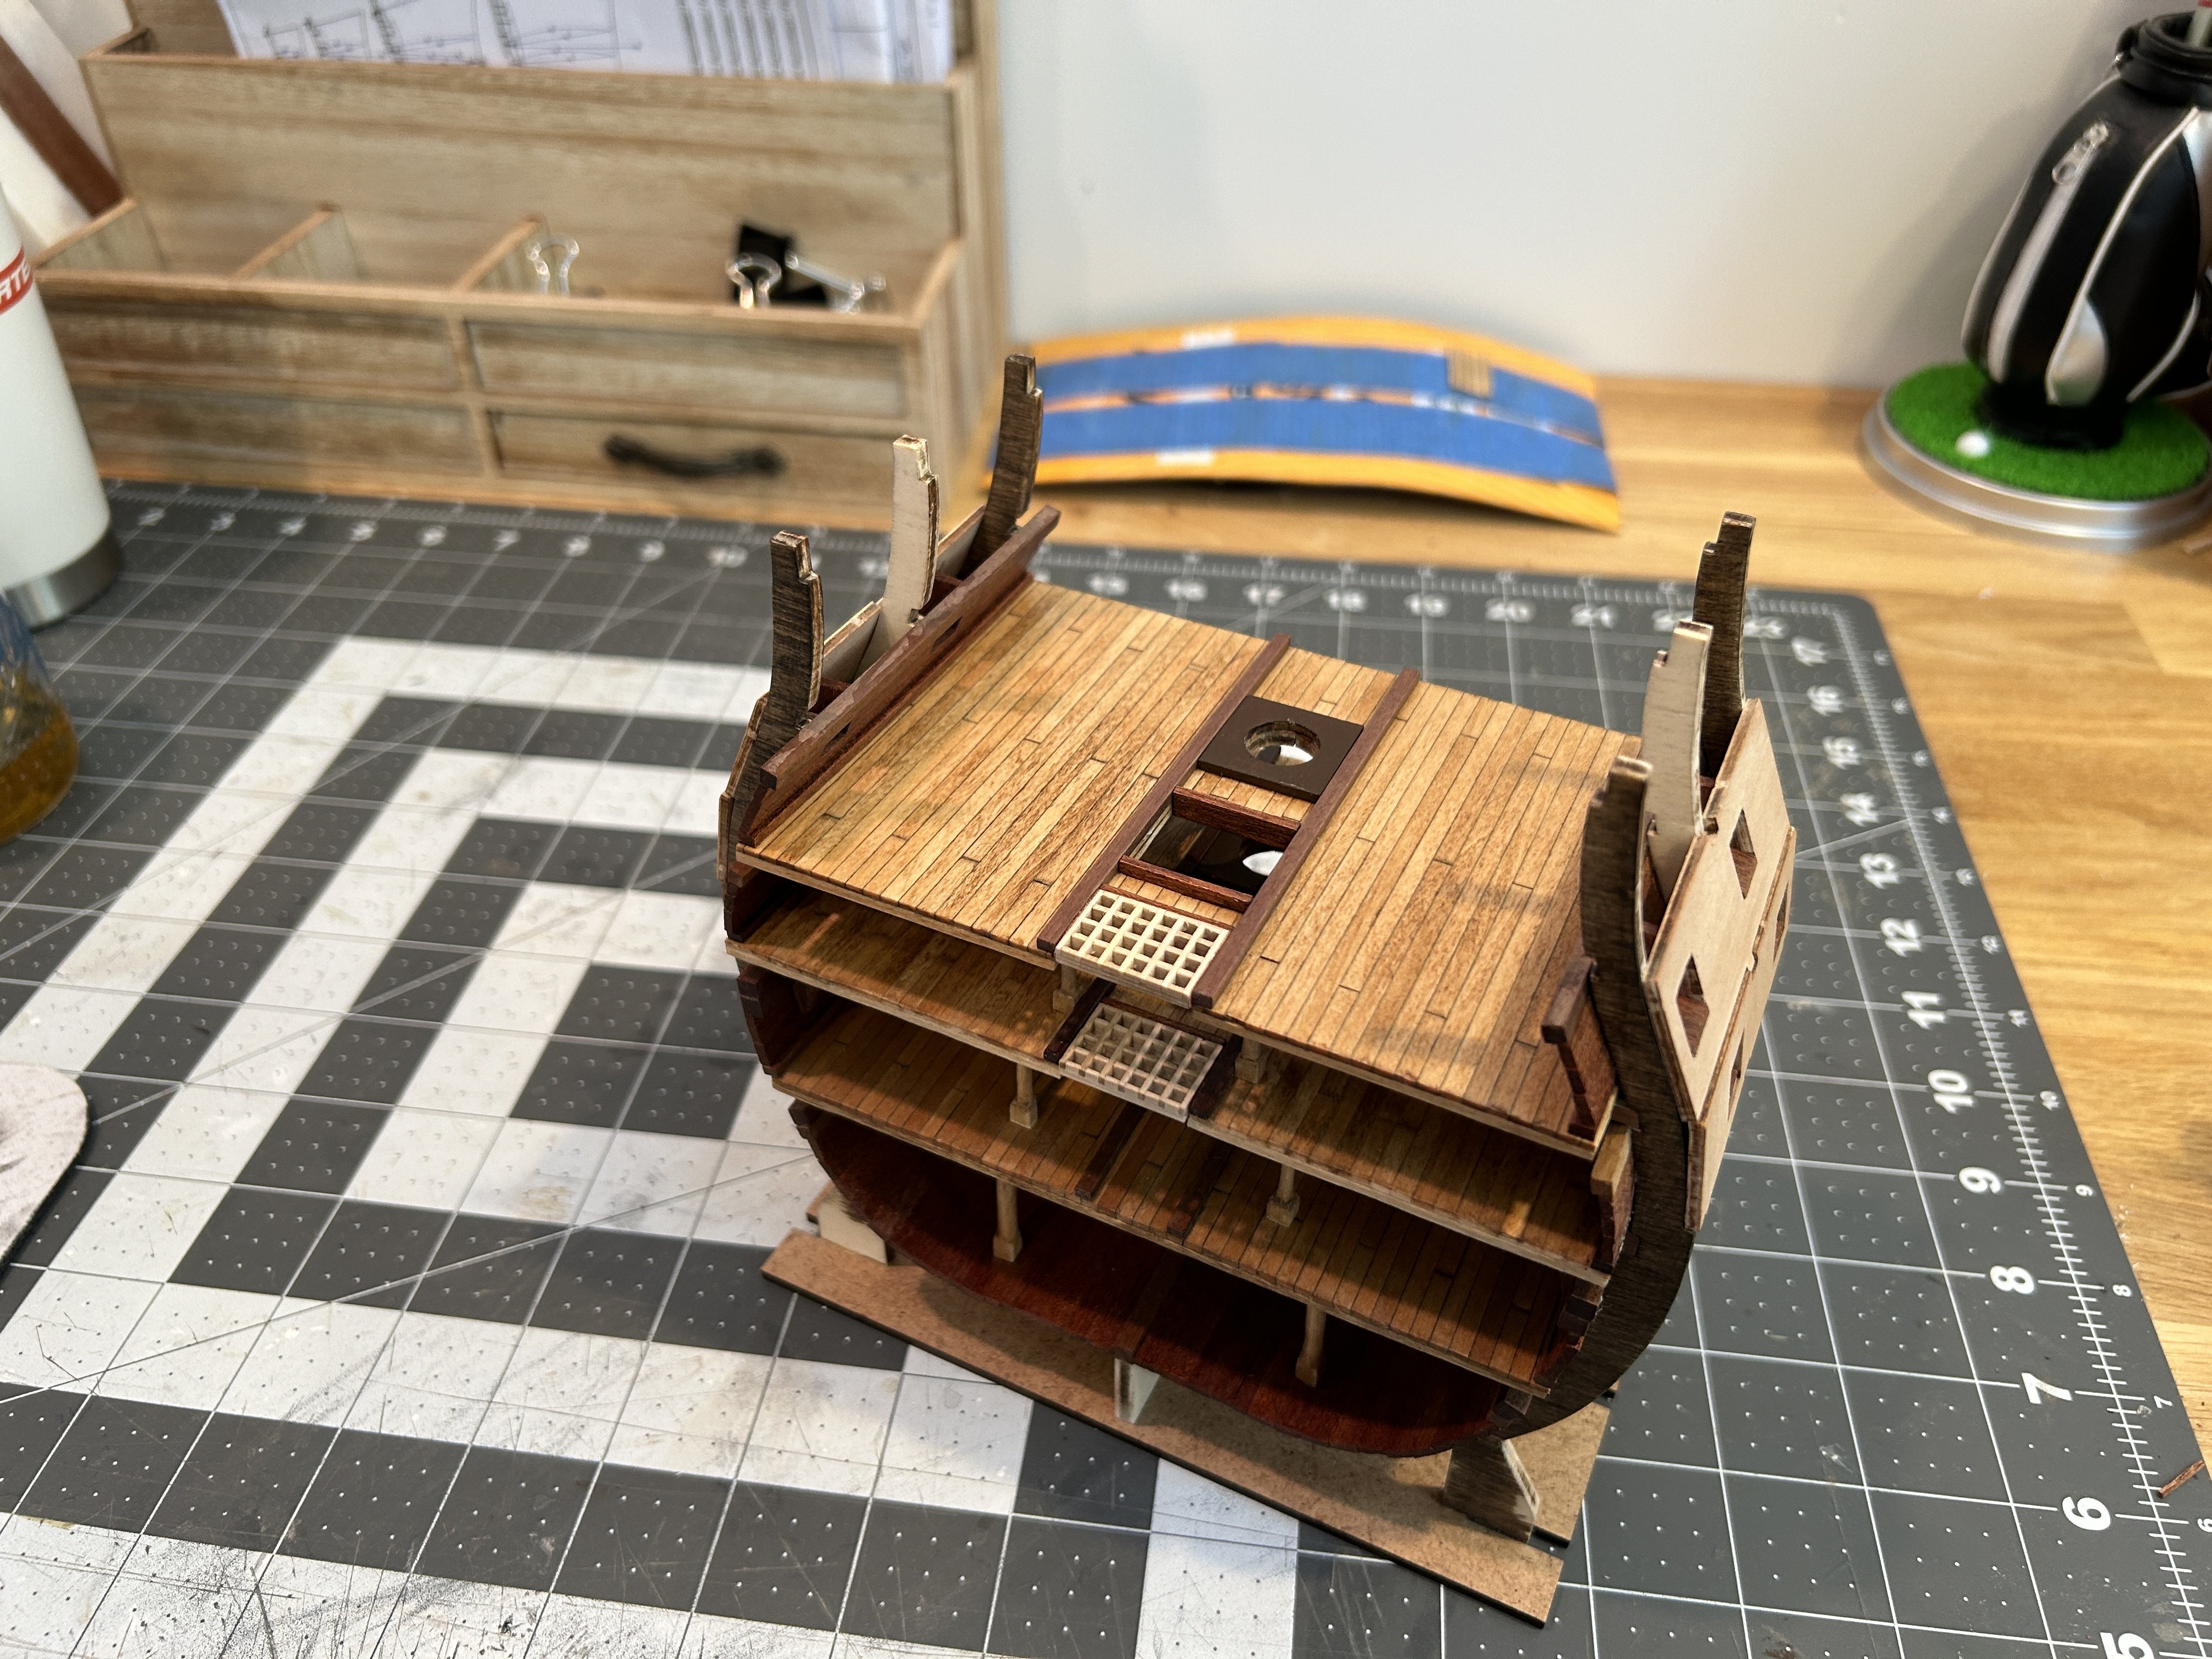
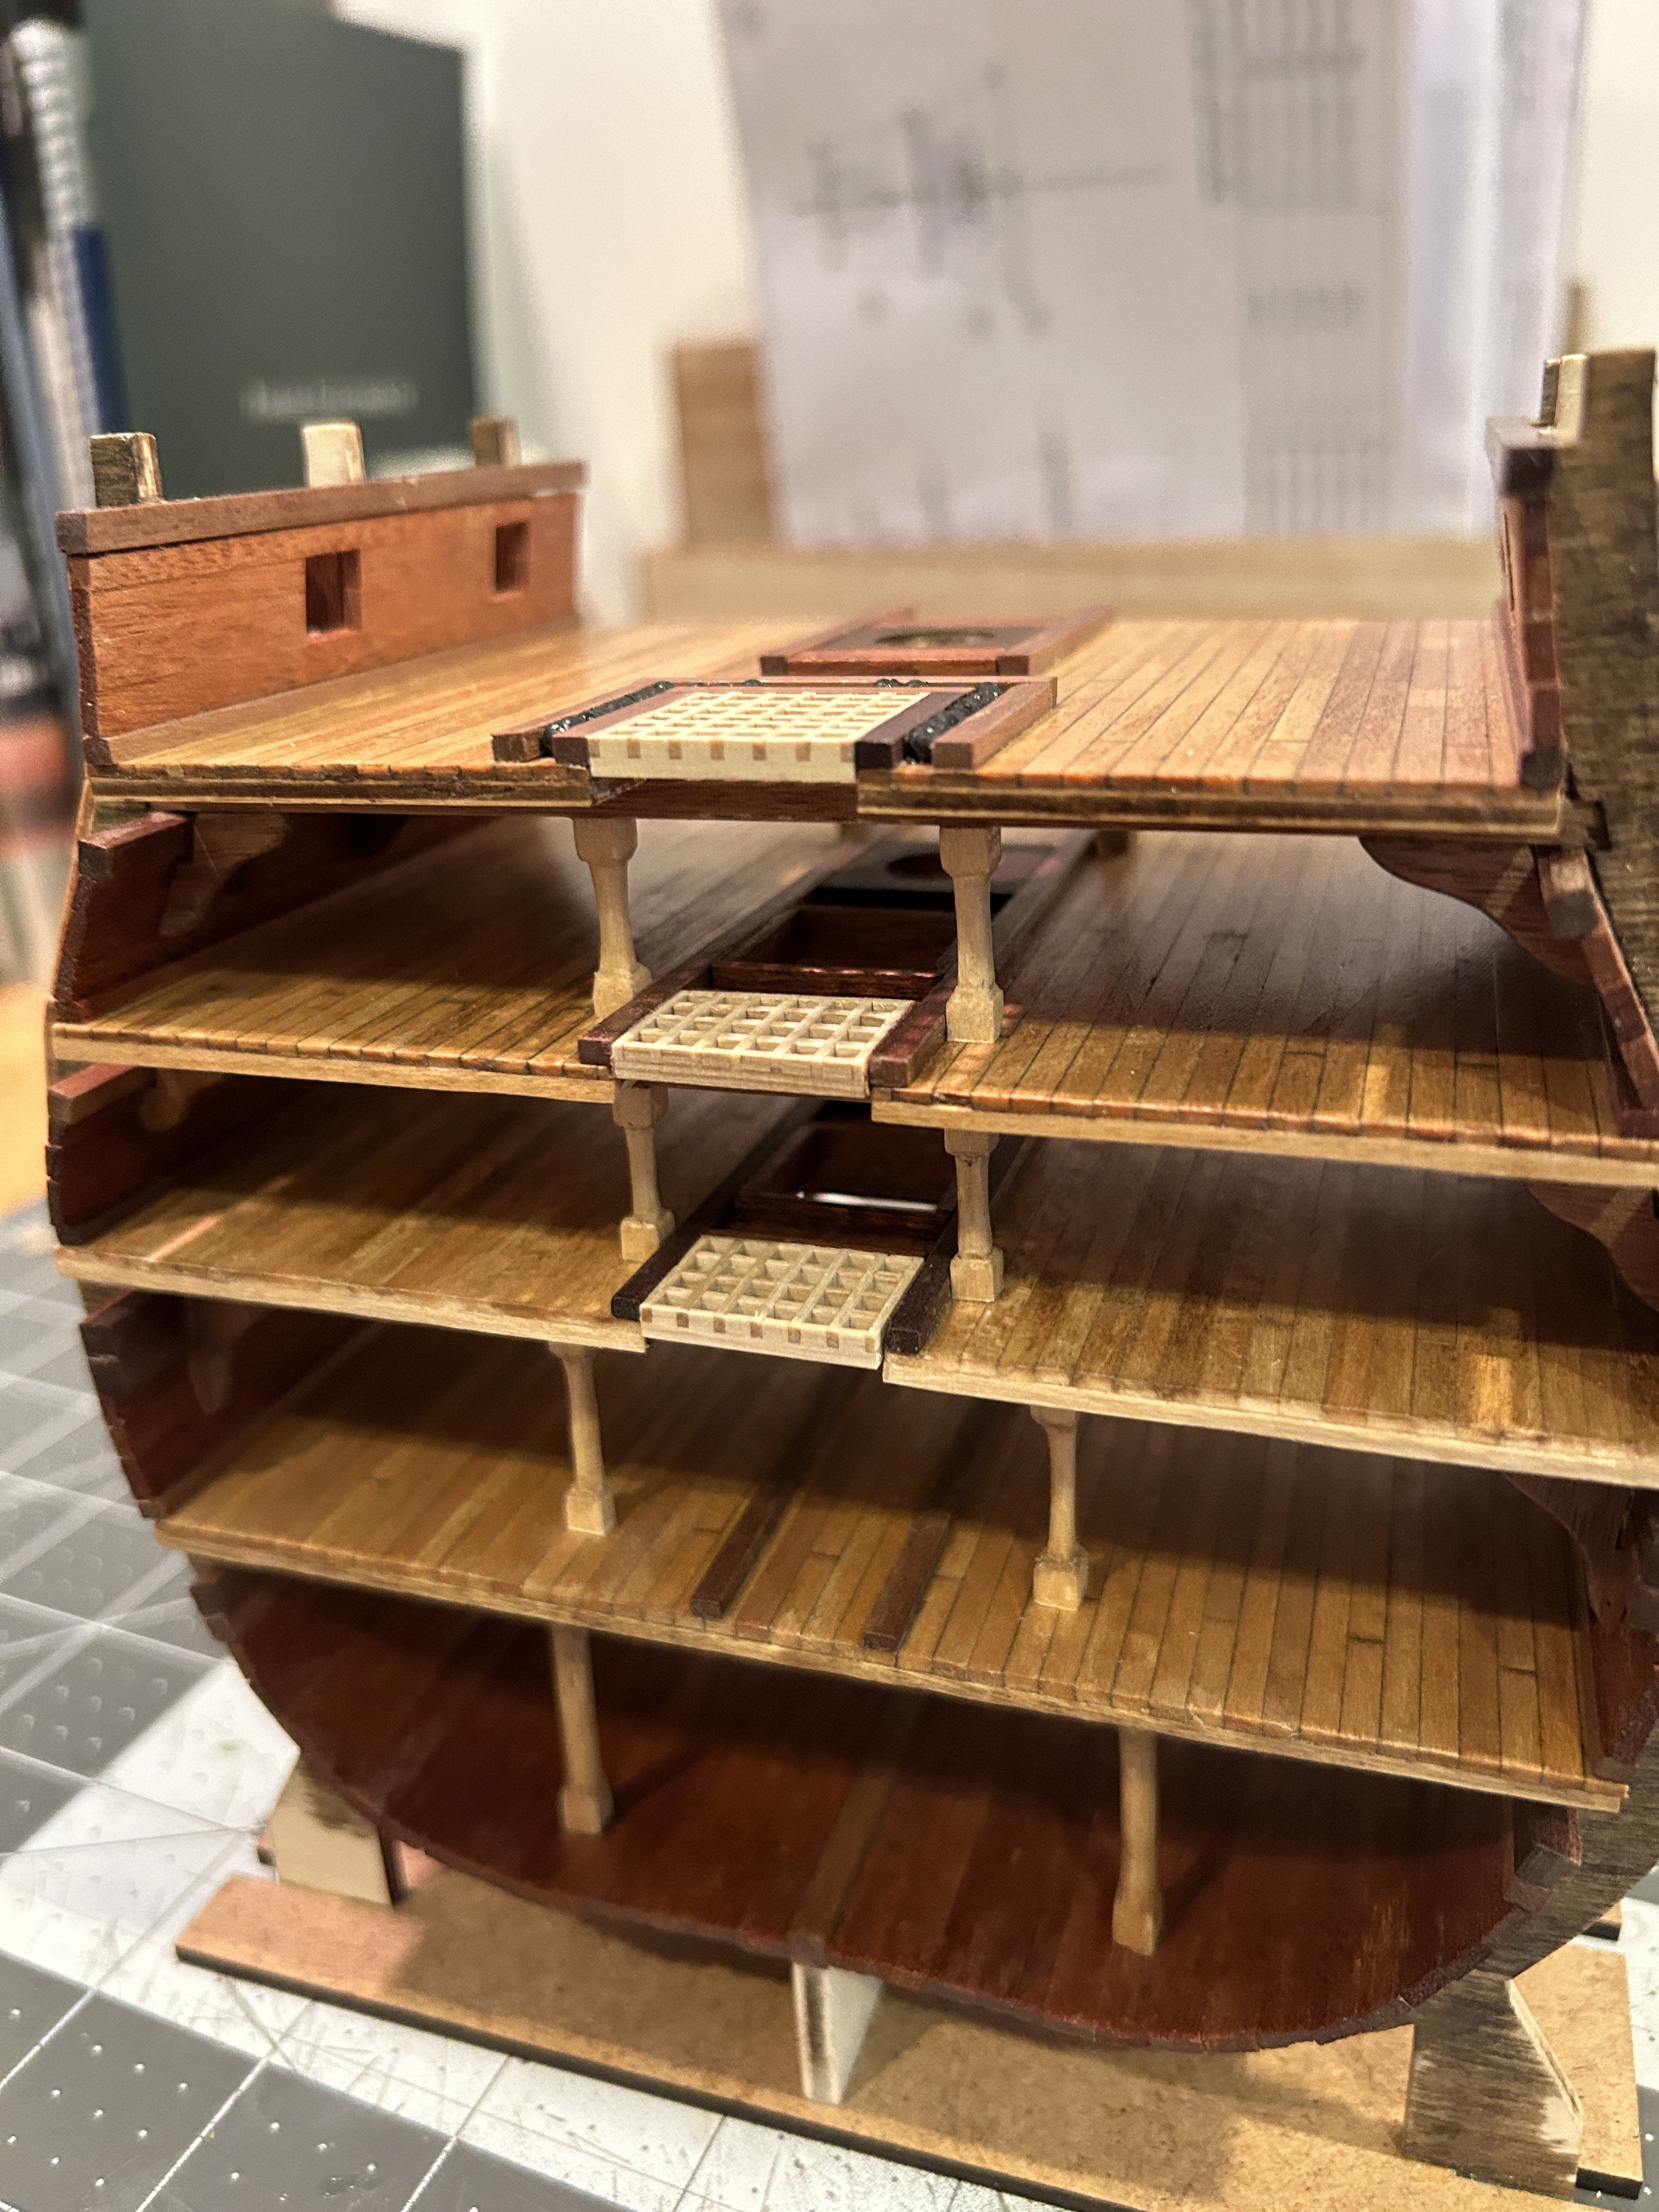
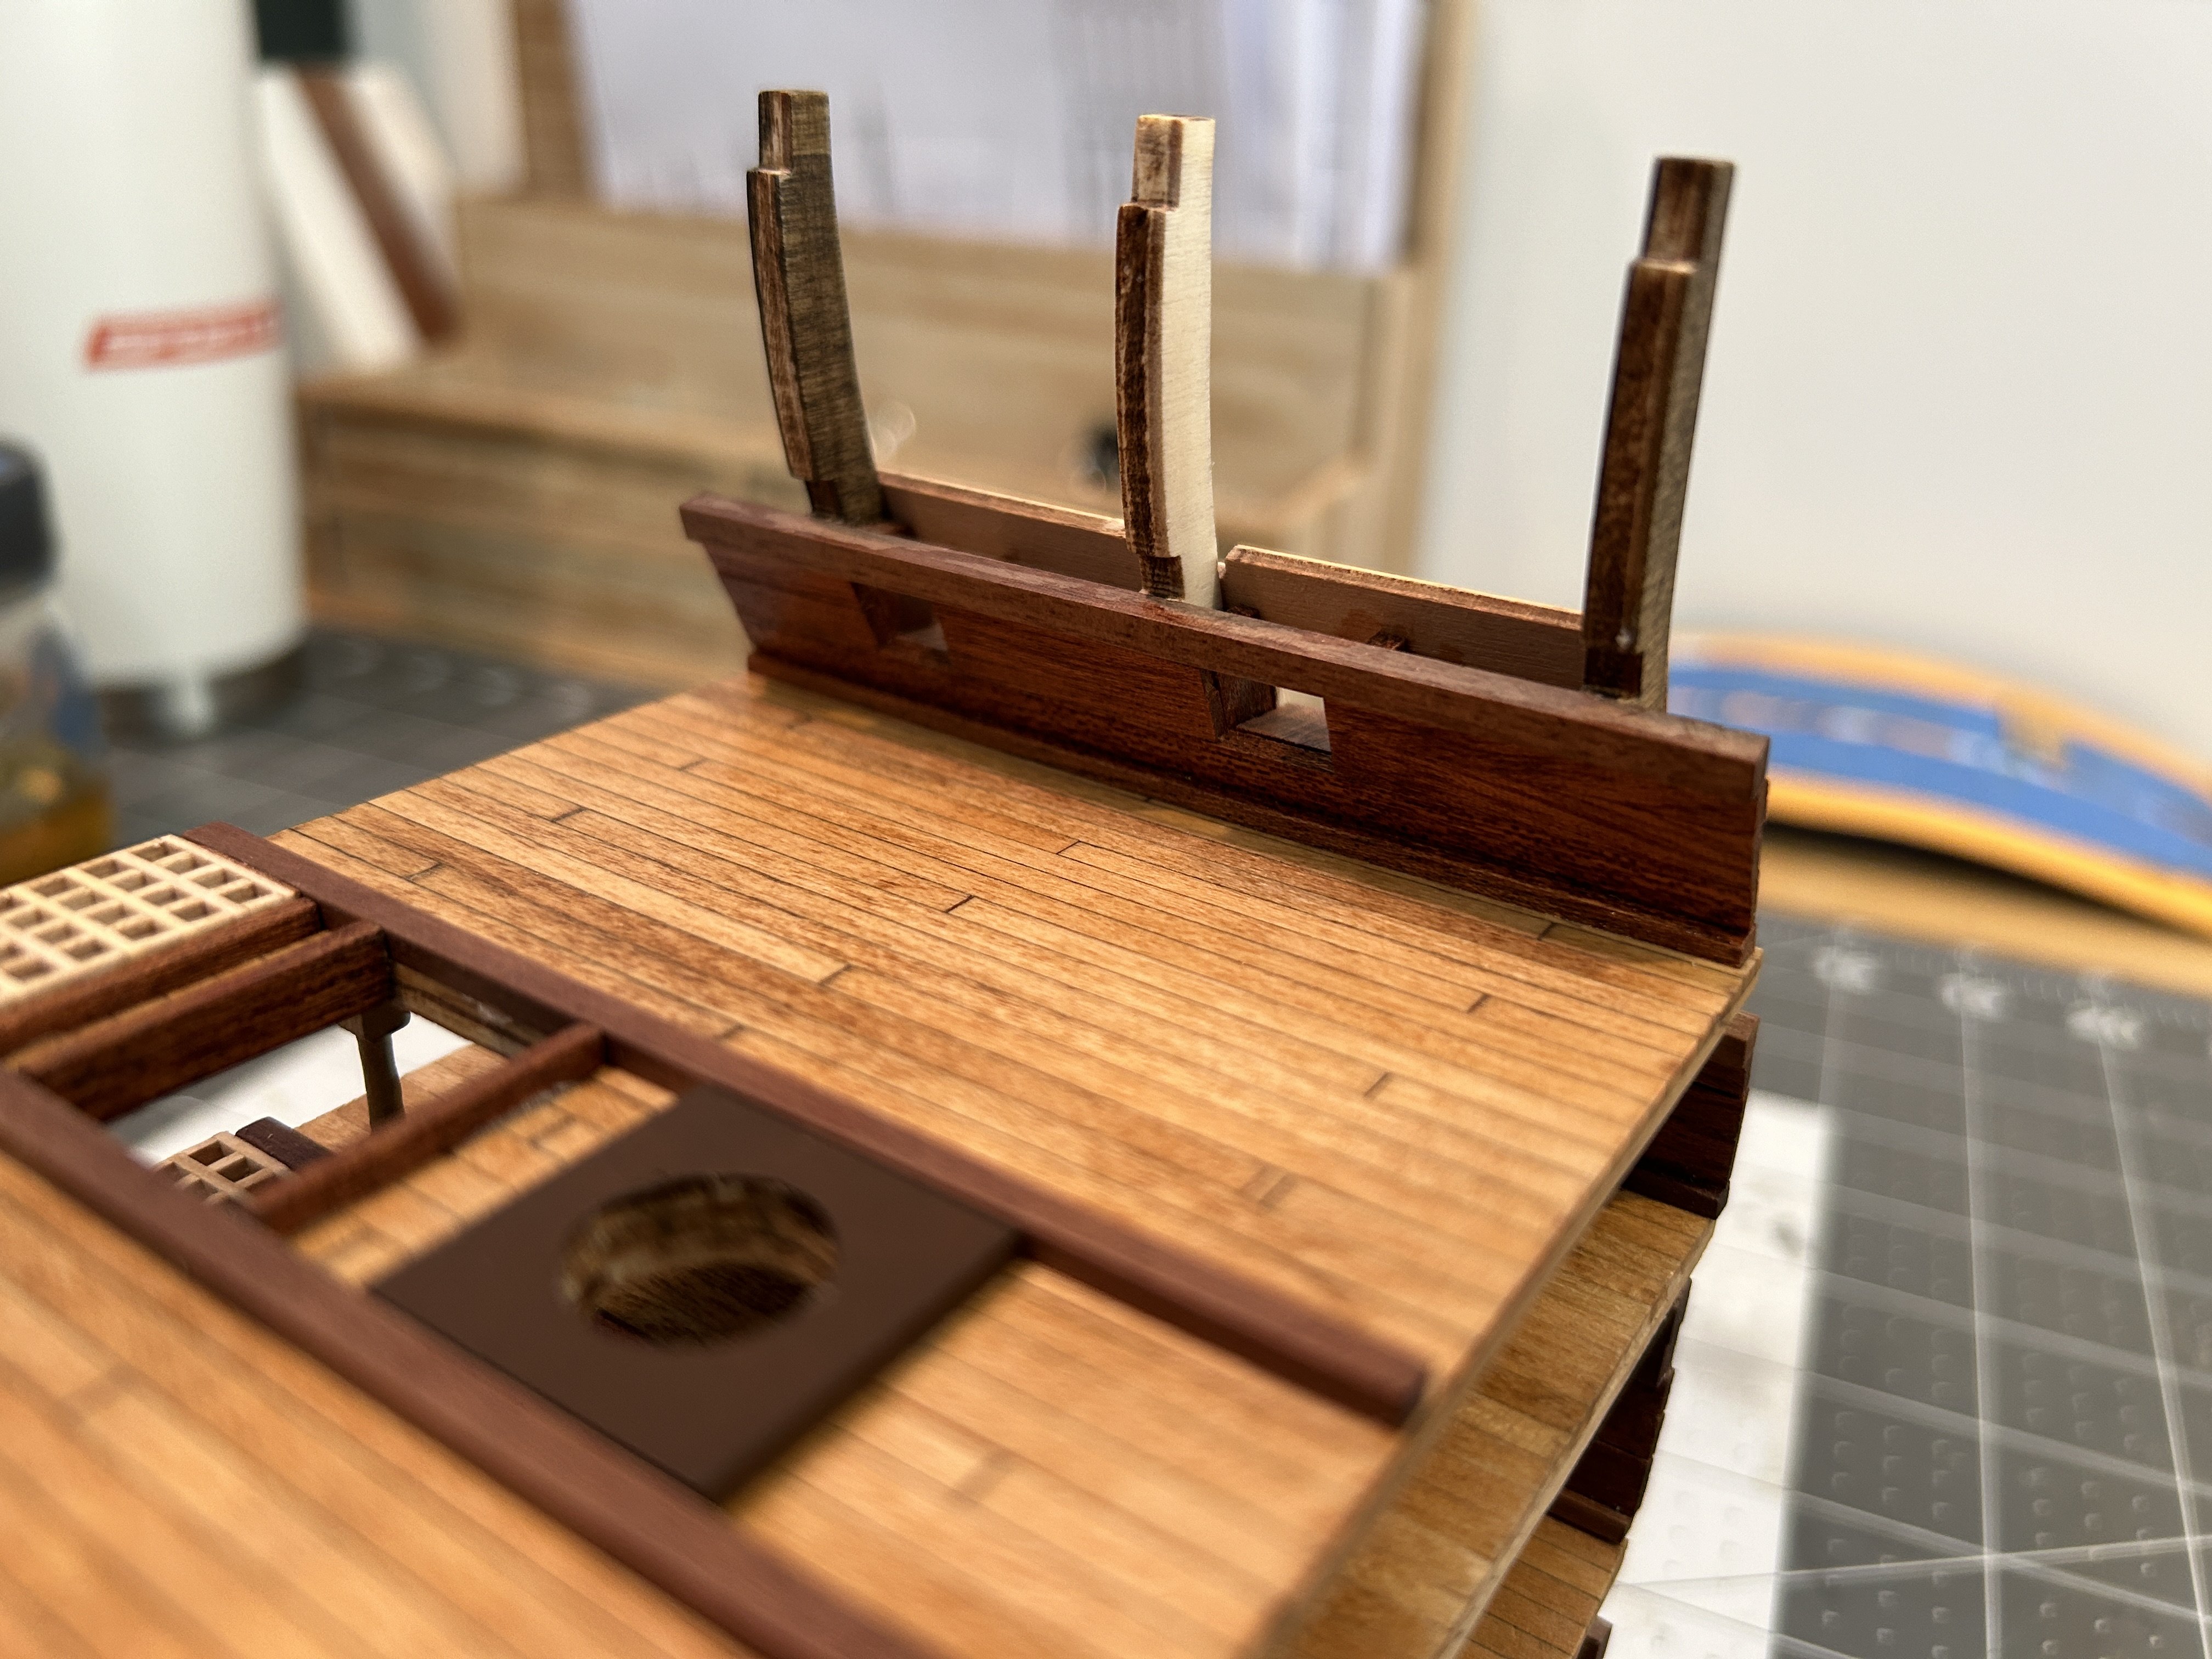
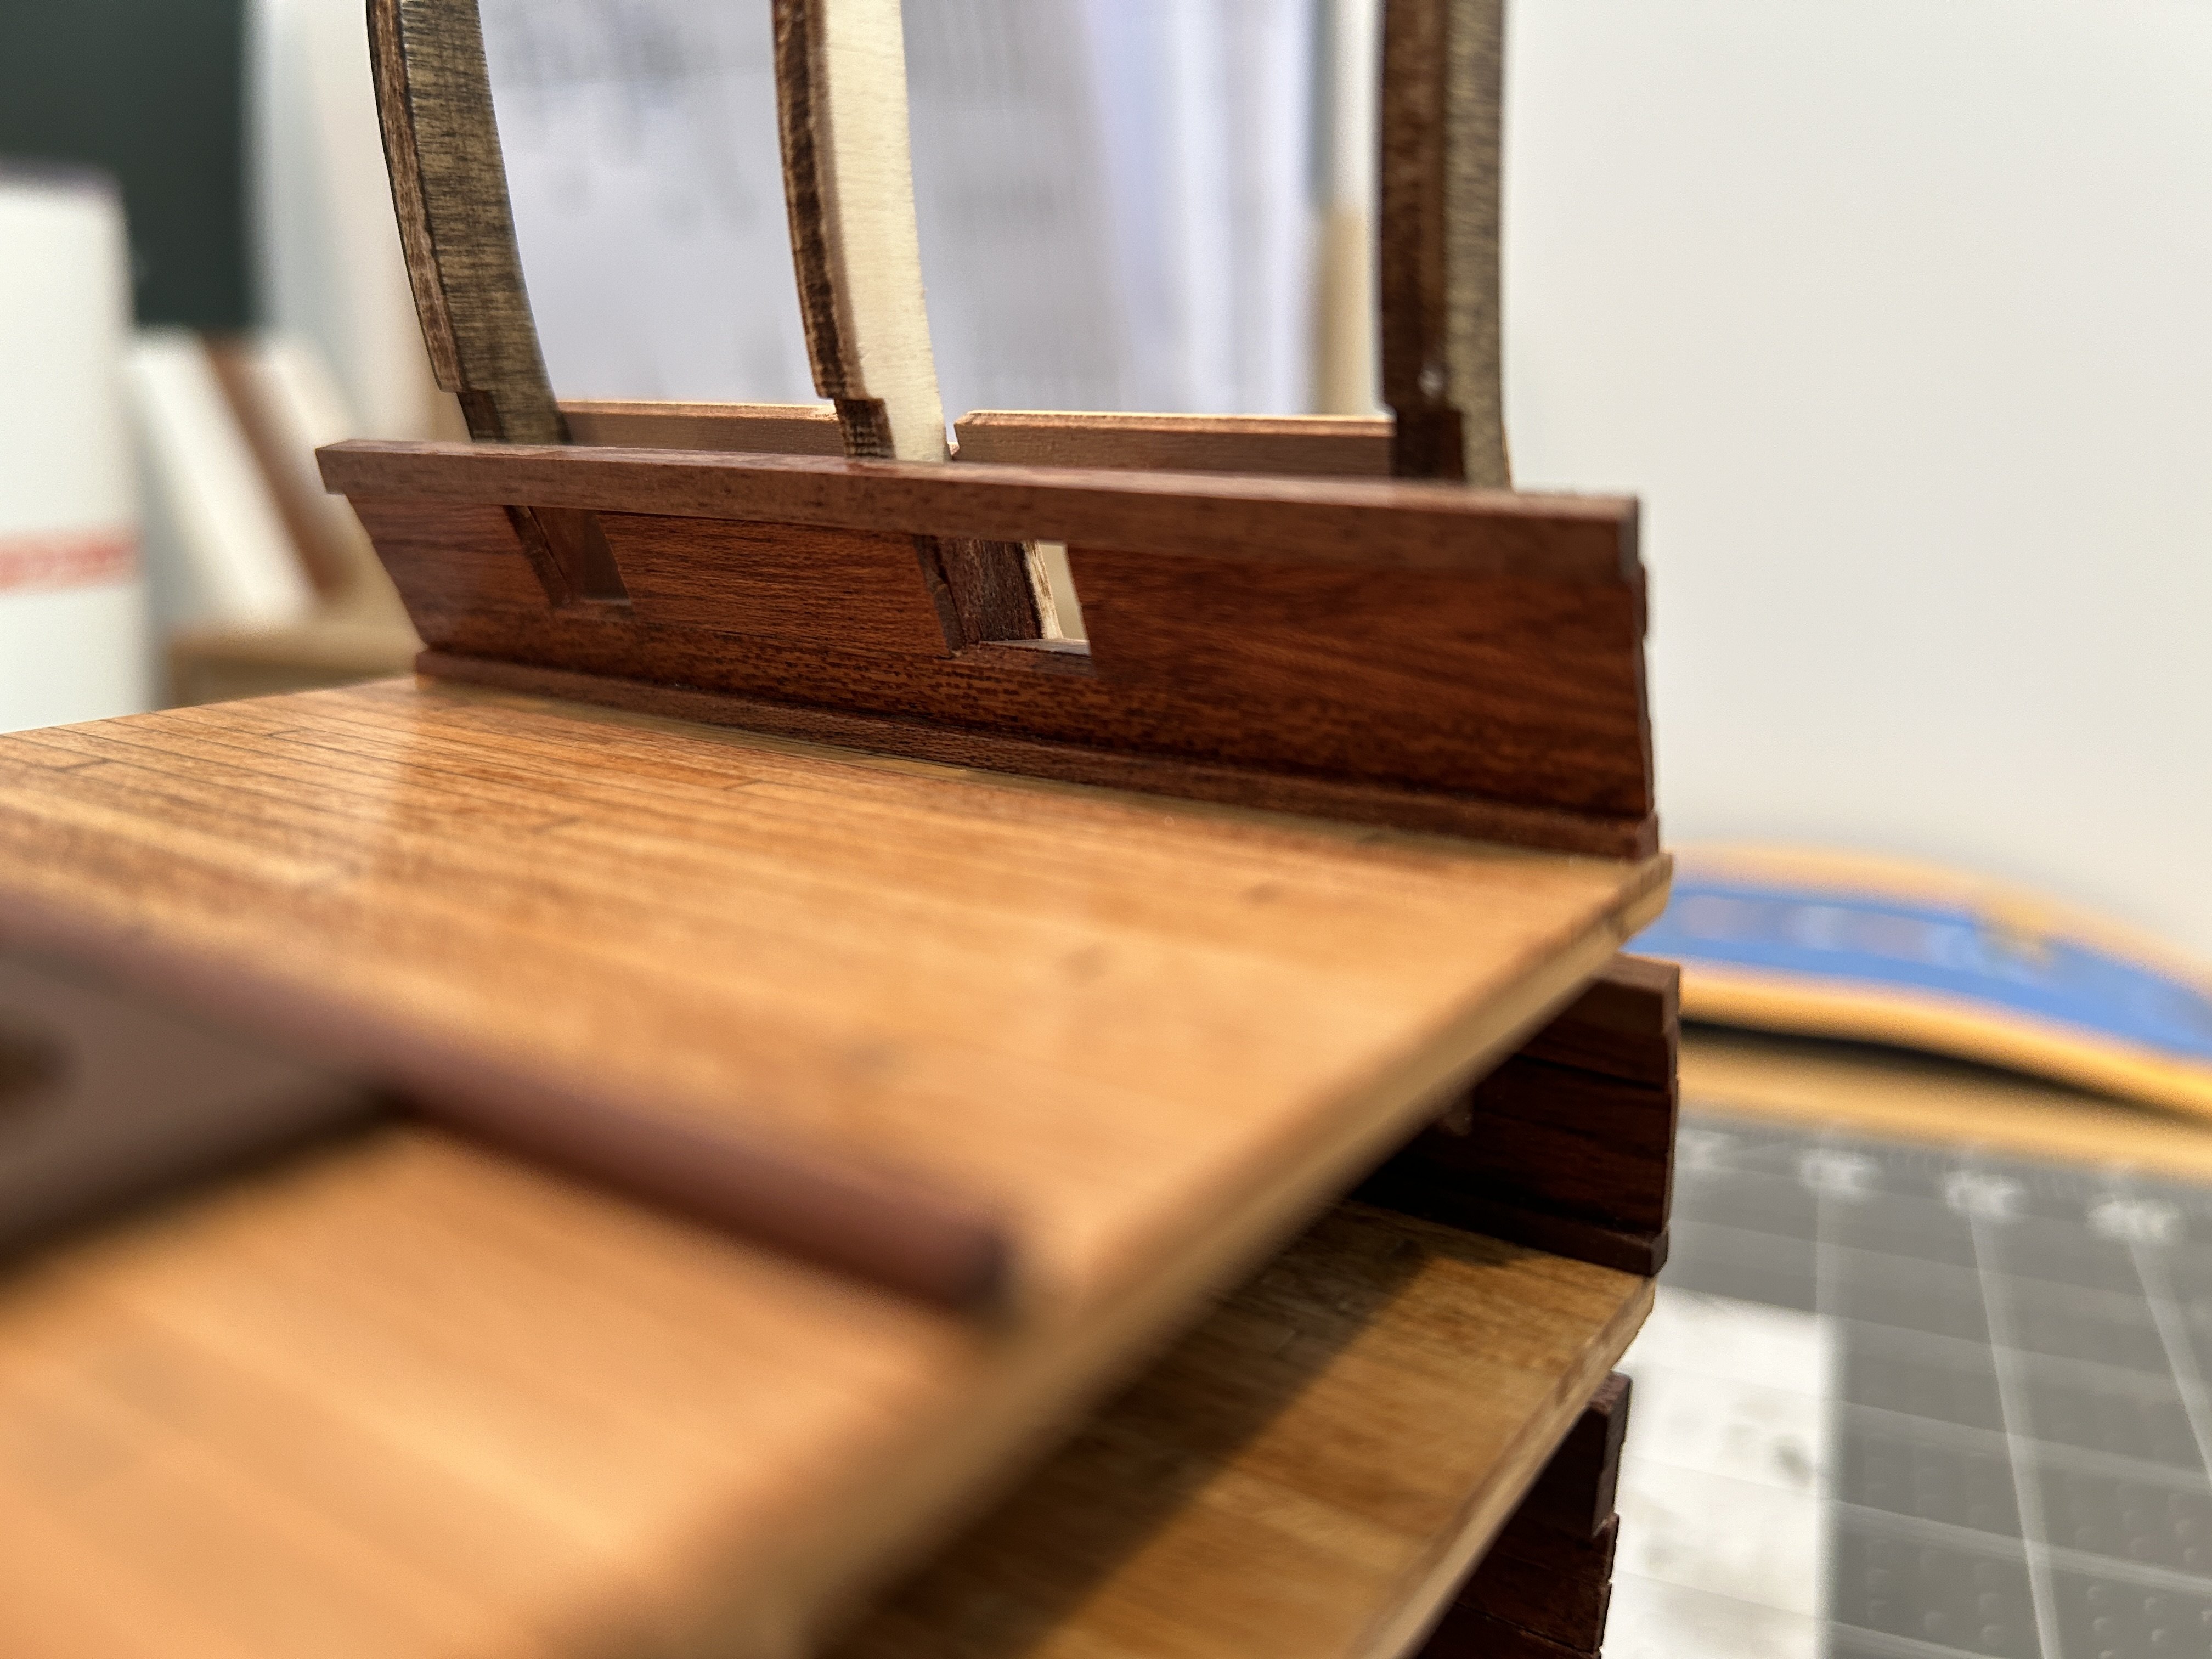
I have added the the pin racks to the upper deck and stained the inside of the gunwales. This was pretty straight forward. I need to use a small square file to open up the holes for the pin rack posts to extend down to the next deck. I am now at the stage where I need to cut the model from the building board, so I have started assembling the display cradle. I am going to paint it black after a coat of shellac as sealer. There has been some interesting discussion about using shellac as a sealer. I have had great luck using schellac, but the water based sealer that Vaddoc suggested looks interesting. I use a coat of shellac and then sand with 600 grit sandpaper. I used the cutoff tool on my Dremel and then the disc sander on the Dremel to smootout the excess material left on the frame. Now on the the planking. There are several bands on the ship that are planked with 4mm x 4mm material. The balance is planked with 2 x 5 mm lime wood and Sapelli. The Ultimation Slicer will cut through the 4mm material, but is is pushing its limits and I don't get a nice clean cut on material that think. When I bought the Ultimation tools I purchased the Repetter for the Sander. I wasn't sure how much I would use it when I bought it, but I just used it to get the 4x4 mm planking material trimmed to length. I couldn't be happier with the results. I would cut the material to a near net shape with a small saw and then use the Repeater to get the length just right. If anyone has any questions about the Repeater, please reach out. Thanks.


- 21 replies
-
- 3
-
-
- Santisima Trinidad
- OcCre
- (and 2 more)
-
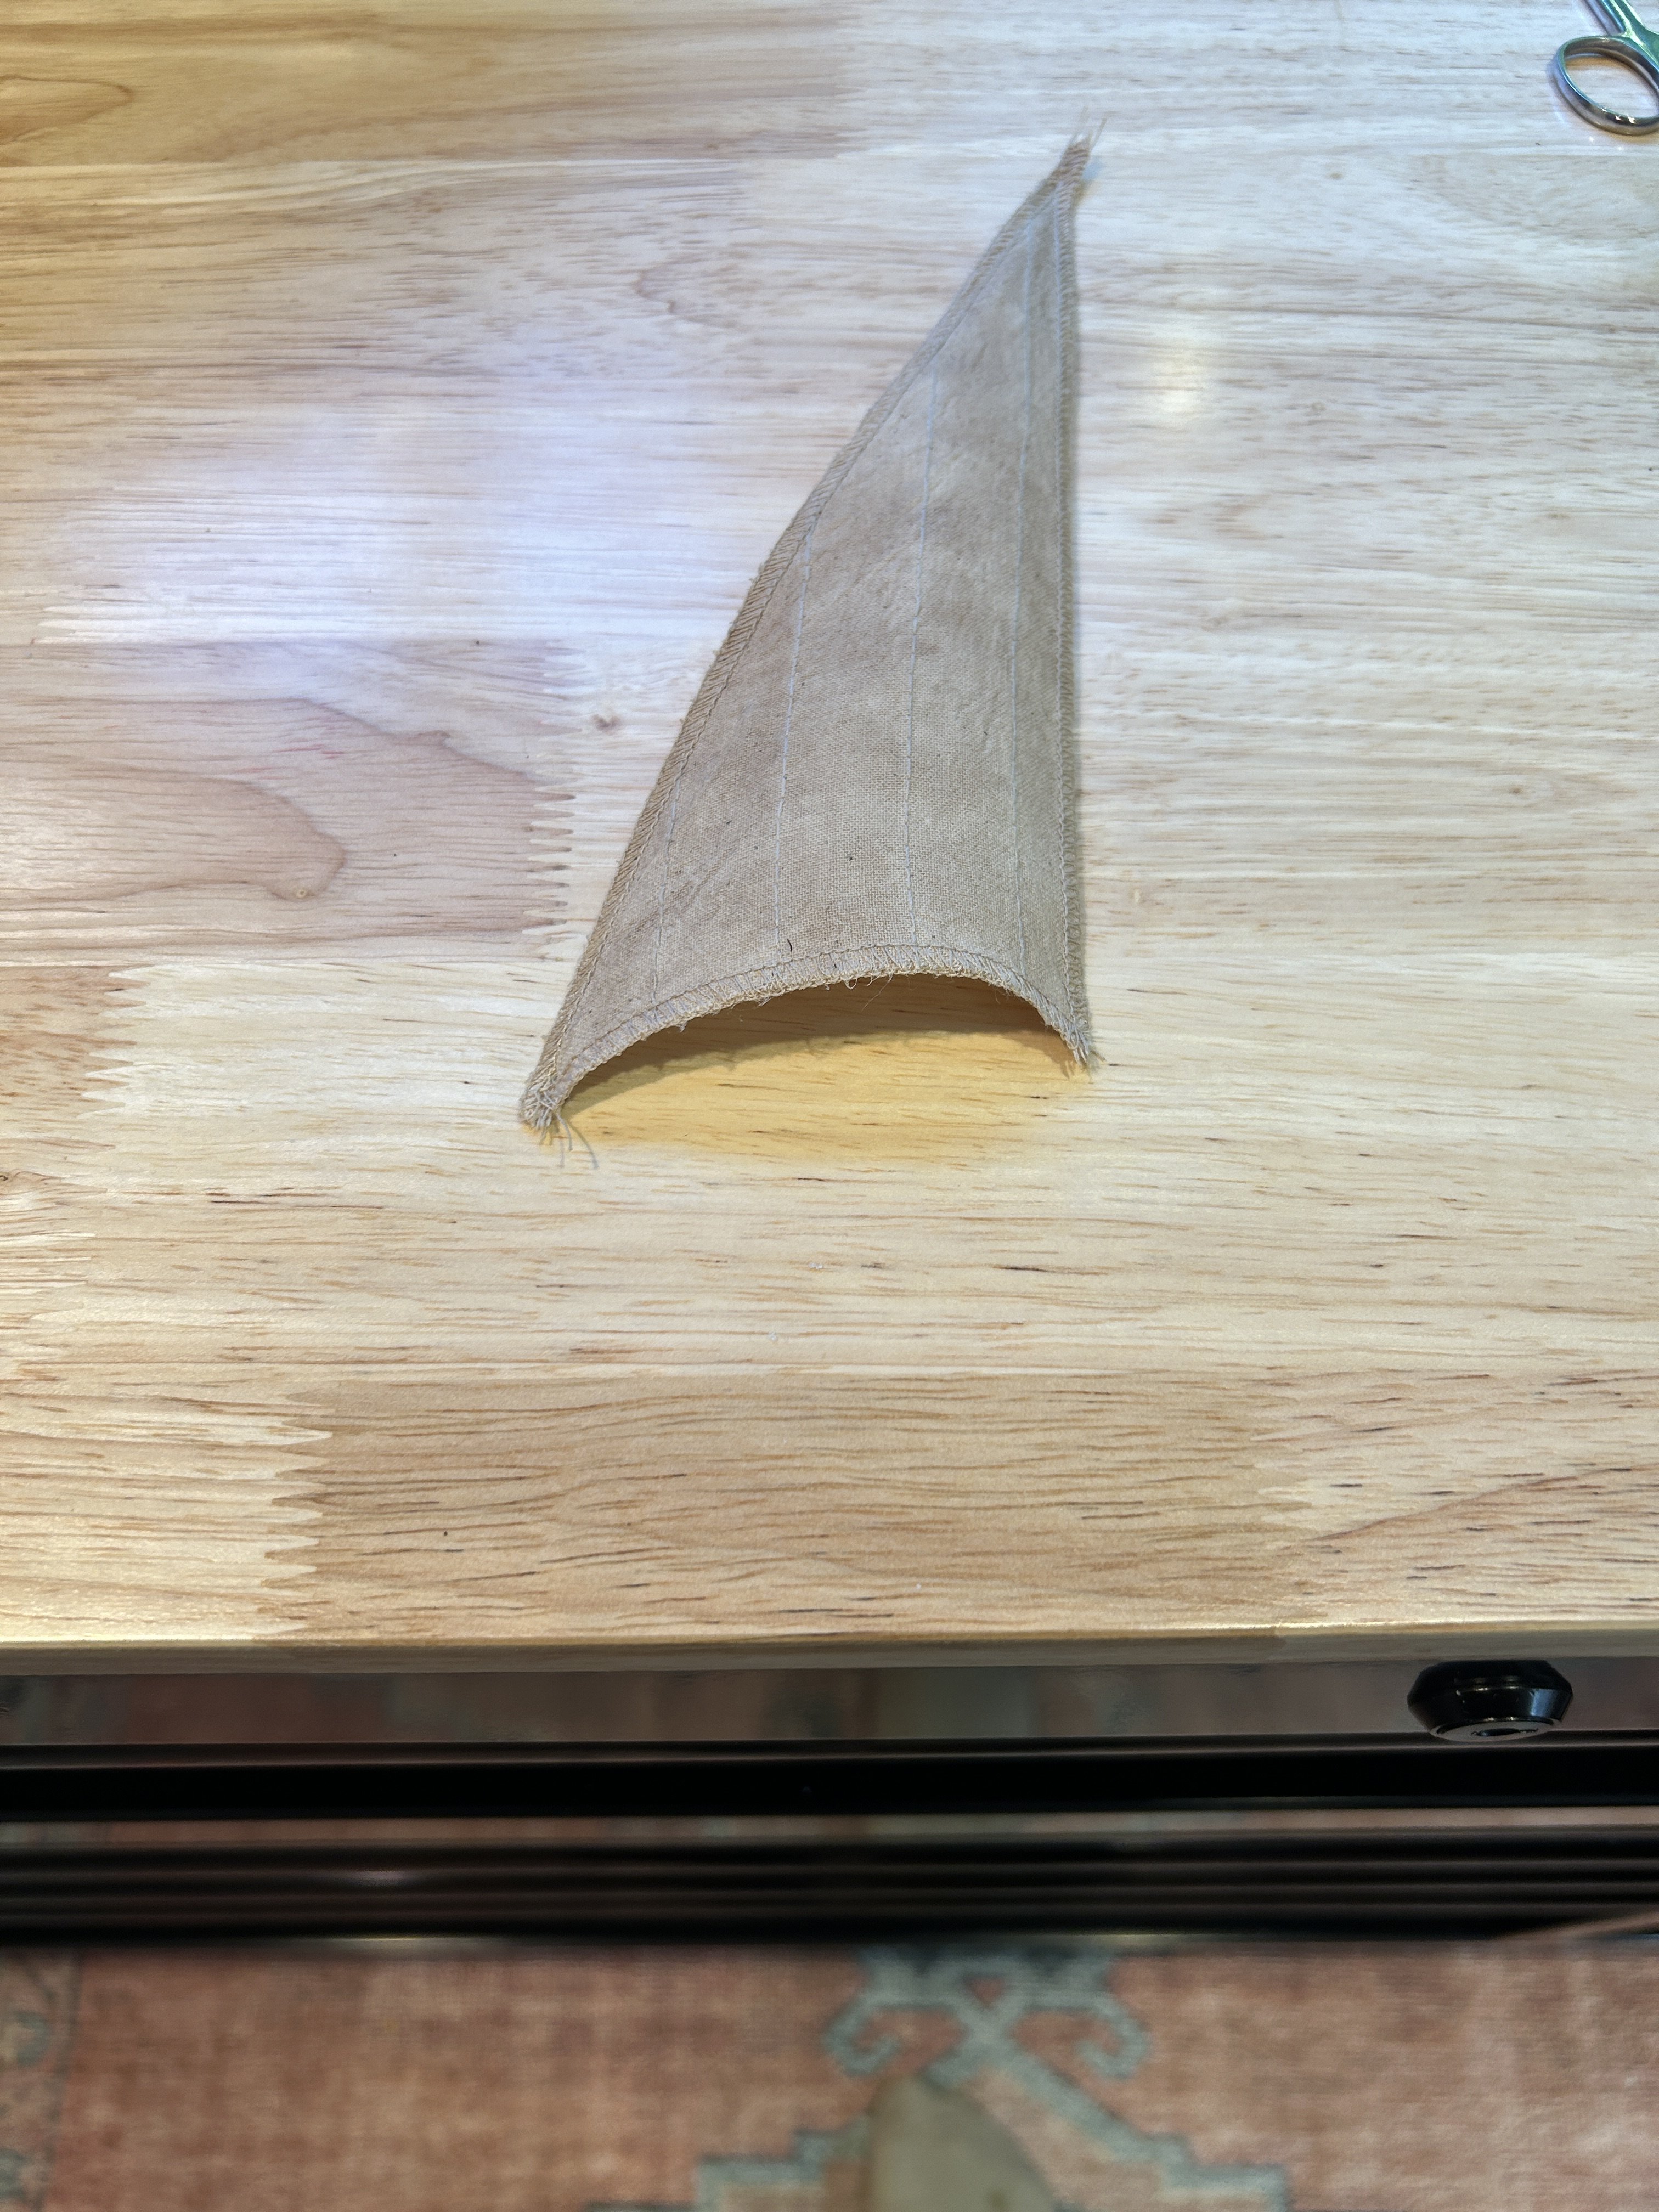
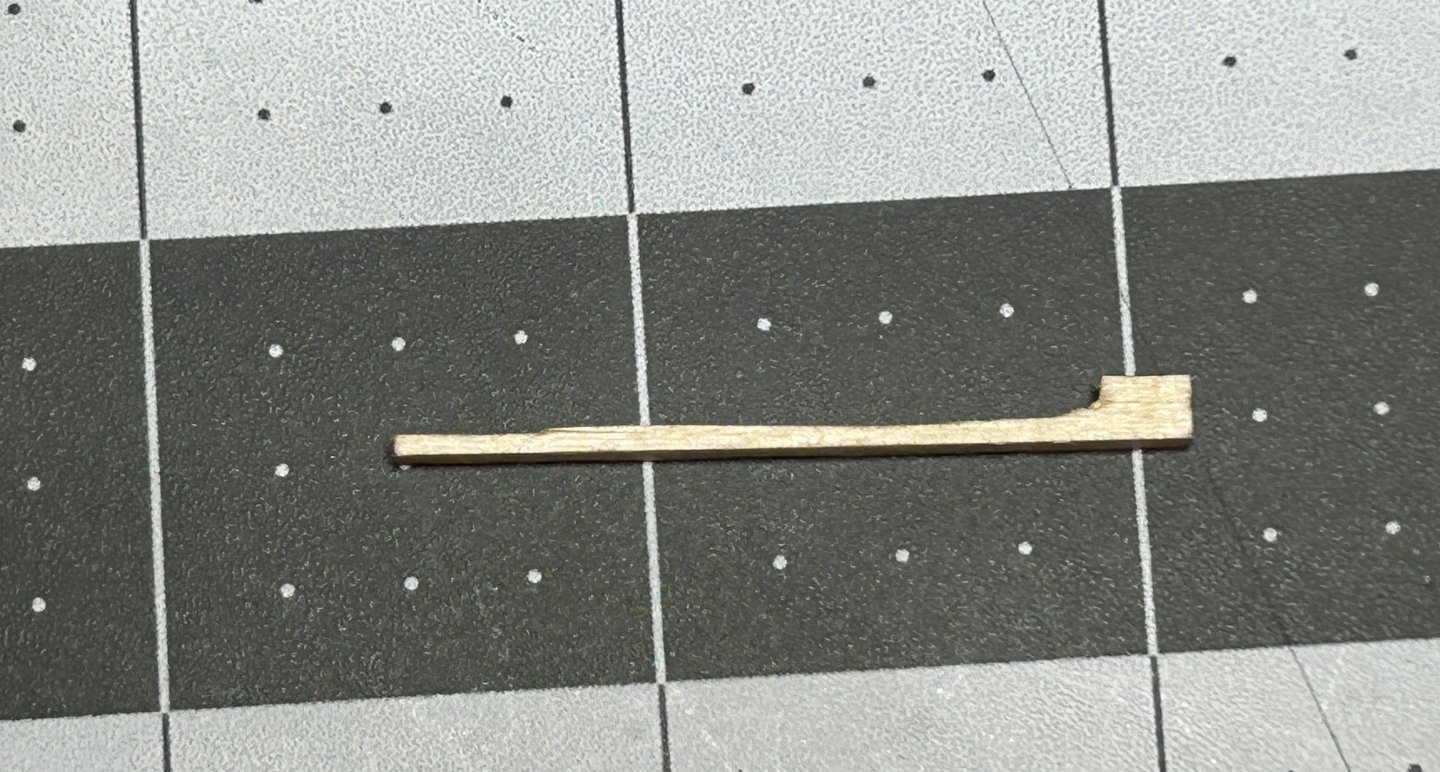
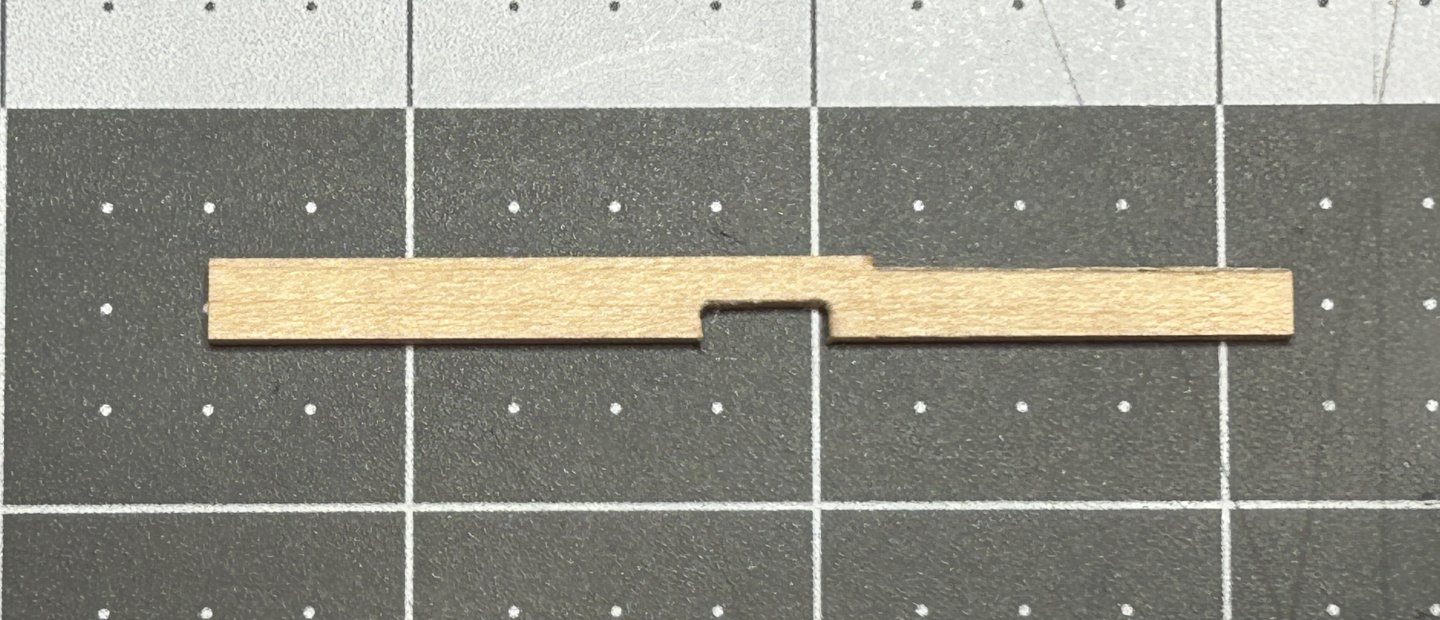
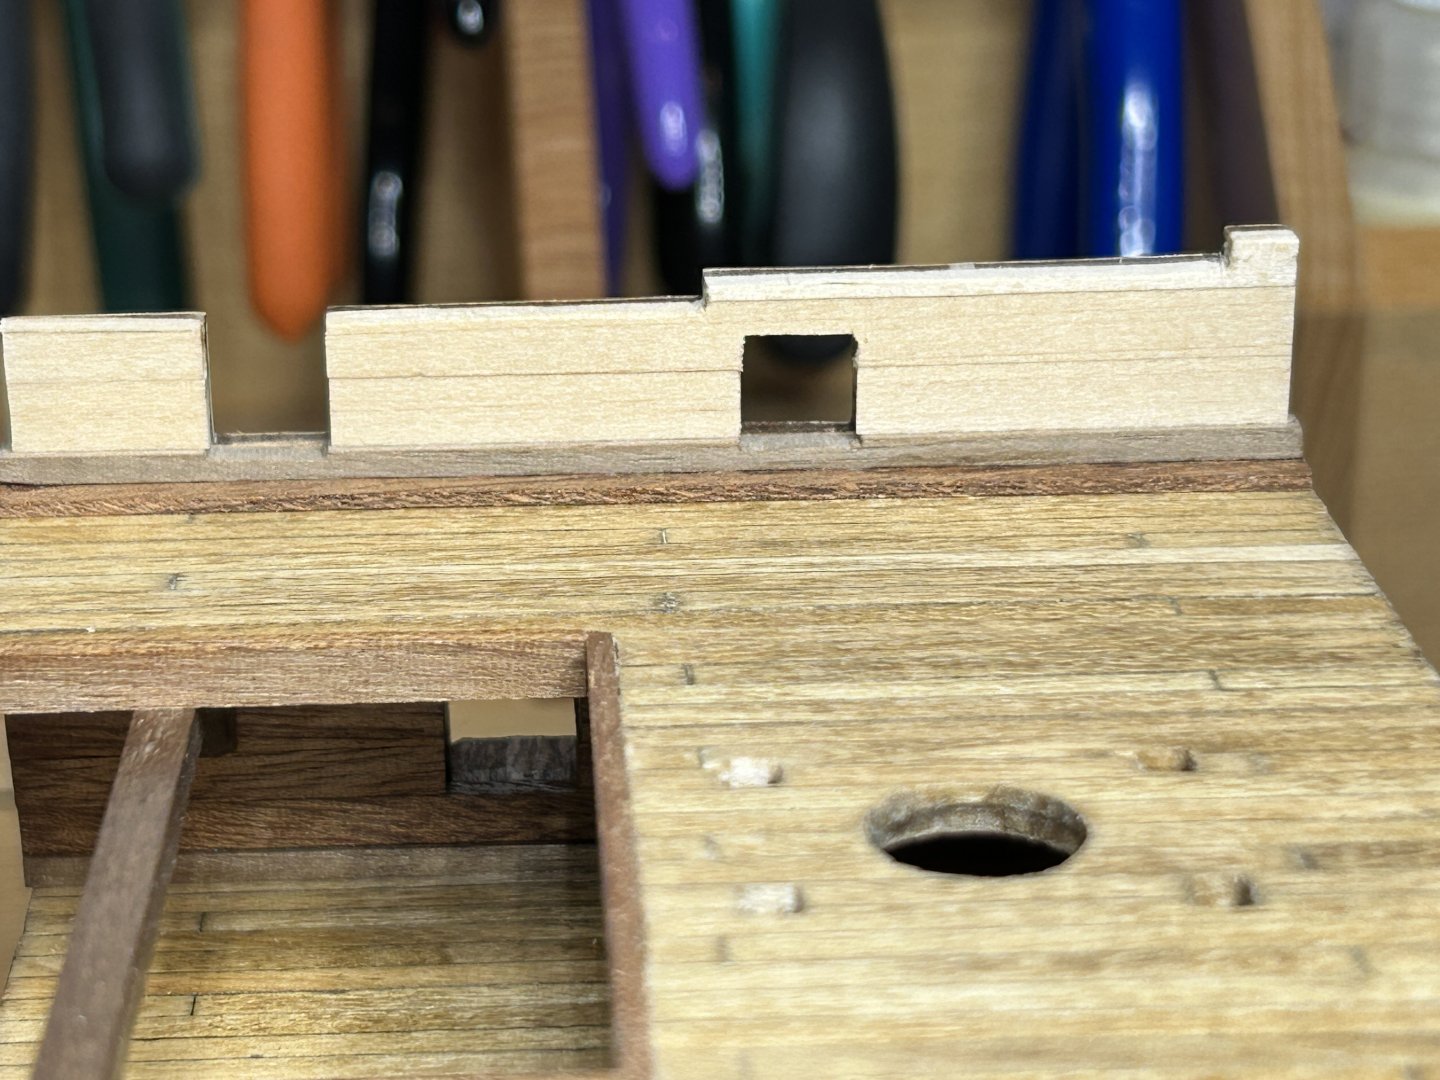
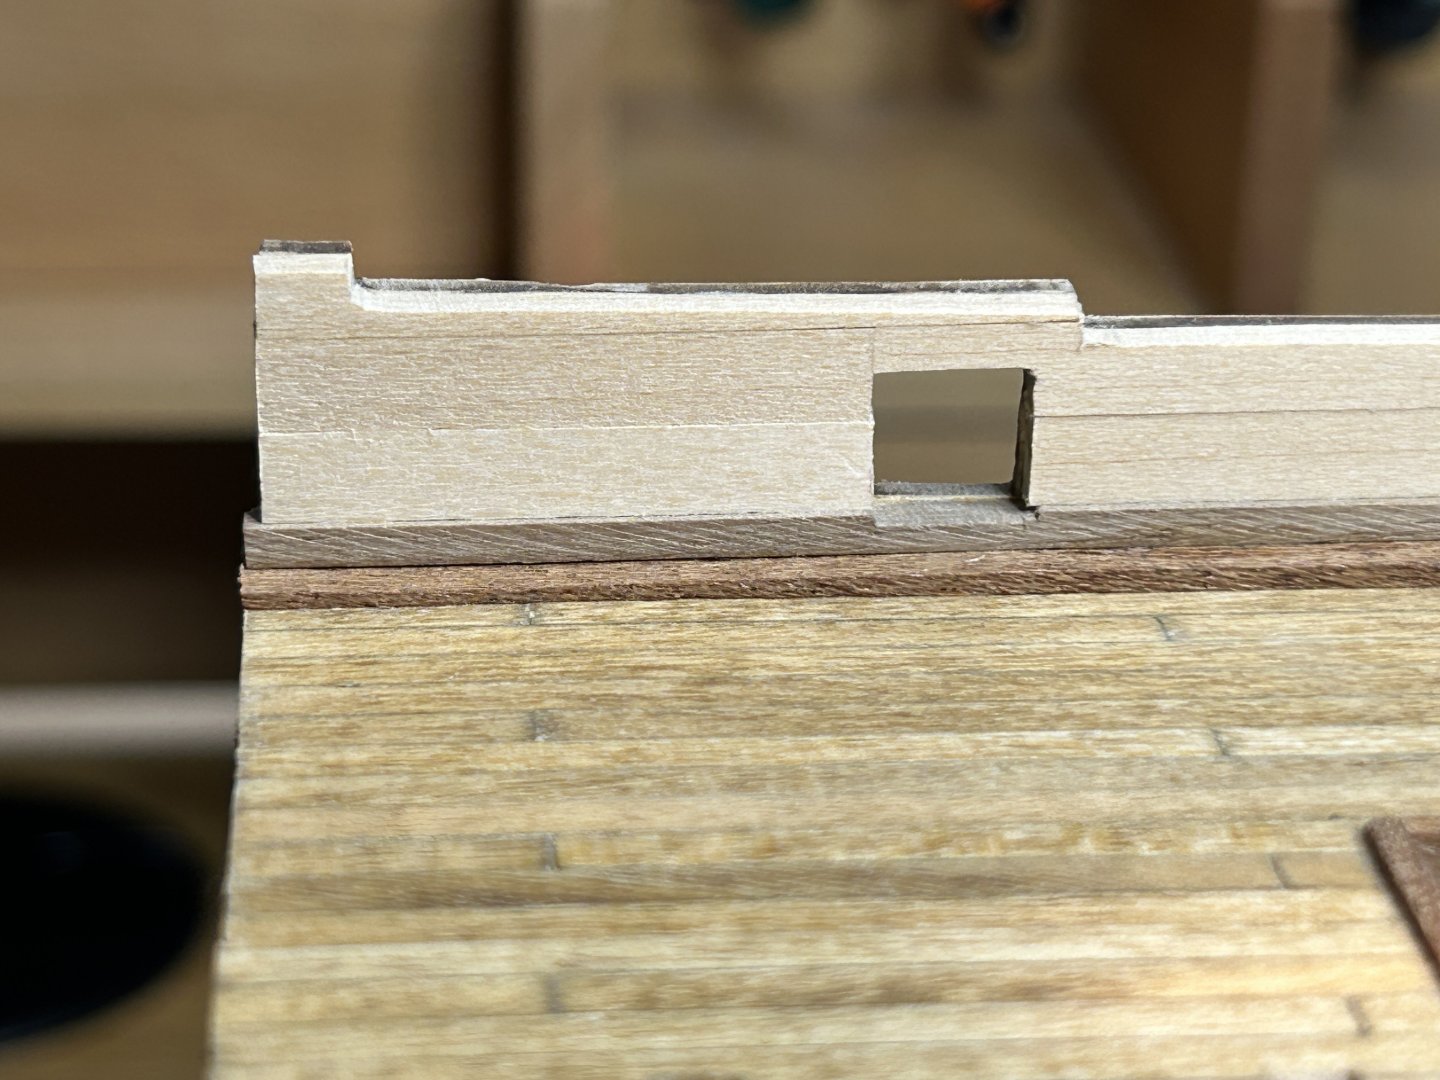
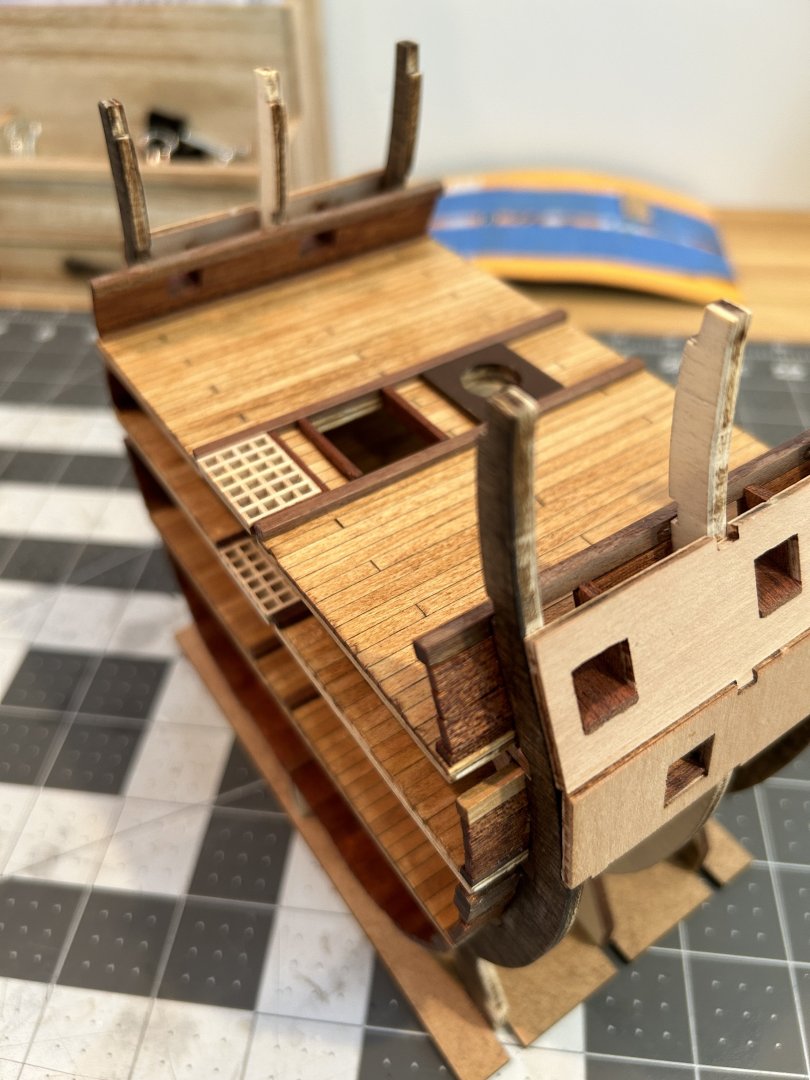
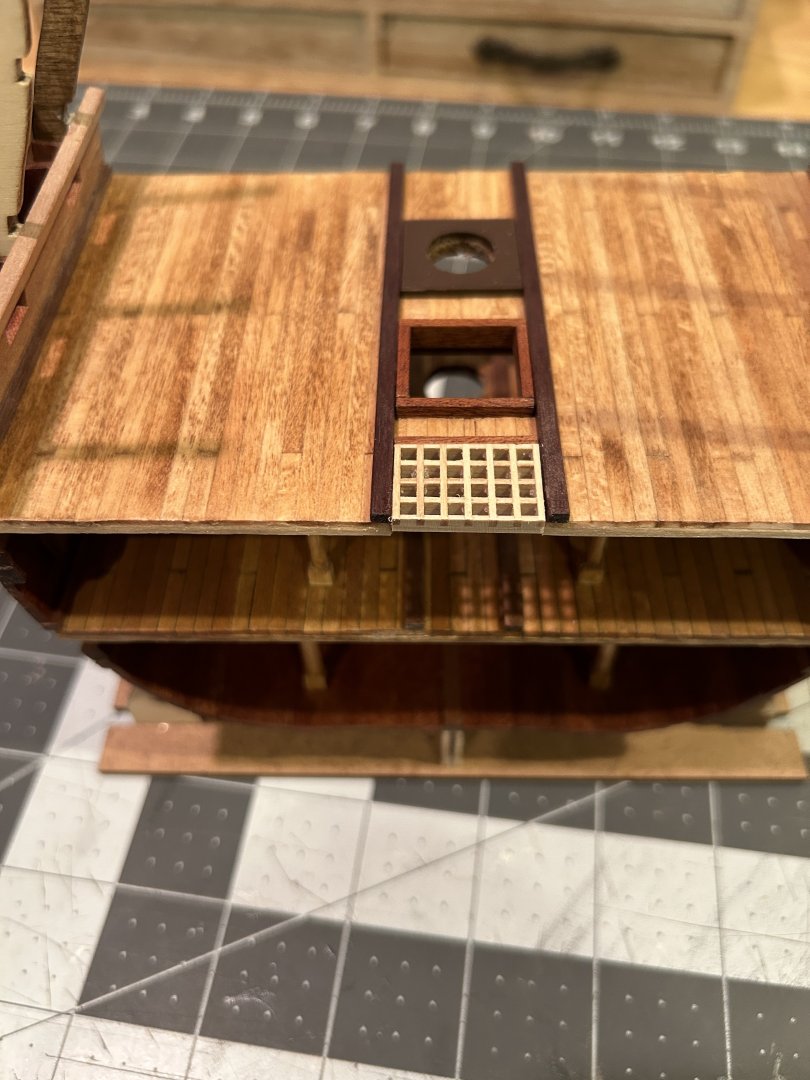
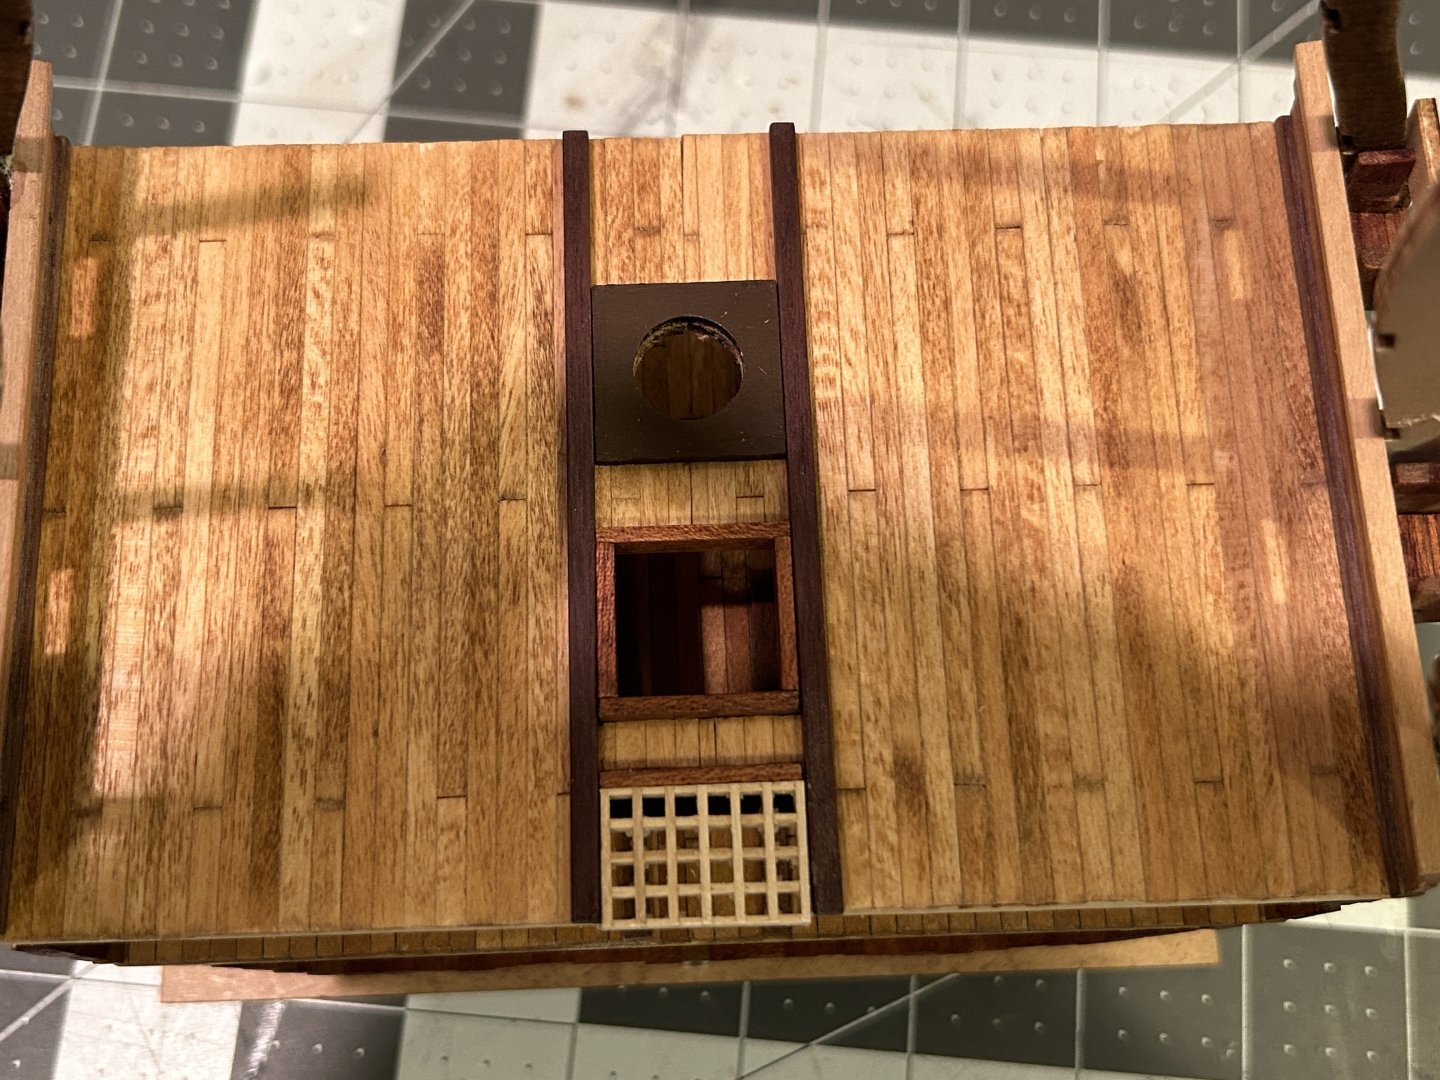
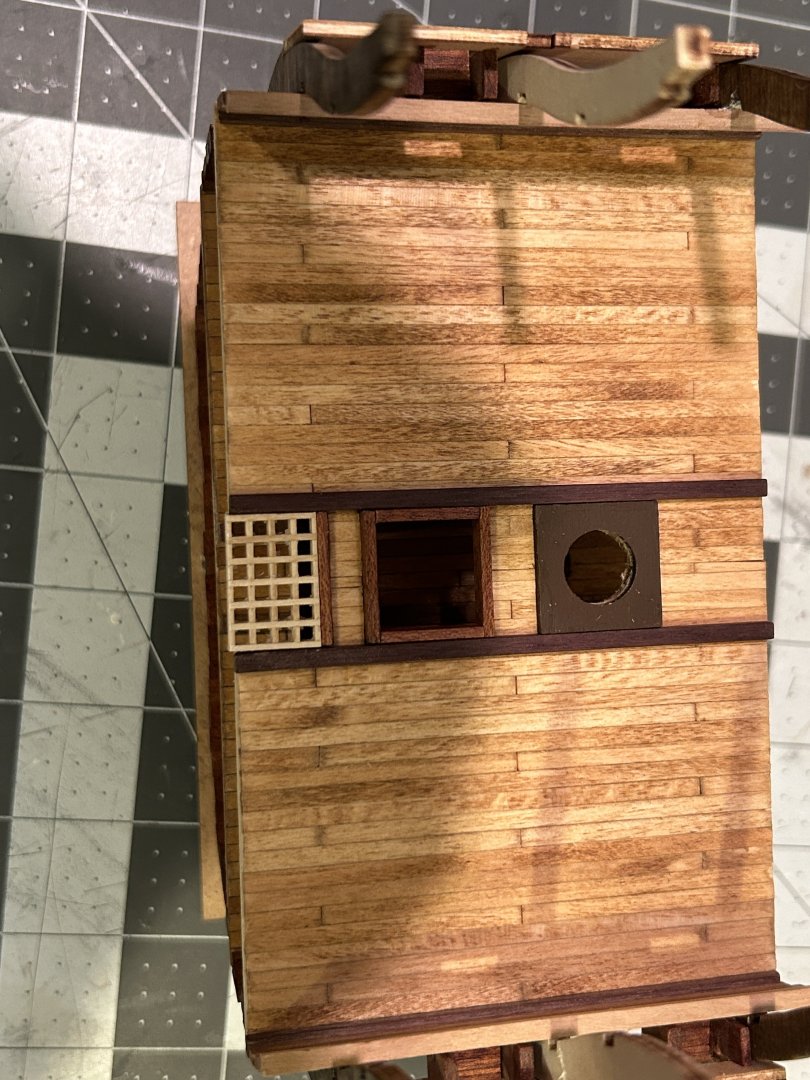
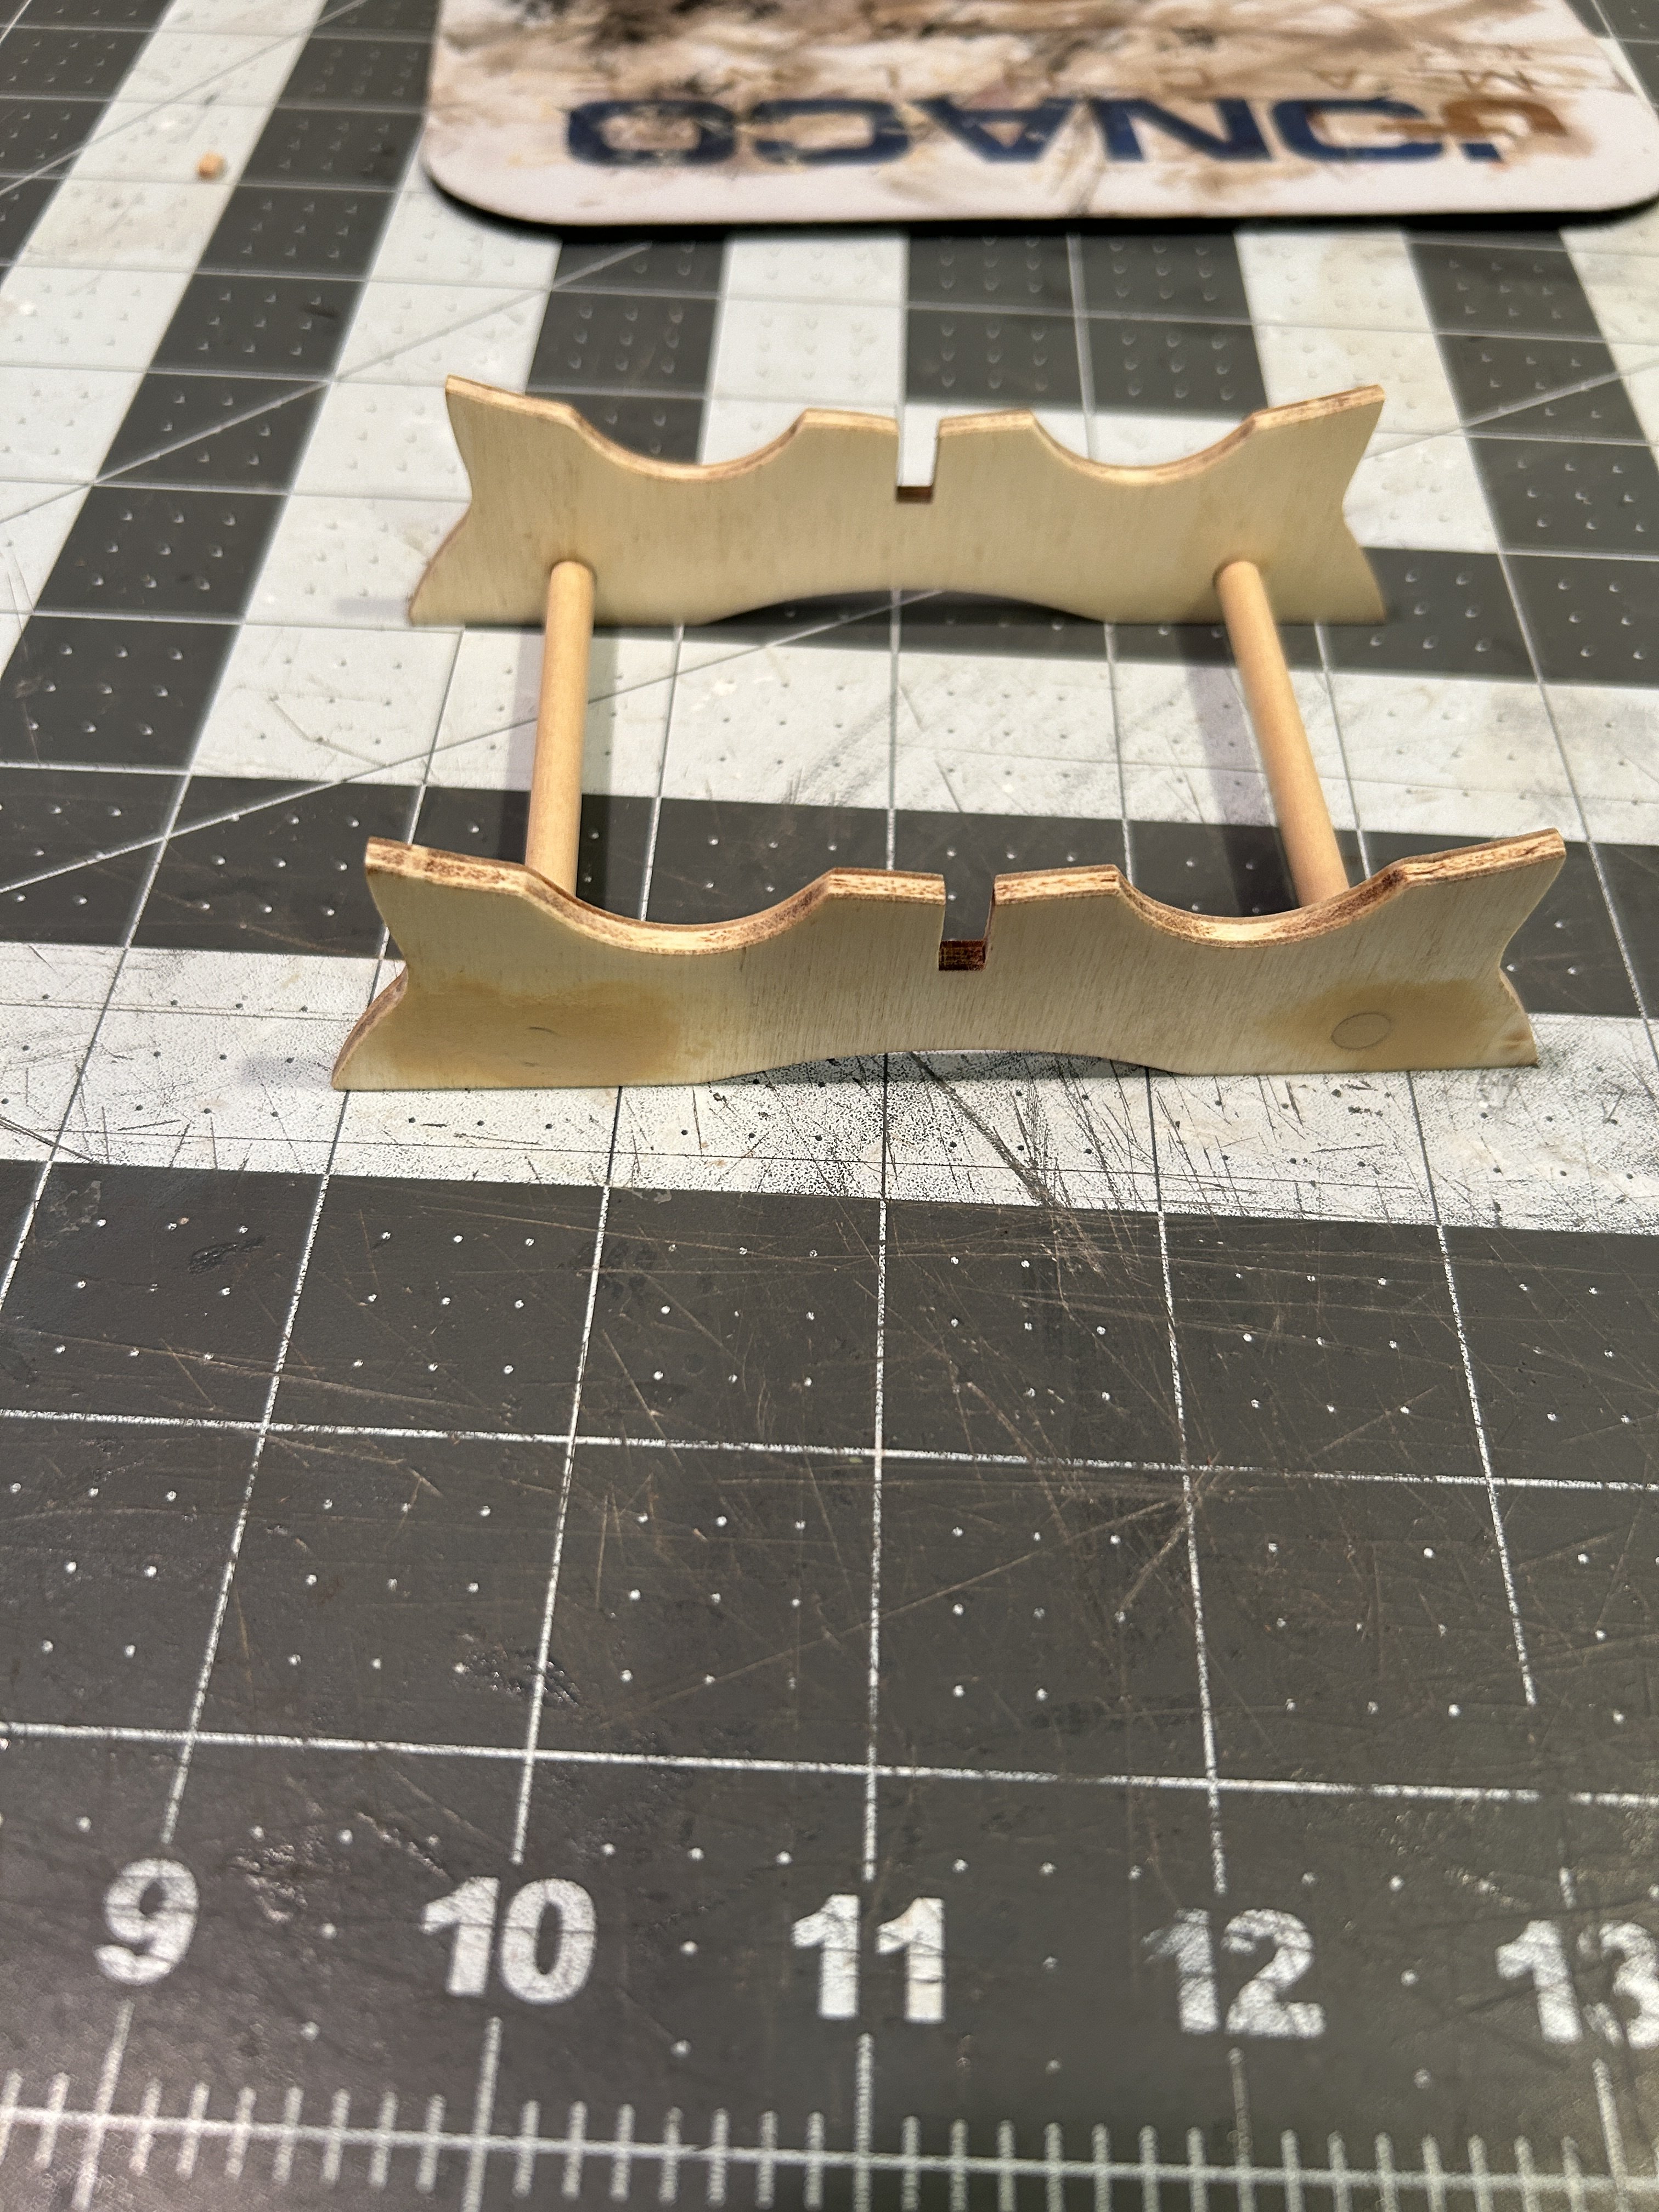
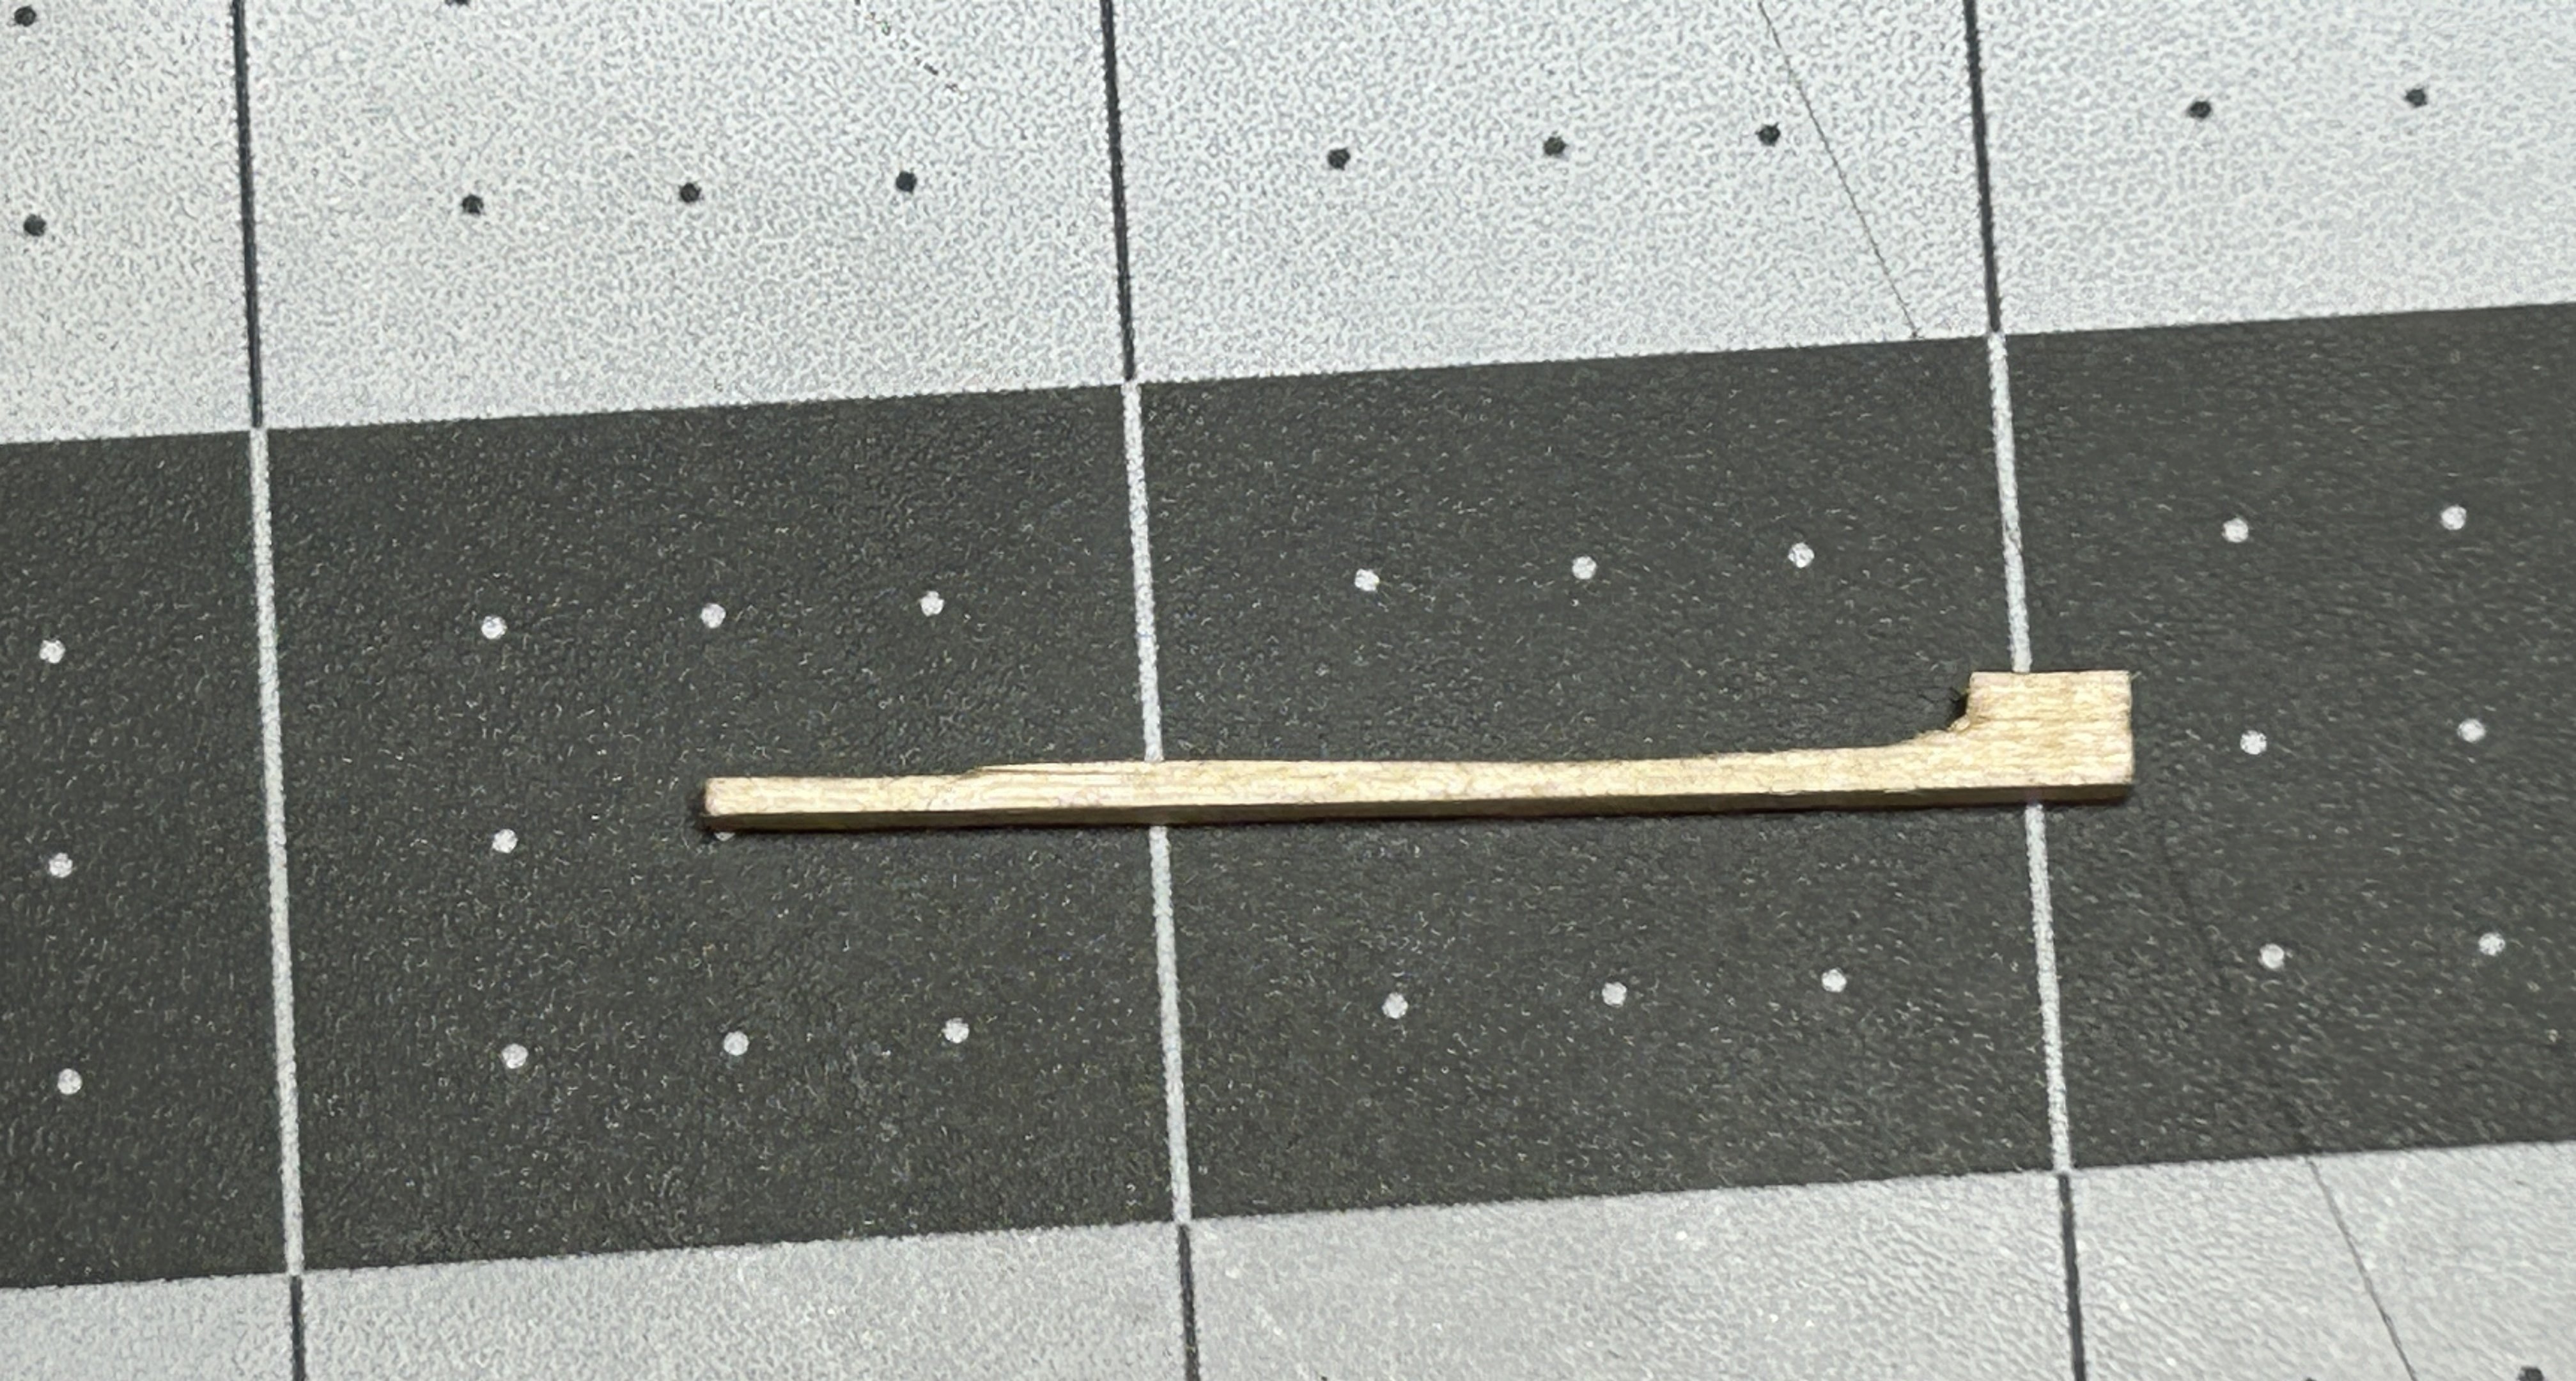
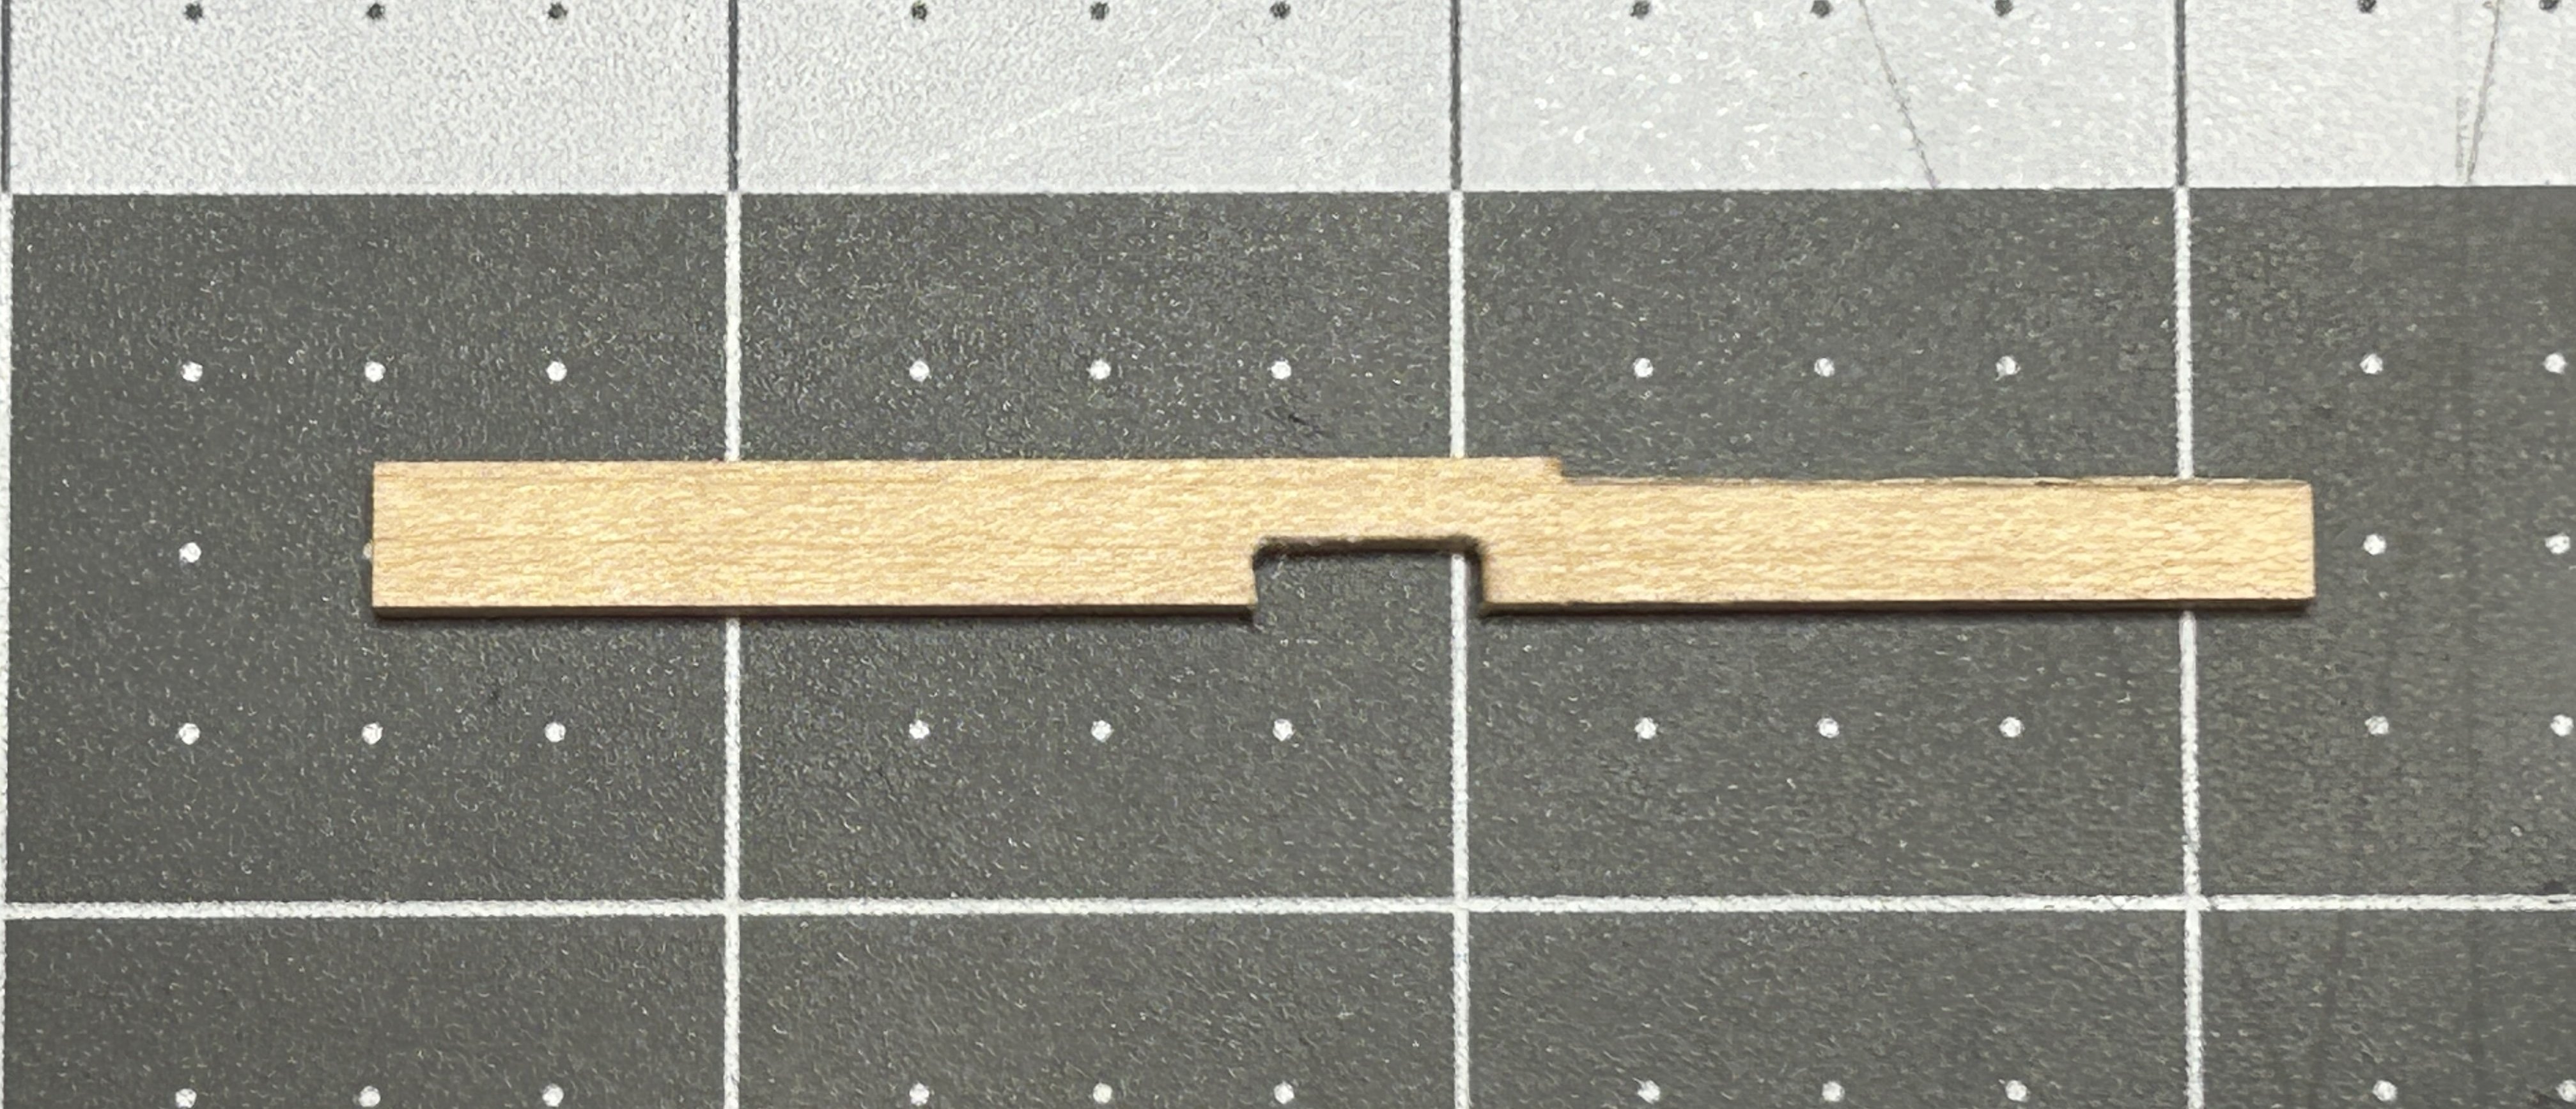
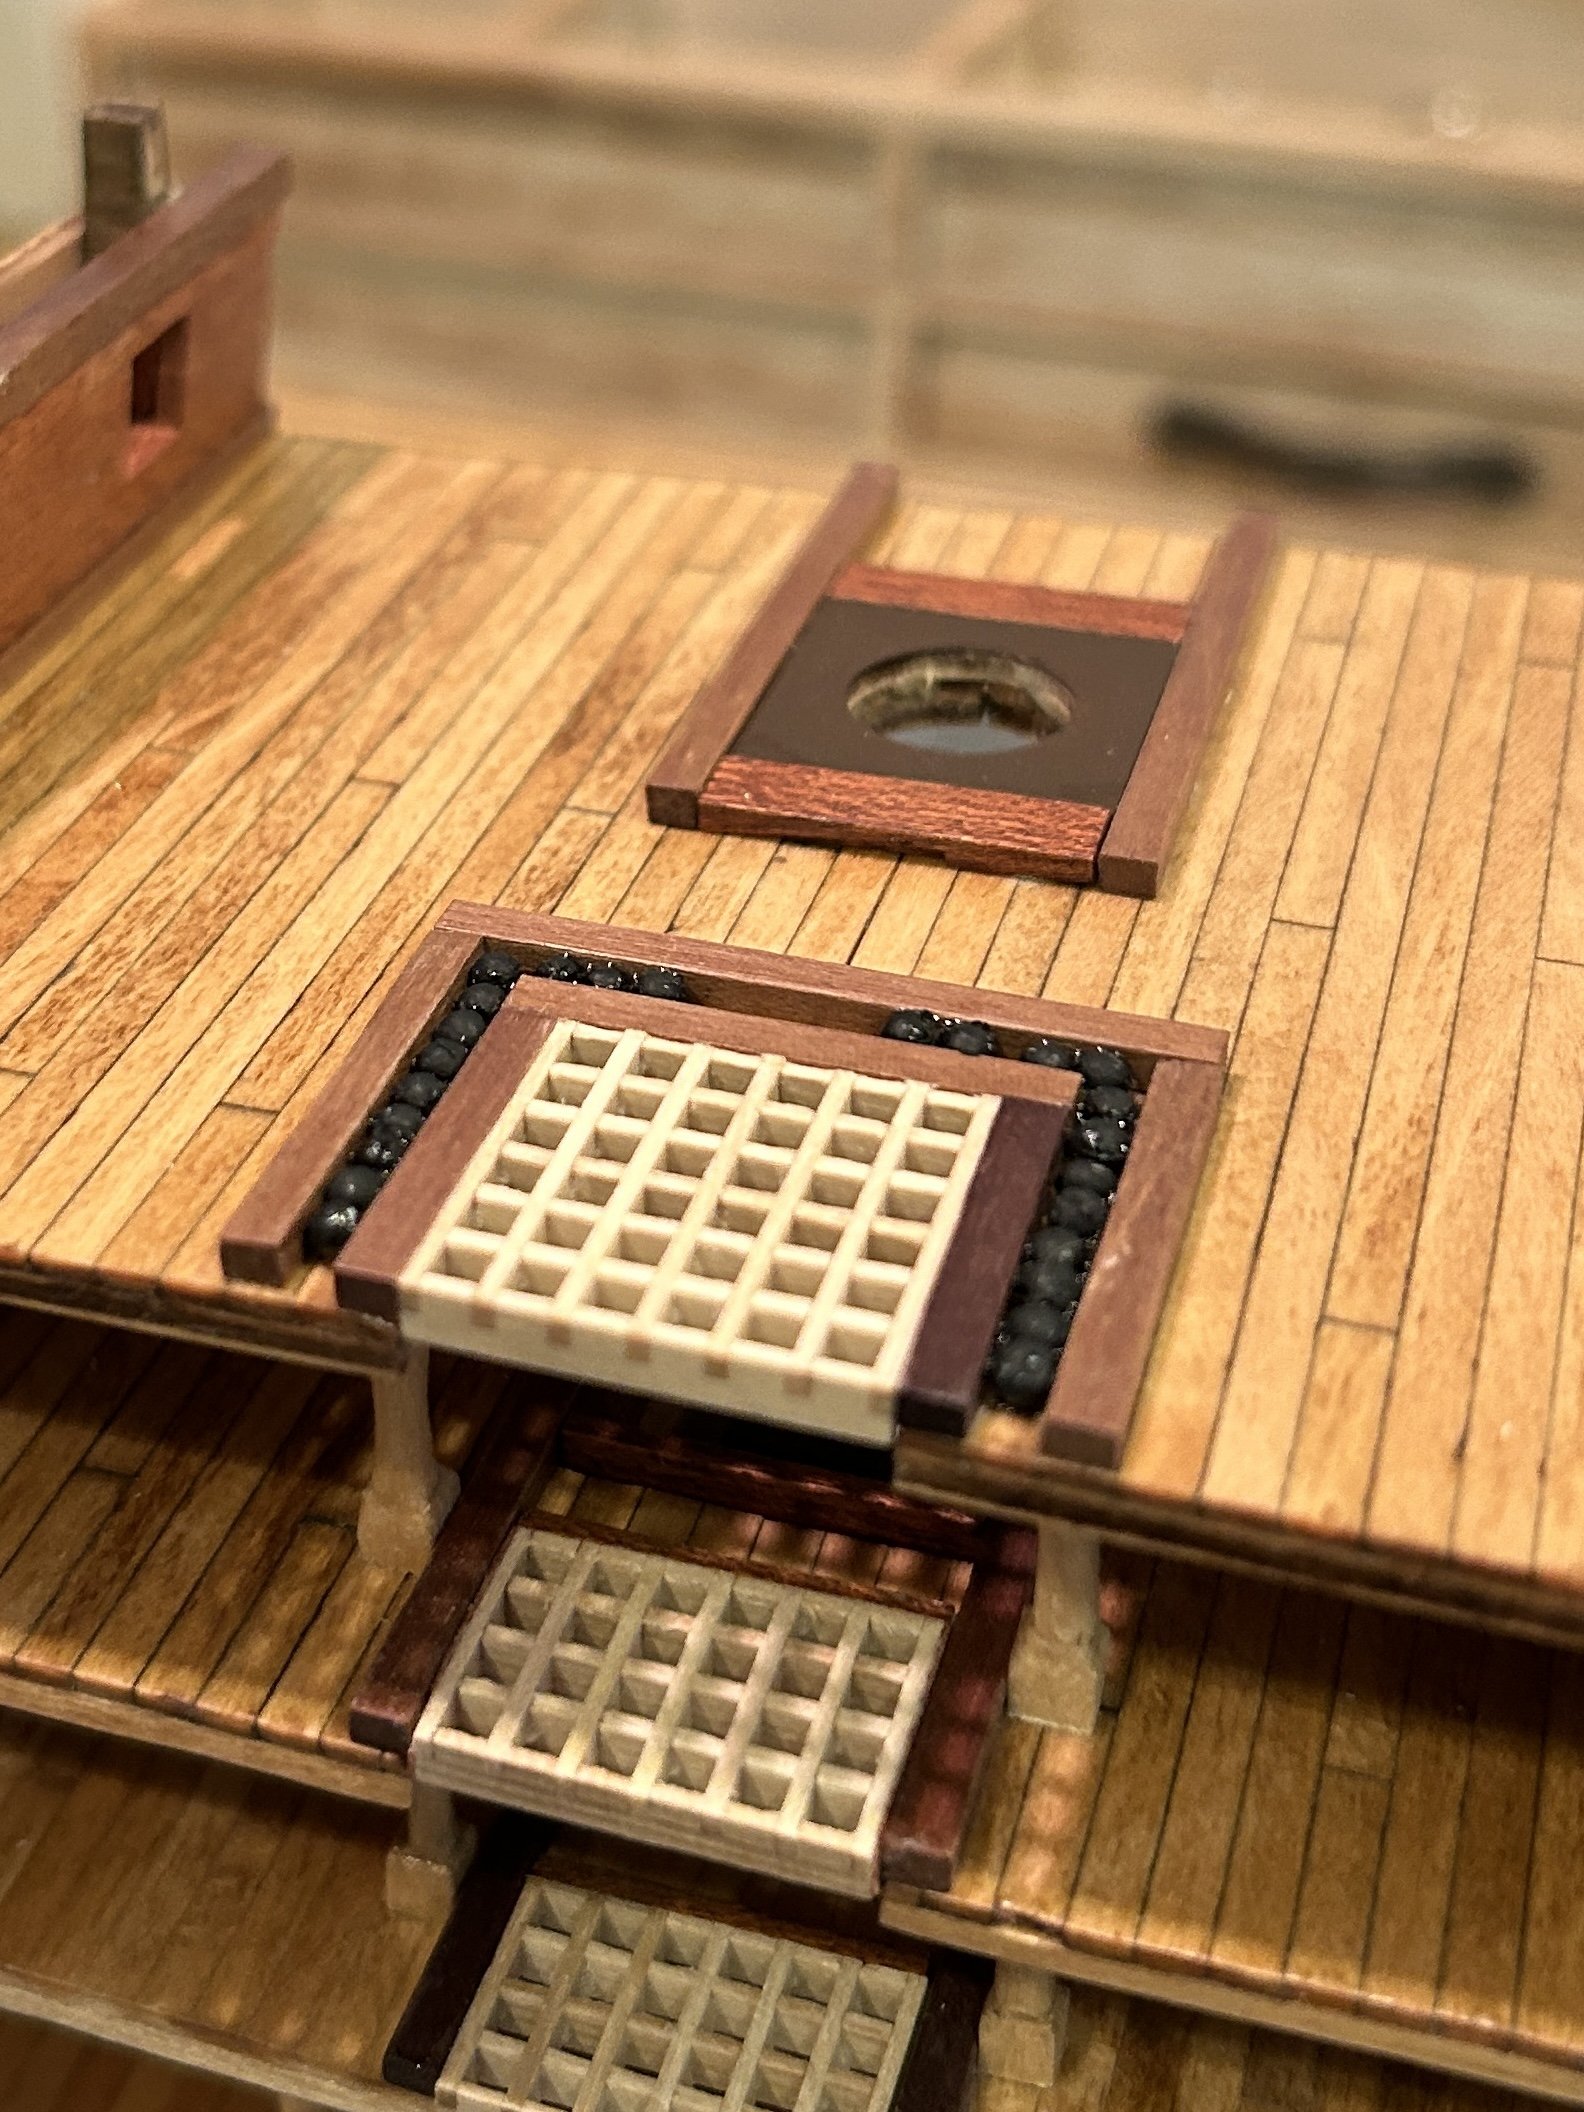
I will have a more comprehensive update down the road, but I was really excited with the way the lining of the interior of the bulwarks turned out and I wanted to post about it. I have been trying to learn to be more patient and take my time on the trickier parts. In his instructions for the US Brig Syren, Chuck says "Treat each planking segment as a small project unto itself". I think this is the first time I really took that advice to heart and I focused on each plank without thinking about the next one and took my time to get it right. The material for this was 2mm x 5mm basswood. I had to notch out around the gun ports. below are a couple of pictures of the pieces I had to create. The second picture was before the final sanding and shaping. It took several tools for tool chest to fabricate these pieces including my Ultimation Chopper and Sander, two sanding blocks, a file, a hobby knife, two miniature chisels, a pencil and a ruler. Here is the end result Thanks for the views and likes, and I will get a more comprehensive post out soon.

- 21 replies
-
- 3
-
-
- Santisima Trinidad
- OcCre
- (and 2 more)
-
I love those two items from Ultimation.
- 63 replies
-
- 2
-
-
- Norwegian Sailing Pram
- Model Shipways
- (and 2 more)
-
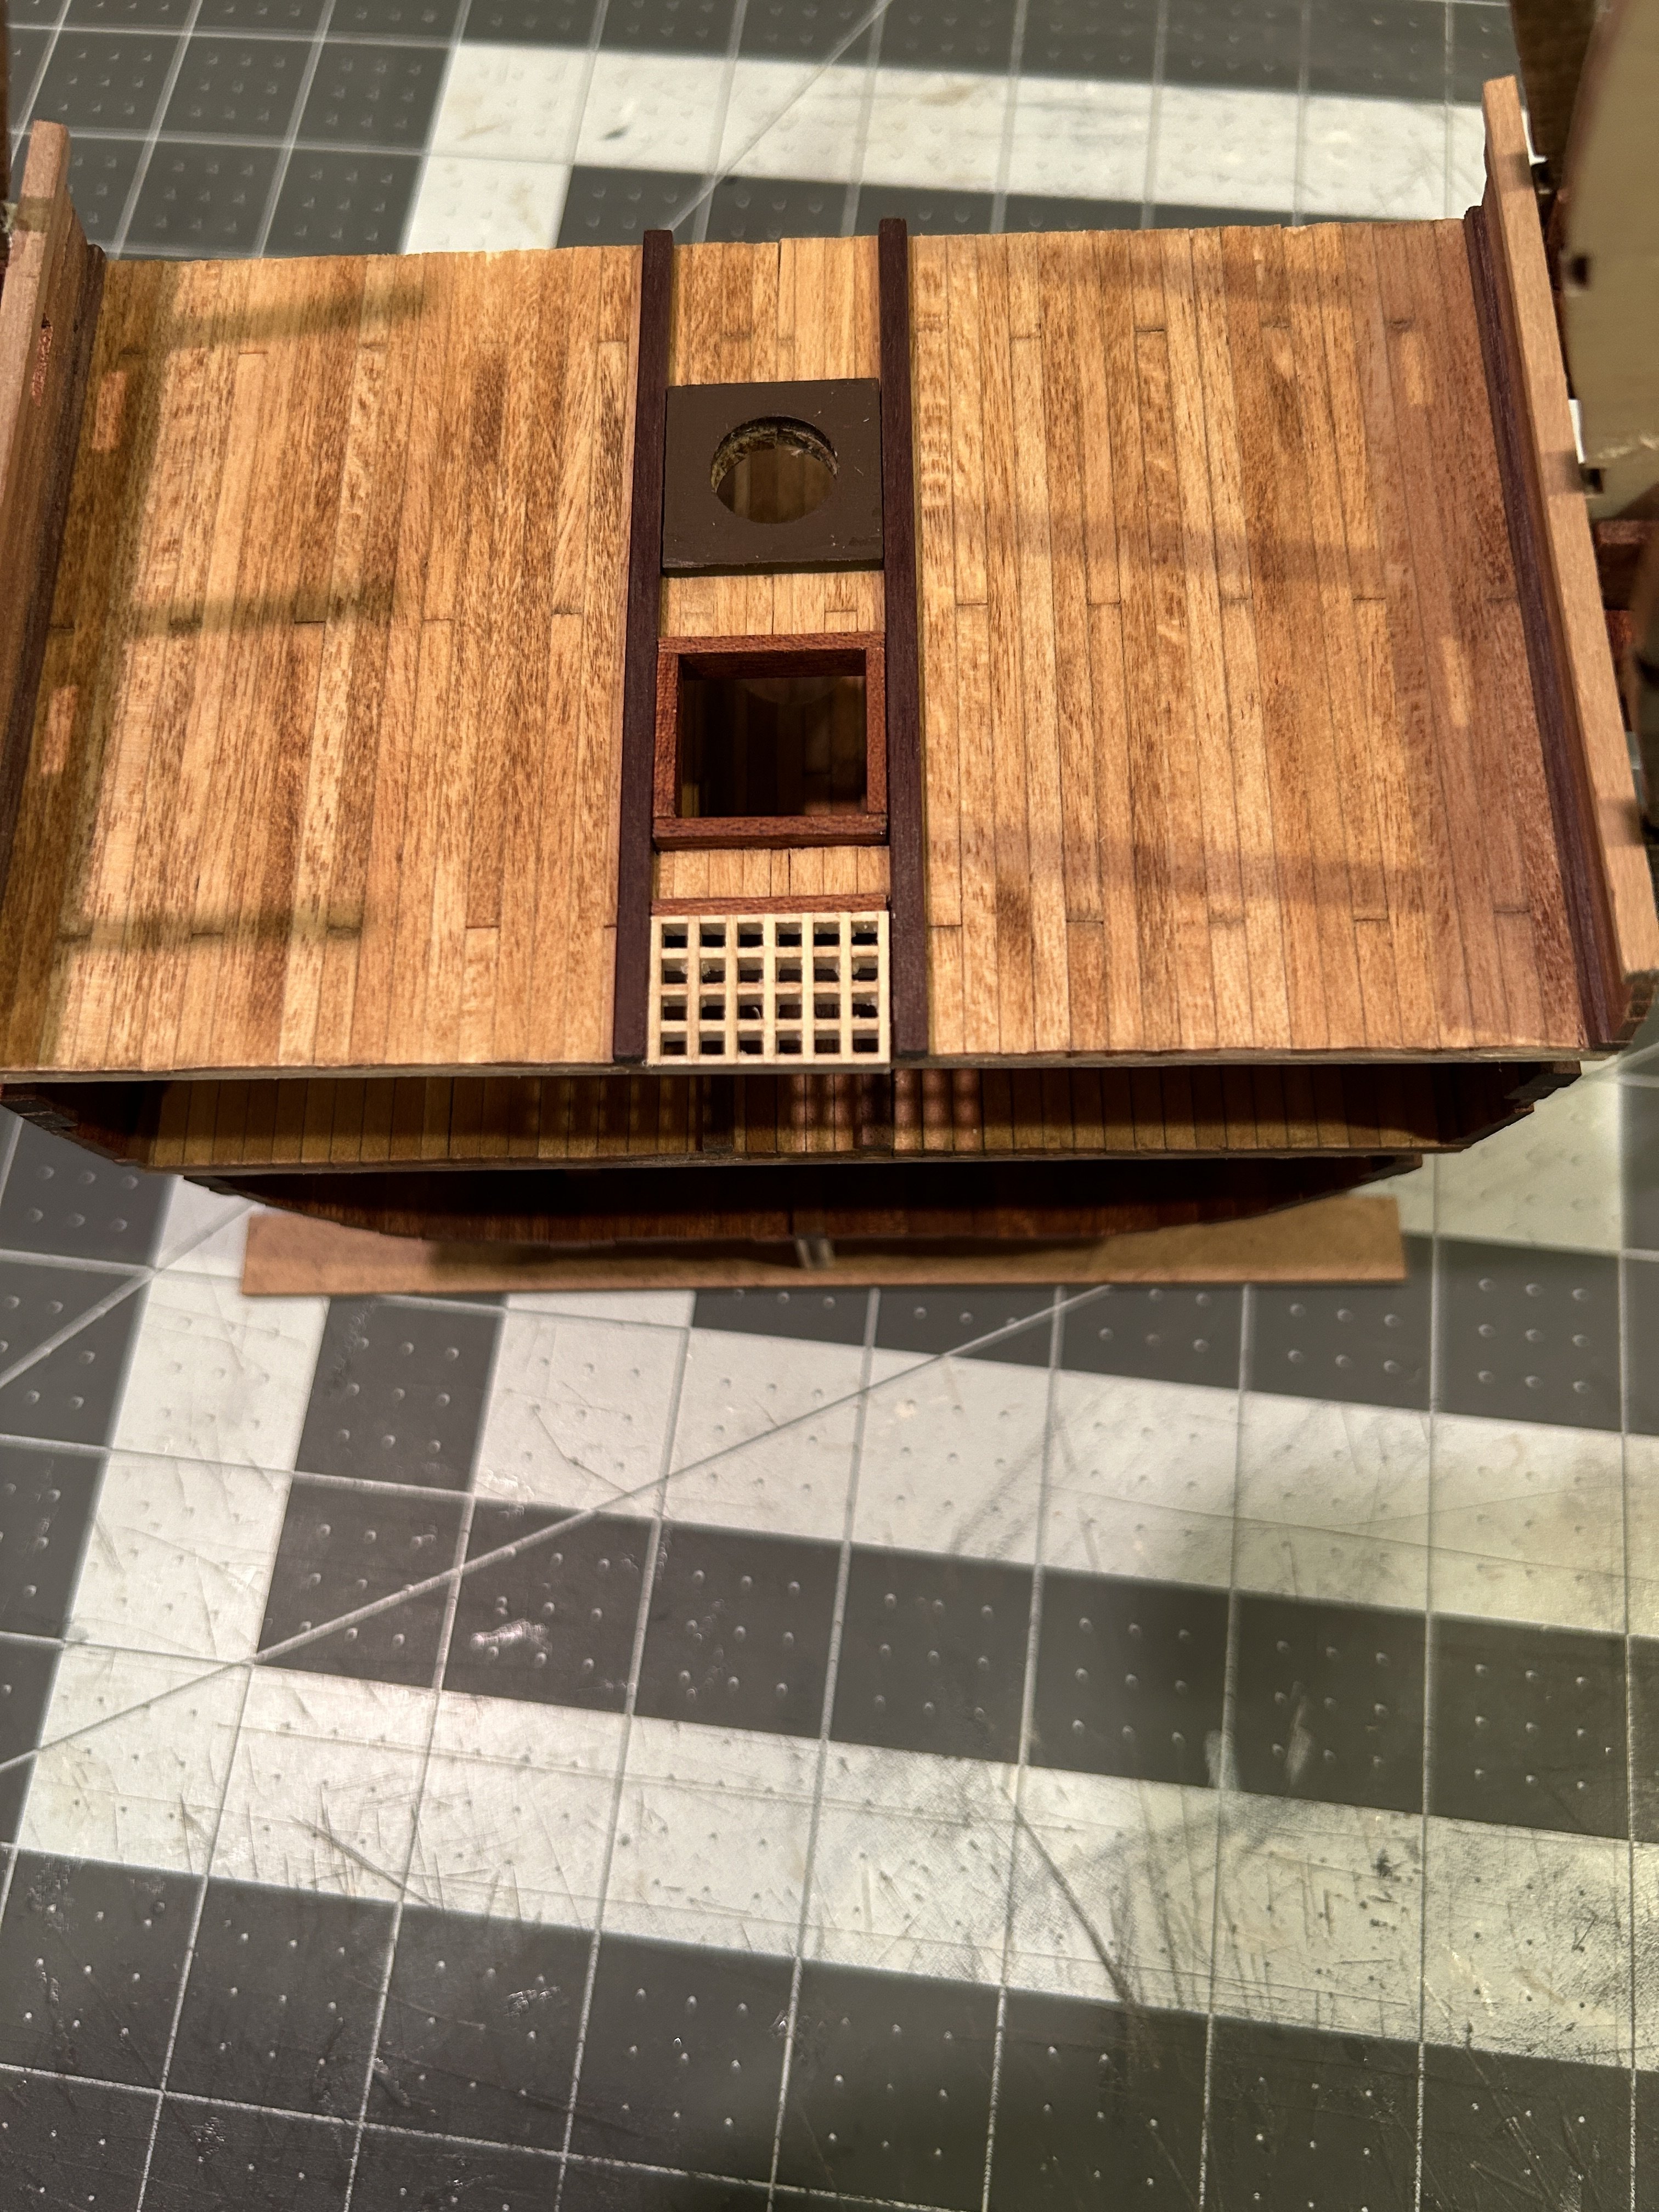
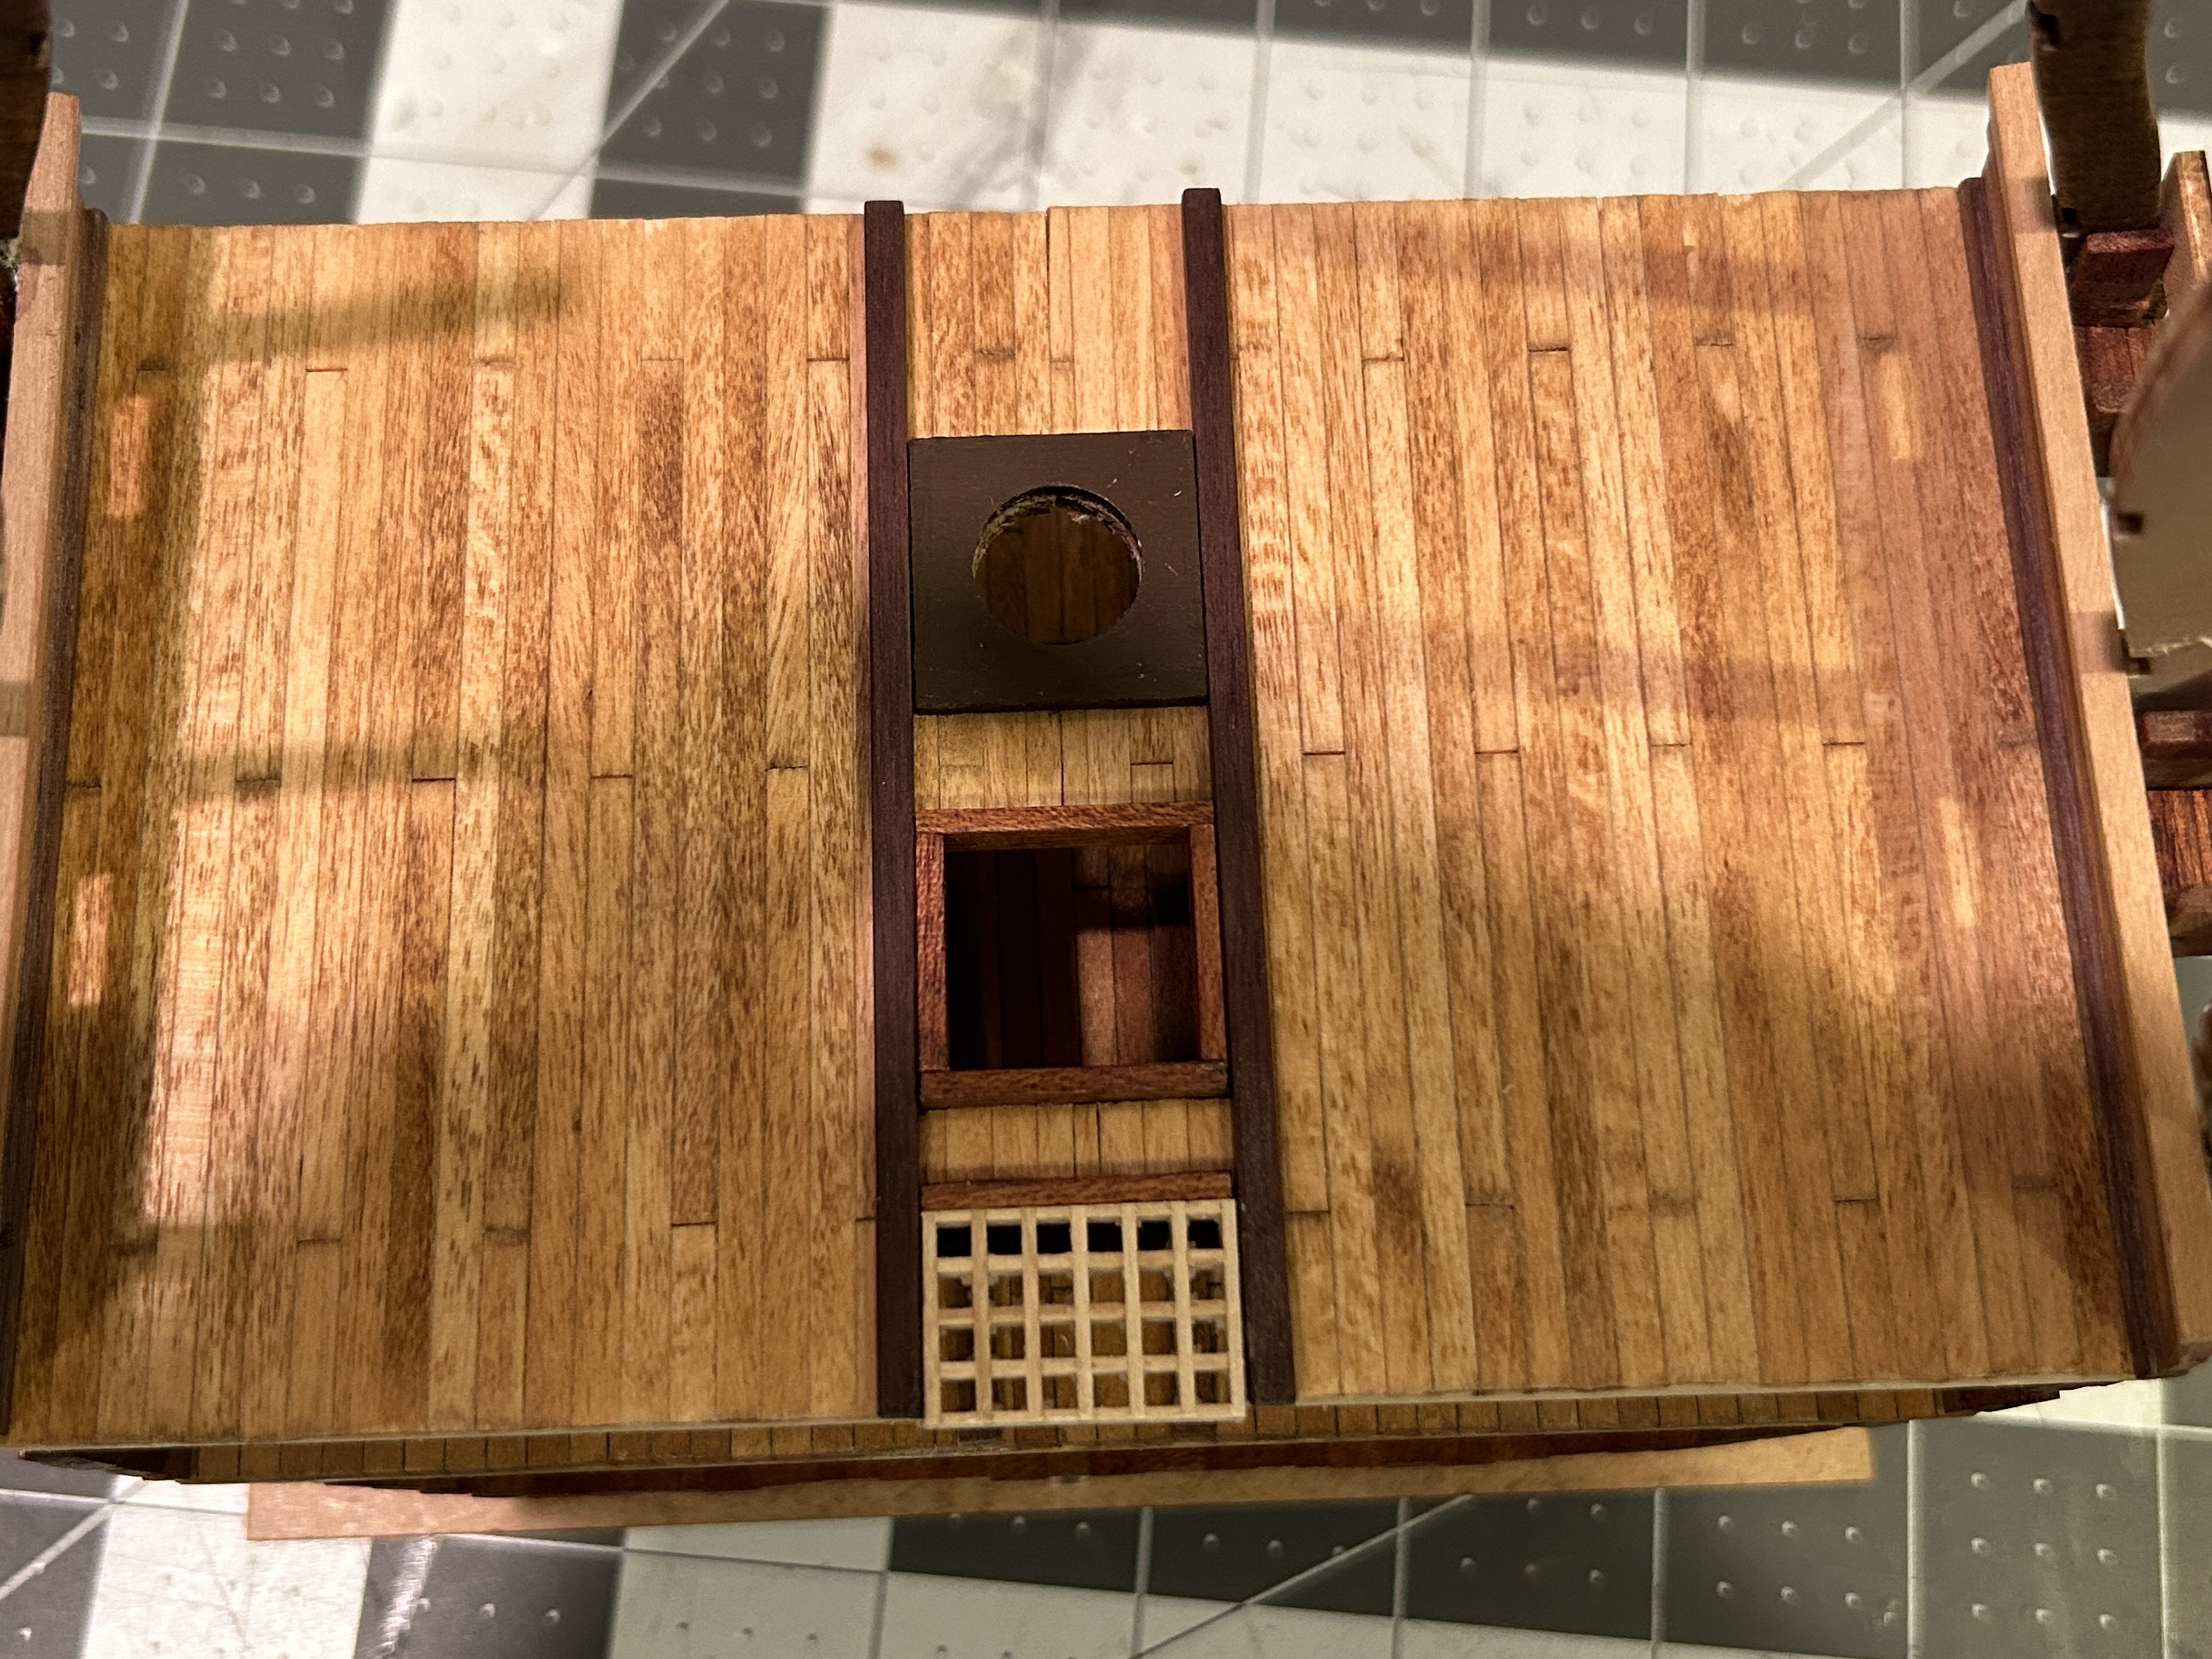
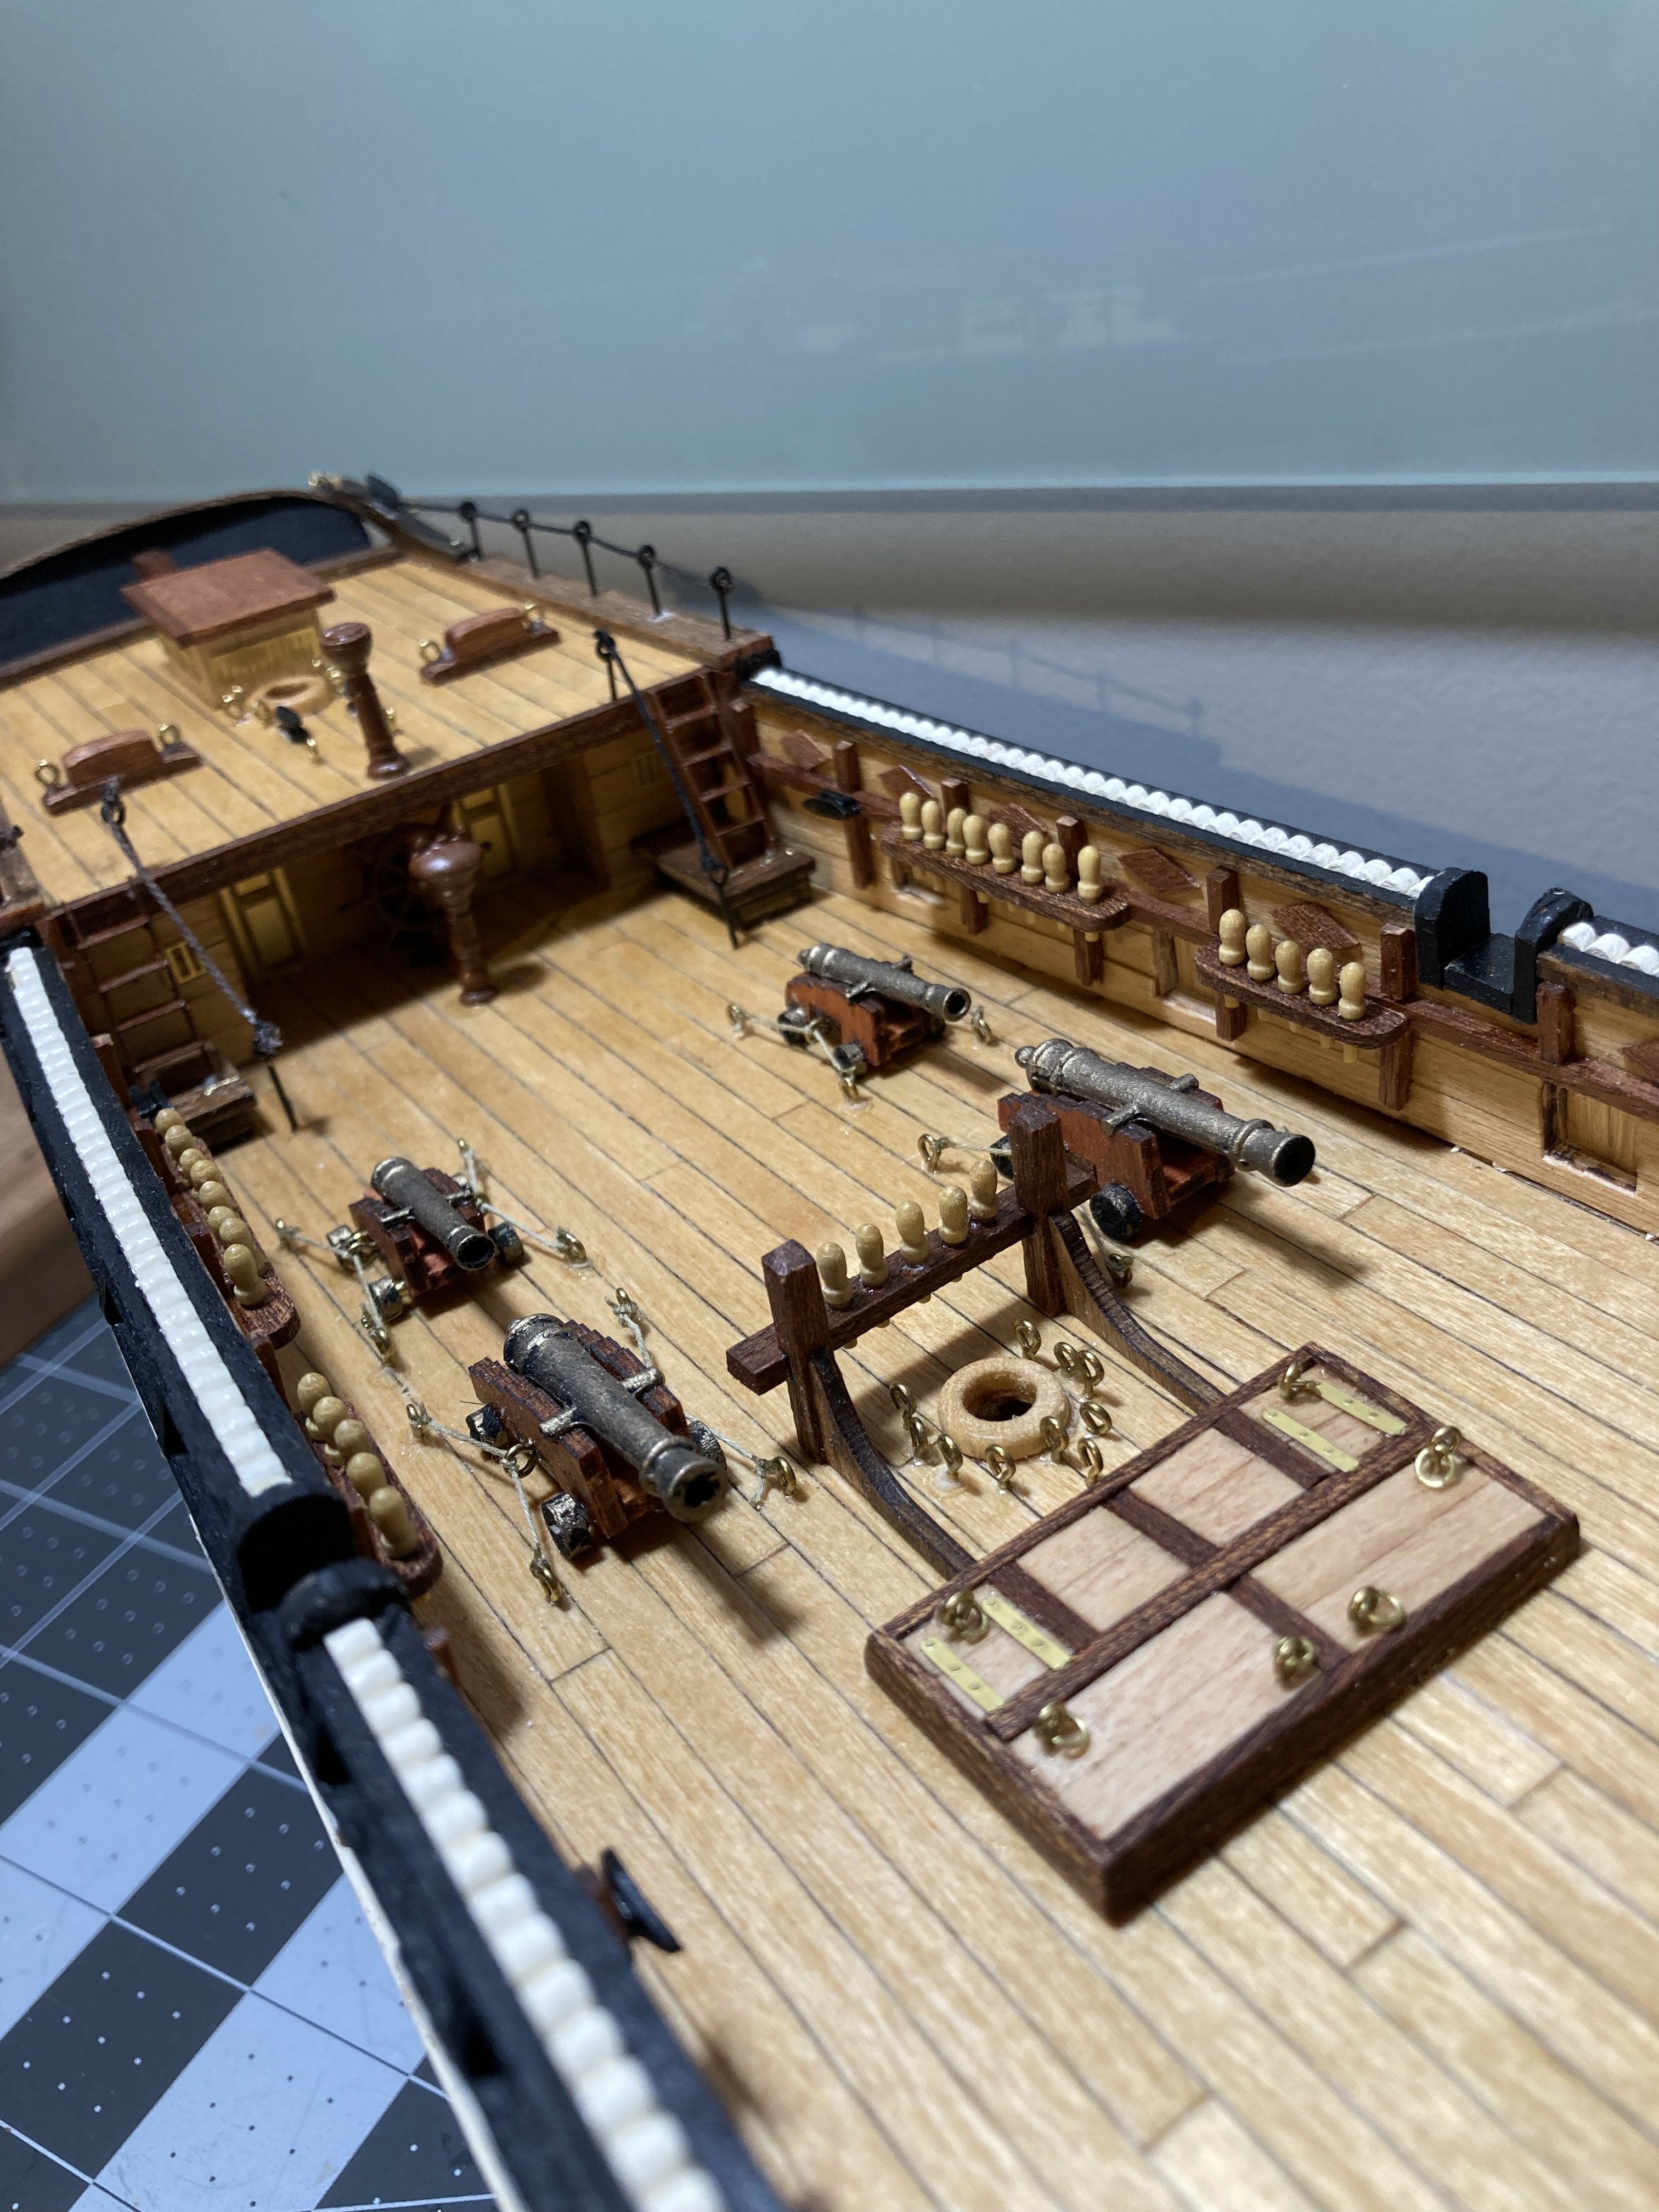
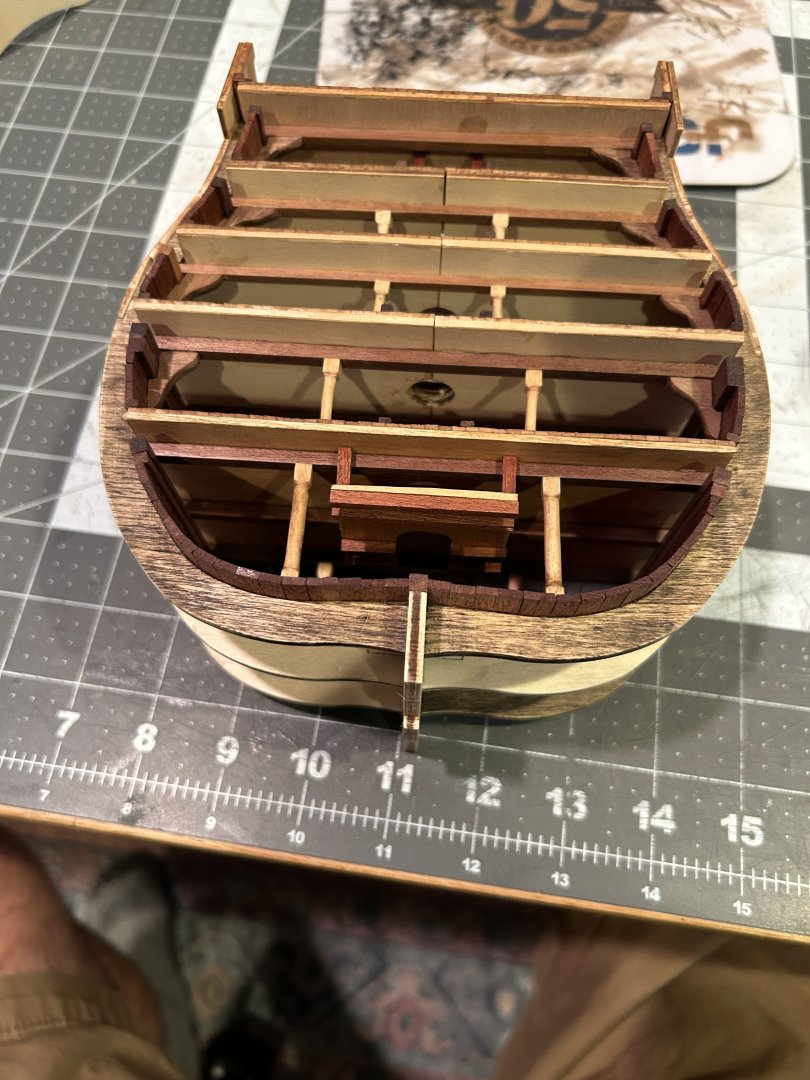
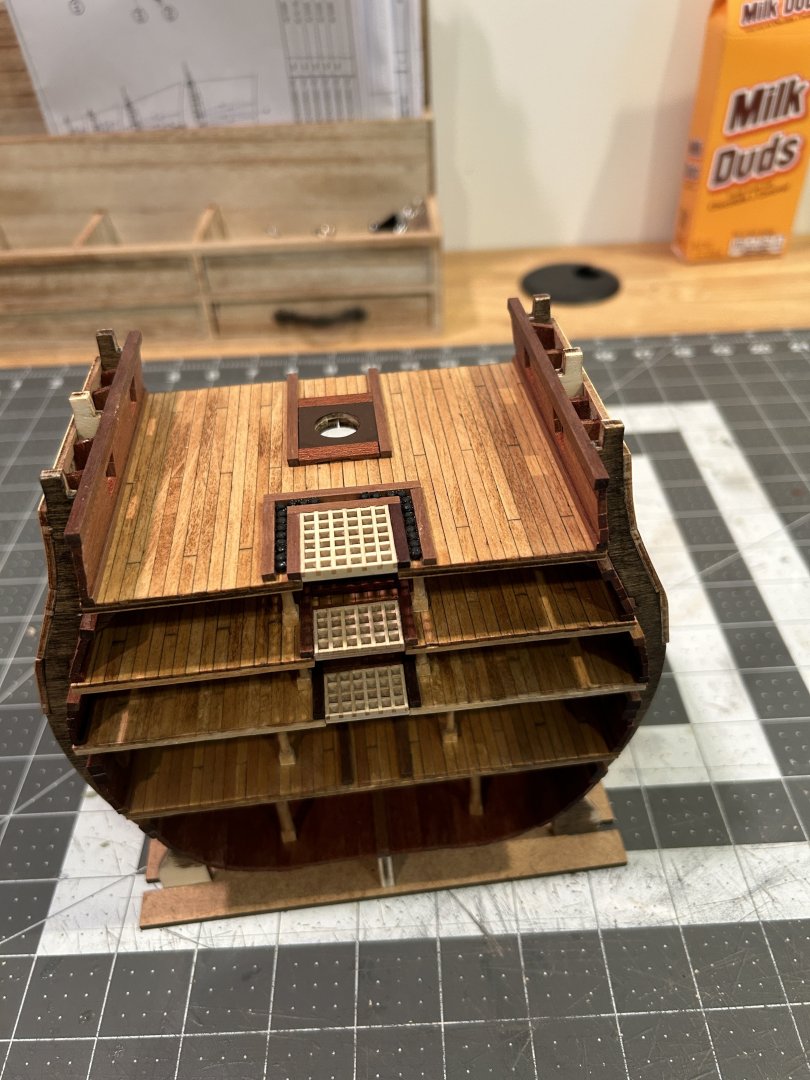
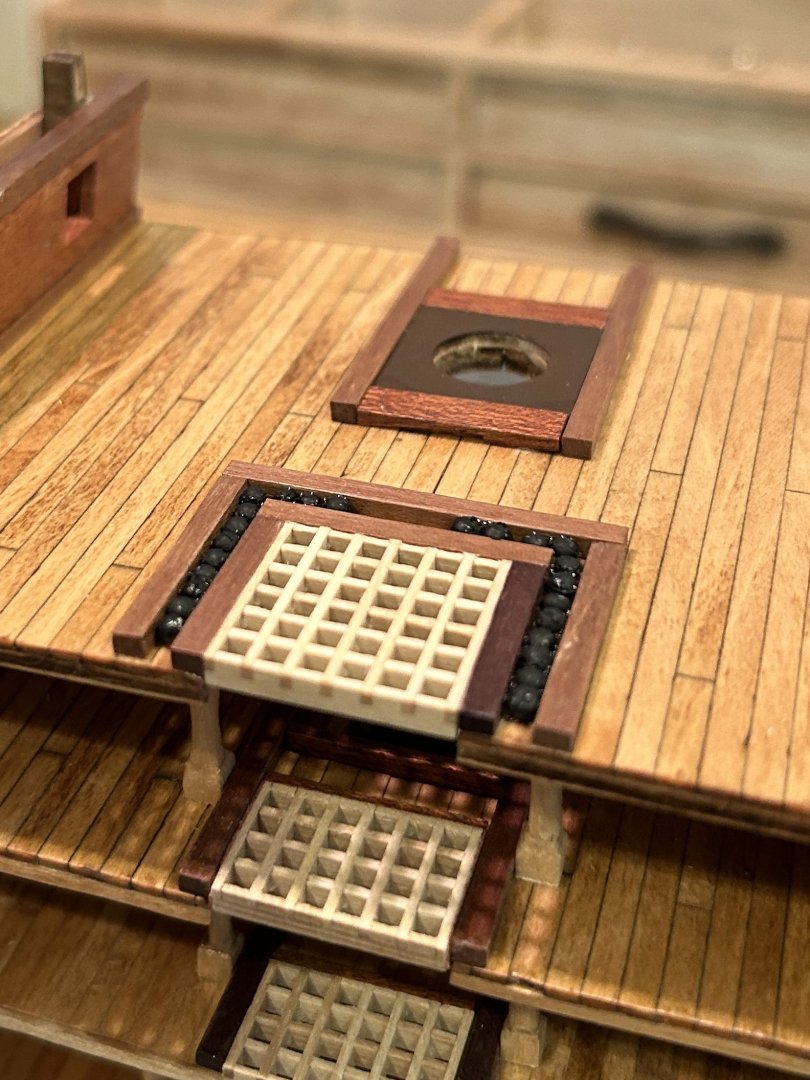
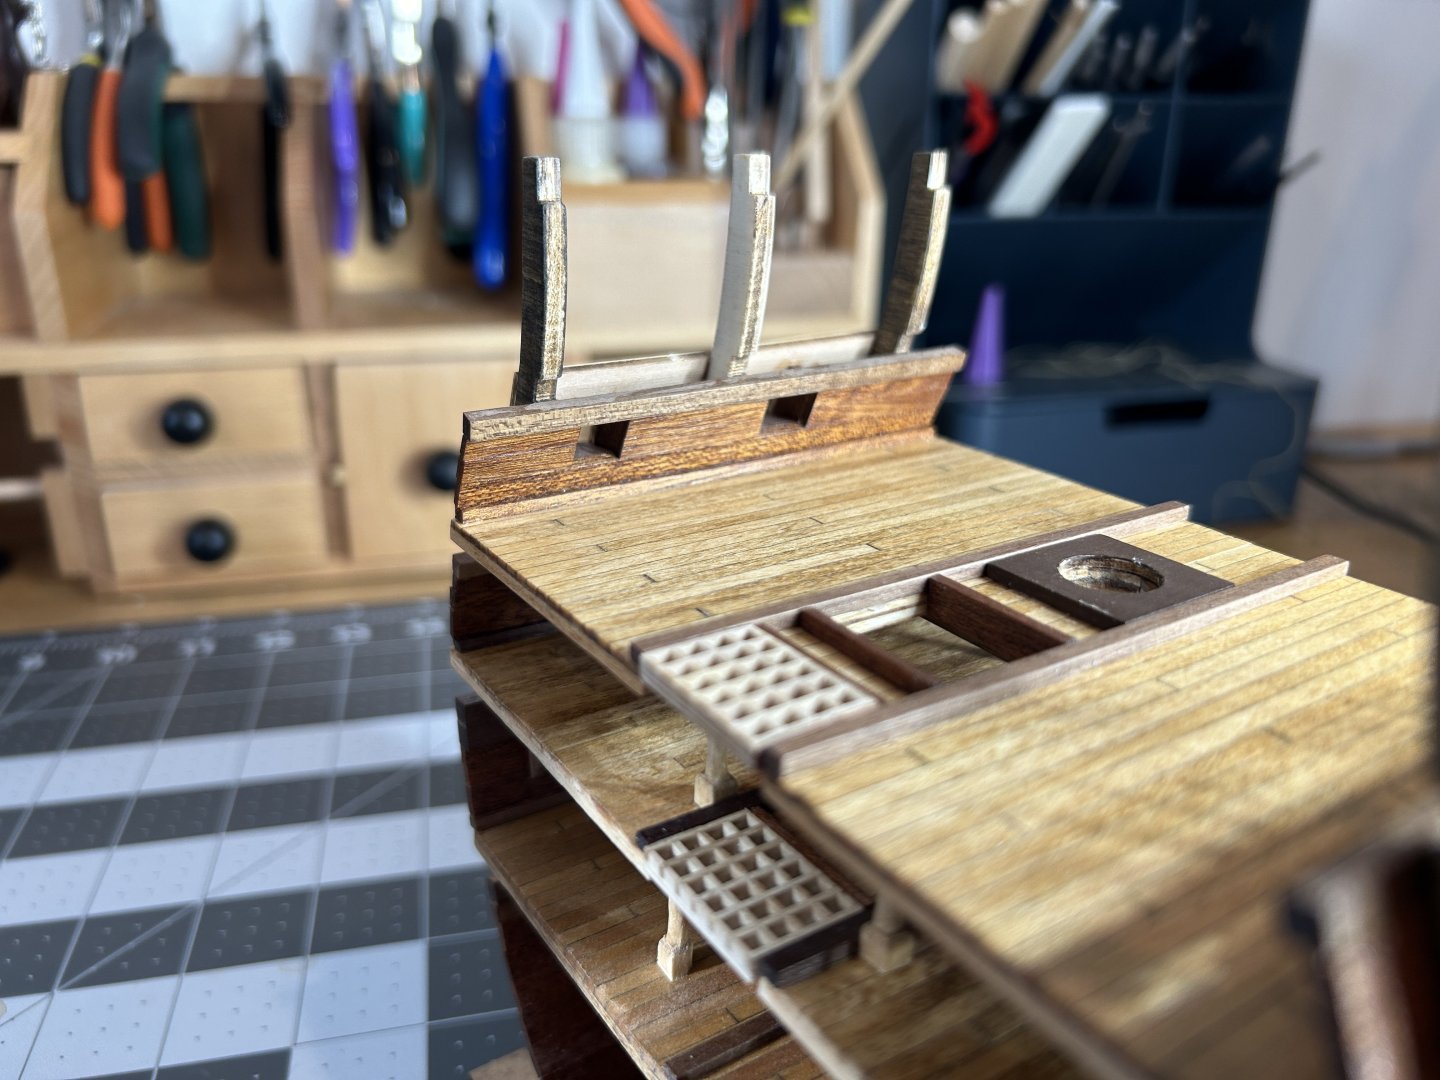
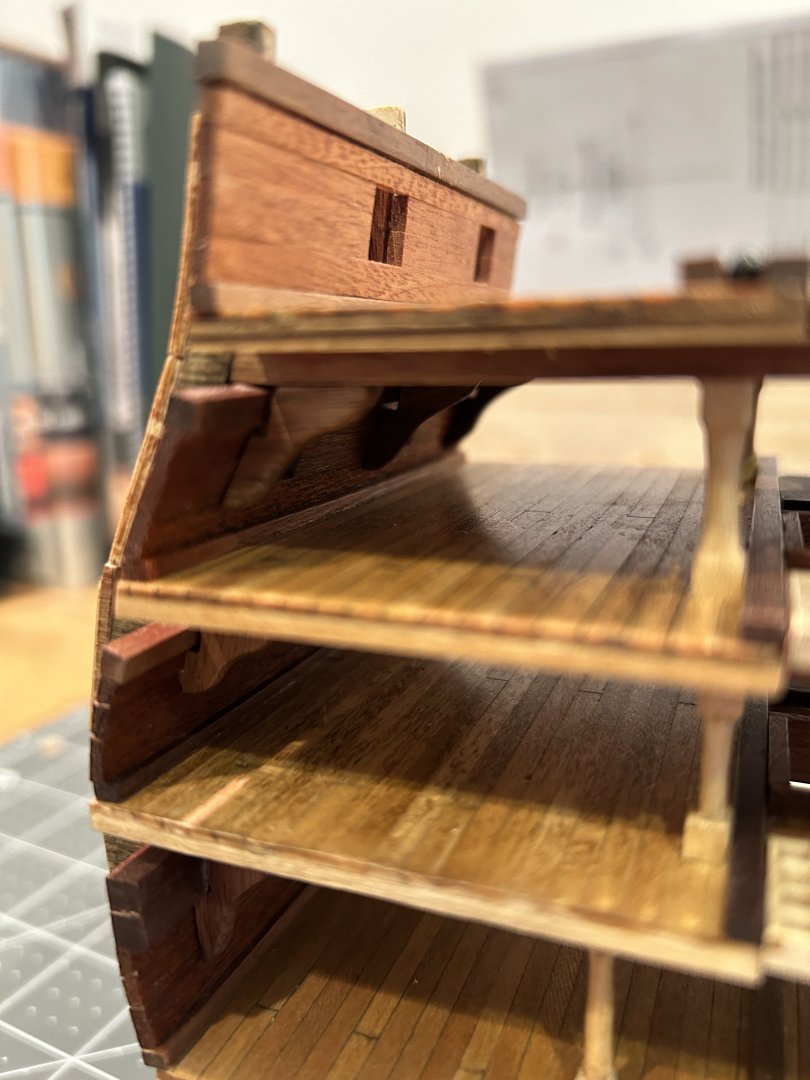
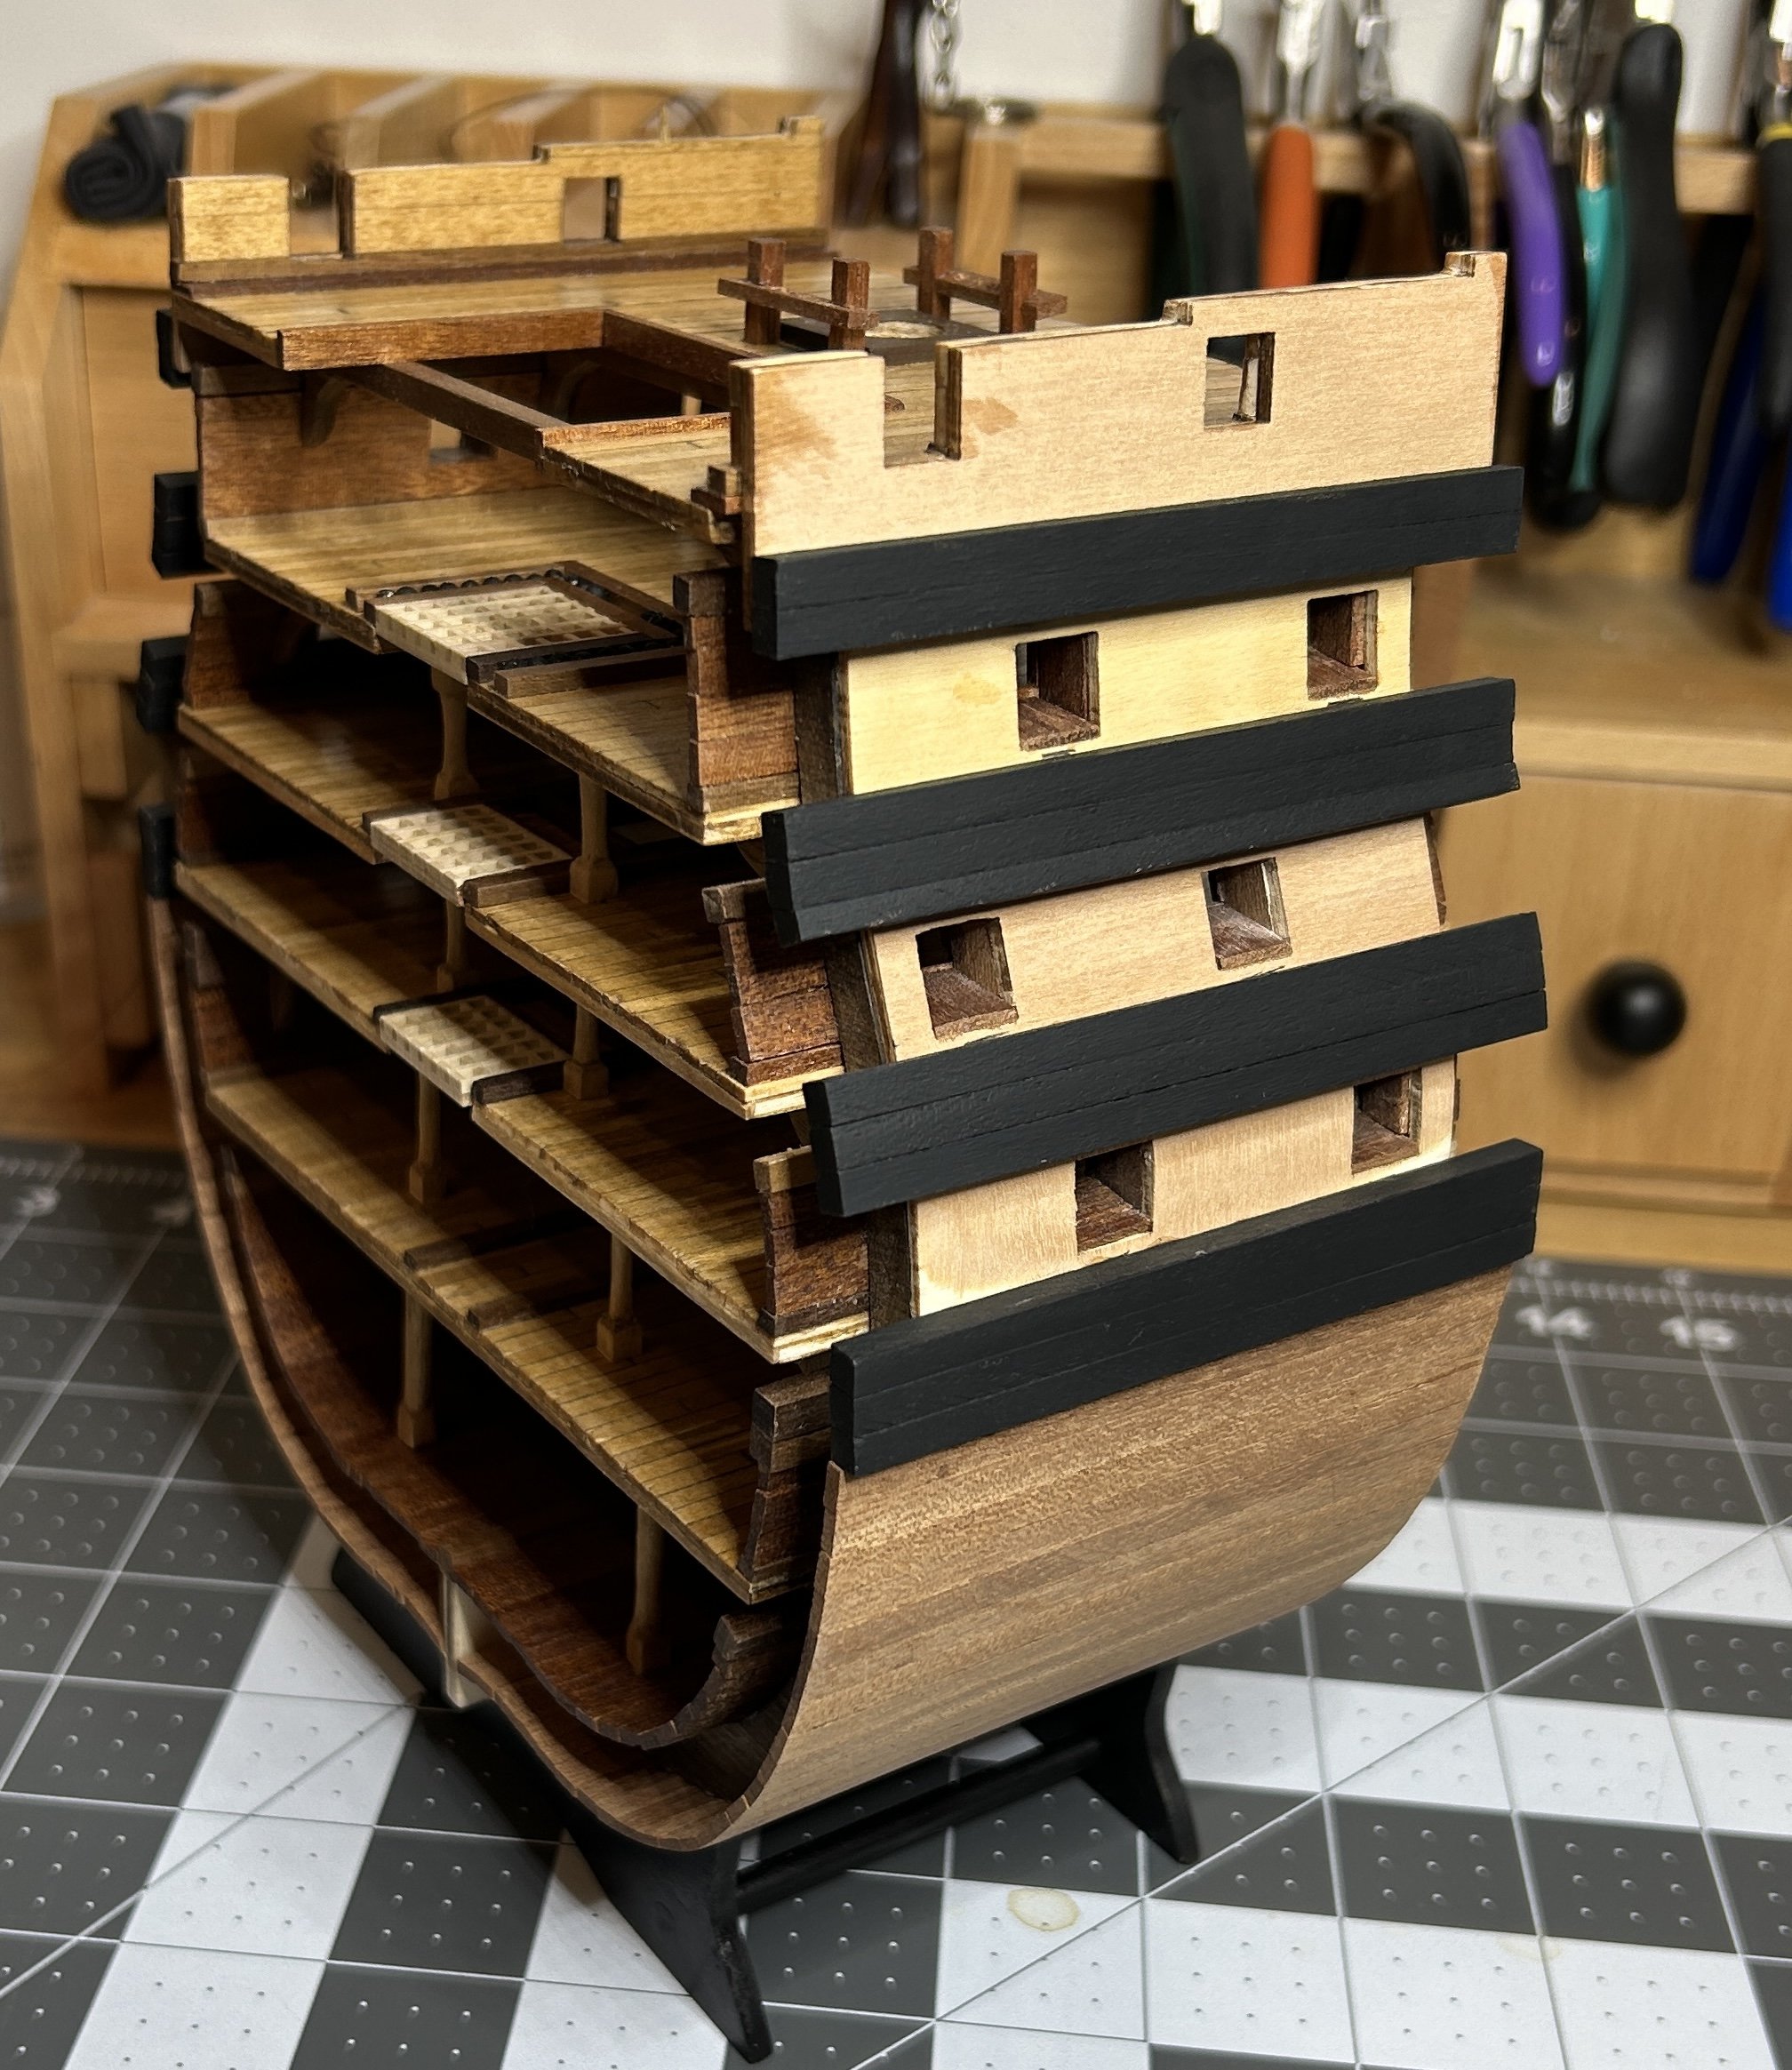
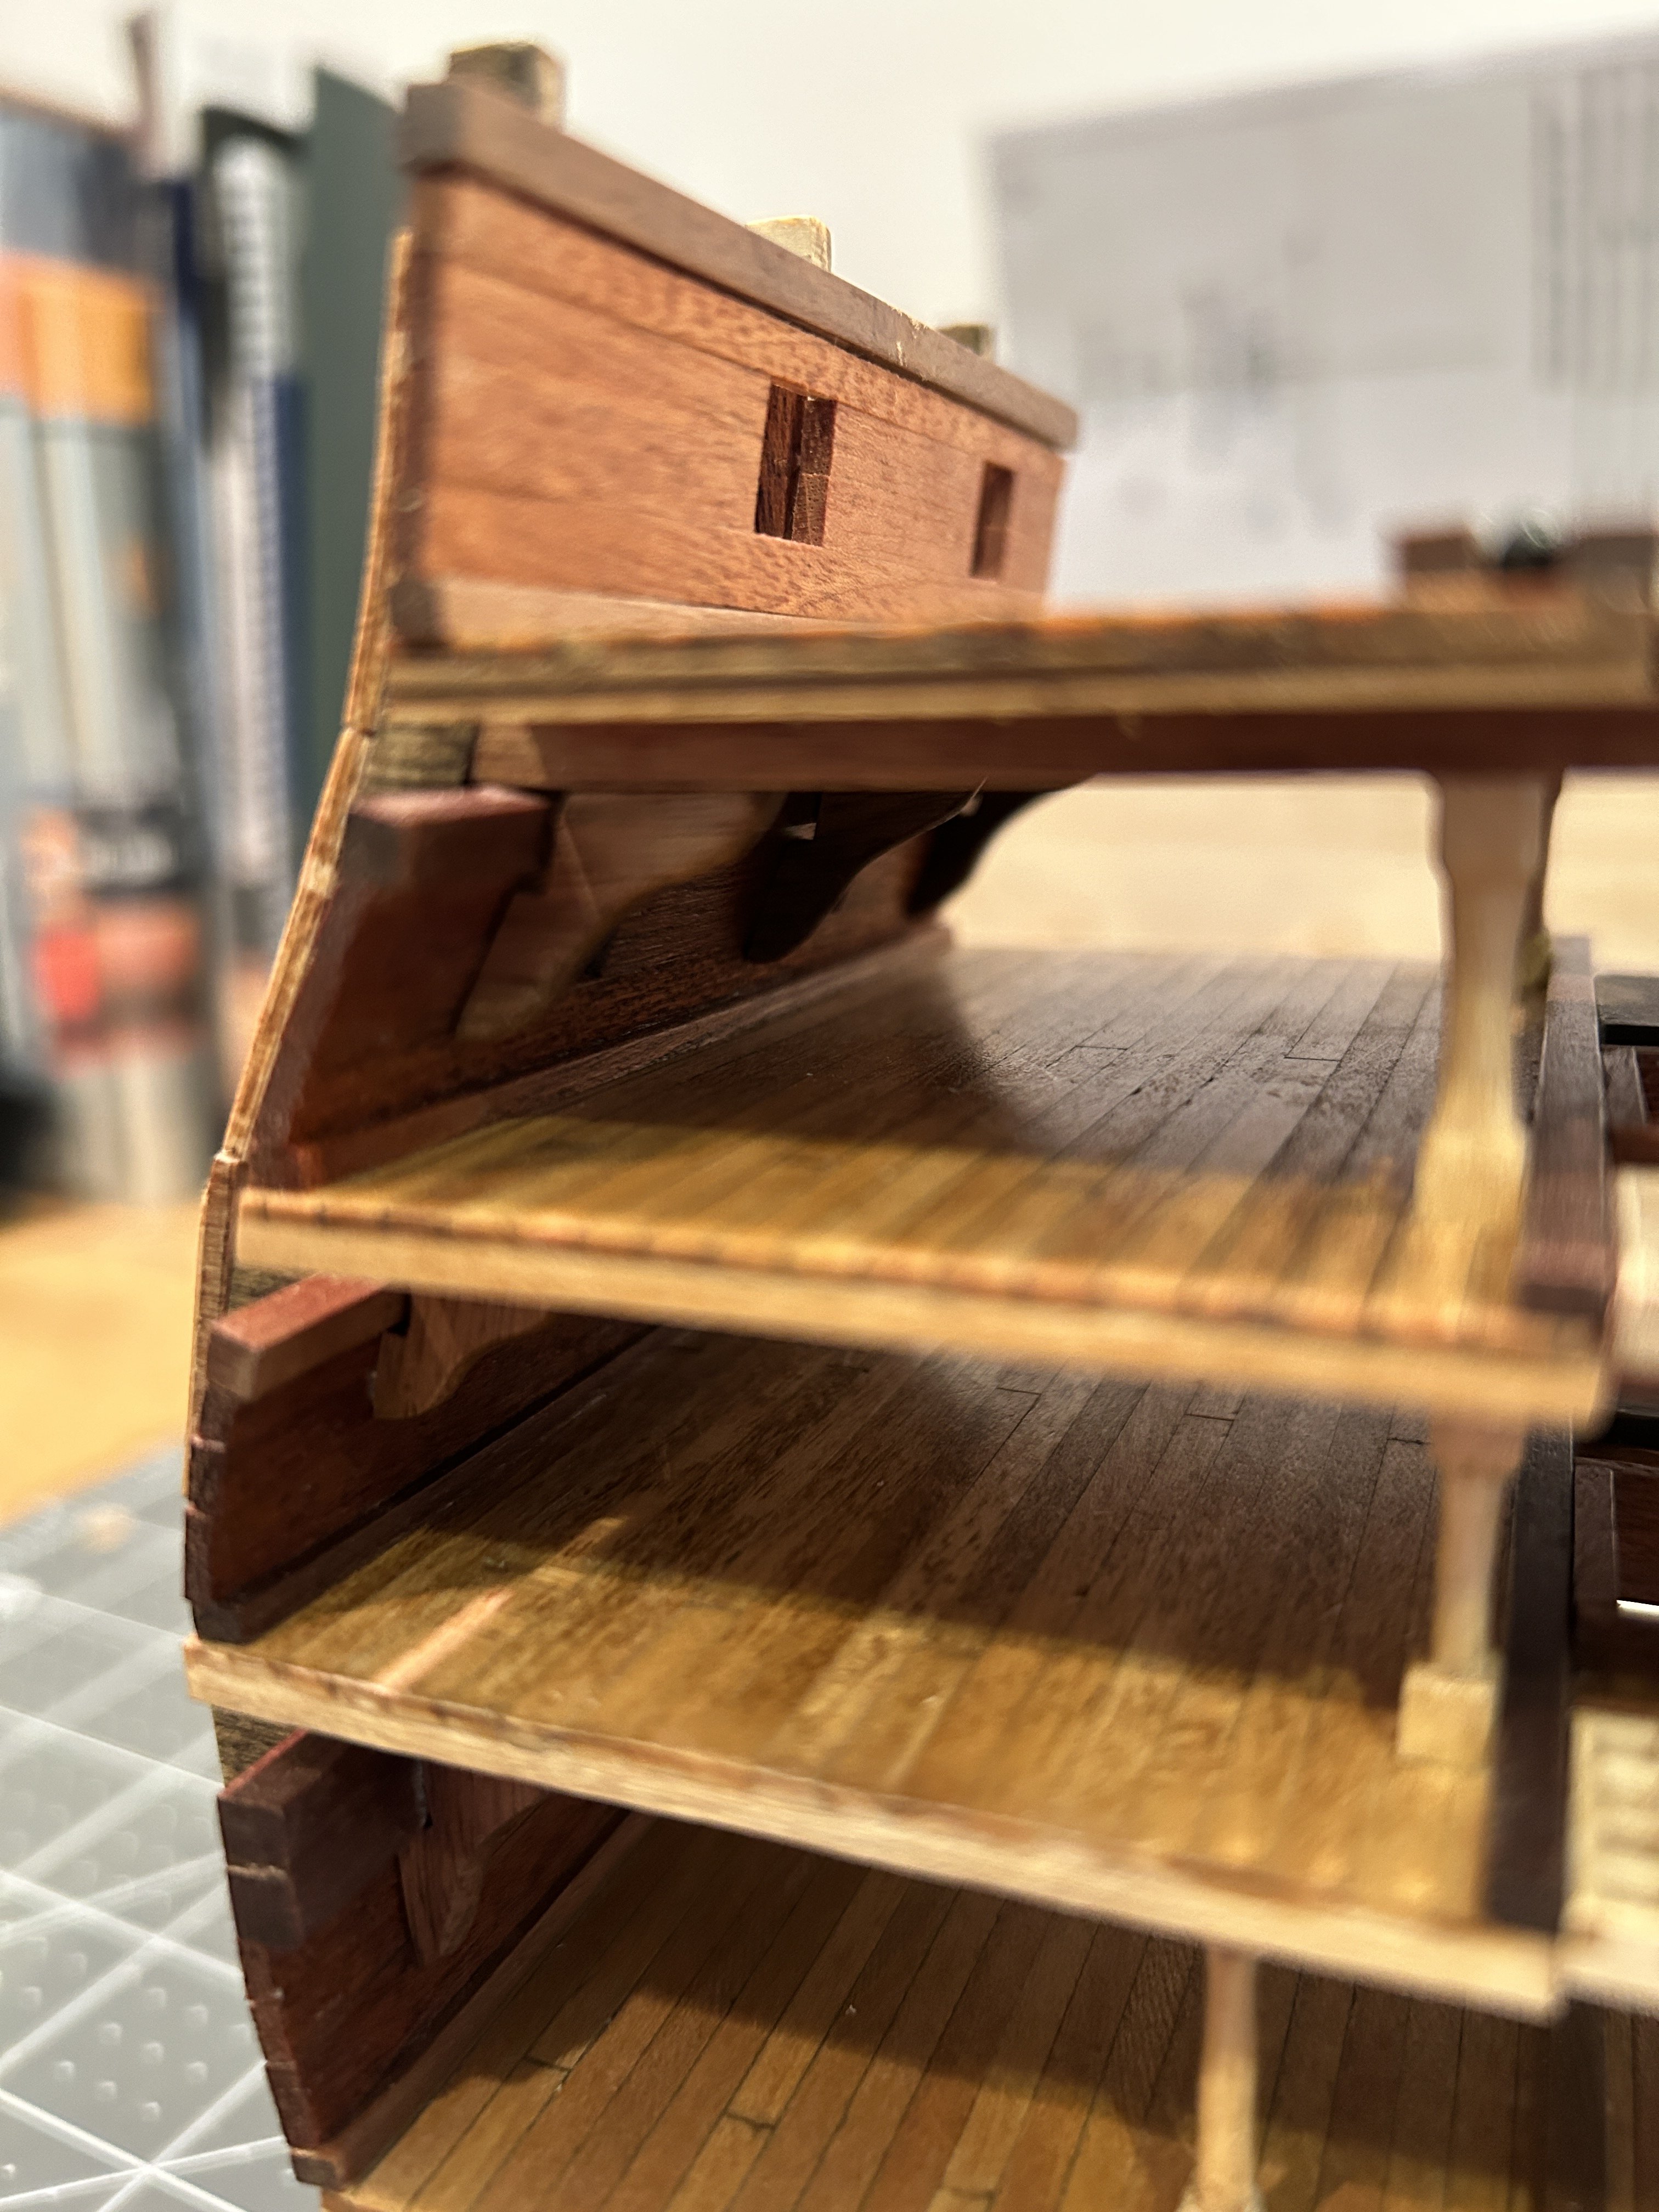
I have taken a break from my Frigate Diana and have spent some time with the Santisima Trinidad. I have added two more decks. The process was basically the same as the last deck. The shot garlands are the only unique feature on either of these decks. I used clear Elmer’s glue to secure the shot in place. working on the top deck now.


- 21 replies
-
- 6
-
-
- Santisima Trinidad
- OcCre
- (and 2 more)
-
Ratline thread recommendations 1/75 scale
RossR replied to John AA's topic in Masting, rigging and sails
Is it difficult to tie knots with these lines. I don’t fish anymore, but 30 - 35 years ago I tried these lines for fishing and you needed to use special knots or the knot would unravel because the nature of the material. -
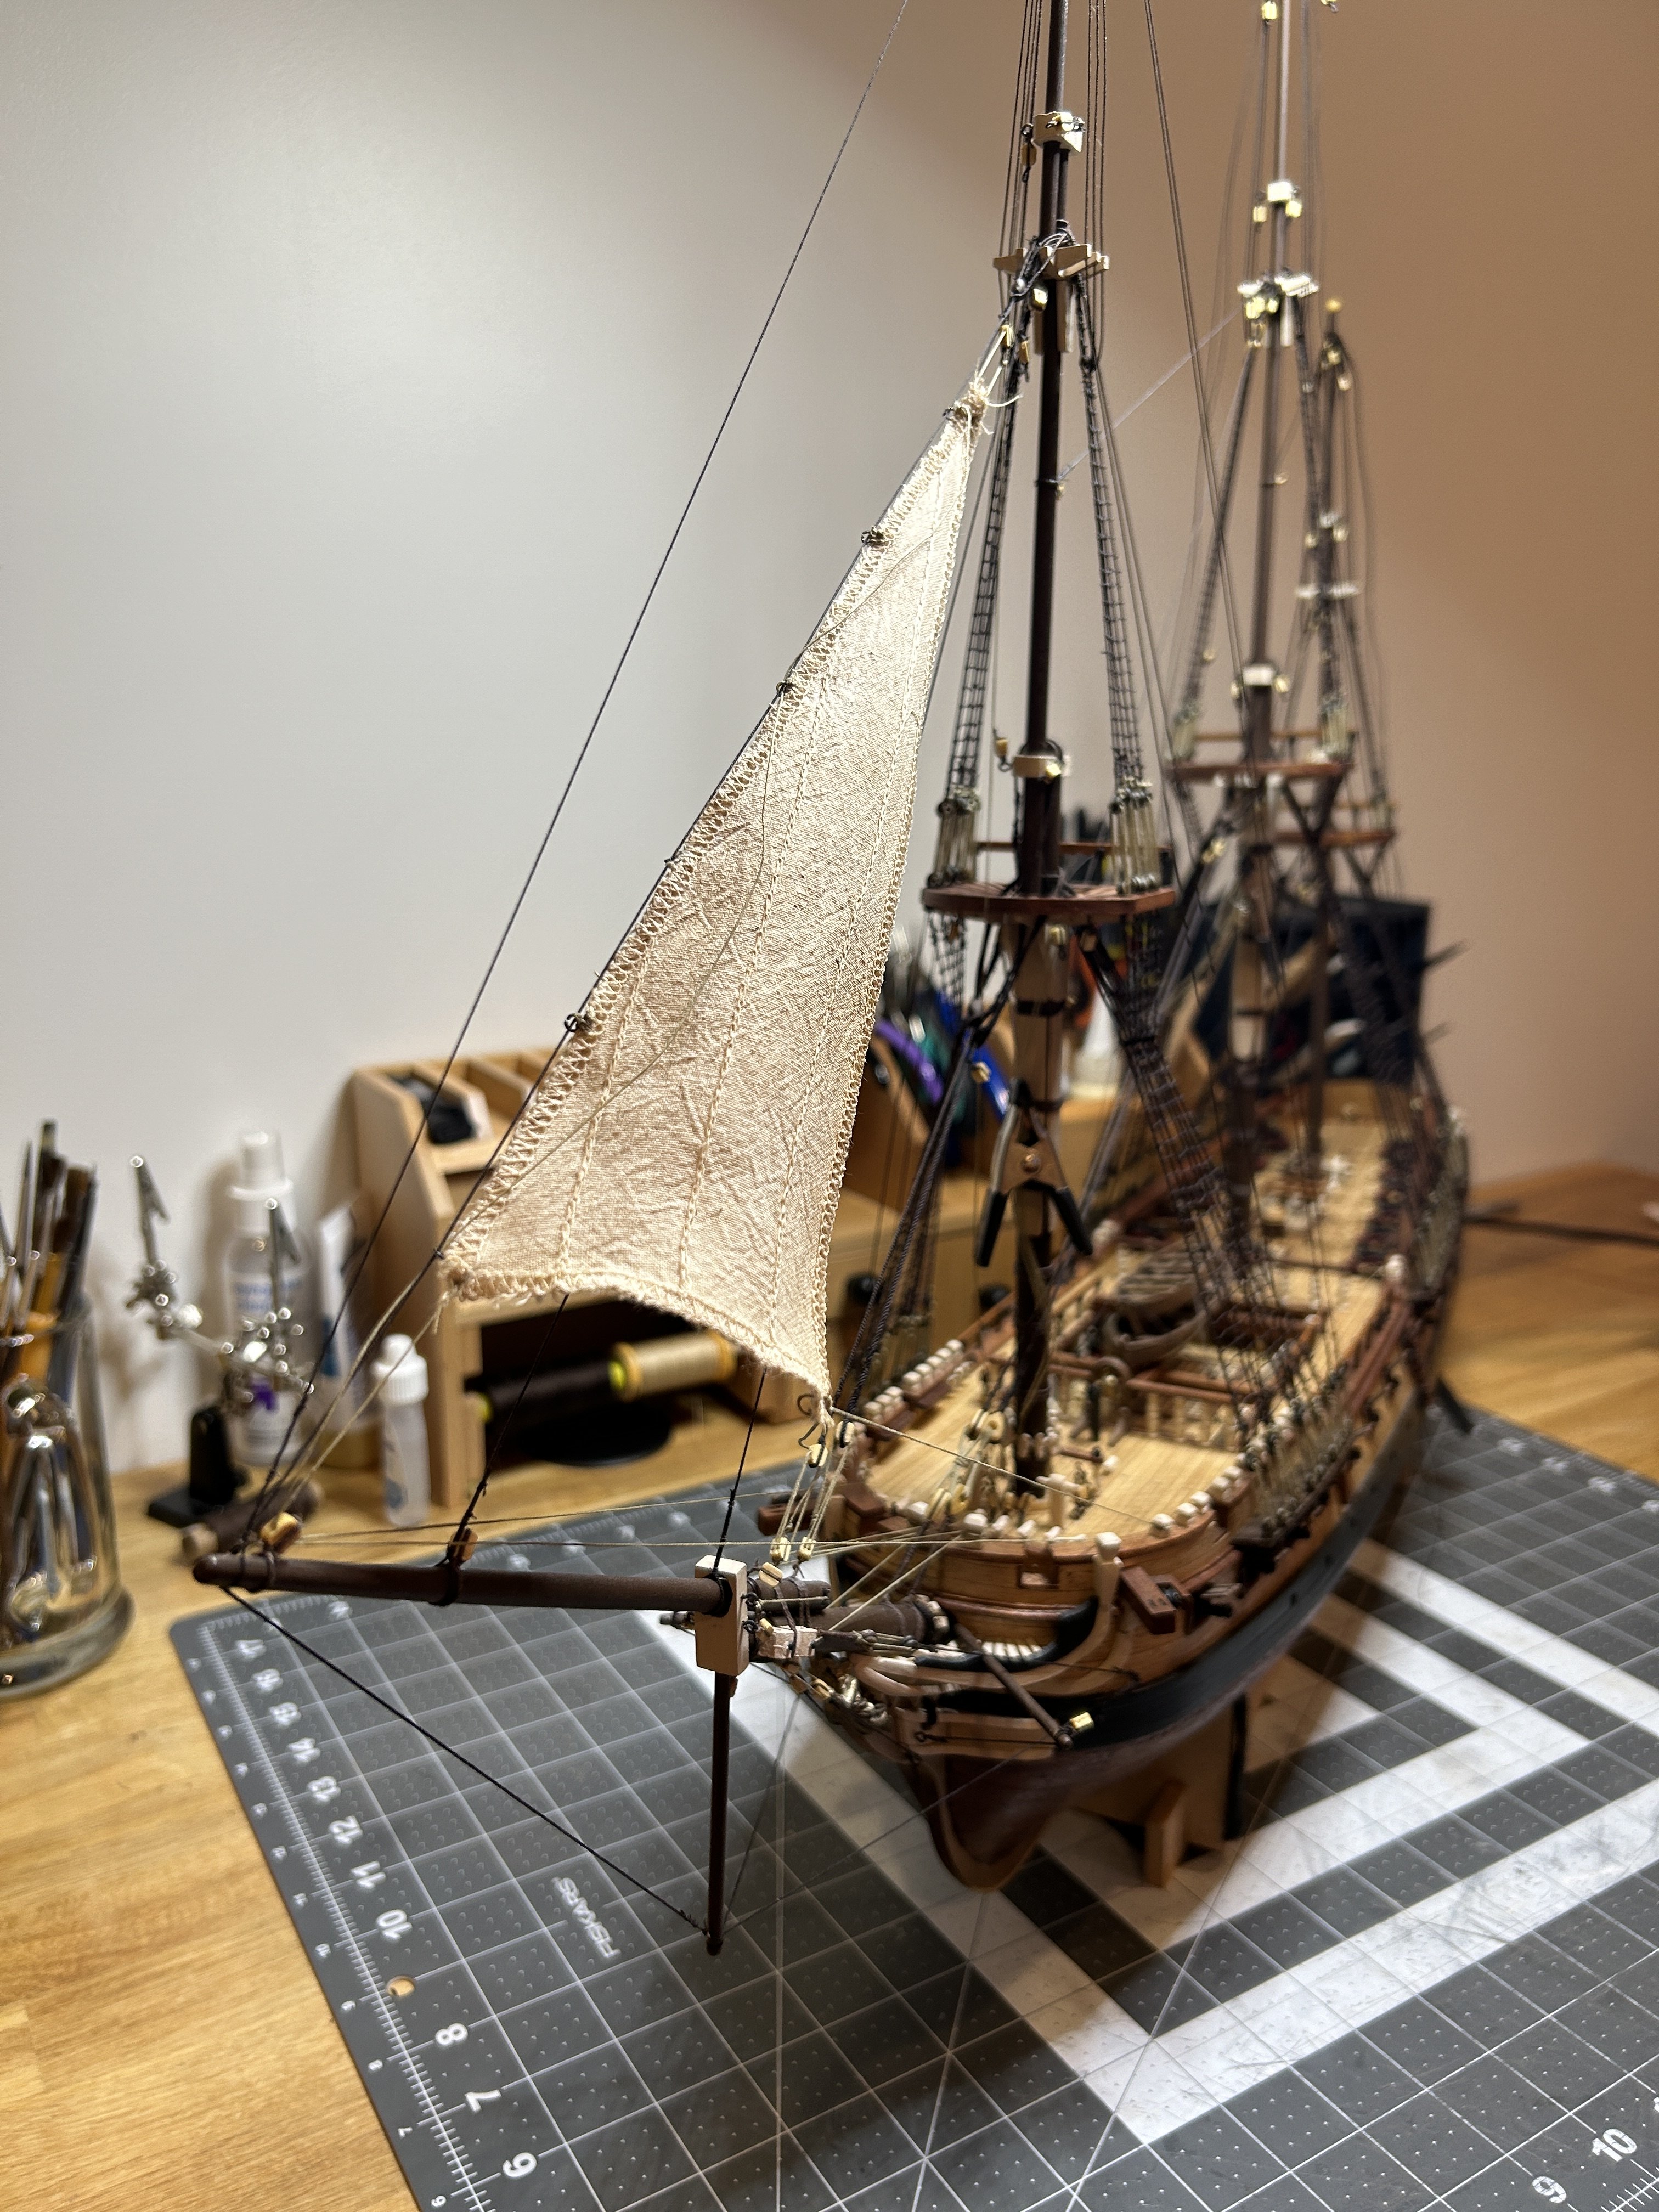
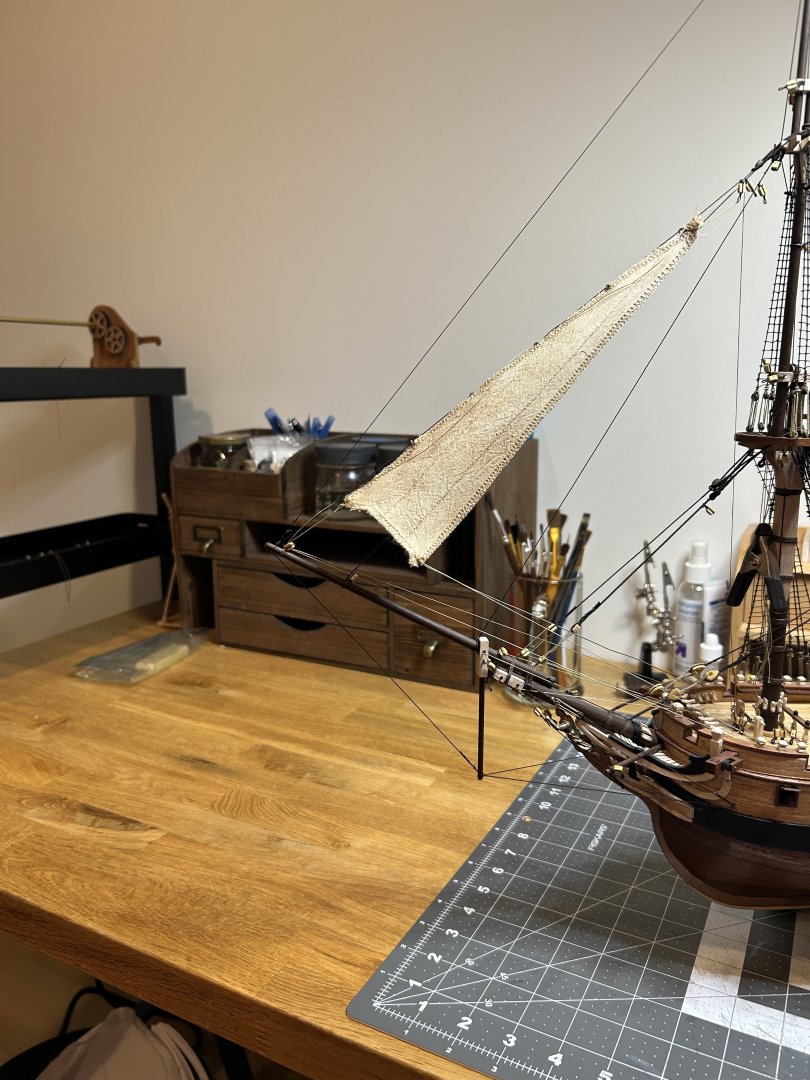
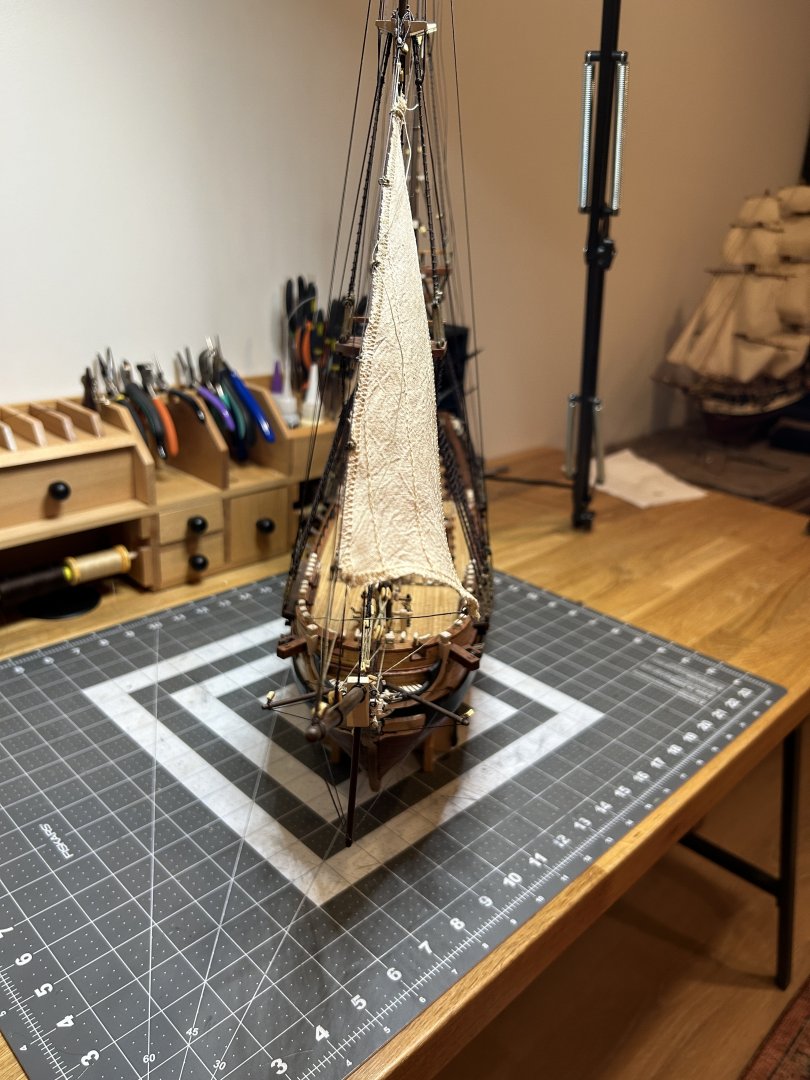
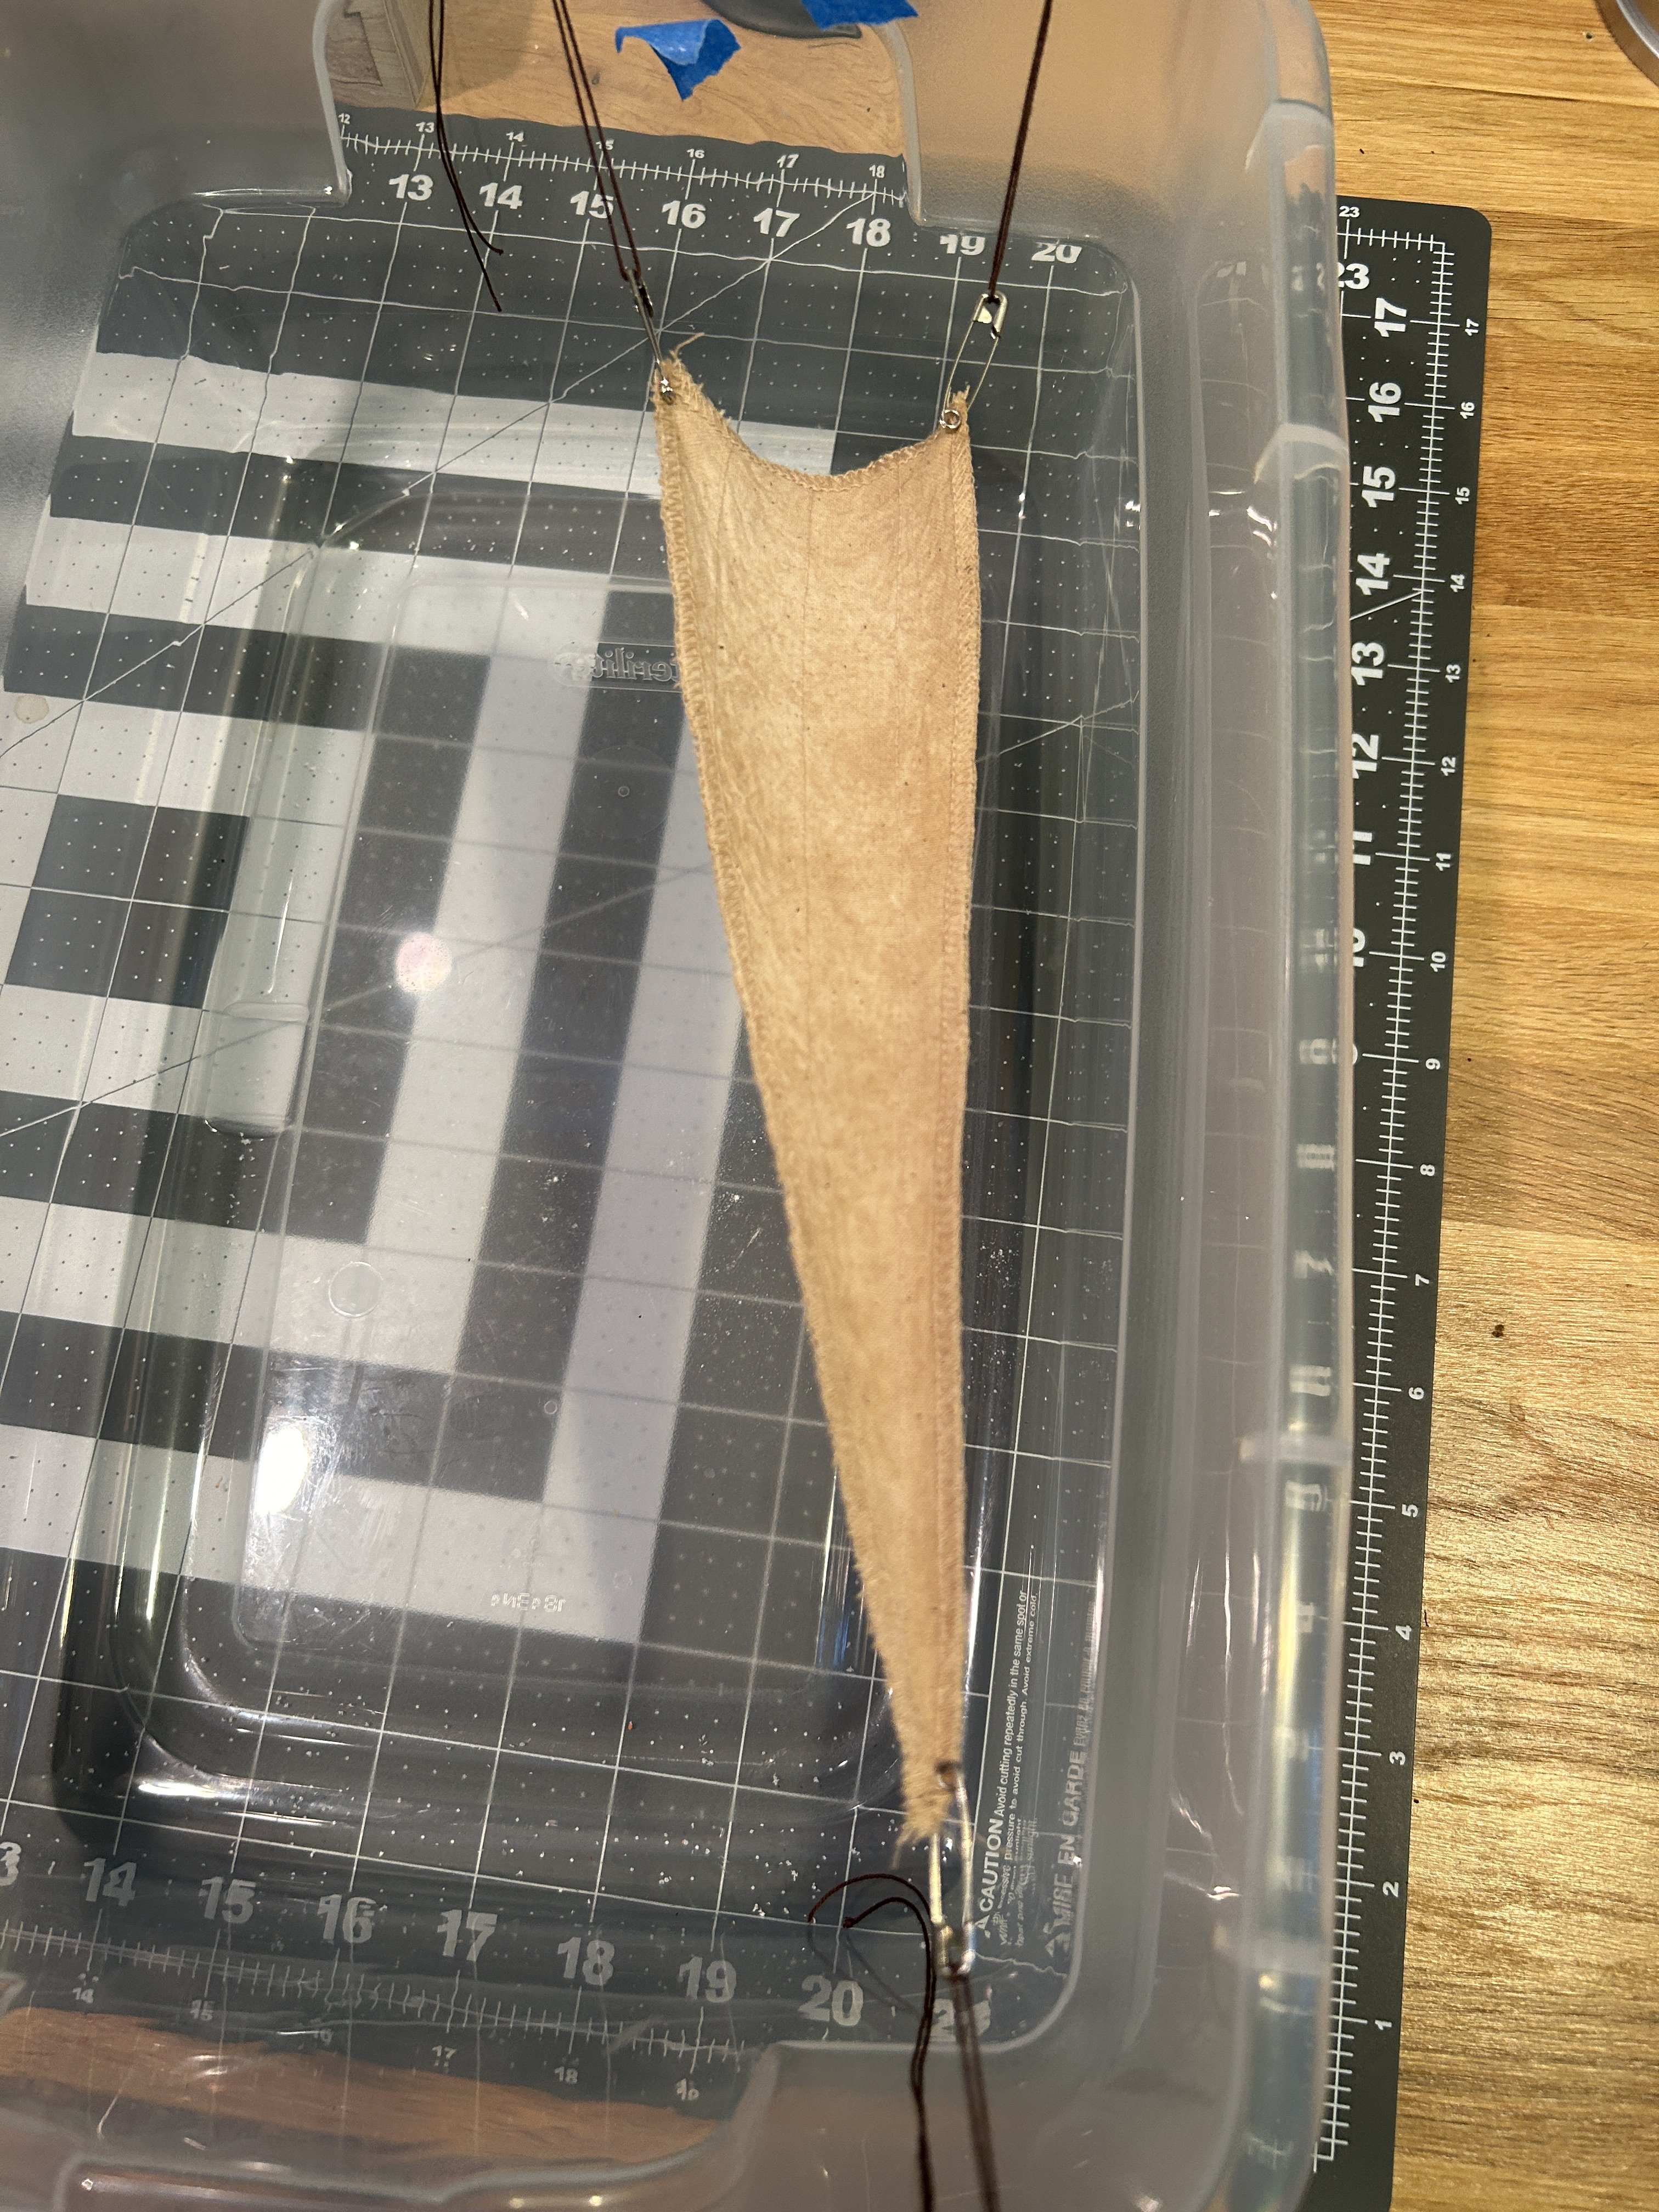
It has been awhile since my last update. I have the jib sails and the fore royal sail and fore top gallant sail installed. I am achieving the look I wanted with the sails. One concern I have with the method I am using create the shape of the sails is the potato starch creates a bit of a shiny surface on the side of the sail that it is applied. With the way I am planing on displaying my model the back side of the sales wont be visible, so I am not concerned on this model, but I would caution others to consider this if they choose to use this method. The Top Sail is not fulling complete yet. I need to get the Fore yard installed to finish the top sail. For the Fore and main top sails and the lower course of stay sails, I will rig those sails furled instead of unfurled. I have seen this as being called "rigged for fighting". Not sure if it is an accurate representation of how a ship like this would enter battle, but I like the idea of being able get a better look at the deck on the completed model. I need to get some help from someone who sew to make the sails that will be furled smaller before I continue with those sails. Due to the over scale thickness of the sail material if I furl the sail as is, it will be way too big on the yard. For attaching the various lines to the belay pins, I am taking the advice I say from a user on the site (can't remember who gave the advice) to run the line through the hole for the belay pin then install the pin to secure it. After I add a rope Hank you won't be able to see that the line isn't secured to the pin in the traditional way. At this scale I think this shortcut is the only way I would be able to complete the rigging. I am leaving the excess lines on for awhile In case I need to adjust any of the lines later. I think In the future if I build a fully rigged model it will be a scale like 1:48 and not 1:85. I wish my eyesight was better, but at this scale the rigging is really challenging to me. As always, thanks for all the views and likes. I will be shifting gears back to my Santisima Trinidad cross section until I can find someone to help me sew the sails that will be furled.
.thumb.JPG.91475c37b9789aeb25e1c4b97ddc6afb.JPG)
.thumb.JPG.bb4bcd929bfe54a9c2120958054a4c27.JPG)
.thumb.JPG.ae3ff09bc0d58425ddc34b6d38527109.JPG)
.thumb.JPG.e8d0ac8097319100c4784d9723c0f85f.JPG)
.thumb.JPG.e4f3dc82080e2ef37c6137c7be1abf04.JPG)
- 142 replies
-
- 10
-
-
I think the only issue you will have is for really small parts the gap between the edge of the table and the disk might be bigger than you would want. Only an issue on really small parts and can be overcome be using a larger sacrificial piece of wood under the smaller part.
-
I love my Ultimation tools. Items like these may not be needed, but they make the process more enjoyable to me. If you ask me if I like the slicer or sander better, it would depend which one I used most recently. Love the both. If you are considering the Proxxon disk sander check out Menards. I think they have the same thing in a different color at a lower price.
-
Thanks Gregory. I updated my comment accordingly.
-
If we want choices, the model companies need to be financially successful. I would never fault a company for looking to make a profit. As far as another Victory model, as long as they do something unique I love seeing some of the Classics re-imagined. I would love to see something like the USS Constitution built with the unique construction that Vanguard uses. I hope we see some build logs on this version of HMS Victory.
-
If you go on Occre’s web site and fill out a warranty form they will send you additional deck materials even though it was a mistake on your part. Mail is a little slow, but in 3-4 weeks you will have any extra deck planks that you need.
-
Looking forward to following along. Good luck.
-
Are you confusing shellac and lacquer? Lacquer creates a thick coat that can look out of scale on a model.
-
I understand not want to mix shellac, a few of the benefits from my perspective are you can mix small quantities. I usually mix 1/4 cup. Shellac cleans up with alcohol instead on mineral spirits for polyurethane. My personal preference is alcohol is easier to work with than mineral spirits. The odor is easier to tolerate. Sorry if I am getting off topic.
-
I use a coat of shellac. Approximately a 1lb cut. Then sand with 400 grit sand paper. I get a nice smooth surface to paint. I have read that shellac is only good for a few months after mixing. I use 2lb cut for finishing stained wood, when it is a few months old I dilute with more alcohol to something close to a 1lb cut and use it as “primer” as described above and to set knots so the don’t come undone.
-
I have the AL scrappers. They are sized for metric dimension wood, so may not work great on non metric wood from modelshipways. I would love to know if anyone has a source for a non metric version of the AL scrappers.
-
When I first discovered Model Ship World I was finishing my first build. At that time there was a build log for a model of the Cutty Sark by Bruma. He made fantastic sails that made his ship appear to be in motion compared to my version of the HMS Beagle with sails that hung rather lifelessly. I was definitely inspired to create something on my next ship that created a feeling of movement with my sails. I was very intimidated with the idea of using silkspan, but followed build logs and youtube videos of builders that did interesting things with cloth sails. Yes I understand the scale issues with cloth sails, but I am trying to create an impression of a real sail under the power of the wind vs an exact scale representation of a sail. Someday I suspect I will tackle silkspan, but not on this model. I borrowed from LyleK1 who used tea to color his sails on the HMS Bounty and from Olha Batchvarov who used potato starch to shape her sails. Unfortunately, Olha didn't give the exact recipe for the boiled potato starch she used, so I am still refining the best mix, but I will share more details when I determine the best mix. I sacrificed a plastic tote to stretch the sails across before brushing with boiled potato starch. I wet the sails then brushed the boiled potato starch onto the sails. I used ziplock bags filled with some flour to create the shape I desired. After a day of drying under the weight of the flour, the sails maintain the curved shape I was looking for. After the first two sails, I will attach any rings or blocks that are need before shaping. It was a little difficult doing this after they were shaped since they are a little fragile. Next I installed the outer jib. The challenge now was how to get the sail to move to the port side of the stay it was attached to as if the wind was coming from the starboard aft side of the ship. I toyed with mounting the ship at a slight angle as if it was leaning with the wind, but quickly abandoned that when I realized I would need to tilt the ship an unrealistic amount to get the sails very far from the center line of the ship. I ultimately used a piece of 26 Guage wire for the Starboard sheet to hold the sale in place. After painting to look like the line I am using for the running rigging, it is a little over scale, but I am worried anything thinner won't be stiff enough. It is just one sail so far, but I am pretty happy with how this is turning out.

.thumb.JPG.c402a15338e92bf09612544765aee1f0.JPG)


- 142 replies
-
- 10
-
-
US Brig Syren will require a lot more work framing the gun ports and stern vs laser cut bulwarks if that interests you I would go that way. if you ultimately what to scratch build, it will do more to prepare you than an Occre or AL kit will. However, I would love to see a cutaway on an Occre Terror.
-
Your work continues to impress. Your details at small scales are truly impressive.
-
Looks like a great start to the planking.
-
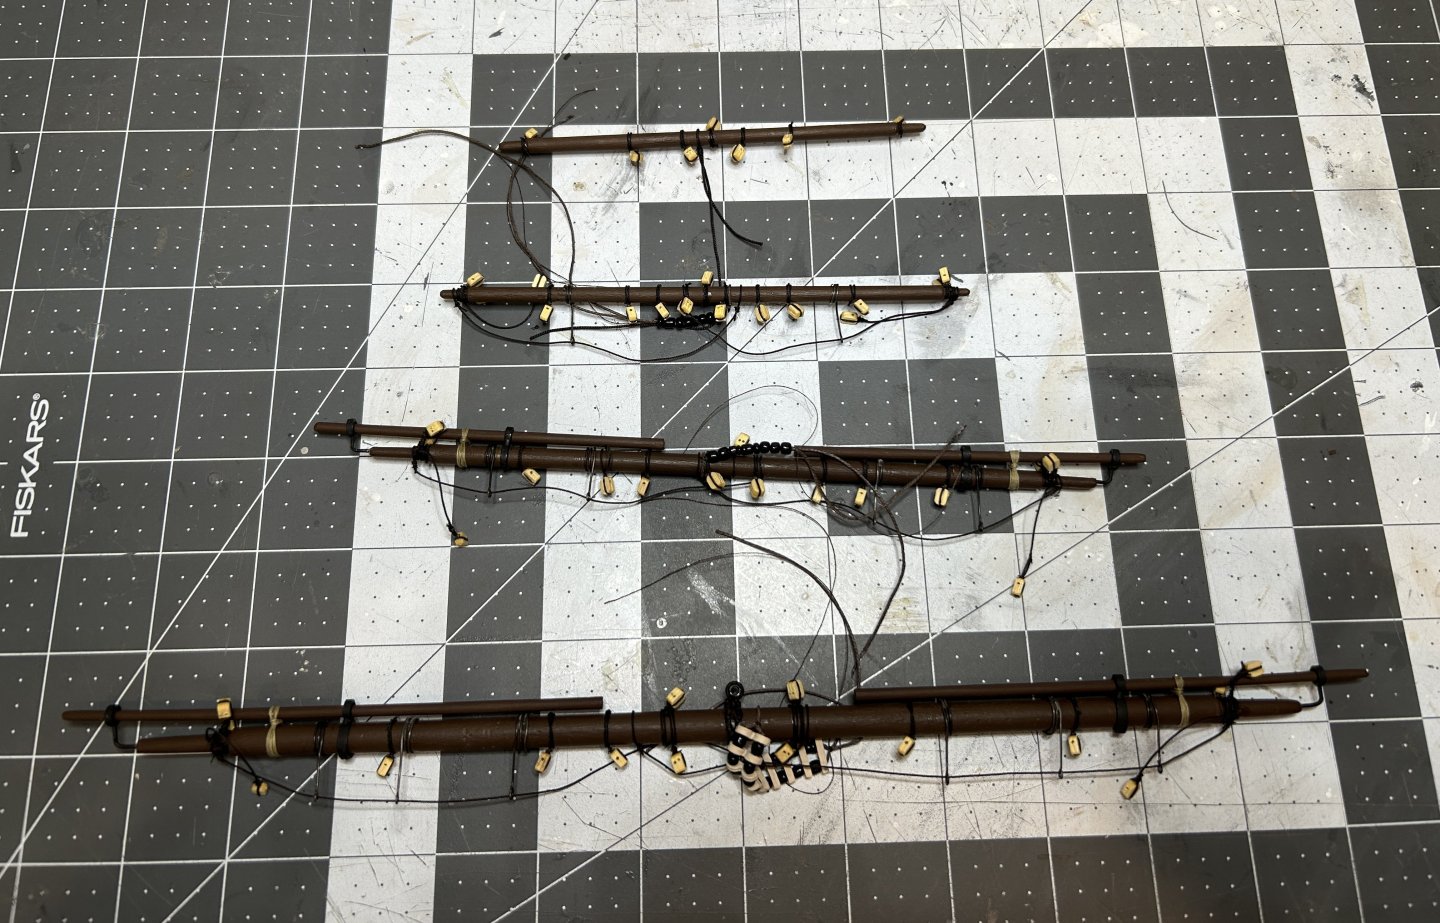
I have a quick update on my build. The yards for the main mast are complete. These are configured the same as the yards for the foremast only a little longer. now on to the sails. I have some ideas for making the sails appear to be full from the wind, but I need to do some experimenting to see if I can create the look I am hoping for. I will keep you posted.
- 142 replies
-
- 10
-
-
Nice job on the tree nails. I think you did a great job on the scale and making them subtle. I think sometimes people make them too big and too much of a contrast to the planking.
-
I have the second deck finished. The instructions don't have you adding the cannons until all of the decks are complete and the exterior hull planked. I am a little worried about gluing the cannons in place after the deck above it is installed. I would prefer to pin the cannons when I attached them to the deck, but that would be even harder with the deck above installed. I am considering adding the cannons now and then adding the next deck. This would allow me to pin the cannons in place and not working about making a mess with the glue when securing them to the deck. The down side with the cannon installed this early in the process is the exterior planking and sanding will be difficult with the Barrel protruding. I may see if I can install the gun carriage now and then install the gun barrel through the gun port after the exterior is complete. I do not plan to rig the cannons since the scale is so small except for the breech rope on the cannons on the top deck. Before I do all of that I plan to get back to my Frigate Diana for a while.

- 21 replies
-
- 2
-
-
- Santisima Trinidad
- OcCre
- (and 2 more)


.JPG.73ec19eeeb0e4a1e5d142efc764ac2b1.JPG)
.JPG.3ae576a0ff8ebd7af056b3bf57e301c1.JPG)
.JPG.d73adb7fc94567fce045c9b8b315a700.JPG)
.JPG.194742d965b640dbc1447235da2fa3d0.JPG)
.JPG.81e0f9d1a172e4f97bbc431a26ecc95d.JPG)

.JPG.c20d280601b0dbe6fba402f8e084695b.JPG)