Rustyj
-
Posts
2,535 -
Joined
-
Last visited
Content Type
Profiles
Forums
Gallery
Events
Everything posted by Rustyj
-
 Hi Mike. Having done her in boxwood I understand your change. Great job on the joints on the Knee of the Head too.
- 607 replies
-
- 4
-

-
- winchelsea
- Syren Ship Model Company
- (and 1 more)
-
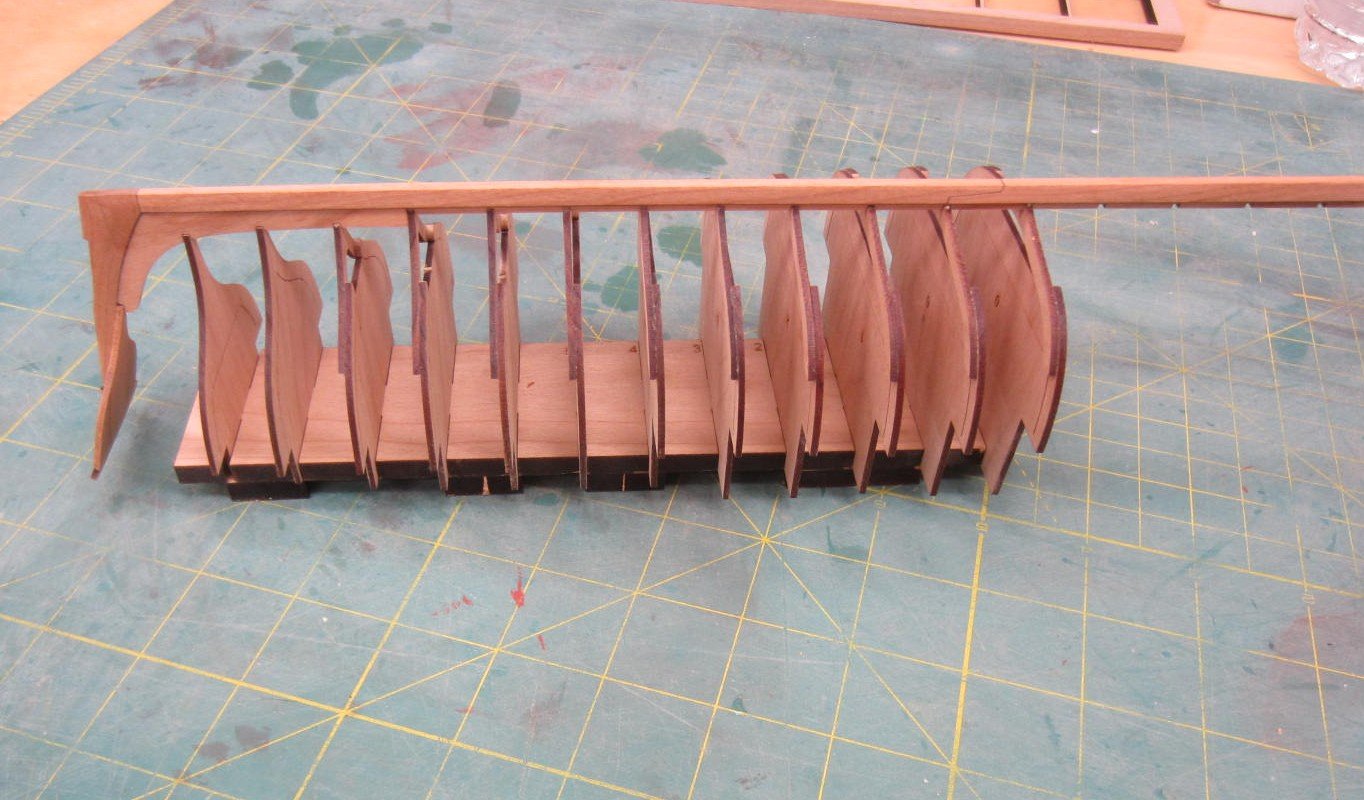
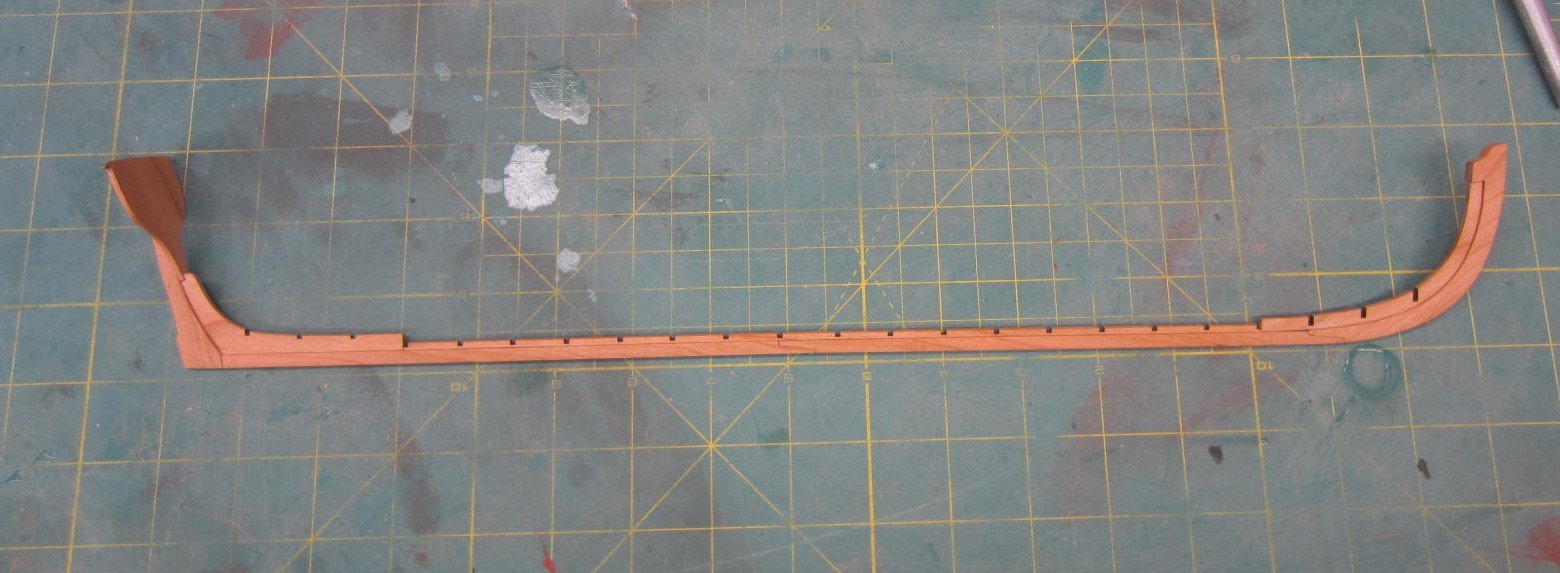
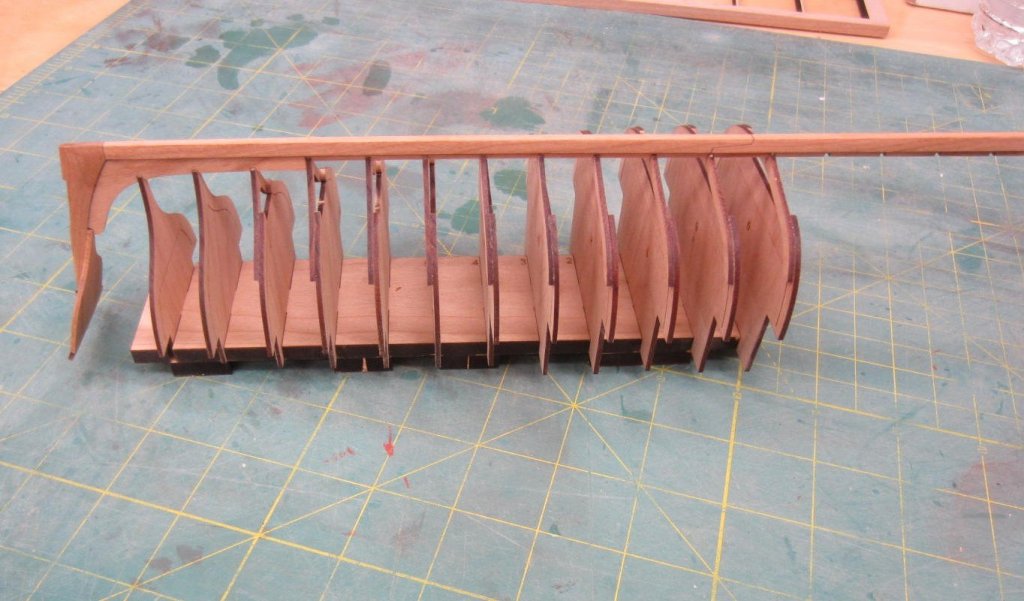
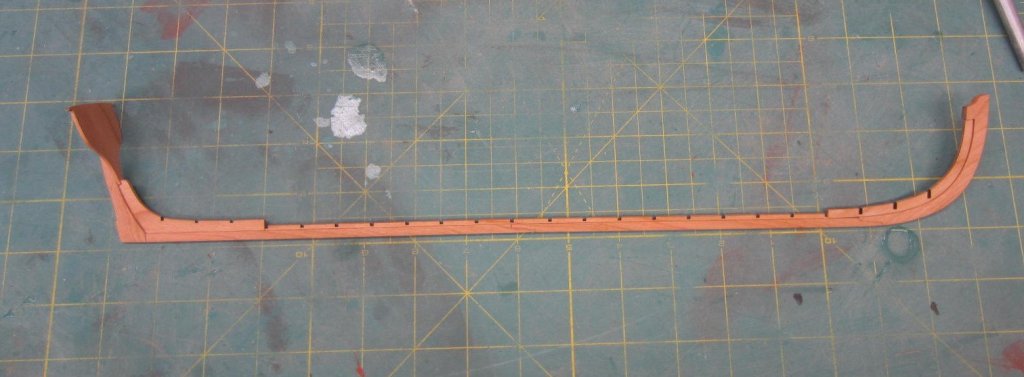
Hi Ian and thank you for the kind words. I've got everything ready to attach the keel to the frames. First the frames are placed into each half of the base board. Some minor sanding was needed for each slot in the base board to get a good fit. The frames can't be too tight or too loose in the base because it could cause problems releasing the frames later on. Here are the frames set ready for gluing to the keel. After I took the picture I noticed an error. The two 0 frames should not face in the same direction. One faces fore and one faces aft. Thankfully I noticed it before I glued it up! Phew. Here half of the frames are glued to the keel and drying. Once dry I'll glue the other half to the keel and then fair the frames.
- 120 replies
-
- 17
-
-
- queen anne barge
- Syren Ship Model Company
- (and 1 more)
-
Welcome to the Barge group. Good start.
- 103 replies
-
- 1
-
-
- queen anne barge
- Syren Ship Model Company
- (and 1 more)
-
Thanks Chuck, you do make it easier though! Also thanks for the likes!
- 120 replies
-
- 5
-
-
- queen anne barge
- Syren Ship Model Company
- (and 1 more)
-
Moving along I have assembled all of the frames. It went very smoothly. I've also been able to complete the keel assembly. Chuck did a great job on the scarf joints. You did not need to sand the char off and the fit was perfect. Thanks for stopping by!

- 120 replies
-
- 17
-
-
- queen anne barge
- Syren Ship Model Company
- (and 1 more)
-
Hi BE, Your planking looks really good. The height at the stern looked good too. I went back and looked at my old pictures and we have about the same distance from the top of the last plank to the top of the stern frame. Also there is a curve to the transom so I think you will be all set!
- 574 replies
-
- 3
-
-
- cheerful
- Syren Ship Model Company
- (and 1 more)
-
Very much so!!! One thing that struck me was that the Queen sat close to the tiller. How was one supposed to gain access to it? Was there enough room behind her for a sailor to stand?
- 74 replies
-
- 3
-
-
- queen anne barge
- Syren Ship Model Company
- (and 1 more)
-
Thanks Ben. Glad to be building along with you again! Hey Joe. Any thing for a successful build!
- 120 replies
-
- 4
-
-
- queen anne barge
- Syren Ship Model Company
- (and 1 more)
-
Looks really nice Ben. I hope to come close to duplicating your work.
- 74 replies
-
- 2
-
-
- queen anne barge
- Syren Ship Model Company
- (and 1 more)
-
Welcome aboard Michael and Canute. Whats great is all seats are front row!
- 120 replies
-
- 3
-
-
- queen anne barge
- Syren Ship Model Company
- (and 1 more)
-
Welcome aboard everyone and thanks for all the likes! Antony, There is an abundance of popcorn available so sit back and relax! Hi Bob, The design of this kit just about assures success. Hi Alde, It was a stroke of luck that I stumbled on it before they were sold out again! Good luck! Thanks Steve.
- 120 replies
-
- 7
-
-
- queen anne barge
- Syren Ship Model Company
- (and 1 more)
-
Hi Floyd. For something you want to look like wood try painting it with yellow ochre. Once dry give it a wash with a minwax golden oak stain. I use a small brush and gently wipe the excess off. Experiment on something first! Hope this helps.
-
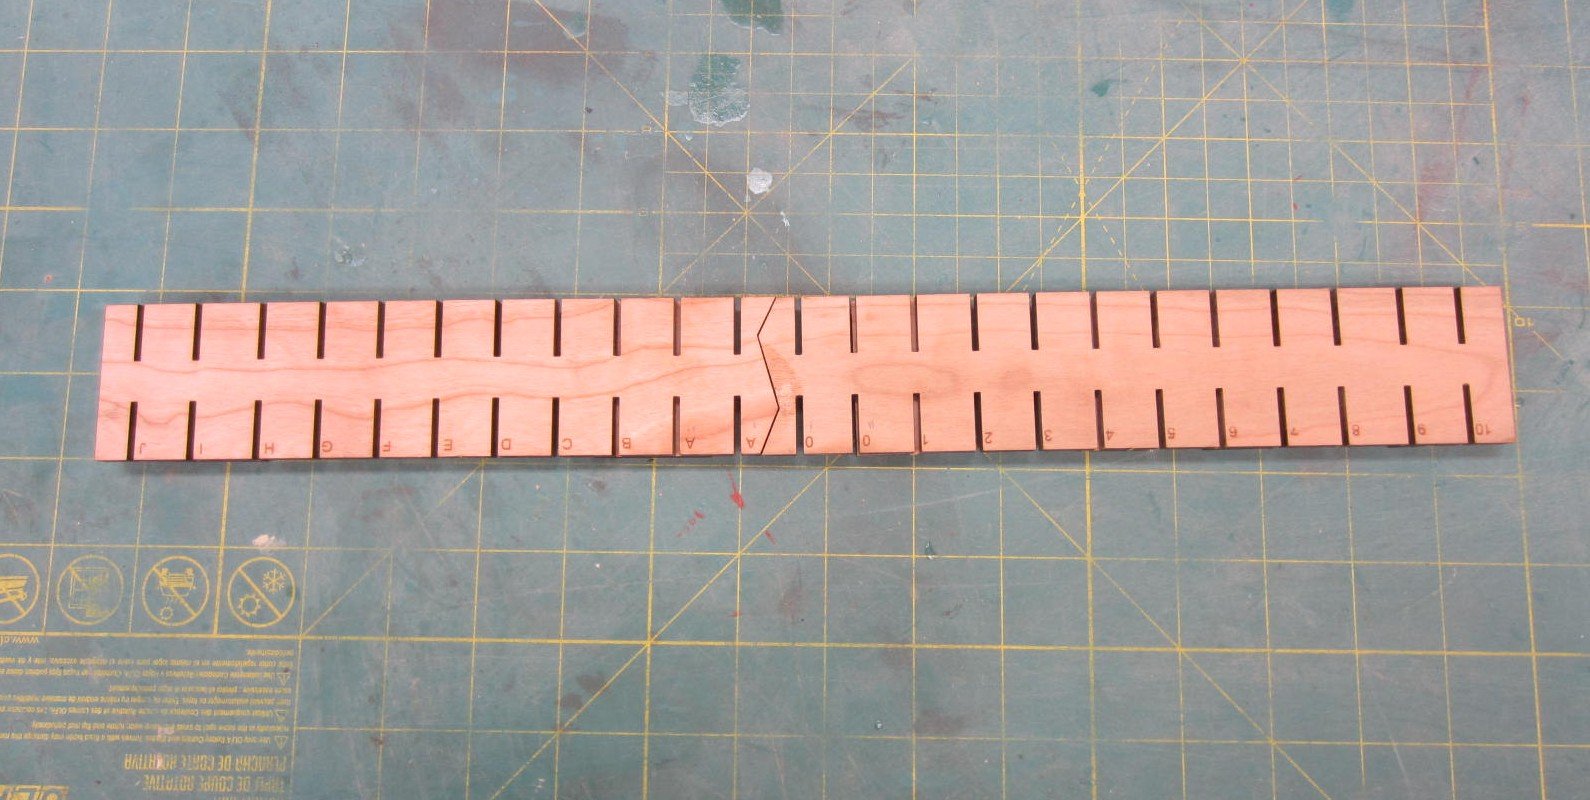
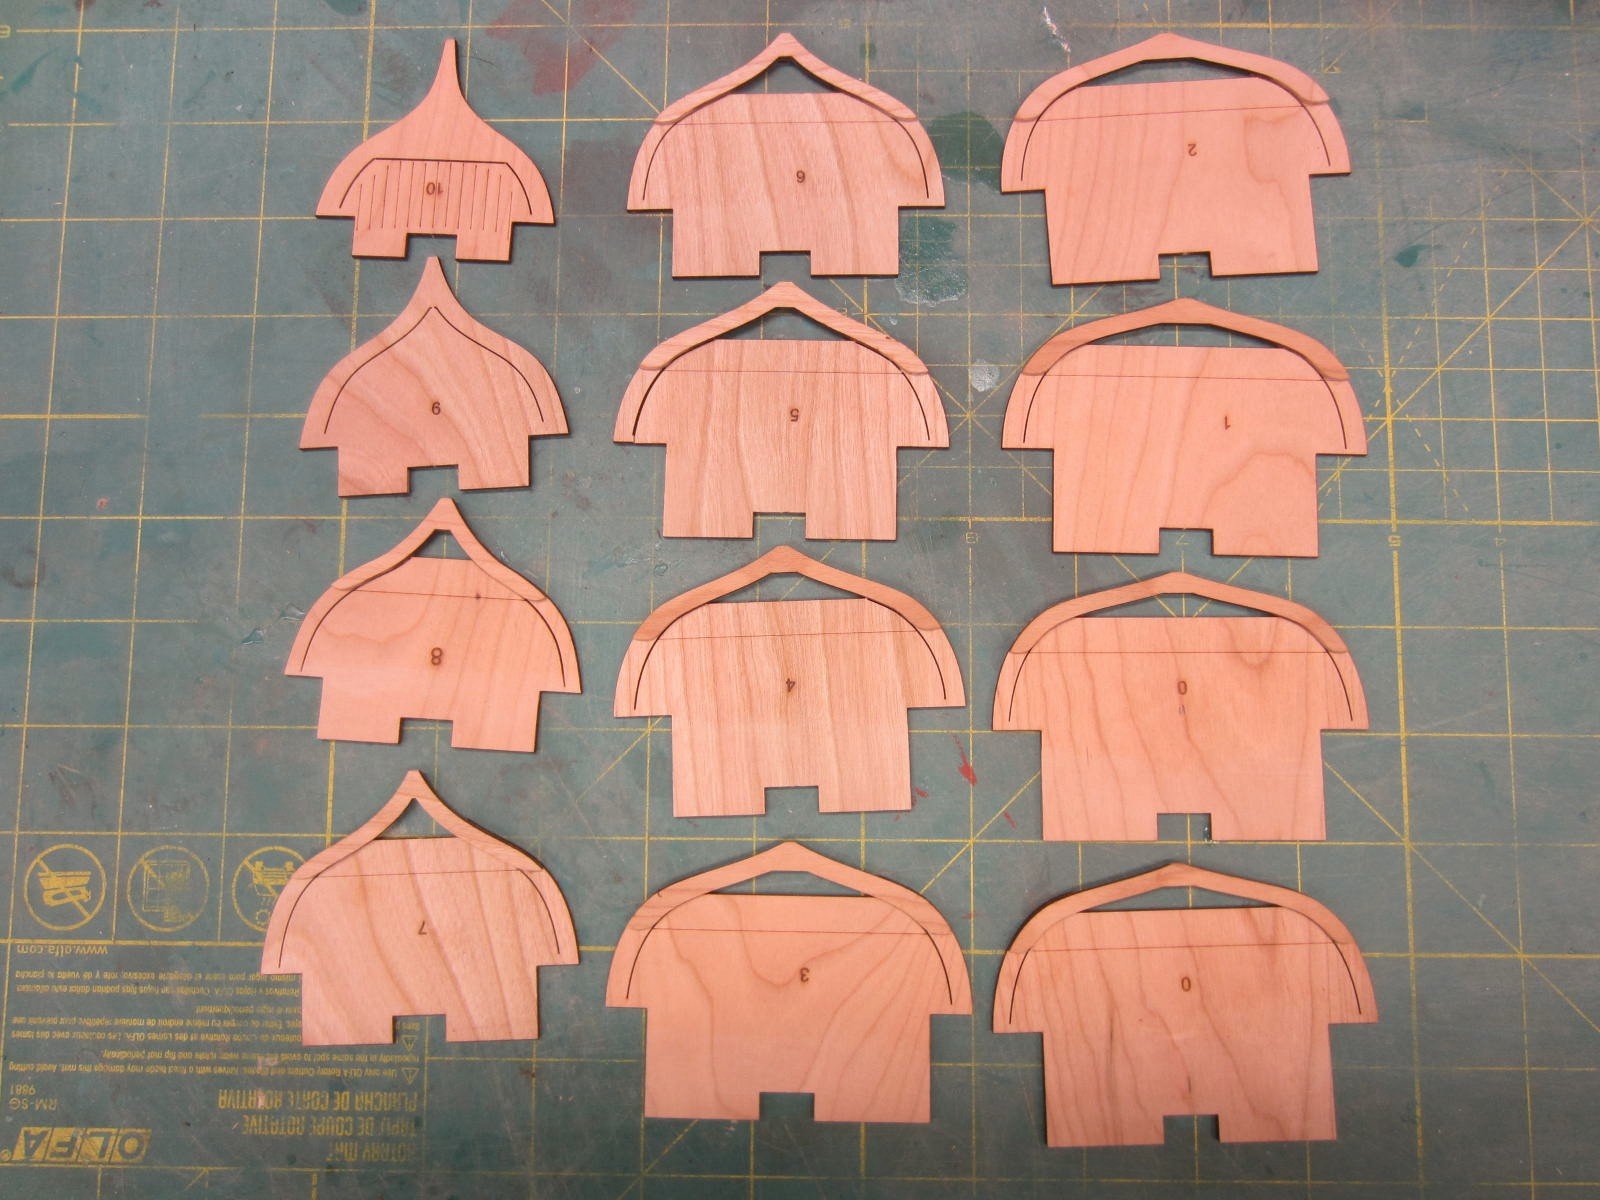
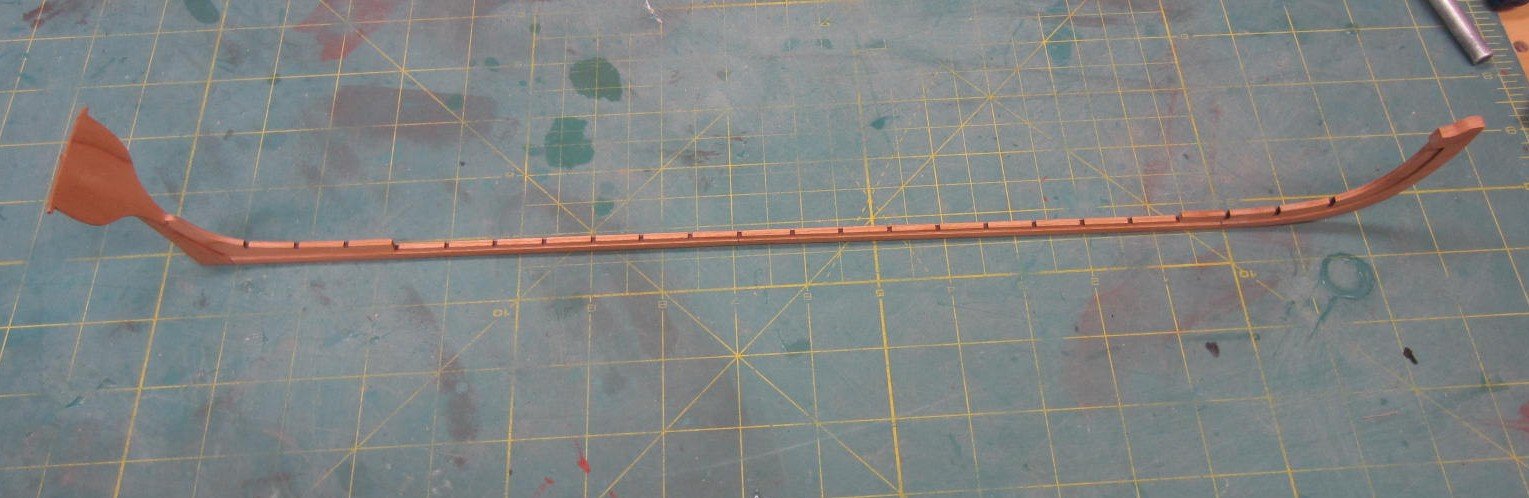
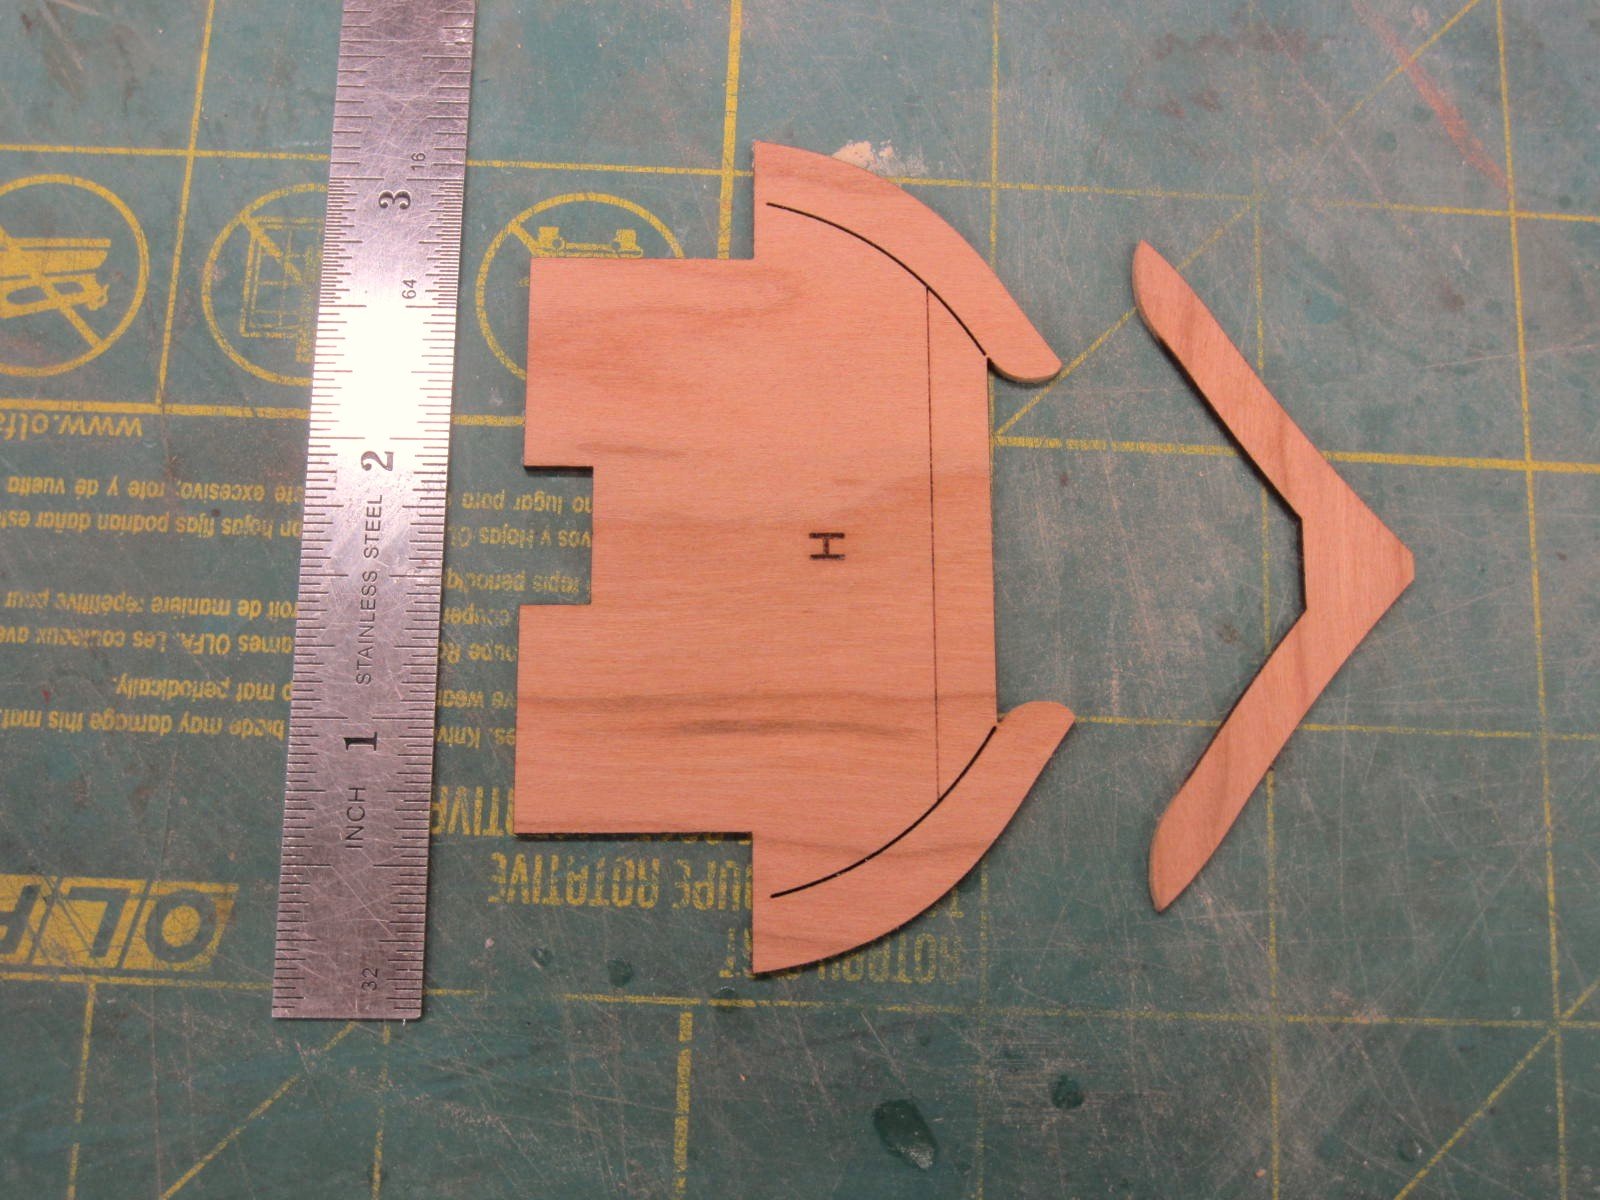
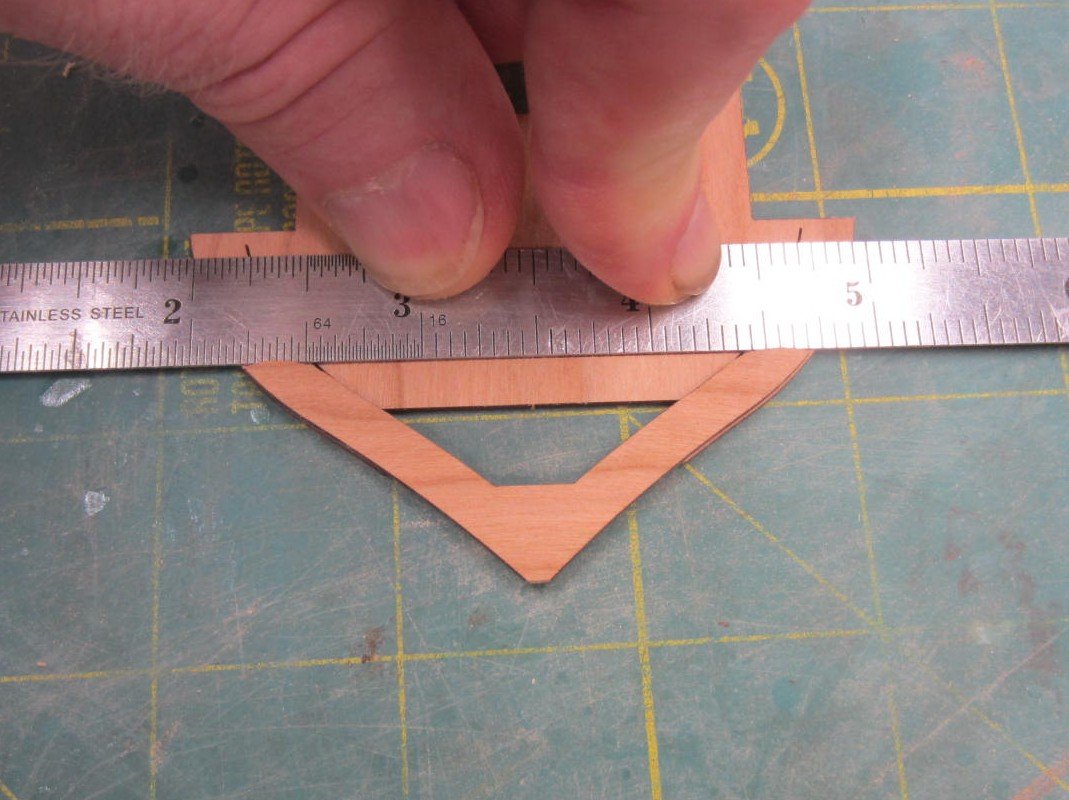
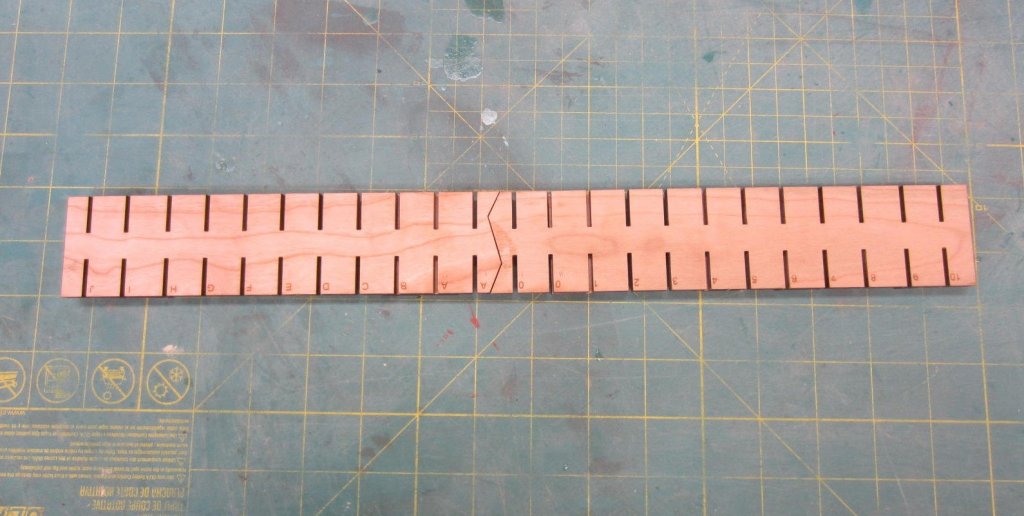
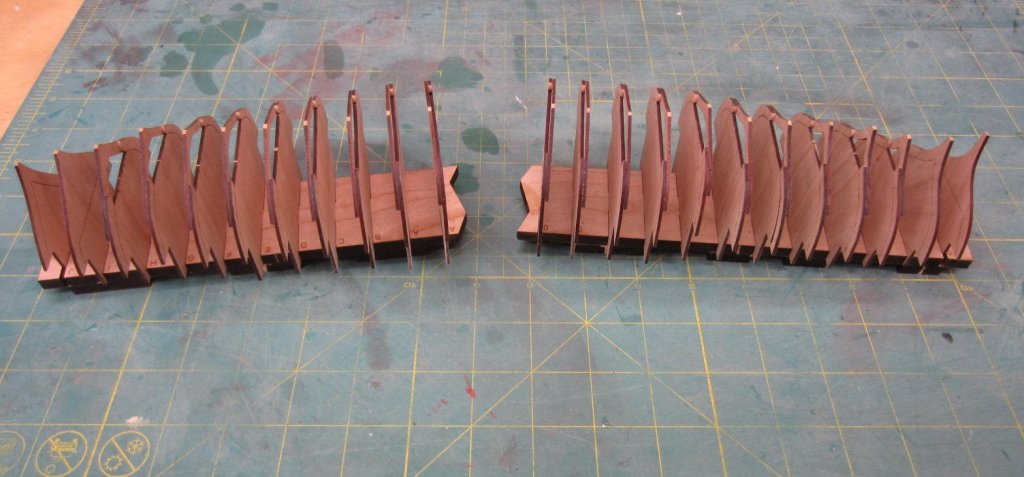
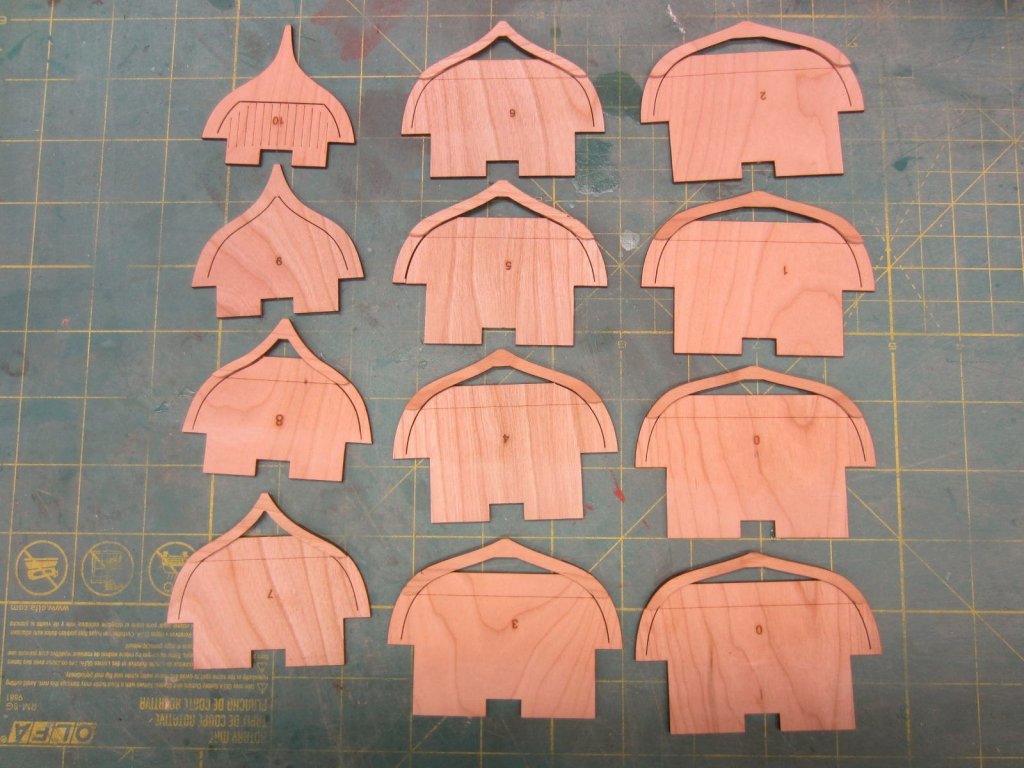
Hi All, I had the good fortune to obtain one of the Queen Ann Royal Barge's from Syren Ship Model Company. I've decided to start doing some of the building while working on the Syren re-rigging. It will make a pleasant break from redoing the yards and the running rigging. The kit comes with two sheets of plans and numerous sheets of laser cut parts. As expected all were in perfect condition upon their arrival. First I started on making the frames. You can see a faint laser line across the futtock frame. This is a reference line for placement of the frame floor. Using this reference line insures uniform placement of all the floors. The futtock and the floor. A straight edge is placed along the line. I clamped the straight edge on the frame, applied glue to the frame floor and then butt it against the straight edge and waited for it to dry. A small weight was placed on the floor while it was drying.I can do two frames at a time. Hopefully care was used to not use too much glue so I can later remove the center away from the futtock. There are a total of 23 frames. 19 that have a separate futtock and floor that need to be assembled. While they are drying I'll work on the keel. The fun has begun!


- 120 replies
-
- 20
-
-
- queen anne barge
- Syren Ship Model Company
- (and 1 more)
-
Looking good Floyd!
-
Very nice Chuck, Trying to convince the Admiral that she would love to move to Jersey! Signed, Envious in Upstate NY.
-
All looks nice and sharp. The deck fitting so nicely together is a testament to a nice square framing job!
- 359 replies
-
- 7
-
-
- prince de neufchatel
- model shipways
- (and 1 more)
-
Very nice start Mike. Good tight fit.
- 607 replies
-
- 4
-
-
- winchelsea
- Syren Ship Model Company
- (and 1 more)
-
Y You and about 50 others of us. Hey just number all the kits #1. That should take care of it.
-
I've been slowly chugging along with the re-do. I've decided to repair/refresh all of the yards first and then resume the rigging. Here you'll see I've finished the Main and Fore lower course yards, the Royal Yards and the Spritsail yard. Well it's onto the Topsail and Topgallant yards and the it's back to running more rope.

-
Hi Bob, Very nice choice for your new build. As with everyone else I'm eager to see you progress.
- 359 replies
-
- 7
-
-
- prince de neufchatel
- model shipways
- (and 1 more)
-
Excellent build Bob. Your workmanship is first rate and its always a pleasure to follow along.
- 682 replies
-
- 4
-
-
- halifax
- lumberyard
- (and 1 more)
-
I did it like Kurt did but I don't see why you couldn't leave it place.
- 574 replies
-
- 2
-
-
- cheerful
- Syren Ship Model Company
- (and 1 more)
-
Byrnes Thickness Sander Advice
Rustyj replied to janet bode's topic in Modeling tools and Workshop Equipment
Hi Janet. I've used my Byrne's sander for an hour doing boxwood and not had any issues. The only thing I can think would cause it to heat up would be too heavy a load by pushing the wood through at too fast a pace. Might want to email Jim Byrne's and get his opinion.