Rustyj
-
Posts
2,535 -
Joined
-
Last visited
Content Type
Profiles
Forums
Gallery
Events
Everything posted by Rustyj
-
 Hi Bob and thanks. Time will tell but I'm optimistic.
- 310 replies
-
- 2
-

-
- cheerful
- Syren Ship Model Company
- (and 1 more)
-
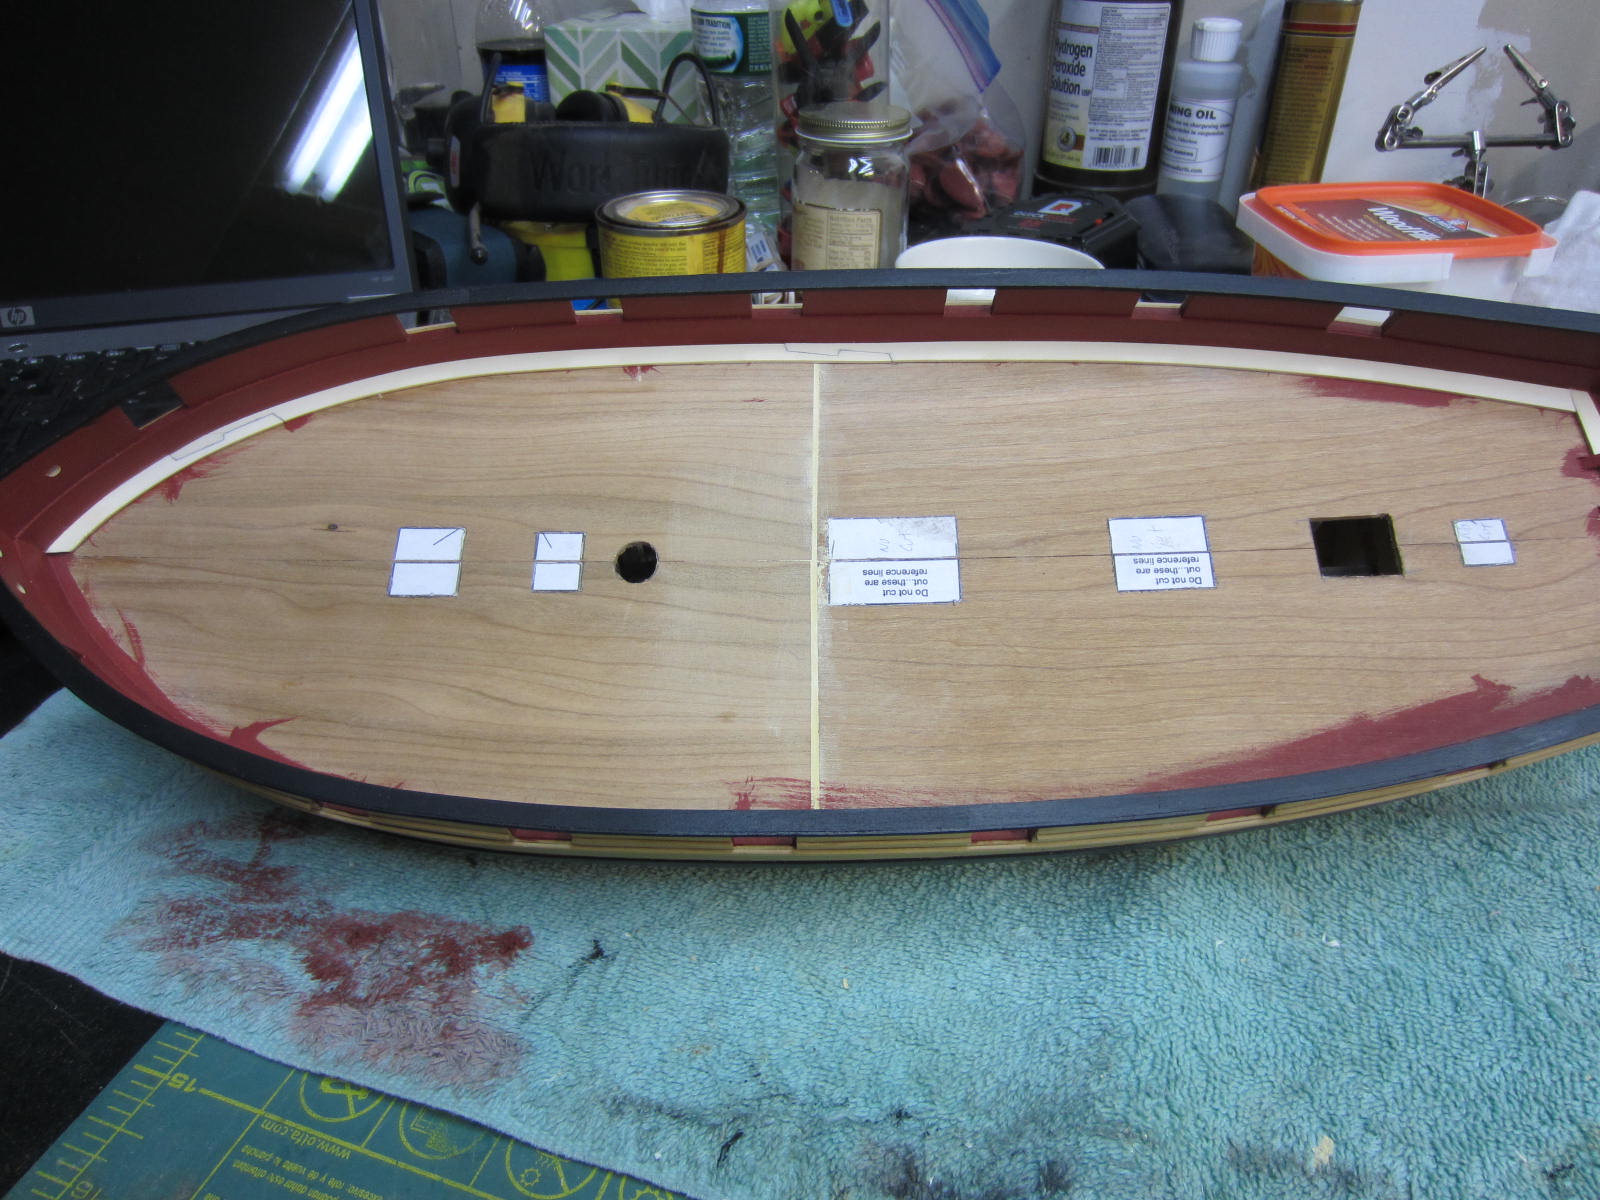
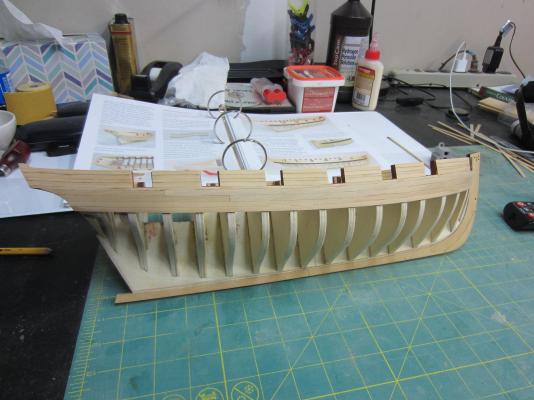
Hi All, Continuing on I’ve completed sanding the bulkheads to the desired thickness. The false deck was cut out of some 1/16” cherry I had on hand. I made it out of two pieces and after adjusting and fitting it I had a minor gap in the middle which I filled with wood filler. Once that was completed I planked the bulkheads and painted it with Red Ochre. Here you can see that the cap rail has been completed and the margin planking has been started. That’s the fun stuff. Well the Admiral and I have purchased a different home and I am now in full renovation mode. Sadly by the end of this month (April) the workshop will shut down until the move has been completed and a new workshop constructed. The new shop will be in a 12x20 section of the basement that is currently unfinished. So it is going to be a happy/sad time coming up. It will be thrilling to double my workshop space but shutting down the shop for 3 months or more will really be annoying! So I will be getting done what I can in between work and the renovations till the end of the month.

- 310 replies
-
- 15
-
-
- cheerful
- Syren Ship Model Company
- (and 1 more)
-
Cutter Cheerful 1806 by rafine - FINISHED
Rustyj replied to rafine's topic in - Build logs for subjects built 1801 - 1850
Great job on her Bob. If you didn't show us that you made the anchors out of wood we would never have known.- 525 replies
-
- 6
-
-
- cheerful
- Syren Ship Model Company
- (and 1 more)
-
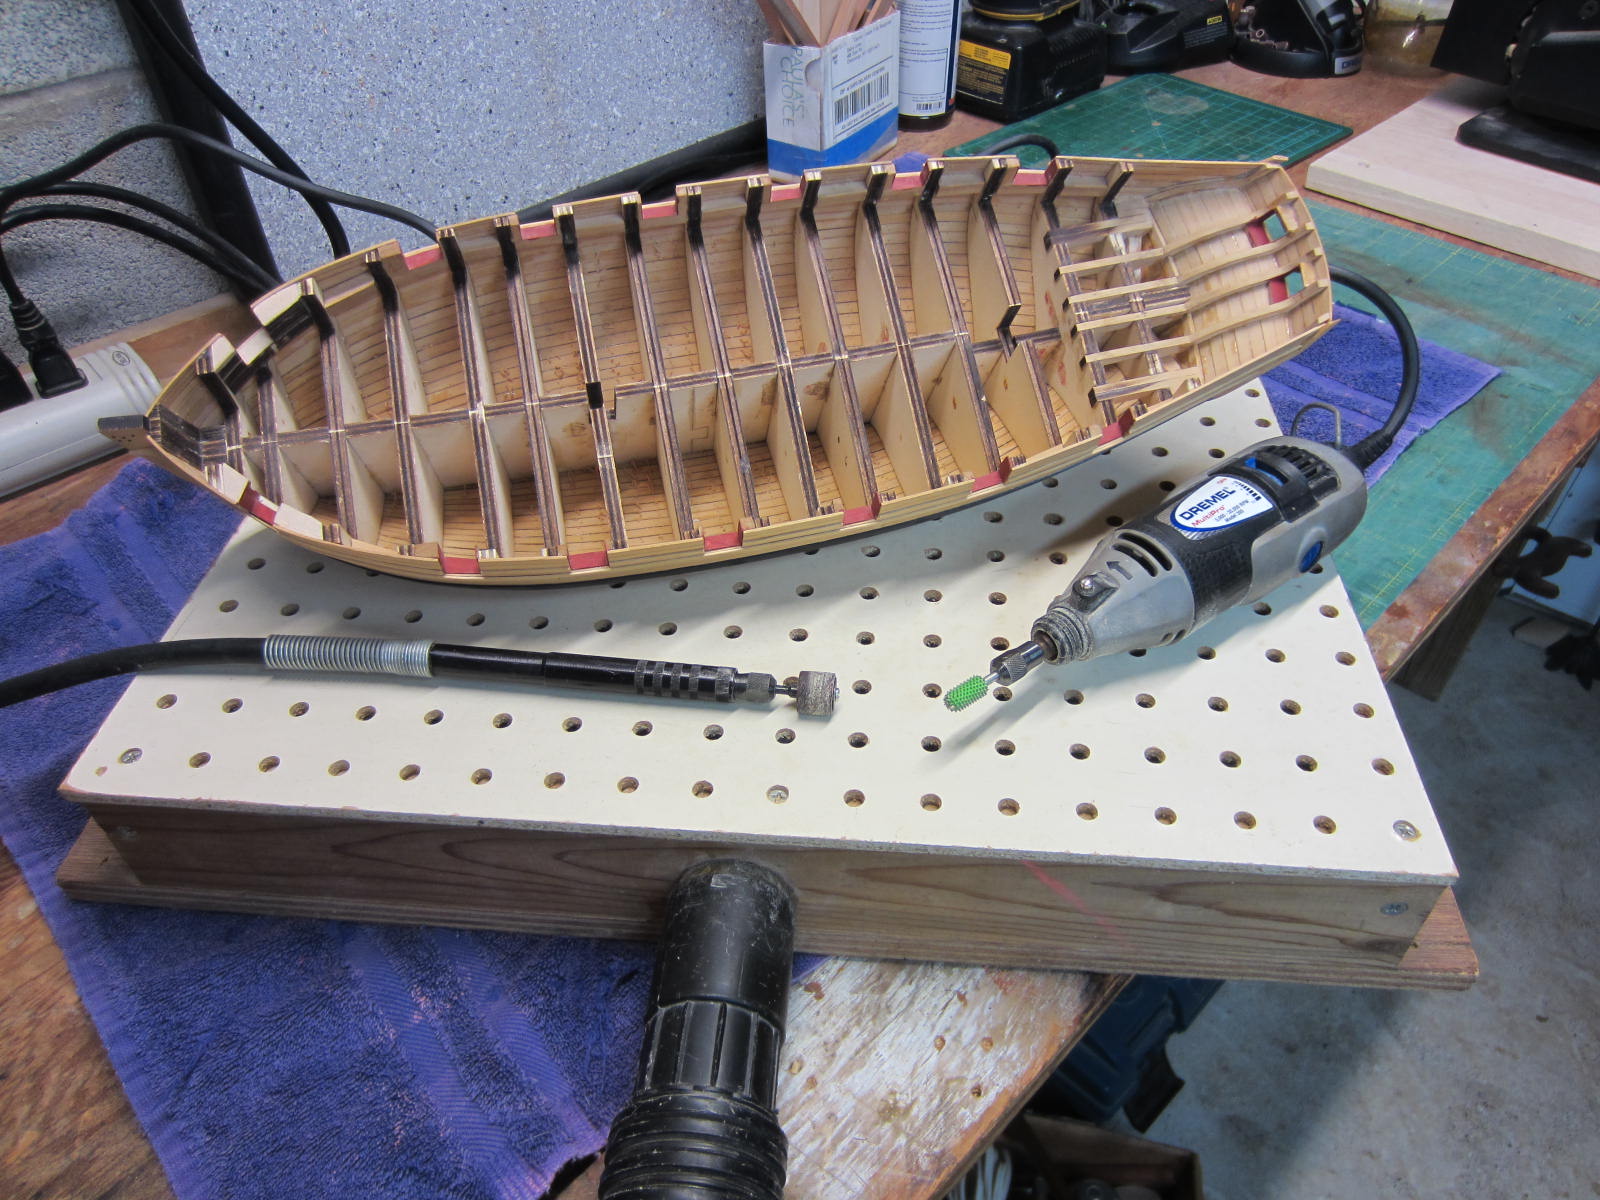
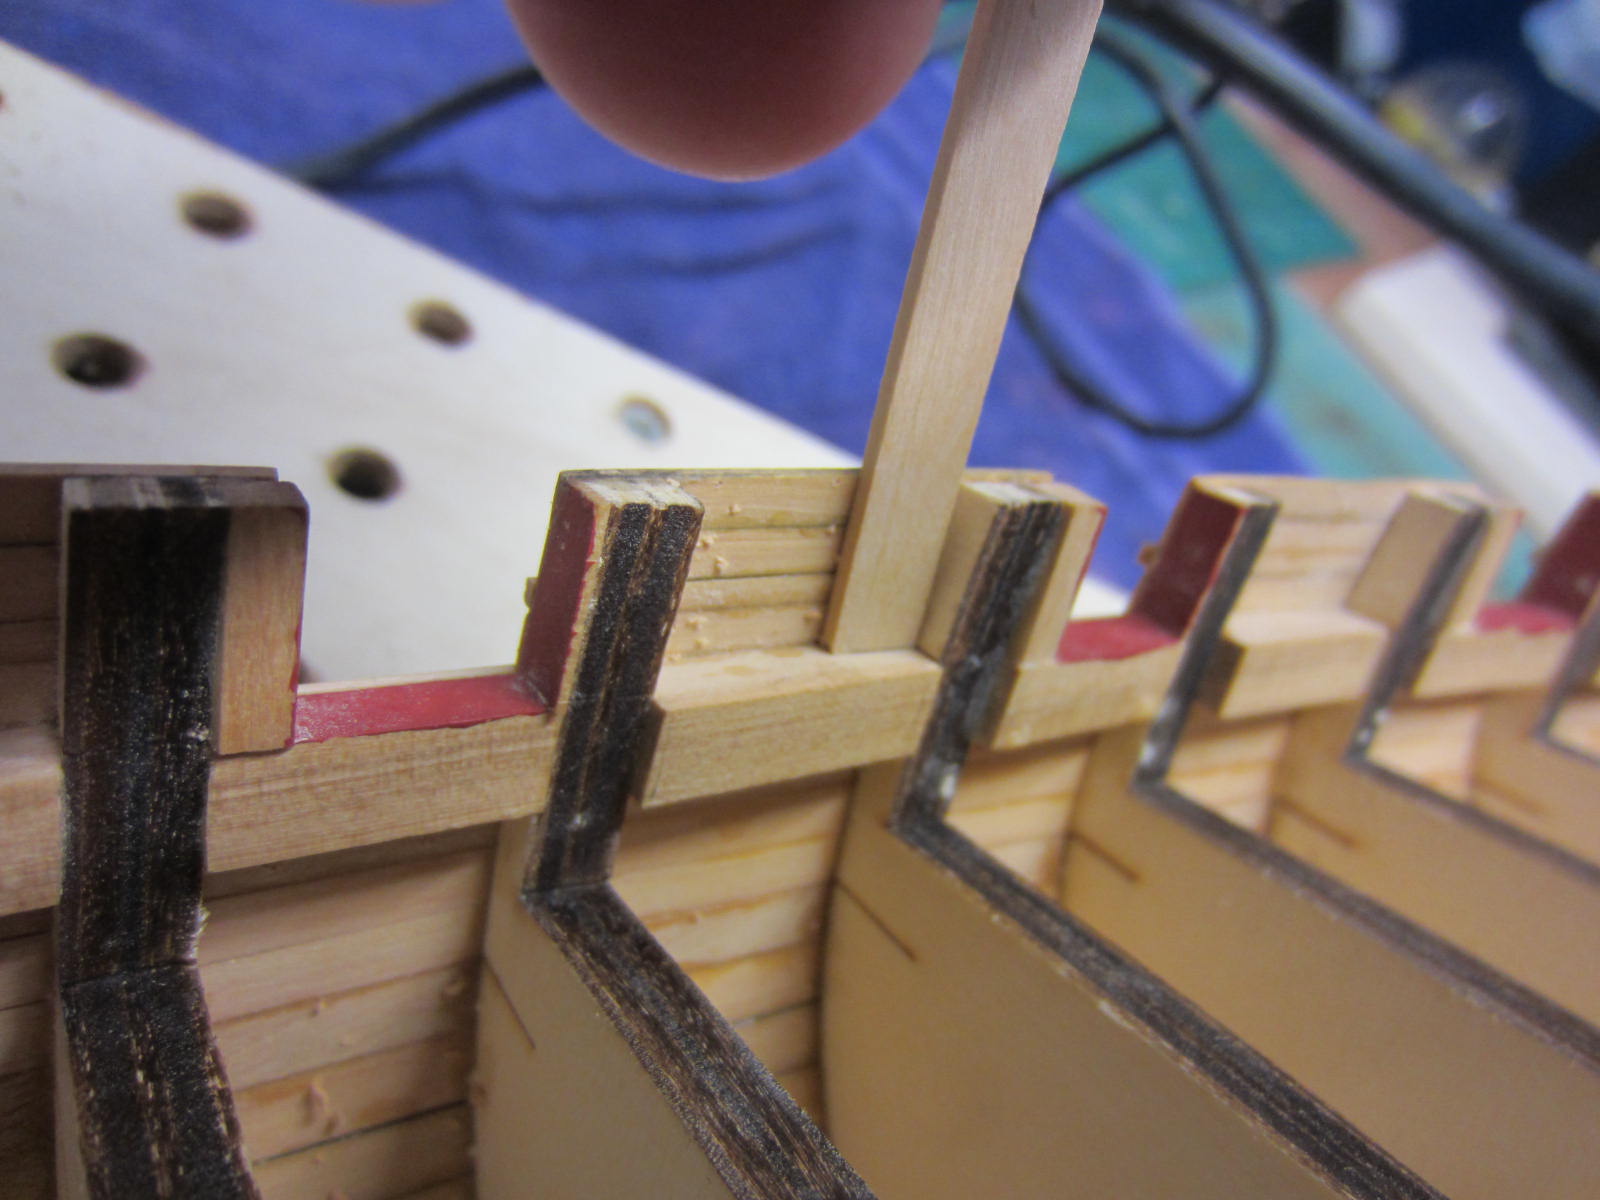
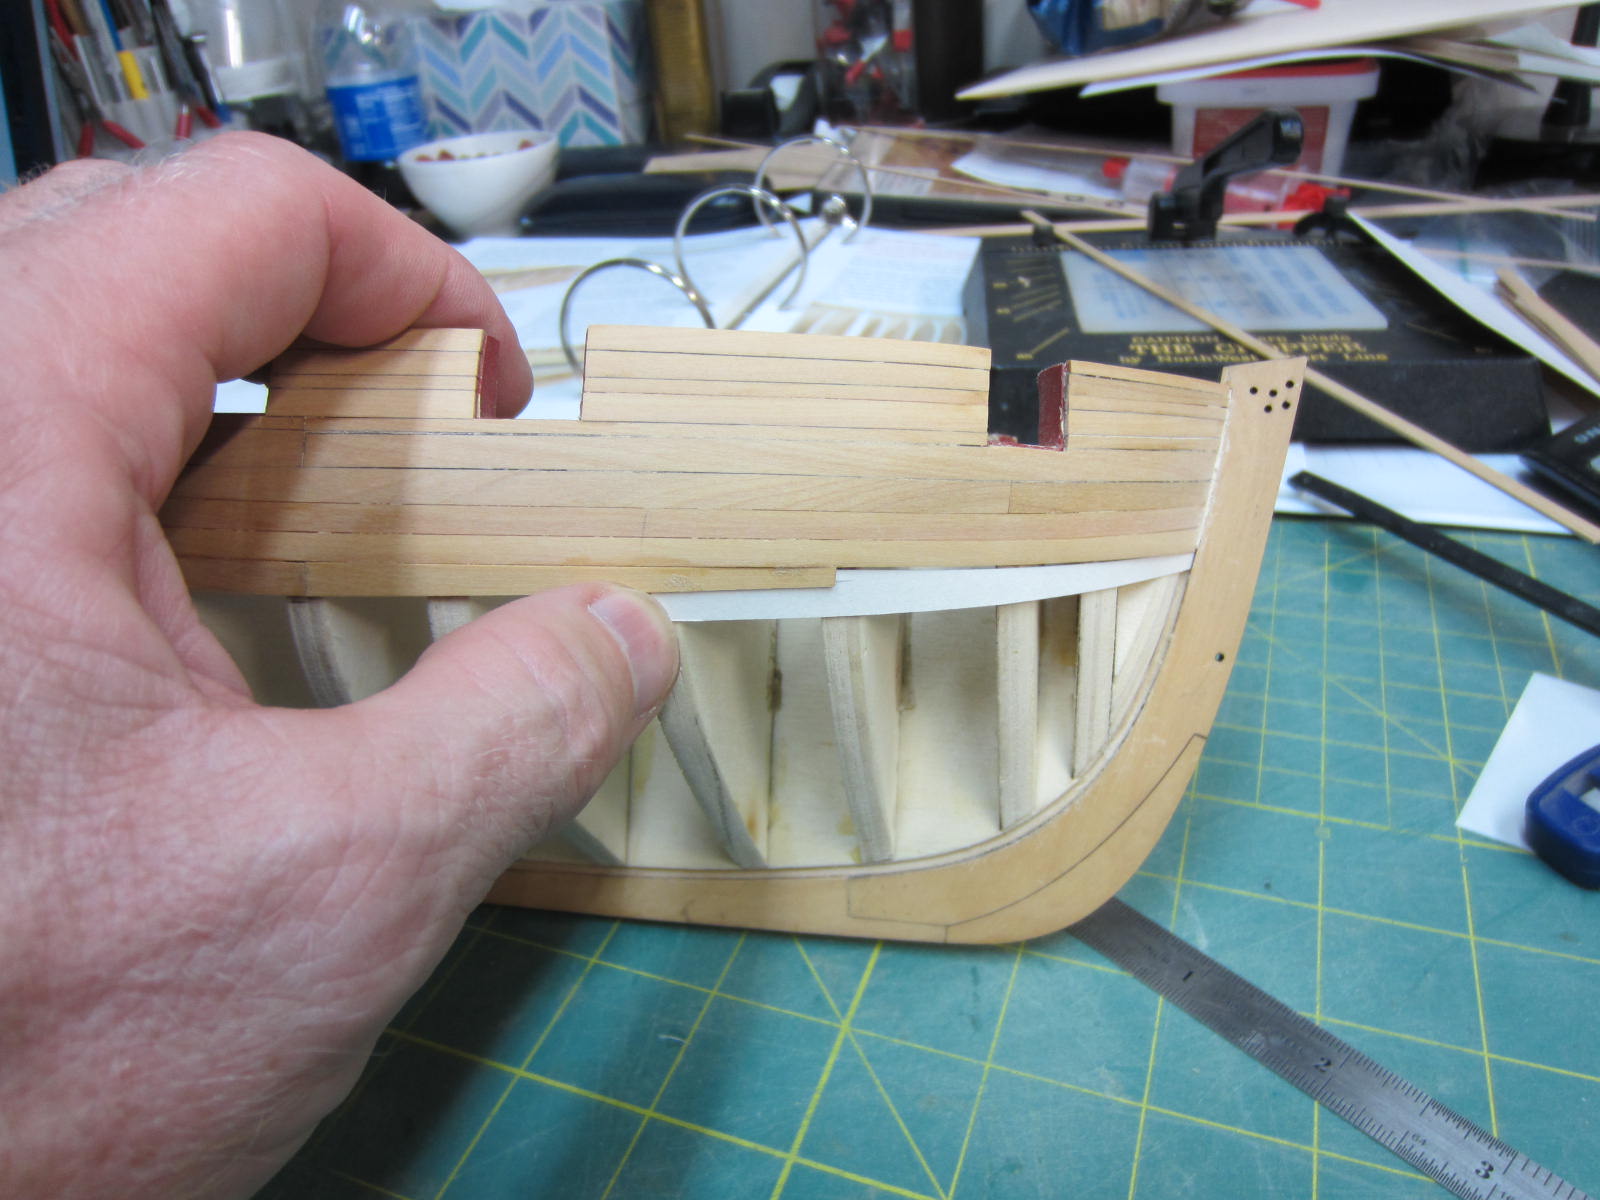
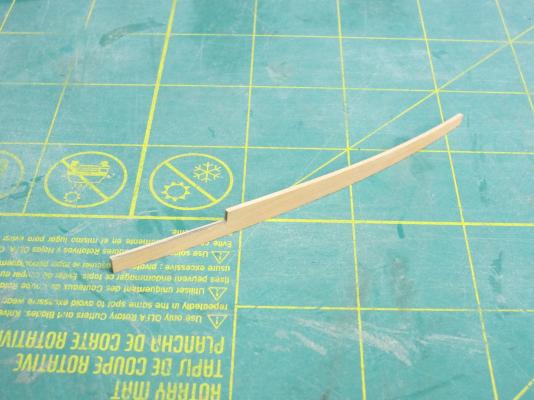
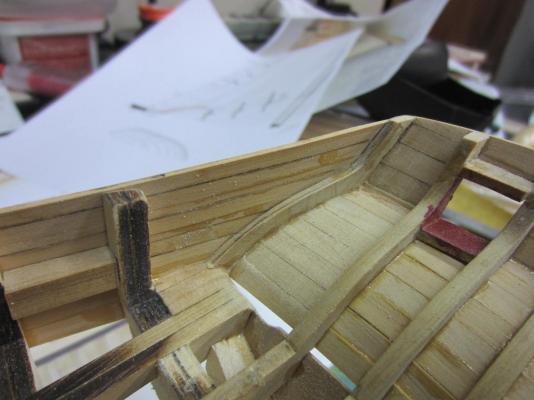
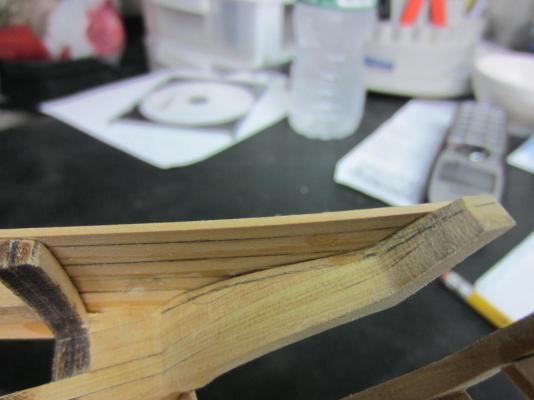
Well it’s time to start chapter 6 which covers inboard work. The first step requires making a lot of dust again. The bulwarks need to be thinned down to 1/16”. I placed a piece of strip wood to show 1/16” and how much needs to be removed. To accomplish this I used a dremel tool with a course bit and then a fine sanding drum to get close and finished with sandpaper. Here you can see the tools I used as well as the down draft table to collect the majority of the dust. Here you can see a section roughed in. Once all has been sanded like this I’ll go back and clean it up and finish it off. After finishing the sanding it will be time to install the false deck and plank the bulwarks.


- 310 replies
-
- 18
-
-
- cheerful
- Syren Ship Model Company
- (and 1 more)
-
Oh Mark if only “twice” was what made it nice! Thank you Nigel, Bob and Dirk for the kind words and also for all the likes.
- 310 replies
-
- 3
-
-
- cheerful
- Syren Ship Model Company
- (and 1 more)
-
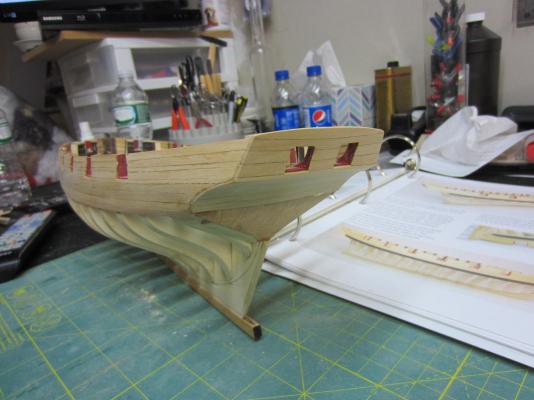
Well I’ve been able to get some time to work on the Cheerful and all the treenails have been added. I went with the simulated ones as Chuck described. I decided to go very subtle with the color of the treenails. While doing the treenails the clumsy hands came to visit and a couple of planks suffered some damage. So a minor tear out and repair was in order. It’s fun to do stuff twice. The molding have been place, wales have been painted black and a coat of wipe on poly applied.


- 310 replies
-
- 21
-
-
- cheerful
- Syren Ship Model Company
- (and 1 more)
-
Thanks Al. It's a great build and between the instructions and all the help here you can't go wrong. Yes Michael I am and thank you. Eric You're glad just like I am to follow behind those great planking jobs before me. Seven weeks Is more like a dozen during the winter here and semi retirement. Within a month everything will slow way down.
- 310 replies
-
- 5
-
-
- cheerful
- Syren Ship Model Company
- (and 1 more)
-
Thanks Nigel. Yes I use a pencil on one edge. Thanks Chuck. Oh it's sooooo much more fun although I think knowing now what you've taught me I would have done a much better job on the Confederacy.
- 310 replies
-
- 4
-
-
- cheerful
- Syren Ship Model Company
- (and 1 more)
-
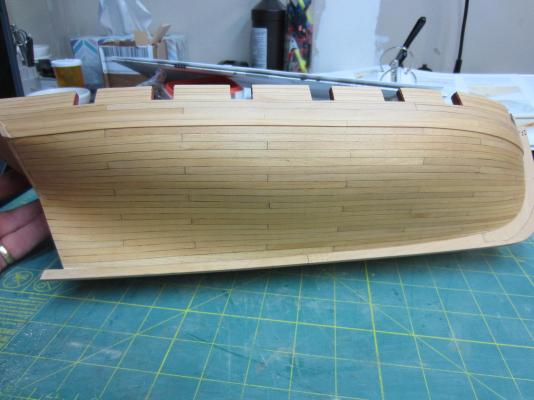
Hi All, Well I've completed the hull planking and the square tuck. Taking ones time, using the planking fan, planning out the belts and run of the planks actual makes for a very enjoyable experience. No more forcing planks and getting an uneven planking job. Follow Chucks description and methods and you won't be disappointed. Also you'll notice that a work area cleaning was recently completed! I'll be out of touch for a couple of days so I'll apologize now for any late response.

- 310 replies
-
- 26
-
-
- cheerful
- Syren Ship Model Company
- (and 1 more)
-
Hi Chuck. As you said there will be many variations. When I get to that point I may make the trucks out of swiss pear just to see how that looks. If that doesn't work then it's red or natural. Time will tell.
- 1,051 replies
-
- 3
-
-
- cheerful
- Syren Ship Model Company
- (and 1 more)
-
Great workmanship Chuck! She's.looking really good.
- 1,051 replies
-
- 4
-
-
- cheerful
- Syren Ship Model Company
- (and 1 more)
-
Well I've been successful in the past so I'm game to try again. Getting tougher every year though.
- 310 replies
-
- 4
-
-
- cheerful
- Syren Ship Model Company
- (and 1 more)
-
Thanks Chuck. Mark I've free handed in the past. If it doesn't go well this time I'll start over and mask it off.
- 310 replies
-
- 3
-
-
- cheerful
- Syren Ship Model Company
- (and 1 more)
-
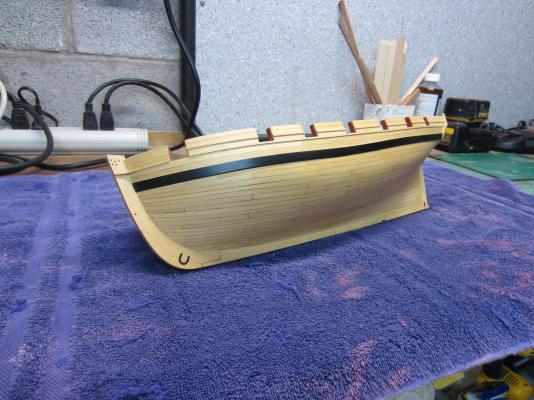
Hi All, After placing the first two strakes it was time to line off the hull. The hull was divided into two bands of 9. Each band was laid out using tick strips and a planking fan as Chuck described in his log. I also added the second layer to the wales now. I will wait to paint them until the hull is fully planked. Here is the first belt fully planked.

- 310 replies
-
- 23
-
-
- cheerful
- Syren Ship Model Company
- (and 1 more)
-
Cutter Cheerful 1806 by rafine - FINISHED
Rustyj replied to rafine's topic in - Build logs for subjects built 1801 - 1850
Very nice Bob. Remember how you did it so I can bug you later!- 525 replies
-
- 4
-
-
- cheerful
- Syren Ship Model Company
- (and 1 more)
-
Thanks Chris and welcome aboard! Thanks Mike. Unfortunately this revelation came from screwing up the Wales on a couple of other builds.
- 310 replies
-
- 2
-
-
- cheerful
- Syren Ship Model Company
- (and 1 more)
-
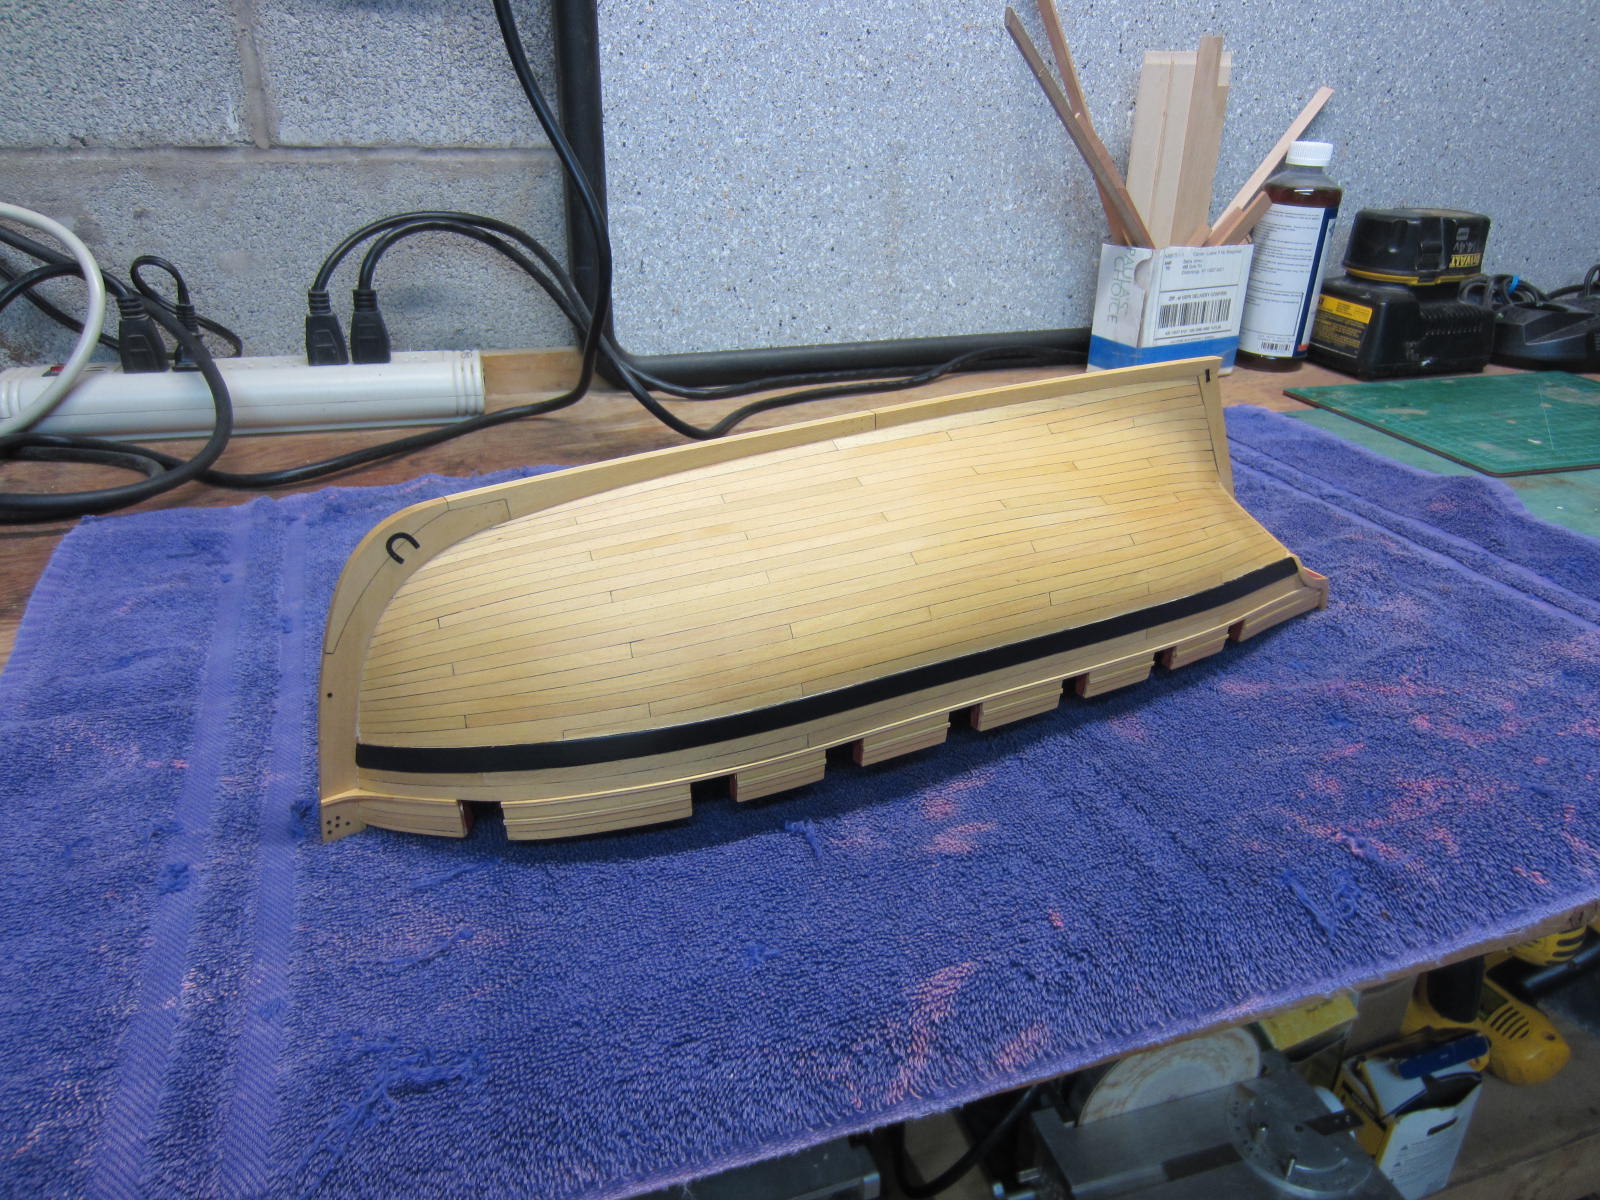
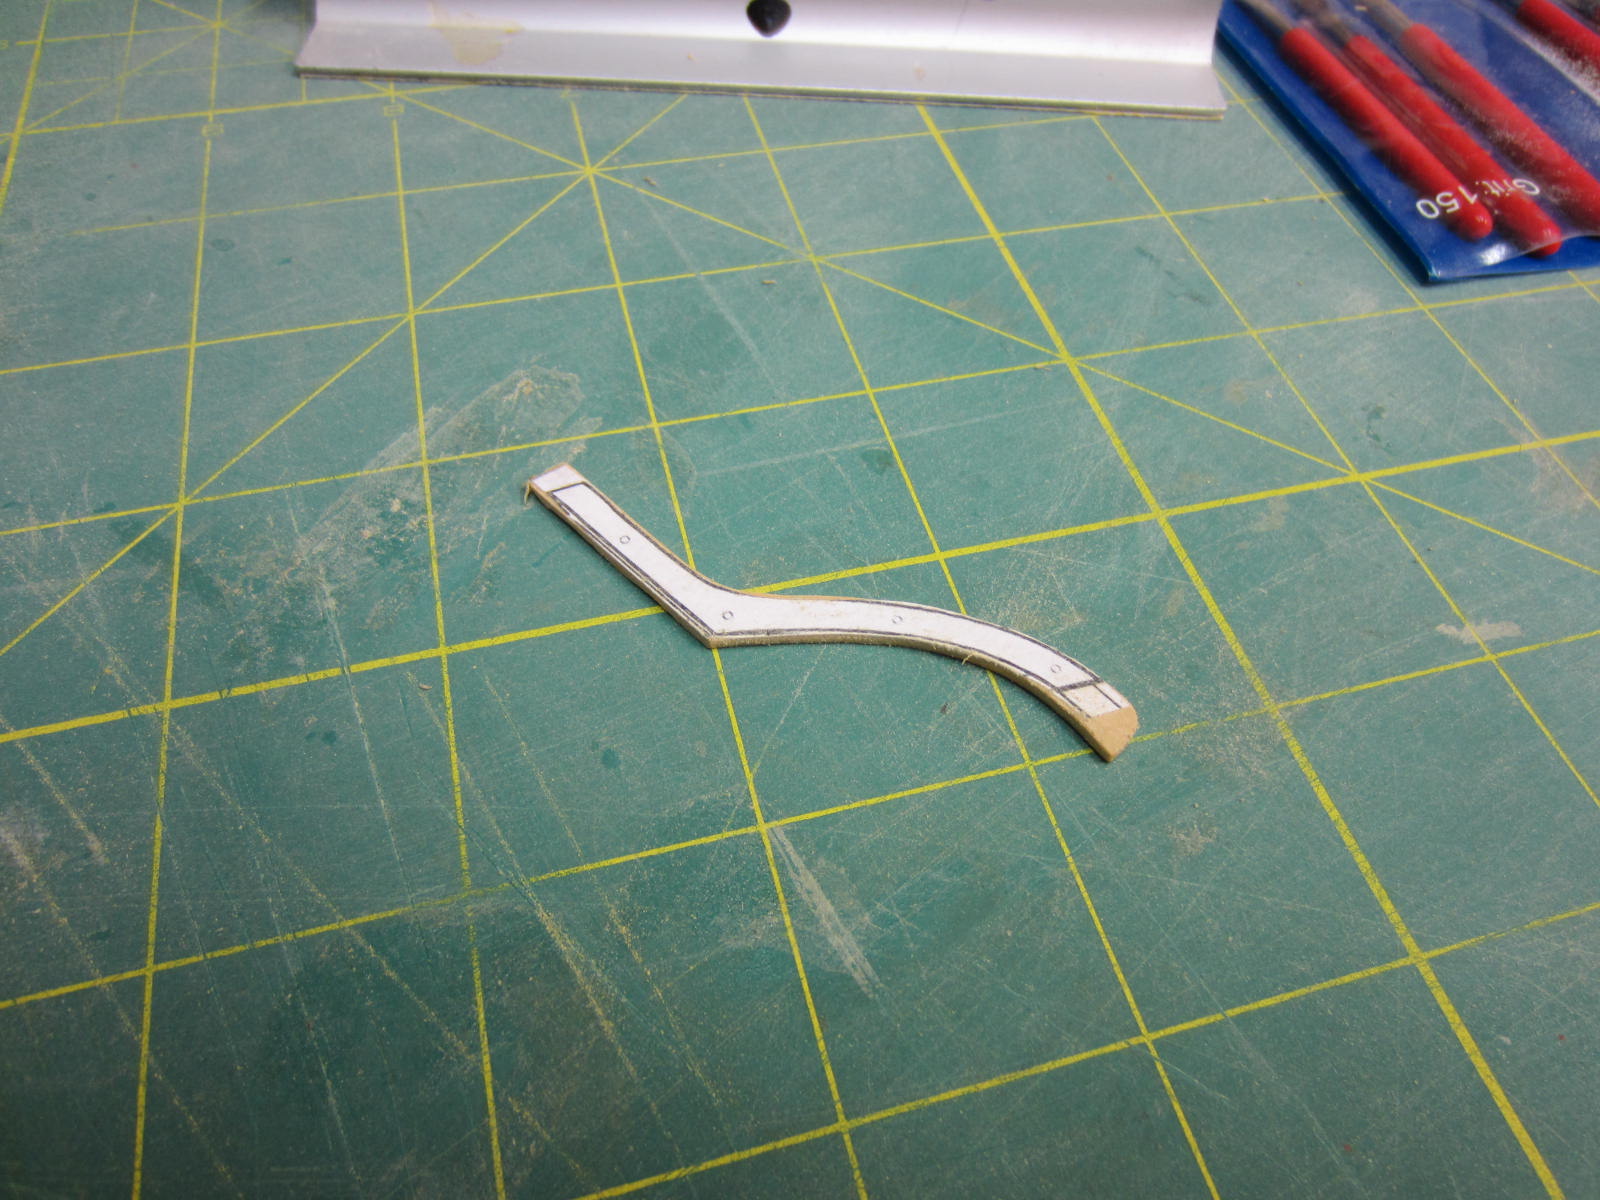
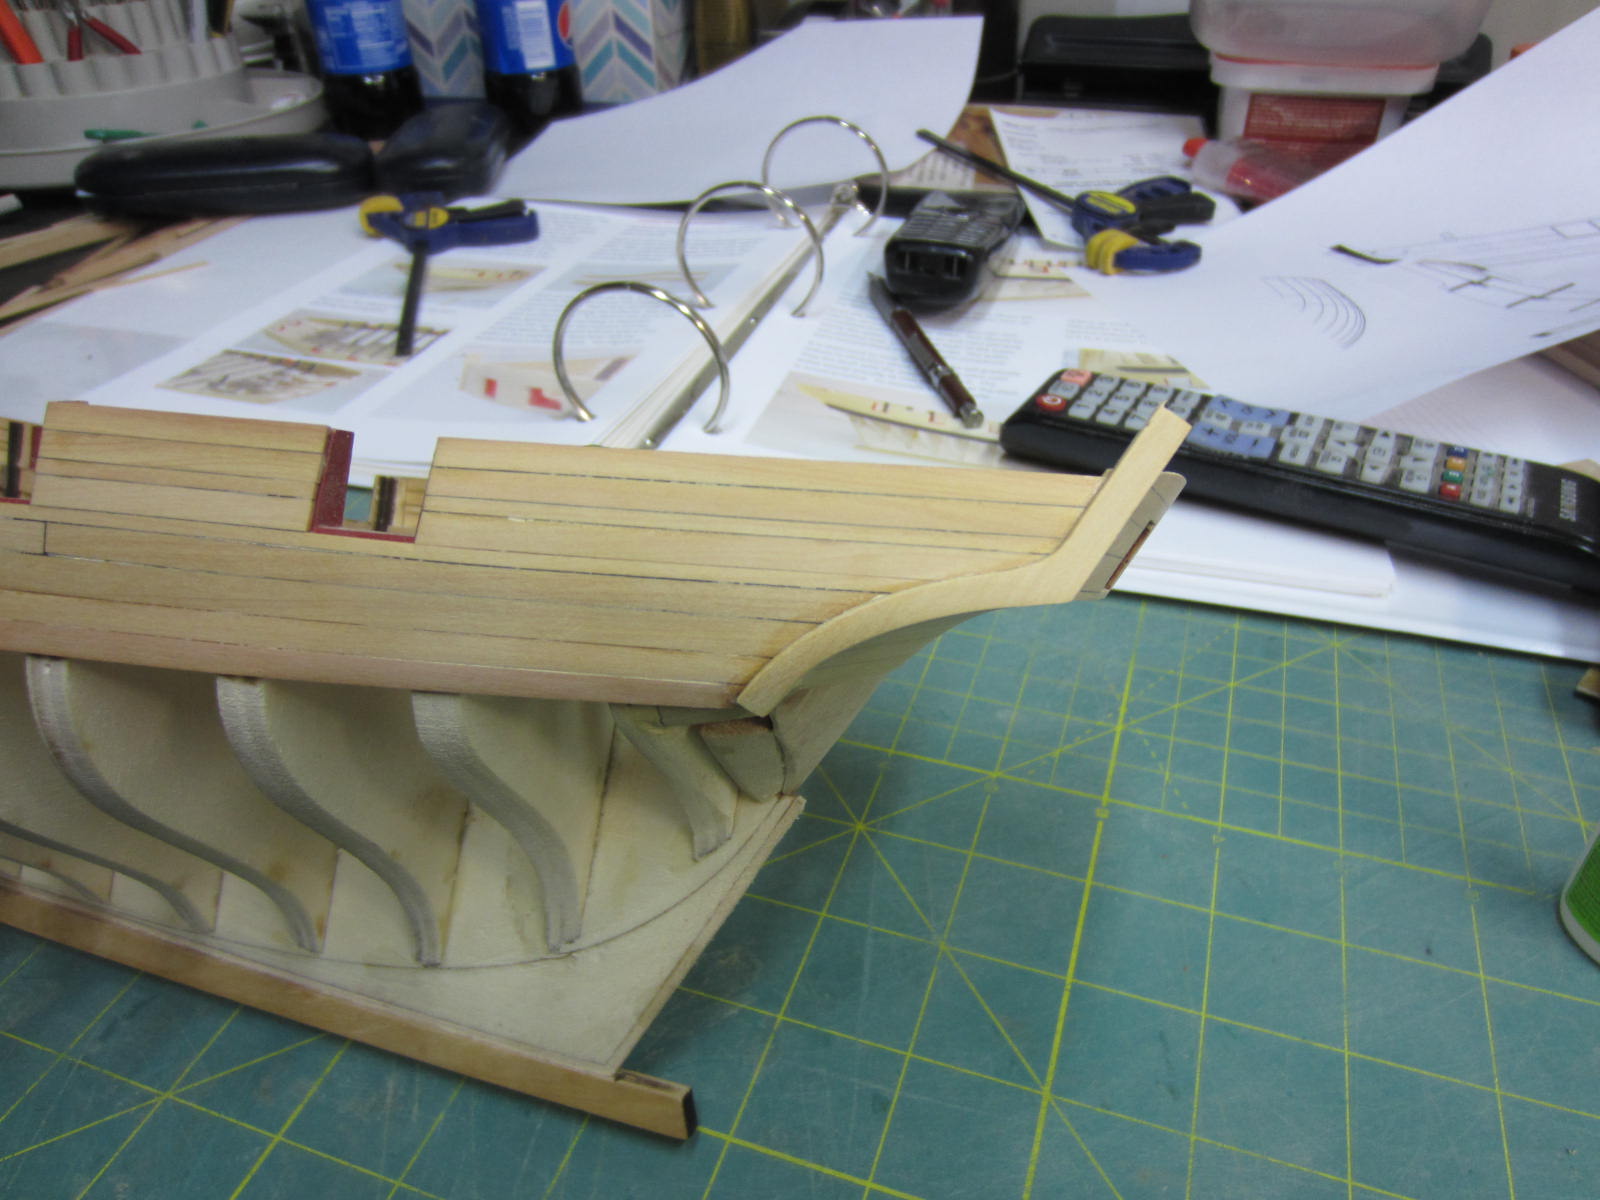
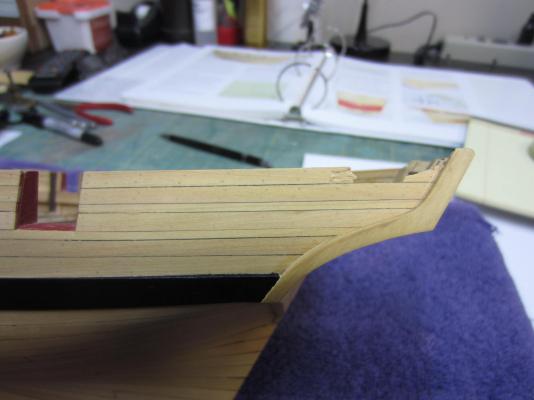
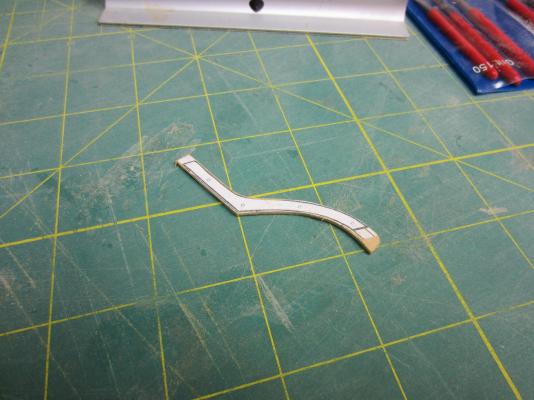
Thank you Ben and also the "likes". I've made the fashion pieces and placed them. At this point I'm supposed to add the second layer of the wales. I decided to delay putting them on until I run the first couple of rows of hull planking. The plans shows a drop plank near the bow. So I'm running the first two strakes with the drop plank before lining off the rest of the hull. A card template was used to find its shape and then cut from a boxwood sheet. Next up will be a lot of planking.


- 310 replies
-
- 17
-
-
- cheerful
- Syren Ship Model Company
- (and 1 more)
-
Very nice Chuck! As one who has enjoyed you making some of these laser parts available to us I thank you!
- 1,051 replies
-
- 6
-
-
- cheerful
- Syren Ship Model Company
- (and 1 more)
-
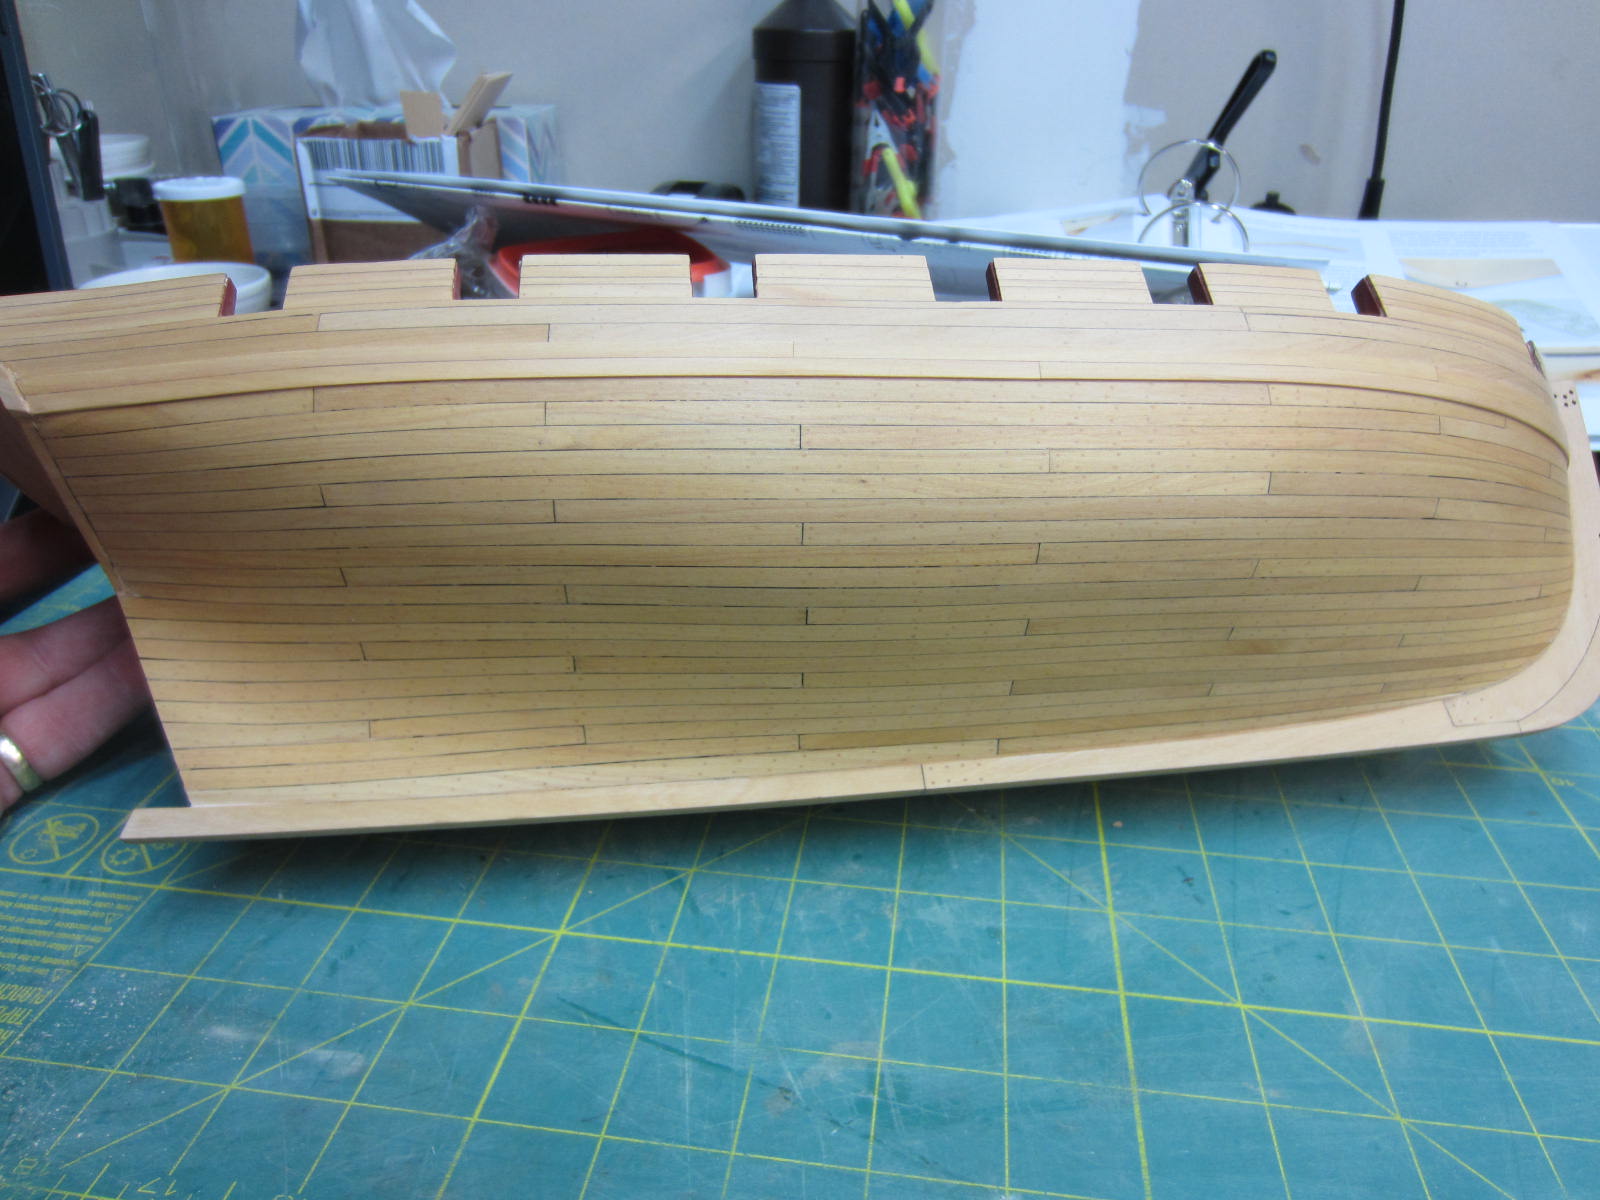
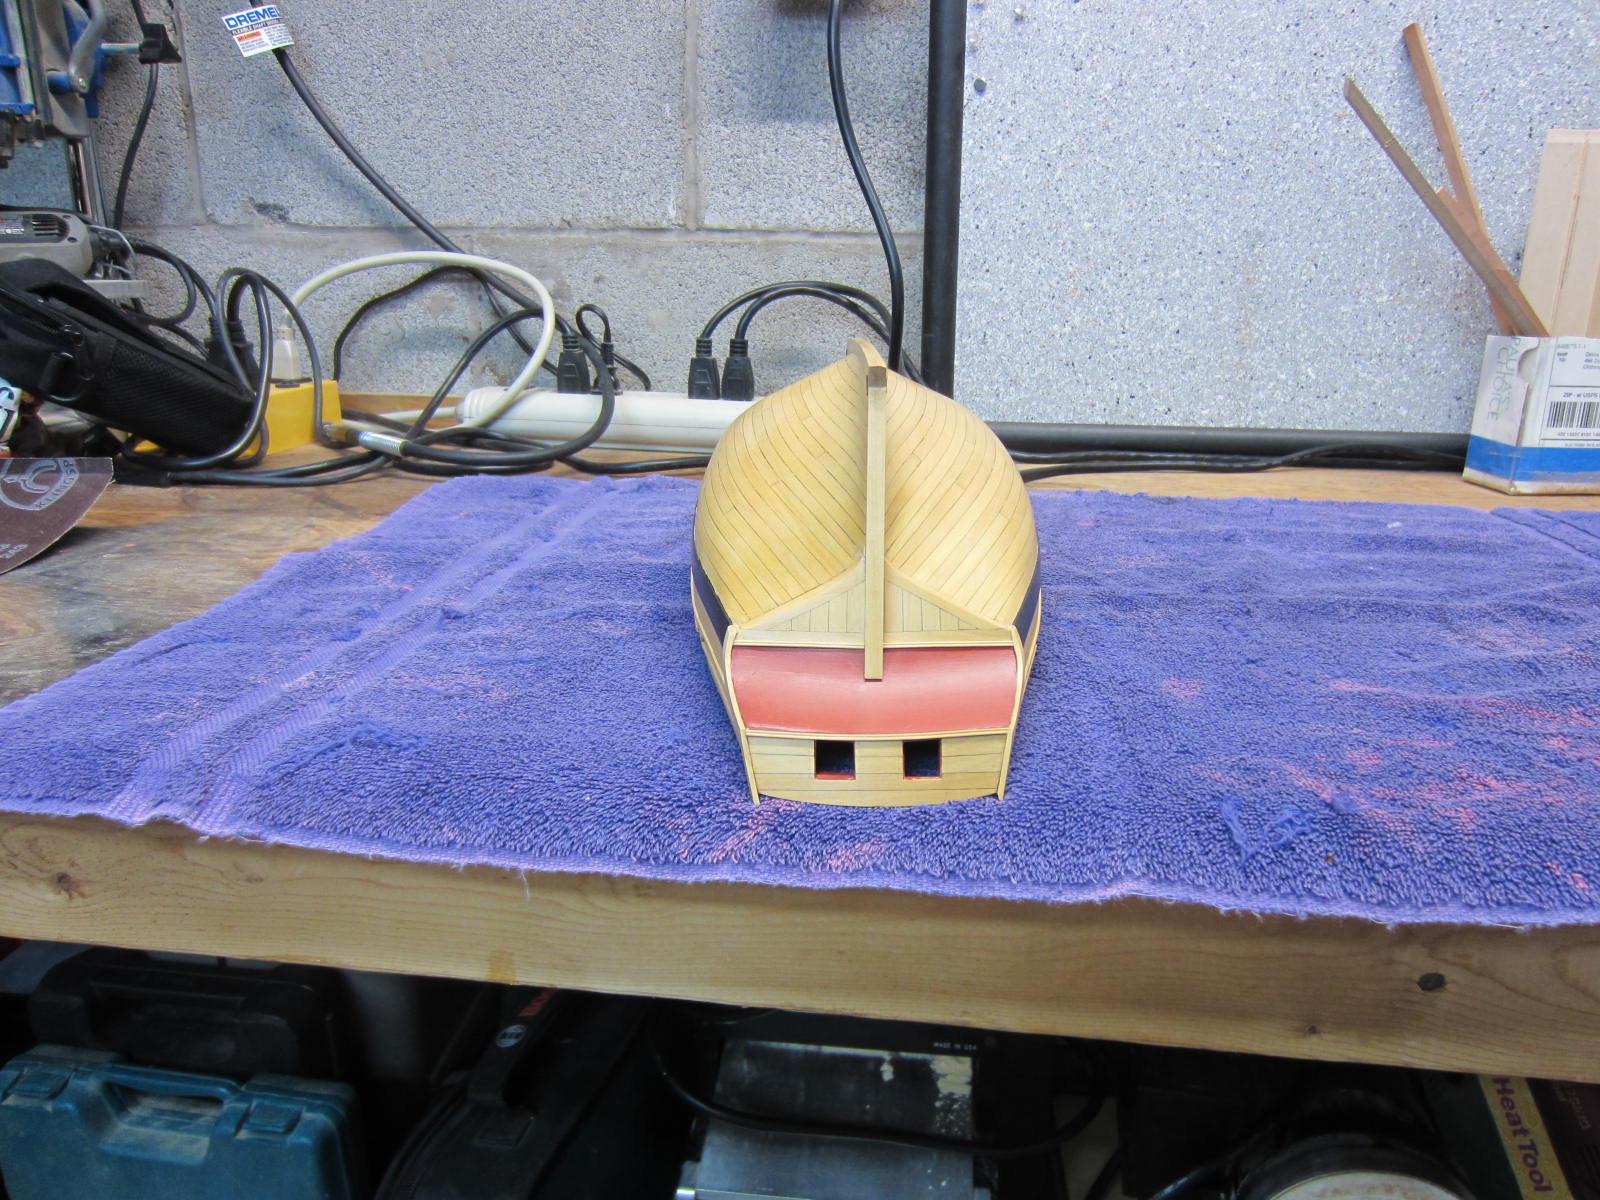
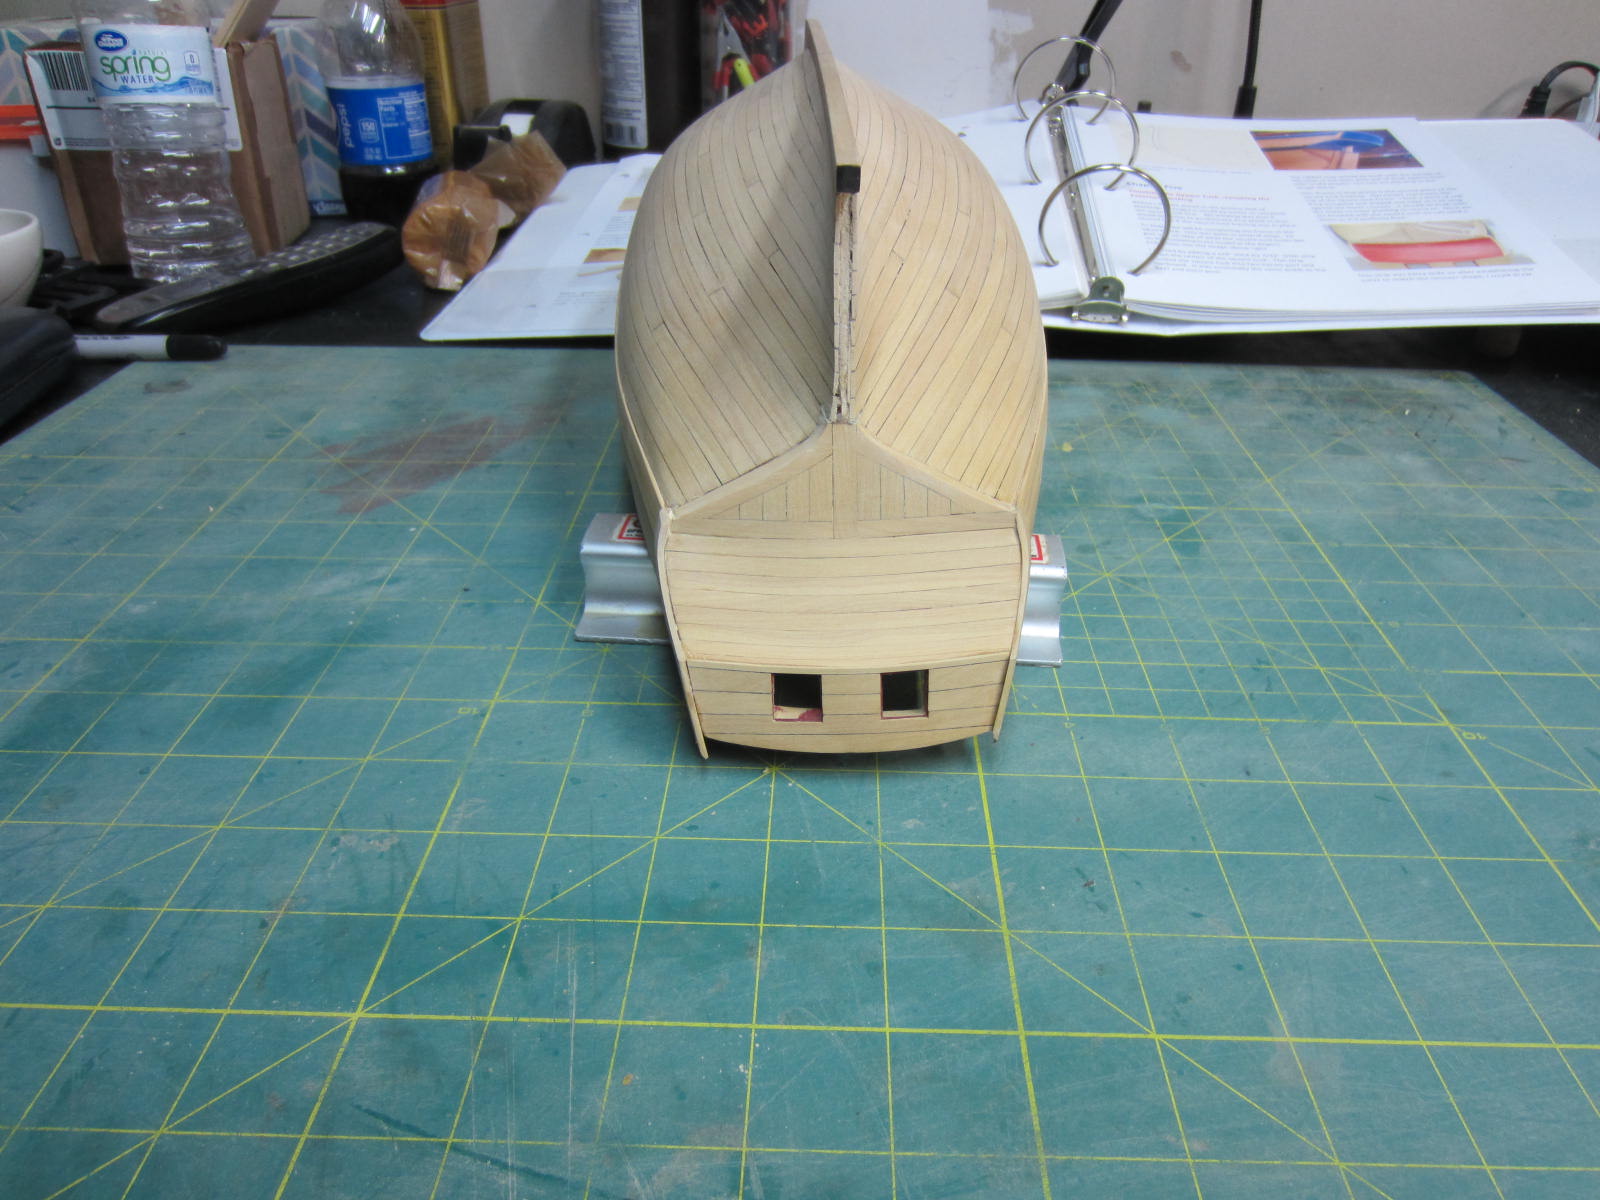
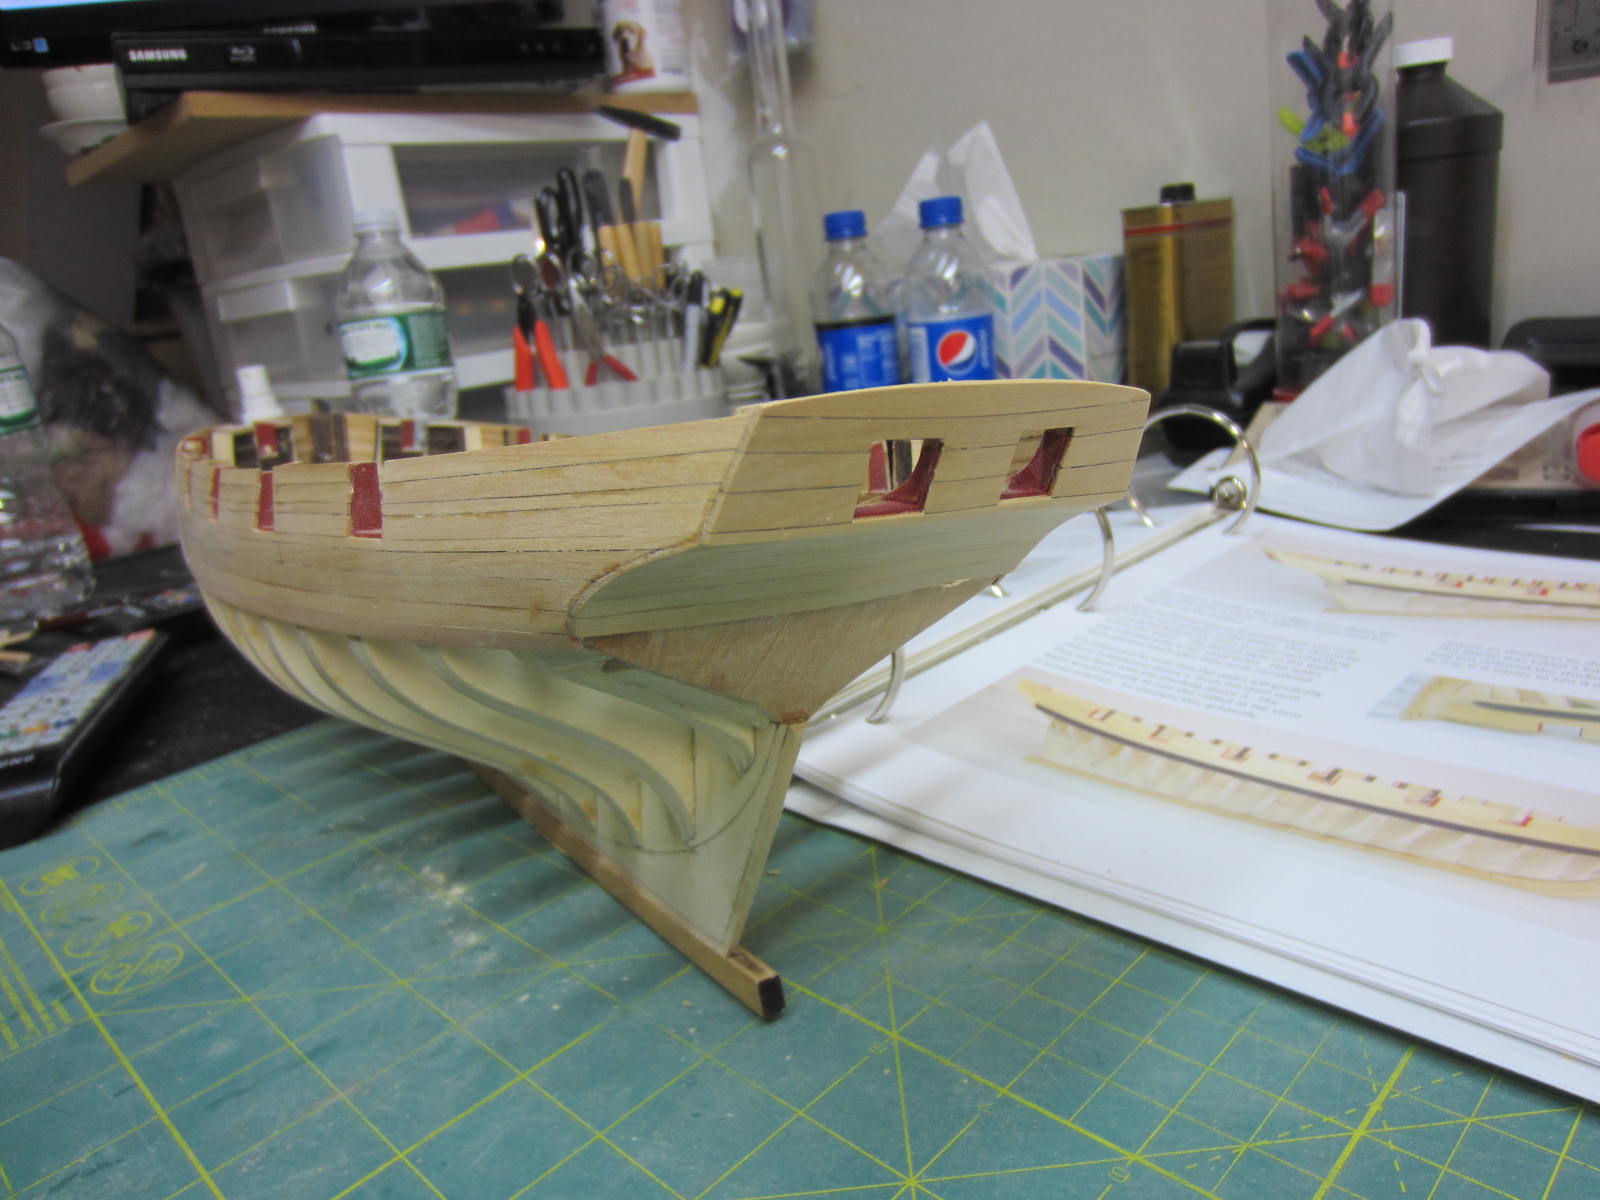
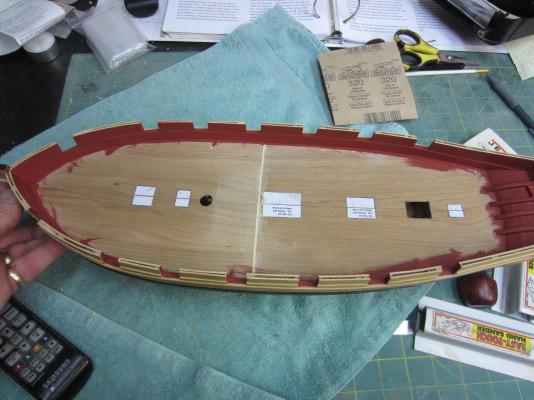
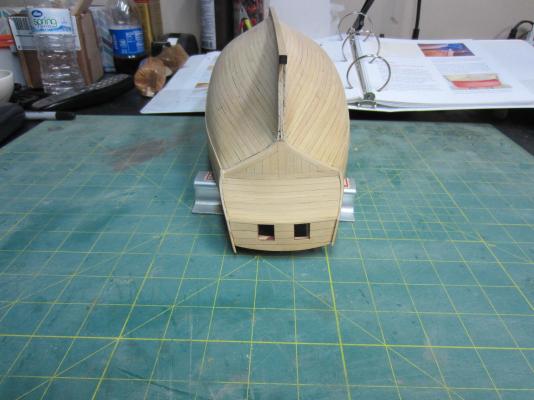
Hi All, The transom has been planked but like everything else needs a good sanding. Here you can see how interior of the outside stern frames have to be thinned down to about 1/6". Next I'll have to do the fashion pieces and start planking the hull.
- 310 replies
-
- 15
-
-
- cheerful
- Syren Ship Model Company
- (and 1 more)
-
Wow Ben. Sorry to see that your having expansion problems. Hopefully getting the humidity stabilized will keep it from happening again. On the good side that's a great looking workshop you've got going there. Good luck.
-
Thanks gerty. Bob it'd be money well spent as I'm always learning from you.
- 310 replies
-
- 3
-
-
- cheerful
- Syren Ship Model Company
- (and 1 more)
-
Work station clutter
Rustyj replied to Senior ole salt's topic in Modeling tools and Workshop Equipment
I start out with a clean desk, lots of room. Then hour by hour, day by day the area that I can work in gets smaller and smaller. Eventually (usually within a week or two) the space is so small I'm setting the model on top of the clutter. Then it's clean it up, put everything where it belongs and within thirty minutes it all starts over again. Even adding a second then a third bench didn't help. In the long run it just ment I had more to clean up. -
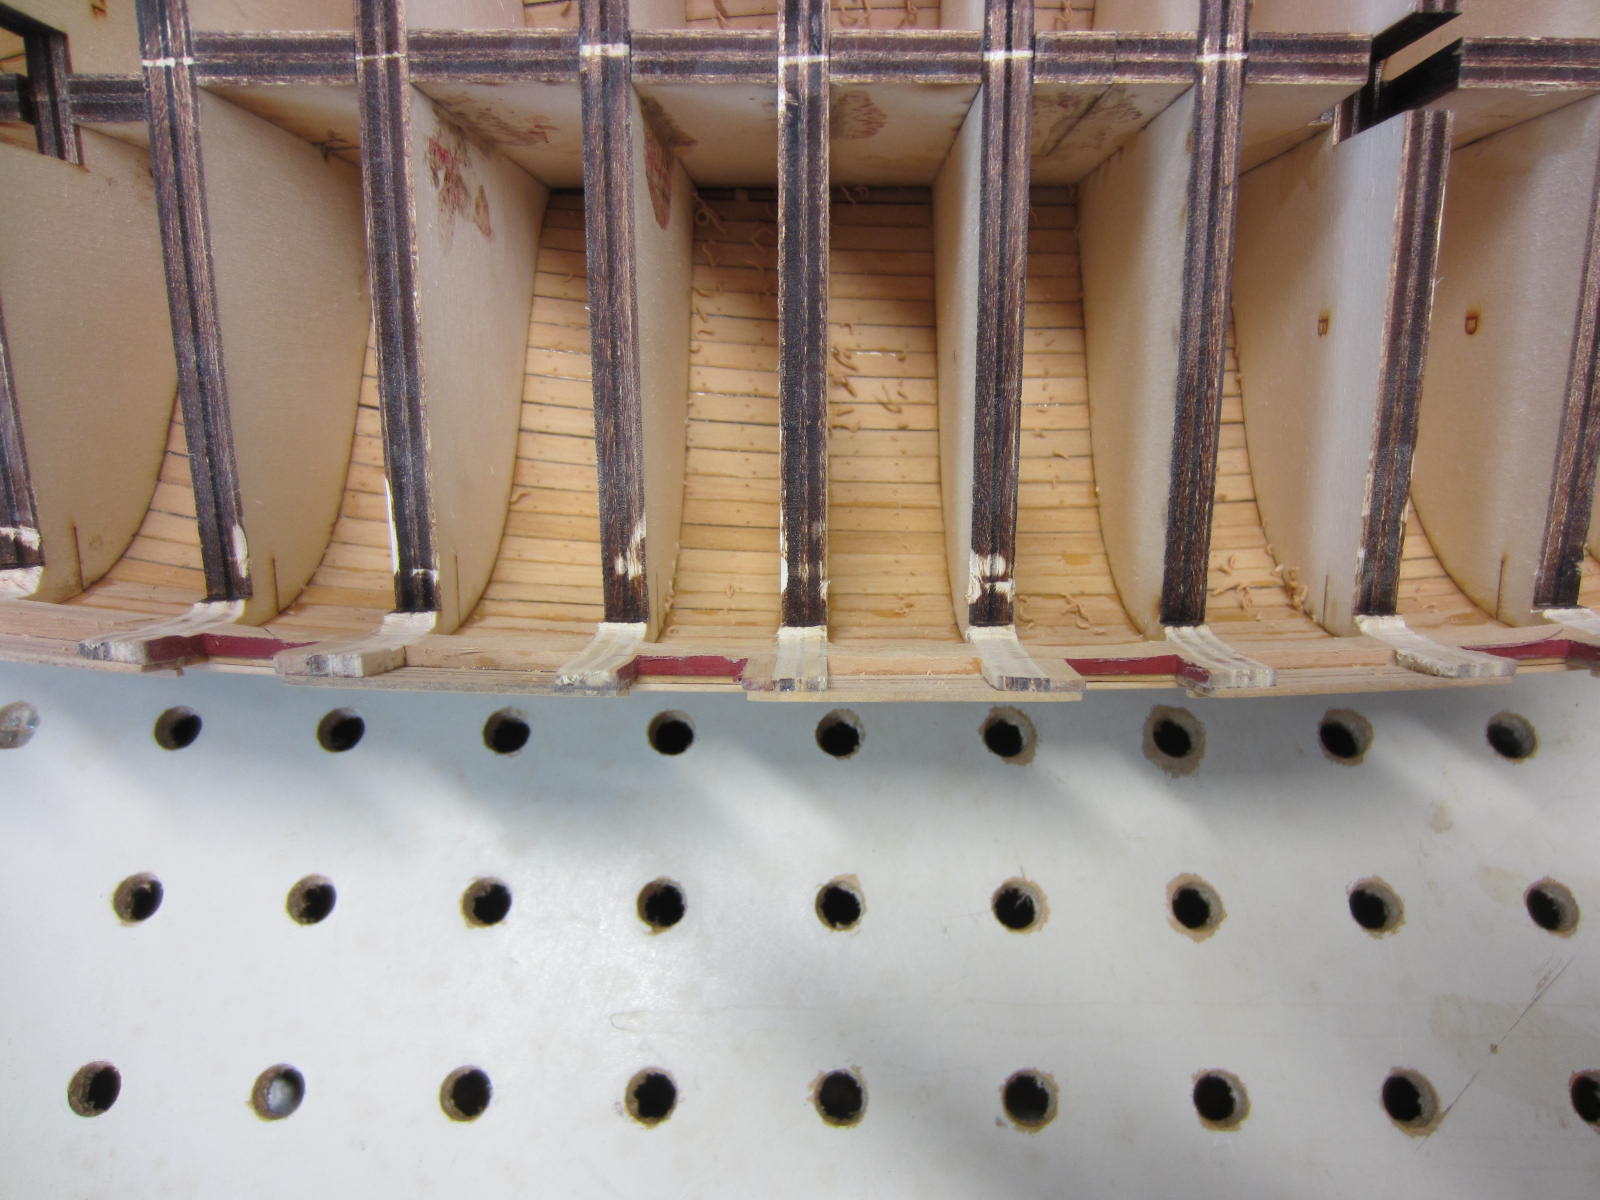
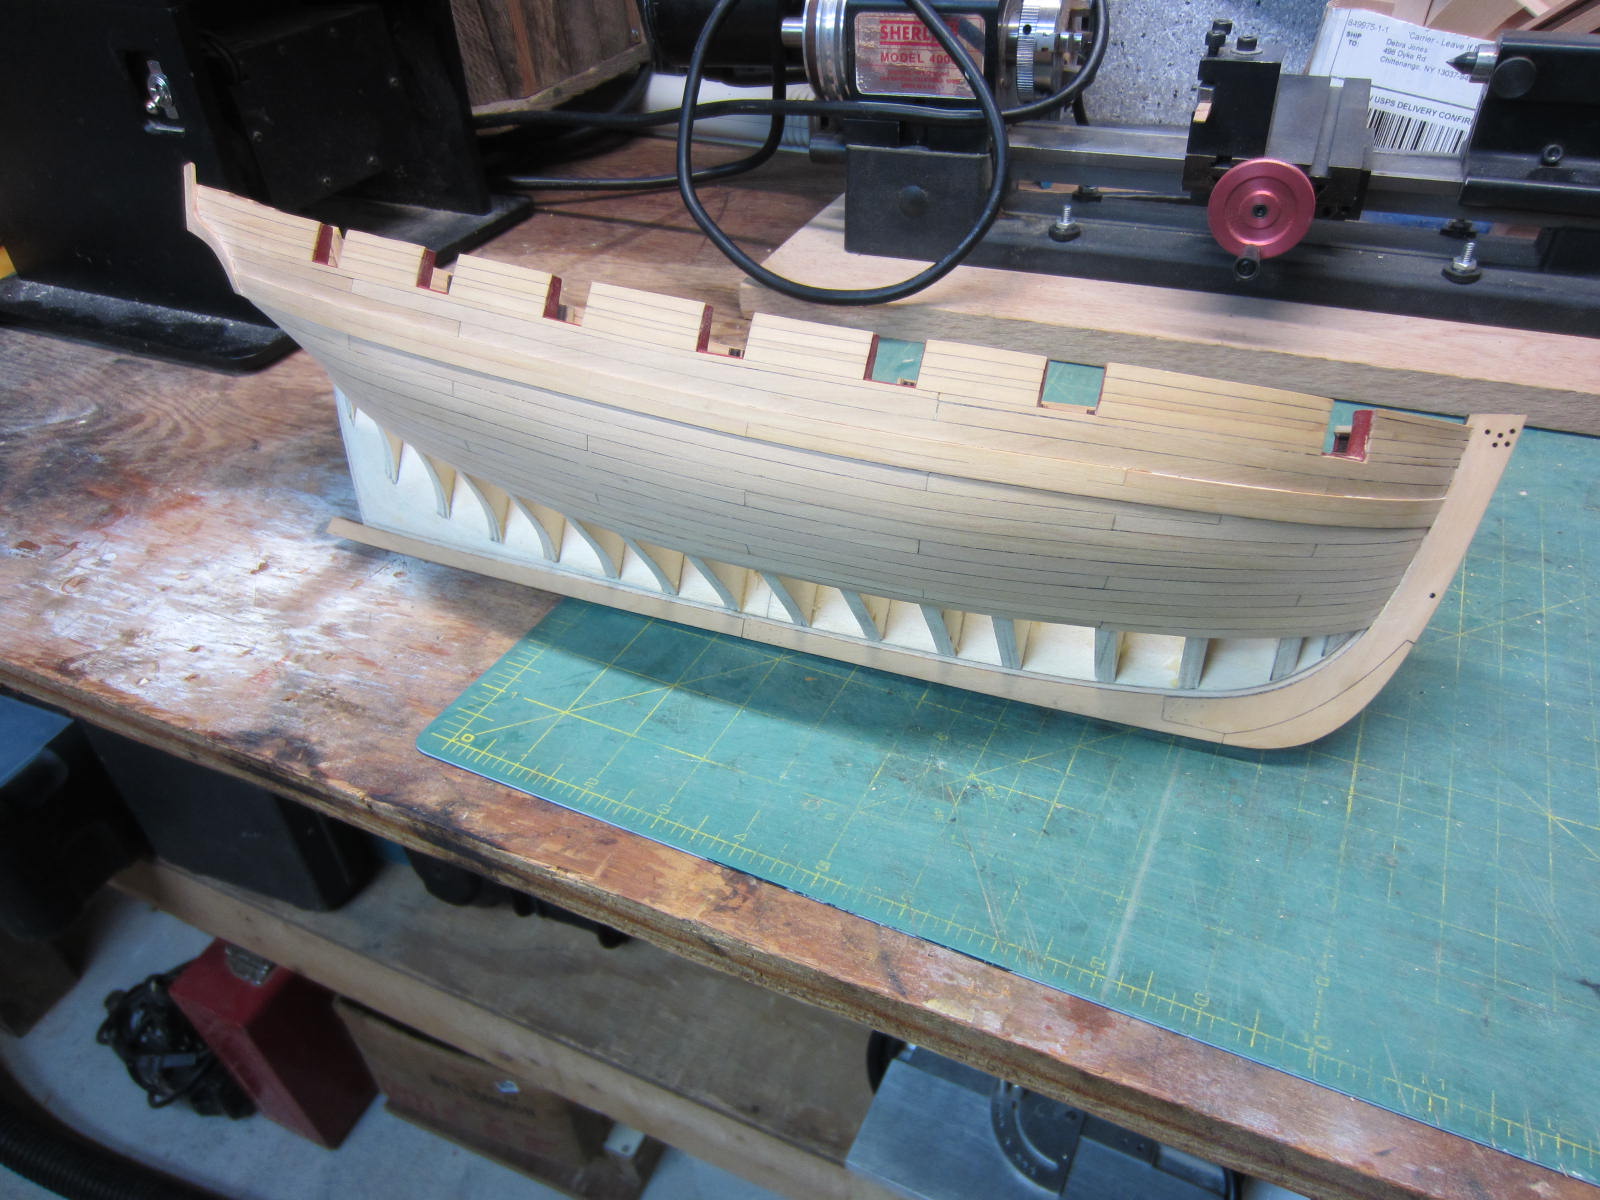
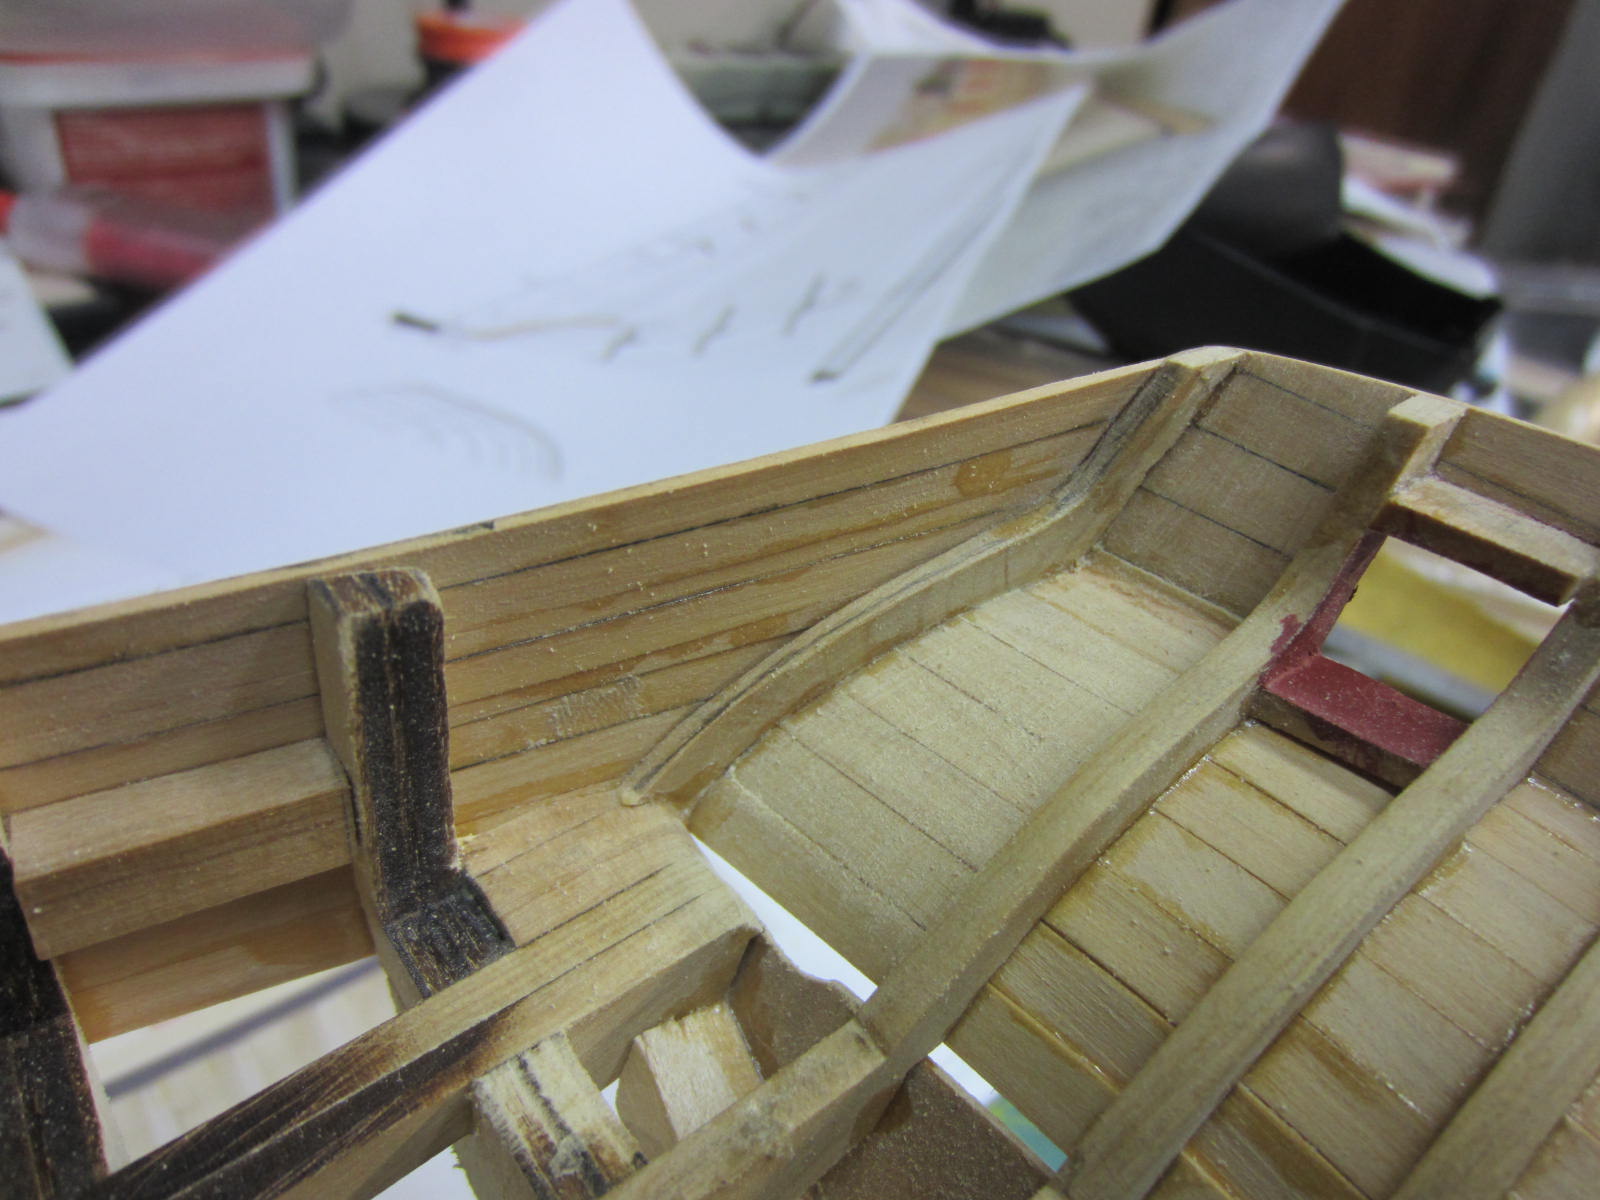
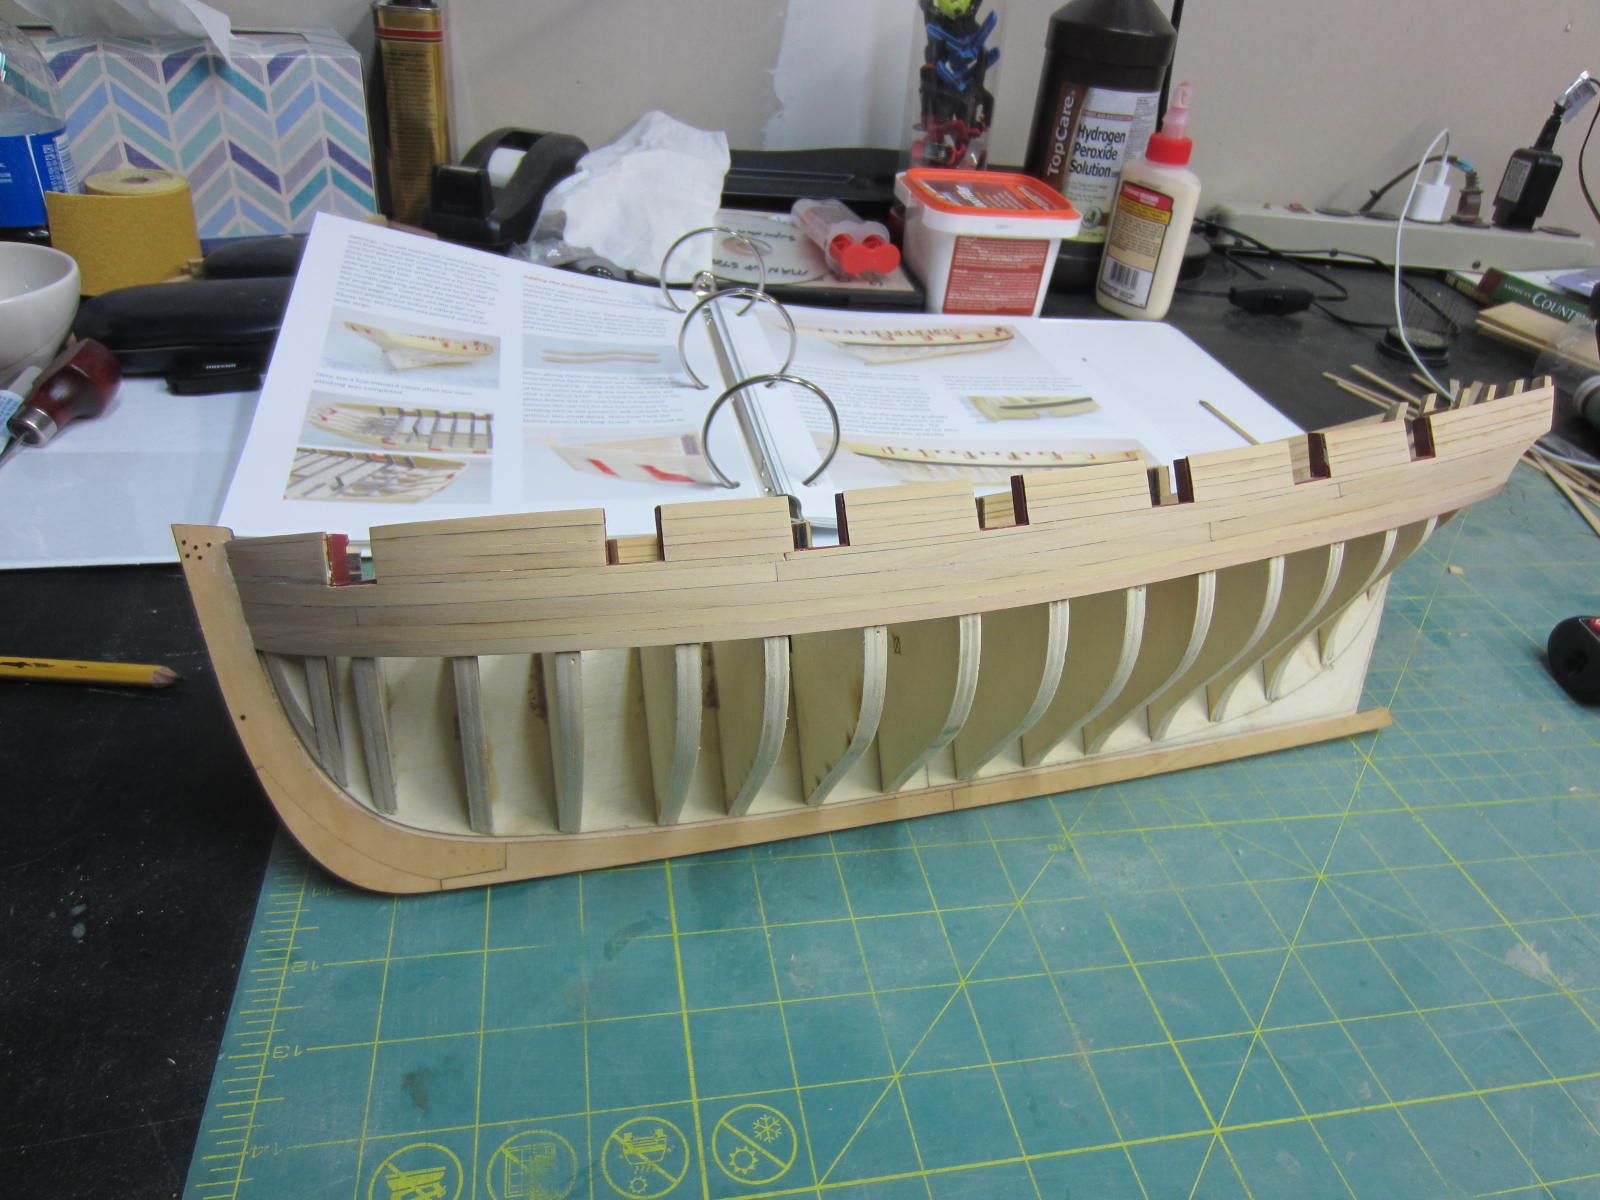
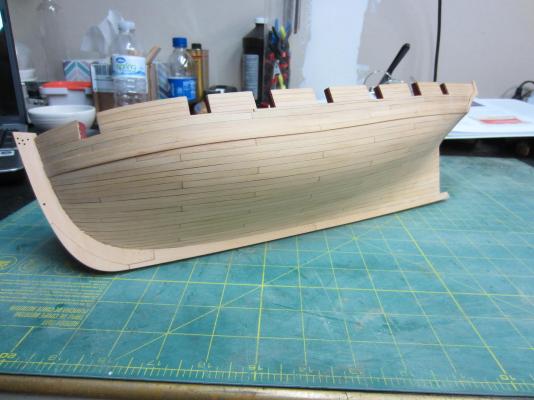
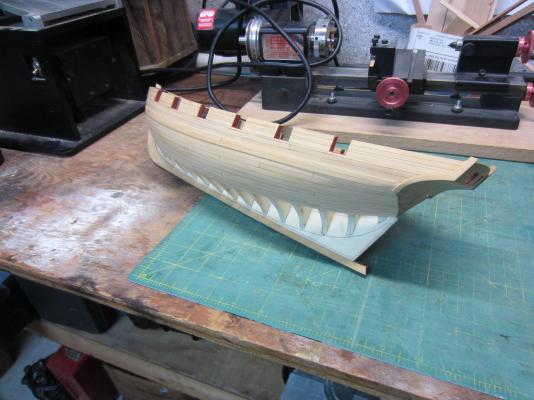
I’ve added the planking between the gun ports. Pretty straight forward. Still a lot of sanding to do. Here you can see the stern framing with the reference line it will need to be sanded down to prior to planking the Transom.

- 310 replies
-
- 17
-
-
- cheerful
- Syren Ship Model Company
- (and 1 more)
-
Cutter Cheerful 1806 by rafine - FINISHED
Rustyj replied to rafine's topic in - Build logs for subjects built 1801 - 1850
Beautiful!!!!!!- 525 replies
-
- 4
-
-
- cheerful
- Syren Ship Model Company
- (and 1 more)