Rustyj
-
Posts
2,535 -
Joined
-
Last visited
Content Type
Profiles
Forums
Gallery
Events
Everything posted by Rustyj
-
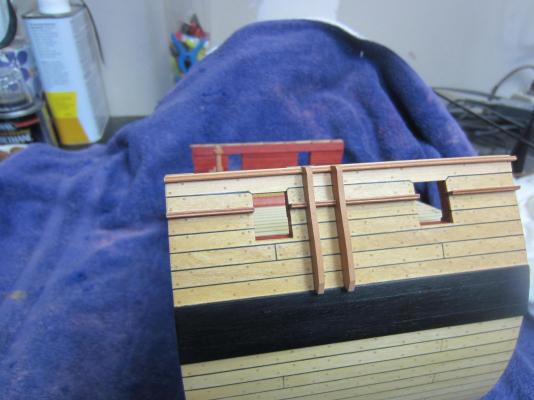
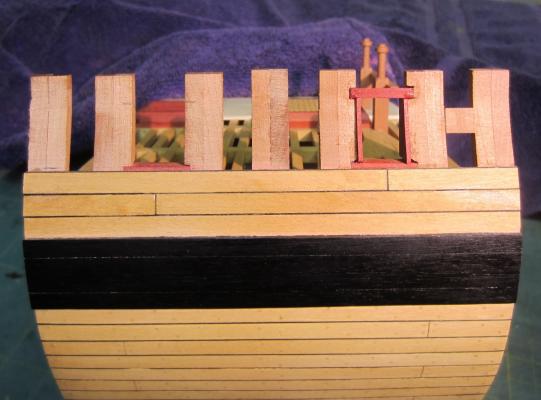
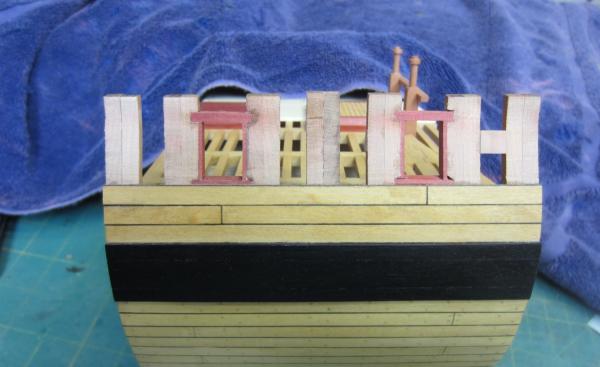
 I was able to get the fenders made and installed. With the moldings in place that would require cutting notches into the fenders and getting them to fit the curve of the hull too. Hmmm seemed a little difficult to me. Then I remembered Chuck (thanks again!) had us cut the molding away and just slide the fenders in place. Then I just had to sand them to fit to the hulls contour. Fit was good and it took a fraction of the time and no waste, oh ok I messed one up and threw it in the scrap heap, but to me that is no waste!
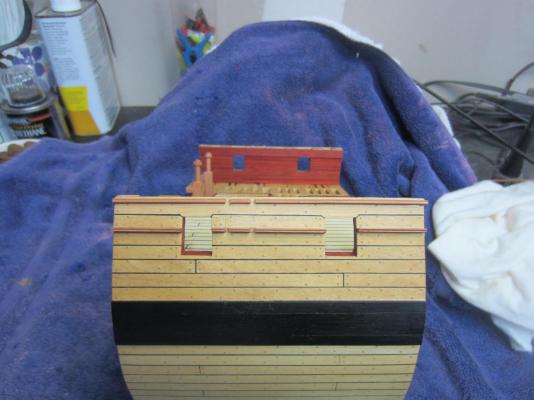
- 332 replies
-
- 5
-

-
- Triton
- cross-section
- (and 1 more)
-
Thanks David. I get all of my wood from Jeff Hayes at Hobby Mill. http://www.hobbymillusa.com/
-
Thanks Mark. I first used Red Heart on the Mayflower around 3 ½ years ago. I applied around 4 coats satin wipe on poly and it still is the same color. I’m hoping that several coats on the Triton will help it hold the color too. I’ve also heard that the biggest cause of color change is sunlight. So I also plan on keeping it away from direct sunlight. Time will tell. Thanks Bob. I’d say great minds think alike but the Admiral would have issue with my side of the equation. Thanks Ben.
-
Thanks Pete and Russ. It was fun using something different.
-
Hi Ron, I agree that your coloring looks very nice and that your build is coming along nicely. Also it’s great that you are learning from any problems you may have had. By the end of a build we are so much better then when we started. That’s a big part of the enjoyment for me.
-
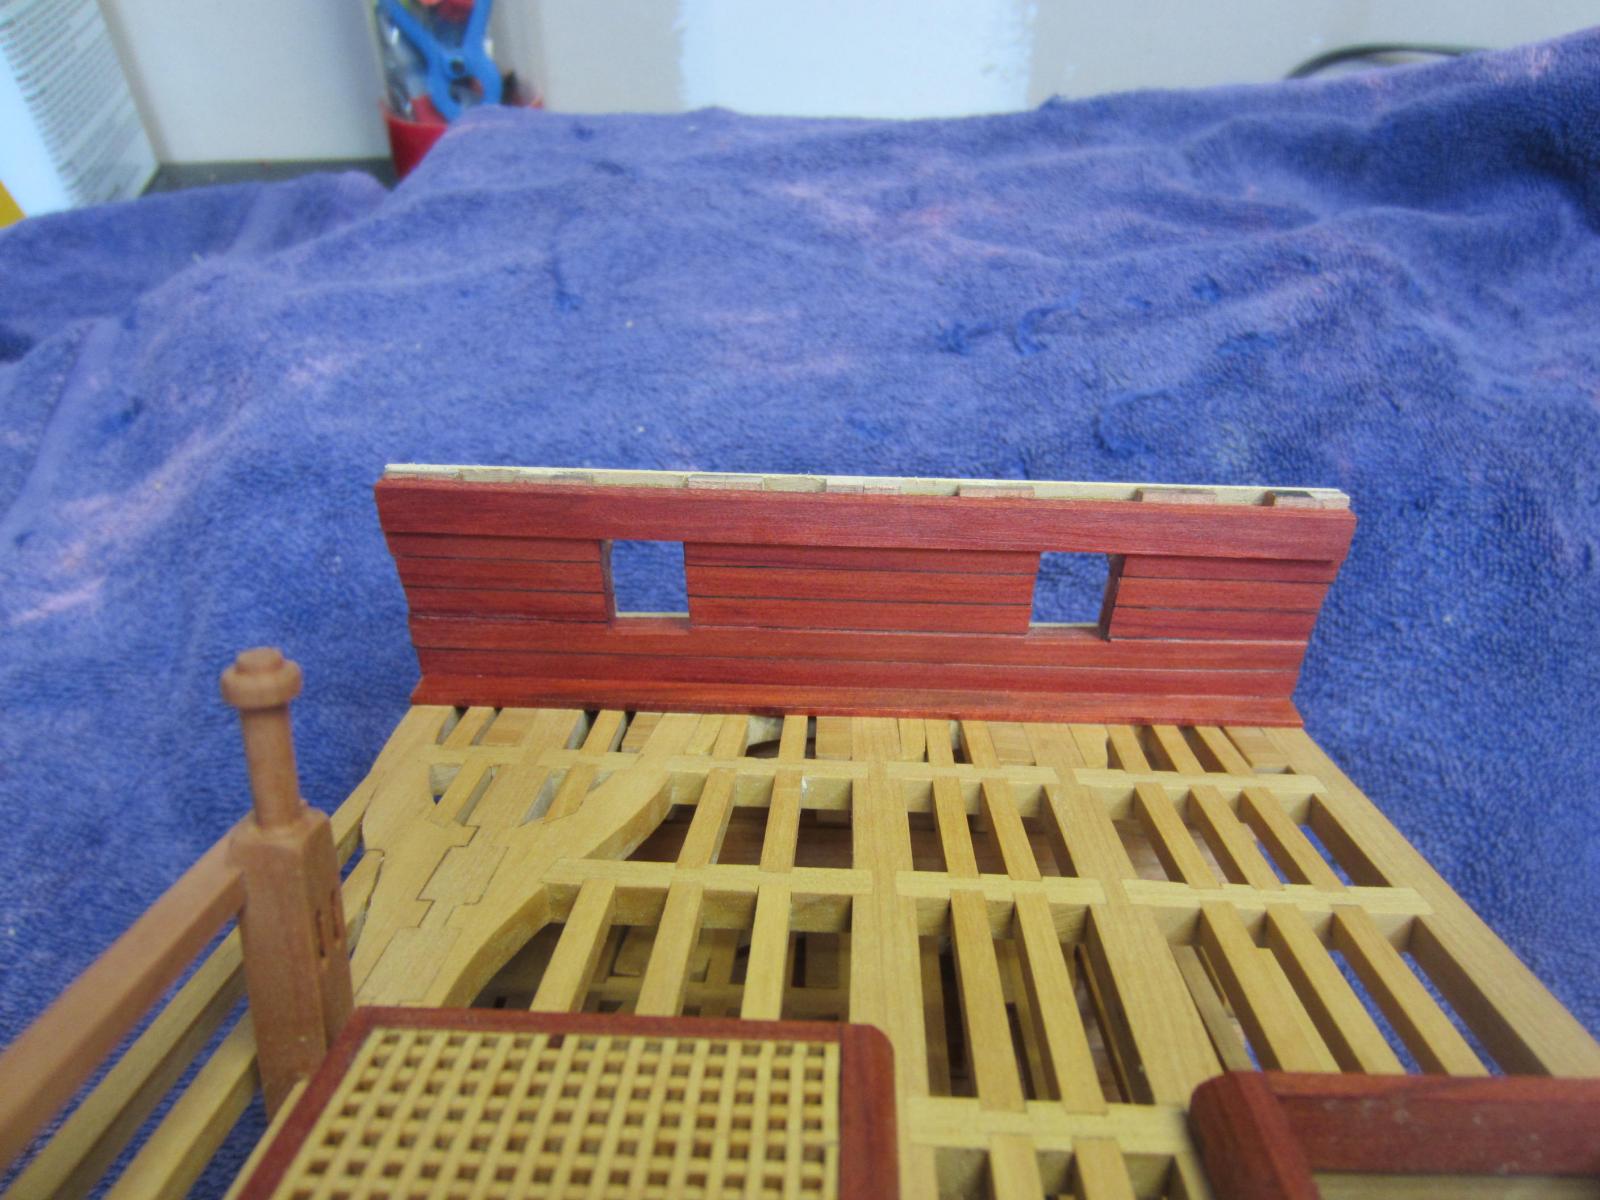
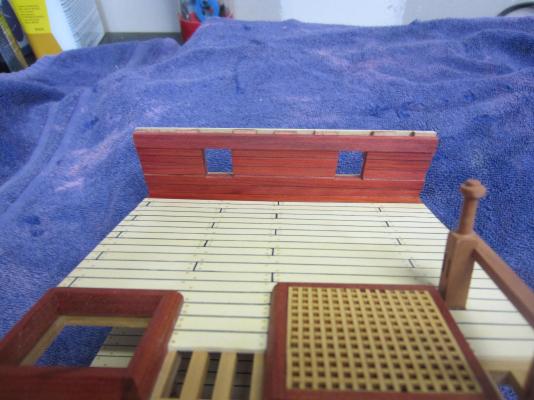
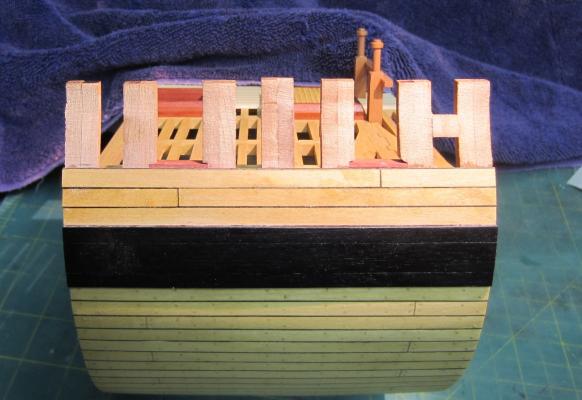
Hi All, Well I’ve completed planking the inboard bulwarks with the red heart. It was very straight forward and went every well. Now it's time to make the steps and fenders.

- 332 replies
-
- 3
-
-
- Triton
- cross-section
- (and 1 more)
-
Very Nice Start Thomas. Chairs for everyone!
-
Oh I'm so glad there was just minor damage. Whew. My Syren decided to take a unscheduled trip and landed on the bow. Snapped the fully rigged bowsprit, head rails, bumpkins etc.
-
Oh that's so nice! Well done.
-
Hi Lee-c, Thanks and welcome aboard! Nothing much, just filled all of those holes and sanded the treenails down. I think I'll finish the inboard planking before I do the fenders and steps.

- 332 replies
-
- 3
-
-
- Triton
- cross-section
- (and 1 more)
-
Echo by oneslim - cross-section
Rustyj replied to oneslim's topic in - Build logs for subjects built 1751 - 1800
Hi Bob. I'm glad to hear you made it through "the big one" now take it easy and do what you need to do to get better. -
LOL I had to google "cack-handed" just to make sure I had the right meaning! Love It!
-
Hi Ben, Thanks and yes I'm going to continue using boxwood for the treenails for this build. I think I will try bamboo later on the Echo.
-
Thank you Pete, both Grants, David, Matrim, Ben, Paddy and 42 Rocker! Bob, Funny you say that. I've always looked to you for insperation to do my best. Thanks! Ok I've spent a whle drilling hole for the treenails. Gonna draw the treenails tonight and start plugging those holes!

- 332 replies
-
- 5
-
-
- Triton
- cross-section
- (and 1 more)
-
That is some very nice, tight framing you have there Bob. I could never do it off the model like that. Well done!
-
Hi Pete, The planking looks very nice. As you said "the cherry....will take some extra time...is not a forgiving when pulling through the drawplate" I never had much luck pulling it so I hope it goes better for you.
-
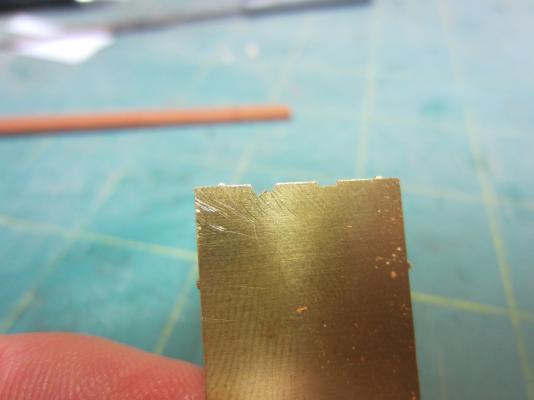
Ok here is my attempt to duplicate Chuck’s work, again. Not as good as his but I’m satisfied. When I planked around the sills I thought I was going to be around ½ a plank wide. But once I put the plank in place finished trimmed it and sanded it flush you see I only have about a ¼ plank width. So with that I attempted to do the tabbed approach Ben mentioned and Chuck demonstrated on the Winnie. I started with cutting a plank the width of a regular plank plus the width of the tab to cover the lintel. I then marked the entire plank at the regular plank width, then marked the widest point of the of the tab and the narrowest point so I would know what angle to cut. I then slowley removed the excess wood and kept testing it until I was satisfied with the finished piece. Then it was glued in placed. Next I'll treenail both sides.


- 332 replies
-
- 6
-
-
- Triton
- cross-section
- (and 1 more)
-
Hi Ben. You read my mind. After looking at the pictures I remembered Chuck doing it and will attempt it on the tops. Not gonna rip off the old though.
- 332 replies
-
- 1
-
-
- Triton
- cross-section
- (and 1 more)
-
Wow Bob that is great.
-
Thank you, Russ, 42Rocker, Mark, Grant, Joss and Bob. I glad you like it. Before I could continue planking I had to make the trim board. I took an old scraper and filed the desired profile into it (the left one). Cut the trim piece from some swiss pear and then used the scrapper to shape it. And then added it to the hull. Now I can finish the planking and then make some more treenails.


- 332 replies
-
- 3
-
-
- Triton
- cross-section
- (and 1 more)
-
Hi Paddy, I can't help with the sizes but the rope sure looks great!
-
Hi Ben, 20 coats is impressive. Ten is about my max. As you've said there are so many ways to do cannon barrels but I find I like painting them the best. Can't wait to see them mounted.
-
Hi Augie, Just stopped by to catch up on the humor and your fine work. That is a great job on the rigging. You are making a complex task look easy. You are getting close to that happy sad moment when you sit back and say “yeah it’s done” and then realize you will miss her. Well done!
- 1,668 replies
-
- 2
-
-
- syren
- model shipways
- (and 1 more)
-
Thanks Grant and Ben. Joe, I'm here, there and everywhere. I flit from place to place. Probably because it harder to hit a moving target. Work has slowed here with the limited summertime availability of shop time. Kevin, you’ll love it and it is huge! After getting the plans I went and had 3 copies of the frames made and one extra copy of everything else and kept the masters to double check everything. Did I mention it’s huge? Now get back to work on the Victory so you can join me!
- 421 replies
-
- 1
-
-
- granado
- bomb ketch
- (and 2 more)
-
Hi all and thanks for the kinds words. I’ve been trying to find a bit of time here and there between summer stuff, grandkids and ugh….work. I started to work on the gun ports. I wanted to keep working with wood instead of paint but I also wanted the bulwarks and ports to be red. So with that in mind I framed in the gun ports with red heart and will plank the inboard with red heart and outboard with boxwood. Here you can see the start of the framing. Thanks for following along!


- 332 replies
-
- 6
-
-
- Triton
- cross-section
- (and 1 more)