Rustyj
-
Posts
2,535 -
Joined
-
Last visited
Content Type
Profiles
Forums
Gallery
Events
Everything posted by Rustyj
-
 Hi Bob. That's a very nice job on the coppering. She is one big hull and you did a good job of keeping the run of the plates true. Well done.
 -
Hi Ben, I pulled my boxwood down to a # 28 on the draw plate and a # 69 drill bit. That was a real snug fit so you might want to try a # 68 bit too. Enjoy!
-
I know what you mean by summer slowing things down but what you have been able to do is very nice. Great Job.
-
Echo by jml1083 - cross-section
Rustyj replied to jml1083's topic in - Build logs for subjects built 1751 - 1800
Looking great Jim. Thanks for all of the great guidance! -
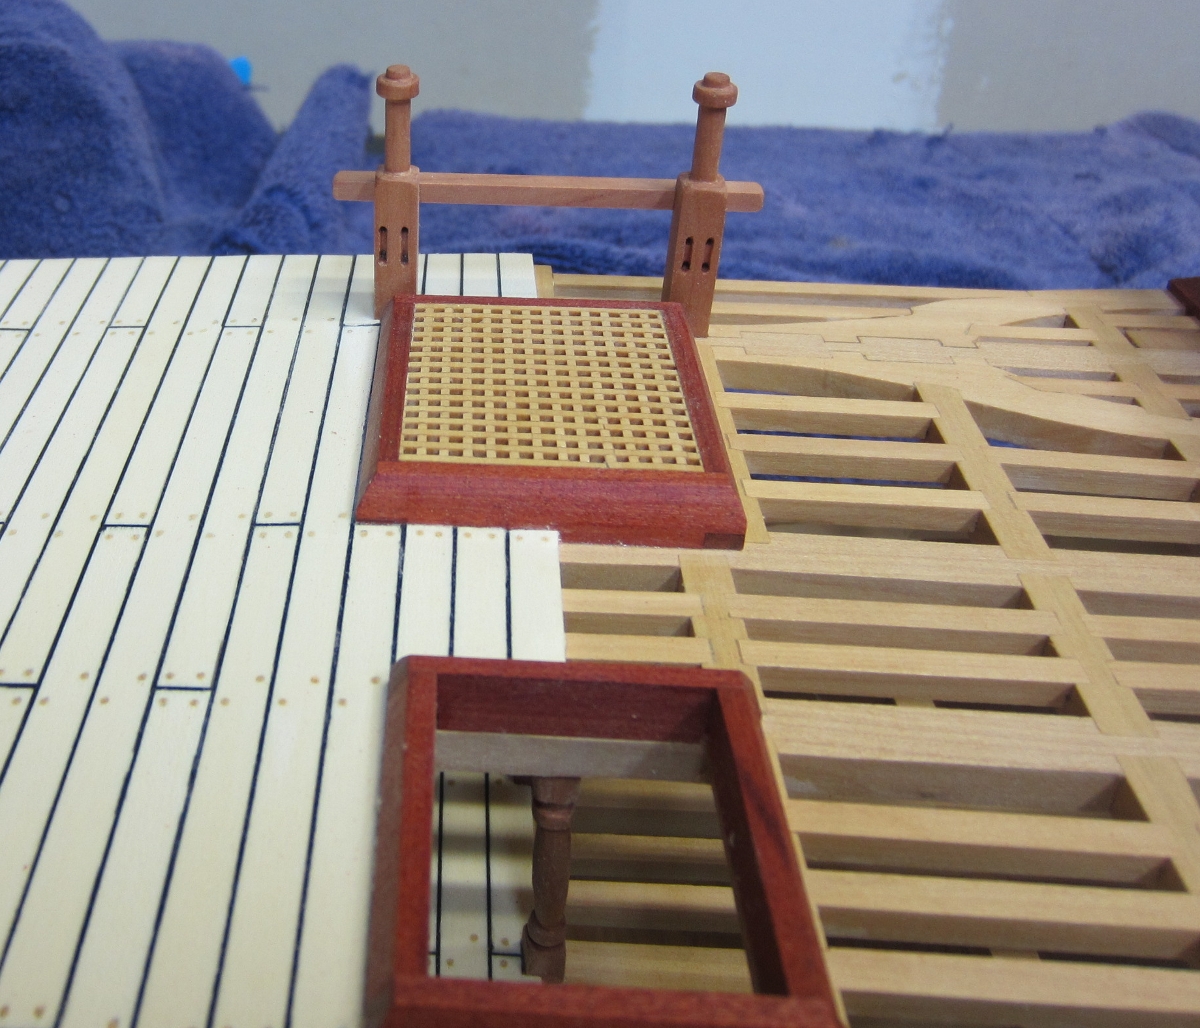
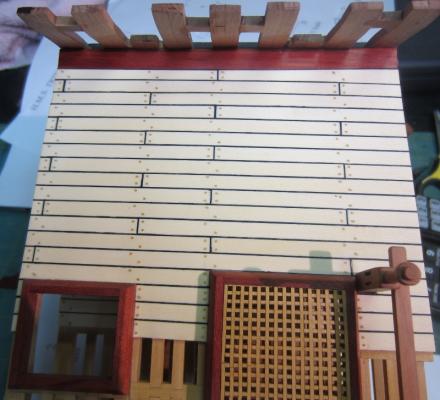
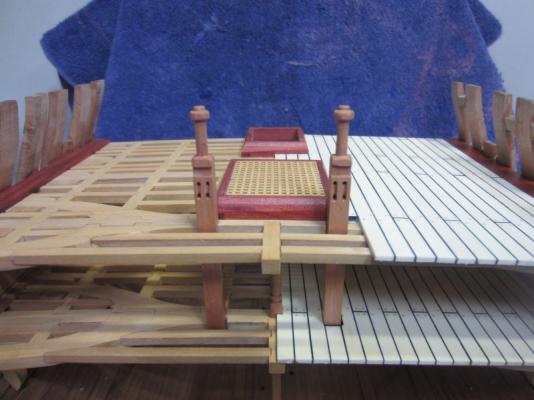
Hi all, Thank you for all the kind words. It is very much appreciated. Well after making the bits and gallows I installed just the bits and cross piece. I left the gallows off for now as I still had to add a few pieces of planking and treenail. I didn’t want to damage the gallows with my ham fist hands. For the deck treenails I used boxwood. They stand out a little more than some will like but I kind of liked the contrast. Next I will start framing in the gun ports and continue planking the exterior of the hull. That is if the summer activates will allow me sometime to do so.

- 332 replies
-
- 8
-

-
- Triton
- cross-section
- (and 1 more)
-
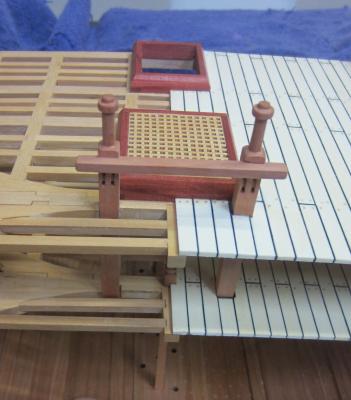
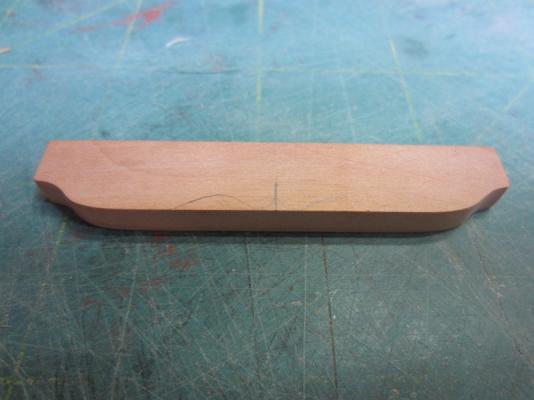
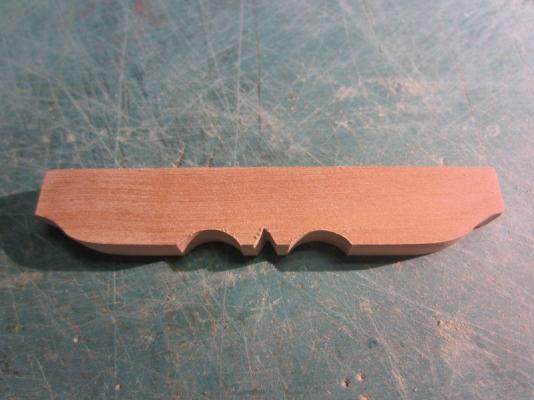
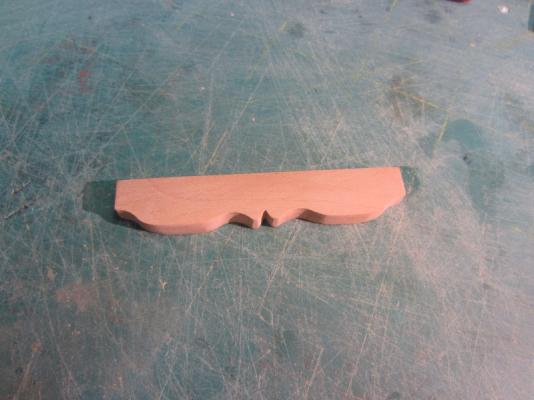
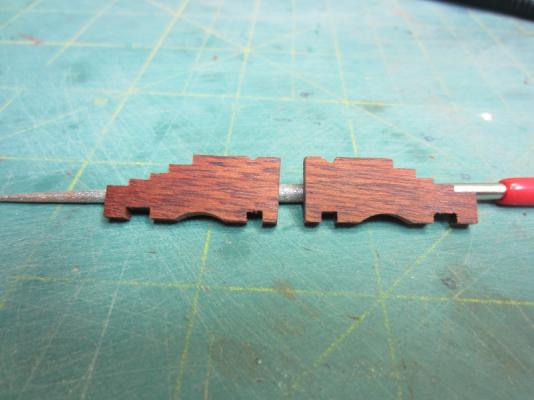
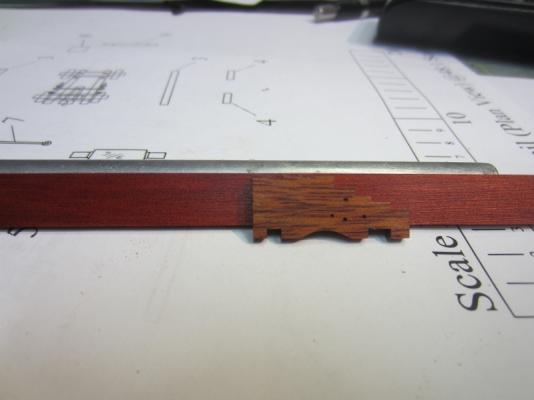
Next I focused on the Gallows. The plans called for them to look like this. I saw some other builds where people got a little creative with the gallows and I liked the look and figured I’d give it a try. First I cut the gallows as per the plans. After cutting the gallows from the plans I decided on a style I like, traced it on the wood. I then using a ¼” dremel sanding drum, files and sand paper I created the shape. Here it is semi sanded to the desired shape. I don’t know if it is historically accurate but I’ve heard the captain can us his prerogative while building his ship.


- 332 replies
-
- 3
-
-
- Triton
- cross-section
- (and 1 more)
-
Thanks Russ. Yes they are a bit off plus the angle of the camera makes it worse. Once I glue them in place hopefully they will sit straight.
-
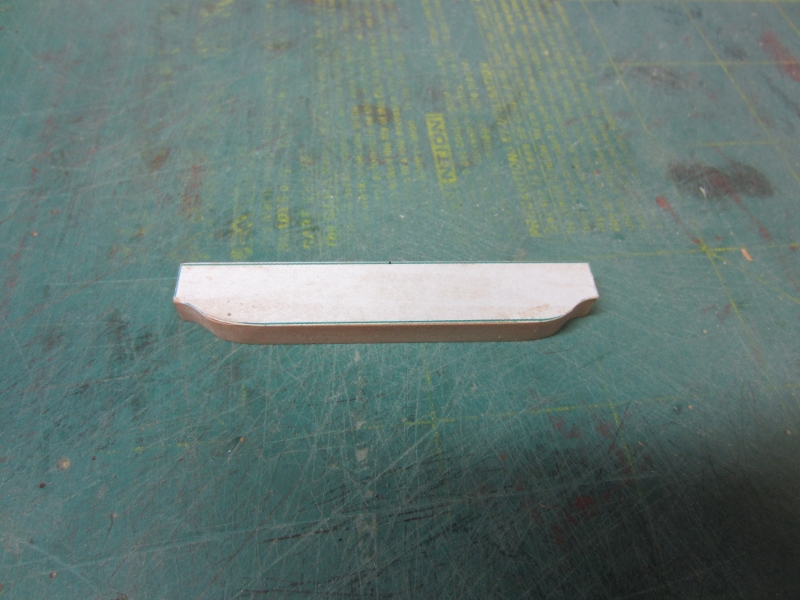
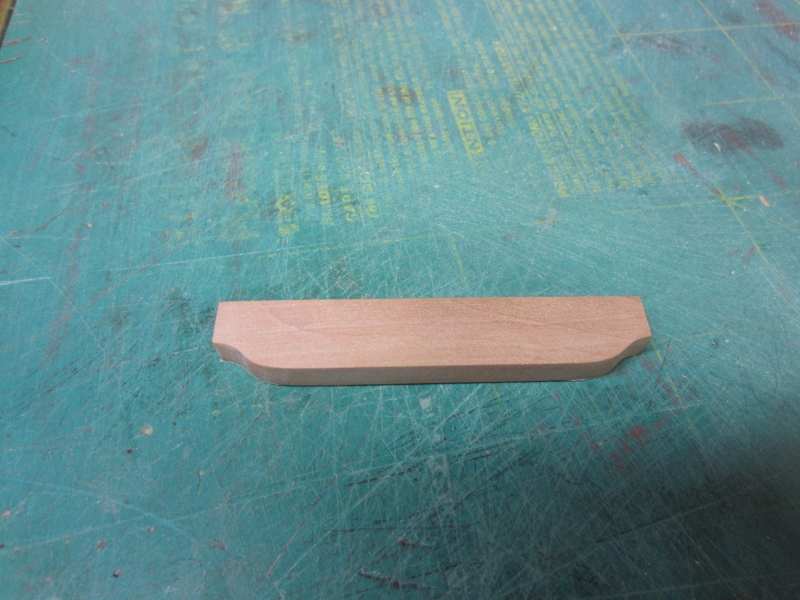
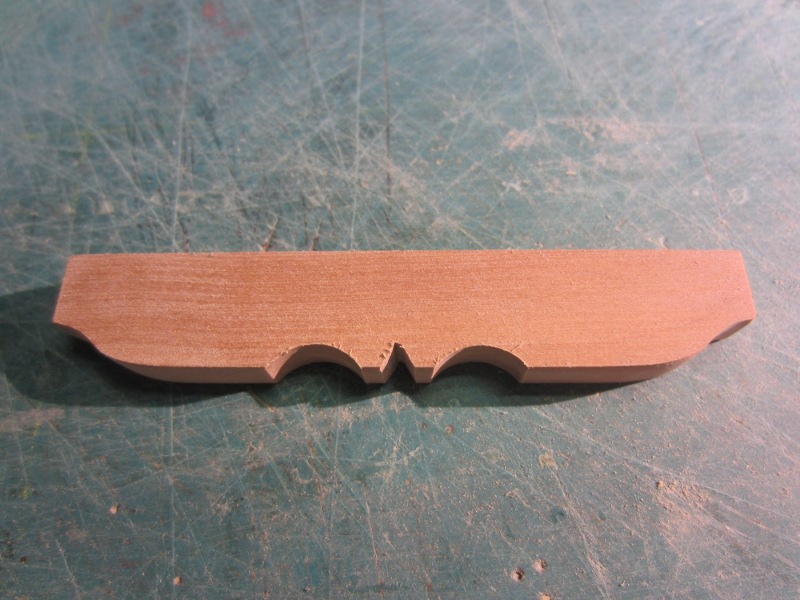
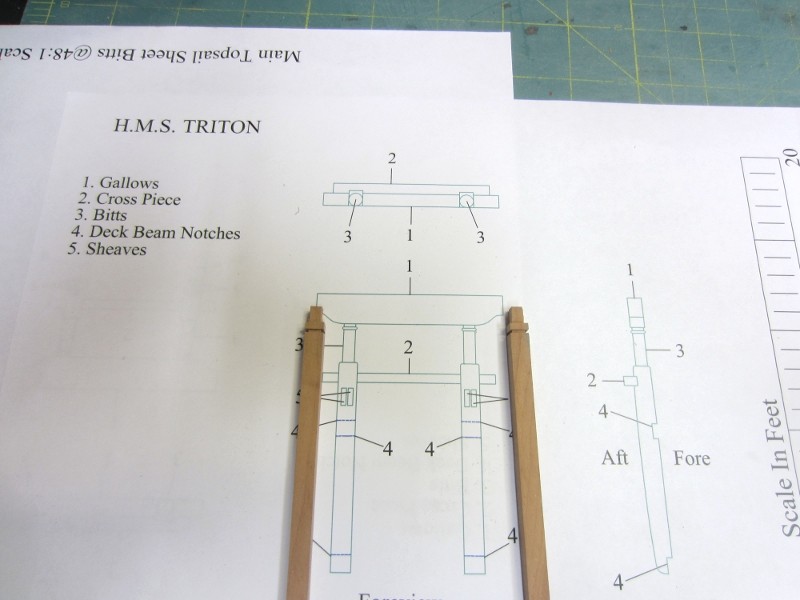
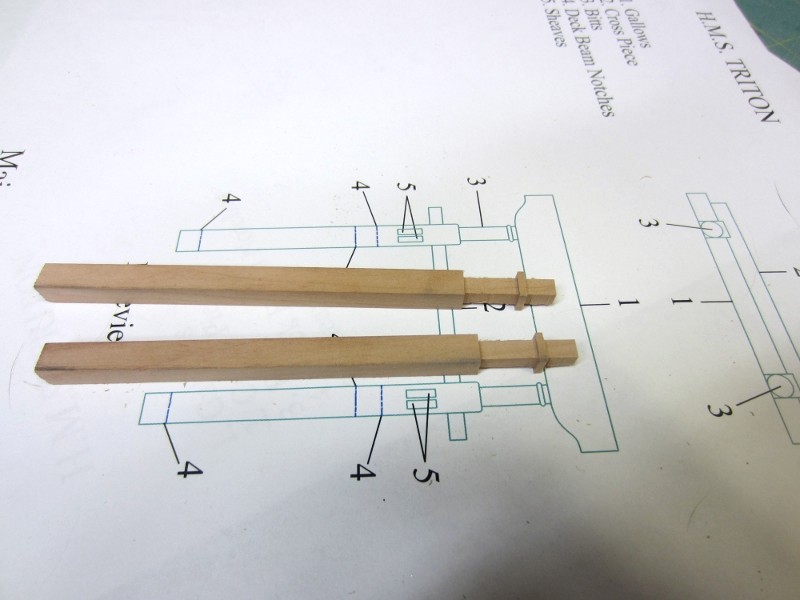
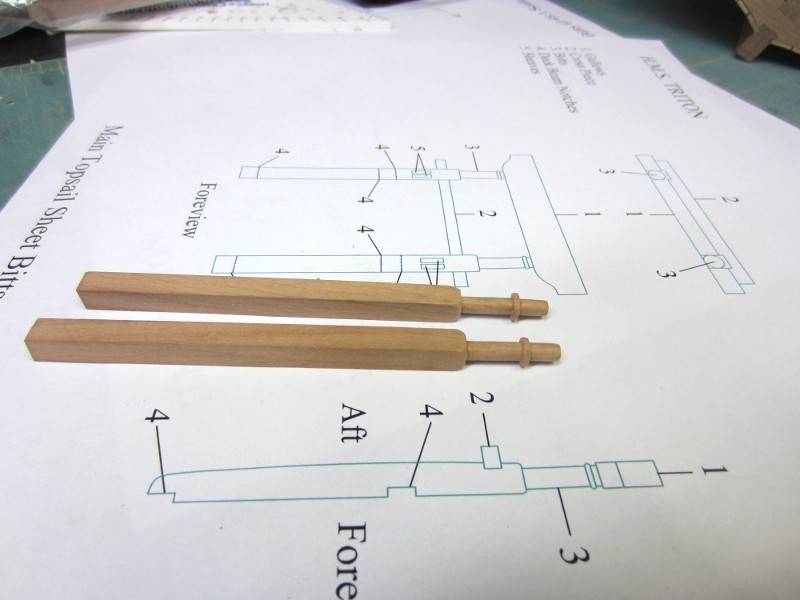
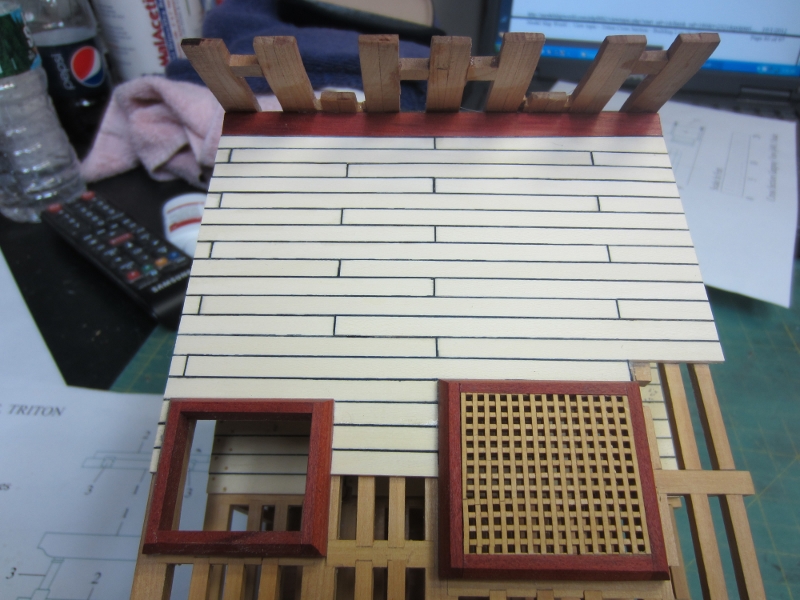
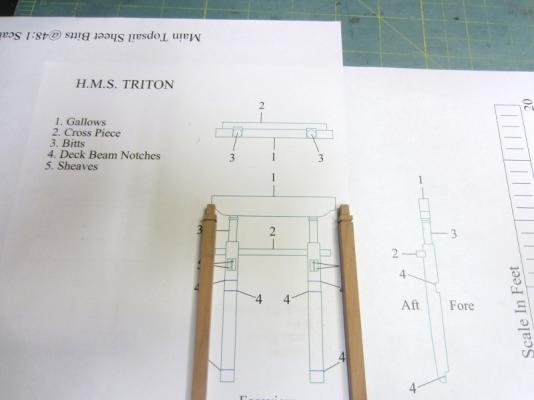
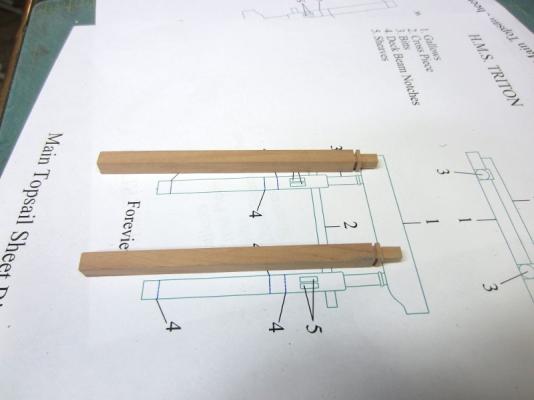
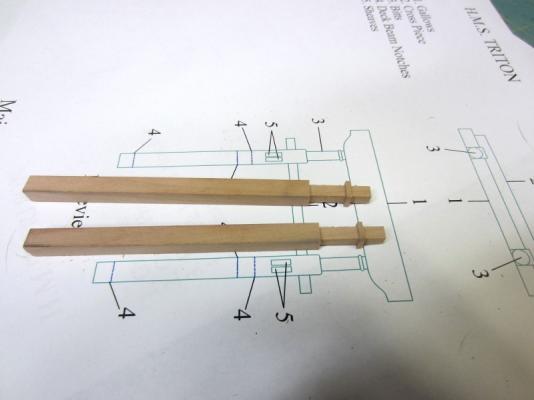
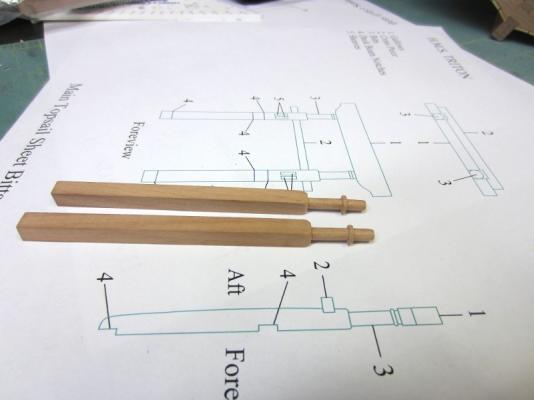
Hi all, Well I’ve been on a bit of a forced break. Our daughter went on a second honeymoon and we had the pleasure of watching three of our sweet but high maintenance grandkids. So needless to say I was lucky if I got to look longingly into the workshop yet not be able to step in and partake! It took one day to figure out where I left off and what to do next. Here are some things I had done prior to their arrival and since the departure. Seeing that I had planked the deck to the point that I needed to install the main topsail sheet bitts before I could continue I figured it was time to make them. I started at the tops, figured the depth I needed to cut them to and the cut away the extra with the table saw. After they were cut square I used a file to sand them down to a round shape. After that I used the table saw to cut the cross piece and deck beam notches. I then drilled the holes for the sheaves and shaped them with a file and xacto. Here they are set temporarily in place.
- 332 replies
-
- 3
-
-
- Triton
- cross-section
- (and 1 more)
-
Hi Grant, Just caught up and I'm glad I did. That's a great idea and will give it a go when I get to that point. Well done and thanks!
-
Hi Mike, I too am glad you started a log. Sure looks like you are off to a good start.
-
Hi Pete, the limber boards look good. If you hadn't fessed up I wouldn't have known. As far as the finish goes I'm a natural kinda guy.
-
Hi Augie, that is one fine job of rigging you have done. You're making a complex process seem effortless. I always enjoy catching up on your build. Well done.
- 1,668 replies
-
- 1
-
-
- syren
- model shipways
- (and 1 more)
-
Hi Jeff. With your experience and workmanship it will be more like a step than a jump!
-
Thanks Pete. Hi Grant. Yes the large piece is the redheart and the grain is nice and tight. The carriage is bloodwood and has a much more pronounced grain. Looking back I find I didn't explain it well. Sorry.
-
Hi Pete, Chach_86 Stated the following in his build log and I used the same for mine. Can’t vouch for the accuracy but they looked good. I hope it helps.
-
Thanks Pete. 42rocker, At the 4th plank the pattern repeats it’s self. I don’t remember if it’s called a 3 or 4 shift pattern. Speaking about gun carriages made me wander off and start cutting parts for them just to see how they look. I do that waaaaaayyyyy too much. I glued the plans to some bloodwood and used my table saw to cut it out. I increased the depth at each step. I repeated each cut on 4 more pieces before adjusting the depth. Good thing I did too becauase one broke while cutting out for the axles. Here is one with a plans in place and a second one cut out. And more And compared to a piece of redheart so you can see the differance in the two colors. You also can see how nice and tight the grain is. Now I'm trying to decide if I should continue on or get back on course.

- 332 replies
-
- 1
-
-
- Triton
- cross-section
- (and 1 more)
-
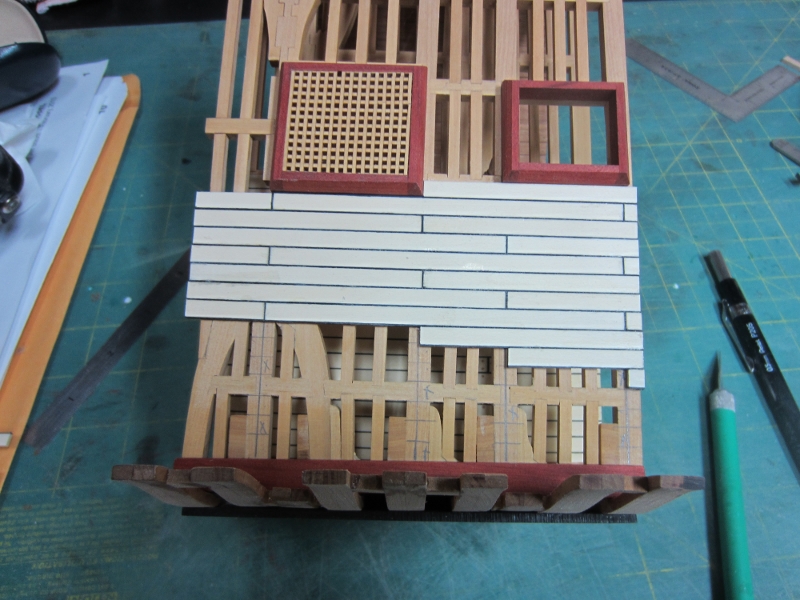
Thanks Russ, Grant, Mark, Martin and texxn5. Ben, Thanks but it’s no real insight. I just like the colors and I love playing with different woods. Just to throw a curve I decided to make the gun carriages out of bloodwood. It will be interesting to see the contrast between the two. Joss, That’s why I stuck with paper on this one. I will try the stain sometime though. You and John0868 made it look so good. Most of the deck planking has been completed. I just have to make the bitts and plank around them, treenail it and sand away. With the way the time is going by it could take awhile.


- 332 replies
-
- 5
-
-
- Triton
- cross-section
- (and 1 more)
-
That Redheart looks really nice. I hope you enjoy it.
-
Great work as always. Very nice way of doing the blocks. Gotta remember that!
-
Hi Pete, That is a great way of doing it and was done very nicely. Well done.
-
Everything is looking very good. Well done!
-
Looks like some really nice wood. Can't wait to see it used.
-
Hi Martin, if they bother you now they will drive you nuts later. Like you said it's best to redo them. Get well.
-
The grating redo, although I didn't think it was needed, is an improvement. The rope work is impressive too. Thanks for sharing.Your're doing a great job.