chris watton
-
Posts
2,335 -
Joined
-
Last visited
Content Type
Profiles
Forums
Gallery
Events
Everything posted by chris watton
-
 Chain pump housings it is, as this will be Aubrey's Surprise (as I am assuming this is what the majority would like to model her as...) After all, who really wants a carronade frigate...
 -
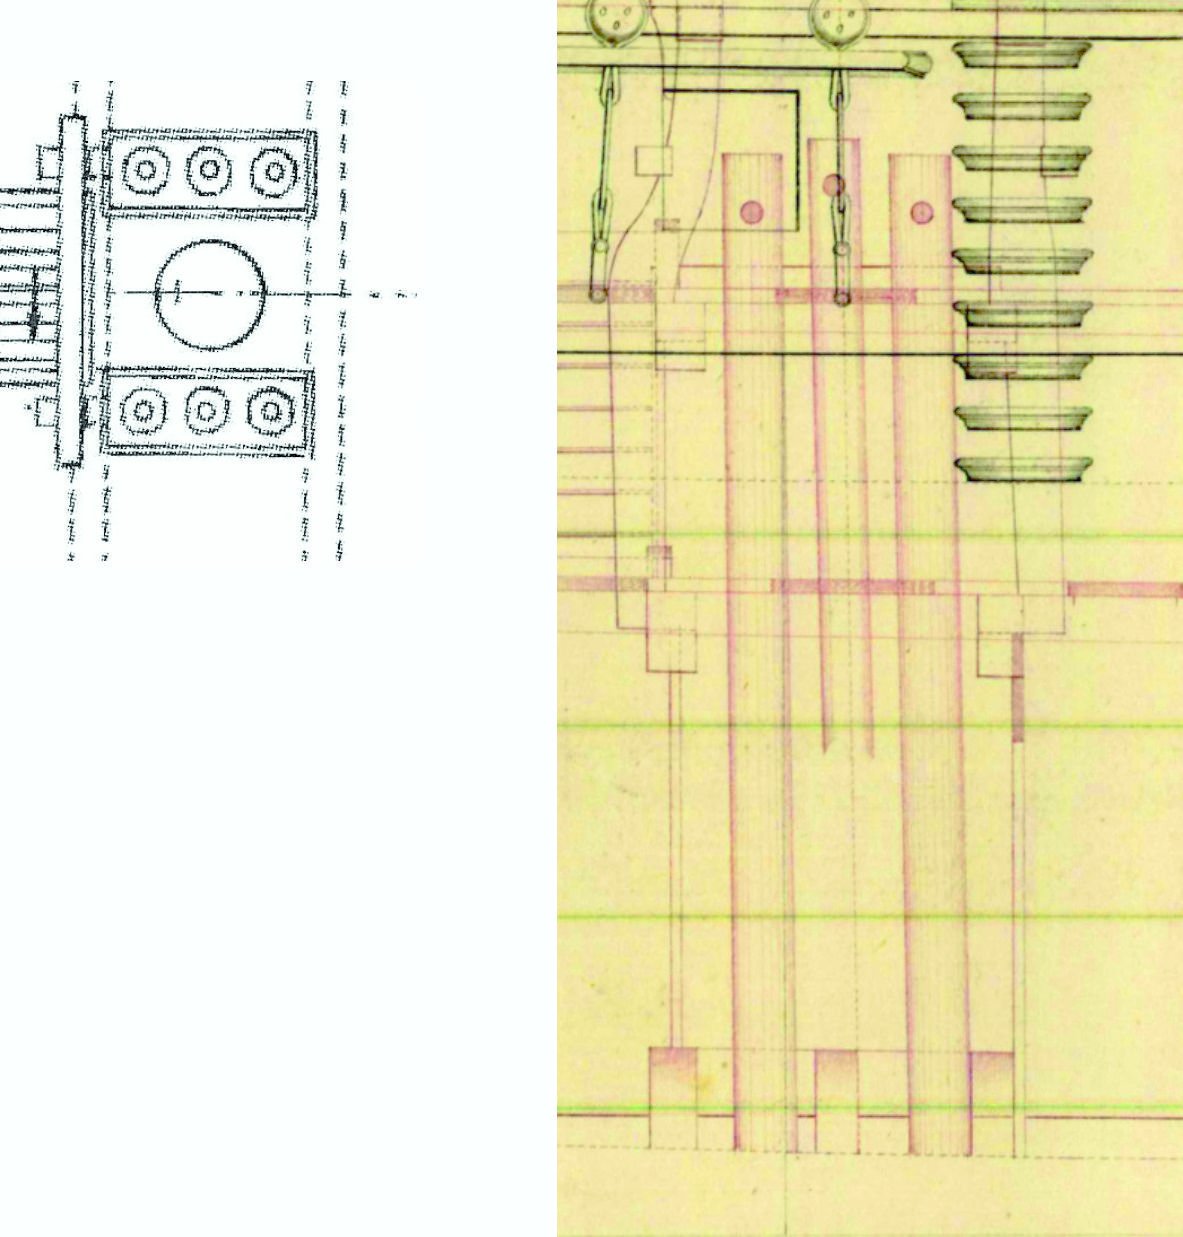
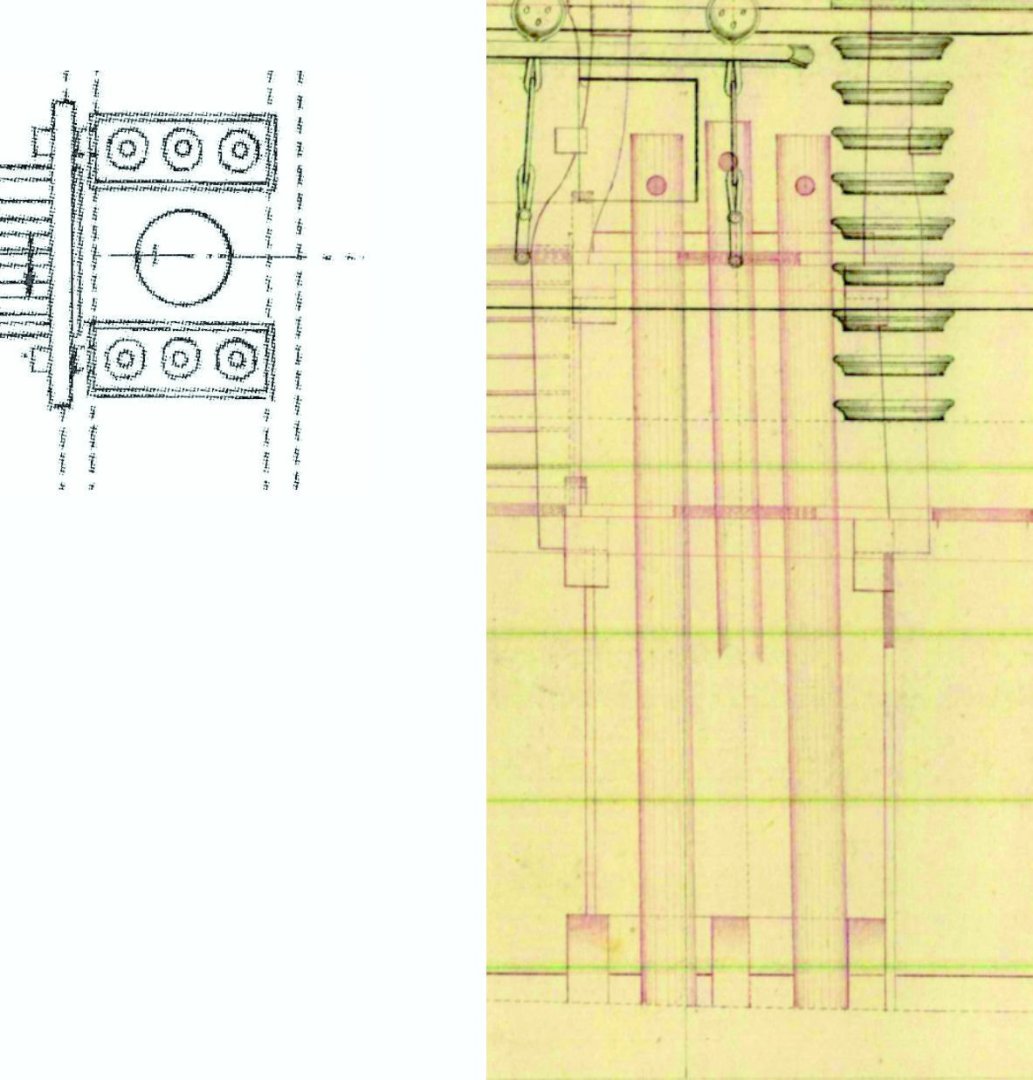
Plans I have show her after conversion, as the capstans have been changed and moved.
-
I seem to always pick the ones with odd pump arrangements. For Surprise, should I go with a typical chain pump and housing config, or, as seems to be the case with the original plans, 3 hand pumps per side? Anyone got any better diagrams for this?
-
Hopefully in a couple of weeks, once we have time to sort through the pallet.
-
It will be Vanguard Models' 18th kit, so hopefully by this time next year, it would have already been released
-
Very neat planking!
-
That does look really nice! I shall tell you a secret about the stove chimney - After I received the photo etched sheets for Sherbourne, I realised to my horror that I had forgot to add the chimney to the sheet, too late to change it, as I already ordered the production parts. So I had to design one for 3-d printing instead, but in the end, it worked out fine....
- 177 replies
-
- 7
-

-
- Sherbourne
- vanguard models
- (and 3 more)
-
CA glue is fine for 2nd planking, I have always use it.
- 129 replies
-
- 1
-
-
- vanguard models
- Sherbourne
- (and 1 more)
-
Nothing flash, as you're just sanding wood, so something like this: BLACK+DECKER Mouse Detail Sander, 55W, 240V, Corded, Includes 6 Sanding Sheets, BEW230-GB : Amazon.co.uk: DIY & Tools They do save a lot of time for sanding.
- 129 replies
-
- 1
-
-
- vanguard models
- Sherbourne
- (and 1 more)
-
I would not use filler for the first planking, especially if there are no huge gaps in between the planks, it just makes for more unnecessary work. Also, I do recommend a small sanding mouse, I use this on all my hulls, and for the Sherbourne, it literally took no longer than 3 minutes to sand the whole hull smooth (then using a bit of sandpaper for the extremes and more awkward areas...)
- 129 replies
-
- 4
-
-

-
- vanguard models
- Sherbourne
- (and 1 more)
-
I just had my new machined walnut block sets for Sphinx arrive, so these are back in stock: HMS Sphinx Machined walnut Block Set – VANGUARD MODELS Also, my large shipment of PE copper for Indy, Speedy and Harpy arrived last week, after a 2 year wait (for the Indy and Speedy copper PE)! ETA - here is the Speedy and Indy specific copper sheets, these are extras that will go with the standard PE copper tiles, just need to add the stock...

-
Eh! Bristol is still and will always be a definite. Cheers!
-
To be clear, not this Christmas!
-
I will definitely do a Phoebe (36 – stretched Perseverance Class of 1795) at some point. Frigates are my favourite, too…
-
Once I have completed Harpy production (seems to be going on forerver, so many bits...), I can then sink my teeth into Surprise designs.
-
I do promise that I shall do my best not to disappoint regarding this kit - it won't be cheap, though....
-
Early days She will have a full suite of 3-d printed ships boats. I will not add the 36 gun frigate main mast (Surprise was a relatively small frigate, really a corvette, being no larger than the 32 gun Amazon Class from the 1770's), so the only real change will be the guns. It will be based off the original lines, and not the Rose from the film, as Rose was a lot smaller than the real Surprise.
-
A little update. I have been working on my 18th kit for the past 3 months. However, something came up, and I have decided to put that project on hold for a while. So my 18th kit will be a 64th scale model of HMS Surprise - This is definite, and will start work on this immediately. The model will be of the fictional version, so long guns instead of carronades.
-
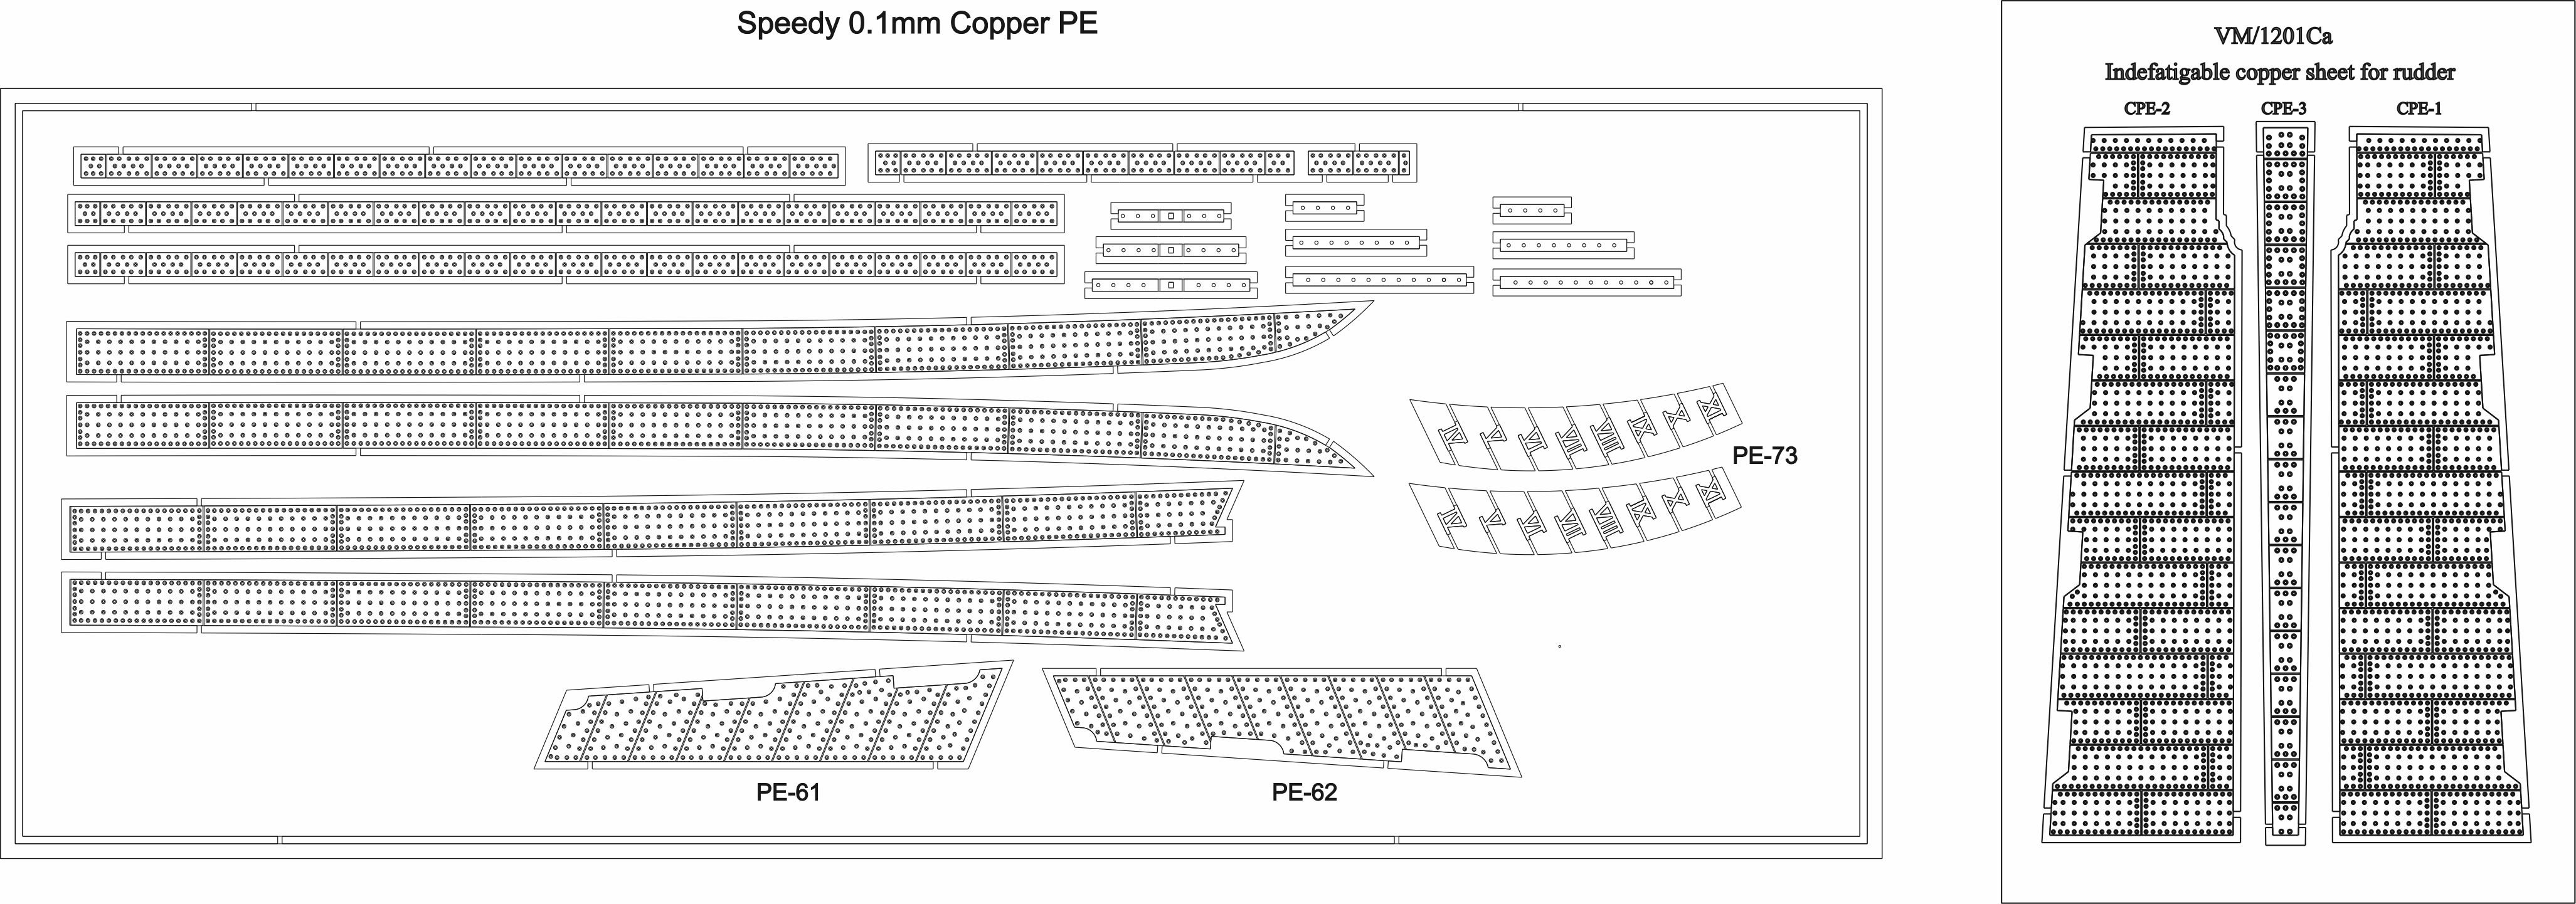
OK, I now have a price for the Harpy. I wanted it to be less than £400, but I cannot due to the sheer amount of materials in each kit (24 separate laser cut sheets and 3 PE sheets), plus the time taken to produce each kit. So the price is: VM/17 HM Brig Harpy (November release) £425 VM/17/XL HM Brig Harpy (PE copper and machined blocks) £490 I am expecting a very large shipment of PE copper next week (45kg worth), so PE copper options will be back for Indy and Speedy too, with Speedy having a dedicated sheet for rudder and keel copper plate, as well as the standard sheets, and also Indy and Harpy will have a small sheet for the rudder patterns. This is the first time in over two years I have been able to order the copper PE.
-
Damn, I always seem to be blown away by these works of art you guys do, simply superb job, Andrew!
- 207 replies
-
- 11
-
-
-
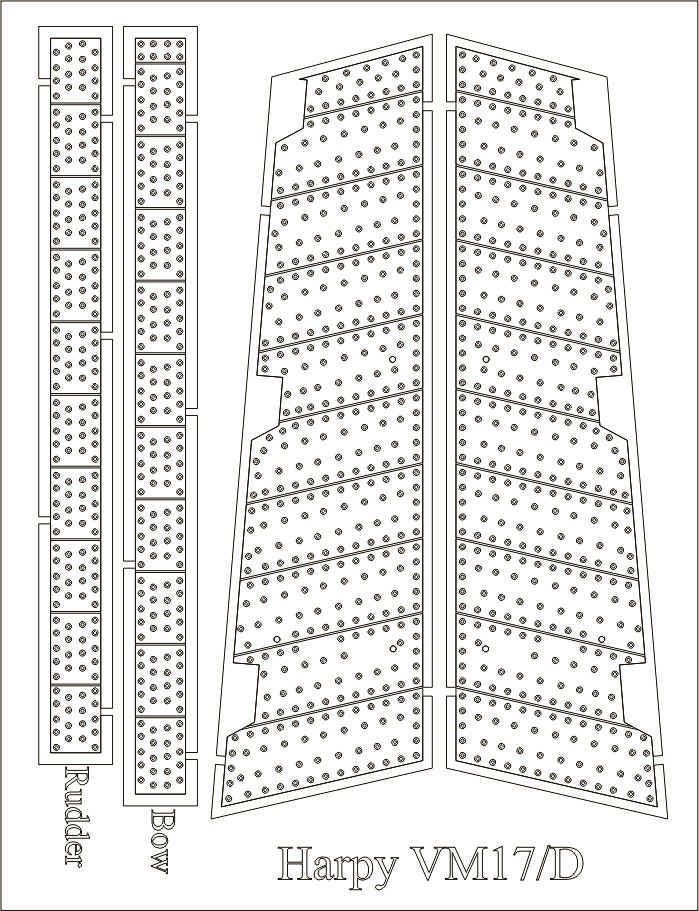
There will be a copper PE option for Harpy, as I have just been told my copper PE order is ready. This includes the copper plates plus a special sheet for the rudder, as shown. For the finished kit version, the treenail count on the outer bulwarks will be doubled. Jim is doing a very nice job!
- 76 replies
-
- 21
-
-
- Harpy
- Vanguard Models
- (and 1 more)
-
Cheers! I didn't realise my expensive mirror was a consumable too (£400 a pop)! Usually, the only consumables are the first and second stage filters for my extractors (which extract all harmful particles when the laser is running). I will not be printing any blocks, mainly due to time. I do however have another source for machined walnut blocks, with sets for Indy, Flirt, Speedy (and Harpy) already available to buy, and soon Sphinx. ETA - I am almost ready to press the button on part exchanging my first little 40W laser machine for another larger machine, 100W to go with my 80W, as I could do with it!
-
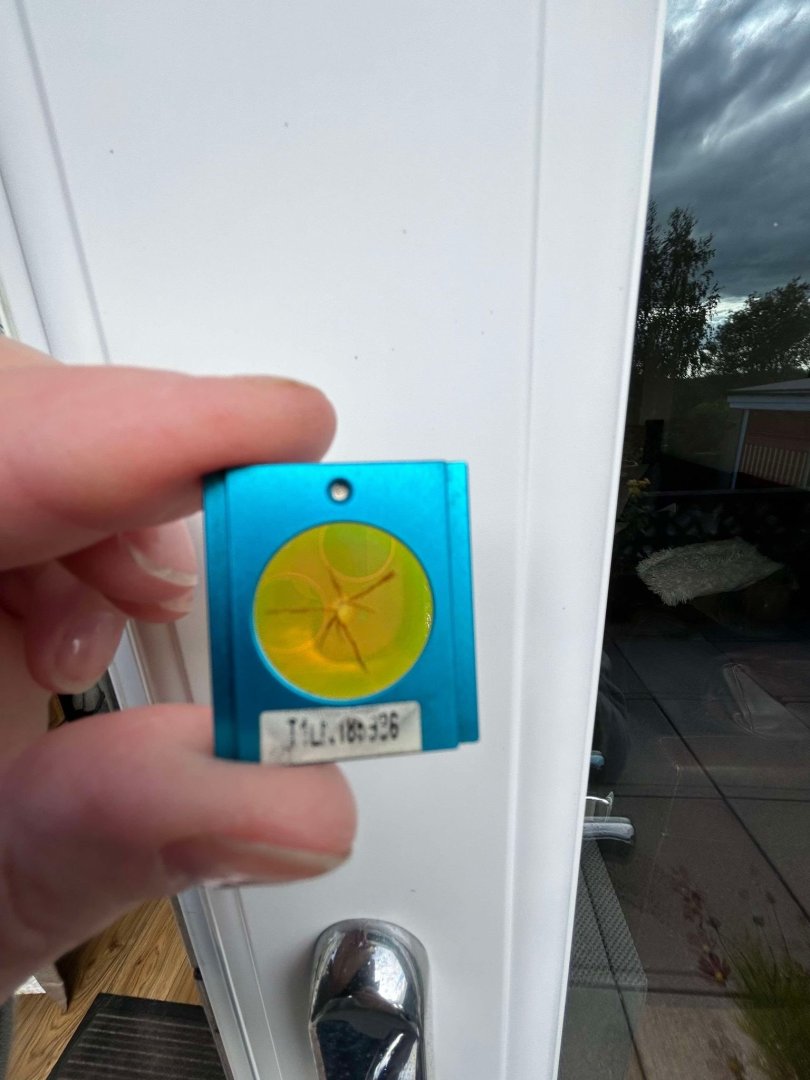
Just a little update. For the past week, I have been out of commission due to 'Man Flu', which has not been fun. My wife had it too, but of course, not nearly as bad as me, being a man.... Just before this, it was my main laser machine out of commission, the lens cracked for some reason, and of course this was noticed on a Friday afternoon, so ended up having to wait 5 days for a replacement. I attached a pic of the lens. Now, I am continuing laser cutting Harpy stuff, and today, my wife sorted out all remaining machined pear blocks we have, so now the remaining blocks are now back in stock, but once these are gone, they are gone: PEARWOOD BLOCKS AND DEADEYES – VANGUARD MODELS
-
Hull only around 530mm, and with stern davits around 560mm About Cruiser/Snake size
- 76 replies
-
- 6
-
-
- Harpy
- Vanguard Models
- (and 1 more)
-
Today I decided that there will be 2 ships boats included with this kit, the 18' cutter and a 22' foot cutter (both highly detailed and accurate models in their own right). This means that if you want to hang the 18' cutter from the stern davits, you can add the 22' foot cutter to the deck - or 22' cutter on the deck, and 18' cutter on spare spars resting between gallows. Jim is doing a fine job, love the shape of this hull.
- 76 replies
-
- 17
-
-
- Harpy
- Vanguard Models
- (and 1 more)