HOLIDAY DONATION DRIVE - SUPPORT MSW - DO YOUR PART TO KEEP THIS GREAT FORUM GOING! (89 donations so far out of 49,000 members - C'mon guys!)
×


chris watton
-
Posts
2,328 -
Joined
-
Last visited
Content Type
Profiles
Forums
Gallery
Events
Everything posted by chris watton
-

Bit of a problem! HMS Speedy, Vanguard Models
chris watton replied to JohnEvans's topic in Masting, rigging and sails
I did the same with my prototype model, the one that's on the box art! But it was the fore topgallant I caught and snapped. You can see it slightly bent in all the finished pics - all I could do was apply a drop of glue and keep it in place until set. But it still has a slight tilt... -
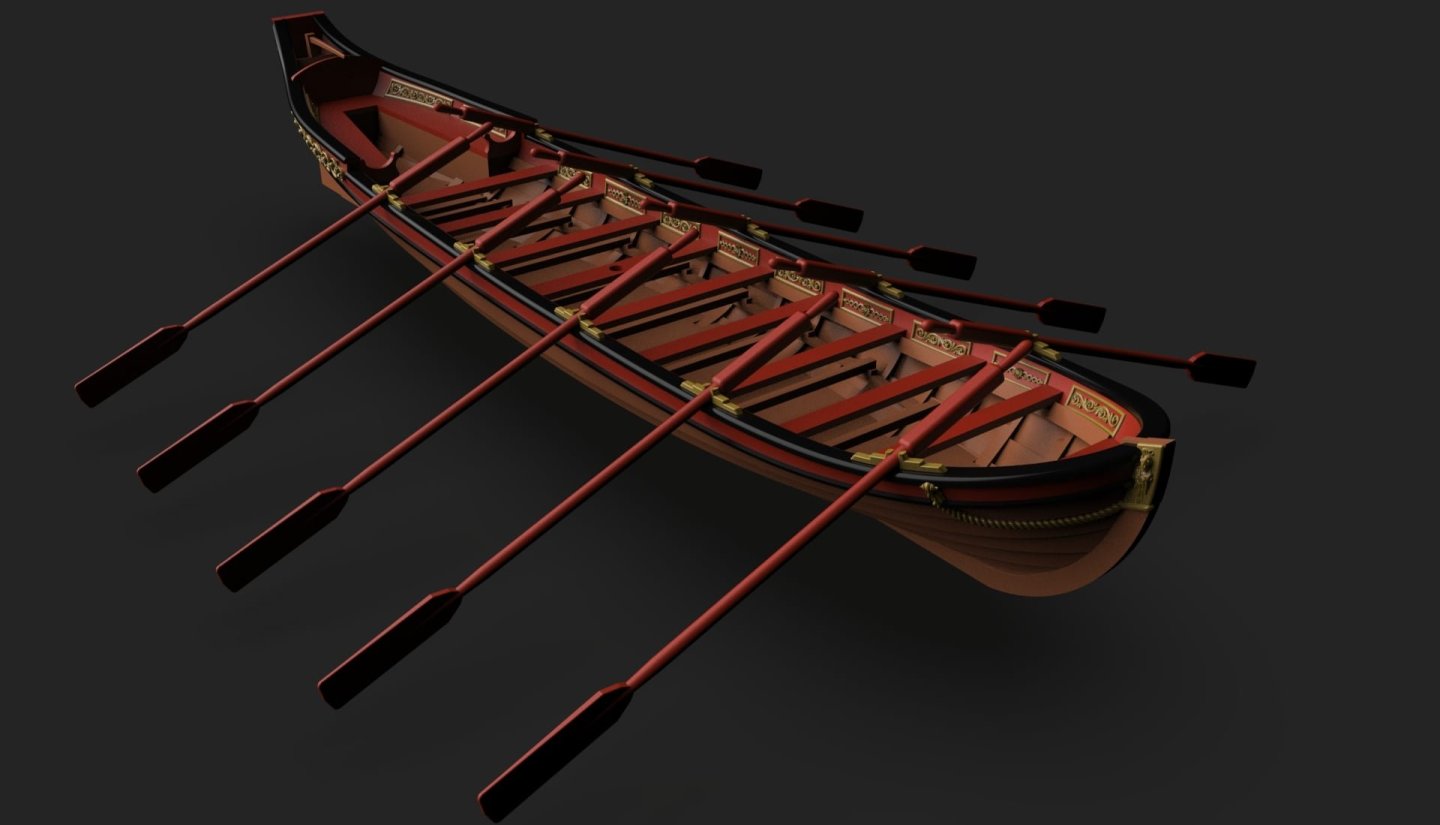
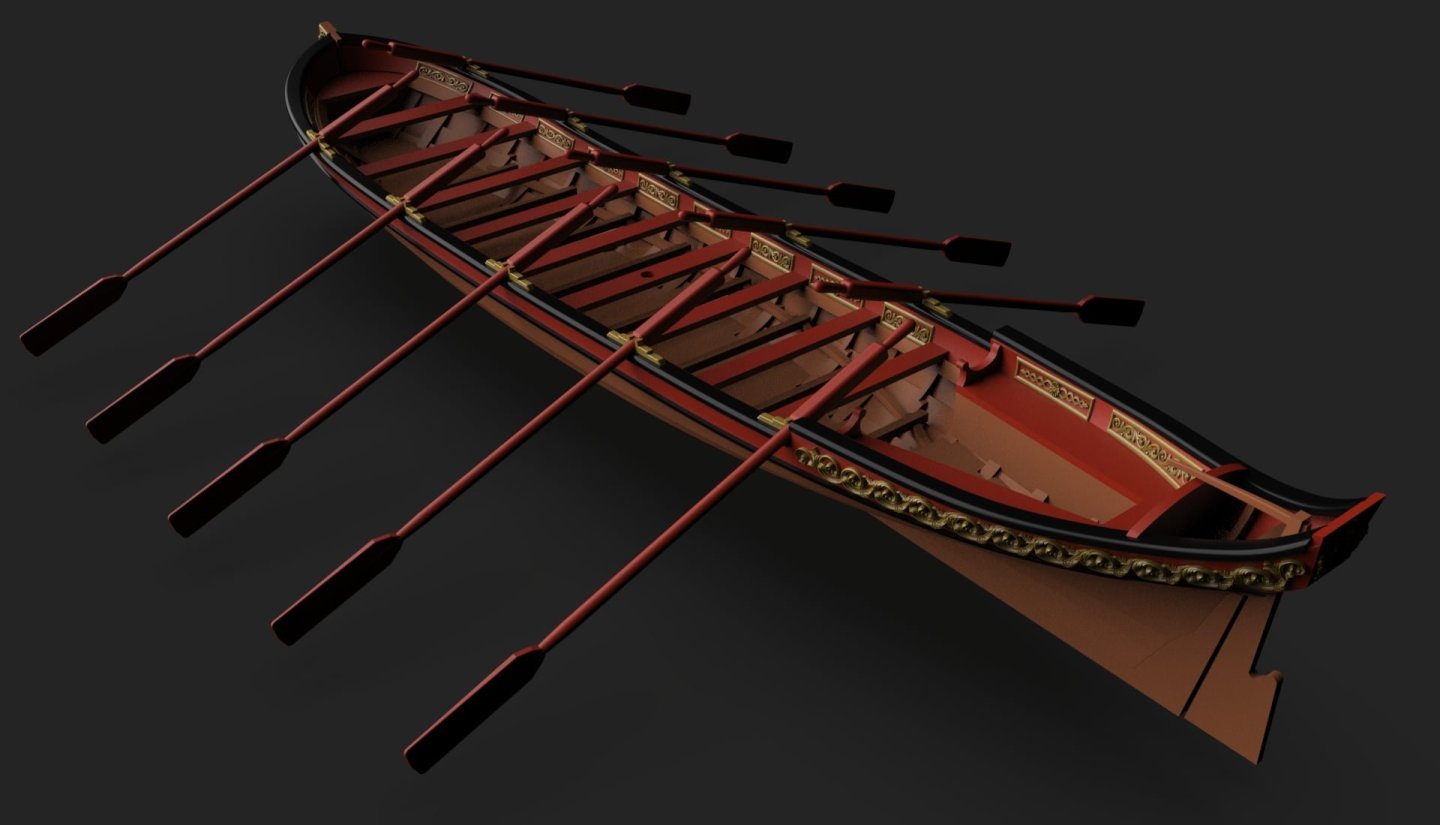
Thank you! I am fine, I think I just needed a little break, as I haven't really stopped since 2019! I need to take it a little slower this year, I think.. Thank you, I have said before that I personally would prefer the 3-d printed hulled boats over standard if I were buying the kit. I had to make sure they were as accurate as they could be, using original plan lines in most cases. Before, I know many had to settle with what looks roughly correct, but really wasn't, as there were very few choices. I wanted to ensure I have a full range of the most often used boats for my kits, with all the hard to do detail already done - especially for the clinker planked boats. 3-d printing allows me to do this, and at a near scale thickness, too, rather than white metal or cast resin, which always made the boat look way too thick and toy-like. I know some still love the all wooden ones, but I also know there are very many more who prefer the pre made hull versions, and with the 3-d printed hulls, there is no longer any need to compromise on historical accuracy so much.
-
Do not take any chances this time of year, take care of yourself, Sparkler can wait until warmer weather!
- 35 replies
-
- 6
-

-

-
- vanguard models
- Adder
- (and 2 more)
-
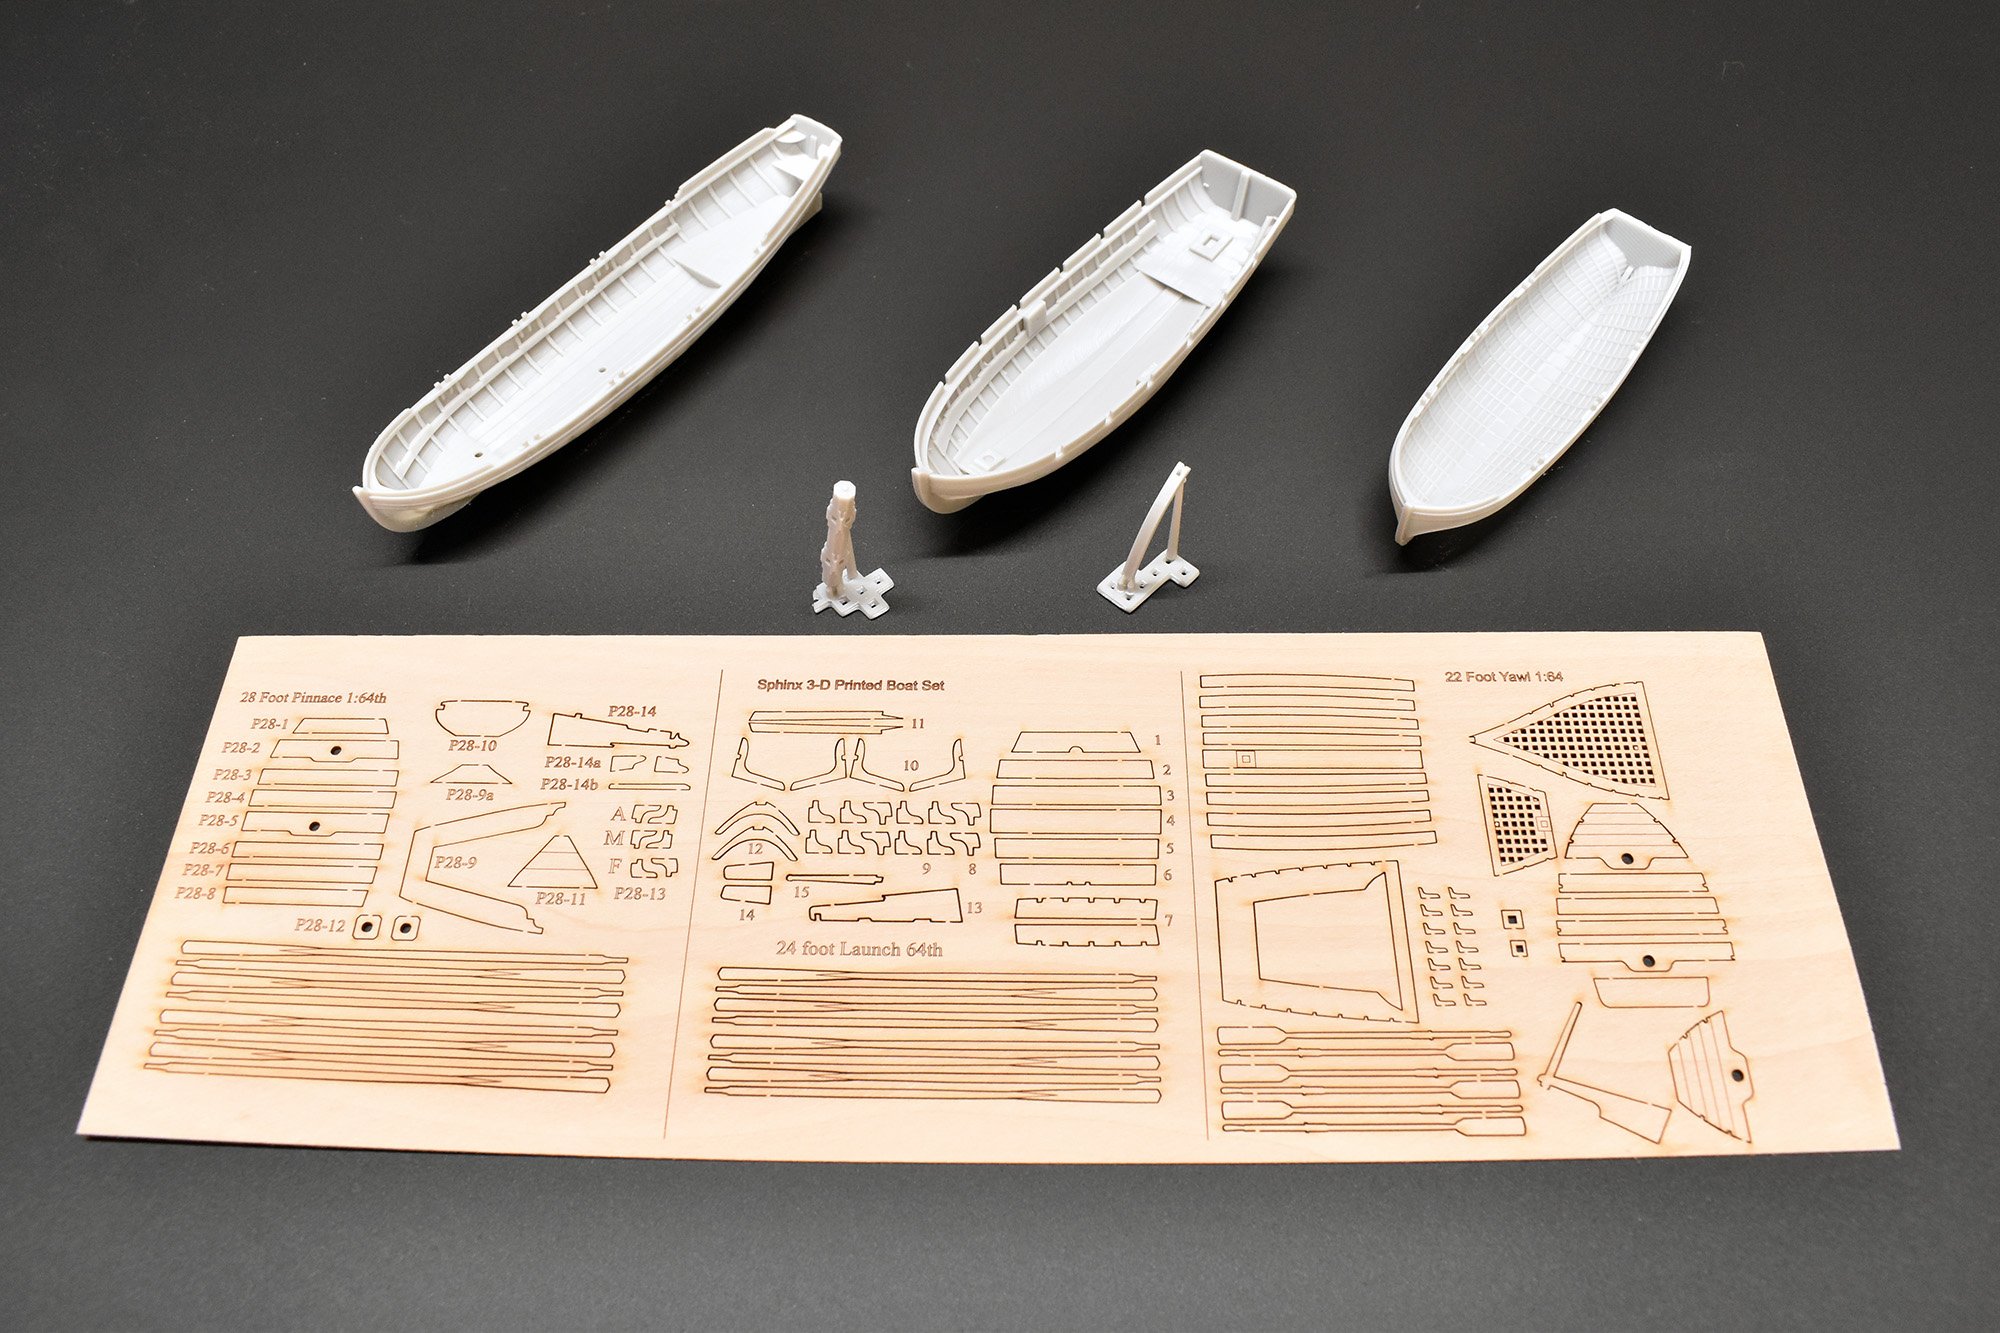
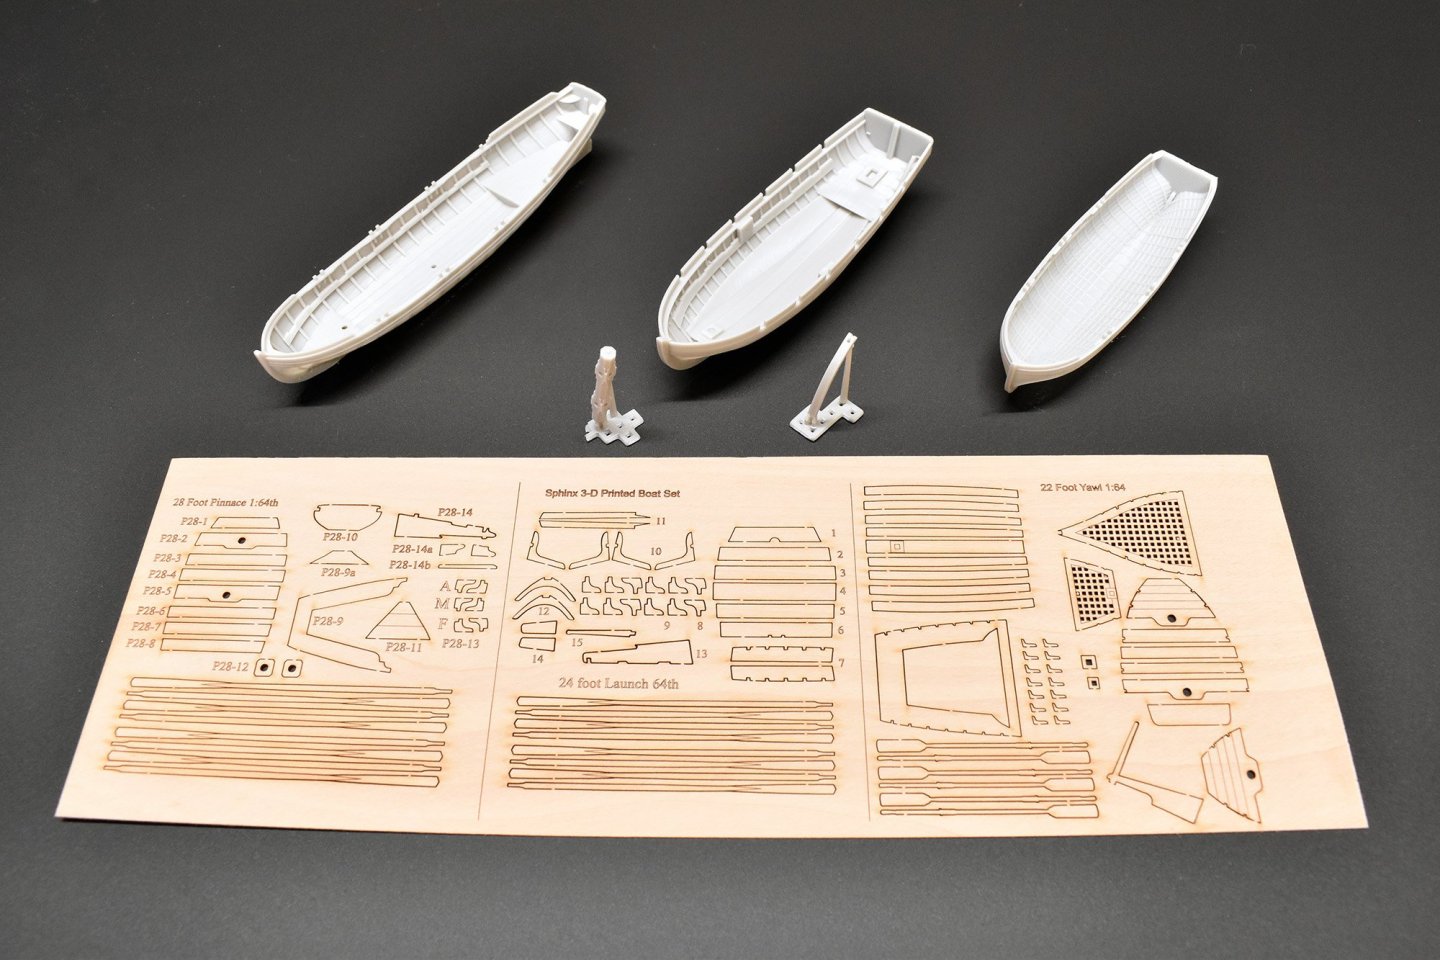
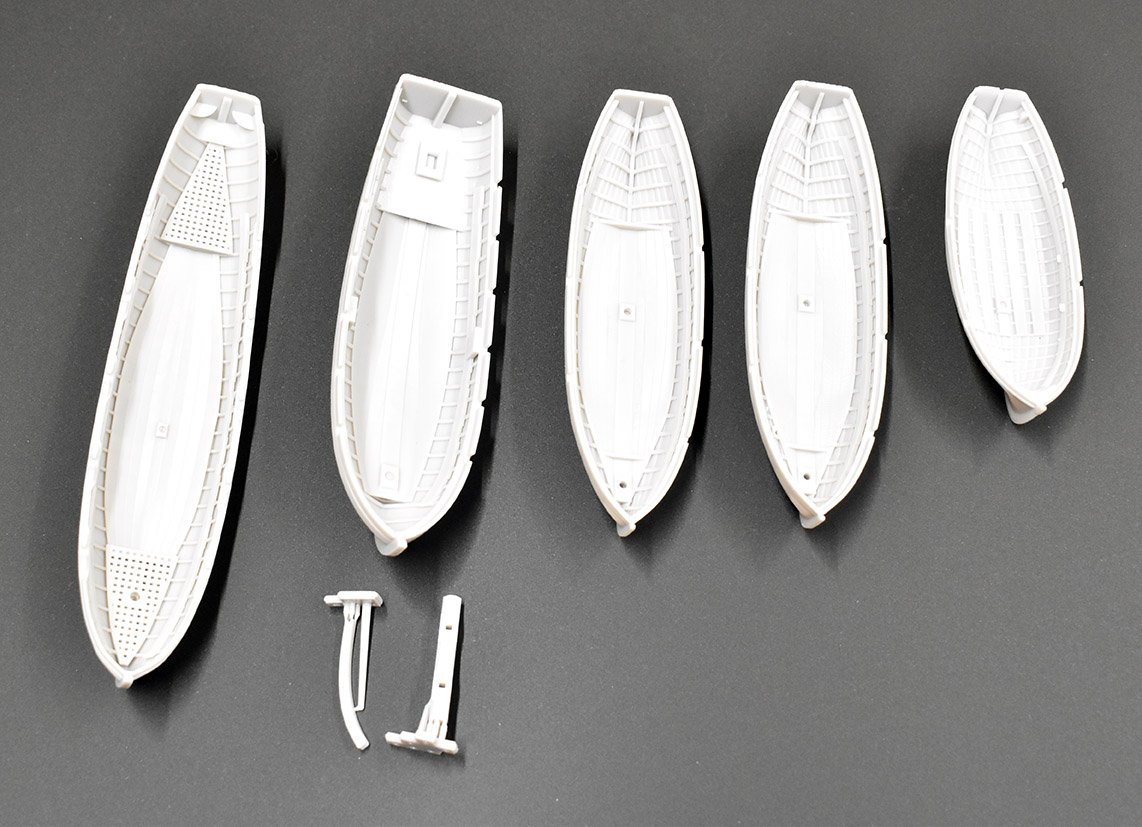
OK, small update: I am hoping to start Surprise development in the next week or so. I have been a little under the weather for around 12 weeks (seem to have had a bug and taking an absolute age to go away completely), so all I have been able to do is continue to produce stock for our kit range (even having the laser machine running throughout Christmas Day)! This has taken all of my time - but am certainly not complaining. I am expecting delivery of my second large laser machine next month, which will help a lot. The website platform will be changed within the next few weeks from WooCommerce to Shopify. The 33 foot Shallop is still ongoing, I have asked for a few more slight changes after trial fitting some of the laser cut pear parts, so am waiting for the updated file for that. What I do have ready now, however, is the Sphinx 3-d printed boat set, consisting of the 22 foot yawl, 24 foot launch and the ubiquitous 28 foot pinnace (Also now in stock as a separate item): HMS Sphinx Boat Set – VANGUARD MODELS Separate 28 foot pinnace: 28′ Pinnace – VANGUARD MODELS
-
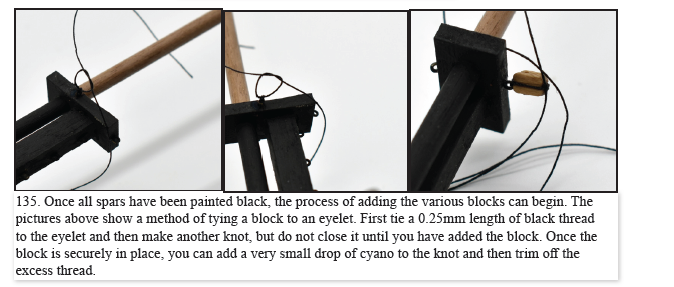
There is this in the manual you have (Page 48): You can apply this method for tying blocks in most instances. It is just a simple knot, but some prefer to go further and simulate a seizing using their preferred methods. If the block is tied directly to a mast or yard, then add the block to the thread first (rather than after if it’s tied to an eyelet, as shown) and then wrap the thread around the mast or yard and secure it with another knot and apply a little glue to secure it before snipping off the excess. If another block is fitted in the same position on the opposite side, then tie a knot as with the single block, and then, as shown in the above images, add the block as shown above.
- 177 replies
-
- 4
-
-
-
- Sherbourne
- vanguard models
- (and 3 more)
-
The futtock staves should keep them apart somewhat - this is why it is strongly recommended that all shrouds are added, including futtock staves, futtock shrouds and topmast shrouds and topmast futtock staves before tying a single ratline.
- 422 replies
-
- 5
-
-
- Vanguard Models
- Sphinx
- (and 1 more)
-
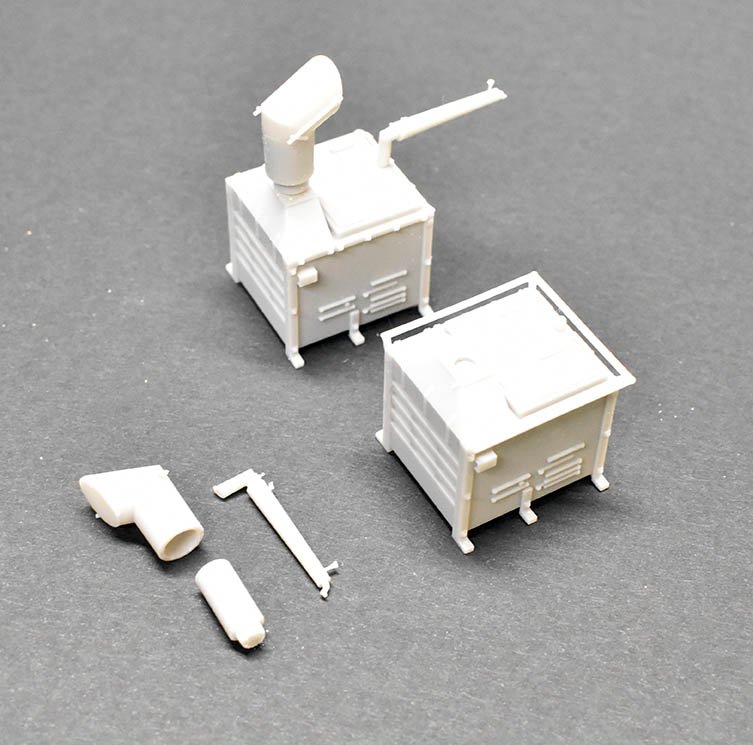
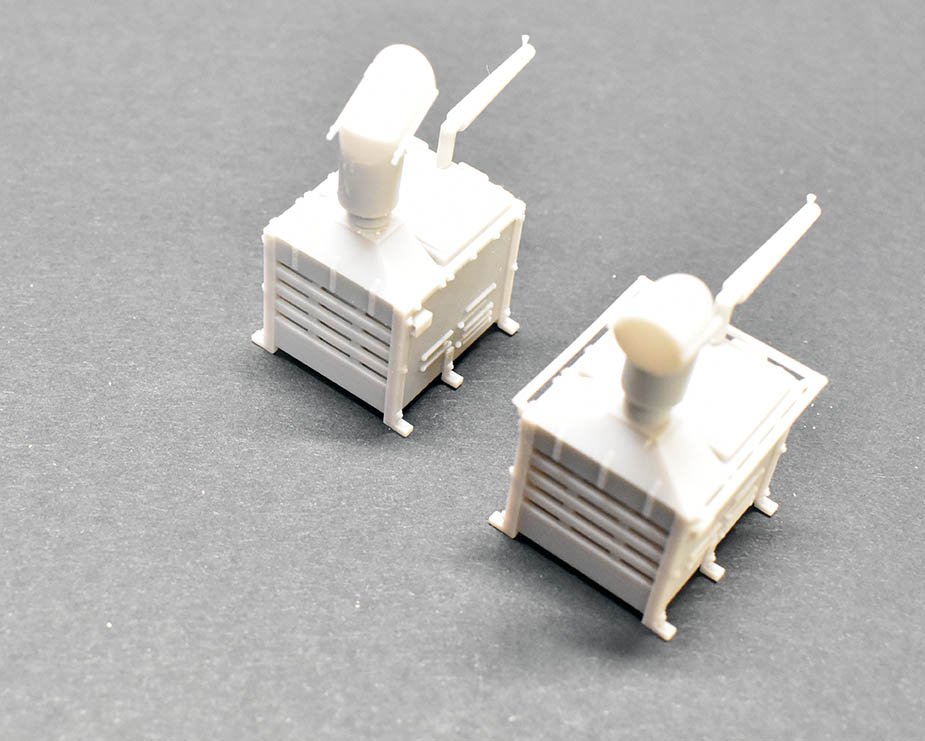
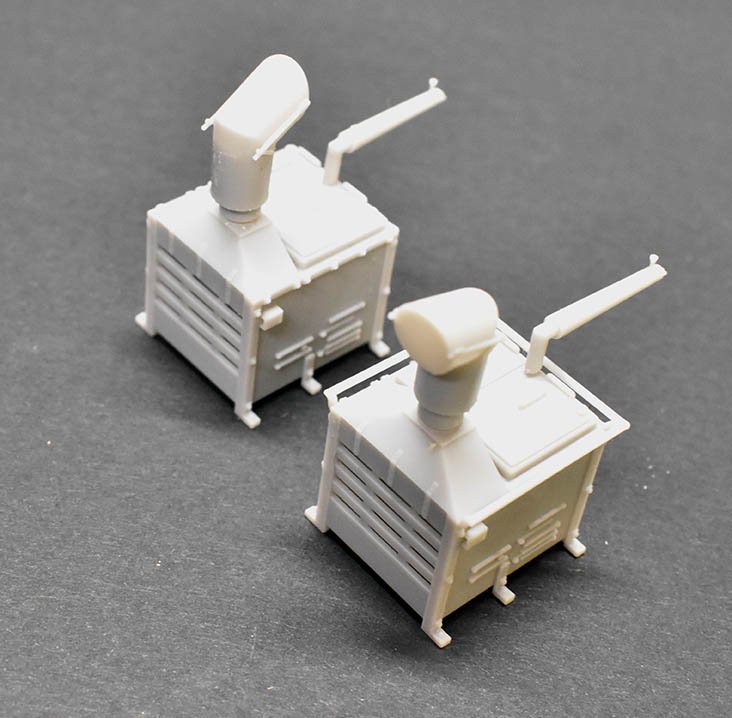
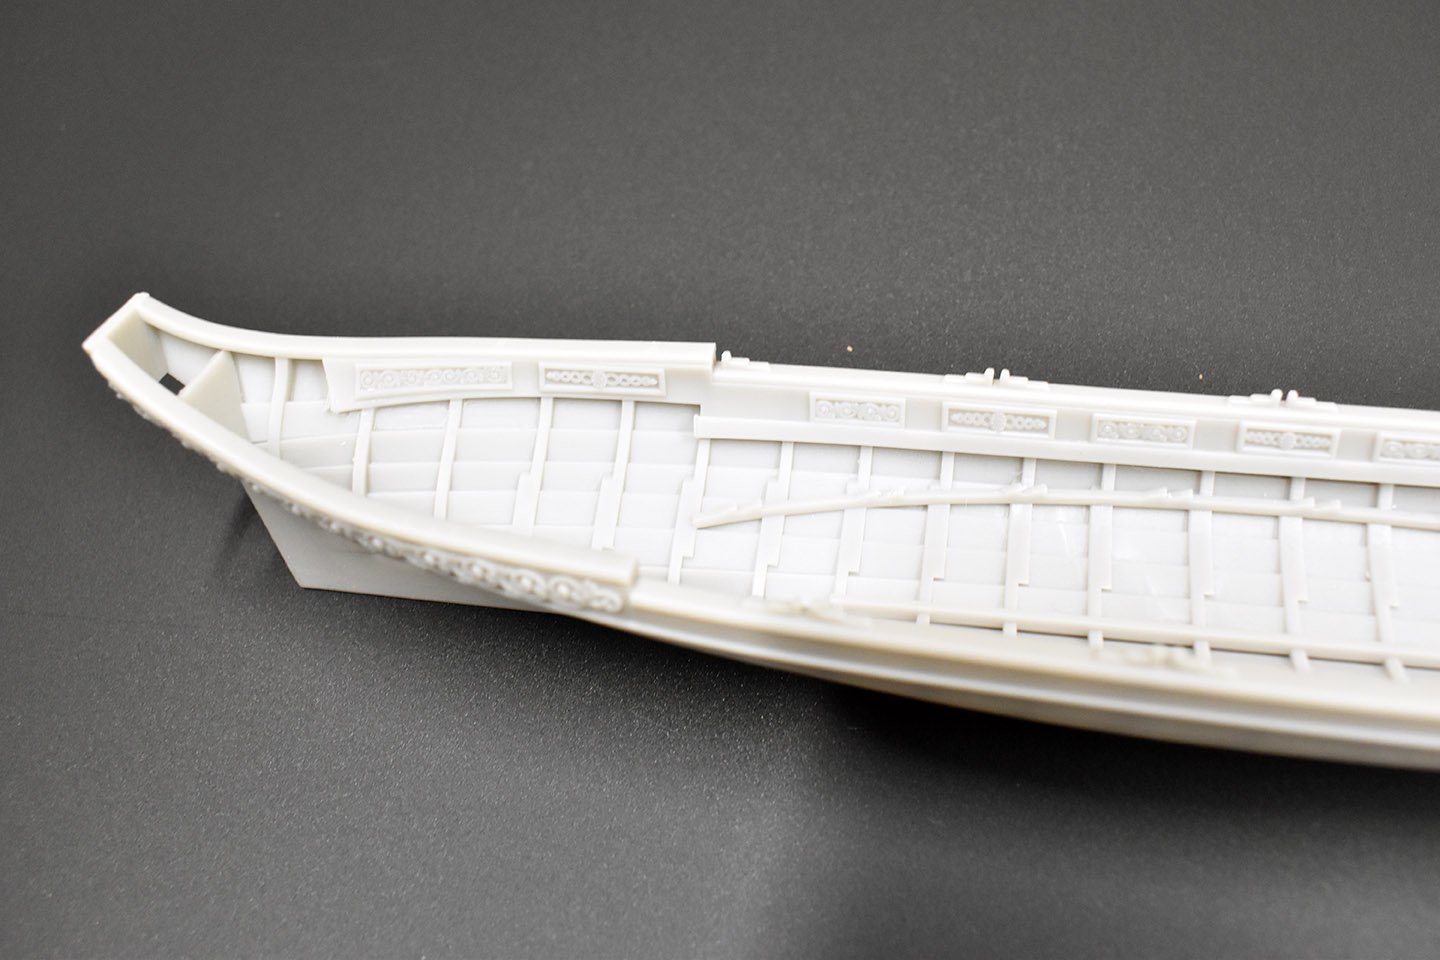
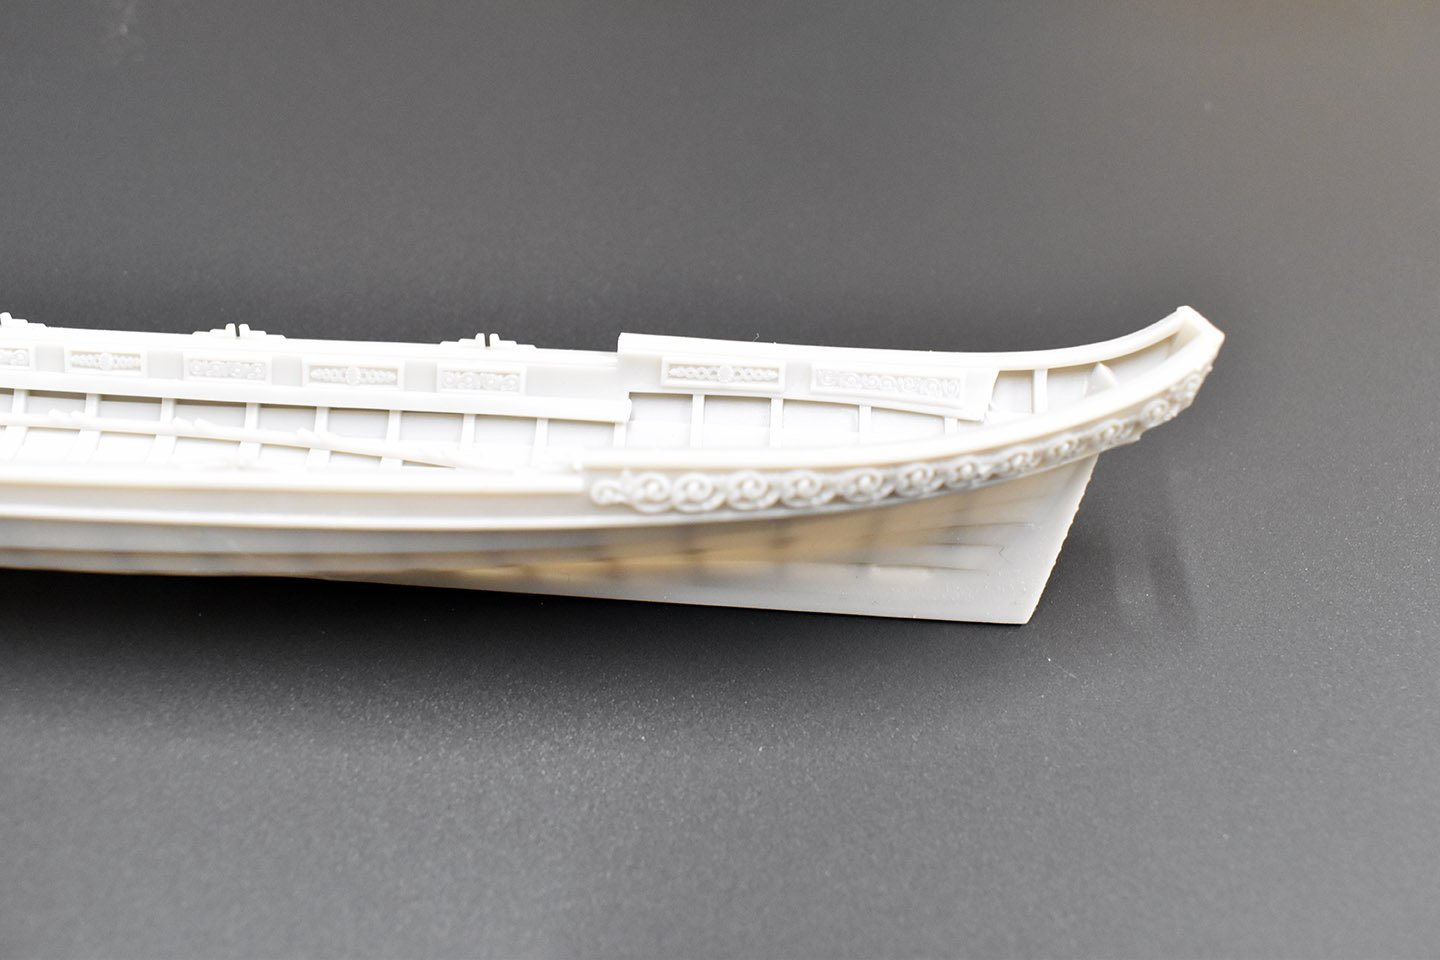
Just a small update. I have not really been able to find time for the new development over the past few weeks (still), as laser cutting and other production processes have had to take precedent, I forget just how long Indy and Sphinx laser cut parts take to produce. However, I do now have the last of my main 3-d printed boats done, the 28-foot pinnace. This means I shall have a complete 3-d printed boat set for Sphinx in the near future, featuring the pinnace, 24-foot launch and 22-foot yawl. I also now have all the 3-d printed boats I shall need for the Surprise kit. I also have the Surprise stove files. I have two files for the main body, one with the outer railing running along the top edges and one without. Not sure which to use yet. The one with the rail is more of a pain to produce. I have added some pics, but apologies for the quality, these were taken in laser room, and the light is very bright! One of the pics shows the 28- and 32-foot pinnace - these are not simply rescaled from the same file, but designed using their specific lines for their size
-
It is only paint, just touch it up with a brush, as you need to paint the innder edges of the gun and sweep ports red anyway.
-
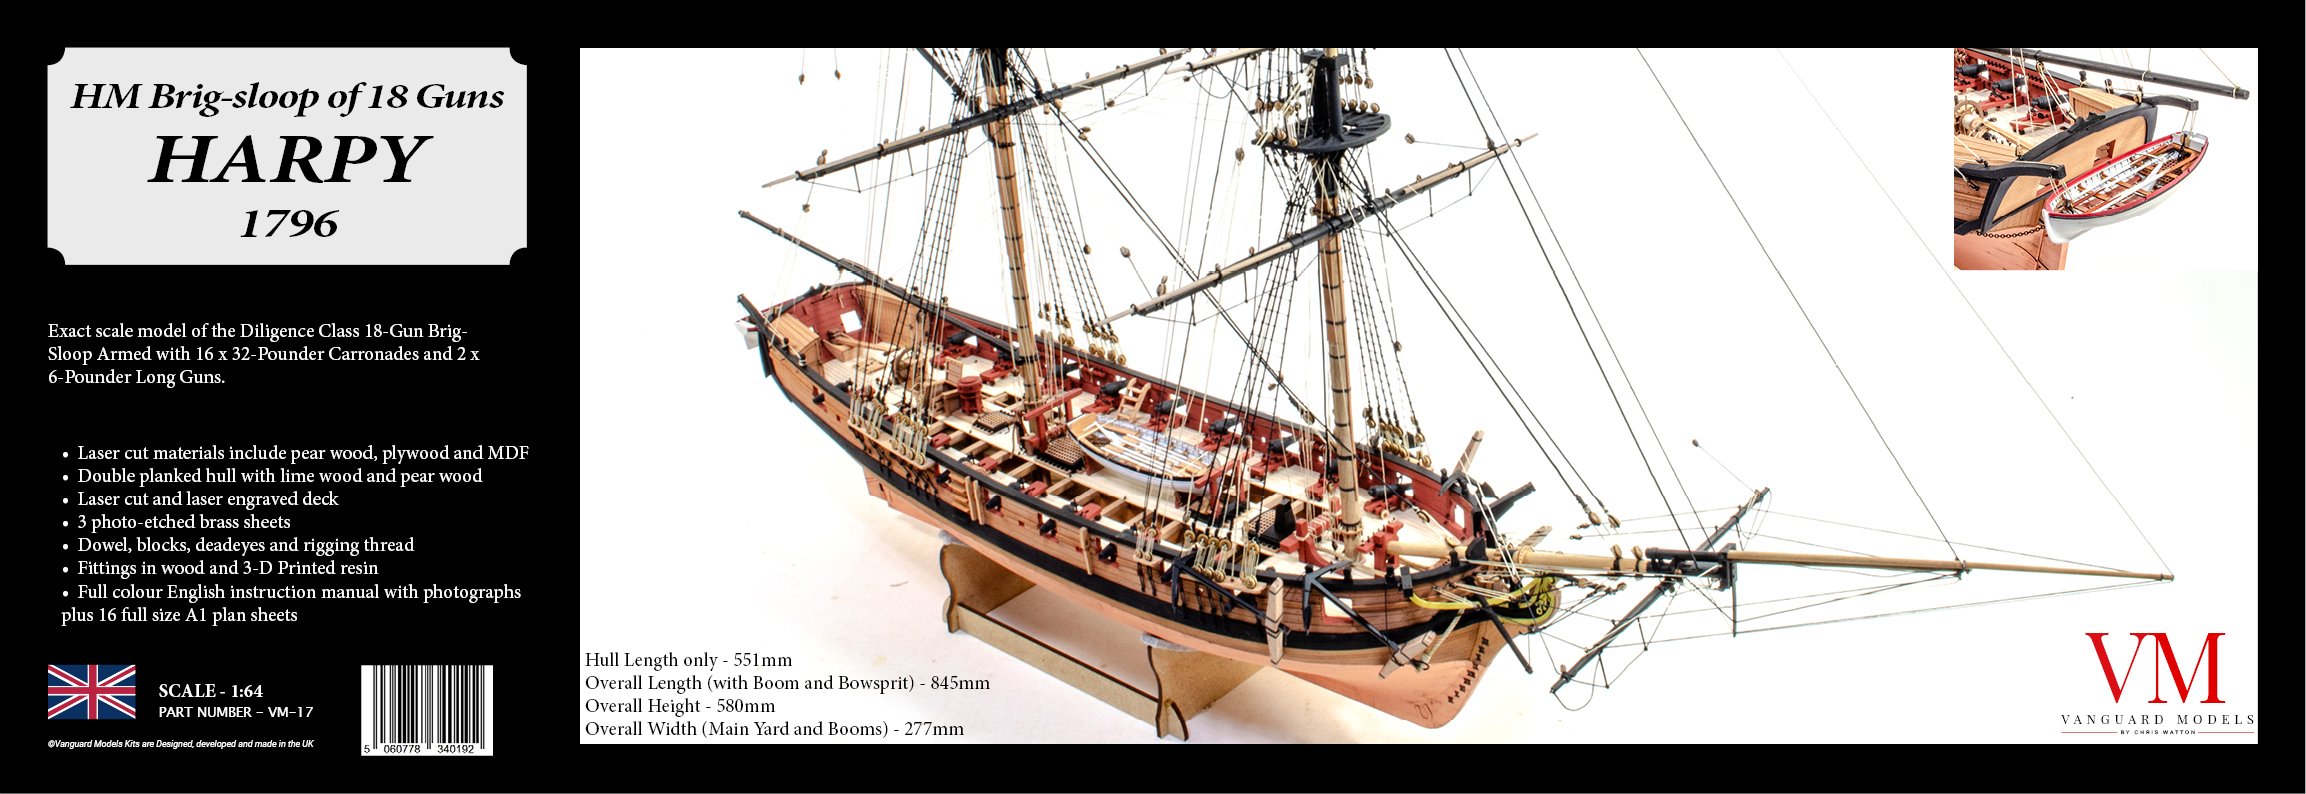
Oh, I don't think I ever showed the harpy box label. My step son, who works in marketing, asked if he could have a go, so most of this is him, a little more minimalistic than normal...

-
Funny you mention the foot supports/bars, one of my amendments I asked for was to have the laser cut drawings for these, so they fit at each station - failing that, I shall include a length of pear. I shall look into rowers at a later stage, but right now, this commission wasn't cheap and have just spent a load on materials to replenish stock and of course, the Harpy stuff. I am now laser cutting a brand new batch of Indy stuff - this takes some time..
-
I have Elegoo Saturn 3's and 4's
-
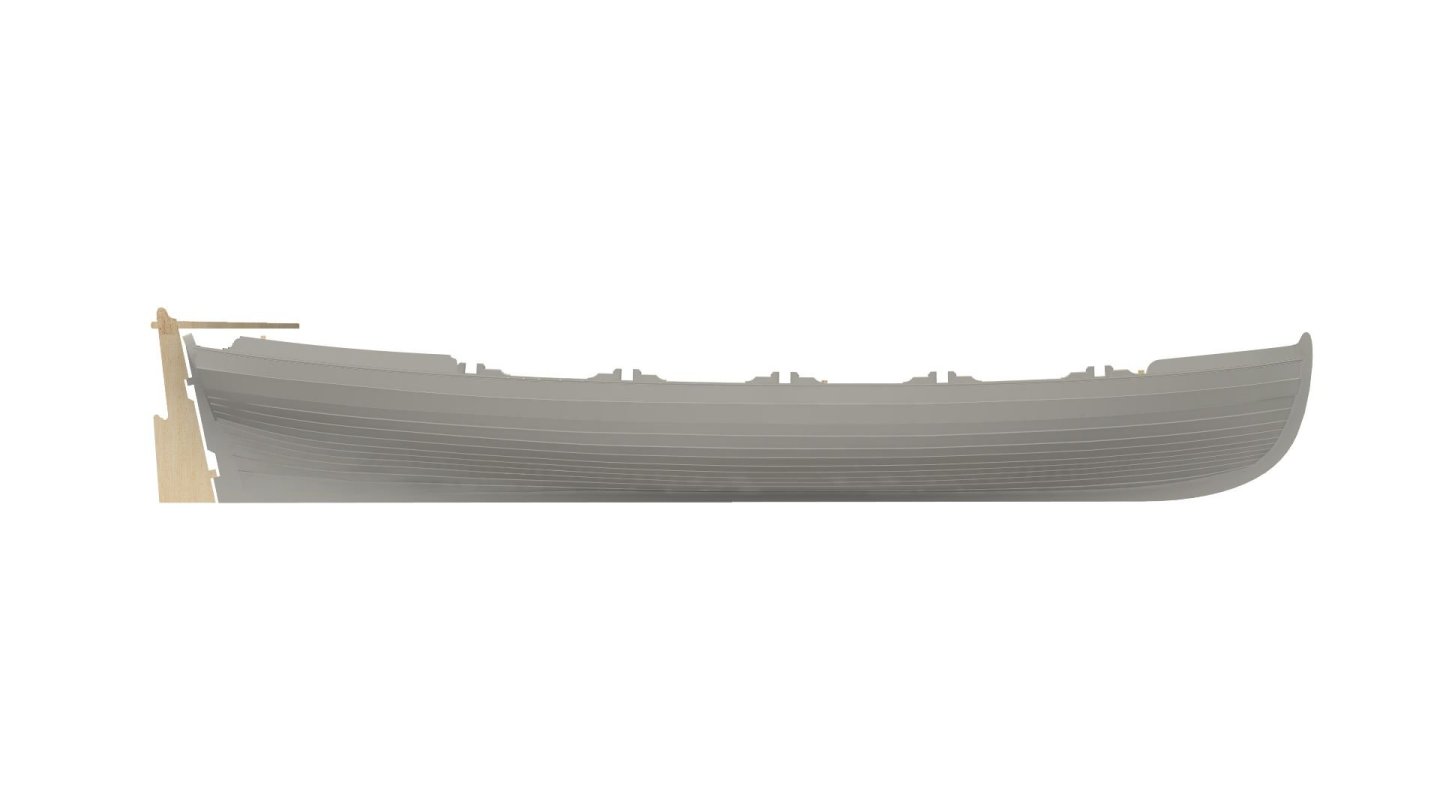
Little update: We now have everything here for the Harpy, plans, manuals and box labels. All pre orders will be sent out within the next few days, so Harpy is now officially released. On Monday I received the 33 foot 'Shallop' or Barge STL file. I have now printed out the first samples, both in 64th (158.5mm long) and 1:48th (over 211mm long), with the latter taking 12 hours to print. I have attached the results of the very first run. On the whole, very nice, but have asked for a couple of minor changes before I start producing them. I may offer this in 48th scale, as I think this would make a nice standalone model in itself, what do you think?


-
I have Harpy manual and box label with me, just waiting for the plan set, so shouldn't be too long now
- 43 replies
-
- 2
-
-
-
- Vanguard Models
- Sherbourne
- (and 1 more)
-
I am still waiting for printed materials, everything else is ready. They should not be too long now, as I know they went into production early this week, and they are all paid for.
-
Will have the 32 foot pinnace on line soon, plus what you see here, the Indy 3-d printed boat full set, which replaces the laser cut frames and planking for all boats. (If ordered with an Indy, you still get the standard kit boats too) 32 foot Pinnace: 32′ Pinnace – VANGUARD MODELS Complete Indy boat set: HMS Indefatigable Boat Set – VANGUARD MODELS
-
Not really, instead of the customer paying VAT at point of sale (like they would if buying from another EU country), they pay import or customs duty. It's not all one way, too, as I pay import duties on all supplied and materials I buy from the EU, pear, photo etch etc.
-
We are about to ship AgesofSail a new order tomorrow, which includes Sherbournes
-
Oops, corrected, am always doing that!
-
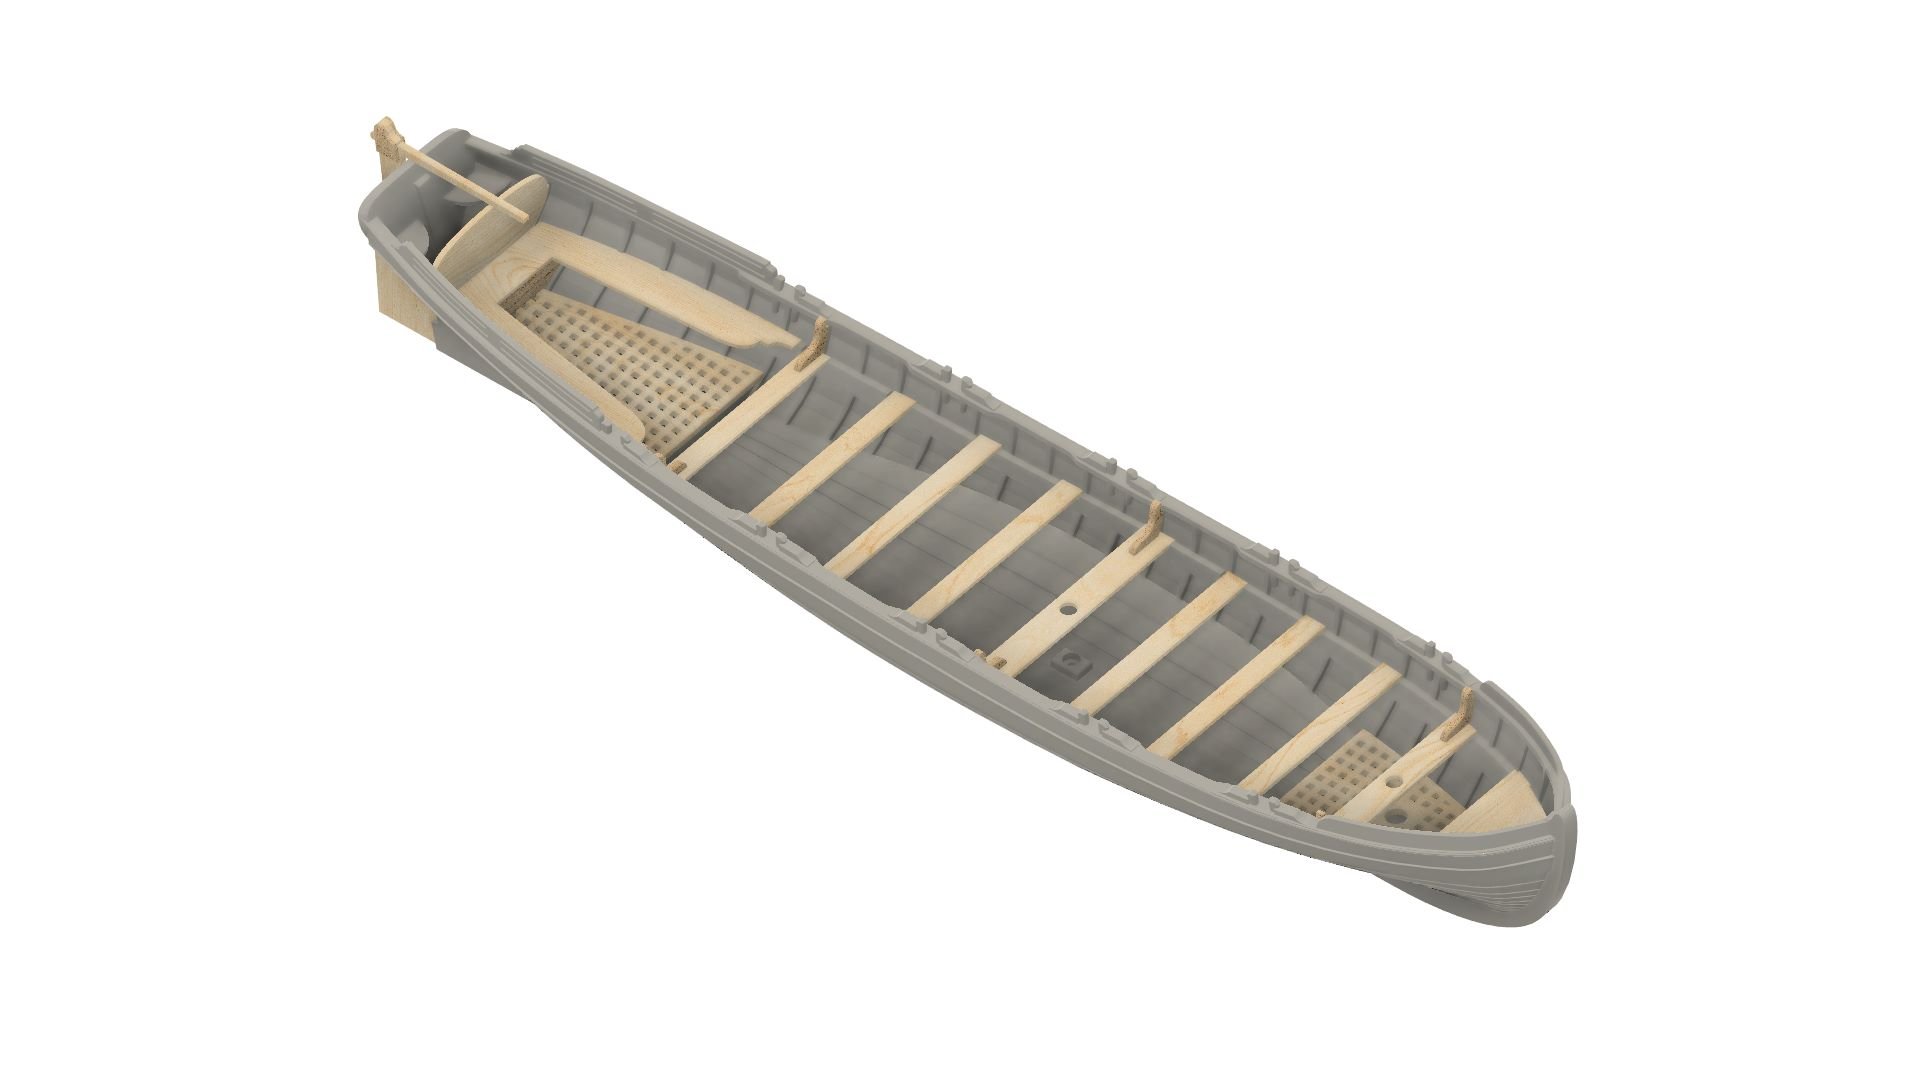
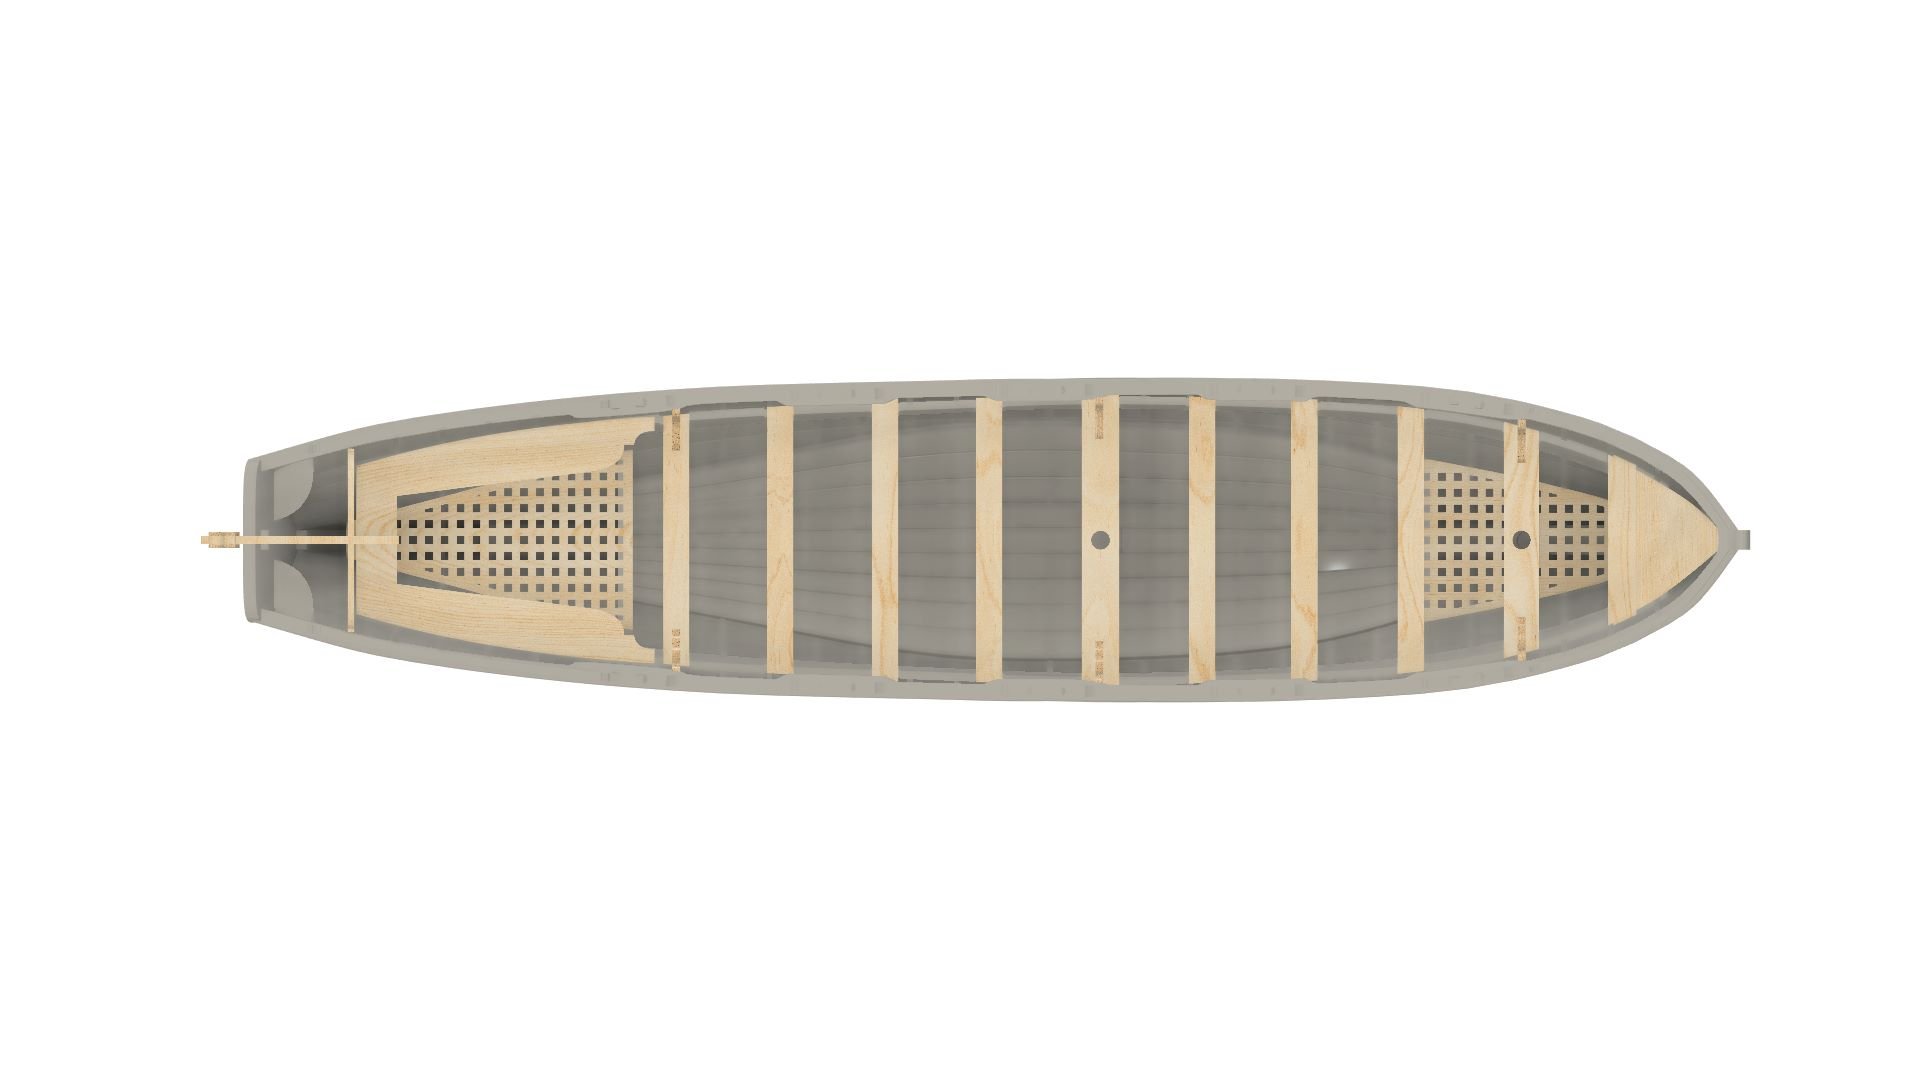
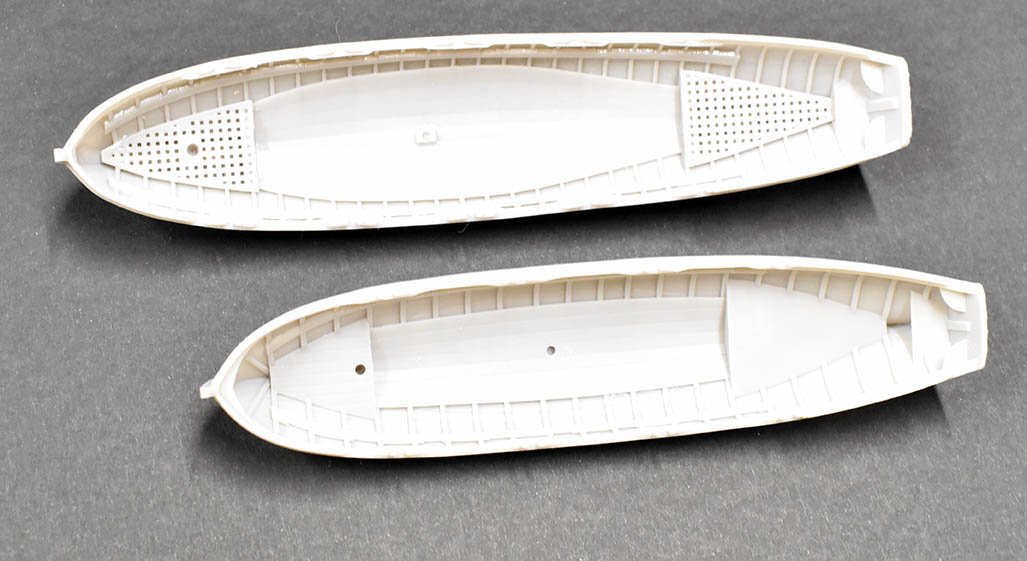
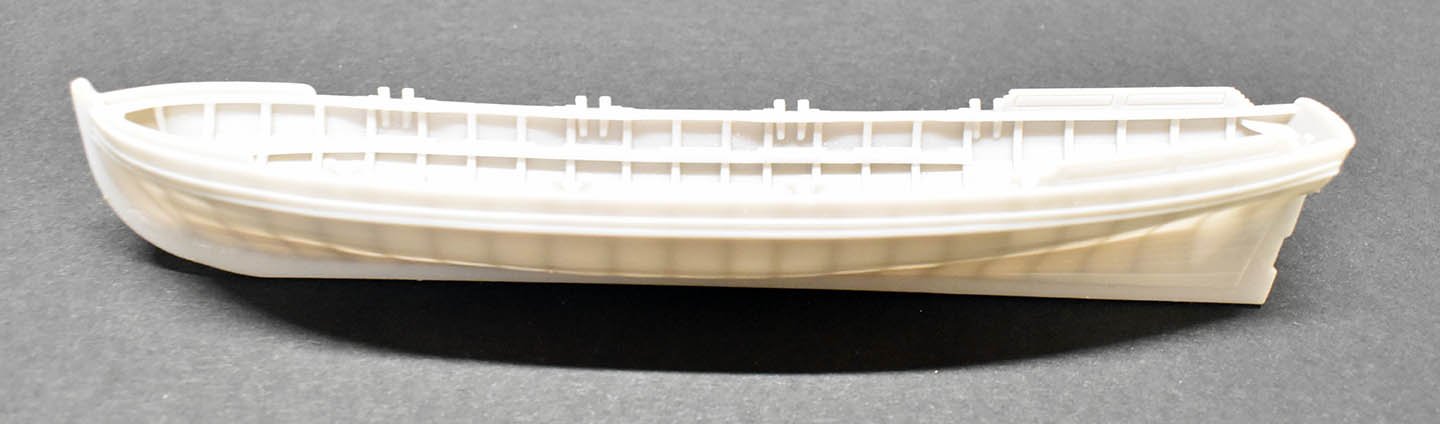
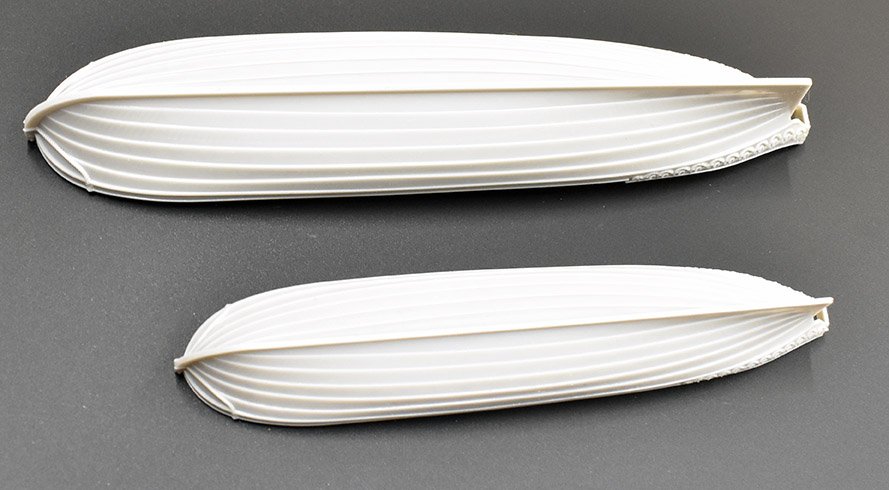
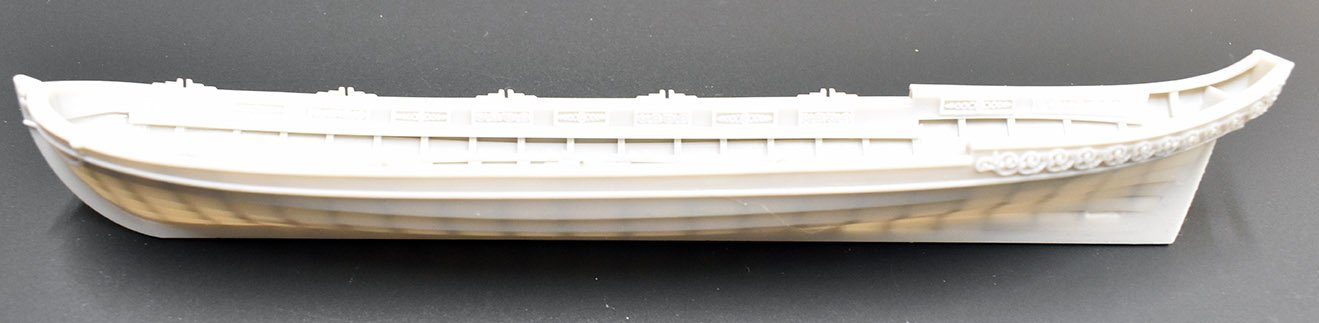
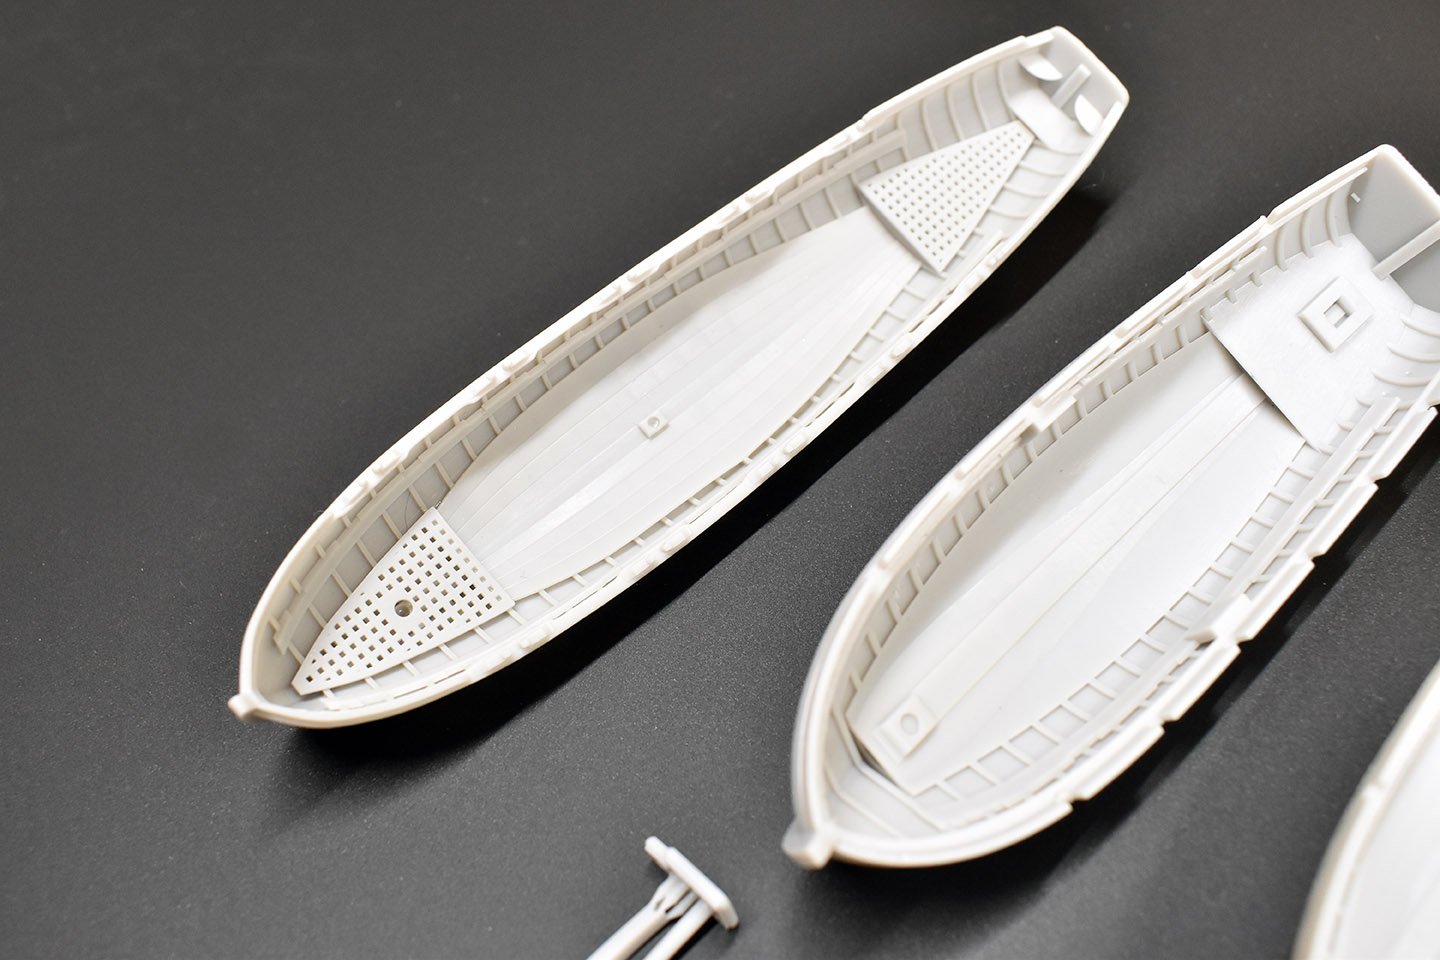
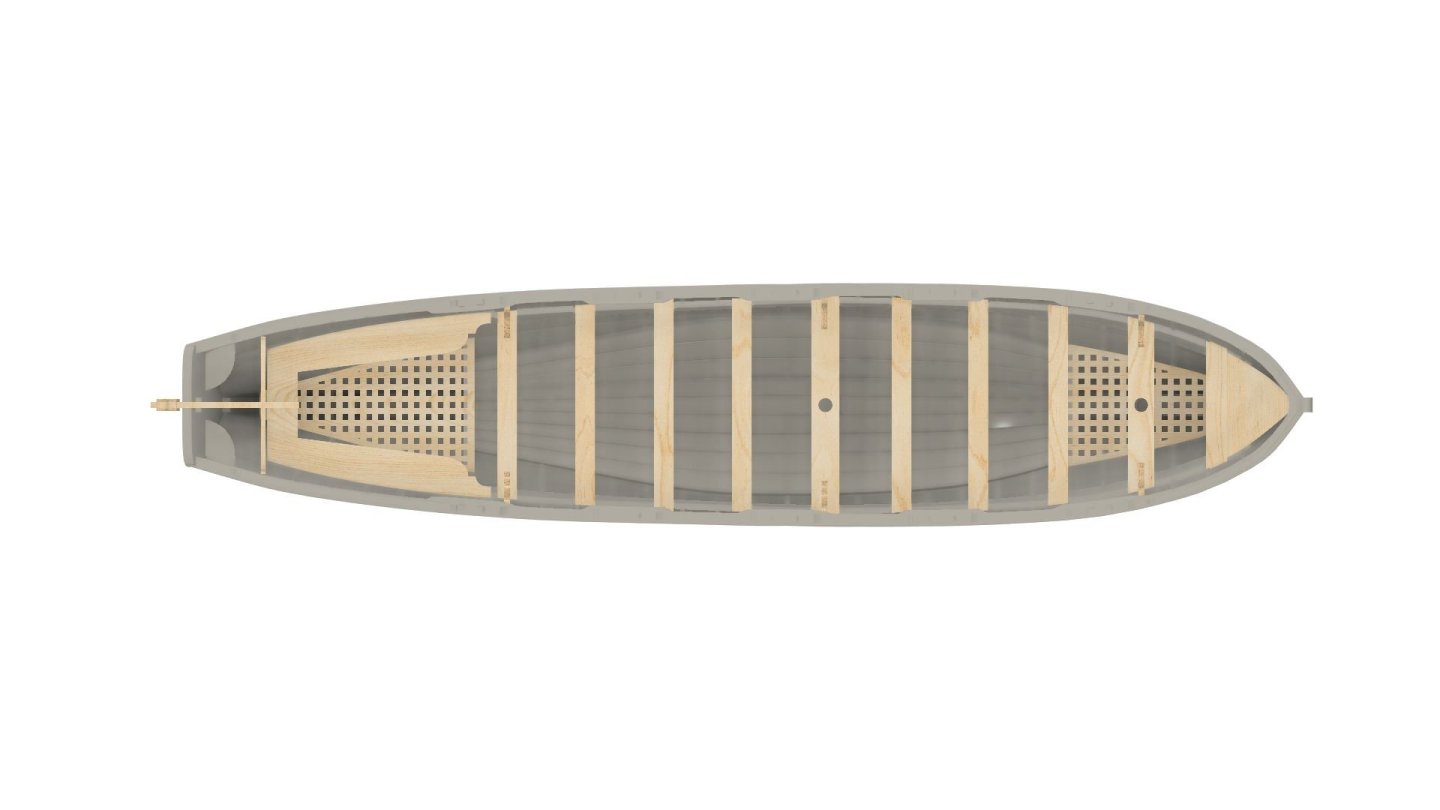
Here is a pick of the first off (trial prints, not production) with the integrated fore and aft gratings - I had 2 files, one with and one without gratings, and I have chosen this one for production hulls. (Also has integrated coxwaines seats at the stern) Next to the 2 test print hulls is the 14 foot yawl hull!

-
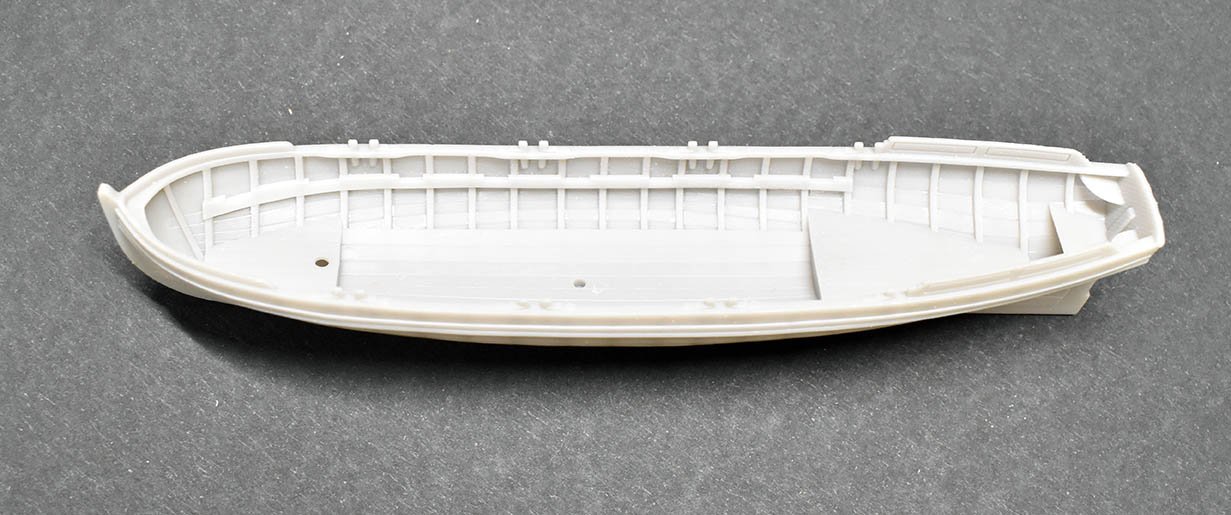
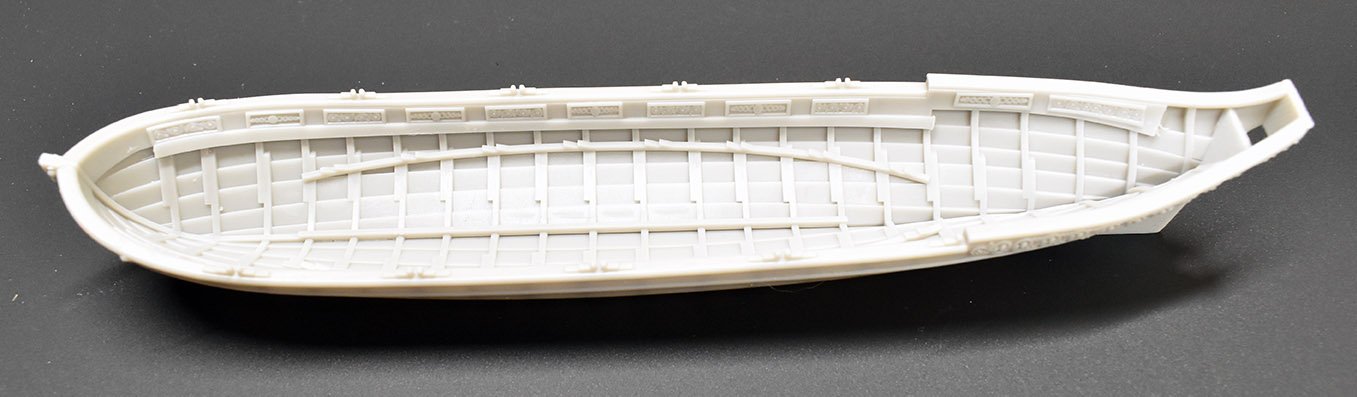
After many test prints, I am NOW doing production prints for the 64th scale 32 foot pinnace. This is quite large at almost 154mm long (so takes over 9 hours to print). The hull does include the fore and aft gratings (intergrated) and feint hull planking lines. Once I have produced these, I need to laser cut the pear parts, and then this will be for sale. Also, I was waiting for this one to complete the Indy full set for 3-d printed boats (Sphinx to follow, as 28 foot pinnace is next)

-
Such a shame, Glenn
-
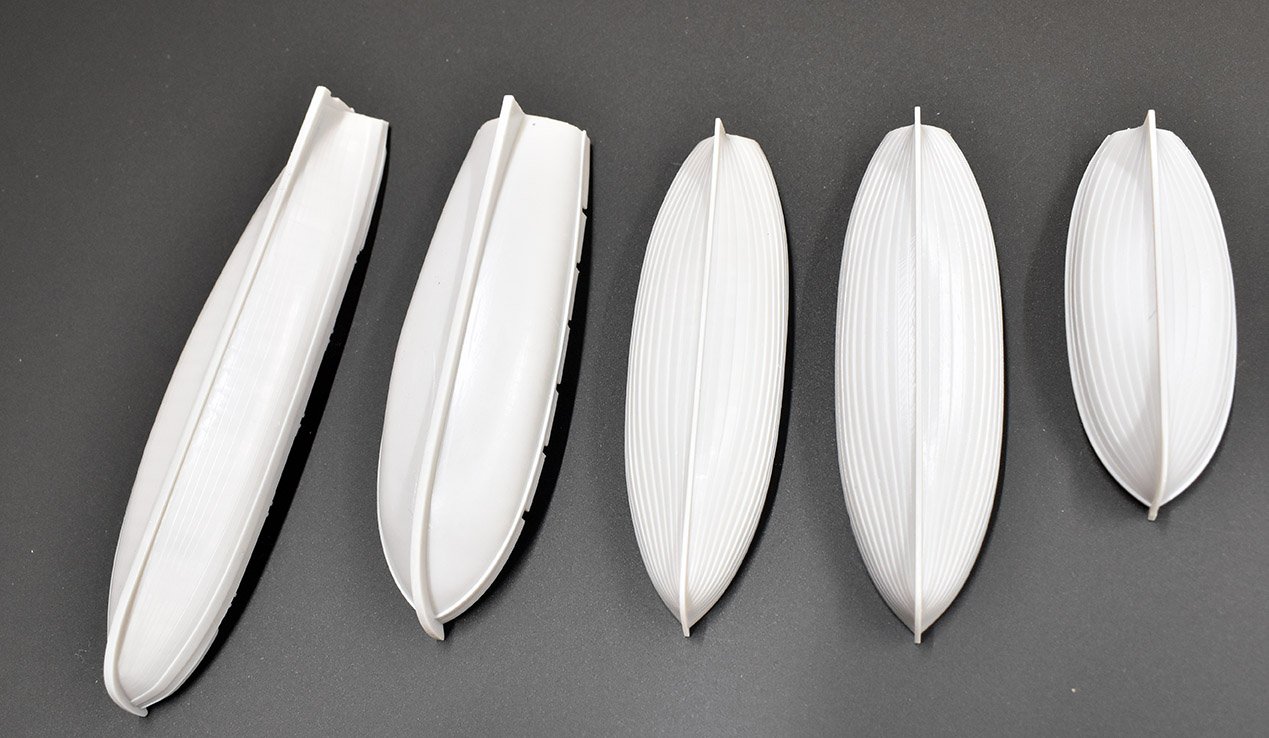
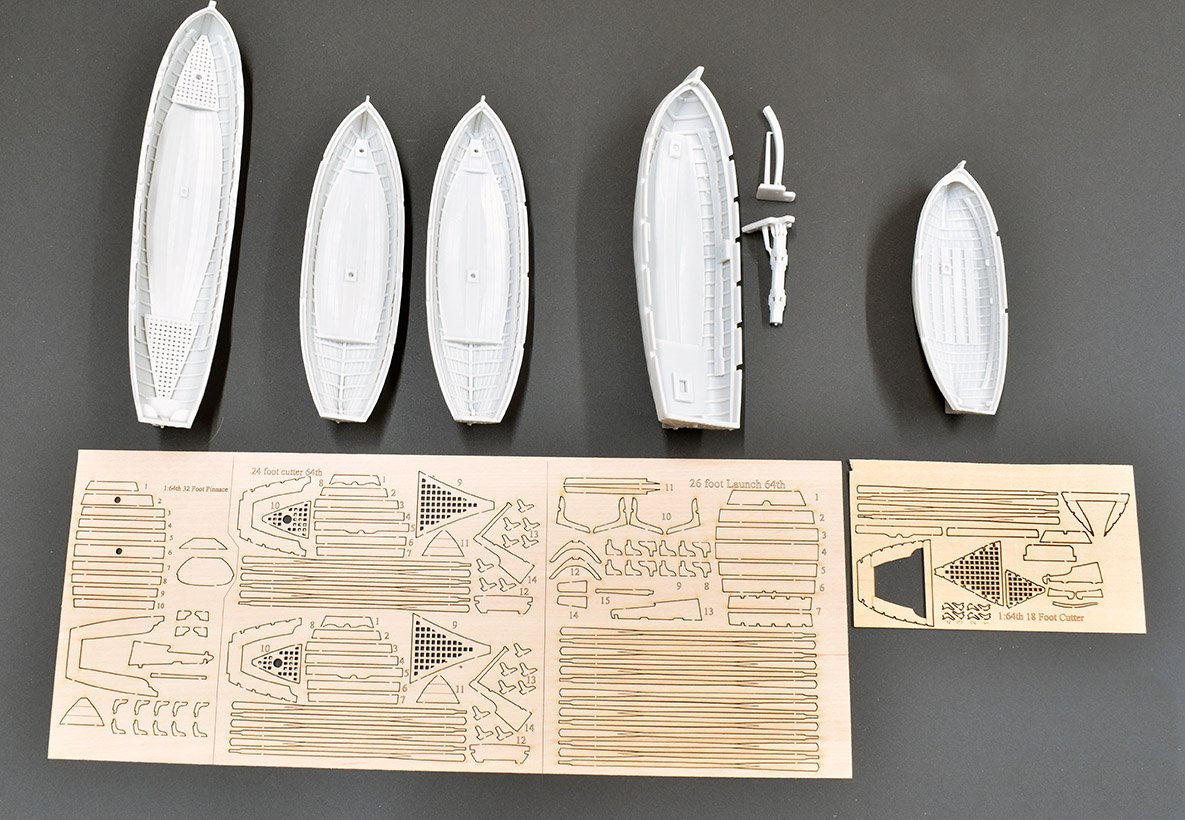
OK, the 3-d printed boats pages have had a revamp. I was hoping to have my pinnaces and shallop by now, but still waiting for those. However, I have now available cutters, yawls and launches, all with detailed 3-d printed hulls and laser cut pear seats etc. and all 64th scale. All are clinker hulls except the 24 and 26 foot launches. 3D-Printed Ship’s Boats – VANGUARD MODELS
-
Thank you! the machine has a 12 week lead time from ordering, so won't have it until around February. For anyone interested, this is what I ordered: