chris watton
-
Posts
2,336 -
Joined
-
Last visited
Content Type
Profiles
Forums
Gallery
Events
Everything posted by chris watton
-
 Today I decided that there will be 2 ships boats included with this kit, the 18' cutter and a 22' foot cutter (both highly detailed and accurate models in their own right). This means that if you want to hang the 18' cutter from the stern davits, you can add the 22' foot cutter to the deck - or 22' cutter on the deck, and 18' cutter on spare spars resting between gallows. Jim is doing a fine job, love the shape of this hull.
- 76 replies
-
- 17
-

-
- Harpy
- Vanguard Models
- (and 1 more)
-
I have said this before, you do not have to add any rigging relating to sails. You could rig Speedy exactly as you did for Adder, omitting the clews, jeers and bowlines etc. Duchess is slightly easier as there is no flying jibboom and associated rig for that (And sail related rig omitted altogether) – but more shrouds and ratlines, being ship rigged.
- 146 replies
-
- 4
-
-
- Adder
- Vanguard Models
- (and 1 more)
-
The boats are by and large a by-product of the kits I do, whether existing or future kits. I have no plans for any more wooden ships boat kits and all future kits will have a 3-d printed hull version. I do this because if I were buying the kit, that is what I would prefer - but existing wooden boat kits are always an option for those who want them, and they will always be included in the Indy and Sphinx kits, with the 3-d printed sets being an option. With any future kit, this will be vice versa. I will do/finish a 16 foot cutter when I am less busy (hulls are already printed), but in all honesty, I could offer and spend many thousands on almost every variant of boat, and I would still get asked to produce something other that what I already have - this is why I make a point of sticking to boats I know I will be using in both current and future kits. I did in fact offer smaller boat hulls for two years on my website, and in that time, I never sold a single unit, so were removed when I started to add the newer types of 3-d printed boats. The boats do not come with cradles, this is something the modeller needs to do, as I have no clue how far each boat will have the cradles positioned or how high - are they on the deck and need to be high enough for the keel to miss hatches, or are they located on the hatch coamings, so no need to be so high - or just stowed on the spare spars on gallows - or davits!
-
I think any wooden model kit that requires planking will always be a challenge to most, and for those who love it, there is and always should be plenty of scope to stamp their own mark on the build, as I see countless times in this forum.
- 76 replies
-
- 17
-
-
- Harpy
- Vanguard Models
- (and 1 more)
-
Wooden kits will never be as easy as plastic kits, but there are things I can do to try and make the experience less frustrating - so when compared to other wooden kits, my aim has always been to at least make them easier to build. Inevitably, the by-product is a lot more parts, though... I have a cut file for the outer bulwarks with double the amount of treenails - but need to see how long they take to produce before deciding....
- 76 replies
-
- 13
-
-
- Harpy
- Vanguard Models
- (and 1 more)
-
Damn, did I! You can use whatever orientation you like, as these were added by me and as usual for garlands, are not shown on the plans. So whichever way you place them would be fine.
-
It is a lot less hassle designing a kit from scratch, rather than updating a very old kit, frought with pitfalls, I know...
-
No plans at present, no small kits planned for the time being, as I will be busy with kit 18 for the next year...
-
I may be wrong, but I am sure that when researching the Adder, I read somewhere that these gun brigs actually never had a boat. I have done a run of 16 foot cutters, (scaled down from the 18 footer), but have yet to laser cut the parts for them
-
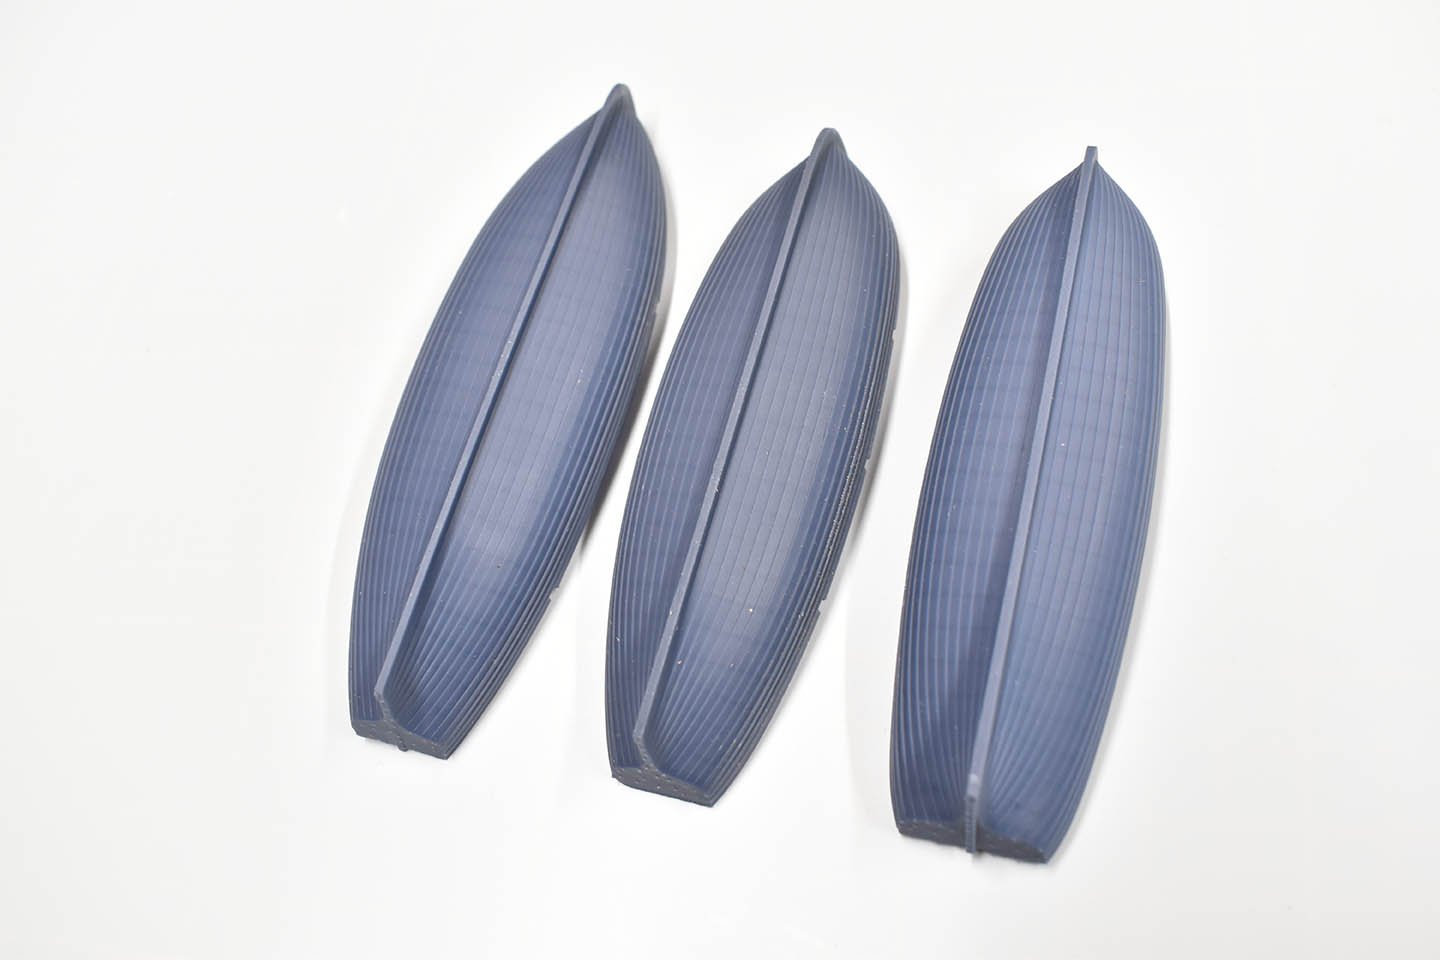
The 22 foot yawl especially, as this should really be clinker planked. Can't wait to see the 28 and 32 foot pinnace print files! Thay are also my personal choice. In the past, there was little choice but to use the plank on bulkhead boats as there was no real alternative. With the advent of 3-d printing, I figured why not offer an alternative. These boats are quite a large investment for me, but I think will be worth it, as they are both as accurate as they can be in shape and detail, and much easier and quicker to put together. As usual, there will be a lot of laser cut parts for each, including thwarts, knees, floors etc.
-
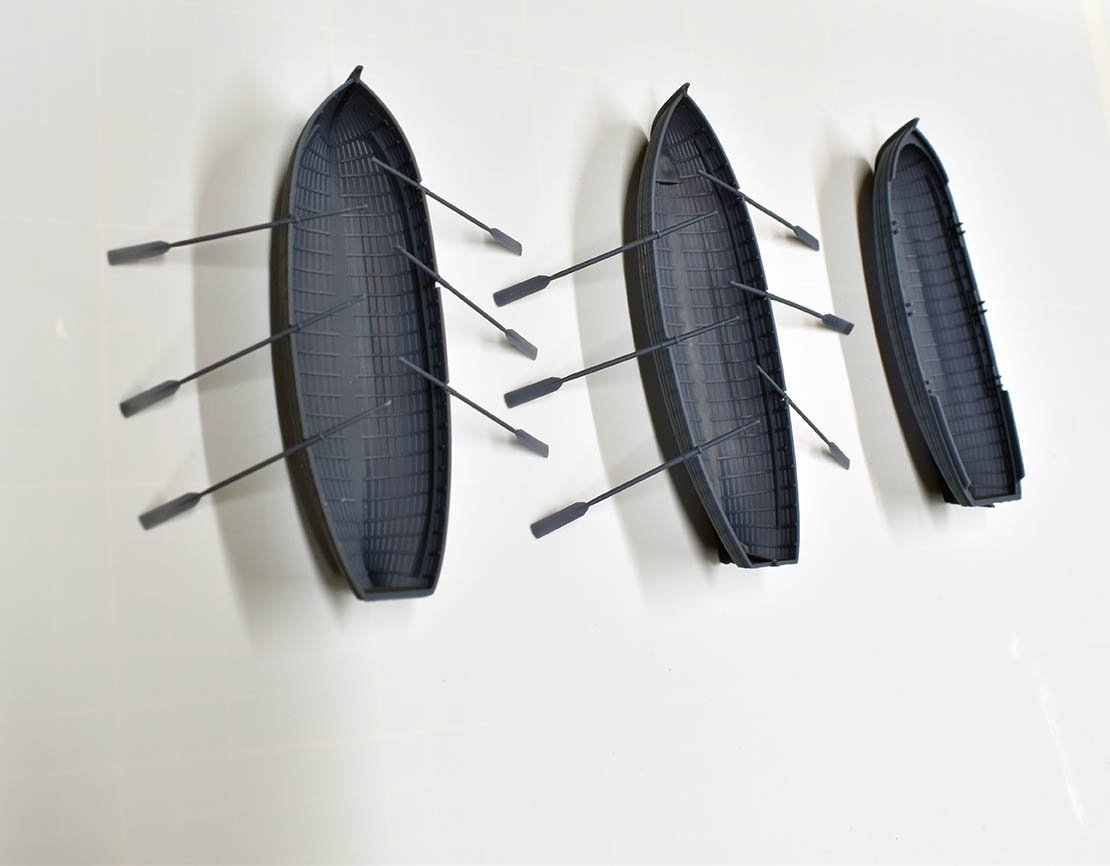
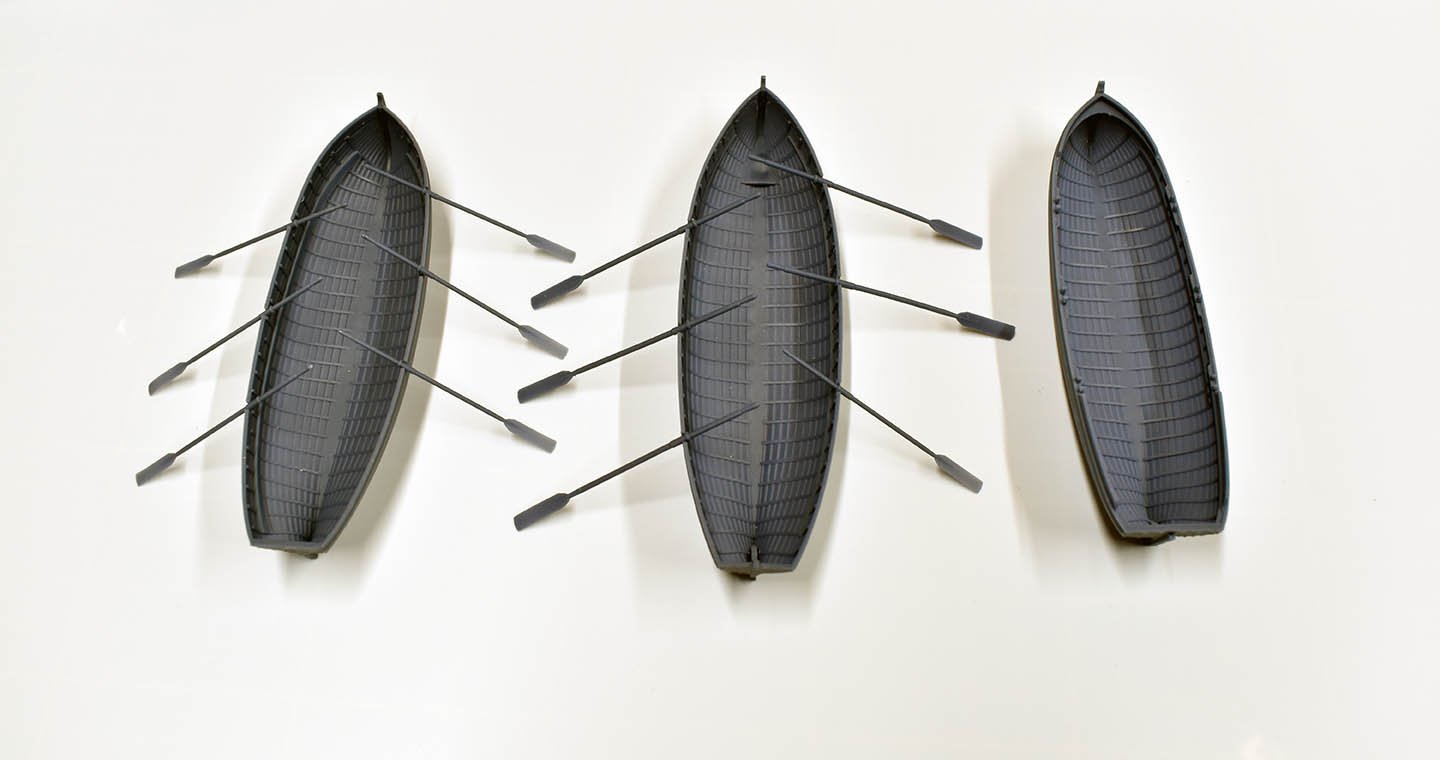
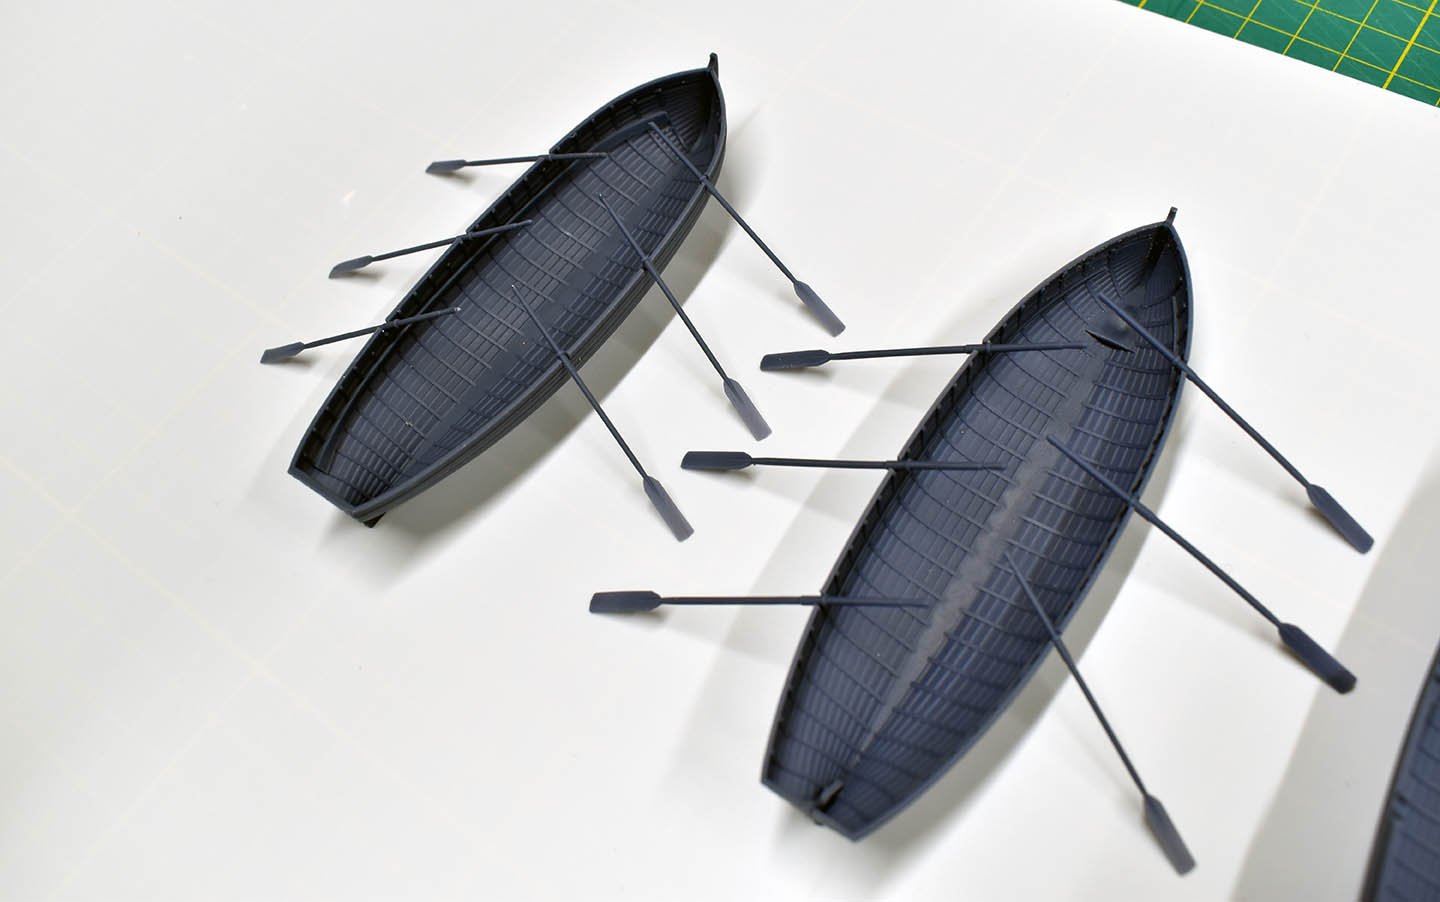
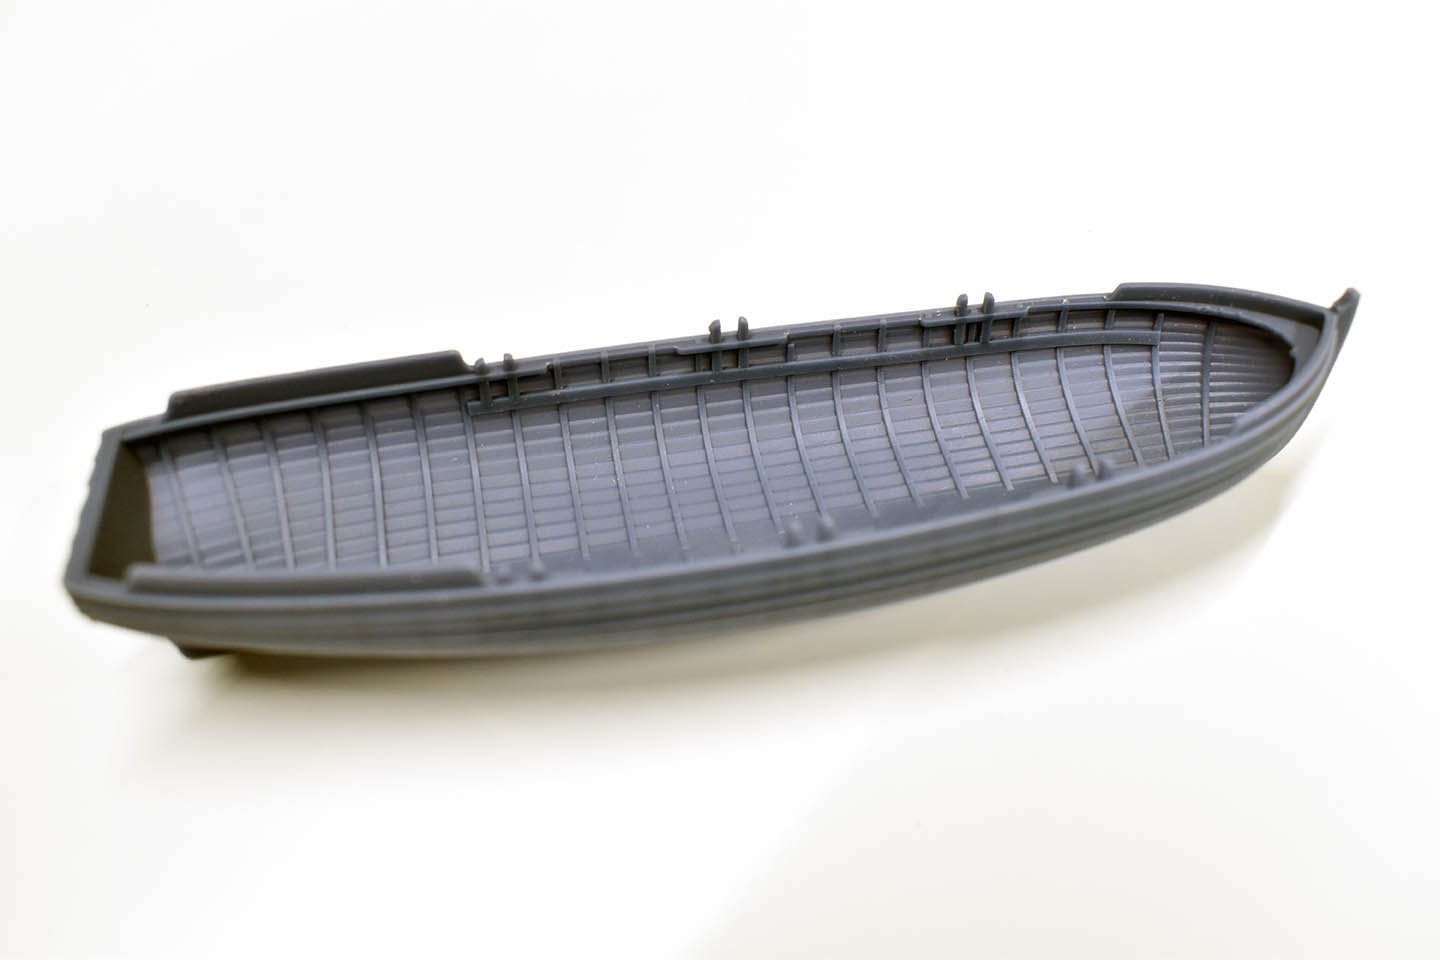
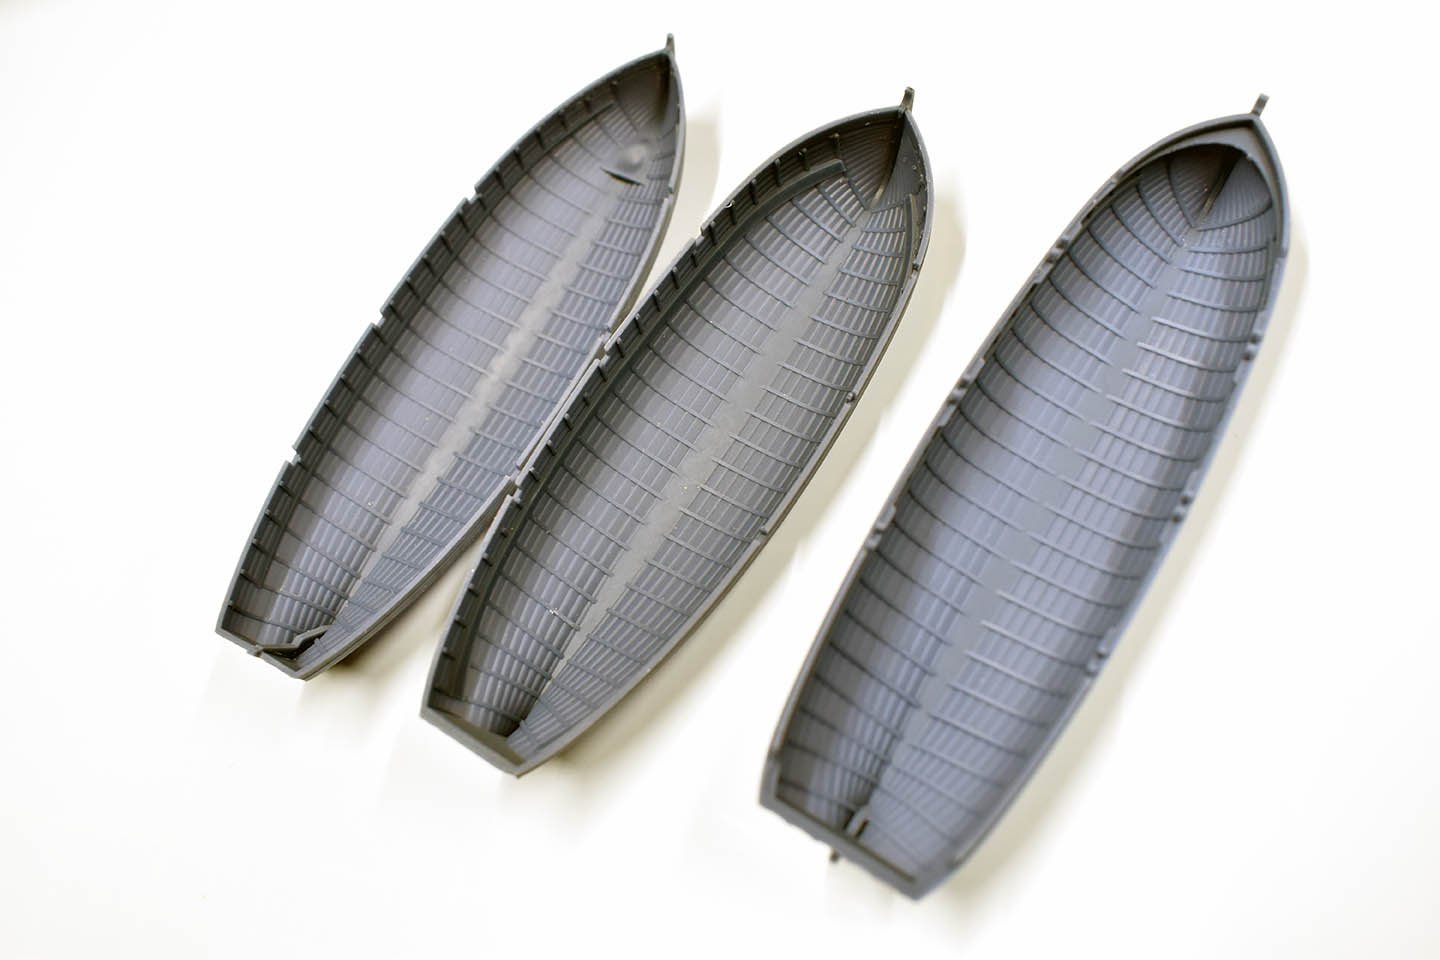
OK, I have done trial prints of the new 22 and 24 foot cutters (these are not simply scaled from the same file, but drawn from separate plans, as can be seen in the shapes). Plus the 22 foot yawl. I am now awaiting the other three boats I am having done for me. The main aim of these was to have options for the Sphinx and Indy boat sets, but will of course be sold separate also. I think I will put the oars on the laser cut wood, as the end paddles are quite flimsy...
-
I had the next boat file sent to me last night, for me to print and check - this time the 22 foot yawl (clinker planking again)

-
As far as I am aware original Admiralty plans do not show shot garlands. I have looked though my collection, and do not see them on any.
-
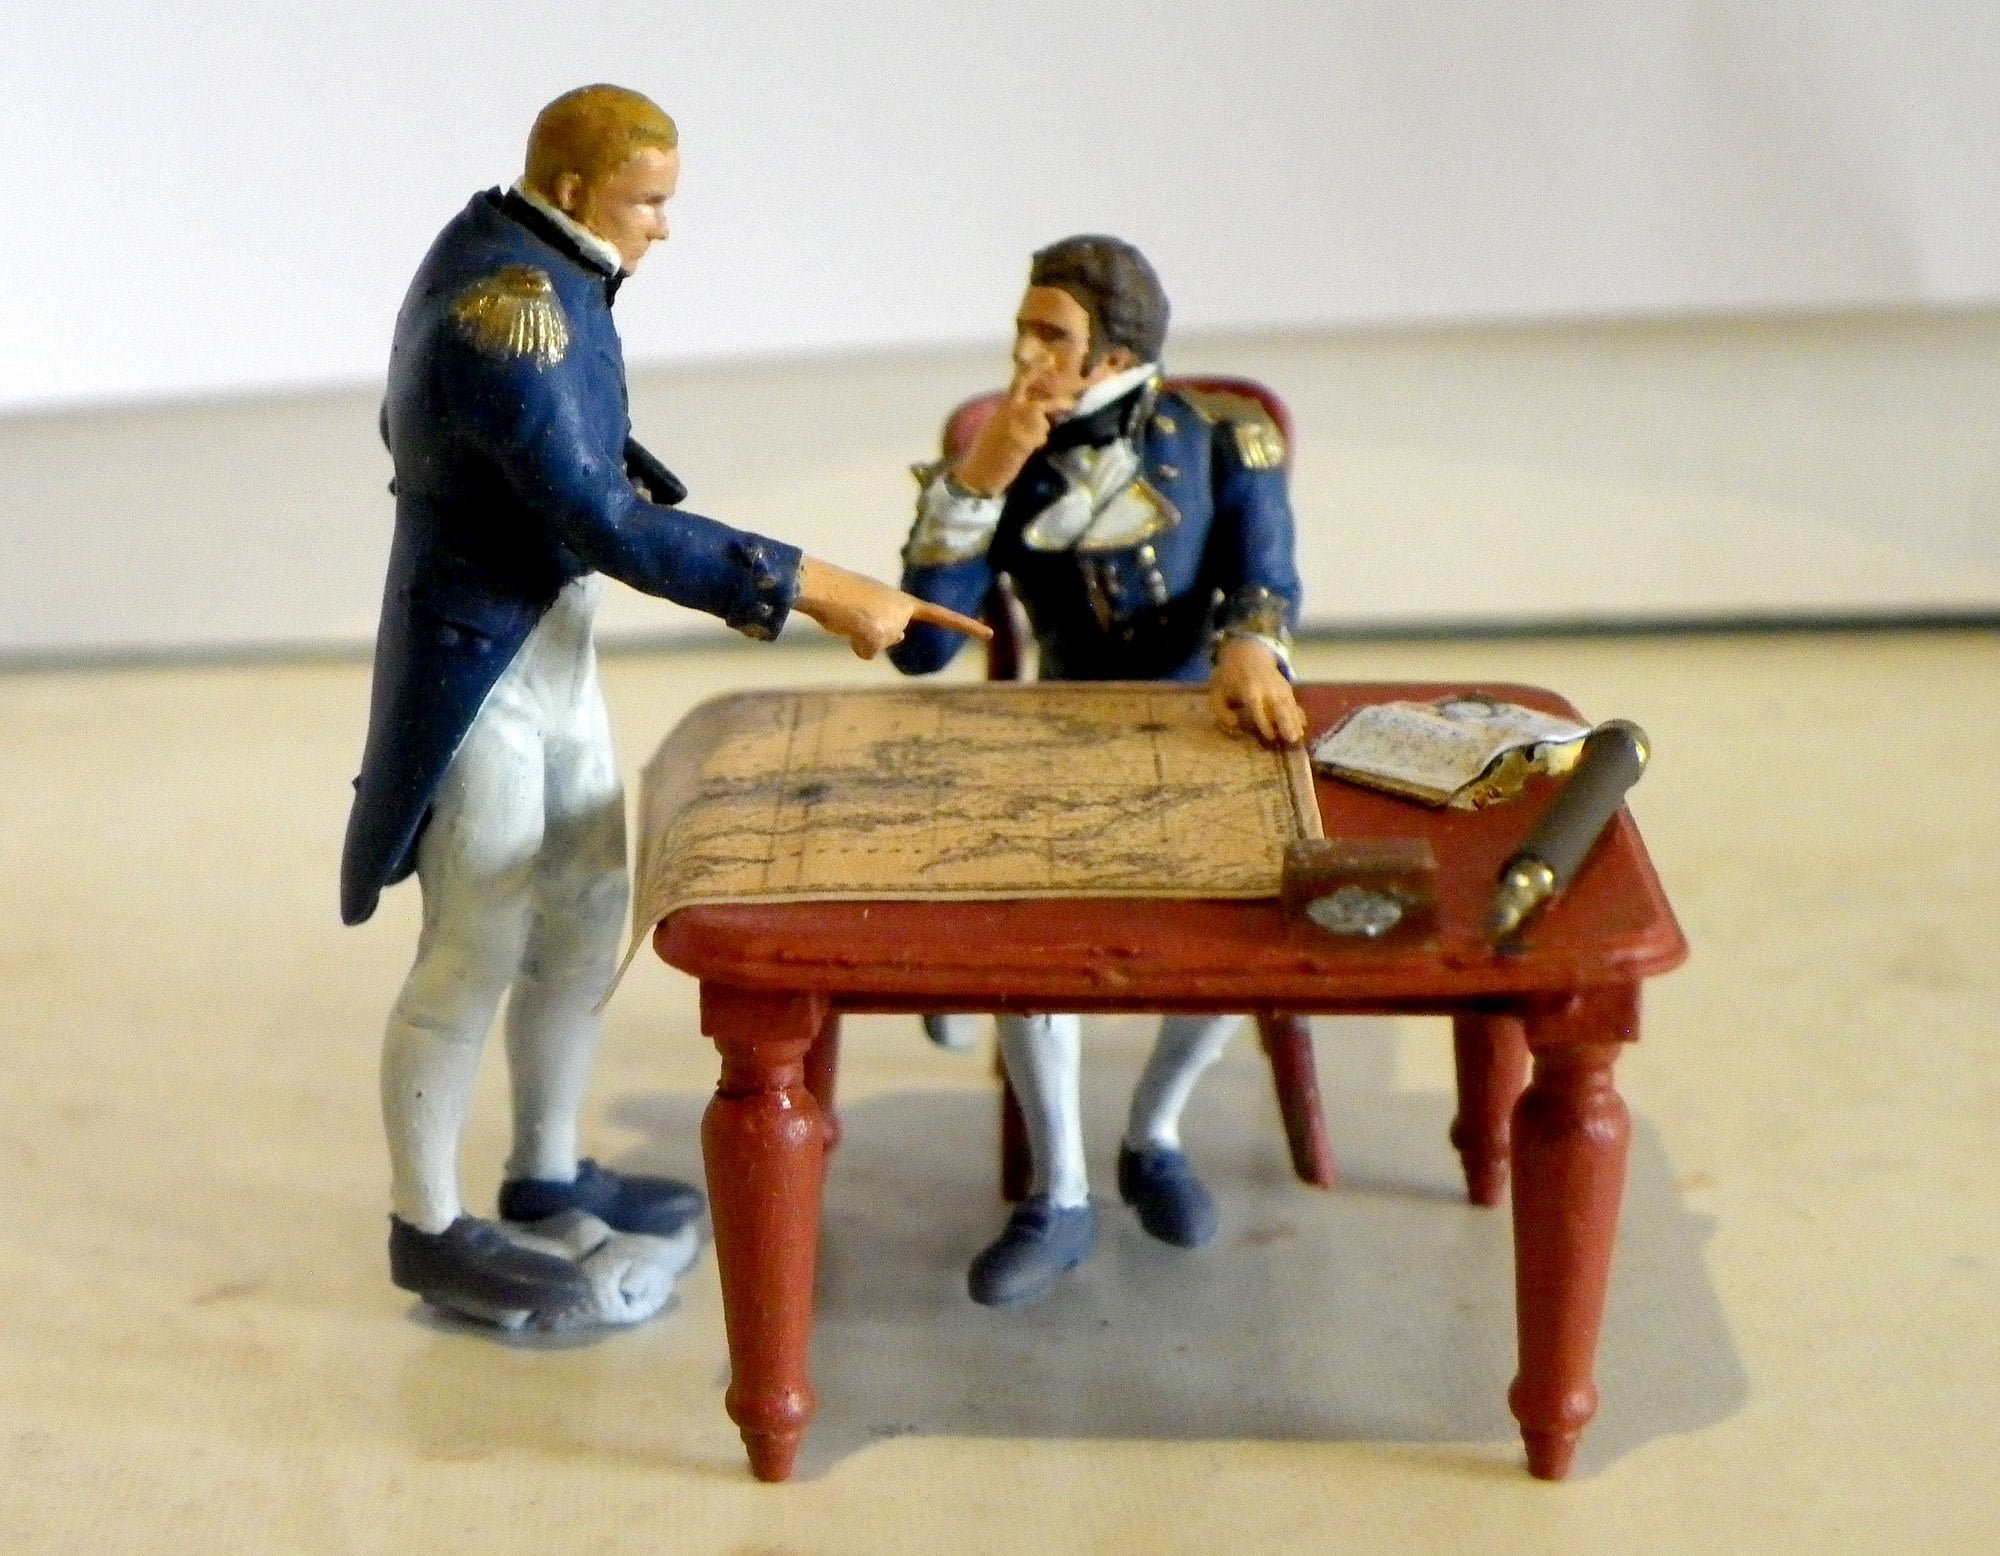
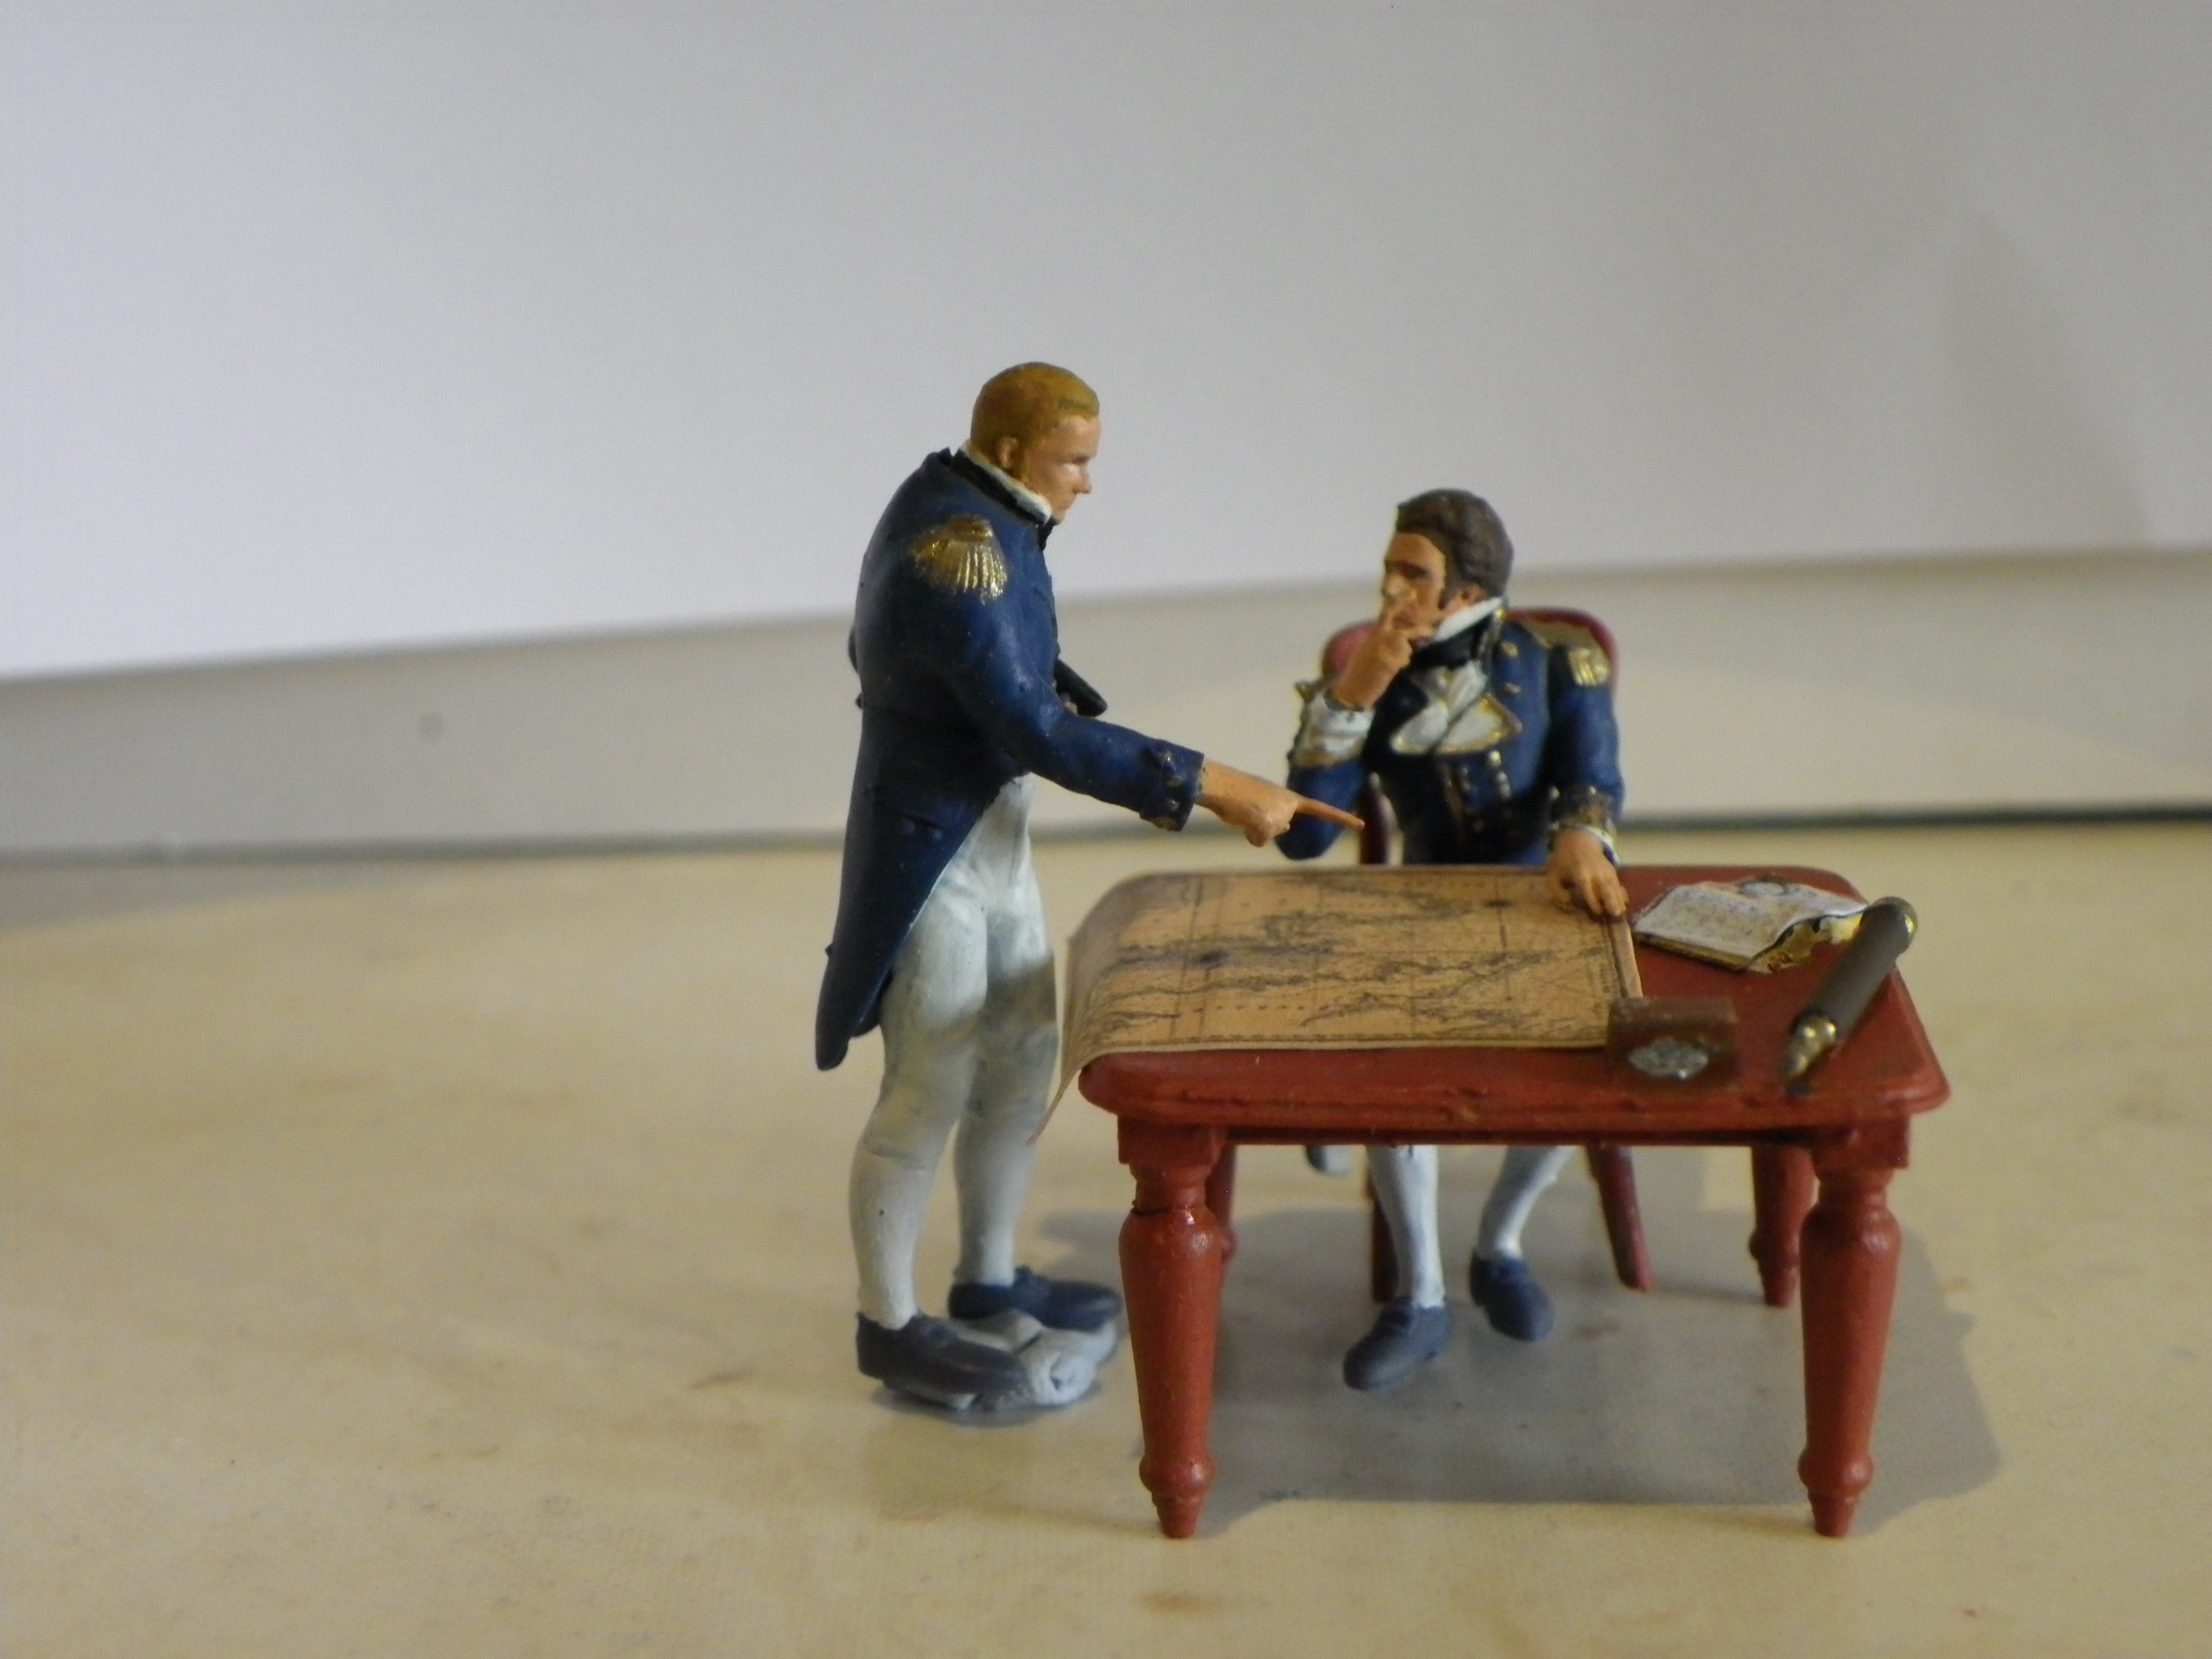
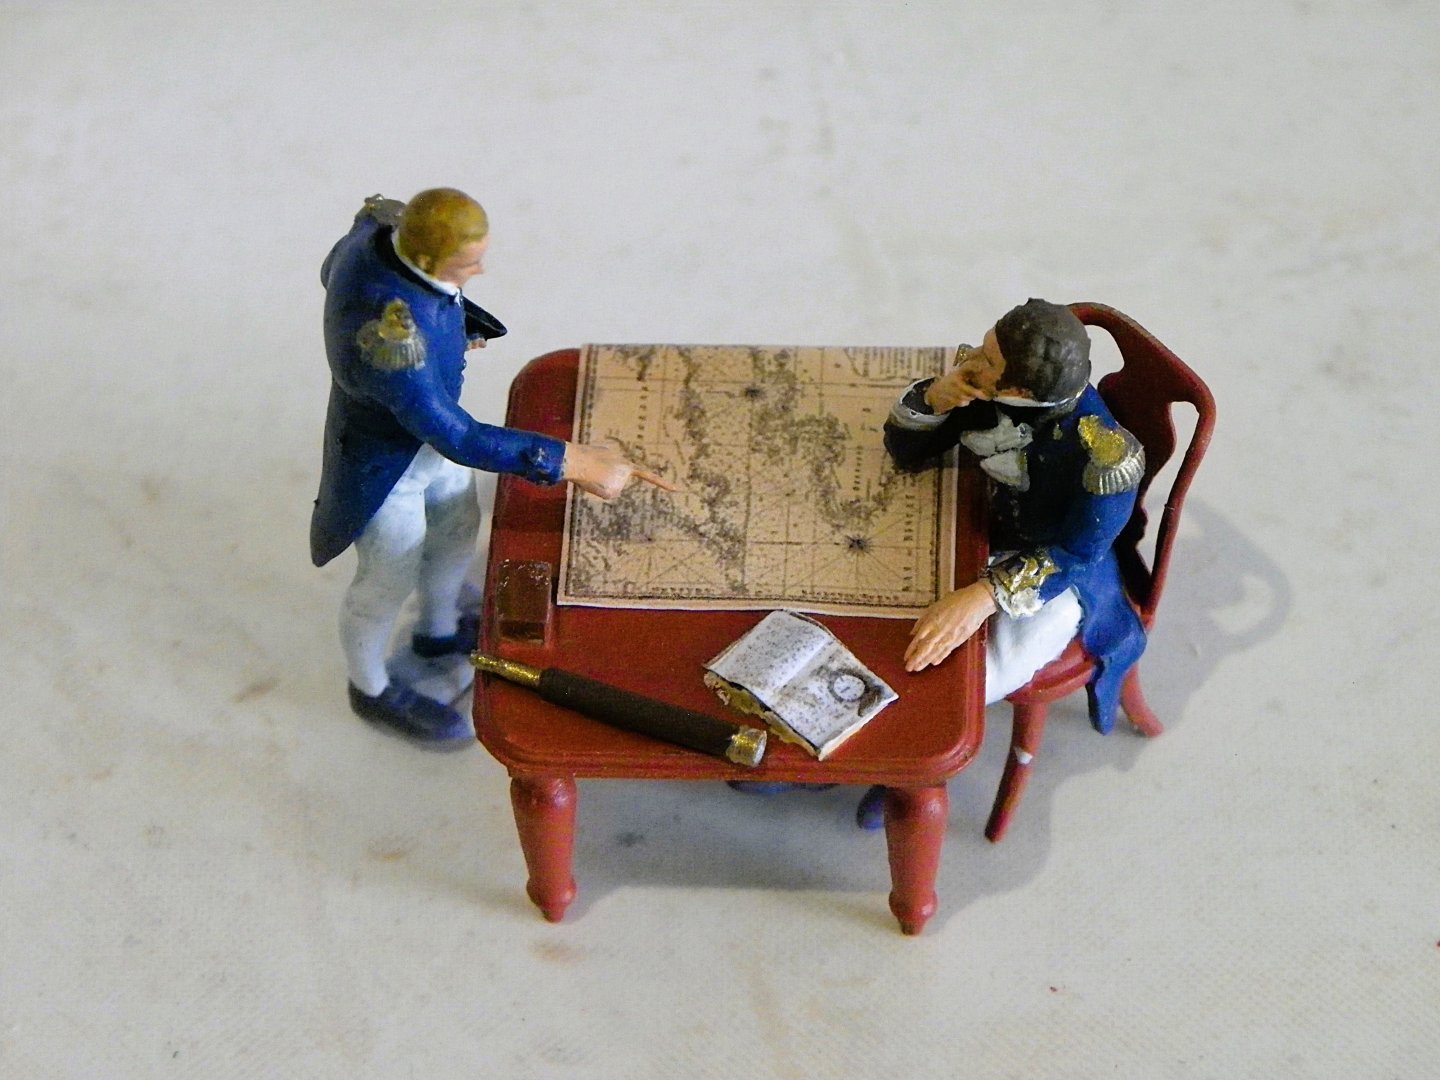
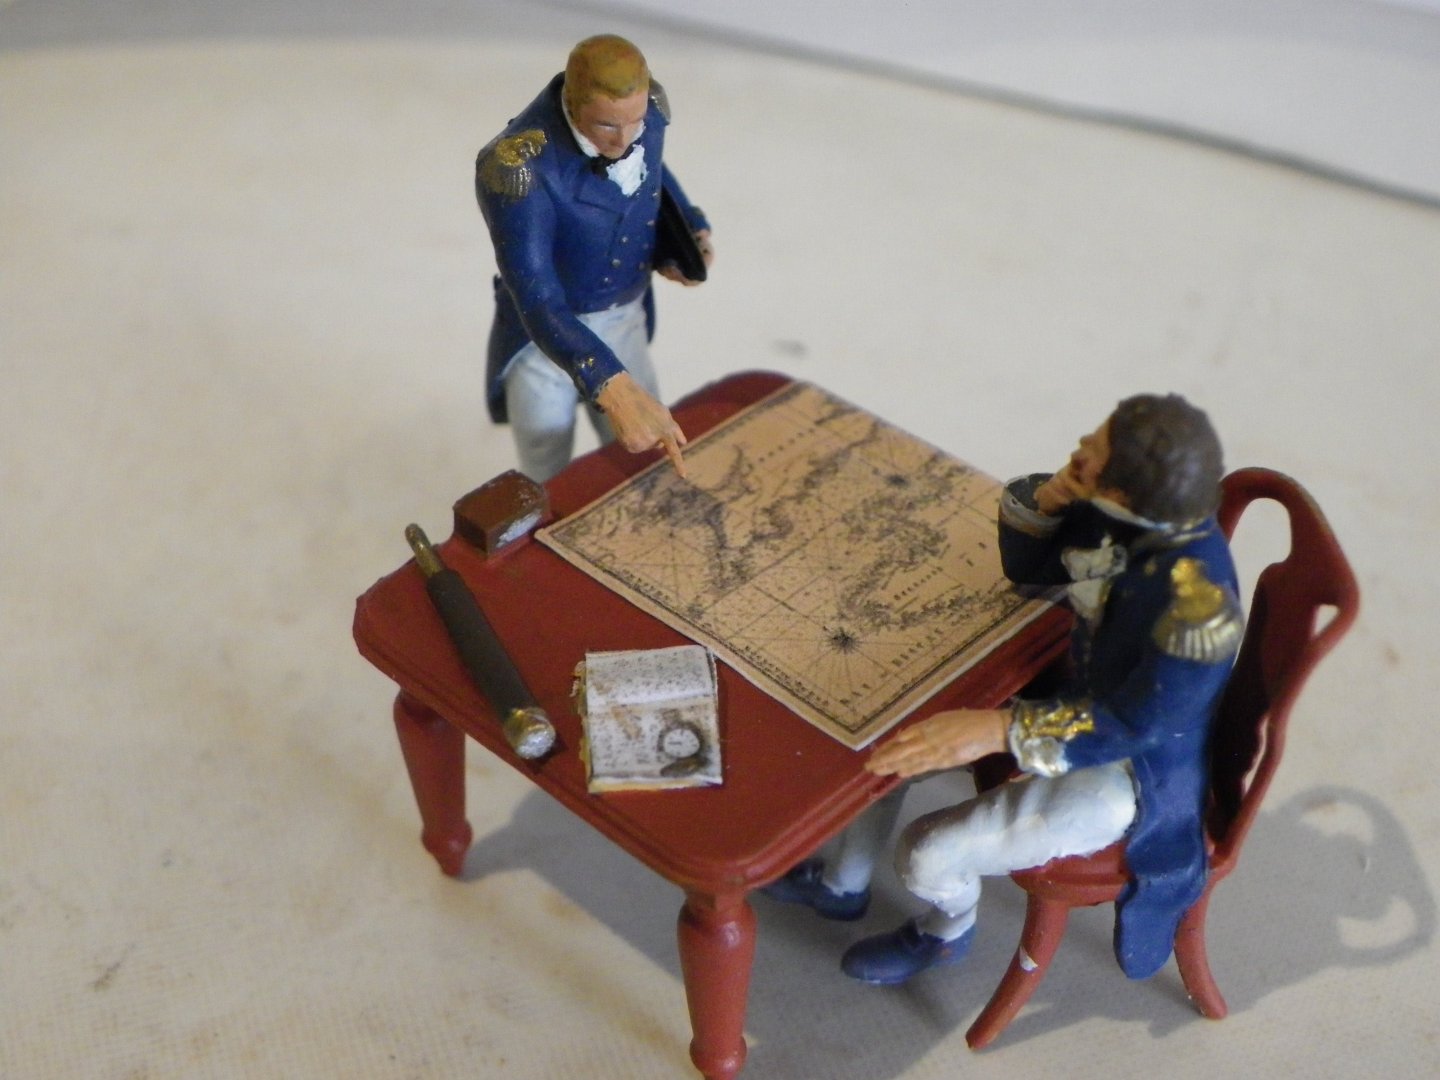
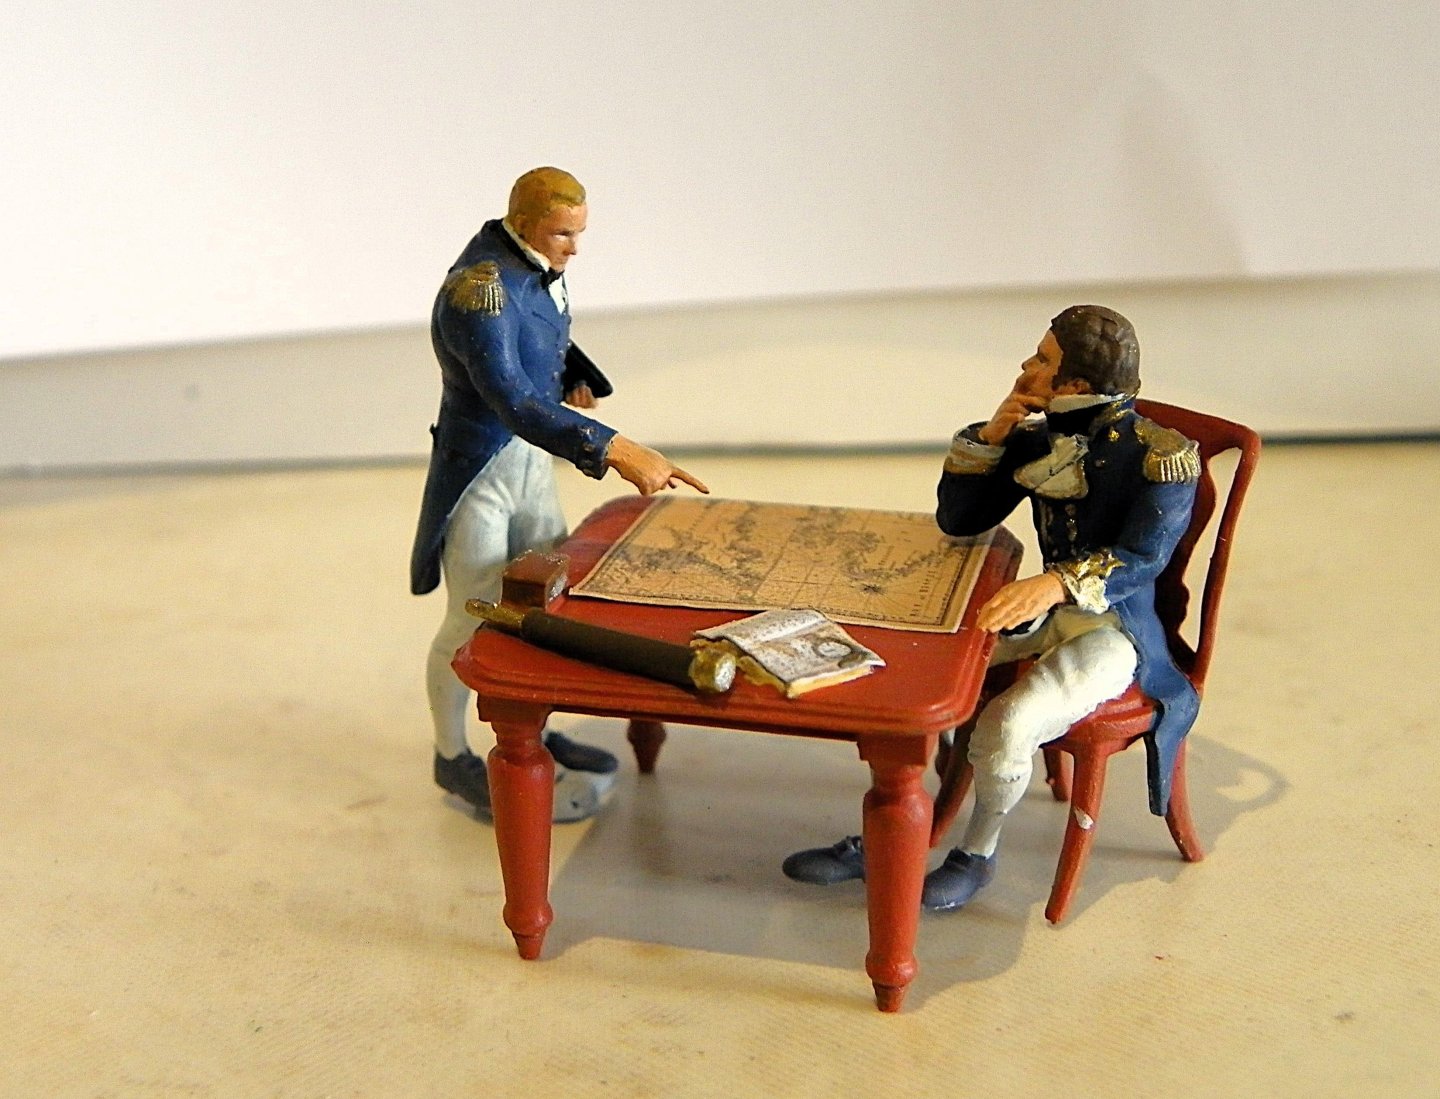
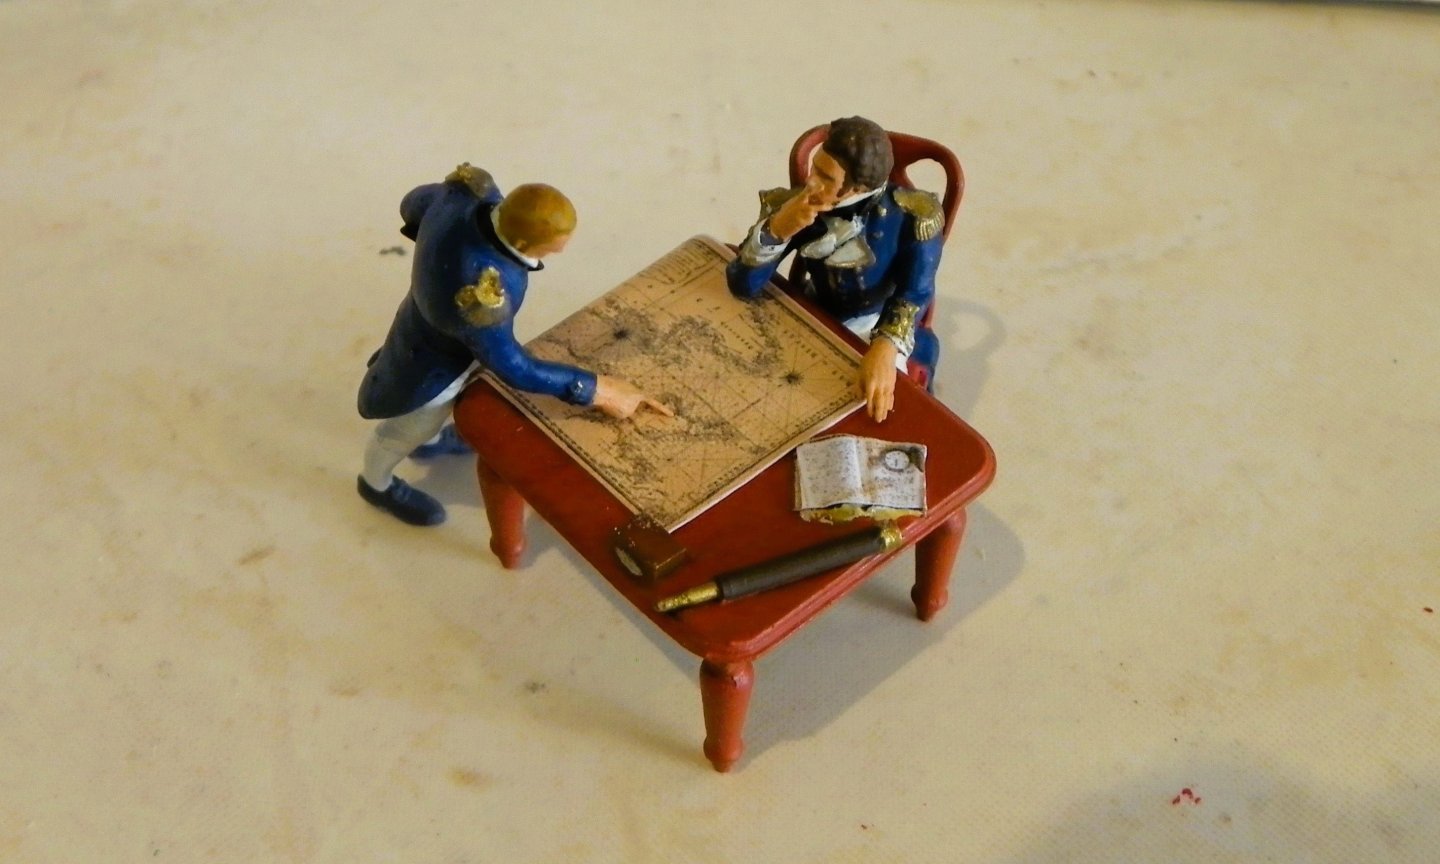
OK, I finally have the officers at table figure set available, after much changing and back and forth, and almost completely giving up on this little project. It is now done, however. I have printed off all 64th sets, and now working on 48th and then 32nd. Officers at Table – VANGUARD MODELS Here are a couple of pics from a set made by Blue Ensign, I sent a pre production set to to gauge feelings towards the set. I have included two standing officers with each set, with each having a different hand/finger position, so you can choose whichever you think is best


-
OK, I have a small batch of the Master Shipwright Flirt kits back in stock: HMS Flirt – Master Shipwright Edition (2024 Updated Kit to include 3-D Printed Cutter) – VANGUARD MODELS I am told my 3-d printed boat sets will be ready soon, so hopefully, I shall be able to offer full replacement 3-d printed boat sets for Sphinx and Indy, as well and being sold separate. There will be: 22 foot cutter 22 foot yawl 26 foot launch (alternative) 28 foot pinnace 32 foot pinnace
-
I use superglue gell or thick. I only apply a thin bead down the centre of each plank, as if you have it near the edges, it will squish out the sides in between the planks..
- 177 replies
-
- 2
-
-
- Sherbourne
- vanguard models
- (and 3 more)
-
I would very much love to have the Fubbs Yacht in my kit line up.
-
Just a little update, I have had quite a few enquiries asking if I will ever have the Flirt Master Shipwright in stock. I was going to retire this, as I could no longer get the machined blocks that are standard with this kit. However, I now have really nice CNC machined blocks in stock again, so have ordered enough boxwood and 3mm birch ply to produce a small run of these kits. When I say 'small run., I do mean that, not 'Limited Edition' of 'only' 1000! I will do two runs of 6 kits, 12 in total. The only change I made from the original Master Shipwright Flirt is the 18' cutter, which will be a 3-D printed hull and laser cut boxwood floors, seats and oars. Regarding Harpy, I have completed all of the A1 size plan sets and started the manual. Once Jim has completed the model and I finish the manual, the kit will be released - am thinking October time.
-
Regarding the rig, I shall add a note saying the modeller can omit any rig directly relating to sails, like sheets, tacks, clews and bowlines. If the modeller wishes, they can just add the standing rigging and runing rigging relating to yards and booms only. But the plans and blocks and thread will allow for a fully rigged model - but you don't have to, you can stop once the yard rigging (Tyes, lifts and braces) is complete.
- 76 replies
-
- 16
-
-

-
- Harpy
- Vanguard Models
- (and 1 more)
-
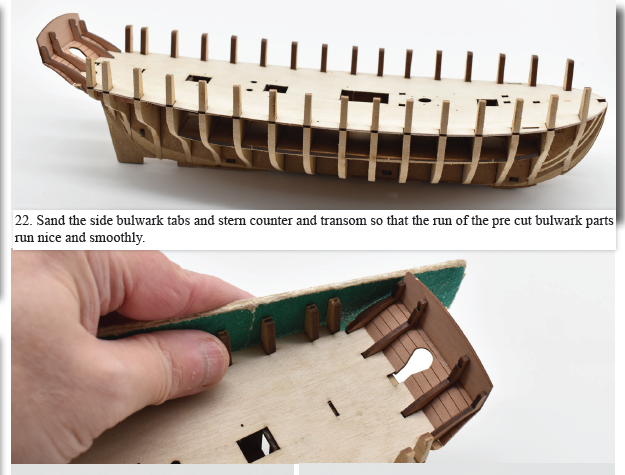
Any part that meets another at an angle will require sanding in order for them to sit flush. The stern counter requires sanding so that the top edge is level with the bottom edge of the upper stern part. Do not be afraid to sand/file parts that would fit much better if you did this - wooden kits require much sanding/filing, unlike plastic kits. I have attached your pic with added yellow lines, showing you what you need to take off. I suspect the bulkhead tabs above deck level also could do with a little more sanding, so the bulkhead pattern will sit flush with the whole of the contact surface of each.

- 177 replies
-
- 5
-
-
- Sherbourne
- vanguard models
- (and 3 more)
-
Cheers guys! This does mean that orders will be done a lot quicker, and we will be able to actually build up more stock. Within the next week, I will have completed/finalised the Harpy plan sets (am on the final 4, rigging). There will be 16 x A1 size plan sheets for Harpy, along with the manual. I will start laser cutting the production sheets soon. Once I finished the plans, I shall have one last look at these darned officers/table/chair figures, as they have been revised again, but I don't want to waste time on these until all my work for Harpy is complete. Today, I did think about adding the nice CNC machined blocks as standard for Harpy. However, I backed off, as this would increase the kit price by around £40. So I think having them as an optional extra would be better. I know people moan about the standard blocks, but in all honesty, they are the only viable choice when they have to be bought in the tens of thousands, some in the hundreds of thousands. It takes suppliers time to produce 50 kits worth for just one kit.
-
Just a little update: We now have premium sail sets back in stock for Saucy Jack and Ranger, plus machined walnut blocks (including sister blocks) sets for Speedy. And today, my wife starts working for Vanguard Models full time, my peace is shattered!