HOLIDAY DONATION DRIVE - SUPPORT MSW - DO YOUR PART TO KEEP THIS GREAT FORUM GOING! (Only 24 donations so far out of 49,000 members - C'mon guys!)
×


chris watton
-
Posts
2,314 -
Joined
-
Last visited
Content Type
Profiles
Forums
Gallery
Events
Everything posted by chris watton
-
 Very nice progress, Glenn! Regarding the vertical gun port frames, it doesn't matter so much if the tops are fragile, or if they break off even. The only thing that matters is that they create the inner surfaces of the gun port frames, the rest is more or less superfluous, so don't worry about the areas above and below the longitudinal patterns.
 -
OK, I have spent 45 minutes checking my cut files to make sure, the master files that are used to actually laser cut the production parts. I checked the distances from the slots in the gun deck and each bulkhead from 2-13. For example, on bulkhead 13, the distance between the tabs is 93.78mm, and the distance between the ply deck slots is 92mm, giving a whopping 1.78mm leeway. This is the same story for all slots I checked, some have a little less tolerance, but always more slack than what is required. There's even plenty of slack in the slot widths, being 4.25mm wide for slots for 4mm thick bulkheads 2-9 and 4.3mm wide for slots for bulkheads 10-13. As these are the exact drawings in the files that I use to cut all kits, there is no way they would cut any different from one to the other. What I suspect has happened is that the deck has not been fitted fully home in the slots in some areas. I know this can happen, as I did this during one of my prototype builds, but noticed just in time.
-
That is very odd, I add more than enough tolerances on slots so they should all fit perfectly, you should not have deepen them by so much! Stuff like this is nailed very early in the designs.
-
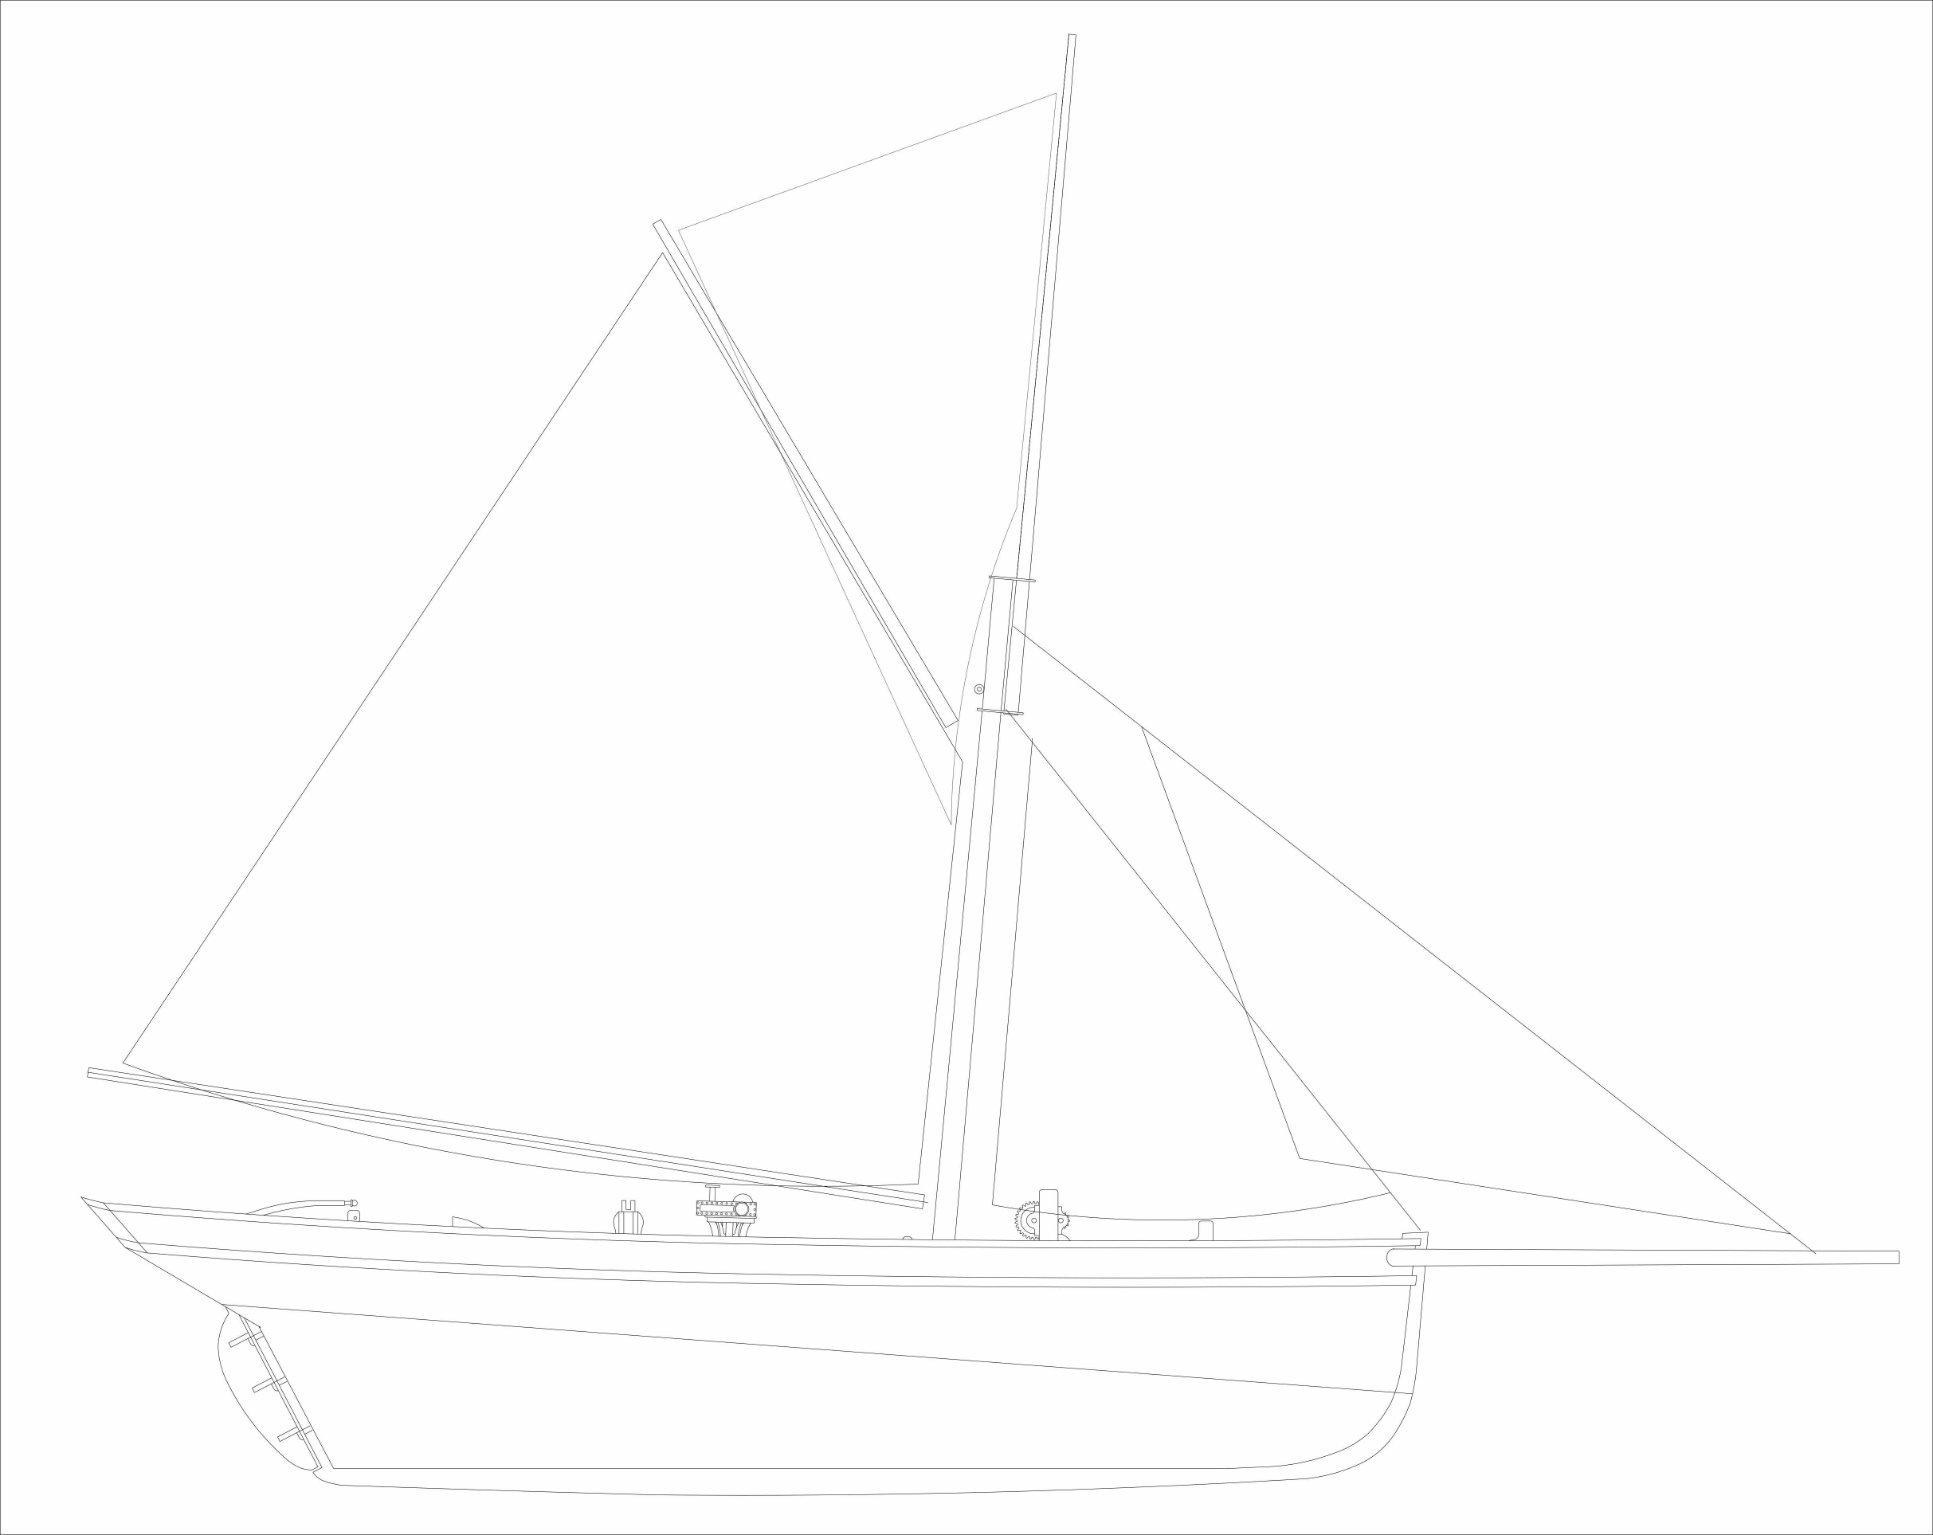
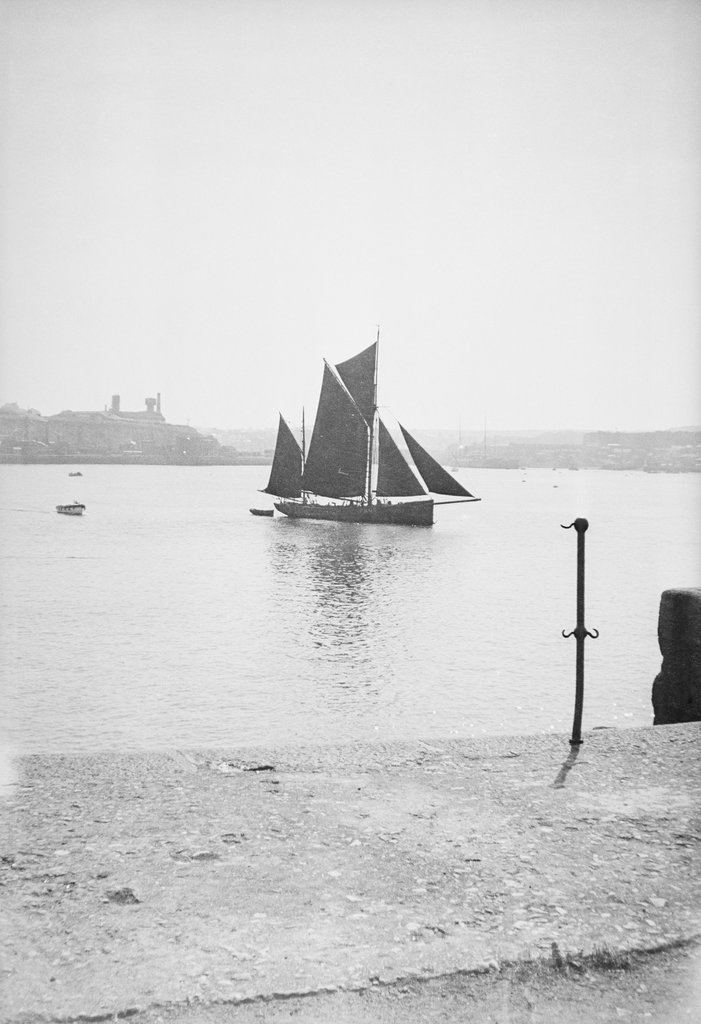
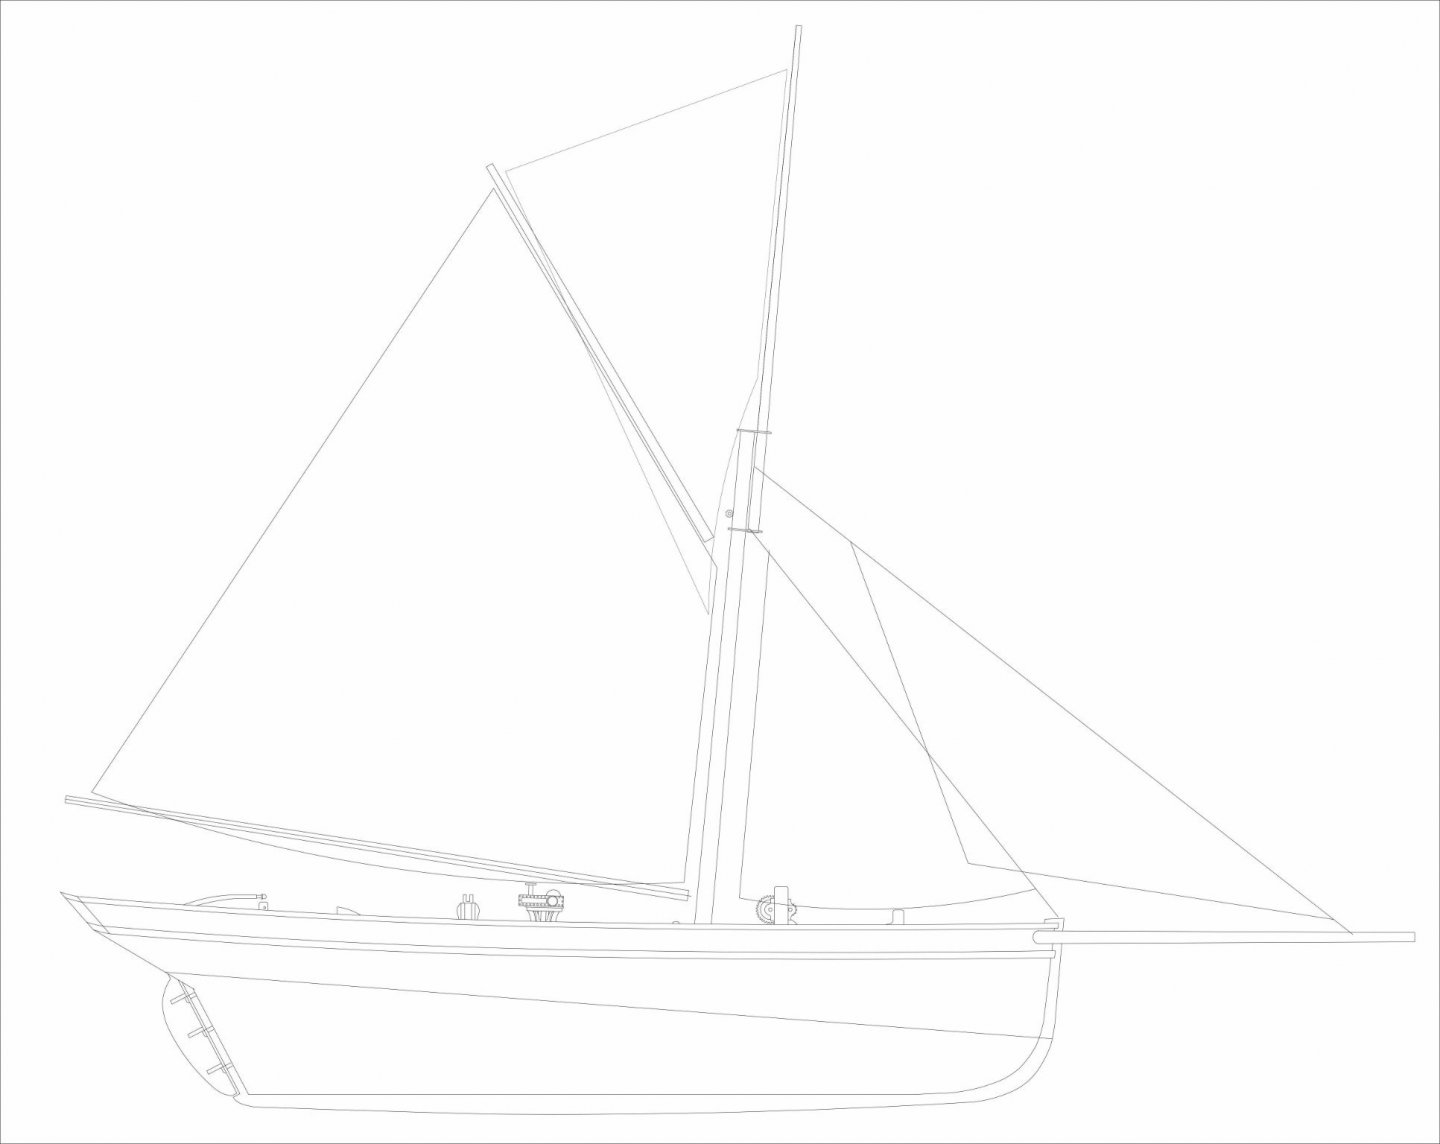
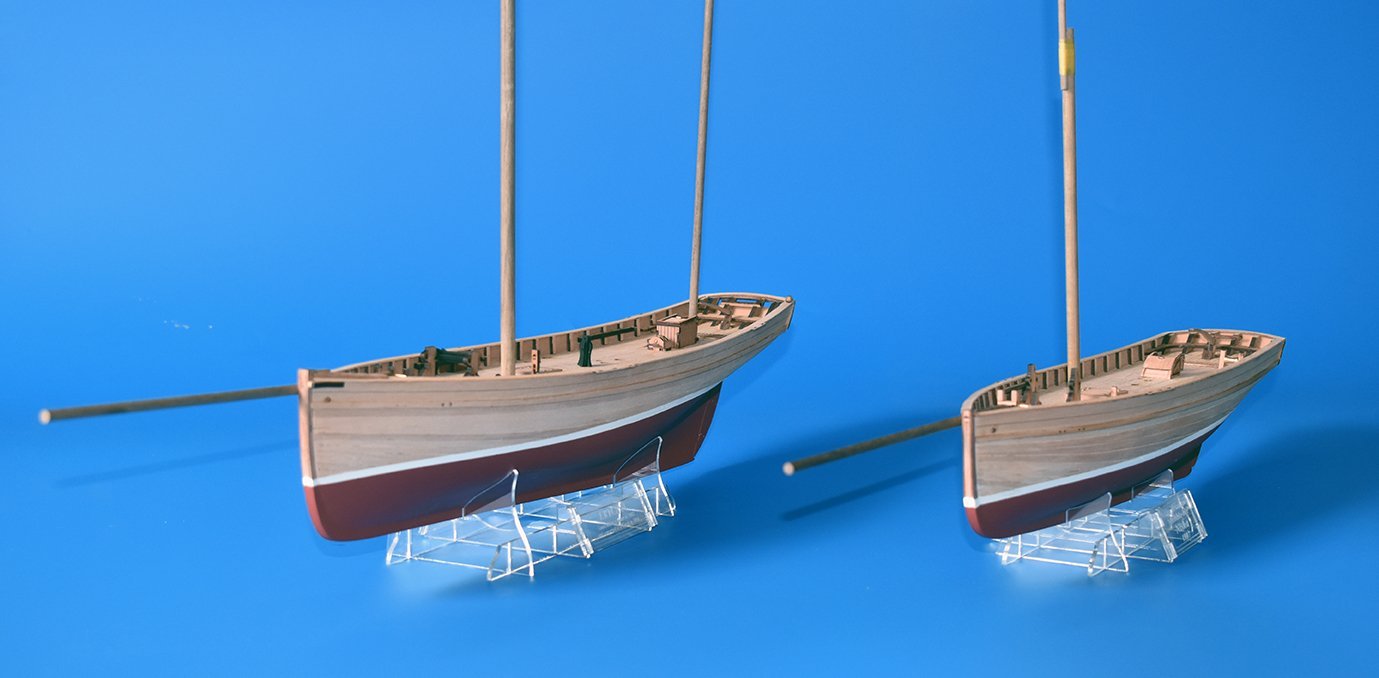
Cheers! I wasn't going to start this one yet, but I had the lines scanned into my PC, and couldn't help myself. I just like to nail the hull designs, as that is well over half the battle for commercial kits, even more so for commercial kits with absolute beginners in mind. Love the name of this one, 'Saucy Jack'! Because it's a much earlier vessel compared to the other fishing boats, the hull shape is more like earlier small craft, almost like a cutter with no guns. For larger kits, don't worry, I certainly haven't forgotten those..
-
Cripes, you've cracked on with that!
-
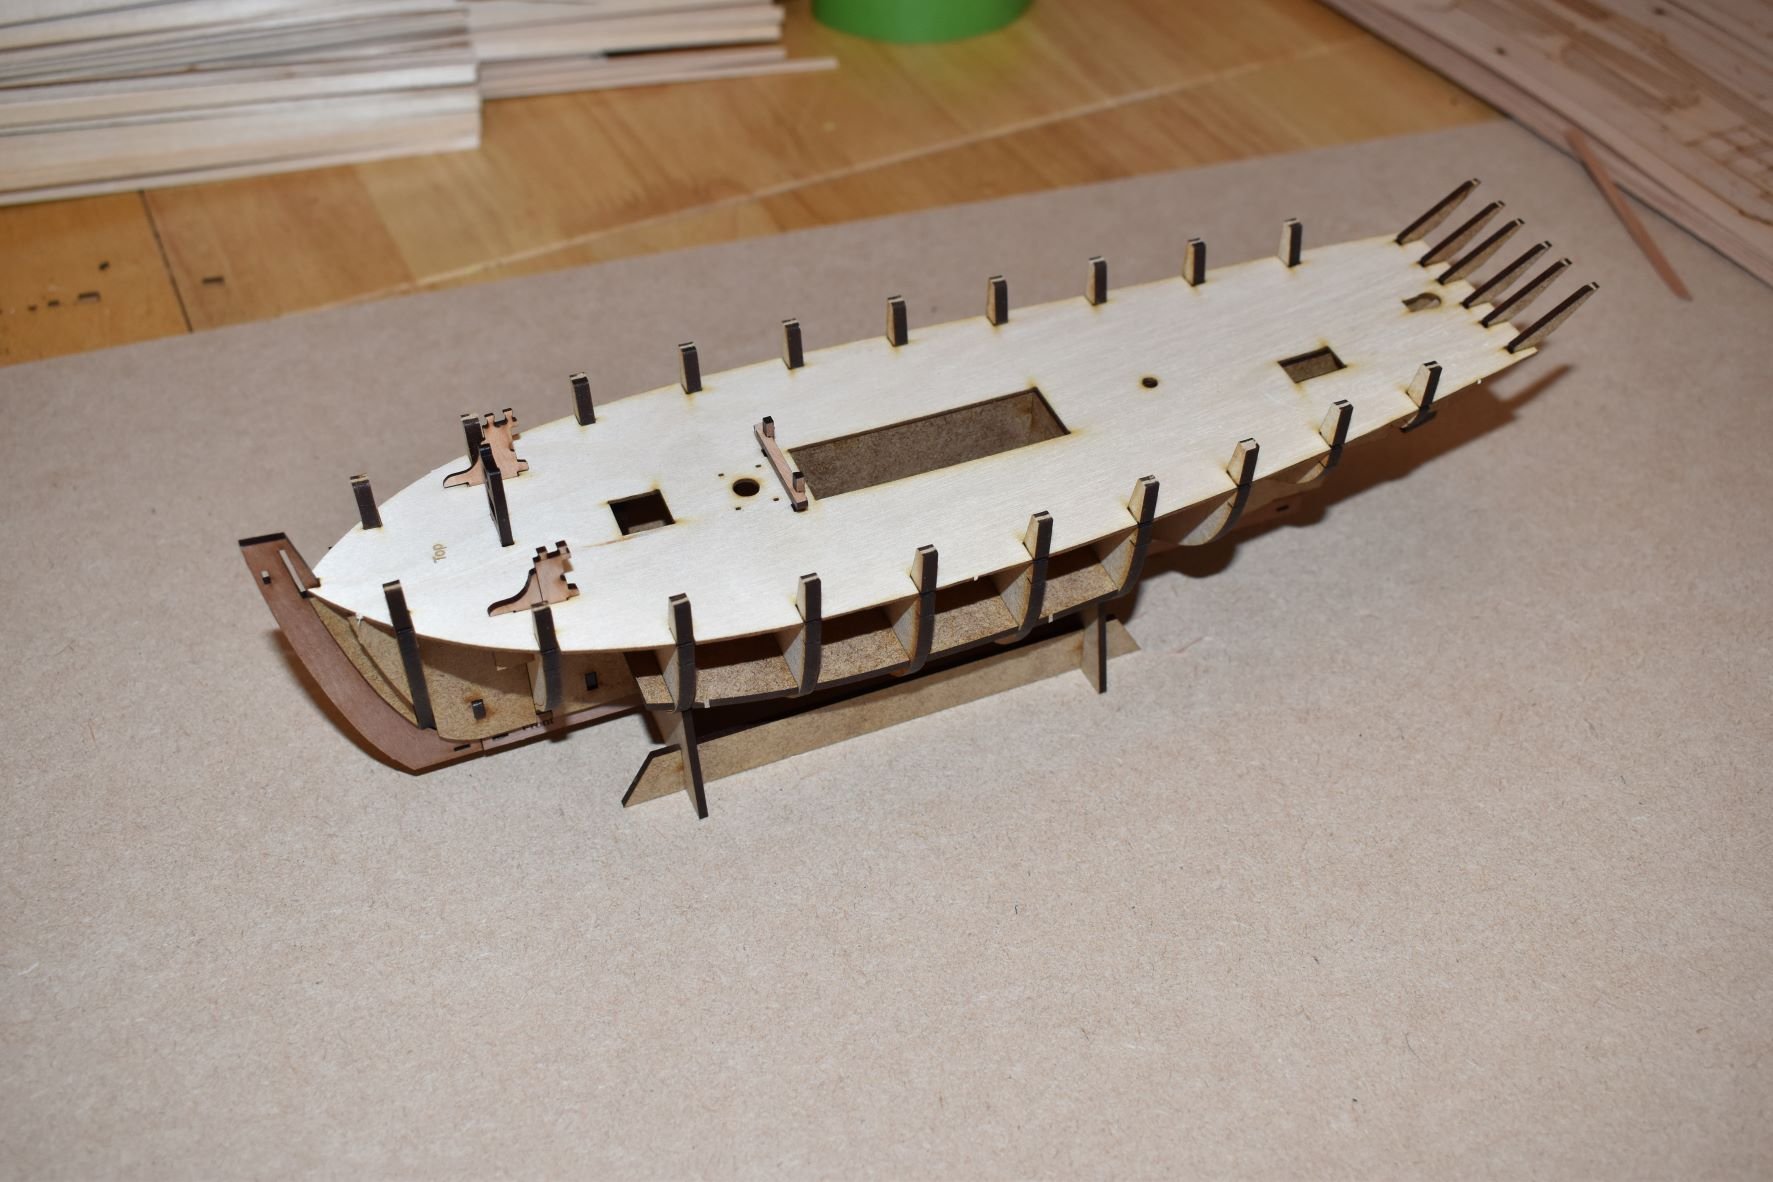
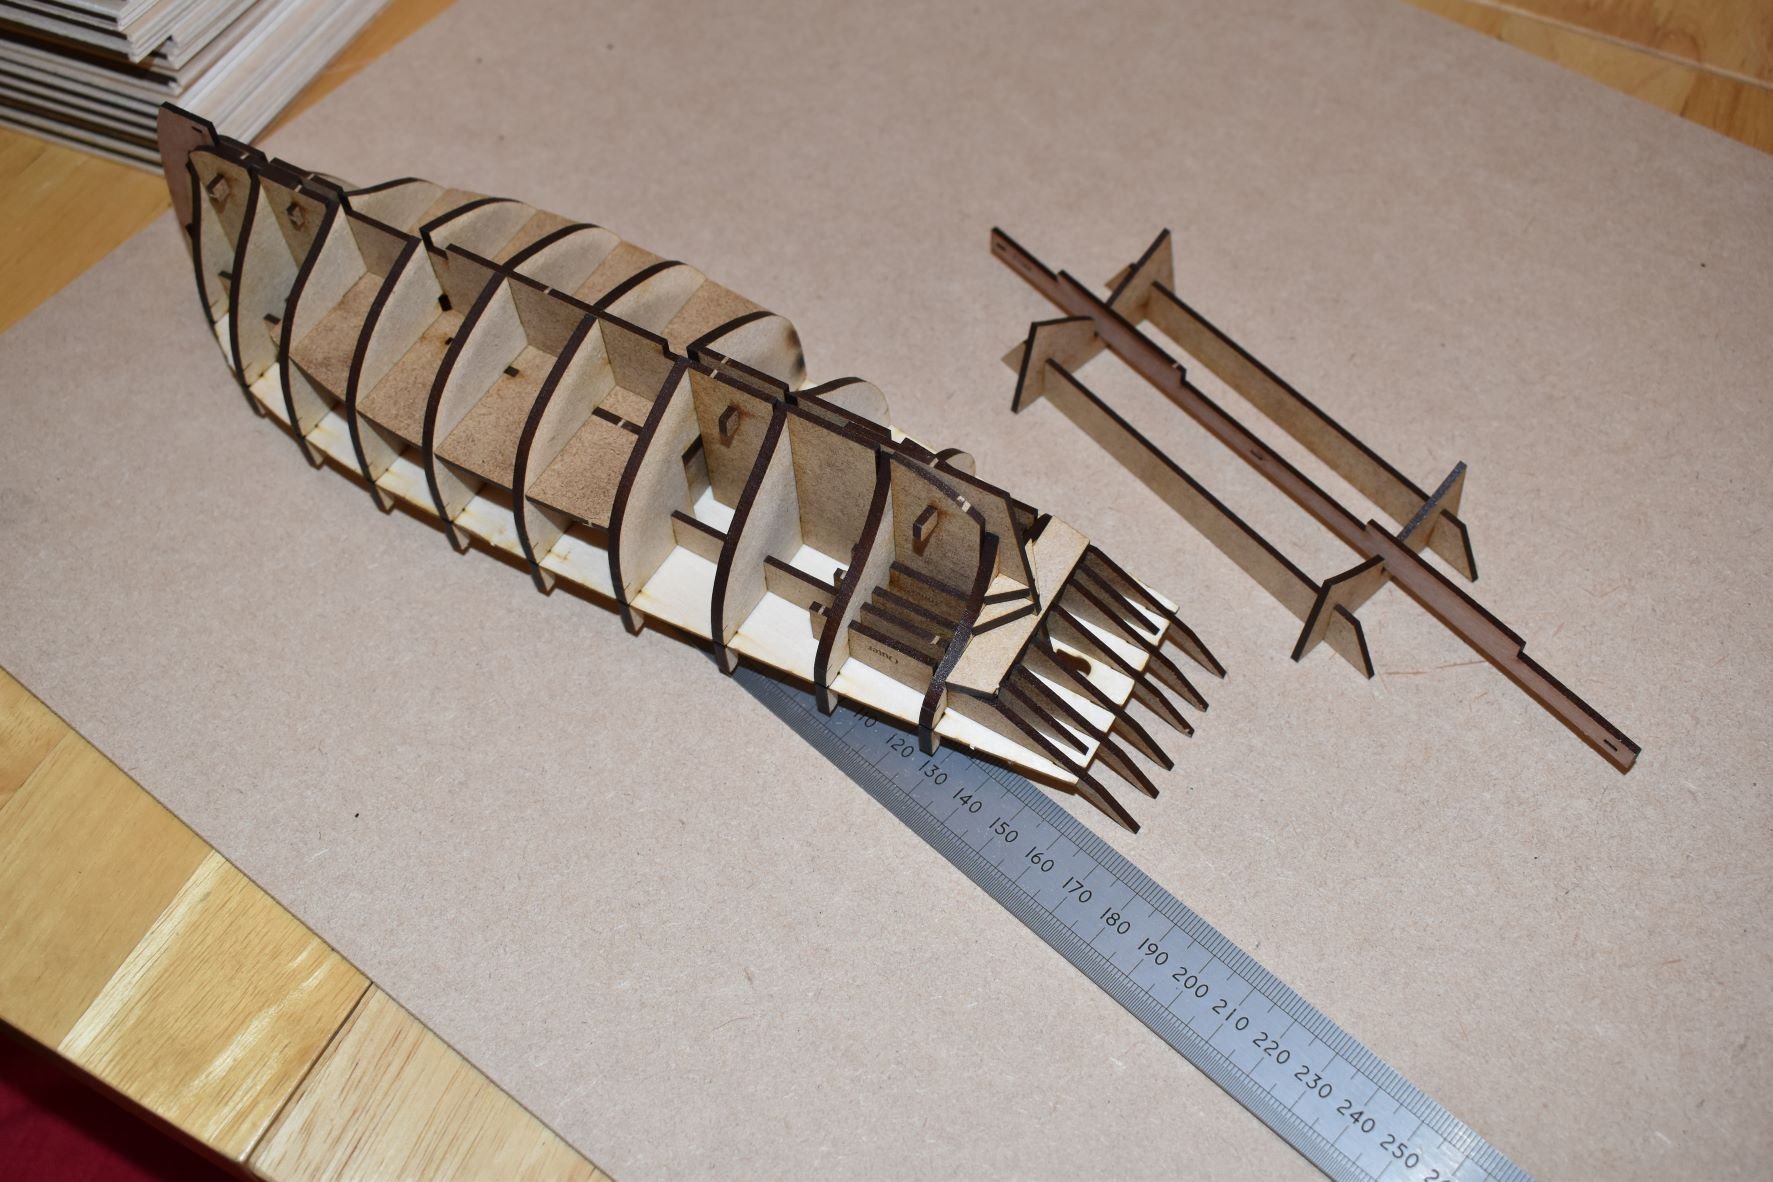
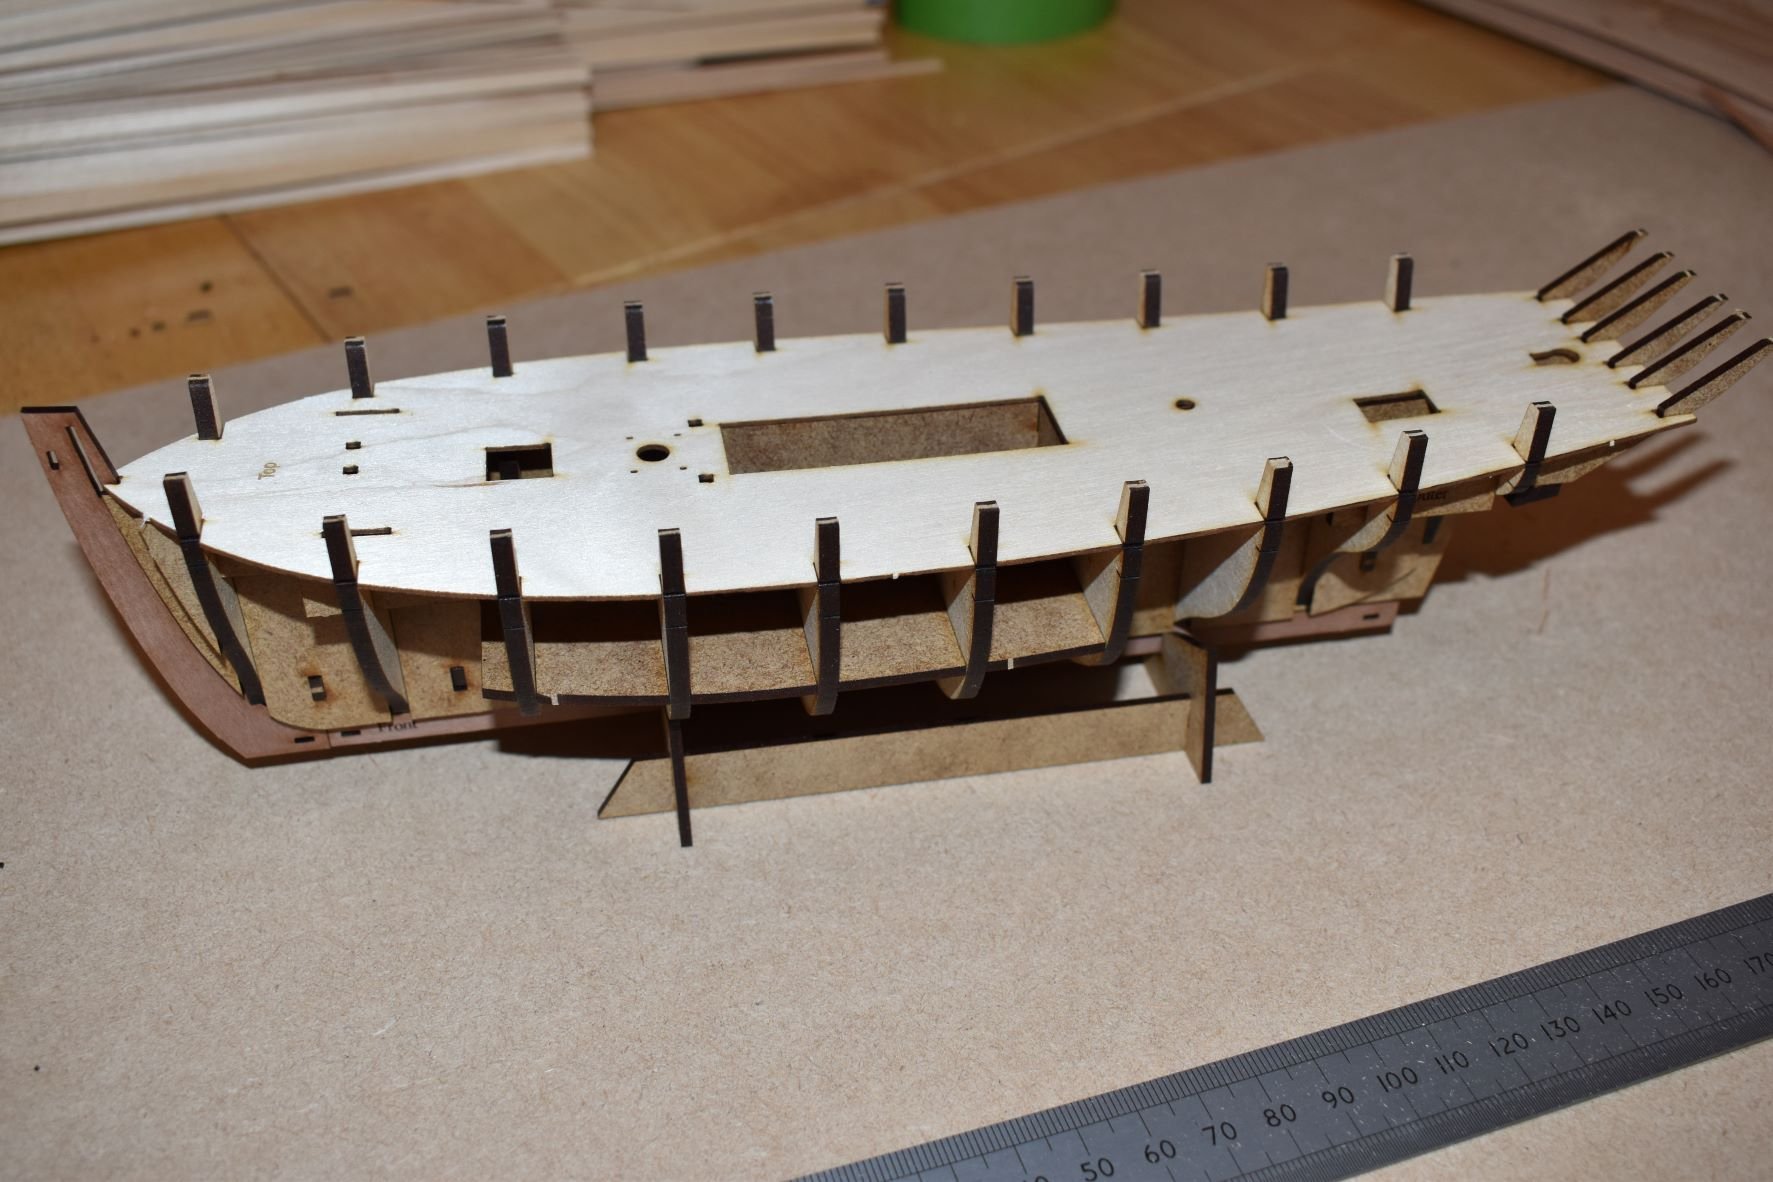
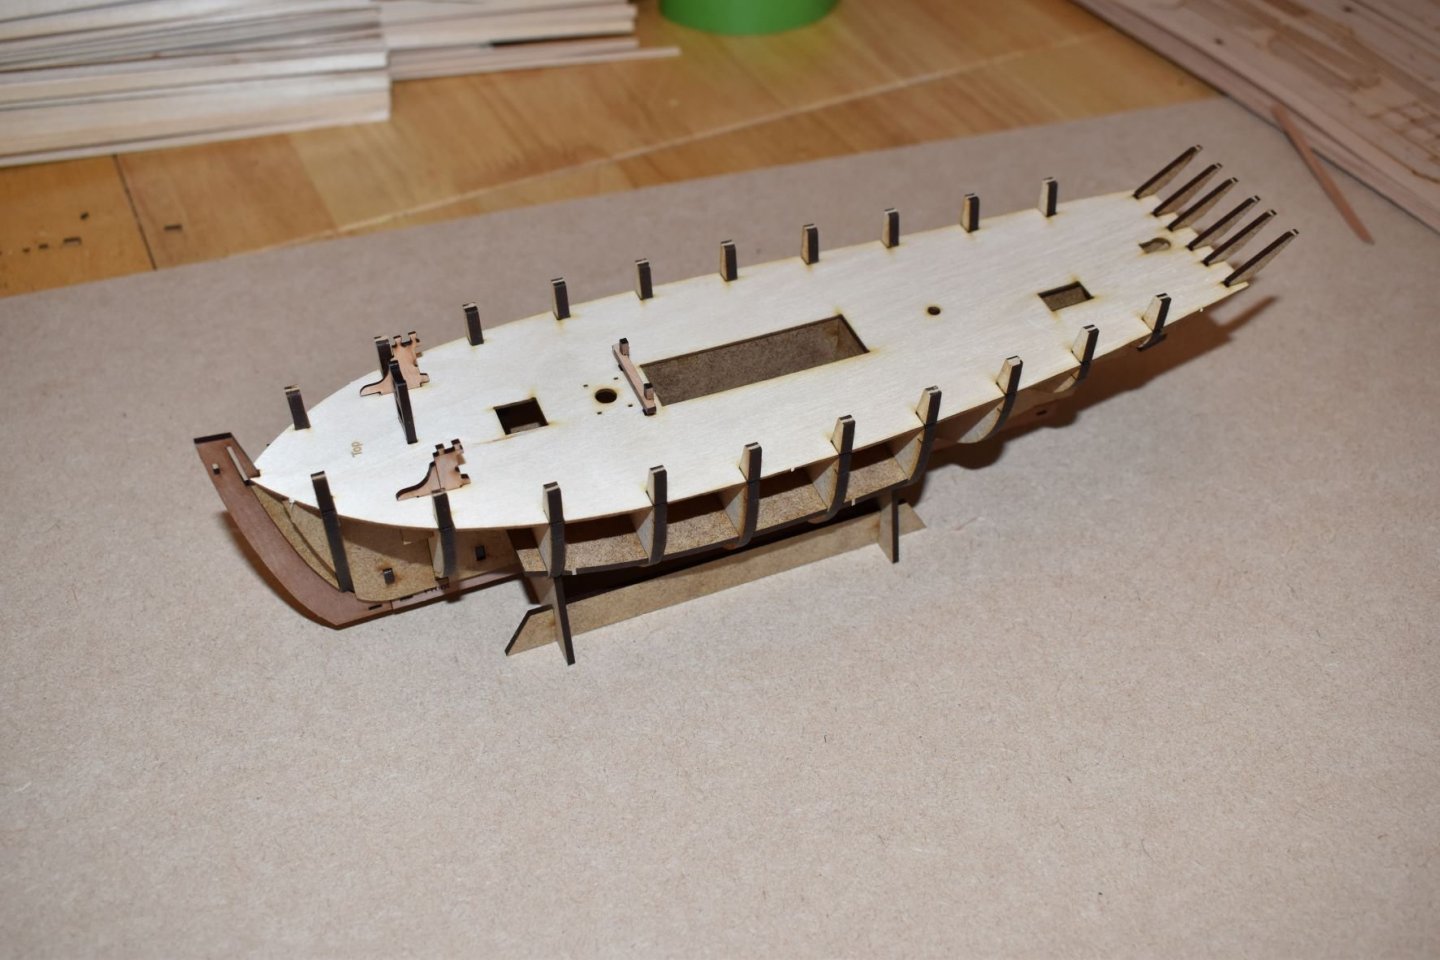
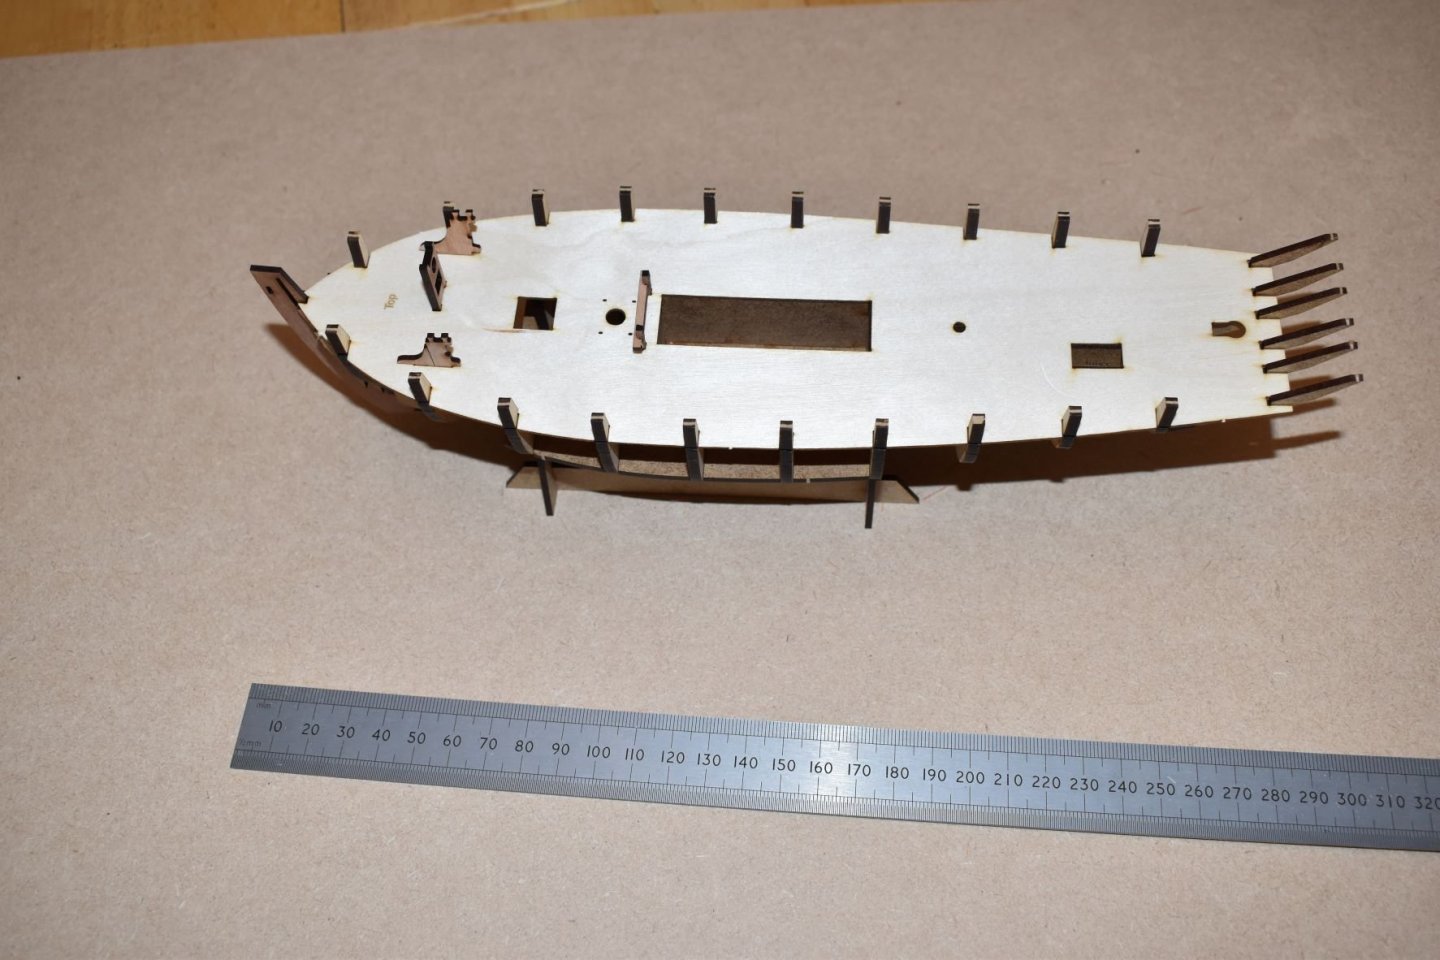
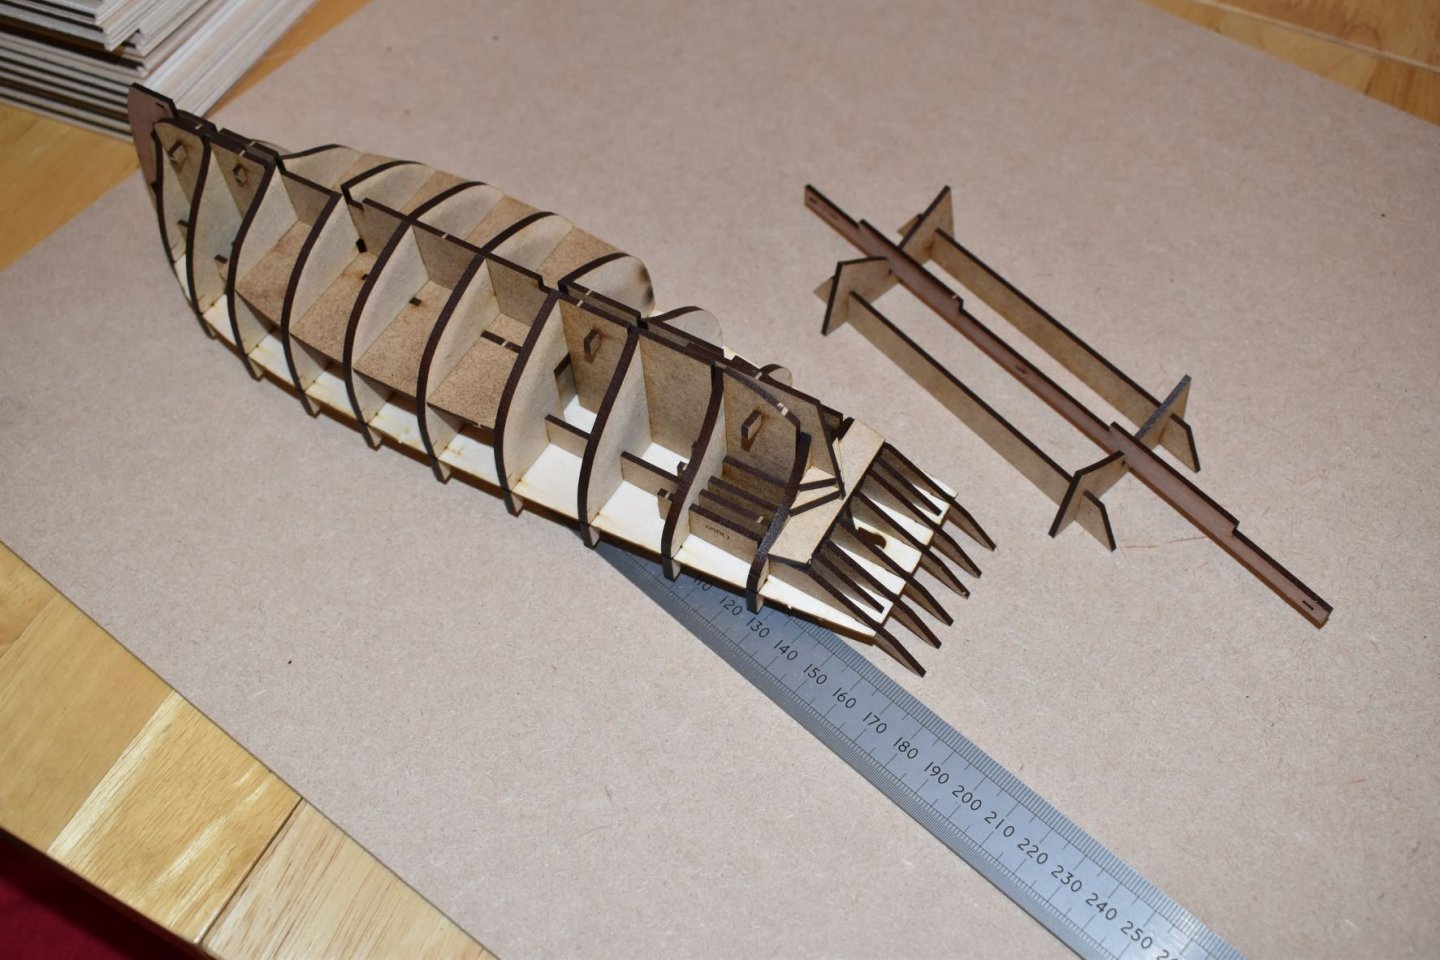
Very first dry fit of first off designs for a Barking Well Smack, 1836

-
Nicely done, Glenn
-
Do not believe or take to heart any mindless negative comments. The work you are doing on this fantastic subject is simply superb.
-
Cheers, we're on it!
-
Fore and aft orlop platforms were included in original designs, but decided against. Due to bulkhead positionings, I removed, but kept fore platform but no ladderway. Original designs I did still show them..
- 857 replies
-
- 5
-

-
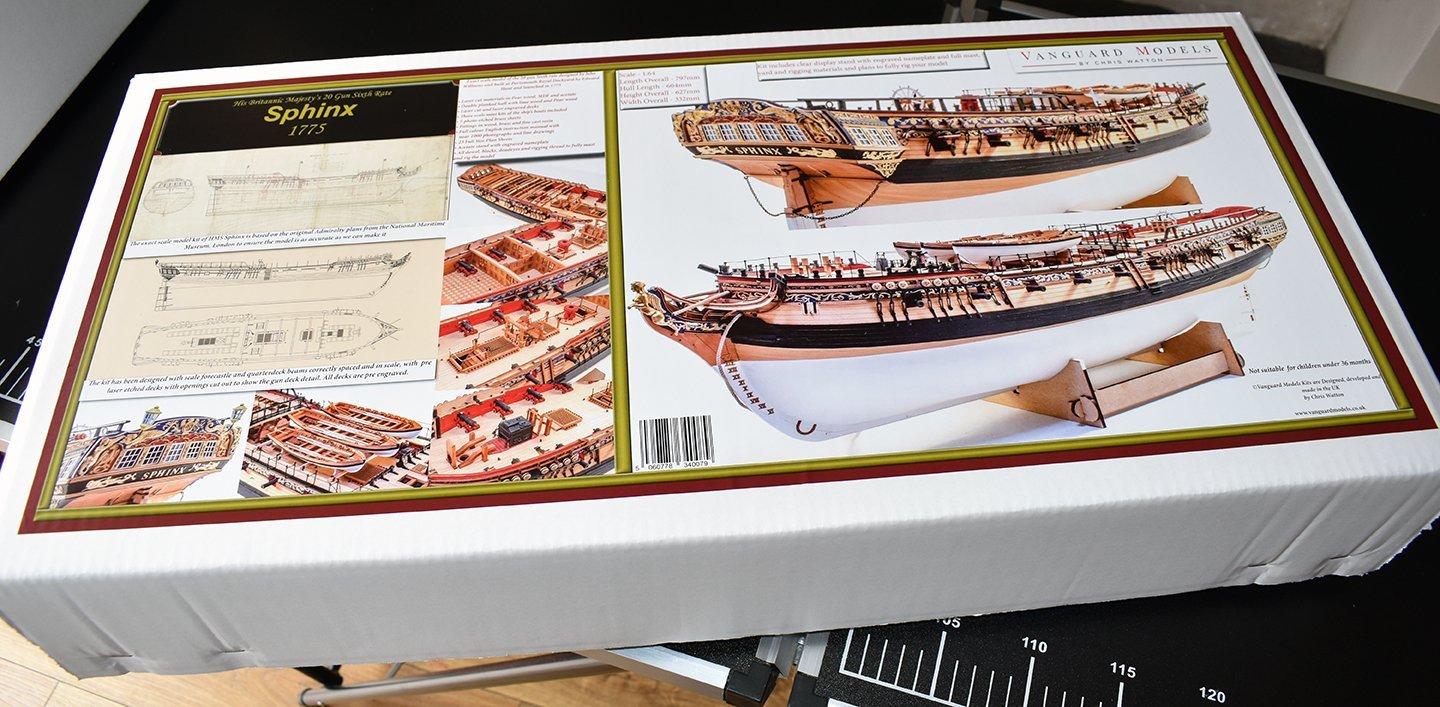
- Sphinx
- Vanguard Models
- (and 1 more)
-
Cheers! All sorted....
-
OK, all Sphinx kits are now gone until next month, of which I am working on now, laser cutting. Hats off to my wife, Chantelle, who managed to pack up 51 kits from Friday to Sunday - damn that was a lot of foam and bubble wrap! Today, I decided to remove the original version of the Alert kit from stock, and will scrap the remaining stock, including those white metal fittings. I did not like the fact that these early kits are not a reflection of the quality I want in my kits, so rather take the hit than offer them for sale. So Alert Version 1 is gone for good.
-
Just checked, it is the original 1953 copy, it even smells of 1953!
-
This book is the Bible of English fishing vessels! I ordered mine from an online second hand bookstore, based in California of all places!
-
It is so arbitrary, it's more like an extortion racket. When my materials are shipped in from Germany, sometimes I have to pay import duty, but other times I don't, and sometimes, the shipper will hold my shipment hostage until I pay their duties! Yet Italy, where my standard blocks, deadeyes, dowel and photo etch originates never charge any import duty (ned to double check that)! So much for the EU being one block!
-
Busy day! Am laser cutting second batch of Sphinx stock and helping my wife with packing and booking the kits. But mostly Chantelle, as the 0.6mm pear sheet I am cutting requires a lot of attention... I think I already mentioned, I will not be able to laser cut anything from 19th September until early October, as our garage is having a new floor, new roof and walls insulated and partitioned, one half for the laser machines, and the other for materials (and gym..). So am keeping the laser machine running for as long as I can until then. I then get my second laser machine in late October, which I am very much looking forward to. Regarding the Sphinx second batch, the price has to be increased as I wanted the first batch to be a kind of 'special offer', as a lot of work per kit hasn't been taken into account for the first batch. I have mentioned that each kit has 6 and a half hours laser cutting/etching alone, and then on top there is much prep required after this. And to (almost) cap it all, I now have to pay import duty for my materials I get from the EU, which seems very arbitrary (with Germany being the absolute worst culprit) Finally, shipping rates, although dynamic and linked to the UPS server, so should be correct, have severely undercharged for all non-UK shipping. This business thing is a hell of a learning curve....
-
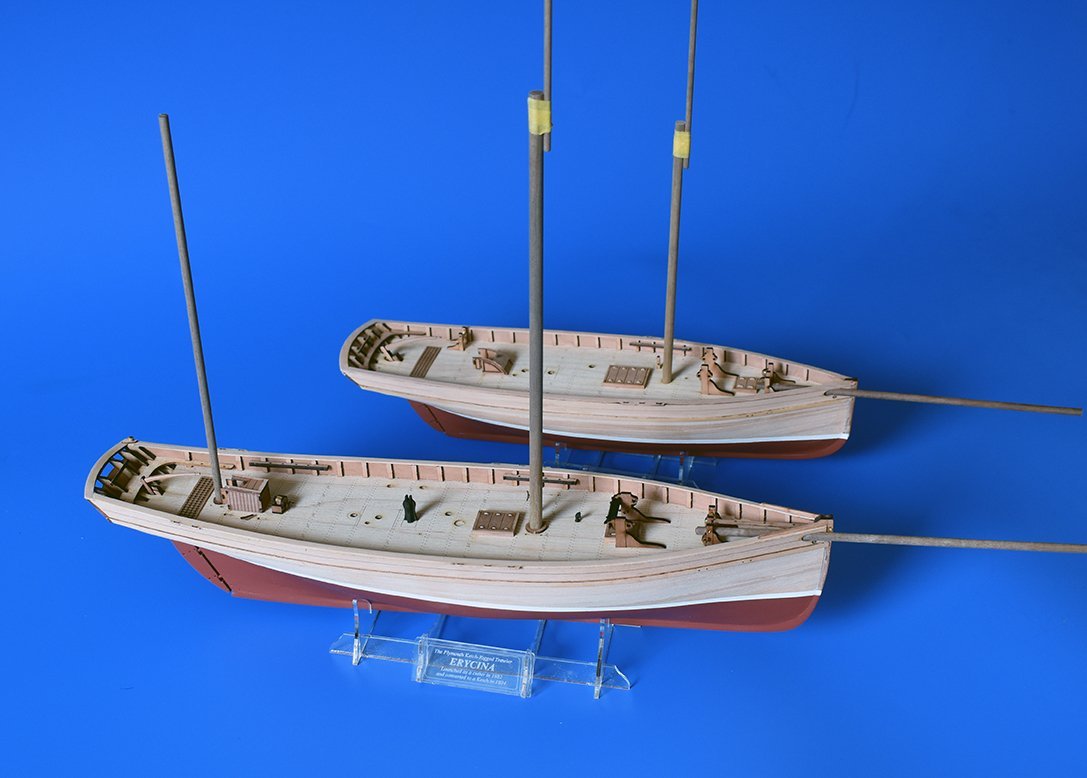
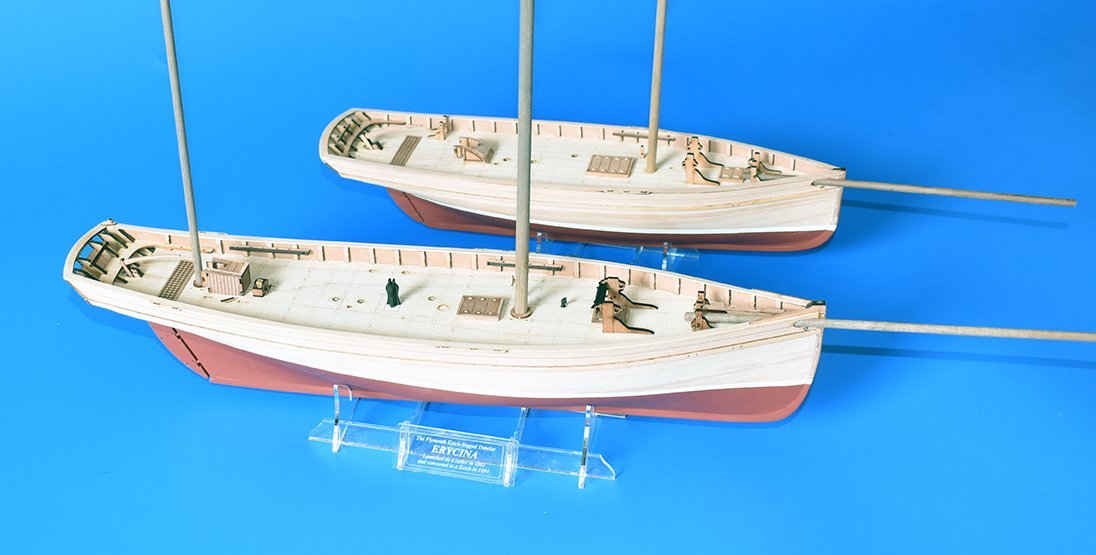
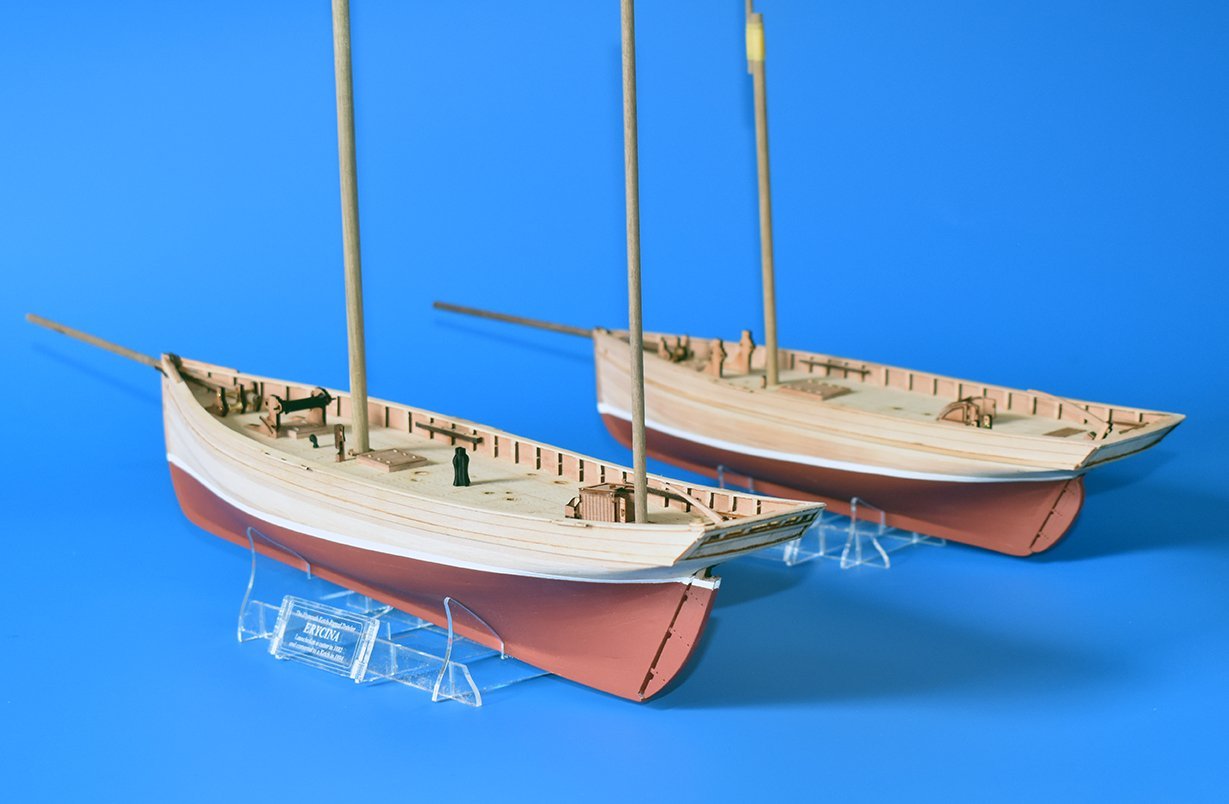
She was built as a cutter (1882), hence the lovely lines. ETA to include my rough initial drawings for Nisha sail plan
-
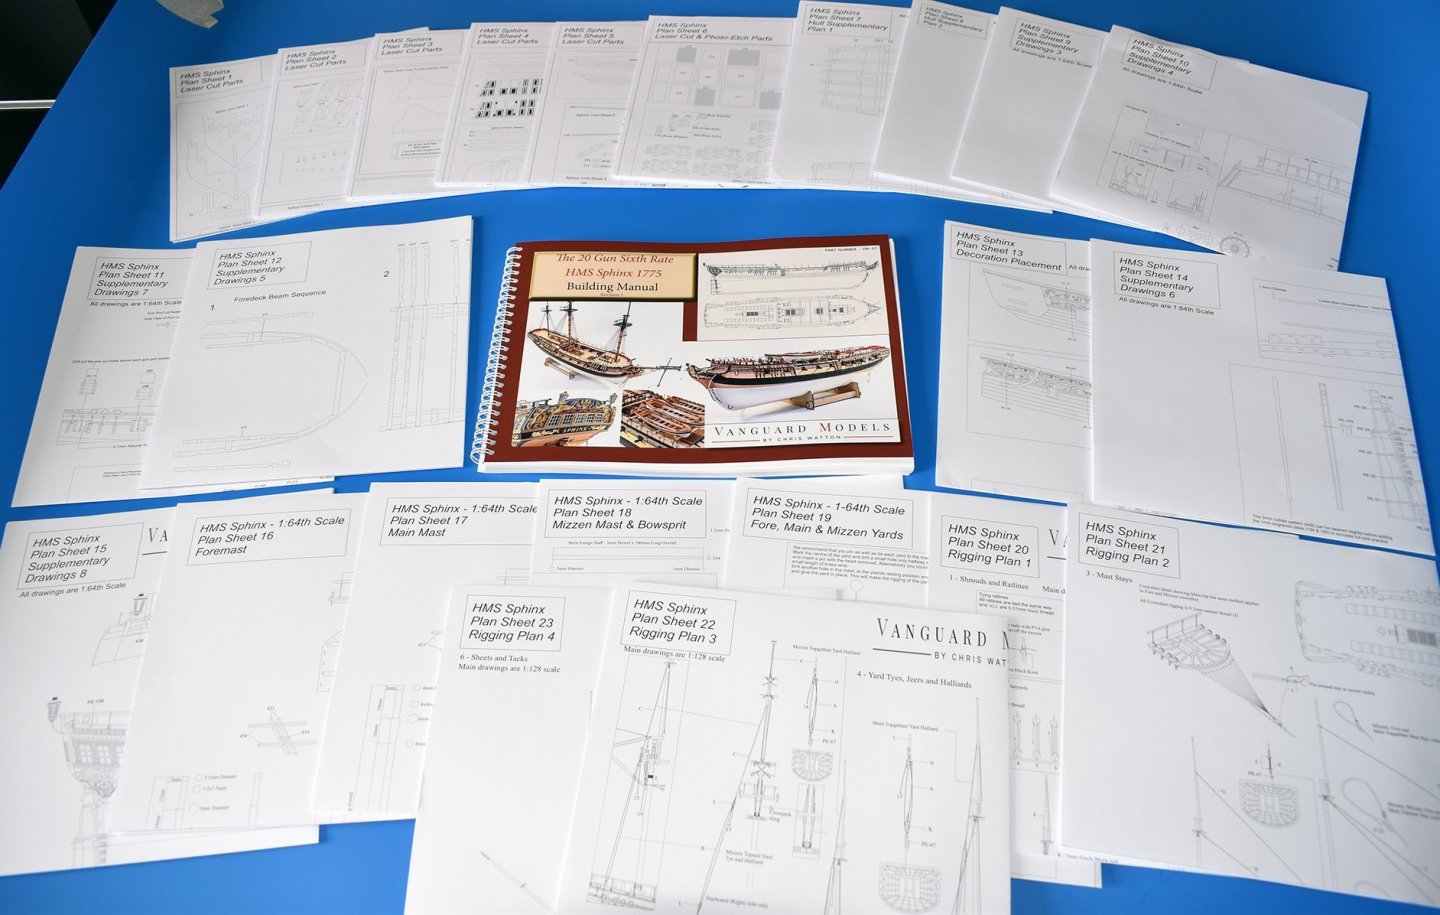
After an age sorting the 51 sets of plans and manual, and working out the best way to fit all in the box, the first has been done! 6.5kg in total (Speedy kit is 2kg and Duchess a little under 2.5kg) Now for the rest..
-
I would have had an extra two, as the printers gave me 52 sets, but one of the 52 0.4mm PE sheets I have has slight damage, so cannot include.
-
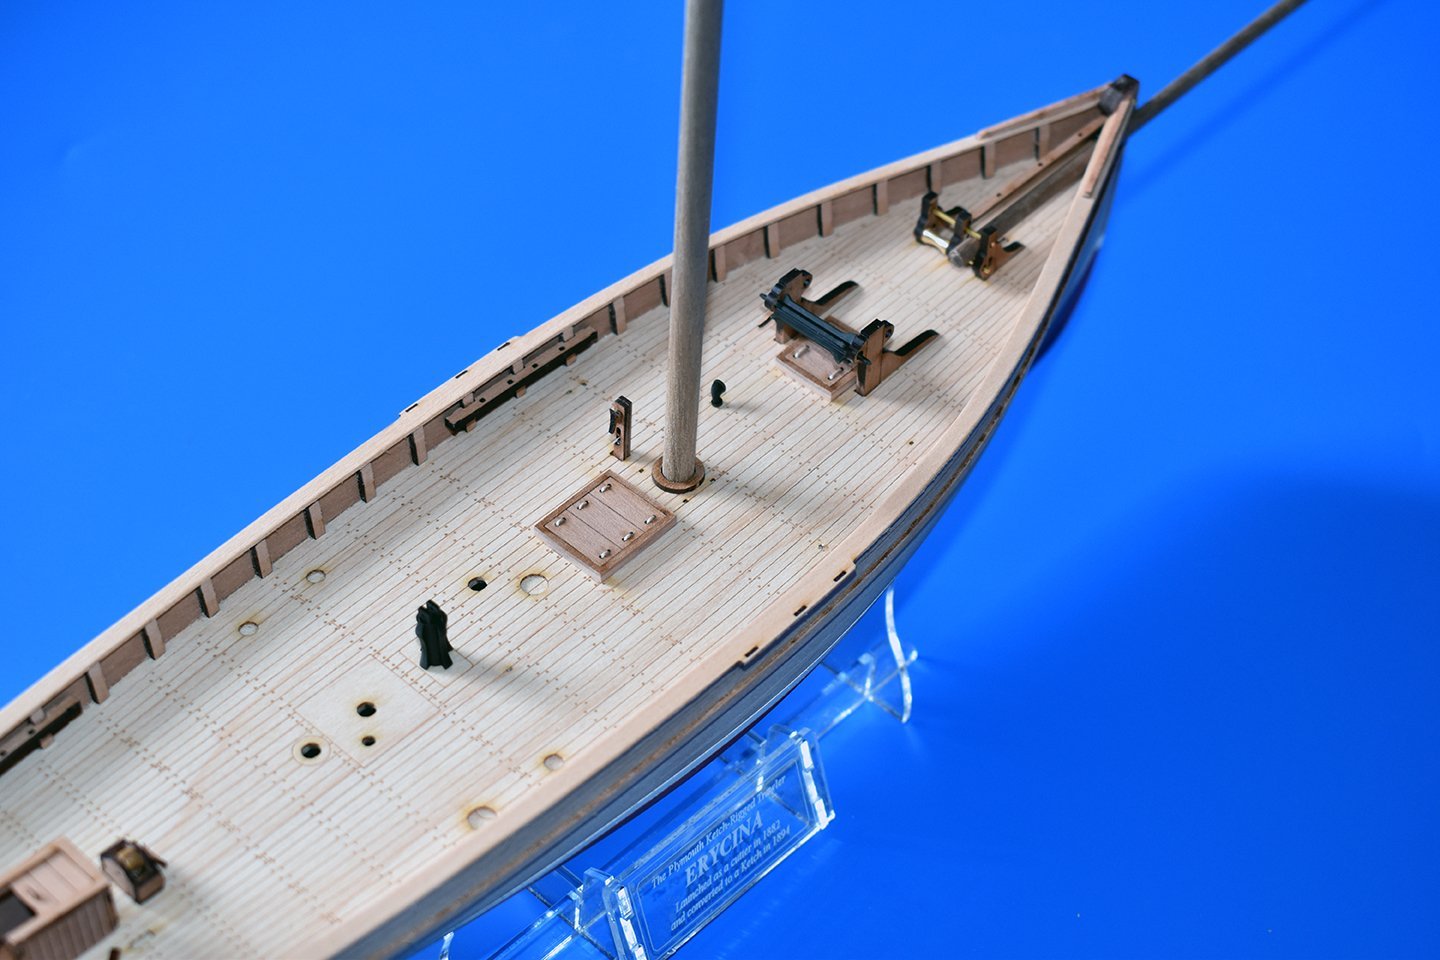
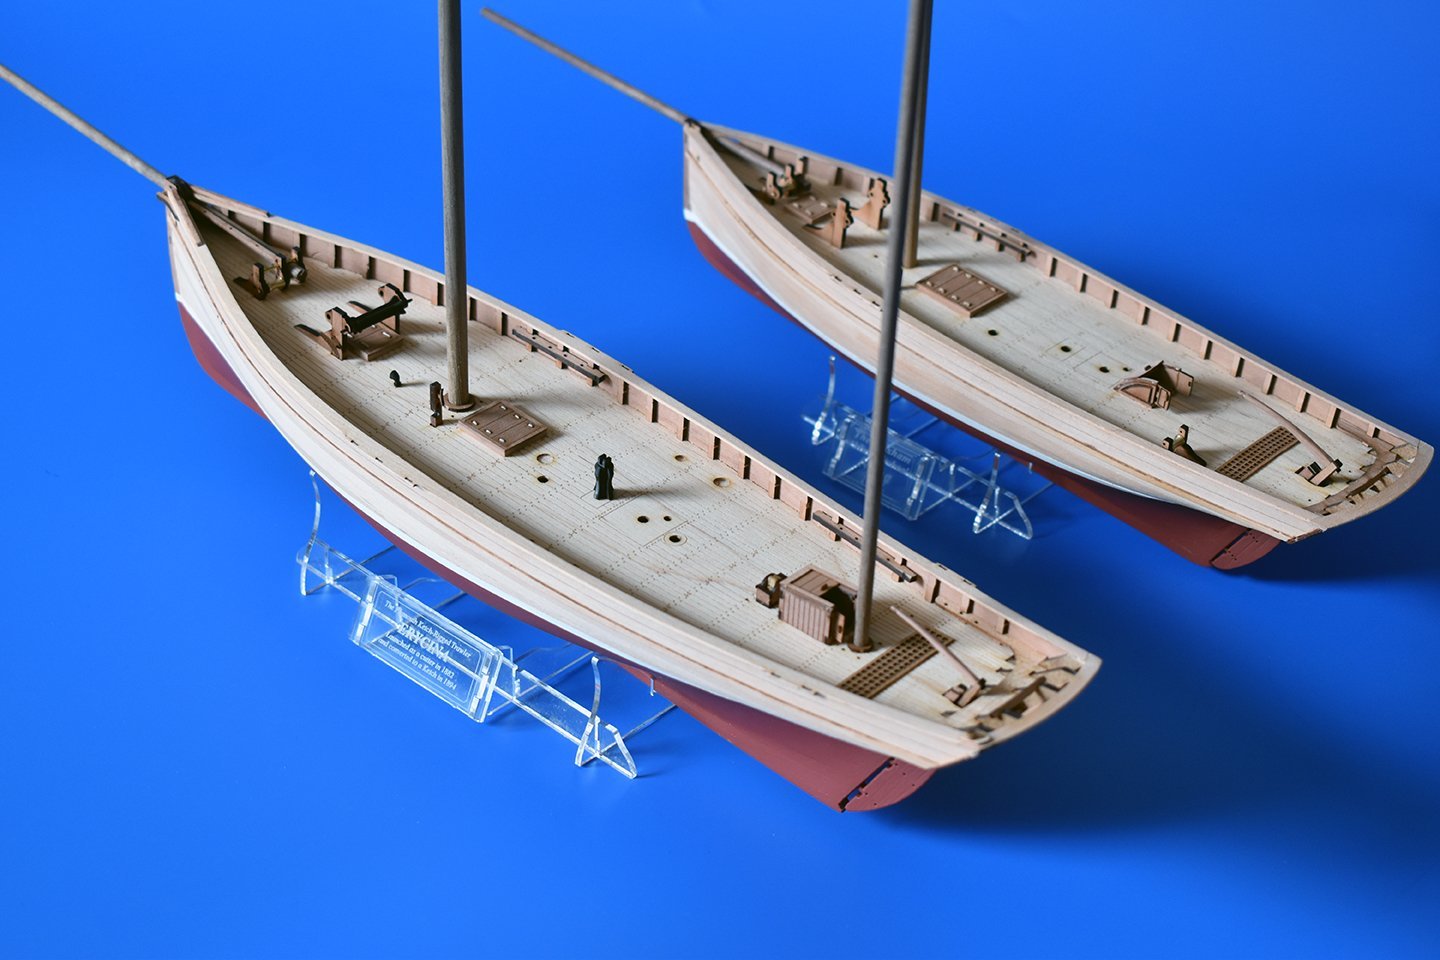
Look what arrived today, as promised by my printers! We will spend all weekend finishing the Sphinx kits, and making sure all is packed well, ready for shipping. All orders will be shipped next week. In the meantime, I have still been working on the new fishing boast designs, and have gone almost as far as I can with my pre-prototype models of Erycina and Nisha. I received samples of the 3-d printed castings for them yesterday. I decided to have the tow posts drawn in CAD and 3-d printed because I wanting it to be as true to the real thing as I could, as it has many shapes, coupled with a bracket with holes each side at the top. The winch drums are also 3-d printed castings, as is the chain pipe. The forward winch drums are new turned brass parts I had made. The rest of the kits will consist of laser cut and PE parts - but have to wait for the PE until next month...


-
I am told I will receive the printed material (plans, manual and box label) on Friday, so all Sphinx orders will start to be shipped from Monday. This is well over three times the weight of any previous kit! And thank you, I still cannot believe I sold out of my first batch! I am working on the second batch, but will not get the PE until late next month, as Italy seems to close down in August.
- 355 replies
-
- 12
-
-

-
- vanguard models
- Sphinx
- (and 1 more)
-
Yes, full length always included, otherwise it would be very confusing!
-
The three sizes of lanterns are still there, they are on page two of the fittings pages: Lanterns (pairs) – Standard – VANGUARD MODELS So I sell a total of 5 different size lanterns, three with PE and and a cast resin top and bottom, and 2 sizes that are 3-d printed. and originally developed for Sphinx (at quite a late stage in the development). Regarding the smaller fishing boat kits, some have asked for non UK subjects. I decided to concentrate first on UK based vessels because I know that many European manufacturers already have their local fishing boat kits for beginner kits (Italian, Spanish, French etc.), and US manufacturers cater for that market.
-
There is one I may do called 'Saucy Jack', a Barking Fish carrier!
-
They do look nice, but lack the 'polish' of a proper display model, I cut corners, as my main concern is seeing if the parts fit as designed. there are some that don't, and will be changed slightly for Jim's parts.