


oakheart
-
Posts
429 -
Joined
-
Last visited
Content Type
Profiles
Forums
Gallery
Events
Posts posted by oakheart
-
-
On 1/23/2022 at 5:37 AM, iMustBeCrazy said:
Lapwing was launched sometime before 25th Jan 1817 when she was reported as having run aground. Where and when she was launched in unknown to me.
Hi Craig, I made it here, some really nice research. Have you completed the drawings?
I am just starting out on my interpretation of the Rattlesnake built at Folkstone ( sister to Alert ) so all of the information gathered here
will help me on my way.
Tim
-
11 hours ago, iMustBeCrazy said:
issues the gaps, the bows, the transom
Lessons learned so far:
Pay more attention to the early stages. Like cutting and sanding the frames to shape.
Do more work on fitting the planks, I did find it tedious to keep putting in on to check, take it off to sand, put it back on bla,bla,bla
Try different methods of clamping
I need to slow down and not try to rush things.
At these small scales I need to learn to use a more delicate approach with my tools.
So my thinking is to move on to the next hull build and leave the 2nd fixings of internal details for later.
That way I still have my planking skills ( ha. ha. ) fresh.
I may experiment with more planks on the next hull, we don't know how many the original had anyway
and it should lessen the problem I had with planks not laying flat.
The Cornish Maritime Museum full size build used 14 per side, I think maybe they did that for the same reason.
Tim
off for a coffee and a read of Craig's cutter drawing log
- Montaigne, Wintergreen, mtaylor and 2 others
-
 5
5
-
8 hours ago, iMustBeCrazy said:
19th century?
Nice work on the cutter, way ahead of me as usual 🙂
I am going to read the whole thread with my coffee. It could be a candidate for a build.
I was in Melbourne / Sydney in October 2022 visiting relatives, shame I had not found this community at that time.
Did a bit of research into the First Fleet while I was there.
Tim
- Keith Black, iMustBeCrazy and mtaylor
-
3
-
5 hours ago, Montaigne said:
why you choose cedar?
Chuck Passaro and others have been singing the praises of Alaskan Yellow Cedar, look for Chucks longboat build log on this site.
I then found somewhere in the UK to get some so ordered some. It does look nice and works beautifully.
Basswood ( Lime in UK ) carves beautifully with sharp tools but it goes all kind of fluffy / stringy when you sand it.
Using a brand new Stanley Knife blade as a scraper gives a really good surface finish.
As long as you don't get glue on the surface, It will stain nicely to any wood colour you want.
I have a love / hate relationship with it on this build.Tim
-
11 hours ago, allanyed said:
You have convinced me to try this method
And there was me looking at your plug method and thinking I must try that as it gave you a good result.
Let's see how CrazyCraig gets on with his separate futtocks and floors.Tim
- mtaylor and Keith Black
-
2
-
1 hour ago, iMustBeCrazy said:
the next one will be even better.
make up a brace to hold the sides in until you have fitted the thwarts (see my small cutter #27).
Thanks Craig, once my head has settled down, I will do all of the things you suggest.
As to what's next as a build ( apart from the my Bounty Launch in cedar )
Do I get a kit or do another scratch ?
I am rather taken by the 18th century Cutters.
The Sherbourne and Lady Nelson? I think they look kind of dumpy, some would say cute.
so possibly an Alert / Rattlesnake much more elegant.
The Rattlesnake appeals because I had family from Folkestone ( my Uncle Stan )
As a pensioner I can't justify the cost of the Vanguard Alert kit, it does look nice. Are there others out there?
For a scratch there is a good amount of information about both, AntonyUK and others on this site have done drawings for them.
I will do some more research and look for information, there are some good scratch build logs on here built from the Goodwin book.
Tim
- mtaylor and Keith Black
-
2
-
15 hours ago, Montaigne said:
Every time we make a mistake, albeit at a price, we learn something new.
I have heard that "we learn nothing from success", can't remember who said it.
Thank you for the encouraging words, they help to keep the fire going.
Thanks too to all the lurking likers 🙂
moving on, whats next?
Thwarts and gunwales I guess.
Tim
- Keith Black and Montaigne
-
2
-
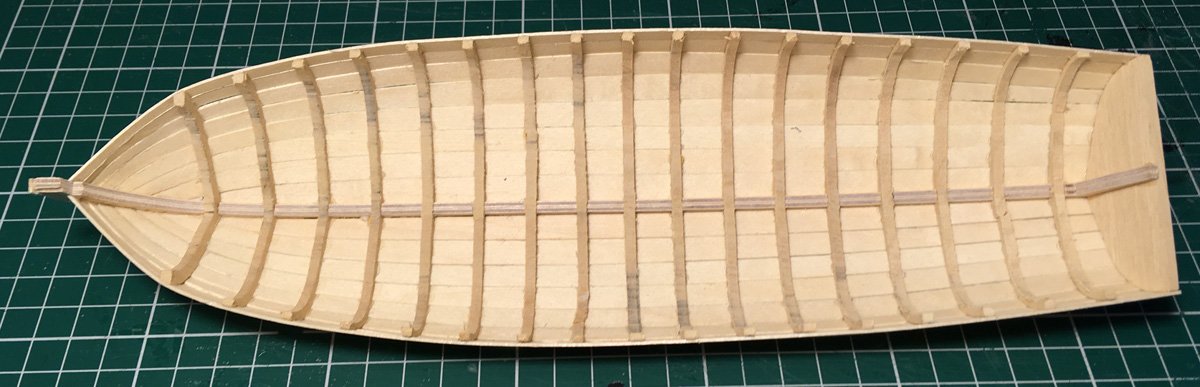
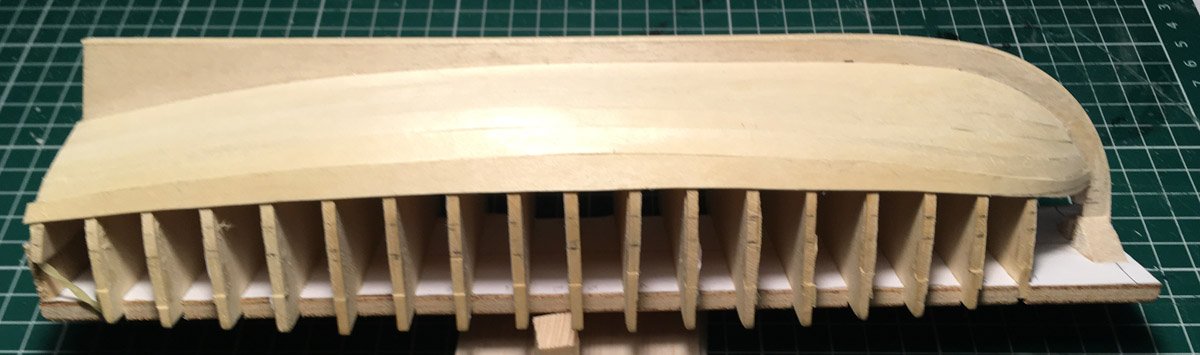
Well here we are, I finished the planking and let the glue set overnight.
Then with great trepidation I cut the frames away from the jig. With some wriggling and gentle pushing the hull popped off.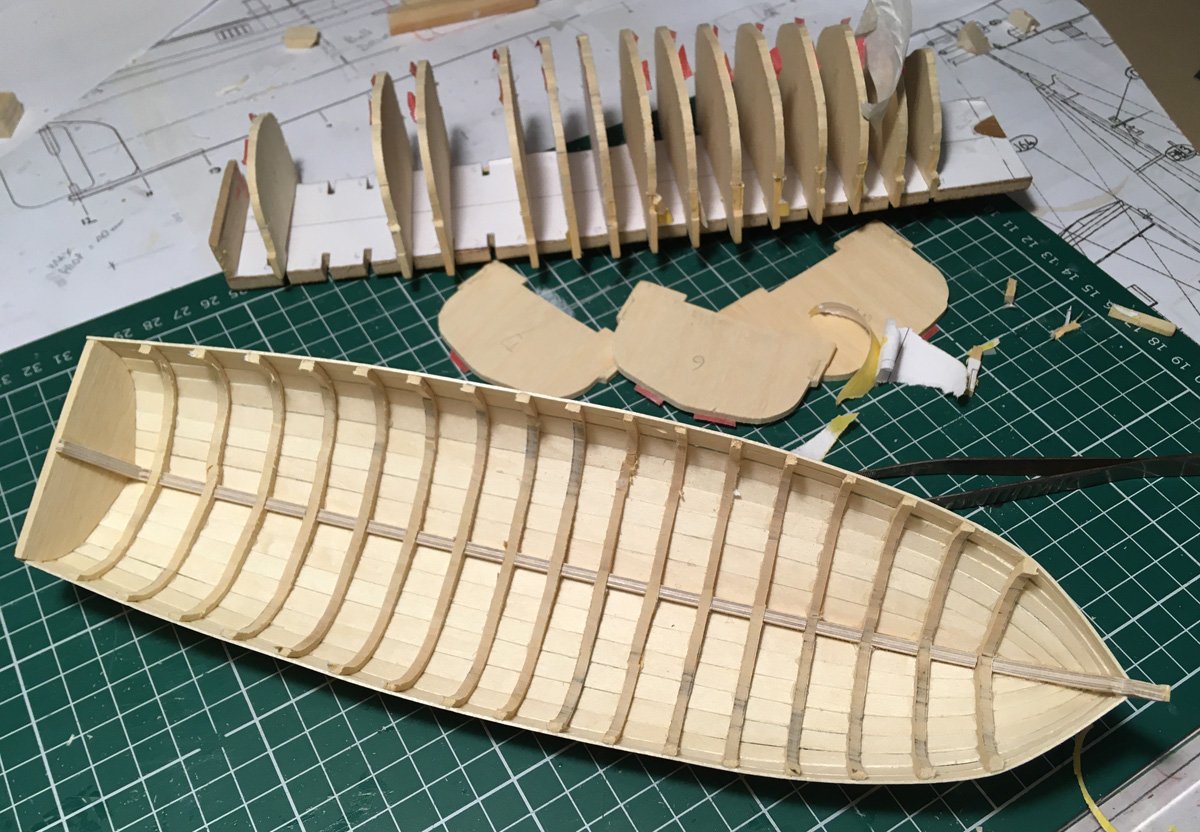
Now some detail shots
External
Inside from stern and stem
close up
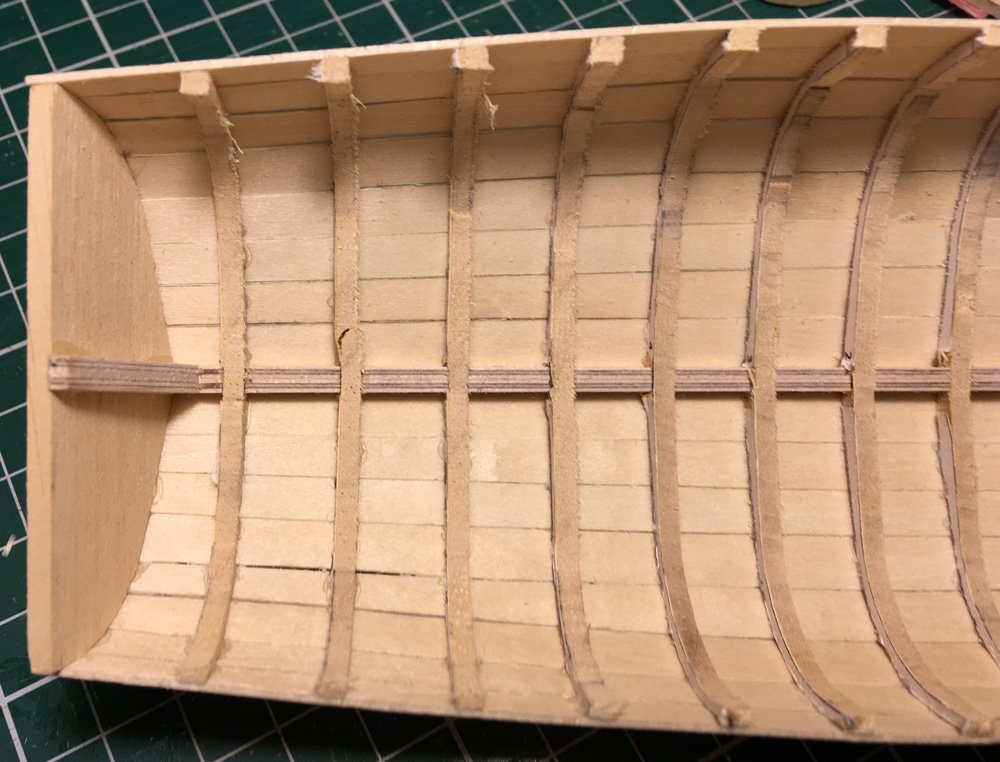
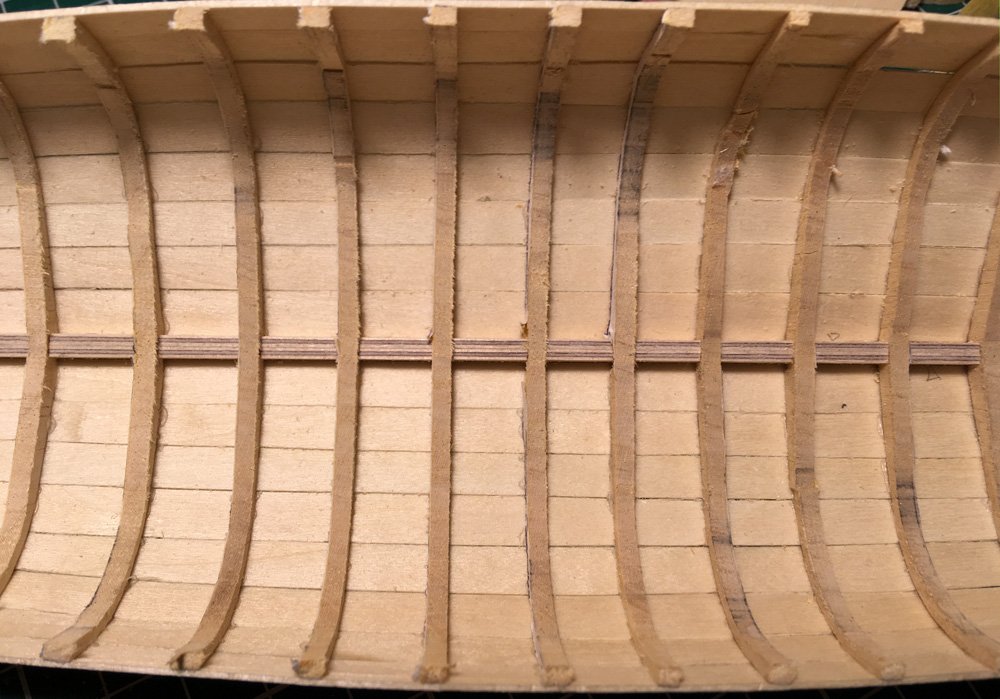
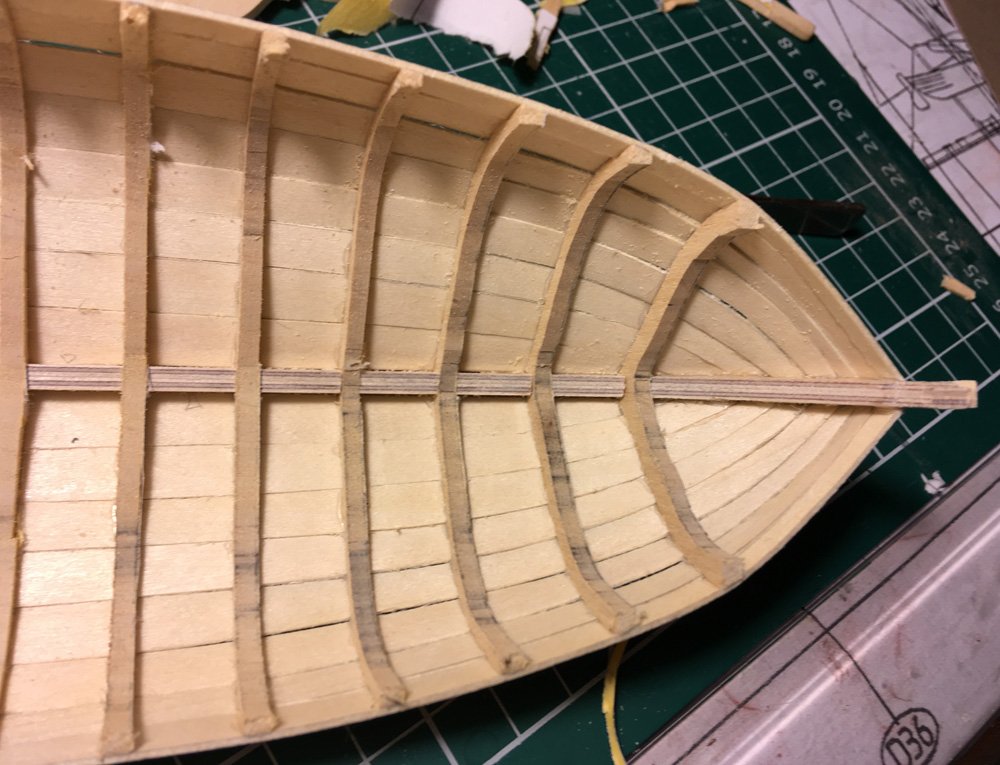
I am really pleased with my very first plank on frame.
It needs a fair bit of fettling, I have learned a lot by doing this
The frames need a lot of sanding, but I have learned to be careful when sanding....
I think I can fix this by gluing in a patch on the inside
so as a proof of concept it worked.
Comments please.
Tim
- Montaigne, Keith Black, Wintergreen and 2 others
-
5
-
6 hours ago, Bryan Woods said:
I don’t have a lot of modeling experience
I don't have a lot of experience with model ships either, but along with the old hands on here, I welcome you.
They are a great bunch.
Tim
- mtaylor, Keith Black and Bryan Woods
-
2
-
 1
1
-
2 minutes ago, iMustBeCrazy said:
My take on the masking tape method.
A piece of tape is placed on the model overlapping the preceding plank.
I will have to try this with tape, all of the tape I have at the moment is opaque.
I have used some 90gsm tracing paper which sort of works.
The problem with using paper is its a bit stiff and when transfering the shape to the wood, you have to cut the paper to shape then run a pencil round the edge, it's awkward and fiddly to get accurate. The tape method looks much simpler to do.
I will look for some different masking tape, I tried parcel tape and sellotape, but could not get any marks, pencil or pen to stay on the tape.
I see some people have used the special 'invisible' matte tape which I don't have.
Tim
-
6 minutes ago, iMustBeCrazy said:
Right or wrong, this is what I do.
Wow, thanks Craig.
I have only a couple of planks left to bodge on this build, ( the dirty boat ) but on the cedar version this is what I will do.
I have copied and pasted it into a word document and will print it out so I can refer to it.
Tim
- Keith Black and mtaylor
-
2
-
1 hour ago, allanyed said:
Cumulative error is the bane of many a ship modeler.
Allan - thanks for reassurance
Note to self : must pay more attention, not just zoom off following my nose.
Tim
- Keith Black and mtaylor
-
2
-
19 minutes ago, Wintergreen said:
Don't let your heart sink though. It IS a learning experience!
Keep it up!
Thanks for that Håkan.
I do need to remember that this is going to be my 'dirty' boat so any errors will be hidden, the next version in cedar wood is the one that I want to look good.
I will read you build log.
Tim
- Keith Black, mtaylor and Wintergreen
-
3
-
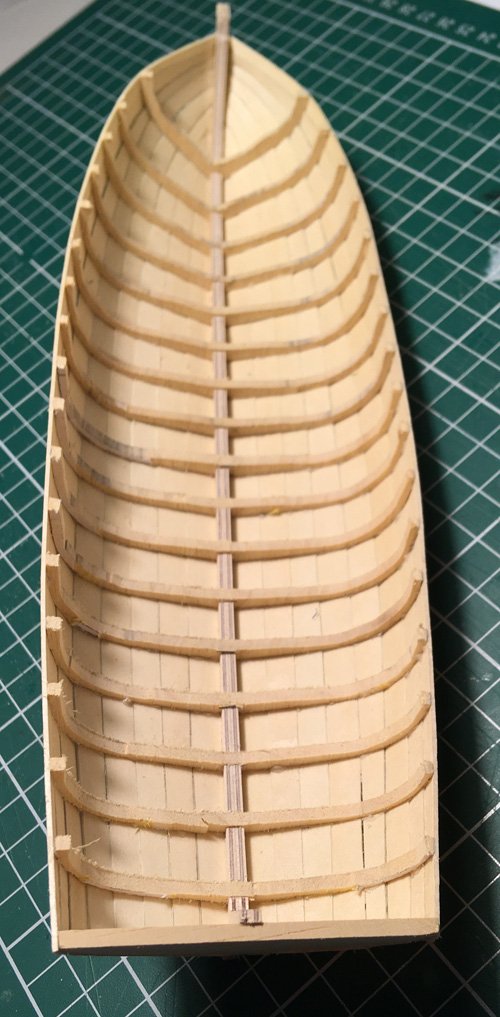
The planking has been ongoing.
I am really not sure about it being correct. I need some advice.The way the planks are tapered from the frame towards the stem looks odd, but I cant figure out what it is I've got wrong?
should it be more like the penciled in line ?
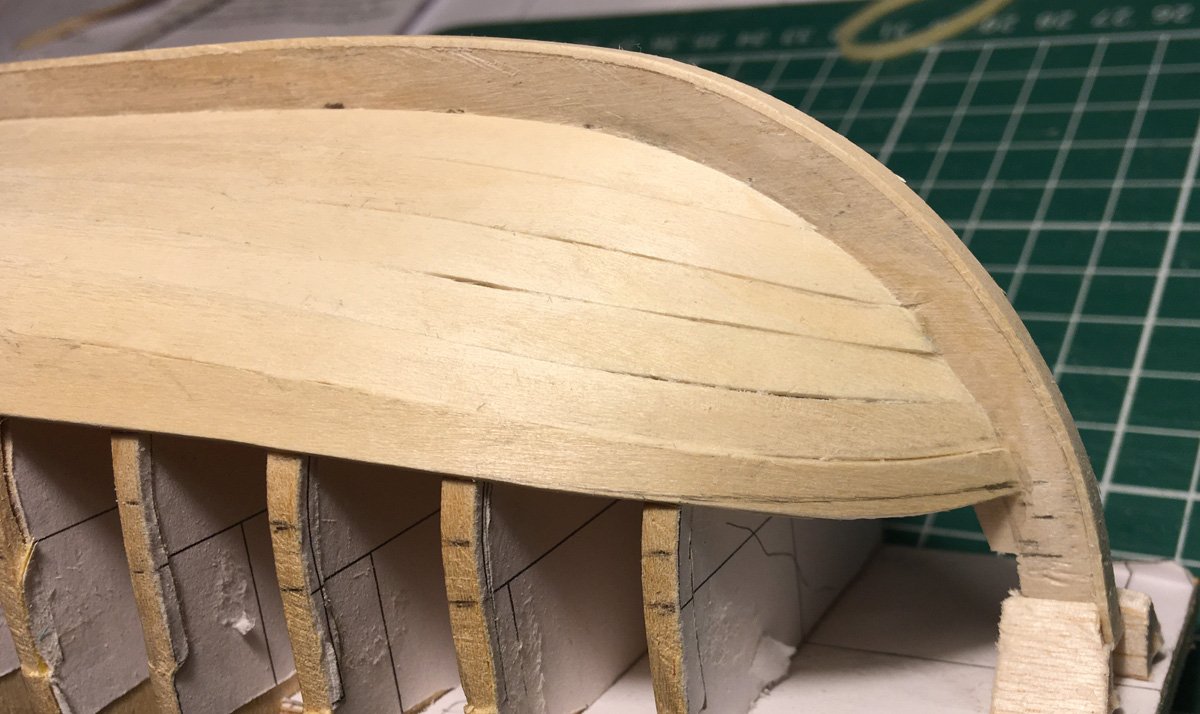
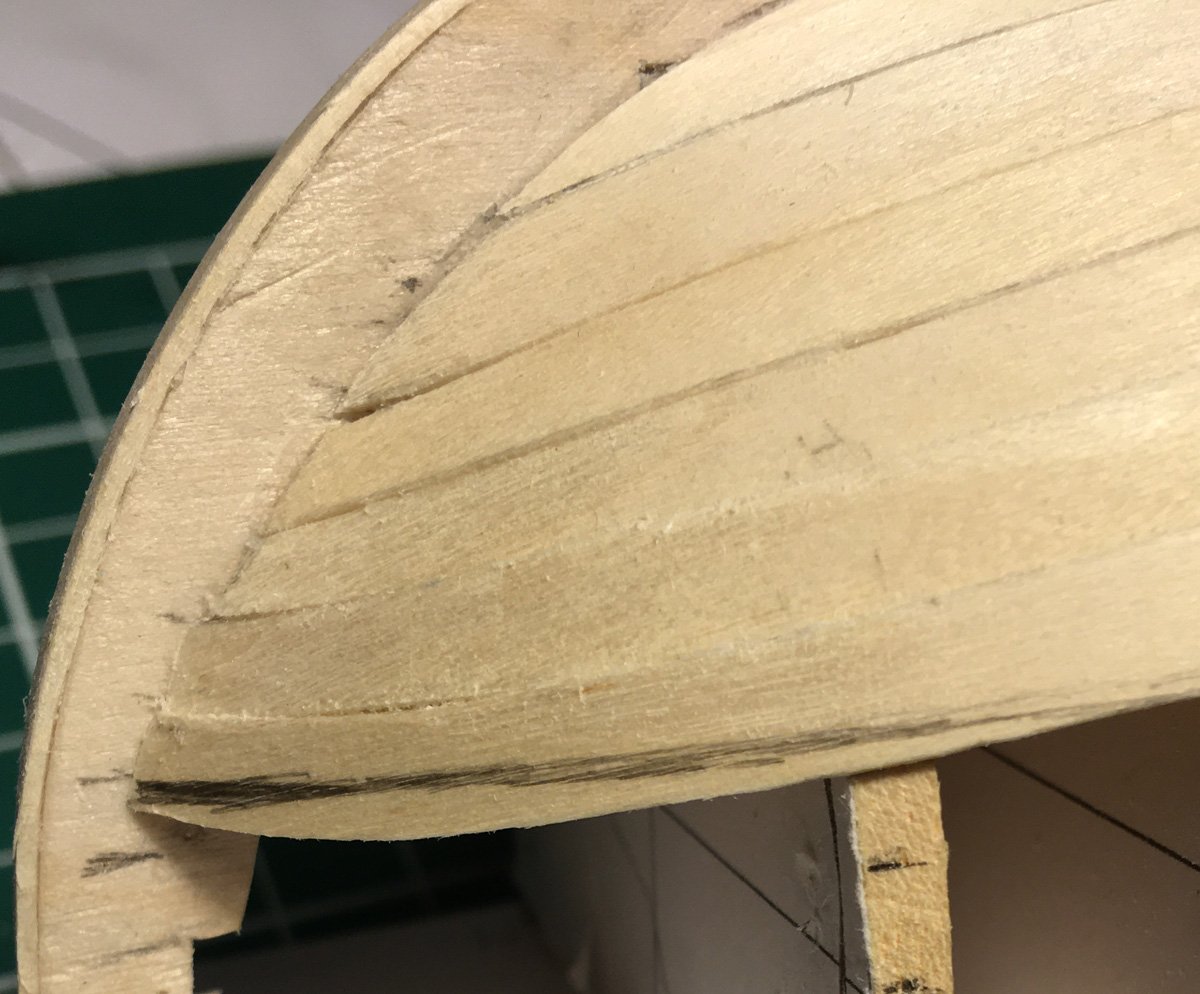
With the photo above , I can also see that I missed the tick mark on the stem one plank up, that can't be helping.
Tim
- Keith Black and mtaylor
-
2
-
1 hour ago, iMustBeCrazy said:
Garboards installed.
Huzzah......!
Tim
- iMustBeCrazy, thibaultron and mtaylor
-
3
-
7 hours ago, iMustBeCrazy said:
It's a good thing I bought more clips the other day.
That's something I learned early in this game, you can't have too many clips, clamps or elastic bands to hand when gluing up.
I sometimes wish I had an extra hand or finger too.
Looking good so far.
Tim
- iMustBeCrazy, mtaylor and thibaultron
-
2
-
 1
1
-
Waiting for the 5th plank to dry, trawling through the incredible amount of build logs there are here on MSW.
I found this build log : https://modelshipworld.com/topic/3741-queen-annes-revenge-1710-by-shipmodel-finished-136-scale/
Thanks shipmodel ( Dan ) your work on the QAR boats gives me a goal to work towards. It has re-inspired me, my planking was beginning to get to me.
I know this is only a tiny model but it is testing me.
Reading the QAR log I'm being tempted towards a larger project, like a pirate ship or a Bounty.
But I really do need to finish my launch first. I am too easily tempted into a new project, leaving a trail of part finished models in my wake
Tim
- Keith Black, CiscoH, Wintergreen and 3 others
-
6
-
On 1/22/2023 at 11:53 PM, LFNokia said:
I've finally made the plans available
Thank you for these plans, I may just have to give this a go................. when I finish my small boat of course
Tim
-
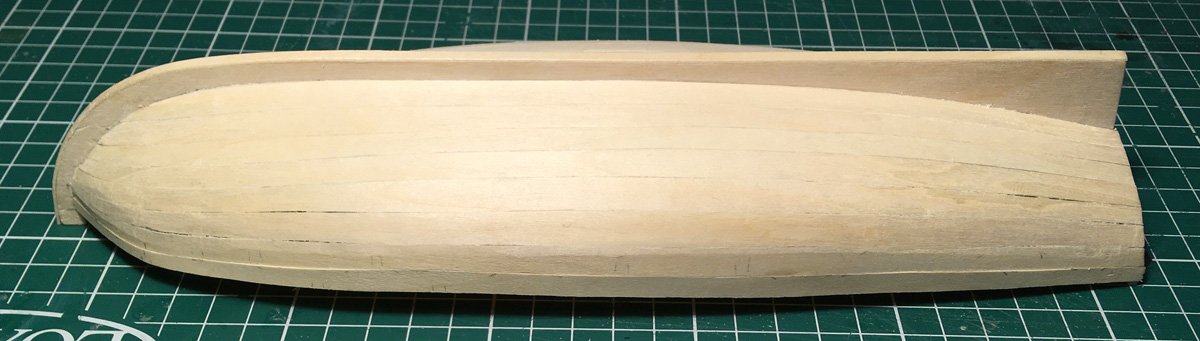
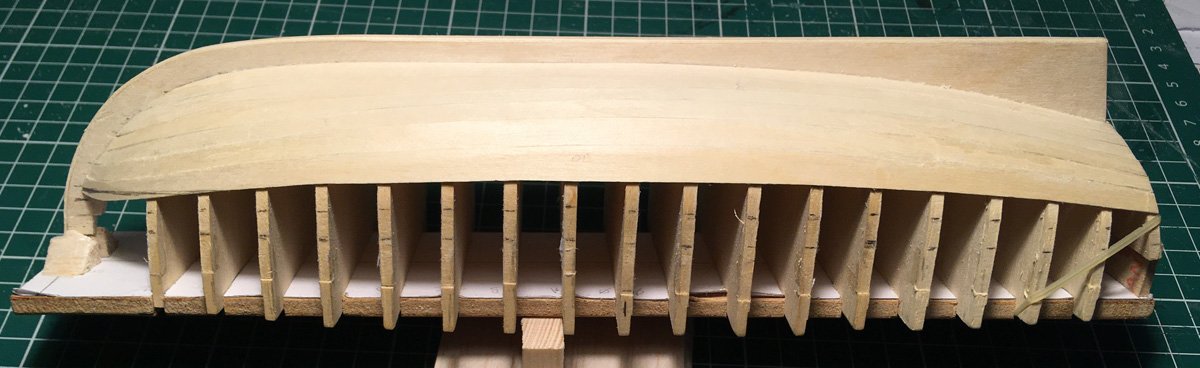
I have now glued up the matching plank pre-bent and faceted the frames.
It looks good, so I think I will continue with this technique until I get round the bend, then up the straighter sides go back to normal.
I saw some one on this forum ( website ) who had planked straight from the Garboard right up to the gunwale in one run, so on this build that is what I am trying out.
As a programmer I was taught "only change one thing at a time" or you won't know what is causing the problem.
Here I have just jumped in with all feet first.Tim
- Wintergreen, Montaigne, mtaylor and 2 others
-
5
-
5 hours ago, iMustBeCrazy said:
1: Facet the frames as you have but this leaves a faceted interior
2: hollow out the inside of the planks3: skinnier planks.
4: using hollowed out balsa blocks
5: Only clamp on the frames.
so my take on those options are :
1: Could I live with the faceted inside - Yes, if it's not to noticeable it could be alright
2 : looks like it would be really difficult to do.
3 : Planks are only 0.8 mm ( 1/32 ") going even thinner may work, worth testing, may break.
4 : This would help but may need a lot of clamping pressure and crush the model.
5 : with the clamps I am using that's the only way they work, will try elastic bands
Thanks for all of those ideas, I will see how my faceted frame worked when I un-clamp it later
Tim
- mtaylor and Keith Black
-
2
-
52 minutes ago, Montaigne said:
translate many nautical terms
Even native English speakers ( Me ) are having problems interpreting, understanding and remembering the nautical terms used here.
It does sink in over time.
Tim
- Wintergreen, Montaigne, mtaylor and 1 other
-
4
-
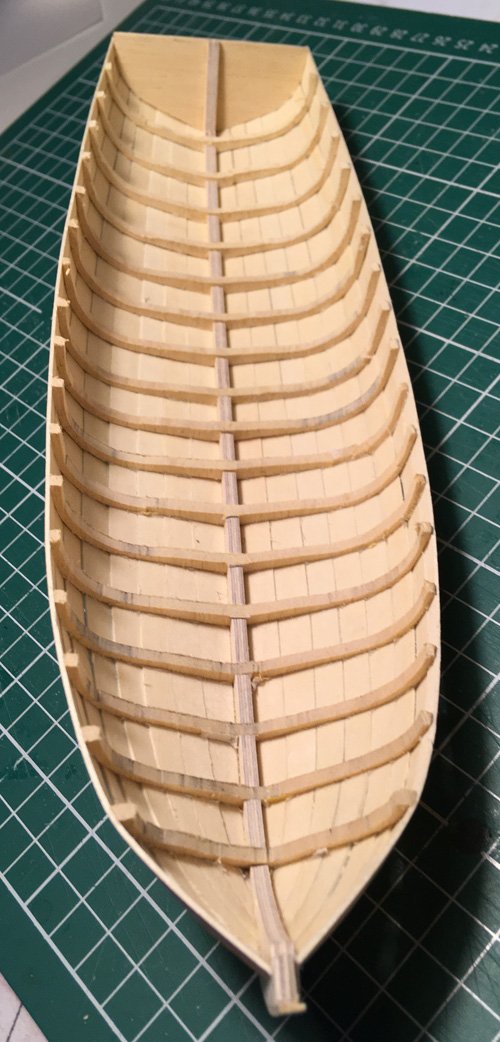
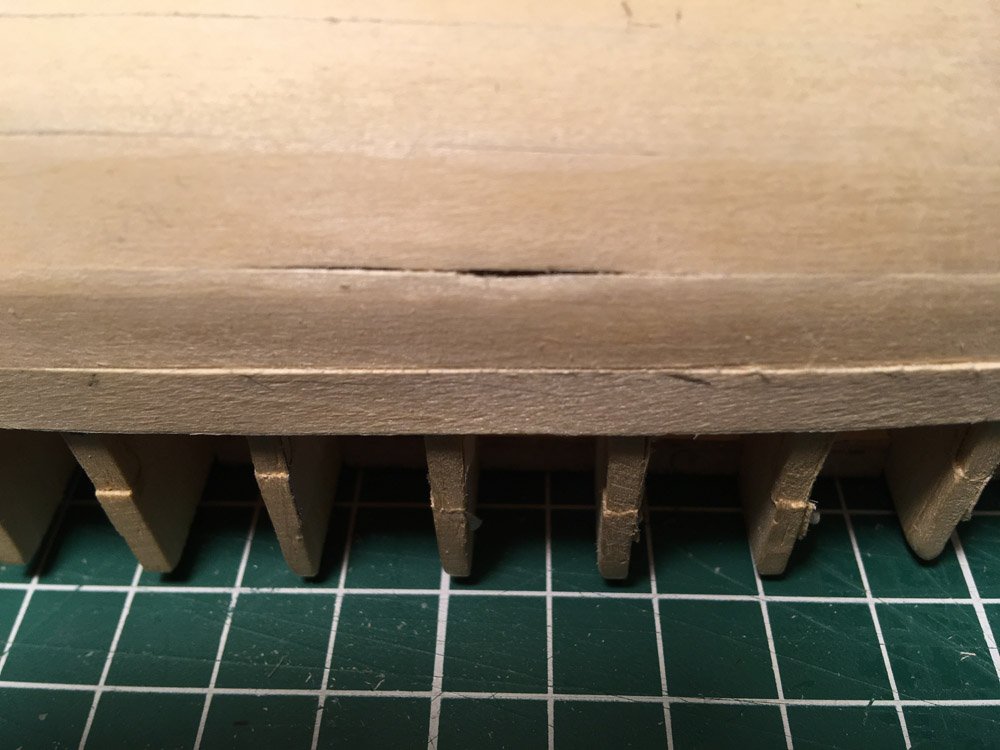
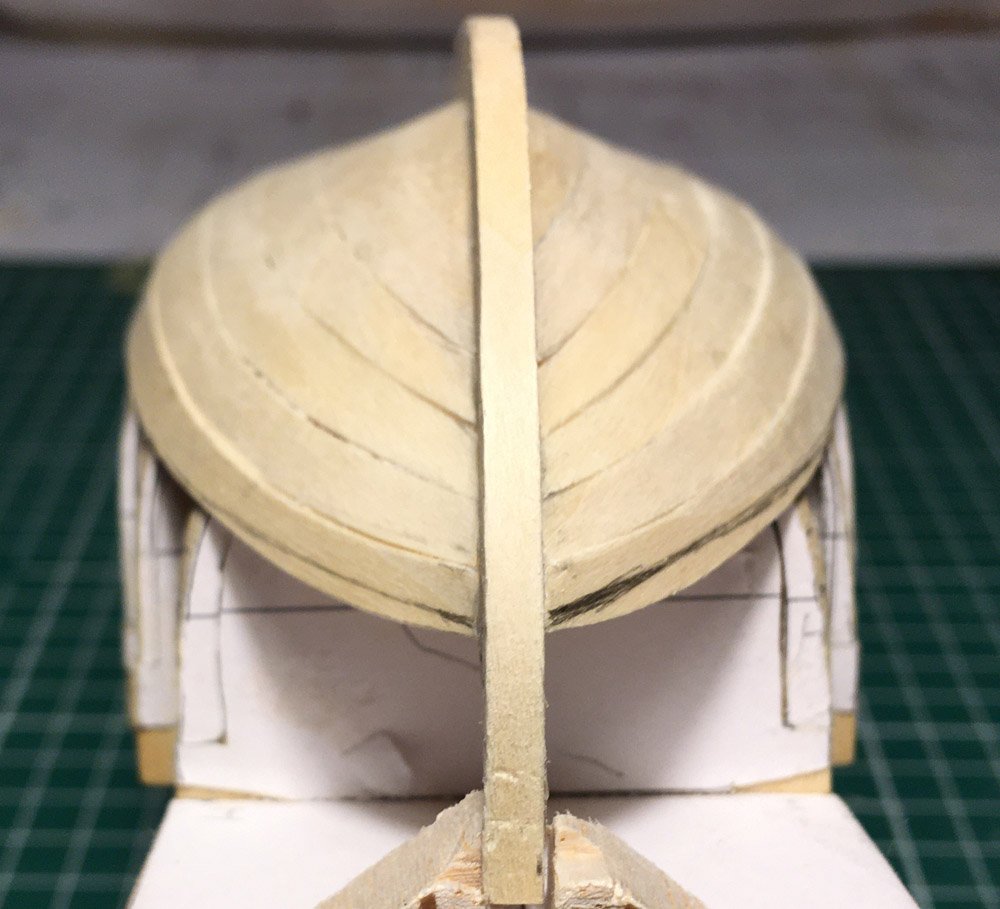
I have now got to, as Craig said - the interesting bit.
Moving down the frame, now when I lay the plank on the frame, the plank is flat but the frame is curved !
In the photo, I have used a wider plank to exaggerate what happens, the problem is made worse when you can only clamp from one side of the plank.
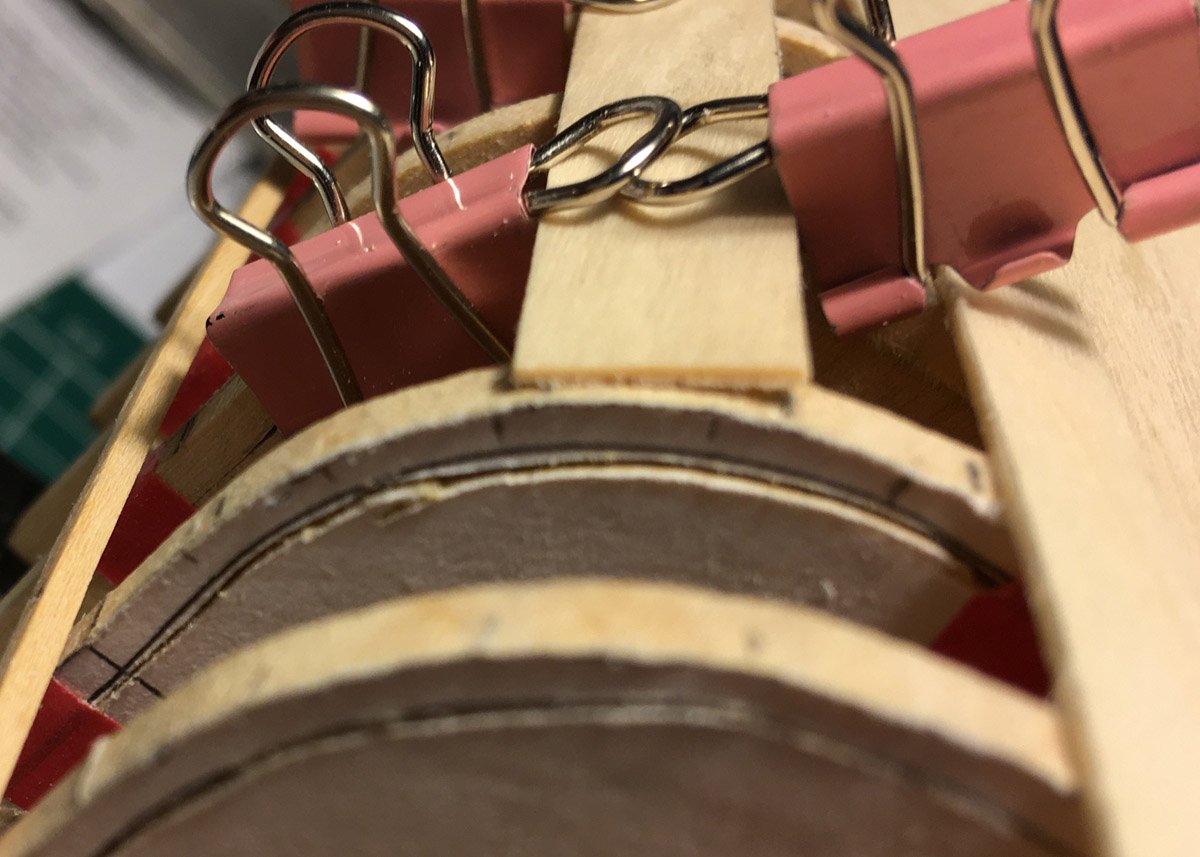
Sorry - I could not get the phone to focus on the end of the plank, but you can see what's going on.
To overcome this I have just tried a test laying of a plank.
Firstly between the tick marks on the frame, I sanded that area flat.
It's glue up right now, we will see later if it worked.
How do others overcome this?
Is there a trick I am missing?
Tim
- Keith Black and mtaylor
-
2
-
1 minute ago, iMustBeCrazy said:
Pushy pushy
")
No really 🙂 I just want to see how you do it, I am having some problems with mine, so looking for clues.
Just like you said, it gets more interesting.
Tim
- mtaylor and thibaultron
-
2
-
12 hours ago, Montaigne said:
Kudos to everyone for sharing their research, ideas and suggestions, and to oakheart: well done so far, it's looking good!
Thanks for the compliments.
Allan and Craig are the experts here, There is a load of information on the their other logs as well.I'm just here having a load of fun doing some research, trying new ideas and learning new skills.
Question : Should all of the detailed information be collected together and put it in the "launch details" log.
Who started that log ?
was it Craig or Allan? my memory is not so good
Tim
- Keith Black and mtaylor
-
2
HMS Bounty Launch by Oakheart - FINISHED - Scale 1:24 – 18th century - based on drawings from National Maritime Museum
in - Build logs for subjects built 1751 - 1800
Posted · Edited by oakheart
I think that's what I will aim for, it will cover up all my mistakes, with a bit of extra weathering from the journey I think it could look very interesting.
Add a bit of dried blood spatter on the inside from those boobies they ate raw.
Mind a good deal of that would have been washed away by all the sea water coming into the boat and being bailed out again.
Tim