


oakheart
-
Posts
412 -
Joined
-
Last visited
Content Type
Profiles
Forums
Gallery
Events
Posts posted by oakheart
-
-
15 minutes ago, iMustBeCrazy said:
Keep a few cotton buds handy,
sanding stick is a fairly flexible
Good tip, Don't know about the spit, depends if I am drinking tea or beer, maybe a jar of distilled water might be better.
Sanding stick looks good, I have some sandpaper glued to a dowel for the lower curved part of the hull which seems to be working.
Tim
-
1 minute ago, iMustBeCrazy said:
I glue the plank edges.
Thanks Craig, I like that idea.
But as I am going to stain the hull, I would worry about glue getting on the front surface of the planks.
I need to do a test and see what happens if I do.
Tim
-
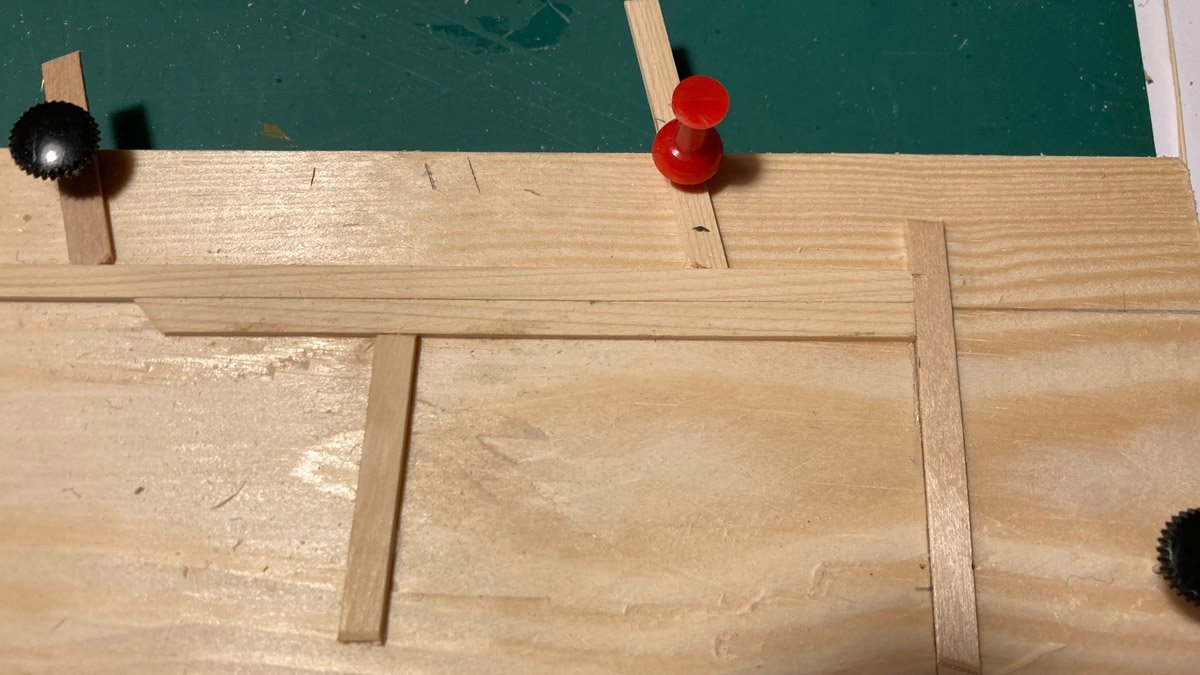
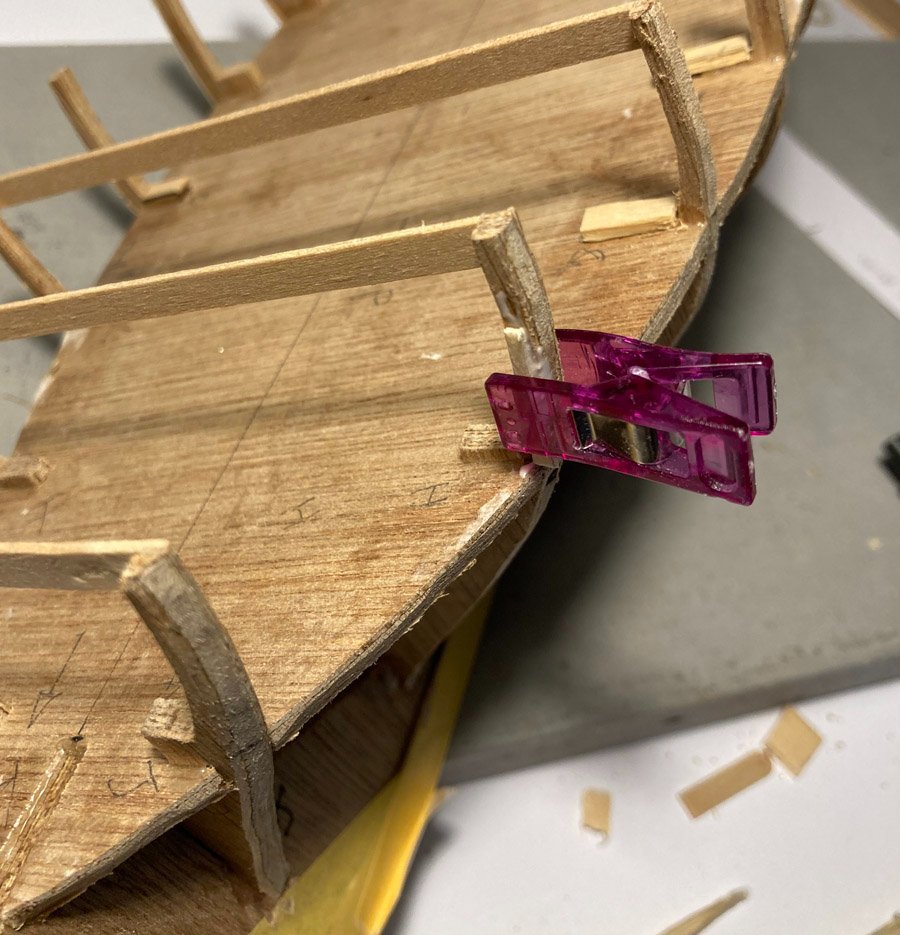
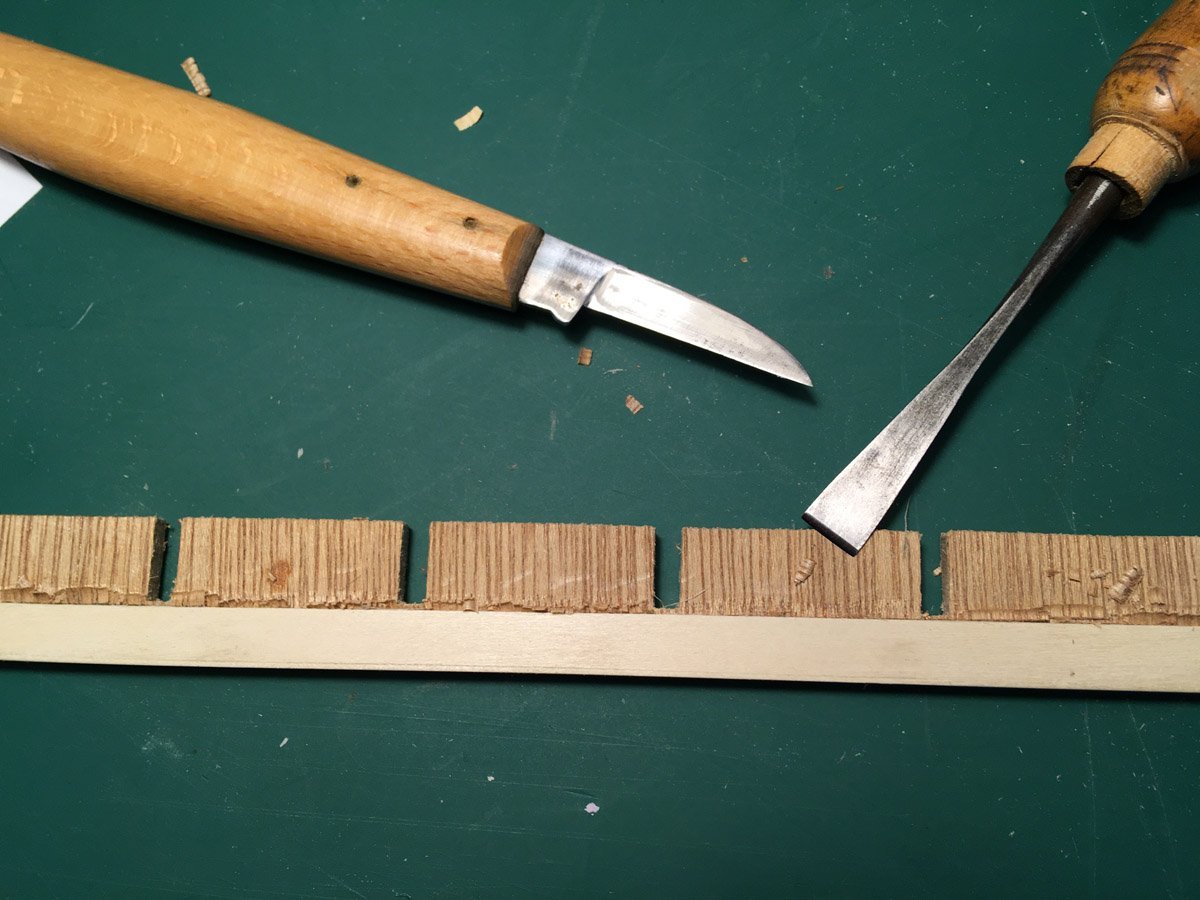
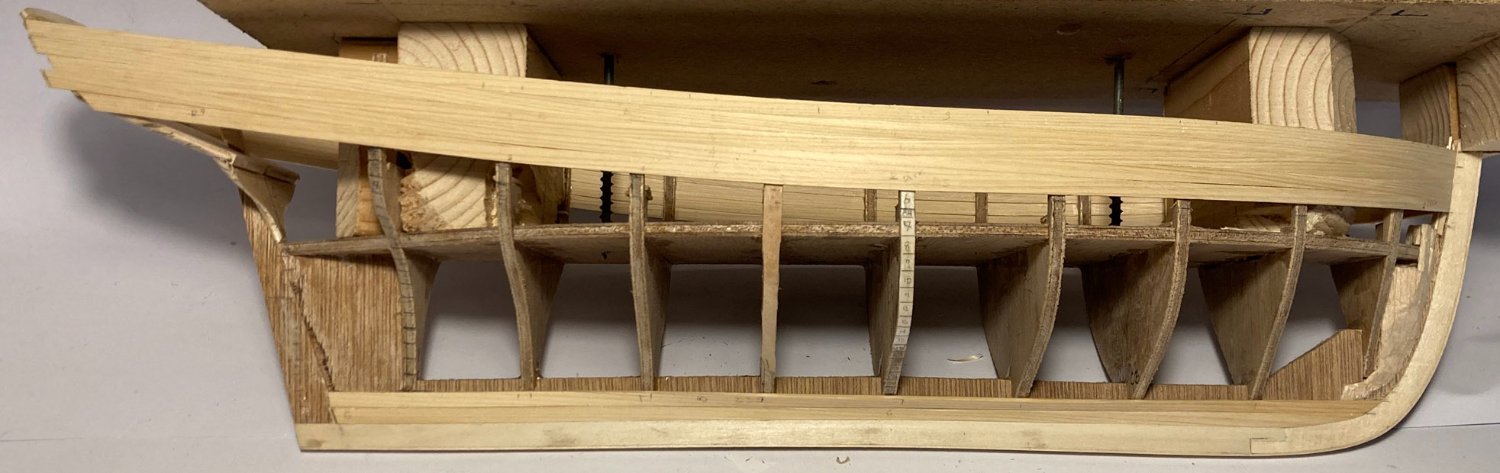
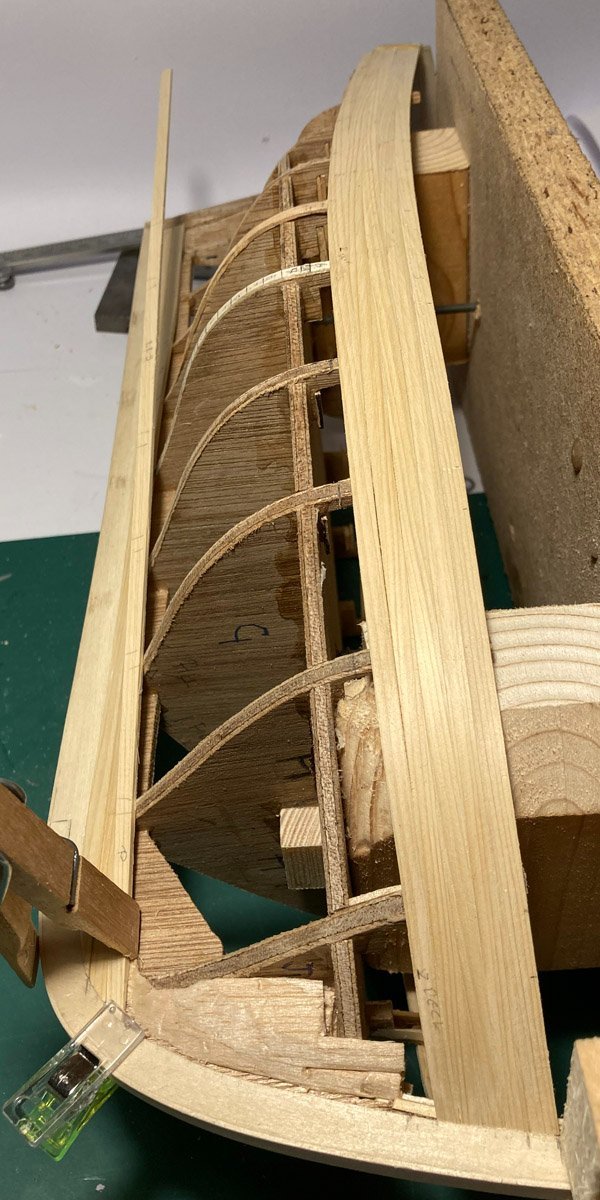
Could not resist, I started sanding the planking already done. Using 50 grit sandpaper on a small wood block.
But I have a problem with the 1.5mm thick planks flexing, while I am sanding the hull fair the planks are bending slightly in between bulkheads, I am not even pressing very hard.
This means that the plank on either side gets sanded a little bit more and becomes thinner.
This is sort of difficult to photograph, hope you get the an idea of what's happening.
On my next build I will use more bulkheads, meanwhile I have glued a small strip behind the planks to stop the flexing.
Has anyone else had this problem?
What have others done about it?
Tim
-
Thanks for the compliment Craig, and everyone for the likes.
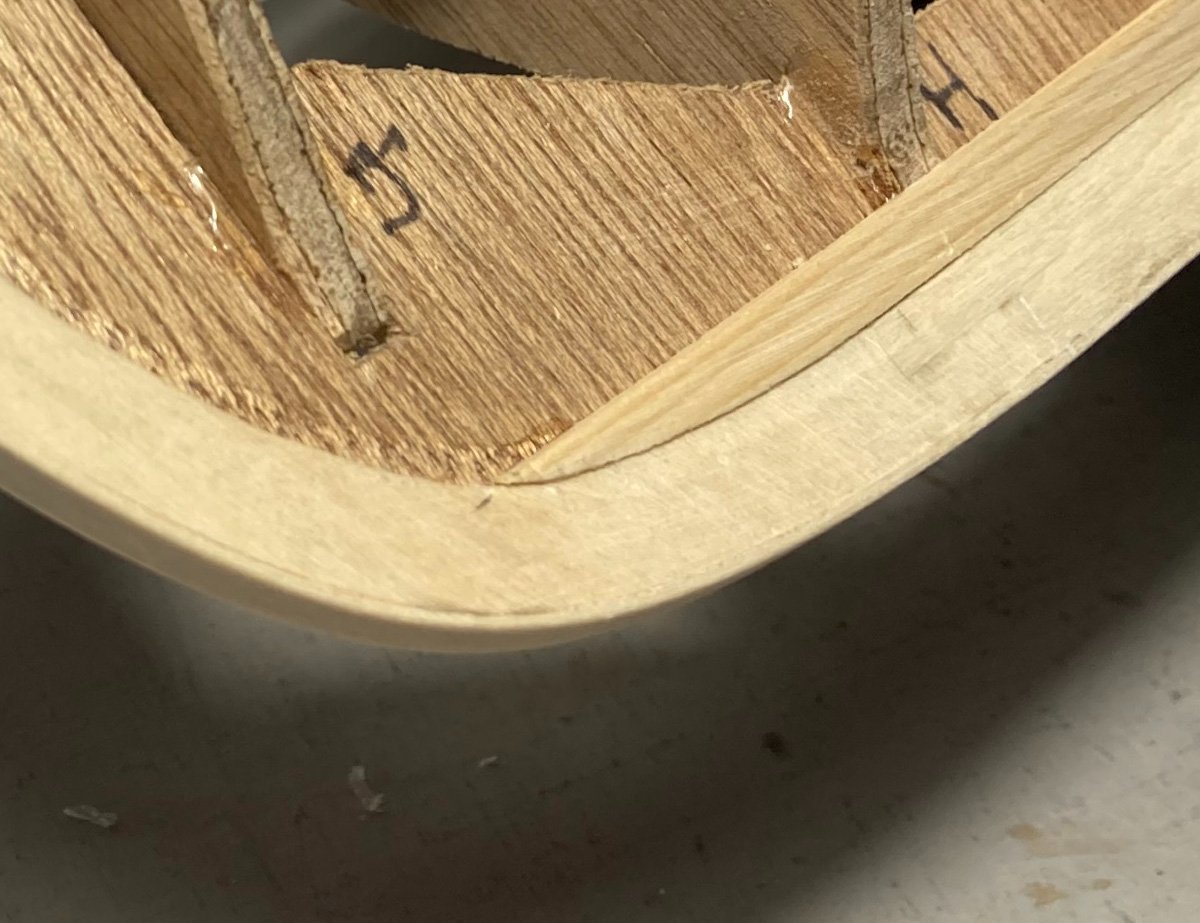
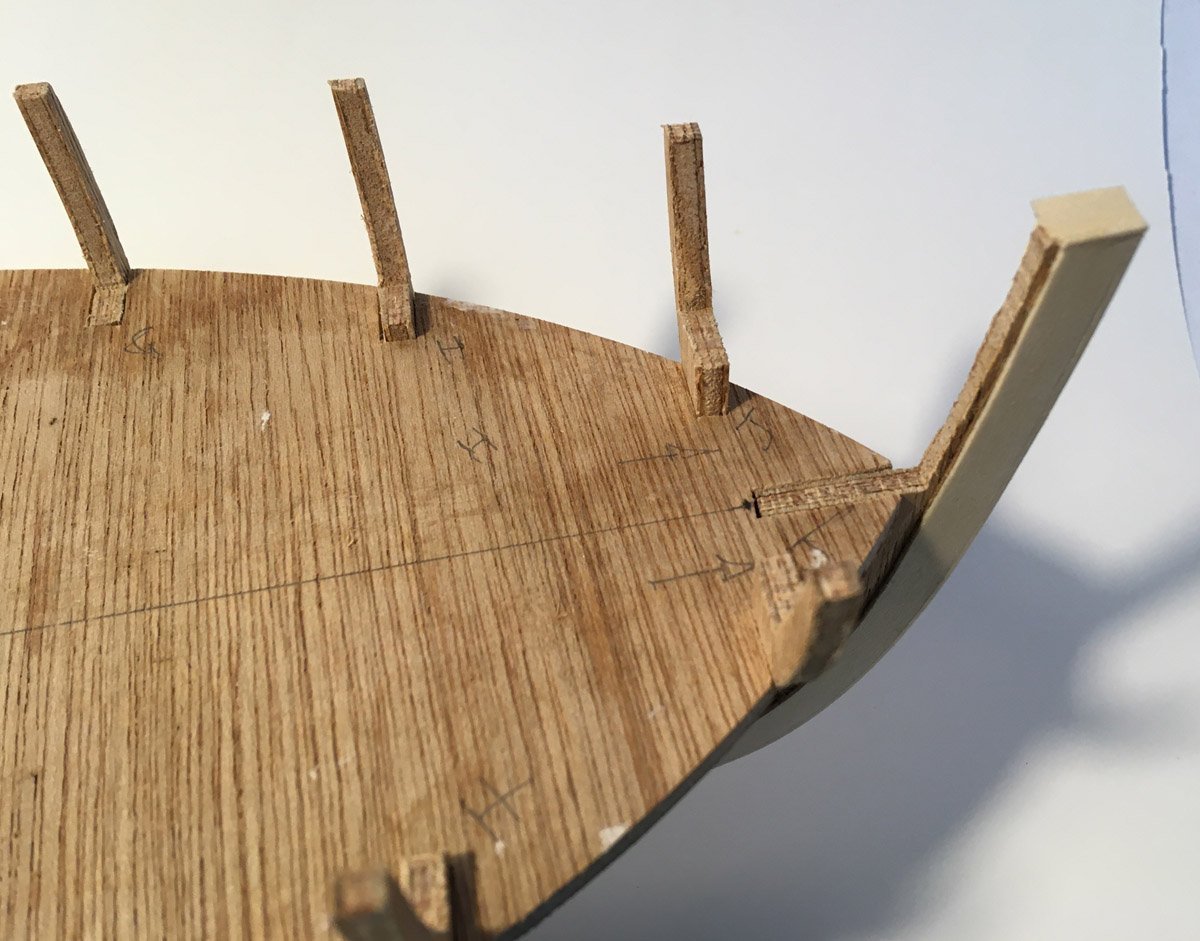
10 hours ago, iMustBeCrazy said:a hair (literally) more off the highpoints of strake 5
I have only just noticed that gap between 4 and 5, things show more in photos than in real life.
Not sure if I will take it off and fettle it or not.Tim -
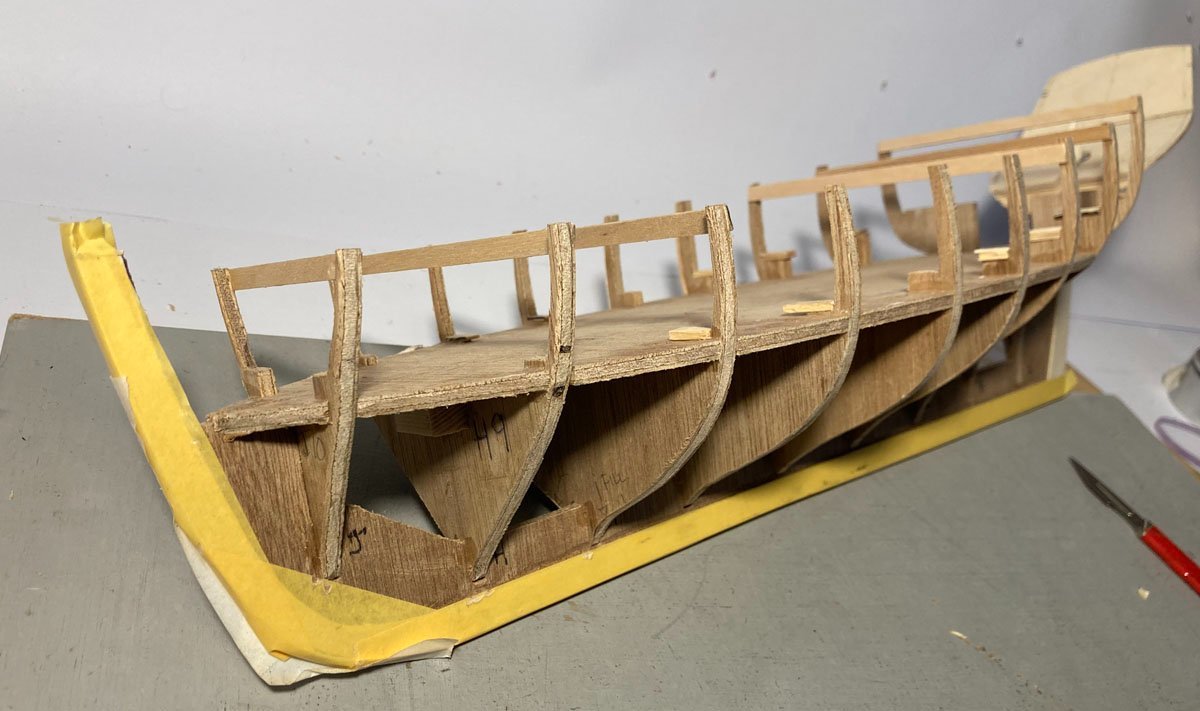
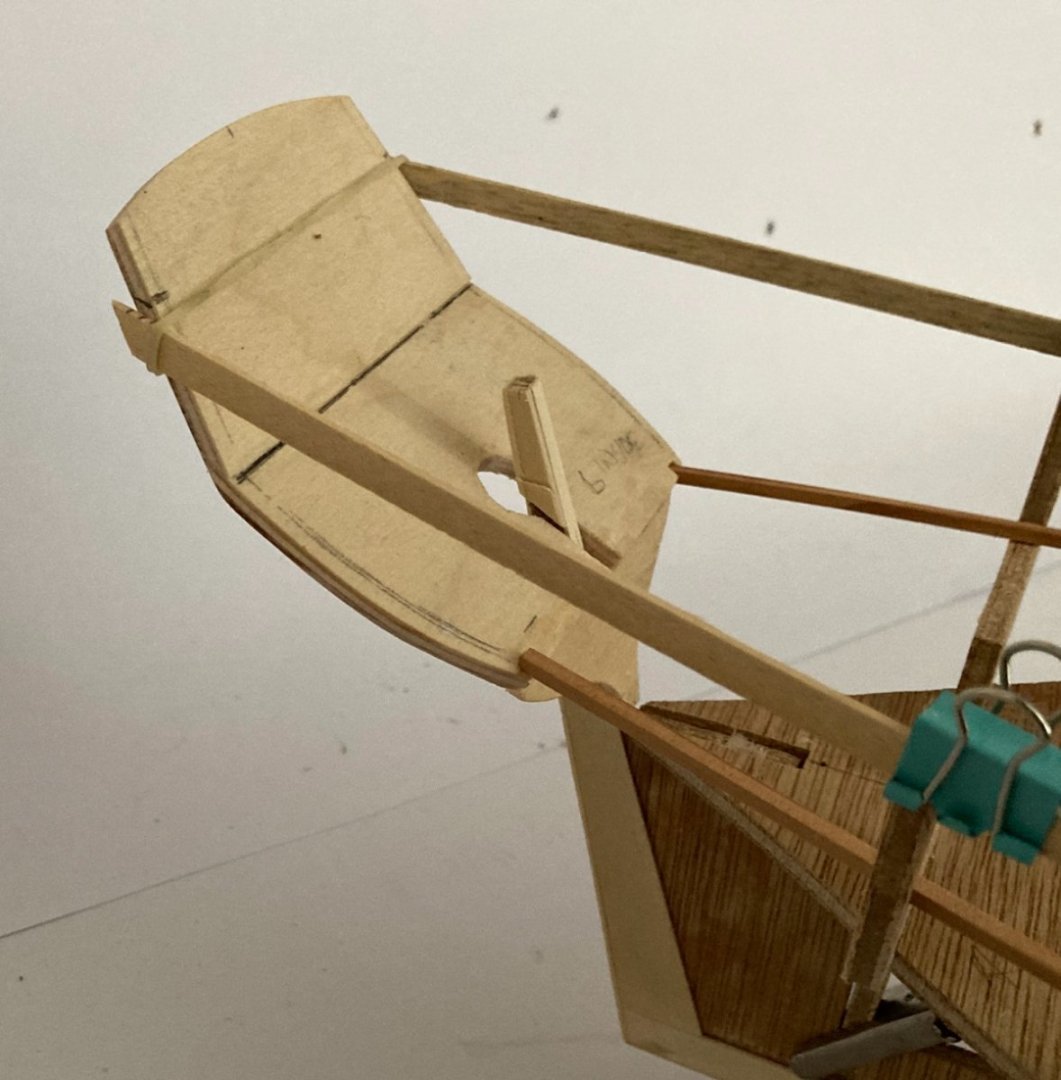
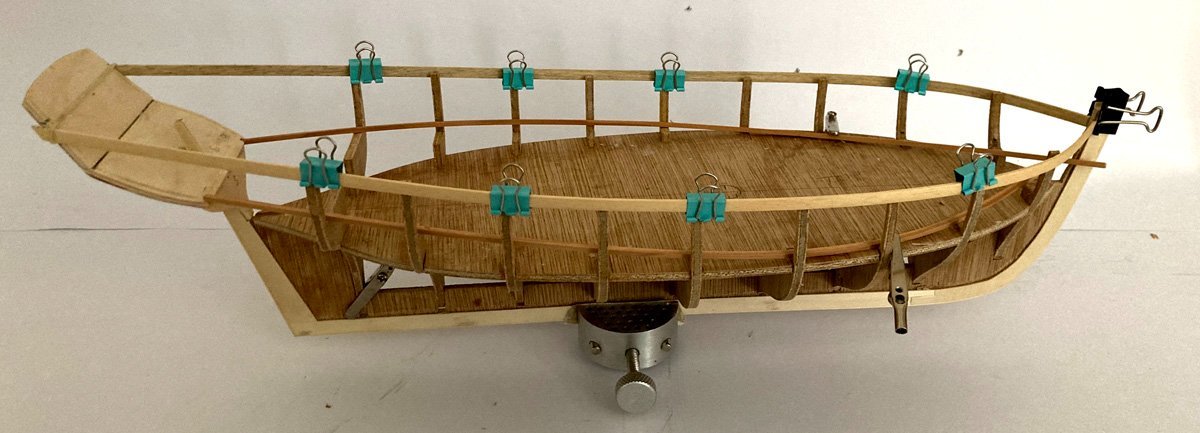
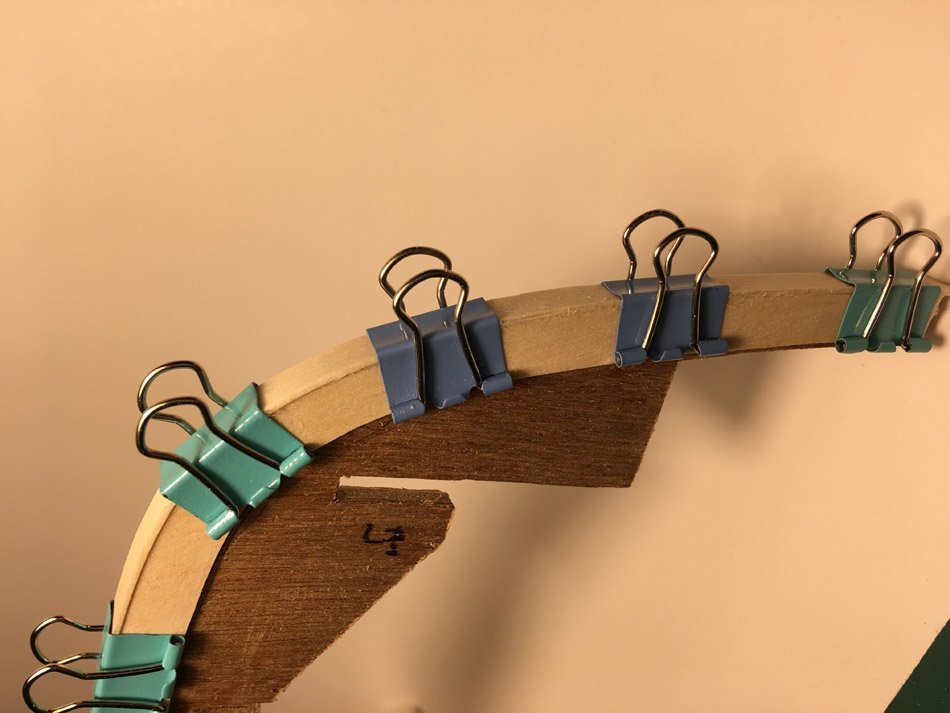
The planking continues.
I made a simple jig to aid cutting the planks into the correct taper.
here it is with the steel straight edge ready to cut the taper
A few planks make it begin to look like a cutter.

the shape begins to appear.

close up of the bow.
Doing the Bounty launch helped me with understanding planking.
I want to stain the Alaskan Yellow Cedar to look like the old models in the RMG collection, so I have been testing a water based wood dye.
Pleased with the result, also found I could not coat with brush on acrylic as the stain runs, so used a rattle can from Halfords.
Tim
-
3 minutes ago, iMustBeCrazy said:
Well, if I can pull this off the guns will have functioning carriages.
Now, I know you really are crazy.
Tim
-
So here I am back, it's been a long summer, so much to do.................
Managed to get a bit done on the Speedy. Garboard plank in place on both sides.


while I am plodding away building this 1:48 scale model some people build full size Cutters. Here is the real thing
Luke Powell built the 'Pellew'
https://www.workingsail.co.uk/pellew?itemId=fihssy98q3833wr2jbjrsb17q7mzt6
loads of videos of it on youtube.
and some action video of other Cutters , really shows what it must have been like sailing these craft.
anyway, the sun is shining and I have more garden work to do.
See you soon
Tim
- allanyed, iMustBeCrazy, GrandpaPhil and 3 others
-
 6
6
-
On 7/14/2023 at 8:03 PM, allanyed said:
If they were indeed Blomefields,
Thanks Allan
For this build I have just gone with whatever Bill Shoulders has shown on his plans.
I have no idea if they are accurate or not.
I will try and find somewhere in the UK where I can get things 3D resin printed, I have tried cannons at this scale on my FDM printer and they do not look good.Tim
-
18 minutes ago, iMustBeCrazy said:
just screw something (or some things) to the false deck
You are right, I need to : KISS
As the plywood is a bit suspect the blocks will be better.
Just some 4x2 ( measure it first ) blocks on the false deck would do the job.
thanks Craig
Tim
-
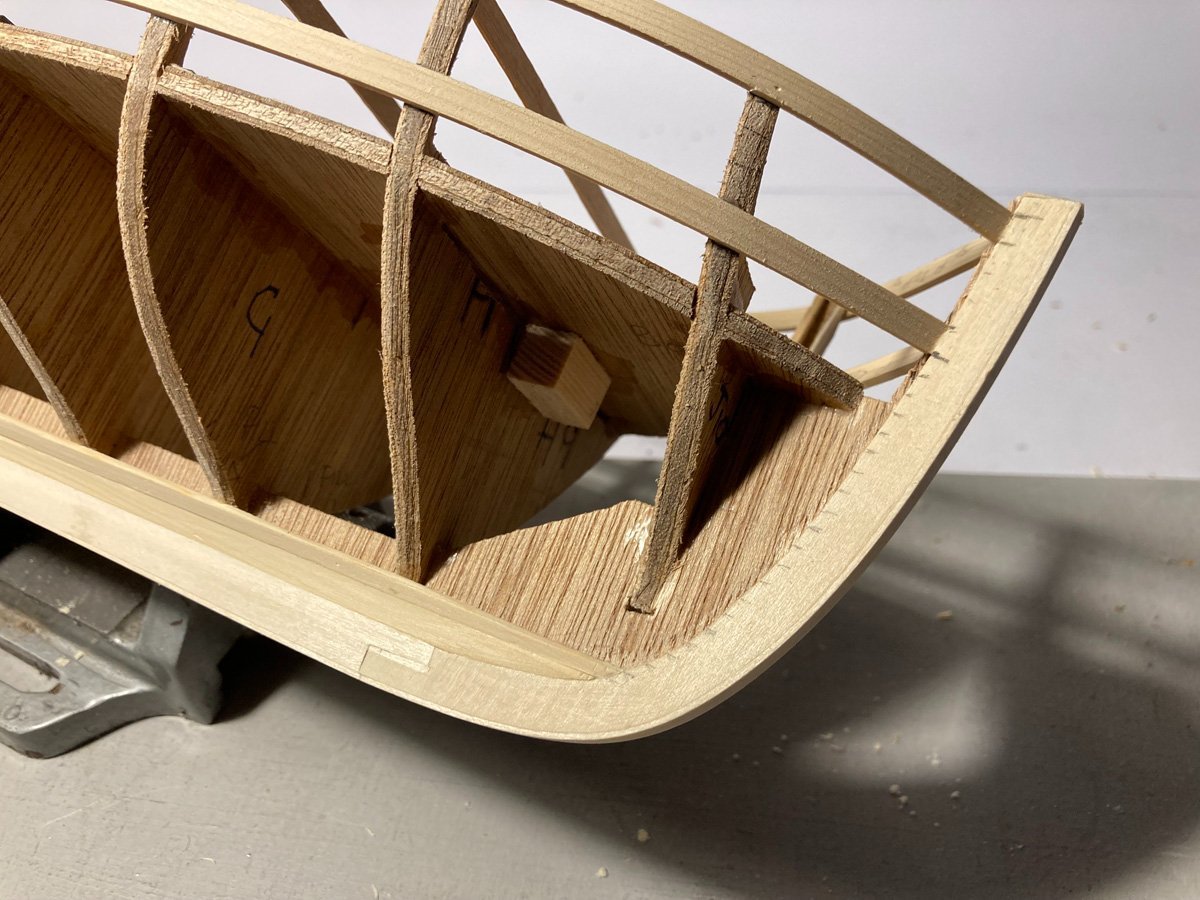
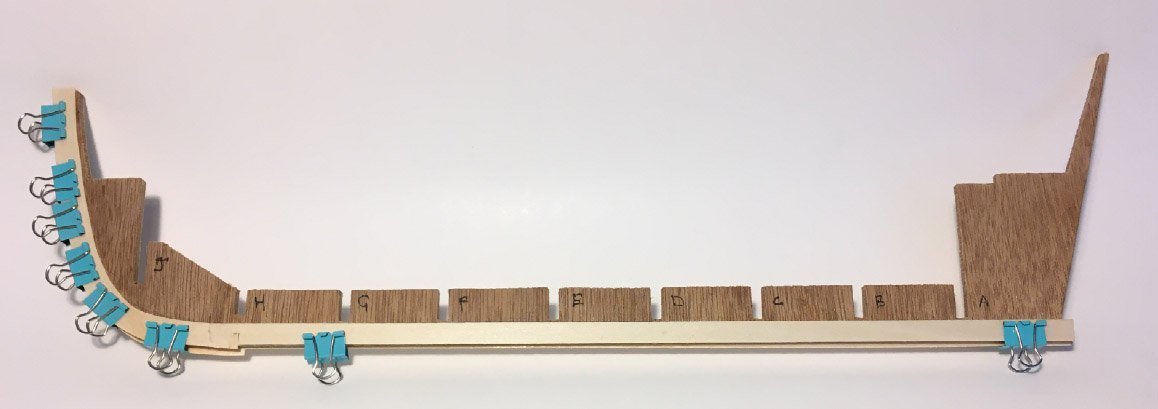
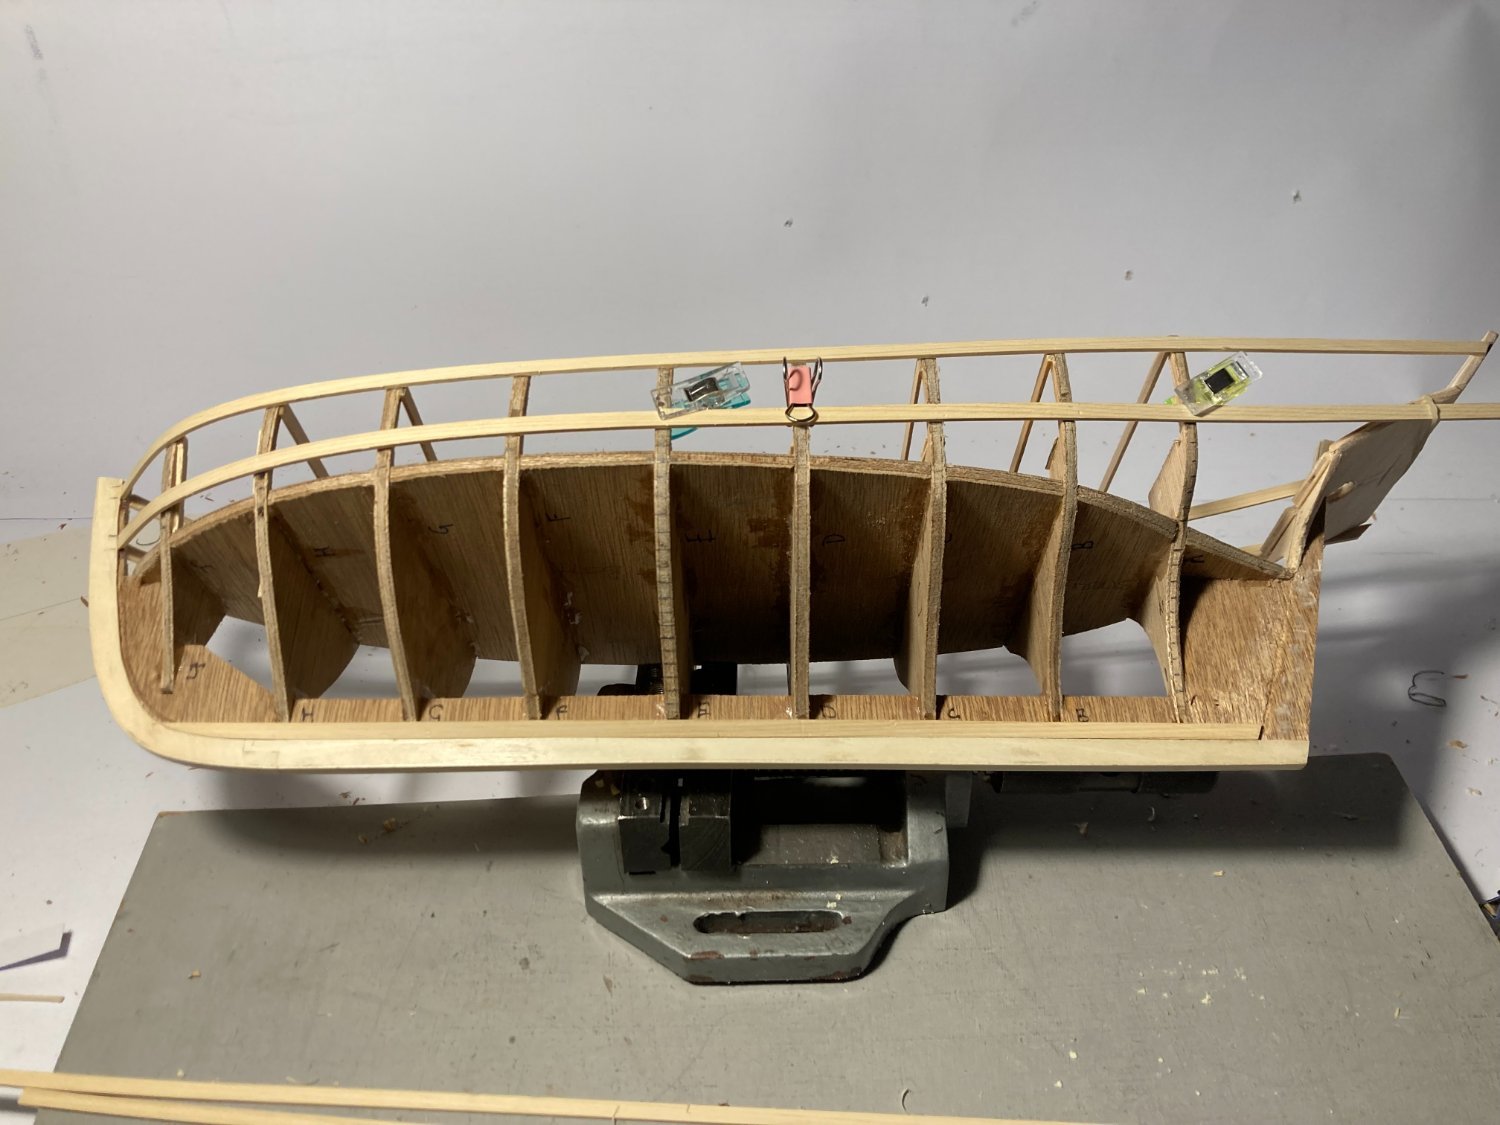
Managed to get some done to the hull over the last few days.
Masked up the keel ready for fairing the bulkheads.
Noticed a fault ( hole ) in the plywood

made a quick and dirty repair
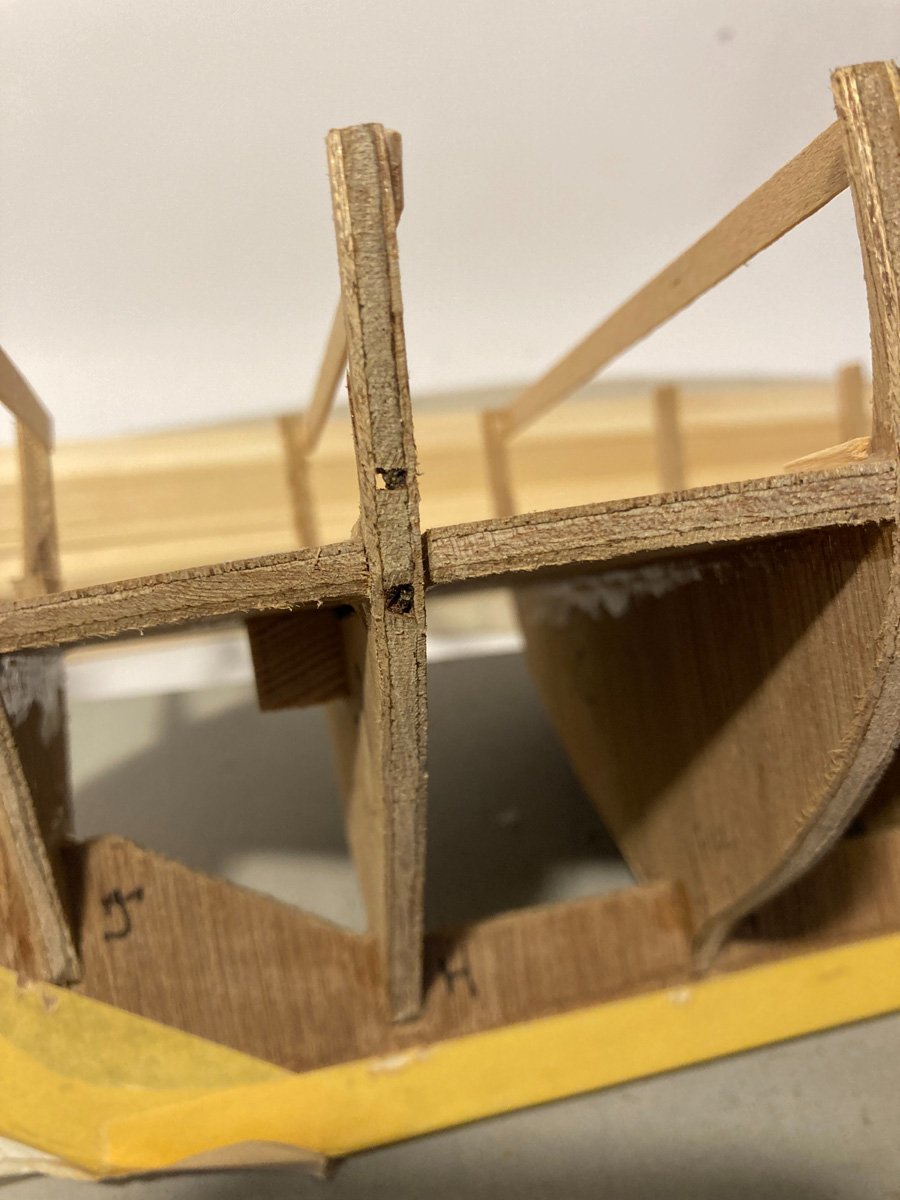
I had to add some temporary beams to strengthen the bulkhead tops while I was sanding.
they will be removed after I have done the planking.
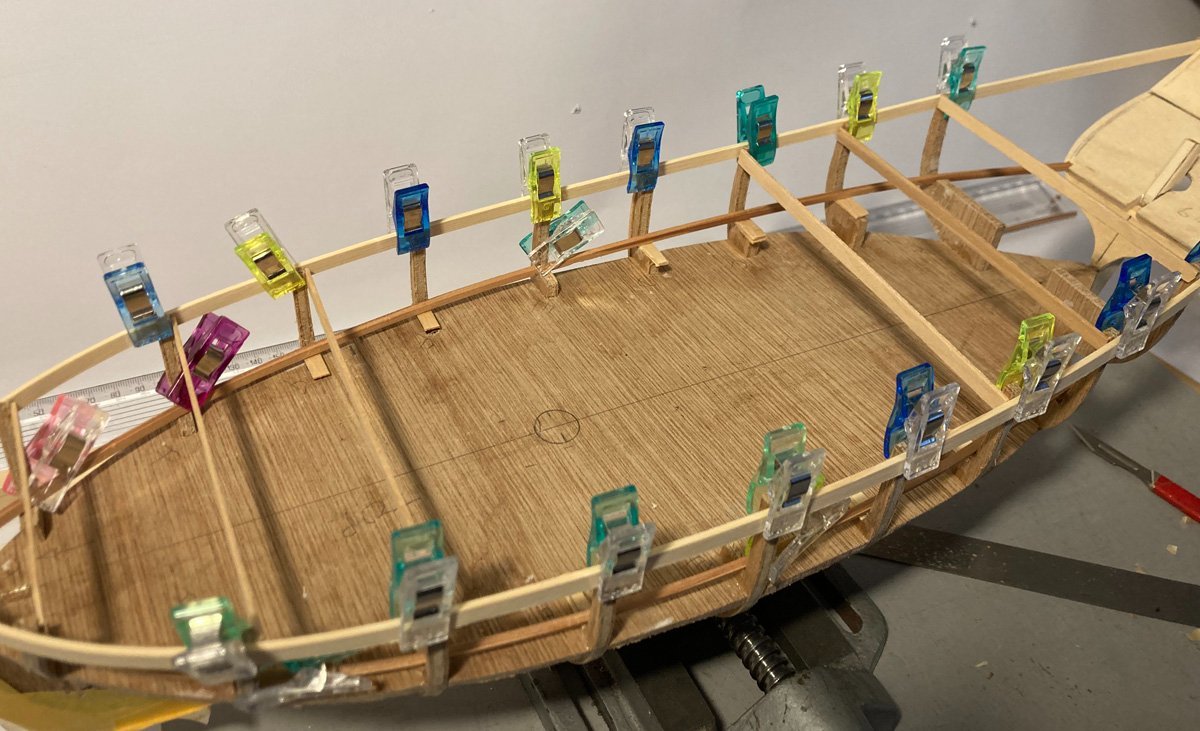
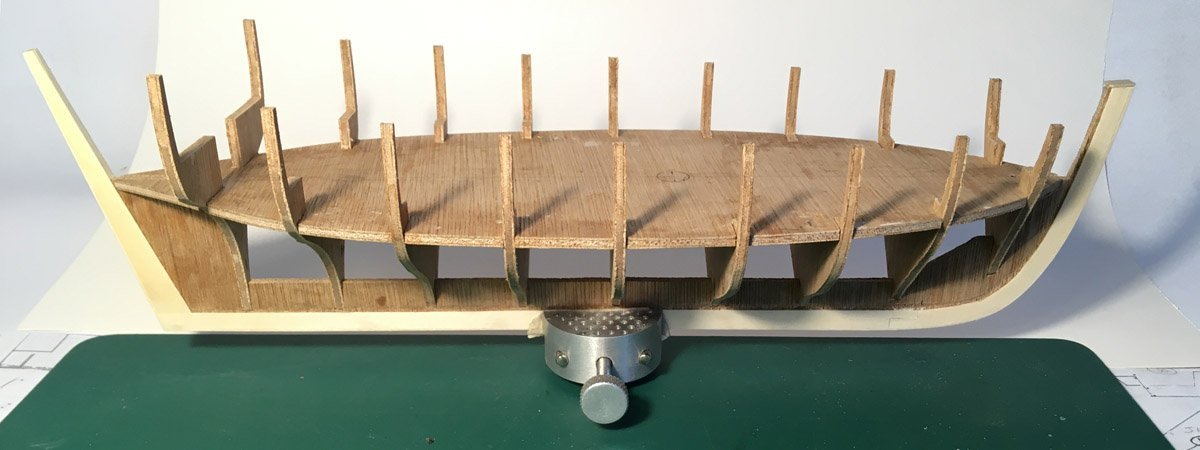
the planks now sit nicely on the bulkheads
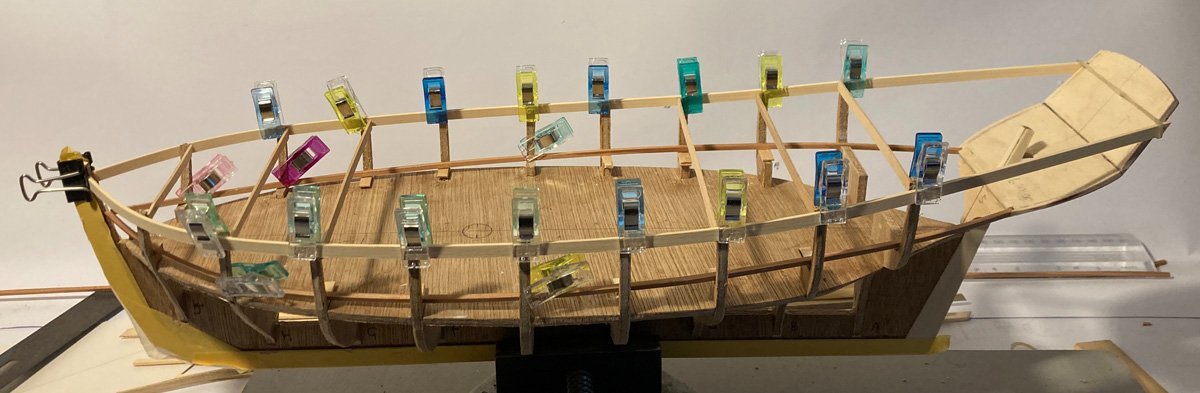
I now need to make a jig to hold the hull upside down while I do the planking.
Off to do some research
Tim
- bruce d, iMustBeCrazy and Thukydides
-
3
-
On 7/4/2023 at 1:00 PM, chris watton said:
released in around 2 weeks
Now I know what my new build will be.
Tim
- mtaylor, Canute, chris watton and 2 others
-
5
-
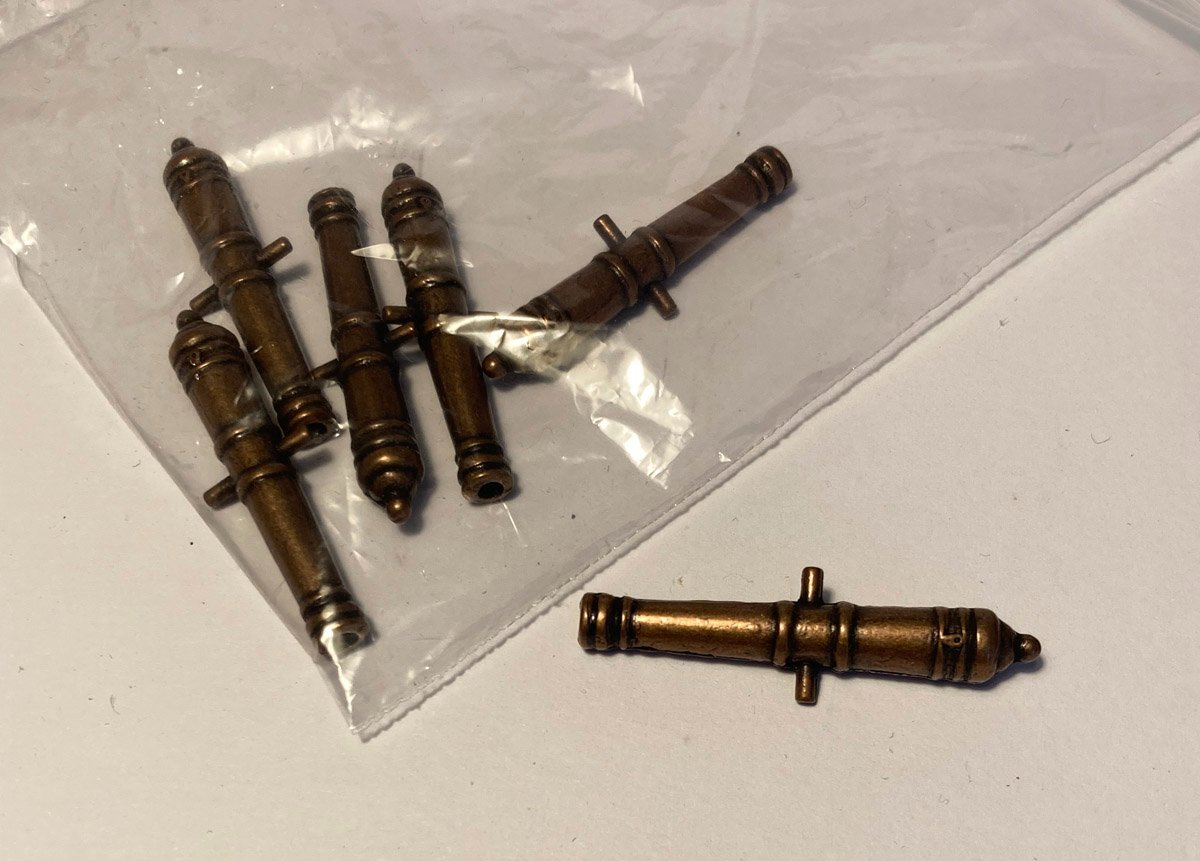
While the glue on the bulkheads was drying, I turned to the cannons.
I had ordered a set of Amati barrels and wheels from my favourite model shop
https://www.cornwallmodelboats.co.uk/acatalog/amati-cannon-barrels.html
I drew out the carriage to scale, printed it out then assembled a stack of 2mm thick wood cut to those dimensions, a small strip was glued along each end to hold the block together. The template was pasted on one side of the block.
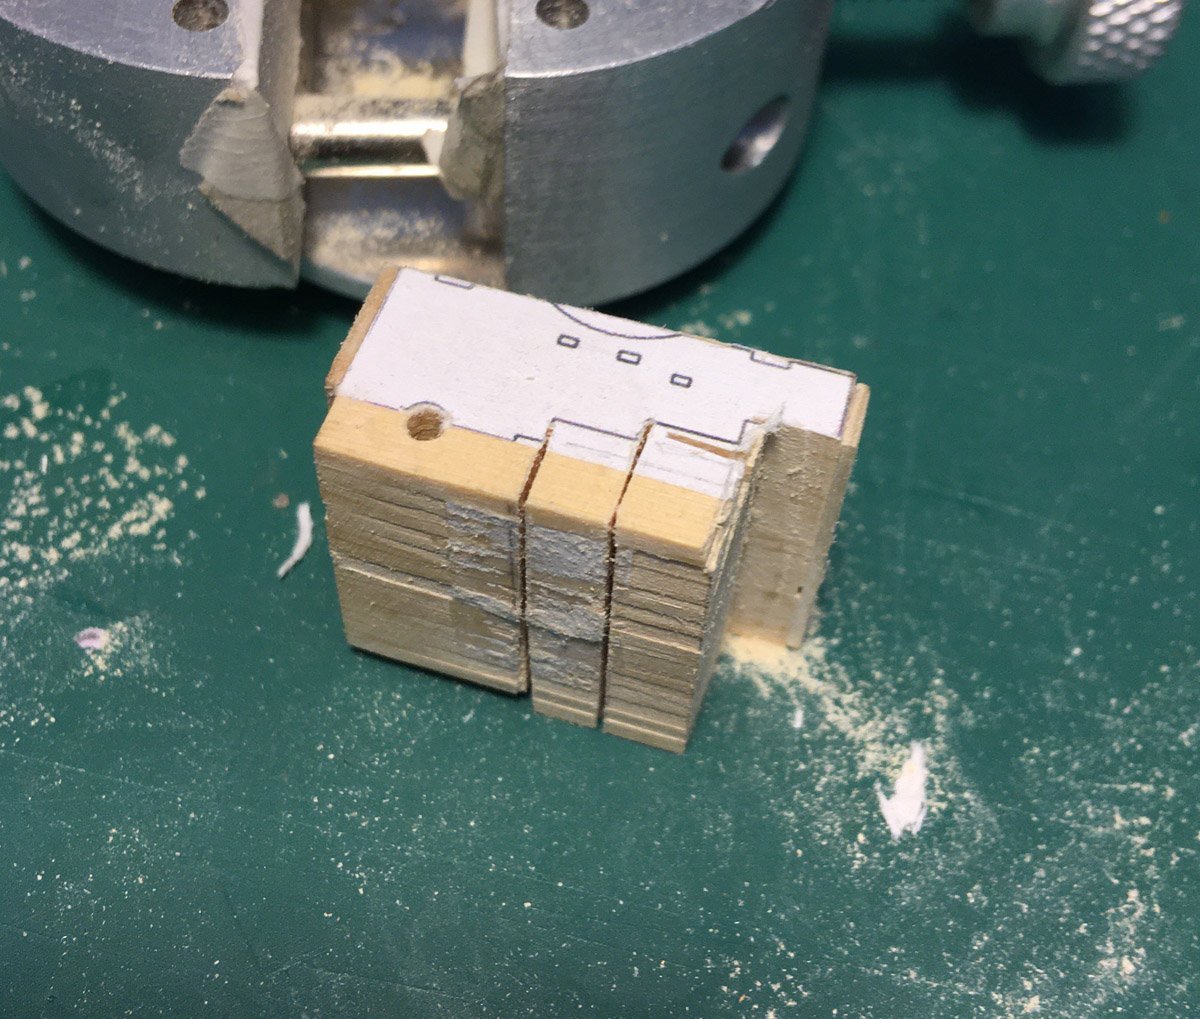
Then using a jewellers saw cut out the shape of the carriage.
There are a few errors with the cuts, but not too bad overall, a quick touch up with a small fine file.
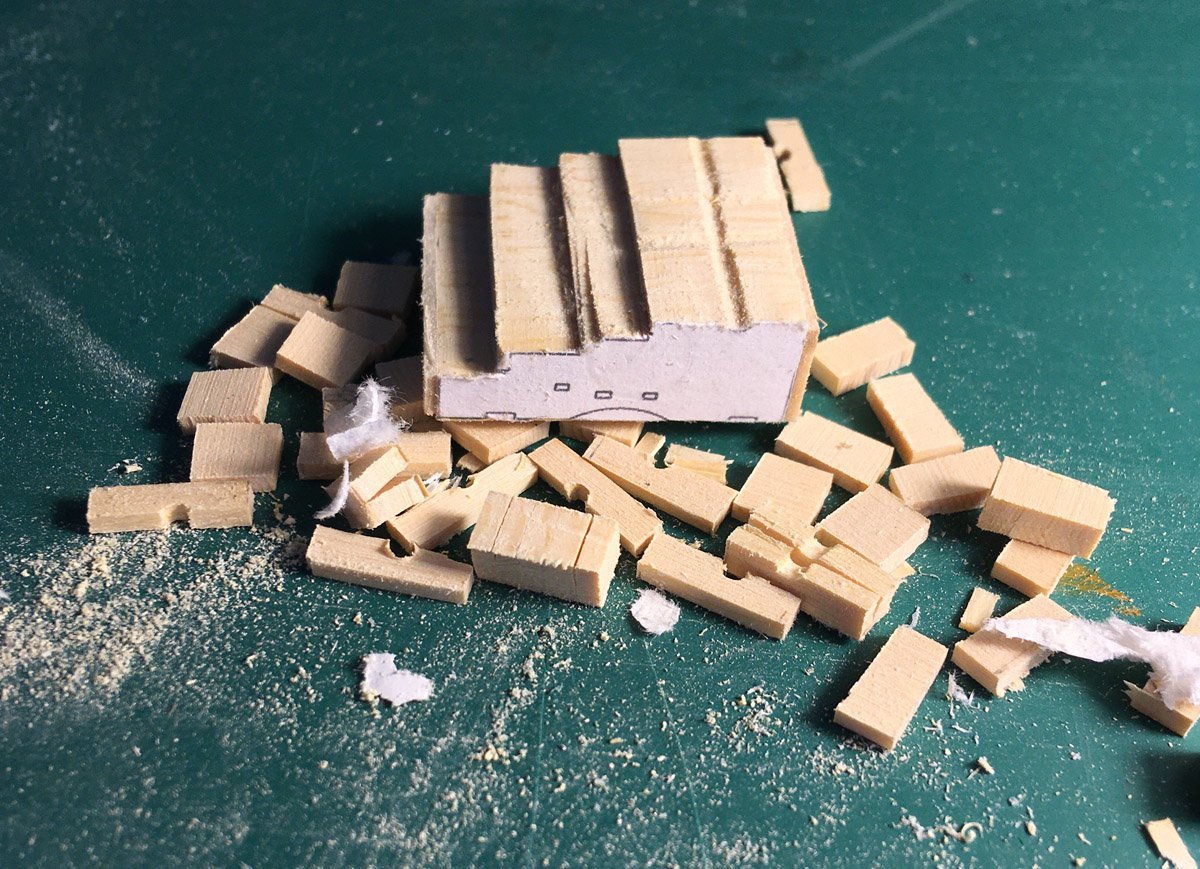
I ended up with enough to make the required number of carriages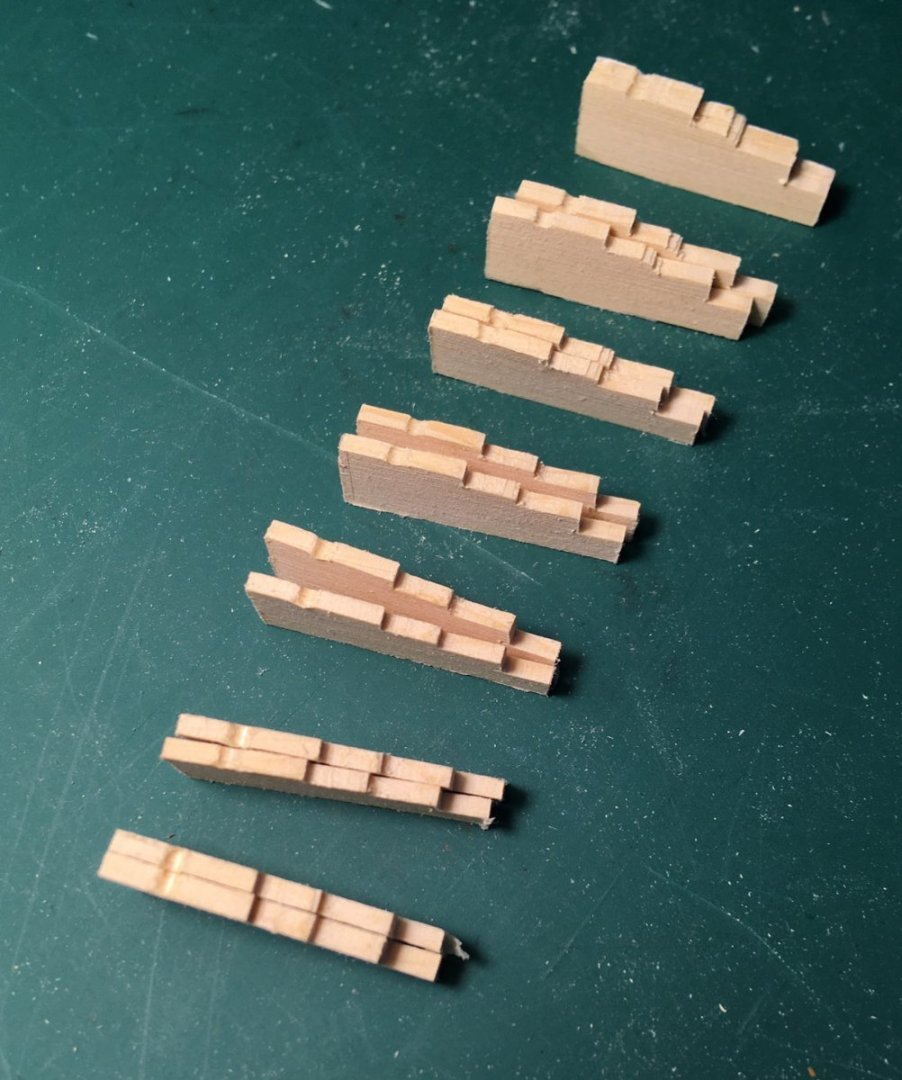
These were assembled and with the barrel in placed look pretty good,
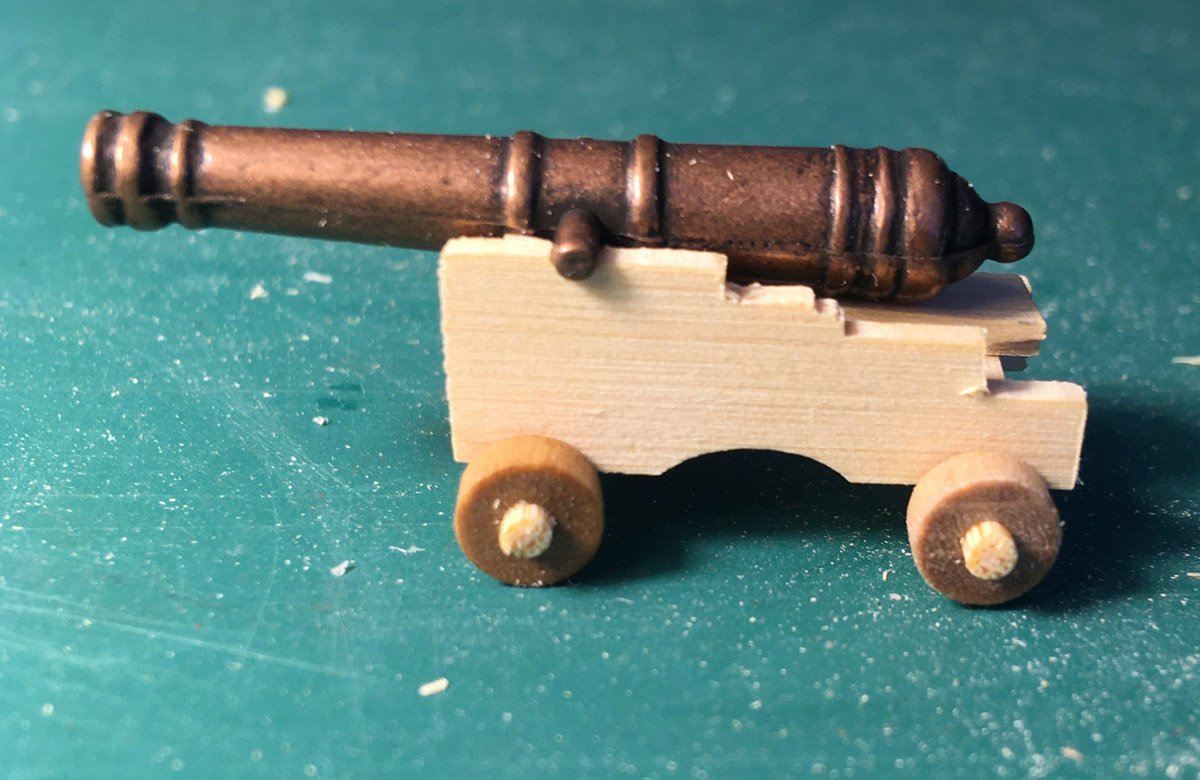
the barrels are a bit to garish so gave them a coat of matte black that I dabbed on with an old scrubby brush.
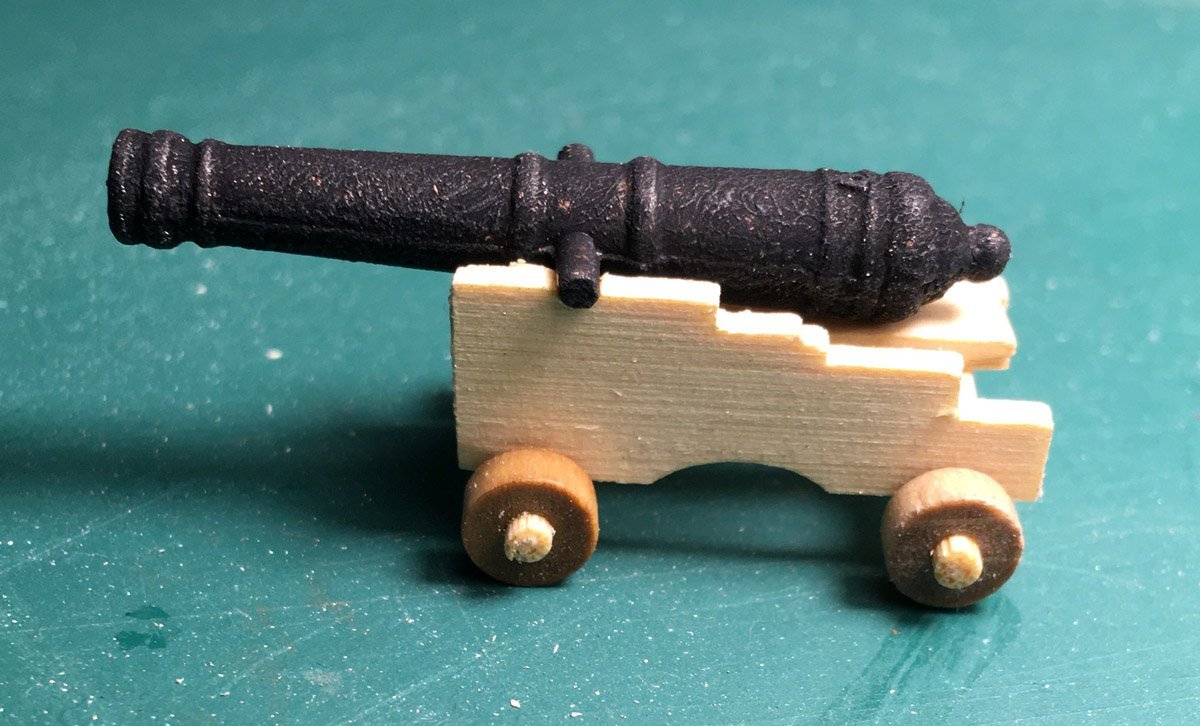
Looking good.
But I have just realised looking the photo that the wheels are on the wrong way round, should be the larger at the front, lucky I had not glued them in placeTim
-
With the angles corrected and the top part made narrower it looks muck more the part.
the shape begins to look like a cutter
now to glue the bulkheads in place.
Tim
- mtaylor, iMustBeCrazy and bruce d
-
3
-
7 hours ago, iMustBeCrazy said:
Yours also seems to sit a bit high, have you joined it the same as Thunder did?
Hi Craig
Well spotted, you have a very keen eye, it is high and I did not join it the same as either you, thunder the booklet.
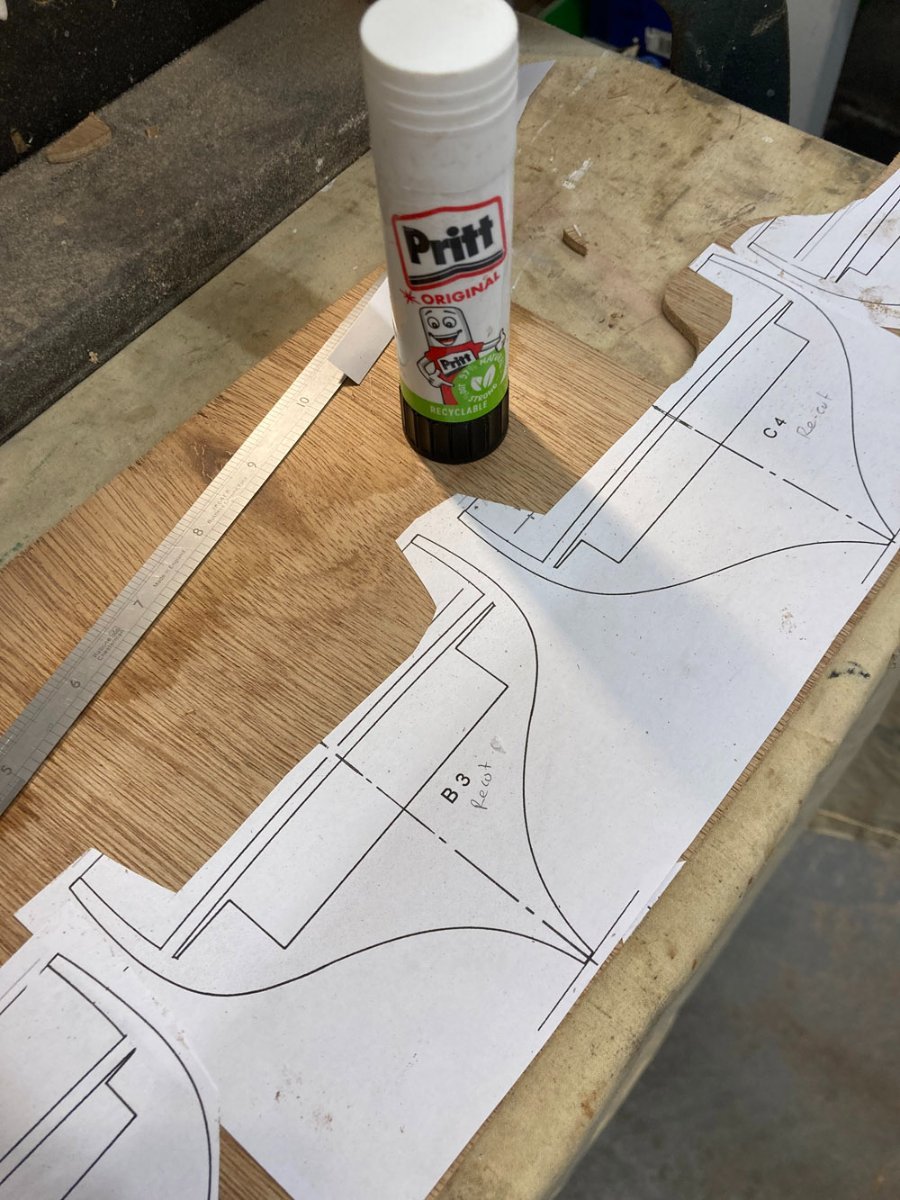
I went off on my own and it worked out wrong, I have no idea where those angles came from?So back the the drawing board, printed out new templates and cut some new parts.
I now need to sand them to the correct angles and glue them up.
Back tomorrow
Tim.
-
-
-
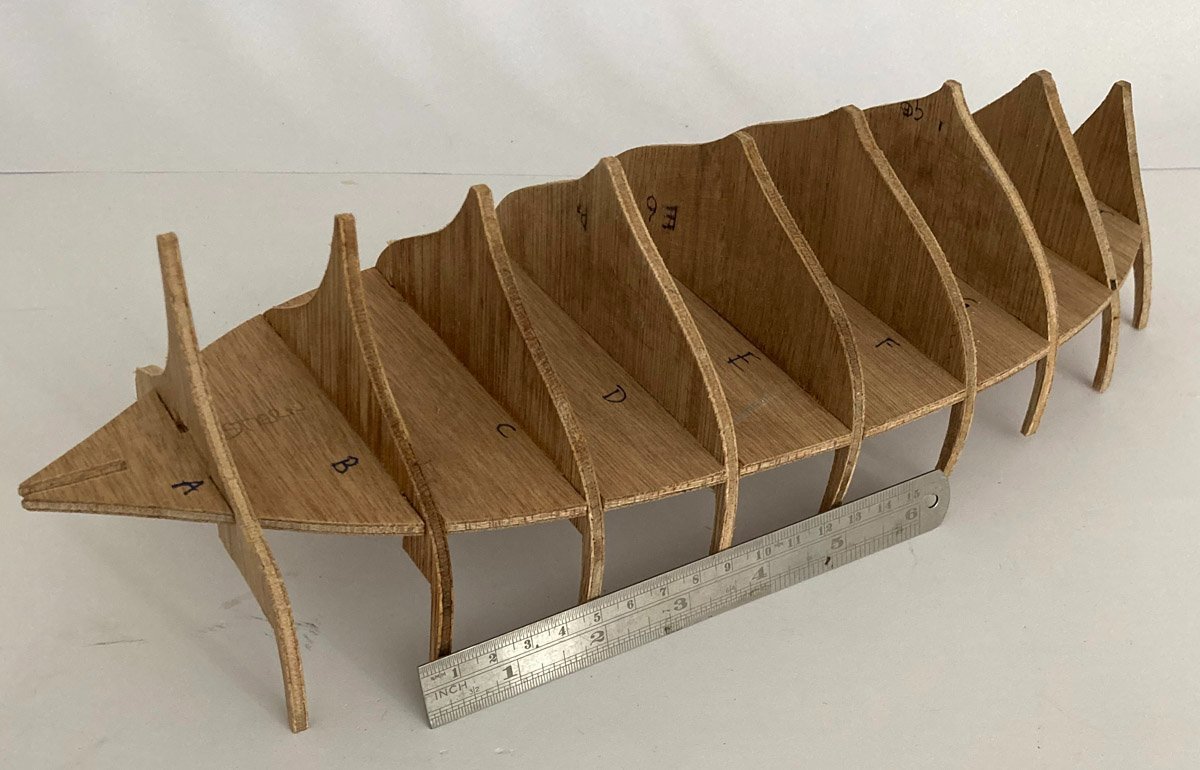
Found some time time to cut the rabbet
and then trying the keel in place.
stem
and stern post

its beginning to take shape
Tim
- bruce d, iMustBeCrazy and mtaylor
-
3
-
Just a couple of small jobs to keep the build moving along.
Glued on a strip of limewood to cover the raw plywood edge.
then added a layer of limewood to the stern. In my next build I really want to make a solid wood stem, keel and stern post.
but for this simple cutter model that I am using to get some practice at planking, this will do.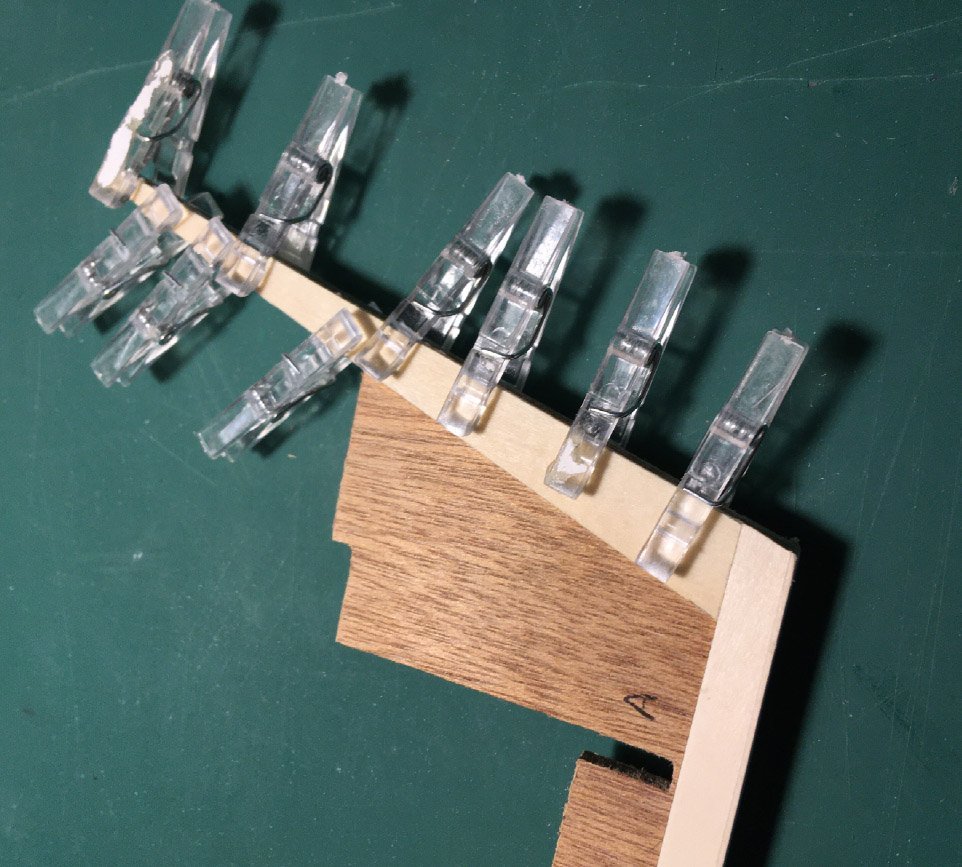
Tomorrow I will cut a rabbet.
Tim
-
4 hours ago, Igmar said:
Hello.
I build models for customers. Recently I got the idea to open my own channel on YouTube.Hi Igmar welcome to MSW
I am glad to be retired, I used to build models for customers ( not ships )
Will go and have a look at your YouTube channel
Tim
- Ryland Craze, Keith Black and mtaylor
-
3
-
Yesterday in the workshop I managed to get quite a lot done.
Pasted the paper templates onto the plywood.

then made some sawdust
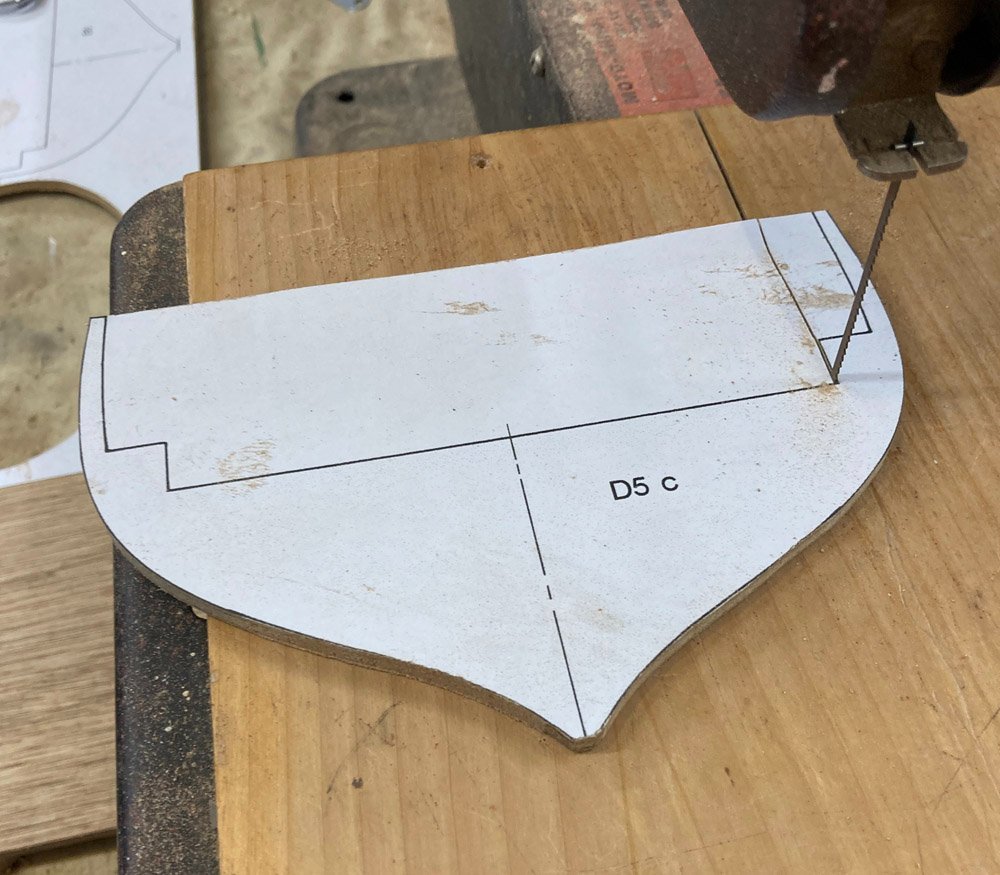
here are the bulkheads and the 'deck' which holds the whole thing together.
I then glued the rabbet strip on the keel using some 1mm limewood.
I will leave that to dry overnight , then cover the plywood edge grain as well.
A good days work
Tim
- mtaylor, CiscoH, iMustBeCrazy and 1 other
-
4
-
On 6/8/2023 at 11:00 AM, iMustBeCrazy said:
Update time.
That has turned out fantastically, congratulations.
Gives us all something to strive to achieve.
Tim
- iMustBeCrazy, Montaigne and mtaylor
-
3
-
9 hours ago, iMustBeCrazy said:
so I designed and built my small Cutter and learned a lot.
I was quite happy with that so I designed and am building my Bounty Launch
And your Bounty Launch is fantastic, I have just been over there to have another look.
So patience and hard work pays off.
For me, I definitely see this small cutter build a step in the right direction.
I am already having new ideas on how the Rattlesnake might be constructed for a PoB model.
Taking ideas from Bill Shoulders original model and mixing it up with modern ideas.
Tim
- mtaylor and iMustBeCrazy
-
2
-
12 hours ago, bruce d said:
Fun ! I think I may need that Aspirin now..........
Just spent a good ten mins looking for a way to search for a specific name?
Any clues?
I was looking for more detail on the cutter Rattlesnake ( I already have the profile and lines that Craig sent me the link too )
Tim
-


Le Renard 1812 by iMustBeCrazy - Artesania Latina - 1:50 - early kit version 20305
in - Kit build logs for subjects built from 1801 - 1850
Posted
Did you turn the barrel ?
How is your planking going?
Tim