HOLIDAY DONATION DRIVE - SUPPORT MSW - DO YOUR PART TO KEEP THIS GREAT FORUM GOING!
×


turangi
-
Posts
276 -
Joined
-
Last visited
Content Type
Profiles
Forums
Gallery
Events
Everything posted by turangi
-

Need some (lots) help...
turangi replied to Moab's topic in Metal Work, Soldering and Metal Fittings
I purchased a diamond file to work brass and it worked great. -
Excellent suggestion! I have found it easy to use a bit of excess glue, wipe off as much as you can immediately after installation and then lightly sand the area before the glue sets and the sawdust created will then fill the area. It has worked both with CA and PVA adhesives and saves a step as it is done during original installation rather than later. Even if you don't edge glue the planks after the plank is installed put a little glue over the seam, wipe off the excess and lightly sand the area. Much easier than slathering the hull with wood filler and sanding for hours. Saves mixing up a slurry of sawdust and glue and neatly achieves the same result.
-
Sea Hoss, thank you for your thoughtful comment! I actually did consult the plans and directions in advance, so now I will probably have to relinquish my man card. The decision came down to the old chicken or egg first conundrum. I finally decided to install the brass first as it will give me specific area to create the slot for the the rudder strap. I realize some of the simulated fasteners may be in the way but I thought I could either flatten them or file them flush prior to installing the strap. I appreciate all comments especially those that may point out perils or pitfalls moving forward!!
-
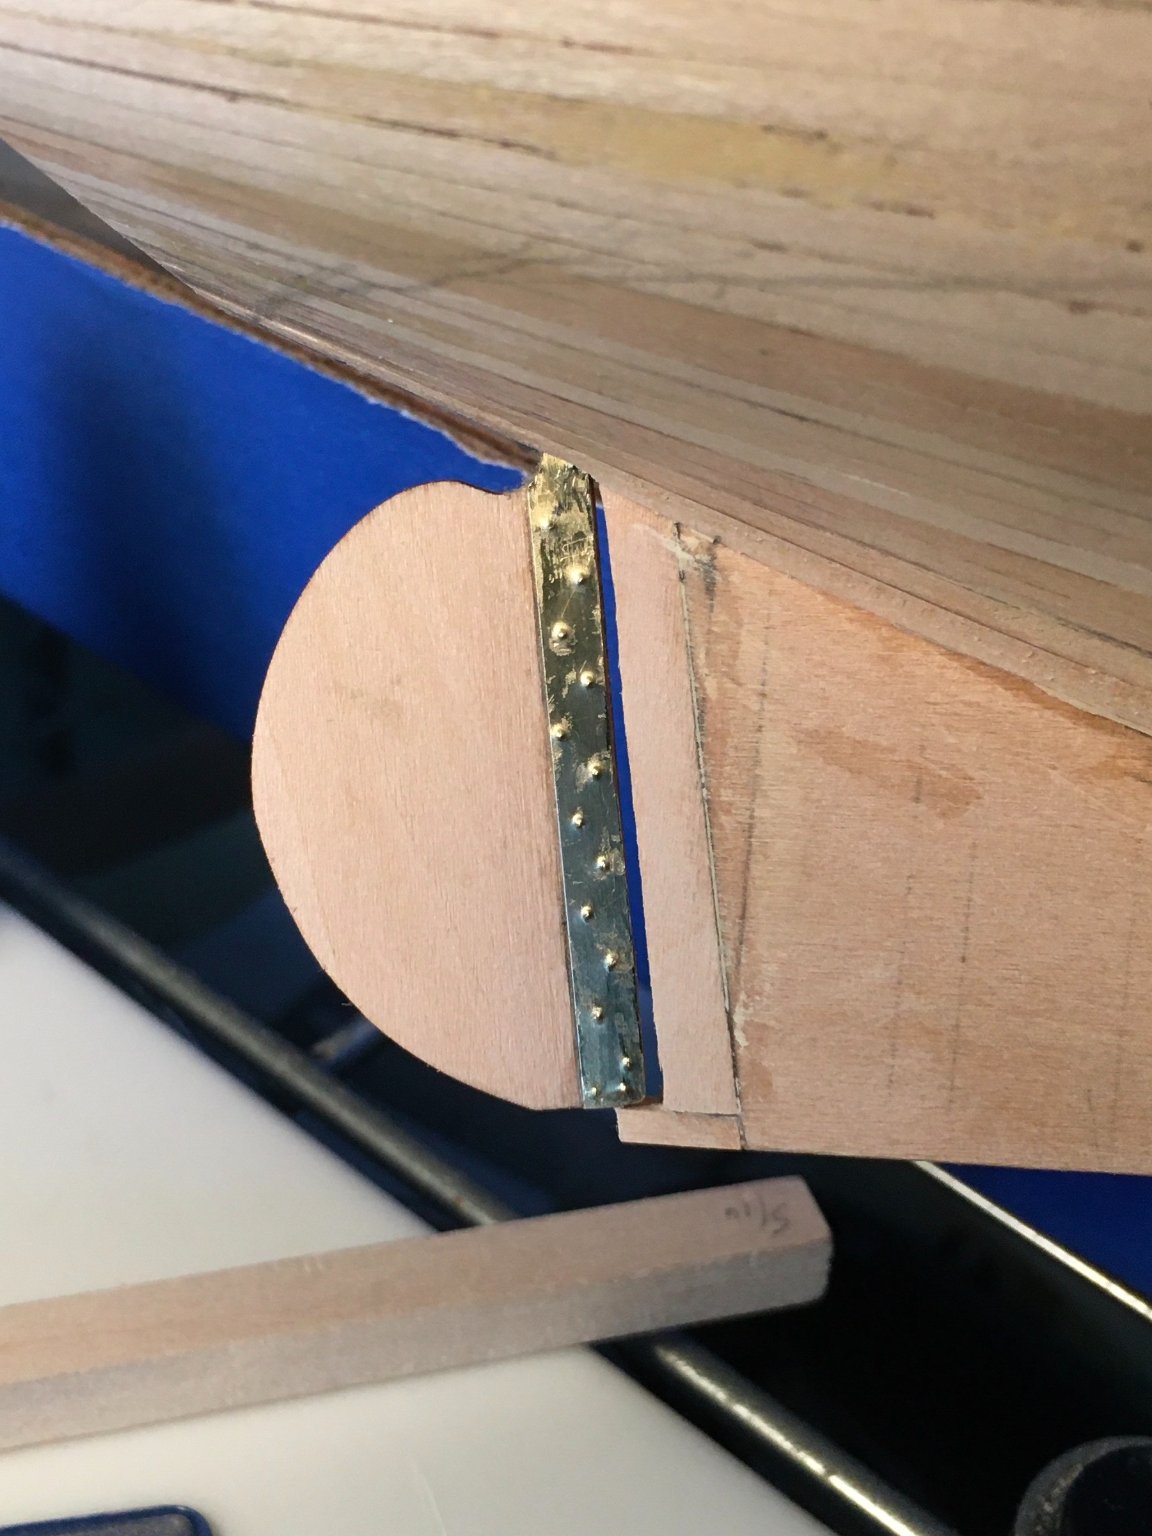
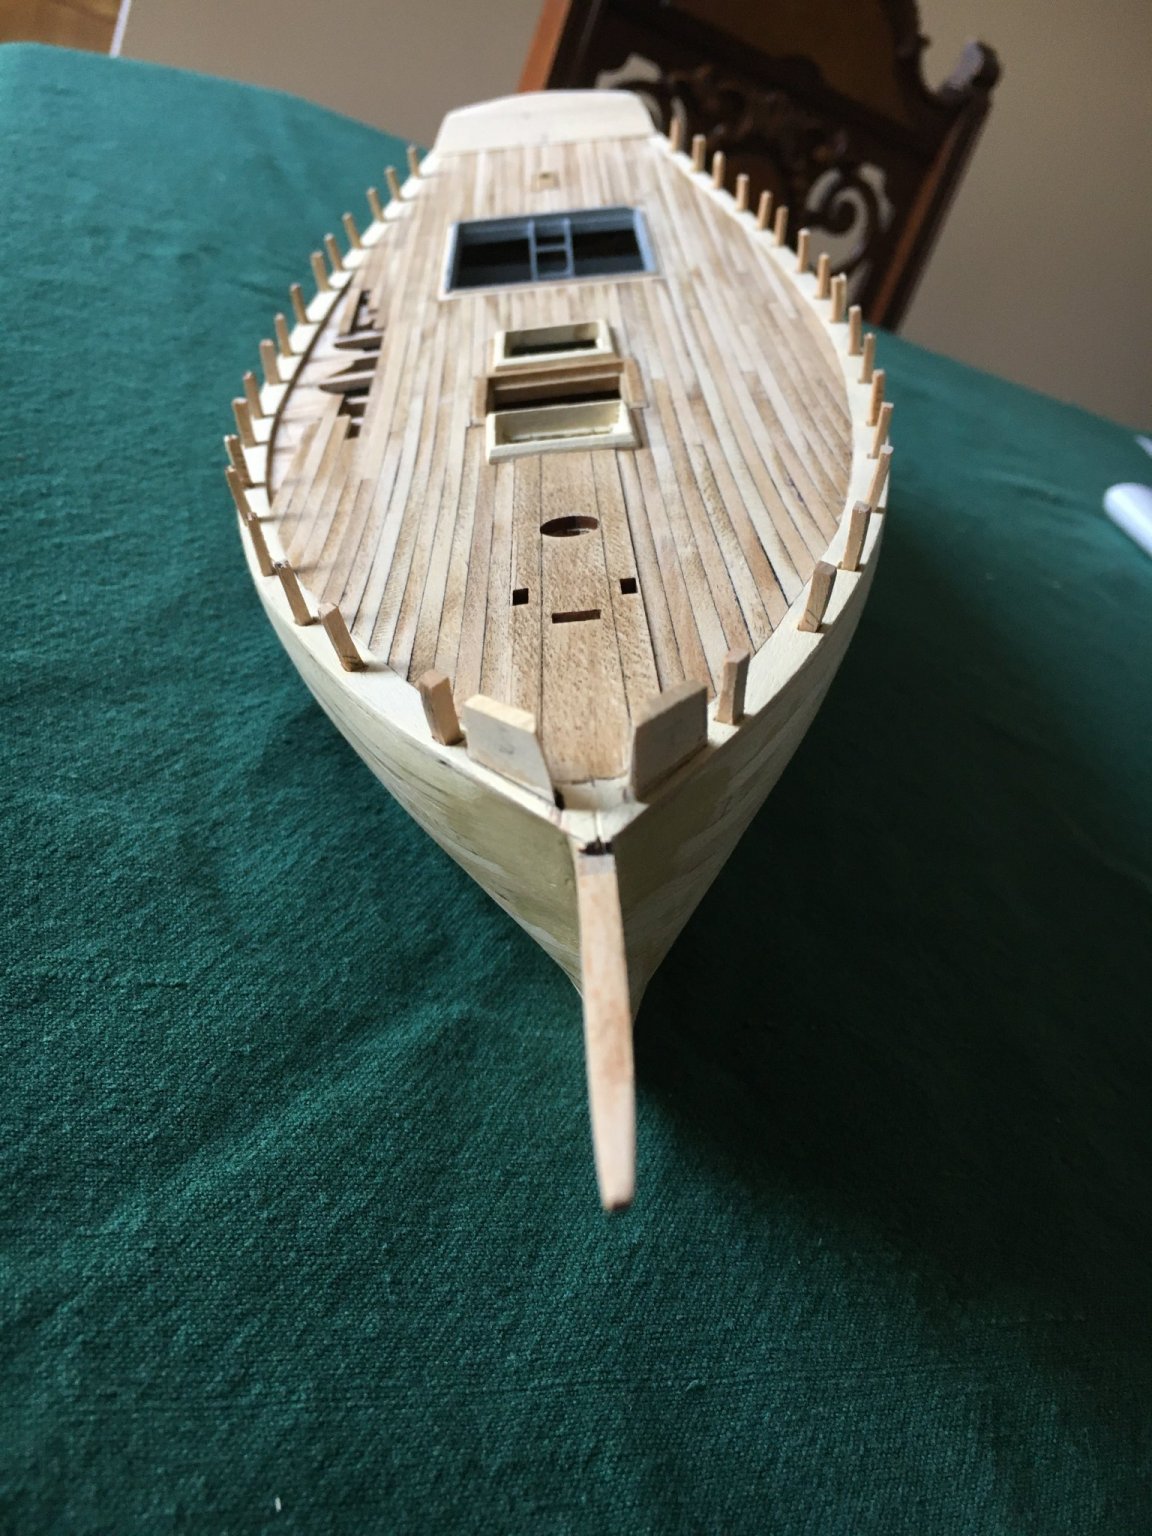
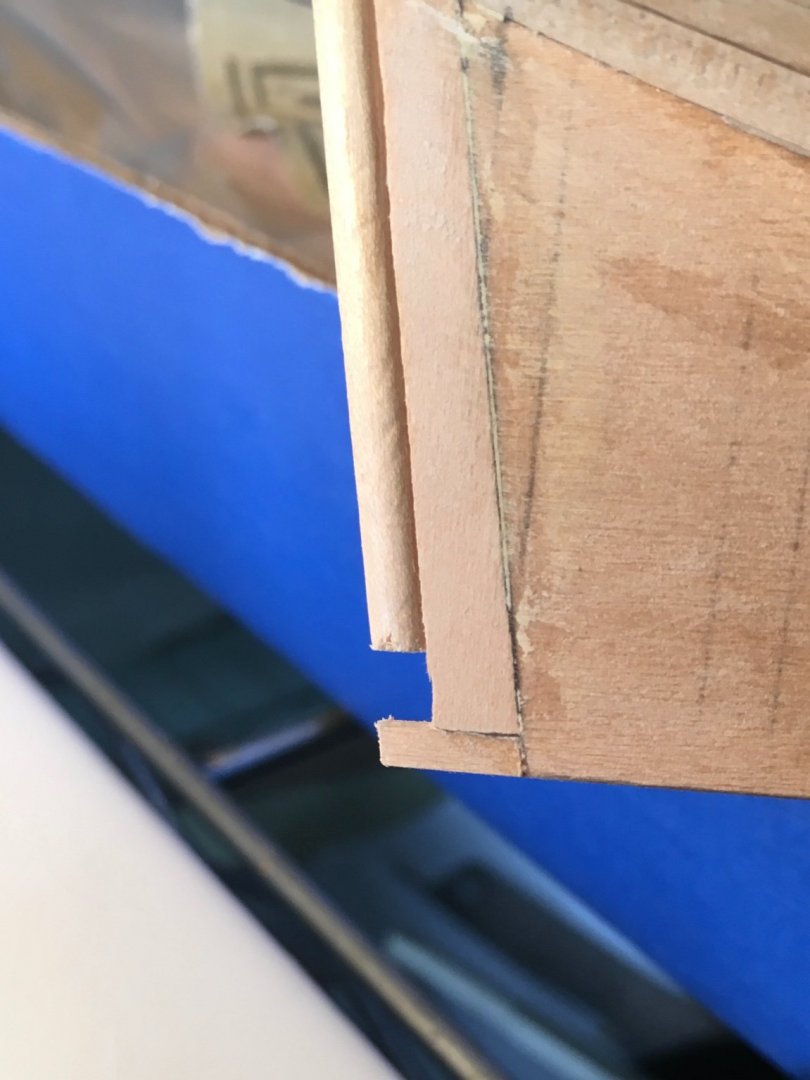
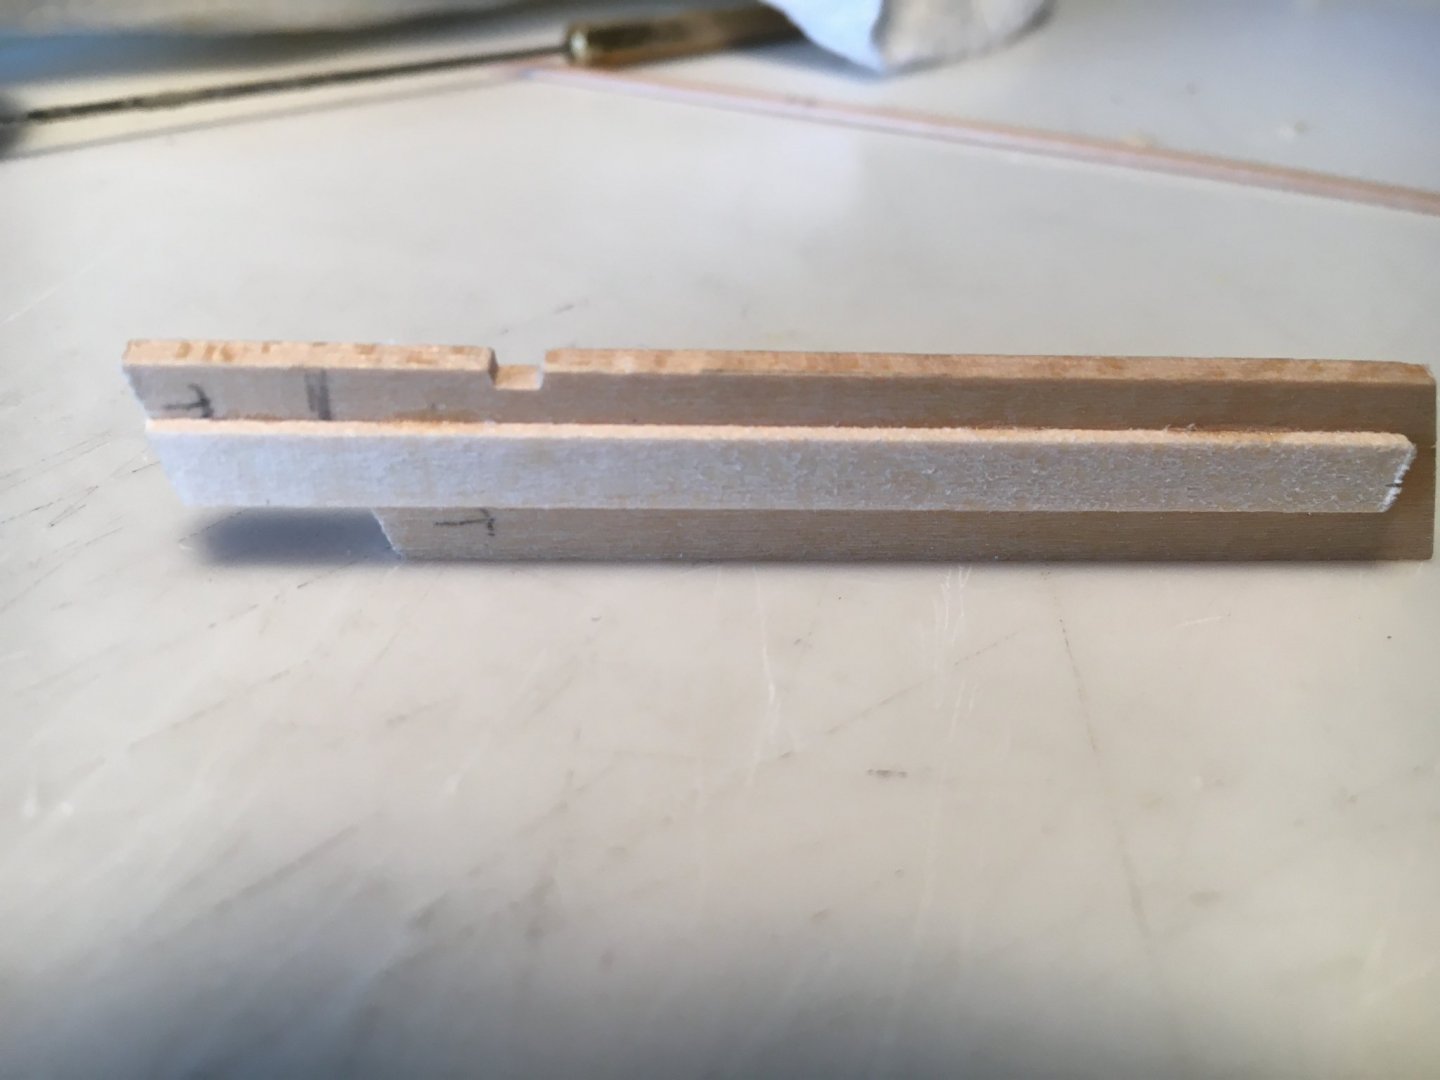
Today I turned my attention to the rudder. The first issue I ran into was there is supposed to be a small projection at the aft end of the keel to pin the bottom of the rudder post in place, mine was almost non-existent. I cut away a bit of the stern post and attached a small bit of wood that will allow the post to be properly secured. The rudder and stern post require a groove to accept the rudder post. I filed a small groove in both and then wrapped sandpaper around a drill bit slightly smaller than the dowel provided and created both grooves by hand sanding. The rudder itself tapers from fore to aft and I was able to do this by sanding. The plans called for copper sheathing the fore end of the rudder but none of the strips provided matched the plan as they were too narrow. I had some thin brass sheet on hand so I transferred the plan dimension to them and after several hobby knife scores I was able to detach a proper sized strip. I used a very small punch from the rear of the strips to simulated fasteners. I them roughened the the back of the strip a bit and used epoxy to fasten them. After the epoxy had set I used a file to contour them to the outline of the rudder. They look a bit garish at present but once painted should be rather more subtle.

-
Andrew, looks great! I ran into the same problem with a few few of the frames covering the area where the stanchions insert. I dilled a small hole on the top of the frames through the covering board opening that allowed me to insert a very small Dremel bit in there and removed enough of the frame to allow the stanchion to be inserted. I did shorten a few of the stanchions but it worked well .
-
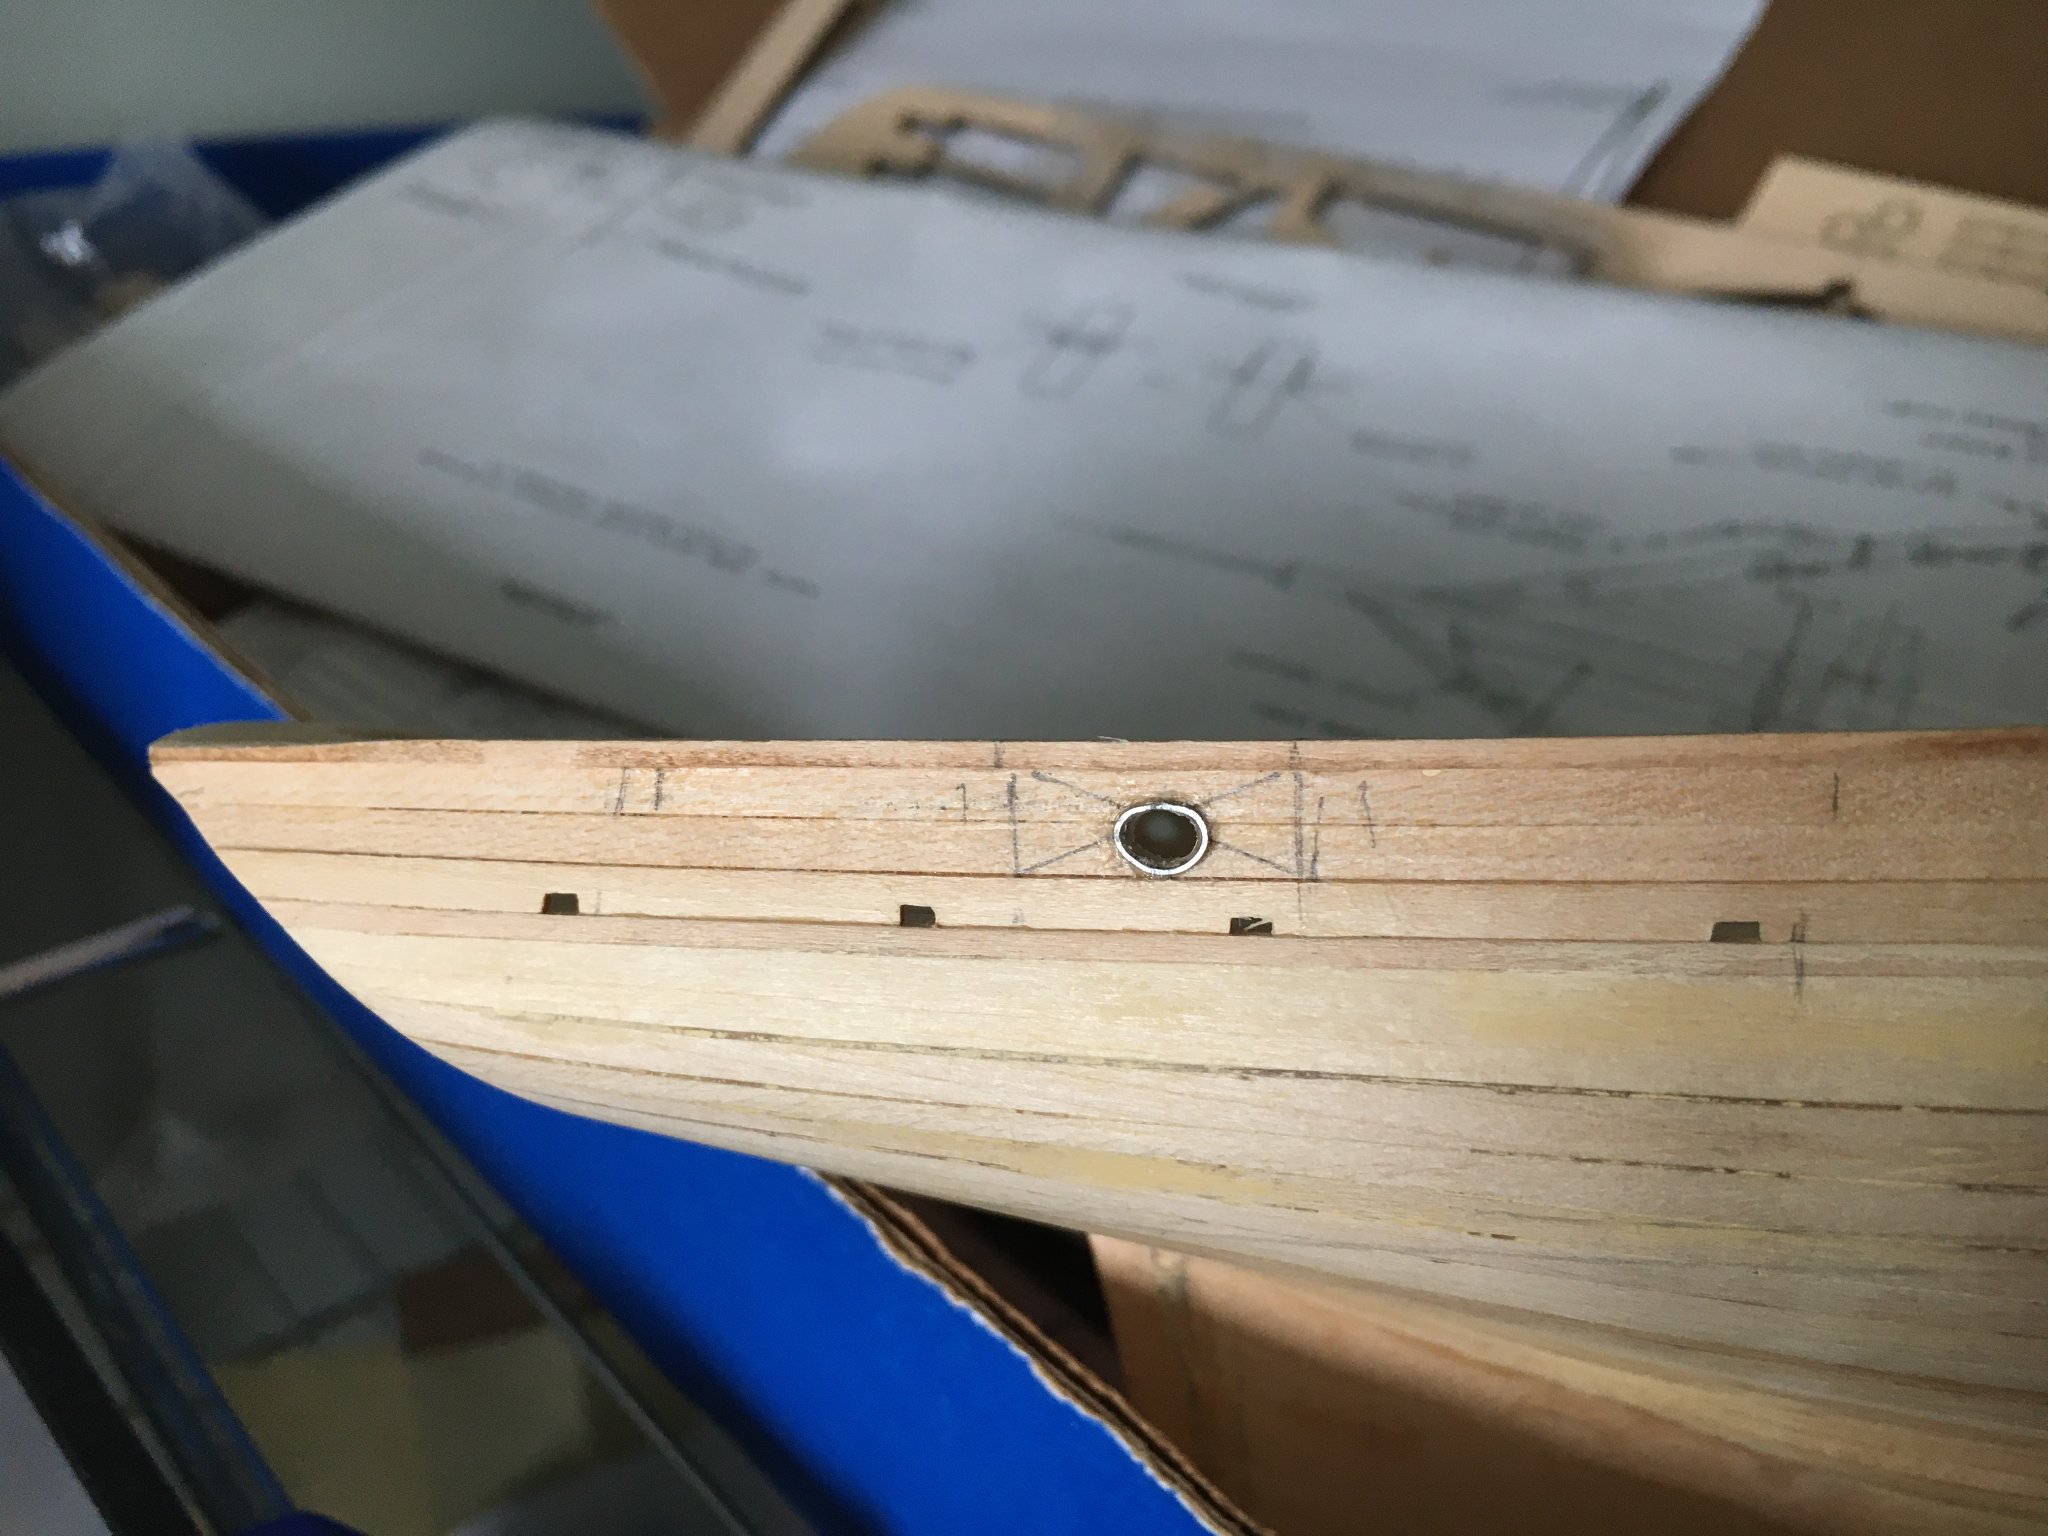
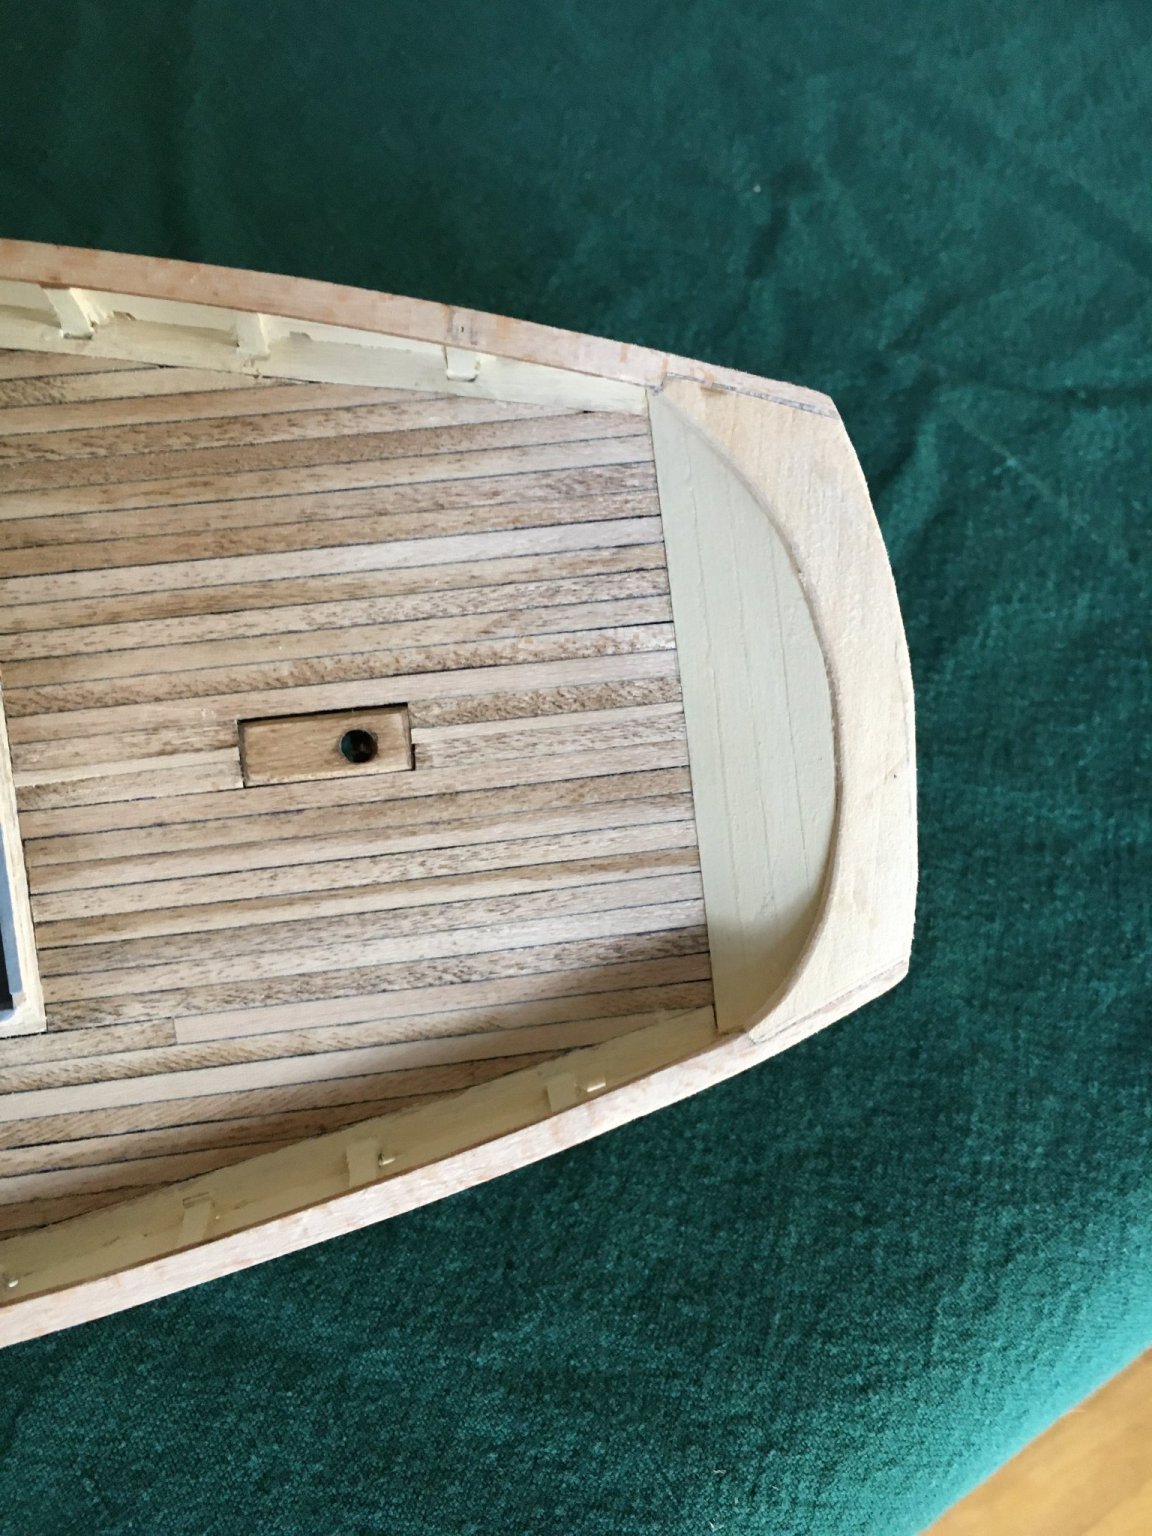
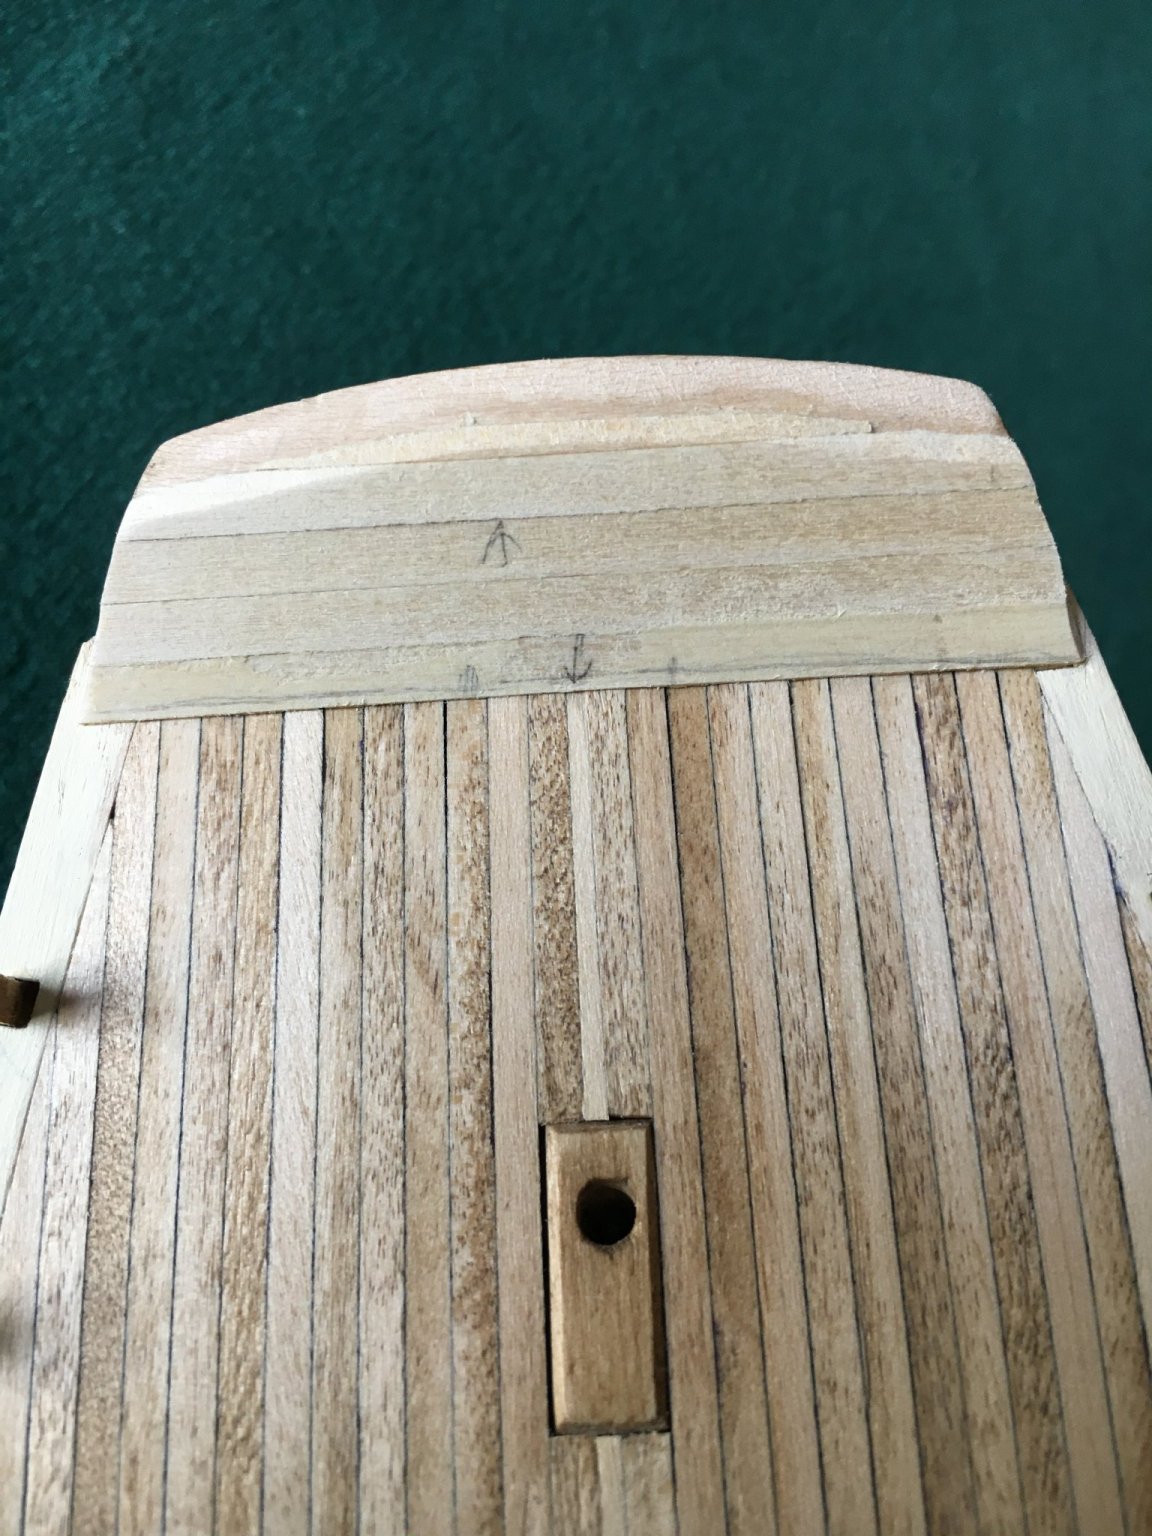
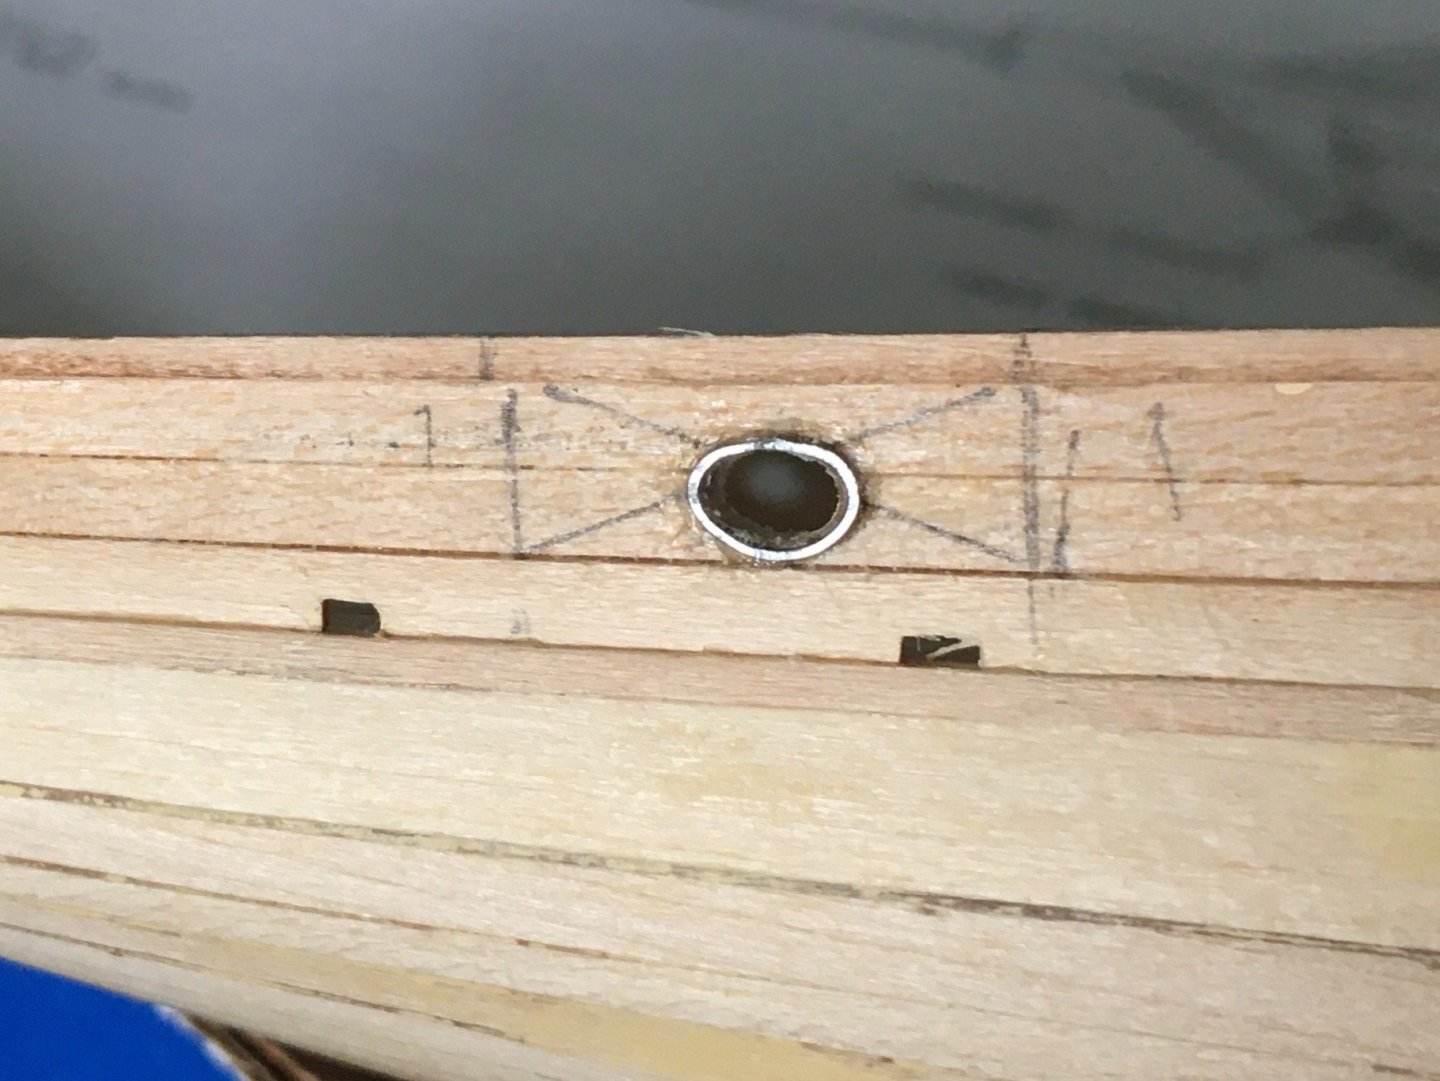
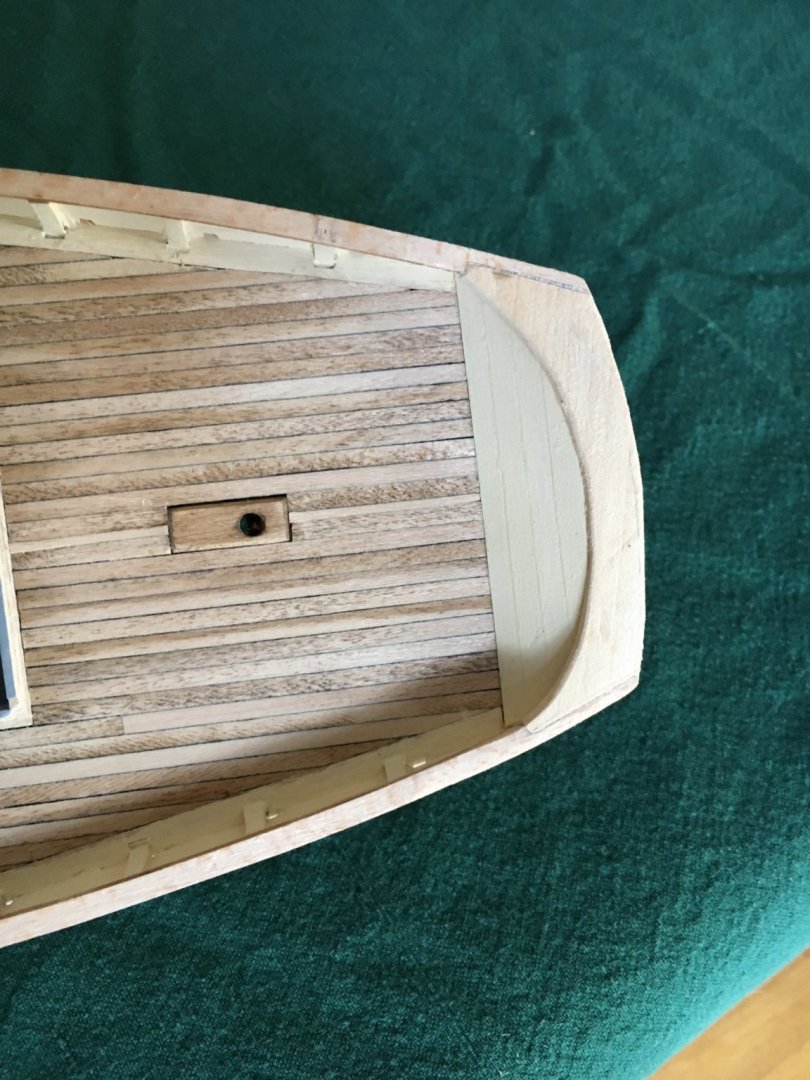
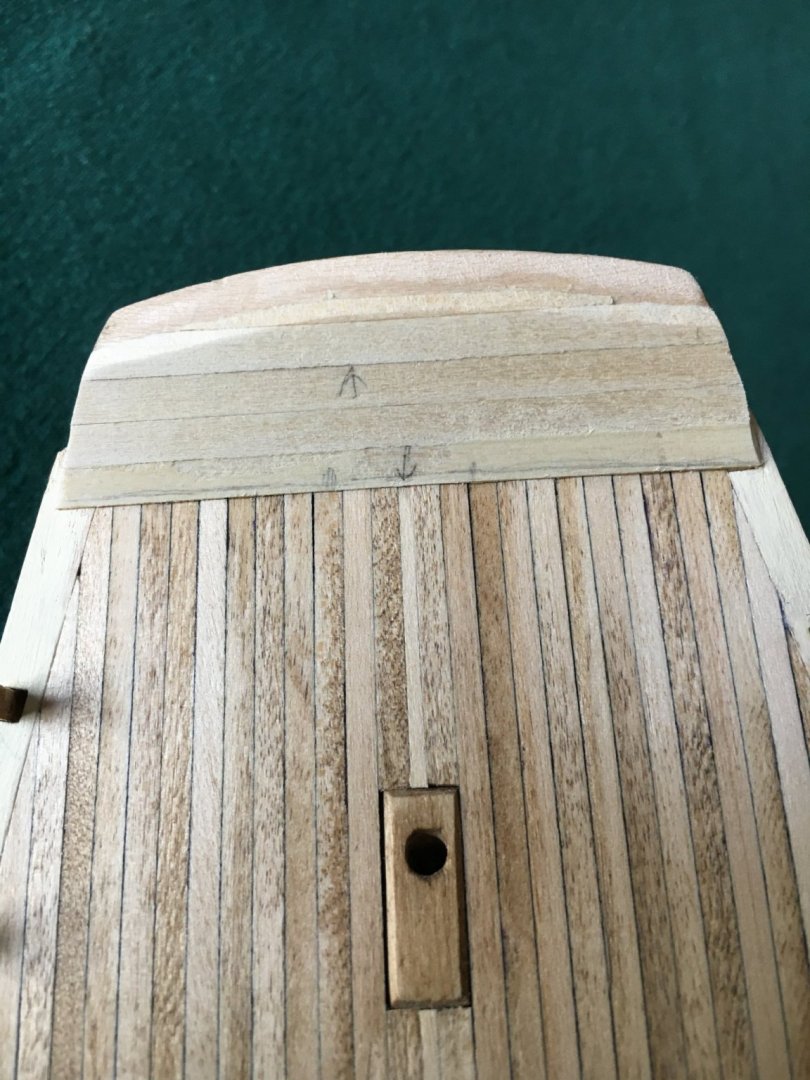
Thank you for the encouraging comments! As to the rear of the transom, it is plain right now. I made a mistake and should have planked it prior to planking the hull so that the hull planks would cover the ends of the transom planking and if I planked it now the overhang of the transom cap would disappear, keep that in mind. I might scribe some plank lines to simulate planking. I installed the doublers fore and aft and drilled the hawse openings and used a file to shape them oval per the plans. I wanted to simulate the iron fittings at the holes and first tried brass wire, a no go. I found some soft steel wire, probably florist wire and tried that with some success. I bent the wire around a drill bit, cut the ends and teased it into an oval shape. I then flattened the piece using a small hammer to give a better gluing surface and attached them with a minute amount of epoxy. Not perfect but I am satisfied. In retrospect, I would probably have been better to attach the ovals first then do the drilling and file work on the opening.

-
A bit more work to report. I installed the cap rail on top of the bulwark planks and stanchions. I joined the two part cap and then held it in position, it did not line up perfectly. I marked the areas that needed attention and edge bent them using a bit of water and an iron as illustrated in post #14. At one point I traced the hull outline on a board I use for edge bending and bent the cap to that line. I installed the cap a few stanchions at a time starting at the bow as that seemed the critical dimension but as I reached the last two stanchions the cap need more bending so I wet that area, held it in proper position and used my iron to set the bend while in place. As it seems in all the other logs the transom cap provided was too short width wise so I made a cardboard template and transferred that to wood stock and made a new one. I am pleased with the results.


-
I am thoroughly enjoying your meticulous build! I took a more rough and tumble approach to the lodging knees. I didn't bother tracing the plans as I was fairly sure the beams would not exactly conform to the plans so I measured the actual distance between the beams and made the knees to fit that distance. I cut the knee to the width required first and after assuring a tight fit then shaped the concave area and the convex to fit the hull curve which eliminated the need to hold it on a difficult angle while cutting it to width. The hull connection is a rather gentle curve and easy to shape by sanding, for the concave inboard area I used a French curve on the plans to obtain the correct shape, transferred that to the knee, cut it out with a fret saw and sanded it smooth. All my work was done with hand tools and satisfied me. Here is an explanation of my method in post #13. I eagerly look forward to your progress!
- 161 replies
-
- 1
-

-
- Model Shipways
- Emma C Berry
- (and 1 more)
-
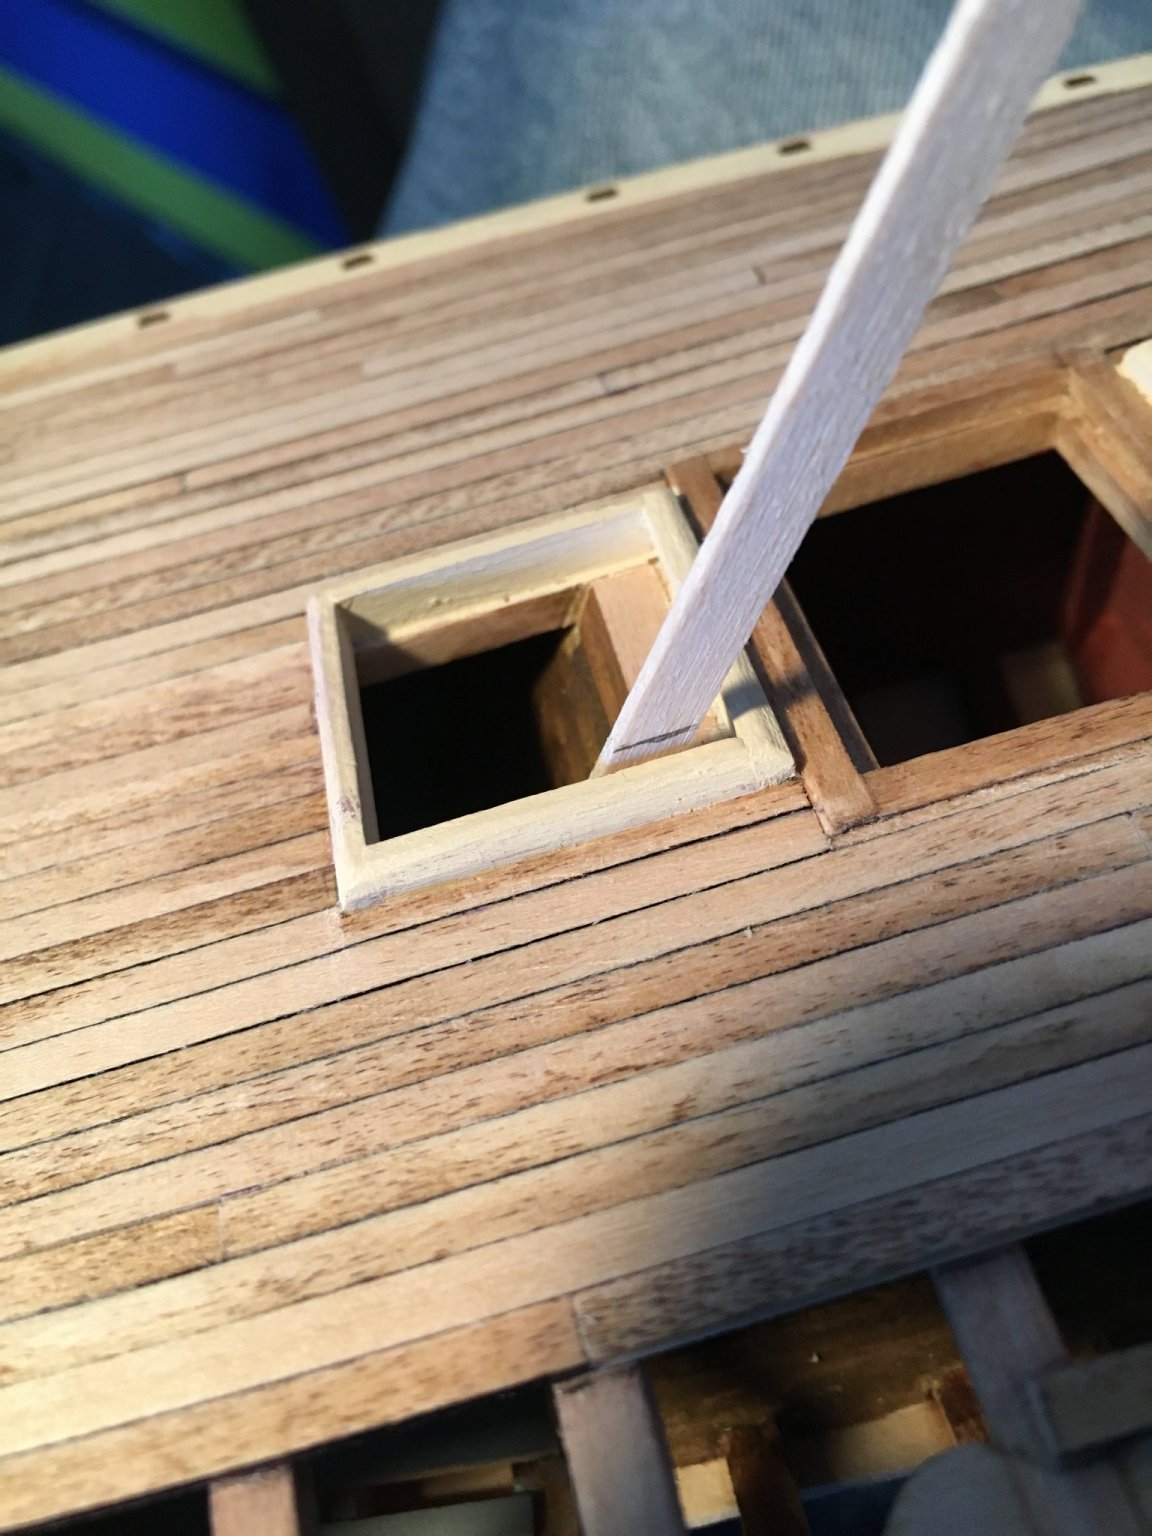
Build looks great! I like your coaming approach but unfortunately I don't have a drill press or any machinery so the trusty scalpel was used. I cut the planks at the transom a bit proud of the surface using a saw or scalpel as seemed appropriate and sanded them flush as you mentioned with a large block and was satisfied with the result.
-
Thanks for the great tip! I have run into this before when wetting the wood and clamping it in position to dry. Fortunately the wood was dry and I tested it before using the clamps with no ill effect. I learned the hard way and that is excellent advice for anyone clamping wet wood..
-
A very interesting project! Though you might enjoy this: https://www.cnn.com/travel/article/dukling-hong-kong-junk-boat/index.html
-
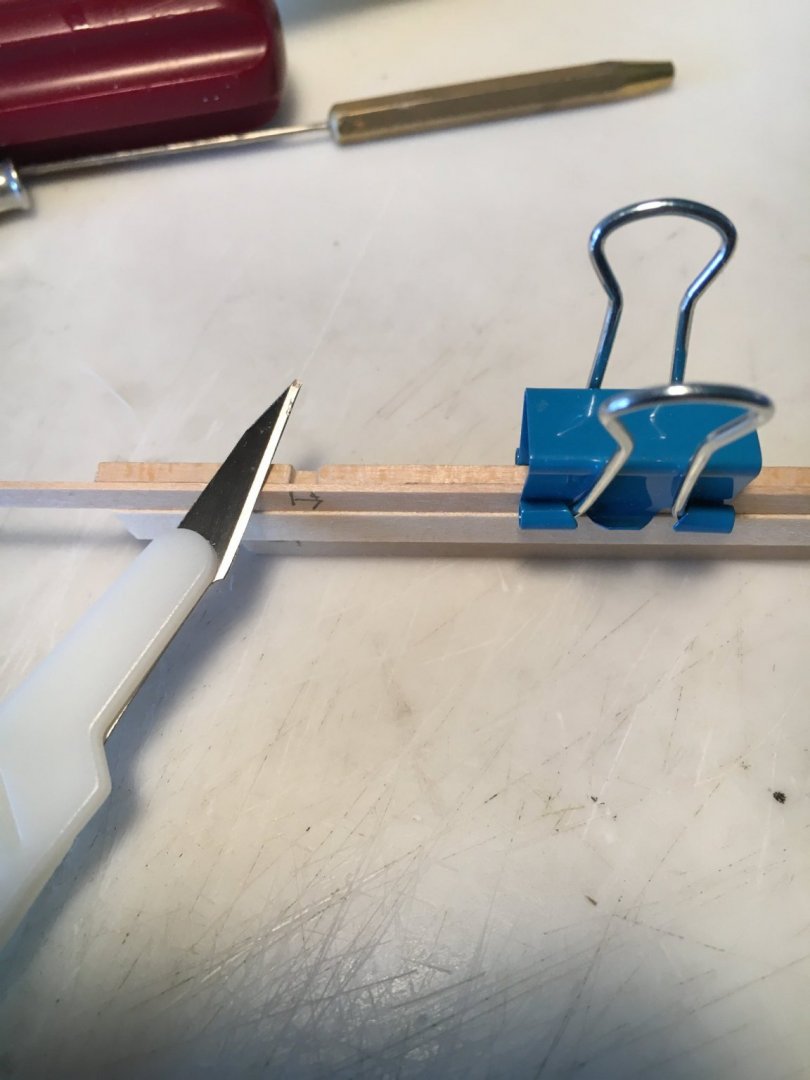
I spent some time working working on the scupper planks today. As I mentioned in a previous post I made a jig to cut the scuppers. It is a simple affair consisting of a scrap of wood with the intended scupper opening cut. I attached a strip of wood to level the top of the plank with the top of the jig, cut the scupper opening with a scalpel using the jig as a guide and finished with a bit of filing. It worked very well! I was afraid if I tried to cut the scuppers freehand they would be very inconsistent or I would damage the 3/64" stock. I then did a clamp-o-rama to install the plank with PVA.


-
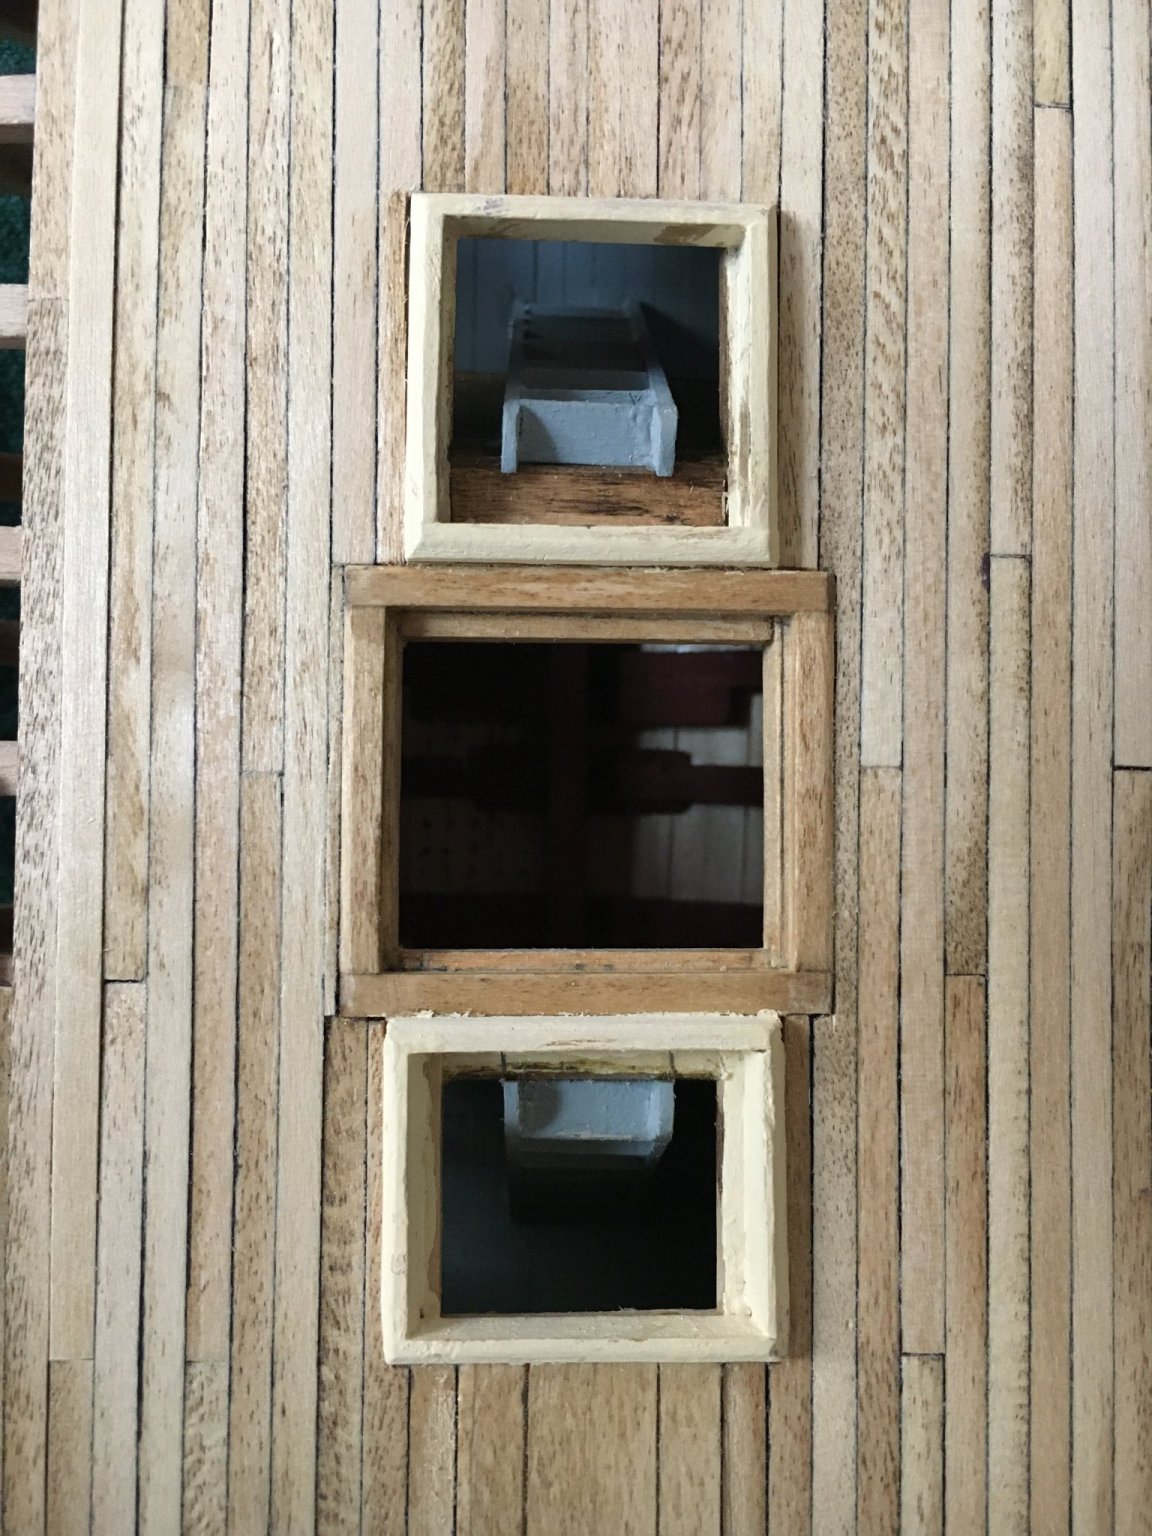
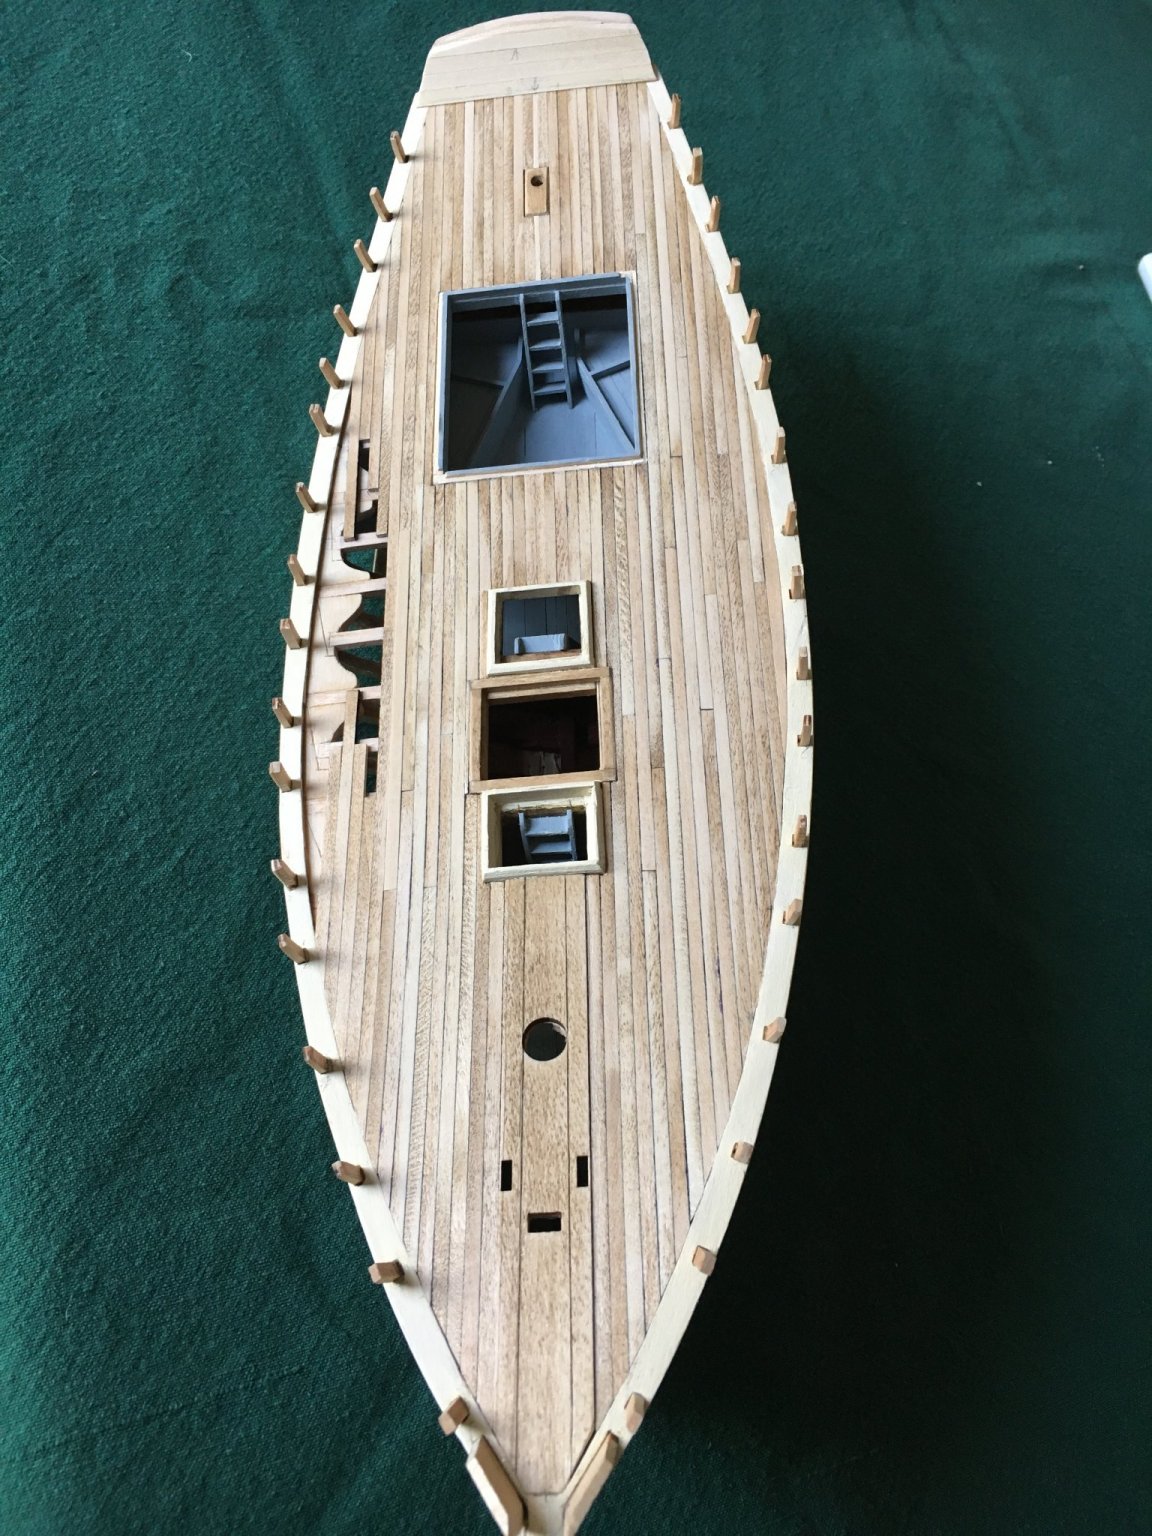
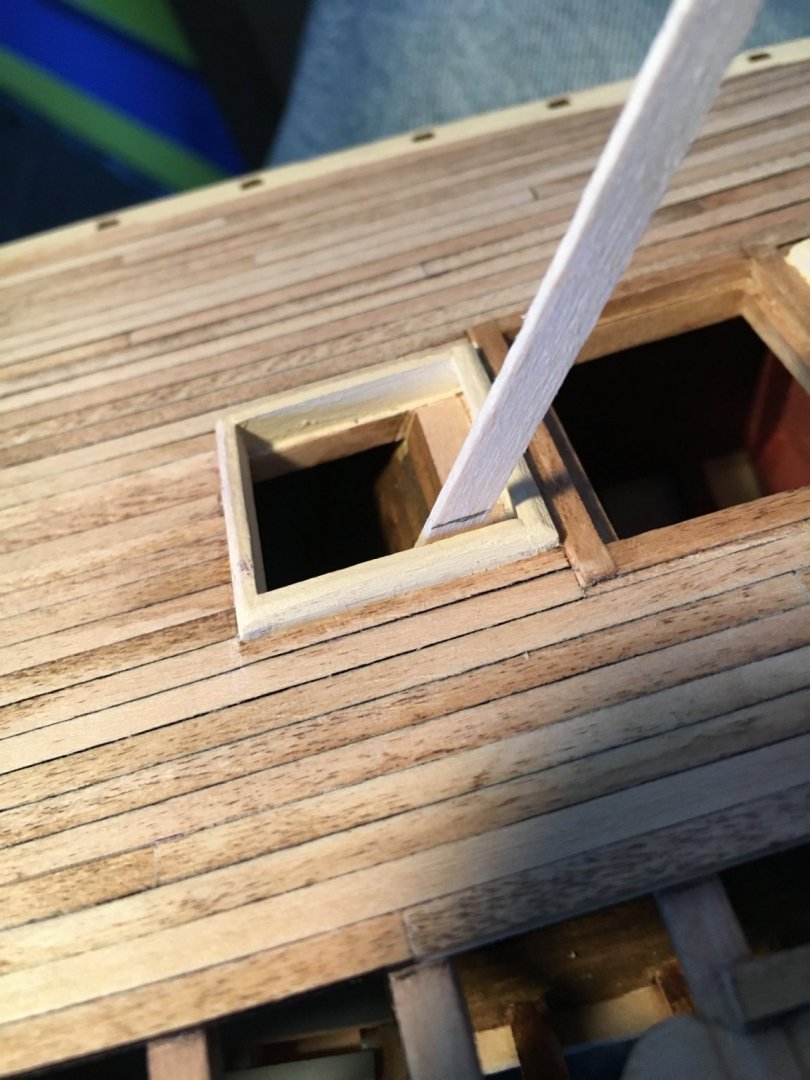
I am moving ahead at a blistering pace? I finished all the ladders and installed them, satisfied with the result. I planked the inner side of the transom to kill time before setting the bulwark stanchions as I rather dreaded that task. I finally took the bull by the tail and faced the situation. I built a simple gauge in order to set them at the same height, I set them all slightly high in order to allow a bit of extra material so I would be able to sand them all level. I will do that after the planking is installed to give them more strength. The first issue was how to glue them in place, if glue was applied to the stanchions most of it ended up on the top of the covering board when they were inserted and offered no substantial strength. I finally pulled out my bodkin from my fly tying tools and was able to pick up some drops of PVA glue on the tip, get it through the small openings in the covering board and apply them in what I thought was the appropriate spot inside the hull. I would hold the stanchion in position until the glue had a firm grip. Another issue encountered was that the stanchions are laser cut and their width varied a bit, some fit the opening very tightly and others had a gap. With the tight ones I applied a bit of thin CA as added strength, if there was a gap I made an appropriate shim, filled the gap with adhesive and pressed the shim in place. The job went reasonably well but I did have to place a small shim on the outside of a few stanchions to achieve a fair plane for the planking. Next I will move on to the scupper strake and upper planking. I have made a simple gauge in an attempt to make consistent looking scuppers and will post a picture as I work on them.


-
Another tip, if your hull is planked and ceiling installed in the interior, while trial fitting a stanchion don't lose your grip! It isn't coming back out of the little opening in the covering board but a new one can be made from the matrix the original was removed from. After losing one I used self closing tweezers to test fit the others.
- 161 replies
-
- 1
-
-
- Model Shipways
- Emma C Berry
- (and 1 more)
-
One suggestion I would offer that deviates from the instructions is to install the bulwark stanchions before planking the deck. Once the deck is planked it is just by guess and by golly to secure the stanchions by applying glue through the small covering board holes without being able to see where the glue is actually landing.
- 161 replies
-
- 2
-
-
- Model Shipways
- Emma C Berry
- (and 1 more)
-
Looking very nice! I too made somewhat liberal use of shims on the frames and am currently adding a few to the bulwark stanchions. Any port in a storm as is said.
-
Great post! I found the same issue with cabin being narrower at one end after I installed the beams and coaming. Too late to change that so I did a bit of correction building the cabin by adding some shims to the walls at the slightly wider end. I noticed the problem while preparing to build the cabin and happened to notice the roof was not a perfect rectangle but slightly tapered. Glad you caught it early!
-
Natural wood always takes stain differently from board to board so it looks rather authentic. If you want a consistent color use a pre-stain conditioner. Looks fine to me.
-
I have used Minwax Gel Stain and rub it in like shoe polish and have actually been able to cover a few glue problems with it. It may take a bit of a heavier application over the affected area and lighter removal of the excess but it has worked for me. Good luck!
-
Beautiful and meticulous work! I am a couple of years ahead of you in terms of trips around the sun so I tend to take the quick and dirty approach.
-
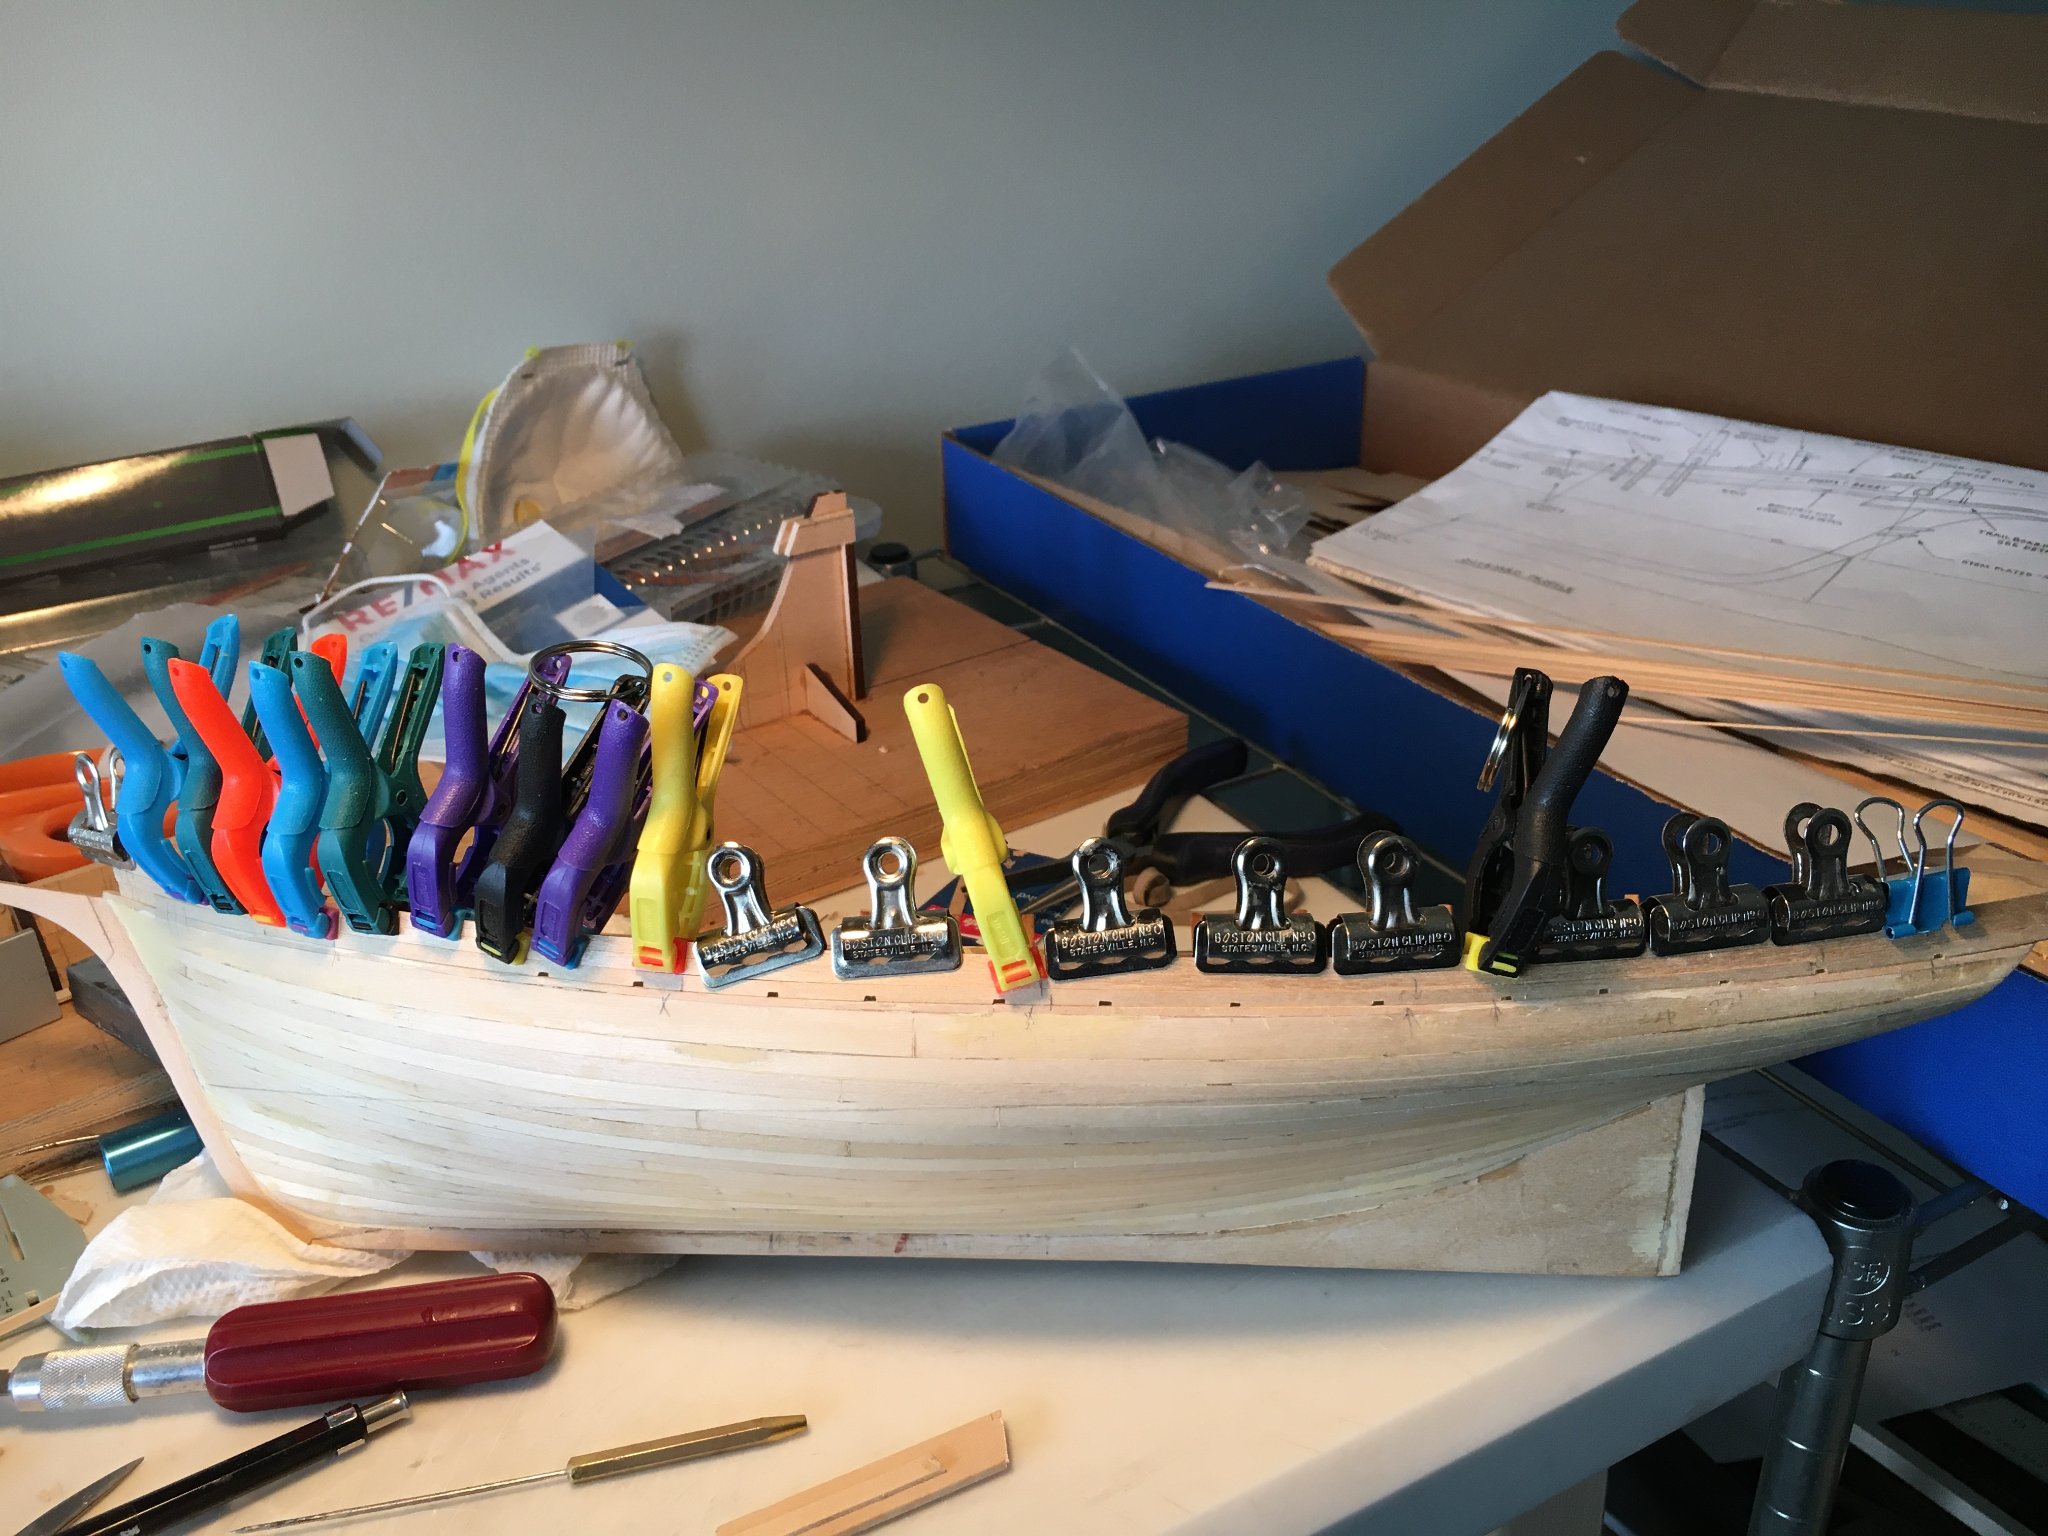
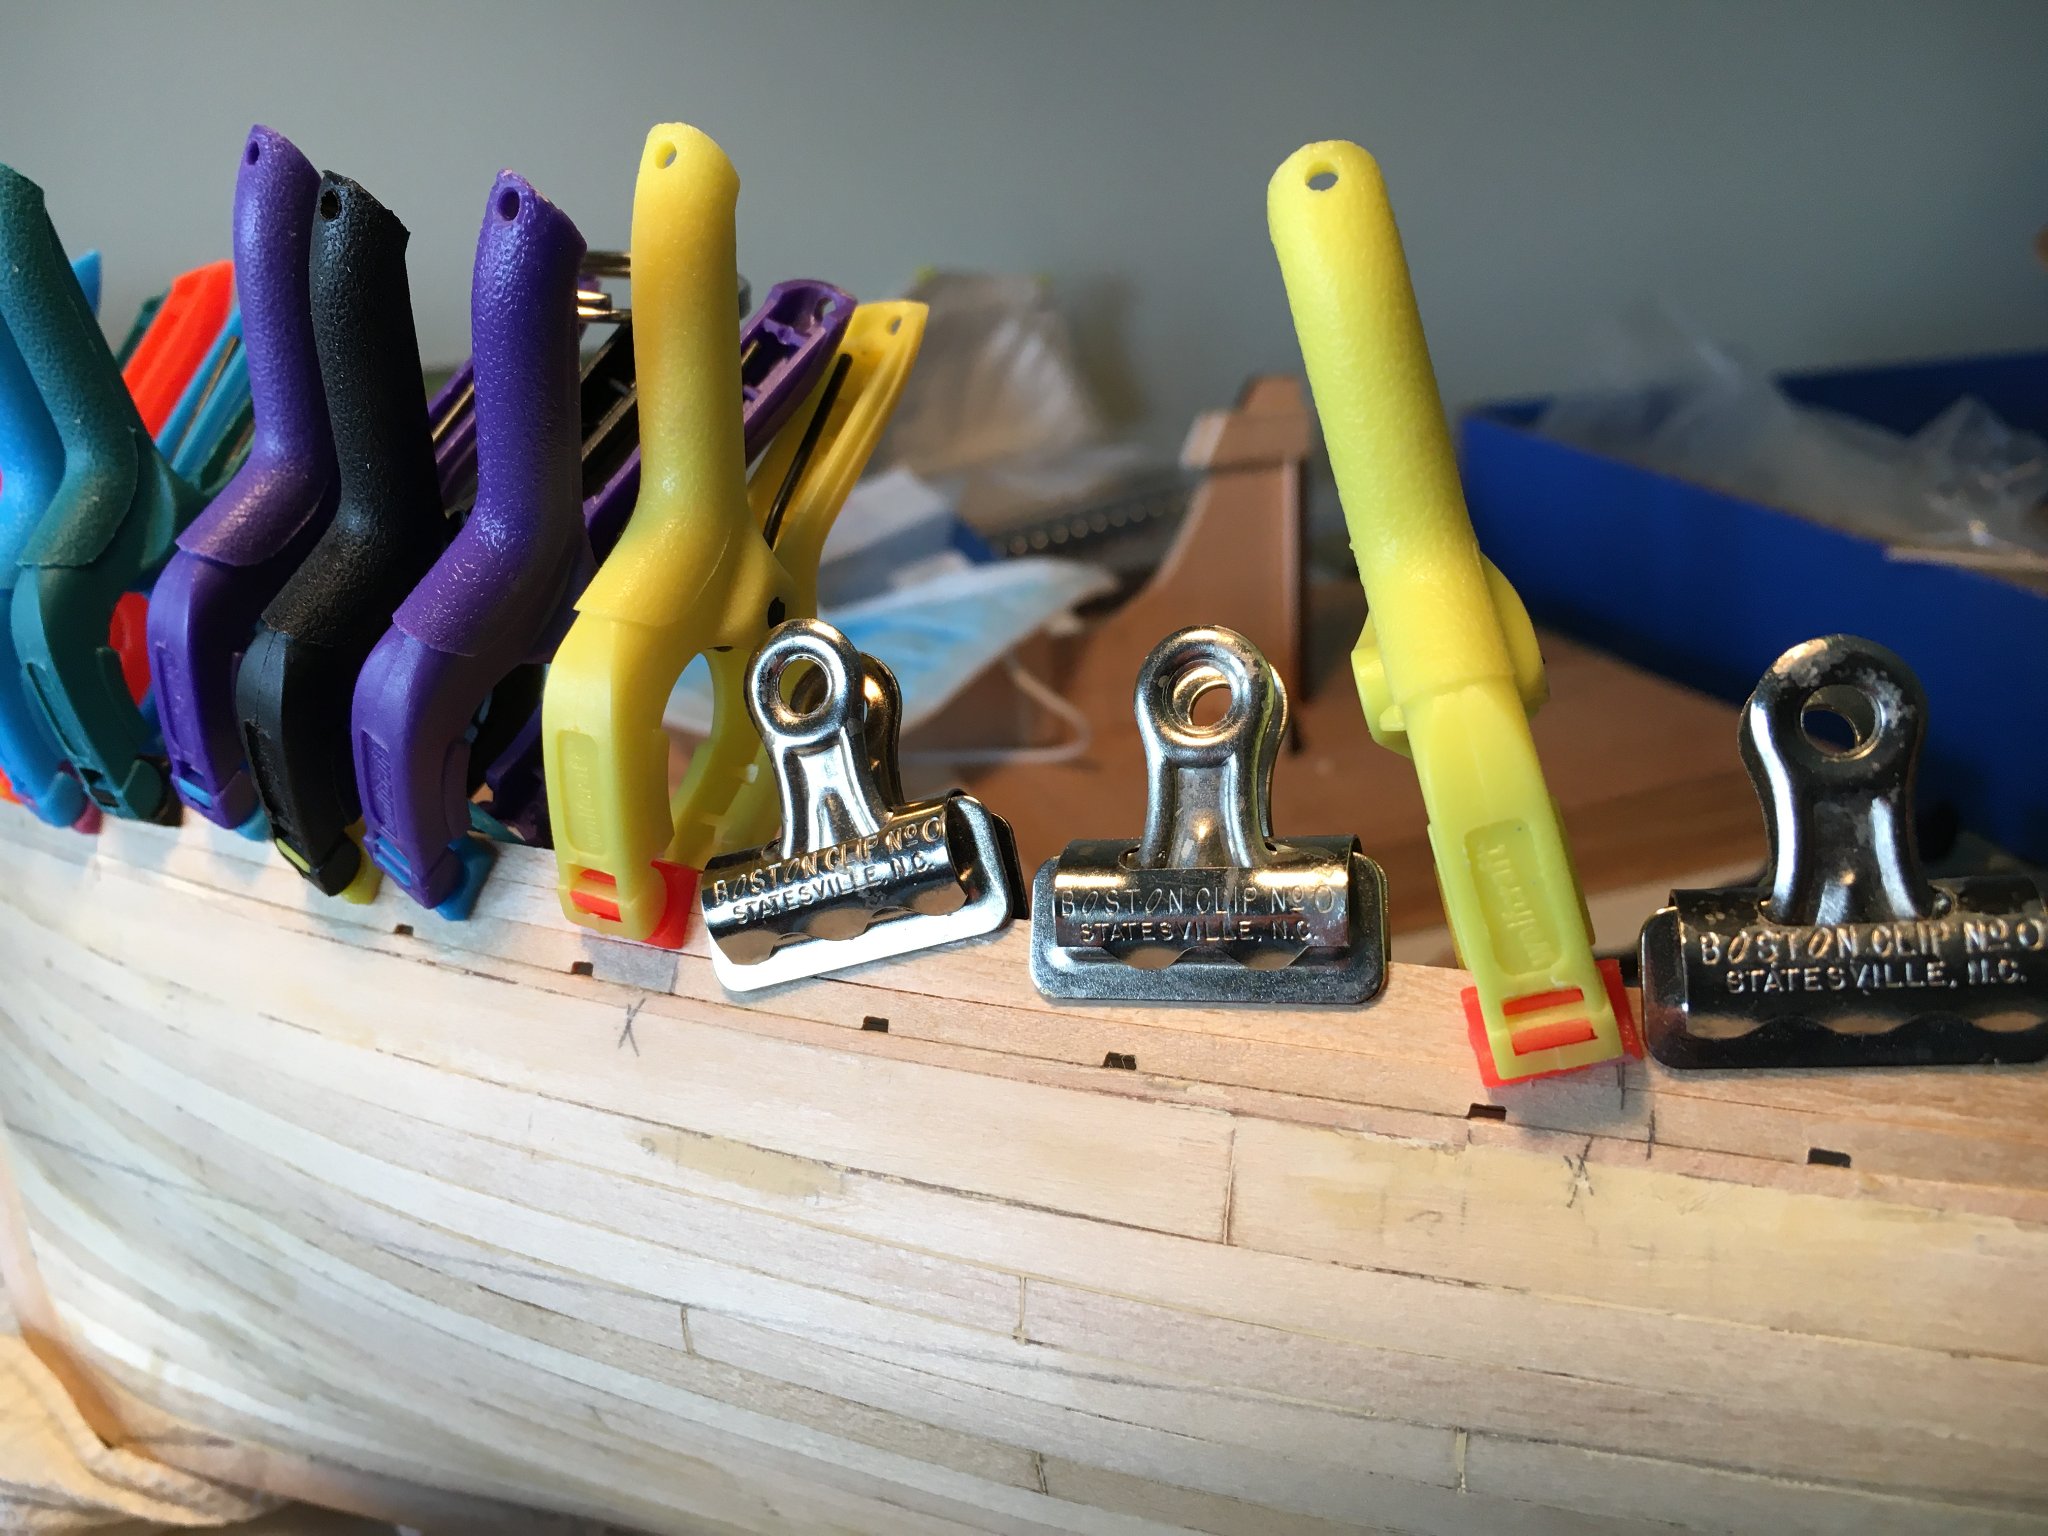
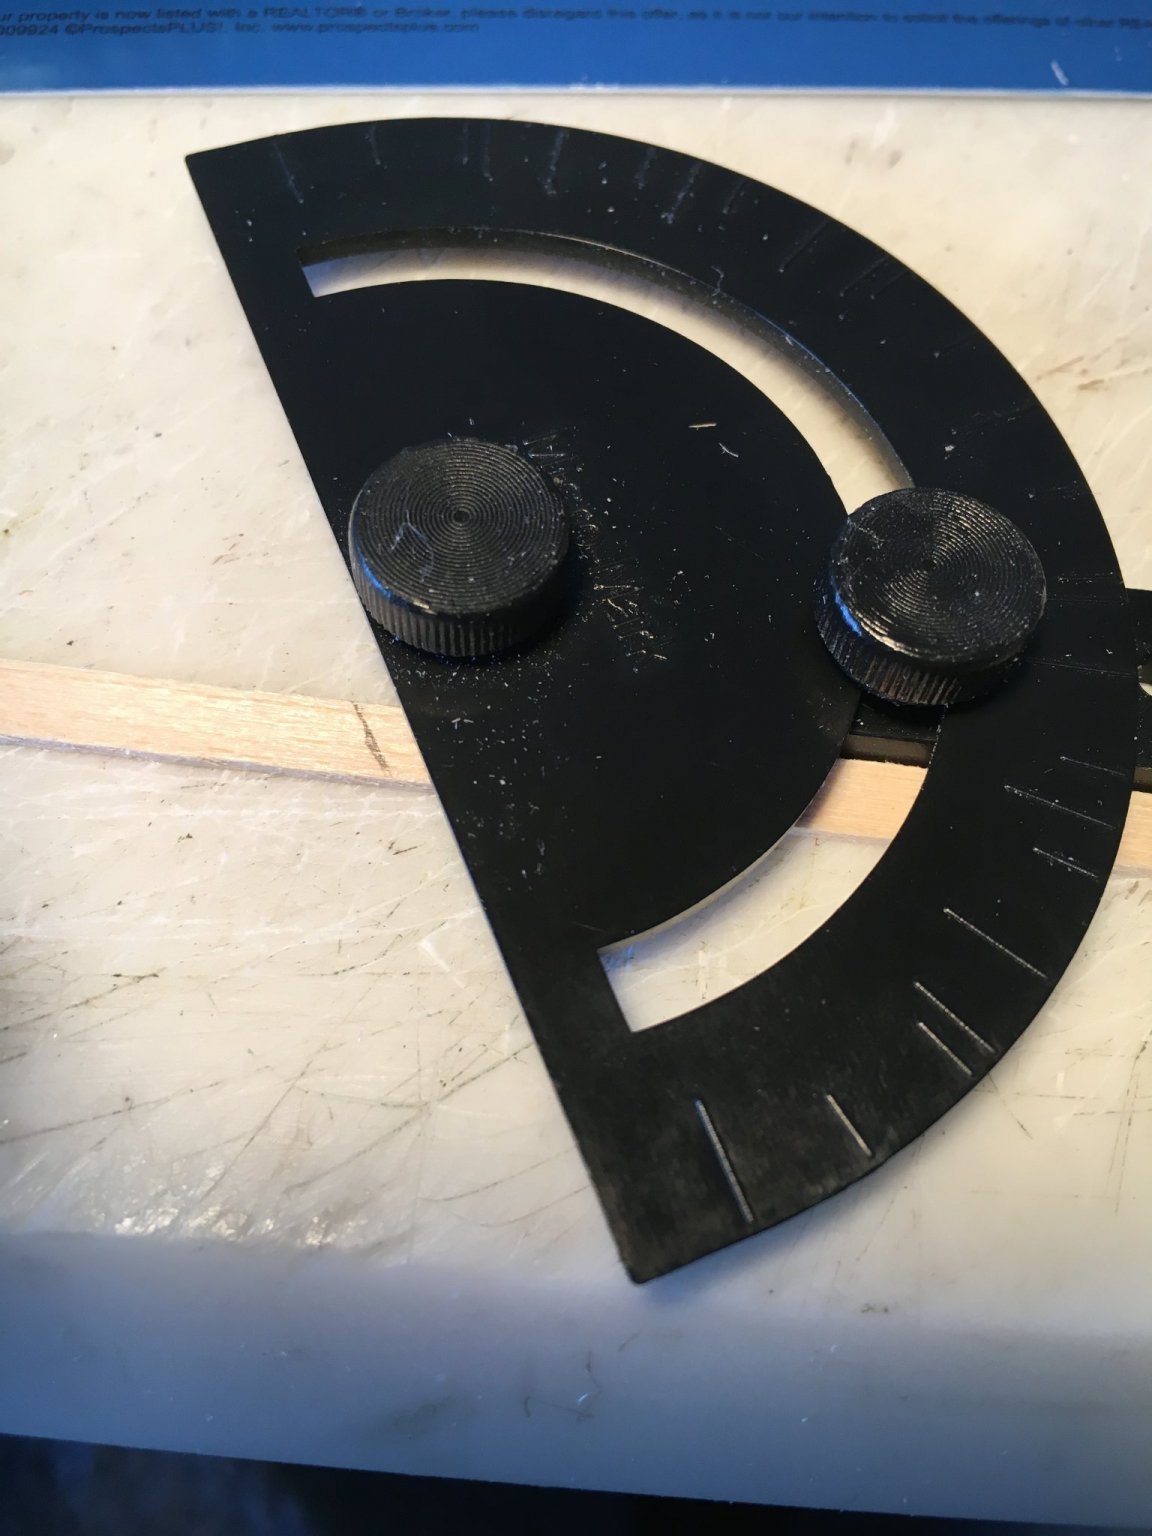
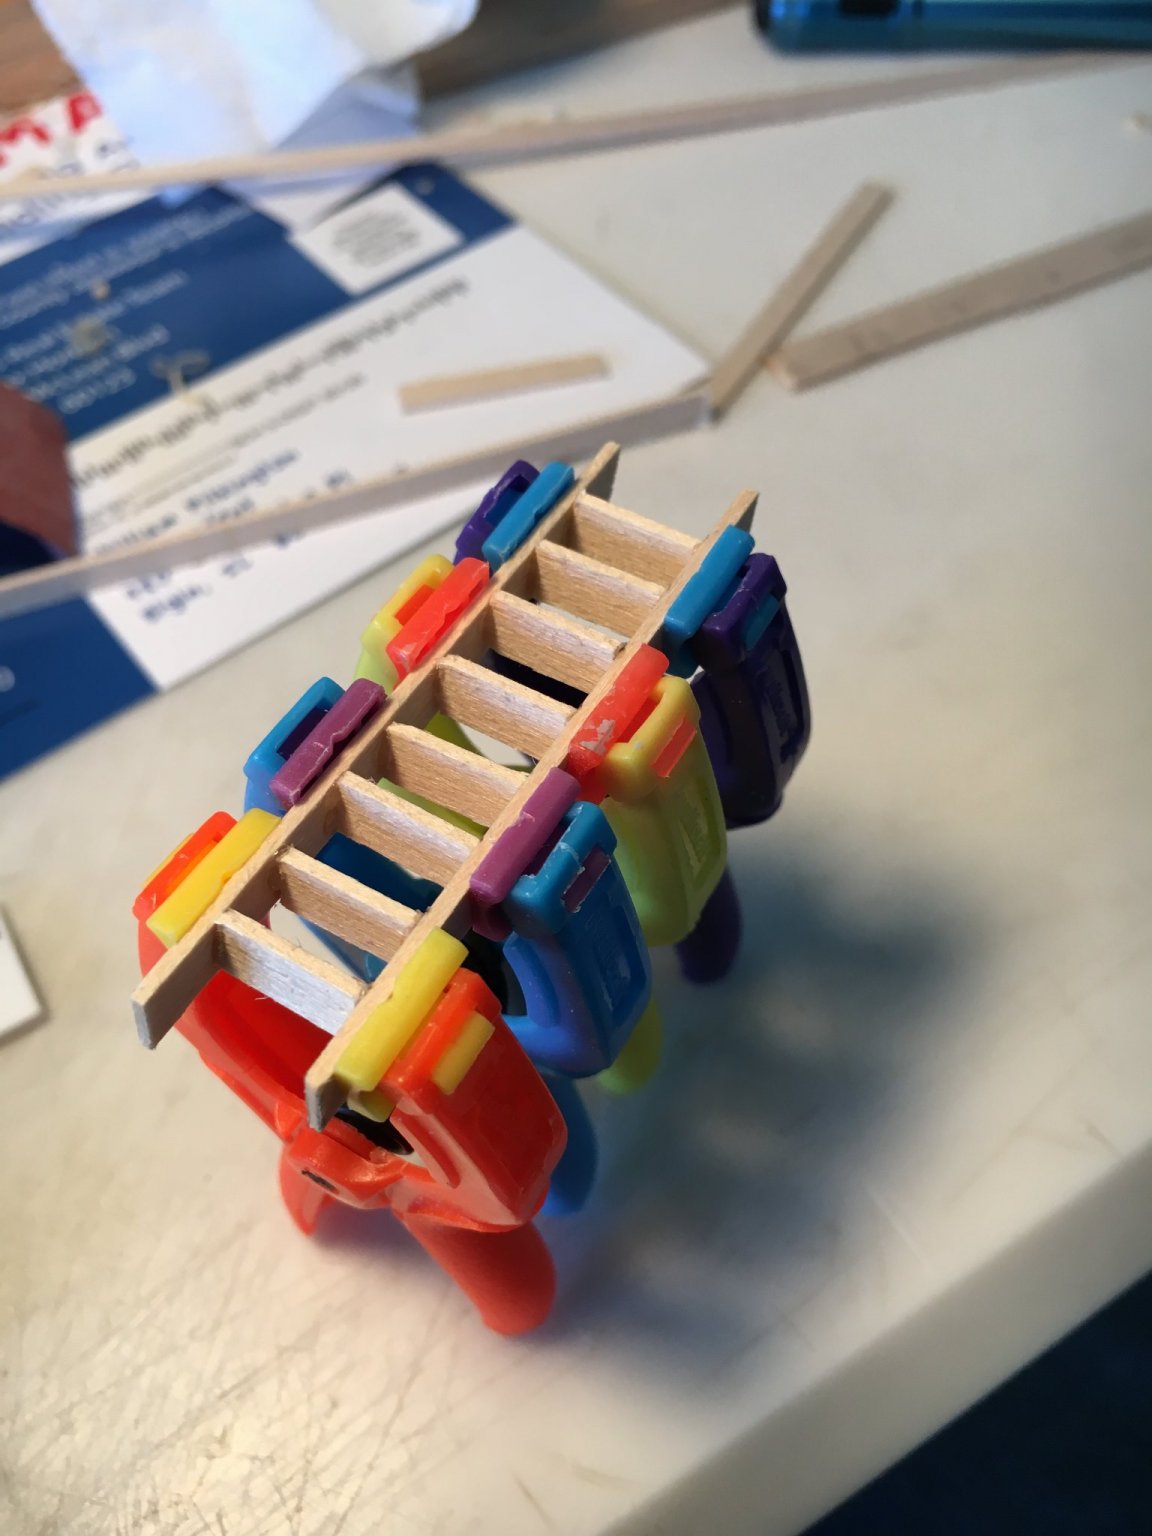
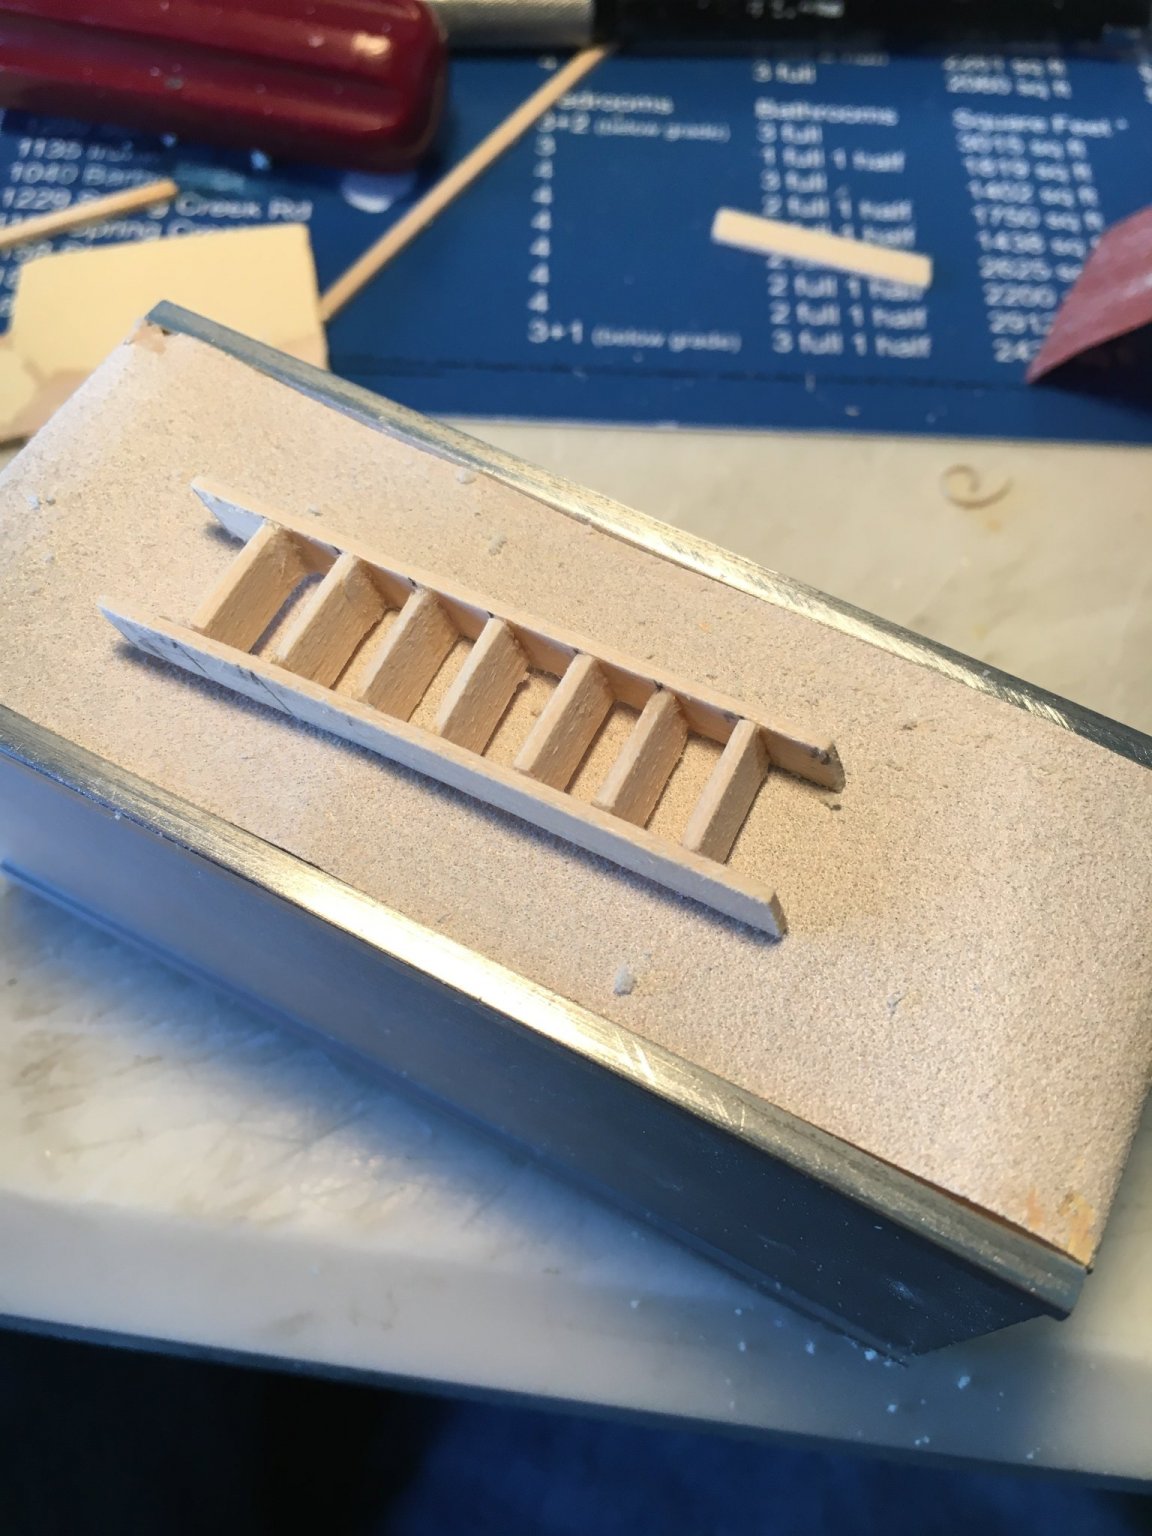
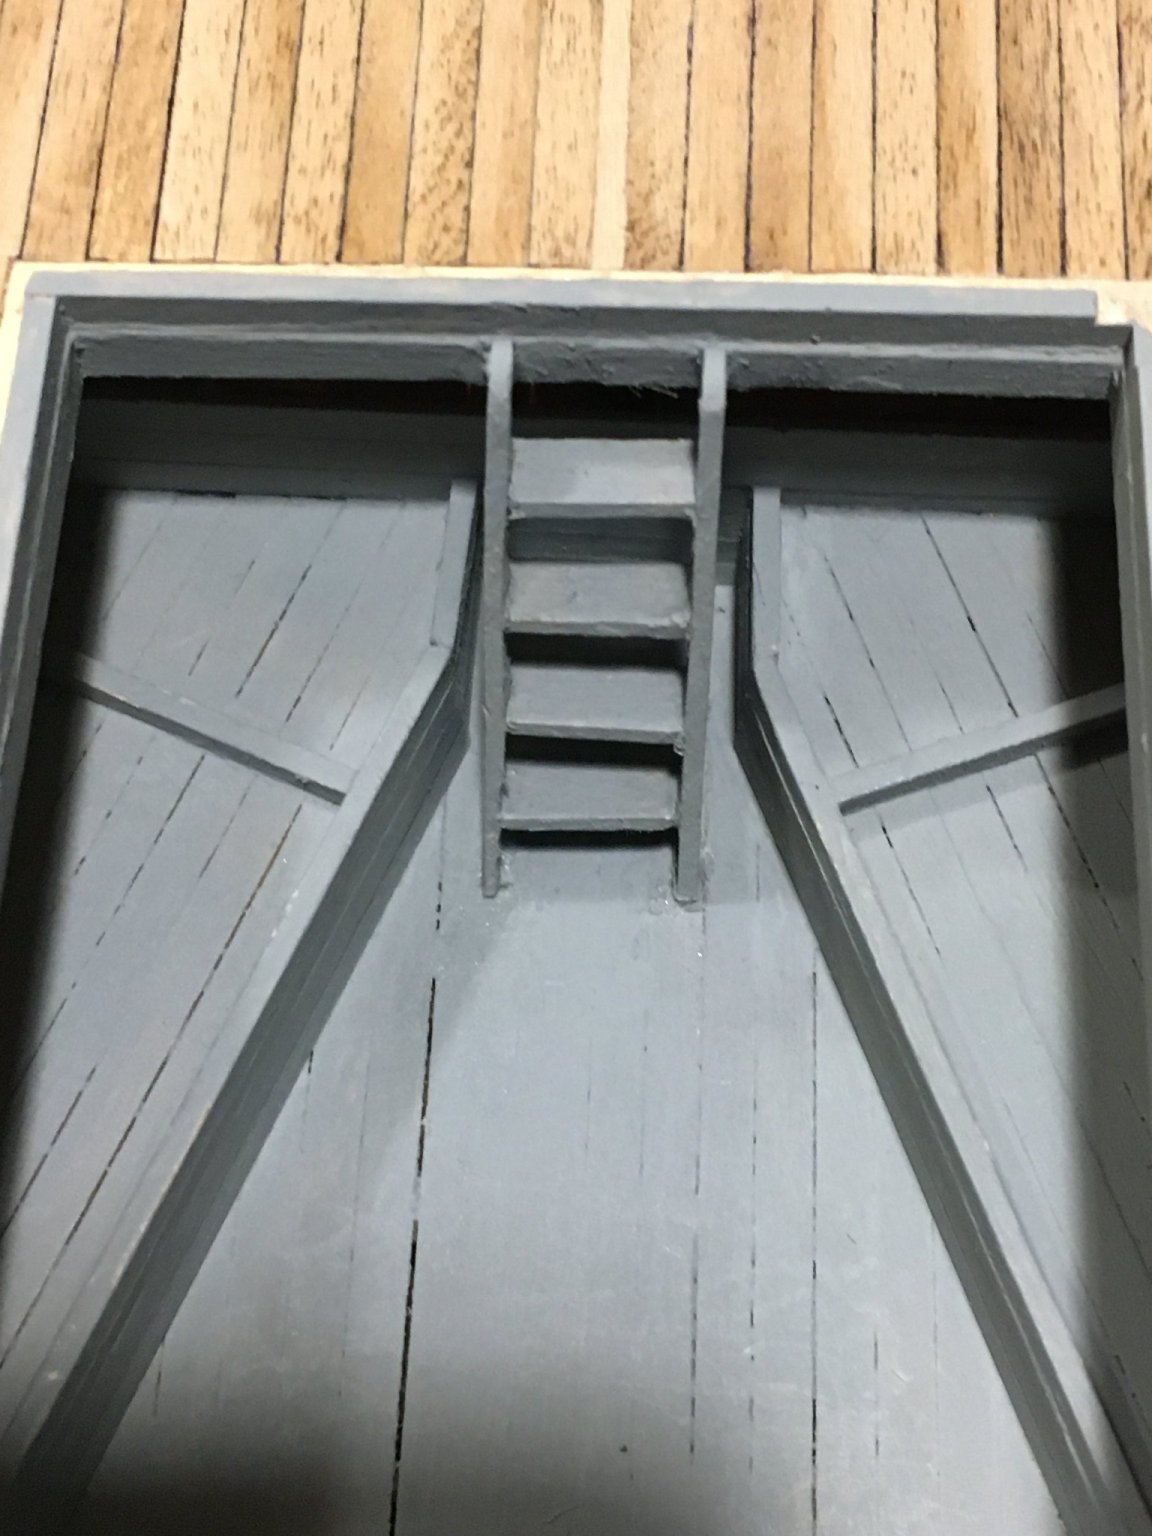
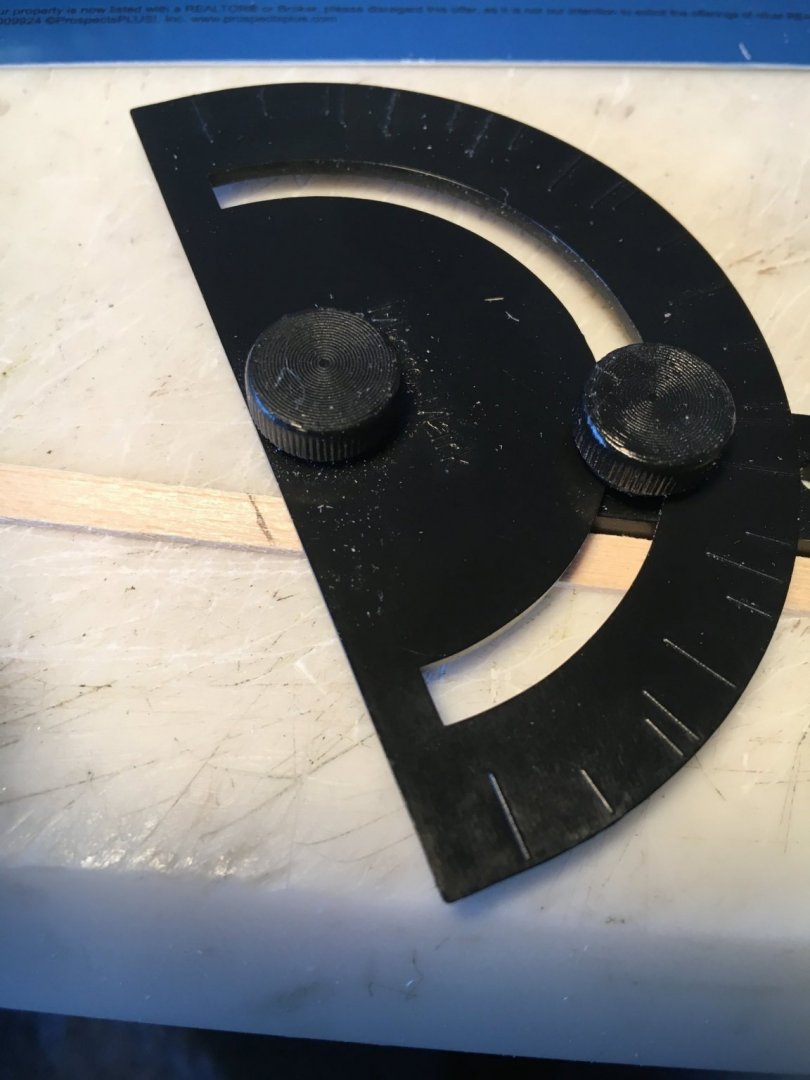
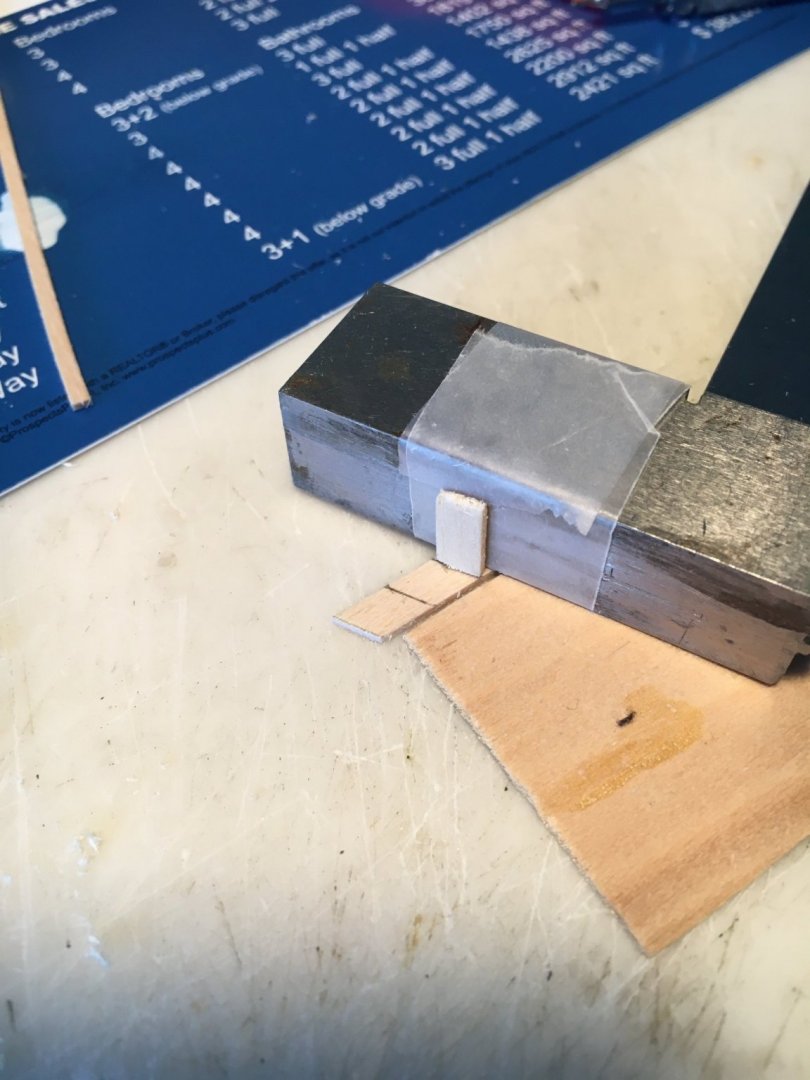
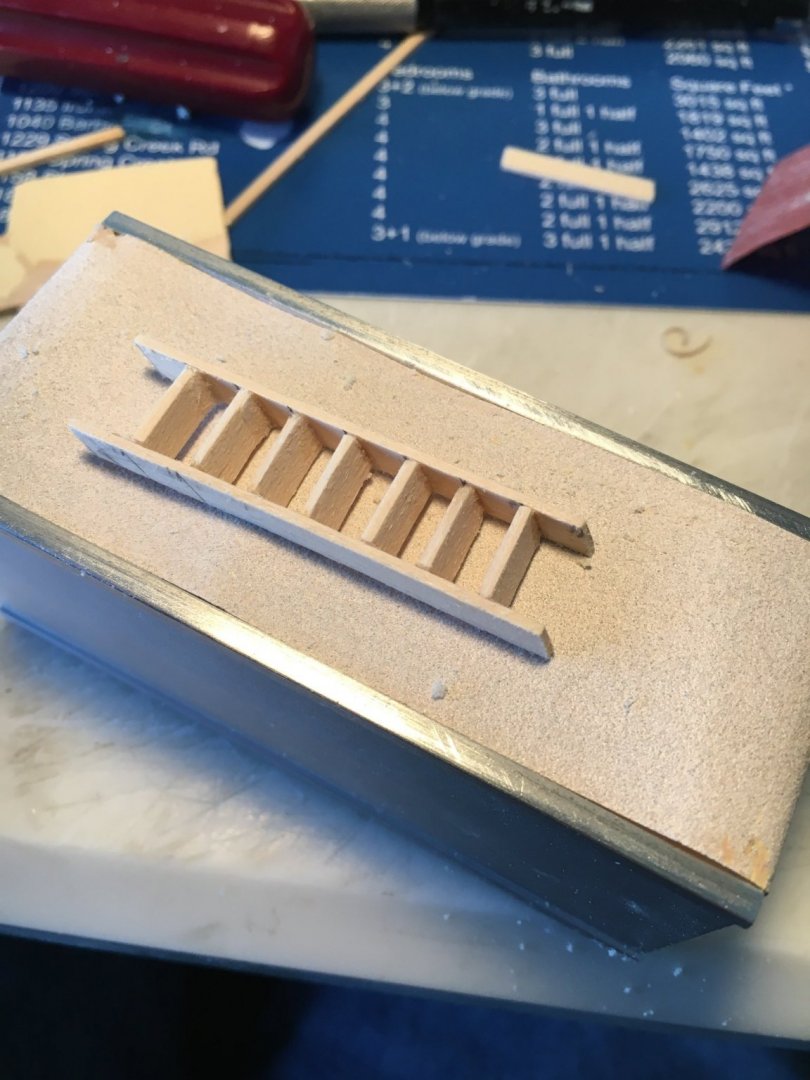
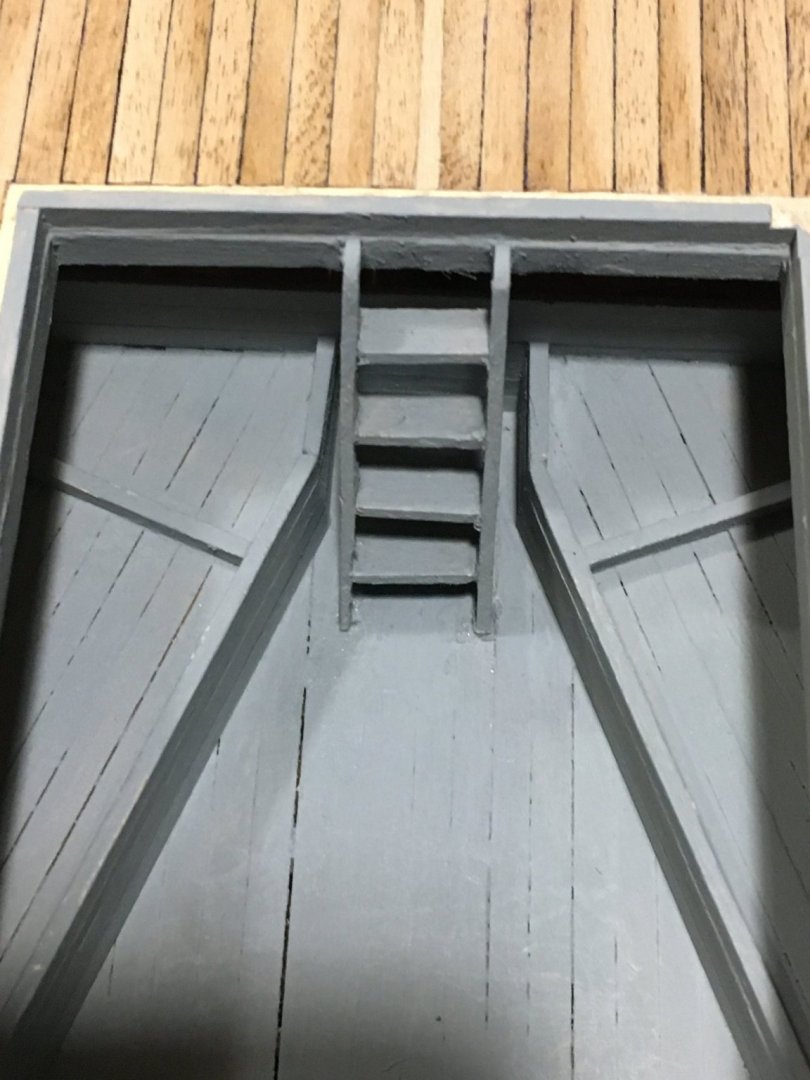
Today I turned my attention to building the 3 ladders. The instructions recommended building a jig but as all the ladders had a slightly different angle between the ladder beam and tread I was not keen on building 3 jigs. What I did is as pictured and it worked out to my satisfaction. 1. I held a piece of beam stock in it's location and struck a line at deck level. 2. I used an adjustable protractor to copy that angle. 3. I measured the distance between treads and used the protractor to scribe lines at the appropriate distance on the beam. 4. I put a stop in my miter box and cut all the treads to the required length. 5. I wrapped my square in tape to prevent glue adhesion issues and lined it up on the struck lines. 6. I applied CA glue the tread and placed it in position with the square providing proper vertical alignment and held it in place for about 45 seconds and then gingerly pulled the square away, no problems. 7. I let the assembly sit for a while to cure and then put CA on the free ends and installed the opposite beam using a flat surface and clamped the whole thing. Clamp colors are at the discretion of the builder! 8. After everything was set I lightly sanded the back and front to ensure everything was even. The process sounds rather complicated but actually went quite quickly. The last photo of the installed ladder has a bit of an off kilter tread, I did better on the last 2 so I'll call that progress!


-
John, your build turned out beautiful!
-
Thanks Sea Hoss, I'm bumbling along.
-
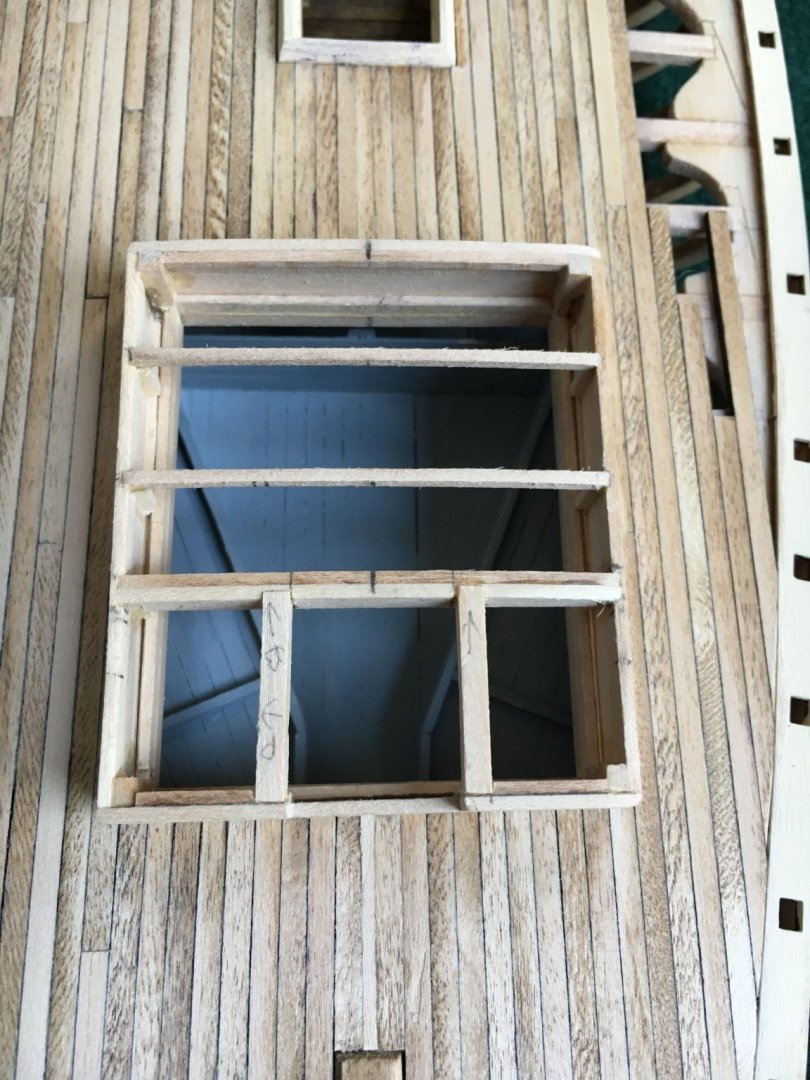
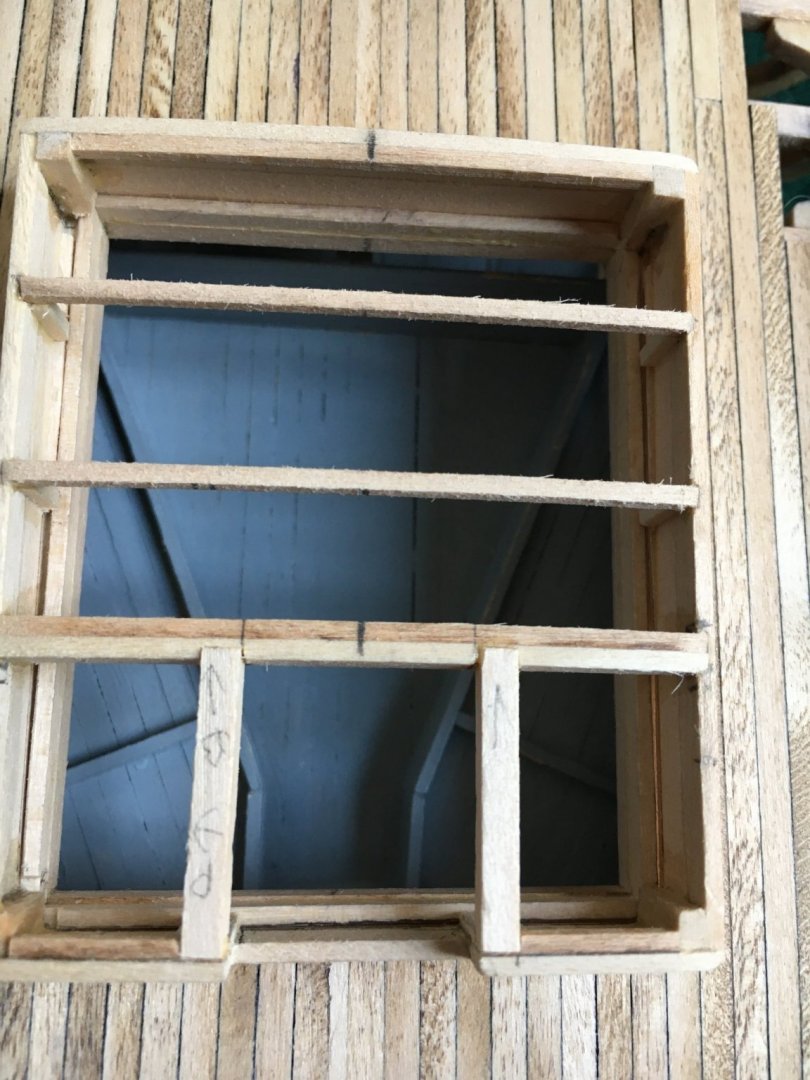
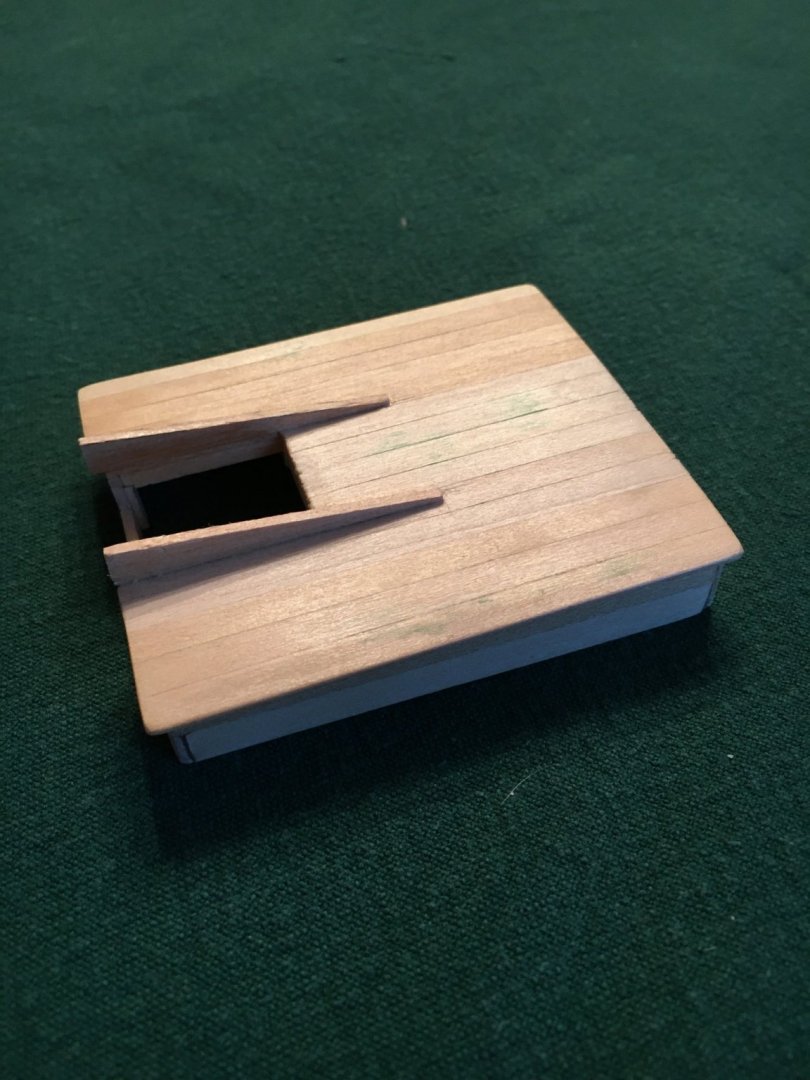
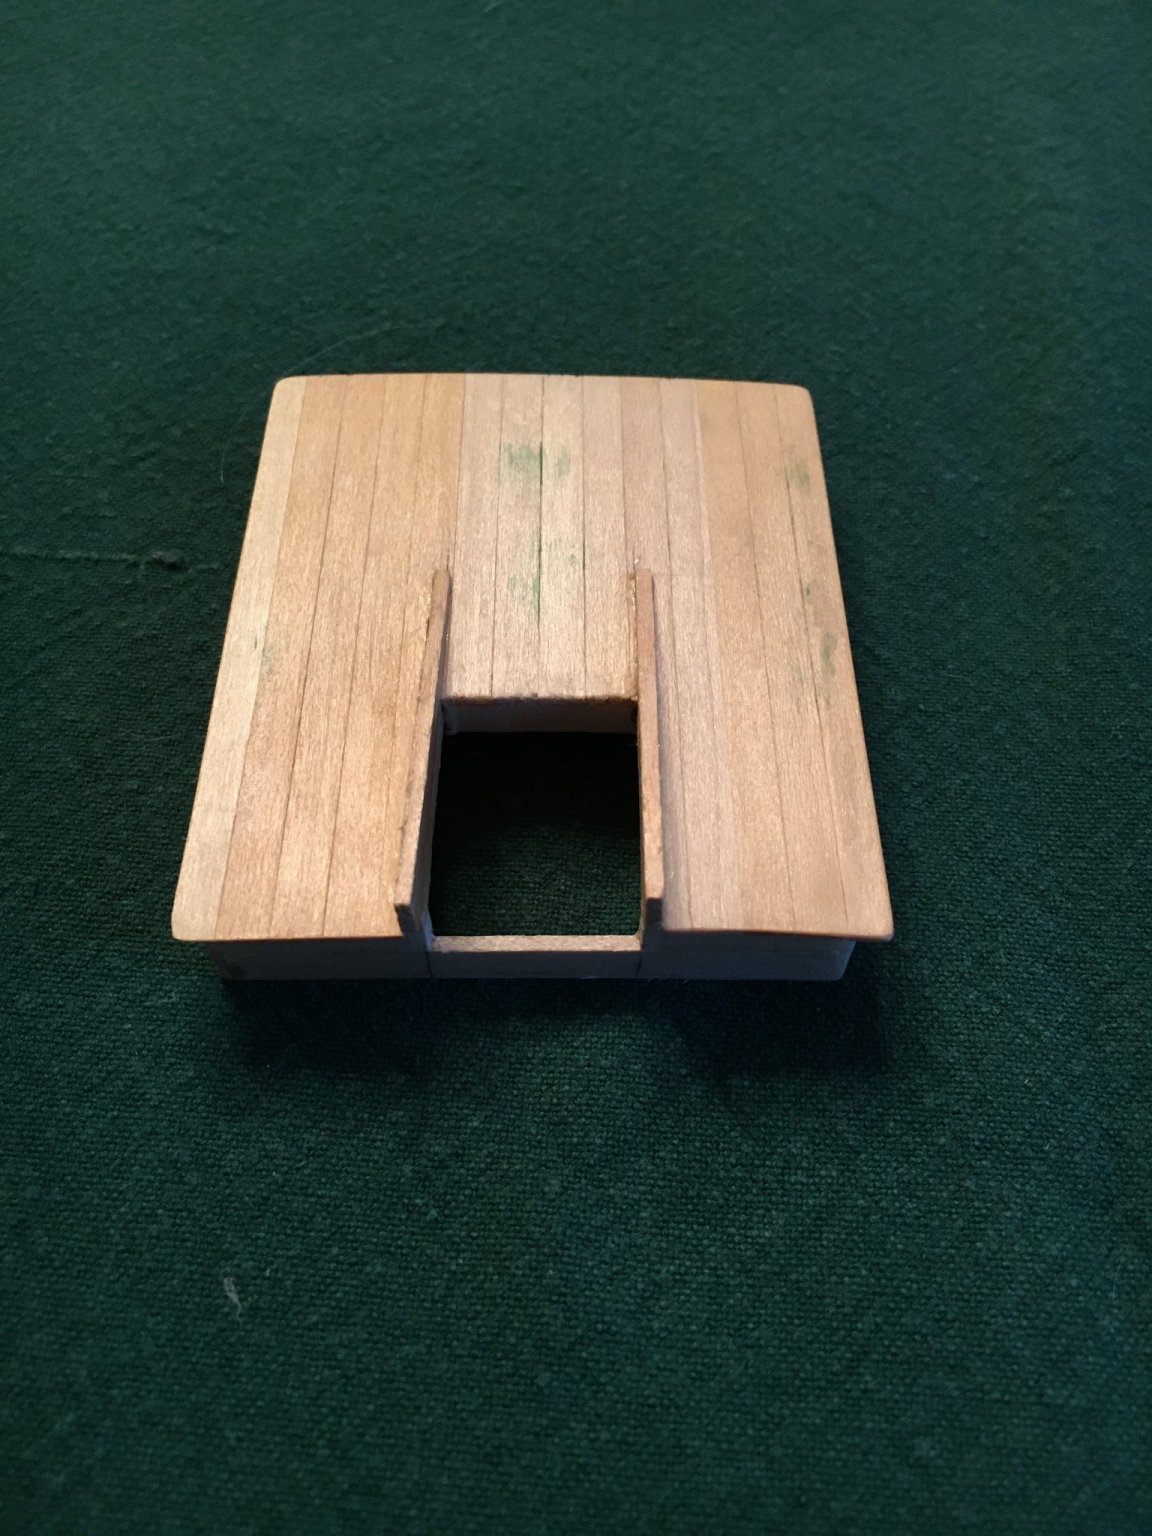
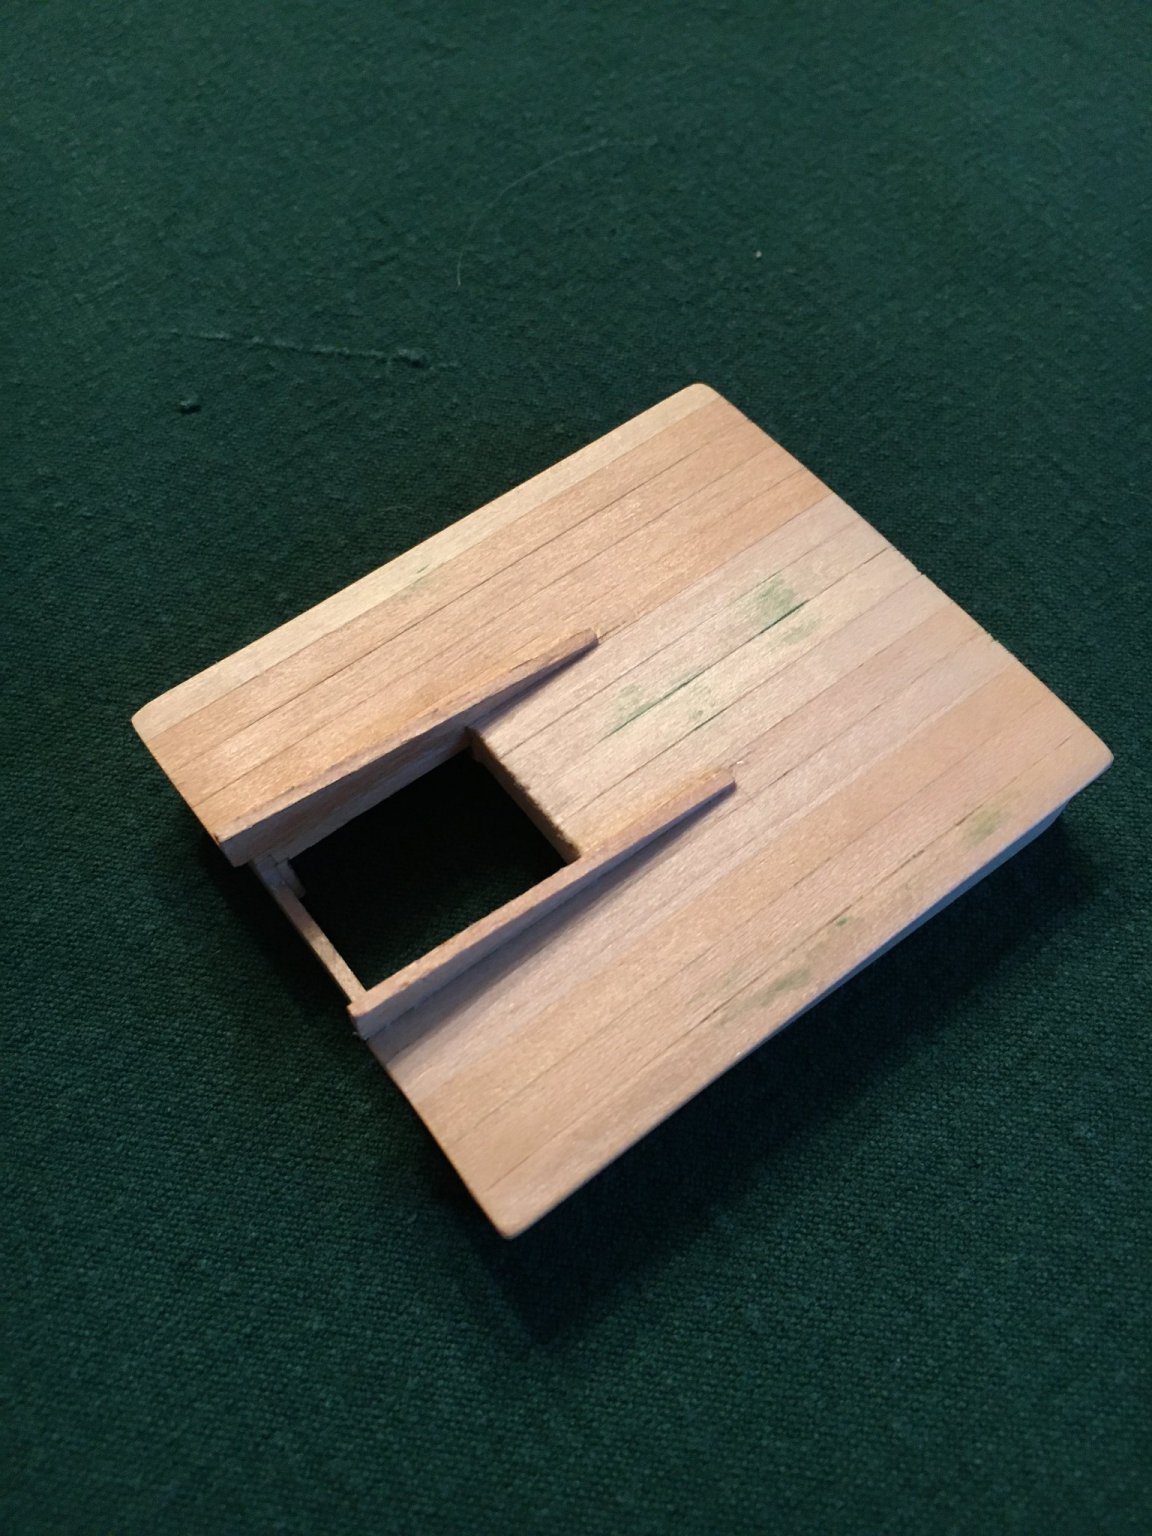
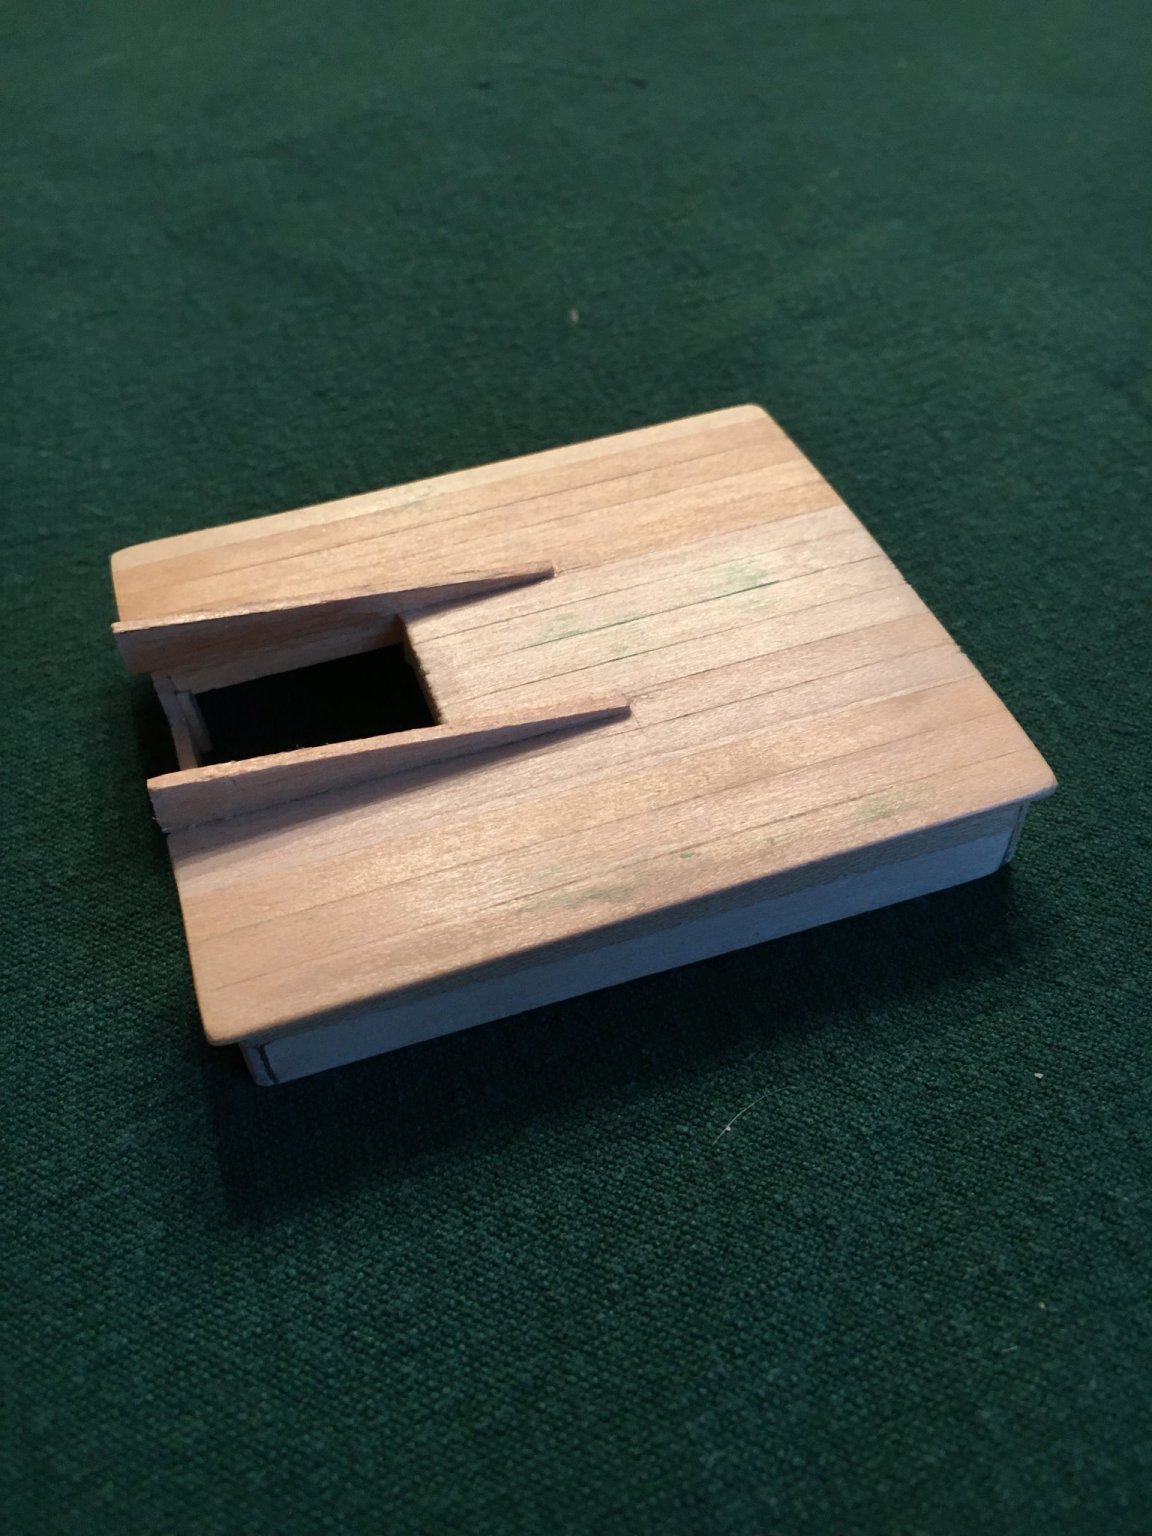
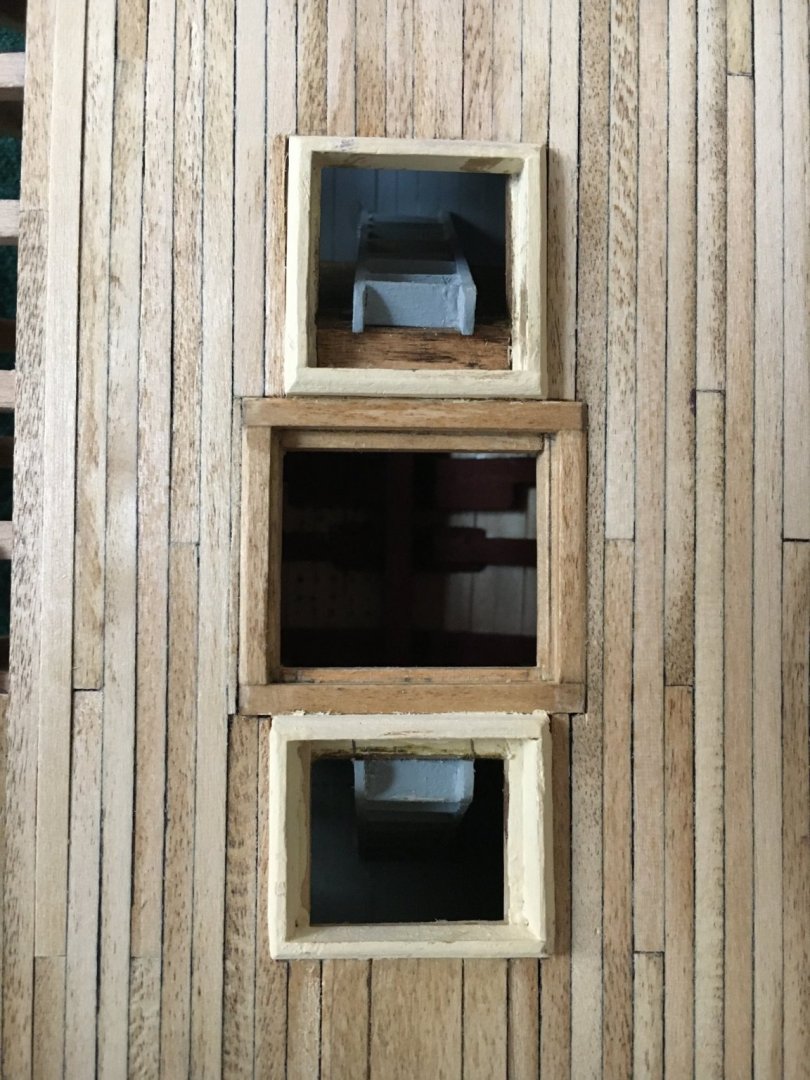
A bit more progress to report. I started work on the cabin and must admit it I enjoy working on these sub-structures. The plans called for the beams to be mortised into the 1/16" cabin sides and with some trepidation I actually accomplished that, perhaps a 1/32" mortise? I only slipped with my scalpel once and after I stemmed the bleeding with minimal blood loss I carried on and completed the task. The beams seemed rather fragile and you will notice that I doubled the last beam aft before the cabin entrance wall to accept the fore an aft beams as I thought it needed some extra strength for those connections. I then planked the roof, installed the hatch runners and am pleased with the results. Very sturdy after the roof was installed! Probably off to the paint shop tomorrow.