JacquesCousteau
-
Posts
1,374 -
Joined
-
Last visited
Content Type
Profiles
Forums
Gallery
Events
Everything posted by JacquesCousteau
-
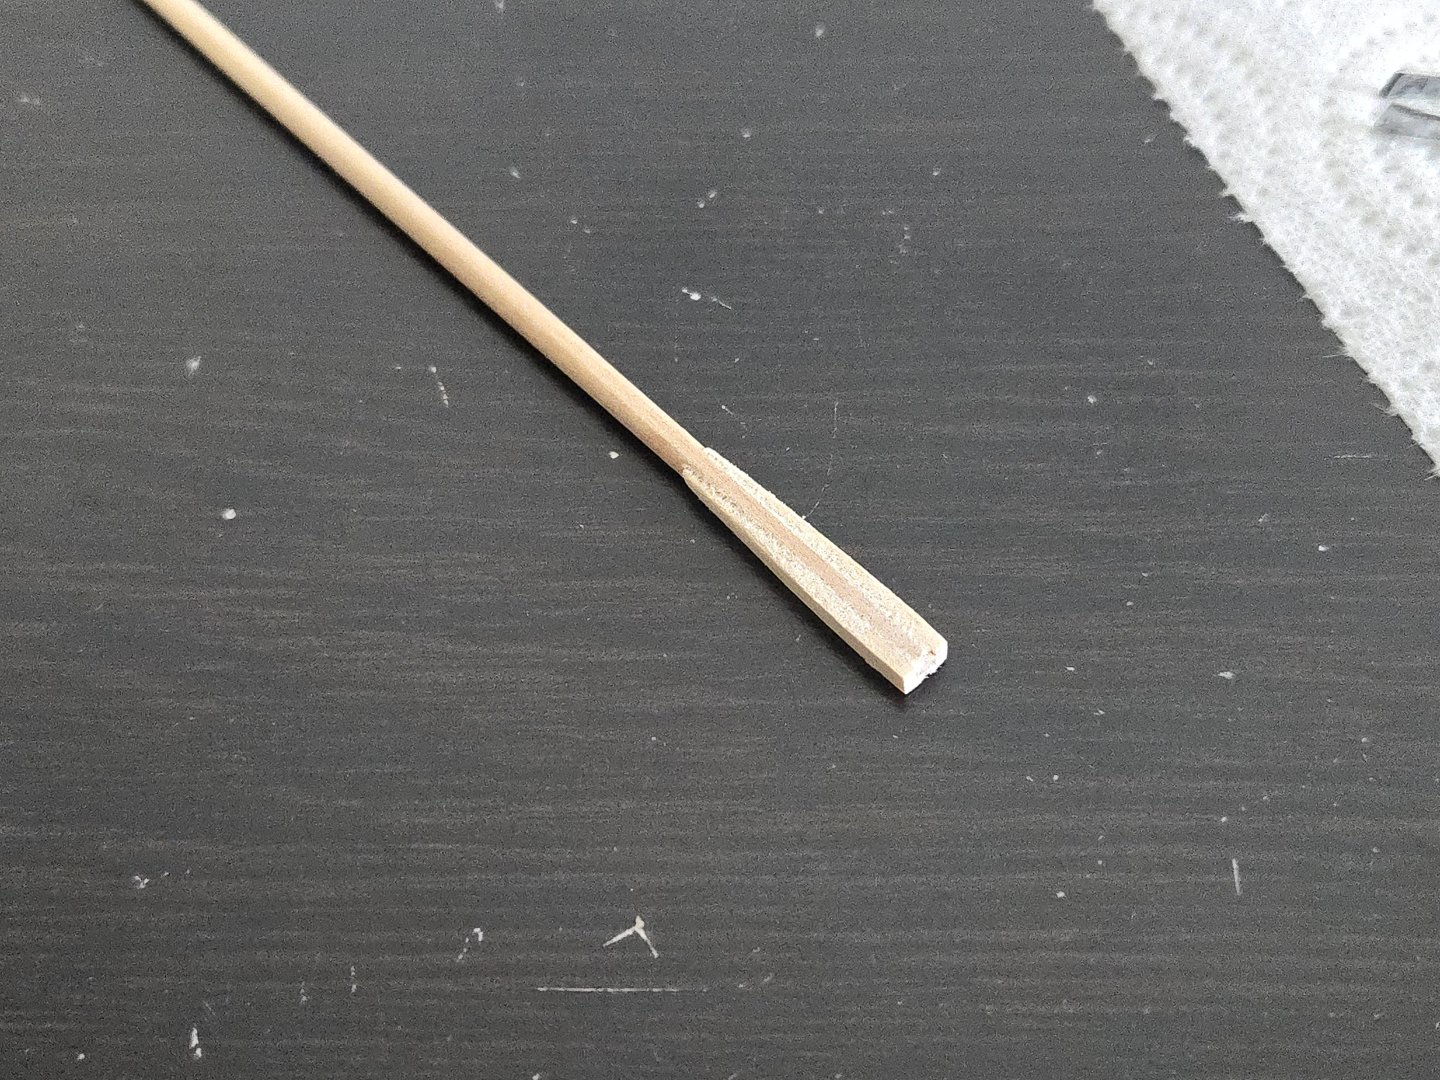
 Thanks, all! @wefalck, I can definitely understand the appeal of a nice clean model, and am considering building the Bateau de Lanvéoc that way. But I felt that this model was particularly well-suited for a more weathered look. I think it also conveys something about the broader context in which these vessels sailed, maybe telling a story (or at least hinting at one) about their sailors' lives. (Of course, one could also say the same about the Bateau, which is also a workboat, but there I have the excuse of wanting to show off the framing.) Not much work for the next week or so, as I'll be traveling, but I was able to make a new, better-tapered gaff. Still need to figure out the jaws.
- 312 replies
-
- 3
-

-
- Chile
- Latin America
- (and 6 more)
-
Definitely a tricky mast to rig with the upright angle controlled solely by the rigging! While it's certainly frustrating, and it's of course up to you what you do, I'd suggest redoing the shrouds and stays to get a result you're satisfied with. The rest of the model has turned out quite nice, including additions like the served rigging not usually seen on this model, and it seems to me like it would not take that much time, relatively speaking, to bring the standing rigging up to the same standard. It sounds like part of the issue was in setting the shrouds before the fore stay. Maybe setting the forestay first would help? Another option may be to fudge things a bit (or let's call it personalizing the boat) by making a new, wider thwart from scratch and drilling a hole in the midline to create a more stable foundation for the mast. I did something similar on my Dory build, which I added a sail to, but I'm not sure if it would work on this particular model. Anyway, it's your model, just thought I'd add my two cents.
- 167 replies
-
- 2
-
-
- Norwegian Sailing Pram
- Model Shipways
- (and 1 more)
-
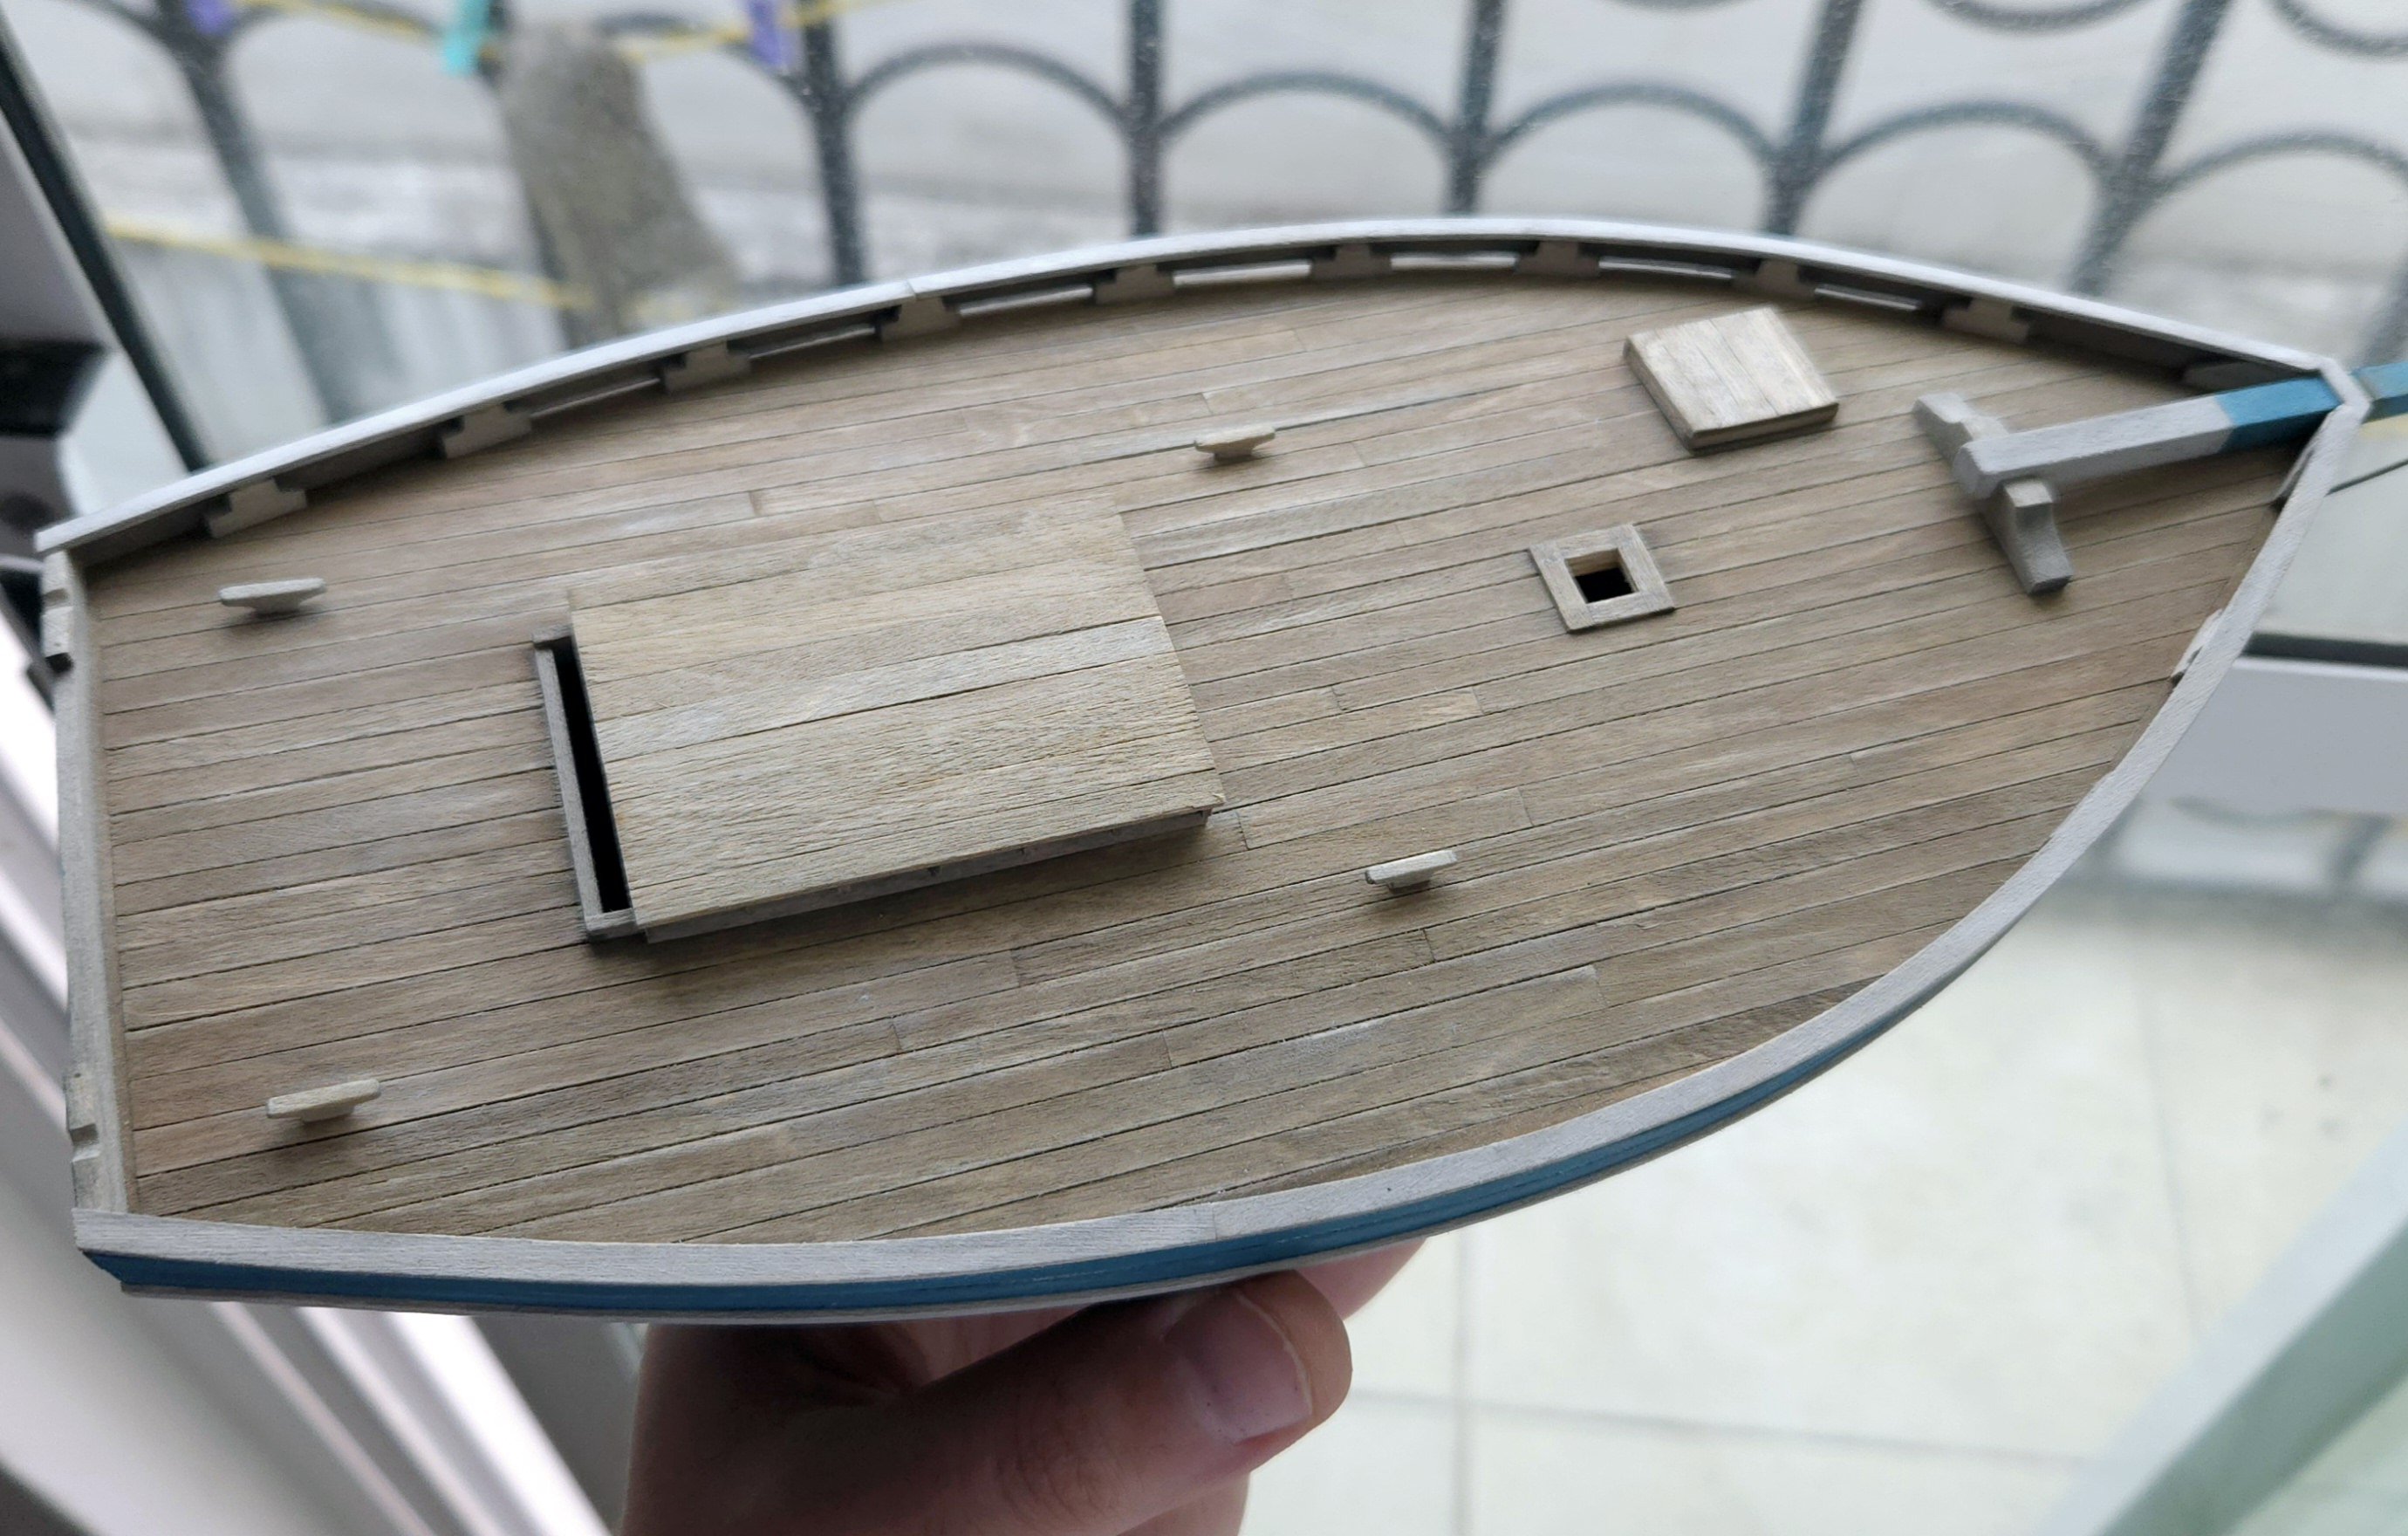
Very nice work! Personally I think having the upper deck mostly unplanked would look great and would really show off the framing.
- 76 replies
-
- 3
-

-
-
- Pinas
- kolderstok
- (and 2 more)
-
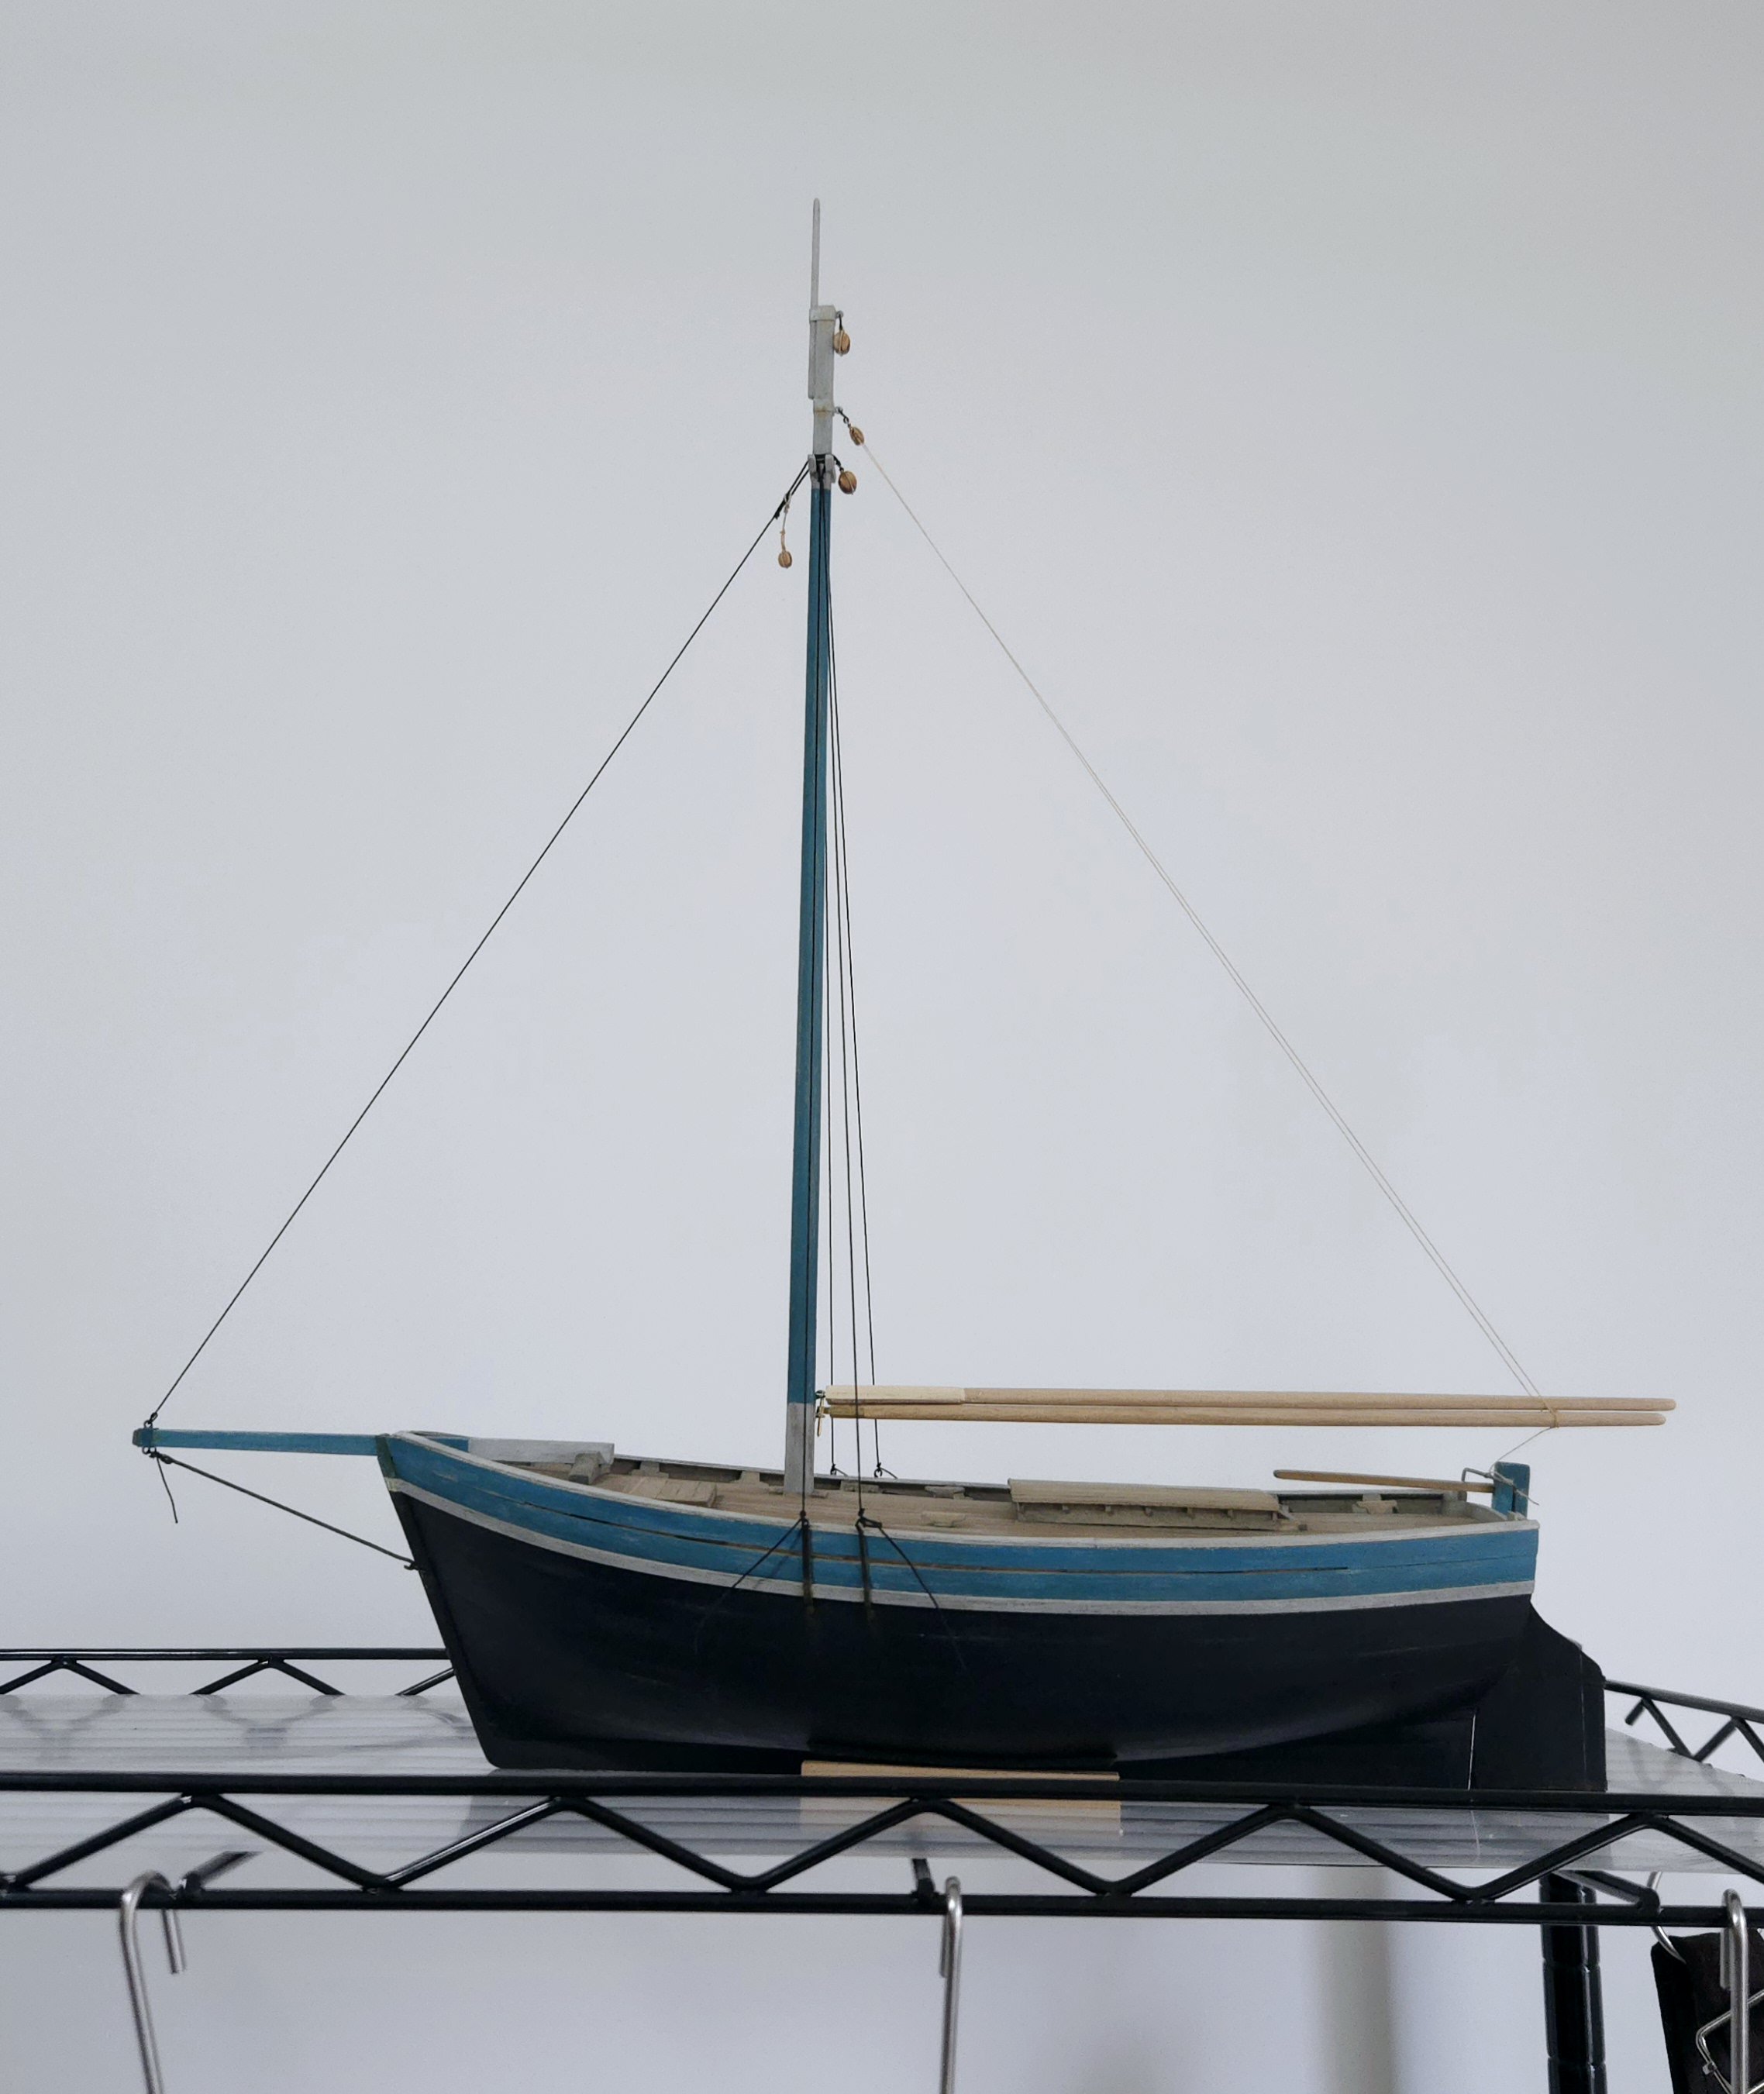
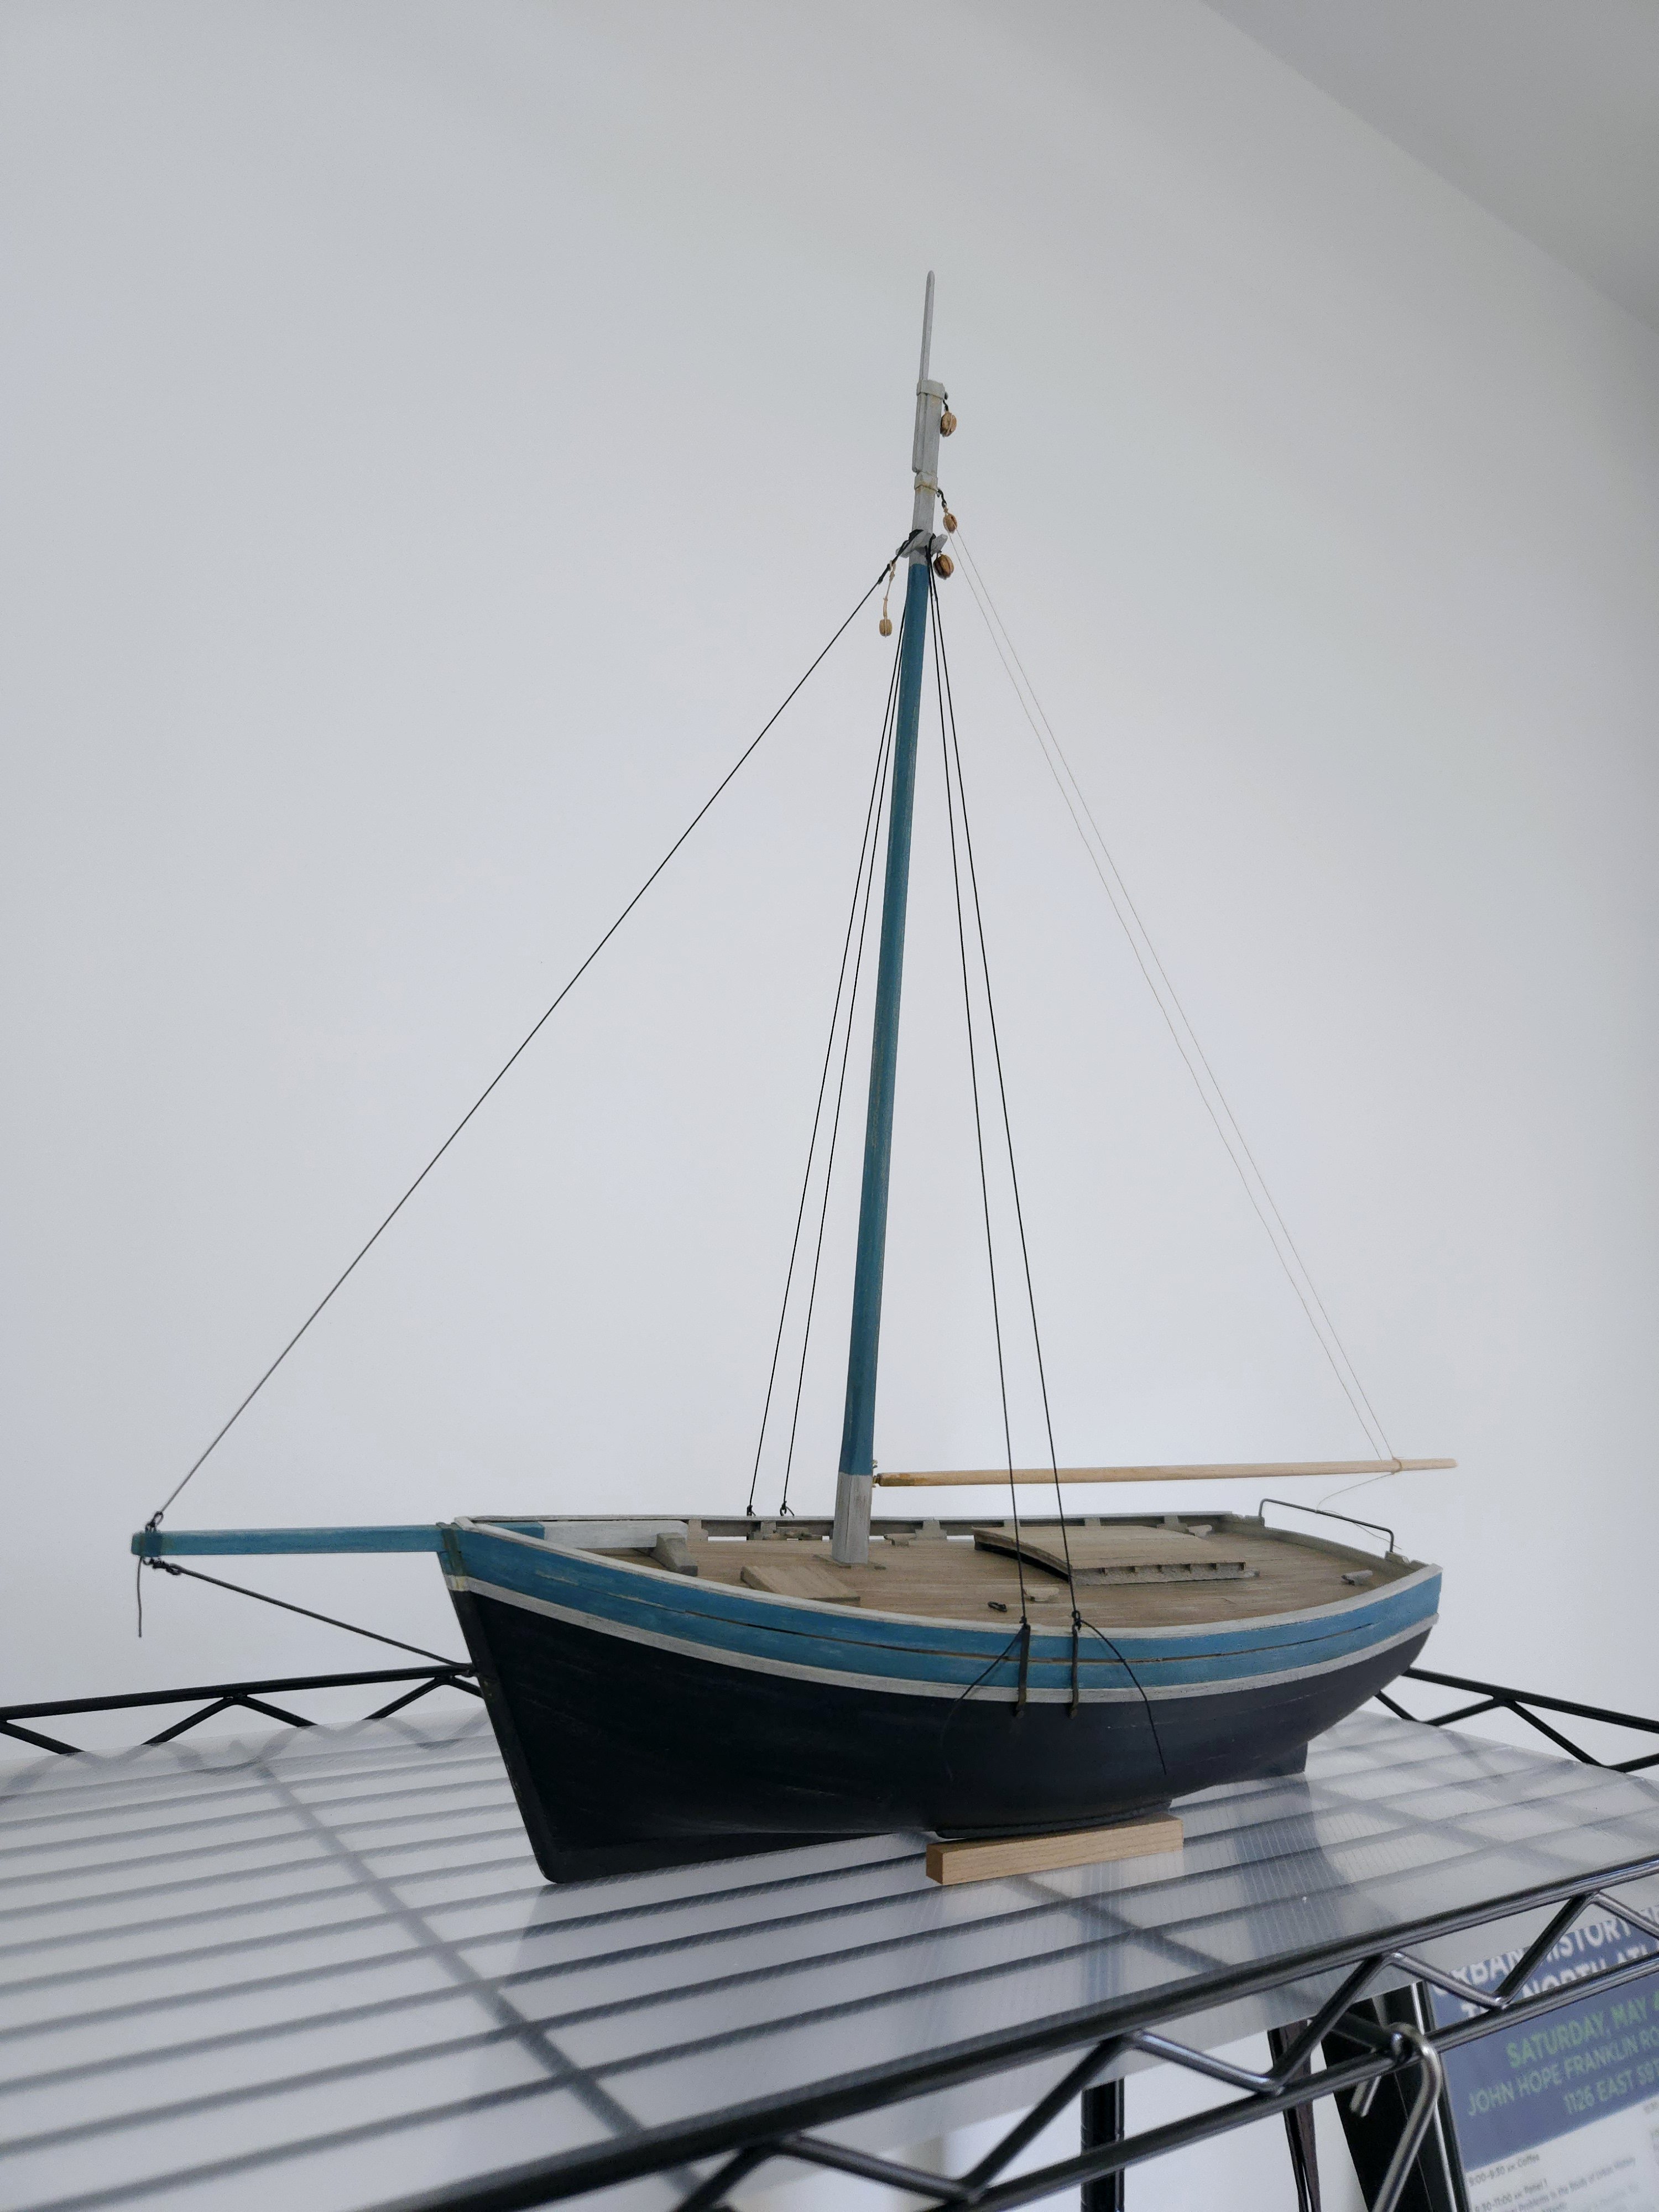
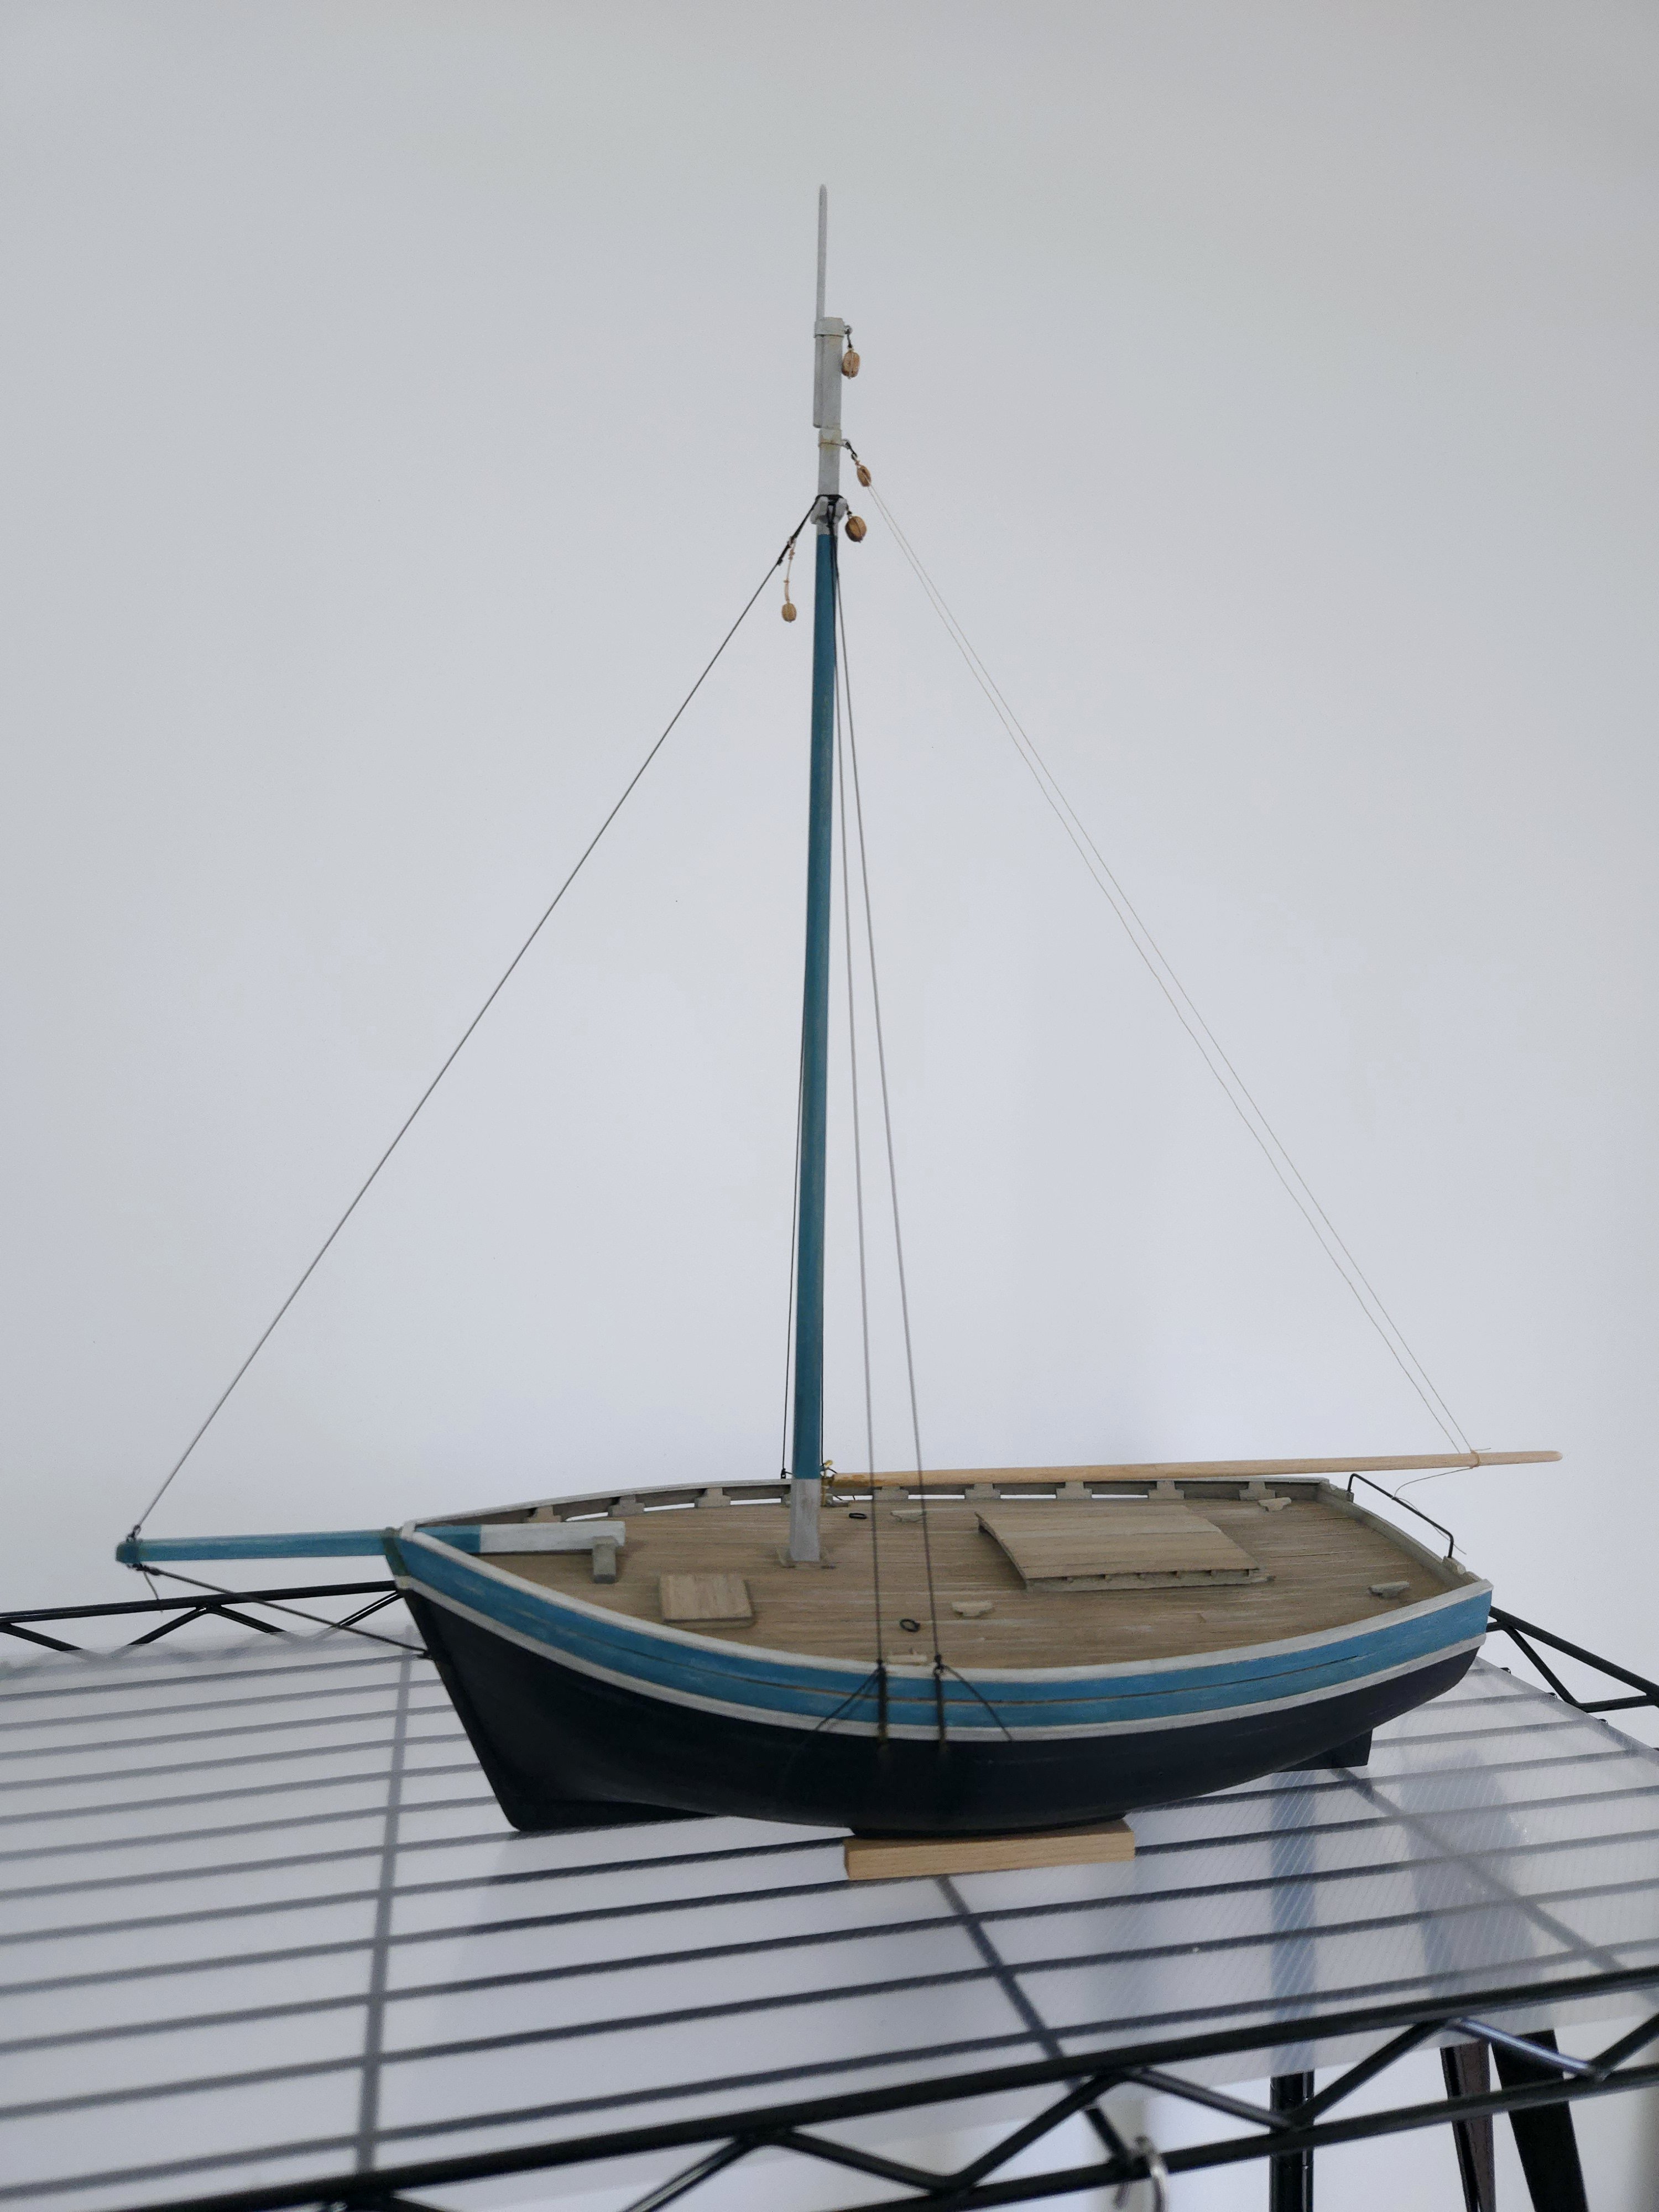
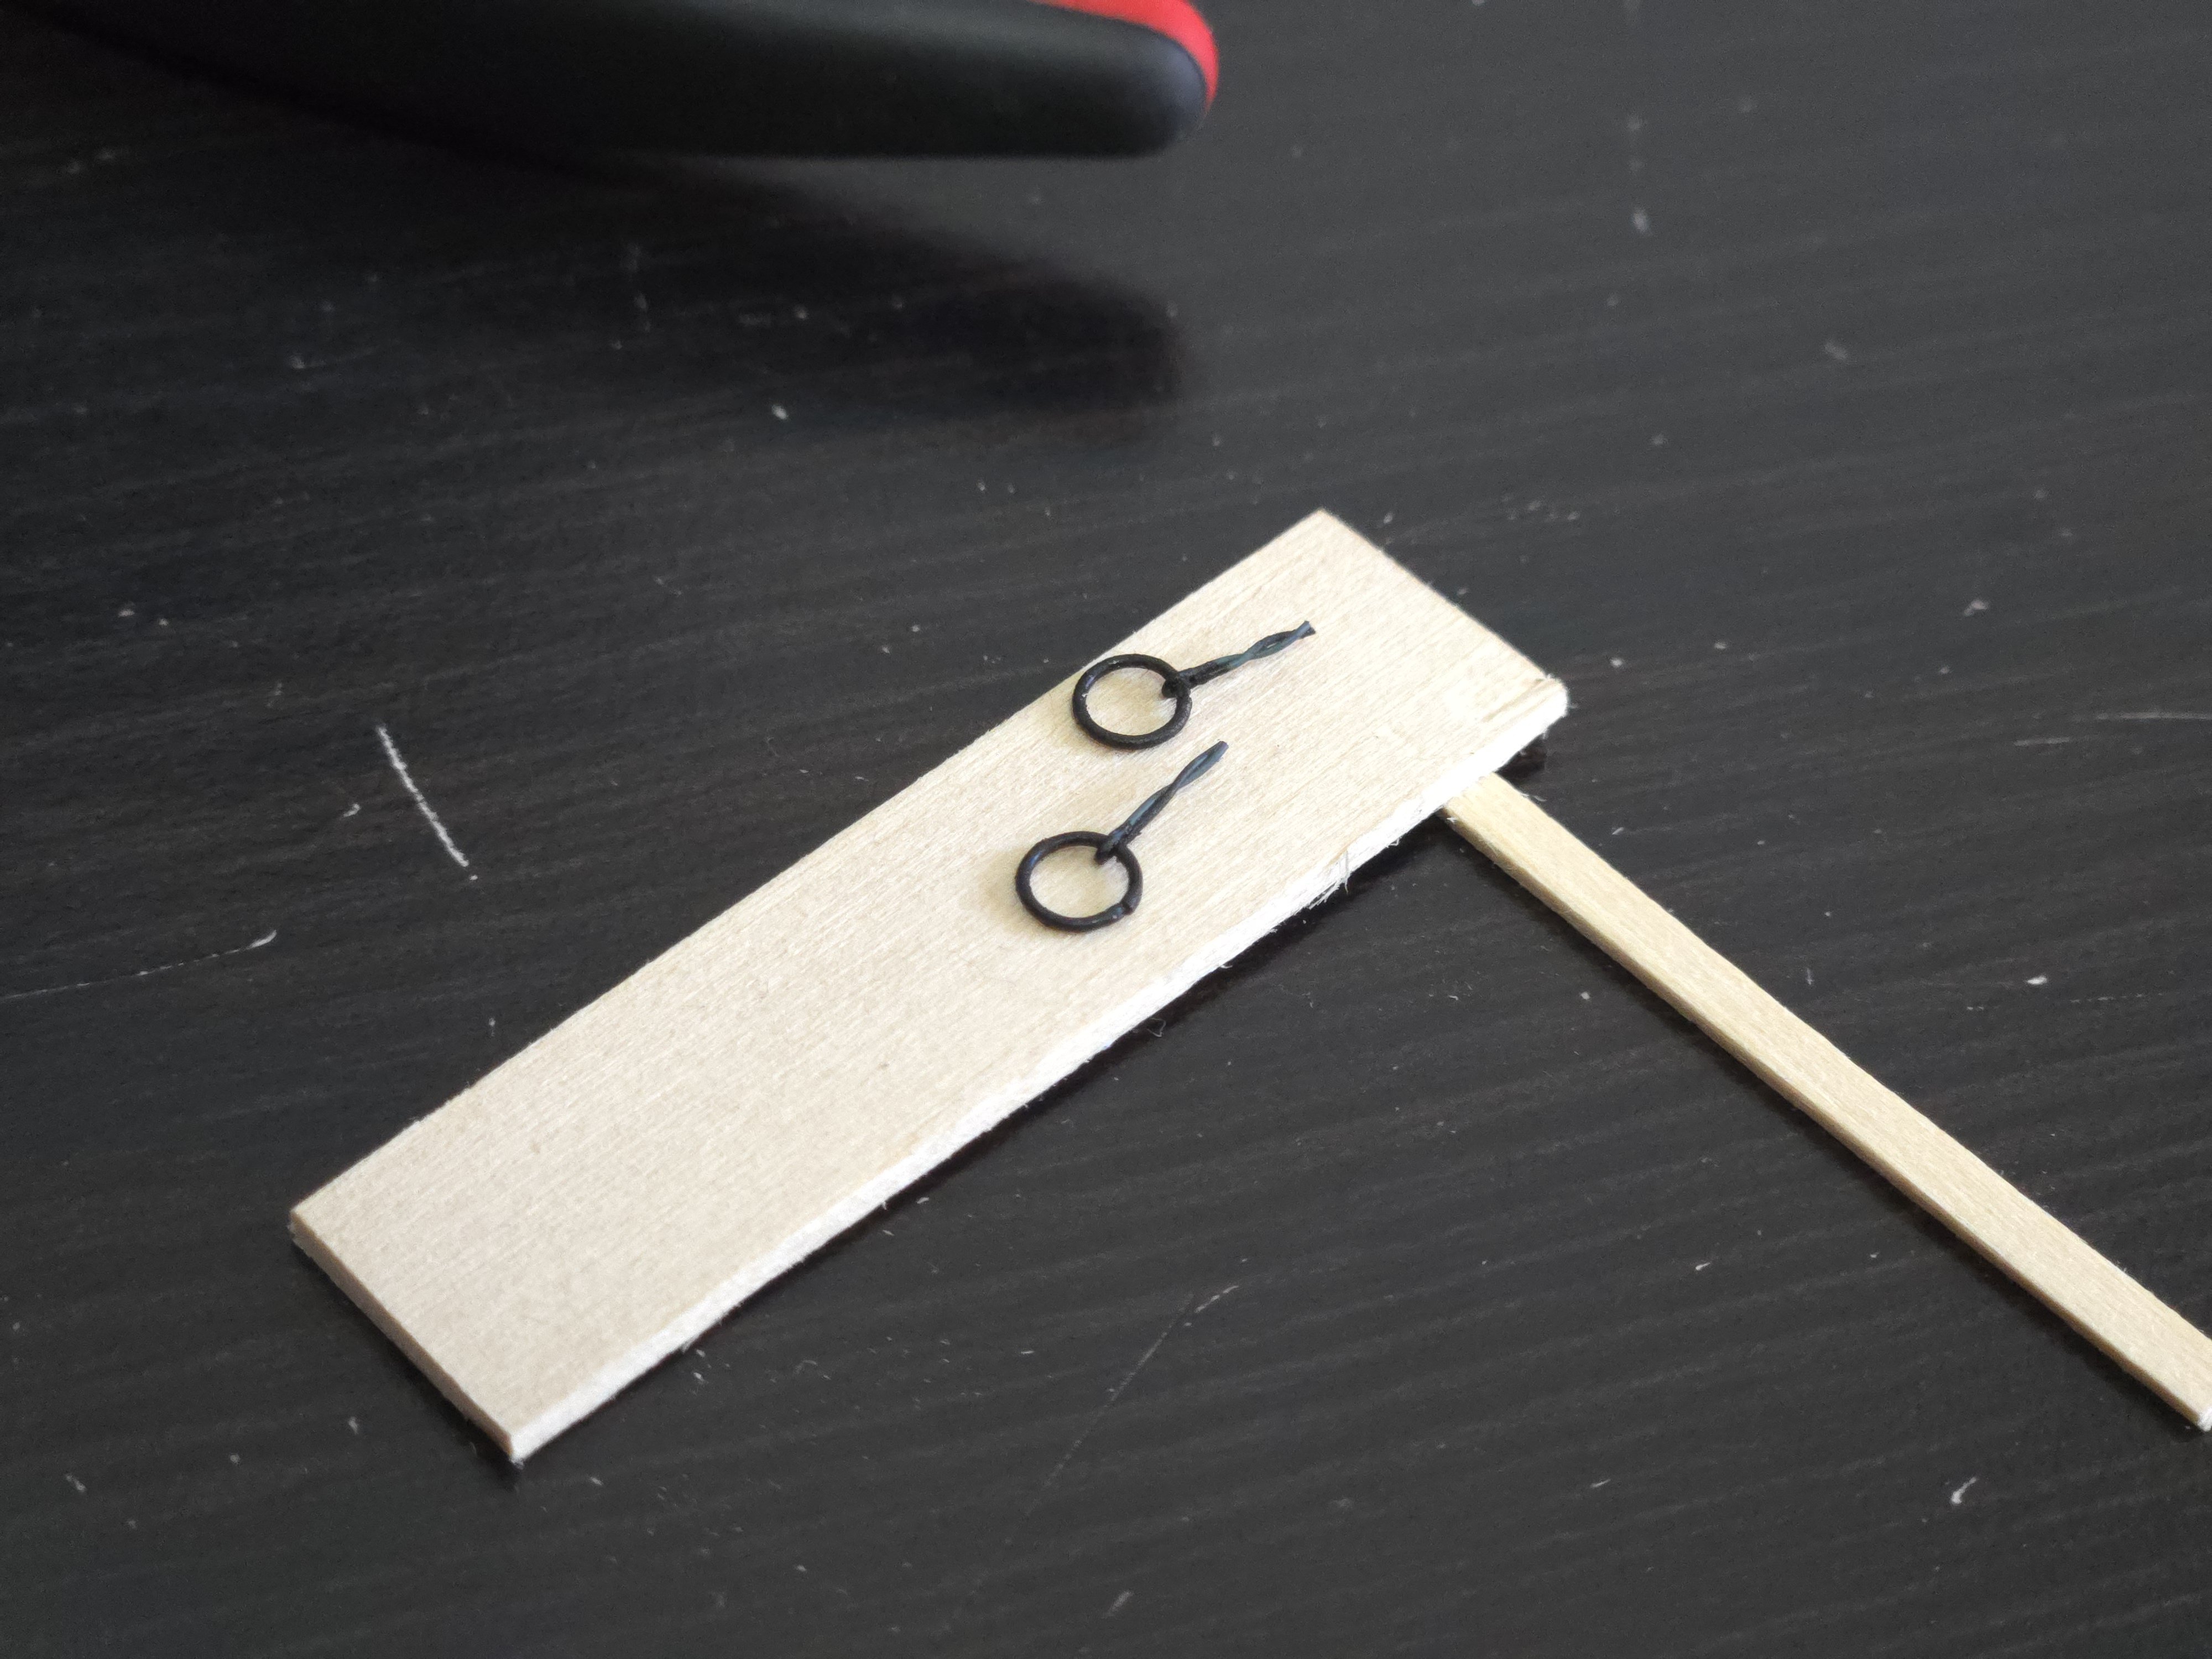
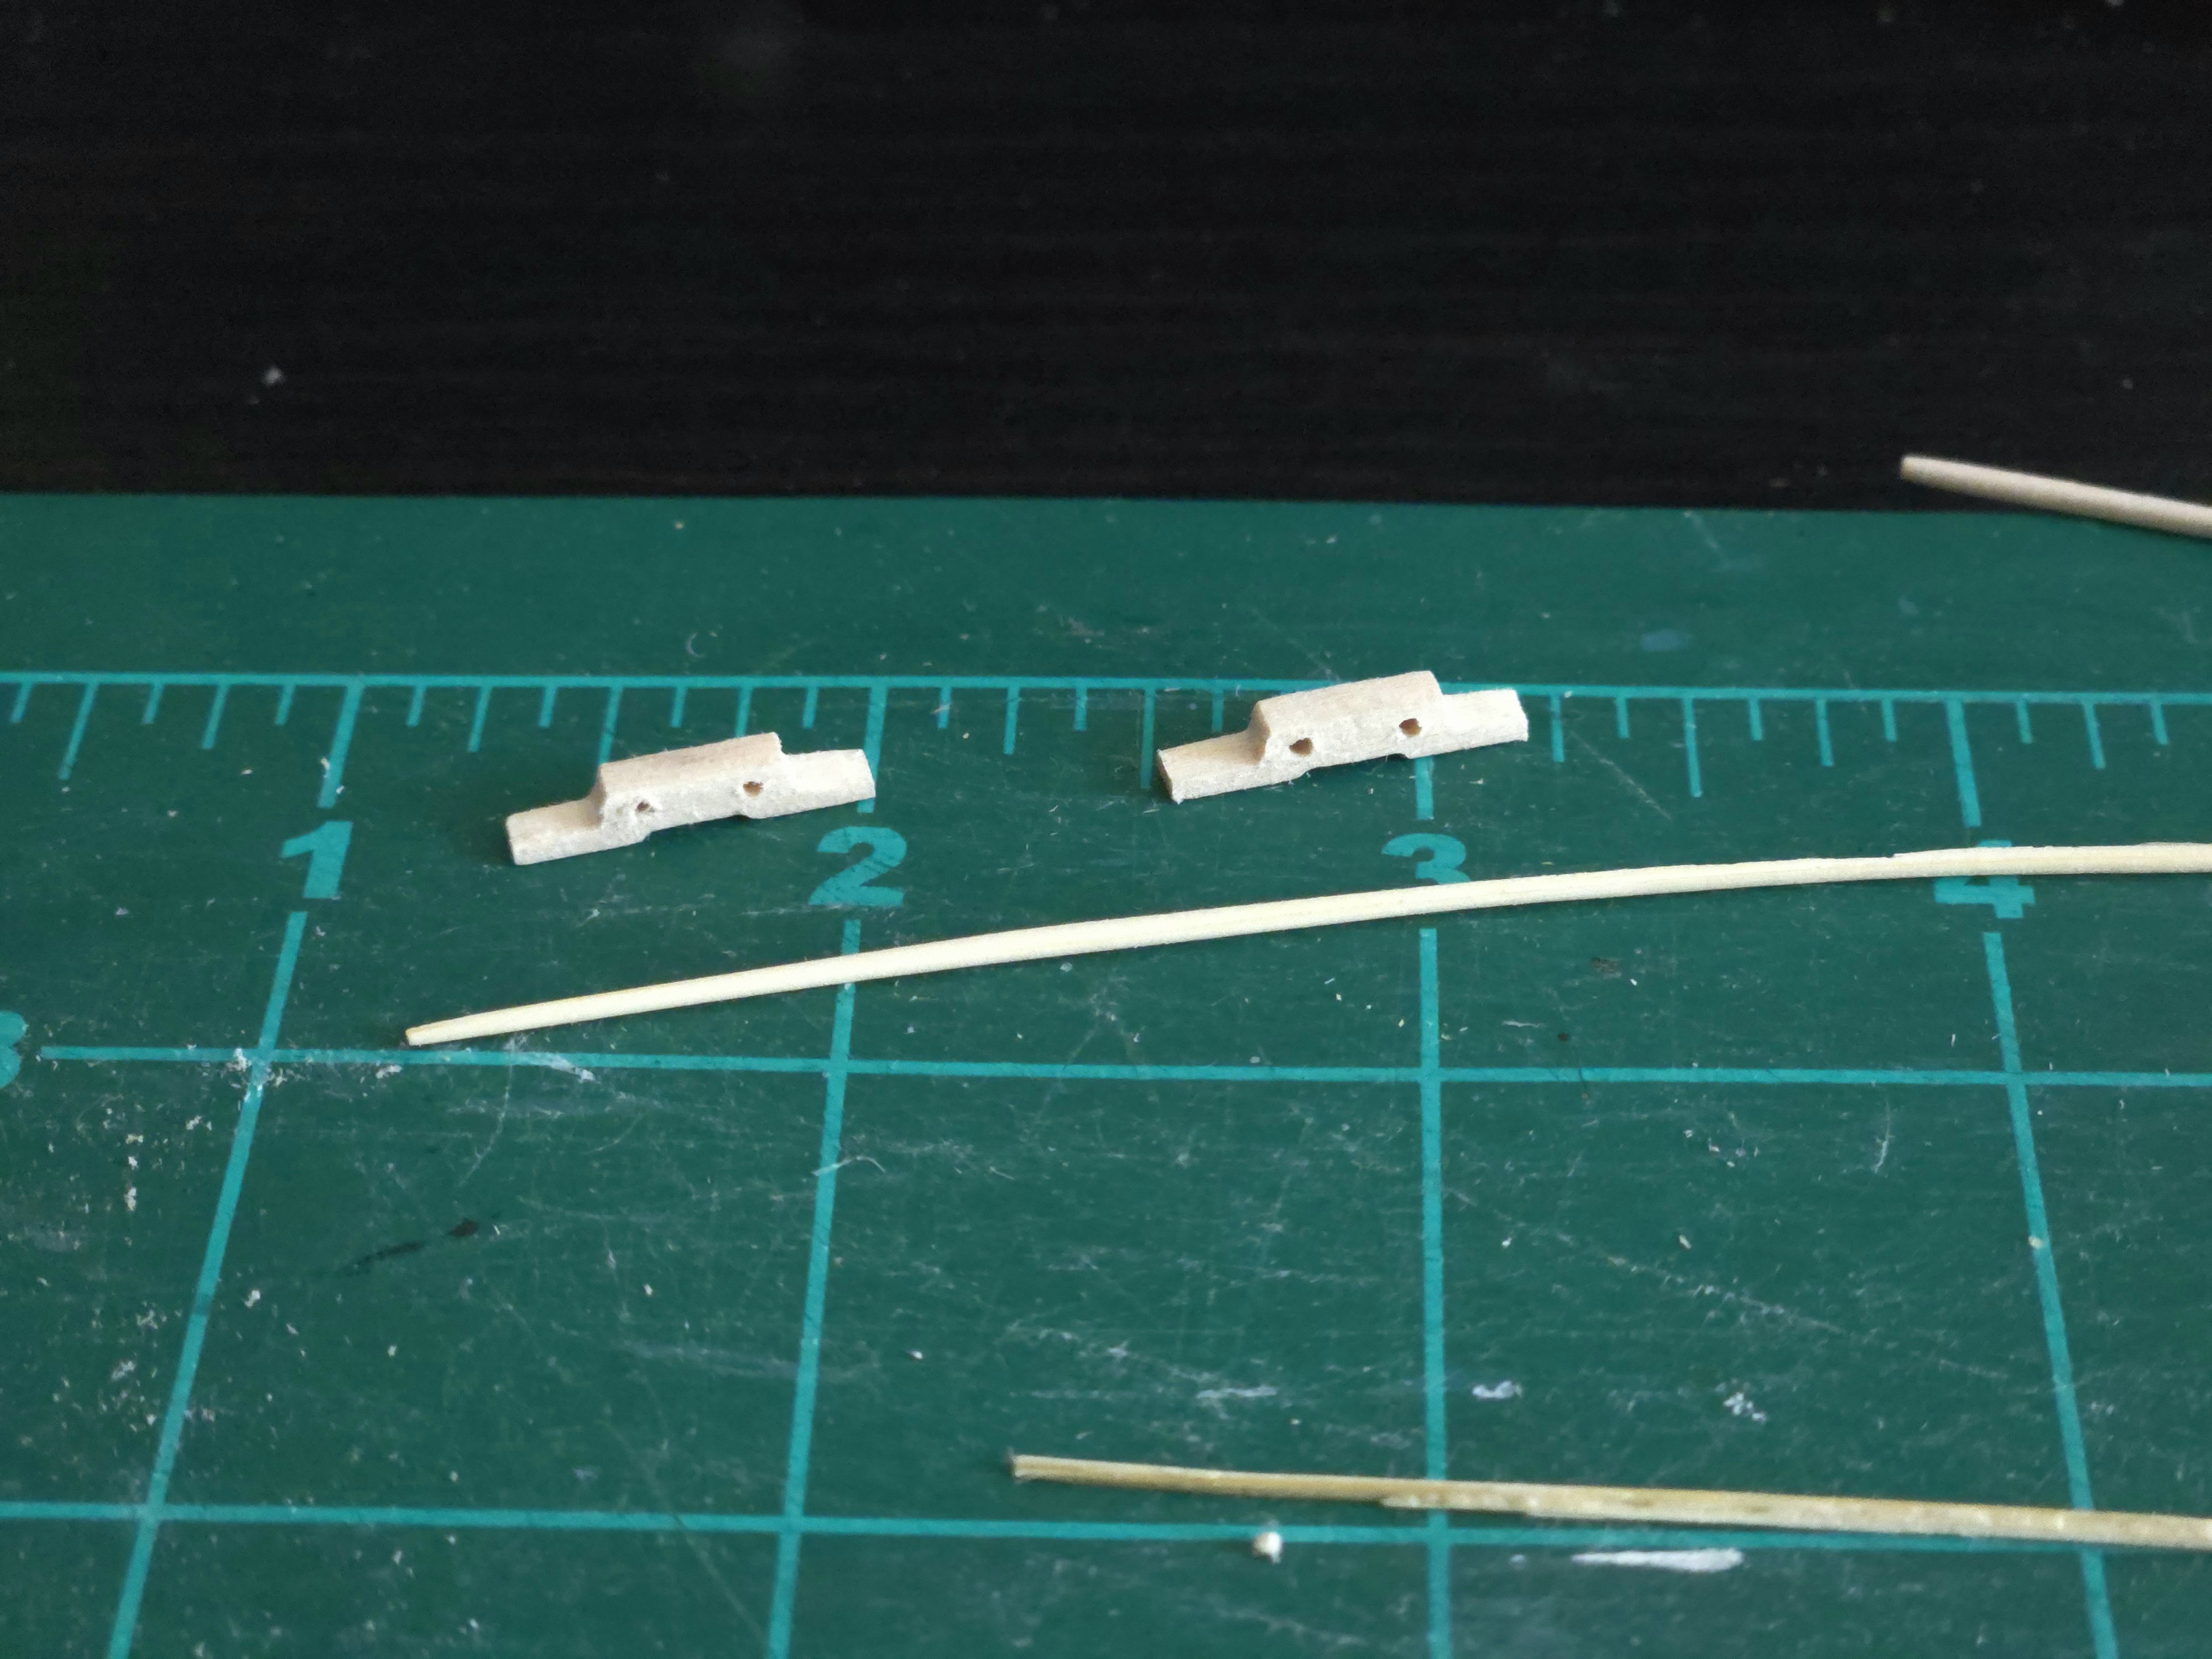
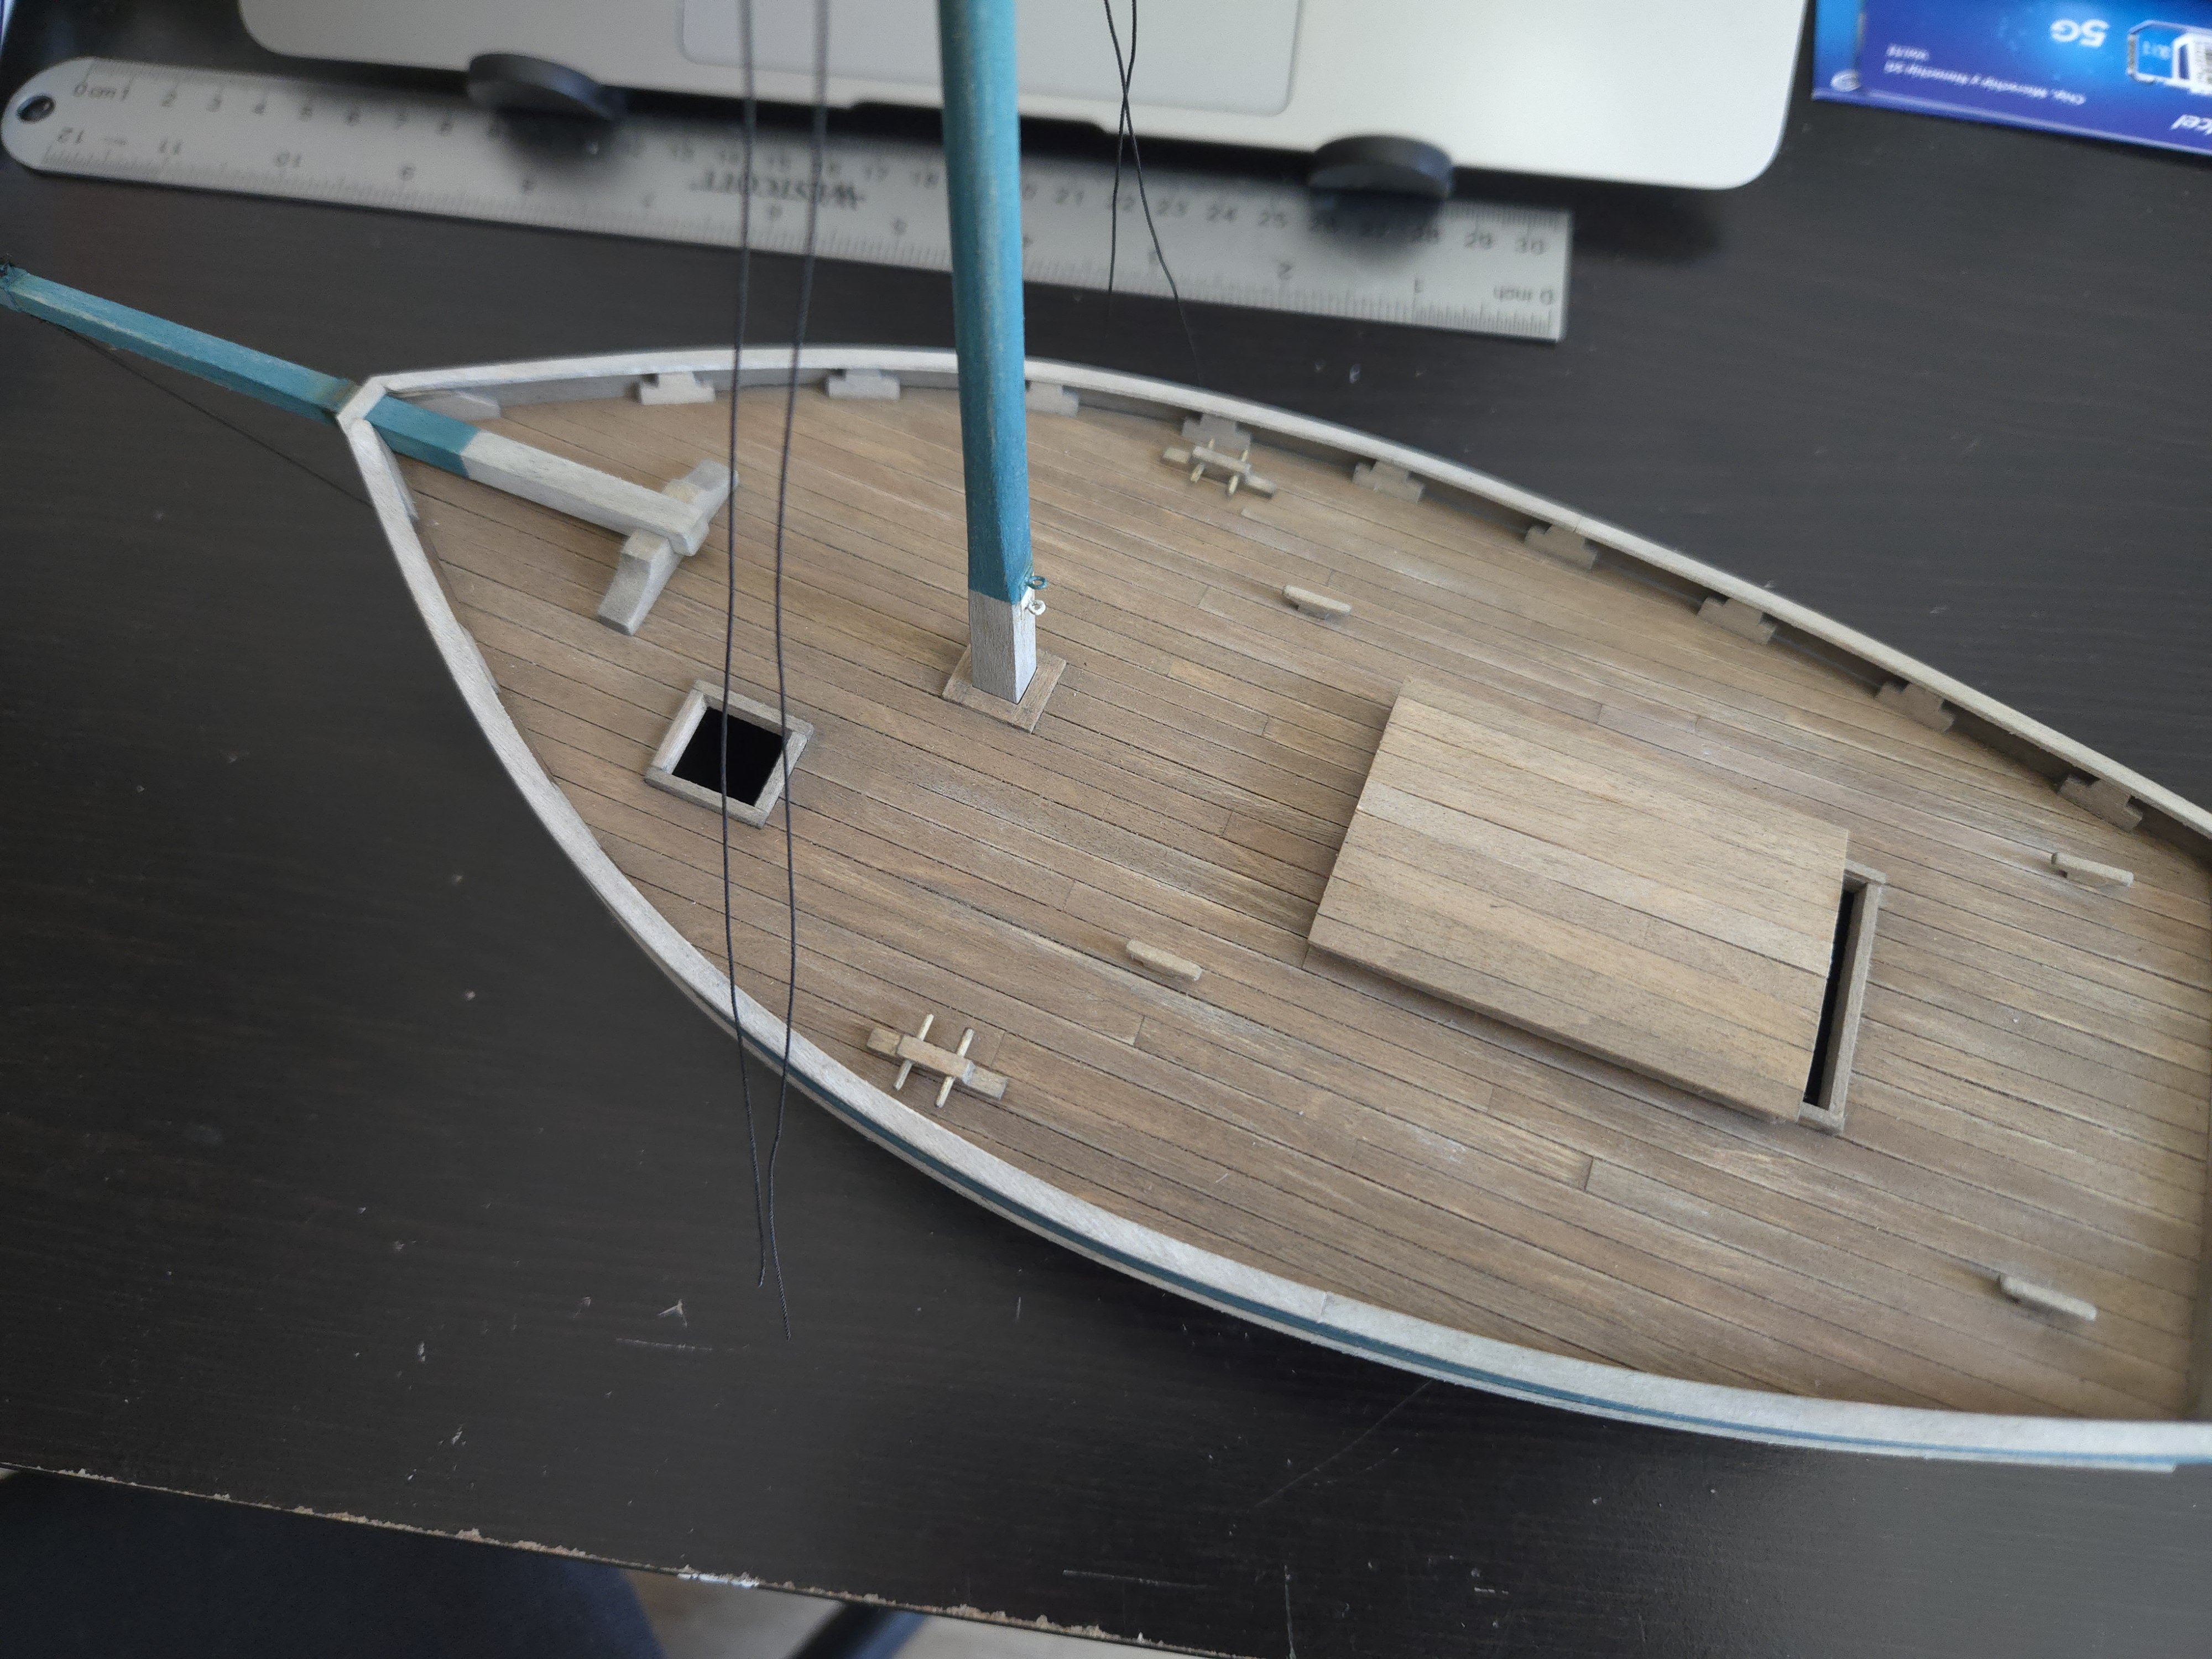
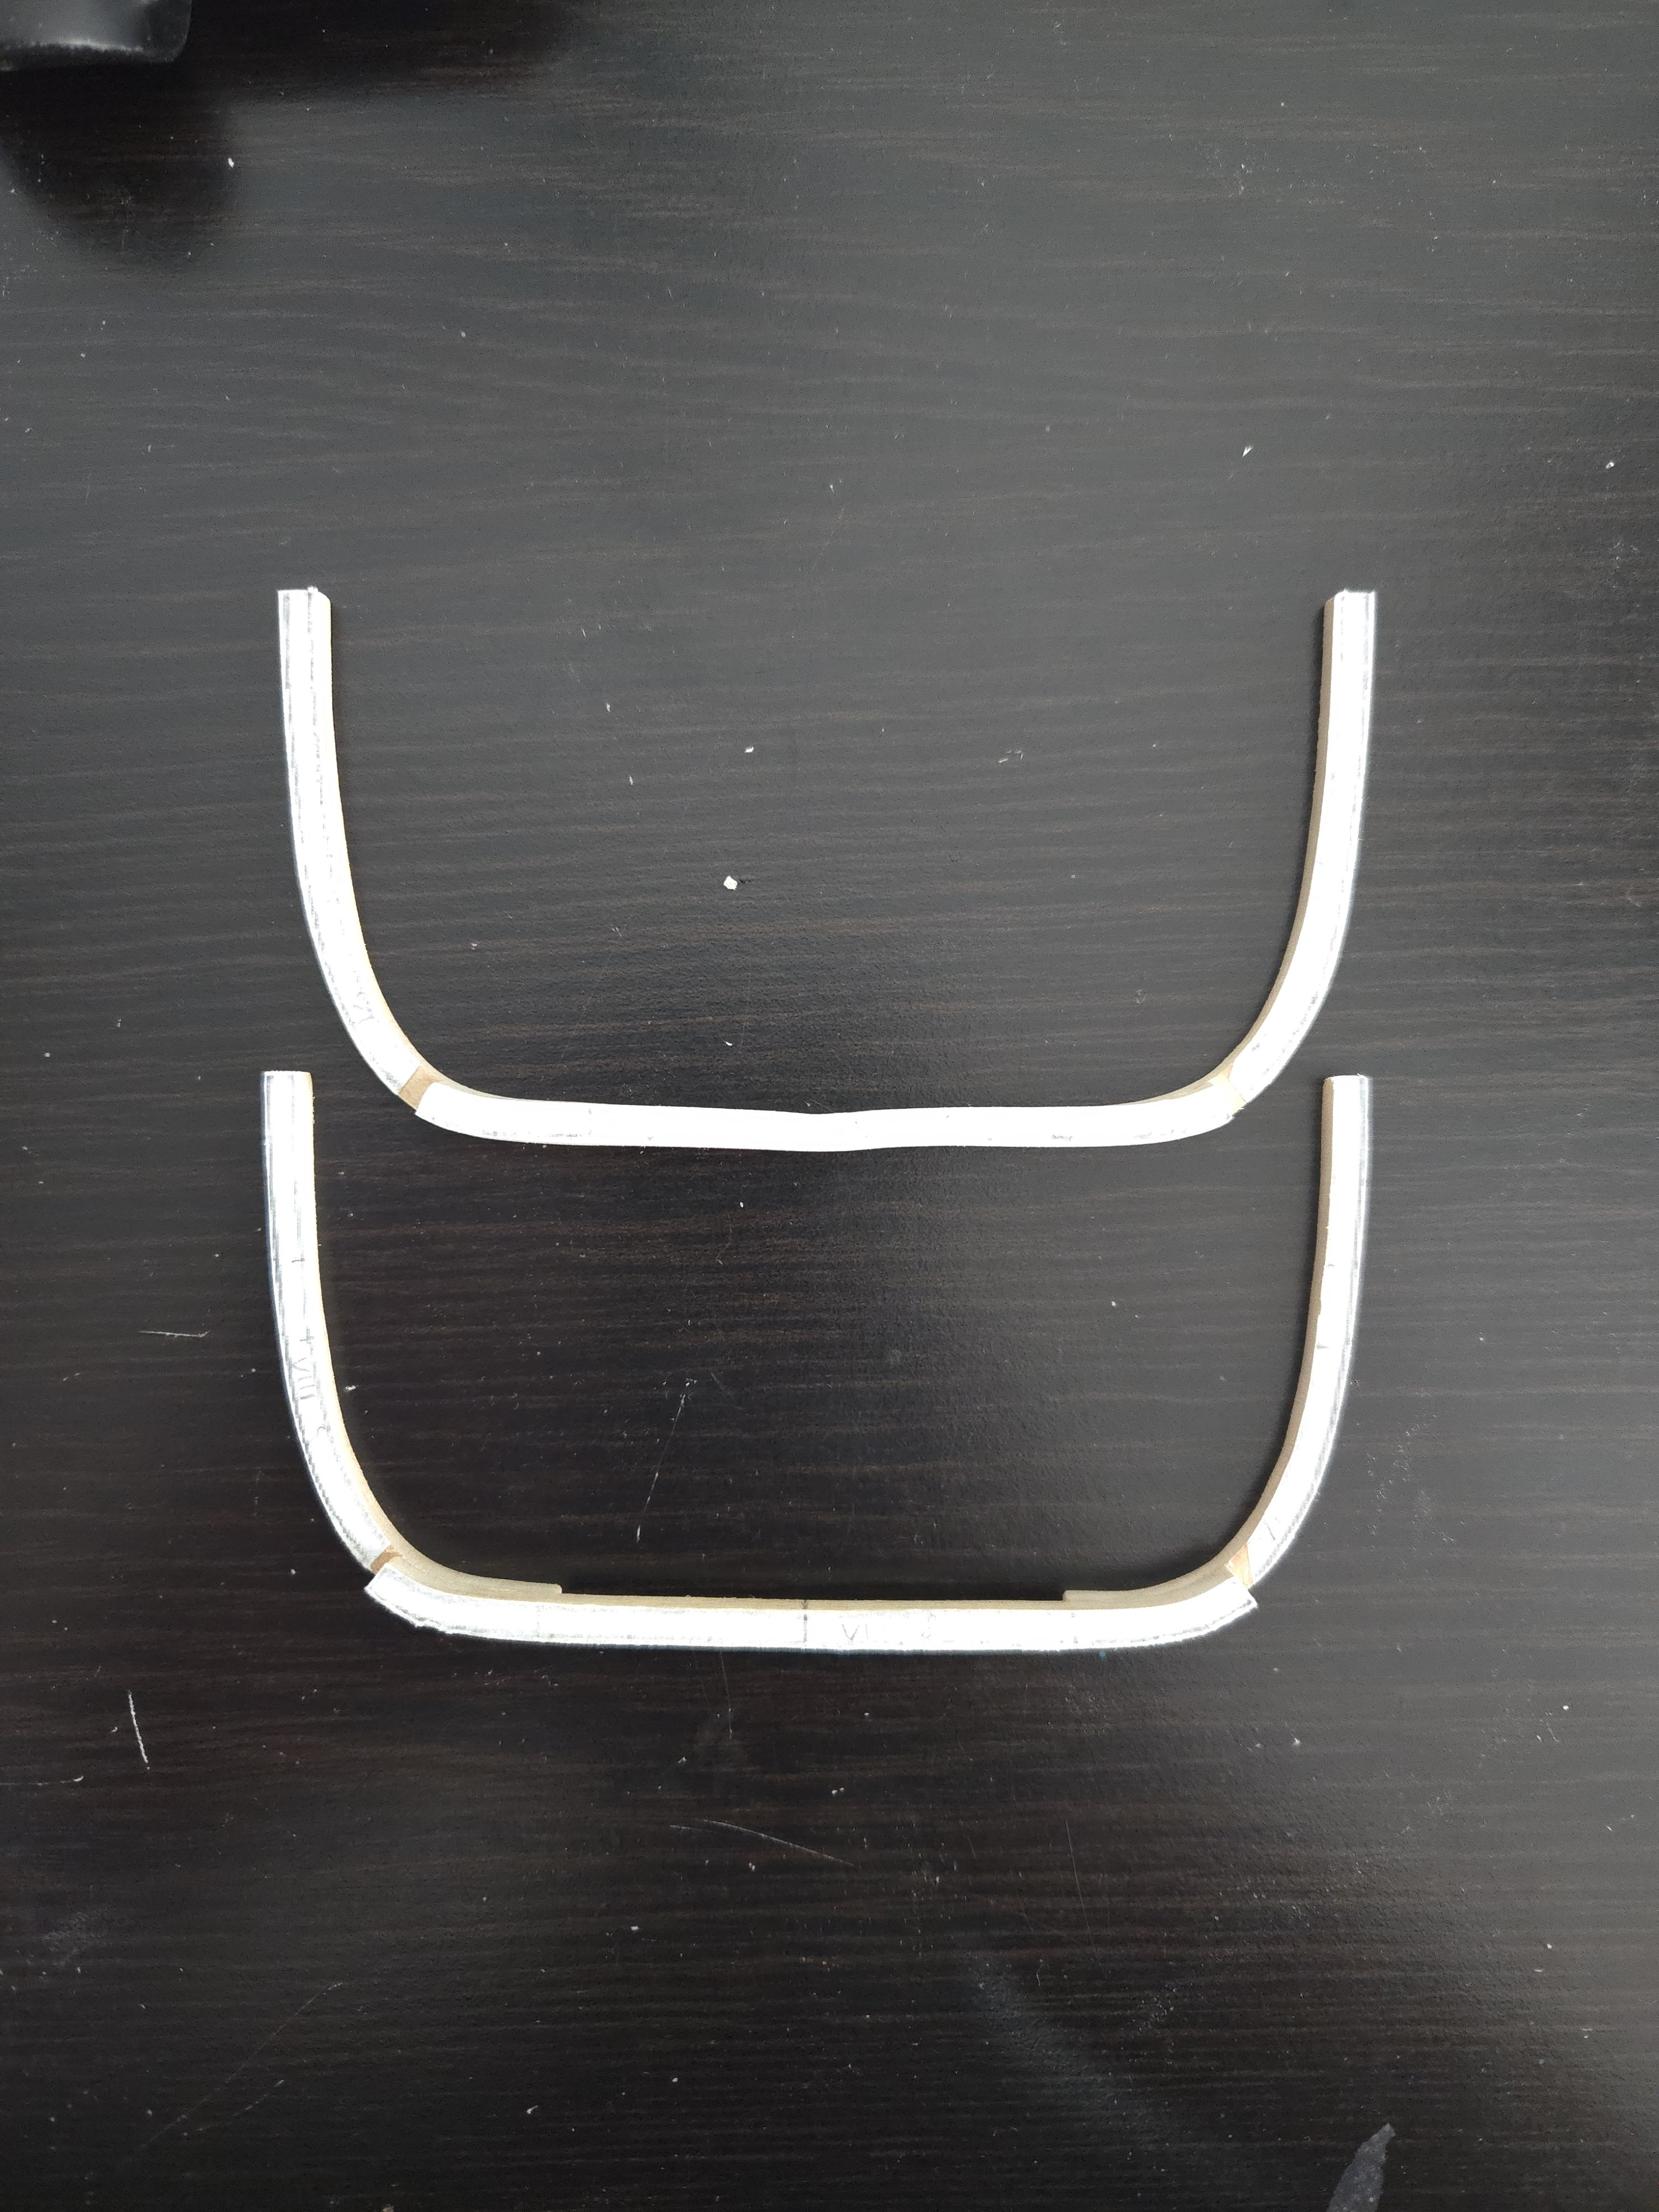
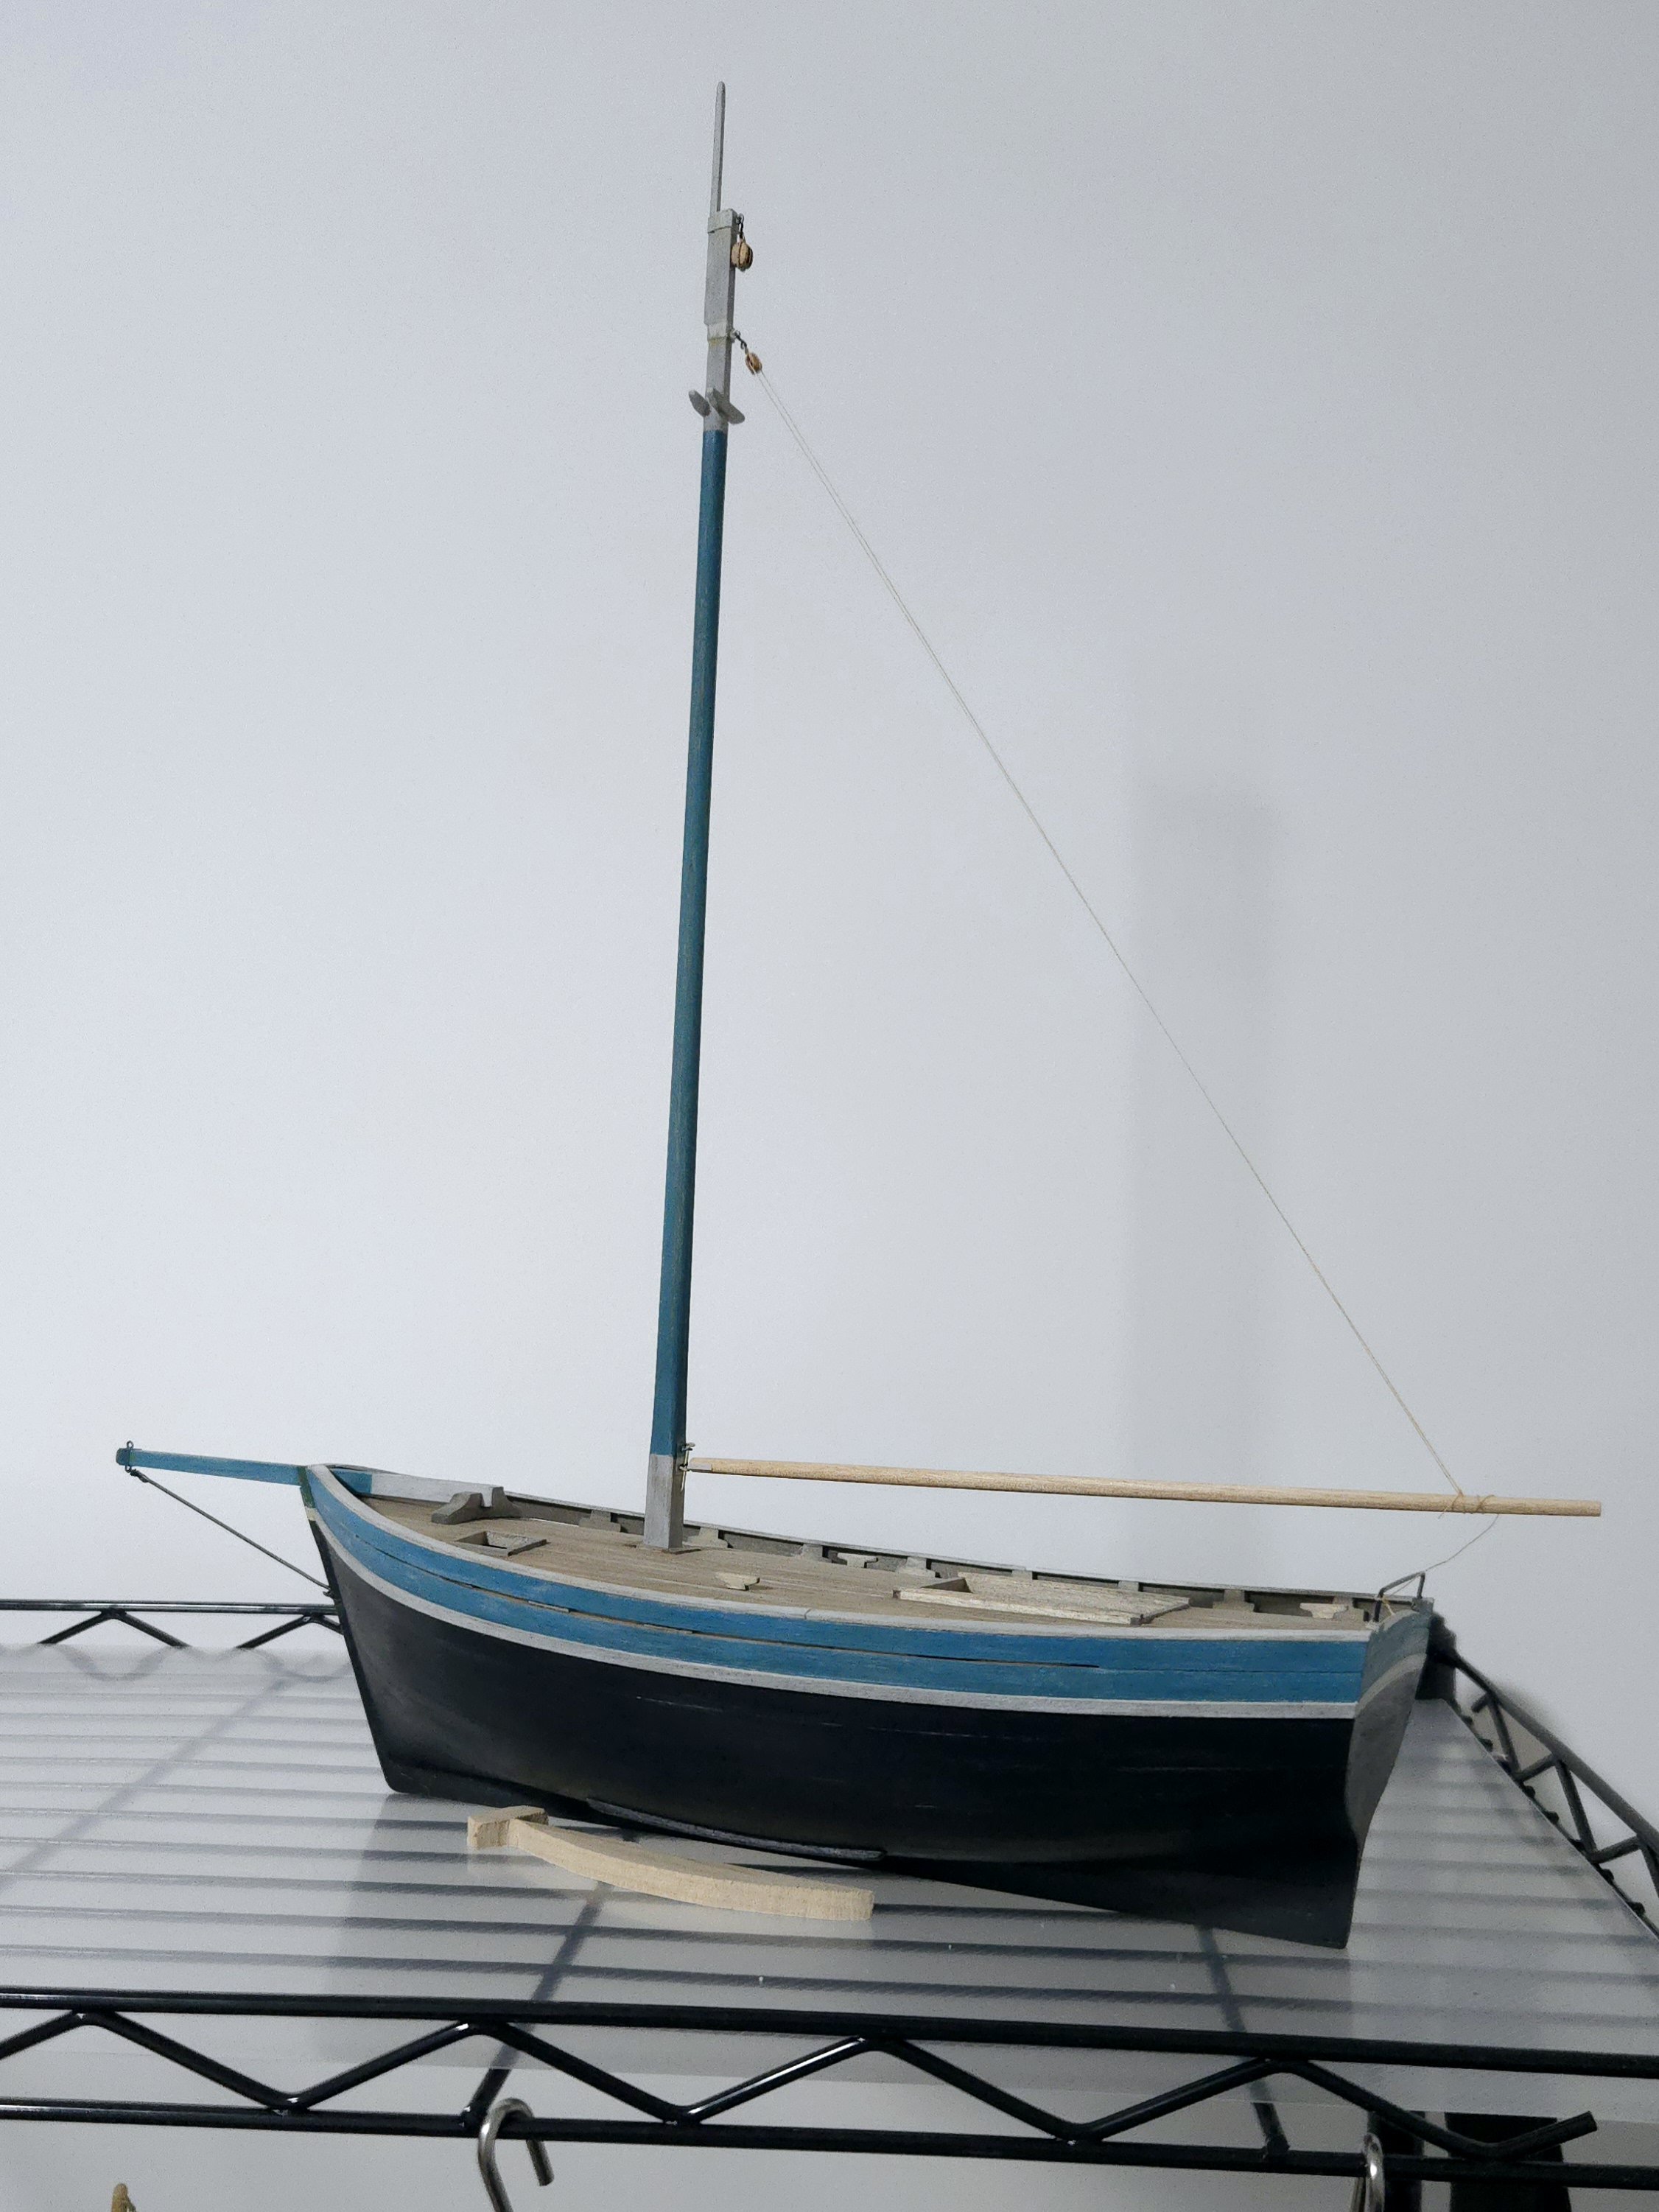
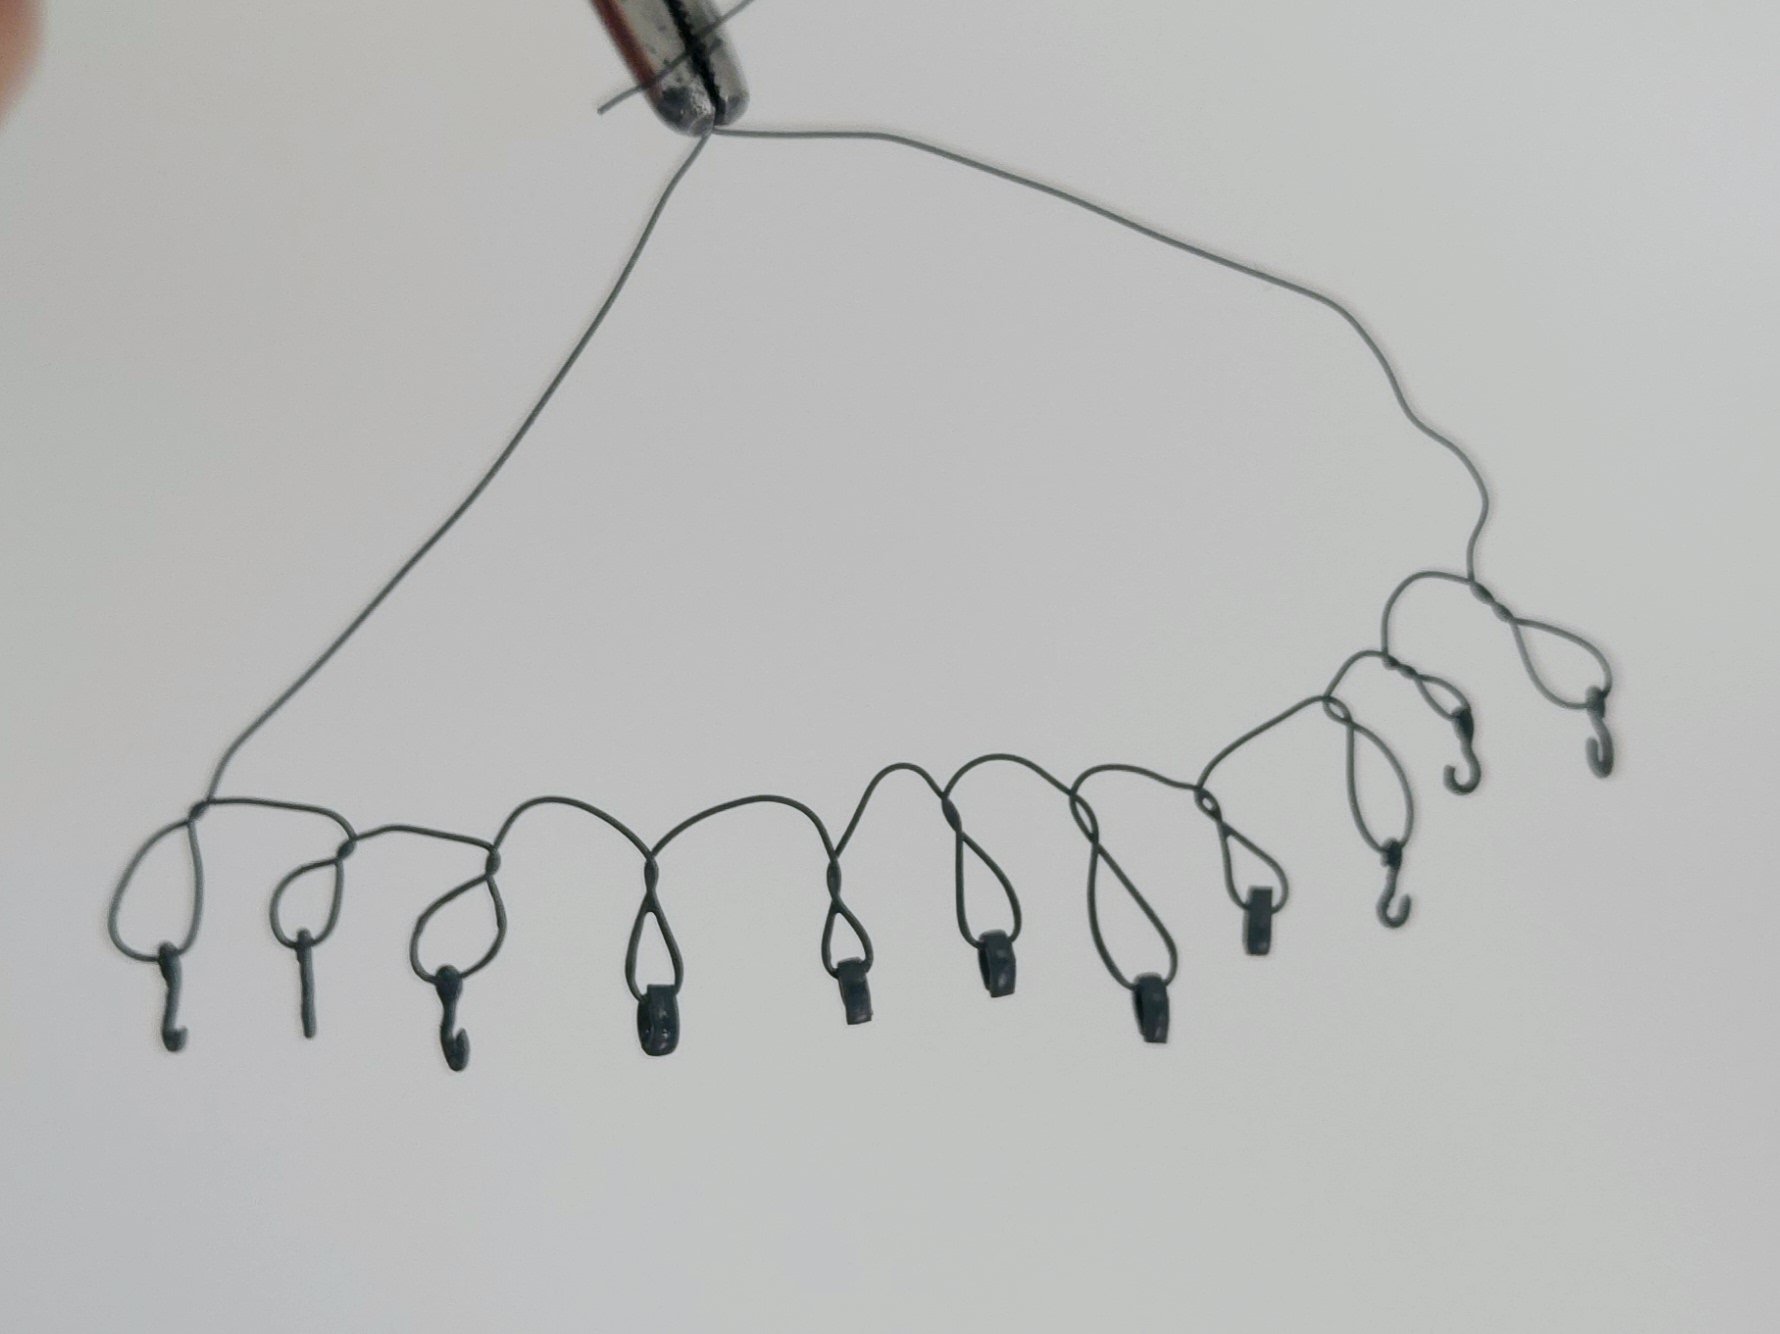
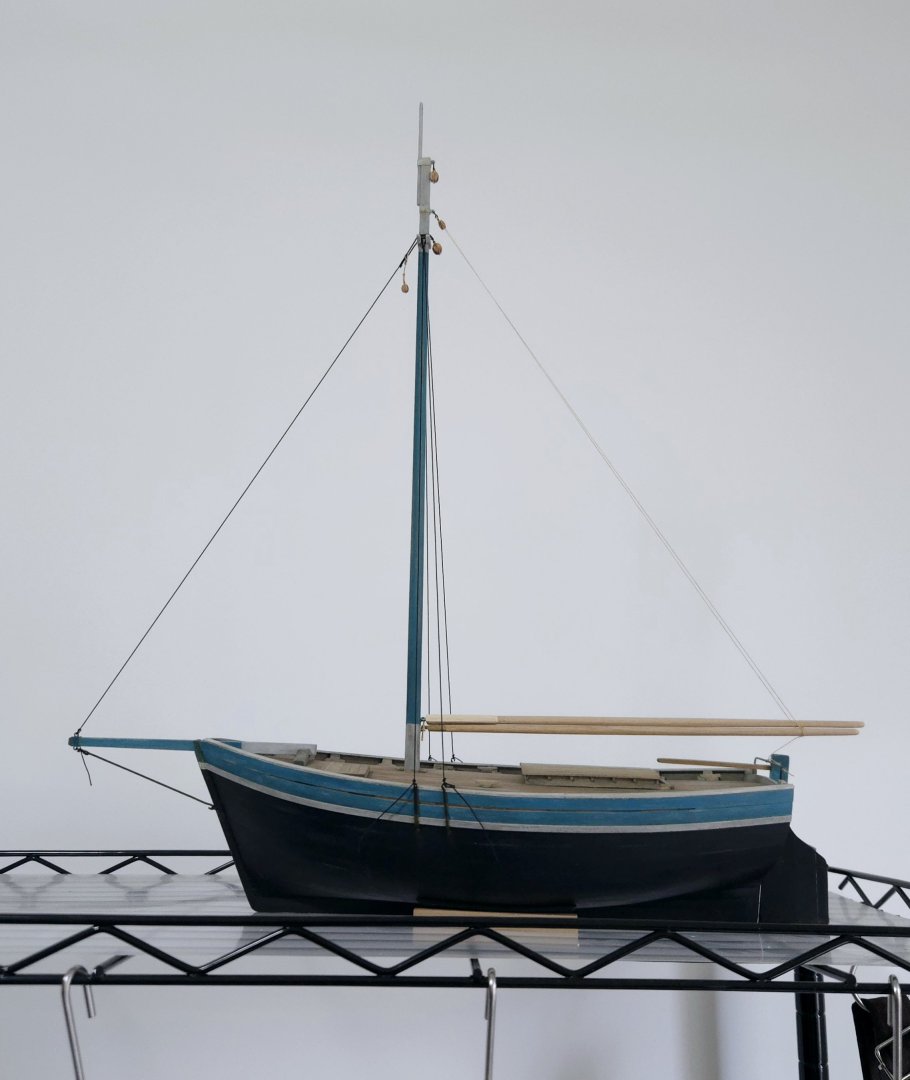
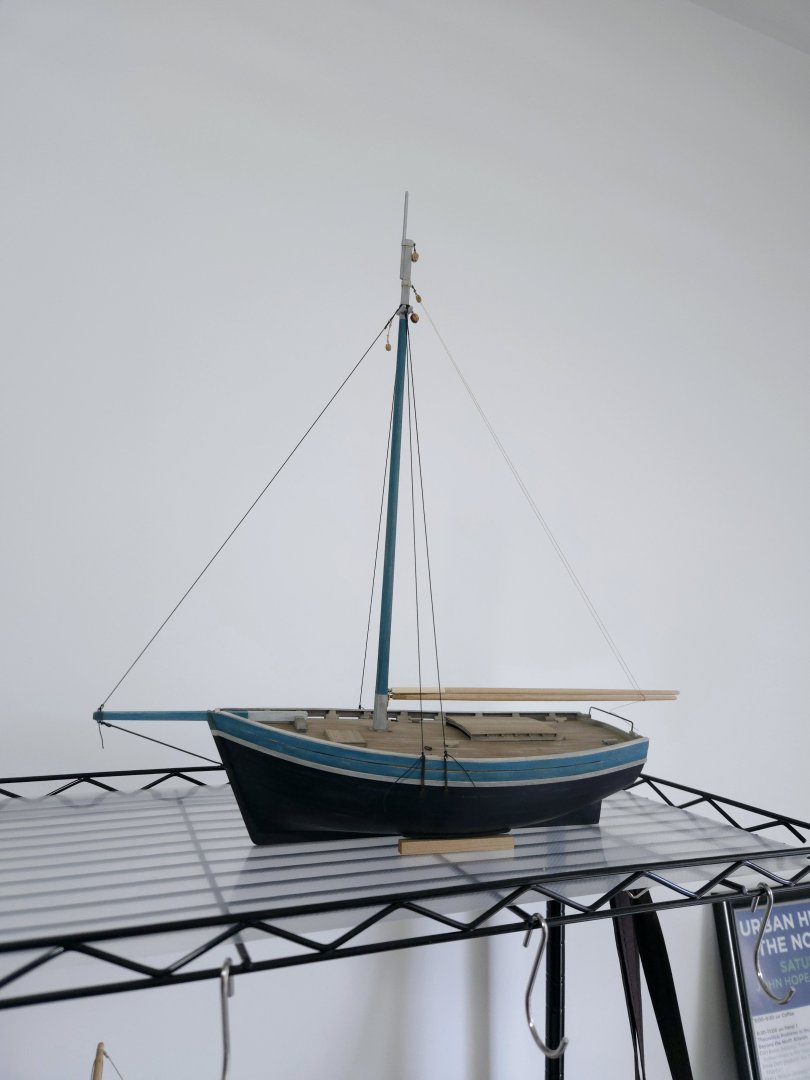
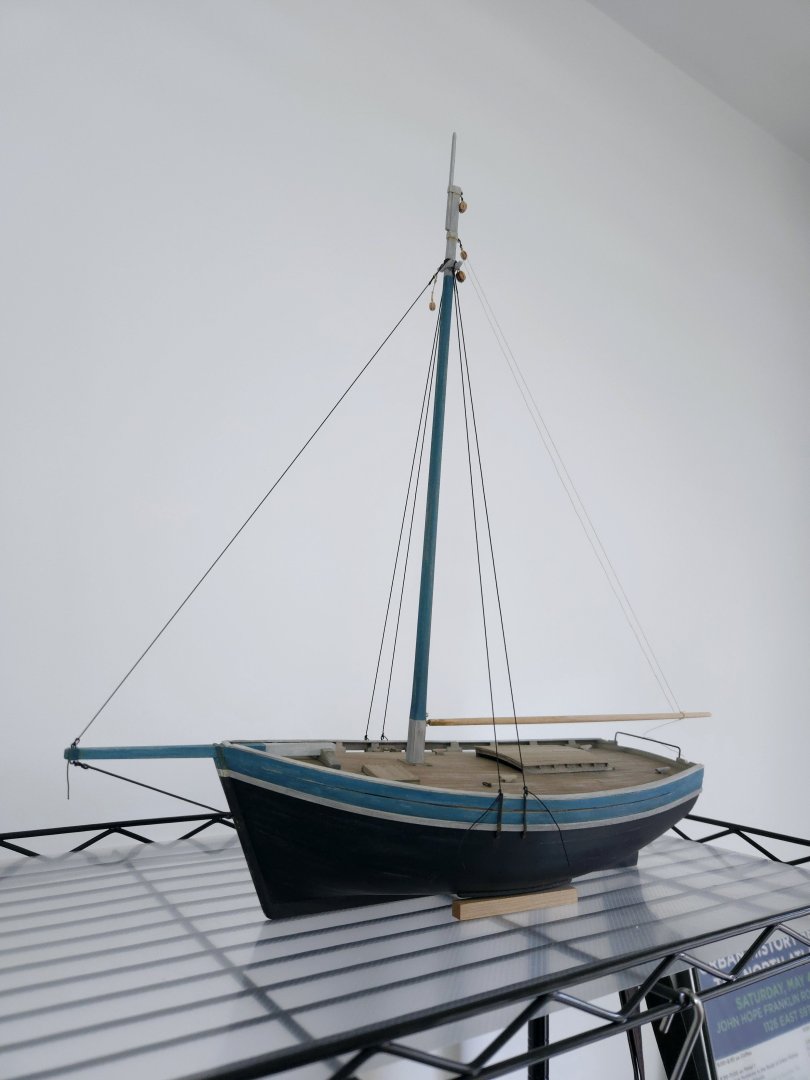
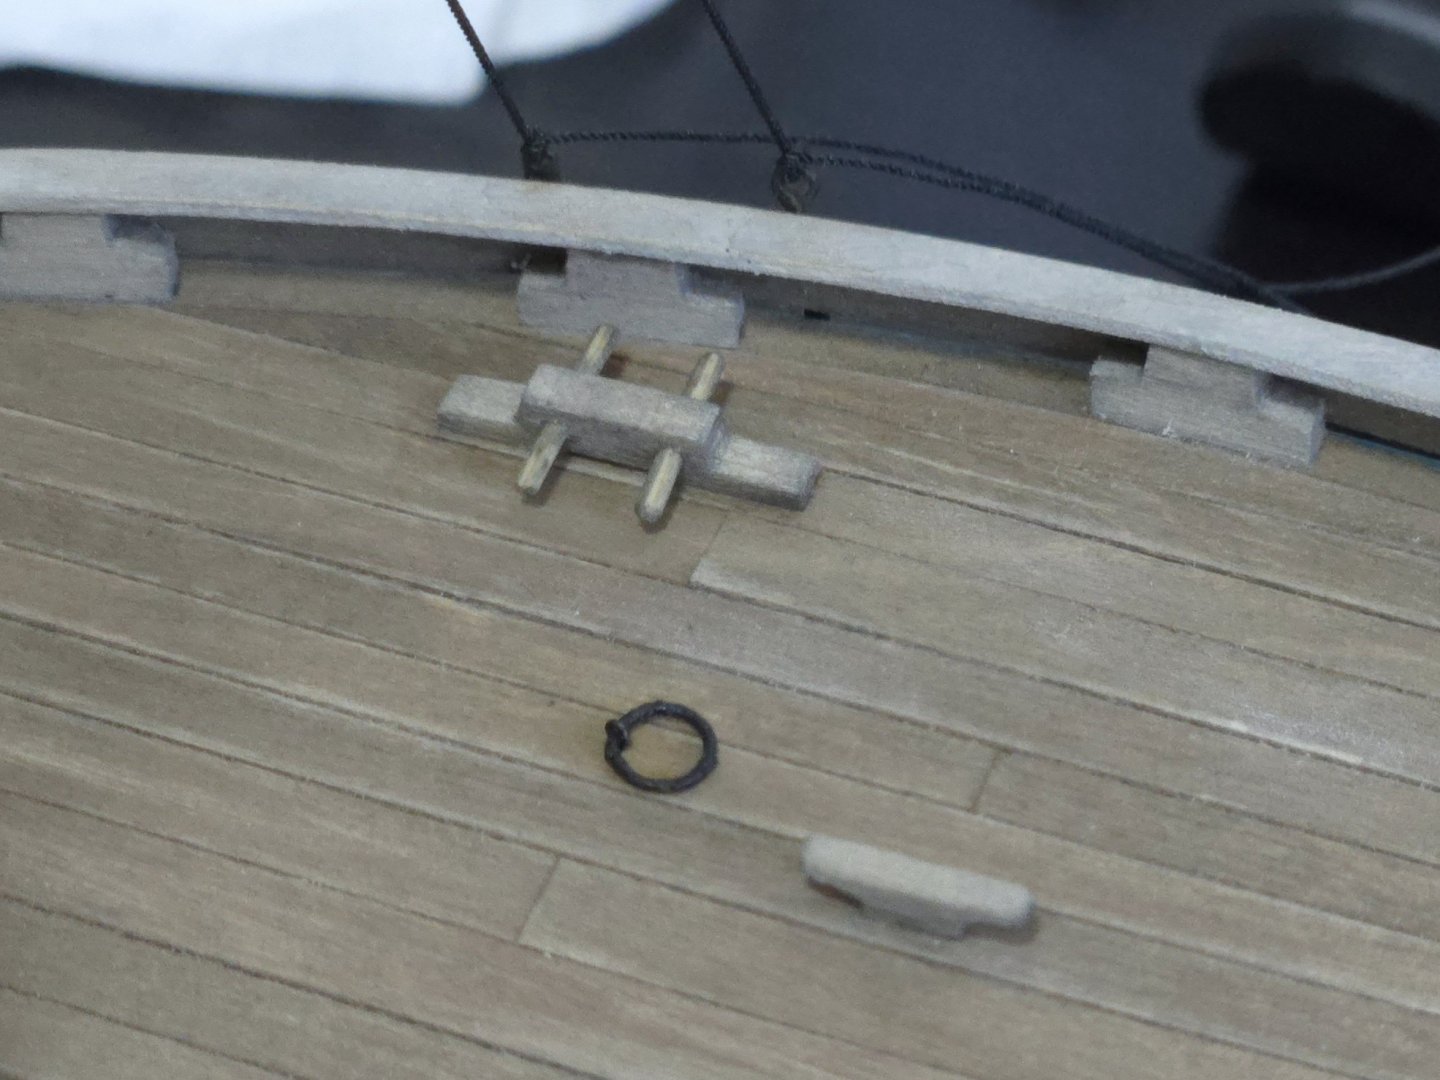
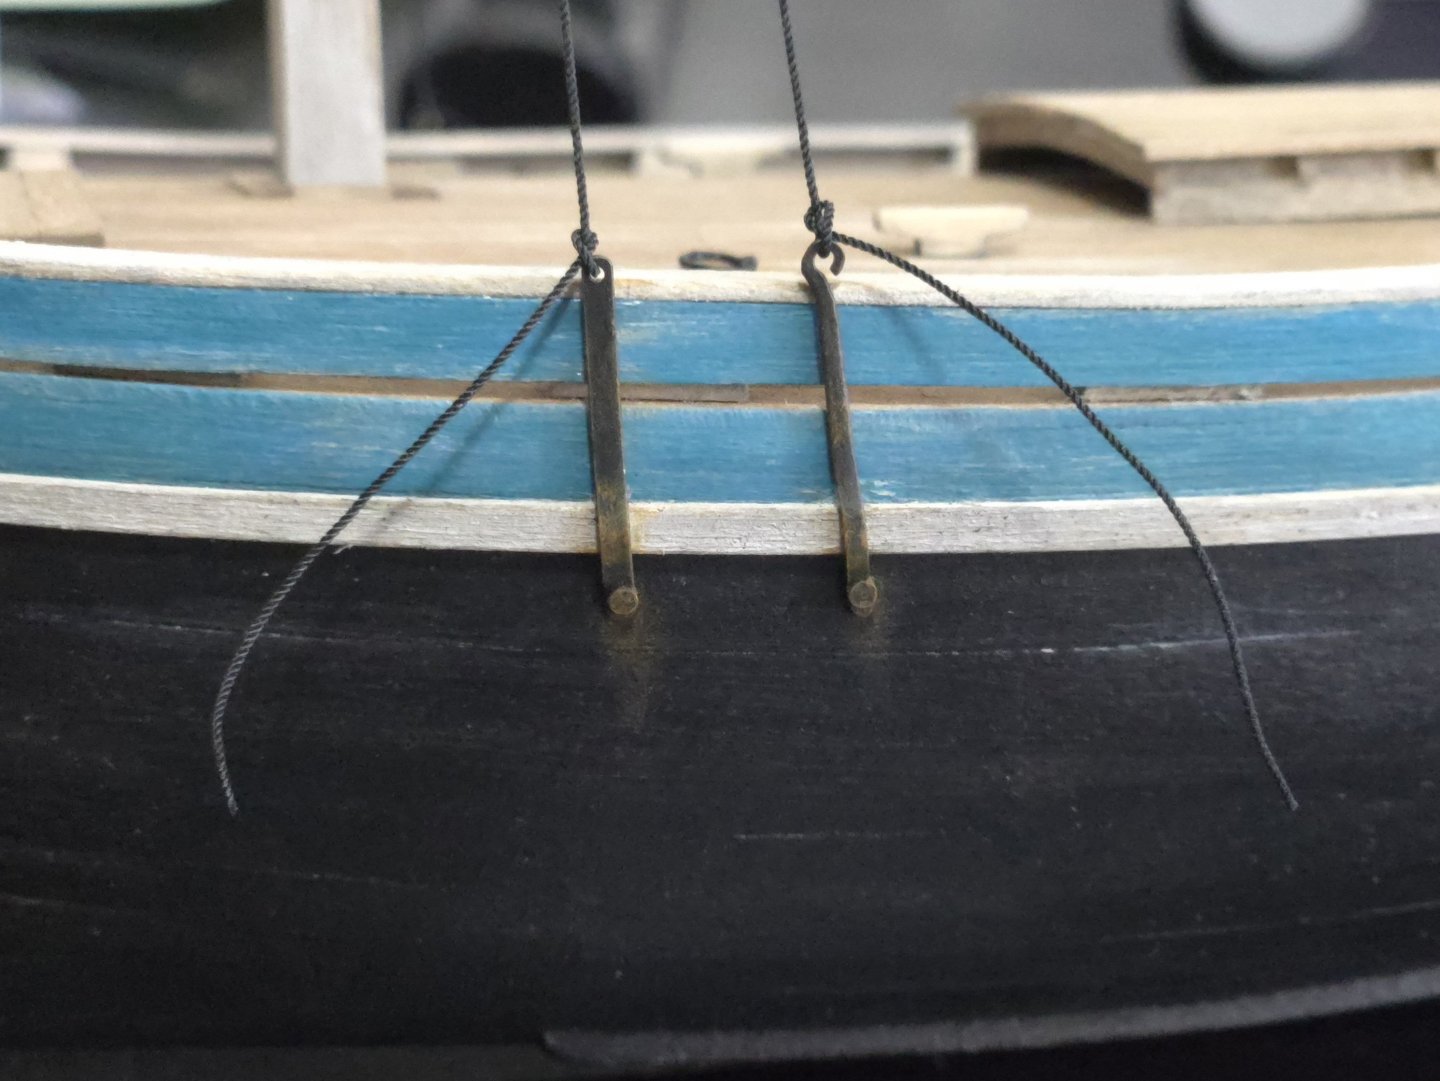
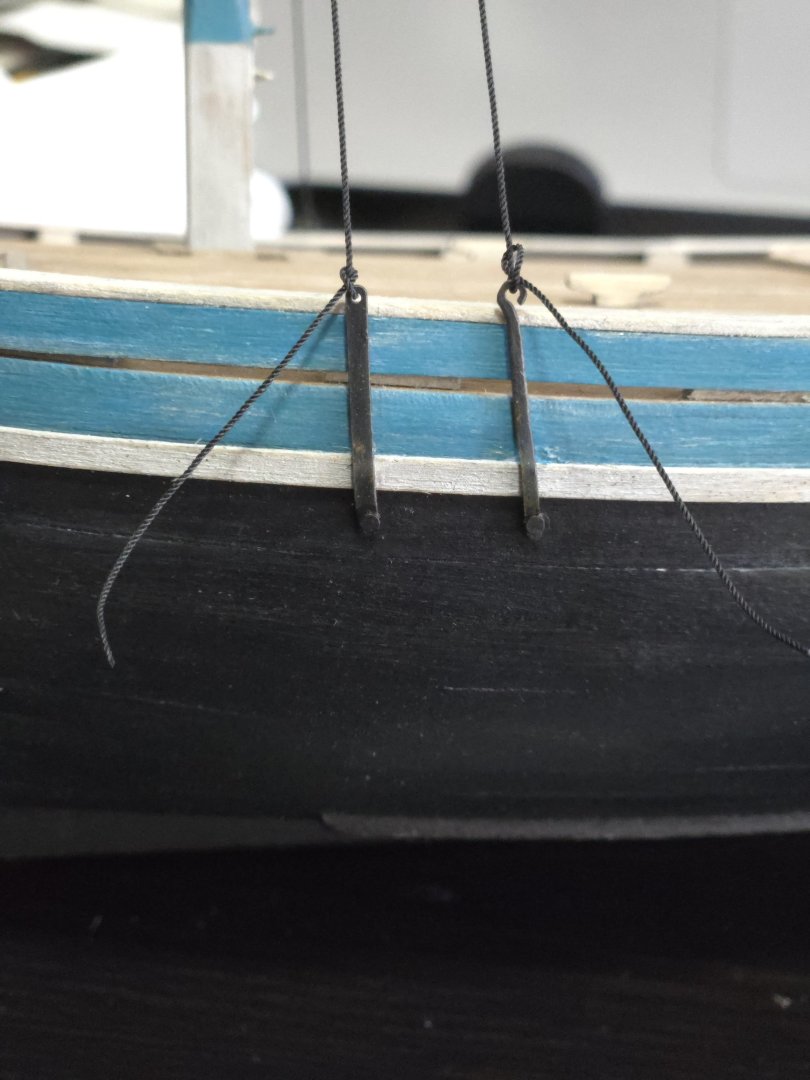
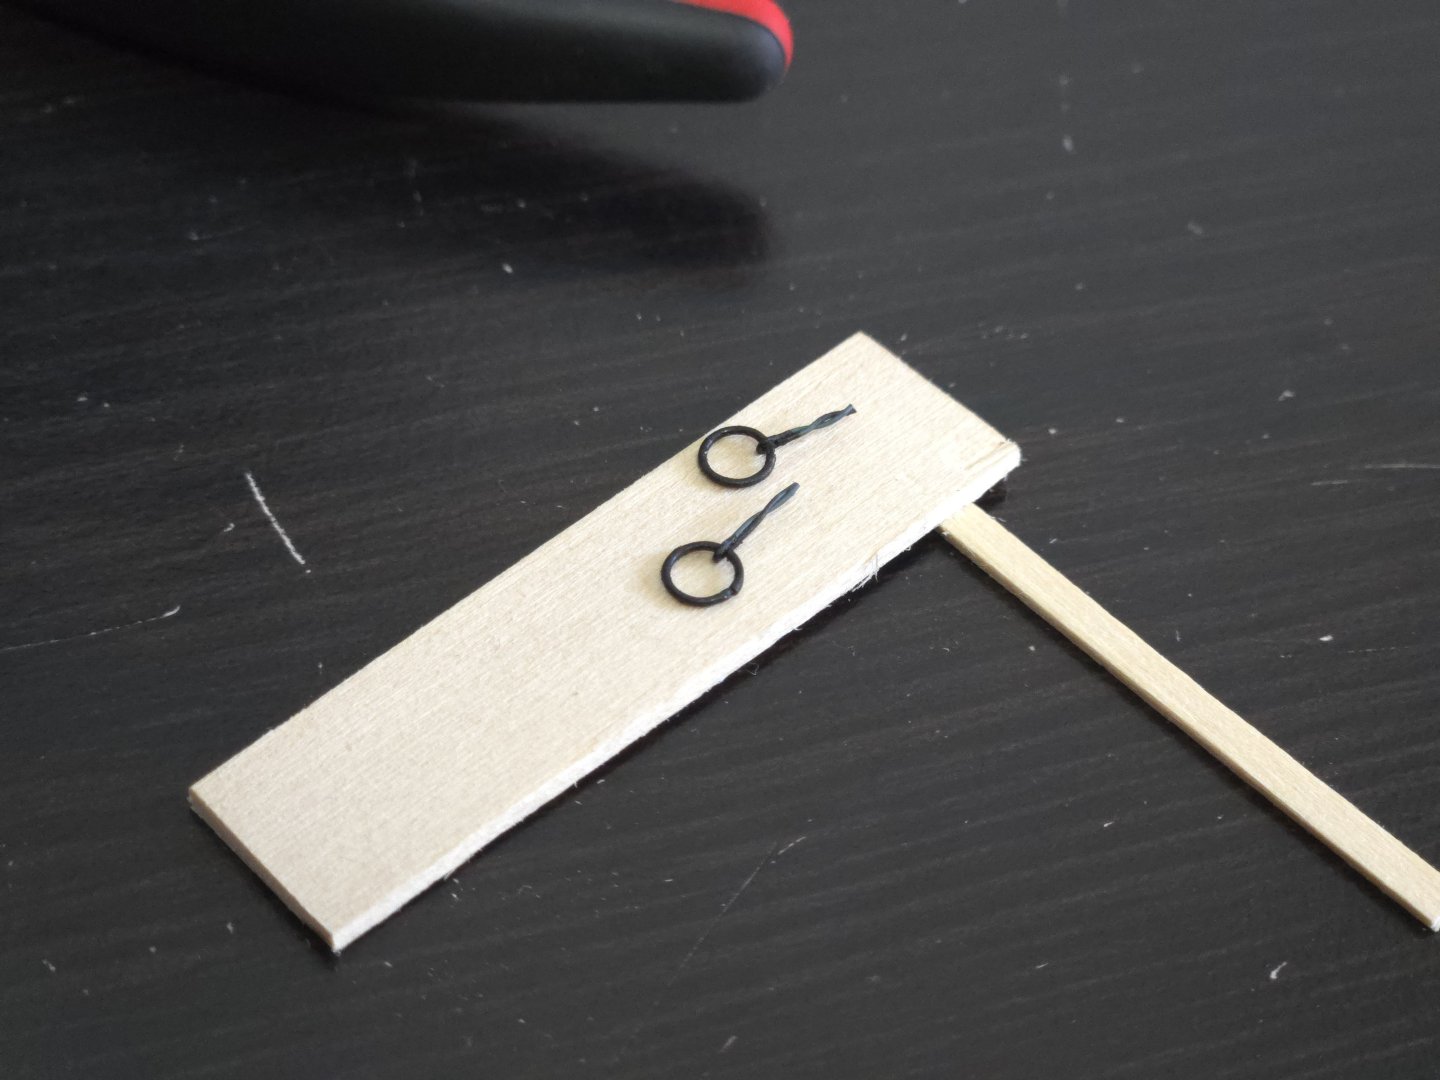
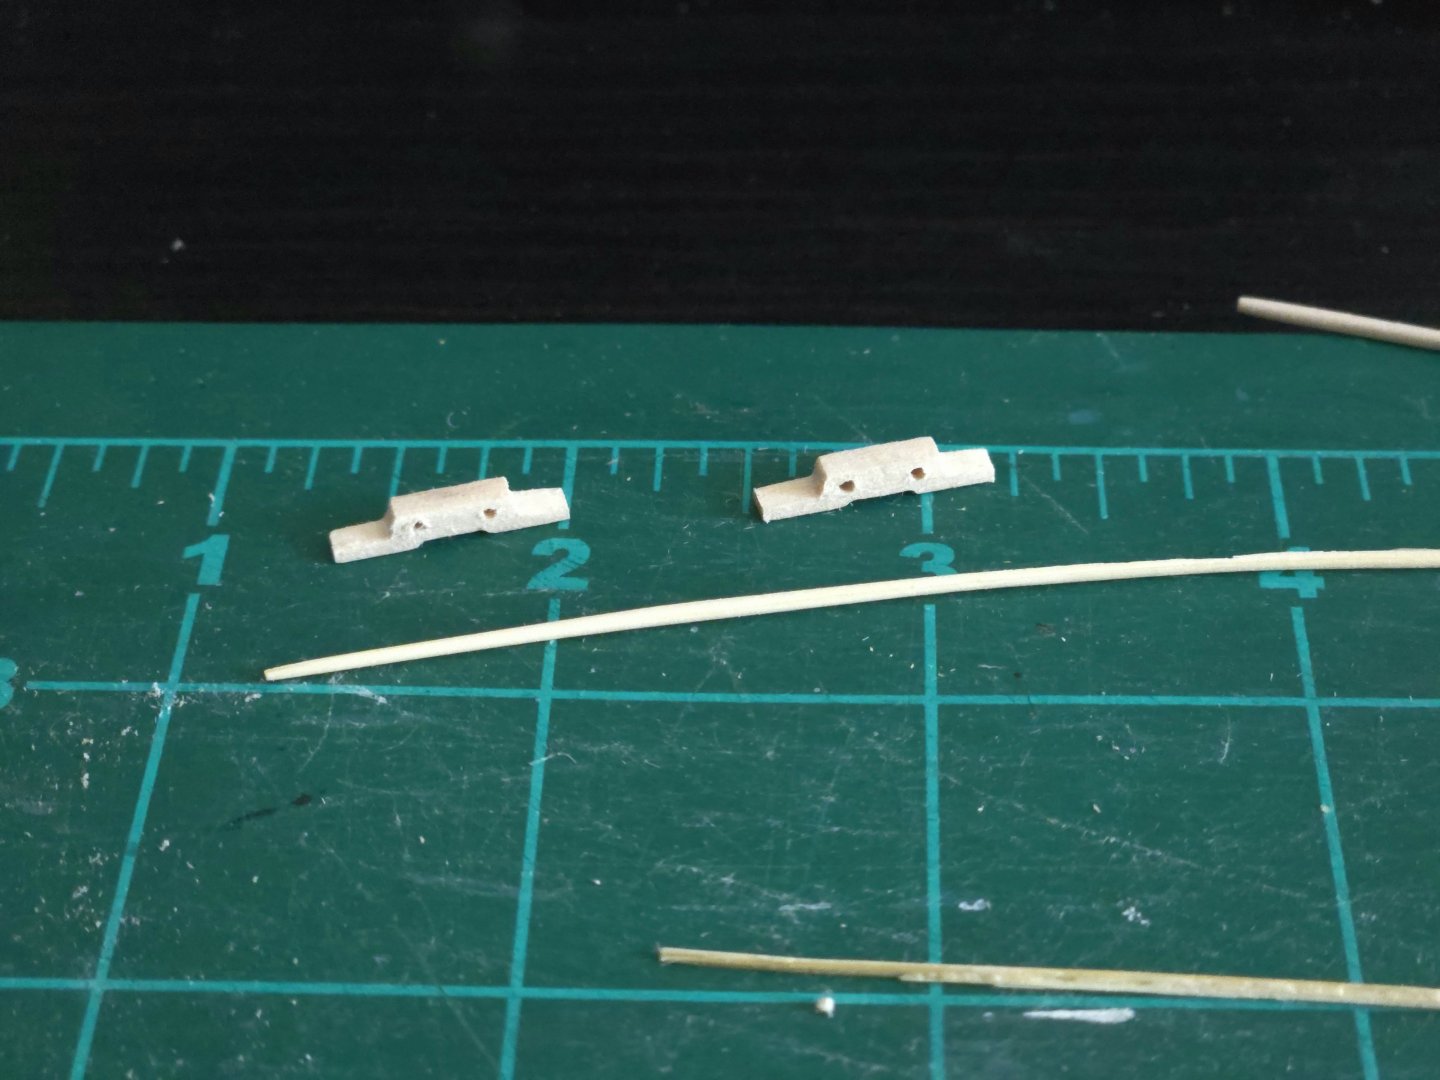
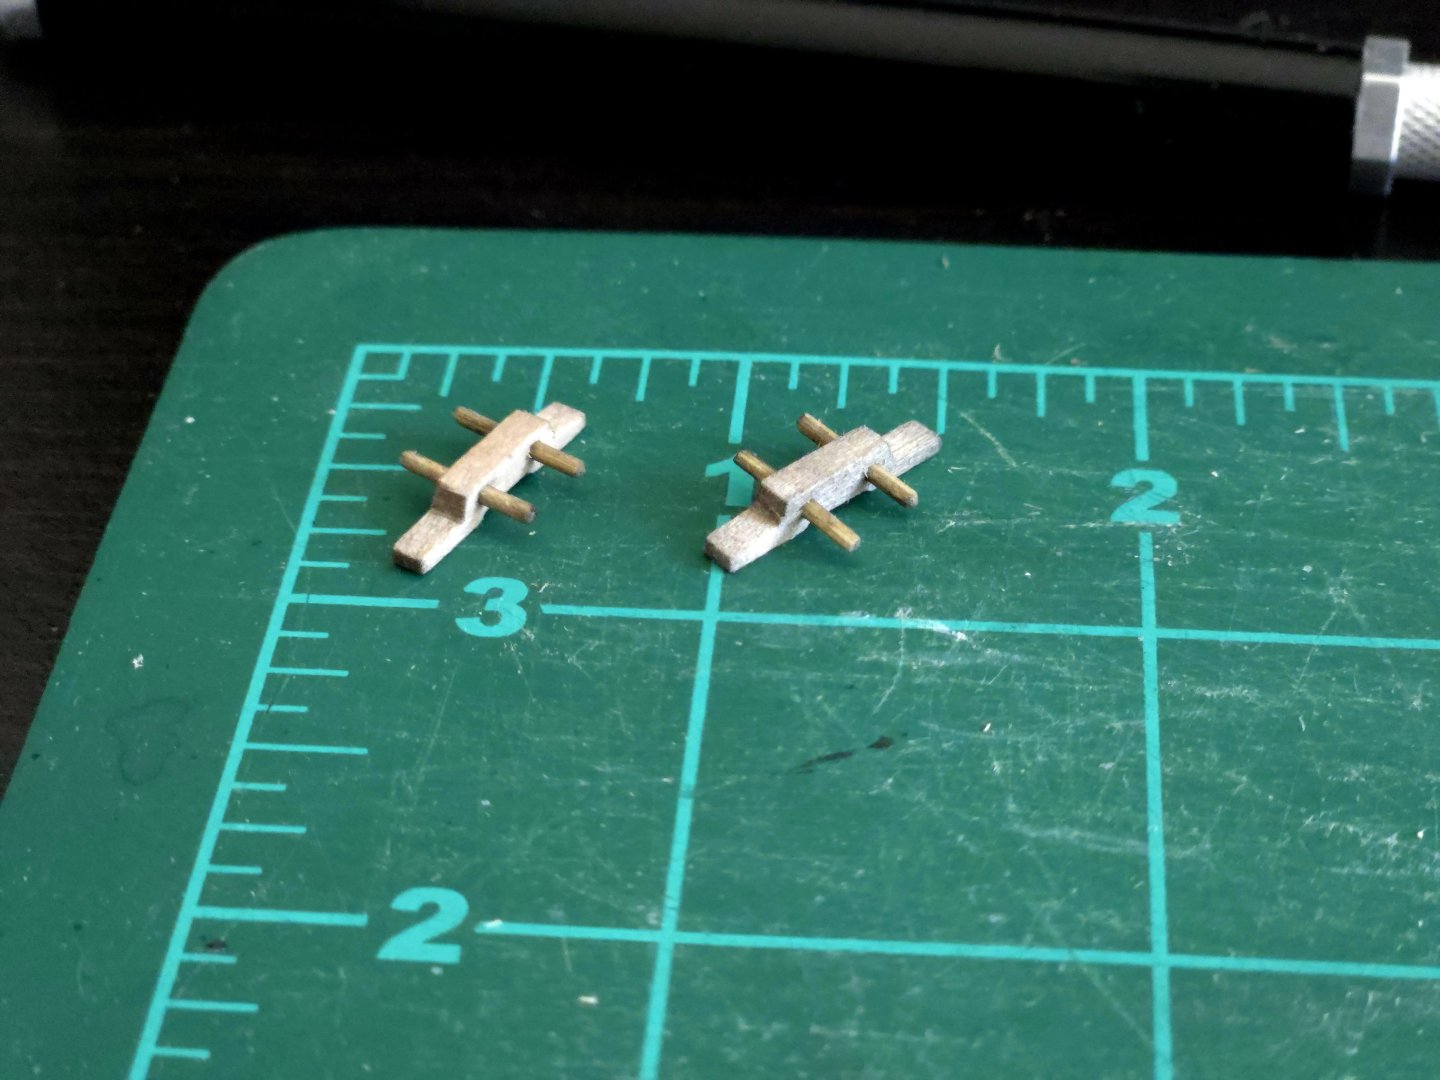
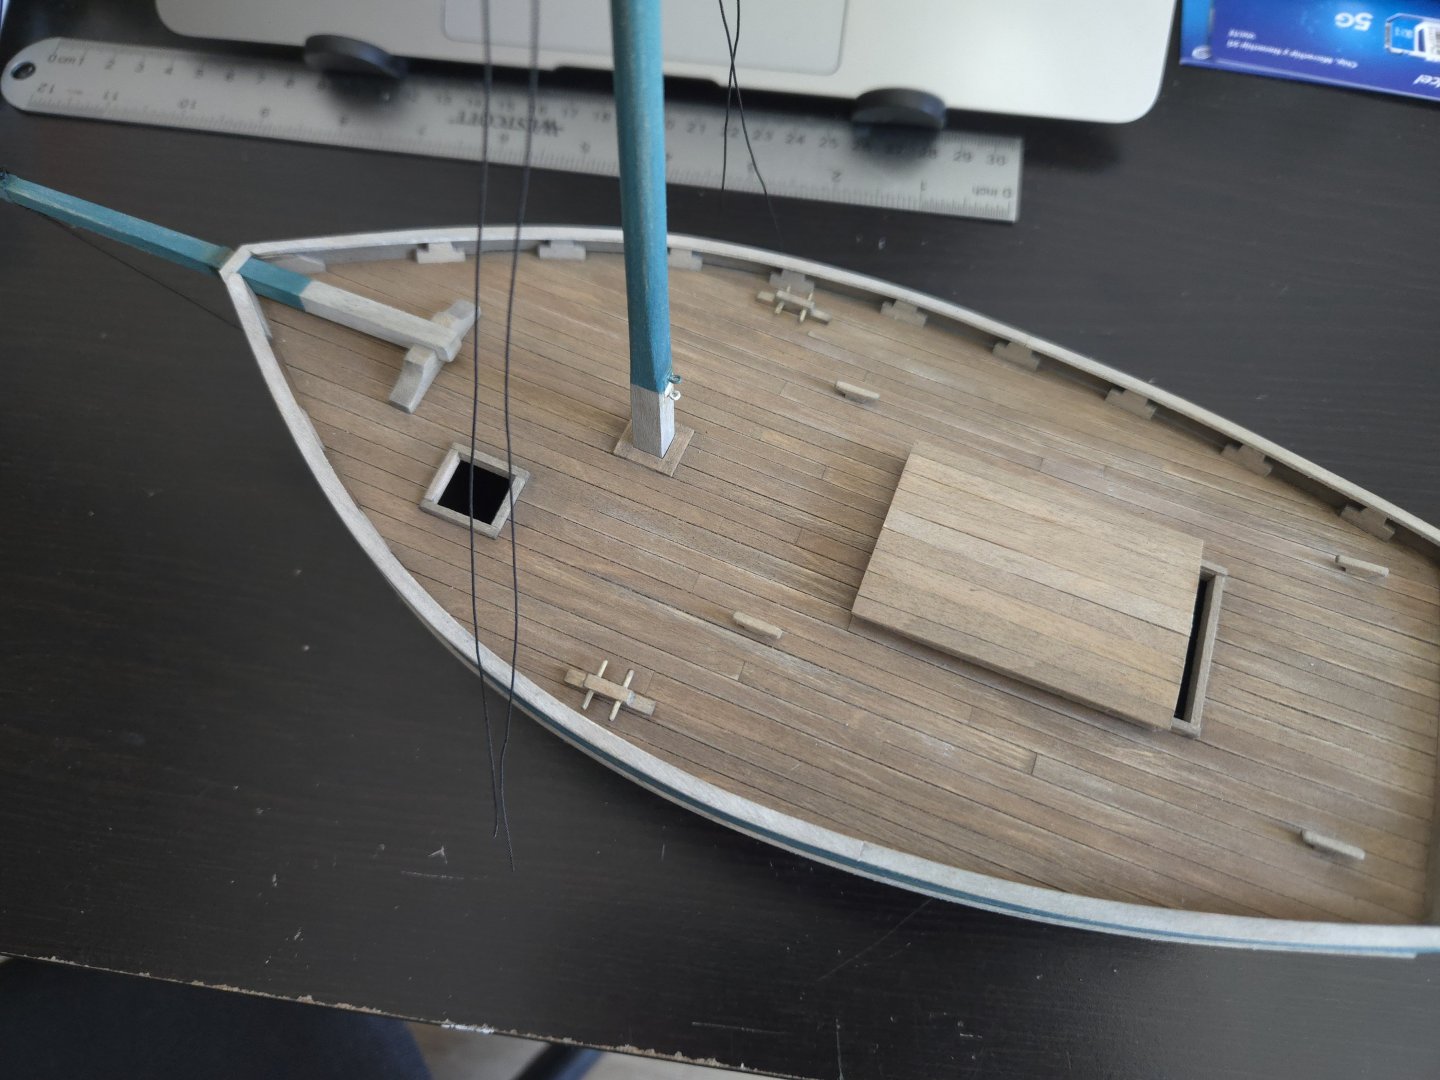
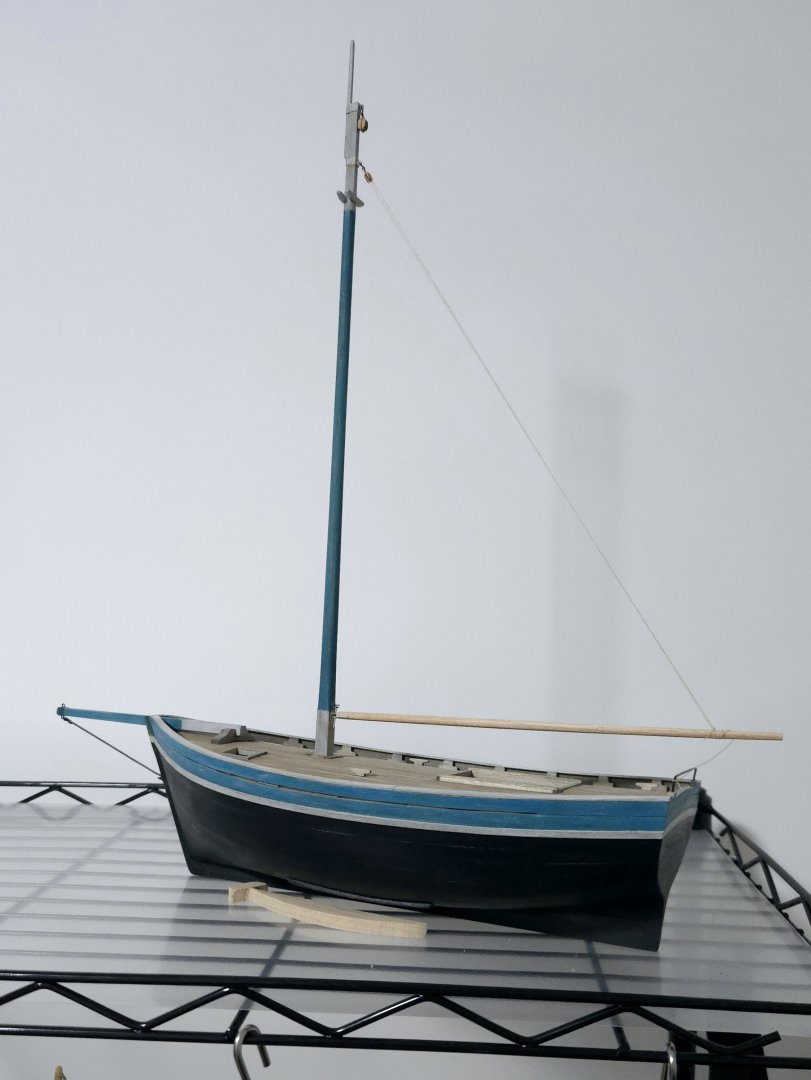
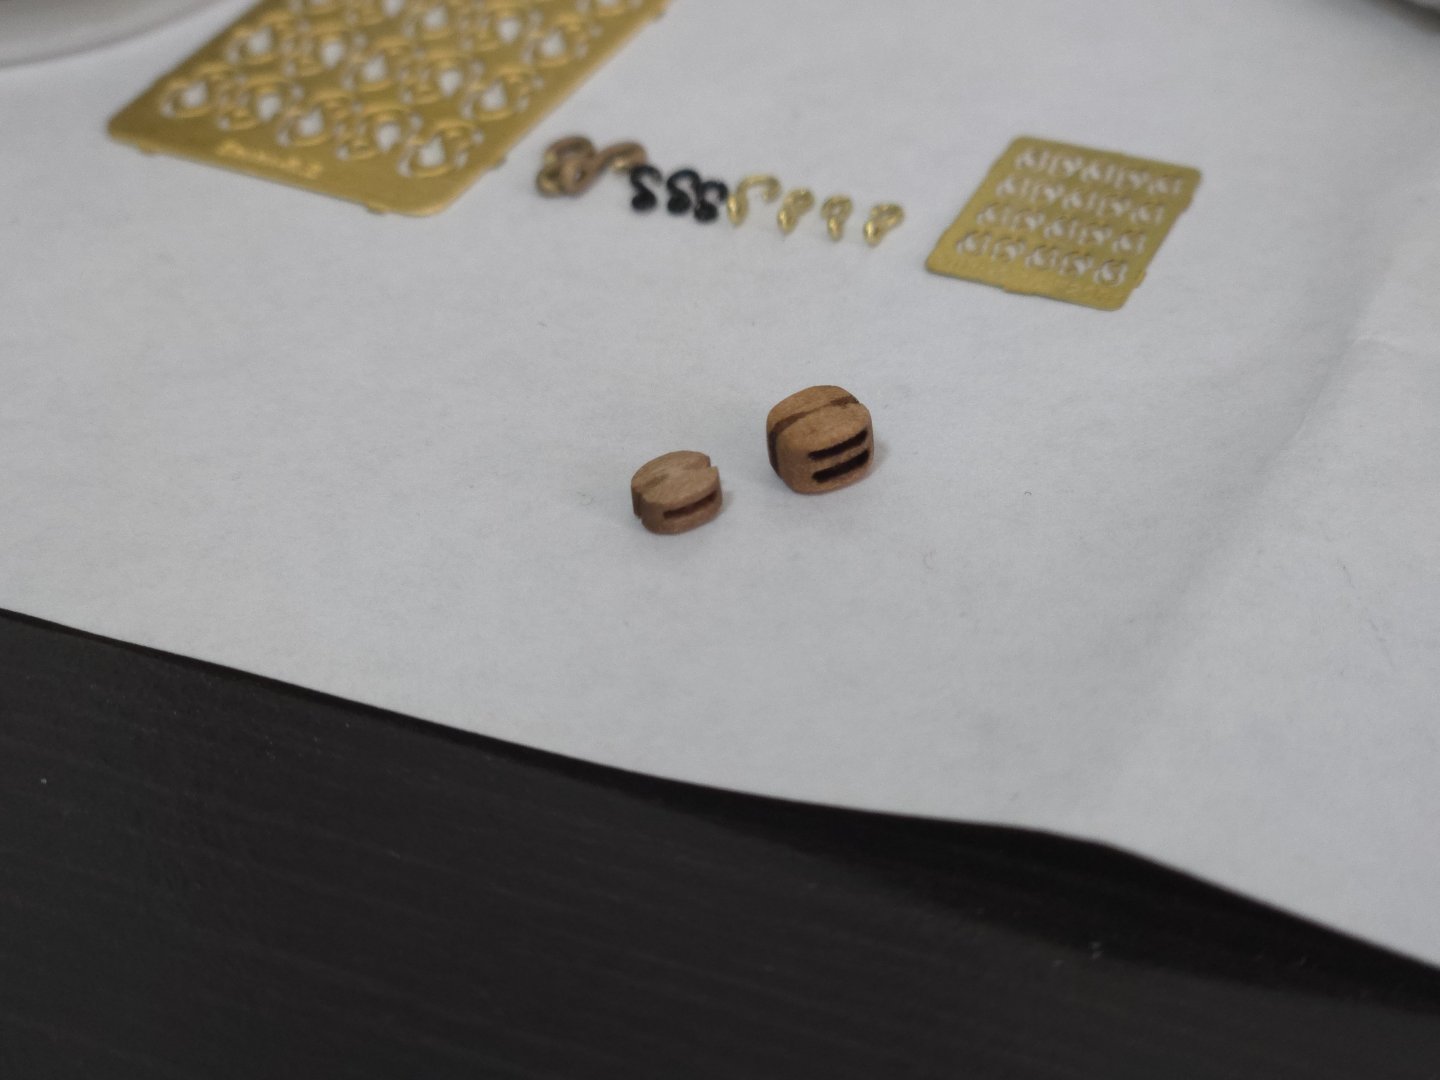
Thanks, all, for the comments and likes! A bit of a minor setback, but also some progress to report. I began work on the gaff, also making it from alder like the boom. Unfortunately I slightly over-tapered the portion nearest the mast. I then had trouble with the jaws. Given that they need to curve in two directions (outward to fit around the mast, and upward so they wrap around it when the gaff is raised and angled up), I thought I might try to build them up from layers. However, I made the lowest layer over-long (photos show they were usually pretty short) and compounded the error trying to use sawdust, glue, and sanding to blend it into the gaff to make up for over-tapering it. It's not a total waste as I'll be able to trim the end and re-use the spar on some subsequent model, but for now I'll need to remake the gaff. In happier news, I finished up the belaying points. Many lanchas had a sort of double cleat formed by running rods through a wooden block. To make mine, I more or less followed the dimensions given in one of Graham's sketches, cutting them from 3/32-inch thick scrap and shaping with a file. To make the rods or pins, I wasn't sure how well basswood or a thinned toothpick woud hold up, so I cut up a bamboo coffee stir stick. I then gave everything a coat of black wash. And here, the belaying points in place. My belaying point plan differs slightly from that shown in the plan set, instead being based on photographs and Graham's sketches. I also needed to add a pair of metal rings in eyebolts, making them of wire and painting them black. While some of Graham's sketches show eyebolts located at different locations on the port and starboard side, I decided to make mine symmetrical, following what I could make out from Vairo's photos. I also got the chainplates attached to the hull. To get the angle right, I first determined their location, then ran the shrouds through the end and back up again, and applied slight pressure while holding the bottom of the chainplate in place. I then marked the nail hole, drilled it out, placed the nail through the chainplate and partly into the hull, and again used the shrouds to get the angle right before applying super glue to the nail and back of the chainplate, and snugging both up against the hull. As can be seen, I've loosely tied off the shrouds for now, mostly to keep them out of the way--I still need to add hooks and turnbuckles to finish off the shrouds. I then dry-brushed a bit of rust. Looking at it in close-up, I may tone it down slightly on the nail head. There was also a little excess super glue, which was cleaned by scraping, adding to the weathering effect. I similarly tied off the fore stay, and took a look at how the build is coming now that it has more rigging (also temporarily adding the boom, which still needs paint). I'm liking how it's coming together so far. And with the failed gaff temporarily added, giving a sense of how it would look if I don't add sails.

- 312 replies
-
- 12
-
-
- Chile
- Latin America
- (and 6 more)
-
Amazing work, the model looks incredible! I like the choice to leave it undecked and half unplanked, too.
-
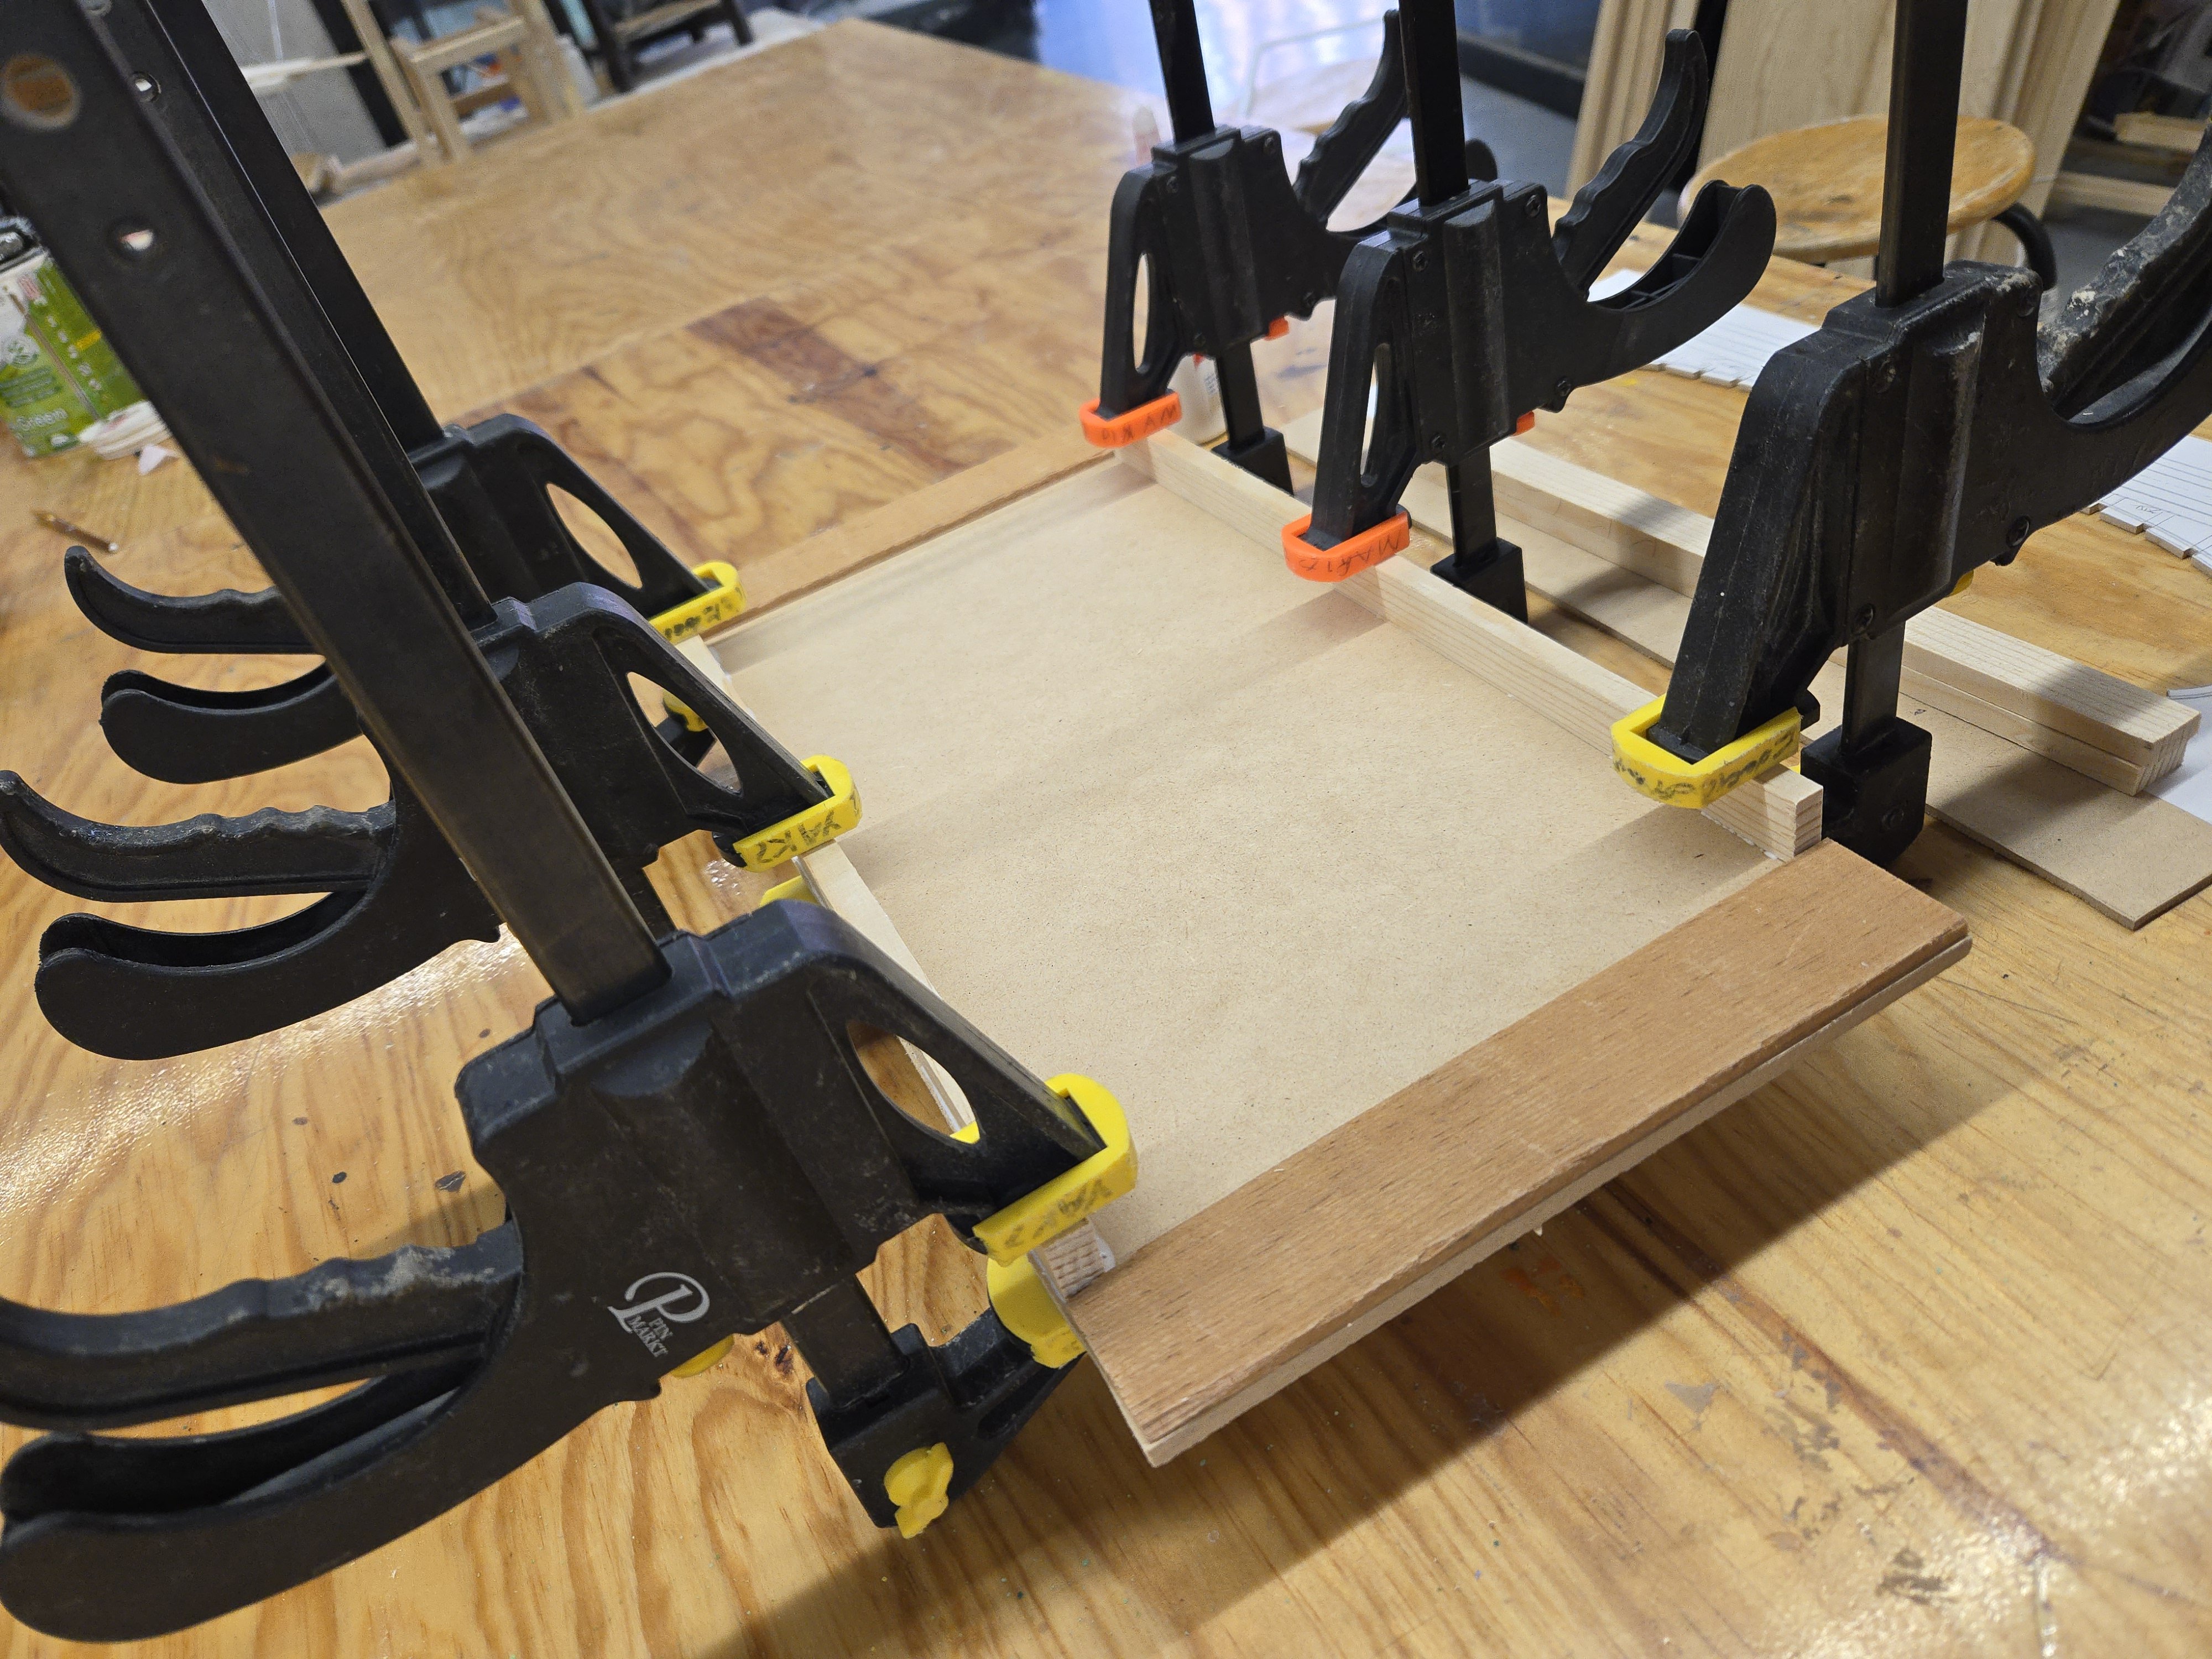
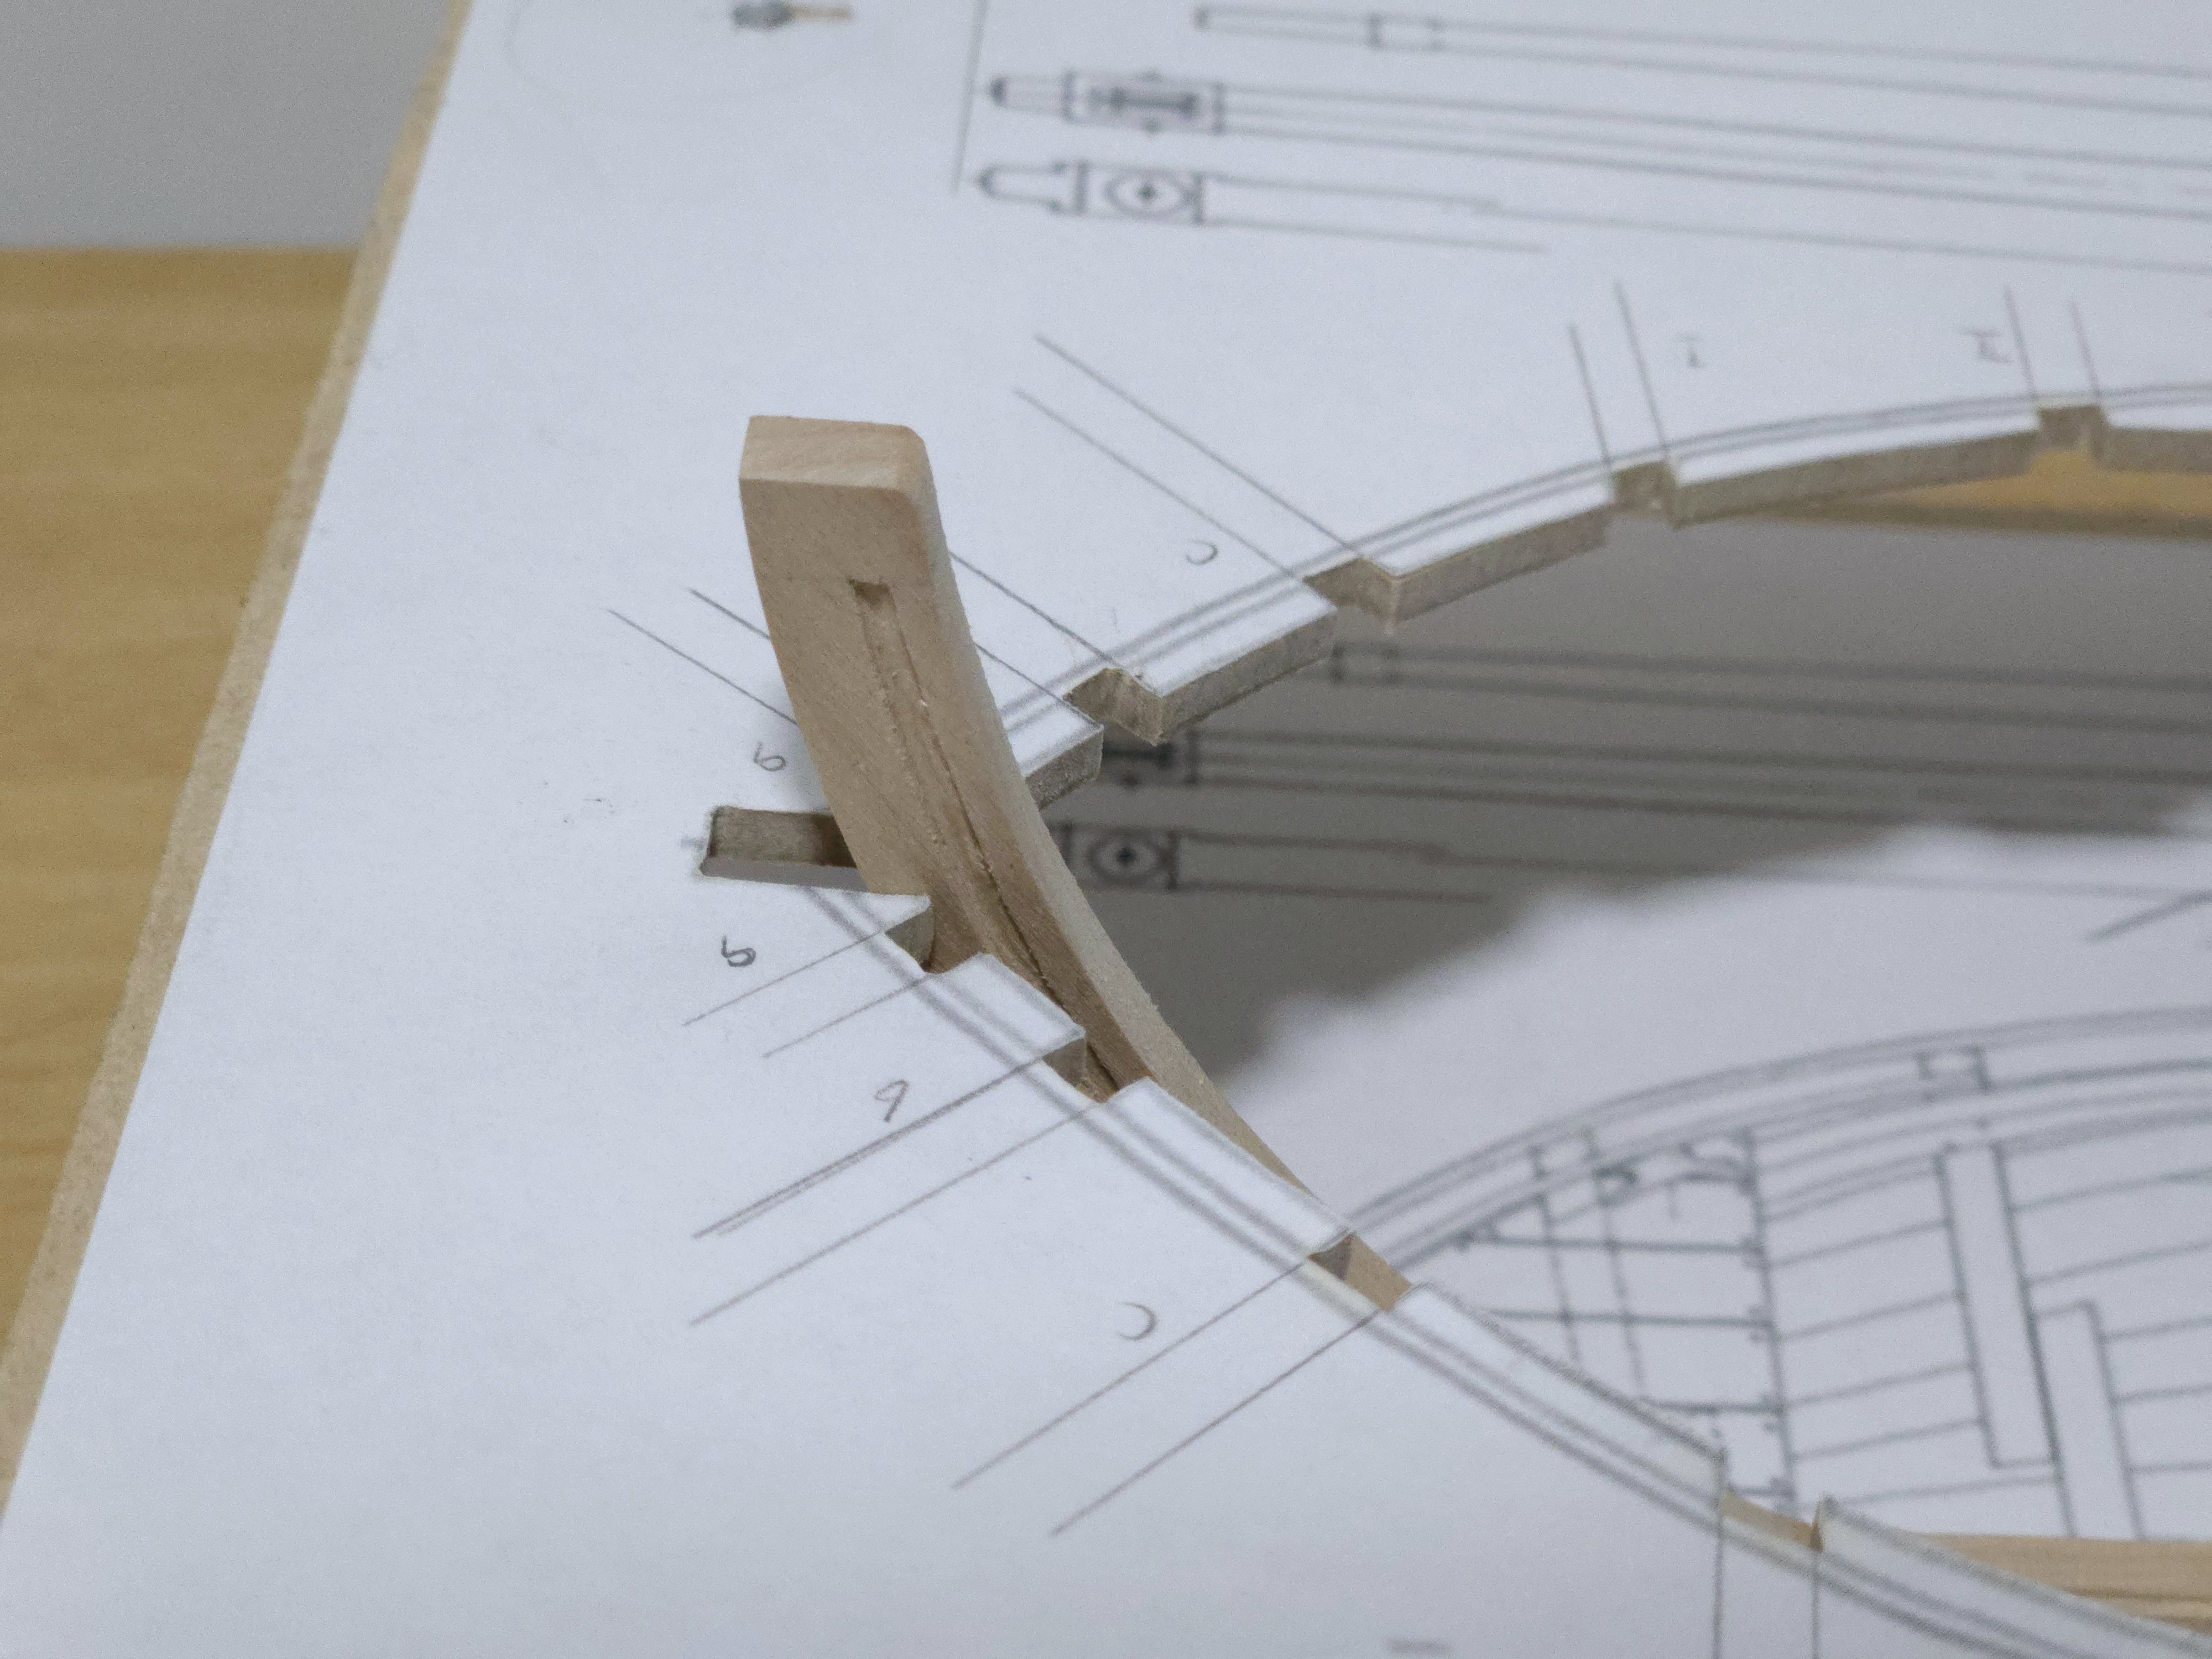
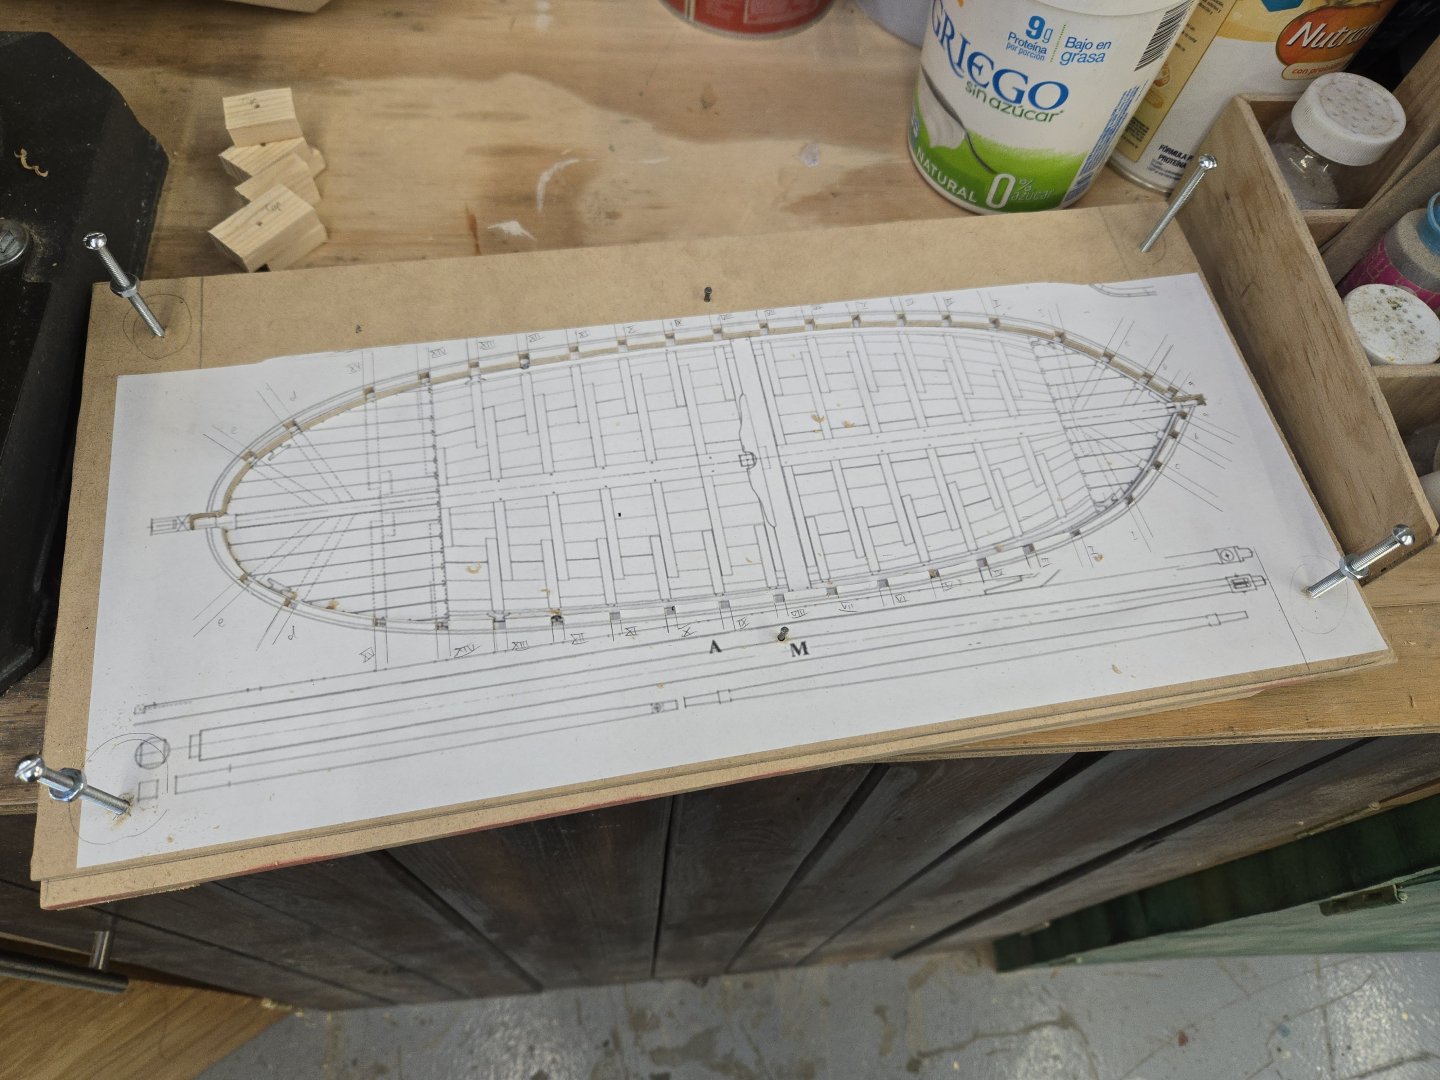
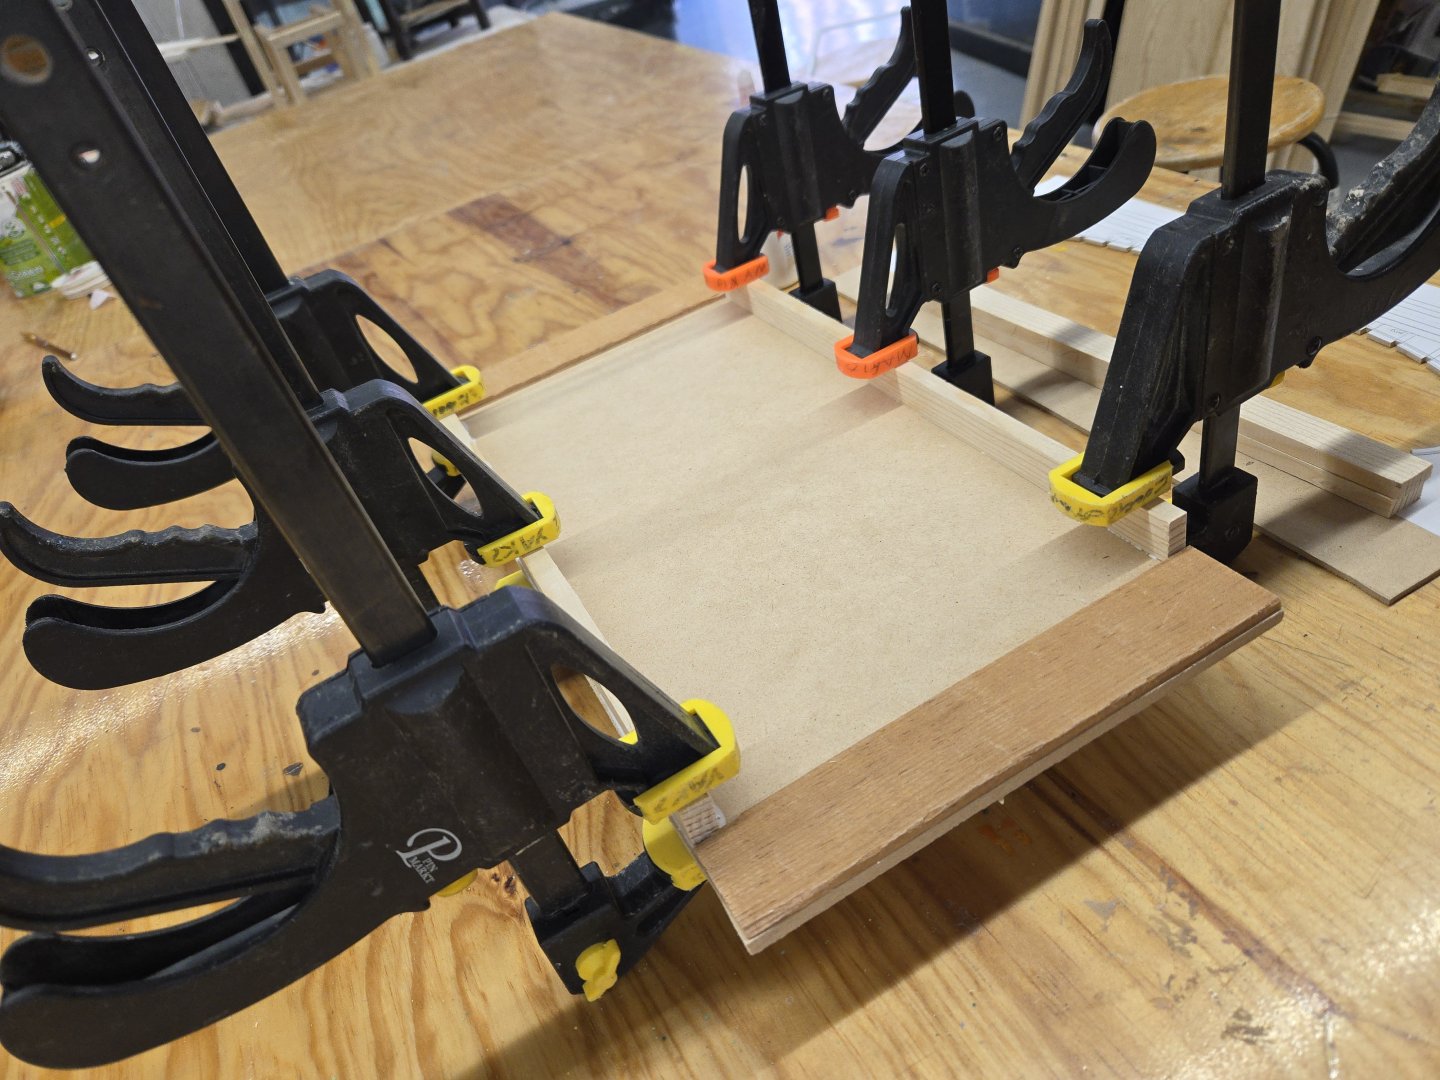
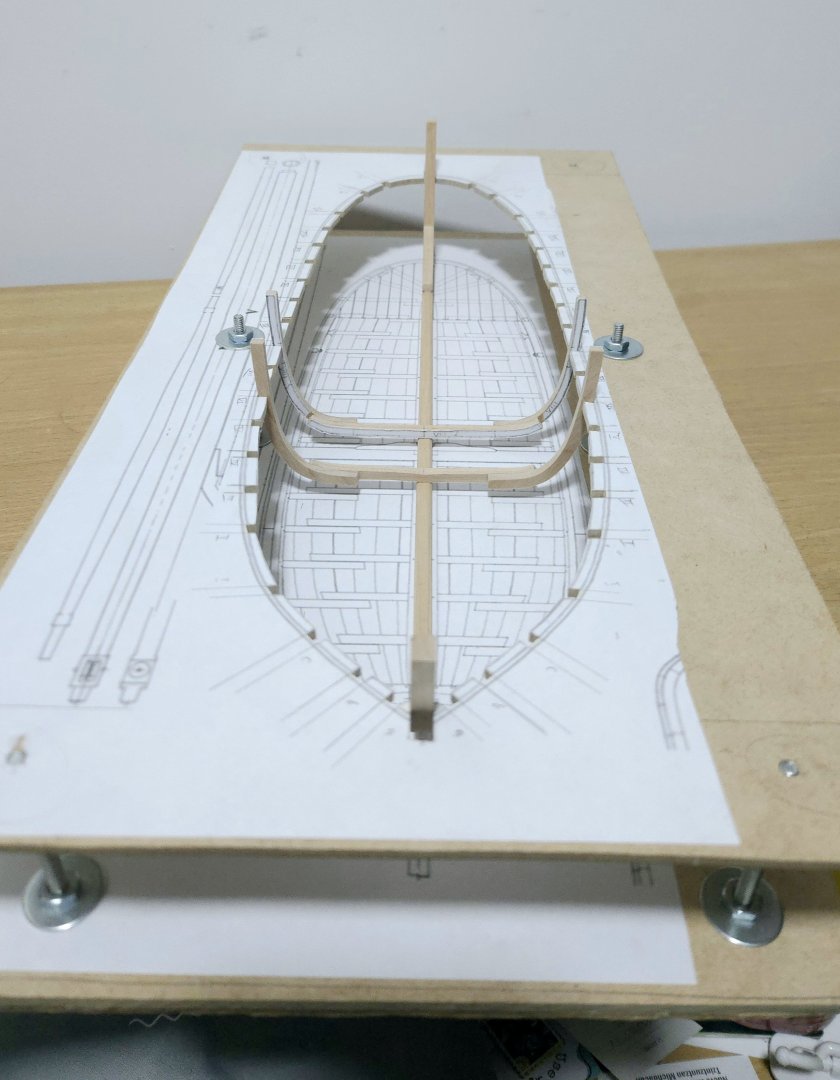
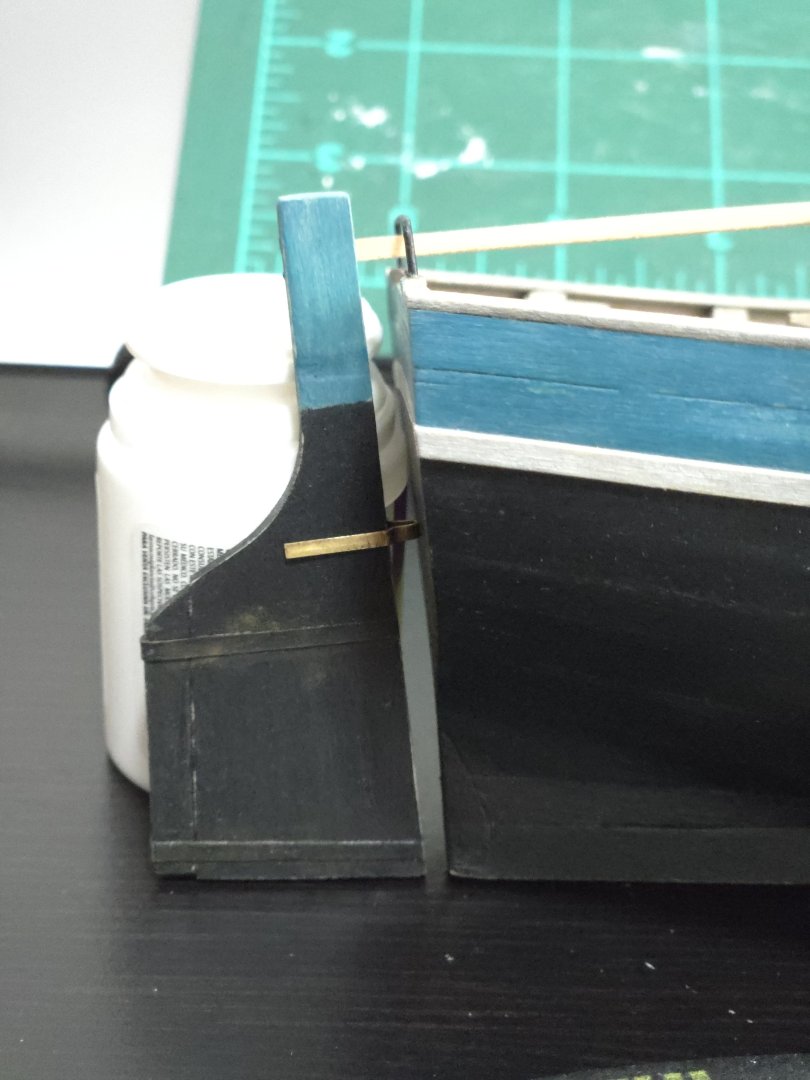
Thank you, all, for the detailed suggestions! That's too bad to hear that the dremel drill press is so flimsy, and that the dremel tools themselves are poorly regarded. Given the price of a quality Proxxon tool, I may leave it for the future but keep my eyes out for any deals. In the meantime, I might get a cheap, small rotary tool. Hopefully it will work well enough for my very limited purposes, and if not I guess it might confirm that I need a better quality tool. Anyway, a bit more progress on the Bateau. Using the hand fretsaw, I've continued cutting out frame pieces. The carpentry workshop has an electric scrollsaw, which seems worth learning how to use. So far, though, my practice runs on scrap mdf have mainly shown me that I need a lot more practice on the machine before I'm using it on my limited stock of alder. For now, I'm much more comfortable using the hand saw. I also got the building jig put together (well, more or less, as will be seen). The base is made of relatively thick mdf, and I decided to strengthen it on the underside with some scrap wood strips. The fore-and-aft strips (seen being glued, below) are much thicker than the side-to-side strips at the front and back of the jig, in order to provide space under the jig for the bolts. I then lined up the top and bottom templates and, using a drill press, drilled holes for the bolts. I was then finally able to get the jig set up, and dry-fit the keel assembly and the couple frames I've completed. It was exciting to suddenly see the build in 3D! That said, there were a few issues to correct. I still need to add some sort of brace pieces to hold the keel centered, and clearly need to get longer bolts--in the test fit photos, the top jig is just resting at the very top of the fore and aft bolt pairs, and is still slightly too low to bring the jig in line with the wales. Which brings me to the biggest problem. Earlier, I mentioned that the frame drawings were wider than the top-down hull view, and ultimately decided that the top-down view must have been aligned with the wales. Now, however, I see that that can't quite be right, as if that were the case, the stem and sternpost would be a bit closer together. In the photos above, you can see that there's quite a bit of space in the jig in front of the stem and behind the sternpost. The top-down plan drawing, then, shows the full length of the hull, rather than just the length at the waterline or wales. So, if I try to use the jig at the wale level--at which point the jig is the proper width for the frames amidsgips--it will be totally off at the bow and stern. As can be seen, if I tried to use the jig at the wale level to fit the foremost cant frame, for example, the cant frame would practically end up intersecting the stem outside the rabbet. It's not an insurmountable difficulty. I think I'll just file the frame slots out wider (equally so on each side), get longer bolts, and mount the jig at the level of the top of the hull. It's just a bit if a mystery to me why the top-down drawing is narrower than it should be.

- 139 replies
-
- 8
-
-
- ancre
- Bateau de Lanveoc
- (and 2 more)
-
Very nice work! The serving looks great. For serving at smaller scales (such as on the lobster smack), fly-tying thread works well.
- 167 replies
-
- 1
-
-
- Norwegian Sailing Pram
- Model Shipways
- (and 1 more)
-
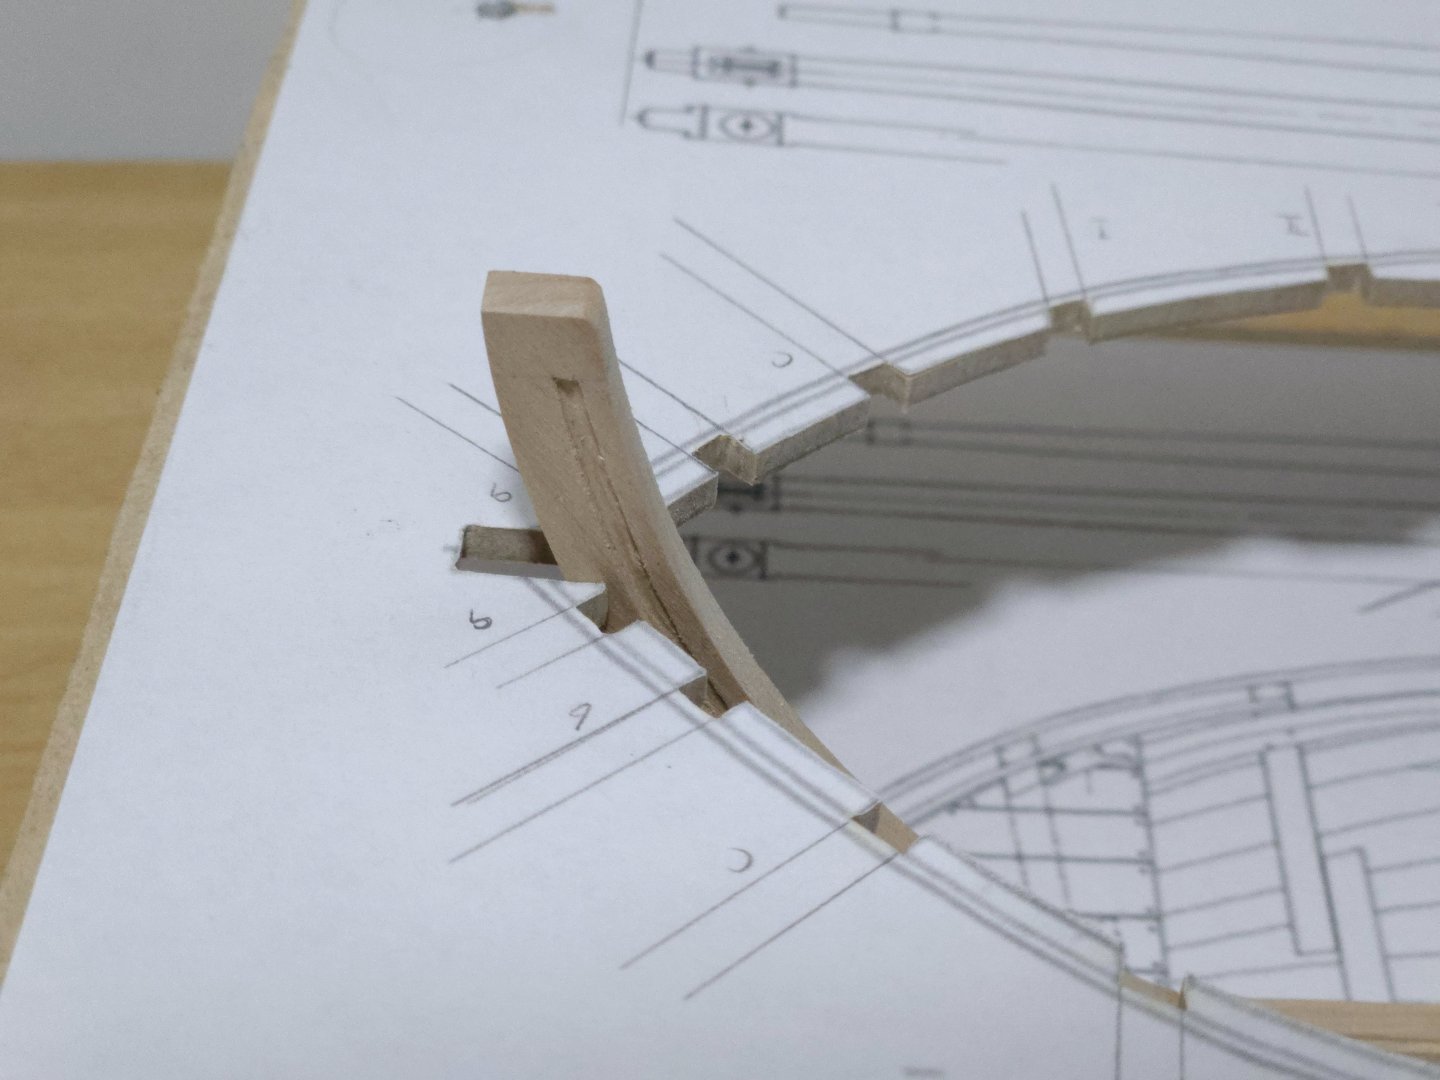
Progress has nearly ground to a halt, as I've been very busy with work and my hobby time has been focused on rigging the Lancha Chilota build (something that has proven much less tedious so far than I thought it would be) and, in my carpentry class, building a TV stand/bookshelf. I've put together one further frame, number VI, seen below with frame VIII. I've also filed out the frame slots in the building jig. Each frame takes a lot of time, most of which is spent in slowly sanding the frames into shape, leaving a little extra for fairing. I don't have any power tools, so I'm just using sanding sticks. This is extremely tedious, and I'm beginning to wonder if I should get some sort of power tool. Here in Mexico, I can pretty easily get Dremel rotary tools and various knock-off versions. Other manufacturers, like Proxxon, are substantially more expensive. Most disc sanders that I see available are much too large and attached to a belt sander, which I don't need, and in any case it doesn't seem like they would be useful for sanding the concave shapes on the interior of the frames. So I wanted to ask if anyone has any recommendations on what to look for in a rotary tool. What rpm range would be appropriate? And how useful is the dremel workstation (the thing that looks like a small drill press)? I'm thinking that it could be useful to essentially turn the dremel into a spindle sander, but I don't know if it's too fragile for that. (I should note that I don't have any ability to machine metal to make my own.) Thanks in advance for any advice!

- 139 replies
-
- 9
-
-
- ancre
- Bateau de Lanveoc
- (and 2 more)
-
Nice job! That said, you may want to double-check that the bulkheads are on square to the keel. Maybe it's the angle, but in the first photo they look a little crooked, which might cause problems with the hull later on.
-
Very nice work!
-
You may want to check out Chuck Passaro's guide to stropping blocks, which is available as a pdf for free download at Syren's website on the "blocks" page. I found it extremely helpful for figuring out stropping techniques, and relatively easy to do. I'm not totally sure about the best way to add a loop to both ends, though. In general, searching MSW for "block stropping" should return helpful results. Best of luck!
-
Congratulations on an excellent model, and on the new family member!
-
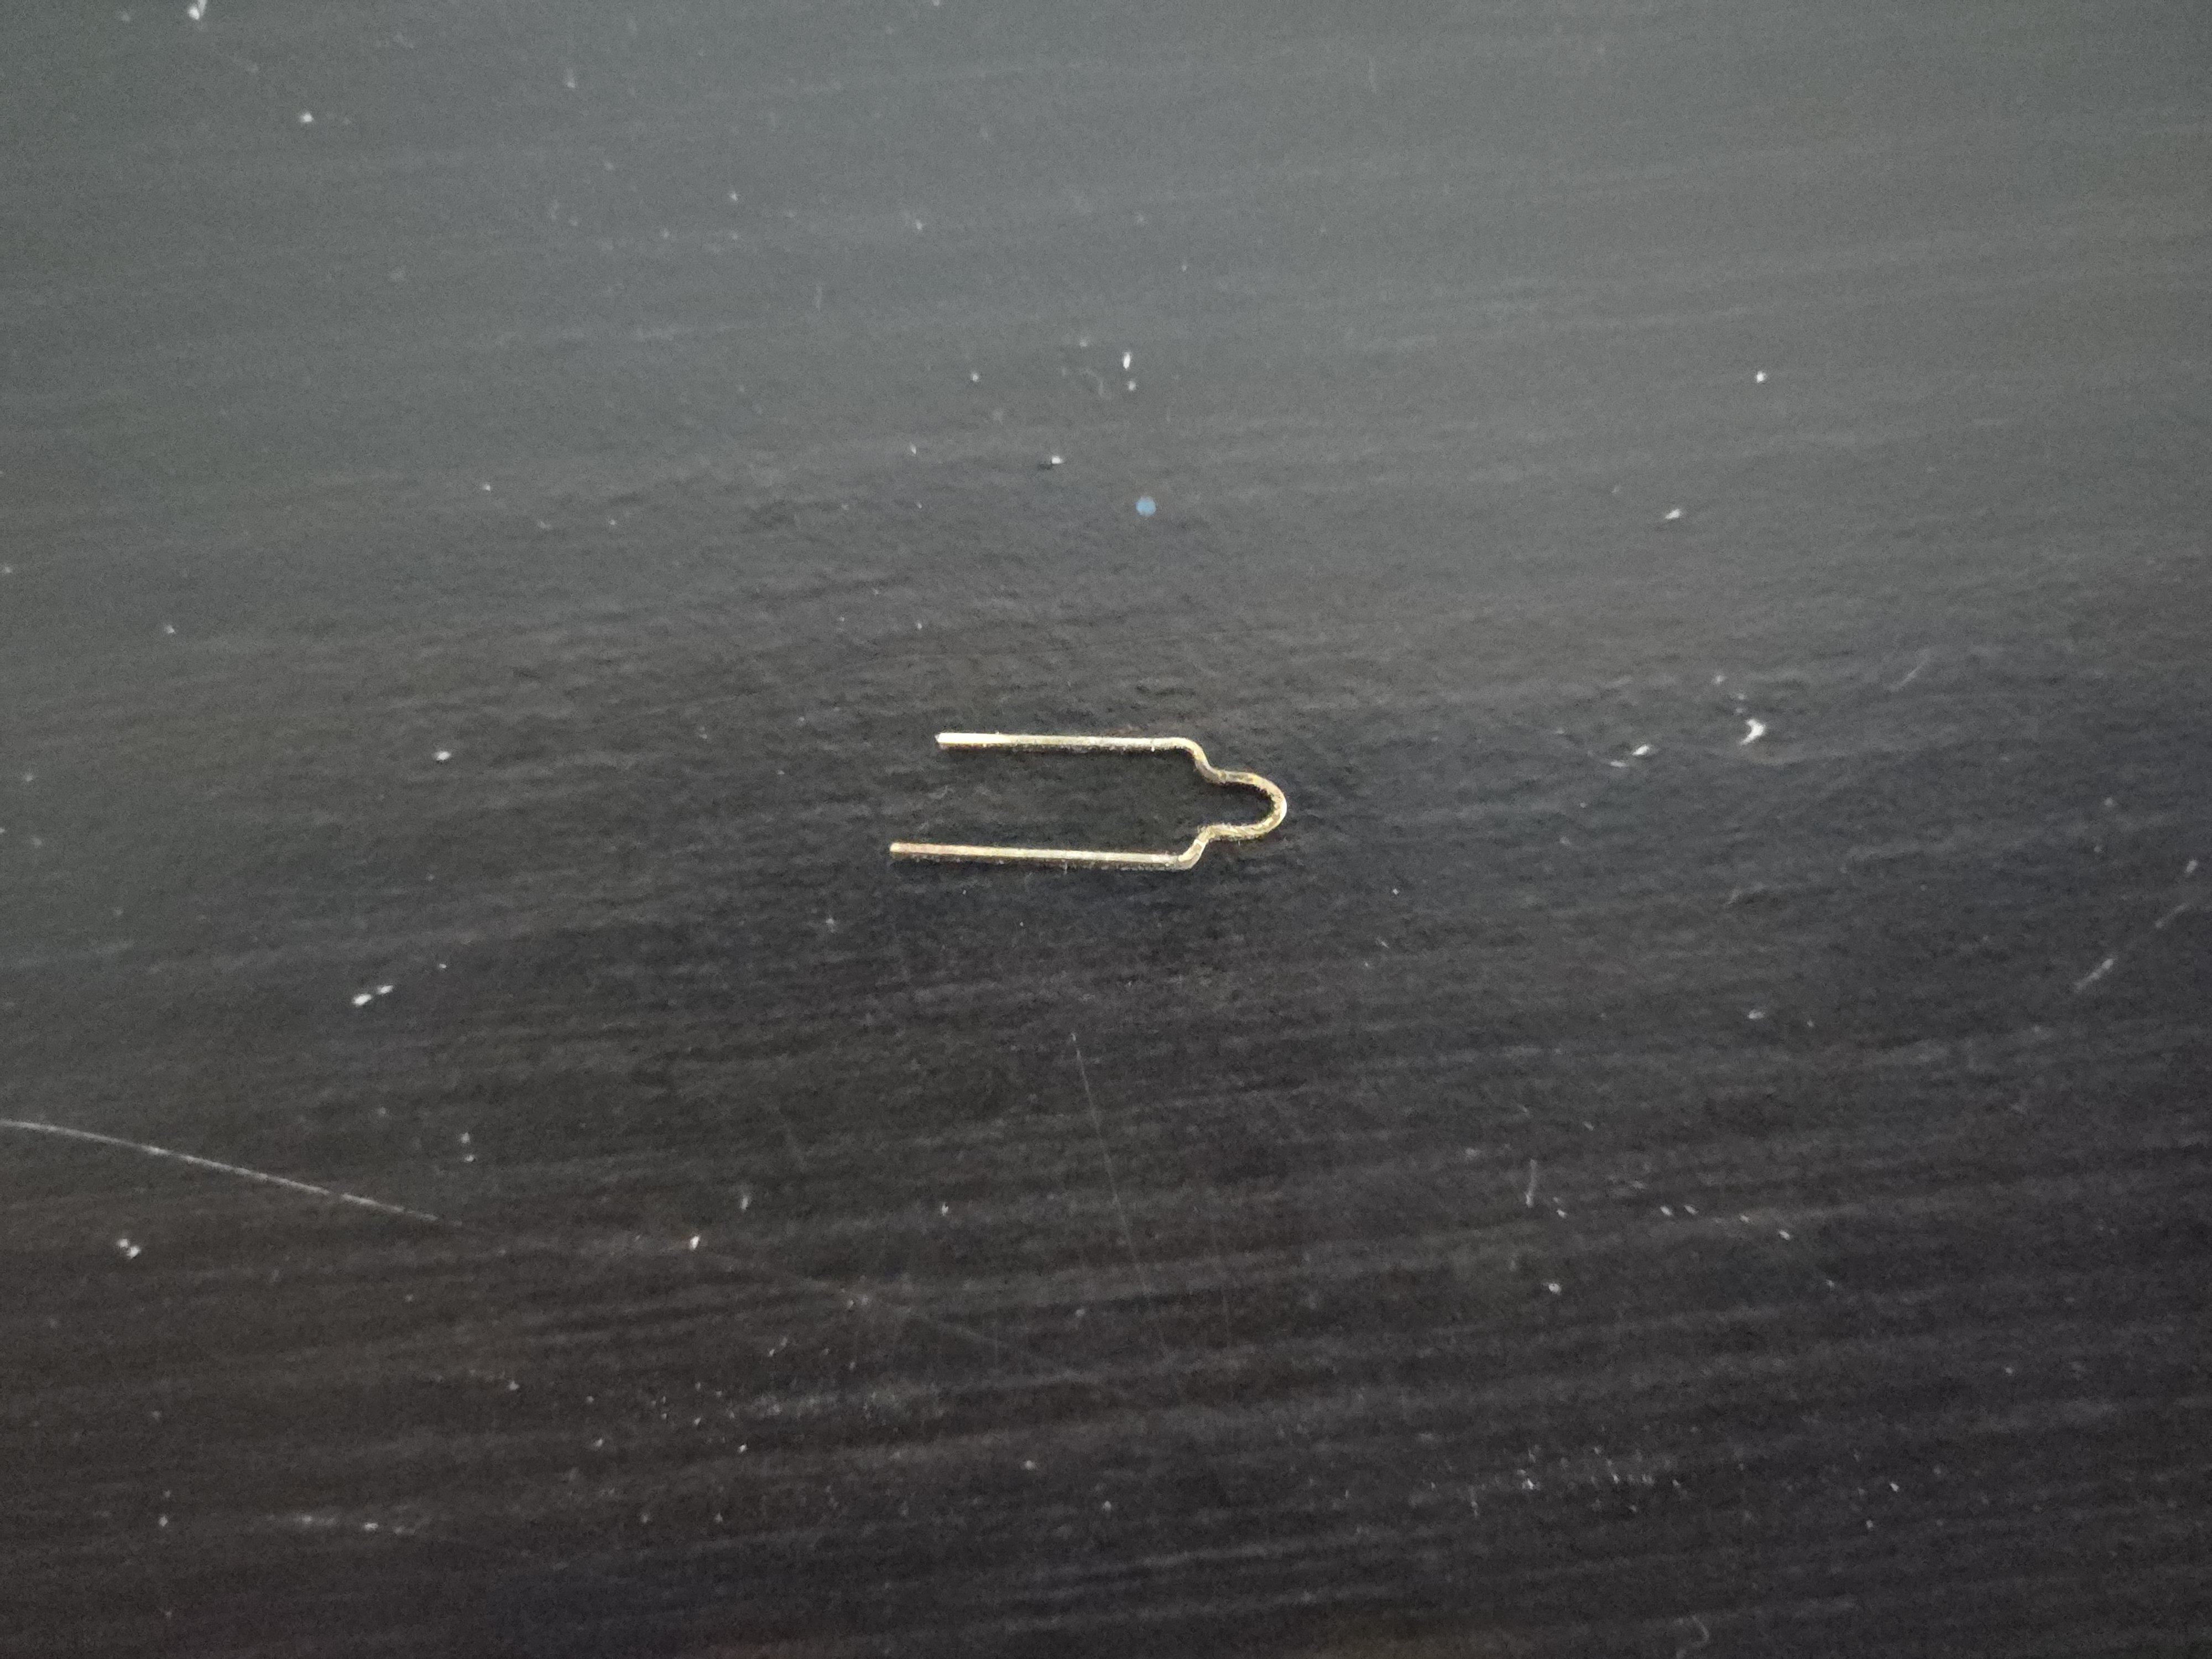
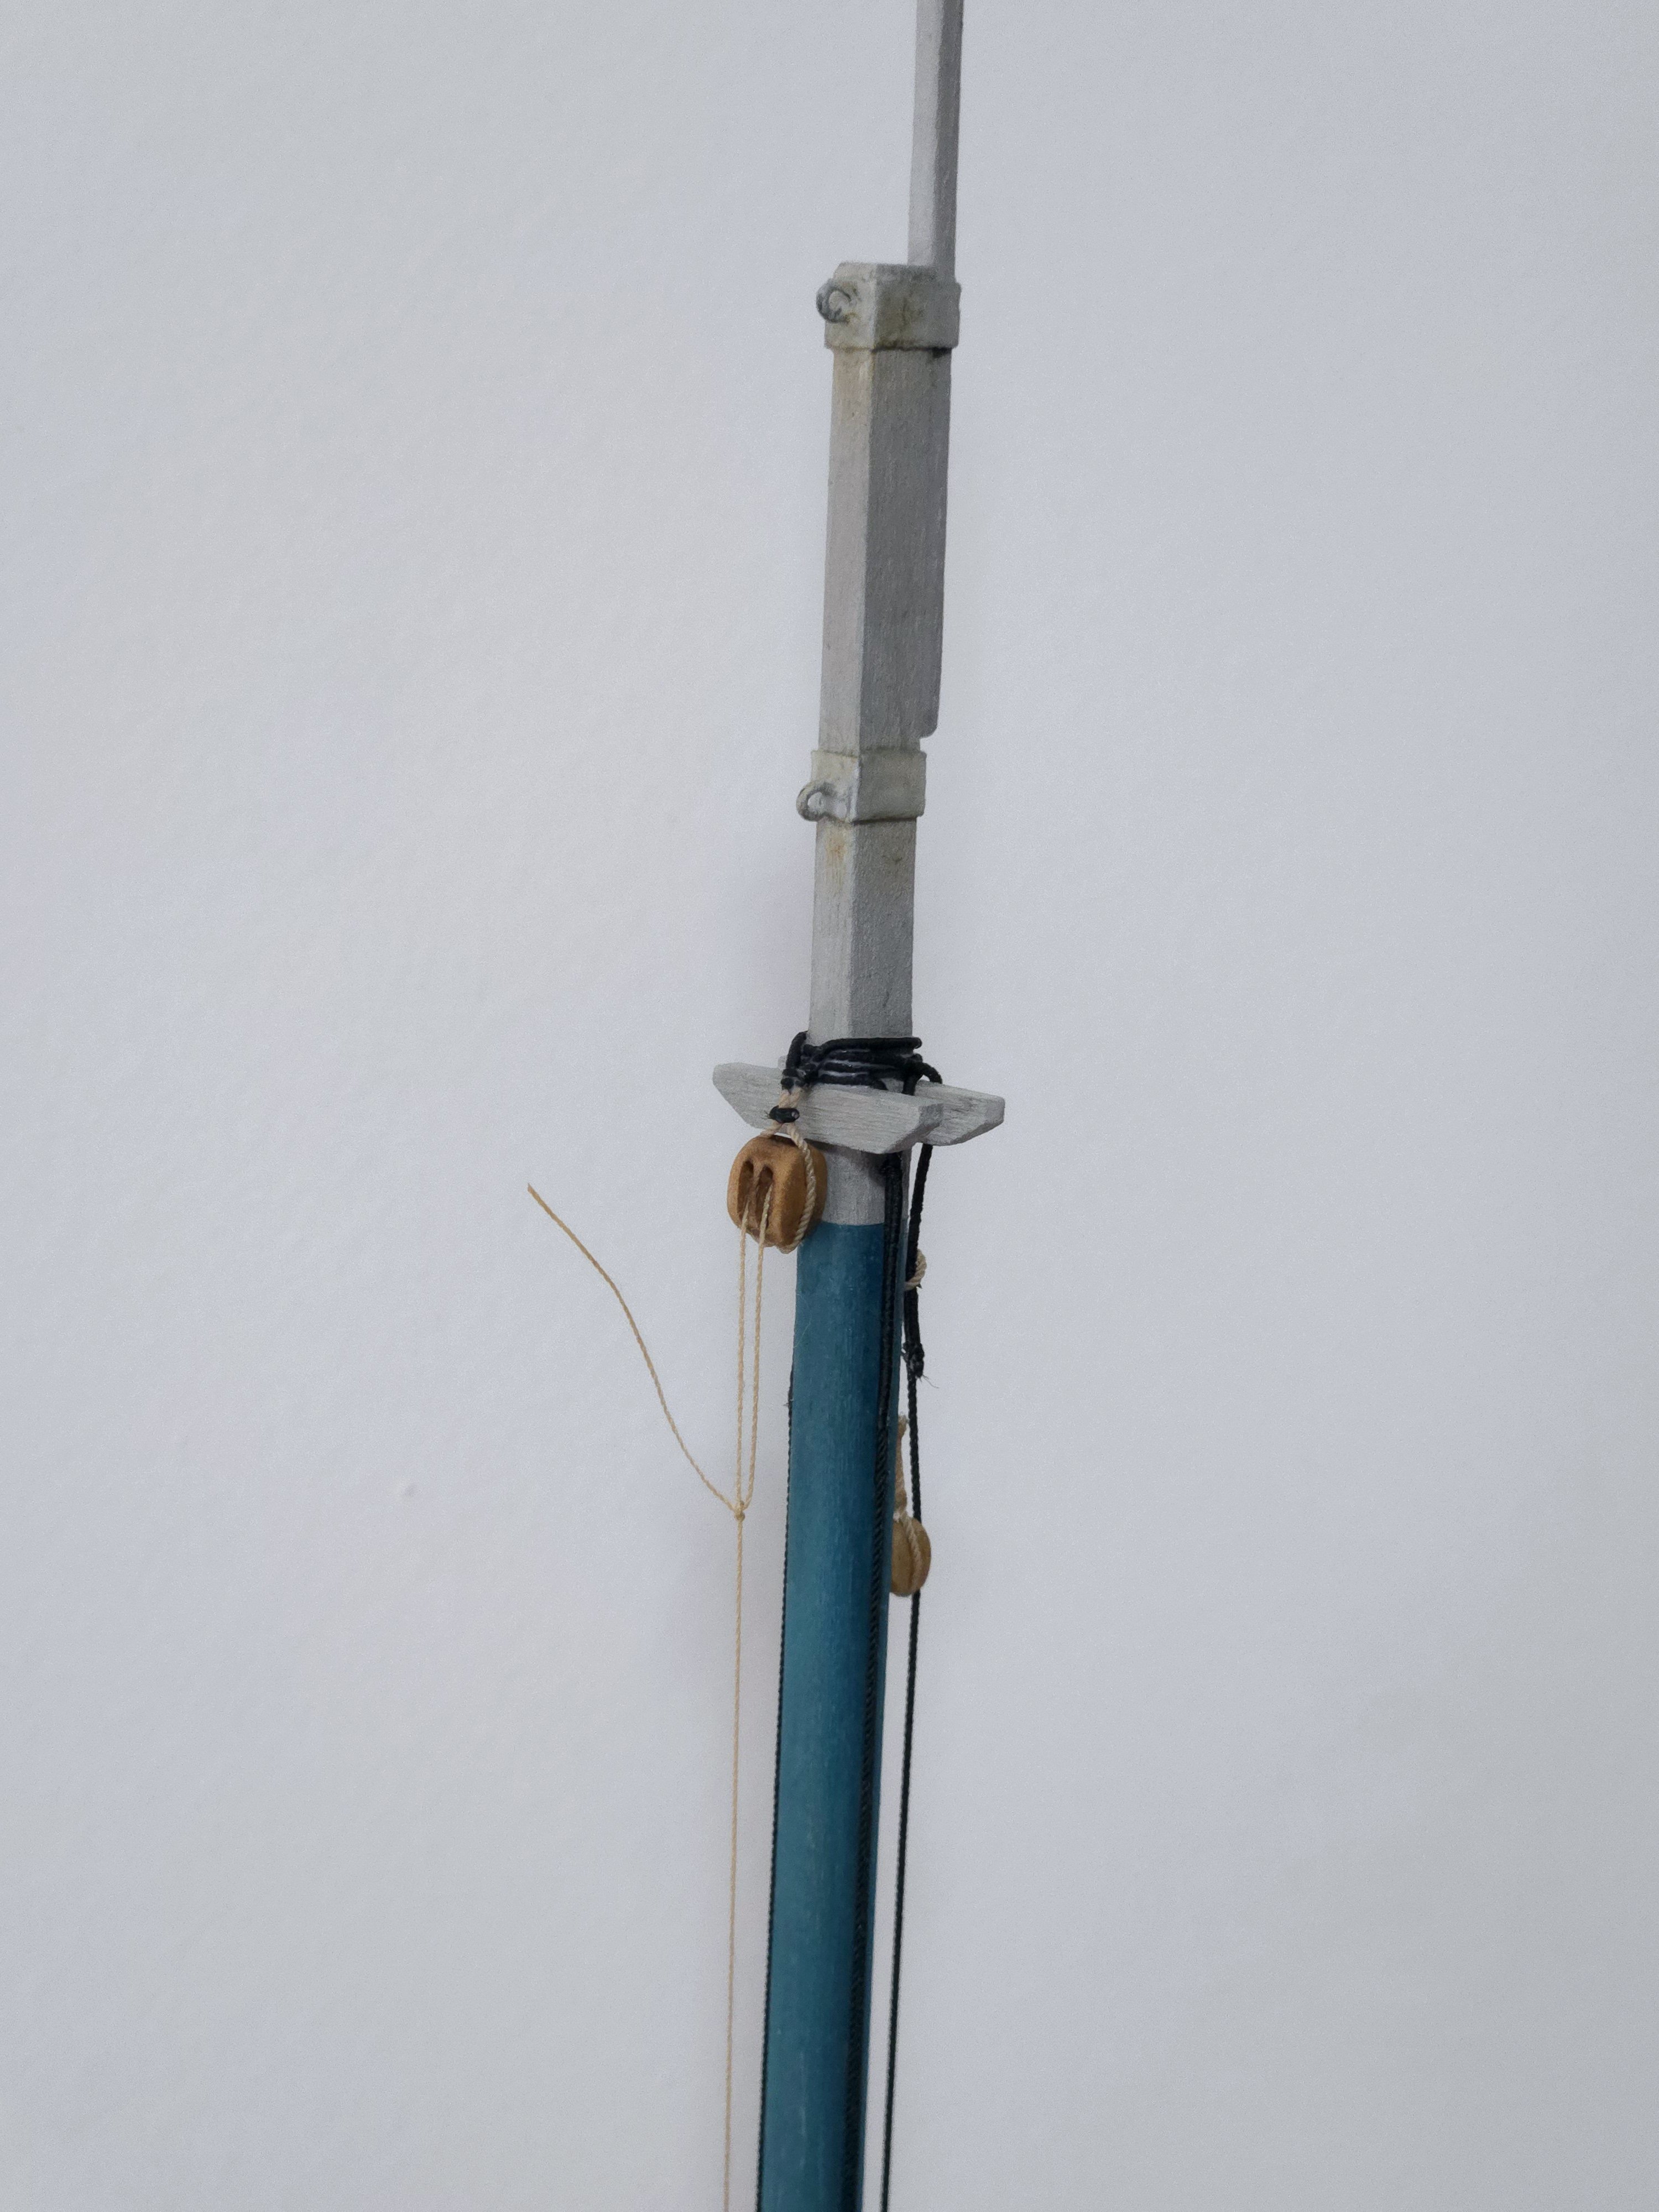
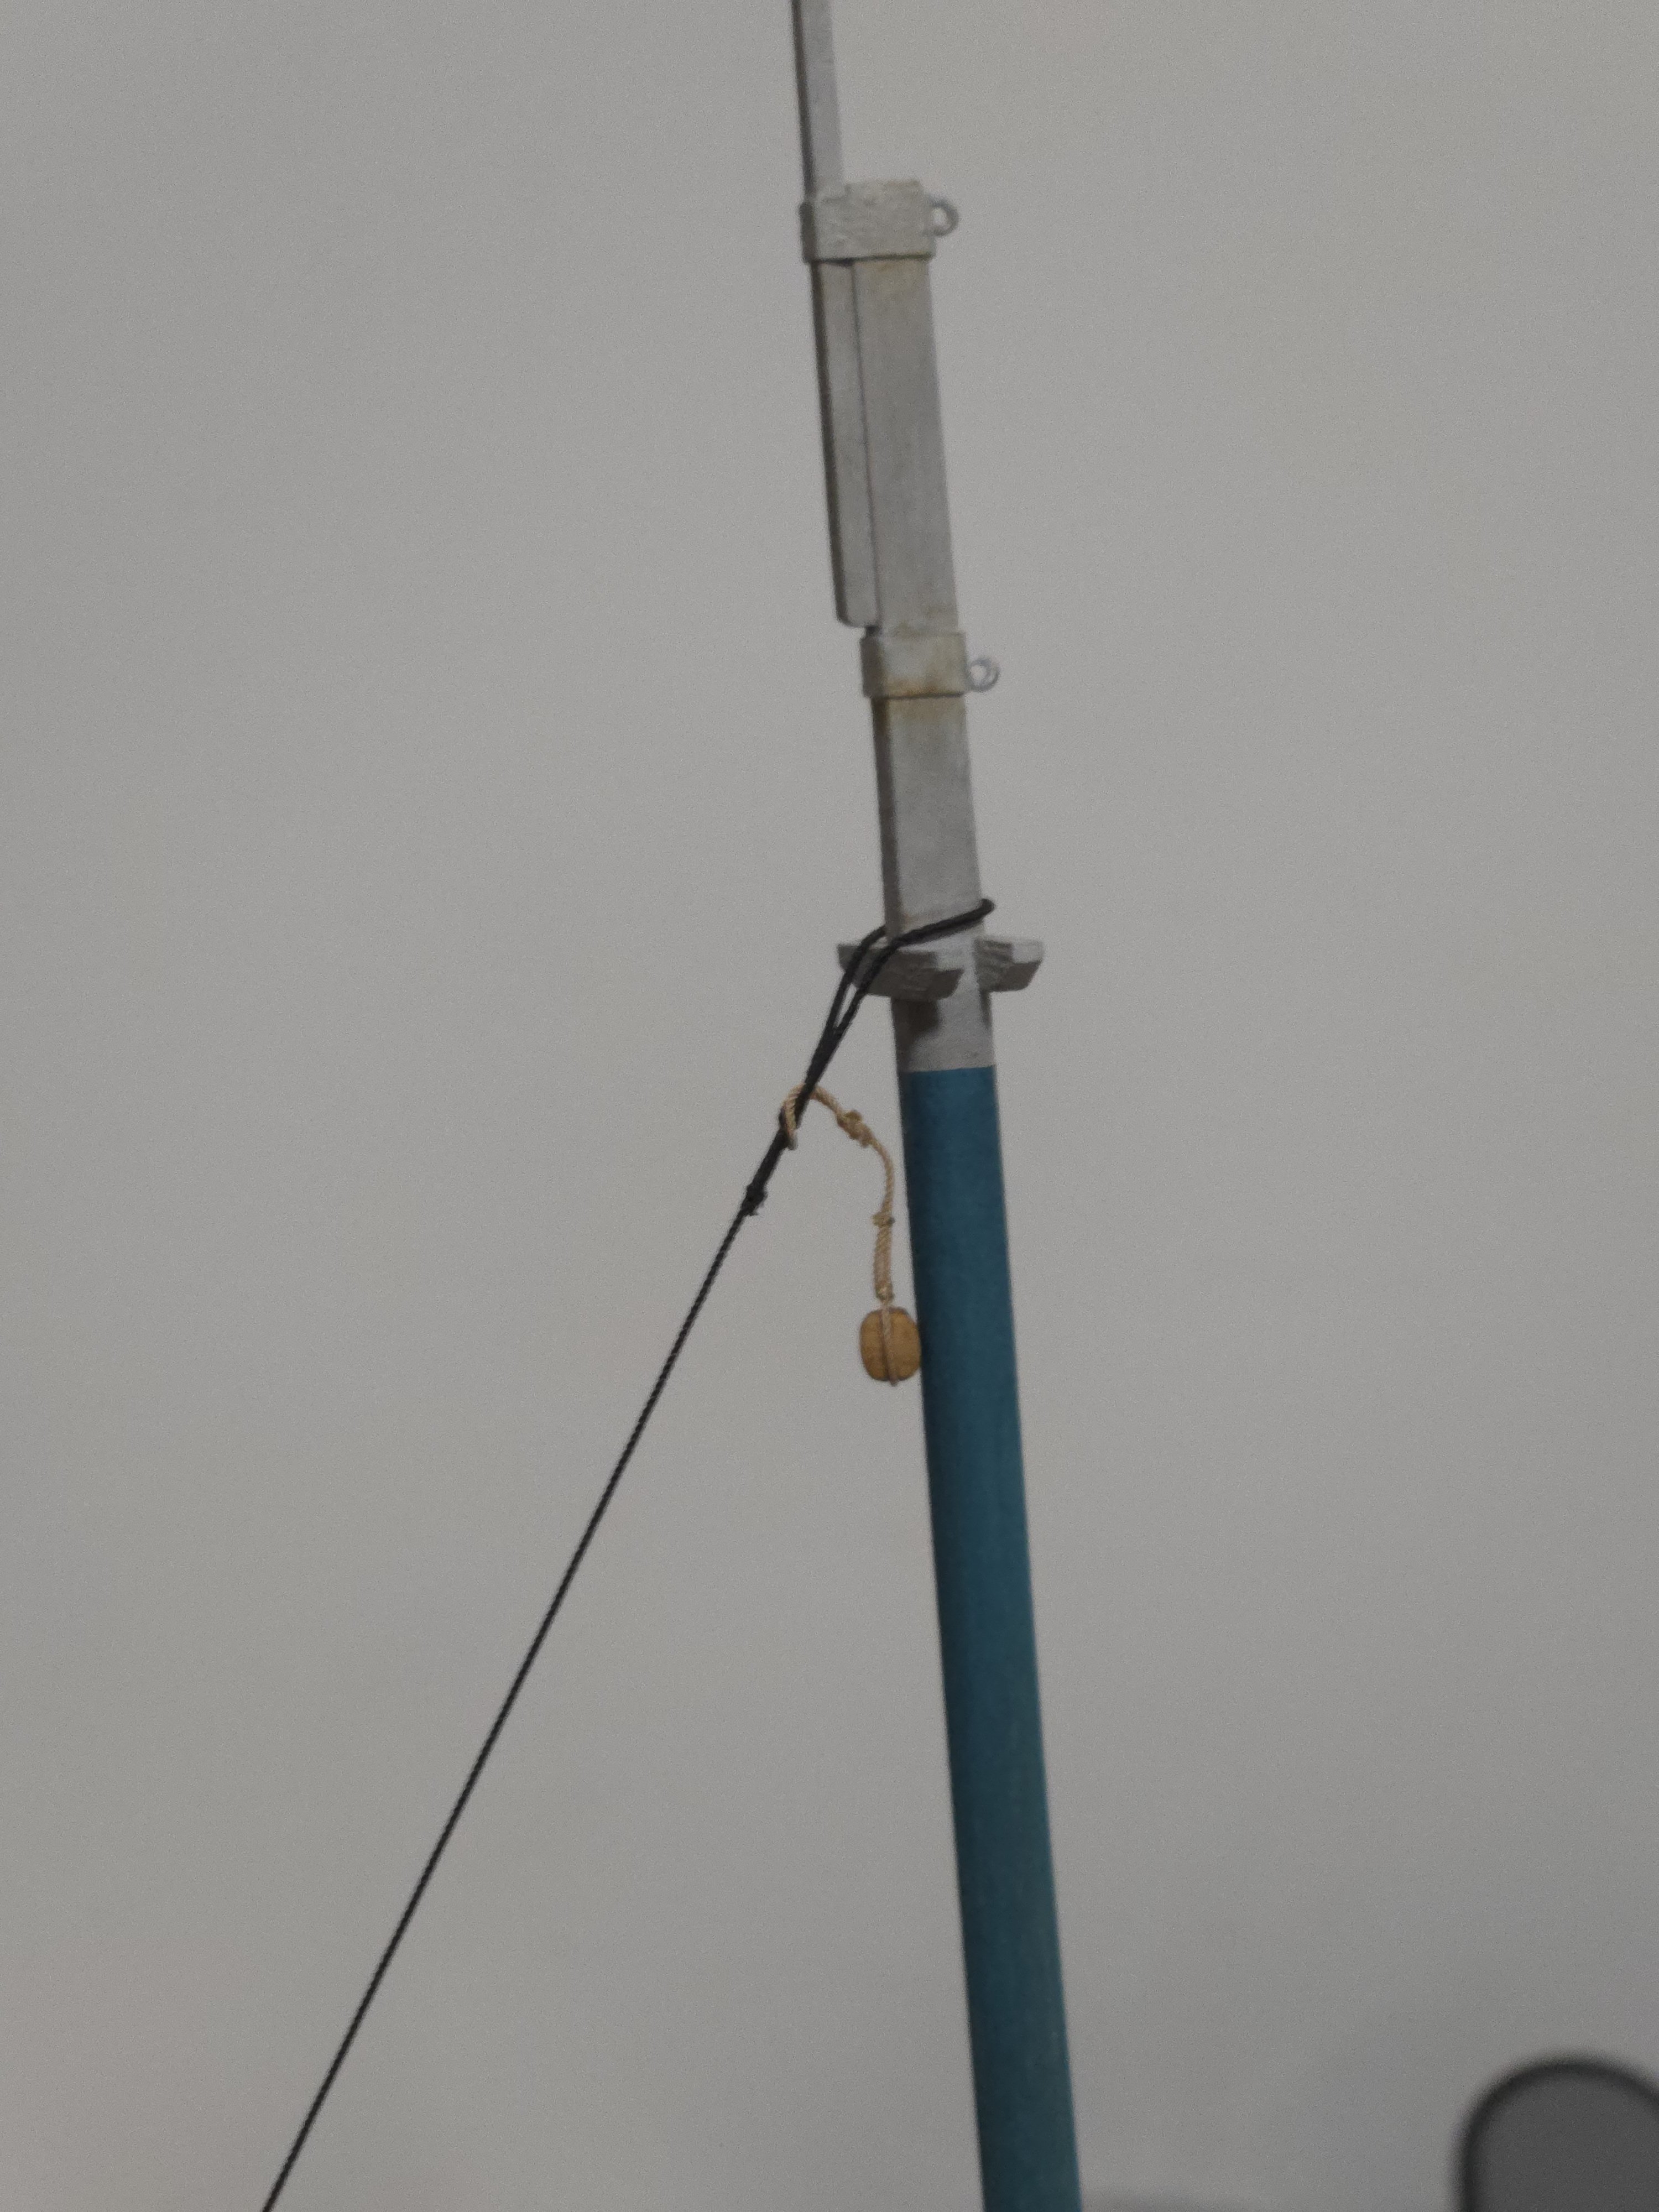
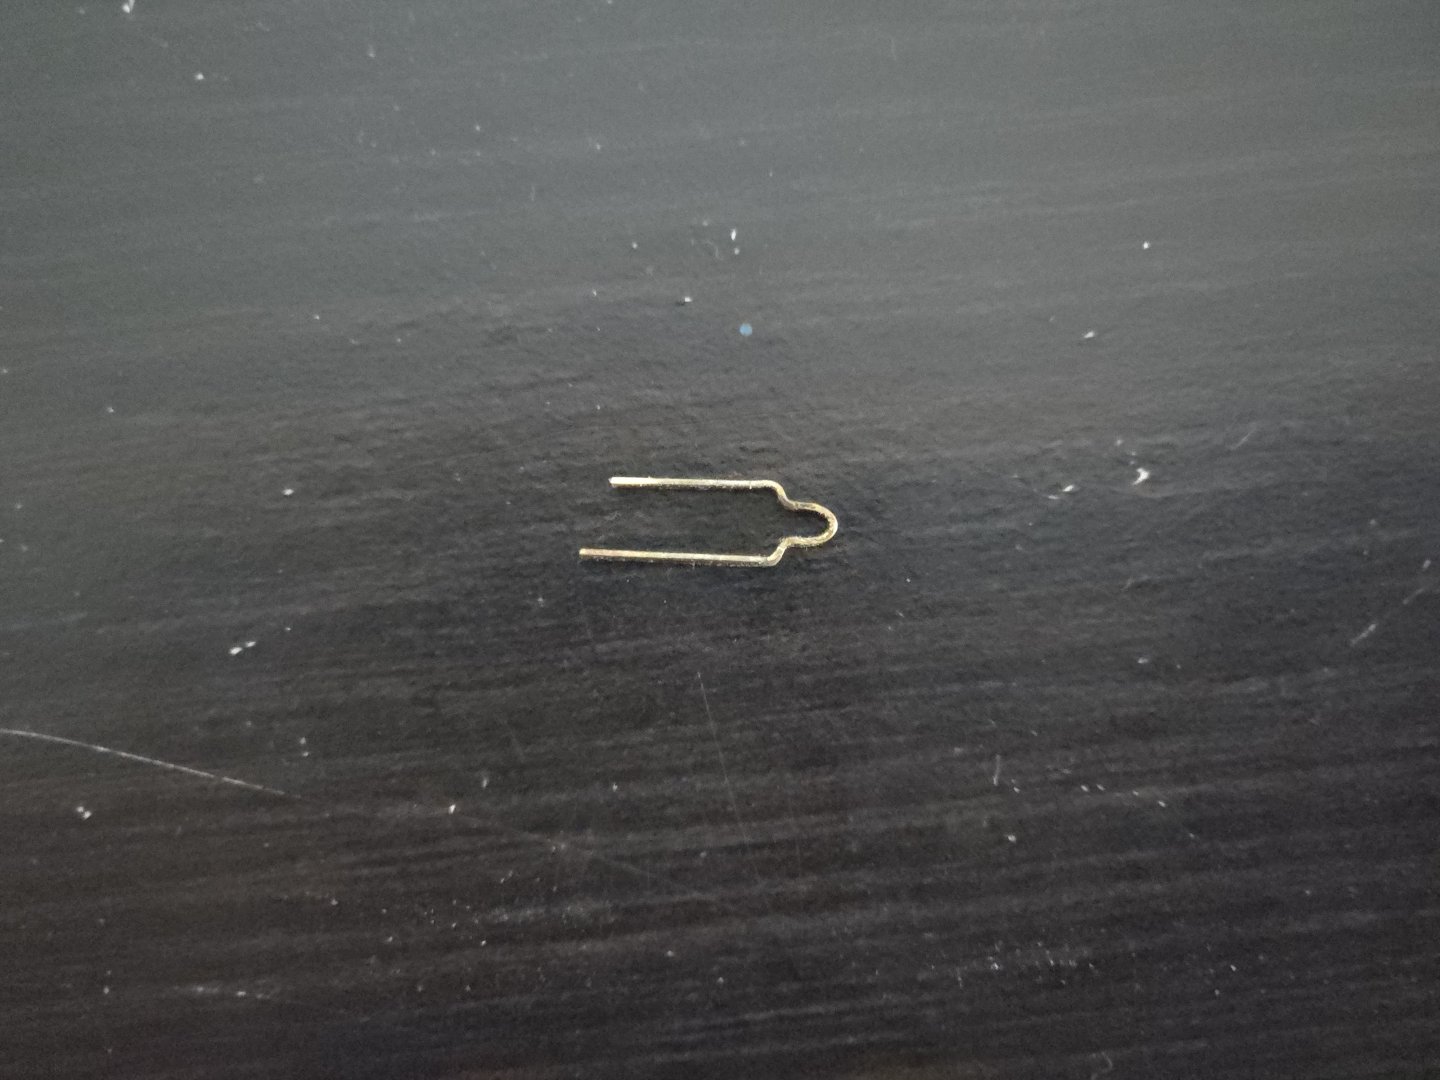
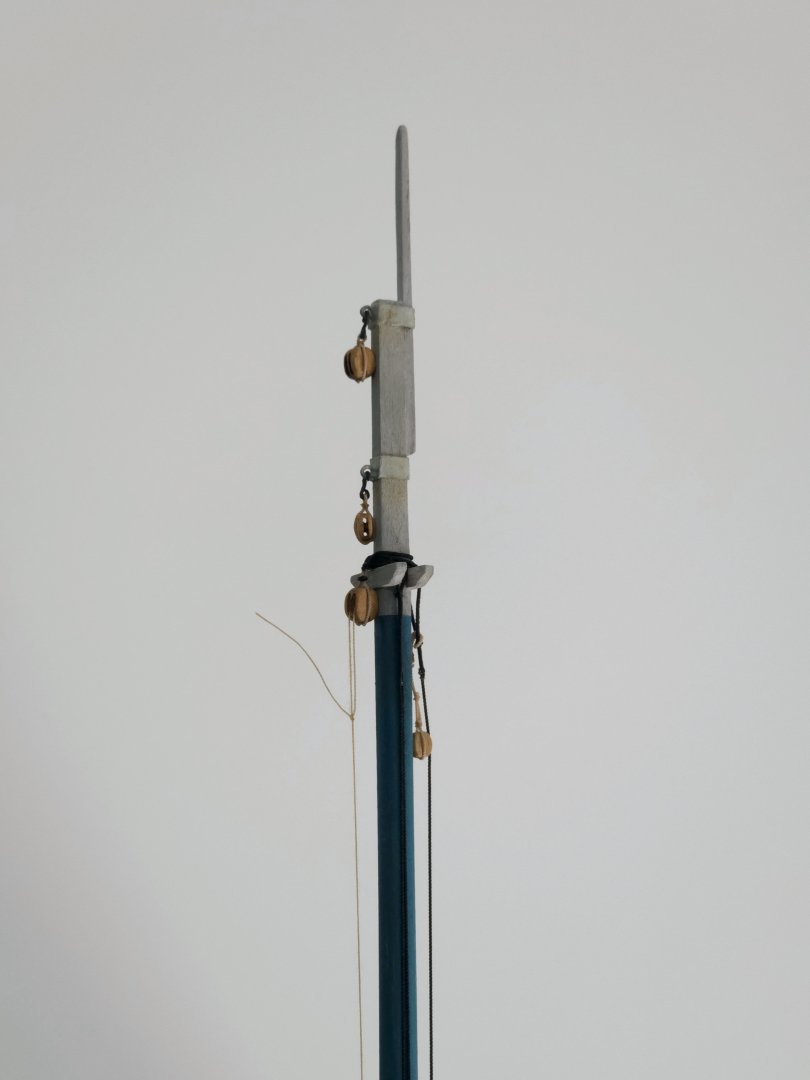
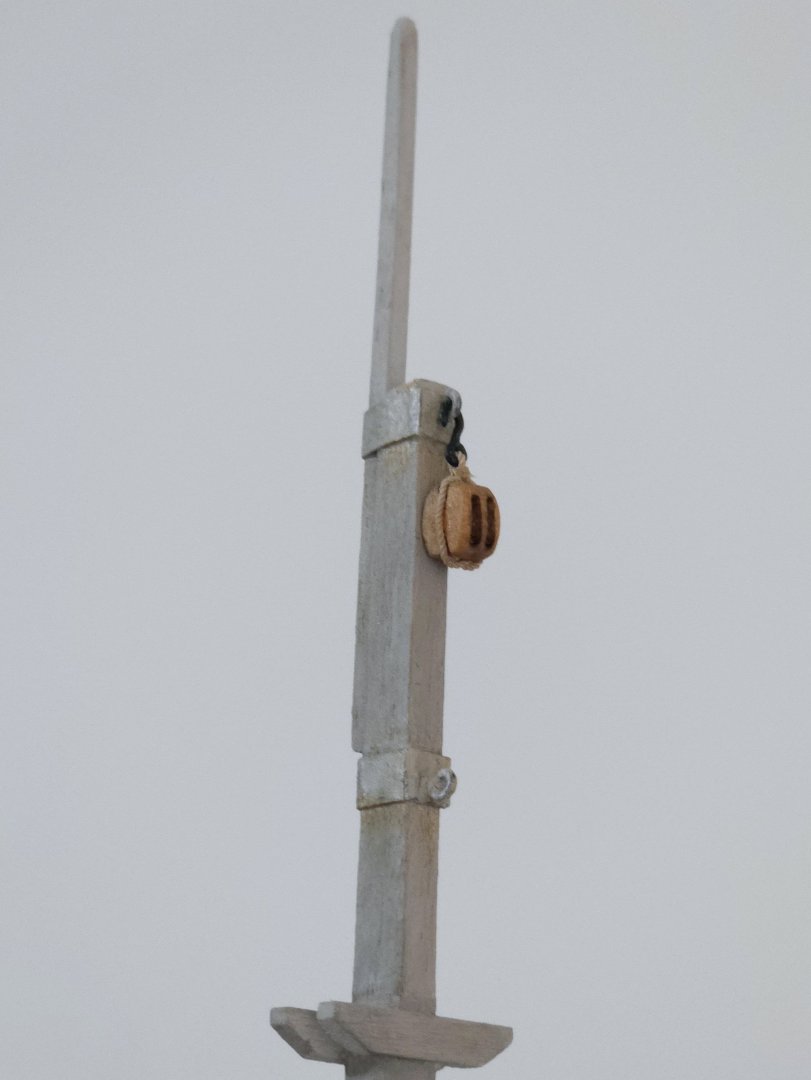
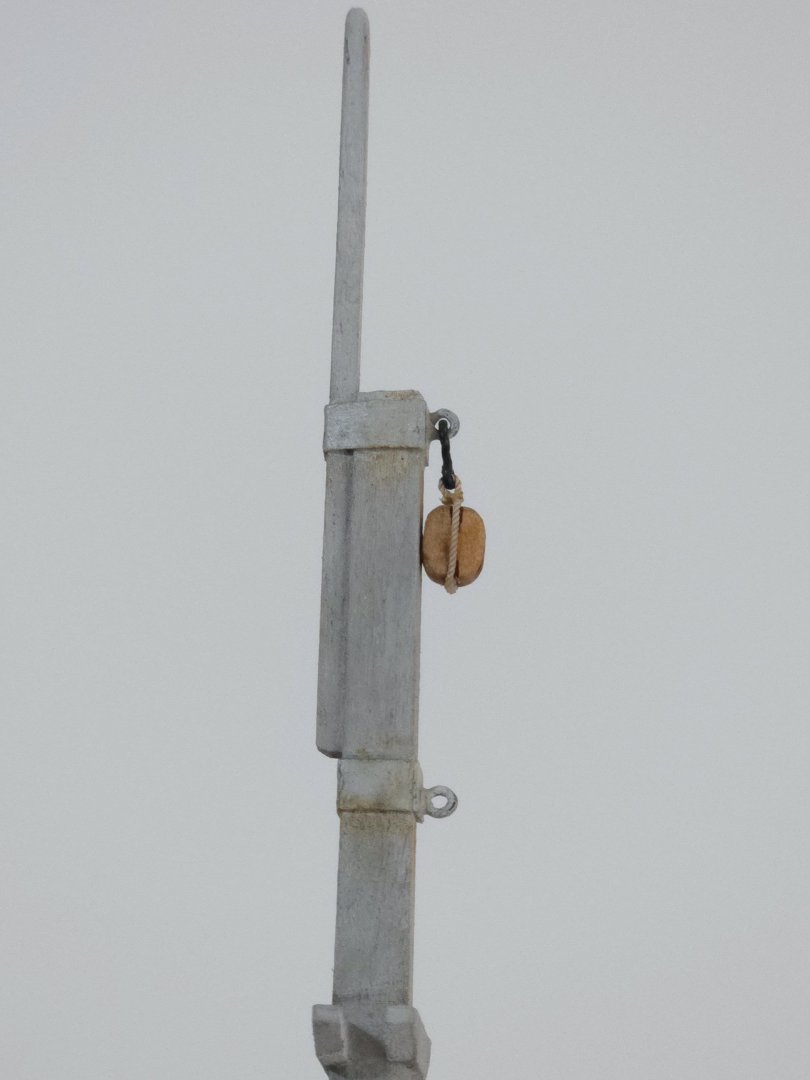
I started work on the rudder hinges, making one out of 1/64x1/16‐inch brass strip. It ended up protruding about 1/8 inch beyond the rudder, which is a bit more than I would like--as can be seen below, the gap is a bit excessive. I still have a hard time making precise bends in brass, which is part of why it sticks out too far. As can be seen below, the 90-degree bends aren't very precise, and the bend for the pintle is simply too big. I'll have to try again. That said, it occurred to me that this piece could also potentially be used to replace the eyebolt on the end of the boom, as seen below in a test fit. This would fill a little more of the excess space between the gooseneck eyebolts. The main issue is that the loop for the gooseneck pin is quite large, so the boom will bounce around quite a bit more than with the eyebolt unless I pinch the loop closed or something. With the metalwork (real and faked) on the mast finished, I was able to add all the standing rigging to the masthead. The shrouds were put in place and seized together with black fly-tying thread, first the starboard pair, then the port. Then, the fore stay was added. I made sure the standing rigging was snugged down against the crosstrees, clamped the lines at the bottom of the mast with clothespins to add a slightly bit of tension, and then applied watered-down white glue to hold everything in place. It was then time to add the throat halyard block, which, instead of being hooked to an eyebolt like the other masthead blocks, is stropped around the masthead. This proved tricky to do. First, I served a short length in the middle of a bit of rope. I then looped the served portion around the masthead and tried to seize the loop closed. This was very difficult for me to do, as there were a lot of moving parts to juggle--the rope, the seizing thread, and the mast itself were all sliding around. Eventually I used a dot of glue to secure the rope to the masthead in the proper location, but it was still tricky to seize it shut. I ended up deciding to seize it a bit further down the line first, as shown below, and then to seize closer to the masthead. While this certainly made it easier to add the closer seizing, unfortunately, that first seizing wasn't quite centered. I therefore added a further, properly centered seizing between the two I had made, to be against the top of the block, and then cut off the lower seizing, carefully removing the glued fibers as best as I could. I was then able to finally add the block, as can be seen below, which I held down in the proper position with sewing thread before adding watered-down glue to hold everything in place around the masthead. With all the blocks added, the masthead is now complete!


- 312 replies
-
- 11
-
-

-
- Chile
- Latin America
- (and 6 more)
-
Nice job, it looks fantastic!
-
Nice job! Metal work remains the most difficult part of modeling for me, but it's gotten slightly easier with more practice. Having a bit of thin sheet brass (K&S metals sells a variety and is pretty widely available) on hand to replace and remake parts as needed certainly helps.
- 167 replies
-
- 2
-
-
- Norwegian Sailing Pram
- Model Shipways
- (and 1 more)
-
Thanks! Thanks! I do think I'll taper the aft end a bit before painting. Incidentally the photo you shared shows another detail I'd like to include on the gaff spar, which has been extended slightly (or perhaps it was a repair) at the tip. I think it would add a bit of character to the model.
- 312 replies
-
- 3
-
-
- Chile
- Latin America
- (and 6 more)
-
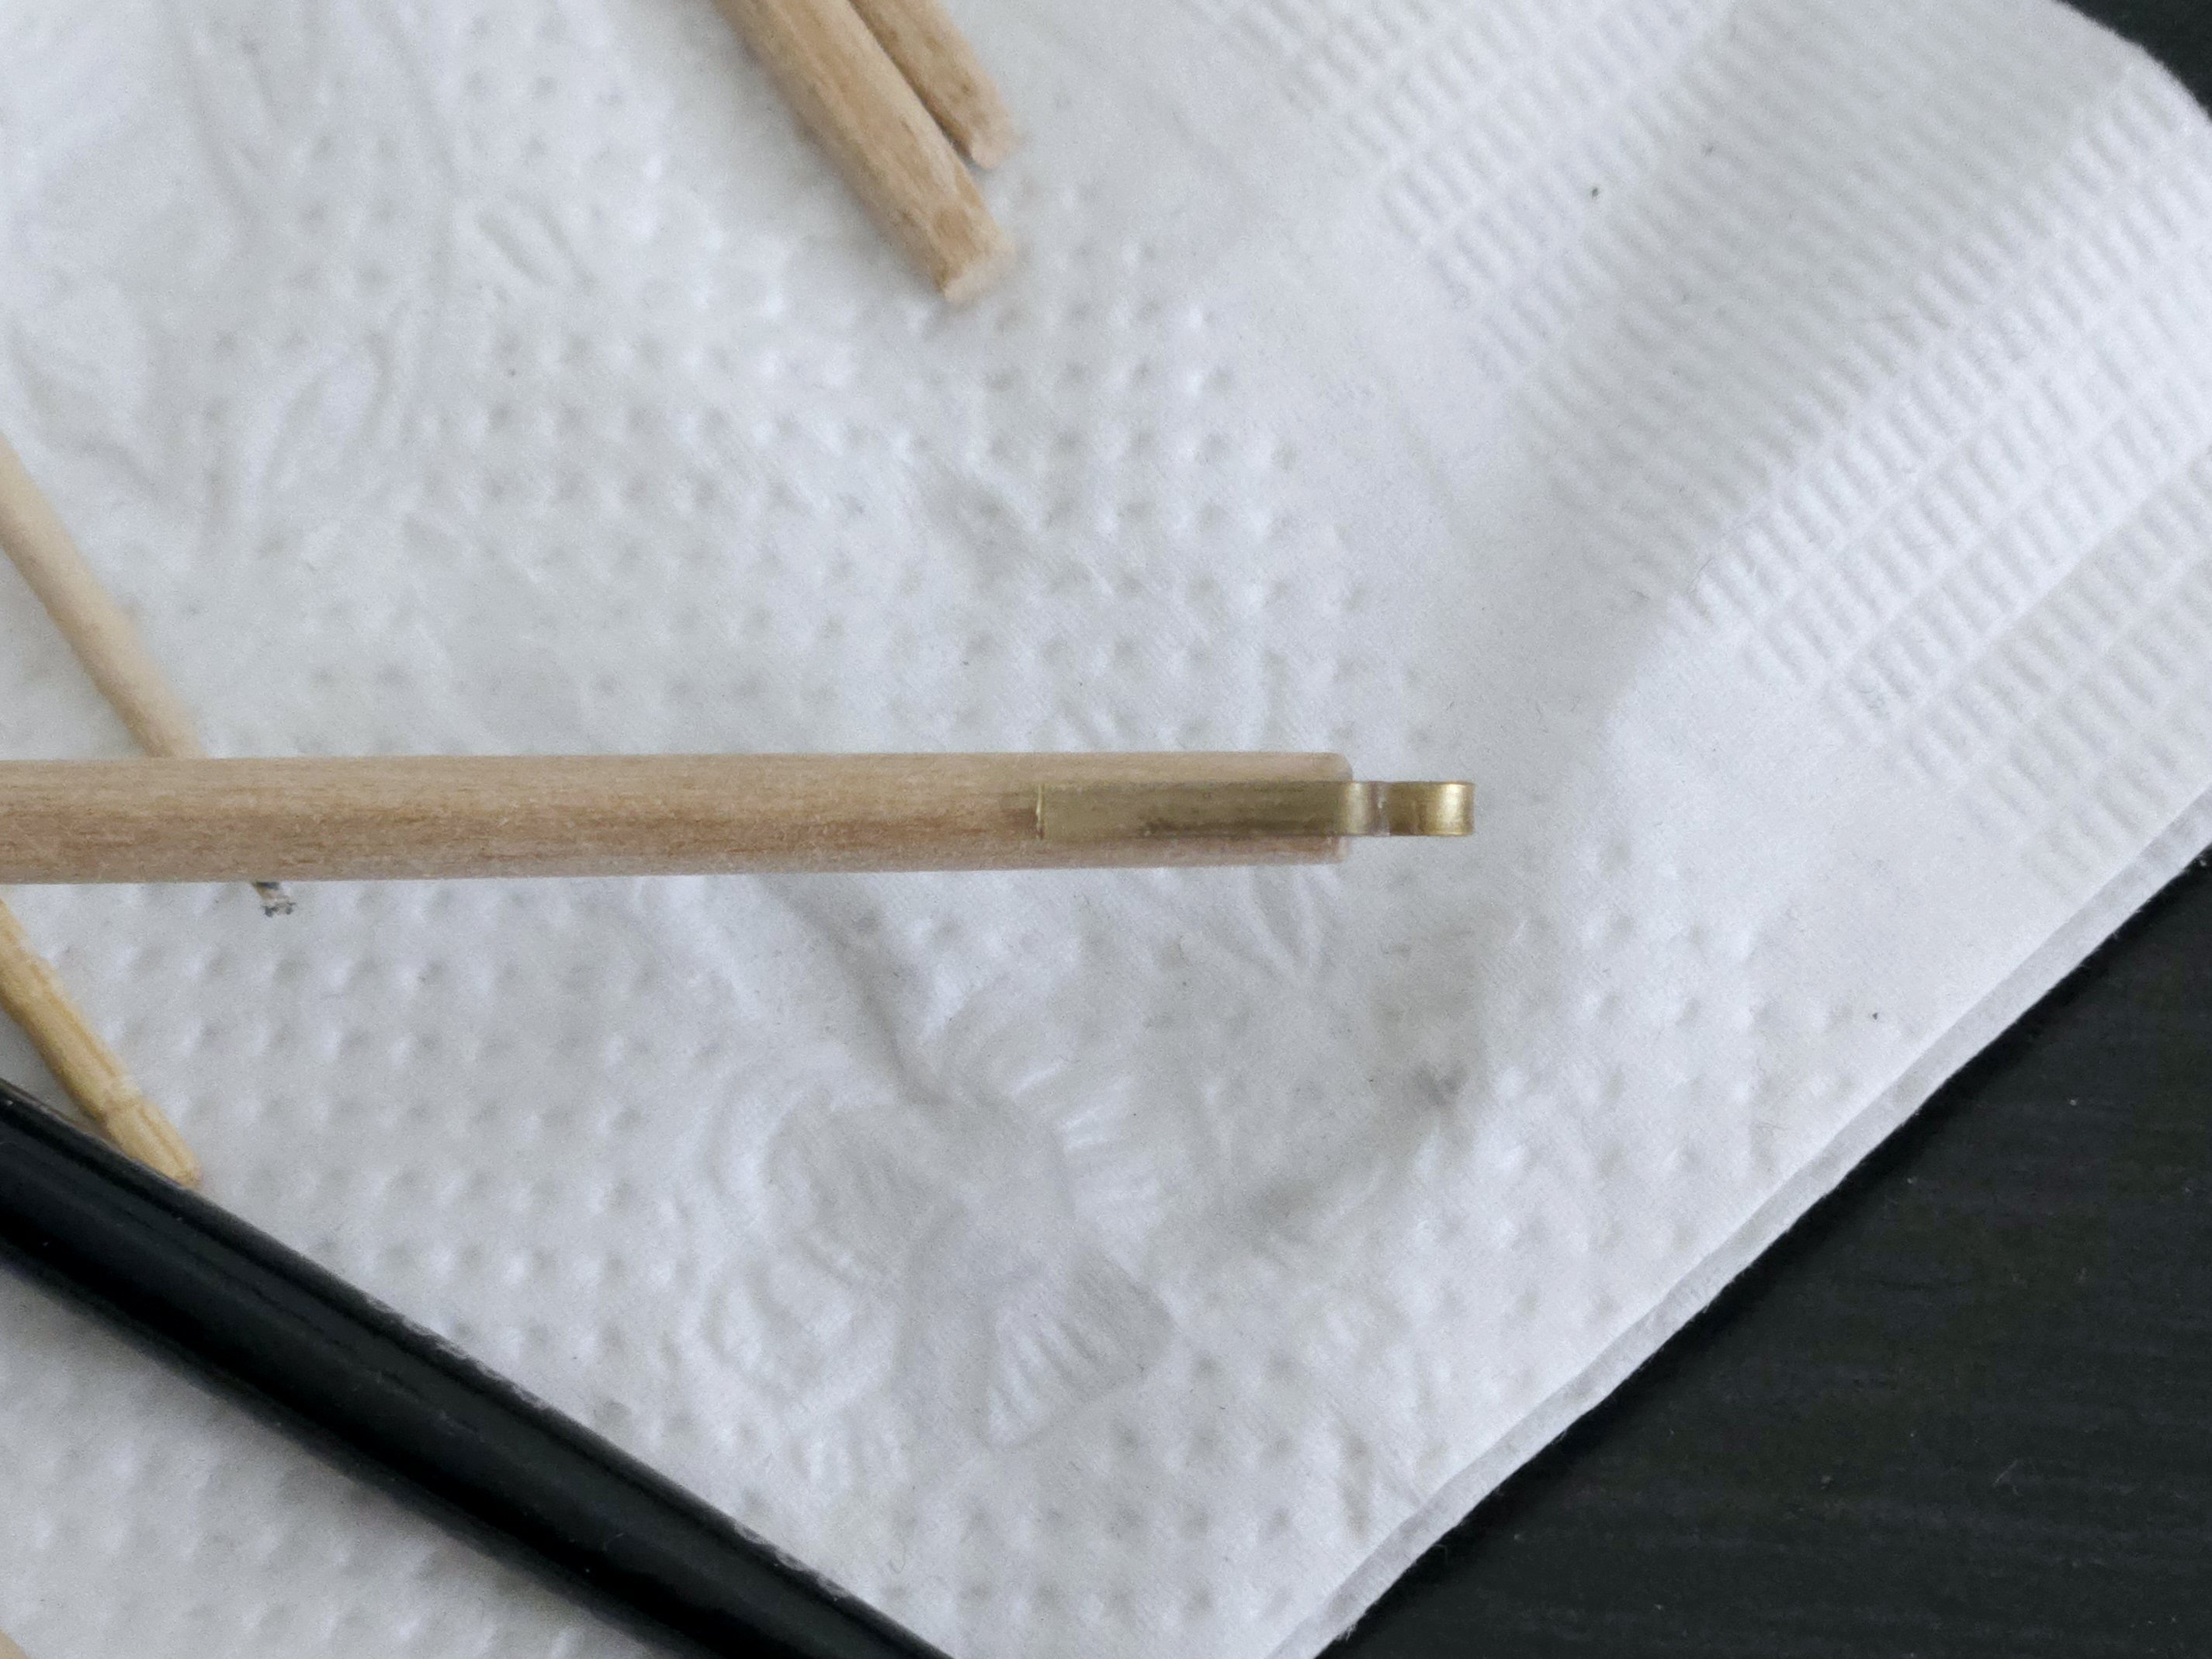
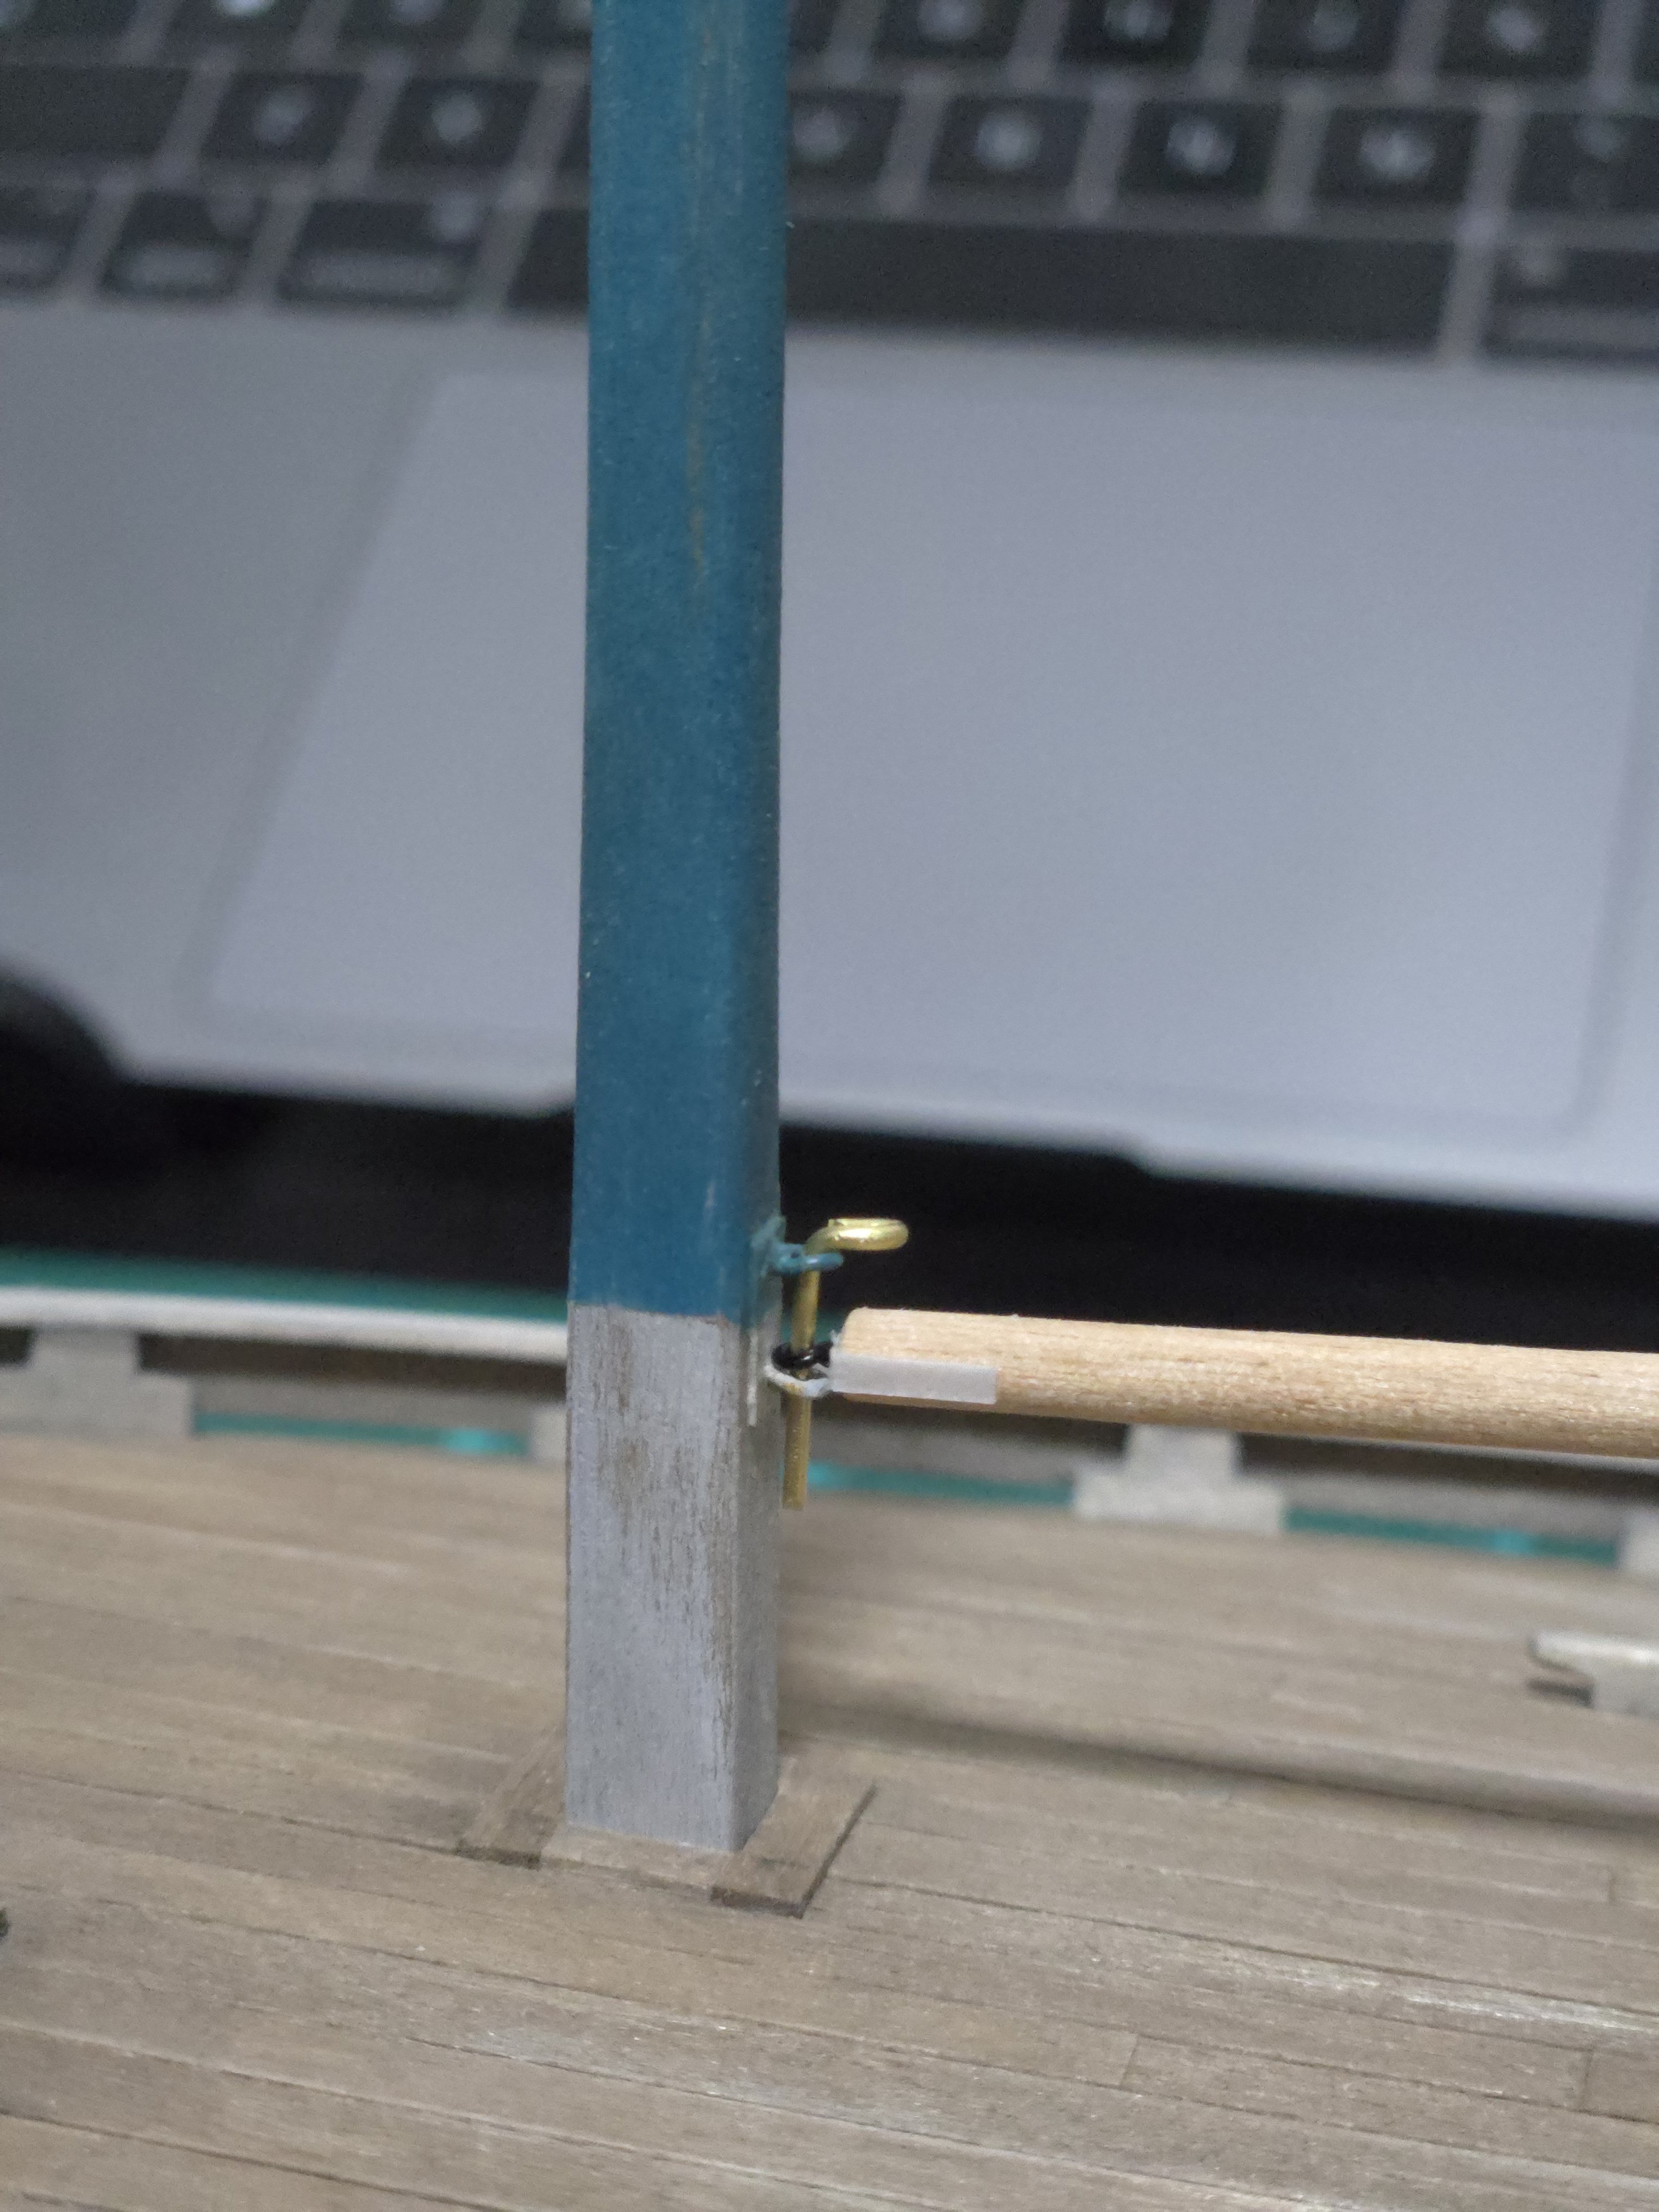
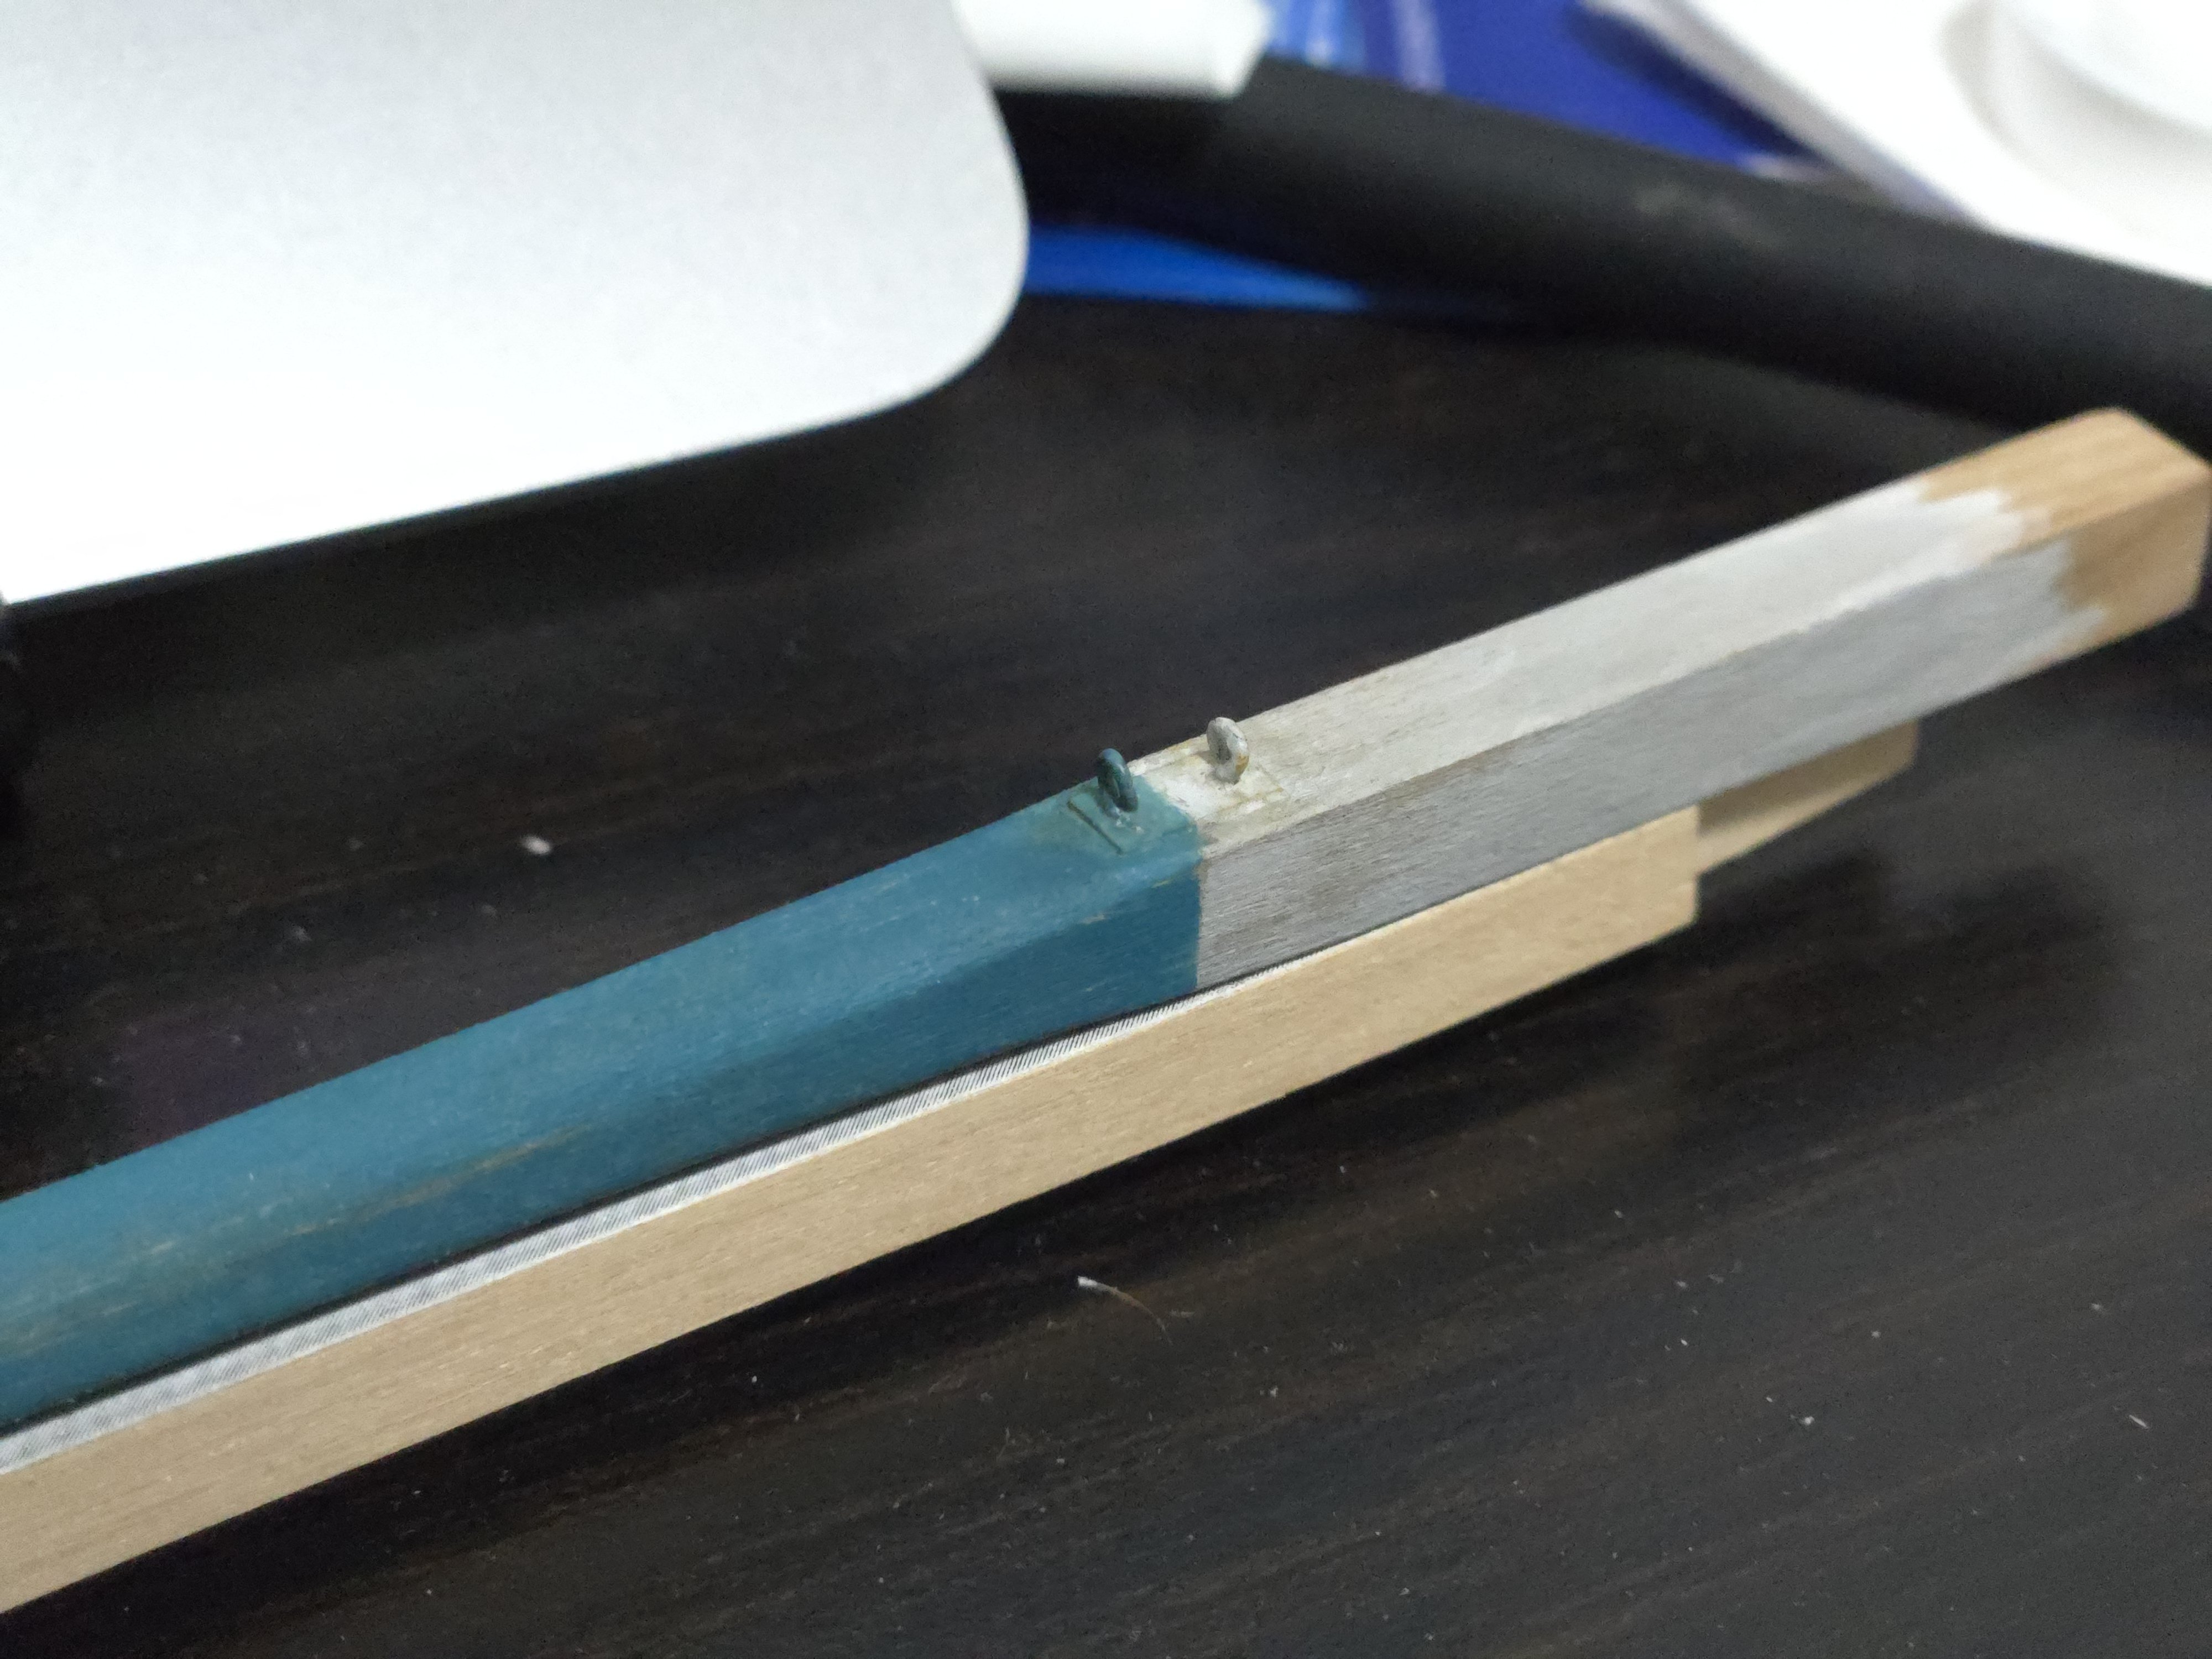
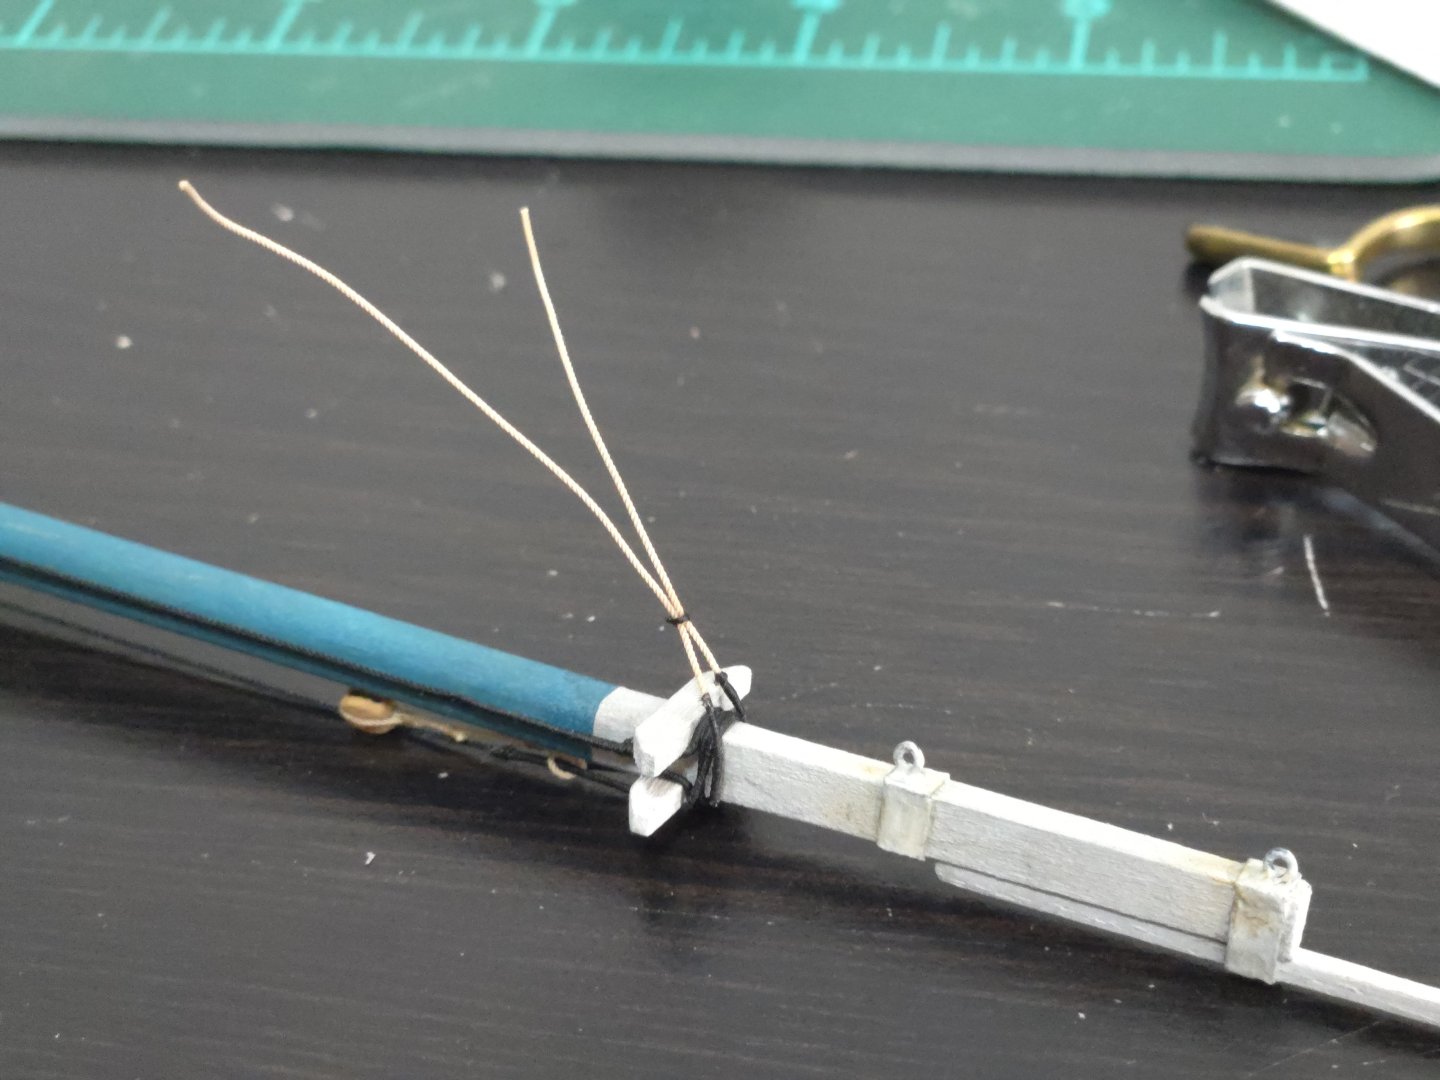
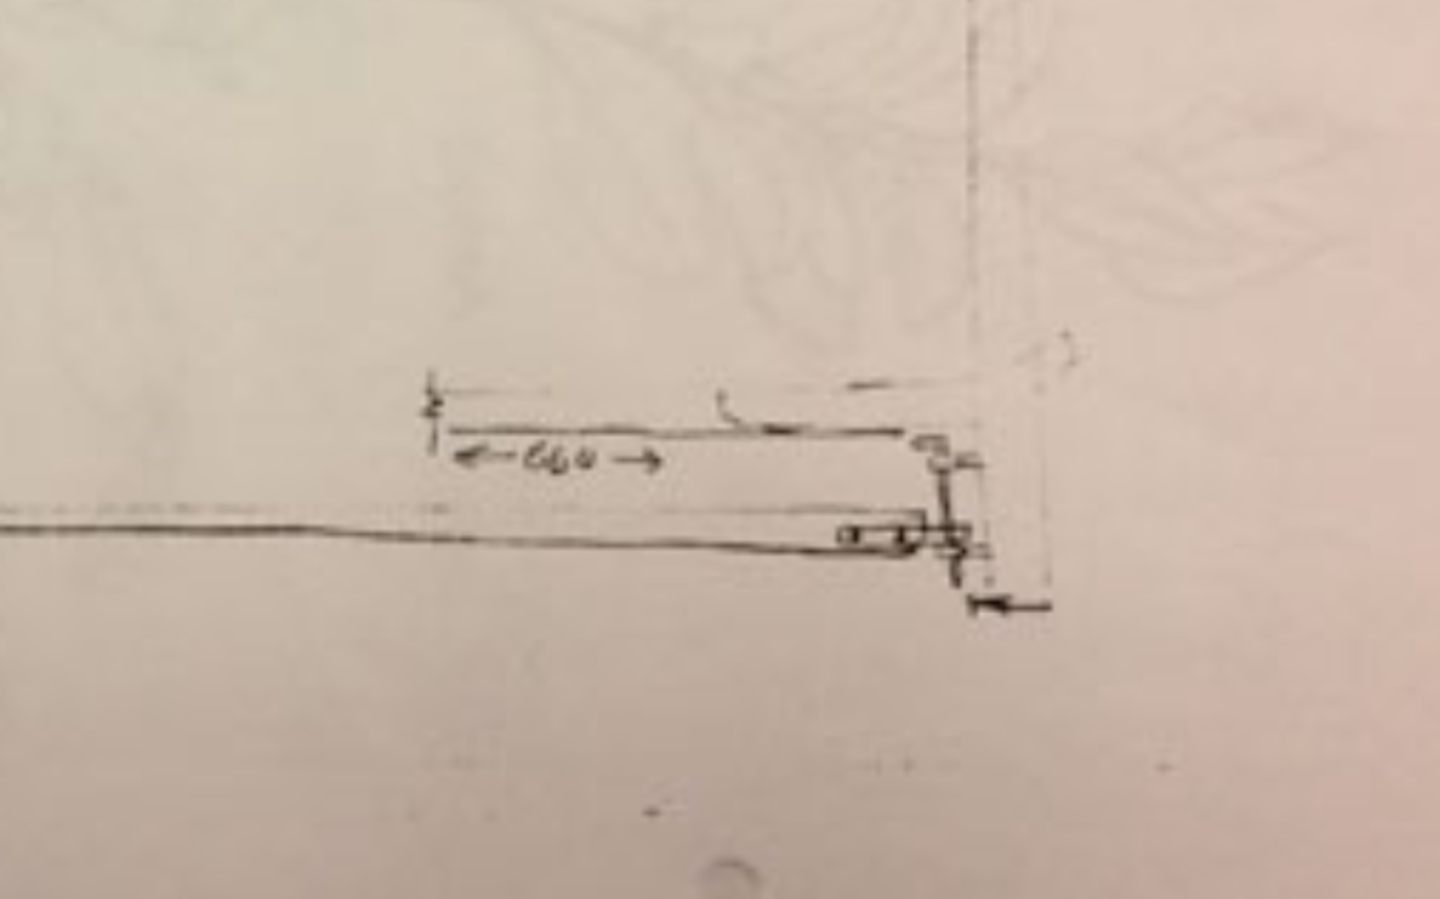
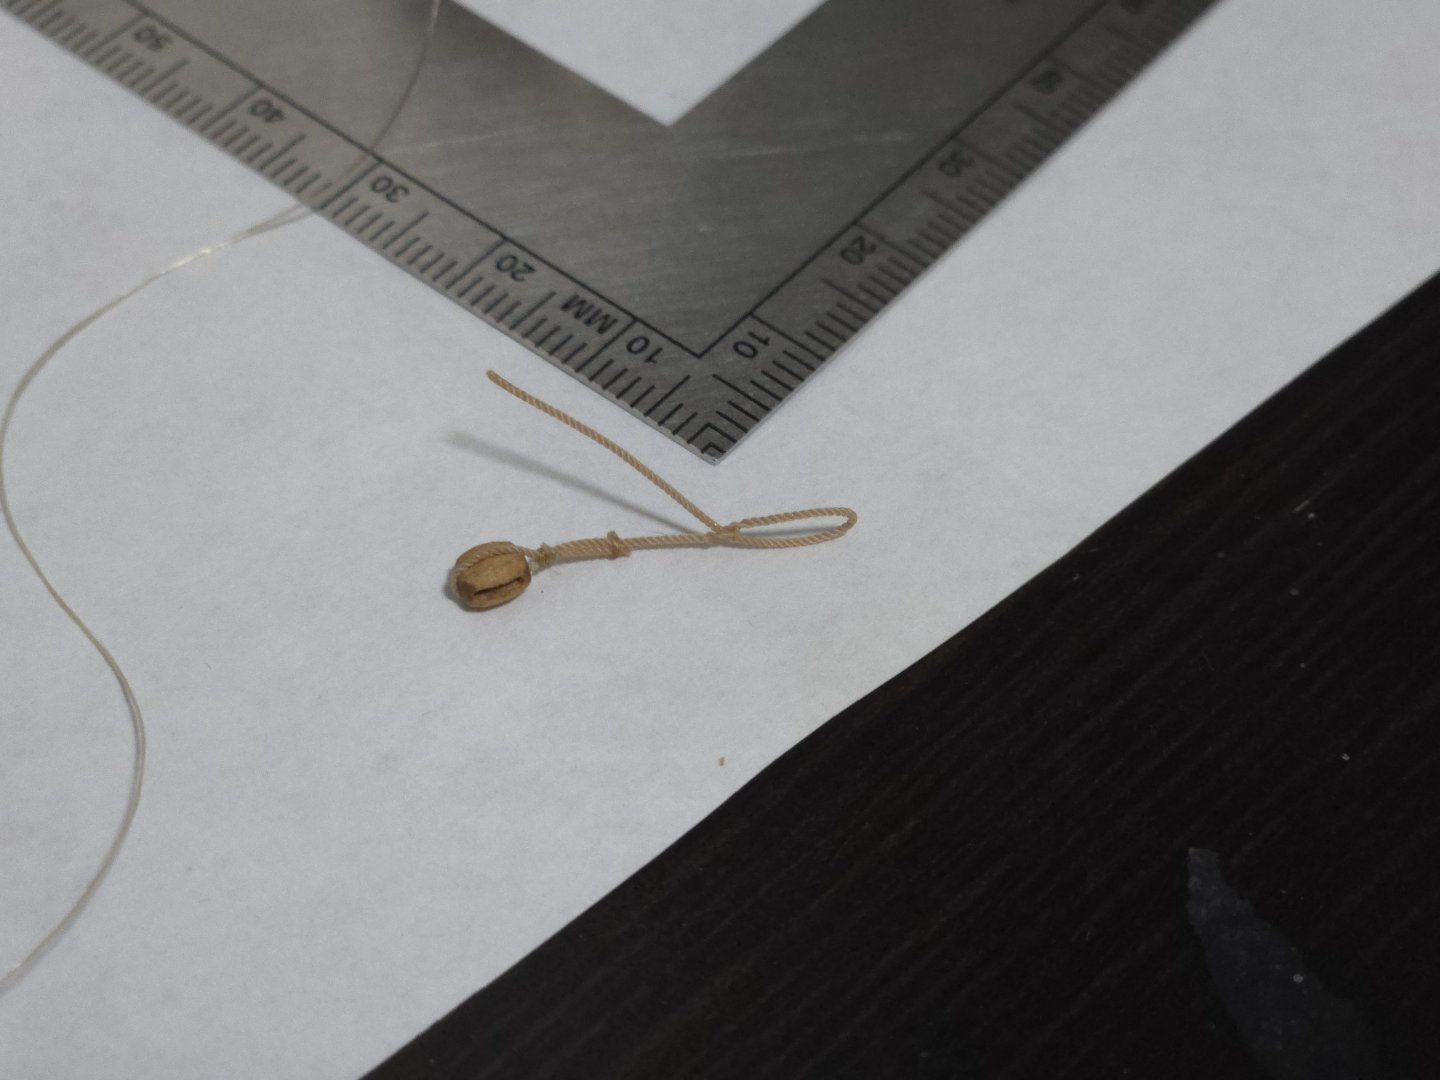
A bit more progress. First, I stropped the block for the topping lift. I forgot photos, but it's the exact same process as for the peak halyard block, just with a smaller 4mm block (as a number of photos showed smaller blocks for the topping lift). Next, the gaff boom and gooseneck. I had puzzled over exactly how to make this for a while, as none of the photos I could find are very clear on this part. About all I could say for sure is that it wasn't like the goosenecks discussed in John Leather’s The Gaff Rig Handbook, or like those shown in build logs for other vessels--notably, there was clearly no band around the mast. But then I realized that one of José A Garnham's sketches included a side view of a gooseneck arrangement. It clearly shows two eyebolts lined up on the mast, with a hinge of sorts attached to the front of the boom, and a bent rod inserted to allow it to pivot. Source: http://lanchaschilotas.com/wp-content/uploads/2018/01/1MG_2946-2L.jpg (Note: that’s the address for the screenshot. However, the page no longer seems to be up. I’ve noticed several images and pages on Garnham’s lancha chilota site seem to have gone down, unfortunately.) I decided to make this arrangement in the same way as I made the eyebolts in the masthead--using paper for the metal strip on the boom and for a metal base for the eyebolts, and then three wire eyebolts linked with a bit of brass rod. Below, the mast eyebolts are shown. The boom portion, meanwhile, required finally making the boom. After looking at a lot of photos, I decided that a boom roughly half the diameter or so of the mast at its widest point seemed reasonable. I made the boom from some of the same alder sheet I'm using for the Bateau de Lanvéoc's frames, cutting a 5/32-inch wide strip, tapering it, and then rounding it off with a mini plane and sandpaper. I did not do a great job of shaping it and it's very slightly curved if you look down its length, but many booms seem to have been bent slightly like that from their weight and use, so I just arranged the gooseneck eyebolt so it would curve slightly upward. Finally, the metal "key" going through the gooseneck eyebolts was twisted from some brass rod. With that, I was ready for a test fitting. (Of course, many of the parts still need to be painted.) As can be seen, I probably could have stood to position the mast eyebolts slightly closer together--I wanted to leave room for a bit of motion, but this is probably a bit excessive. I'll need to consider whether I want to remove and replace one of the mast eyebolts, or something else, or to just leave it as it is. The gooseneck is functional, though, and I think looks a bit better at a normal distance. As can be seen below, I used simple thread as a rough topping lift and sheet to keep the boom from flopping around too much in test fitting. Besides the gooseneck, I'm also wondering whether the boom should be tapered slightly more. In any case, I'm enjoying this build quite a bit, and am definitely learning a lot from it!


- 312 replies
-
- 11
-
-
- Chile
- Latin America
- (and 6 more)
-
Good luck with your build! Thankfully it's pretty easy to repair most broken parts with glue (especially if the part will be painted), or even to replace parts by tracing and cutting out of scrap wood or a sheet of basswood (which is readily available in craft shops in 1/32‐, 1/16‐, and 3/32-inch thick sheets at a very reasonable price). You've chosen a tricky first model, given that it's single-planked and an open boat, so any errors in the planking will show up on the interior as well. To include photos, you have to click "add files" and add the photos you want. Then you click your cursor where in your text you want the image, and scroll down to click "insert" and it should appear.
-
Nice progress, and great job on the oars, they look excellent! It looks like you've done a lot of good work fairing the hull more than before. That said, I think you may run into trouble around the inner support pieces that the thwarts will rest on. It looks like the support is sticking out a ways beyond some of the frames, which will make planking there difficult unless the instructions say it's supposed to be that way for some reason. Sanding it down even with the frames now will probably save you a big headache later. Also, how high up the bow do the planks extend? If they go too high up, it will be very hard to fit other planks against the stem.
-
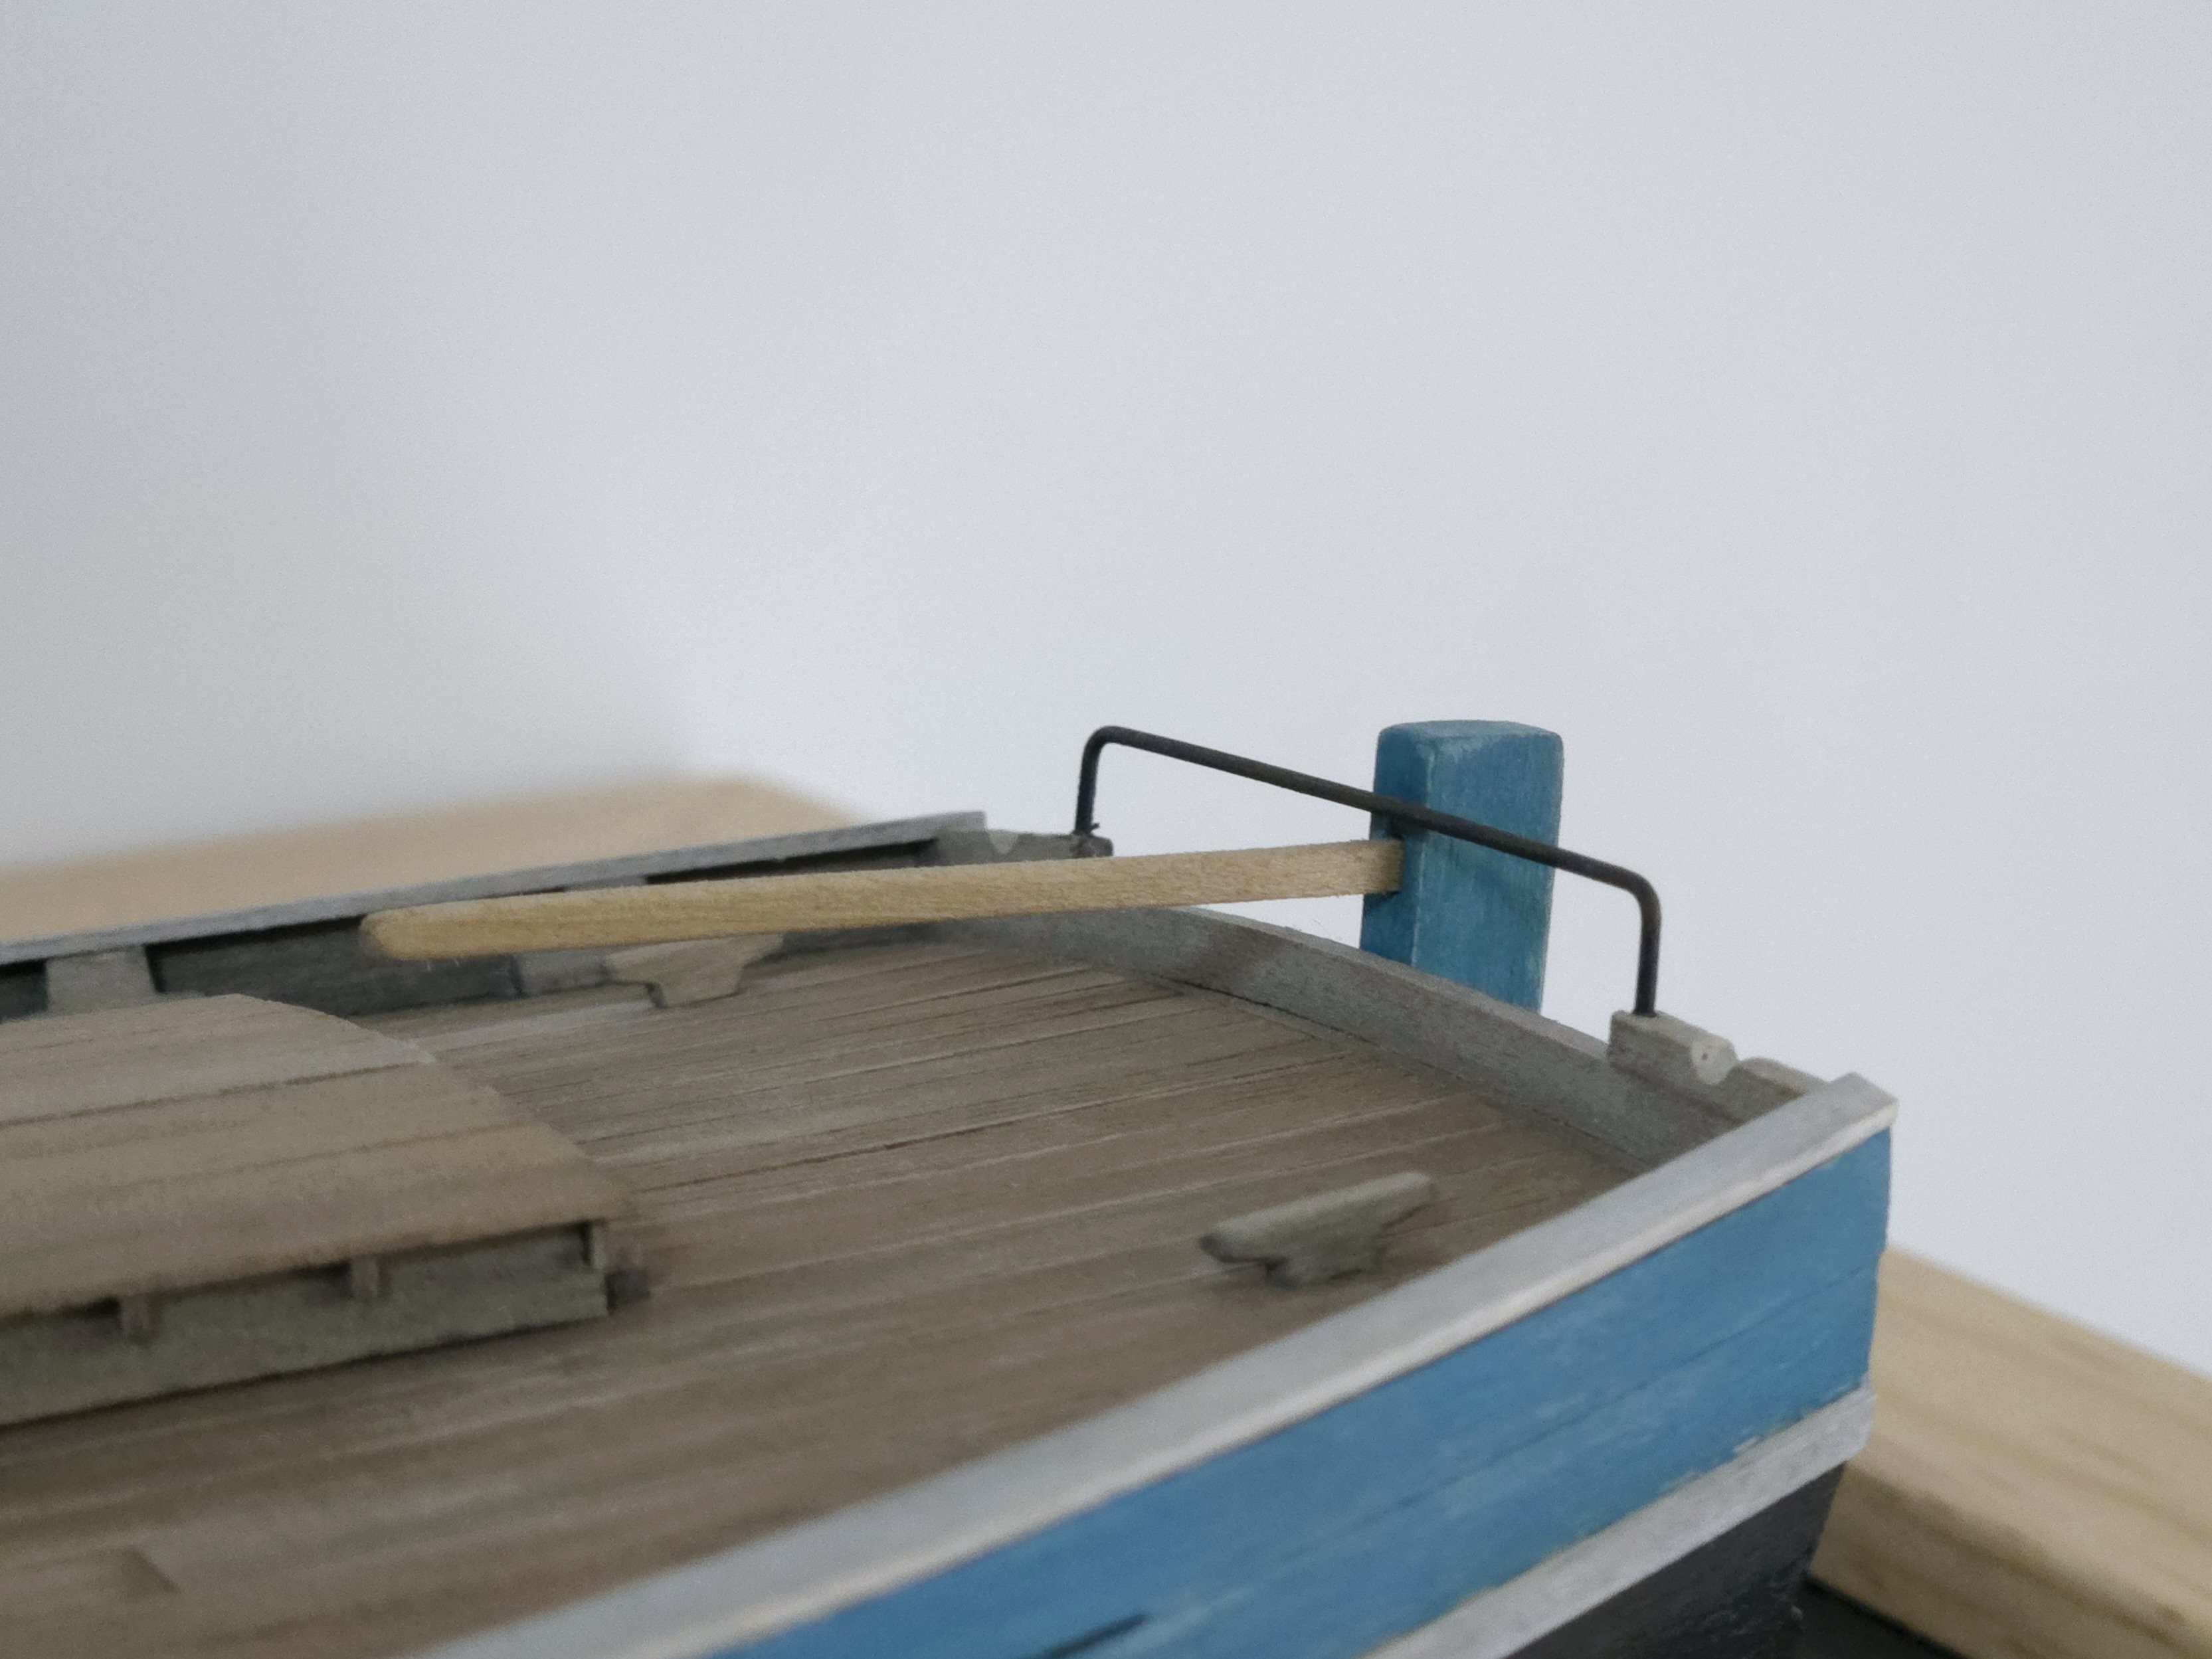
After having primed the metal parts, I was able to paint them dark grey with acrylic paint and to add a dash of dry-brushed rust coloration and some pencil marks to highlight certain areas, although the varnish seems to have darkened things slightly. I added the horse rail, making sure to leave room for the tiller. Unfortunately the wood split on the right side while I was test fitting, but I was able to glue it back into place and re-drill the hole (this time using a slightly bigger bit so that the horse wouldn't get stuck). It was then time to try stropping a block with a hook--in this case, the peak halyard block, as I already had a double block stained and ready. Once again, I followed Chuck Passaro's stropping instructions, which I'm finding to be very clear and relatively easy to do, with the modification of doing a few half hitches instead of just wrapping the seizing. I also had some difficulty getting the super glue (which you mostly wipe off immediately) right, as it was very easy to either wipe off too much and have nothing stick, or to not wipe off enough and end up with a shiny spot (which I'll try to take down with a bit of matte varnish). The false splice turned out pretty neat. I'm using .45mm rope from Ropes of Scale for the blocks, and 140-size fly tying thread for the seizings. Sharp-eyed viewers may note that I accidentally used the wrong hook for this--I should have used one with a perpendicular eye instead of twisting the eye of the stropping 90 degrees. Oh well, I think it's hard to notice unless specifically looked for. Now that I finally have the necessary hooks, I'm finding block stropping to be pretty fun. I know this is all pretty basic information to be documenting here, but it's new for me. I'm quickly reaching the point, though, where I'll need to do a bit more woodworking to make the gaff and boom.


- 312 replies
-
- 8
-
-
-
- Chile
- Latin America
- (and 6 more)
-
Welcome! Having built the dory, and having the lobster smack on my shelf, the model shipways set is a good introduction that will set you up well for more complex kits or for scratchbuilding, if it interests you. If you're interested in fishing and workboats, there are a number of vessel types from Florida history that would make great models, although they'd have to be built from scratch.
-
Thanks Paul! Unfortunately I don't have annealed steel wire, the 24 gauge wire I have has a black plastic coating. I need to pick up some annealed wire soon, it would be a lot stronger and wouldn't require painting. Thanks John! I've now primed the metal parts that I've made so far, after first bending the chainplates into shape. This proved a bit frustrating, as I first tried sticking the hooks and thimbles (the latter of which will go on the ends of the shrouds and forestay) onto a bit of double-sided tape for priming. I didn't realize just how sticky our double-sided tape was, though, and it left a ton of residue. After soaking in alcohol overnight, it still took quite a bit of work to scrape it all off. I ended up instead placing the small parts, like the larger parts, on a loop of 28-gauge wire for priming instead. I also finally added the cleats to the hull, although I still need to add a couple eyebolts with rings and a pair of the blocky double-cleats (not sure if there's an actual term for them) as well to finish up the deck furnishings.


- 312 replies
-
- 10
-
-
- Chile
- Latin America
- (and 6 more)
-
Nice job on the hull, the color scheme looks great! The metal cleats are unfortunate. There are lots of better wooden ones for sale, thankfully, and they aren't hard to make by hand either.
- 34 replies
-
- 2
-
-
- muscongus bay lobster smack
- Model Shipways
- (and 1 more)
-
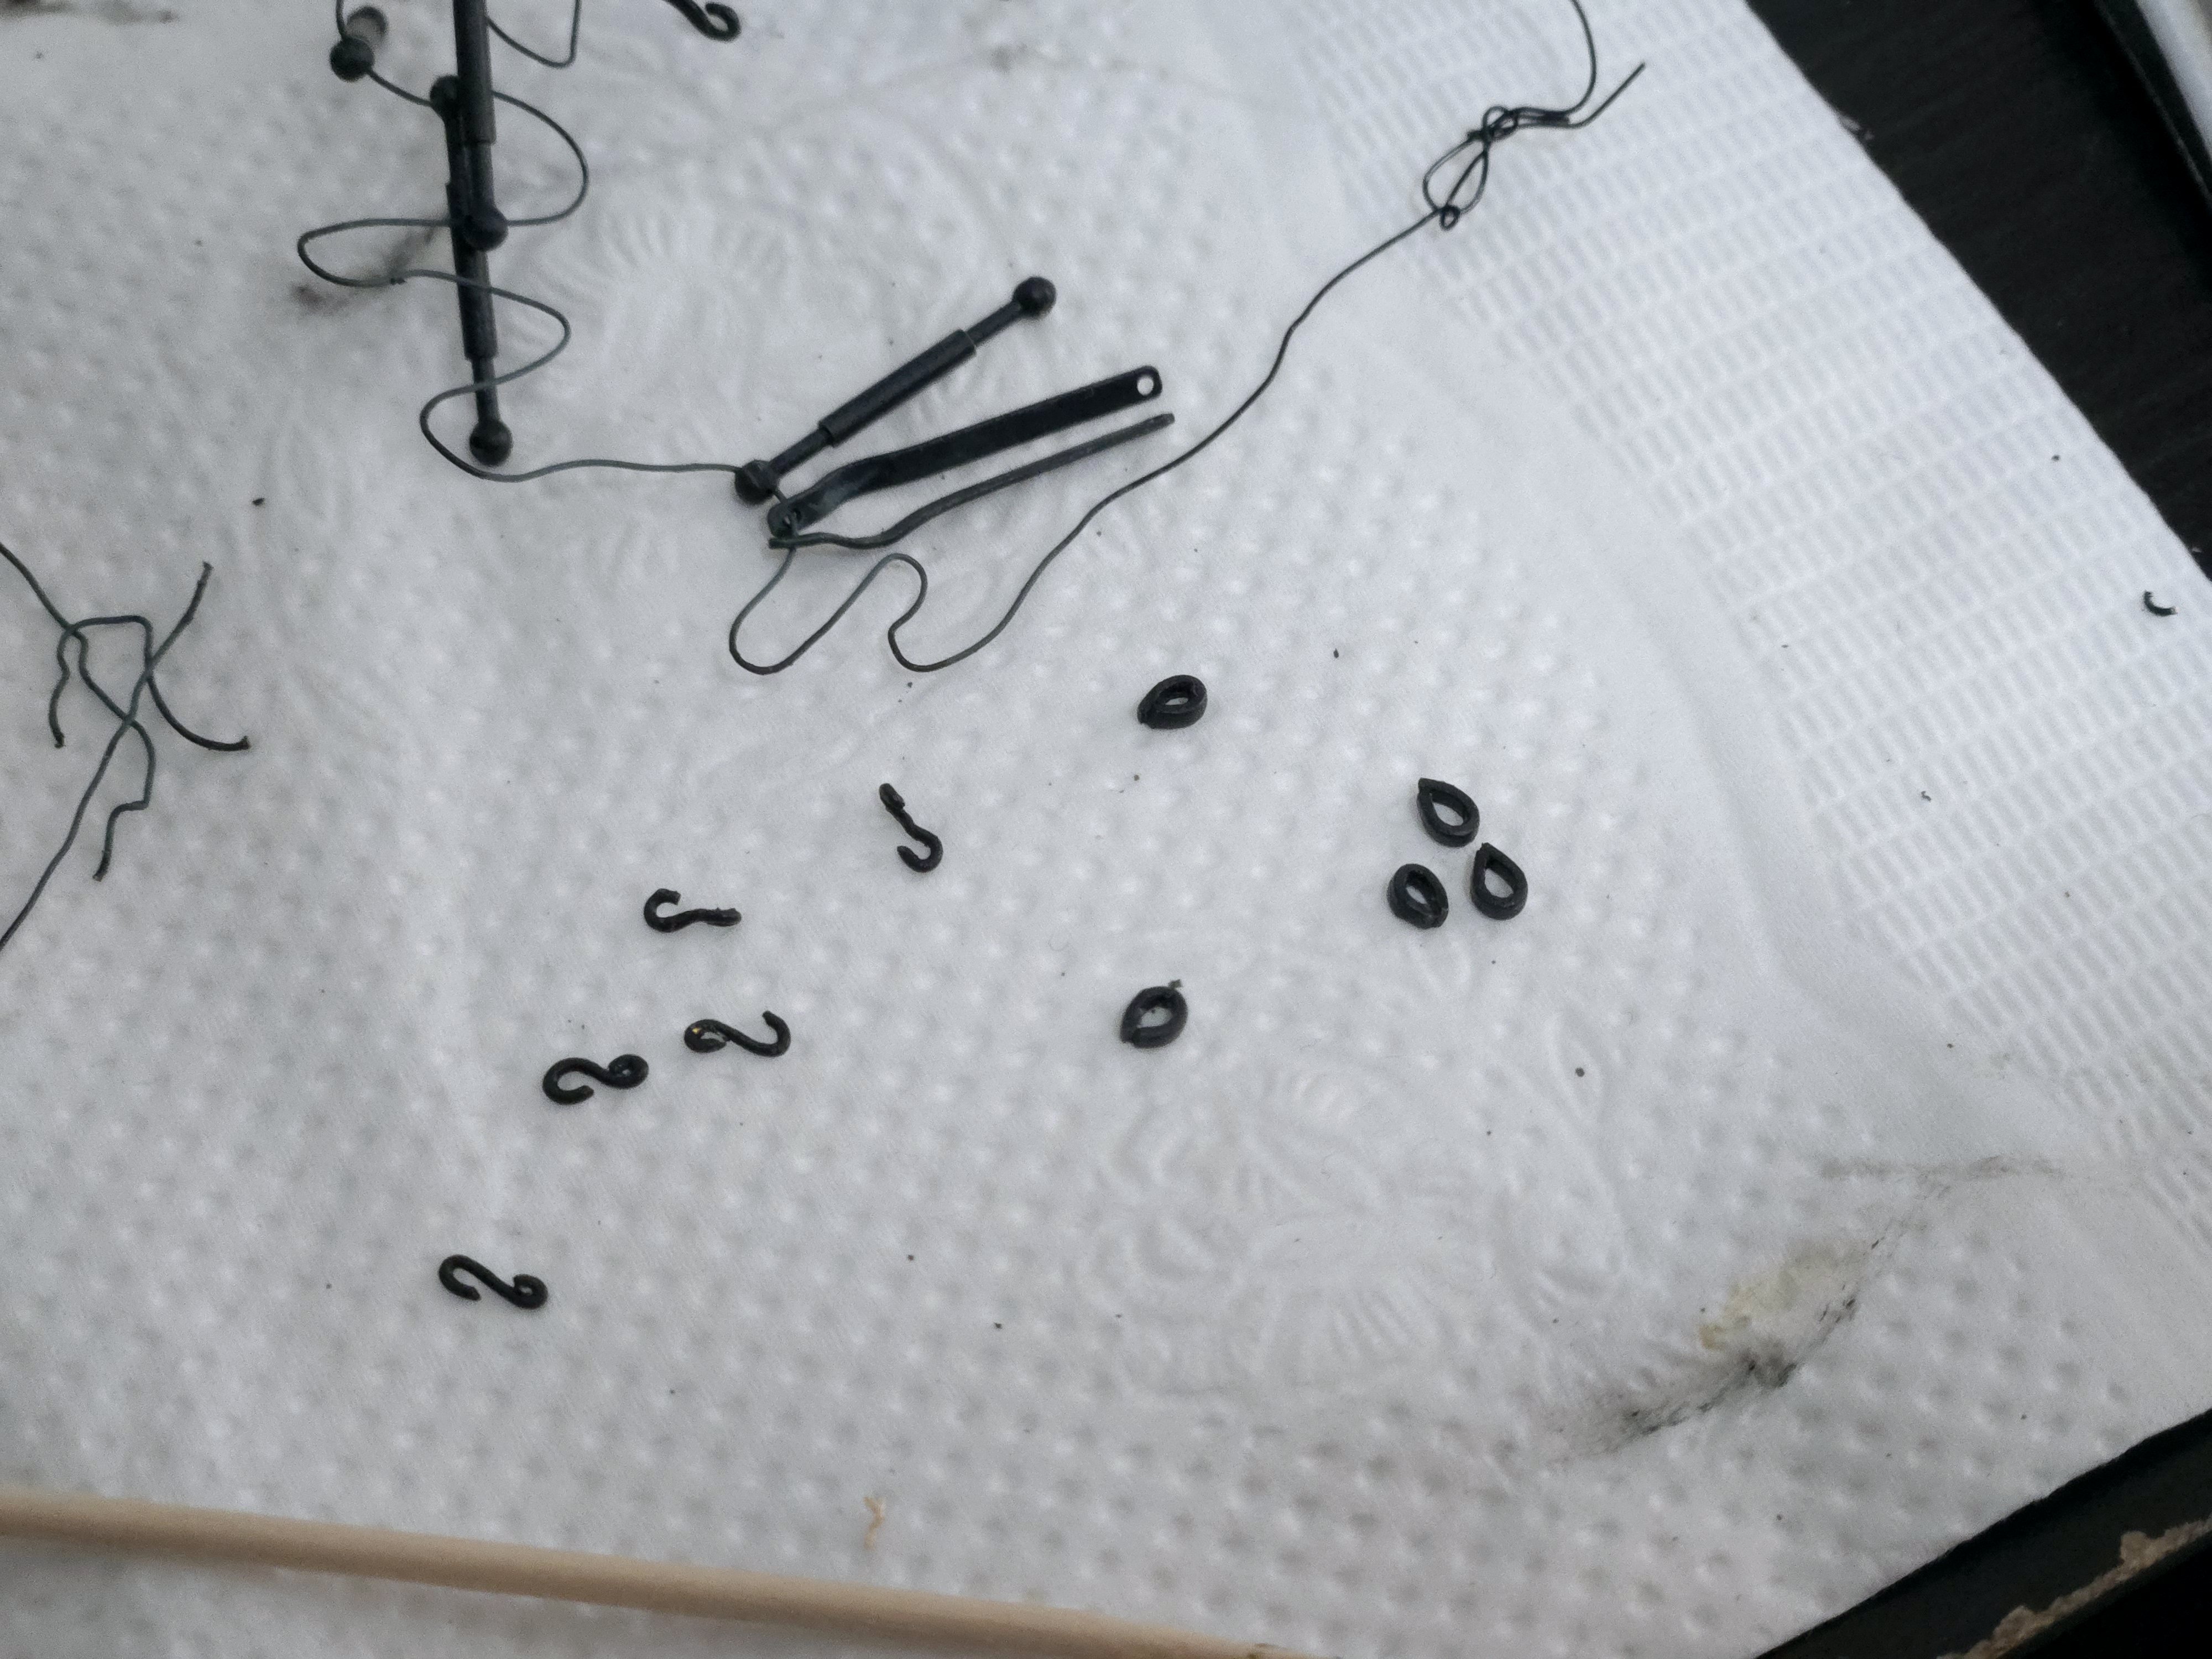
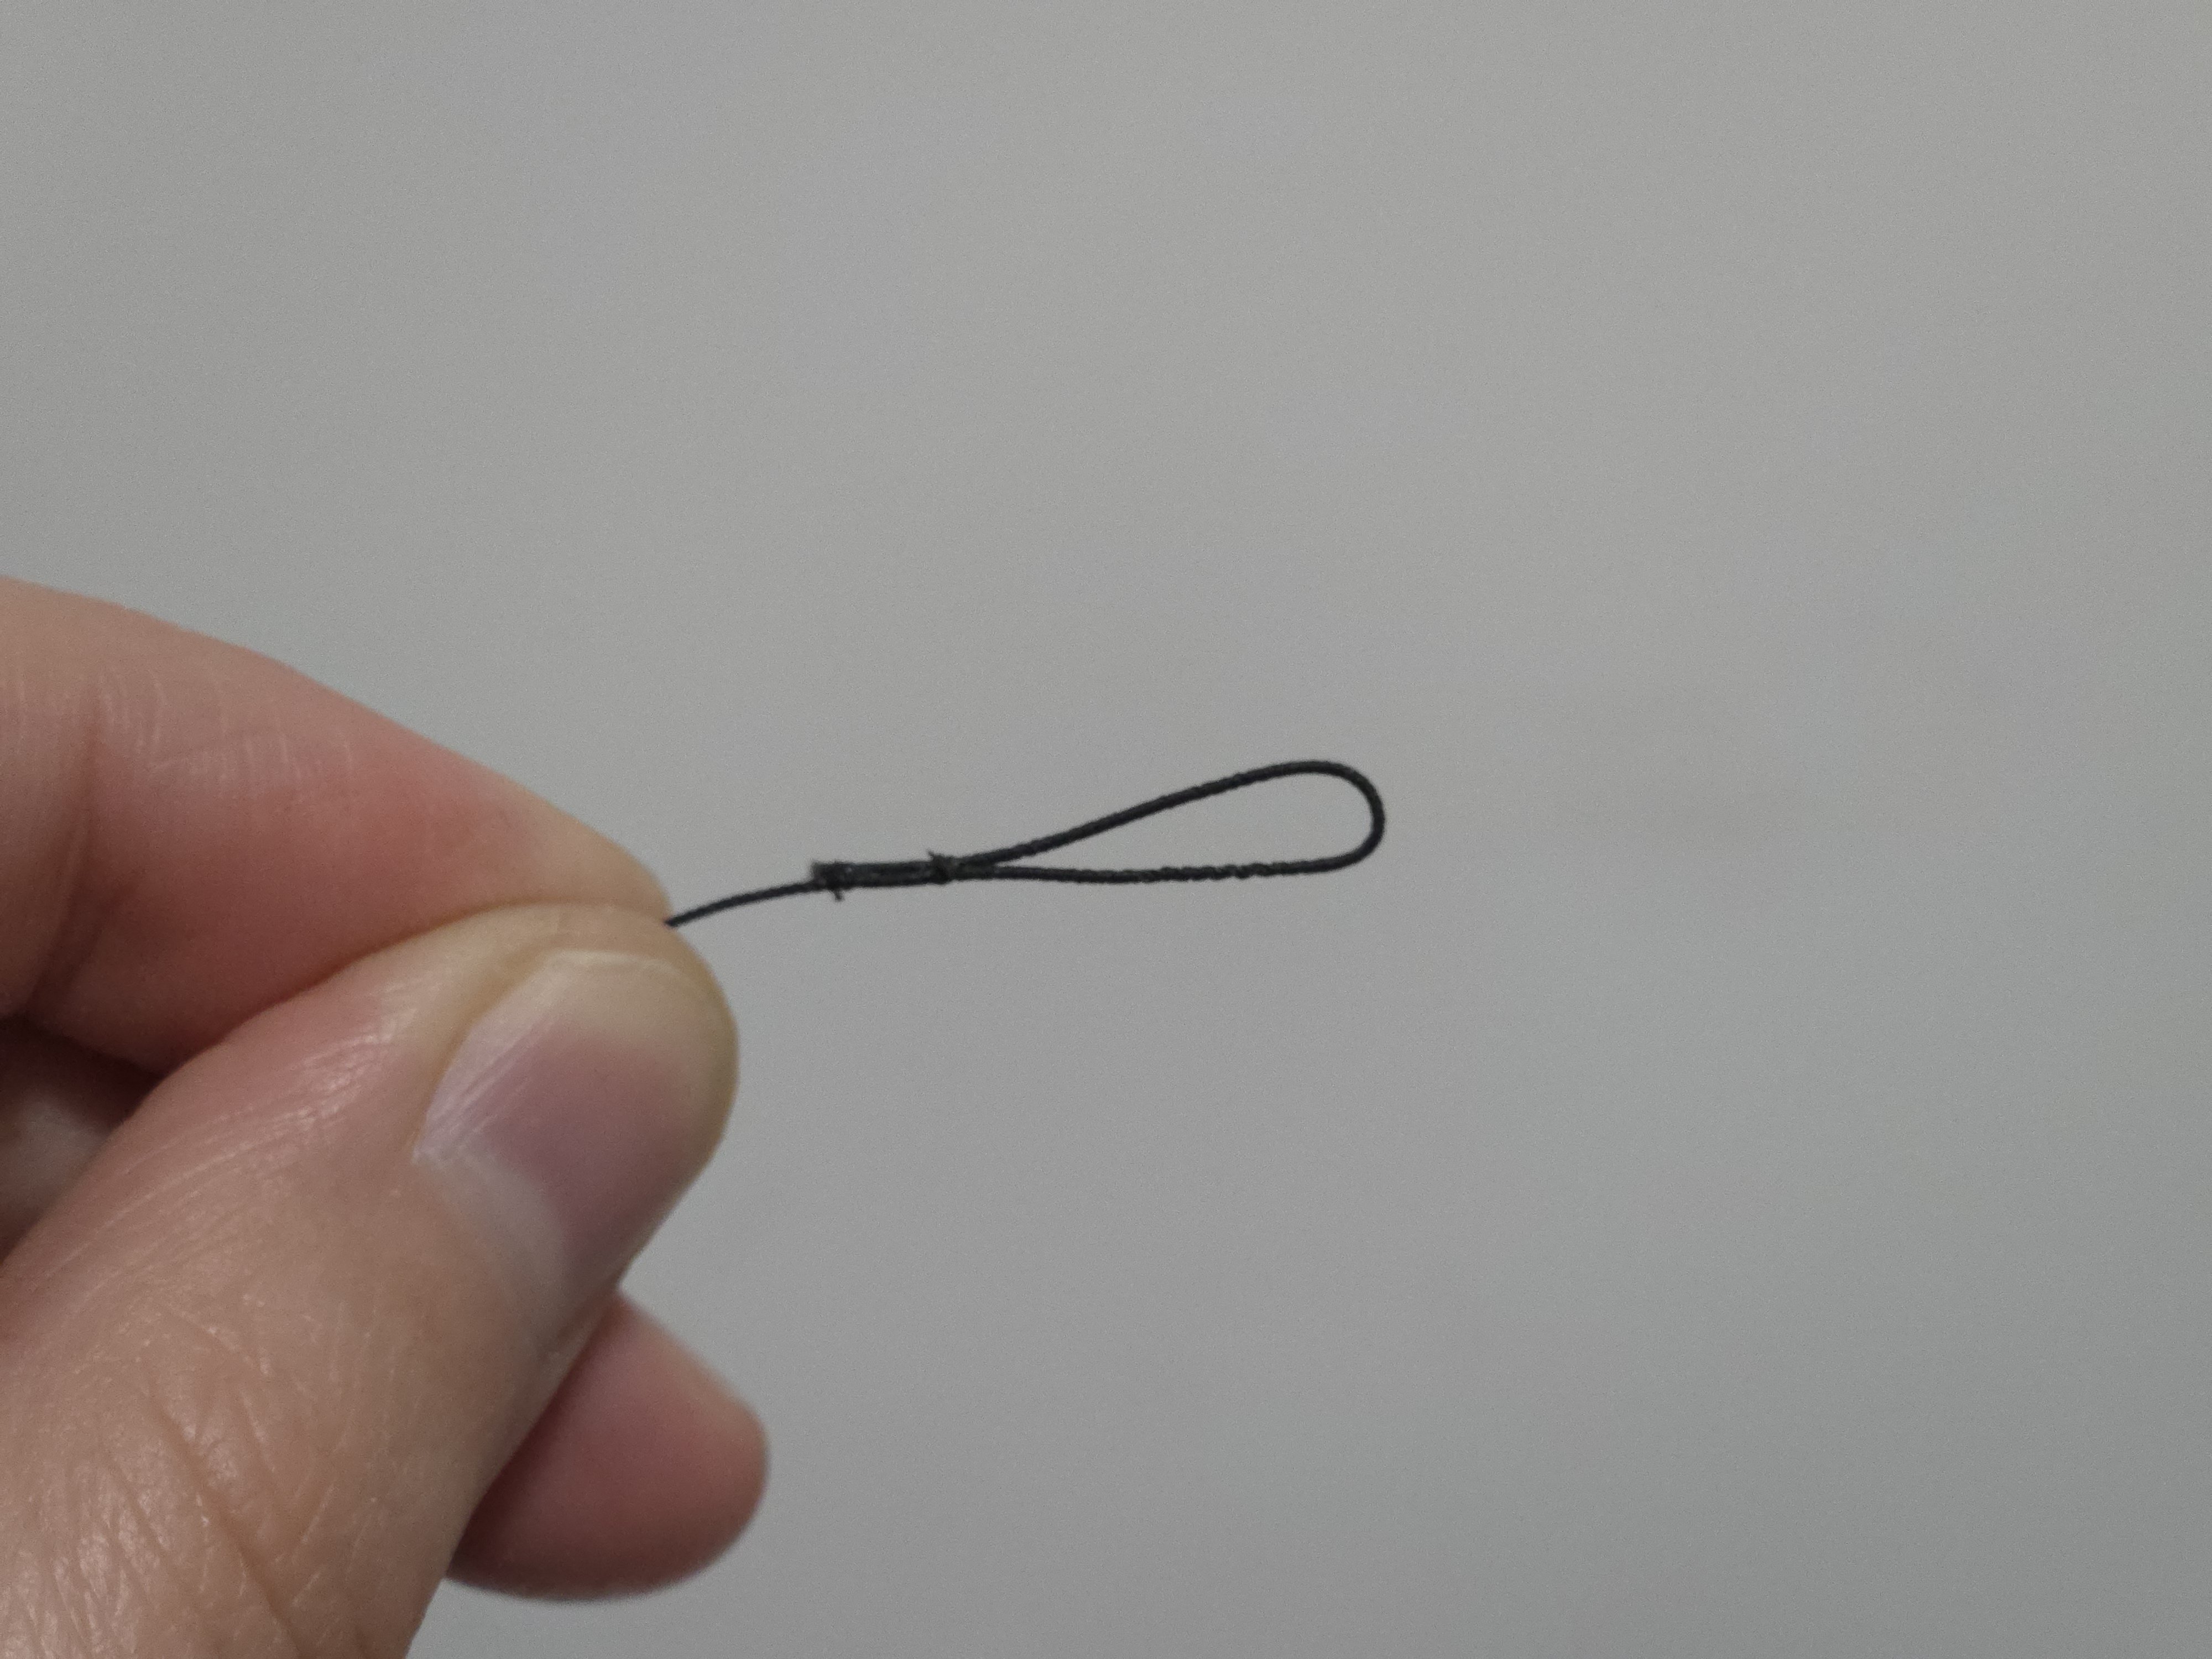
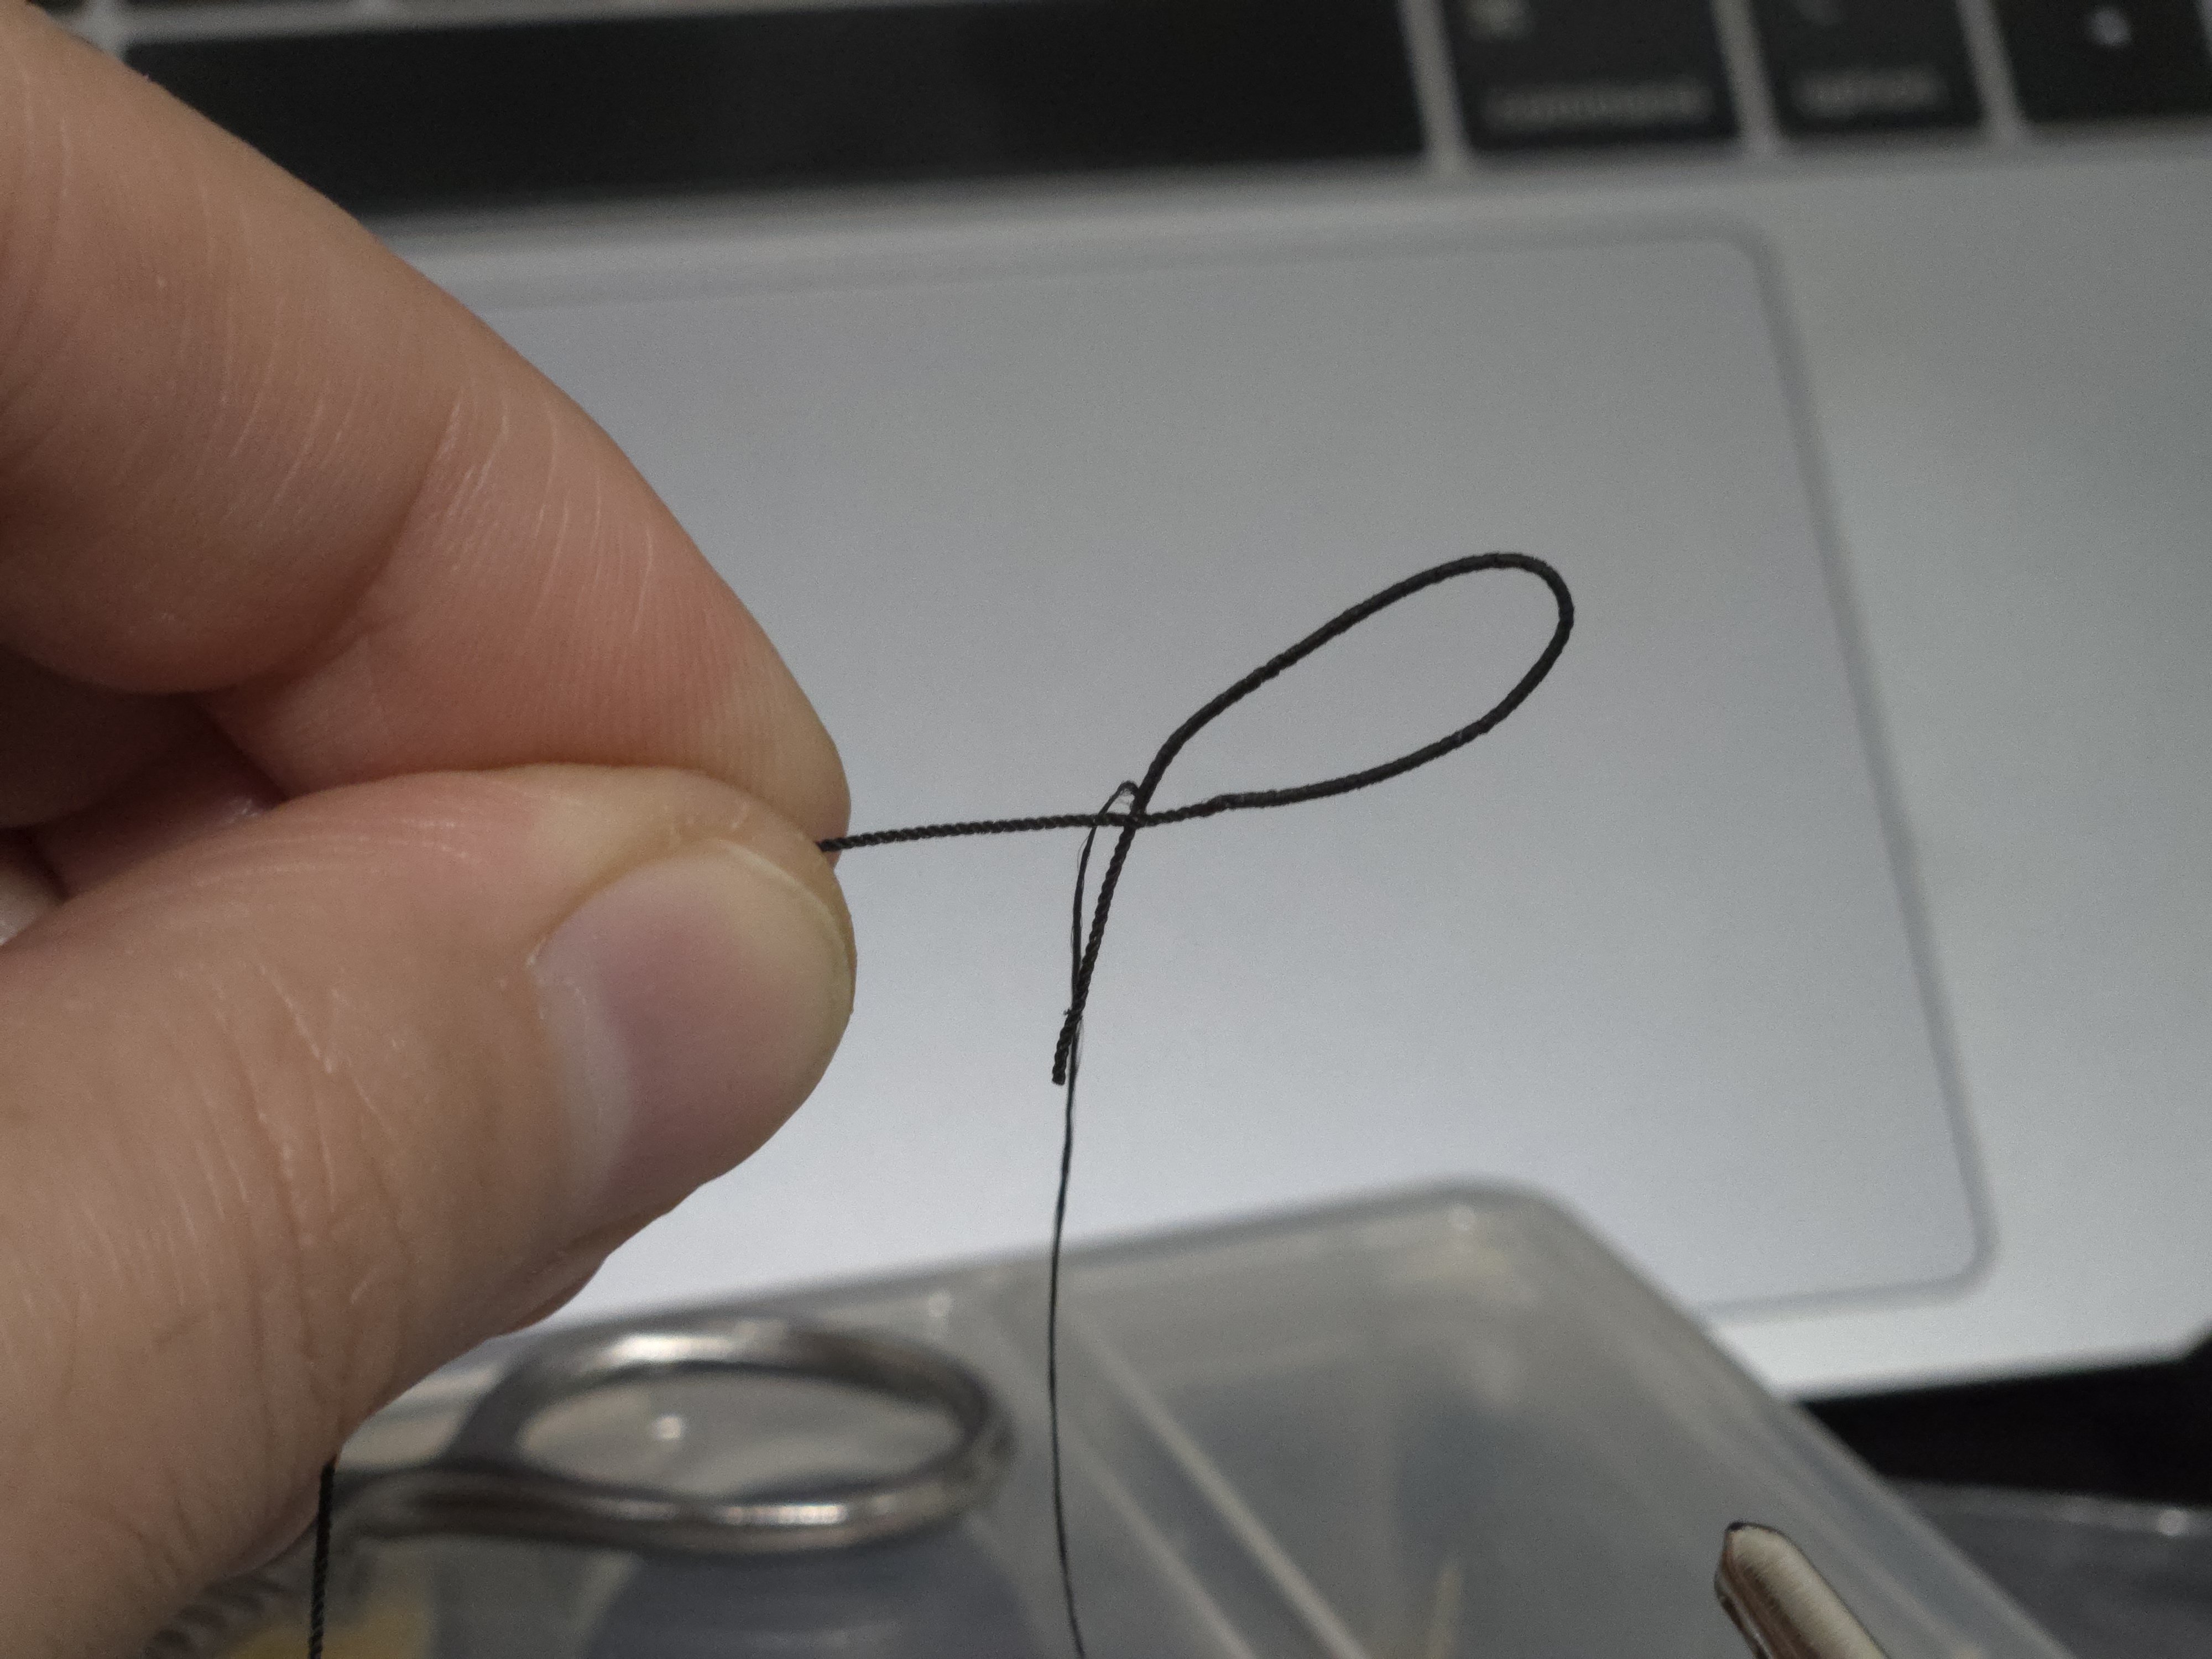
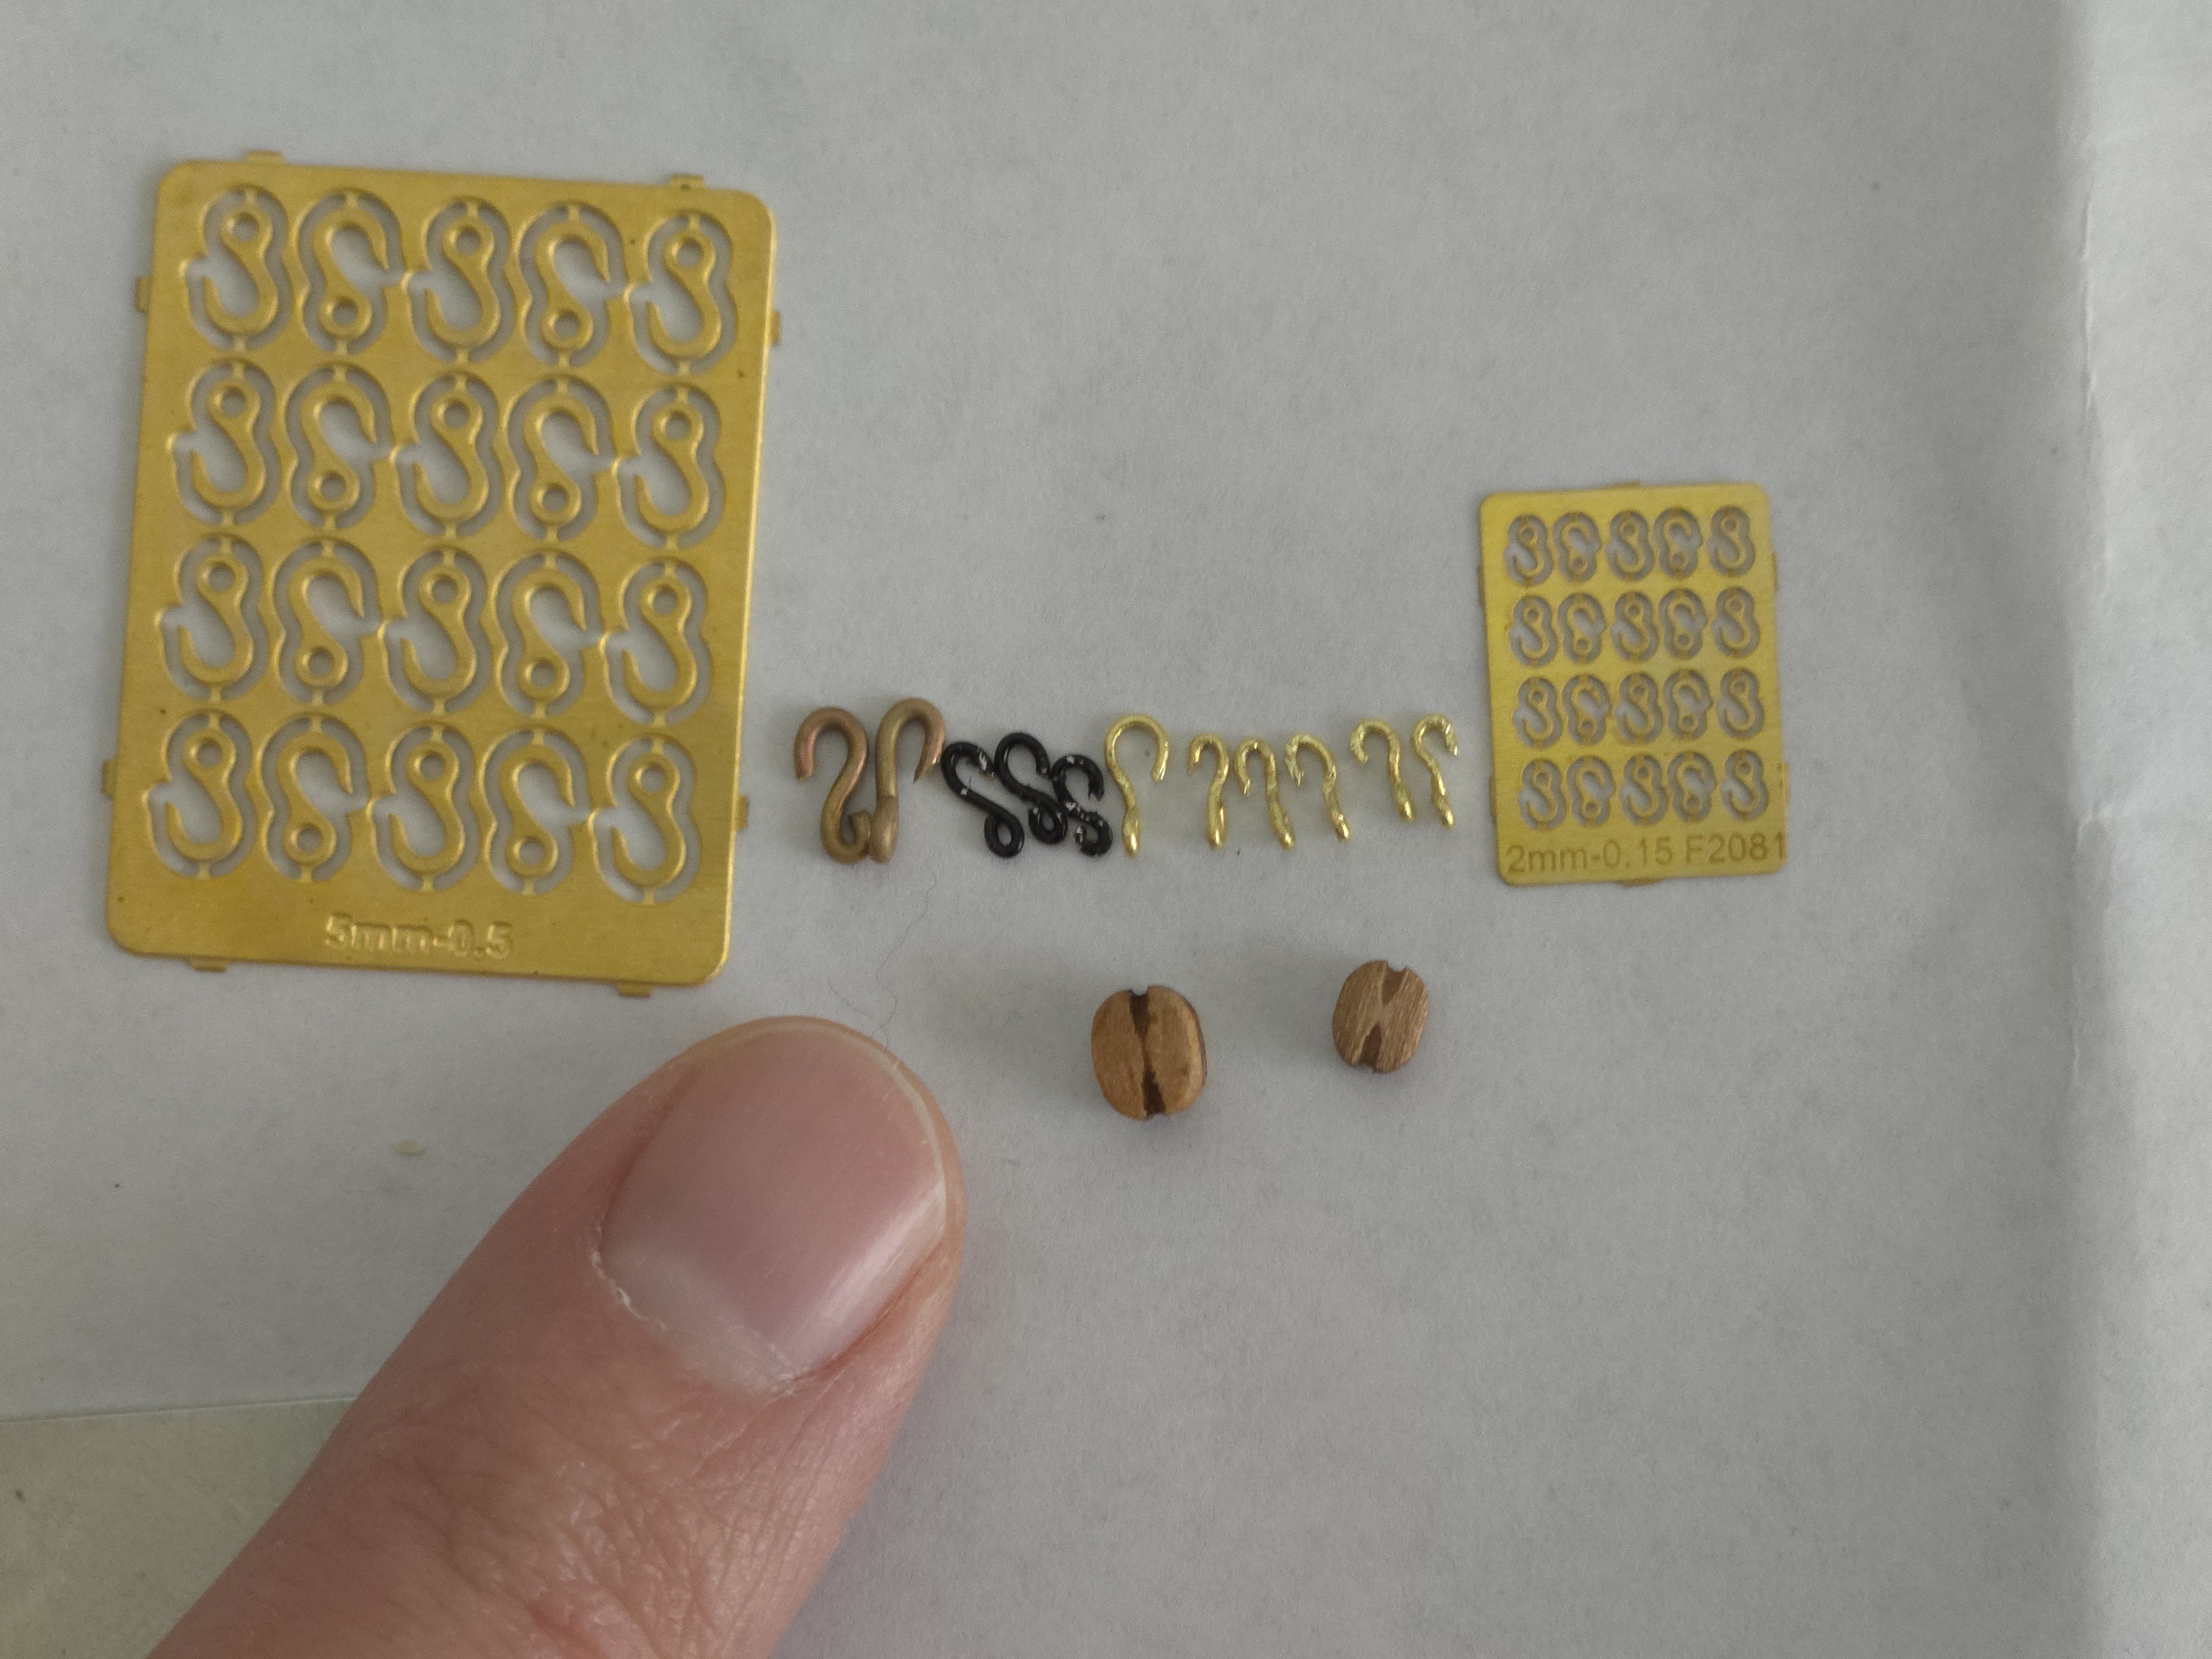
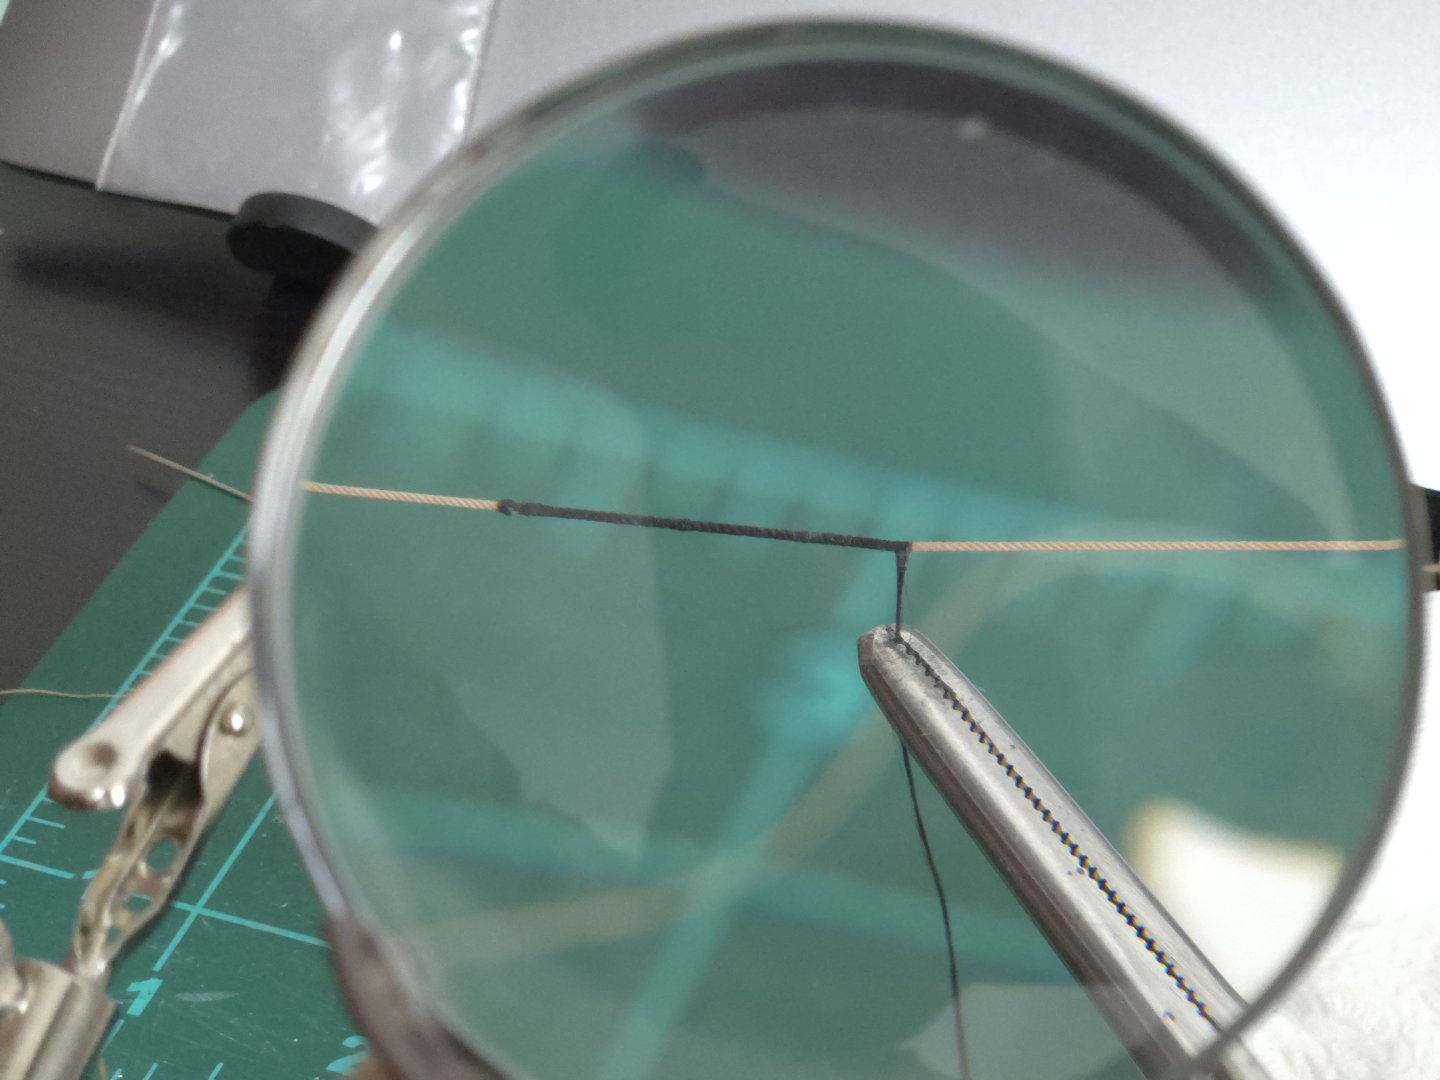
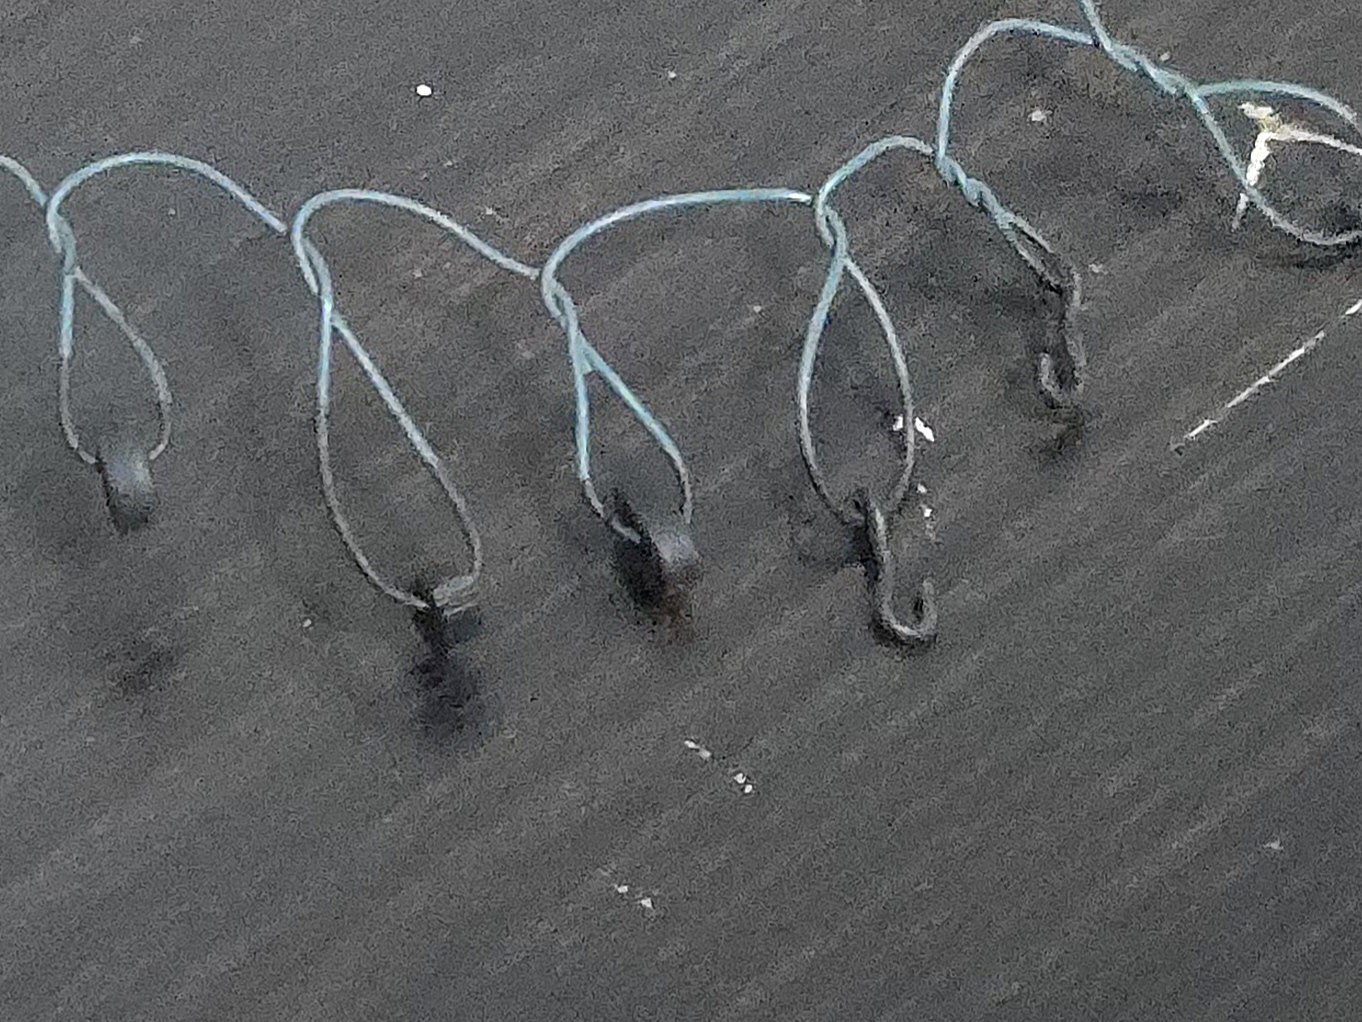
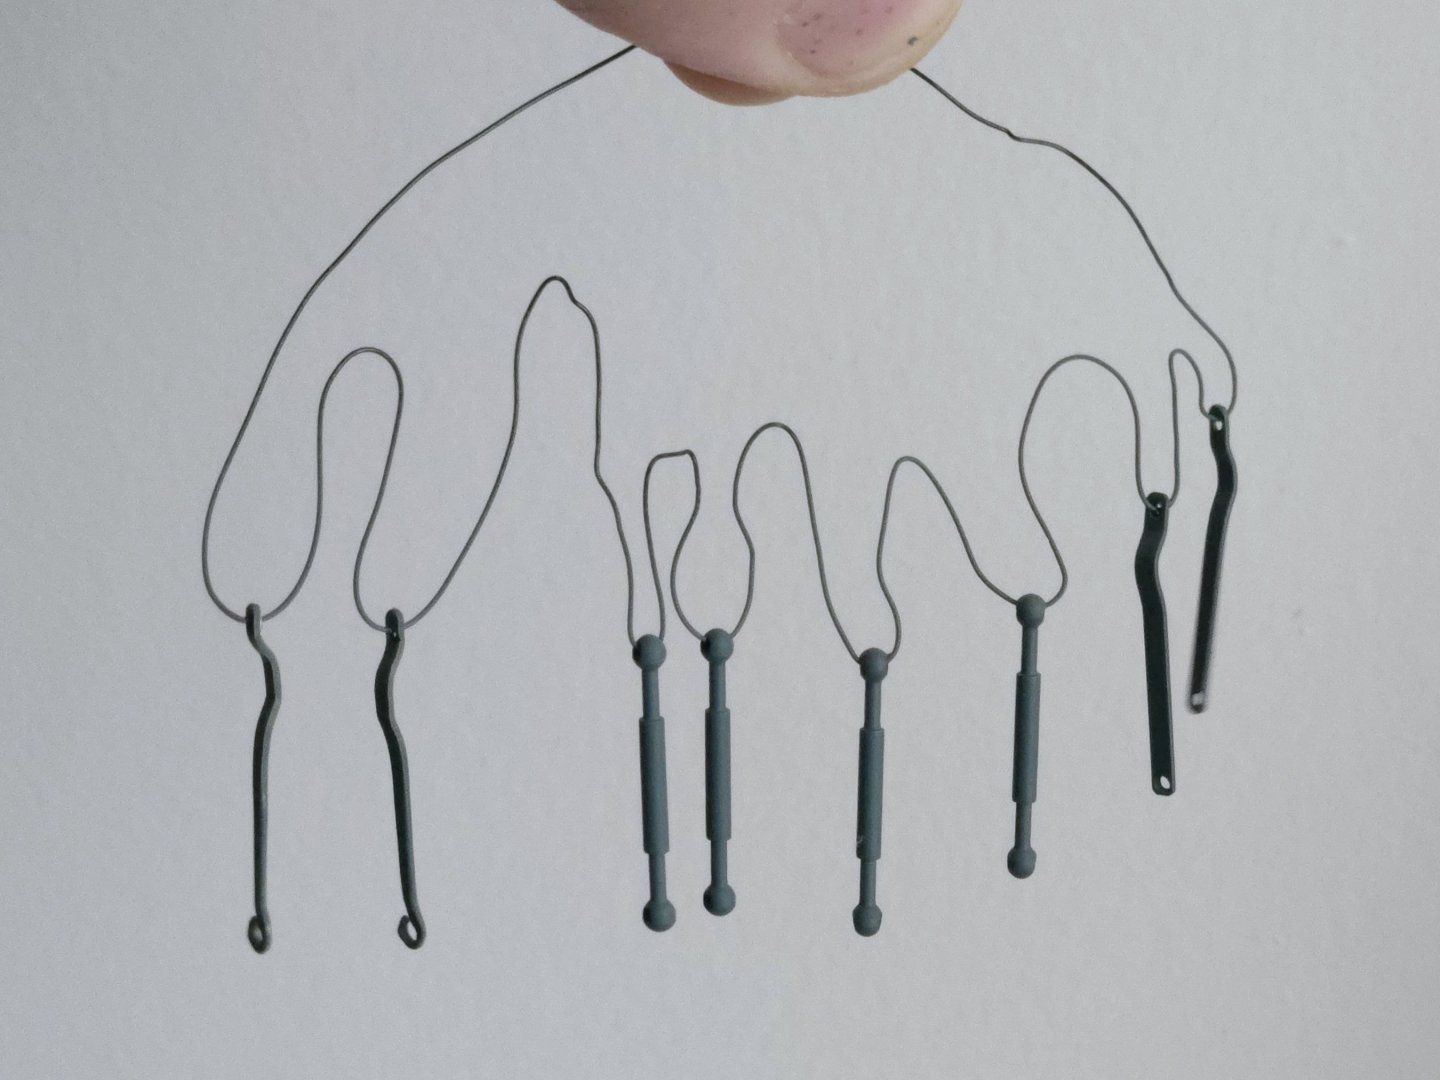
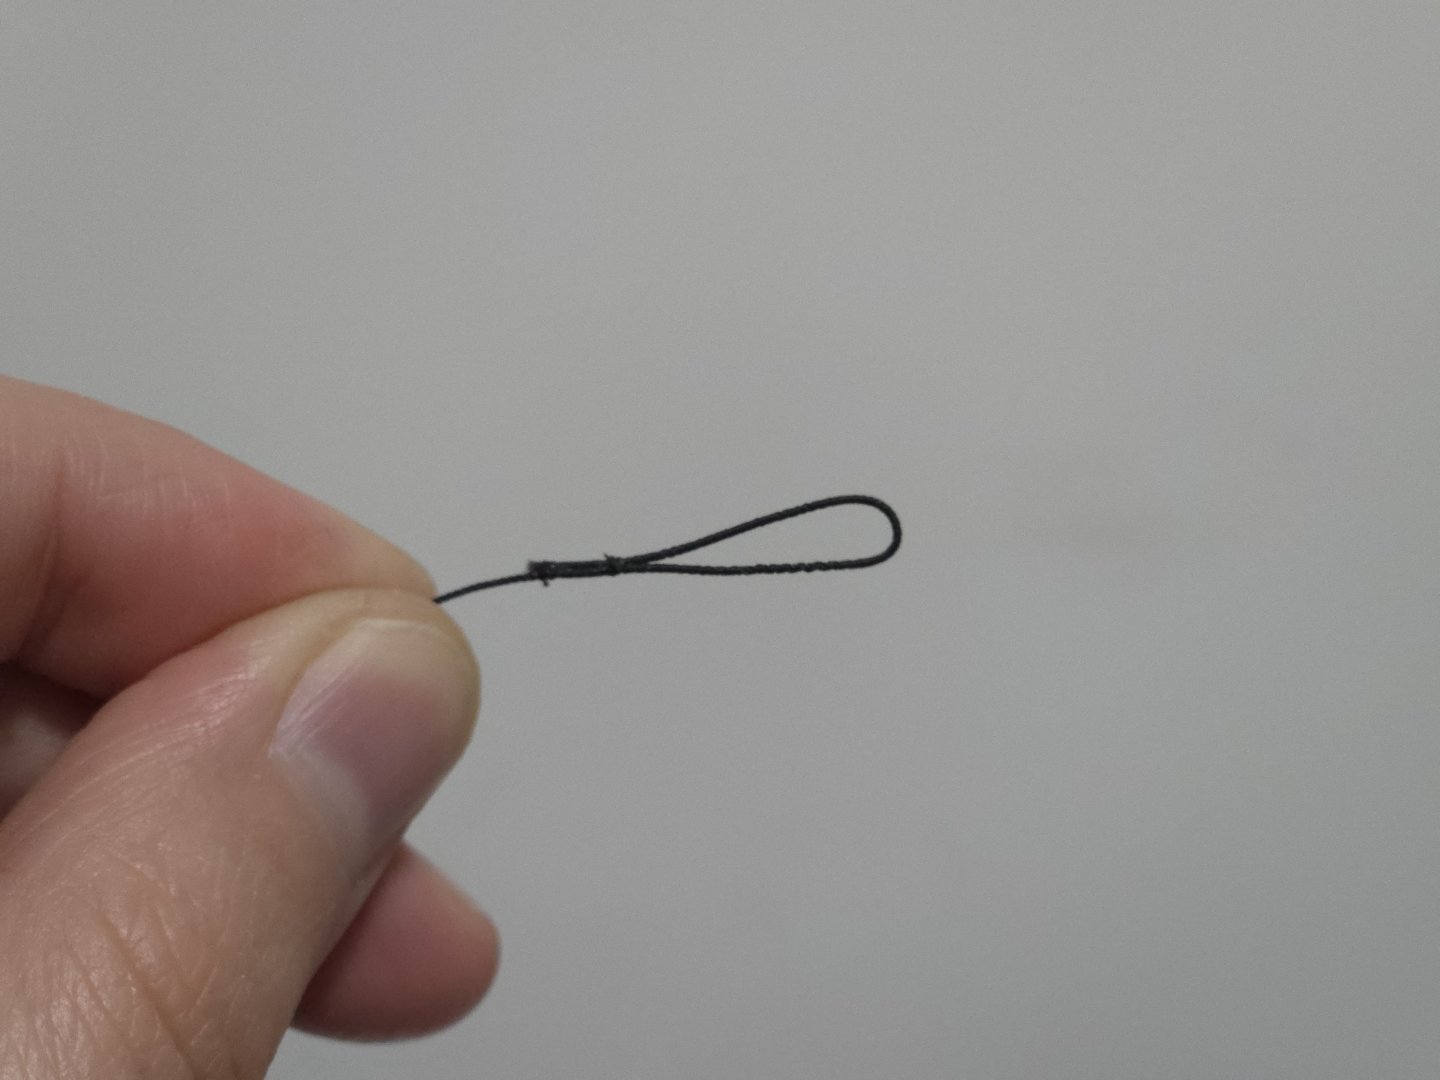
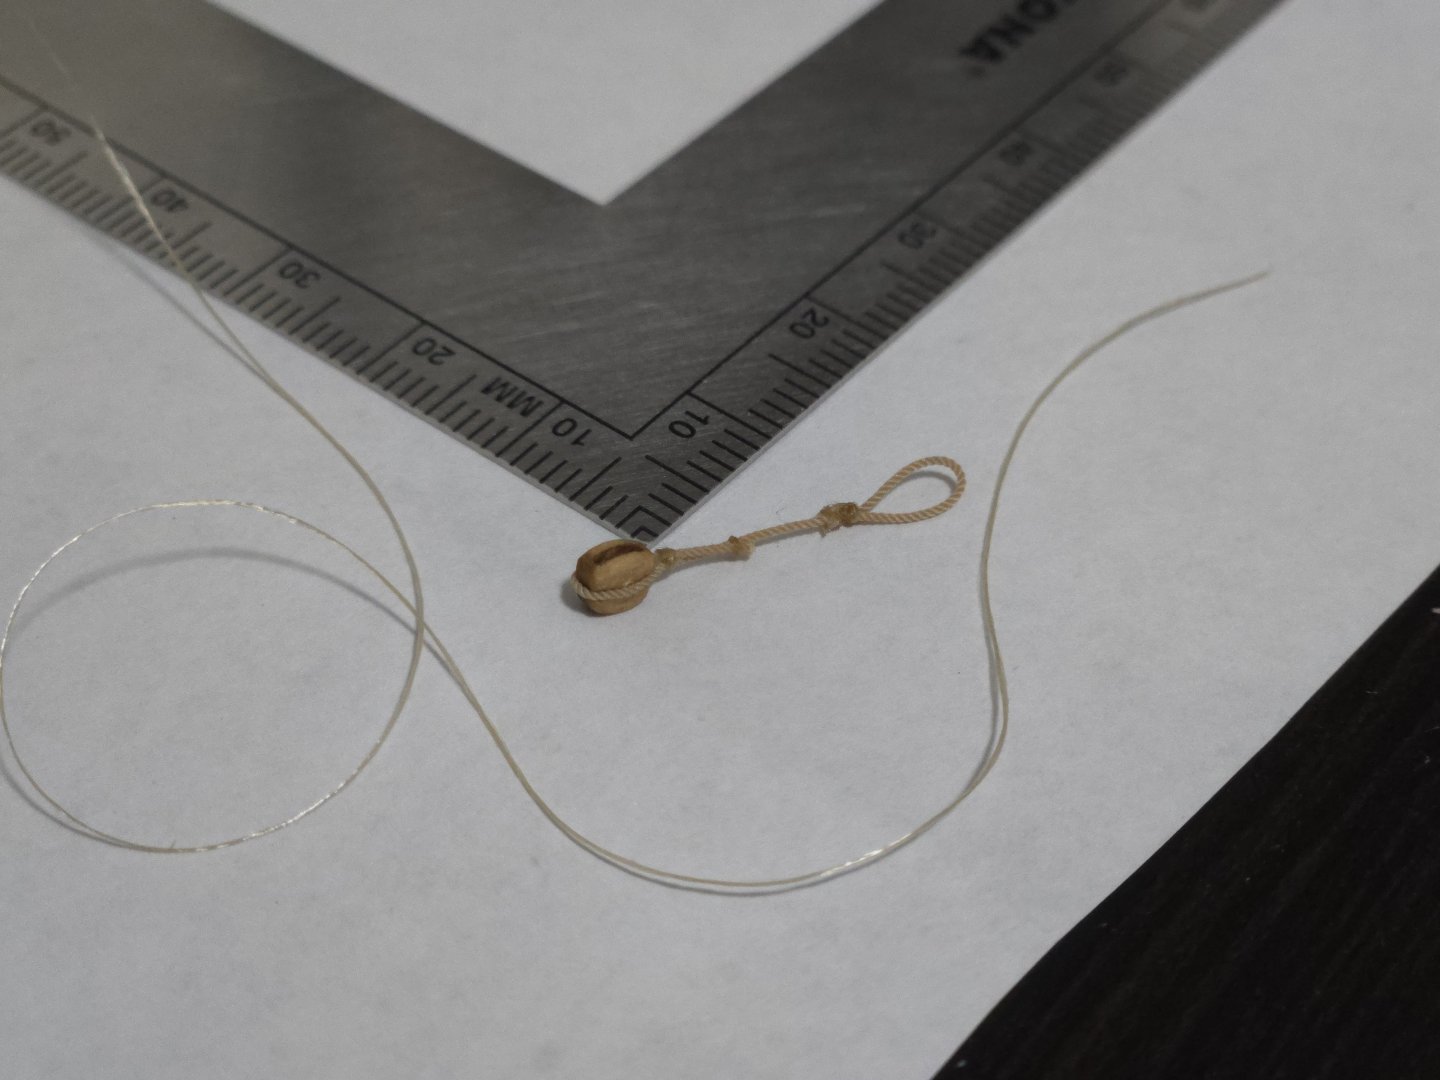
Thanks, @wefalck and @Thukydides! Your responses are very helpful and make a lot of sense. I decided against serving the strops themselves, as while it may be accurate, it would substantially increase the amount of work to do and would make the stropping thread much harder to work with. I also decided to use hooks to attach blocks to eyebolts, following the examples in photos of the gaff. This required making hooks, which was a bit of a process. Hats off to the many of you who work in smaller scales, making tiny fittings is tricky work! Last year when Crafty Sailor was having its going-out-of-business sale, I picked up two sets of photo-etch hooks in 5mm and 2mm. Looking at them alongside the blocks I have for this build, though, they seemed alternately too big and too small. I tried making a couple hooks from the thinnest brass rod that I have, but found it too difficult to make hooks smaller than 5mm or so due to the thickness of the material. I then tried with 24-gauge wire and was able to get a smaller size, but the coating got very ripped up and they didn't look very good. At that point, I remembered that I had a small bag of eyebolts made of thin brass wire, which worked much better and after a false start resulting in a very oversized hook, I was soon able to make hooks of about 4mm. The hooks are not particularly consistent in shape, but I figure that they're widely spaced enough on the model that it won't be all that noticeable. Below, between the photo-etch hook sets, there are, from left to right, the brass rod hooks, the 24-gauge wire hooks, and then the brass eyebolt hooks, with a 4mm and 5mm block below (and my finger for scale). Of course I only notice now that some of the hooks will need the eye parallel to the hook instead of perpendicular, but that's not a difficult fix before painting. I also did a bit of prep on some blocks. The "beautiful blocks" from ModelExpo look very good to my eyes, but I went to soften some hard edges with fine sandpaper and found that their wood is actually a lighter color than they appear (presumably they look darker because of laser char or some other effect of the manufacturing process). So, I sanded one lightly on all sides, and then stained with minwax golden oak. Below, the 4mm single block has been left untouched, while the 5mm double block was sanded and stained. I think it's a subtle difference, but a nice one. I also did a bit more work on the rigging, this time focusing on the forestay. I began by serving a length of black line. Once I reached the desired length, I secured the end of the serving, but didn't snip it off. Instead, I did a false slice through the opposite end of the served area, forming a served loop, as seen below. The idea was to then continue serving around the splice and a bit down the stay. Unfortunately it didn't work out. My set of helping hands seems to be getting a little loser, despite tightening the screws, and while I've been able to serve straight lengths of line ok, it was impossible to serve around the splice. The rope, which was doubled on the loop side, kept wrapping around itself instead of letting the serving wrap around it, and it became very difficult to maintain tension. I had to stop. So instead, I decided to go for a simpler method of using a couple of seizings to make the loop in served black rope, as seen below. Finally, I did the jib halyard block in the way that Wefalck suggested several posts ago. I used a 4mm block (sanded and stained) as several photos seem to show a smaller block, relative to the gaff halyards, in this location. To strop it, I followed the instructions that Chuck Passaro recently posted on Syren's blocks page, finding it to be clear and easy to follow. The only change was that I ended up using a few half-hitches instead of just wrapping the seizing thread, as I found it hard to maintain pressure otherwise. After stropping the block into place, I did a false splice at the other end to create a loop to fit around the forestay. I then trimmed it and tried to serve around the splice, which was a bit difficult and didn't turn out very smooth. I still found the result acceptable, though. Below, in an unfortunately blurry photo, the forestay has been temporarily put in place, as has the jib halyard block, which will look better once the halyard puts a bit of pressure on it so it doesn't try to pop upward. I think I'll make the gaff throat halyard in the same way, just larger so it loops around the masthead. I'm debating whether I should serve the masthead loop, though--I think I should--and whether that serving should be black or brown. Probably black to match the shroud and forestay serving, although those are meant to be wire while the throat halyard block stropping will be rope.


- 312 replies
-
- 9
-
-
- Chile
- Latin America
- (and 6 more)