JacquesCousteau
-
Posts
1,383 -
Joined
-
Last visited
Content Type
Profiles
Forums
Gallery
Events
Everything posted by JacquesCousteau
-
 Good repair job! Learning how to correct for these sorts of things is a big part of modeling. Also, if the break is near where the frames attach to the cross-piece, it may be in a part that gets cut off anyway.
 -
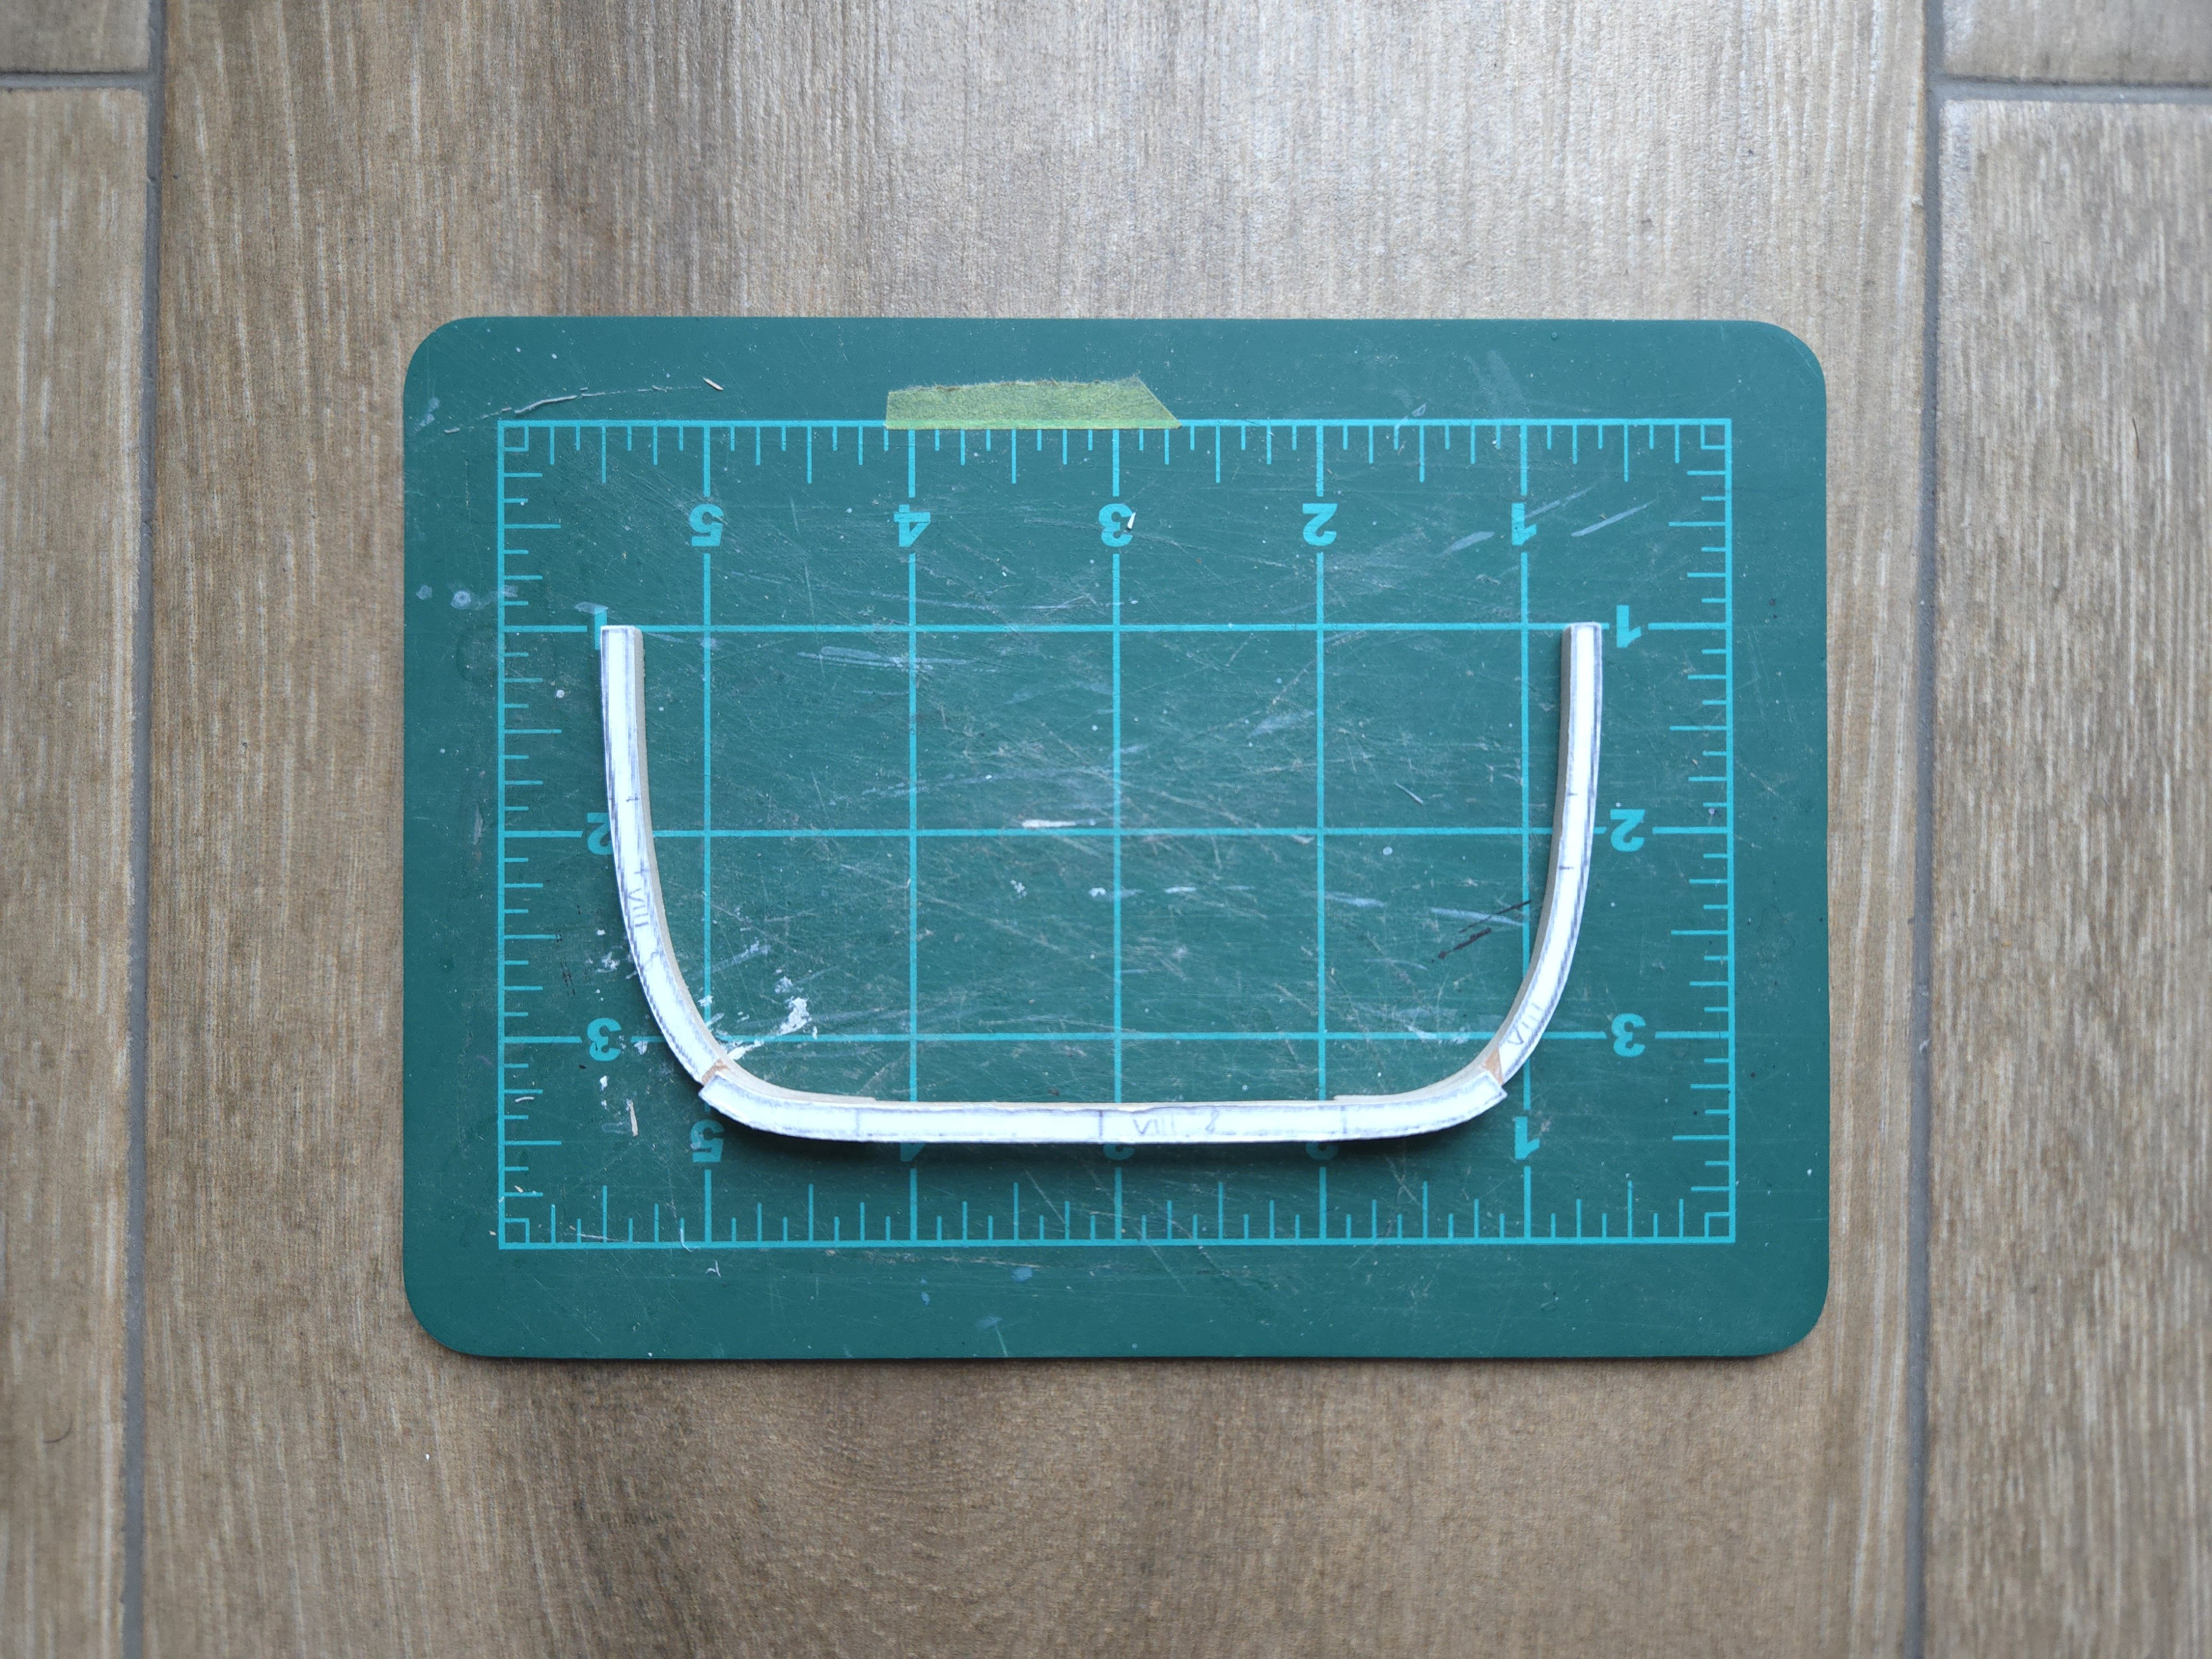
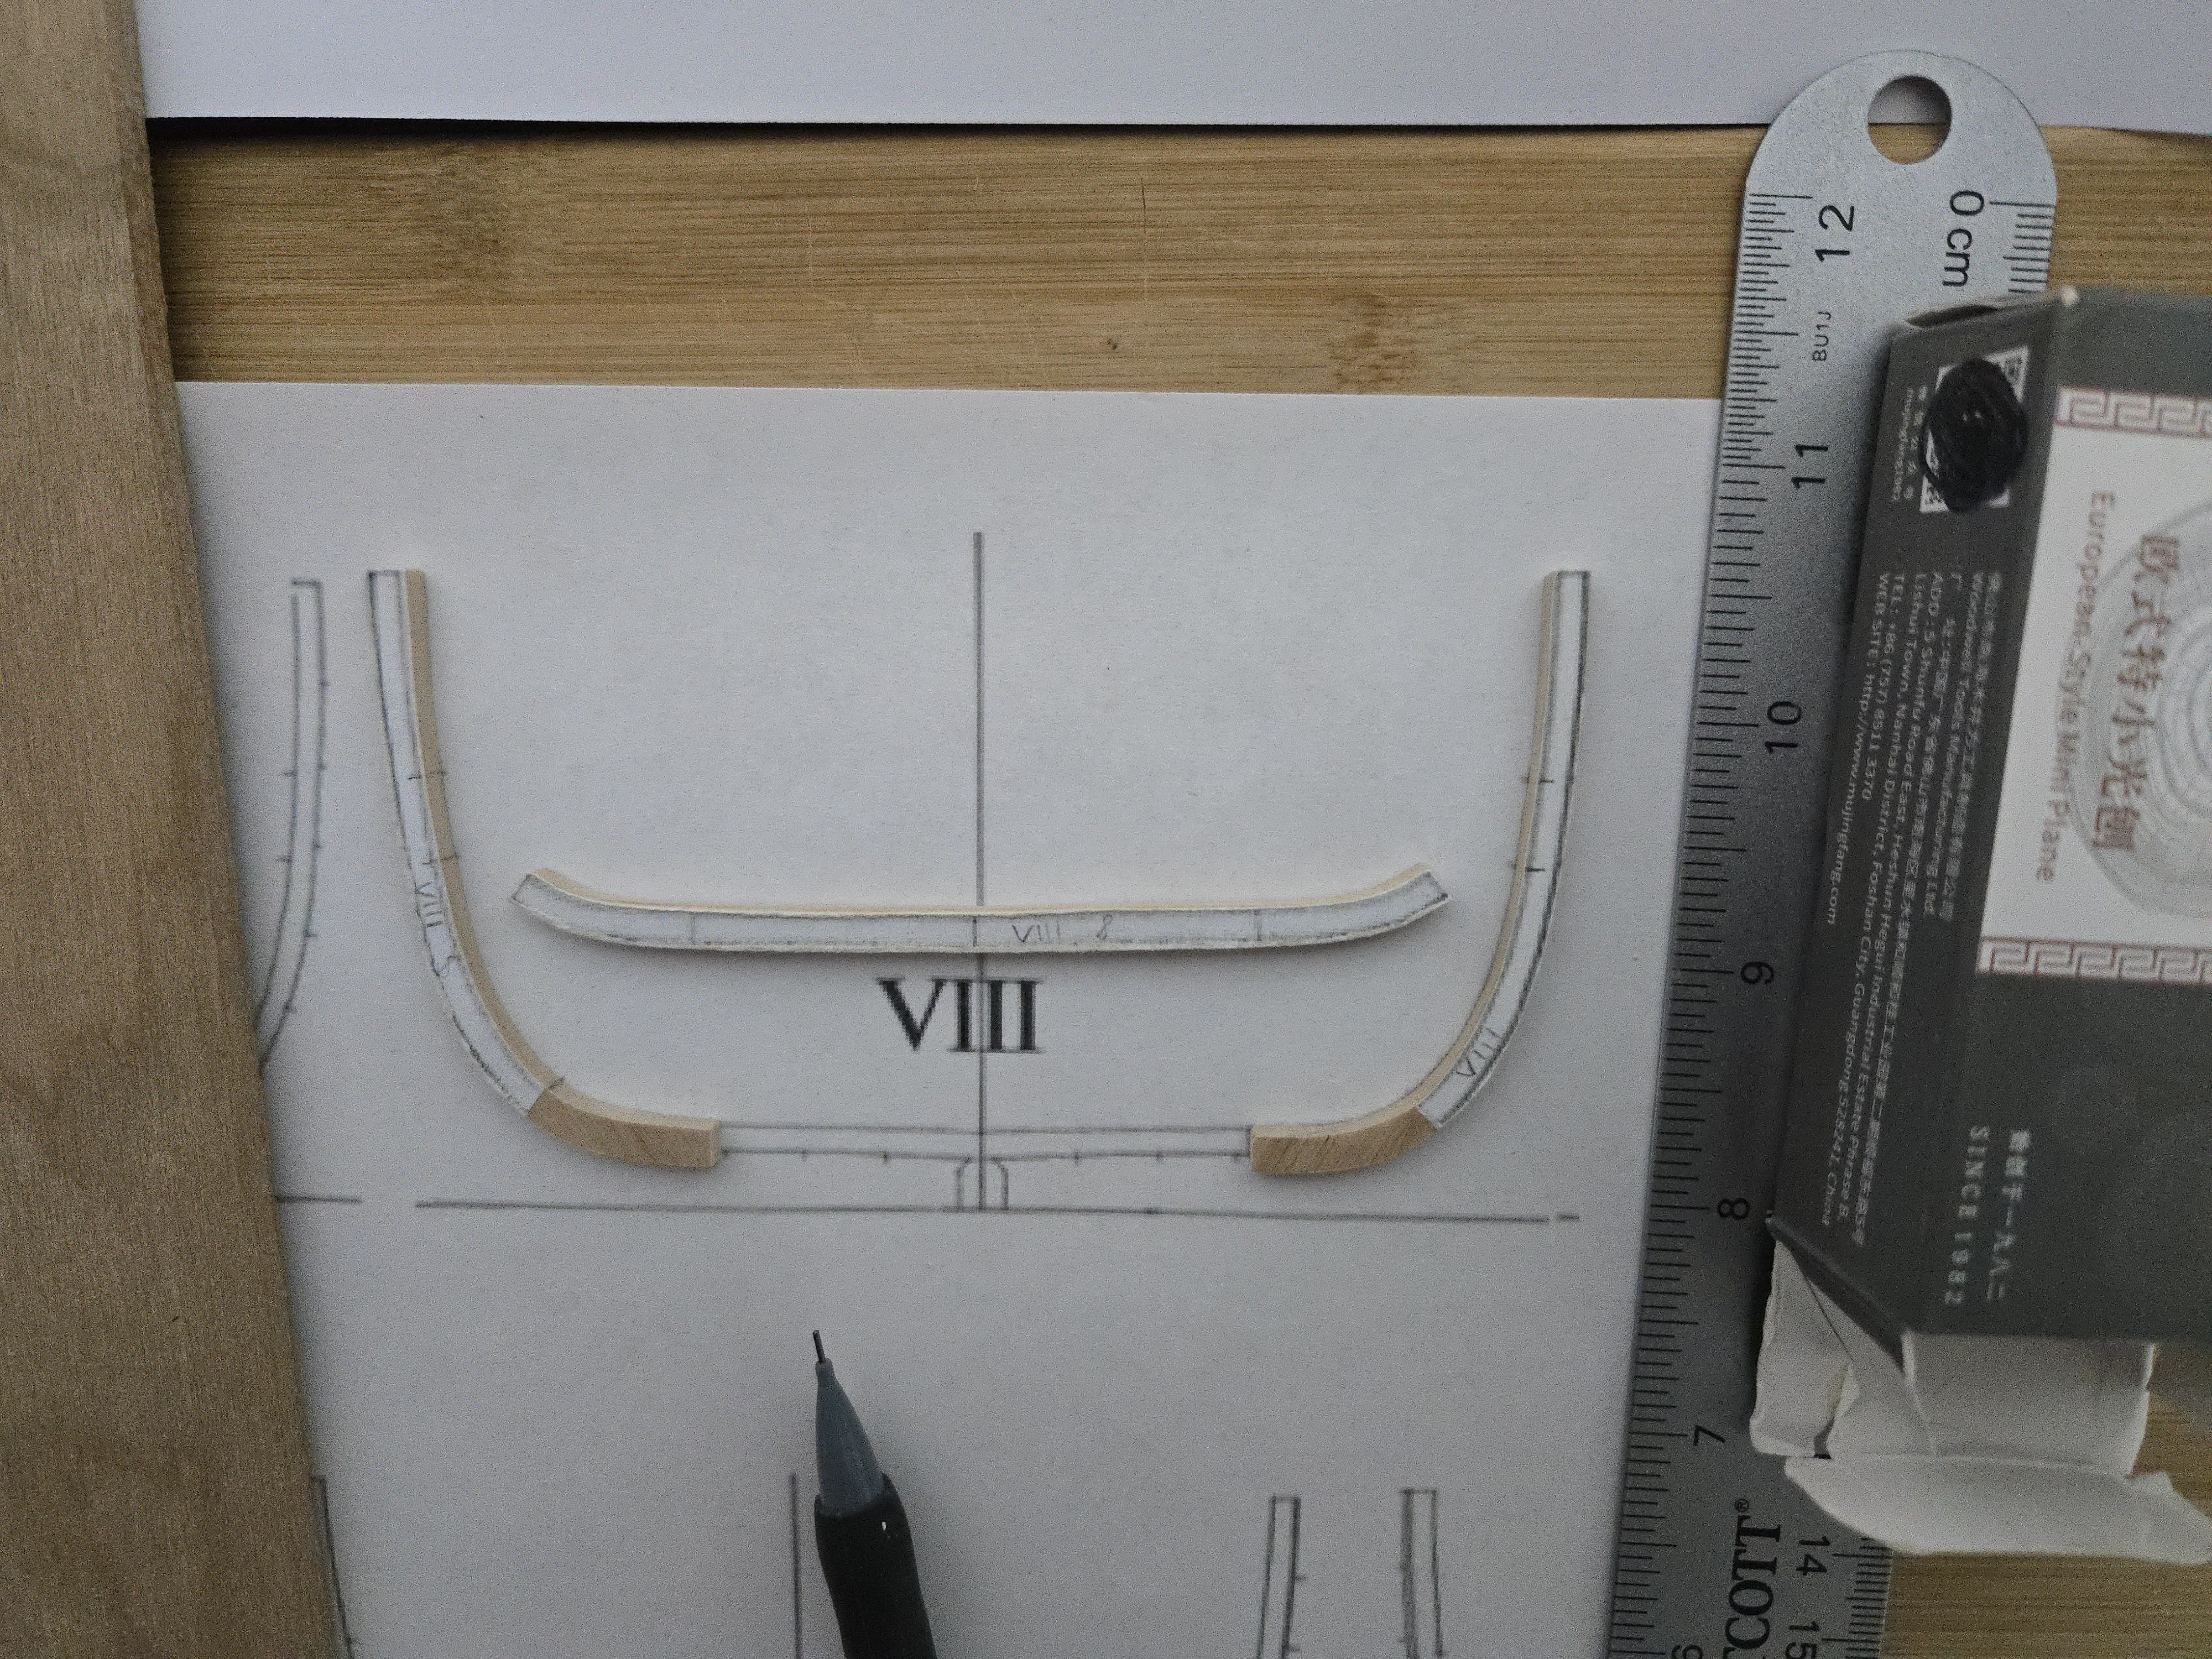
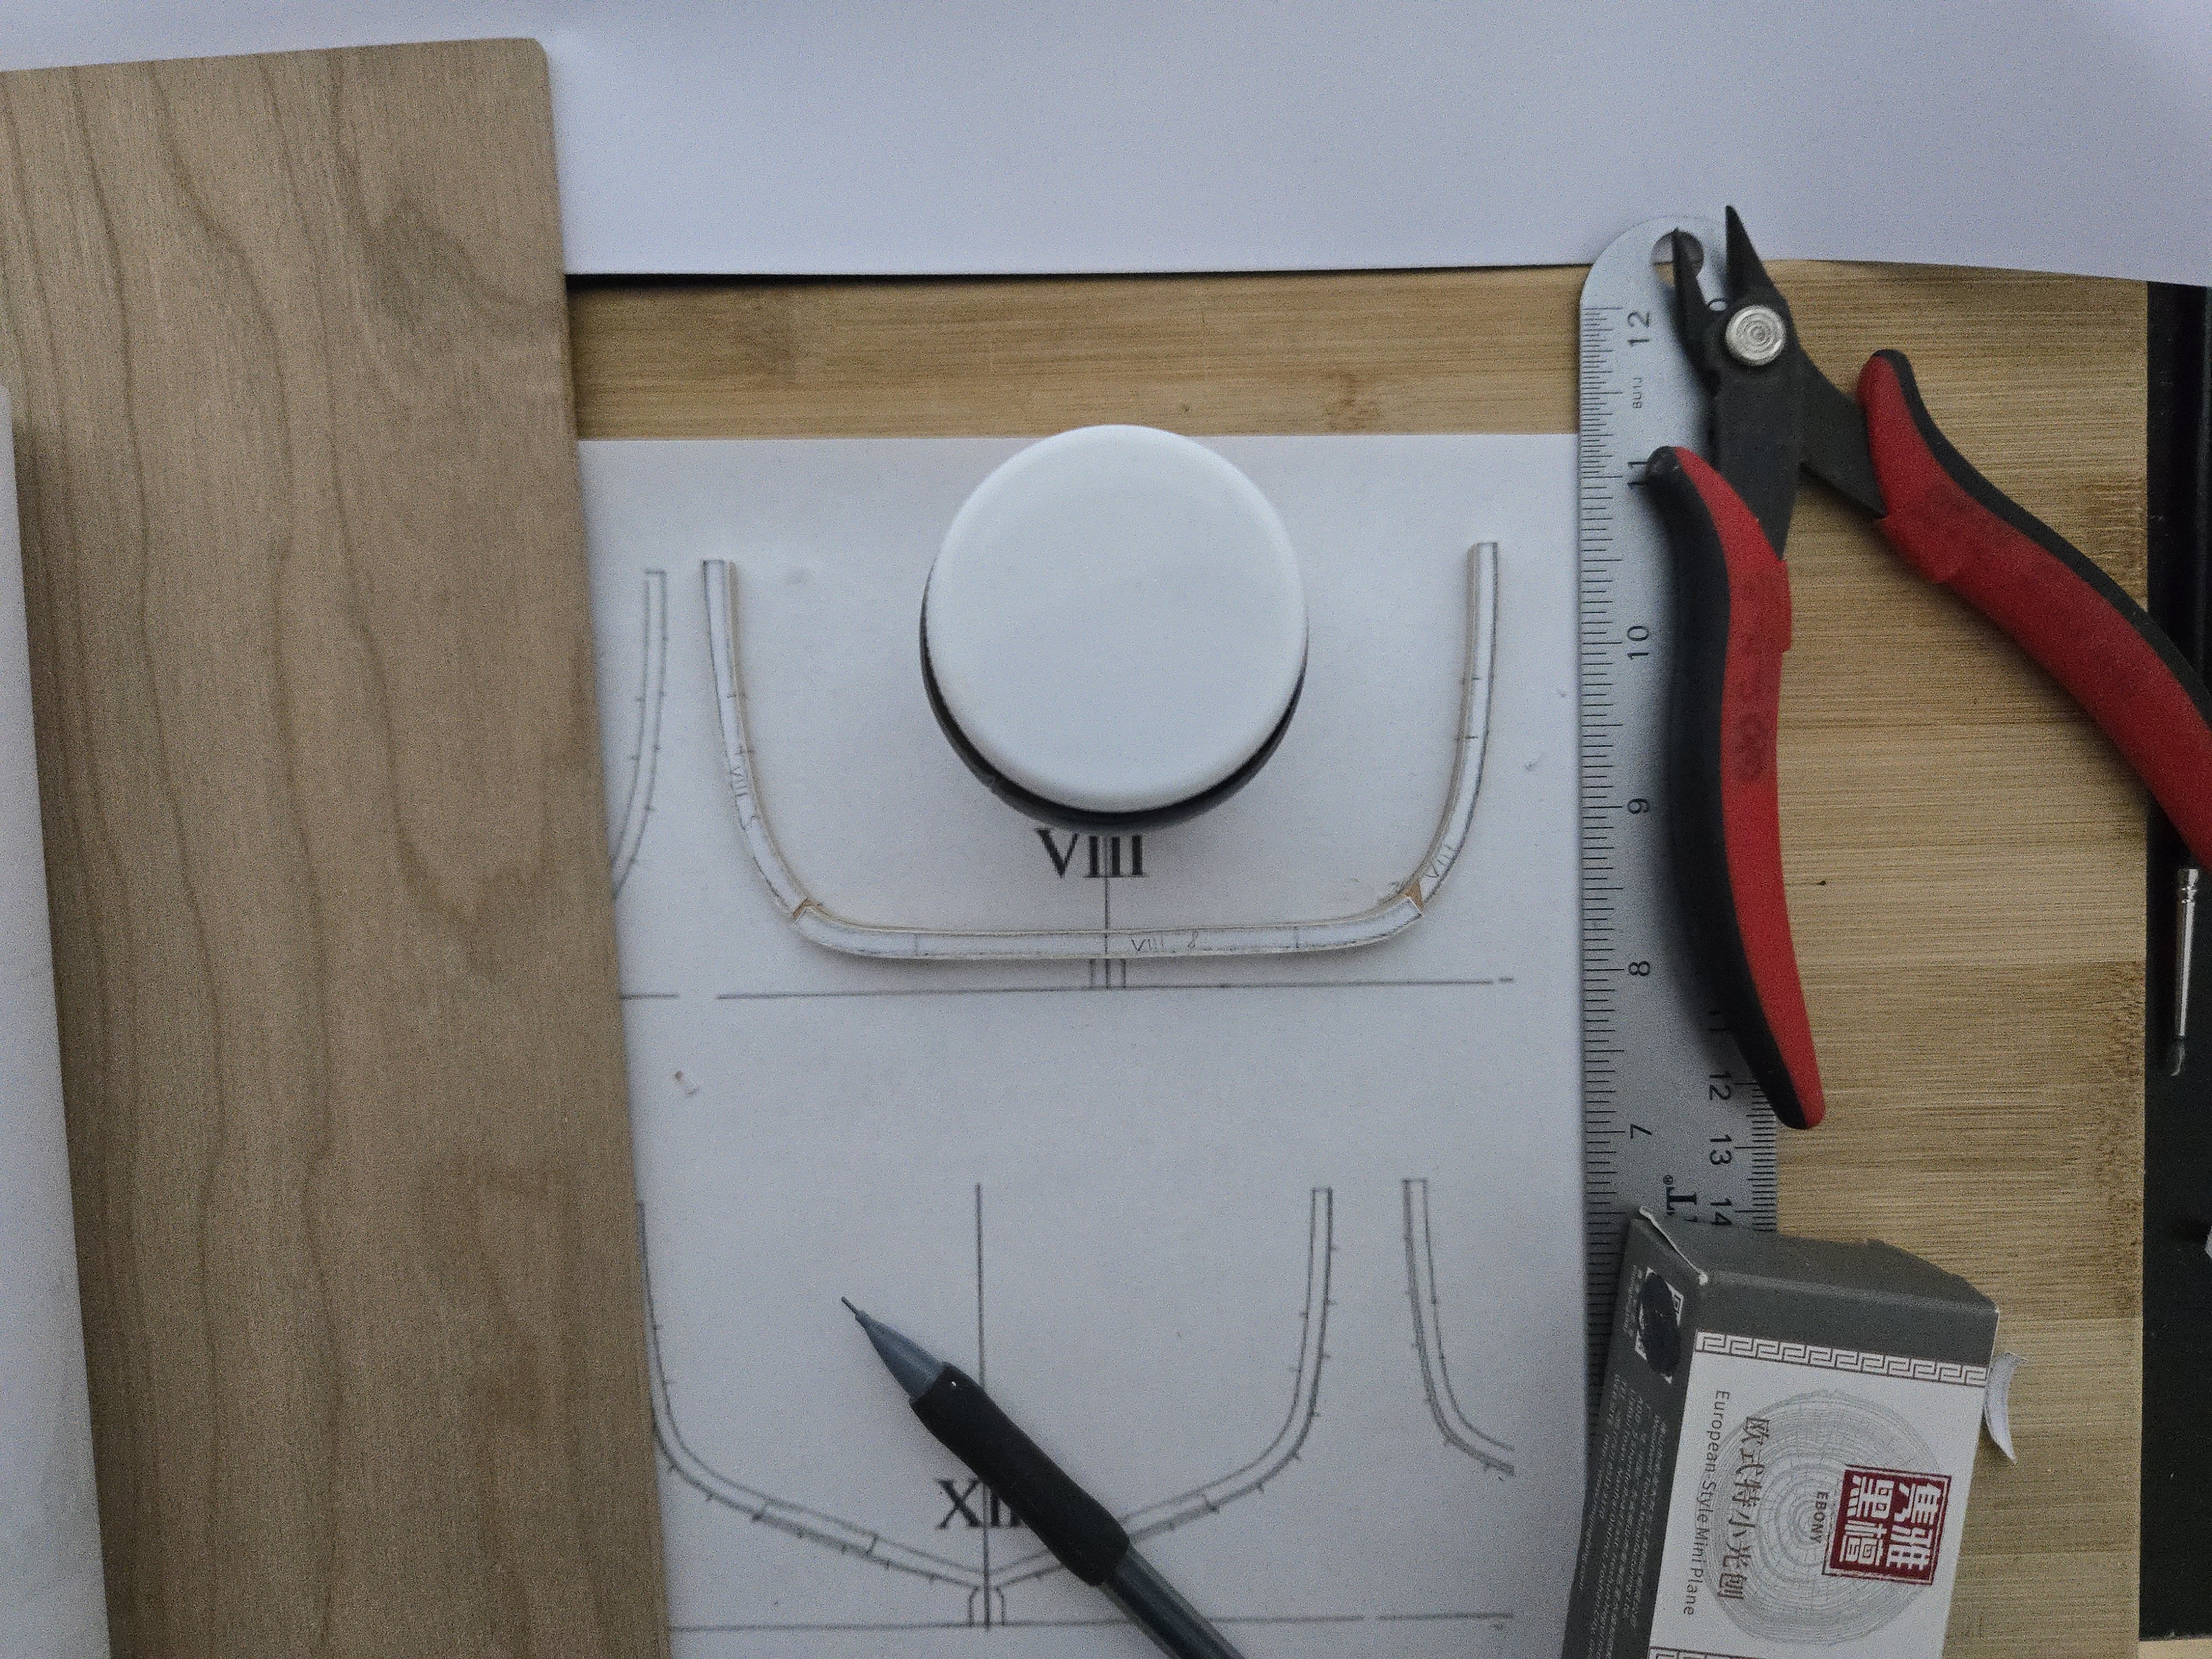
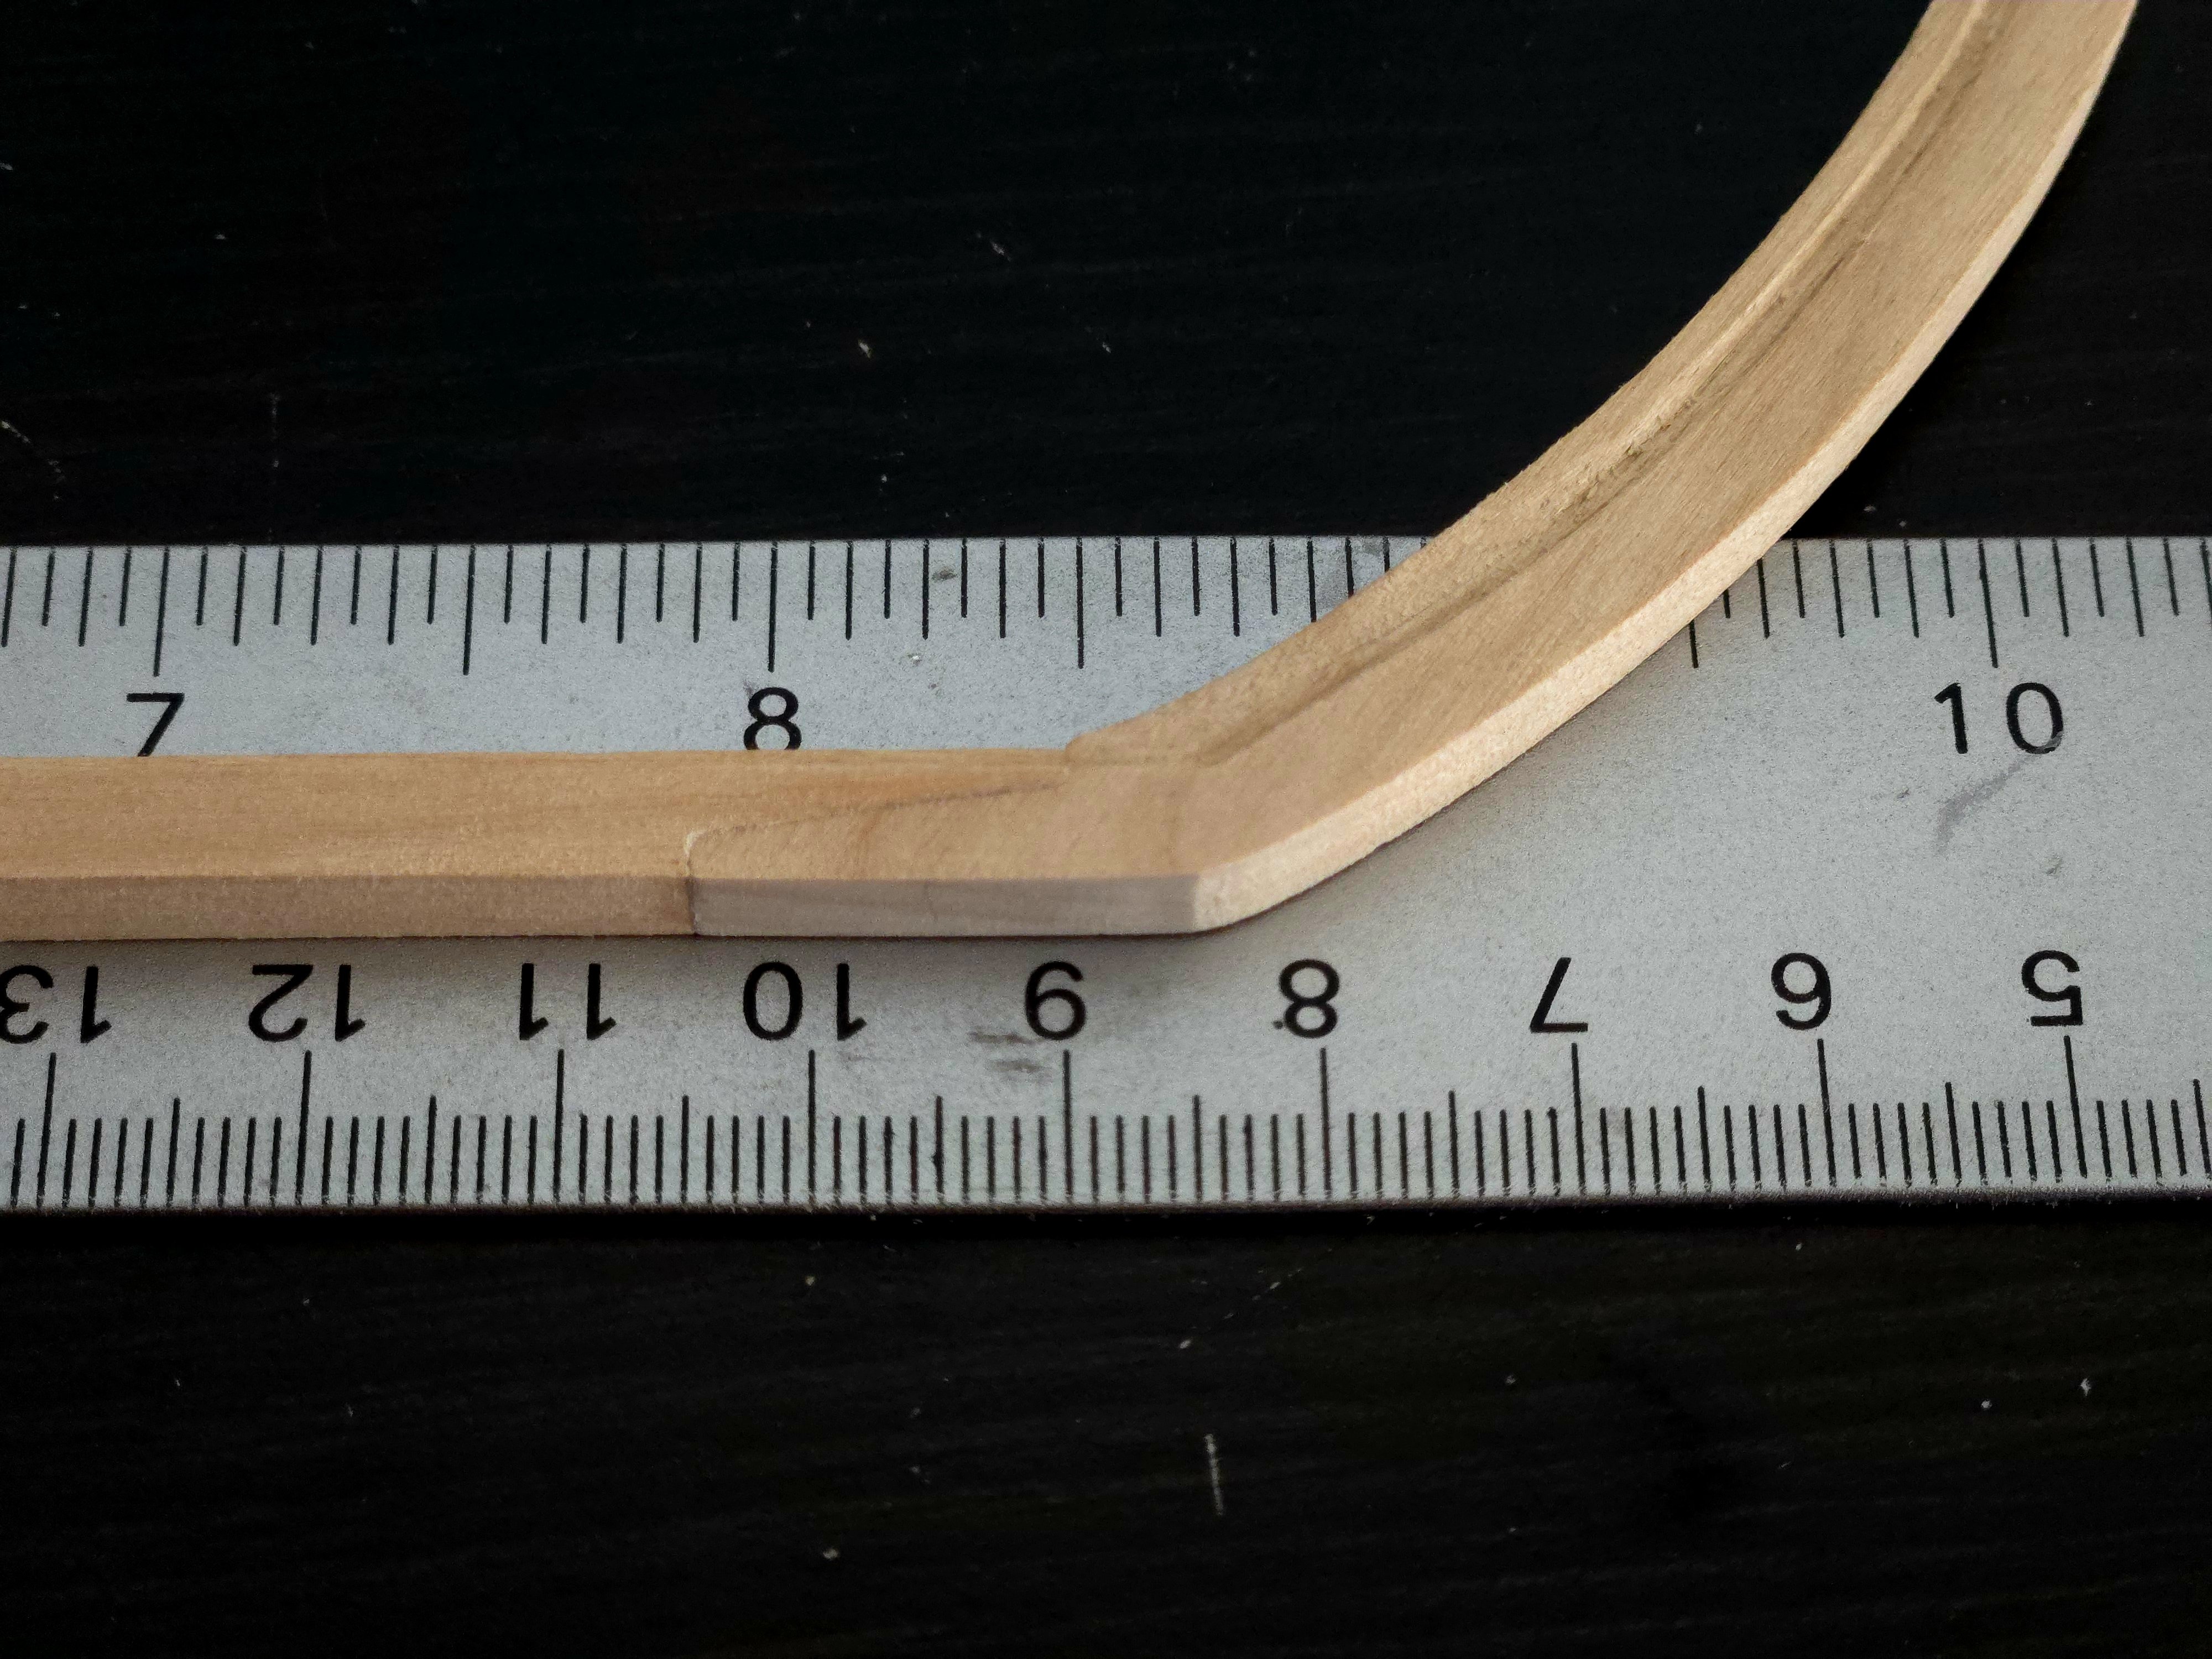
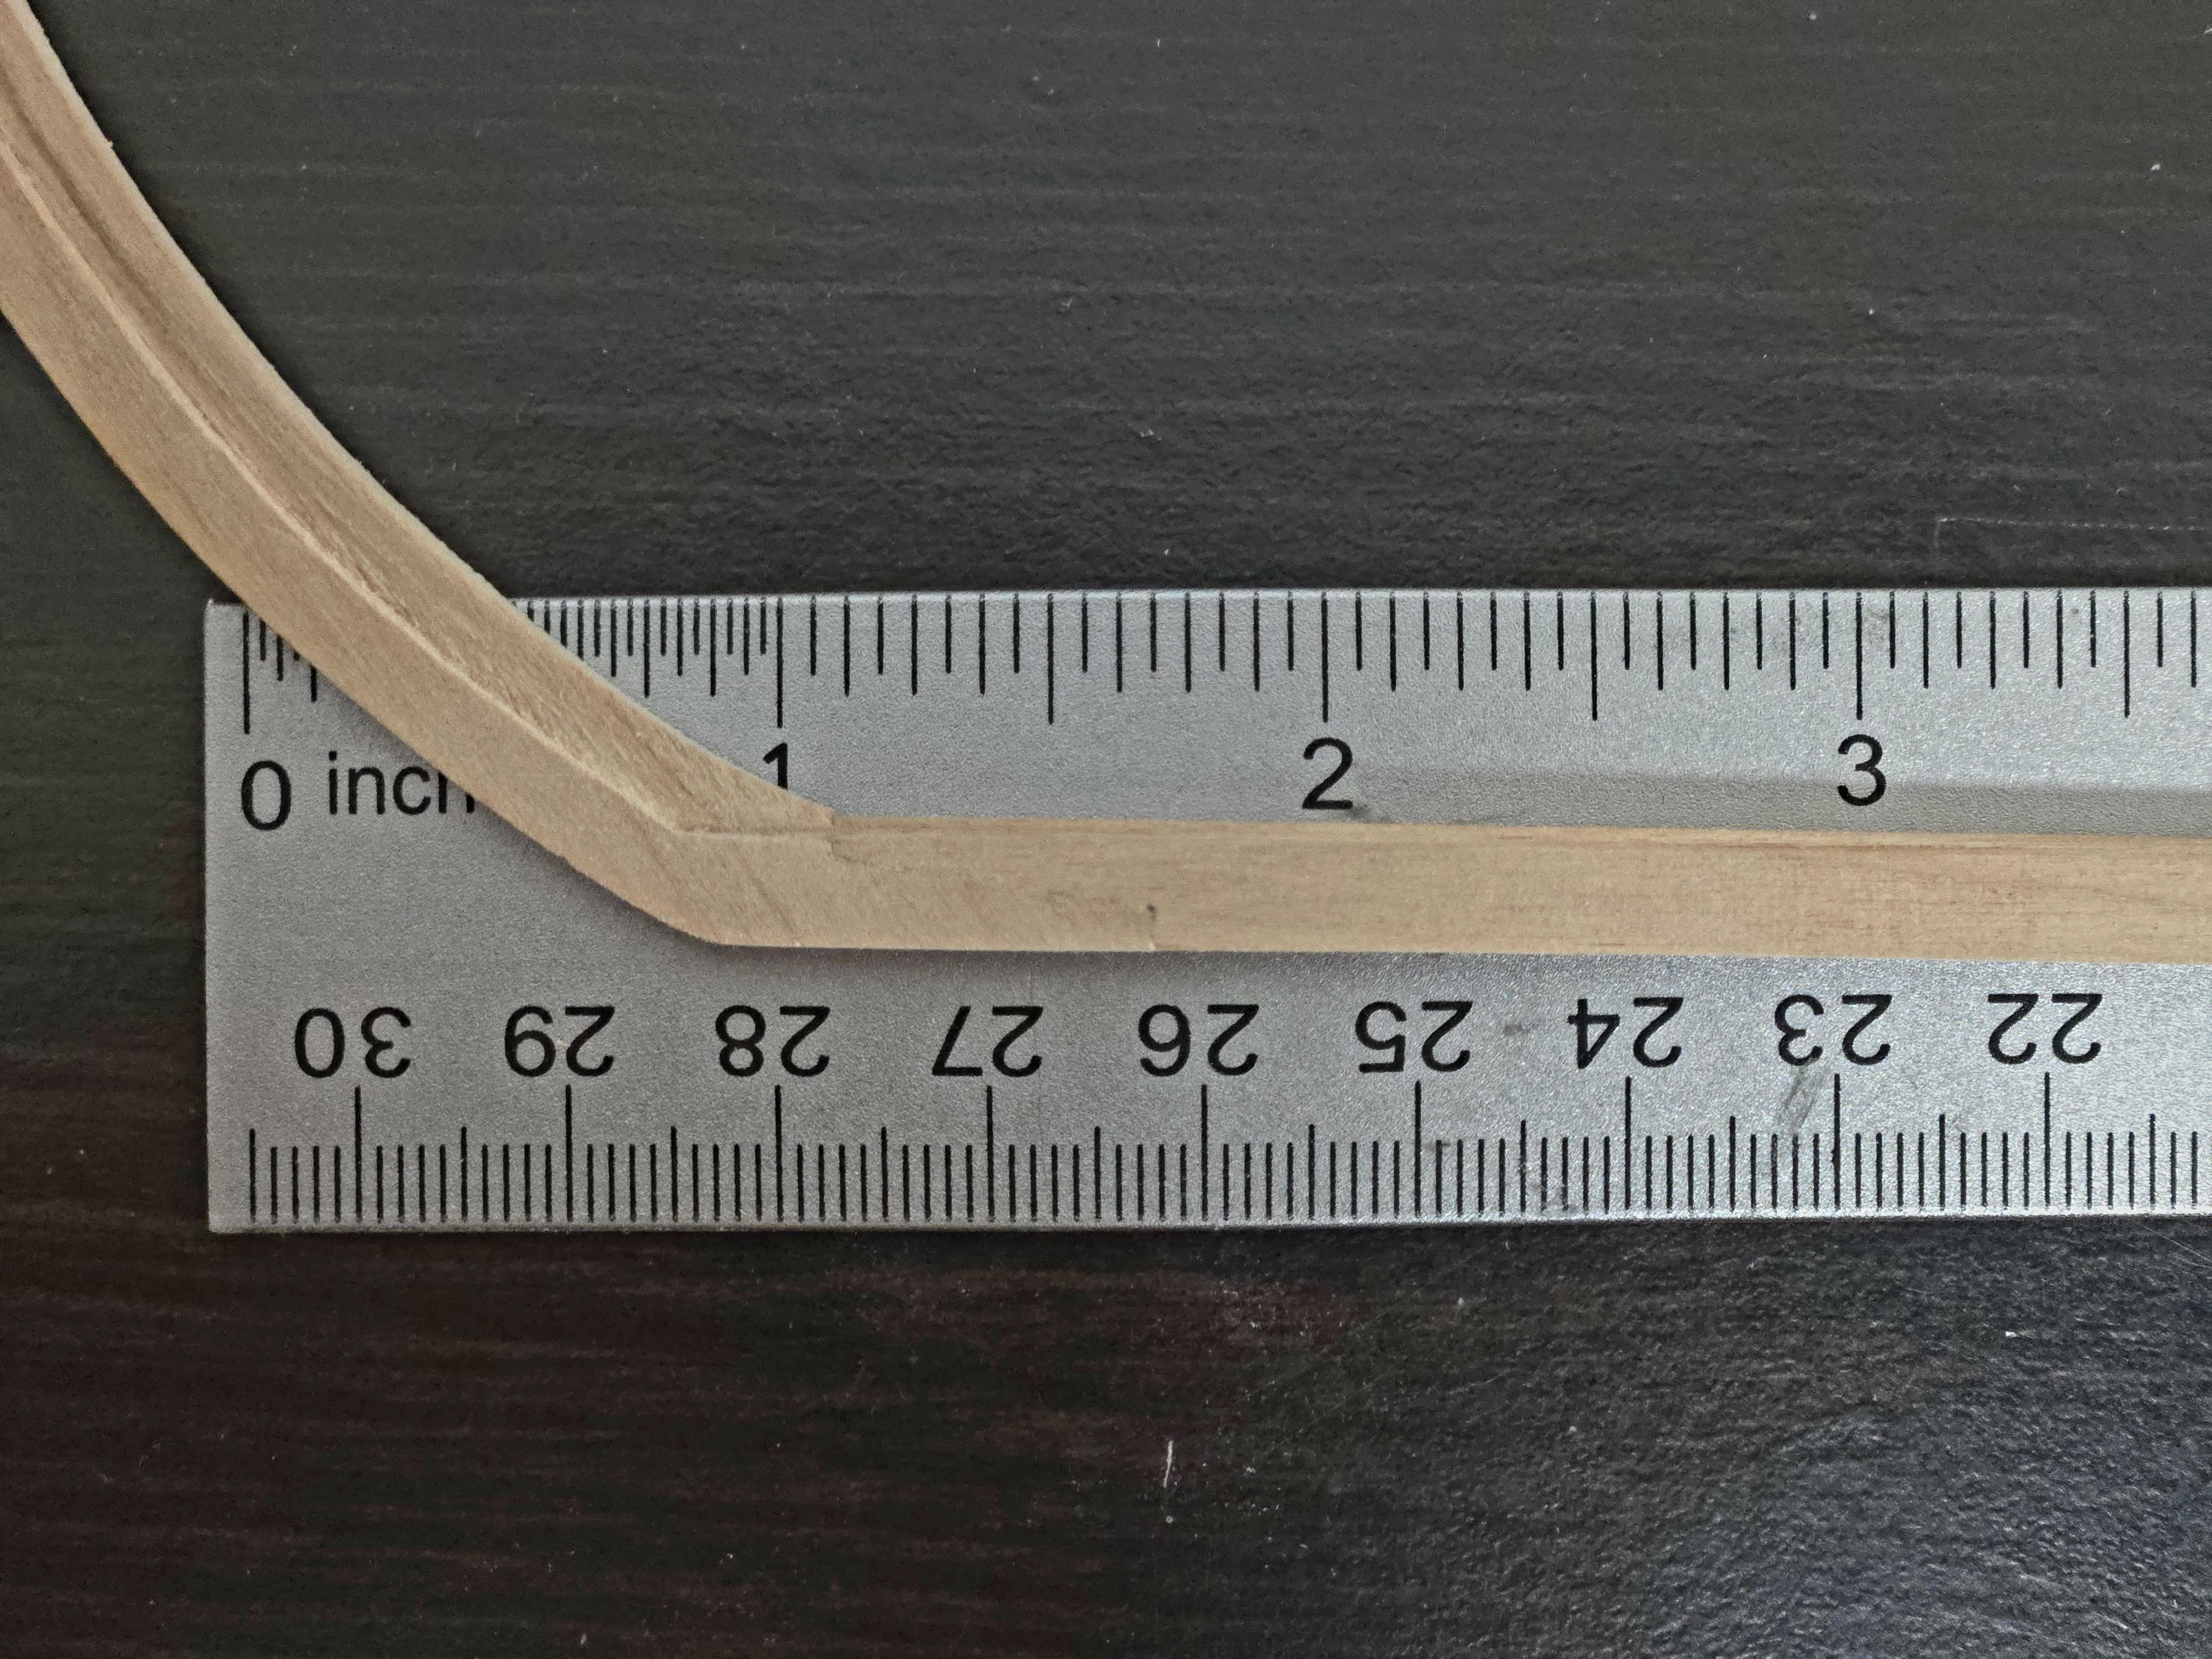
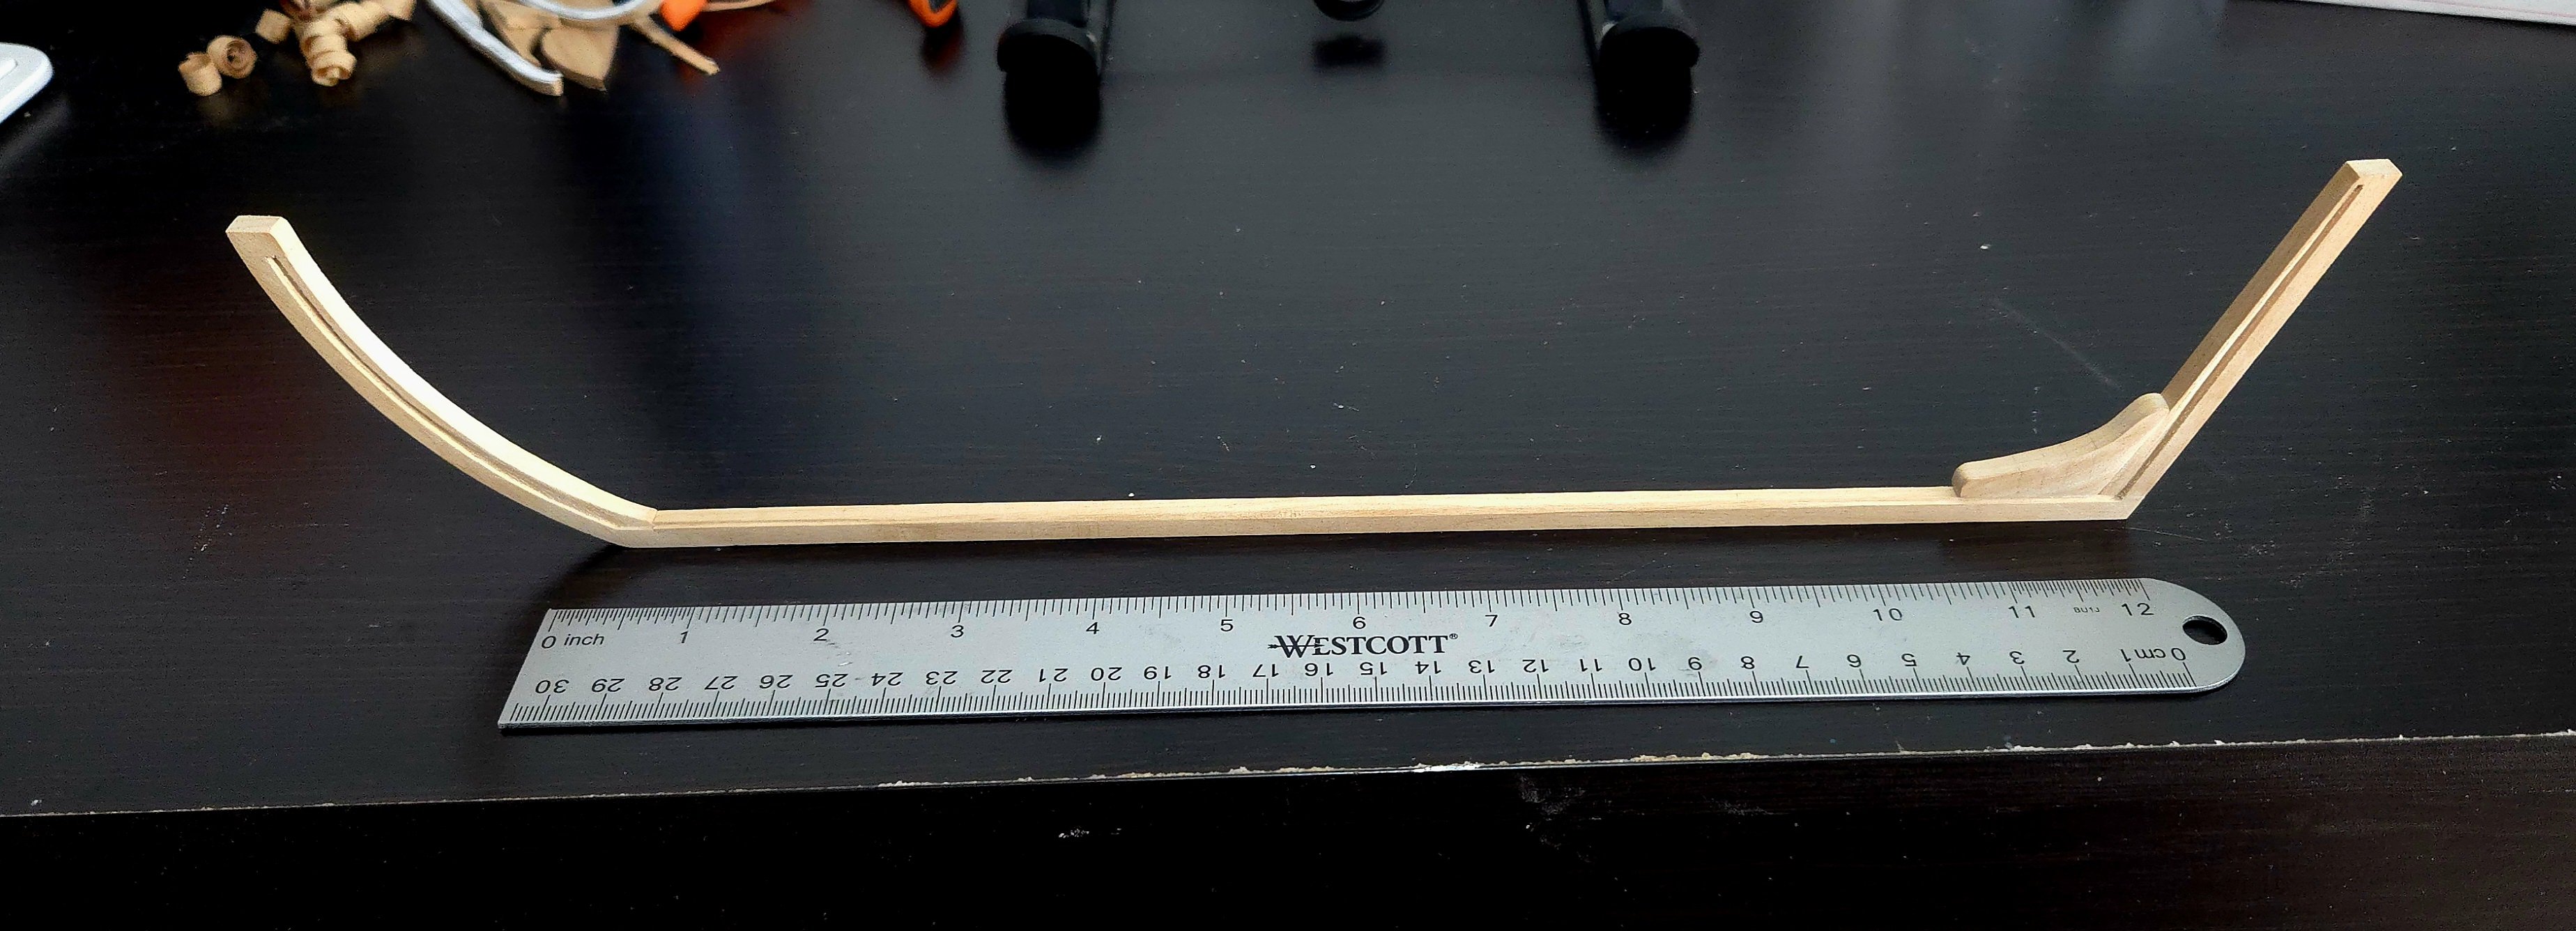
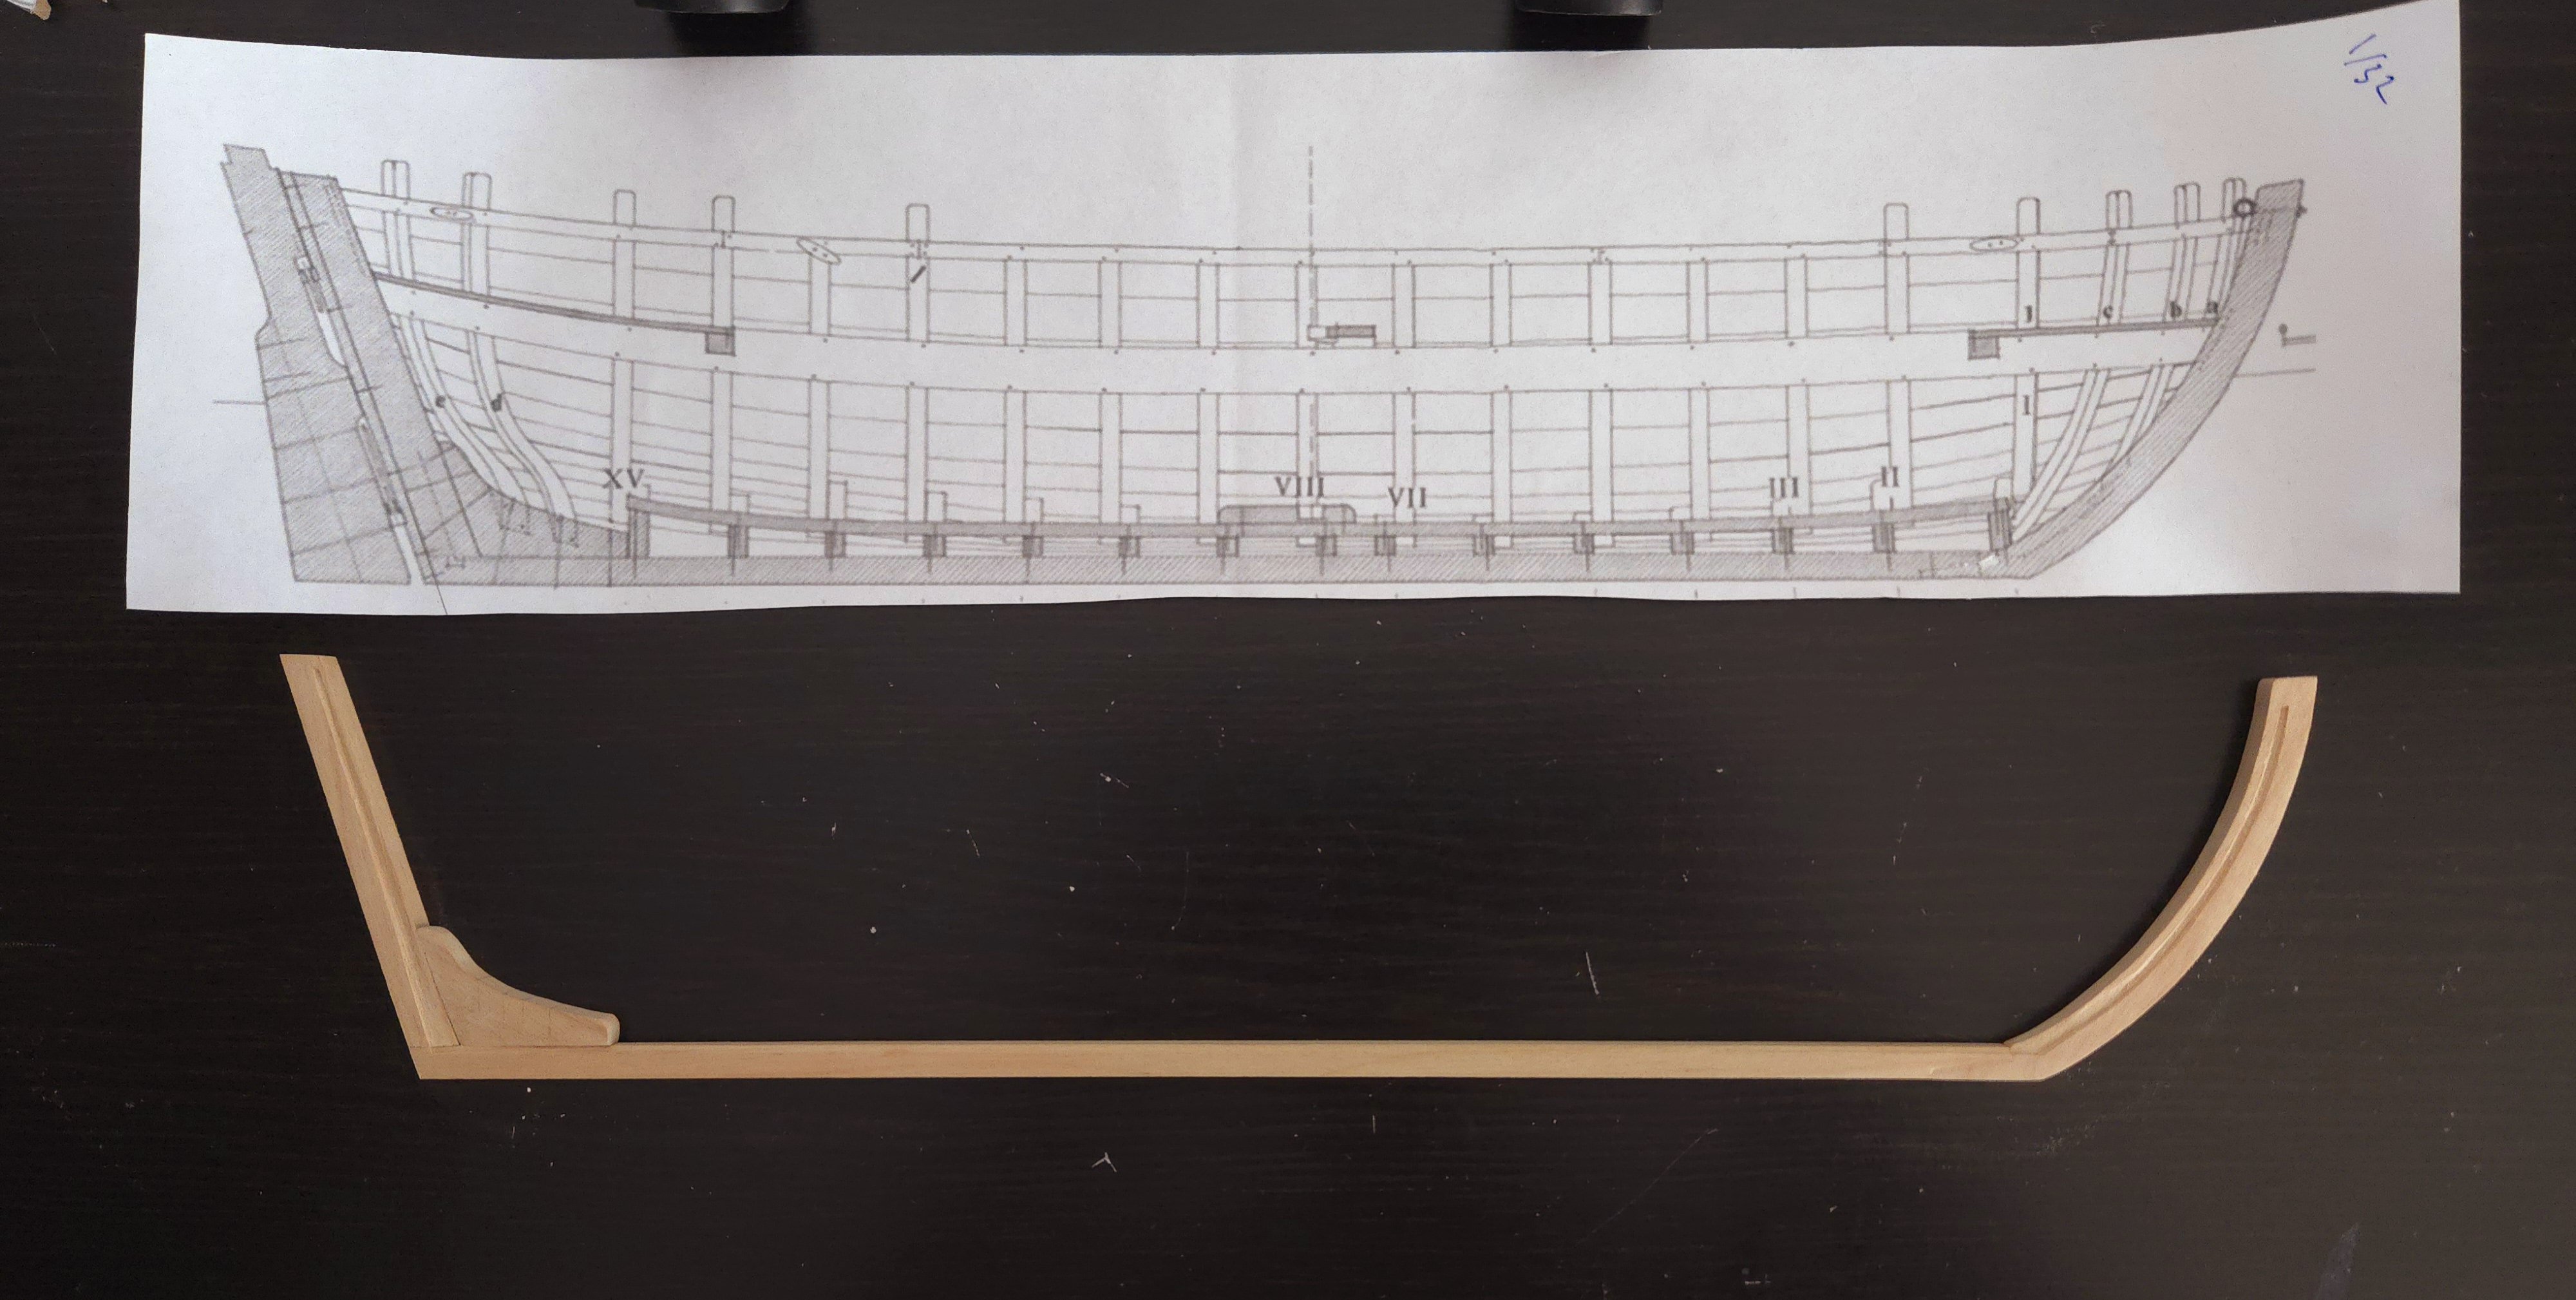
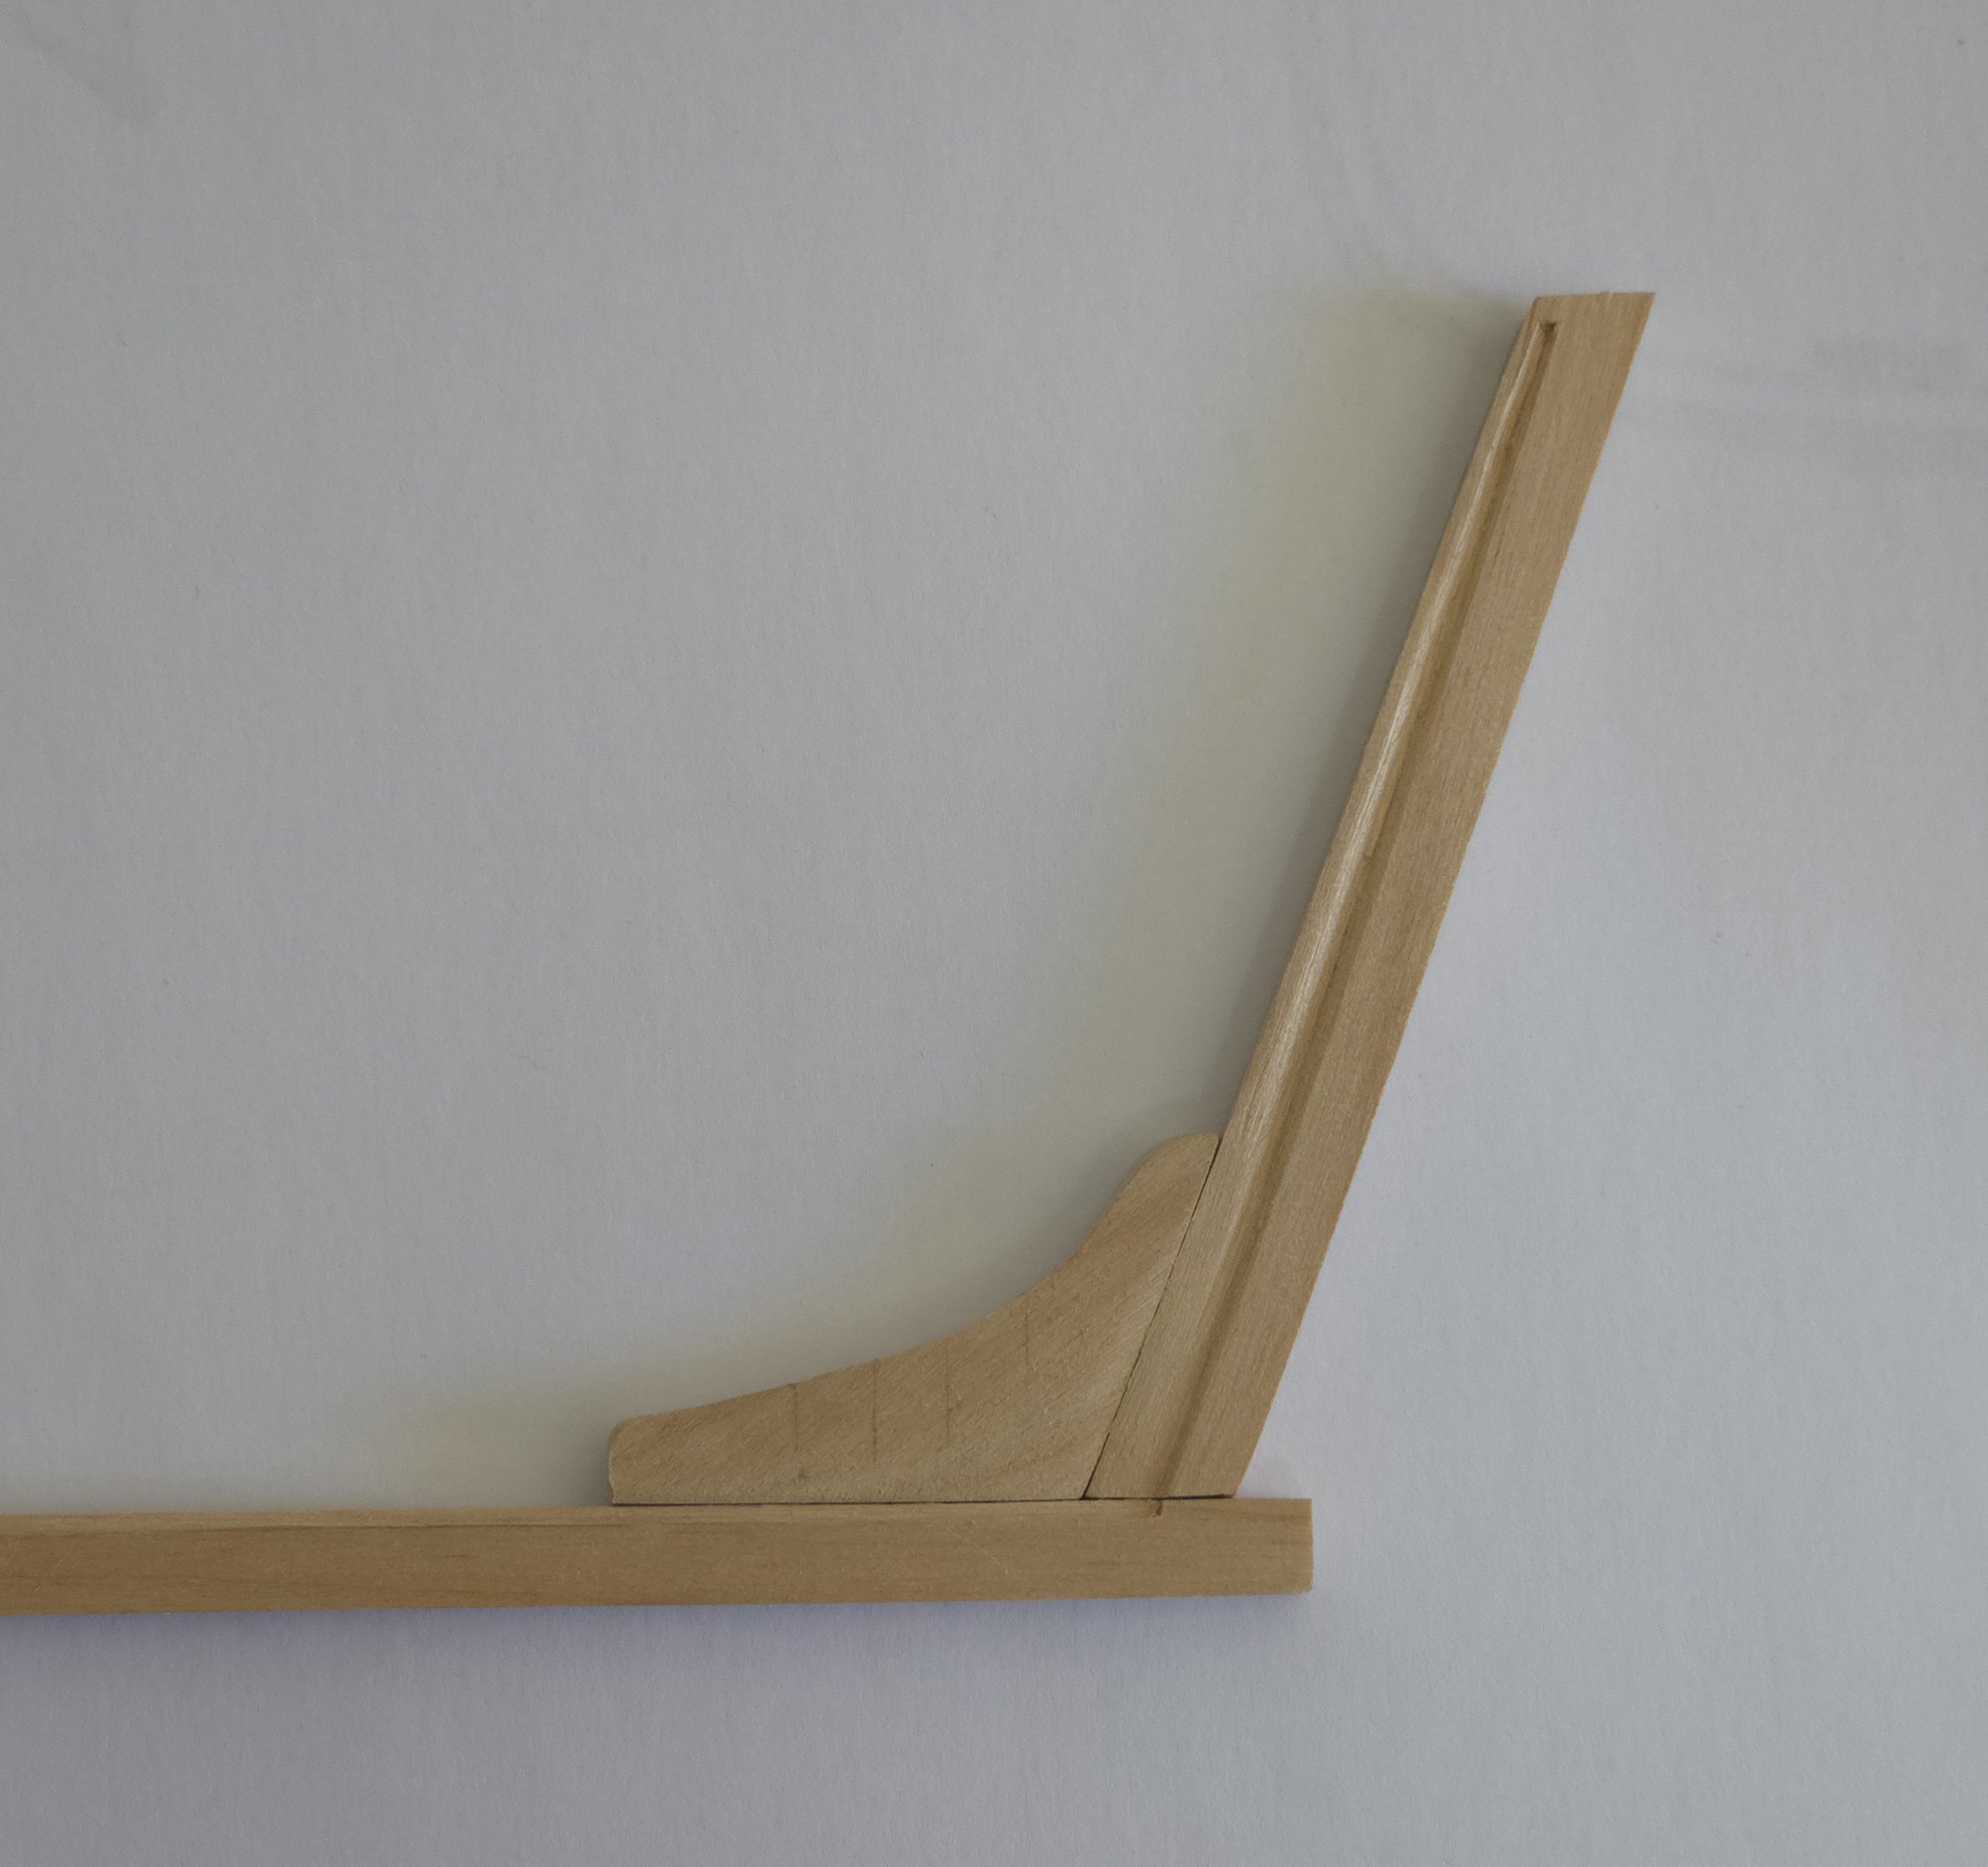
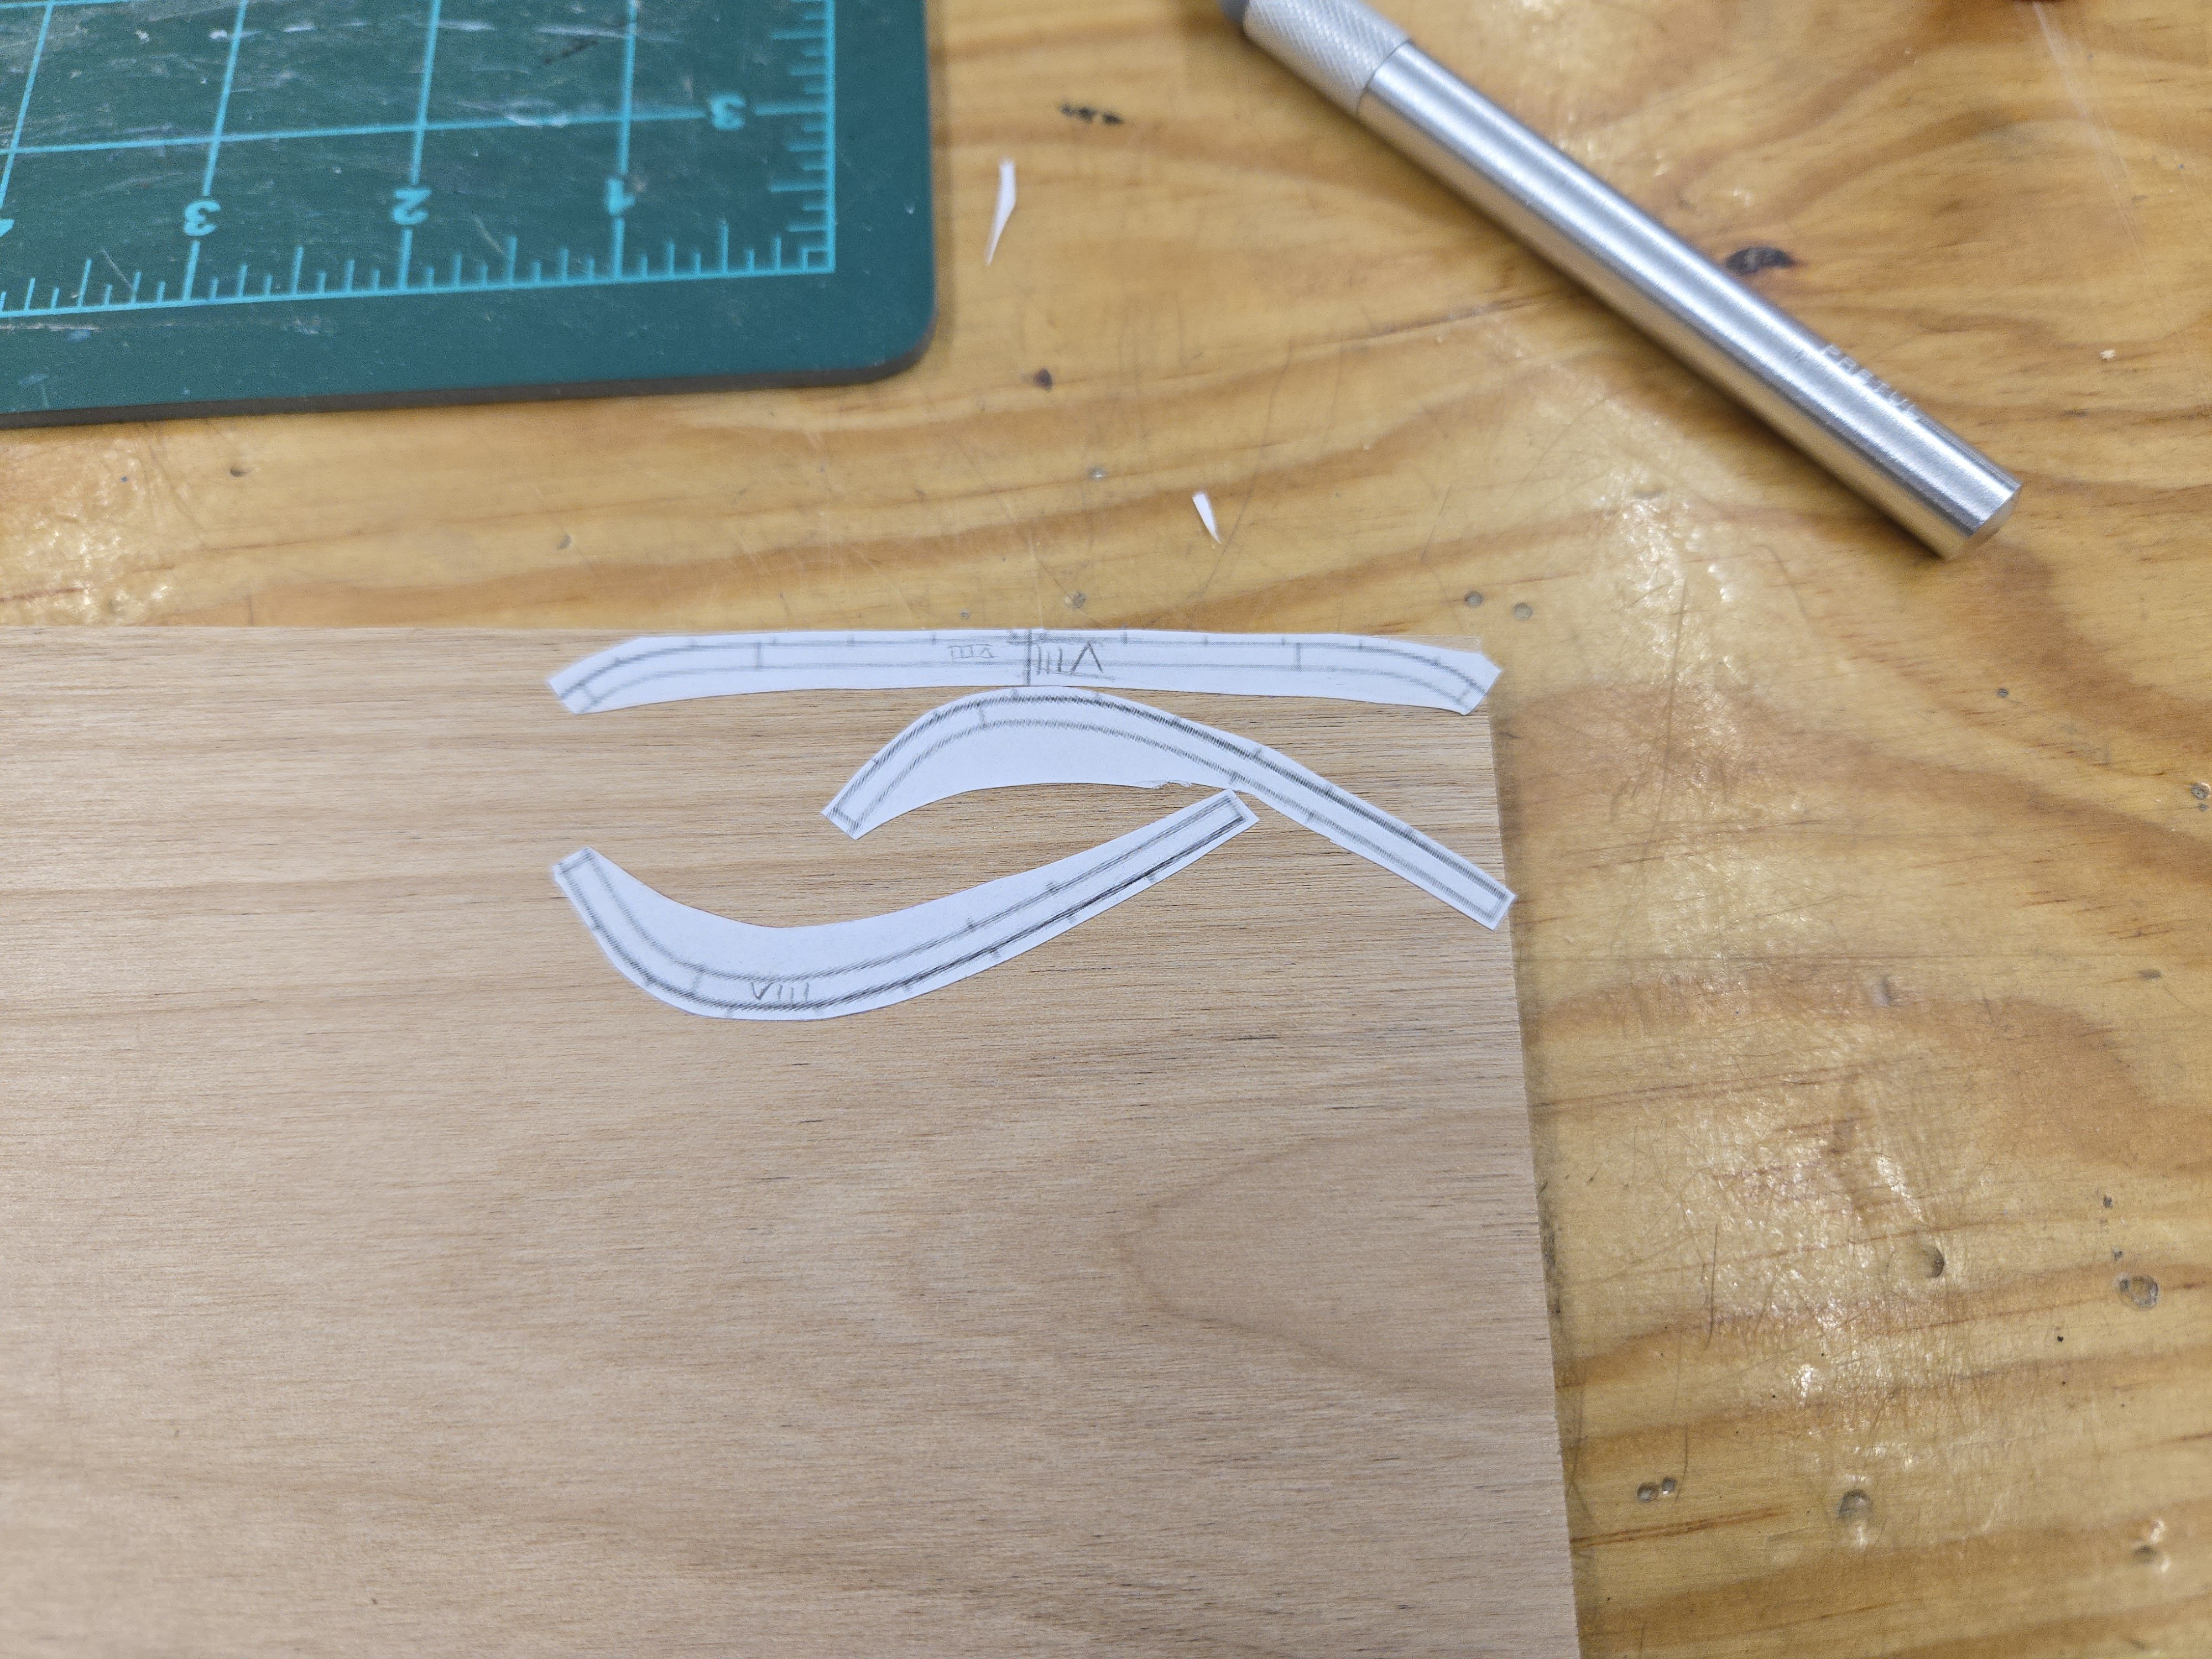
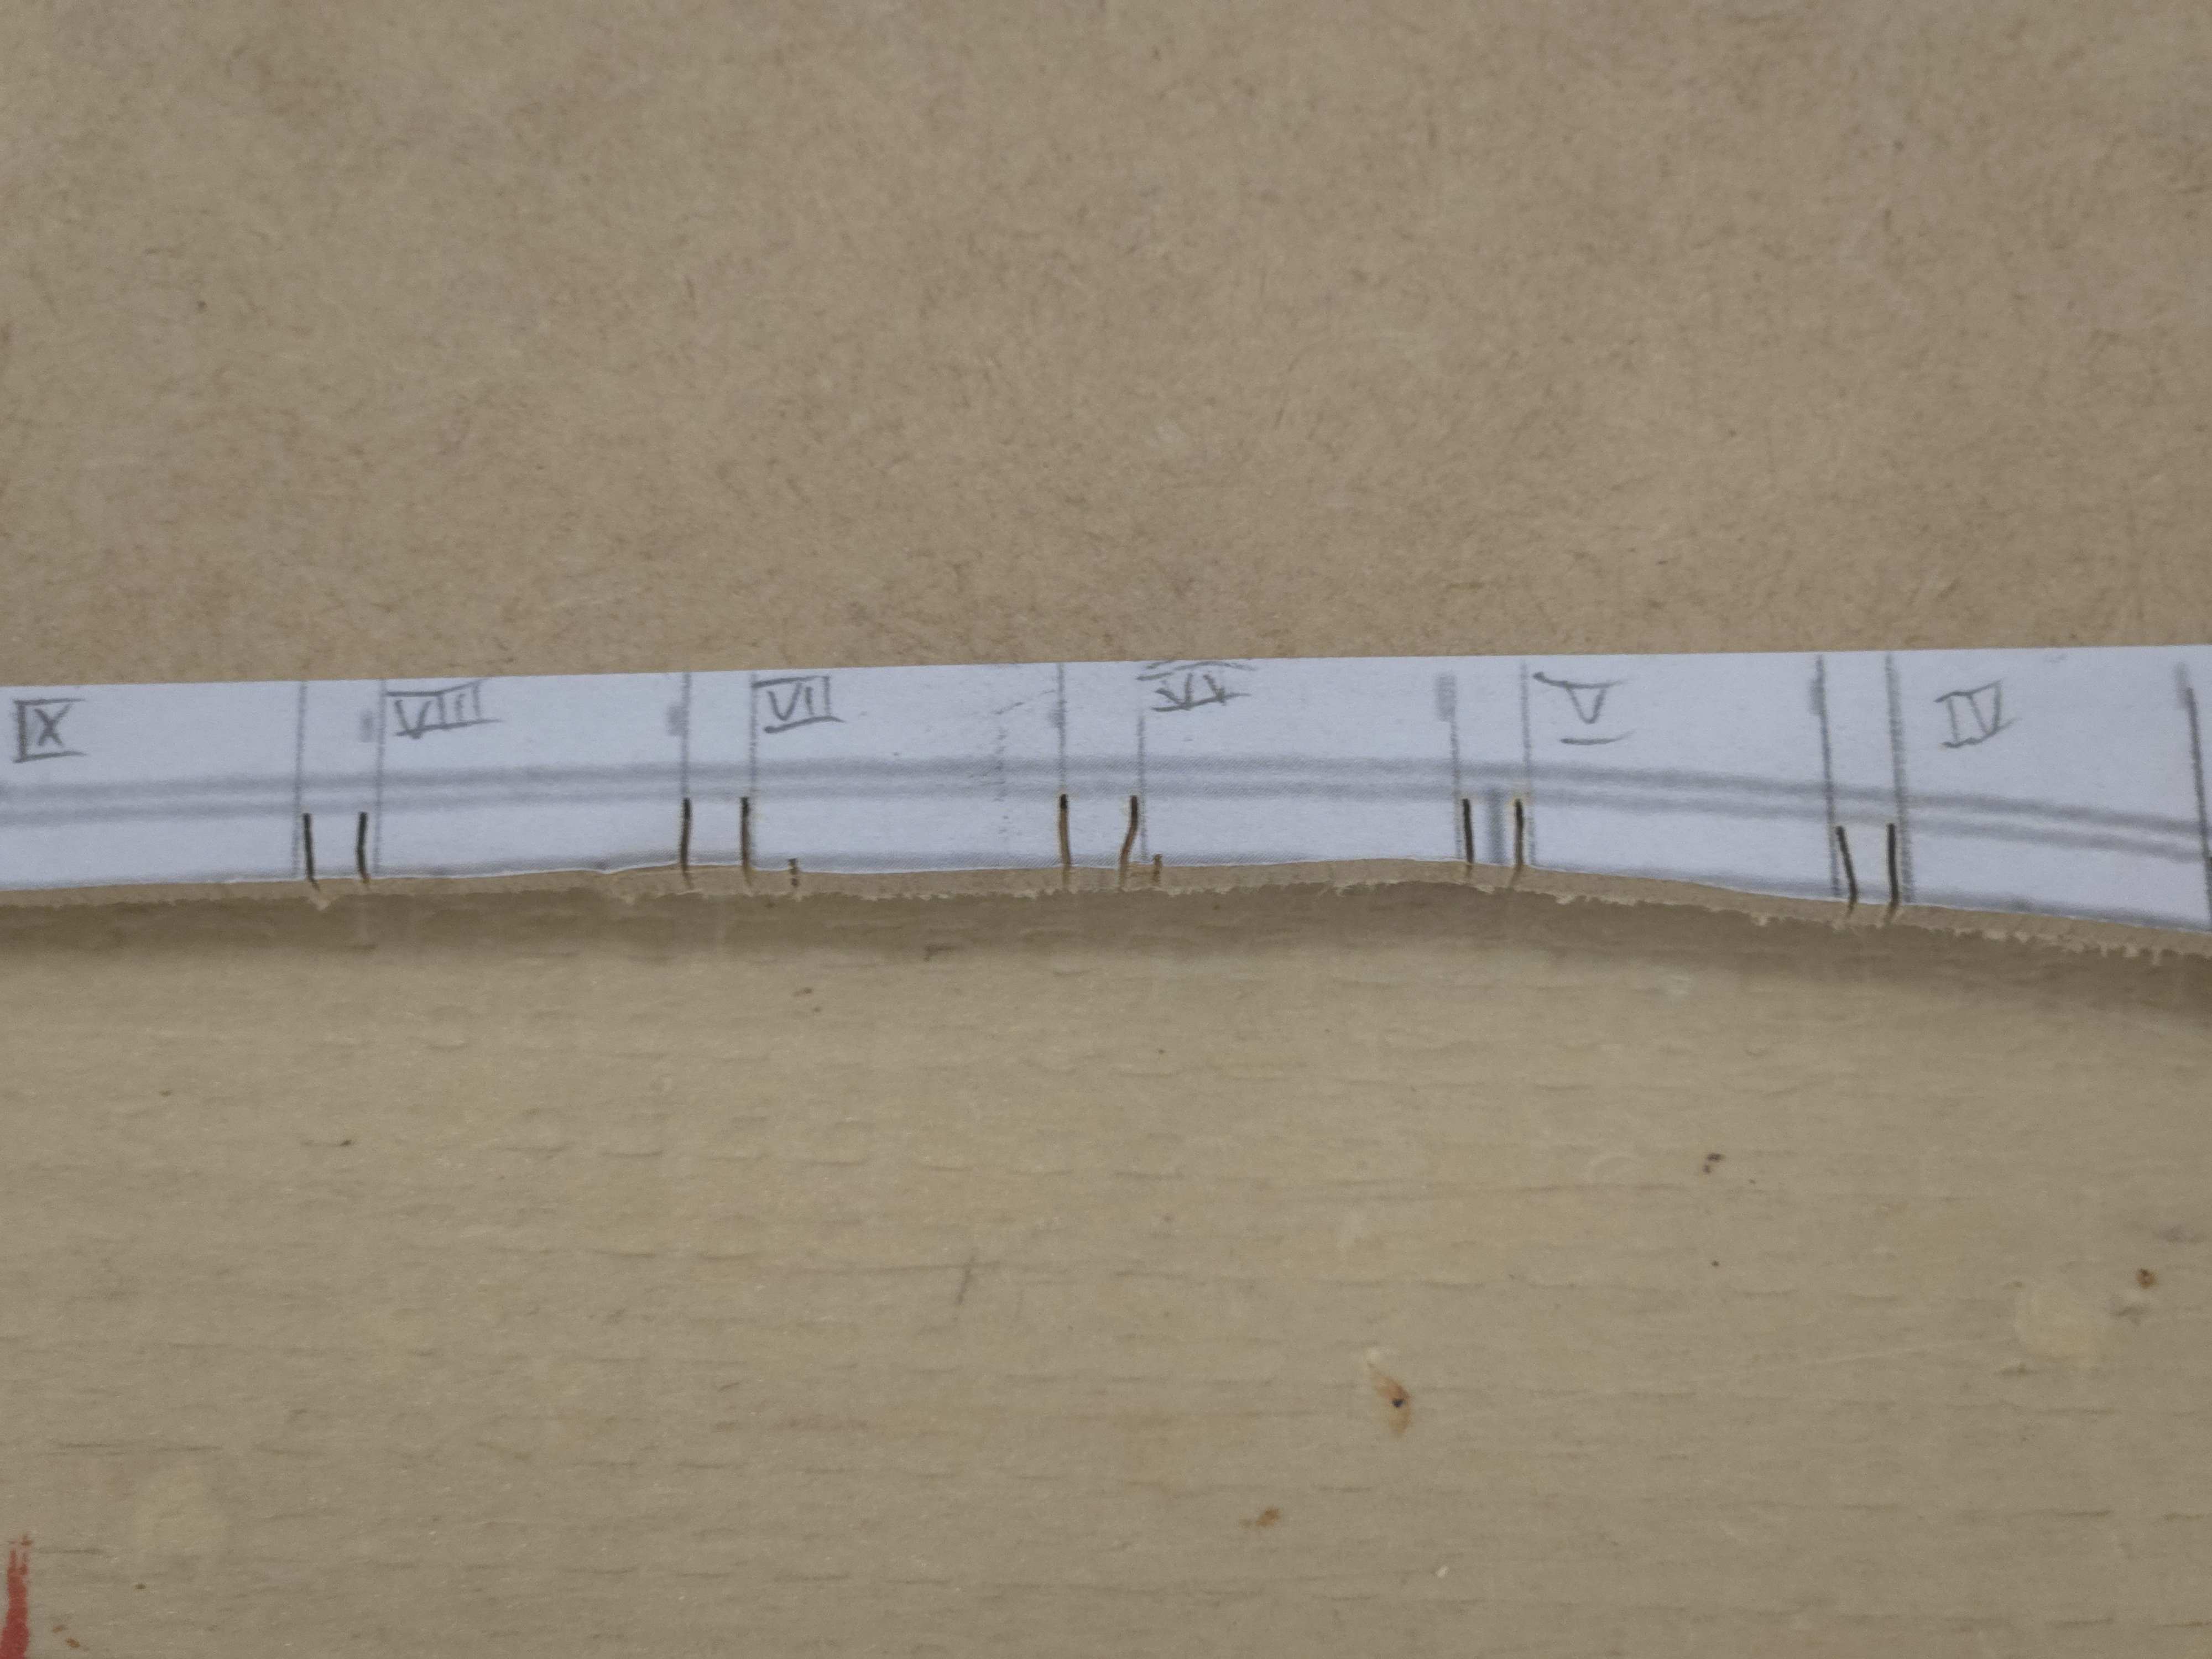
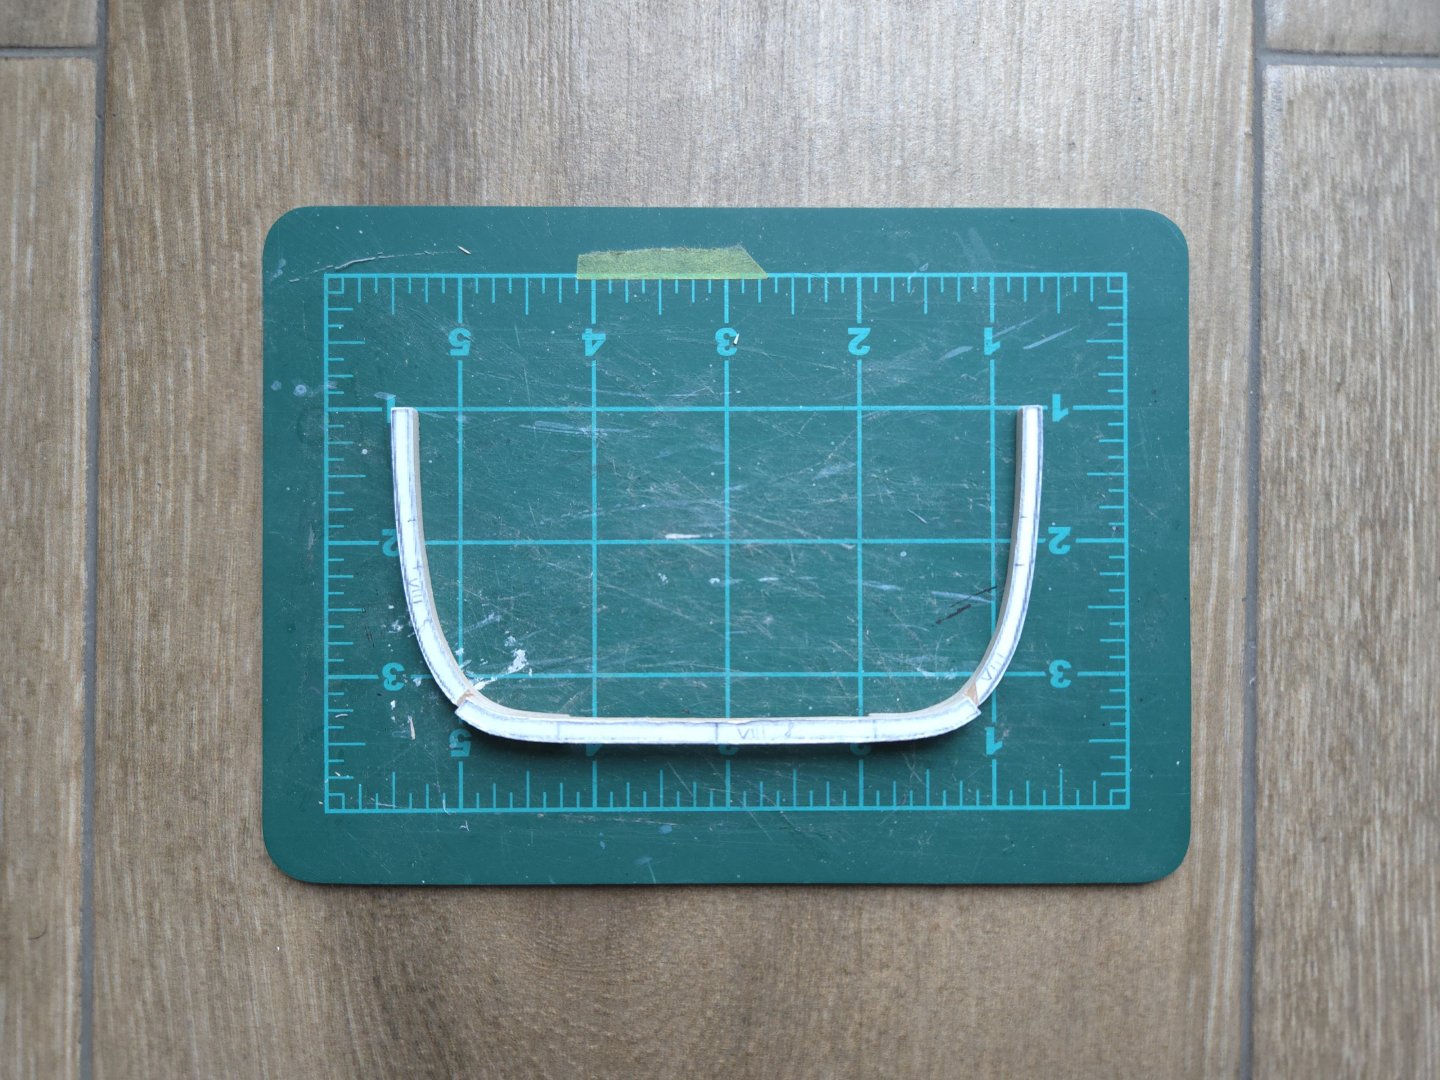
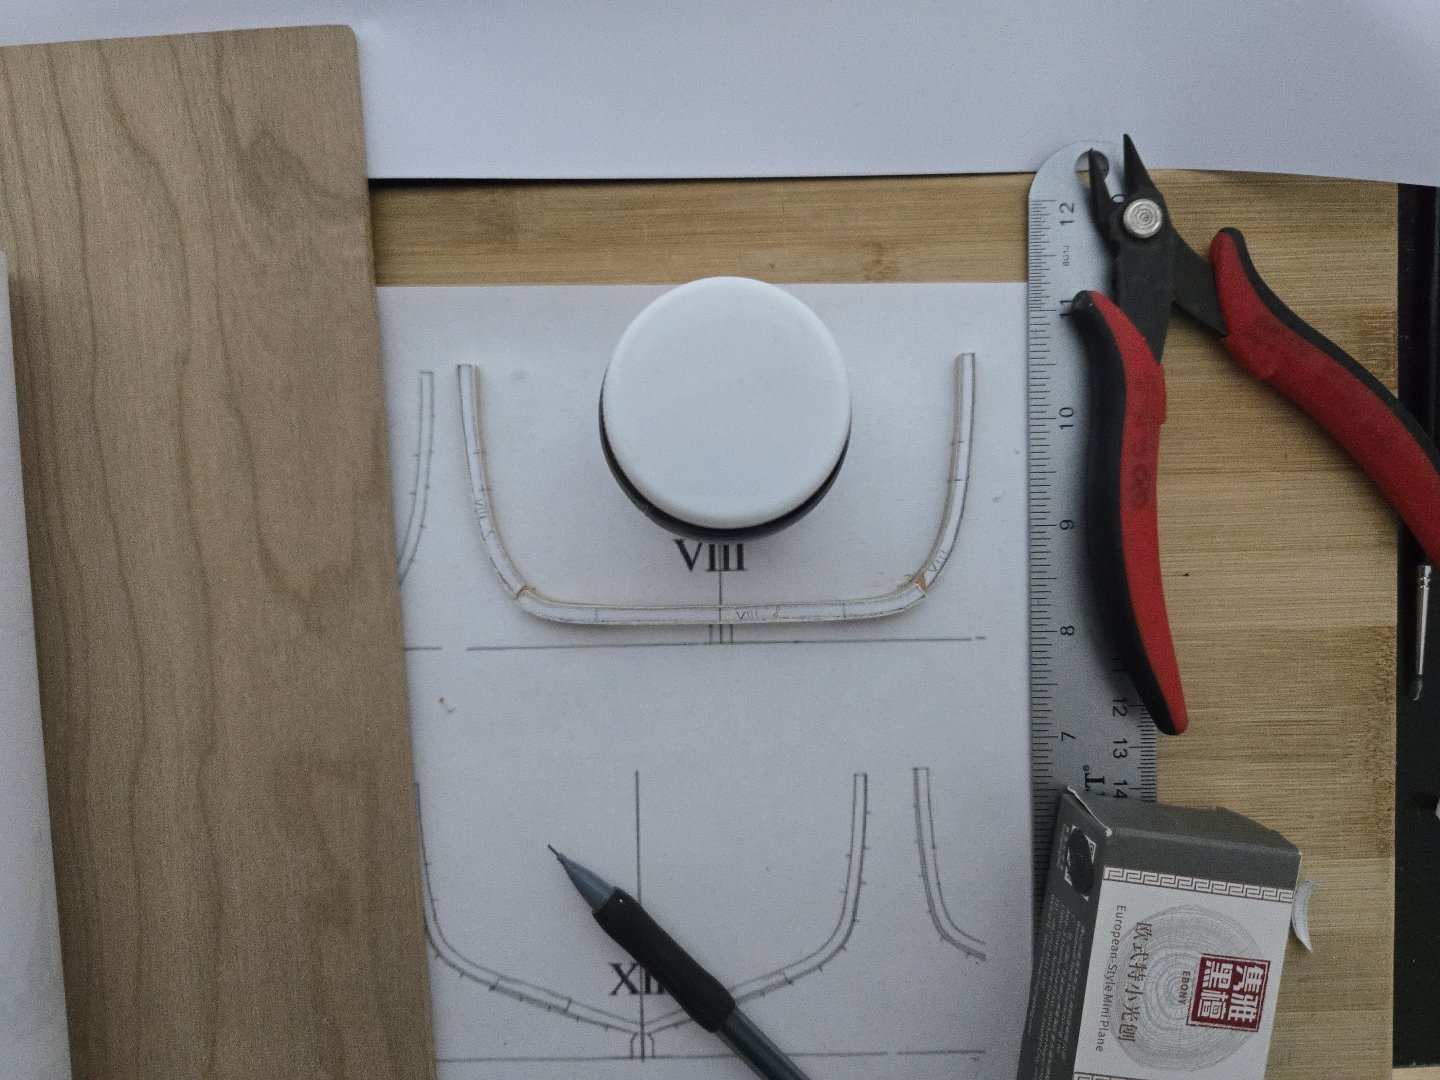
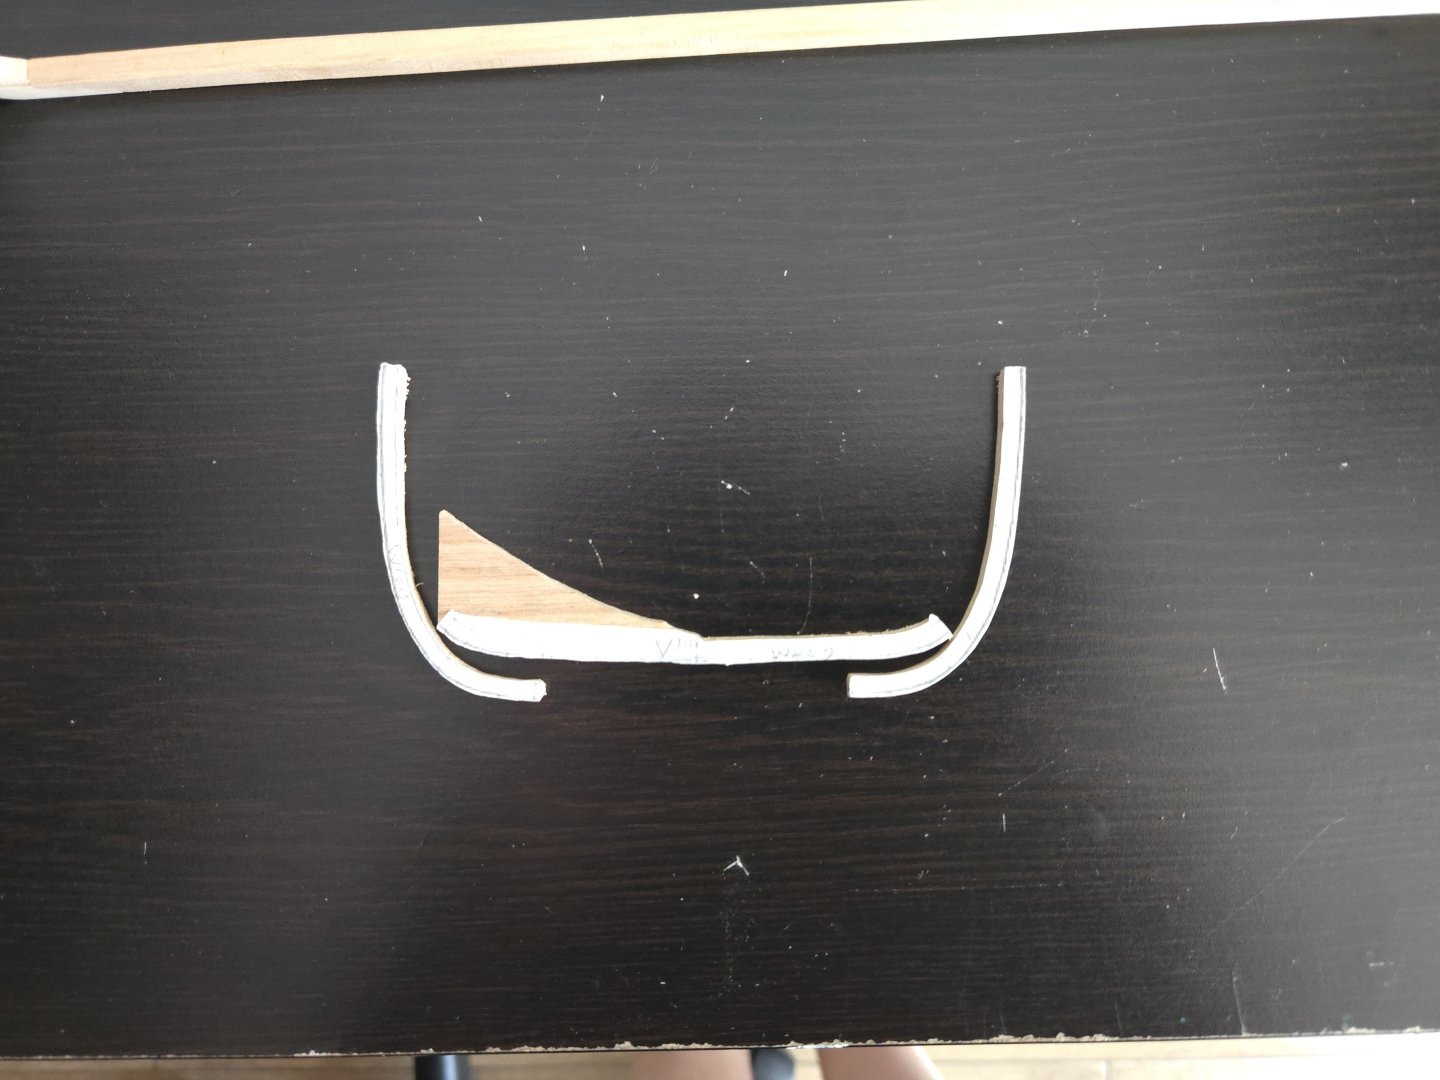
One step forward, and what may be many, many steps backward. Good news first: I've reached another milestone and finished the first frame. As mentioned earlier, my first attempt at sawing out the parts met with failure due to 1) cutting too close to the line, and 2) not paying enough attention to the rings in the wood sheet. So, this time I drew a line a short distance outside the actual frames, extended the ends a bit, and minimized the presence of rings running across frames. Drawing the line really helped guide my sawing, and I was much more successful this time. While my first attempt had led to failure on two out of three frame parts, this time I only had one failure out of eight parts (and I think it was because I was rushing to try to finish sawing before the workshop closed--a good lesson there to take my time). Granted, this is just with rough-cutting, and I still might break parts during shaping, but it's a promising result. Making the first frame (number 😎 did take a little while, though. The pieces required a ton of sanding, even with leaving a bit for fairing. In the future, I'm going to try to draw the saw lines slightly closer to the actual frame, while still leaving space for fairing. In any case, after a lot of sanding, I was ready to glue together the frame. I removed the paper from the areas that would be glued. I then secured the futtocks to a copy of the plans with a couple tiny dabs of a glue stick, so that they would stay in position but be easy to remove later. I then glued the floor in place, making sure it was properly lined up. Given that it would be quite difficult to clamp like this, I simply held it with finger pressure for 10 minutes or so. I also used a damp brush to remove any excess glue. Finally, I was able to remove it from the plan sheet. I gave it a light sanding to smooth things out, and removed any excess glue left over. With that, my first frame was complete! In the future, I may want to leave slightly more meat on the frames to ensure proper fairing. I'm also wondering how I'm going to fair the interior, which seems quite complicated. But, I'm happy to have a frame complete! Now the bad news. Looking over the plans, I placed the frame over its proper location in the top-down hull view, and found that the top of the frame was a good bit wider than shown on the plans. It's not just because of having left the frames a bit thick for fairing, as the interior edge was too far out as well (even with the extra left on for fairing). I began measuring across the hull on the top-down view at frame locations and comparing them to the distance across frame tops on the frame drawing sheets, and found that the frames were over-wide. I was worried that I had missed something weird with the scaling when I resized and printed the plans at 1:32 scale. So I went to the original plan sheet. There, too, the frames were overly wide compared with the top-down view. For example, on the original plans at 1:36 scale, Frame VIII measures 10.8cm across from the outer edges of the tips of the frame on the frame drawing sheet (Plan 3). Meanwhile, in the top-down hull plan drawing (Plan 2, the one showing the details of the hull interior), Frame VIII measures 10.55cm across (against from the edge of the frame, discounting the hull planking which is shown on the plans). I'm very concerned by this. If the frame drawings are wrong, I don't really know if this build will be possible. It's one thing if everything is a couple mm wider and I just need to widen the jig a bit, as this is a model of a generic type rather than a specific vessel, but I don't know if the frames will still produce a fair hull. And unlike with a POB hull, where you can sand a lot to fair, that's not as possible with a POF build. It's also quite frustrating as the whole reason I bought a monograph was because, in theory, the drawings should be accurate. Not to mention that I had many of the wood sheets cut to custom thicknesses for this build, specifically. The only thing I can think of is that I believe @KLarsen mentioned being surprised in his Santa Caterina build that the top-down view corresponded to a lower point along the hull and not the sheer line. I still need to check whether that may be the case here. I'm hoping my issue is a relatively easy fix like this, as otherwise I'll need to work how how to correctly adjust the scaling on the plans, reprint, and redo things. Finally, I realized that while I checked the hull length and width to make sure there were no scaling errors when I first printed out the plans eight months ago or so, I forgot to do so when I printed a new batch more recently, so I need to double-check that as well (although it would of course not impact the broader problem which is in the original plans).

- 139 replies
-
- 7
-

-
- ancre
- Bateau de Lanveoc
- (and 2 more)
-
That does look frustrating! If you're painting the cap rail, you can probably glue it back together and use a bit of wood filler to disguise the joints. The other option would be to make a new rail from scrap wood or by cutting from a fresh sheet of basswood of the appropriate thickness. I think you mentioned that you wanted to stain the cap rail, correct? In which case you'll probably want to make a new one so that the glue joints don't show up (although I suppose you could also creatively drape some rope over the joints). If you were thinking of staining it a darker color, you may want to just make both rails from scratch from cherry or a similar darker wood. Cherry is pretty widely available in a range of thicknesses and usually at very reasonable costs, and it's a much harder, more durable wood. Basswood is also available in a wide range of thicknesses and may be easier to get at your local craft store.
-
Thanks, that makes significantly more sense! I did a fake eye splice on the Canoa de Rancho build, but didn't think to use it here because I was worried that it wouldn't work with the line already served. But perhaps it would work, I suppose I would be serving back over the splice so any disruption to the original serving wouldn't be seen.
- 312 replies
-
- 4
-
-
- Chile
- Latin America
- (and 6 more)
-
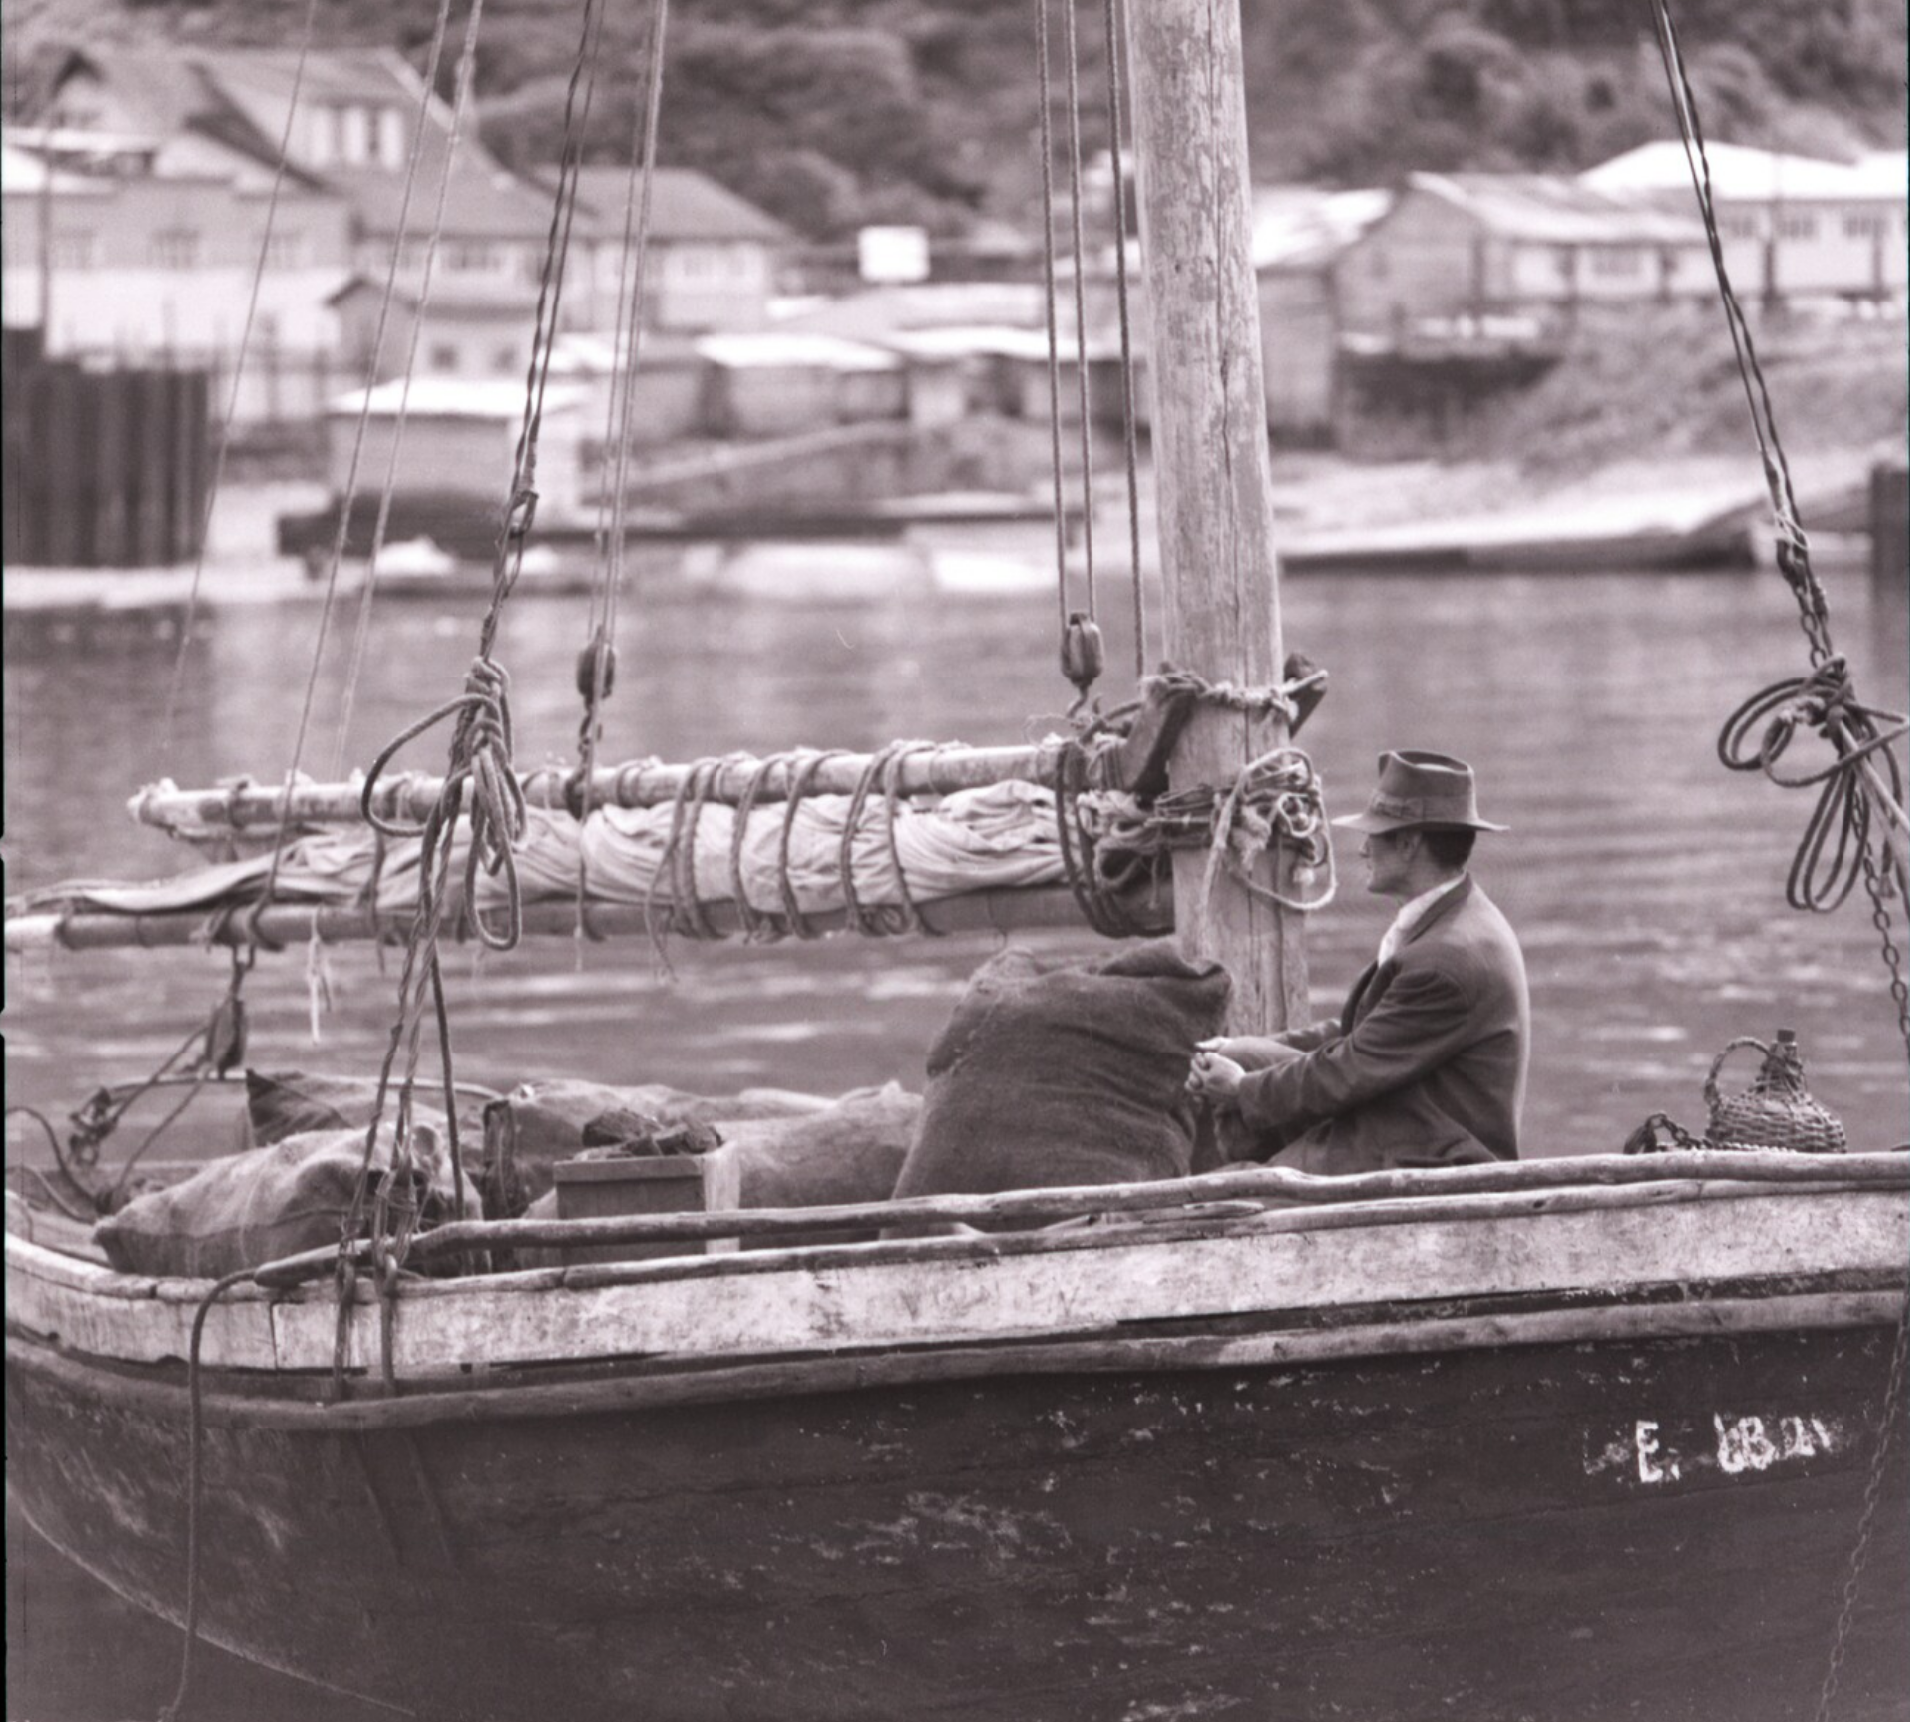
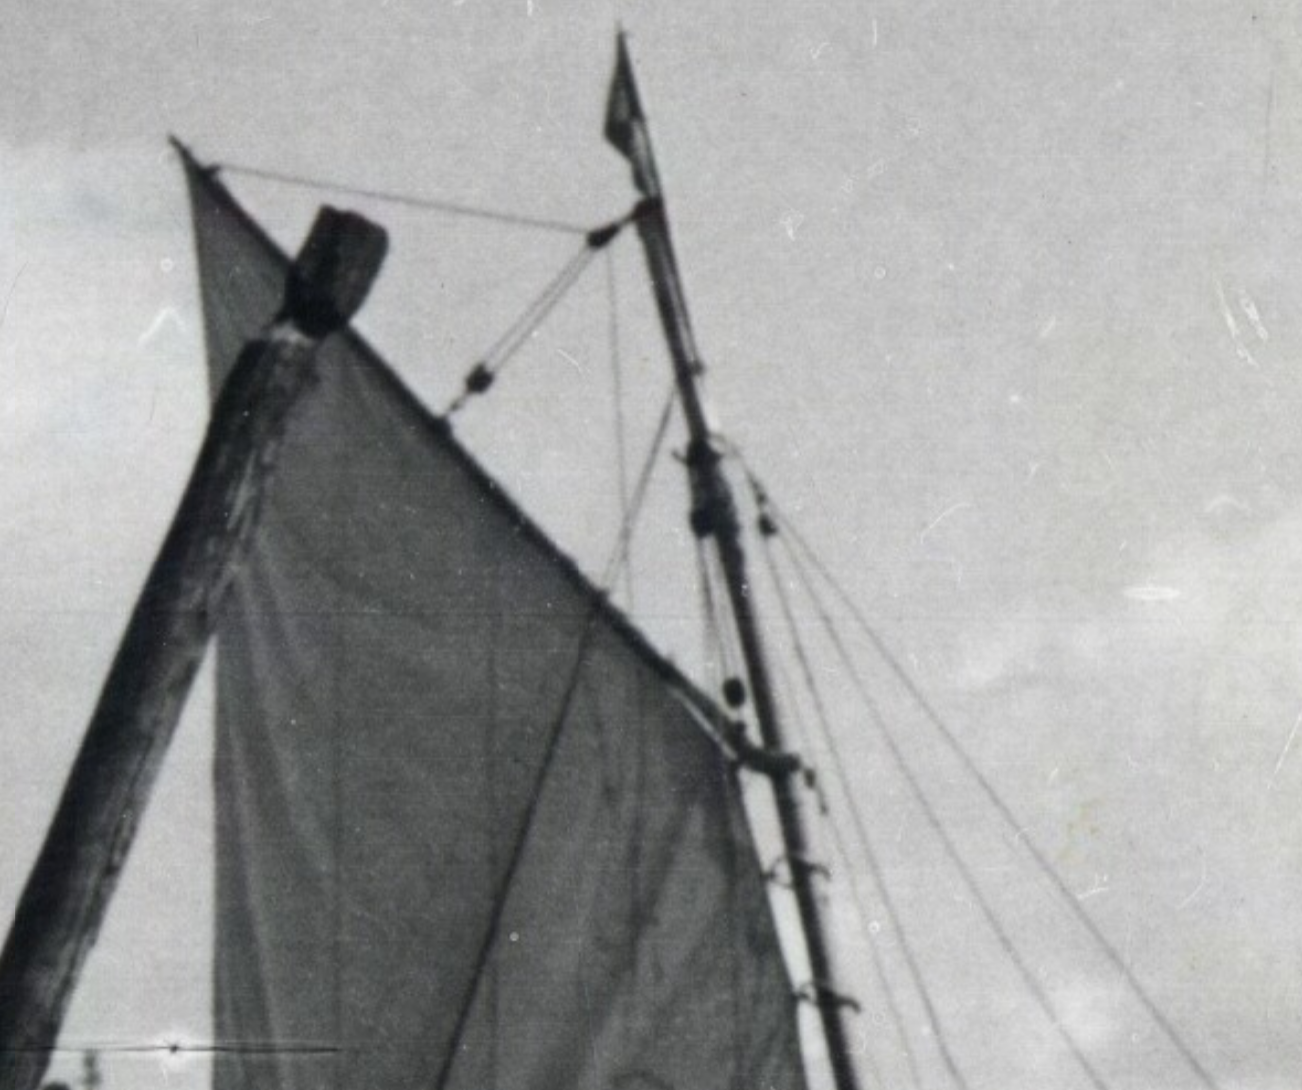
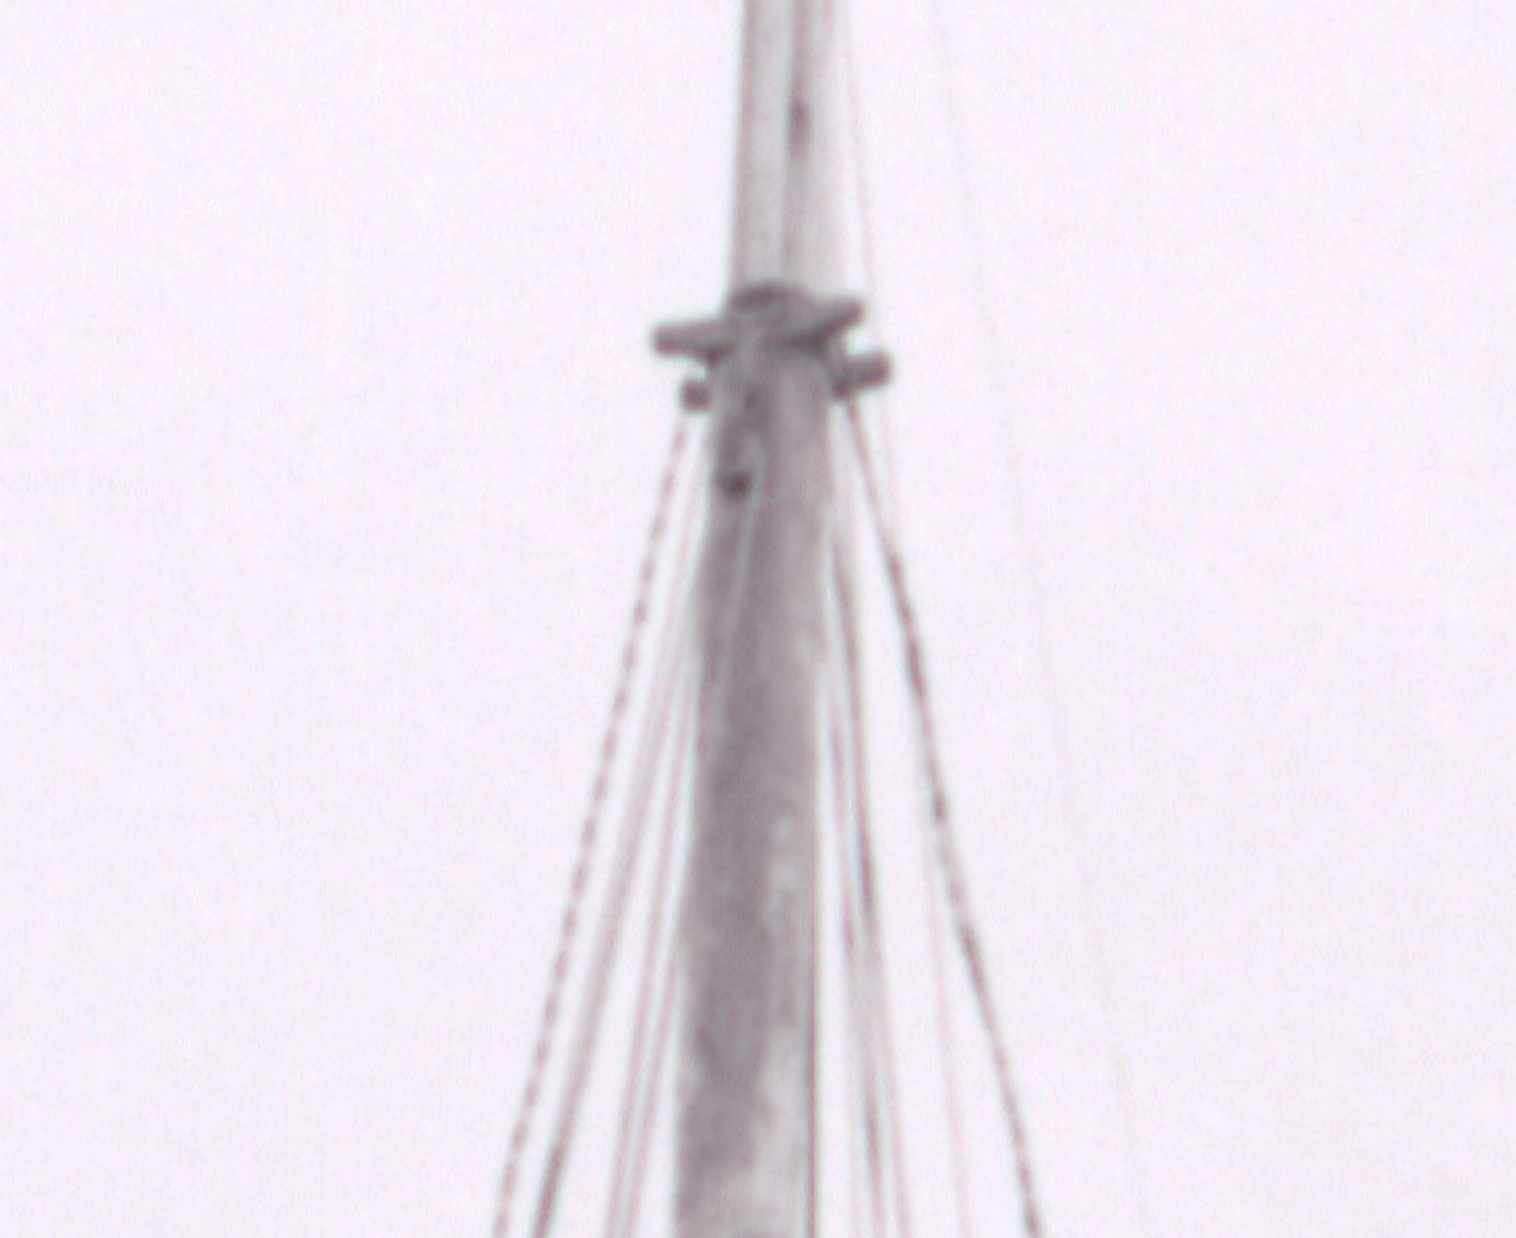
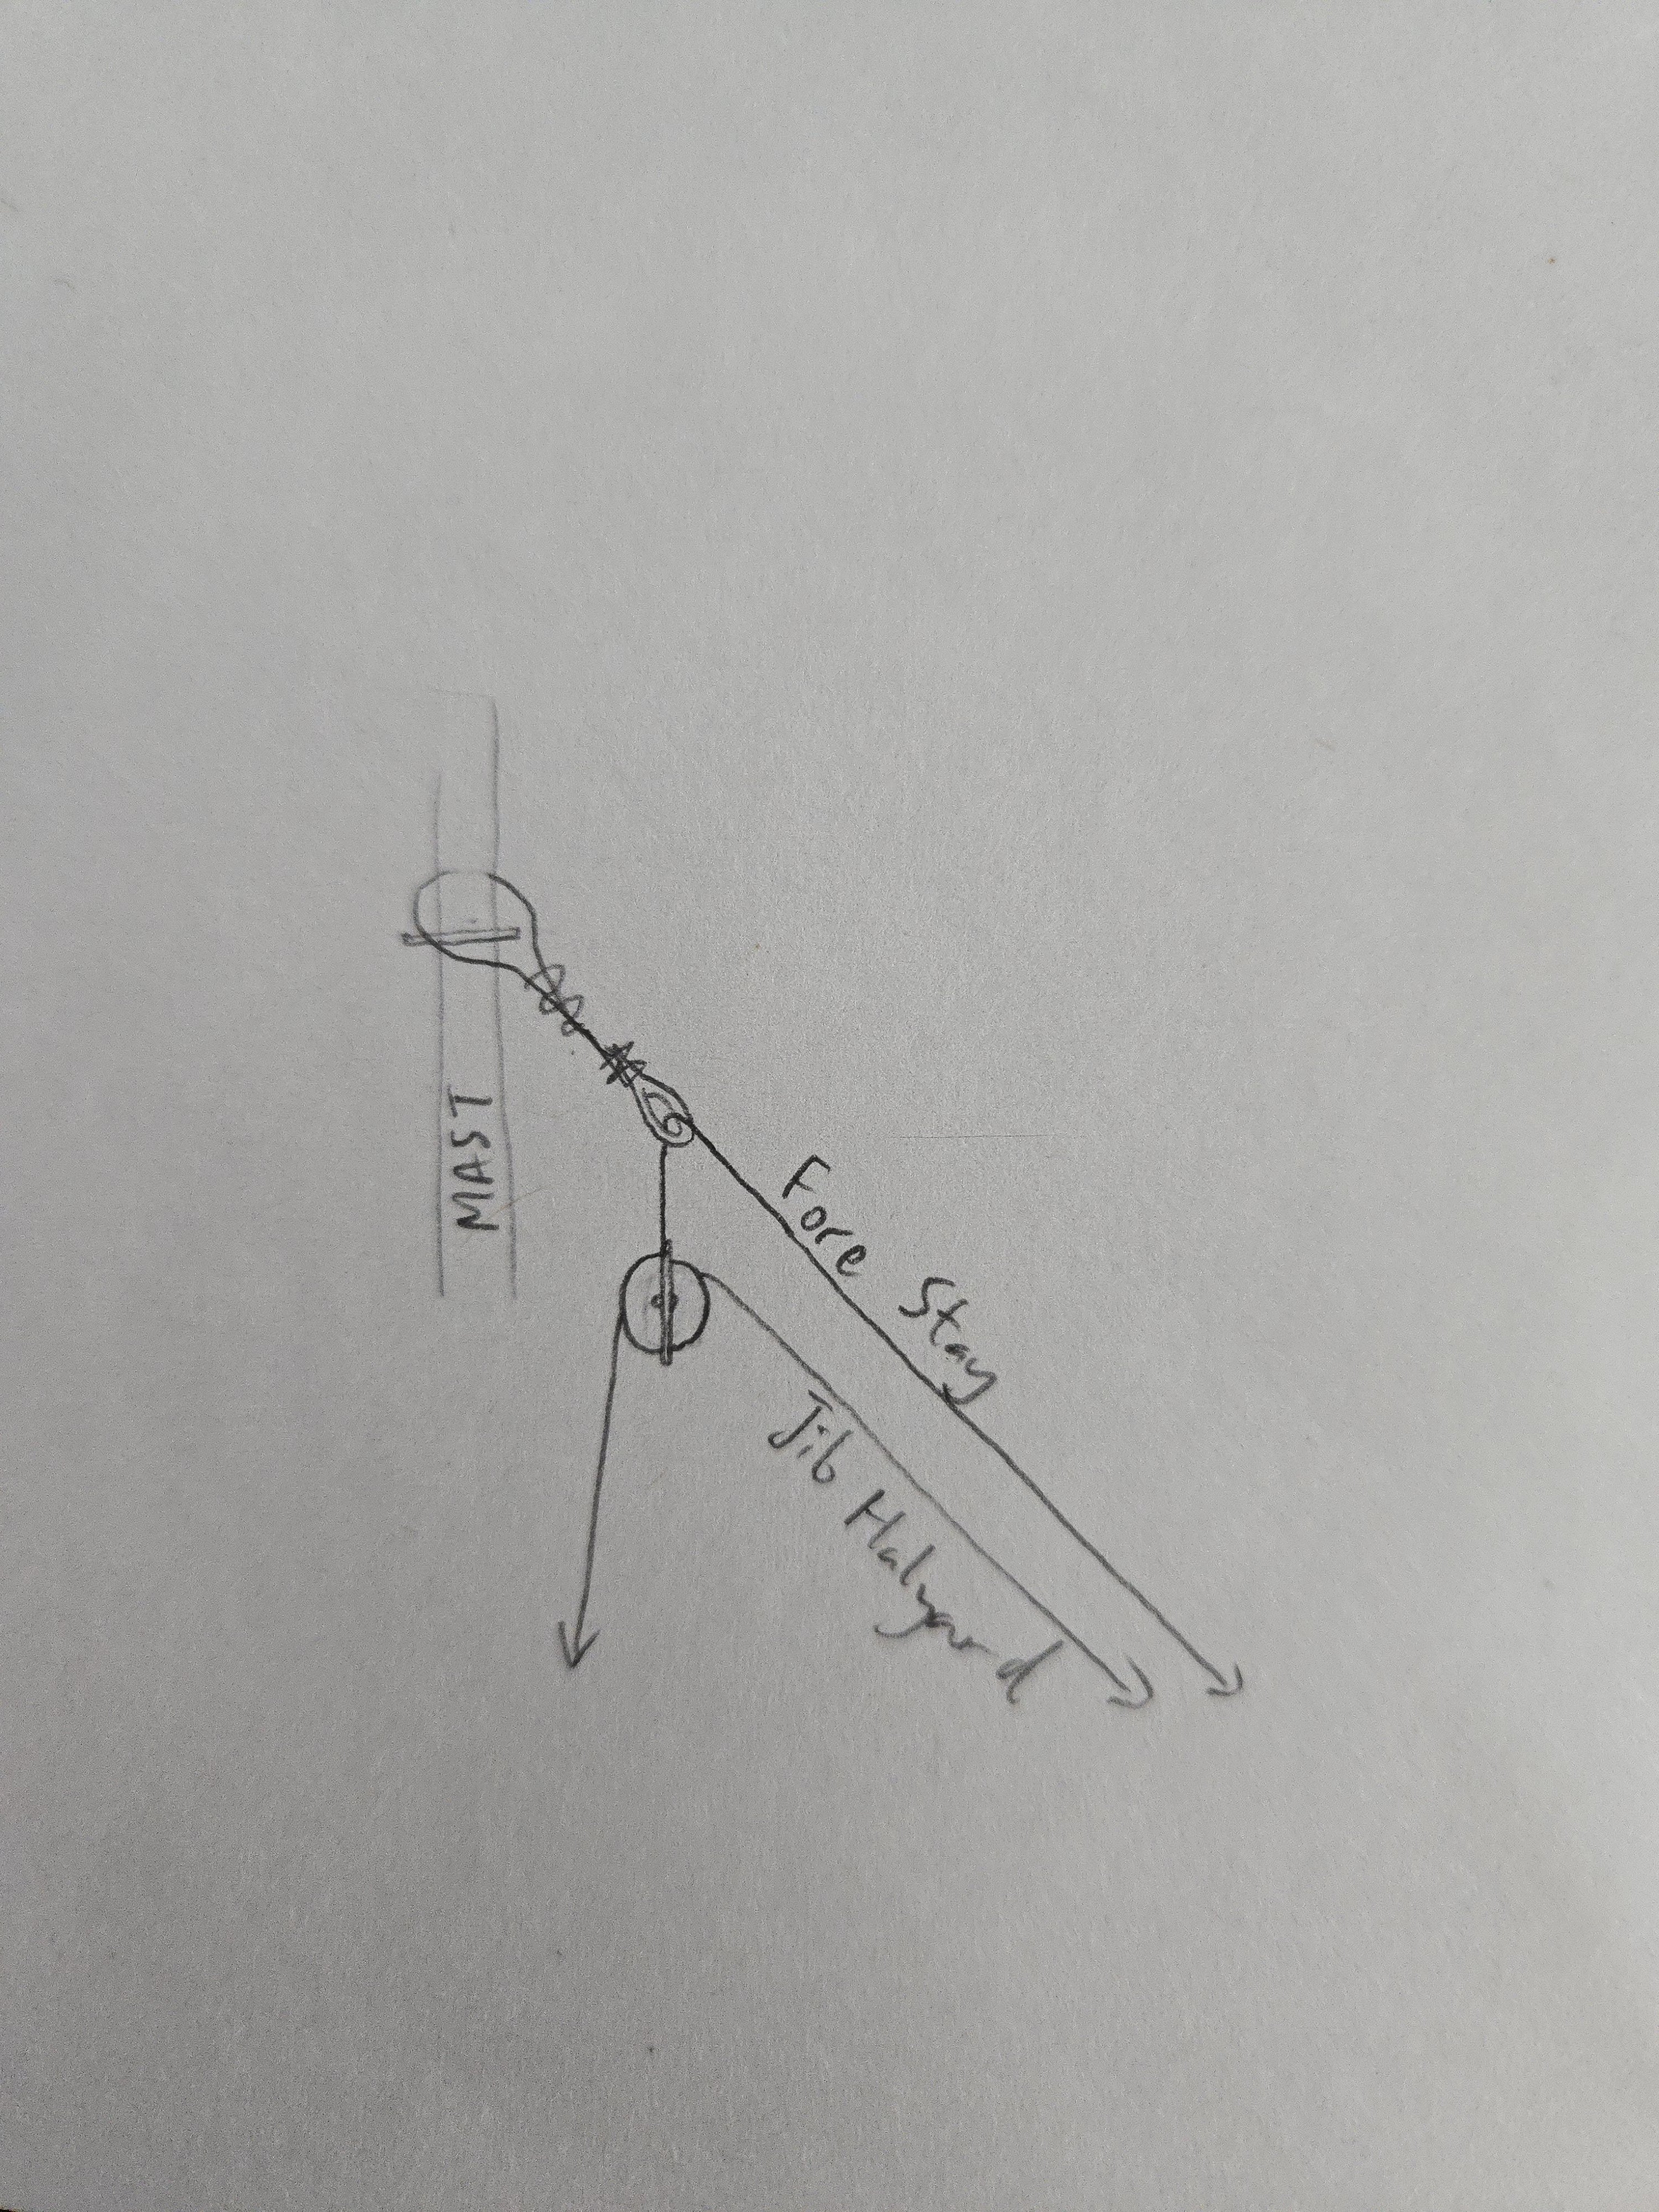
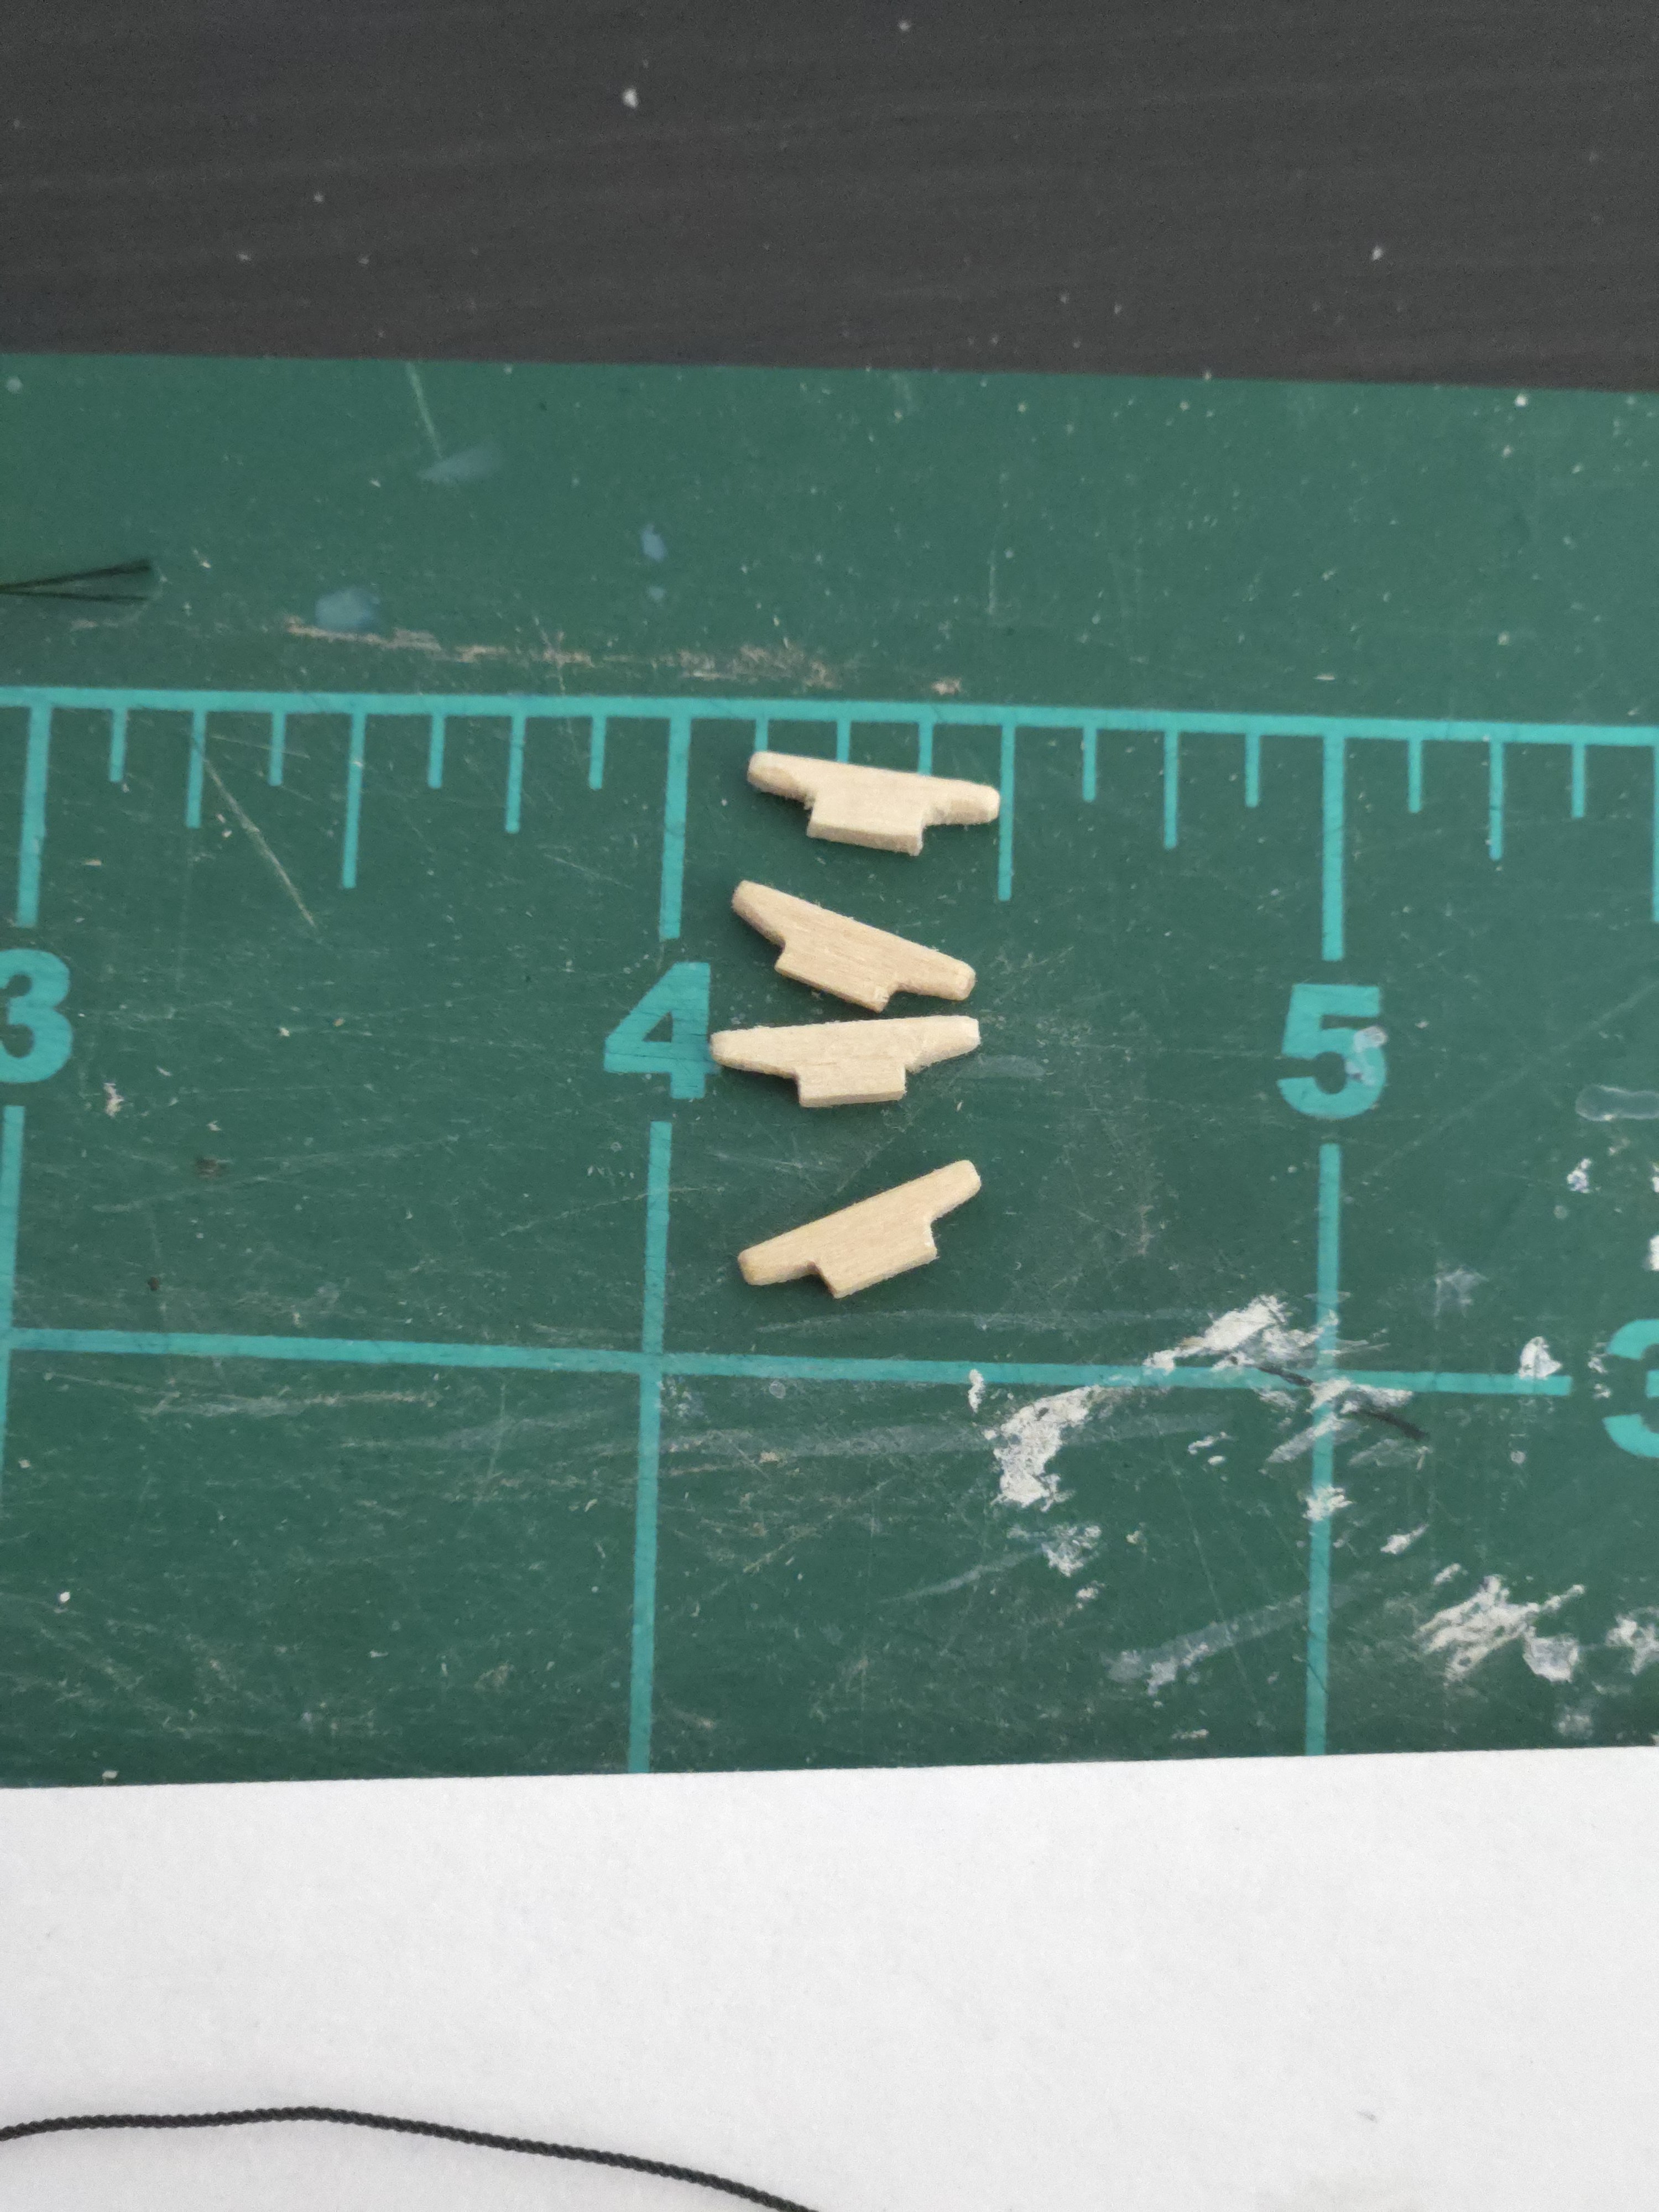
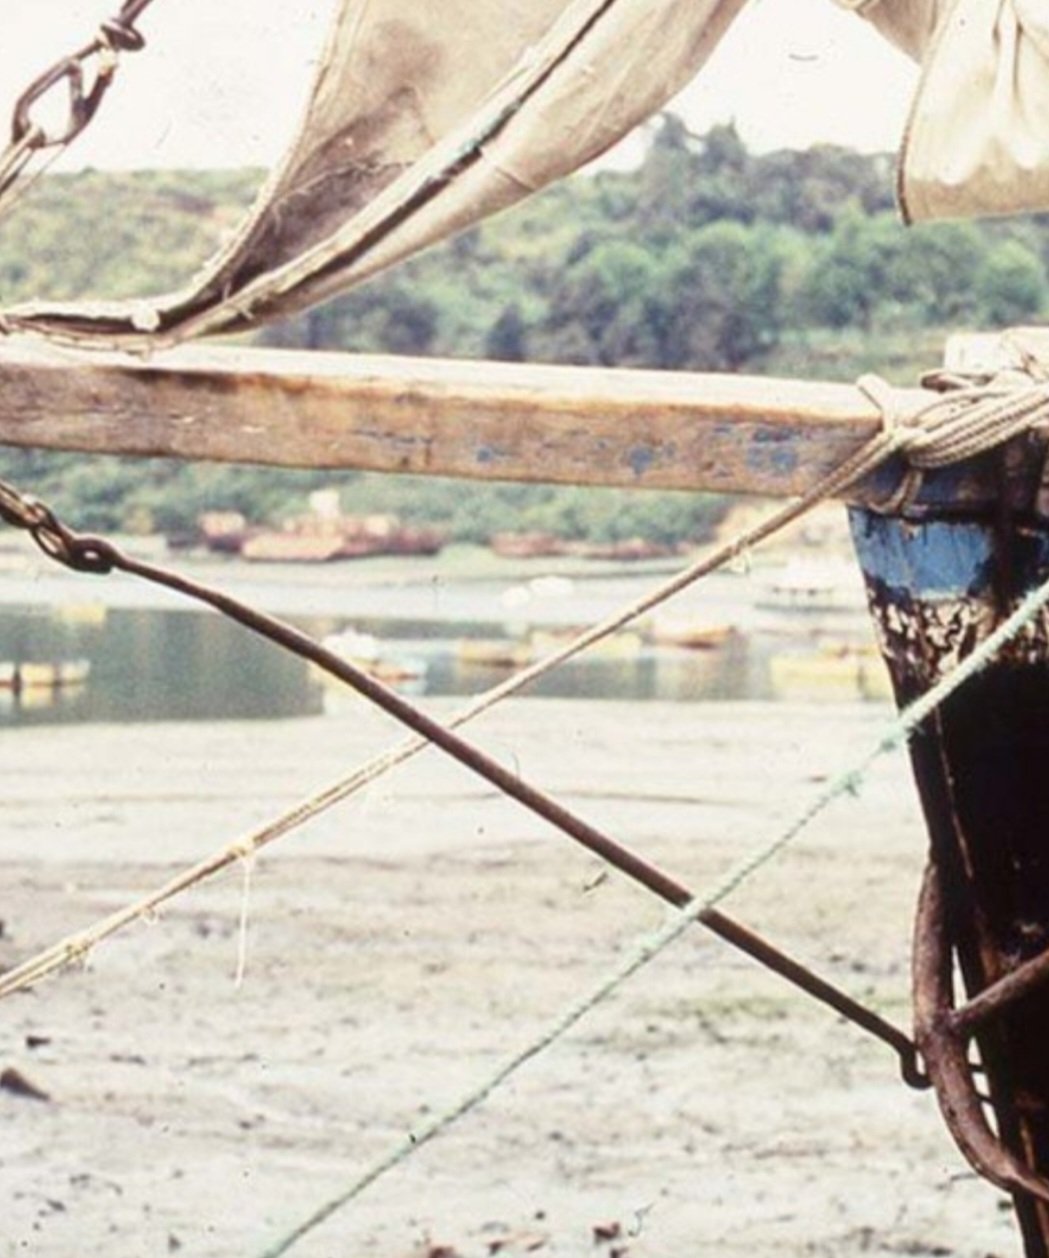
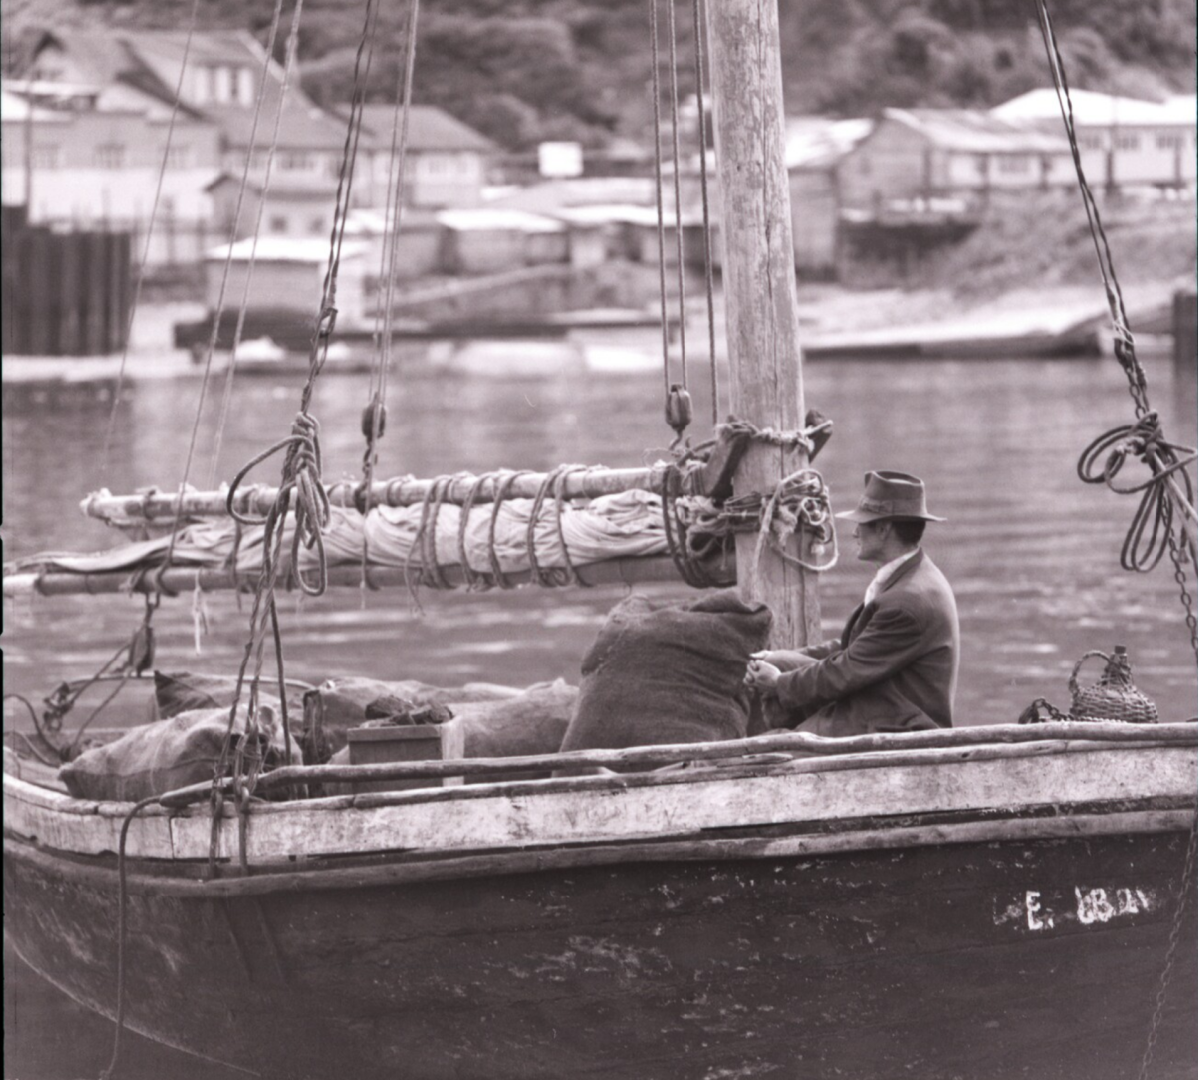
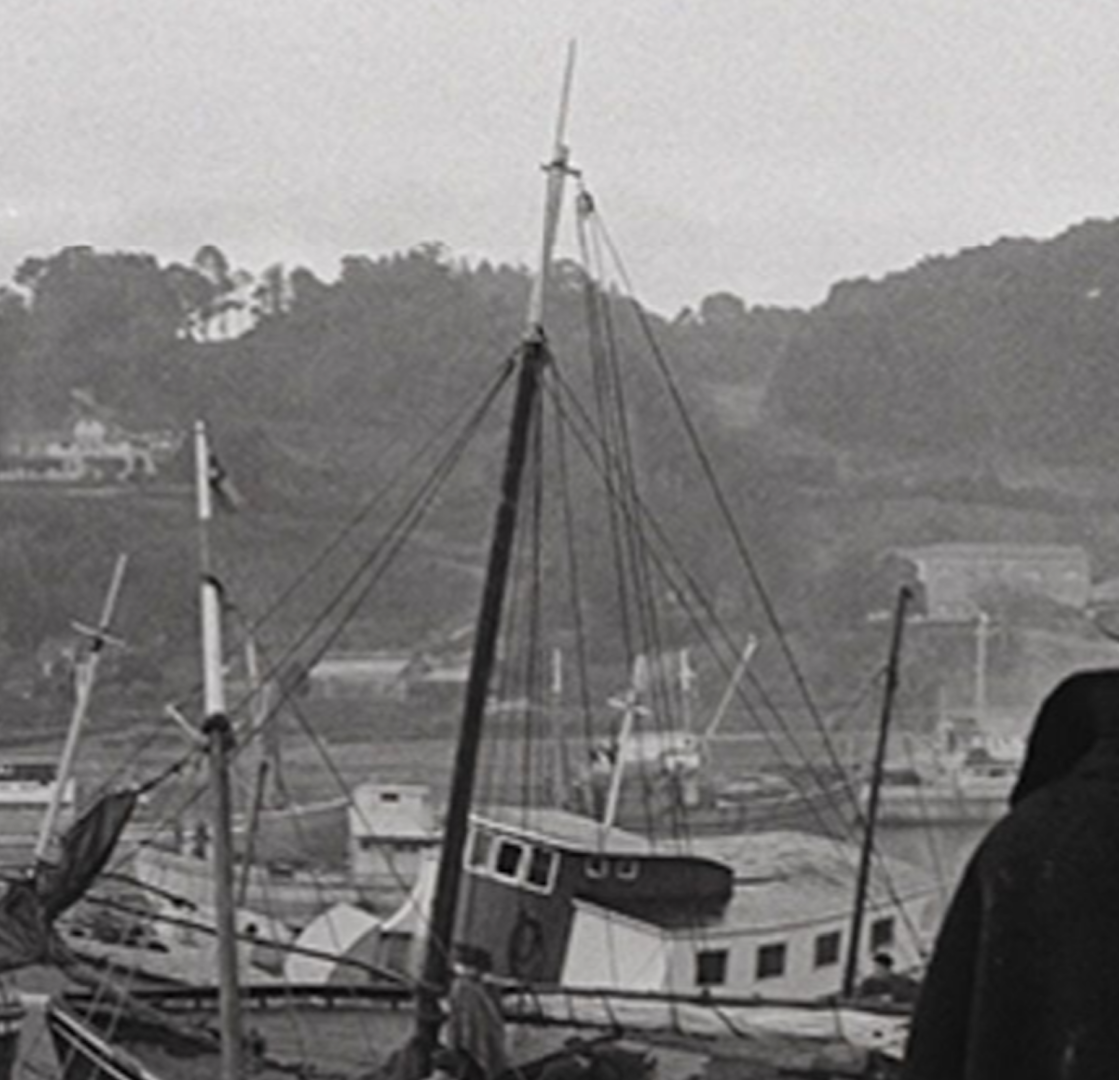
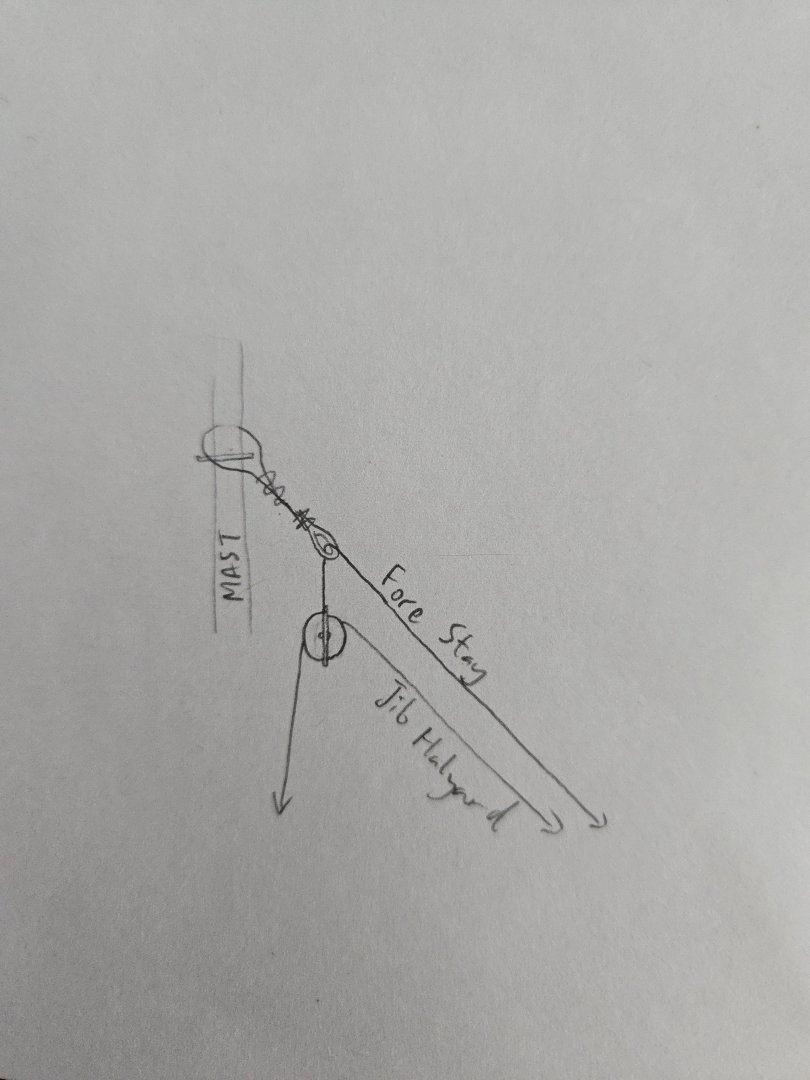
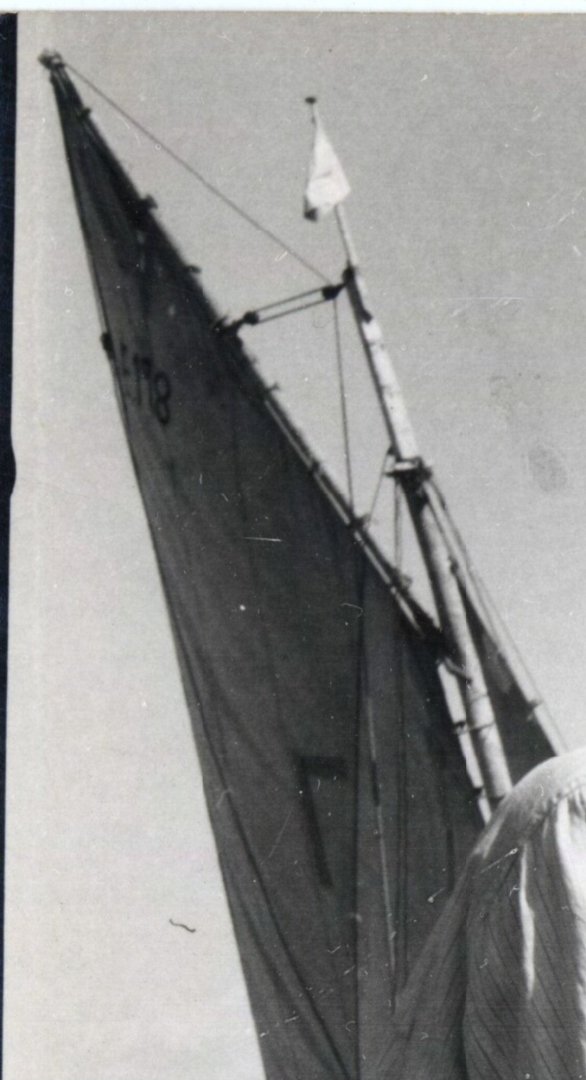
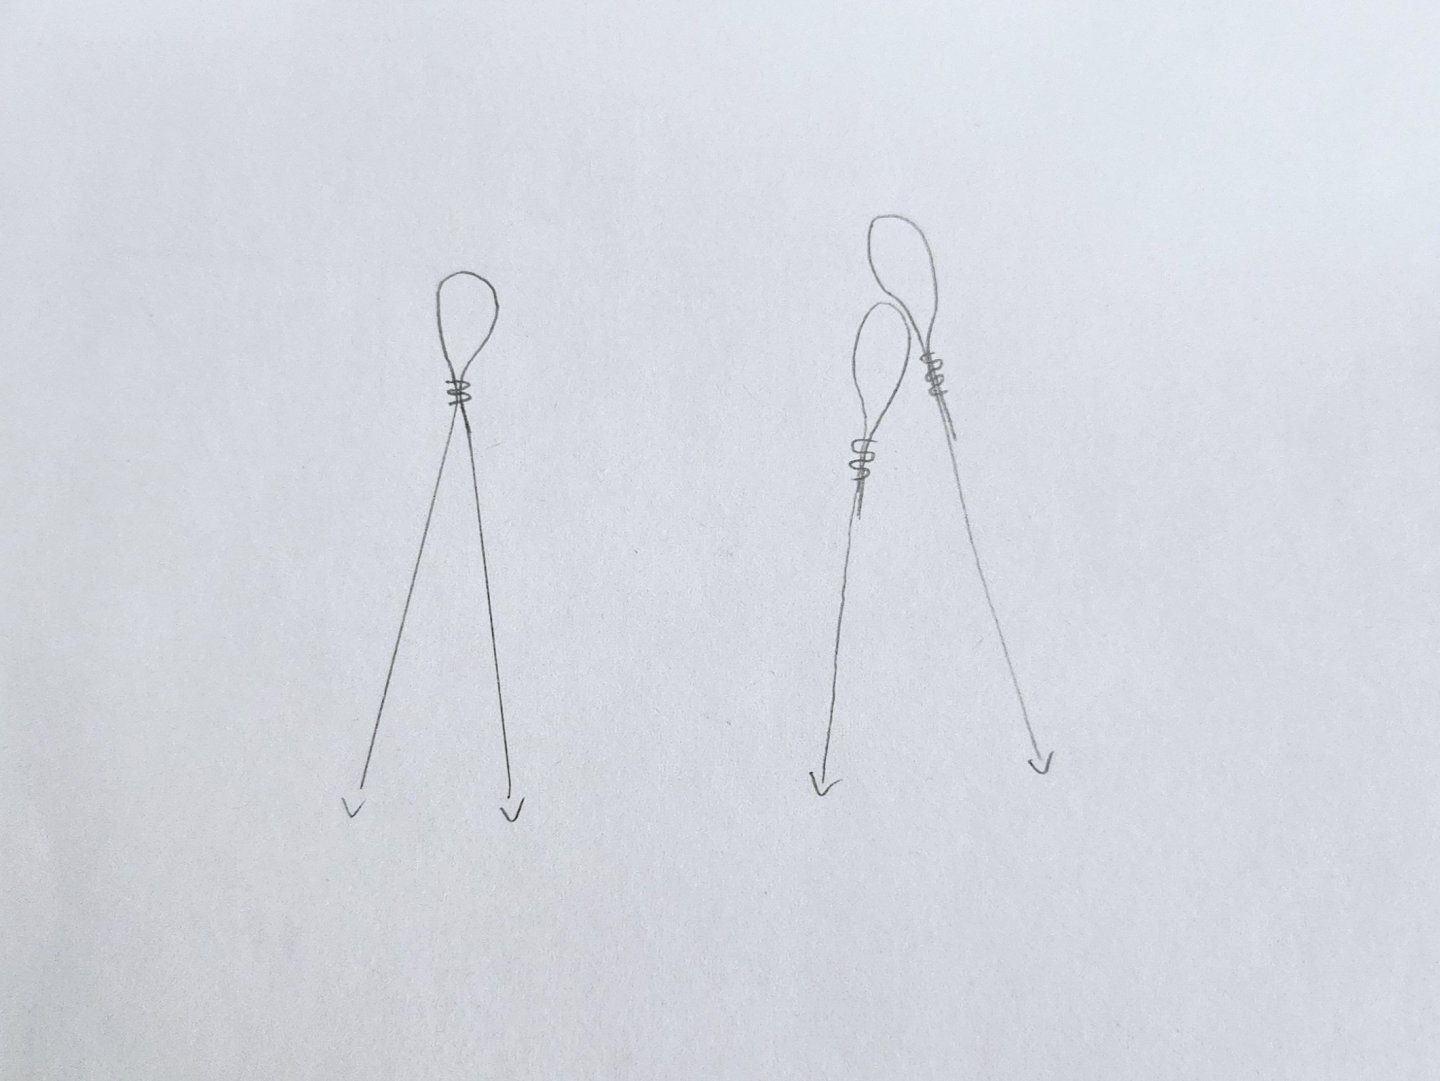
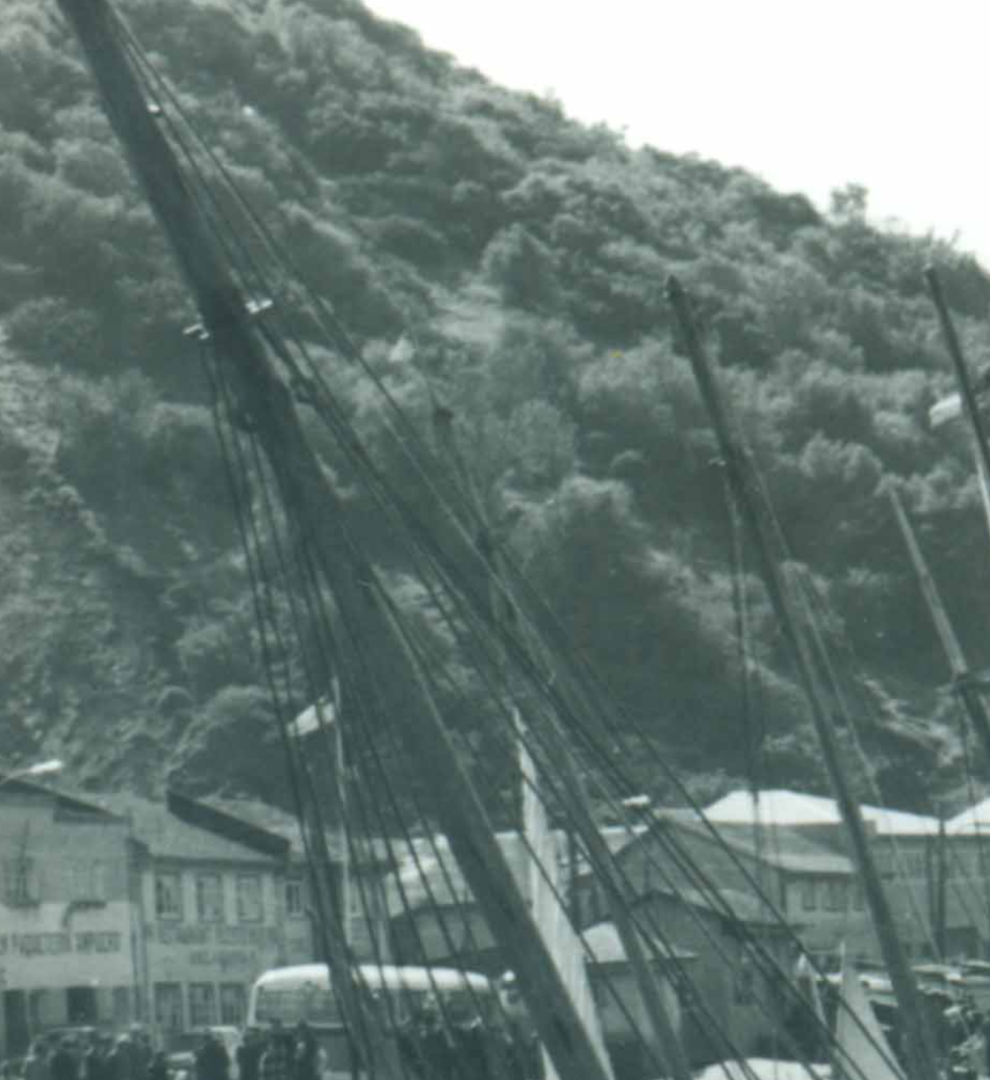
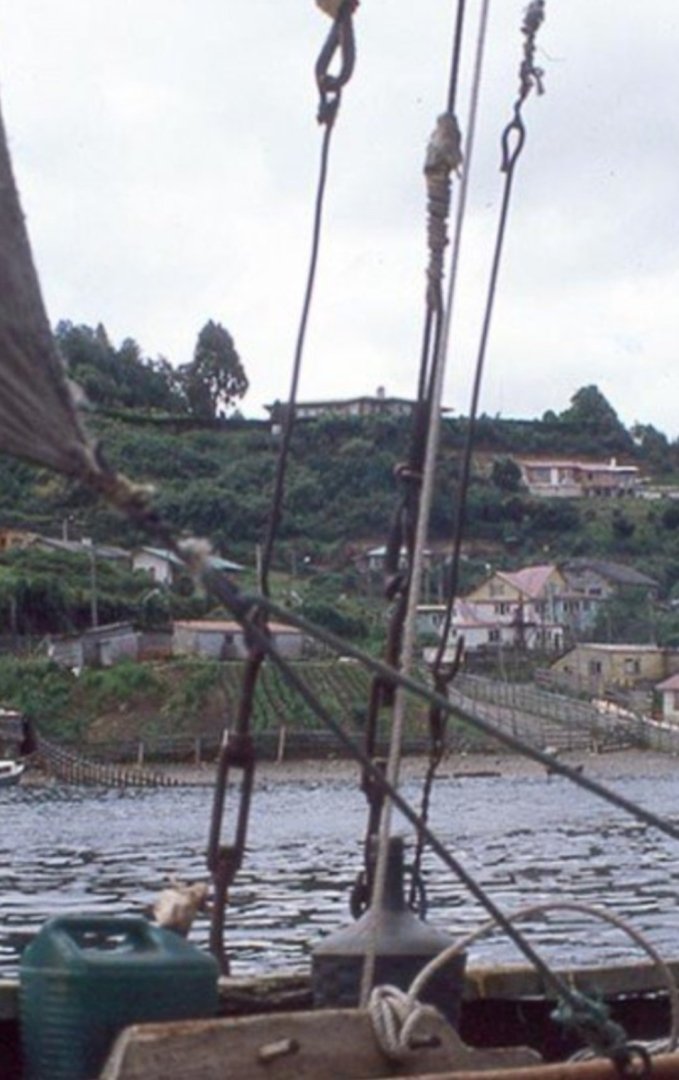
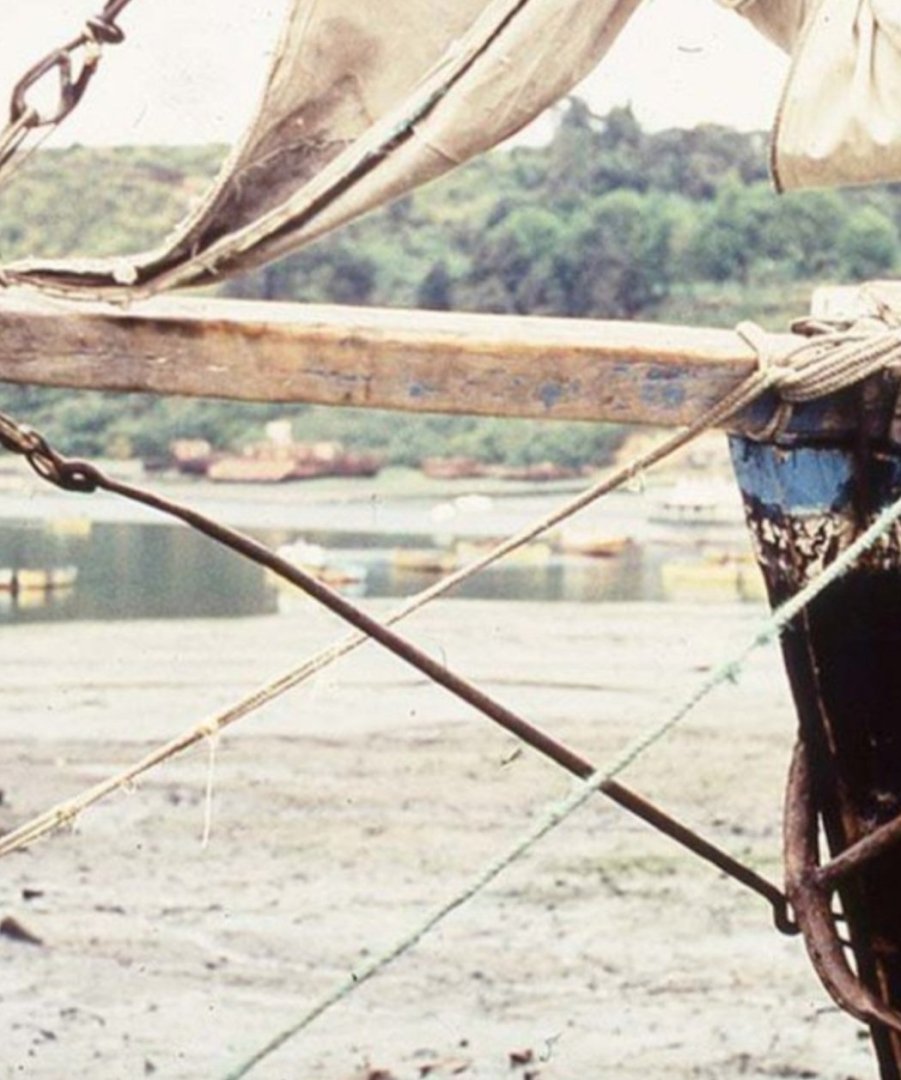
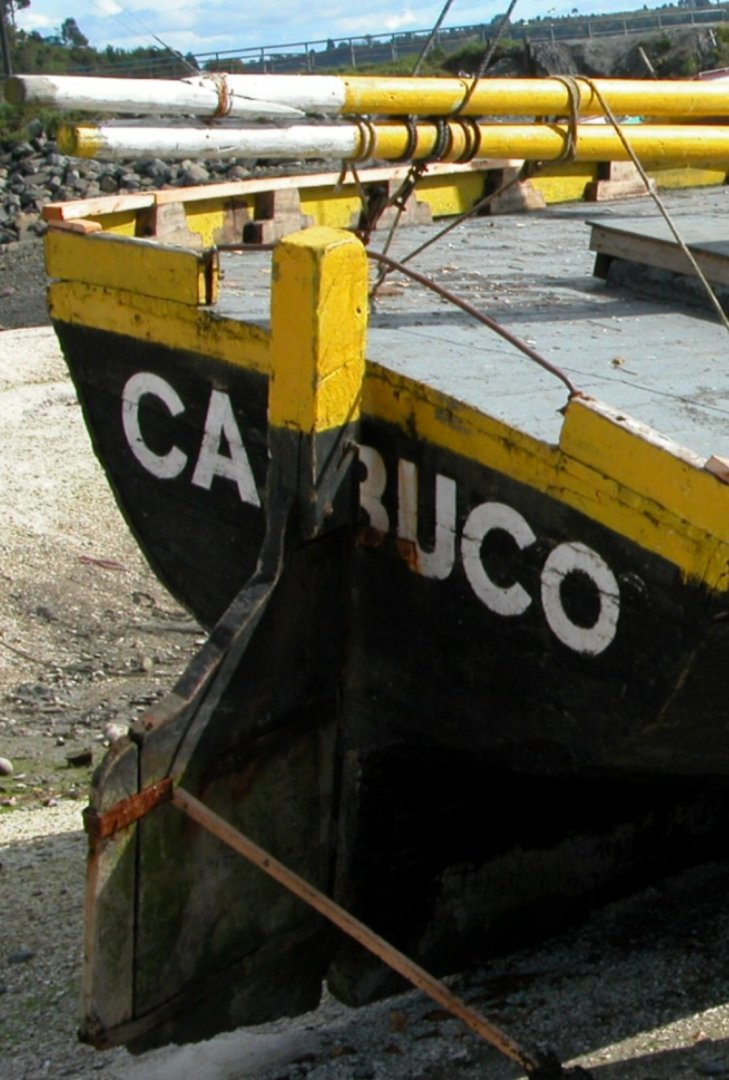
I’ve mentioned before that this is the most complex rigging I’ve dealt with so far, even though it’s quite simple in relative terms, and it’s definitely posing a challenge. A few notes on working things out and progress on the build: First, I came across this image from 1969, which I had somehow missed before. It has some good details on the shrouds and will be extremely useful when I attach the gaff, although I’ll be using rope-stropped blocks (which I’ve seen in other photos) rather than metal-stropped ones shown here. Unfortunately, it doesn’t show the masthead, which is the current site of my difficulties. Source: https://www.bibliotecanacionaldigital.gob.cl/bnd/629/w3-article-644834.html One of the main difficulties that I’m having is with the arrangement of the forestay and the jib halyard block at the masthead. It’s clear that the block needs to be lower than the forestay, but it’s not clear to me how this is arranged. Many photos are extremely unclear, like that below (which shows the same vessel as in the photo above but from a different angle). You can vaguely make out the jib halyard block, but not much else—it looks like it may be looped around the masthead, but that might be the forestay itself? (Incidentally, it also seems to show the shrouds as individual rather than doubled; at least a couple of them are also made out of a very unusual-looking, wide-braided wire). Source: https://www.bibliotecanacionaldigital.gob.cl/bnd/629/w3-article-644836.html Meanwhile, one of the clearest images (which isn’t saying much) looks to have a totally different arrangement. To me, it looks almost like the forestay itself doesn’t go directly around the masthead, instead passing through some sort of bullseye or something (which is instead looped around the masthead), making a sharp turn, and being attached to the jib halyard block. Maybe I’m misunderstanding the image, but this seems like a very odd way to do things, and I’m not sure how well a wire rope can withstand being placed through such a tight turn. Source: https://www.bibliotecanacionaldigital.gob.cl/bnd/629/w3-article-164310.html Here’s a simple drawing to try to explain better what I think I see (although, again, I could very easily be wrong and it seems quite strange to my eyes): Images like this one are also rather hard to follow, but also seems to show the jib halyard block very close to the forestay, such that I’m not sure if they’re connected (as in the image above) or what. Source: https://penobscotmarinemuseum.historyit.com/items/view/digital-collection/261854/gallery I have similar questions about how the gaff throat halyard block would have been attached to the masthead, so far my best bet seems to be that it was on a rope that was just looped around the masthead. I’m less concerned about how to attach the gaff peak halyard block, as it’s pretty clear that it usually was connected to an eyebolt that was part of a bracket around the mast, and the block for the topping lift on at least some vessels was also attached to an eyebolt (often without a bracket) about midway up the masthead. Finally, I'm also trying to figure out the boom gooseneck, as there are no clear photos of it--about the only thing that is clear is that there was no associated bracket around the mast. In any case, I have made a bit of progress. First, I decided to make my own cleats so that I could properly color them. I’ll just need to drill holes for pins to better attach them to the deck. Second, I made a first attempt at serving an eye to loop around the masthead. Serving was quite tricky, as I don’t have any sort of serving machine or anything. Instead, I held the line between the jaws of a helping hands and spun the roll of serving thread (fly-tying thread) around the line. It was hard to maintain an even pressure, although I got better at it over the course of serving. Once it came time to form the eye, it was especially difficult to serve it, as I had to hold things so close to the jaws of the helping hands that I couldn’t get the serving thread all that close, so it bunched up and got very lumpy. Another difficulty was that I started the serving with a knot (which just wanted to spin around the rope instead of holding), but upon checking the instructions for the Syren Serving Machine, apparently it’s better to instead thread the serving thread between the strands of the rope to start. I also made the eye slightly too big, and served too long a stretch to join the eye. So, this first attempt won’t be kept, but it was a good learning experience that I hope to build on. Finally, I attached the bobstay. To do this, I used very fine black thread and made a very messy series of loops, in an attempt to represent something like the rather messy wire knots that were common on these vessels (which is visible in a lot of the photos I’ve shared). I’d give the results a “B” grade, and I may want to tone it down slightly for future such knots and use less super glue (which is part of why I don’t want to try redoing it), but I think it works. It also looks better in real life, as the whole knot is a little less than 1/8 inch long.


- 312 replies
-
- 9
-
-
- Chile
- Latin America
- (and 6 more)
-
Nice work! If you're not a fan of the overlapping planking (called lapstrake or clinker planking), you may not want to do the Pram next. For your next build, the Muscongus Bay Lobster Smack would be a step up in complexity, but appears to be a well-designed kit that would prepare you well for more complex builds. It uses plank-on-bulkhead construction, which is what many larger builds use. That said, it all really depends on what you're interested in, how comfortable you are with tools, how much woodworking and related experience you have, etc. I began scratch-building very simple hulls with just the dory as experience, but used other kits (the NRG Half-Hull and the Midwest Peapod) to build skills for more complex models. Just keep in mind that a more complex build may be frustratingly difficult, though, and a full-rigged, armed ship like the Rattlesnake will have a lot of repetitive and tiny rigging work and guns to make. If you're really interested in sailing warships, a lot of people seem to have done well with one of the cutter models from Vanguard, which reportedly makes excellent kits. Cutters have just one mast and a limited number of guns, so are a bit less repetitive to build.
-
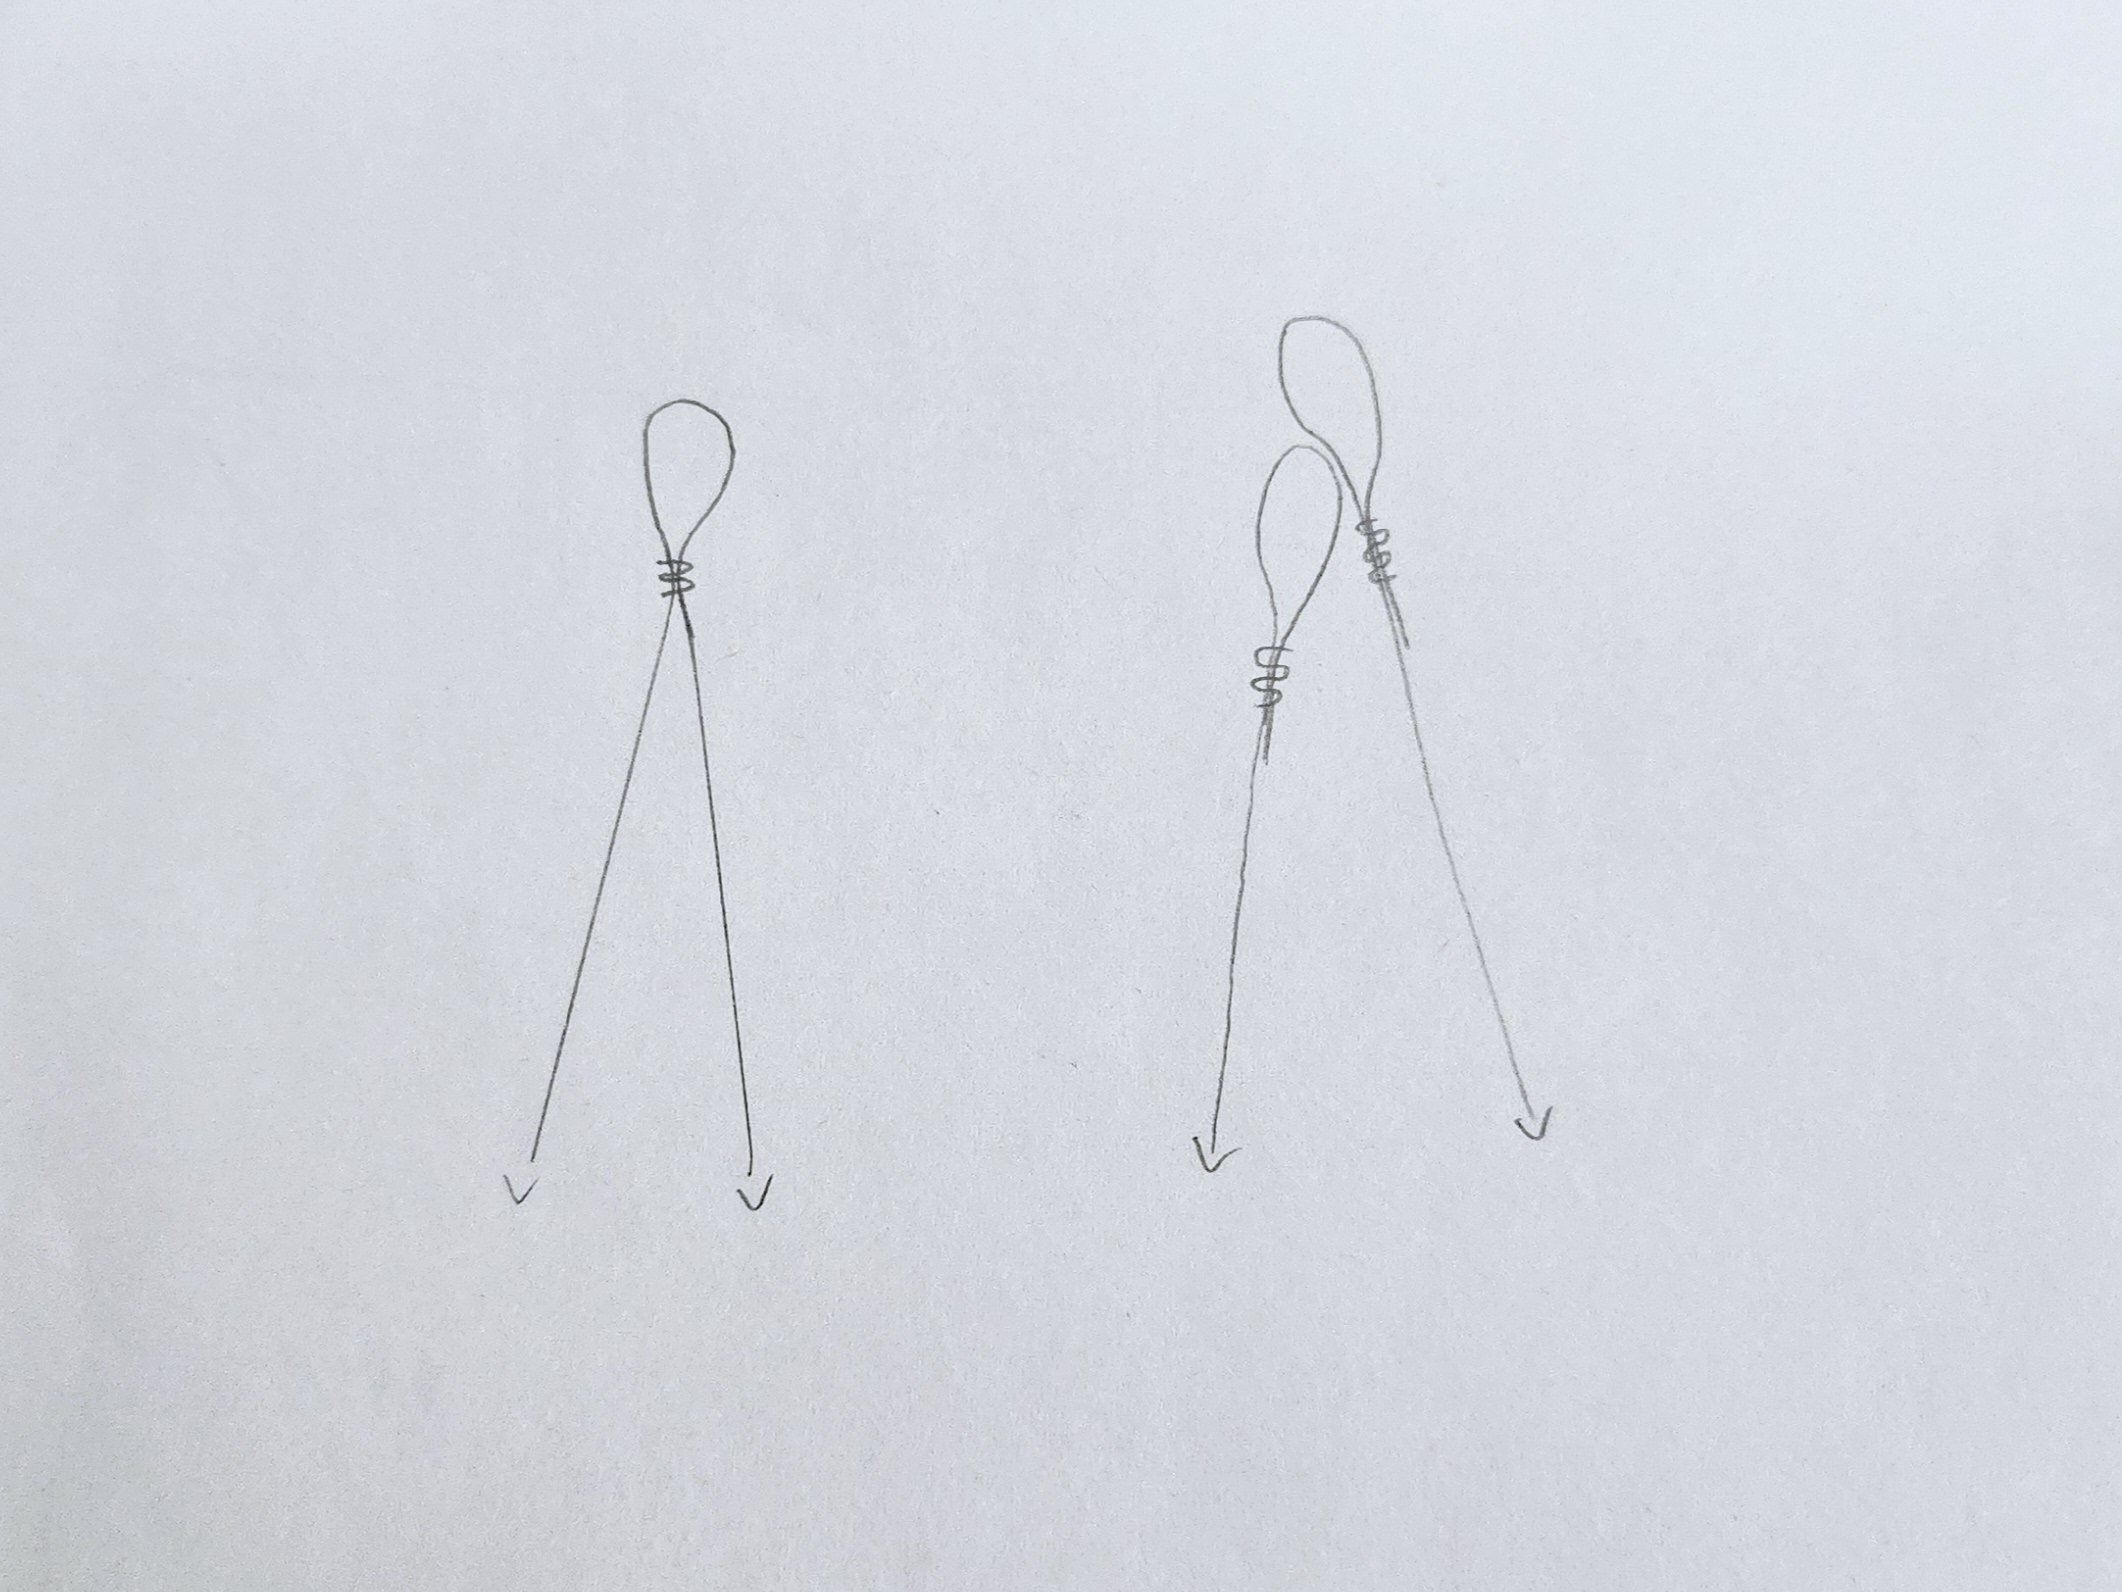
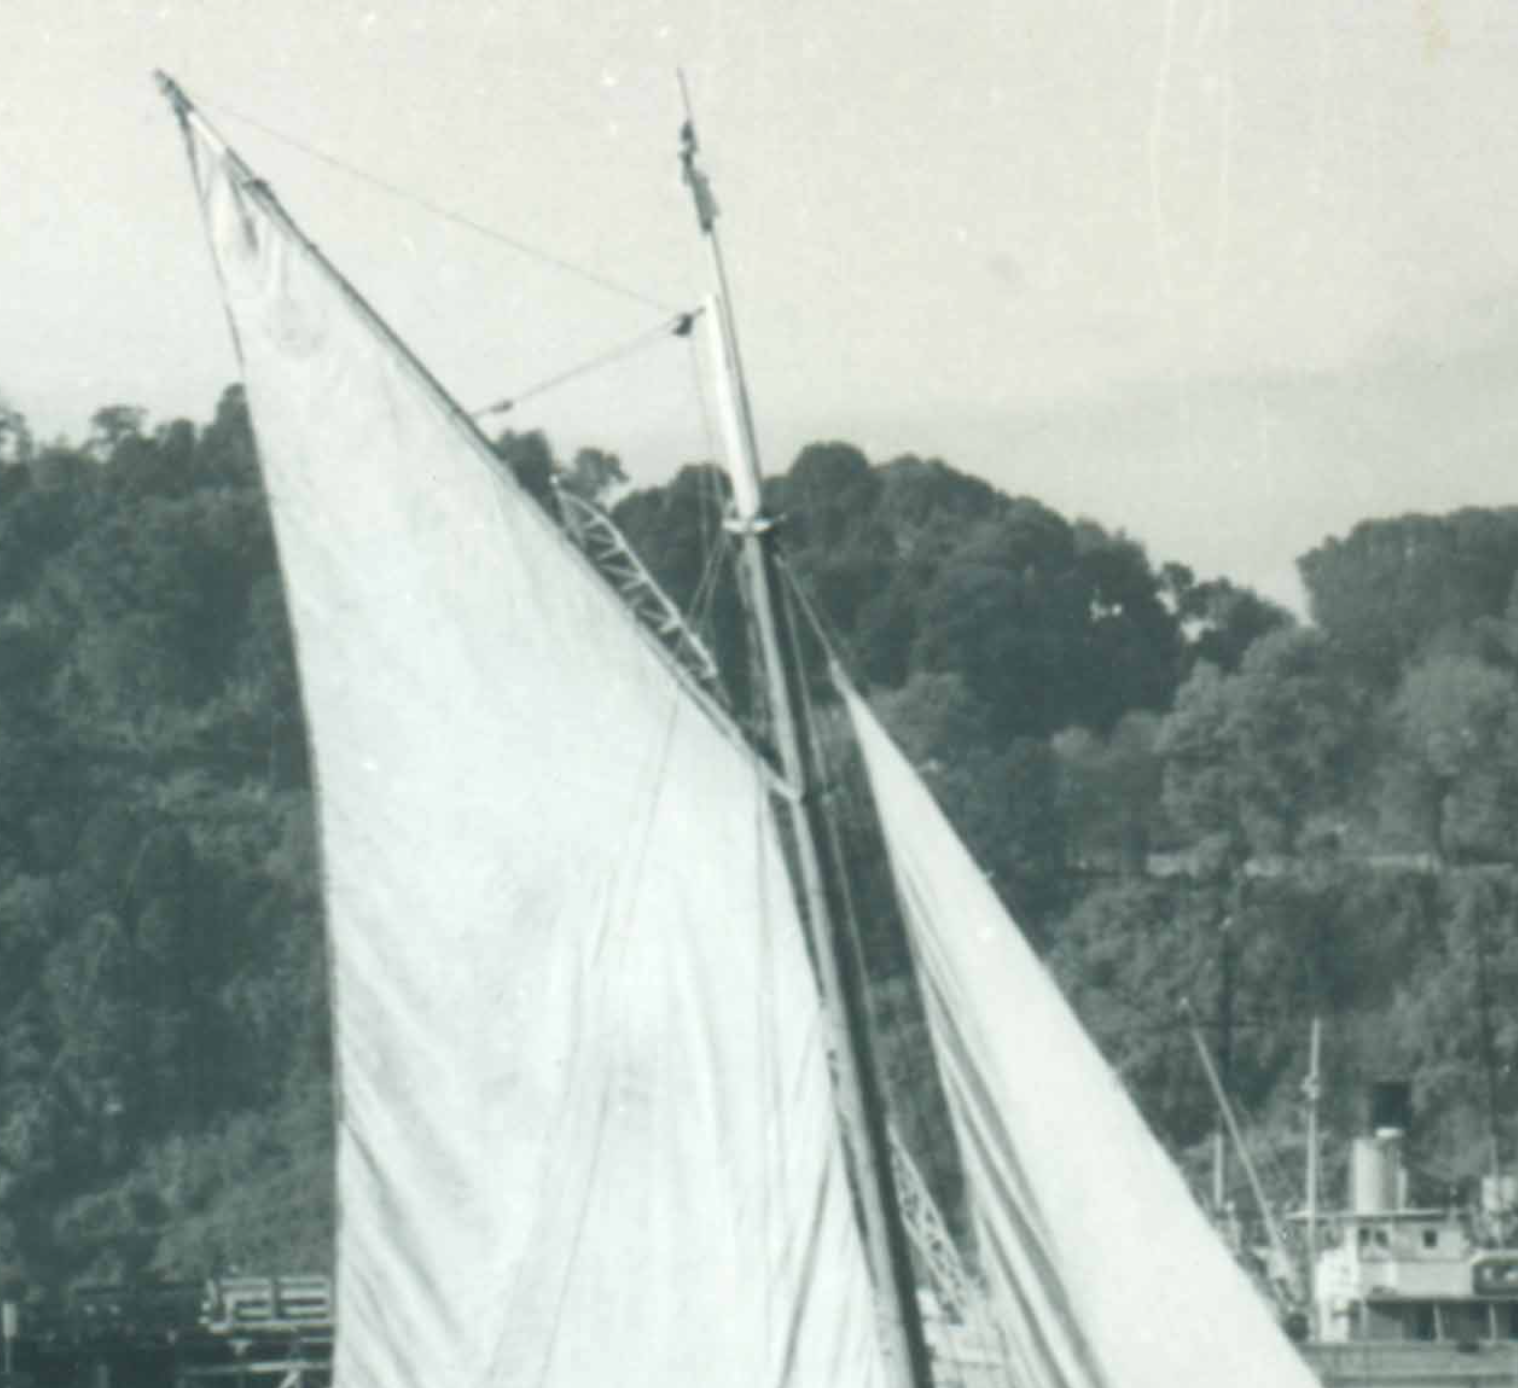
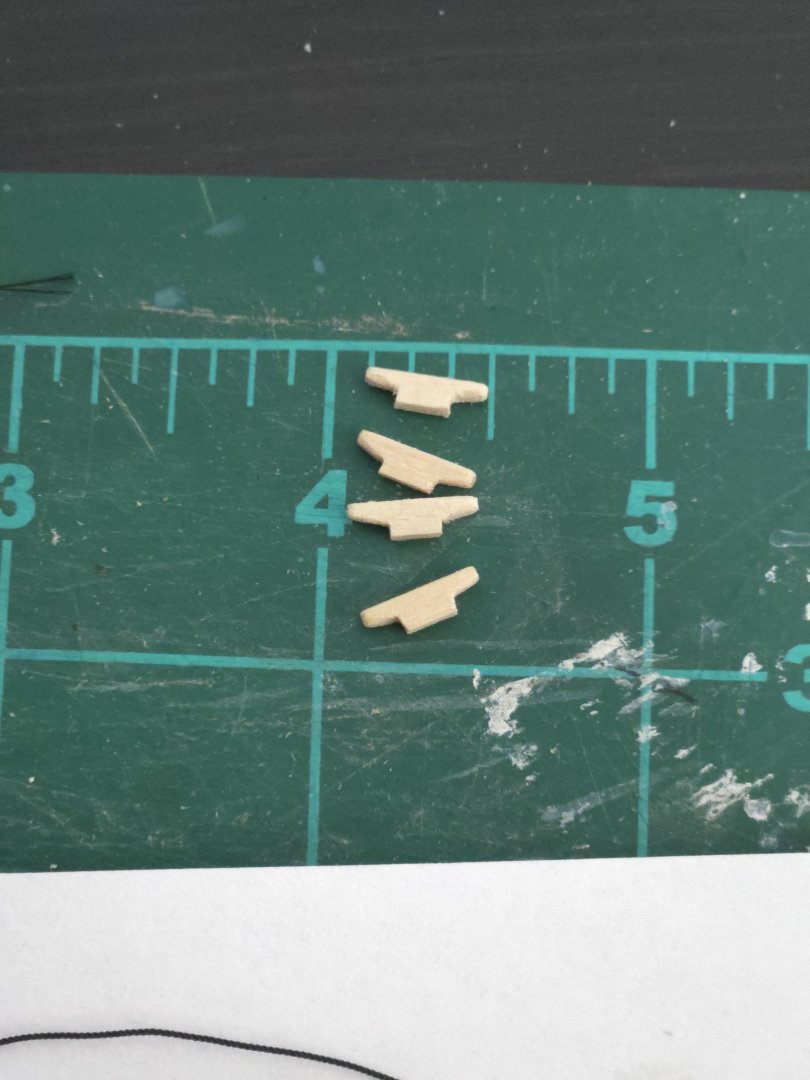
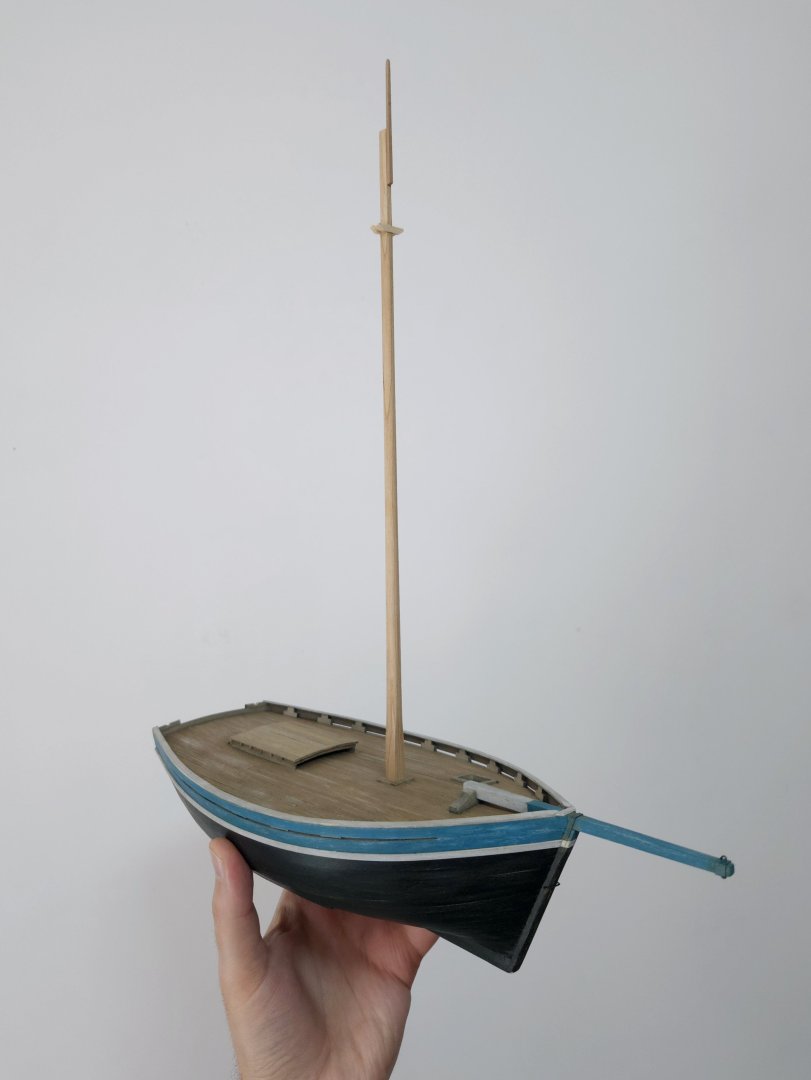
I've been working on the mast head. First I trimmed down the sides, and then cut out slots for the crosstrees. I made them from basswood and followed the dimensions given in Garnham's diagram: 10cm wide by 45cm long at full scale. I also added the flagpole at the top, which I made from walnut or mahogany left over from the Maine Peapod kit. I figured that the pole may get snagged on something, and basswood would be much more likely to snap than a harder wood. I decided to only attach the pole from about midway up the masthead. Many images show it running the full length, but some, like that below, show it partway up the masthead. Interestingly, it looks like there's a metal bracket running not just around the masthead, but around the flagpole, too, to support the peak halyard block. Source: https://www.bibliotecanacionaldigital.gob.cl/bnd/629/w3-article-164310.html As I move ahead, I'm finding that I have a few questions about the shrouds. These were made of wire, which I'll be representing with black rope from Ropes of Scale. (At least some photos seem to show that the standing rigging could be made of a multi-stranded braided wire rope, so the rope that I have should work just fine.) I'm not quite sure how to go about serving these around the loop that goes over the masthead. I think they probably would have been served to reduce wear on the mast, but I'm not sure whether this would have been a brown rope (and this representable with brown thread) or some other kind of rope (presumably synthetic by the 1980s, but for midcentury probably manilla or something similar?). Some photos seem to show the serving as a very dark color. I'm also not sure how to go about arranging the shrouds. It's not clear to me from the photos I've seen whether each shroud would be a separare line, as at right in the drawing below, or if they would use a single line, looped in the middle, to make two shrouds, as at left. Some images seem to show single shrouds, but on others they may be doubled, especially in cases where there are a large number of lines looped around the masthead at the crosstrees but the stack of served loops doesn't seem all that thick. The image below, for instance, may show paired shrouds, but it’s not totally clear (also, it interestingly shows fore-and-aft crosstrees). Source: https://www.memoriasdelsigloxx.cl/601/w3-article-1805.html While the image below looks to me to show separated shrouds, given that each line seems to be pretty separated at the masthead. Source: https://www.memoriasdelsigloxx.cl/601/w3-article-86078.html


- 312 replies
-
- 9
-
-
- Chile
- Latin America
- (and 6 more)
-
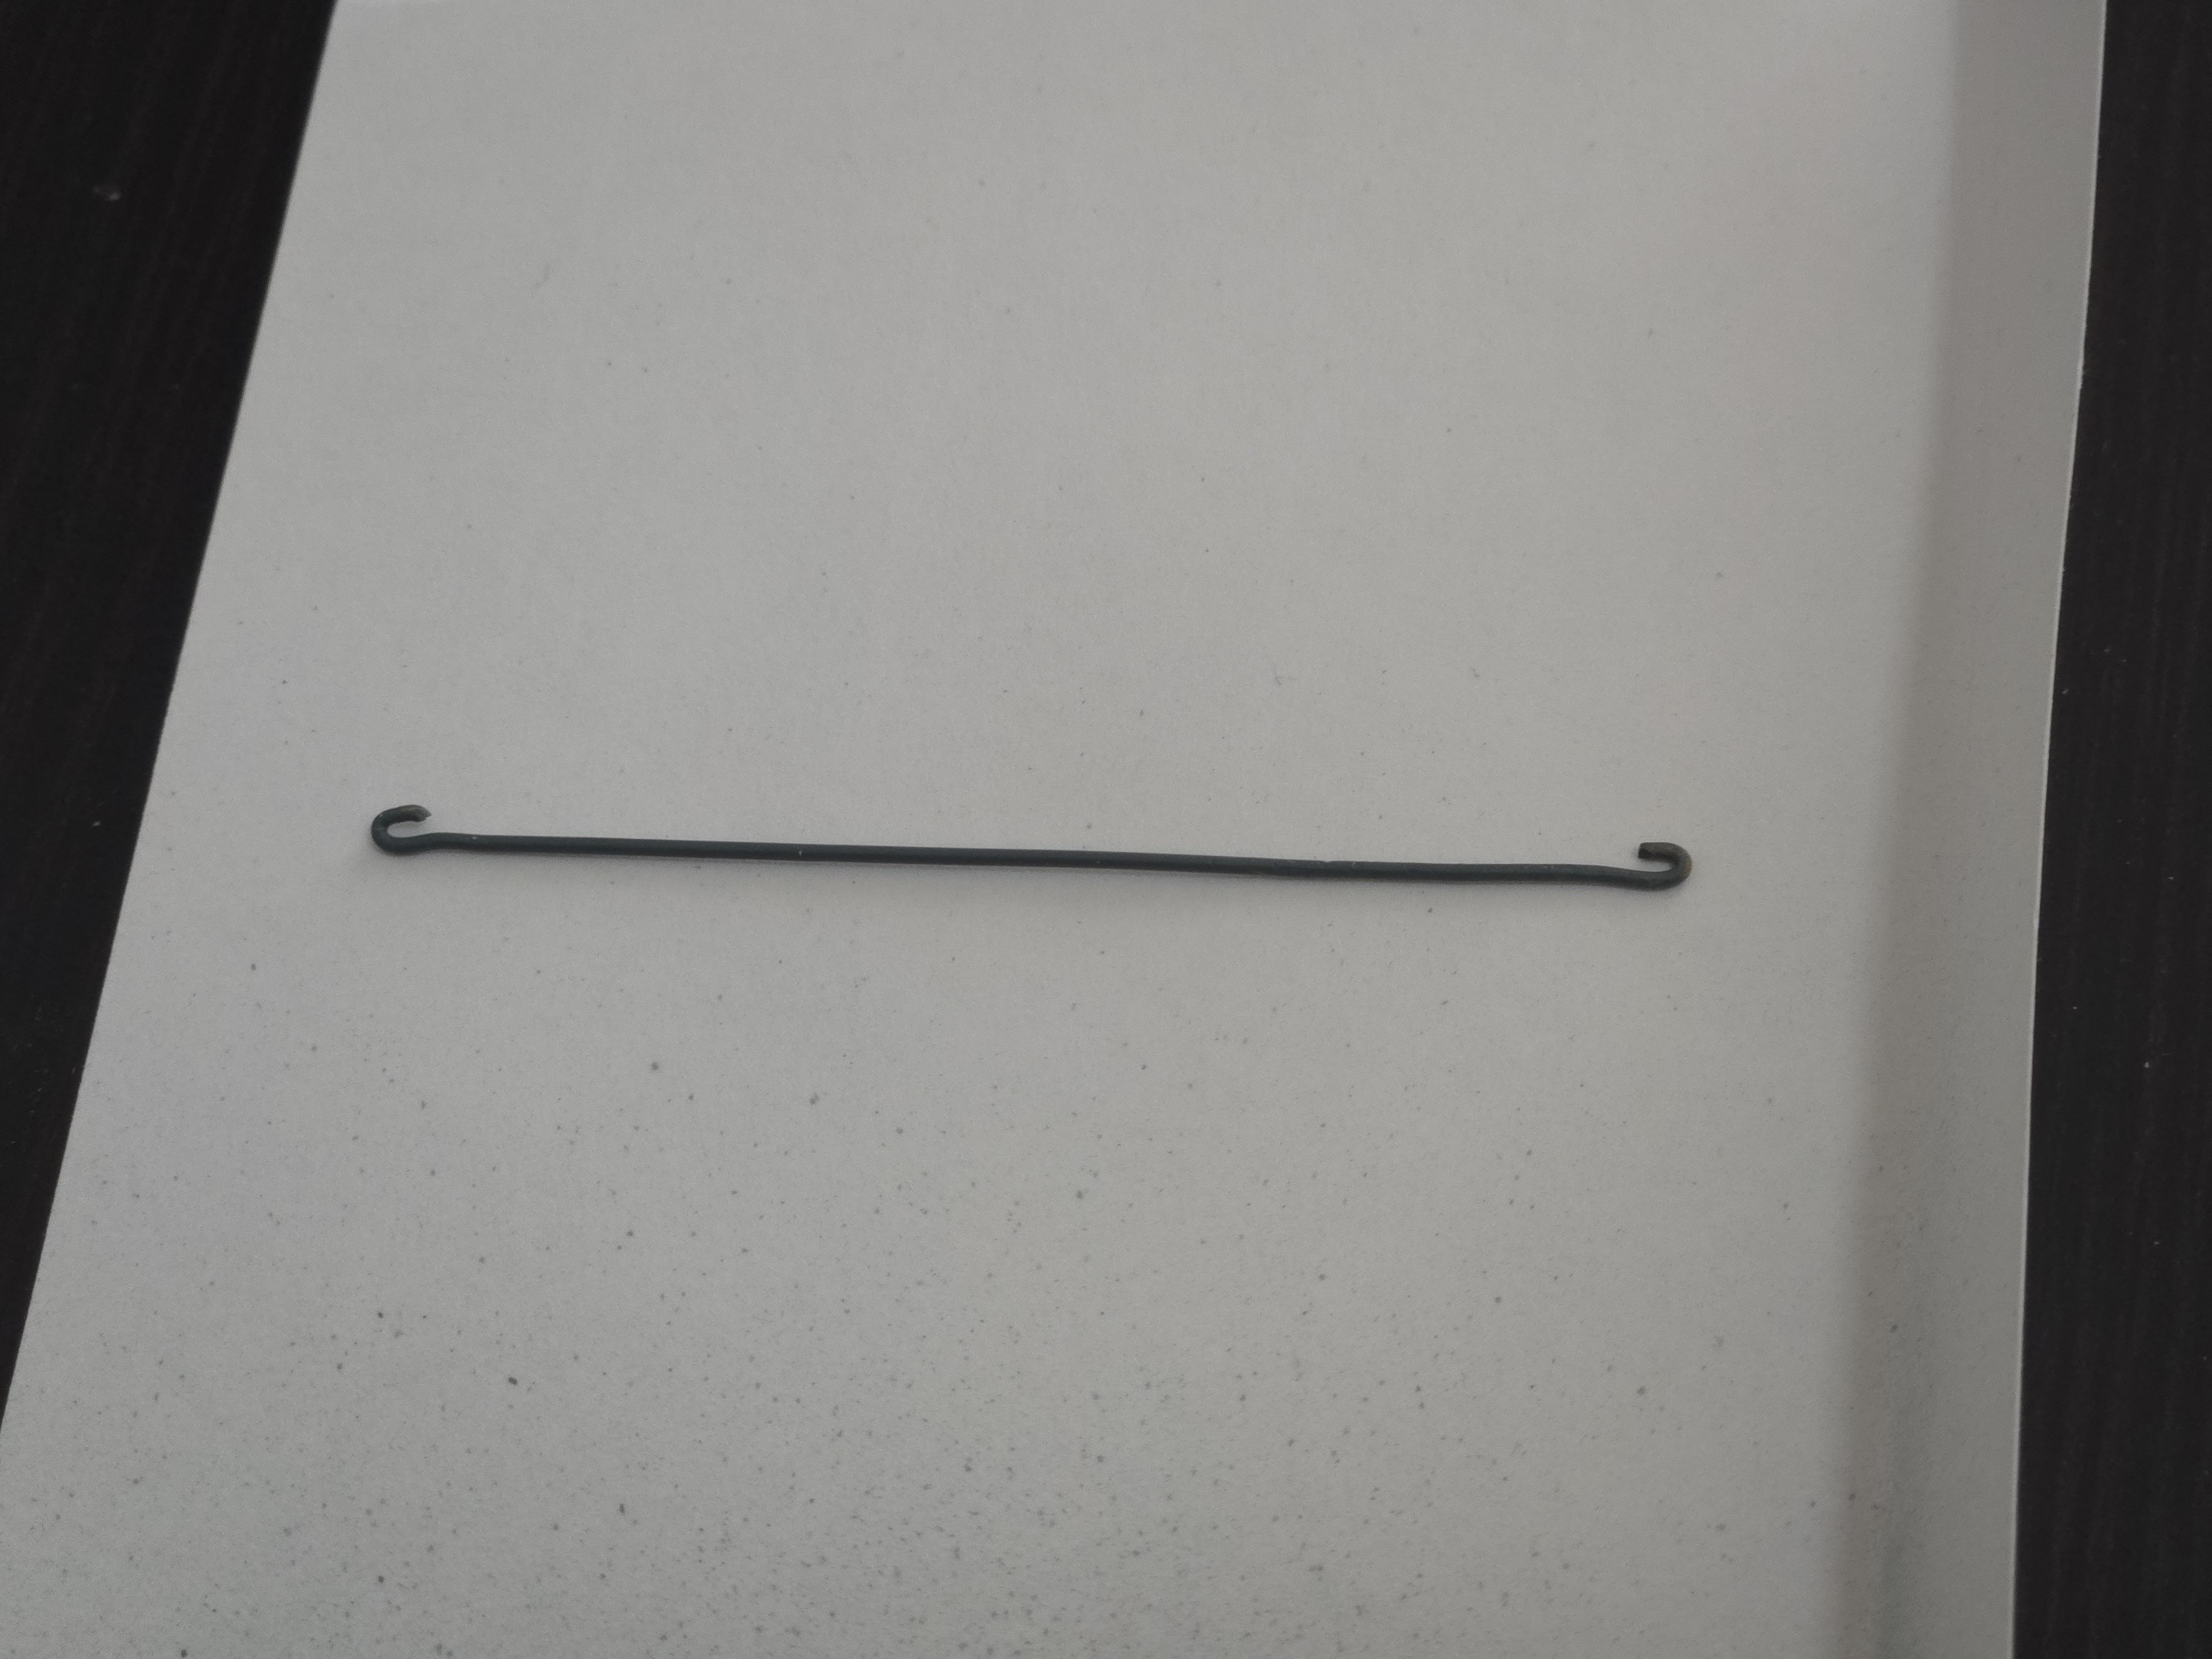
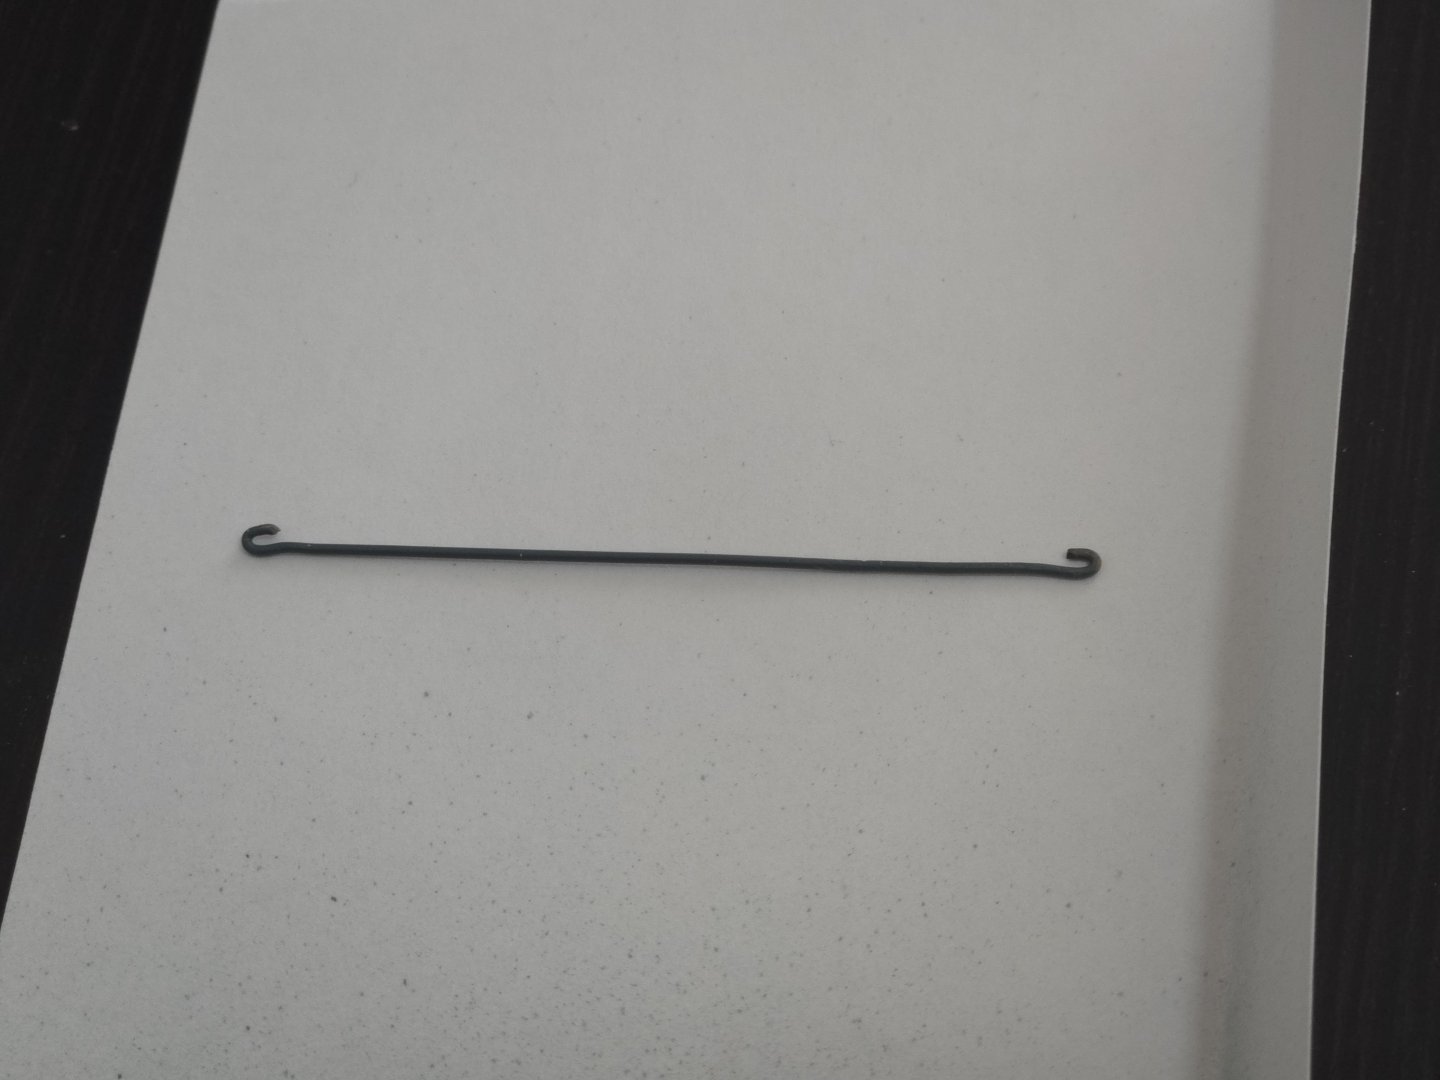
Thanks, all! I appreciate the kind words and helpful suggestions. I do think I'll hold off on further weathering the hull until later, if at all. I've started work on the bobstay, which I'll be making as just a hooked metal rod. I'm using this as a chance to try out painting metal parts. I wasn't able to find an etching primer at a reasonable cost/quantity, but I did find a spray primer, intended for painting wargaming miniatures. The salesman said it would work on metal, and comments on reddit agreed, so I figured I would give it a shot. I made the bobstay hook out of thin brass rod, cleaned it with dish soap, alcohol, and vinegar (separately), and then suspended it from a loop of my thinnest fly-tying thread for priming. I was quite happy with how the primer turned out--it adhered very well in a very thin coat. Subsequent coats of acrylic went on quite well, and it seems like the primer will work great for the other parts. The real challenge is getting a good metal color. I wasn't happy with a flat black, so I tried more of a dark gray. I then dry brushed a bit of rust color, and used a soft pencil to try to give it a slight metallic sheen. As can be seen below, on its own it doesn't look too bad, but I think it suffers in comparison with the blackened turnbuckles, which look much more metallic. (I should note that my phone camera is making everything look a bit lighter against the black desktop background than it looks in real life.) I'm not sure whether I should try to add more pencil highlights, or if I should invest in a more metallic paint. Comparing the above with the Vairo photos below, it may make the most sense to simply paint the turnbuckles, too, and add a bit more dry-brushed rust to everything, as nothing looks particularly shiny. Source: https://www.carlosvairo.com/galeria-puerto-montt-lanchas-chilotas If anyone has any suggestions, I'm all ears!
- 312 replies
-
- 8
-
-
- Chile
- Latin America
- (and 6 more)
-
Very nice job! I felt the light joints stood out a bit too much on the first attempt, but they look great on the latest version.
-
Thanks, all! @wefalck, yes, I think I'll be looking into getting some more tools for detail work--a riffler file, maybe some micro-chisels--in the future. I'm making some basic furniture in my carpentry class and there's a lot more room for error at full scale. (At least for my current skill level--no fancy dovetail joints for me!) @KLarsen, you're right, I need to figure out how to make more effective use of the wood grain, especially when the futtock takes nearly a 90-degree curve. I think that laying out more frame pieces at a time will help me to set them up more efficiently on the sheet.
- 139 replies
-
- 4
-
-
- ancre
- Bateau de Lanveoc
- (and 2 more)
-
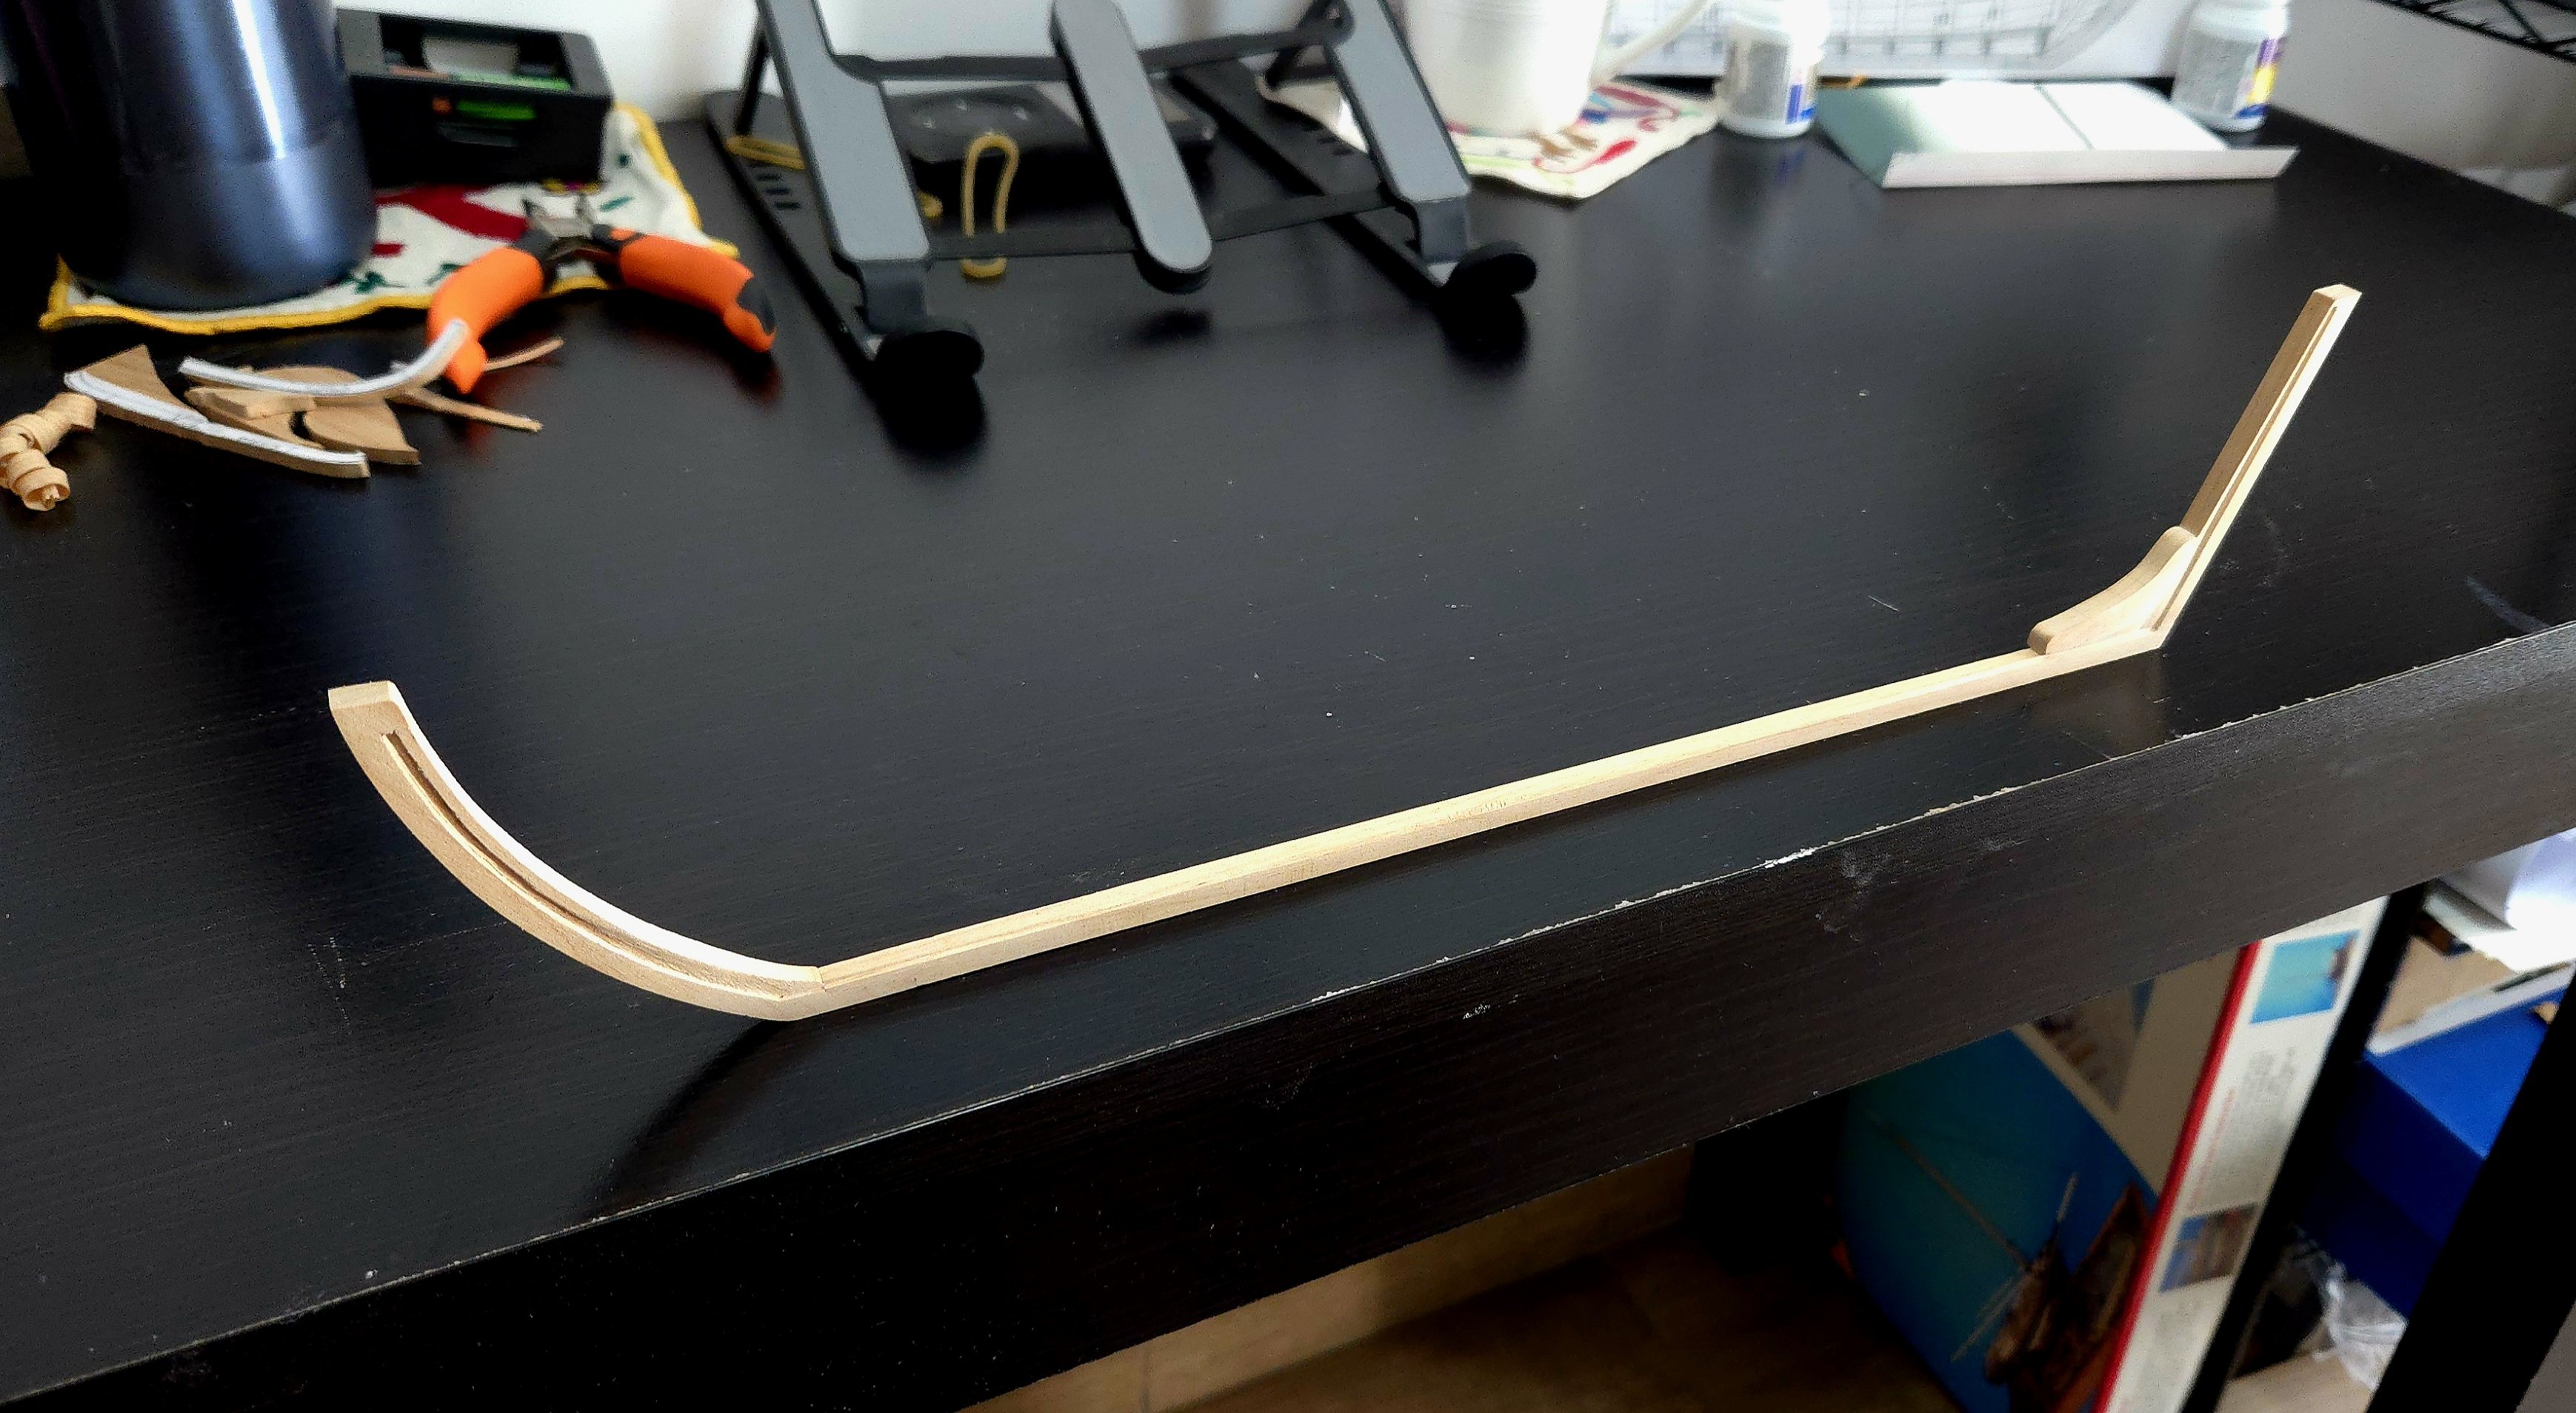
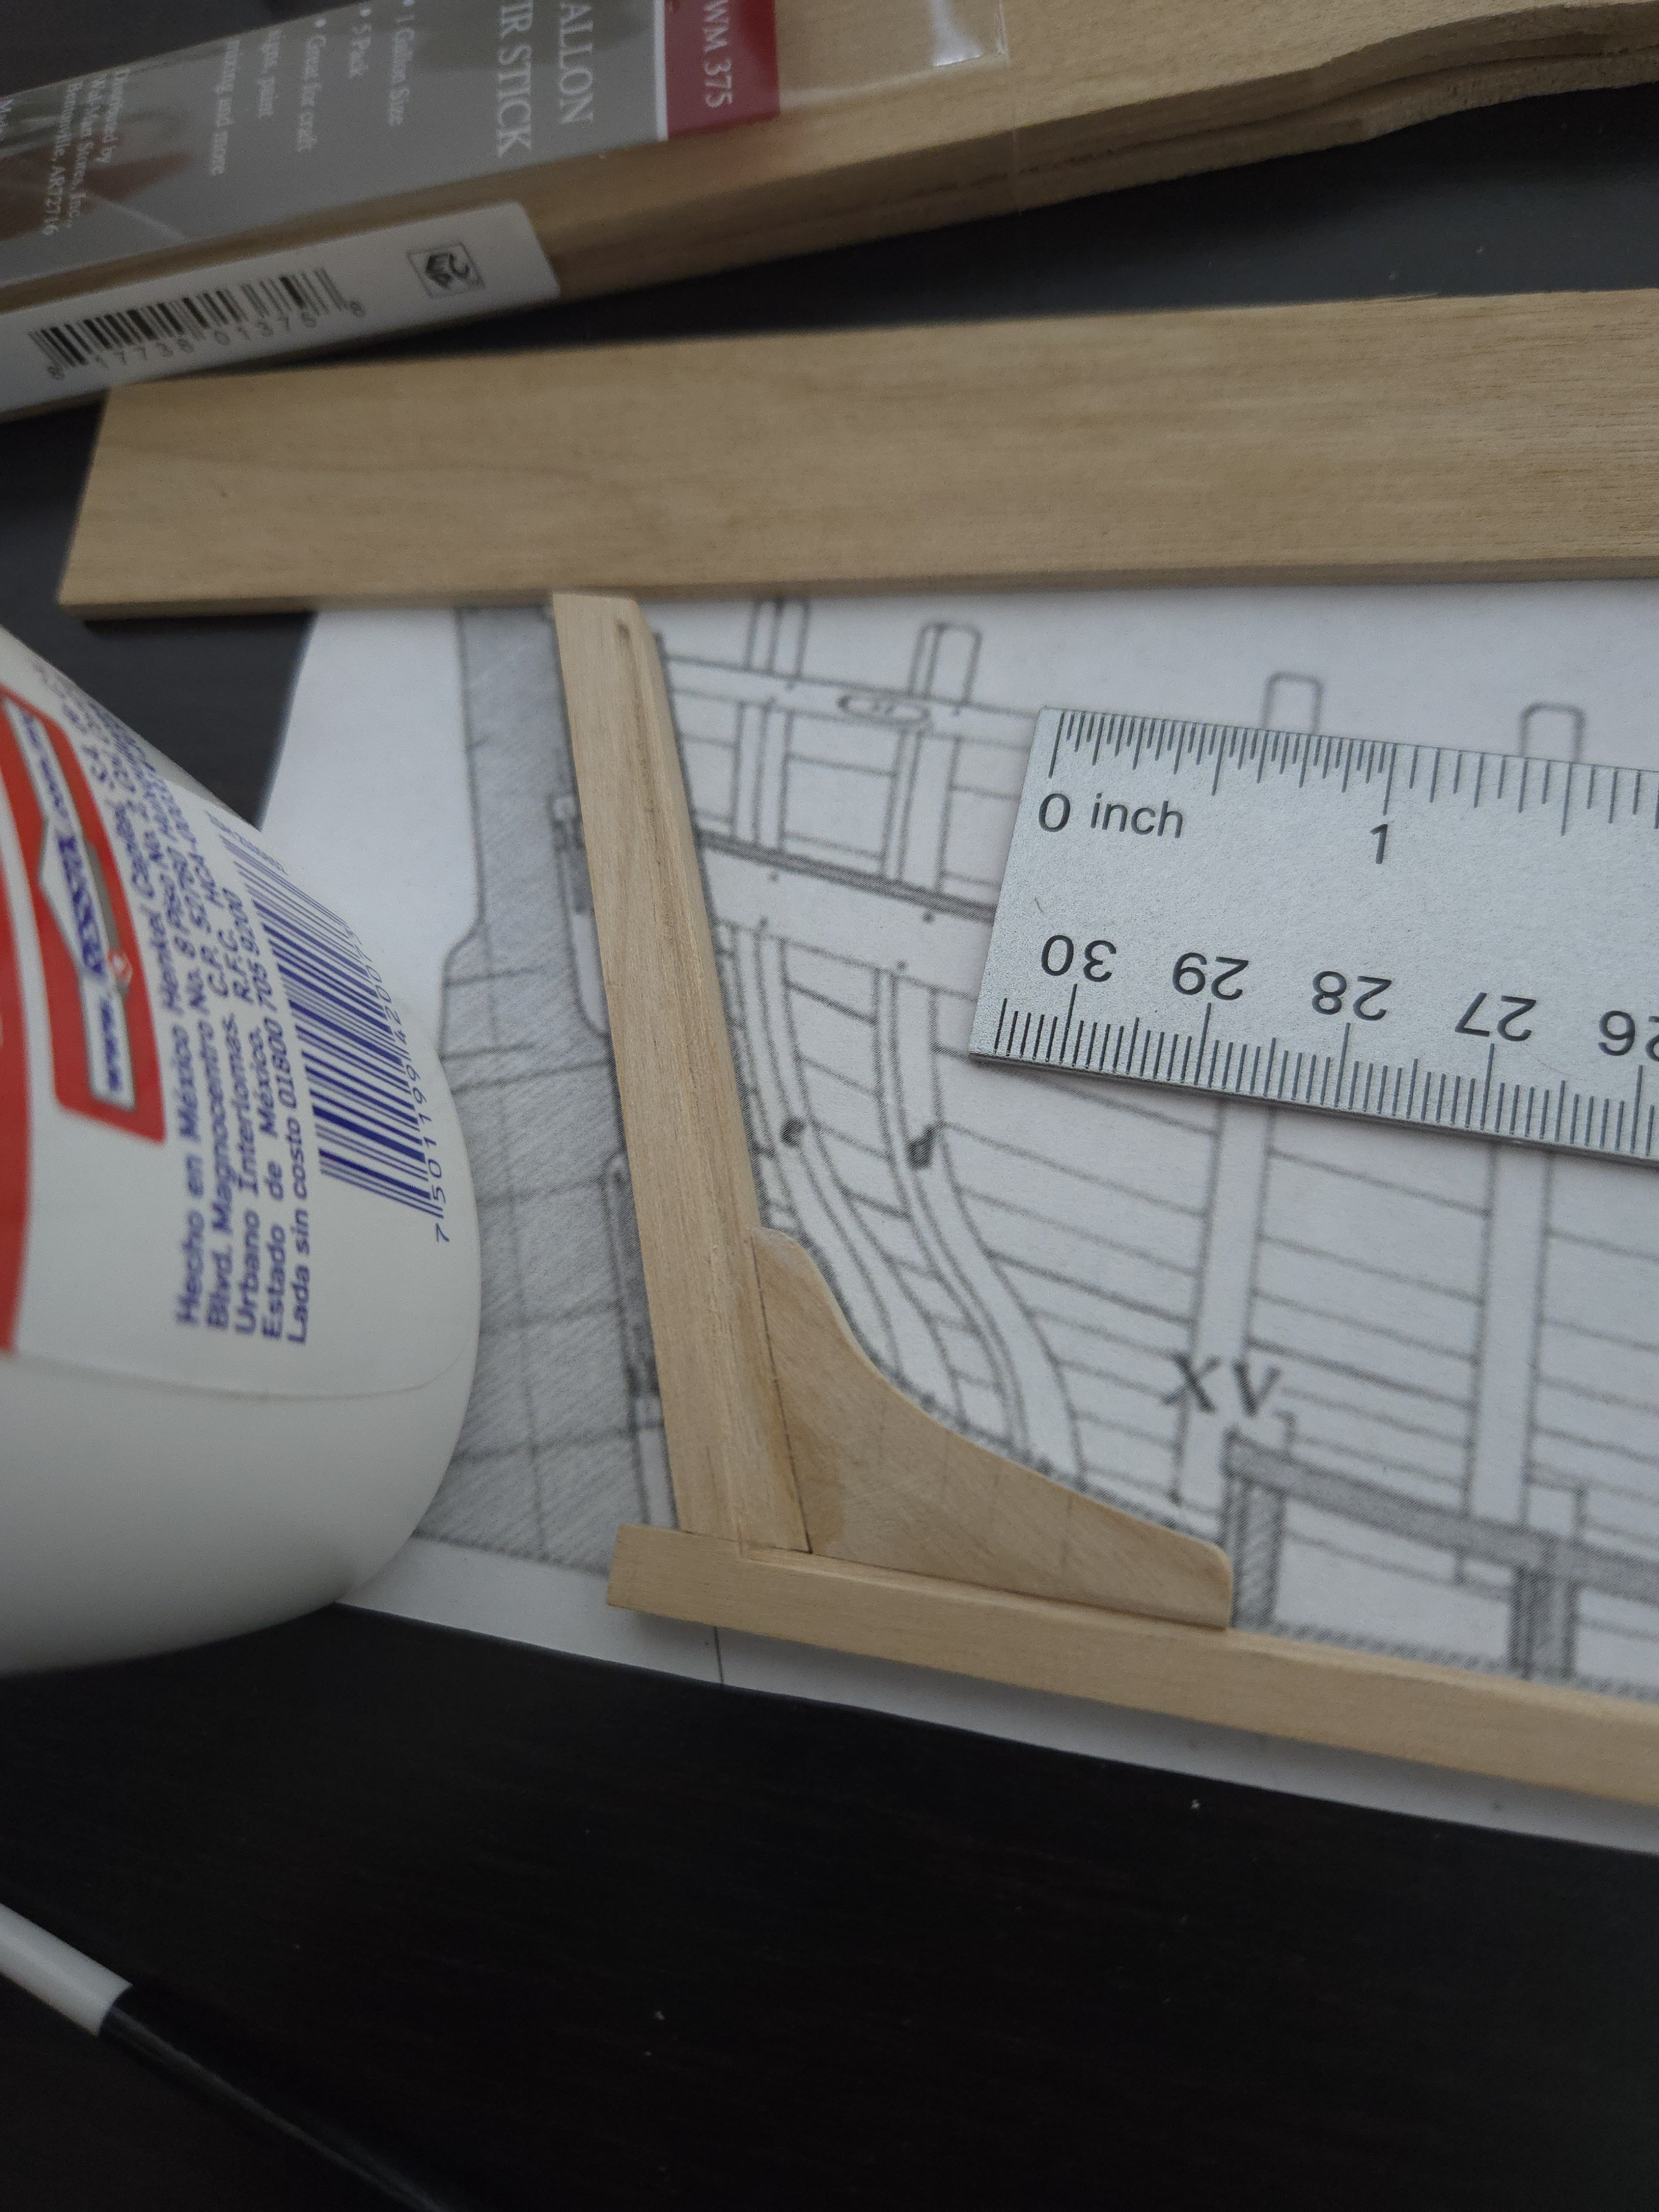
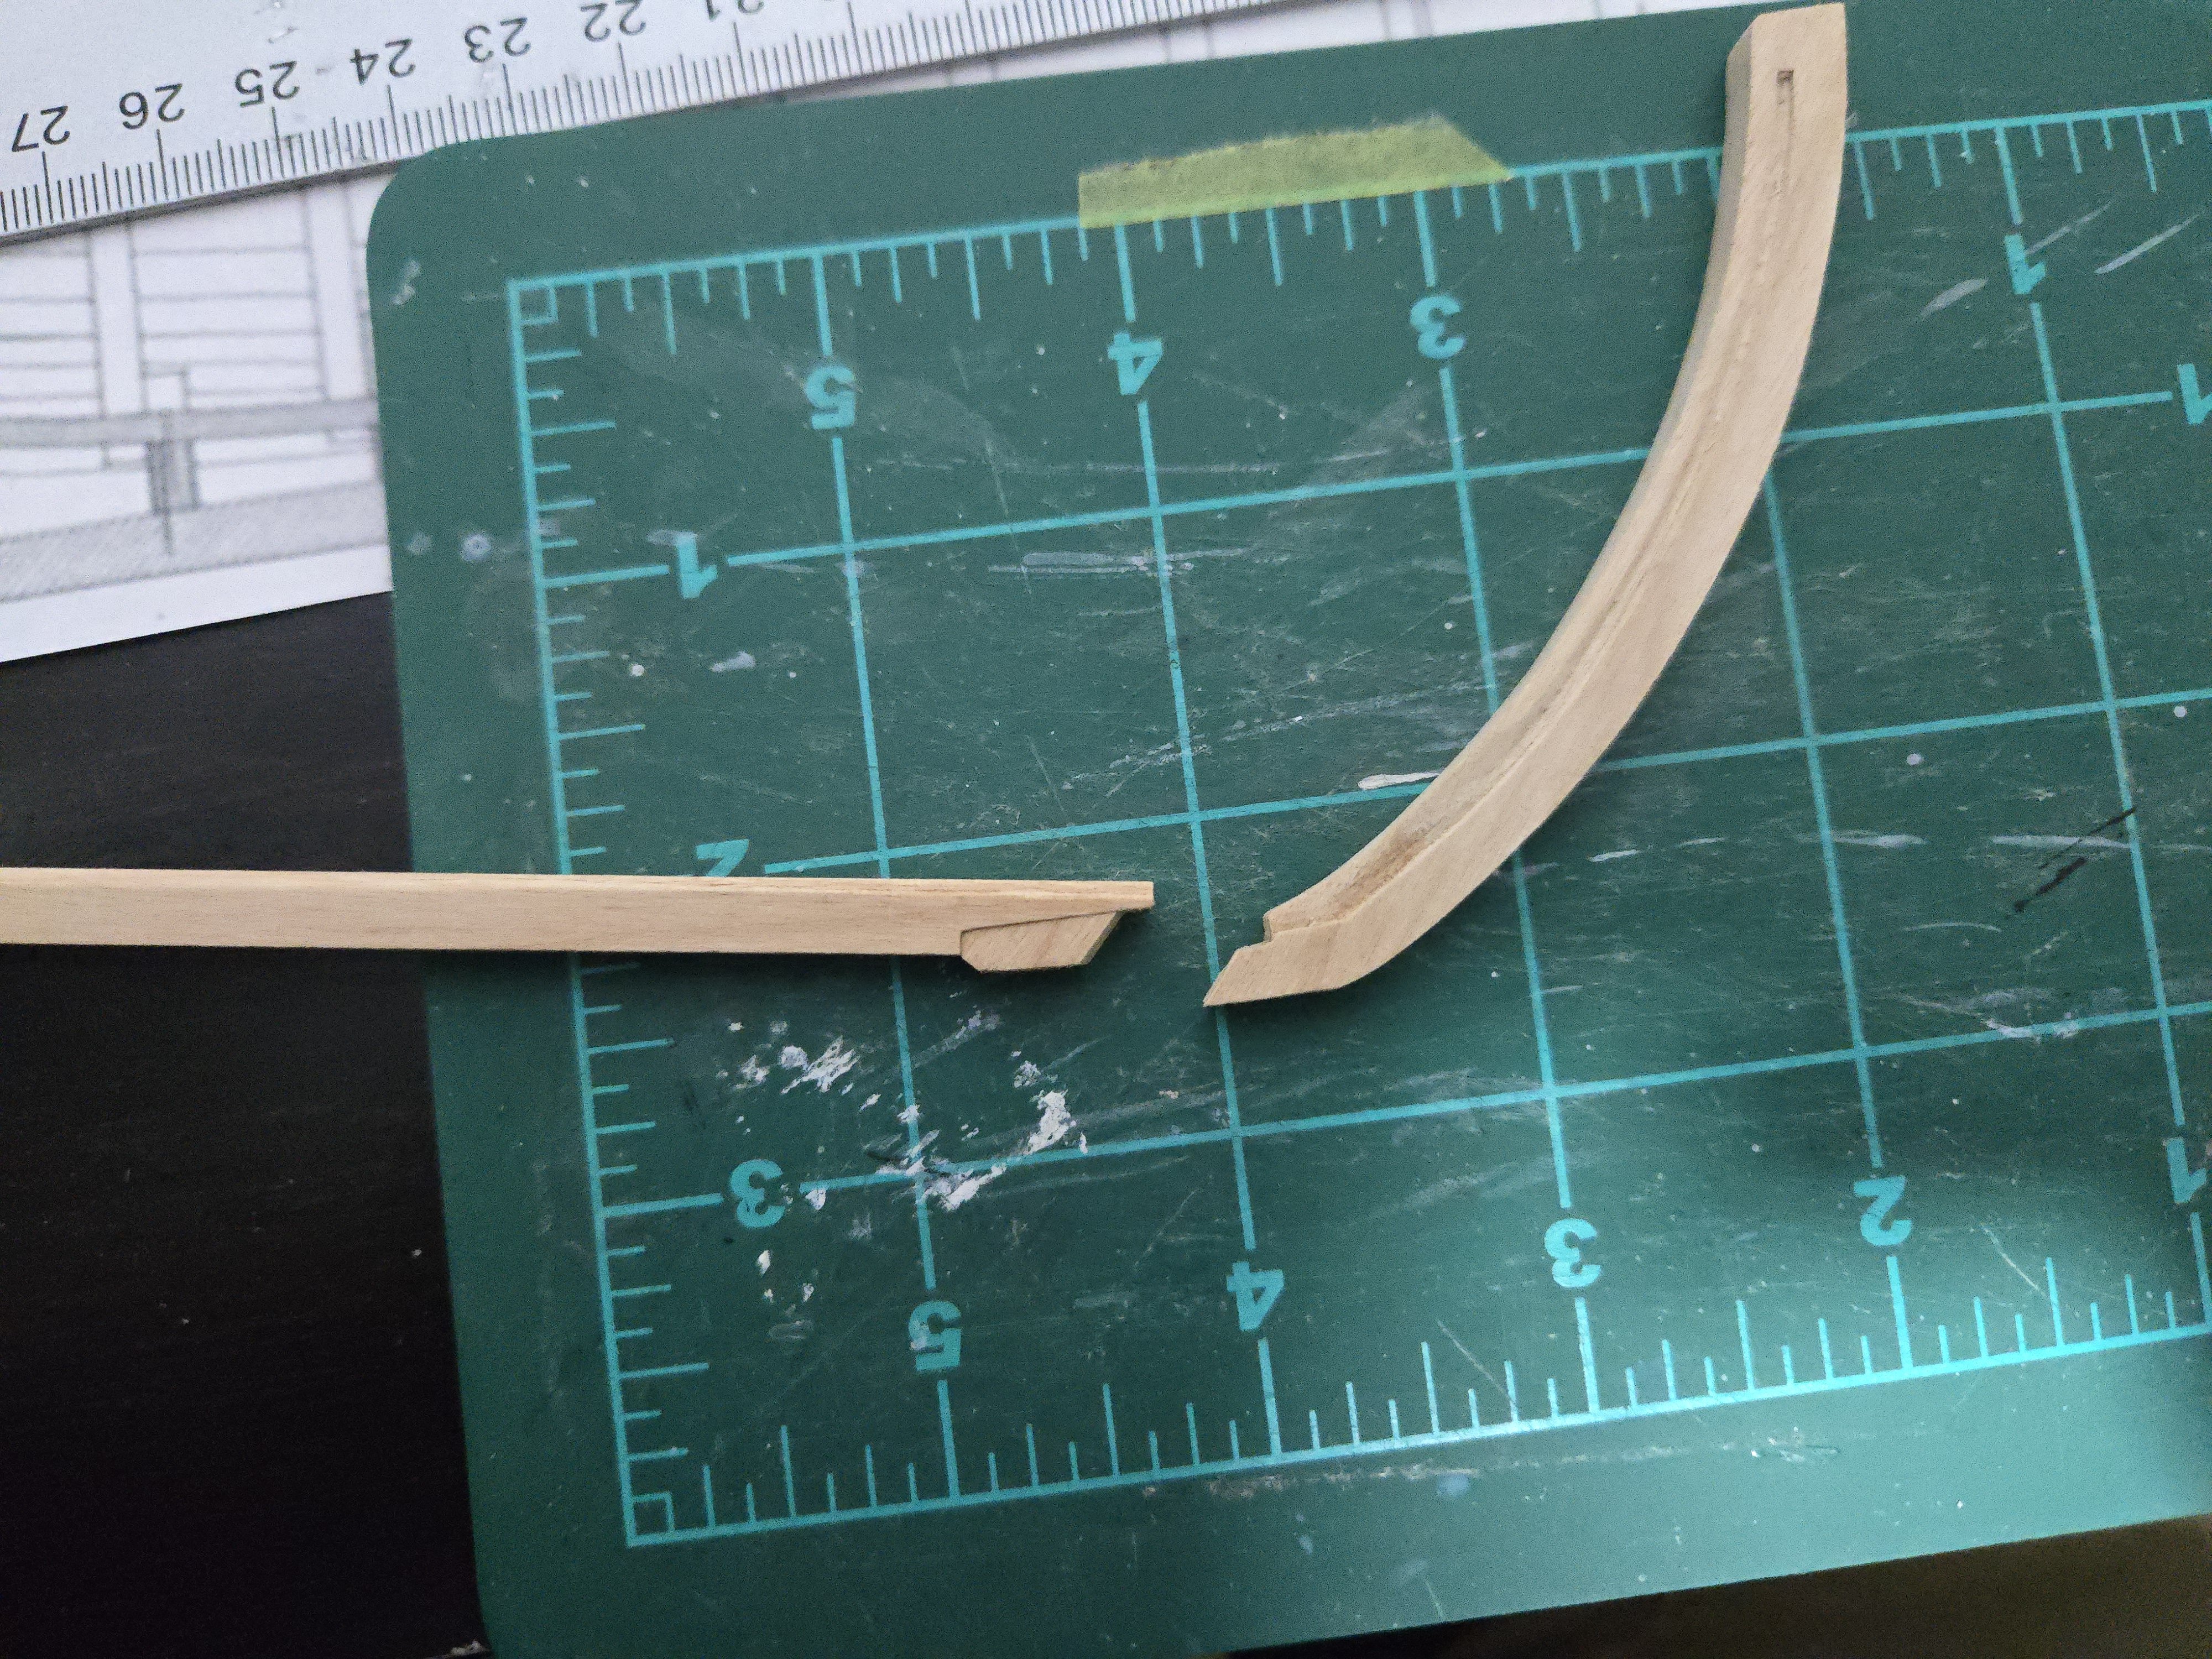
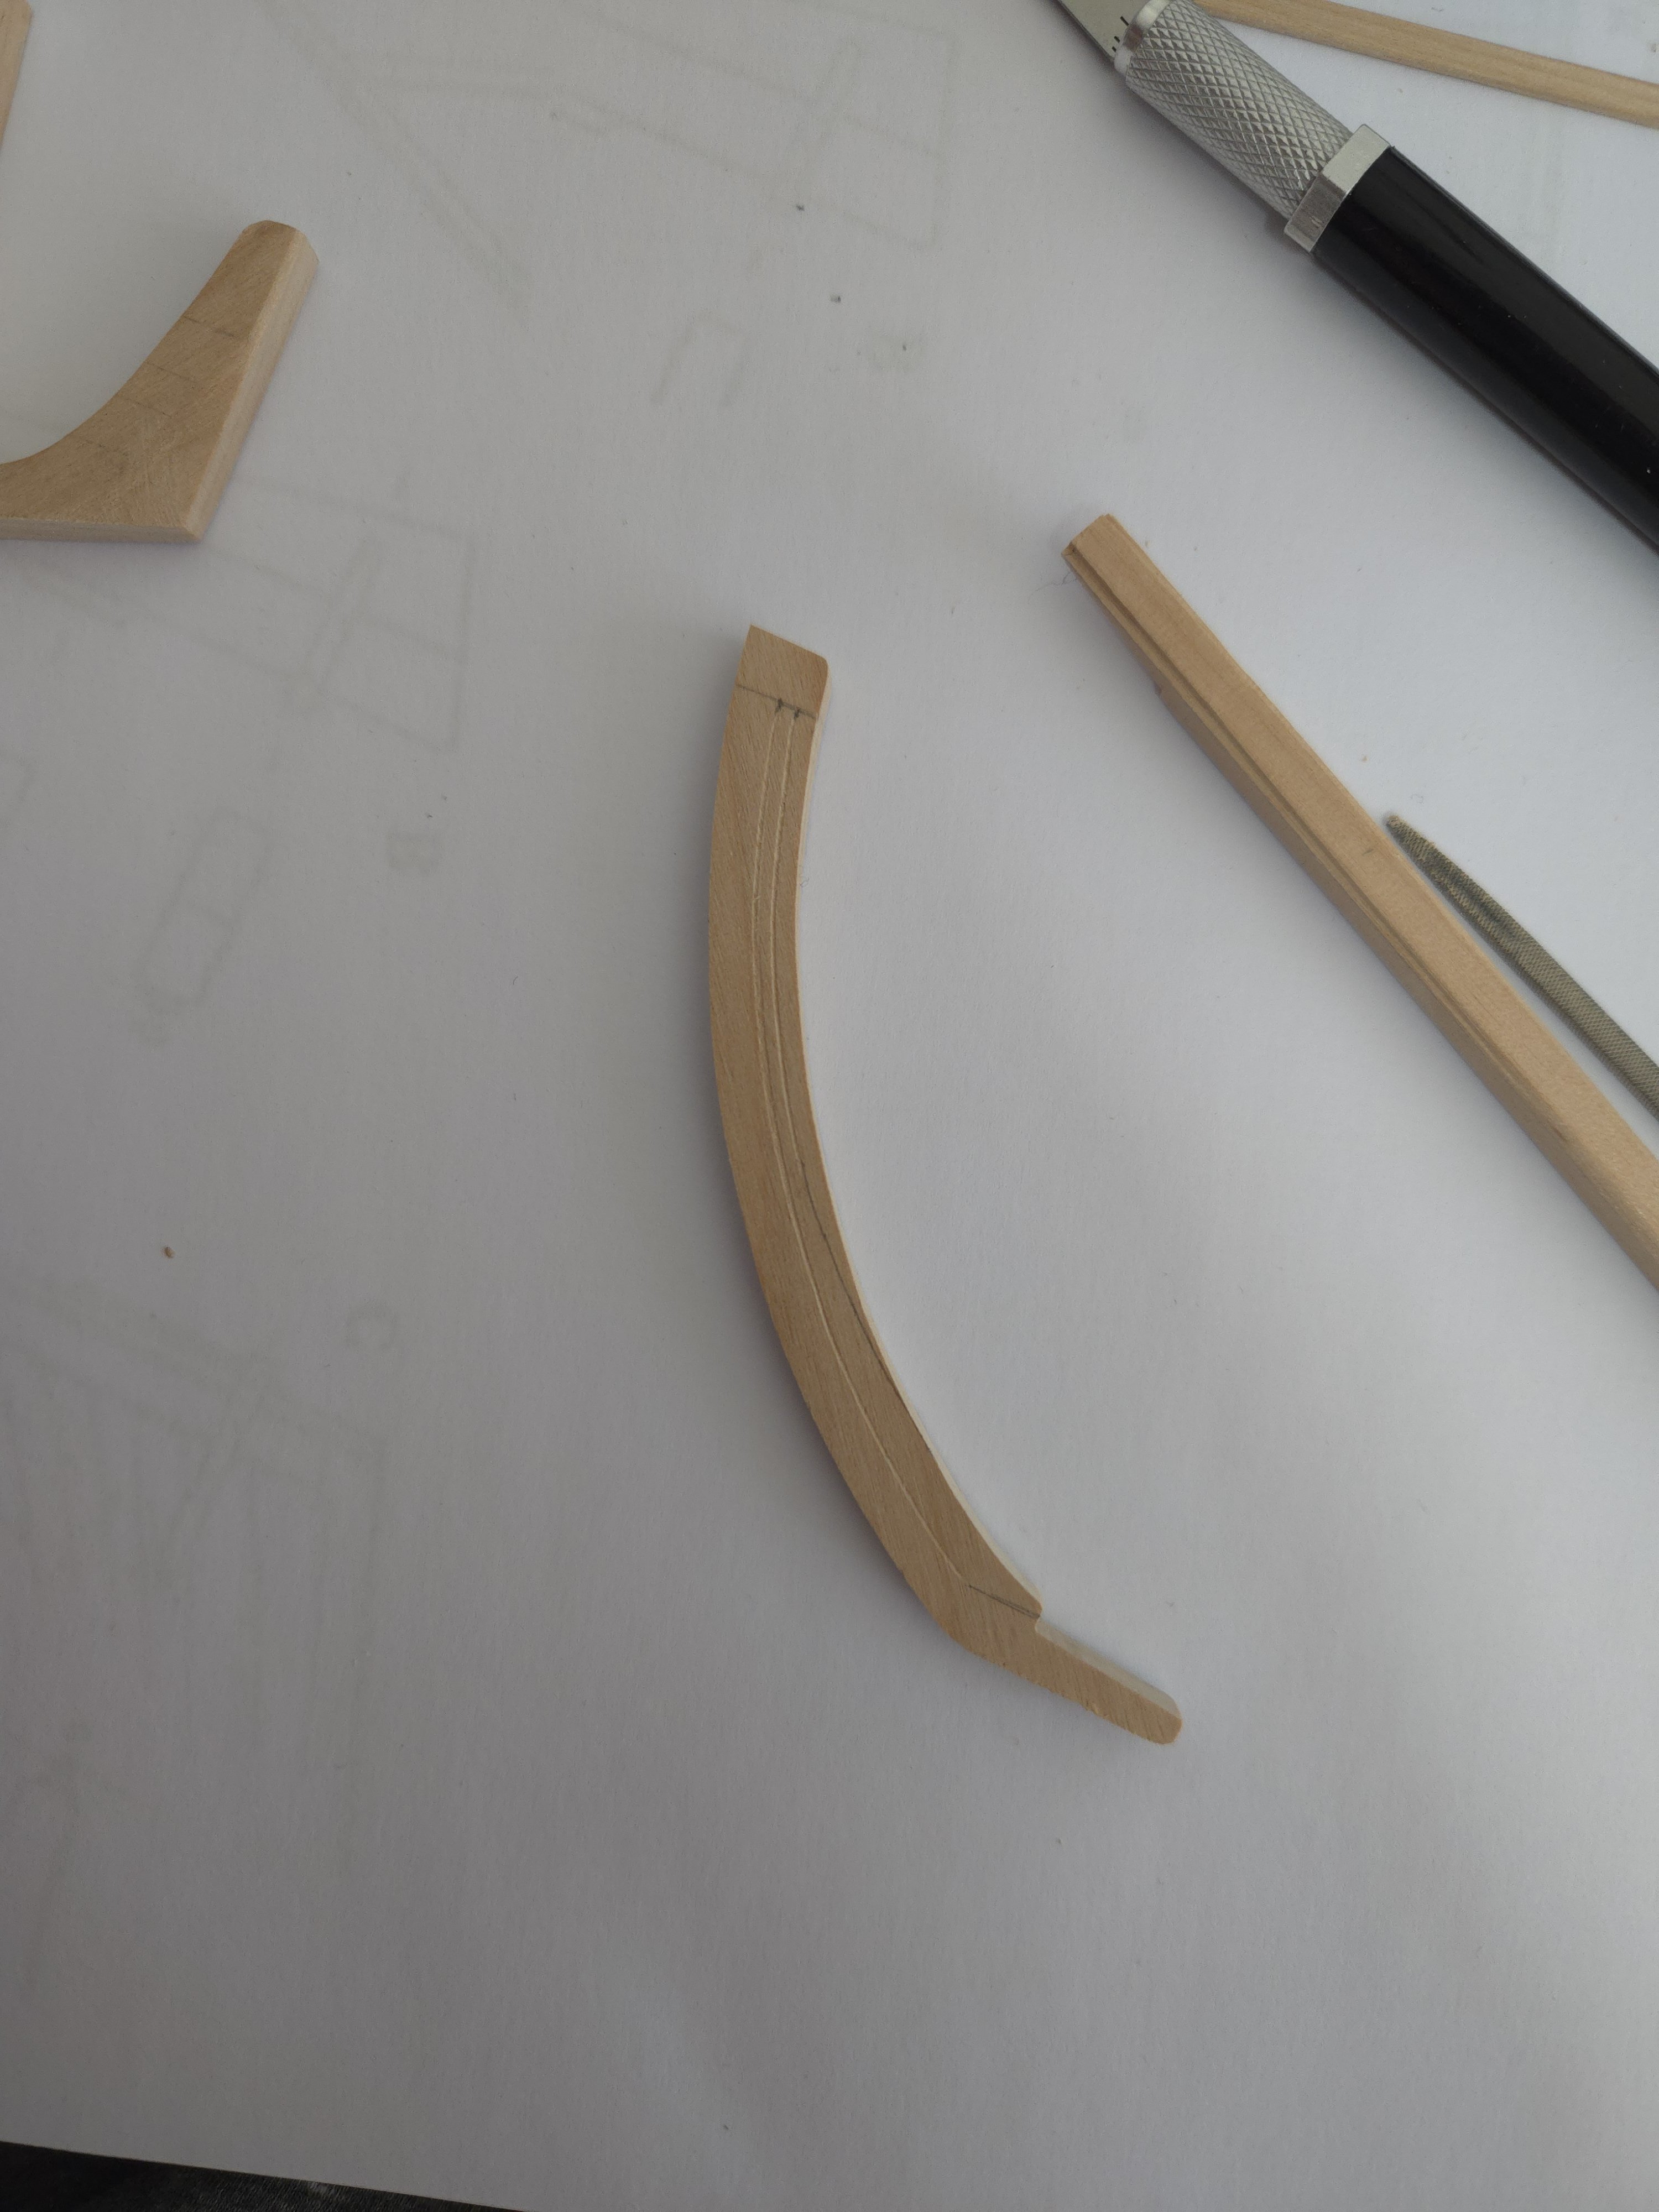
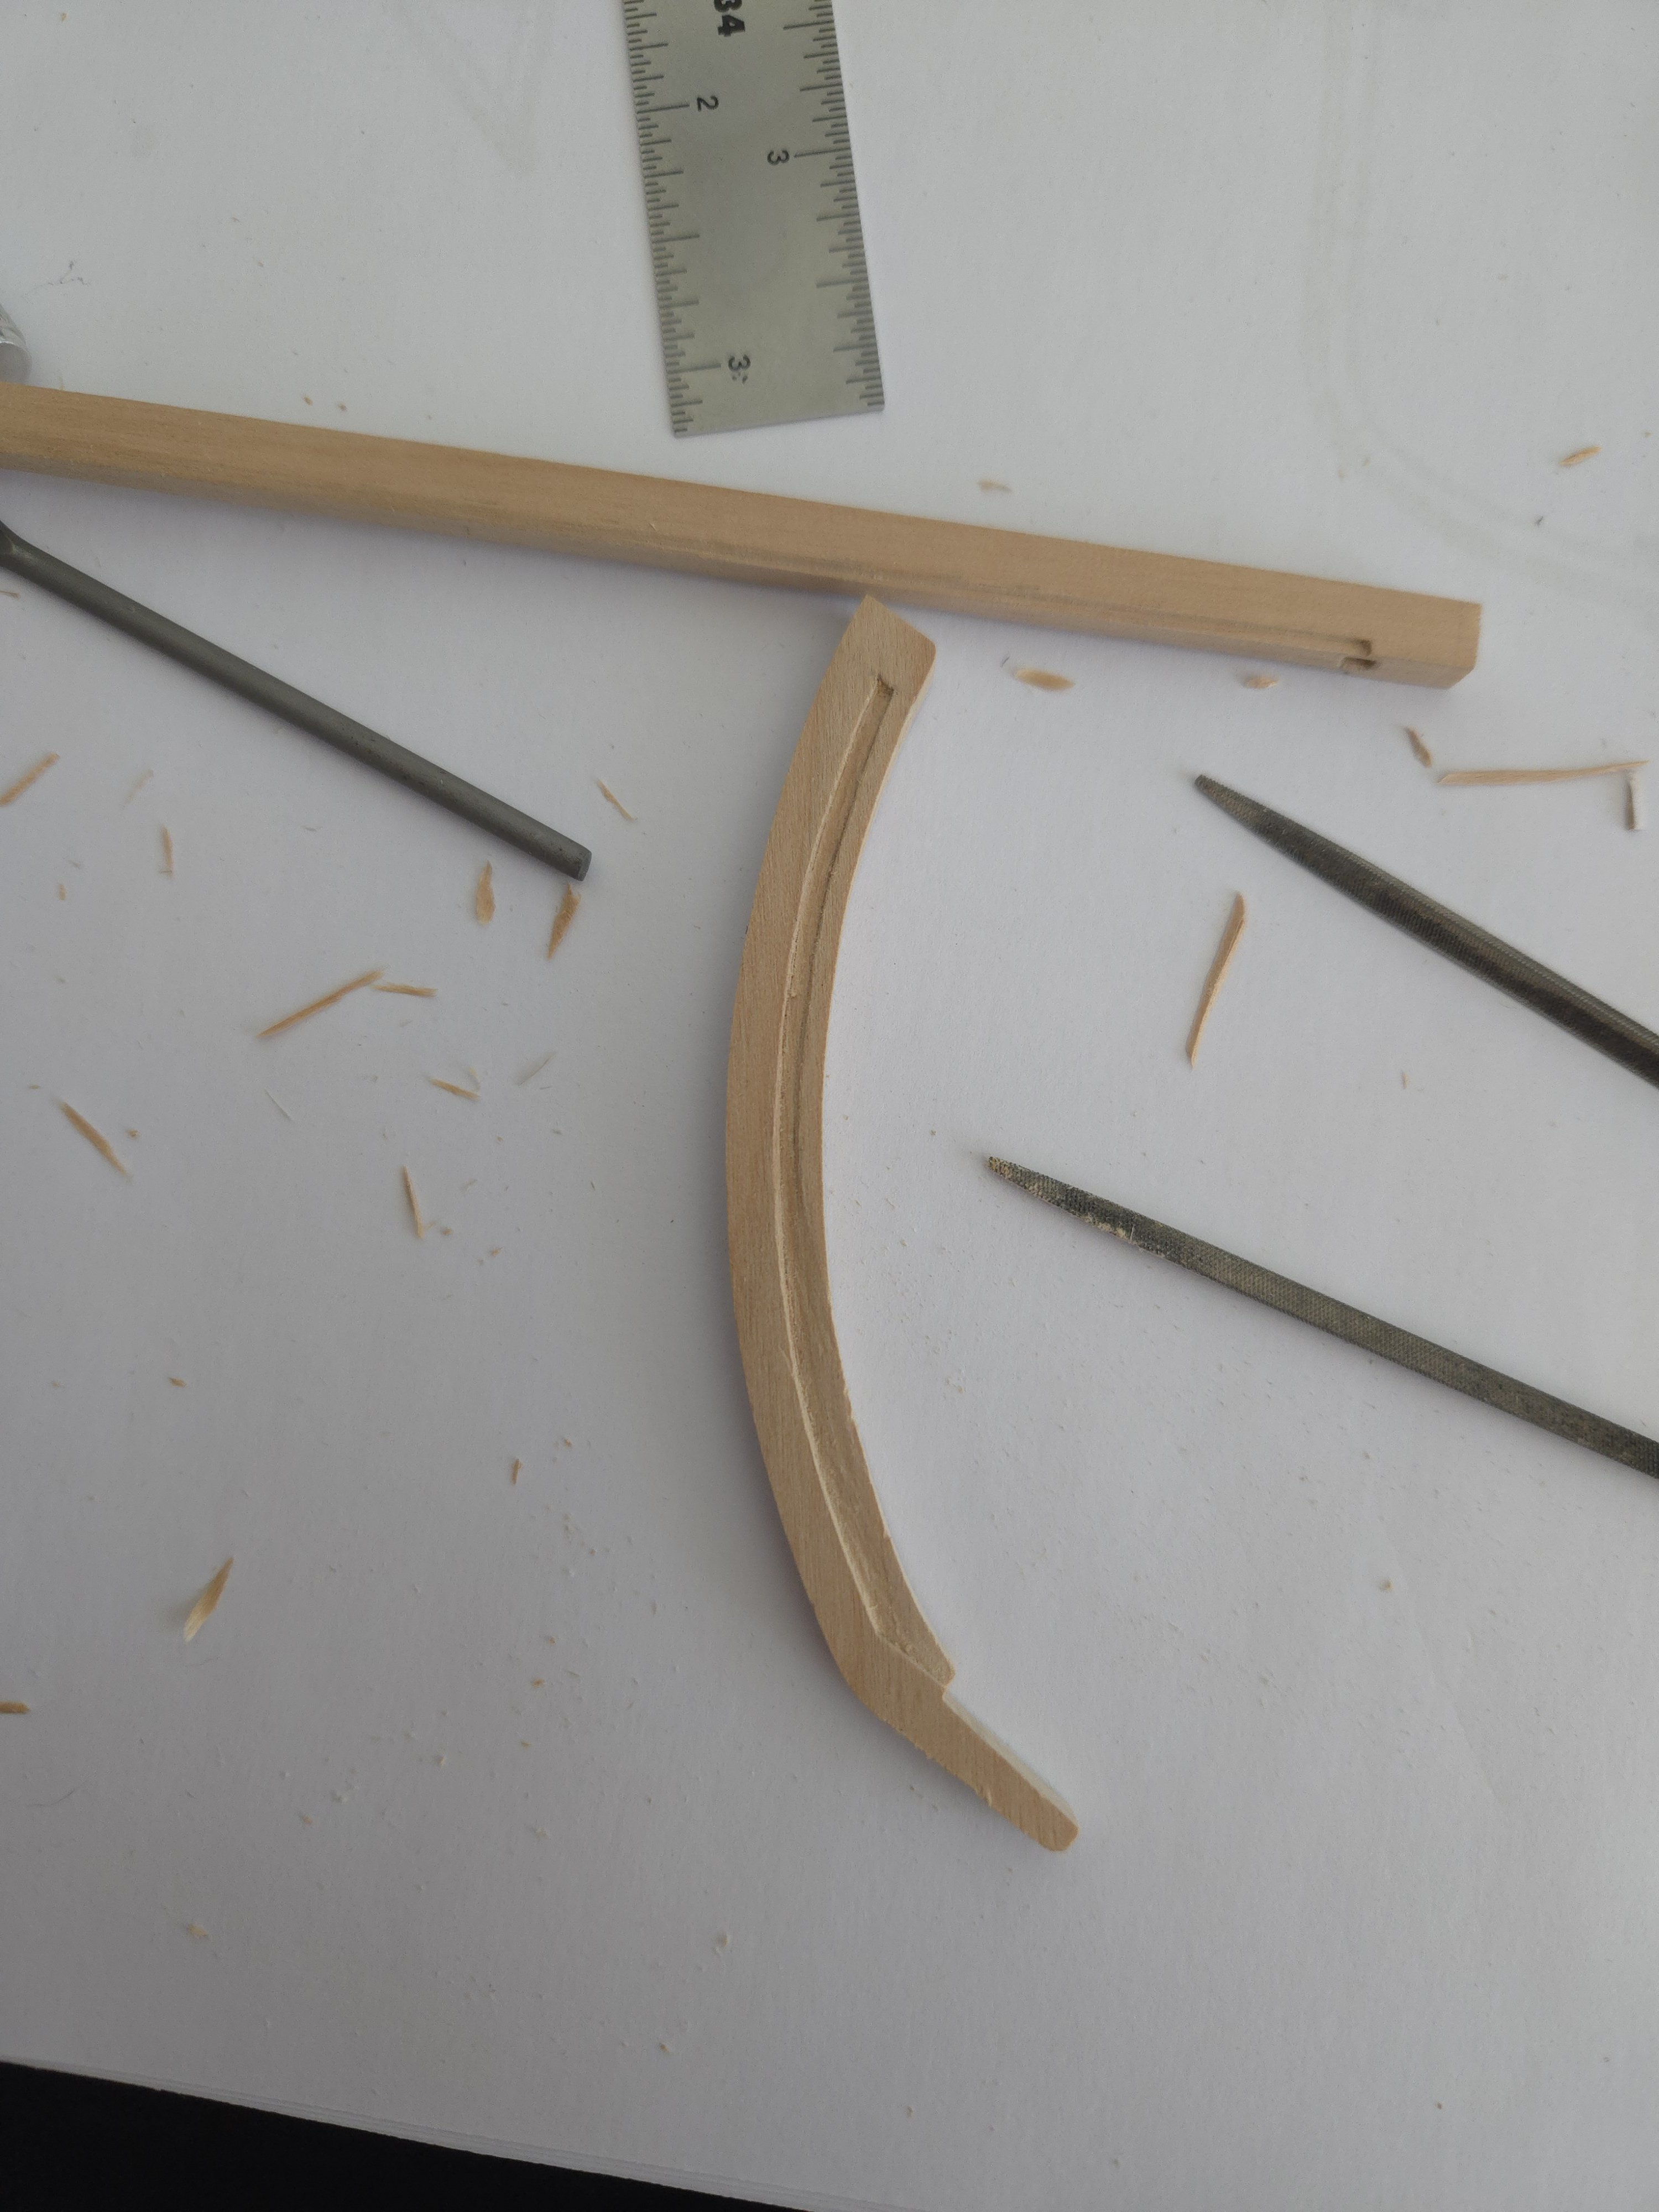
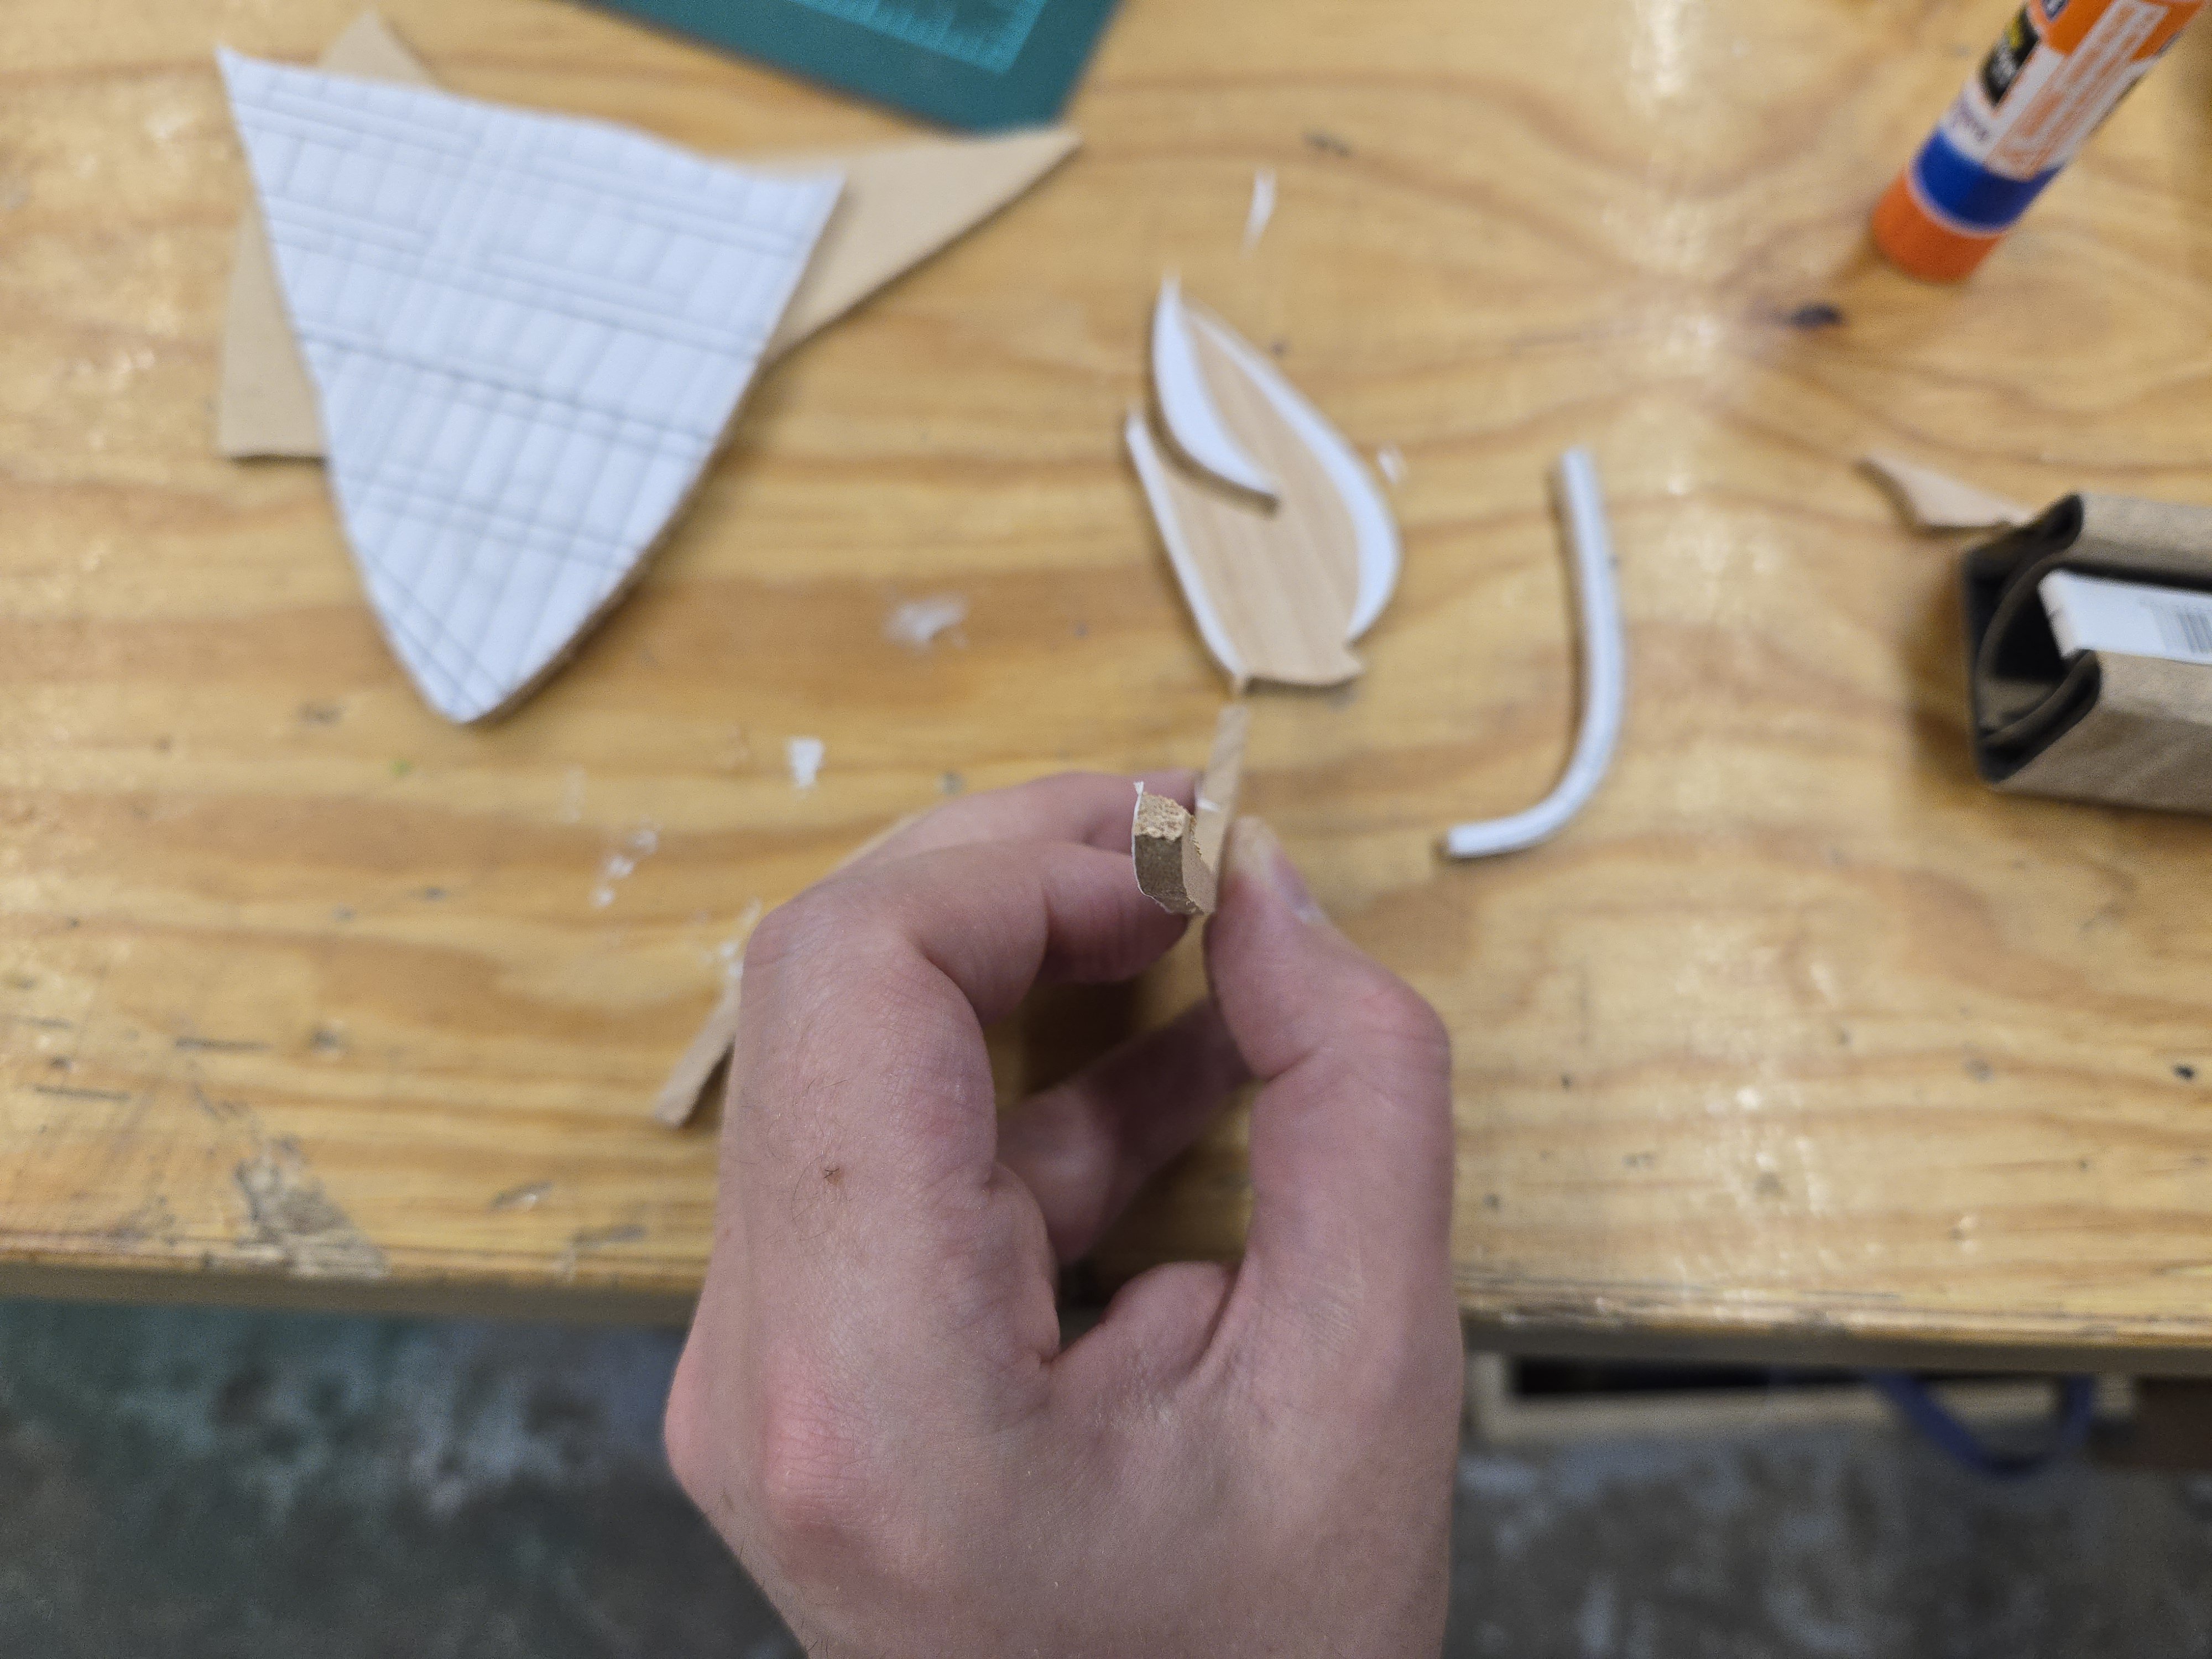
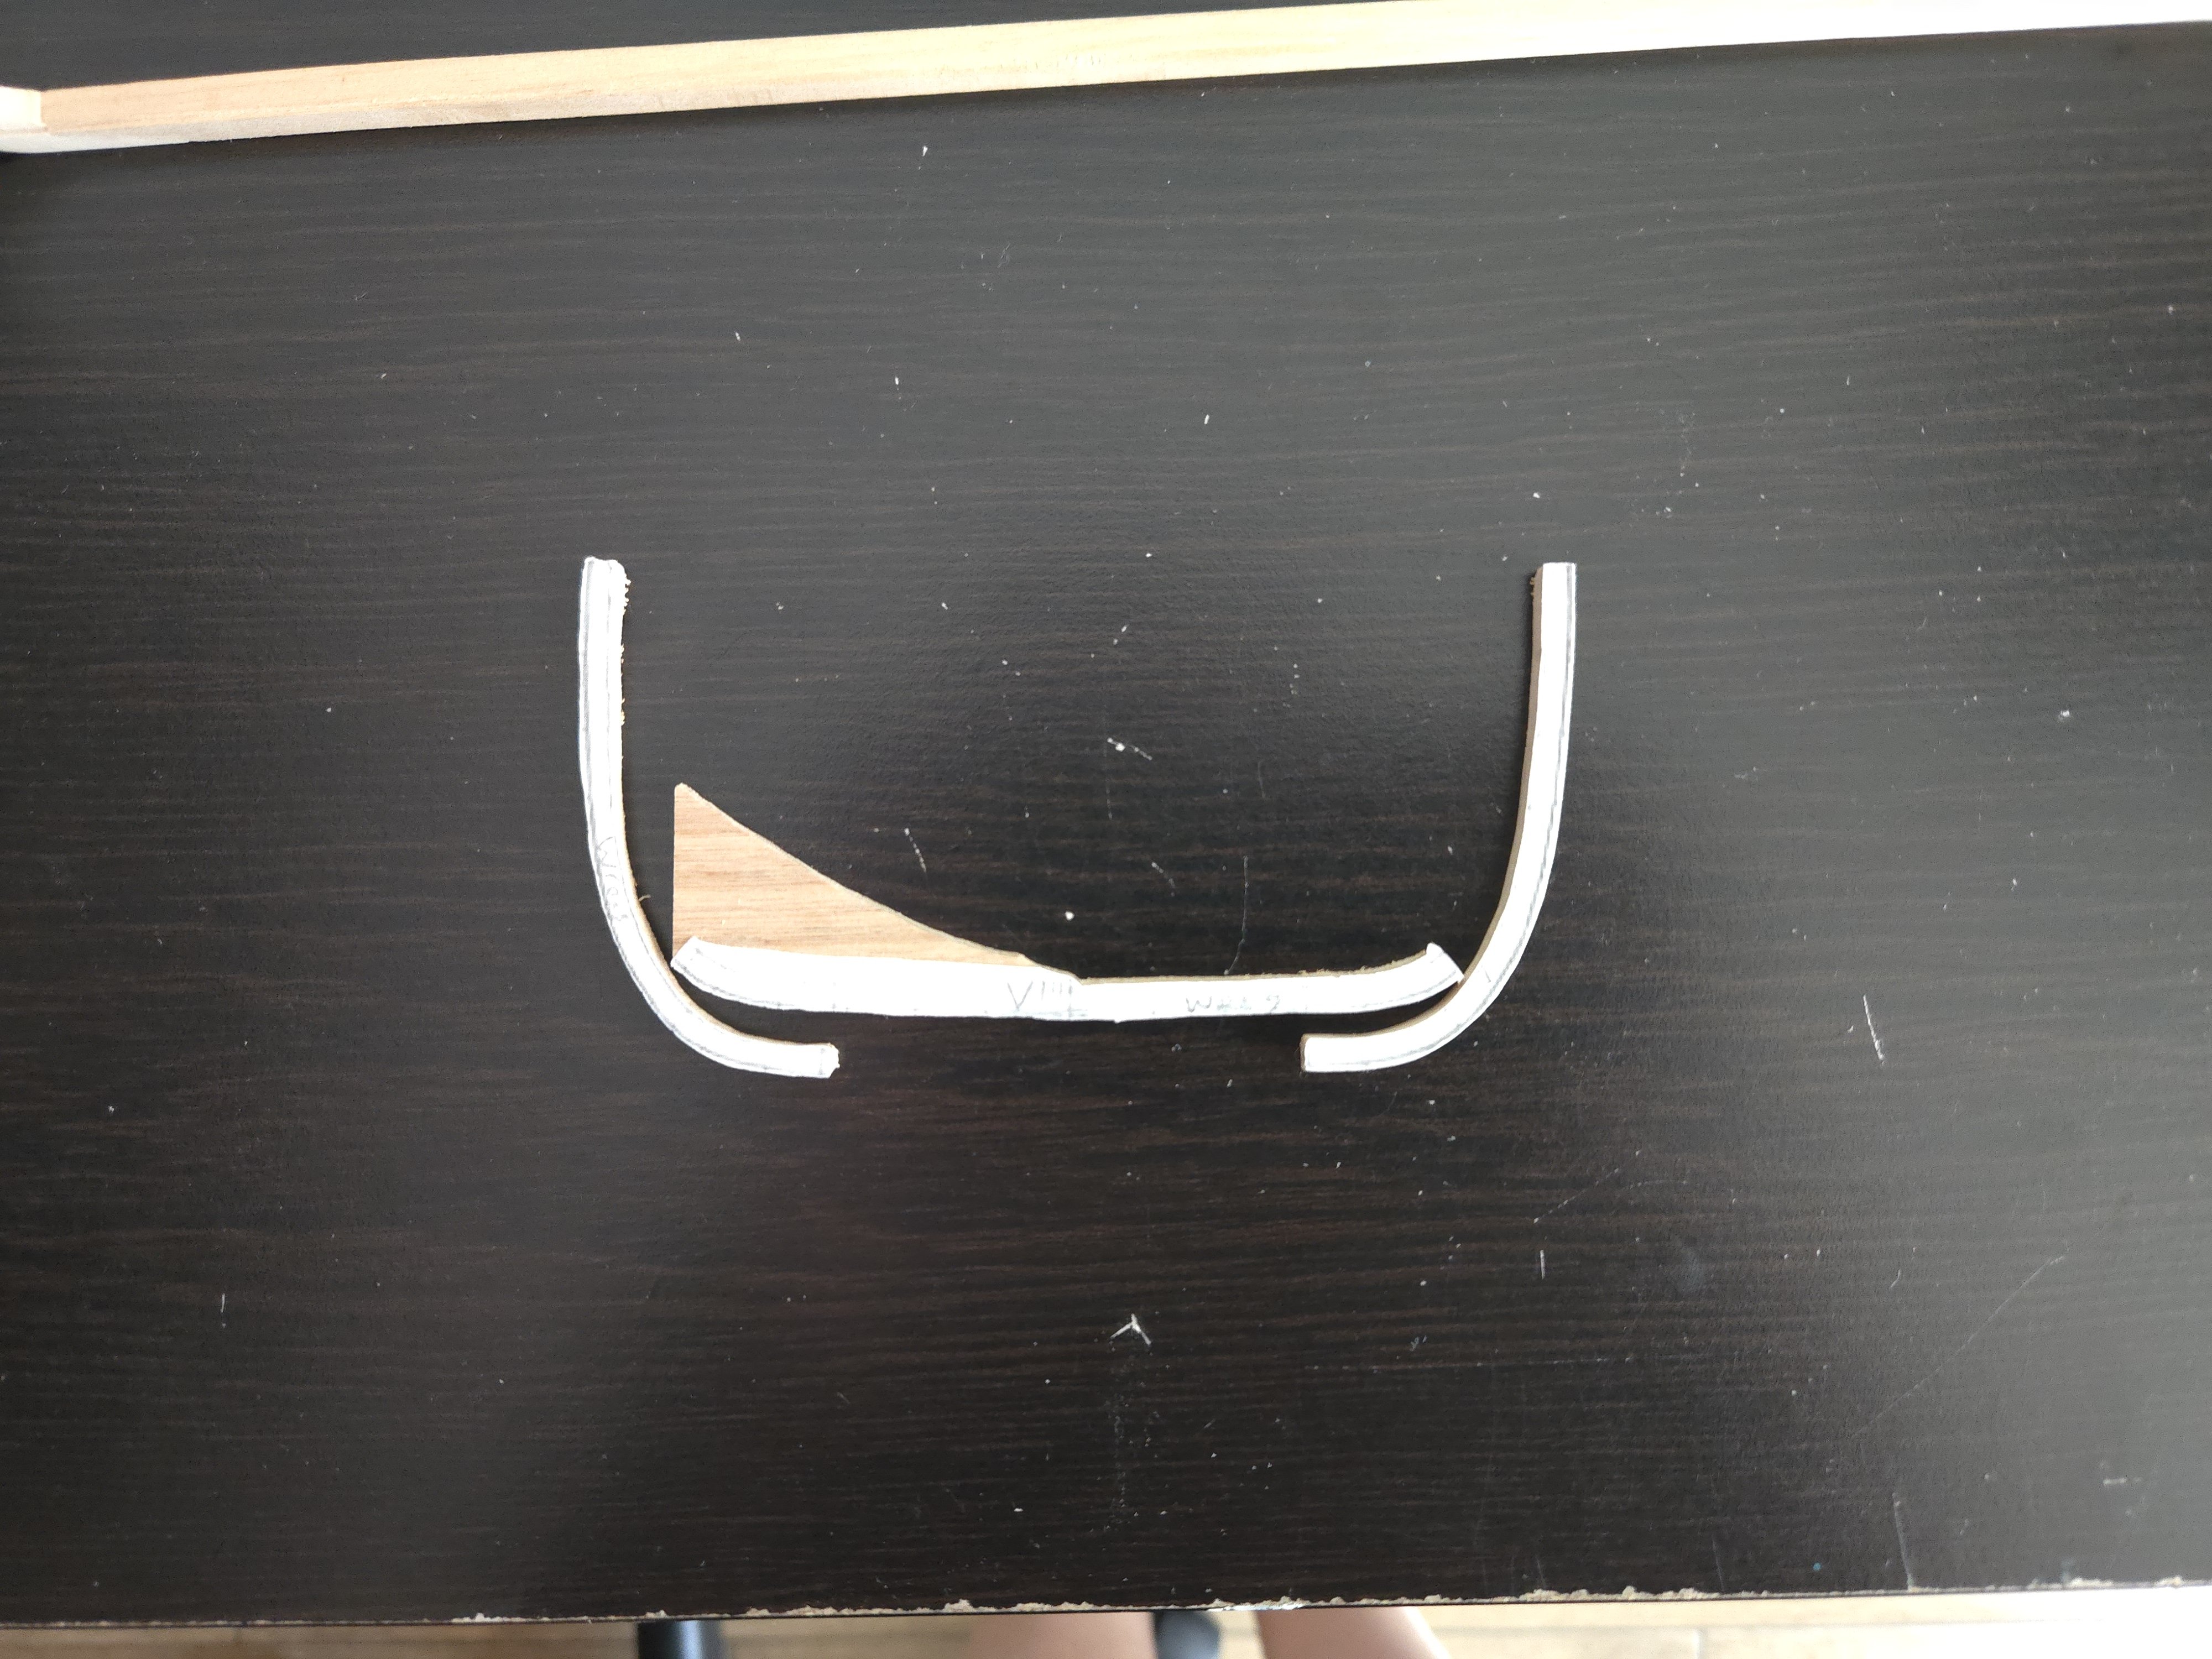
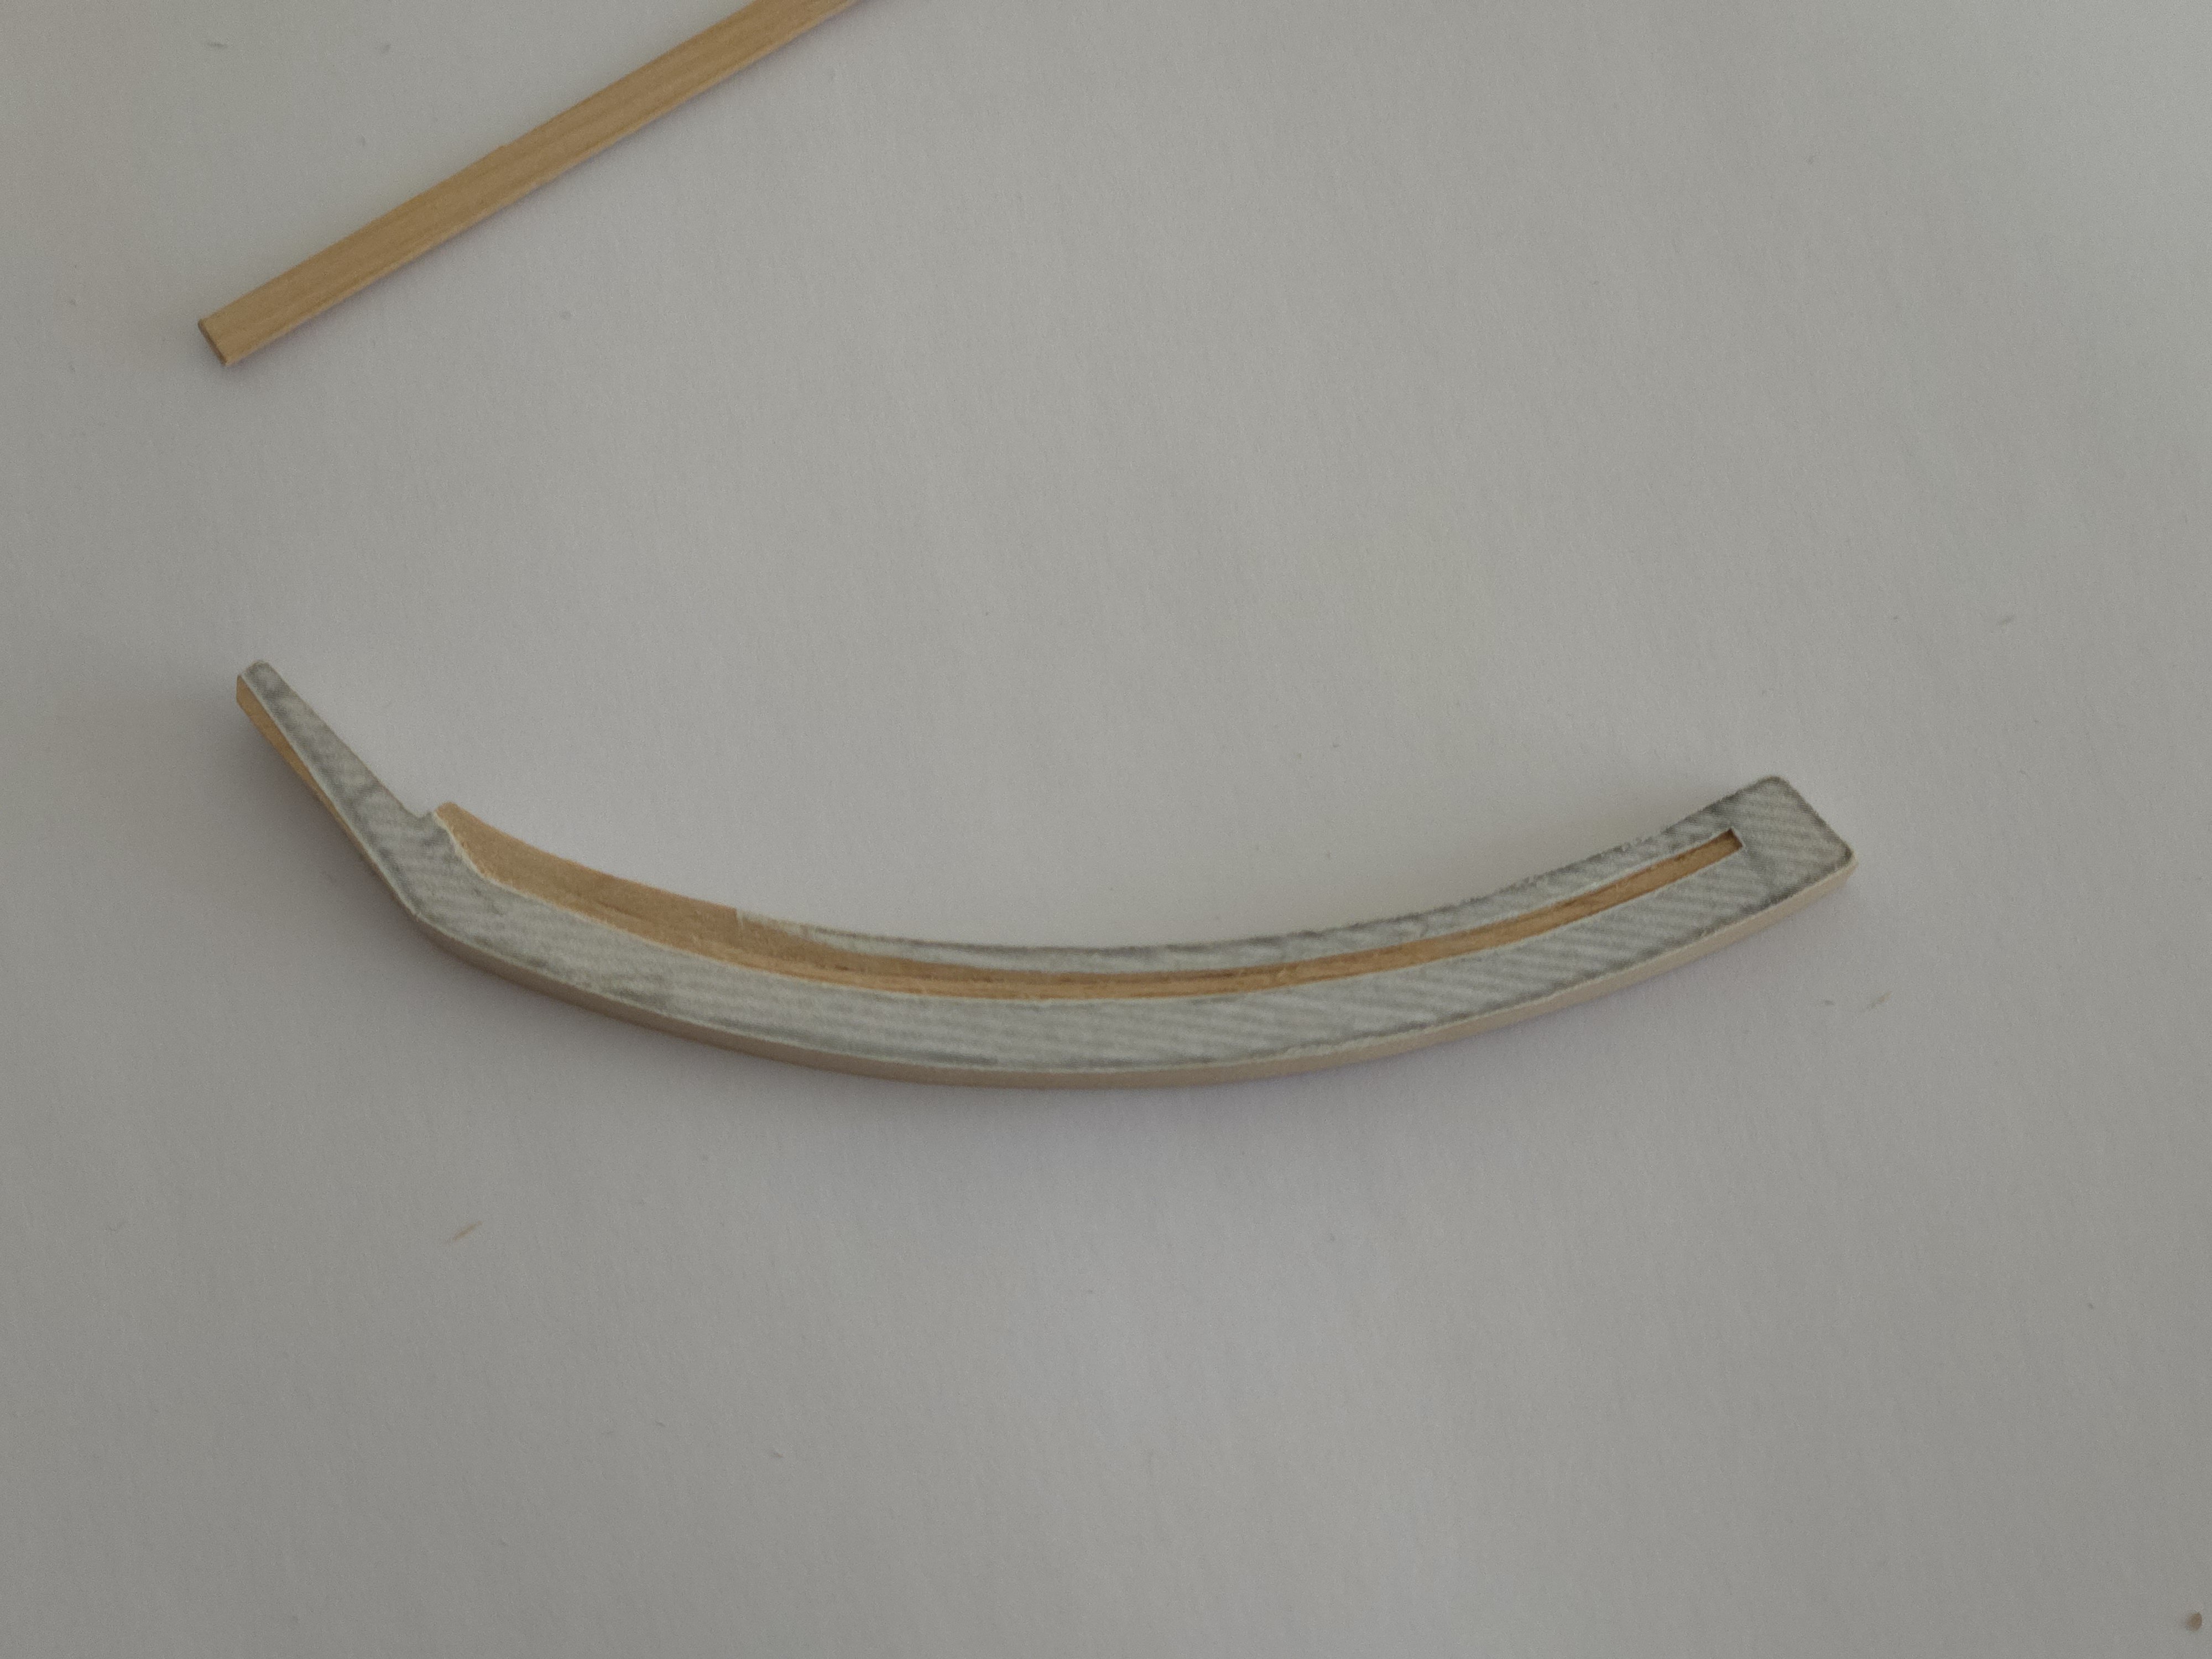
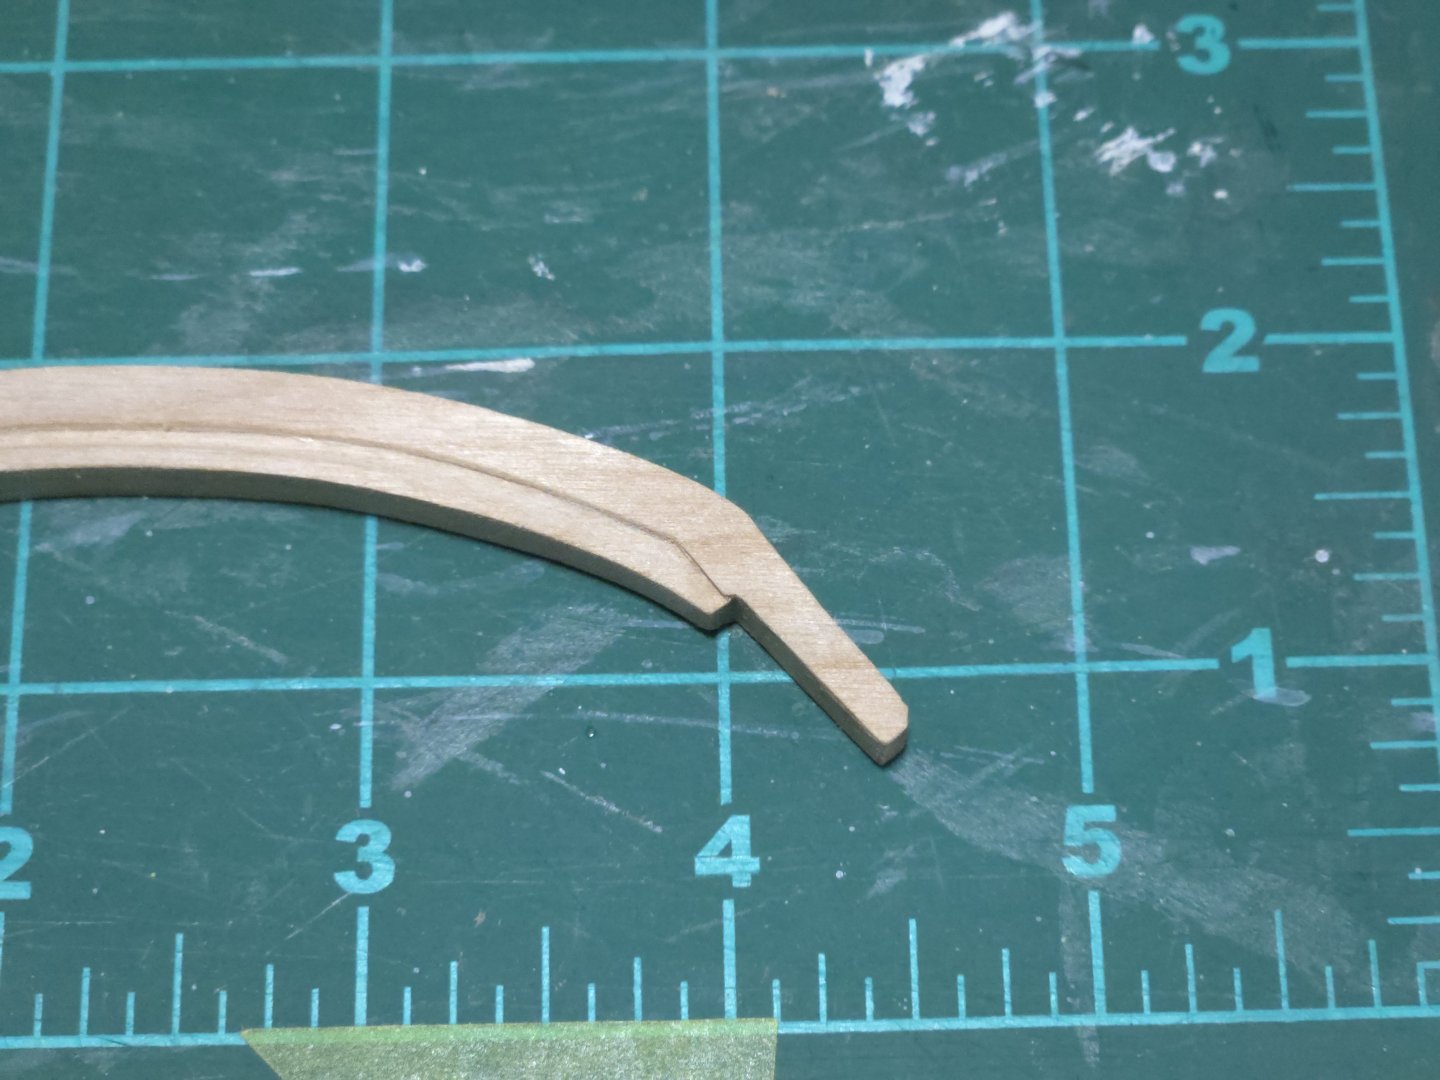
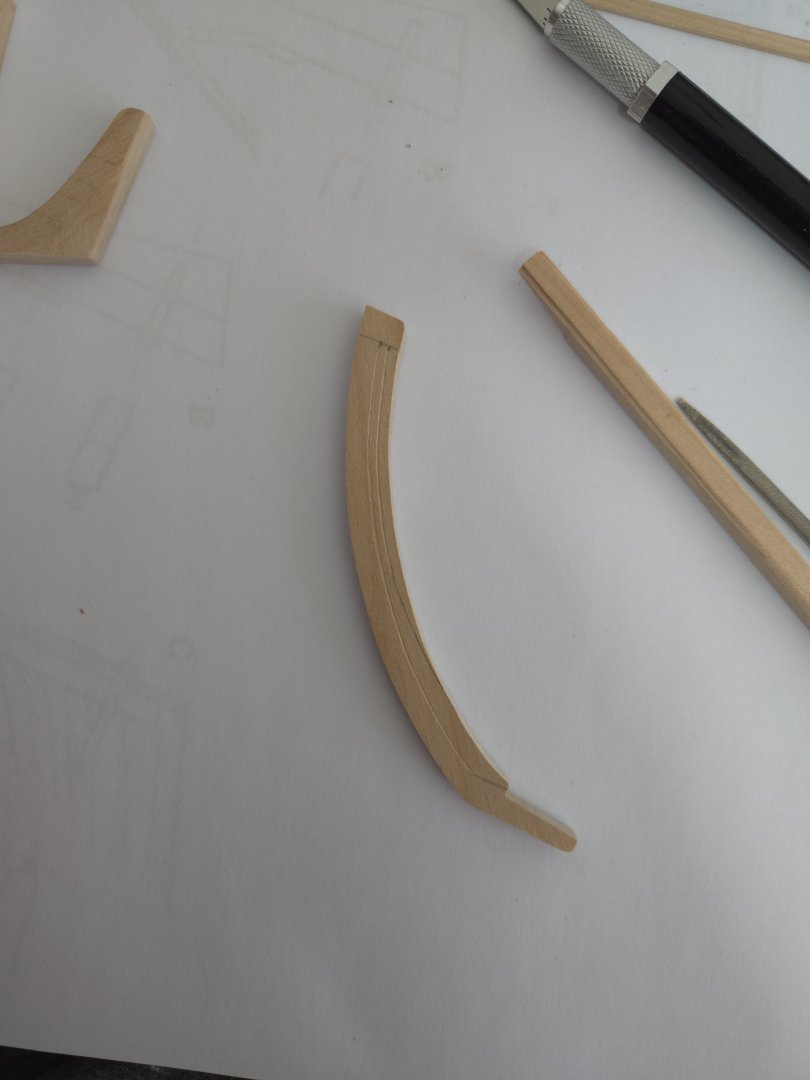
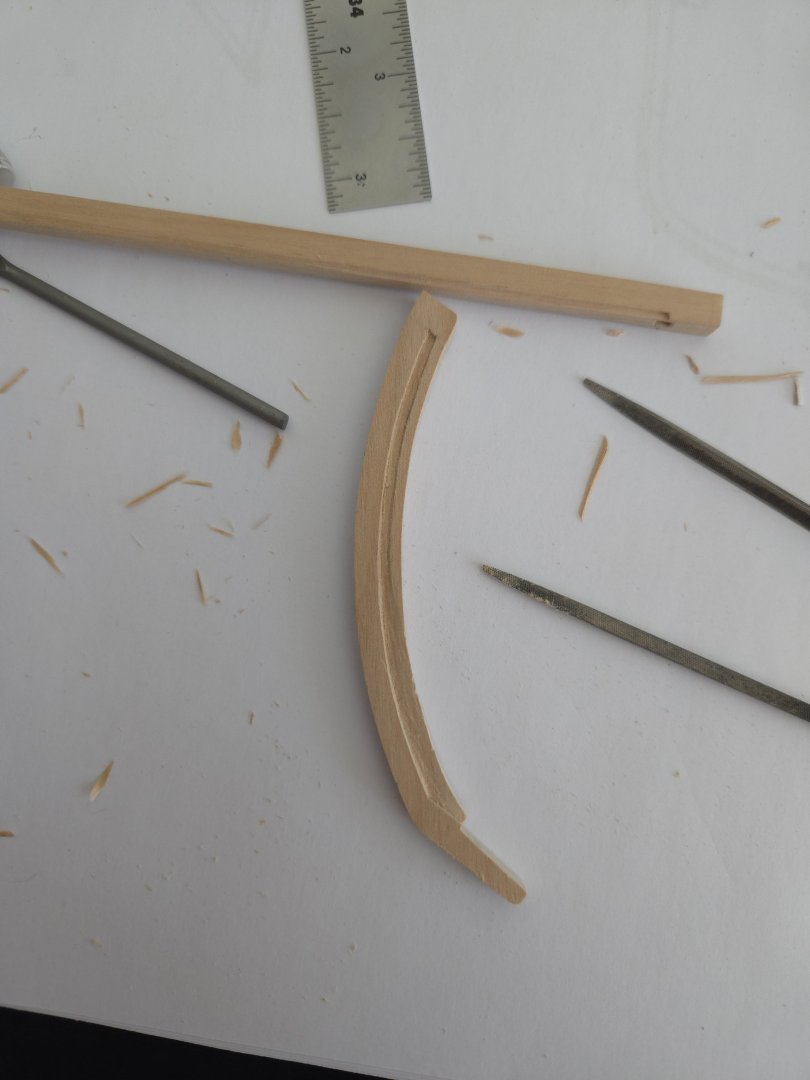
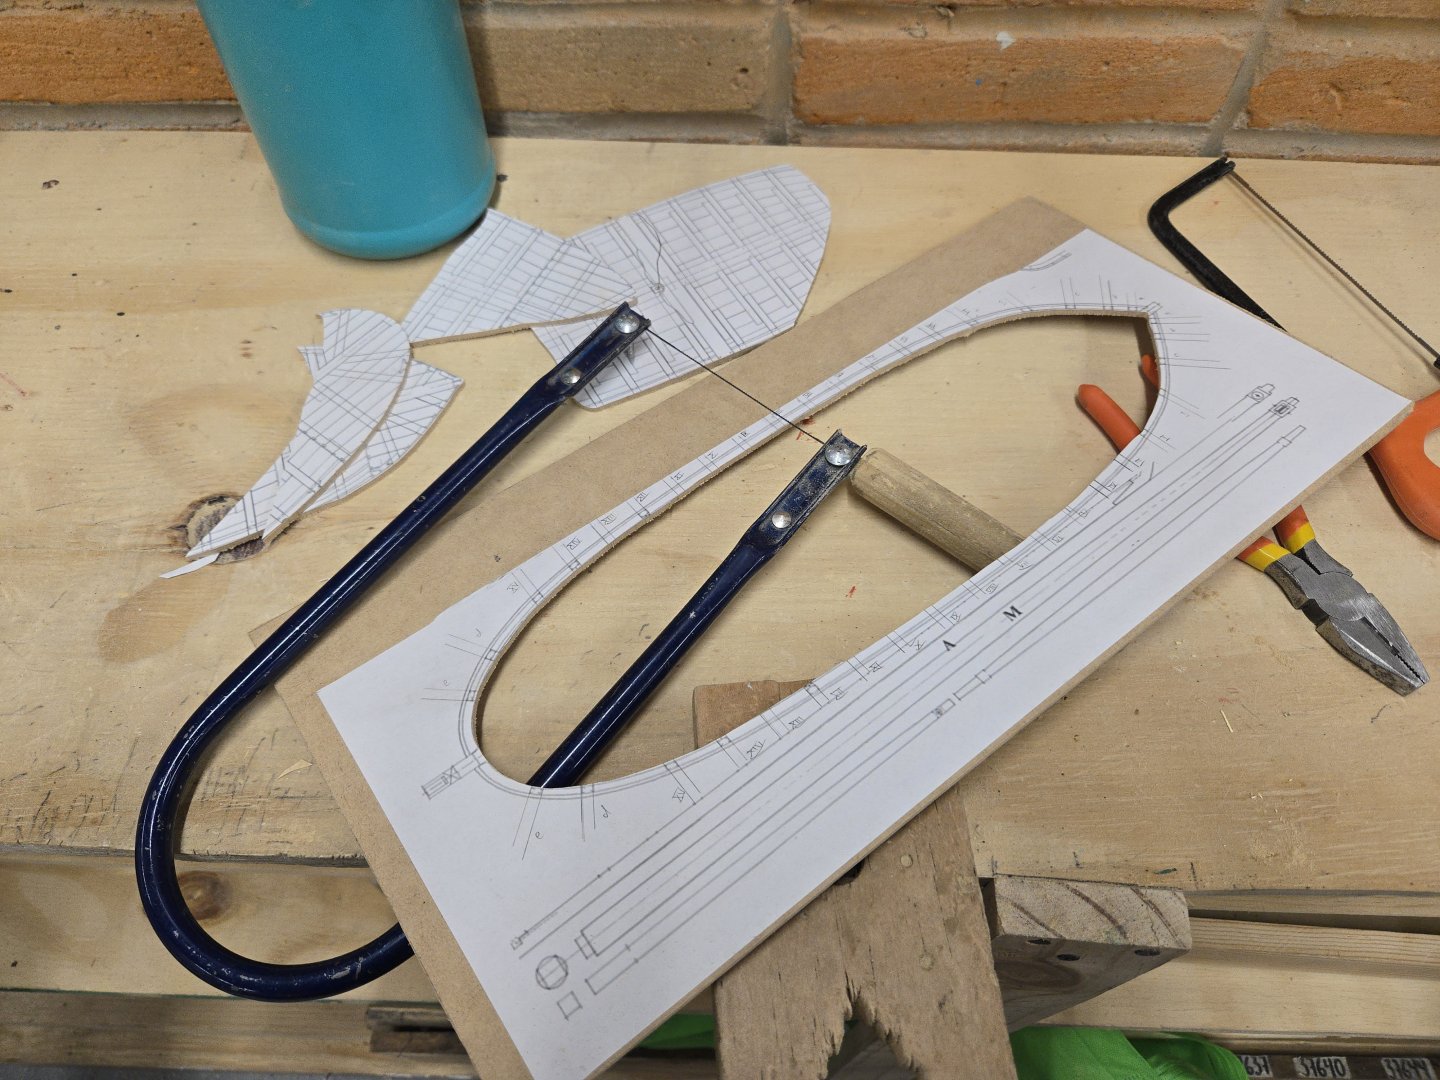
Lots of ups and downs, but I've made some progress on the Bateau. First, I advanced a bit on the building jig, although I still need to file the frame notches to the proper size (I forgot to bring the files that day) and add the bolt, nut, and washer assembly that will hold the jig up properly. I also decided to try cutting out my first frame. The first futtock turned out great. For the second, though, I didn't leave enough space cutting outside the line, and somehow managed to cut at a bit of an angle, resulting in an unusable, thin piece. I resolved to do better with the floor. But, as I was nearing on tip, the wood suddenly snapped, cracking at a diagonal that rendered this piece, too, unusable. The good piece is on the right, the unusable ones at center and left: This was a frustrating experience, but I think I can draw two lessons from it. First: I should just start drawing a line about 1mm outside the frame line to follow, because I have a hard time cutting a consistent distance outside a line. Second, I should cut the frames purposely overlong and only trim the edges to the proper size afterward, so that there's more support around the ends of the frames and they're less likely to break while cutting. Meanwhile, I worked out the rabbet shape. It was a bit tricky to get right, because the edge of the garboard is bevelled in a way that changes over the length of the hull. So rather than assuming a squared-off plank edge and setting the rabbet to the changing angle of the plank, I had to figure out how the plank bevel was changing and would interact with the rabbet. The result is a little messy and probably not quite right, but it should work and I can always make minor adjustments as necessary later. At both the bow and the stern, the rabbet needed to transition from a simple beveled edge to a squared-off cut, which I did with a sharp blade and mini-files. I think I extended the squared portion a little too far forward at the stern, but checking with a piece of planking wood shows that everything should still fit well. While the deadwood was pretty straightforward, just thinning the lower edges and corner a bit, the stem and sternpost were more complicated. At the top of the sternpost, the planks enter pretty much straight from the sides due to the pronounced curve of the hull, but that gradually shifts until, by the bottom, the planks will run flat into the sternpost. The stem is similar, but a different shape. To transfer the rabbet shape to the opposite side, I used a metal divider to scribe the line before cutting. After a lot of careful cutting, I decided that it was finally time to start gluing. I began with the bow. Unfortunately I couldn't get a clamp onto the parts very well while holding them against the plans on a flat surface, and right after gluing, I realized that it was angled to the side--very slightly, but possibly enough to cause a problem. I applied alcohol and began to separate the parts, when a minor tragedy struck and the stem snapped at the joint: After a bit of cursing and considering my options, I decided that I may as well see if I could glue it back together before making a new one. Between carving out a tight scarf joint and the rabbet, the stem had been the most complex part so far, and I wasn't exactly enthusiastic about remaking it. Fortunately, the parts fit very well and, after clean-up, the joint was practically invisible from the sides. While waiting on that to dry, I glued the sternpost and deadwood to the keel: And then the stem. After sawing off the excess bit of keel at the stern and sanding off the extra I left below the stem, I'm pleased with how the keel structure turned out! There's a bit of touch-up here and there to do, but it's coming along well. The repair at the bow is invisible from the sides and barely visible from the bottom (which of course will be barely visible on the completed model). Overall this has been an eye-opening experience. The complexity of making a POF build from scratch is an order of magnitude greater than any previous builds I've done, and I've made plenty of errors. (And tried to learn from them.) Even something as seemingly simple as the keel structure has taken a lot of work and plenty of frustrations. Challenging as it is, I'm learning a lot and (mostly) enjoying the experience.


- 139 replies
-
- 10
-

-
-
- ancre
- Bateau de Lanveoc
- (and 2 more)
-
Nice work! Expanding the bulkheads for more gluing area is a great idea. Every time I see this build I'm surprised again by how big it is.
-
Very nice, precise work!
-
I'm not sure how helpful this suggestion will be, or how necessary it is for the model, but the chapter on grain in William Cronon's Nature's Metropolis might have relevant information--either the text itself, or a footnote may point toward a source on it in some trade journal or something. Edit to add: it's been a while since I read it, but grain transportation technologies are important to his broader argument about commodification, so the book should have something on it.
- 303 replies
-
- 11
-
-
Nice work! The rivet heads are a great detail, just visible enough without looking out-of-scale.
-
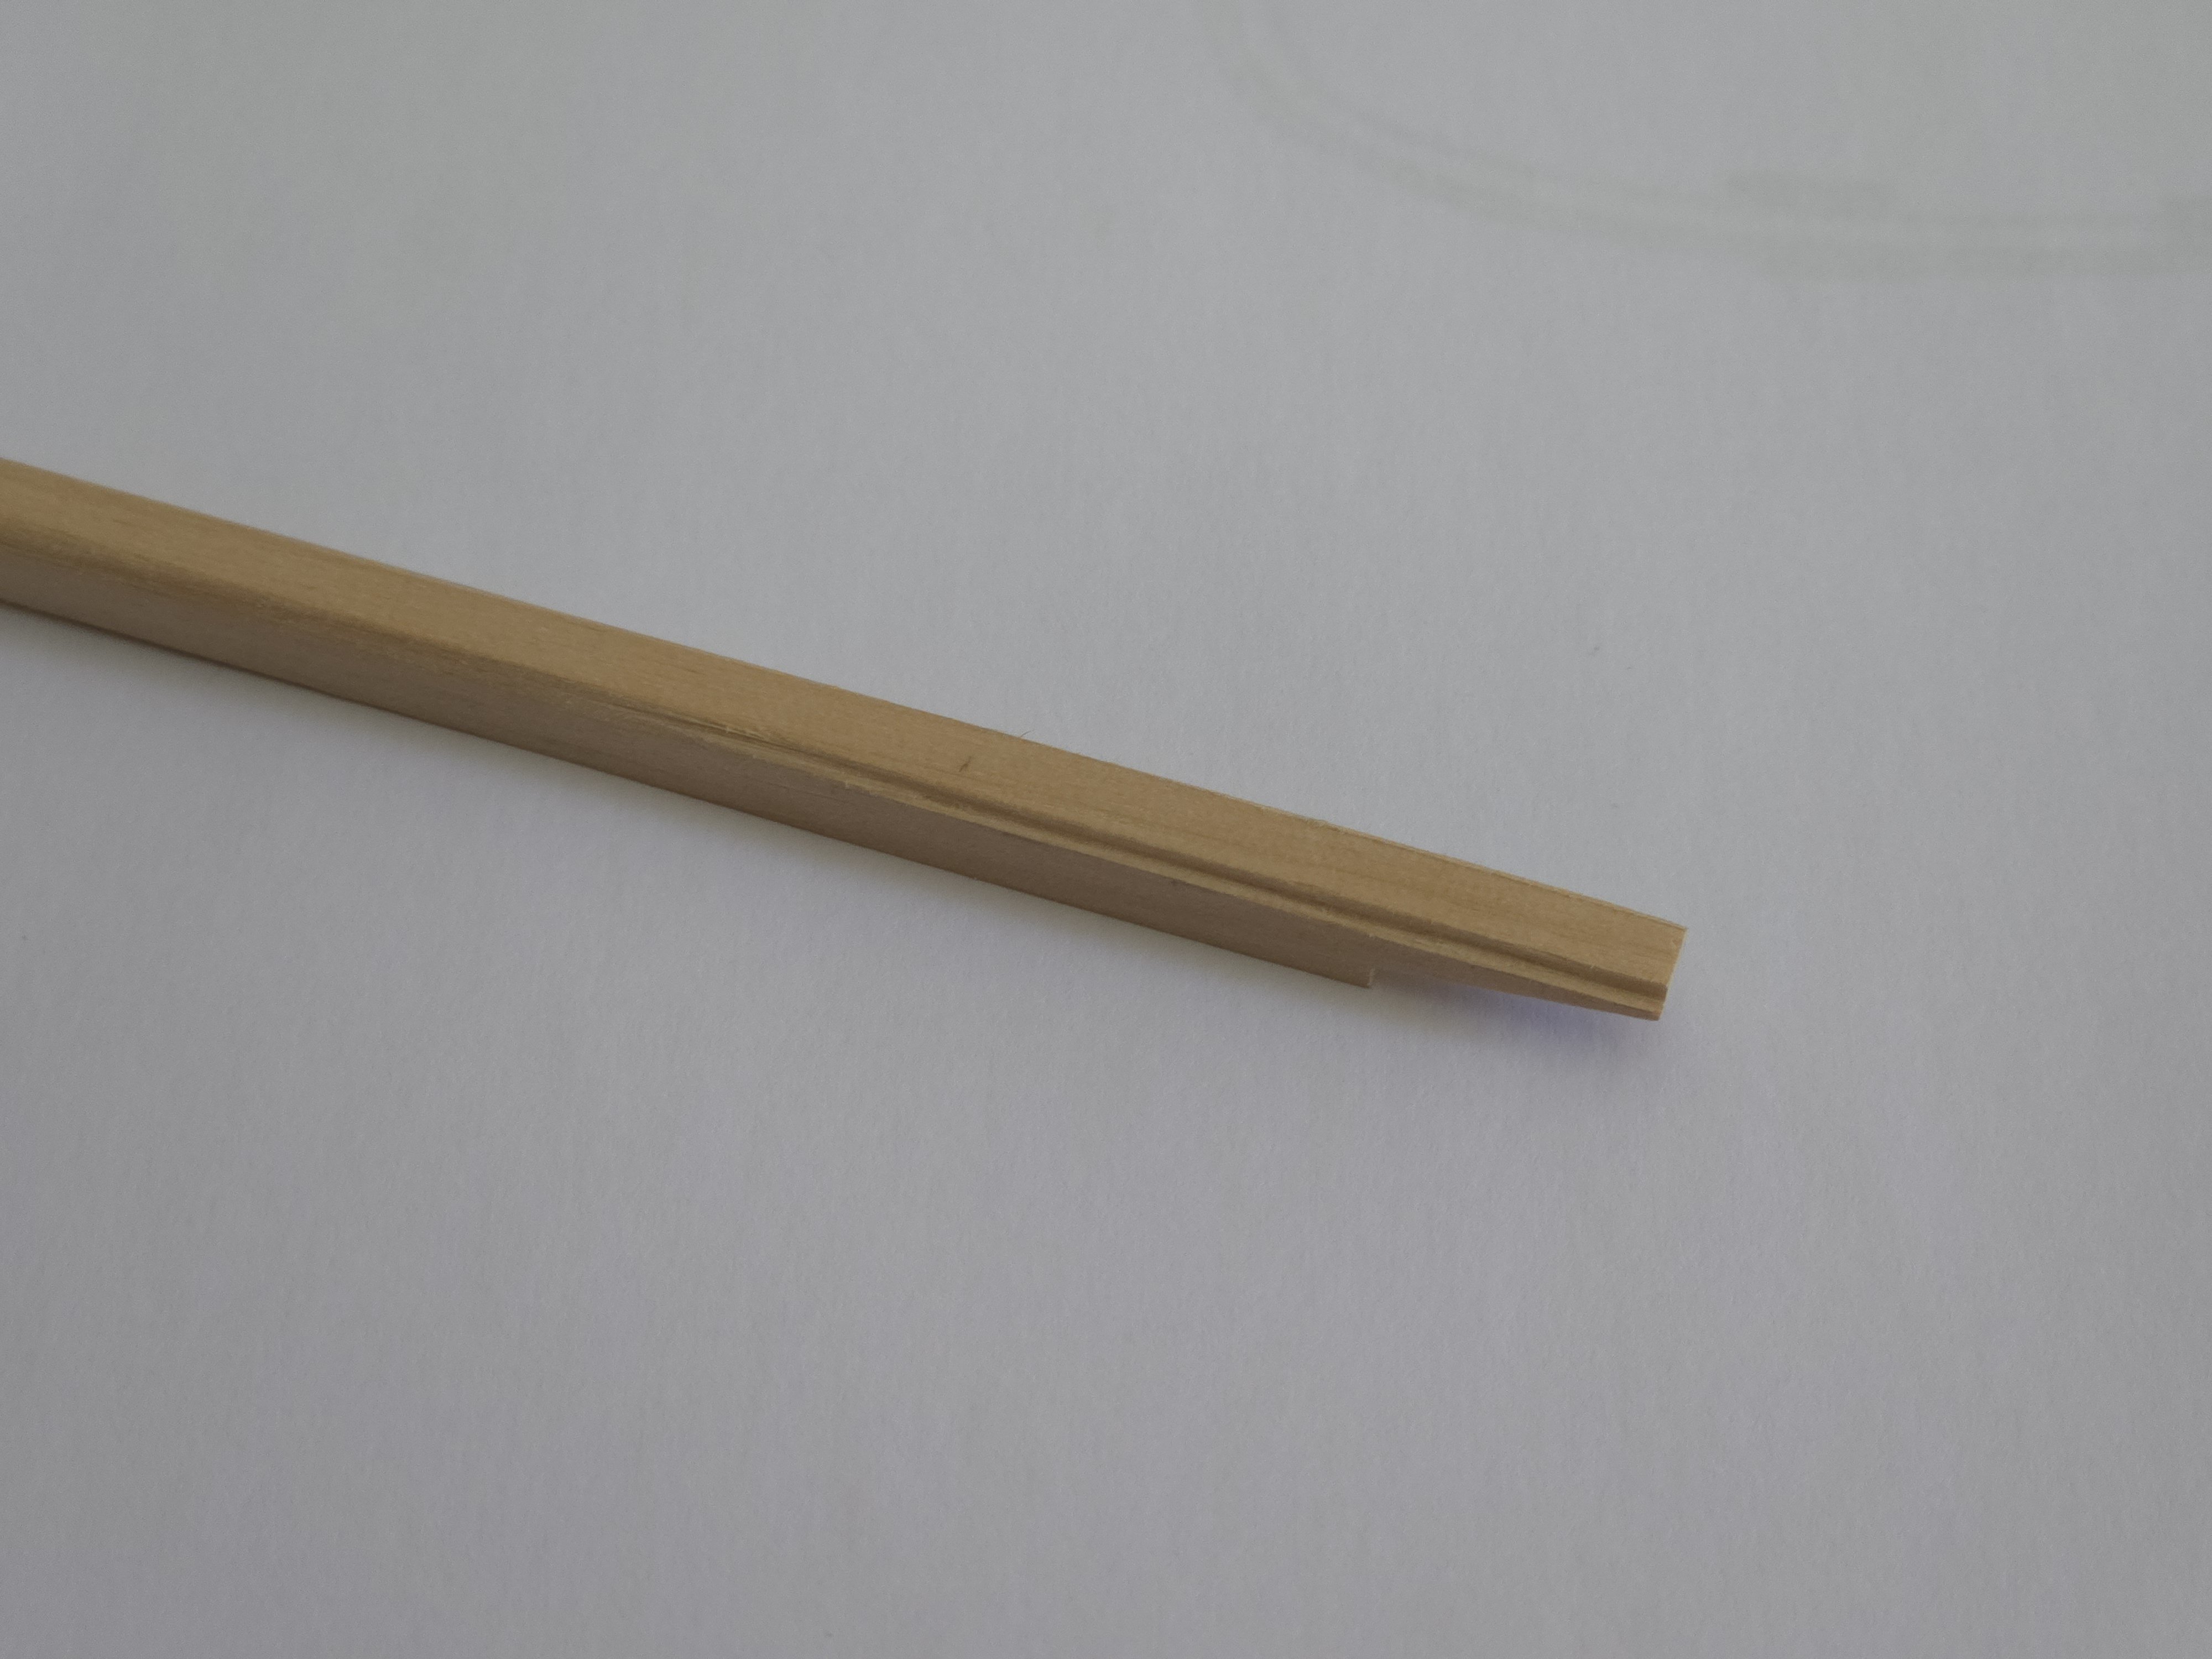
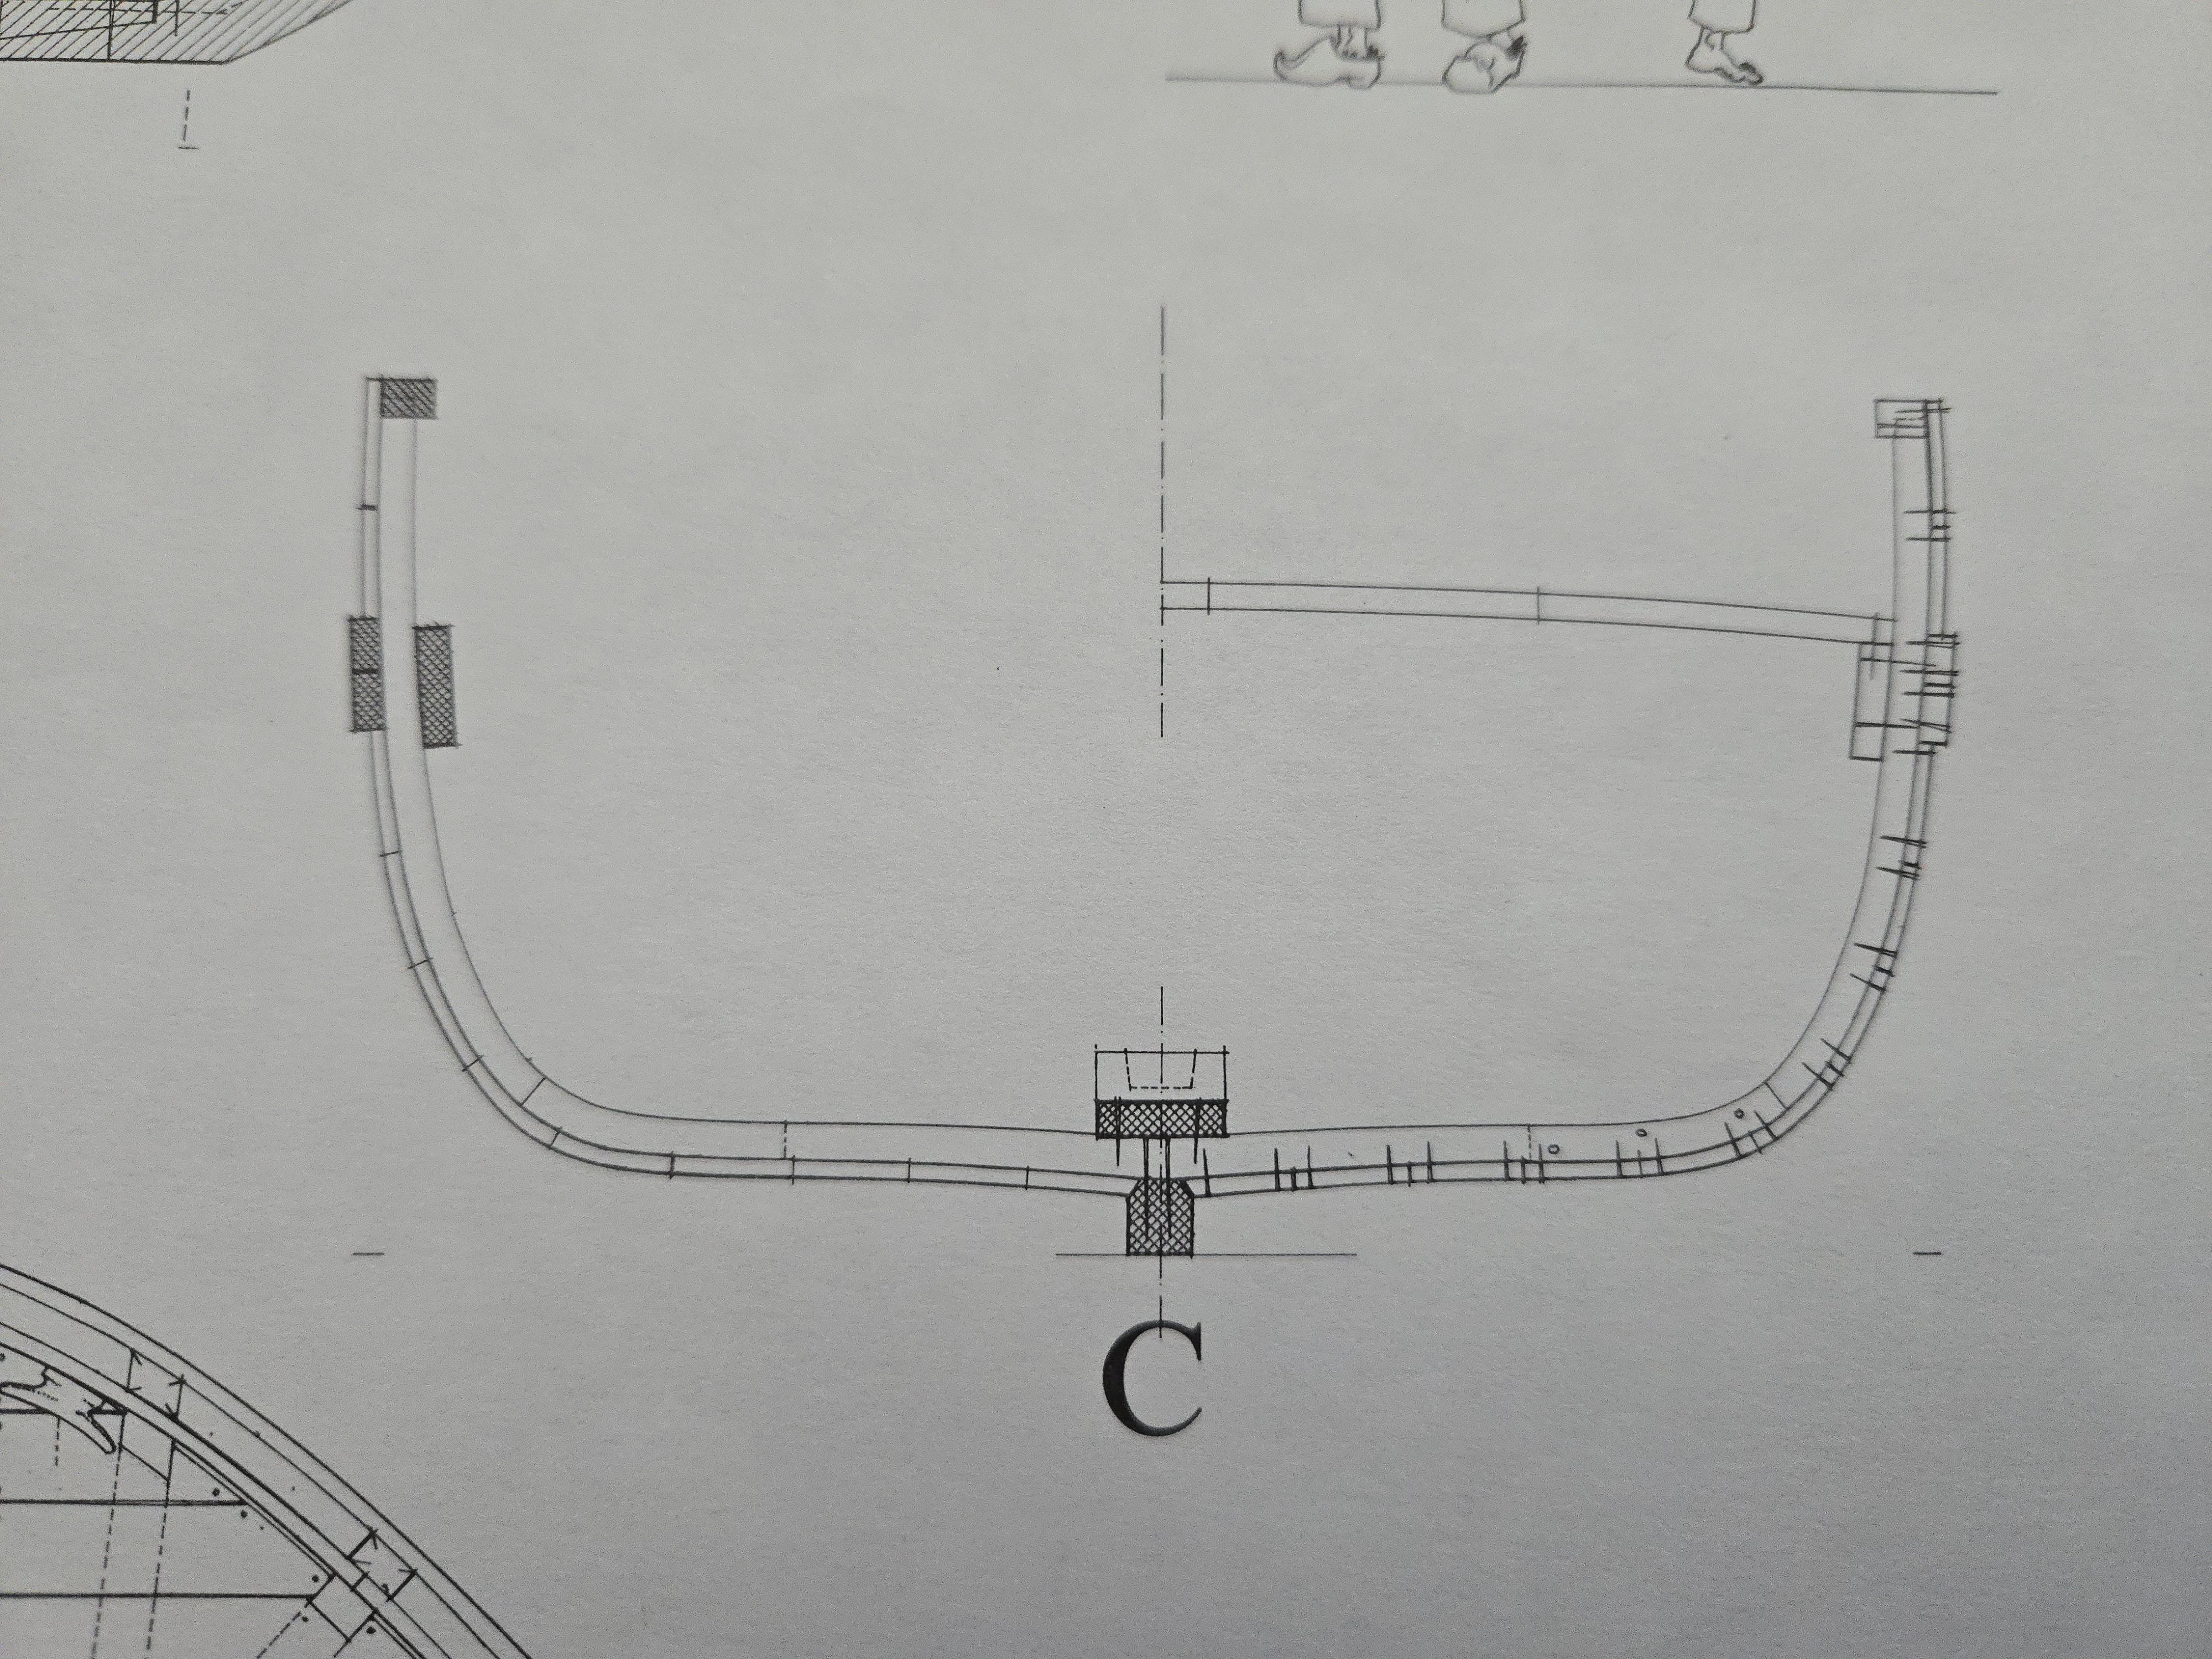
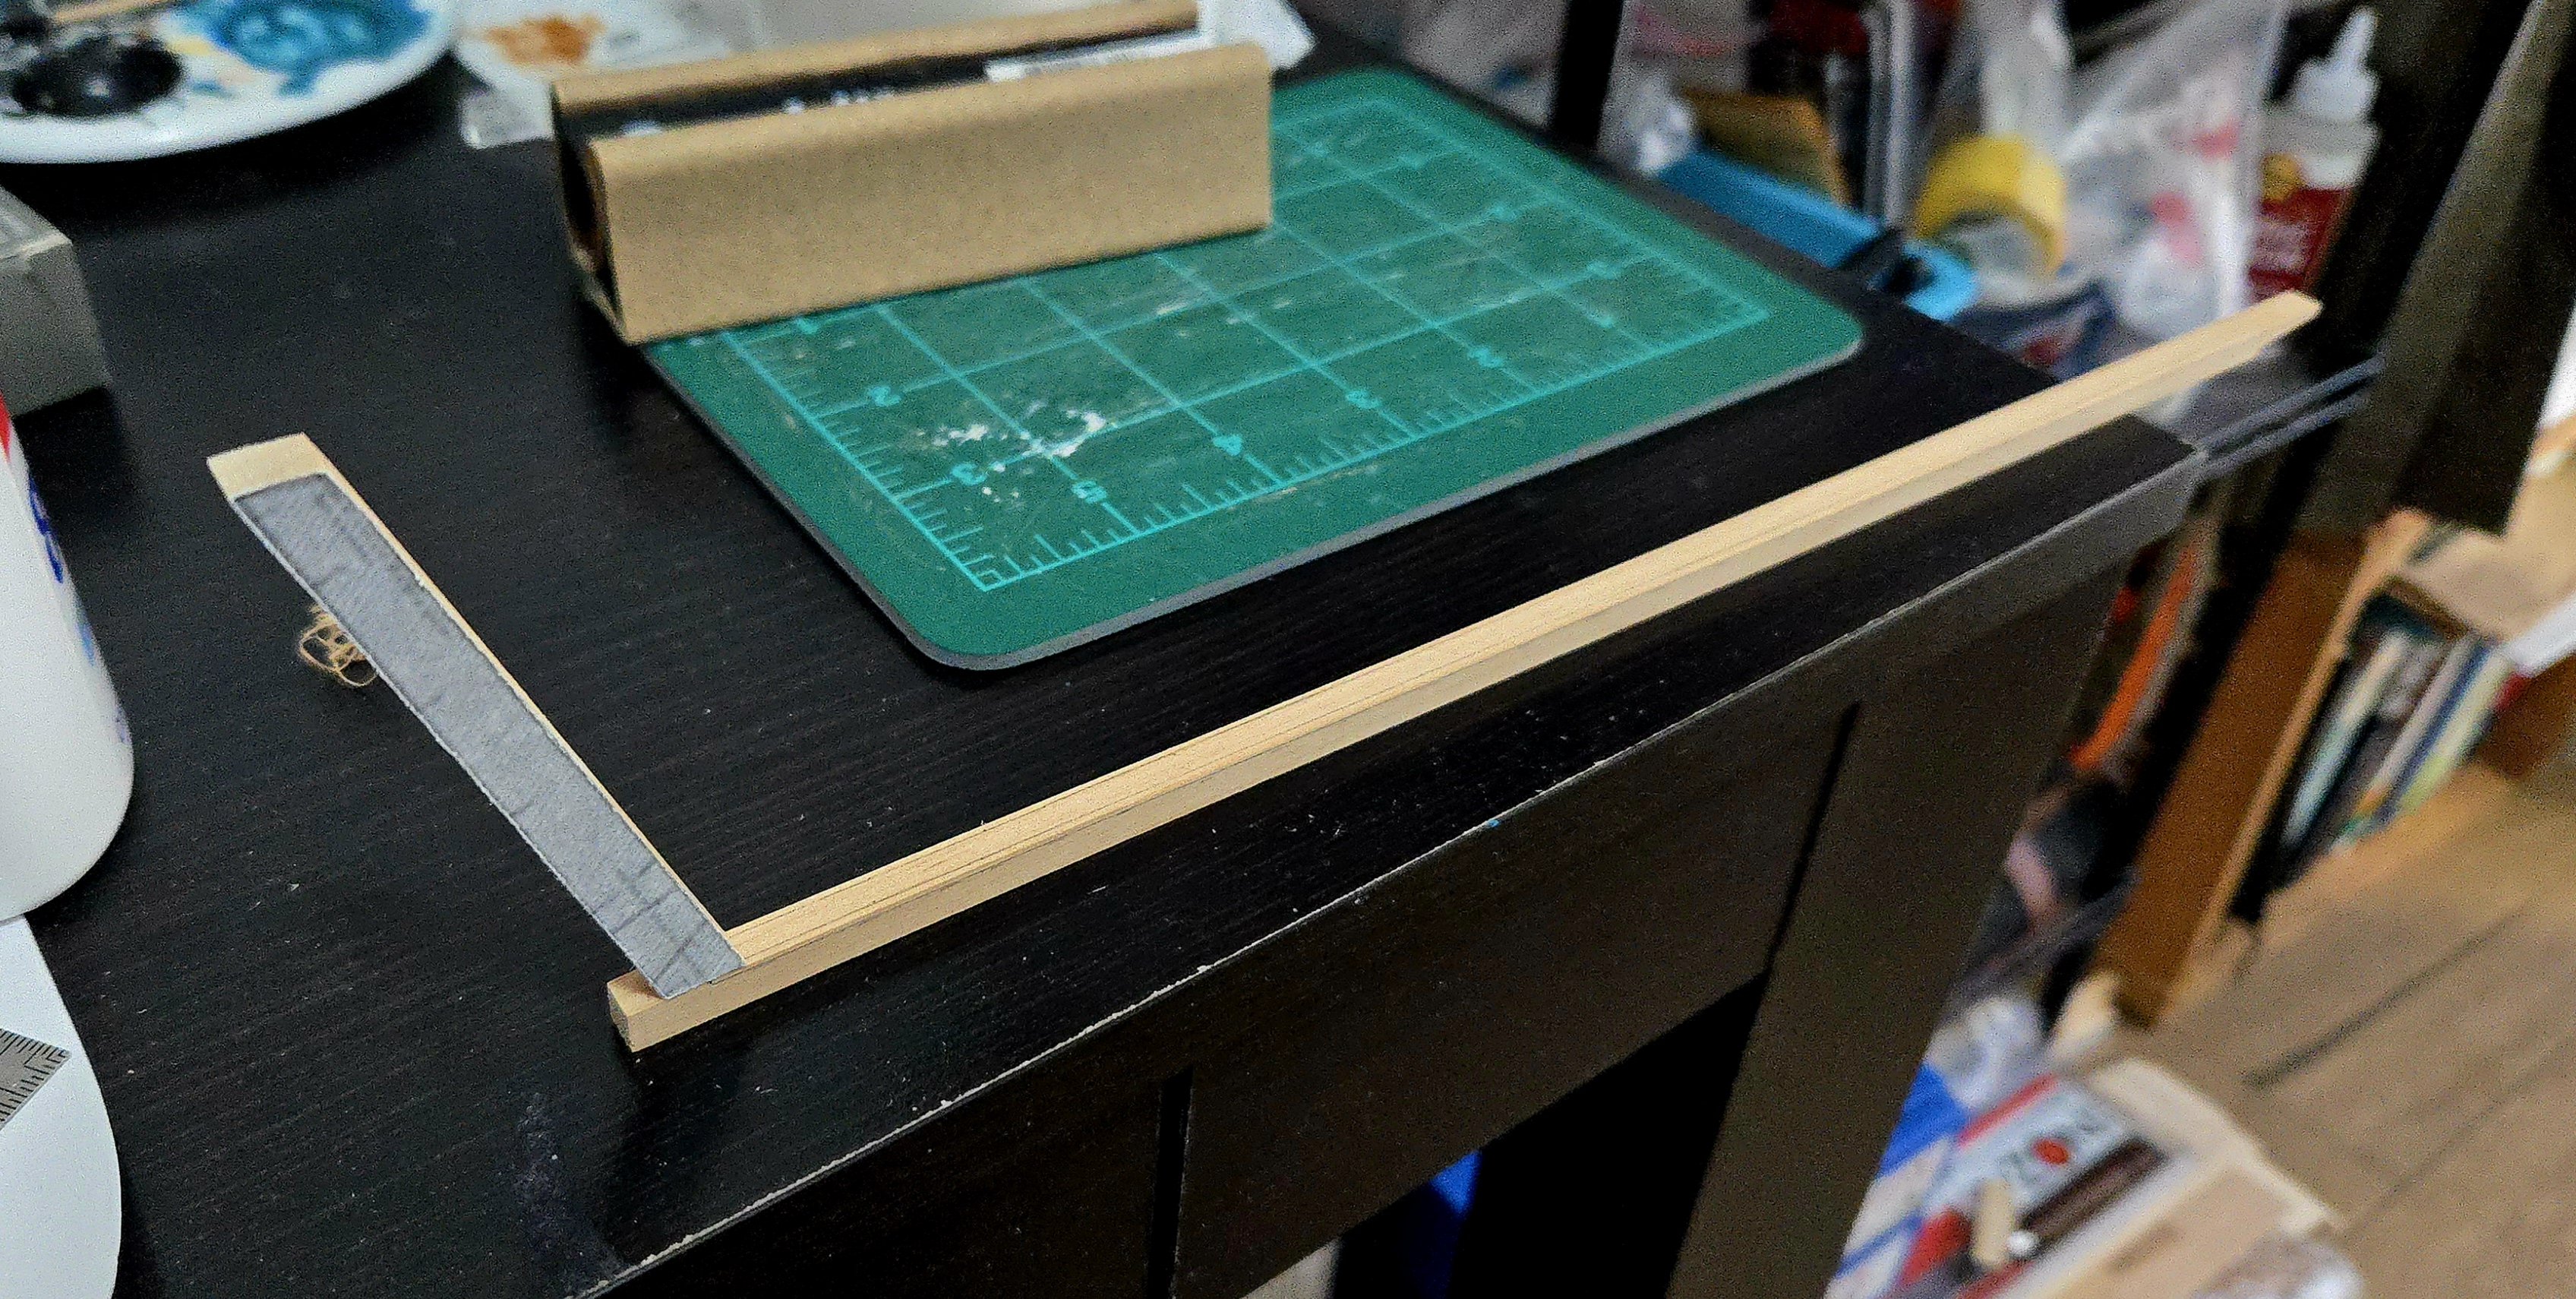
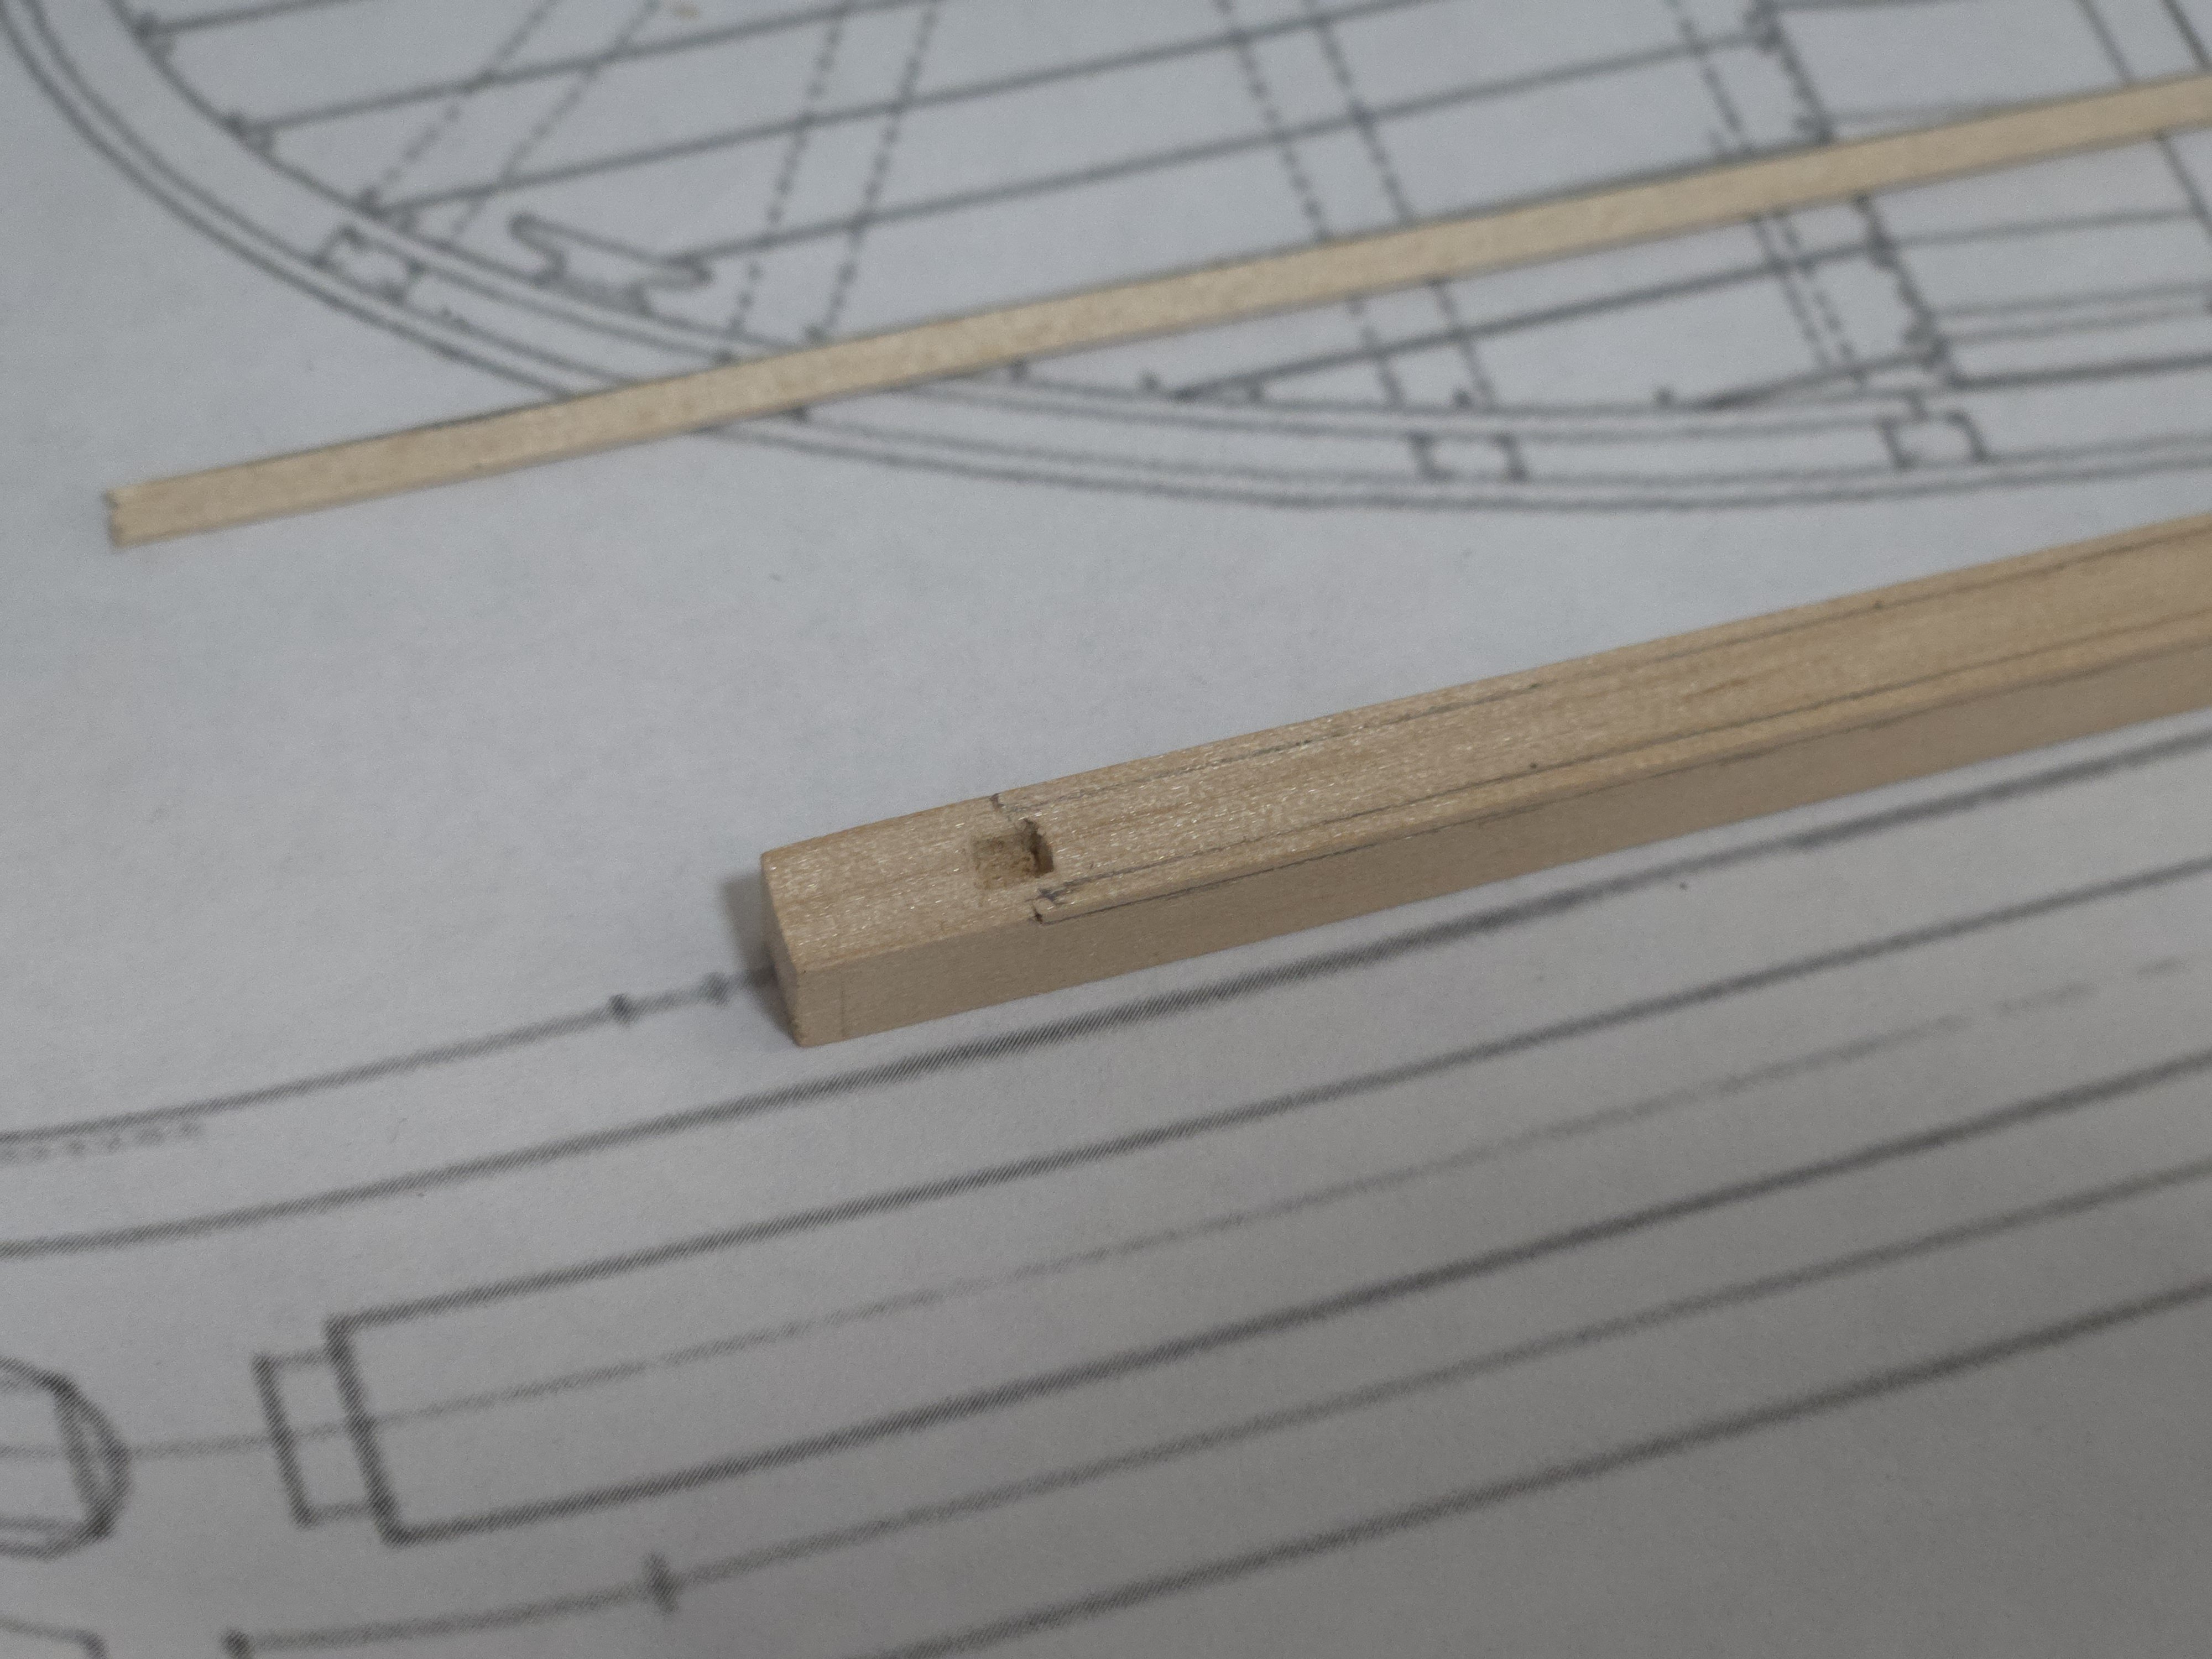
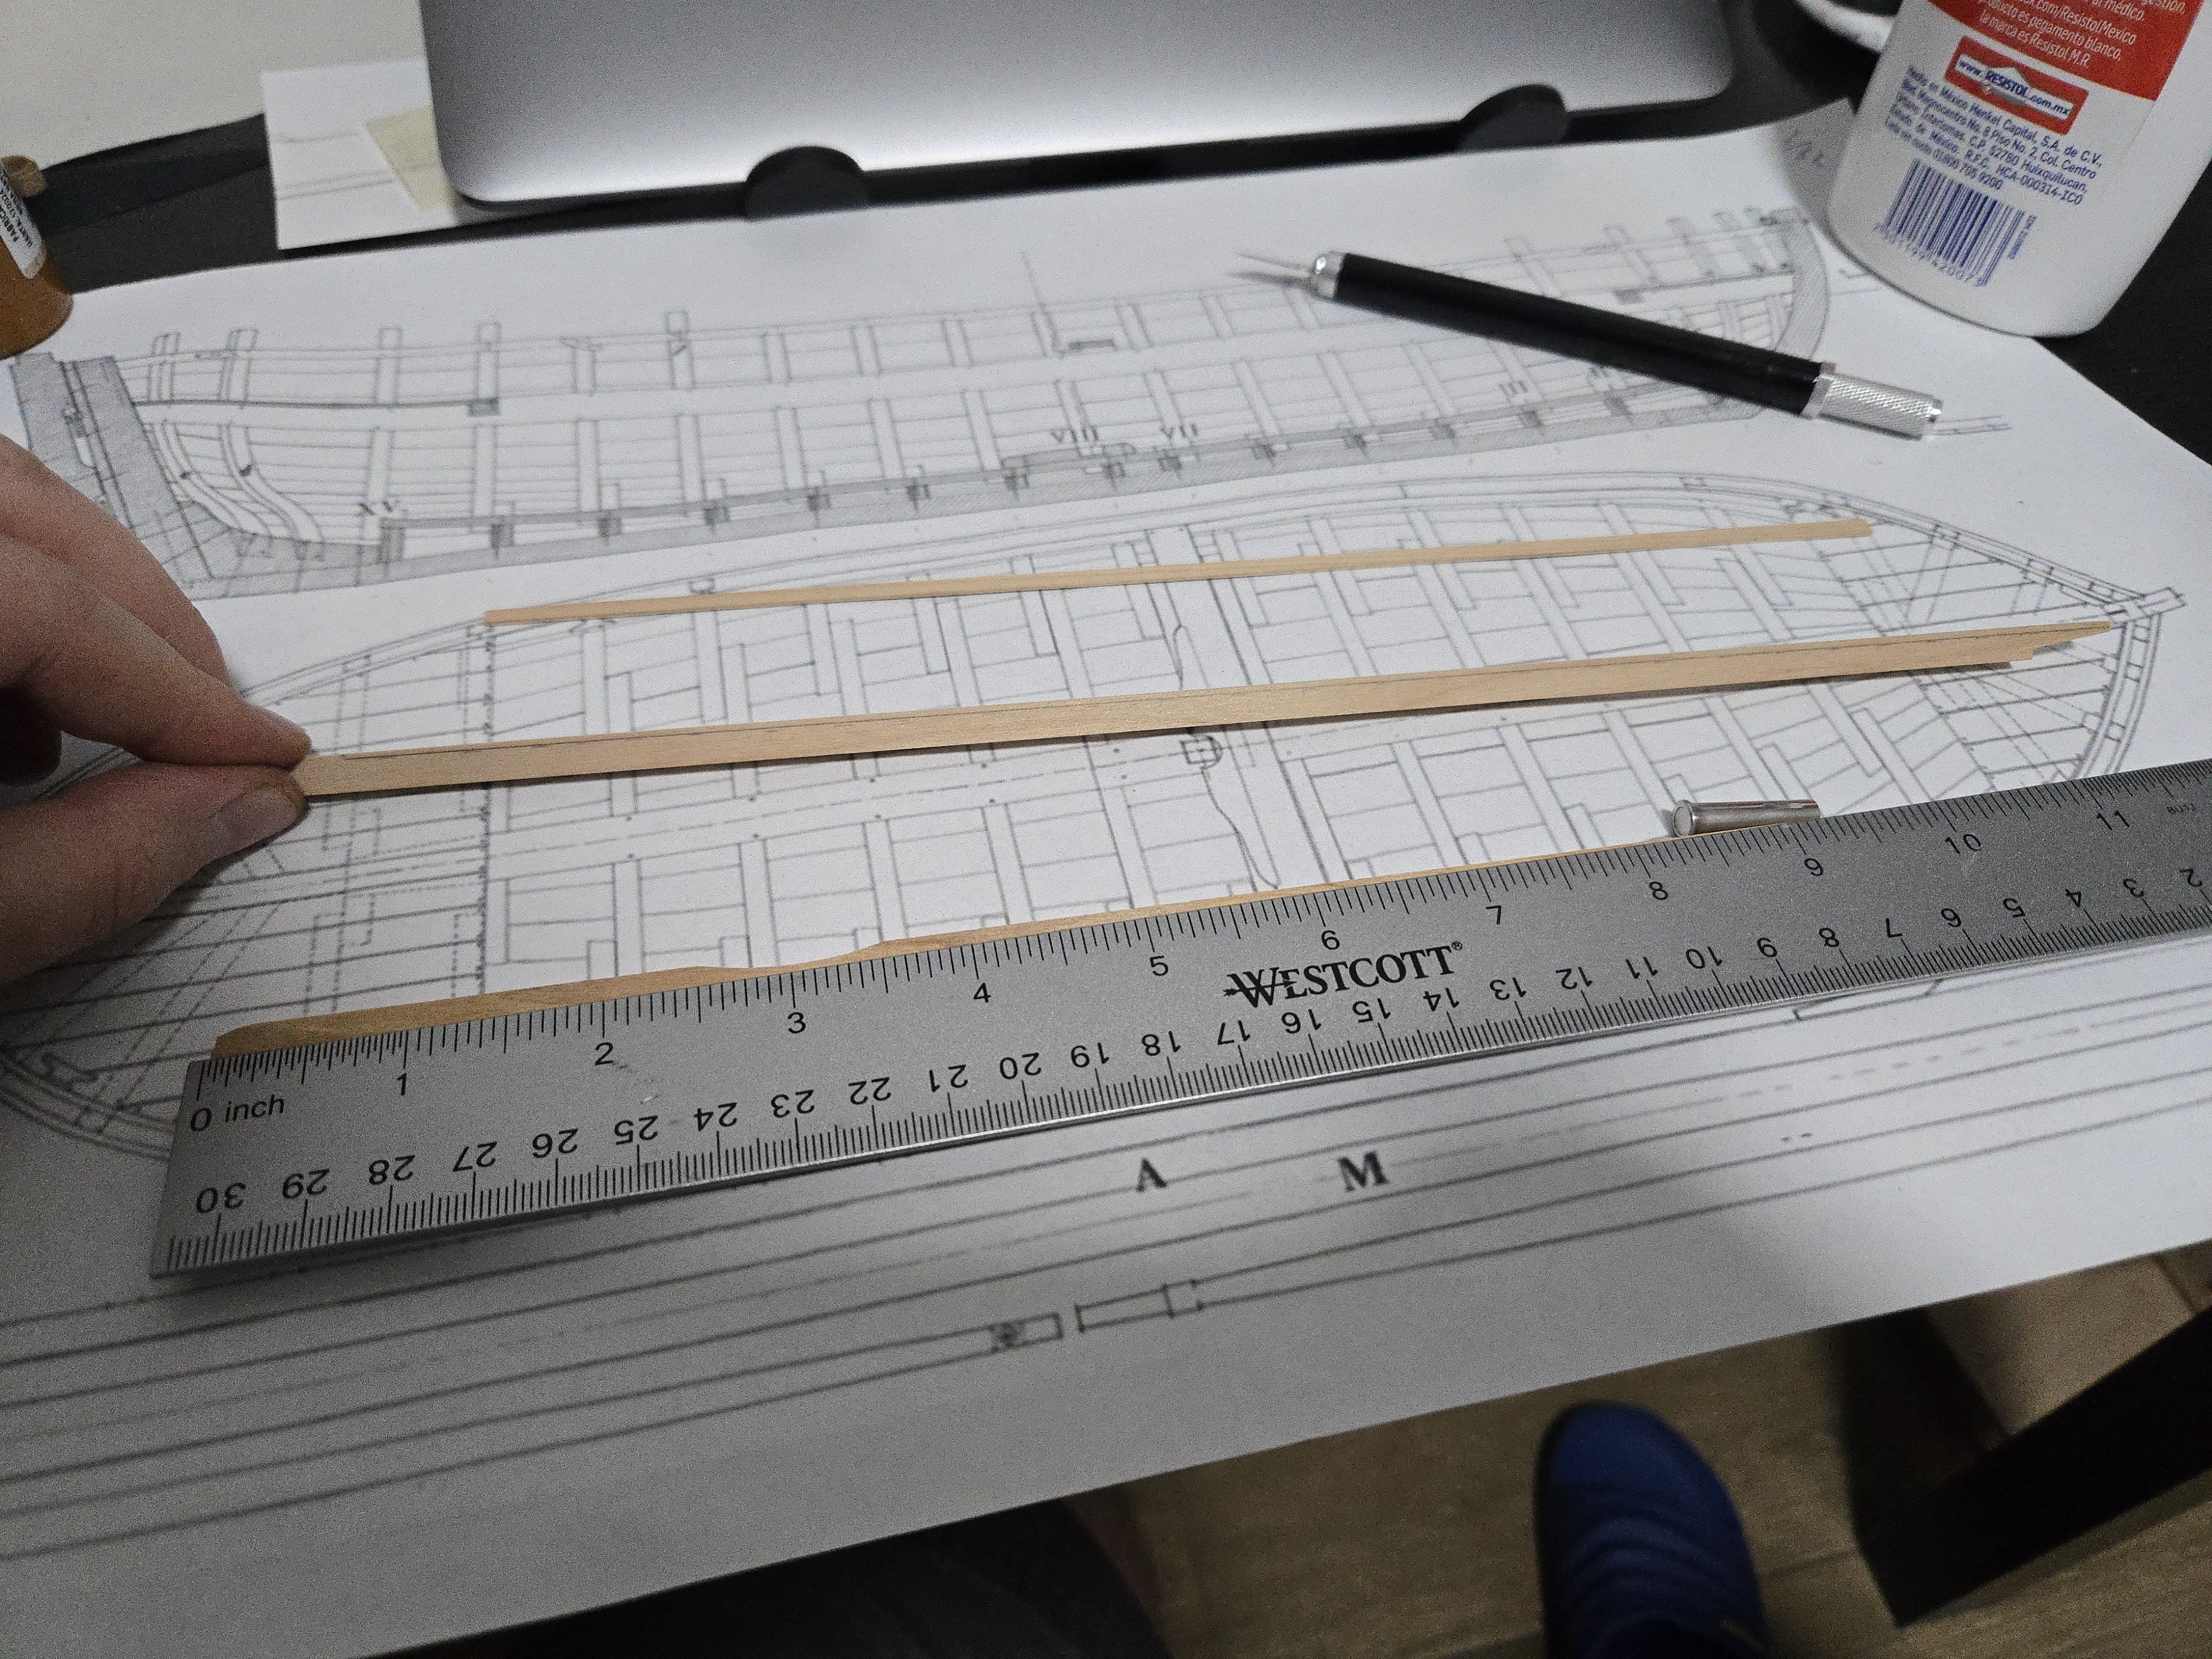
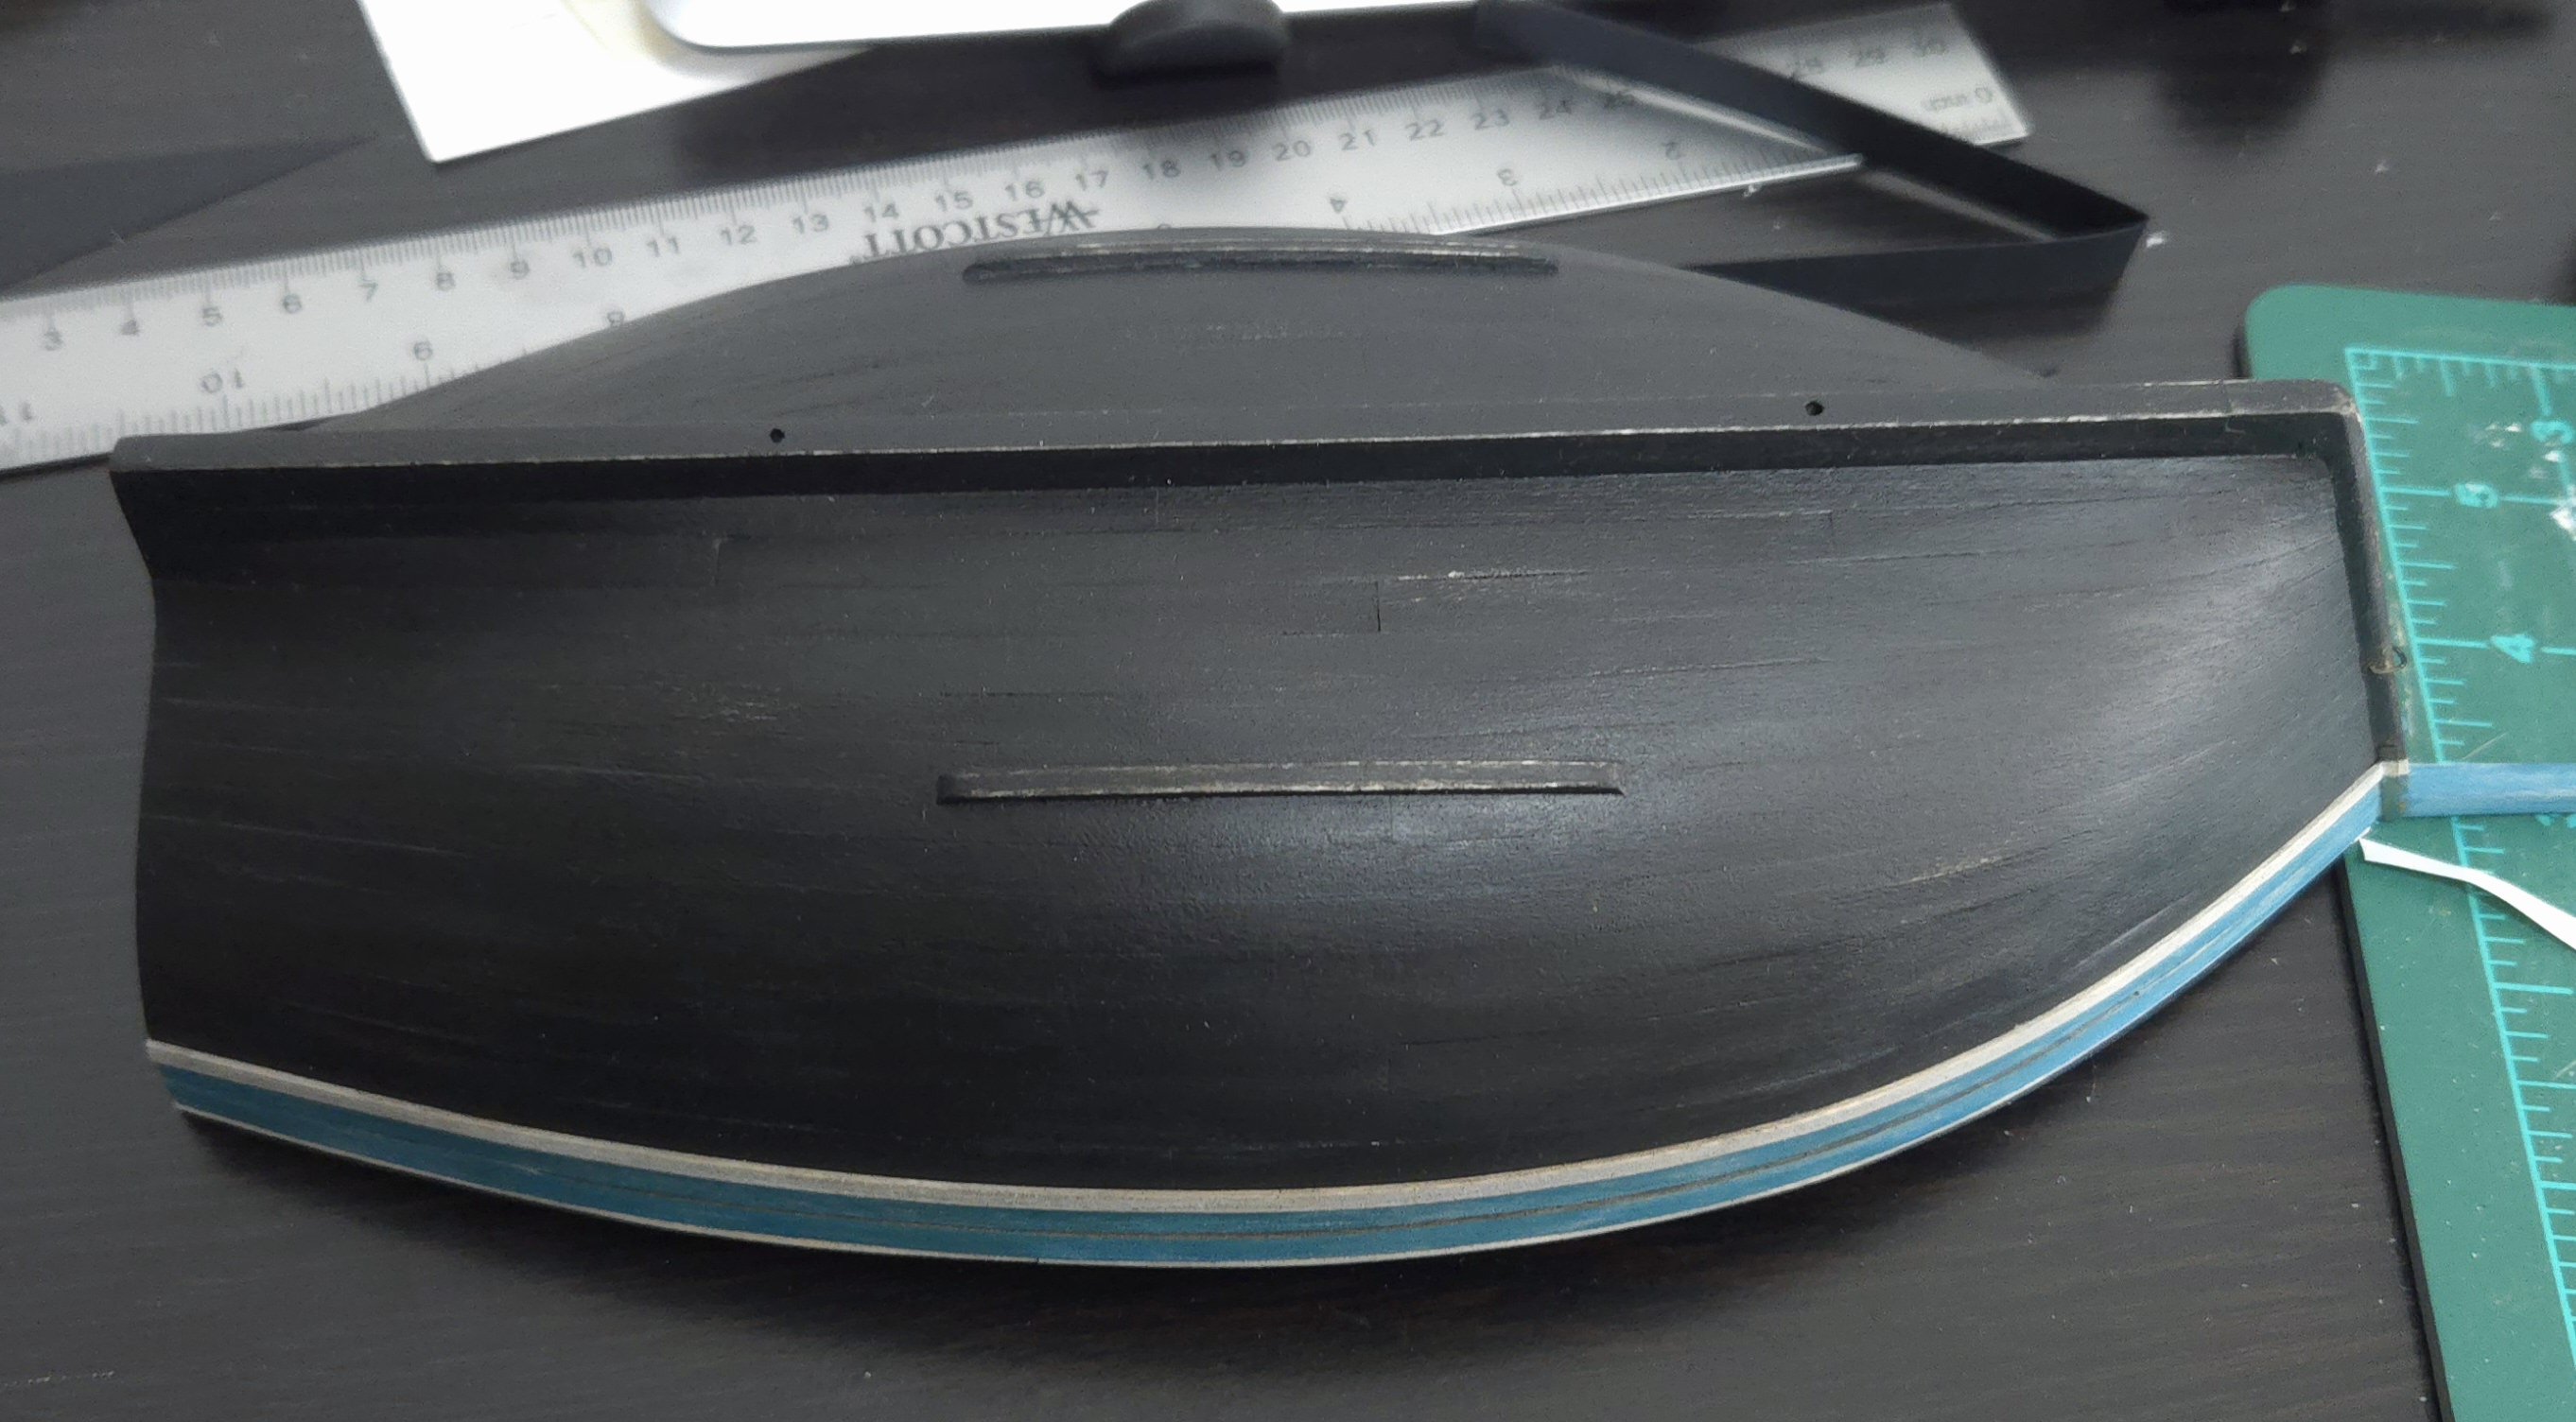
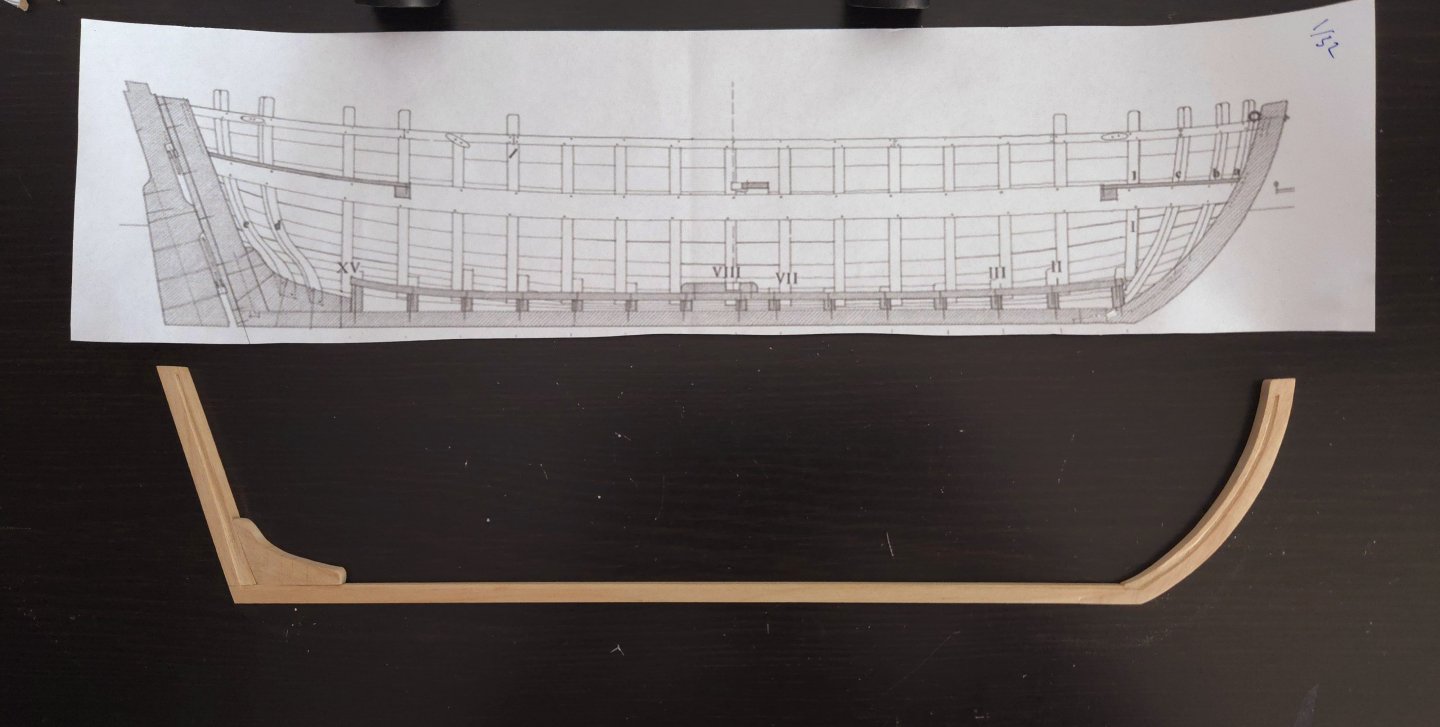
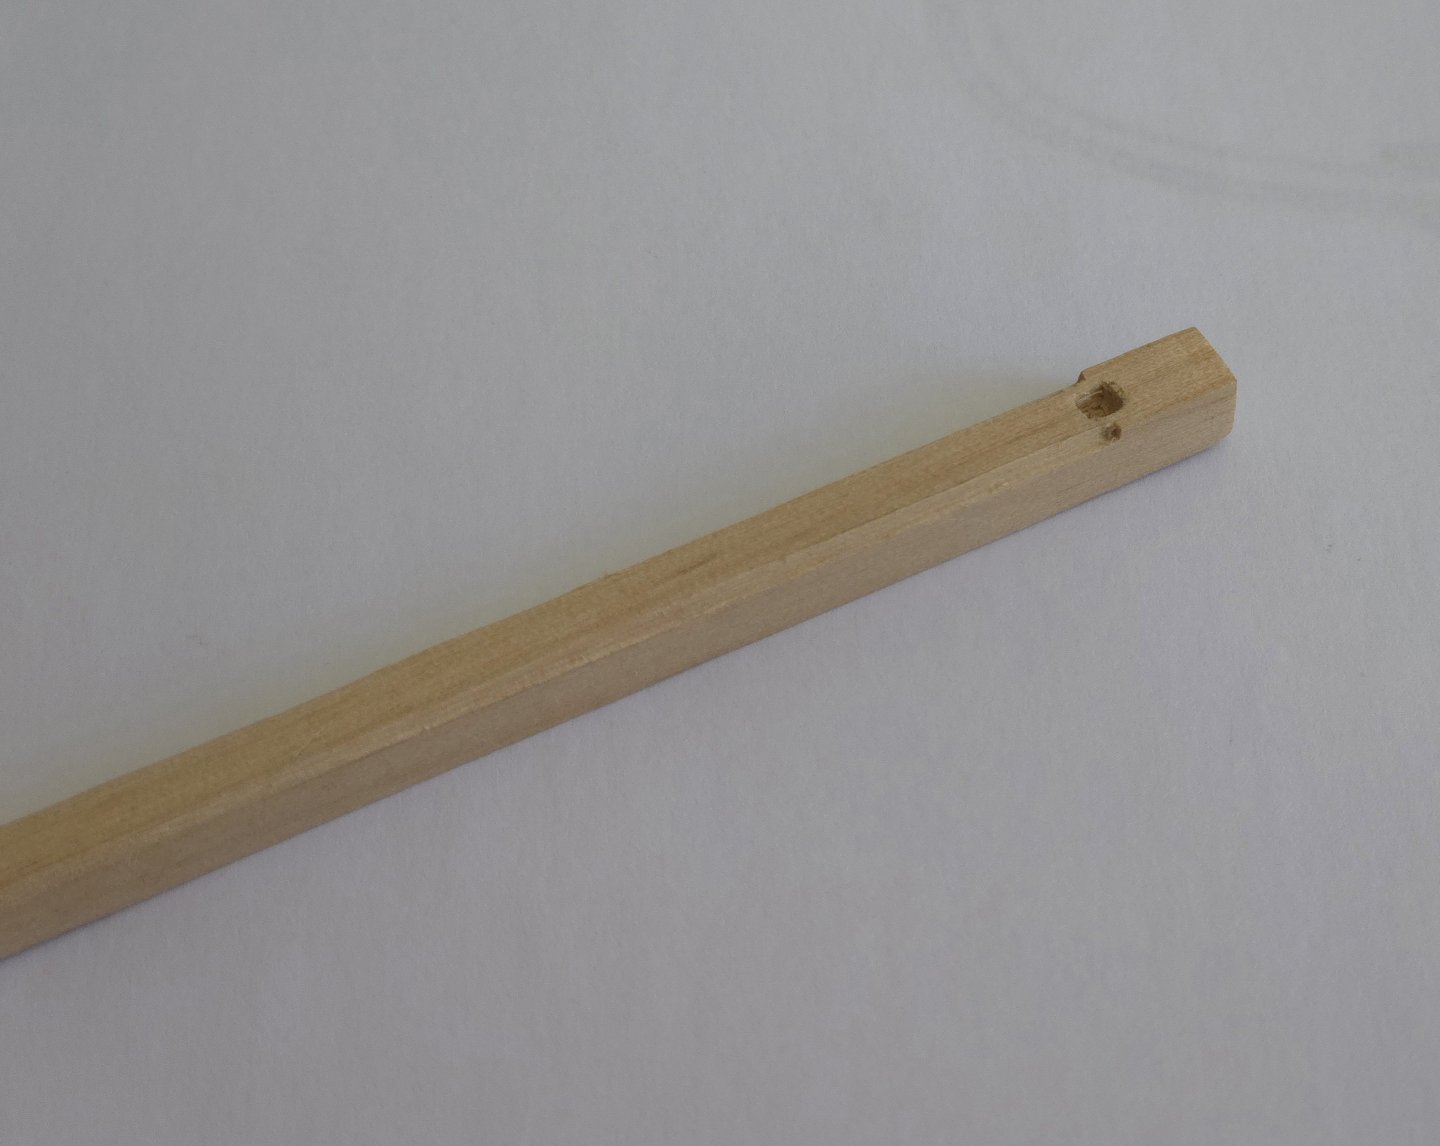
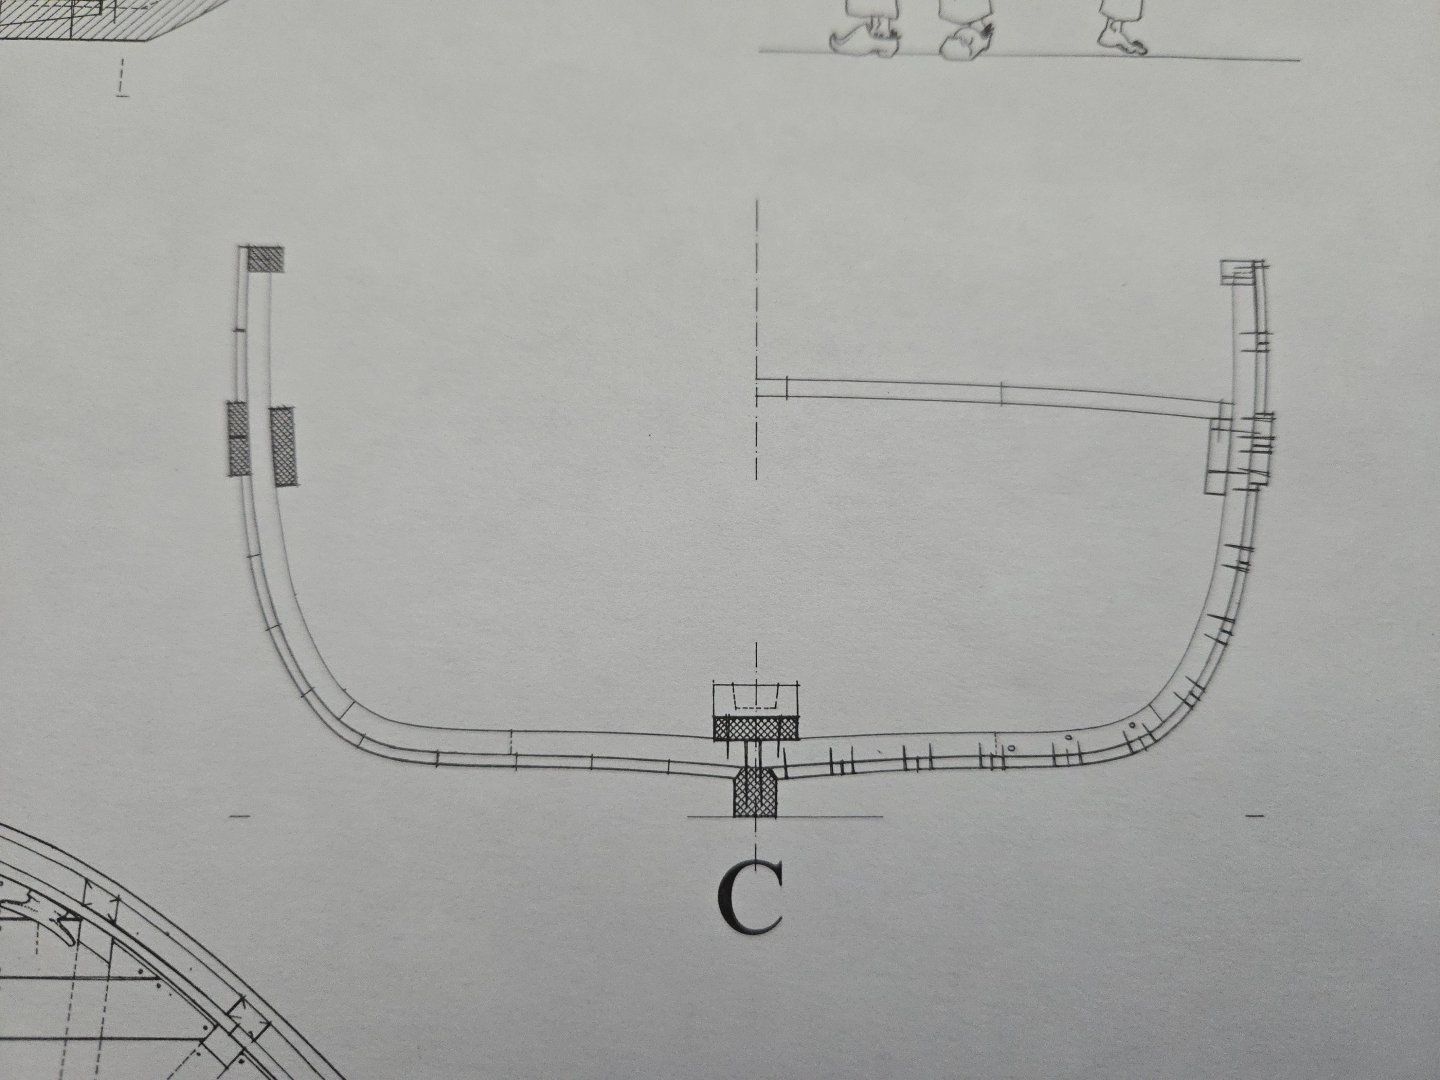
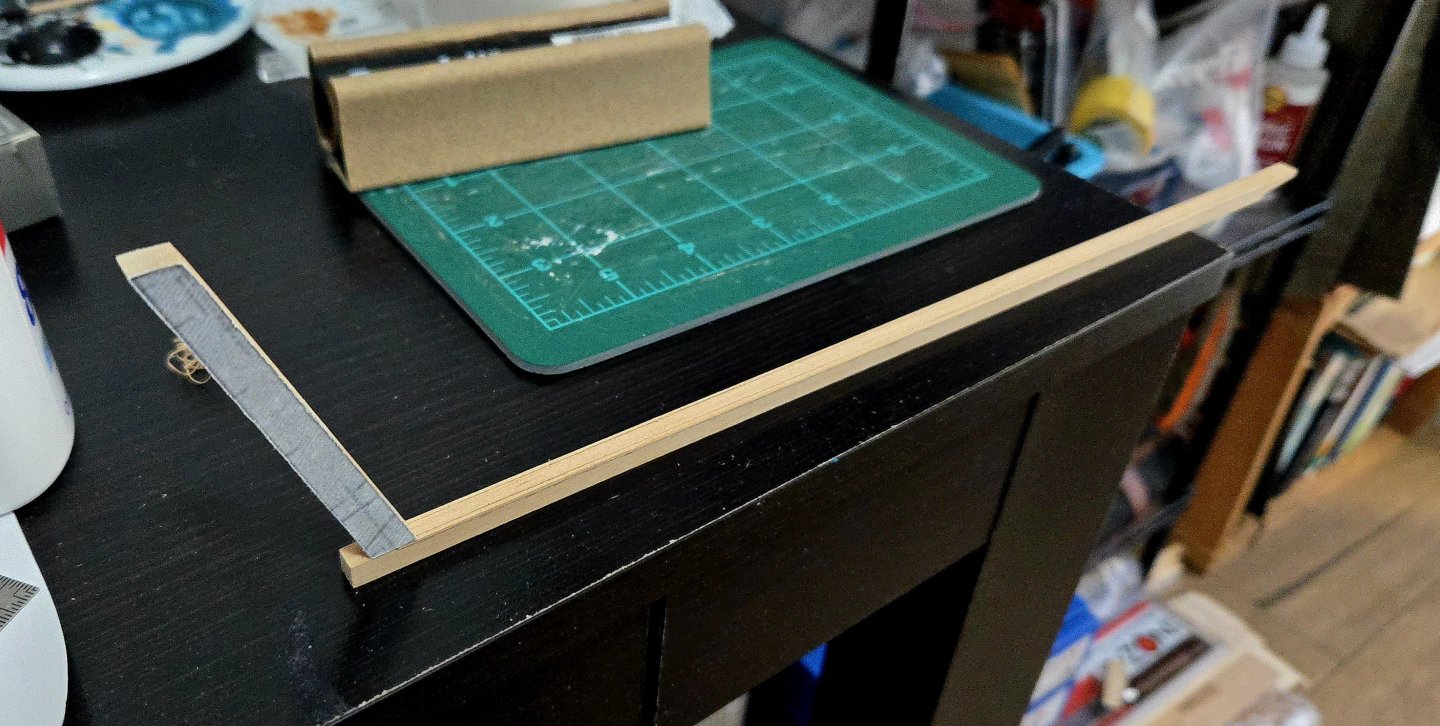
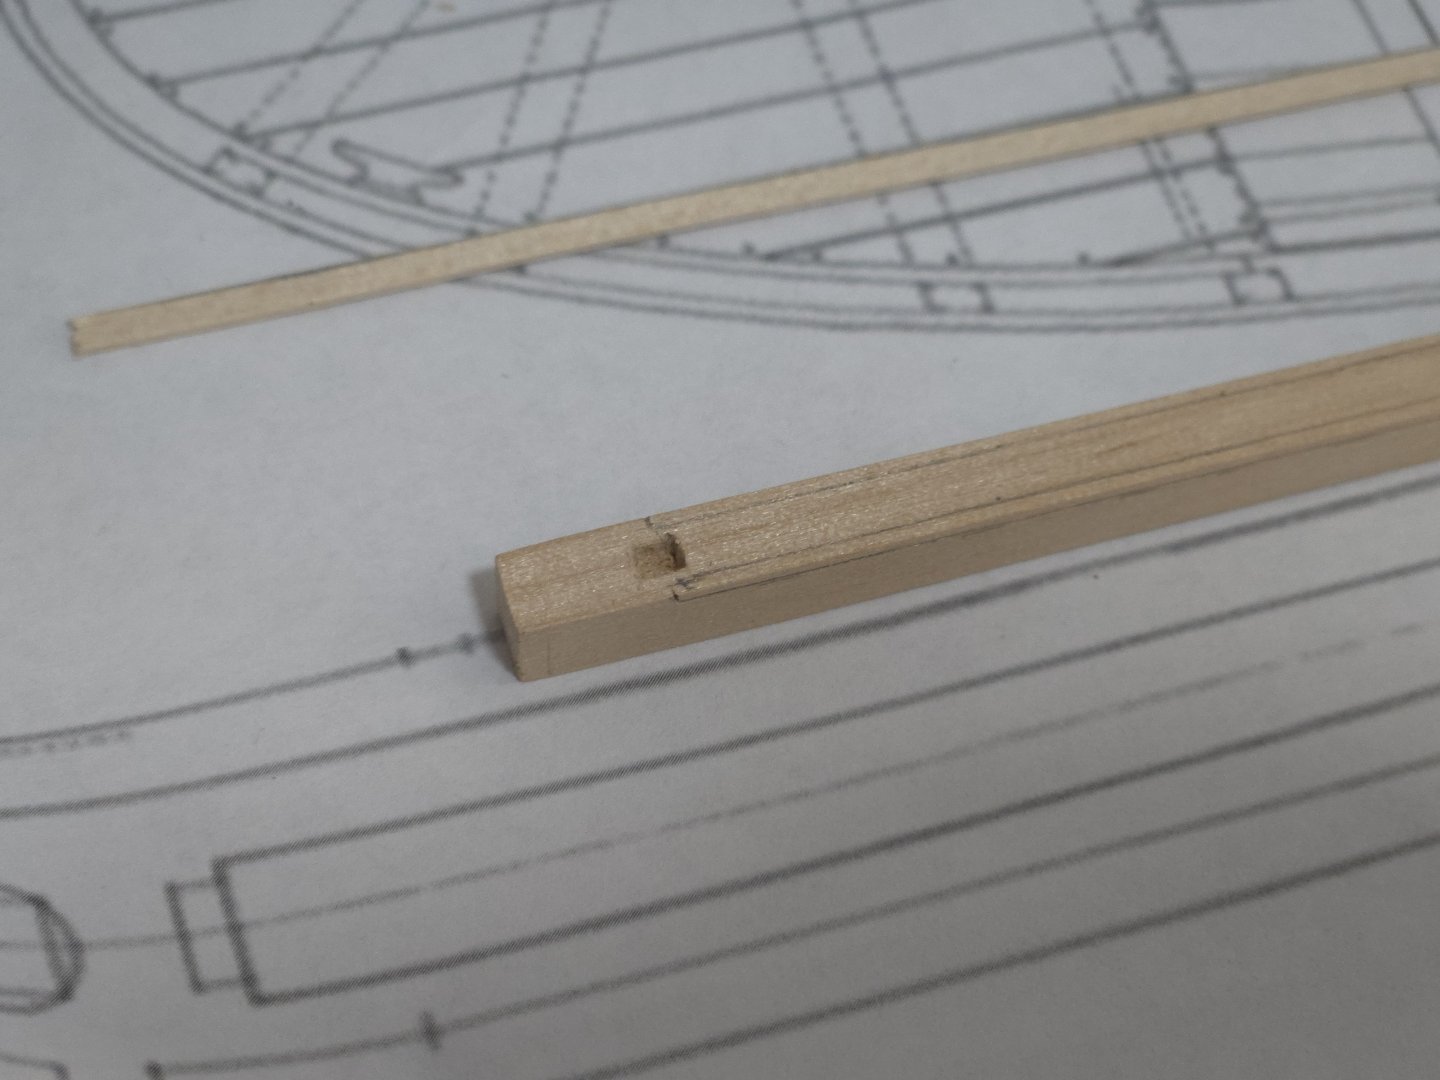
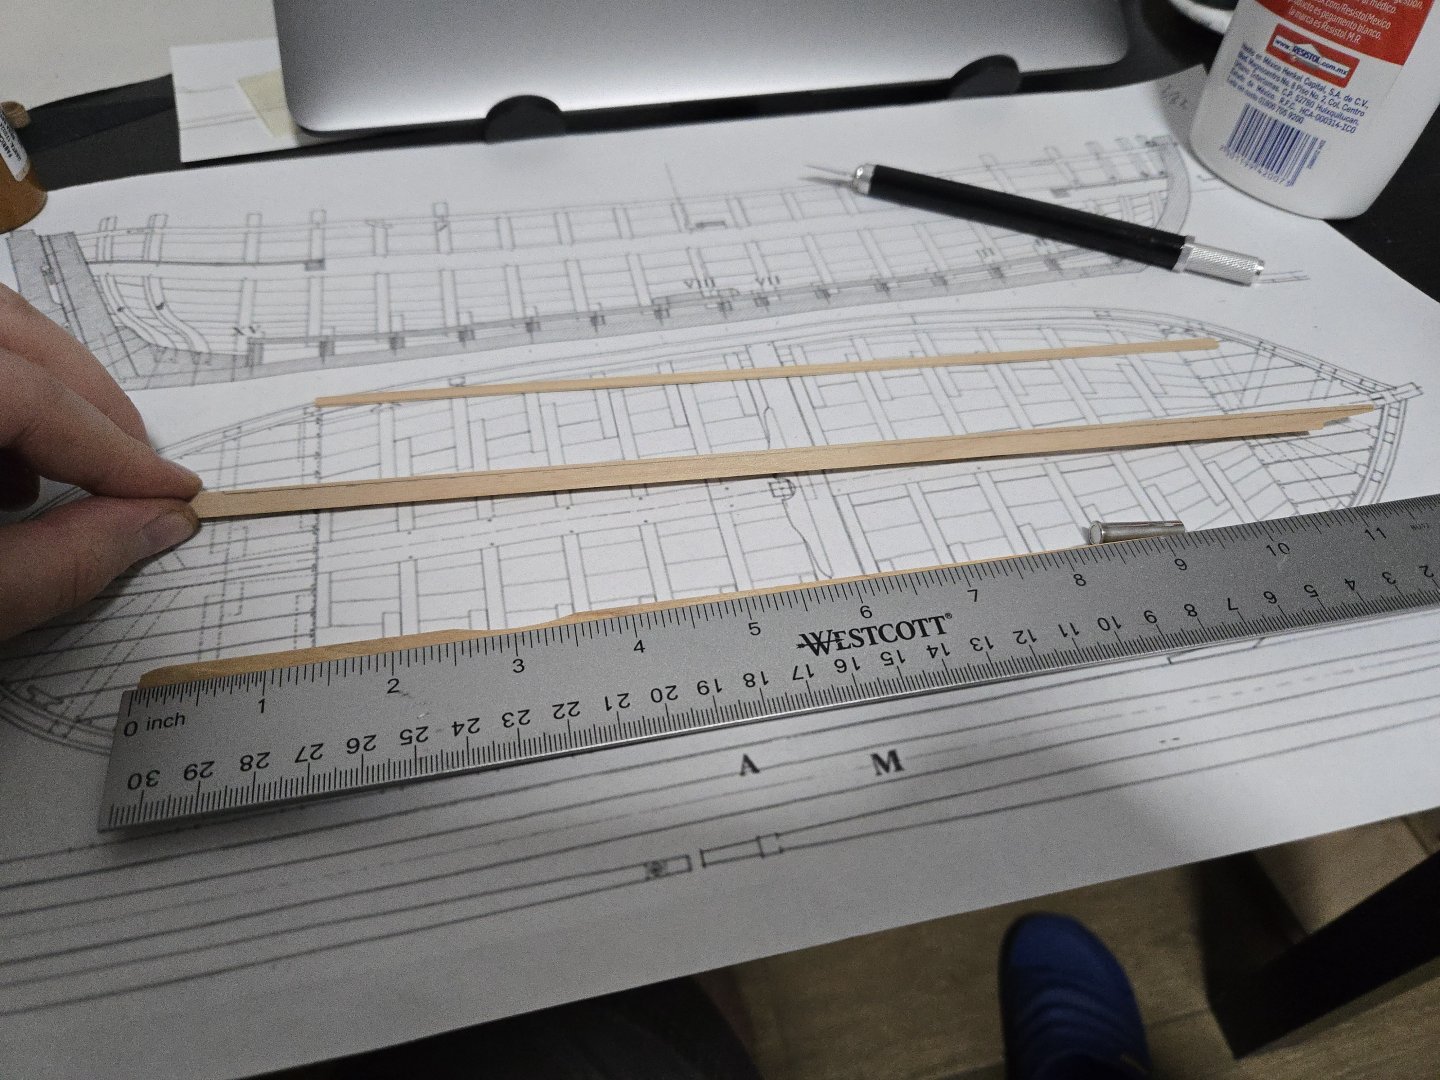
Thanks, Paasch's From Keel to Truck looks extremely useful! I haven't been able to do as much work on this lately, as I started a new job and what modeling time I've had has been focused on the Lancha Chilota. But I've made some, miniscule, progress. First up, I've begun work on the framing jig. The top piece is made of relatively thin mdf, while the bottom is thicker mdf that I will strengthen with wood strips along the bottom to prevent warping. Cutting out the hull shape on the top piece with a fretsaw was a little challenging due to the size of the board, and the line wandered a bit in one part. Thankfully the cutout is just an internal line and doesn't need to be precise, as the frame slots are cut out separately. So far I've cut their sides with the fretsaw, trying to stay a bit inside the line, and I'll need to use a chisel to cut them out fully, and then file into the final shape. Sawing out the frame slots was a bit challenging, as the moment of greatest imprecision is always the start of each cut--in a couple cases, the blade skipped a bit, as can be seen, but it should be fine once I can file things straight. I also made a little progress on the keel structure. First, I marked the location of the rabbet on the keel, using a batten of planking material to ensure it would be the proper size. The rabbet is a bit odd, in that it's just a chamfered edge on the keel rather than a slot. This can be seen in the cross-section image below. In the monograph, it's described as: "... la quille, celle-ci ne comporte pas de râblure mais seulement un chanfrein contre lequel se place le premier bordage ou galbord." So, when I eventually get to planking, I'll need to chamfer the garboard edge to fit properly. I haven't cut out the rabbet yet, as I'm still trying to work out how it will be shaped as the planking angle changes along the hull. I think it will make the most sense to do at least a rough cut of the rabbet before attaching the stem and sternpost, taking care that everything will line up. Finally, I decide to at least try to carve out the mortise on the aft end of the keel where the tenon on the sternpost fits. I don't really have the right tools for this, lacking any micro-chisels, but with a sharp knife I was able to carve it out. It's not the prettiest joint, but a) carving it was a learning experience, and b) it will be entirely covered and invisible. It could be tighter and more precise, but even so, it holds up the sternpost without glue. Next up, I need to work out the rabbet, glue the keel assembly, finish the jig, and start on the frames.

- 139 replies
-
- 6
-
-
- ancre
- Bateau de Lanveoc
- (and 2 more)
-
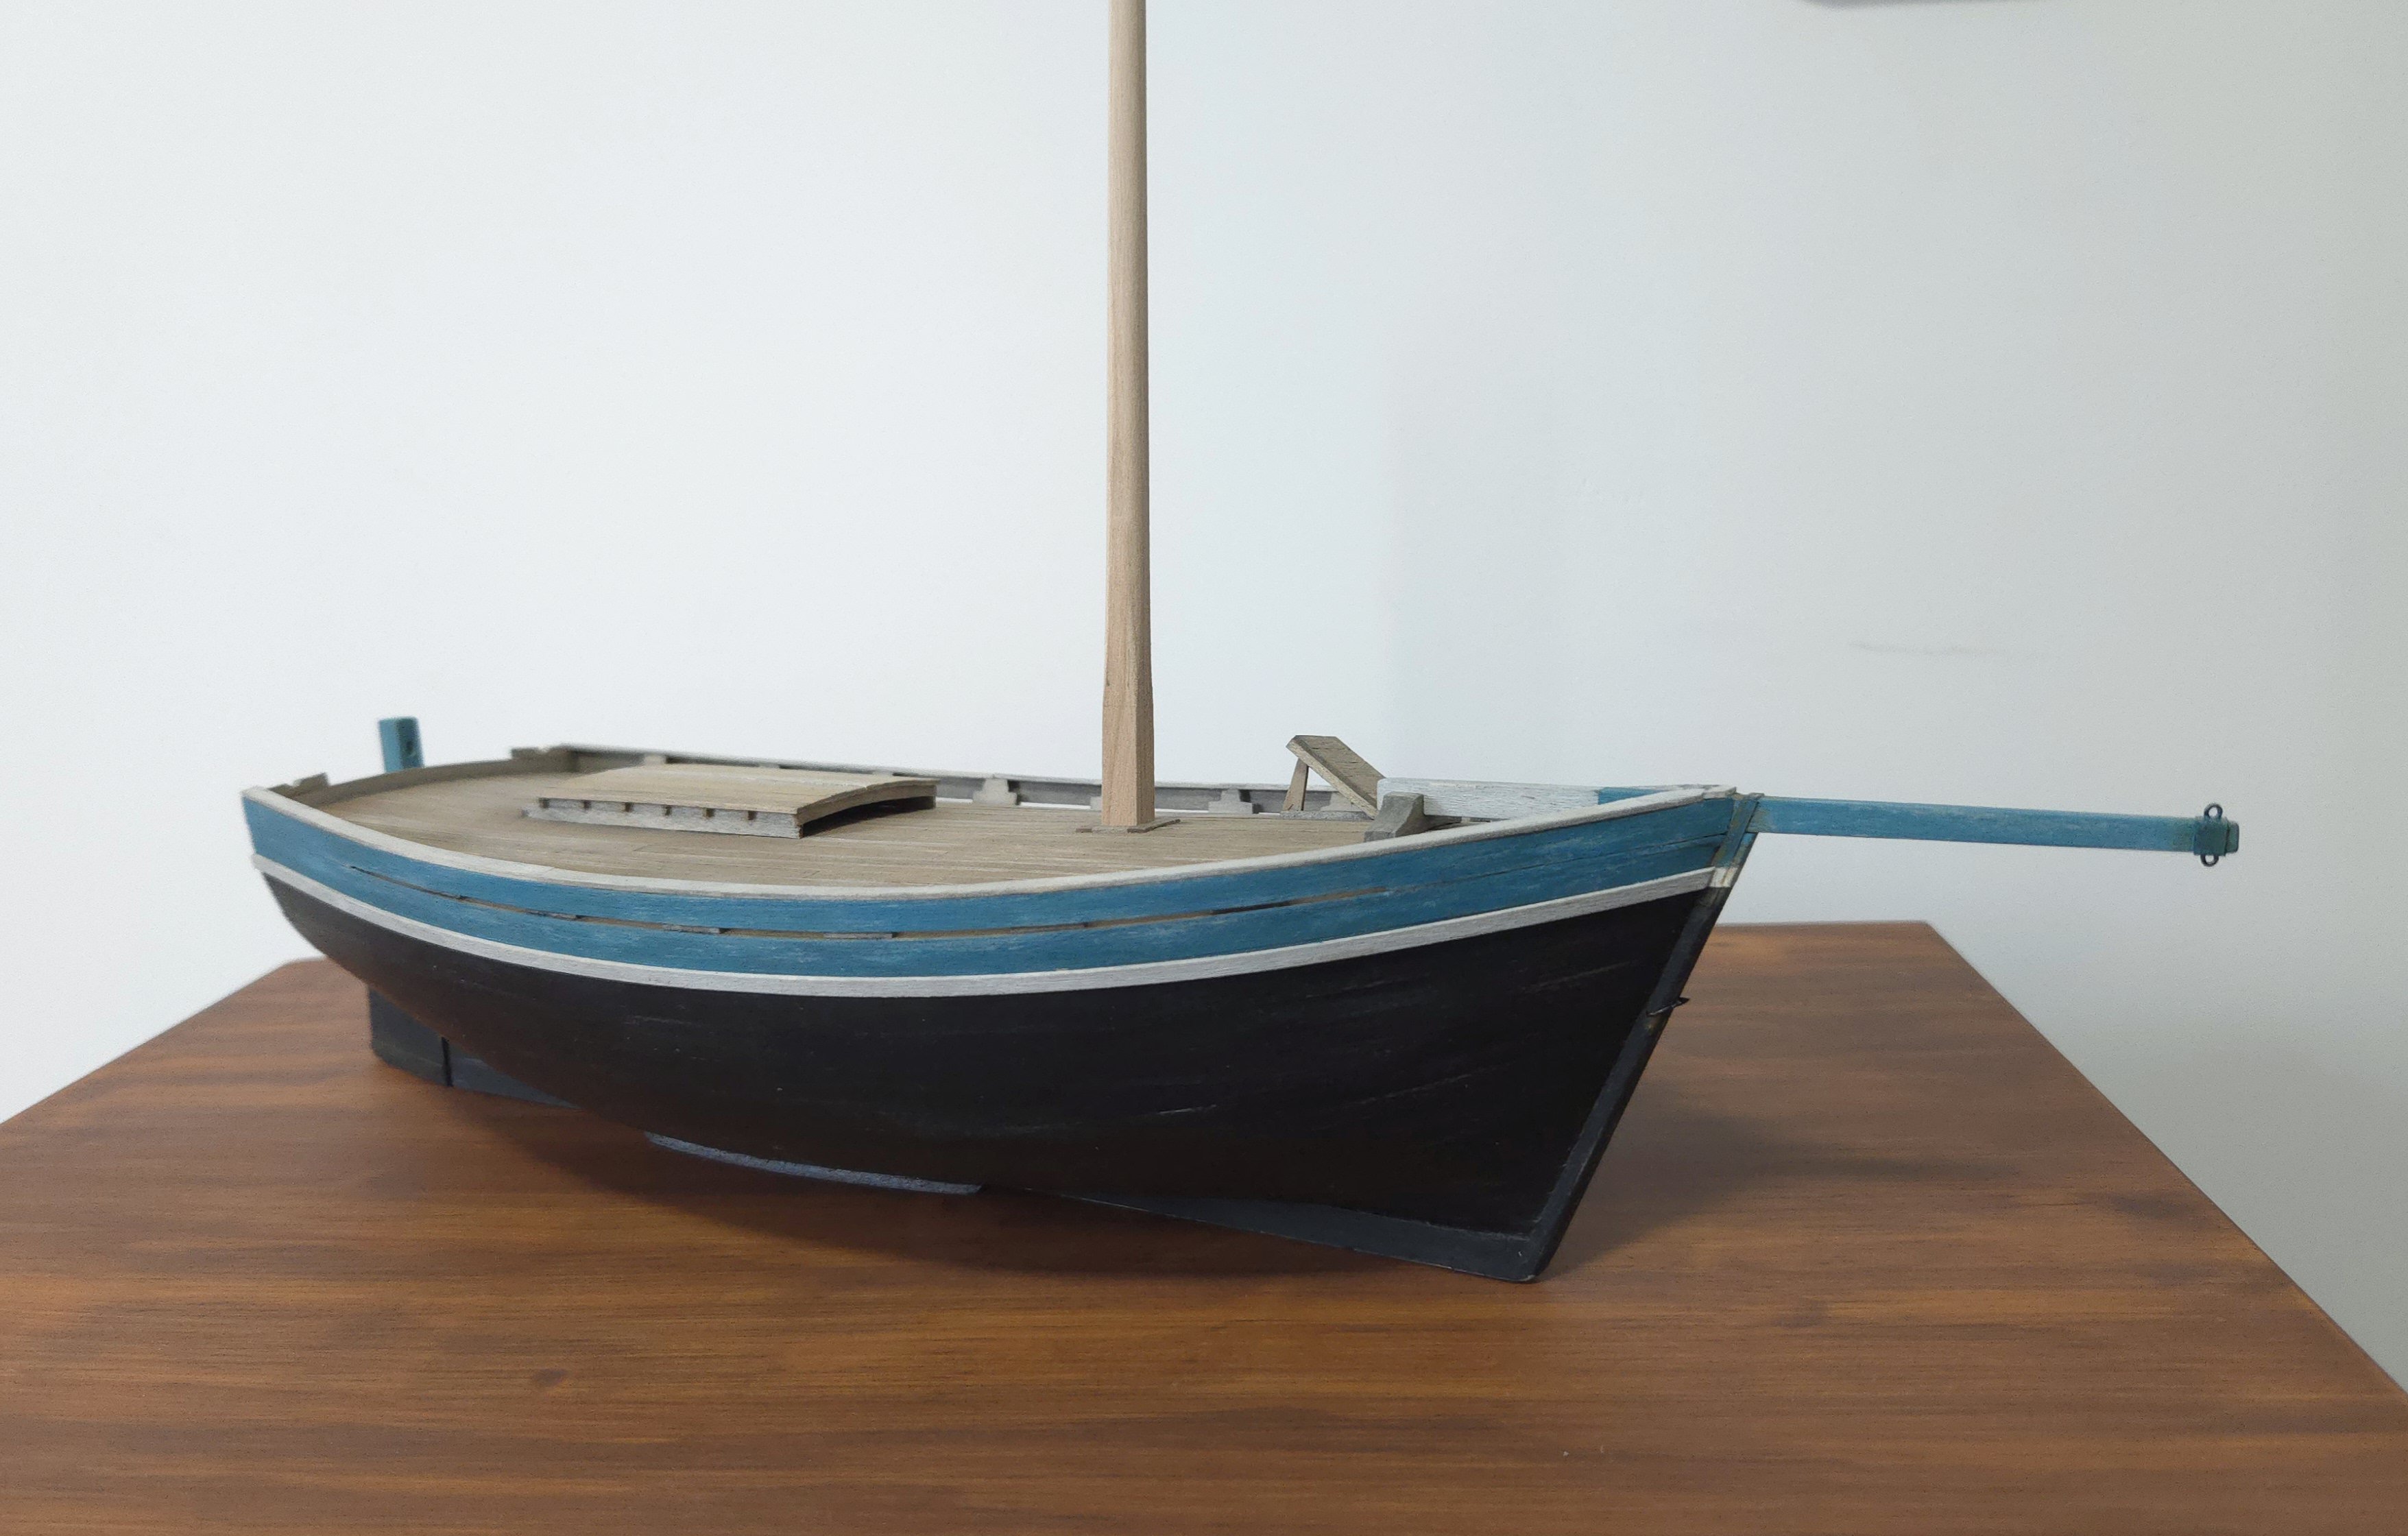
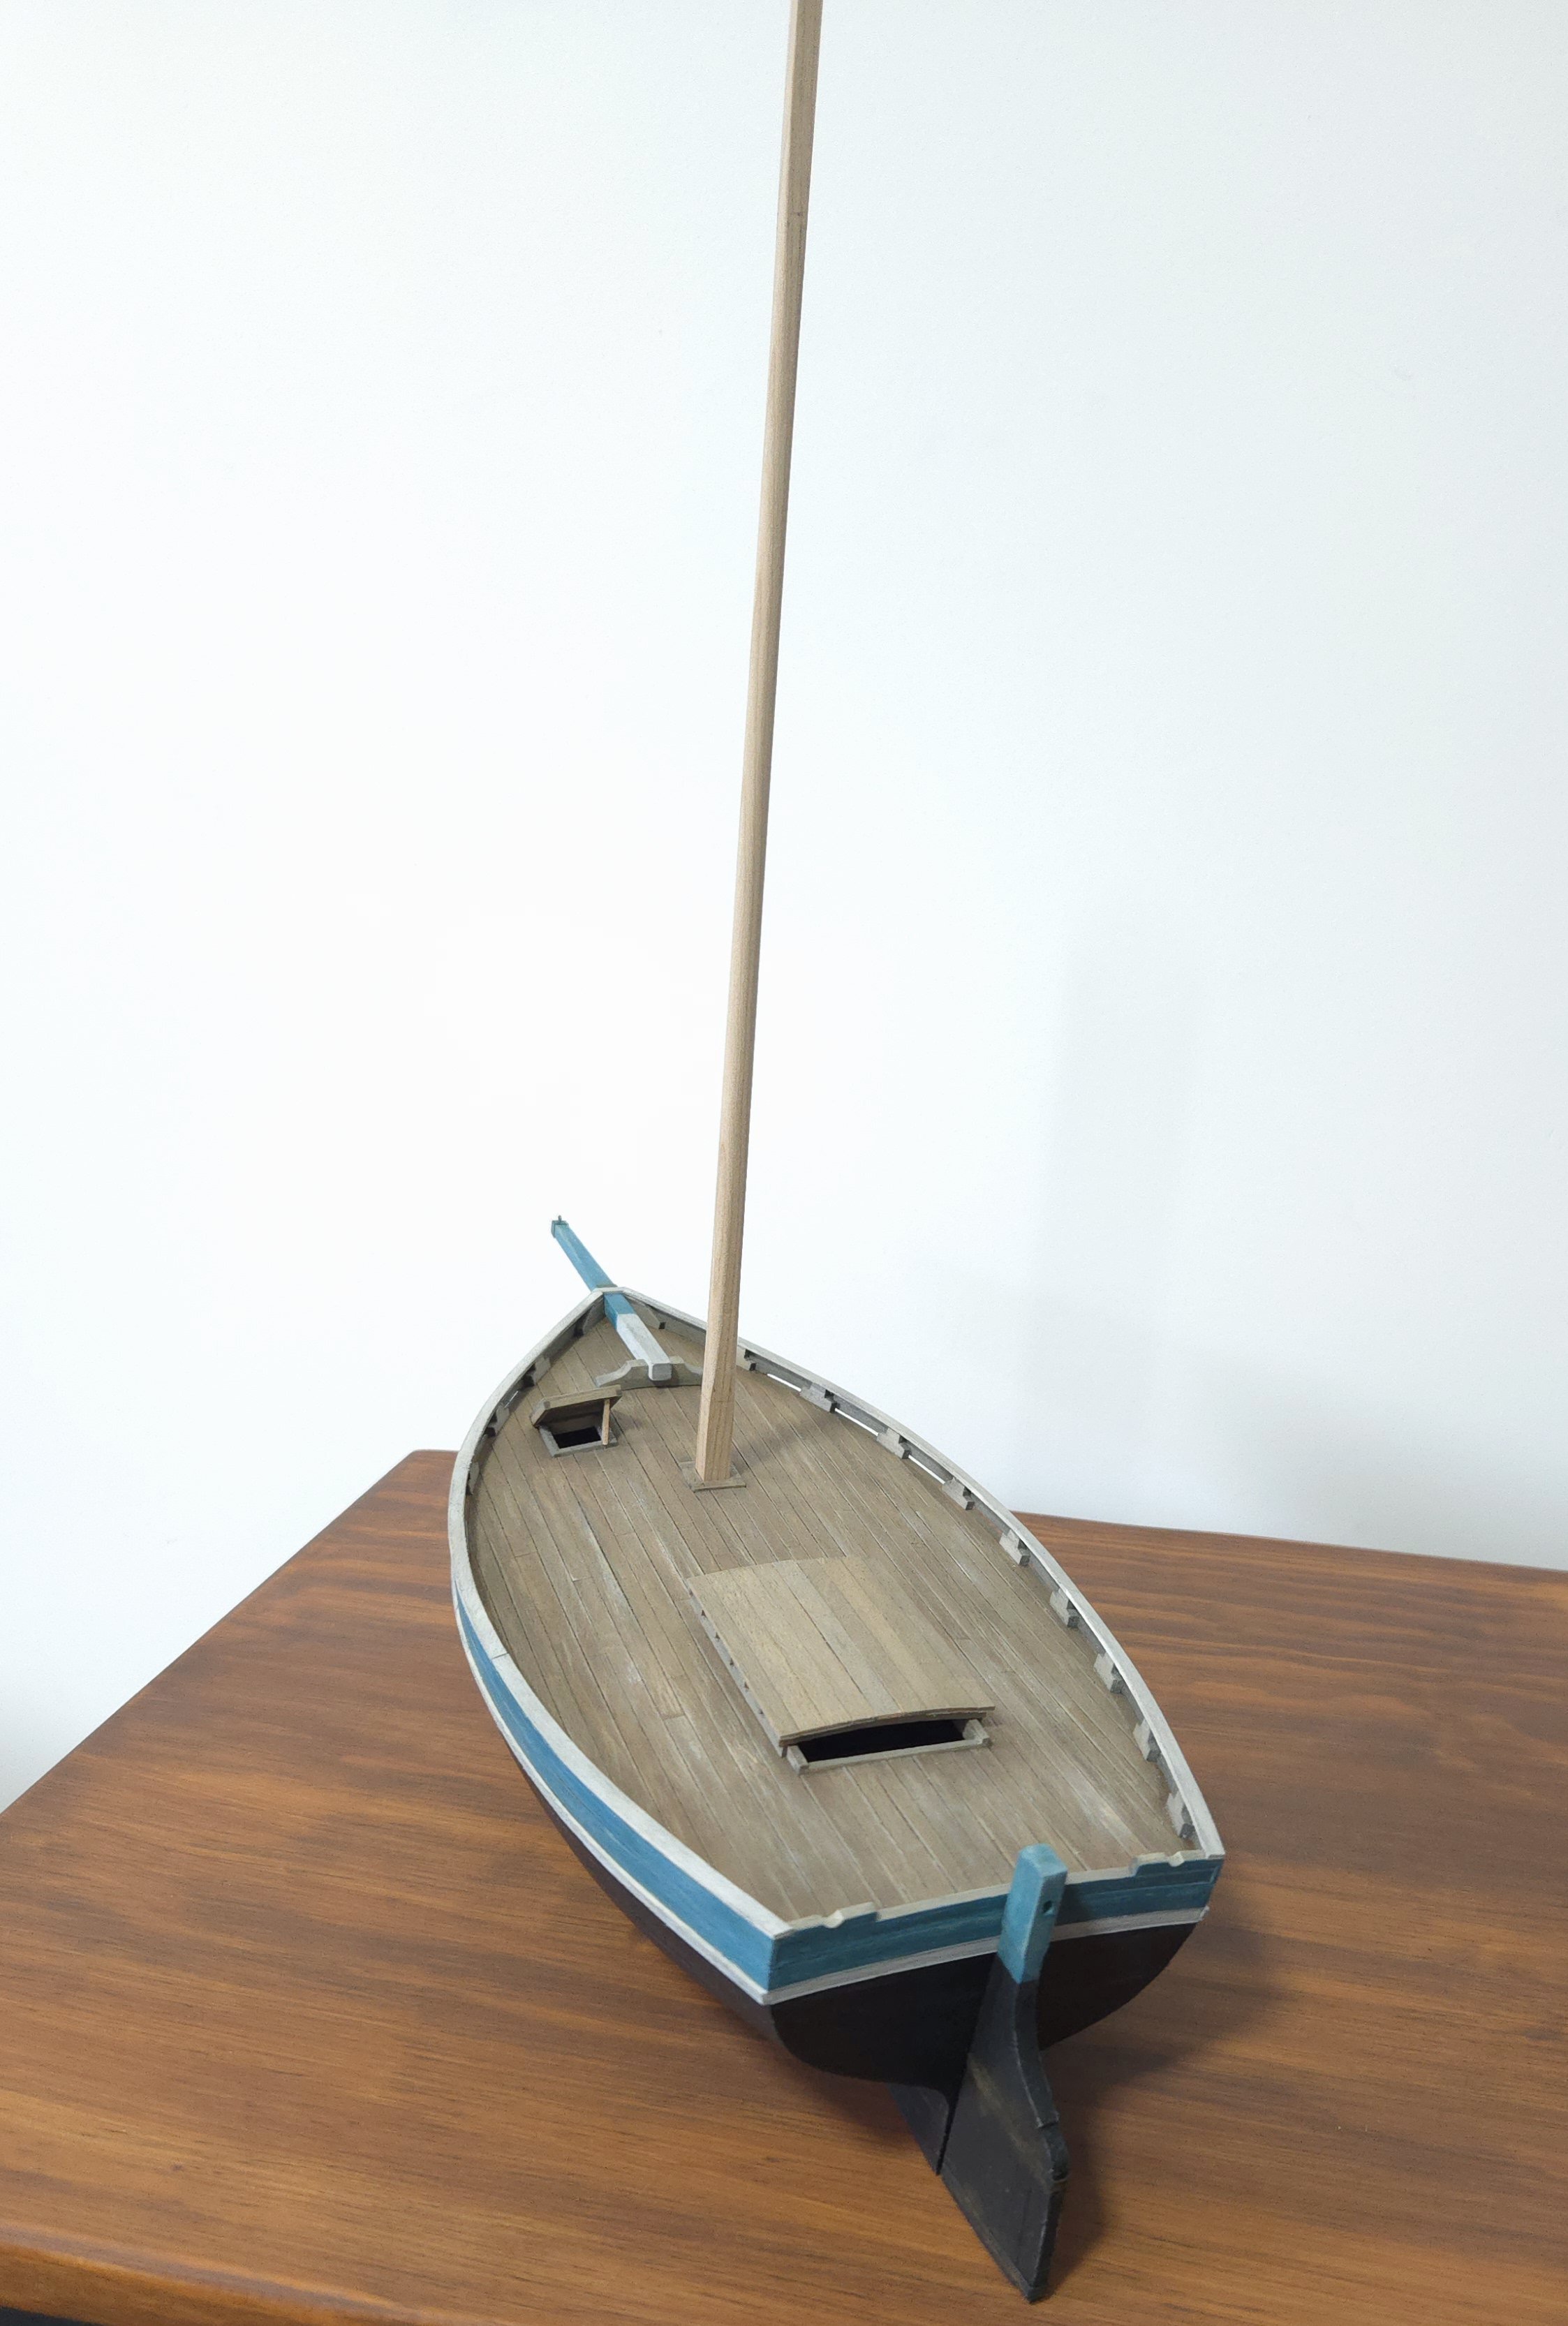
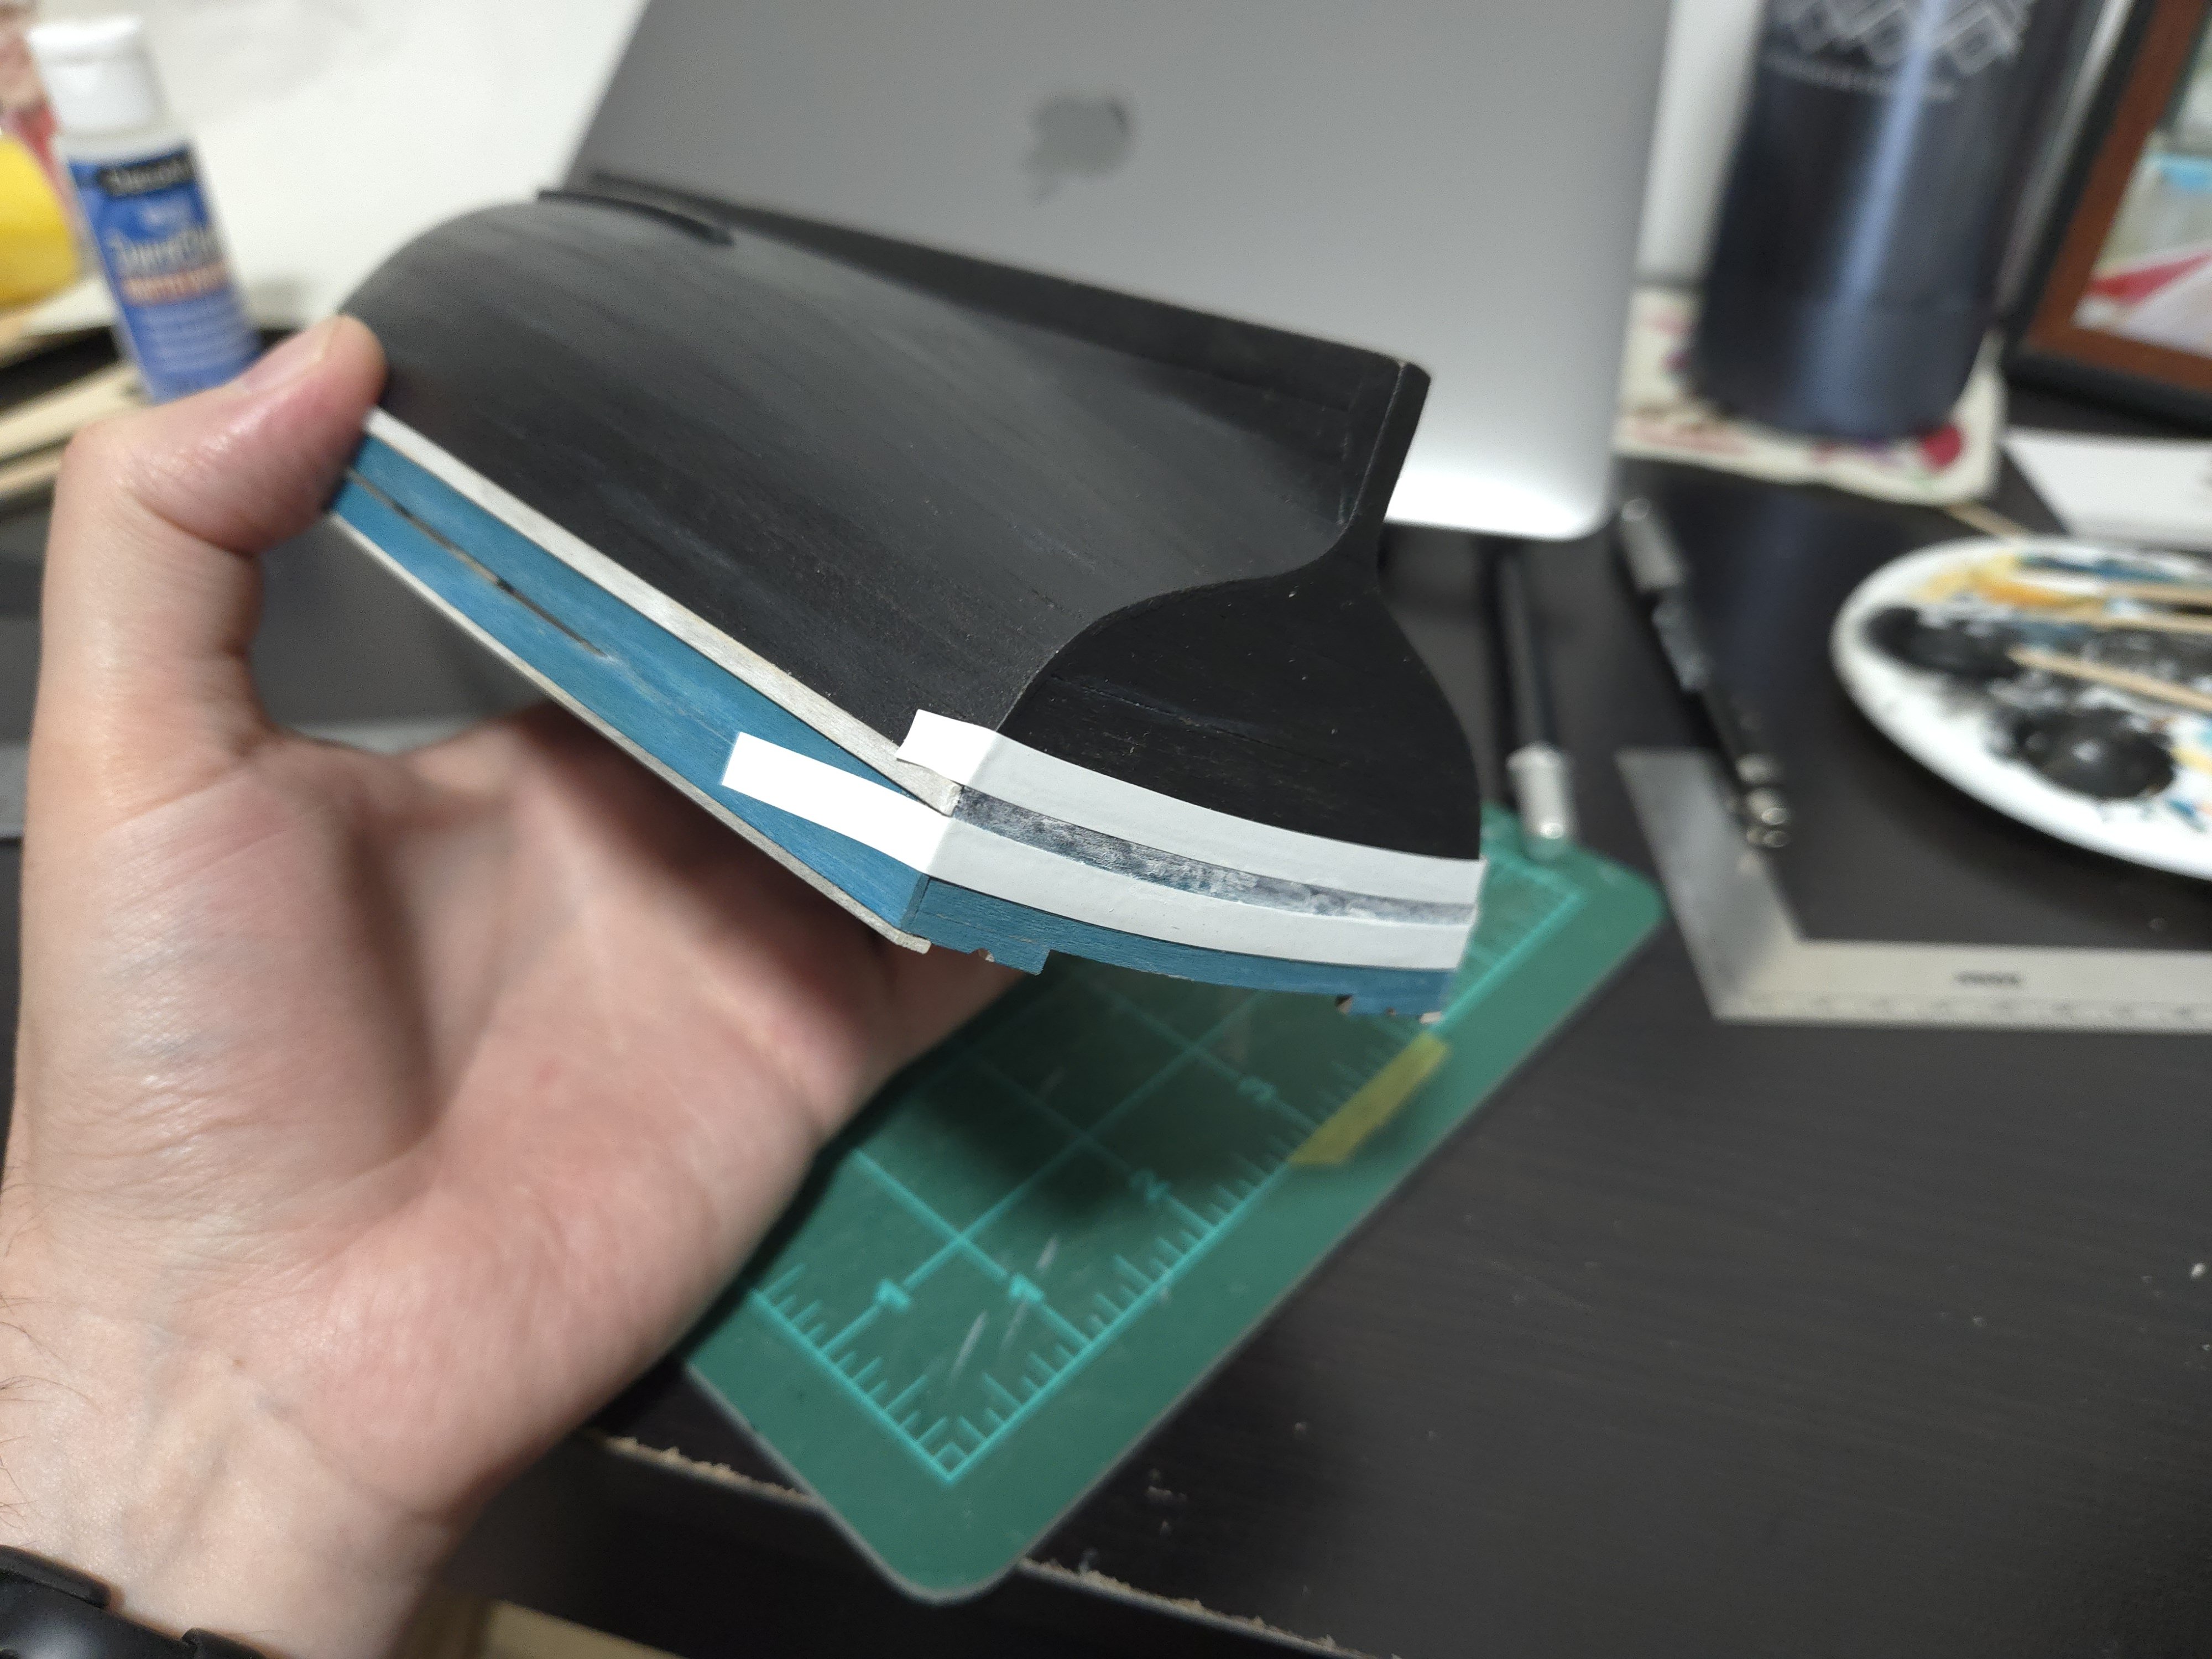
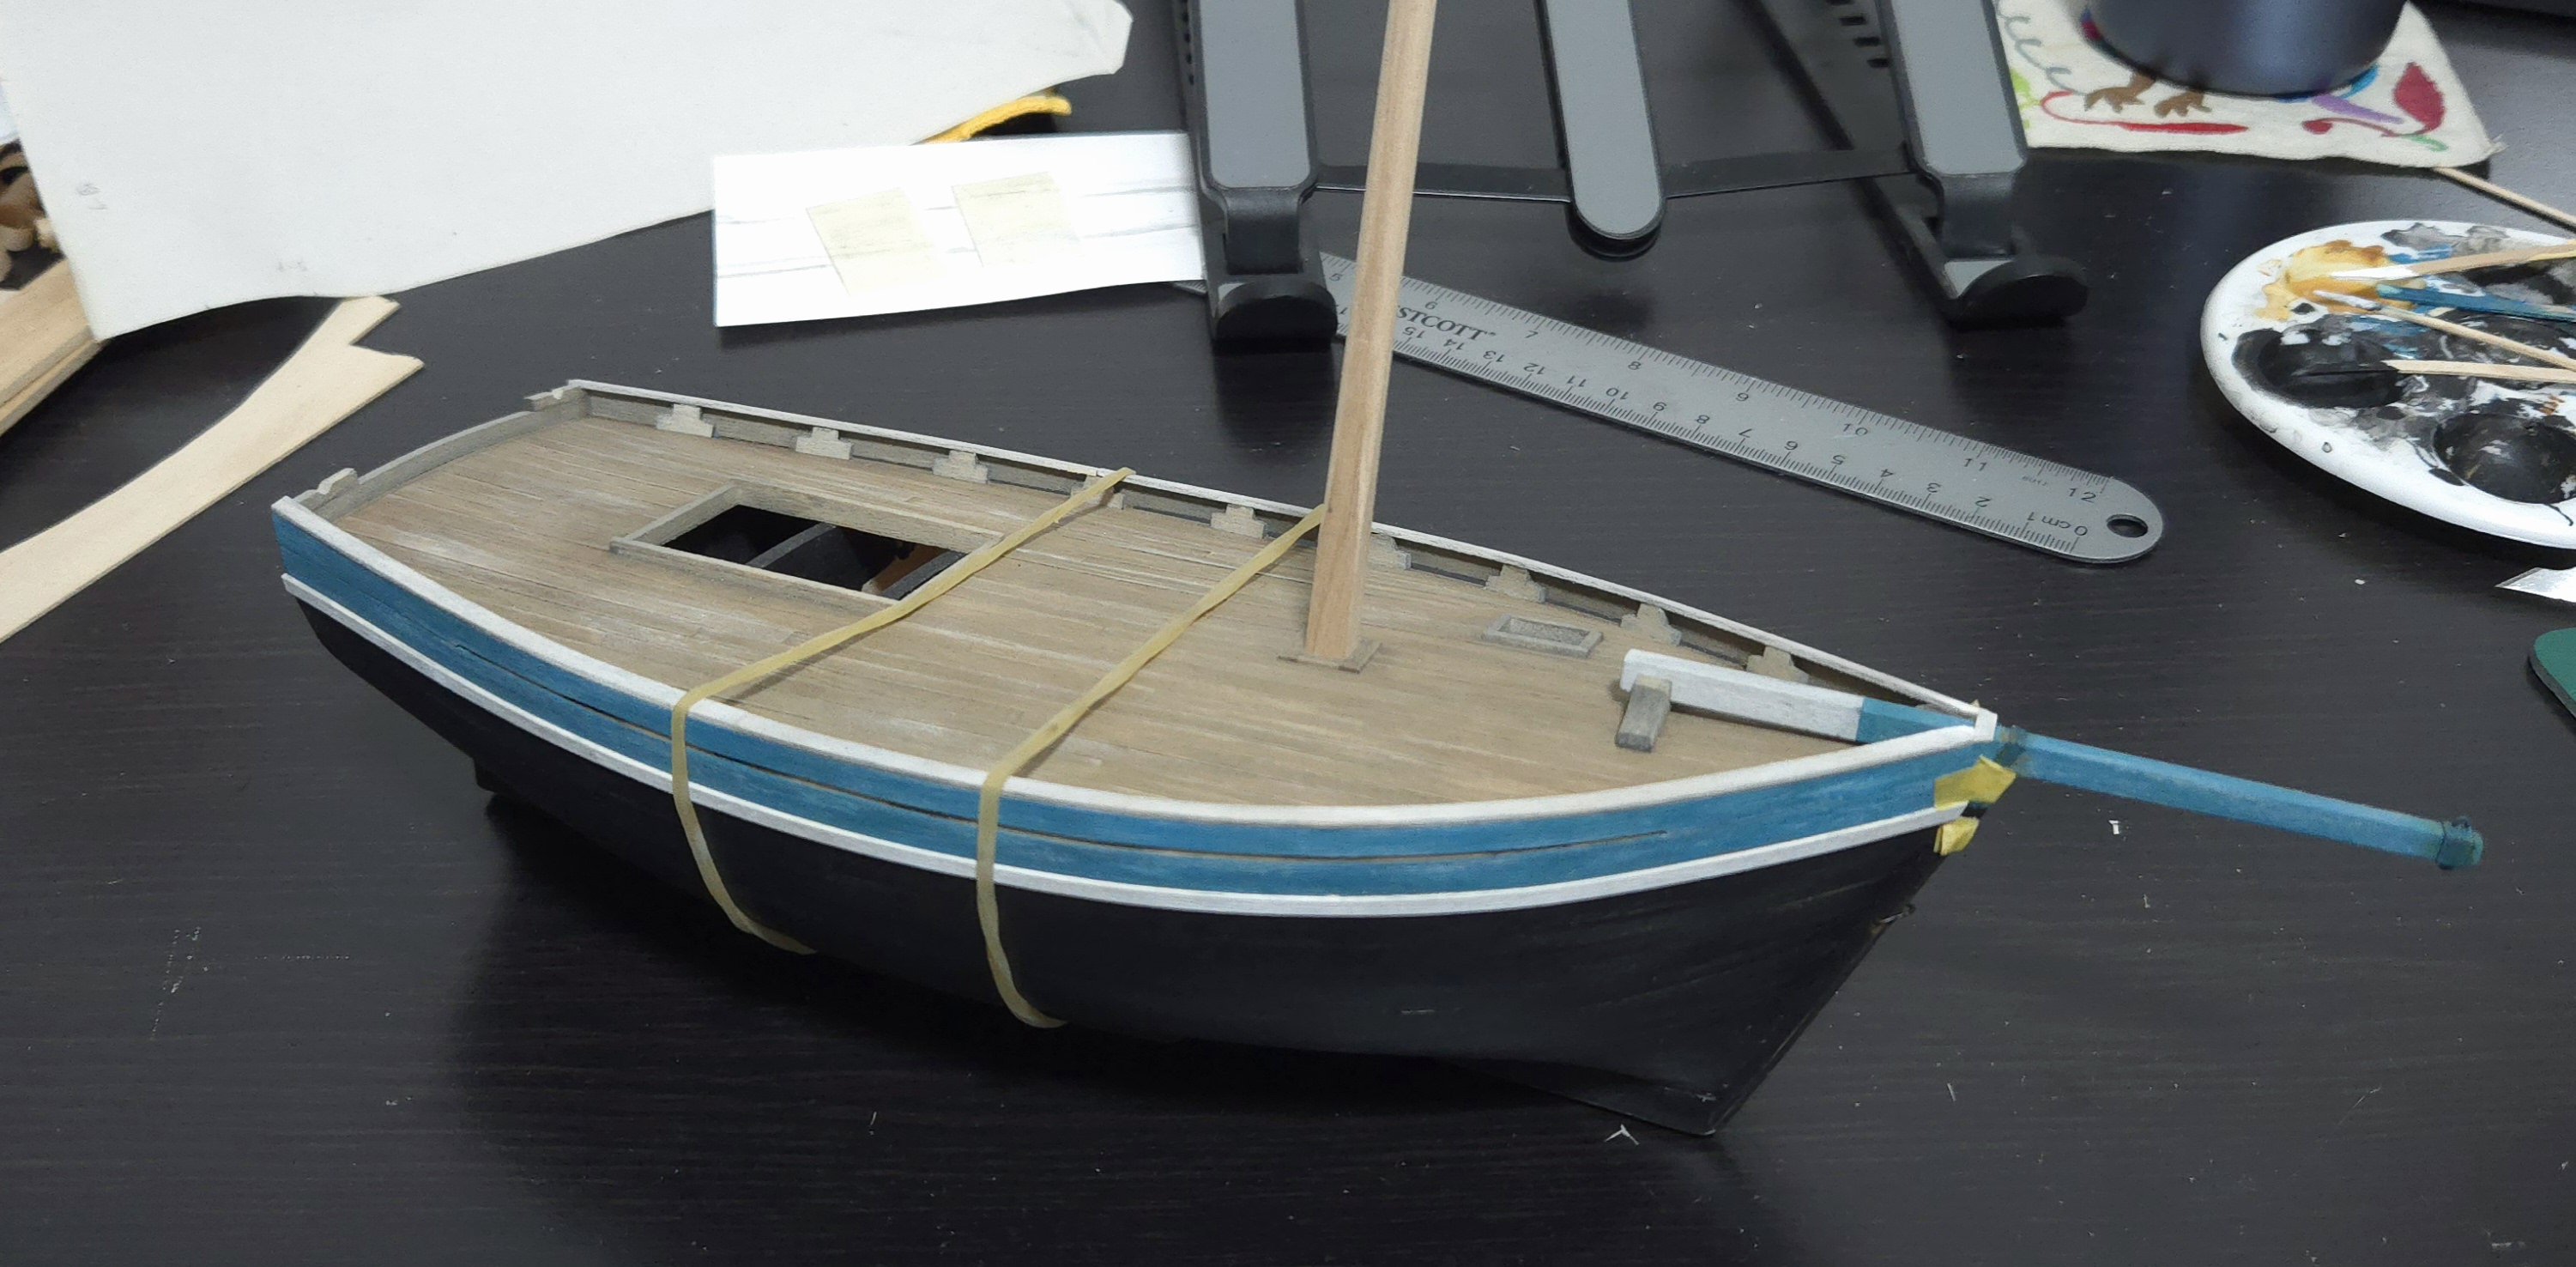
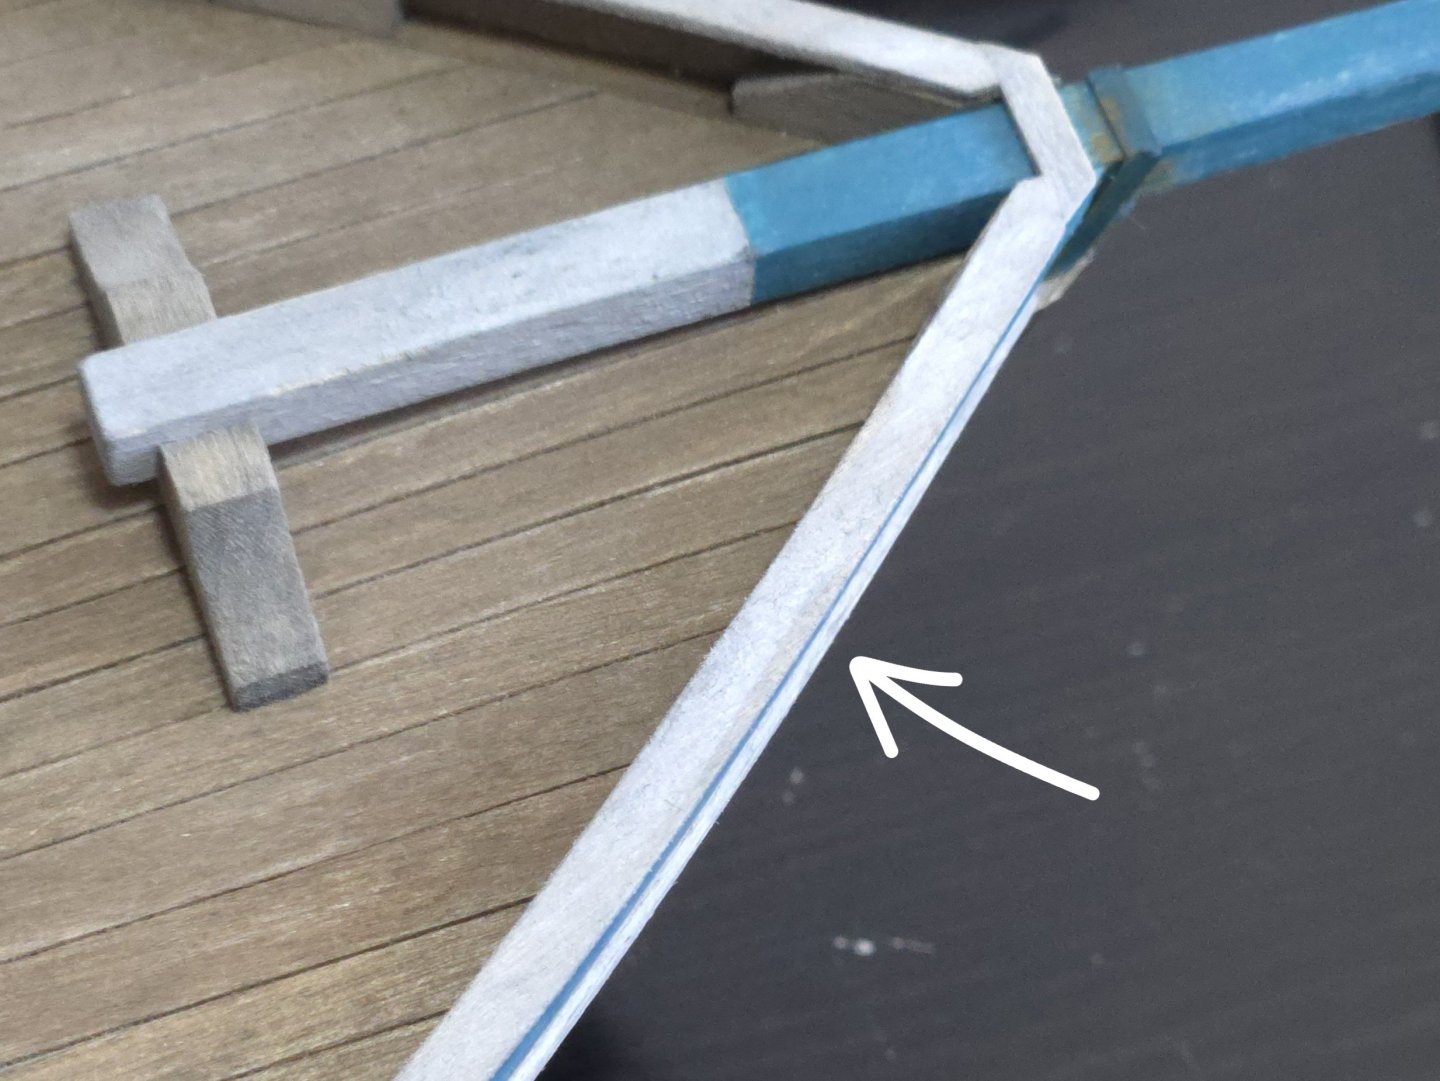
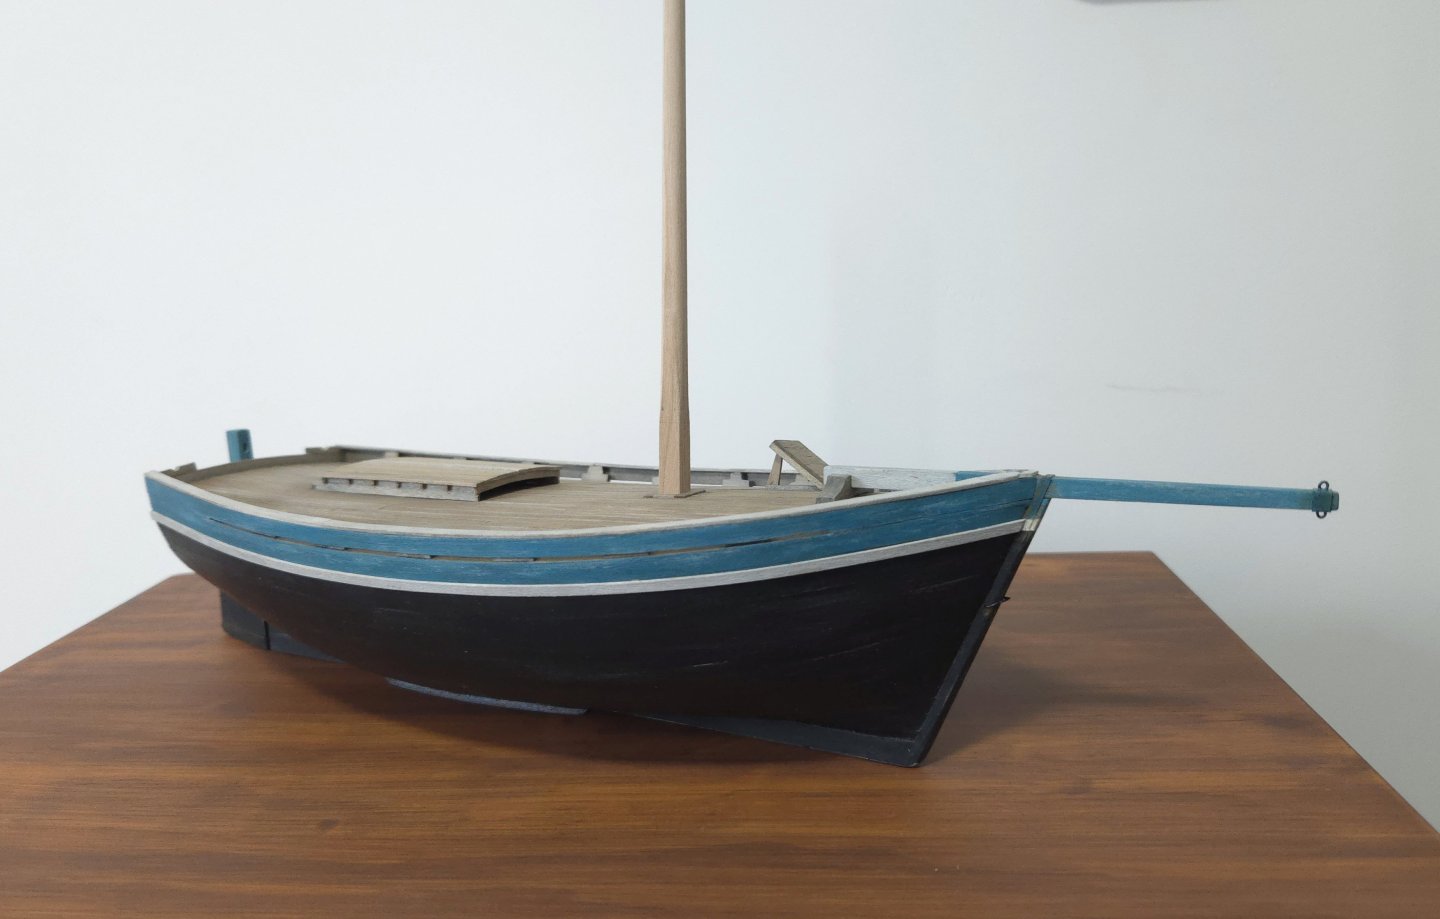
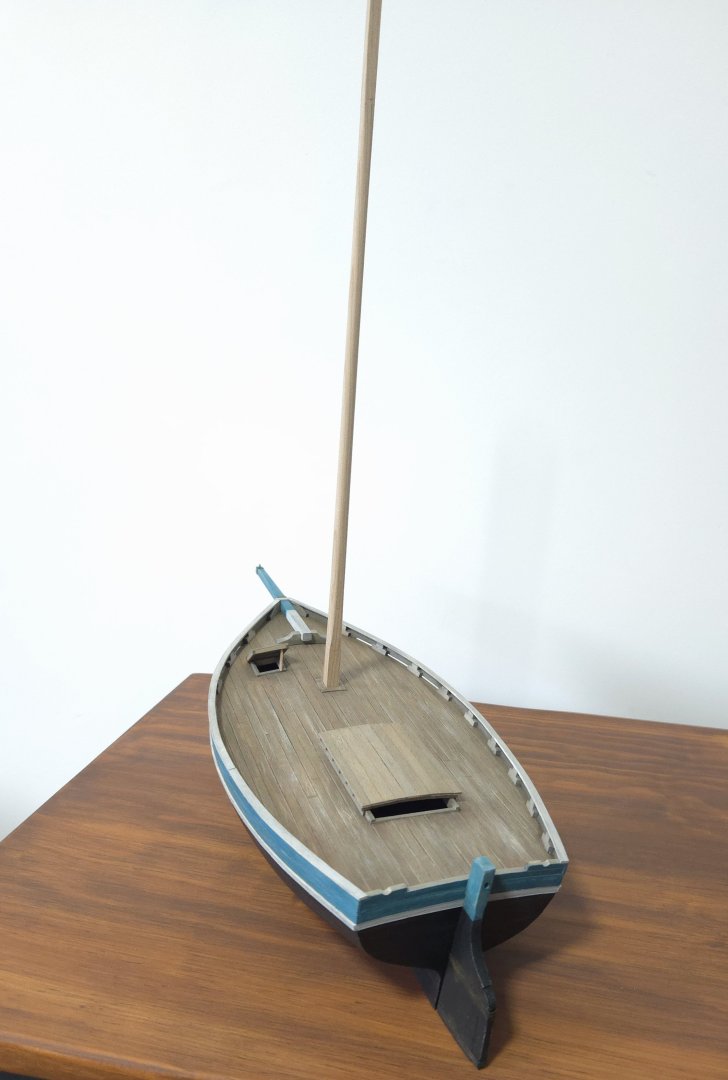
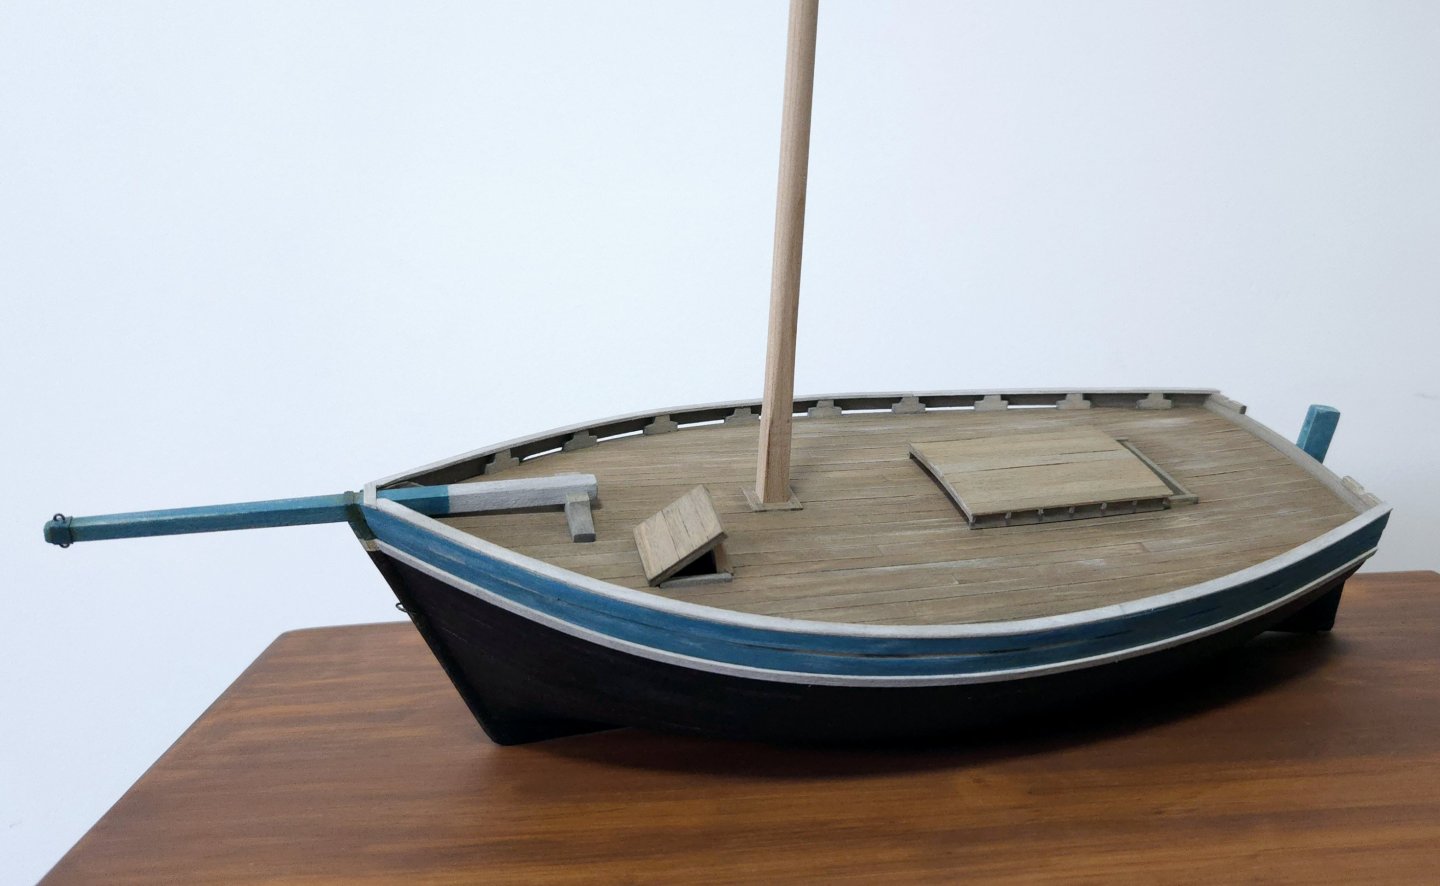
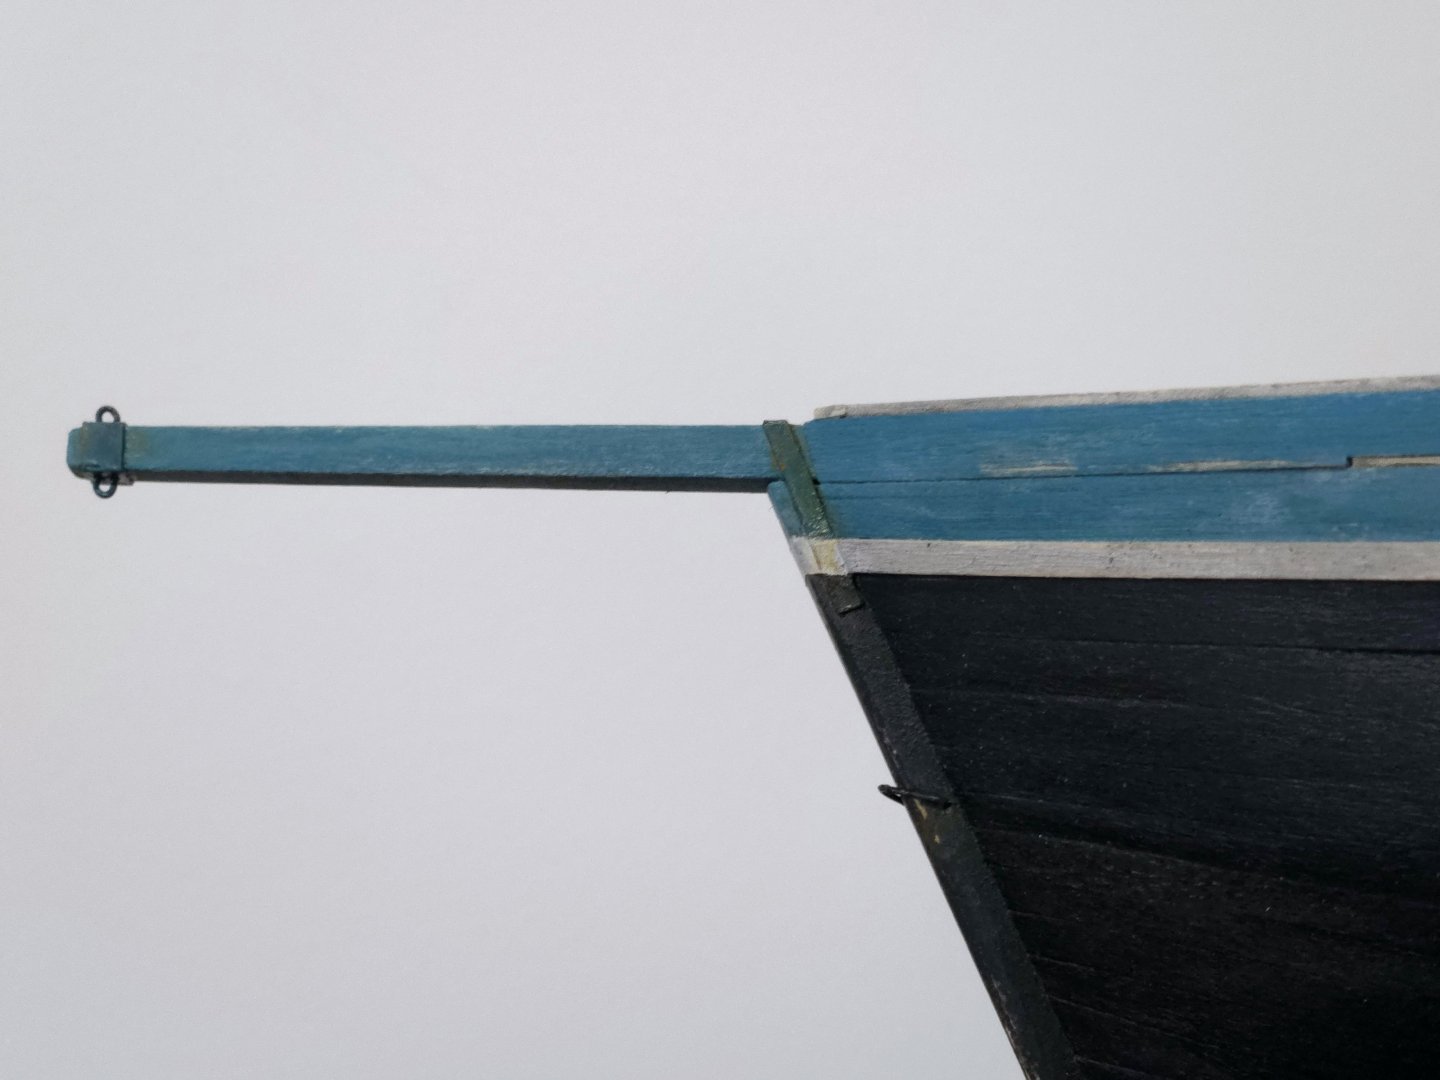
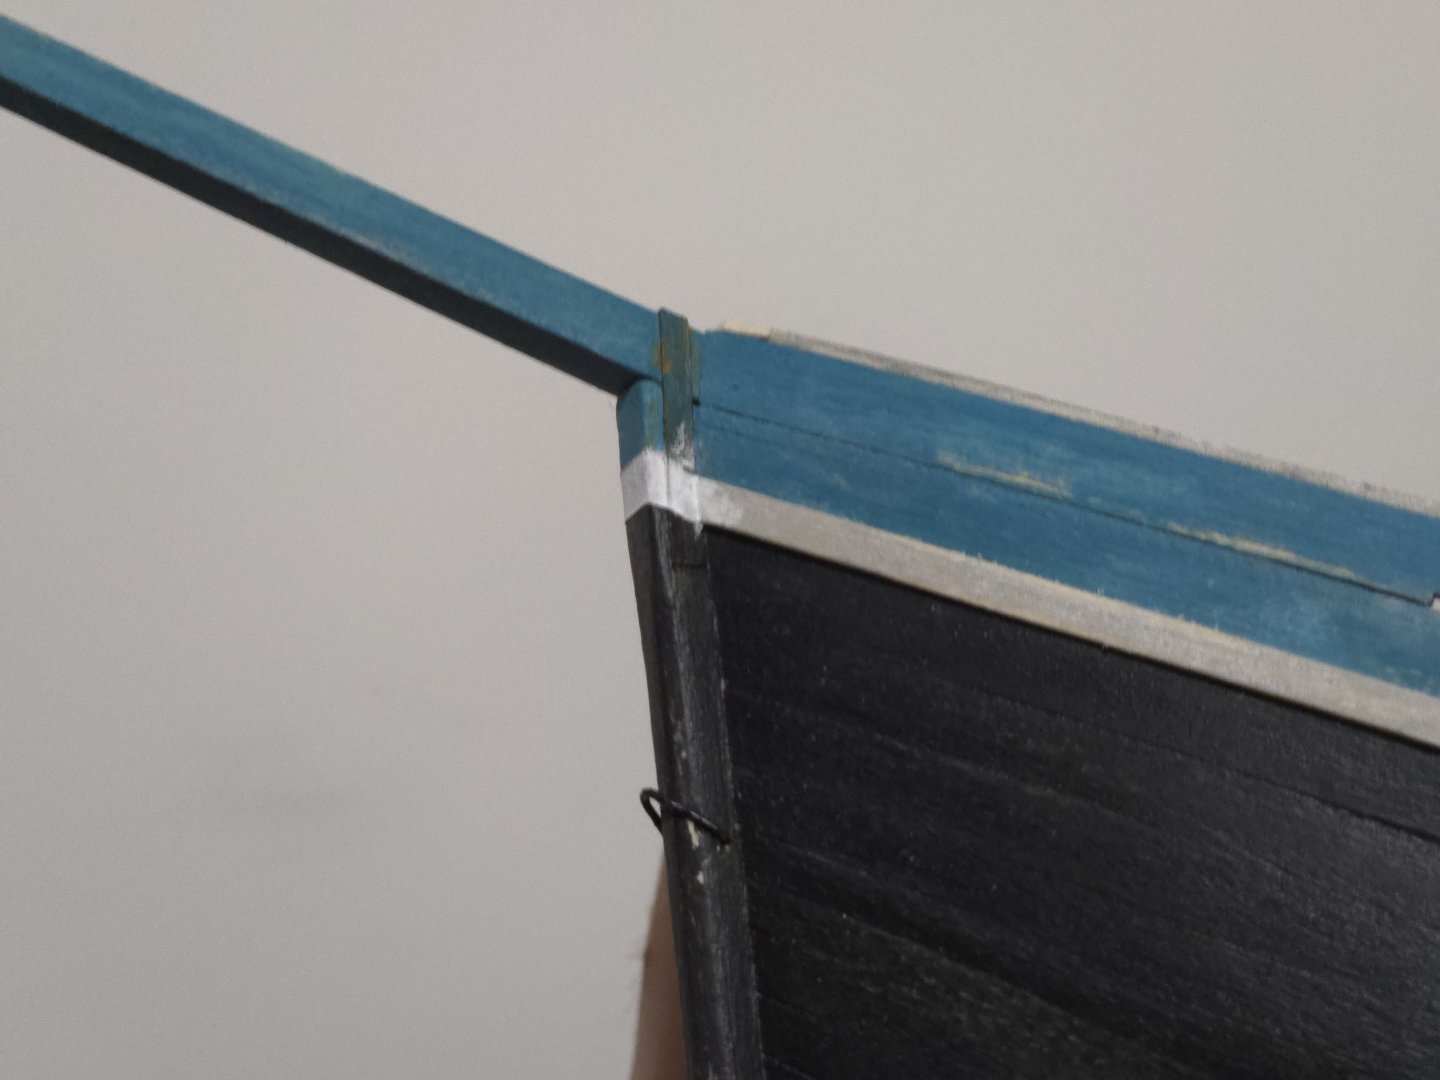
Thanks, @wefalck! Dry brushing certainly seems to give a lot of bang for the buck--easier to figure out (at least the basics) than I expected and a little can add a lot of character. After more consideration, I decided to just go for mounting the chainplates outside the rubbing strakes. I painted the rubbing strakes off the hull and glued them on 1/3 at a time, starting at the bow and working my way back. Rubber bands were helpful around the center, but not further forward or back, due to the pronounced curve of the hull. I also attached the bowsprit and was able to attach the cross-piece rail that goes across it. I realized that I should have waited to weather the gammon iron and surroundings until I extended the white stripe of the rub rails around the stem. The area was quite tricky to tape off. Despite my best efforts to burnish the tape and seal it with clear varnish before painting, a good bit of paint still managed to escape on the port side (my apologies for the poor picture quality!). It took a good bit of patient scraping and repainting the area, but I was able to get it looking right, especially after adding the dry-brushed rust and some dark washes. At the transom, meanwhile, I used Tamiya masking tape for curves for the white stripe. Besides the rust, I also wanted to weather the hull a bit. I scraped and sanded some edges, especially on the rubbing strake and cap rail around where the shrouds/chainplates will be located and at the bow where the anchor would hang*, and around the keel, stem, and guardaplayas. I then used a dark wash to tone down some of the exposed bare wood (drawing on Gary's example in his dragger build). The effect is subtle. *Some photos show lanchas with a hawse hole through the cap rail for the anchor, but many lanchas simply ran the anchor cable over the rail, as I've decided to go with on my build. I also dry-brushed a very little bit of white in some places to suggest salt deposits. The hull could maybe do with a dash more color variation (maybe a brown wash?) to suggest more weathering, but I don't want to over-do it. (Not to mention that there will be rust around the chainplates and rudder hinges when those are added.) In any event, the hull is basically complete now! I still do need to shape the masthead. I'm happy with how the build is turning out, thank you all for your advice and comments.


- 312 replies
-
- 12
-
-
-
- Chile
- Latin America
- (and 6 more)
-
Nice work! Getting the joints right is certainly tricky.
-
Looks like a nice start! I second the suggestion to check out other build logs, they have a lot of useful information.
-
Great job on the repair!
-
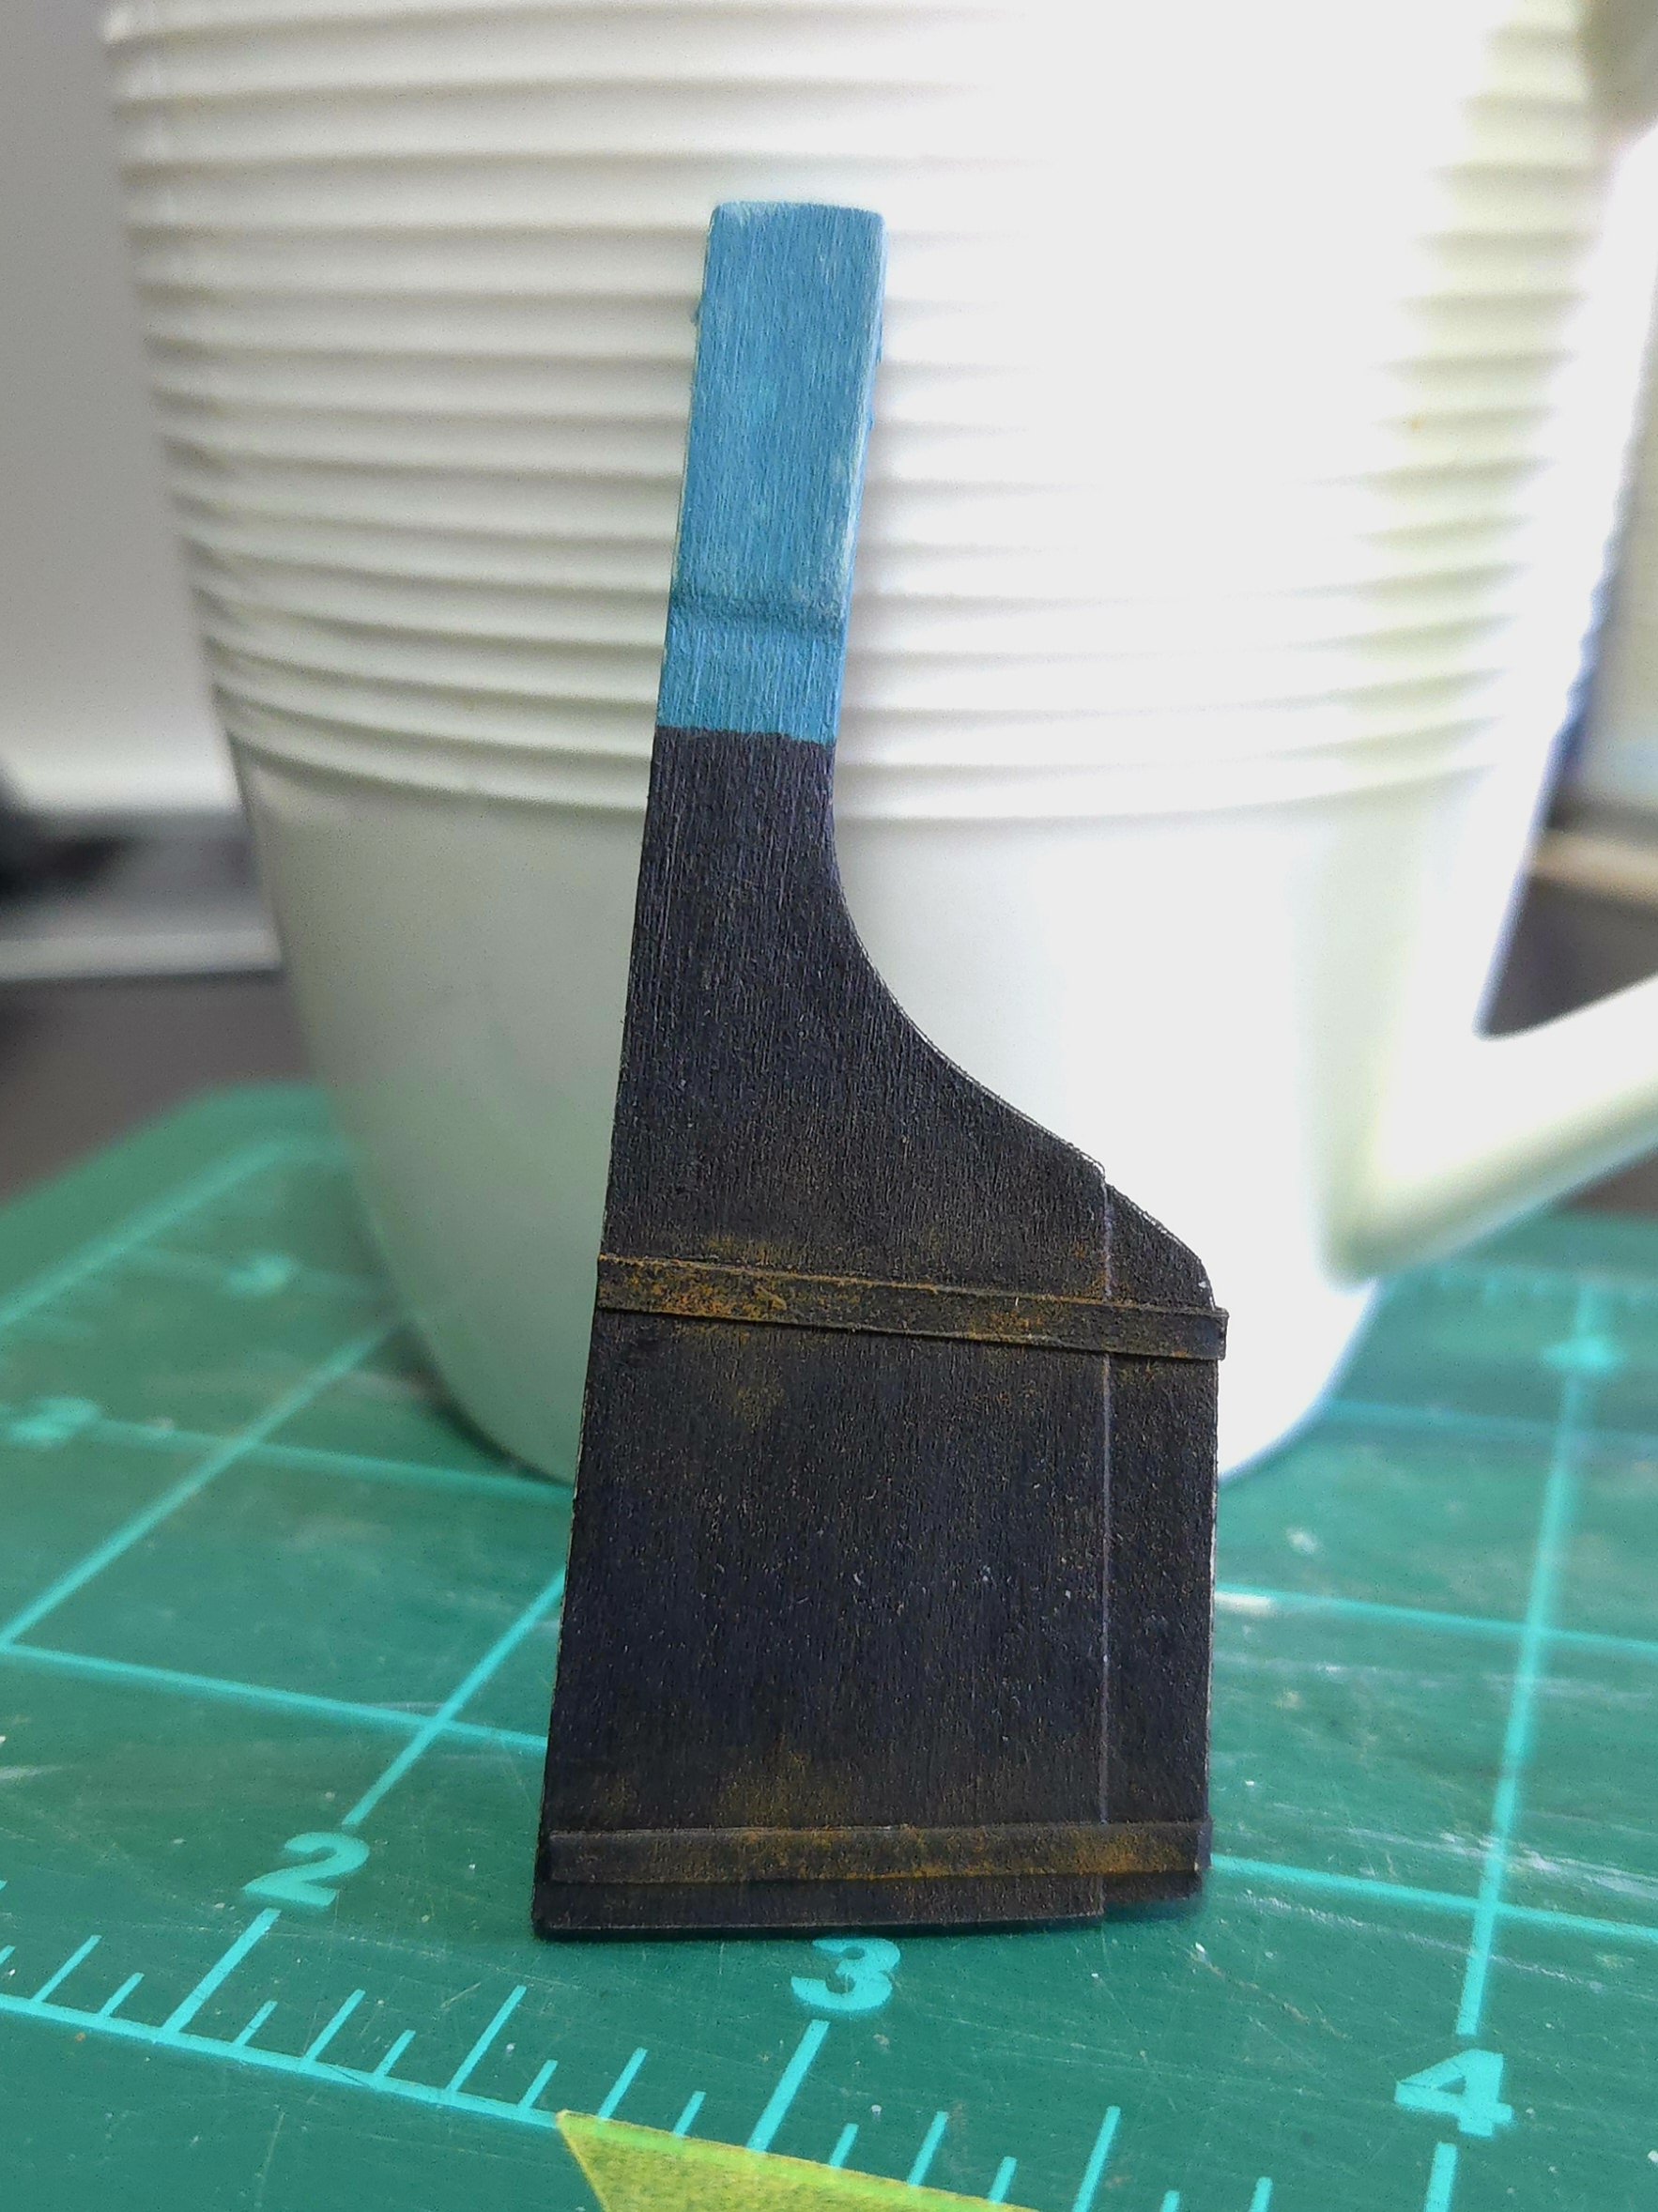
Thanks, Gary! I've also finished painting the rudder, except for the hinges, which I haven't added yet. I made the metal straps that support the rudder extension out of card. Photos of the Quenita show that the rudder metalwork was almost more rust than metal. Source: https://lanchaschilotas.com/wp-content/uploads/2011/03/DSCN71501.jpg I'm not planning on weathering my model as much as the Quenita, but it does make sense to me that the rudder would be a bit more weathered than the upper works. It would have been totally submerged when sailing, but lanchas--which were operated by small farmers rather than specialized traders--were regularly hauled out of the water when not in use, which was often, and thus were subjected to a lot of wear. So, I used a little more rust coloration here: As for the other metalwork, a lot of it--rudder hinges, chainplates, block hooks--will need to be made of actual metal due to the pressure on them. Hopefully I'll be able to similarly weather them.

- 312 replies
-
- 10
-
-
- Chile
- Latin America
- (and 6 more)
-
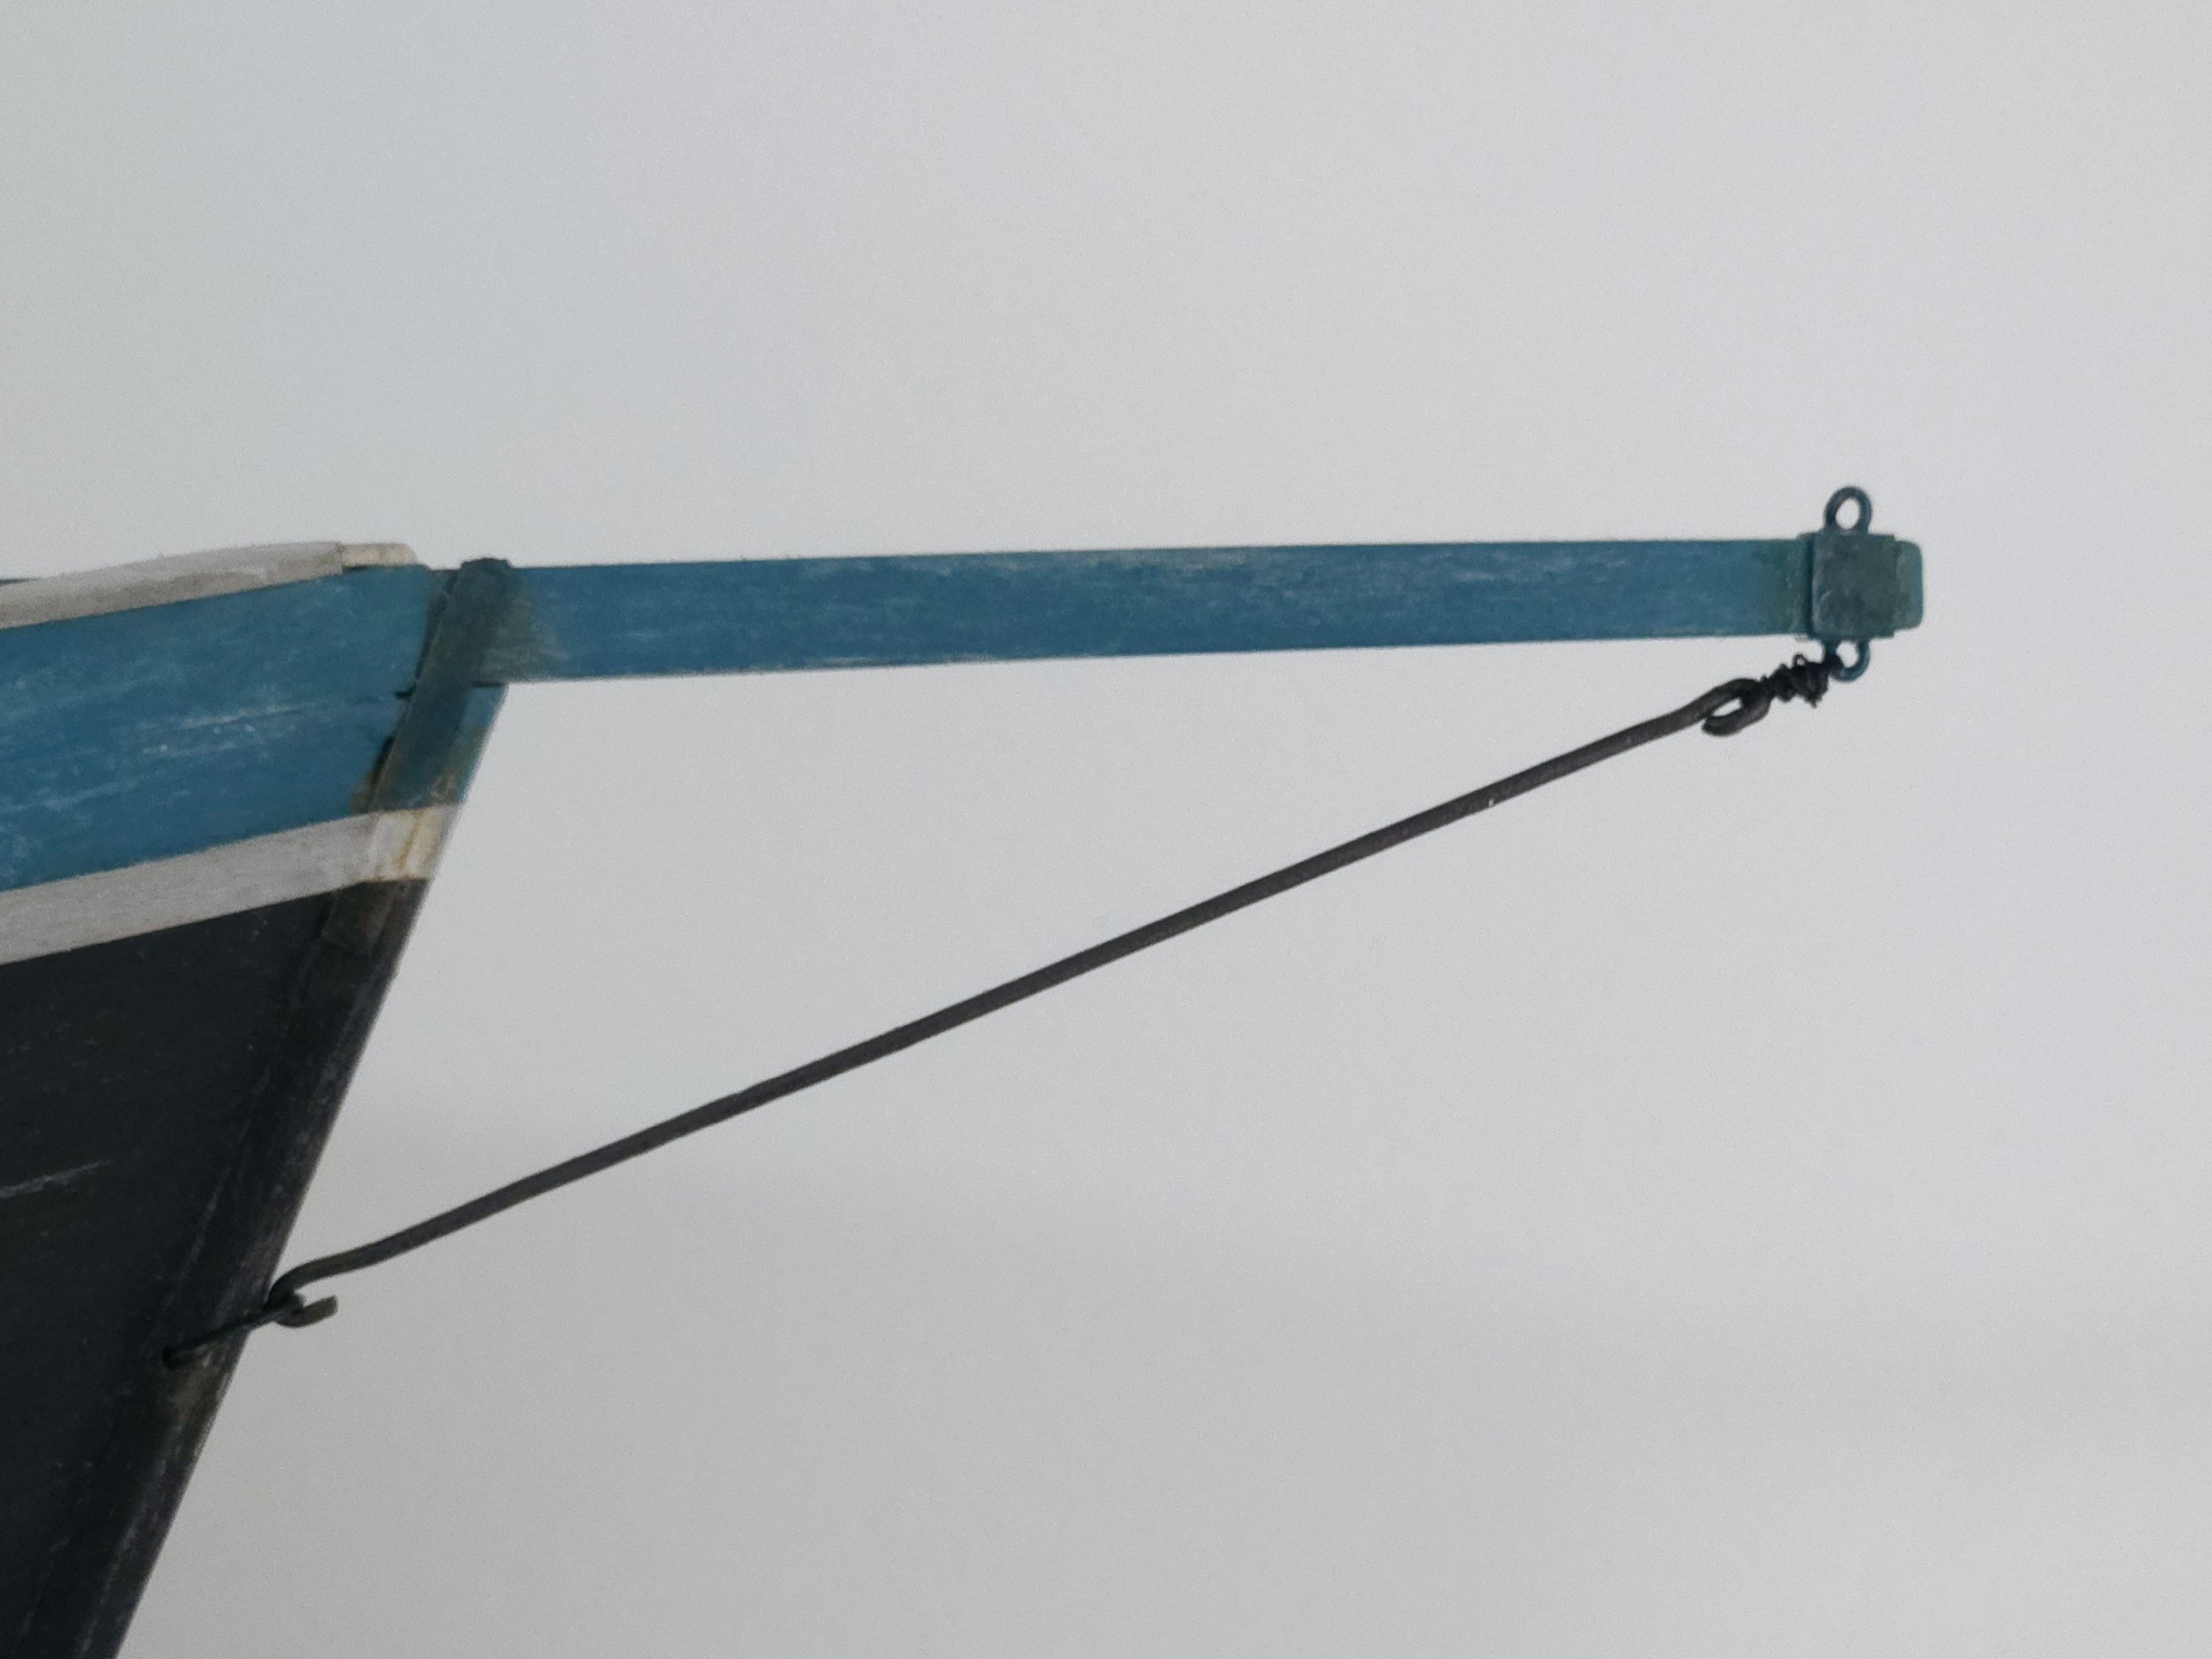
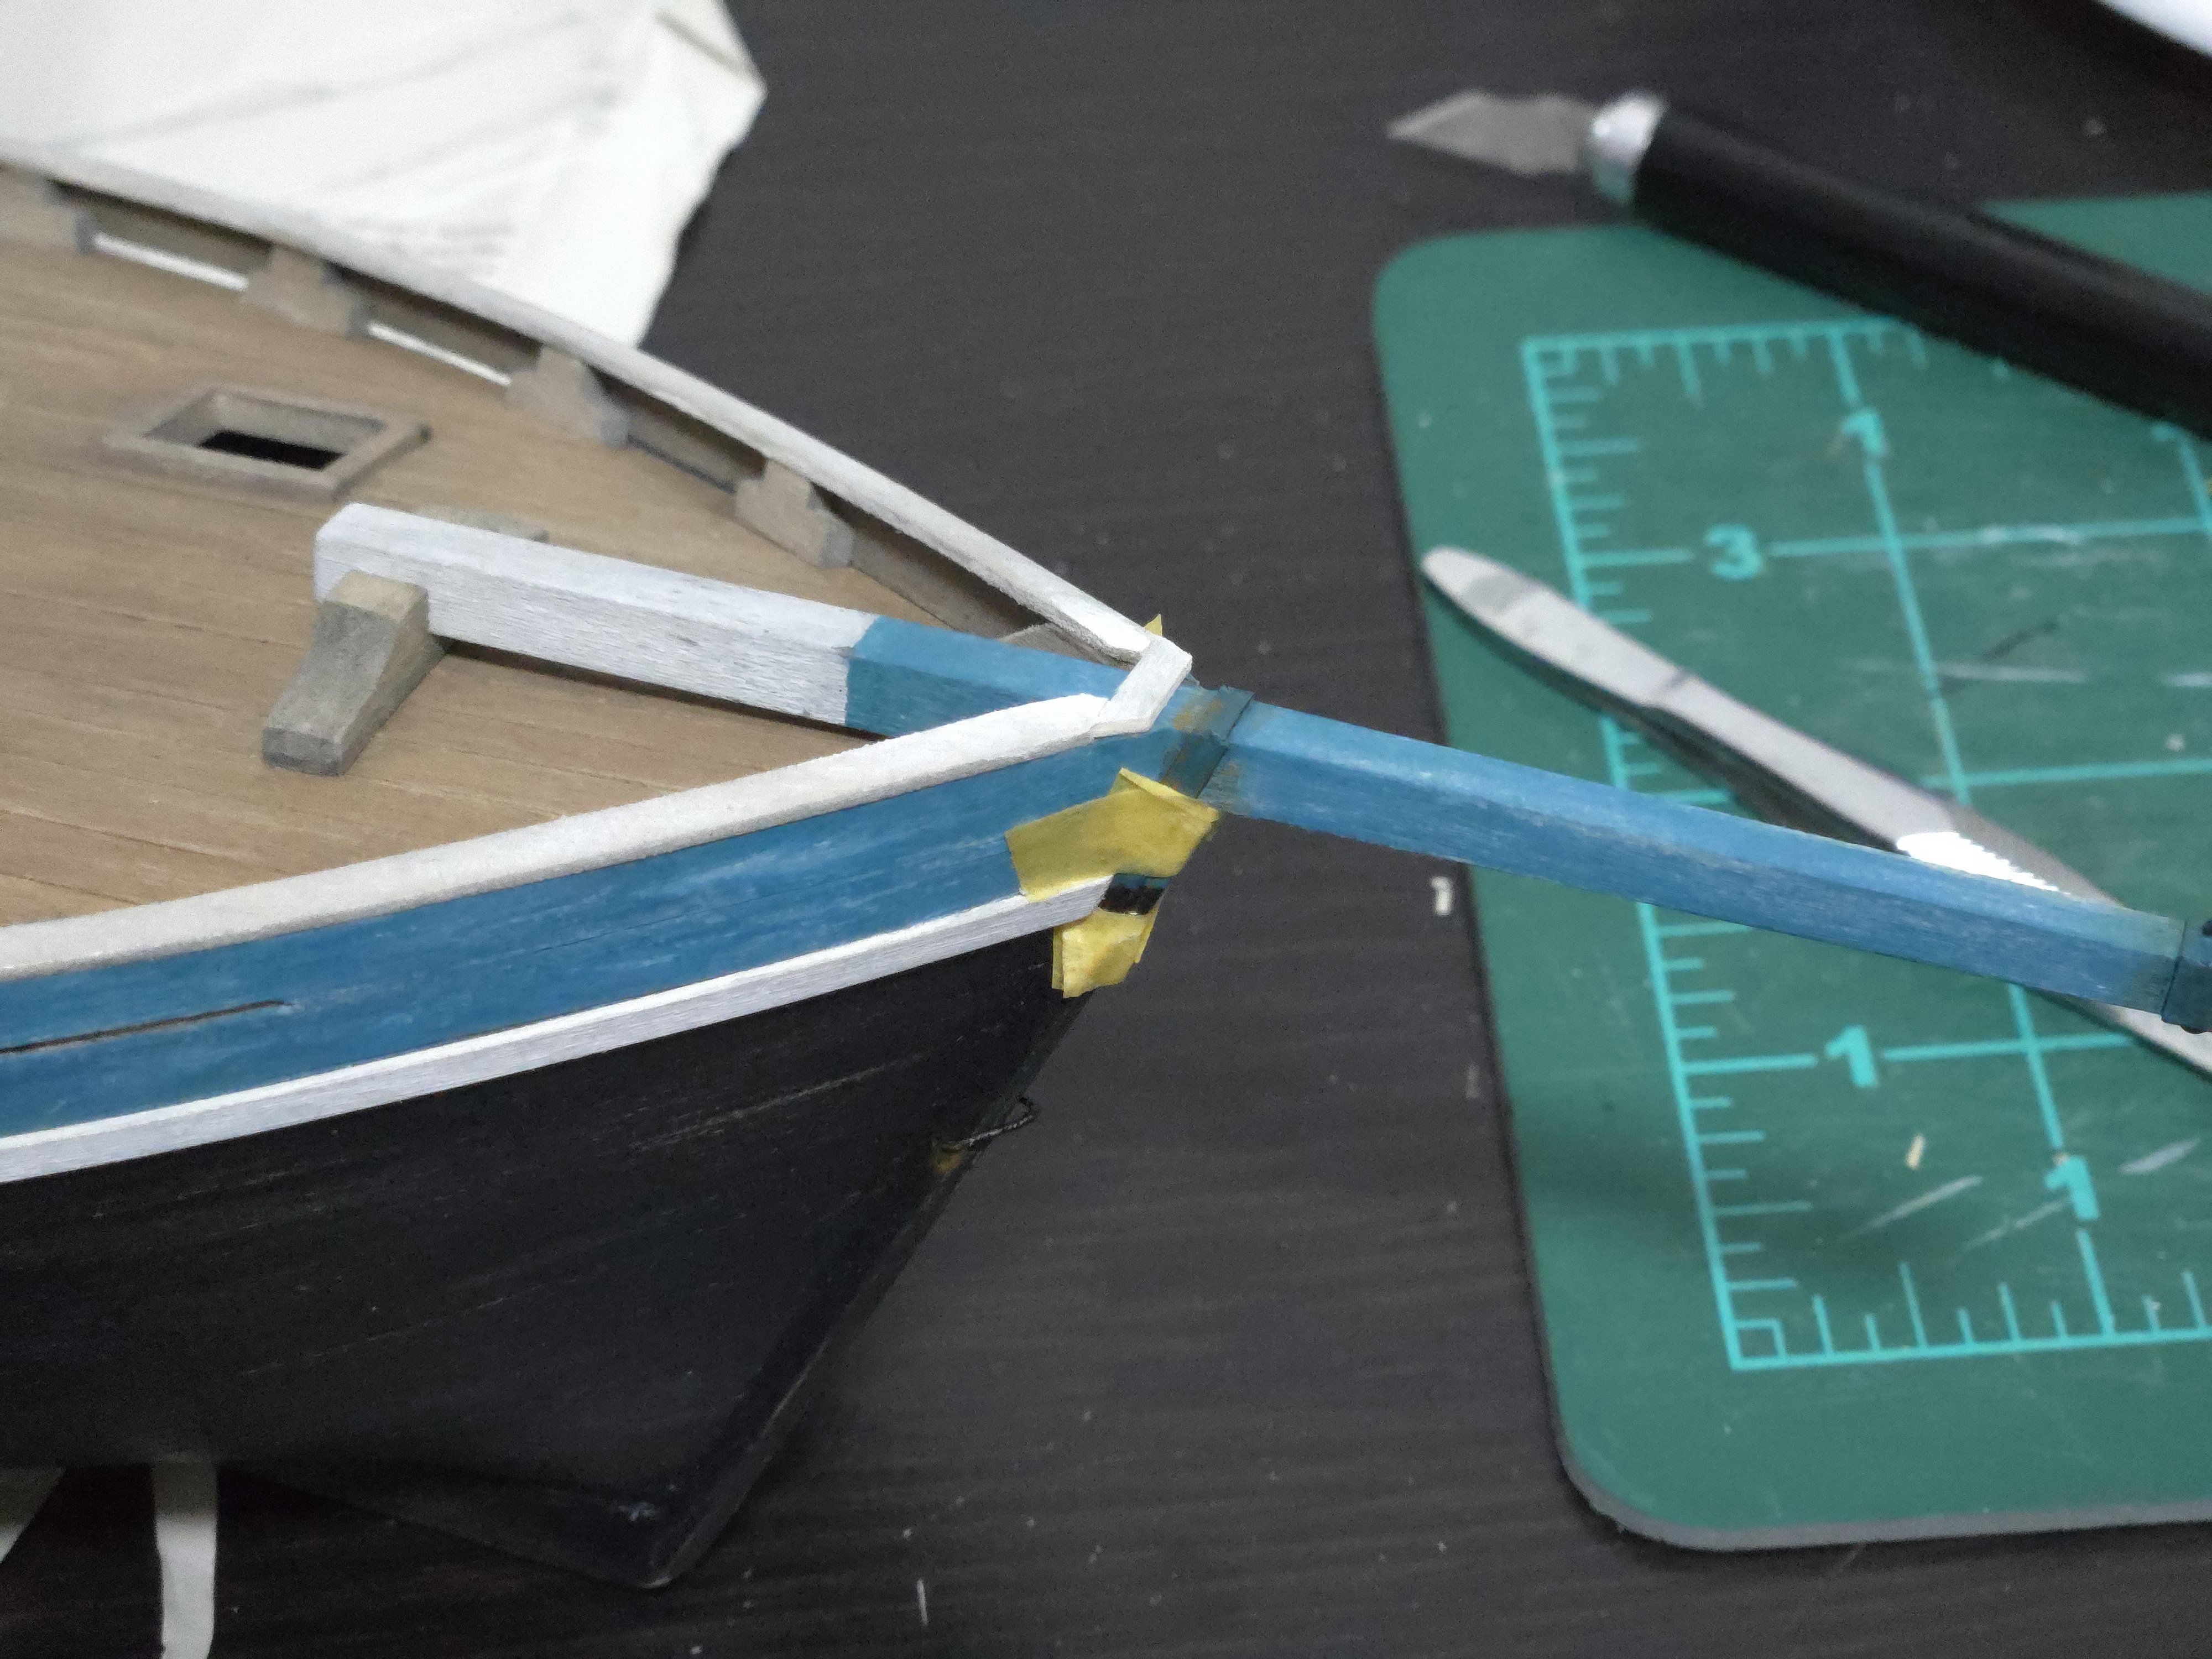
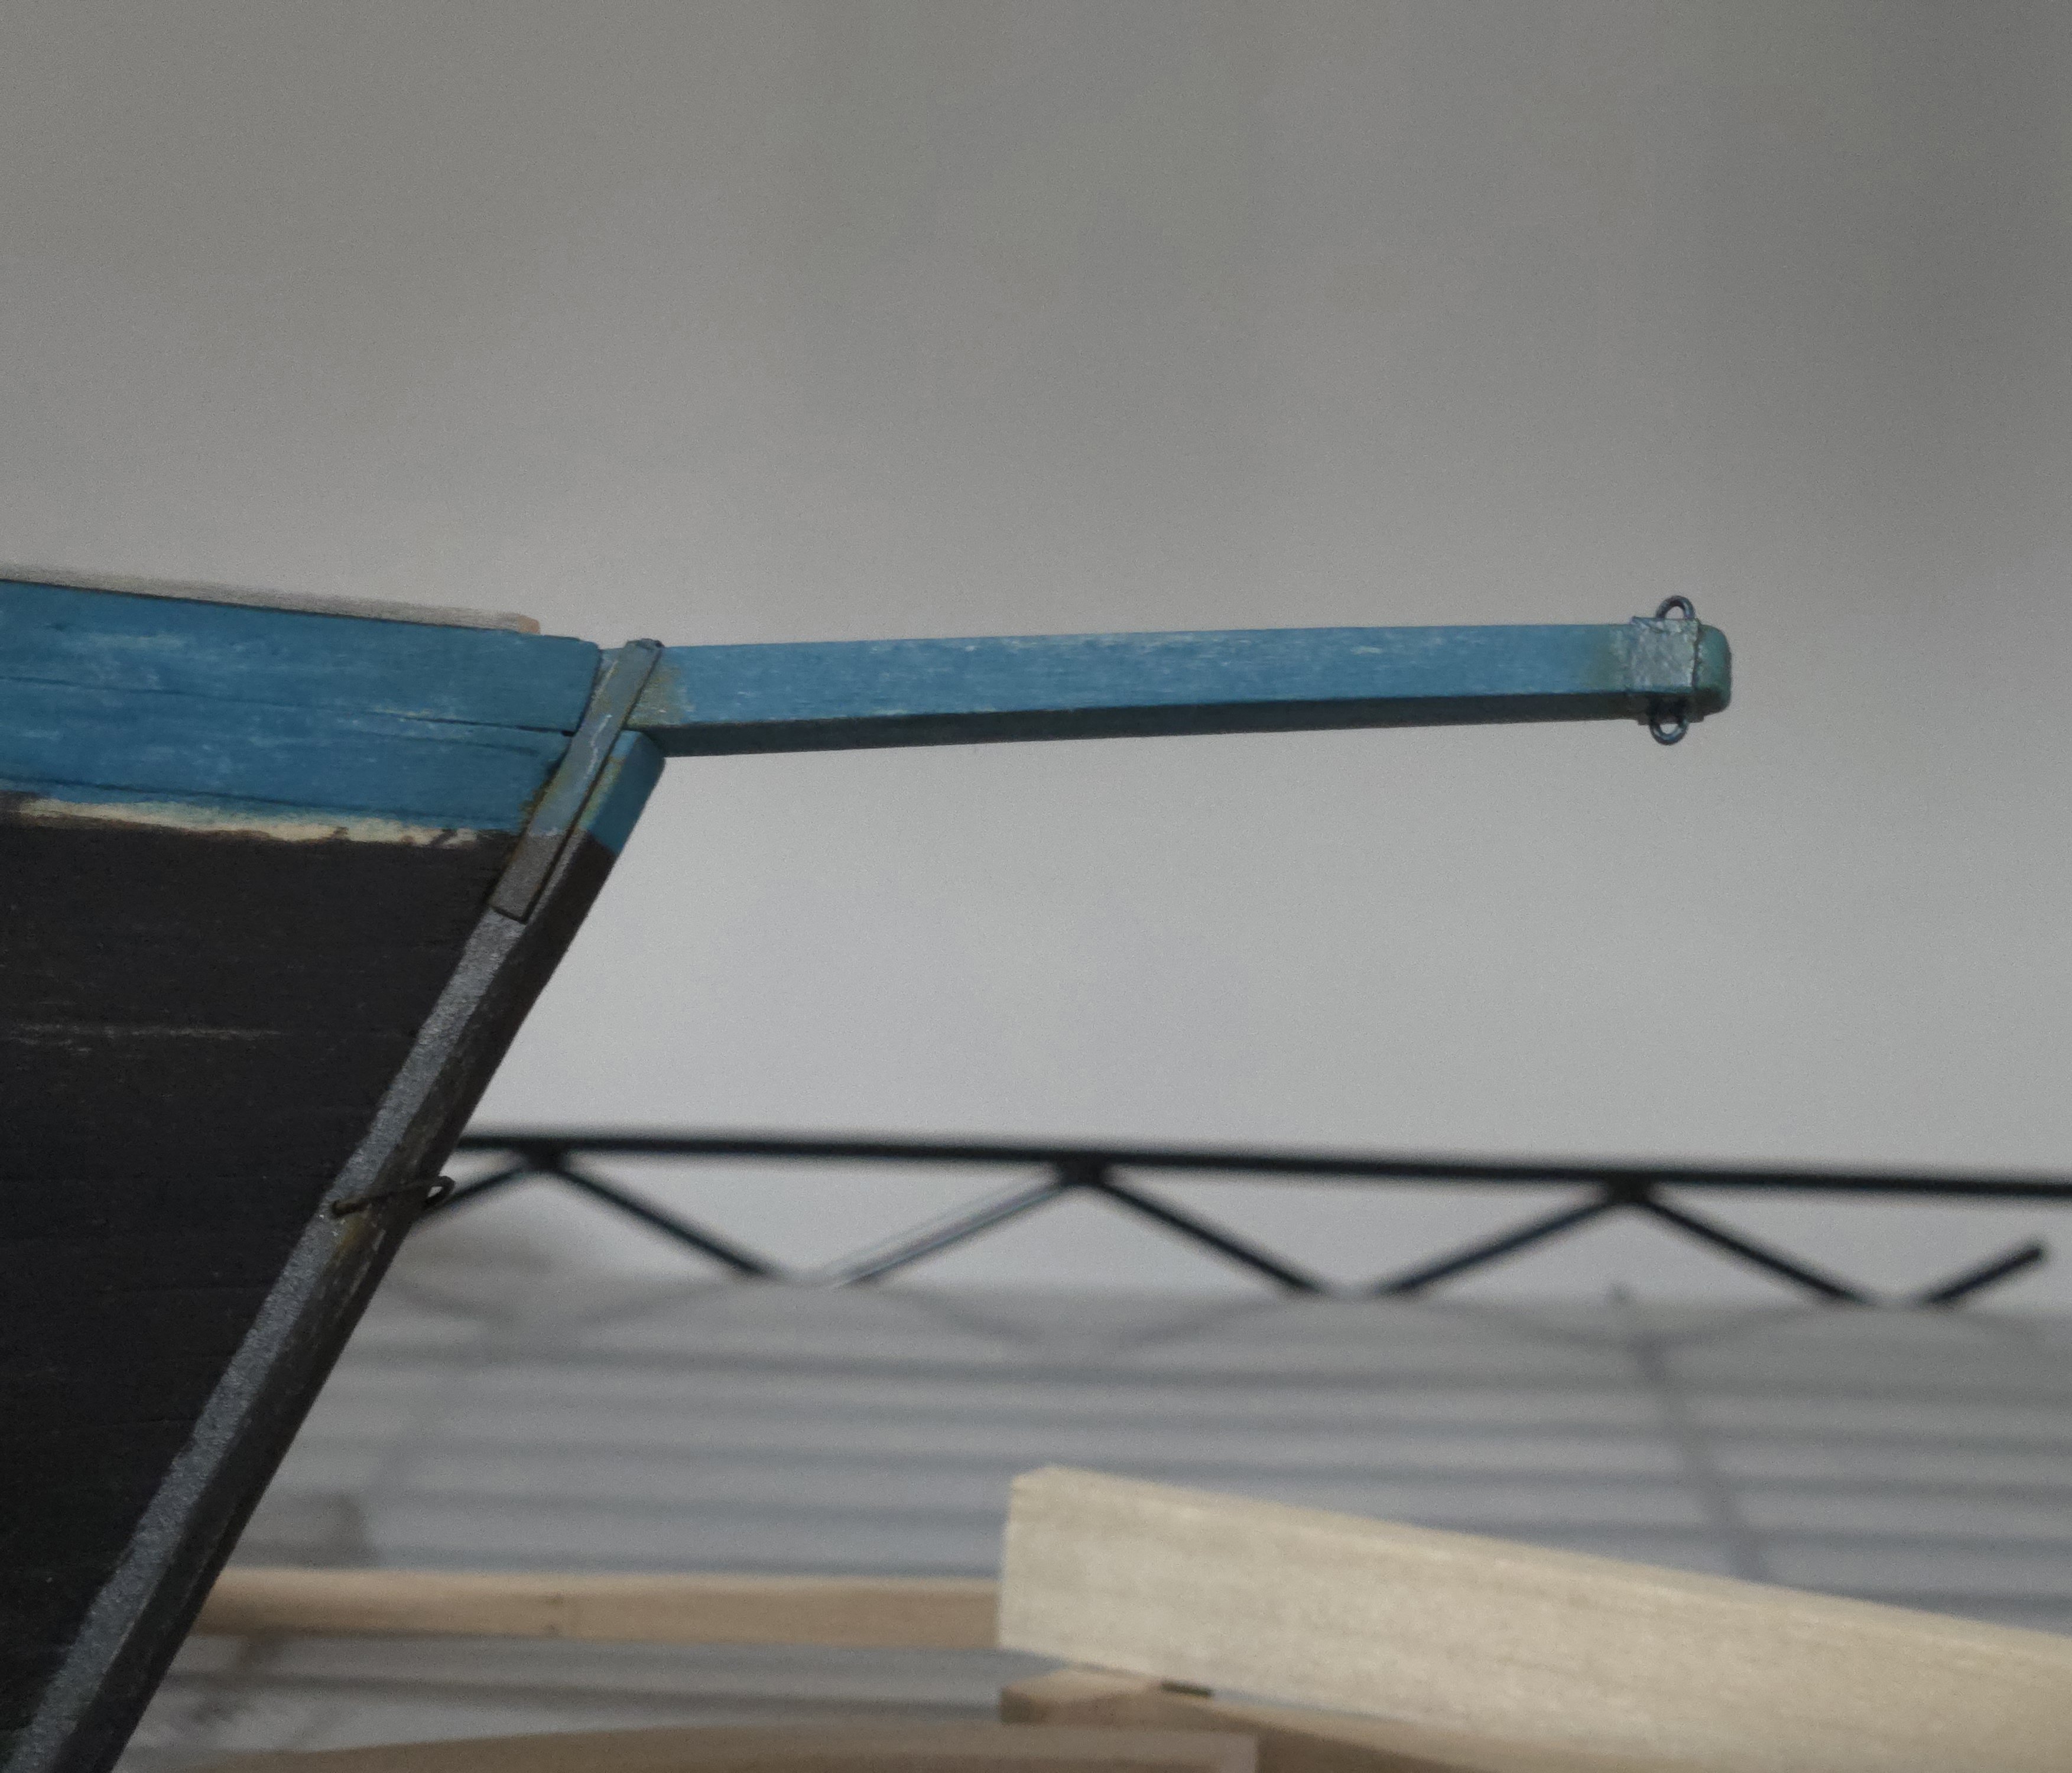
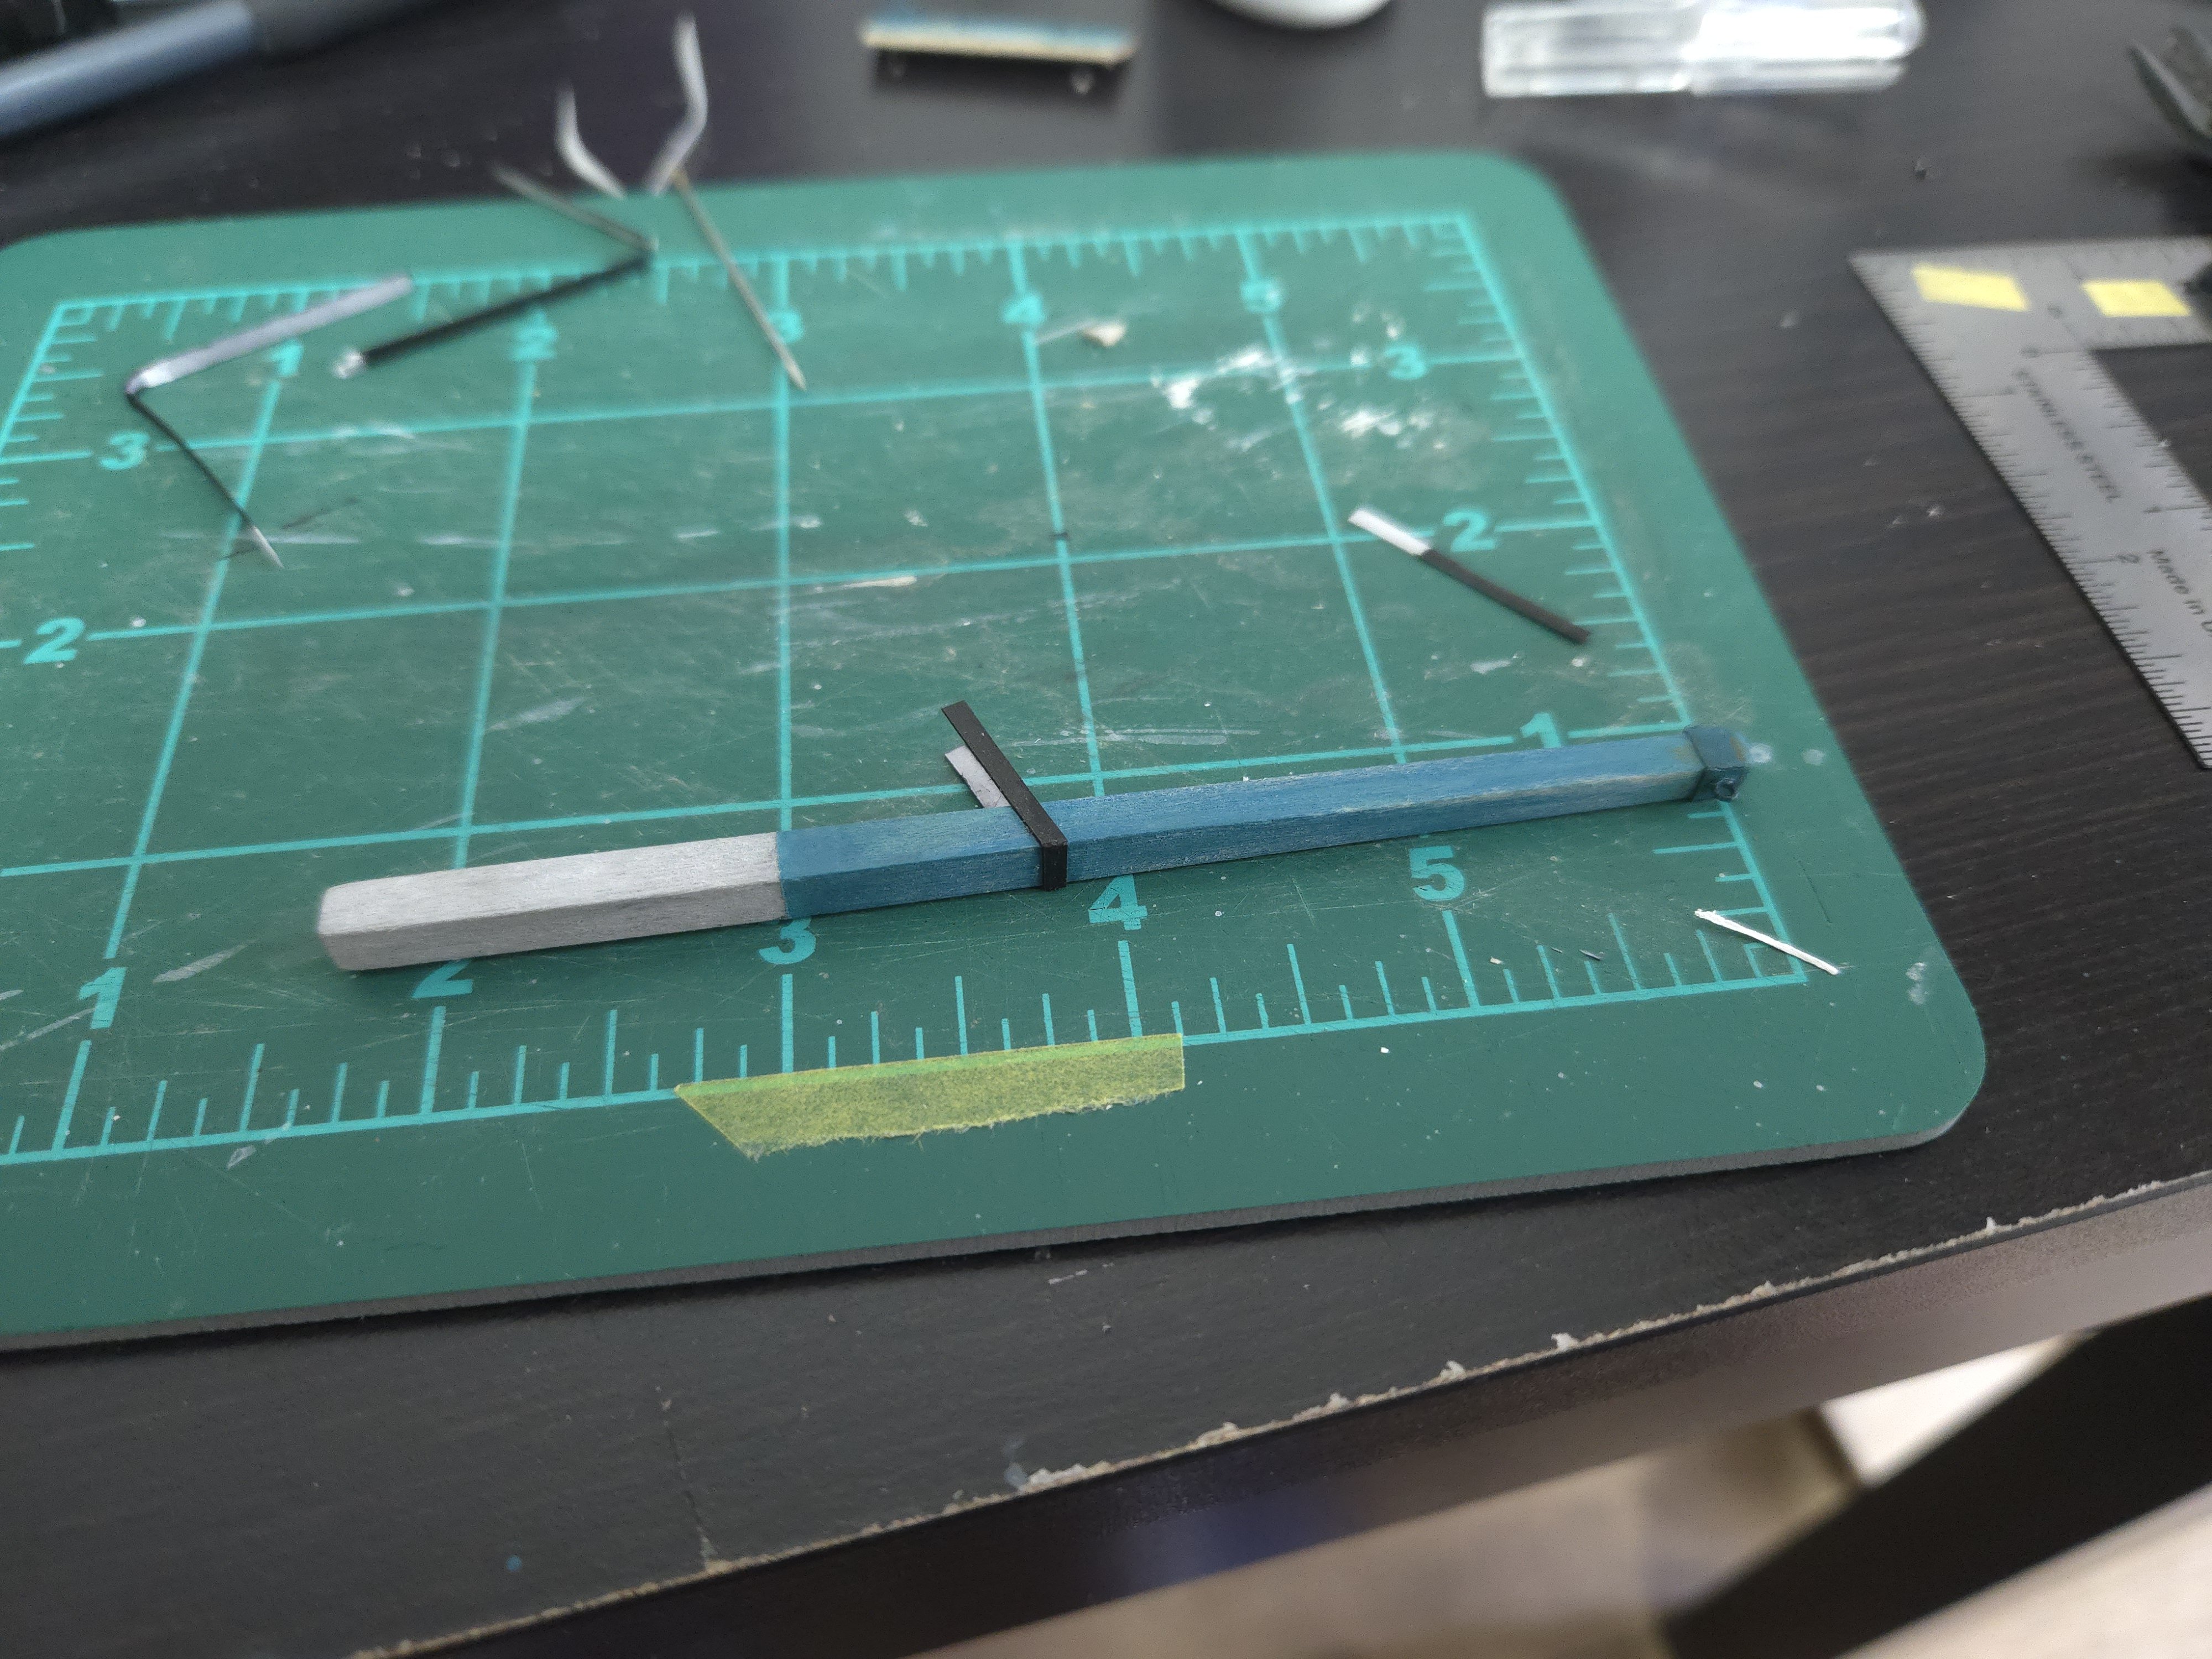
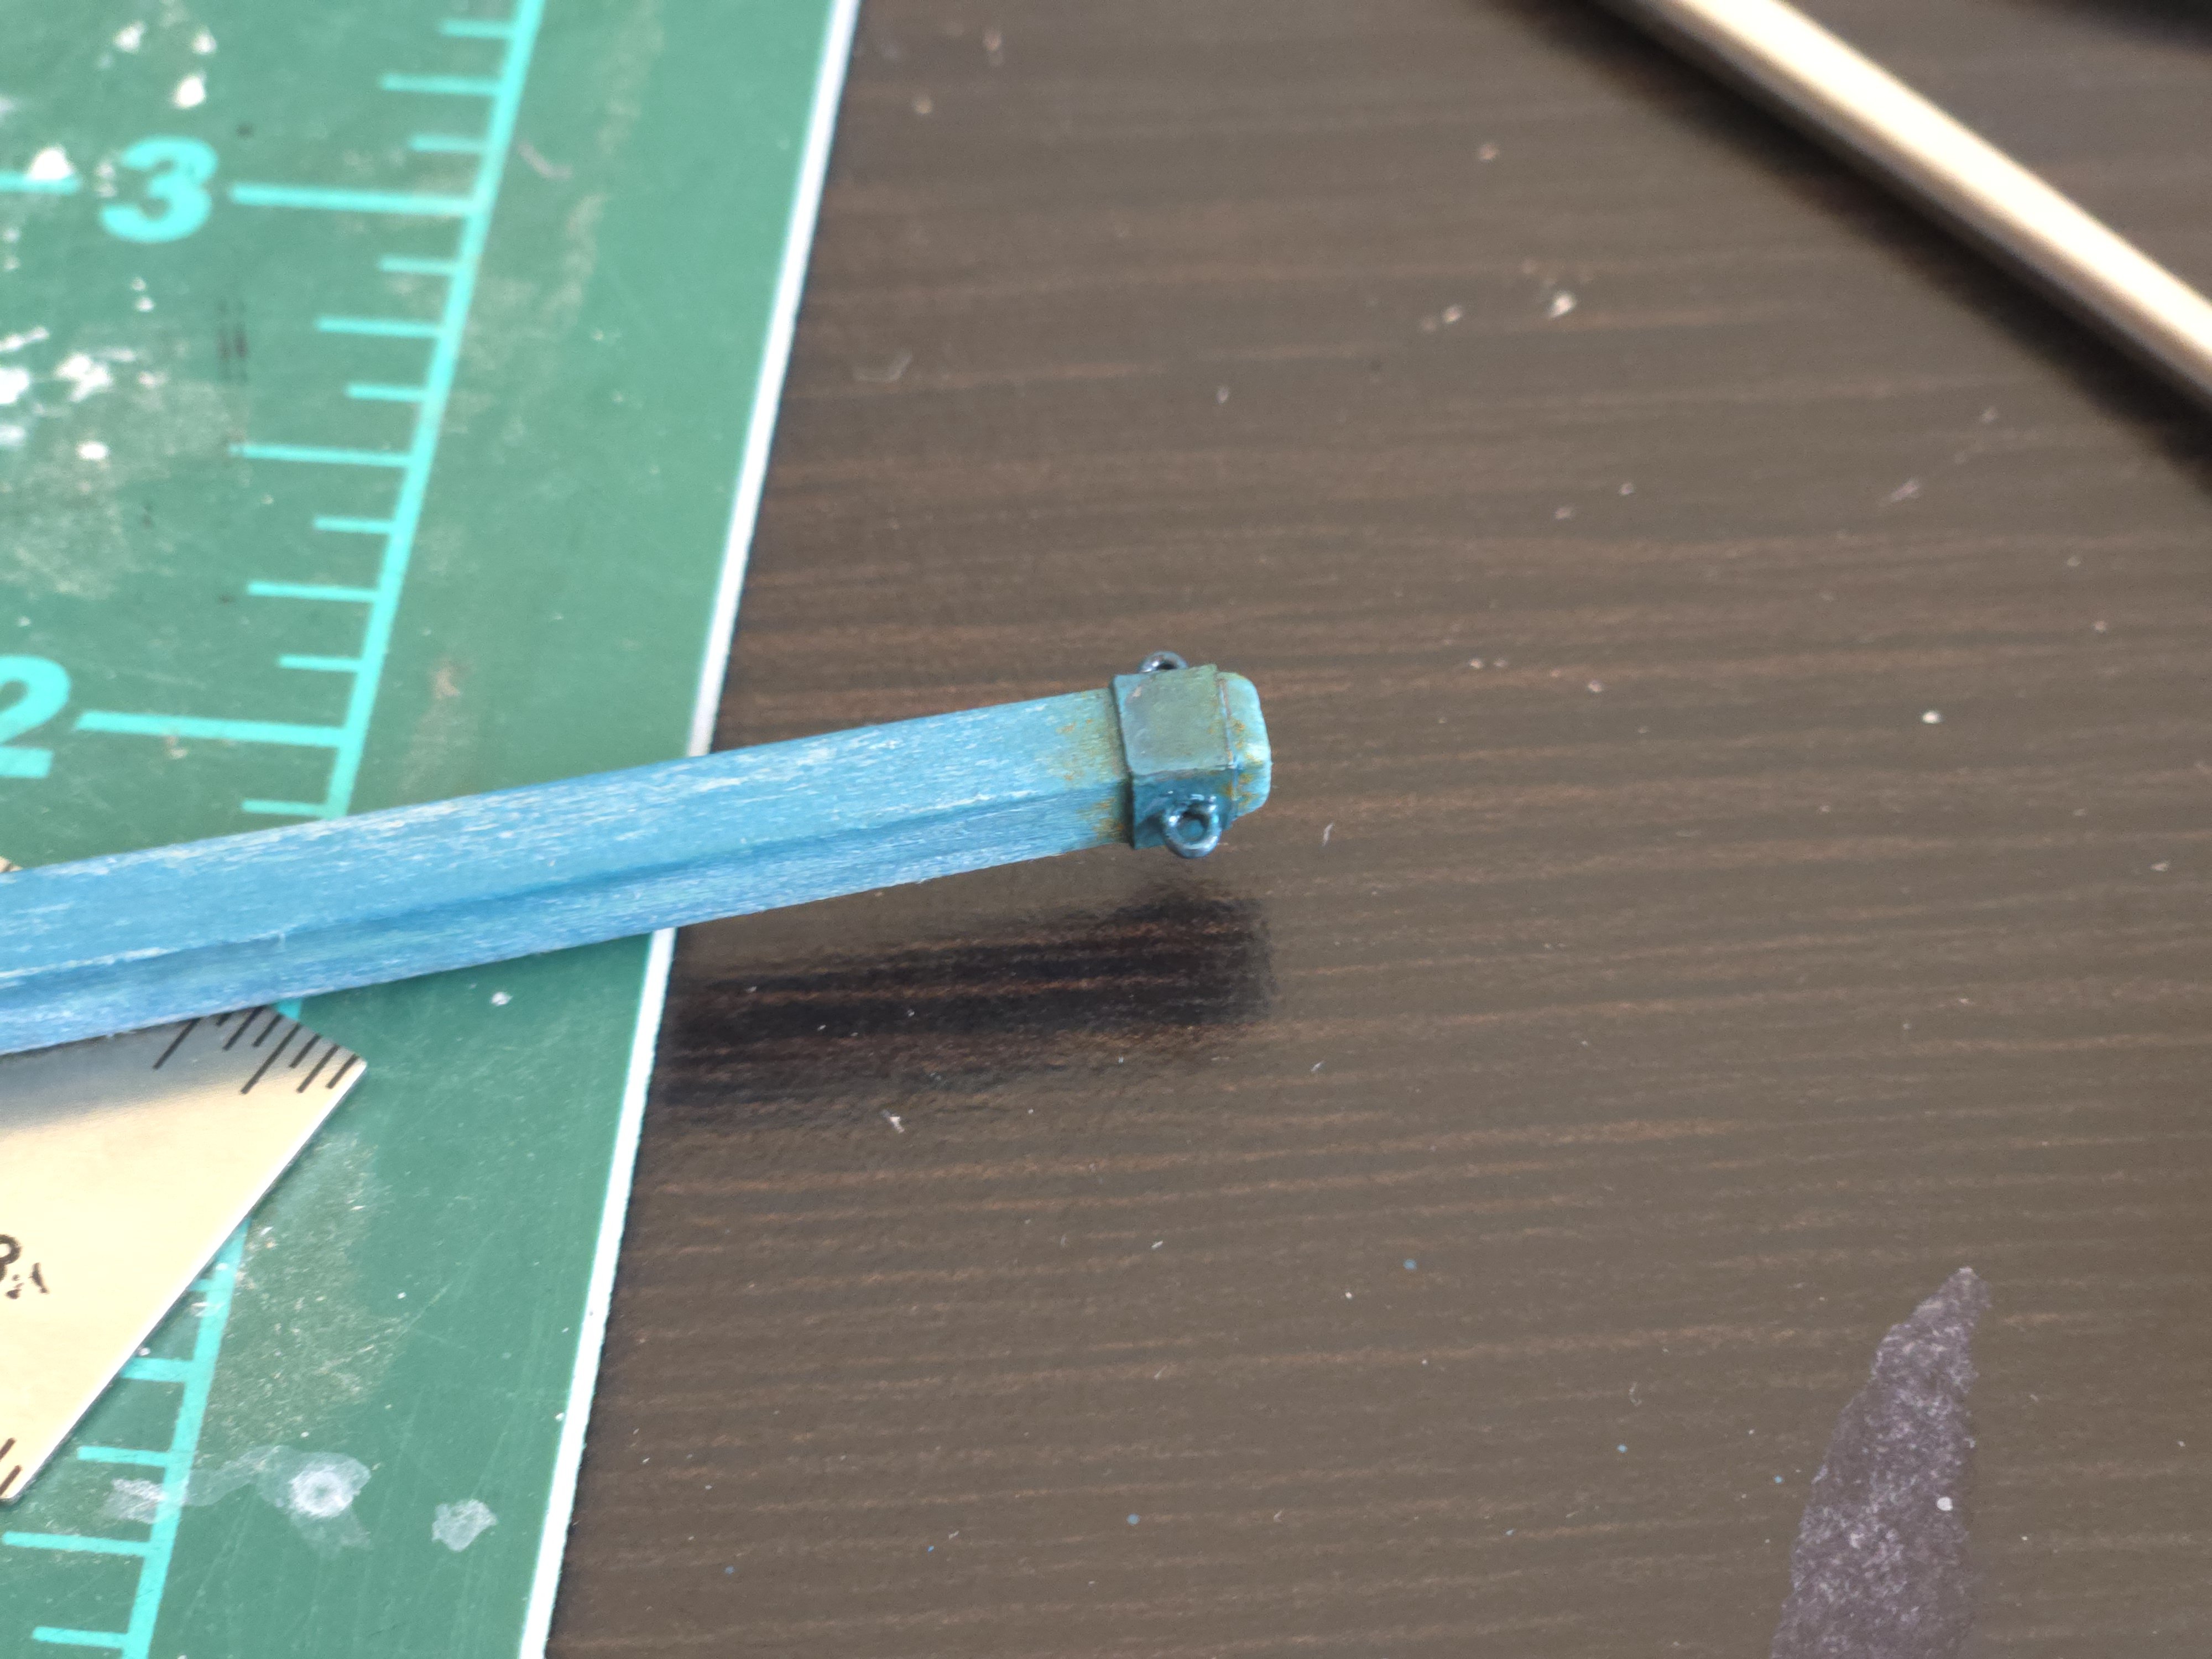
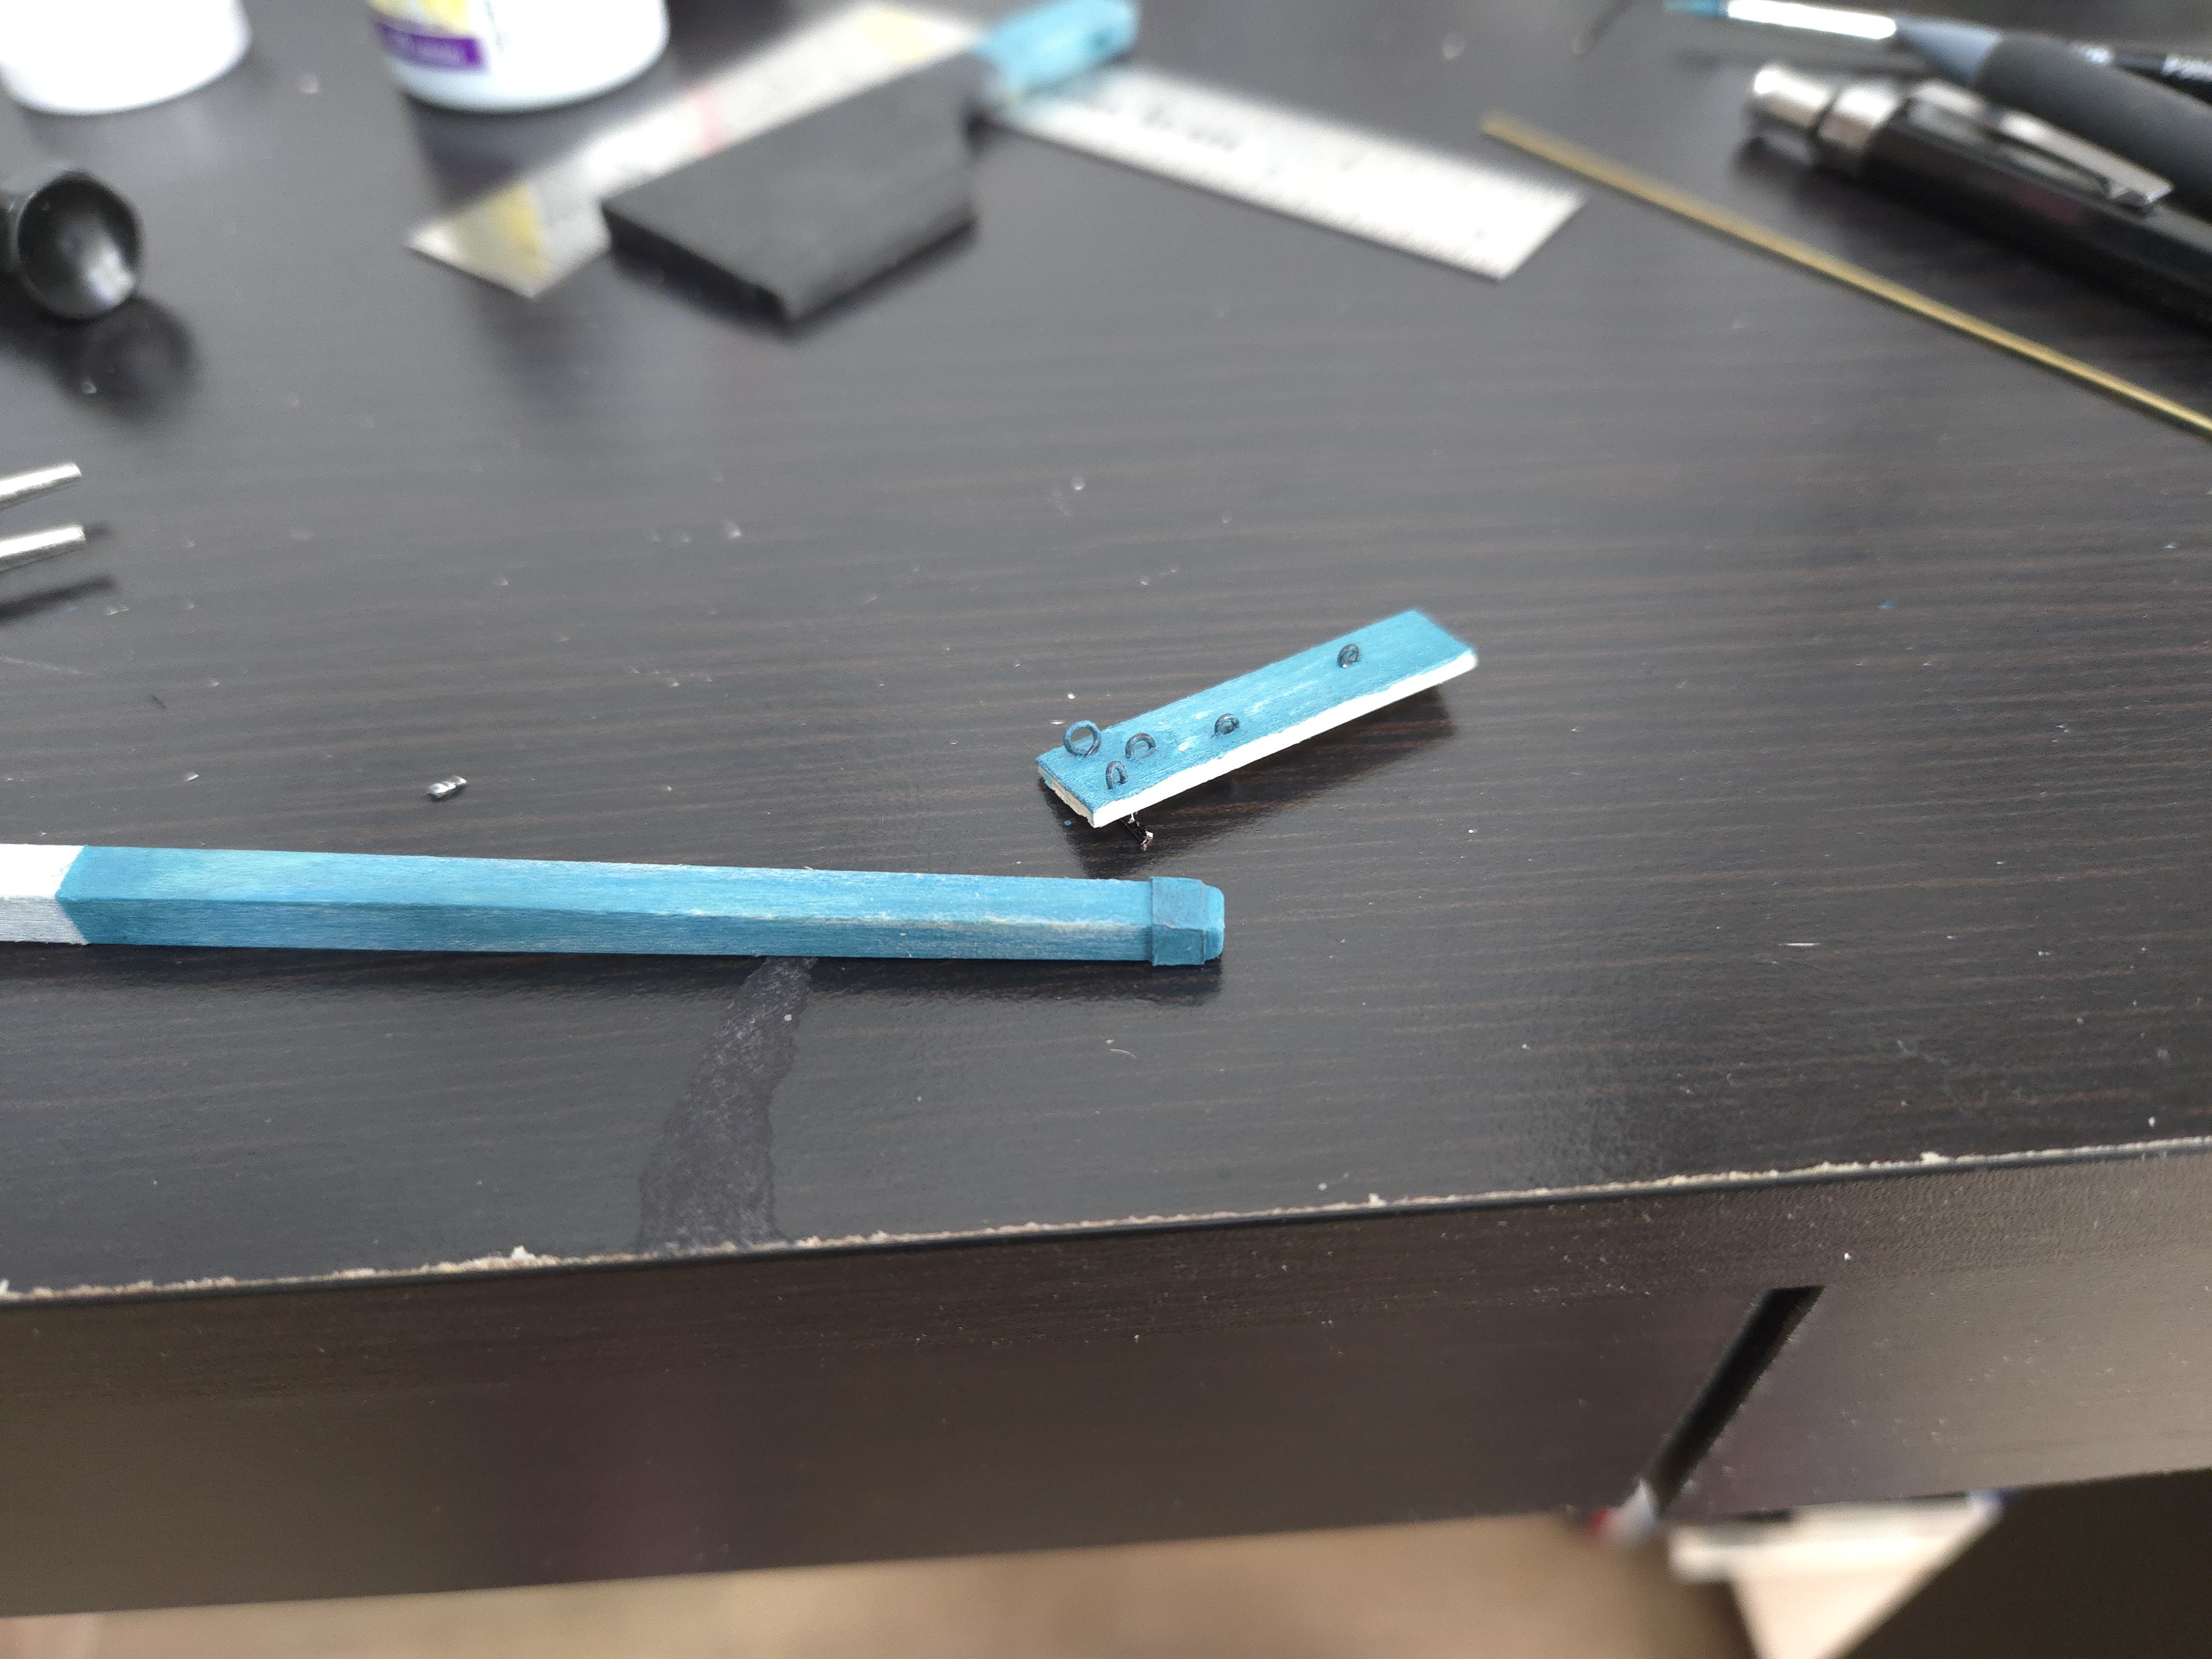
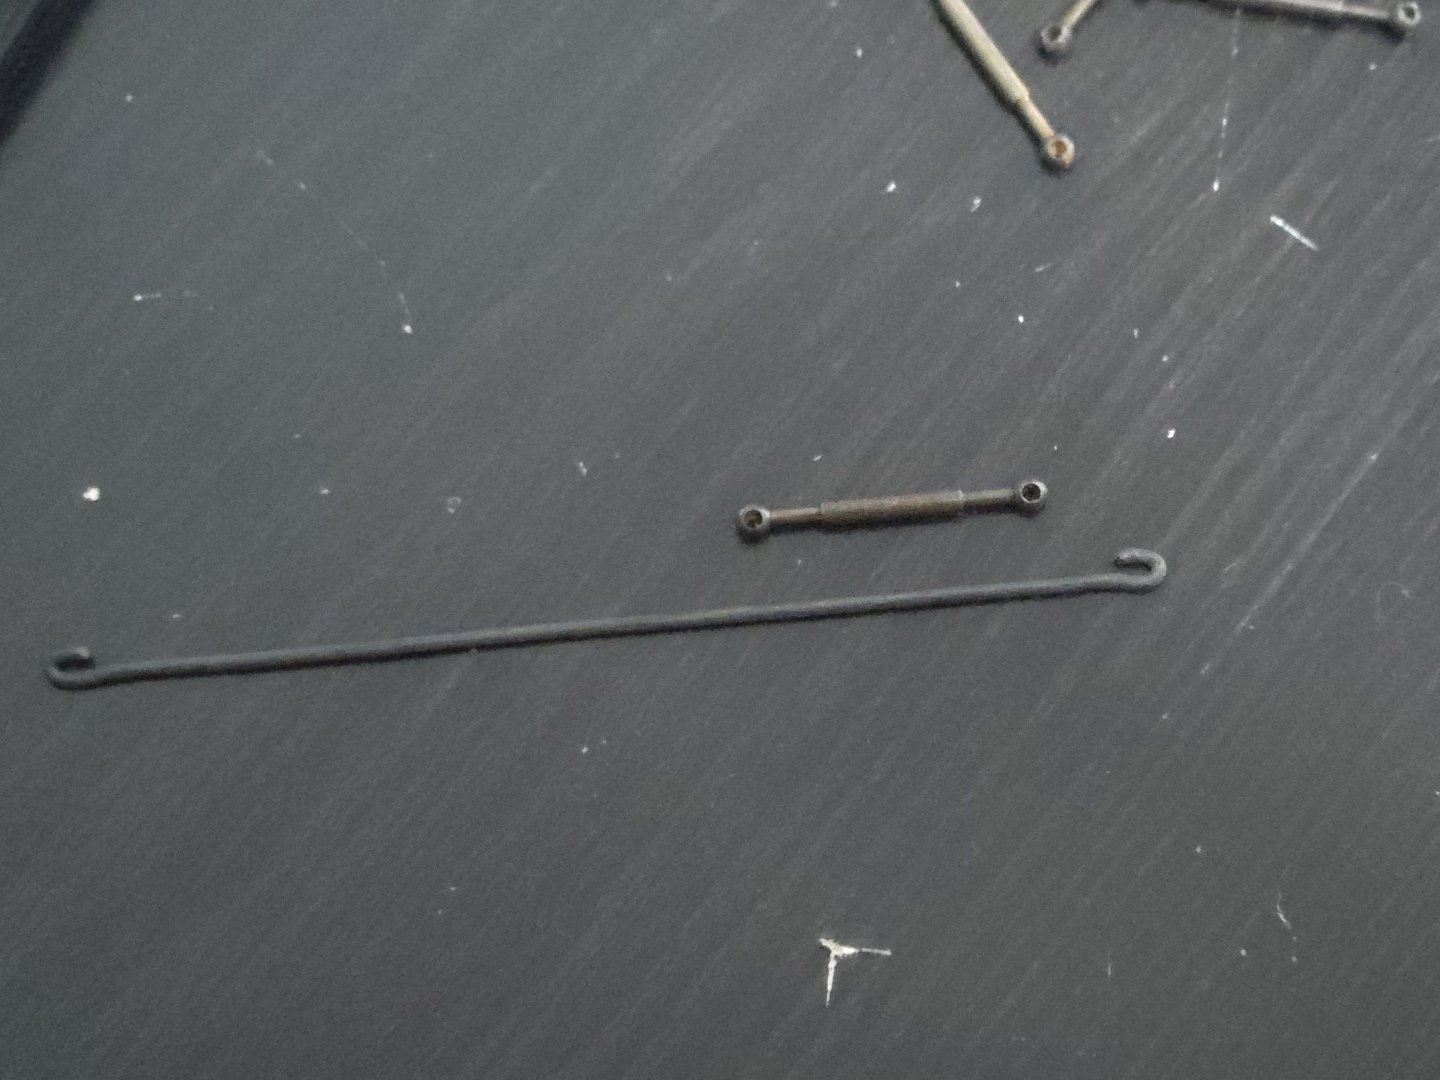
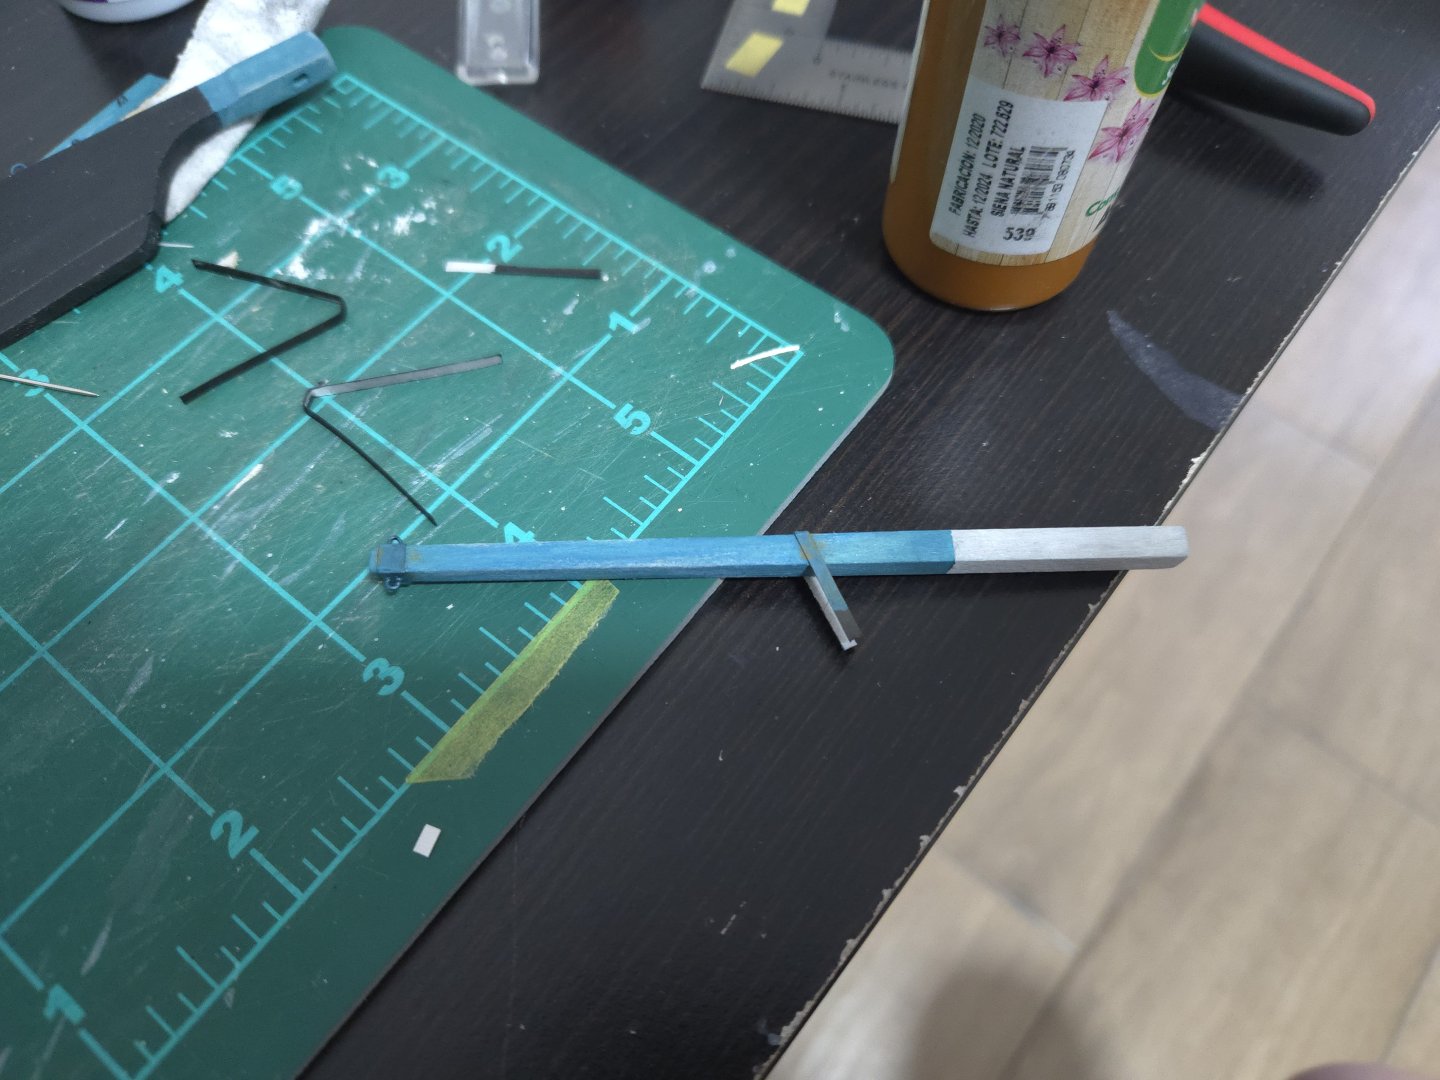
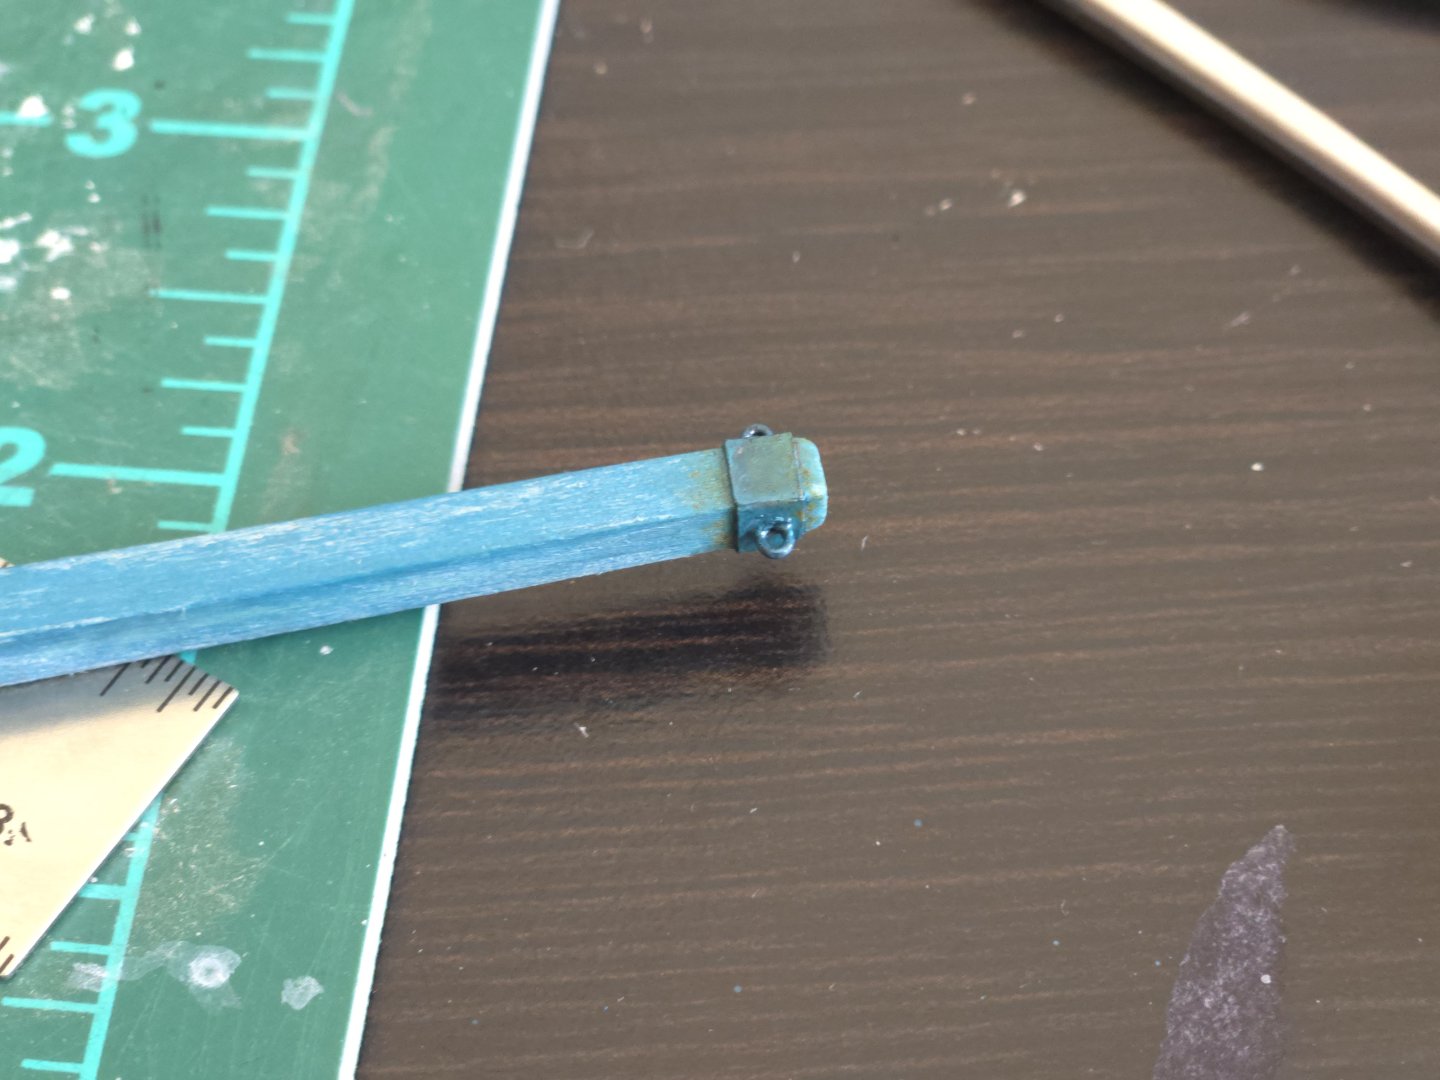
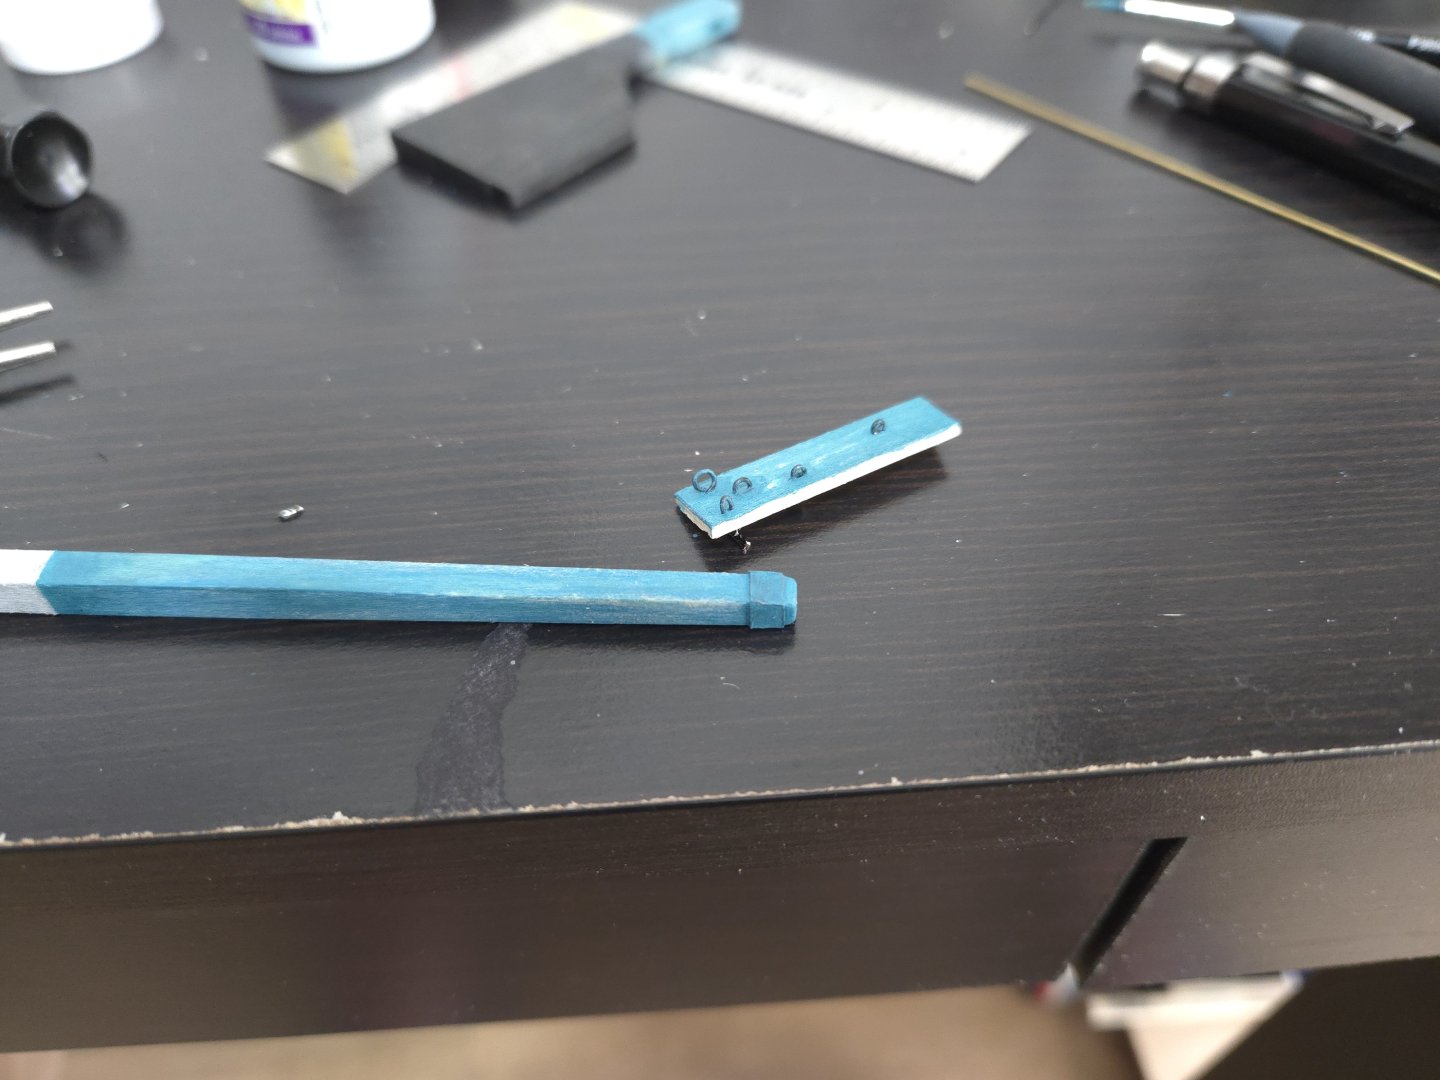
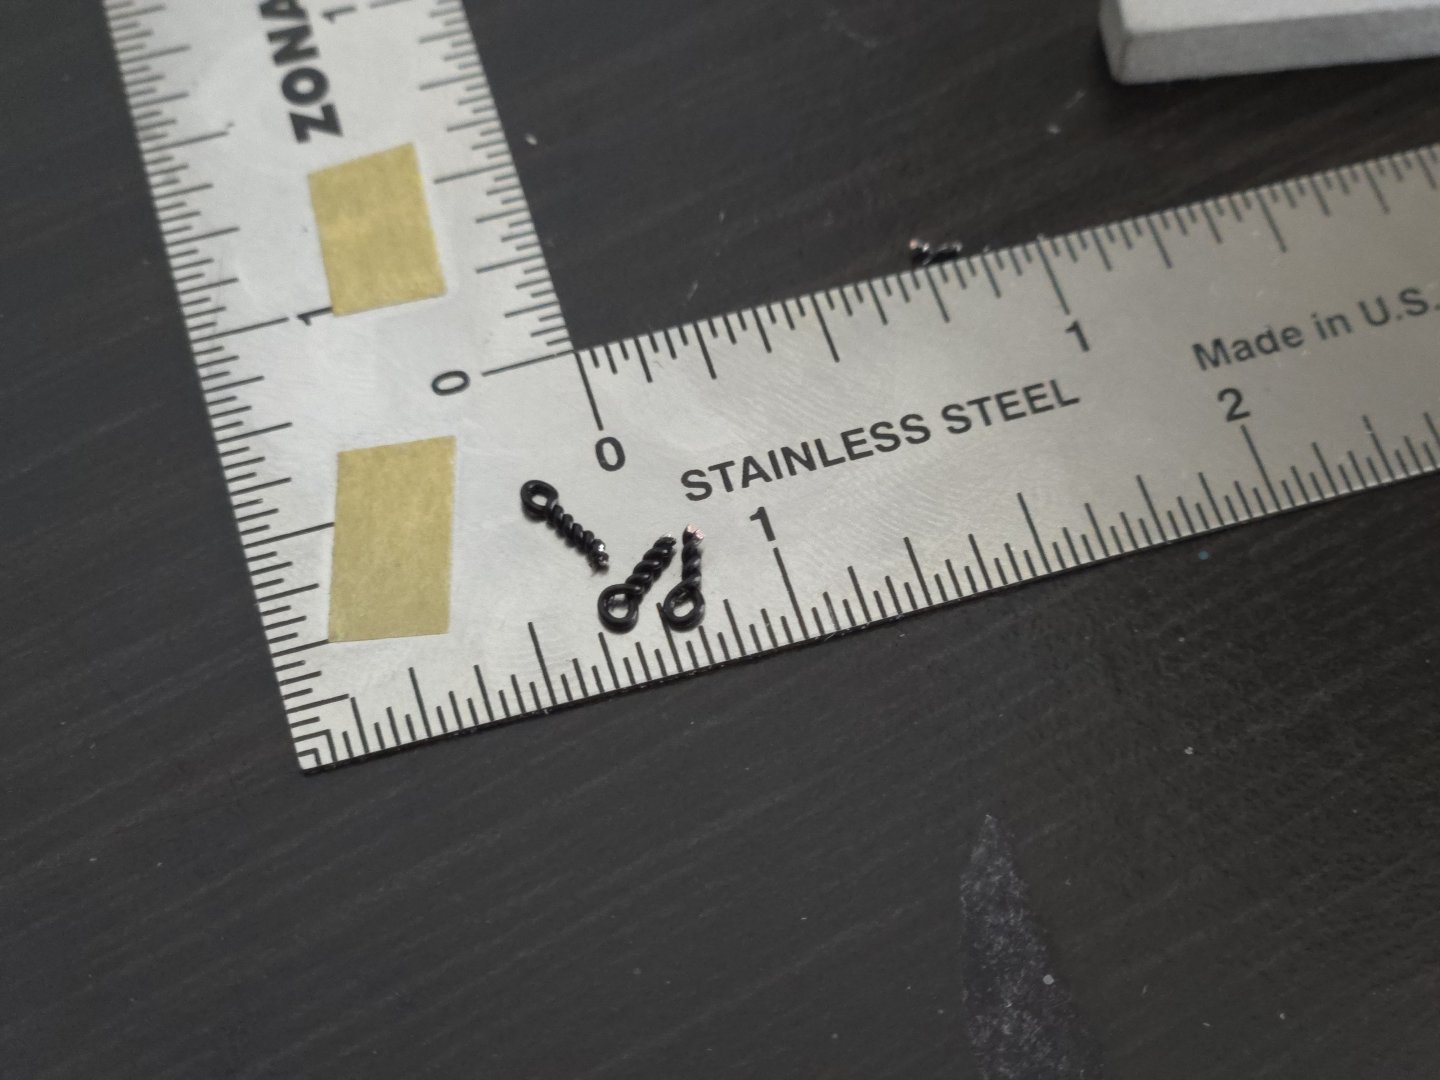
I decided to start on the bowsprit. To make the metal bracket around the tip, I used an index card, stiffened with super glue. To try to make it look more like painted metal, I first painted the card black, and then painted blue-green over it, allowing hints of the black to show through, as seen below: The image also shows the test piece where I tried out different ways of making eyebolts from wire. Ultimately, I went with the twist design seen below, as it seems to offer the best chance of gluing sturdily and resisting pullout. I then drilled holes in the top and bottom of the bowsprit through the bracket, affixed the eyebolts with superglue, and painted them blue-green as well. Next, I weathered the whole assembly. I dry-brushed a bit of brown to add rust stains, and ran a pencil along some of the edges to suggest metal shining through where the paint may have chipped off. This was my first time really making use of dry-brushing, and I'm happy with how it turned out. The same goes for the bowsprit tip as a whole. Next, I handled the gammon iron the same way, starting with black card: Painting said card: And finally adding weathering in the same way. I also added the wire loop through the stem that the bobstay attaches to, and added a little rust there as well. Finally, I gave the hull a final coat of black (this time with just a dash of white added) and then sanded and scraped in some areas to suggest a bit of wear and tear. I'm very pleased with how the bowsprit turned out. I haven't glued it in place yet because I'm still deciding whether or not to add a turnbuckle for the forestay. If I do, it will be easier to add it off the hull. But, if I go for a lanyard arrangement instead (which is what I'm planning on doing for the bobstay), it will have to be added on the hull as it will serve as a way of tensioning the stay. Beyond this, I'm now leaning more toward just adding the chainplates outside the rubbing rail rather than inside, as it's just as accurate and greatly simplifies construction.


- 312 replies
-
- 6
-
-
- Chile
- Latin America
- (and 6 more)