JacquesCousteau
-
Posts
1,370 -
Joined
-
Last visited
Content Type
Profiles
Forums
Gallery
Events
Everything posted by JacquesCousteau
-
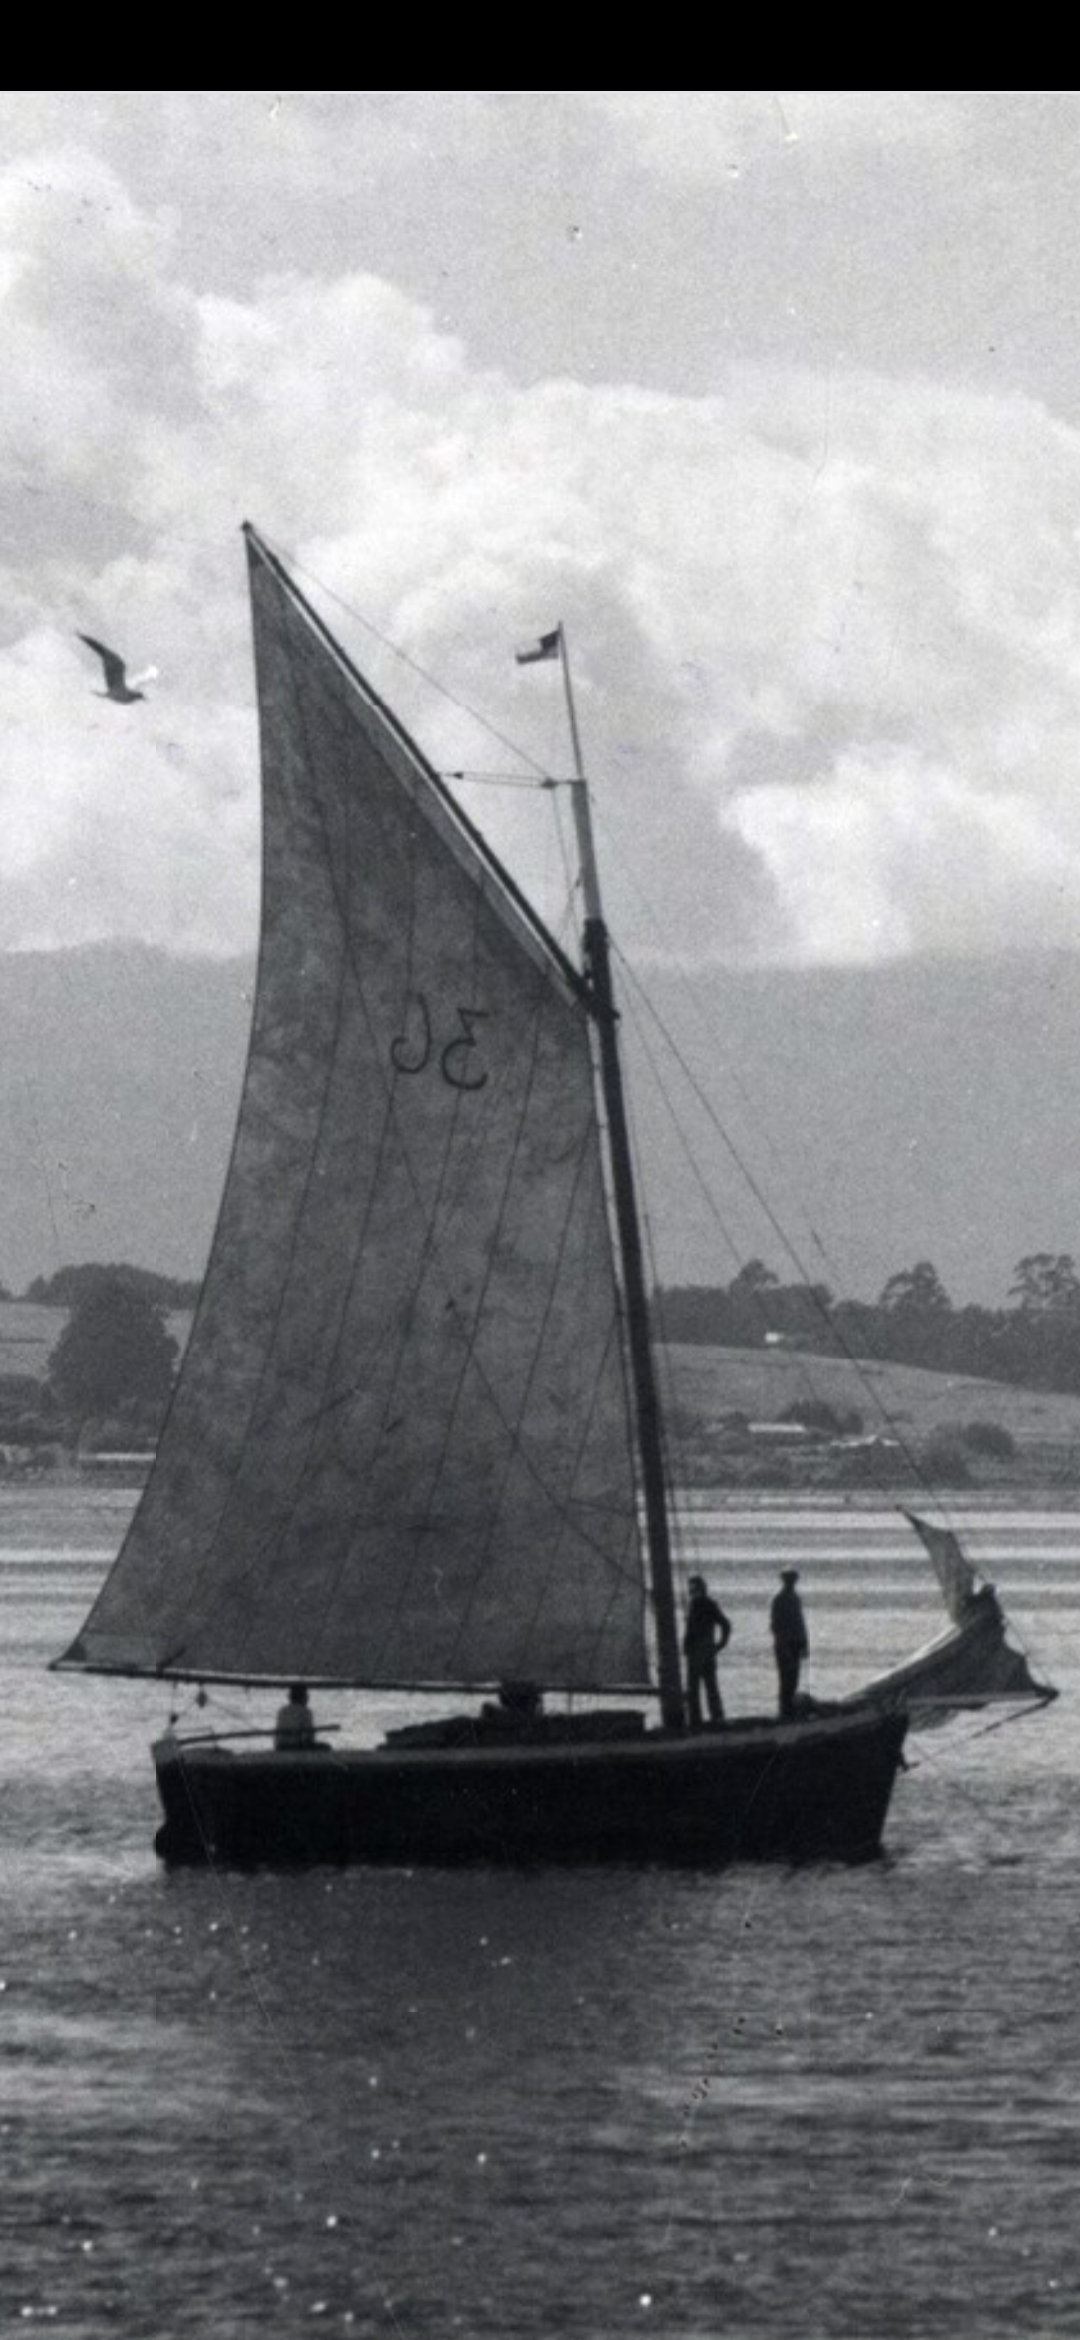
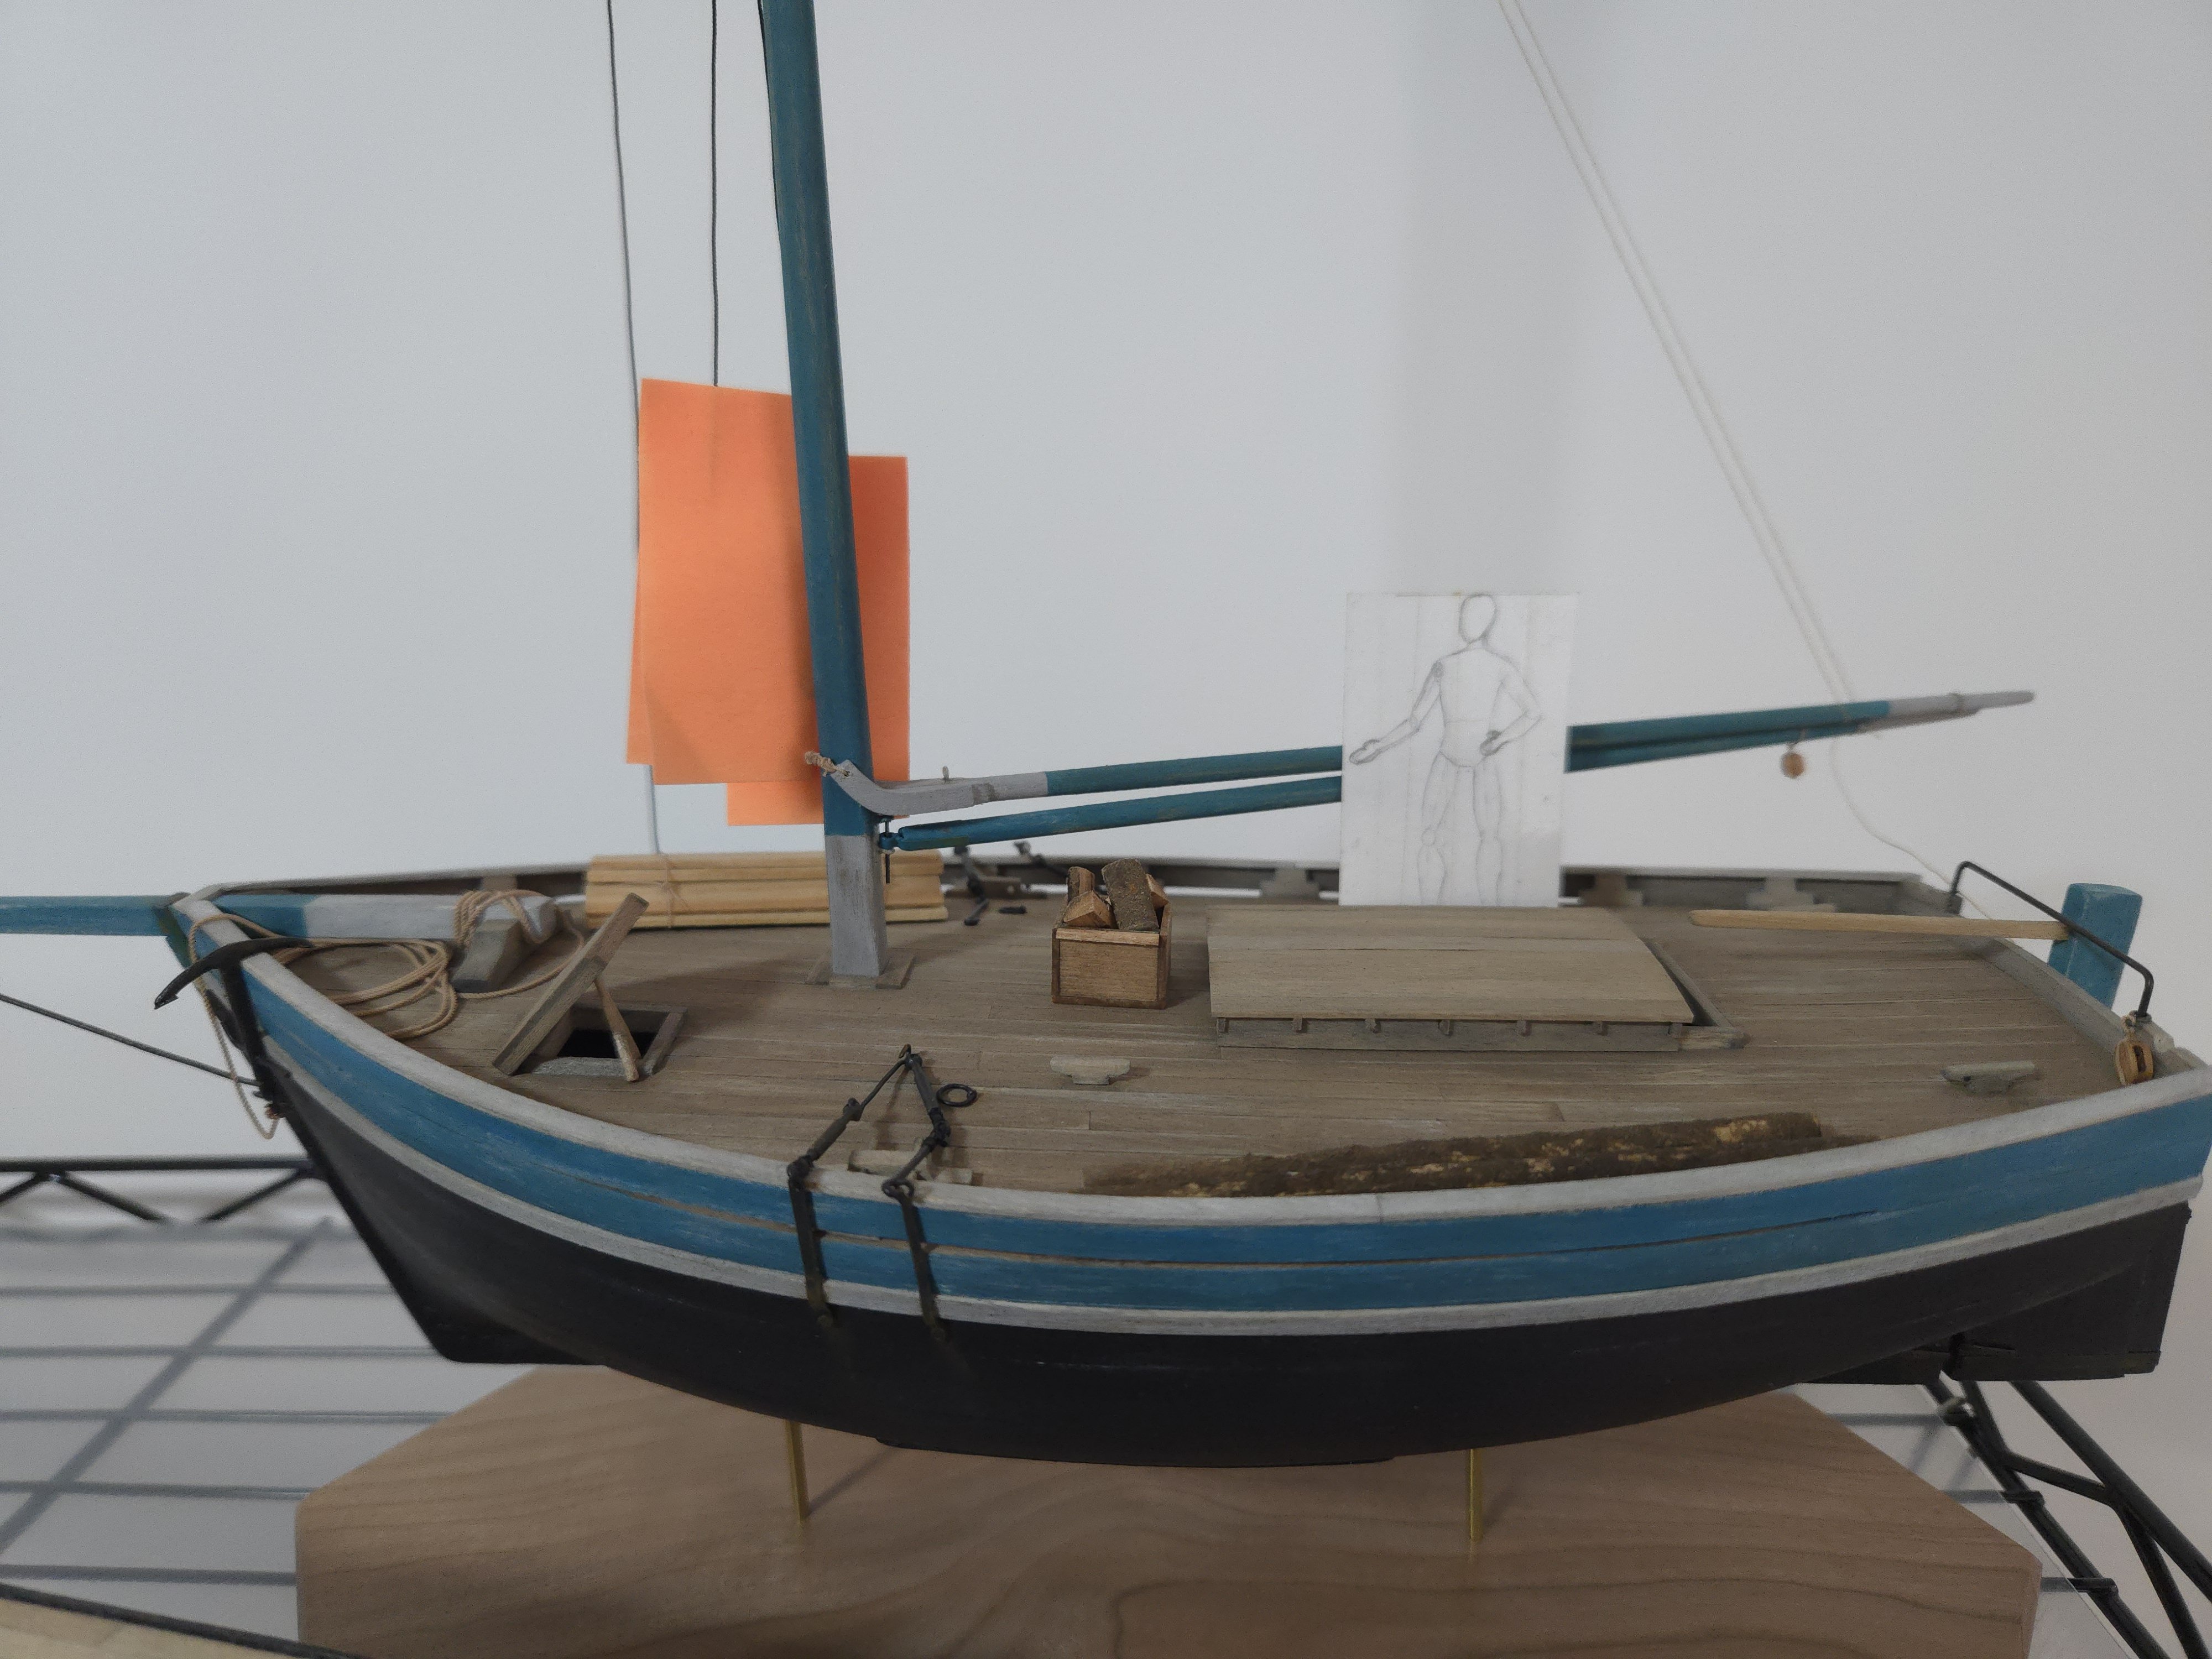
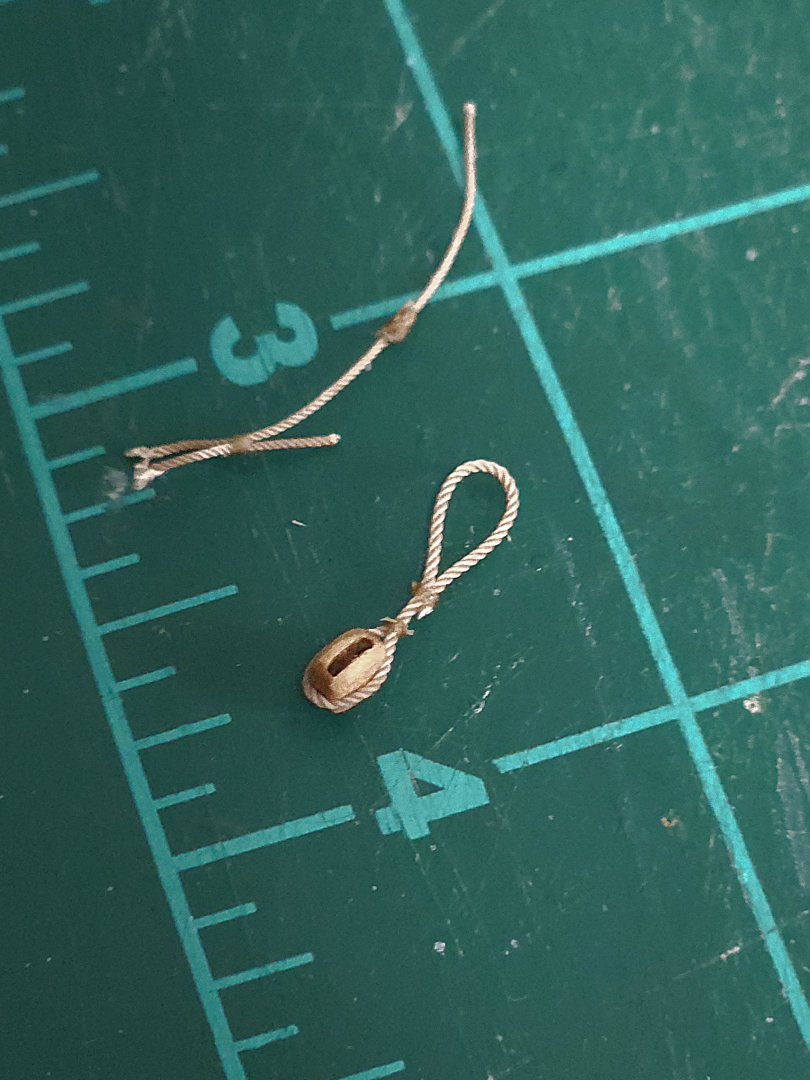
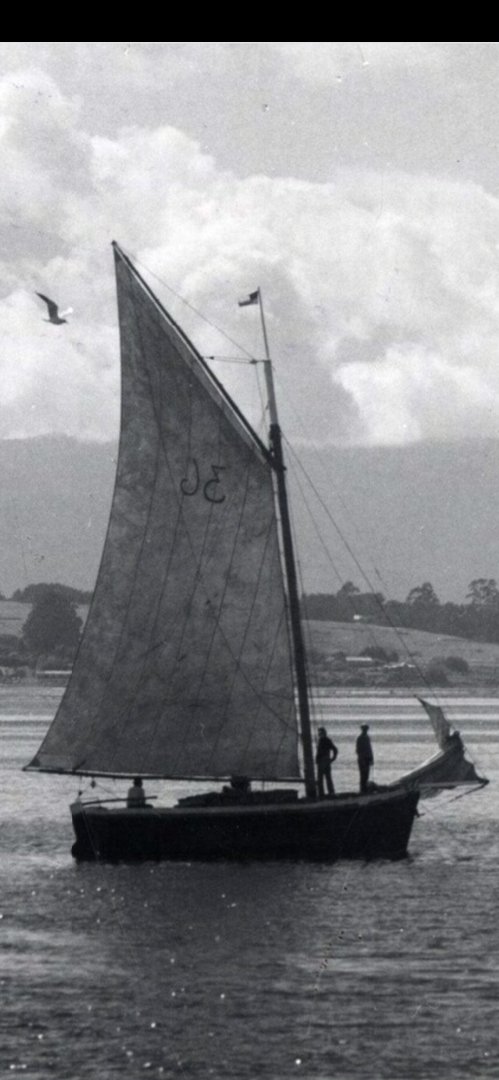
 Continuing on the sail, I first laced it to the mast hoops, securing all the knots with a dab of superglue. The photo below is from before trimming the loose ends. Next, the robands on the gaff. I was initially going to just loop the rope through the eyelet in the sail and then directly around the gaff, as below. But, looking at photos, I decided it would look more accurate to first do a half hitch through the eyelet around the boltrope, and then around the gaff, as below. Subtle, but worth it. As with the mast hoops, I first tied off everything around the sail before attaching the gaff spar. The throat took some thought, as I wasn't sure whether it should be attached to the gaff or the mast, and once I decided the former, it wasn't clear how to tie it off, as it's located at the gaff jaws. After a bit of searching, I noticed in the photo below that there was a thin rope running around the gaff jaws. Source: https://www.flickr.com/photos/luchinmardones/5232587713/in/photostream/lightbox/ After seeing it in a few other photos, I now think that the throat was simply tied off around the jaws on many lanchas, so I did that, as seen below. To make the robands, I used the same "fake splice" as I've used for stropping blocks: tie a half hitch, secure with a bit of glue, and trim the ends tightly. A quick check, with the gaff temporarily held at the right angle with scrap thread and wire, to make sure none of the angles are wrong. For the boom, I ultimately decided to go with the continuous loop instead of robands. While it at first looks like the continuous loop uses more rope, that doesn't take into account that each roband needs excess rope that gets trimmed after tying the knot. Handling it as a continuous loop was much easier than doing separate robands. That said, while I've seen a number of photos with a continuous loop lacing on the boom, none of them show that on the gaff spar, so this is accurate. Finally, the photo below shows that, unlike the rest of the mast where hoops were used, the tack was held in place with a wrapping of rope. Source: https://www.carlosvairo.com/galeria-puerto-montt-lanchas-chilotas This was a pretty straightforward matter to represent. With that, the gaff sail itself is finished! Next up, I need to figure out how to properly represent the hanks on the jib, and add the running rigging. At this point, I have about 1.5 feet of the .35mm rigging left, hopefully I won't need much for the jib.


- 312 replies
-
- 9
-

-
- Chile
- Latin America
- (and 6 more)
-
That's unfortunate. Plywood does have a tendency to delaminate when soaked. If you can trace the shape of the bulwarks onto thin wood, like basswood (walnut might work too, if you already ordered it, but it will be harder to bend), you might be able to redo the bulwarks. You also might want to look at build logs for kits from Vanguard Models, I believe that company uses plywood for the bulwarks too.
-
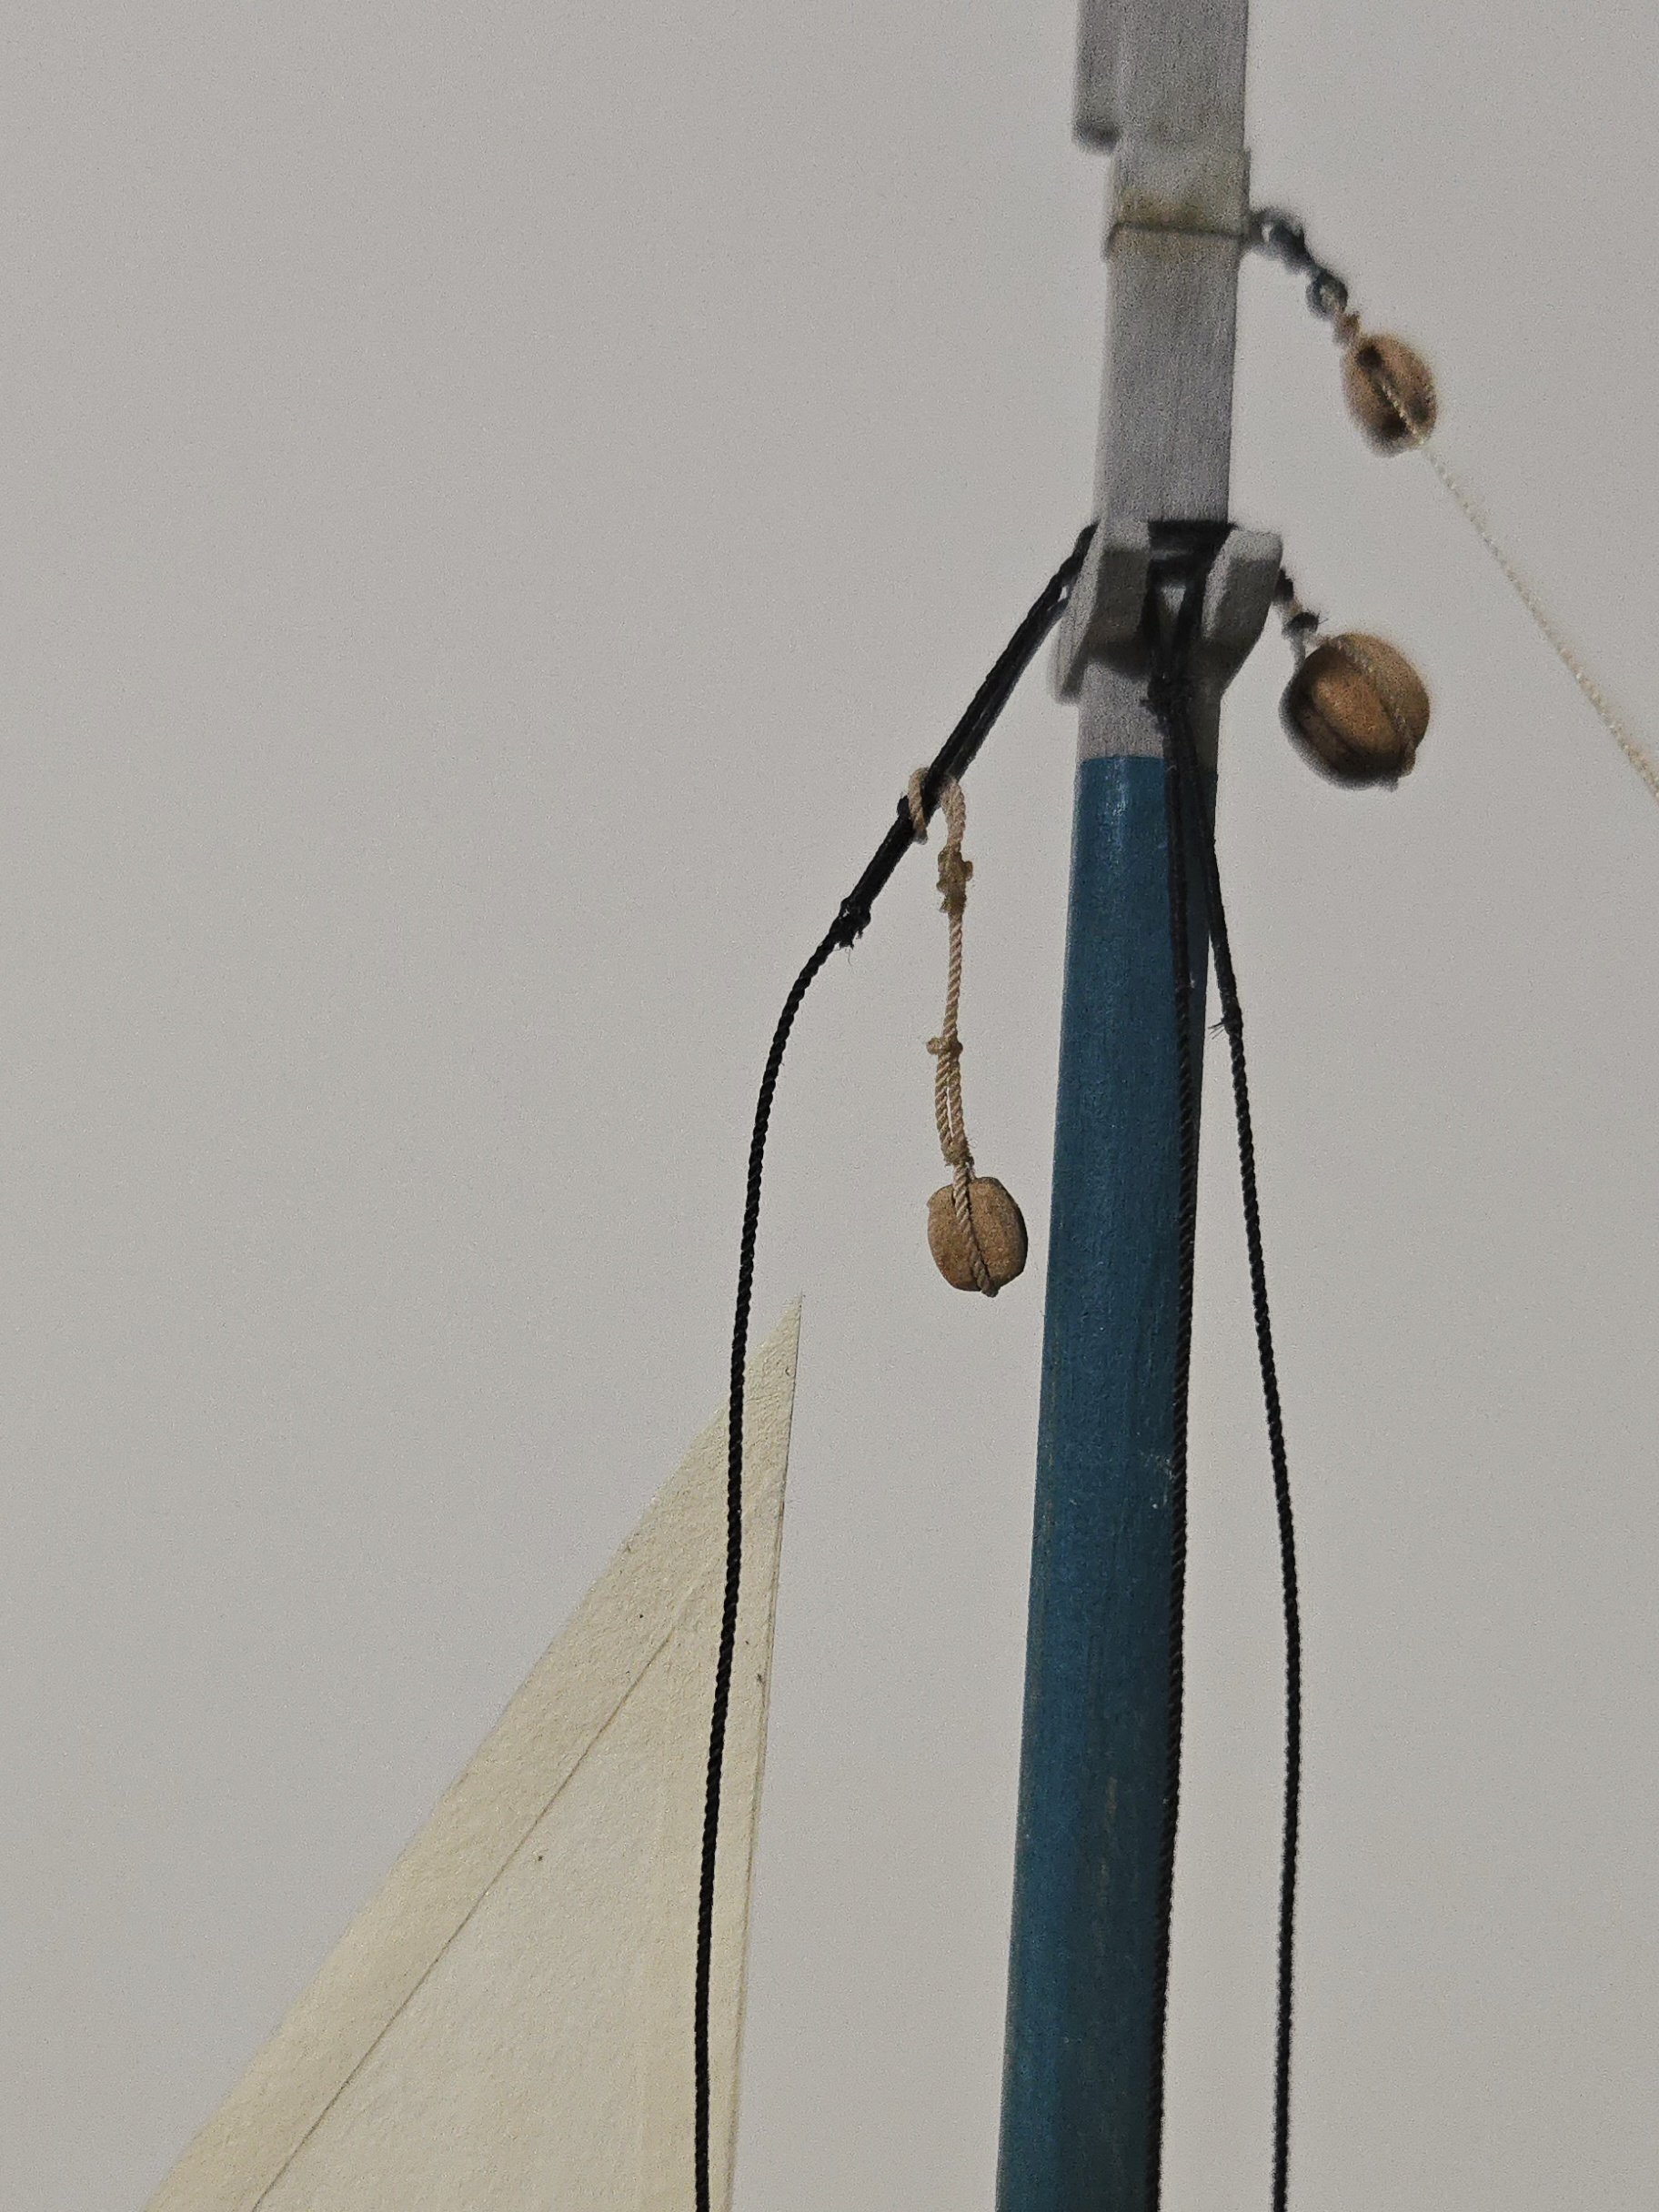
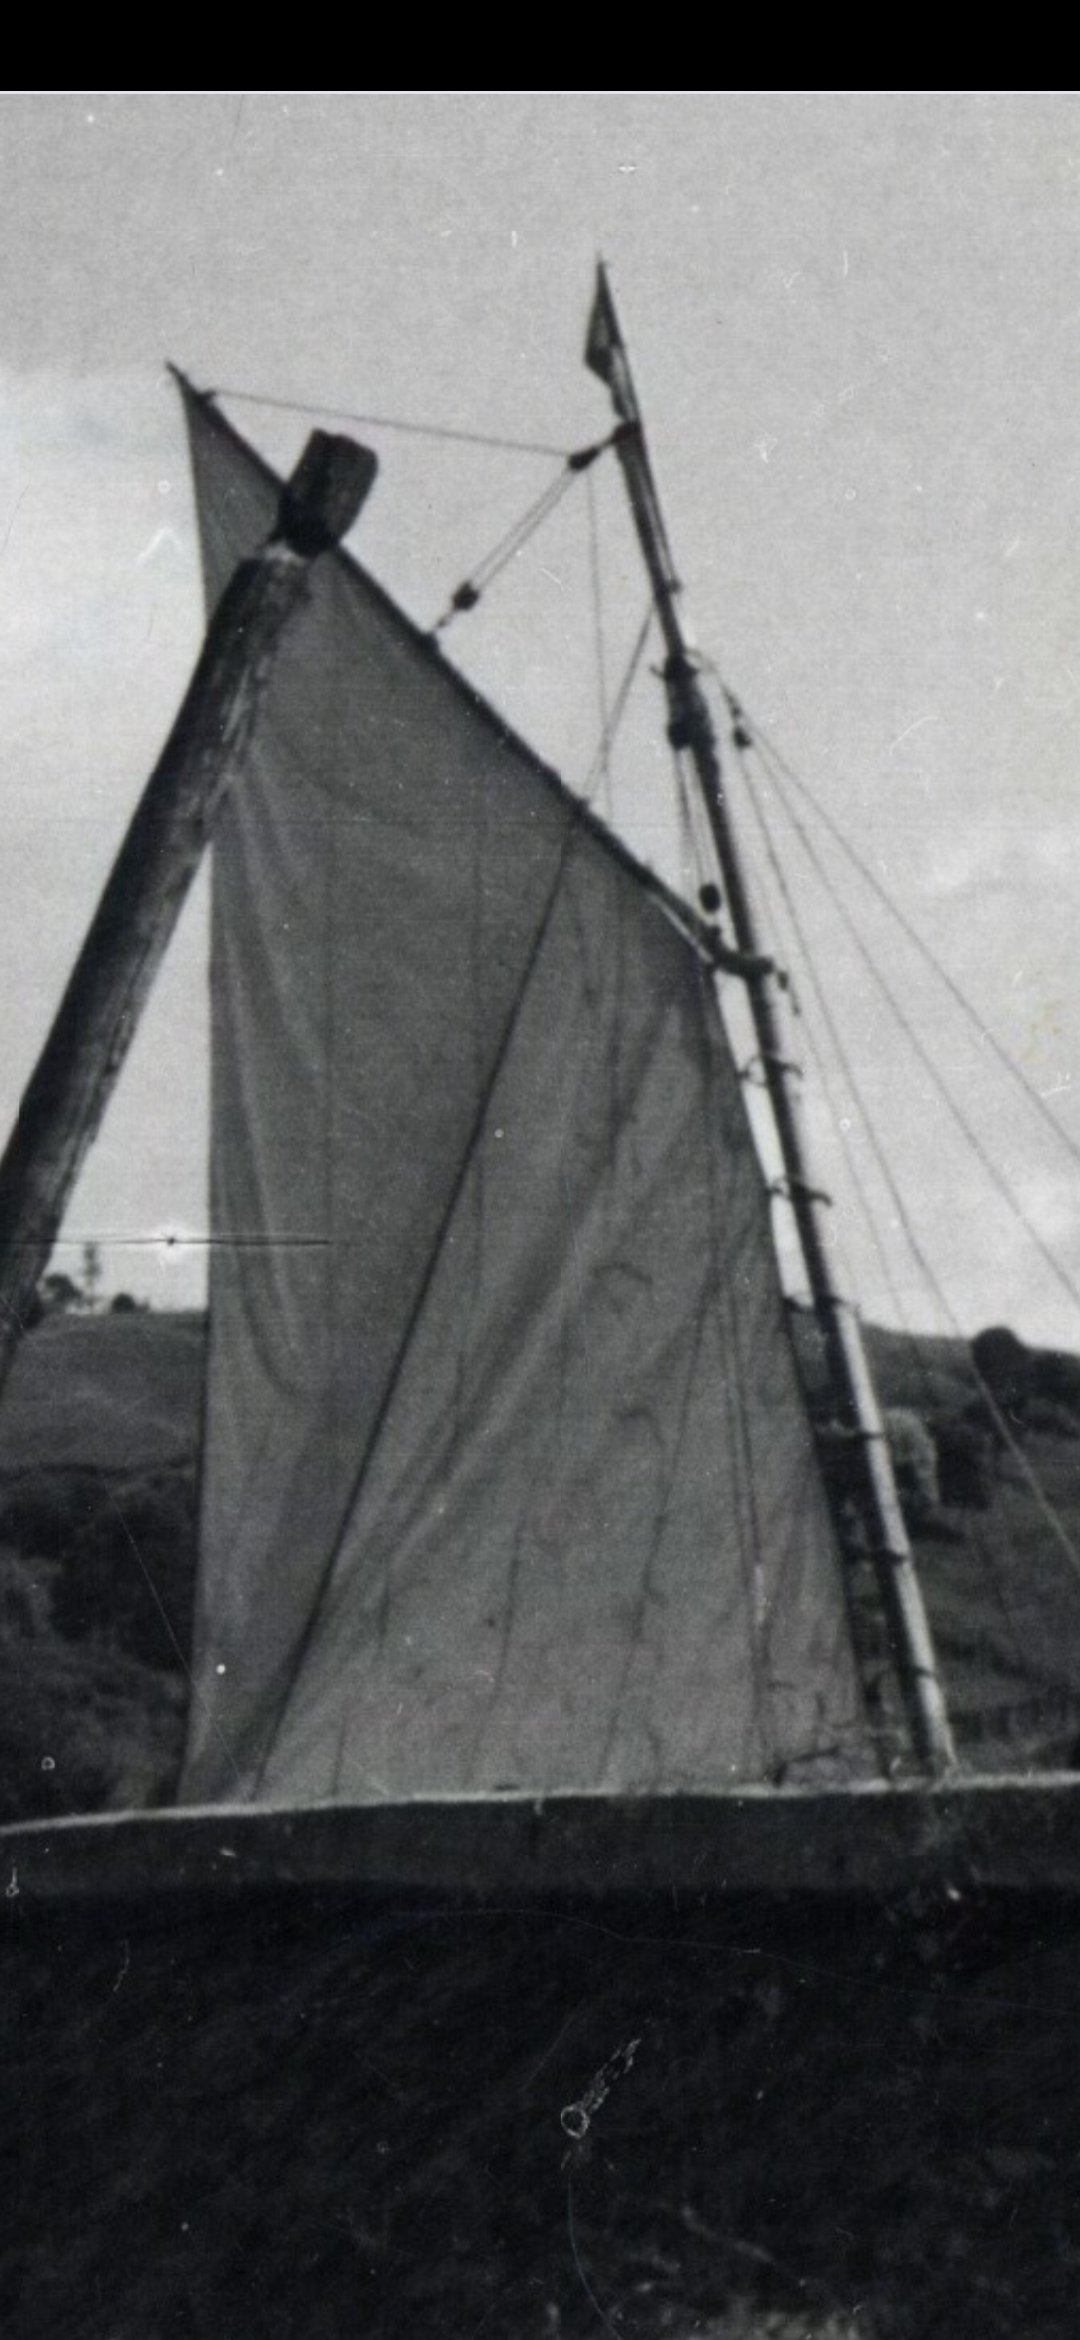
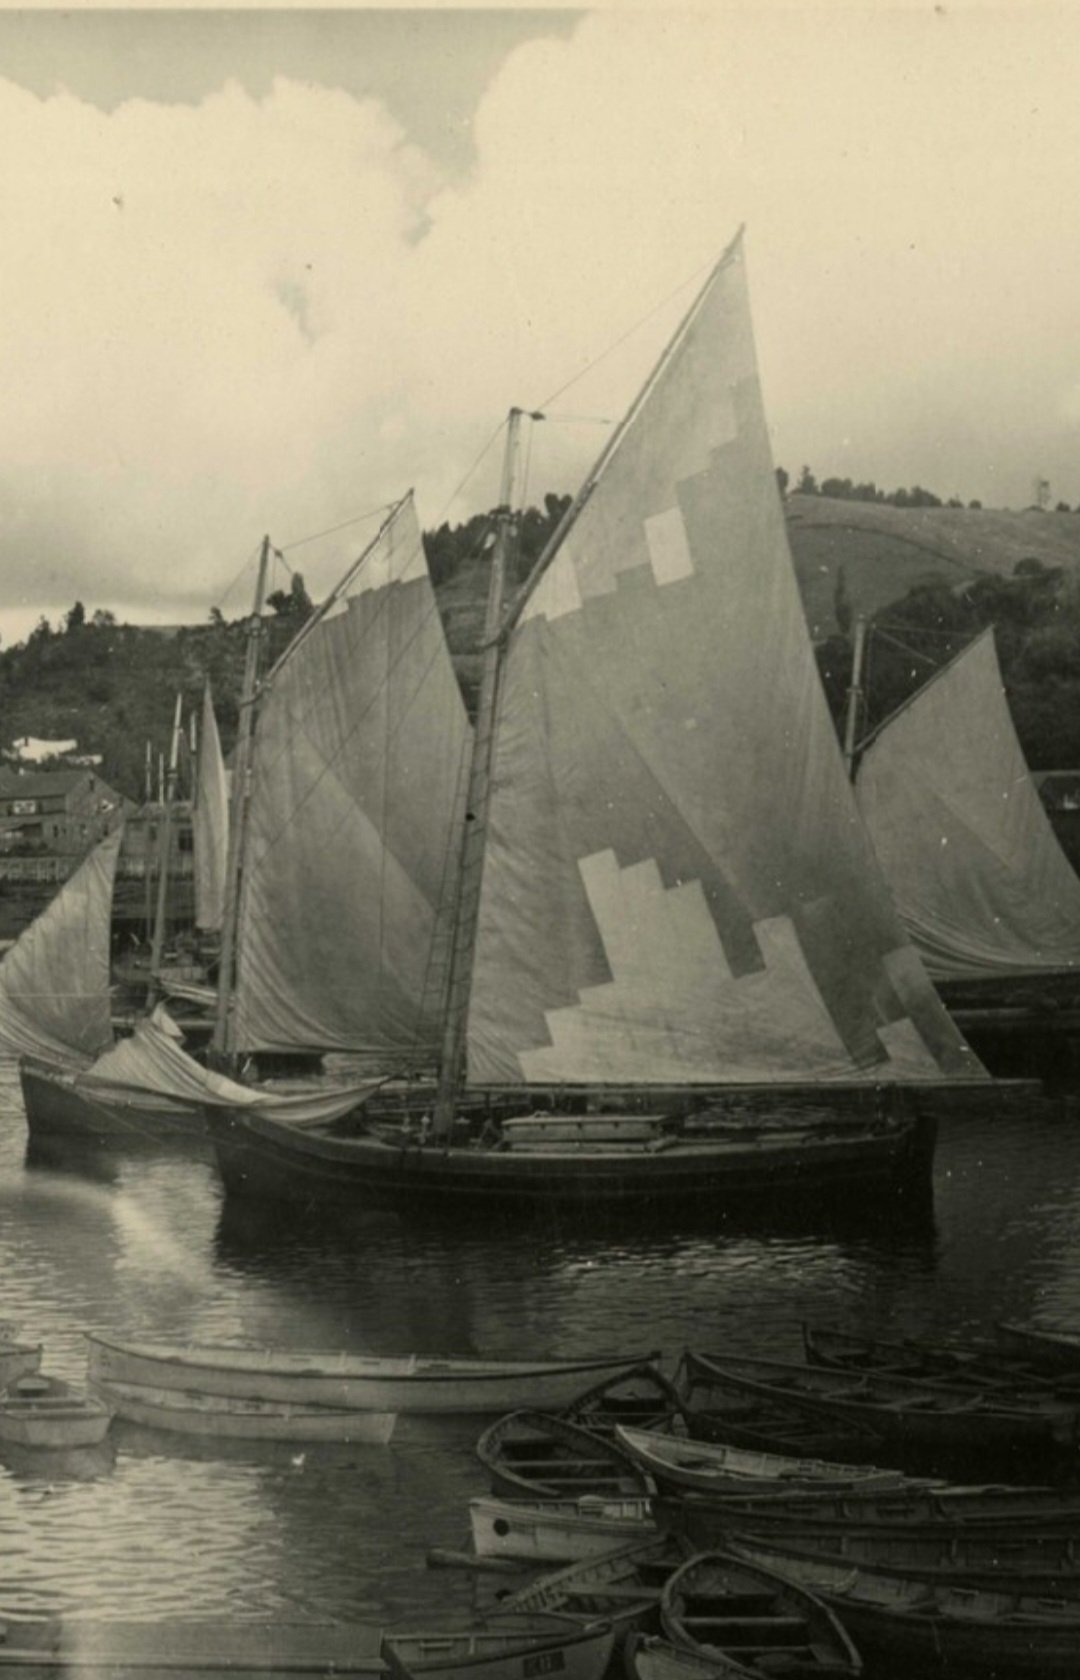
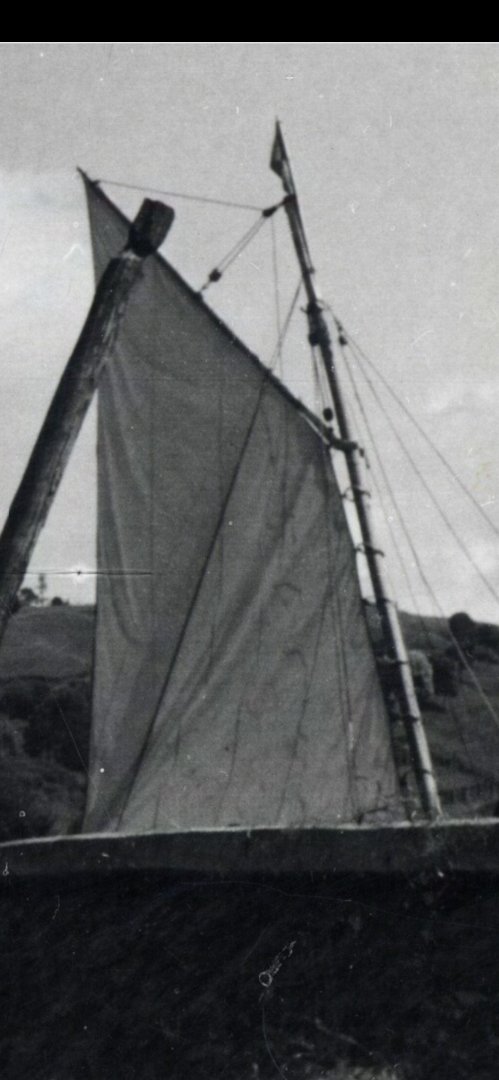
Thanks, @Glen McGuire! I agree, I think the second option looks less bulky. Thanks, @wefalck, it's good to know that robands and continuous lacing can be mixed. While it would make a lot of sense to leave the foot of the gaff sail loose, photos show it was attached. Below, the looped continuous lacing is very clearly shown: Source: https://www.carlosvairo.com/galeria-puerto-montt-lanchas-chilotas Of course, that photo's from the early 1980s, so I wanted to check earlier photos as well. The photo below is from 1940 and shows what look to me like robands: Source: https://www.bibliotecanacionaldigital.gob.cl/bnd/629/w3-article-613541.html At this point, I'm leaning toward robands on both gaff and boom, as I think it might use less of my dwindling supply of .35mm rope.


- 312 replies
-
- 7
-
-
- Chile
- Latin America
- (and 6 more)
-
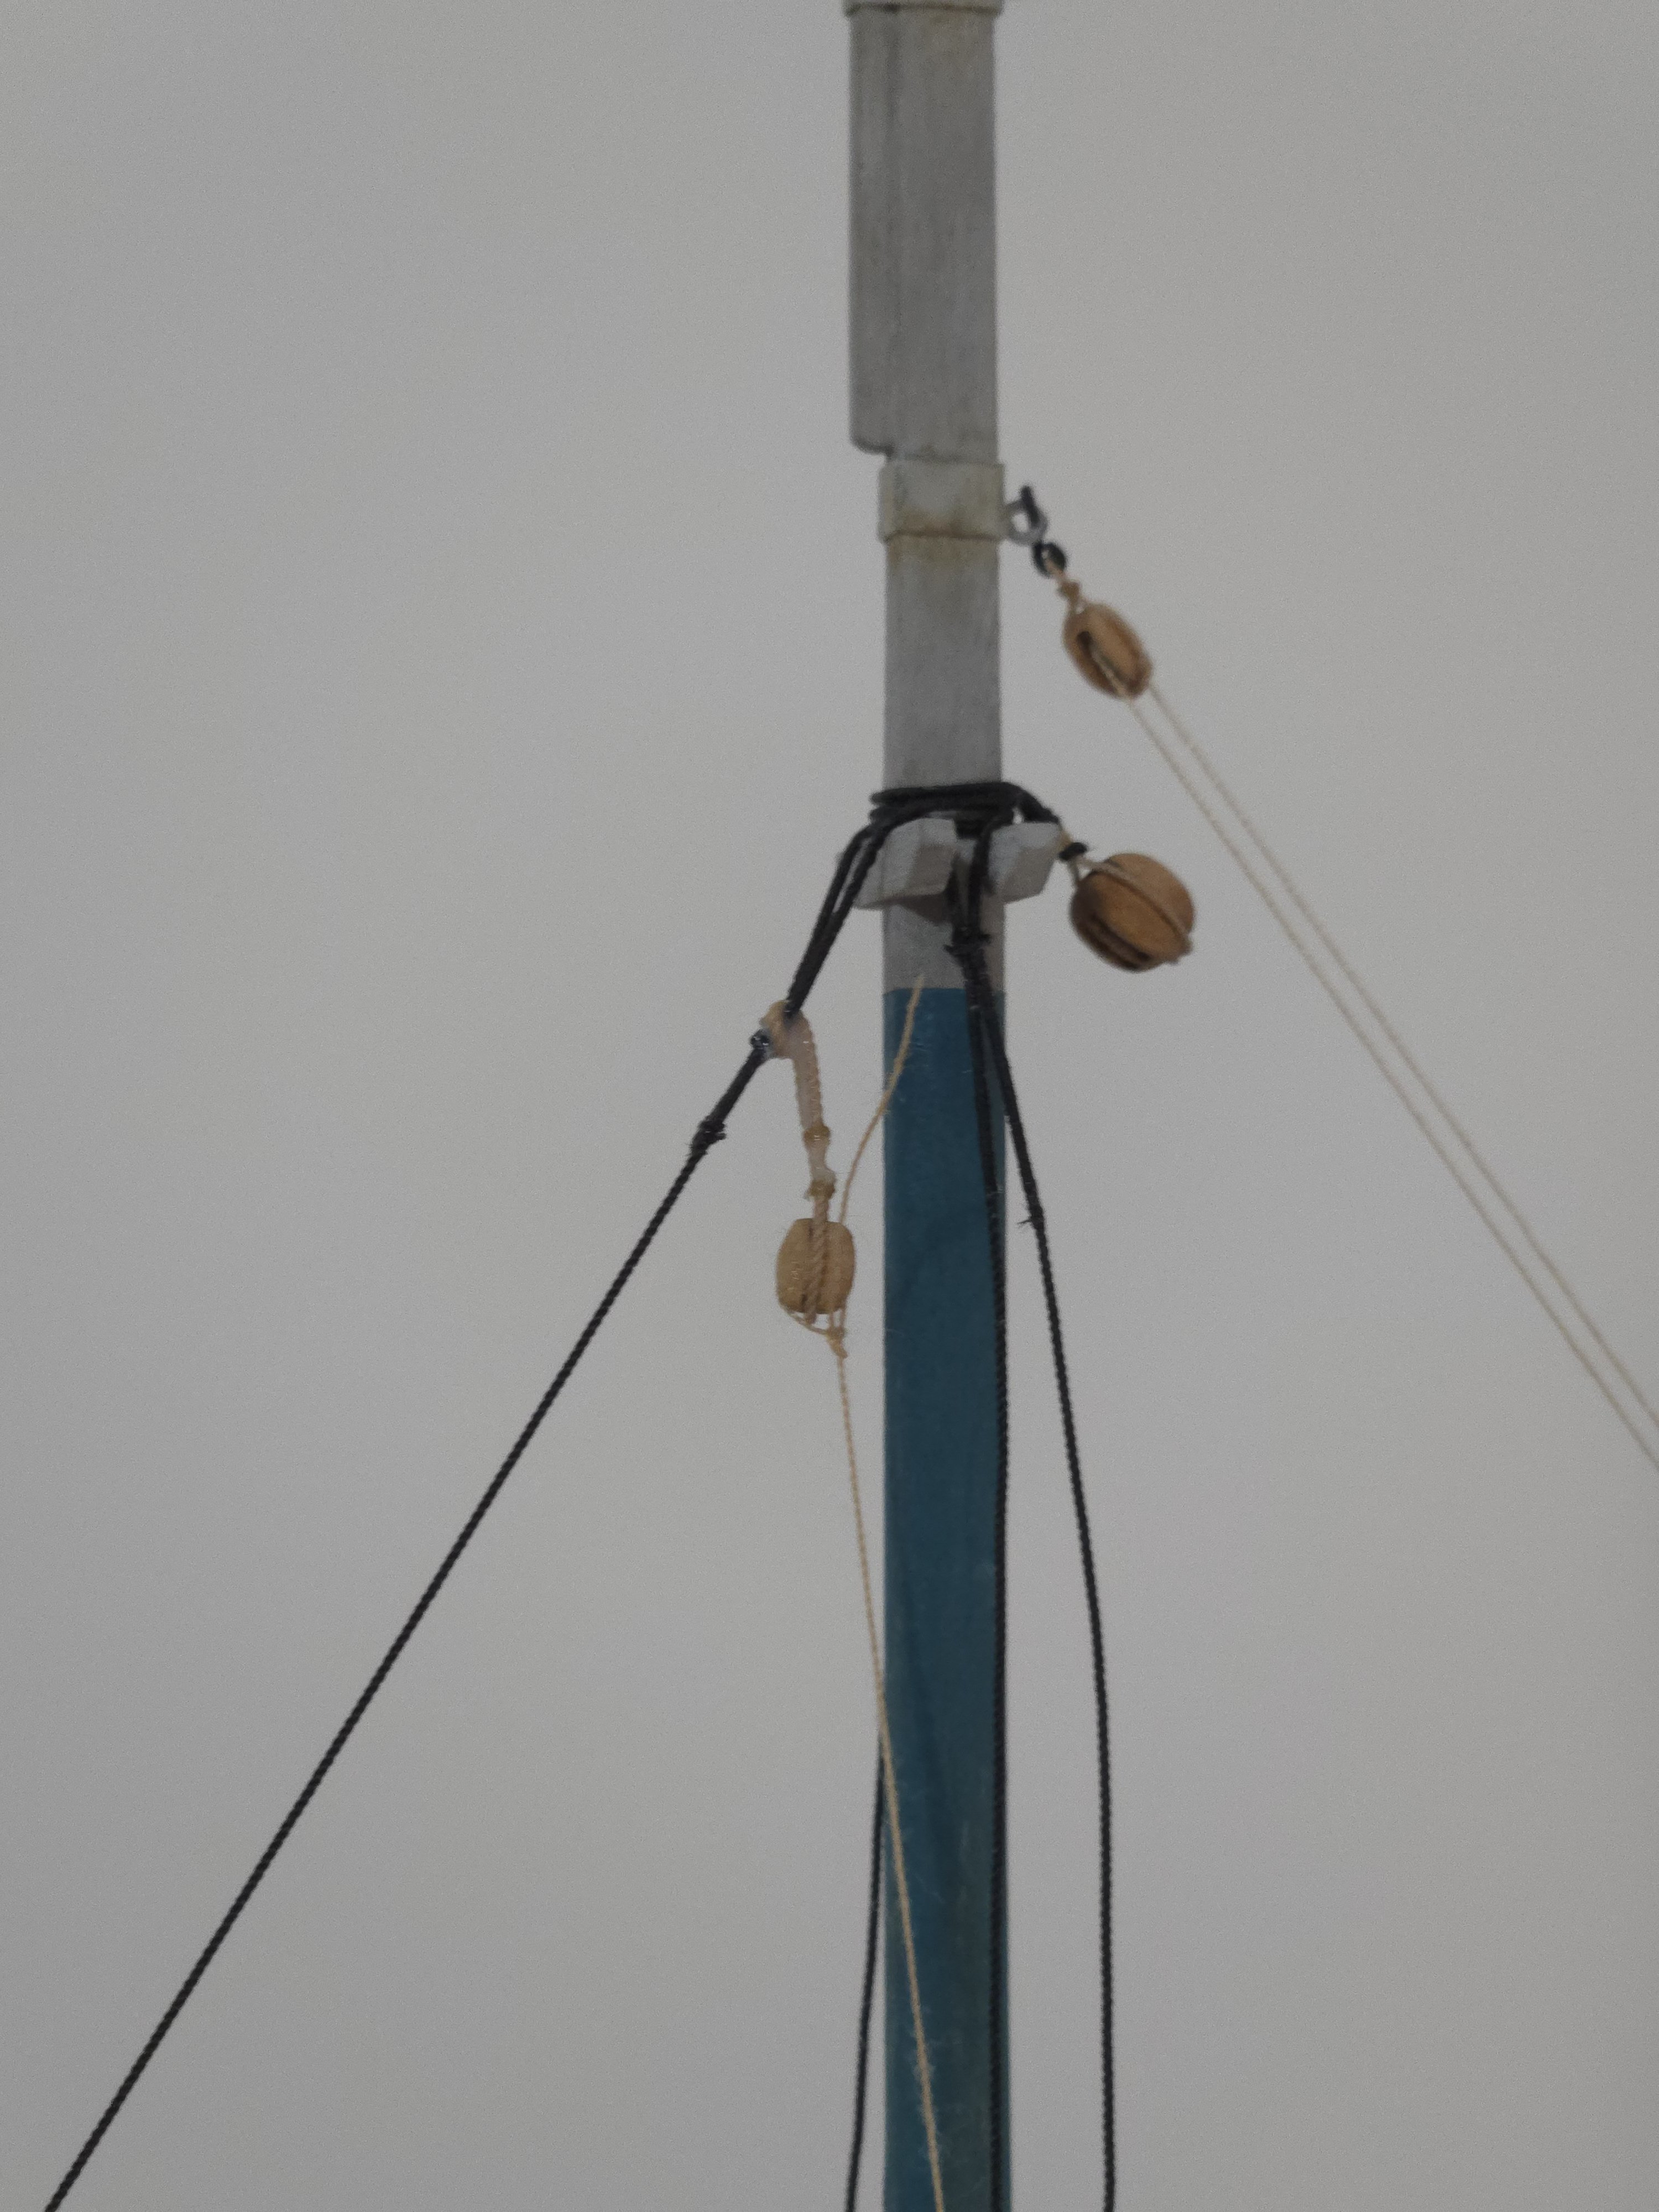
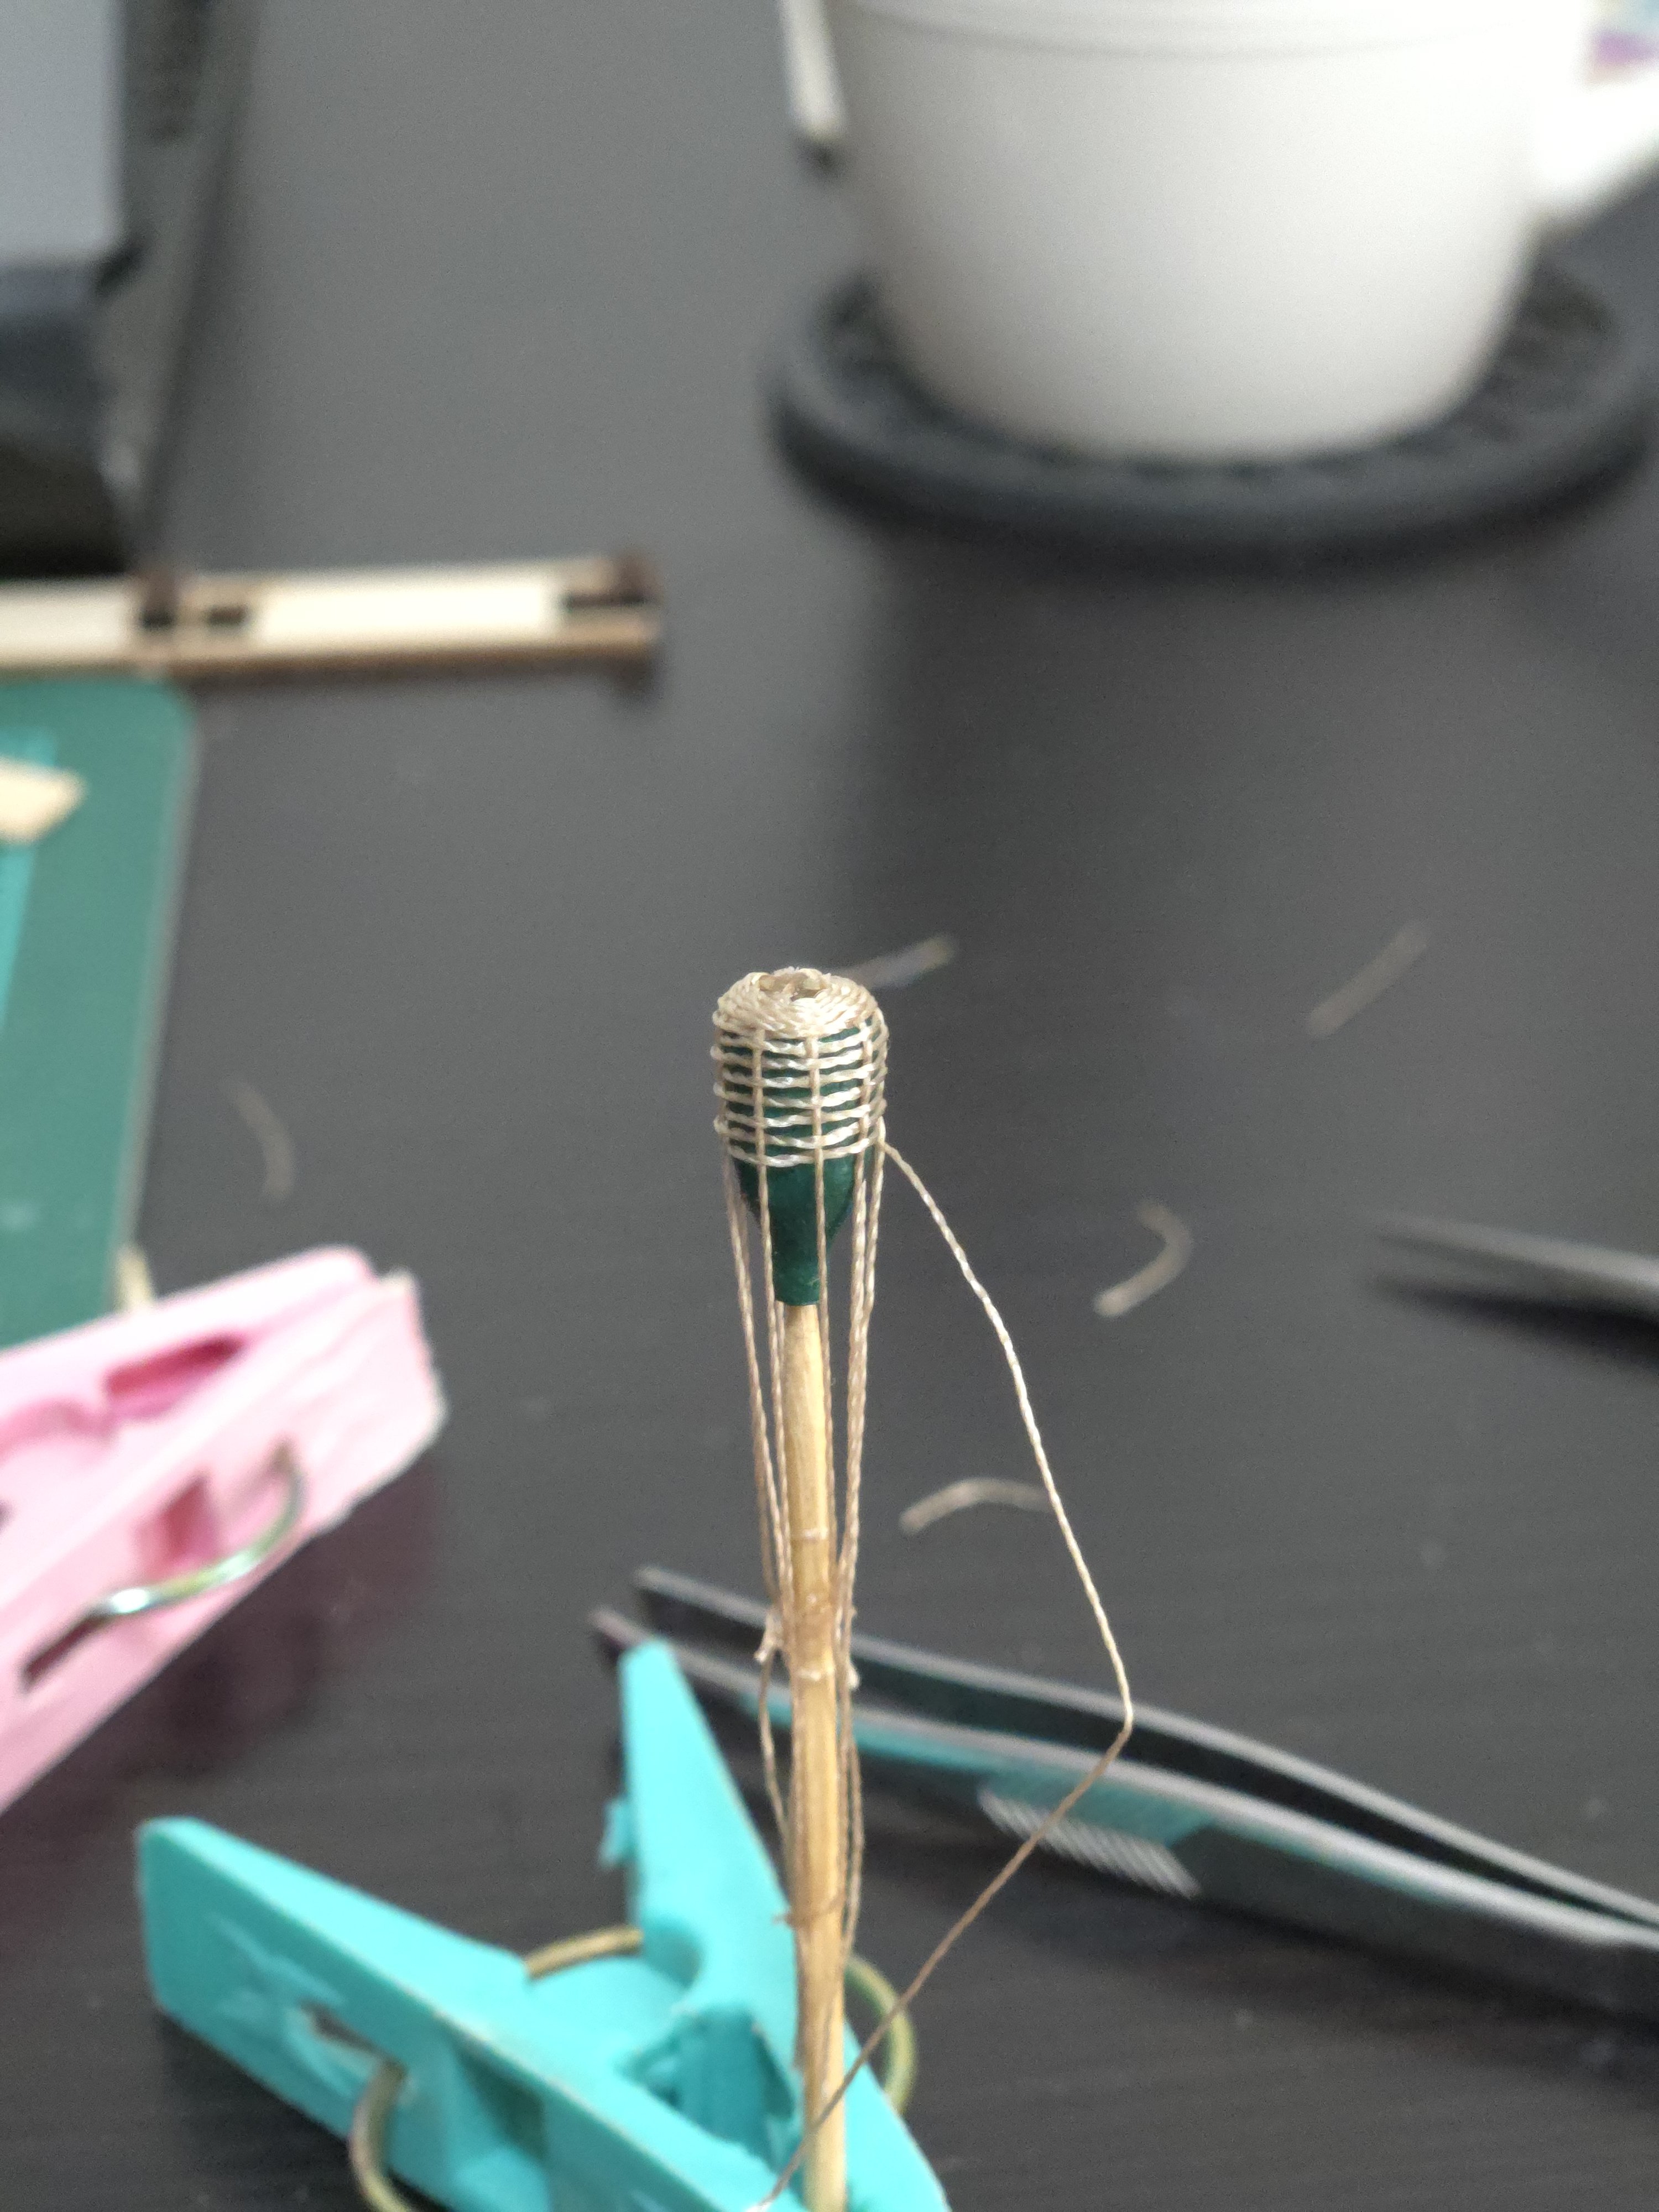
Thanks, all! Yes, Wefalck's bark technique is really excellent. If anyone gives it a try, my main advice is to not judge it until it's dry, as it looks odd and fuzzy when the paint is still wet but really sharpens up once it dries. I've continued to advance on the sails. I added the bolt rope to the gaff sail and, taking advantage of a brief break in the clouds, applied the transparent spray. I then measured and drilled holes where needed to attach the various bits of rigging. I also added a loop of rope to the clew of the jib, as photos showed that the jib sheet ran through a loop here. Next, it was time to start actually attaching the sails. After looking at several photos, I decided that thin wire mast hoops would be the most realistic-looking option. I made them out of 28-gauge wire, wrapped around a length of dowel. The dowel was a little oversized, so I trimmed a bit off the ends before gluing them shut with superglue. Next, lacing the mast hoops to the sail. A lot of other build logs show people adding the mast hoops directly to the sail and then sliding the whole thing onto the mast, which which would definitely be easier, but with everything already on my mast, this option wouldn't work for me. I drew inspiration from diagrams in John Leather’s The Gaff Rig Handbook and examples in a lot of build logs to figure out how best to loop it. I experimented with using fly tying thread, but found it a bit too thin and tricky to work with as strands kept coming off it when threading it. Instead, I went with. 35mm rope. Initially, after looping it through itself around the hoop and running it through the eyelet twice (once from each side), I tied a simple knot on each side with the remaining thread, as shown below: I had a hard time getting it tight on each side, though, and was worried that it was a bit bulky. So I retried by just tying the loose ends off to each other. I'm still deciding whether the first or second option looks best--feel free to weigh in! Both are simplifications from actual practice, but completely following how it was actually done would result in a very bulky knot here. While I decide, I've been attaching the lacing to the mast hoops. Finally, I'm trying to figure out how to attach the sail to the gaff spar and boom. It's a bit tricky. I've seen some photos where the boom very clearly has a continuous rope lacing, and others where the gaff spar very clearly uses robands. So both options seem to have been used. But would a single boat combine both methods--e.g., continuous on the boom and robands on the gaff--or would it make more sense to be consistent?


- 312 replies
-
- 9
-
-
- Chile
- Latin America
- (and 6 more)
-
Incredible work! Especially making the shiplap planks, they look great!
-
Nice work, looks like you're off to an excellent start! The weathered deck looks good. One word of advice for future builds: planking one side at a time can sometimes cause the hull to twist, so it's generally advised to plank both sides simultaneously.
-
Very nice work, the model’s really coming along well!
-
Excellent work! Did you use a tiny needle to thread it, or just stiffen the end of the string with super glue?
-
Thanks, all! I'll give wax paper a try next time instead of plastic. Some minor progress to report. First, I remade the jib halyard block's stropping and the loop around the forestay. It's much shorter now, which is more accurate to photos and will allow the jib to fit properly. After fitting it, I tensioned everything with thread and applied a bit of watered-down white glue so that it would properly hold the tight fold into the eye of the forestay. I also worked more on the jib. The bolt rope is made of .35mm rope from Ropes of Scale, glued in place with more Aleene's Fabric Fusion. As can be seen above, a lot of the seams had shiny glue residue. To get rid of this, I took advantage of a brief bit of sun--Mexico City is quite rainy these days--to apply a matte transparent spray. A couple of coats on each side later, and the residue is practically invisible. The spray also adds a bit of strength and resistance to the sail, which is a nice bonus. Next, I need to do the same to the gaff sail, and add the running rigging. I also need to work out how best to make the hanks (to hold the jib to the forestay) and mast hoops. According to Vairo, by the 1980s these were usually made of wire. I think I'll do some tests with 28-gauge galvanized wire and with thin black rope.

- 312 replies
-
- 9
-
-
- Chile
- Latin America
- (and 6 more)
-
Quite a bleak story! Who knows how many other cases were never brought to the authorities' attention. I wonder if the sailors ever tried to unionize? Although the seasonal nature of the work might have been a barrier. Excellent progress on the build, too. The hull really looks great! Wonderful lines.
-
Great work! Details like the extra planking really help bring the hull to life.
-
It's great to see the model coming together! And very interesting research, too. That German-language newspaper is really something, I wonder what happened after the captain was questioned?
-
Ironing Paper Sails
JacquesCousteau replied to JacquesCousteau's topic in Masting, rigging and sails
Thanks, all! Based on your suggestions, I experimented a bit. -
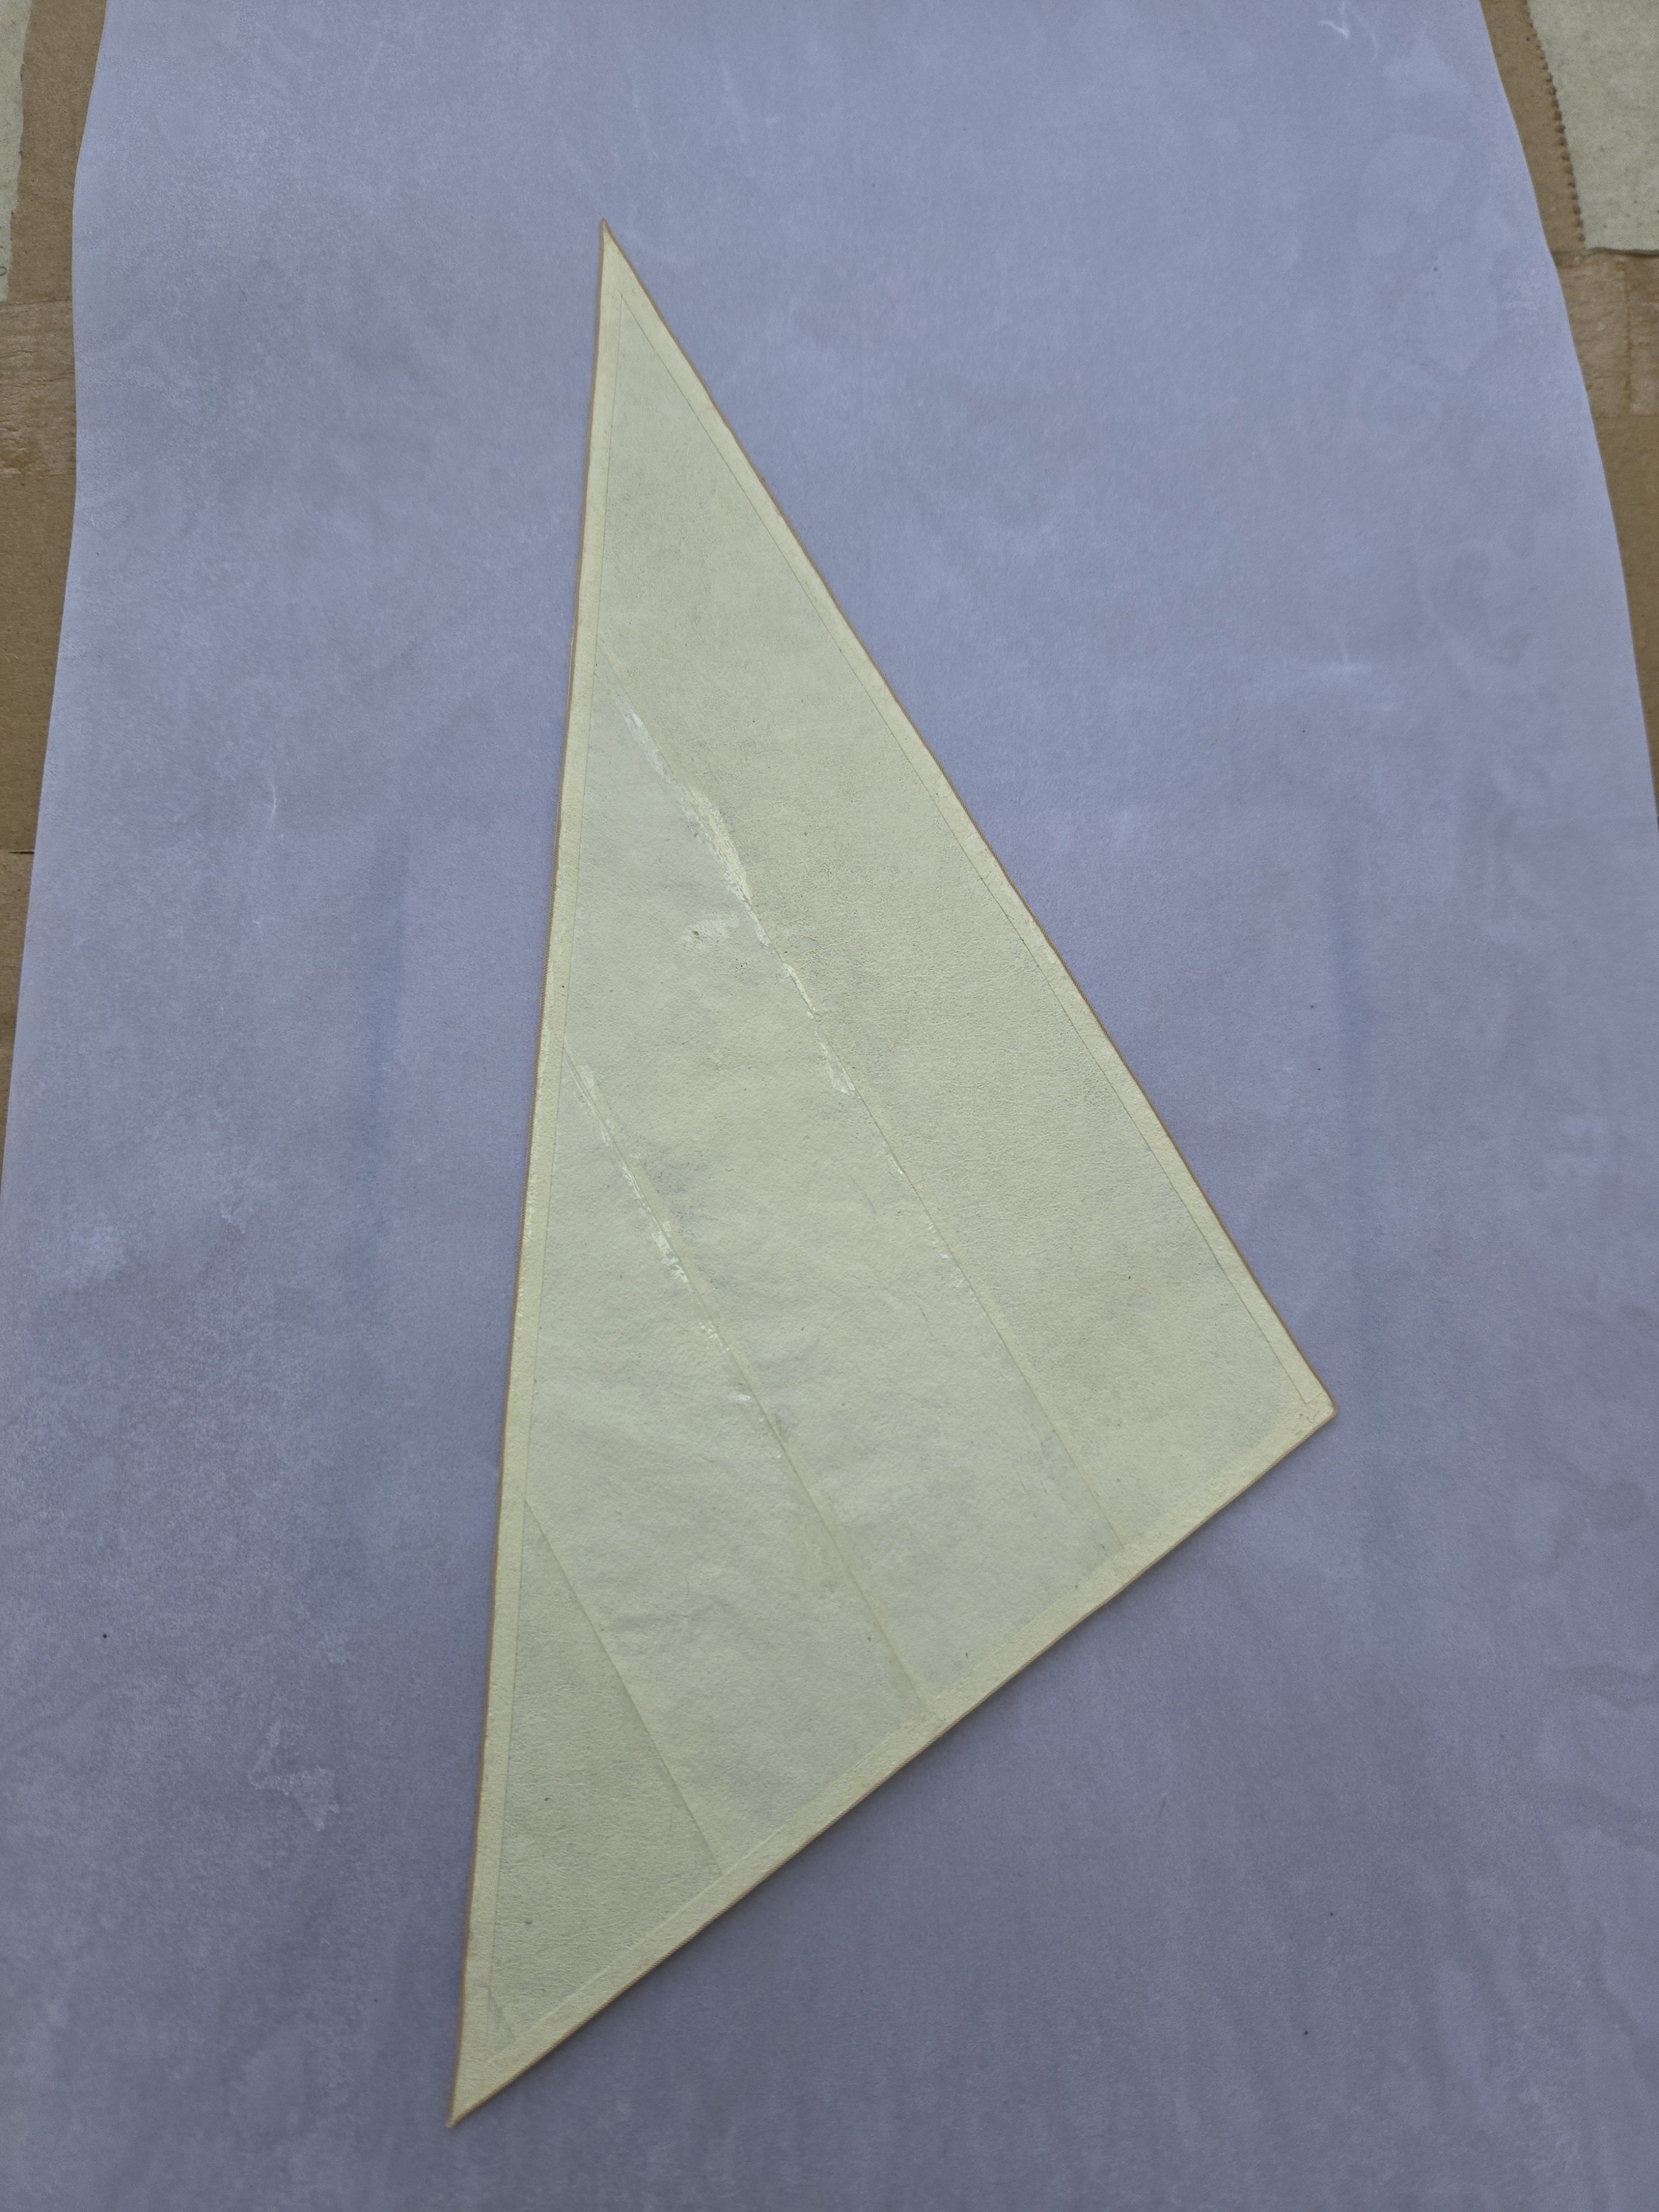
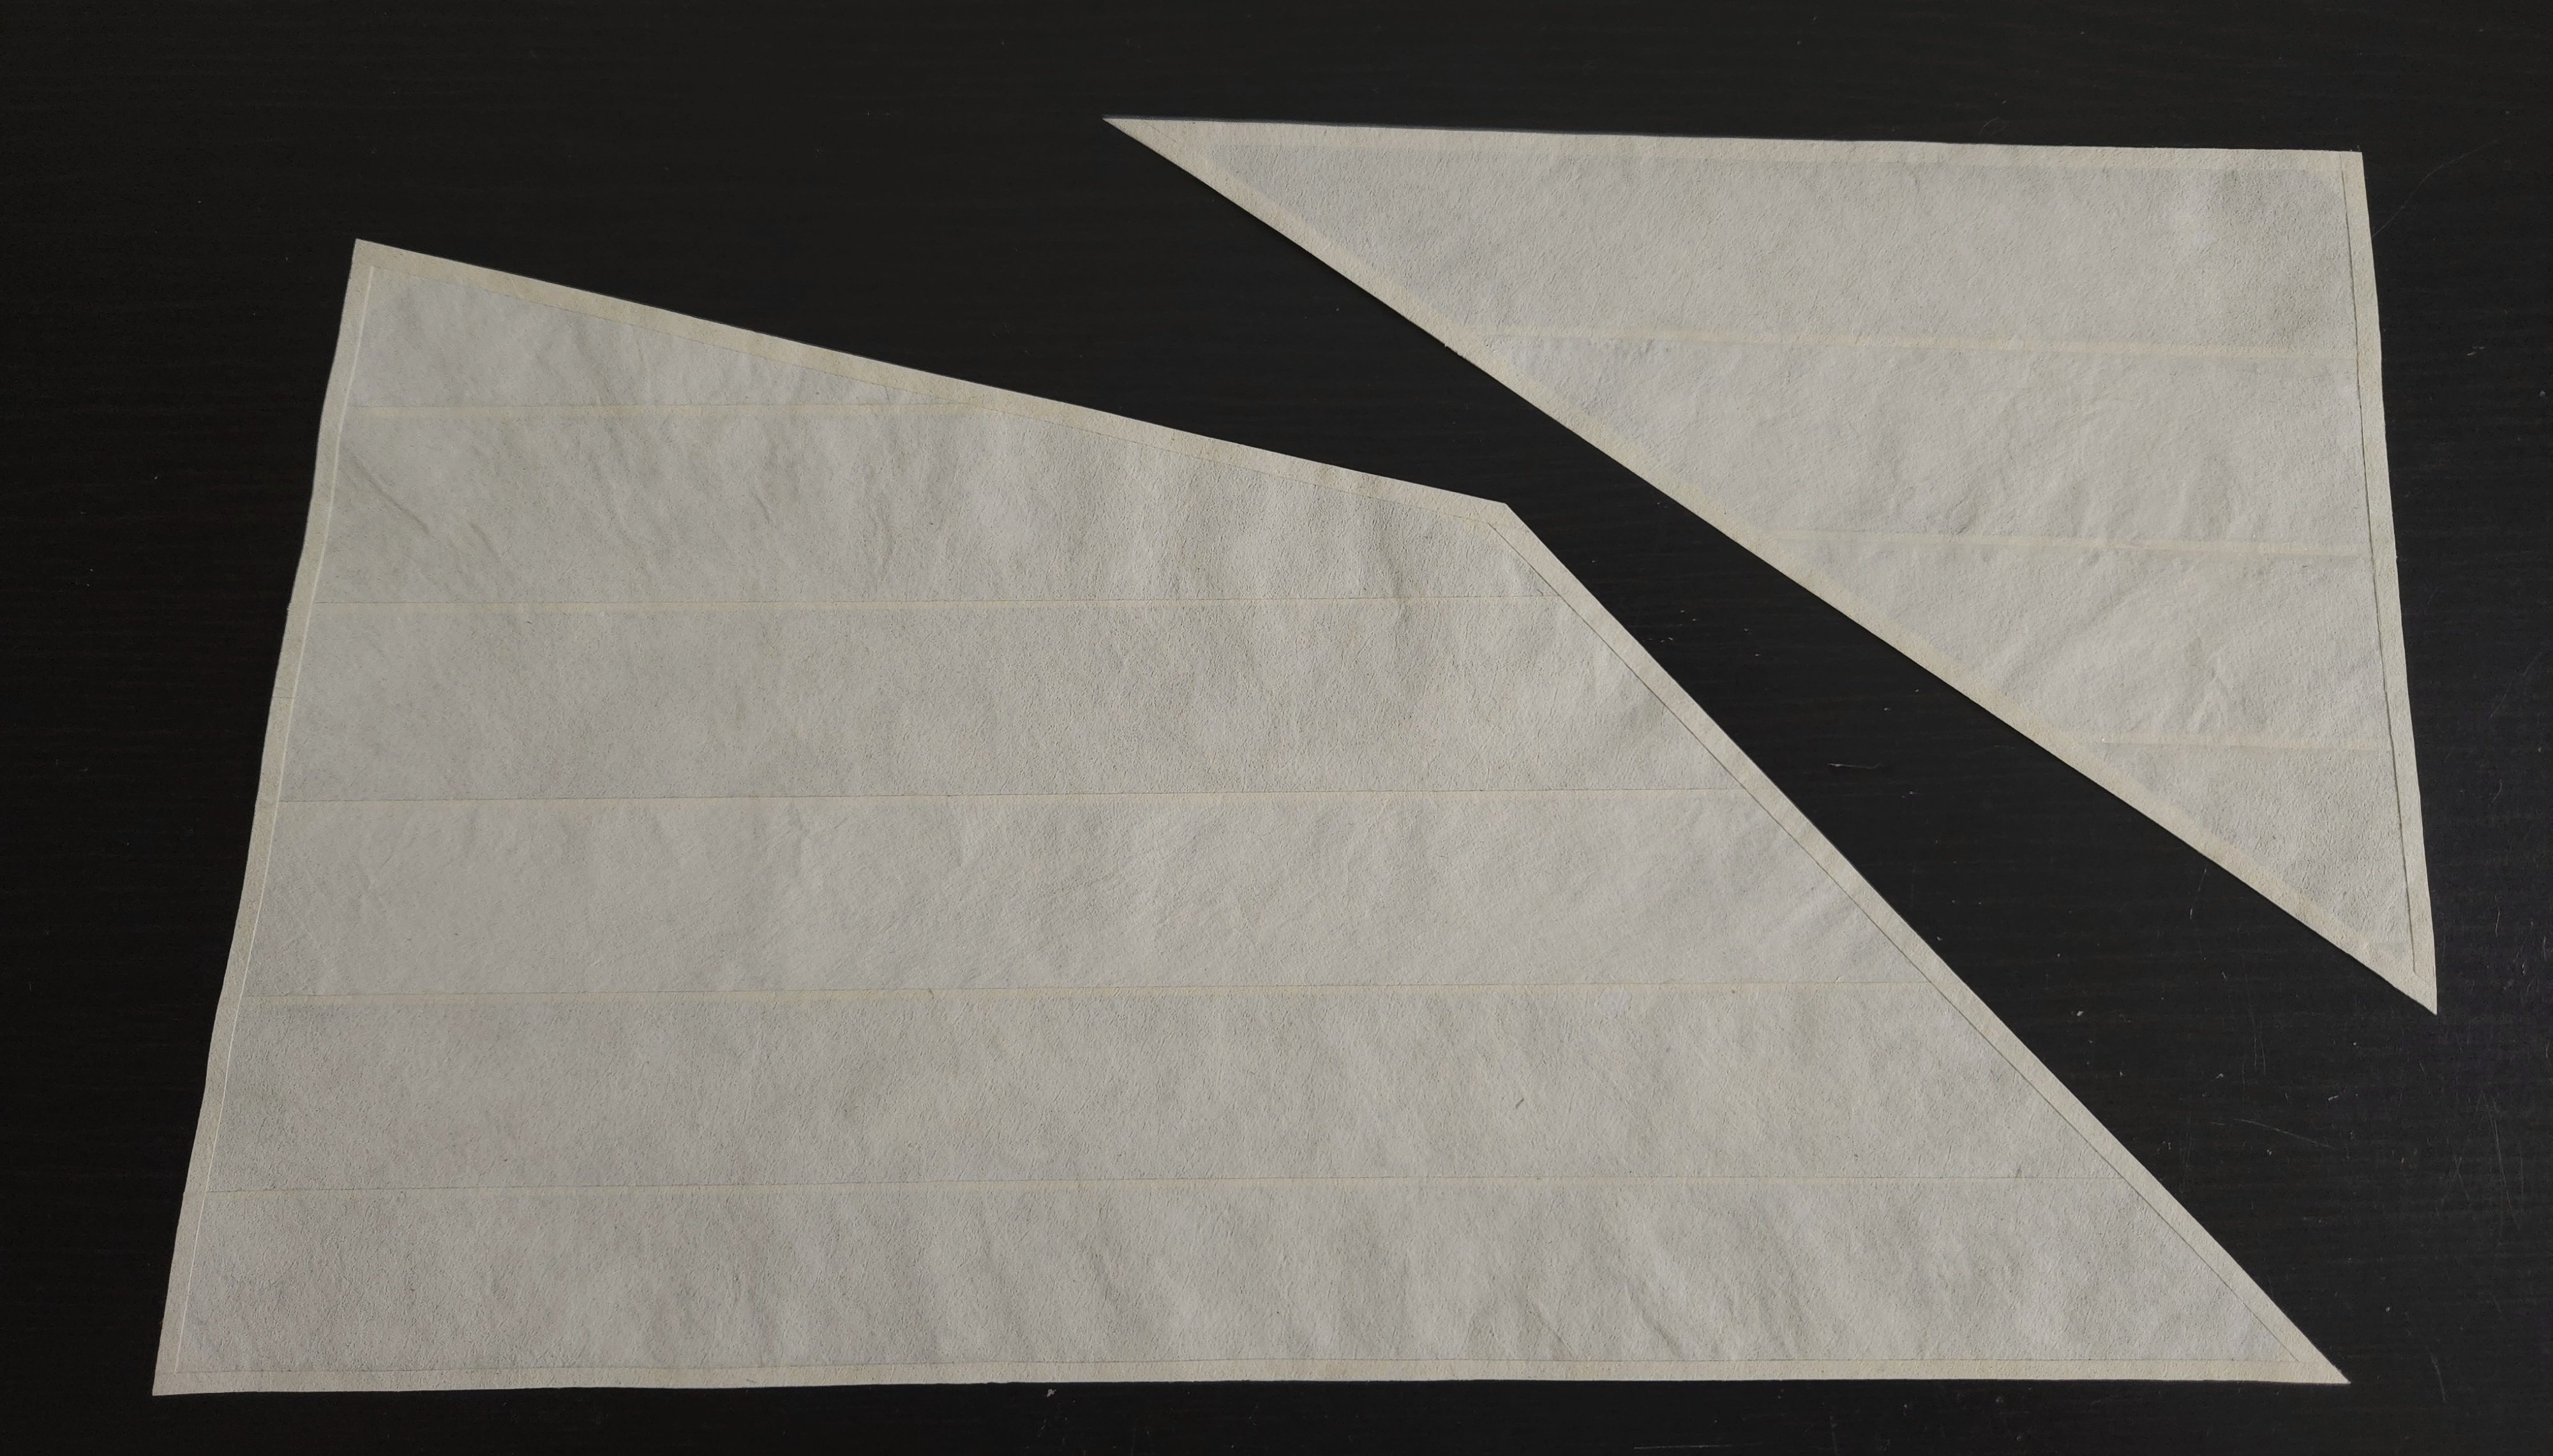
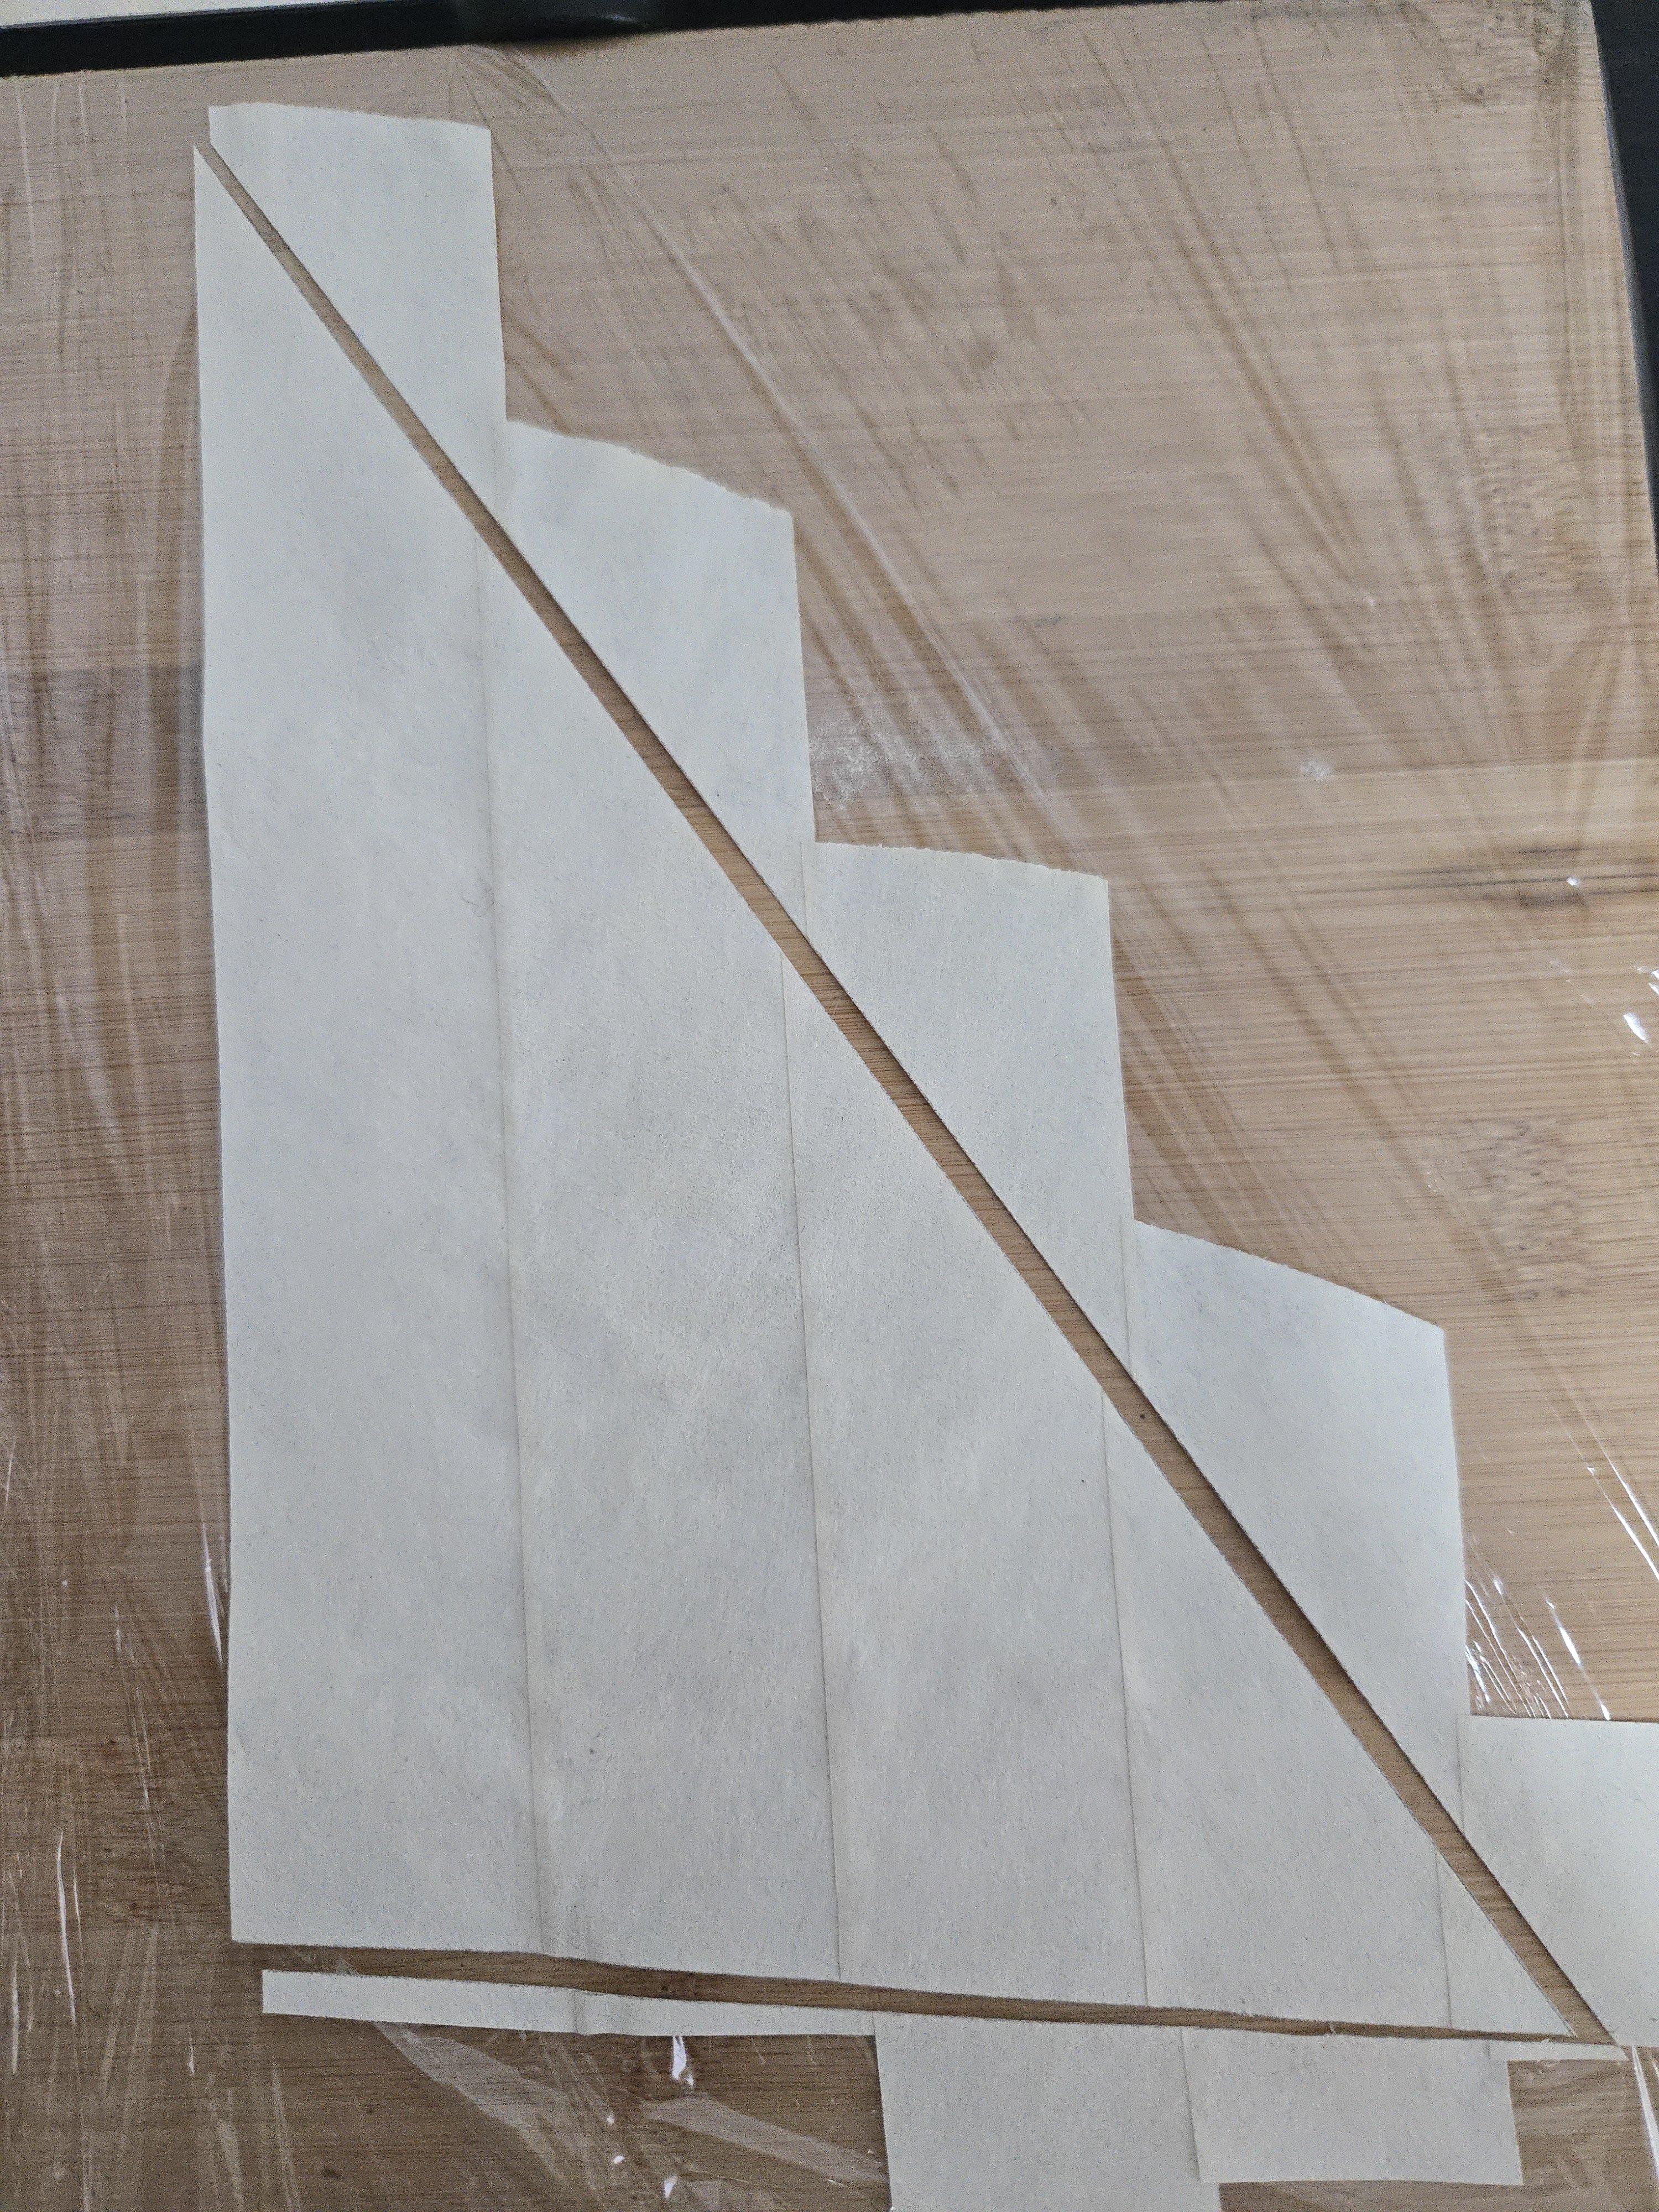
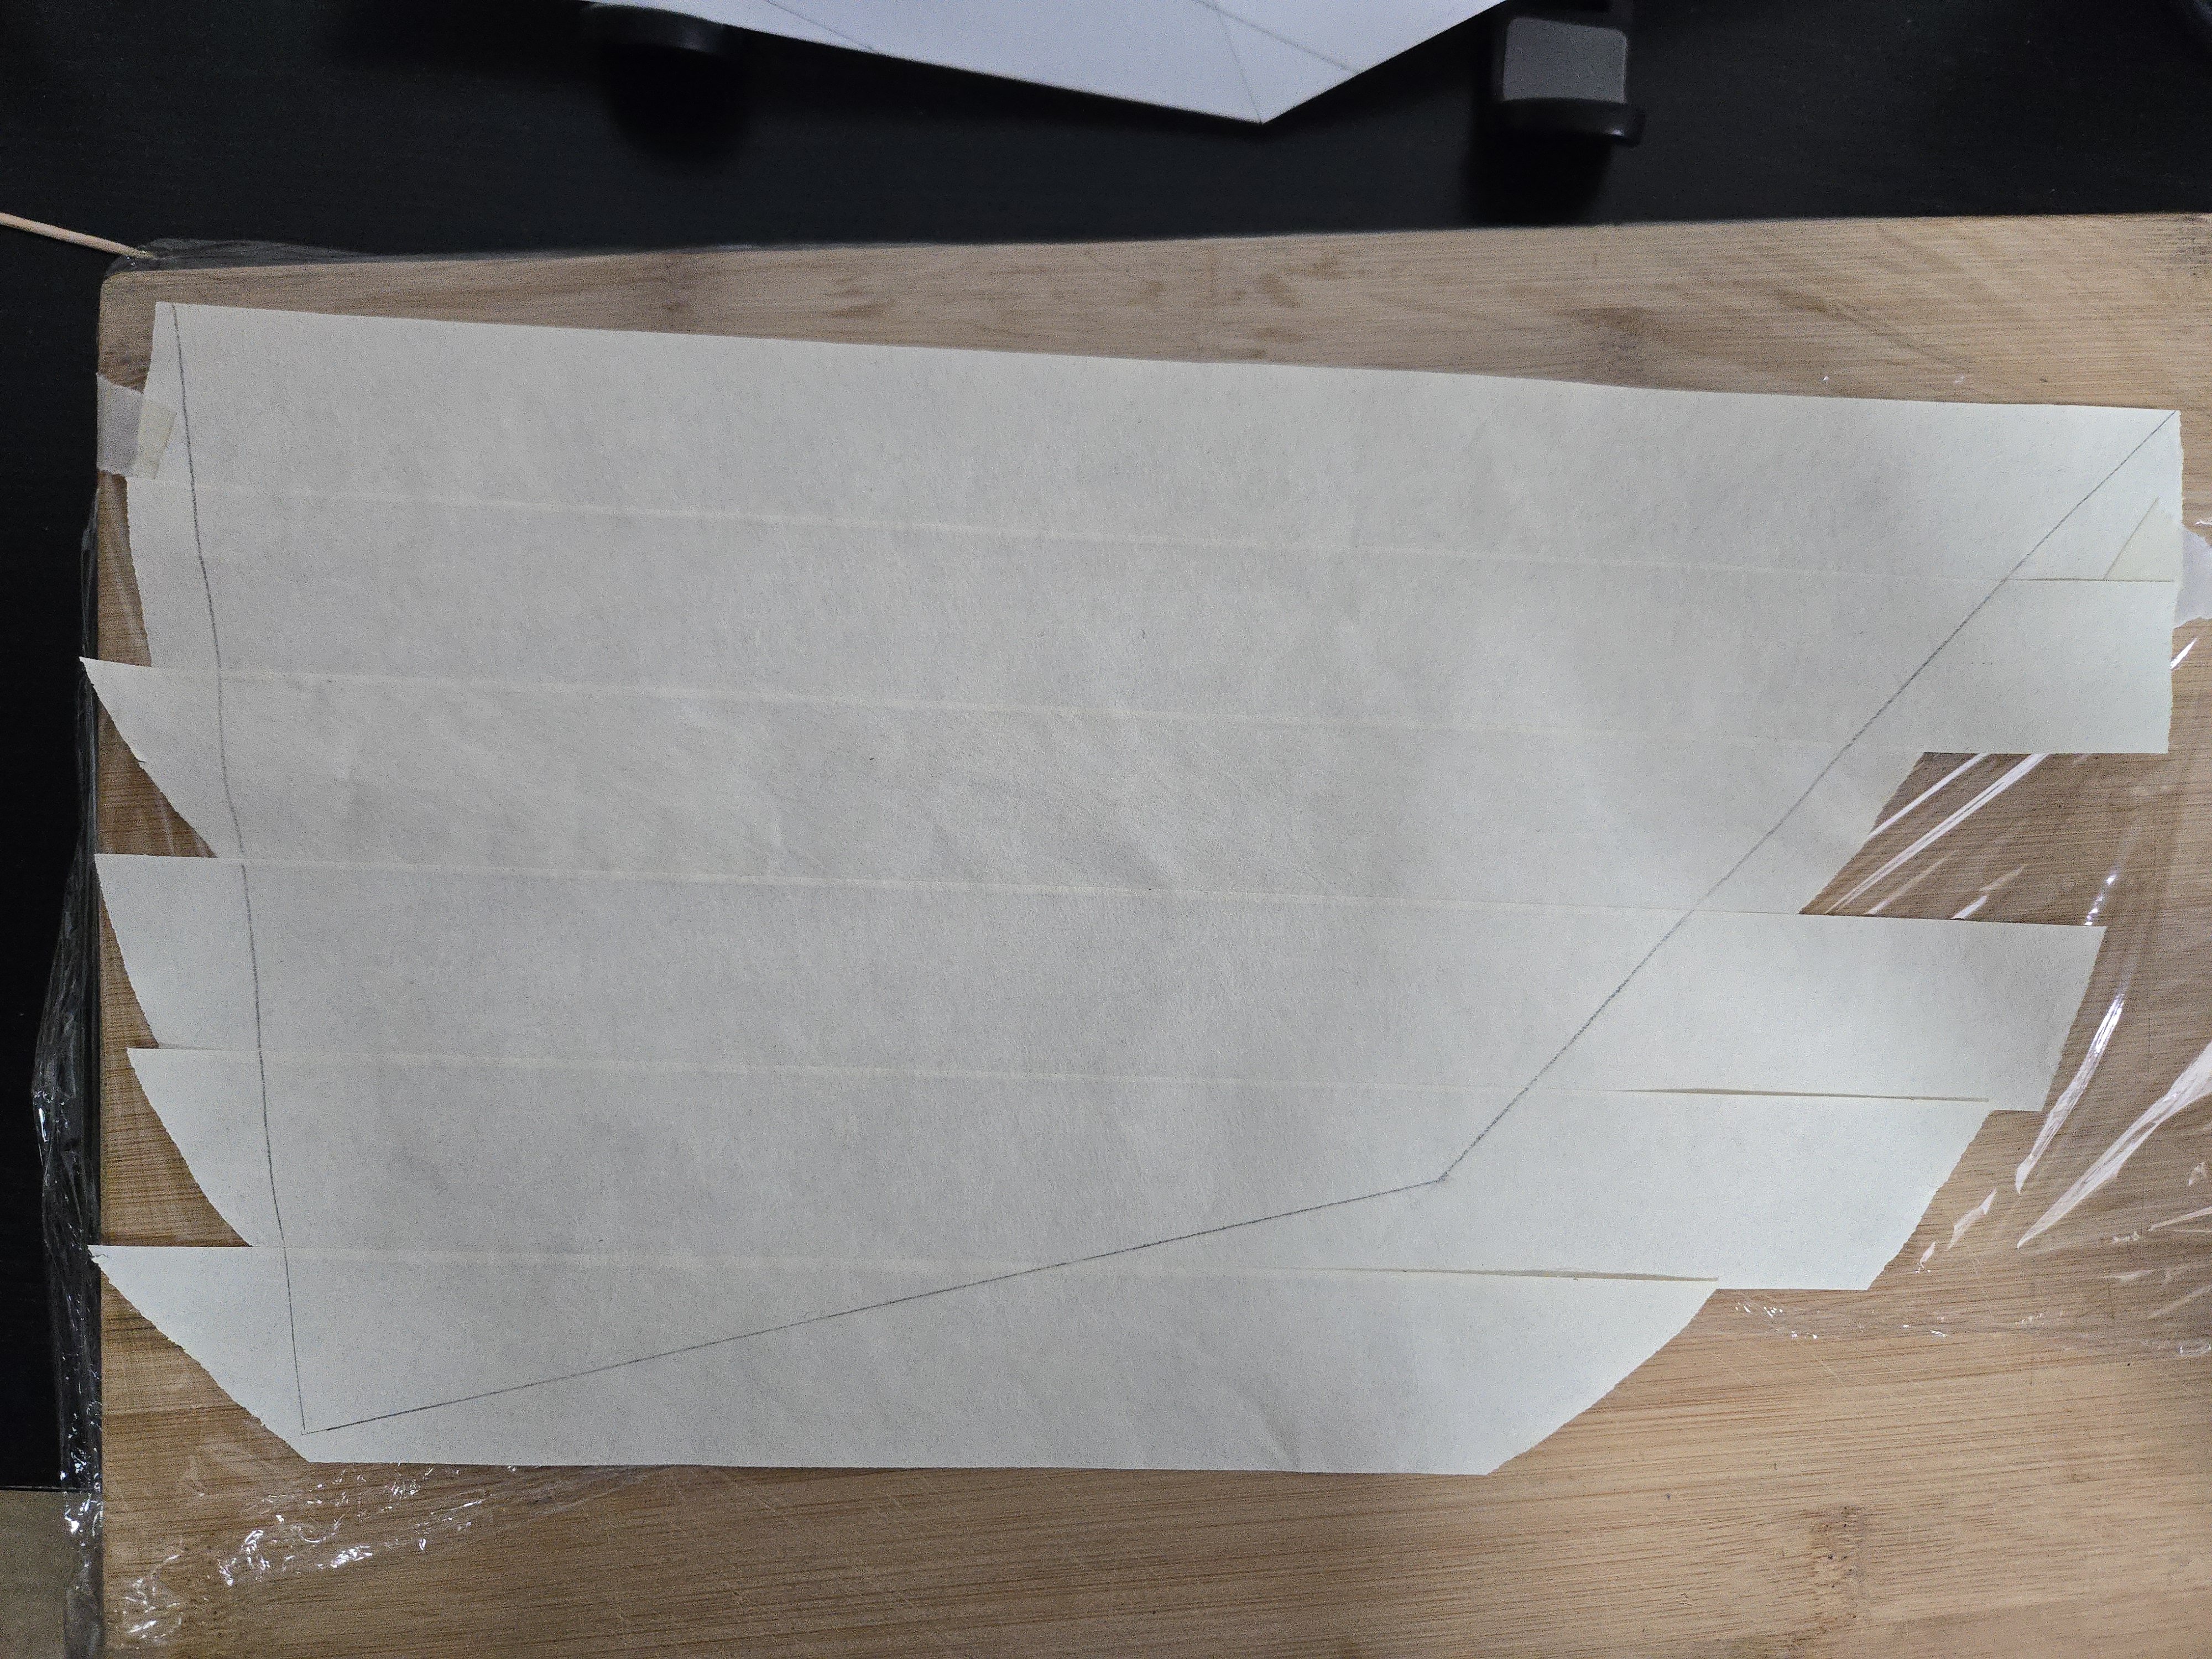
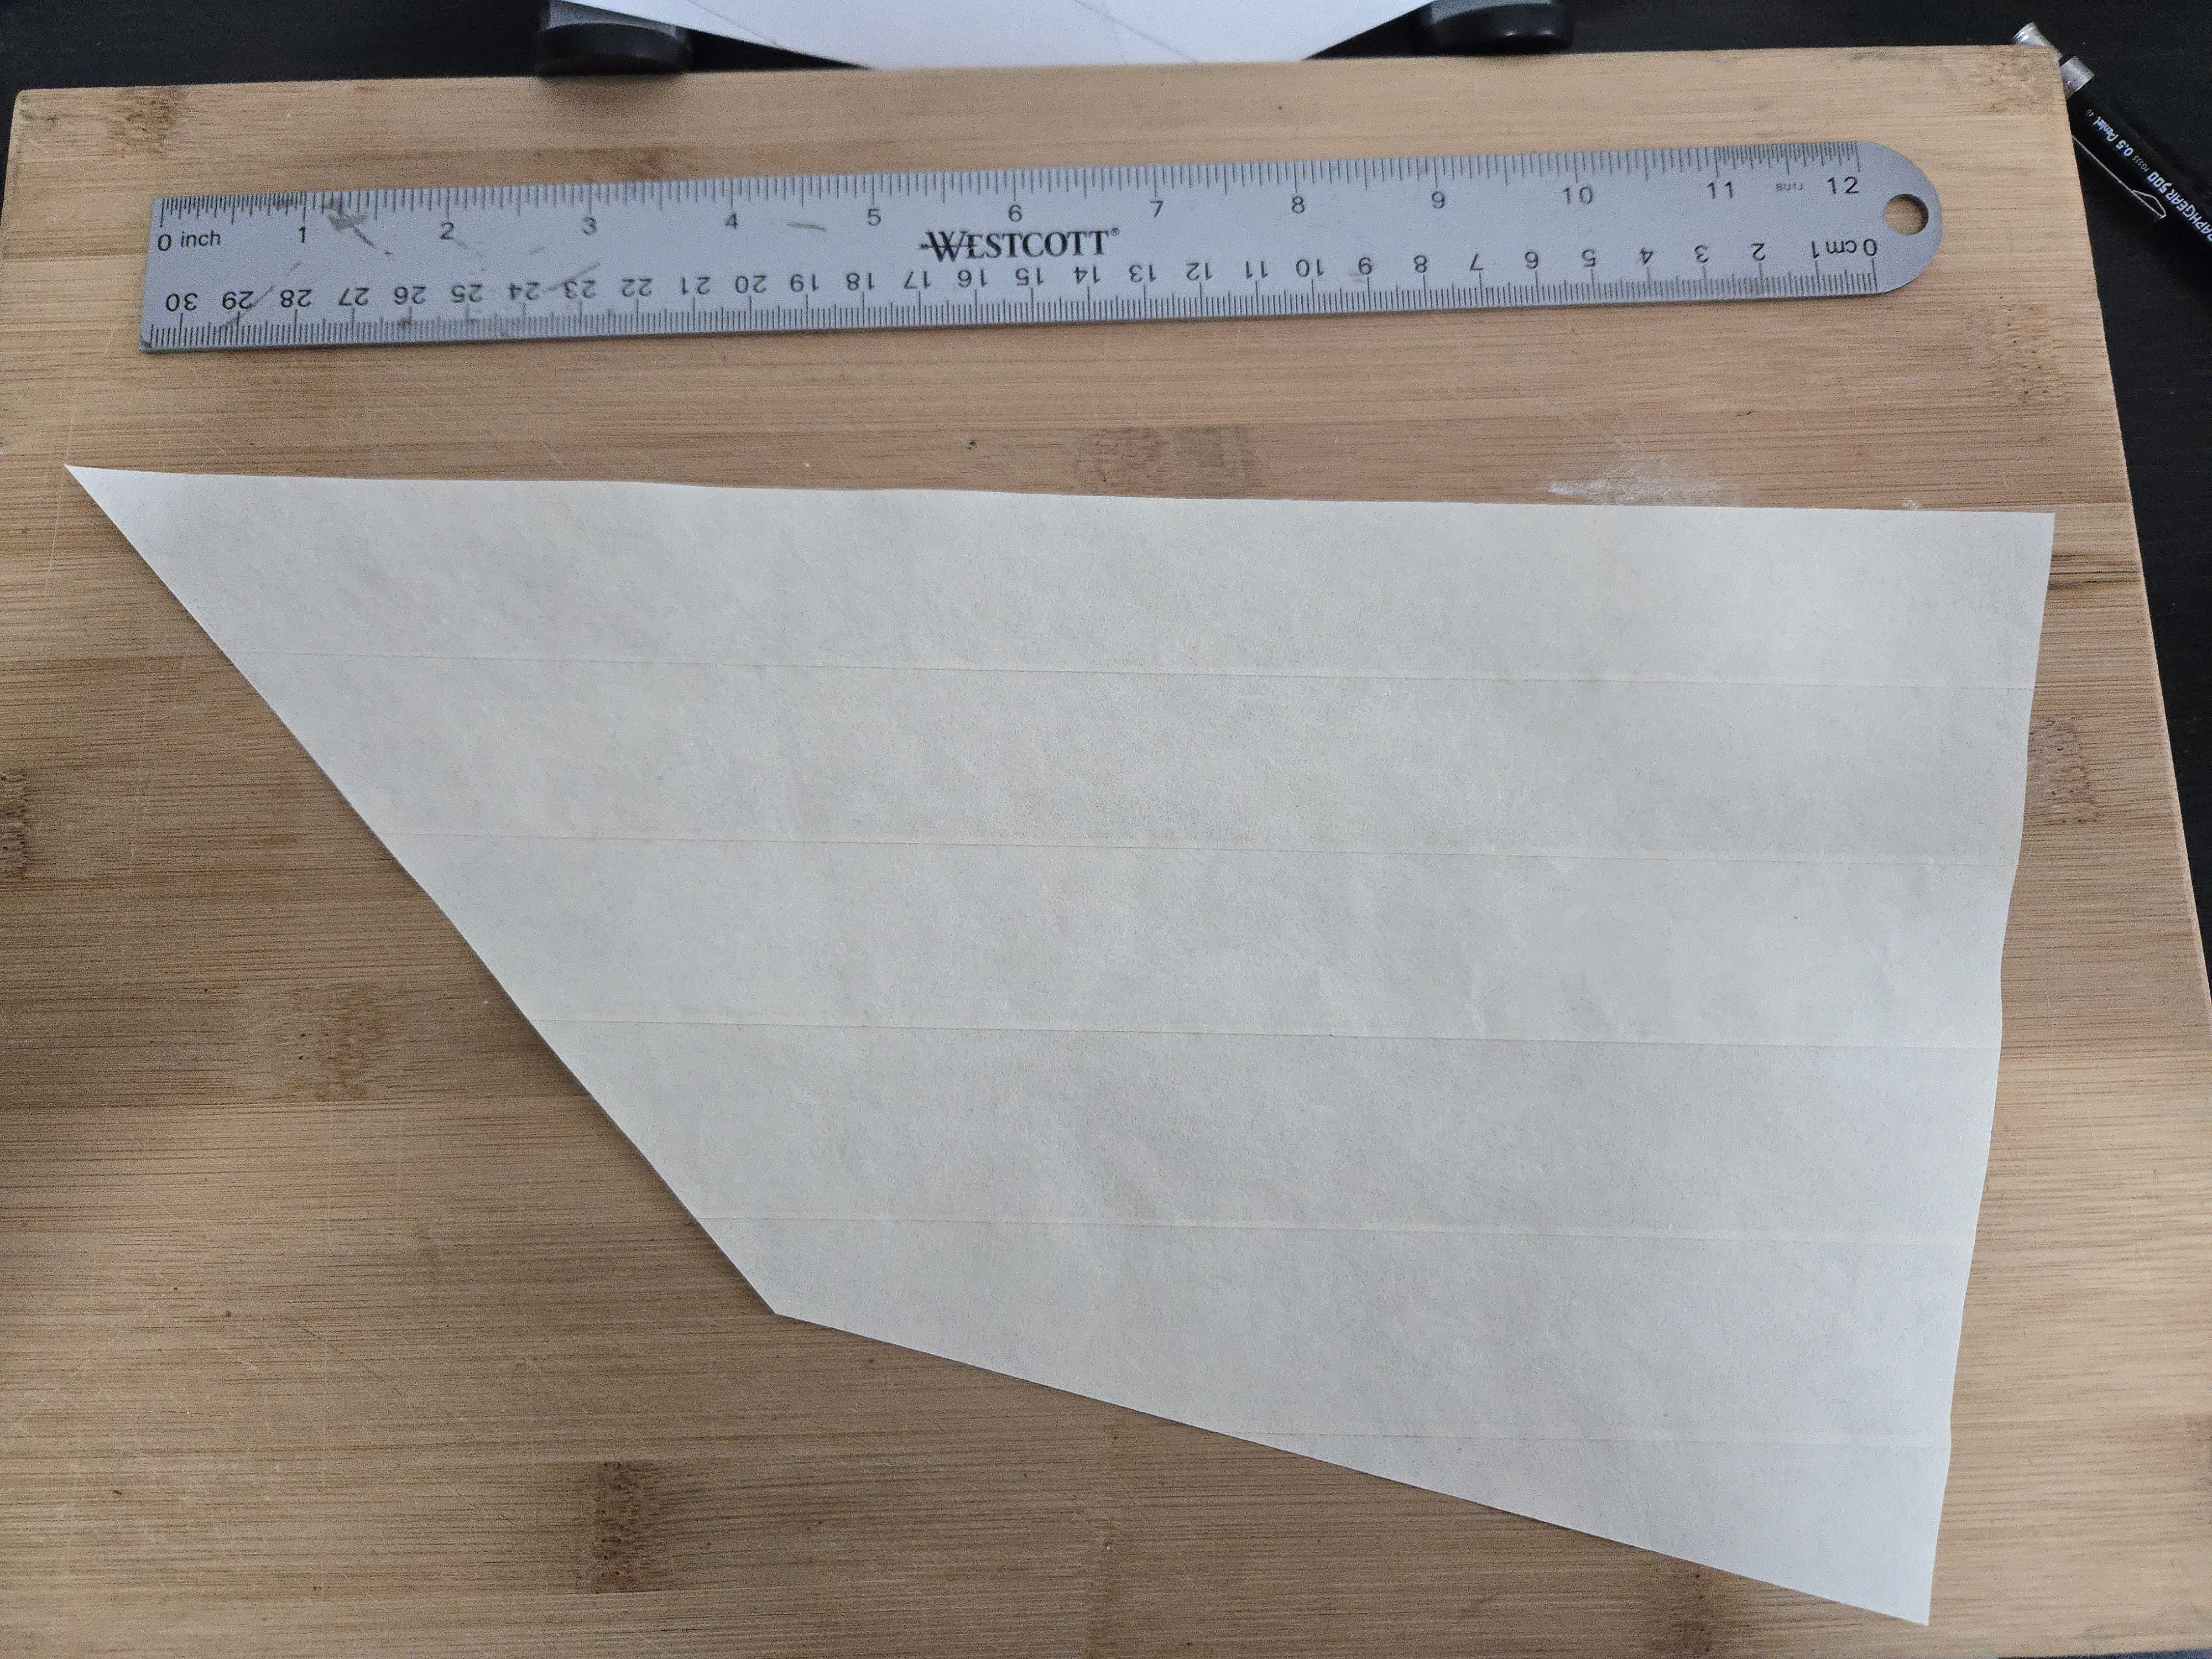
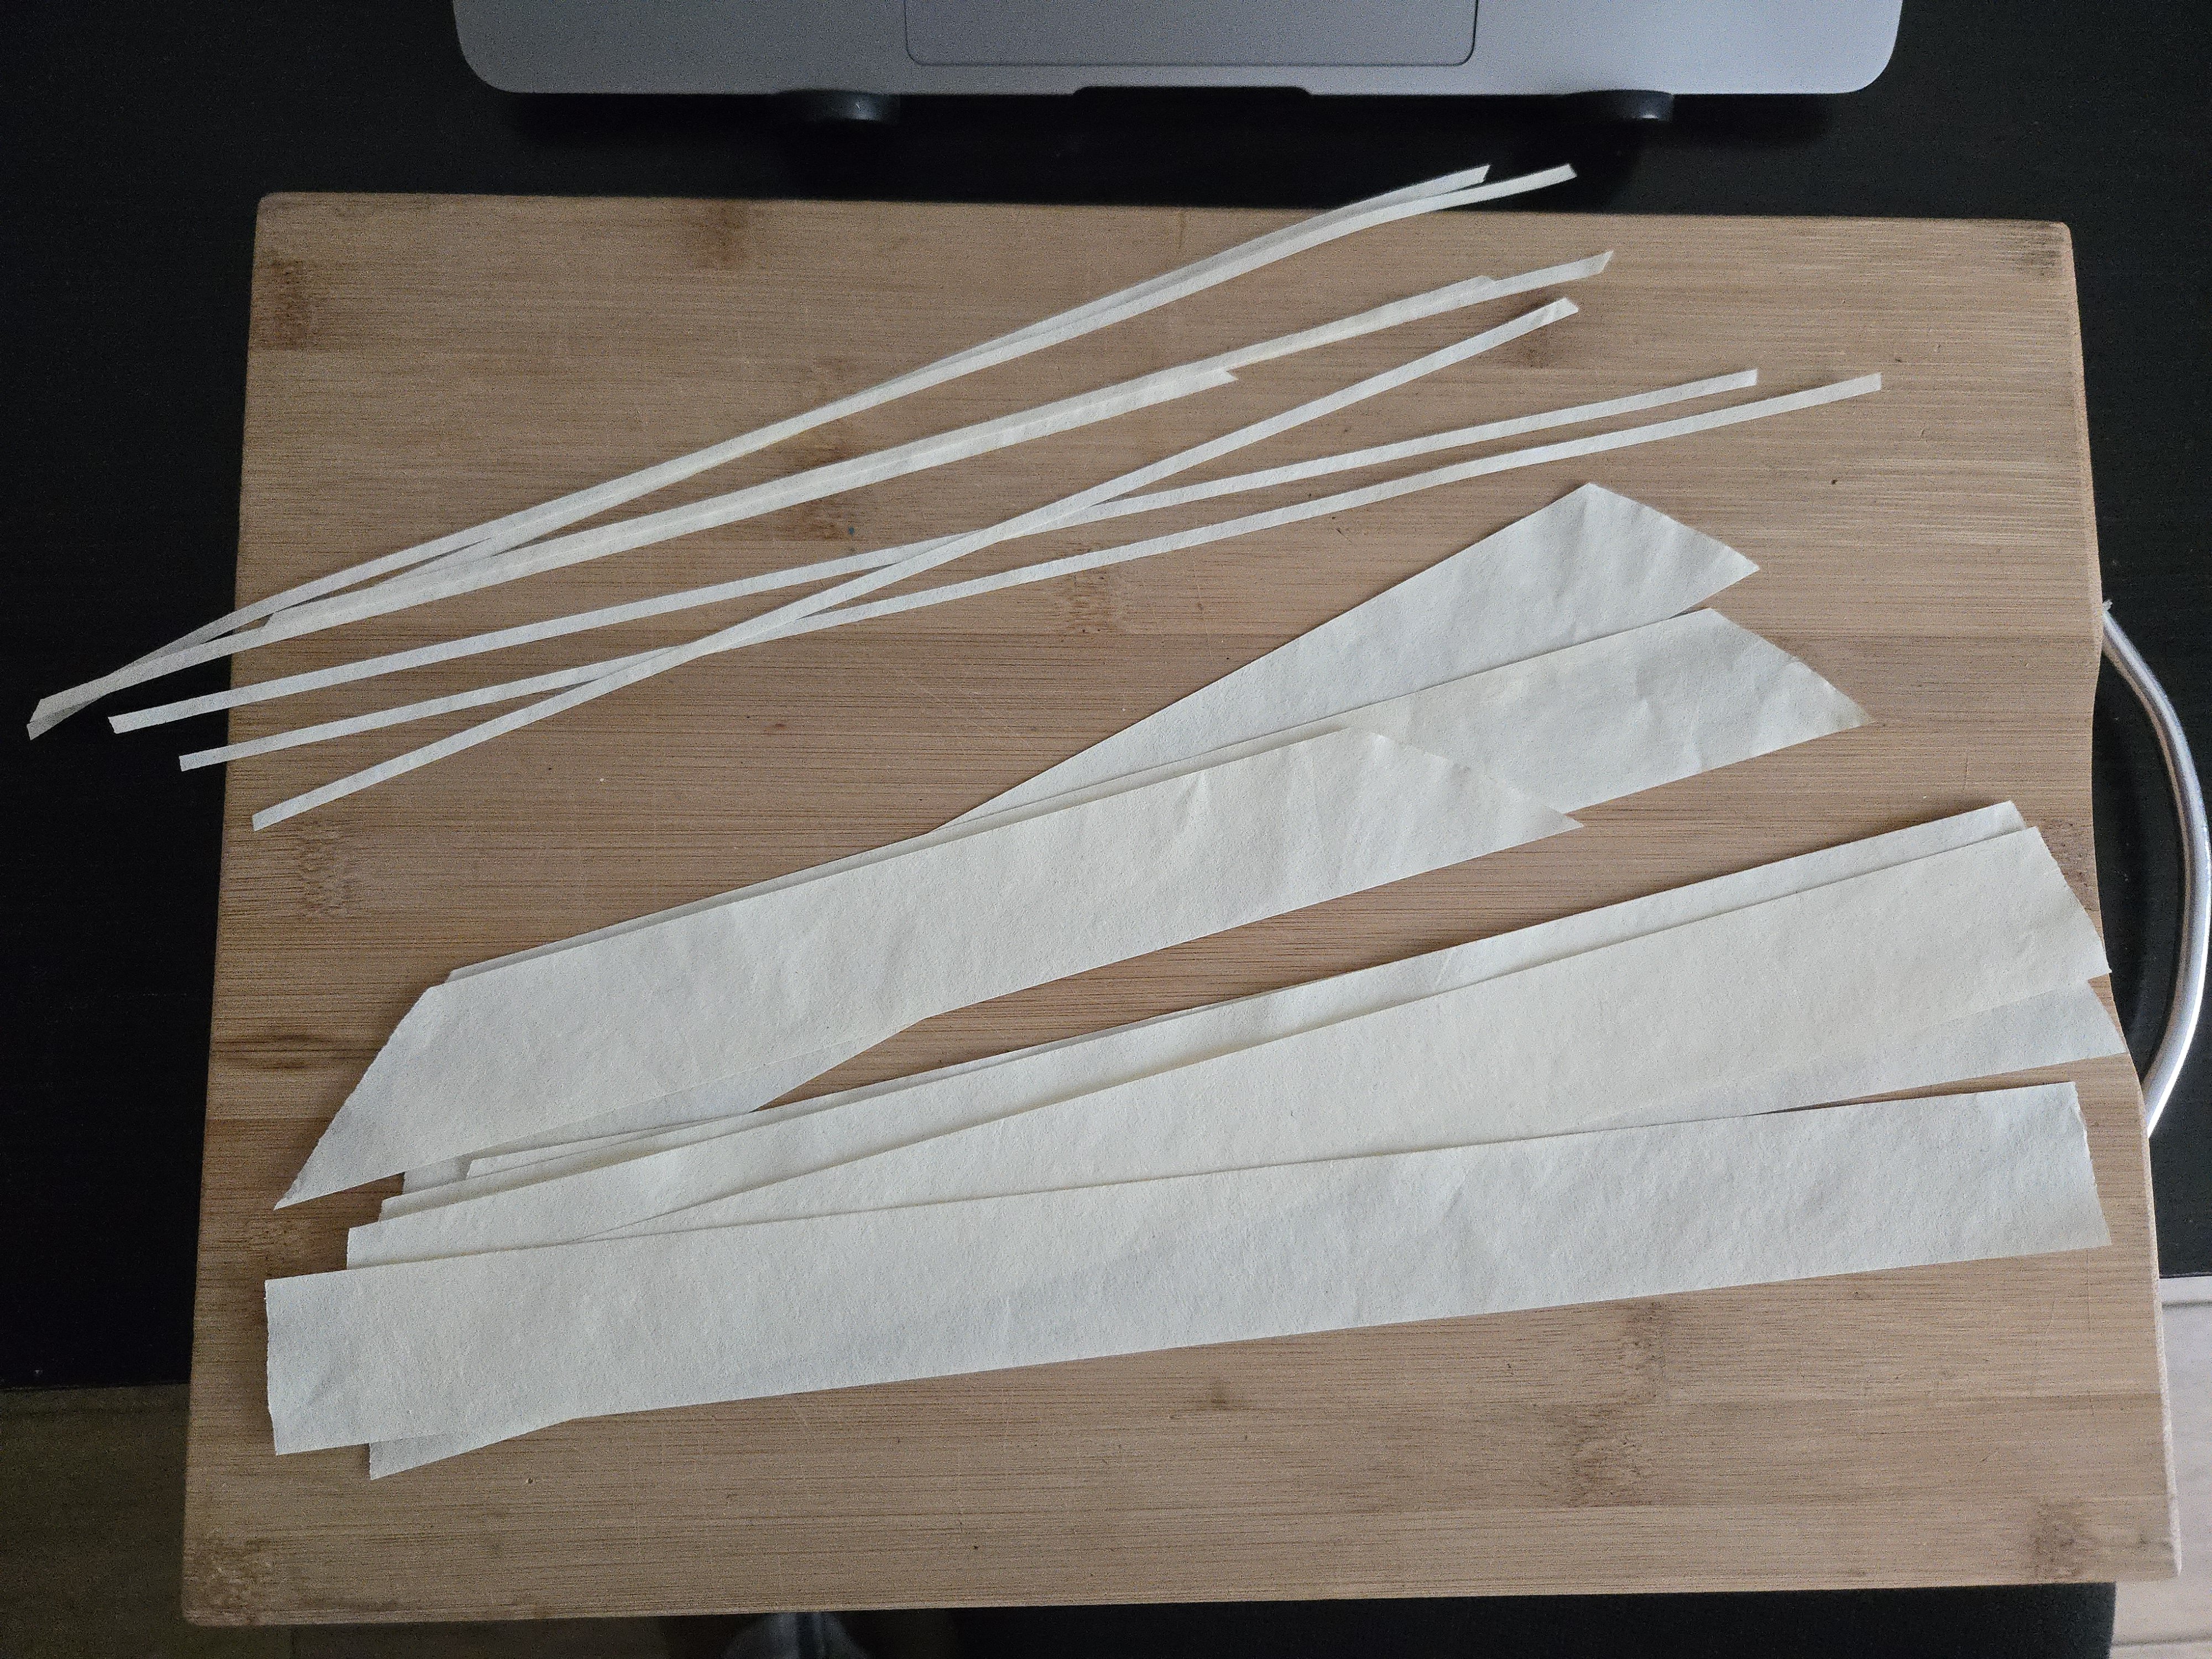
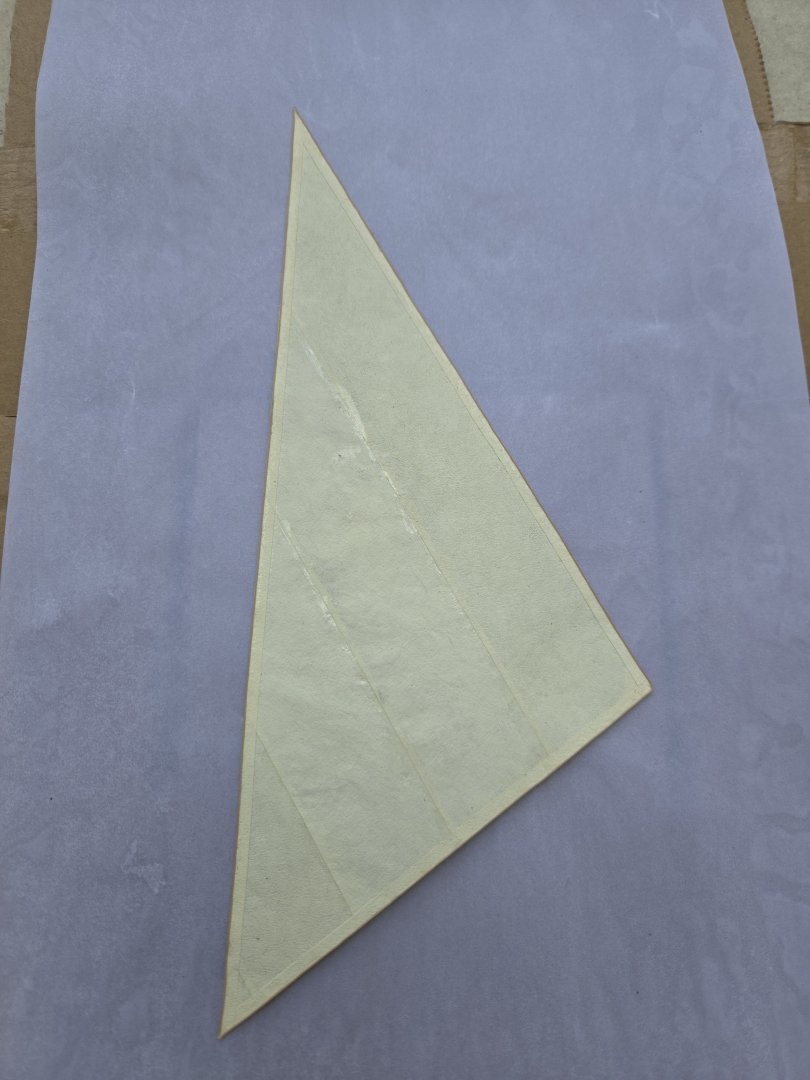
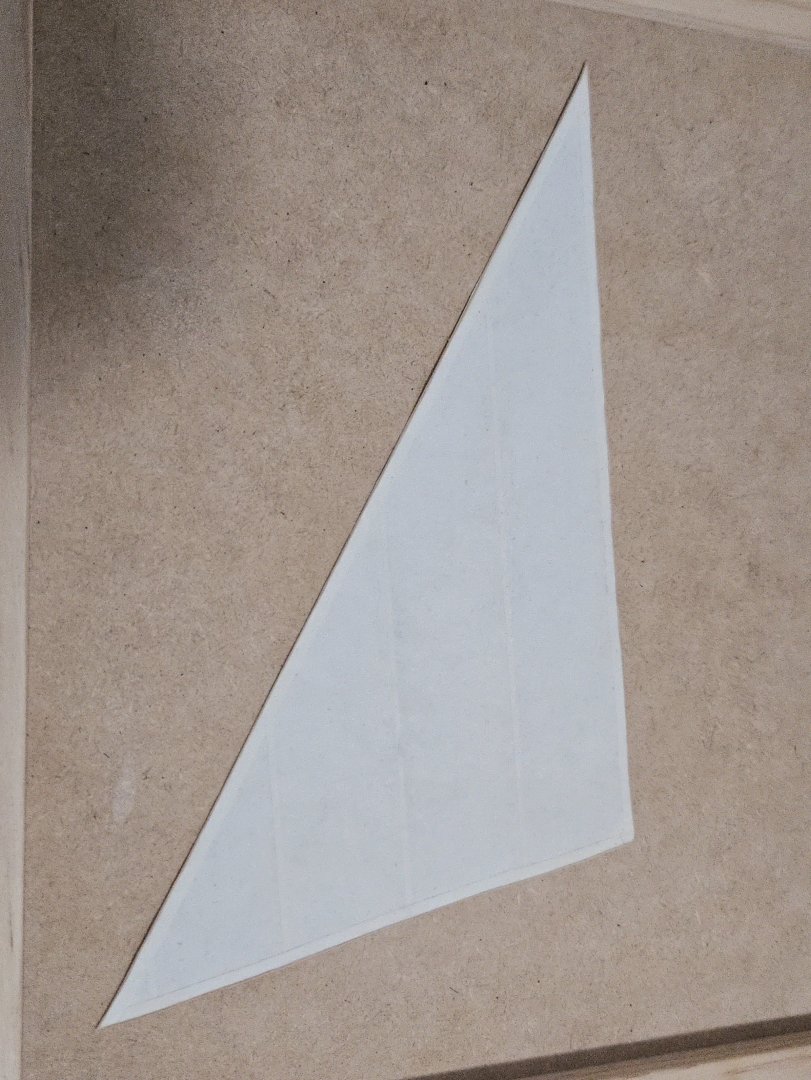
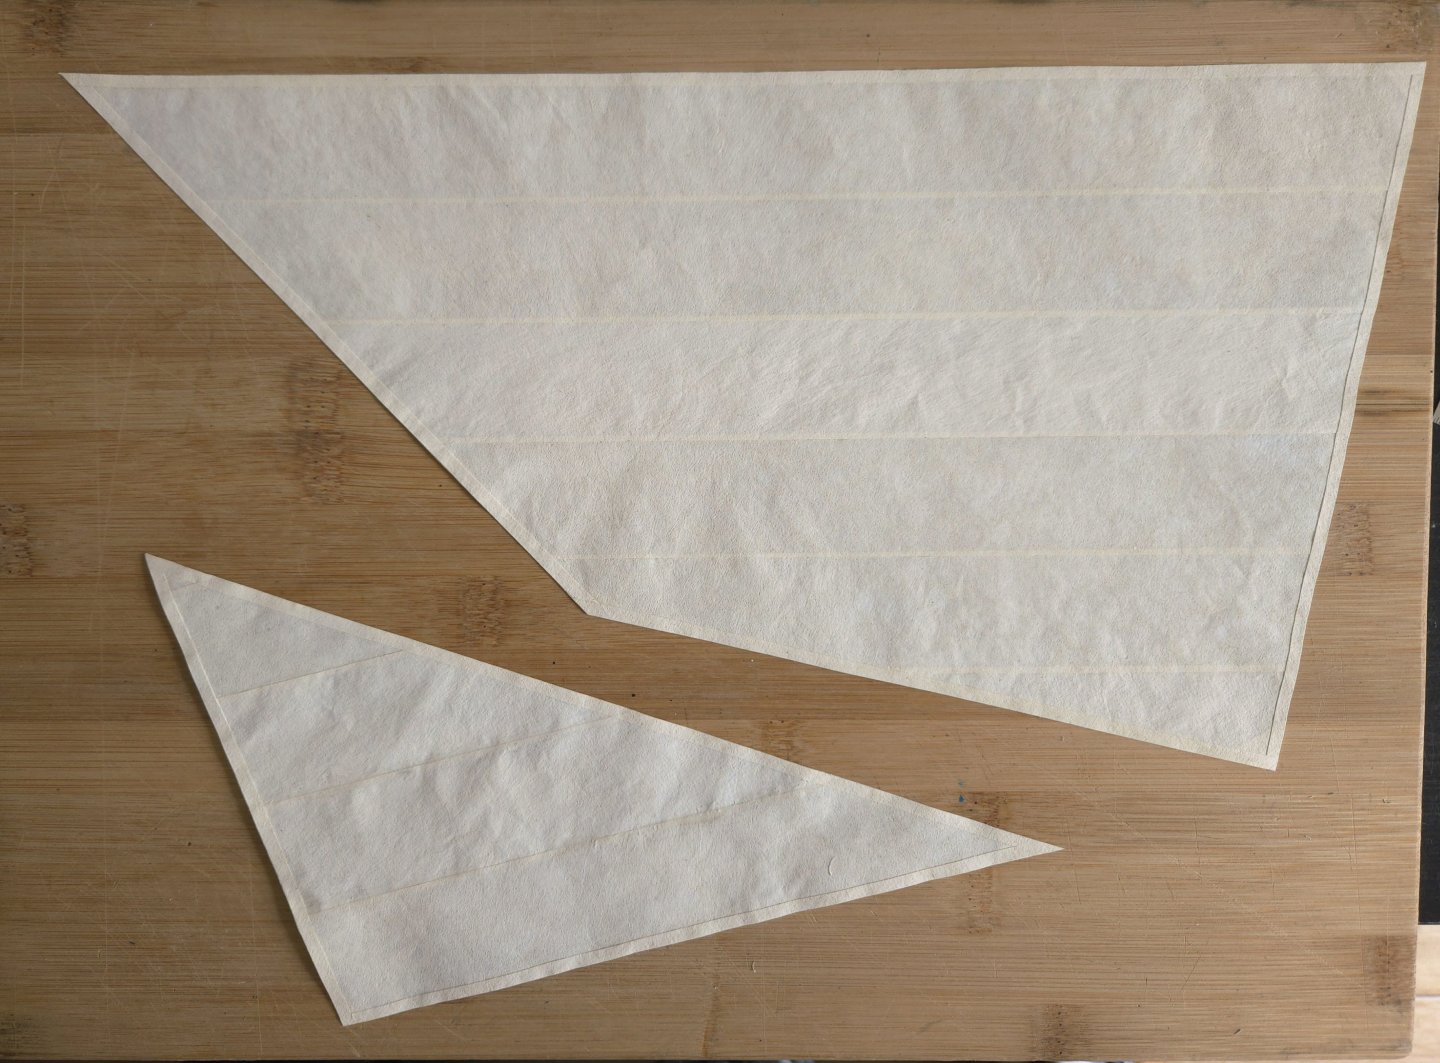
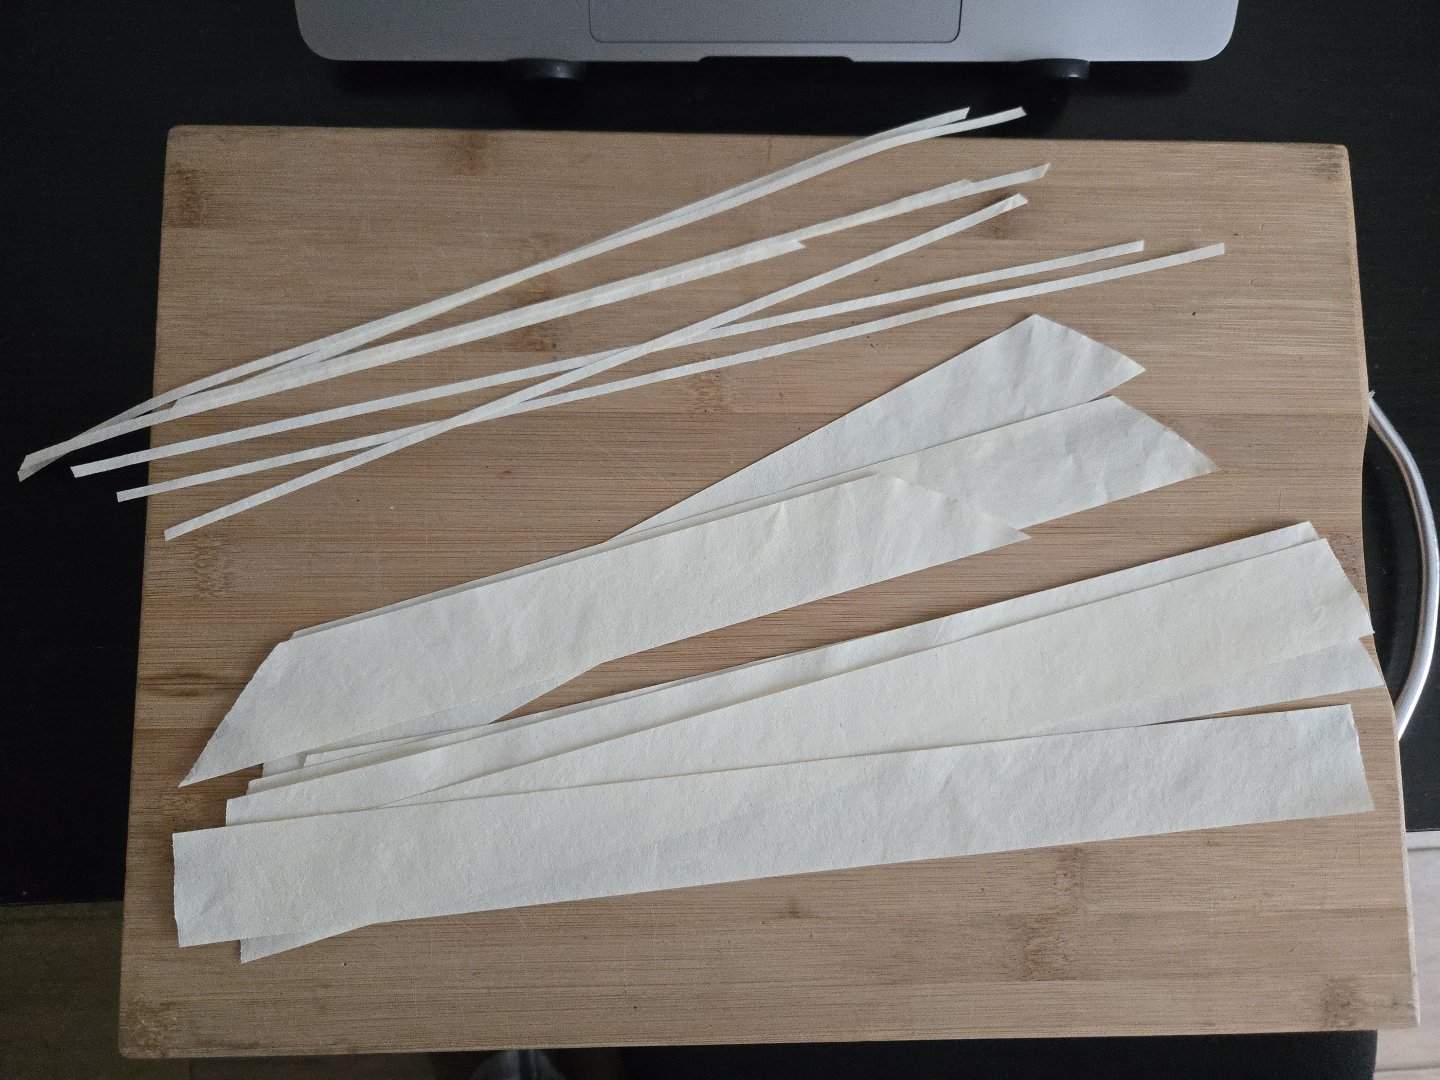
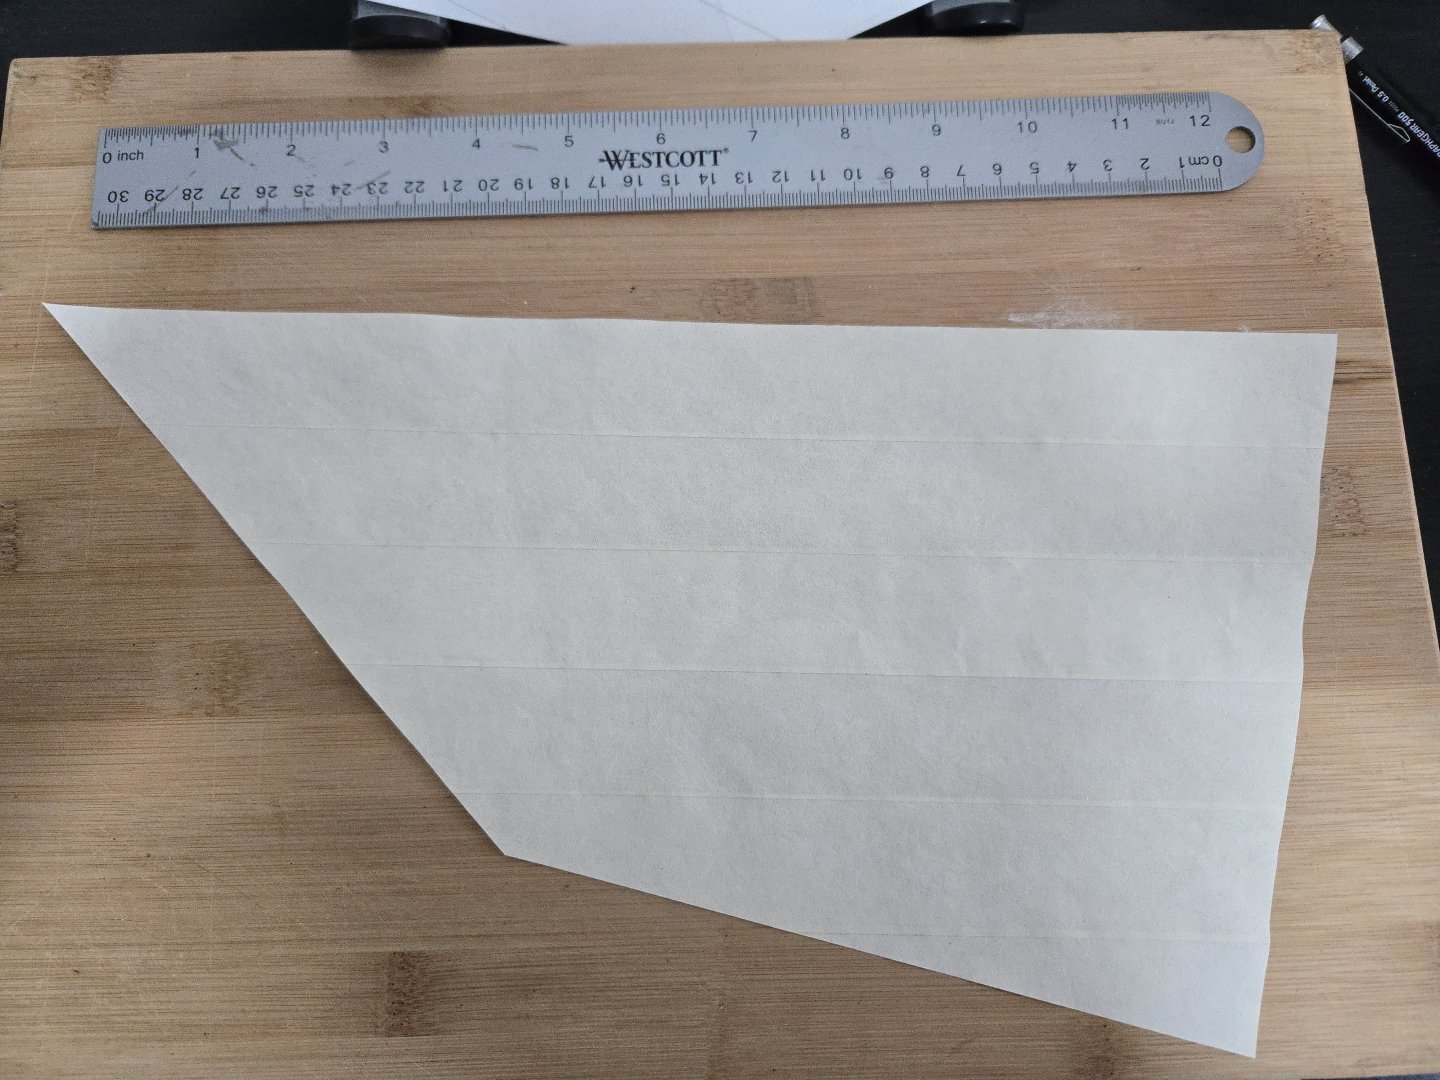
Thanks, all! It took a bit longer than I thought, but the sails are now just about done, needing only the boltrope. As mentioned earlier, I began by painting a large coffee filter in a mix of acrylic paint, white glue, and water and letting it dry on stretched plastic wrap. Looking at photos of lanchas, there was a lot of variety in sail panel widths. The lancha below, for instance, has 8 panels across the gaff sail: Source: https://www.bibliotecanacionaldigital.gob.cl/bnd/629/w3-article-164339.html While this one has twelve or thirteen (and also shows lots of repairs). Source: https://www.bibliotecanacionaldigital.gob.cl/bnd/629/w3-article-613540.html And at the other end of the scale, this one has six: Source: https://www.bibliotecanacionaldigital.gob.cl/bnd/629/w3-article-164310.html I'm not really sure why there was such variation. As far as I can tell, there isn't a strong correlation between fewer panels and more recent dates, which you would expect if larger strips of fabric or stronger fabric came into use over time. I suspect it just depended on what materials were available at the time where the lancha was built. In any case, I decided that making a six-panel gaff sail would be as accurate as one with a lot of smaller panels, but would have fewer chances for something to go wrong. I cut the panels accordingly, as well as some thin strips for the edge bands. To glue the panels together, I used Aleene's Fabric Fusion glue, which dries strong but transparent and doesn't wrinkle the filter paper nearly as much as white glue would. I put plastic wrap over the template, and then began gluing the panels together. I overlapped them by about 3/64-1/16 of an inch, which is maybe a little oversized for scale, but I was worried that the sail wouldn't hold together well if I went smaller. Once it dried, I took out the template, outlined the sail, and cut. I then did the same to make the jib. This process seemed to work all right, but I did run into some trouble with the thin cheap plastic wrap sticking to the glue residue and ripping rather than peeling off. This was especially true for the jib. In the future, I might go for a thicker, sturdier plastic sheet instead of the cheapest plastic wrap around (which also, I should note, was tricky to get flat as it bunched to itself extremely easily). I also noticed that, between the gluing and peeling the plastic off, the sails got a little more wrinkled than I would have liked. I posted about the wrinkling issue in a separate thread, and received a lot of helpful comments. While I figured out how to deal with the wrinkling, I added the reinforcement strips along the edges and the corner reinforcements. In hindsight, I probably could have made the edge strips a bit thinner. After considering the advice I received about how to iron (or not) the sail, I decided to run some tests on scrap material. Unable to get baking parchment paper, I placed the sail material between two sheets of wax paper and put a rag over the top. On low heat, the iron didn't do anything, probably because the rag is pretty thick. Higher heat did press the sail material a little flatter. On a whim, I then slightly dampened the sail material and tried that (still in the wax paper and under the rag), which caused the paint to run. Lesson learned! For the actual sails, I carefully ironed them without moisture between wax paper and under the cloth. It helped a bit, although they're not the smoothest of sails. At this point, all that the sails need before being added to the mast/spars is the bolt rope. I should note that I have not seen any photos showing reef points on a lancha sail. I'm not entirely sure why, as they certainly faced strong winds. According to Clinton R. Edwards's article on the Lancha Chilota, they usually hugged the coast and simply put into the nearest bay whenever the weather got too rough. Unfortunately, at this point I realized that I made a mistake somewhere in the process, and the jib is slightly too large to properly fit under the jib halyard block--the tip of the sail will be basically in the block. I'm not sure how that happened, given that I had checked with the template. I think I'll redo the jib halyard block strop to be shorter which should raise it sufficiently to work with this sail.


- 312 replies
-
- 10
-
-
- Chile
- Latin America
- (and 6 more)
-
Nice work!
-
I'm working on making paper sails for my Lancha Chilota build, and was wondering if anyone had any advice on how to iron them. The sails are made of coffee filter paper, colored and stiffened with a watered-down mix of acrylic paint and white glue, and the panels are glued on with Aleene's Fabric Fusion glue. While it isn't horribly wrinkled, it would be nice to get it a little flatter, but I'm not sure what the best way to iron it would be--low or high heat? Underneath a cloth to avoid direct contact with the iron? Damp or dry? If anyone has any experience with ironing paper sails, I'd love to hear it. Thanks in advance!
-
Welcome to the forum! I haven't built this model, but if you search for build logs of the Syren 1:24‐scale Medway Longboat, I think you'll find a lot of helpful information. Syren's kit is a larger-scale and more detailed model of a very similar vessel, and it was designed by the same person, Chuck Passaro. He's active on this forum, and has a very detailed Medway Longboat build log that might be helpful. Syren also has its instructions free for download, and it probably would tell you what you need. The only thing to keep in mind is that, with your model in a smaller scale, it will be more difficult to strop the blocks and make other parts of the rigging. There are also plenty of build logs for this exact kit, some of which may show in detail what you're after. Best of luck! PS: Syren's guide for stropping blocks (available for download on its website) is also extremely helpful--it doesn't quite replicate how actual blocks were stropped, but it shows a way that's pretty easy and looks good.
-
Nice start! Looking forward to following along with your build, I'm planning on building this kit myself one day.
-
It looks great as it is. If you're not in the mood to rig it but think you might change your mind in the future, I think you could leave it as-is and add the masts later. Another interesting option might be to add stub masts or just the lower masts, which wouldn't add too much to the space requirements but might give it more of a "finished" look.
-
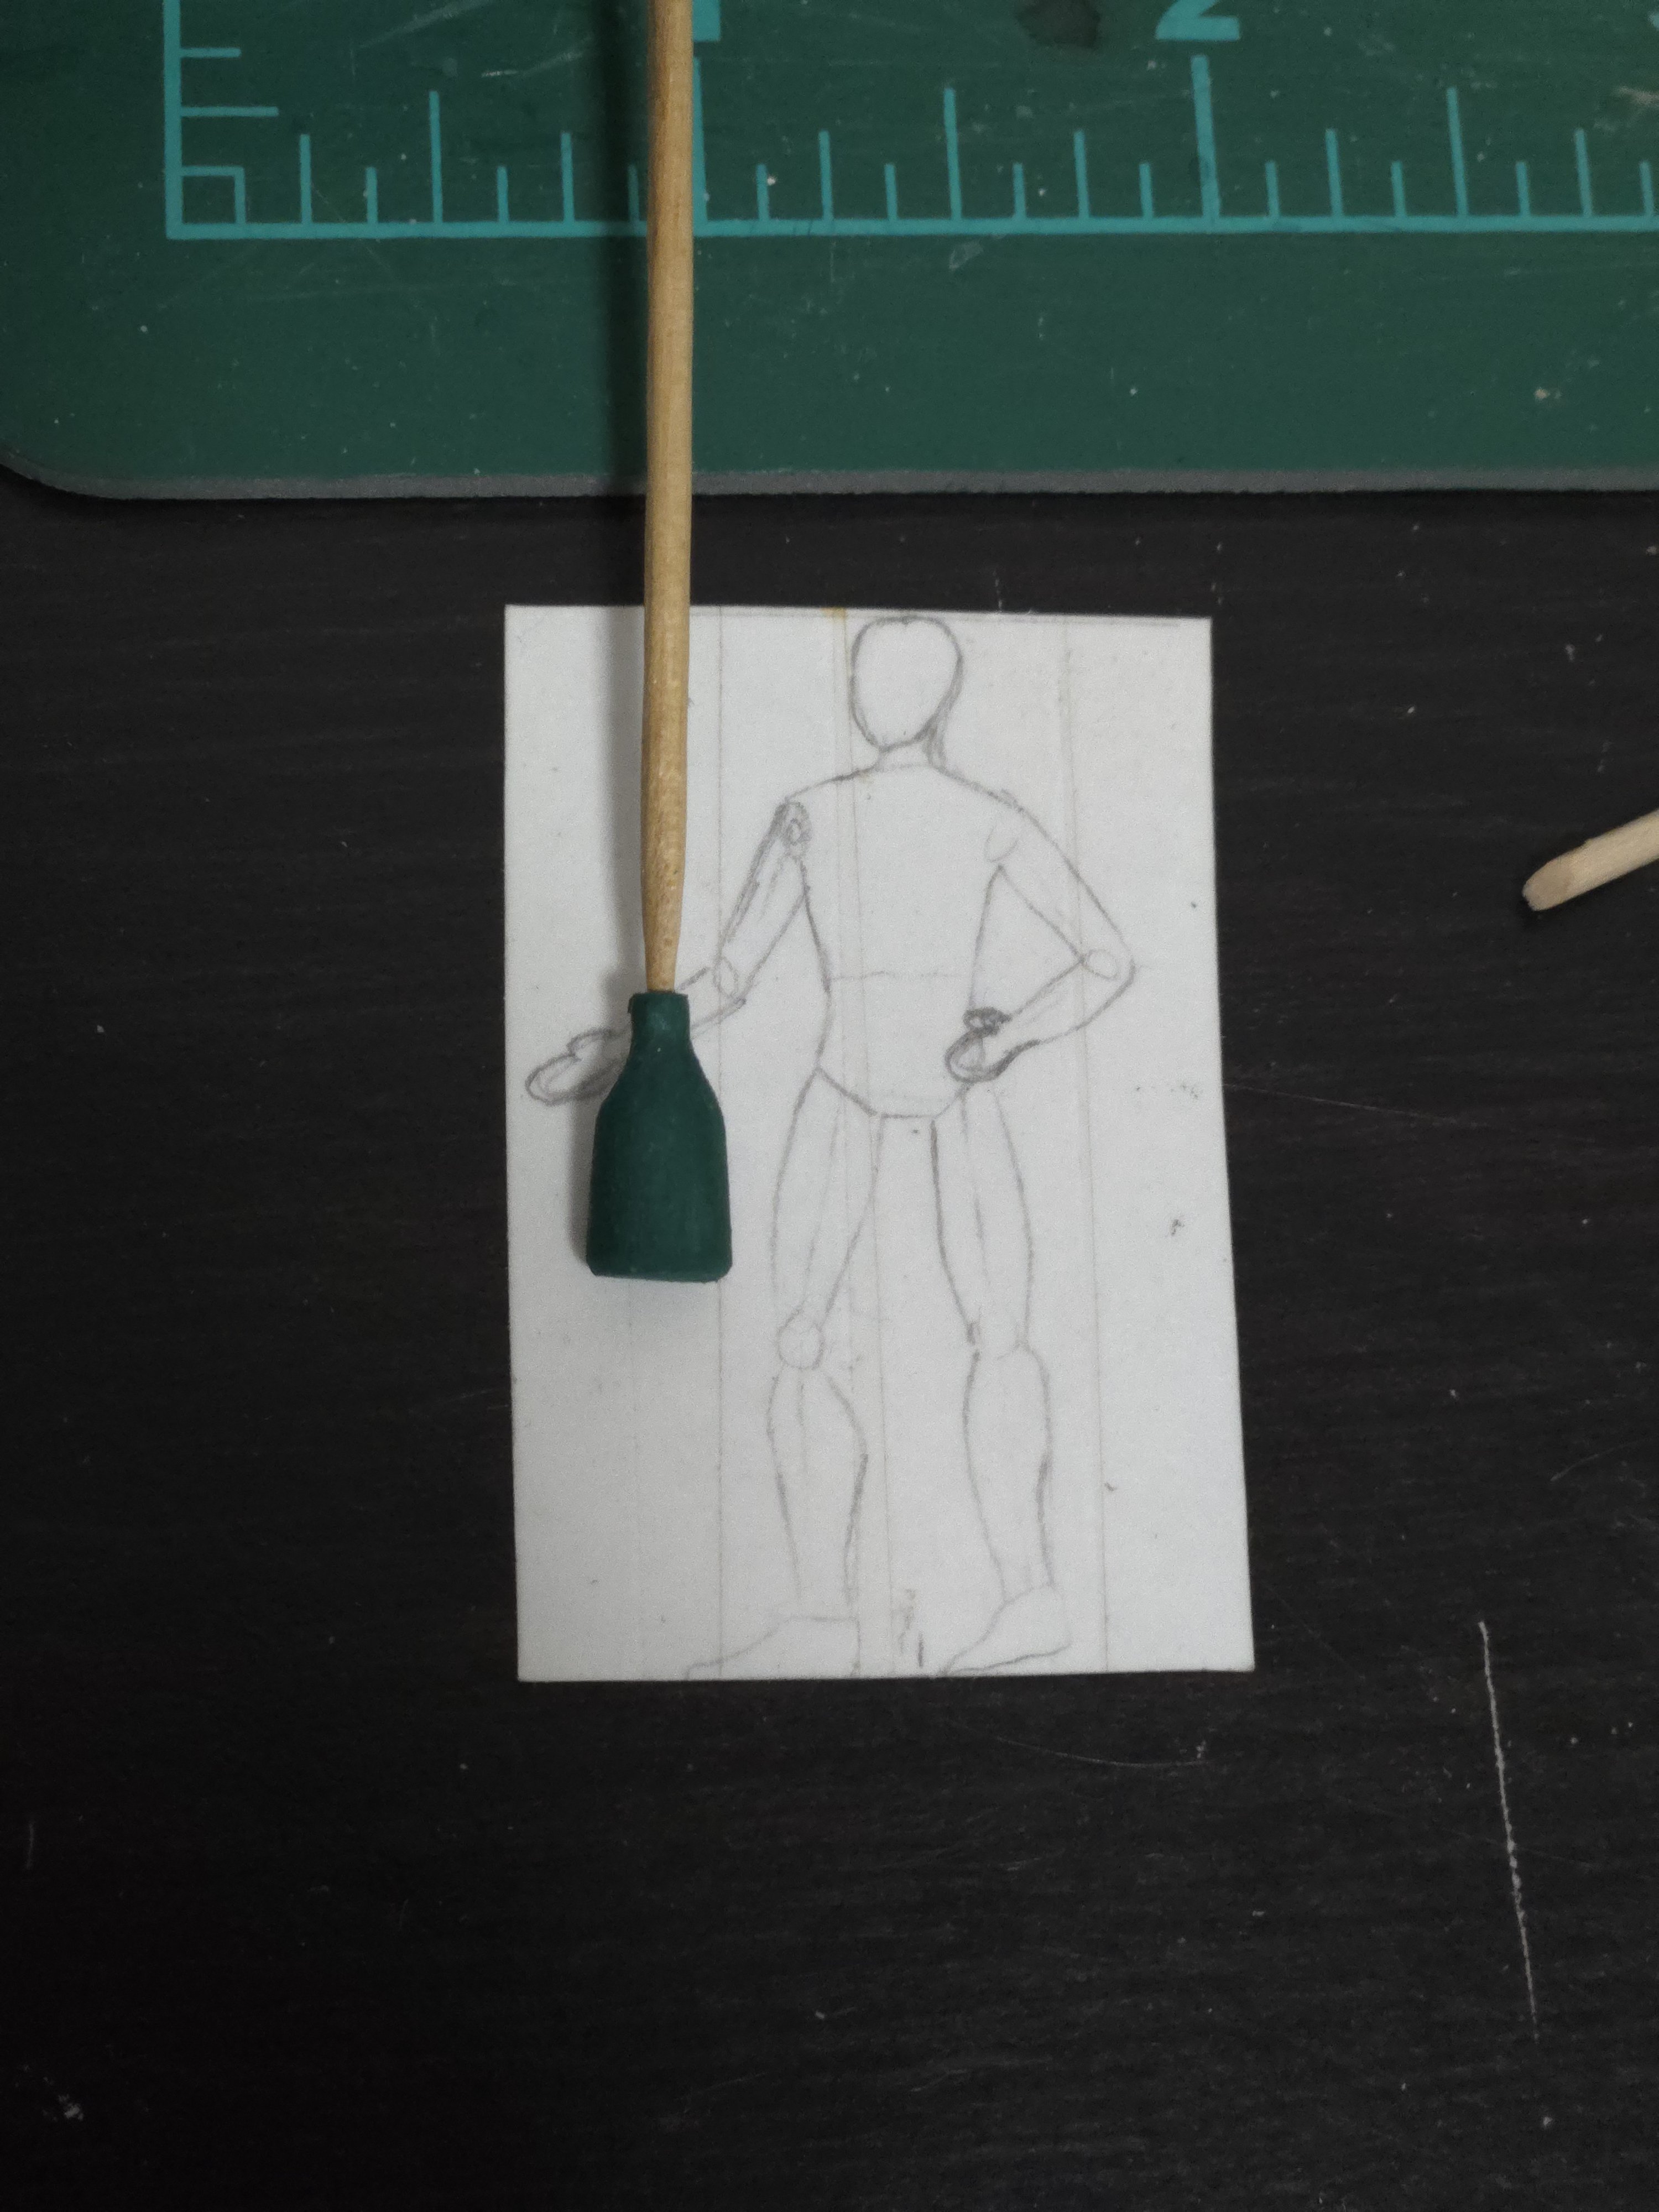
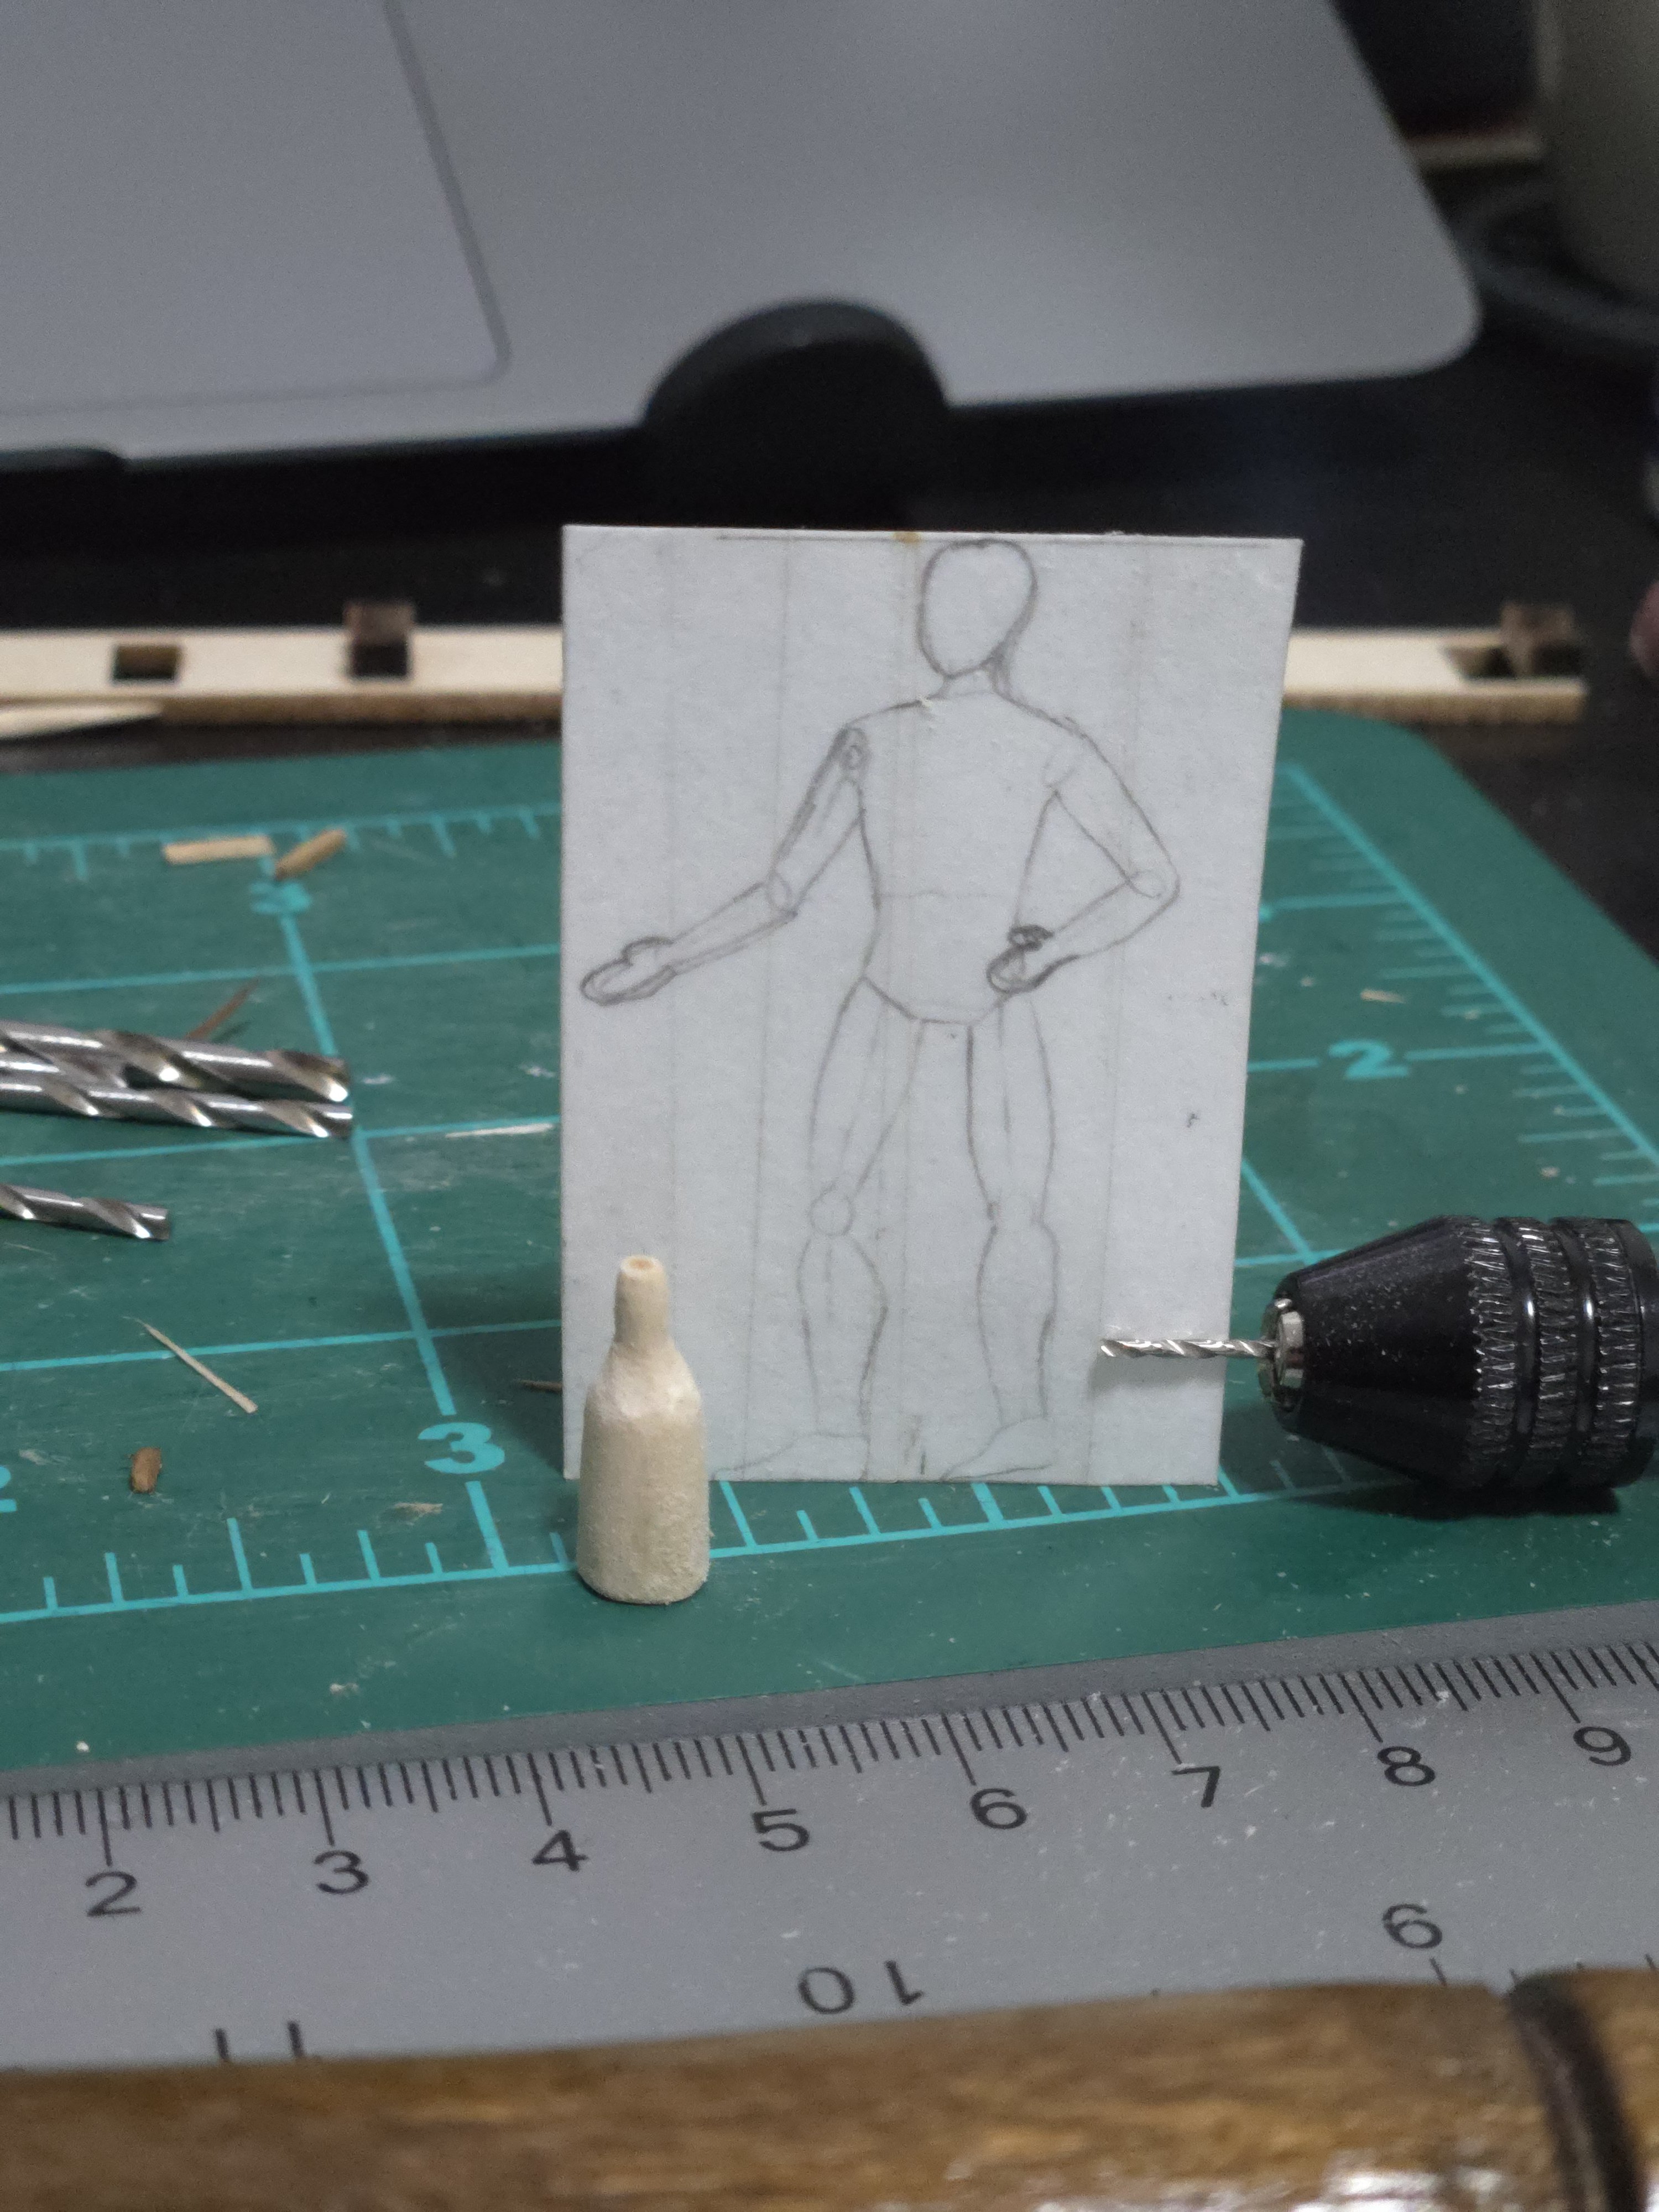
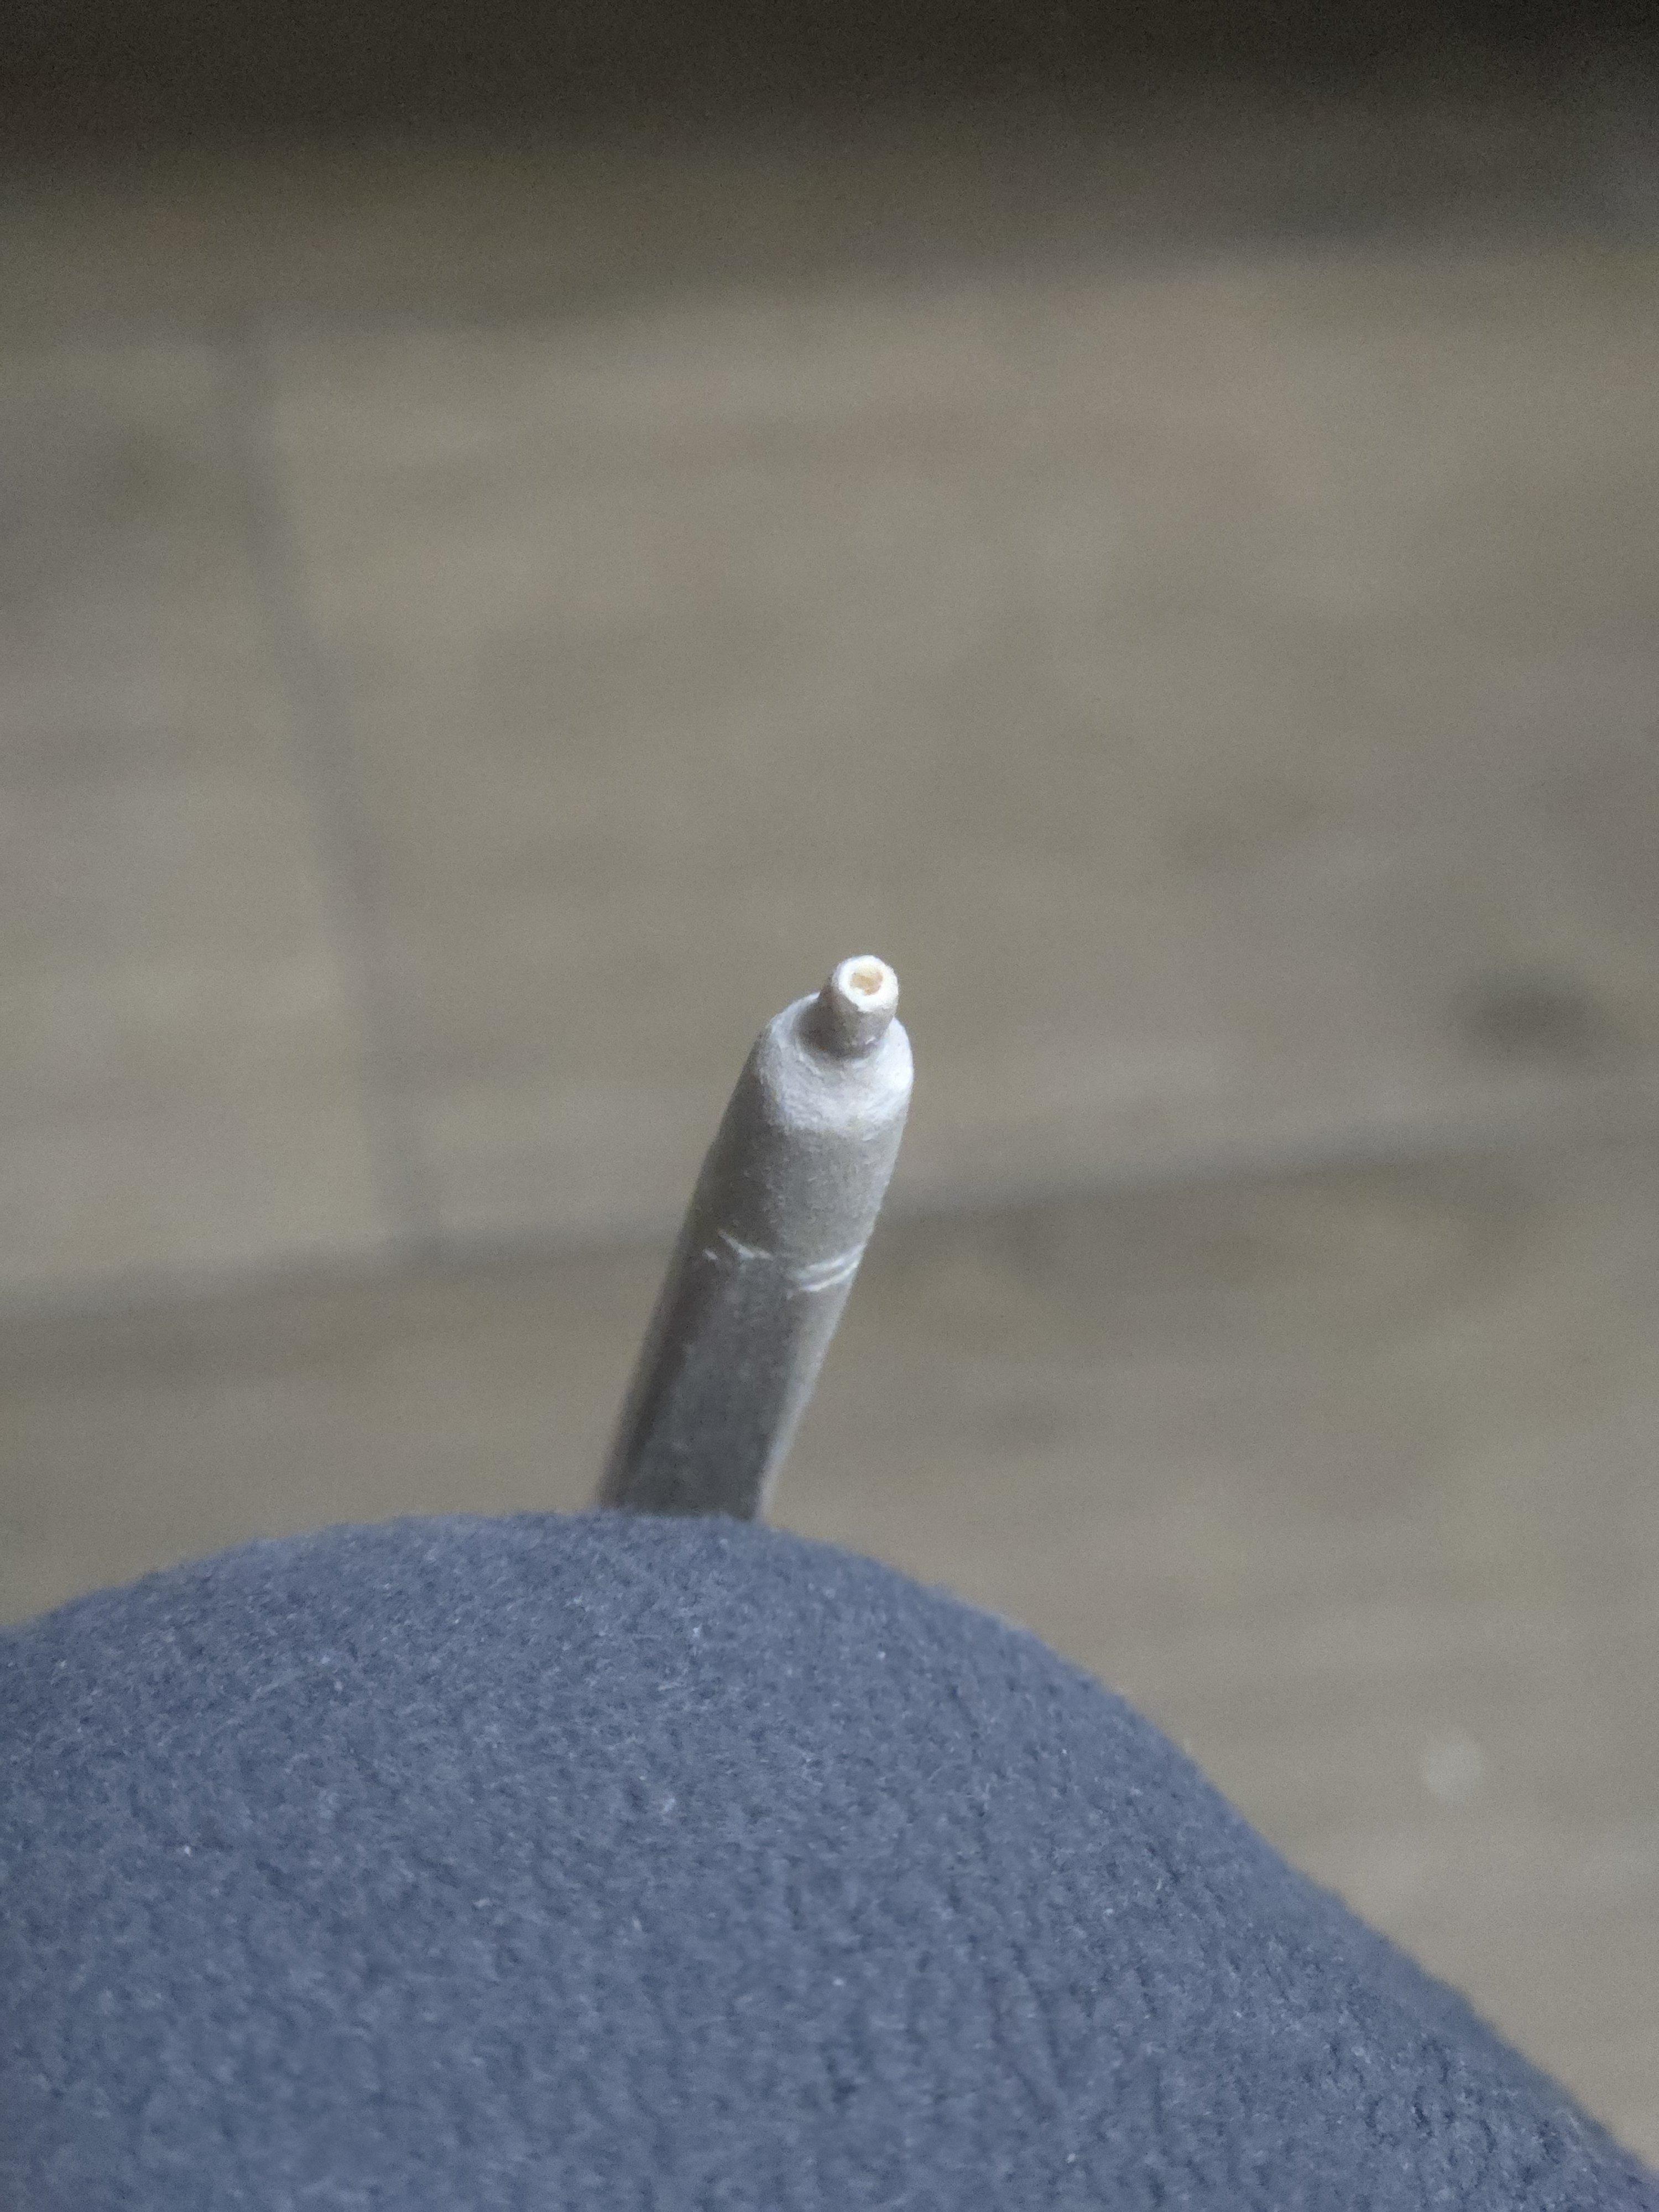
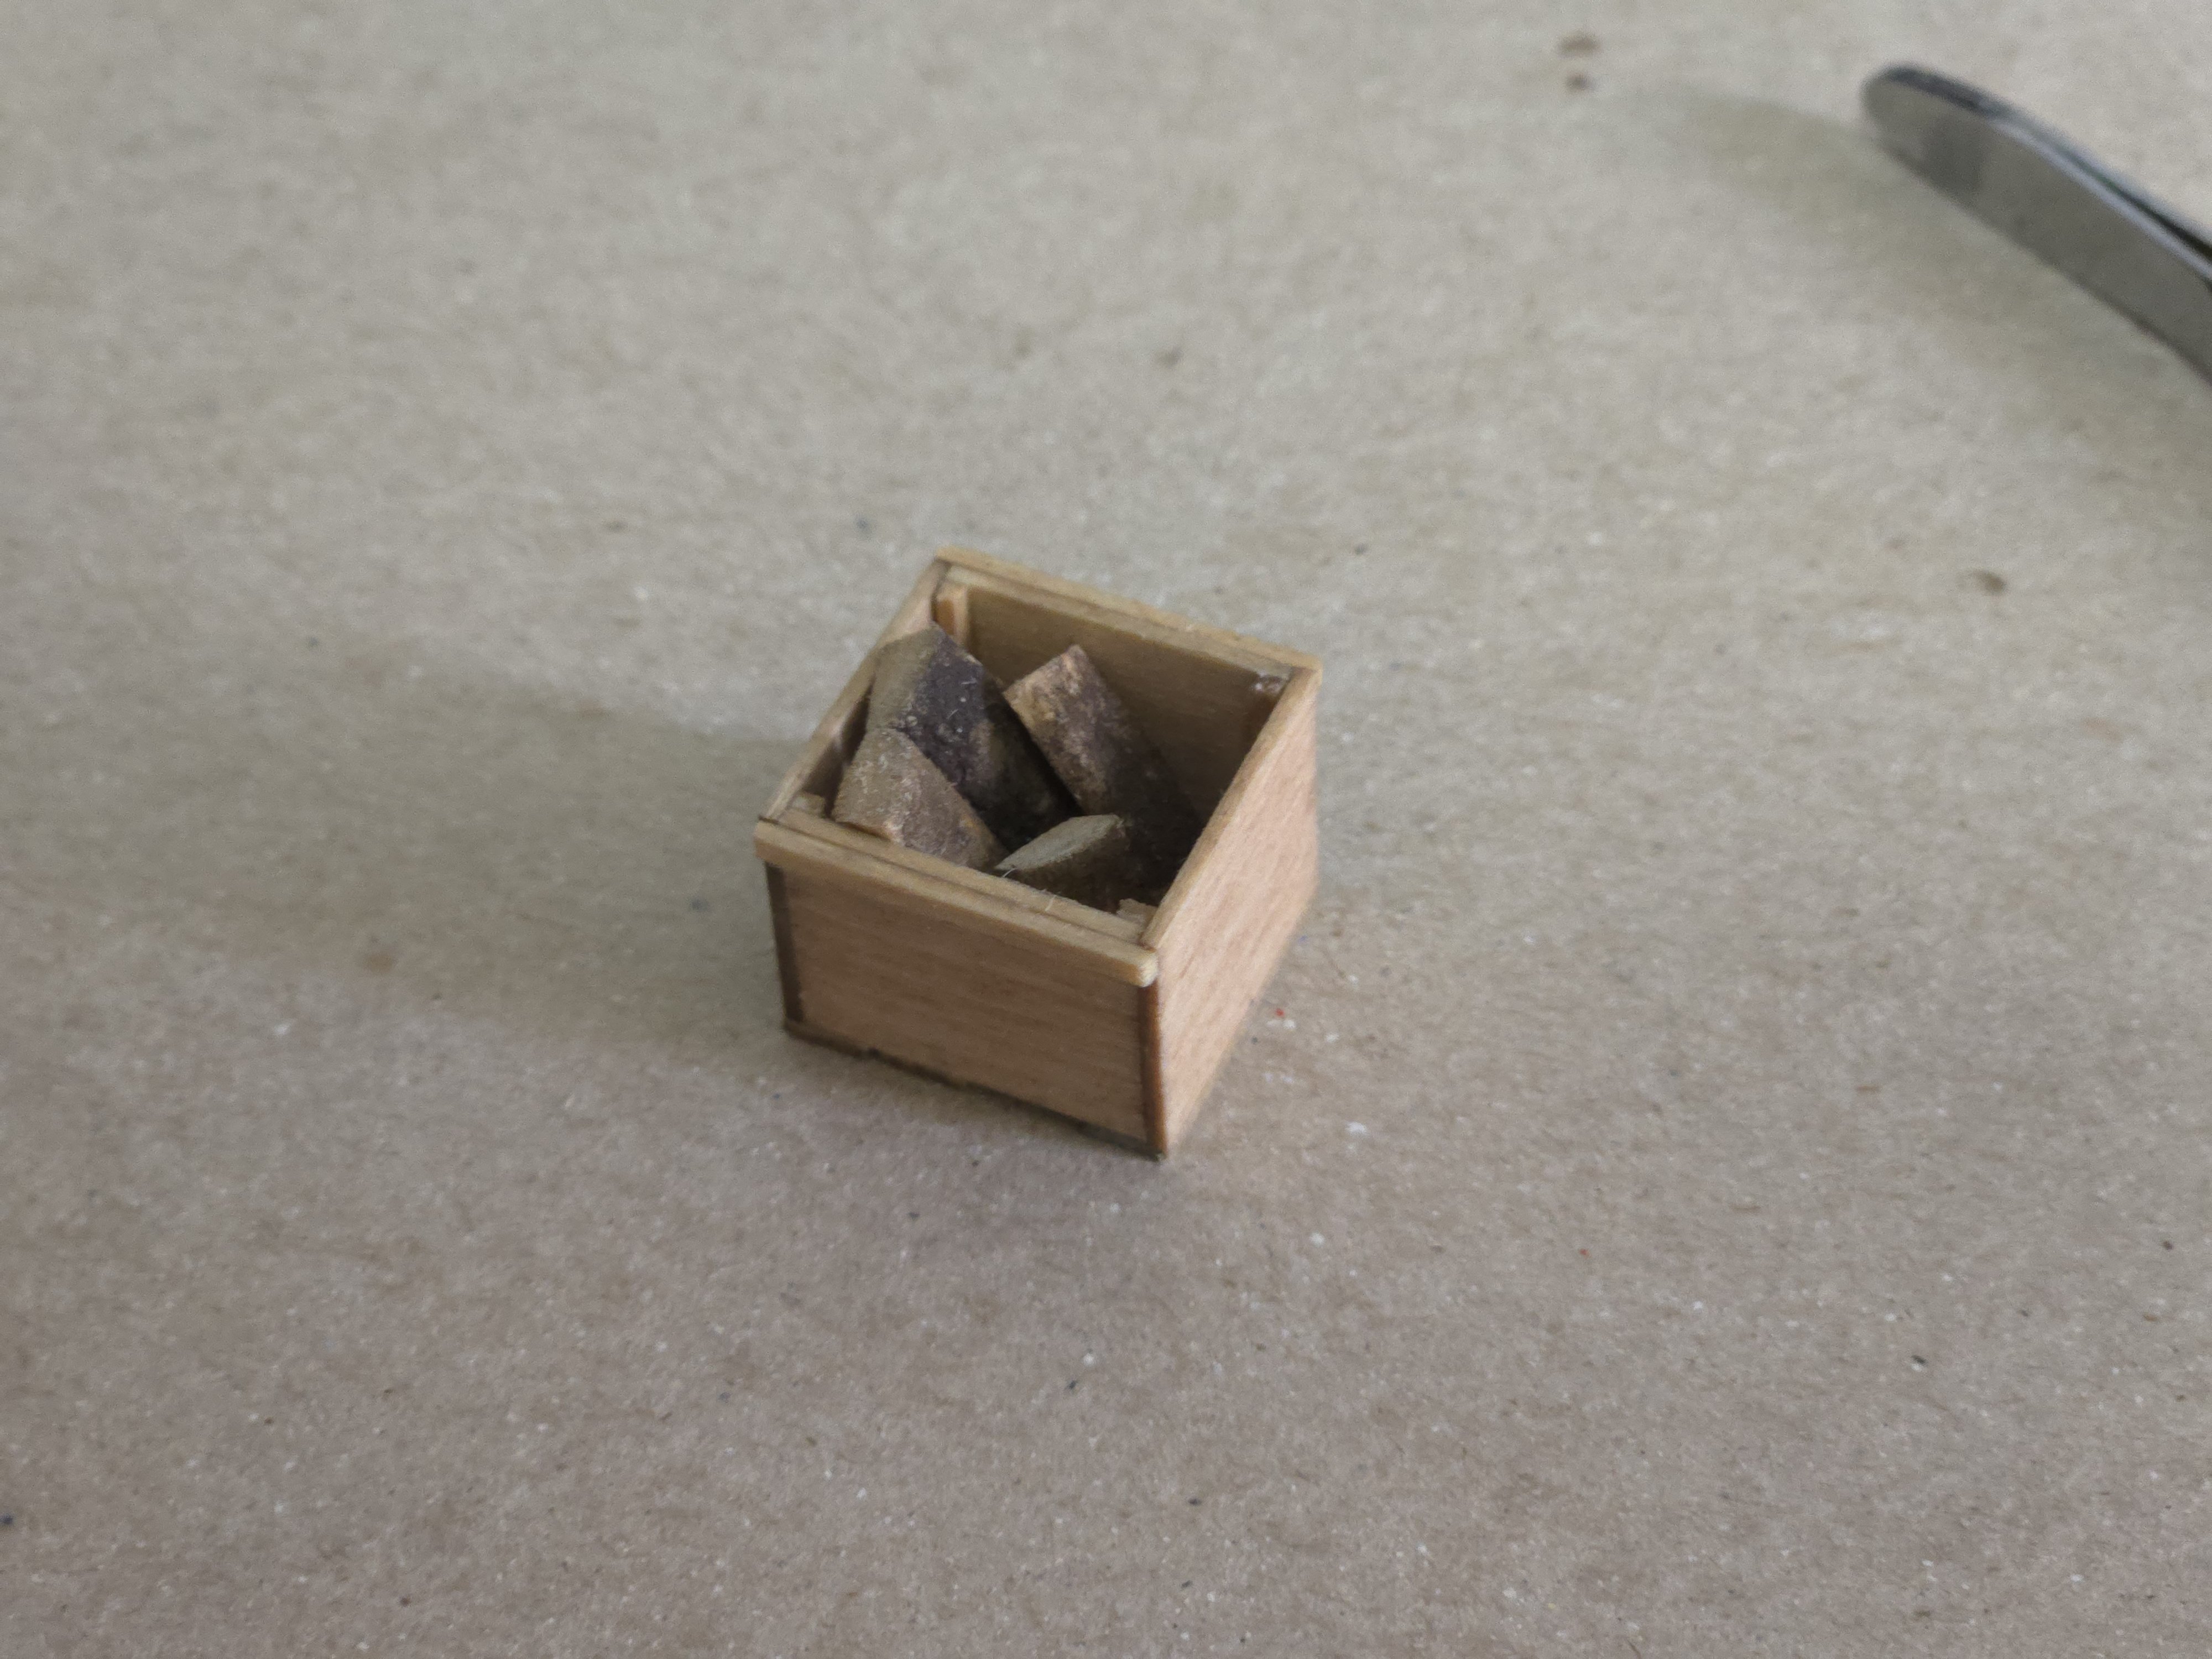
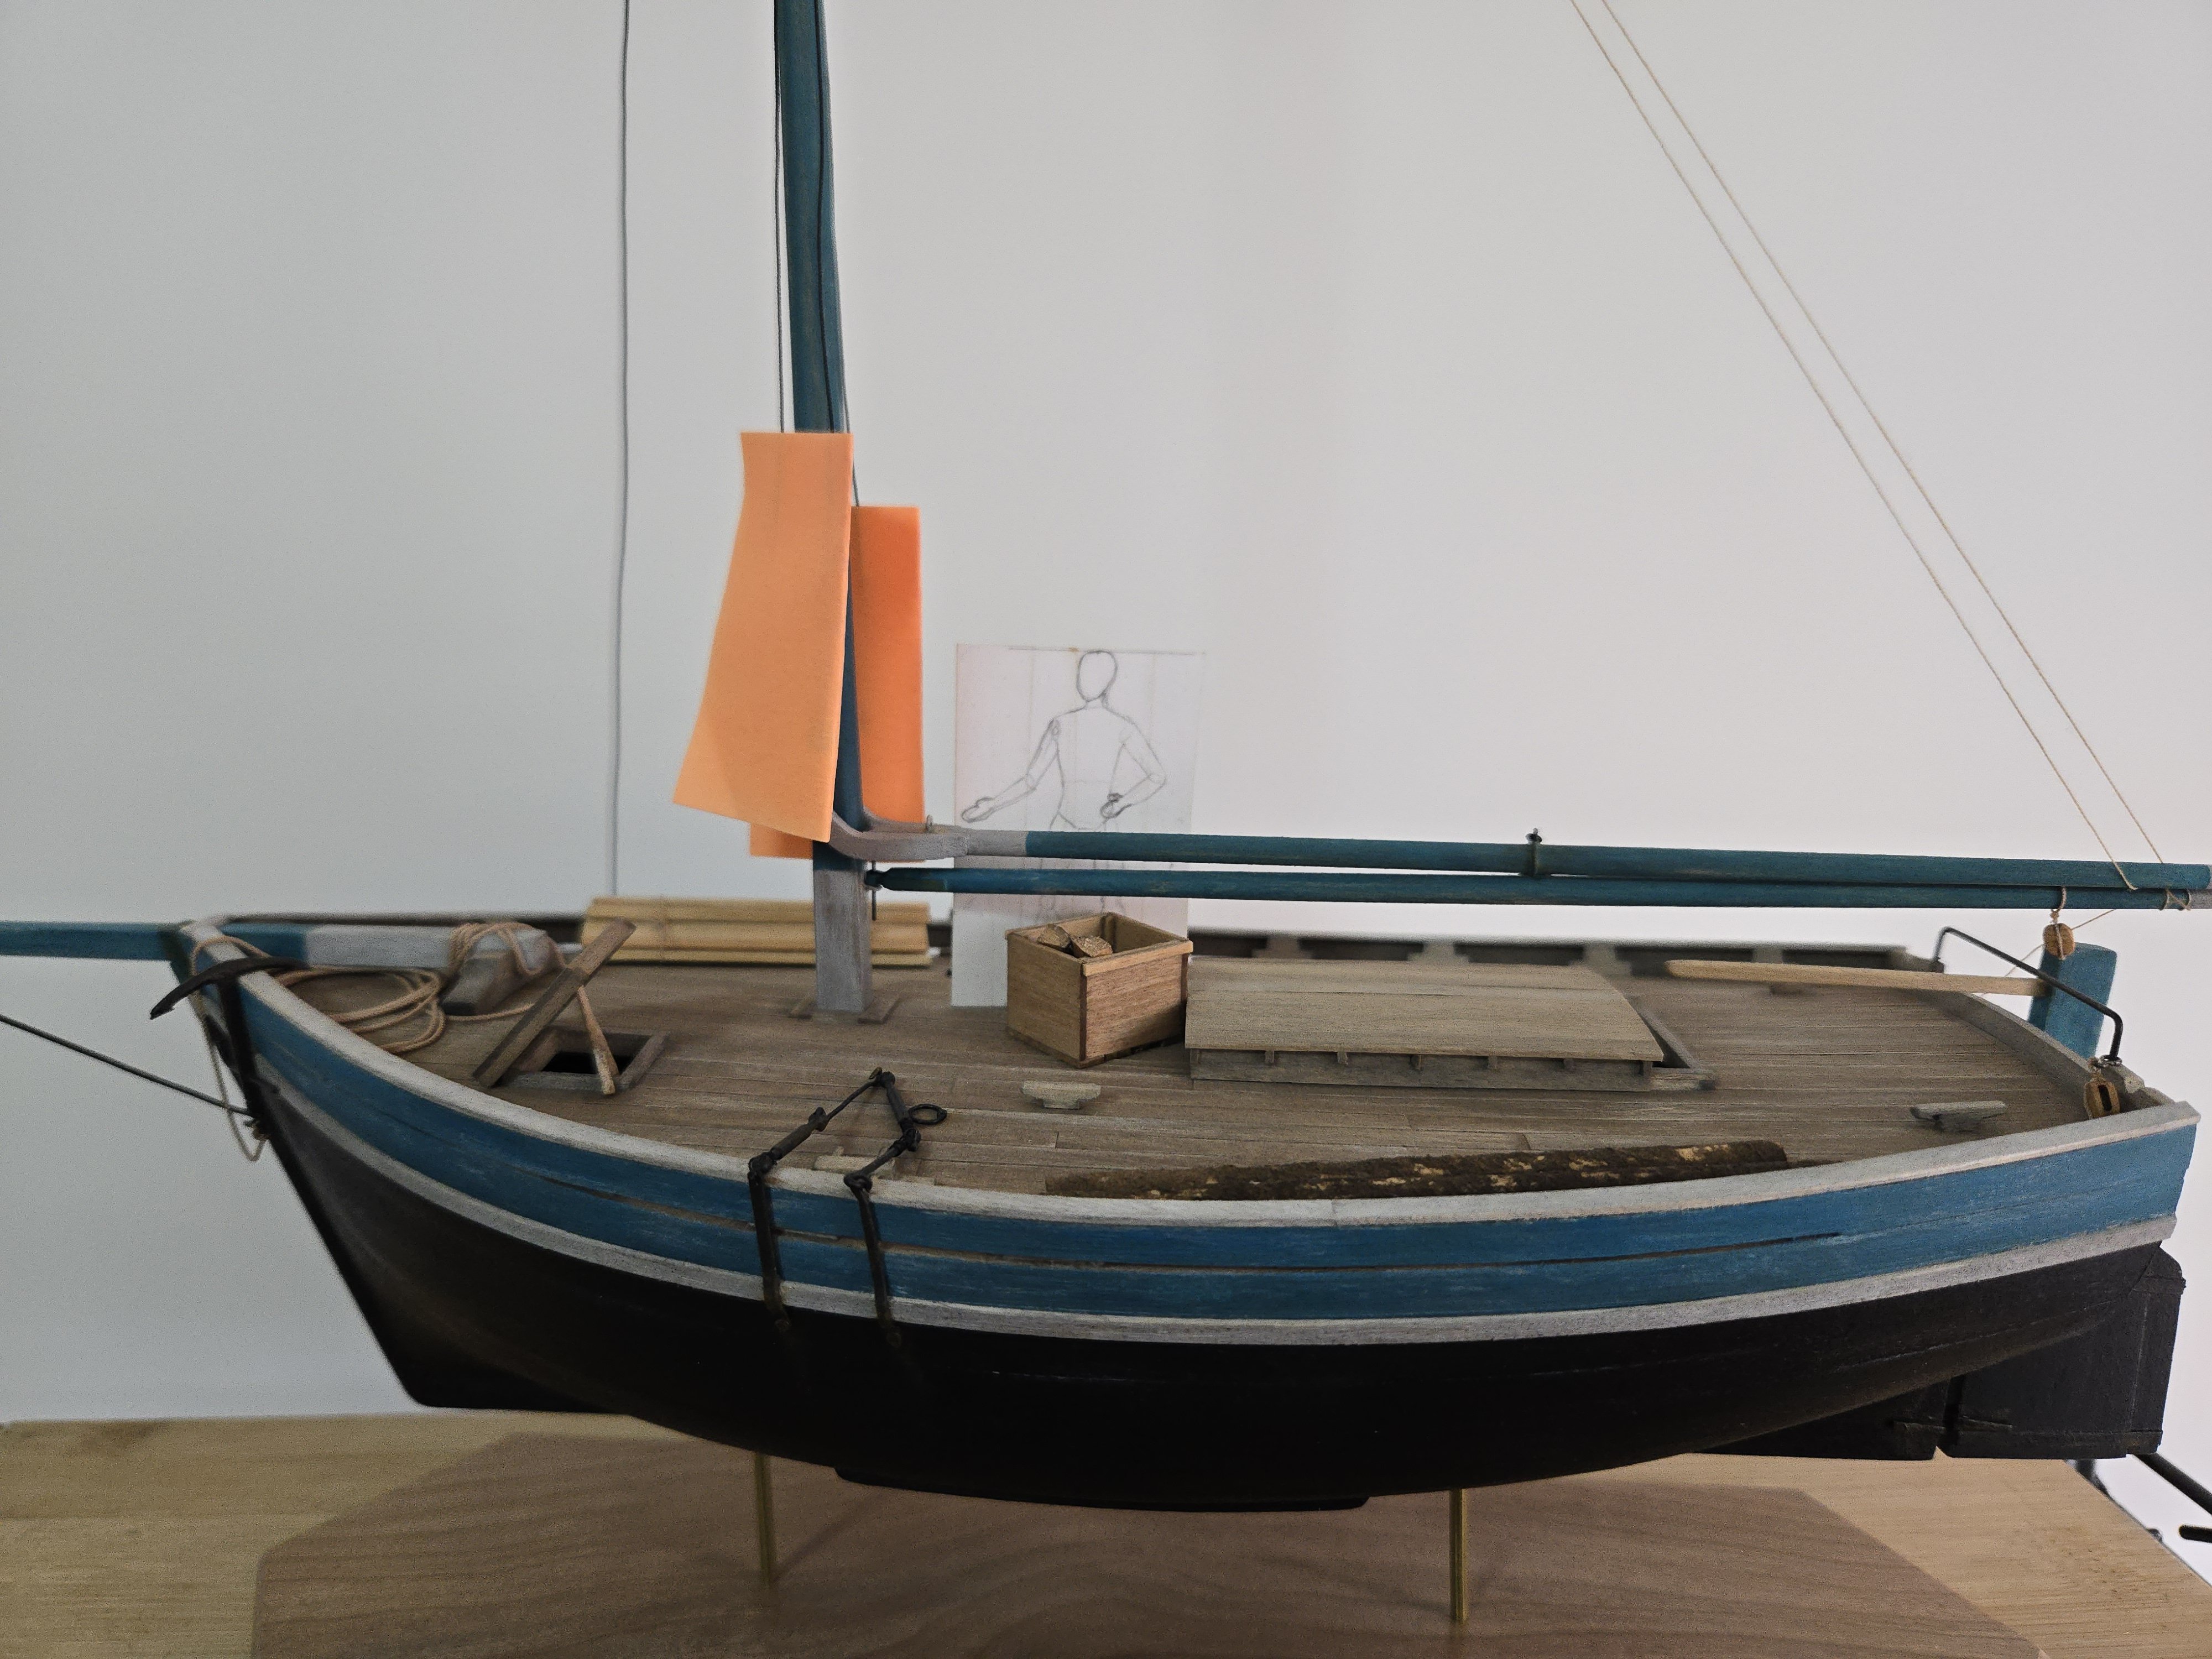
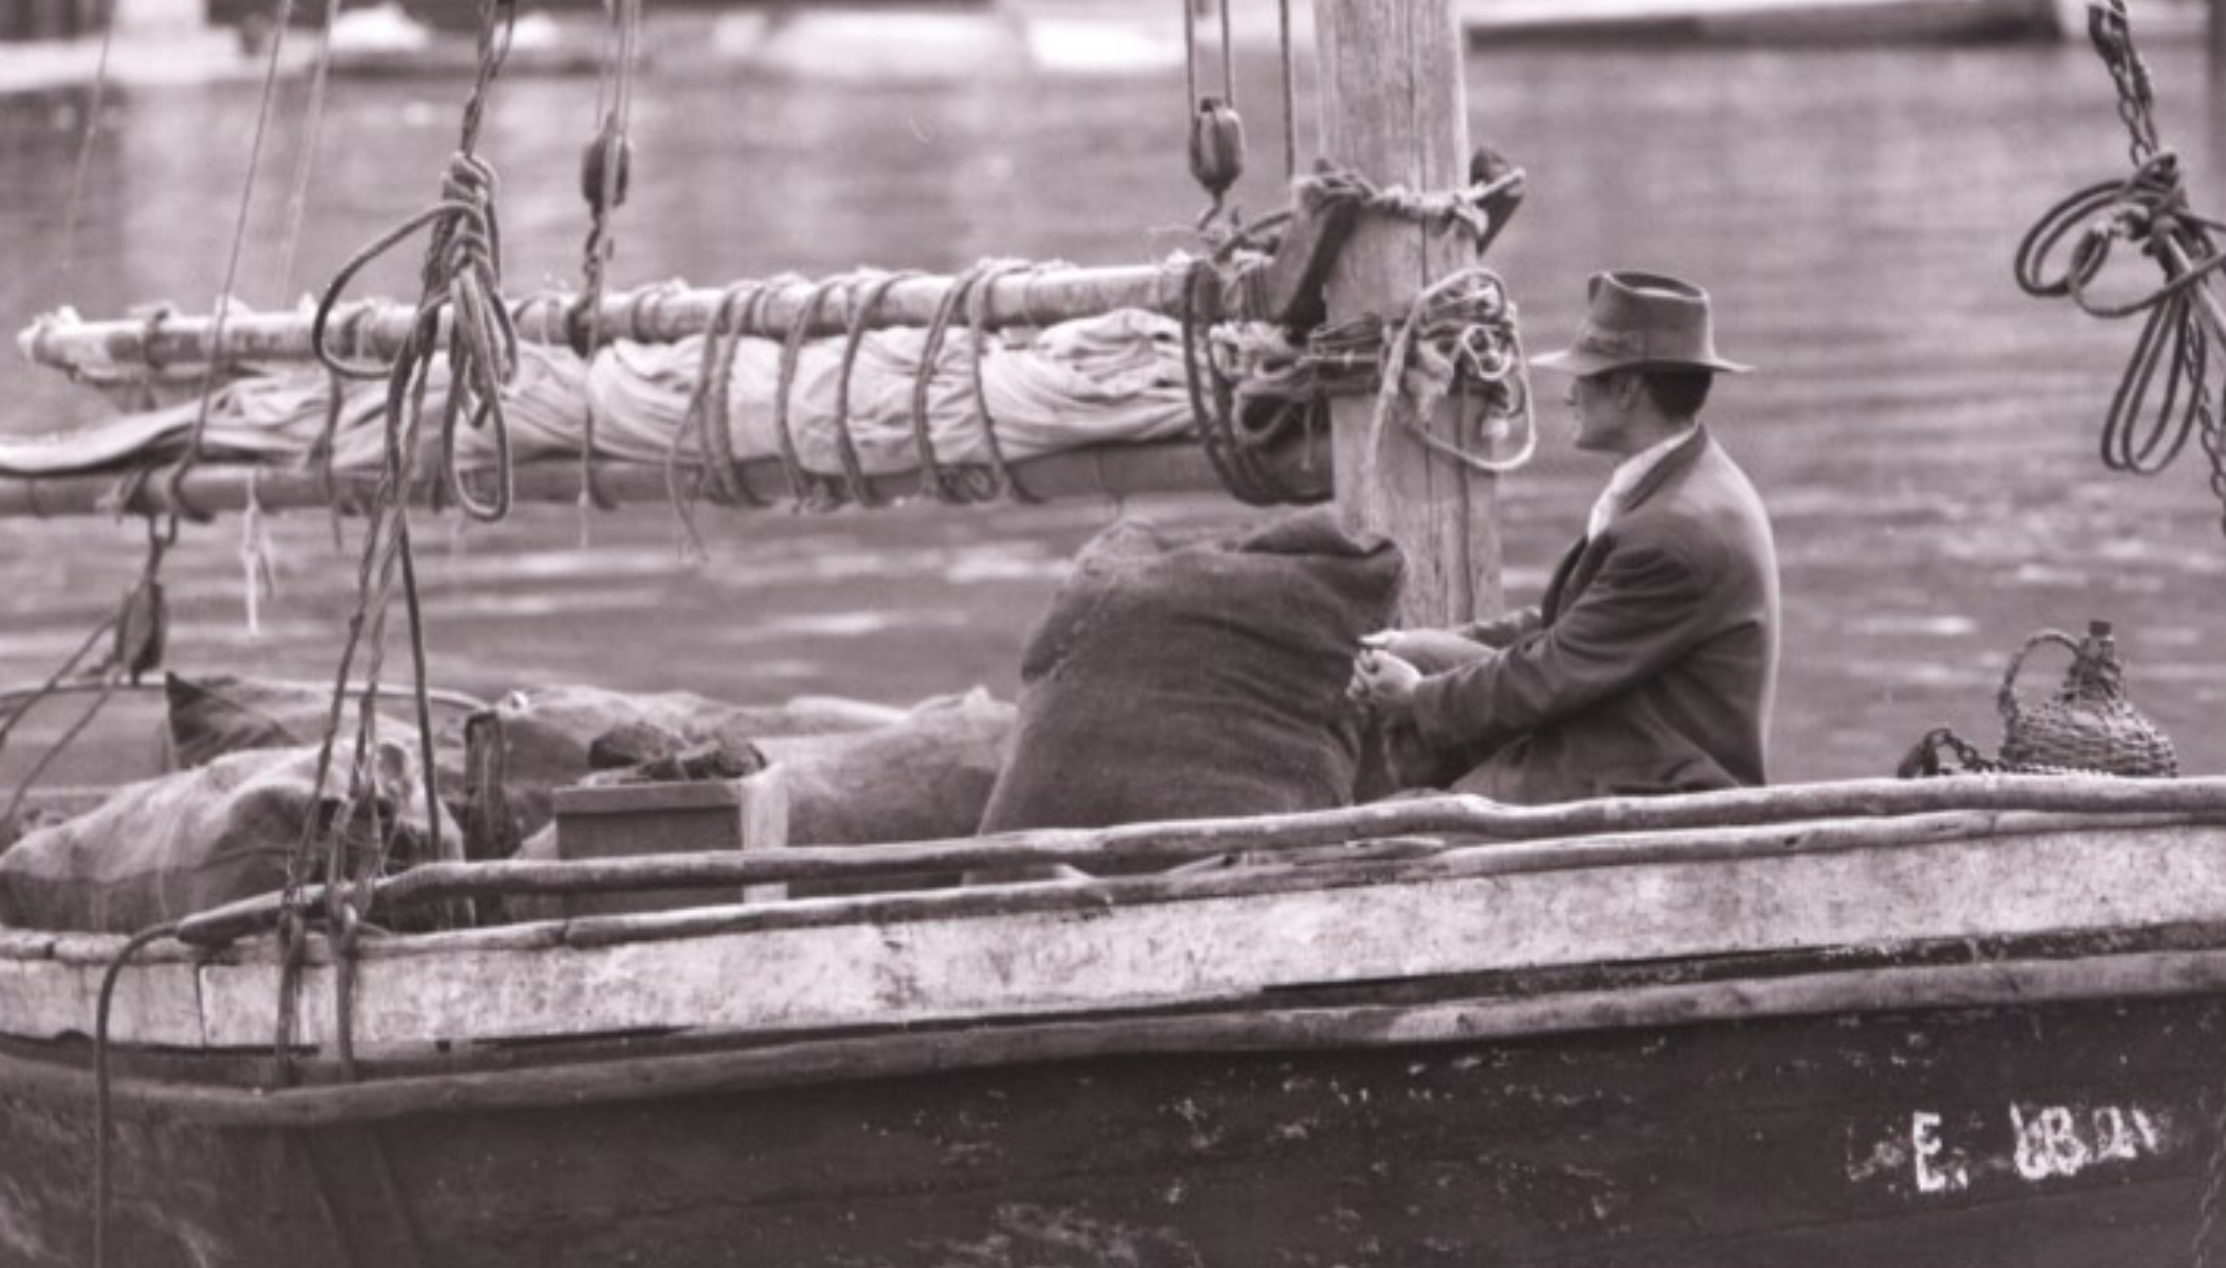
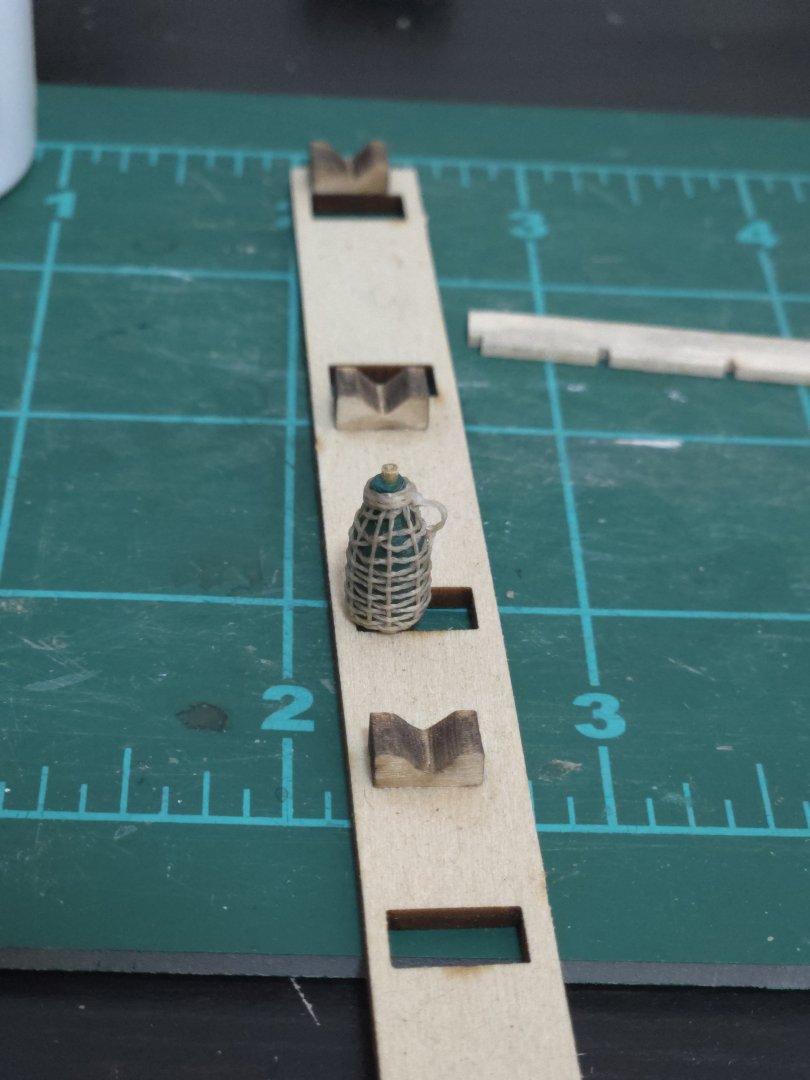
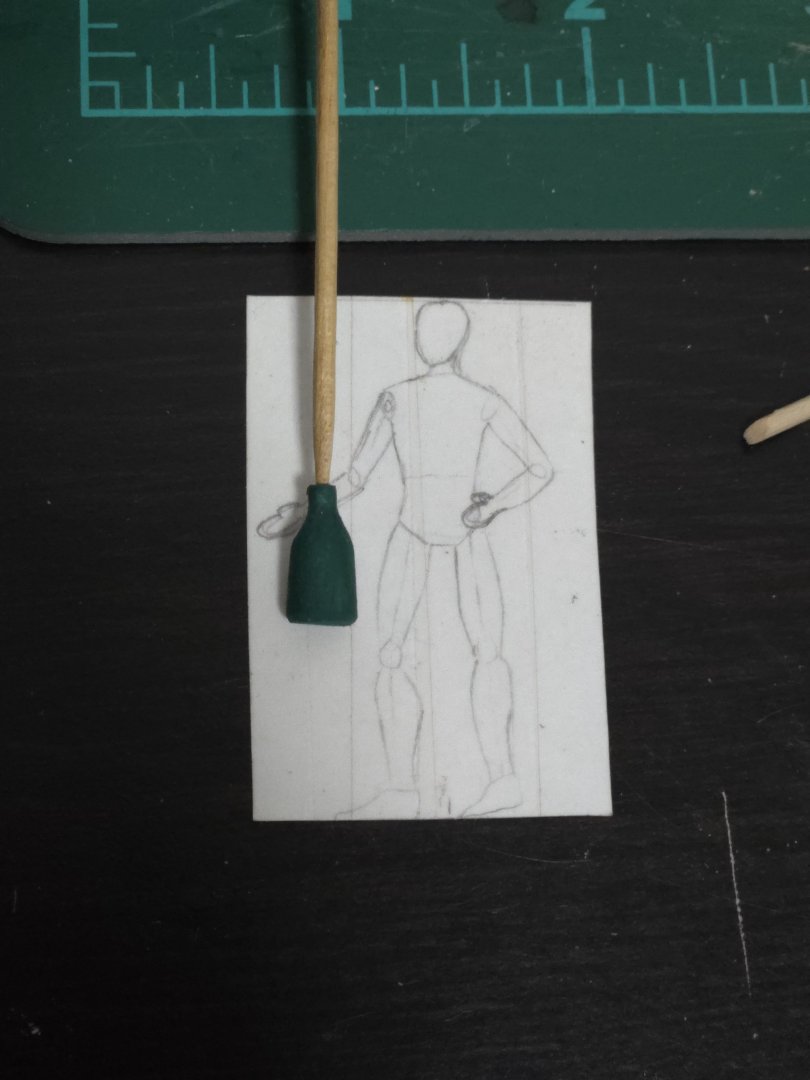
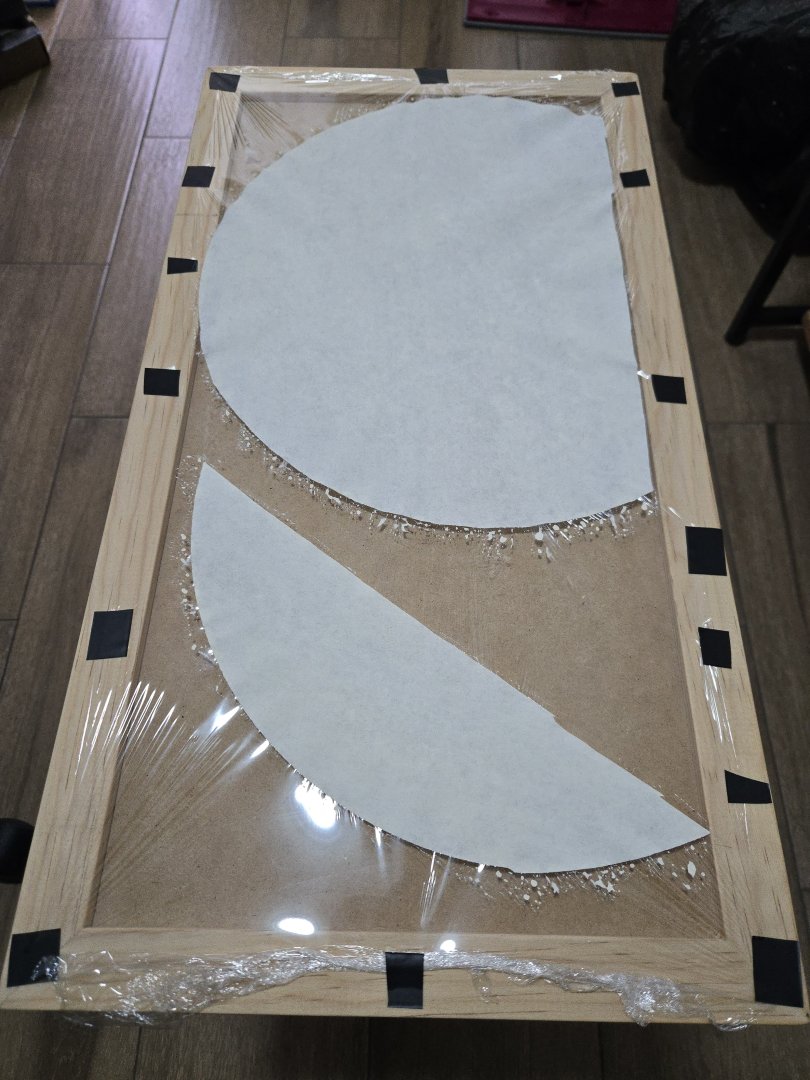
Thanks, Keith! The box won't be used for this model (photos show that non-firewood cargo was more often carried in sacks), but one benefit of trying to make most of my models in 1:32 scale is that a lot of accoutrements are interchangeable, so it will probably be used for some other build. Remaking the box was straightforward. It's just a little smaller in each dimension, but it looks like a much better fit. I also started work on the sails, which I'll be making by joining together panels cut from a big coffee filter. I first tried stretching plastic wrap over a flat surface (a side table), but the wrap bunched up a lot and was impossible to keep flat, which I realized would lead to a wrinkled, unevenly-colored sail. So, I instead stretched some plastic wrap over the back of my NRG Half-Hull frame. The ability to stretch the plastic over an empty space made it much easier to get a flat surface. Unfortunately the sudden change meant I had to haphazardly cut the still-wet coffee filter to size, leaving a jagged edge. While I advance on the sail, I also made another deck accoutrement. Photos like the one in my last post often show a glass bottle wrapped in wicker. According to Clinton R. Edwards's article "Commercial Sail and Small Fishing Craft of Western South America" (The Mariner's Mirror Vol. 53, No. 4, Nov. 1967: 357-369)*, it was common in Colombia and Peru for fishermen to carry their drinking water in glass or ceramic bottles protected from breakage by a wicker or net wrap, and based on photos it seems Chilote sailors did the same. I began by carving a bottle from the end of a 1/4‐inch square basswood strip. After rounding it and somewhat tapering with a mini block plane, I used a sanding drum on a rotary tool to get more of a bottle shape, holding the tool steady and spinning the strip in my hand. I nearly took off too much material right at the start, but it worked out in the end. I then drilled out the top and used a razor saw to cut the bottle from the strip. It didn't look too oversize, considering that it's a pretty big bottle (about 8 inches diameter), but I was wary of scale issues after having had to redo the box, so I trimmed the bottom and neck a bit. I then placed a toothpick in the opening to better handle the bottle and to serve as a cork once cut off later, and painted the bottle a dark green, which seemed like a reasonable glass color. I then began to weave around the bottle using .2mm nylon thread, as I did for one of the baskets on the Canoa build. Around the sides, I went with a much looser weave than I had used on the basket, to better show that this was a bottle wrapped in a protective coating. The neck was a bit of a challenge, as pulling the thread tight tended to make it slide down off the bottle neck. I finished it off by wrapping the excess a few times around the neck and tying off a simple handle, cutting off the excess toothpick to create a cork stopper, and giving the whole thing a coat of matte varnish to hold everything in place. Overall I'm happy with how it turned out, although maybe it would have looked better with a thinner material and more stakes (although adding more stakes would have produced a bulkier bottom). *I should note that the Edwards article is invaluable for understanding "traditional" workboats on the Pacific coast of South America, although it would be significantly more useful for modeling if it had included any hull lines or at least more photos. A few particularly interesting tidbits: - Pre-hispanic vessel types (although often modified with European influence) seem to have predominated through the colonial period, with generally limited impact from European-style designs until the early 1800s or so. This comports well with Maino Prado's observations about Chile discussed in an earlier post. - Sloops and schooners remained in frequent use for coastal trade in Colombia and Ecuador by the mid-20th century, focusing on small towns and trade routes that were ignored by more expensive motor vessels. - There were a number of distinct vessel types, including double-ended rowing vessels clearly influenced by whaleboats, and the Peruvian "bote de pescador"‐‐a beamy, partially-decked, single-masted lugger. As happened in San Francisco, immigration by Italian fishermen led to the introduction of Mediterranean-style lateeners, called "faluchos" in Peru (but quite different from the Chilean "falucho maulino" mentioned in an early post in this topic). - In arid parts of the Peruvian coast, the preferred boatbuilding lumber by the mid-20th century was pine imported from the Pacific Northwest of the United States, which local boatbuilders considered superior to Chilean lumber.


- 312 replies
-
- 11
-
-
- Chile
- Latin America
- (and 6 more)
-
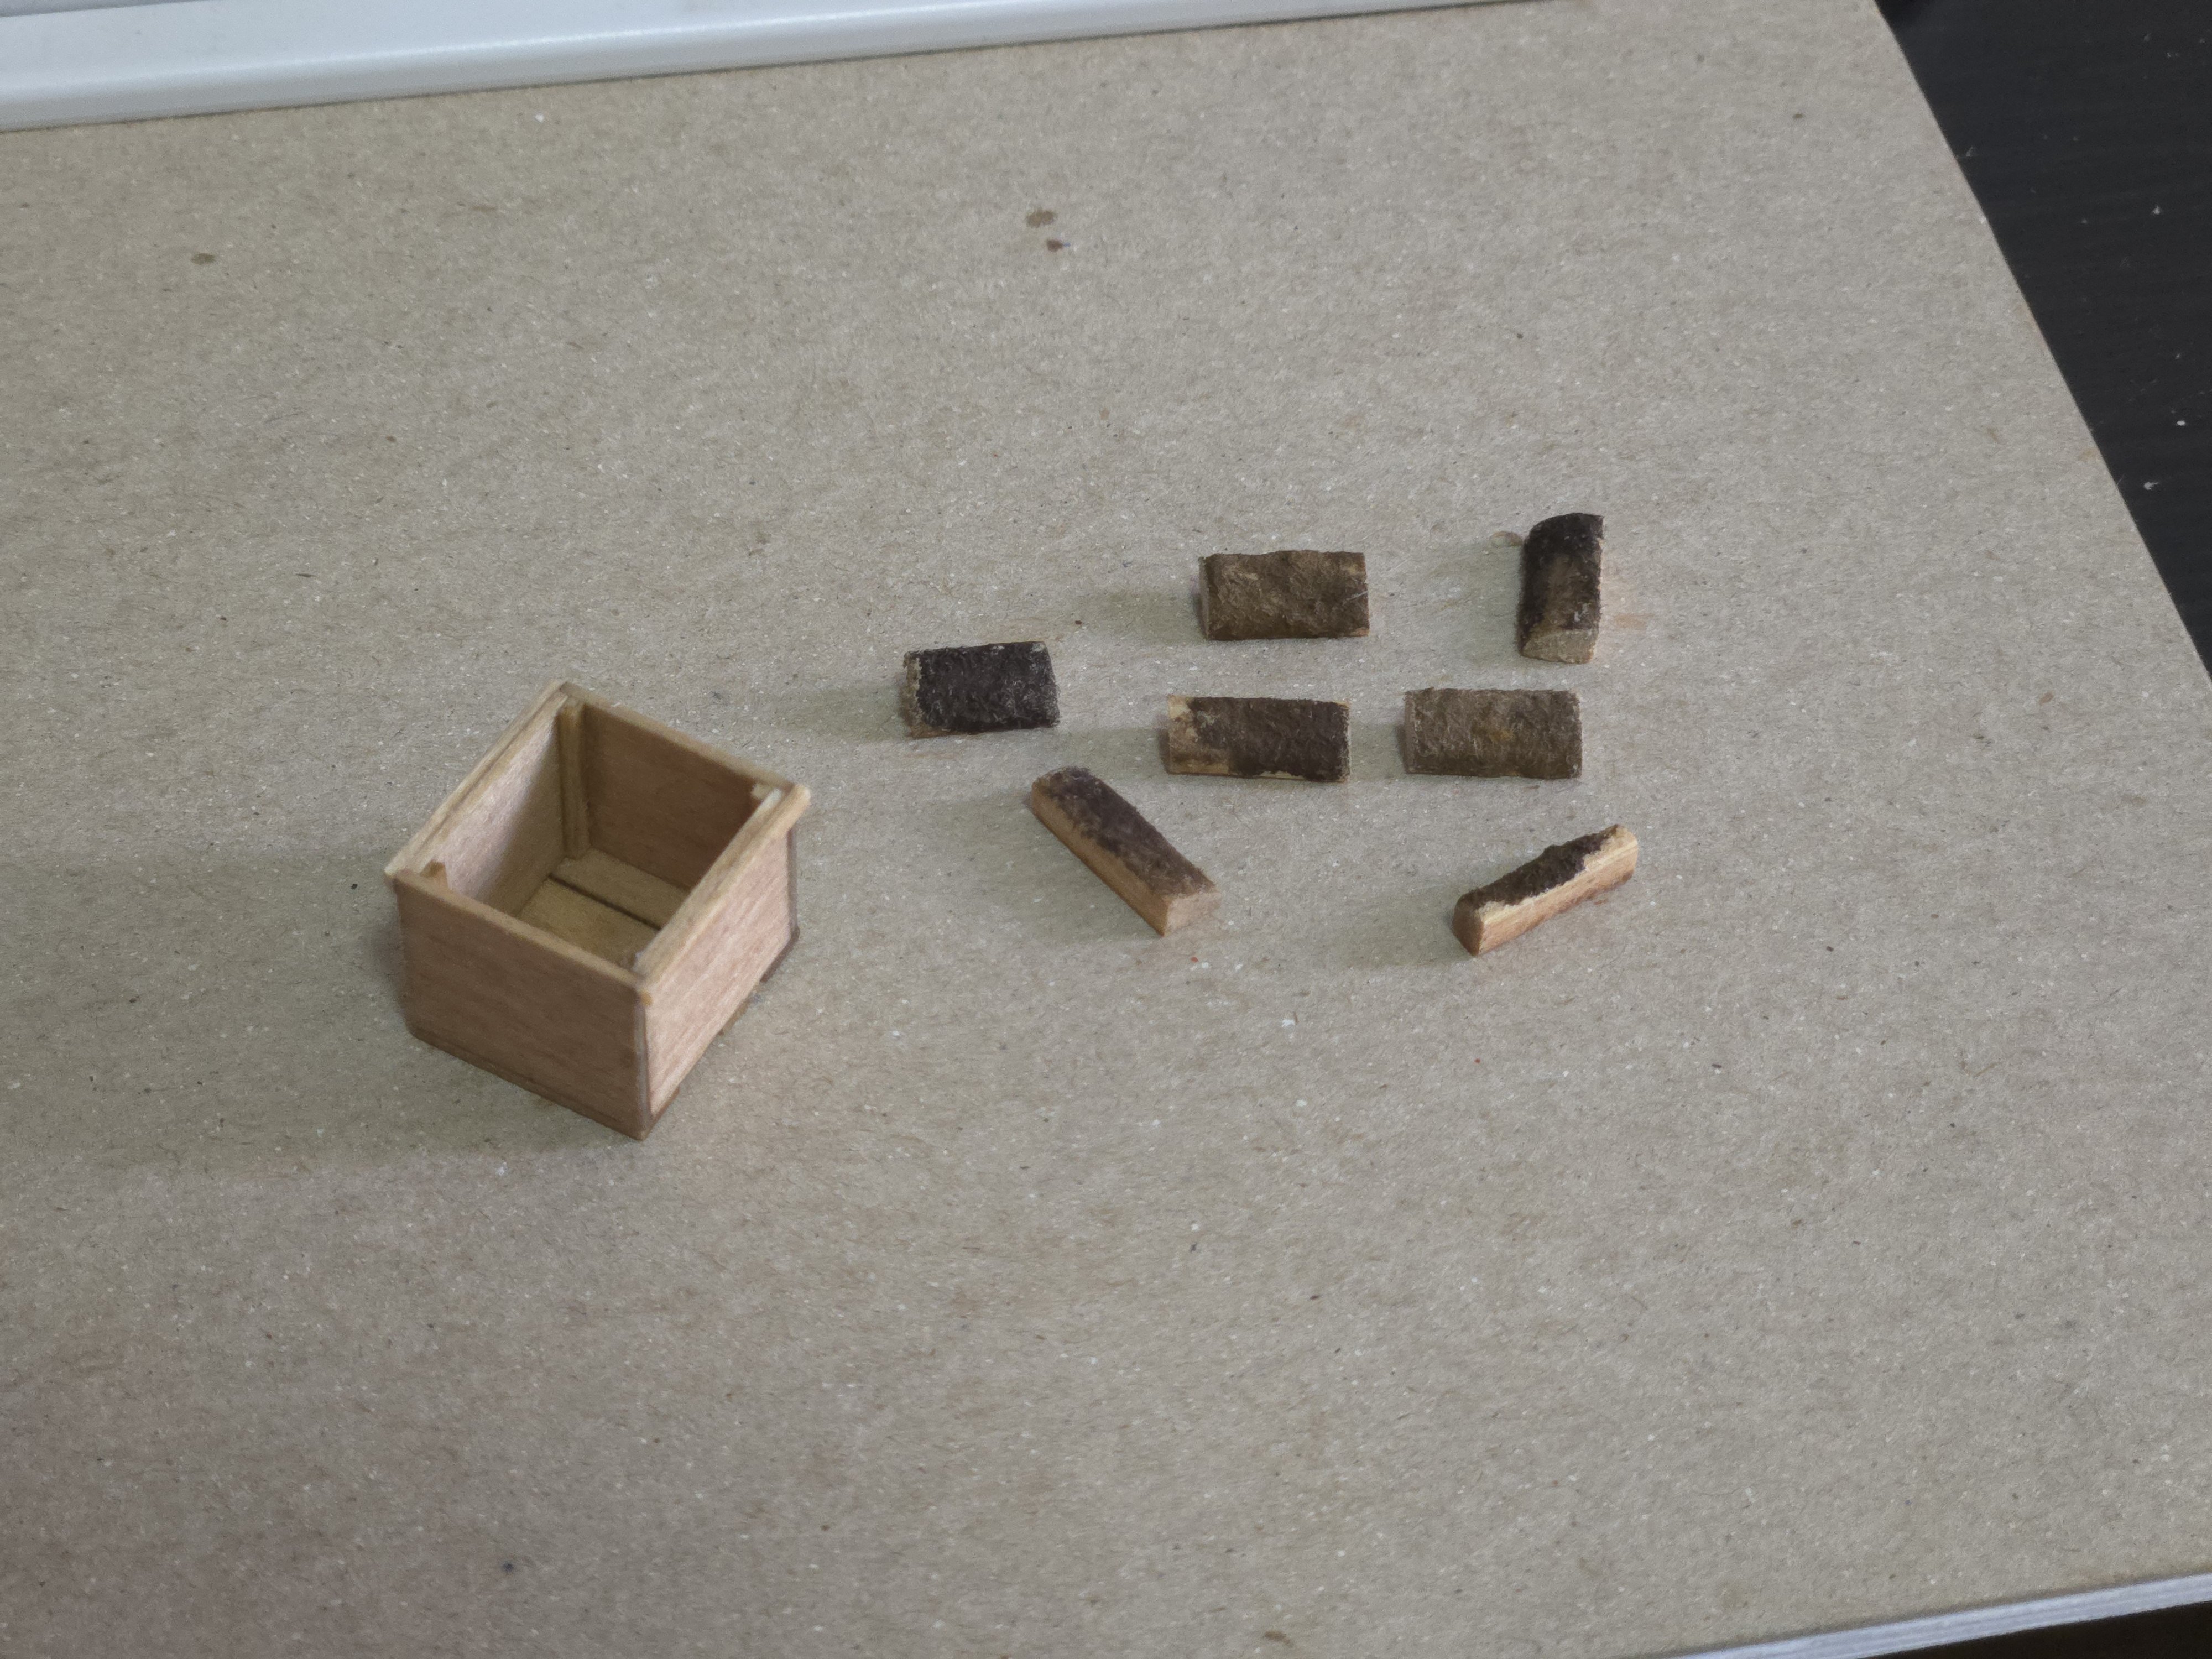
A slight setback. In the photo below, you can see what looks like a small box of firewood on the deck of the lancha. I thought this could be a fun detail to add, to have some small split pieces of firewood alongside the longer pieces I already made. Source: https://www.bibliotecanacionaldigital.gob.cl/bnd/629/w3-article-644834.html The box was pretty straightforward to make, and the firewood was made by the same process as earlier. Unfortunately, when I put it on the hull, I found that the box looked disproportionately large. I had tried to judge the size from the photo, but I guess I had said "just a hair larger will be fine" a few times too many. It's still not a particularly large box, but a big bigger than I would like. The firewood, at least, can still be used, and it won't be too hard to make a smaller box. It's a good reminder to stick to scale dimensions rather than to change things up on the fly. I've also been working on the sails. I've got basic paper templates made, and hope to start on the actual sail soon. I plan on making the sails from strips of coffee filter paper glued together, and as I've had trouble in the past getting things to stick with watered-down white glue (which also has a tendency to swell and distort the material), I decided to test another glue. I used Aleene's Fabric Fusion glue to good effect for some touch-ups on the Canoa sail, so I gave it a try for the seams on some scrap. Unfortunately, I found that any excess left a shiny residue. I then tried a matte varnish to cover it, but the varnish I have left its own residue. Finally, I tried some leftover transparent matte acrylic spray that I've been using in my carpentry workshop. It seems to have worked pretty well. The one issue is that my scrap material was a bit wrinkled to begin with, and didn't exactly improve with all these tests, so I'll be testing to see if I can flatten it out with an iron (carefully and with some material covering the paper to avoid burning) or if it will work if I spray it at an earlier stage.


- 312 replies
-
- 10
-
-
- Chile
- Latin America
- (and 6 more)