

brunnels
-
Posts
337 -
Joined
Content Type
Profiles
Forums
Gallery
Events
Everything posted by brunnels
-
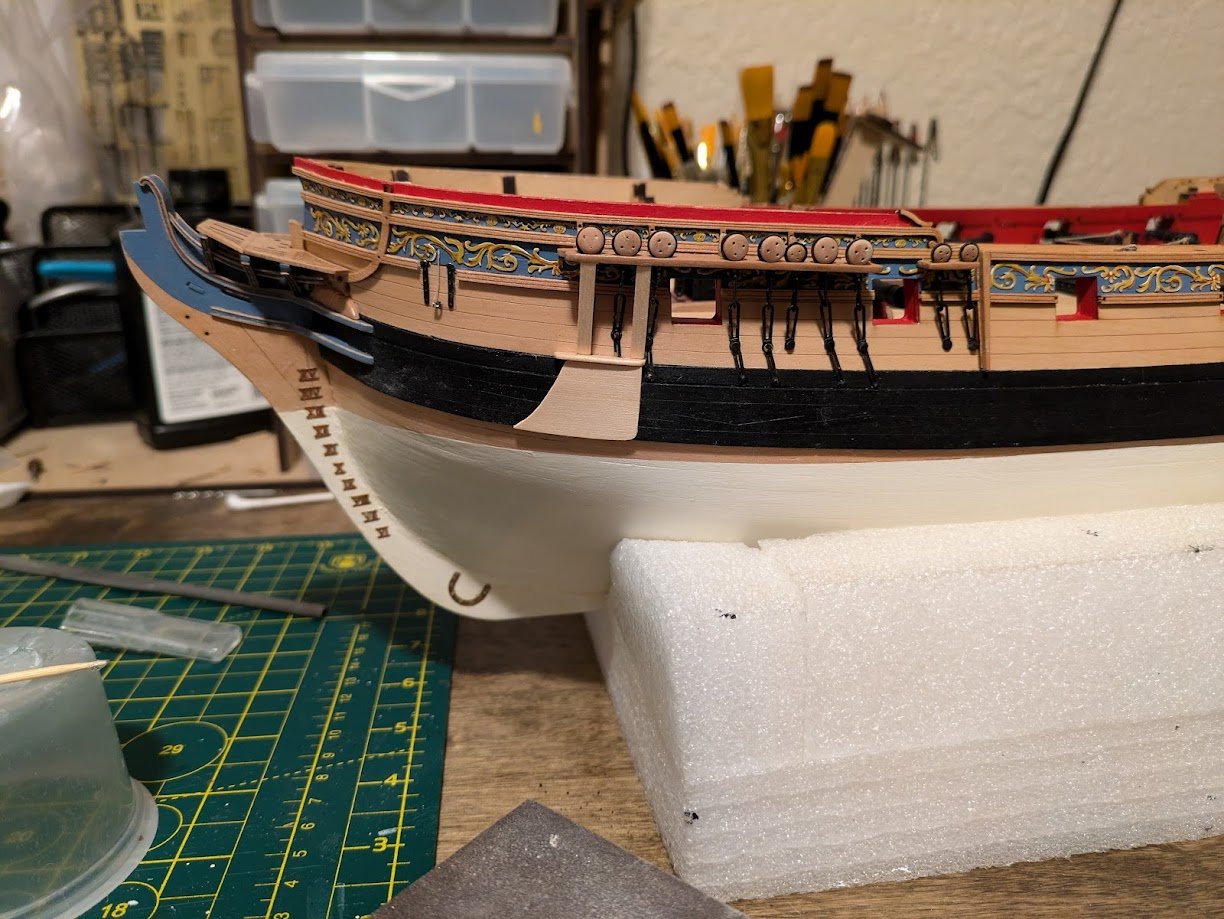
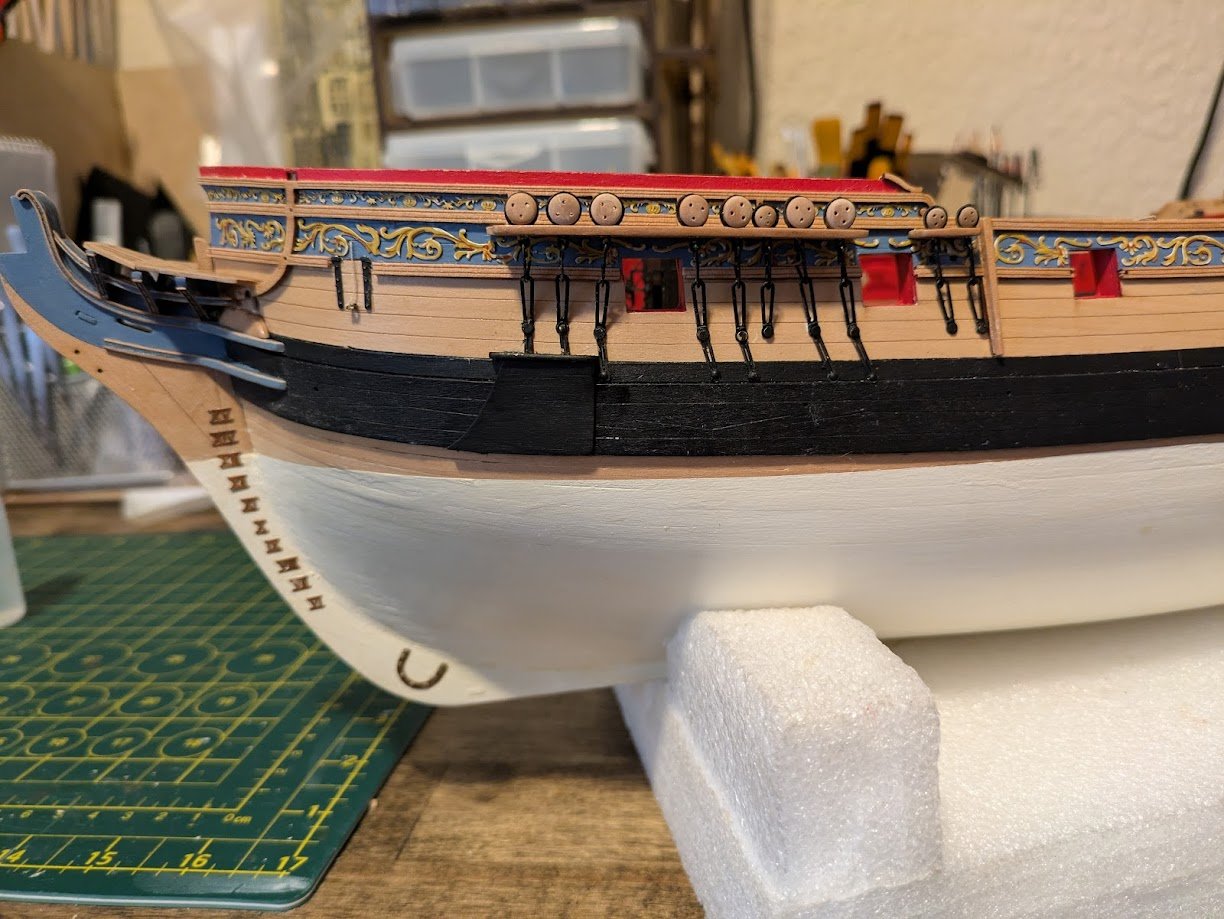
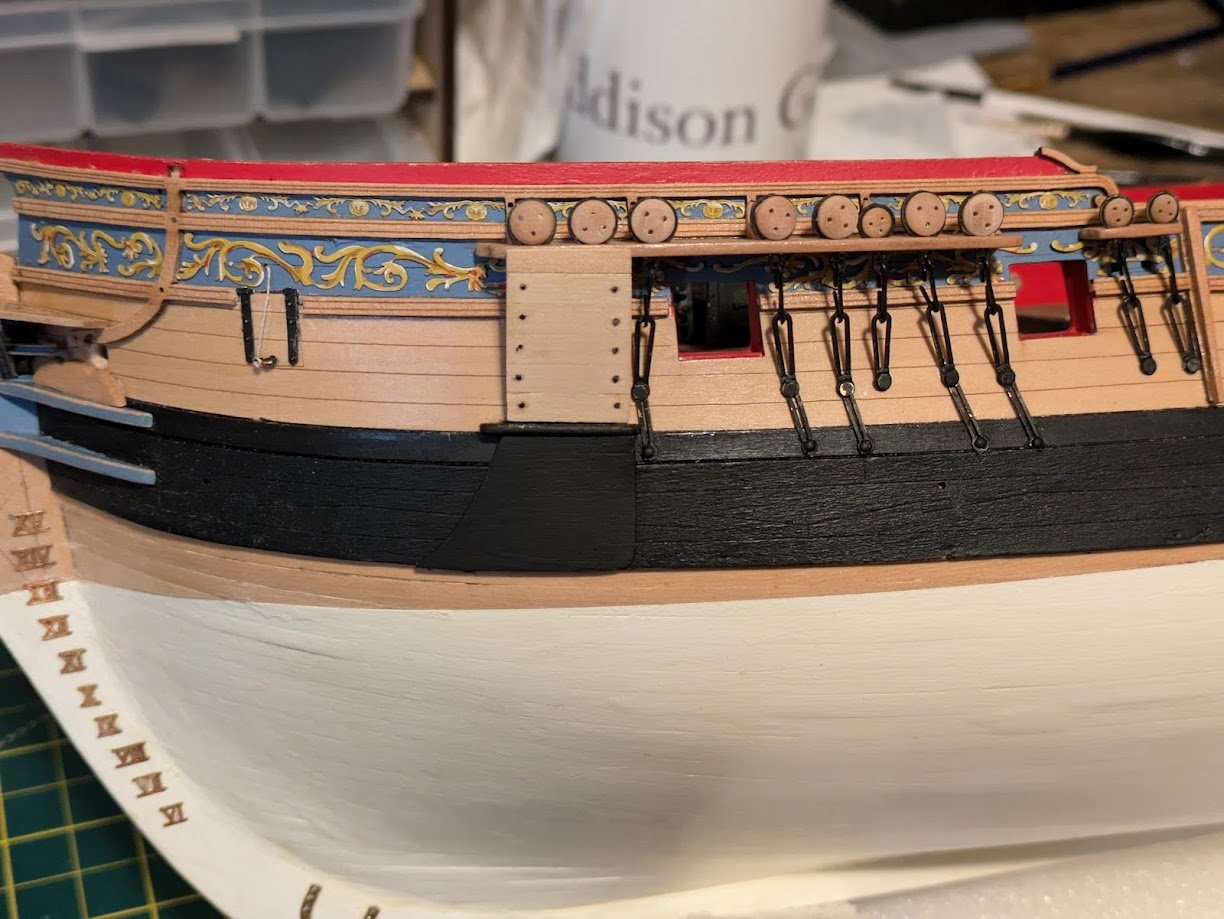
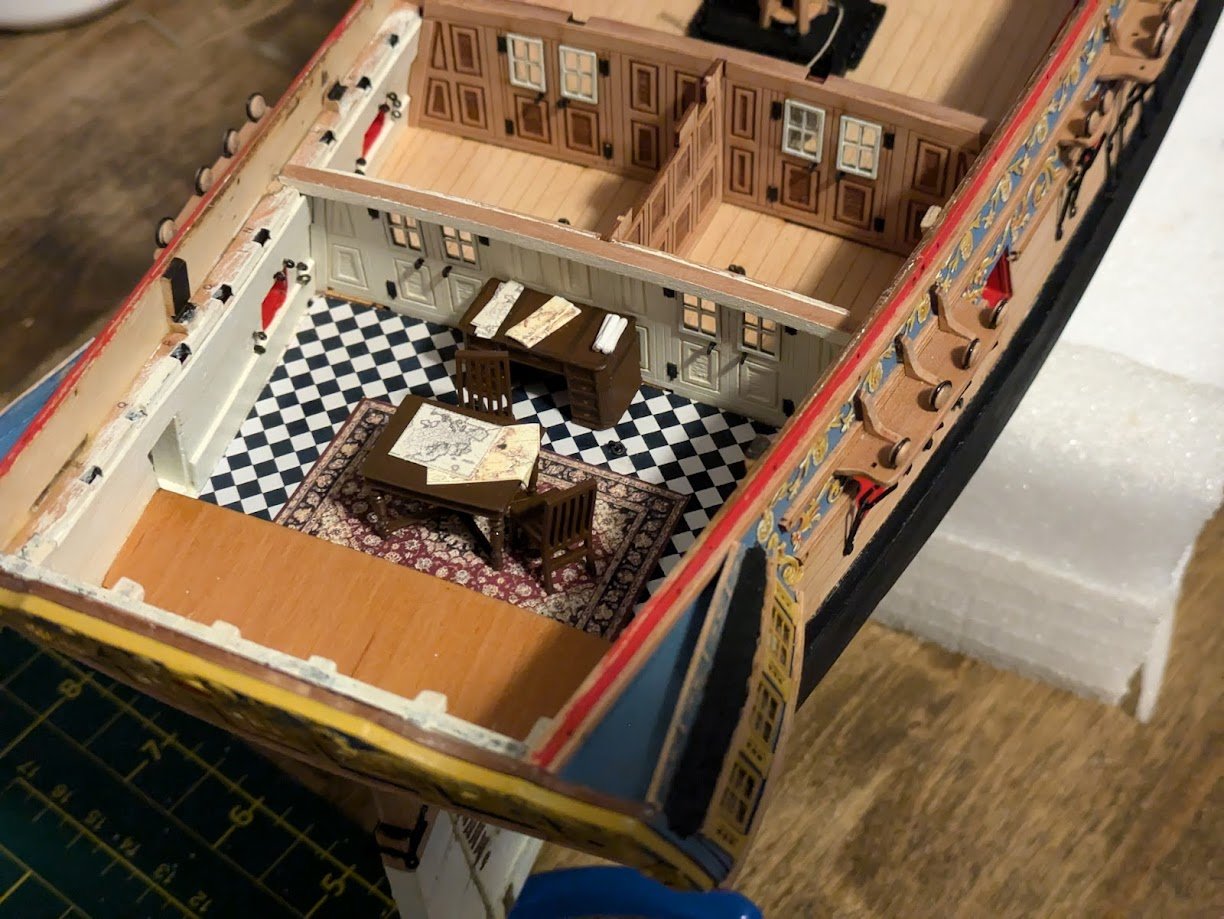
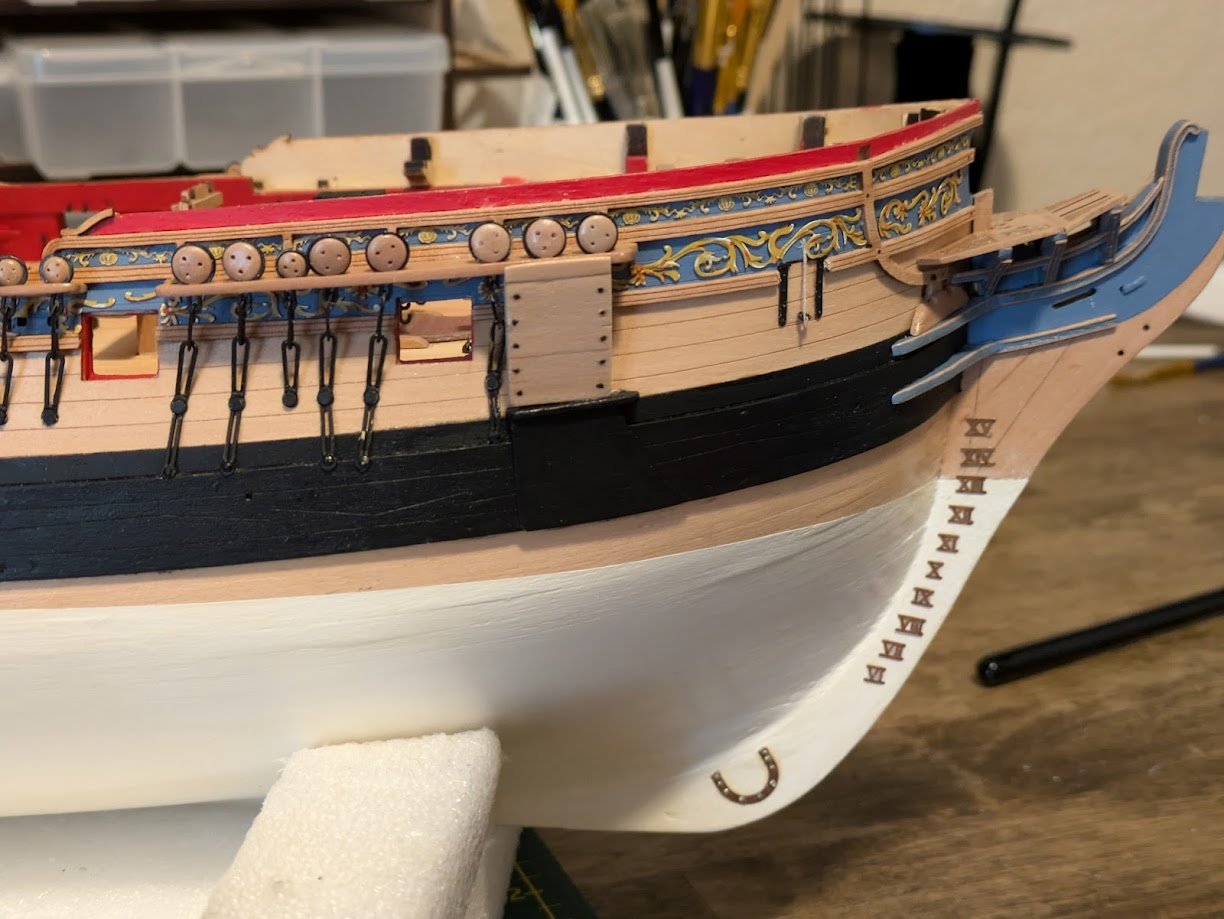
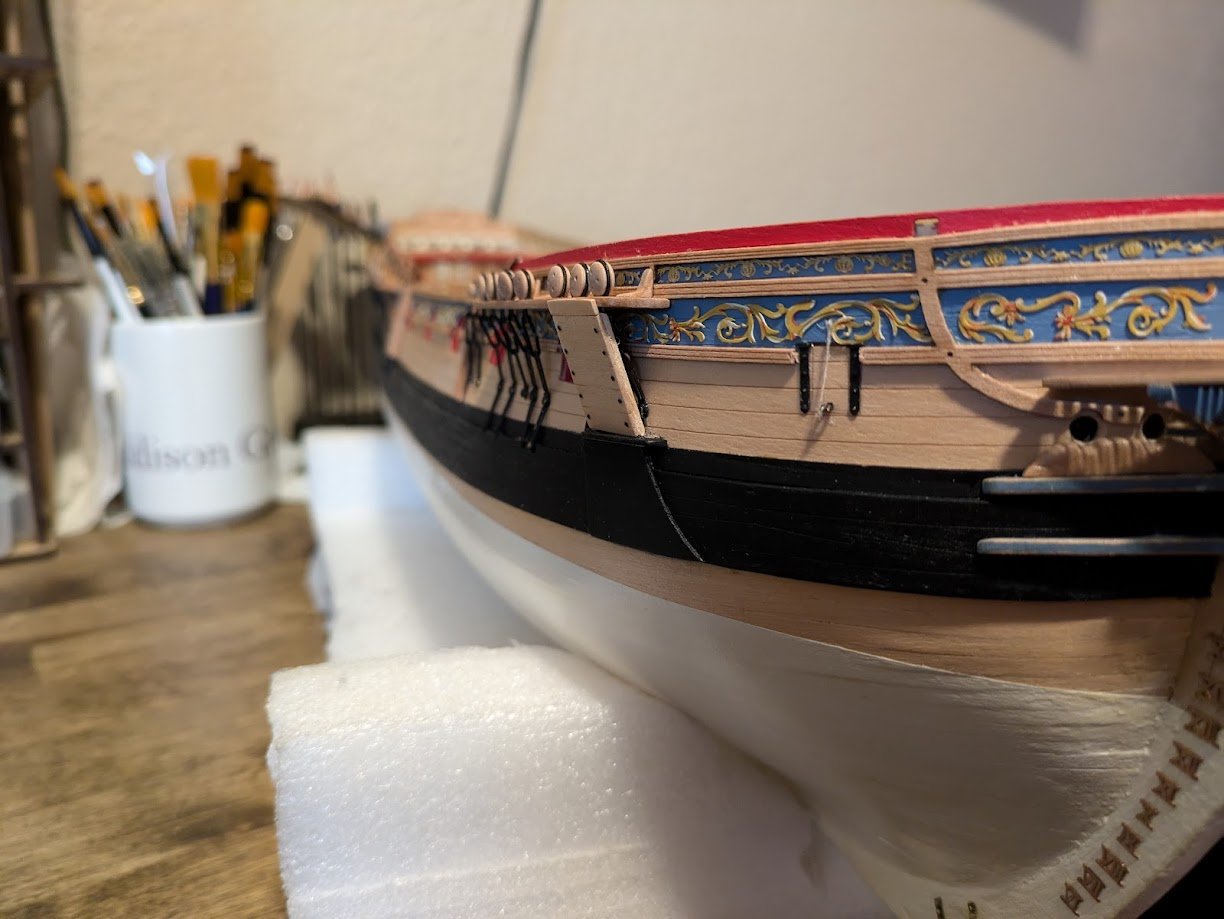
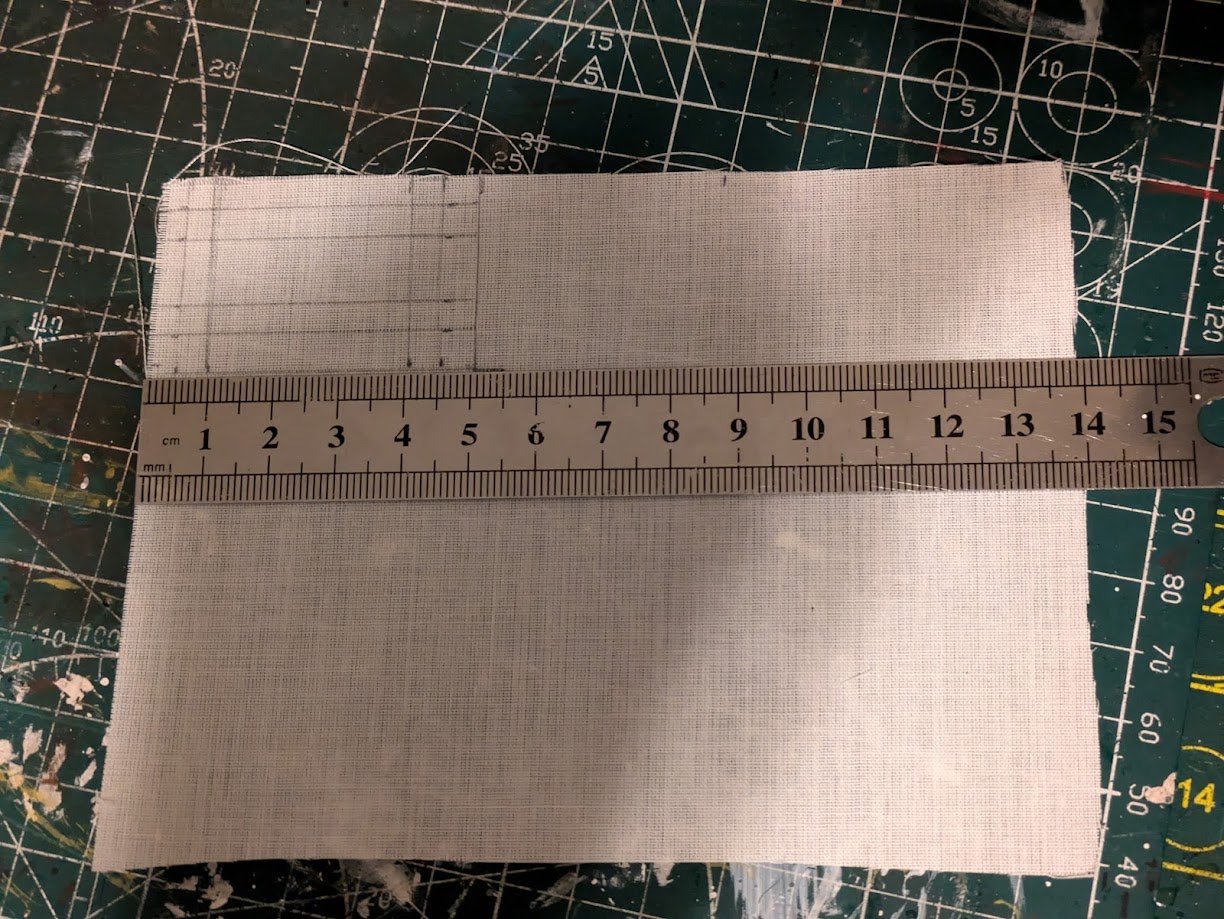
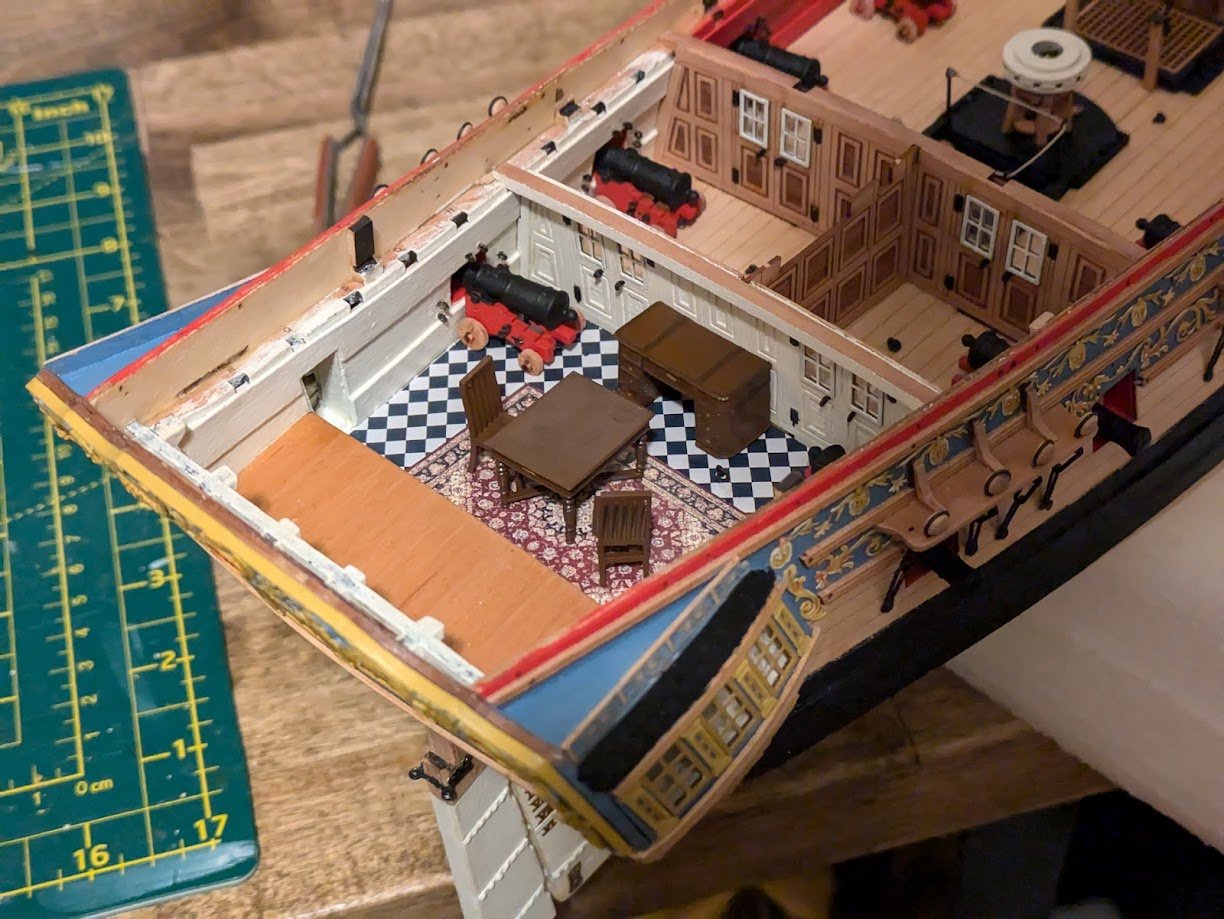
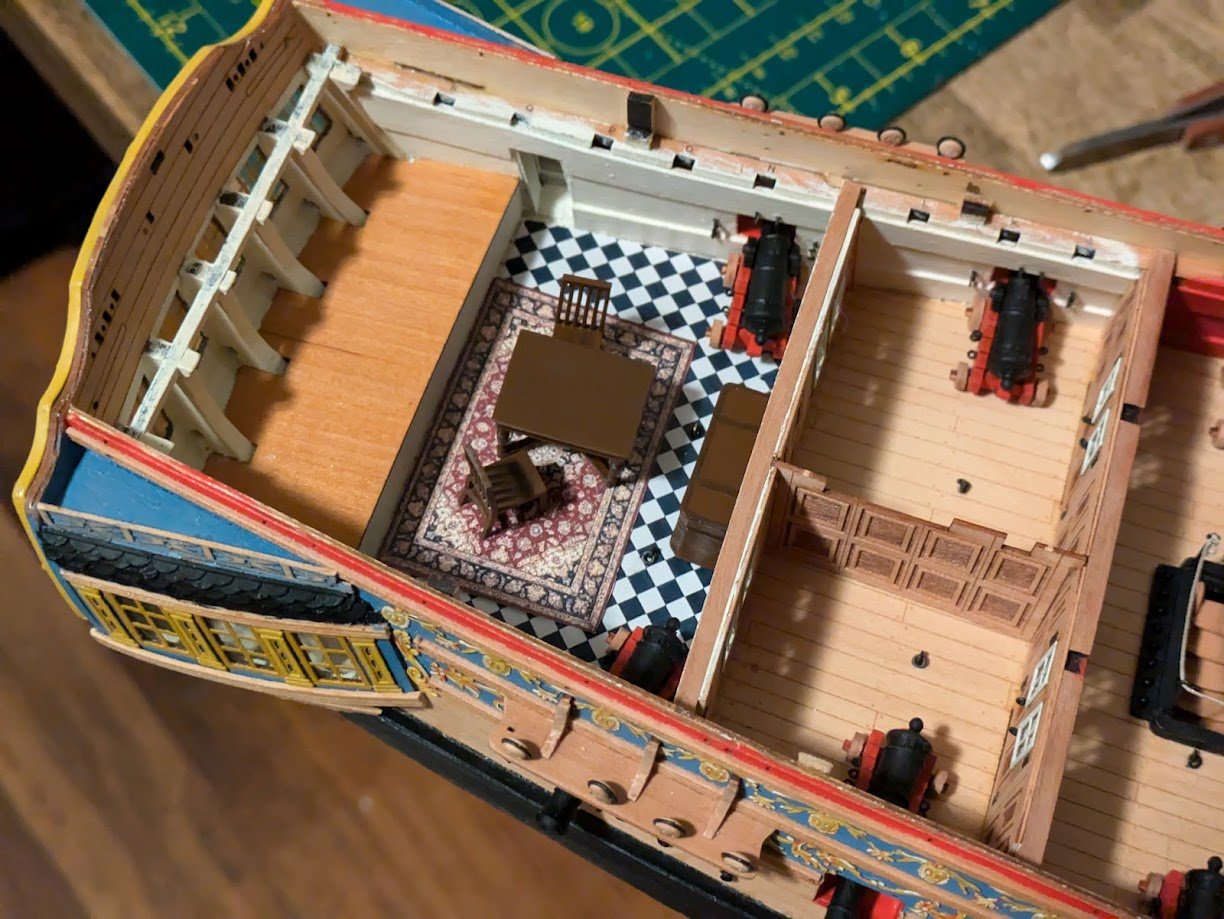
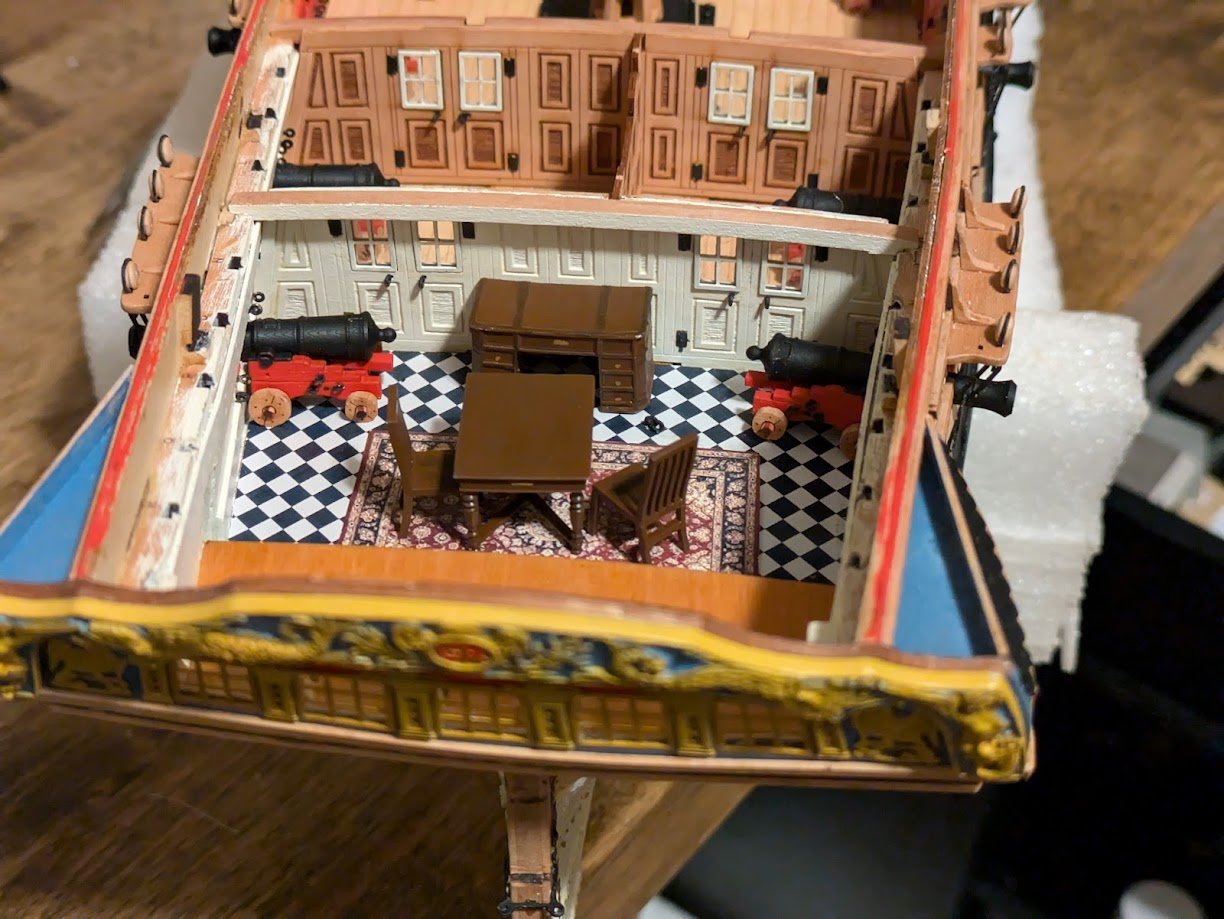
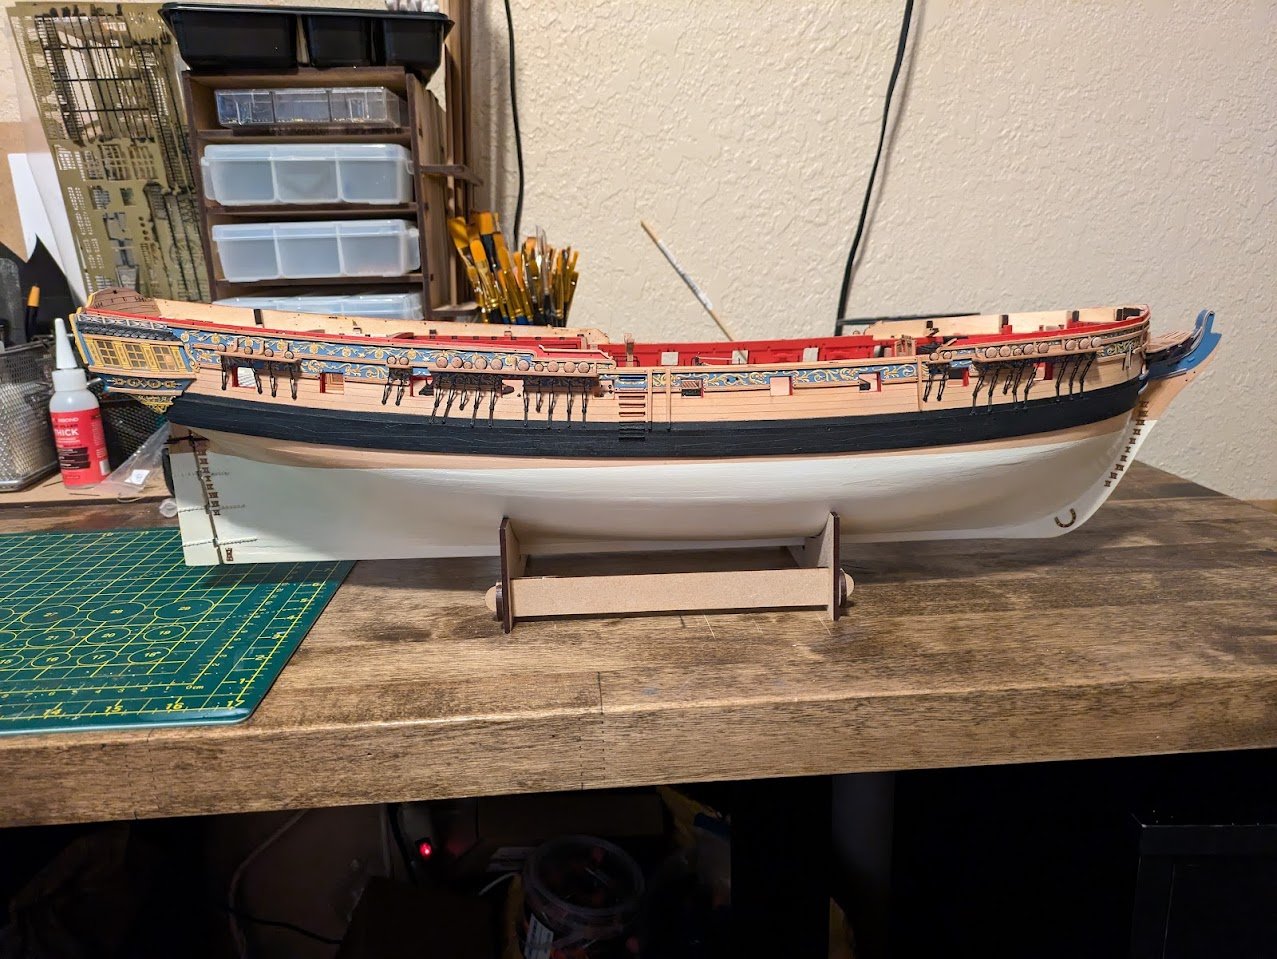
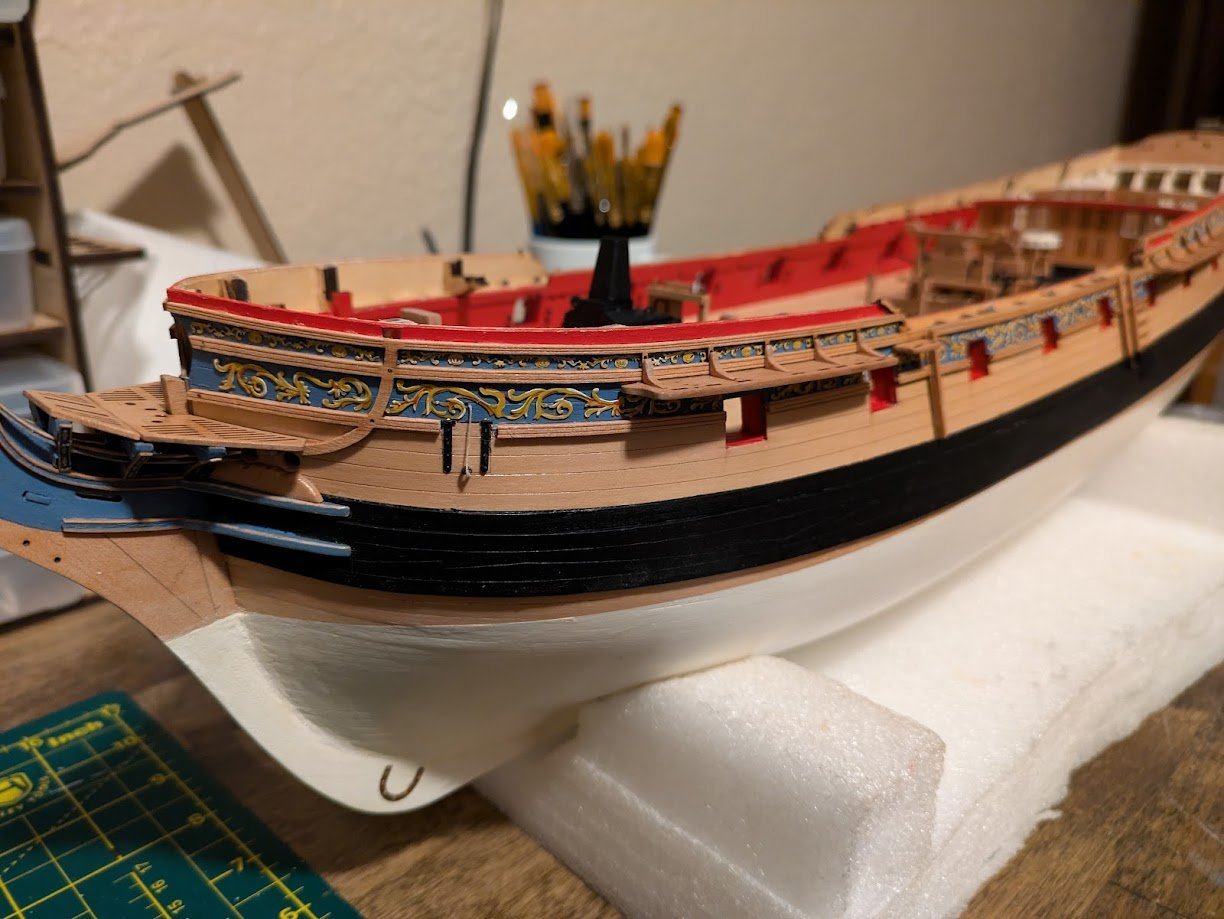
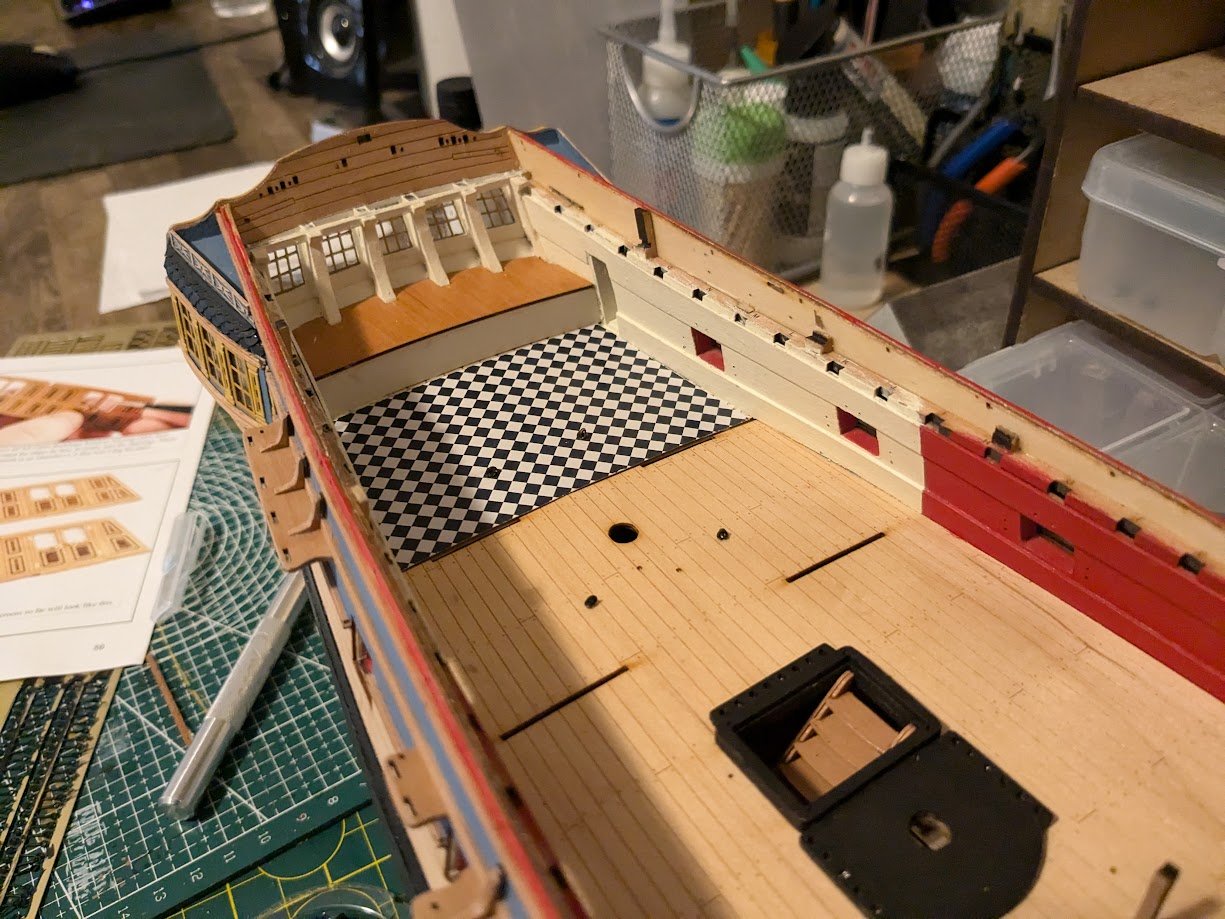
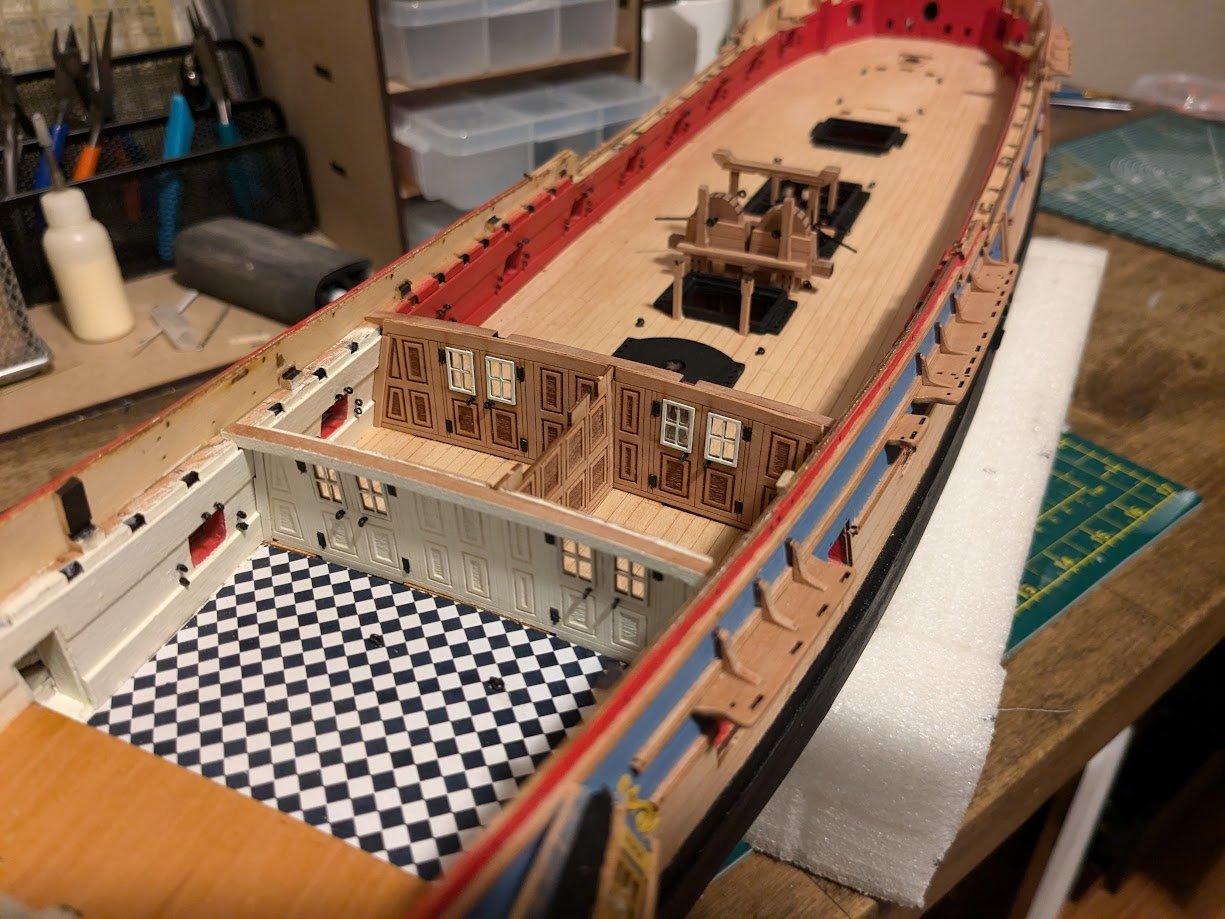
 Anchor liners/Bill Boards Not sure what these parts are officially called, but inspired by @Blue Ensign design for the top "bill board" section, and looking at a lot of contemporary frigate models I noticed many had a sort of swooping part over the gunwales which is also present in the AOTS Pandora book. From what I can gather it seems like these swooping pieces were more permanent, while the top billboard piece were less permanent and could be unbolted from the ship, but I could be totally wrong on that. I grabbed some graphing paper and took some measurements and made a template piece. I then grabbed some maple veneer off cuts and copied the template over and then cut it out with some scissors. I glued the swooping pieces to the gunwales. I then added a 1x3 piece on top of the gunwale piece, and then added a couple vertical pieces for the top billboard part to be built on. I used pear strips, with holes and some small brass wire cut off in the holes to simulate bolts. Then a couple coats of WOP, and this is the finished result I downloaded the Indefatigable instructions from Vanguards website, because Chris included some cool little maps in the instructions you can print and cut out. I cut a few out and folded them in various ways just to add a little life into the great cabin.
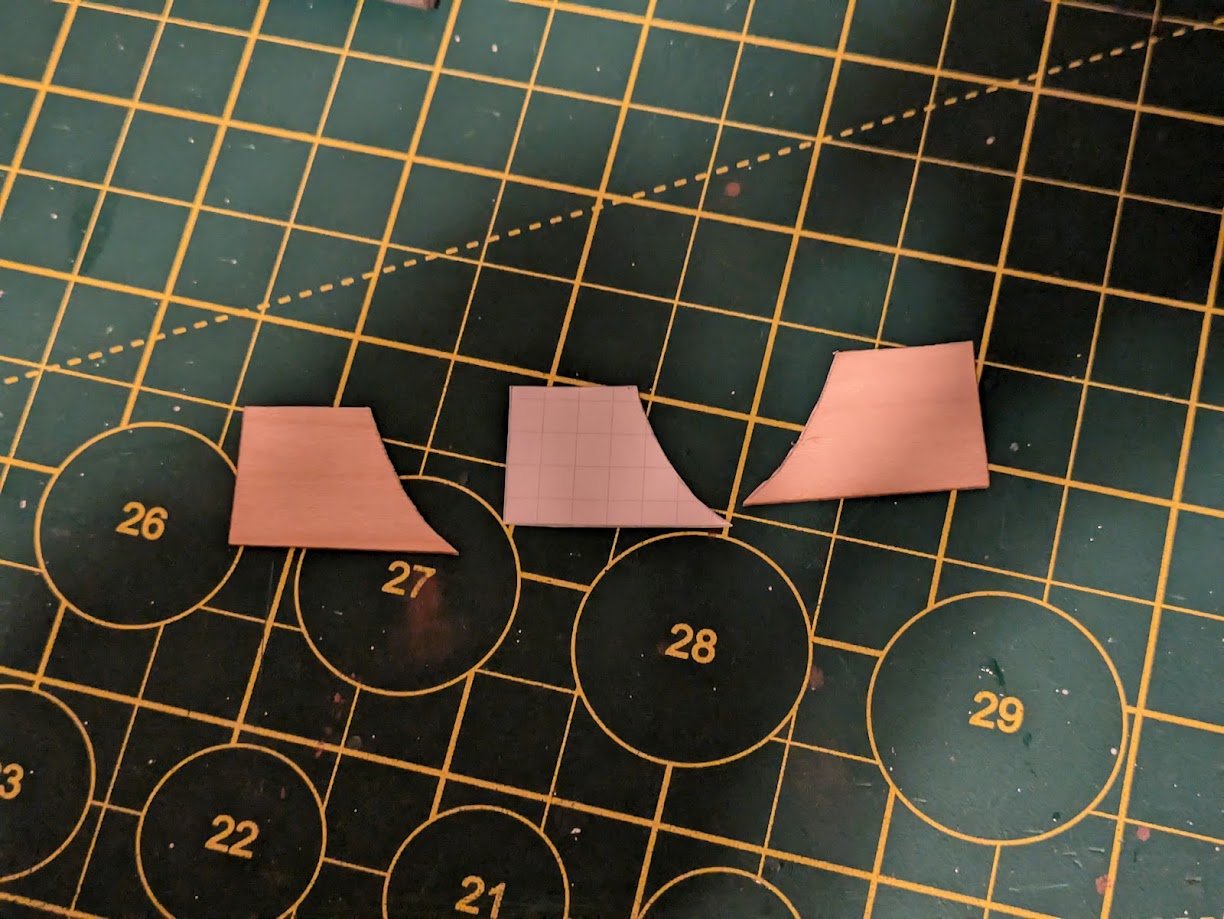

-
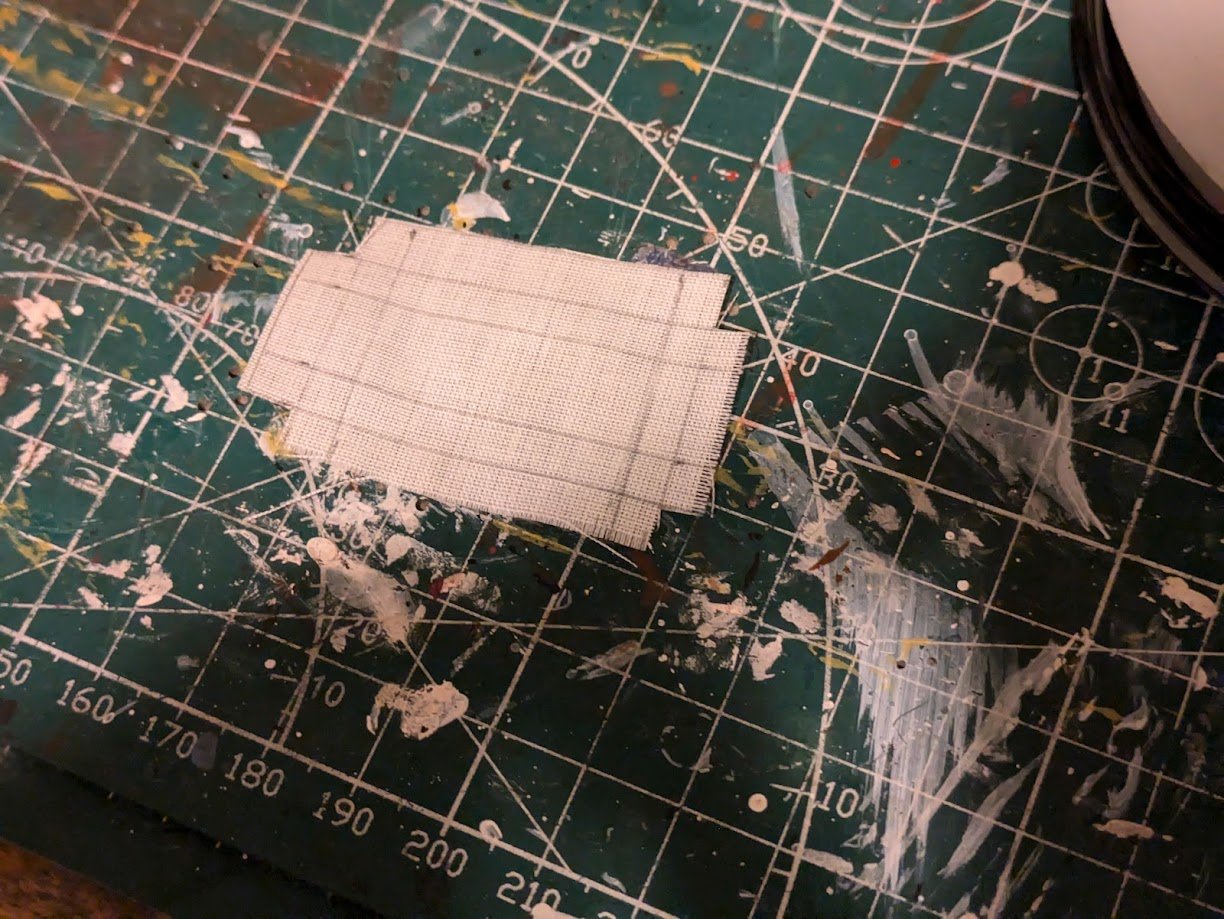
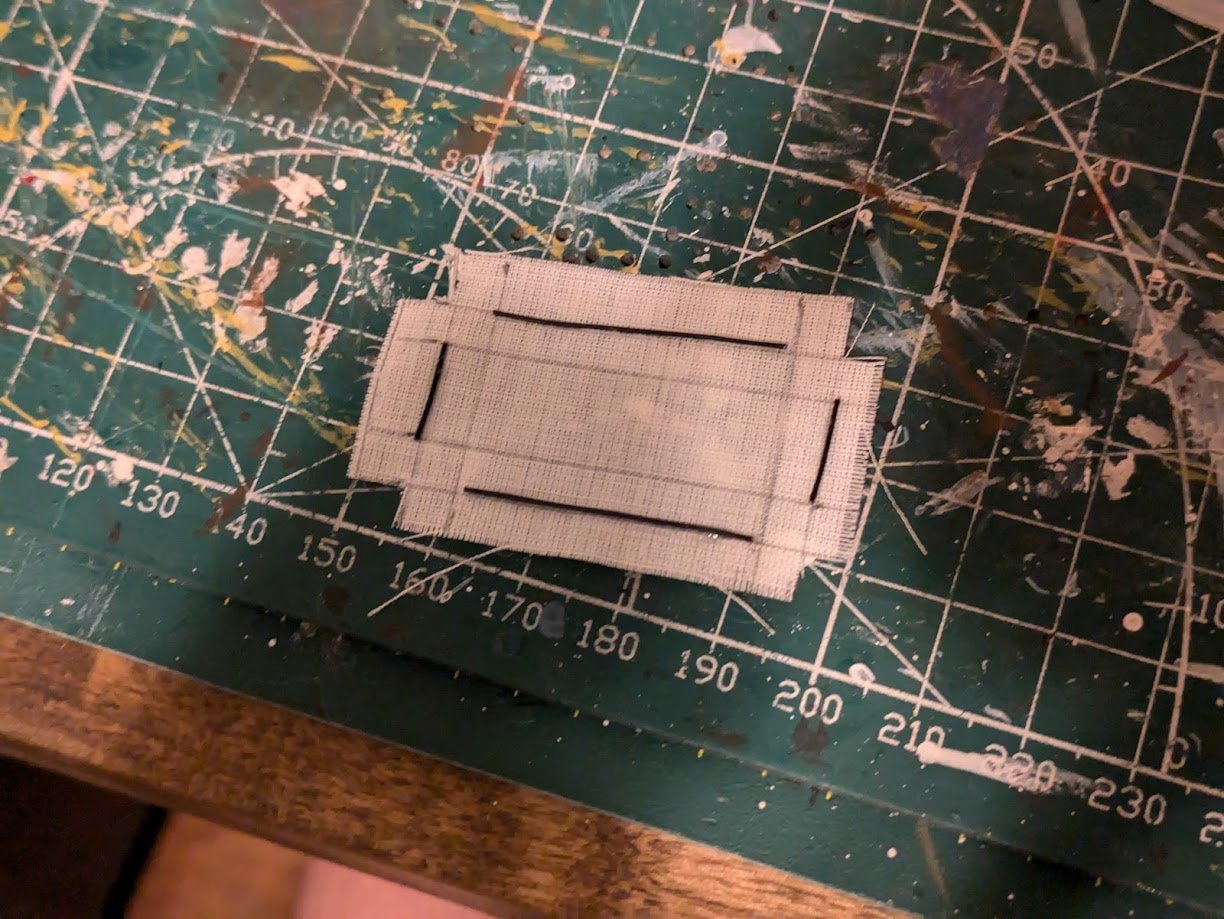
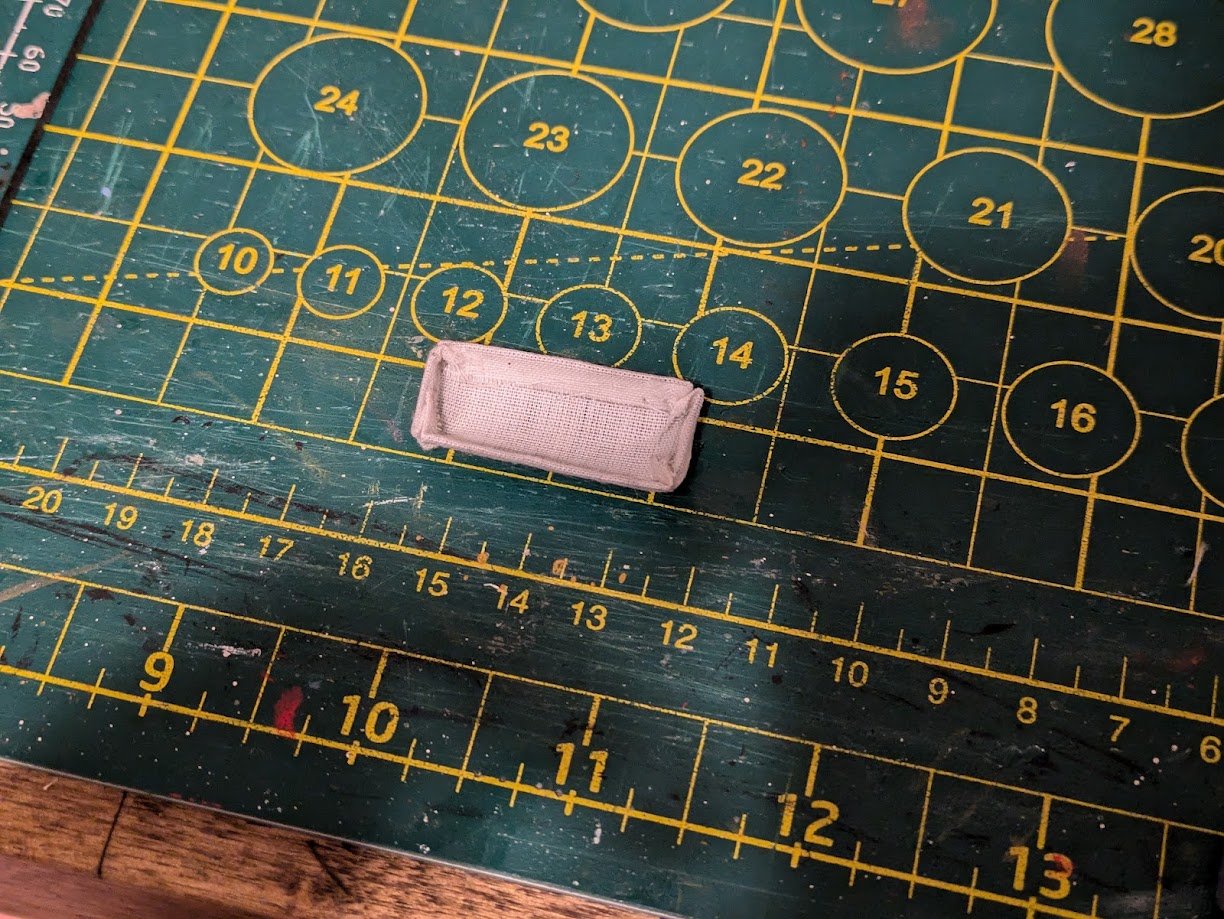
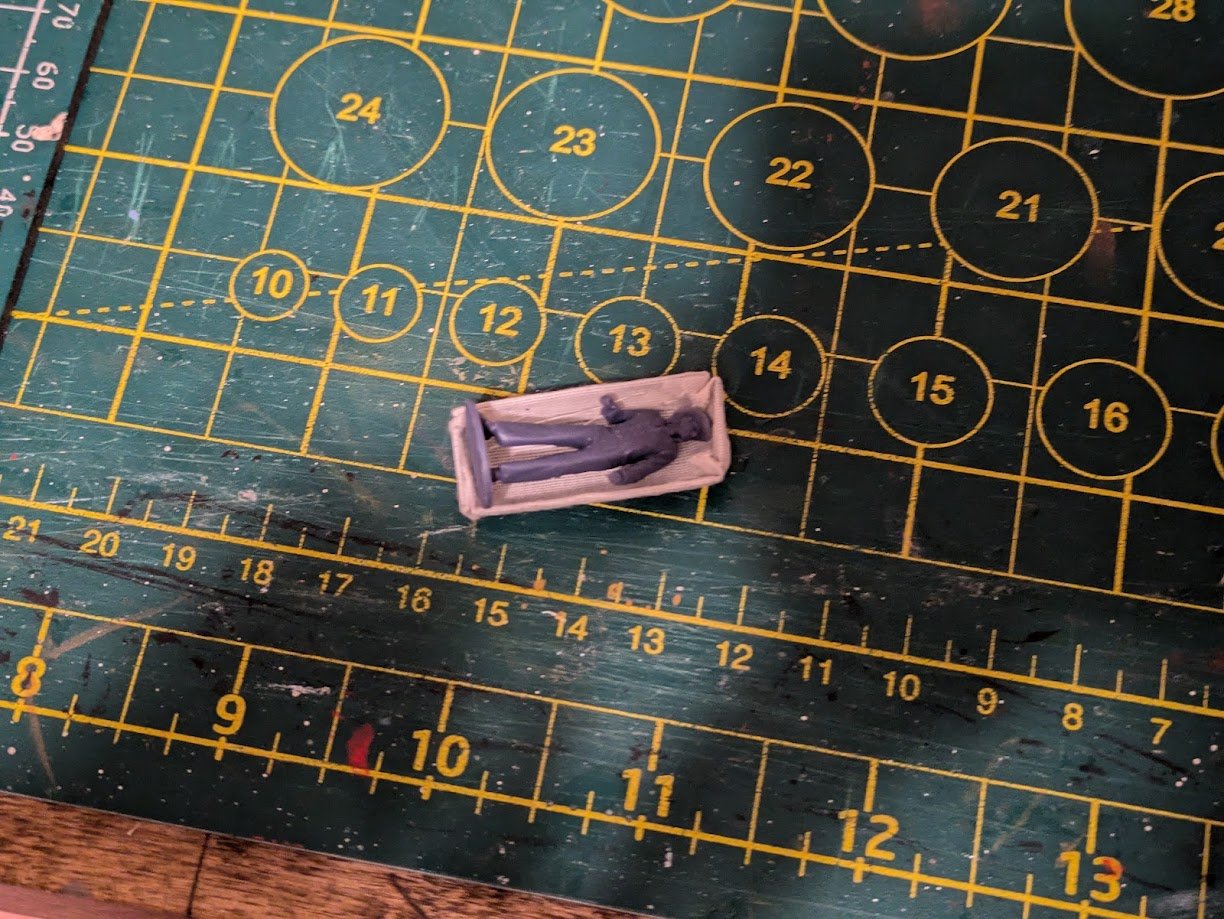
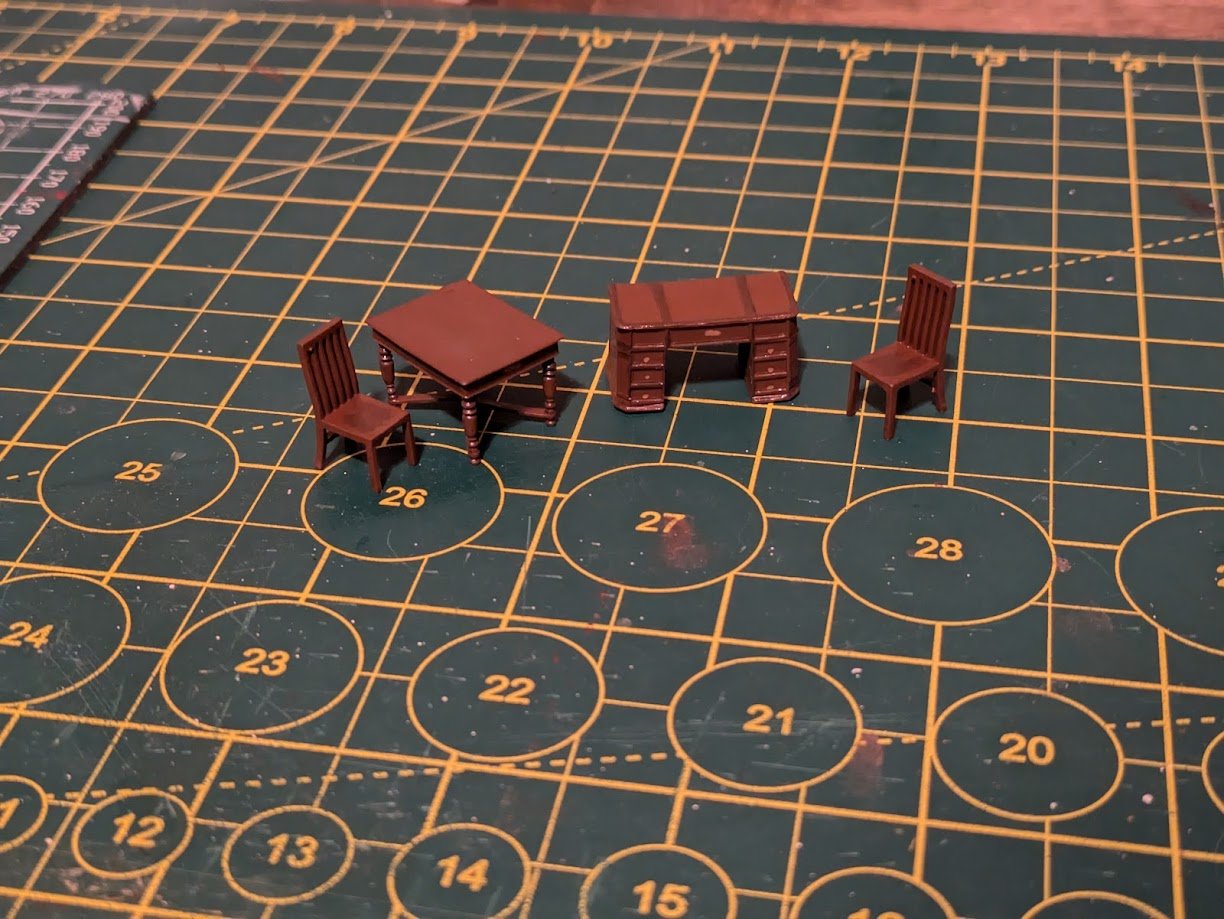
I needed to order some more rope for the cannons, so while I wait for that I started to work on the Great Cabin furniture. I am using the 3d printed furniture from Vanguard, I painted with some Model Expo Cherry Paint that I had left over from my Beagle kit. I then added went over with a little American Walnut paint to add a little depth. I Varnished with WOP, but Its a little glossy so I will probably try a Satin or Matte Varnish to tone down the shine. I'm also going to try to print out some little maps or papers to add a little life to the cabin. I also wanted to try out making a captains hammock, so this is my first attempt. Once I get to the QD beams I will figure out the ropes to hang it.
-
That's exactly the look I was going for, but I believe his ropes are larger diameter and I don't think they would fit through the 2mm blocks I am using, heck its difficult to get the .1mm thread through those blocks. I may try messing around with some slightly larger Syren rope I still have to see if it looks too out of scale, .1mm thread is just so thin its hard to make look like real rope.
-
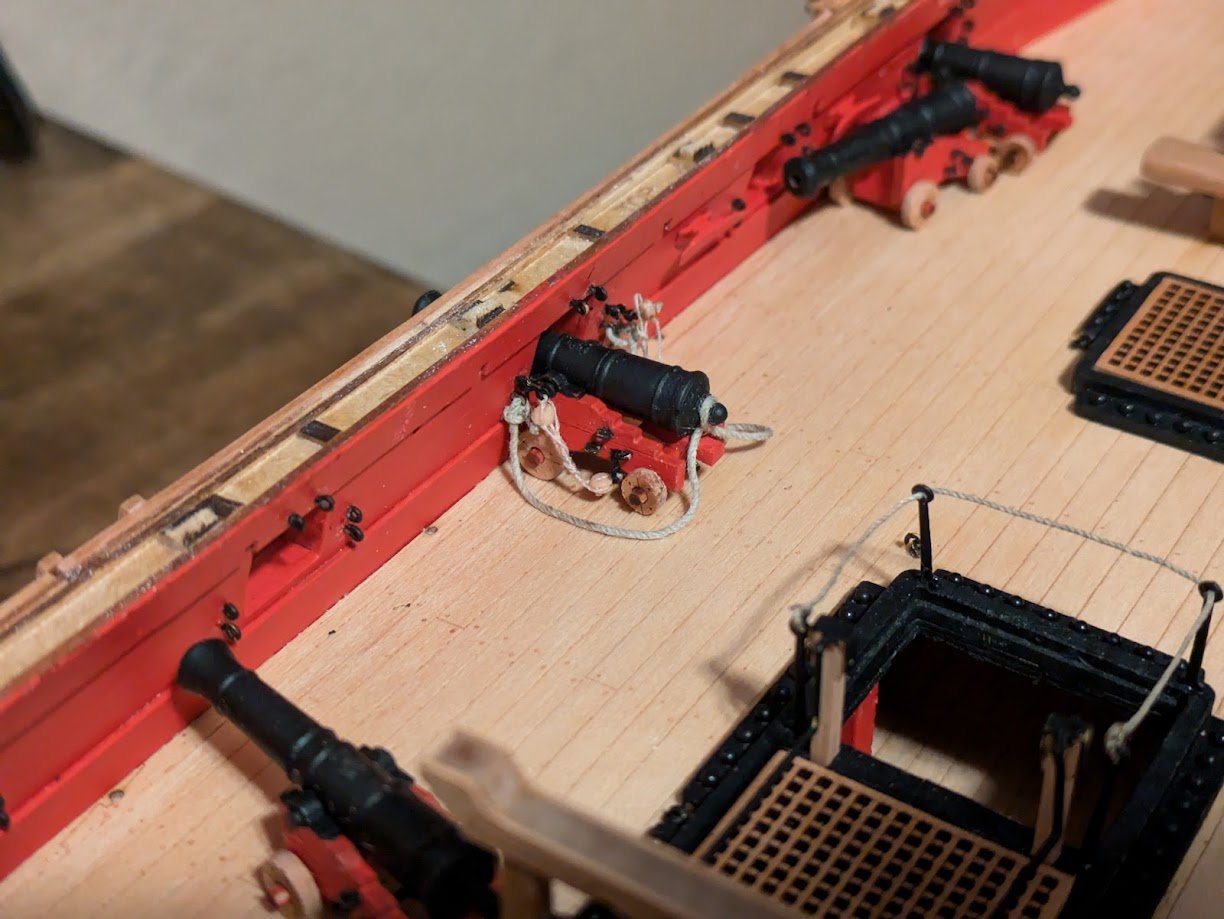
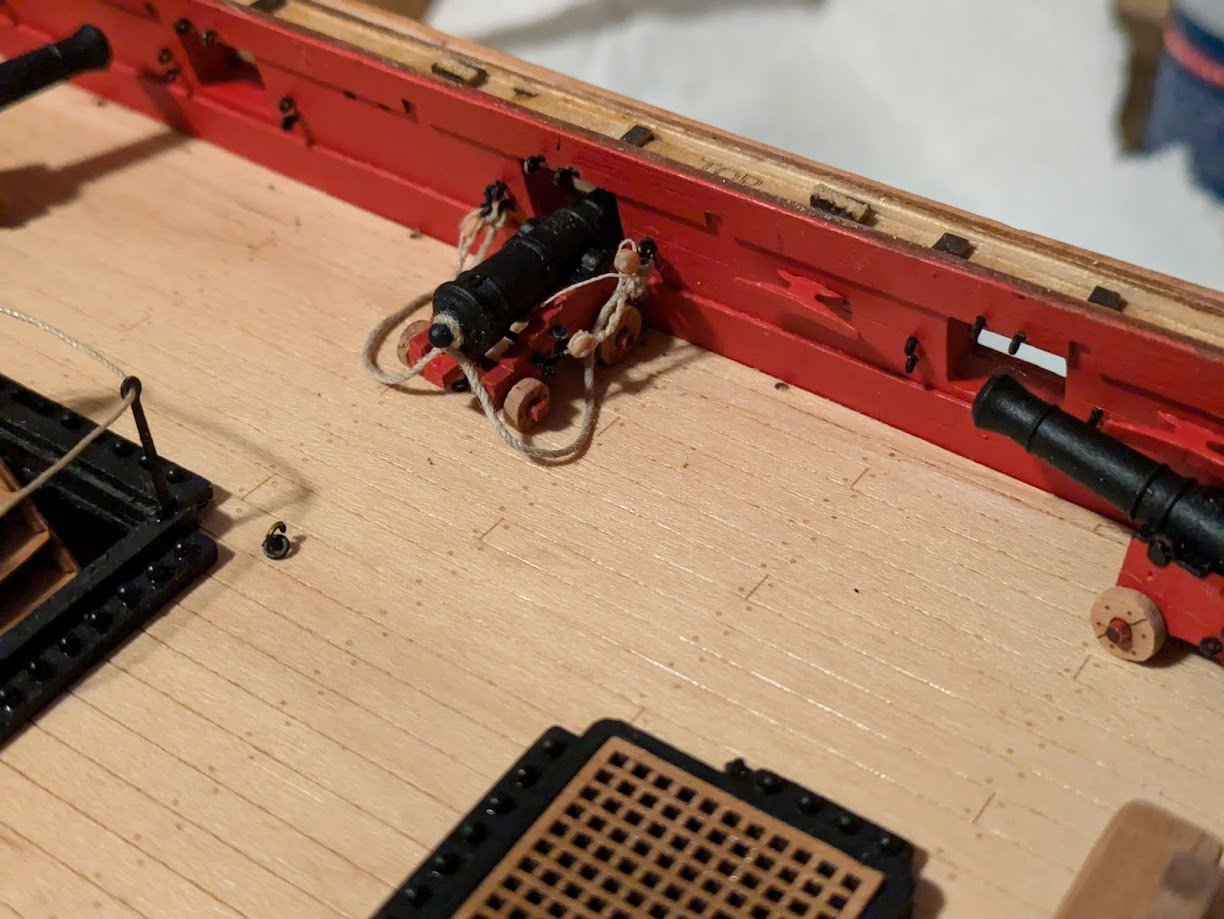
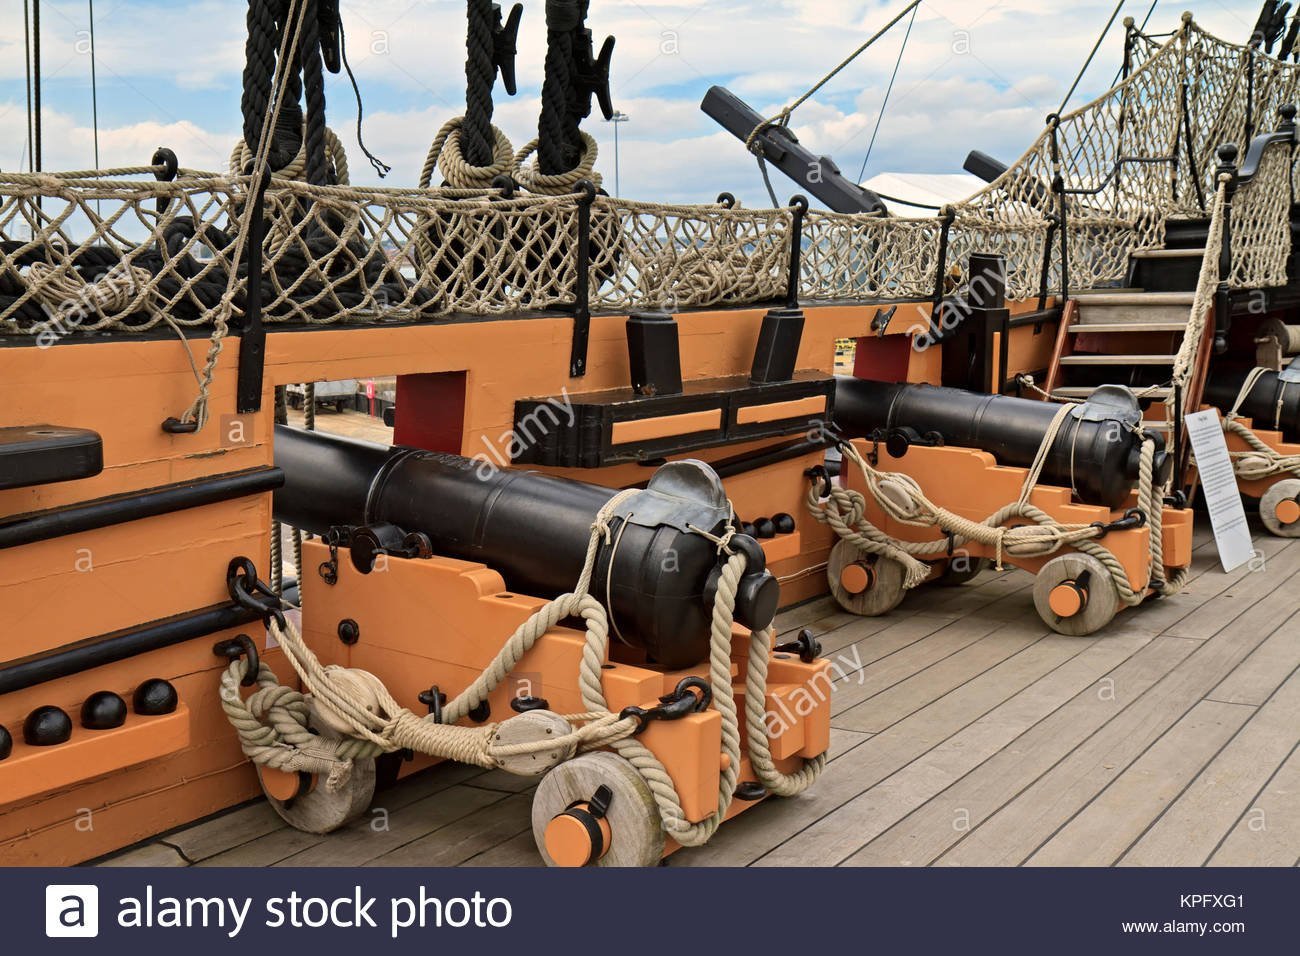
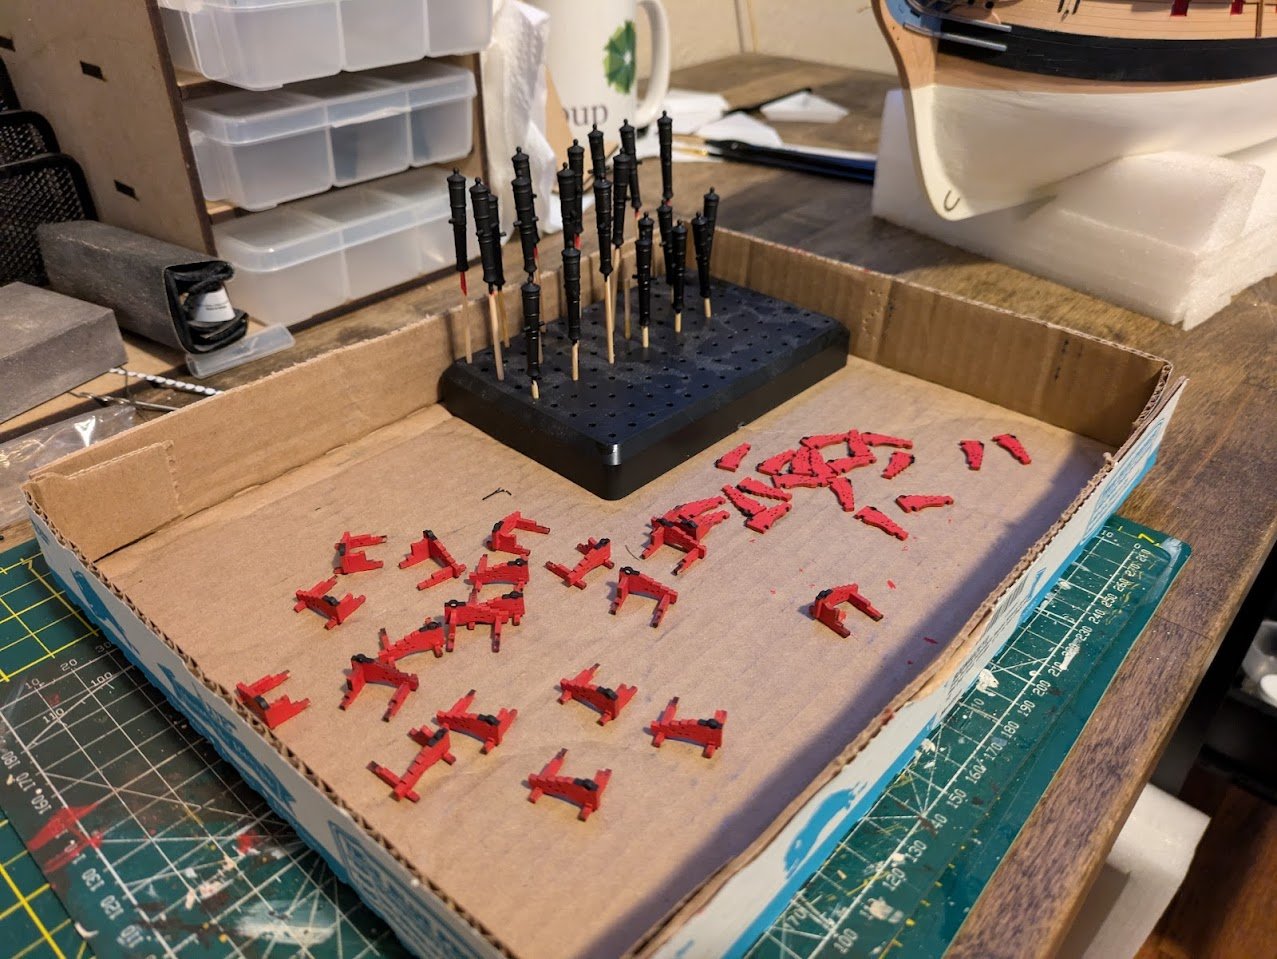
Here is my first dry run at rigging the cannons, nothing is glued in place, I just want to get my process down before I start an assembly line. My feelings are mixed, for the amount of work that is involved I'm not really sure if the effort pays off at this scale. I'm fairly happy with how the breeching line went, but the gun tackles and rope are so tiny that I can't really get a good looking result yet. The blocks are Chucks 2.5mm resin printed blocks, they look fantastic but their size isn't easy to work with. I was going for something like this on the gun tackles where the excess rope is wrapped around the line, but the .1mm rope is so small that you Its hard to make it look nice without looking like a blob of white rope. I know many like to coil the ropes to the side, and I think that looks great but I don't really want to go with coils at the moment, plus I'm just horrible at making coils. Here is the other side At this moment I'm considering just doing the breeching lines, but I'm still working on alternative ways to rig the tackles to make them look good. I just don't want to spend a huge amount of time working towards a result I won't be 100% happy with.
-
Those cannon look great, I think you made the right choice doing the cannons first.
-
Before I secure the cannons in the ship I wanted to install the deadeyes and chain plates. Looking at all the pieces required on the photo etch was fairly intimidating, but it all went together fairly easily and I had no real issues other than needing lots of touch ups on the paint. Next I finished the carriage quoins which was the last non rigging piece of the cannons I had left to finish. Cannons aren't glued in yet, as I will do that after I figure out the rigging of the guns. Next step will be rigging the guns (if I can manage the super small blocks)
-
Well looks like I am going to need to by some more replacement parts. Not sure how or when this happened, I opened up my fittings box this weekend and noticed the lanterns had somehow got crushed. Does anyone know if the Syren lantern kits are similar in size and shape to the ones that come with the Sphinx? Trying to decide if I should order another Vanguard set or go with one of the Syren kits.
-
I'm glad I'm not the only one who had to use a ton of nails on the wale.
-
You are giving me too much credit lol. Only reason I am rigging the cannons after is because I have never done it before and am ignorant to which way is easiest. I'm sure in the next week I will be wishing I did it your way.
-
I never even considered a jig to rig the cannons up, I may have to steal your idea. So you rig them on the jig, unhook the hooks from the jig, and glue and hook them onto the model?
- 422 replies
-
- 1
-

-
- Vanguard Models
- Sphinx
- (and 1 more)
-
Amazing model, I'm bookmarking this thread for when I get around to a Speedy build.
- 53 replies
-
- 1
-

-
- Speedy
- Vanguard Models
- (and 1 more)
-
For medium CA glue i like to use those long nozzles you can get online, they really cut down the flow rate so you don't use too much. Below is an example of some I use. CA Nozzles Lately I have been using thick CA glue more and more as its a little more controllable than Medium CA glue on small parts. For planks I just use the bottle and a smaller nozzle. For smaller more precise applications, I like to pour a bead of thick CA glue in a small cup or piece of plastic, and then dipping from that bead either use toothpicks for less fine work, or these glue loopers which have quickly become a staple in my toolbox. Glue looper
- 177 replies
-
- 4
-
-
- Sherbourne
- vanguard models
- (and 3 more)
-
I think you all are on to something with the weather and wind regarding the doors, it would make sense that the stove would need some protection from the elements considering the gun deck is open. Small update, I have all the wheels on the cannons, and I only lost one wheel to the black hole under my desk so I will call that a win. The only task left on the cannons before gluing down and attempting to rig are the carriage quoins. I haven't touched these yet so I will have to remove the char, sand, paint, and varnish 20 of these as my last step on the carriages.
-
I am planning on it, and even purchased a bunch of super small 2mm blocks from Chuck to do it. But to be honest when I saw how small those 2mm blocks were I started to get some second thoughts haha, I know some curse words are going to be said while trying to work with those little buggers.
-
That looks absolutely fantastic with some WOP.
-
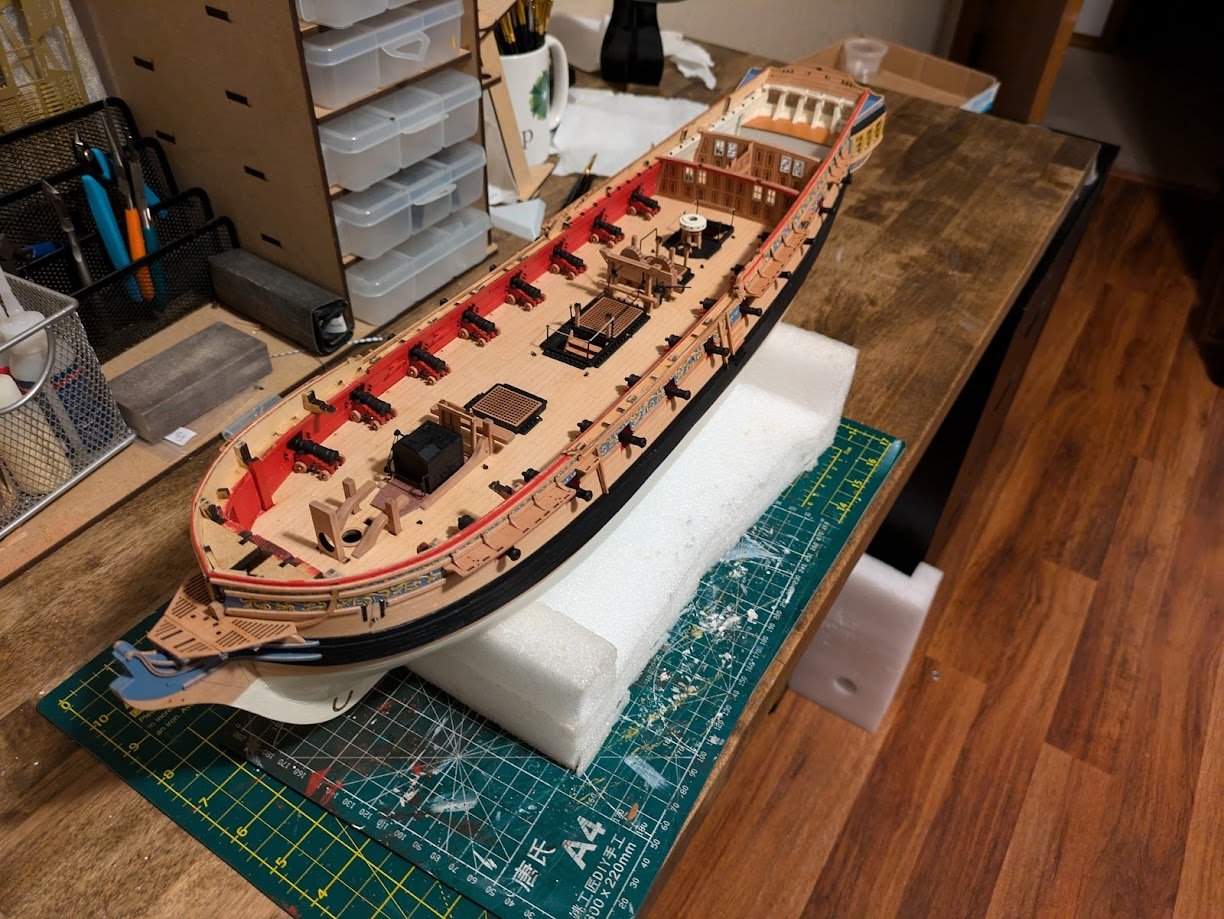
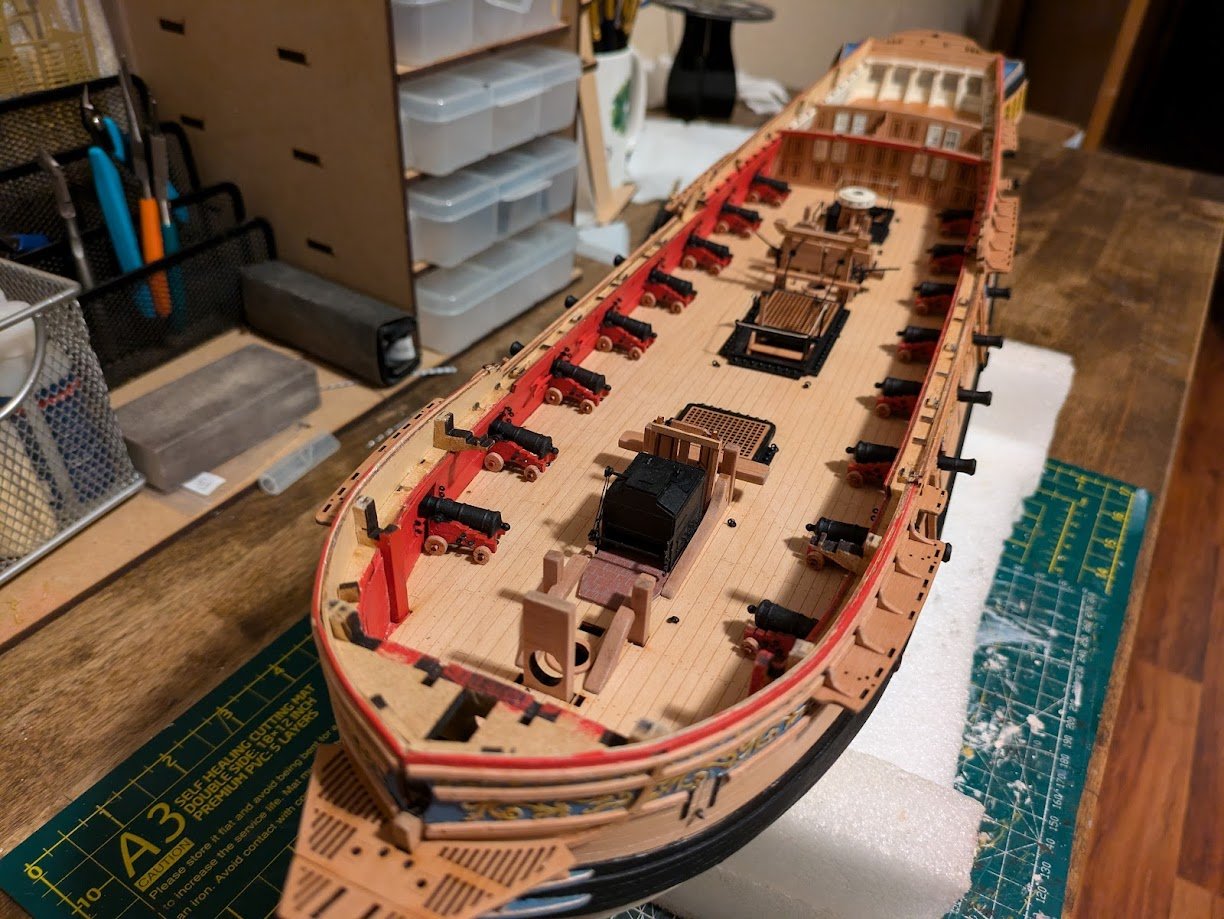
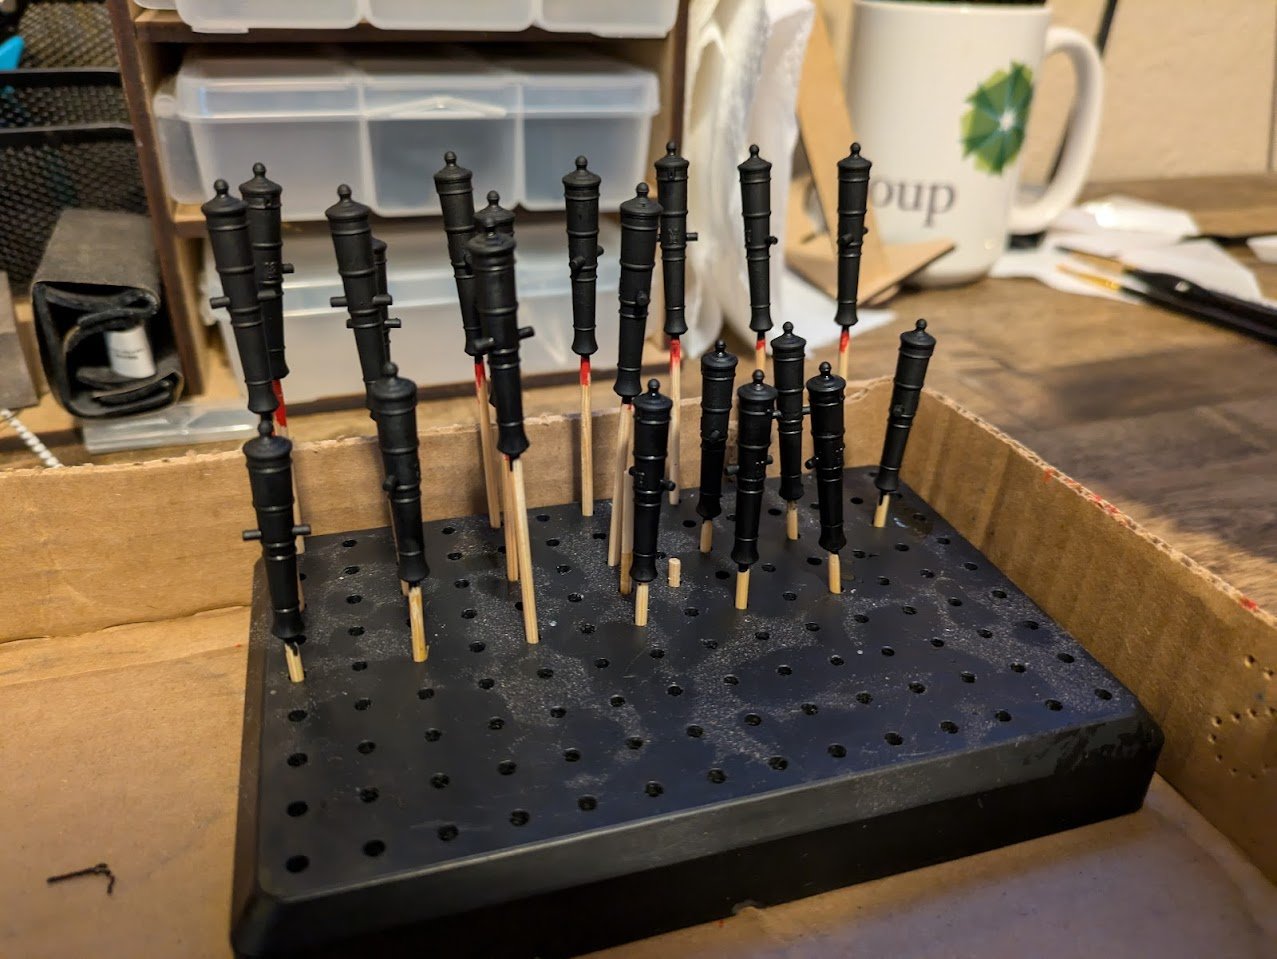
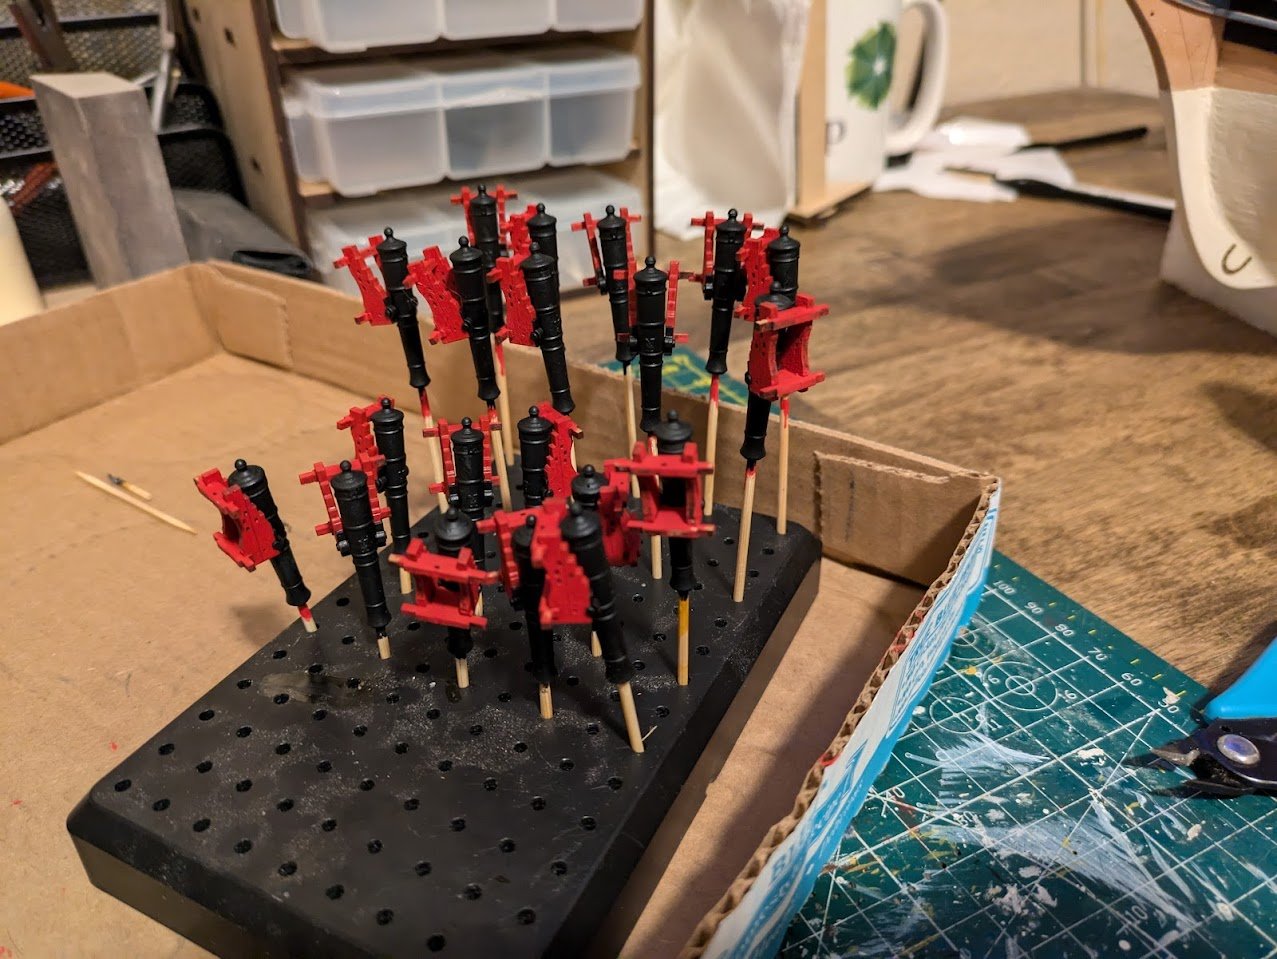
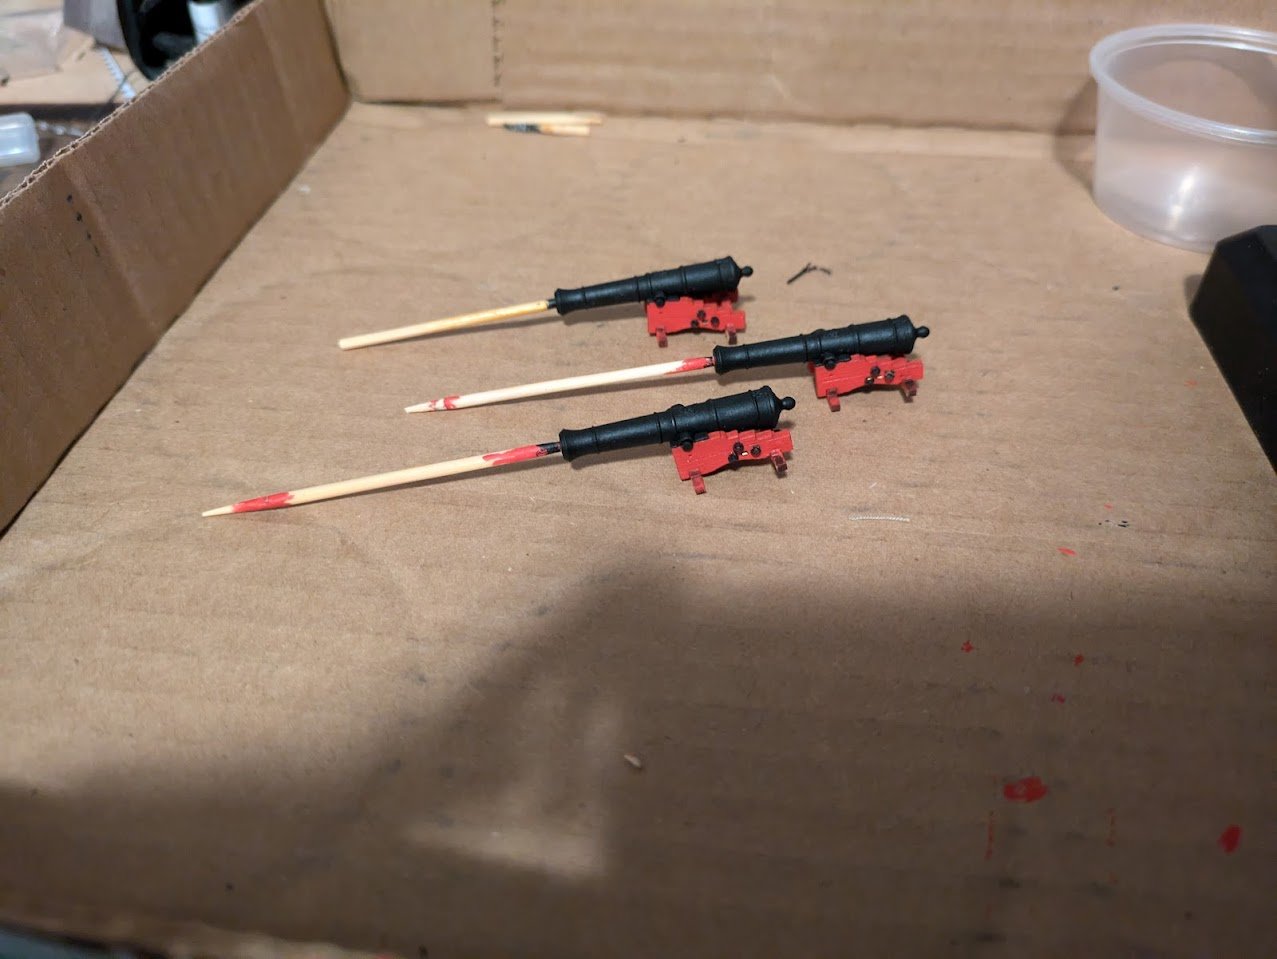
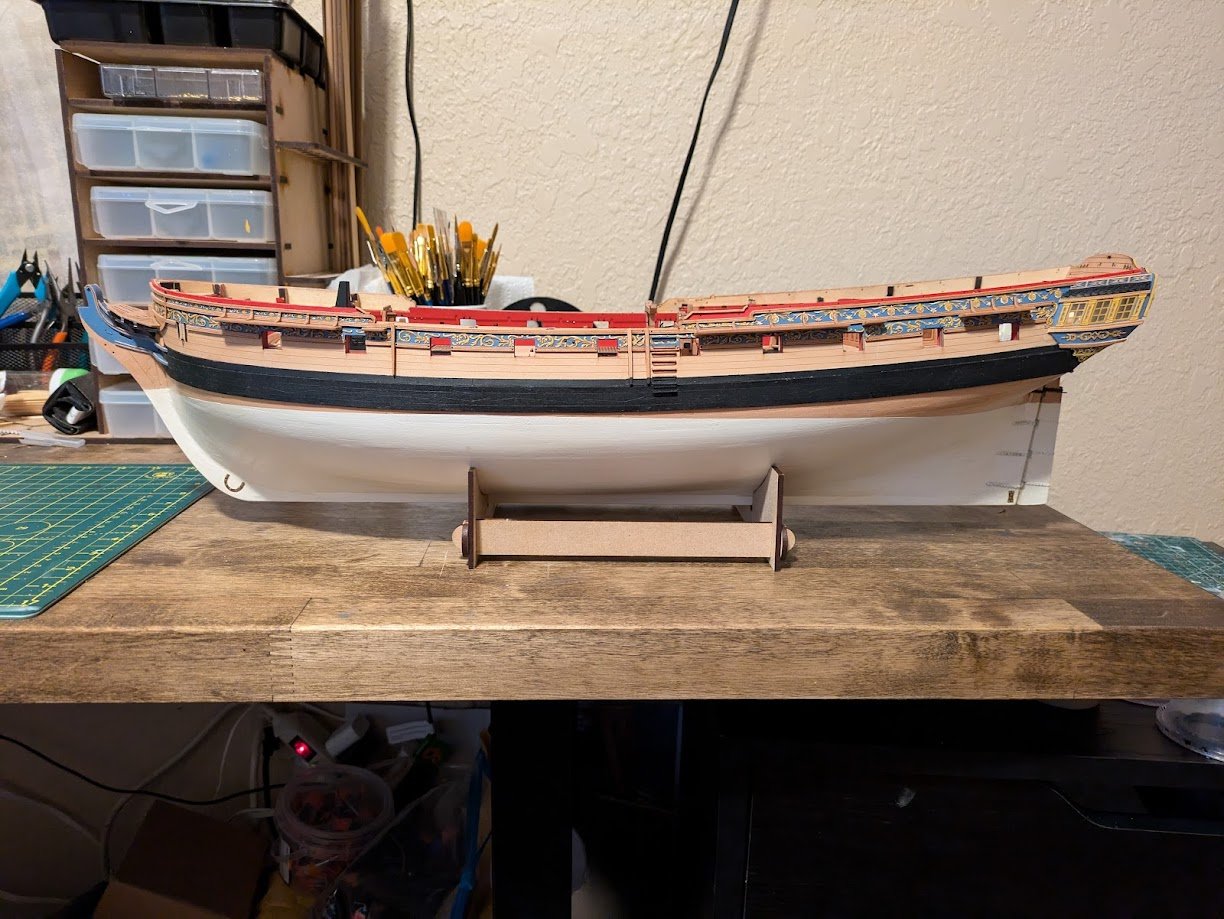
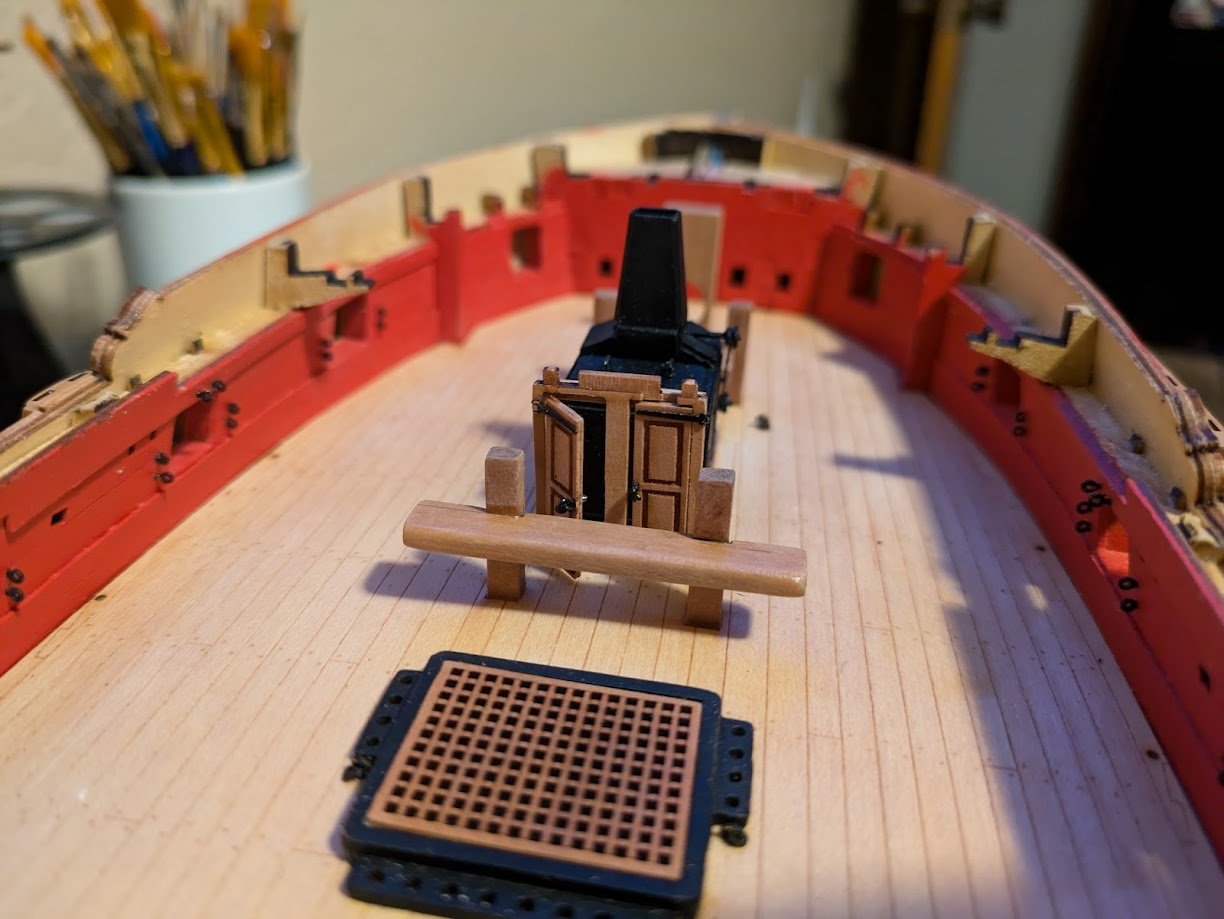
Howdy everyone, happy monday. Here is my progress update from the past few days. My time was mostly spent on cannon duty which means lot of tedious work on lots of very small parts. Luckily the Olympics kept me entertained while doing things like char removal on 80 cannon wheels. But first I installed the water pump handles, and the caps. I'm out of nails so once I receive some more I will pin the caps down with the nails per the instructions. I also added the rope railing around the steps. I'm not sure if I am going to keep the rope fairly tight, or if I should add some droop to the lines, I'm thinking a little droop will look more natural. While I am waiting on more nails to come in the mail for the deadeye chain plates, I decided to do some work on the cannons. Working on the guns always gives me more respect for you builders who do larger ships with more guns. Each cannon just has so many pieces and lots of small pieces takes time no matter how good the kit design. Carriages painted ready for installation of the guns. When I first saw the design of the carriages I wasn't sure If I would like the cap squares being one piece with the carriage side. But after putting these together I must say, doing a little detail painting on the cap squares with some black paint is FAR easier than fiddling with some super small PE pieces. I really like this design and once painted you don't even notice that they are one piece. Cannons painted Cannons installed on the carriages. Cannon cross bars, and 7 eyebolts installed. Next step will be touching up the eyebolts and crossbars, and then installation of the wheels.
-
Amazing model, I had to do a double take when I saw how massive it really was, the size of some of these kits really gets lost in the macro haha.
-
Can't go wrong with any Vanguard kit, plus the Duchess is a beauty. I look forward to your progress.
- 207 replies
-
- 4
-
-
- vanguard models
- Duchess of Kingston
- (and 1 more)
-
Does anyone know where I can get the brass nails or a similar size that are used in the kit? I just realized the deadeye chain plates also require some nails, and I have run out of the nails.
-
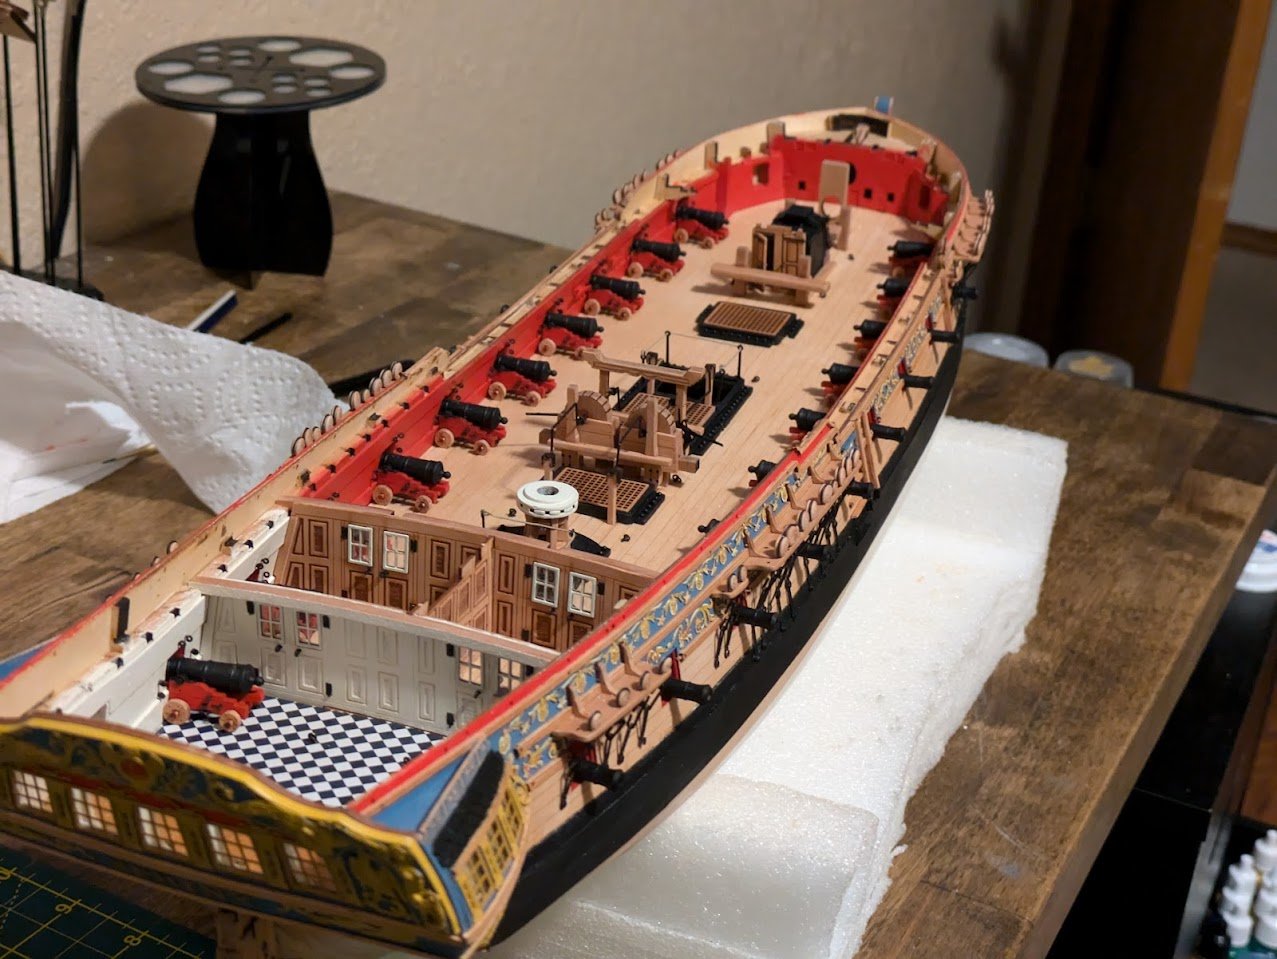
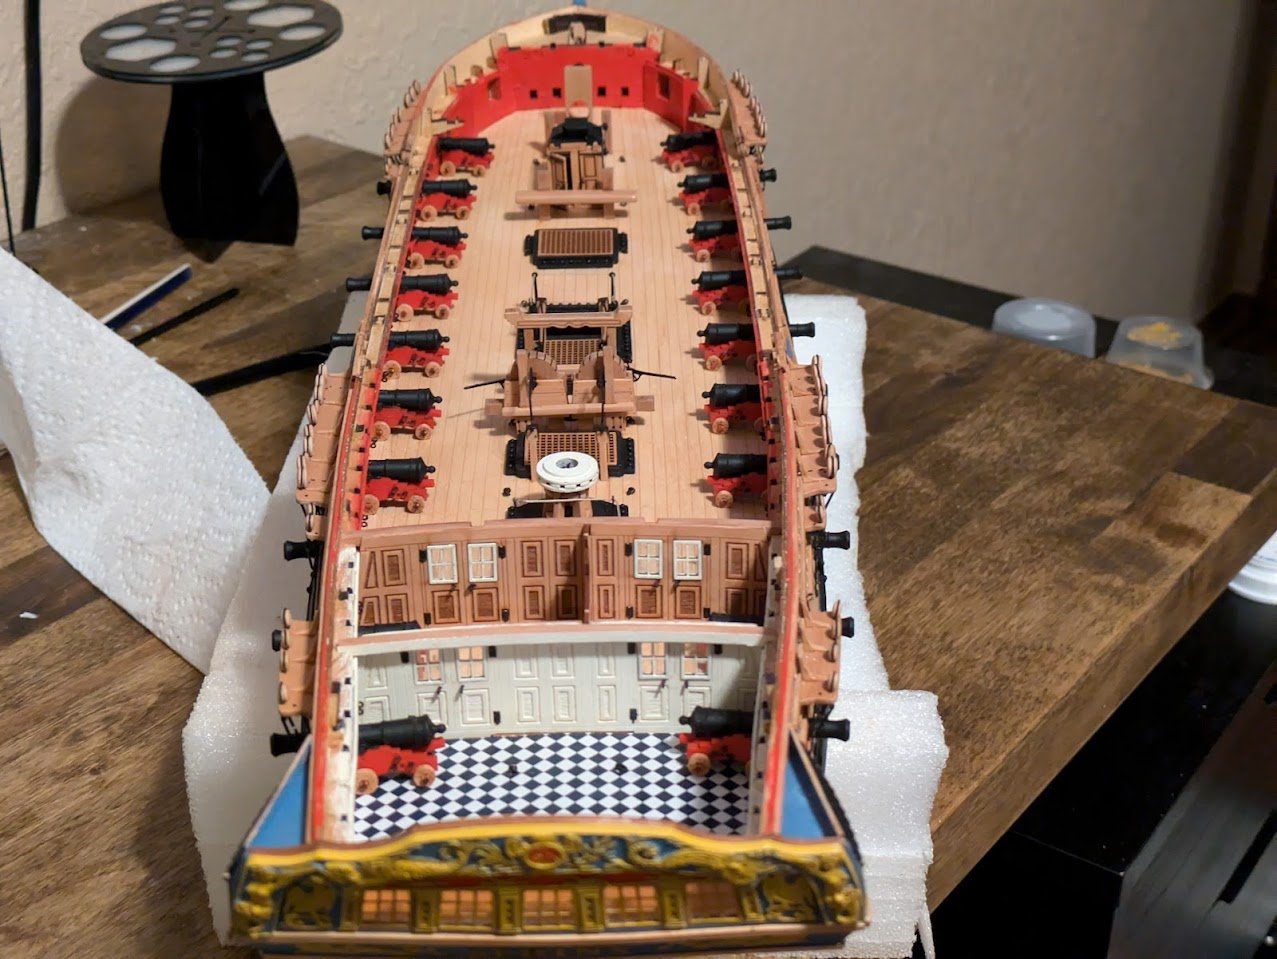
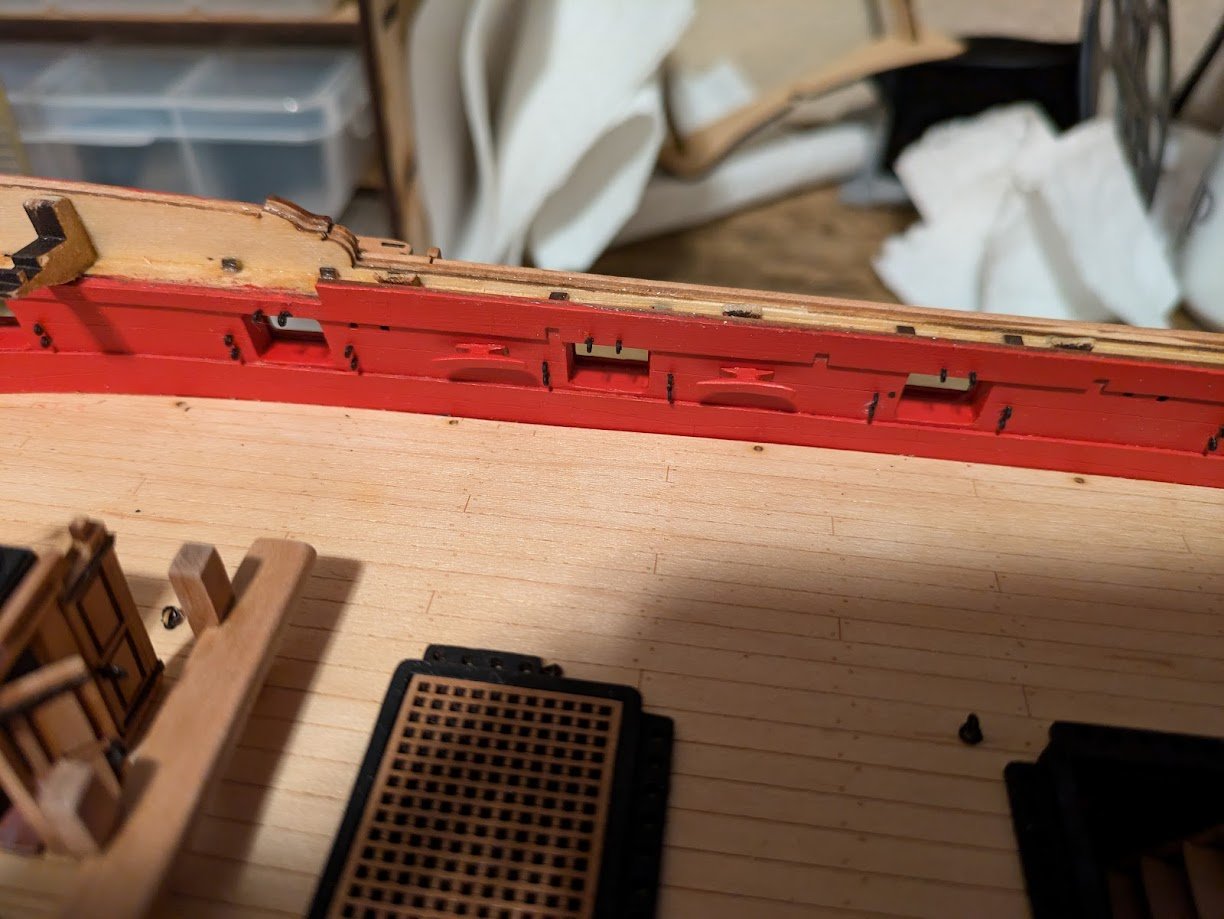
Upper Frieze's: Finished the upper frieze work, these were quite a bit smaller than the lower frieze patterns, so It was hard to do a ton of shading and highlights without it looking like an absolute mess. So I kept it fairly simple on these, they don't look the best on macro, but they do look acceptable when viewing from normal viewing distance. The upper patterns on the bow are very small, so these only got a very simple Ochre Yellow on top of Ochre Brown base. Lastly I painted and glued in the 4 cleats that go in the bulwarks on the gun deck.

-
For my Sphinx I printed mine on some 200g brochure paper I found at work. I had the same thought about applying some varnish on top, but it ended up making the lines on the paper bleed and not look good. I used a laser printer, so not sure if paper type or printer type would make a difference on preventing the colors from bleeding. Here is how it looks on my sphinx.
-
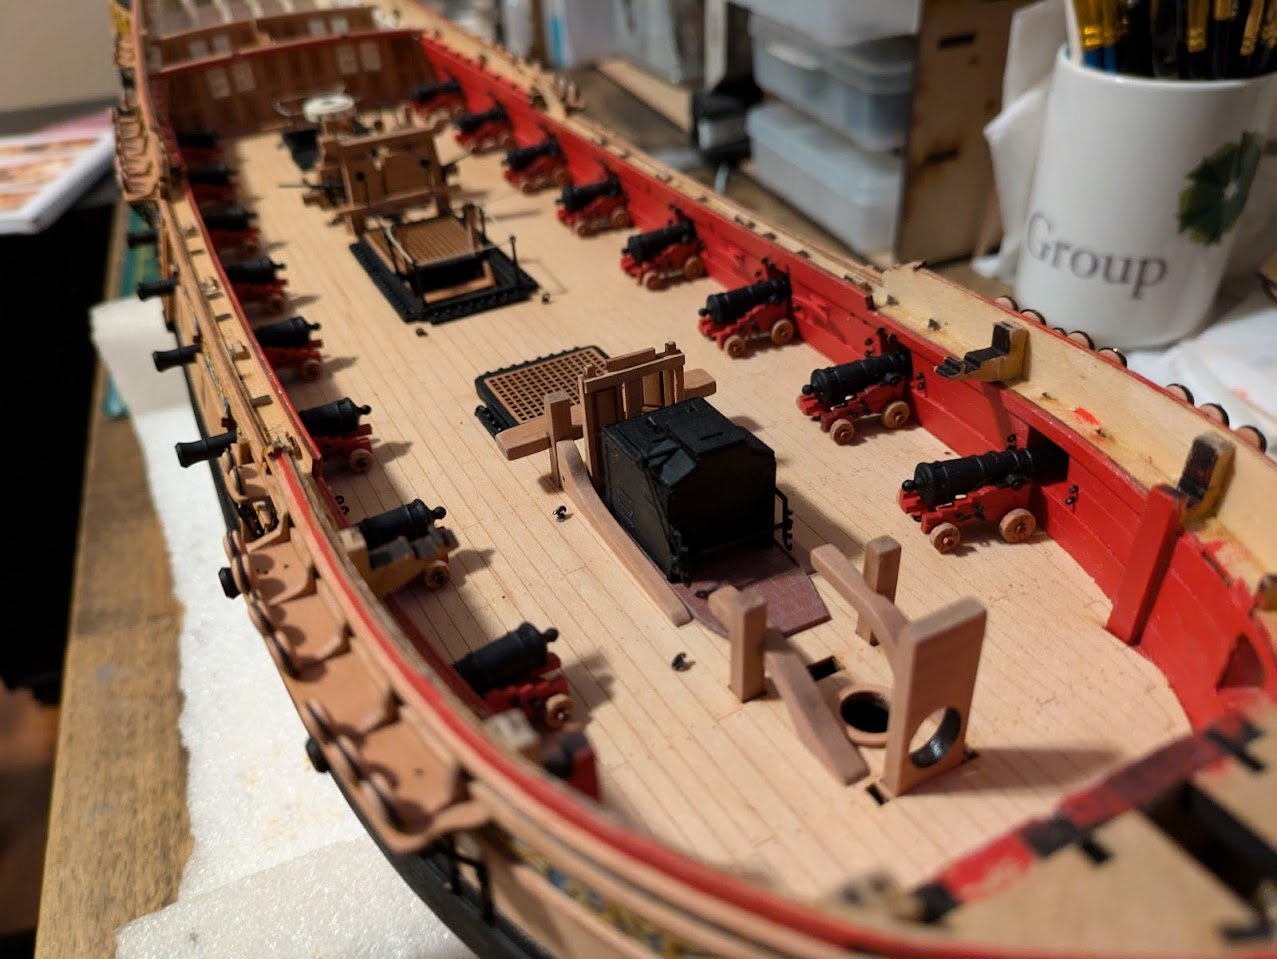
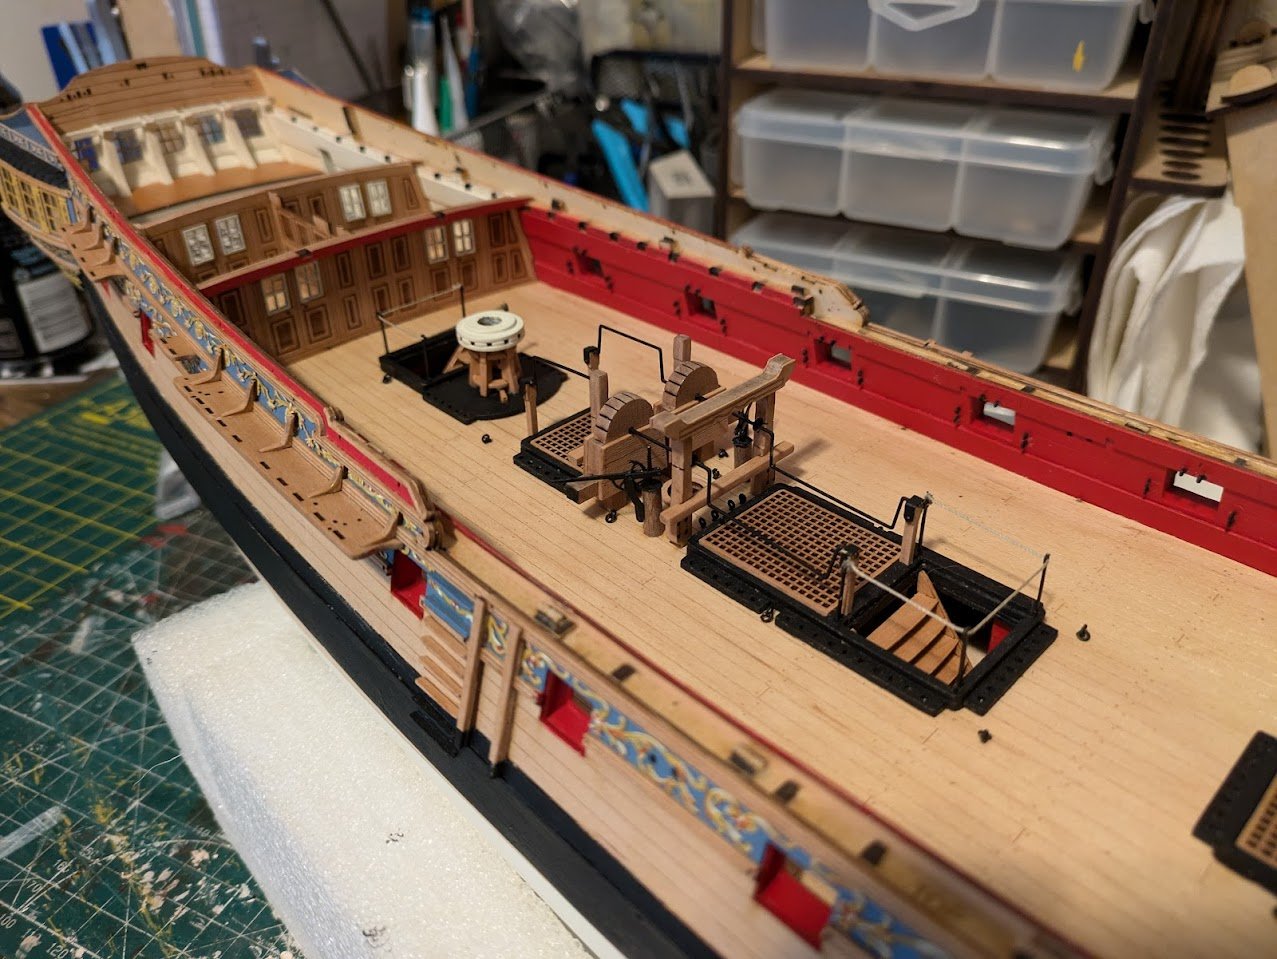
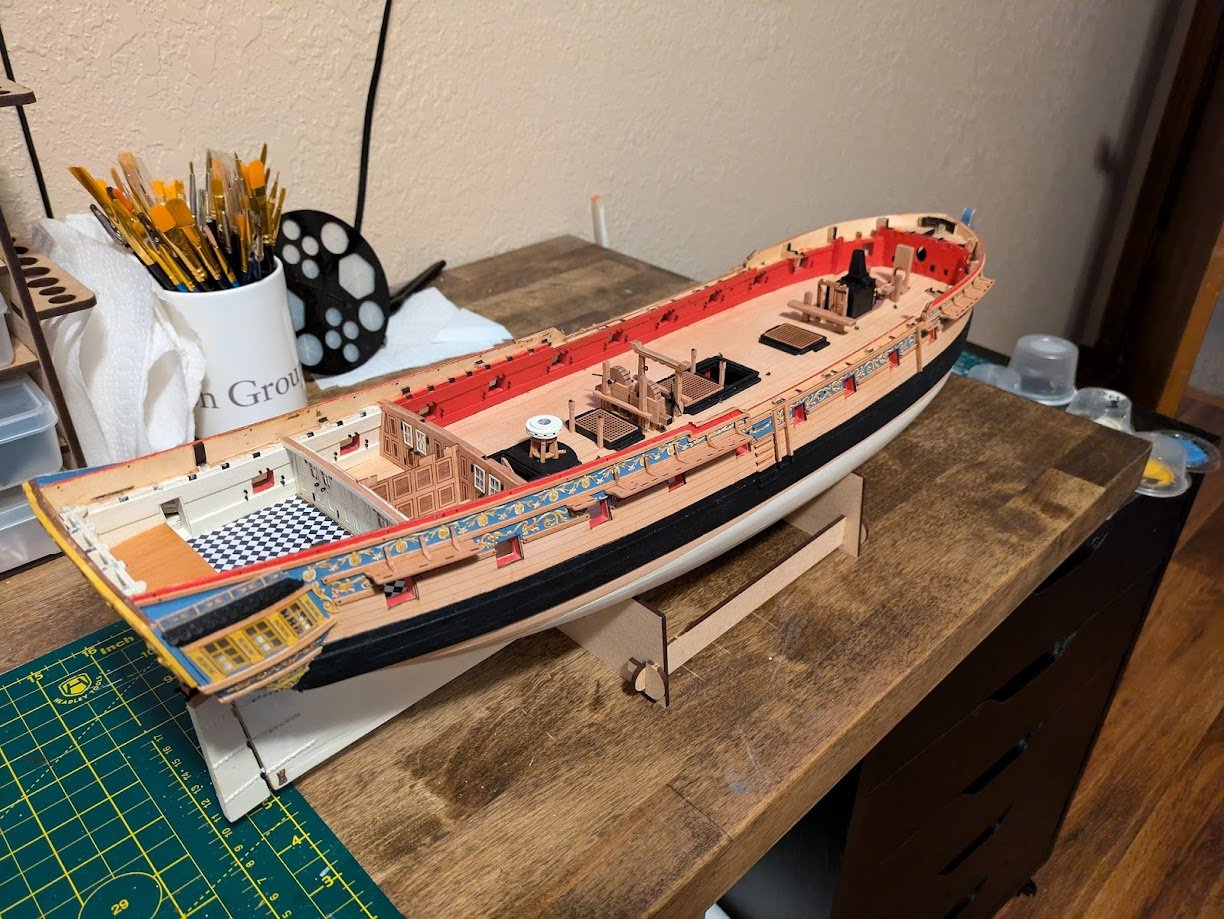
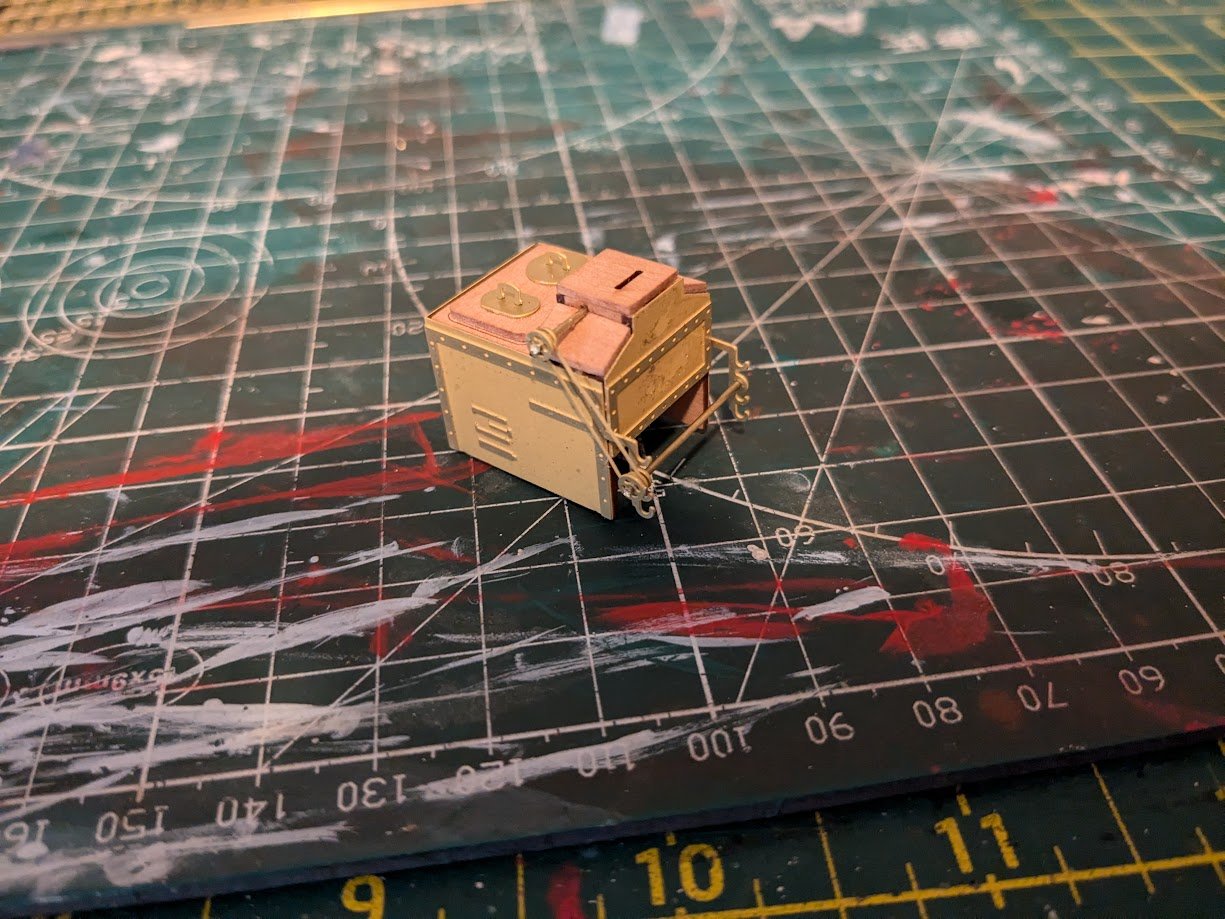
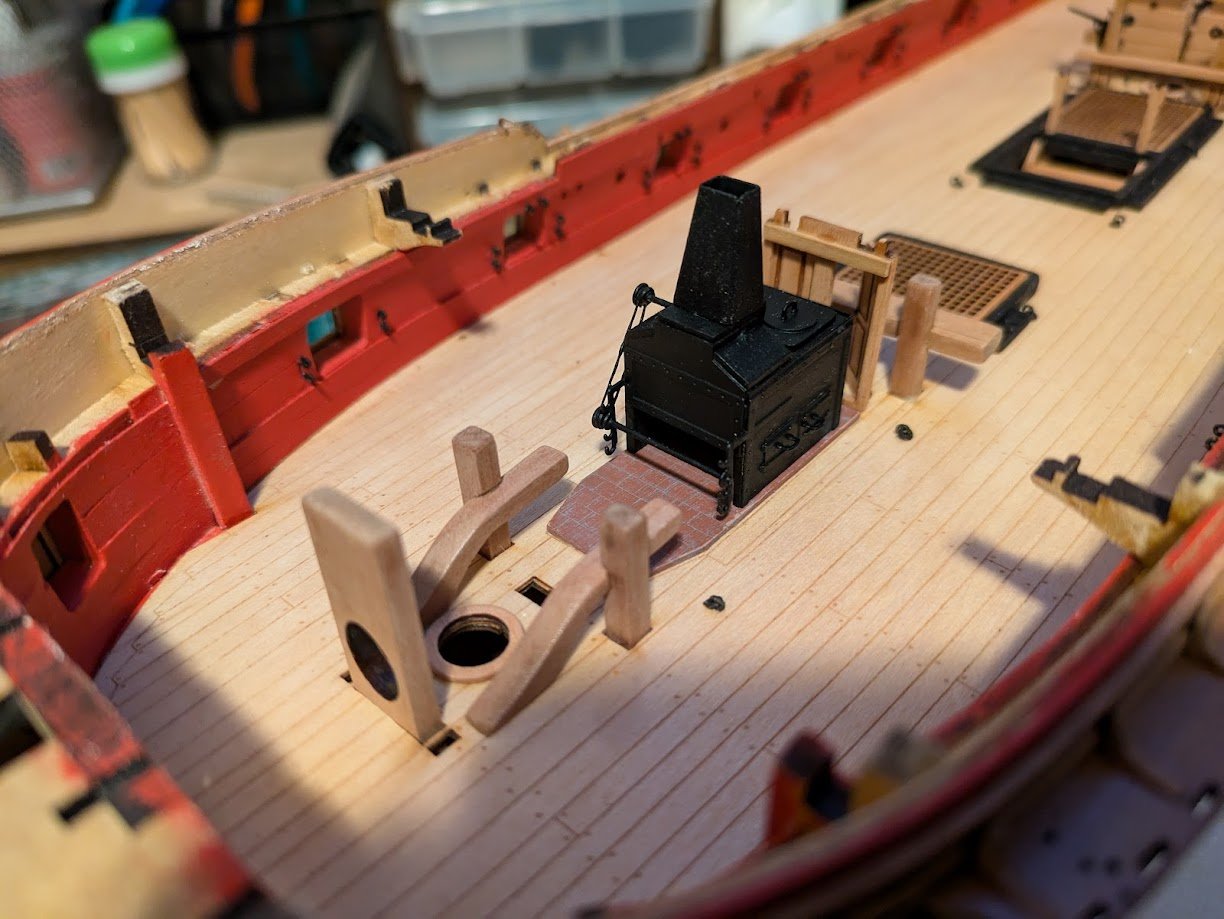
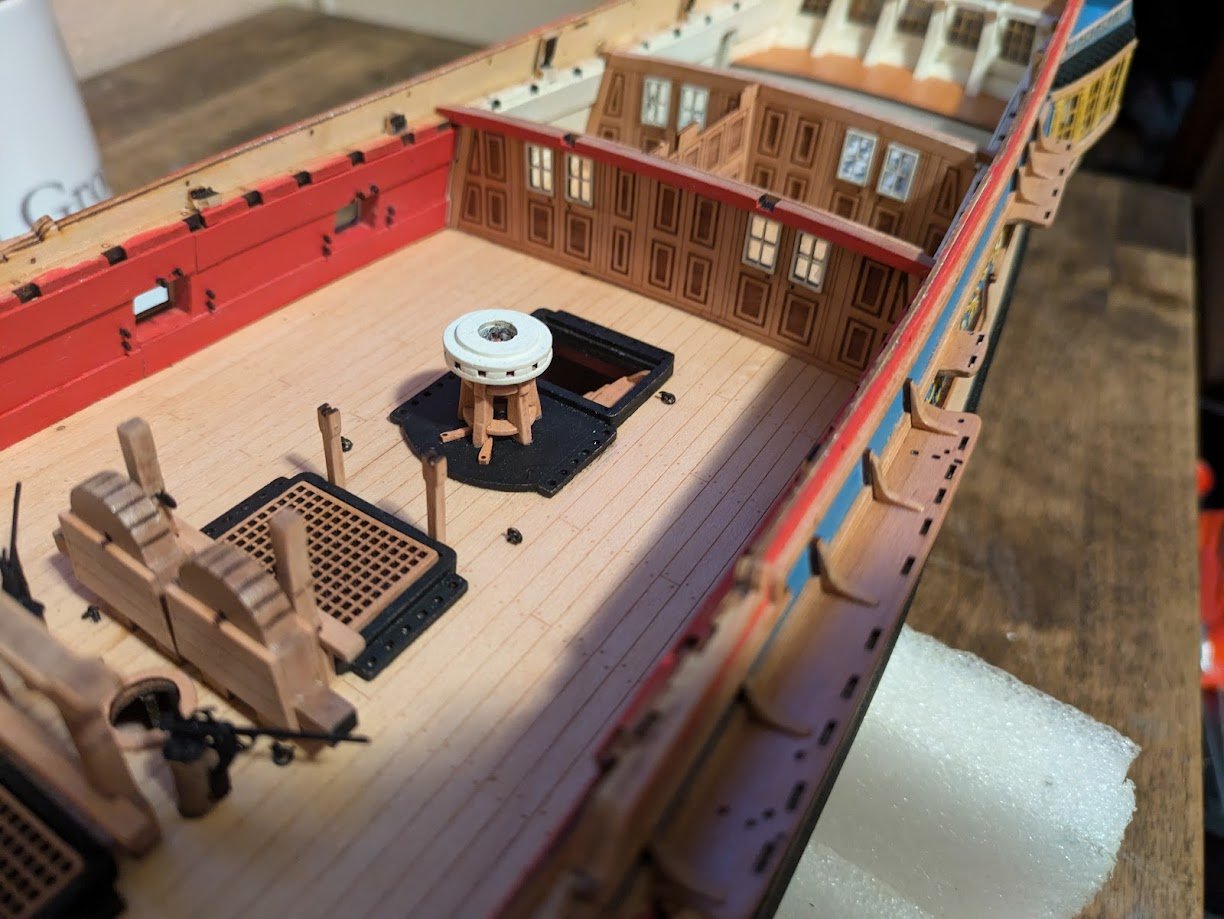
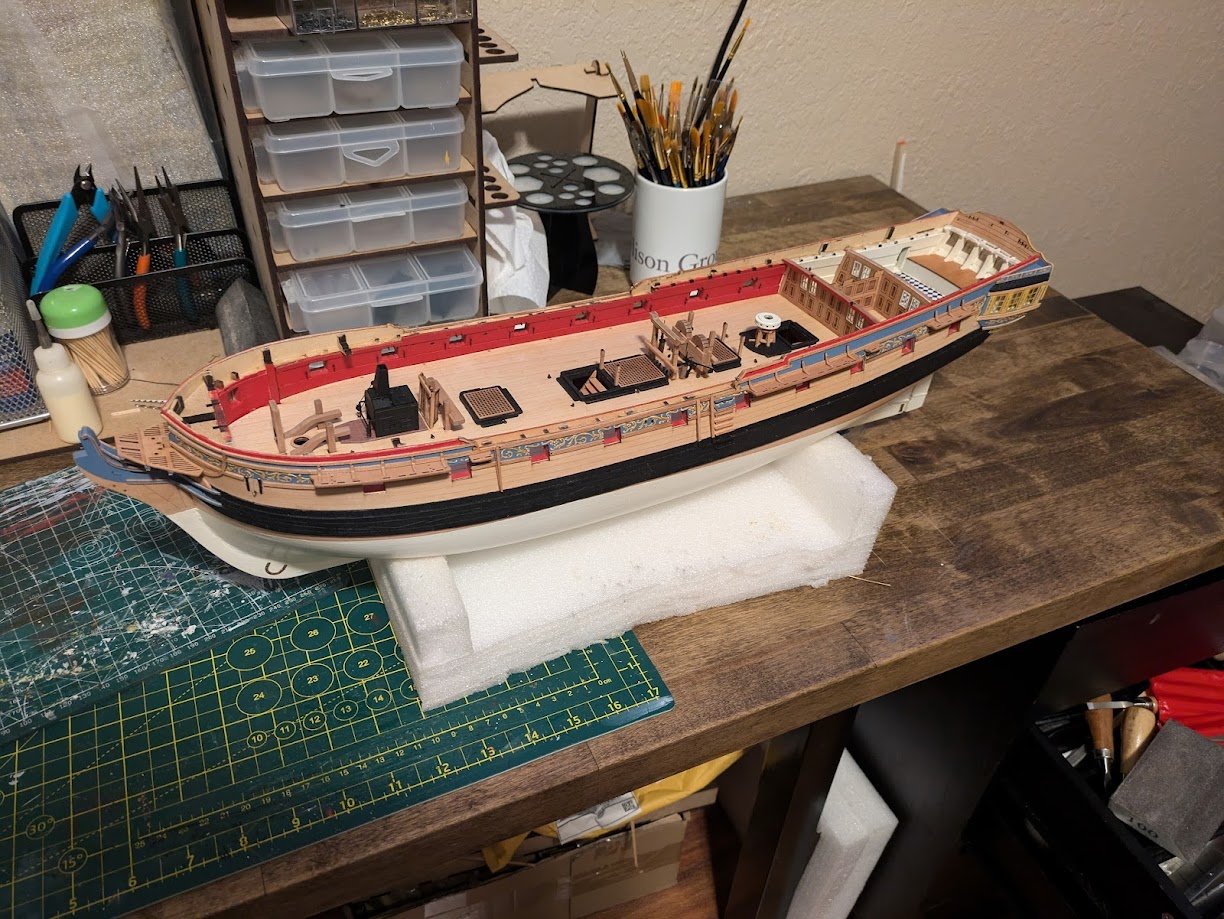
Howdy everyone, thanks for the likes and compliments on the frieze work it really boosted my painting confidence. While working on the frieze work between coats I have also been working hard on equipment on the gundeck. Ships stove: Assembly is very straight forward, assemble to wood frame, glue on the brass PE and then paint. I used Vallejo black mixed with a little steel pigment powder. I have never really used pigment powder, so I am not really sure if I used too much or too little, but I am happy with how the stove turned out. I really struggled with painting the bricks, I have discovered mixing paint is a skill I am not very good at. After probably a dozen attempts I got a brick color I was happy with. Next I used a light grey wash for the brick mortar. I have never used washes before, and I never really figured out how to use it properly. No matter what I did I always seemed to remove the wash in the cracks when trying to remove the excess wash. Finally I just used a 000 paint brush and painted it in the cracks as best I could. The doors in front of the stove. Can someone explain the purpose for these doors, because their purpose doesn't really make sense to me. The doors were pretty straight forward, glue two sides together add the hinges and door handles and glue on the frame. The frame I had some issues with as it was very fragile and I snapped it in a couple places. I repaired It best I could with a piece of 1x2mm wood I had, but some of the frame is still missing above the closed door. Capstan: The capstan looked like it would be very fiddly to put together, but it was actually a very easy process that went together in no time. Here is how the ship looks as of 7/30/24, hopefully I haven't missed covering anything.

-
Yes I paint them while still attached to the sheet.


