
HOLIDAY DONATION DRIVE - SUPPORT MSW - DO YOUR PART TO KEEP THIS GREAT FORUM GOING! (Only 44 donations so far out of 49,000 members - C'mon guys!)
×


marktiedens
-
Posts
1,737 -
Joined
-
Last visited
Content Type
Profiles
Forums
Gallery
Events
Everything posted by marktiedens
-
Love your current rope - don`t really want something that will unravel with the slightest mistake in cutting! Mark
-
Not sure if I`m the Mark you are asking,but I added spacers between the bulkheads to keep them from flexing while planking - I had a small problem with flexing bulkheads a few builds ago. As long as the keel is straight & the bulkheads square,the spacers shouldn`t change anything as far as bulkhead alignment goes. They just need to be fitted well enough to not push things out of shape. Mark
-
Yes,my transom is a bit flat - it was built long before there was a forum like this & I had a little trouble interpreting the plans,so many errors were made. Painting everything gold is probably incorrect also,but I didn`t know any better back then. Mark
-
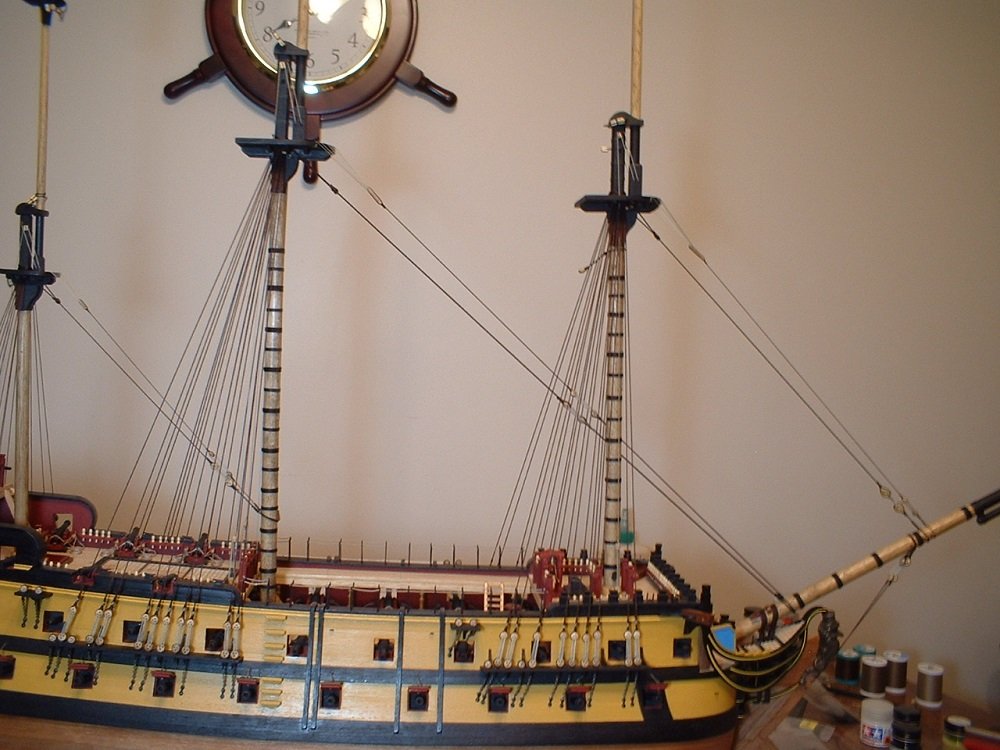
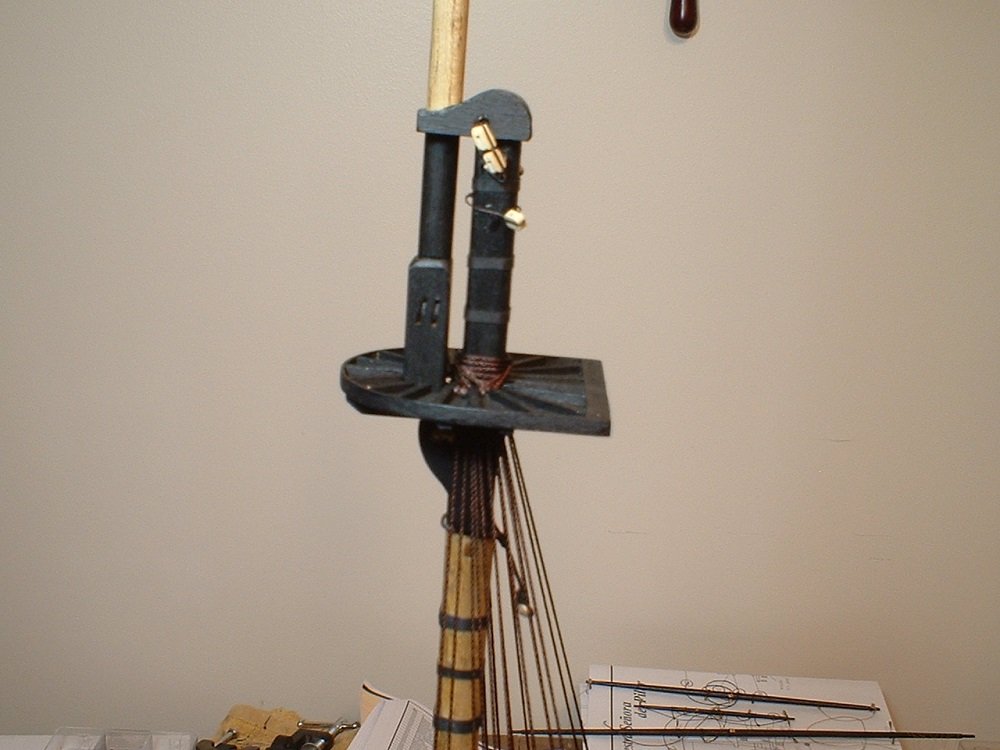
Hi everyone - just thought I would get the lower stays done before continuing with the shrouds(while I can still get my hands in close to the mast tops). Thanks for looking in. Mark
- 331 replies
-
- 13
-

-
- nuestra senora del pilar
- occre
- (and 1 more)
-
Hi Max - maybe a little late now,but what I did was I used the notches in the decks to line up the frames before glueing the frames in place. I set all the decks in place,then added glue to the frames at the keel former. After the glue had set,the decks were removed. The deck notches needed very little adjustment that way & the frames were good & square also. Mark
-
Vasa deck shift
marktiedens replied to BLACK VIKING's topic in Building, Framing, Planking and plating a ships hull and deck
Here you go - hope the link works.... http://warshipvasa.freeforums.net/ By the way,the research director`s name is Fred Hocker. Mark -
Thanks Frank! Yes, I need to be careful now. I have snapped off the jib on my Victory twice just moving it around the house. Gotta be more careful around doorways. Mark
- 331 replies
-
- 2
-
-
- nuestra senora del pilar
- occre
- (and 1 more)
-
Vasa deck shift
marktiedens replied to BLACK VIKING's topic in Building, Framing, Planking and plating a ships hull and deck
Hi Martyn - from what I understand from the Vasa forum there is no definite deck plank shift. According to the museum research director,the planks were all different lengths & widths. They seem to have used whatever they had on hand that would fit into the spaces. In other words,they seem to have made it up as they went along! It would be difficult to replicate all the different widths on a model,but random lengths would appear to be acceptable as long as the plank ends don`t line up side by side. If you would like,I can give you a link to the forum - the museum research director is on that forum and is happy to answer questions about the ship. Mark -
Thanks Katsumoto! The rigging plans are testing my patience,but so far,so good. There are a few blocks & cleats on the decks which are not shown on the belaying plan,so I will just make a 'best guess" at what goes to them. Mark
- 331 replies
-
- 2
-
-
- nuestra senora del pilar
- occre
- (and 1 more)
-
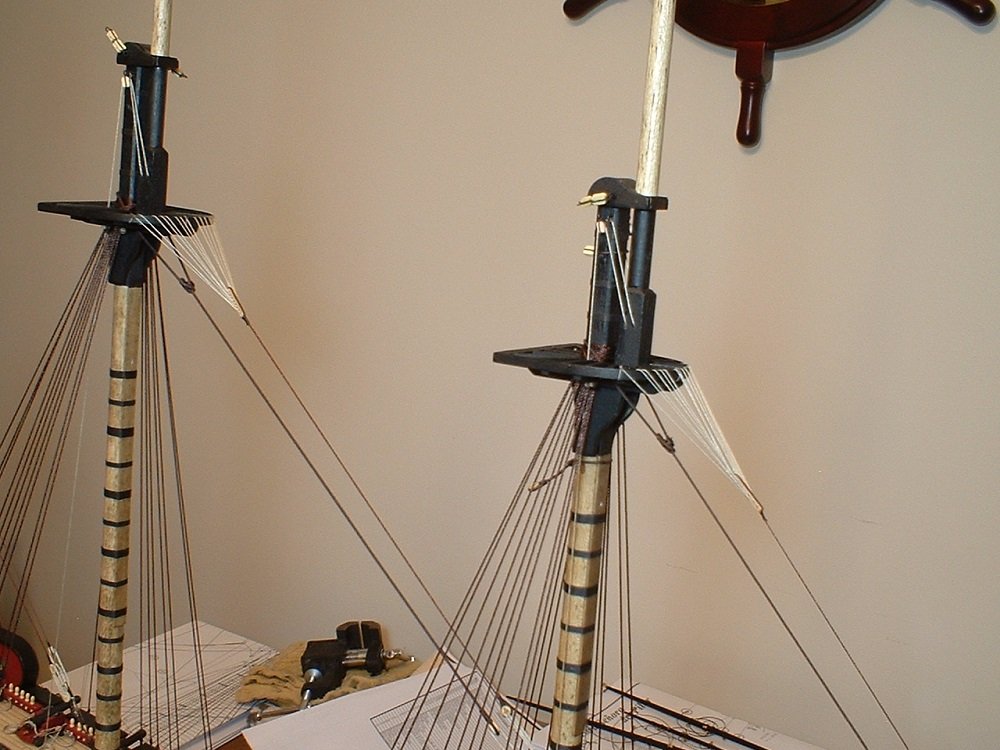
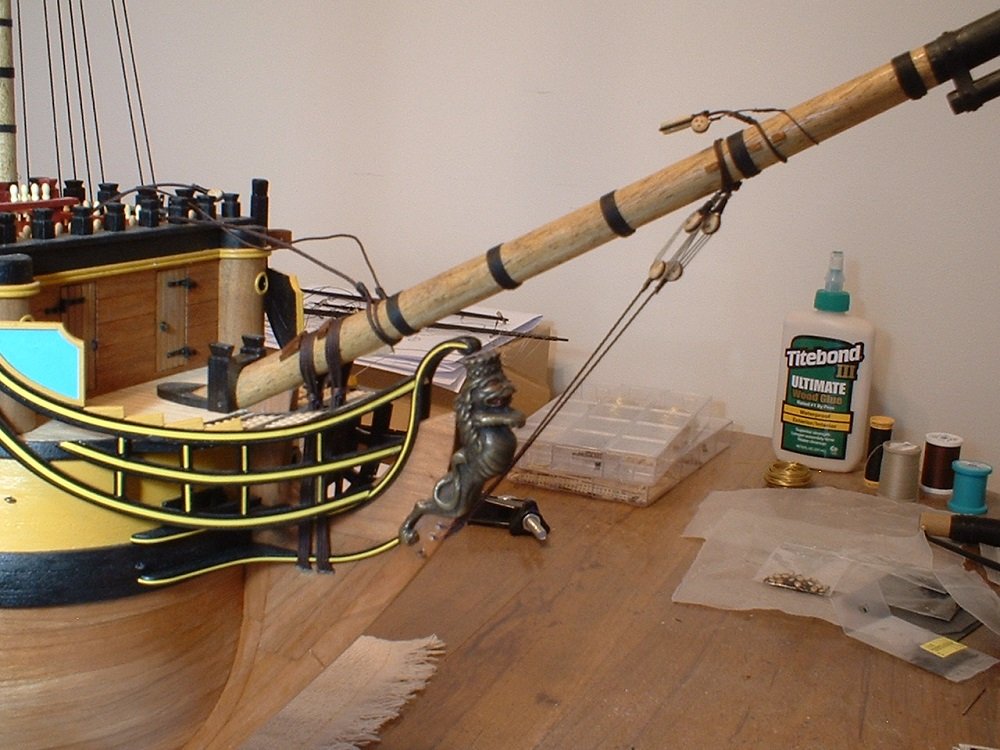
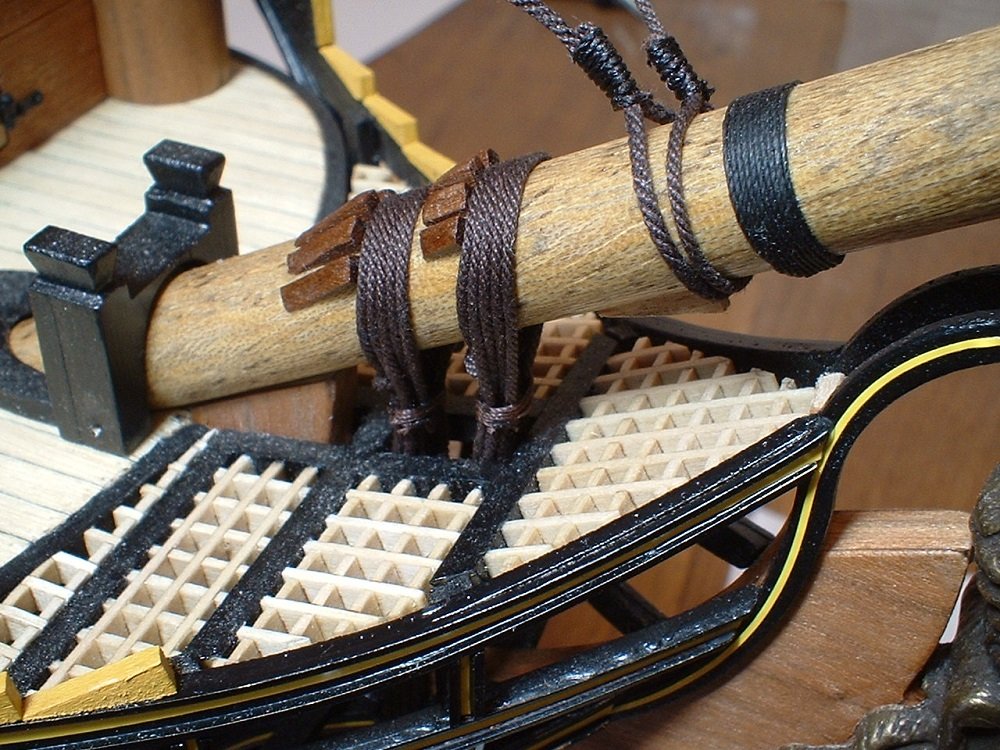
Update - all lower shrouds done! Also,I went ahead and fixed the bowsprit in place & added the bobstays & gammoning. The plans don`t show any catharpins,so I don`t know if I will add them or not. Mark
- 331 replies
-
- 10
-
-
- nuestra senora del pilar
- occre
- (and 1 more)
-
CA adhesive, which one do you use?
marktiedens replied to Modeler12's topic in Masting, rigging and sails
Here`s what I use - a bit expensive,but with no odor & almost no fumes it`s worth it to not have the irritation of the fumes. Once again,rather expensive,but the 2 oz. bottle will last for almost an entire ship build. Mark
-
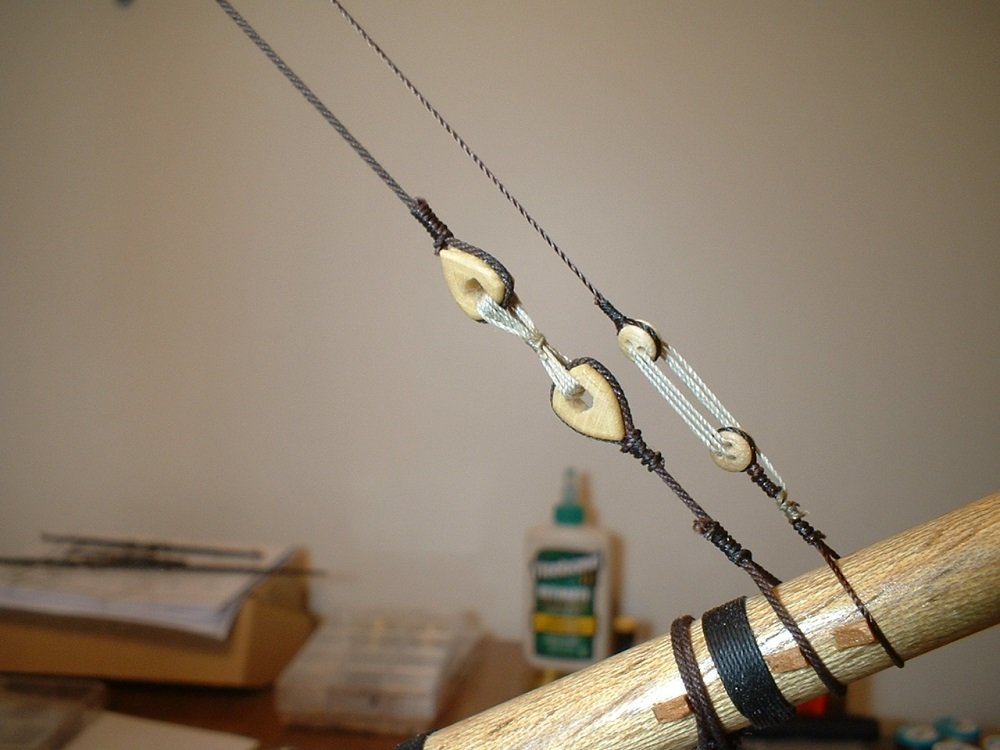
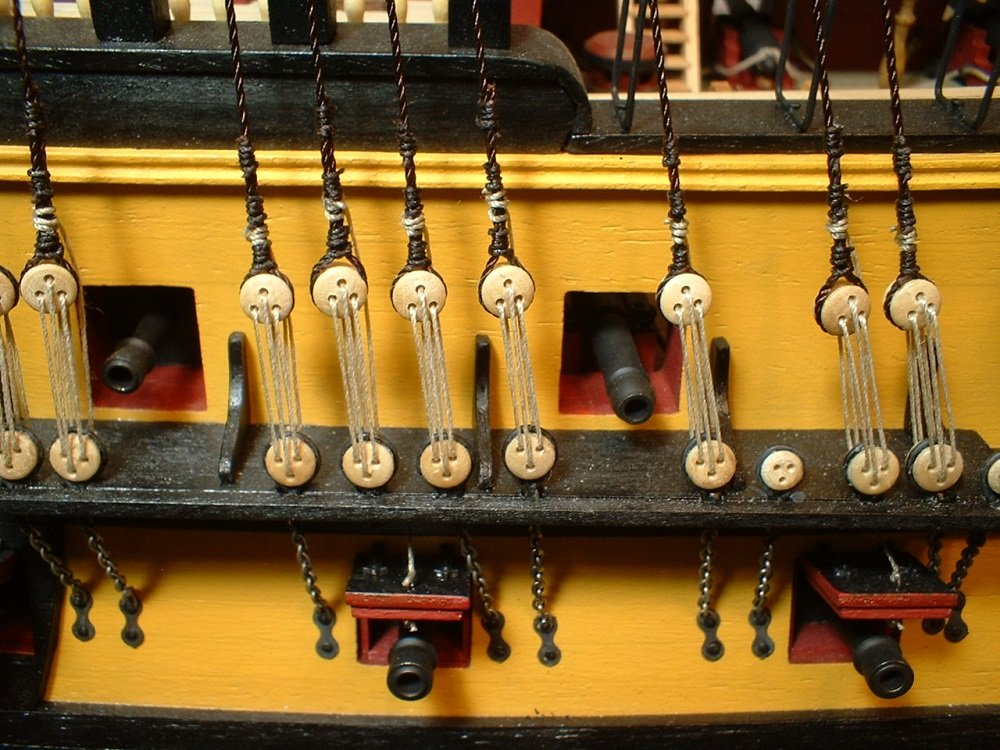
Thanks O.C.. Rigging is not my favorite thing to do & I tend to be a little sloppy with it as those brutal close-ups show. Mark
- 331 replies
-
- 1
-
-
- nuestra senora del pilar
- occre
- (and 1 more)
-
Max - How much detail you want to add is your choice - the plans are excellent & show plenty of detail. Not every detail is in the kit - you may need to scratch build some of it. Do not hesitate to contact Pete - he is a great help if you get stuck on something. He is on this forum as piratepete007. I built my ship without the help,as I didn`t even have a computer when I built it,so I struggled with a few things. Regards,Mark
-
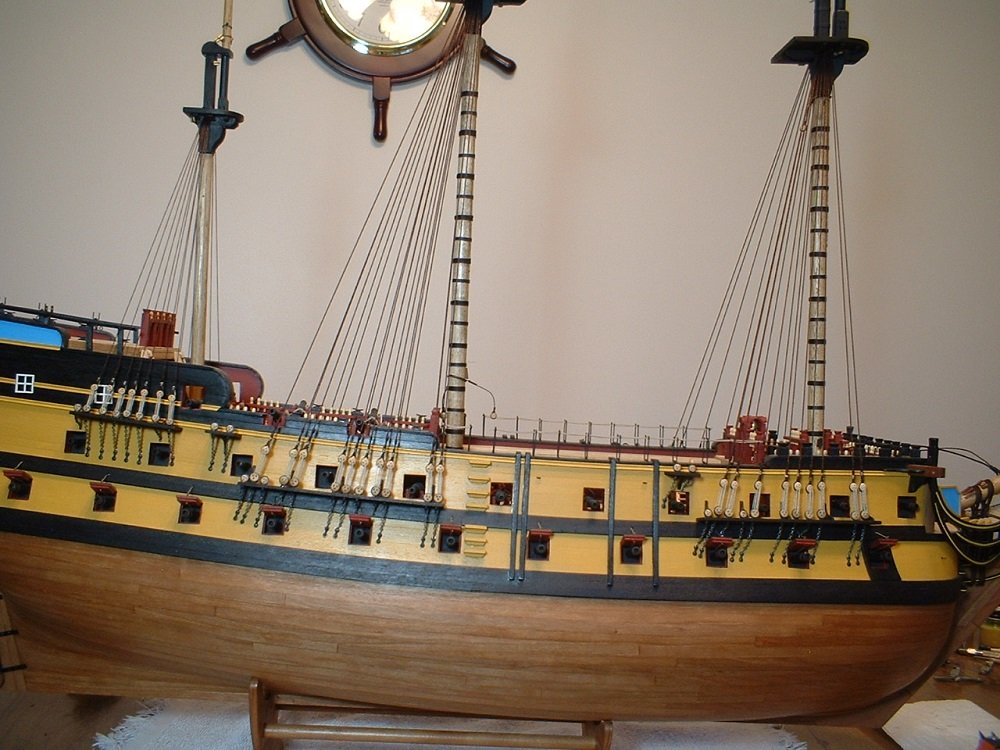
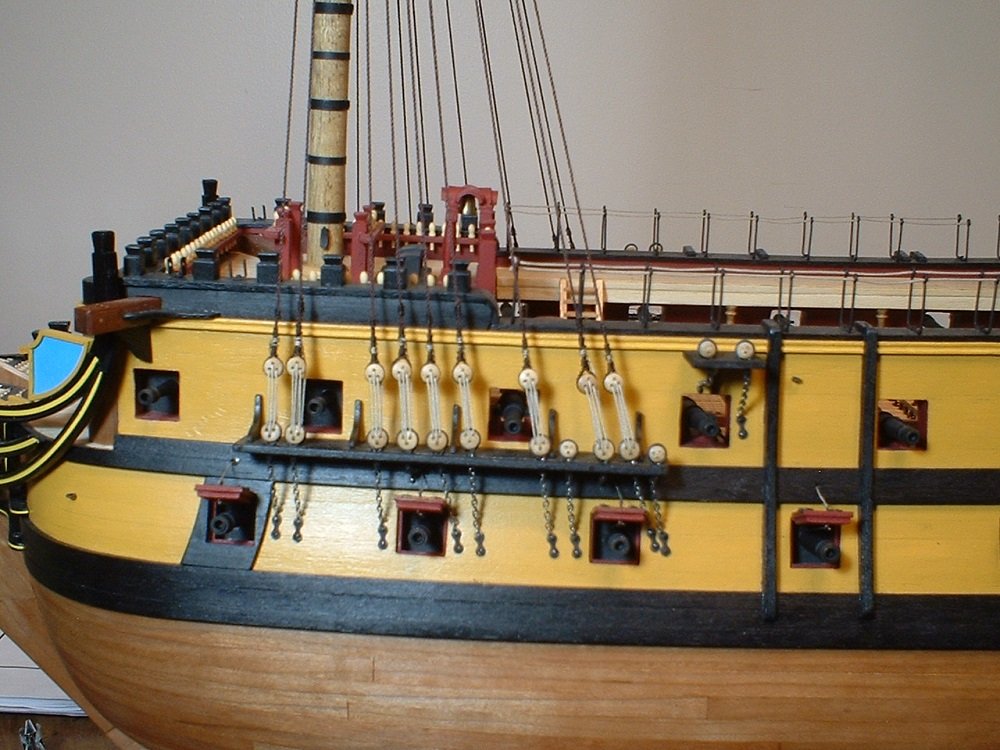
Hi - a little more progress. The fore lower shrouds are now finished. The rope provided is a reddish brown with almost no fuzz. The only bad part is the rope is somewhat shiny & slick,so it`s a little tricky to work with. The deadeyes are not lined up perfect,but good enough for this ship. Mark
- 331 replies
-
- 13
-
-
- nuestra senora del pilar
- occre
- (and 1 more)
-
Hi Max - I built this ship quite some time ago,so I will follow along also. Mark
-
Moving along nicely! I have this kit in my stash,so I have been peeking in on some of the connie builds occasionally. Good luck when you get to the RW - it`s quite an adventure. Mark
-
I agree - really nice! I really like the sails. Mark
- 593 replies
-
- 2
-
-
- royal william
- euromodels
- (and 1 more)
-
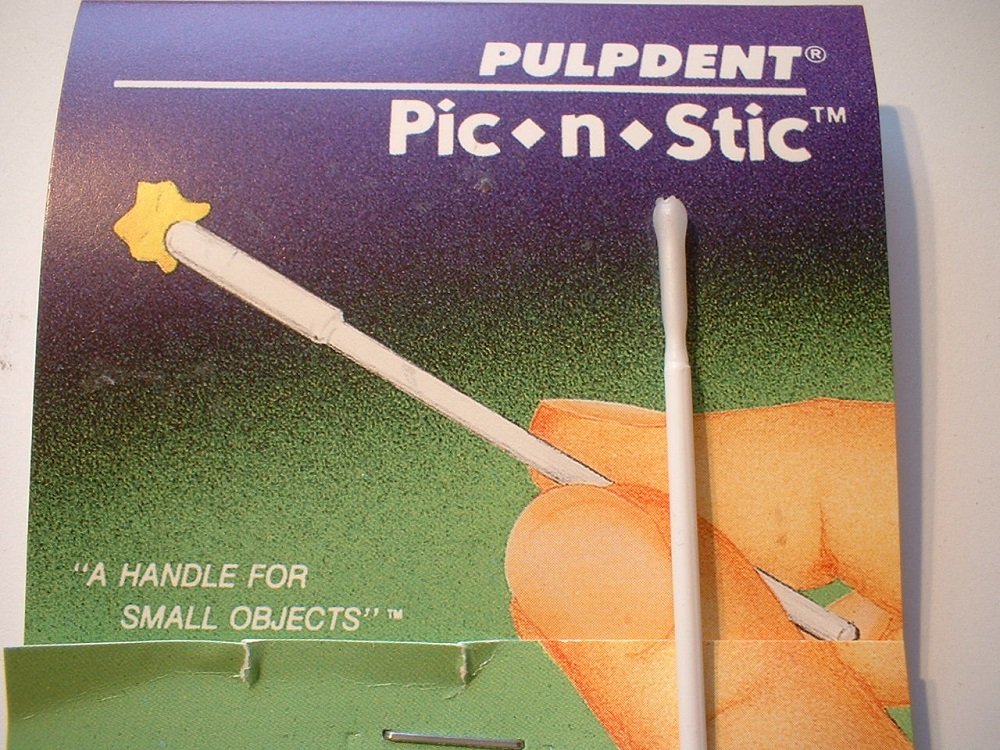
Hi Jack - I found this item at Micro-Mark. It`s a sticky wax-like substance on the end of a plastic stick. Works pretty good for holding tiny parts so you can put a spot of glue on the part. It comes in a large "matchbook" & you just snap off a new one when the wax gets to where it doesn`t stick well anymore. It comes in a package of 2 matchbooks with 15 sticks in each matchbook.
- 140 replies
-
- 7
-
-
- the sullivans
- trumpeter
- (and 2 more)
-
Thanks Frank! The sails are pre-made & included in the kit - otherwise I would probably not add them(don`t have a sewing machine). As far as the cloth goes,it`s way too coarse but since they are pre-sewn & ready to mount,I will use them. I may try some spray starch to make them billow a bit. There are not any bolt ropes on them,but that`s ok since a whole lot of other things in this kit are not very authentic either. Mark
- 331 replies
-
- 3
-
-
- nuestra senora del pilar
- occre
- (and 1 more)
-
Correction to my last post - there are 3 sizes of rope provided in the kit,not 2 . Mark
- 331 replies
-
- 2
-
-
- nuestra senora del pilar
- occre
- (and 1 more)
-
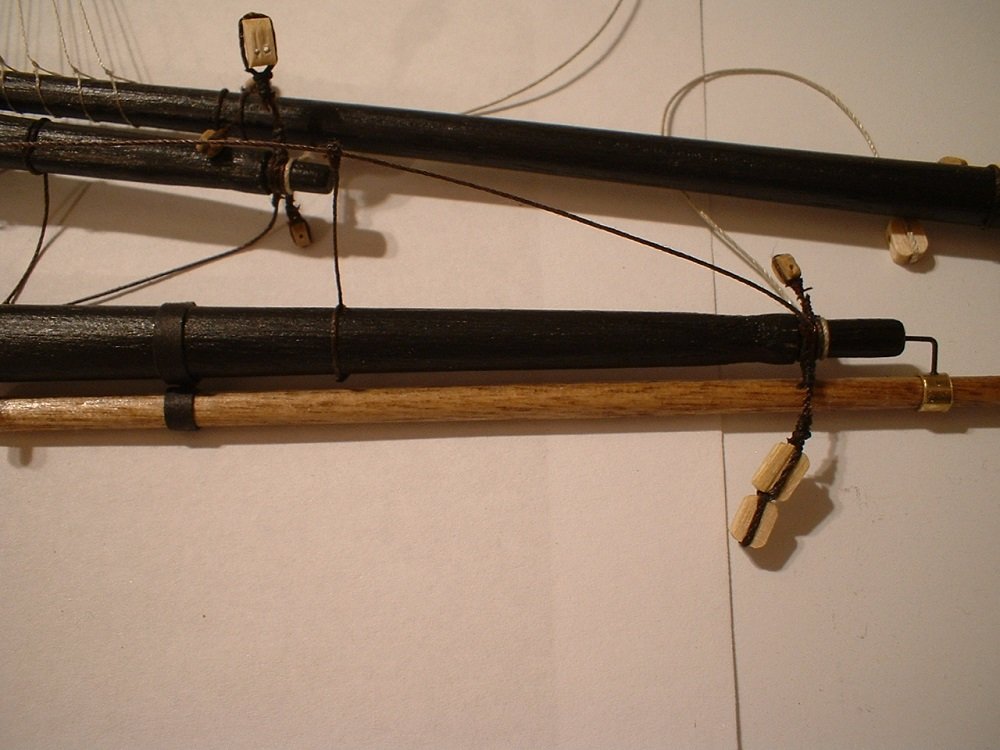
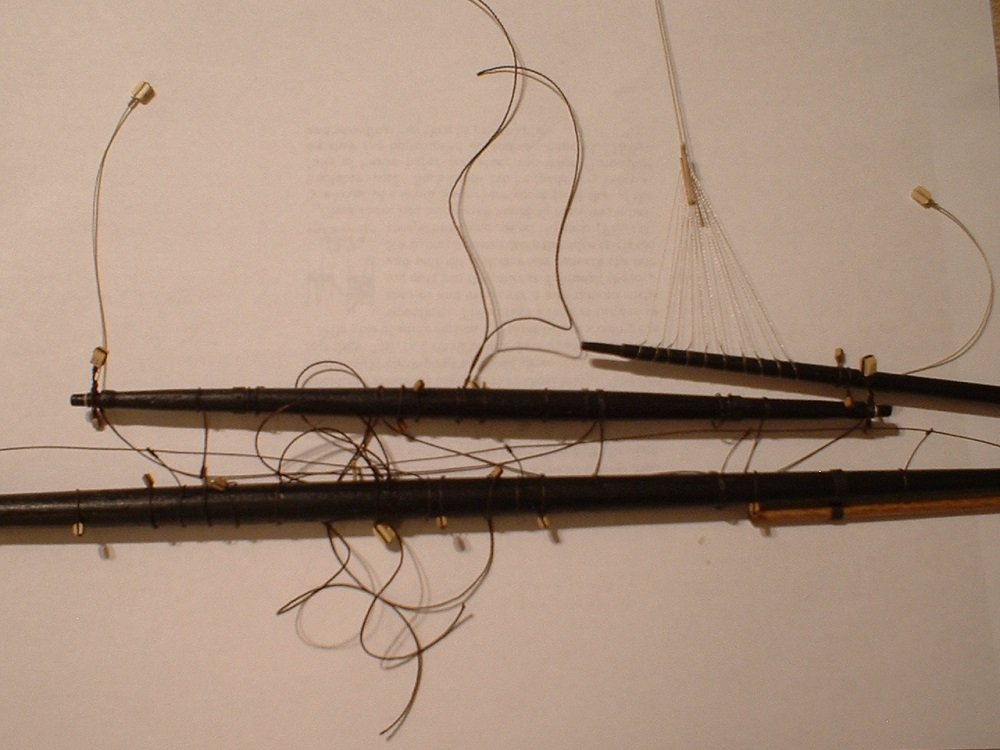
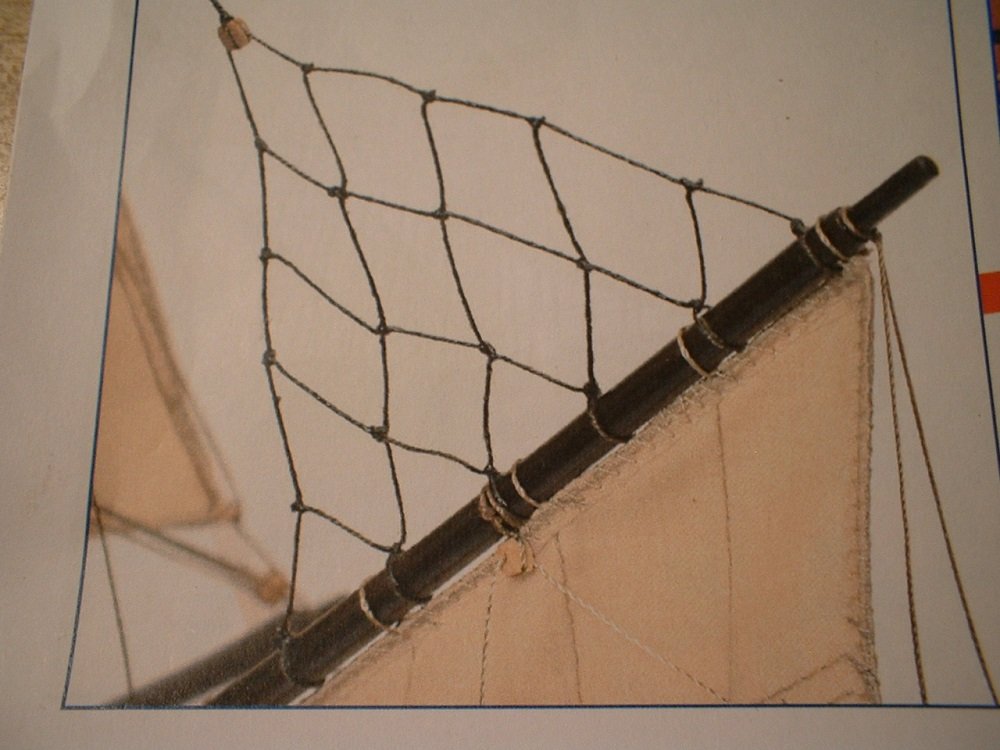
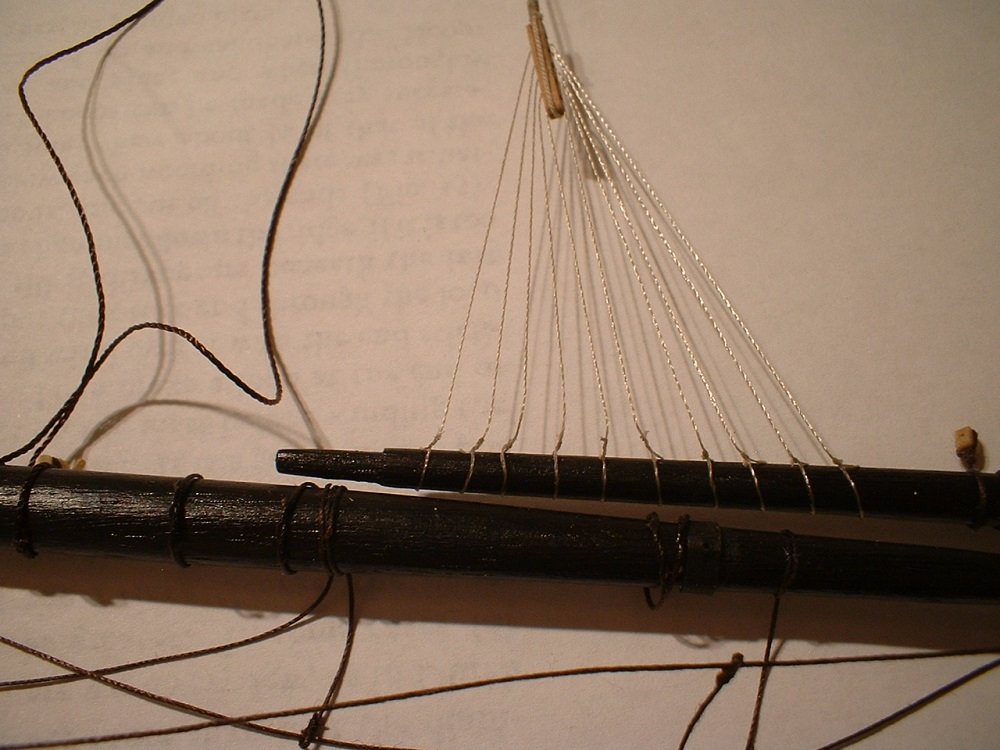
Hi all - been a while since I posted anything. I decided to by-pass the standing rigging & get all the blocks & ropes attached to the yards. A couple more issues - the kit only supplies 2 sizes of blocks(big & bigger),so I substituted some different sizes from my stash. The plans also show the studding sail booms just tied to the yards with some rope,so I made some mountings from a combination of brass tube & black cartridge paper - they will not be permanently glued in place until after the sails are attached. The yards look kind of like a rat`s nest right now,but the footropes & stirrups will be straightened out also after the sails are attached. Another thing - the peak halyard of the lateen yard is shown in the plans as some sort of netting. After some discussion with some knowledgeable members it was determined that it is totally wrong for ANY ship so I made a crowsfeet arrangement instead. It may or may not be totally correct for this particular ship,but it`s better than the impossible setup in the plans. Note - the supplied rigging rope is only provided in 2 sizes,so once again I used some from my stash. Regarding the yards themselves,they are not near as shiny as the pictures show(lighting can do some funny things). I will set these aside for now & start on the standing rigging. Mark
- 331 replies
-
- 10
-
-
- nuestra senora del pilar
- occre
- (and 1 more)
-
Welcome back! Yes,you are correct - this is a lousy kit!! Plans don`t match the pictures,parts don`t match the plans or pictures in many places,wood is terrible also. Mark
-
Roger - Thanks very much for the info. I must admit I am not very good at doing lots of research. This is a Manila galleon supposedly built in the Philippines. My half-hearted search did come up with general info like tonnage ,number of guns & the like,plus one small blurry picture of a painting supposedly of this ship. I am well too far along for any more re-do`s ( already did a bunch of modifications),so I will just continue on. This kit is more or less crap,so I`m just trying to get it done & move on to something better. Bob - your post is spot on - thank you! this kit was purchased before I knew there was a forum like this. Had I known which were the "bad"kits & which were the"good" kits I would never have wasted my money on this one! Mark