marktiedens
-
Posts
1,737 -
Joined
-
Last visited
Content Type
Profiles
Forums
Gallery
Events
Everything posted by marktiedens
-
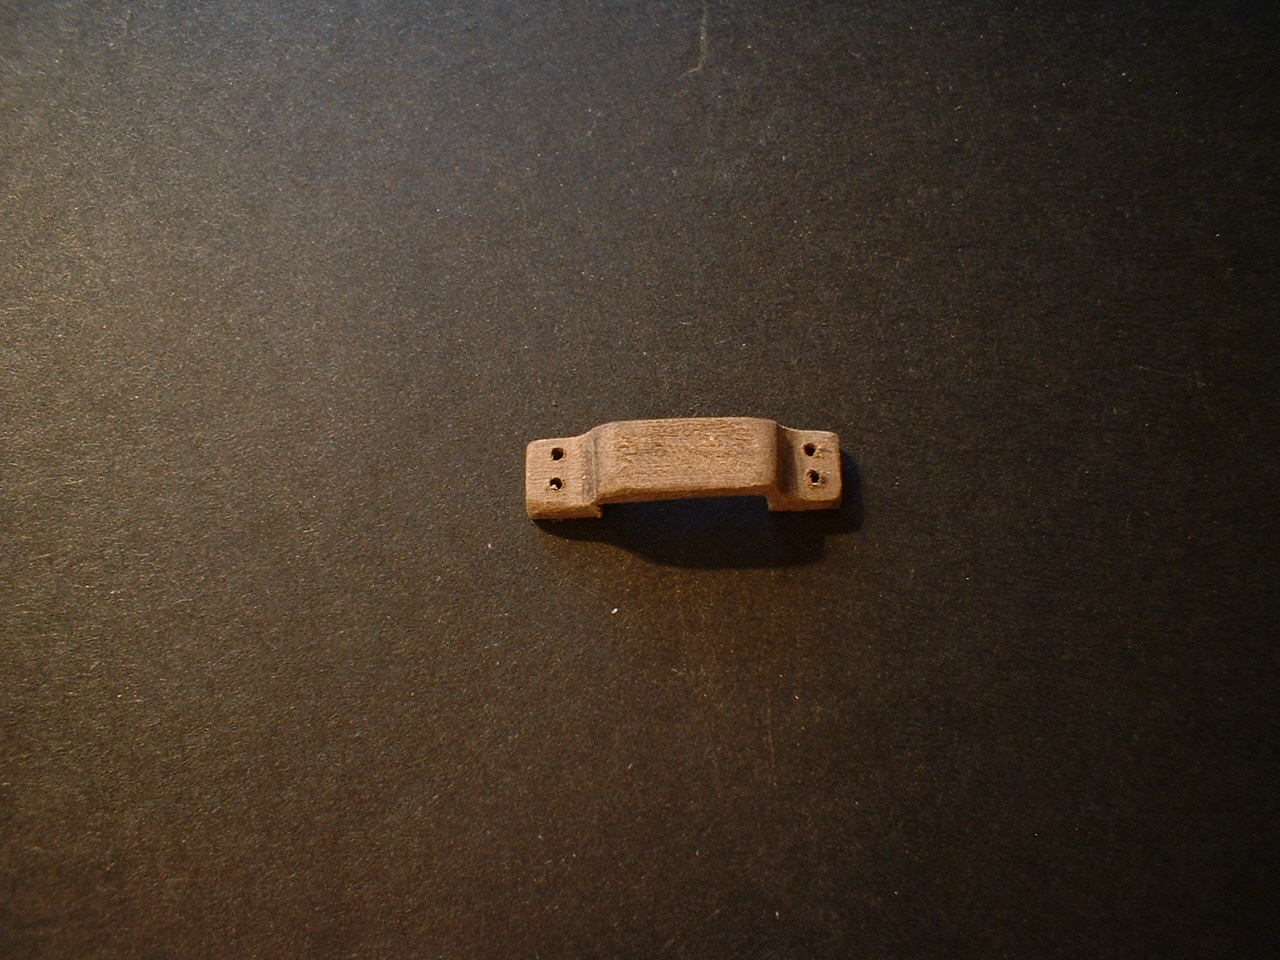
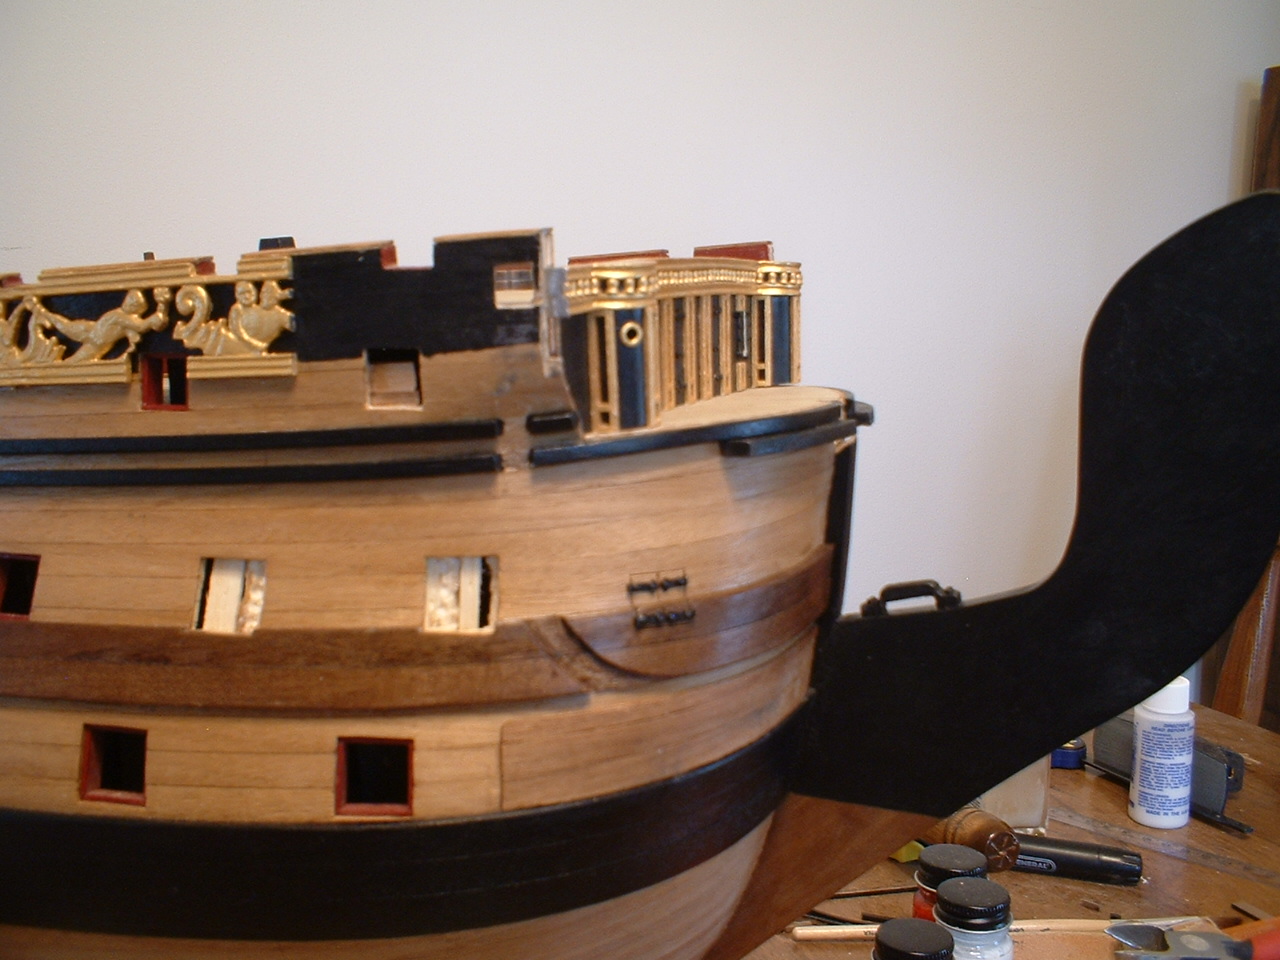
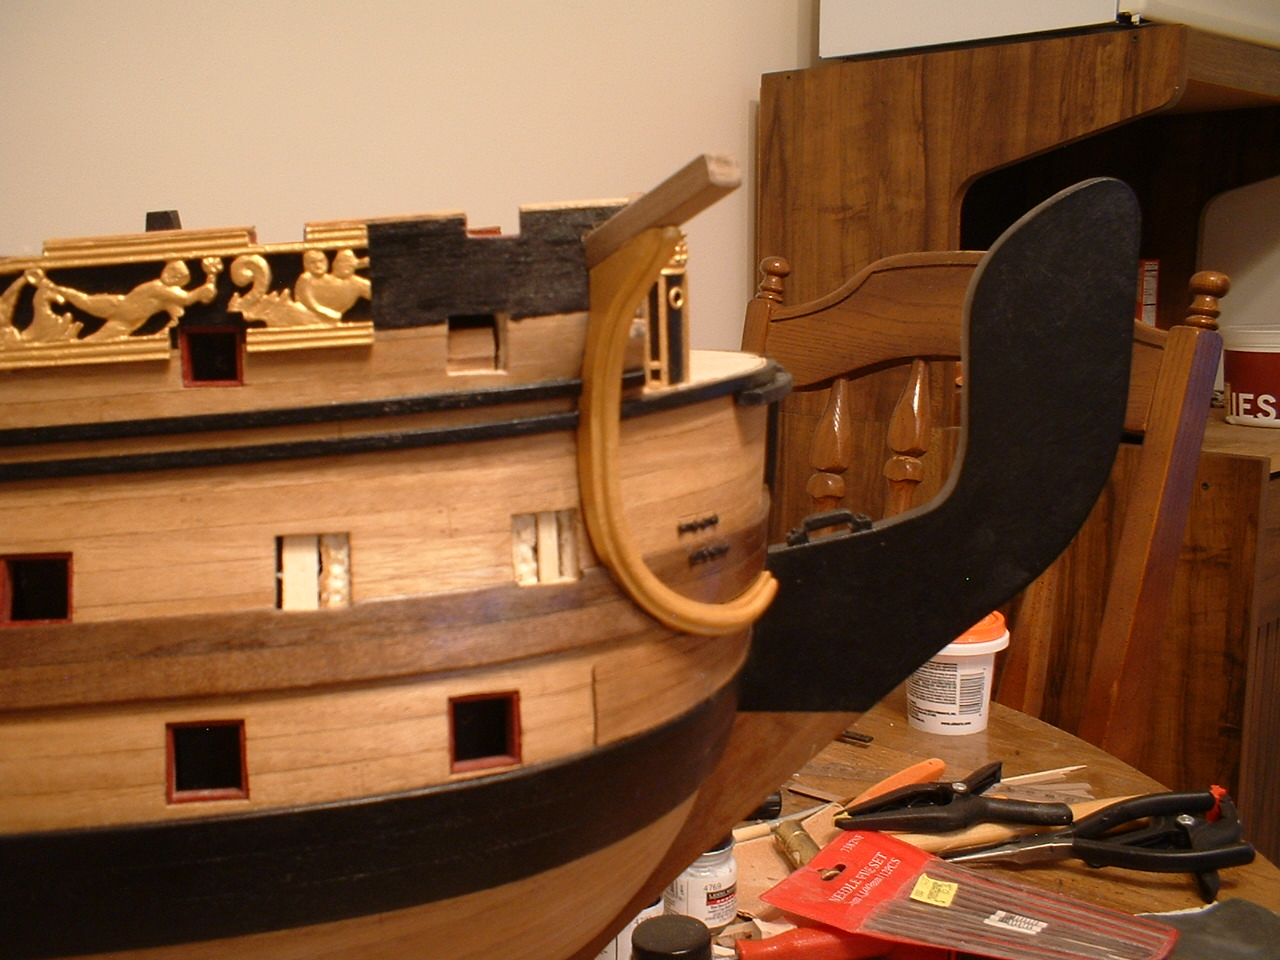
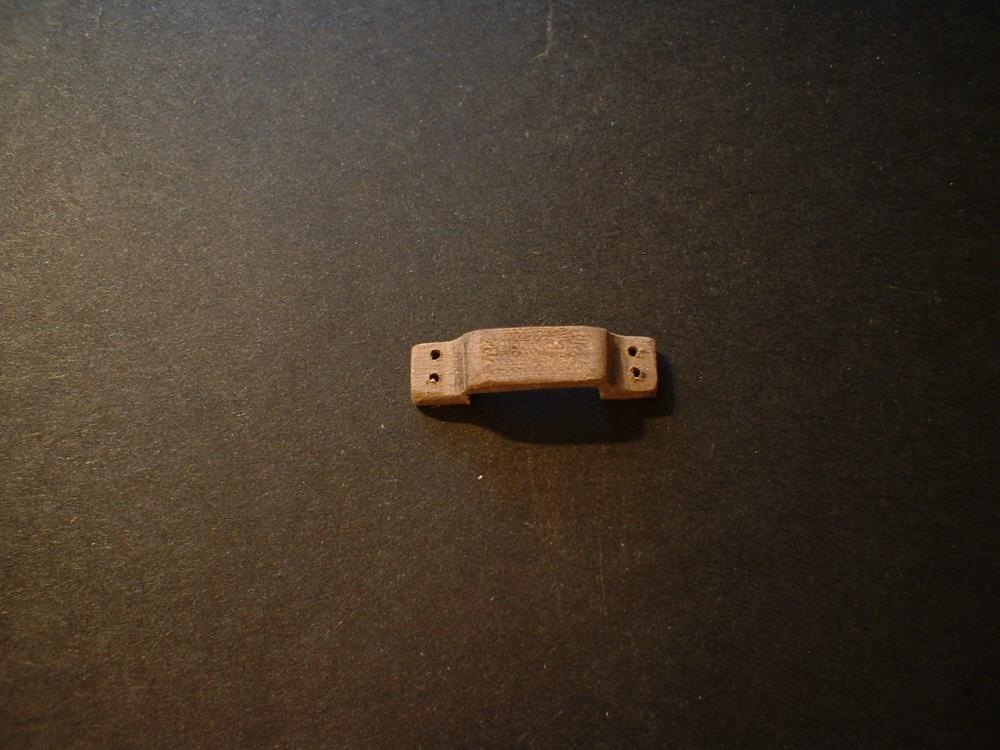
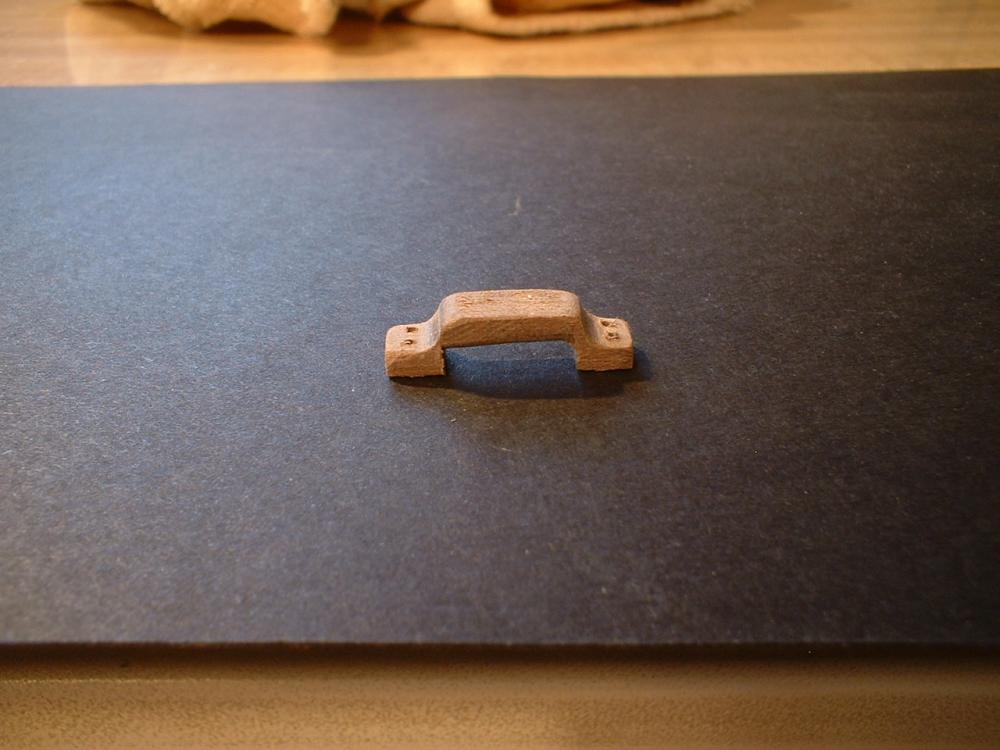
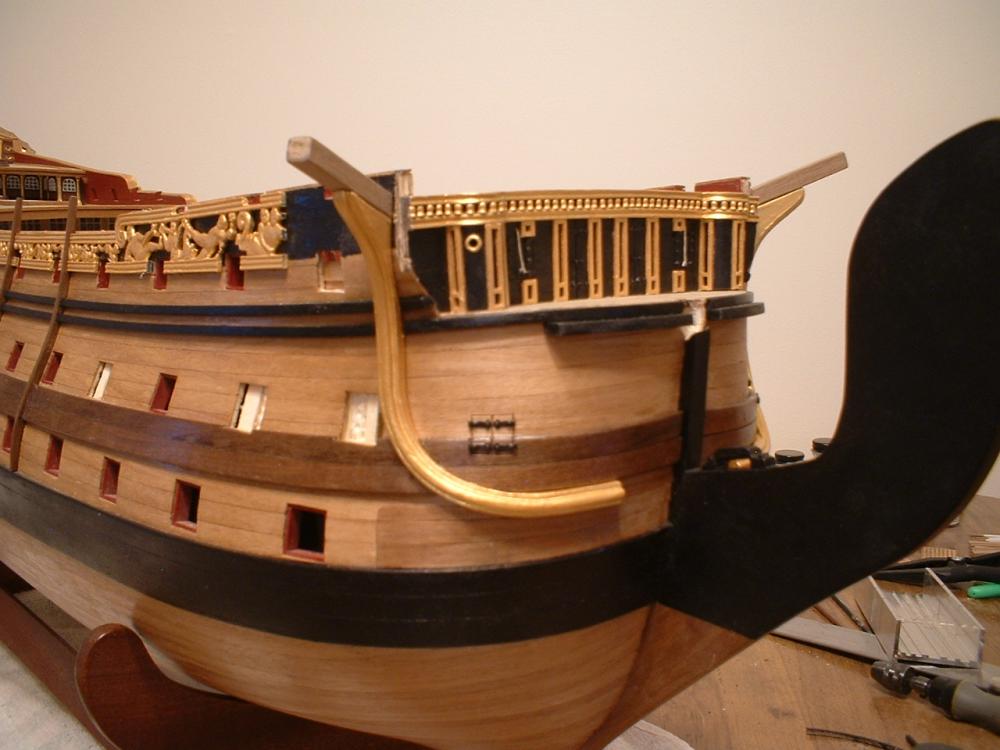
Hi all - thanks for looking in & all the likes. Update - working on the bow,the next thing I did was to make a cleat for the gammoning out of some hard walnut. After painting it black,I glued & nailed it to the stem. Next I started work on the head rails. I was having trouble bending the cathead supports using the heating with a flame method,so I decided to try a heat gun. While wearing some thick leather gloves to keep from burning my fingers I found that holding the metal cathead support in the heated air from the heat gun I could bend the metal pieces quite easily. After a bit of filing to fit the curves of the hull,they were painted gold & glued in place. To anyone building this ship using the heat gun is the best way I have found to bend the metal pieces. The low setting on the heat gun is all that is necessary to heat the metal to be bent. Mark


- 652 replies
-
- 13
-

-
- royal william
- euromodel
- (and 1 more)
-
I see where Nils (Mirabell61) used clear string trimmer line to "glass" the portholes on his KWdG. Looked very good. Mark
-
Nice work - makes you wonder how the kit makers could get the shape so far off when they had the actual ship to measure from. Mark
-
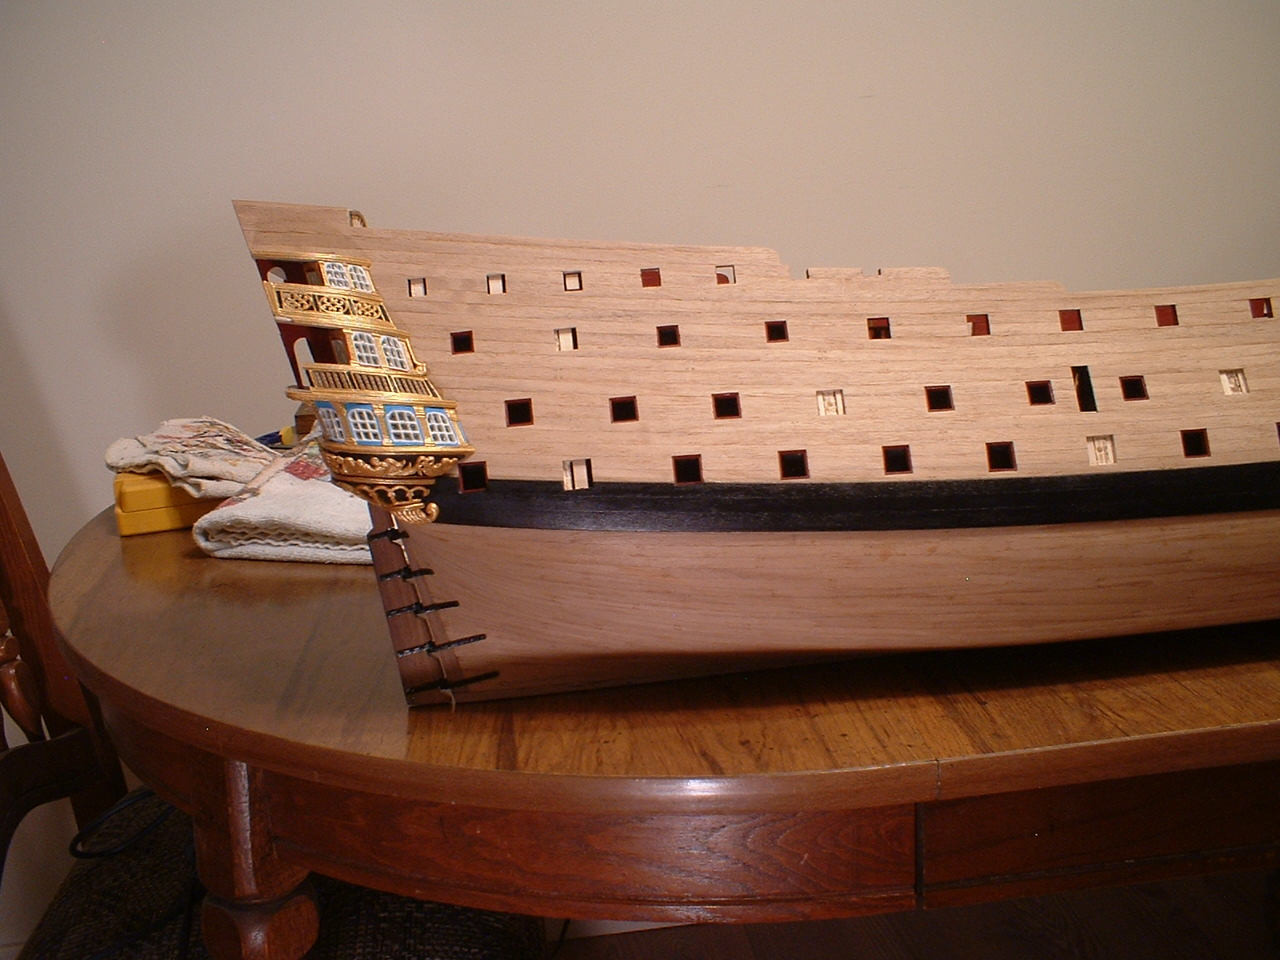
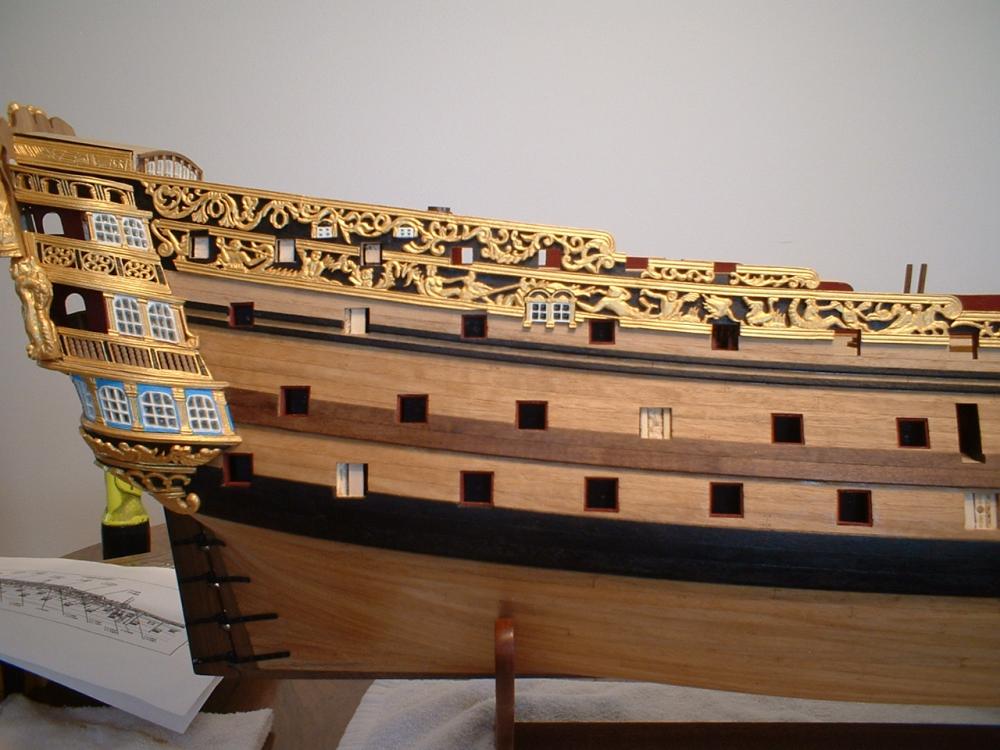
Another update - port side decorations done & cap rails installed & finish applied to the rest of the hull. I think its time to turn my attention to the bow area - looks a bit tricky. Mark

- 652 replies
-
- 15
-
-
- royal william
- euromodel
- (and 1 more)
-
Pete - Ages of Sail lists 2.5mm natural hemp rope on their web site. It`s a bit pricey,but not a lot is needed. They sell it in 2 meter lengths. Mark
-
Pete - many thanks to you for your kind words. You are so right about requiring time,patience,initiative,interpretation,research,& time,PLUS a bit of help from you. This is the most difficult kit I have done,but also the most enjoyable. Mark
- 652 replies
-
- 2
-
-
- royal william
- euromodel
- (and 1 more)
-
Hi Lawrence - thanks for your kind words. If you are referring to the red color,it is a Vallejo paint called gory red which I darkened slightly with a few drops of black mixed in. Mark
- 652 replies
-
- 1
-
-
- royal william
- euromodel
- (and 1 more)
-
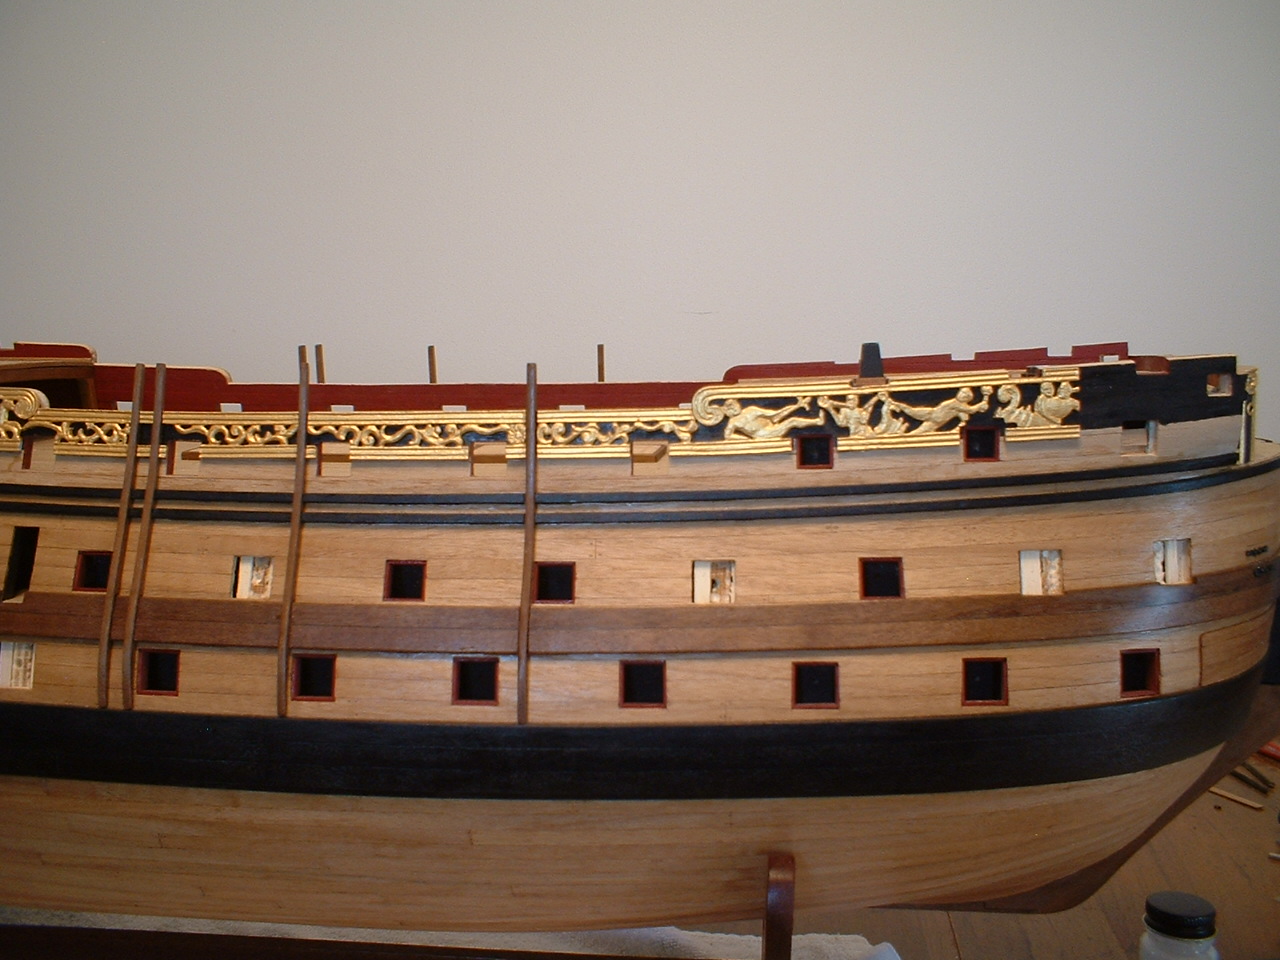
Update - After painting the background black,the side decorations were trimmed to fit around the gunports,painted gold & glued in place.The joints were filled with some filler & smoothed over & painted. The forward most section will be fitted after the positions of the cathead brackets are determined. The port side decorations will be fitted next. Mark

- 652 replies
-
- 13
-
-
- royal william
- euromodel
- (and 1 more)
-
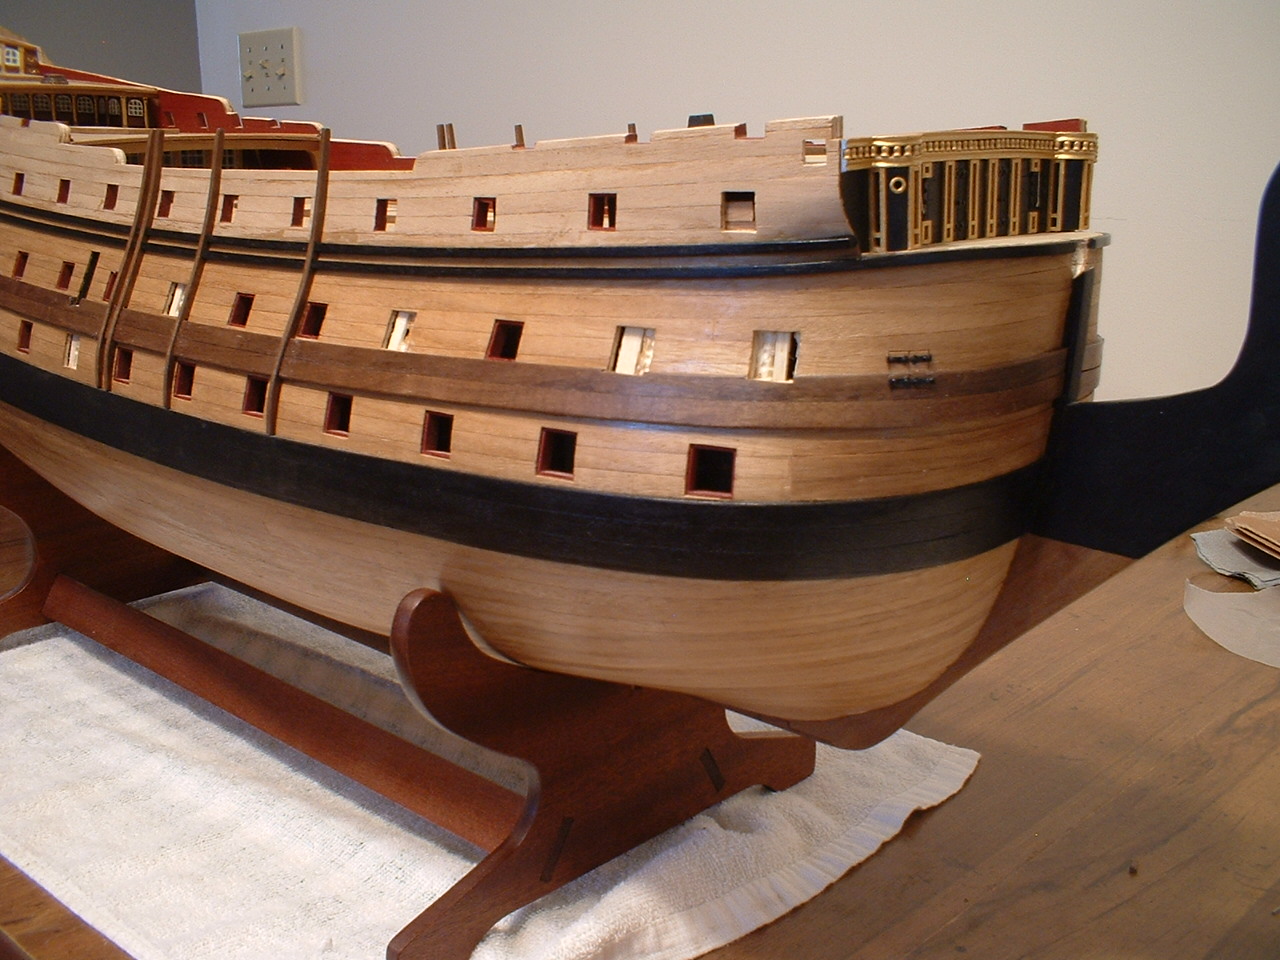
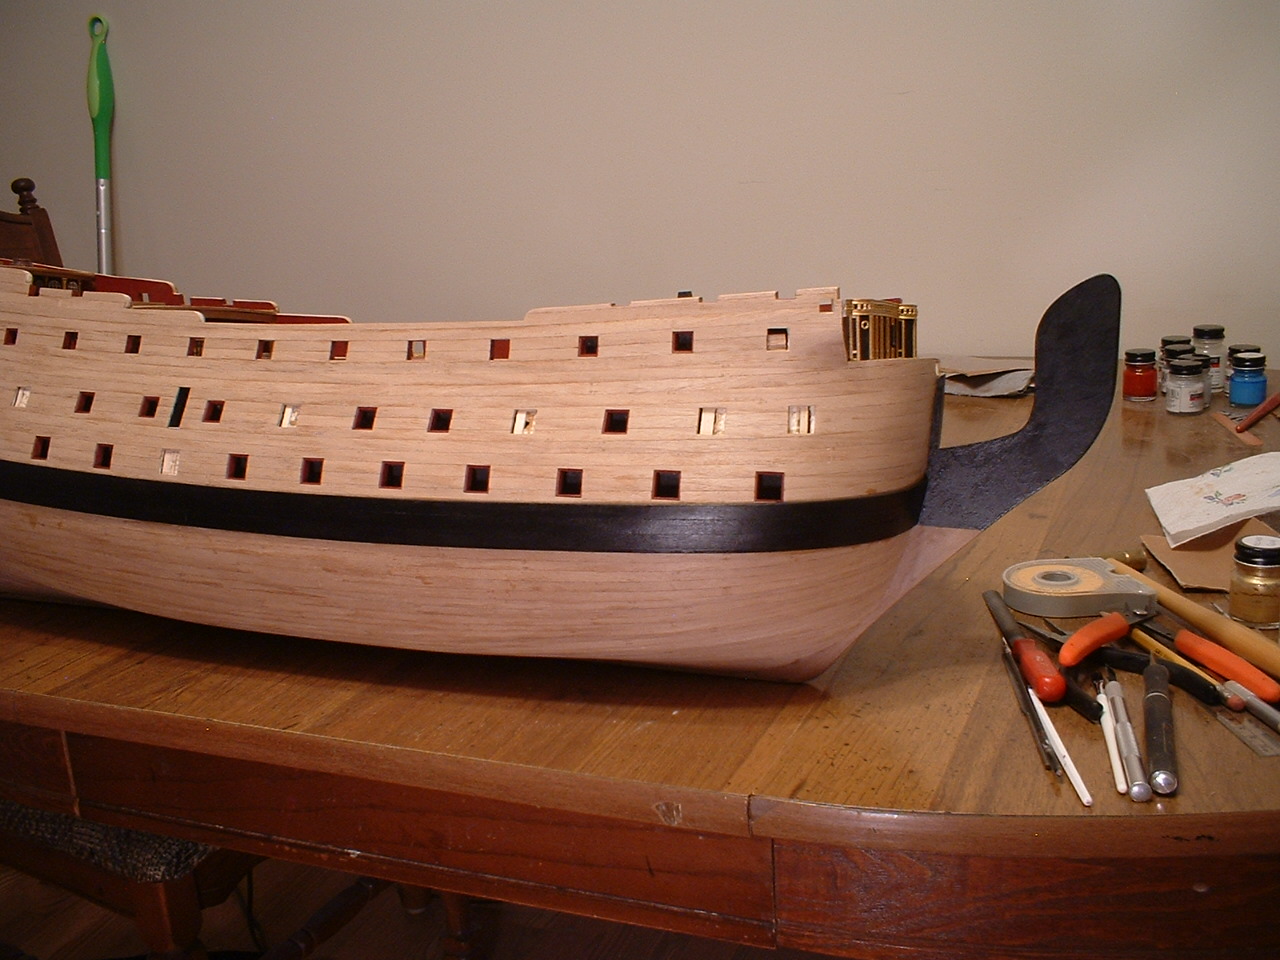
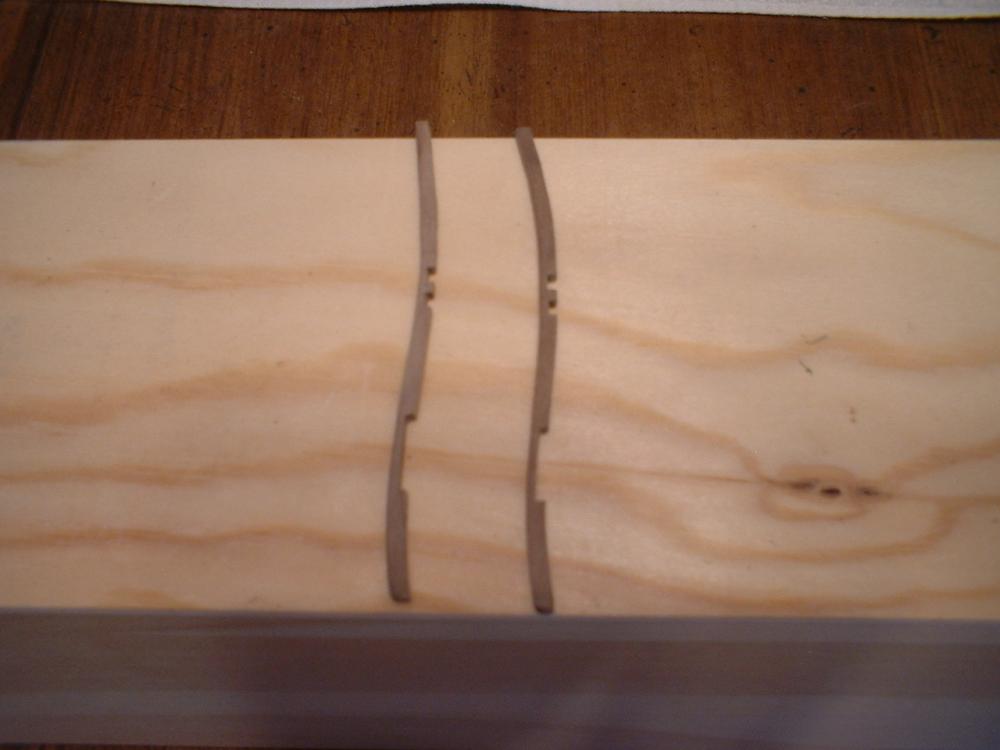
Update - I fine tuned the fenders by tapering the lower ends & glued them in place. The tops will be trimmed off after the railings are in place - if I don`t break them off first. I then added the bolster for the hawse holes - another layer will be added when the cheek rails are fitted. I simulated the double doors at the bow by simply cutting into the planking with a chisel & added some hinges from my spare parts box. Then I put a coat of polyurethane on the hull below the upper wales. I think it may be a good time now to start working on the side decorations. Mark


- 652 replies
-
- 16
-
-
- royal william
- euromodel
- (and 1 more)
-
Hi Michael -you are doing a great job with all the details. As you know,the paint scheme & colors are very well researched by the museum,so I say detail it all you want. Back when this ship was built,it seems that the more "bling" the better was the rule. Mark
-
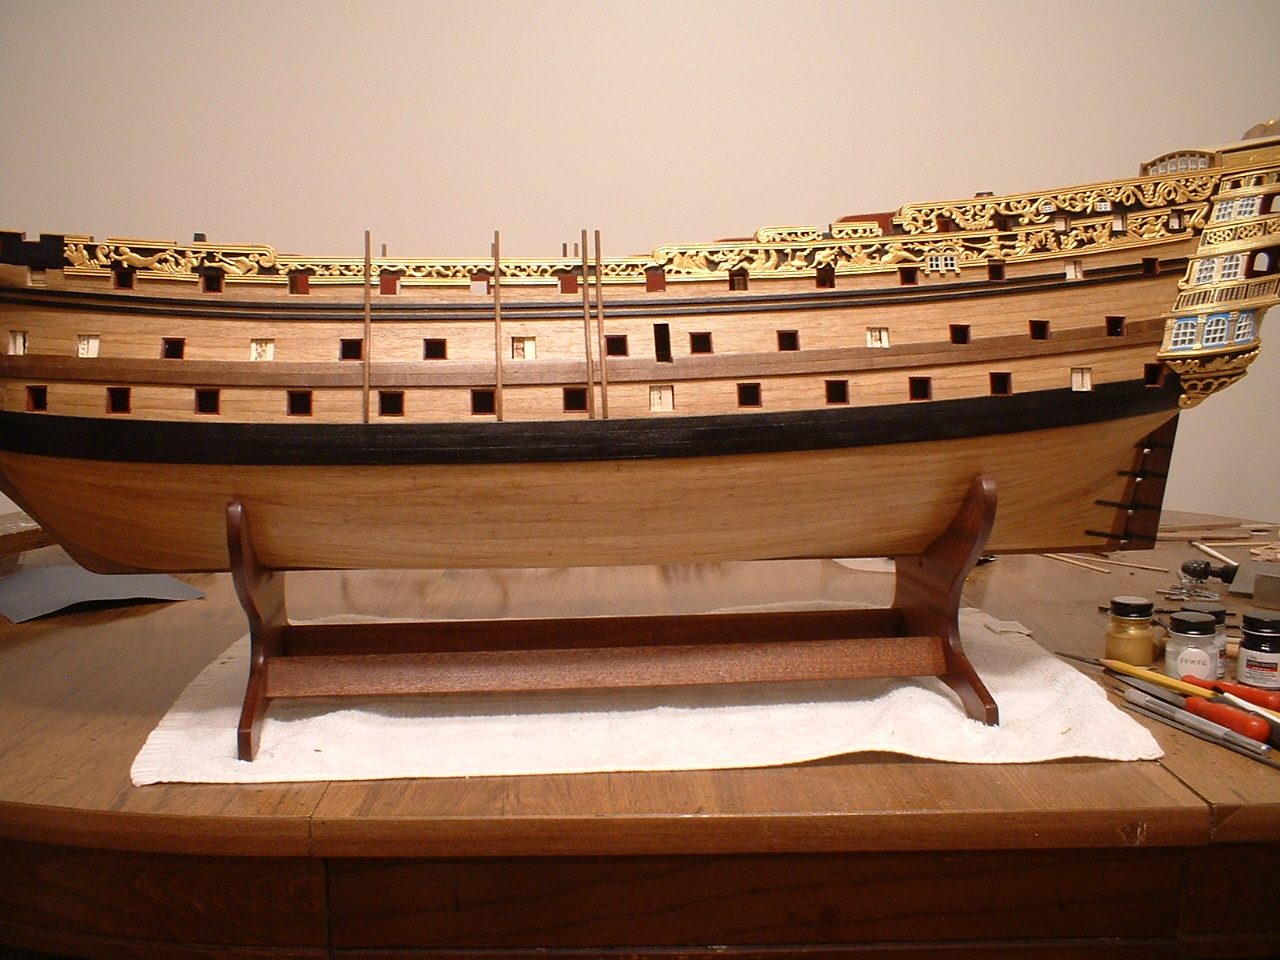
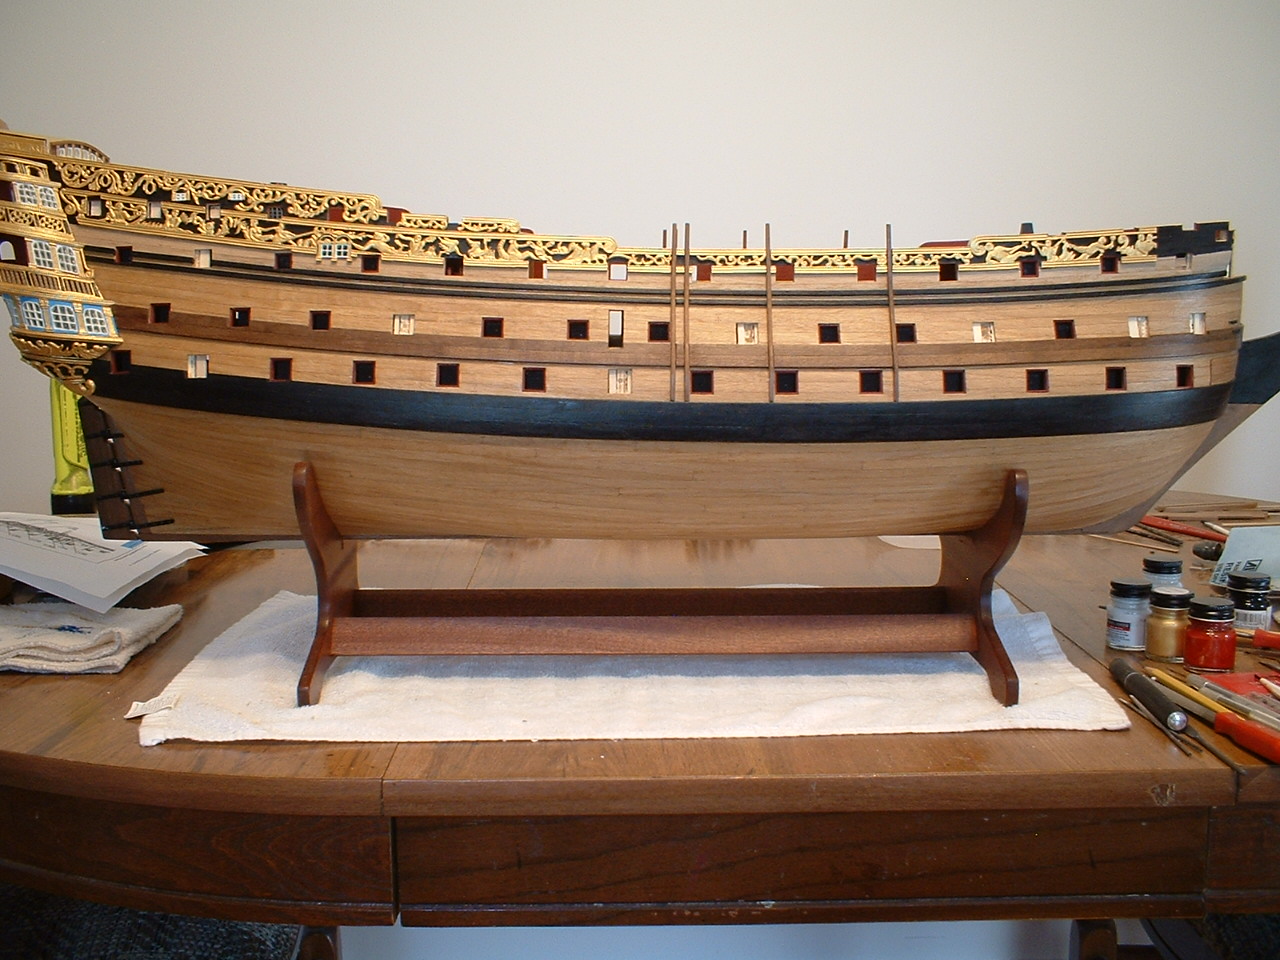
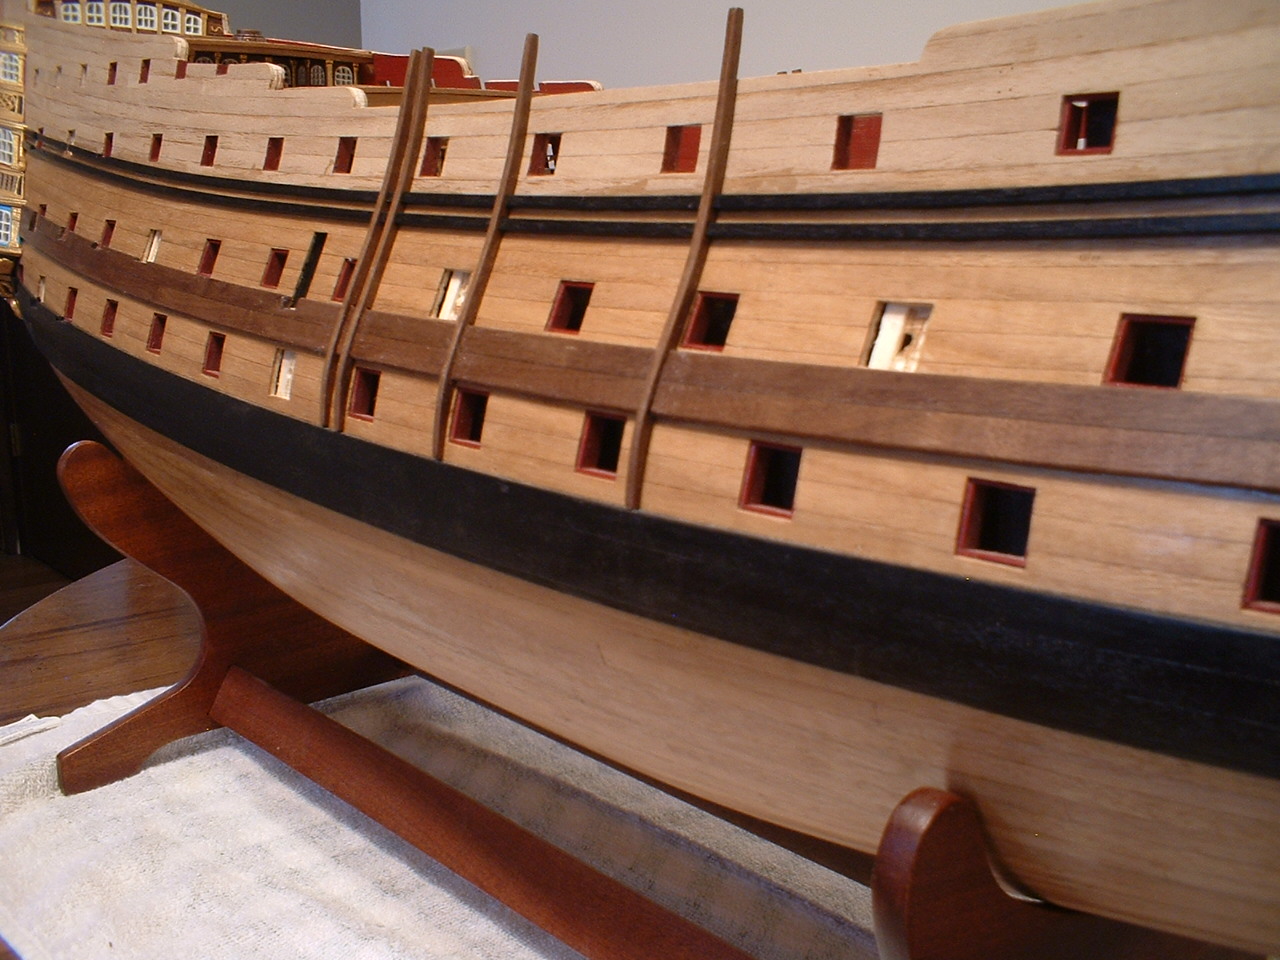
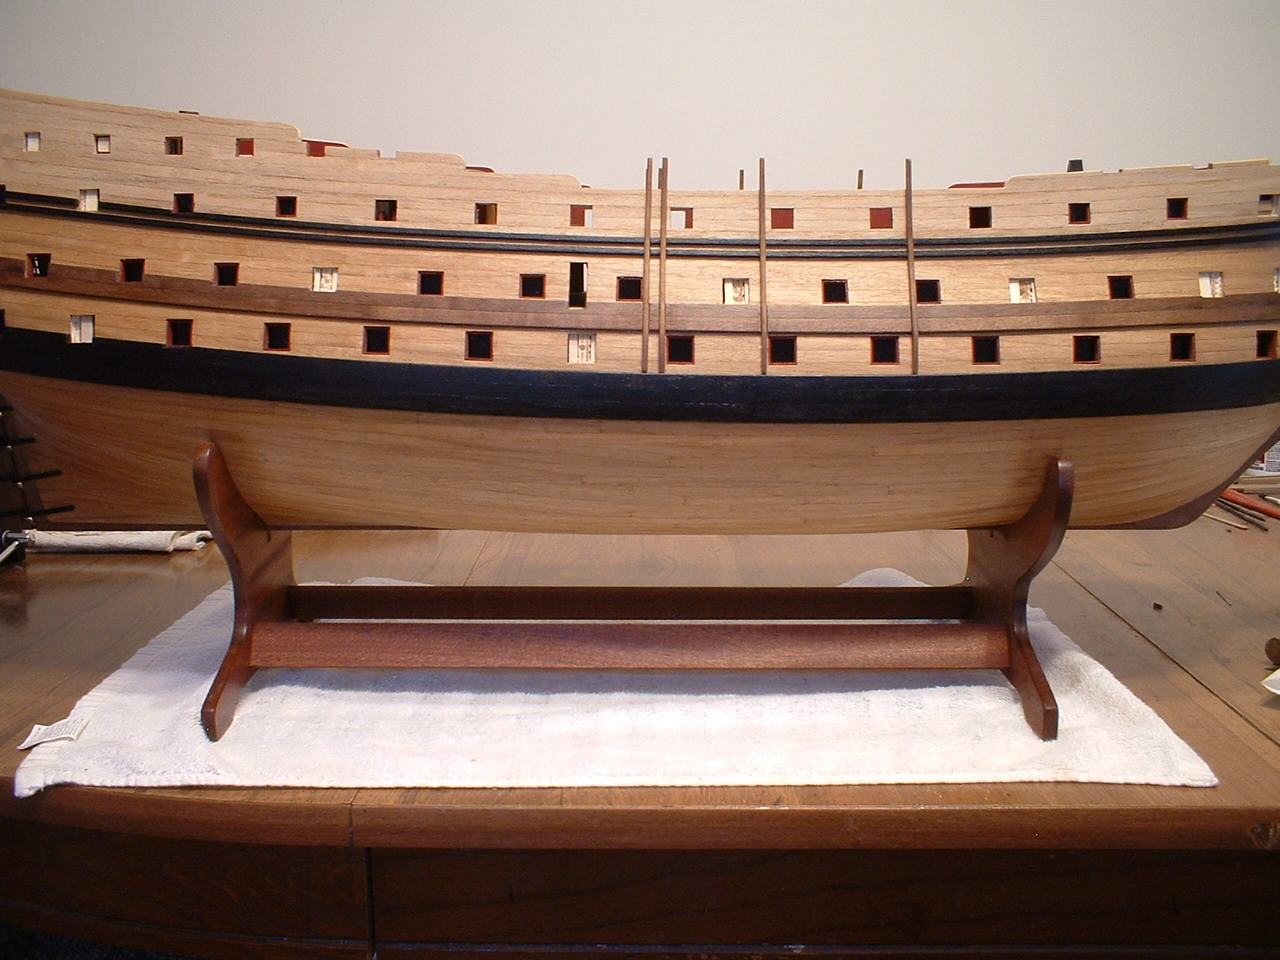
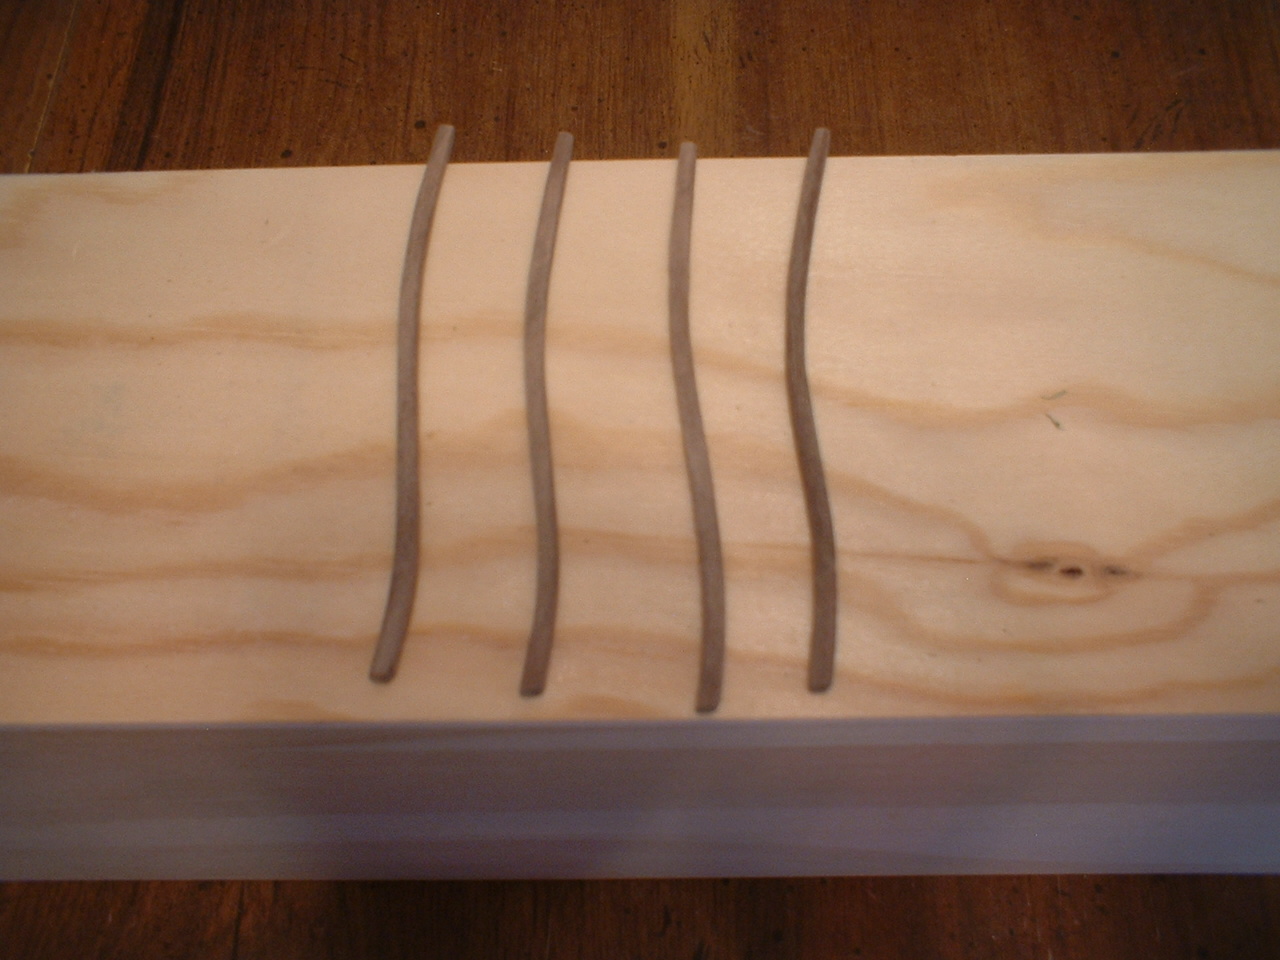
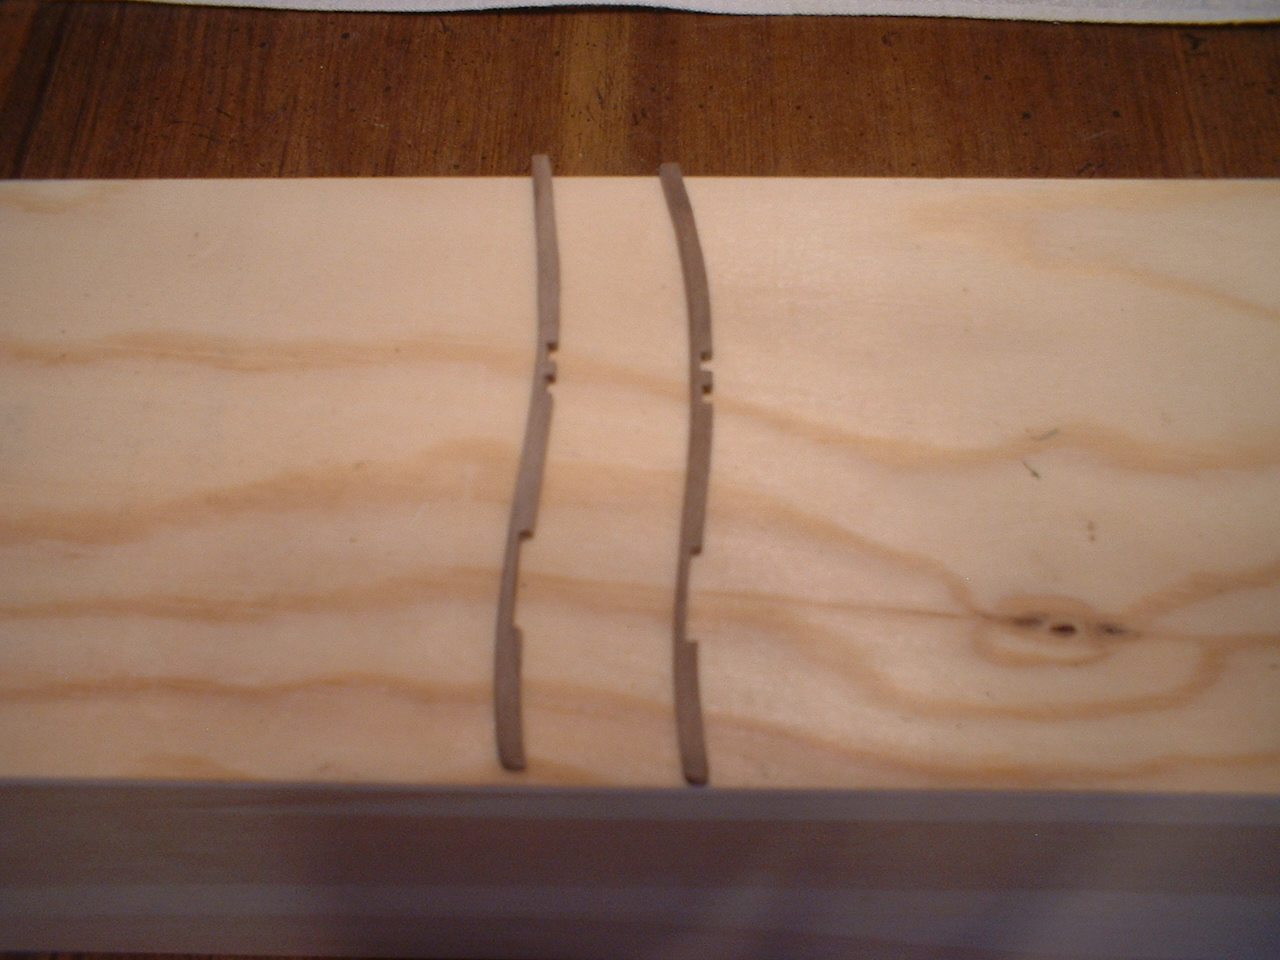
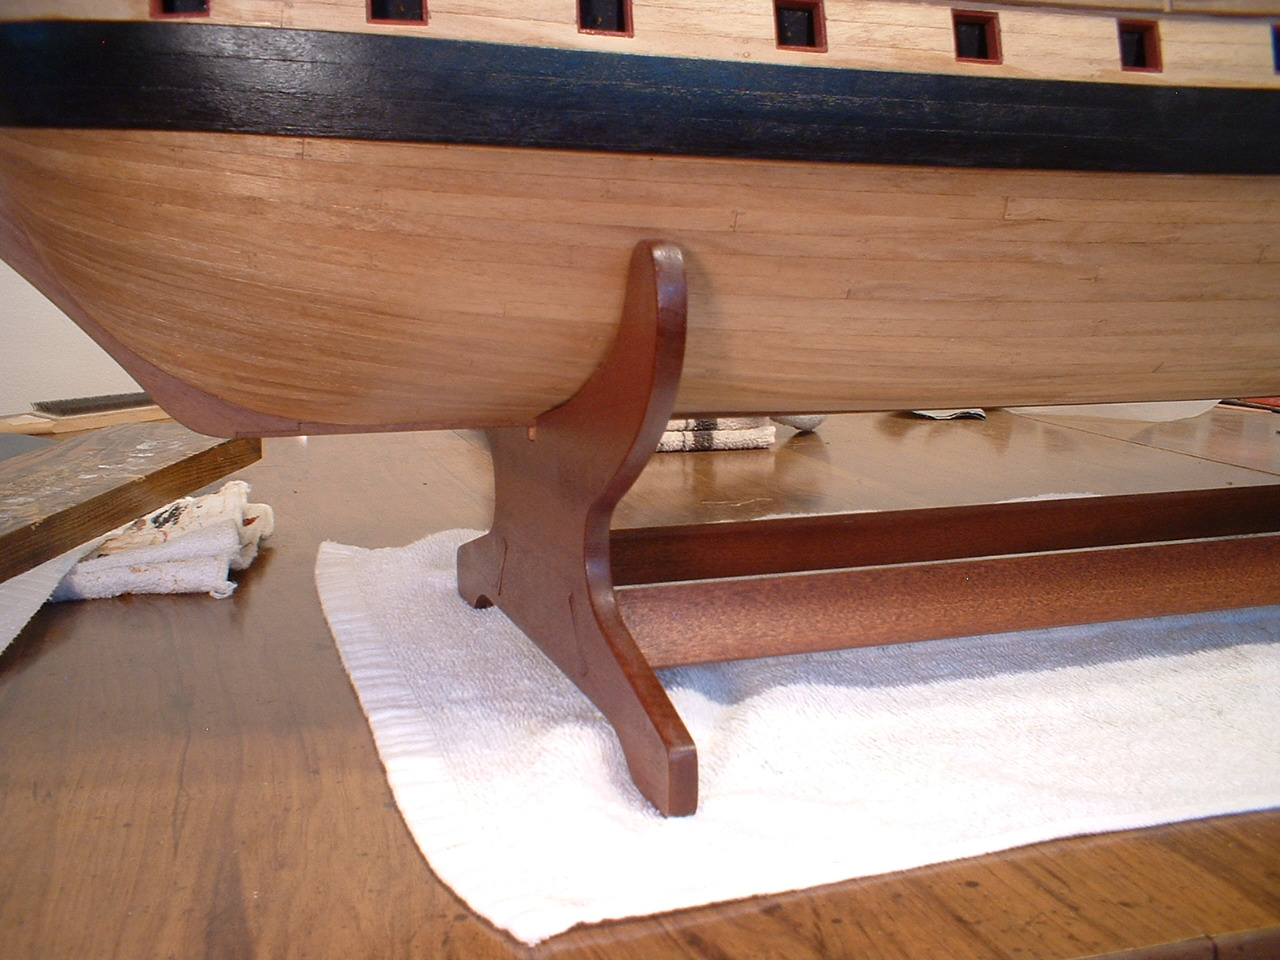
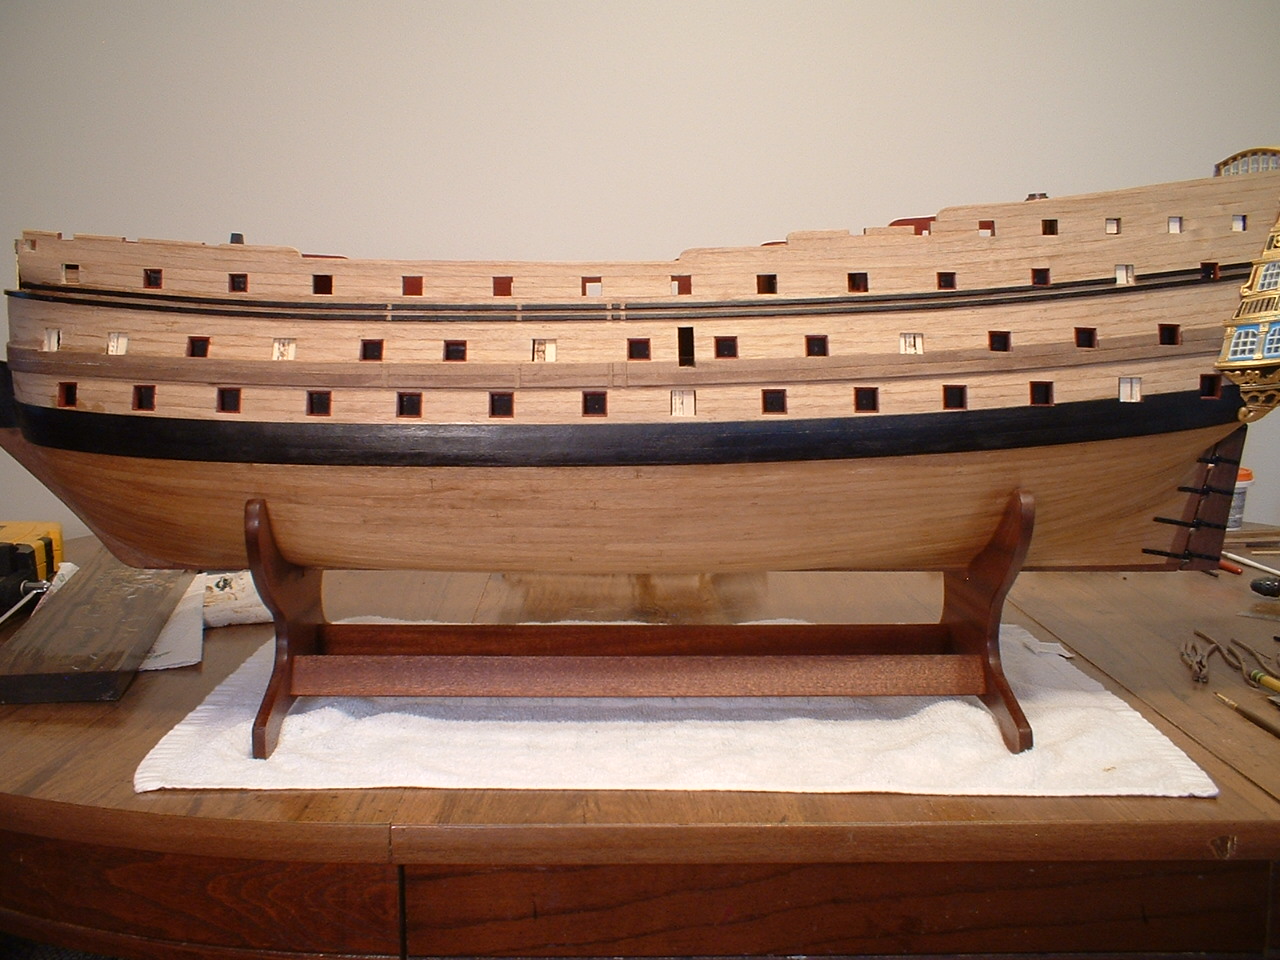
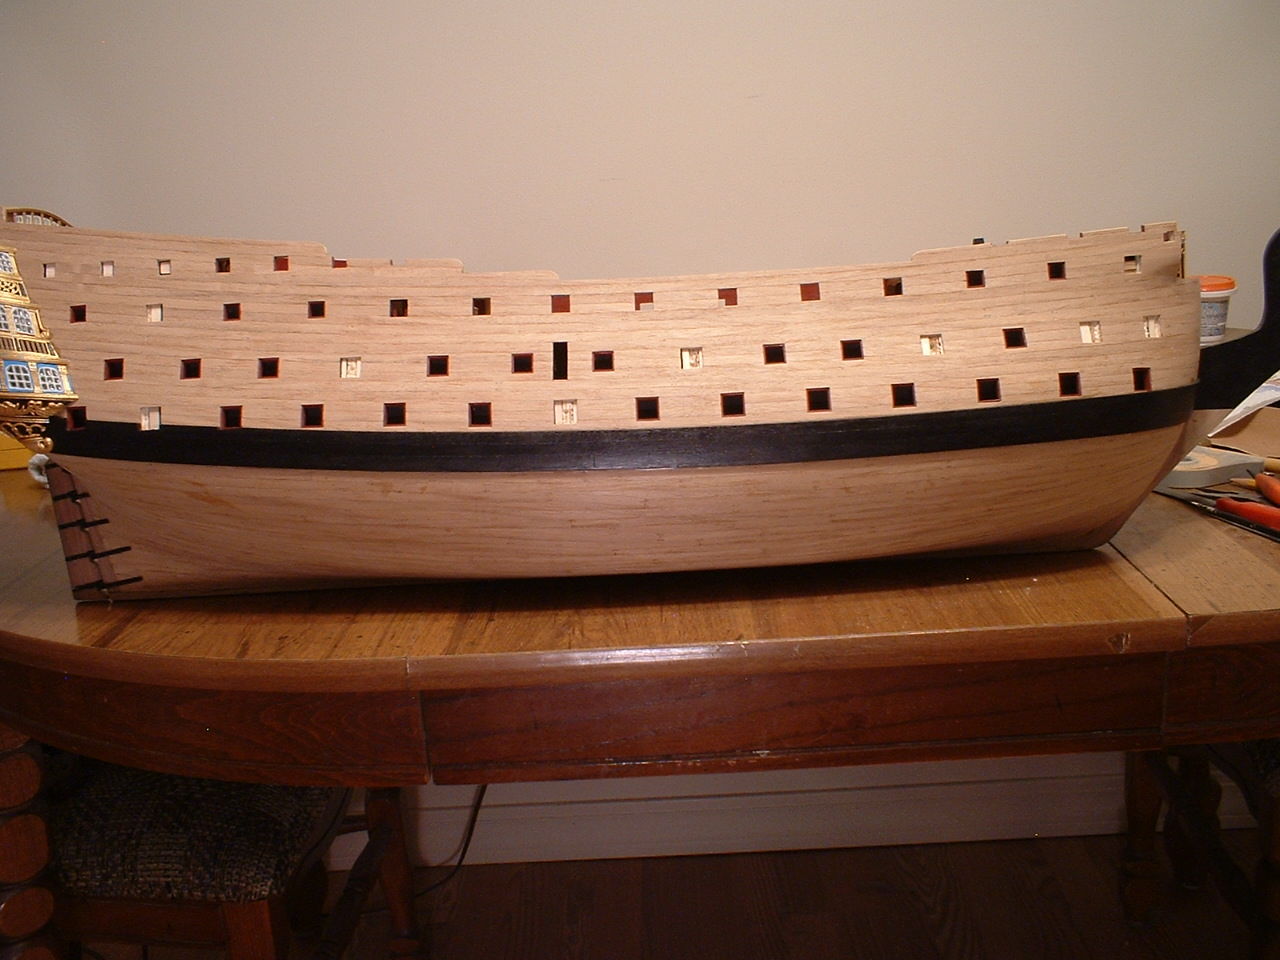
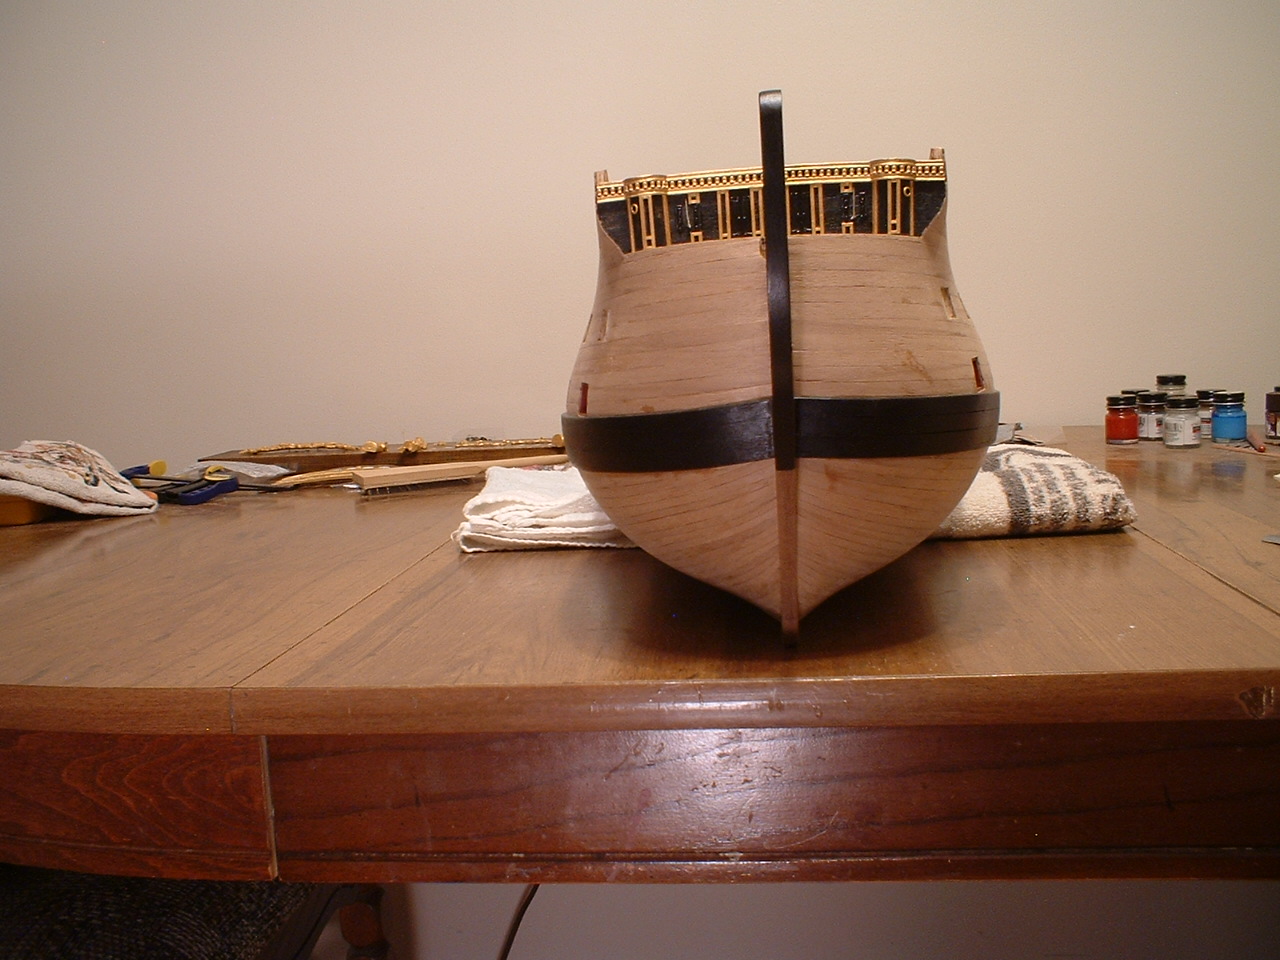
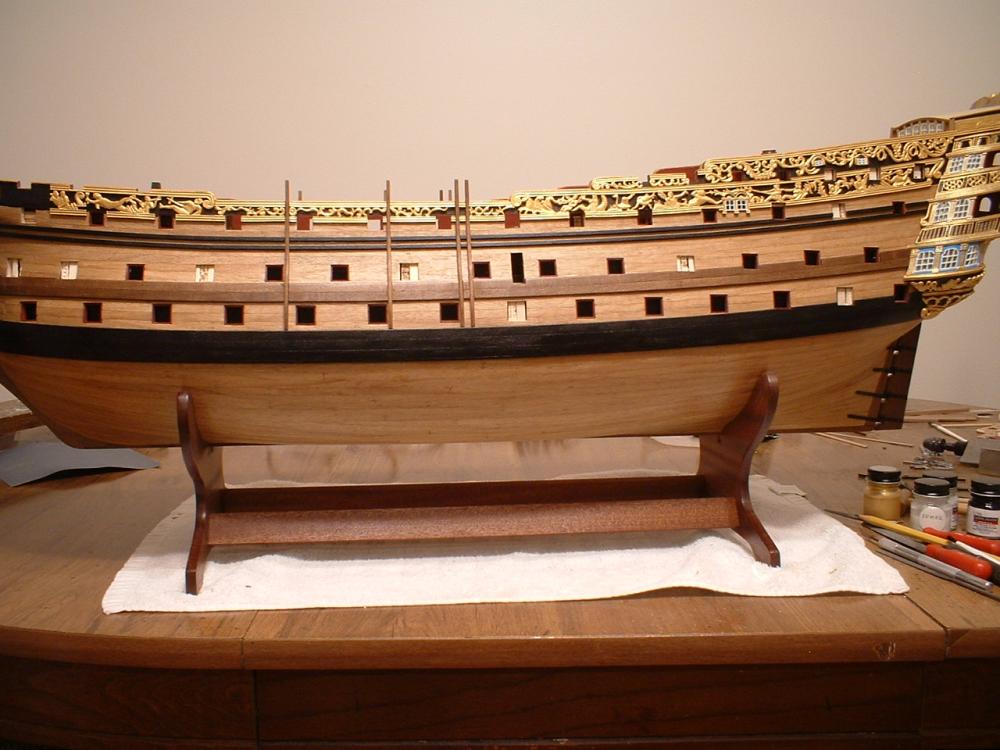
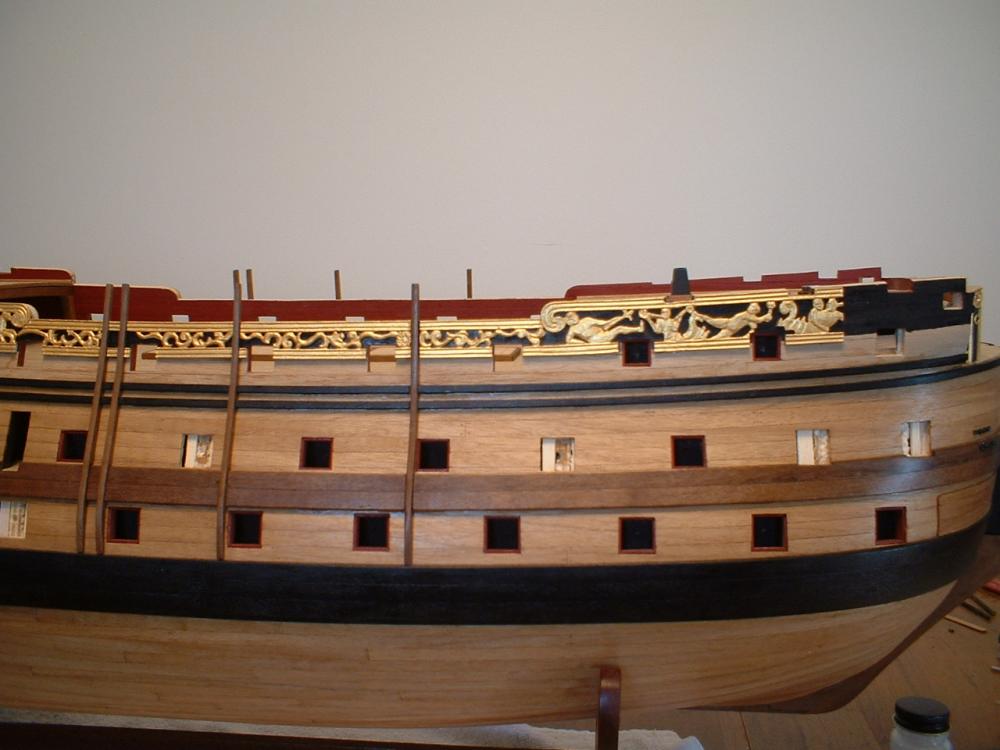
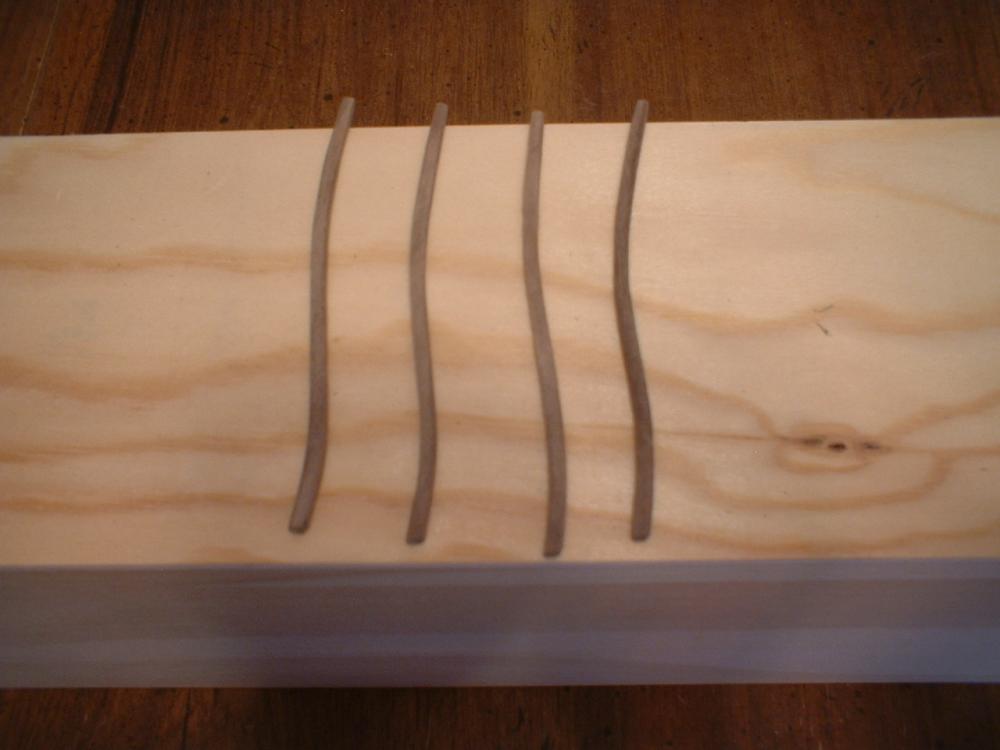
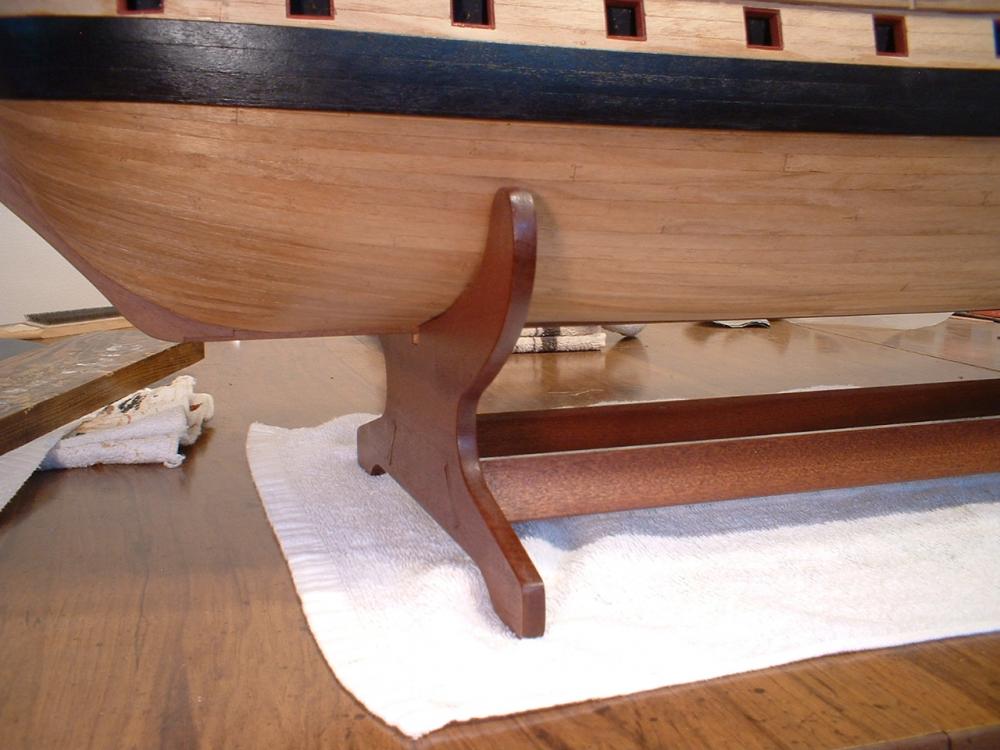
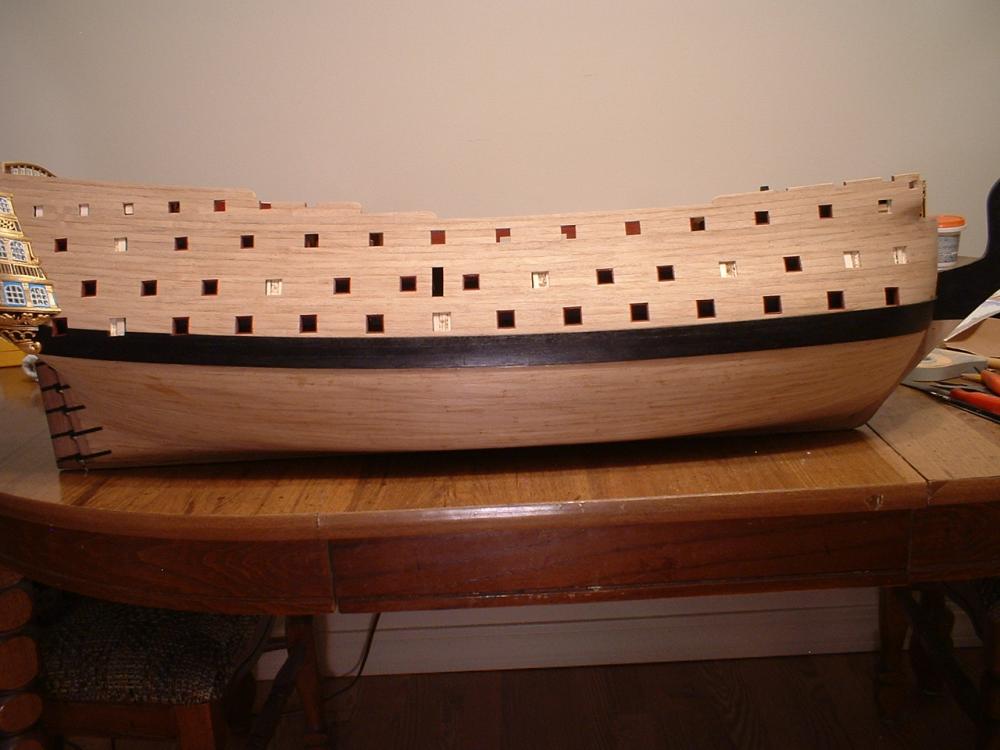
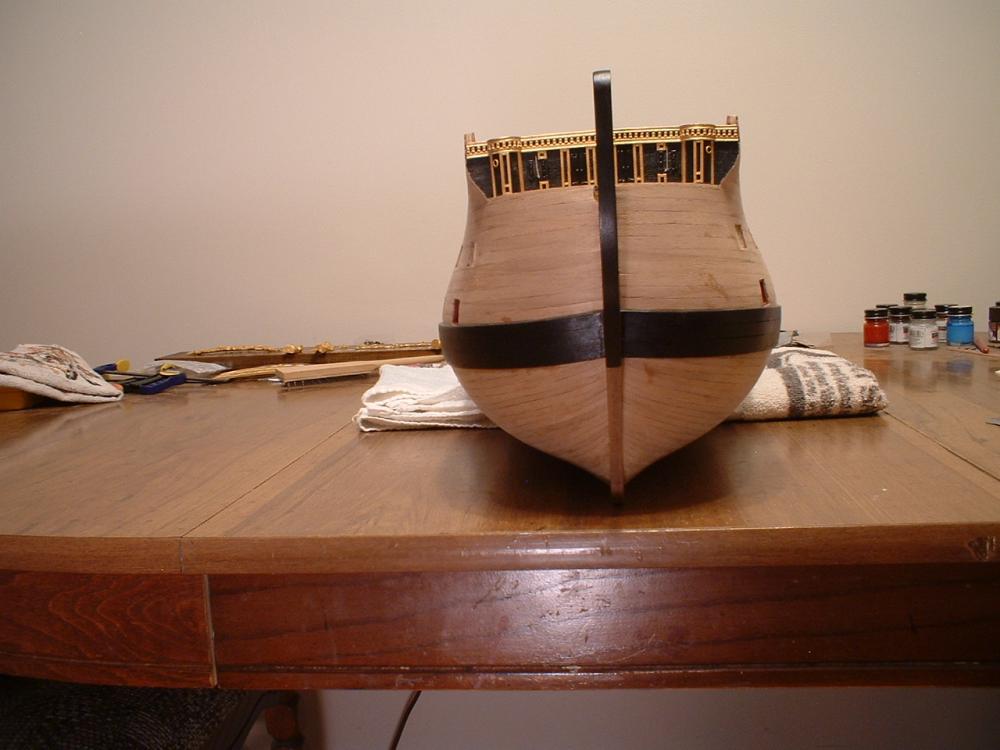
Update - before adding the upper wales,I pre-shaped the fenders to the contours of the hull. They were made from some 4x4mm walnut strips. After bending them with my plank bender,filing,& sanding they ended up being 2.5x3mm. I figured it would be a good time to put a finish on the hull below the lower wale,so on went a coat of polyurethane. The ship was getting a little top heavy with all the metal work,so I felt it was a good time to mount it on the stand,which is a beautiful solid mahogany - not plywood as in most other kits. All the upper wales were then glued in place & notched for the fenders,which were also notched to fit over the wales. Mark


- 652 replies
-
- 9
-
-
- royal william
- euromodel
- (and 1 more)
-
Thanks Frank! Mark
-
Many thanks,Greg . Mark
-
Thanks Pete - a long way to go yet. Mark
-
Thanks Michael - a lot of fiddly work,but fun.
-
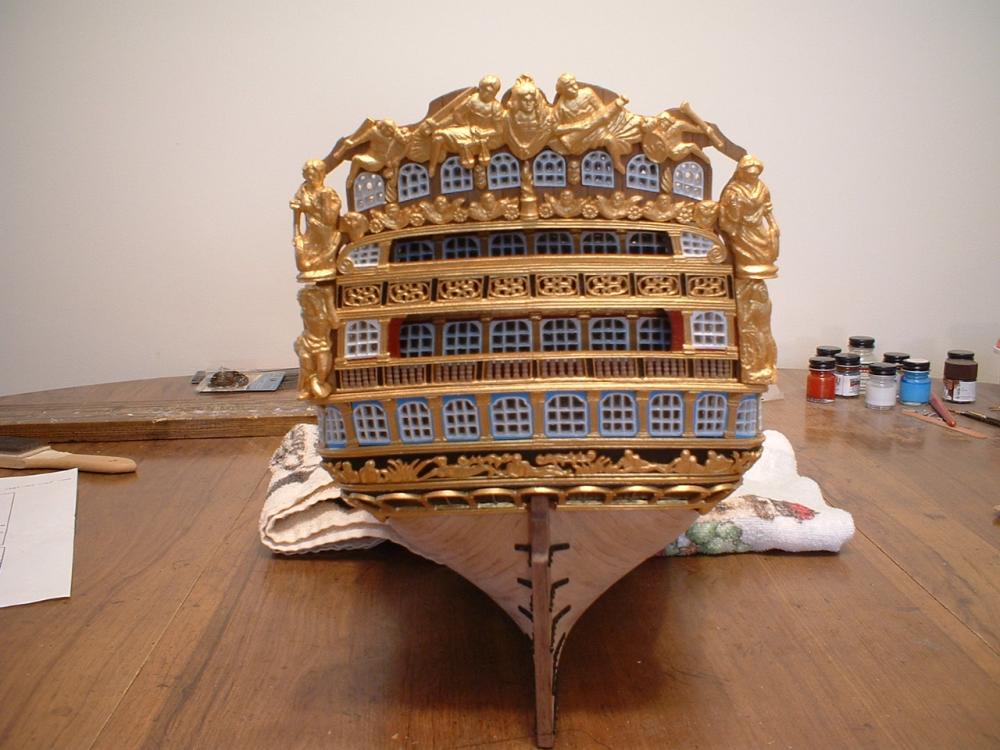
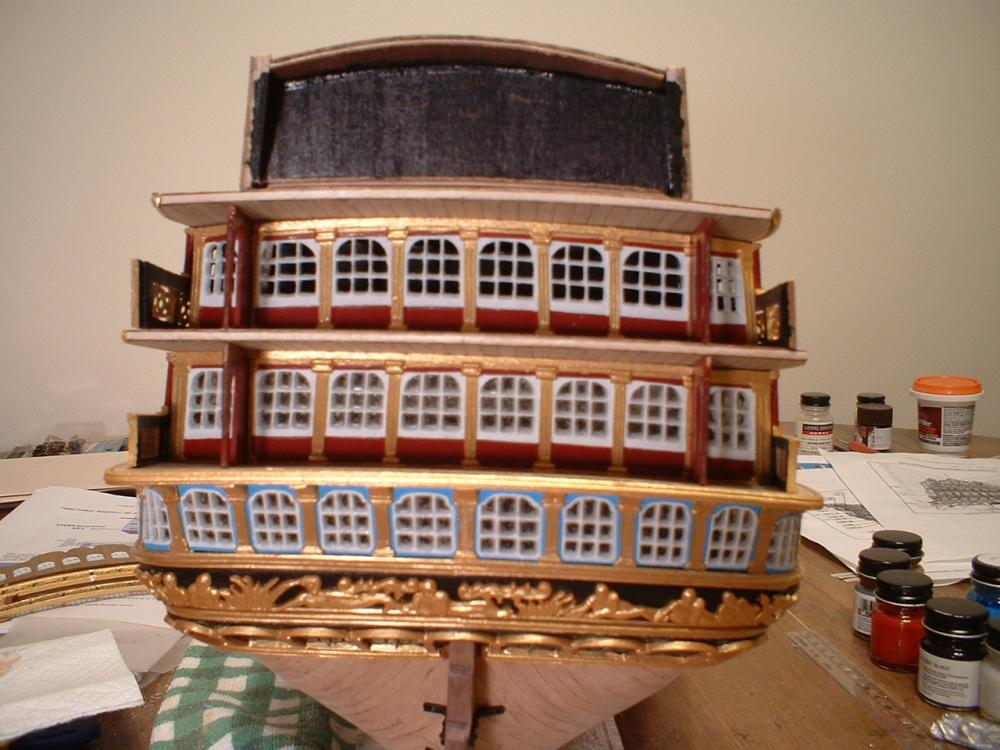
Update - I finished up the stern today. I decided to cut out the recessed areas of the upper railings & glued them in place. Then the stern fascia was glued on & the rest of the decorations added. The only things left are the lanterns,& 2 spears held by the upper figures. They will be added much later to avoid damaging them. I added a couple of brass pins to the uppermost decoration due to it`s weight. This ship is getting really heavy! Next I will probably put some finish on the hull under the lower wale. Mark

- 652 replies
-
- 10
-
-
- royal william
- euromodel
- (and 1 more)
-
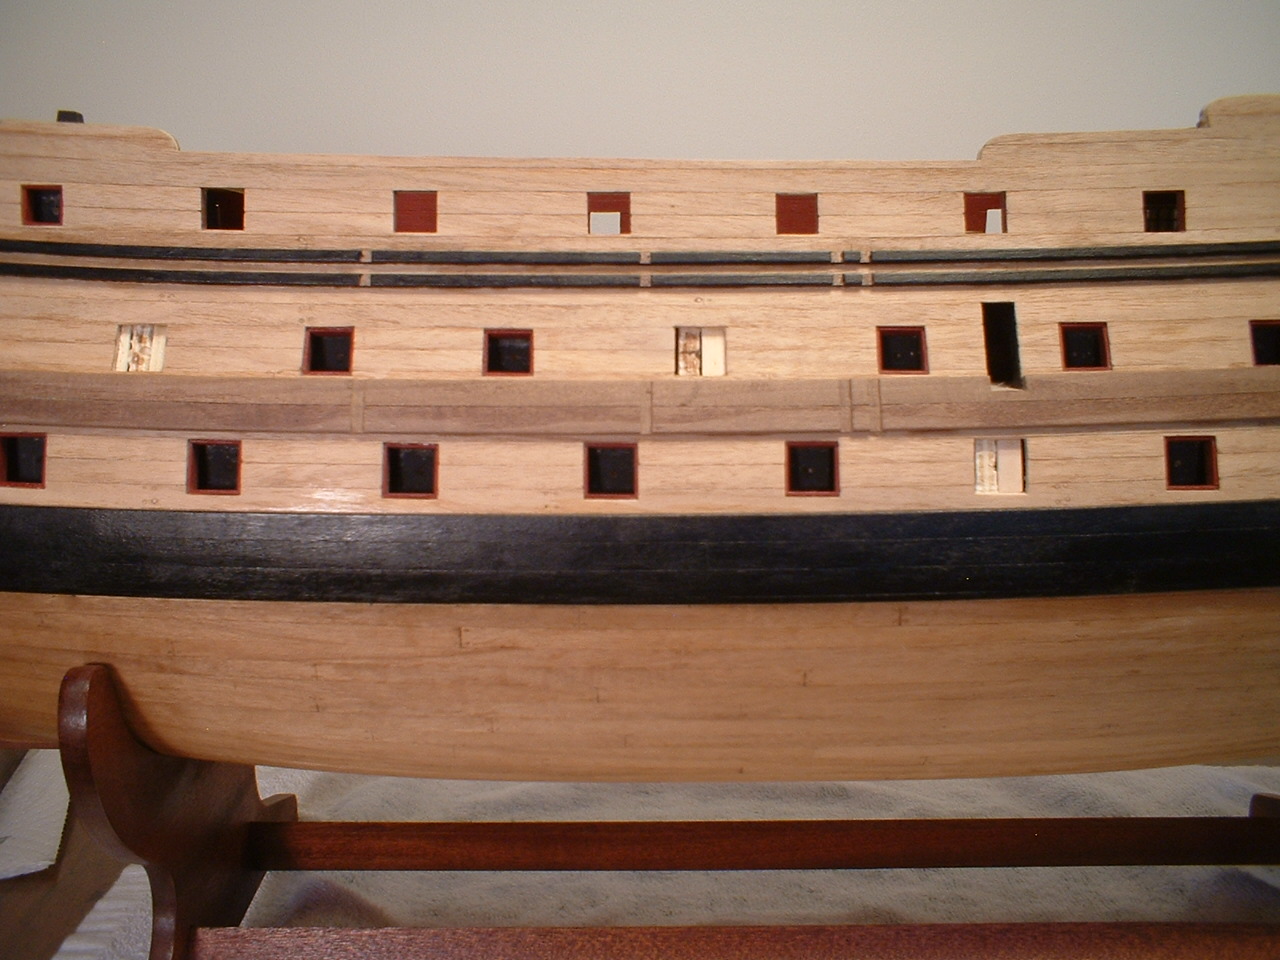
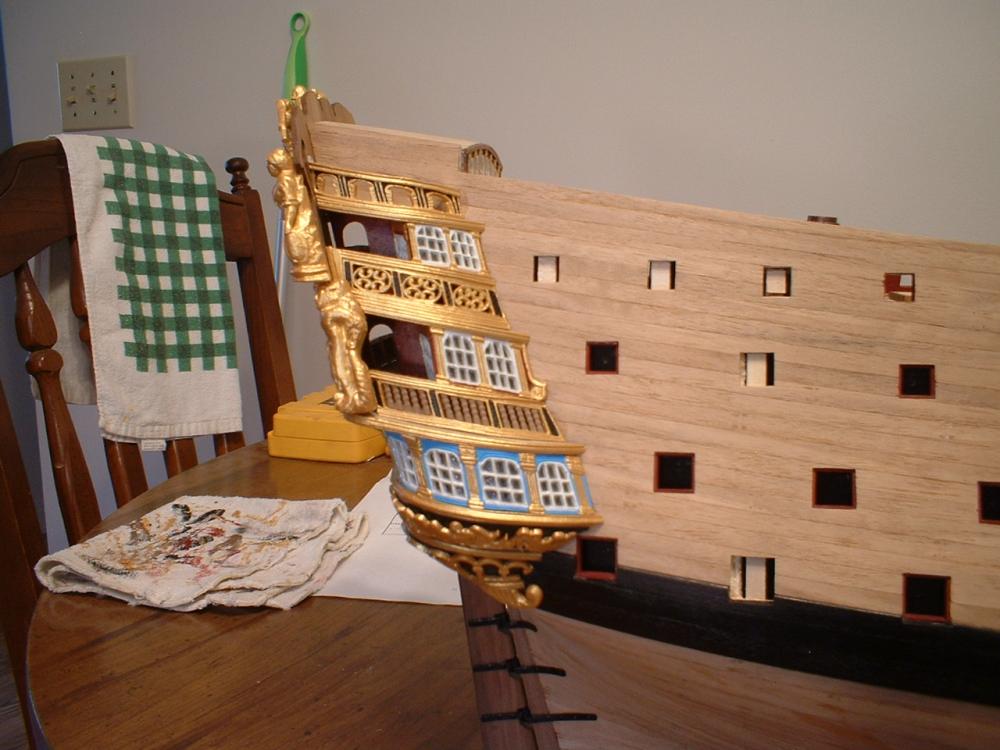
A little more progress has been made - lower wales are on & painted. I made one little error - after gluing all the wale strips on I saw that they are a little too high.This is not a problem except for fitting the lower decorations at the stern,so I added a 2mm strip to the bottom of the wale so the decoration would fit. Also painted the upper part of the stem Mark


- 652 replies
-
- 9
-
-
- royal william
- euromodel
- (and 1 more)
-
Thanks Pete. I see from the close up that I have a little touch-up do do yet. Funny how the camera can show things better than the eyes alone. Mark
- 652 replies
-
- 1
-
-
- royal william
- euromodel
- (and 1 more)
-
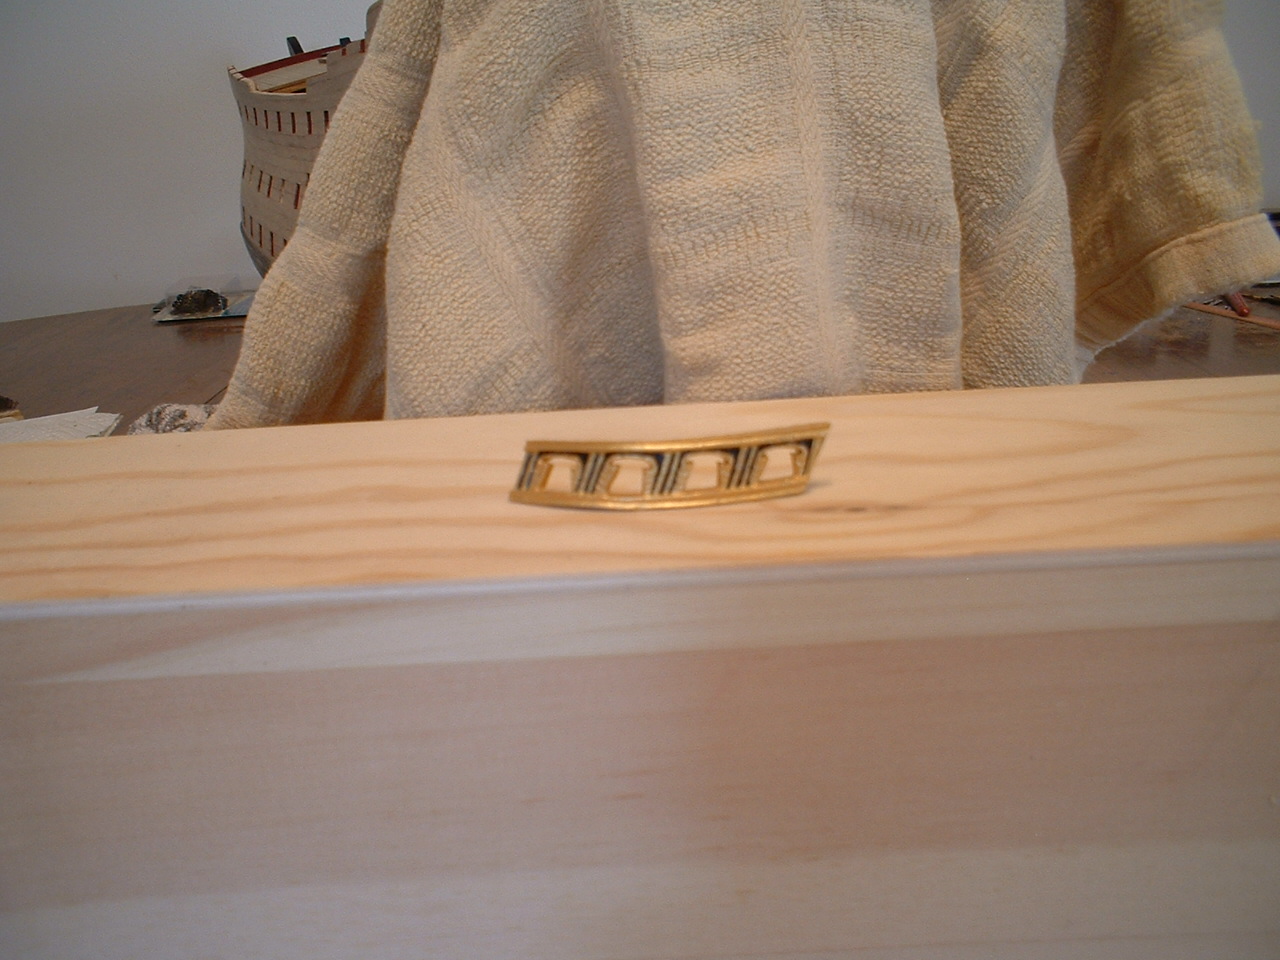
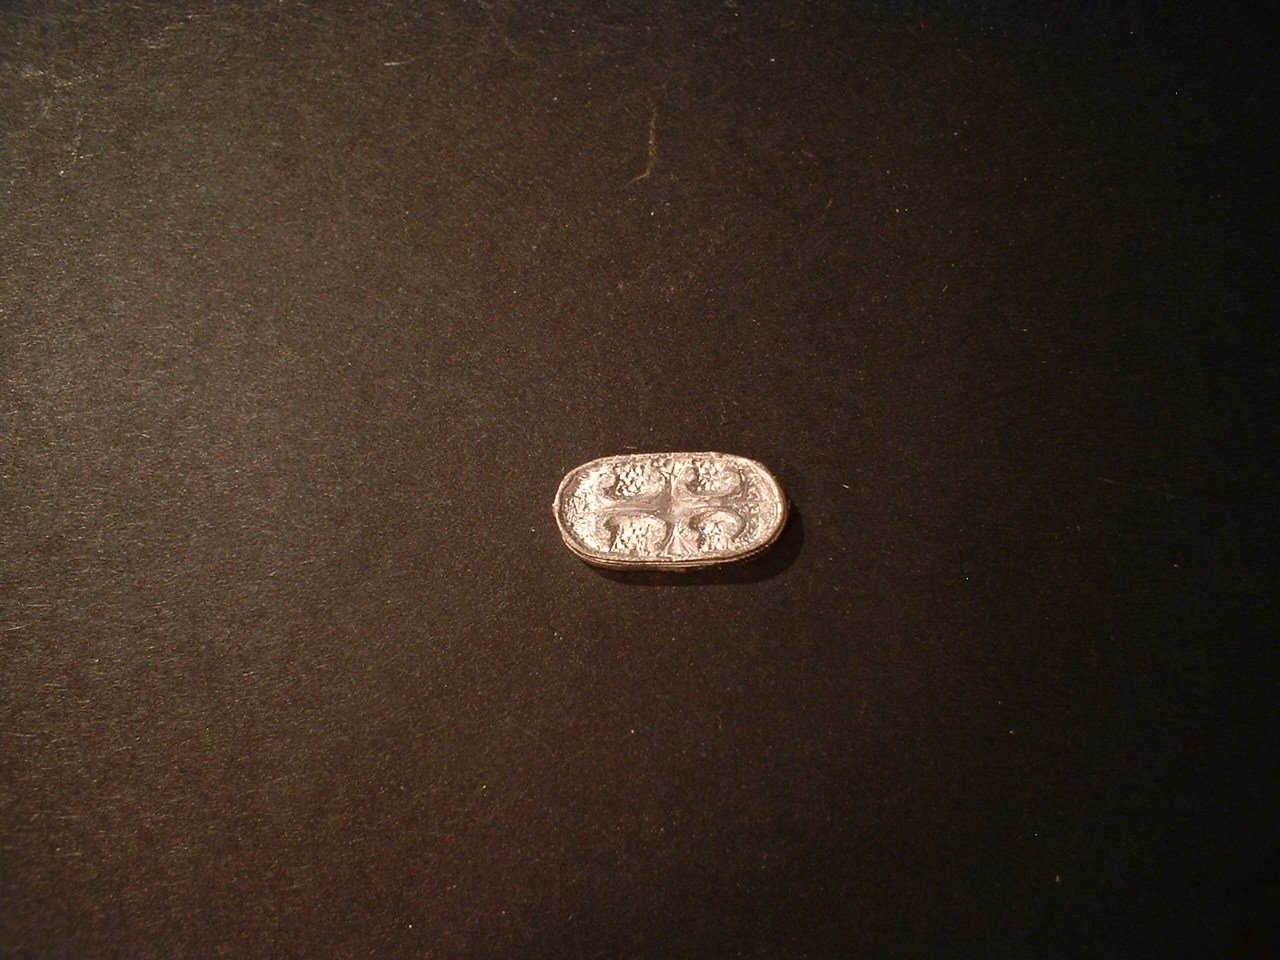
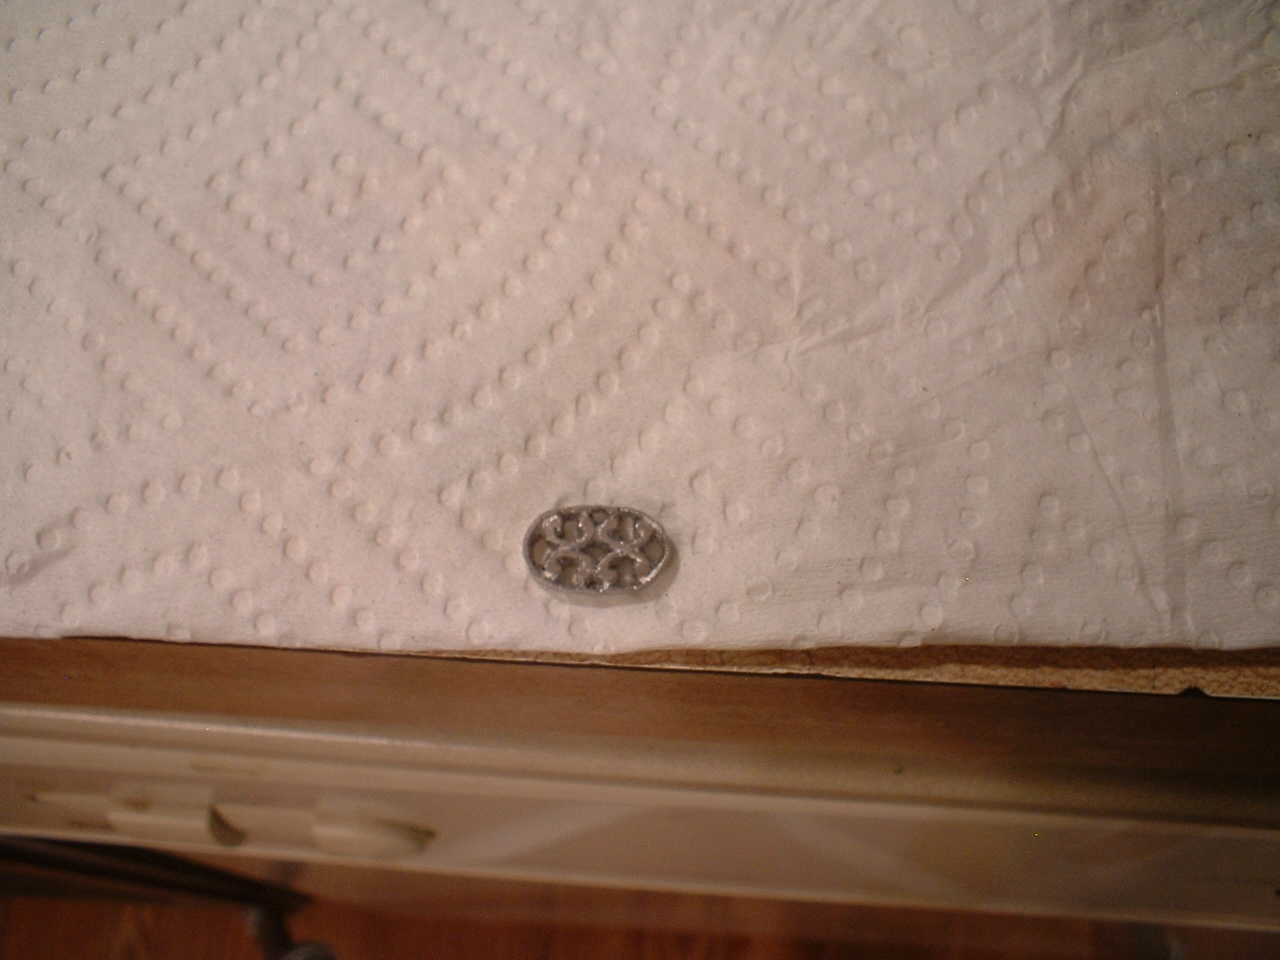
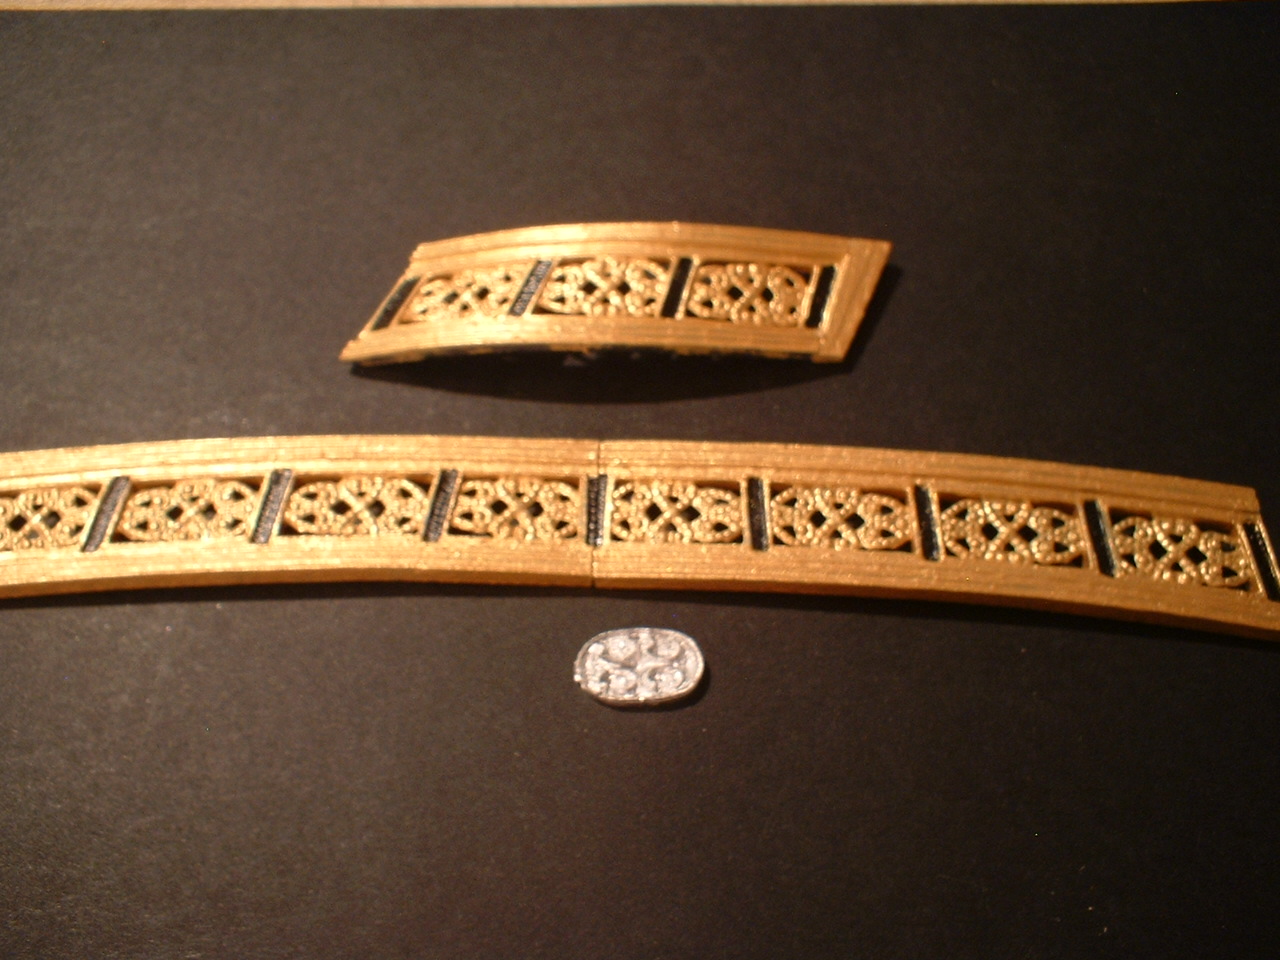
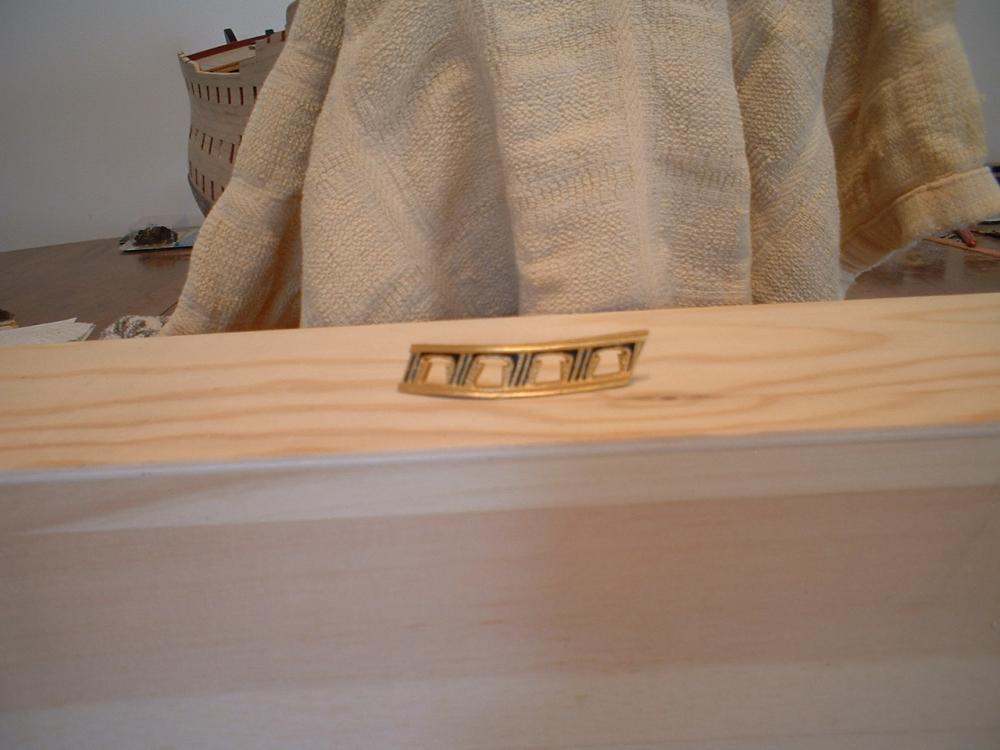
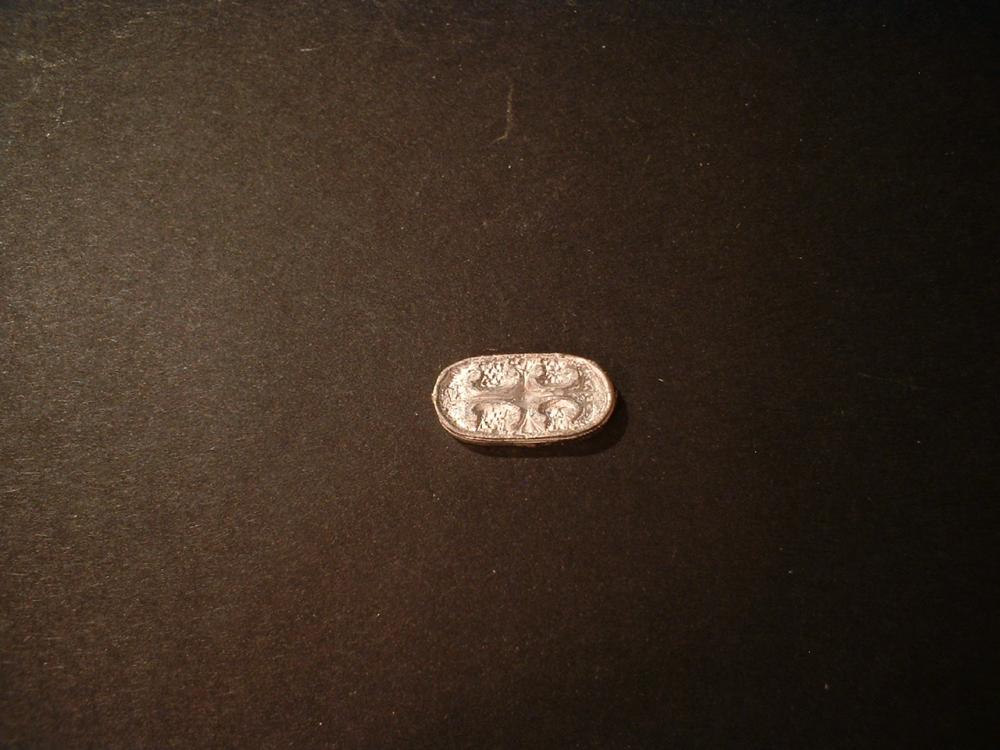
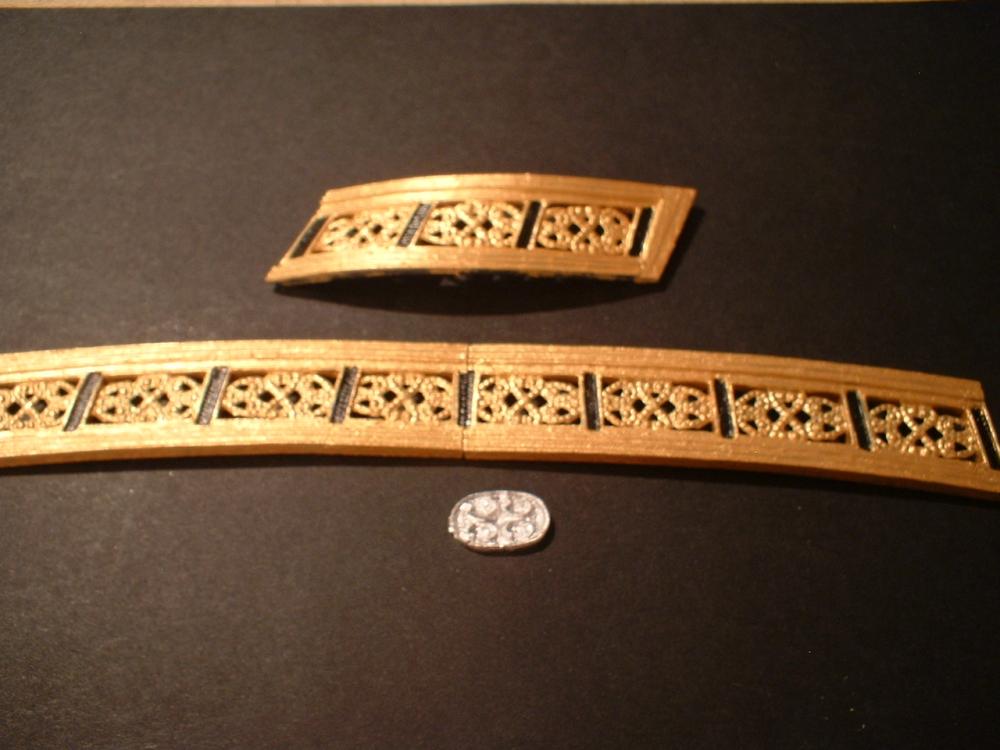
Hi all. Just a thought before I continue - If anyone has thoughts about getting a Euromodel kit their web site is offering their kits at 20% off for a limited time. I have no connection to them - just a satisfied customer. On with version 2 of the stern railings. I decided that my little scrolls did not look that great,so I decided to change them back to the kit supplied oval decorations with a little modification. The first picture shows the decoration as supplied. I modified them by carefully cutting out the recessed portions to produce a better 3D effect as shown in the second picture. After painting & gluing in place I am happy with them. Next,I will work on getting the lower wales in place before finishing the stern while I can still lay the ship on its side. Mark


- 652 replies
-
- 13
-
-
- royal william
- euromodel
- (and 1 more)
-
Thanks Keith - I don`t see any way I can duplicate that intricate pattern ,so I am going to try & cut out the recessed areas of the ovals & use them. Someone really good with photo etch might be able to simulate that fancy scroll work. Mark
-
I see what you mean Pete. I may fiddle around with those oval pieces & see what I can do with them. Mark
-
Thanks Michael - I do go to Michaels sometimes - they have a good selection of basswood,balsa,& plywood - even the very thin stuff. I always seem to find myself wandering around the store looking for that one item I can use . I intend to rig the ship,but am undecided about sails - so hard to find material that hangs right. Michaels also has a good selection of good quality paint brushes. Mark
-
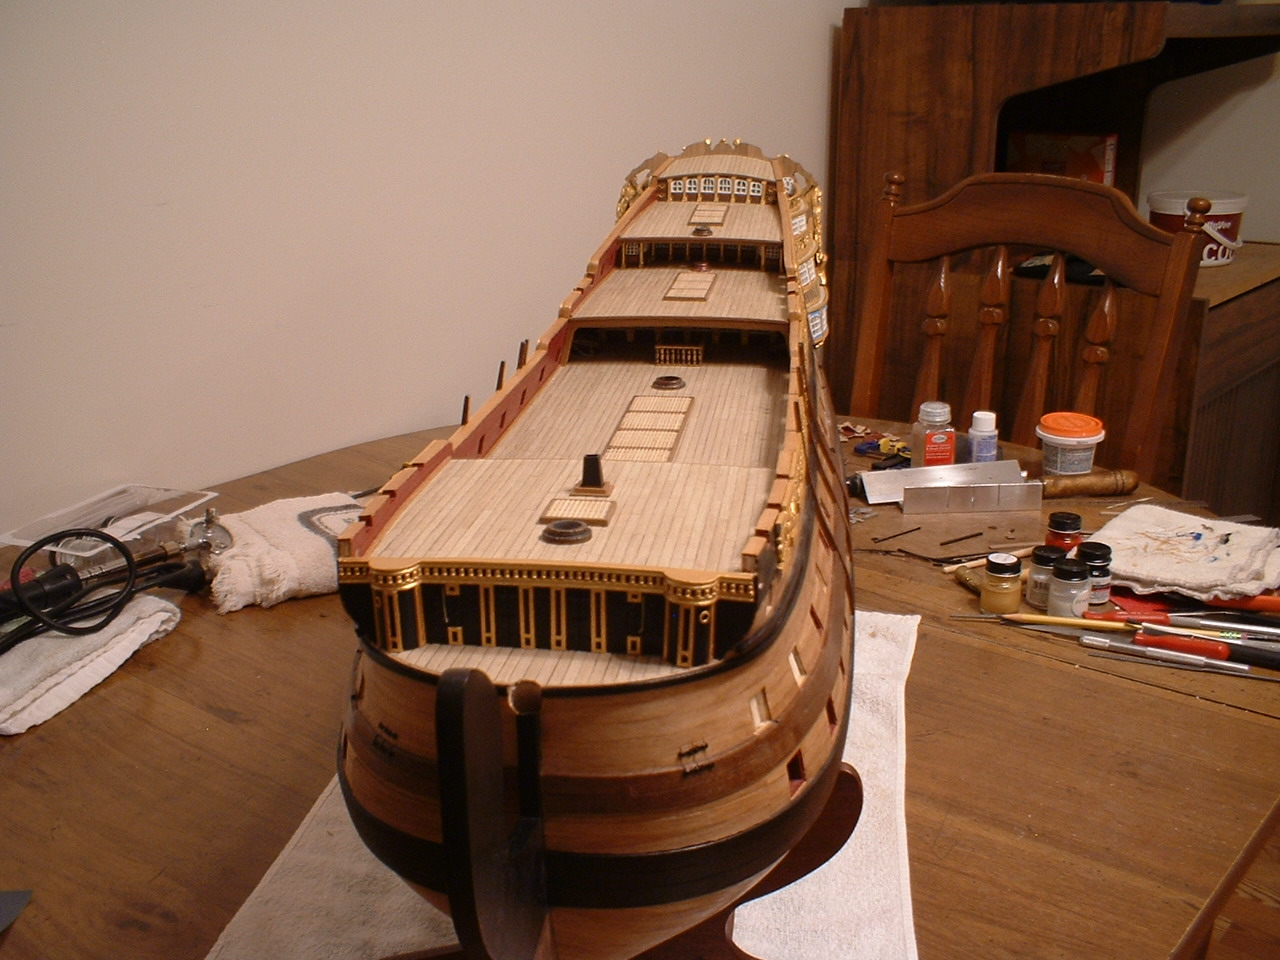
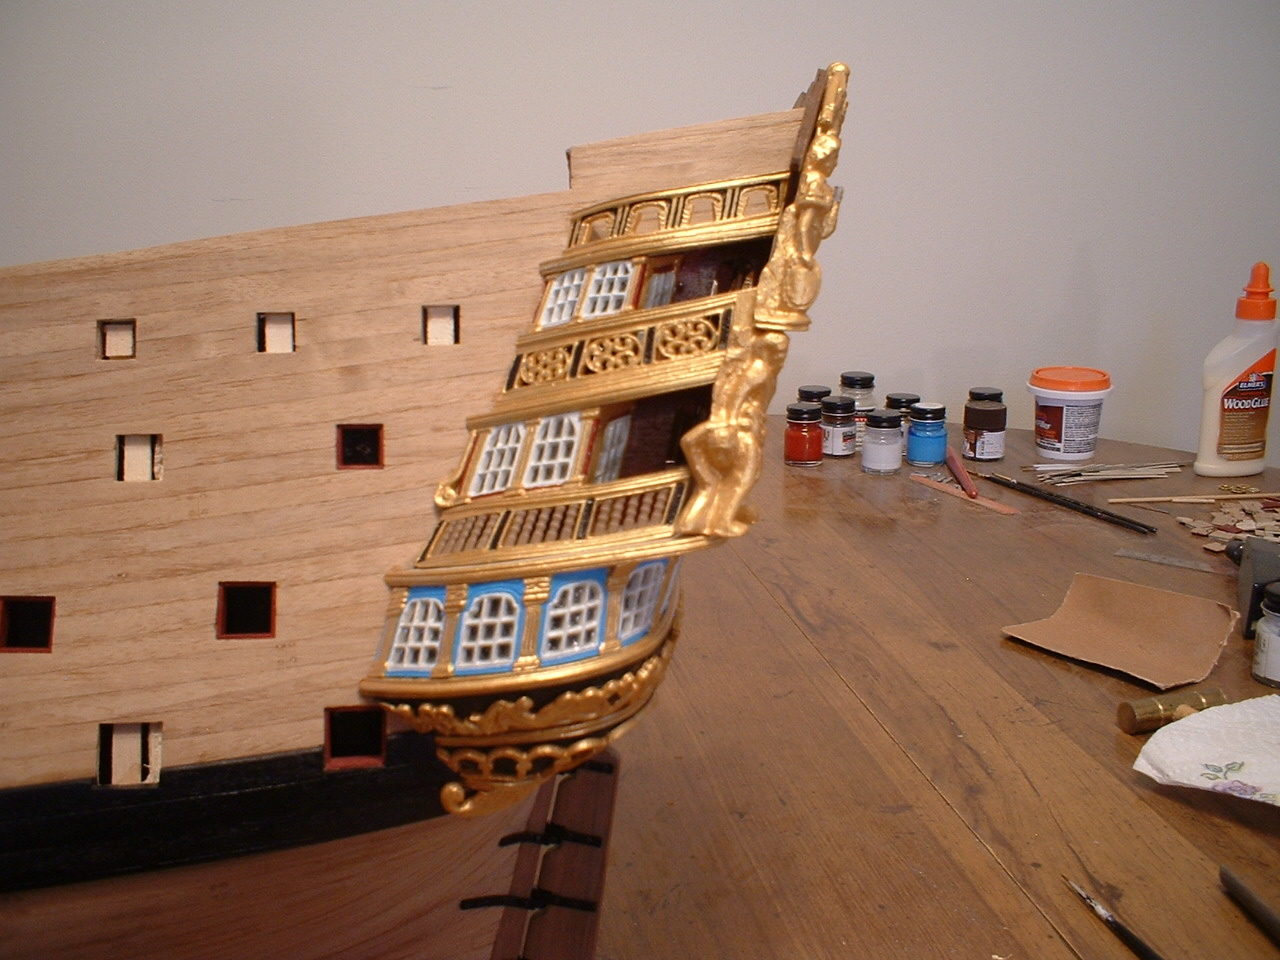
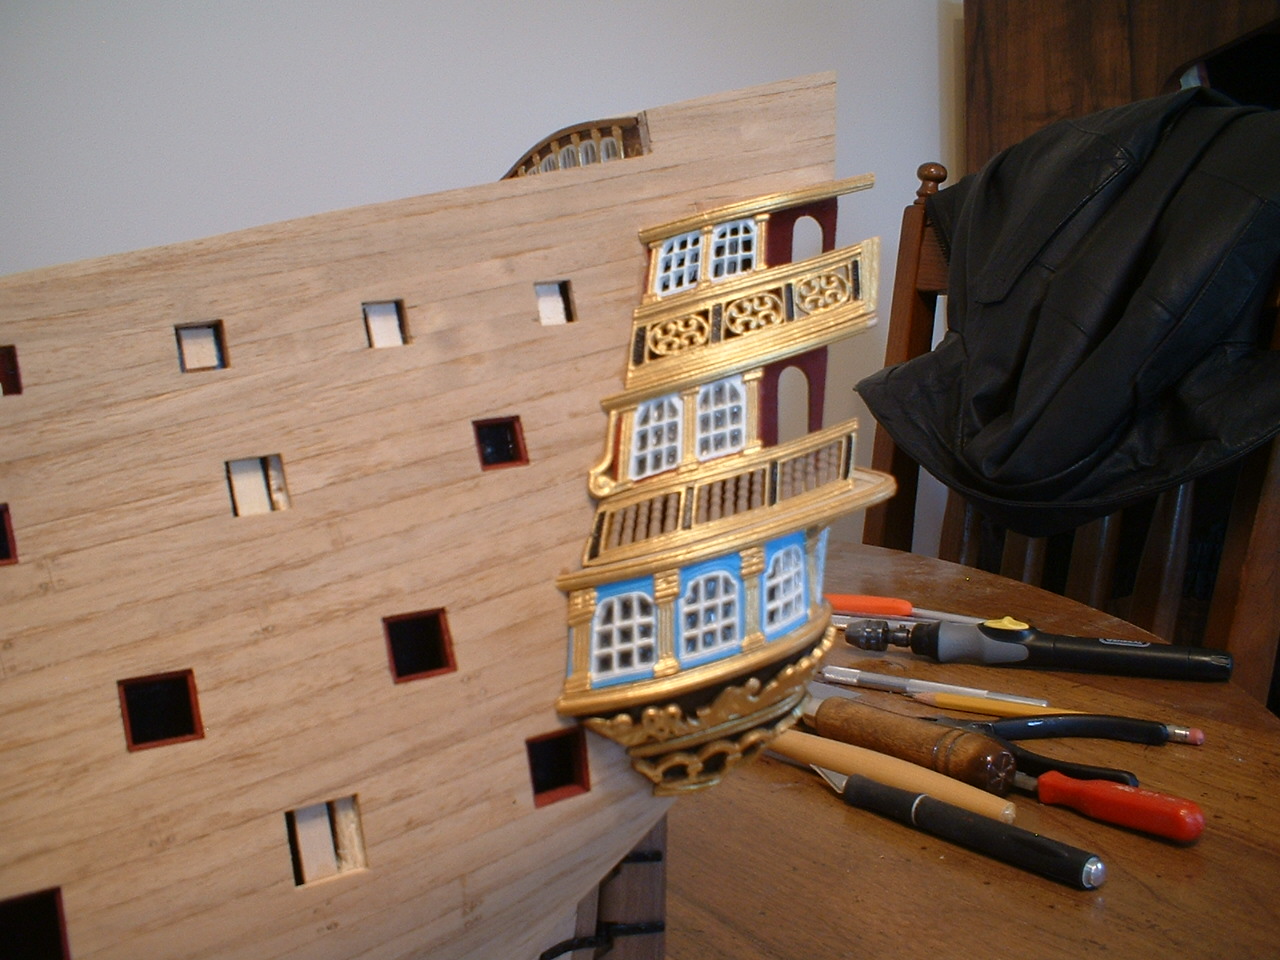
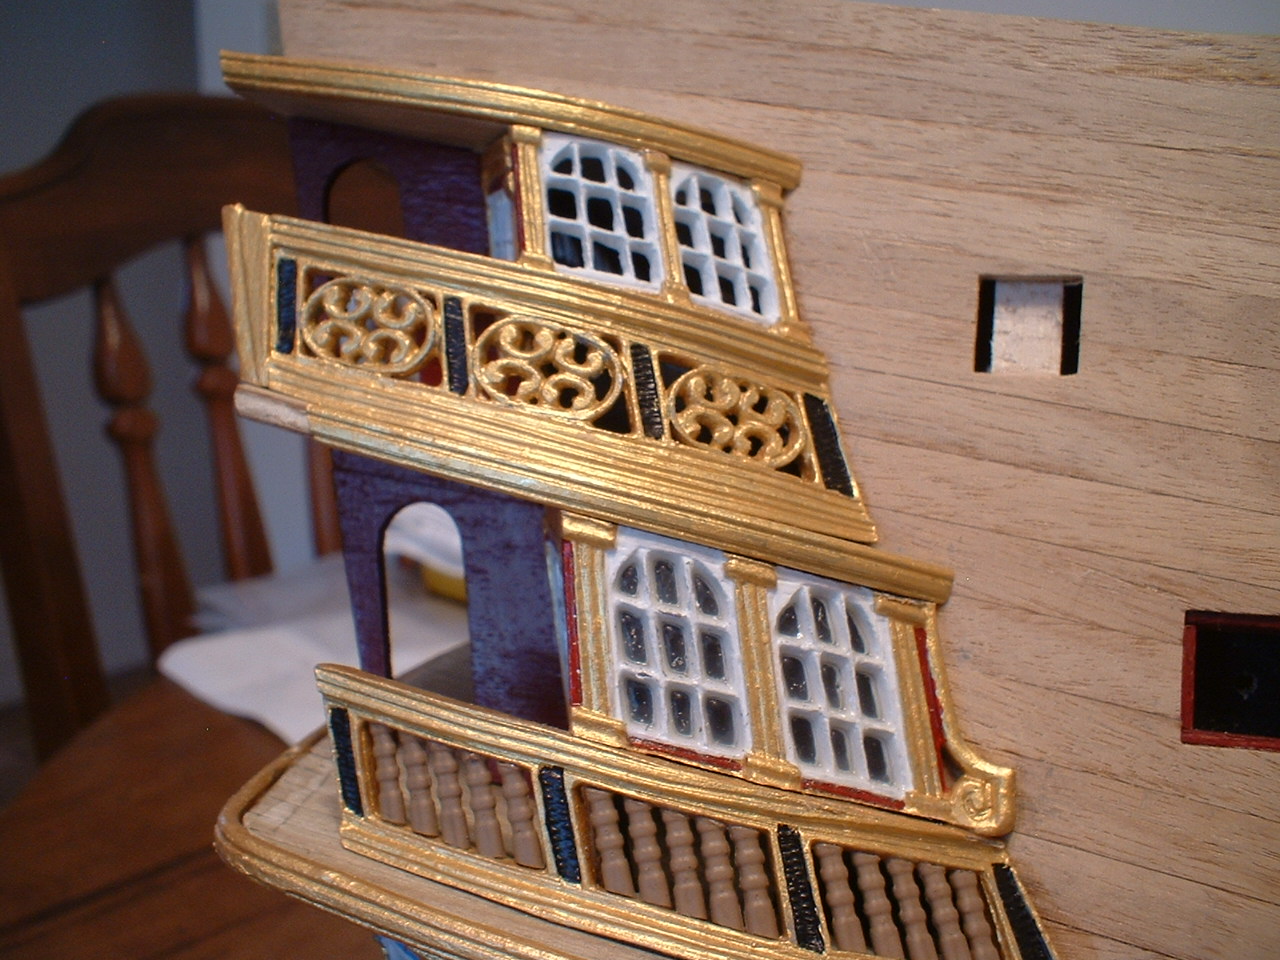
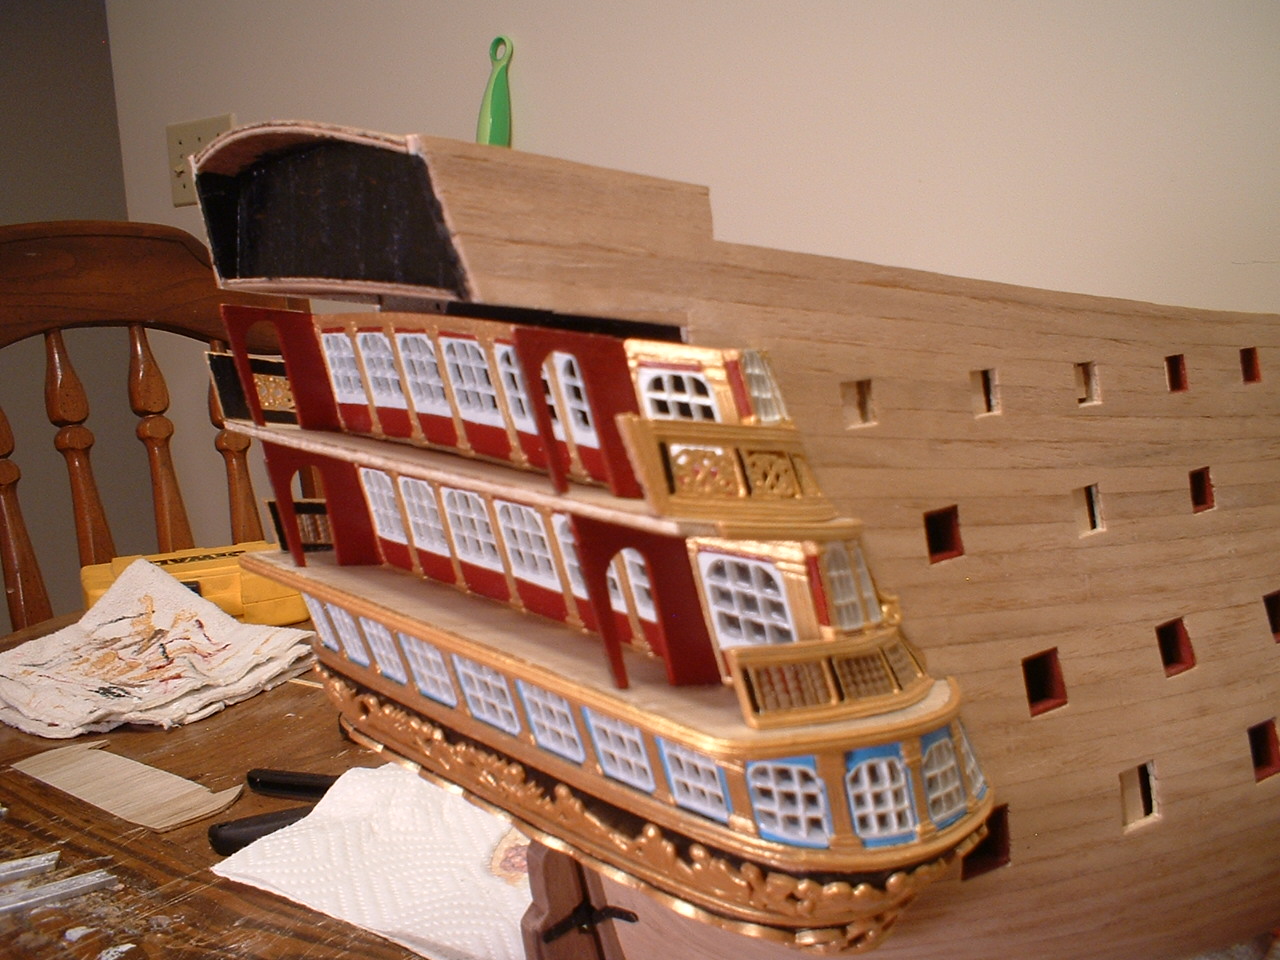
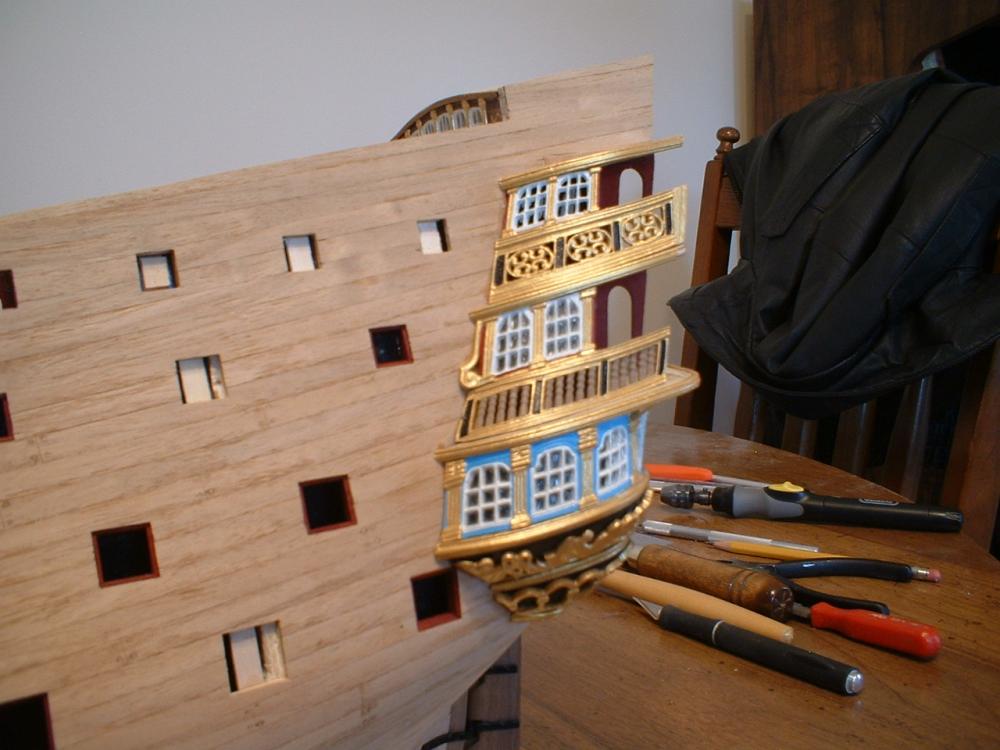
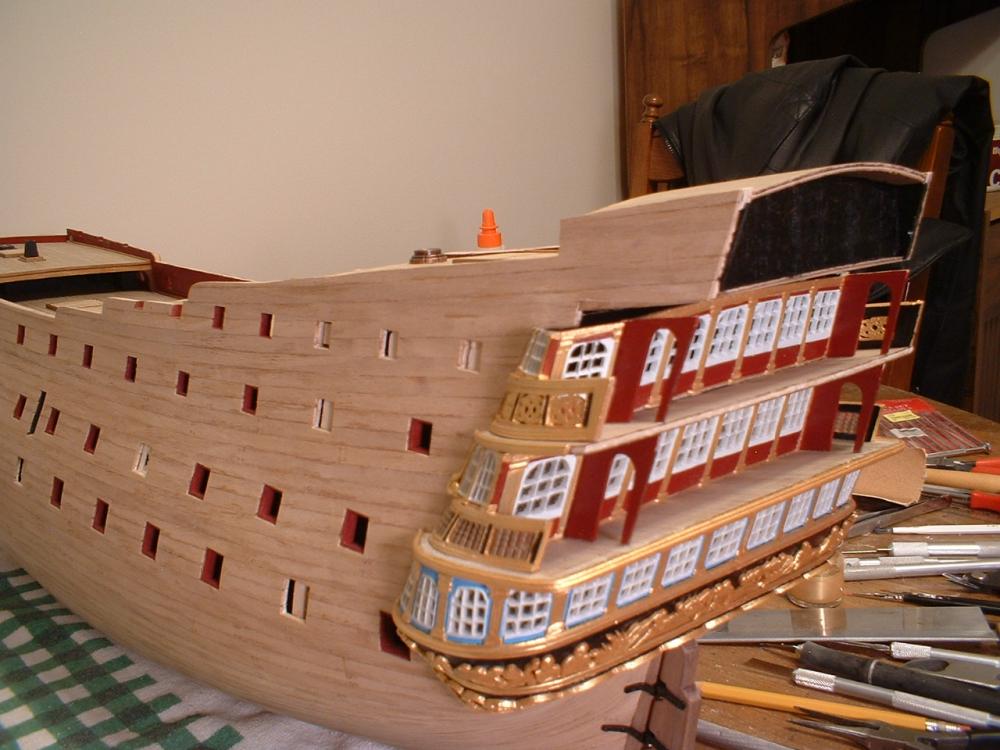
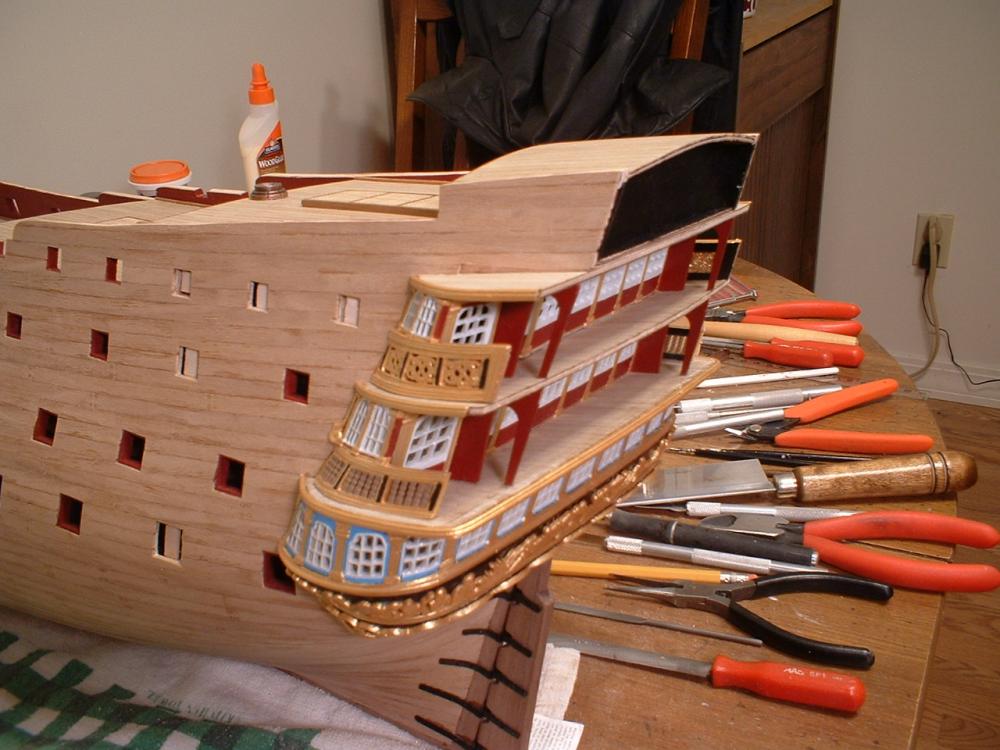
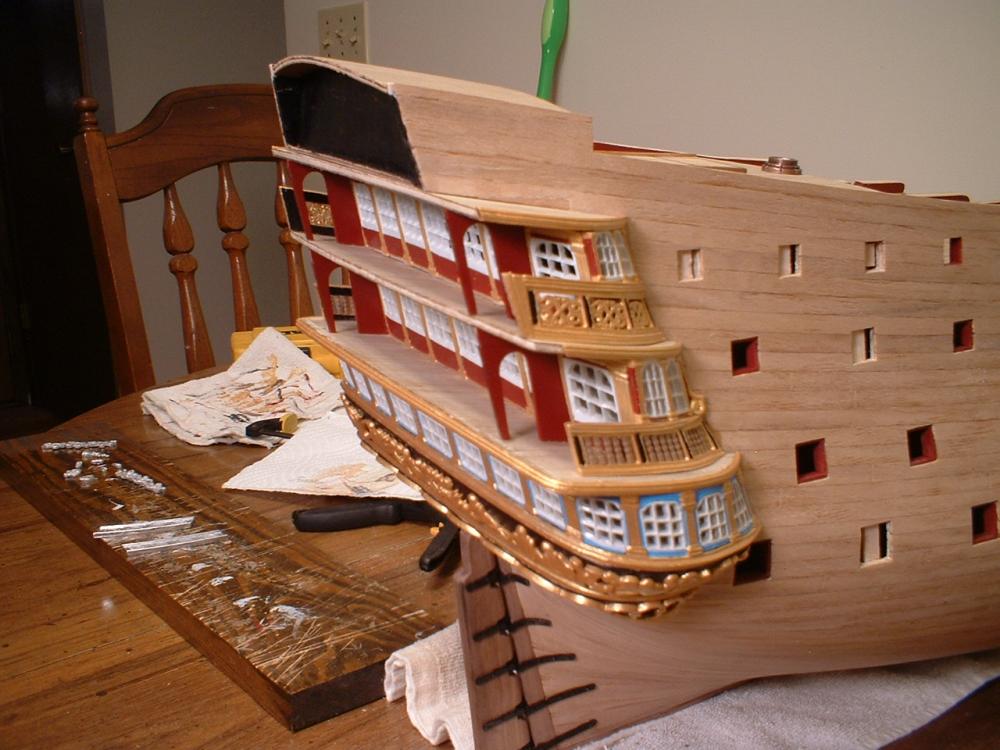
A little more progress has been made. While working on the railings between the middle & upper decks I didn`t really care for the little ovals that fit in them,so off to the art & craft store I went to browse around. I found some items in the bead dept. that looked like some fancy scroll work & looked about the right size so I bought some & installed them in the railings. They really seemed to dress them up a bit. Then I cut out all the window panes in the upper windows & painted them.With some very minor adjustments they were fitted in place,along with the railings. Then I made & planked the upper deck & slid it in place. All 3 of the stern decks were made from 1.5mm basswood sheet planked on both sides with some brass mouldings around the outside edges.The brass mouldings were left over from a previous build. The very top rail will be fitted after the fascia is in place. The lower & middle windows are also now "glazed". Mark

- 652 replies
-
- 11
-
-
- royal william
- euromodel
- (and 1 more)
-
Thanks Frank! Mark
-
You are correct about the glue,that`s why I am waiting until at least the wales are on. I plan to use satin polyurethane,maybe just one coat. In the past I have used just one coat on other ships & gives a nice finish that isn`t too shiny. 2 or 3 coats just seems to come out too shiny,even with a satin finish. Mark