marktiedens
-
Posts
1,737 -
Joined
-
Last visited
Content Type
Profiles
Forums
Gallery
Events
Everything posted by marktiedens
-
Steam Bending
marktiedens replied to Julie Mo's topic in Building, Framing, Planking and plating a ships hull and deck
Yes,hornet - I have one of those too. Marvelous tool - I have bent strips as large as 3x8mm with it. Mark -
Thanks Mercdaddy . Mark
-
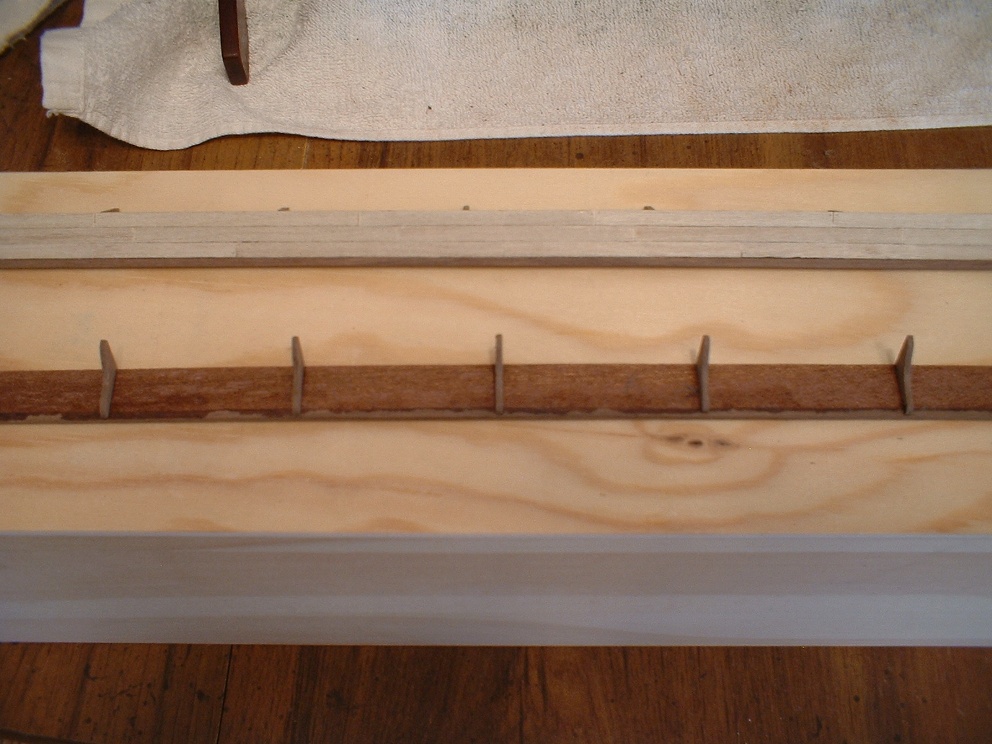
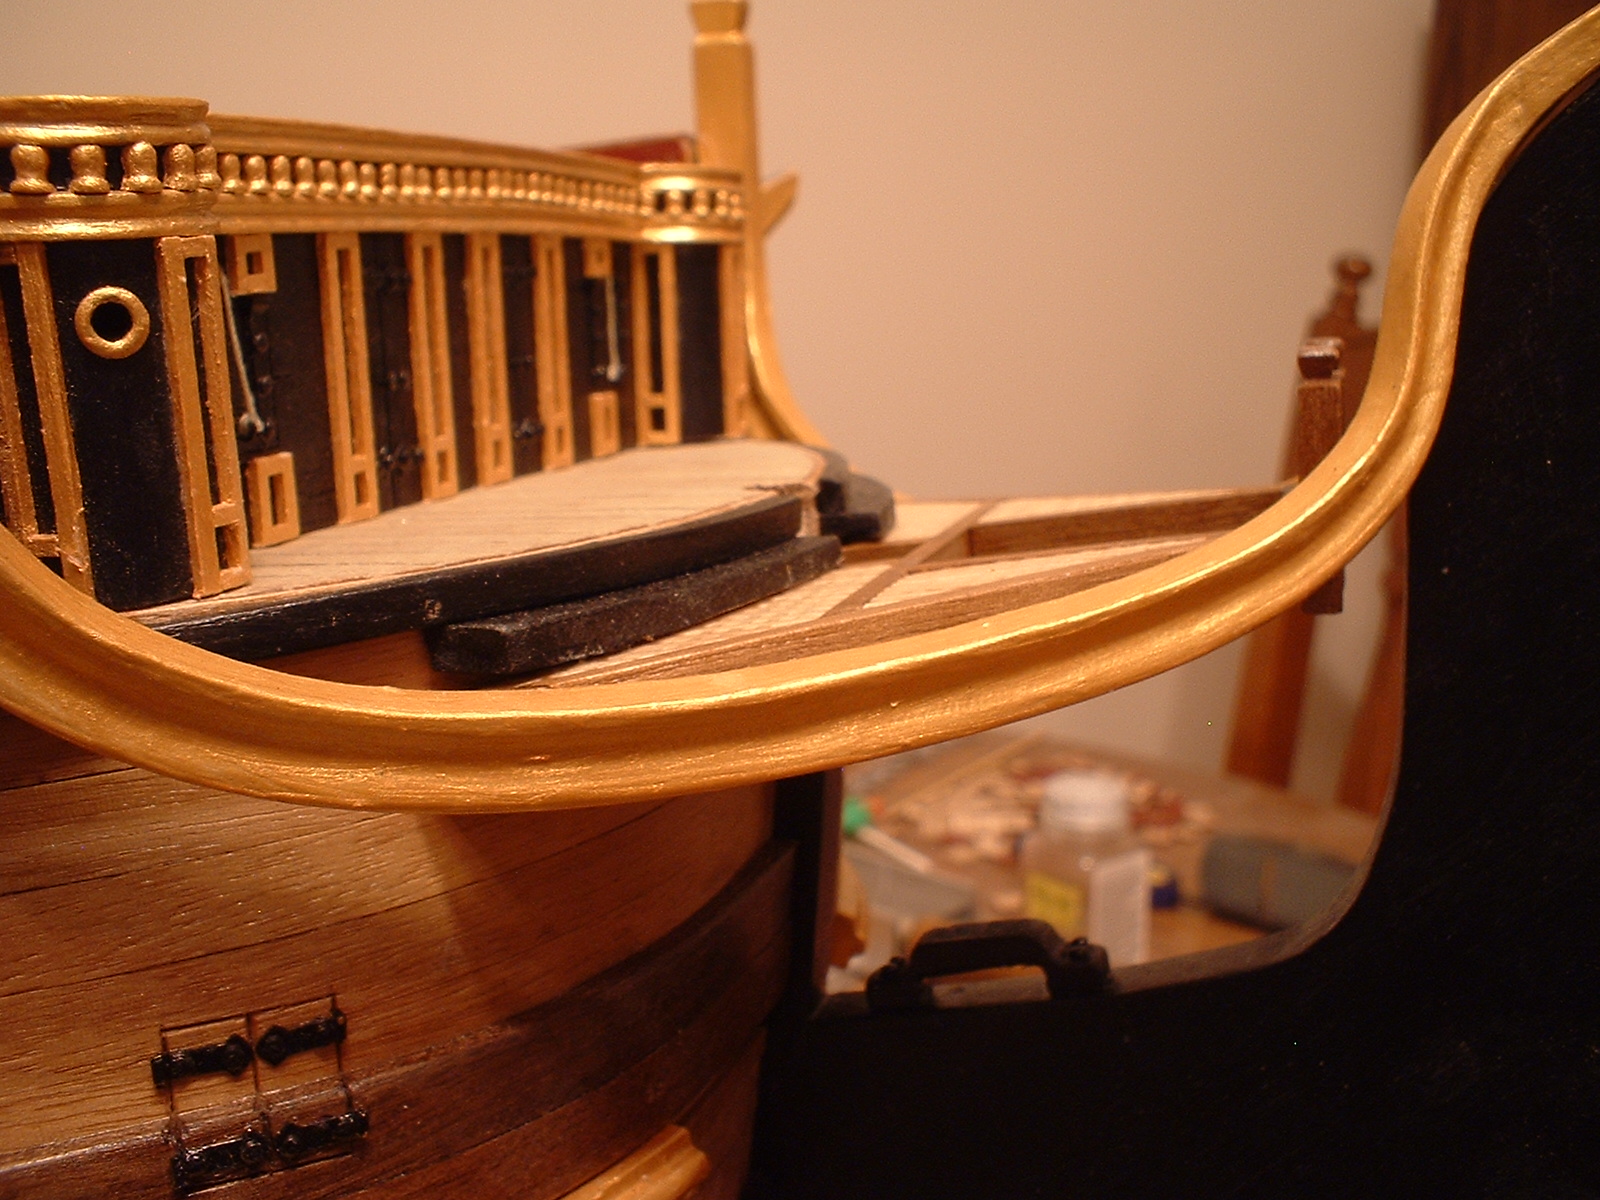
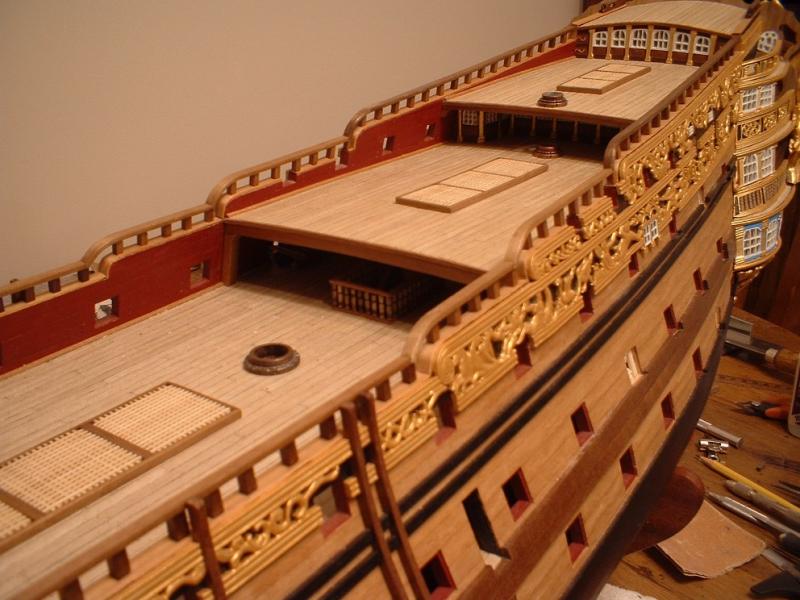
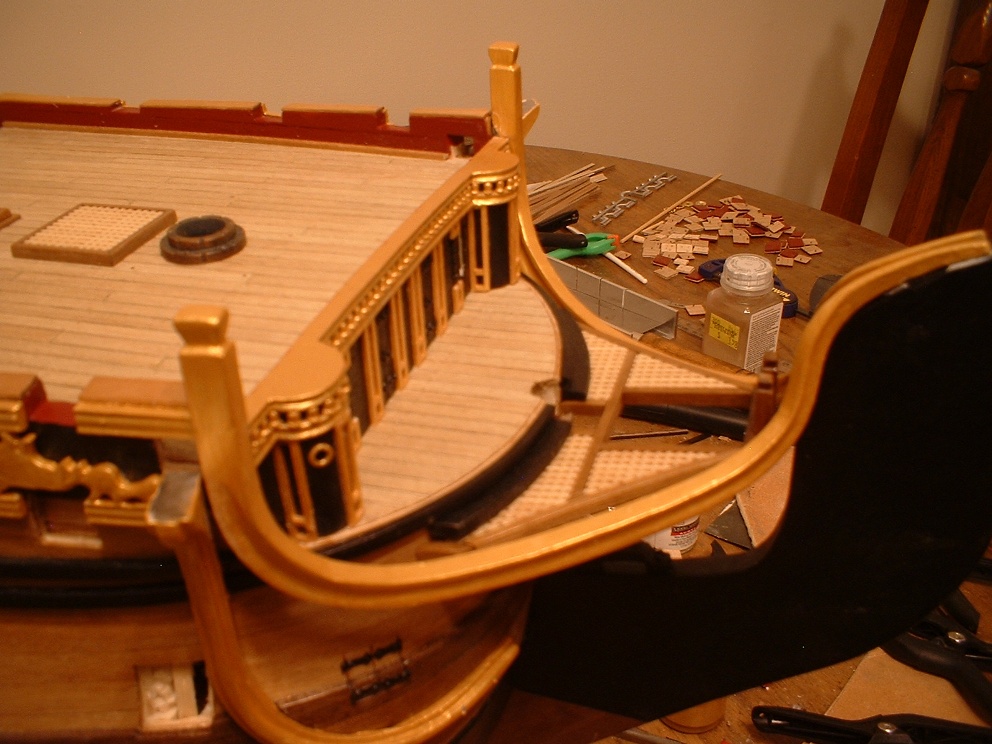
Another small update - I decide to make the gangways that go between the forecastle & quarter decks. I made the base for the gangways from a leftover mahogany ply sheet that the false decks were removed from. Then I planked the top side with leftover deck planking strips & covered the outer edge with a 2x2mm strip. Then I made some support knees from some 2x12mm walnut strip & glued them in place. The gangways will not be glued in place until later - after the cannons underneath them are in place. At that time the bottom side will be painted red & hand rails added along with some steps to the quarterdeck. Mark
- 652 replies
-
- 5
-

-
- royal william
- euromodel
- (and 1 more)
-
Oh goody - another Euromodel ship to follow . Hope you don`t mind if I pull up a chair. Mark
-
Edwin,Mike,Keith - thanks very much. Your comments are appreciated . Mark
-
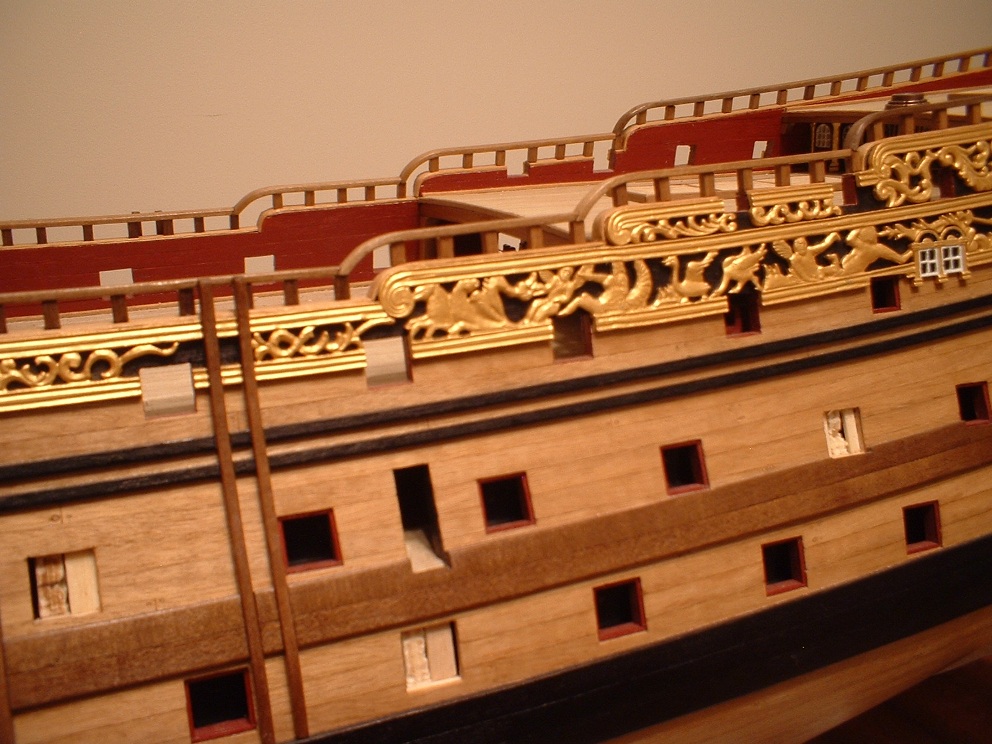
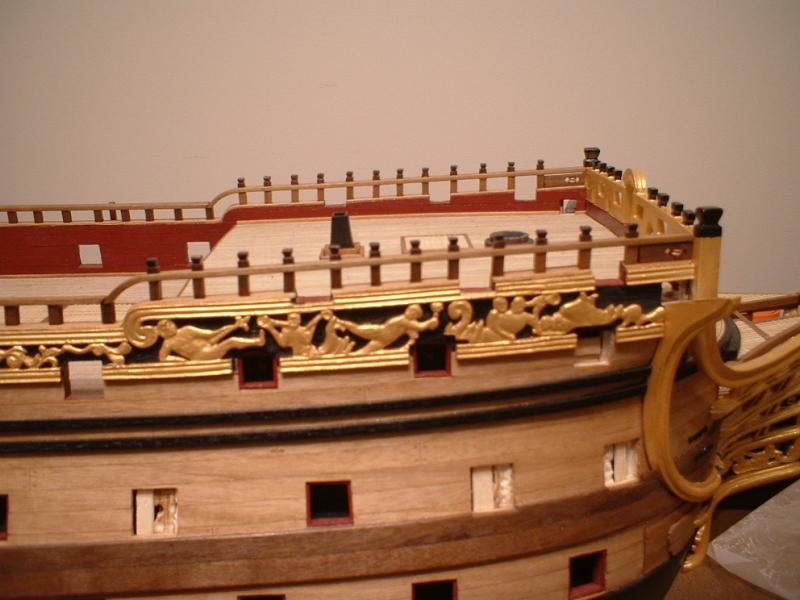
Hi all - a little more progress has been made. The roughtree (hand) rails are now done. All 114 stanchions were cut,pinned & glued in place. The kit provided 2x5mm walnut strips for the railing,but it seemed a little too wide. So I narrowed them down to 2x4mm & made the curved ends with my old Aeropiccola plank bender. That company is no longer in business,so I am wondering why no one has tried to make one like it - it really works well.Then I made all the timberheads on the forecastle railing & pinned & glued them in place. Lastly,I made the sheaves that are at the fore & aft ends of the railings. The pulleys in the sheaves are small deadeyes filed flat to fit in the slots. A coat of poly was then applied to finish them off. I may work on the deck furniture next. Thanks for looking in Mark


- 652 replies
-
- 10
-
-
- royal william
- euromodel
- (and 1 more)
-
Frank & Bill - thanks for your generous comments & also thanks to everyone for the likes . Mark
-
Pete - it was just a lot of filing,test fitting,filing some more,test fitting. The hard part was holding onto the short pieces while I filed. I couldn`t hold these little pieces with pliers or they would get nicked & dented due to the softness of the metal. The cheek rails ended up a little lower than I would have liked due to a couple of factors - the wales are a little off & the metal parts for the rails are a little thicker than what the plans show. Using the small ovals to determine the spacing of the rails,the small differences in thickness from the plans added up to the cheek rails being a little low.I still think it looks ok,though. Thanks a bunch,Greg. I think Euromodel`s web site still has 20% off. Mark
-
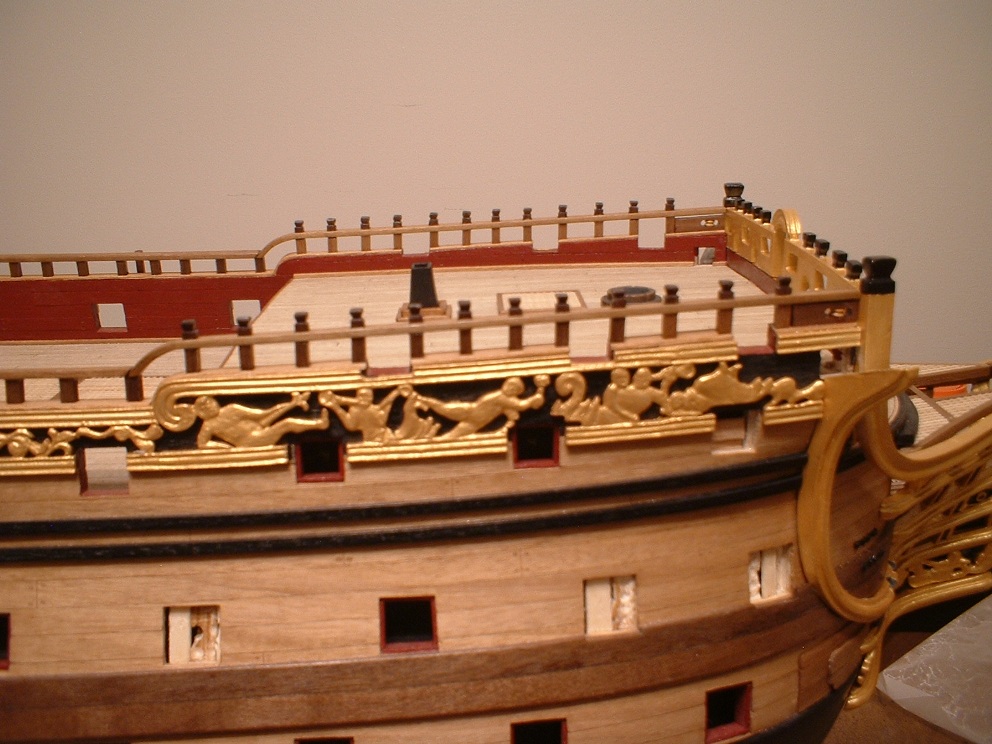
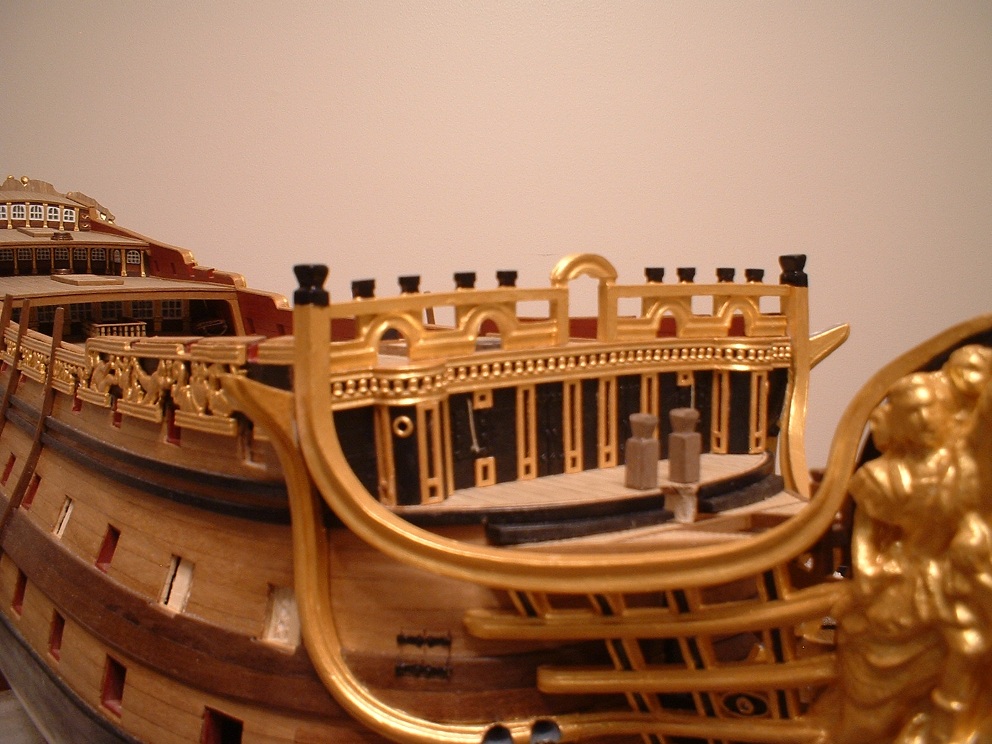
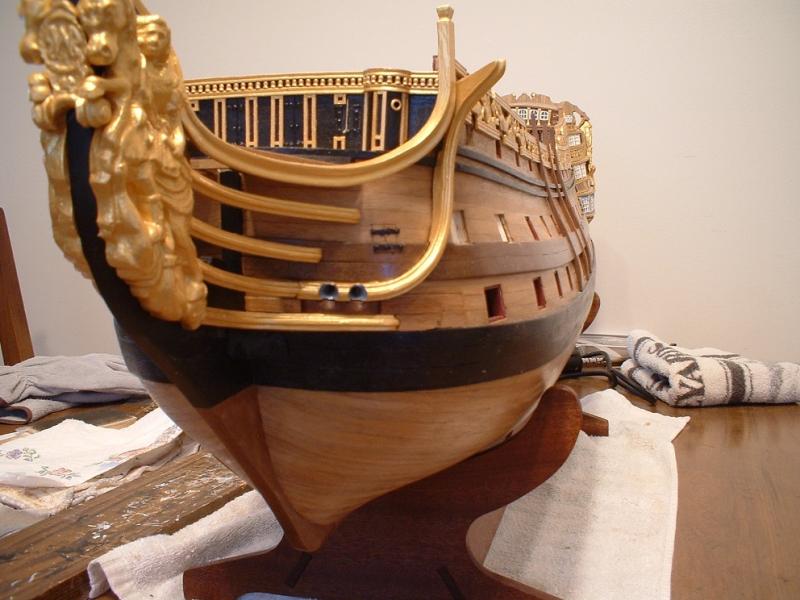
A little more progress - all the head rails & support timbers are done . Also,while waiting for paint to dry I figured I might as well make the bow knightheads,& install the front railing of the forecastle. All the timberheads were painted black to offset all of that gold. Mark

- 652 replies
-
- 12
-
-
- royal william
- euromodel
- (and 1 more)
-
Thanks ,frolick - since the hull is double planked I didn`t feel it was necessary to fill in between the bulkheads. If it was single planked I would probably fill the spaces between the bulkheads with balsa or something. Mark
-
Thanks Don - I am also impressed by your use of different colored woods in your work. Mark
-
Thanks very much,Lawrence - you are also doing a fine job on your Bounty. By the way,I`m Mark - not Greg Mark
-
Thanks very much Greg. Difficult? At times,yes but very satisfying at the same time. Mark
- 652 replies
-
- 1
-
-
- royal william
- euromodel
- (and 1 more)
-
Hi Michael - I feel your pain . I used some blocks from Chuck at Syren - very nice & very small. Mark
-
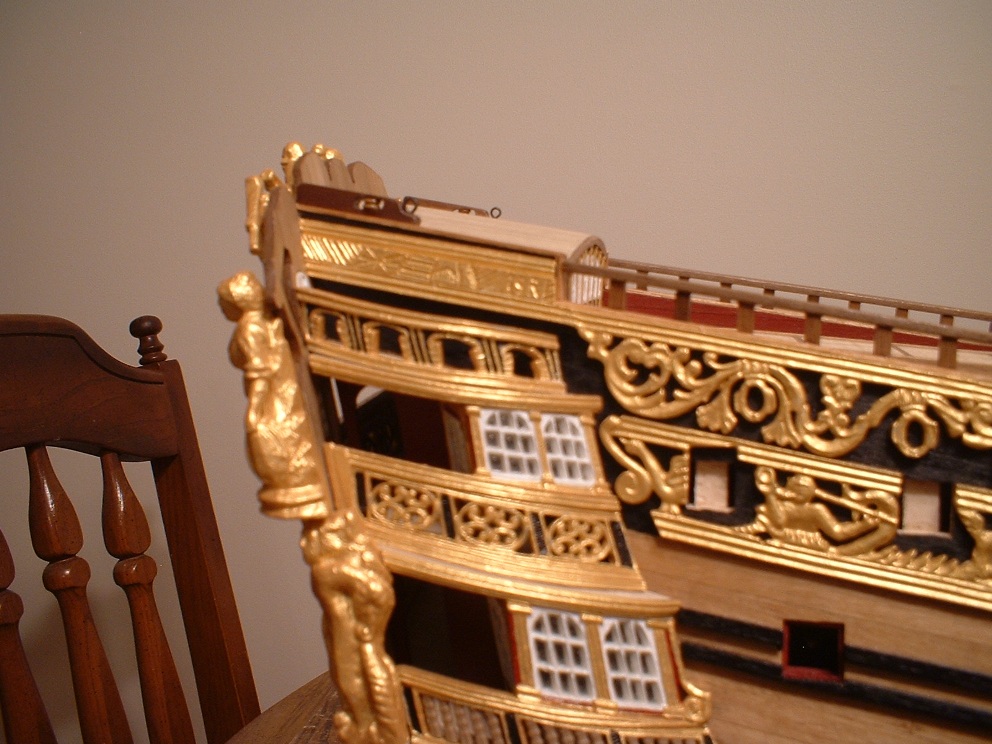
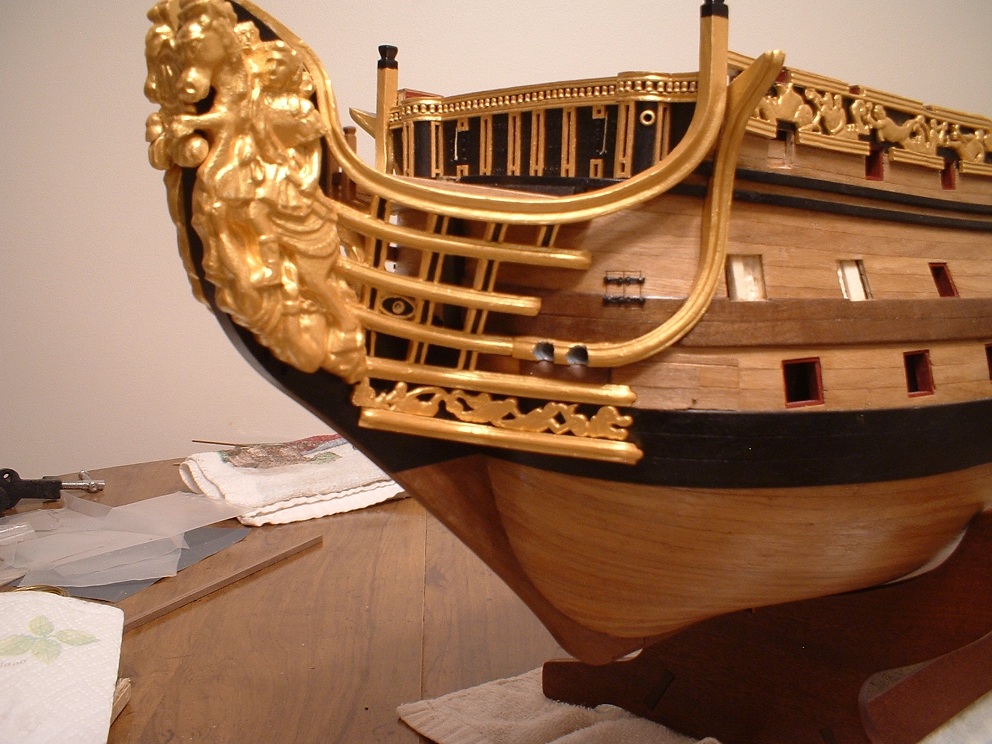
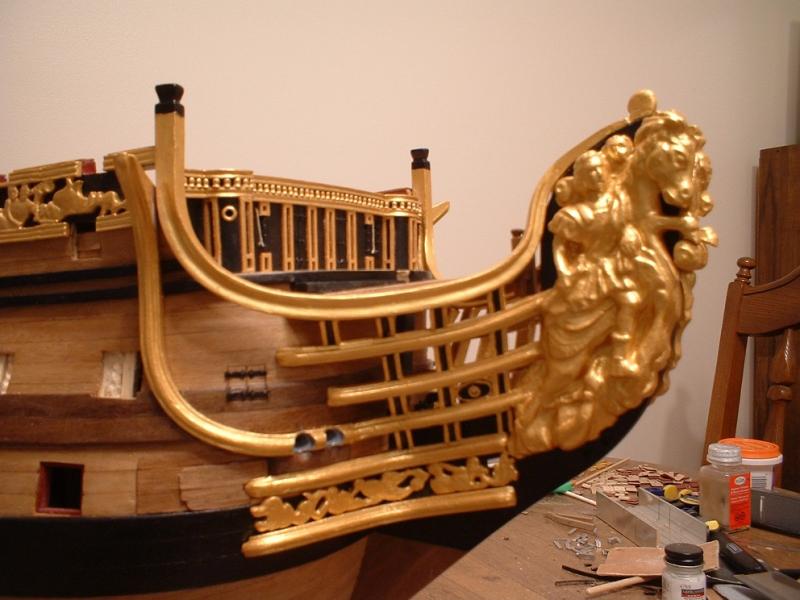
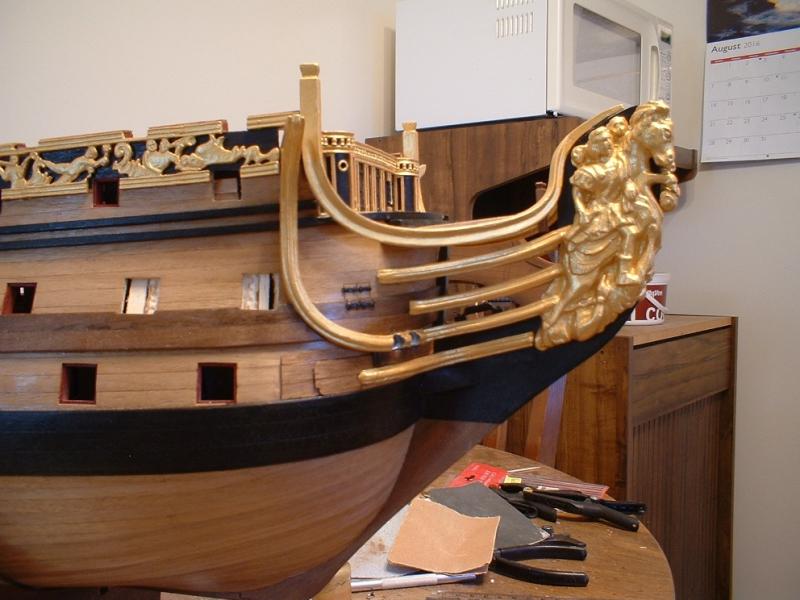
A little more progress - first thing I did was determine the best position for the figureheads,then pinned & glued them in place. Next,the middle & lower head rails were bent & cut to fit,painted,& glued in place.After that,I drilled the hawse holes & finished adding the bolsters. The upper cheek rails were then filed & shimmed to fit,painted,& glued in place. hard to see in the pictures,but a curved block was added to the underside of the cheek rail to allow for a more gentle curve to glue the decorations to. Next will be to add the bow decorations,lower cheek rails,& head rail support timbers. Thanks for looking in & all the likes. Mark
- 652 replies
-
- 13
-
-
- royal william
- euromodel
- (and 1 more)
-
Tools and Supplies for My "Shipyard"
marktiedens replied to daveward's topic in Modeling tools and Workshop Equipment
I got a heat gun at Harbor Freight for 15$ Mark -
Comparison of Victory kit manufacturers
marktiedens replied to dchrismiller's topic in Wood ship model kits
I have built both the Mantua version,& the Caldercraft version - there is no comparison. The Caldercraft version is by far the best - 18 sheets of plans & good instructions with many illustrations. The wood is a little better than average for a kit & is CNC cut instead of laser cut so only a little sanding on the edges is all that is needed to clean them up - no laser char to deal with. Any wood parts that have edges showing are solid wood - not plywood. Lots of well done photo etch parts & crisply cast metal parts.It is more expensive than the other Victory kits on the market,but well worth it. The Mantua version could be made into a good model,though with a LOT of bashing. Or you could wait - Amati is supposed to be coming out with a Victory kit that is rumored to be the best yet. Mark- 19 replies
-
- 7
-
-
- Victory
- kit manufacturers
- (and 5 more)
-
Keith,Pete,Ulises - thank you all for the compliments. I guess I feel "slow" because I had to punch a time clock for 46 years & do work under some time restraints. After being retired for a couple of years I am still trying to slow down . Mark
-
Thanks J.P. & Edwin. I feel that I am working at a snail`s pace,but progress continues. Mark
- 652 replies
-
- 1
-
-
- royal william
- euromodel
- (and 1 more)
-
Pete - thanks for your compliments. Your responses showed up in my email,but didn`t make it into the forum Mark
- 652 replies
-
- 1
-
-
- royal william
- euromodel
- (and 1 more)
-
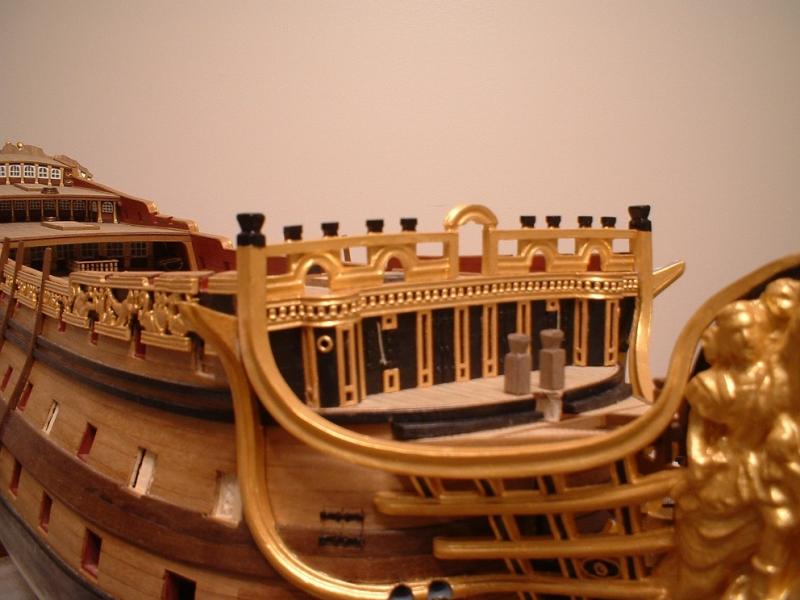
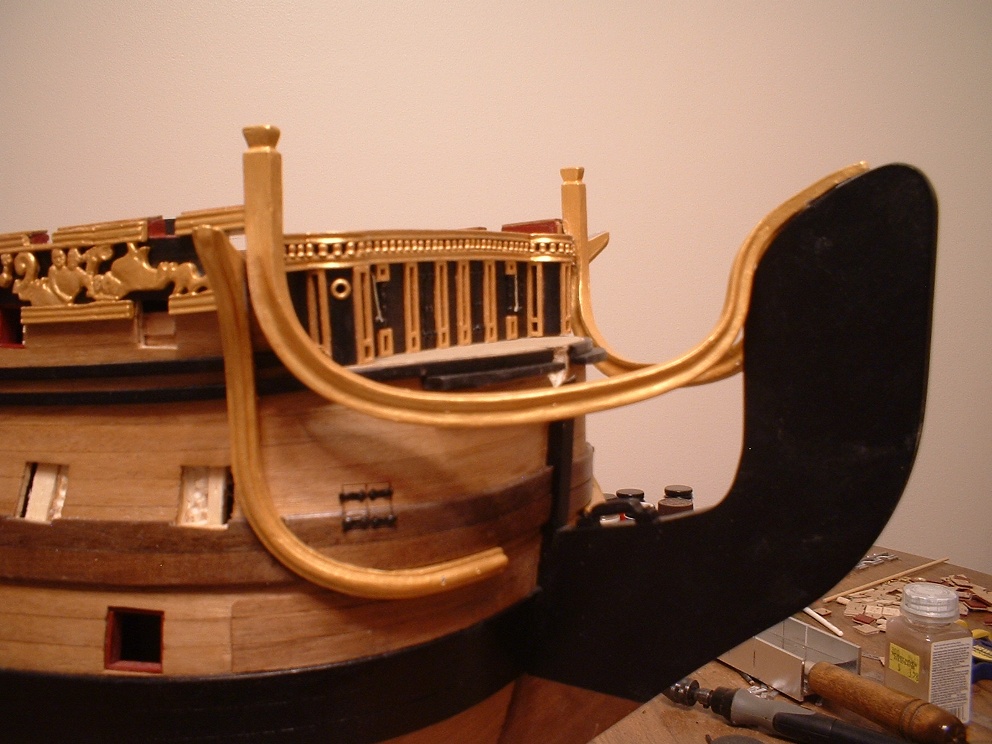
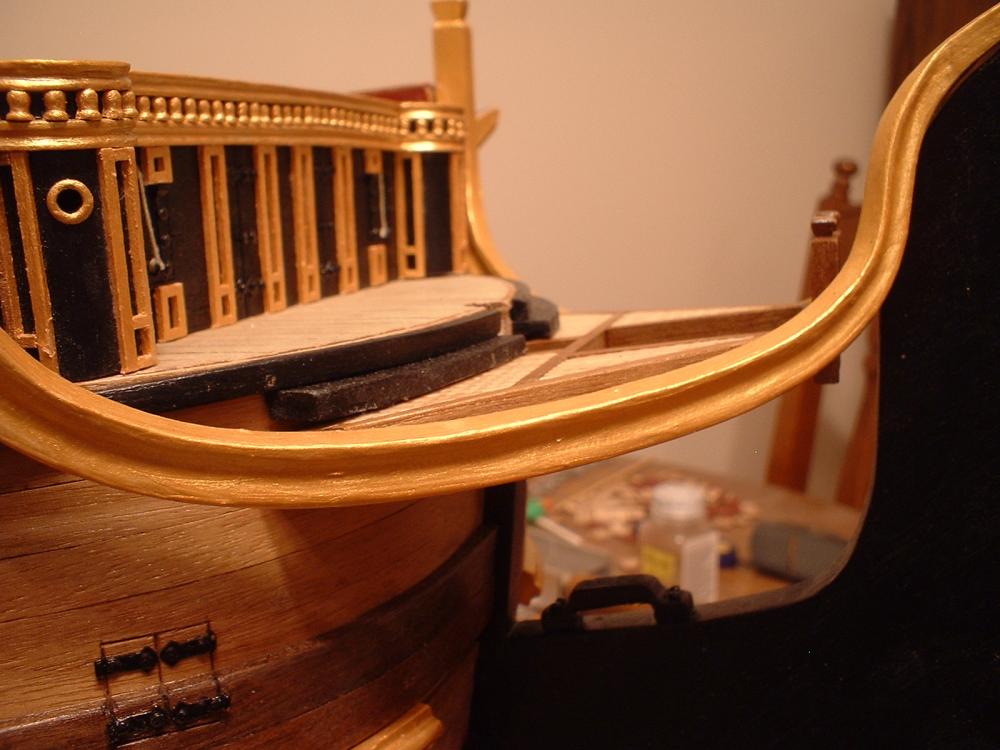
Hi all - more work on the head rails, First thing I did was cut a notch out of the front edge of the bulwarks for the upper head rail top timber to sit in - right next to the cathead support. Forgot to take a picture for this post,but can be seen in my previous post #271 in the next to last picture. After fine tuning the shape of the upper head rail it was glued in place. I then built the bow grating - it needed to be put in place before the lower head rails were in place. The grating was then glued in place. The front section of the side decorations were then trimmed & glued in place. Mark


- 652 replies
-
- 10
-
-
- royal william
- euromodel
- (and 1 more)
-
I have been using Chrome for several years. I only have the problem when adding a picture to a PM - works fine when adding pictures to a build log. Everything else on the site works fine.I could send you a PM with a picture added to show you.
-
Yes,Windows Vista
-
I am having problems adding pictures to a PM. Every time I add a picture to a PM about an inch on the left side of my screen is cut off. I have manipulated the screen every way I know how but I can`t get the left side back. Also when that happens all the posts under that subject have the left side cut off. If I start a new subject with text only it looks normal. Adding pictures to a build log also look normal. The pictures are only about 350kb. I am using Vista & Chrome. Everything else on the site works normally. Mark
-
During the bending I did not let the metal cool too much. When I felt I could start the bending I just backed away from the heat gun - the metal would stay hot, but not too hot. I didn`t want it to cool too fast in the middle of trying to make a curve. I did the heating several times because I had hold it up to the ship to check the curve & it would cool down. Re-heating several times did not seem to affect the workability of the metal. It was a trial & error kind of thing,but it seemed to work out ok. I probably spent 30 minutes bending each piece. Even after all the filing I had to do to make them conform to the curves of the hull,I had to tweak the bends I made earlier. Just have to be careful not to get the metal too hot - just enough so it can be bent. The temp at the nozzle of the heat gun is about 500 degrees,so it wouldn`t take long to overheat the metal & destroy it. I held the pieces close to the gun only about 7 or 8 seconds then backed away. When I could feel the metal not wanting to bend anymore I moved a little closer to the gun to warm it more. Kind of hard to explain - I just did it by "feel".
- 652 replies
-
- 4
-
-
- royal william
- euromodel
- (and 1 more)