marktiedens
-
Posts
1,737 -
Joined
-
Last visited
Content Type
Profiles
Forums
Gallery
Events
Everything posted by marktiedens
-
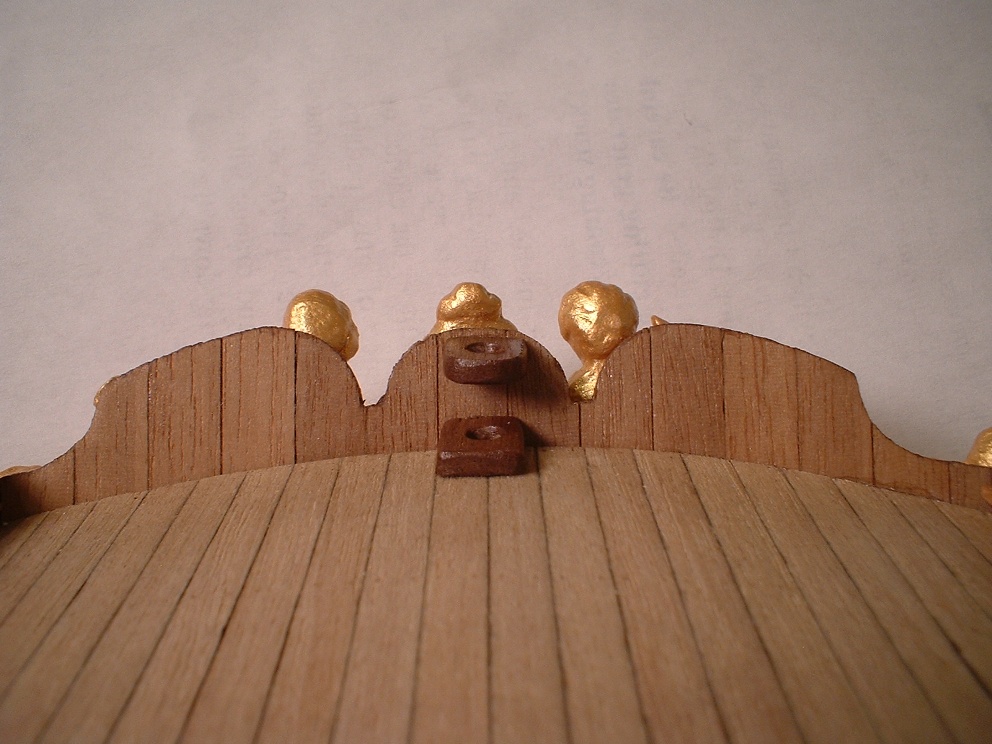
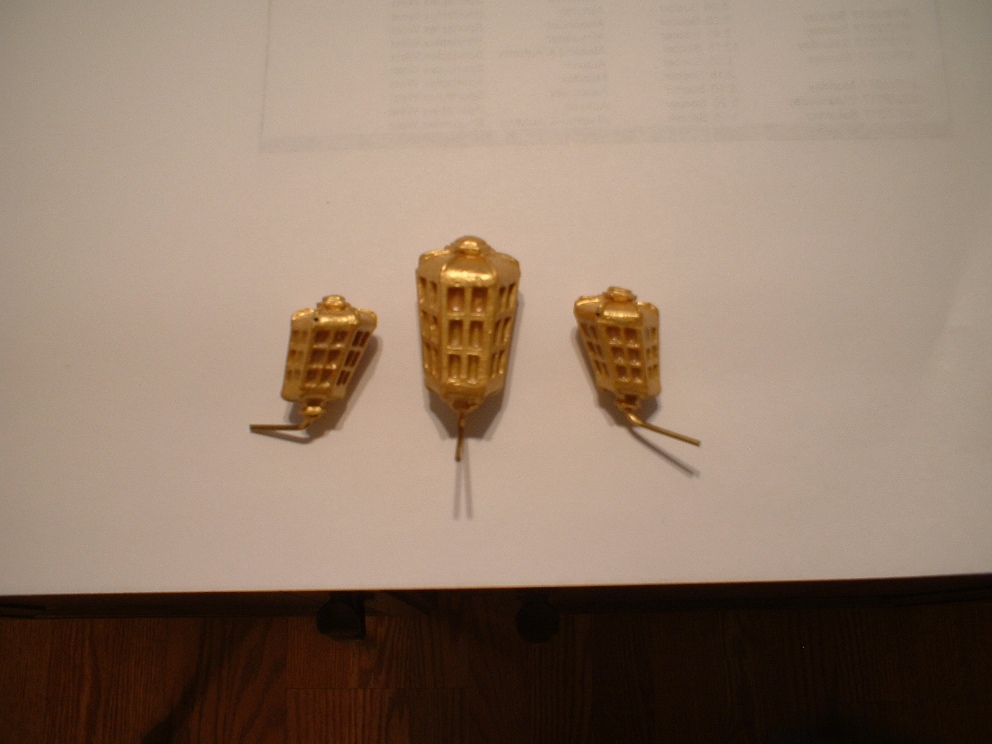
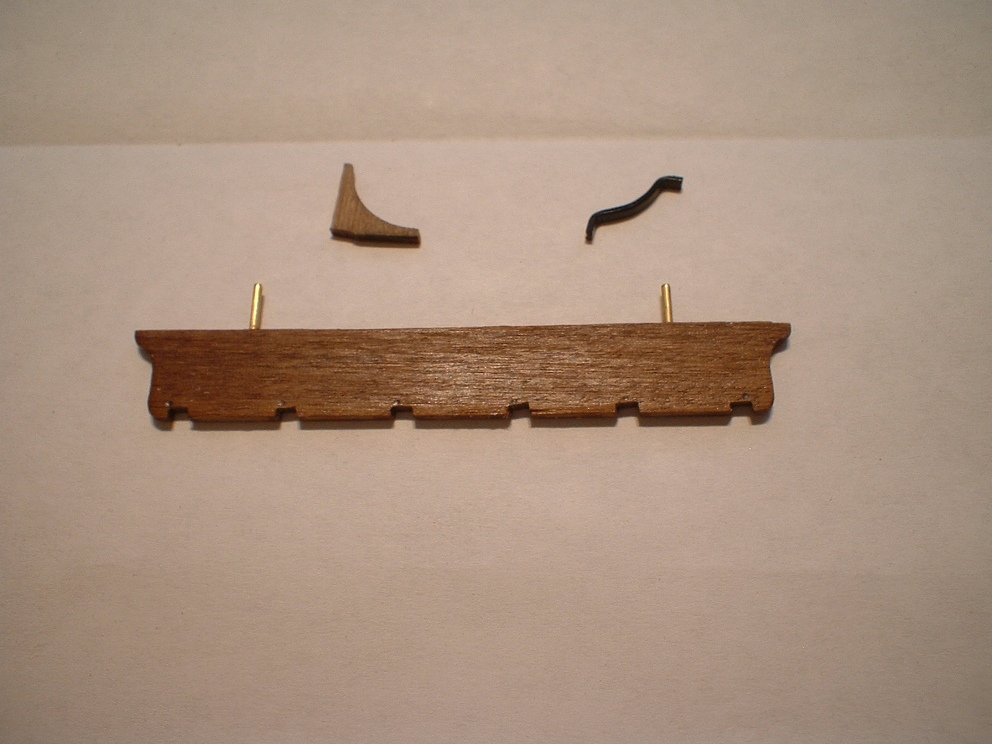
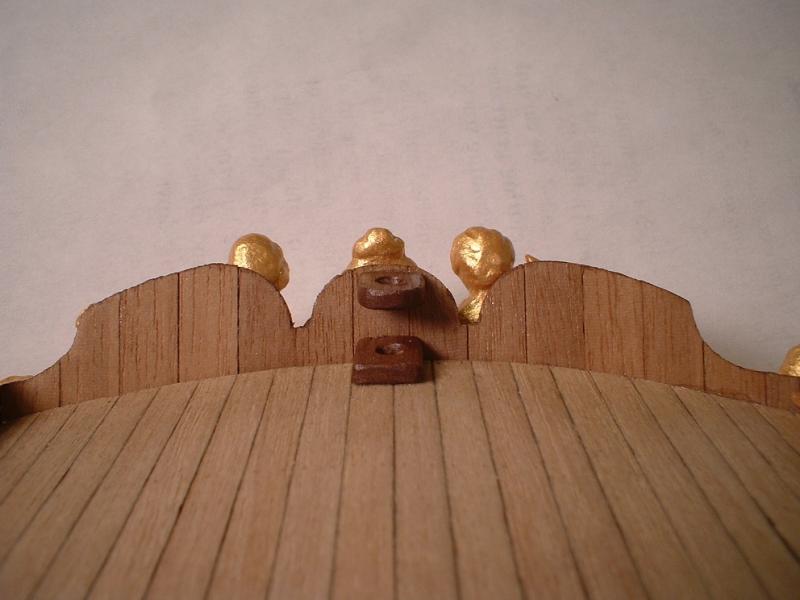
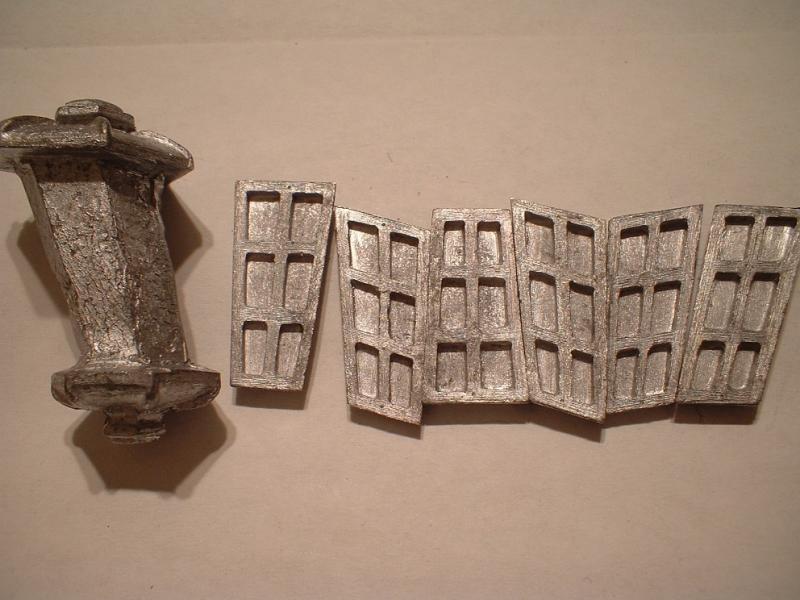
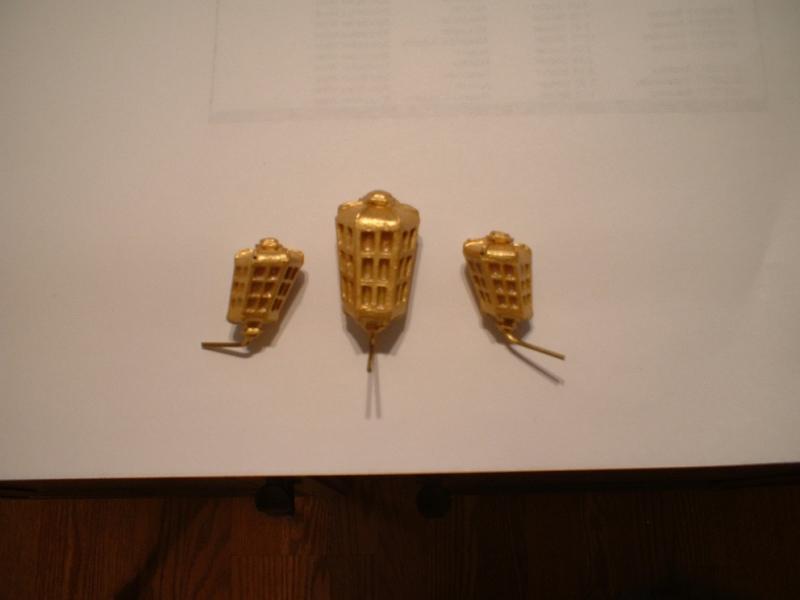
Hi all - another little update. first of all the two small brackets for the ensign staff were shaped & glued in place at the stern. Then I figured it would be a good time to build the stern lanterns. They come as a central former with 6 window sections for each one. They fit nicely with very little clean up needed. I decided to cut out the "glass" sections of the windows as I did with all the other windows on the ship. The center section of the former was painted a combination of bright yellow & orange to try & simulate a flame. The window frames were then painted gold & liquid glass maker was used to make the windows. All frames were then glued to the formers & after a little filler & some filing on the edges I finished painting the tops & bases. I didn`t quite get the look I was after,but I think they still look better than just painting the window areas. They won`t be fixed in place until much later & some side supports will be added at that time. Mark
- 652 replies
-
- 7
-

-
- royal william
- euromodel
- (and 1 more)
-
Thanks Medic! Mark
-
Royal William Kit by Vince P. - Euromodel - 1:70
marktiedens replied to pirozzi's topic in Wood ship model kits
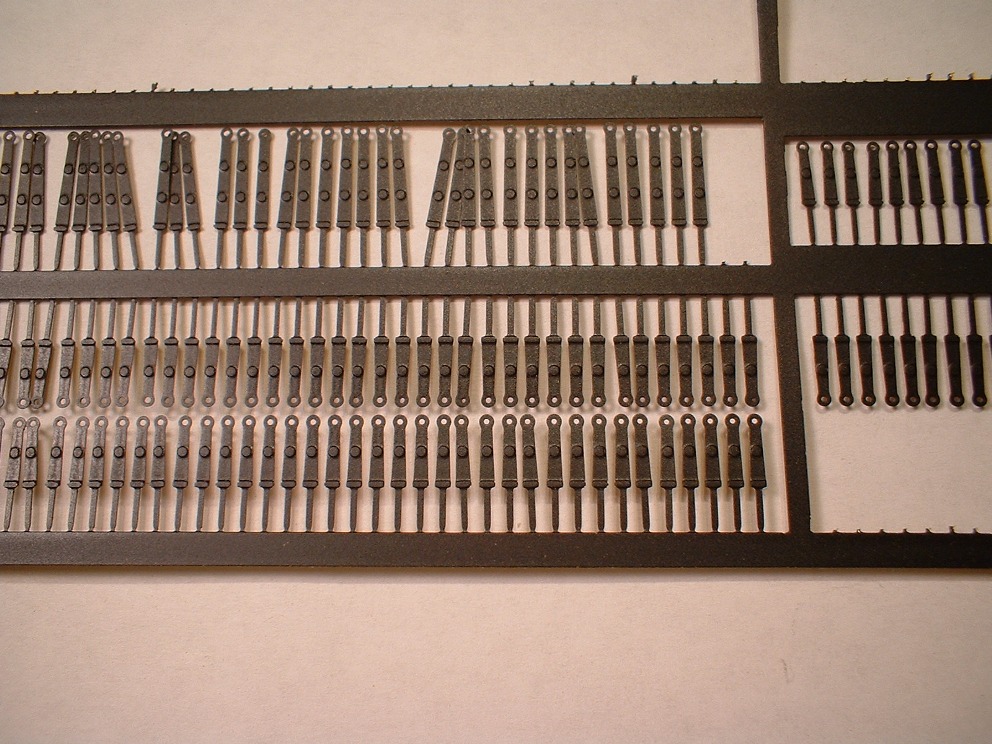
I am also building this kit,so I will add my two cents. As far as the laser cut parts go,mine fit perfectly - nice & snug. Is it difficult - yes,but it has been an absolute joy to build. My only real disappointment has been those gun port hinges - I would still have used them,but they are just way too short. They are all 9mm long,while many of the lids are 13 or 14mm long. Comparing it to other large kits I have built is like comparing a fine oil painting to a paint-by-number painting - with a little extra work you can make it as nice as you want to. I would not hesitate to recommend it to an experienced modeler with some scratch building experience. The best part is all the help & information from Pete - he is a joy to work with. Mark -
It was only my second build & was built out of the box with no modifications. I thought it was a fairly easy build. There was no forum like this way back then,so I had no idea whether it was accurate or not. I could post a couple of pictures if you would like,or I could send them to you in a PM so as not to clutter up your log. Mark
-
Hi Medic - I built this kit many years ago & if my memory serves me correct I glued the bulwark strips on before planking them. They would be much more difficult to bend around the bow if they were planked first. Mark
-
Frank,Mike,Greg - thanks very much for your generous comments. The work never stops here - just slows a little at times . And a happy new year to everyone . Mark
-
Thanks Keith - speaking of getting back to work,I haven`t seen any updates from you for a while Mark
-
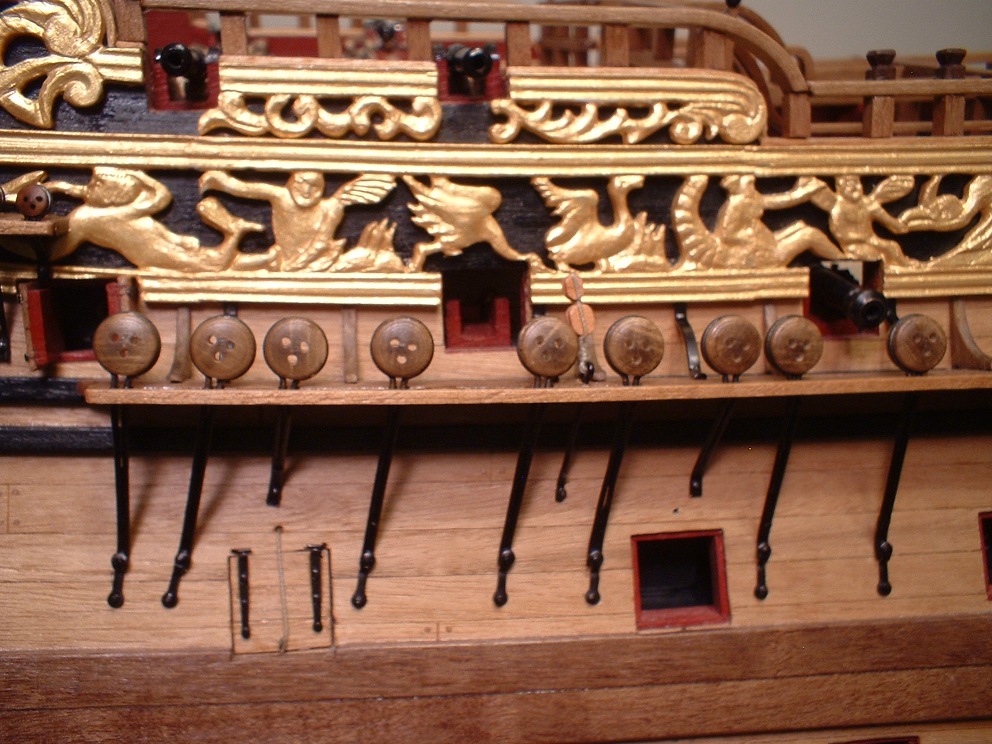
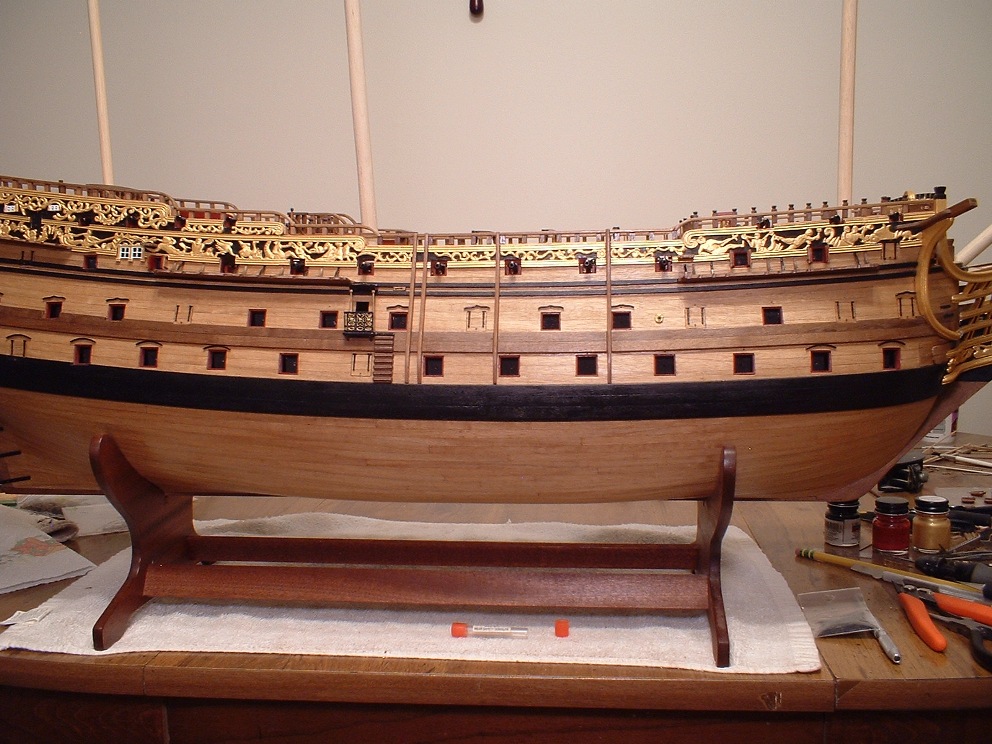
Update - all the guns & lids are now in place so she can defend herself. The tangs on the lid hinges were inserted in small holes drilled in the hull & with the ropes attached they are fairly sturdy. The ropes for closing the lids were simply tied to the pins on the backs of the dummy guns before gluing them in place. Happy new year to all & thanks for looking in. Mark
- 652 replies
-
- 12
-
-
- royal william
- euromodel
- (and 1 more)
-
Thanks Don - your thoughts are appreciated. Mark
-
Thanks so much,Greg. I tend to be more critical of my work so future builders of this ship won`t make the same mistake . I could go into detail about why the wales are too low,but I would probably get cramps in my fingers from all the typing . Mark
- 652 replies
-
- 3
-
-
- royal william
- euromodel
- (and 1 more)
-
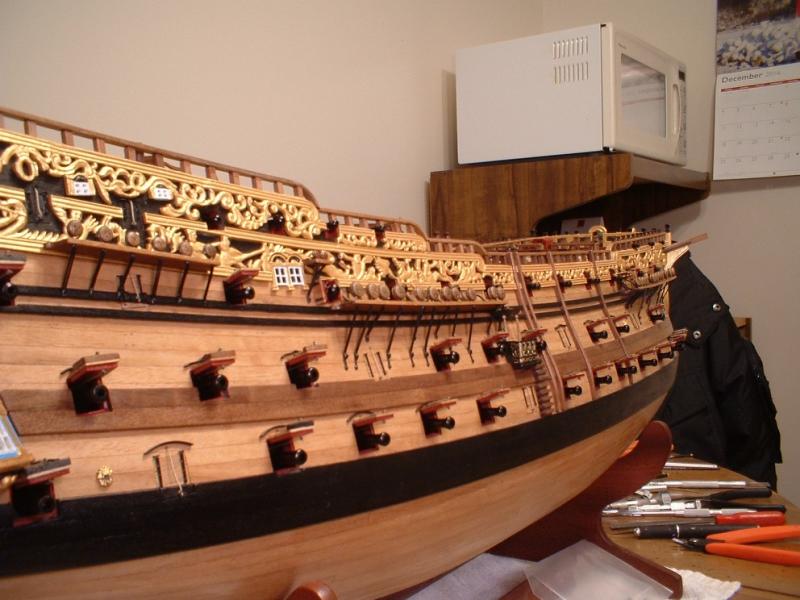
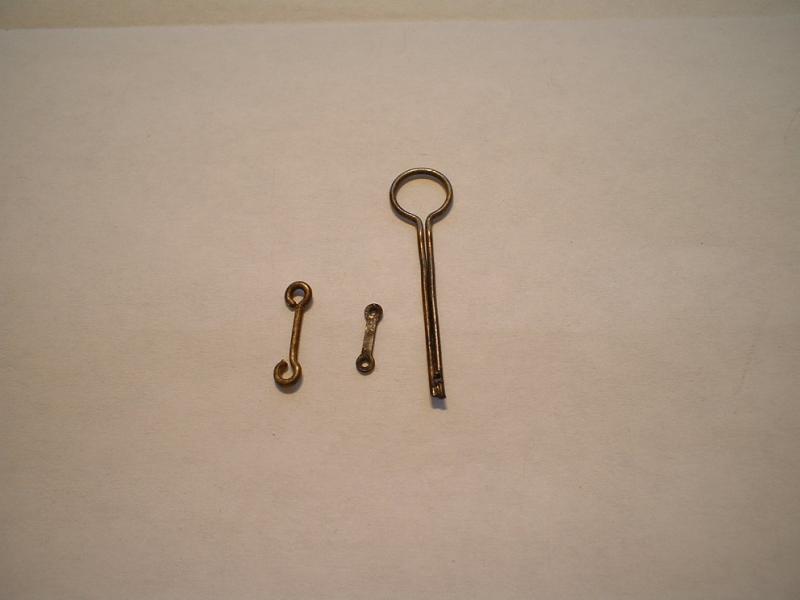
Update - chainplates are now installed. I substituted the lower links from the kit with smaller links because the kit links(on the left in the first picture)had holes that I thought were way too big & out of scale. I used a string & some stub masts to set the angles of the chainplates. Unfortunately,the chains were supposed to reach the middle wale but due to my error in positioning the wale too low they don`t quite reach. To make them long enough to reach the wale,they would be way too long. Mark

- 652 replies
-
- 11
-
-
- royal william
- euromodel
- (and 1 more)
-
Cyanoacrylate (CA) Glue for Rigging
marktiedens replied to EdT's topic in Masting, rigging and sails
I still use CA to secure knots - just the tiniest drop from the point of a pin. I have tried watered down white PVA with no luck - doesn`t hold well. I have also tried something called hypo cement for fabrics - too stringy & takes too long to dry. I don`t like having to wait an hour after gluing each knot - it would take me ten years to rig a ship. I have also gone to using a CA called Super Gold CA - it`s odorless & works just as well as the smelly stuff. I also use the medium viscosity - it doesn`t leech up the line like the thin CA does. I have never had a knot or a line fail. Mark -
Hi Vince - mighty fine work! That quarter deck breast rail is a bear to build - luckily,my old plank bender works very well. I built mine using Pete`s info,although the plans show a more simplified version - a single rail rather than a double rail. Mark
- 593 replies
-
- 2
-
-
- royal william
- euromodels
- (and 1 more)
-
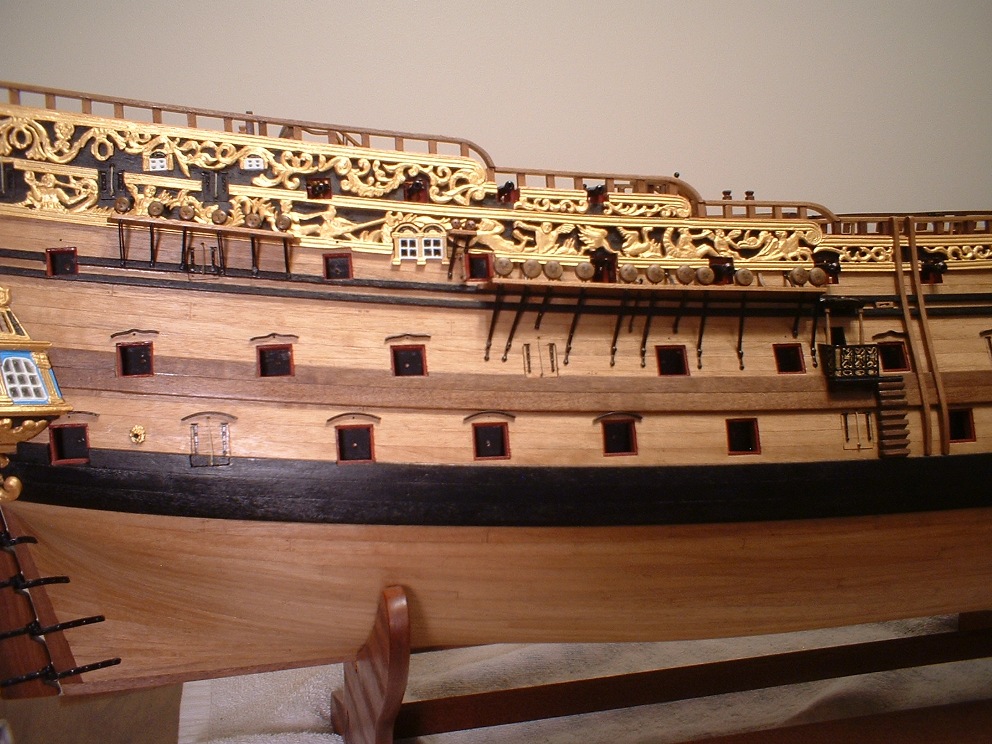
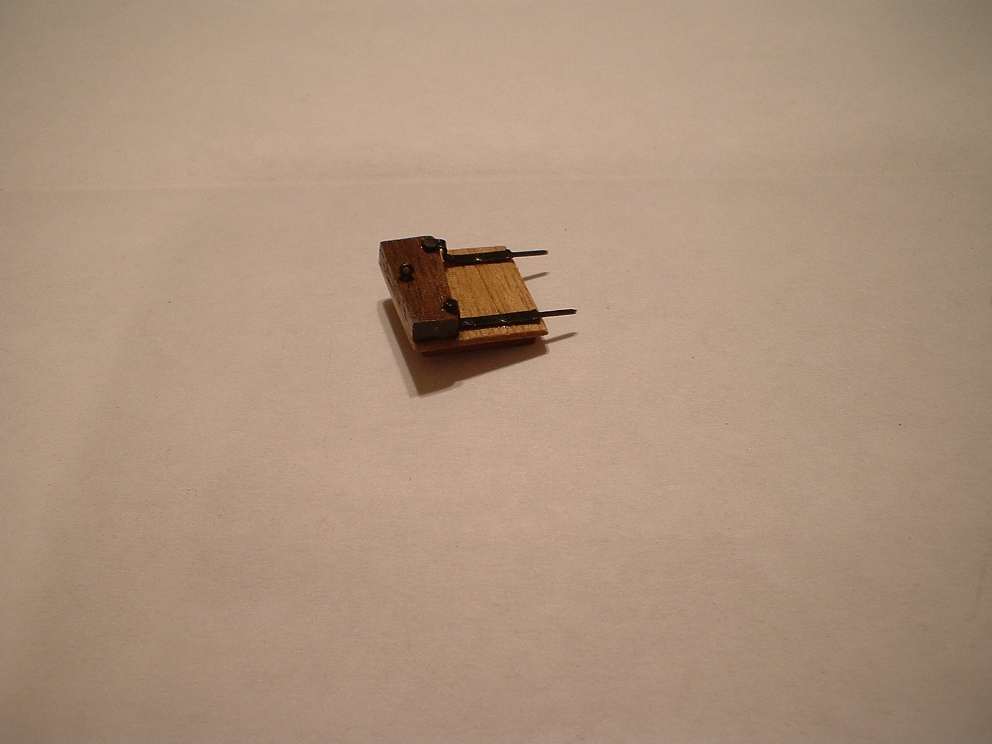
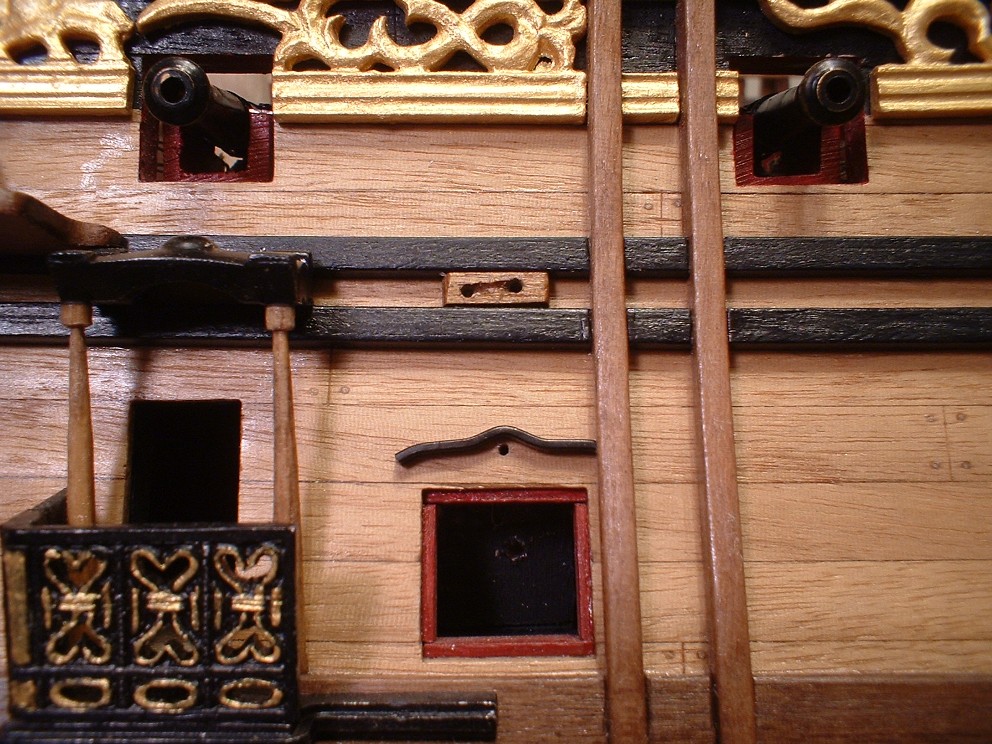
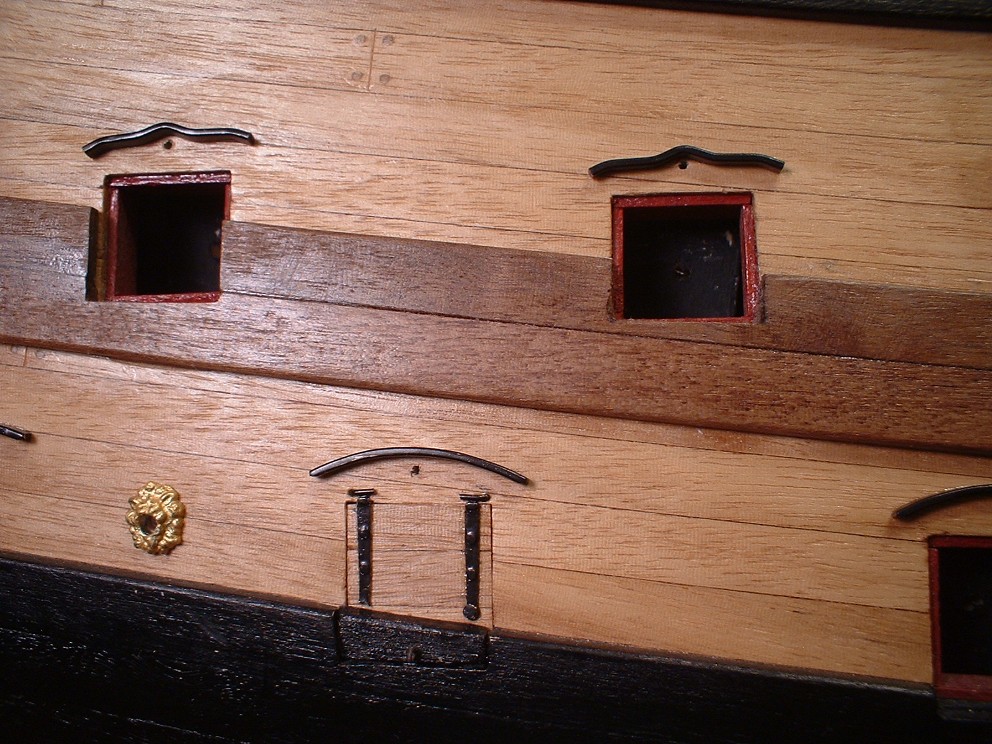
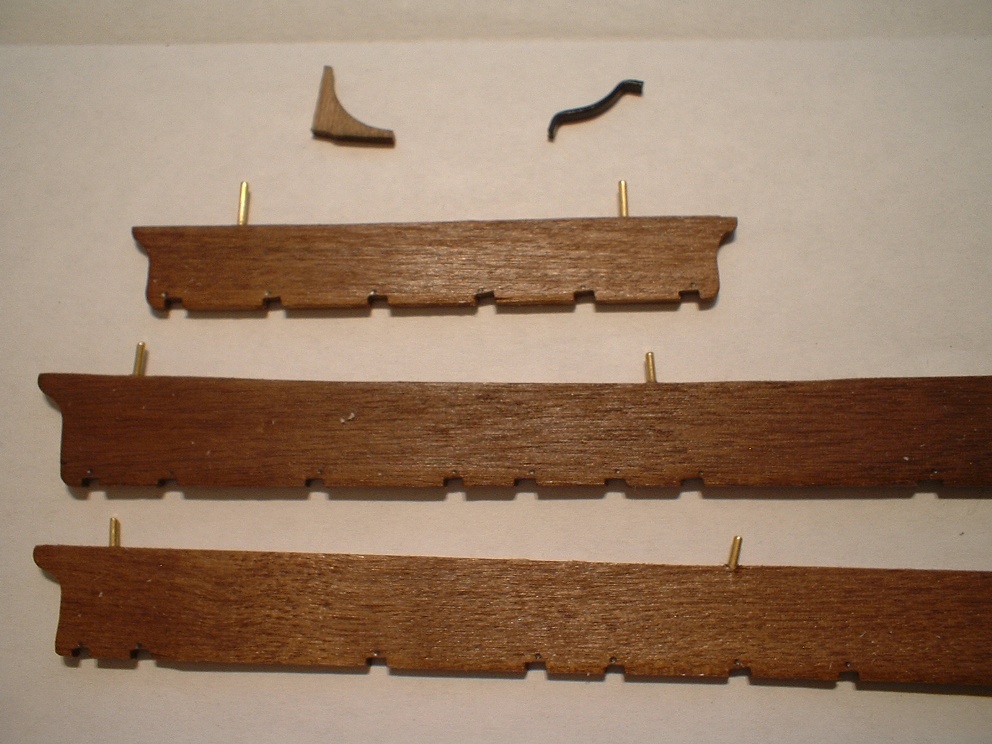
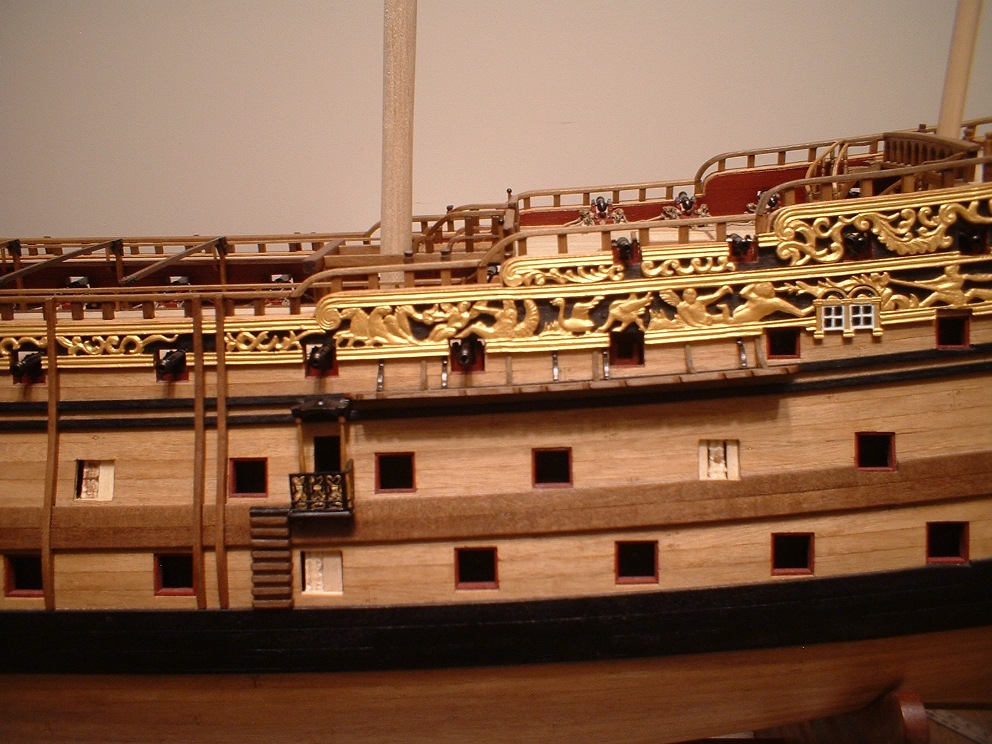
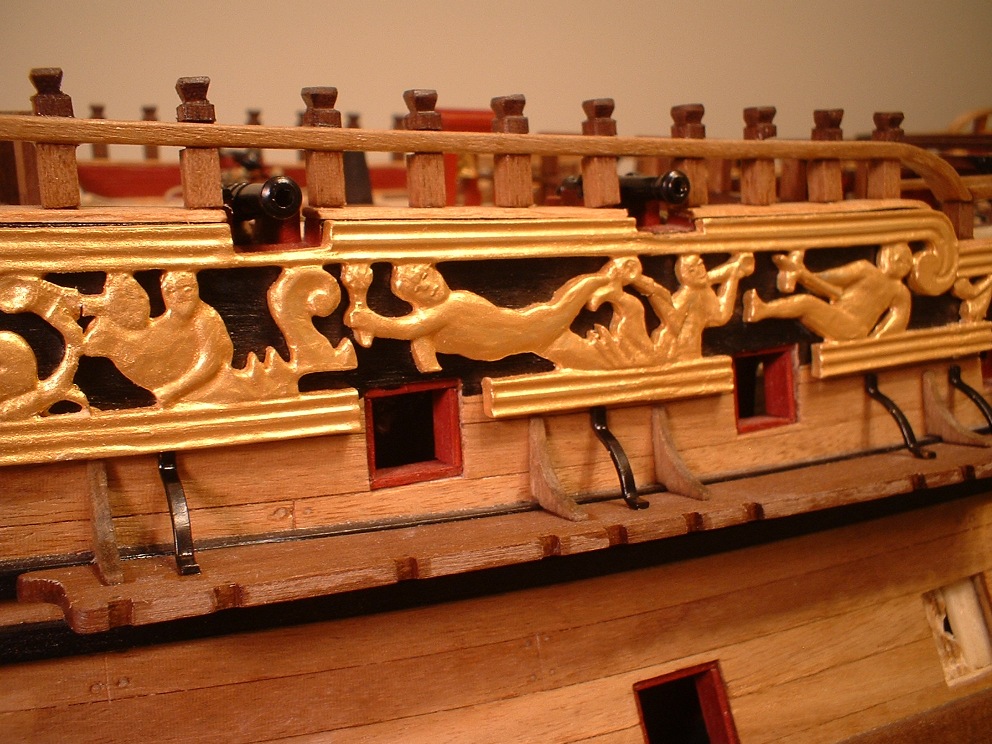
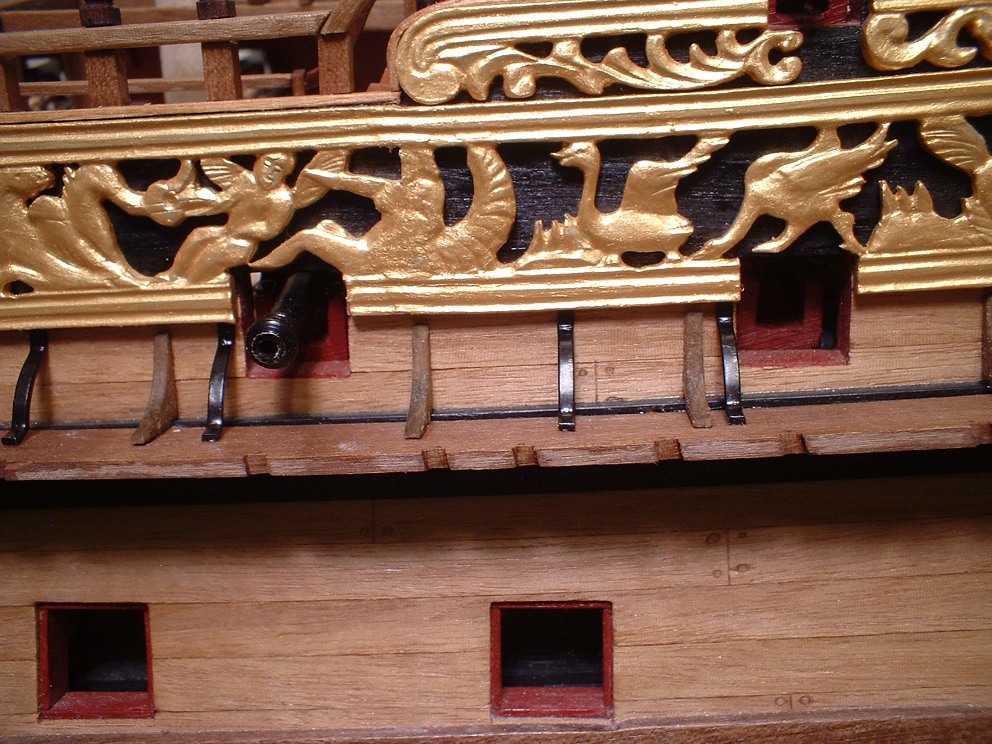
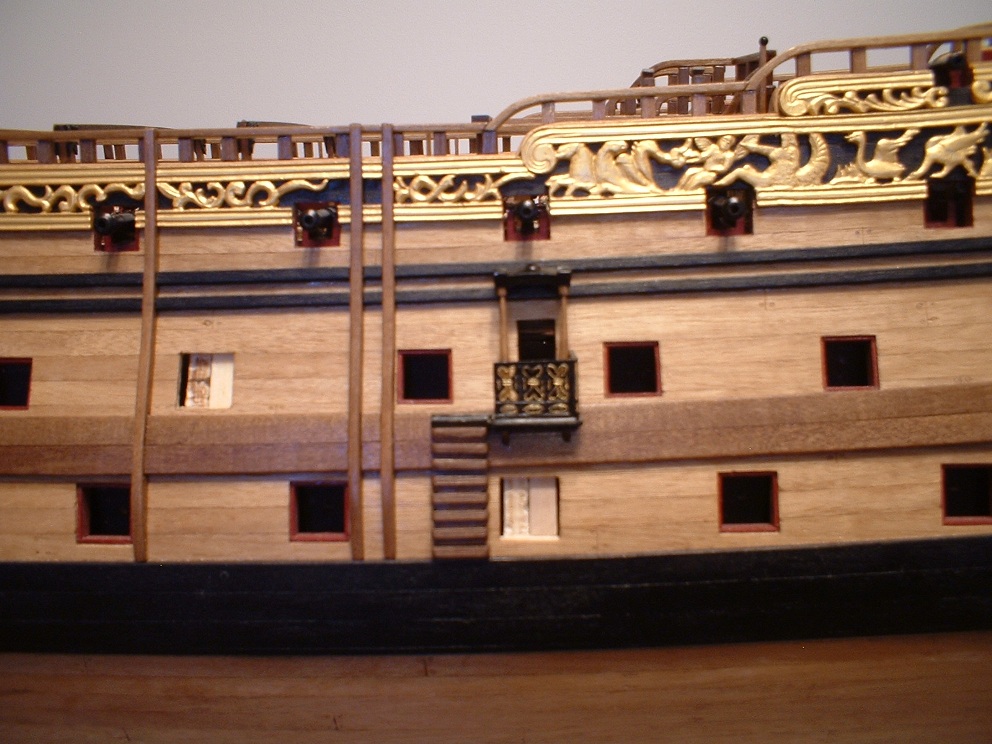
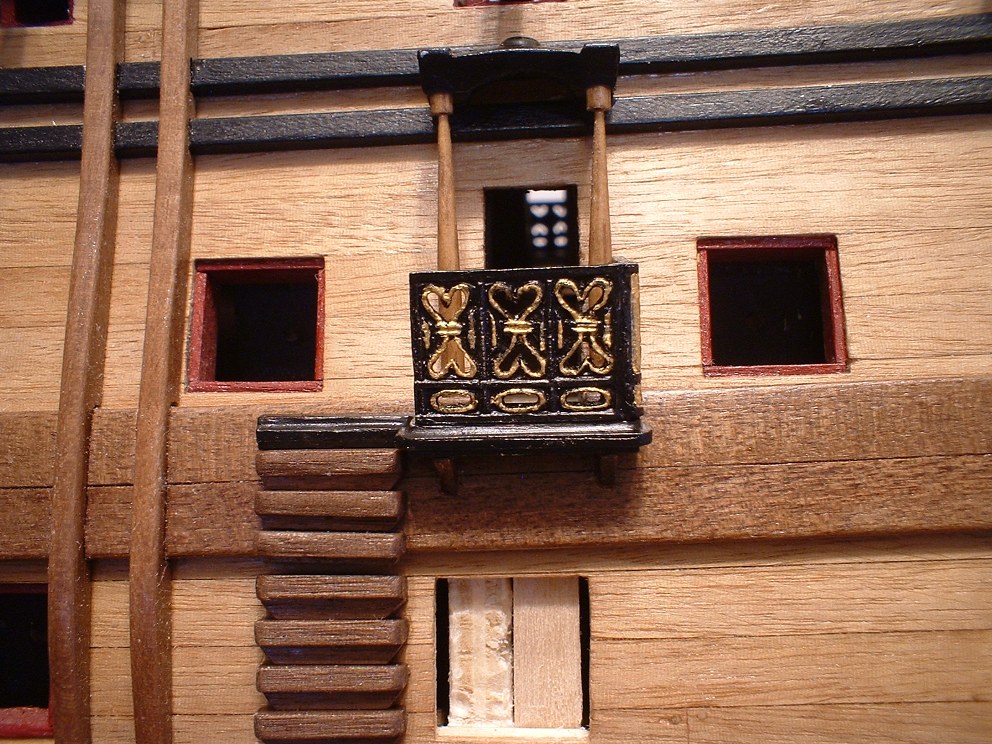
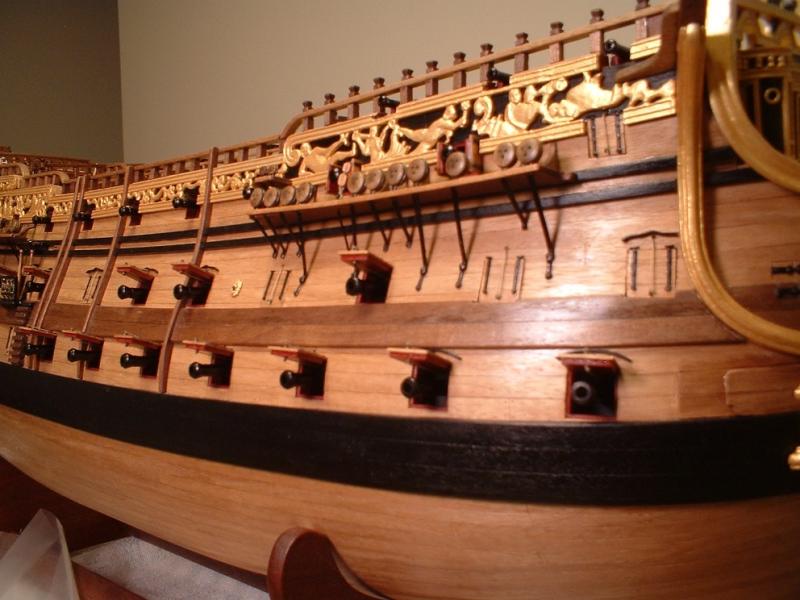
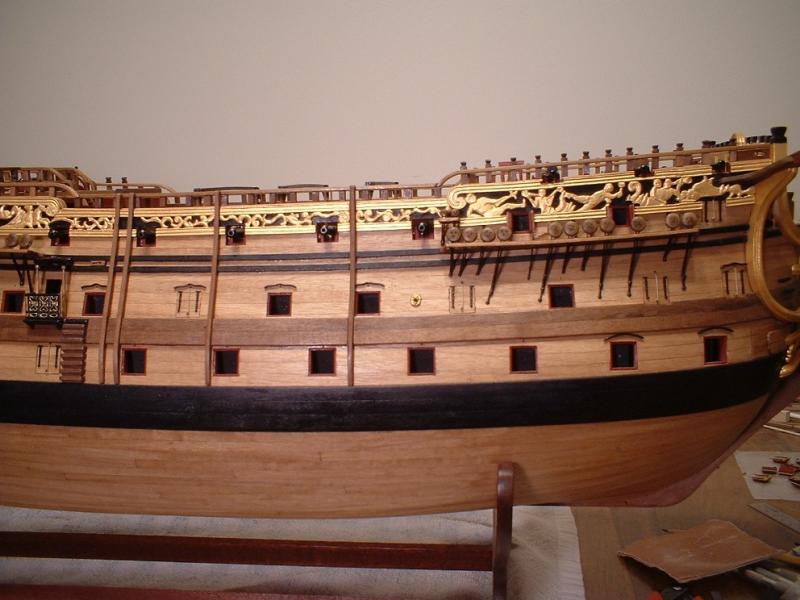
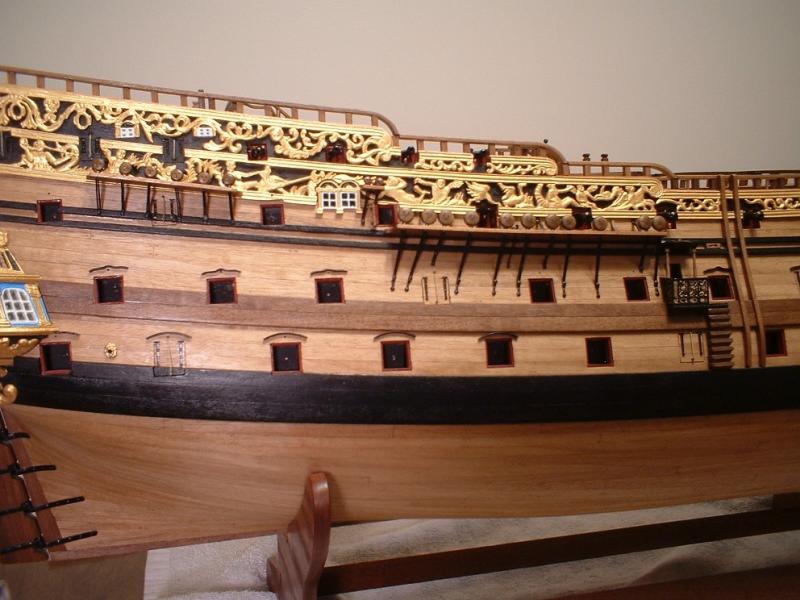
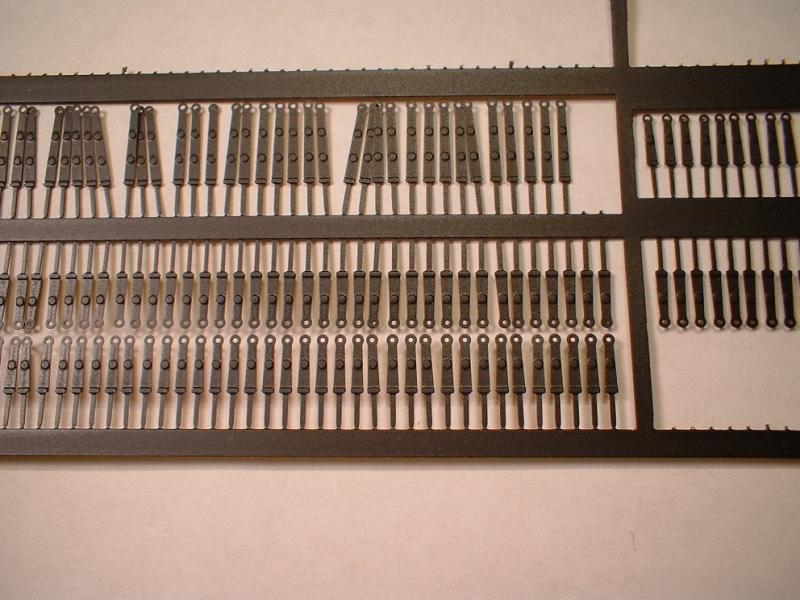
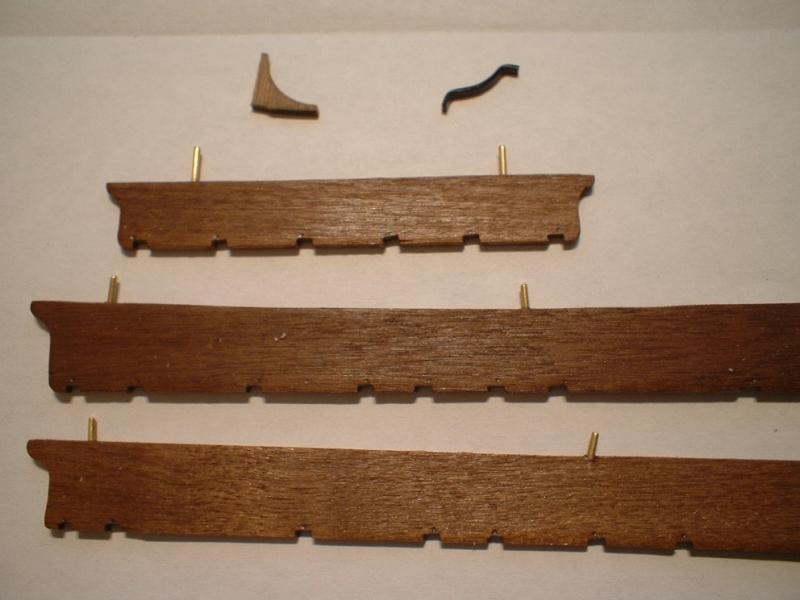
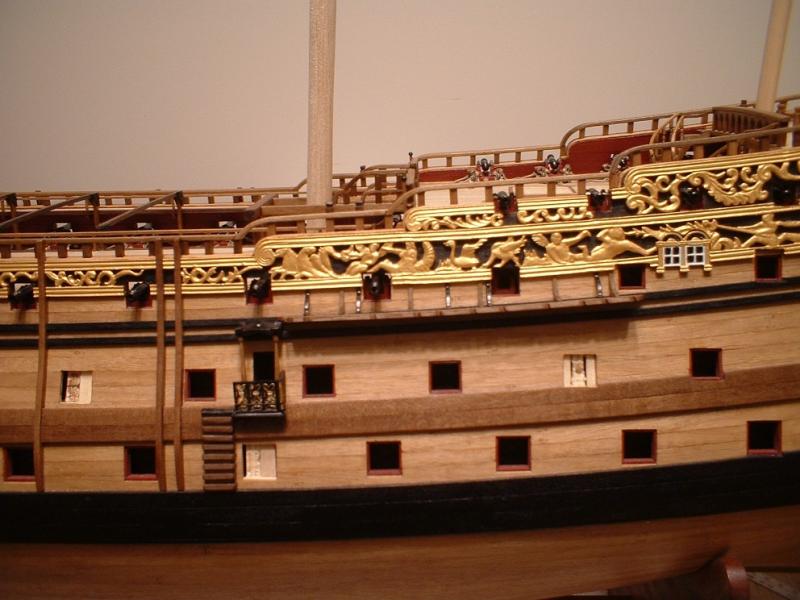
Update - all the gun port lids on the closed ports are now in place. The hinges are from Rick at Modelers Workshop - the kit hinges are way too short. Rick`s hinges are a little short for the middle & lower lids,but still better than I could find elsewhere. Short sections of wale planking were added to the lids that cut into the wales. The ropes are still to be added. Also made & installed sheaves just forward of the side entries. There are 2 chesstrees per side which I made using some lion heads left over from a previous build. The "mouth" was drilled out for the rope to pass through. I then made the rigols above the ports in some .8x1.5mm brass strip,forming them with a combination of looping & needle nose pliers. The port side still needs to be finished up. Mark edit - the hinge parts of the closed lids were simulated by cutting the heads off some black HO railroad nails,bending them 90 degrees,& drilling small holes,were pushed in to meet the top of the hinge straps.


- 652 replies
-
- 10
-
-
- royal william
- euromodel
- (and 1 more)
-
Thanks very much Greg - all the nice comments are appreciated . Mark
-
Thanks Pete! Mark
-
Update - I decided to make the channels for the chainplates next. First ,I cut the channels from the kit supplied wood & shaped them to fit the curve of the mounting areas. Then I filed some grooves just deep enough for the chainplates to fit in. A strip will be added to the outside edge after the chainplates are fitted. I didn`t have enough wide strips to make the support knees,so I made them out of basswood. Then I made the metal support arches from .8x1.5 brass bar using a combination of looping & needle nose pliers. Brass pins were installed to help hold the channels in place. Mark


- 652 replies
-
- 7
-
-
- royal william
- euromodel
- (and 1 more)
-
Good info Pete - I would have thought that the bell would be stationary so it would not be clanging every time the ship rolled through a wave. That was my reasoning for putting a rope on the clapper. Mark
-
Thanks Mike After looking at that bell tower for a while I think the size is ok,but the bell itself may be a little oversize making it look squatty. Anyway,it is what it is & I`m not going to change it now . Mark
-
Thanks Greg. Not sure about the height of the bell tower - I just used the parts provided in the kit. Mark
-
Thanks Pete . Mark
-
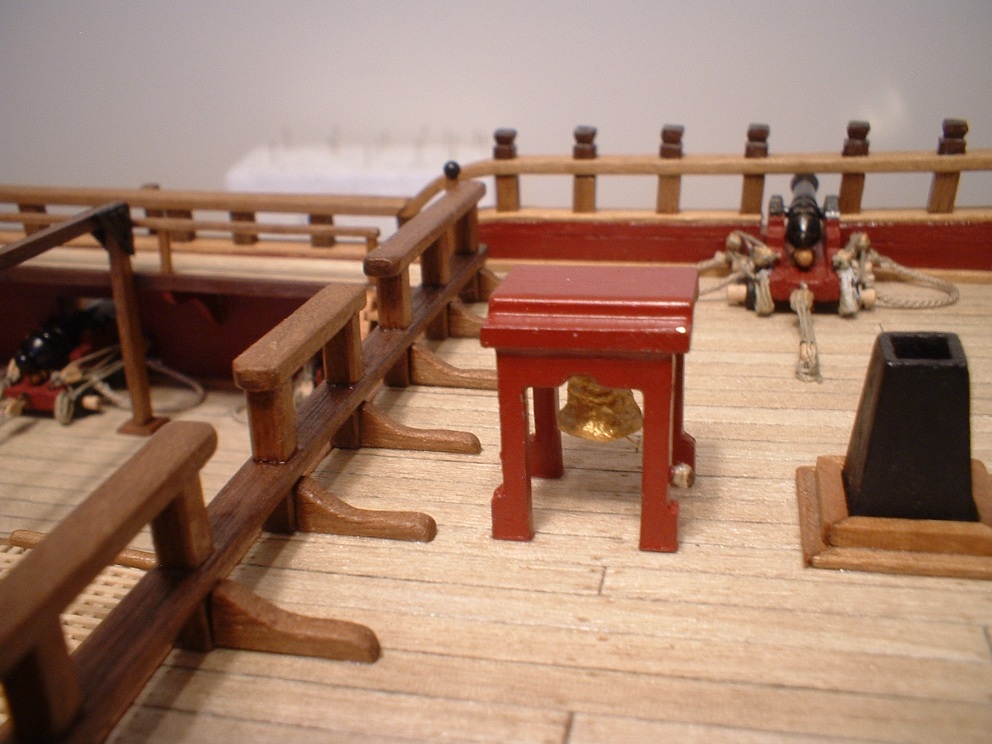
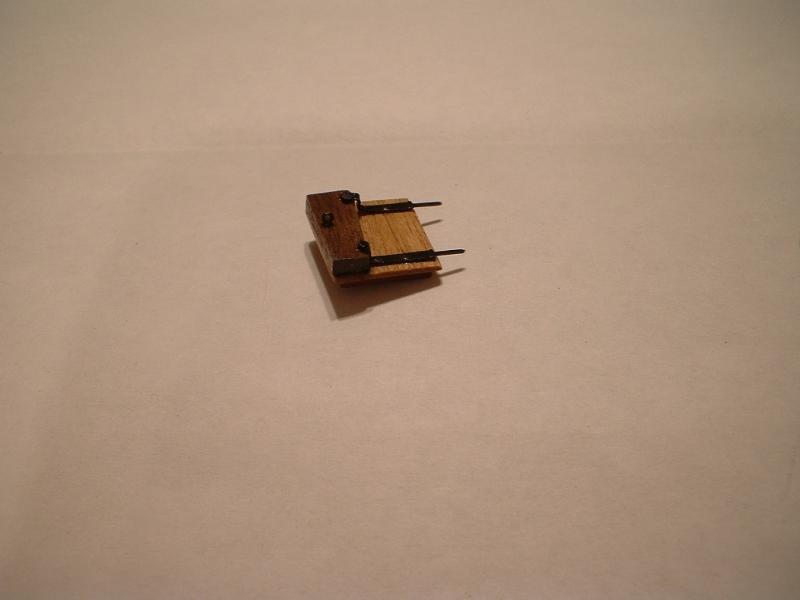
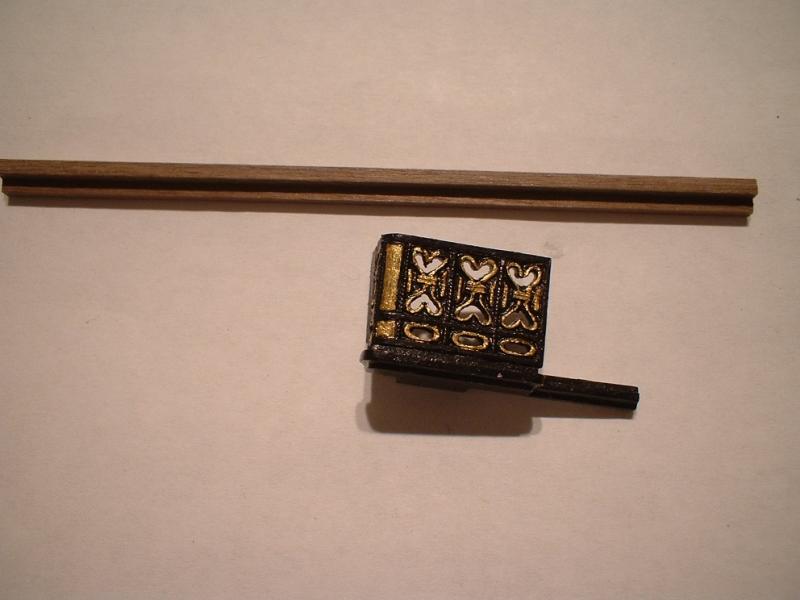
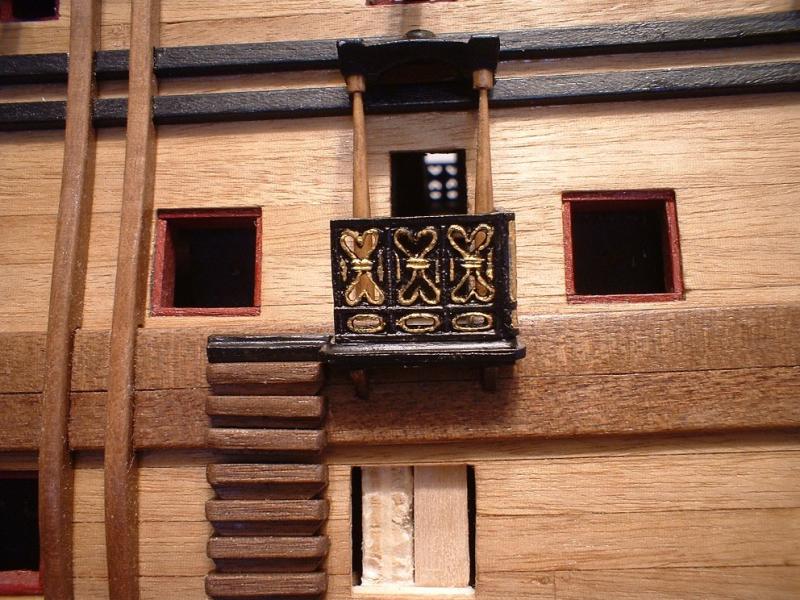
Update - I thought it would be a good time to build the bell tower. It`s simply 3 metal pieces glued together with the bell. I also added a rope for the clapper. The side entry was next to build. after opening some of the recessed areas the sides & floor were painted black with gold trim. I had some L shaped timber from a previous build which I cut to length & chamfered the ends to make the steps. After those were glued in place I fitted the roof & turned some support posts from 2mm timber & glued in place. Finally ,2 floor supports were shaped & glued in place under the floor. Mark


- 652 replies
-
- 11
-
-
- royal william
- euromodel
- (and 1 more)
-
Great job,Don.Takes me back to fishing with my Dad in a little 12 footer. Mark
-
Thanks Frank - yes,plenty of room on this deck. Here is a little better picture - Mark

- 652 replies
-
- 10
-
-
- royal william
- euromodel
- (and 1 more)