


marktiedens
-
Posts
1,737 -
Joined
-
Last visited
Content Type
Profiles
Forums
Gallery
Events
Everything posted by marktiedens
-
Thanks Jason - there is no finish on the hull yet,so it should look a little better after that. I am waiting to apply a finish until at least the lower wales are installed. Mark
-
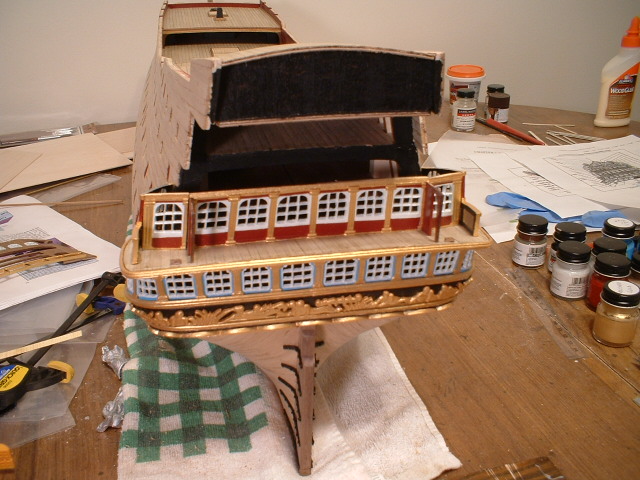
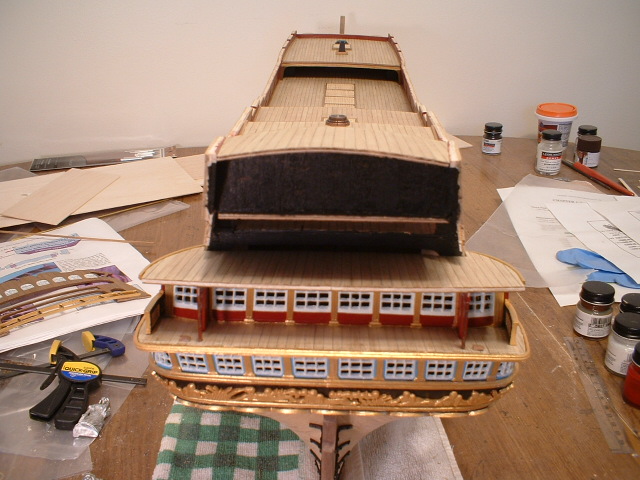
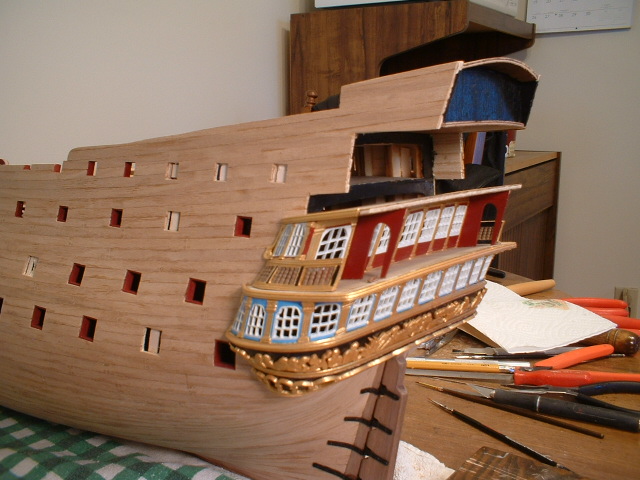
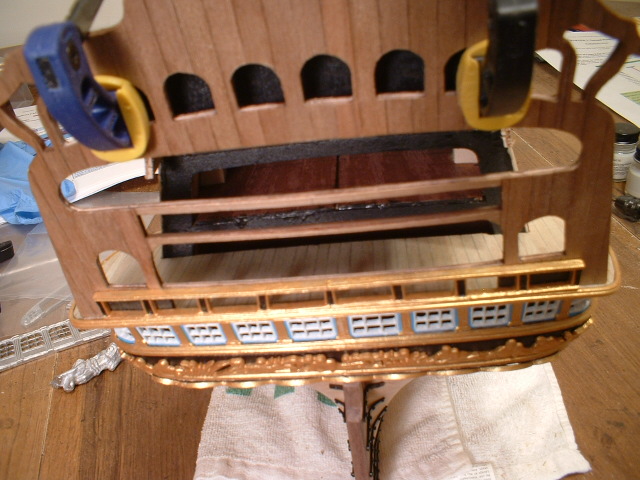
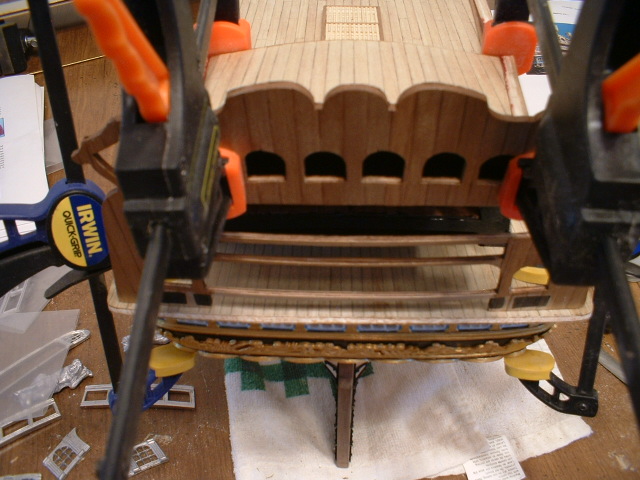
Update - all the middle deck windows are in place. They fit together nicely,although I had to add a shim across the tops of the windows between the side openings. the middle deck is now in place also & lines up nicely with the openings in the stern fascia. Mark

- 652 replies
-
- 11
-

-
- royal william
- euromodel
- (and 1 more)
-
Thanks Michael - I don`t have a small enough lathe to make them from wood,so I am always on the lookout for alternative items. I know it is blasphemy to some to use plastic on a wood ship model,but it`s ok with me . Mark
-
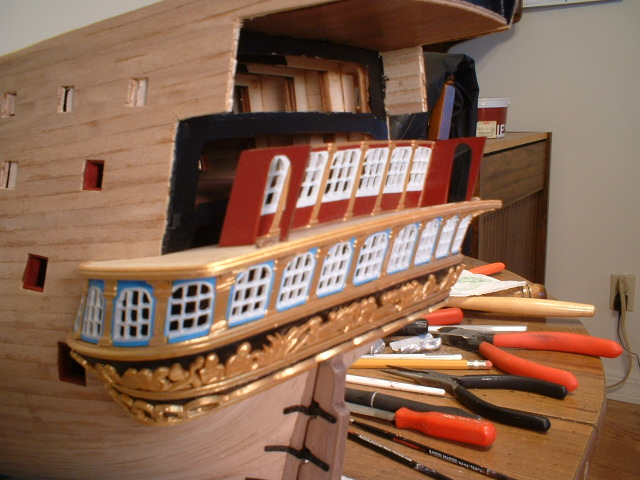
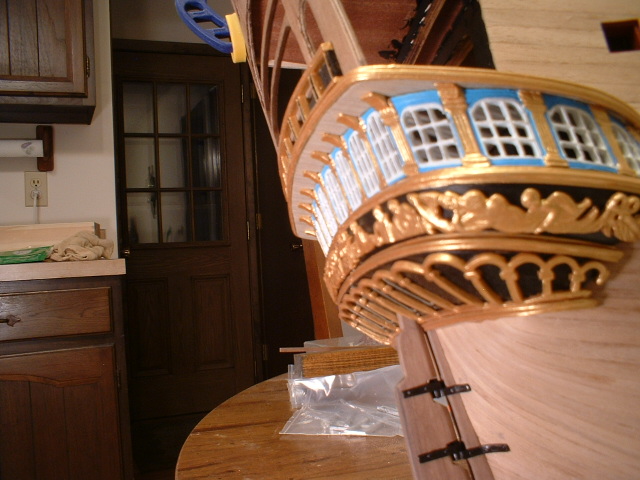
A little more progress - After carefully bending the railings above the lower windows,I painted them gold & black. I couldn`t get regular taffrail stanchions to fit to my liking,so I went shopping & found some plastic toothpicks with some nicely grooved shanks. After trimming them to fit,I painted them a medium brown & glued them in place. I think they look pretty good. The railing is not glued in place yet - I am still trying to determine exactly where to position them. Also the red on the doorway behind the railing now looks close to its actual color. Mark

- 652 replies
-
- 12
-
-
- royal william
- euromodel
- (and 1 more)
-
I would probably have used red ochre too,but I could not find it locally. The red I`m using looks almost exactly like blood when it`s dry . I spilled a little on my hand once & didn`t realize it at first & when I did notice it I thought I cut my hand. A few drops of black makes it more of a brick red. Mark
- 652 replies
-
- 1
-
-
- royal william
- euromodel
- (and 1 more)
-
Thanks Greg & Keith. The red is a Vallejo game color called gory red - with a few drops of black to tone it down. It`s a little darker in person than the picture shows - I don`t have the best camera. The blue is Vallejo model air light sea blue.I really like the Vallejo paints. For some reason reds always seem to come out lighter than it actually is,but other colors are pretty close to their actual color. In the future I will try & use the adjustments in my computer to get the colors closer to actual colors. Mark
-
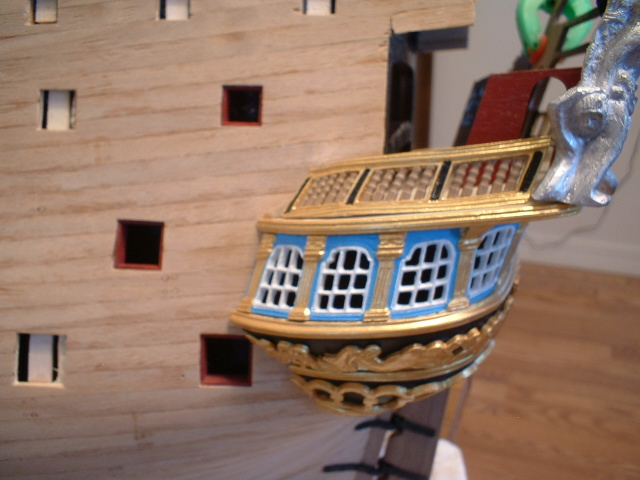
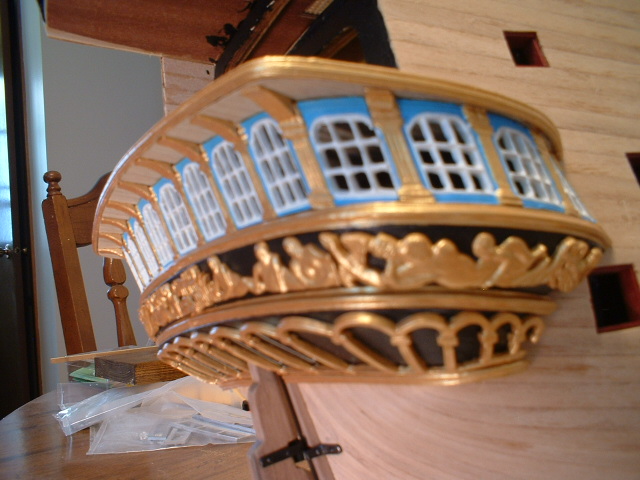
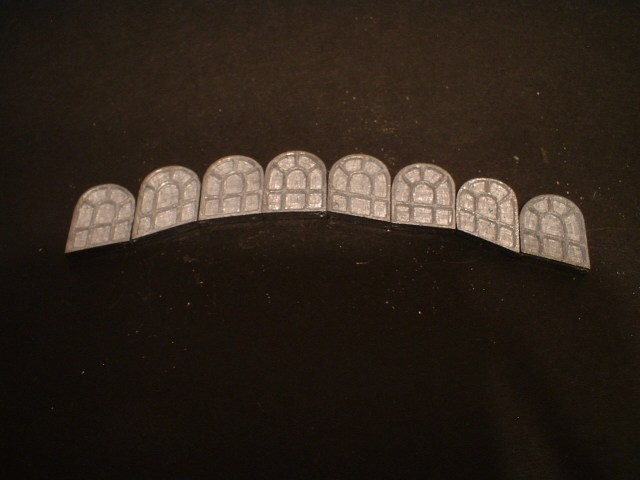
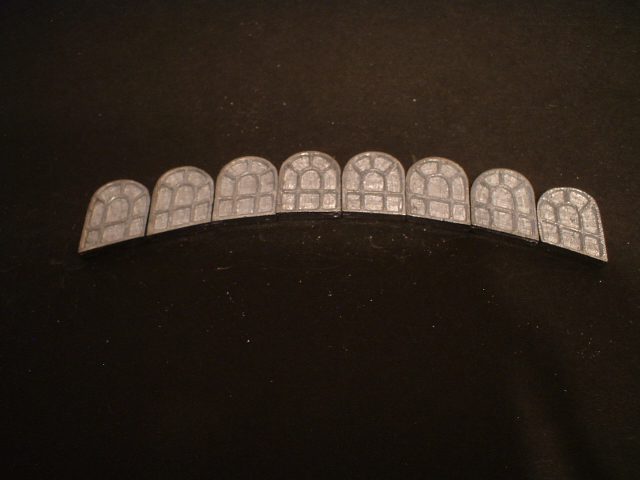
Hi all - another small update. I once again cut out all those window panes in the middle gallery windows & painted them.There seems to be no definitive color scheme,so I am just painting everything as I see fit. Giving it a curve to match the stern fascia,it set on the deck with no filing on the bottom. The slant of the side openings matched the angle of the fascia very nicely also. The side entry pieces are VERY fragile - I broke one twice just fitting the parts to the deck - a bit of paint hides the repair. The assembly must be placed carefully so the side entries go up against the back of the fascia. Mark
- 652 replies
-
- 9
-
-
- royal william
- euromodel
- (and 1 more)
-
Hi Vince - other than ripping everything off & starting over,maybe you could drill some holes down through the rails close to the stem & run the ropes through them. It may give the appearance of running behind them. Mark
- 593 replies
-
- 1
-
-
- royal william
- euromodels
- (and 1 more)
-
Thank you very much,Don. Mark
-
RIGGING THE ROYAL WILLIAM
marktiedens replied to piratepete007's topic in Masting, rigging and sails
Are the original authors of the drawing still available through Euromodel? Maybe Euromodel could contact them & ask what it is. Mark -
RIGGING THE ROYAL WILLIAM
marktiedens replied to piratepete007's topic in Masting, rigging and sails
Pete - maybe it is meant to be an arrow pointing to the truss pendant knot. Mark -
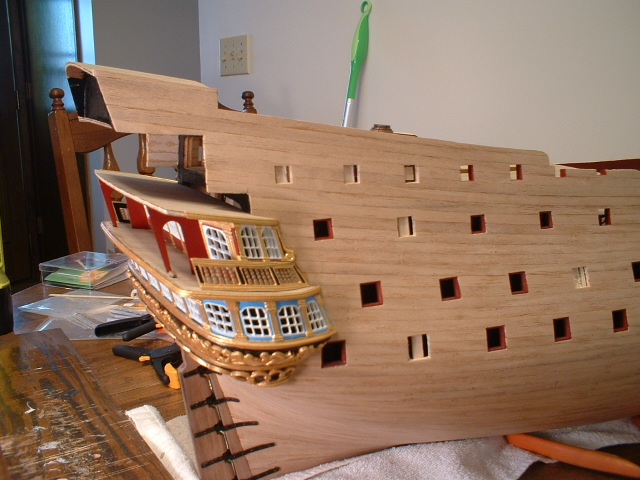
Well,I decided to re-do those knees to better match the edge of the deck. Not to difficult - the old ones just popped right off. I think it looks a little better. Mark
- 652 replies
-
- 10
-
-
- royal william
- euromodel
- (and 1 more)
-
Thanks very much Greg . Mark
-
Hi Greg - I see what you mean about the knees. I am still thinking about whether to re-do them. They are not easily seen at normal viewing height,though. The deck has a little more of an overhang than those photos,but mine is not a museum model . Mark
-
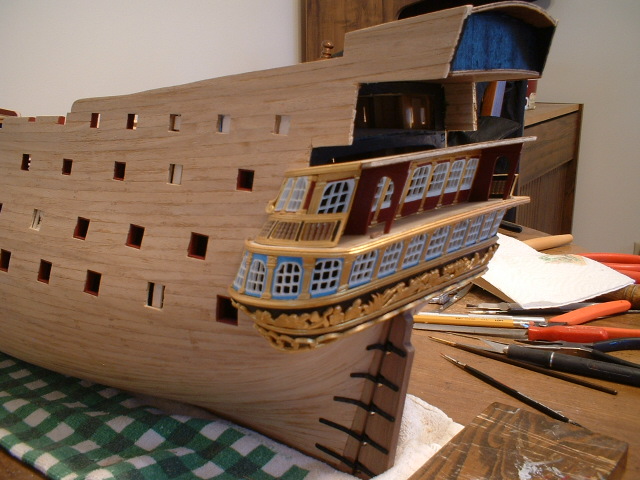
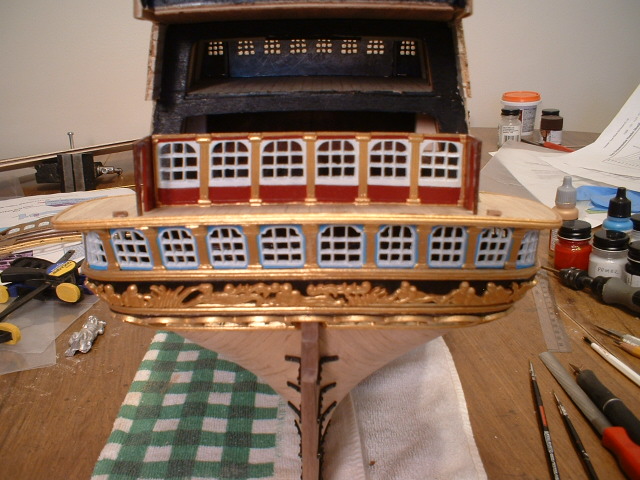
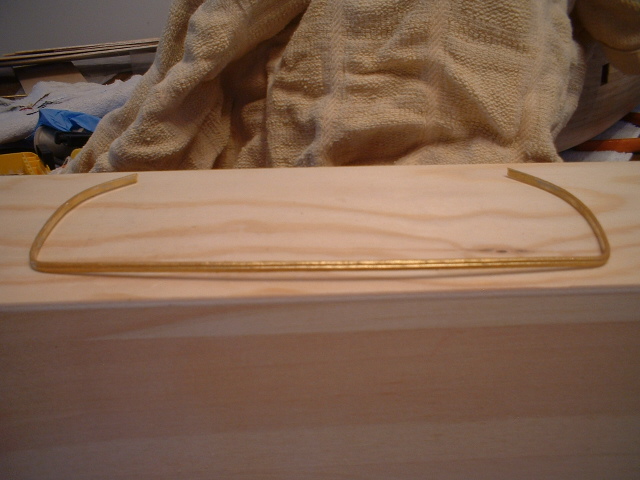
Another small update - after tweaking that lower deck a little more,I glued it down. I had some nice brass moulding left over from a previous build,so I formed it to fit the edge of the deck & glued it on. Then I decided to make some small knees to go under the rear edge of the deck at the top of the columns. they are simply 2x5 walnut with a radius filed in them & painted gold to match the columns. They are shown on the plans,but are not part of the castings. After clamping the fascia in place the lower railings line up nicely with the outer edge of the moulding. Mark
- 652 replies
-
- 10
-
-
- royal william
- euromodel
- (and 1 more)
-
RIGGING THE ROYAL WILLIAM
marktiedens replied to piratepete007's topic in Masting, rigging and sails
Hi Pete - I don`t really know what that oval shaped thing is,although it is also shown on the fore lower mast only smaller. Could it be some type of metal band? those 2 lower yards were rarely lowered,so they don`t need parrels. I checked on my Victory & Agamemnon and although they are of a different time period they are attached with simple rope pendants,slings,& jeer blocks. I`m not really an expert on rigging either. Mark -
Hi robboxxx - the instruction booklet does not tell the sizes,but on plan sheet 5 they are shown as 11mm tall by 13mm wide & planked with .5x3mm strips. If you use 1mm by 3mm strips ,you could make the raw opening a little larger - maybe 12x14mm. Mark
-
Hi Frank - Pete said it better than I could. The stern fascia is of good quality - it`s just that it is faced with mahogany,which has a grain that is out of scale. Actually,very little of it will show once all the castings are in place. Also,the extra thickness of the planking will allow the upper row of windows to be inset flush with the front & rear surfaces.The accuracy of the kit is pretty good - especially the plans.It has been a challenge so far,but I am working my way through it. One example is the windows - they could just be painted blue or black to simulate glass & look just fine to most people,but I decided to drill & file them out to look even better. Nigel - thanks very much. I think you would also agree that the plans are excellent. Thanks also to everyone looking in & hitting the like button. Mark
- 652 replies
-
- 4
-
-
- royal william
- euromodel
- (and 1 more)
-
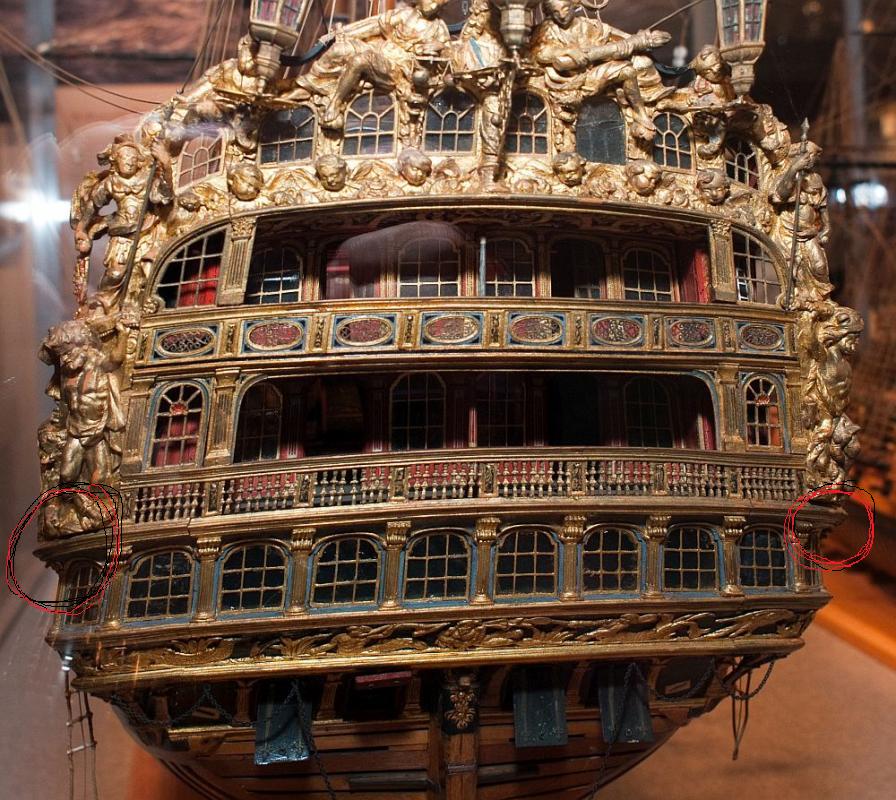
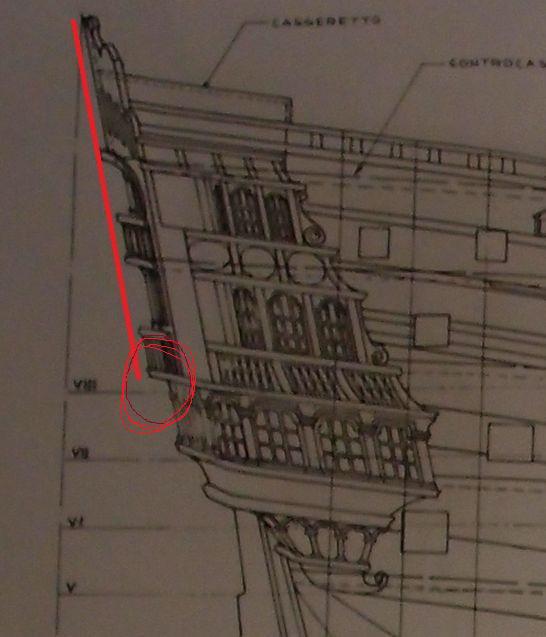
First of all,thanks Nils & Michael for your nice comments. Keith - I have circled the areas where the lower deck overhangs the lower windows. I will do some more checking,but I don`t think I am too far off. Mark
- 652 replies
-
- 6
-
-
- royal william
- euromodel
- (and 1 more)
-
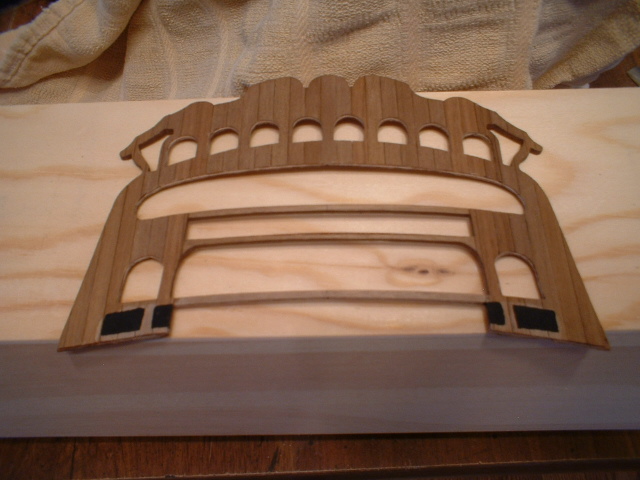
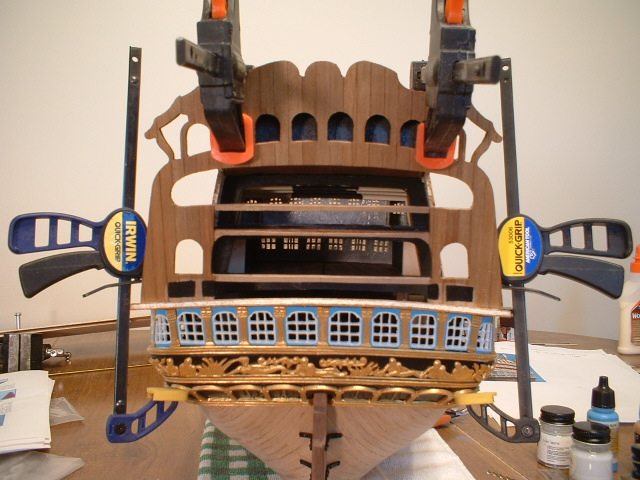
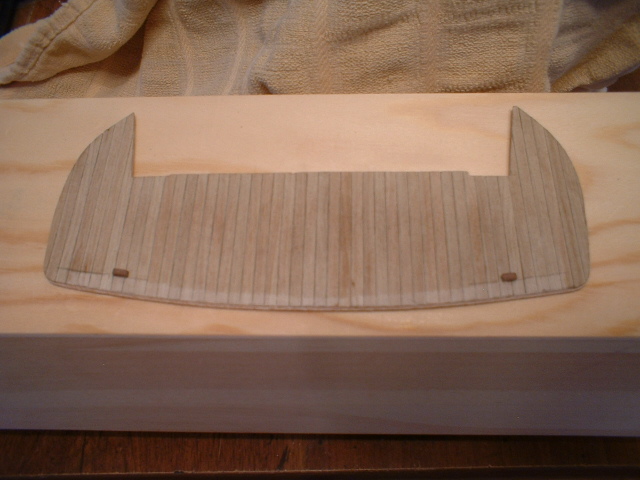
Hi all - a small update. After scratching my head,checking the plans,& Pete`s info I am slowly proceeding with the stern. The stern fascia is flat & needs to be curved,so I put it in some water for a short time & clamped it to a hard plastic oval shaped waste container. When dry it retained a proper curve. Since it is made of an ugly mahogany plywood I planked it with some leftover hull planks. After clamping it to the back of the hull,I could proceed to make the deck it sits on. One other note - while sorting out the upper row of windows they appear to be mis-marked according to what the plans show. If I laid them out according to the plans,they don`t fit the openings. After shuffling them around,they then matched the openings. Mark
- 652 replies
-
- 13
-
-
- royal william
- euromodel
- (and 1 more)
-
Hi Vince - I have that piece also & don`t know where it goes. You might try asking Pete - if anyone knows,it would be him. Mark
-
Michael - I figured that the railings would be a pain to do after rigging the shrouds - that`s why I did them beforehand. I was just really careful not to mess them up . You are doing a marvelous job - much more detailed than mine. Mark
-
I will echo what Amateur said in post #7,but in a larger scale such as 1/64 or 1/72. I would love to see a historically accurate kit at a reasonable scale (1:96 or 1:192) of a Dutch two or threedecker, like the Gouden Leeuw. I would like: advanced, building time: long, price around 400 euro, (but higher is open for discussion) I would like a POF, but with the option to build the interior from th lower gundeck upwards. I would prefer serious wood, not the usual kit-stuff i would prefer historicall accurate i would prefer non-guilded, resin (?) 'carving' I would prefer fullguns, and not those silly half-guns. (At 1:192 resin casting is OK with me) I am not a large fan of an 'assembly kit' in which all parts are lasercut, and only need to put together. (Although the resulting model greatly benefits from those lasercutassembly parts) Second type of kit iI would be seriously be tempted: navyboard style English first or second rate. (Again 1:192, serious wood, historically accurate, and all other remarks i made above) Jan Mark
-
Greg - I cut out the windows before bending them. I thought that would be easier. The bending needs to be done slowly & with a little heat applied - not too much or they will start to melt. David - I thought about that for a while,but if I thinned them down enough to be a scale thickness I think they would break just by looking at them. It is a different kind of metal than what is in most other kits - soft enough to bend,but if you go too far or too fast it will snap. They are not really designed to have those panes cut out - I am just trying to do a little more than painting the solid windows blue or black. Also they are quite heavy & if thinned down too much they might just bend under their own weight while holding them. Mark
- 652 replies
-
- 1
-
-
- royal william
- euromodel
- (and 1 more)