NenadM
-
Posts
3,254 -
Joined
-
Last visited
Content Type
Profiles
Forums
Gallery
Events
Everything posted by NenadM
-
 Extra work. What more to say
 -
Question - to fix rudder or to leave it movable ? In my opinion, rudder is one of the most sensitive part exposed to damage during working on model. Maybe to mount it as later as you can ?
-
Luckily, She never sank !!! Even in wine or beer
-
Cutty Sark by NenadM
NenadM replied to NenadM's topic in - Build logs for subjects built 1851 - 1900
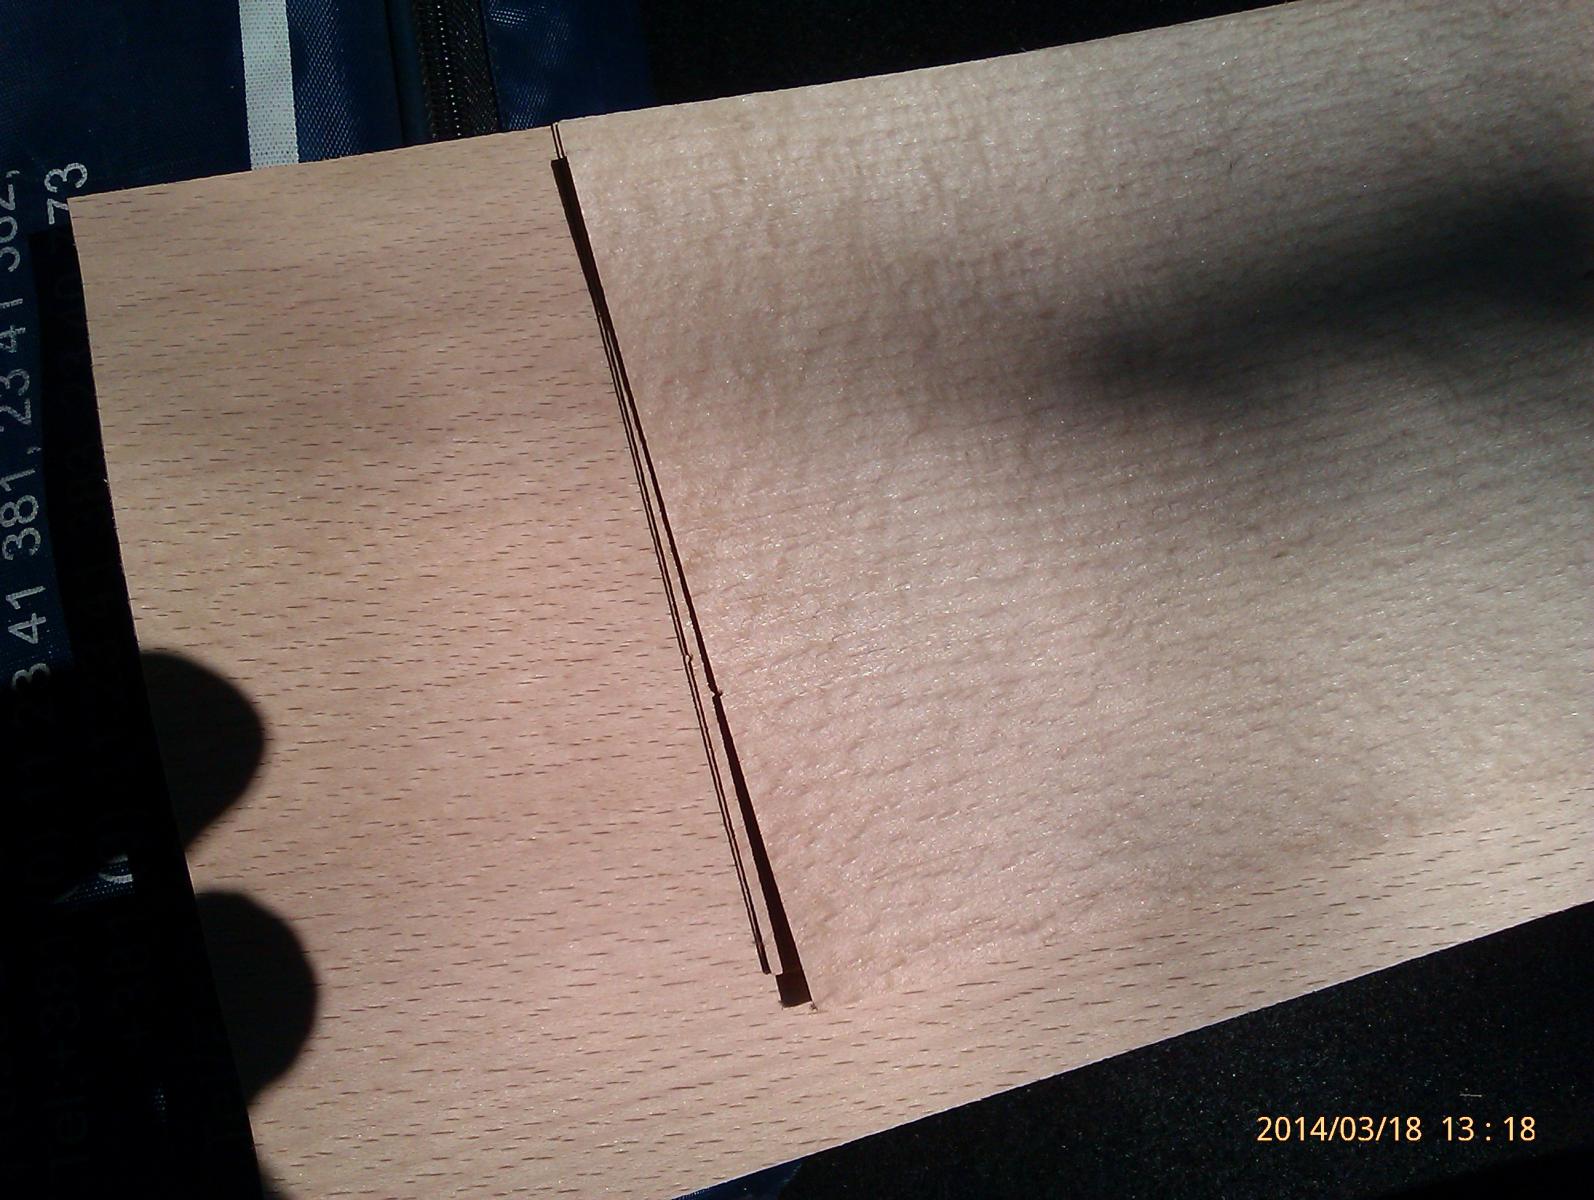
I started with reconstruction of missing pictures in some posts What a boooooooooring job ... Addendum 23:21 local time Final decision maked, last test done, production tehnology chosen (and remembered), adequate acrylic coating colour maked and stored Just in case to forget Veneer sheet surface sanding 220+400 First coat of colour applied, and wiped out with clean cloth when dry, sanding with 400 second coat, wipe out again, no sanding Cut sheets 5 cm wide, sand and aligh longitudinal edges Cut equial wide slices 3,5 mm, sand and align longitudinal edges Apply caulking with grey colour, and turn again 1000 times Careffuly adjust, tailor and glue Light sanding whole deck(s) with 400 Third light coat of colour, and wipe out When dry, weather whole deck with very transparent white acrylic paint When finish, step out one meter away from the model and begin to admire Central fore aft line is drawn , steps 1-5 are done, and tomorrow replanking starts
- 4,152 replies
-
- 3
-

-
- cutty sark
- tehnodidakta
- (and 1 more)
-
You are on the right way Just slow nice and easy Go on !
-
Just remember 35 years ago and rigging of Santa Maria. Broken masts more than once teach me - do not start working on rigging where you are nervous, tired, sleepy and not dedicated and concentrated 300%. Forget inpatience I hardly wait for your photos !!!! Nenad
-
Cutty Sark by NenadM
NenadM replied to NenadM's topic in - Build logs for subjects built 1851 - 1900
One of the points of this hobby. This is not plastic Lego, without soul. And where is soul, somewhere in neighborhood is always art. All we have to do is just knock on the door and open your senses ...- 4,152 replies
-
- 5
-
-
- cutty sark
- tehnodidakta
- (and 1 more)
-
Dogan I wish you success in your build If you want to do valuable model, you have to find Campbell plans. You can order them from British National Maritime Museum. There can be a lot of differences One detail - present Cutty Sark in Greenwich has only four windows on each side. On your plans, as I can see, windows are whole along from bow to stern http://www.rmg.co.uk/national-maritime-museum Be careful reading plans, and always compare details with photos you can find on Google and on MSW - see http://modelshipworld.com/index.php?/topic/5178-cutty-sark-constructional-details/#entry149283 Happy modelling
-
Cutty Sark by NenadM
NenadM replied to NenadM's topic in - Build logs for subjects built 1851 - 1900
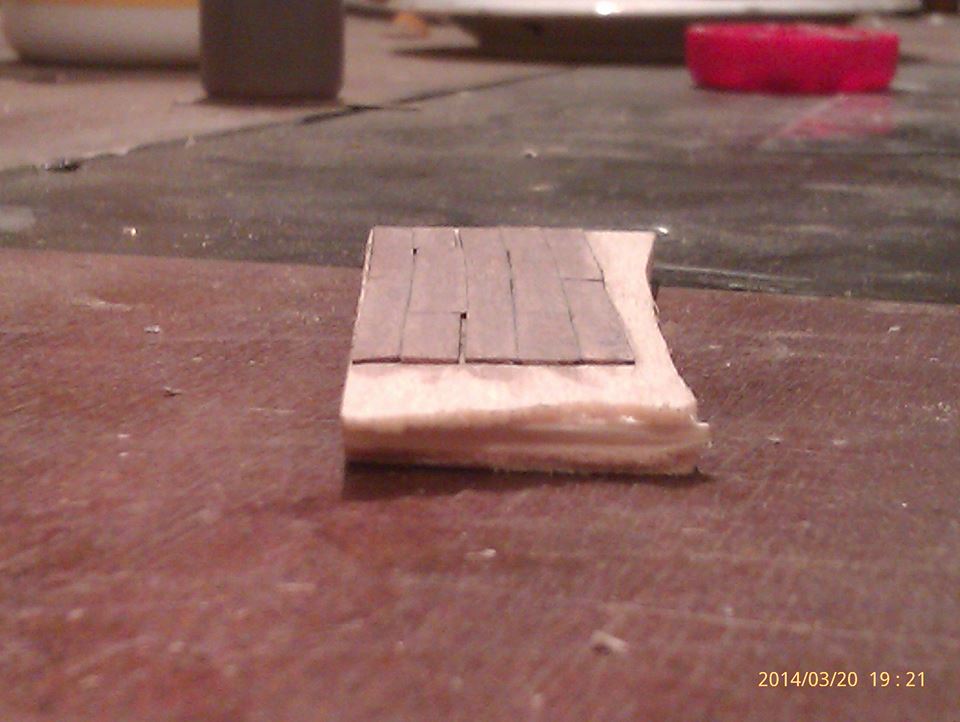
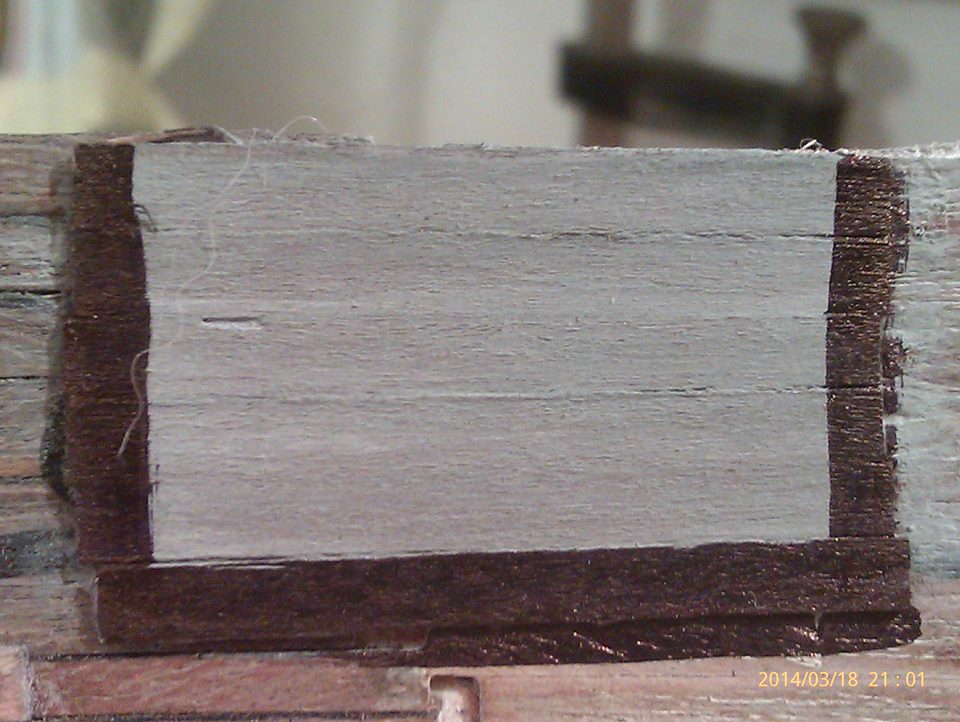
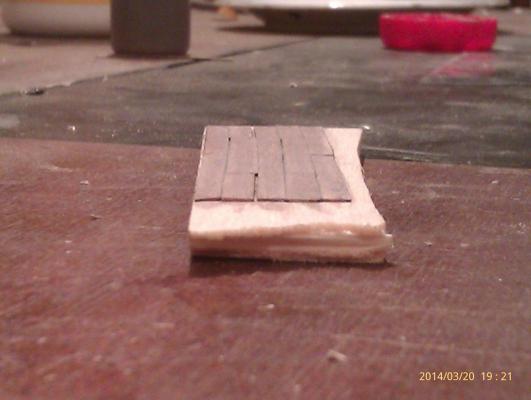
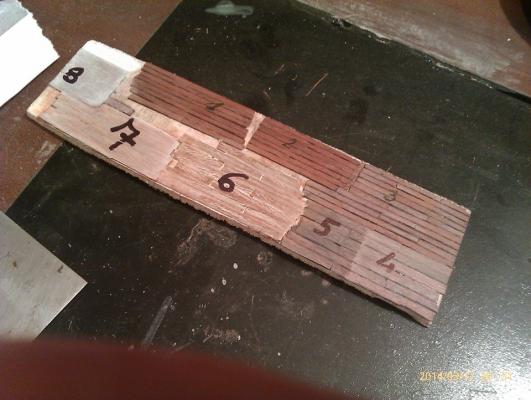
I think this is final test, and I am on right way to get what I am looking for ... something which has visible wooden structure, with visible caulking, with aproximative natural colour of wood ... and in same time in grey gamut ... looking at from close distance and in right angle, it seems as ... looking from sharp angle ... almost grey There will be time for some more tests, because all sanding and "caulcing" works have to be done before applying any paint, and I think that all of three decks must be planked simultaneously and painted at the same time with same colour and same method of weathering PS On third picture can be seen stowaway in his way to board on Her Majesty - a hair from my daughters Persian cat. I didnt see it by eyes, but camera catch unwanted intruder ,,,

- 4,152 replies
-
- 6
-
-
- cutty sark
- tehnodidakta
- (and 1 more)
-
Cutty Sark by NenadM
NenadM replied to NenadM's topic in - Build logs for subjects built 1851 - 1900
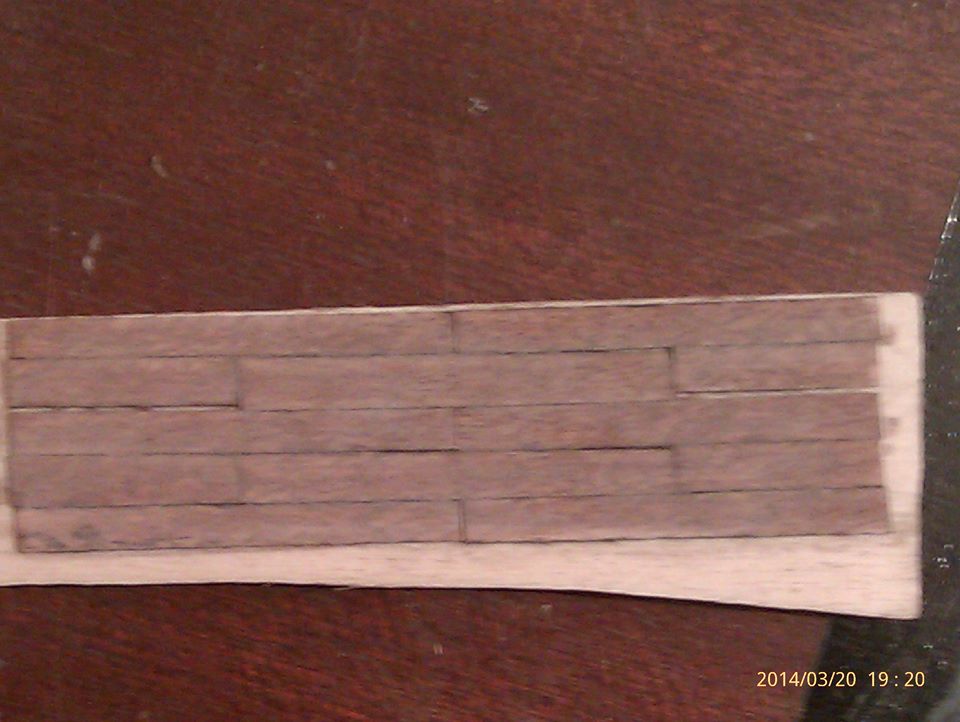
And brand new beech veneer for further experiments
- 4,152 replies
-
- 4
-
-
- cutty sark
- tehnodidakta
- (and 1 more)
-
Cutty Sark by NenadM
NenadM replied to NenadM's topic in - Build logs for subjects built 1851 - 1900
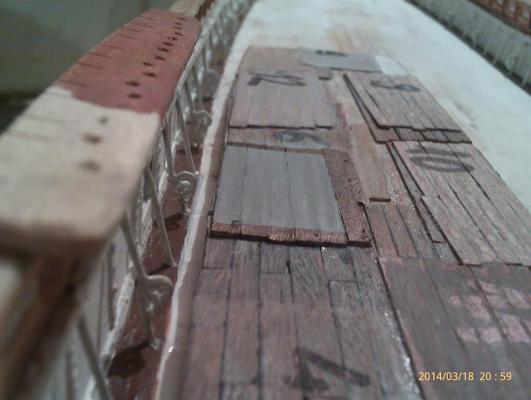
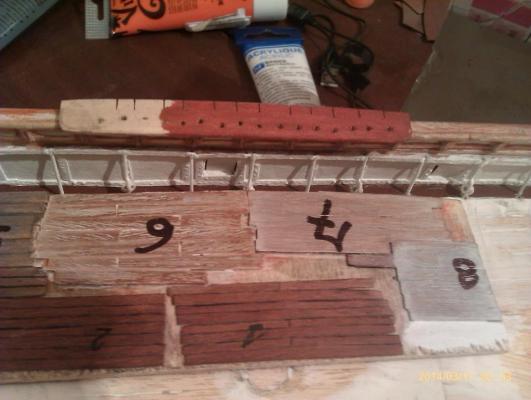
Some more about testing above I'm a great kid! Yesterday I got so carried away in a two-hour joy in playing with colours and varieties sequence of steps, with or without sanding edges of slices, with or without "caulking" edges, the rough and light sanding before, after or during painting, with and without weathering technology, with fast drying layers over 200W bulb to go as fast as it can be and to make as much as I can variations in one night, so I completely forgot to write down behind the variations which of that technology is under each of them The result - I now have eight varieties, and I have no idea what I was doing in order to get any of them All I know that all tests are on mahogany veneer Patience thing again But it worth in some way, I learned and concluded something: Place of composition of the laminate must be visible in some way. If put slices of veneer right and tight one to other without caulking, and sand it, composition disappears in most places, and you got colourful surface which do not seem as decking. If you live some space between greater than 1/4 mm, it can be wider than it have to be and it looks ugly. Filling that rifts with putty or with sanddust+glue, with or without pre-painting filling material, do not get right effect. So, it seems that some caulking must be done. But ... caulking with black can be so much strong visible on 3mm wide strips. Caulking with grey seem OK, but "weathering" with white or grey colour can cover caulking more than you want Another thing - wideness of veneer slices According to photos, Campbell, Lou, existing logs of Her Majesty on MSW and other sources, recalculated to cm/mm, and rescaled to my scale, if want accurate scale of decking, each slice of decking must be about 1 mm ( it is not visible difference between 0,9 or 1,0 or 1,1 mm) And considering in mind that I am not master builder in such a small space, this lead me to conclusion that from aesthetic issue, I must depart of right scale, and make little wider slices of veneer Tests 1 and 2 are made of 1,5-2 mm width slices, I concluded still too narrow for "look" I am trying to get, so test 3 is little wider (2-3 mm), and tests 4-8 are from slices about 3-3,5 mm wide Looking in wider screen from distance, and trying to imagine whole deck filled with everything on it, when caulcking such an narrow slices ( particulary tests 1-3) it seems that there is danger to get surface "look" instead "decking" look, rather in colour of caulking material than a wood material. But, result of tests 4-8, width of slices seem a bit too much wider than it need to be Still I have not definitive attitude The truth is somewhere in the middle and in more tests And more playing With or without using my brain Again
- 4,152 replies
-
- 1
-
-
- cutty sark
- tehnodidakta
- (and 1 more)
-
You have eagle eye Bob, and your note remind me to research and study carefully all little holes which have to be drilled for eyes etc etc on all decks and rails before starting making my pin-rails Thx
-
Wonderful work my friend, just keep it on that line Yards and masts look very good Are they so fragile as them look ? If they are, that might be a huge problem later which need many patience and forward thinking. There are many ropes and not to forget chains of standing and running rigging, and a weight of sails, so many many many little forces which collect and summarize on masts and yards. This appear as a great problem with plastic Cutty Sark models, and I hope this is not problem with wooden build Following you with great interest and continiously learning
-
Cutty Sark by NenadM
NenadM replied to NenadM's topic in - Build logs for subjects built 1851 - 1900
Note It seems that MSW had little semi-dissaster with avoidable (?) damage which reflect in missing some pictures in logs Boys from stuff works very hard on this issue, and for now it is not quite clear will all pictures be safe an returned to place. We must understand that there is enormous amounts of data, text and pictures, conected and linked in many ways. It is everything than easy job I noticed that some photos in my log also miss, but fortunately, they are saved on two ways - on my FB albums, and on my backup plan (every page of log is saved as *.pdf). For now I decide to wait a while to give a chance to running recovering process, and if somebody want and need some of missing picture, I can easily put it on place I suggest to alll of us to be patient and to support stuff members on their way to continuing MSW to be best forum on planet- 4,152 replies
-
- 4
-
-
- cutty sark
- tehnodidakta
- (and 1 more)
-
Cutty Sark by NenadM
NenadM replied to NenadM's topic in - Build logs for subjects built 1851 - 1900
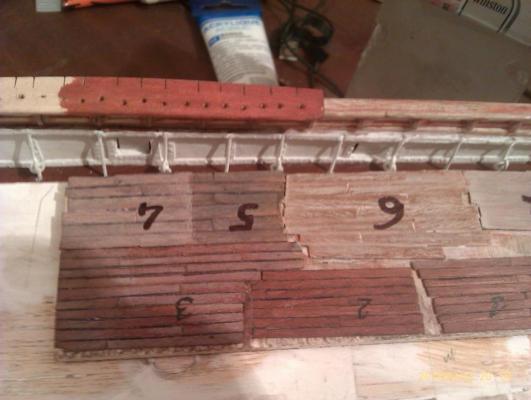
Persevering in my own laziness to start the car and go to bye veneer, some more tests done New are options No 4,5,6,7,8 Hmmmm ..... ???? And Hmmm thing again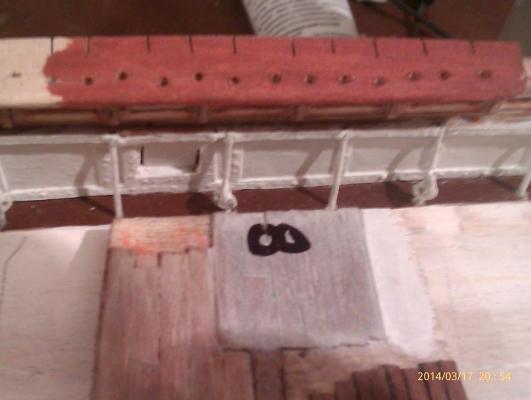
- 4,152 replies
-
- 2
-
-
- cutty sark
- tehnodidakta
- (and 1 more)
-
Hello, and wellcome to CS fleet. Please try to post in English I ll follow your log with great interest Nenad
-
Nice work Bob, keep on with photos All that little holes in narrow space ... Mounting dead-eyes and nails - before or after ? If after - when - on which stage you plan it to do ?
-
Hey Bob, I feel free to ask you to read for me from plans when time for rigging comes. My Plan No 1 is OK, but on No2 nad No3, there will be some problems. But, far far away from now Is it OK ? ( If I in meantime do not decide to order from Museum)
-
Very very very well and nice Go on !
-
Cutty Sark by NenadM
NenadM replied to NenadM's topic in - Build logs for subjects built 1851 - 1900
I agree Michael, and forgive, but ... ? PS It was joke about bike and water... I am thinking about 2 kg of pink paint in some connection with something on two wheels .... Joke again- 4,152 replies
-
- 3
-
-
- cutty sark
- tehnodidakta
- (and 1 more)
-
Cutty Sark by NenadM
NenadM replied to NenadM's topic in - Build logs for subjects built 1851 - 1900
With a hammer 3 x larger and heavier than anvil $%#$%&%$$ I must try to drive his bike trough deep water ....- 4,152 replies
-
- 2
-
-
- cutty sark
- tehnodidakta
- (and 1 more)
-
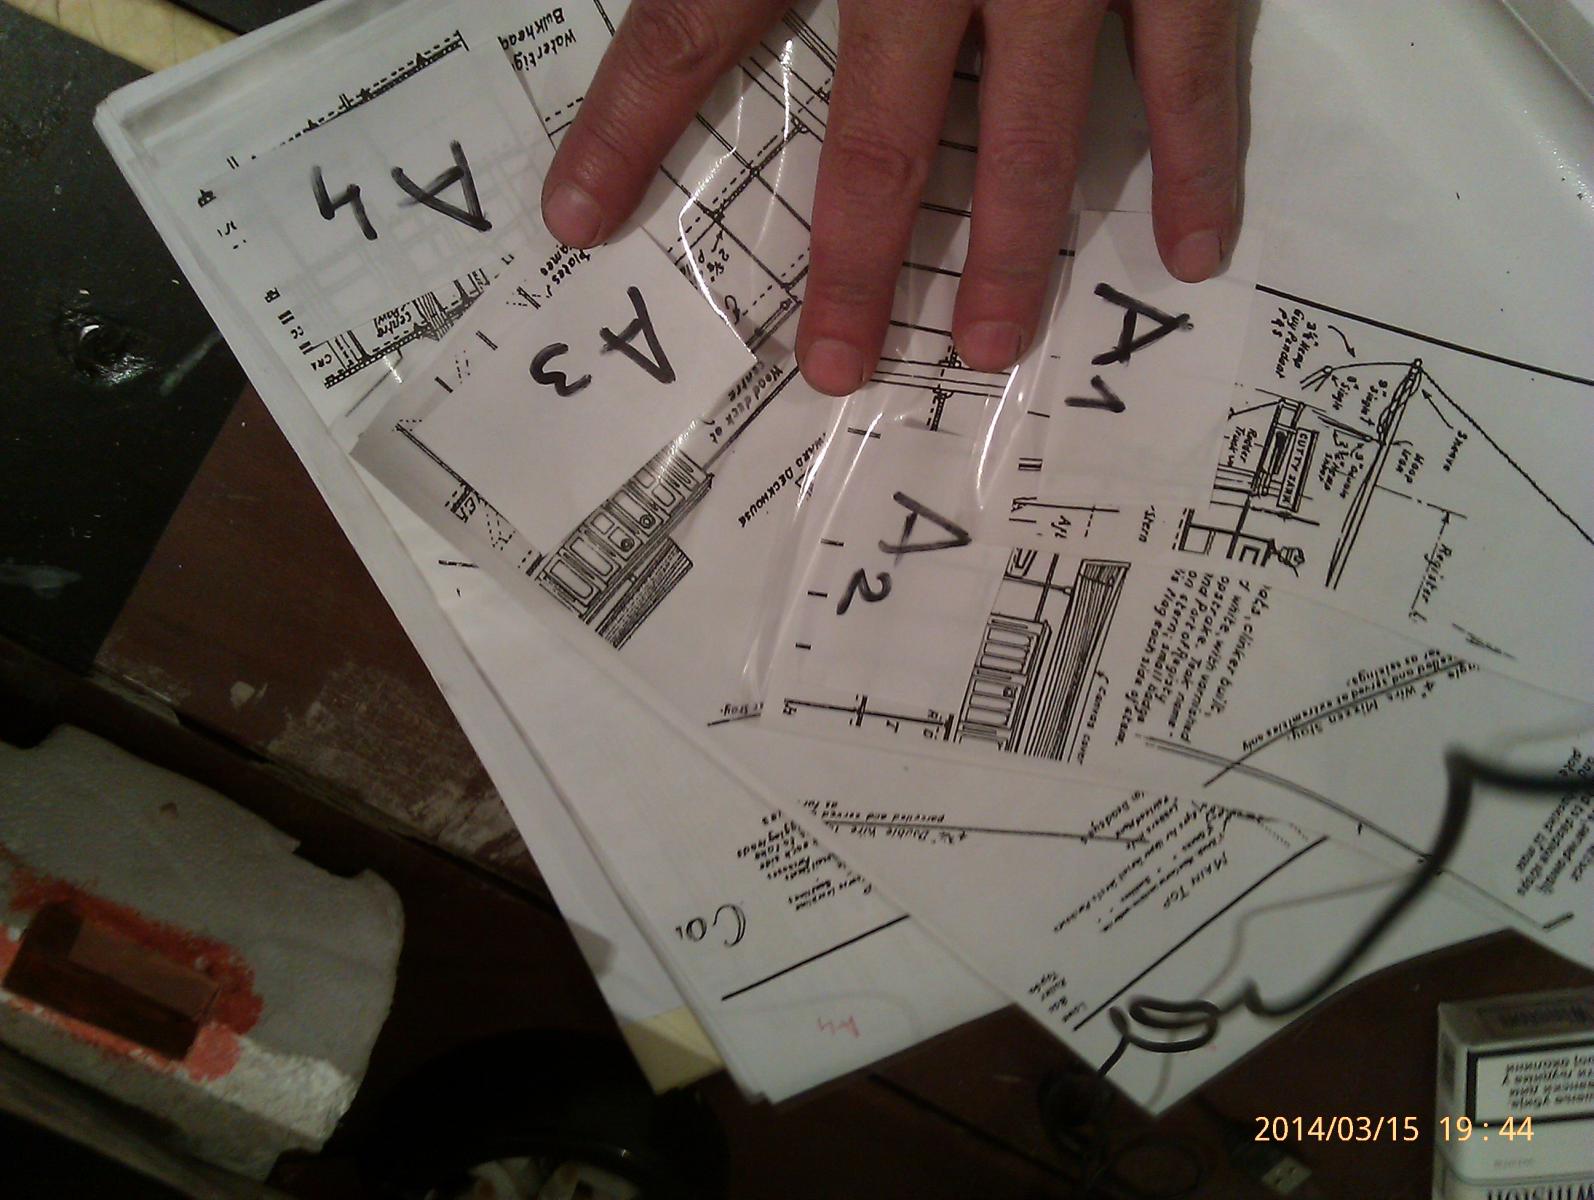
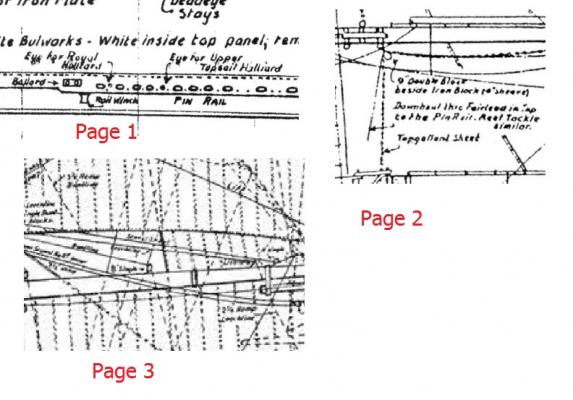
Bob, please take a closer look to your C-plans Did you got them on paper or in digital version ? I attach three crops from my plans ( from ... internet ... ), and you can notice that crops from plans 2 and 3 are not readable in small letters. In plan No 1 everything is OK. But it seems that plans 2 and 3 are scaneed in unsatisfactory resolution Are this deetails on your plans 2 and 3 much readable ( little letters) ?
-
Cutty Sark by NenadM
NenadM replied to NenadM's topic in - Build logs for subjects built 1851 - 1900
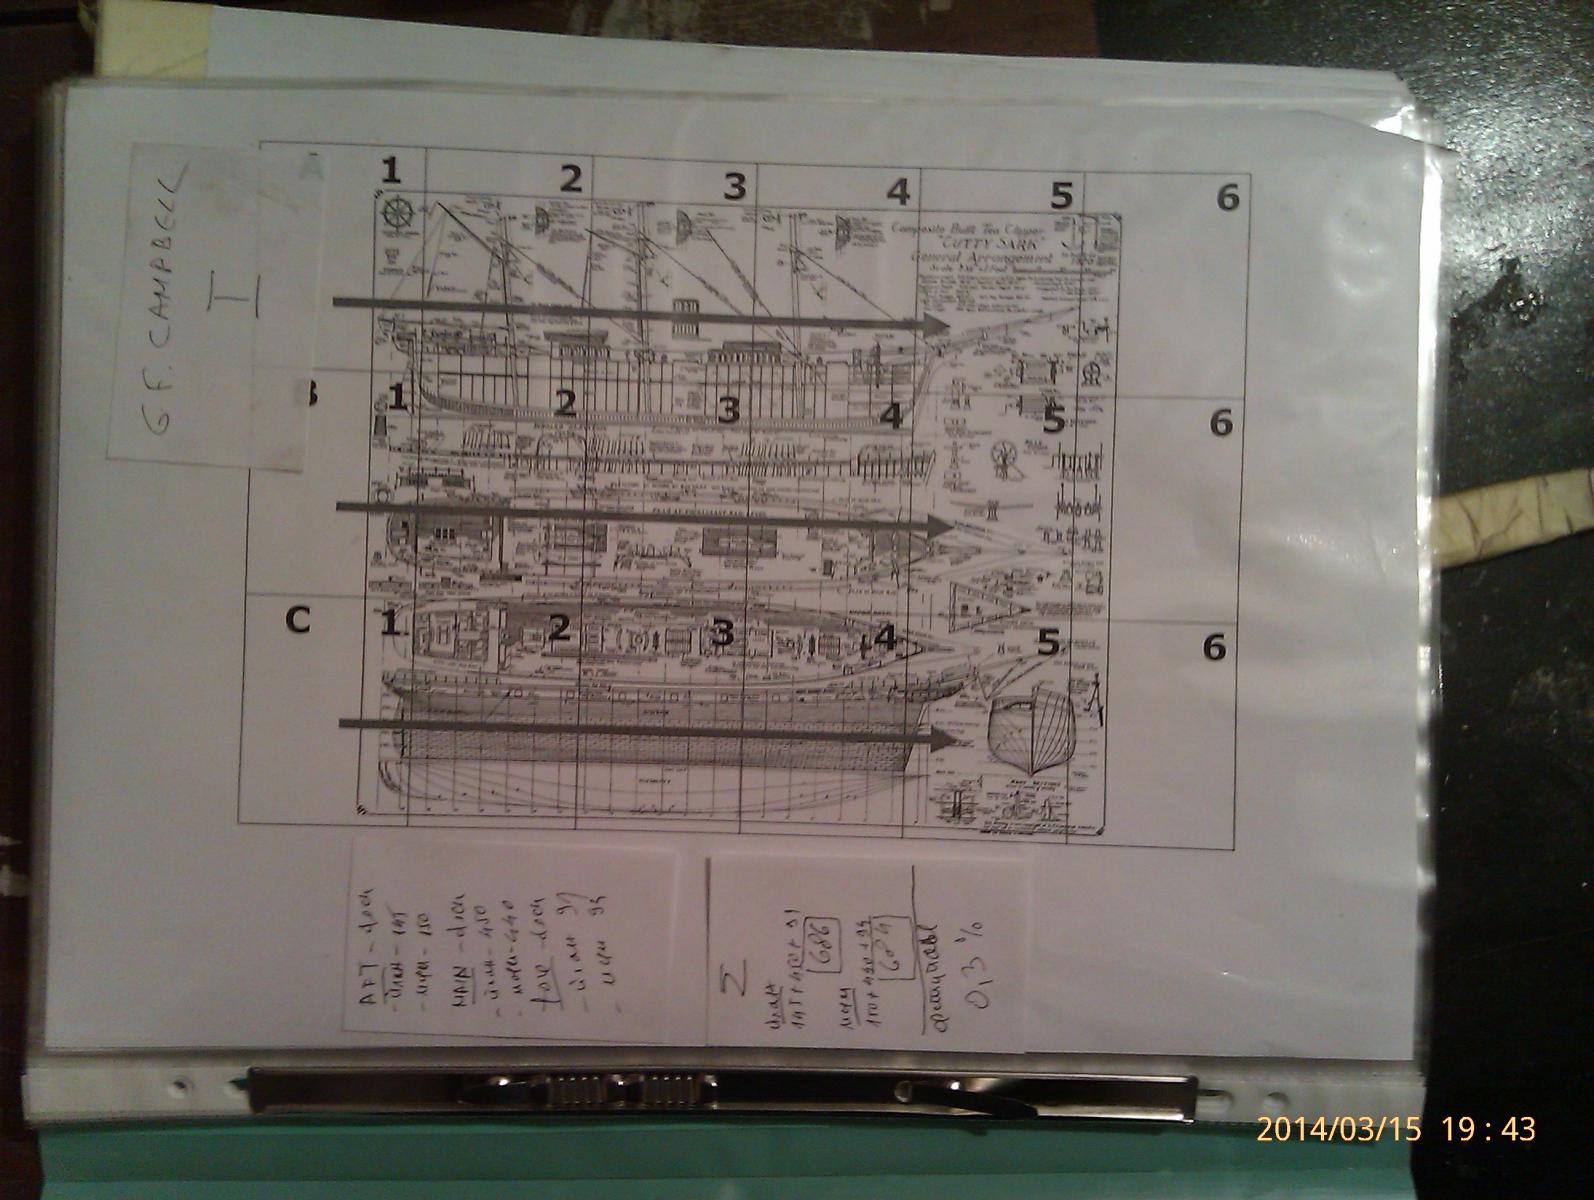
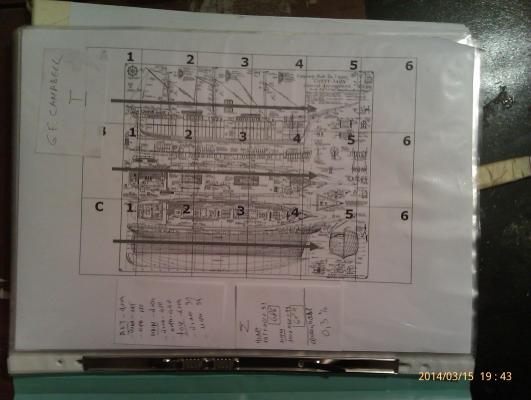
In my workshop there is no place for C-plans to spread. Also, I tried many times to englare them to the size and scale to my model. With last try I am not satisfied, some details lost, too much blur, all is rather gray than b/w, and all of this is A0 format. Realy large to work with. And finaly succed and find a solution. It lasts, beacuse I am not expert ( rather novice) with Photoshop, and PC in office is old one adjusted to office work, not to work with large graphic files. I freezed my office PC couple of times to an half of houre, and must restart, and give up. Yesterady I tried on laptop,which is much younger and stronger Plans are in PDF format, I experimented a while, and when make some files over 900 MB large, decide to try on this way: Opened first page with Photoshop, with resolution 300 dpi/grayscale/16bit depth, saved it as *.jpg. Then correct brightnes middle tones and contrast in simply MSOffice picture manager , saved this, and print it as *.pdf. Somewhere in print dialog I change resolution to 600dpi (corespodending to home laser printer) find option to englare to 127% which percentage I measurd earlier, and ... that is this !!! Then I find a way to print this file on laser printer on A4 format instead A0, and got extraordinary result - whole englared bright clean plan in 18 A4 papers. Very easy to use, when they are sorted and packed in orded And the best thing - comparing dimensions on model and on this version of plans I made, mistake is - ONLY 0,3 % Happy to the sky. Now, I can pick up measure and dimensions directly from plans !!!!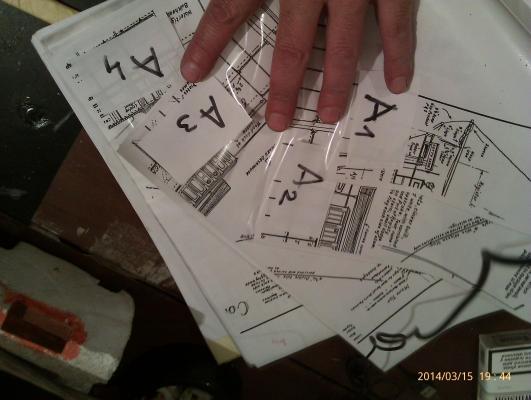
- 4,152 replies
-
- 4
-
-
- cutty sark
- tehnodidakta
- (and 1 more)
-
Cutty Sark by NenadM
NenadM replied to NenadM's topic in - Build logs for subjects built 1851 - 1900
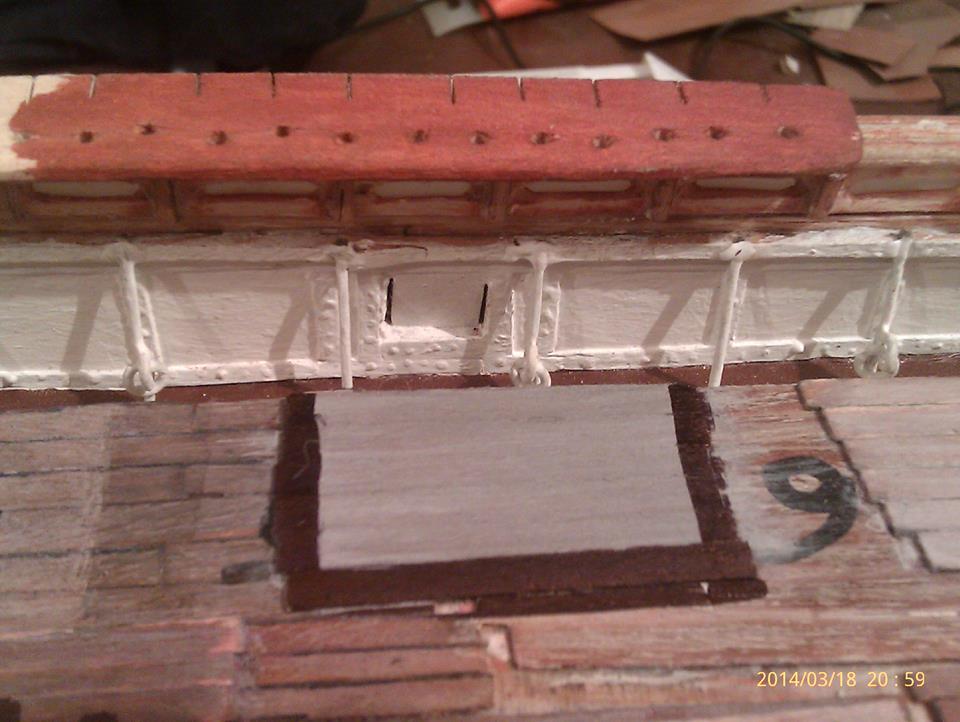
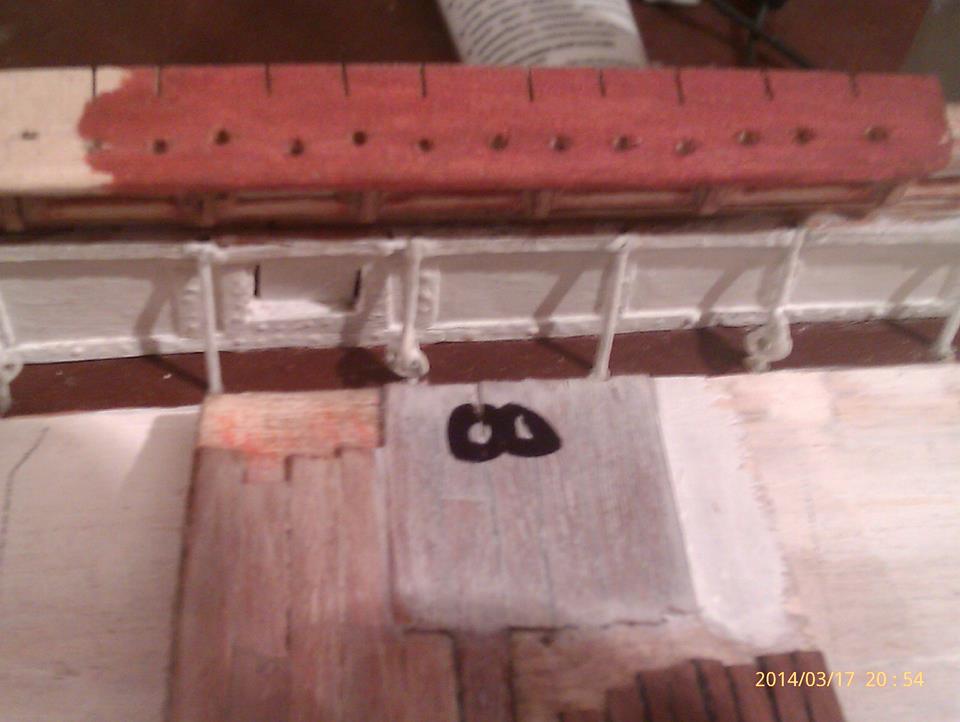
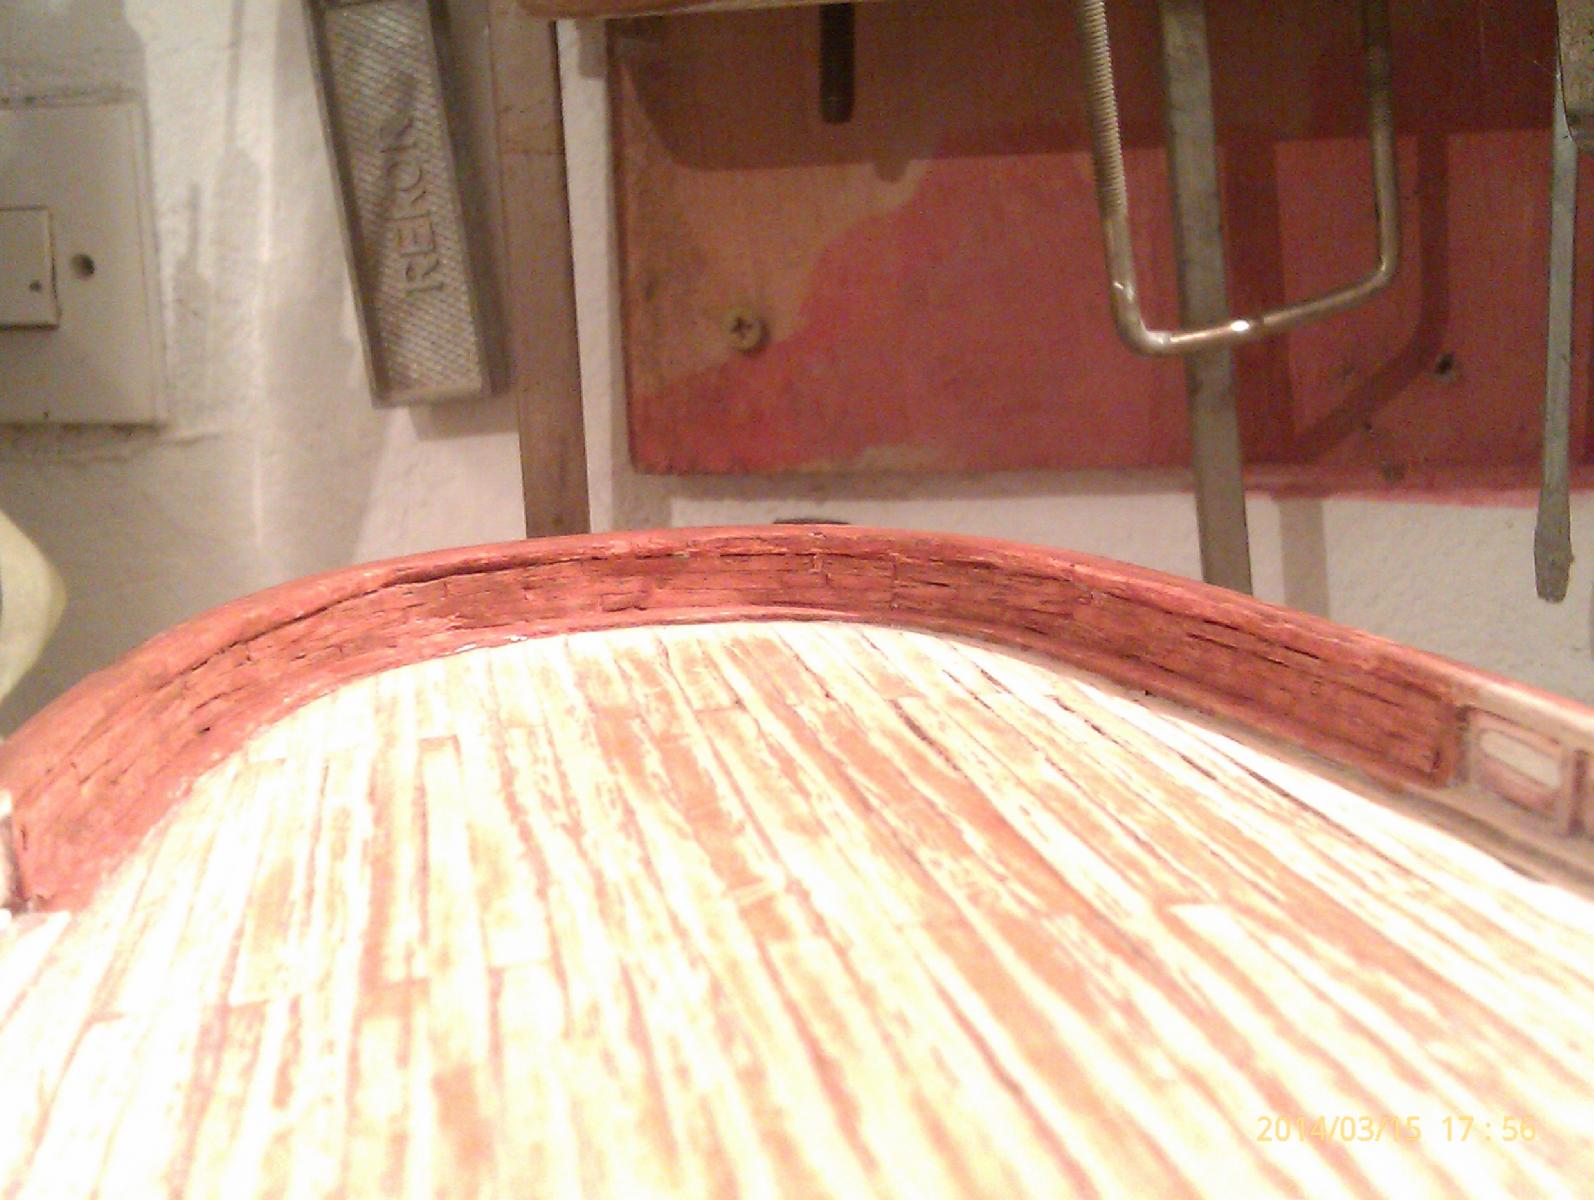
This days main job in front of me is re-planking of deck, and waiting for me to bye veneer, I did just some little things Finally resolved and fixed inside look of inner aftdeck bulwark. Not much precise on the composition of blwark and top rail, because on that place I must do some compromises with lost/found hull/ship lines, and for me it is more important to keep same outside width of whole top rail, and keep as much as possible curvatire of aft-deck and inner bulwark than another things that eventualy can be done. This is not final colour. Final painting follow when nail and dead-eye rails will be mounted Also, I checked position od mast and mast holes which were drilled according to TEHNODIDKTA plans, and discovered that I have to move all of them about 3-5 mm forward bow, so I closed holes for masts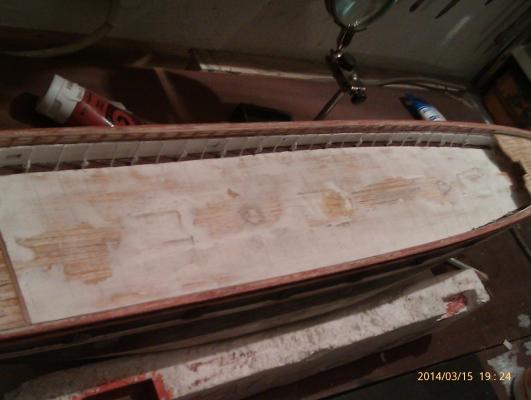

- 4,152 replies
-
- 2
-
-
- cutty sark
- tehnodidakta
- (and 1 more)