NenadM
-
Posts
3,254 -
Joined
-
Last visited
Content Type
Profiles
Forums
Gallery
Events
Everything posted by NenadM
-

Cutty Sark by NenadM
NenadM replied to NenadM's topic in - Build logs for subjects built 1851 - 1900
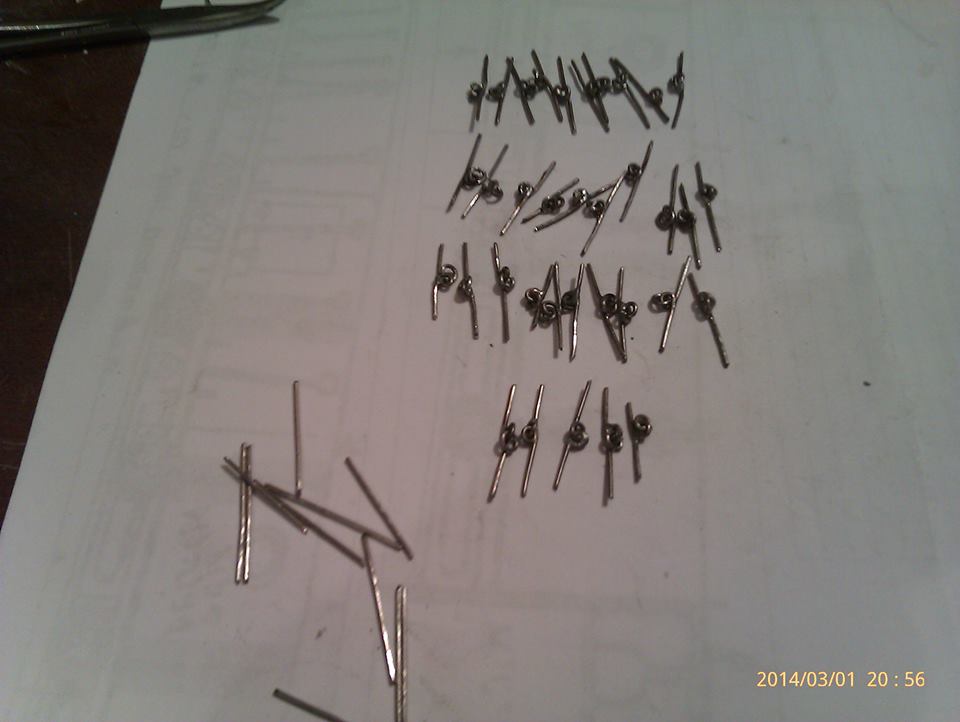
Here are 26 of them with rings, and some more just in case Tomorrow 26 without ring, and painting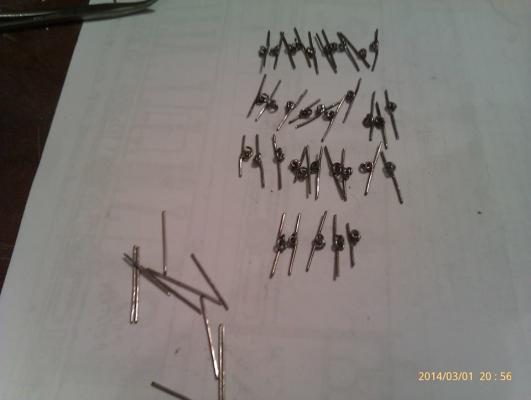
- 4,152 replies
-
- 4
-

-
- cutty sark
- tehnodidakta
- (and 1 more)
-
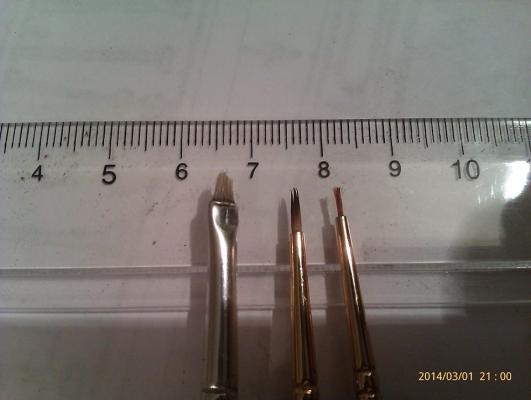
Here are thin nice brushes I use. When wet, top of brush is narrower, almost as a needle Rough one is used for takeing off paint/glue from wrong places
- 47 replies
-
- 1
-
-
- constitution
- revell
- (and 1 more)
-
Nice soldering Luca. Do you plane rings on stanchions?
- 121 replies
-
- 1
-
-
- cutty sark
- artesania latina
- (and 1 more)
-
Cutty Sark by NenadM
NenadM replied to NenadM's topic in - Build logs for subjects built 1851 - 1900
@mspringer Sadoline is trademark for paints, warnish etc for wood protection. In Serbia term "sadoline" is used as colloquial name for different types of wood finish coverings. It can be based on water or oil, with warnish or without, glossy or mat, transparent more or less, in very different spectre of colours, usually trying to imitate color of different wellknown natural wood . Mostly used for furniture and construction carpentry with basic use to protect wood. You can see deep in this log how it looks ( when decks were renewed, when bulwark panels in this appearance come to scene. ) I had bad experience with this in ship modeling @Popeye Finishing bulwarks is sure "must do" thing before replanking. There is no meaning in other way without new mess, and I do not want this again. Just a bit of thinking forward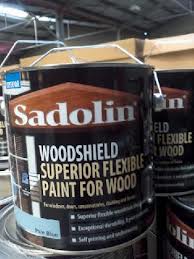
-
Since long time ago, everything electrical or mechanic which must go to trash, first cross through my hands, to cannibalize them, put off screws and nuts first. Many times in life this collection of different screws and nuts I keep, save my time and resolved problem. Wires of different kind also. Ship modelling opened my eyes for another potential useful pieces/things/stuff/issues of all kind in surrounding
- 396 replies
-
- 3
-
-
- Idea
- Bright Idea
- (and 1 more)
-
Cutty Sark by NenadM
NenadM replied to NenadM's topic in - Build logs for subjects built 1851 - 1900
Thanks mspringer Just boring day in office, no serious work to do. Courts still do not work 3th mounth in line ... "successful" judical reform ... all court hearings are canceled, with no idea when they will be sheduled again ... think I`m goin` home soon to Her Majesty, to shove and hide in shipyard not to think about madness ... more than 50% of my month income cutted three months ... I hope to finish stanchions tonight, to paint them over weekend, and to start mounting next week In mean time thinking about to re-plank fore and aft deck together with main deck with veneer. Have a little fear about that: If I do not this, all decks maybe wouldnt look in the same way. I was "ingenious" couple months ago, and have covered all decks with sadoline, which was bad decision. After that, made new fore and aft deck, and covered then again (?) with sadoline. And after that, during cleaning decks and inside bulwarks from trash and mess, I had to sand fore and aft deck, and on some positions there is no sadoline, but between strips ... Now, I have a fear: can I make exactly same veneer strips on main as on the fore and aft, and if I put the same veneer and the same sadoline on new main deck and on old fore and aft, will colour hue be the same ? I do not think so And I am closer and closer to whole re-planking job on all three decks Again - week of work and three in correcting mistakes Really good fun ... now have to sniff throught some topics I noticed with decking tips and tricks to see and eventually decide if to use some- 4,152 replies
-
- 1
-
-
- cutty sark
- tehnodidakta
- (and 1 more)
-
Maybe you hurry a while with mounting dead eyes and toilets in this stage (I did, and that was mistake). During coopering, Her Majesty need to be turned upside down, and what happeness with dead eyes then?
-
To add another WOW !
-
Cutty Sark by NenadM
NenadM replied to NenadM's topic in - Build logs for subjects built 1851 - 1900
And a drink to everybody ! Of course, popcorns Today is littlle thing to celebrate: over 30.000 visits to topic and at the same time promotion in rank Thanks everybody for support, interesting and likes- 4,152 replies
-
- 6
-
-
- cutty sark
- tehnodidakta
- (and 1 more)
-
Cutty Sark by NenadM
NenadM replied to NenadM's topic in - Build logs for subjects built 1851 - 1900
Factory wotks on full steam ... 20 stanchions finished, 6 to go ( ± 10-15 just for case)- 4,152 replies
-
- 1
-
-
- cutty sark
- tehnodidakta
- (and 1 more)
-
Cutty Sark by NenadM
NenadM replied to NenadM's topic in - Build logs for subjects built 1851 - 1900
Bob, feel free to take one of this ...
- 4,152 replies
-
- 6
-
-
- cutty sark
- tehnodidakta
- (and 1 more)
-
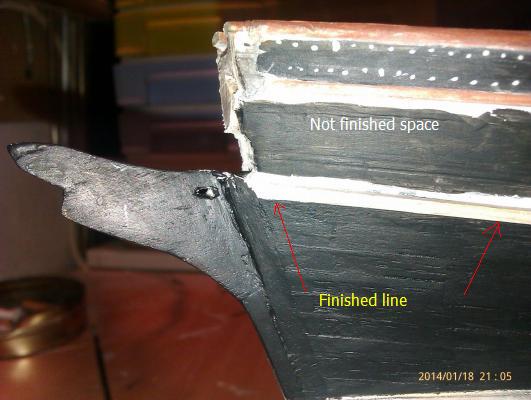
Kim if I, as a relative novice, can help with my small experience. I did plastic kits long long ago, and there was no way to get straight line with paintbrush (not even when you close your nose to model, always very very visible and ugly ) In my CS I tried different approach, with magnifier, and slowed painting work as much as I can, with the thinnest paint brush I can find With magnifier, with thinnest brush you can find, and only with a little drop of paint in top of brush, you can do much more precise. And a little mistake you make and see with magnifier you can not correct, IS NOT VISIBLE with eye only. Do edges carefully first, and then surface. Secret is in SLOWLY moves of hand As I said, I simply could not paint anything precise without this technique With magnifier and thin brush, I was delighted with results ( masters sure can do this better) See attached picture. And to notice, there are two layers of dark acrylic I hope it helps Nenad
- 47 replies
-
- 1
-
-
- constitution
- revell
- (and 1 more)
-
Wow, I am not alone ! And very steady hand, and patience, ( eralier you must put your familly in deep freeze) and speed of 5 cm for 1x1 mm rail by half an hour is a good speed Magnifier is great helper for me in paint job, and as begginer I was supprised with results Dont forget to drug your ket/dog and to burn all telephone lines before Kidding ( about family and pets)
- 47 replies
-
- 1
-
-
- constitution
- revell
- (and 1 more)
-
OFFICE PAPERCLIPS Inexhaustible source of different thickness wire that can be easily processed. I made ( just making) inside bulwark staanchions from paperclips TELEPHONE LINE WIRE Inexhaustible source of thin cooper wire for different purposes Cellophane from a cigarette box Can emulate glass on windows, lanterns etc etc
- 396 replies
-
- 2
-
-
- Idea
- Bright Idea
- (and 1 more)
-
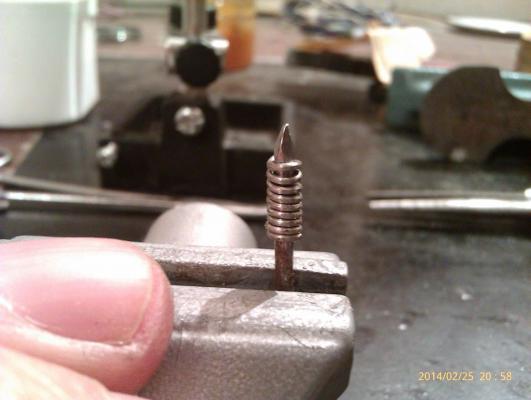
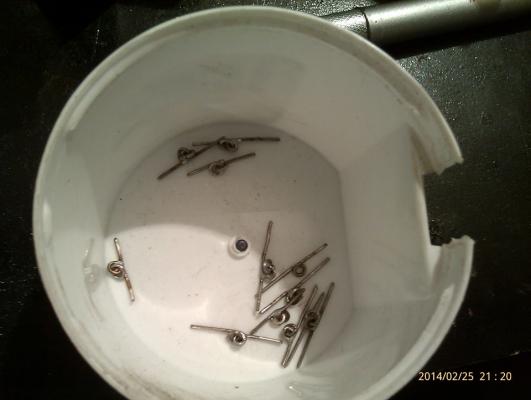
Watch parts can be used to make a jig for "makeing" or simulating rivets on cooper plates etc etc
- 396 replies
-
- 4
-
-
- Idea
- Bright Idea
- (and 1 more)
-
Cutty Sark by NenadM
NenadM replied to NenadM's topic in - Build logs for subjects built 1851 - 1900
Denis ( if I am alowed to use your name) Generaly, folowing difertent logs on MSW, I noticed next occurance Mainly, here are two (and a half) basic type of modelers: First group, hardly connected with their kit parts, without idea to sniff another way; Second, so called scratch builders eg. darksiders, who mainly ( or I am wrong?) order finished stuff from online sellers; And from time to time, appear somebody ( mainly real masters) with quite different aproach to whole thing ( makeing own wood, makeing own ropes etc etc). Diferent men enjoy in different ways. Somebody, I think most of all, rather go on easy way, so called in my country "path of elephants". But there is always some curious impatient fool (as me) to discover hot water again, going with head right through a wall instead through the open door, who always wanna see what is out of road and on the top of the hill. Let anybody enjoy in his own way But, there is a joy in collecting ideas. There is sure something also in laziness to walk around whole city to find something, or lack of time, or lack of money, whatever. There is something also in bad equiped shops with stuff we need Somebody like chalenges, somebody dont. It is no big dil to order finished dead-eyes or blocks even them are 50€ dor 100 pieces, more or less, and real work in serious rigging is still in front of you. Also you can order ropes, and fittings, and laser cut parts, and ... For me, it is much interesting to improvise in way to find solutin. Much more creative. But, as I am some kind of fool, I have no right to judge to other people approach Ha ... caught in philosophizing again ... PS CaptanSteve started very interesting topic on above point http://modelshipworld.com/index.php?/topic/4679-the-kit-bashers-guide-to-the-galaxy/#entry134594- 4,152 replies
-
- 1
-
-
- cutty sark
- tehnodidakta
- (and 1 more)
-
Cutty Sark by NenadM
NenadM replied to NenadM's topic in - Build logs for subjects built 1851 - 1900
Bindy, I wrote earlier about trouble to find them in shops. I use the somethimes in office, but very rarely and temporary until put paper in place in folder. Rather use stapler. Stapler ammunition is also interesting material to work with. Strong and soft at the same time, with squared profile less than 0,5 mm, when you need it One box with 100 pieces of clips last about 3-5 months Thx for your interesting- 4,152 replies
-
- 1
-
-
- cutty sark
- tehnodidakta
- (and 1 more)
-
Cutty Sark by NenadM
NenadM replied to NenadM's topic in - Build logs for subjects built 1851 - 1900
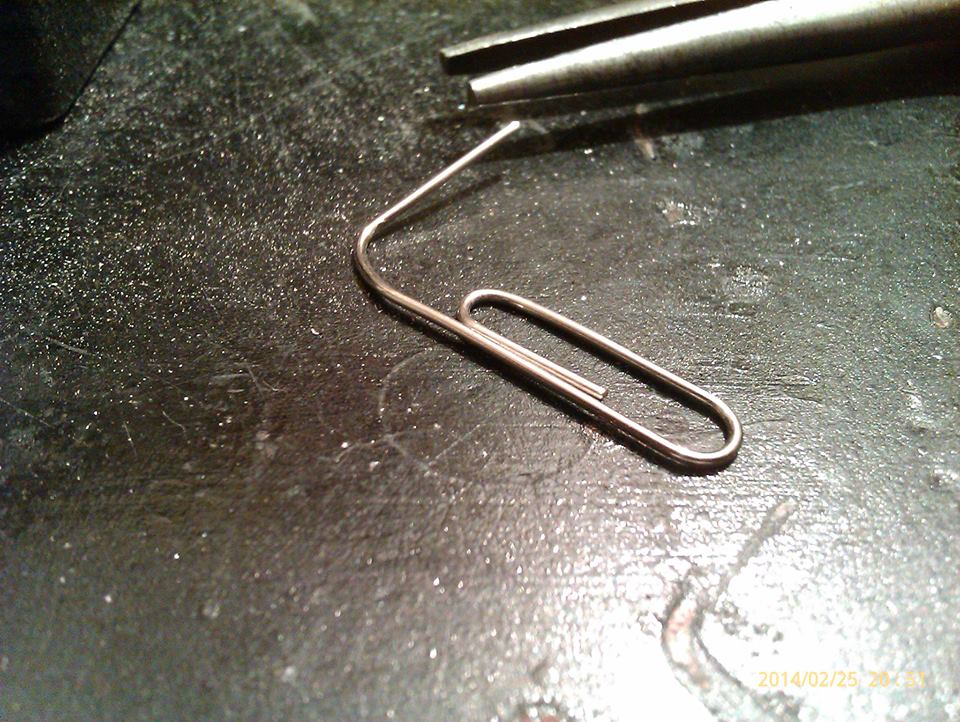
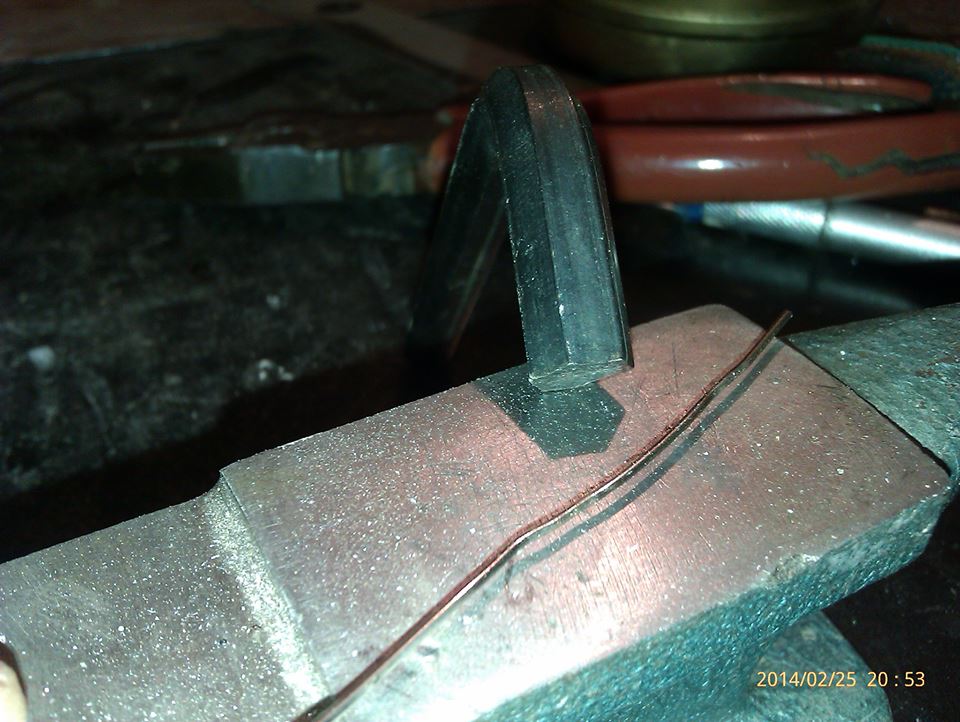
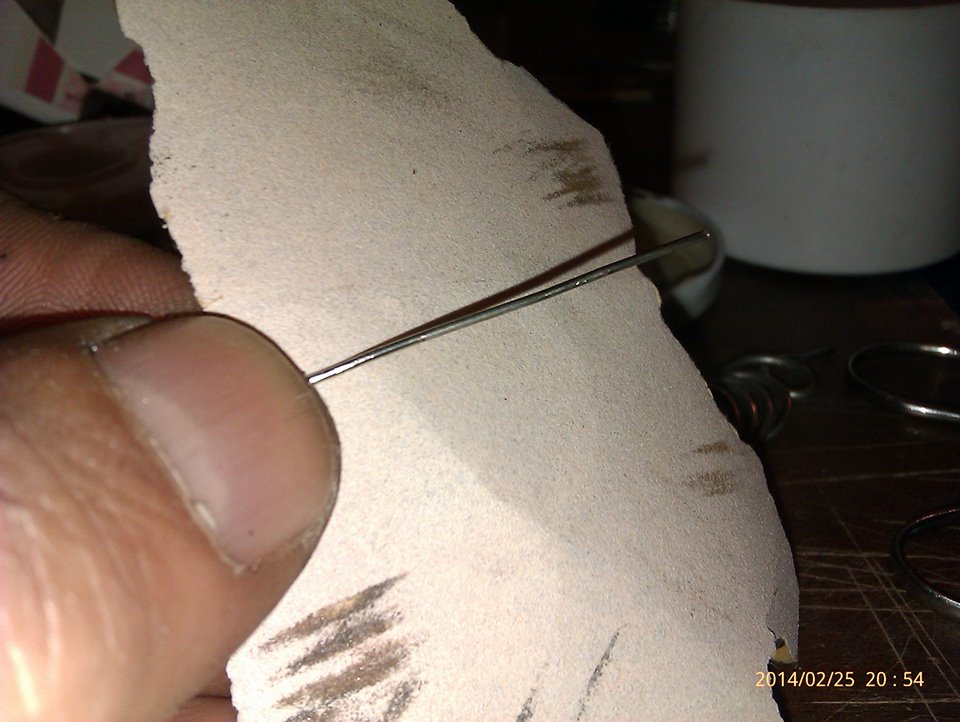
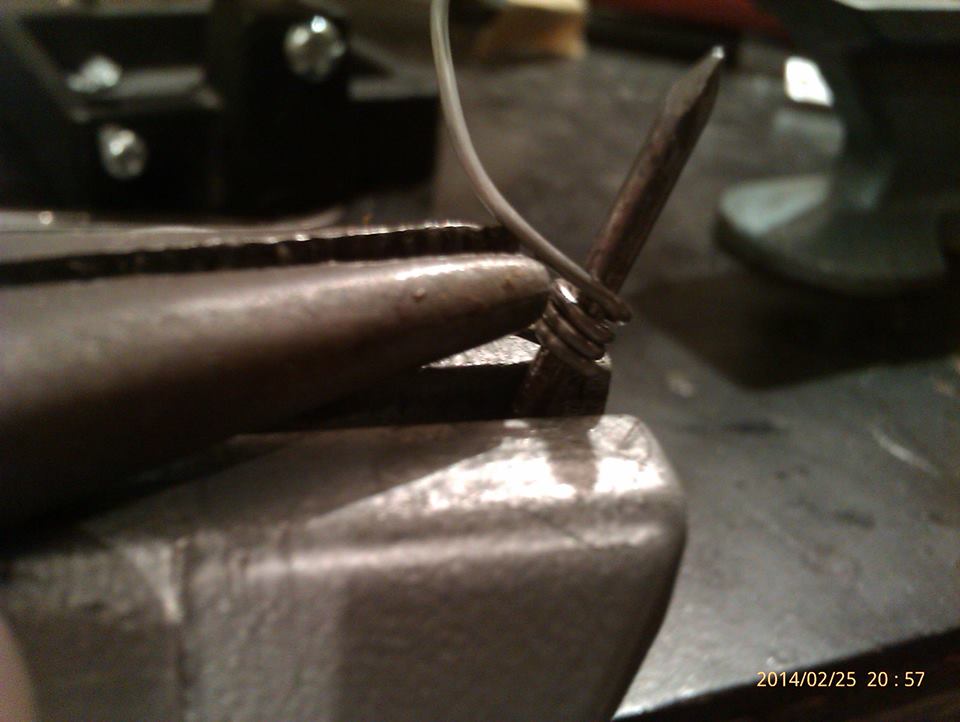
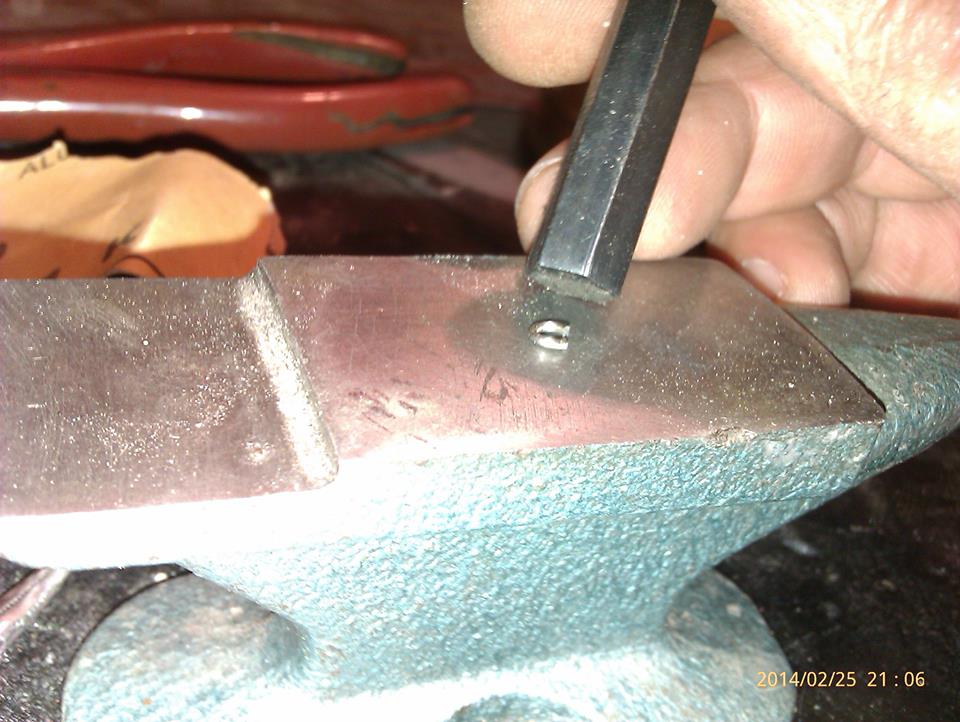
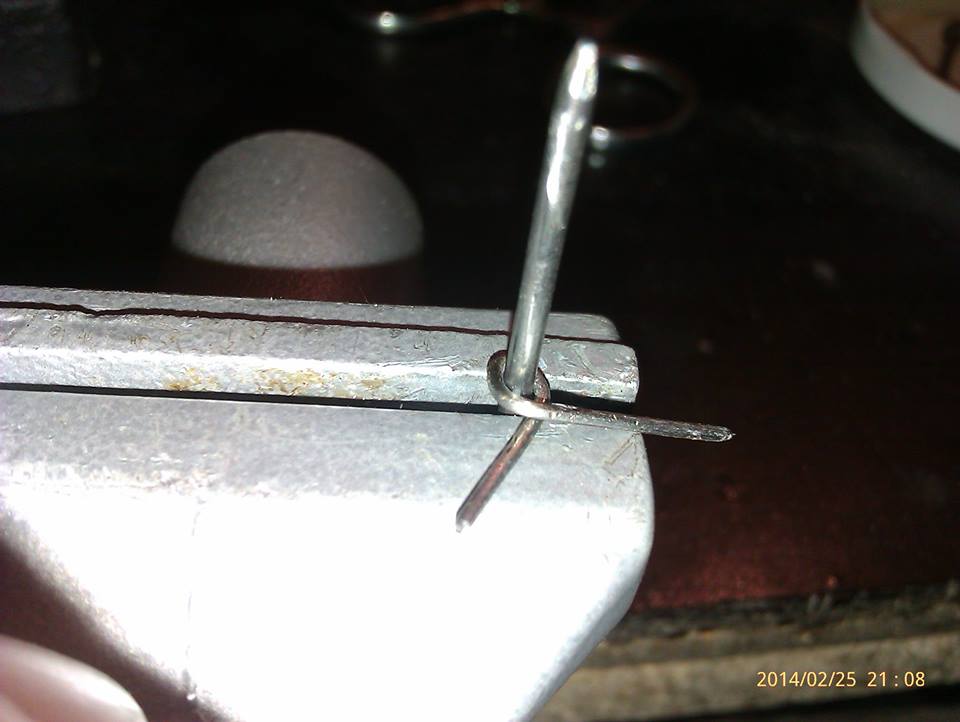
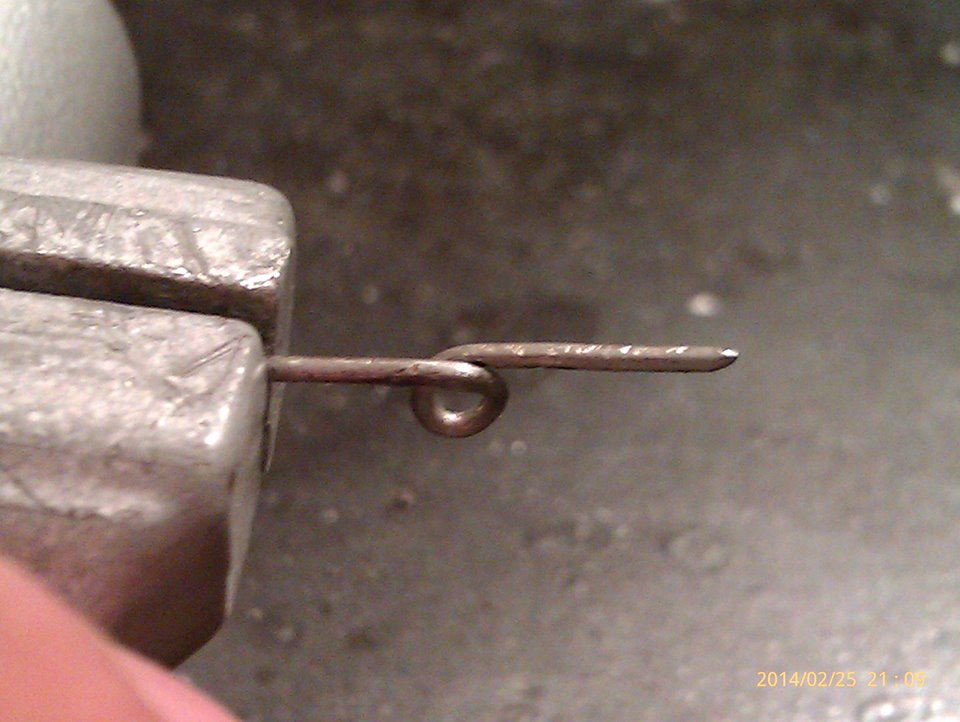
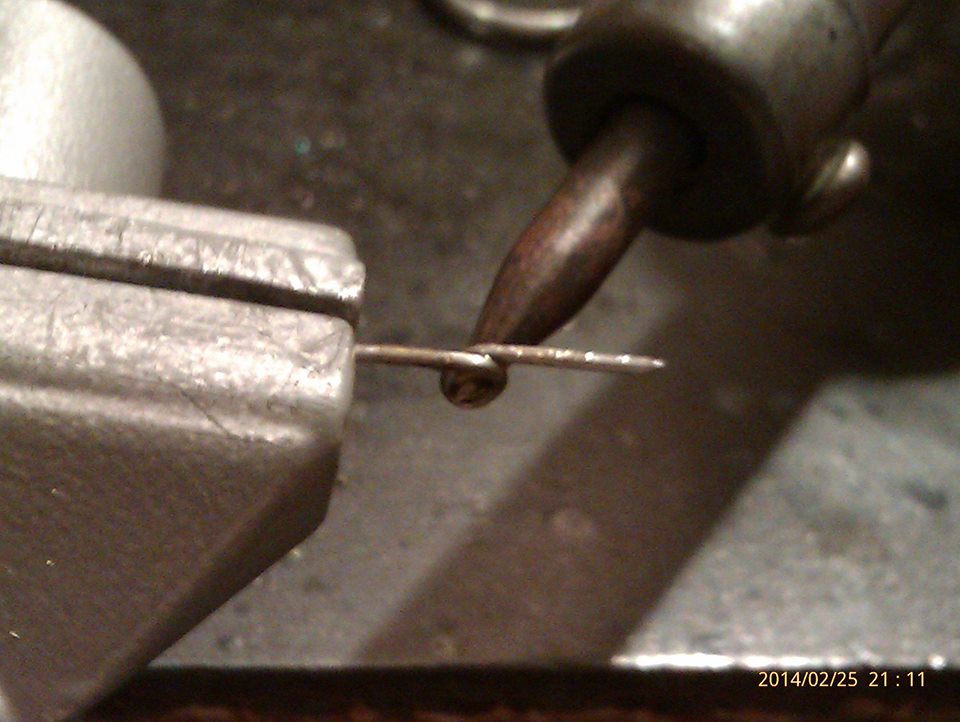
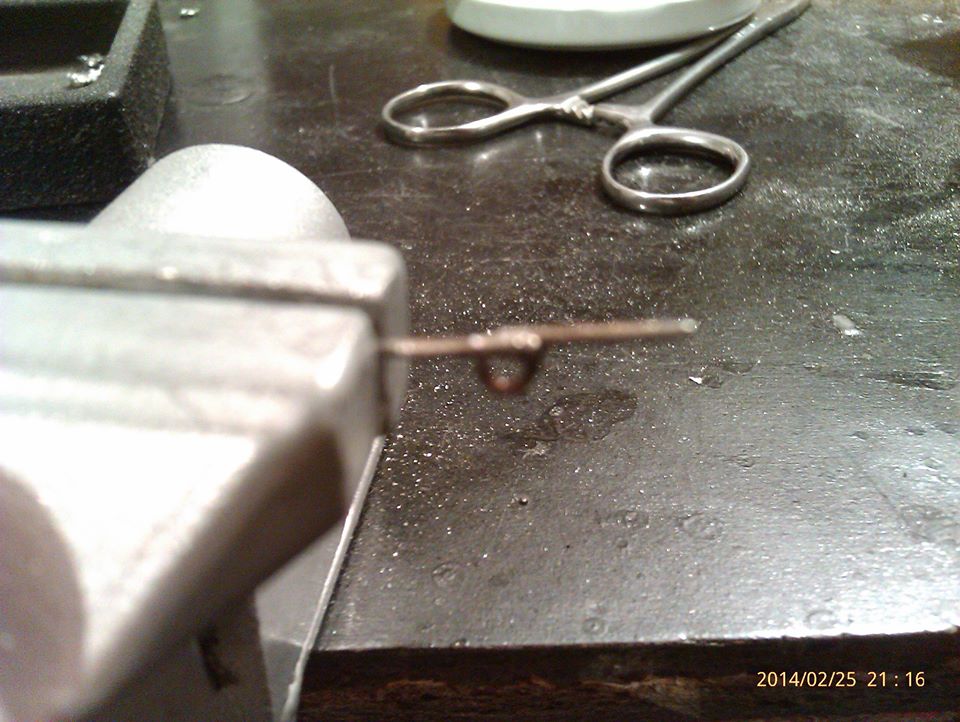
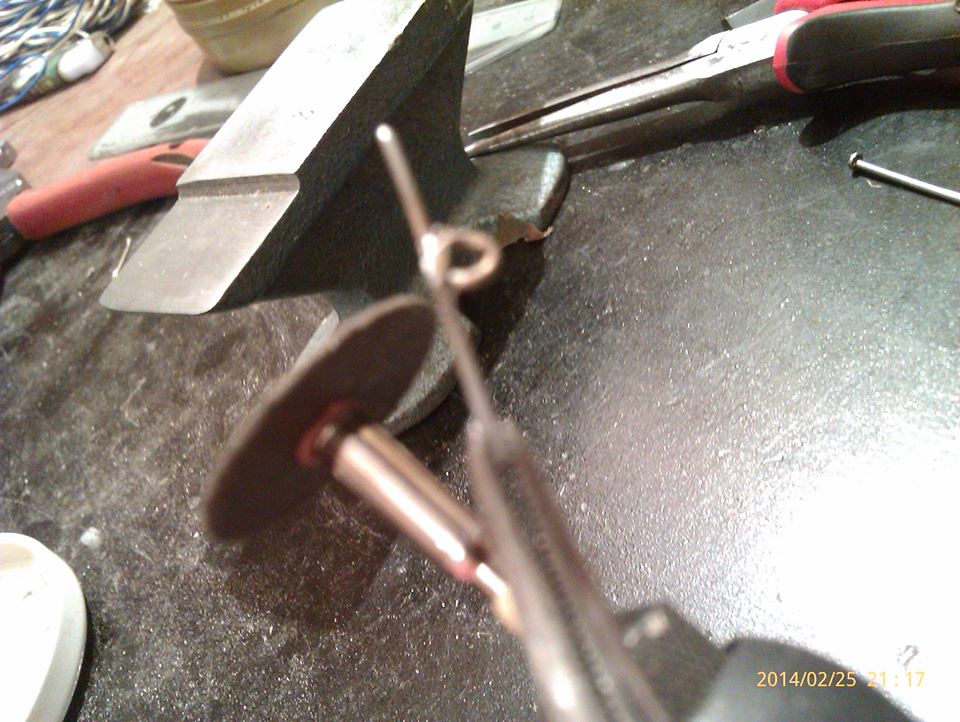
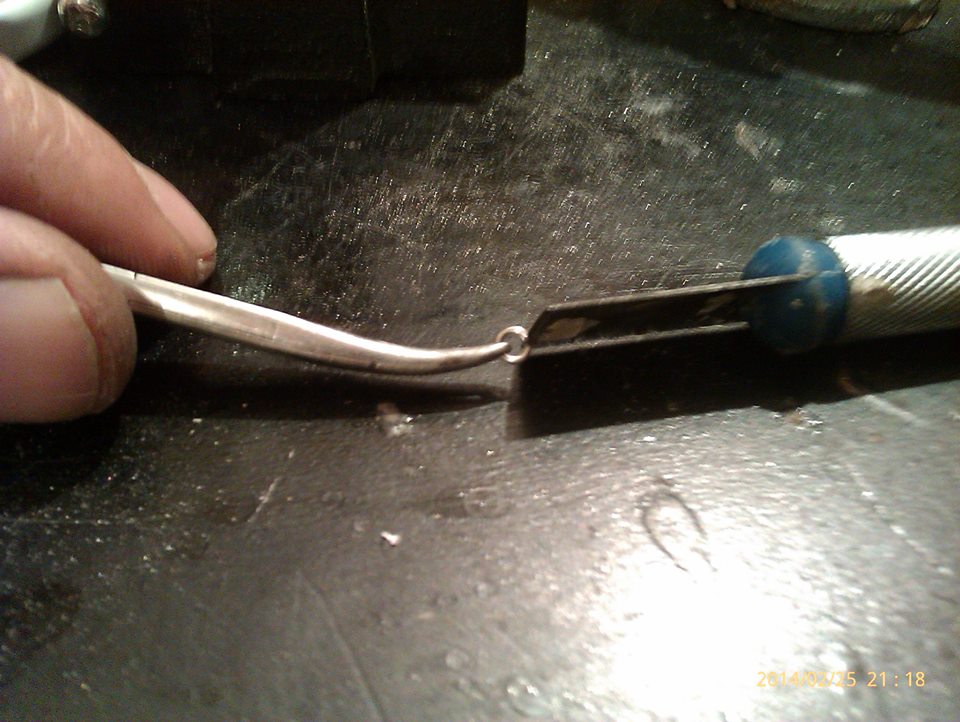
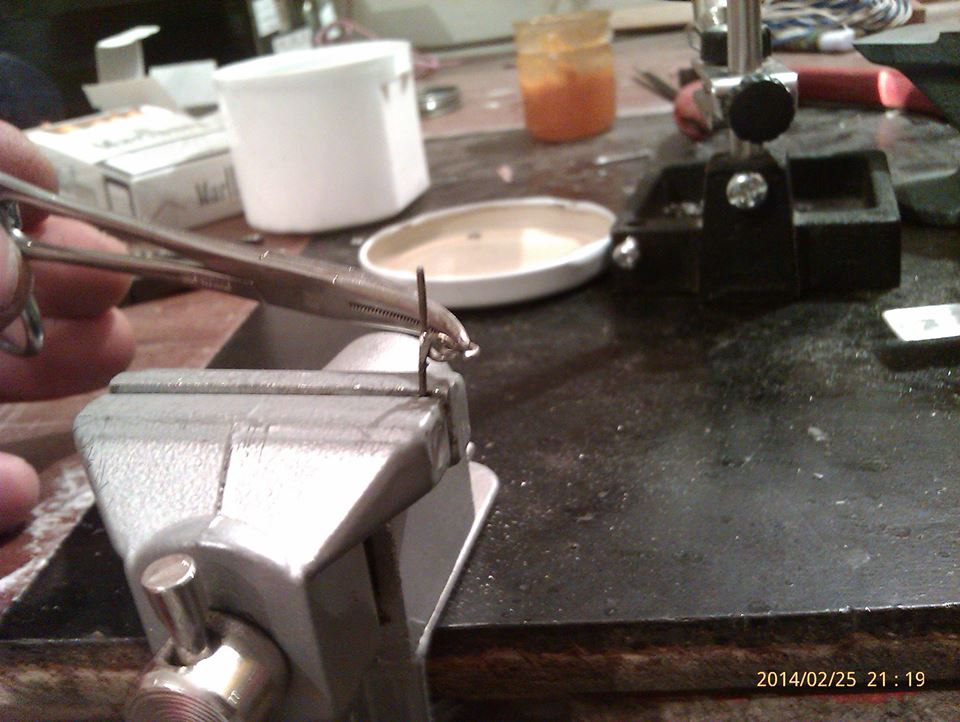
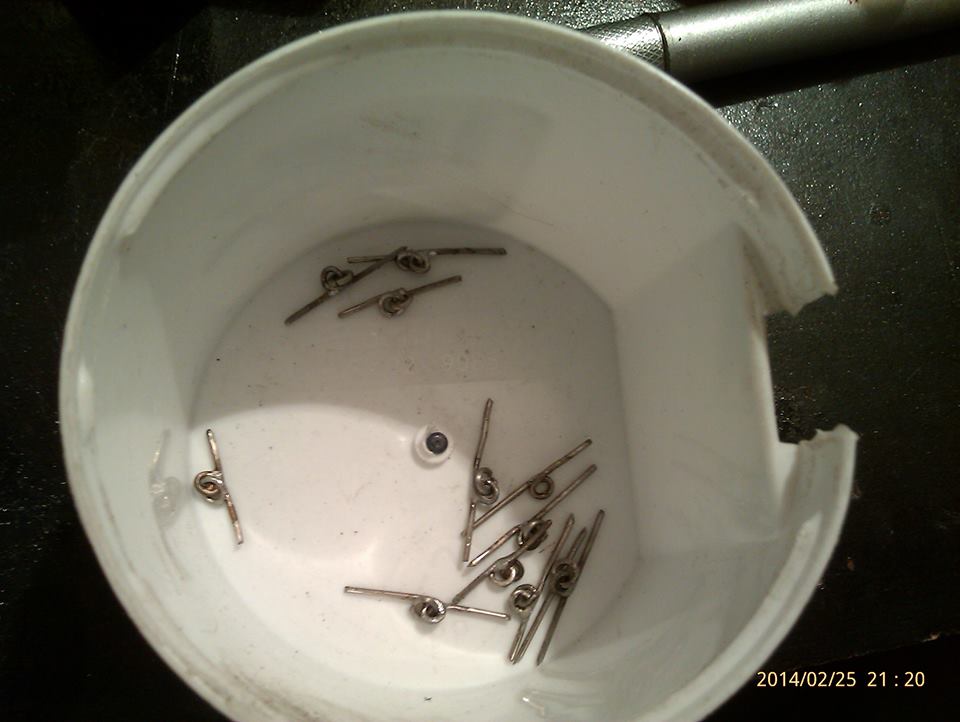
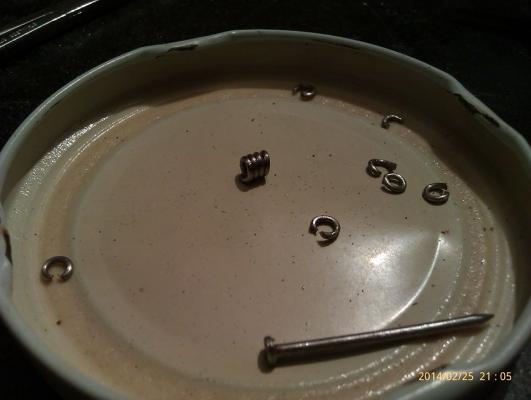
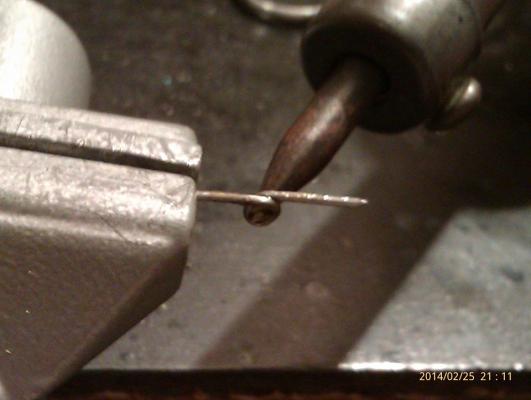
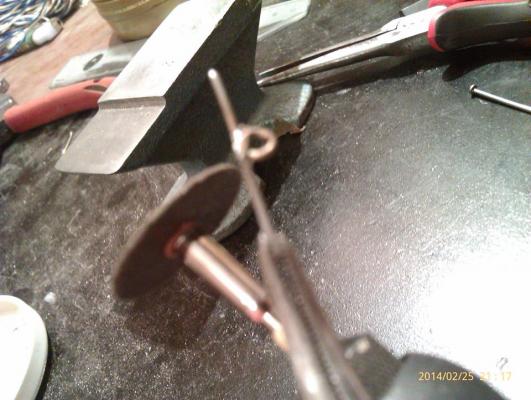
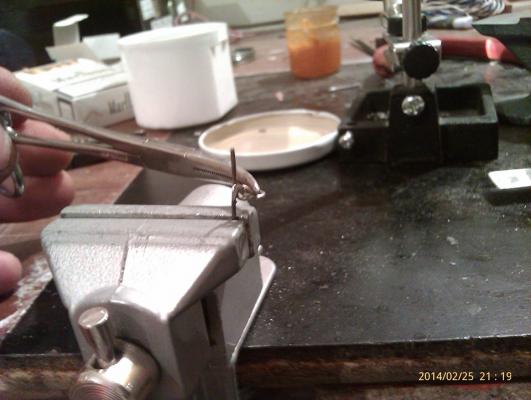
Factory starts working After too much philosophizing, let`s finally do it !!! In addition is Carton/Comic about making stanchions with rings Explanation is added as edit As I decided earlier about thickness of wire, next question was - what type of wire. Silver and cooper - to soft. Jewelry steel wire - to hard. What left without going to downtown - wire from thin office clips, hard enough, but still soft enough to allow work with First move is to rectify wire by hand and pilers for wire as much it is possible Additional rectify on anvil must follow. I learned this technique during building my house, same technique is used to rectify small parts of reinforcing iron. Every corner/angle/curve leaved on wire can cause problems later. There are very little parts, and curvature on wire on place you do not think about, can be large on place where you do not need them I have not hammer small enough, so "big" allen key can help. Cleaning wire with sandpaper 280. Significant from two reasons: 1 - there will be some soldering; 2 - roughened surface allow better adhesion of colour later Making rings. Do I mention I like rings ? This is most usual way to make them, I think there is no need for wider explanation, but some notes. As mold, at first, I use little nail little over 1 mm in diameter. Rings were about 2,5-3 mm in external diameter, what means about 1,5-2 mm in internal diameter, so there arise problem how to cut rings from spring. My scissors for wire in comparsion with ring seem like Tyrannosaurus Rex against mosquito, and there is no way to cut anything in with them inside spring What is solution ? I use one number bigger nail as mold, and make cutting line with Dremell cutting circle. Trace of cutting is little less than 1 mm, so when you connect edges, you got exactly diameter as you use narrow nail Dont forget to allign edges to right position in spring, Use pair of fine wire pilers Define safe place to hold and keep them. Even sneezing can blow them from table. And there is no way to find this little rings on dusty floor . Do not even try. Make more rings than you need. some of them will sure be unworkable Correct curvature, but do not connect edges !!! If you connect edges in this phase, you go in trouble latter, because then will be very hard to open edges Correct and form next piece of wire, cutt to dimension, and start making some stanchion around smaller than two nails Tight edges with pilers until stanchion is still on nail, then take it of and align in all direction. Tighten ring on stanchion from all direction slightly, keeping in mind not to change its diameter and shape. Align again and tight again until you will be satisfied And here is product Stanchion is strong enough No soldering has to be done. But I did it for aesthetic reasons - surface is much better looking with "holes" little "filled up". Also make more than you need. Then you can chose better of them to mount Carefully and slightly clean soldered part with Dremell ( I must use magnyfier) Put stanchion in table clamp, and then with medical pean take ring. It is important to take ring in opposite side of the opening. Pean or tweezers that can remain tight are essential for this Carefully with blade spread hole, only enough to squeeze trough ring on stanchion Squeeze gently, and do not unhold pean !!! Keep in mind elevation of ring and correct it before mounting Holding pean with ring in one hand, with other hadn use pilers to close opening slightly. Tight closed ring again. If you want and know how, you can solder connection on ring Finished stanchions put somewhere in safe place to wait for painting It takes 10-15 min for one stanchion, if they do not fall from workspace. There have to be 52, 26 with rings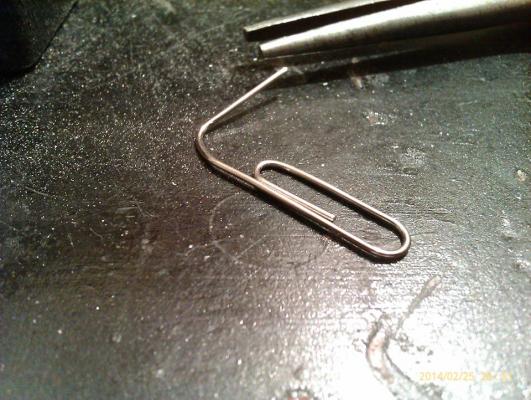


- 4,152 replies
-
- 10
-
-
- cutty sark
- tehnodidakta
- (and 1 more)
-
That seems to be general problem with white acrylic