HOLIDAY DONATION DRIVE - SUPPORT MSW - DO YOUR PART TO KEEP THIS GREAT FORUM GOING! (Only 75 donations so far out of 49,000 members - C'mon guys!)
×


yvesvidal
-
Posts
3,607 -
Joined
-
Last visited
Content Type
Profiles
Forums
Gallery
Events
Everything posted by yvesvidal
-
 I am planning to follow your build log, since I purchased that kit a year or two ago. You have made some great progress, so far. Yves
 -
Go for it. It is a nice little kit and will allow you to build a plank of frames hull, exactly like a real ship. Mine is currently stopped, as I am pursuing other projects, but I hope to finish it one day. The scale of 1/32nd is also perfect if you decide to build a diorama around it, with the vast choice of figures and details in either 1/32nd or 1/35th scales. Yves
-
The old Lindberg Bismarck kit had a clever way to elevate the guns while rotating them. Look it up. Yves
-
Beautiful little vessel. I love Billing Boats kits. Yves
-
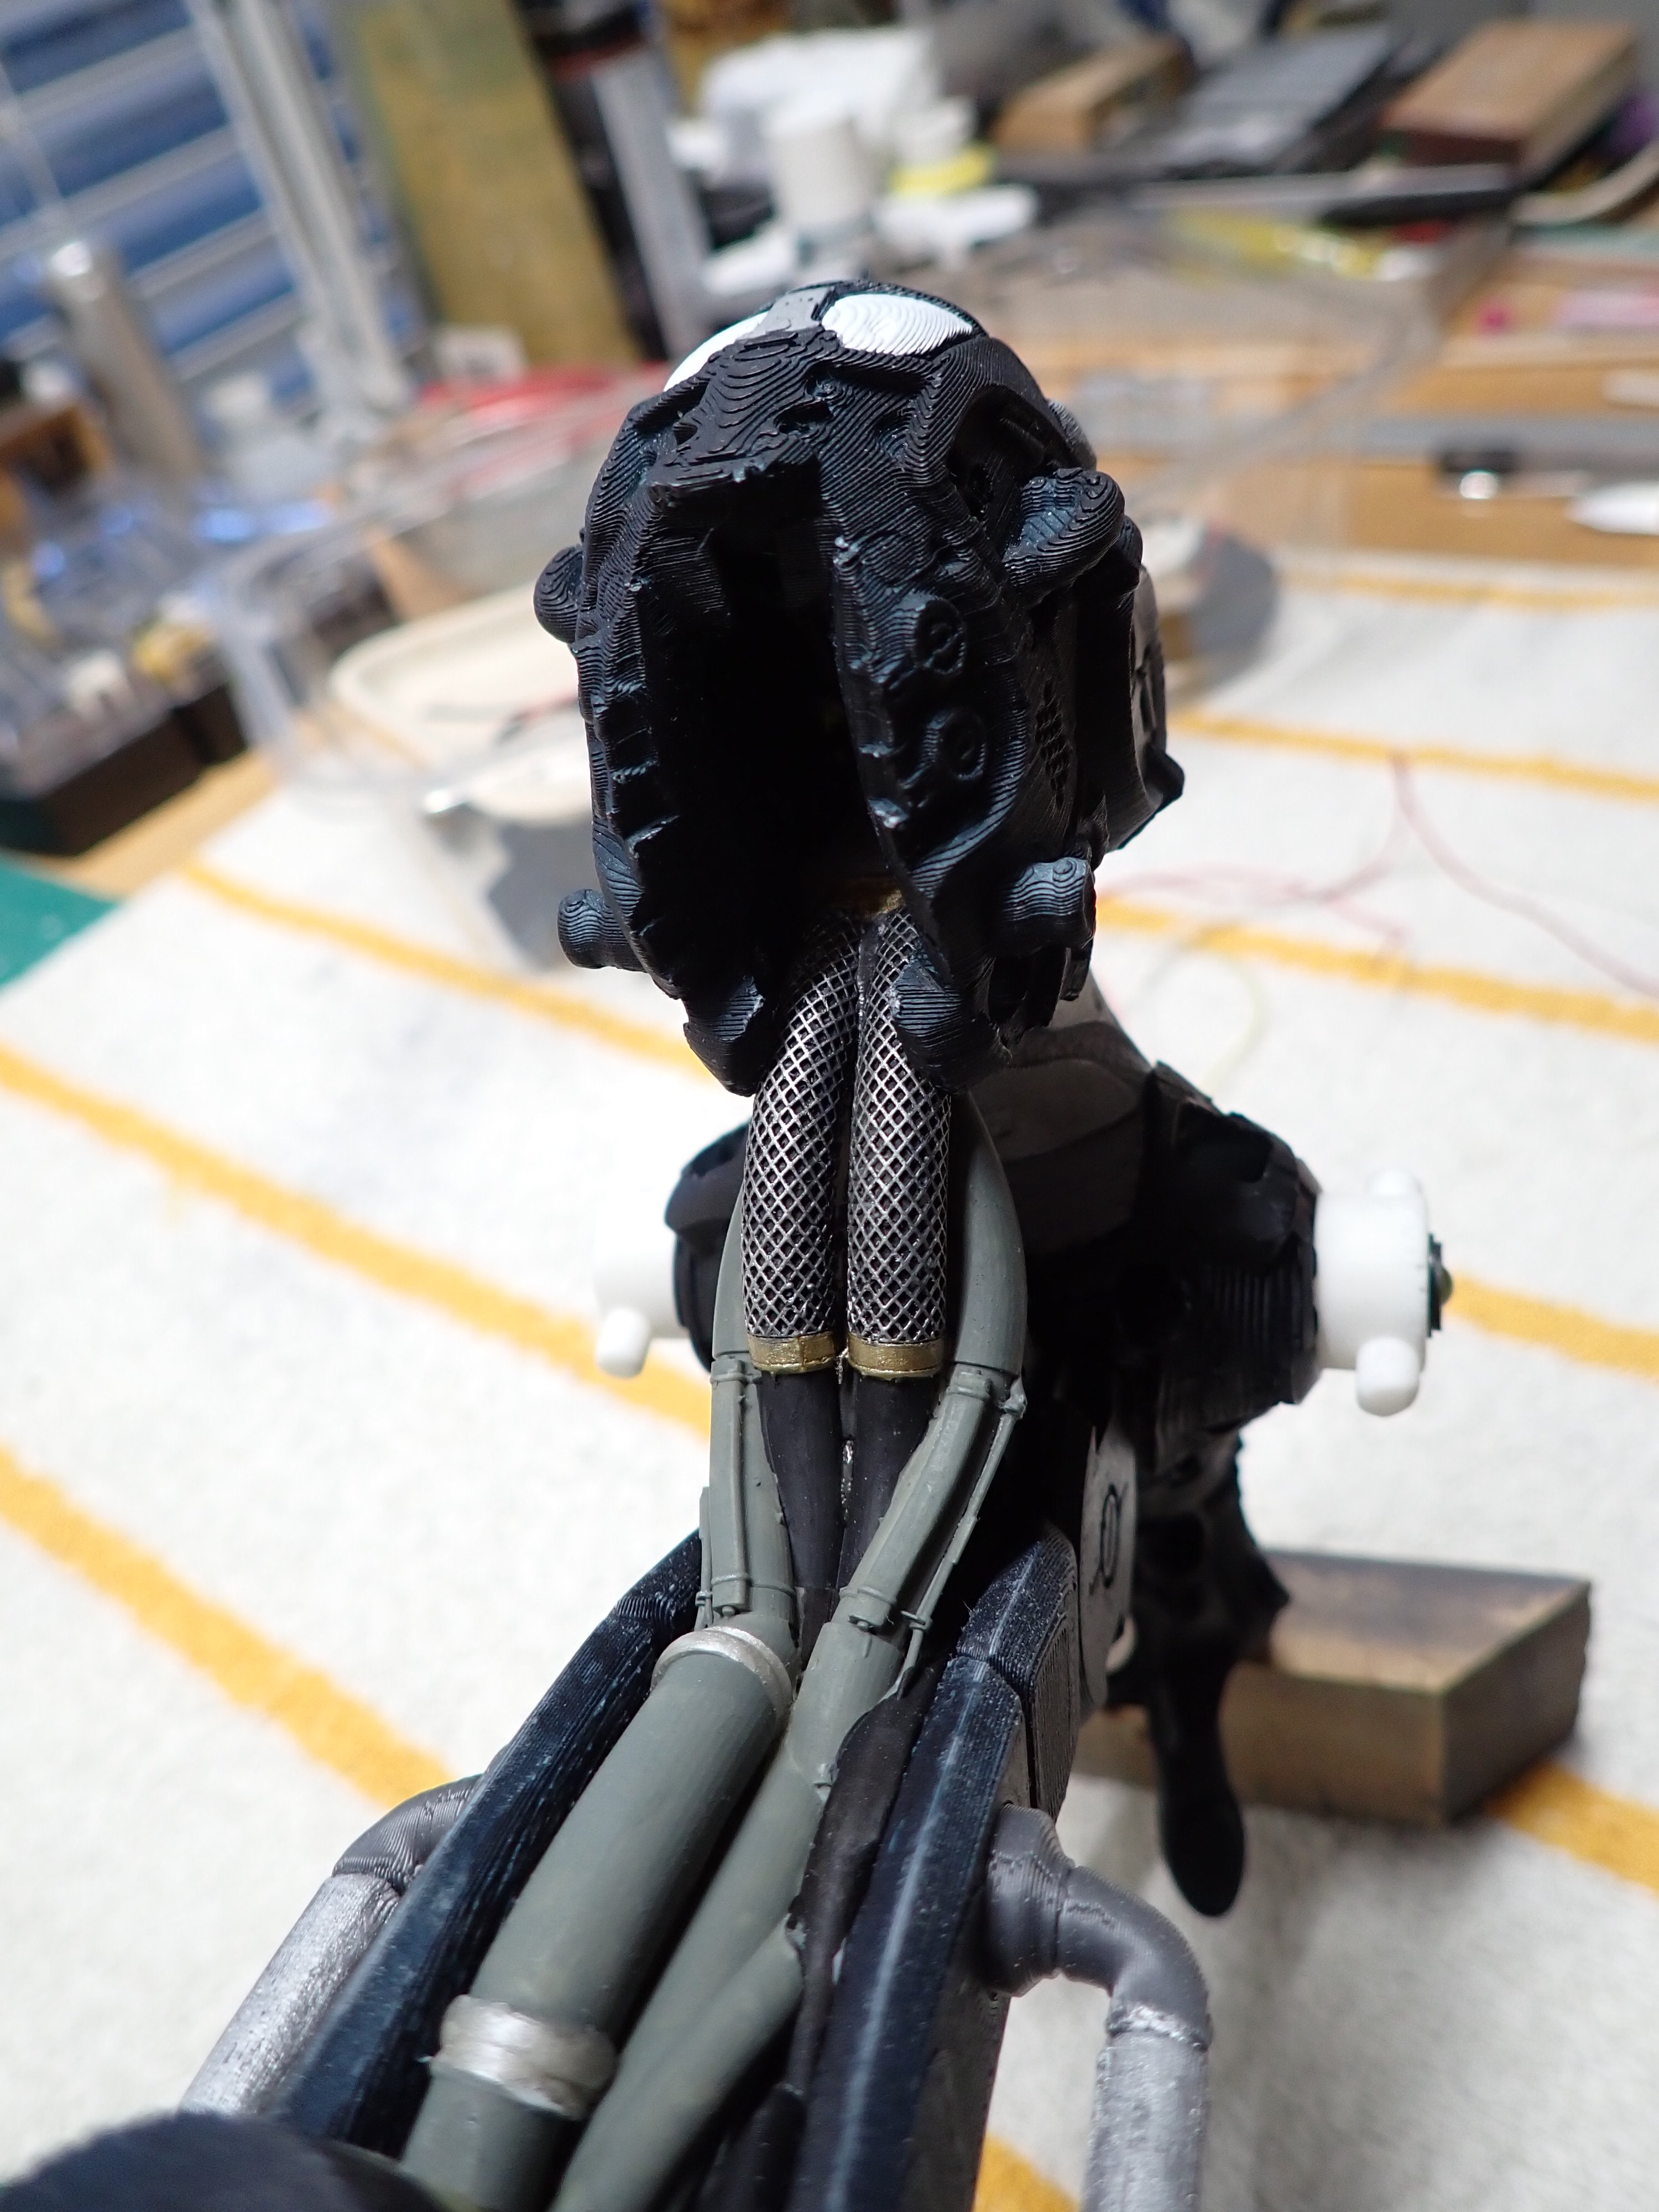
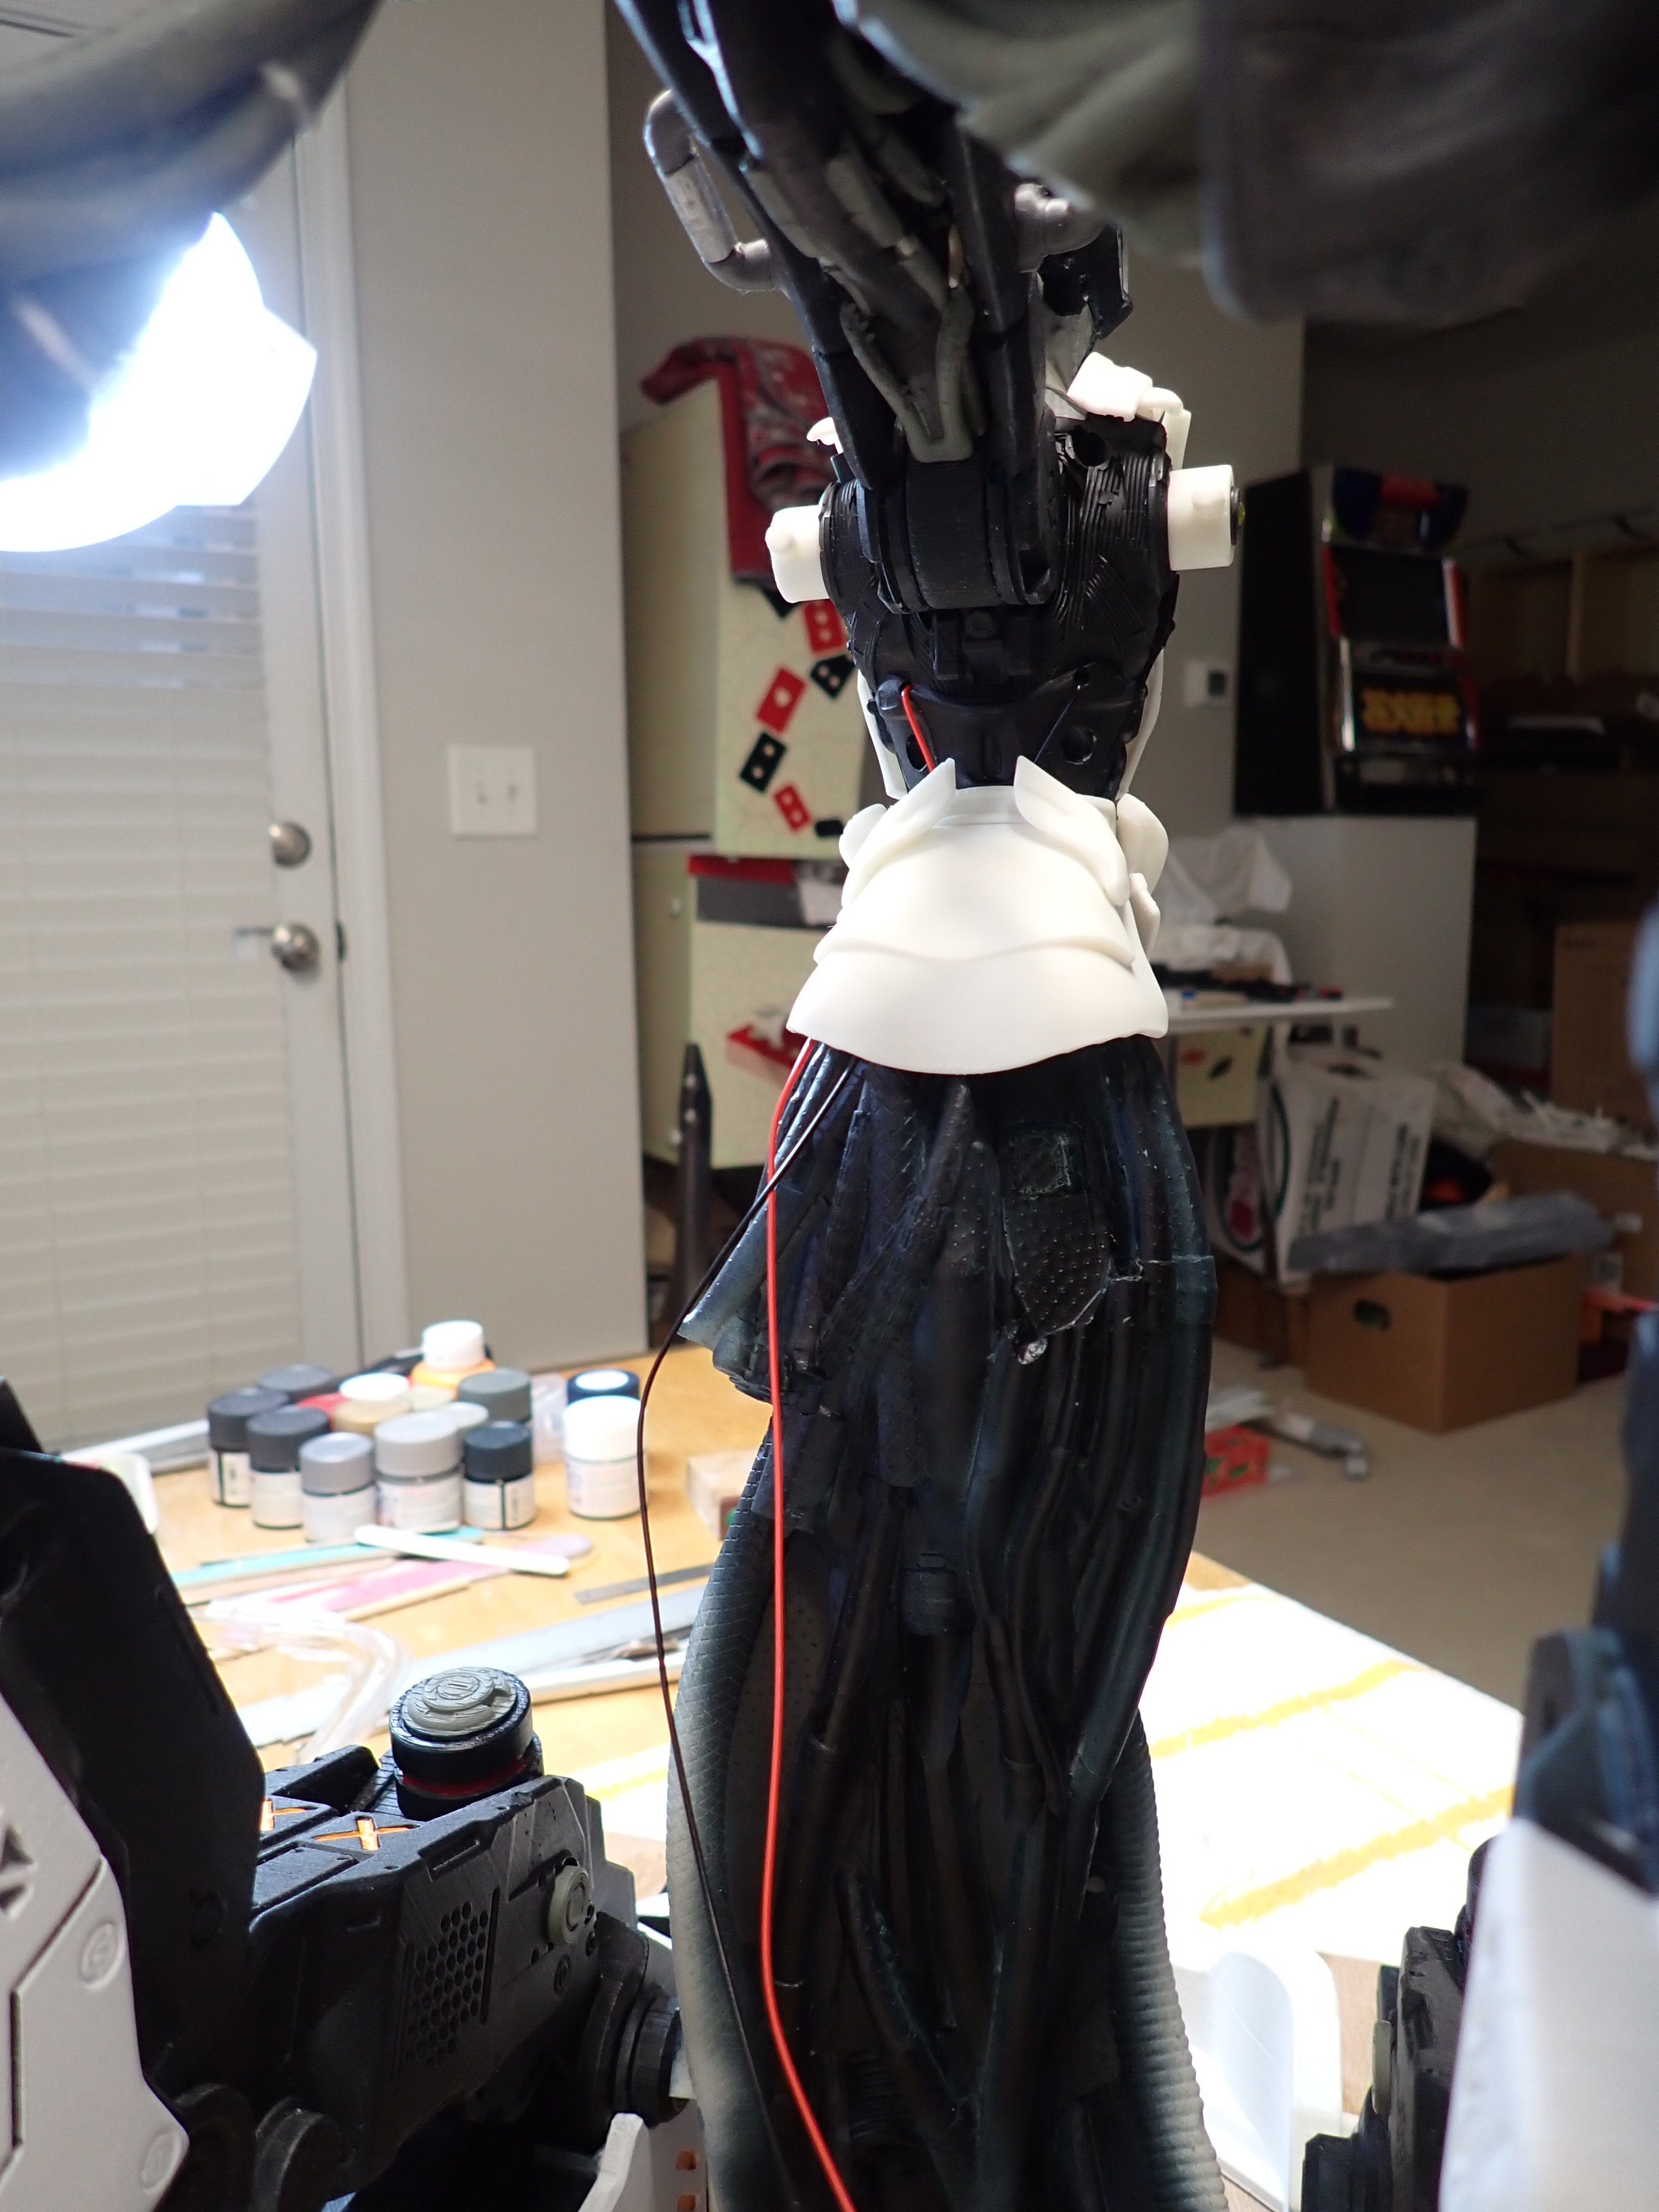
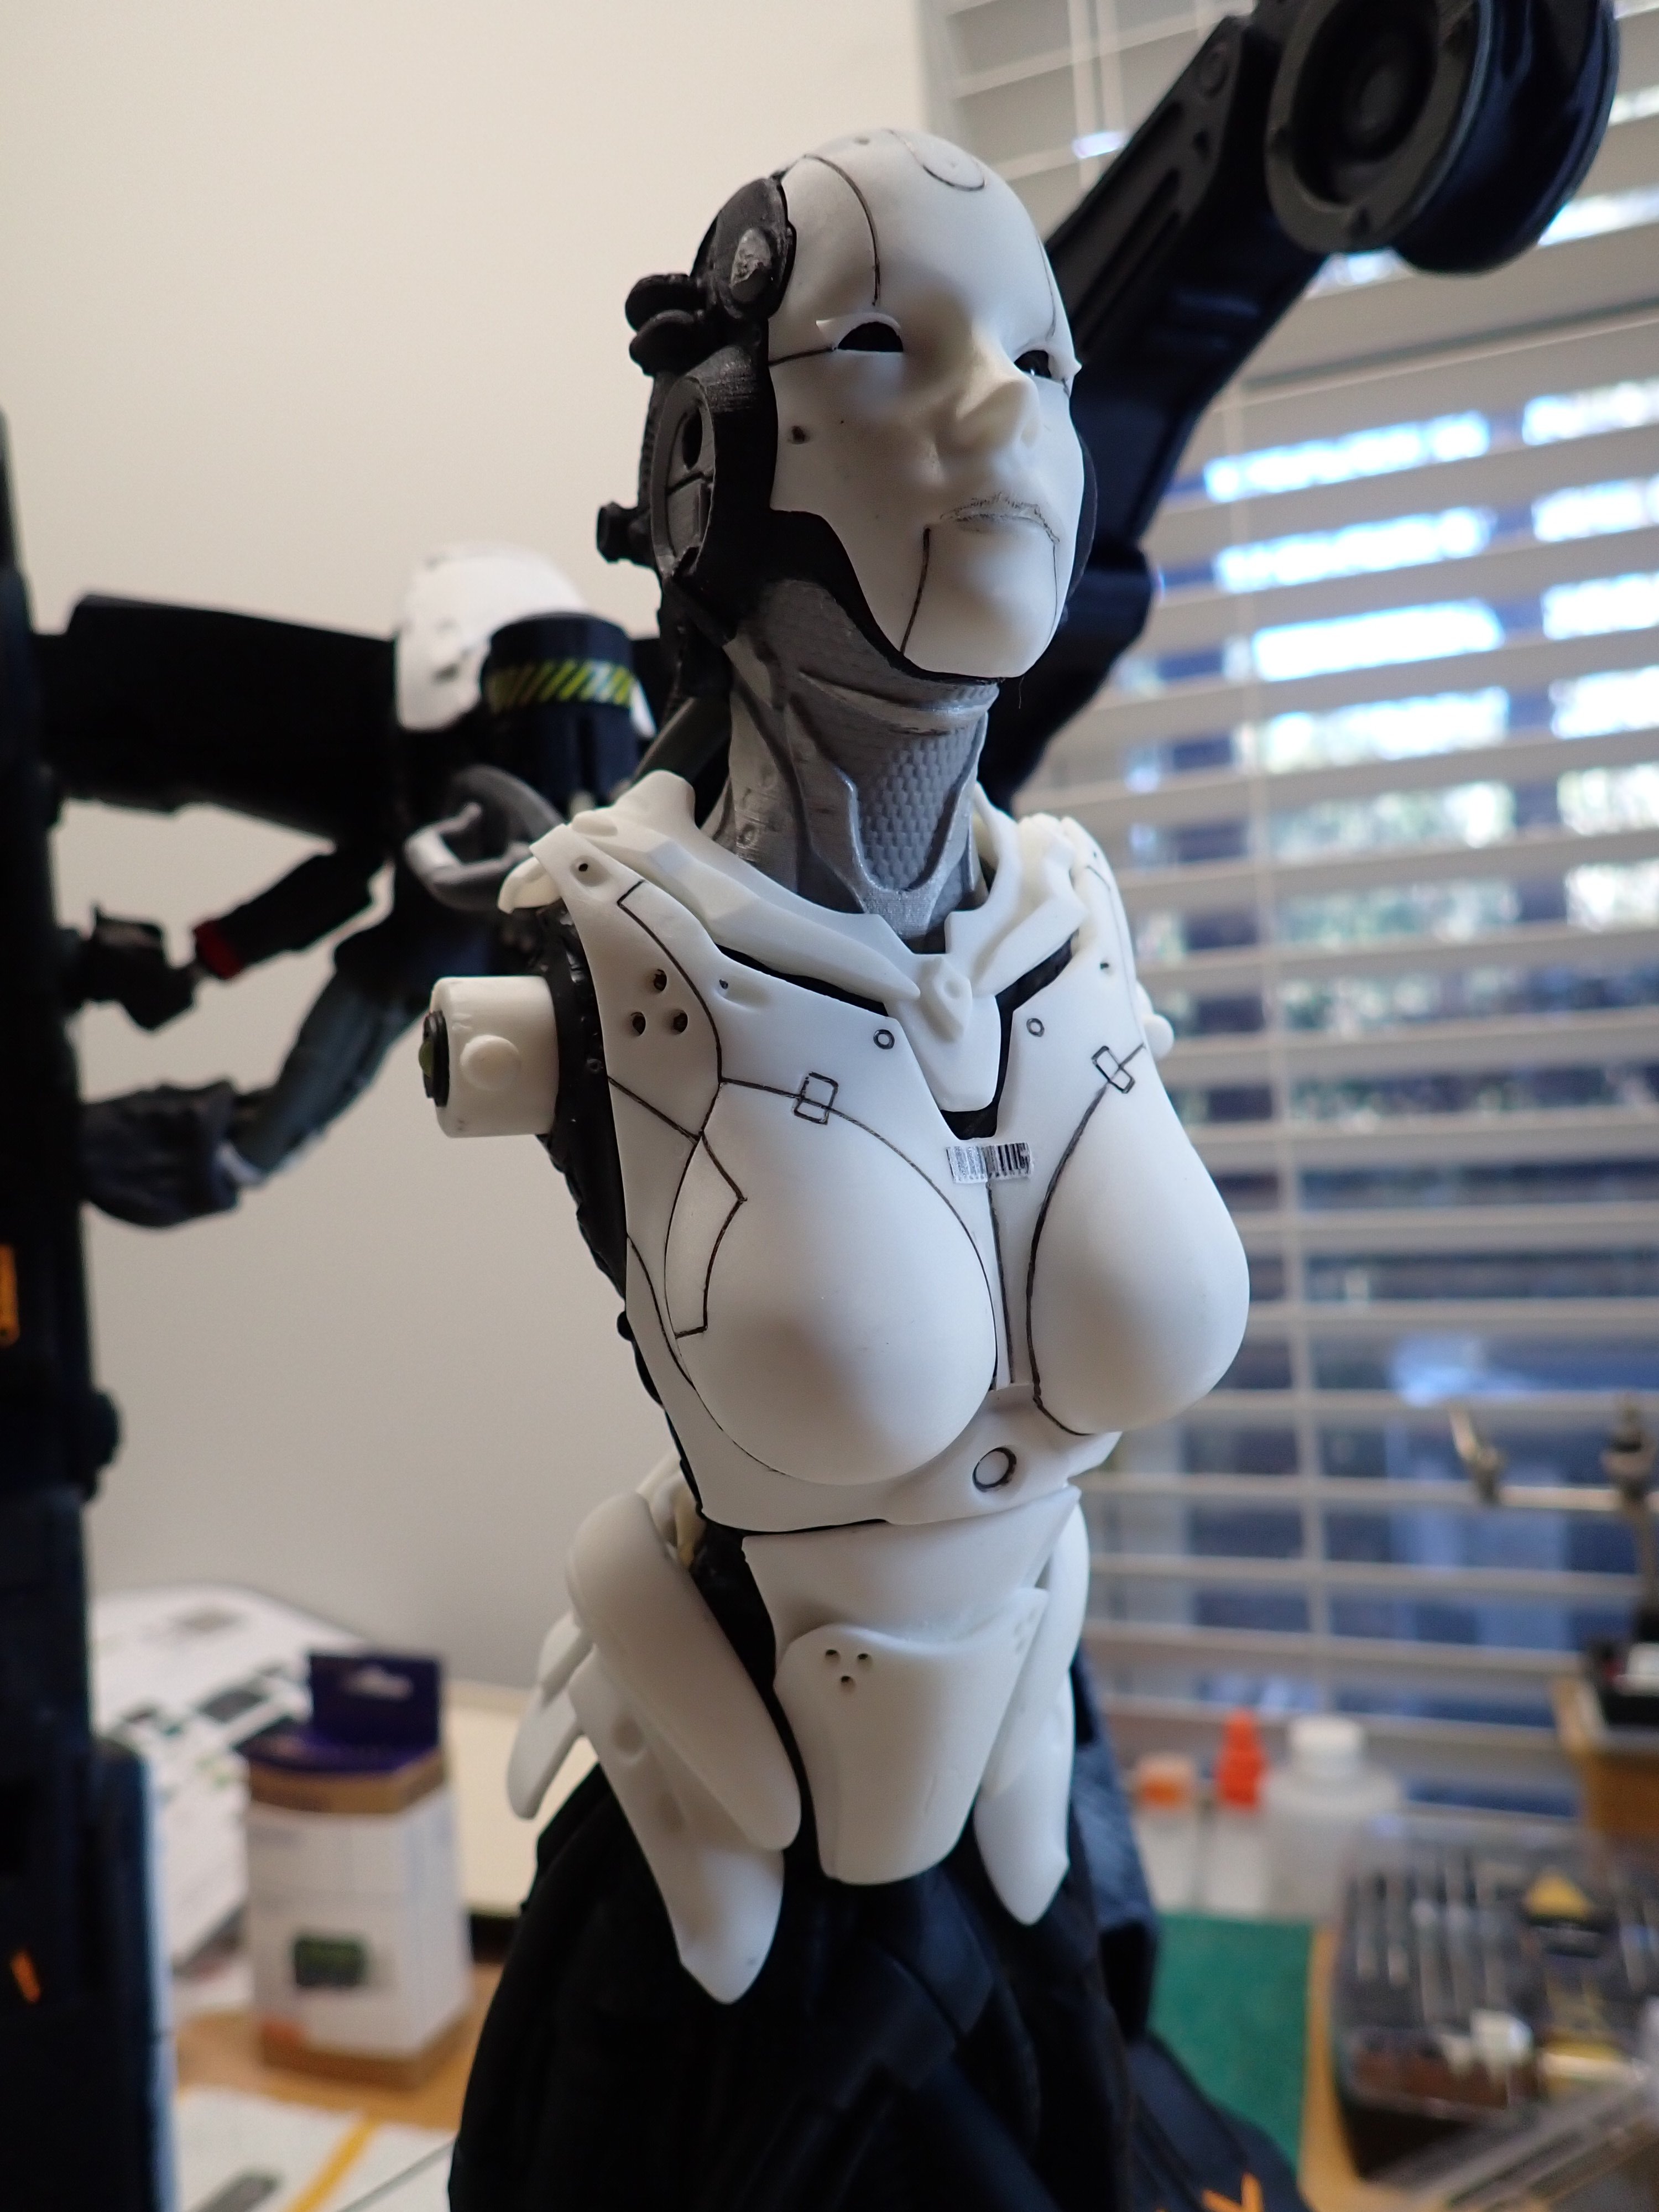
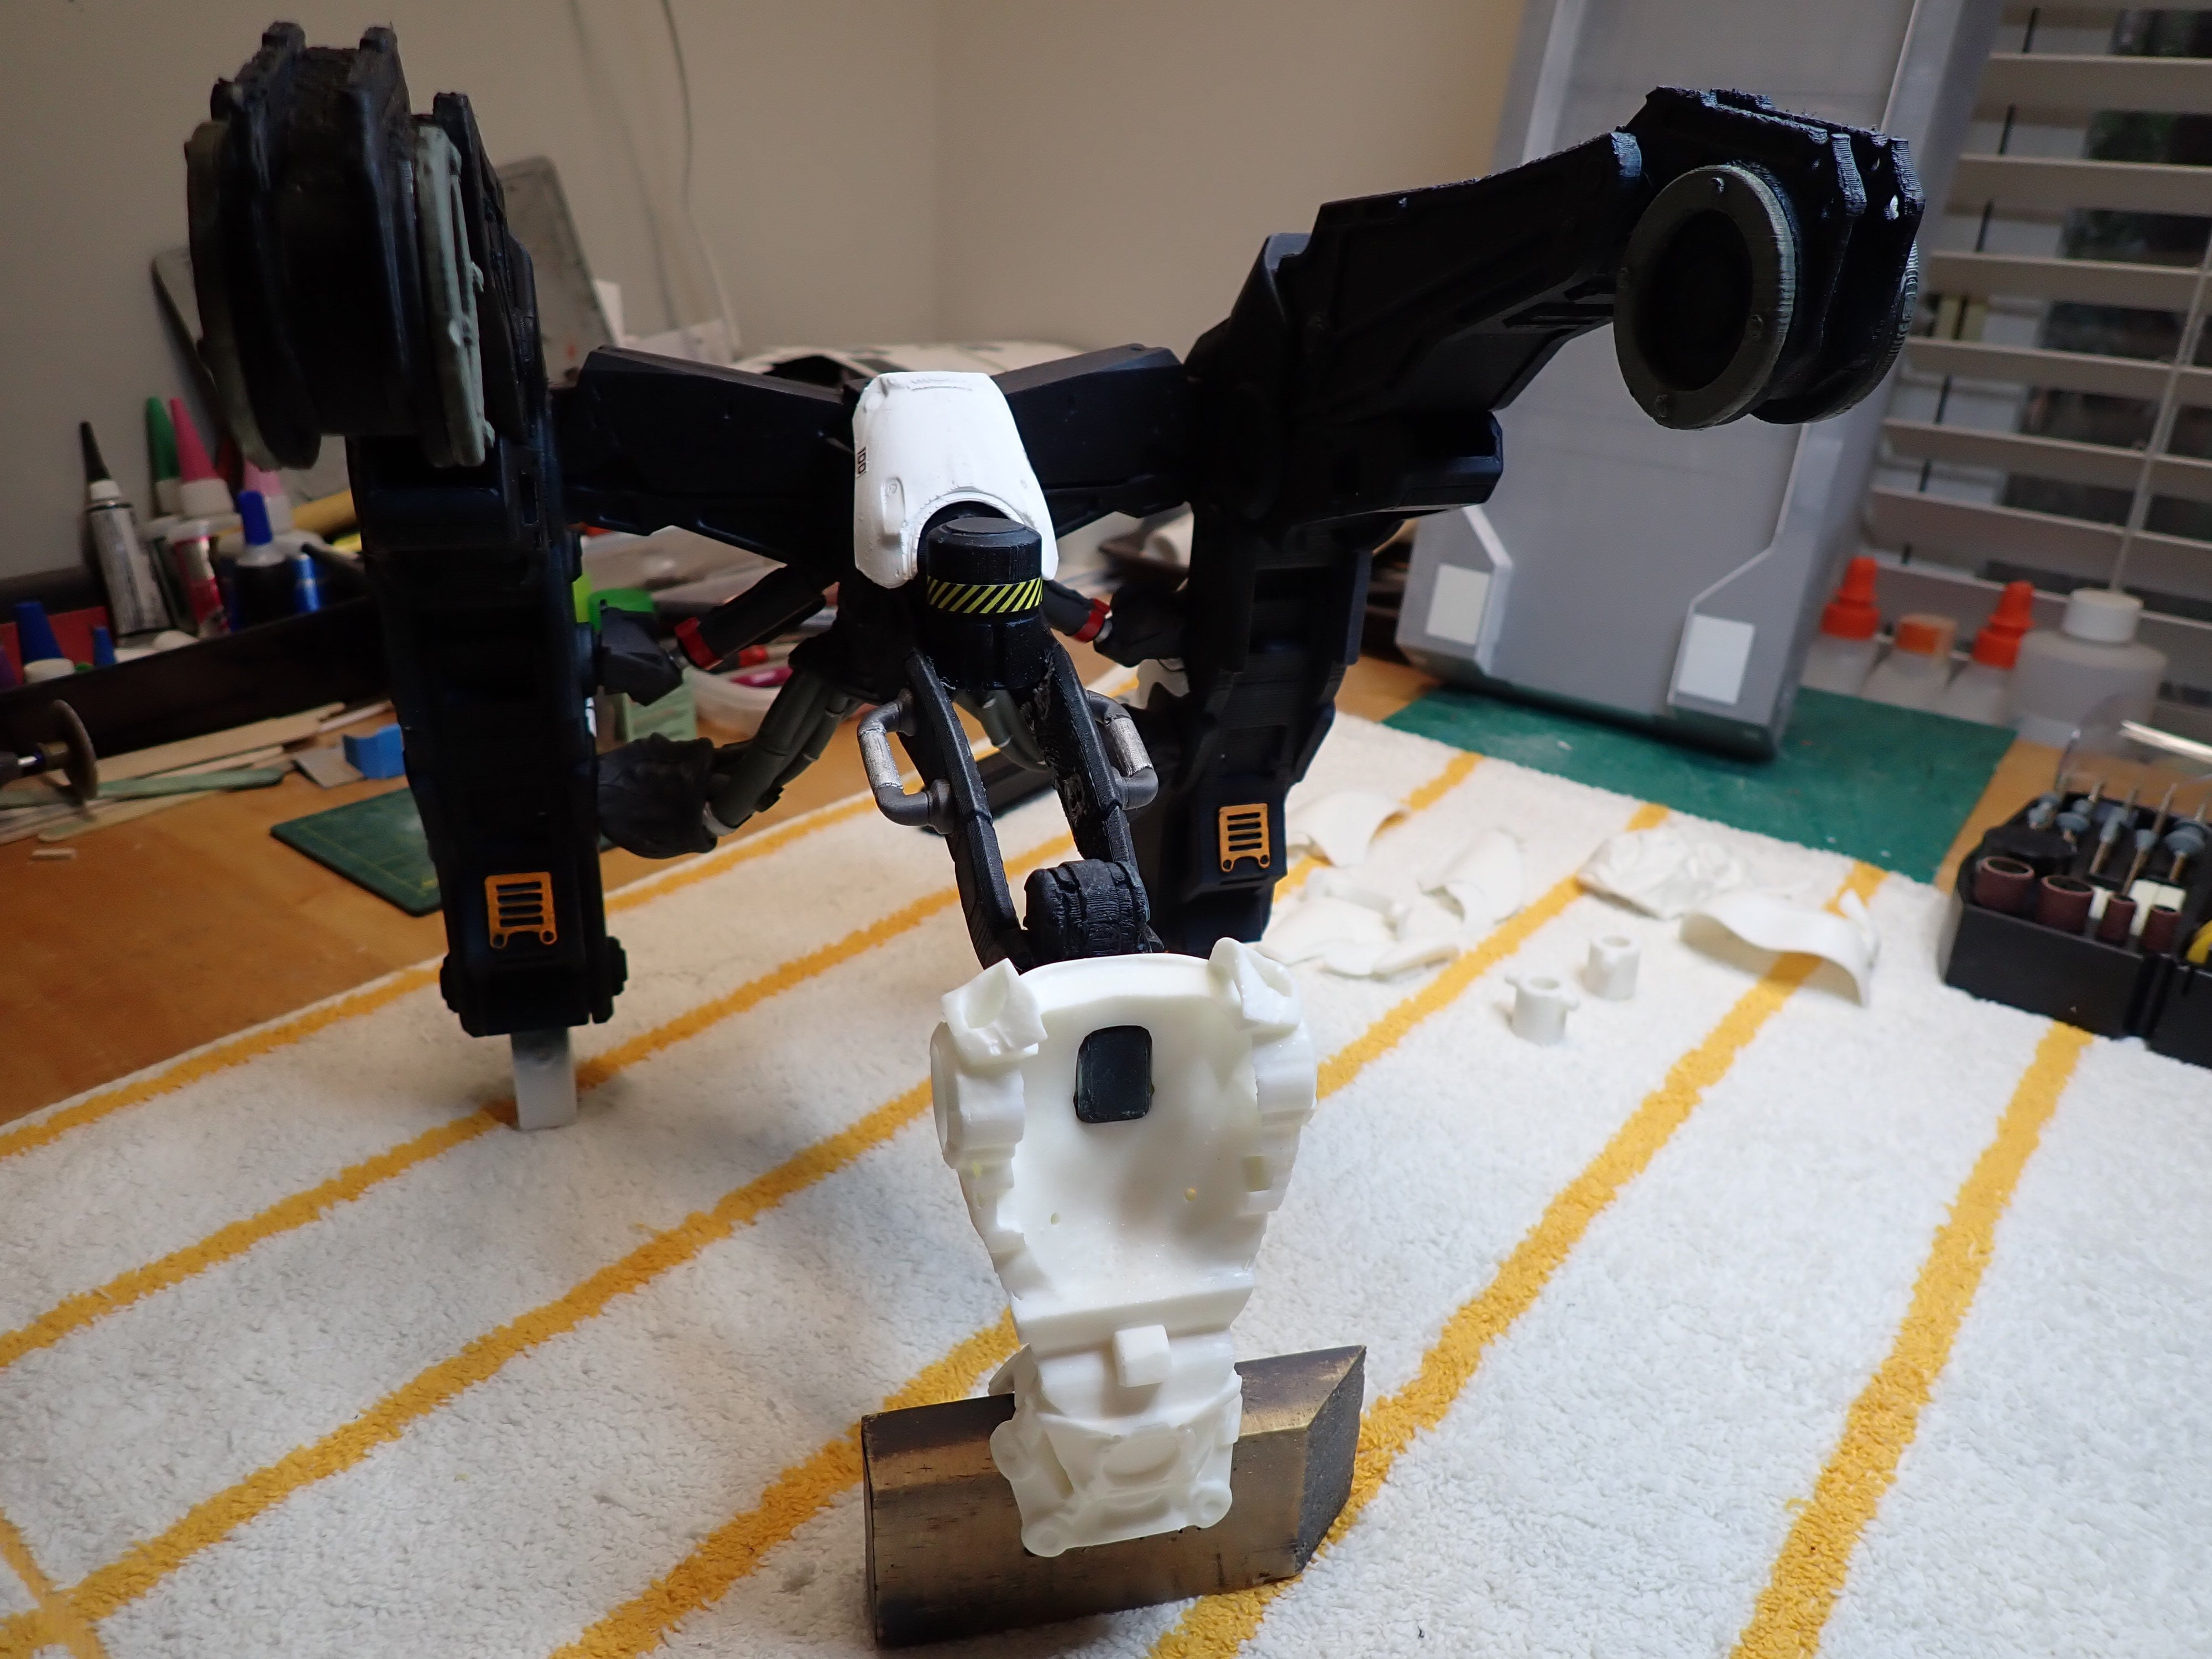
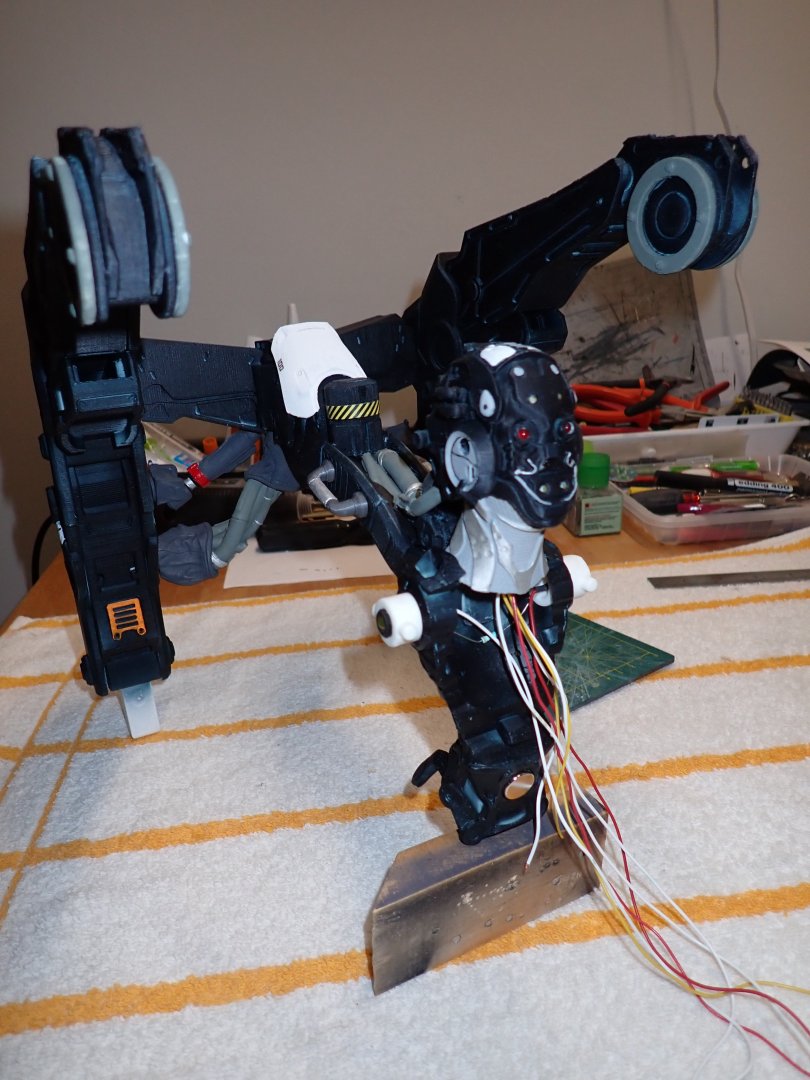
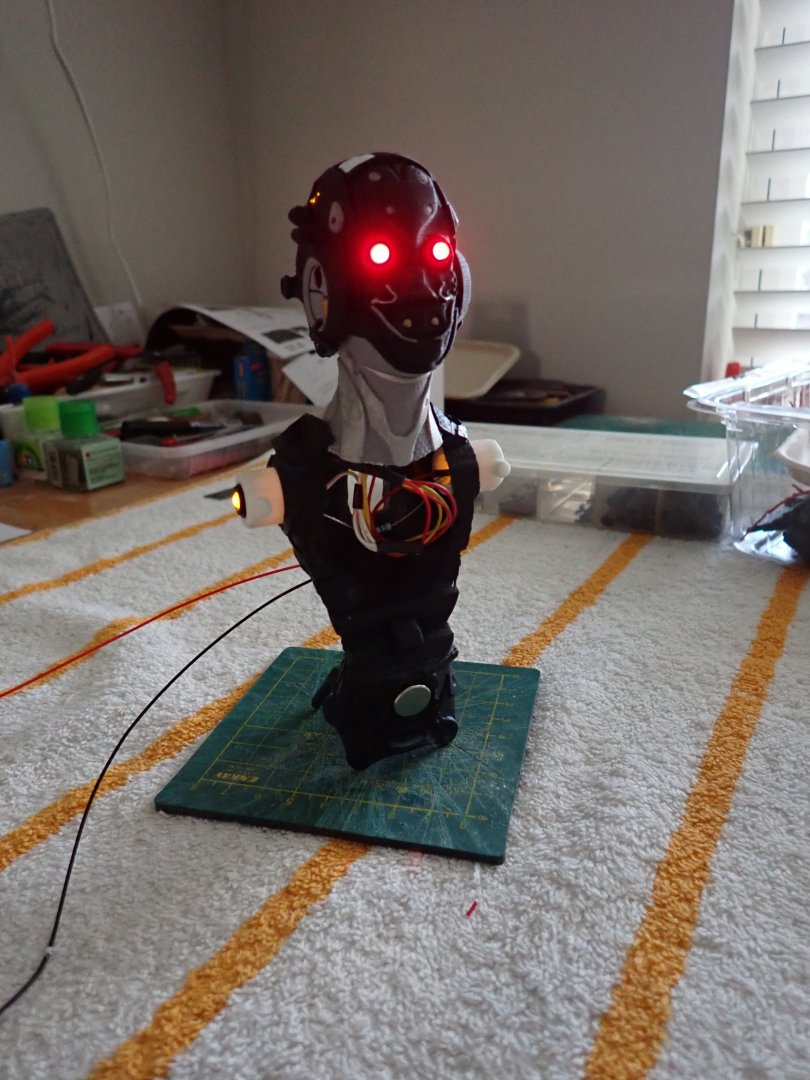
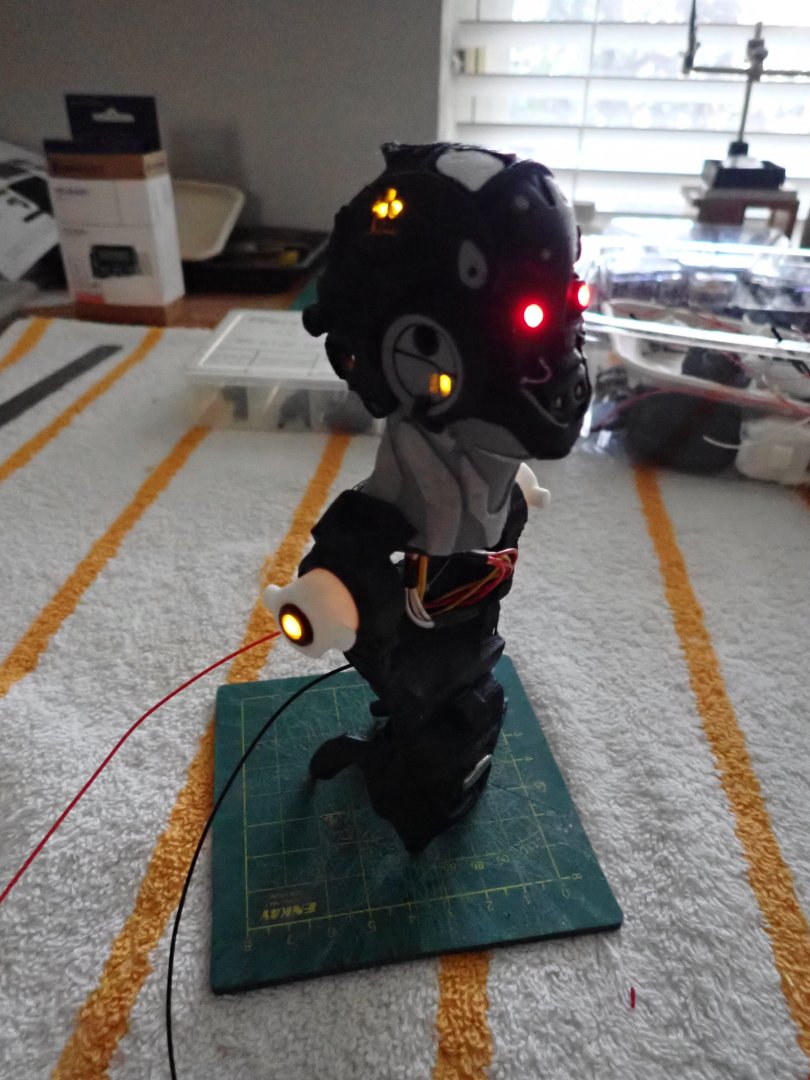
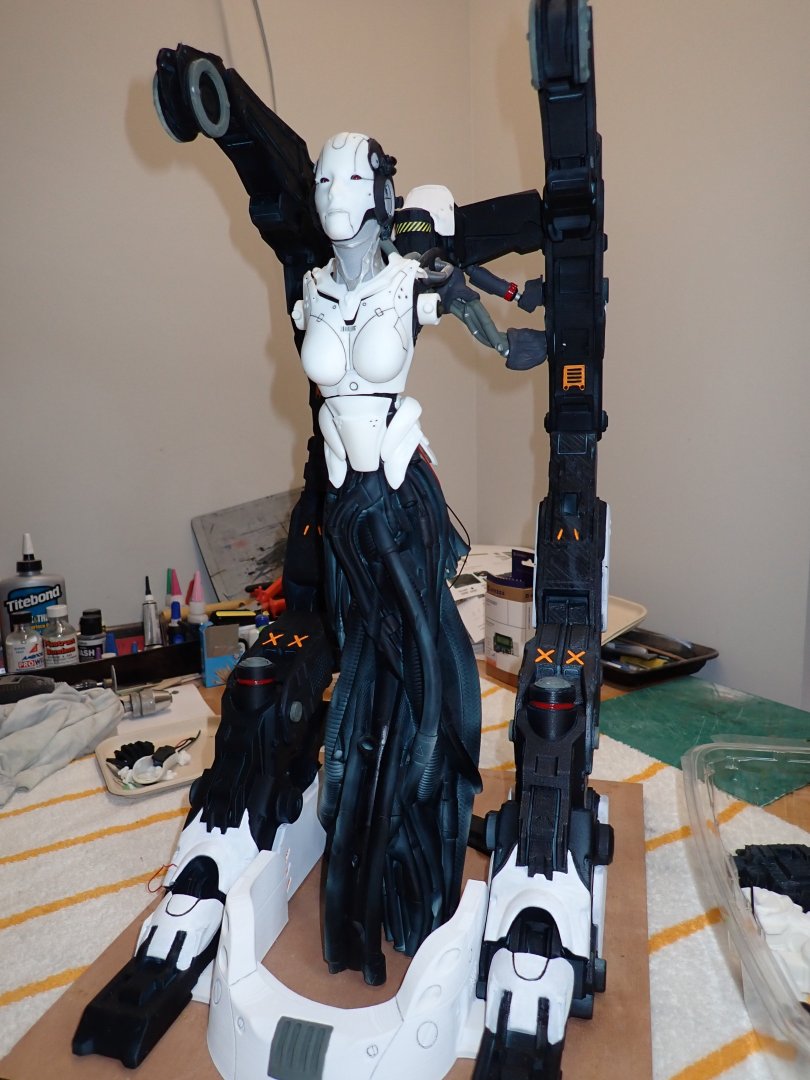
I am putting together the main components, to make sure that everything fits more or less correctly. First verification that neck and back are fitting to the "Hangar" crane: It seems to click in place, correctly. Then verification that the LEDs are working, after some soldering: The LEDs at the top of the cranium are flickering, showing some intense computing activity. Shoulders are also equipped with LEDs. Below, I will have to paint in black, the inside of the face mask to avoid light leaks. The wires are coming out through the back and are hidden by the various pieces of the armor. They will be invisible, once finished. Finally, a teaser for our audience. Putting everything together without most of the plumbing..... Her sweet derriere.... Aerial view, showing the main cooling hoses to the computer: I hope you are enjoying this crazy project. Yves


-
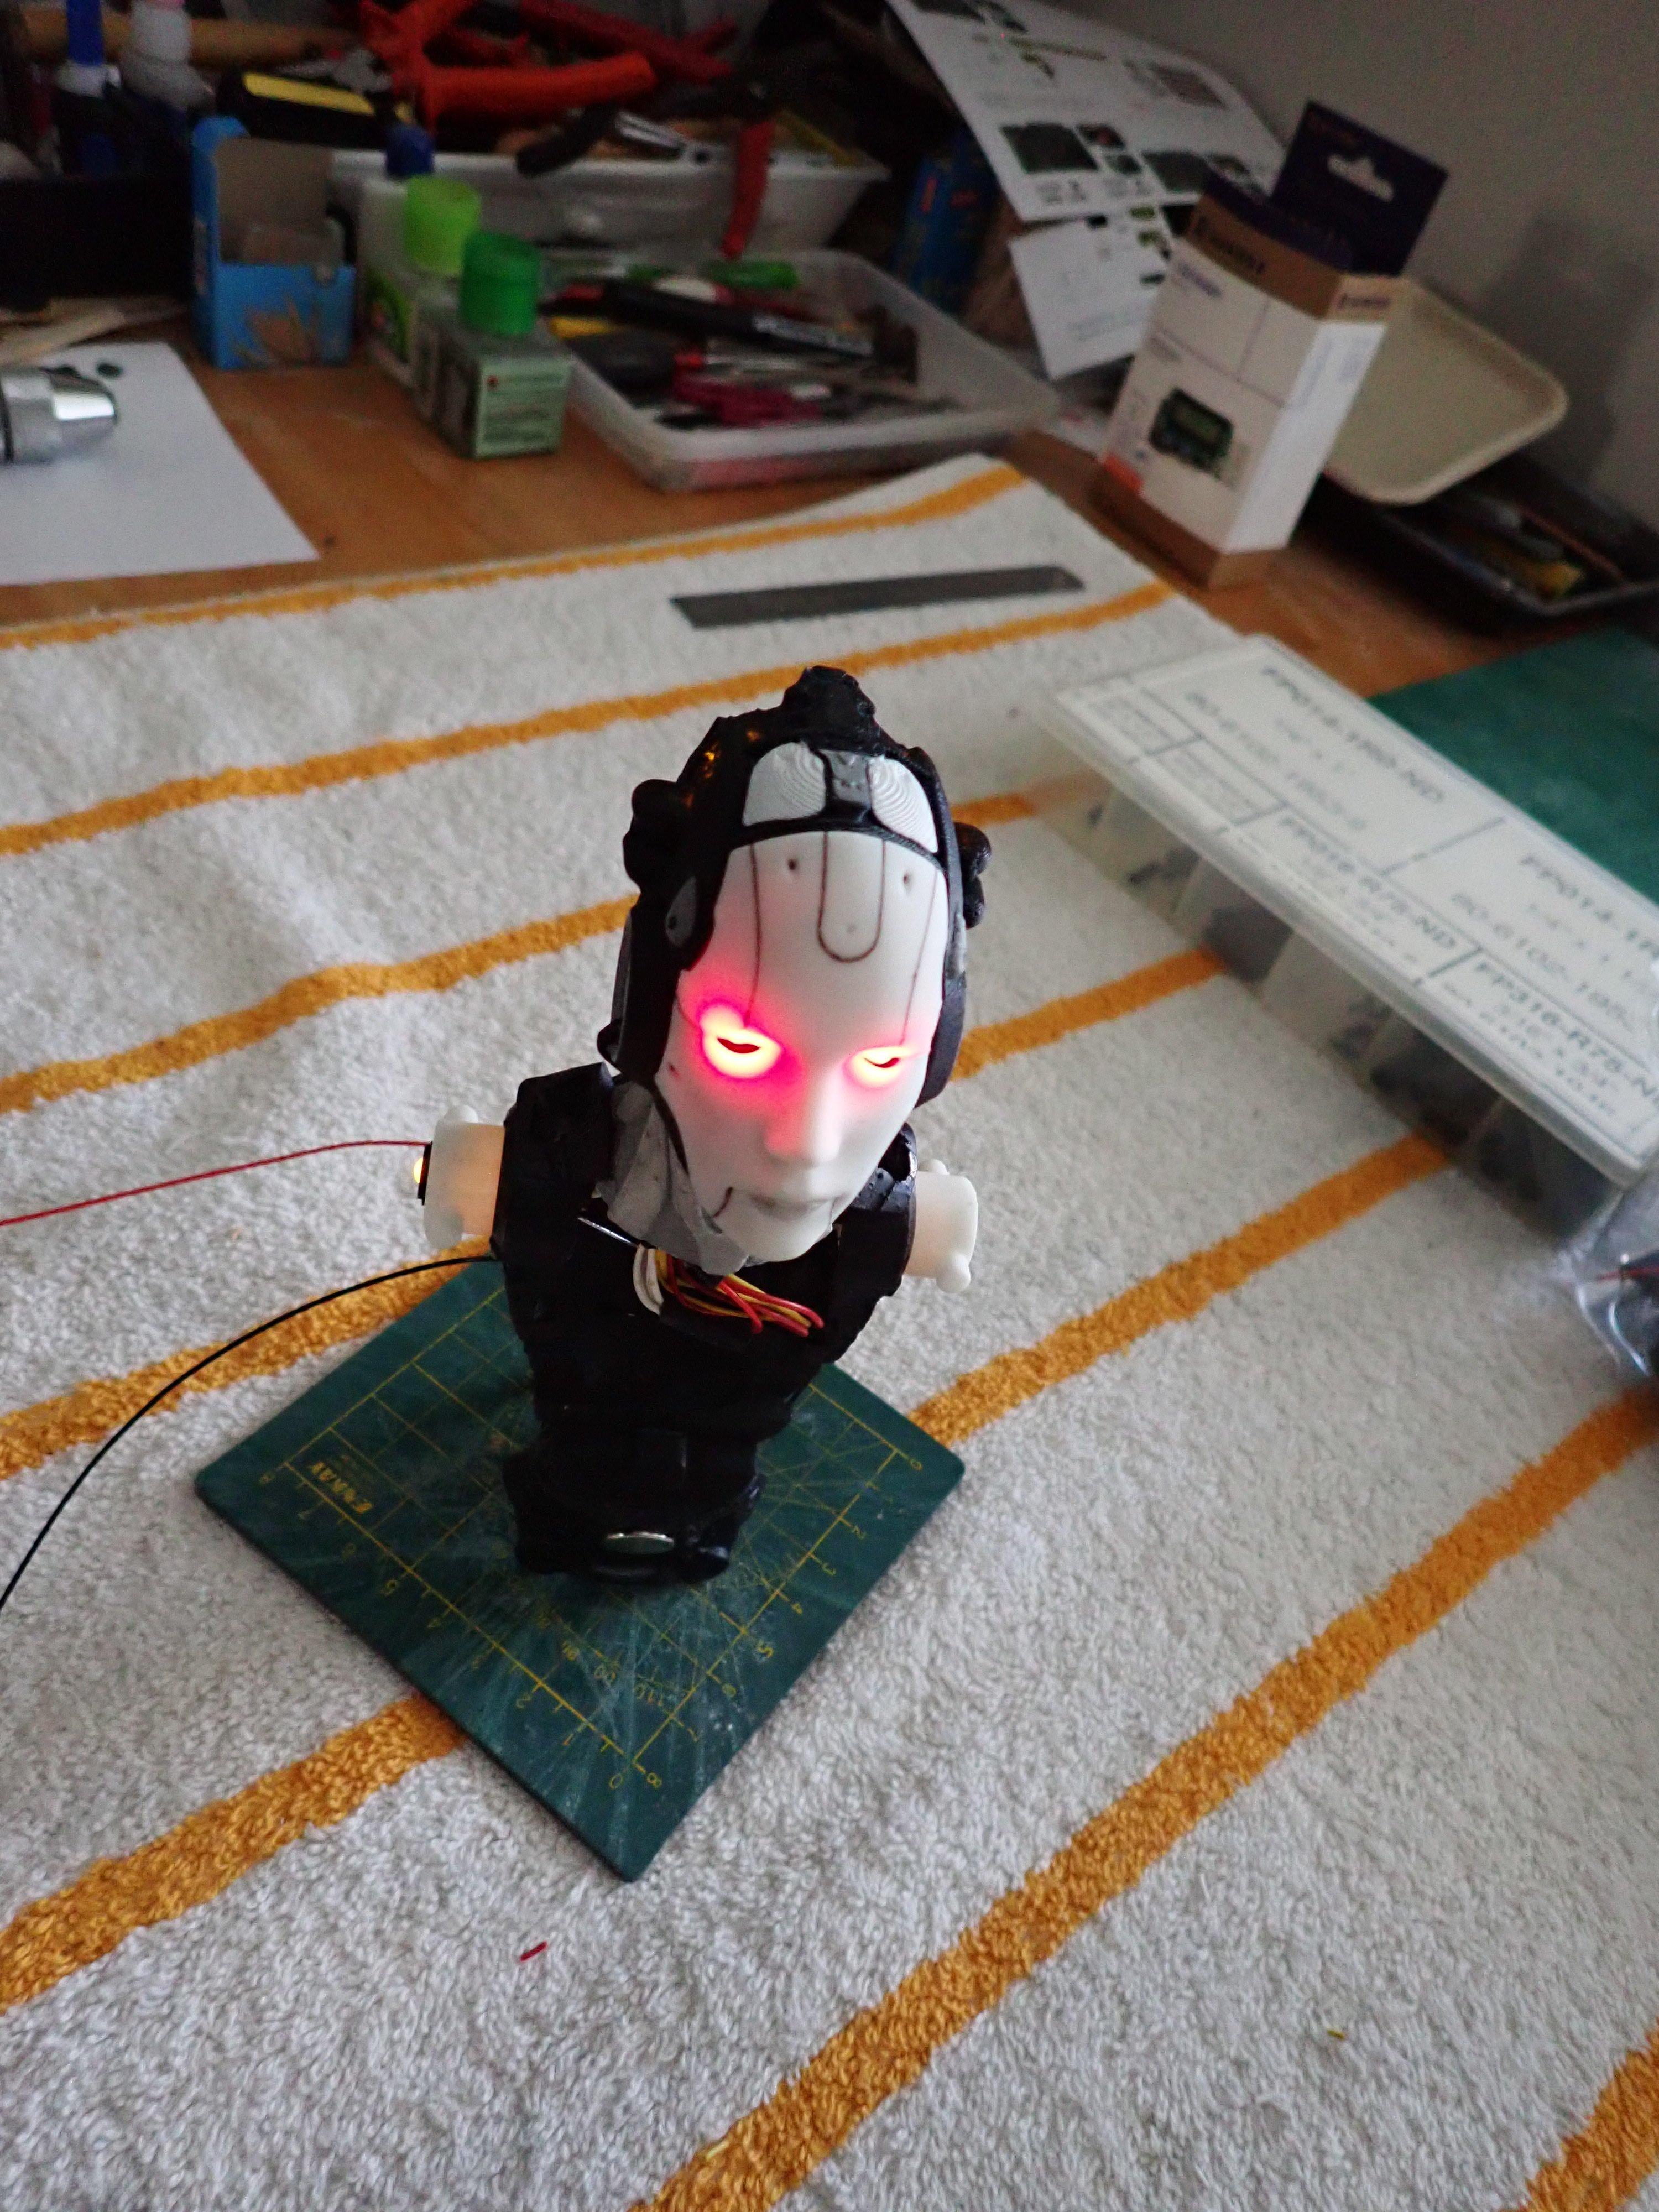
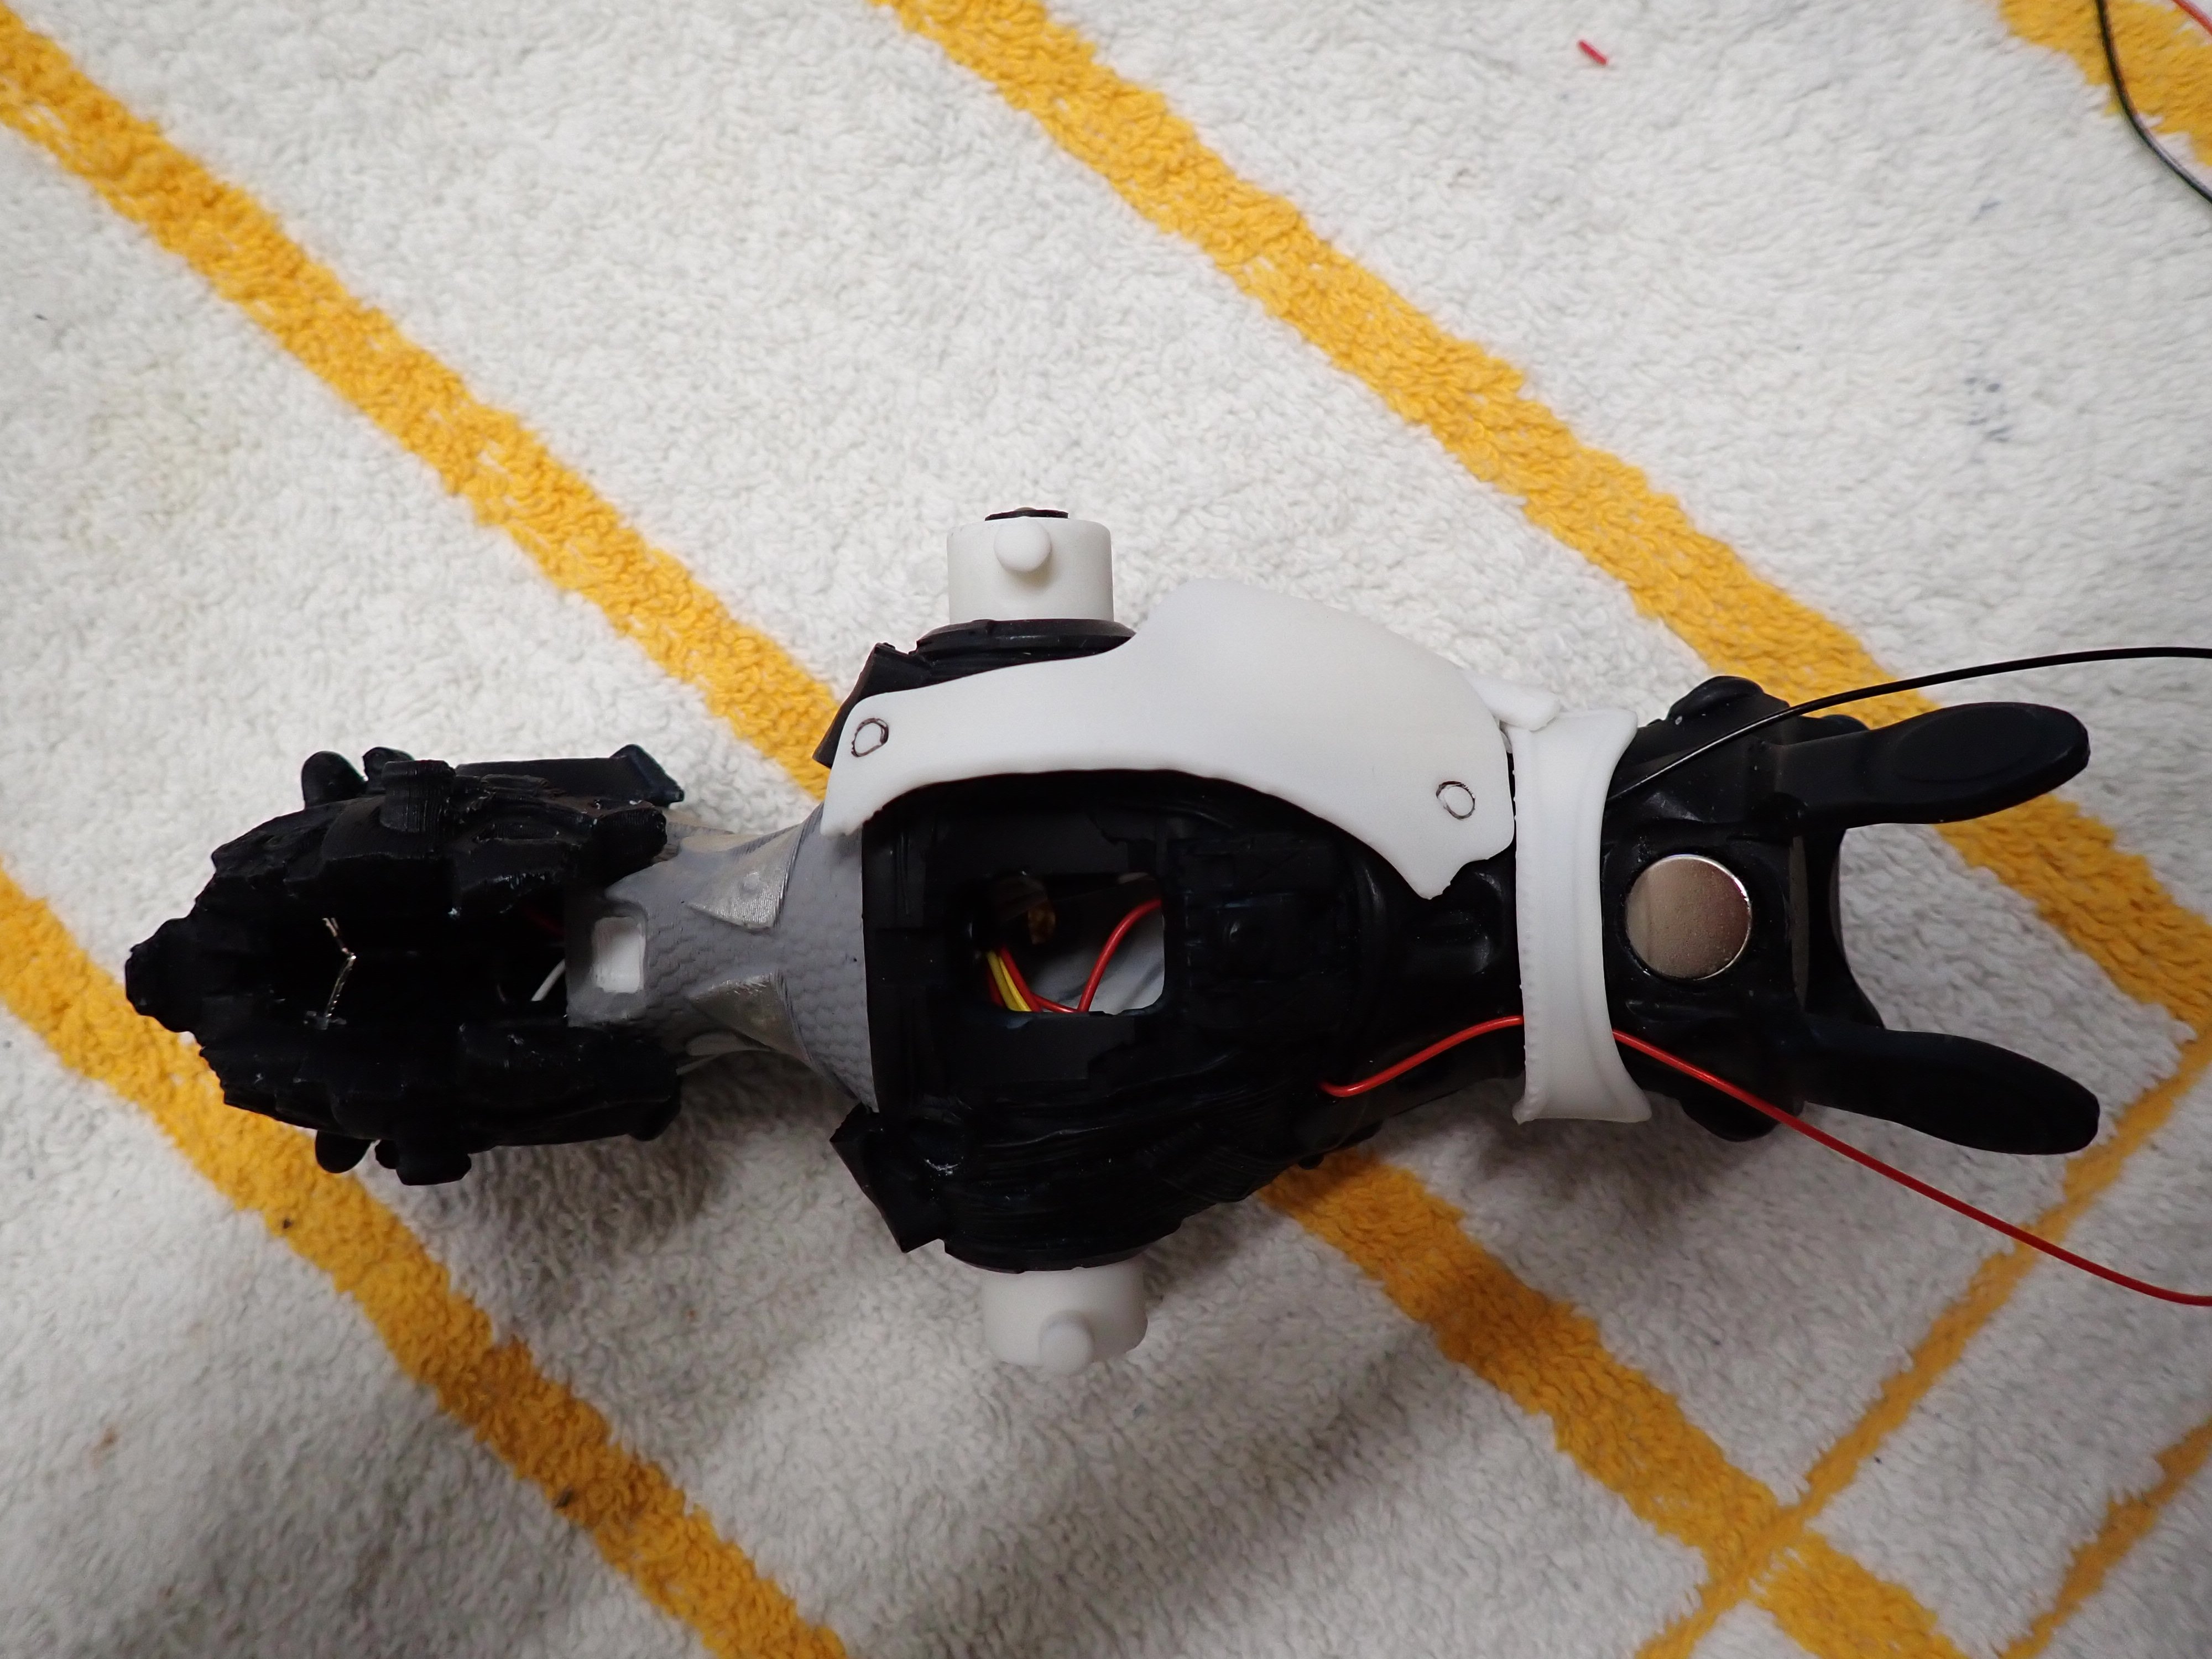
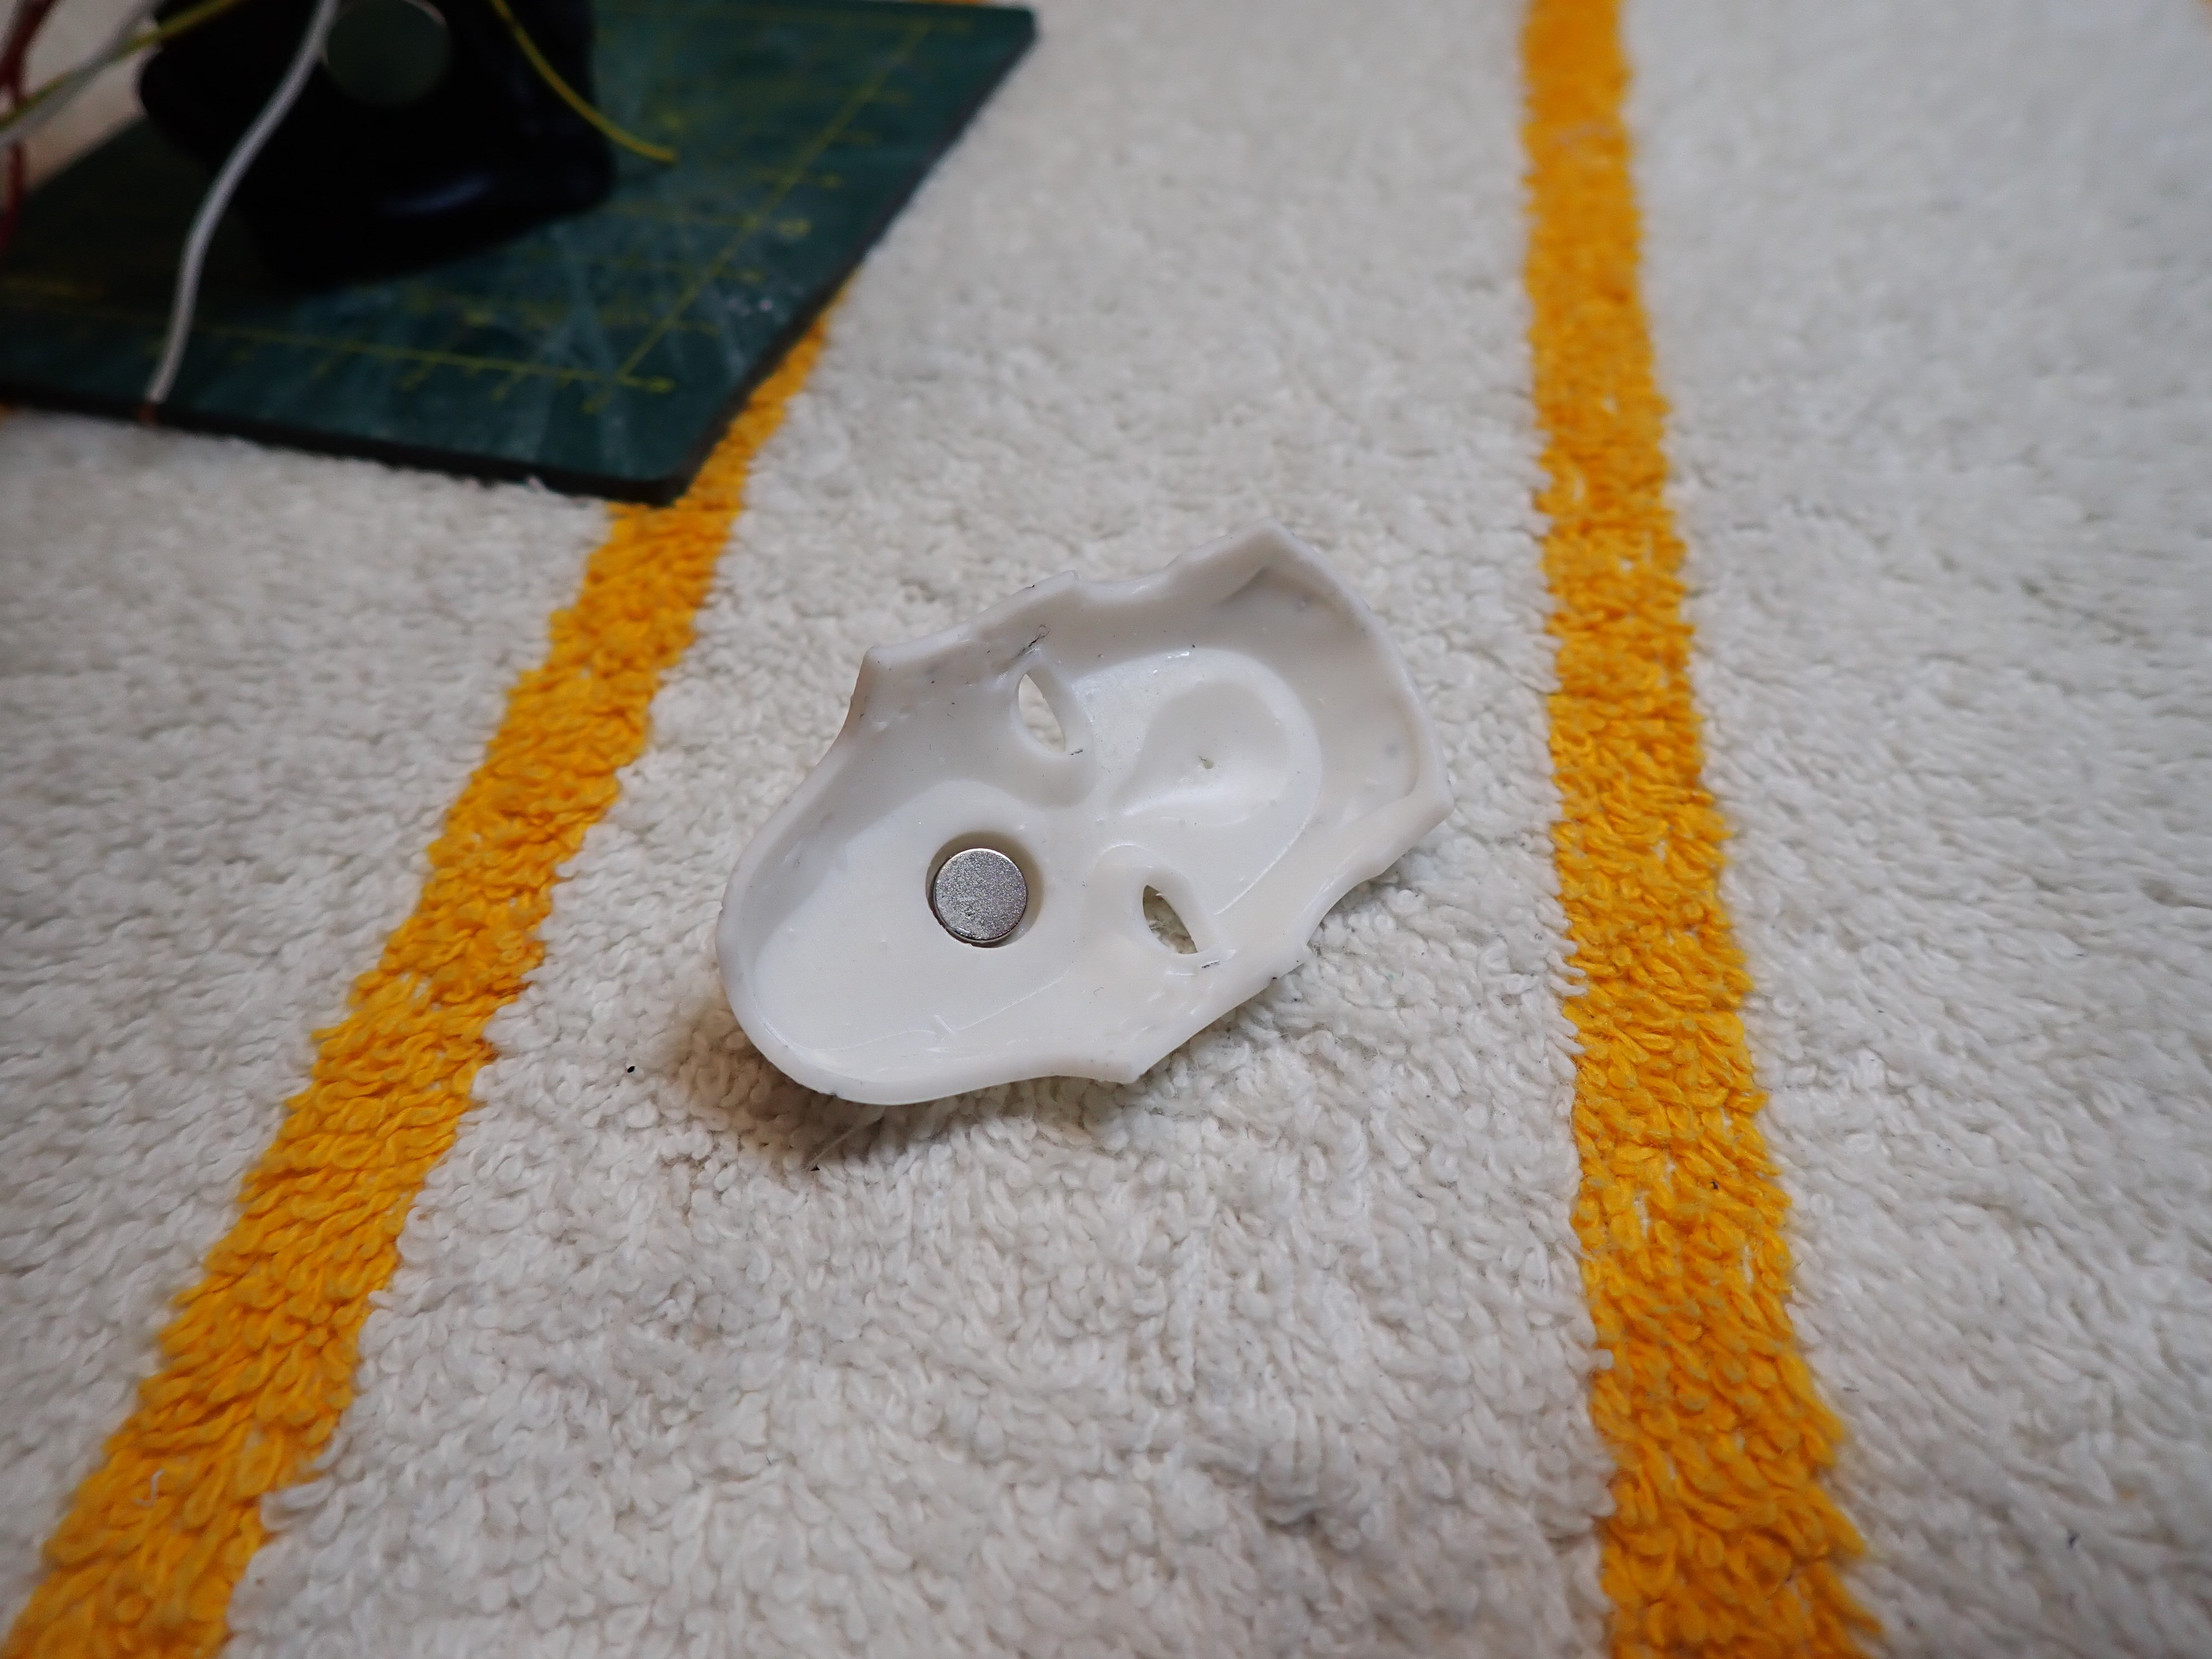
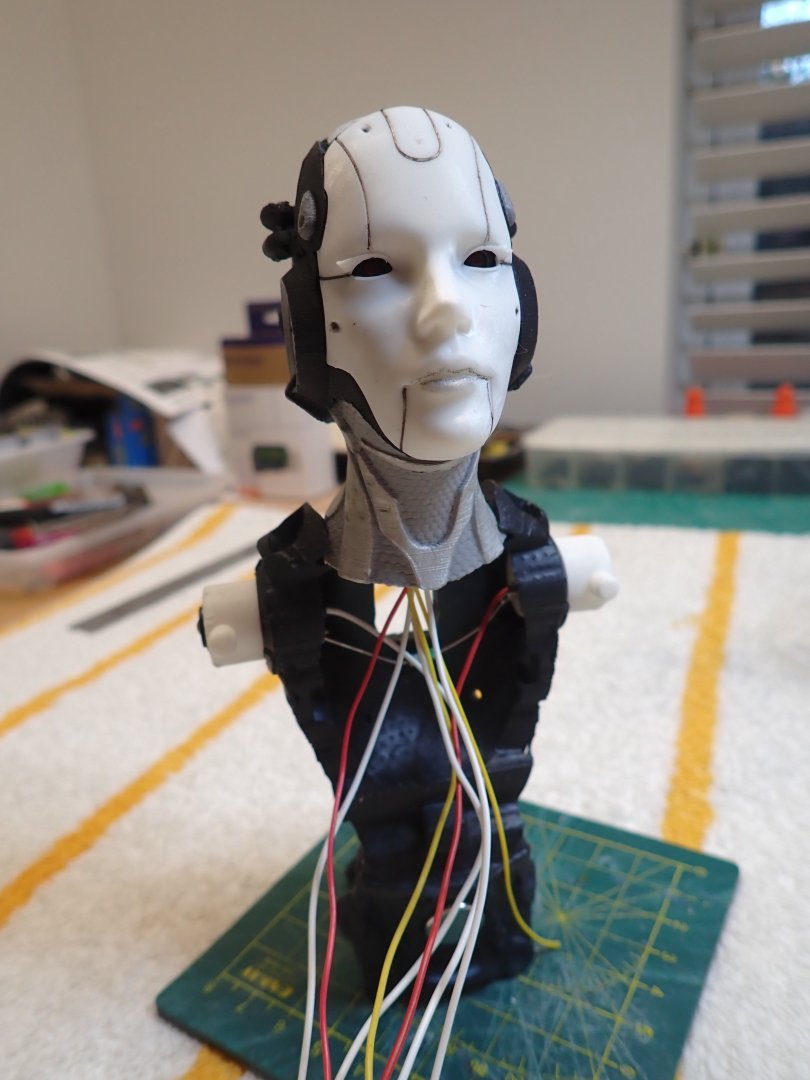
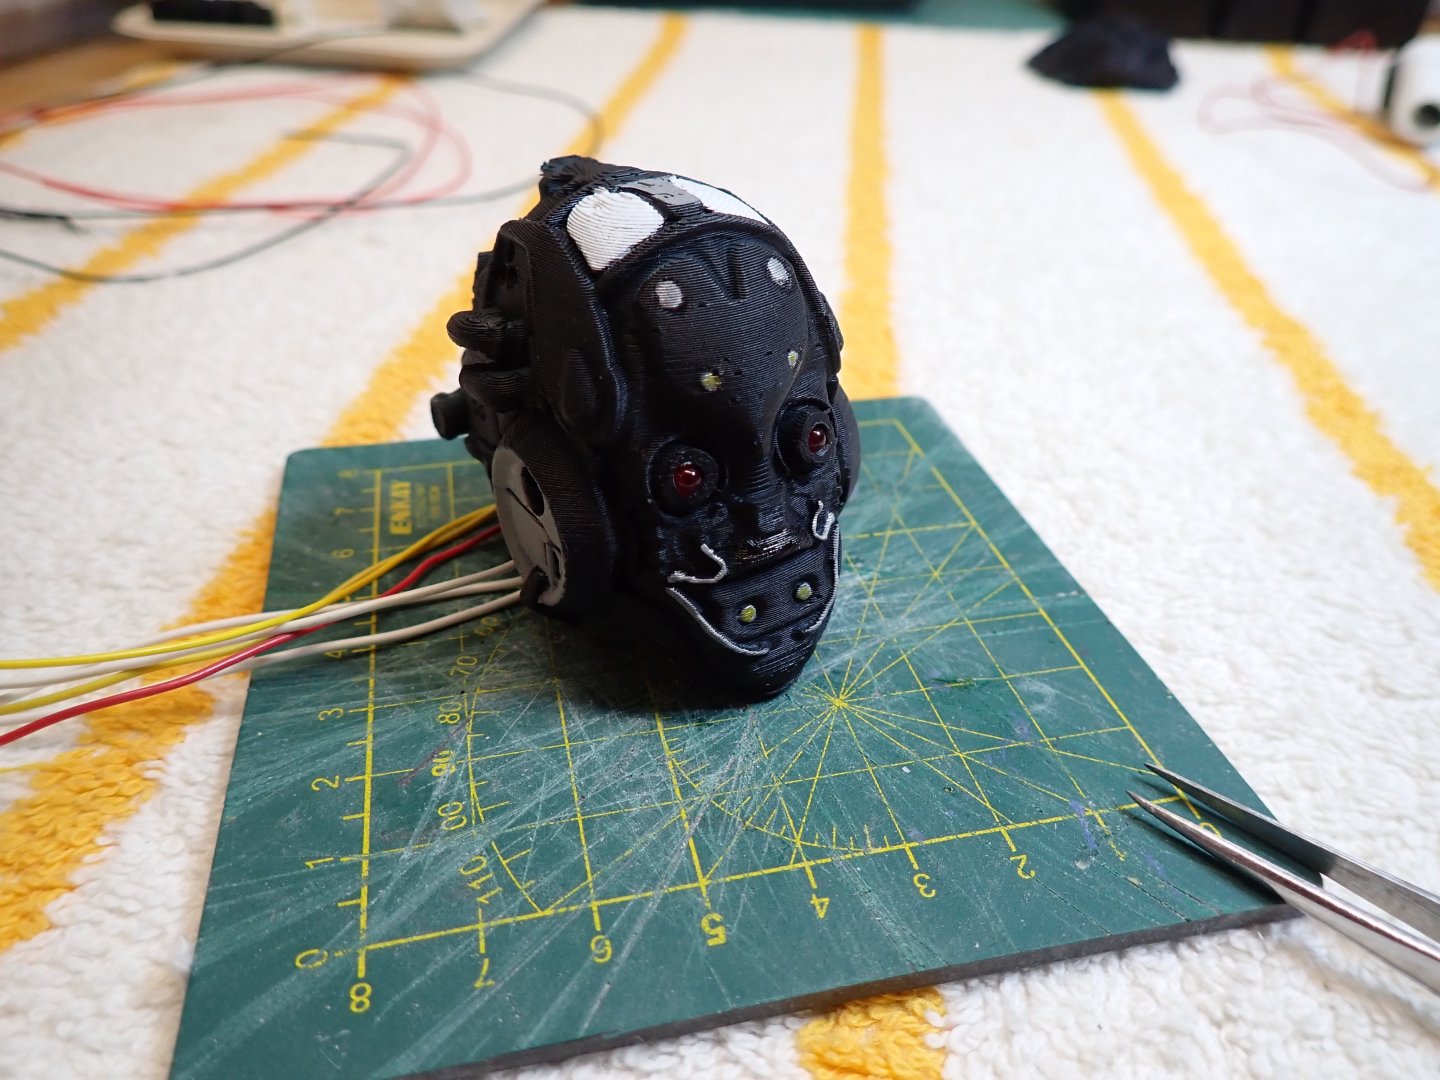
The neck piece and the head have been glued. I have to go slowly and always check that the assembly of the AI creature fits in the "Hangar". Above, you can see the two anchors to the "Hangar": the large rectangular hole in the middle of the back and the small square opening in the nape of the neck. These two have to fit perfectly. The face mask is held by a small magnet: Et voila. Still plenty of work to be done on the head and back of the head. The wiring has to be centralized as only two conductors will protrude out of the back and be mingled with the plumbing of the robe, into the wooden base. I may have to do a little bit of make-up on the face.... Yves


-
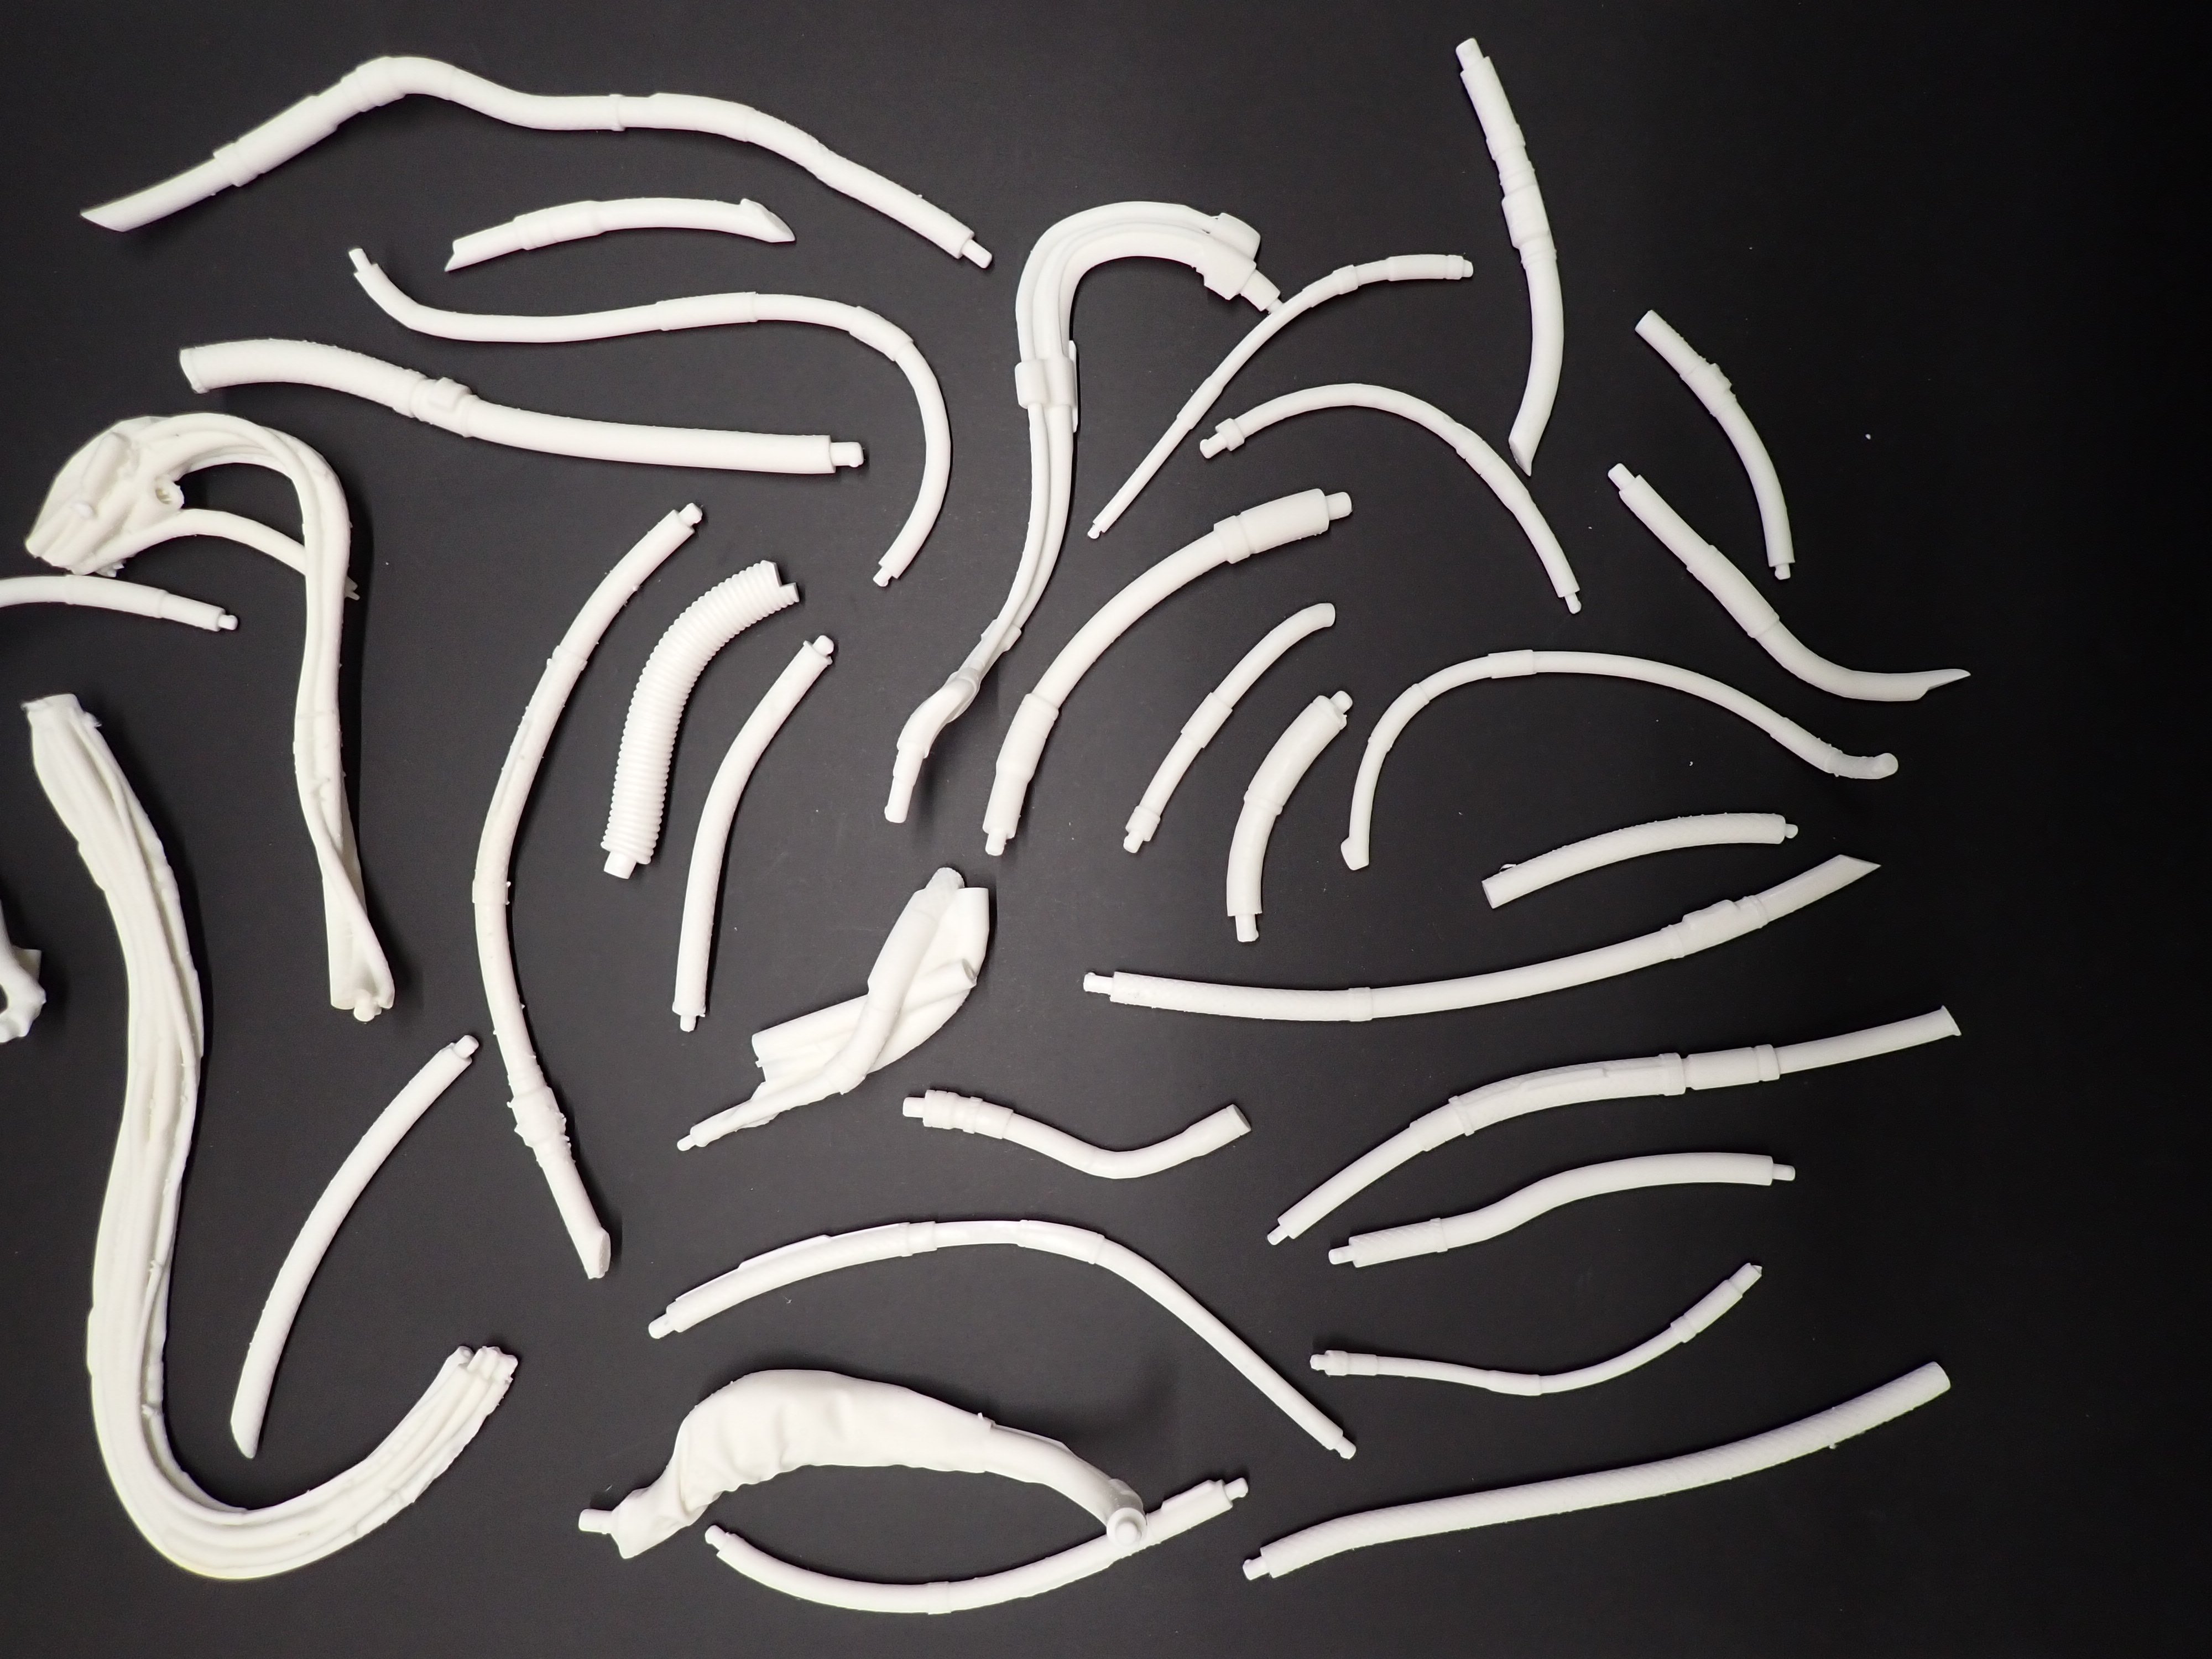
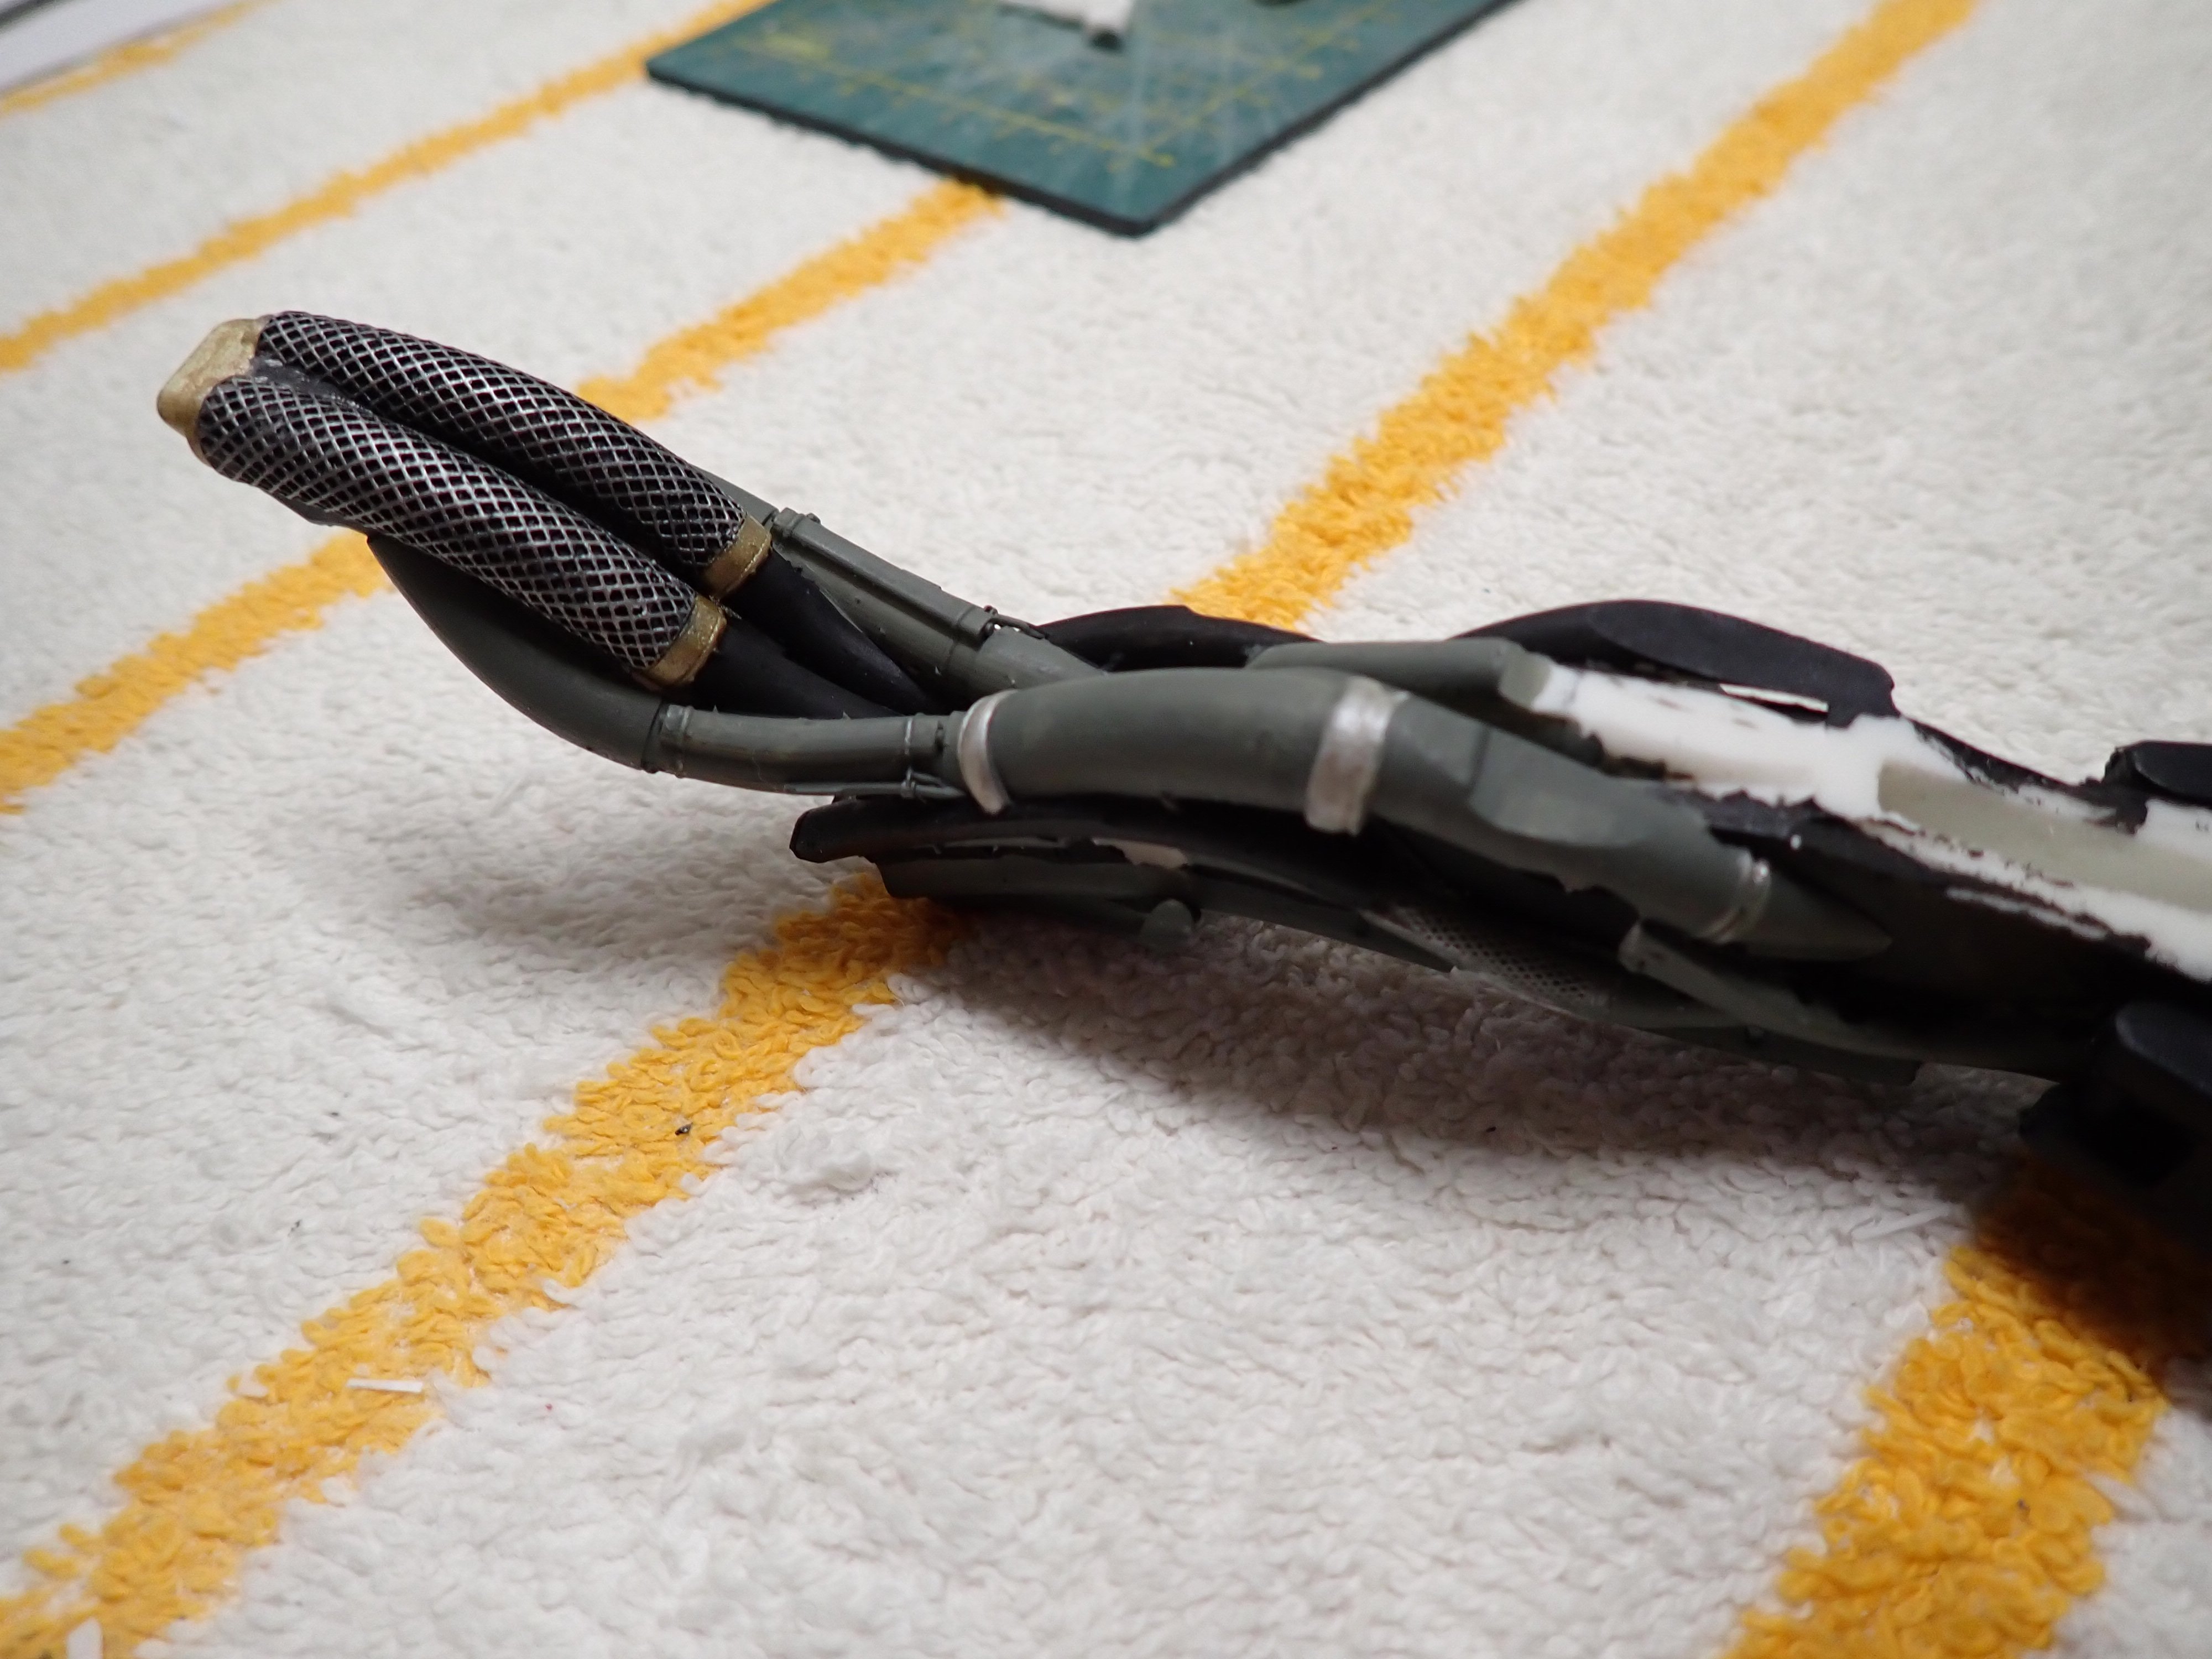
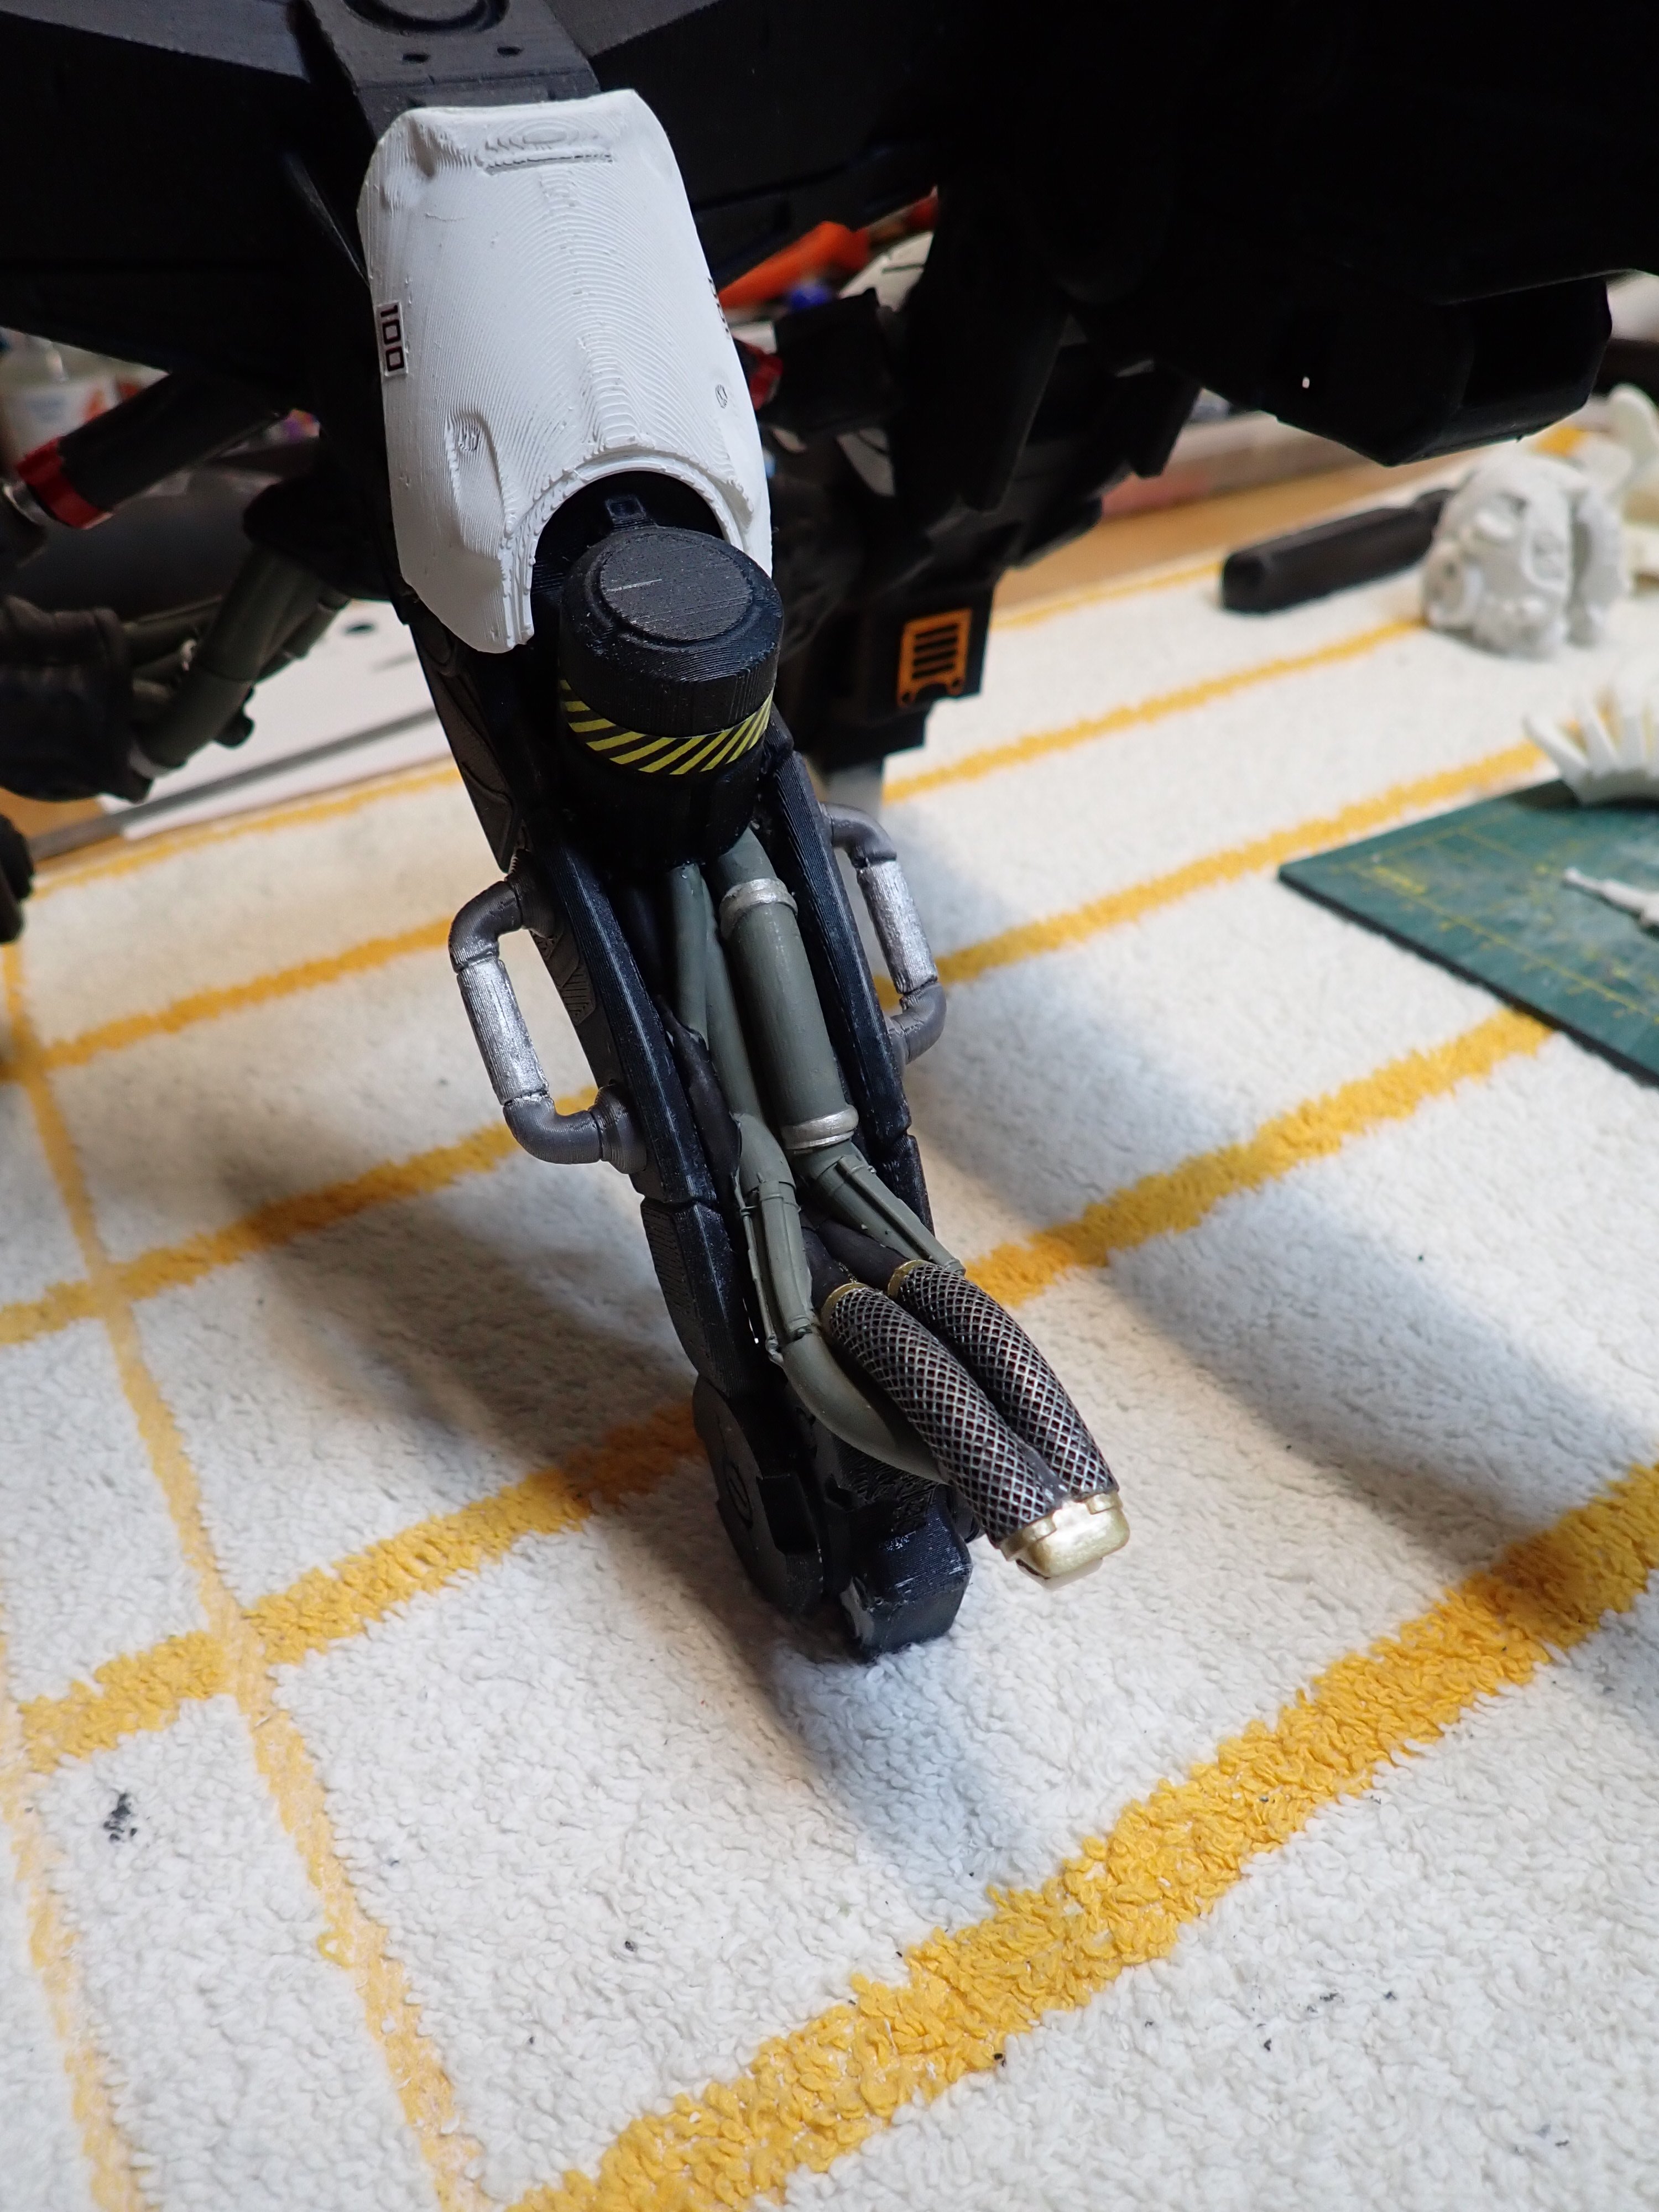
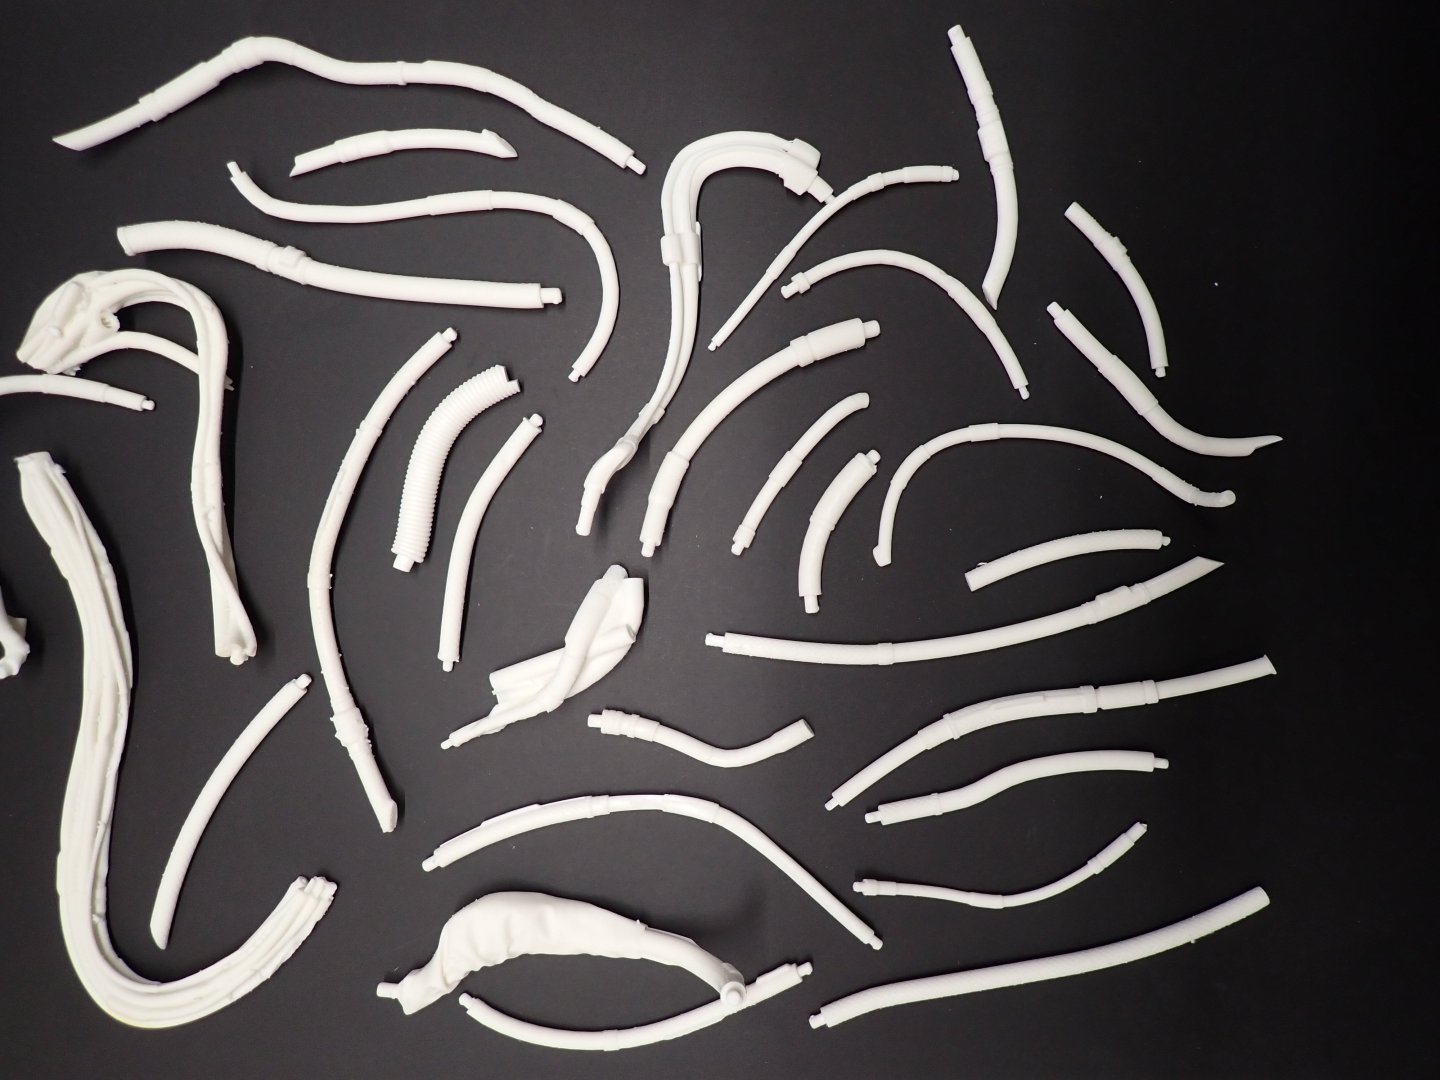
Time to become a plumber... I have spent the week printing hoses, tubes and pipes: 34 of them. Two have already been glued to the massive grape previously printed. Not much in term of explanations is given, and most of the work will be done by looking at pictures. Not easy.... Yves

-
What a beautiful work. I hope we will be able to see these details, once the superstructures are in place. Hopefully, they will be removable to show the exquisite details inside the hull. Yves
-
With the presence of the Revell kit in 1/72nd scale, you should have no problem finding spare parts and details in the market. I will be watching your Build Log with a lot of interest. Yves
-
Absolutely amazing. The new owner will be delighted by such a beautiful model, so well presented. For us, it was a fantastic journey following your progress on such unusual vessel. Let us know what is coming next. Yves
-
Thank you for all these explanations. You know a lot about these vessels, obviously. I realized that I built a "Dublin" ship instead of the Bellona, but that is fine with me. I like the Bellona name better (Goddess of War) and I love the copper coated hull. Yves
-
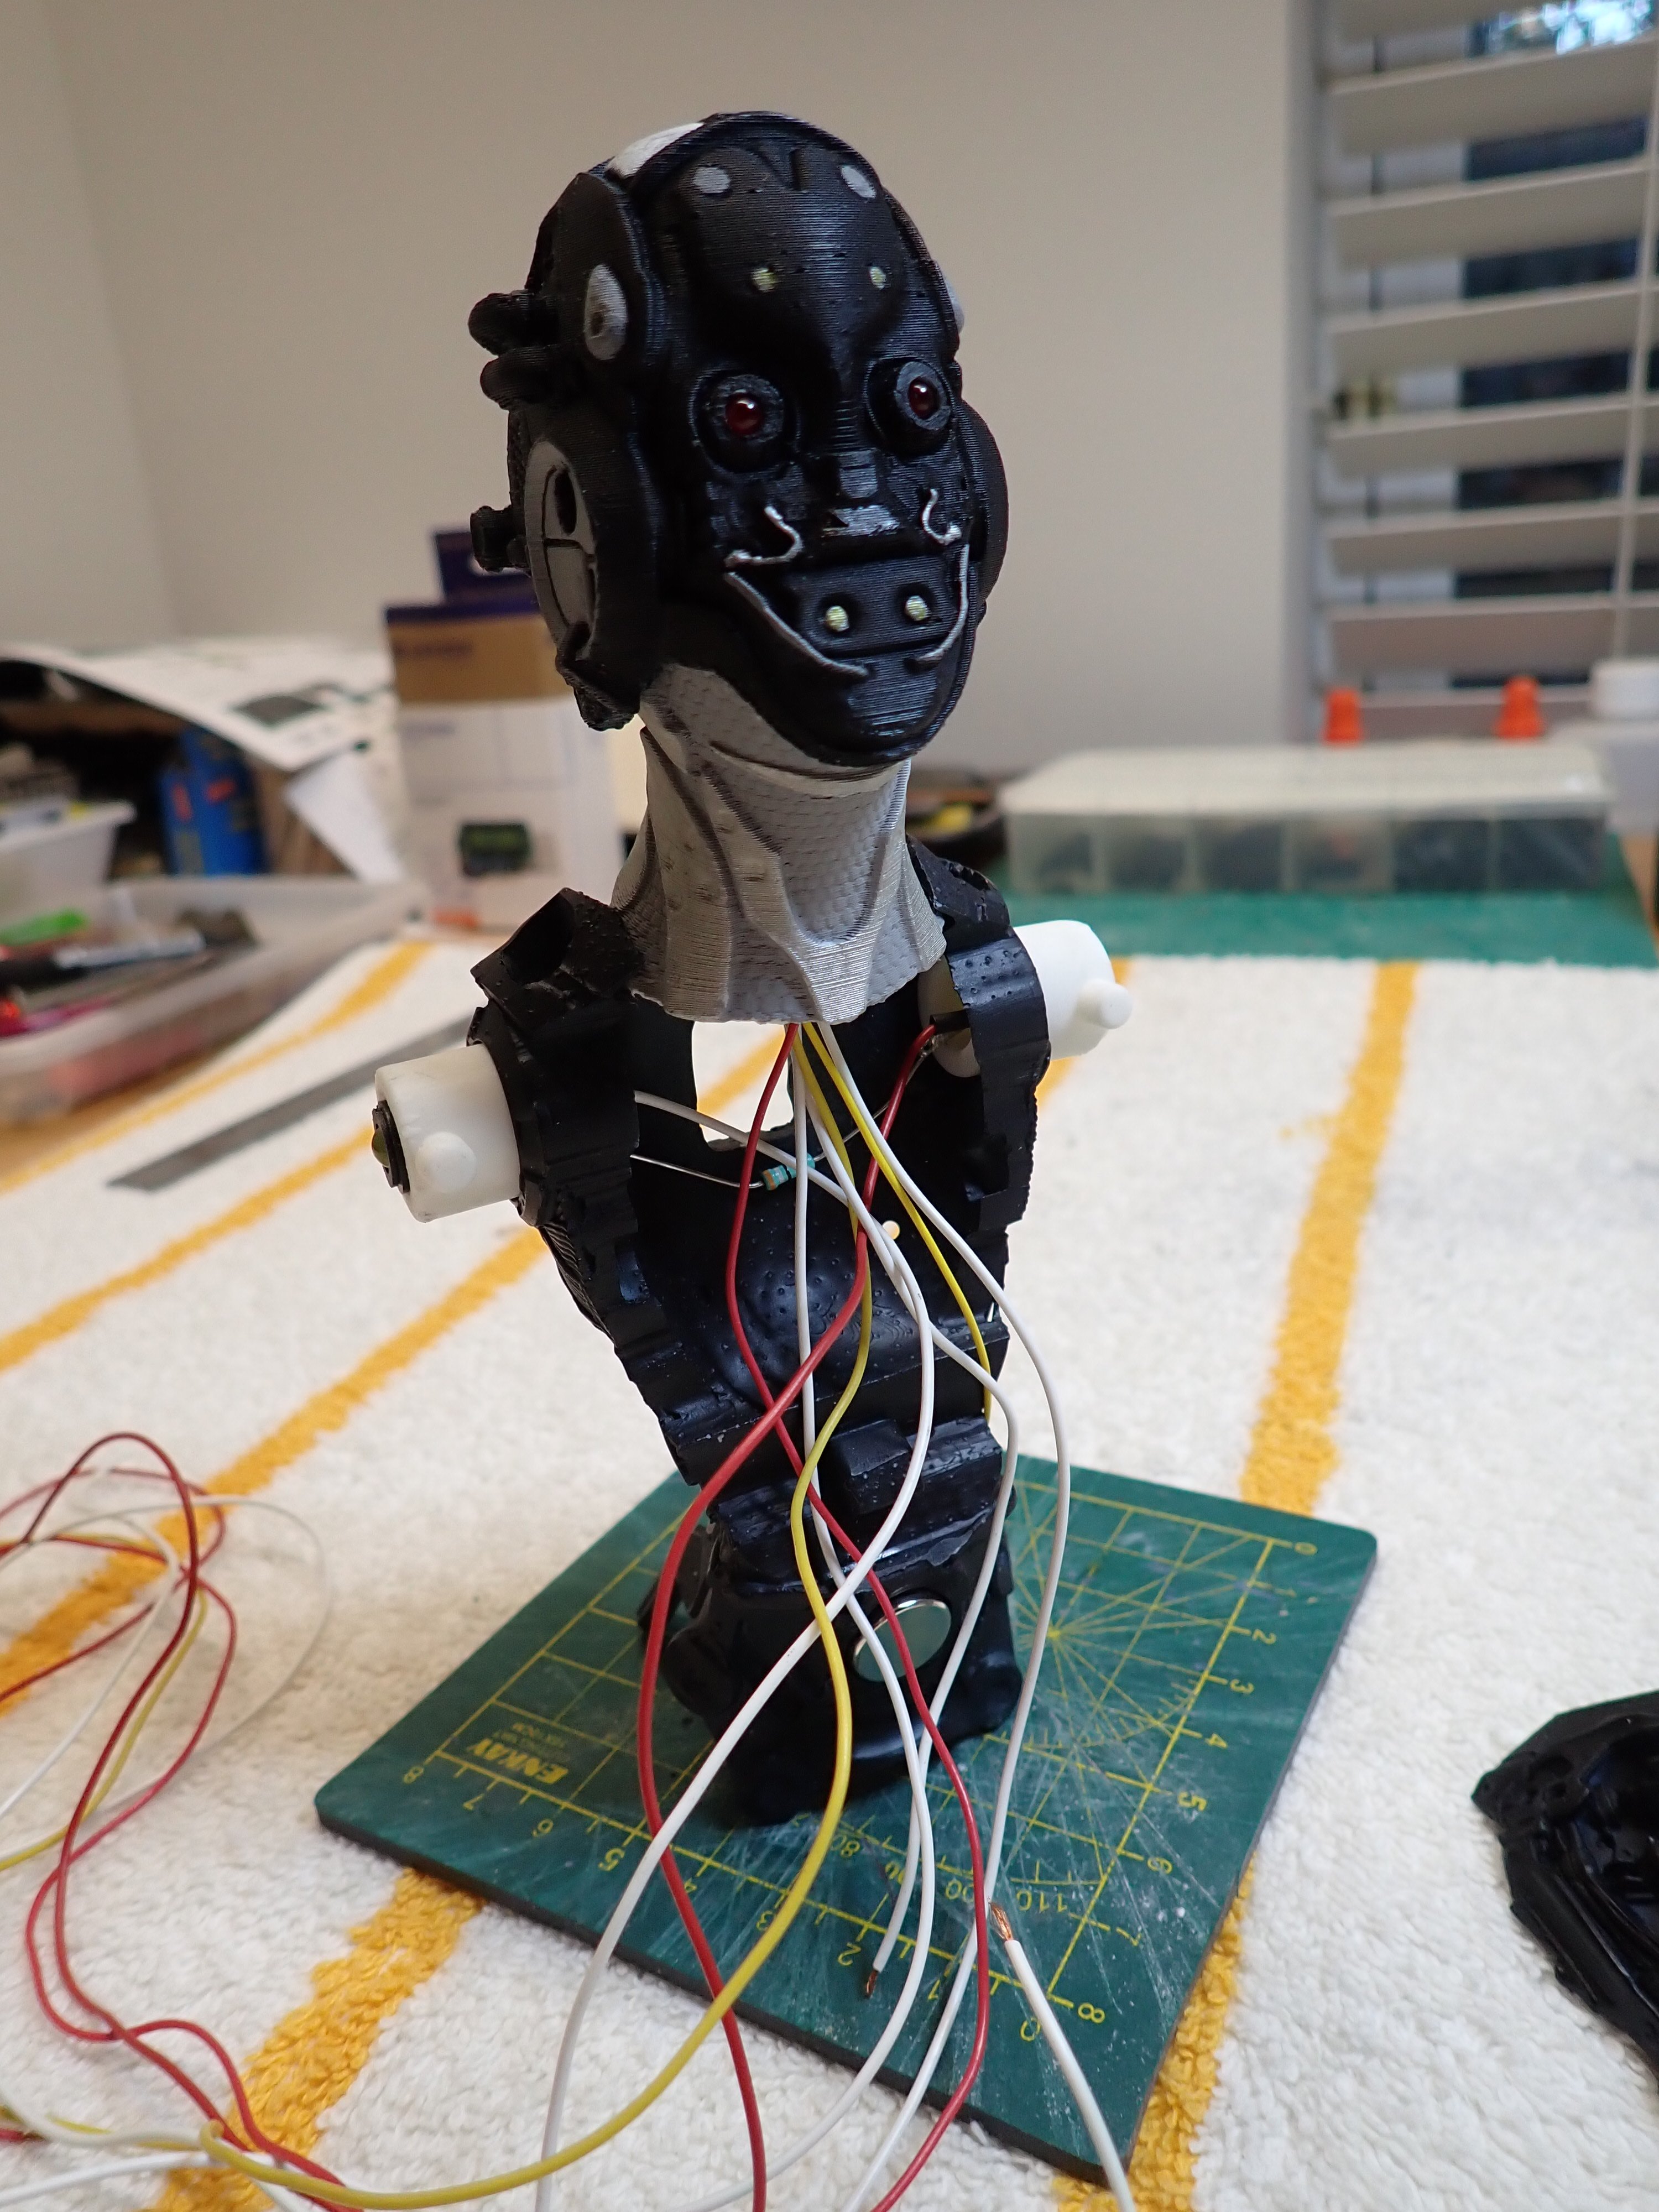
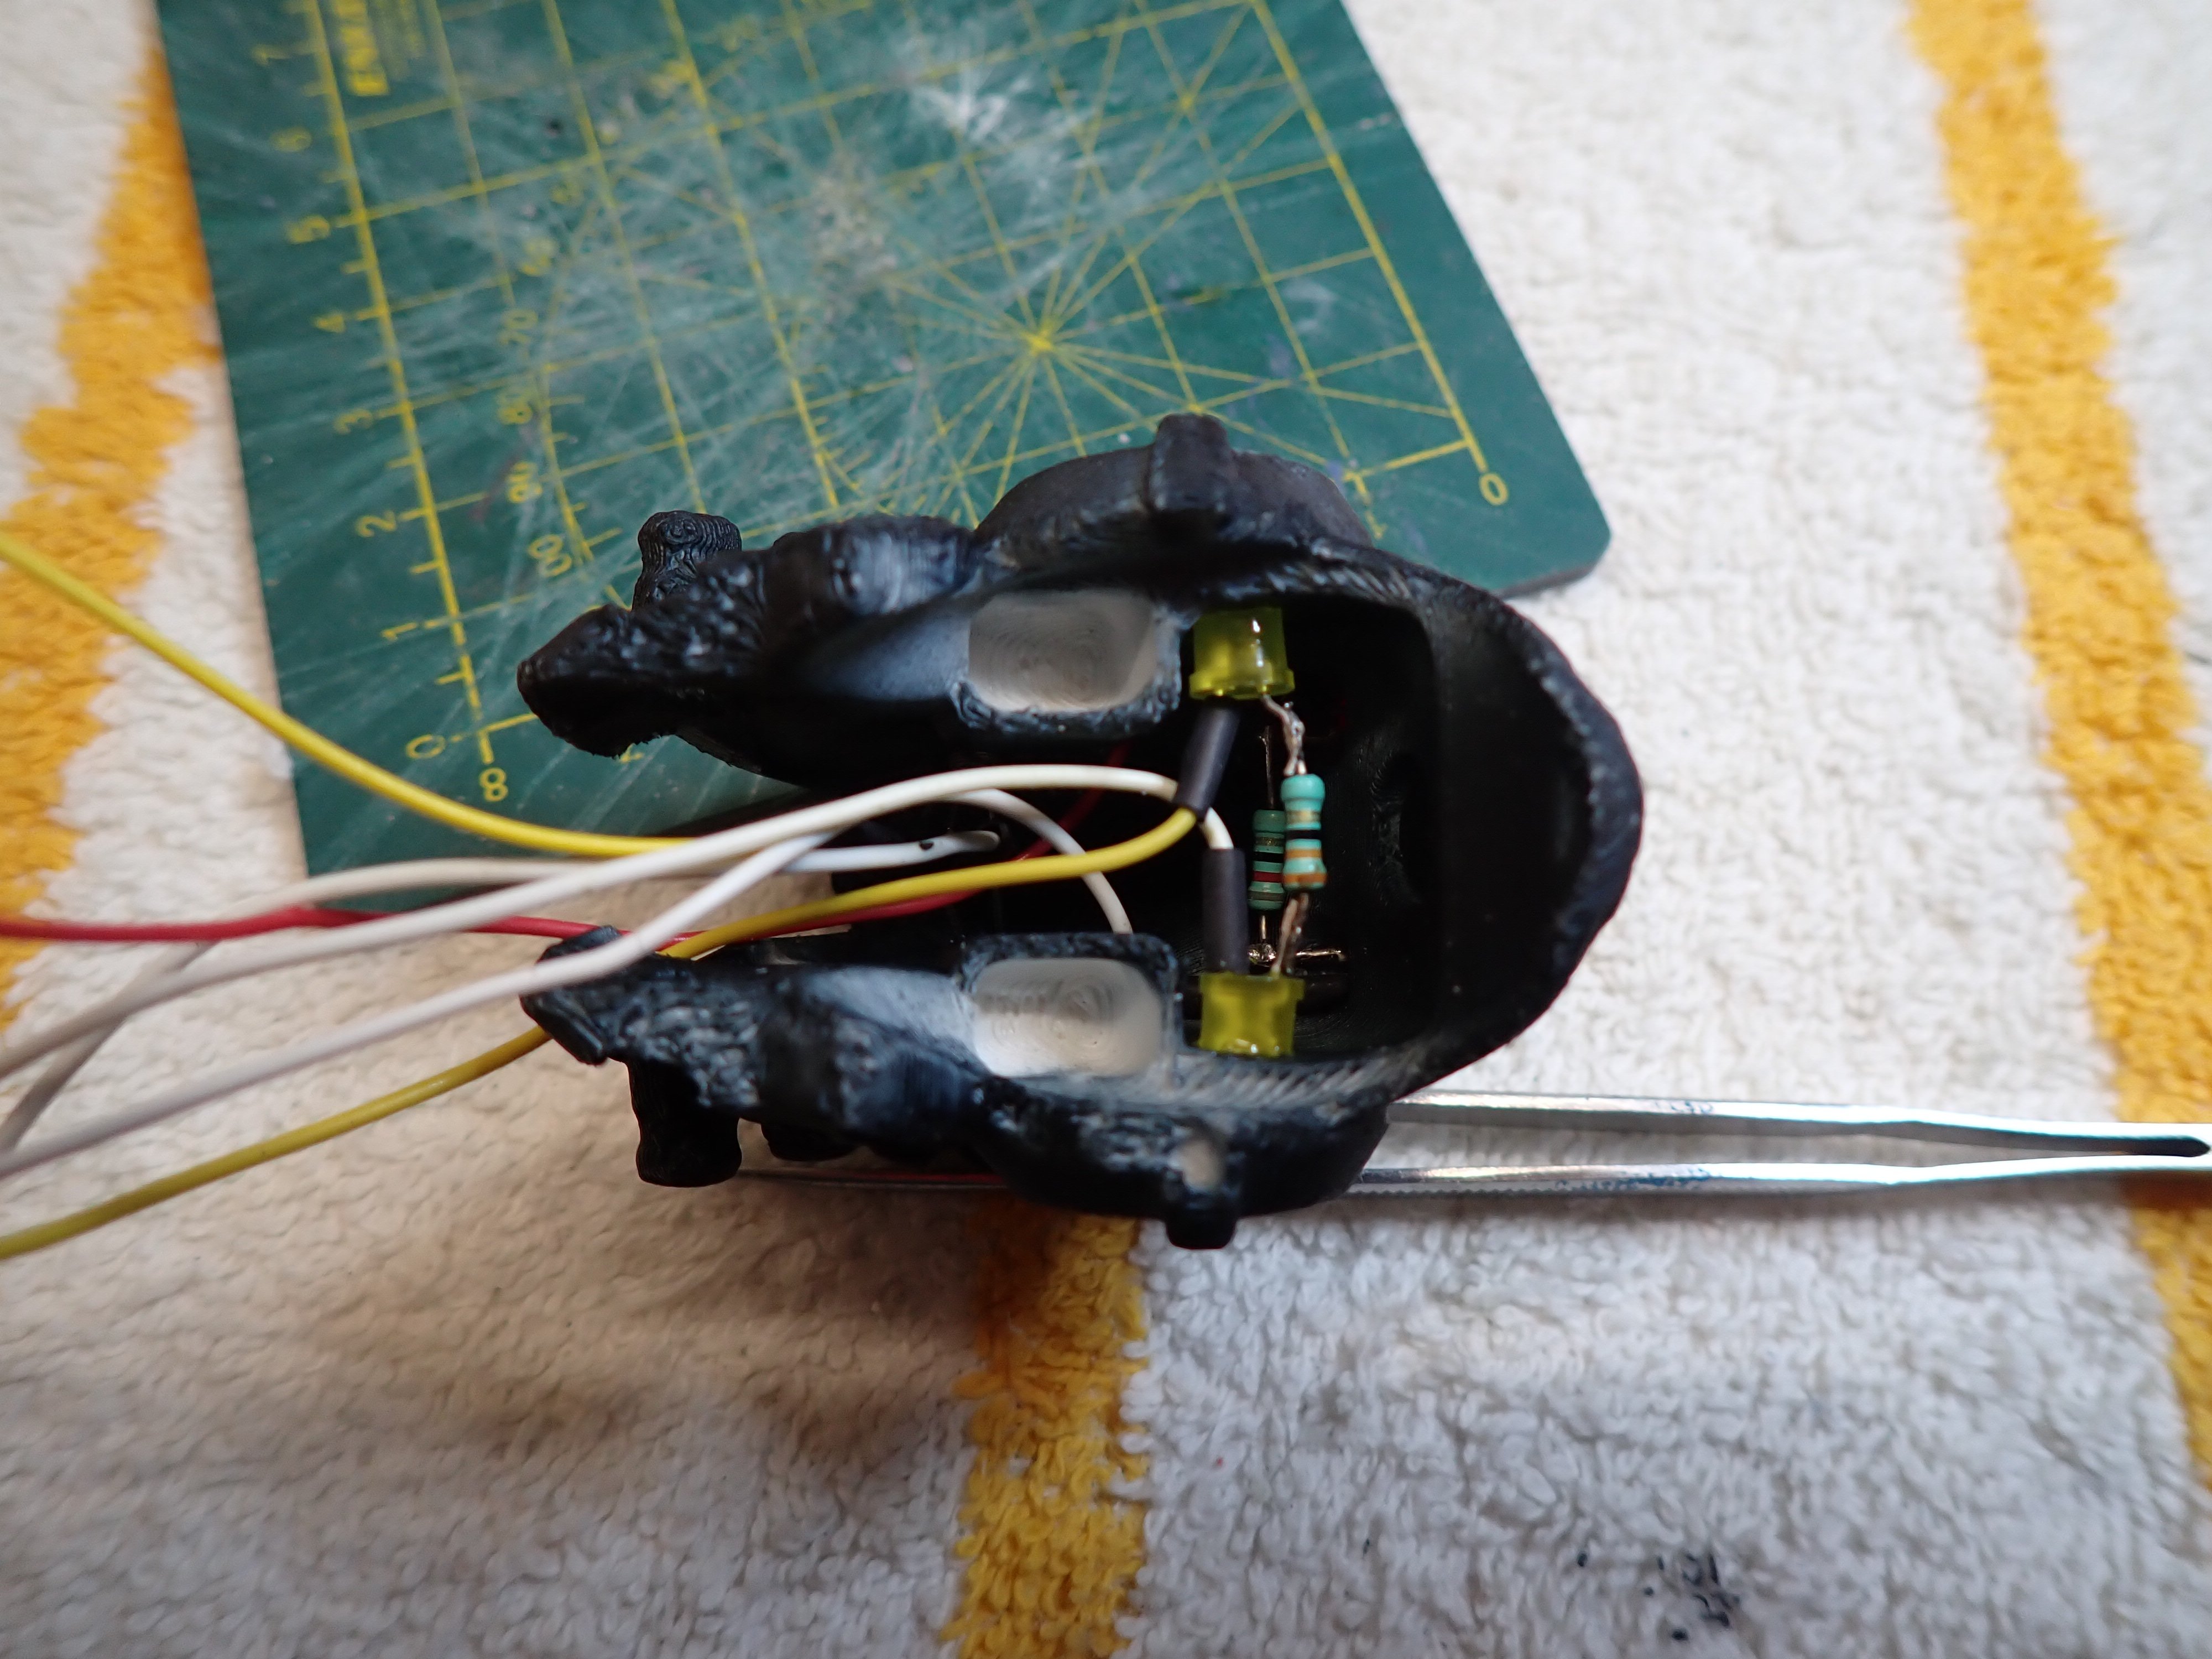
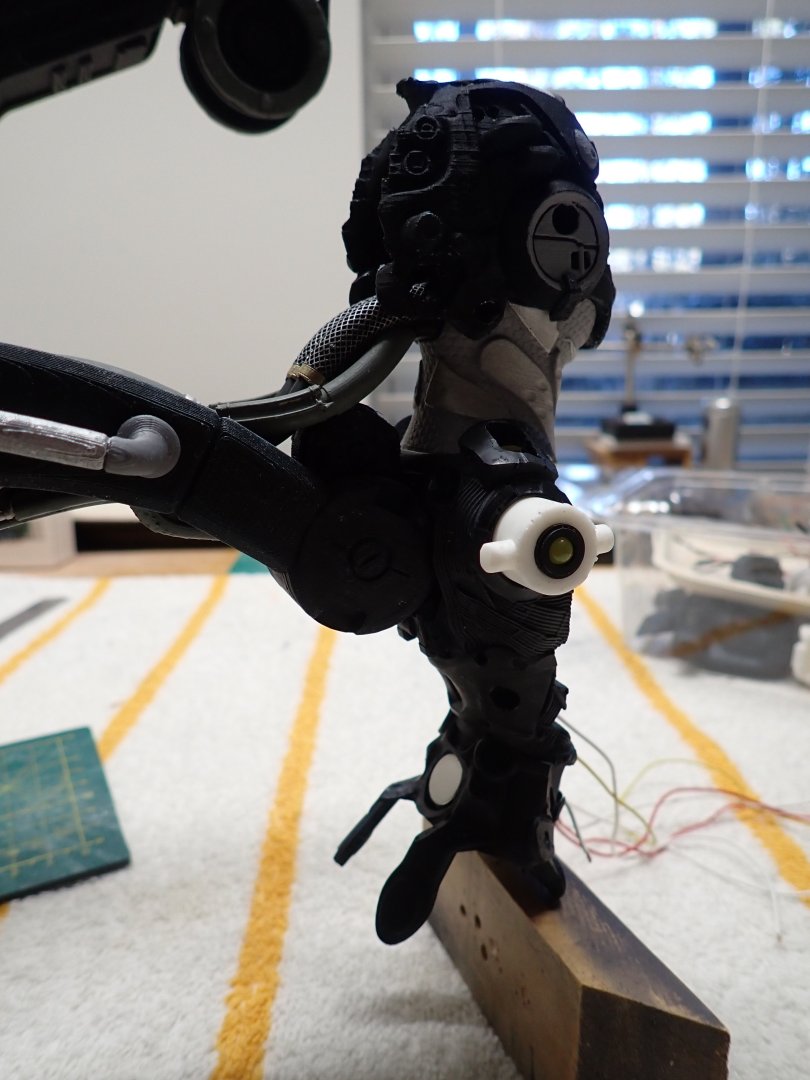
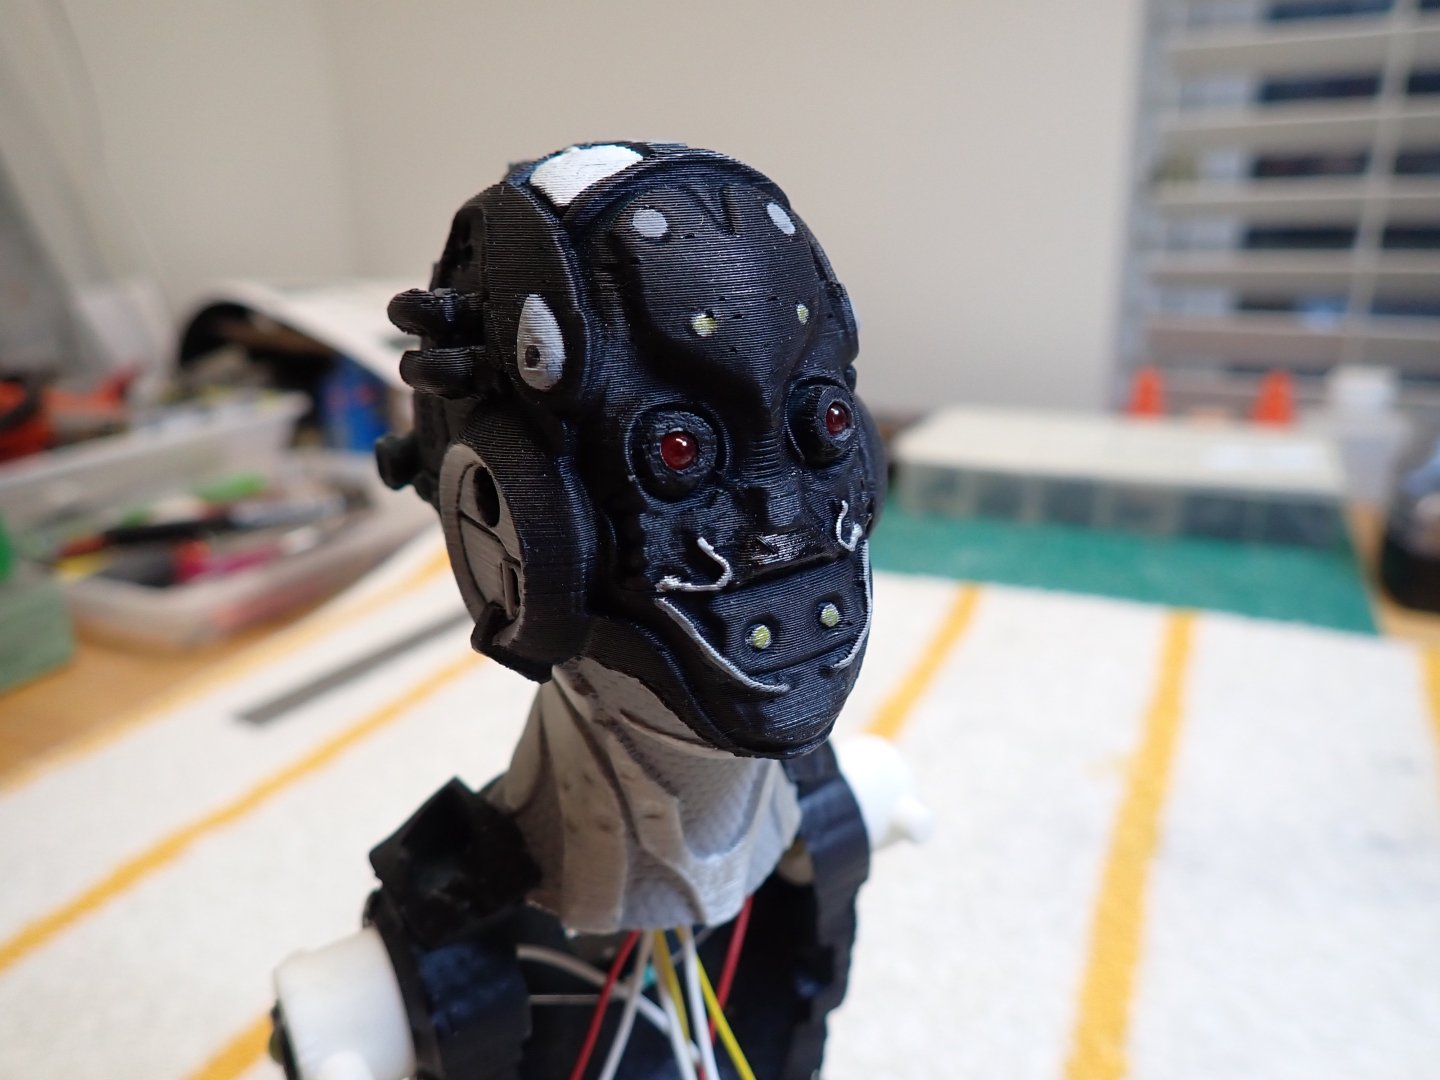
The head is almost finished, at least from an electrical point of view. No less than 6 LEDs have been installed inside it: 2 for the eyes, 2 for the ears (sides) and 2 flickering LEDs at the top of the cranium to simulate some kind of processing activities. It is a little bit tight, but it fits with regular Pinned components. I did not want to use Surface Mounted components, which are so delicate to handle and solder. All the wires will go through the neck, where they will merge in the back/chest, with the shoulders lights. The whole enchilada will be powered with a 5 volts source. Yves

-
Frecap, I like your explanations and thoroughness. You are taking the COREL kit to another level, for sure. Below is a picture of the CAF Model kit of the Bellona, I built a couple of years ago: This kit (1/48) is based on the Anatomy of the Ship and the fabulous 1/36 model located in England at the Maritime Gallery. You may want to consider it when you are done with your COREL model, if you still need an extra dose of Bellona 🙂 Yves

-
Before you butcher your nice decoration near the catheads, keep in mind that the Anatomy of the ship does not mention the presence of that knee pointing towards the stern, as you indicated. I think this element only belongs Slade's model and is not representative of the ships of that time. In my opinion, you should not add it as it makes the sleek lines of the Bellona less pleasant and is not required from a carpentry perspective. Yves
-
I wish you could find that catapult (or scratch build it) to display that masterpiece. Truly impressive. Yves
-
White Freightliner DD by CDW - AMT - 1:25 Scale - PLASTIC
yvesvidal replied to CDW's topic in Non-ship/categorised builds
You need to find a set of these dangerous spiky wheels lugs that truck drivers seem to enjoy so much on the front wheels of their tractors. Yves -
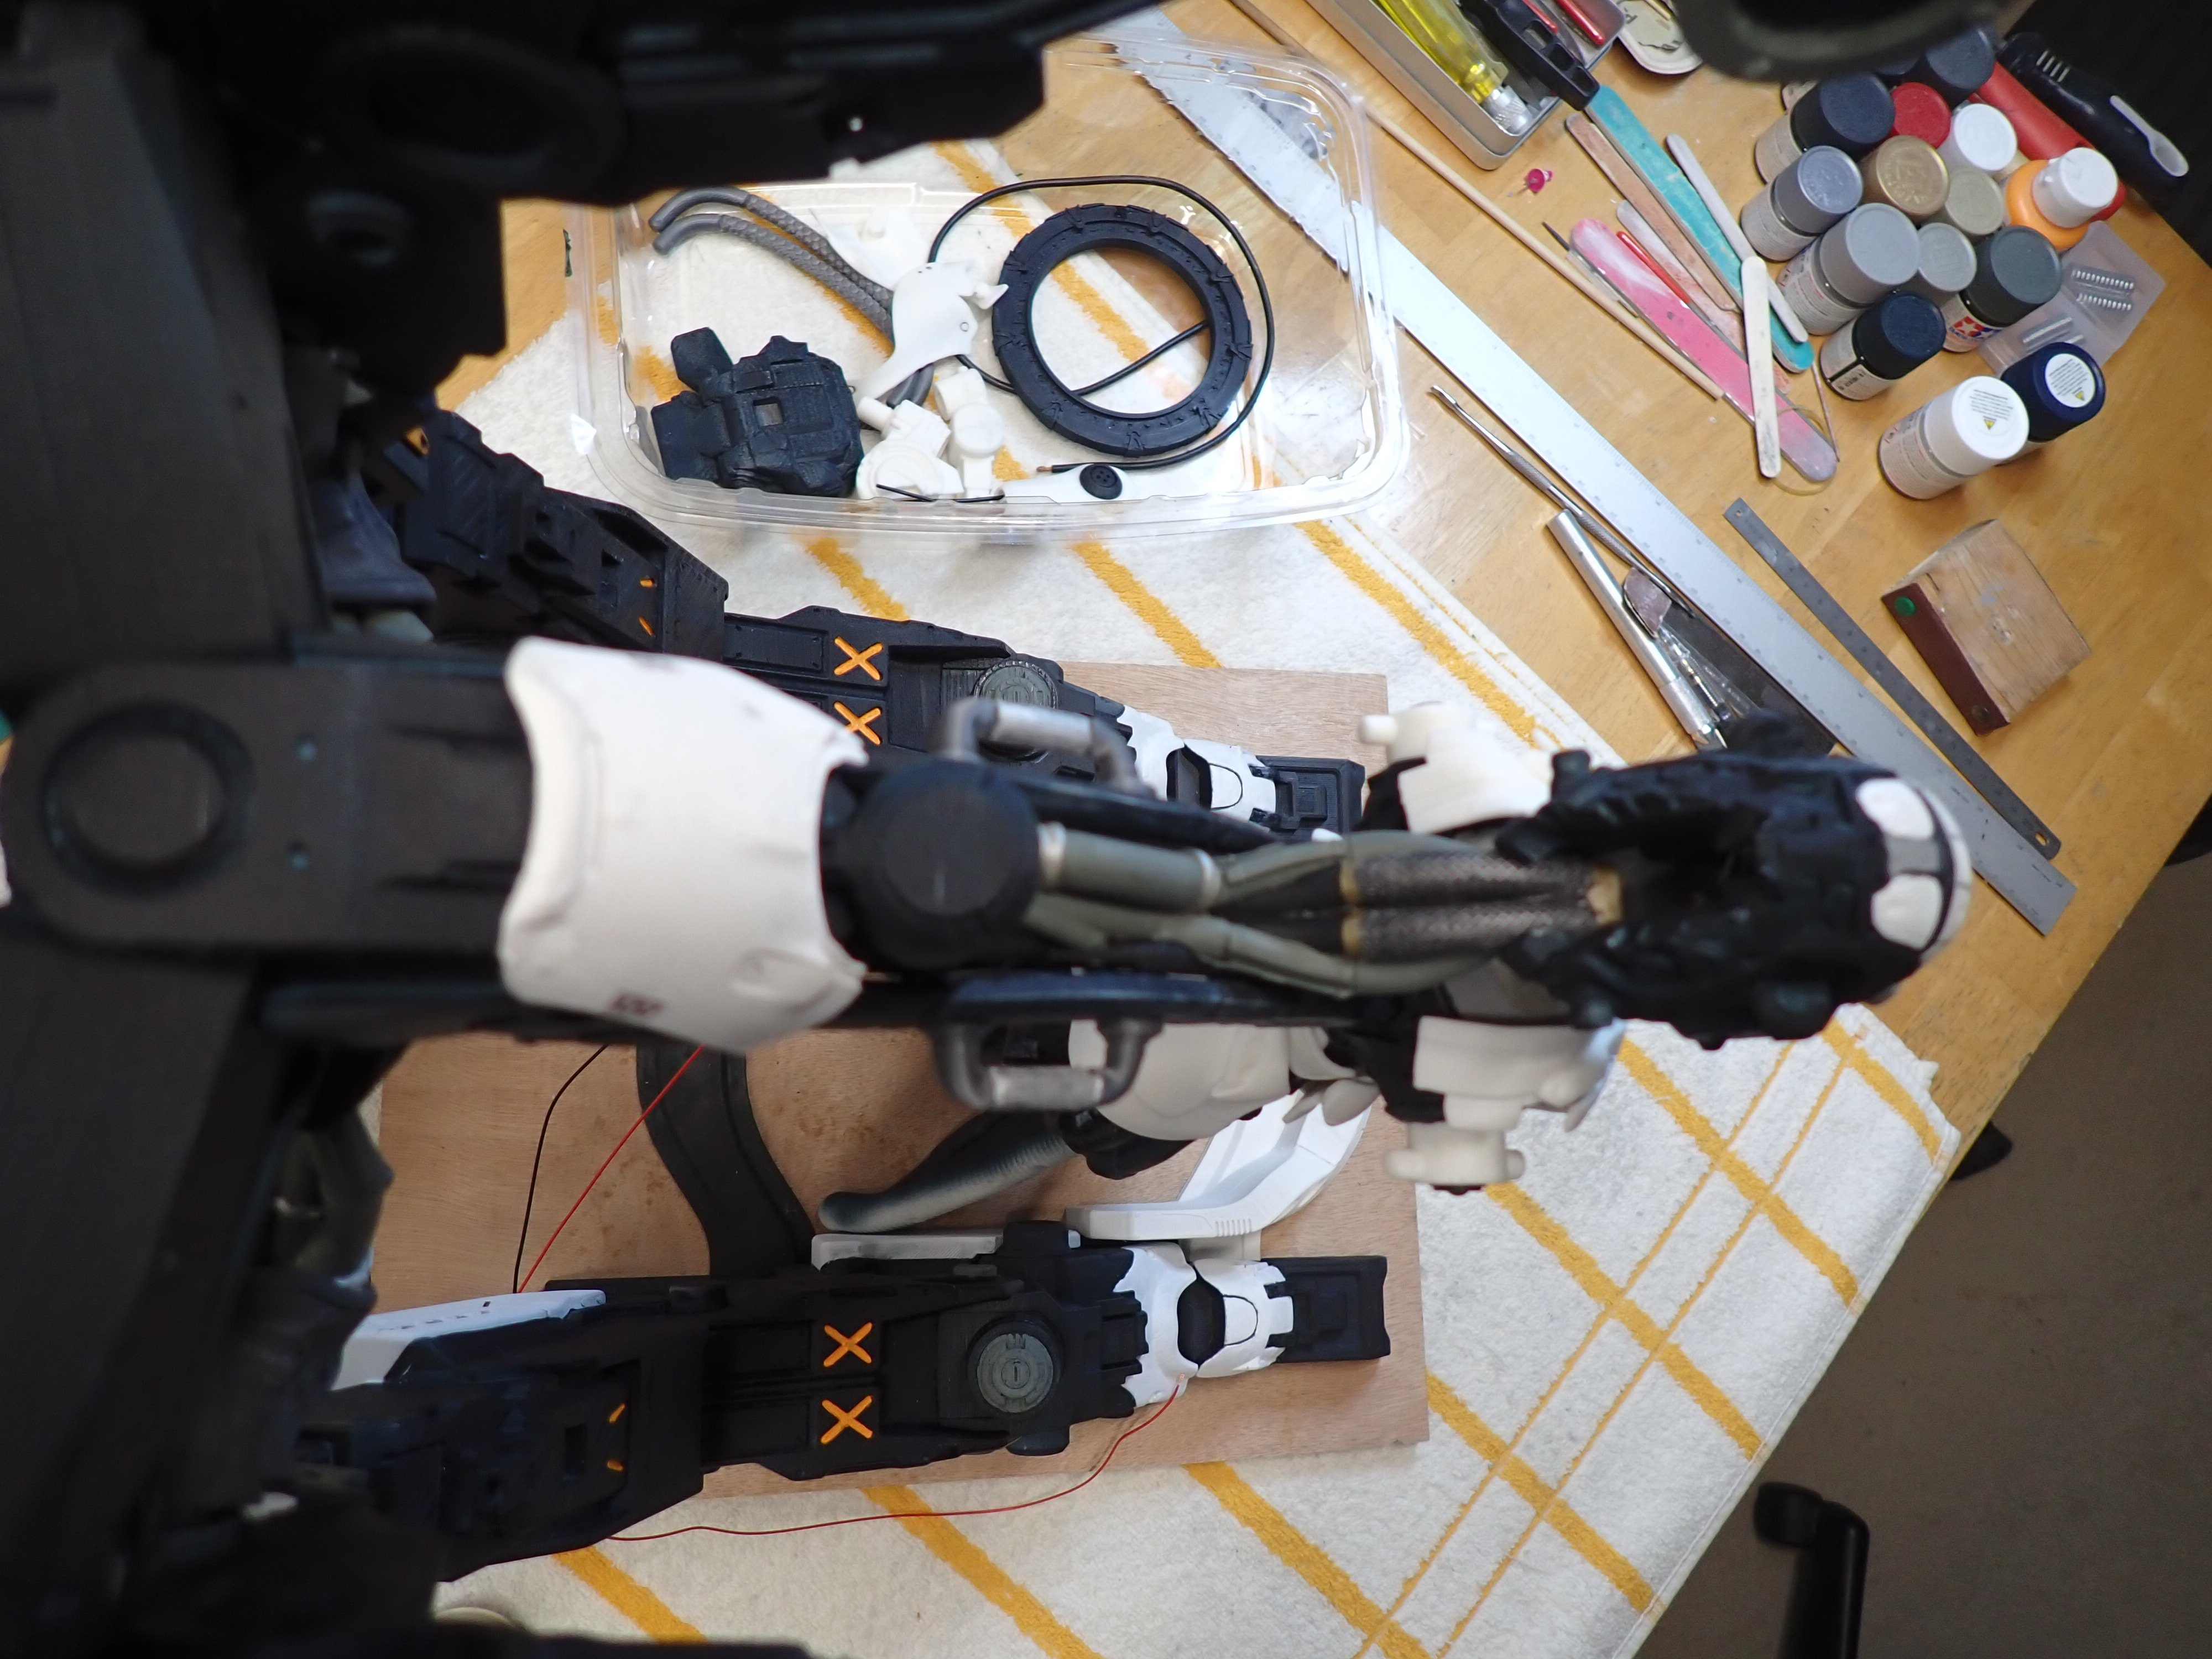
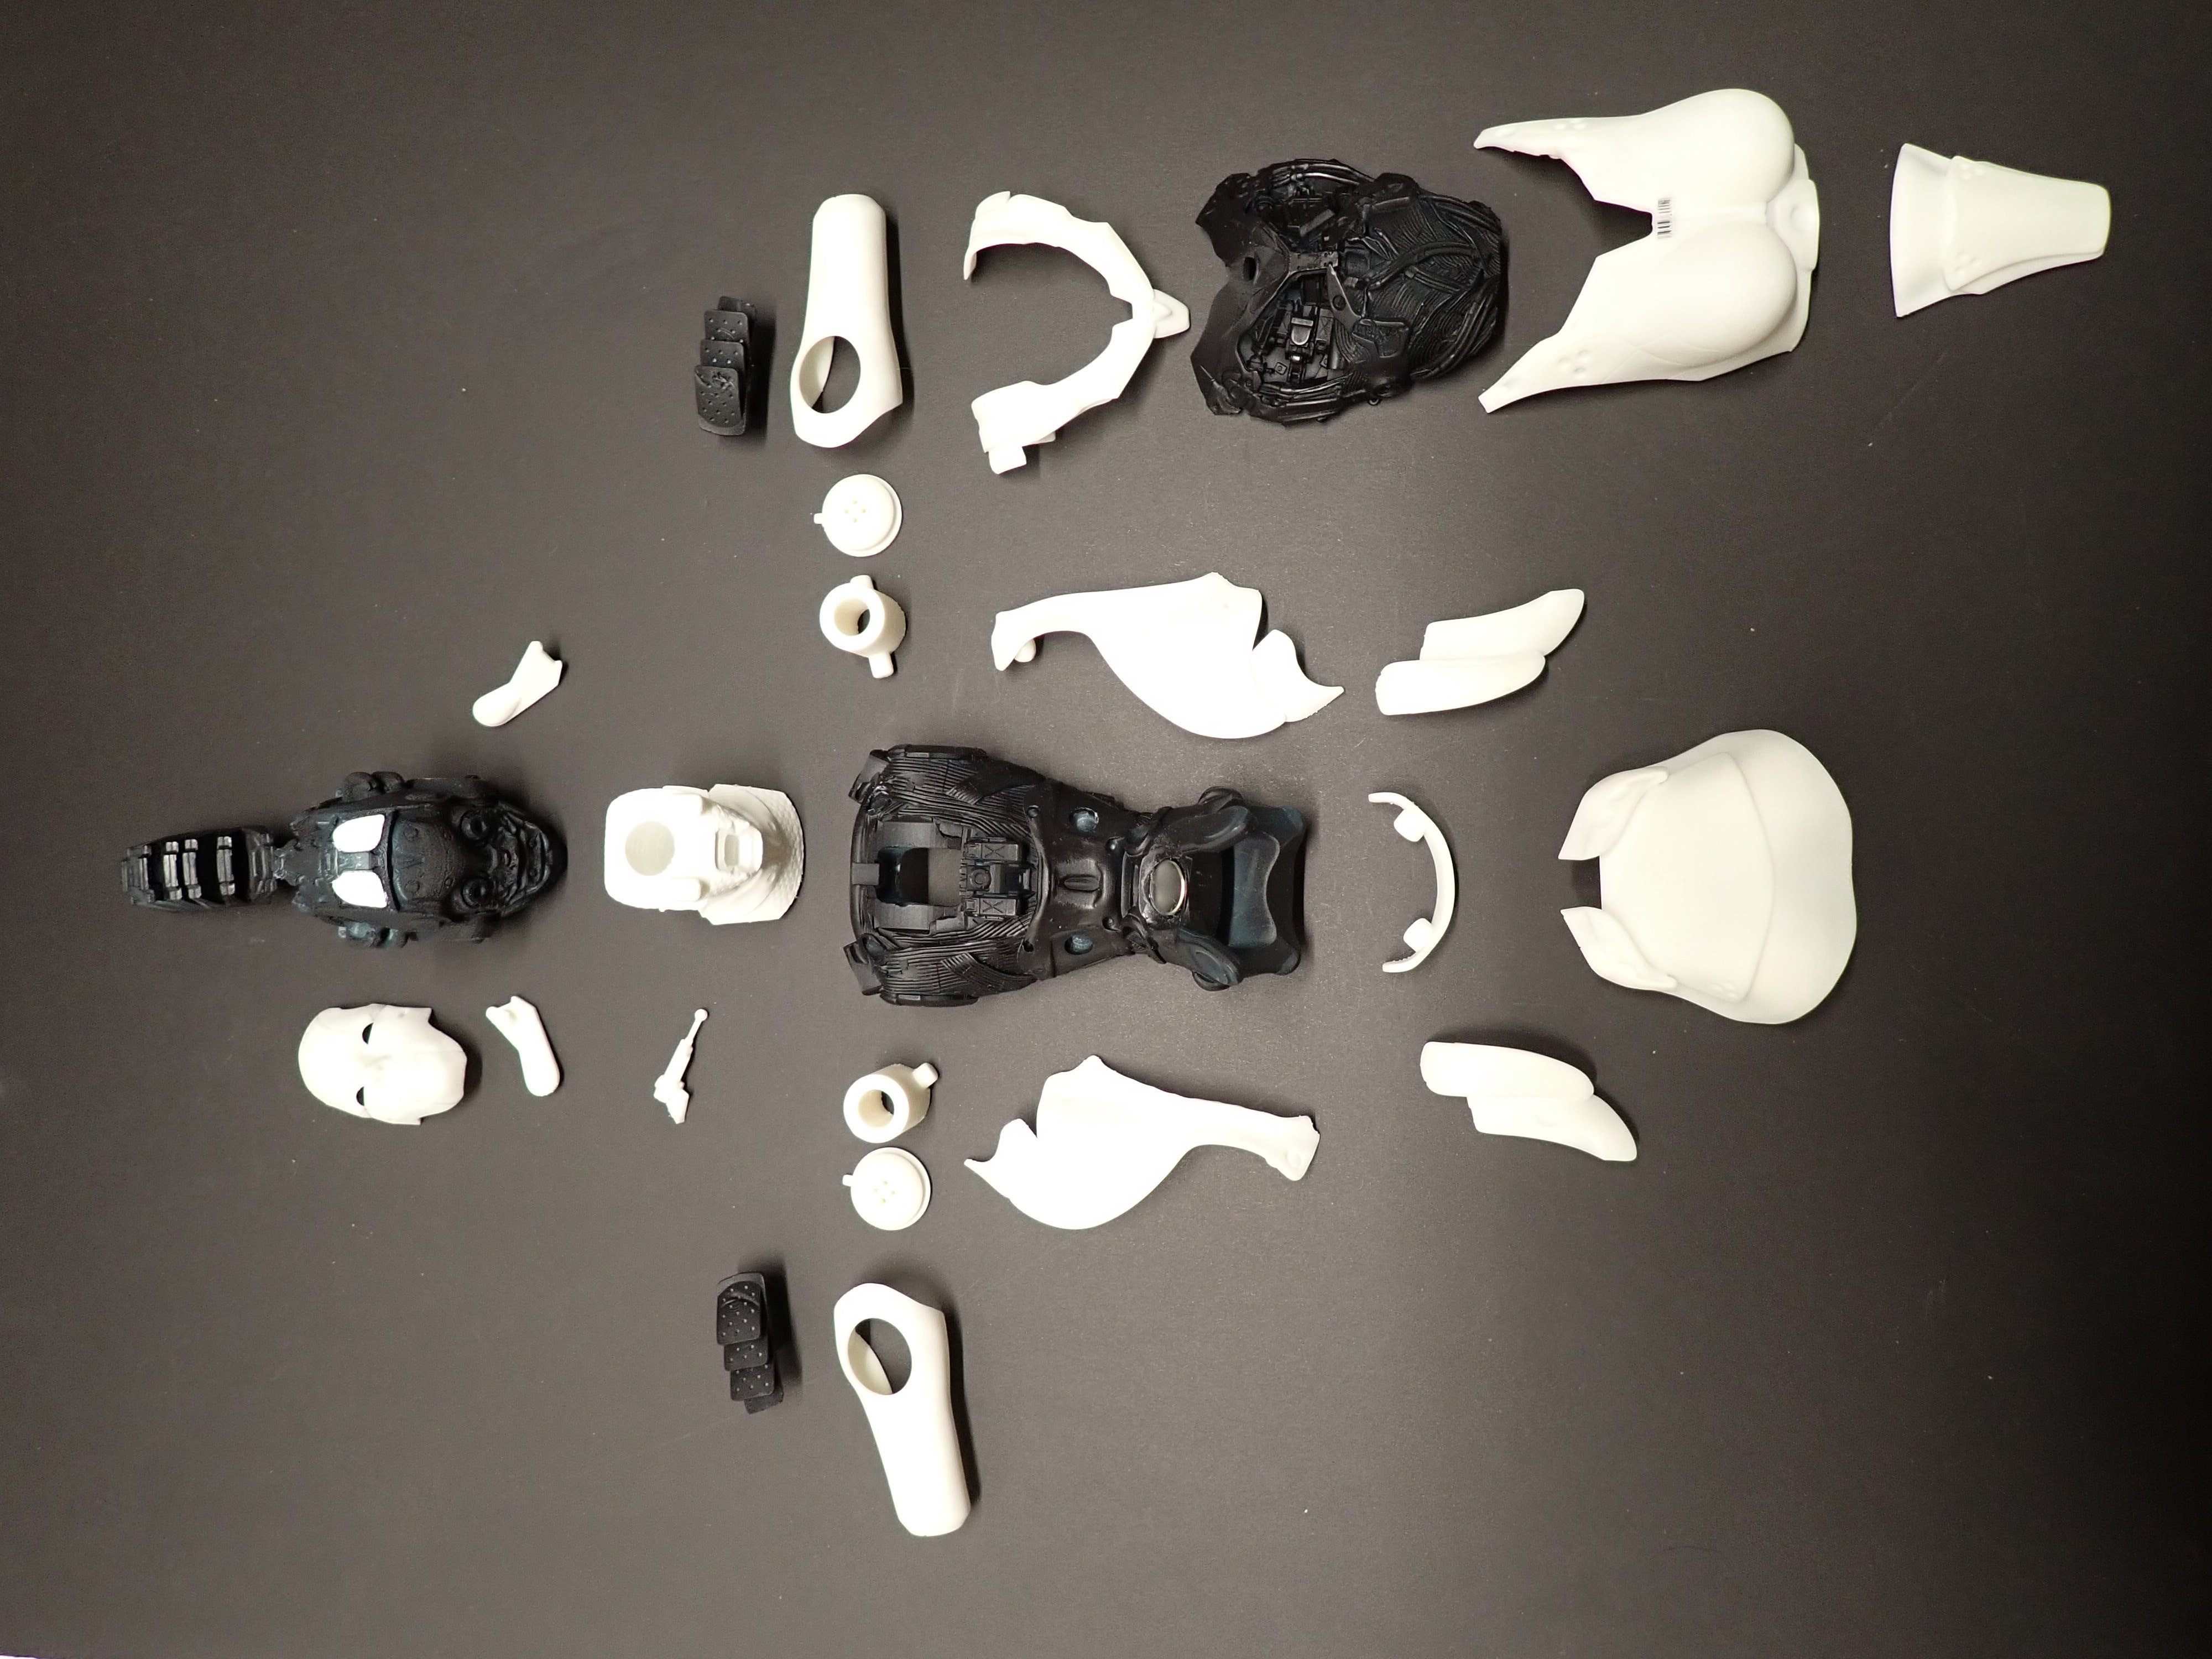
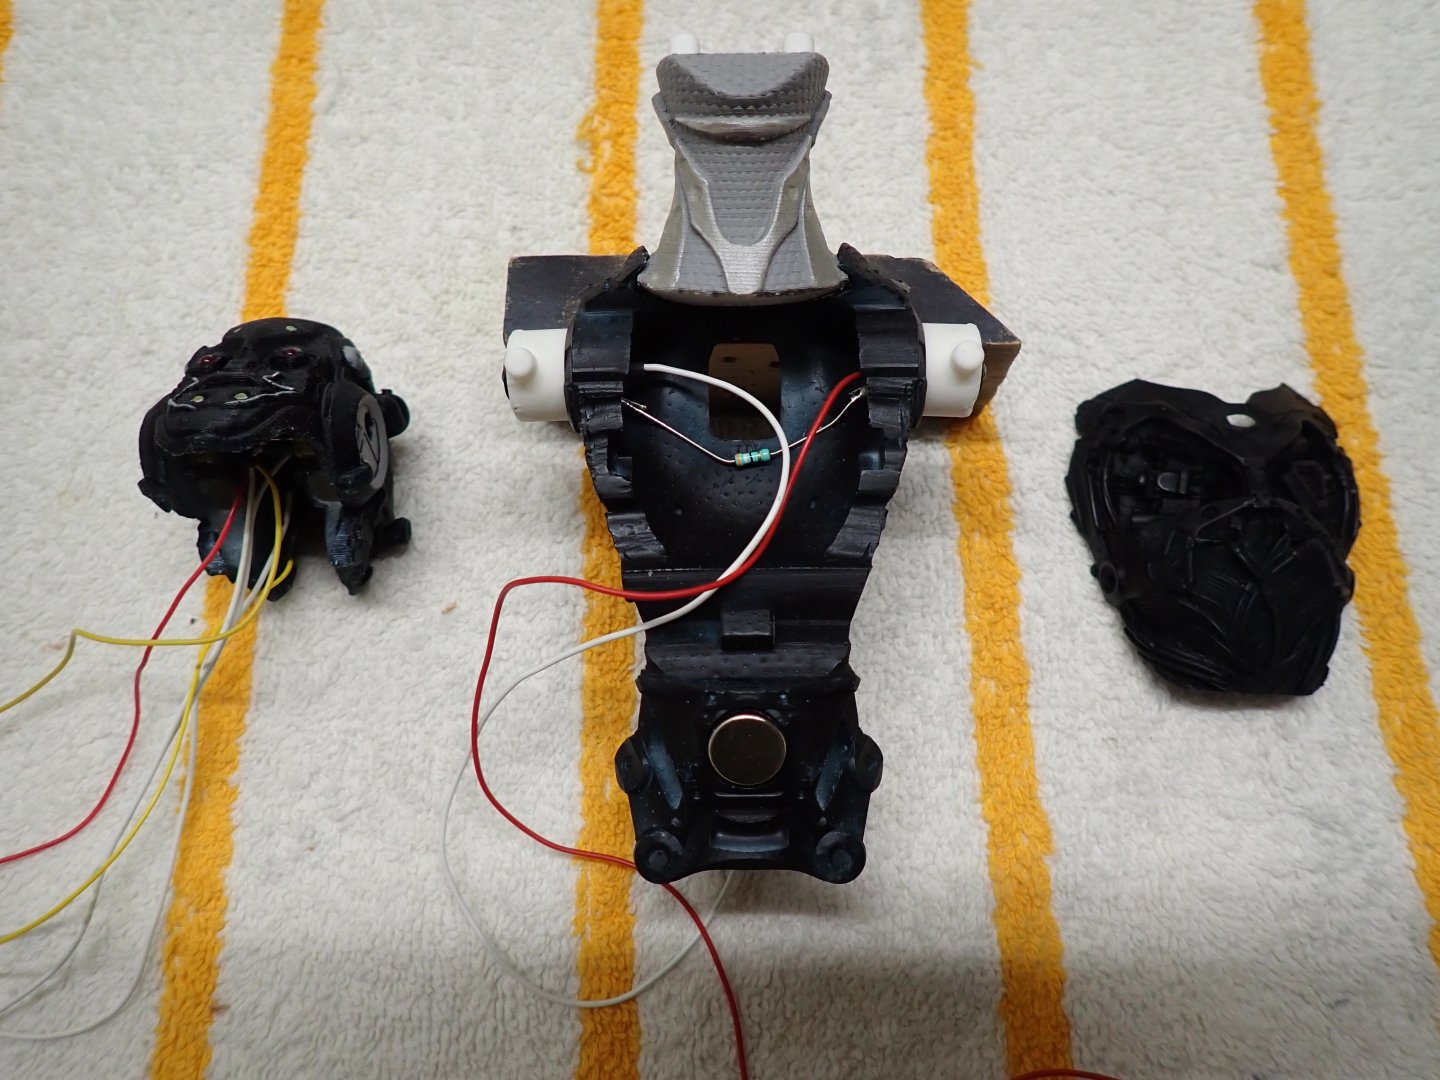
I am now working on the AI creature. Below are pretty much all the parts that will go into her: Lots of details to paint. Yves

-
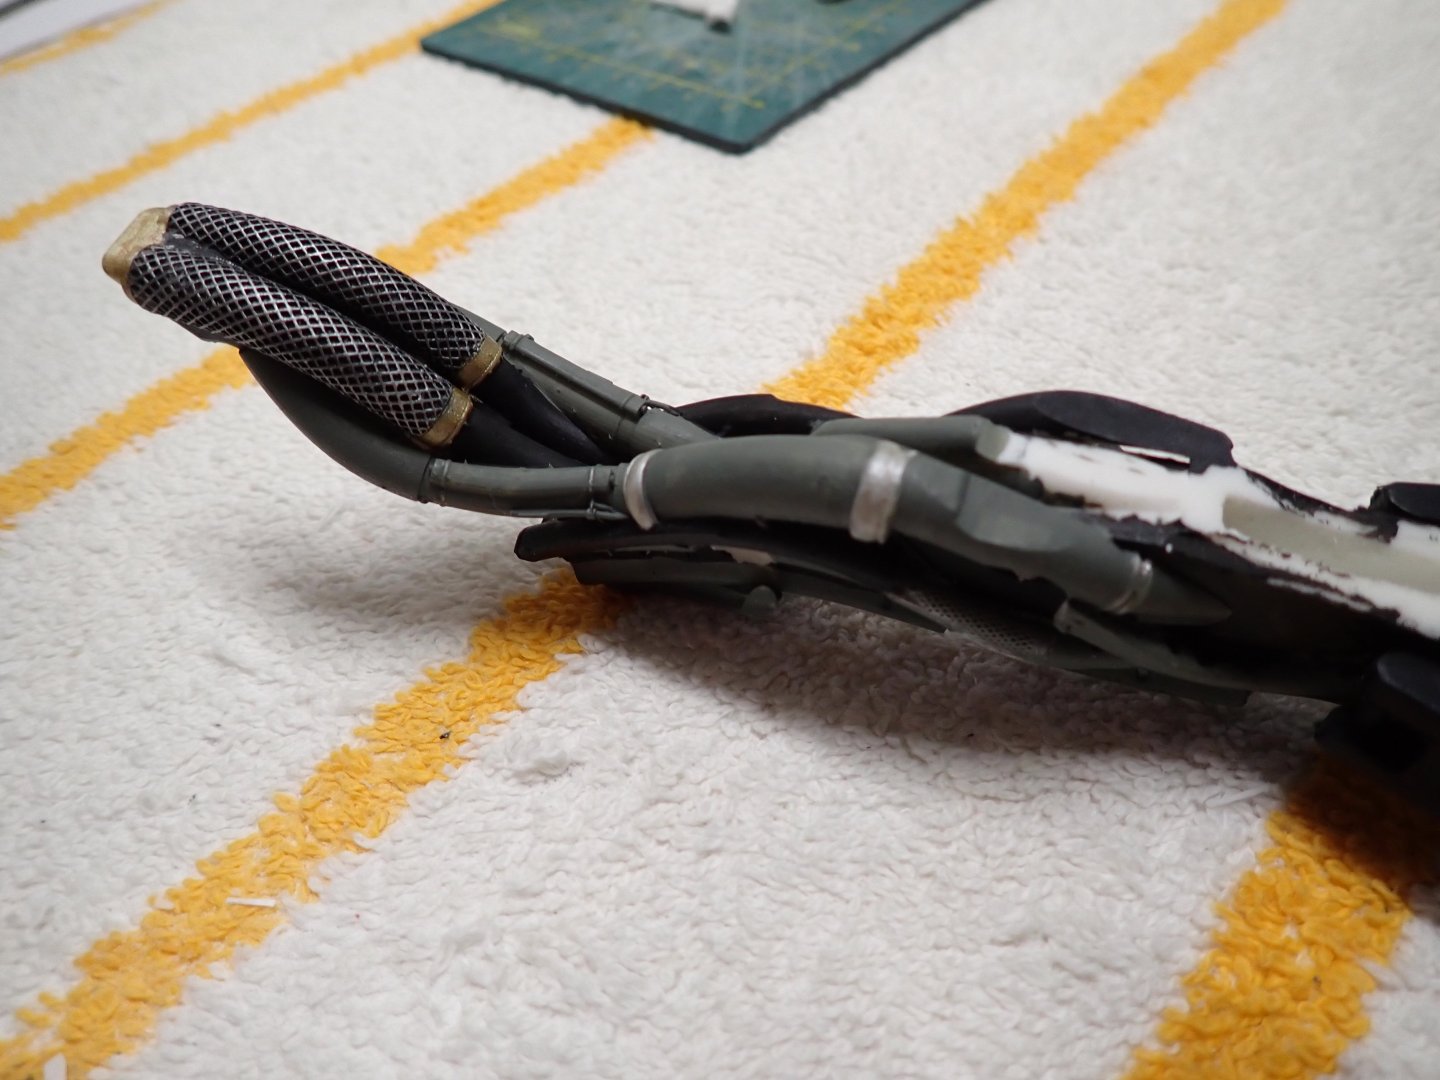
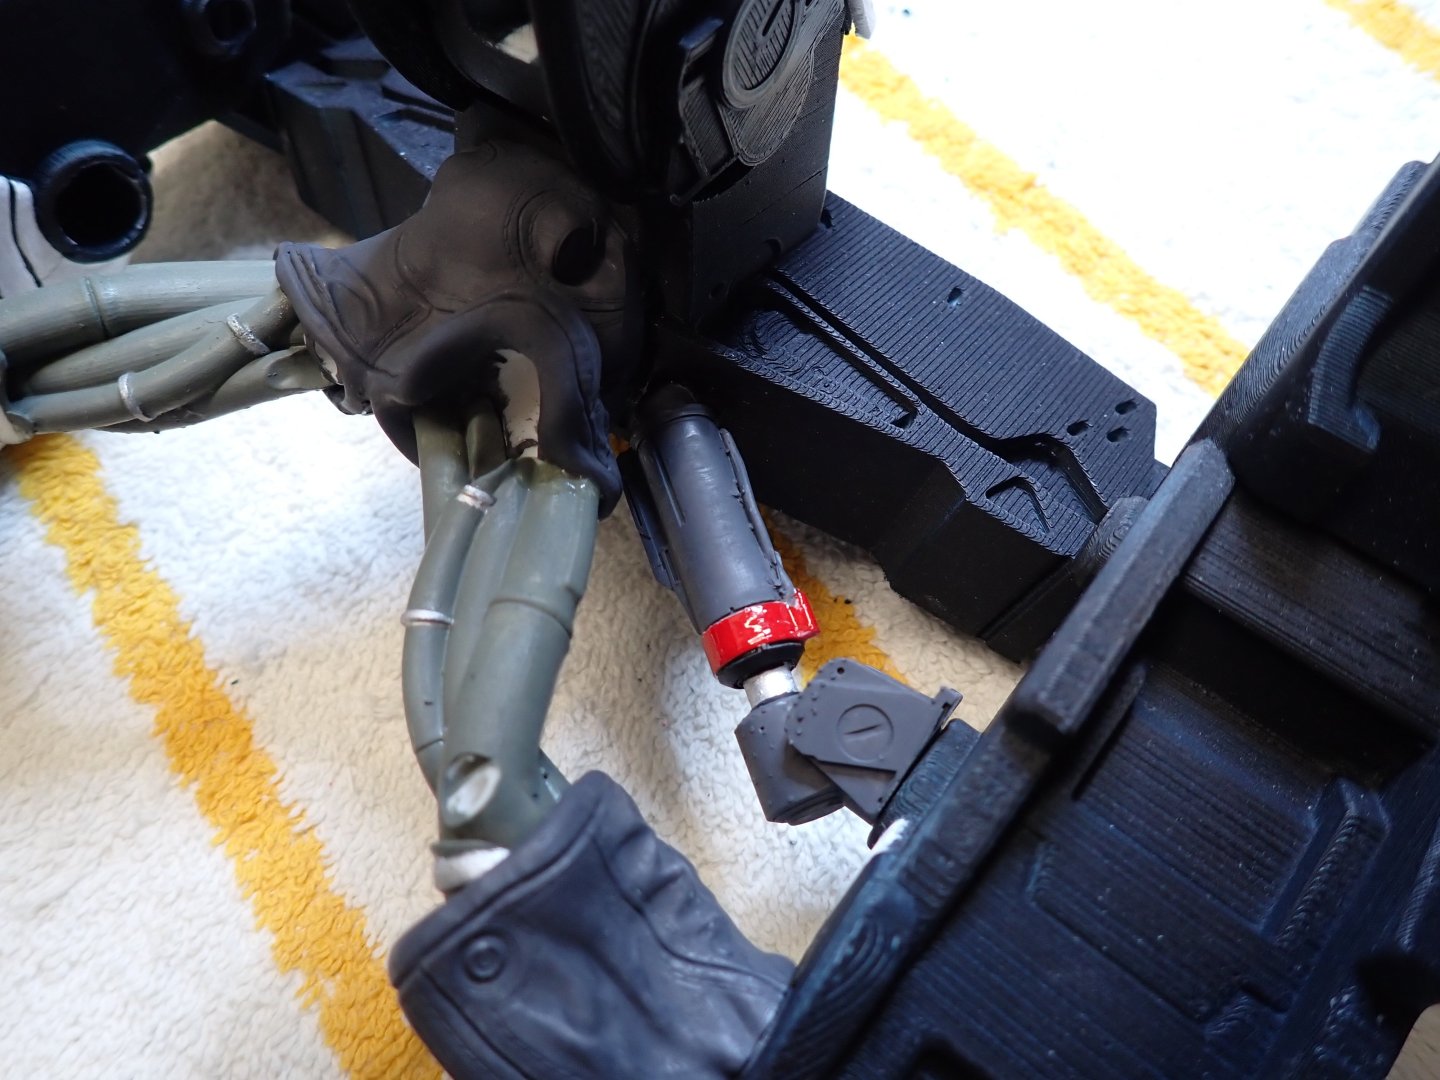
There are a lot of pipes, hoses and tubes on that sculpture.... It is actually kind of fun to replicate them... Below is a bundle of hoses that will connect to the back of the neck of the AI creature. There are definitely some pipes dedicated to cooling. Dry brushing is used to render the stainless steel braiding of the hoses: In situ, on the main spine of the "Hangar": Yves

-
White Freightliner DD by CDW - AMT - 1:25 Scale - PLASTIC
yvesvidal replied to CDW's topic in Non-ship/categorised builds
The "super" chrome painting is impressive. You should do something about the tires, they look too new. Yves -
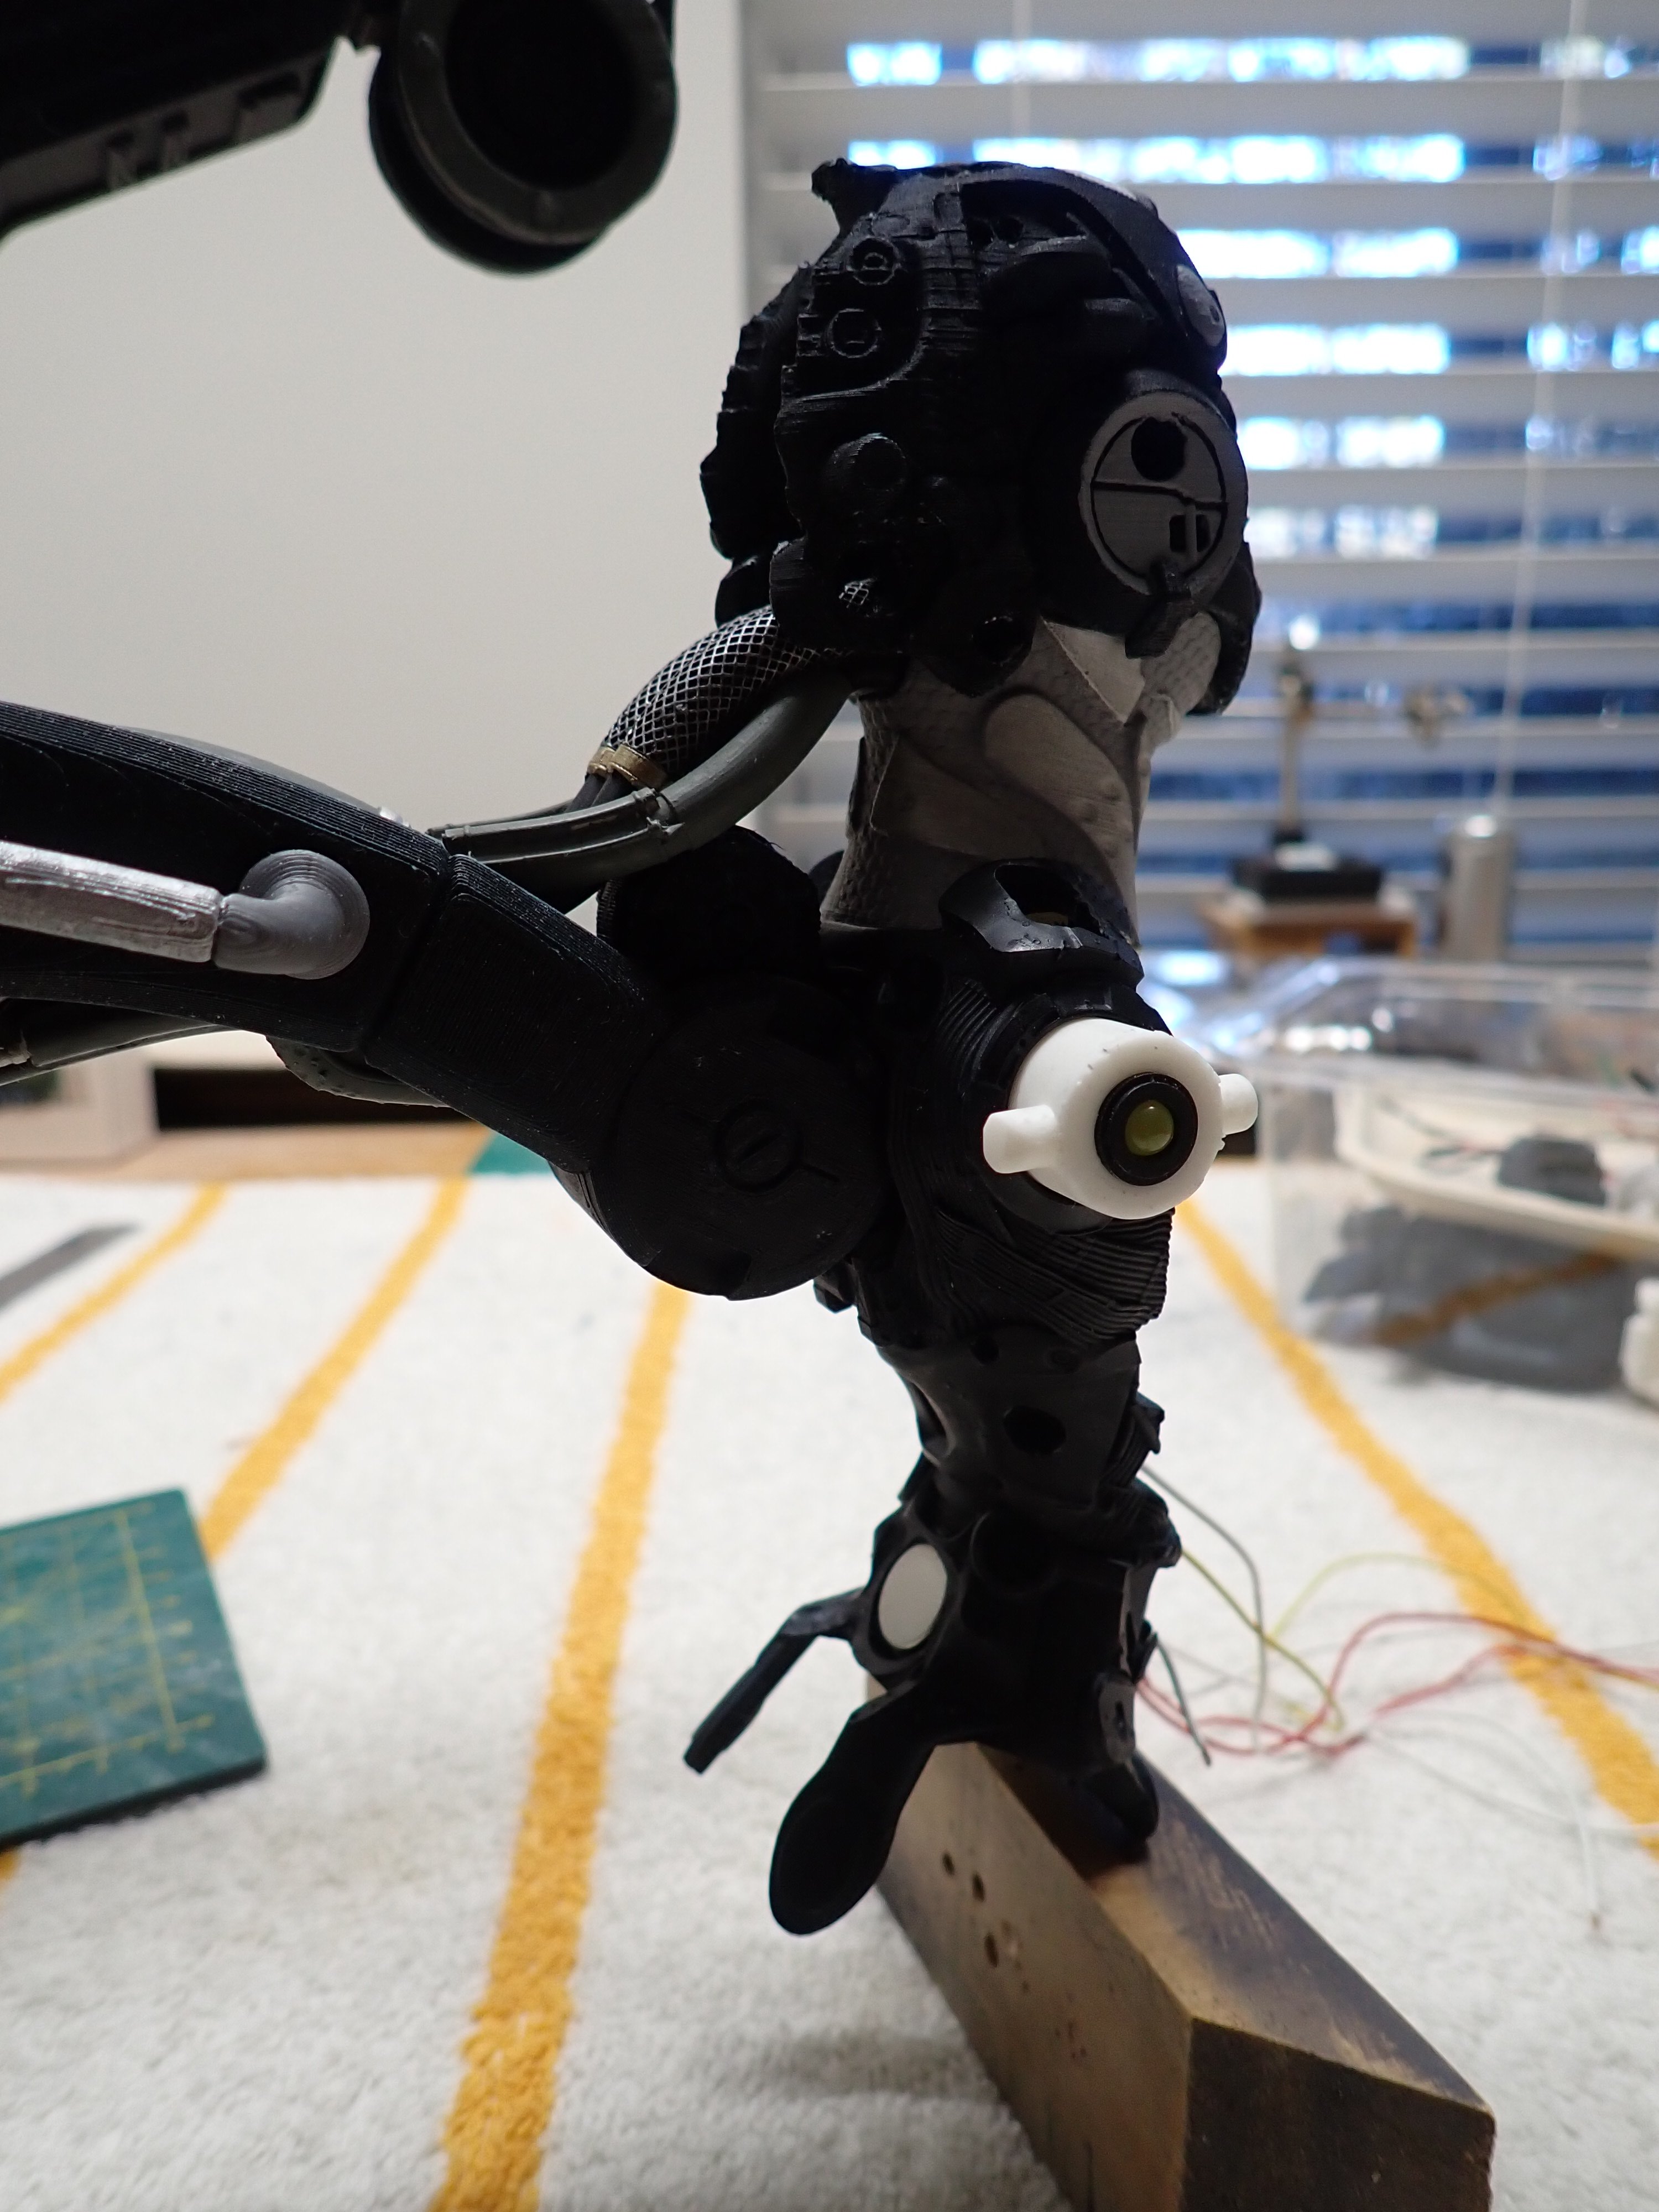
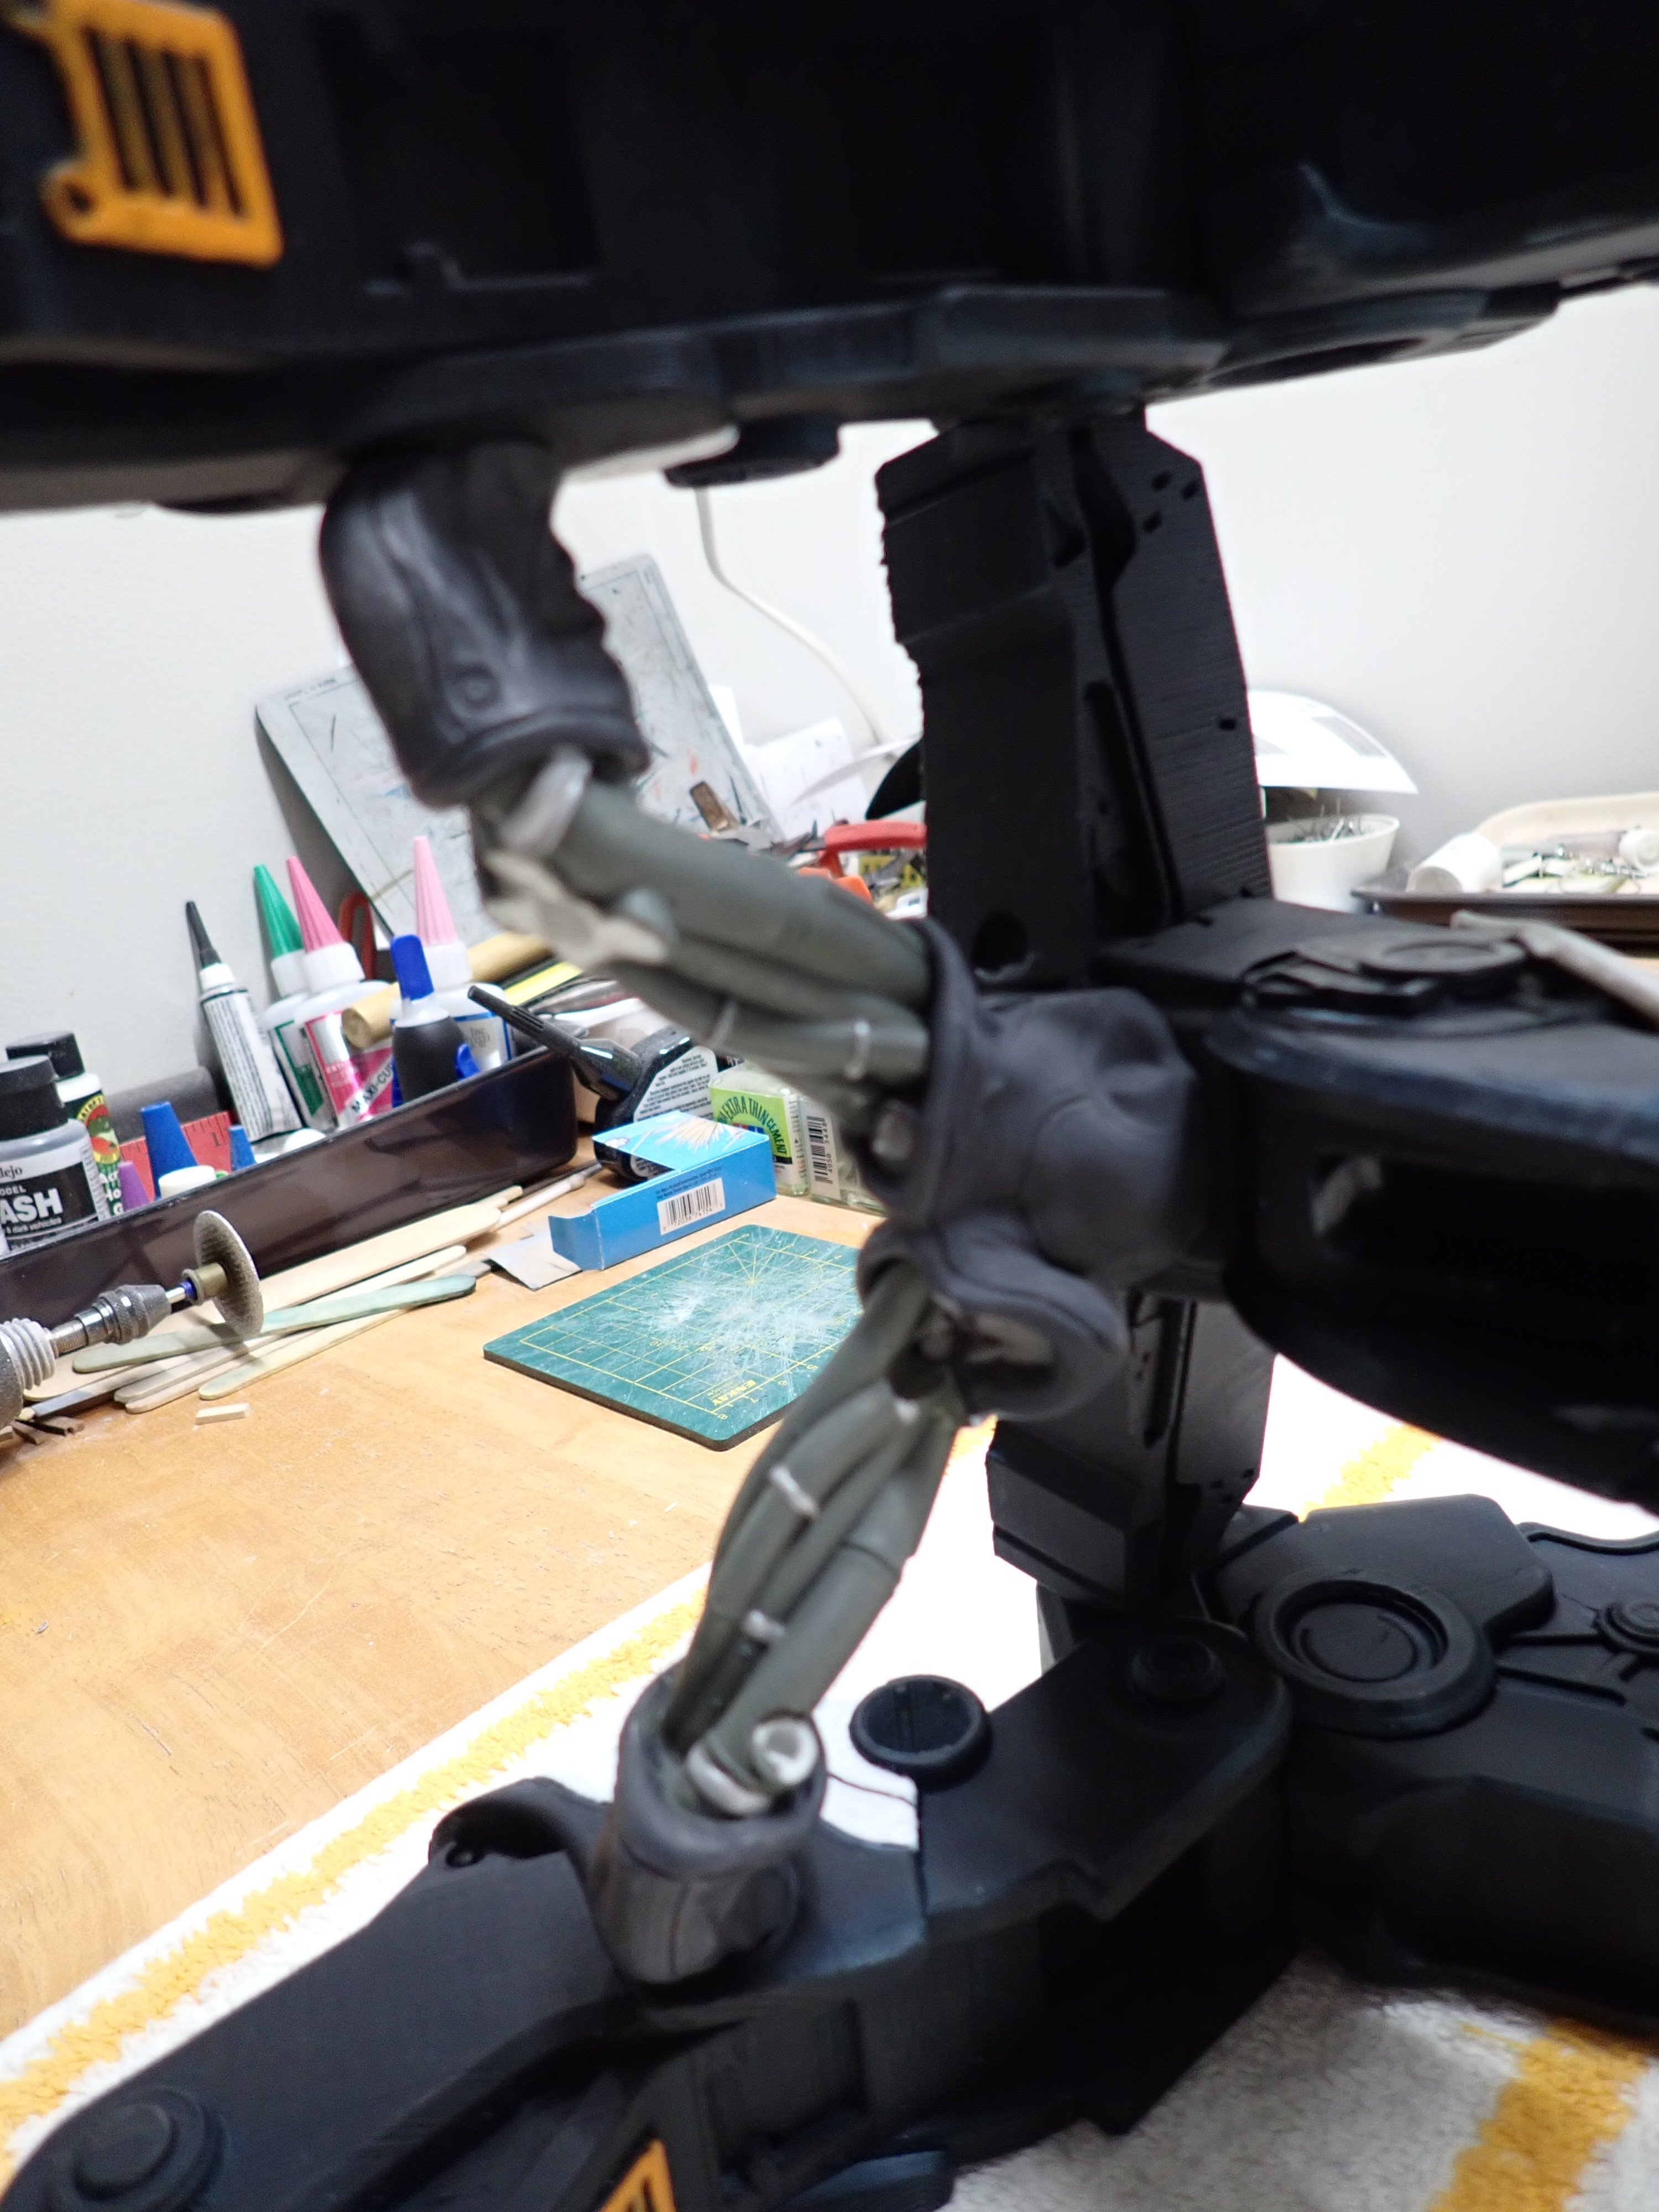
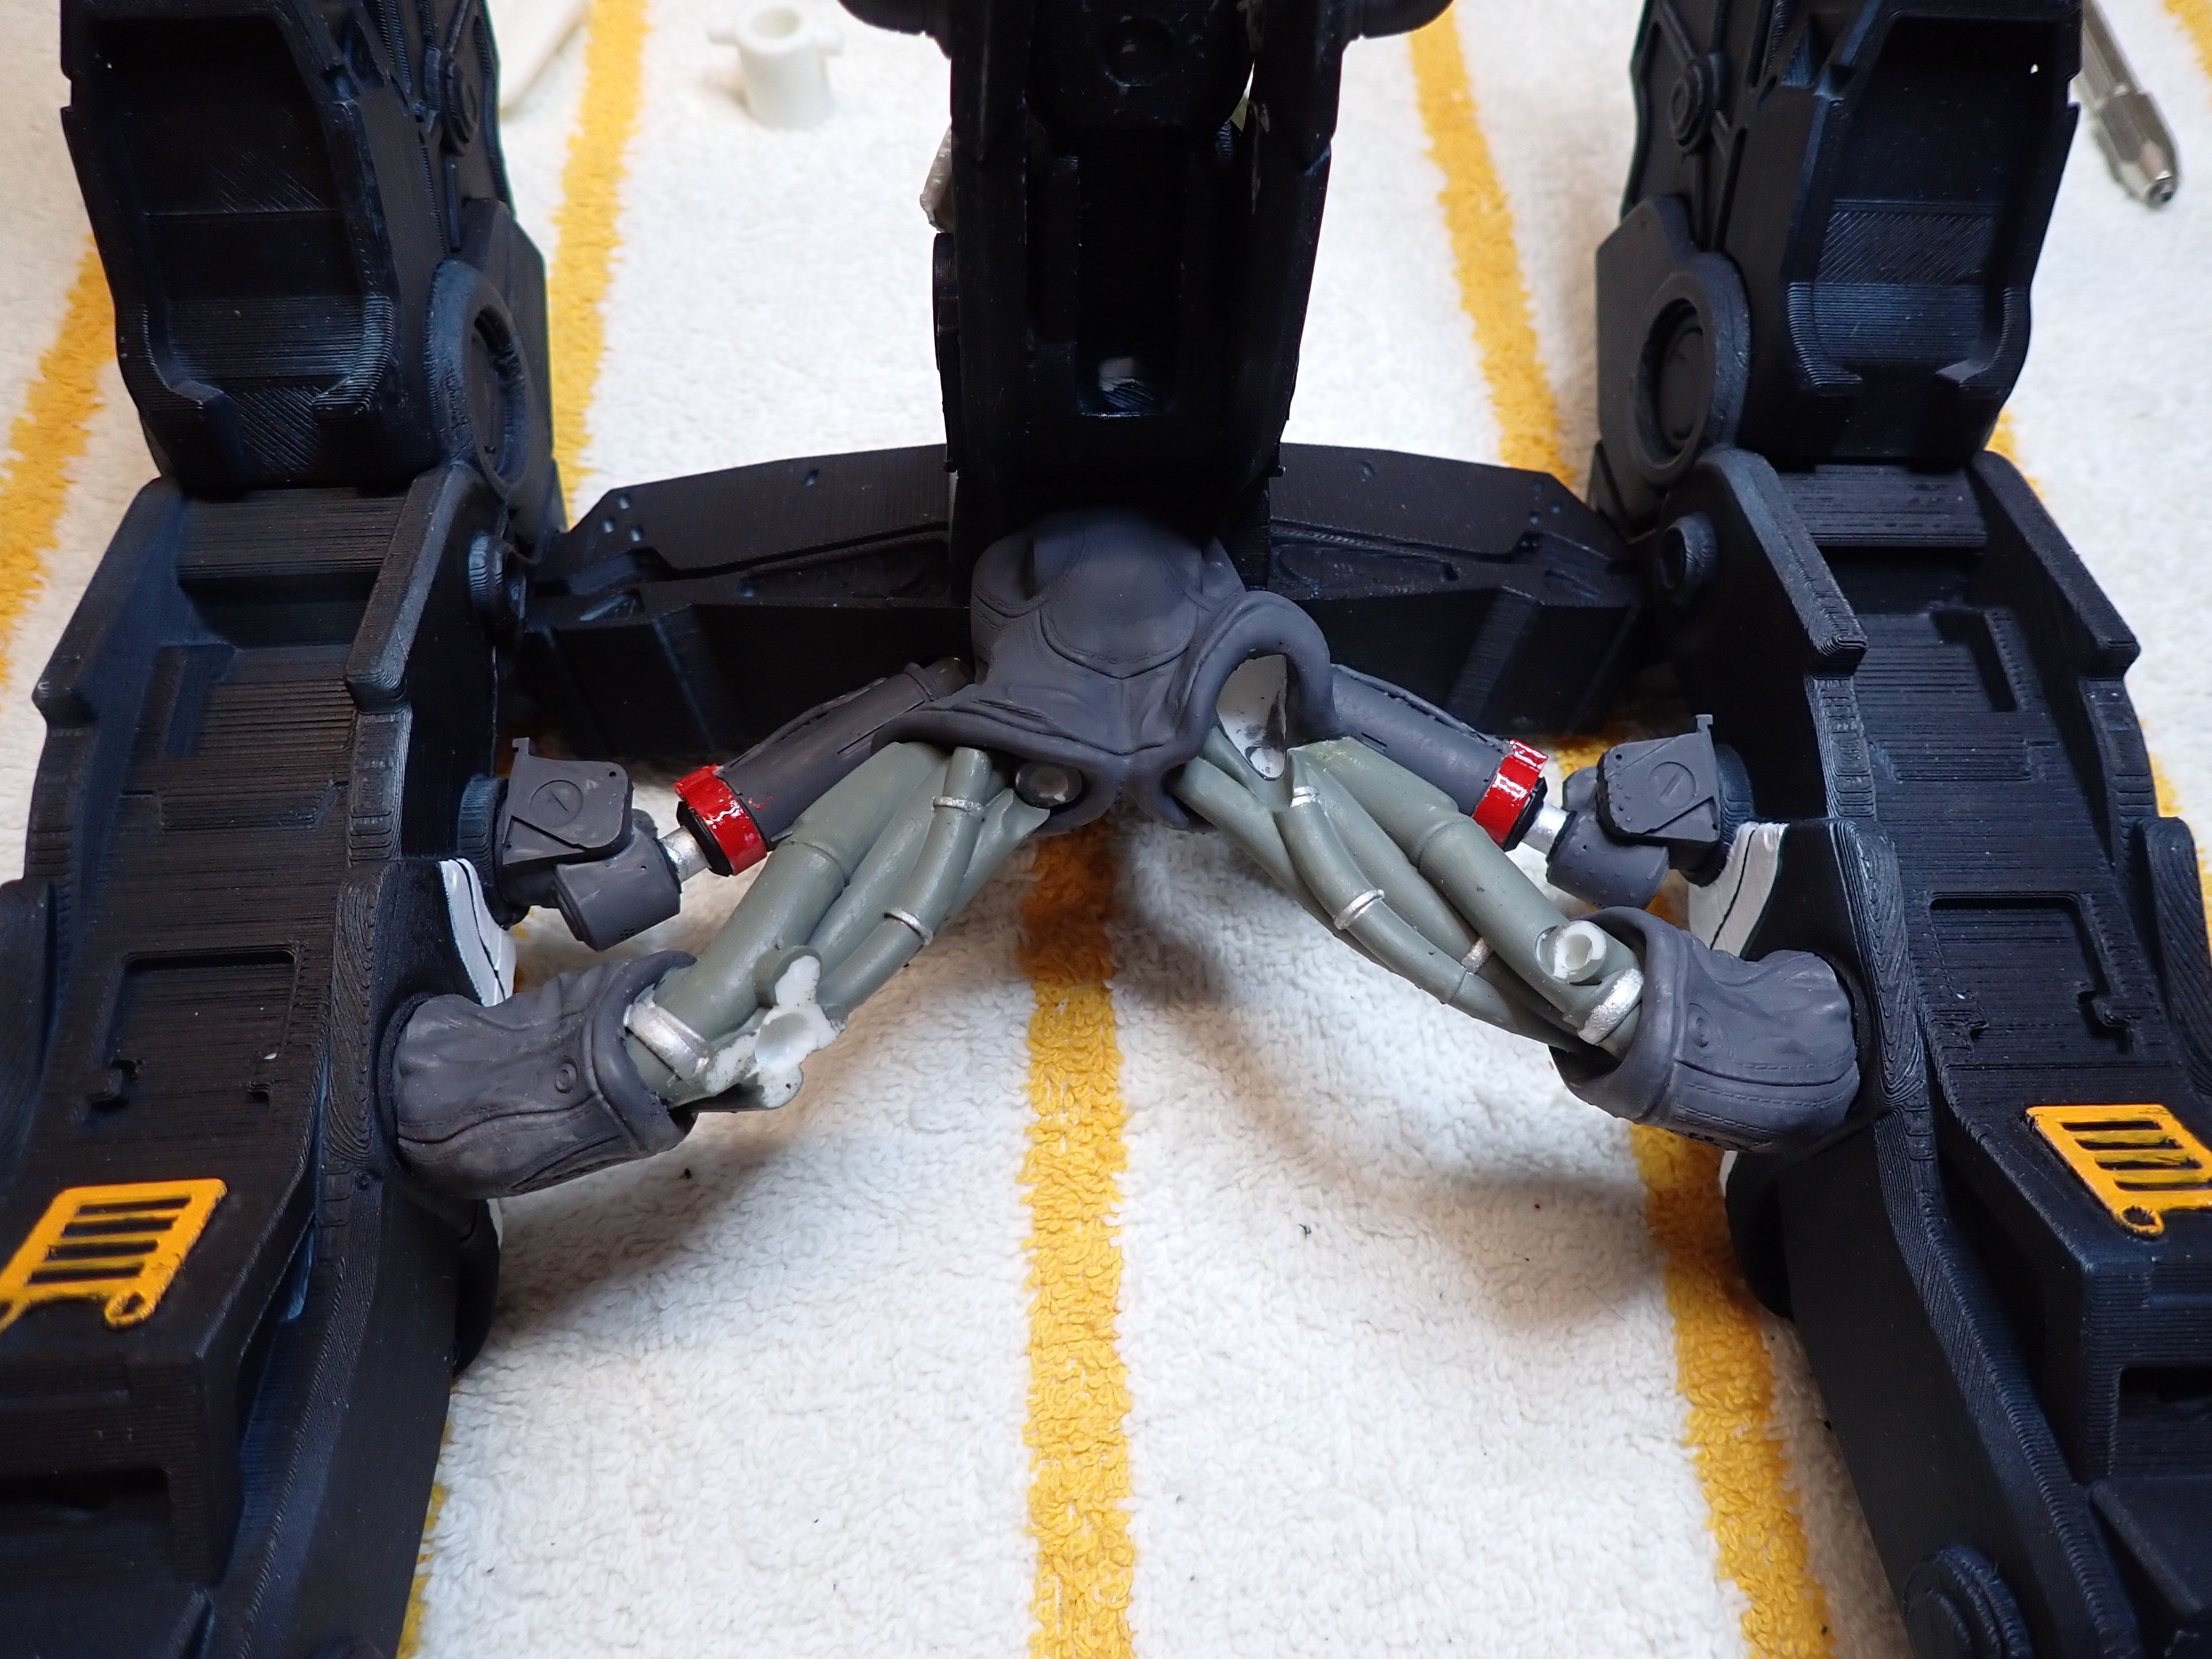
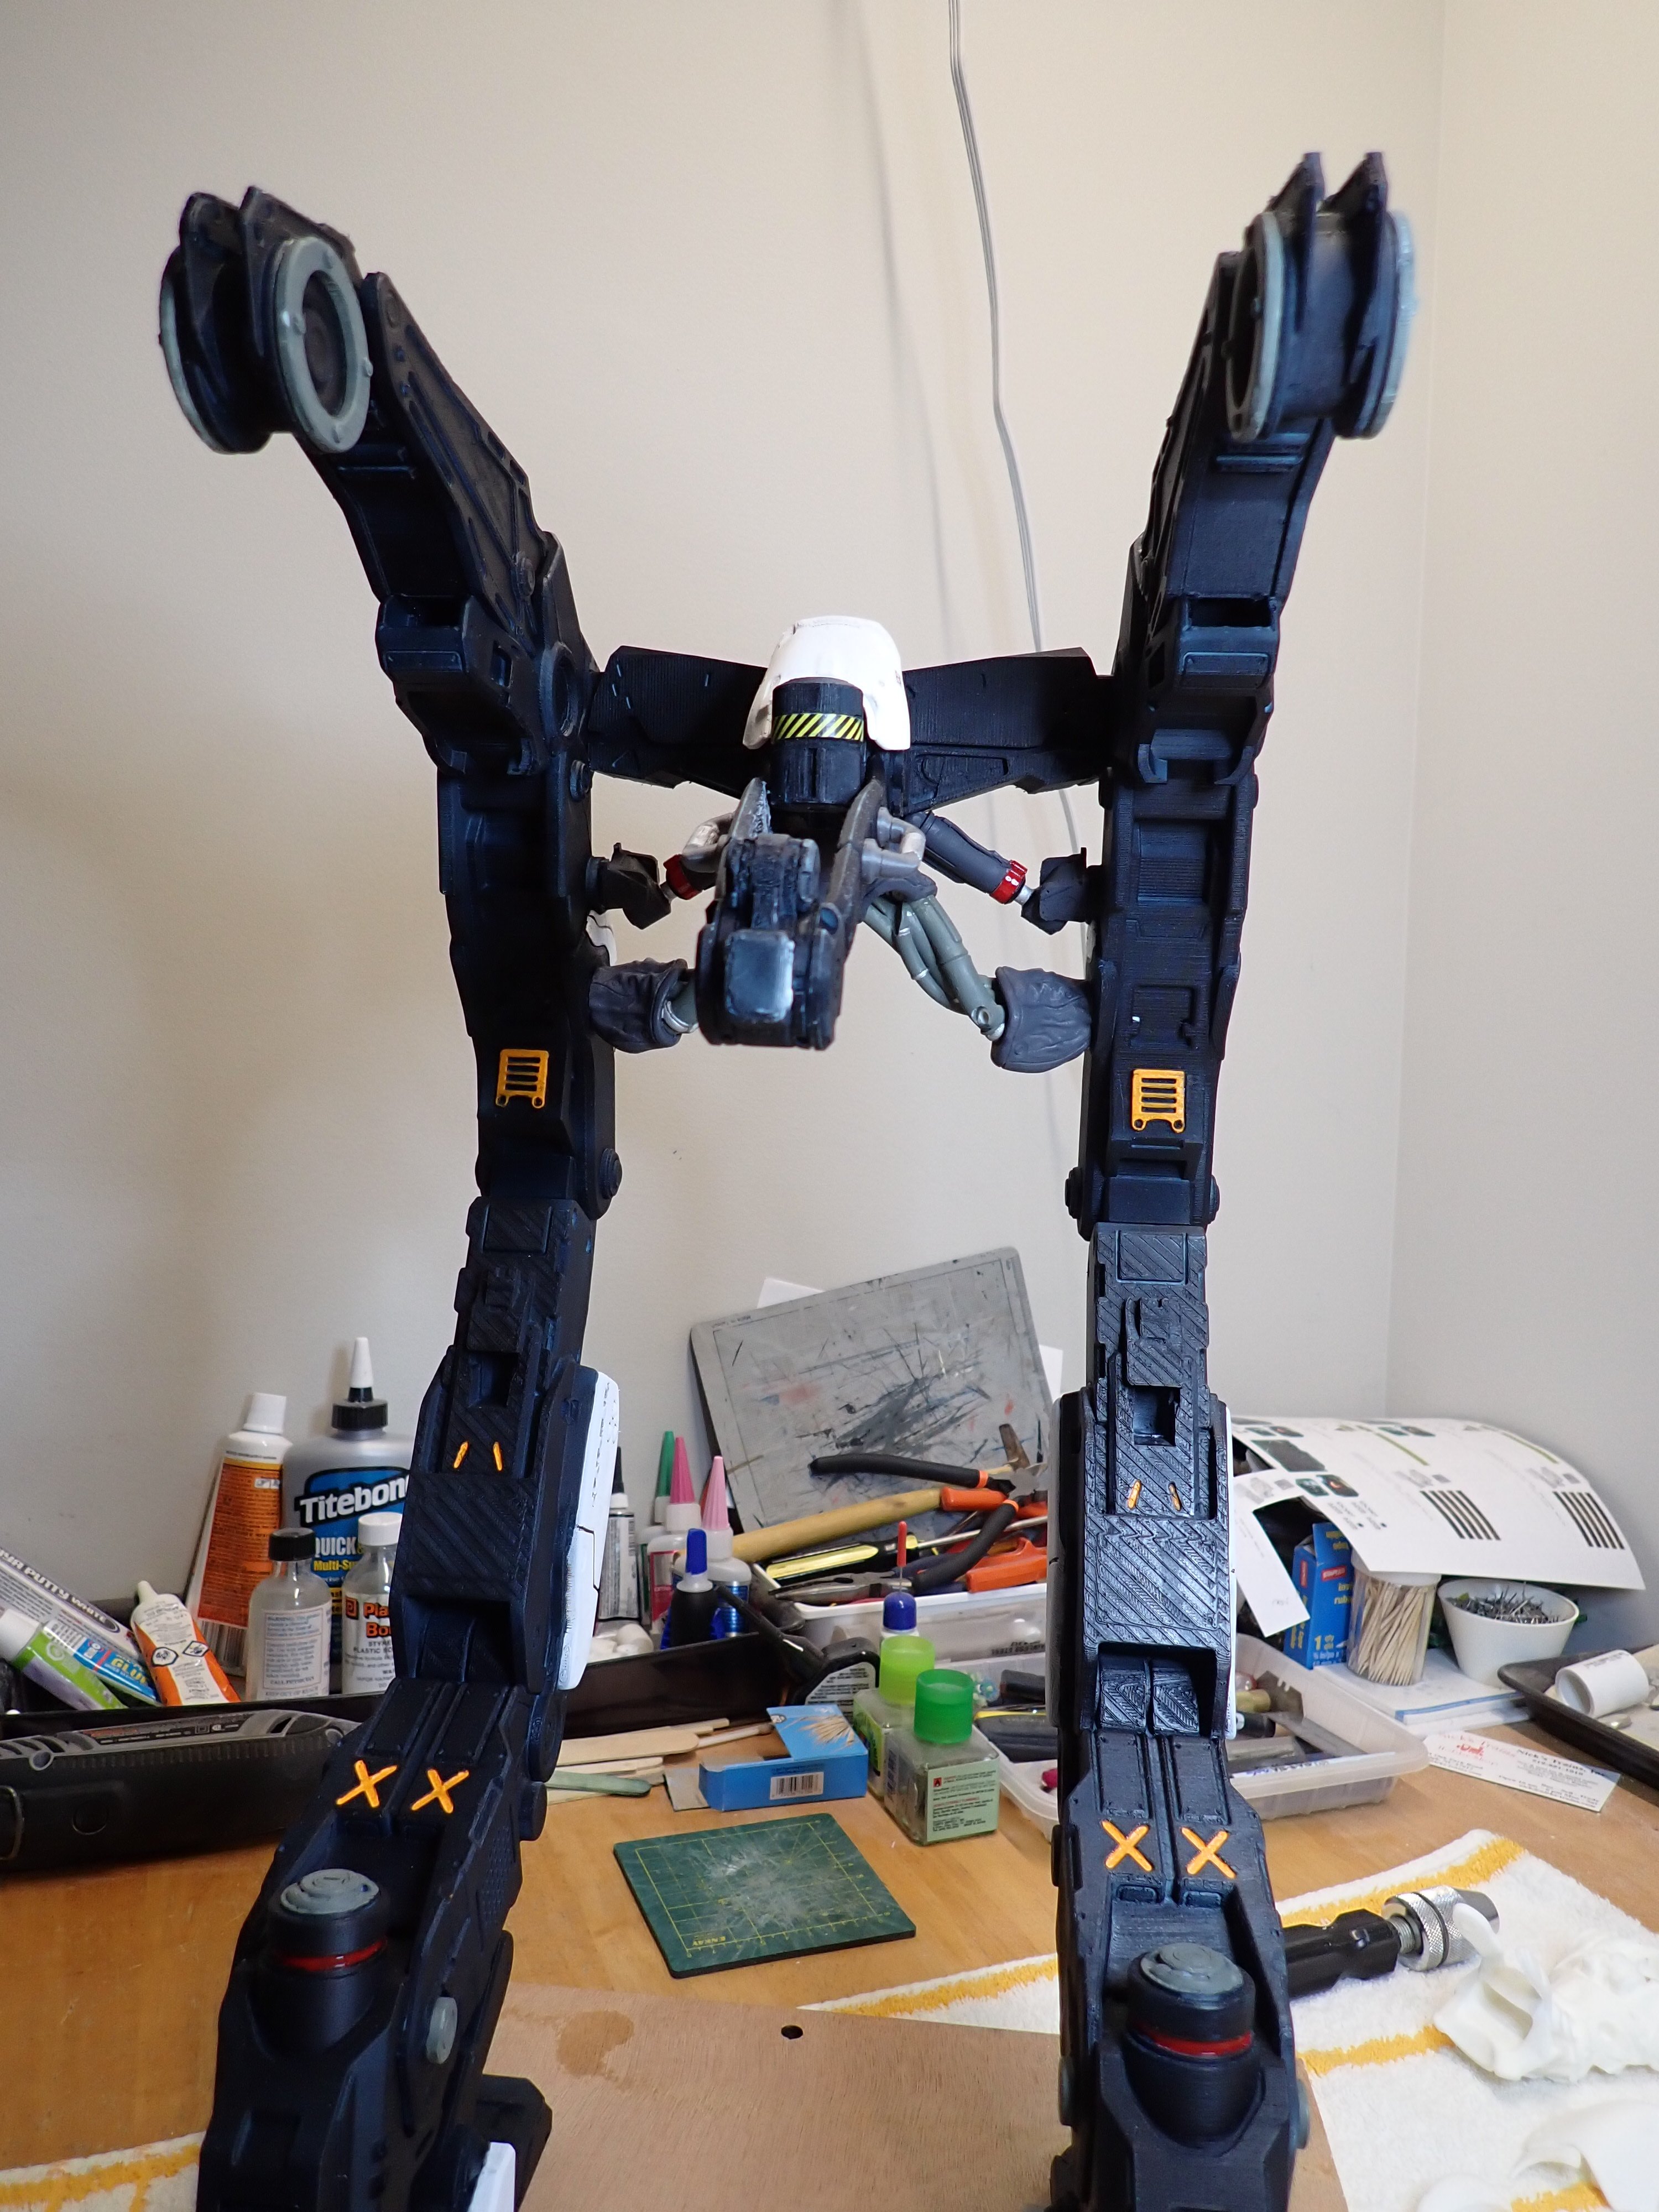
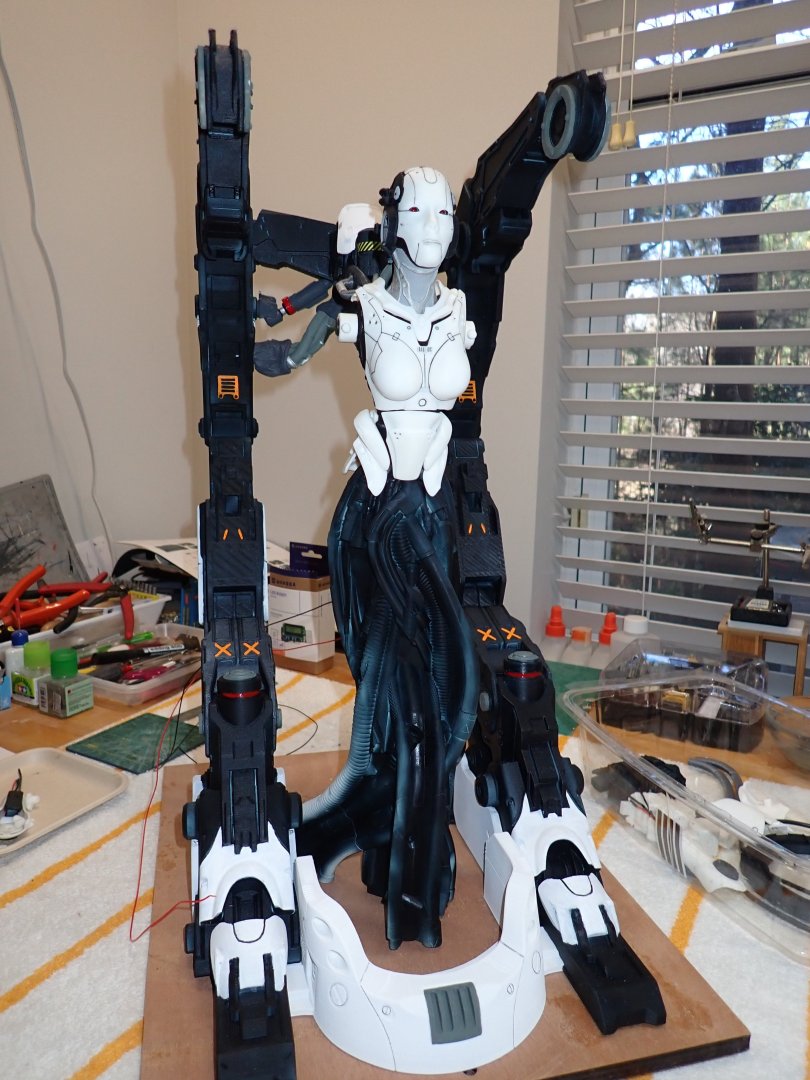
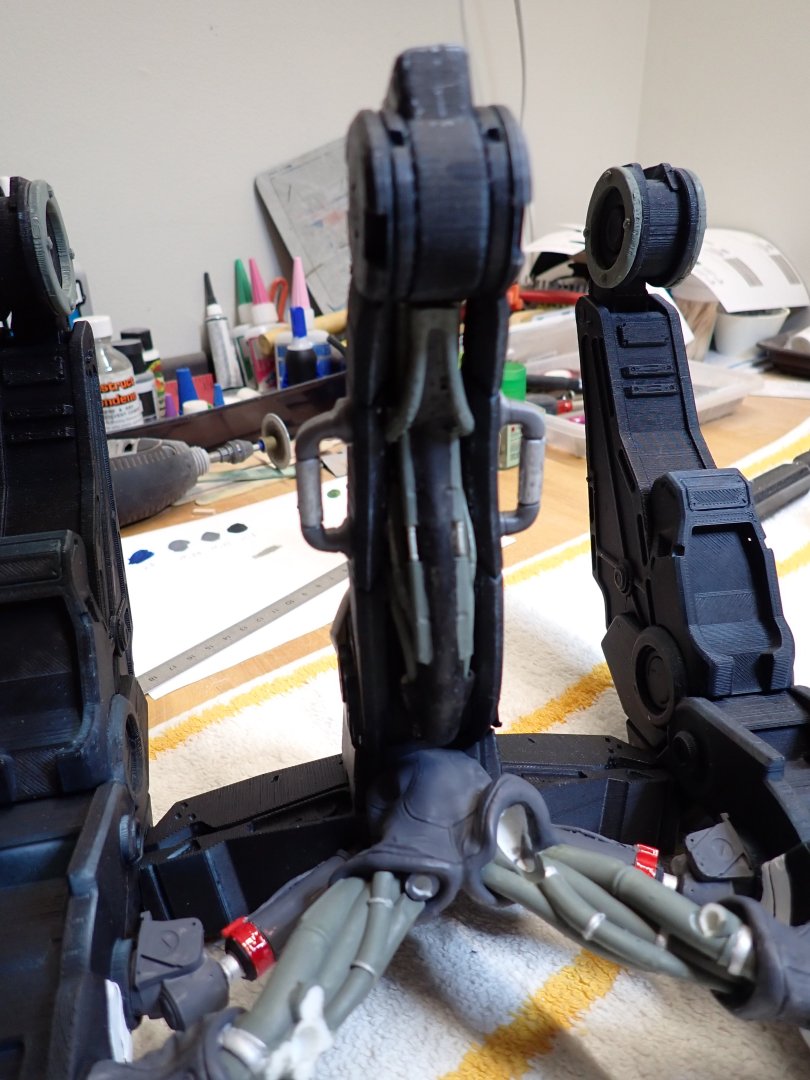
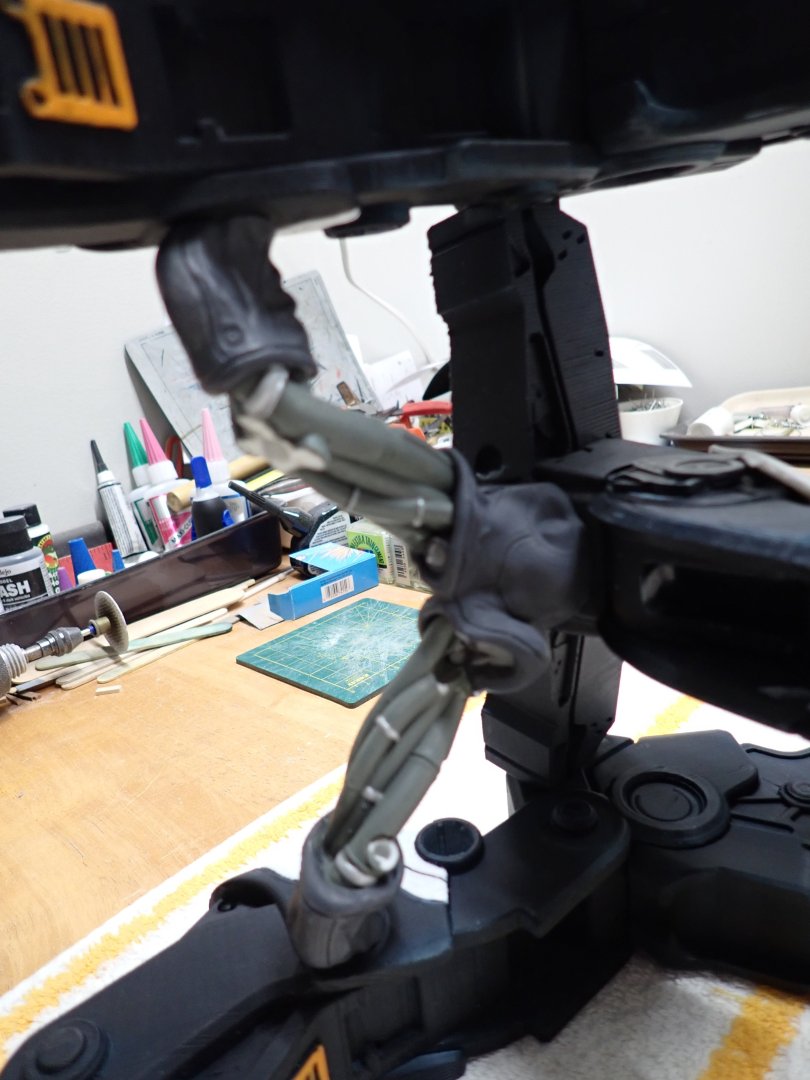
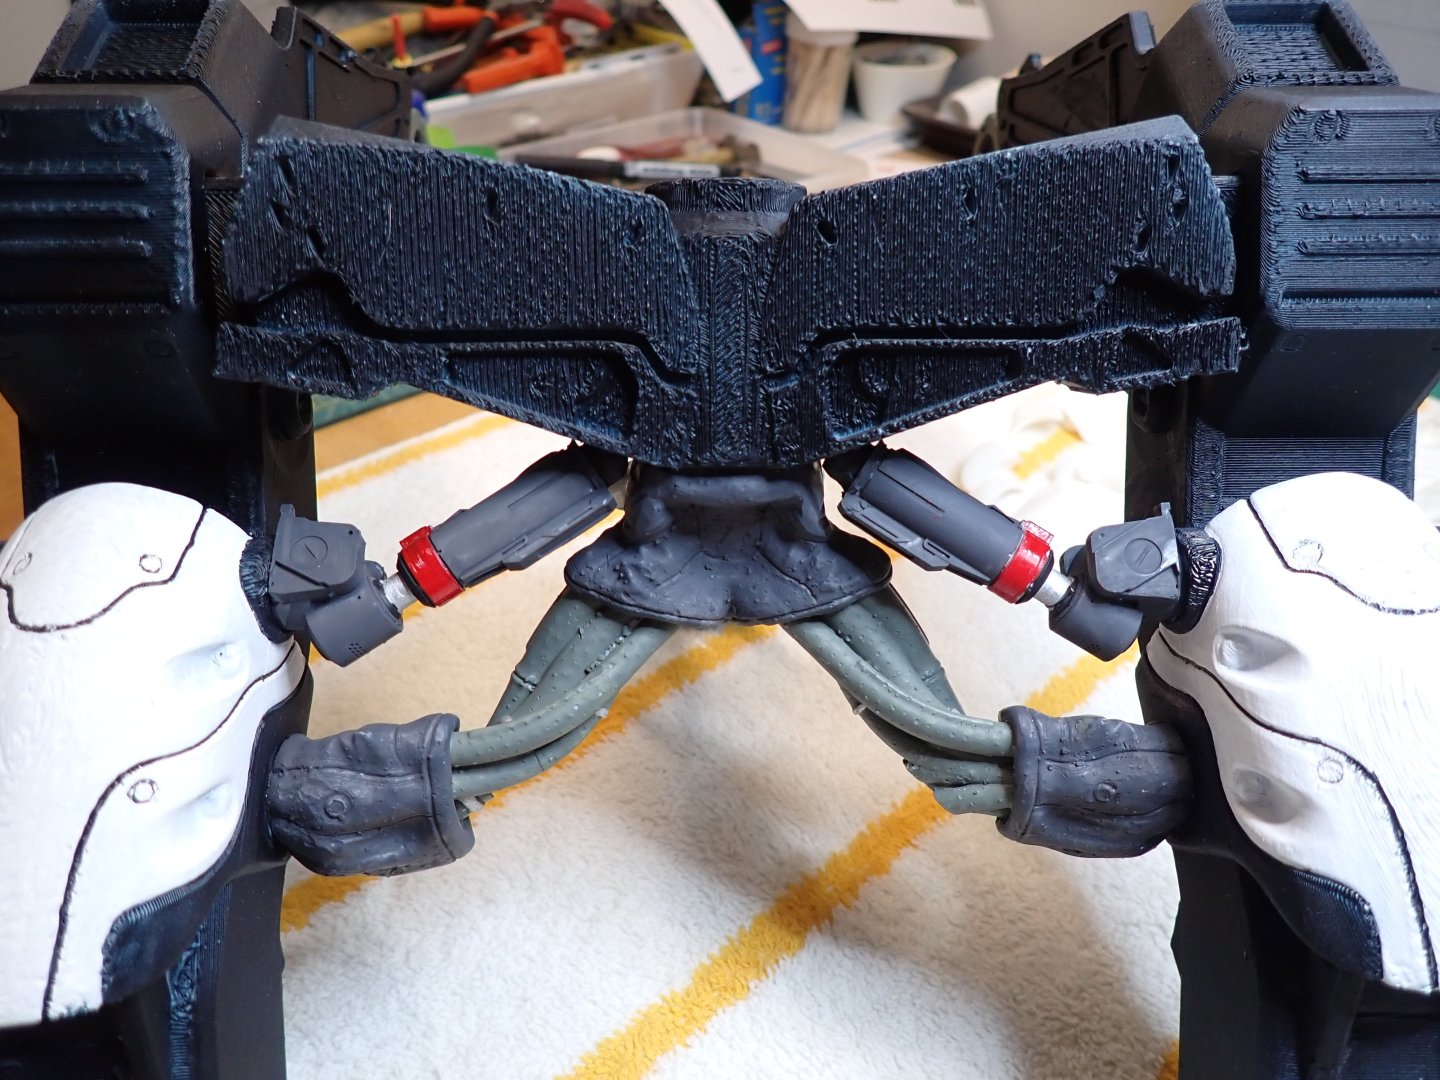
I decided to install some hoses, pipes and bags as well as the hydraulic pistons to control the "Hangar": It has that ominous look of a war machine.... Pistons, below: Above, you can see the coarse appearance and texture of the PLA printing with support. Fortunately, this is the back of the sculpture. Back of the AI creature in place (above). Overall view of the "Hangar" (below): Yves


-
White Freightliner DD by CDW - AMT - 1:25 Scale - PLASTIC
yvesvidal replied to CDW's topic in Non-ship/categorised builds
Beautiful colors, very Christmassy. You did a great job with this old kit. It looks very convincing. Yves -
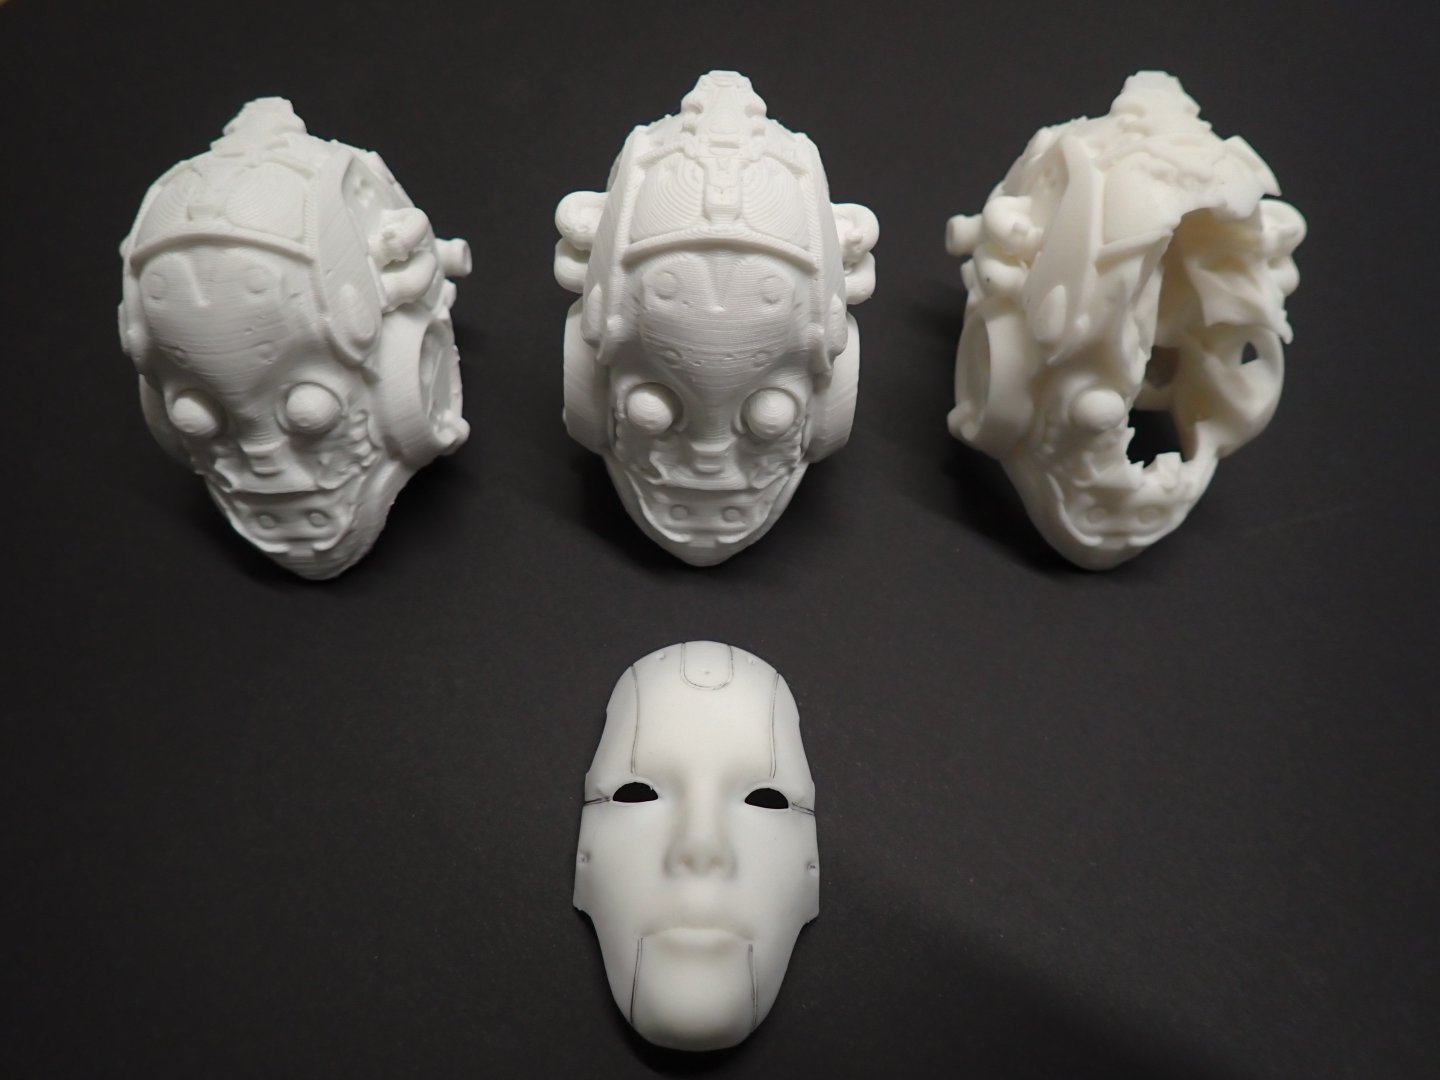
Most of the parts for the AI creature have been printed: The neck and head were printed with PLA (Filament) whereas all the other parts are made of resin. I tried three iterations of the head: To the right, is a missed 90% resin printing. Supports were inadequate and half of her face went wrong. In the middle is a 85% scaled head printed with PLA. To the left is an 88% head printed with PLA. This one is perfect, it is filled at 100% PLA and the face shield fits perfectly on it. I may still try another resin print of her face at 90%, changing the supports. All the armor/shield parts are holding with mini magnets, so that they can be removed to show the guts of the machine. Yves

-
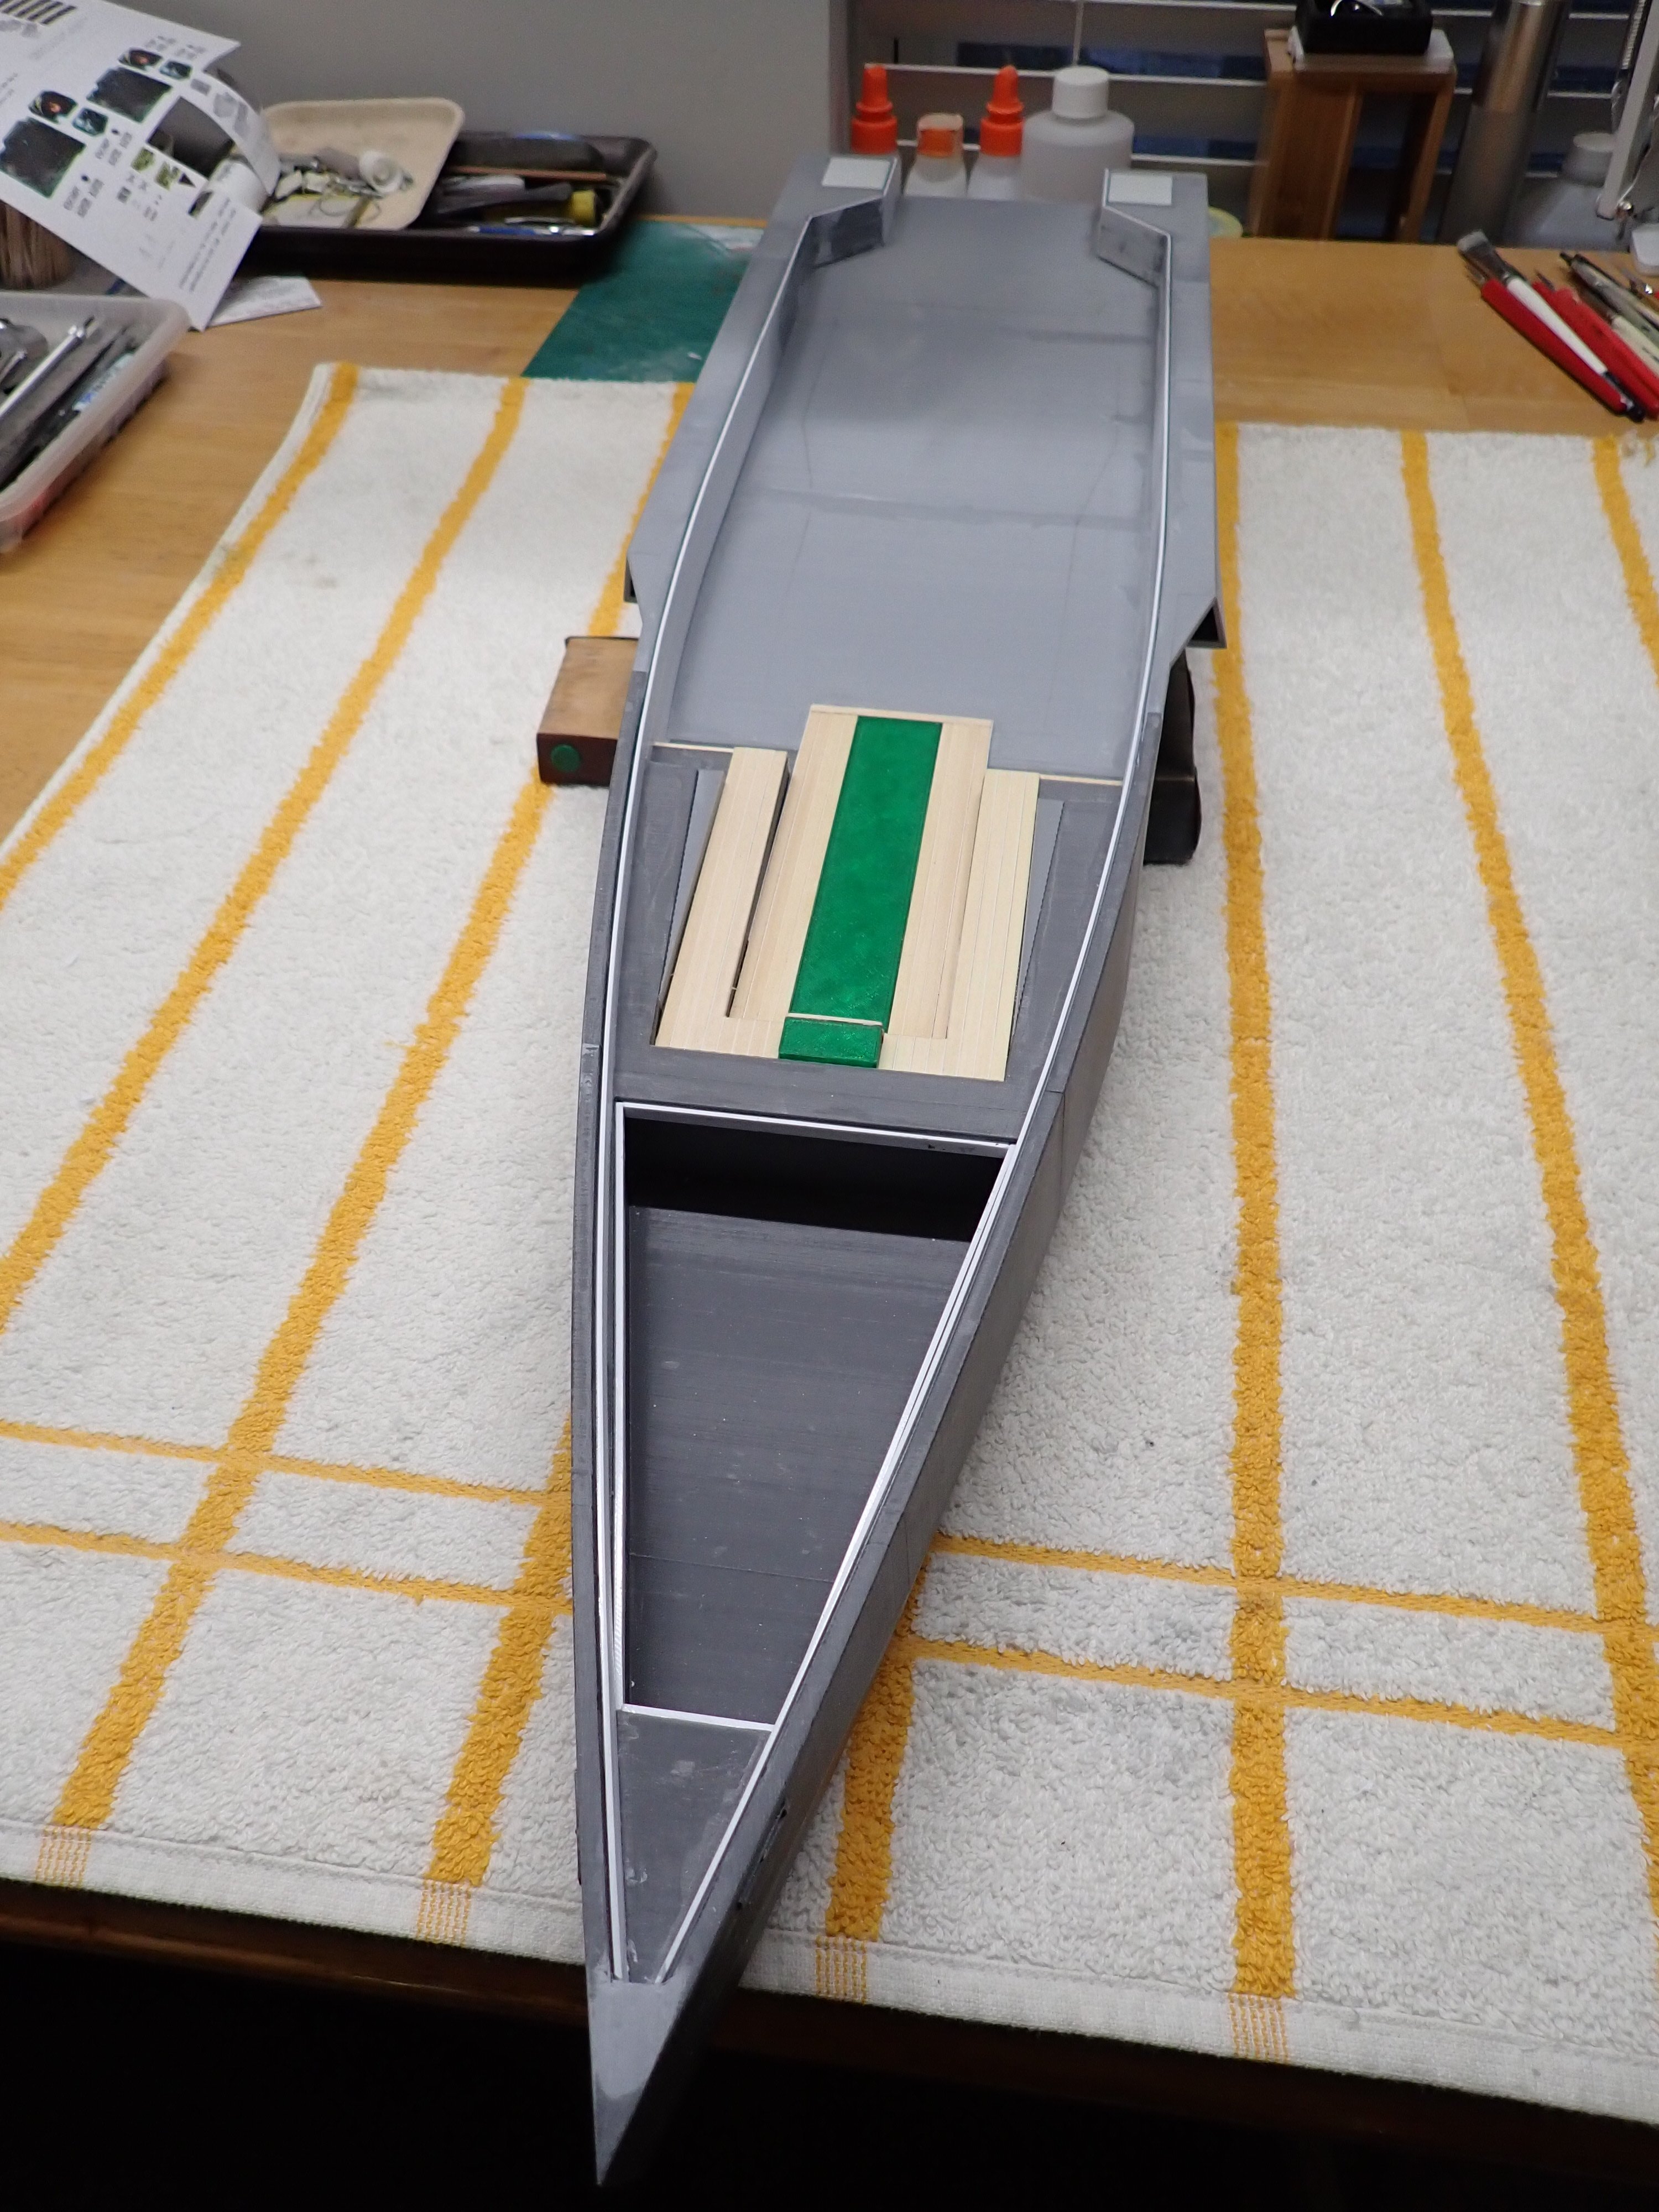
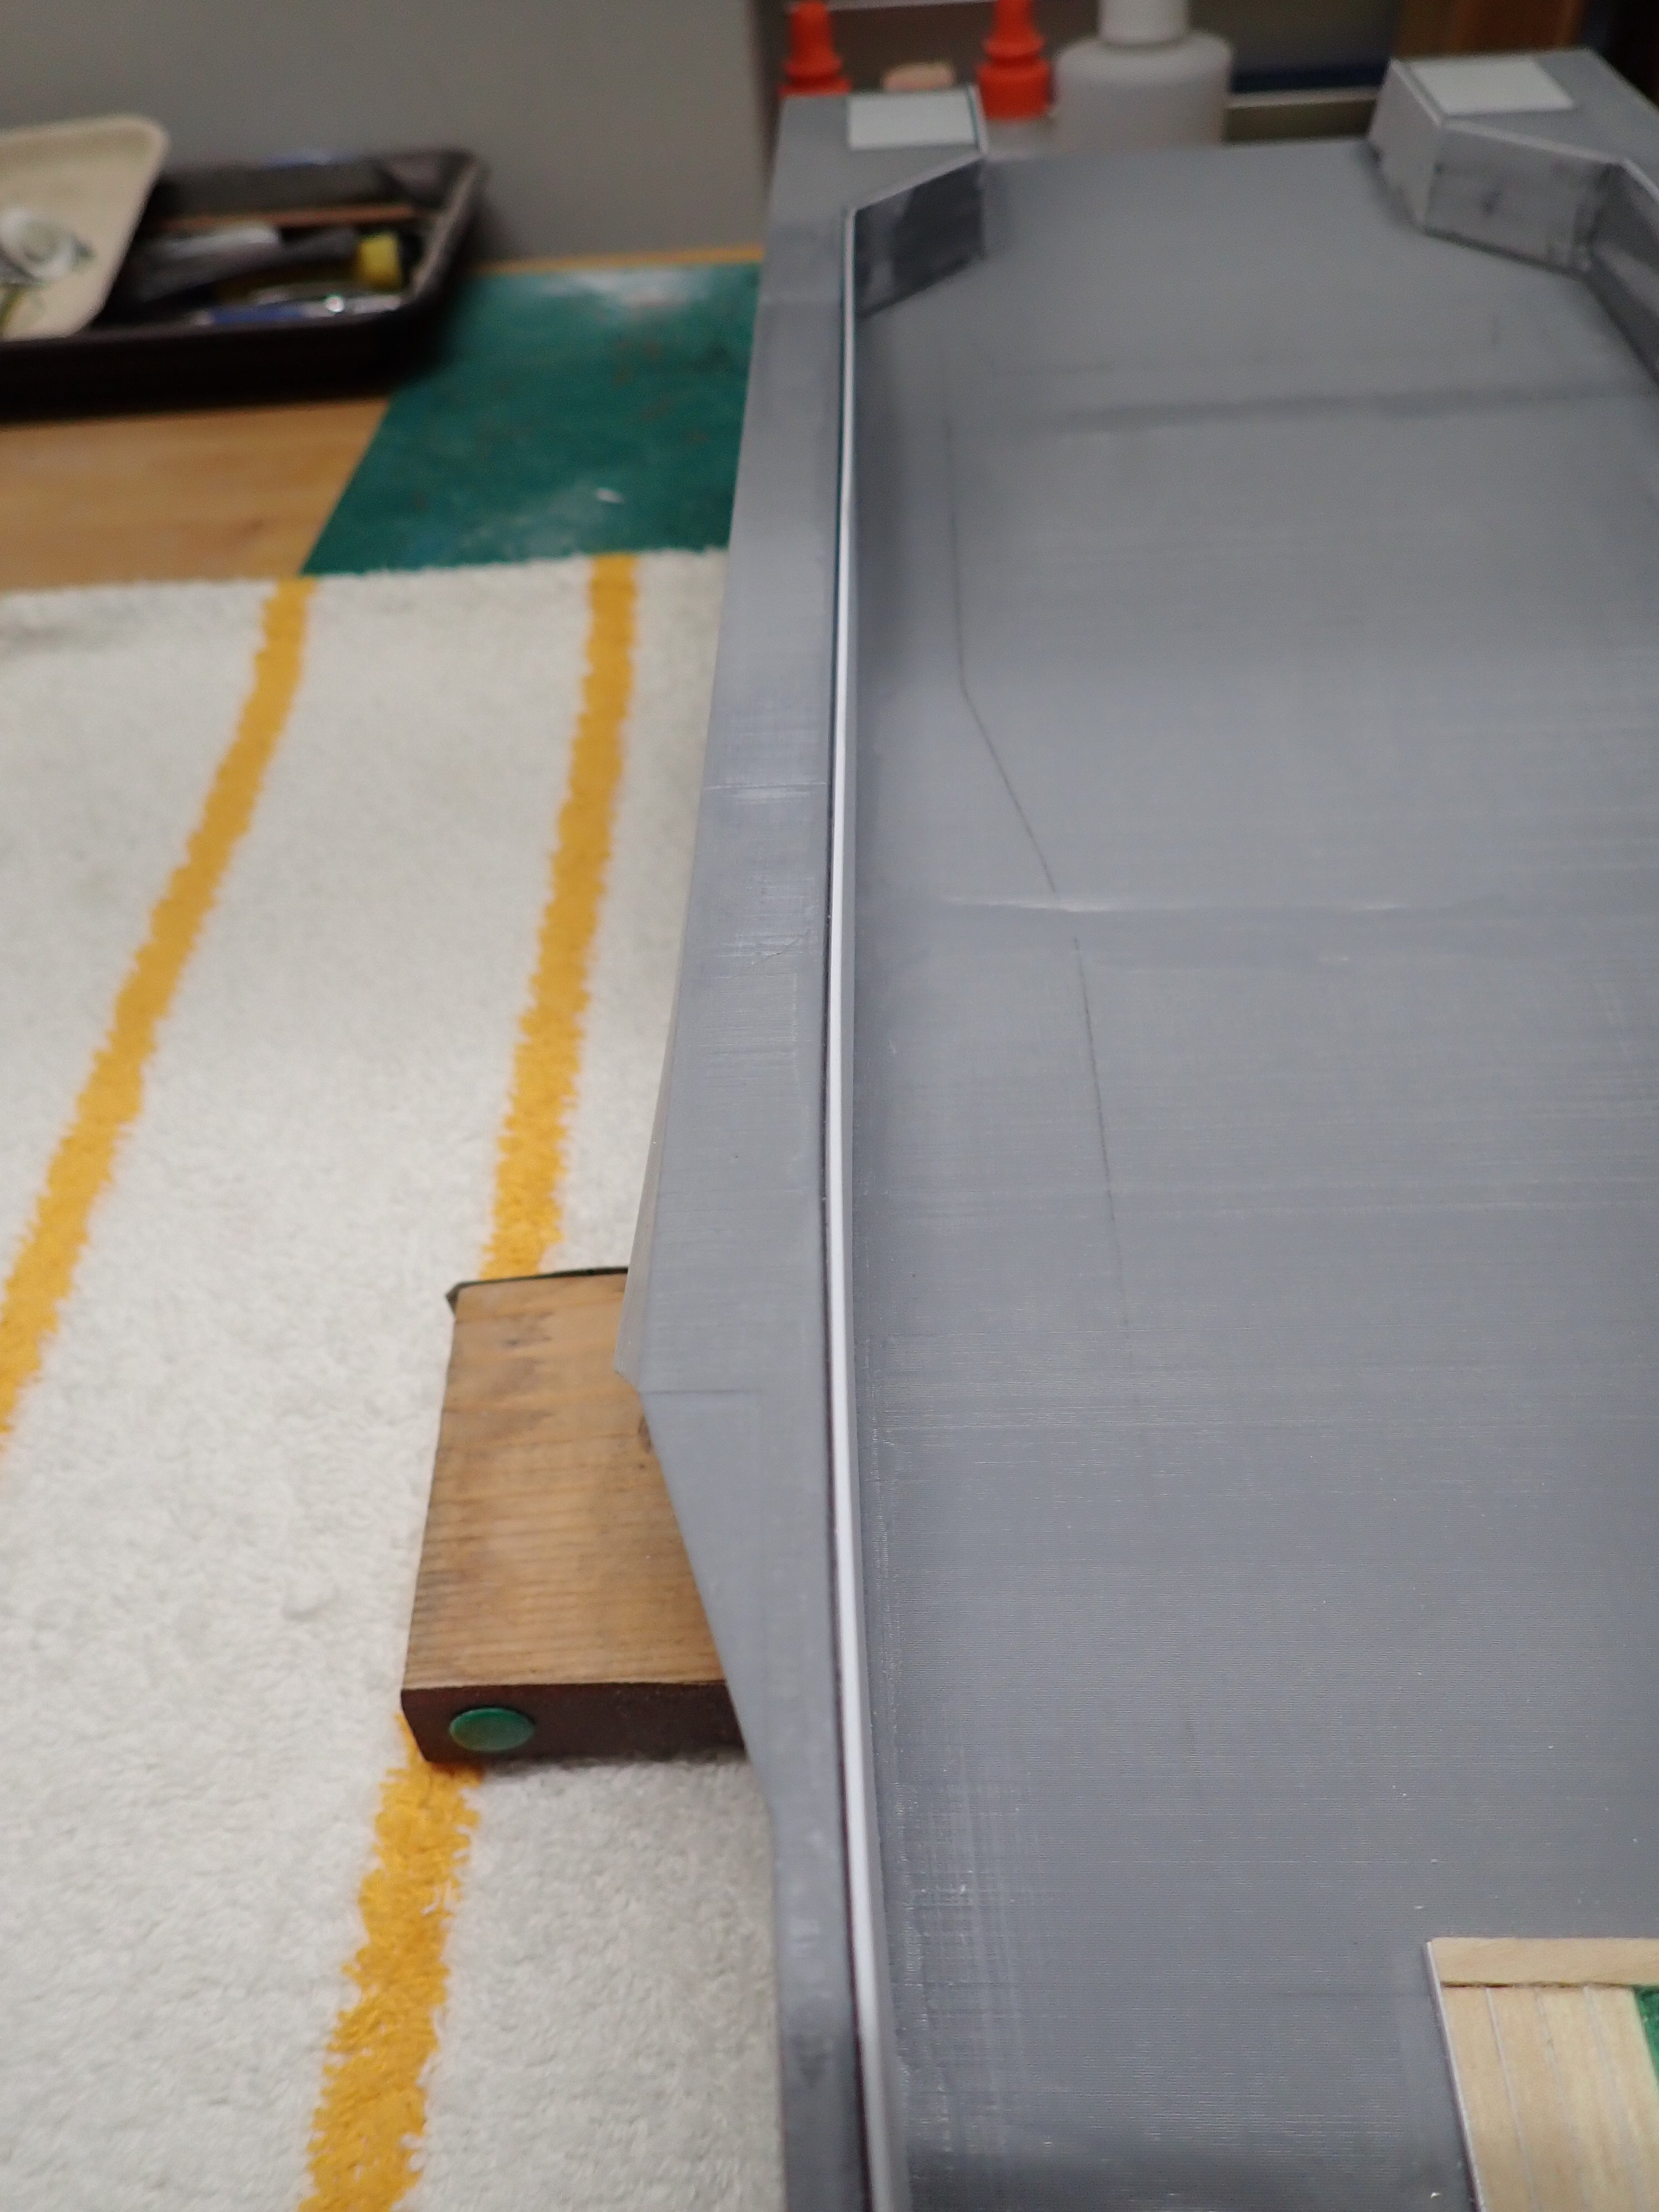
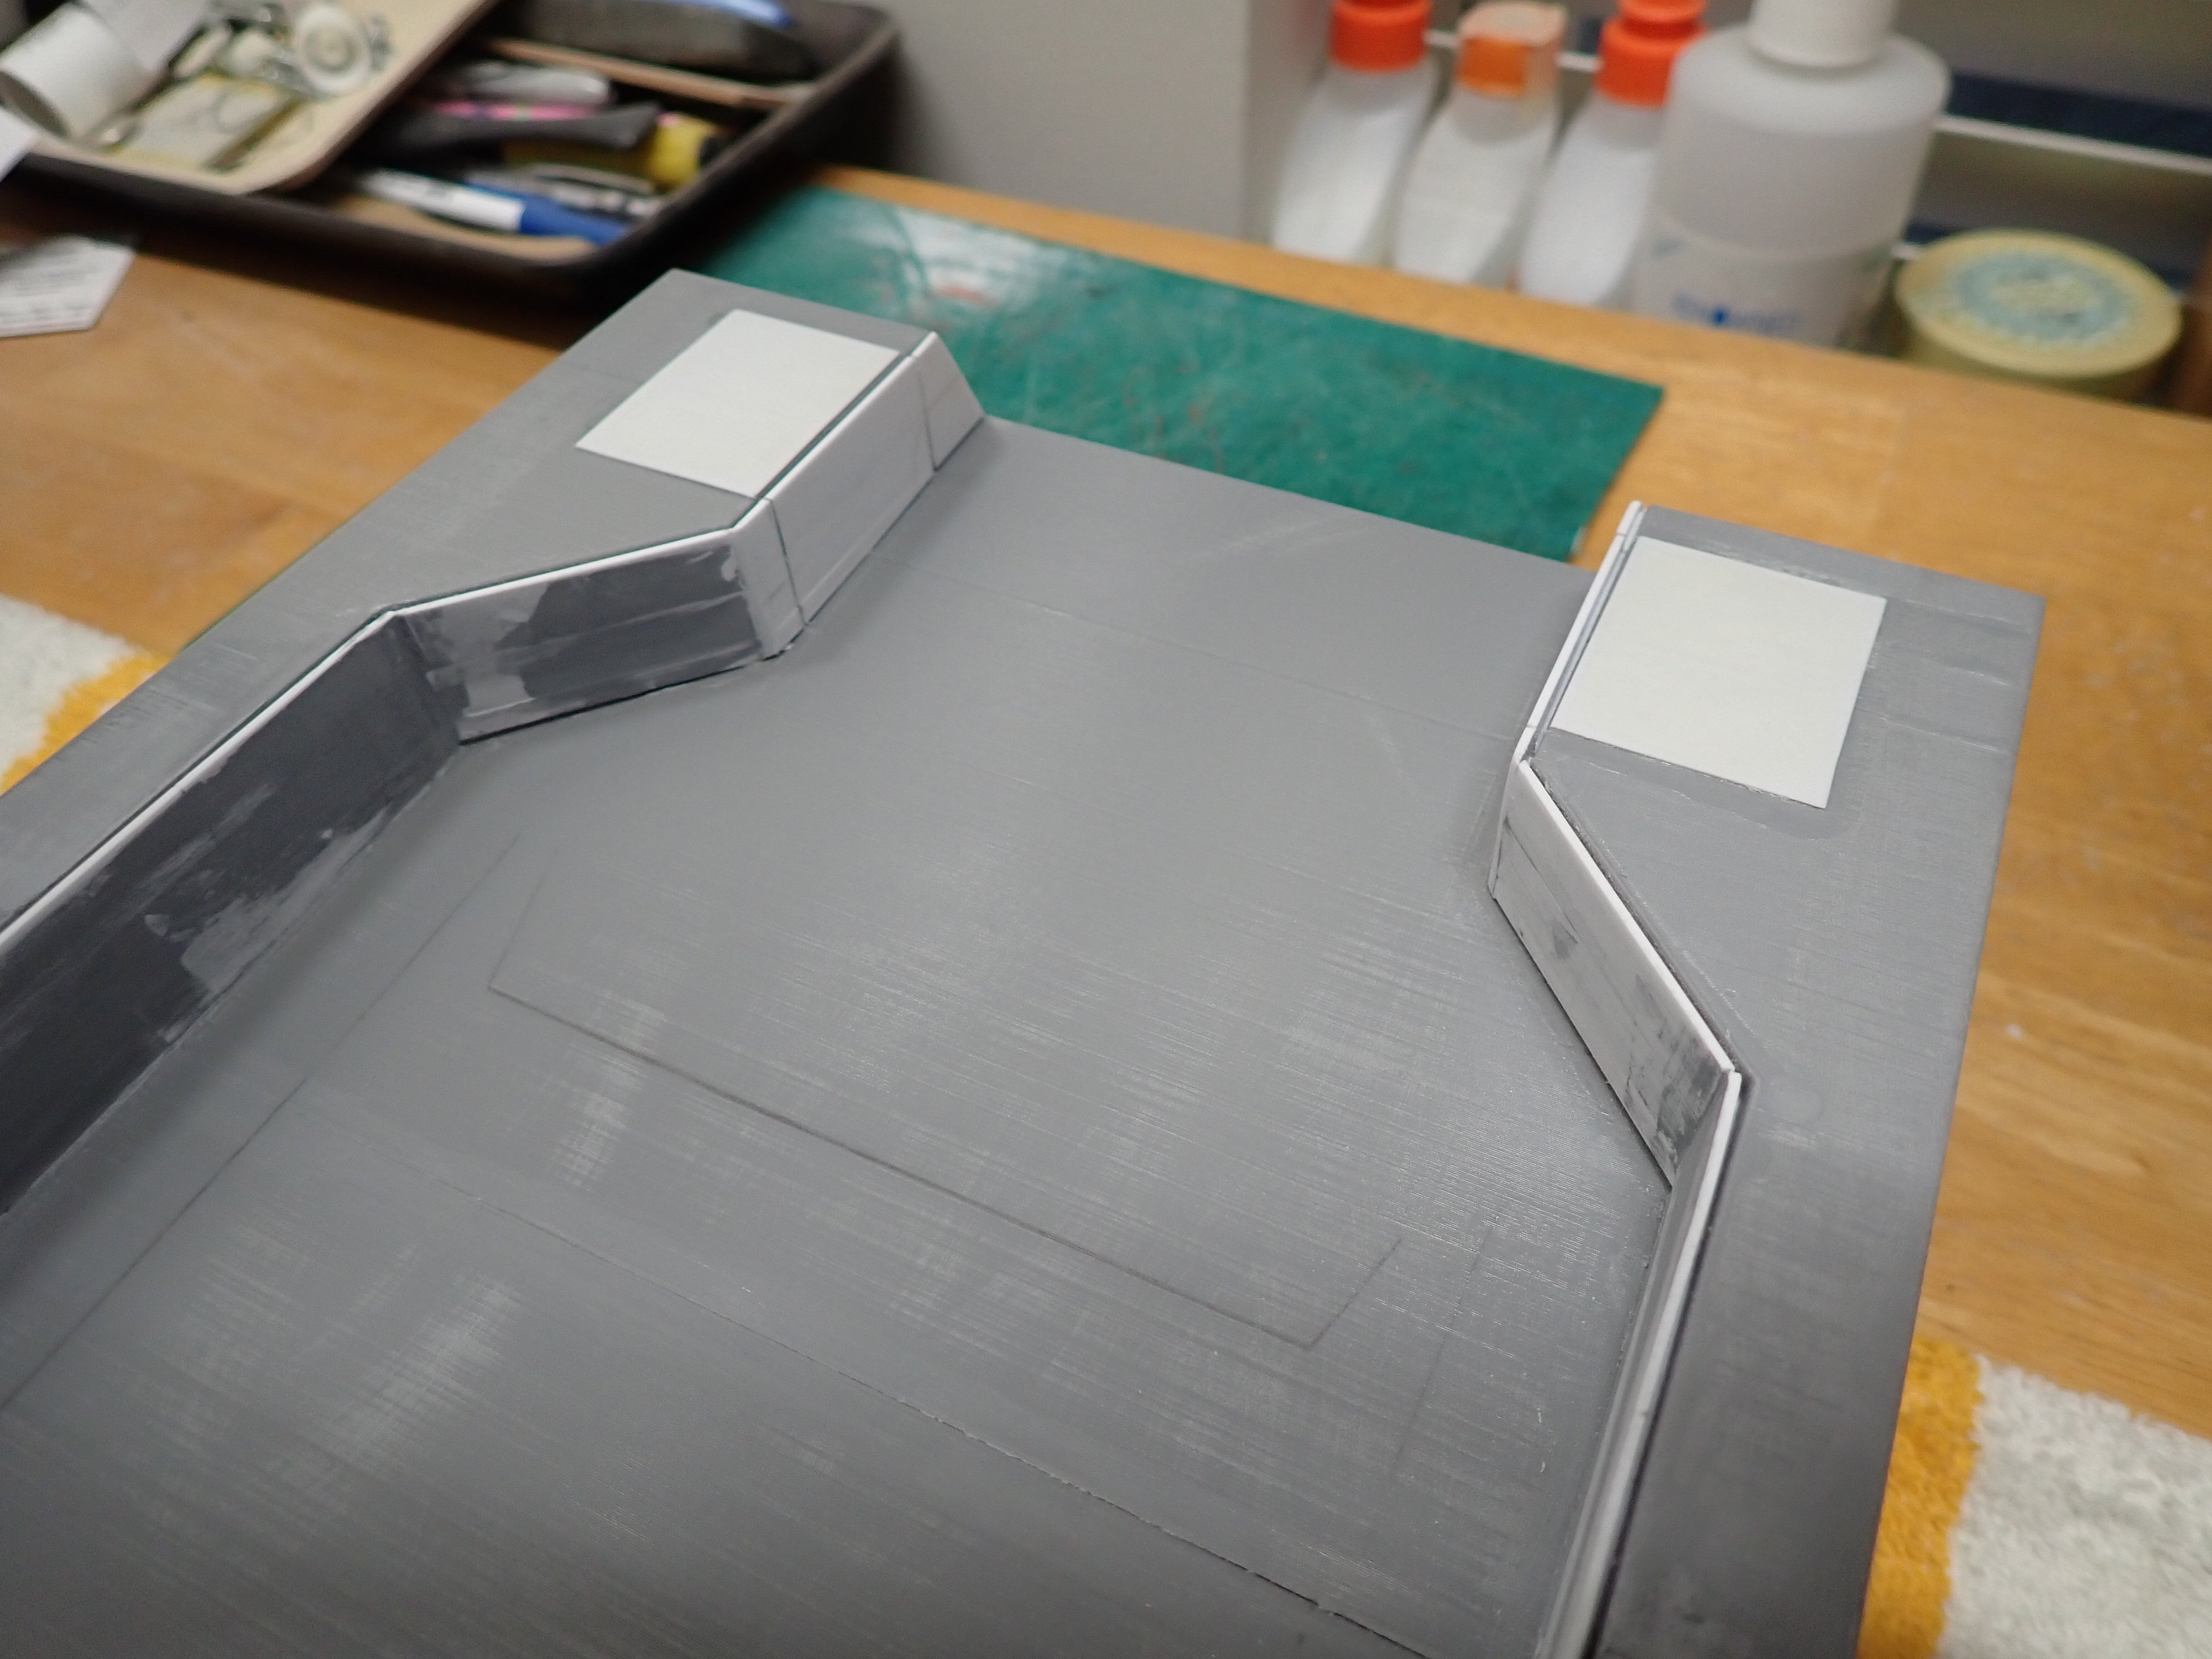
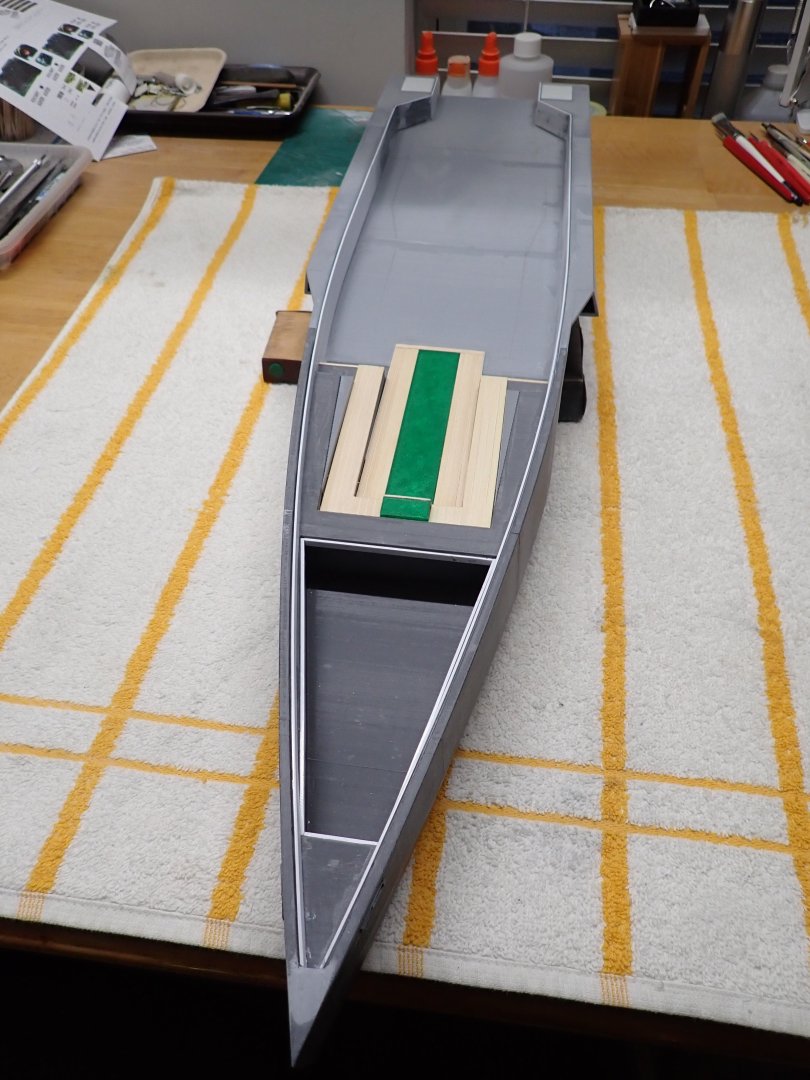
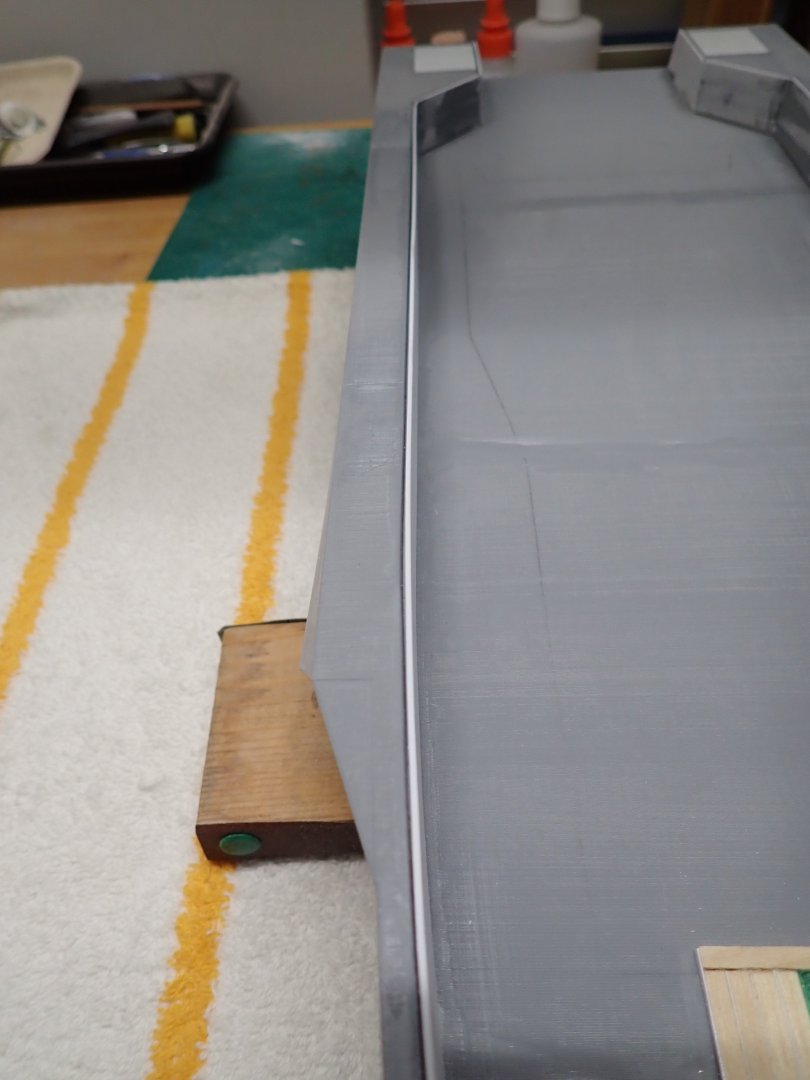
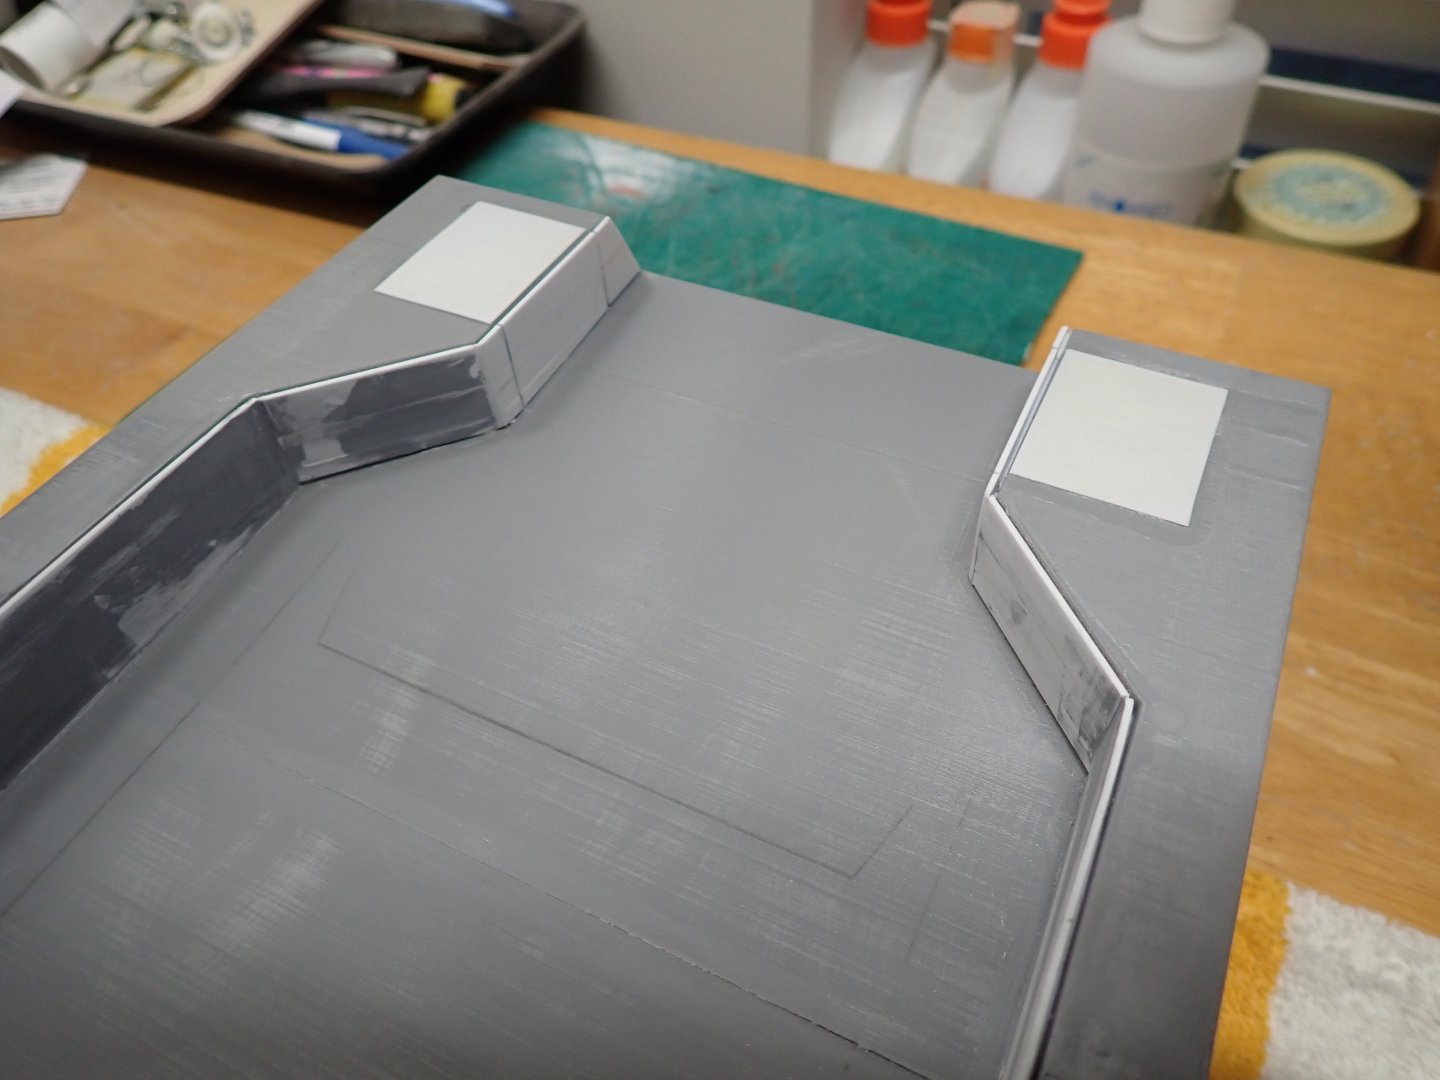
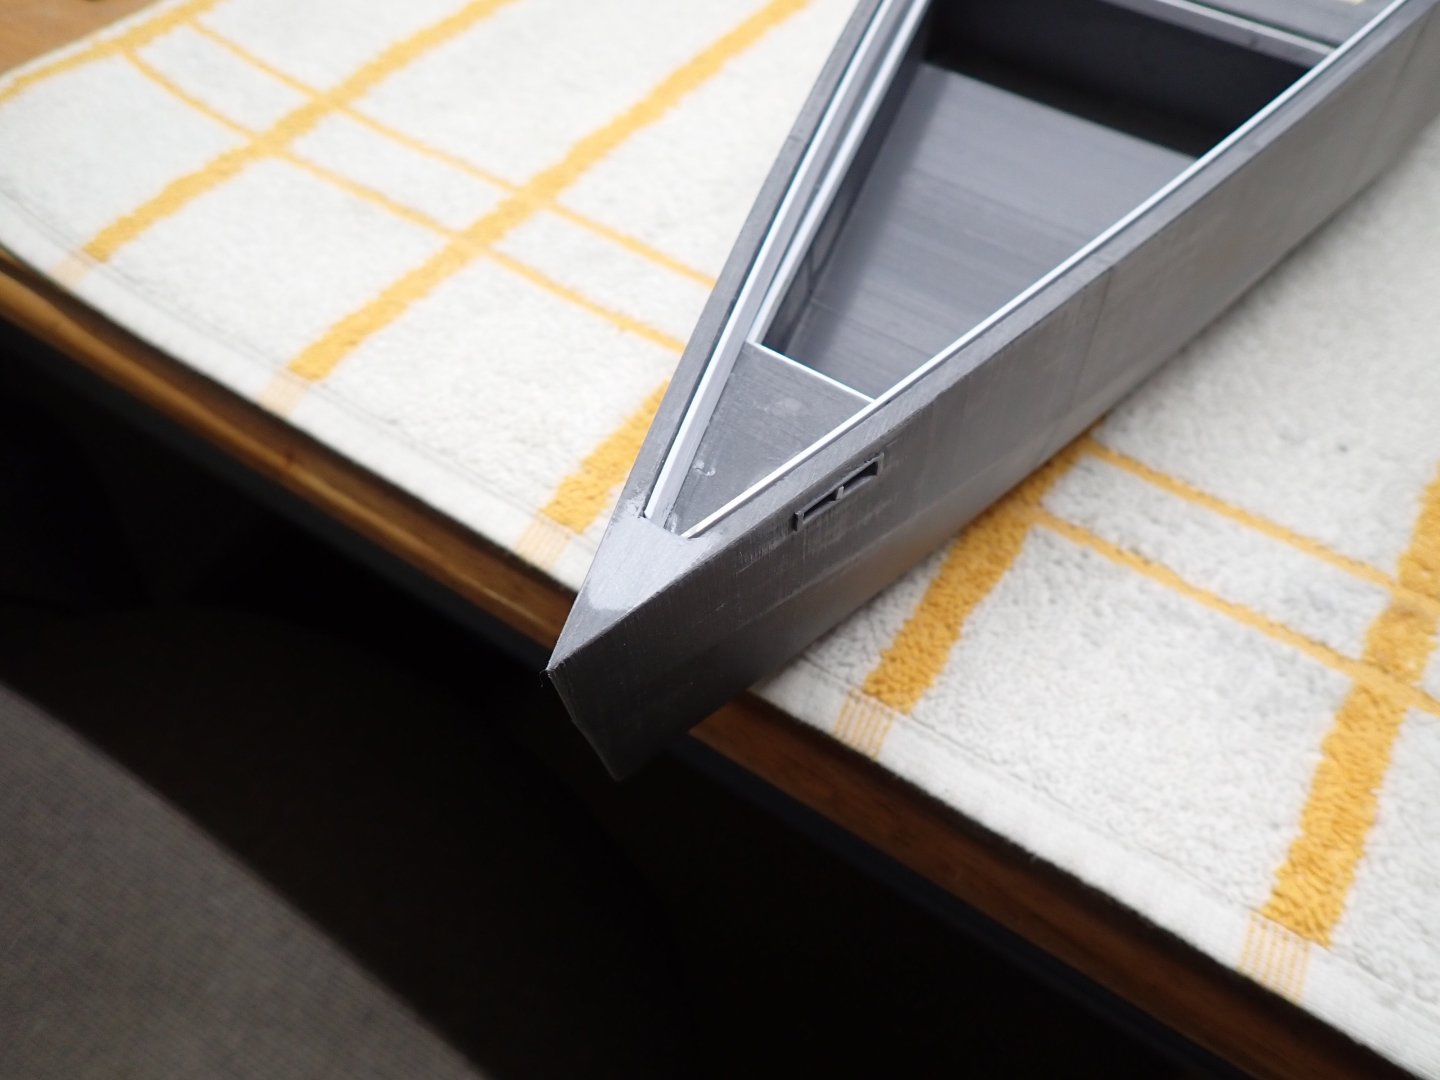
I finished the building of the handrails, along the hull. This was done with styrene strips as described in the previous post. The model almost looks like the real thing.... 🙂 I increased the area of the bow, by filling up about 2 additional centimeters: The railing is not too bad and should give the illusion, once painted like the hull: At the stern, the railing goes all the way to the boarding deck. The flat pieces are the covers for the winches used most of the times, on the Mediterranean sea (Med mooring). There are still some minor details and a lot of sanding to add to the hull, but it will be ready for a first coat of primer soon. Now, we need some better weather....not 29-32 degrees F. Yves

-
Bentley Blower by RGL - Airfix - 1/12 - PLASTIC
yvesvidal replied to RGL's topic in Non-ship/categorised builds
Jay Leno had a recent show about a similar Bentley: Yves -
Bentley Blower by RGL - Airfix - 1/12 - PLASTIC
yvesvidal replied to RGL's topic in Non-ship/categorised builds
Fabulous !!! I have that kit and will be watching what you are doing with it. I'll never get to your level, but may be able to grab some ideas. There are a few aftermarkets parts for that kit, one of them being the spoke wheels. Very pricy but really nice. Yves