-
Posts
3,590 -
Joined
-
Last visited
Content Type
Profiles
Forums
Gallery
Events
Everything posted by yvesvidal
-
It all depends how the finished model will be presented. Since it is a waterline model, it may fit in a sea diorama and as such, will need to be painted to look more realistic. Otherwise, it could stay as bare wood. Since the wood seems to be basswood, I would at least do some Wipe on Poly applications, to protect it. Yves
-
Very interesting and so unusual model. Definitely worth realizing. Please post pictures of the 3D parts before assembly if you have them. It is always fun to look at them before and after assembly. Which scale are you shooting for? Oh, and the traditional question: are the parts (STL files) available from you, for a modicum? Yves
-
Why not paint it soft white? British ships had a lot of the cabin walls, painted in soft white with blue frames. Yves
- 1,124 replies
-
CaptainMac, I have the same kit in my stash and will follow with a lot of interests, your progress. Yes, the Chaperon by Model Shipways is definitely the most realistic kit proposed on the market as the Occre and other Spanish kits are offering woods which do not match what was used to build these paddle boats, in the USA. There are a few excellent realizations of the Chaperon on that forum, and I invite you to look into them for ideas and inspirations. Yves
- 23 replies
-
- sternwheeler
- Chaperon
-
(and 3 more)
Tagged with:
-

stagecoach by kgstakes - FINISHED - 1/8th scale
yvesvidal replied to kgstakes's topic in Non-ship/categorised builds
Absolutely superb. It looks super realistic and I love the work you did on the wheels and seats. Yves -
Working on the bow for a change of pace, and to see some details and progress: these parts are like little kits in themselves: The position of the front mast has to be carefully done, both laterally and longitudinally, to respect the 20 degrees angle: I will finish the other side, after installing the front rail (starboard side). I hope you enjoy these little progress. It is very enjoyable to build and adjust precisely. Yves
-
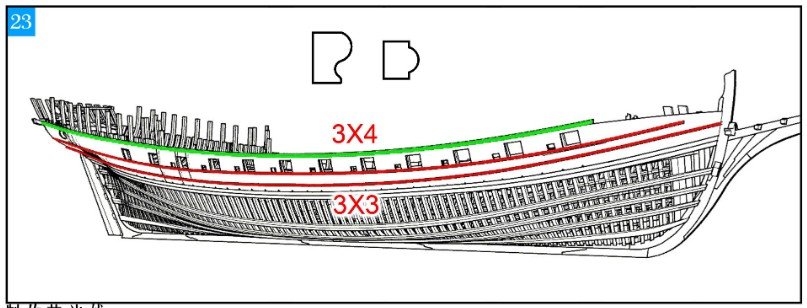
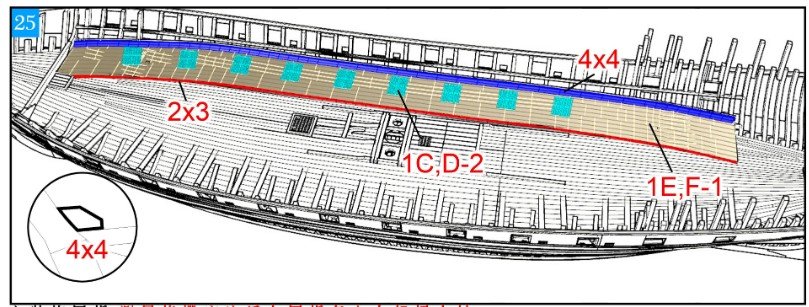
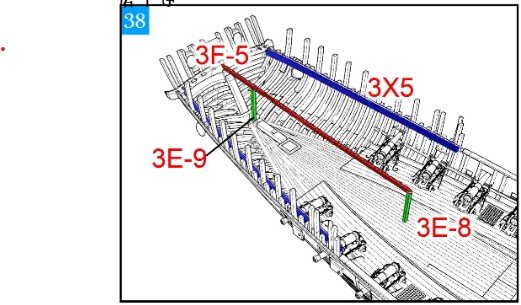
Moving along (slowly) with some delicate assembly. The kit calls for a 3x4 mm strips all along the handrail. Unfortunately, I do not have the exact molding profile and thus decided to go with a semi-round, instead. It goes in one piece from the stern to the tip of the railing. It will stay with the color of the wood for now. I may tone it down a little bit later.... Next is the assembly of the railing and the various strips going on the deck and bulkheads: Again, the kit calls for a dark strip of 4x4 mm which is enormous on that little deck. Instead I went with a strip of 2x3 mm matching the color of the deck: This provides a barrier when rolling the guns on the deck and potentially funnel the waters through the grates. I think its smaller size looks a lot better. Finally, that long piece of wood used to anchor the guns and attach various things can finally be installed at the right location and height: Now, to do the same on the other side.... Of course, all the parts (railings and strips) are painted before being assembled. Yves
-
Incredible work Kevin. Congratulations. You must be well "fatigued" after such a build 🙂 Are you going to resume the building of the big gun? Yves
- 443 replies
-
- Indefatigable
- Vanguard Models
-
(and 1 more)
Tagged with:
-
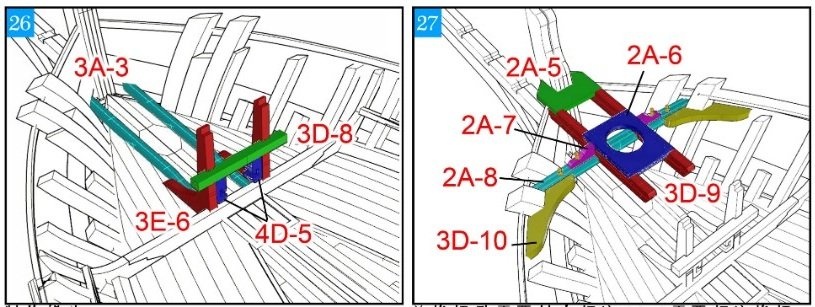
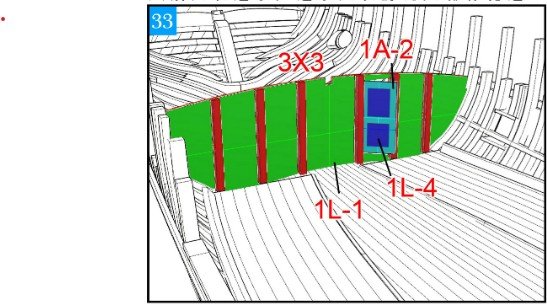
I am now concentrating on the stern as I need to make some progress there, to place the mizzen mast and the rear deck extension. Also, and not surprisingly, I am not following exactly the order of the instructions as suggested but moving along to what makes the most sense to me. Interestingly, the door is missing from the parts provided with the kit and as such, I will have to build it myself. It should not be too difficult. A few pictures of the construction of the cabin wall: It is now time to build the two large joists, which are supporting all the framing of the quarterdeck: After careful measurements, we come to this: I started assembling some of the quarterdeck framing, but nothing will be glued until I finish all the trims on the hull. It is way too fragile and will impede the correct installation of the guns and other details located on the main deck: Yves
-
Nice recovery Kevin. Yes, in a few months/years, it will all look the same. Yves
- 443 replies
-
- Indefatigable
- Vanguard Models
-
(and 1 more)
Tagged with:
-
Interesting and unusual kit. I will be following with interest your model. Yves
- 23 replies
-
- Speedwell
- battle station
-
(and 1 more)
Tagged with:
-
Kevin, This rigging looks amazing. Man, you are patient and precise in your work. Yves
- 443 replies
-
- Indefatigable
- Vanguard Models
-
(and 1 more)
Tagged with:
-
I am so glad you could donate your model to a Museum. This way, many people of all ages and backgrounds will be able to admire this superb model. Yves
- 32 replies
-
- St Louis
- 3D Printing
-
(and 2 more)
Tagged with:
About us
Modelshipworld - Advancing Ship Modeling through Research
SSL Secured
Your security is important for us so this Website is SSL-Secured
NRG Mailing Address
Nautical Research Guild
237 South Lincoln Street
Westmont IL, 60559-1917
Model Ship World ® and the MSW logo are Registered Trademarks, and belong to the Nautical Research Guild (United States Patent and Trademark Office: No. 6,929,264 & No. 6,929,274, registered Dec. 20, 2022)
Helpful Links
About the NRG
If you enjoy building ship models that are historically accurate as well as beautiful, then The Nautical Research Guild (NRG) is just right for you.
The Guild is a non-profit educational organization whose mission is to “Advance Ship Modeling Through Research”. We provide support to our members in their efforts to raise the quality of their model ships.
The Nautical Research Guild has published our world-renowned quarterly magazine, The Nautical Research Journal, since 1955. The pages of the Journal are full of articles by accomplished ship modelers who show you how they create those exquisite details on their models, and by maritime historians who show you the correct details to build. The Journal is available in both print and digital editions. Go to the NRG web site (www.thenrg.org) to download a complimentary digital copy of the Journal. The NRG also publishes plan sets, books and compilations of back issues of the Journal and the former Ships in Scale and Model Ship Builder magazines.


