yvesvidal
-
Posts
3,637 -
Joined
-
Last visited
Content Type
Profiles
Forums
Gallery
Events
Everything posted by yvesvidal
-

White Freightliner DD by CDW - AMT - 1:25 Scale - PLASTIC
yvesvidal replied to CDW's topic in Non-ship/categorised builds
Beautiful colors, very Christmassy. You did a great job with this old kit. It looks very convincing. Yves -
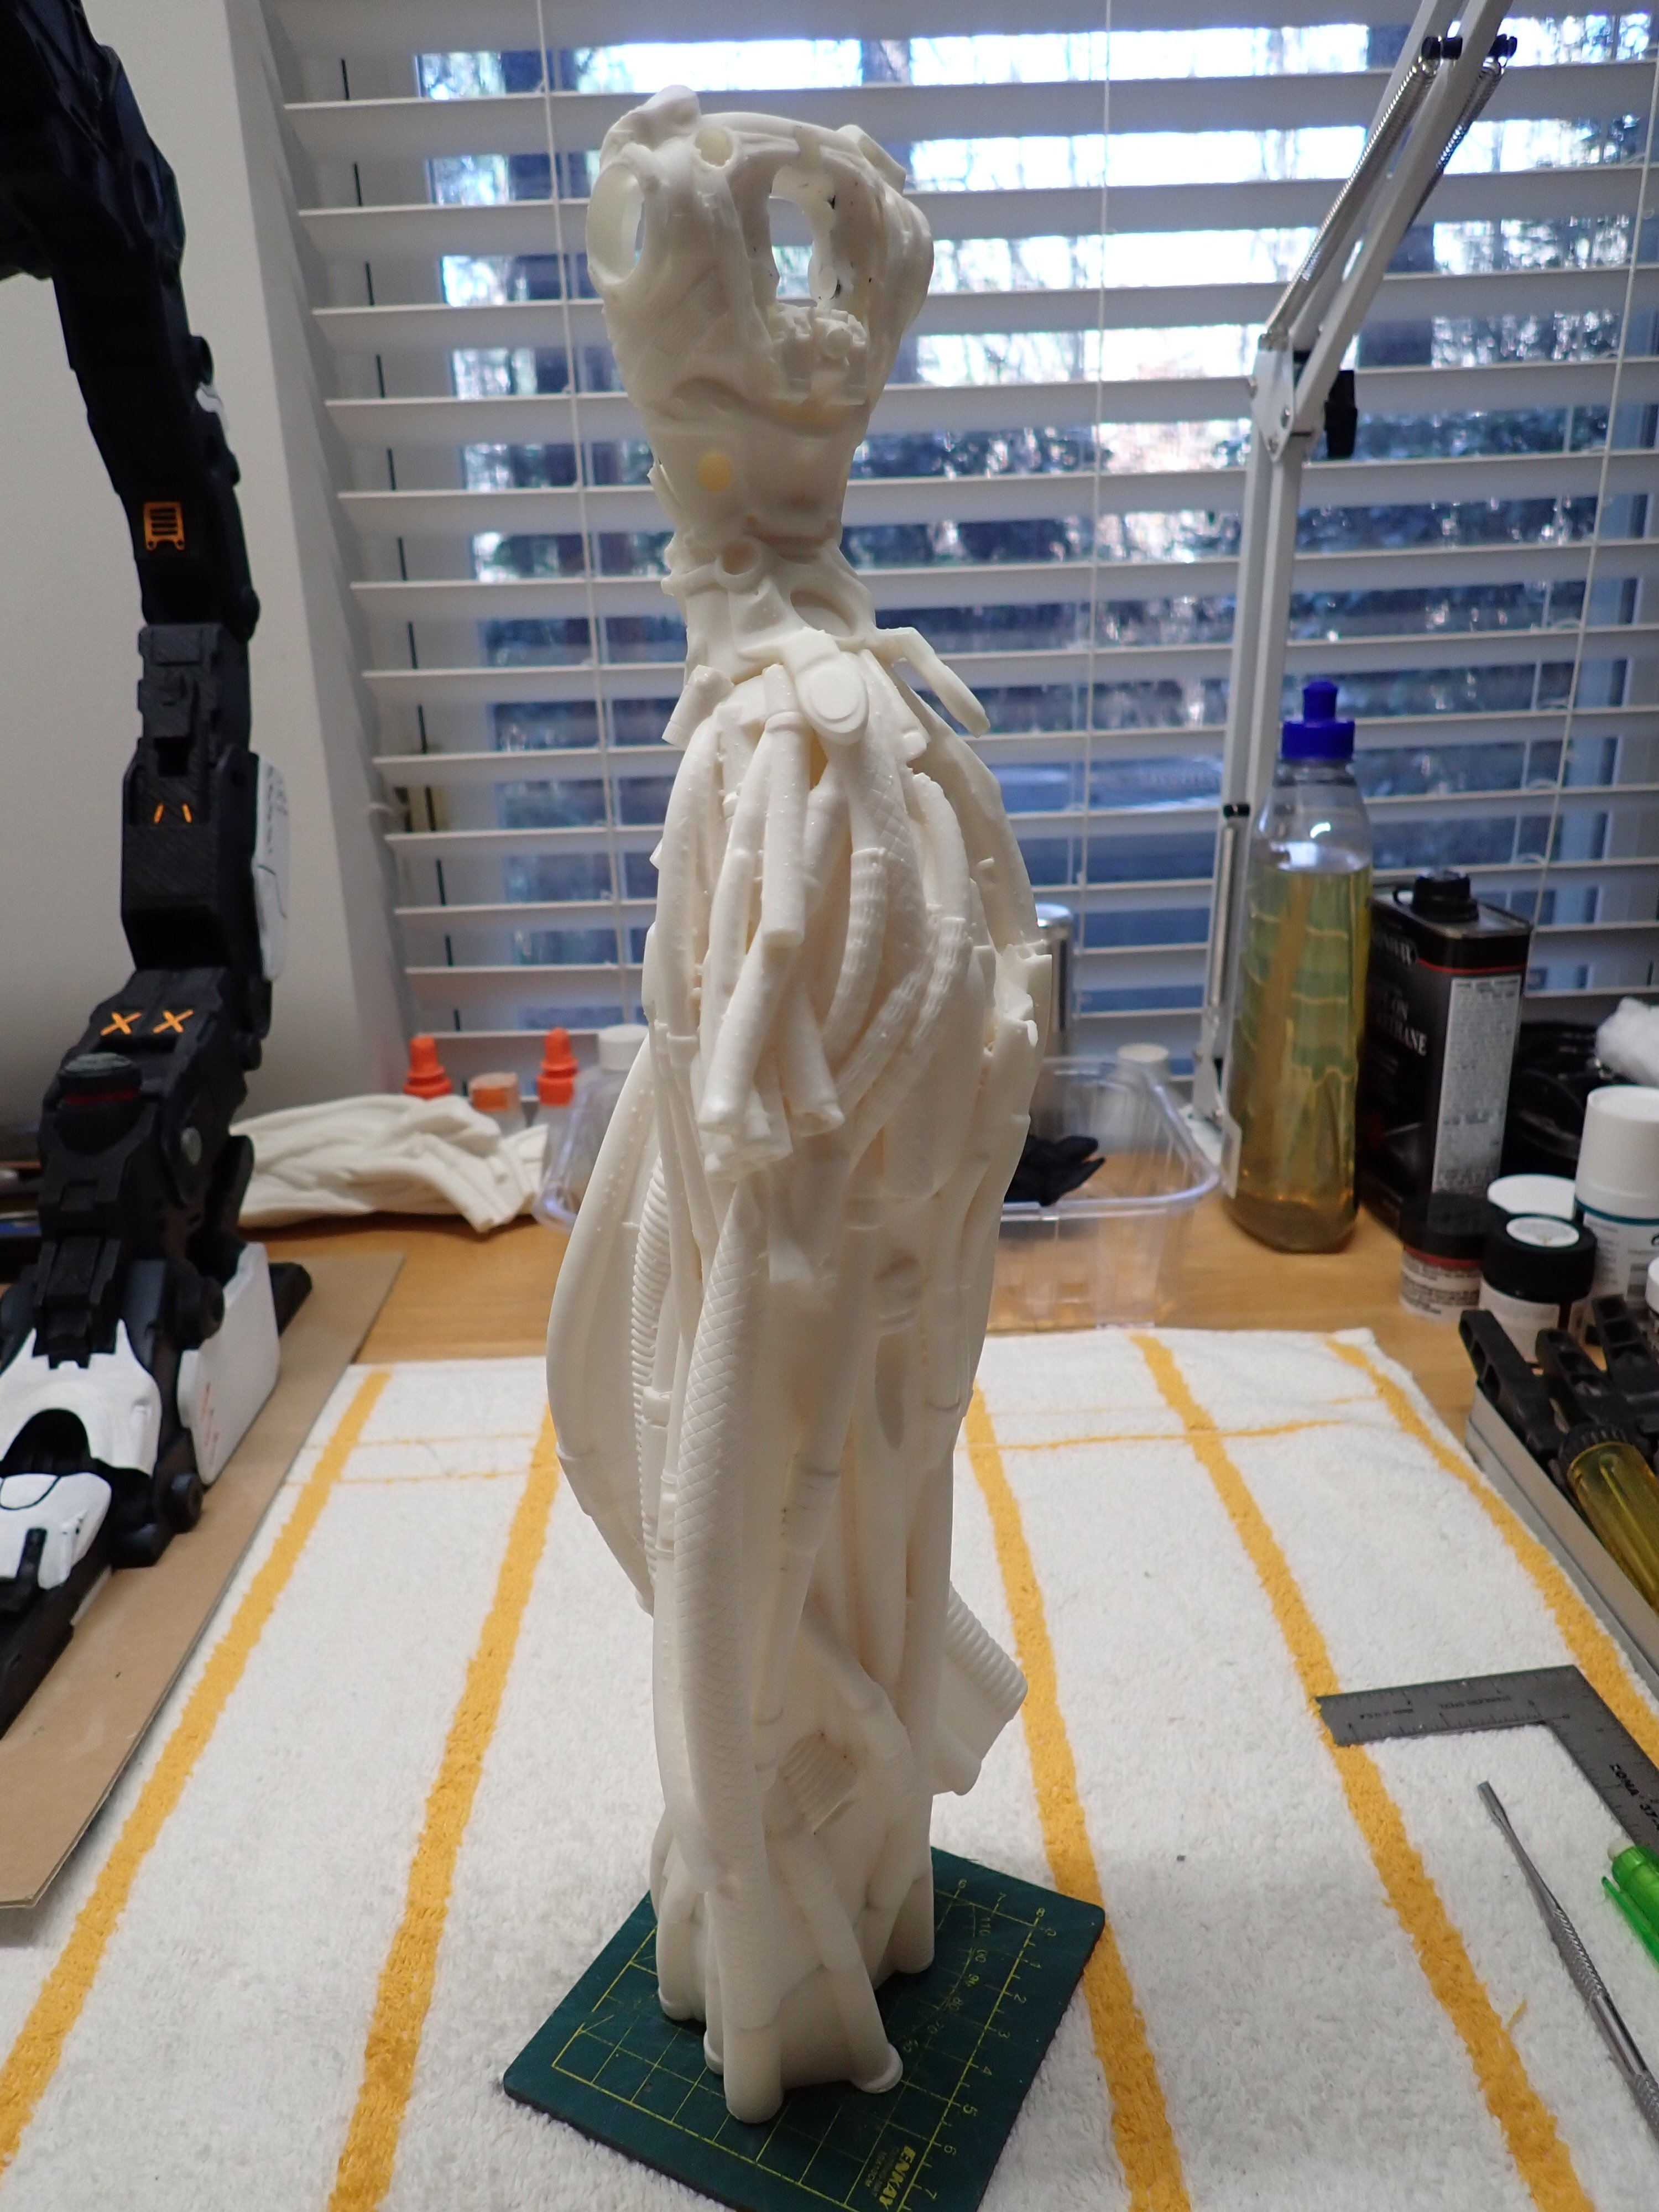
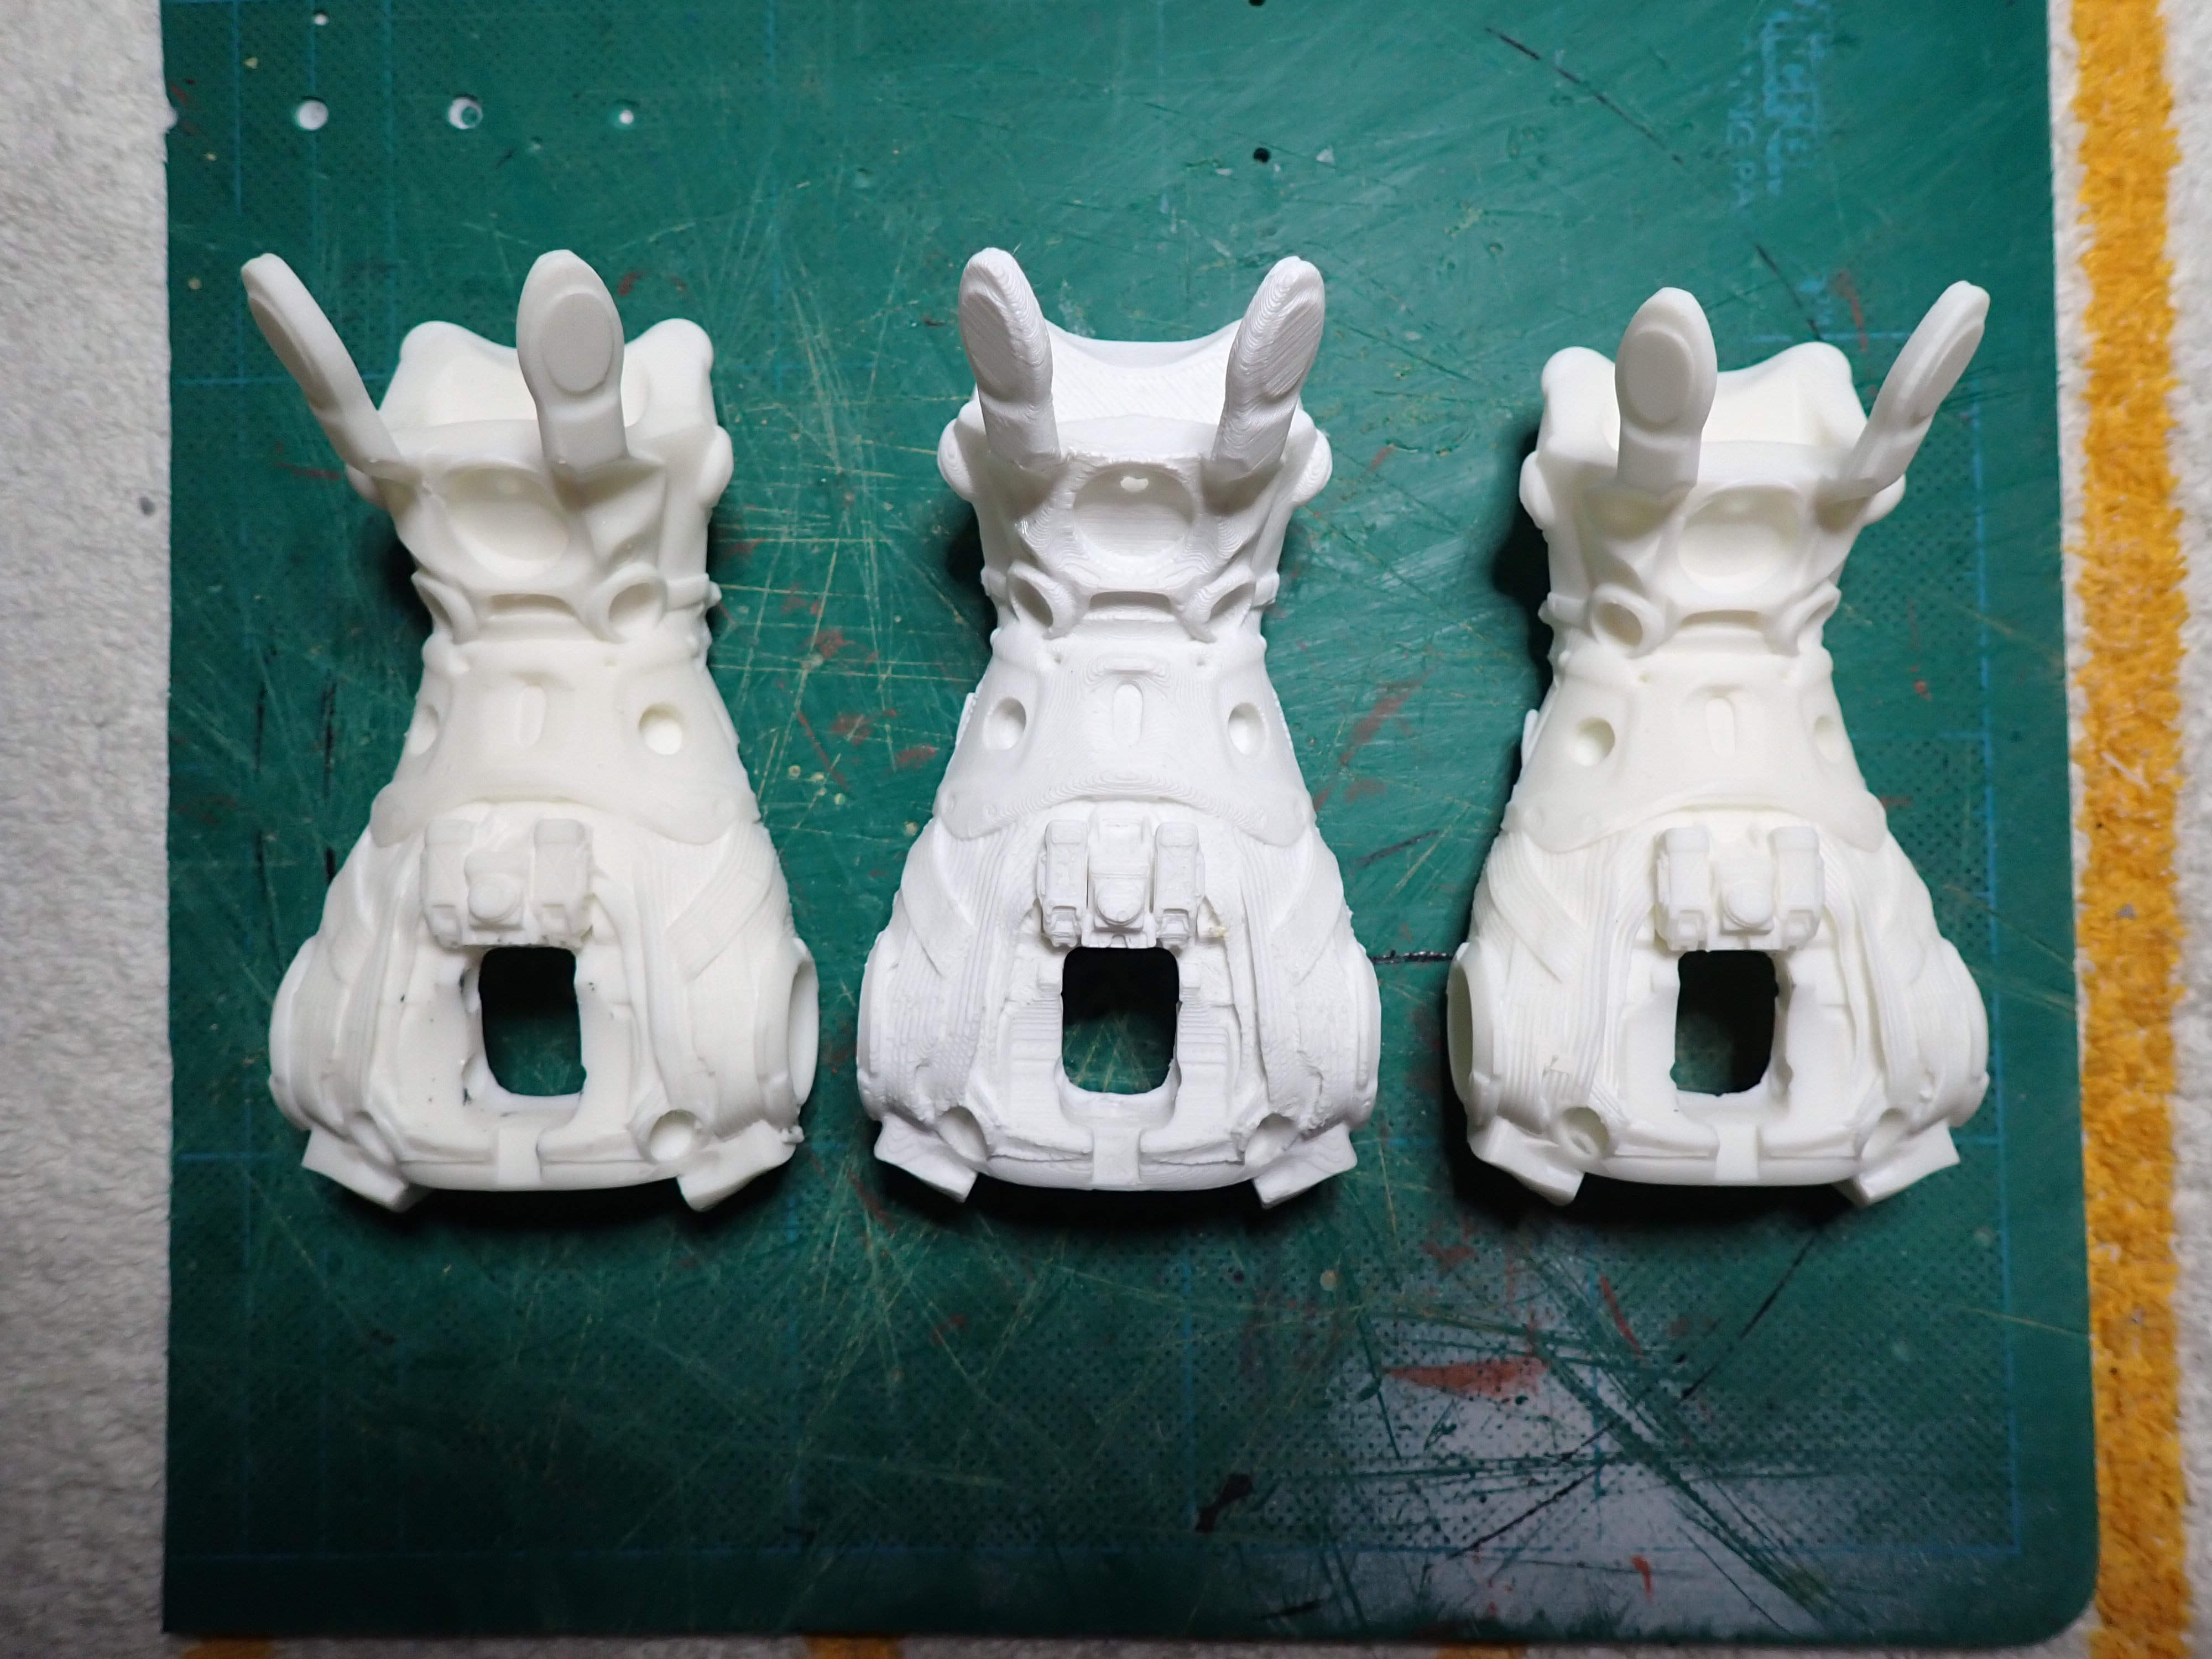
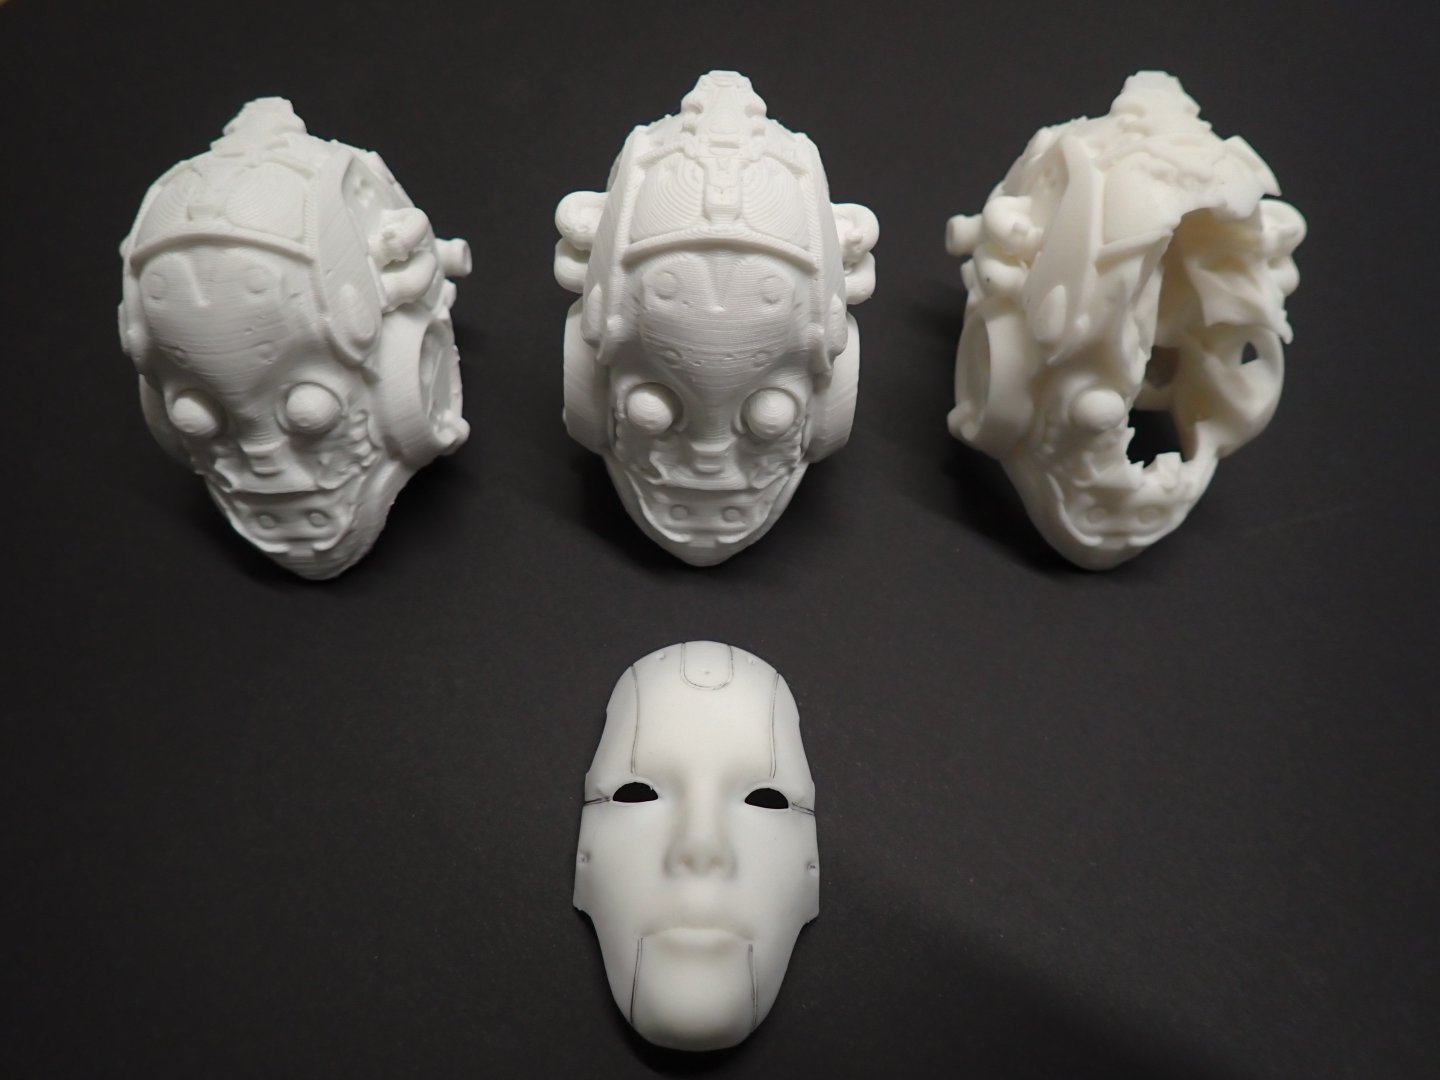
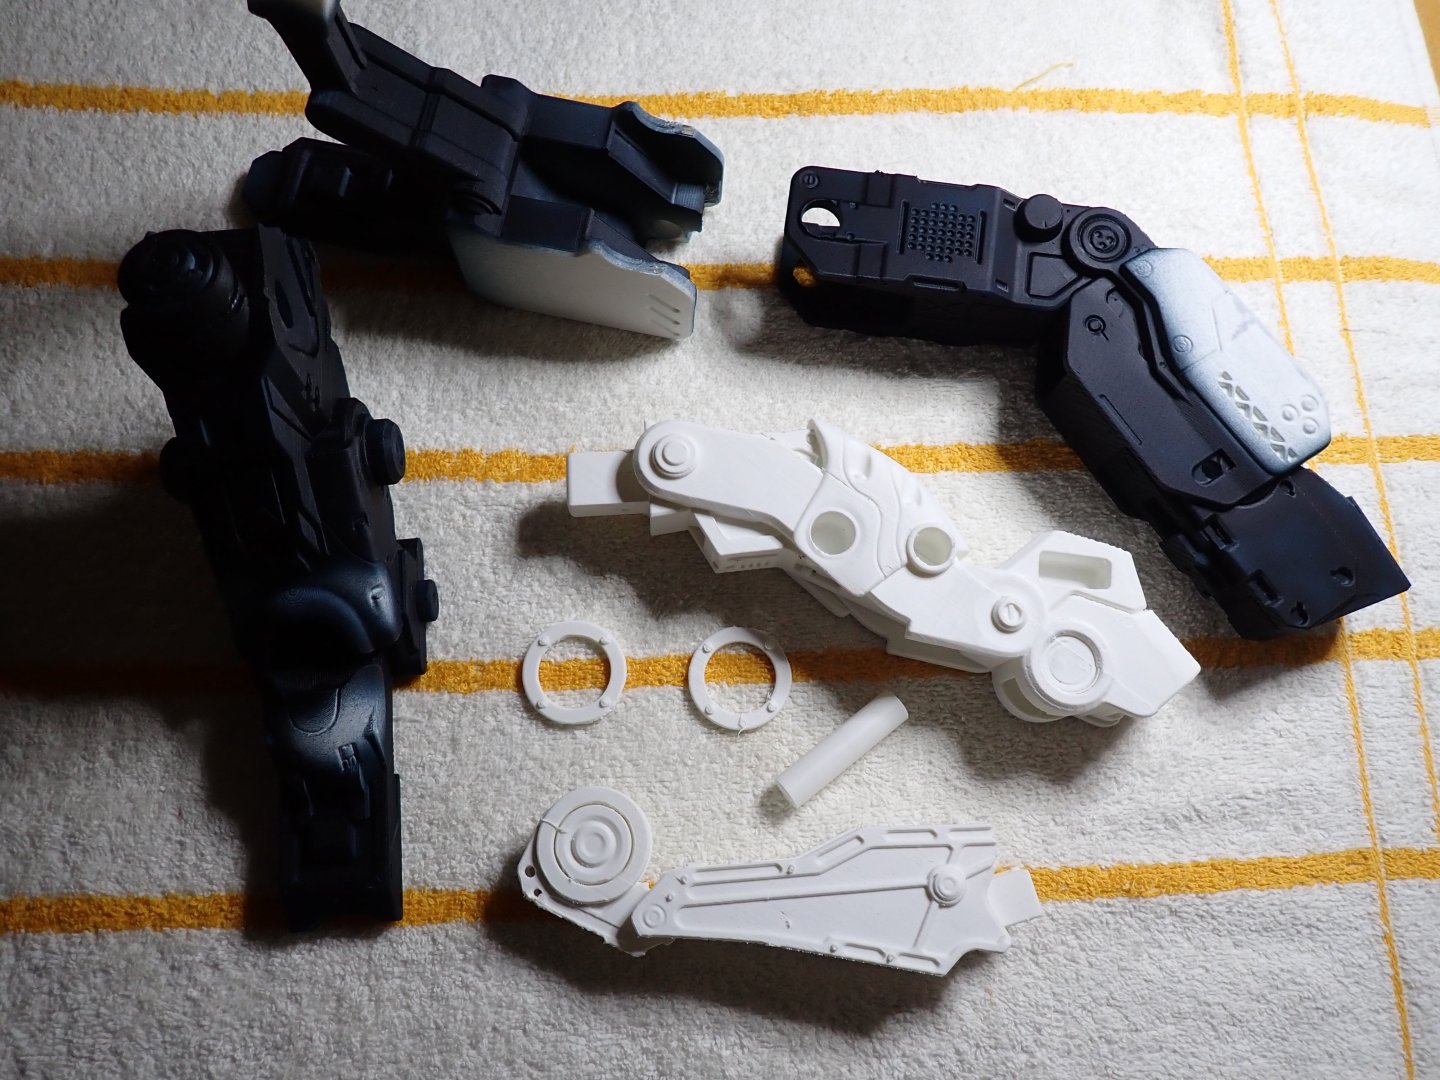
Most of the parts for the AI creature have been printed: The neck and head were printed with PLA (Filament) whereas all the other parts are made of resin. I tried three iterations of the head: To the right, is a missed 90% resin printing. Supports were inadequate and half of her face went wrong. In the middle is a 85% scaled head printed with PLA. To the left is an 88% head printed with PLA. This one is perfect, it is filled at 100% PLA and the face shield fits perfectly on it. I may still try another resin print of her face at 90%, changing the supports. All the armor/shield parts are holding with mini magnets, so that they can be removed to show the guts of the machine. Yves

-
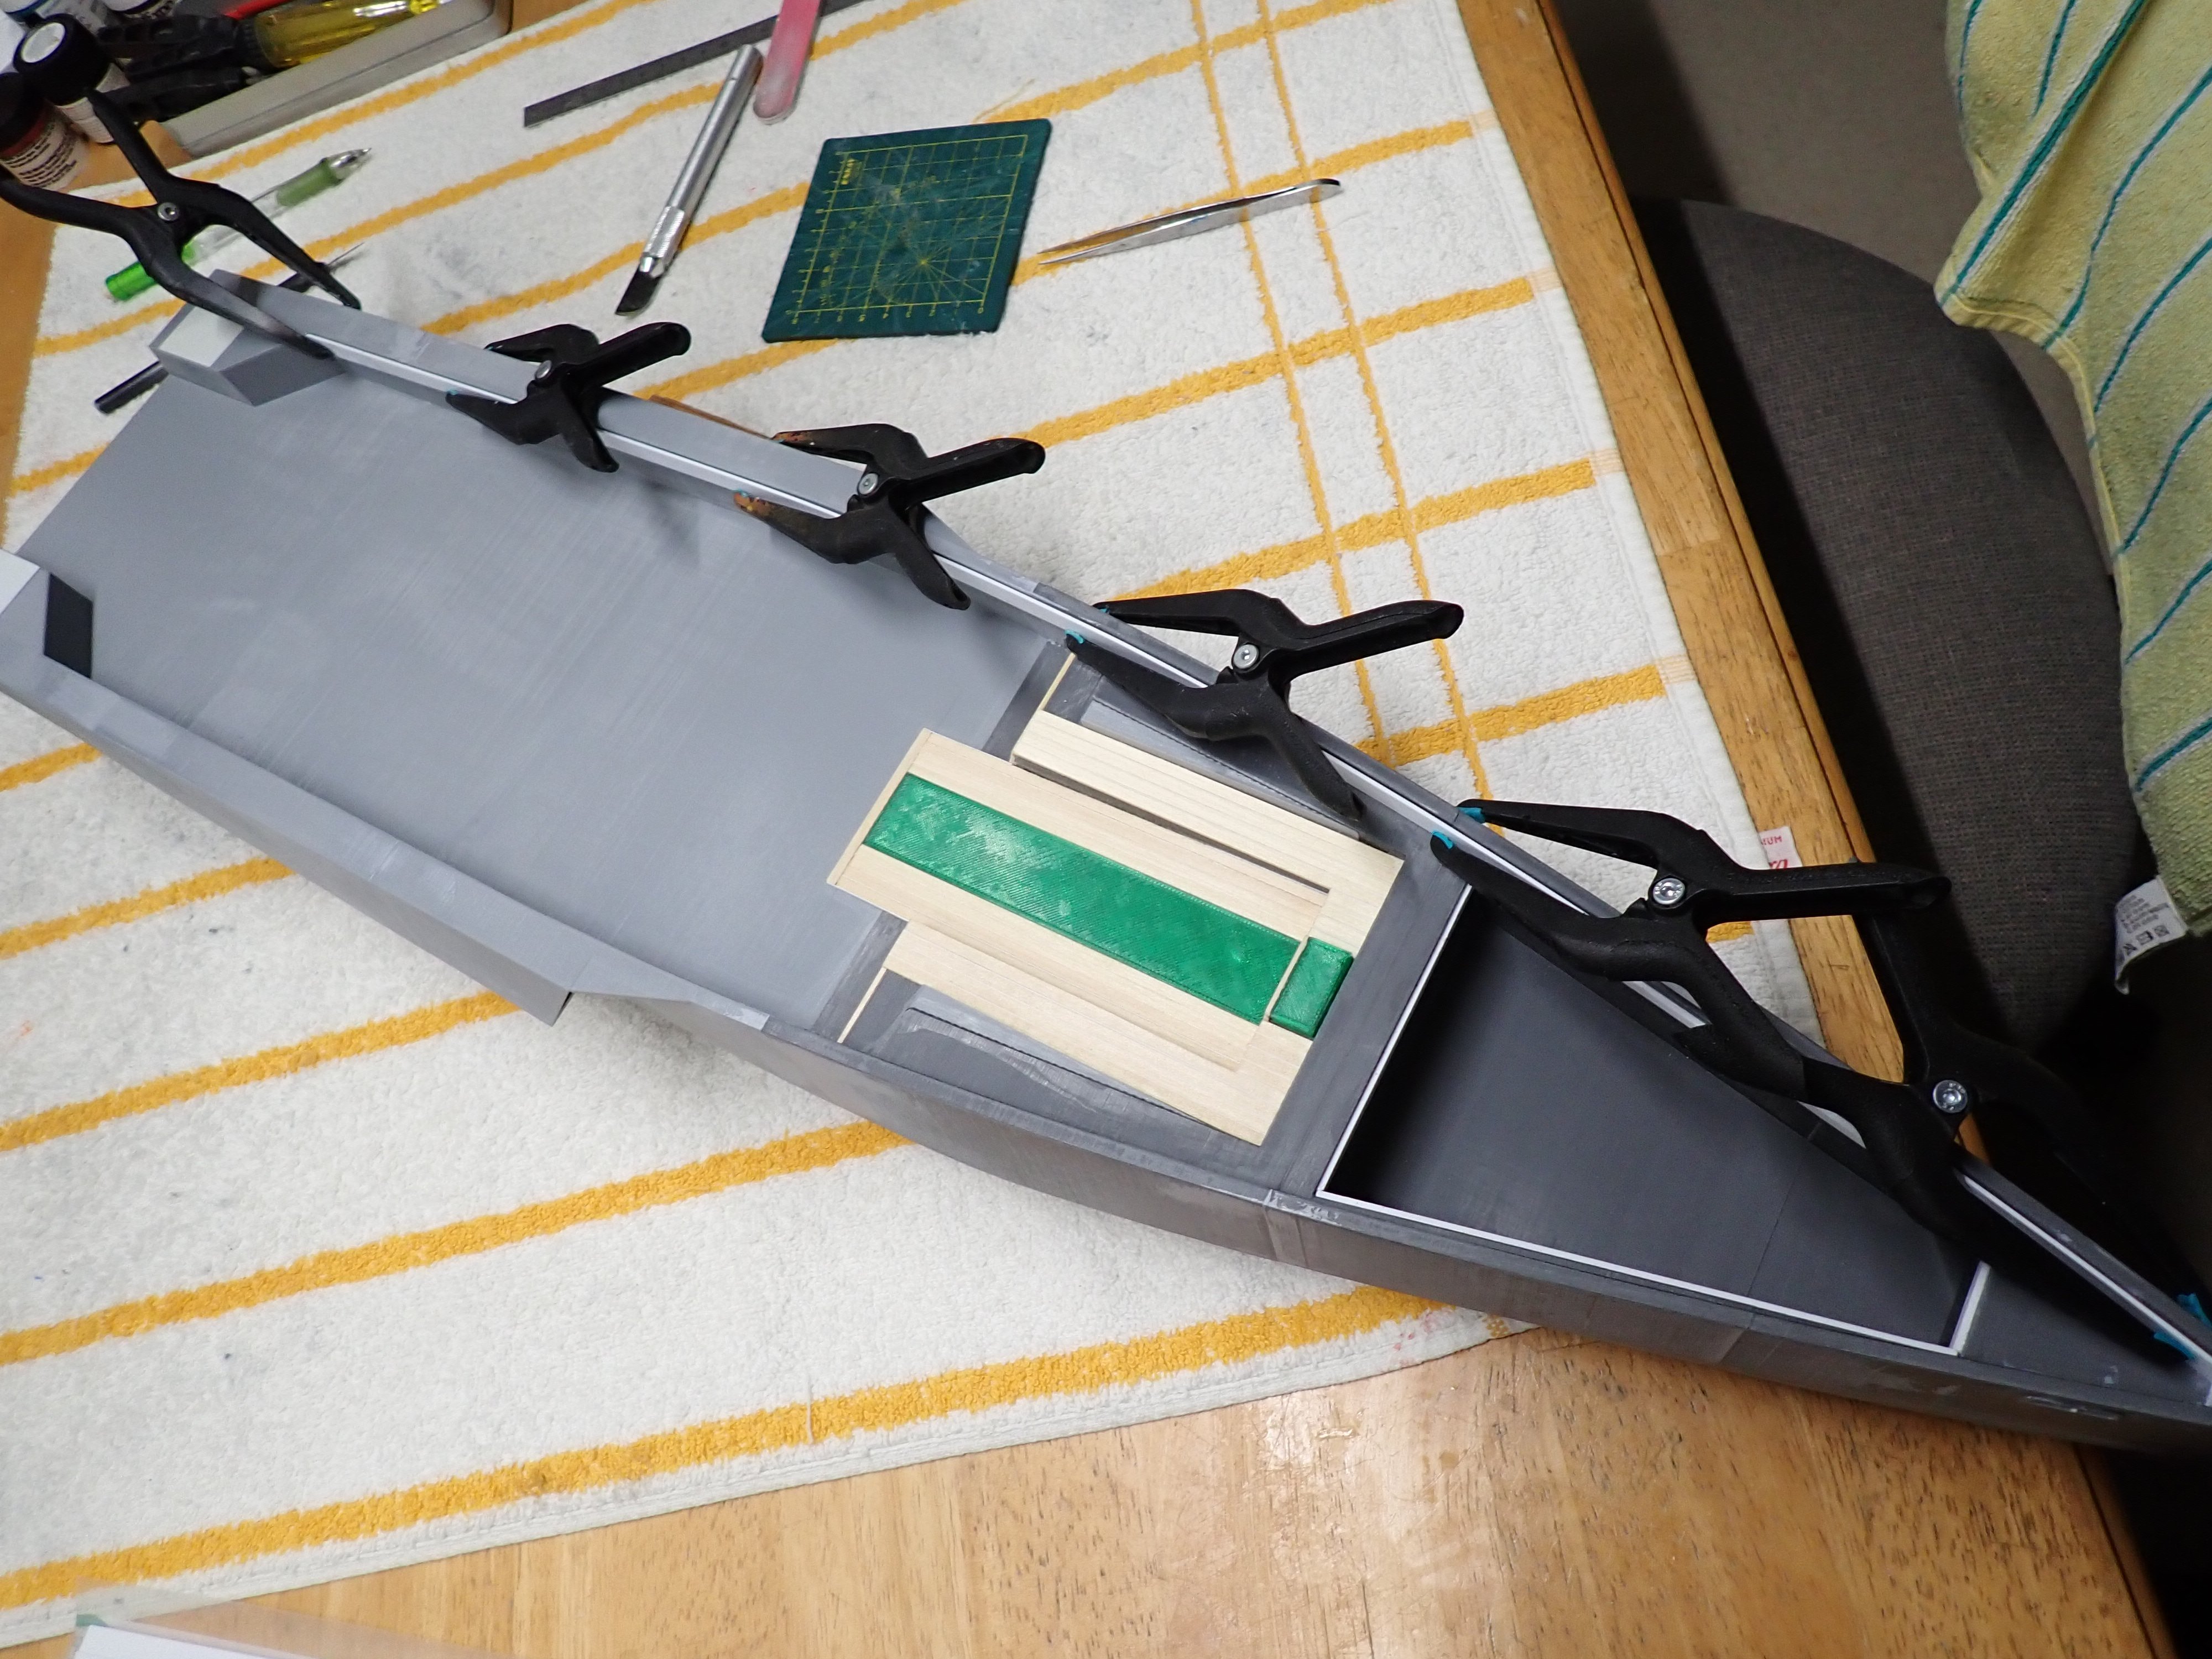
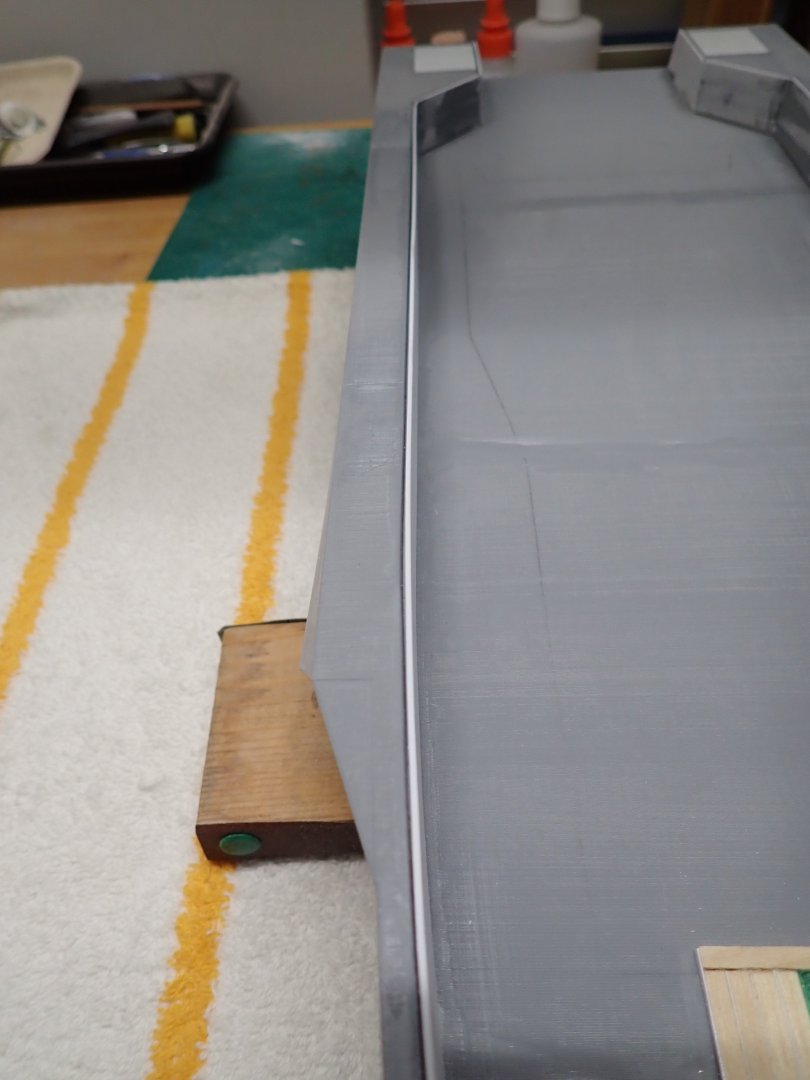
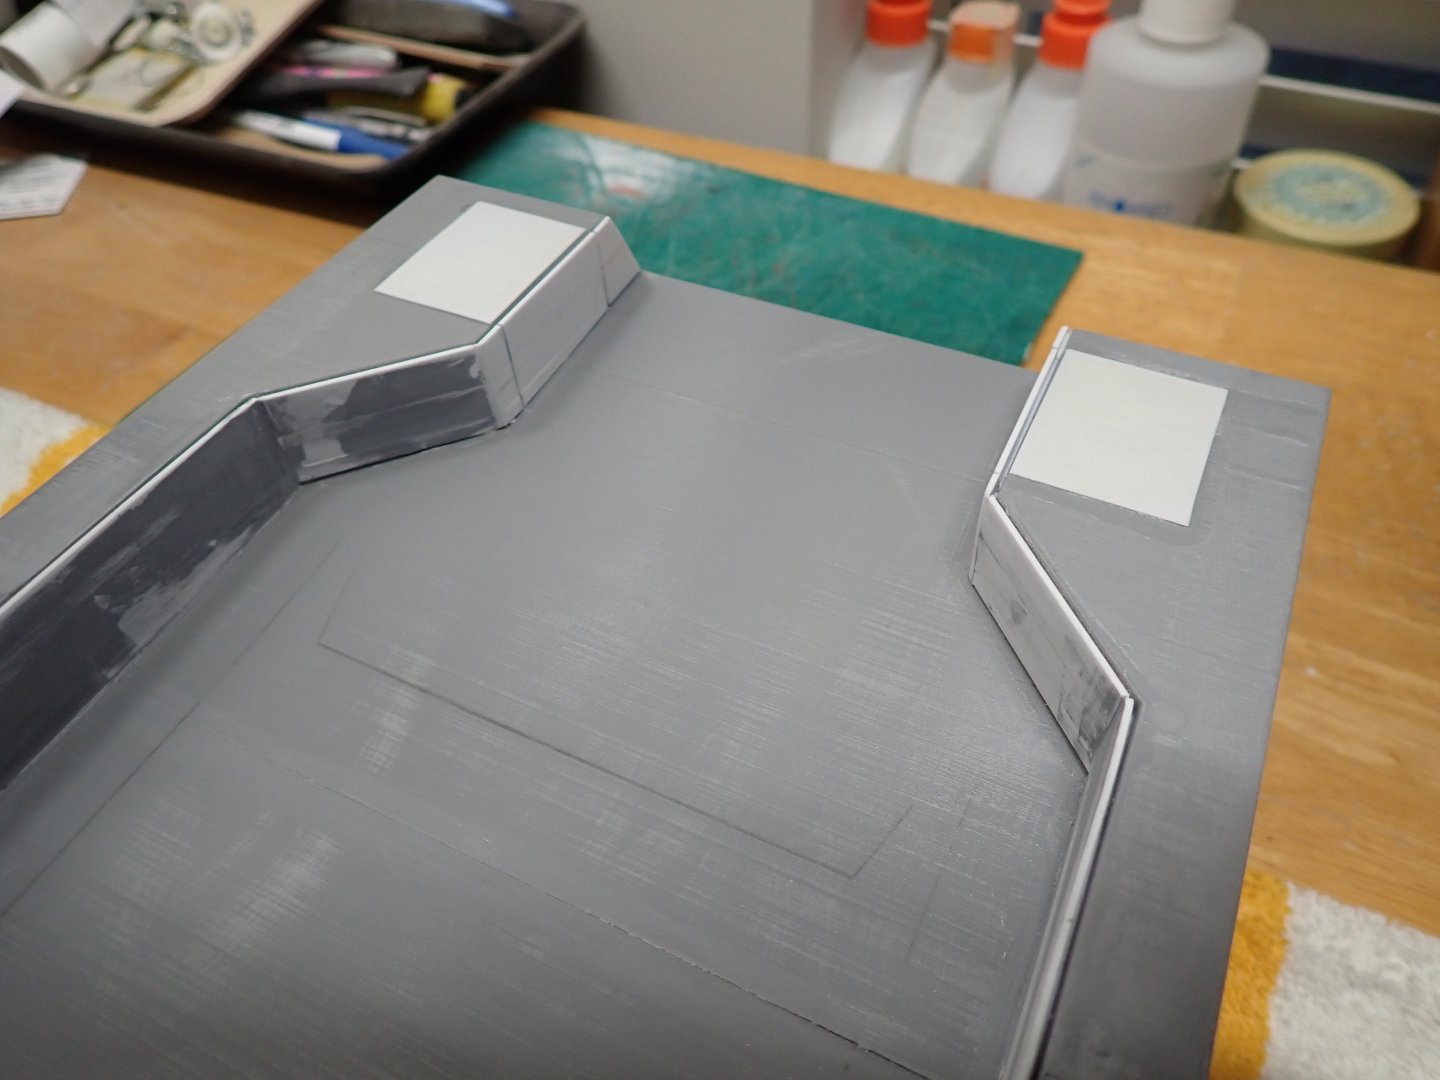
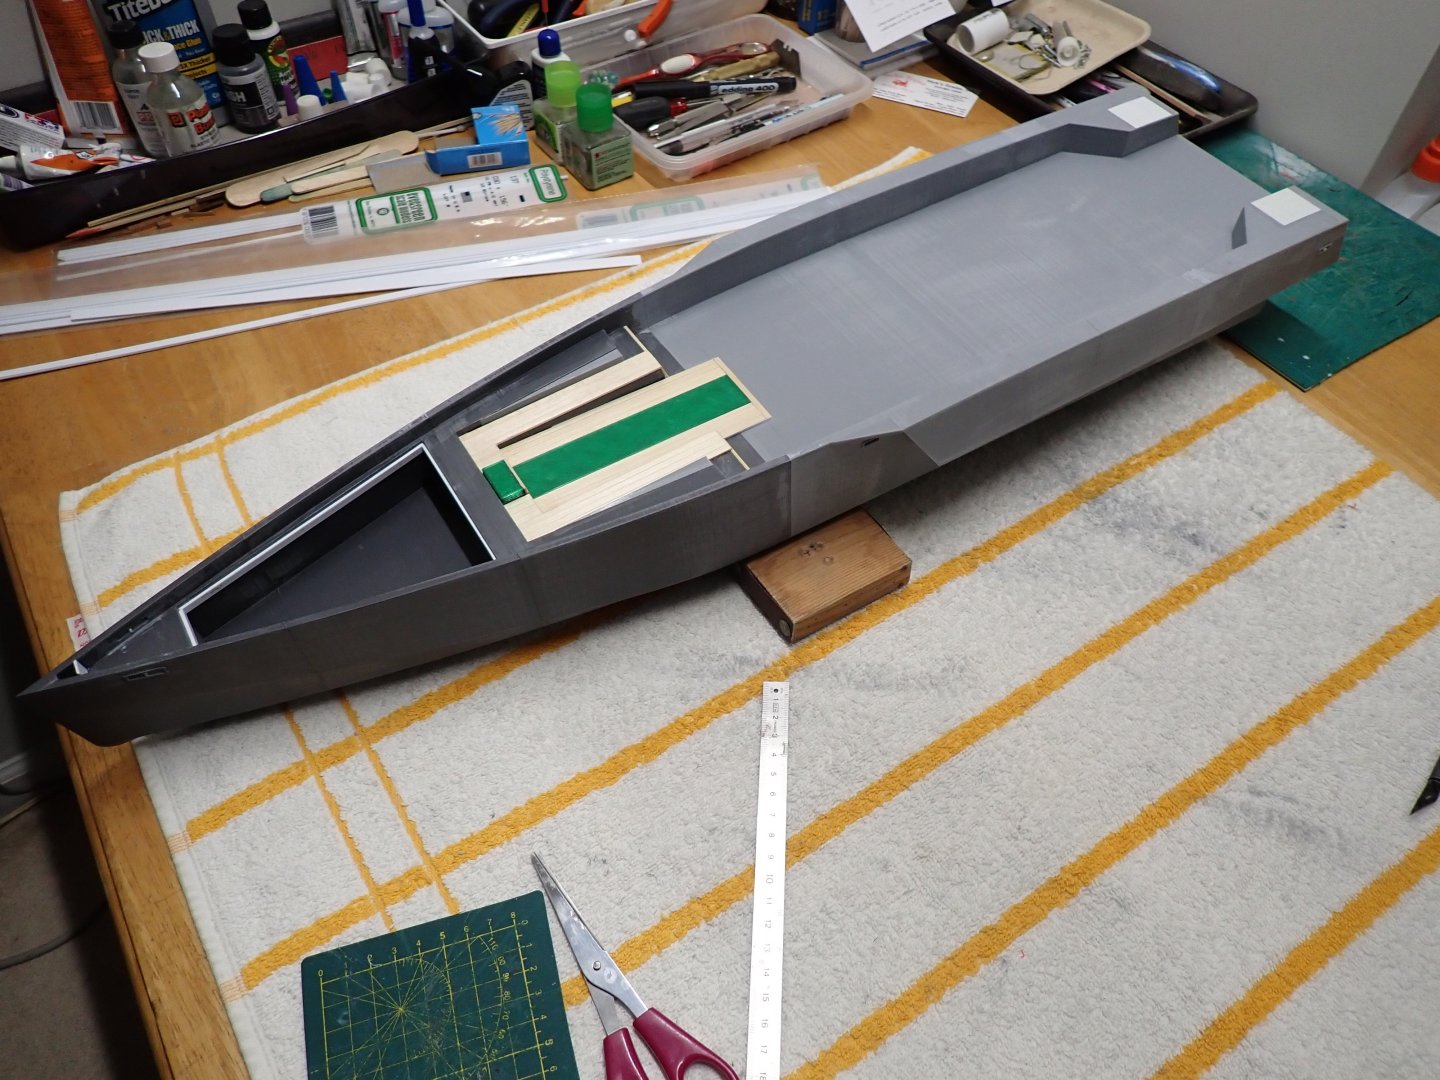
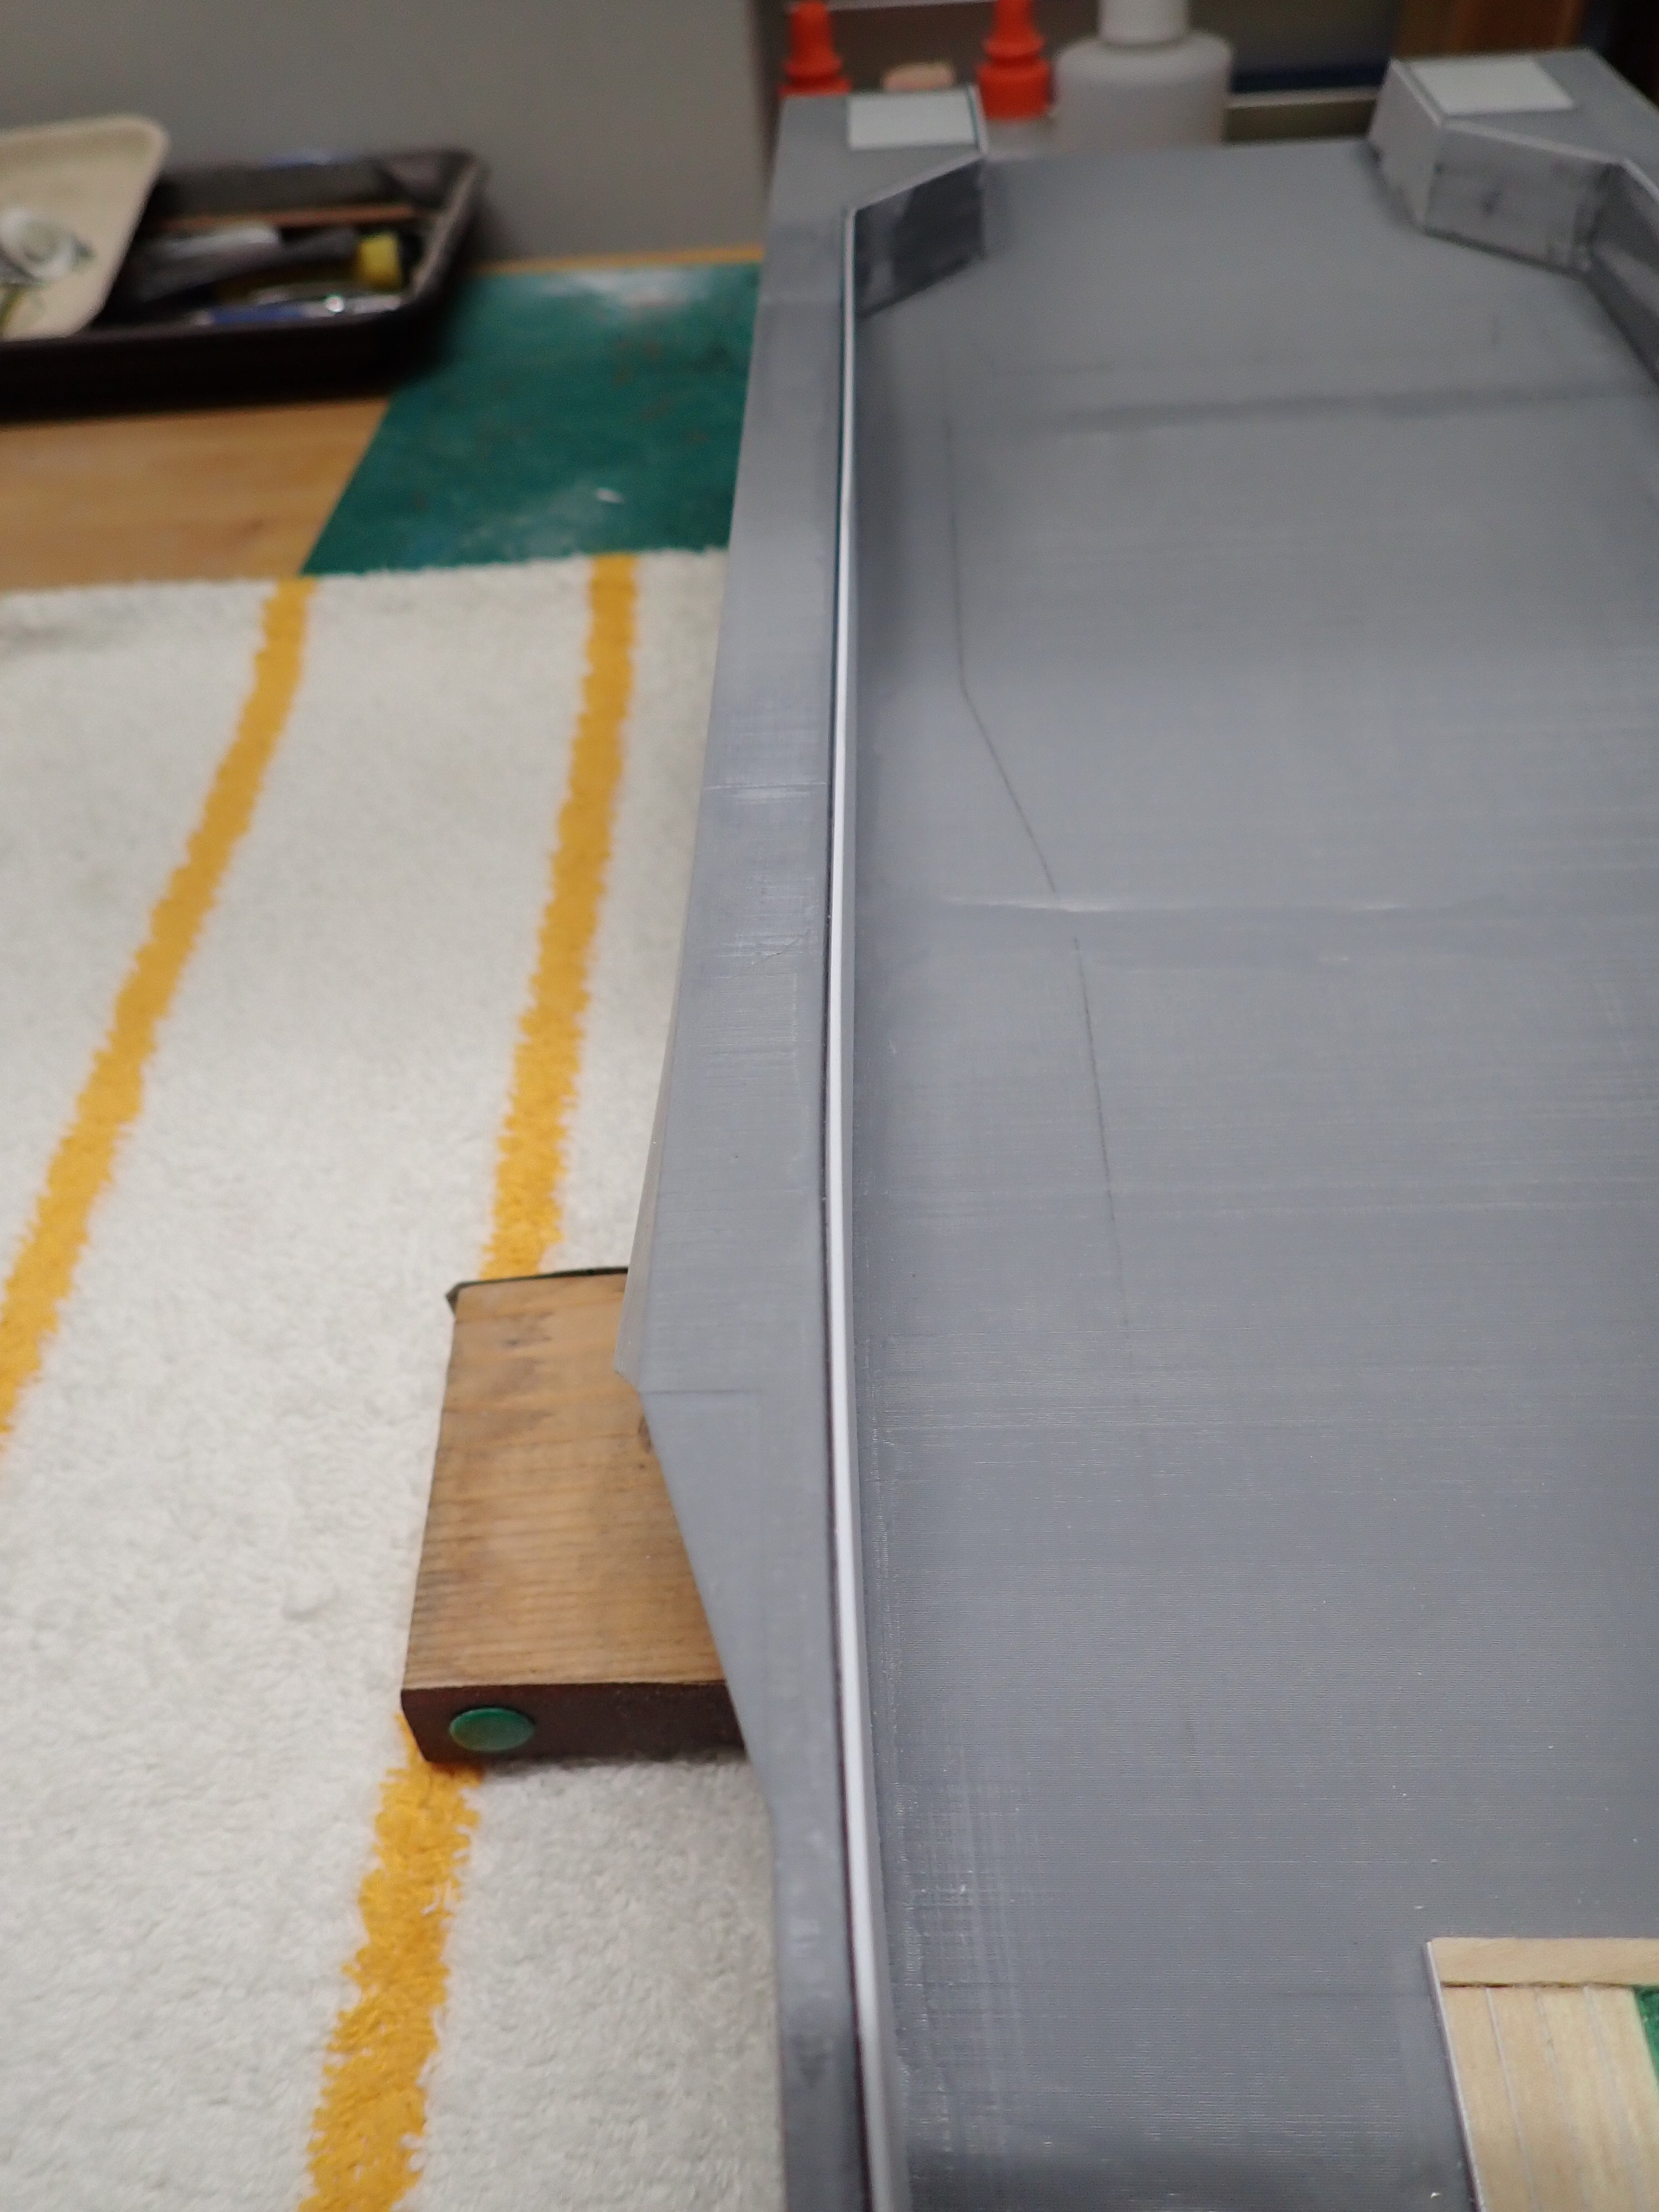
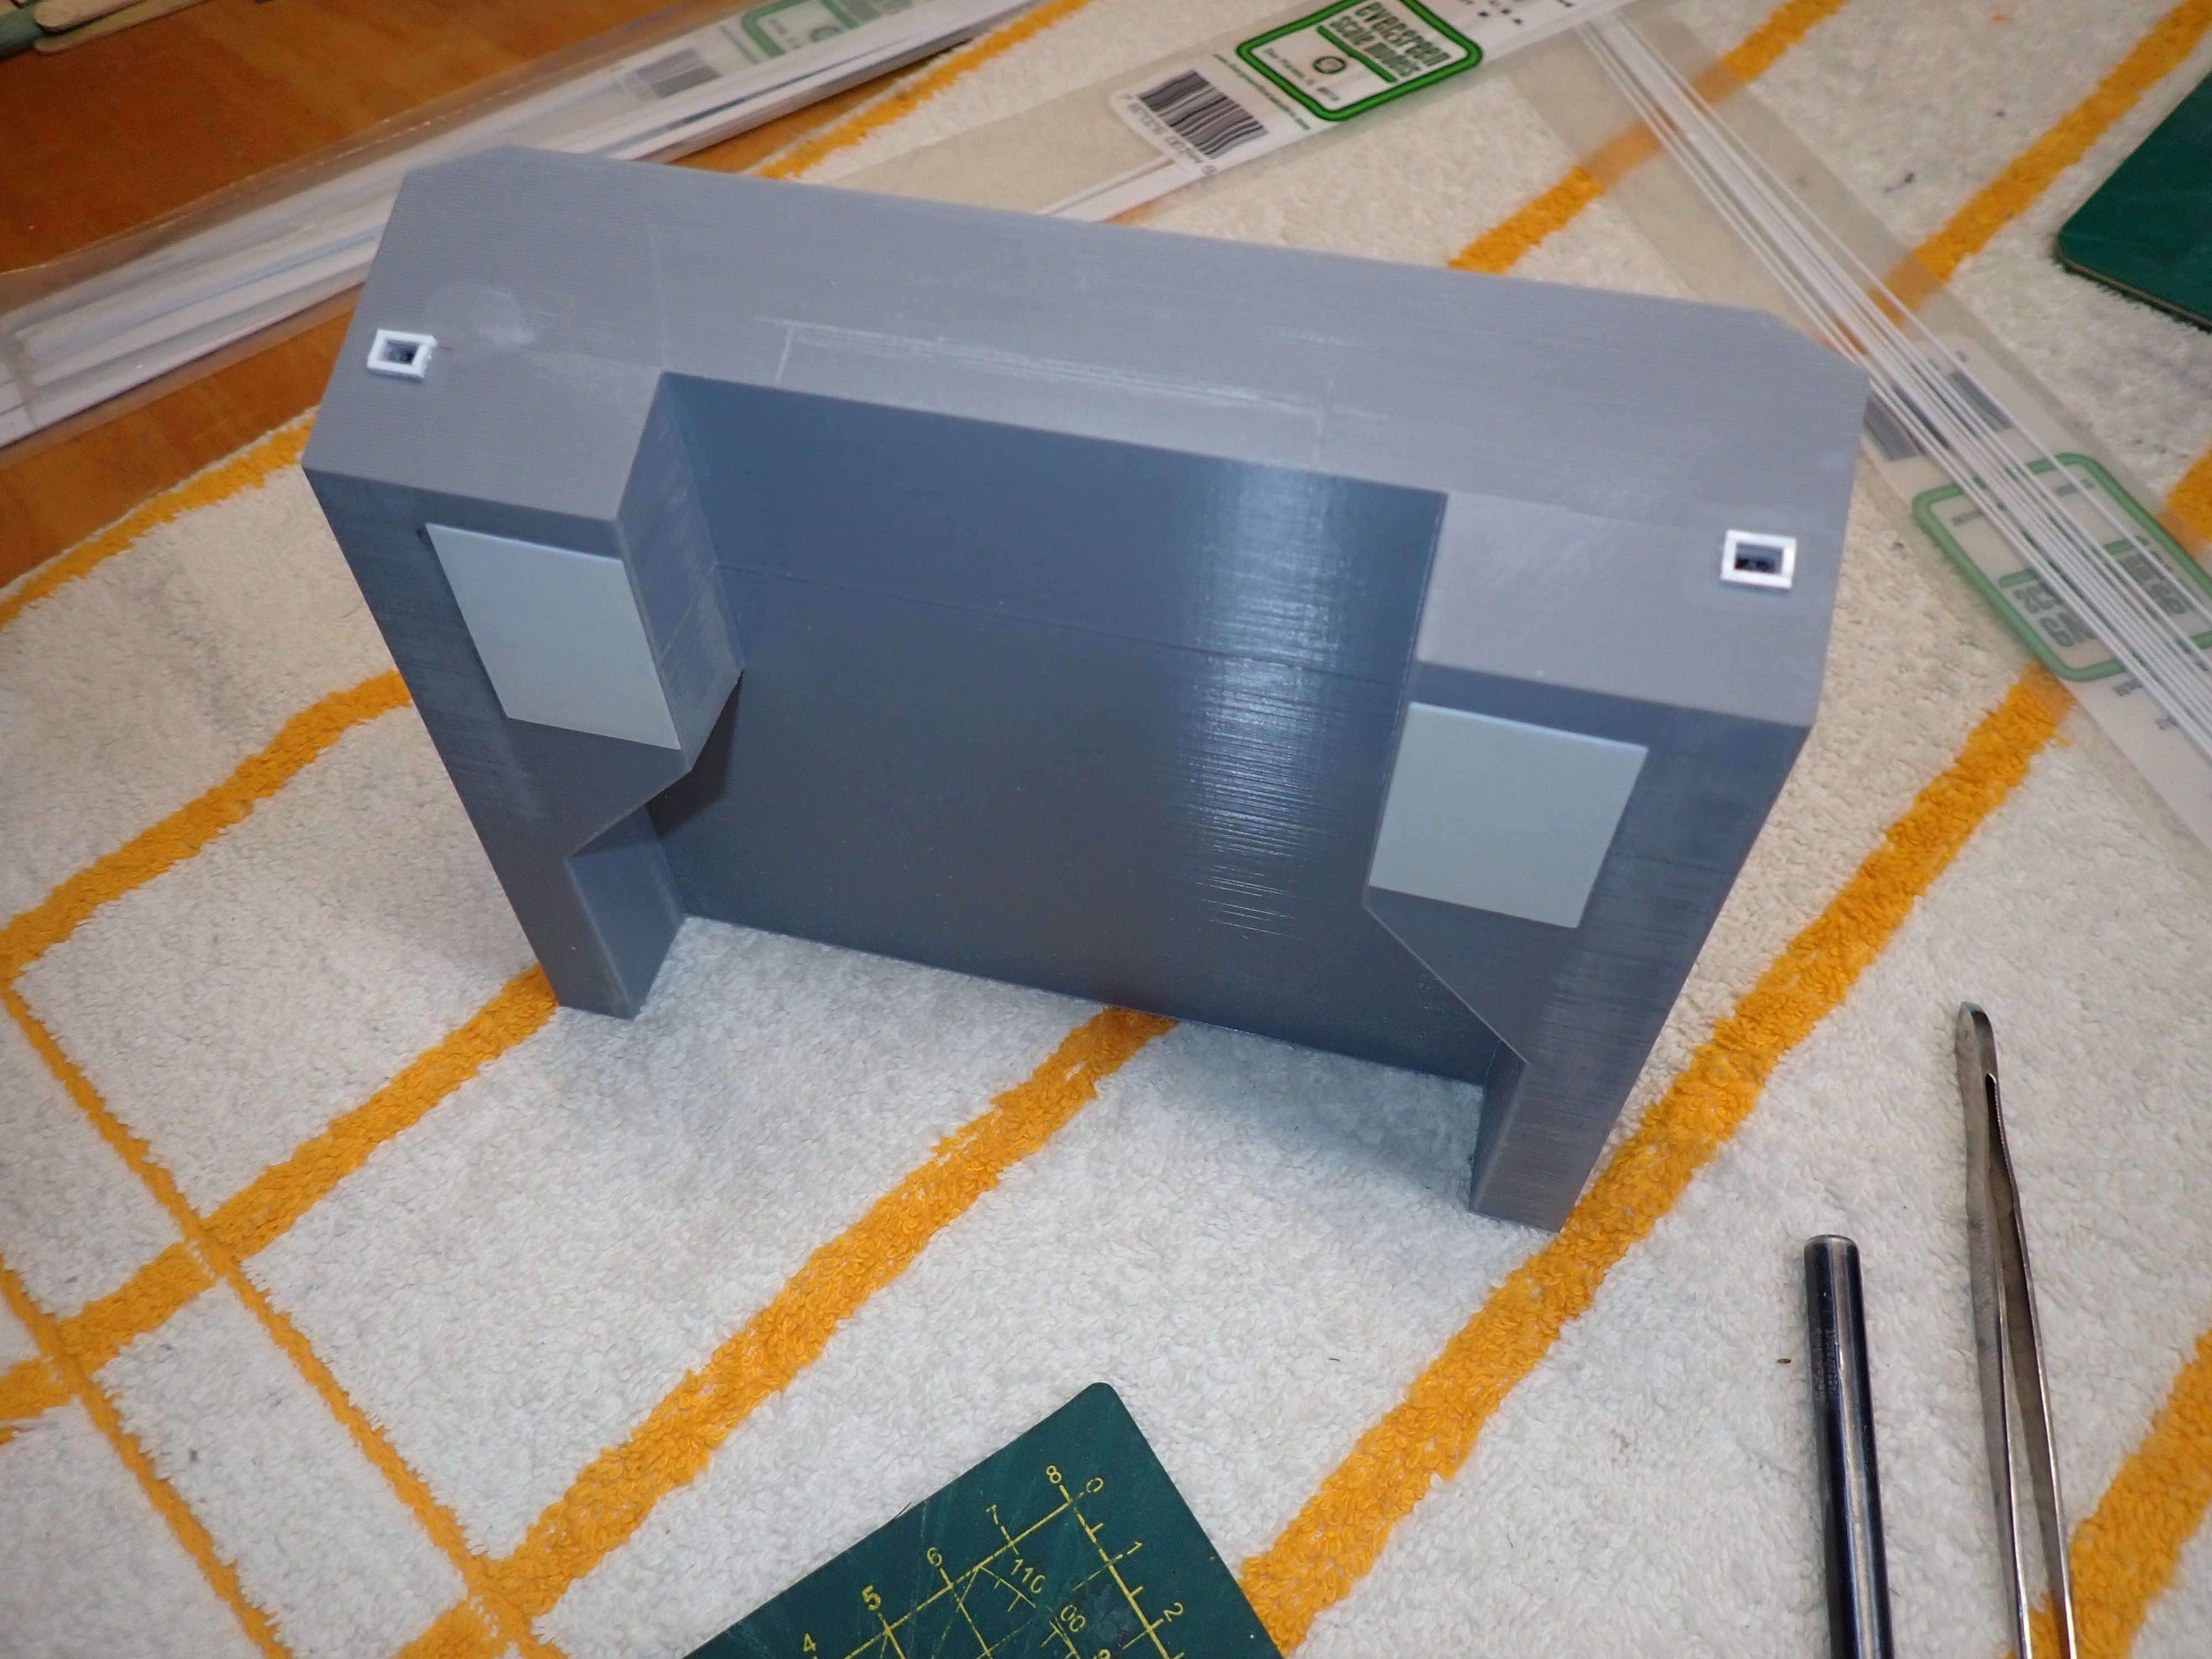
I finished the building of the handrails, along the hull. This was done with styrene strips as described in the previous post. The model almost looks like the real thing.... 🙂 I increased the area of the bow, by filling up about 2 additional centimeters: The railing is not too bad and should give the illusion, once painted like the hull: At the stern, the railing goes all the way to the boarding deck. The flat pieces are the covers for the winches used most of the times, on the Mediterranean sea (Med mooring). There are still some minor details and a lot of sanding to add to the hull, but it will be ready for a first coat of primer soon. Now, we need some better weather....not 29-32 degrees F. Yves

-
Bentley Blower by RGL - Airfix - 1/12 - PLASTIC
yvesvidal replied to RGL's topic in Non-ship/categorised builds
Jay Leno had a recent show about a similar Bentley: Yves -
Bentley Blower by RGL - Airfix - 1/12 - PLASTIC
yvesvidal replied to RGL's topic in Non-ship/categorised builds
Fabulous !!! I have that kit and will be watching what you are doing with it. I'll never get to your level, but may be able to grab some ideas. There are a few aftermarkets parts for that kit, one of them being the spoke wheels. Very pricy but really nice. Yves -
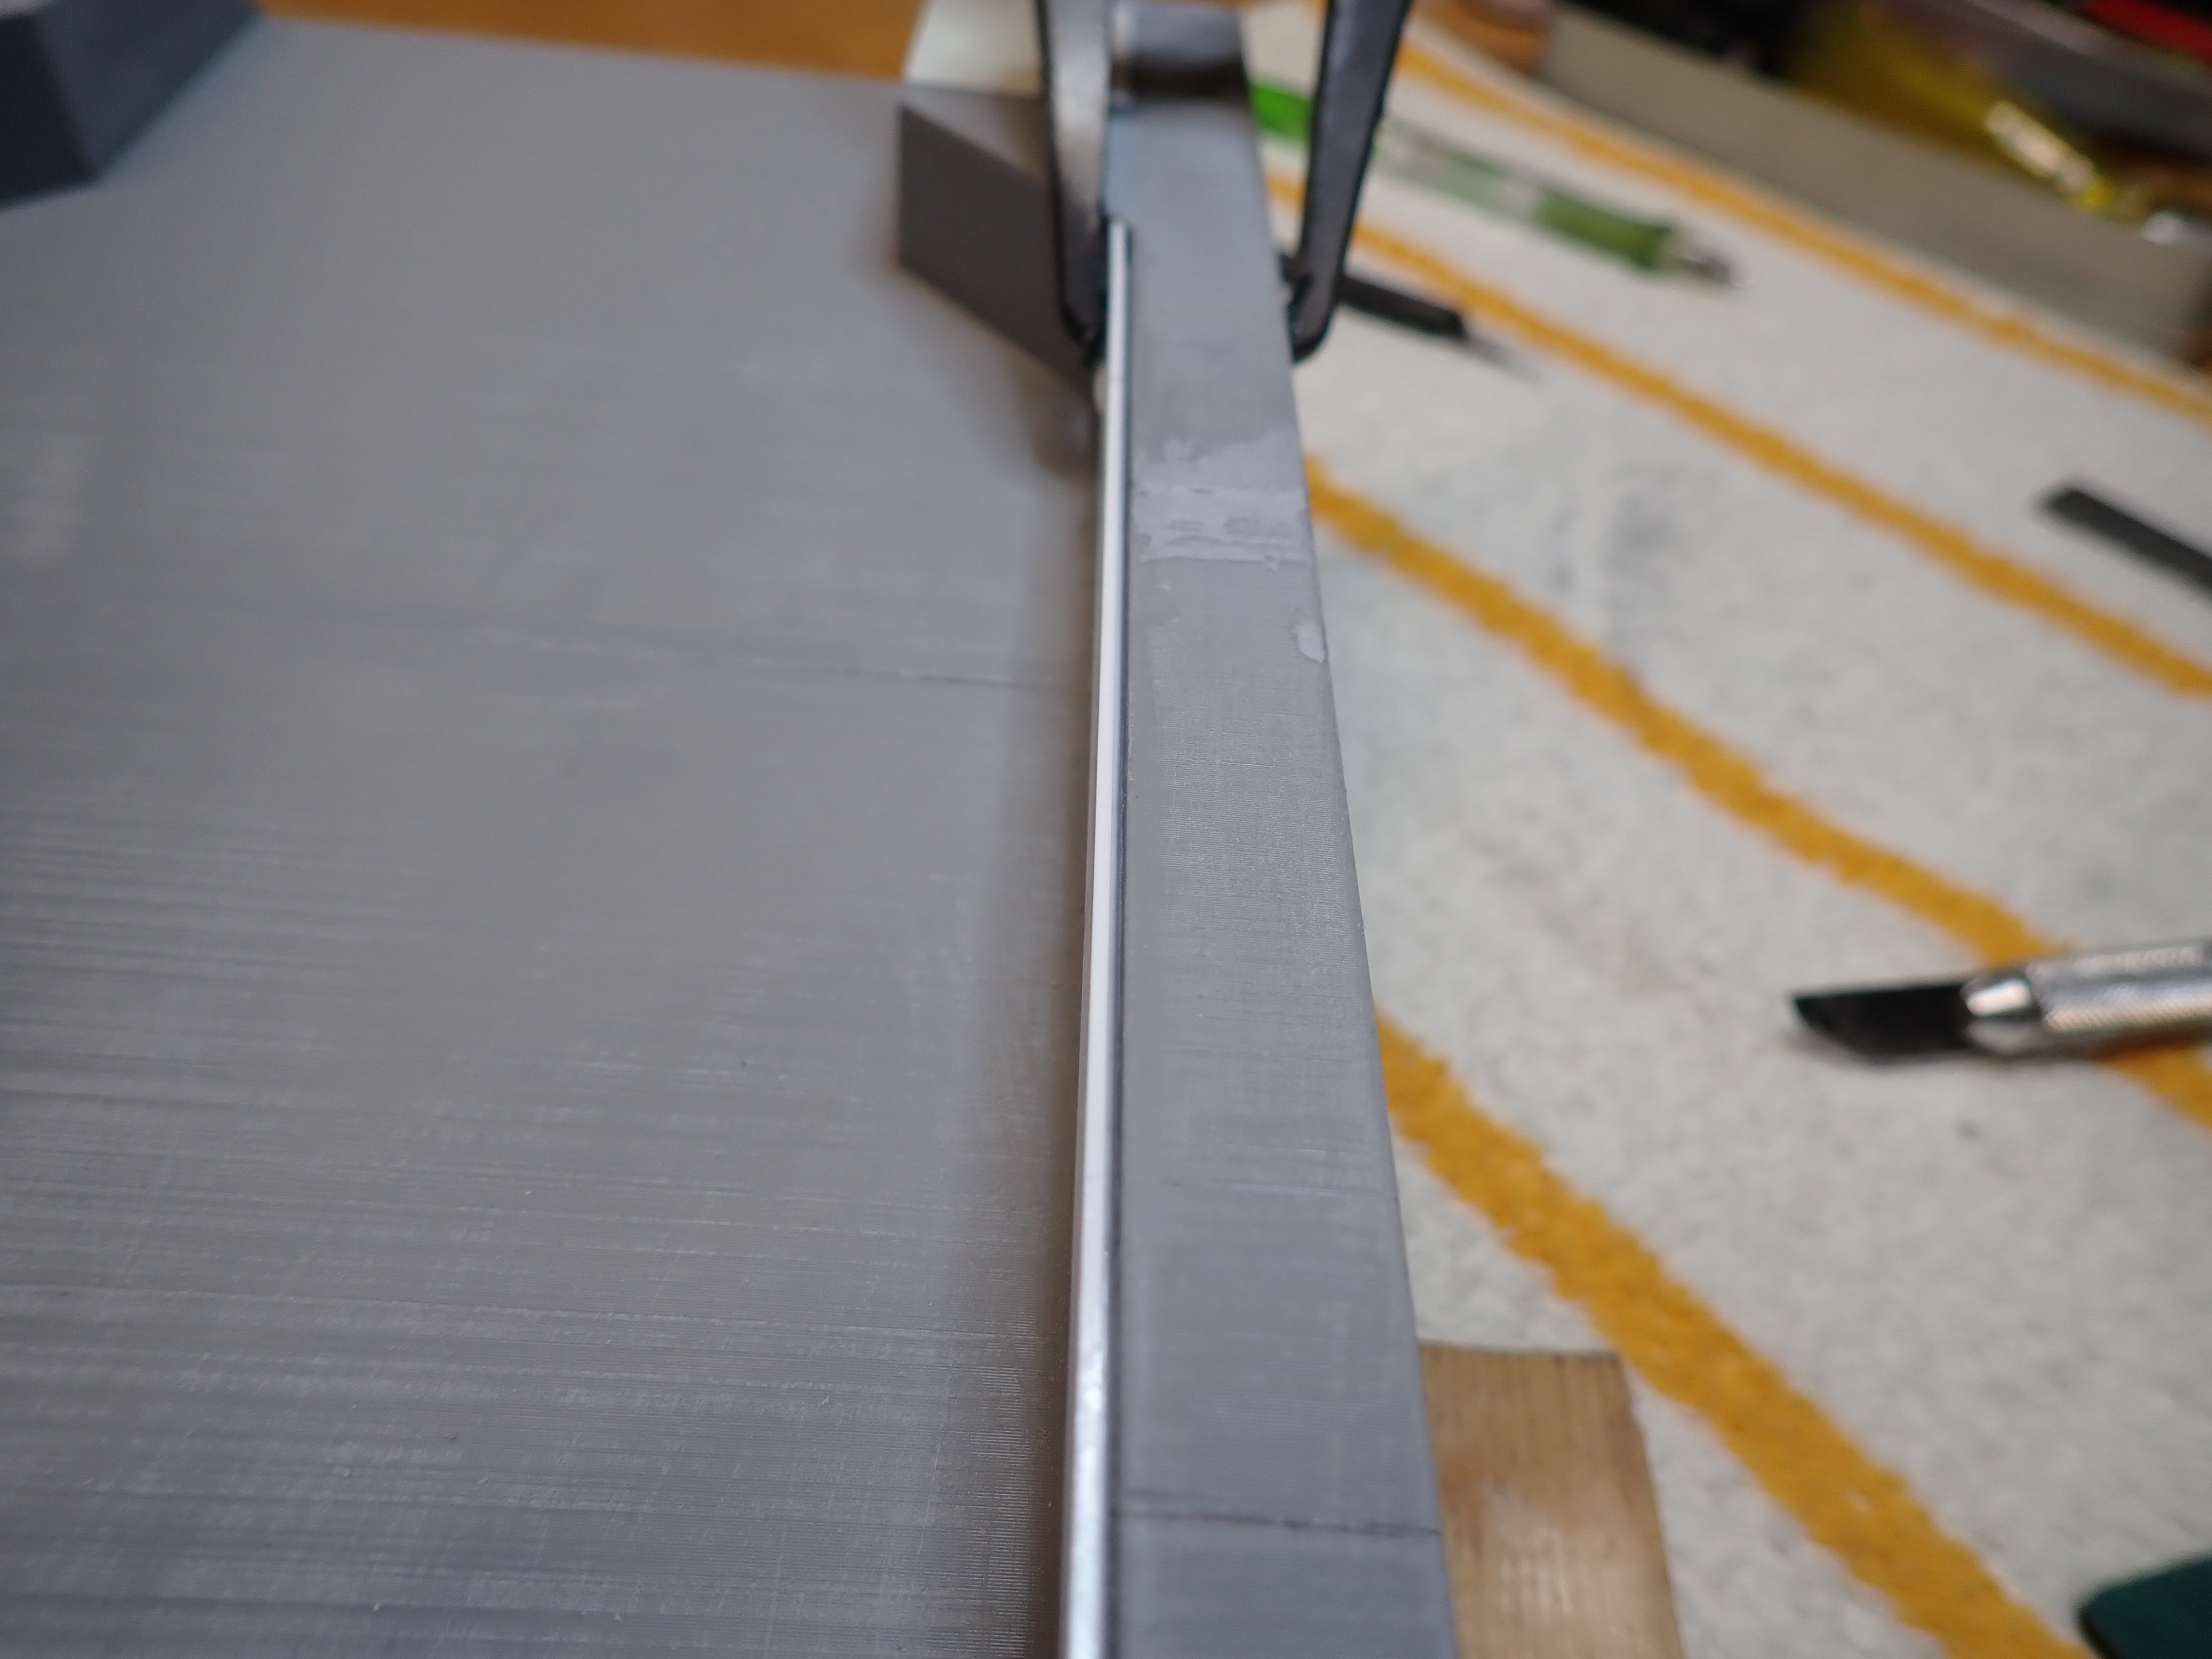
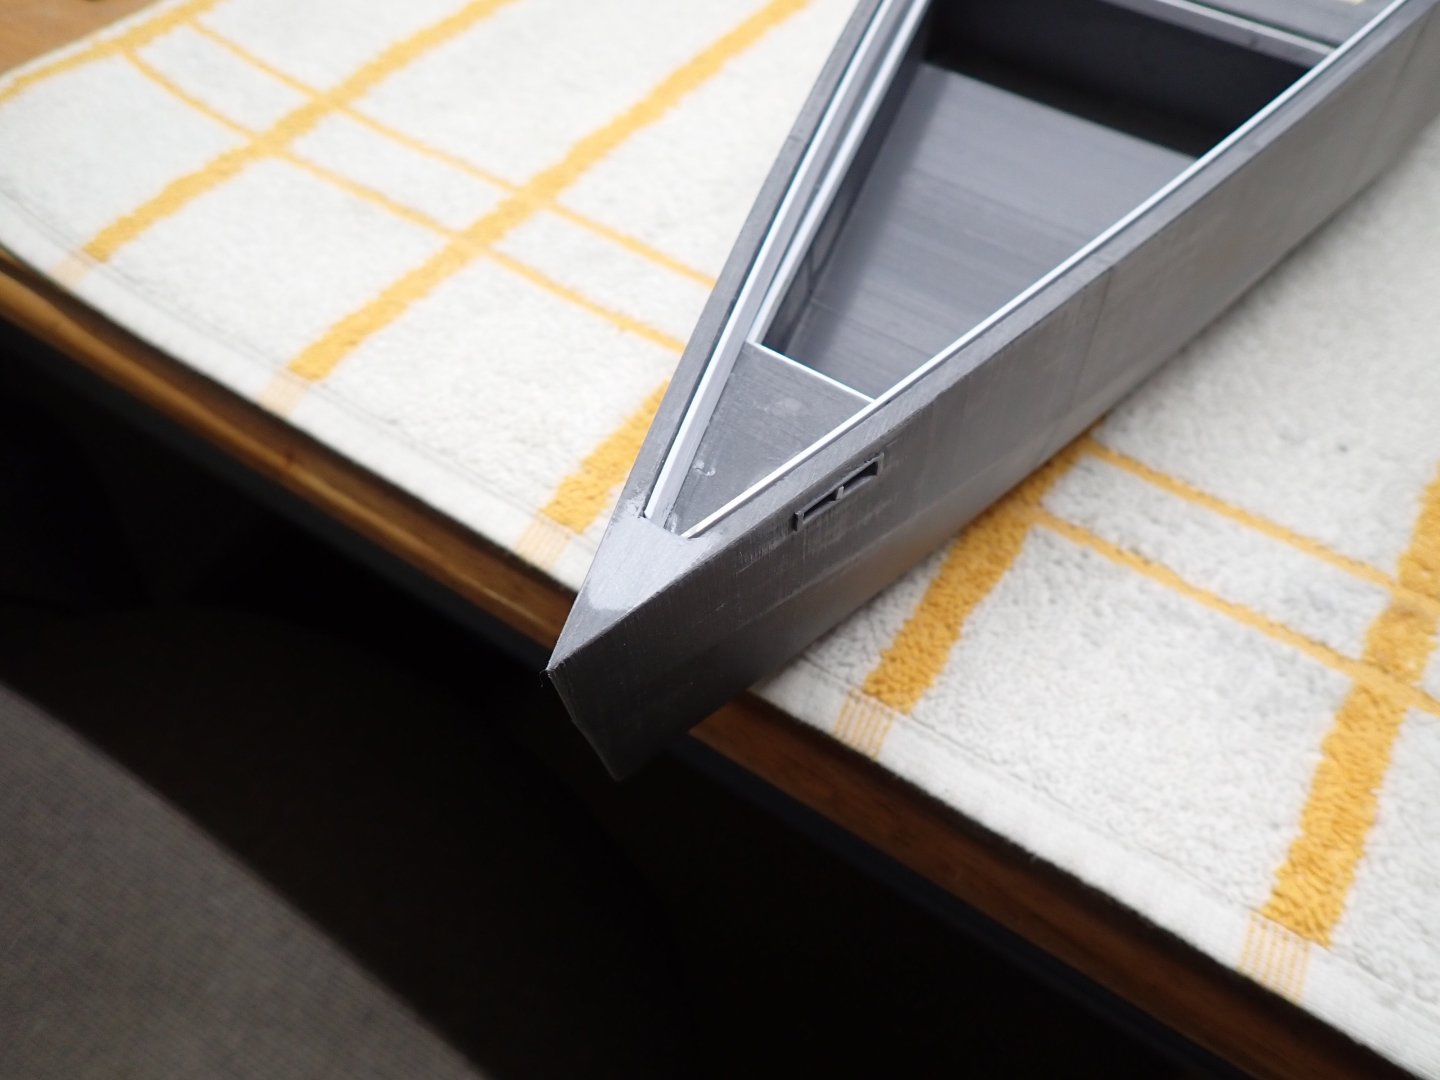
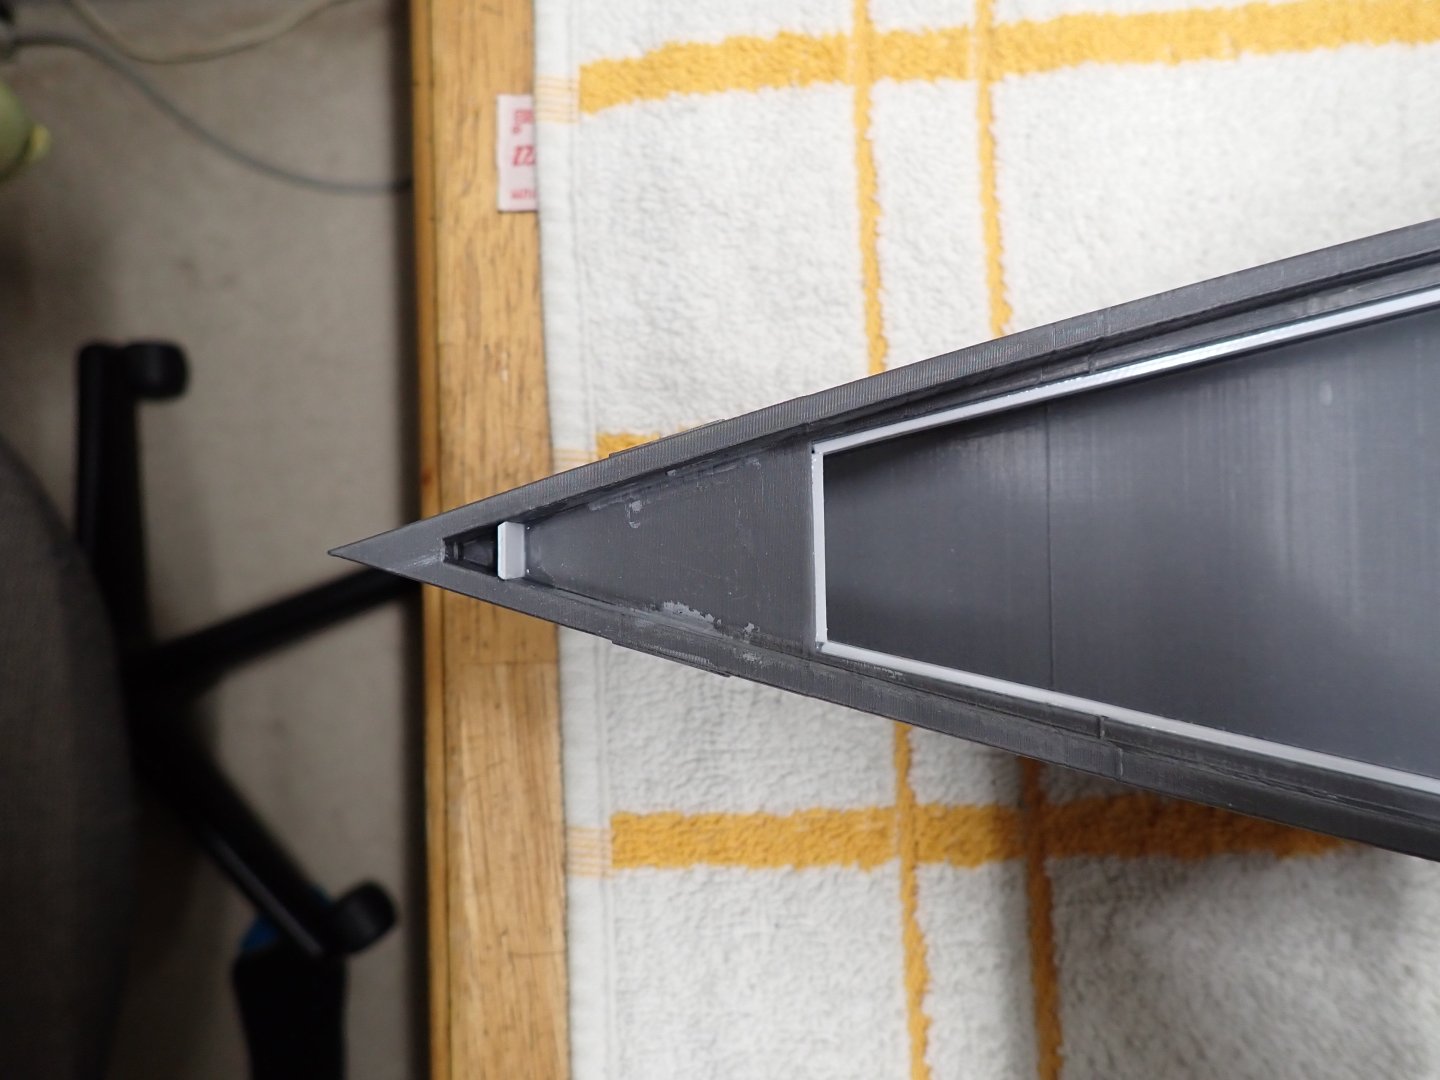
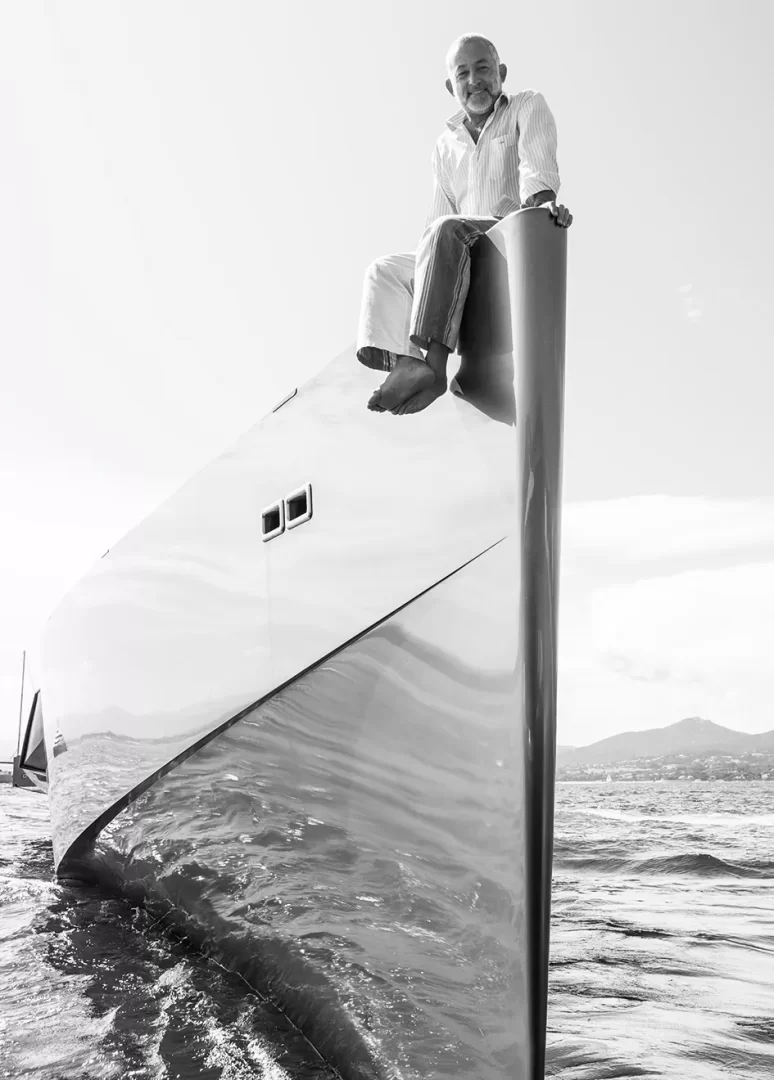
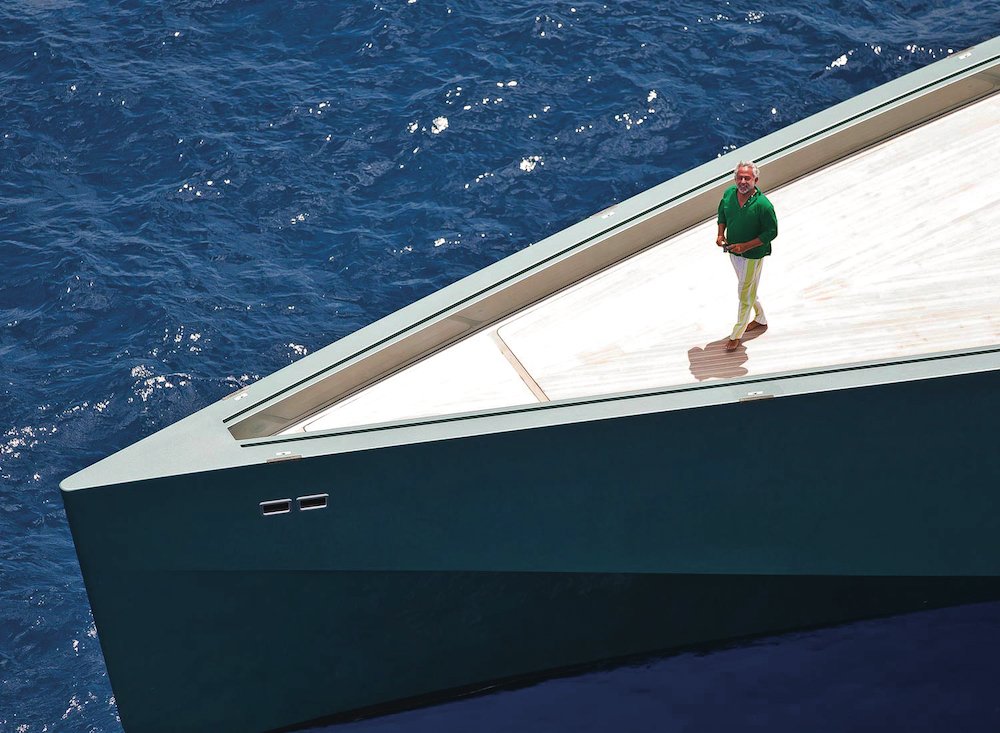
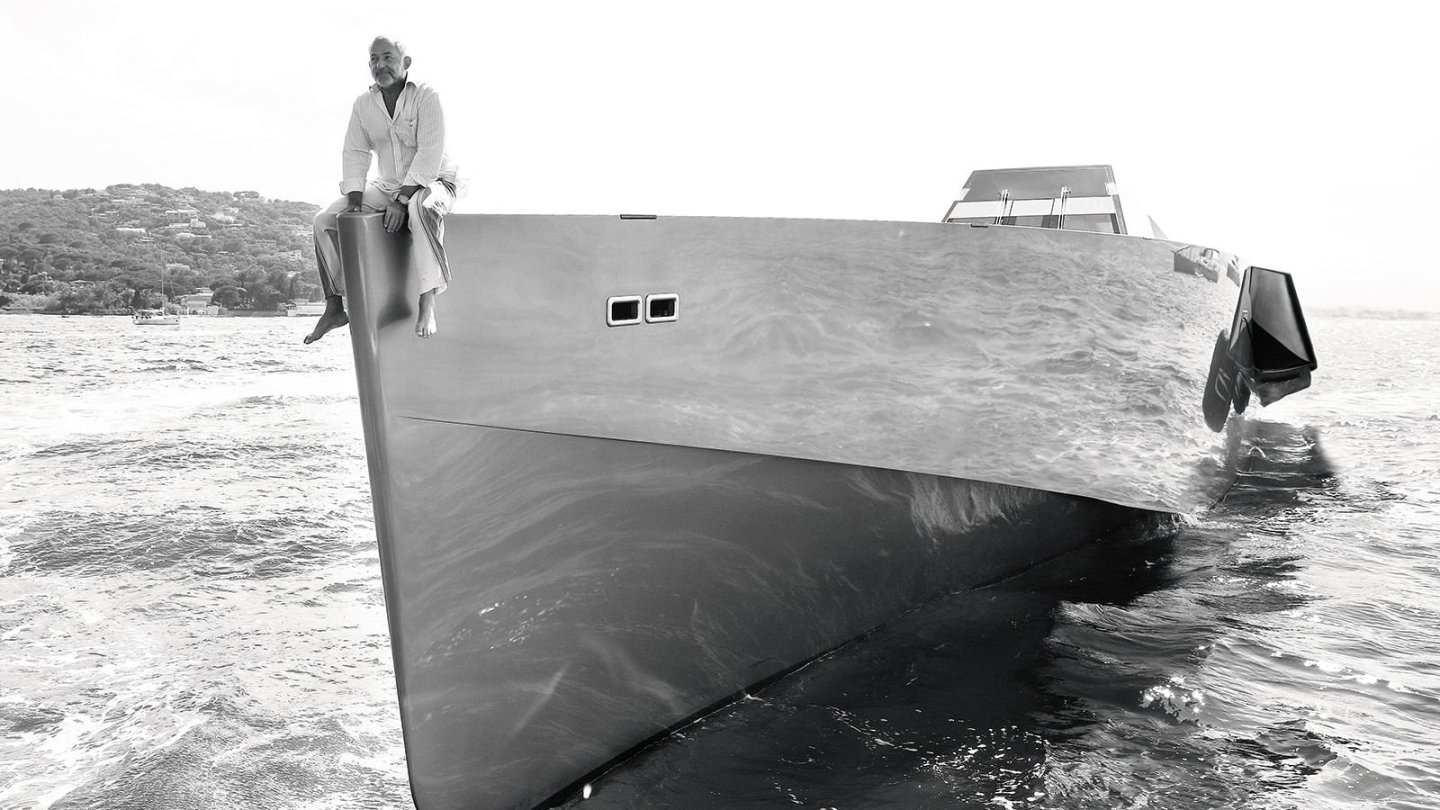
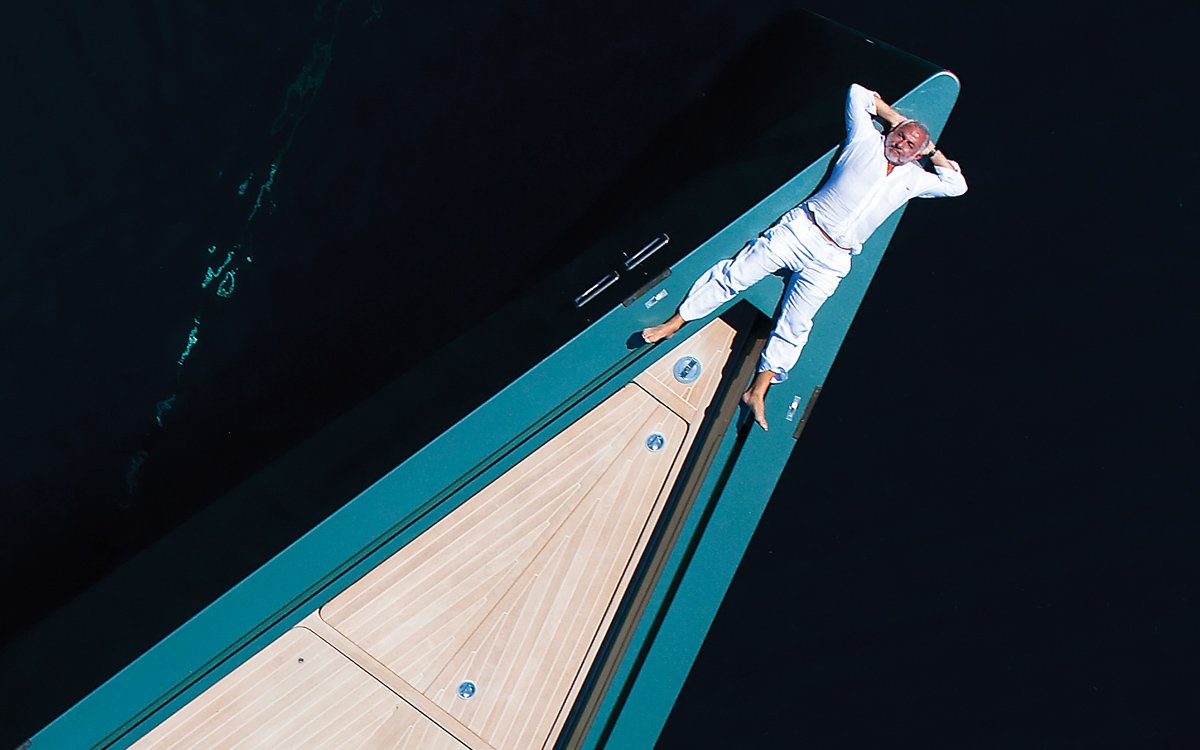
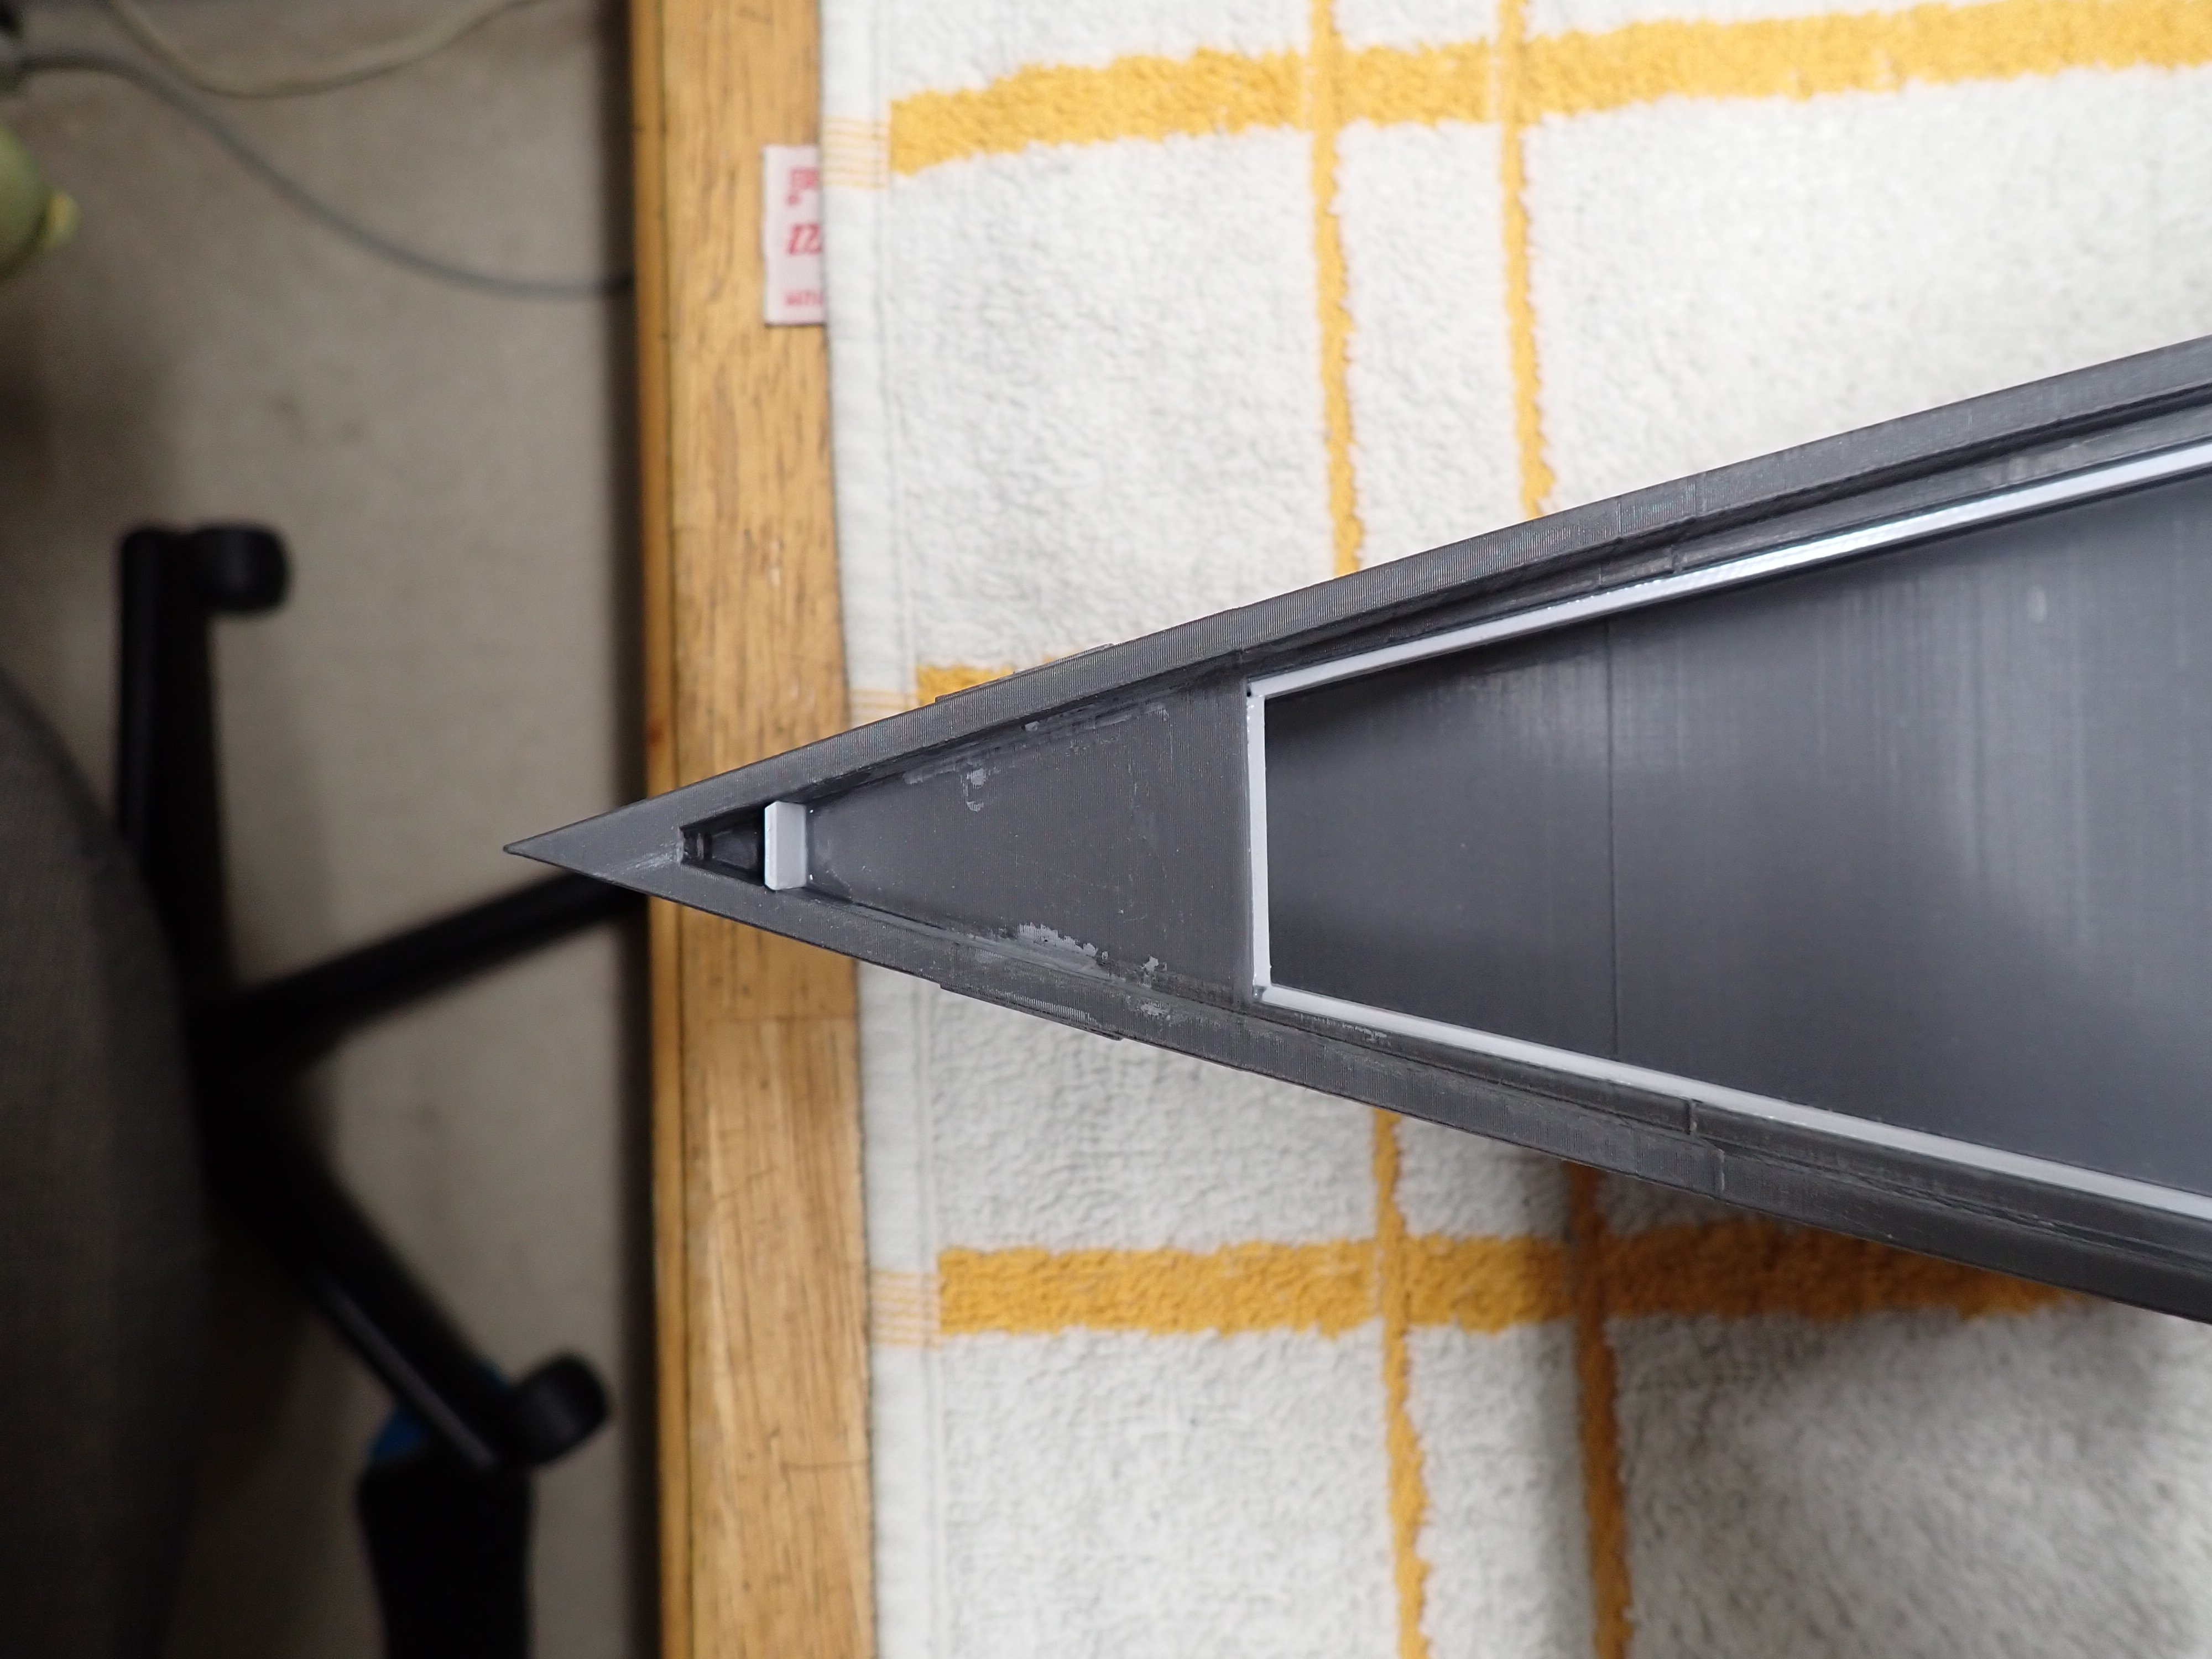
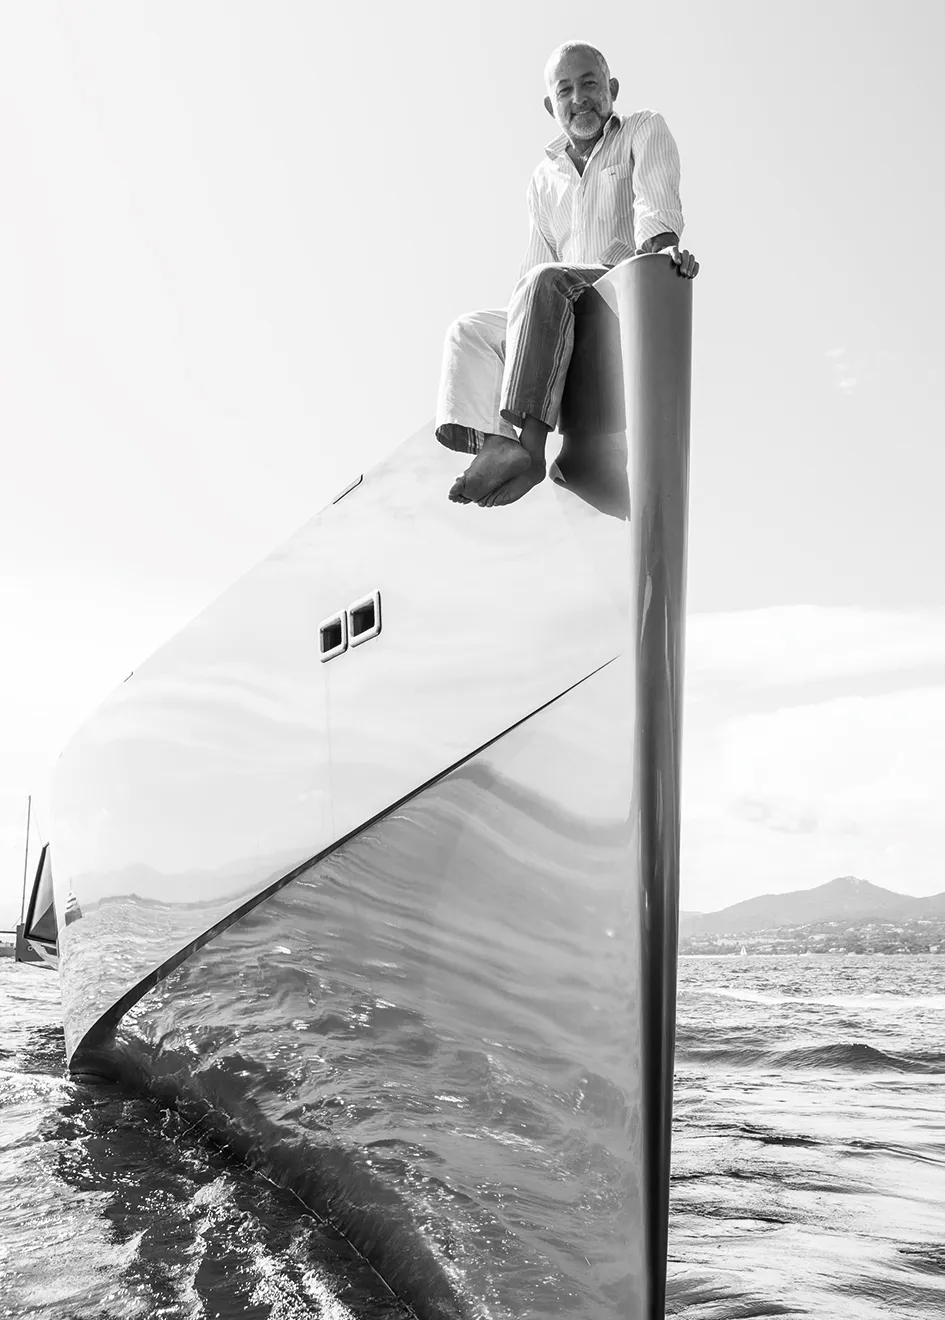
I finally finished working on the last section of the hull, the stern. The water jet system will come later, as I am studying the real vessel and how to replicate them. Here is a crude shot of the full hull: Another point that needs some modifications is the tip of the bow. On the printed model, this section is too small and needs to be extended. You may recall Luca Bassani taking a nap and sitting on the bow: I will fill up that area, so it looks more extended. Another very disturbing lack on this printed model, is the absence of the beautiful and integrated railings all along the hull (see below): Using strips of styrene, I have decided to try to replicate them in some ways. I use a small 4 x 0.75 mm spacer strip glued to a 1 x 8 mm strip. The opening is about 45 mm (in scale 1/1) which should correspond to that groove for your fingers on the real yacht. These are little details that will hopefully, enhance that very crude 3D printed model. Stay tuned.... Yves

.thumb.jpg.00f6edda23605698f079bf8014a1cfbc.jpg)


-
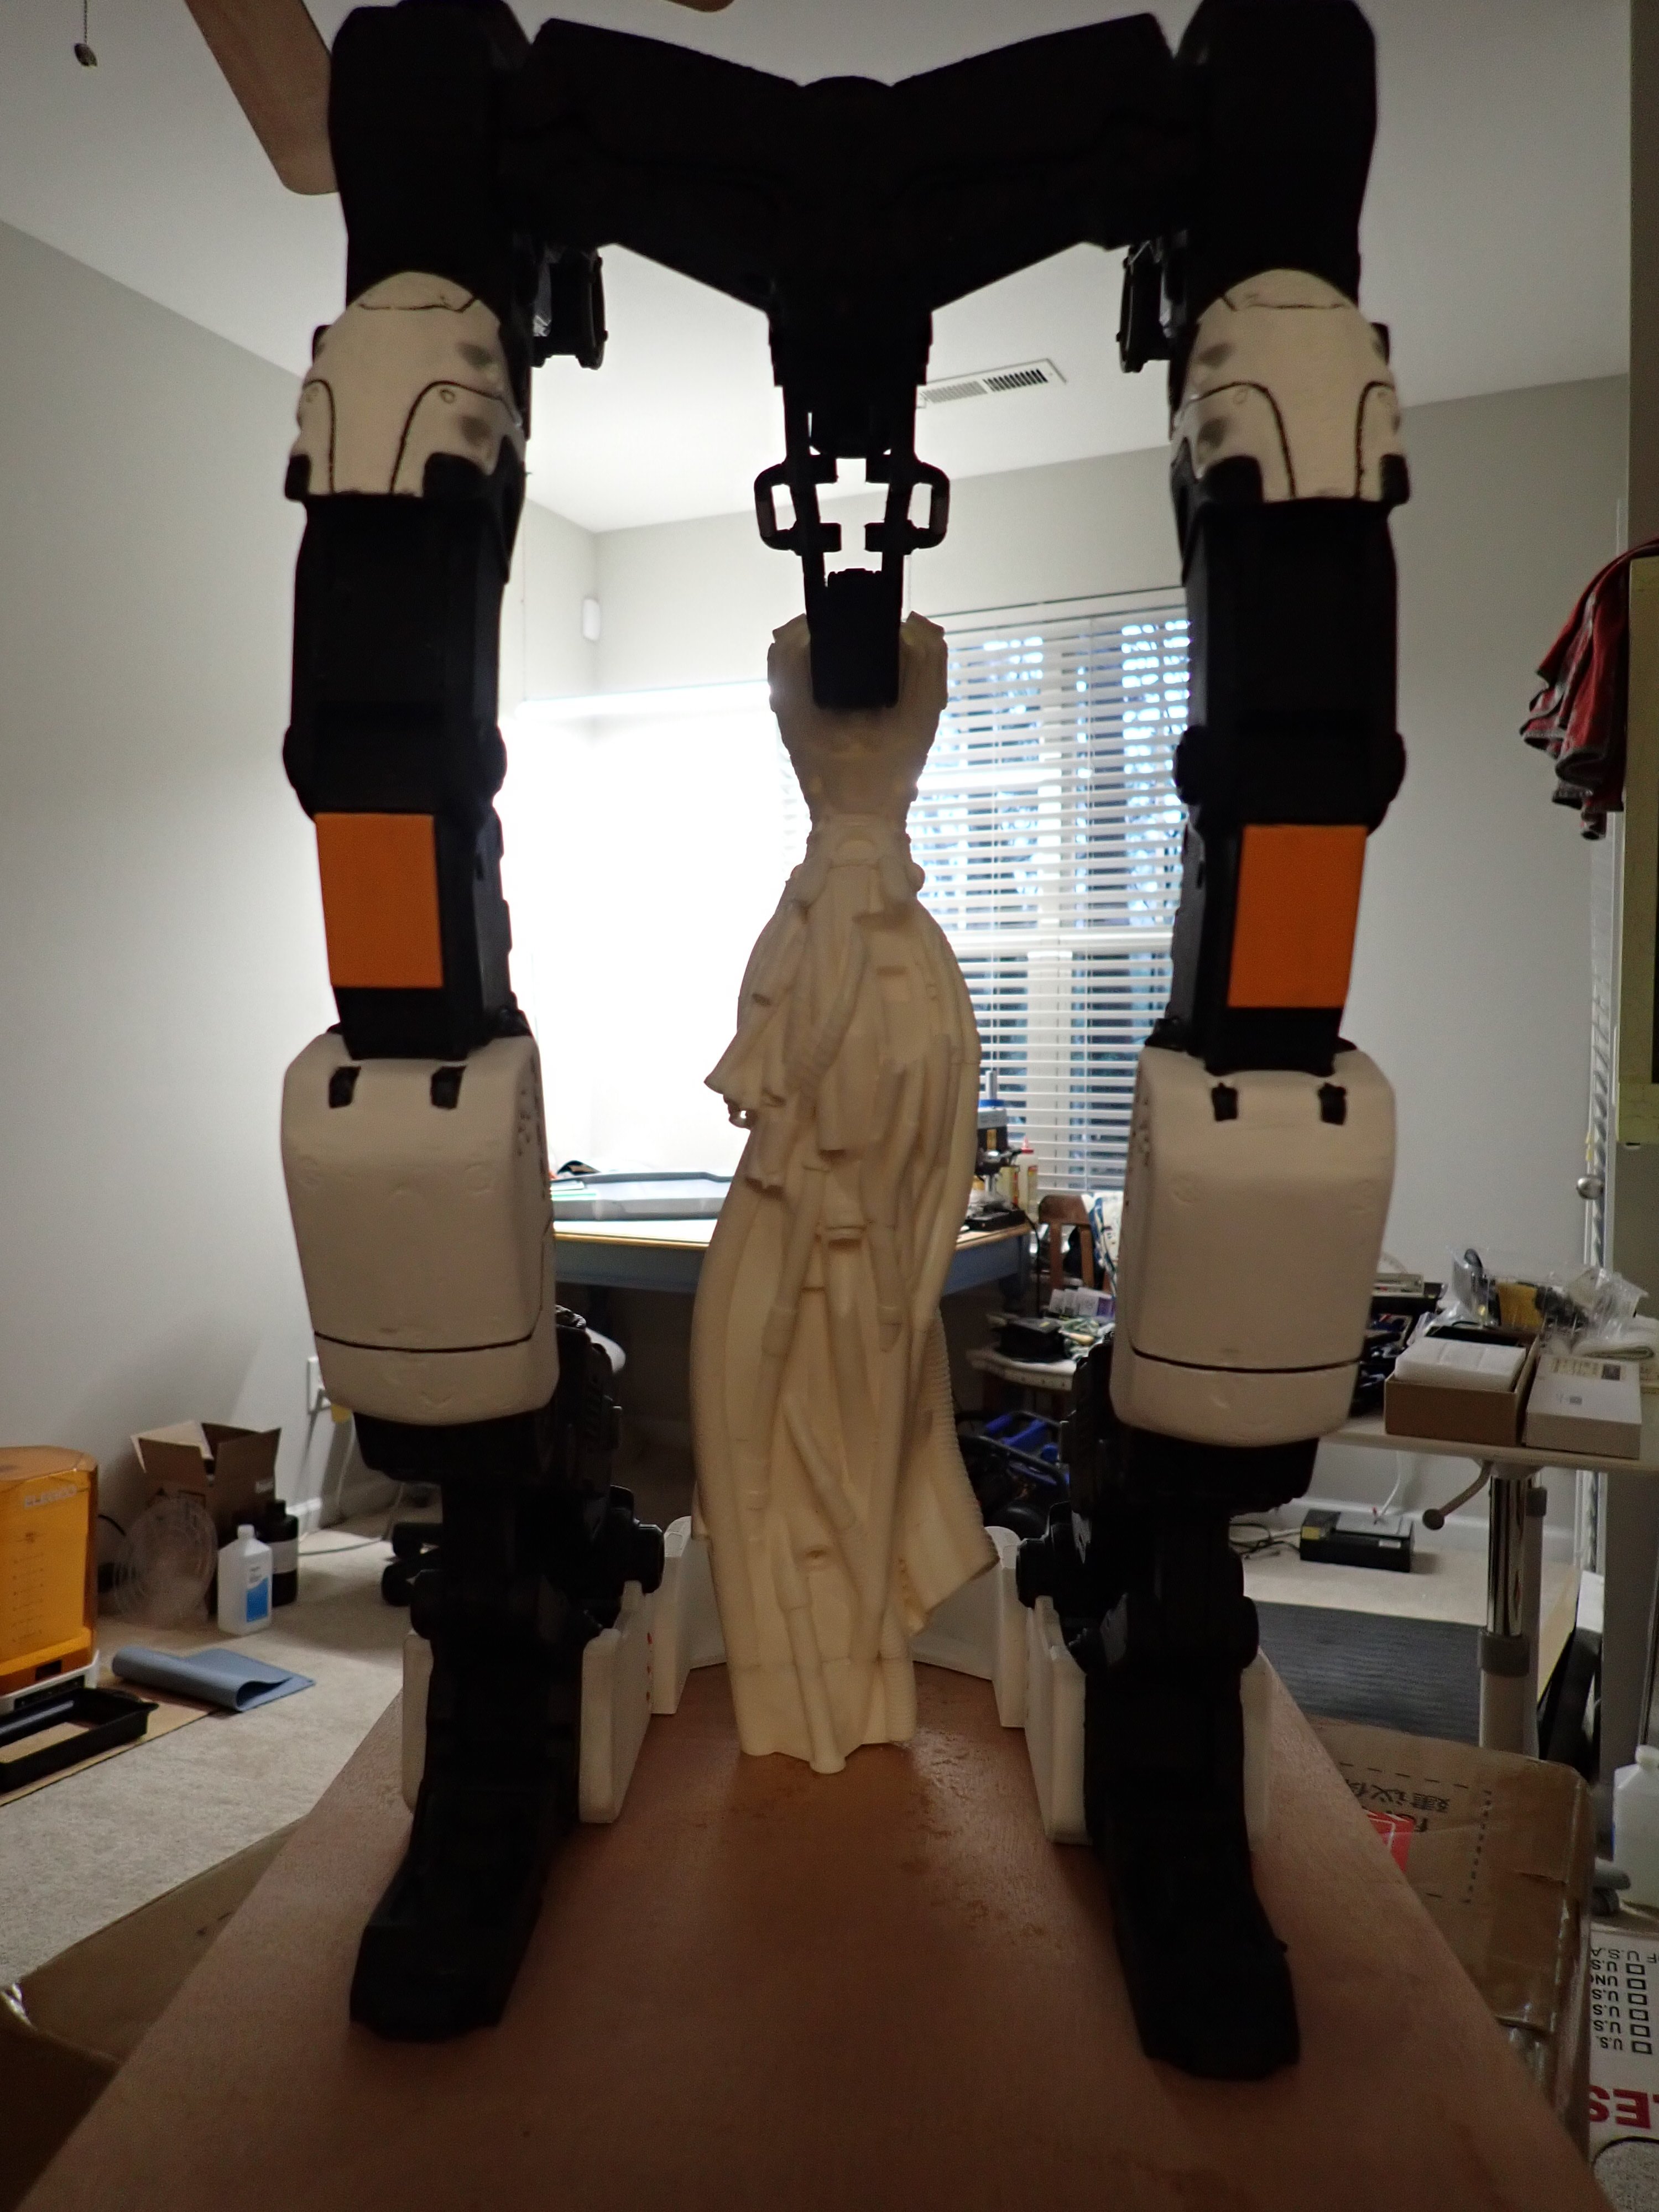
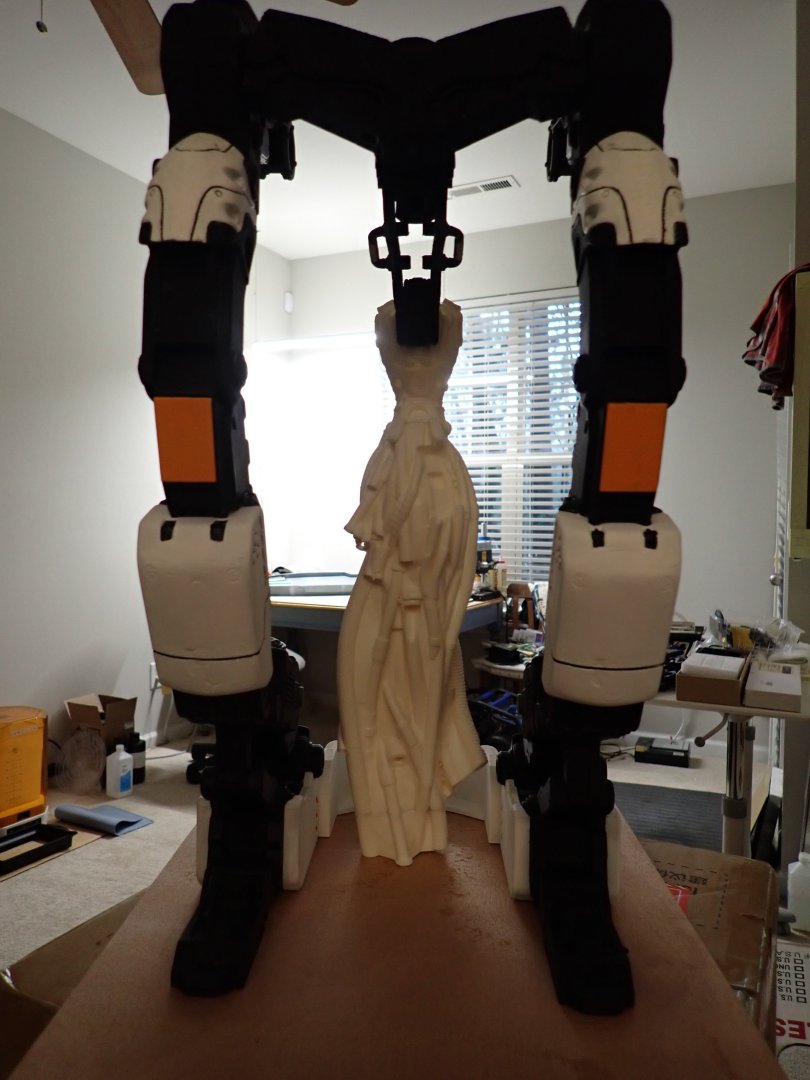
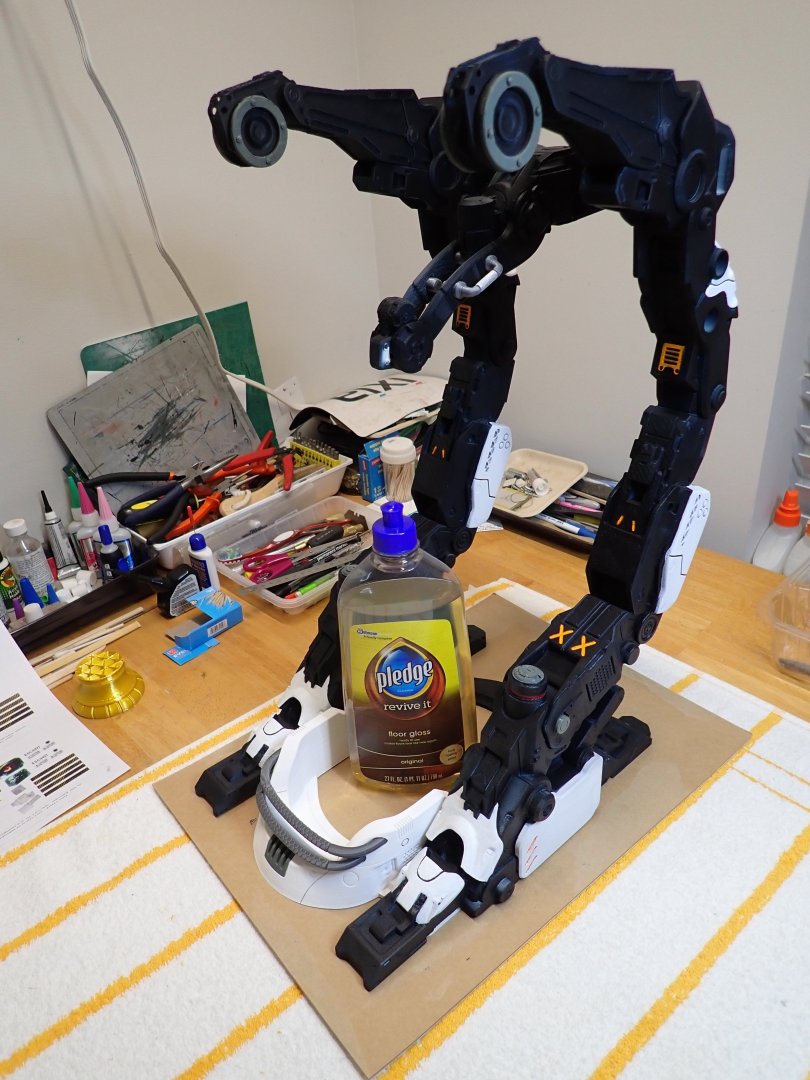
And here is part of the AI creature in situ, within its "Hangar". Please forgive the mess in the room. I have too many projects going on.... I am currently waiting for some resin before being able to print other parts. Yves


-
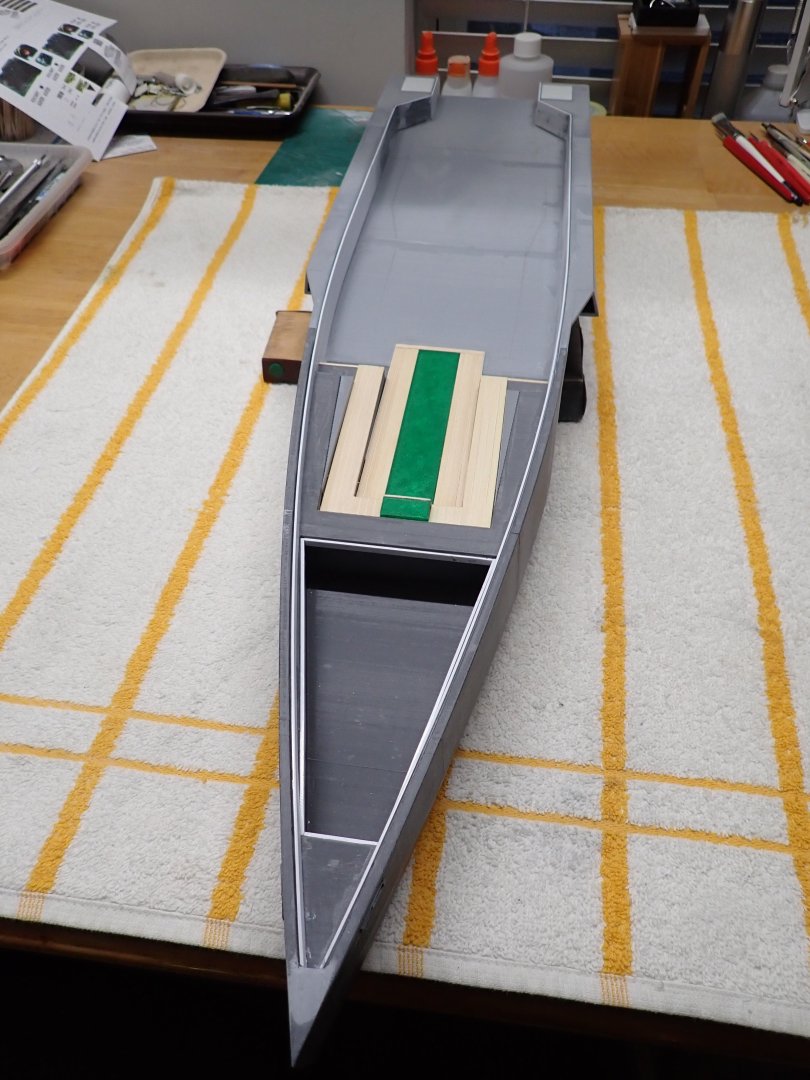
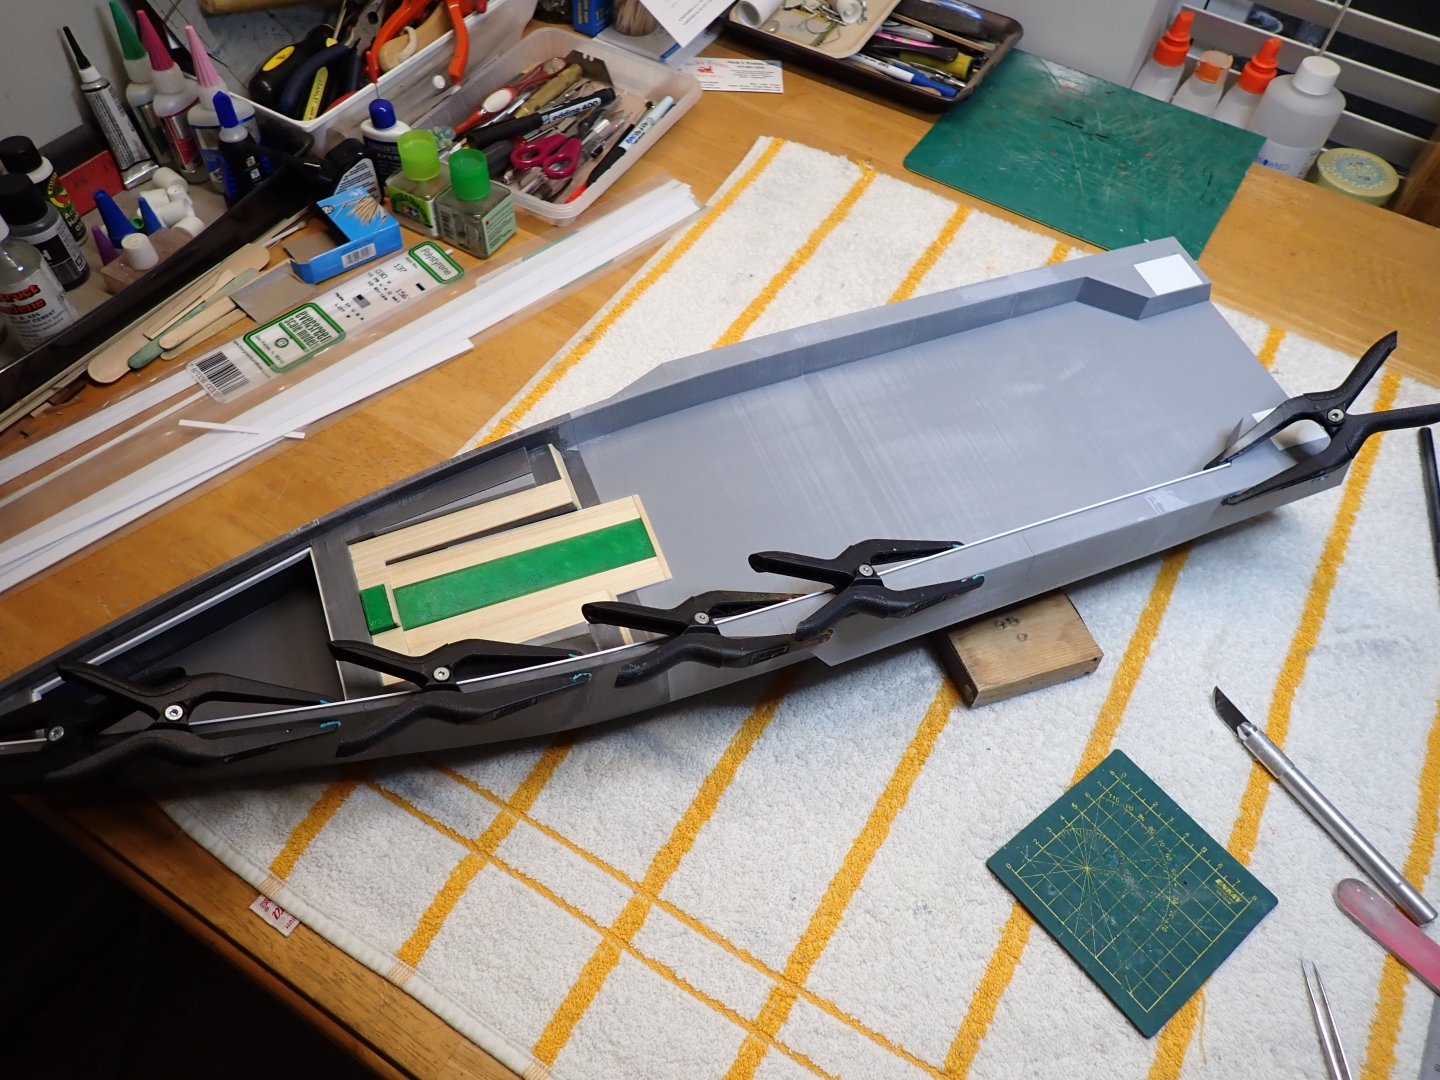
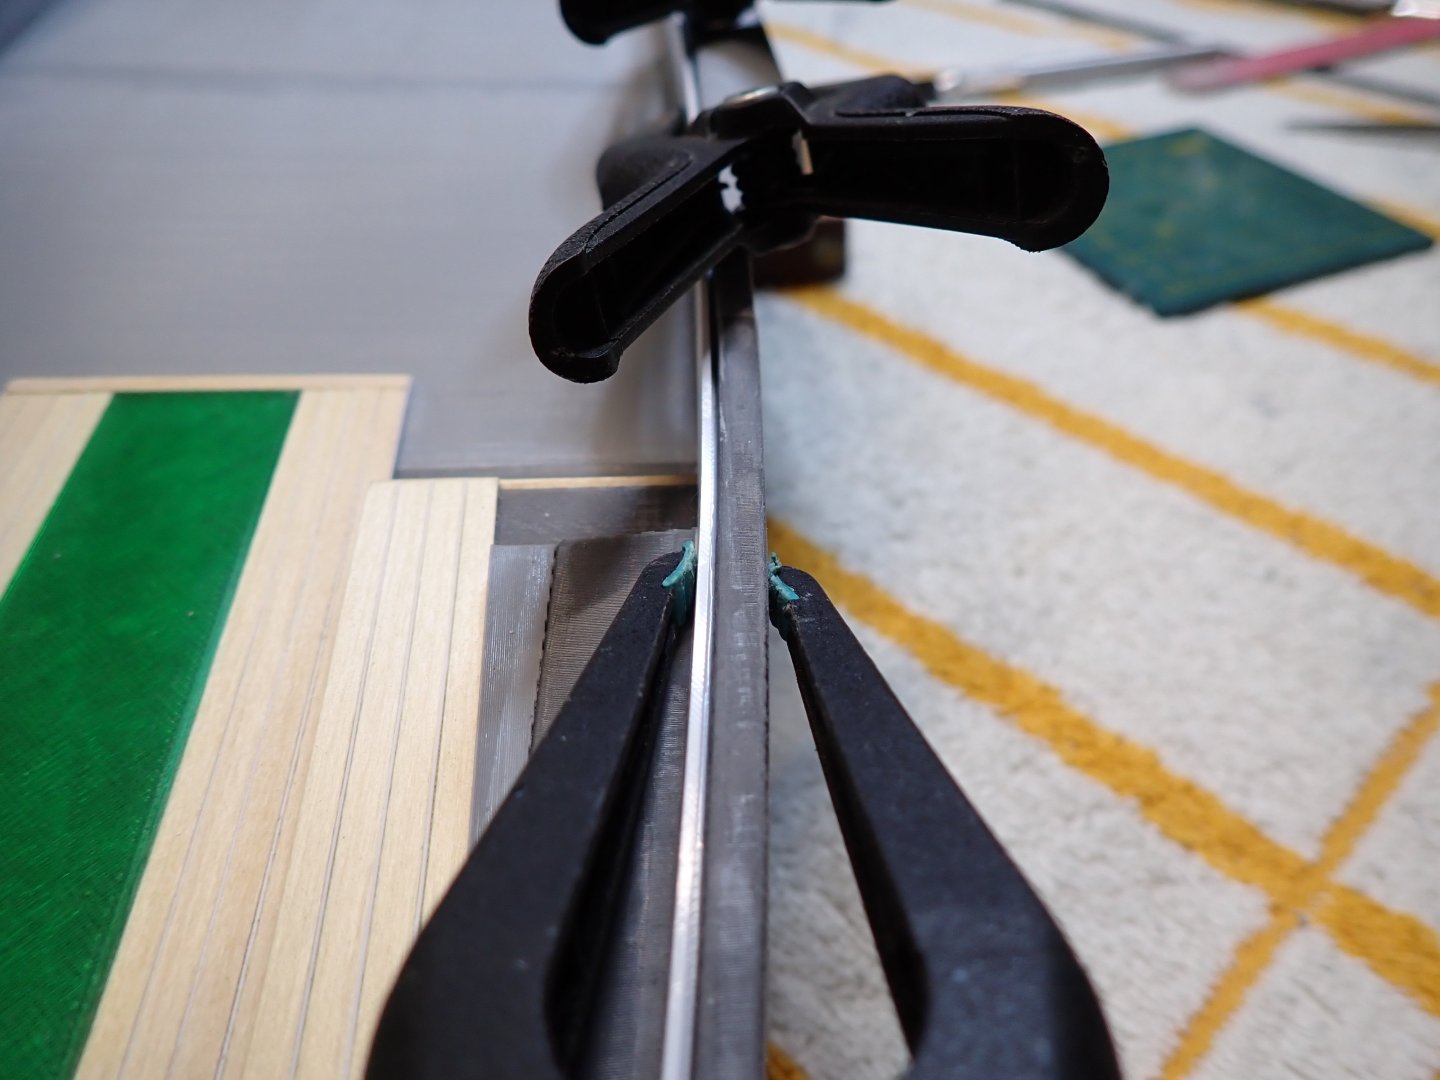
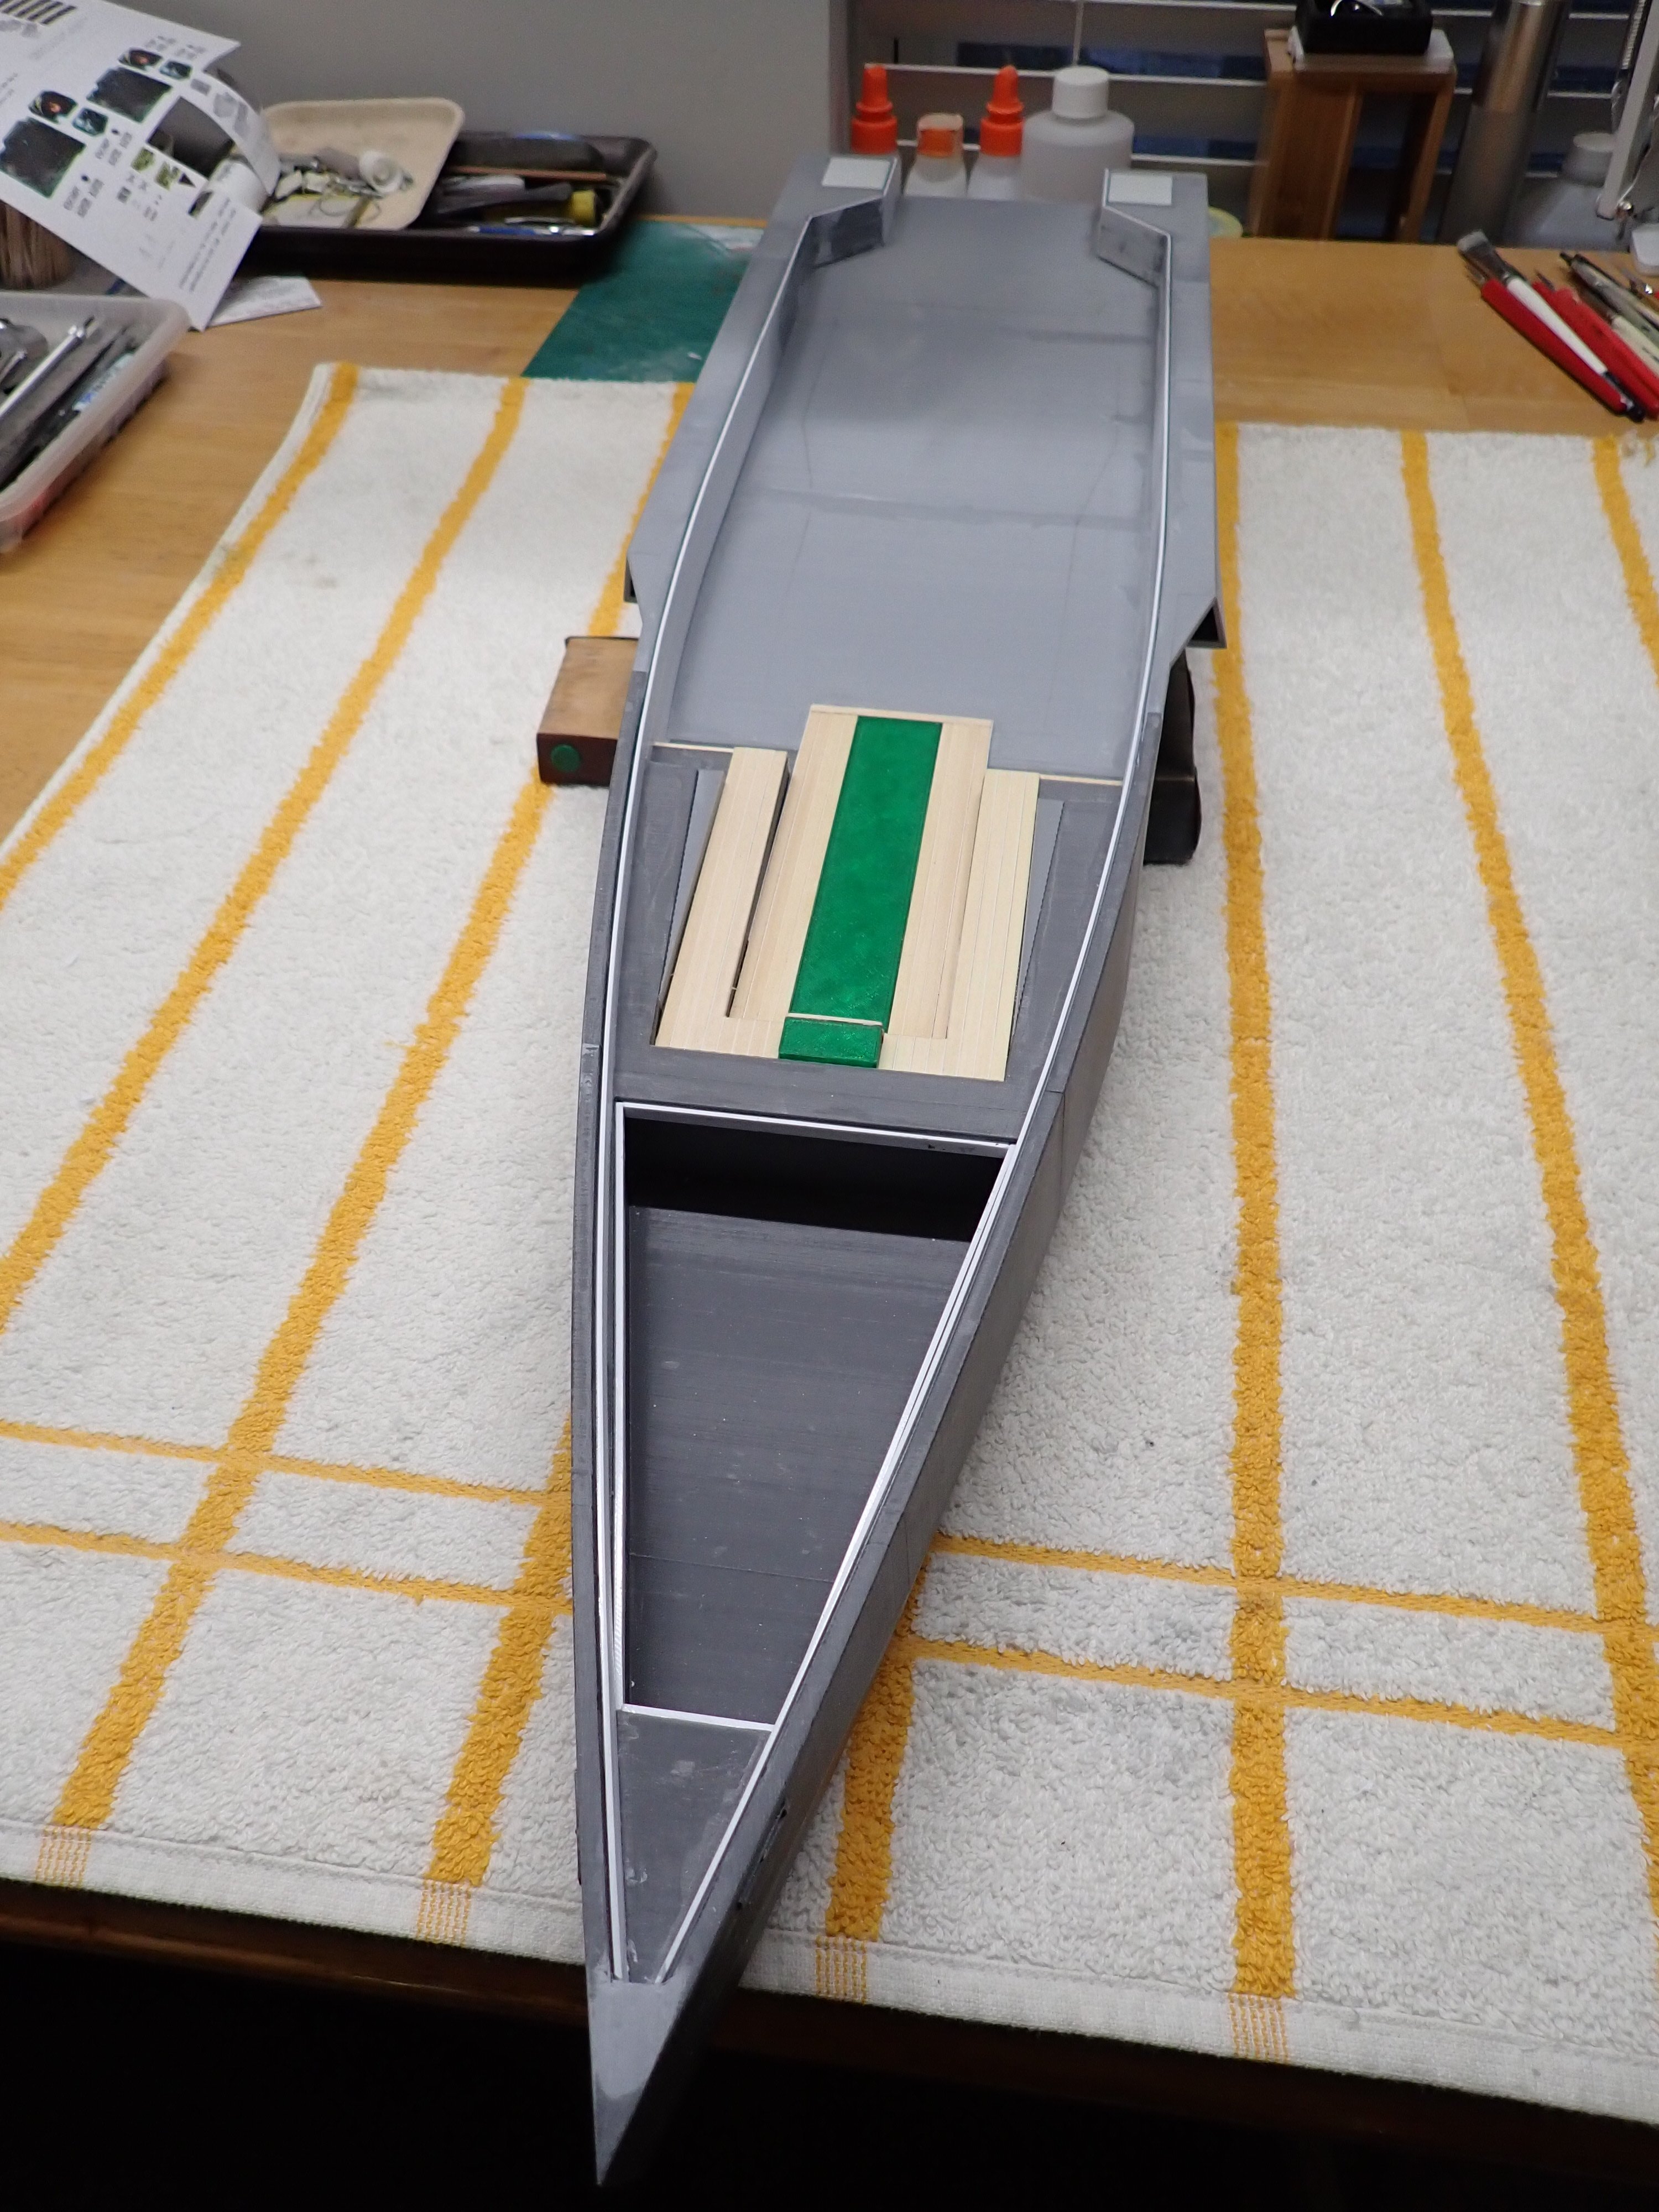
The connection with the third module is done: Besides the slot for the deck window, the third module does not require much in term of modifications. Below, you can see some dim light peeking through the green windows of the deck: Elegance of the hull: I am curious to see how the planking will look on the deck. Thus, using basswood strips of 3.0 x 1.5 mm and polystyrene strips of 025 x 1.5 mm , I am starting the delicate planking. The caulking is made in white on the original yacht. Again, using TinkerCad, I am creating two wedges to compensate for the incorrectly angled seat backrests around the dining area. These two wedges will be covered by planks. It is a constant struggle to make this hull work with the real prototype. I am also printing some cushions that will be used around the dining area: And that is where we are today: I hope you enjoy this model. Yves


-
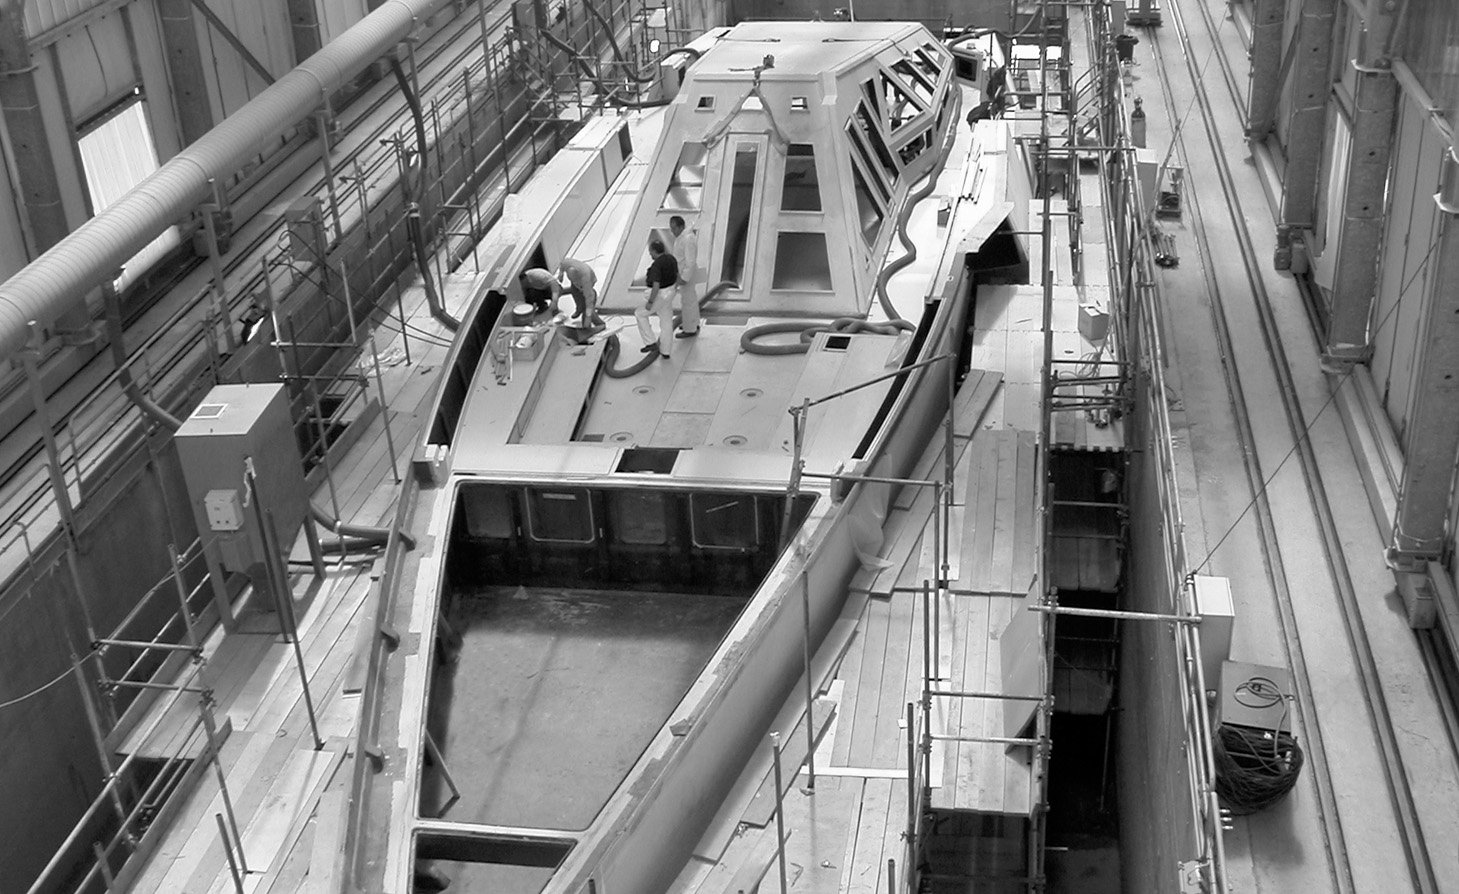
This is terrific. For the last picture, I thought it was a real boat on the dry, being refurbished. You have done a fantastic job at recreating these ship chandlers yards, where boats are being restored (for most of them...). Yves
-
Fantastic work on the glazing. I do not see any traces of glue on them... 🙂 Yves
-
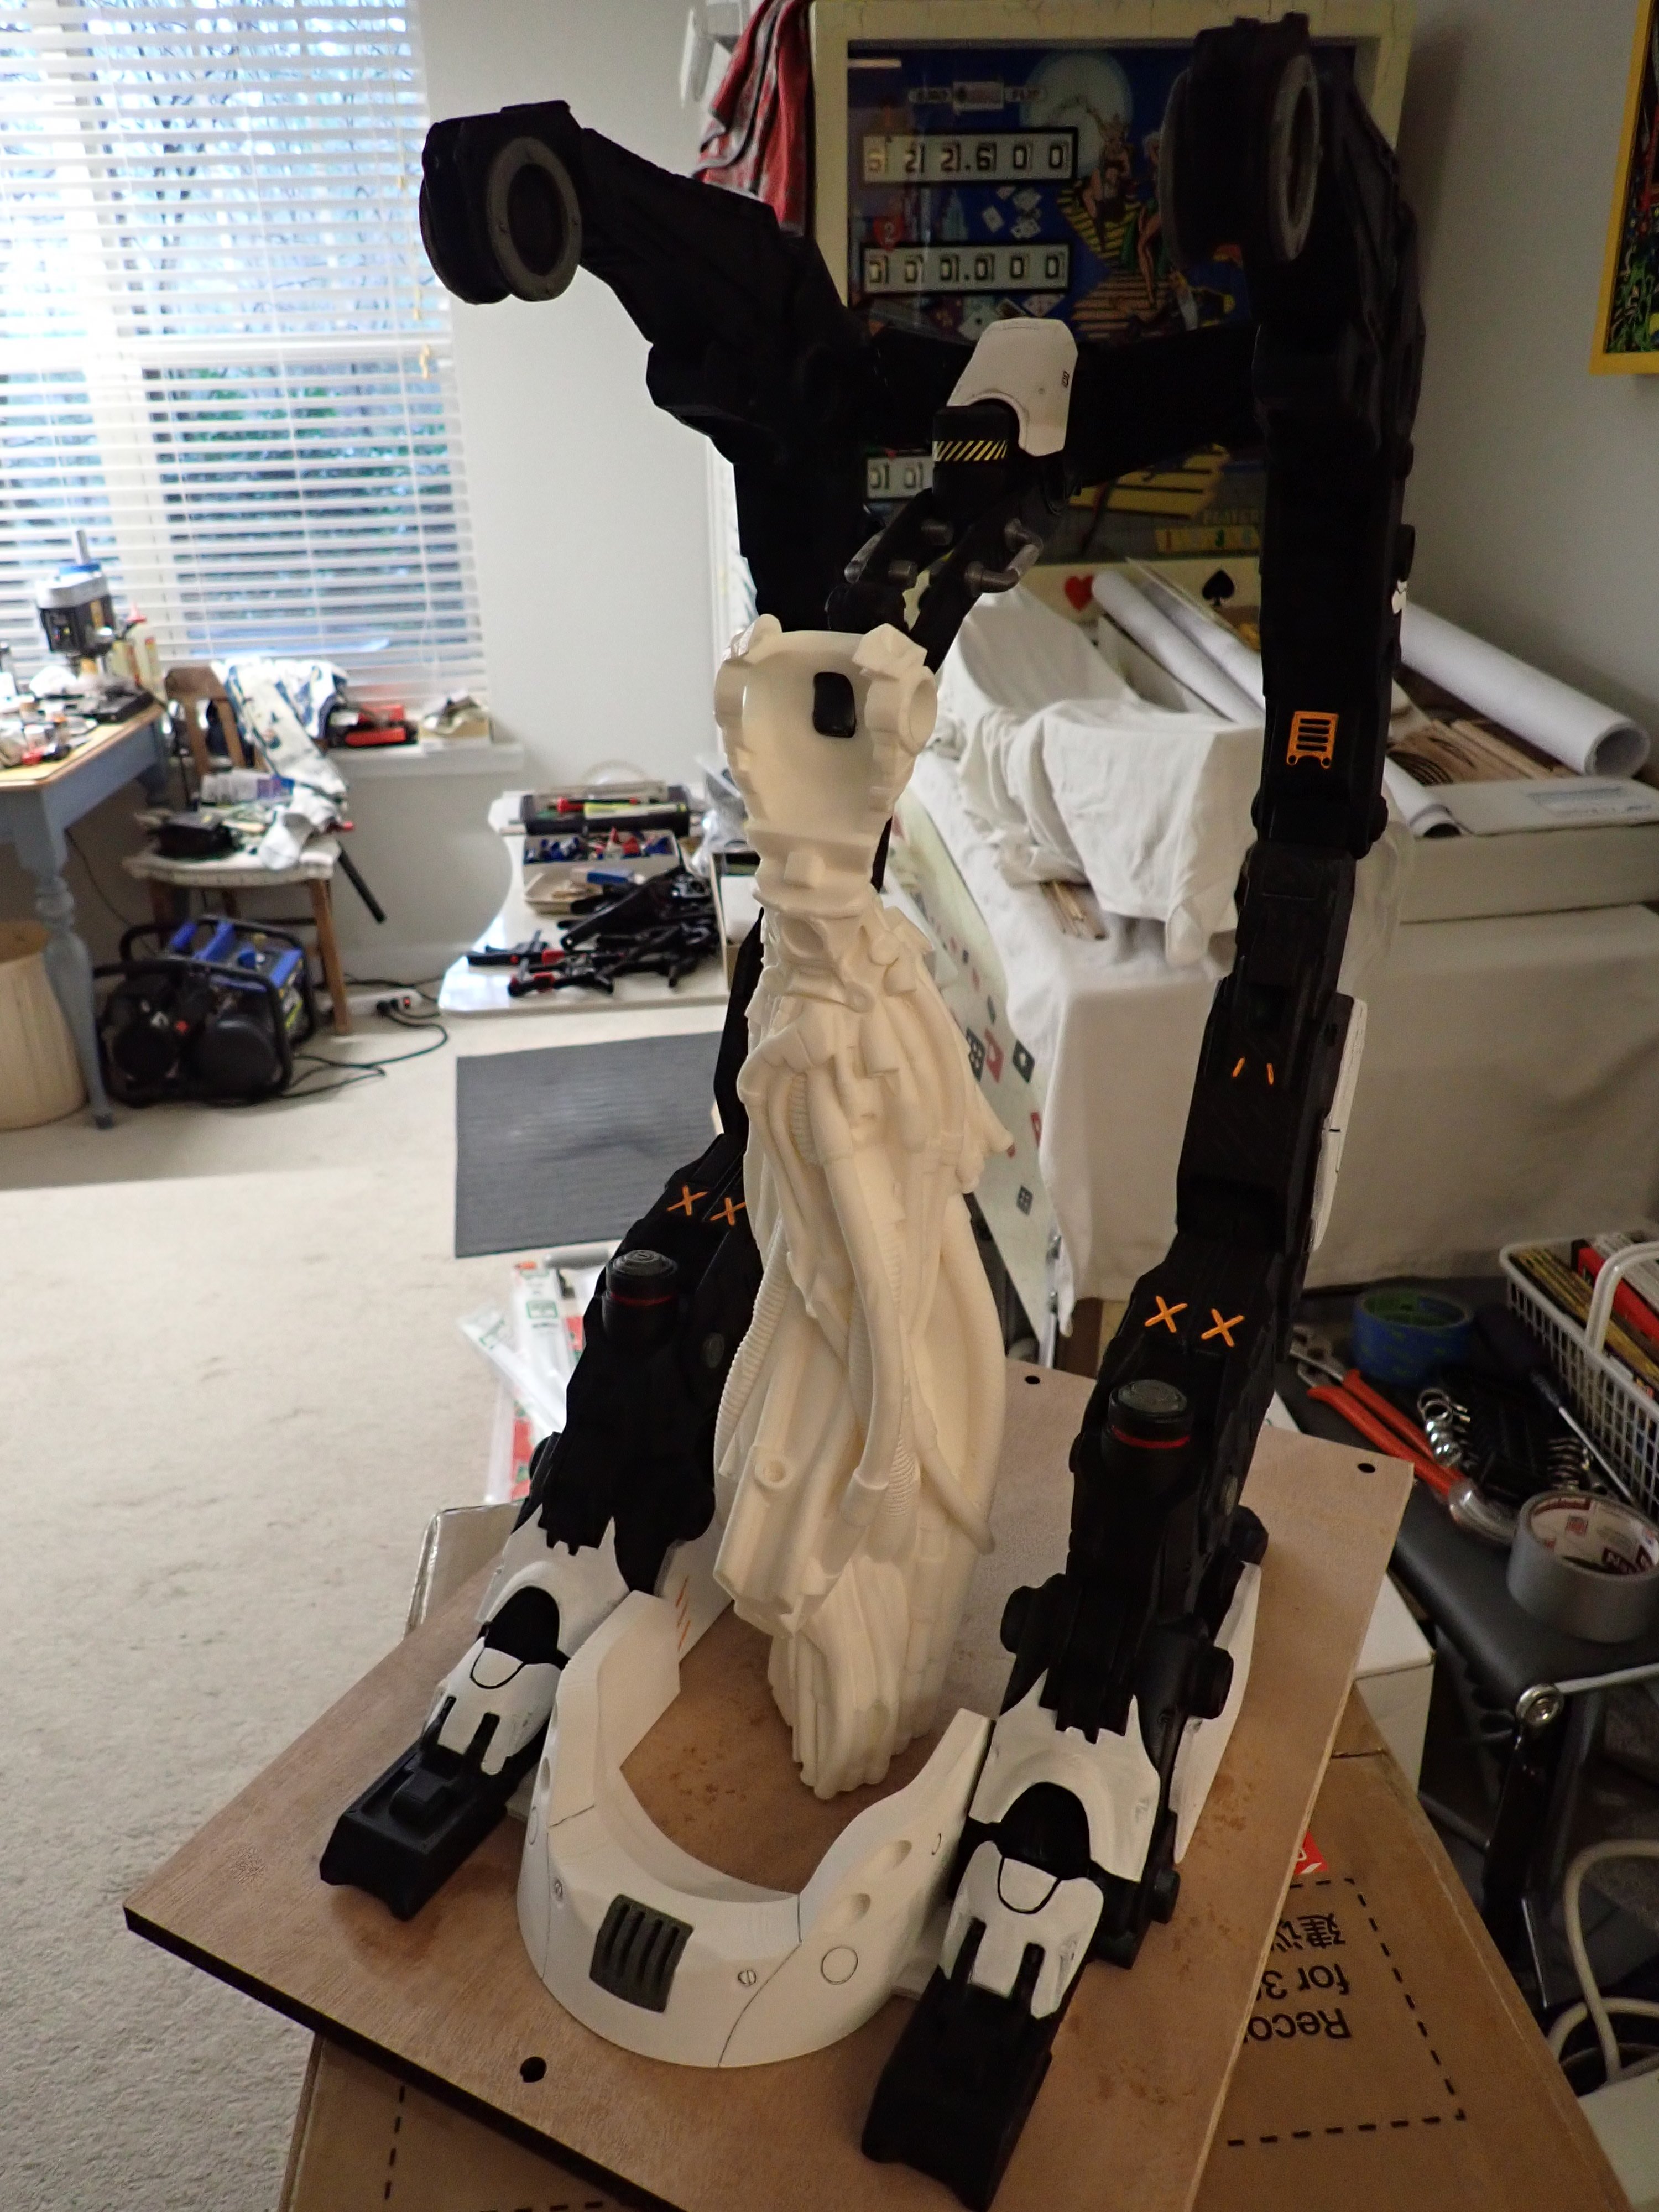
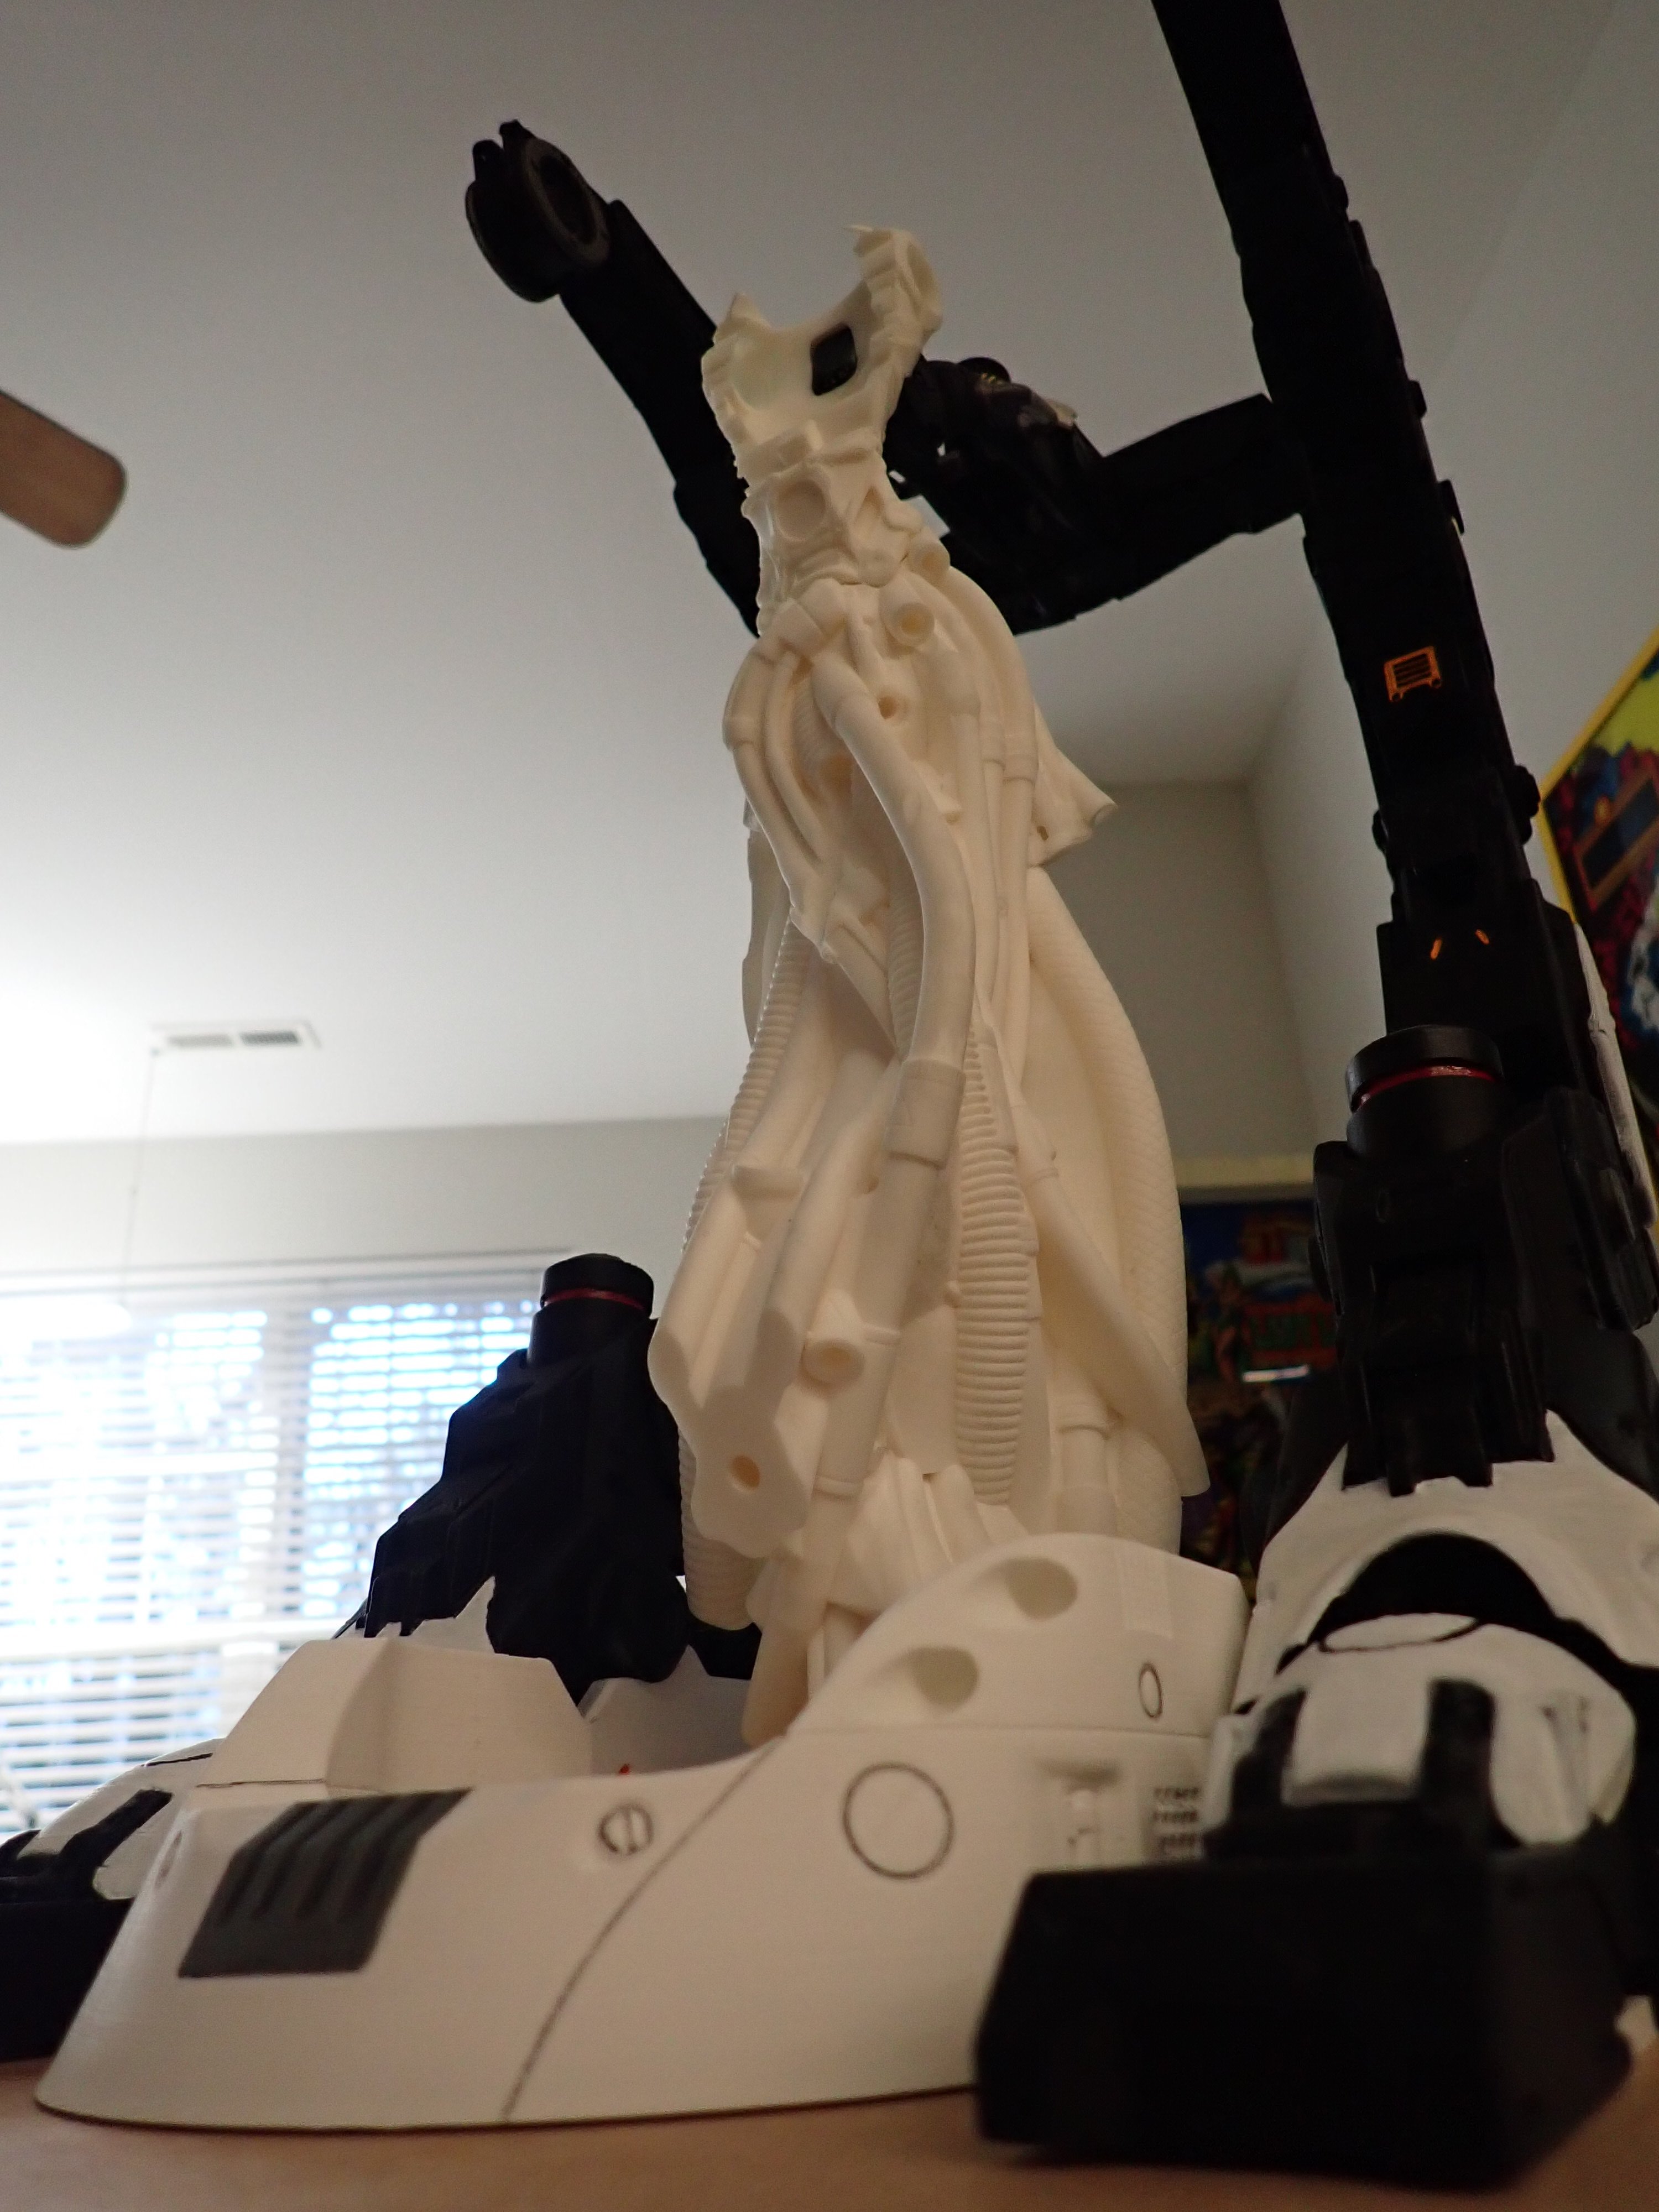
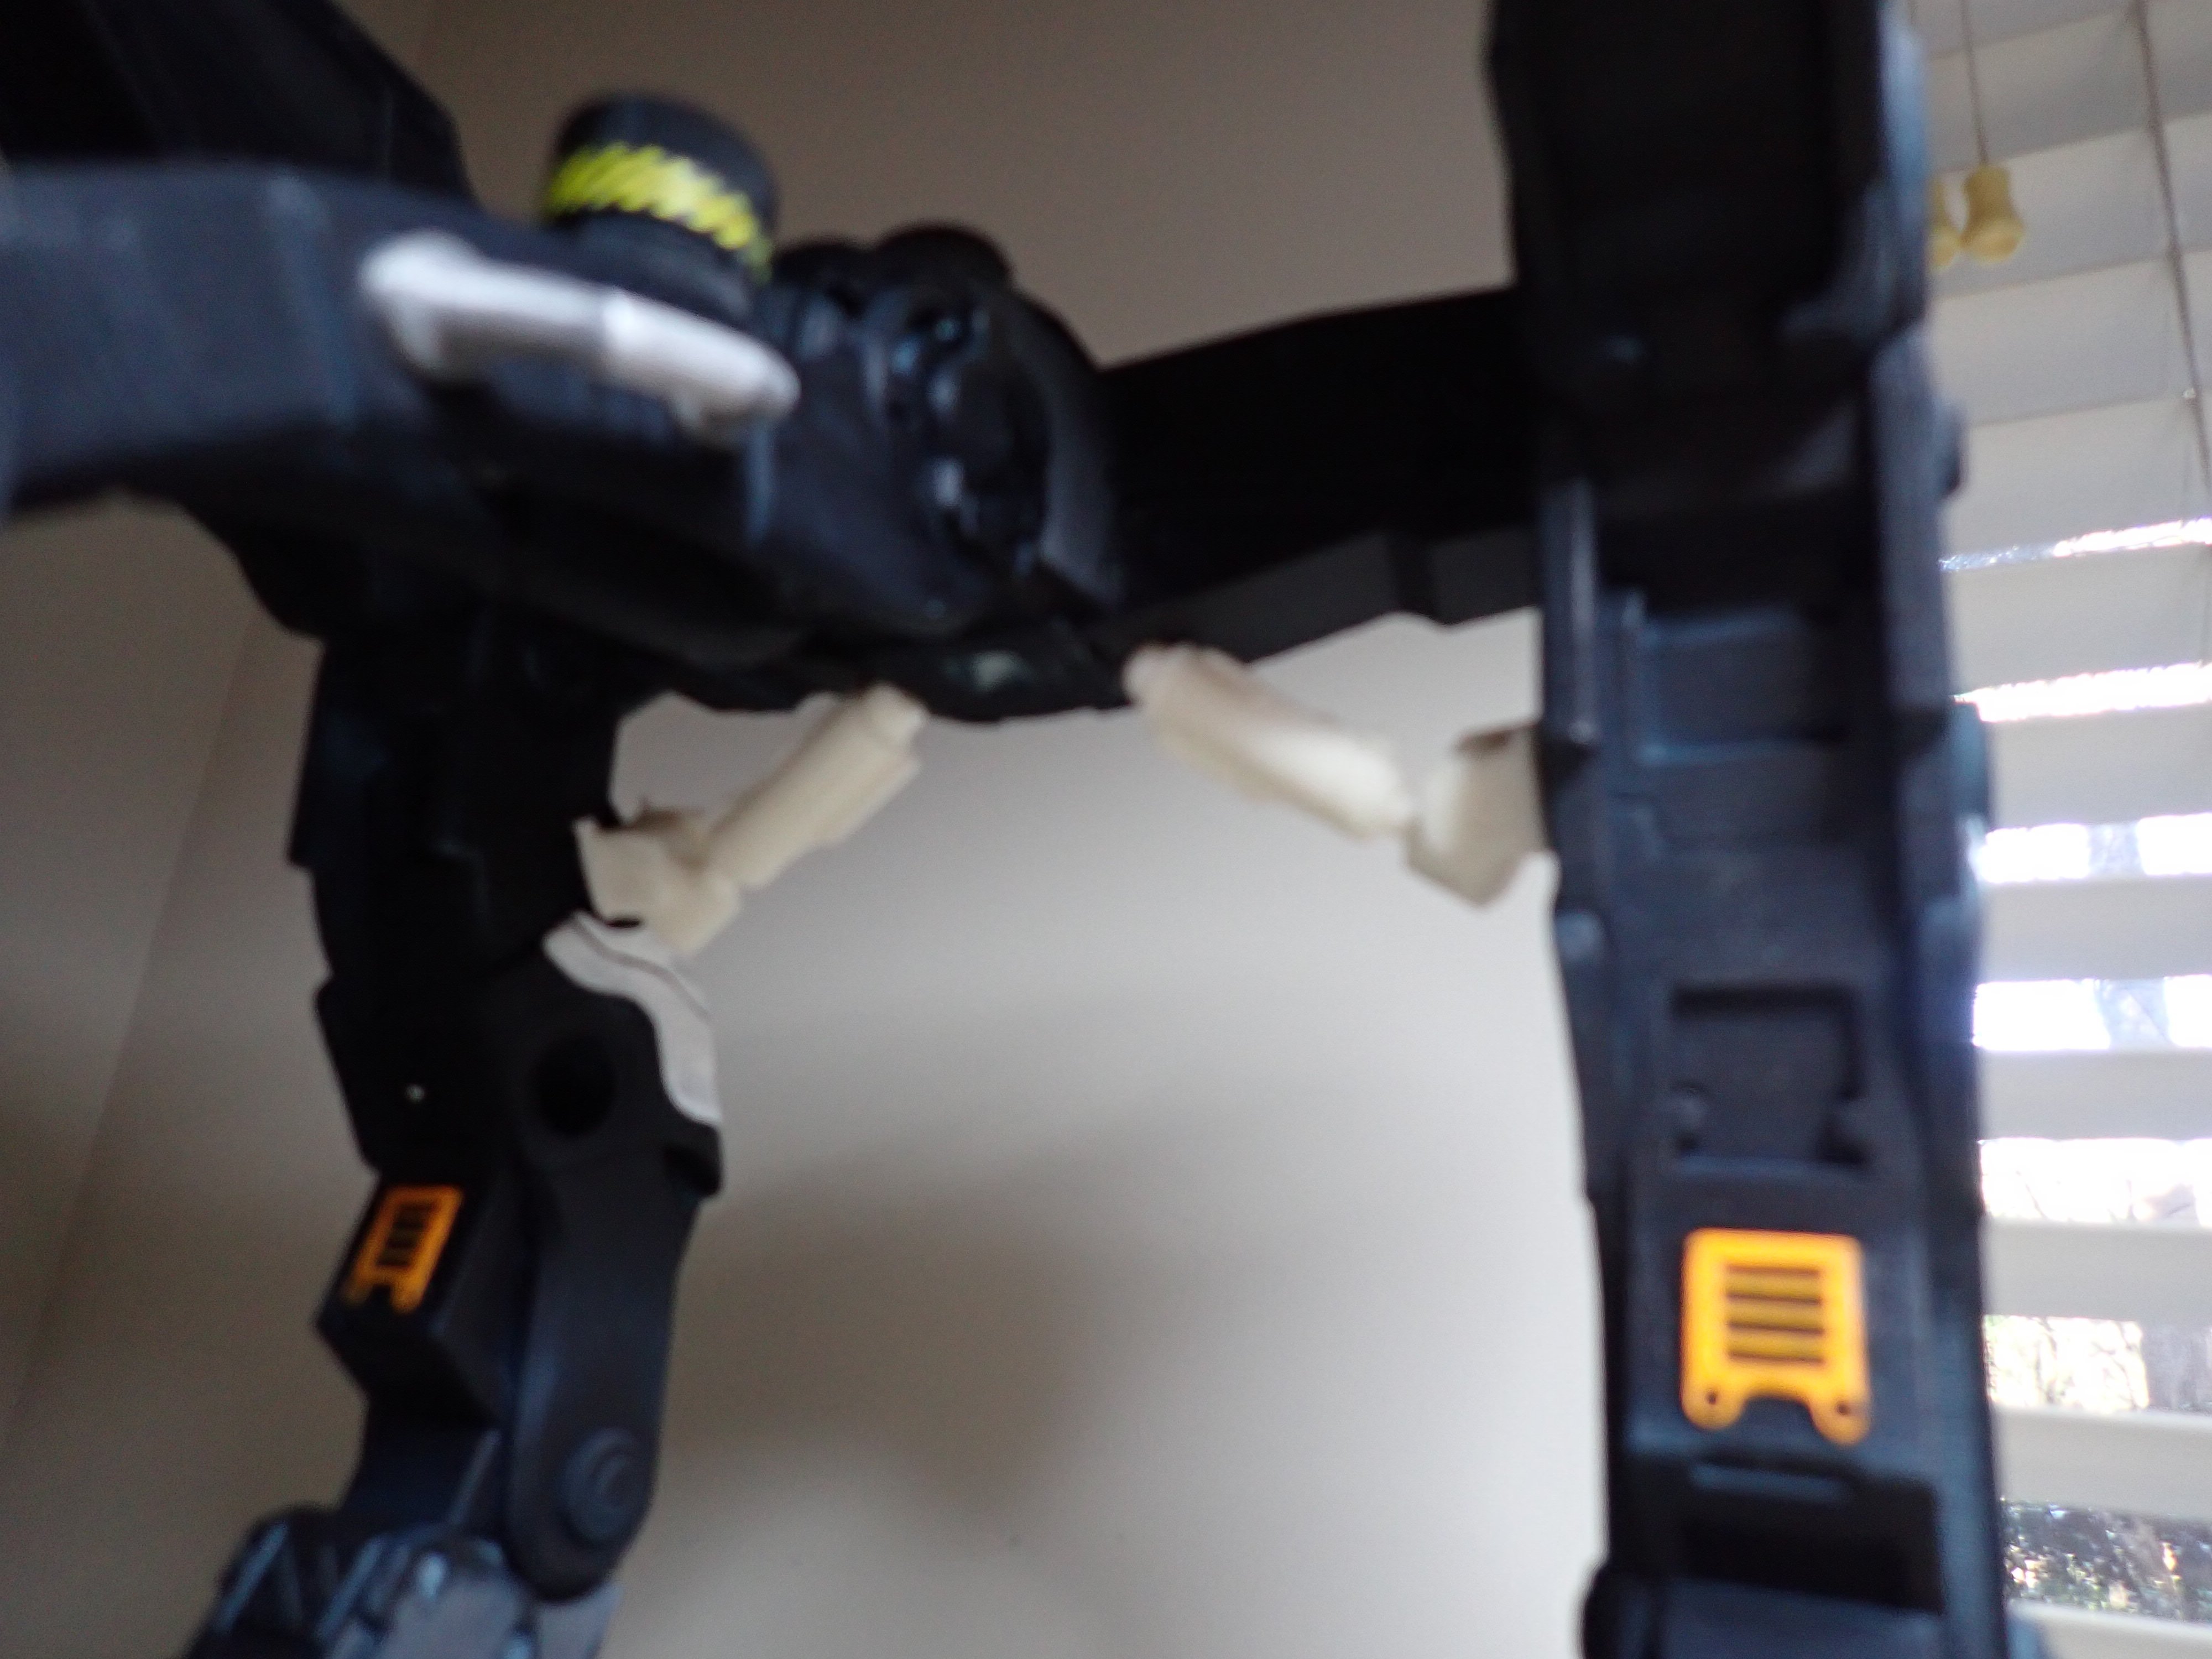
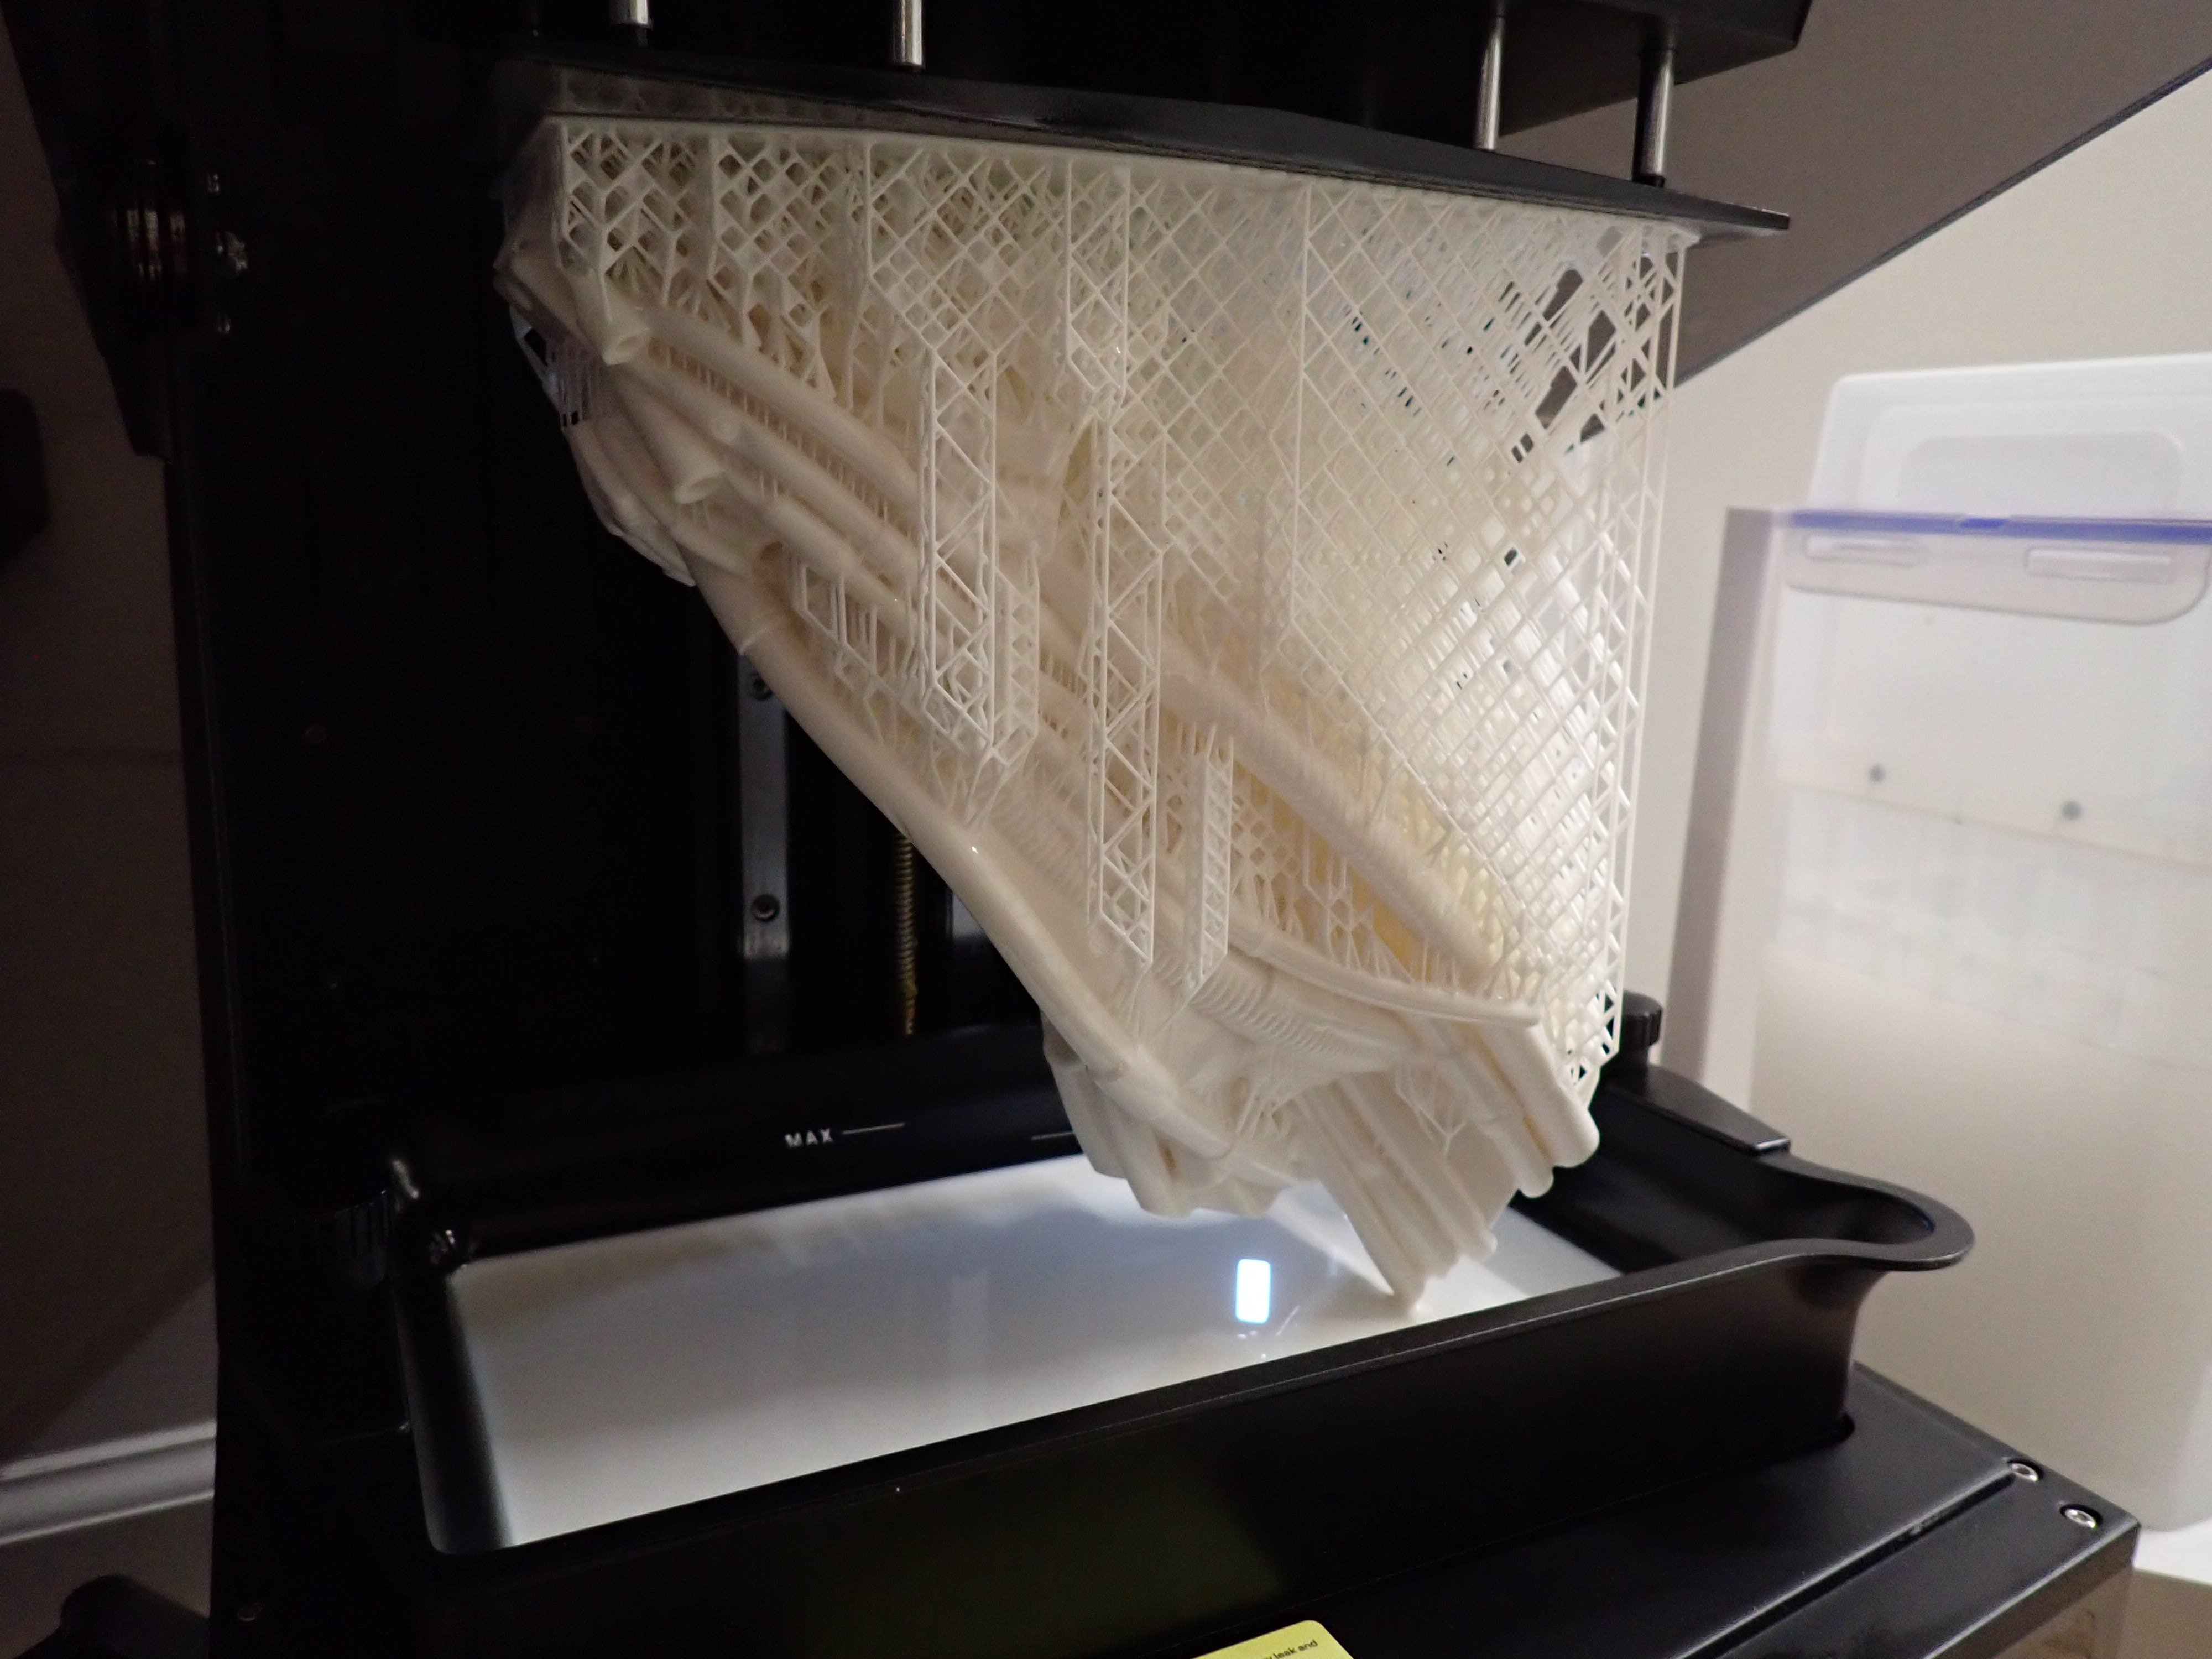
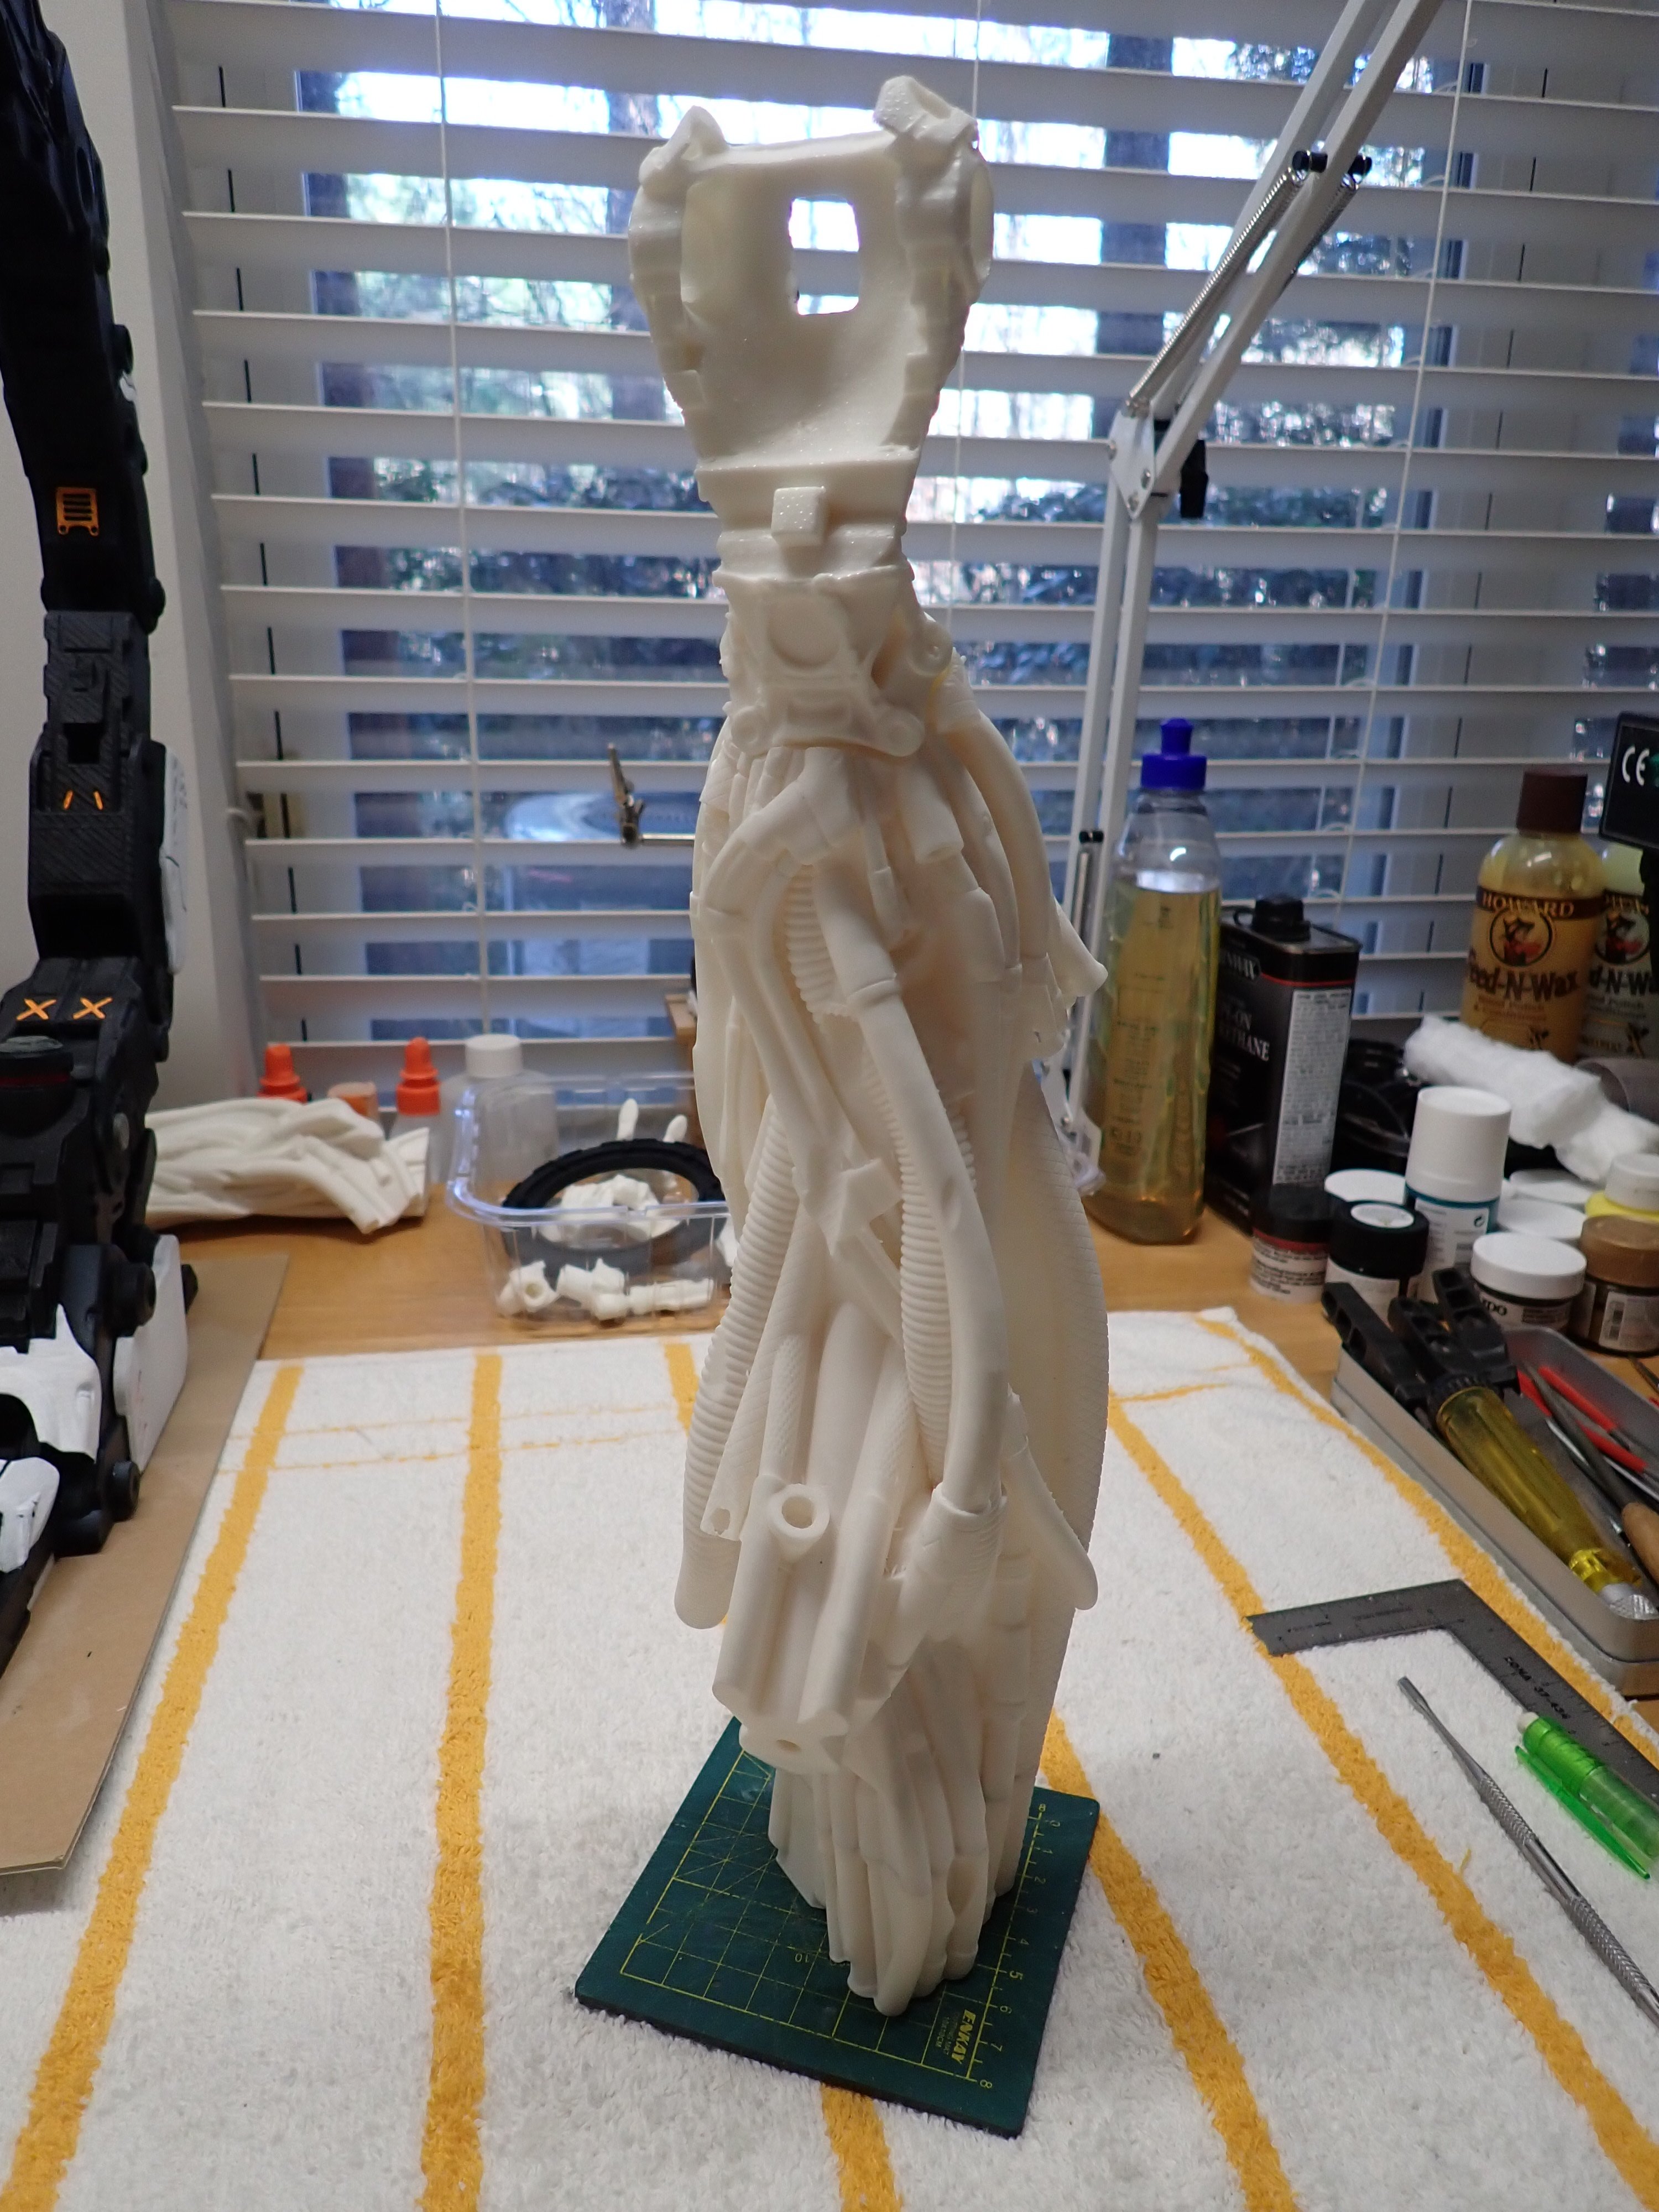
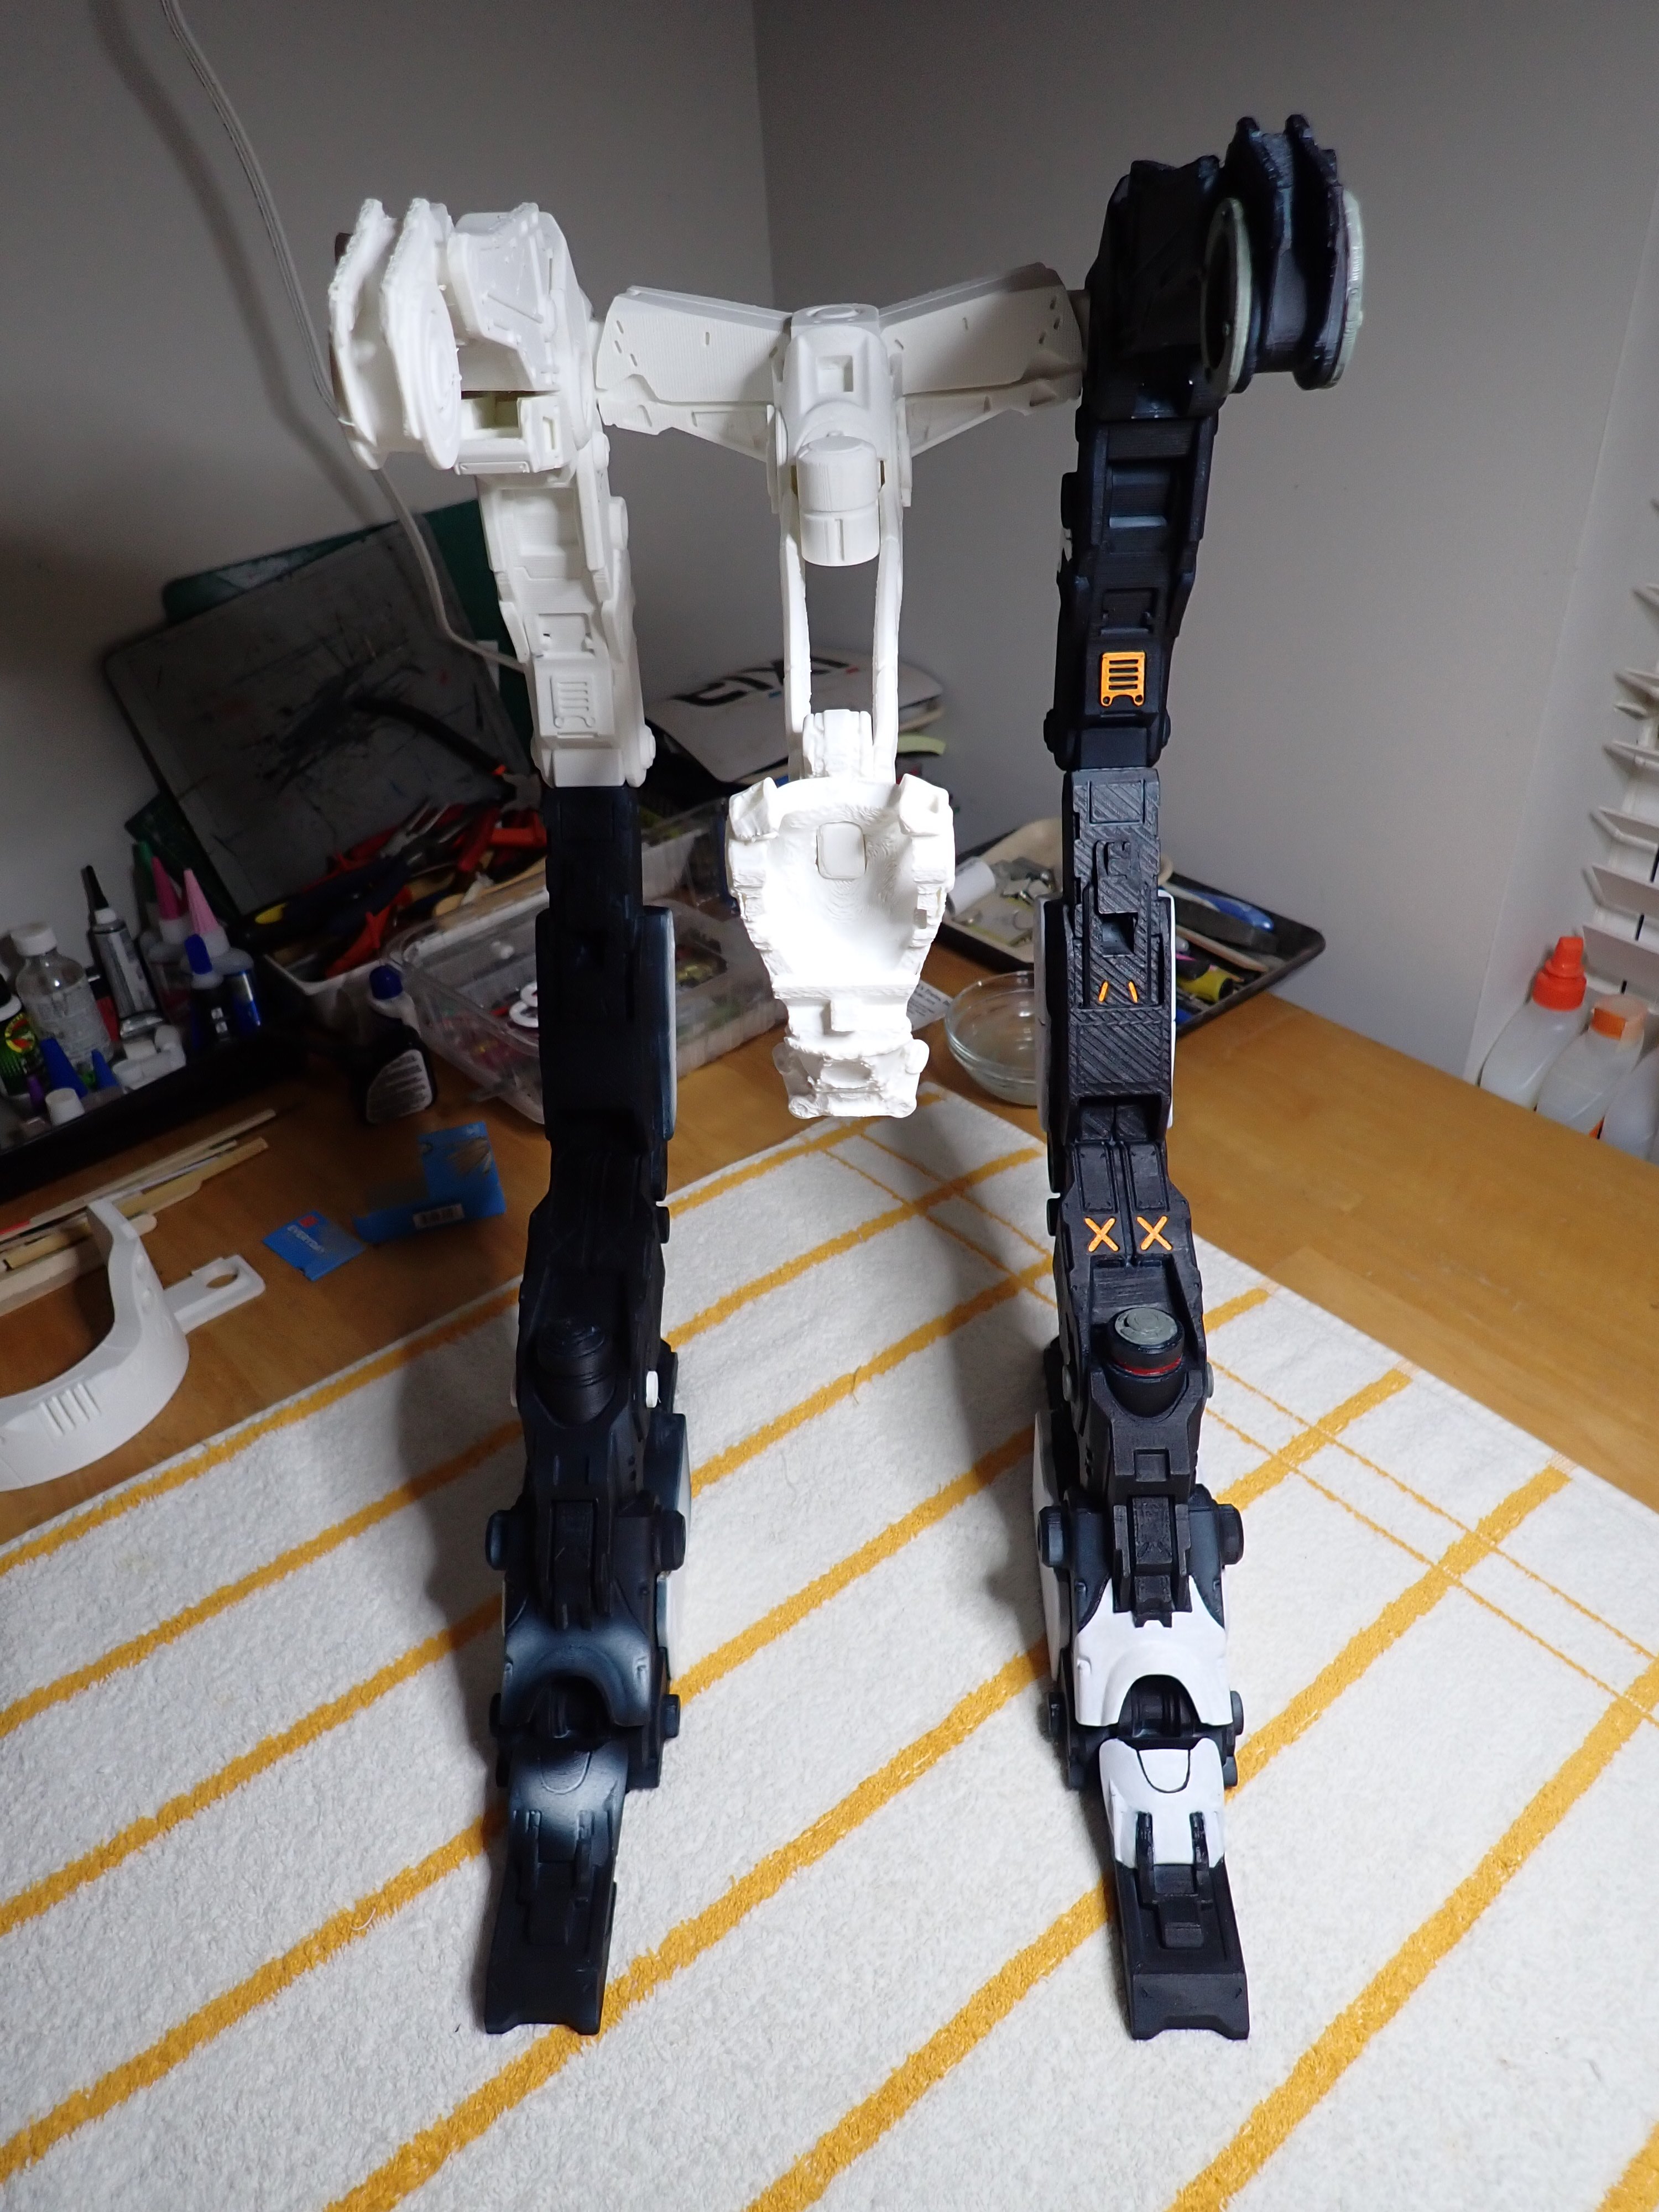
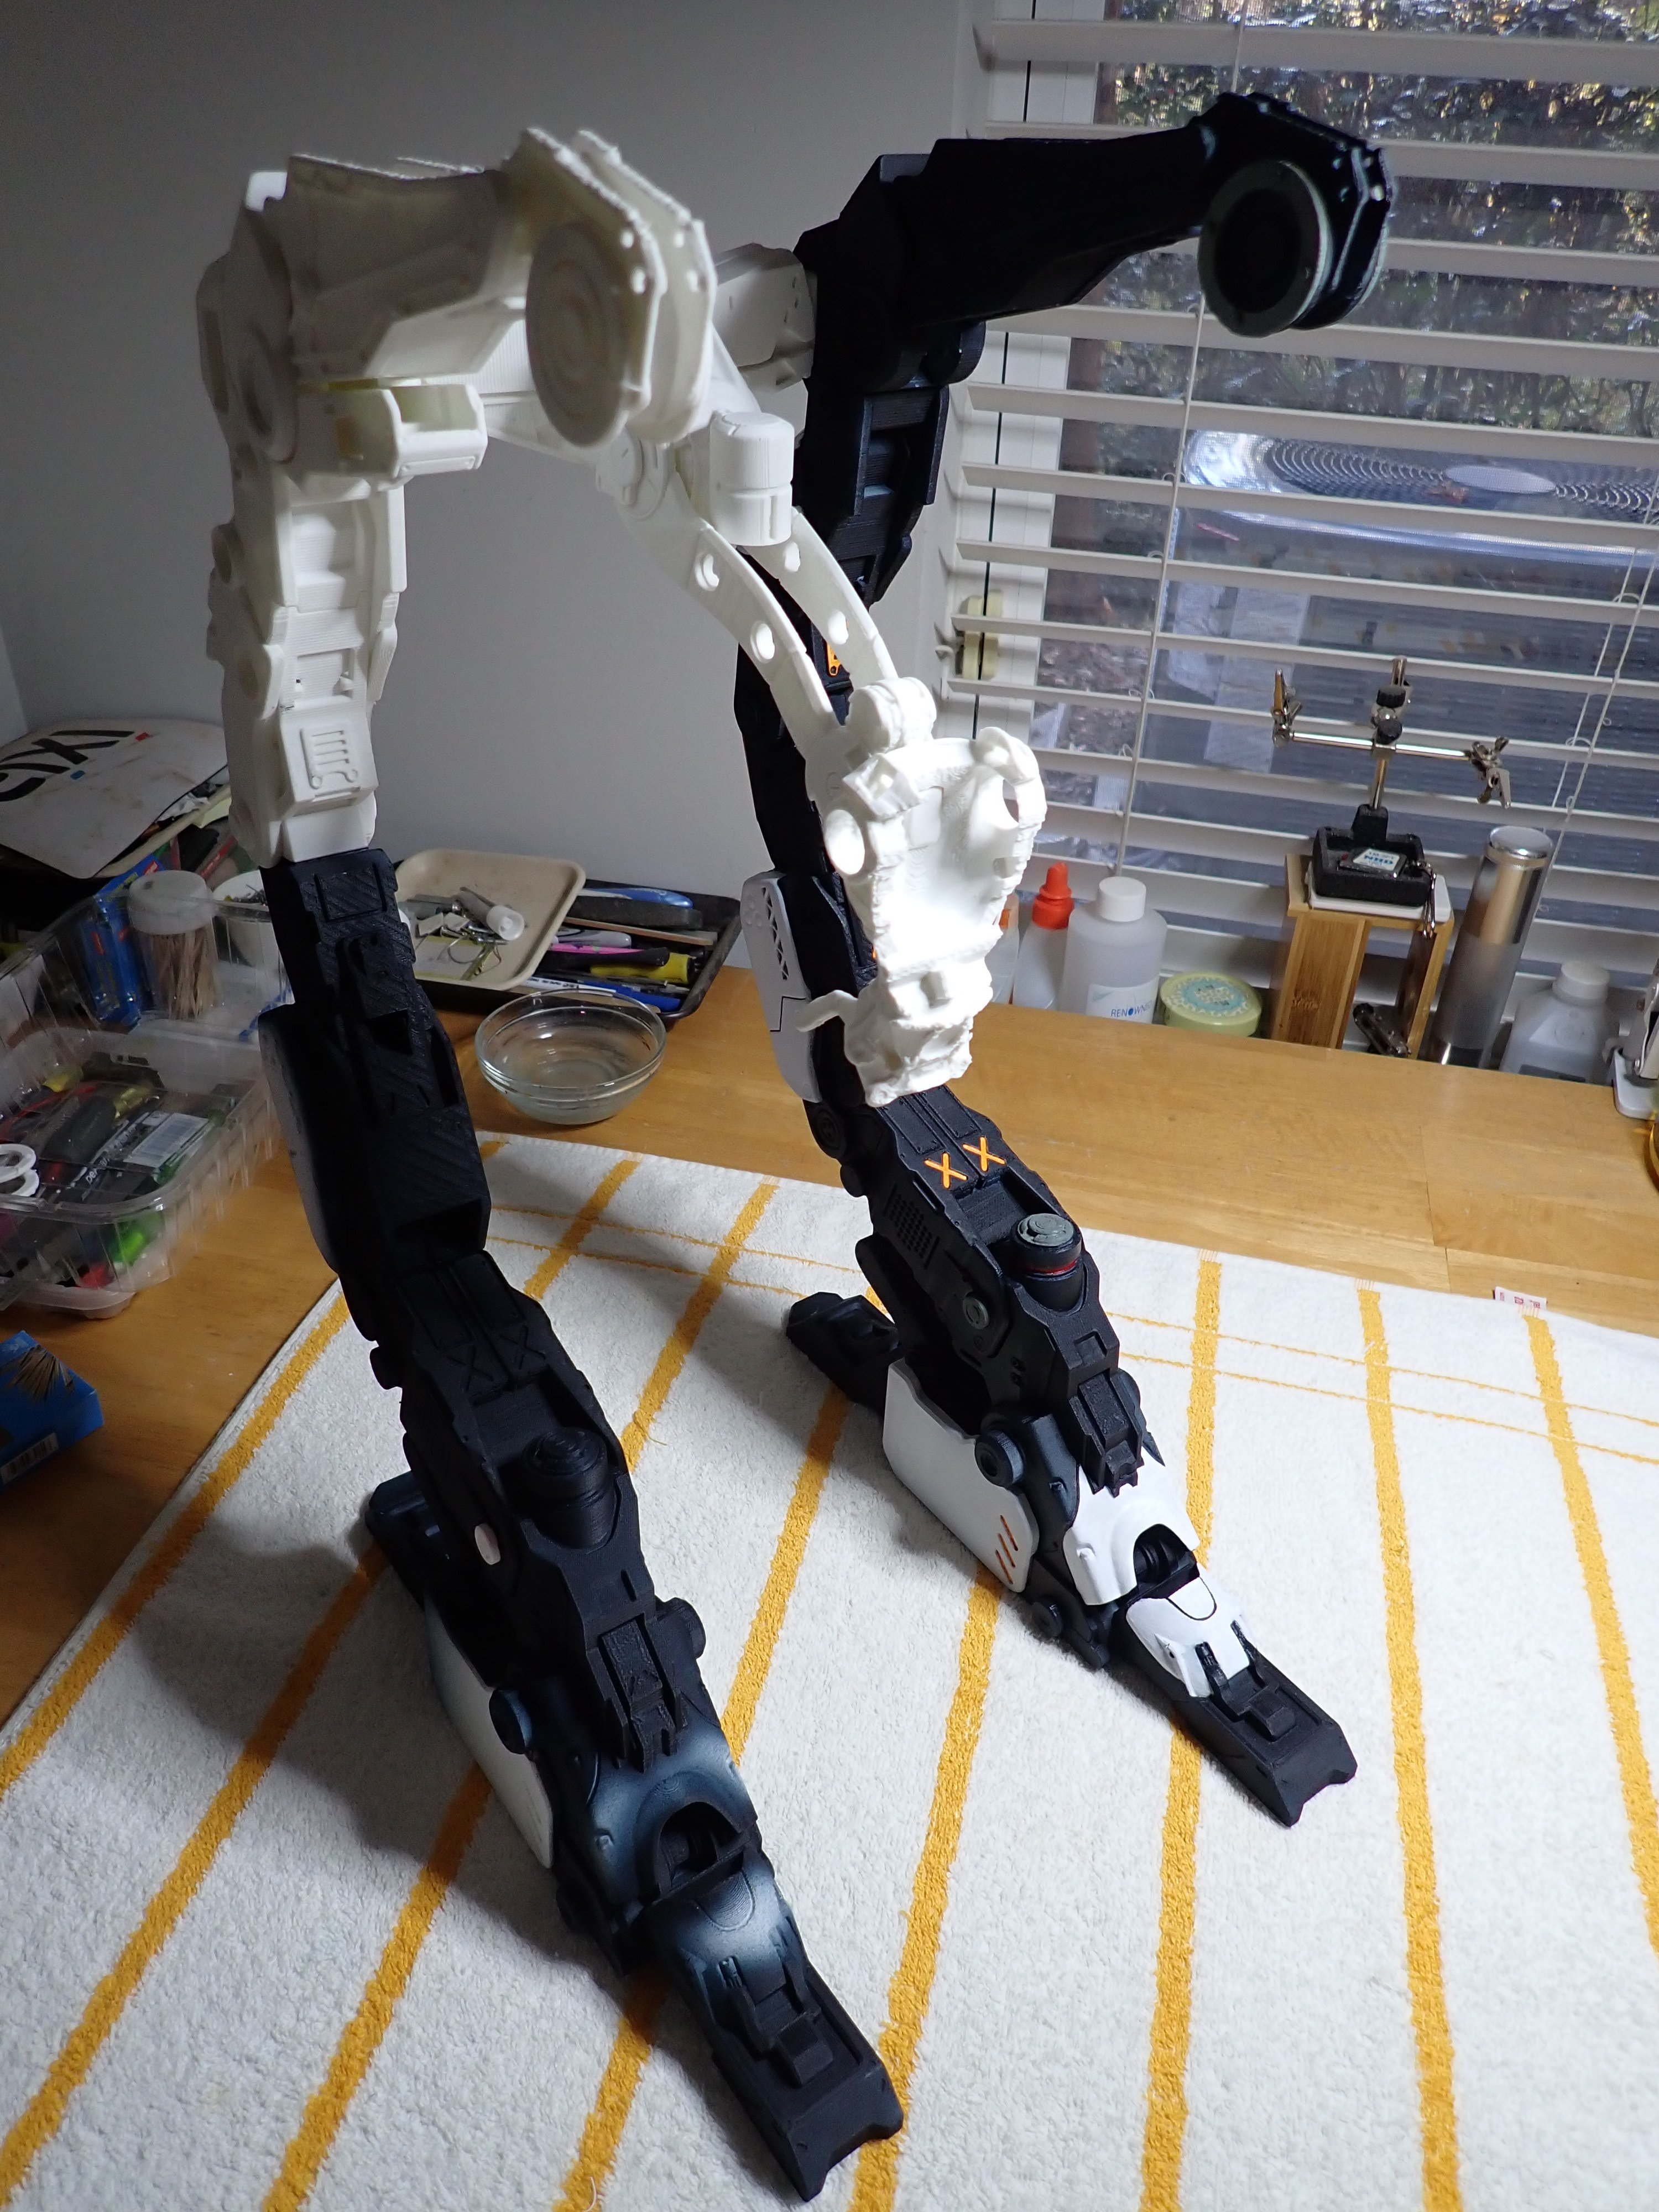
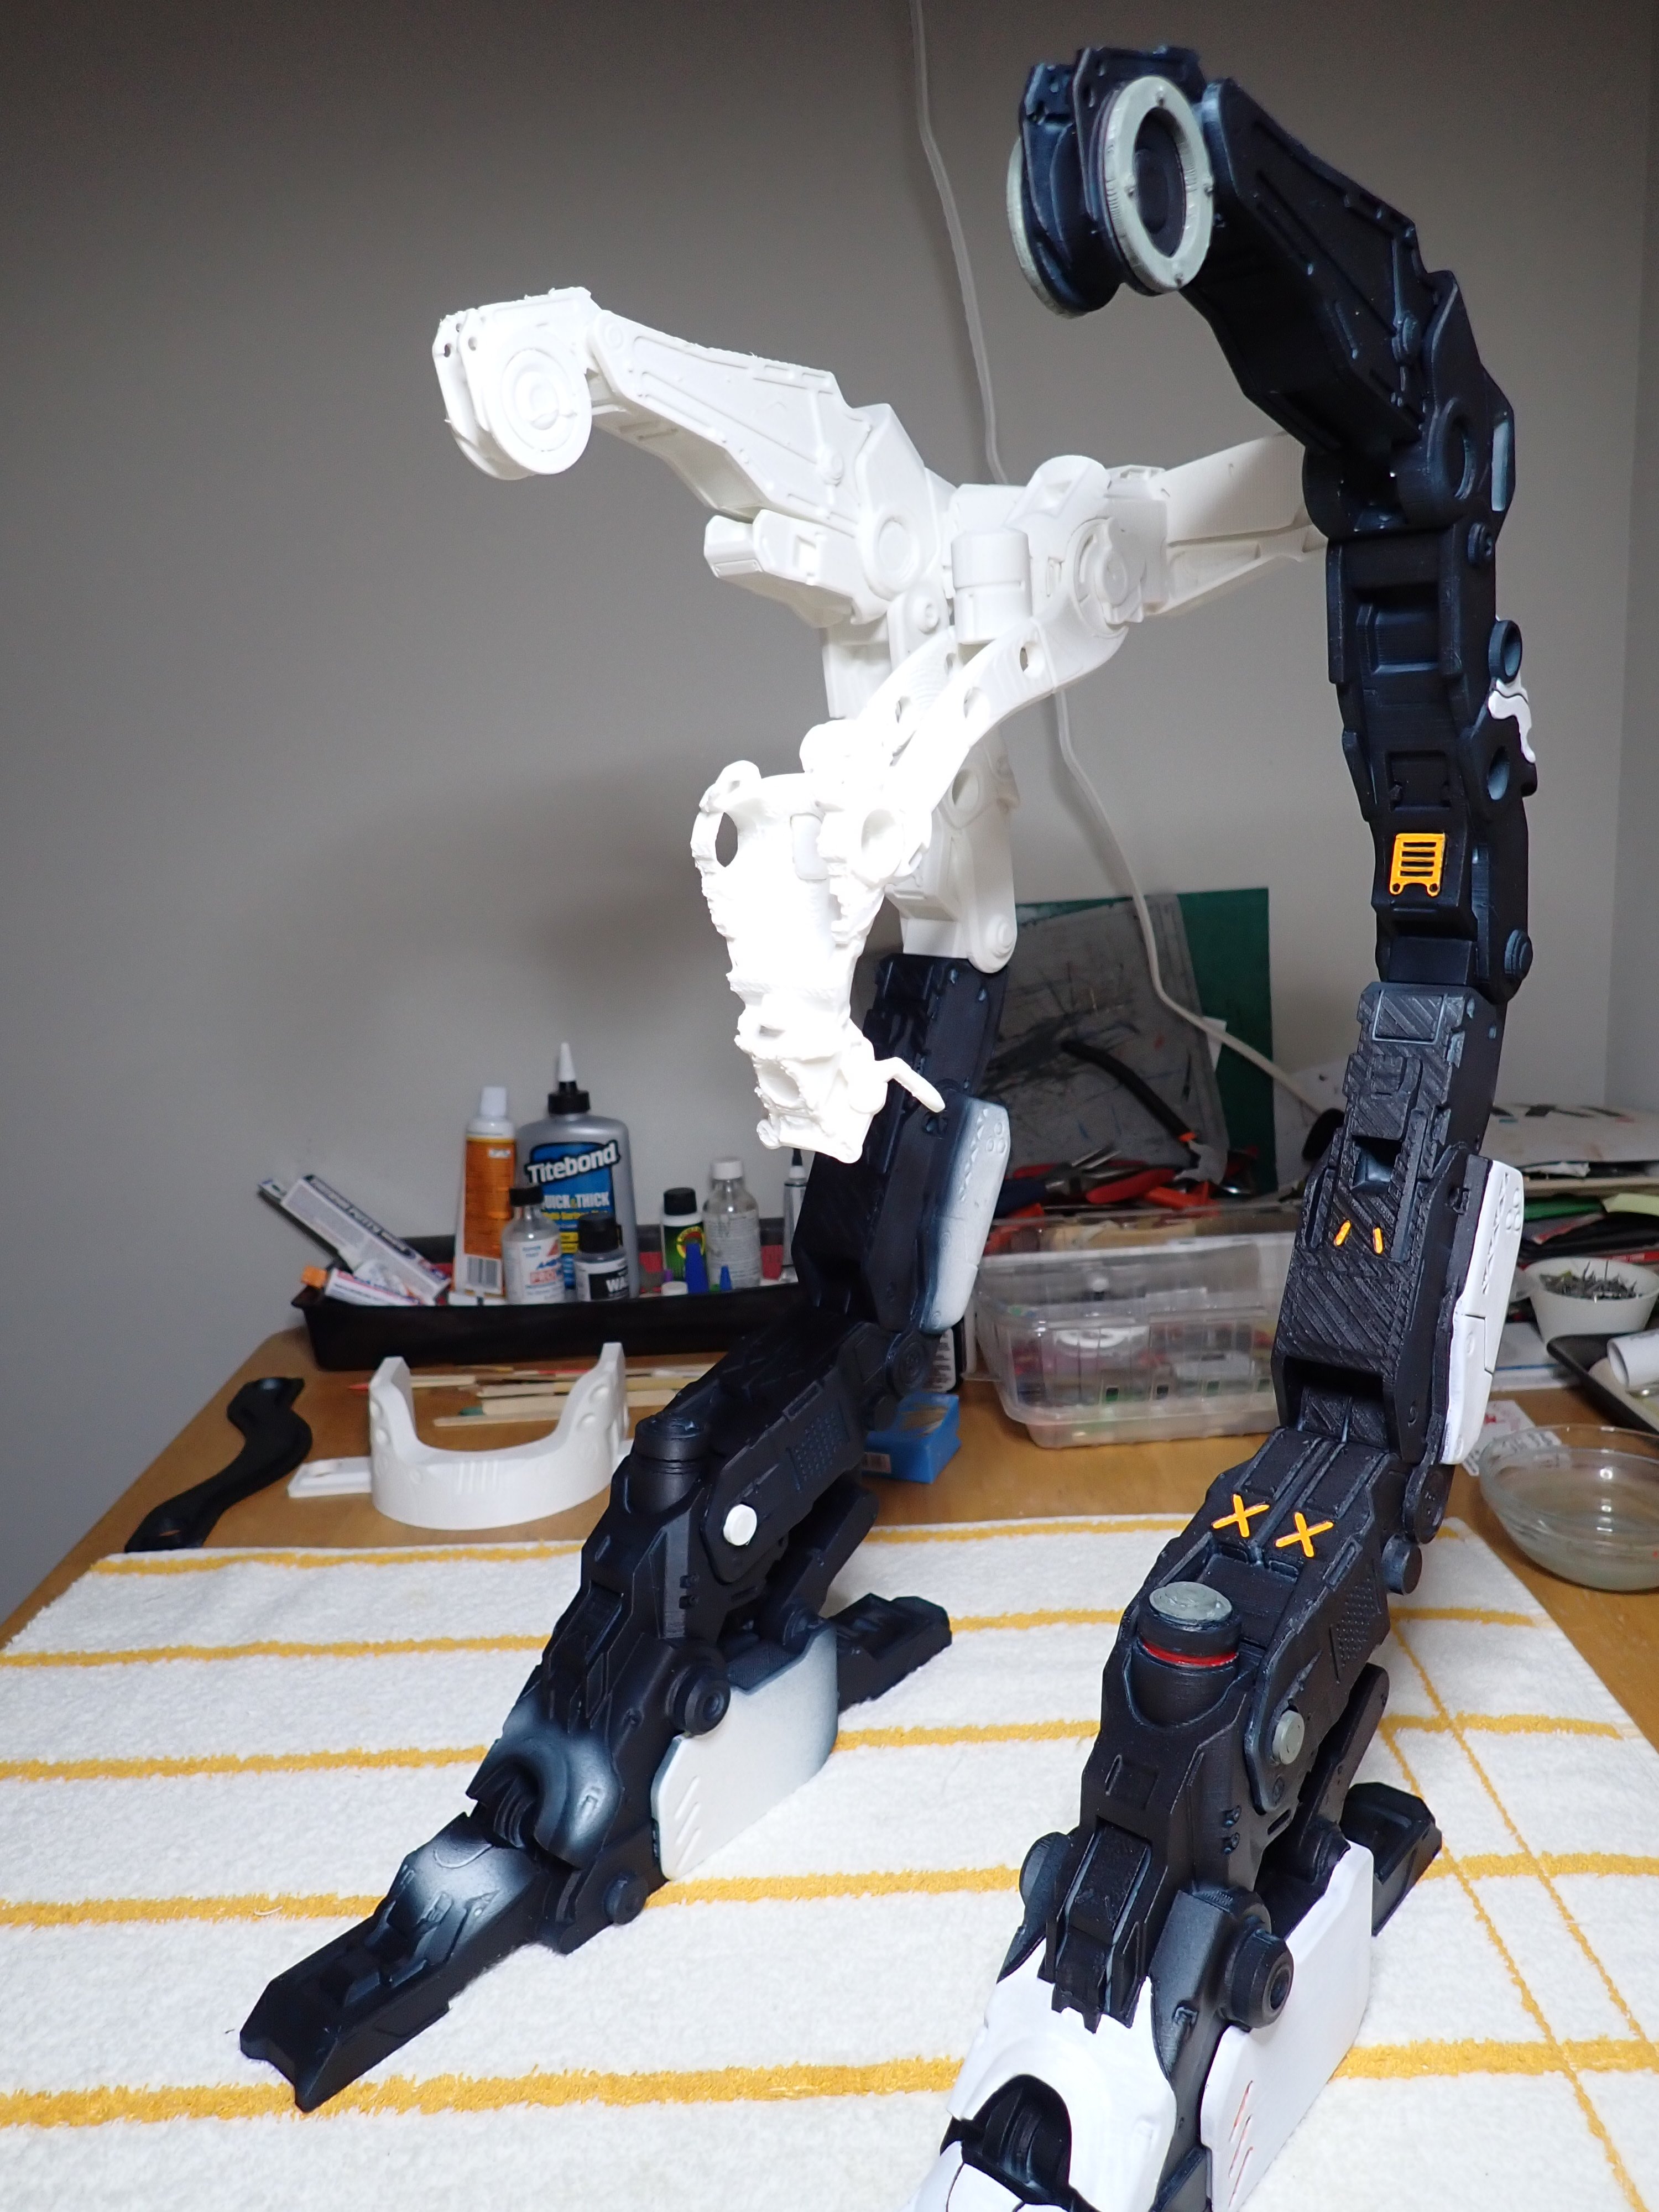
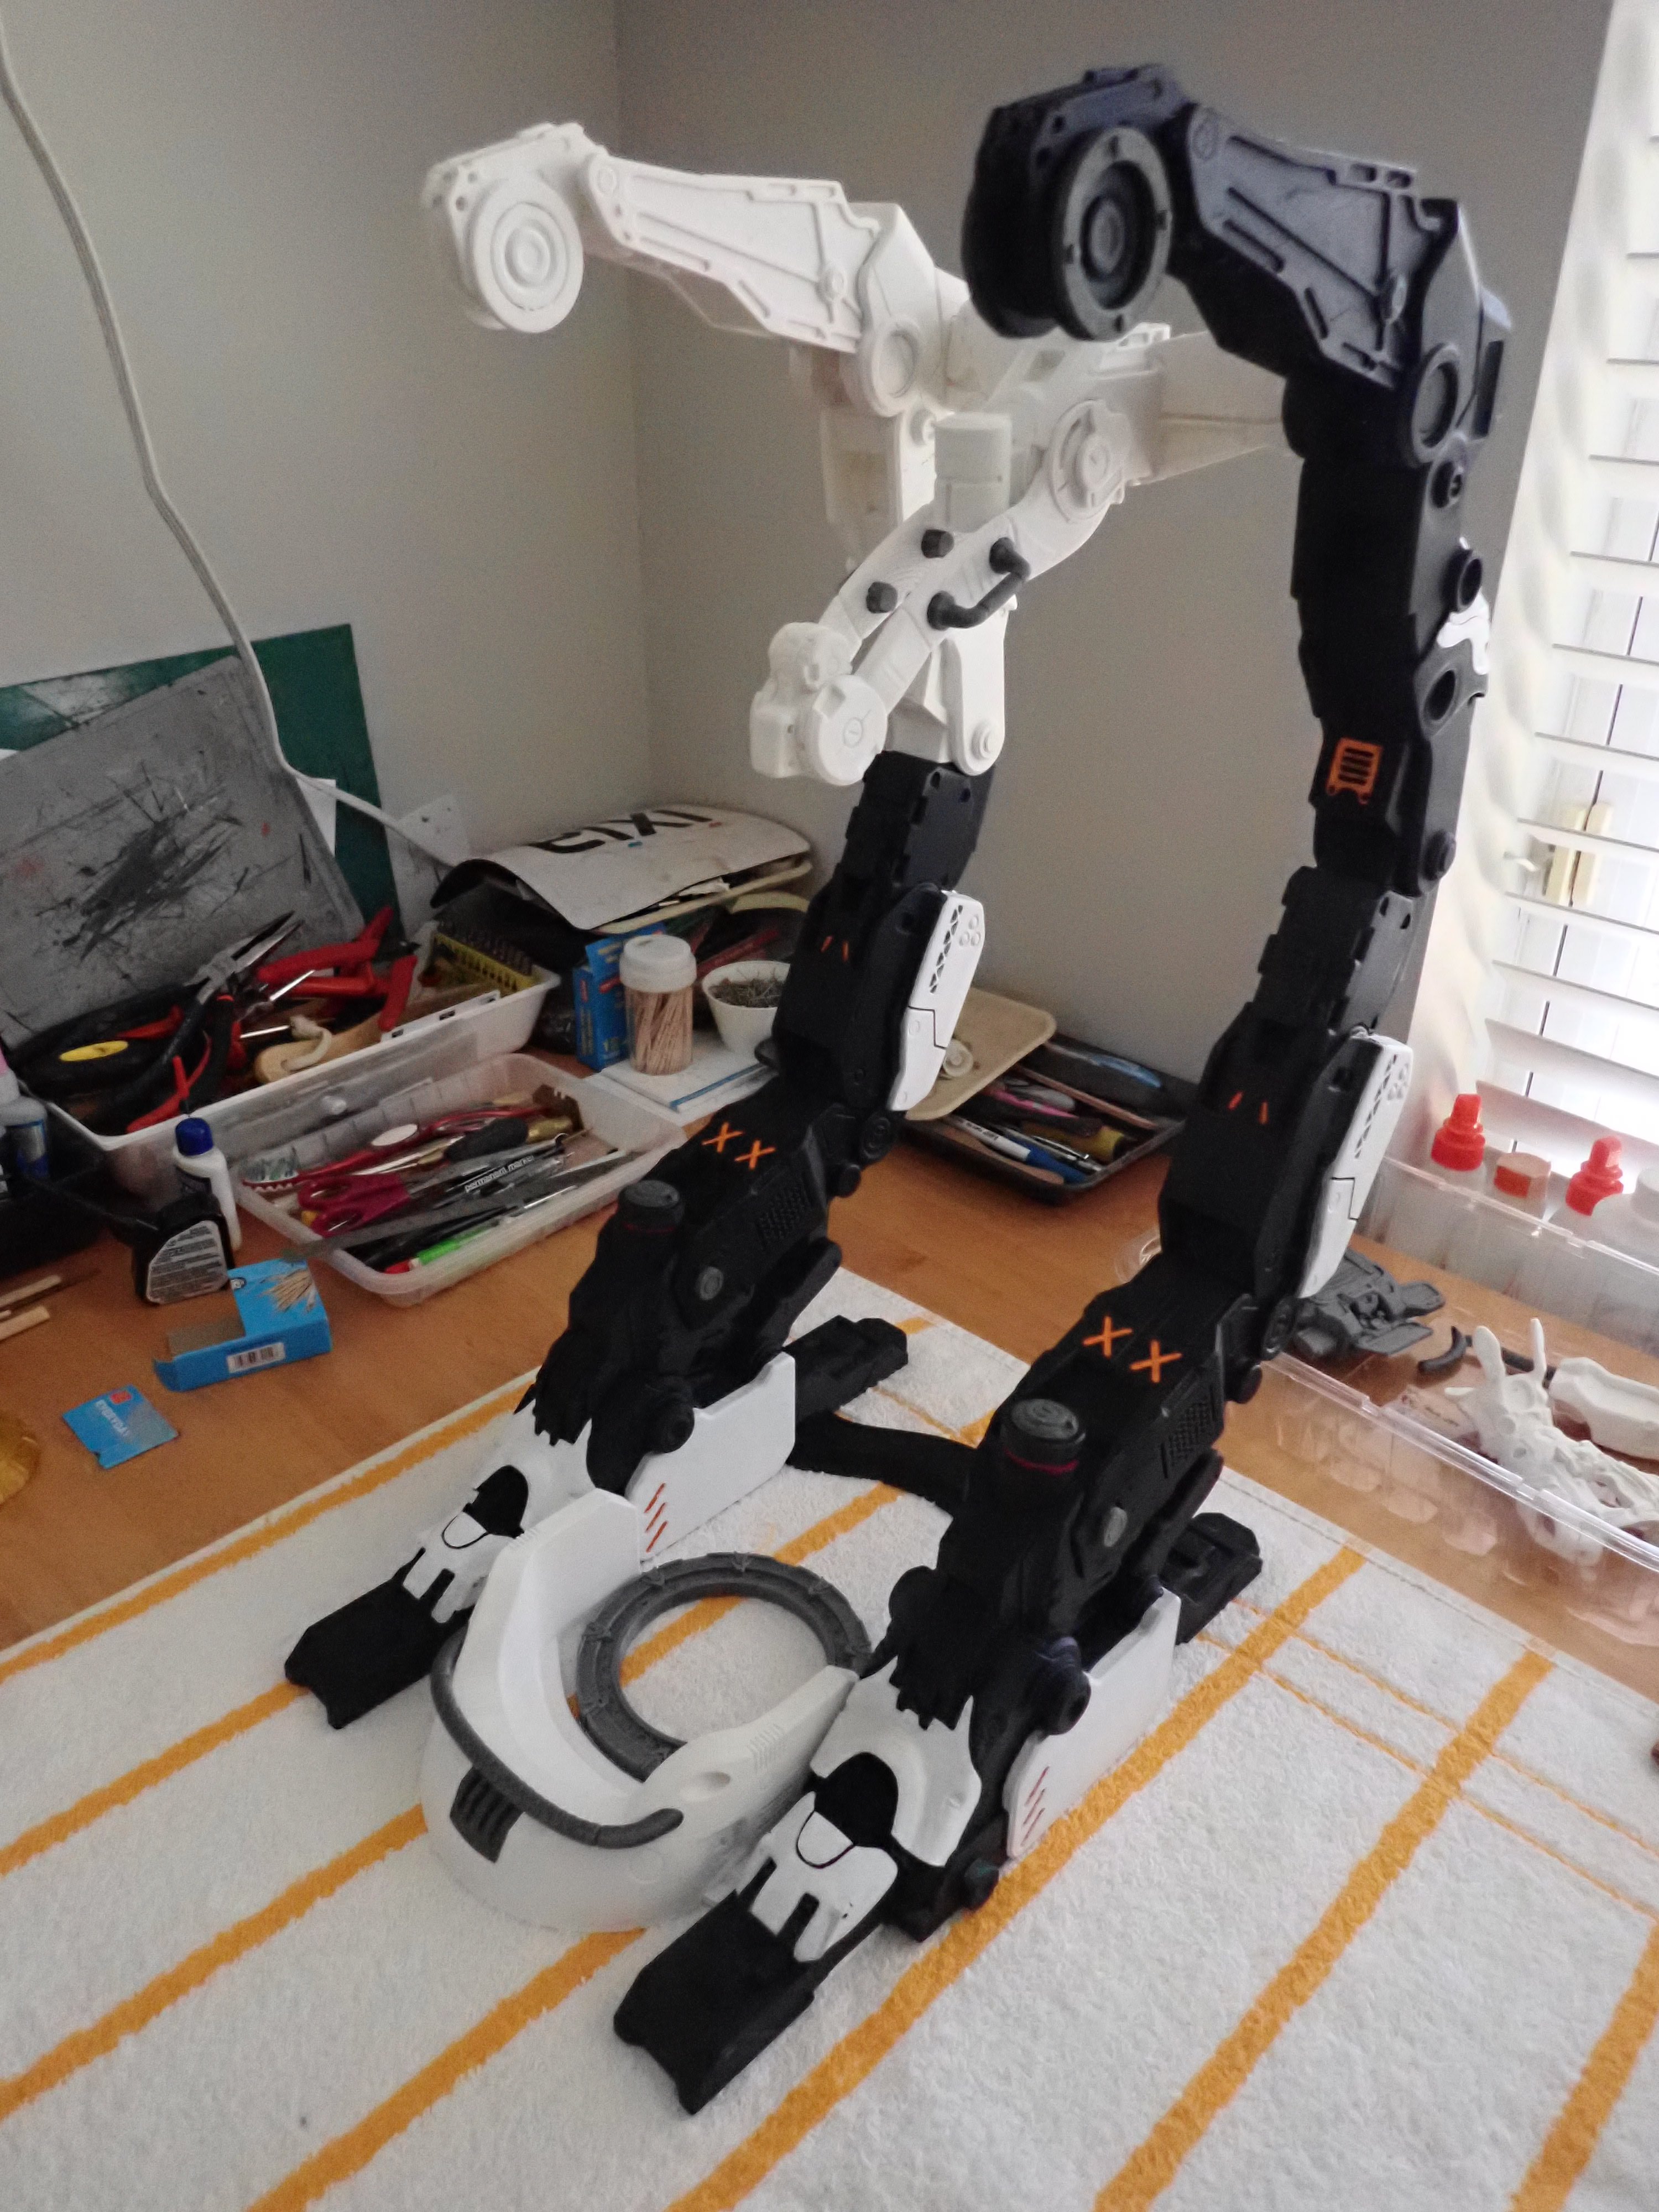
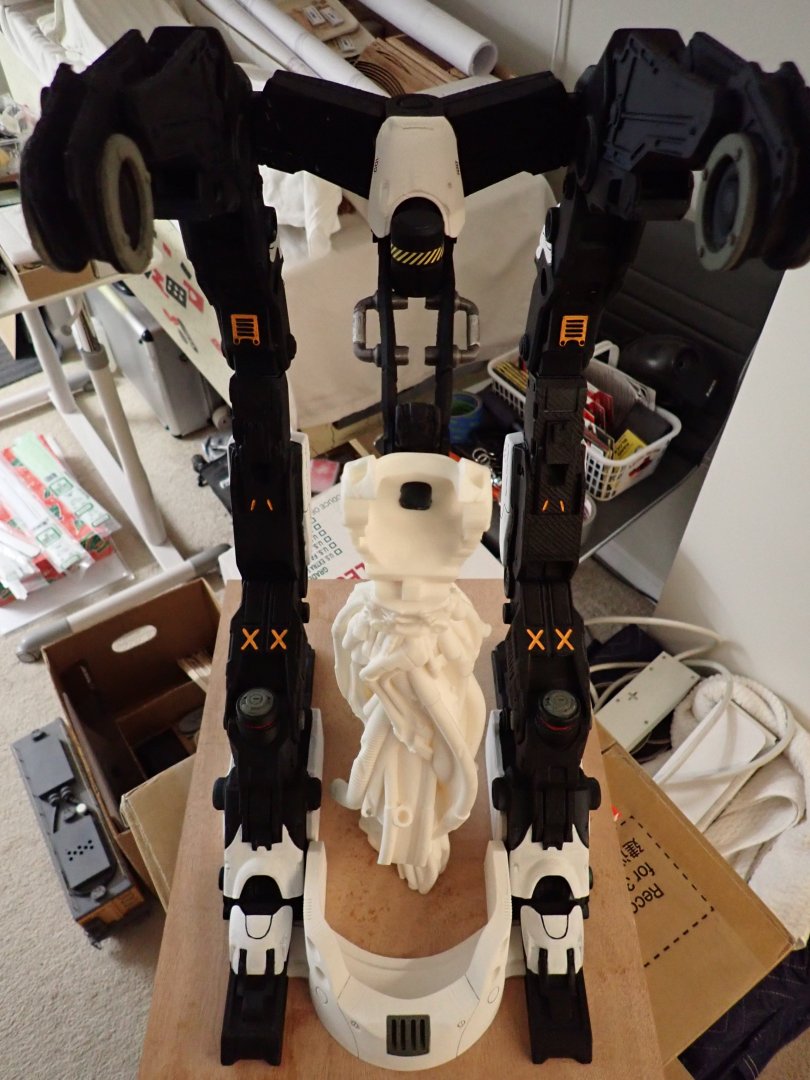
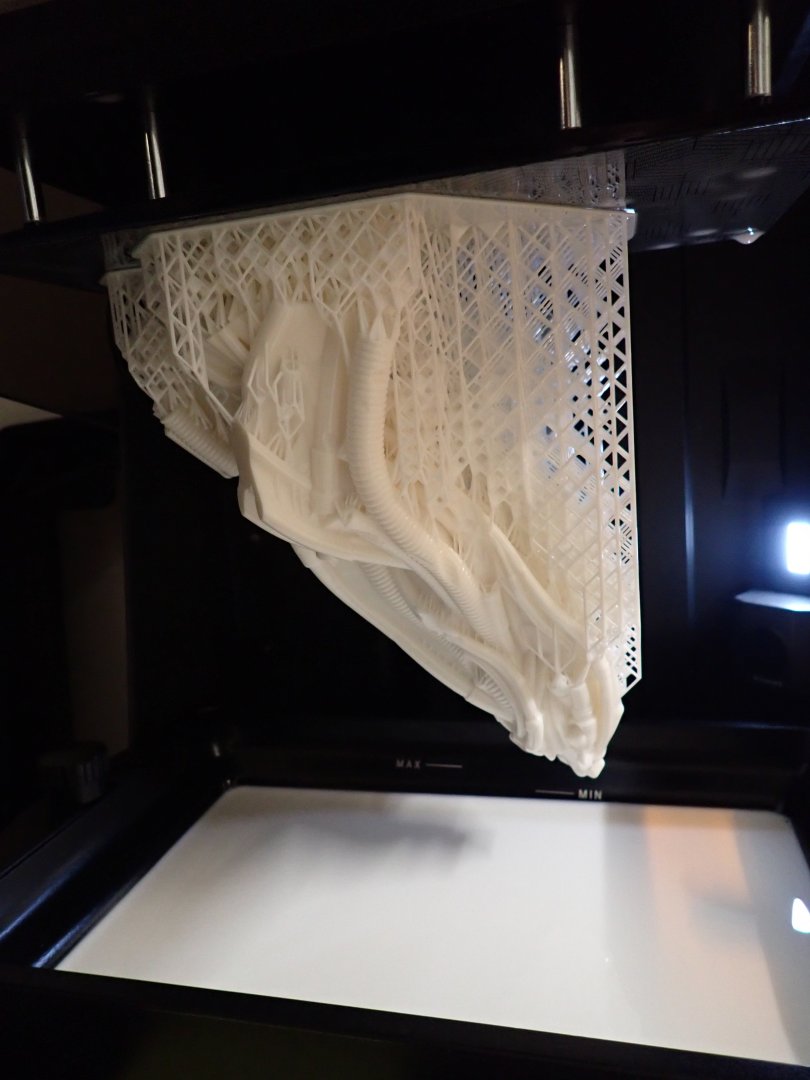
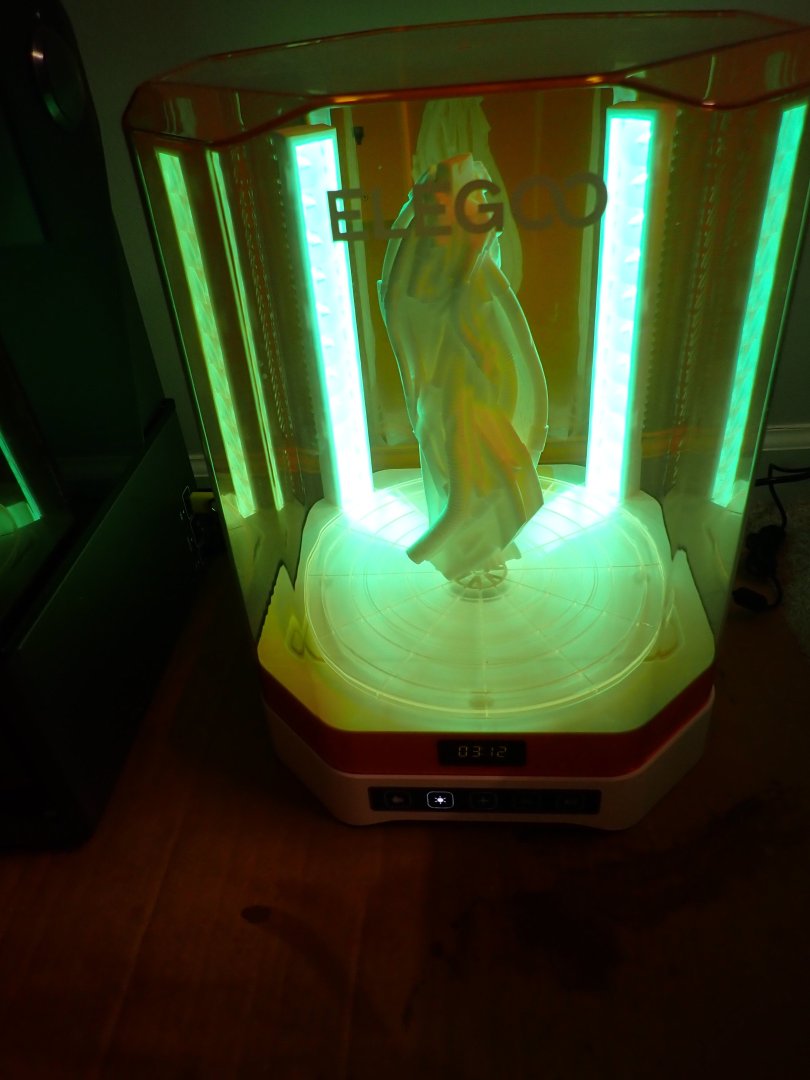
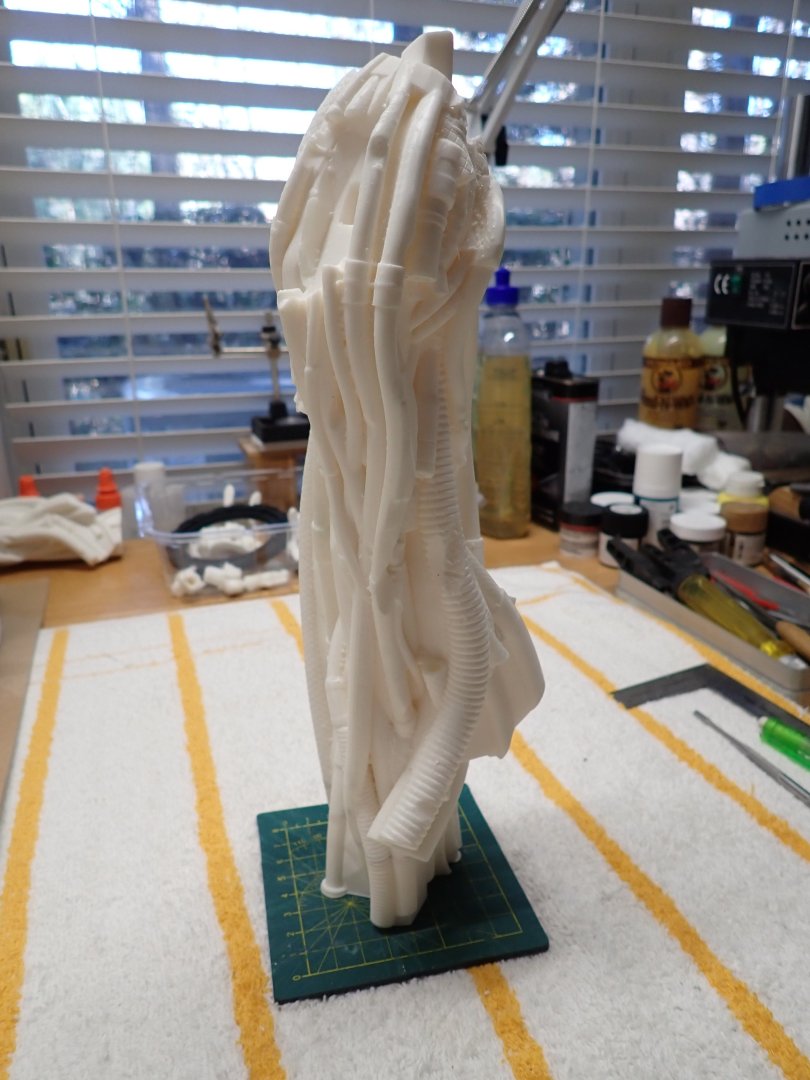
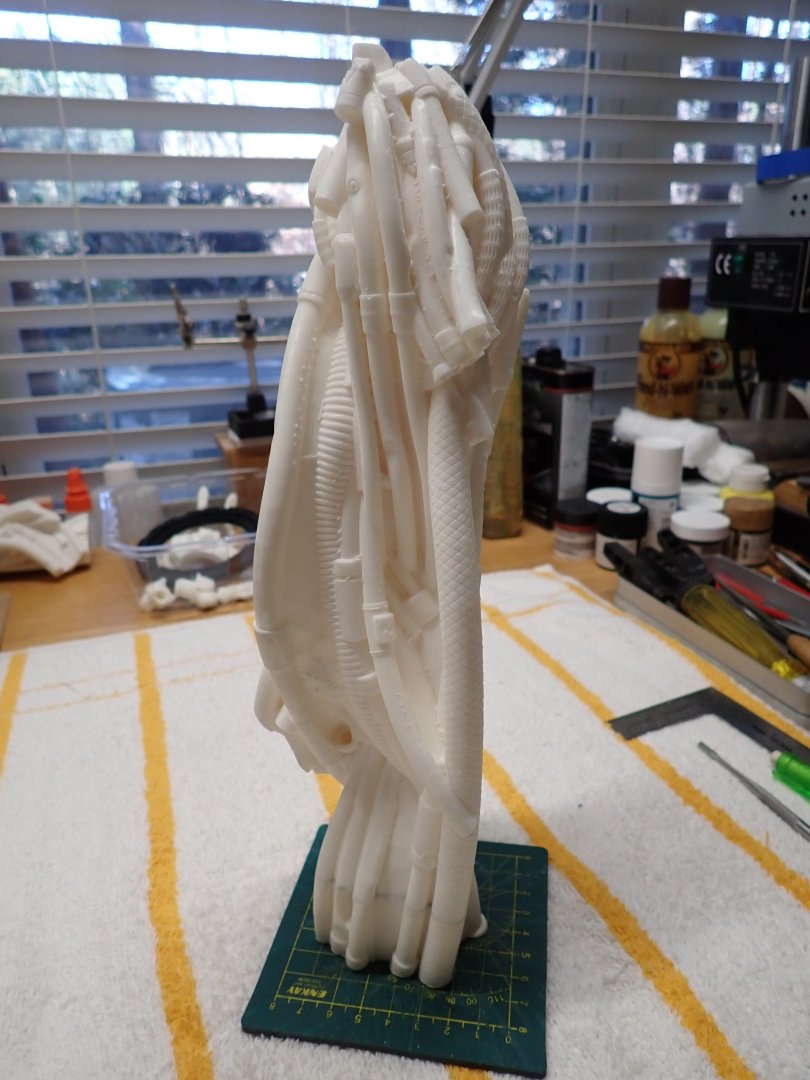
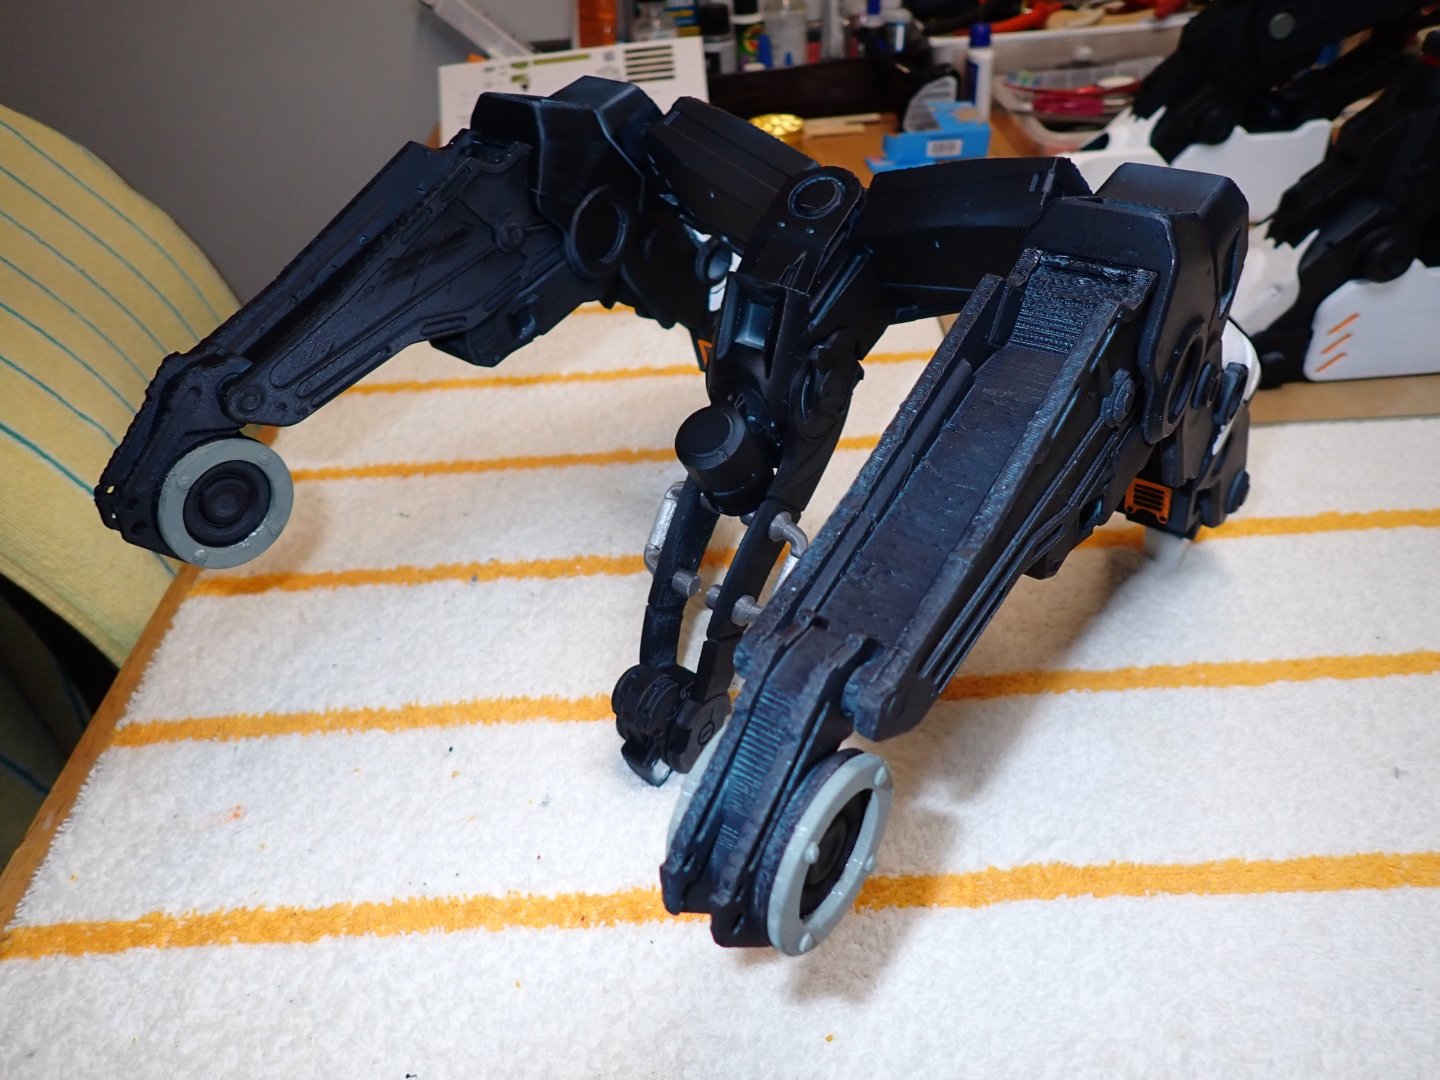
Moving along with this crazy project. The Hydraulic pistons providing some kind of motion to the AI creature: They actually stiffen very well the structure. I will paint them and glue them, later on. We have seen the back of the AI creature in a previous post. I printed three versions and will retain the 90% resin printed. The back is inserted into the main crane protruding from the hangar, but is also held by a long and massive set of hoses, wires and other cylindrical pipes. That enormous set creates a "robe", re-enforcing the feminine aspect of the creature. That part is massive and I cut it into two pieces using Meshmixer, as it does not fit into my resin printer in one part. It took 11 hours of printing and represents some 17,000 layers. After removing all the supports under scalding hot water, I place the part into the curing station for a few minutes: The result is quite impressive and very tall: You can see at the bottom, the second part that was glued using CA gel glue. On the last two pictures, the back has been set on top of the robe: You can almost guess the feminine appearance of that creature: Many more tubes, hoses and pipes will be added to the "robe". Yves


-
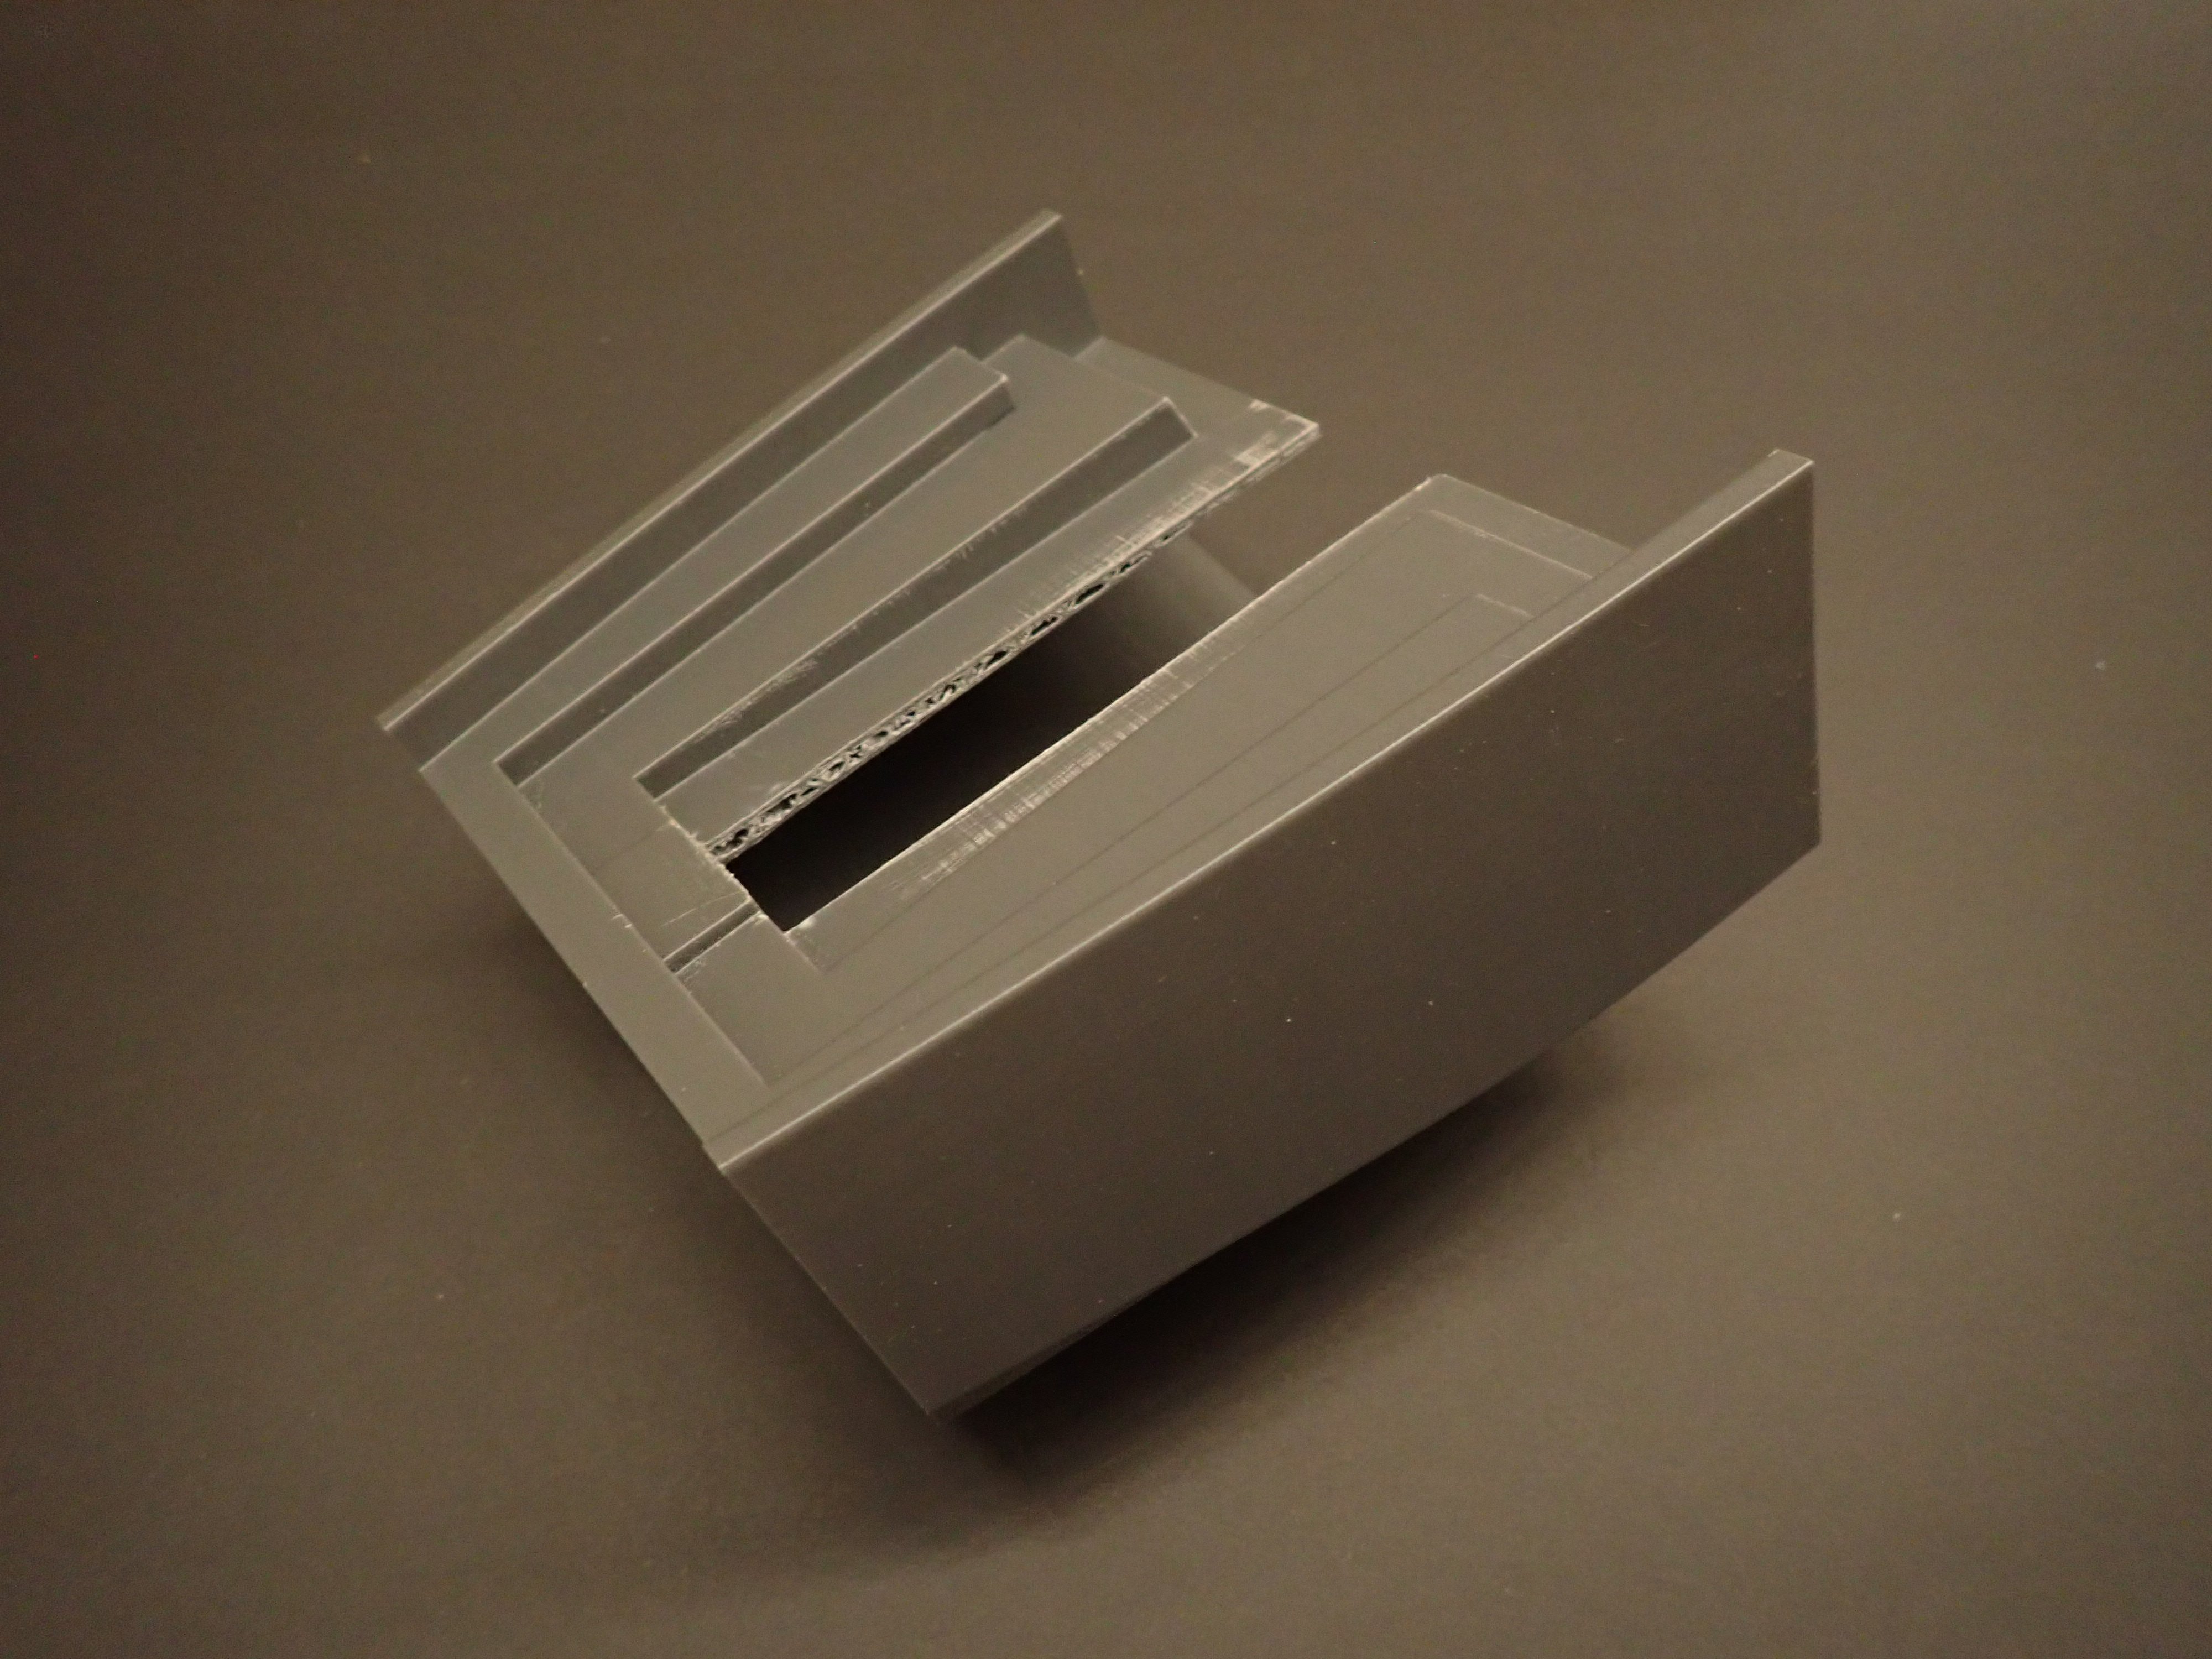
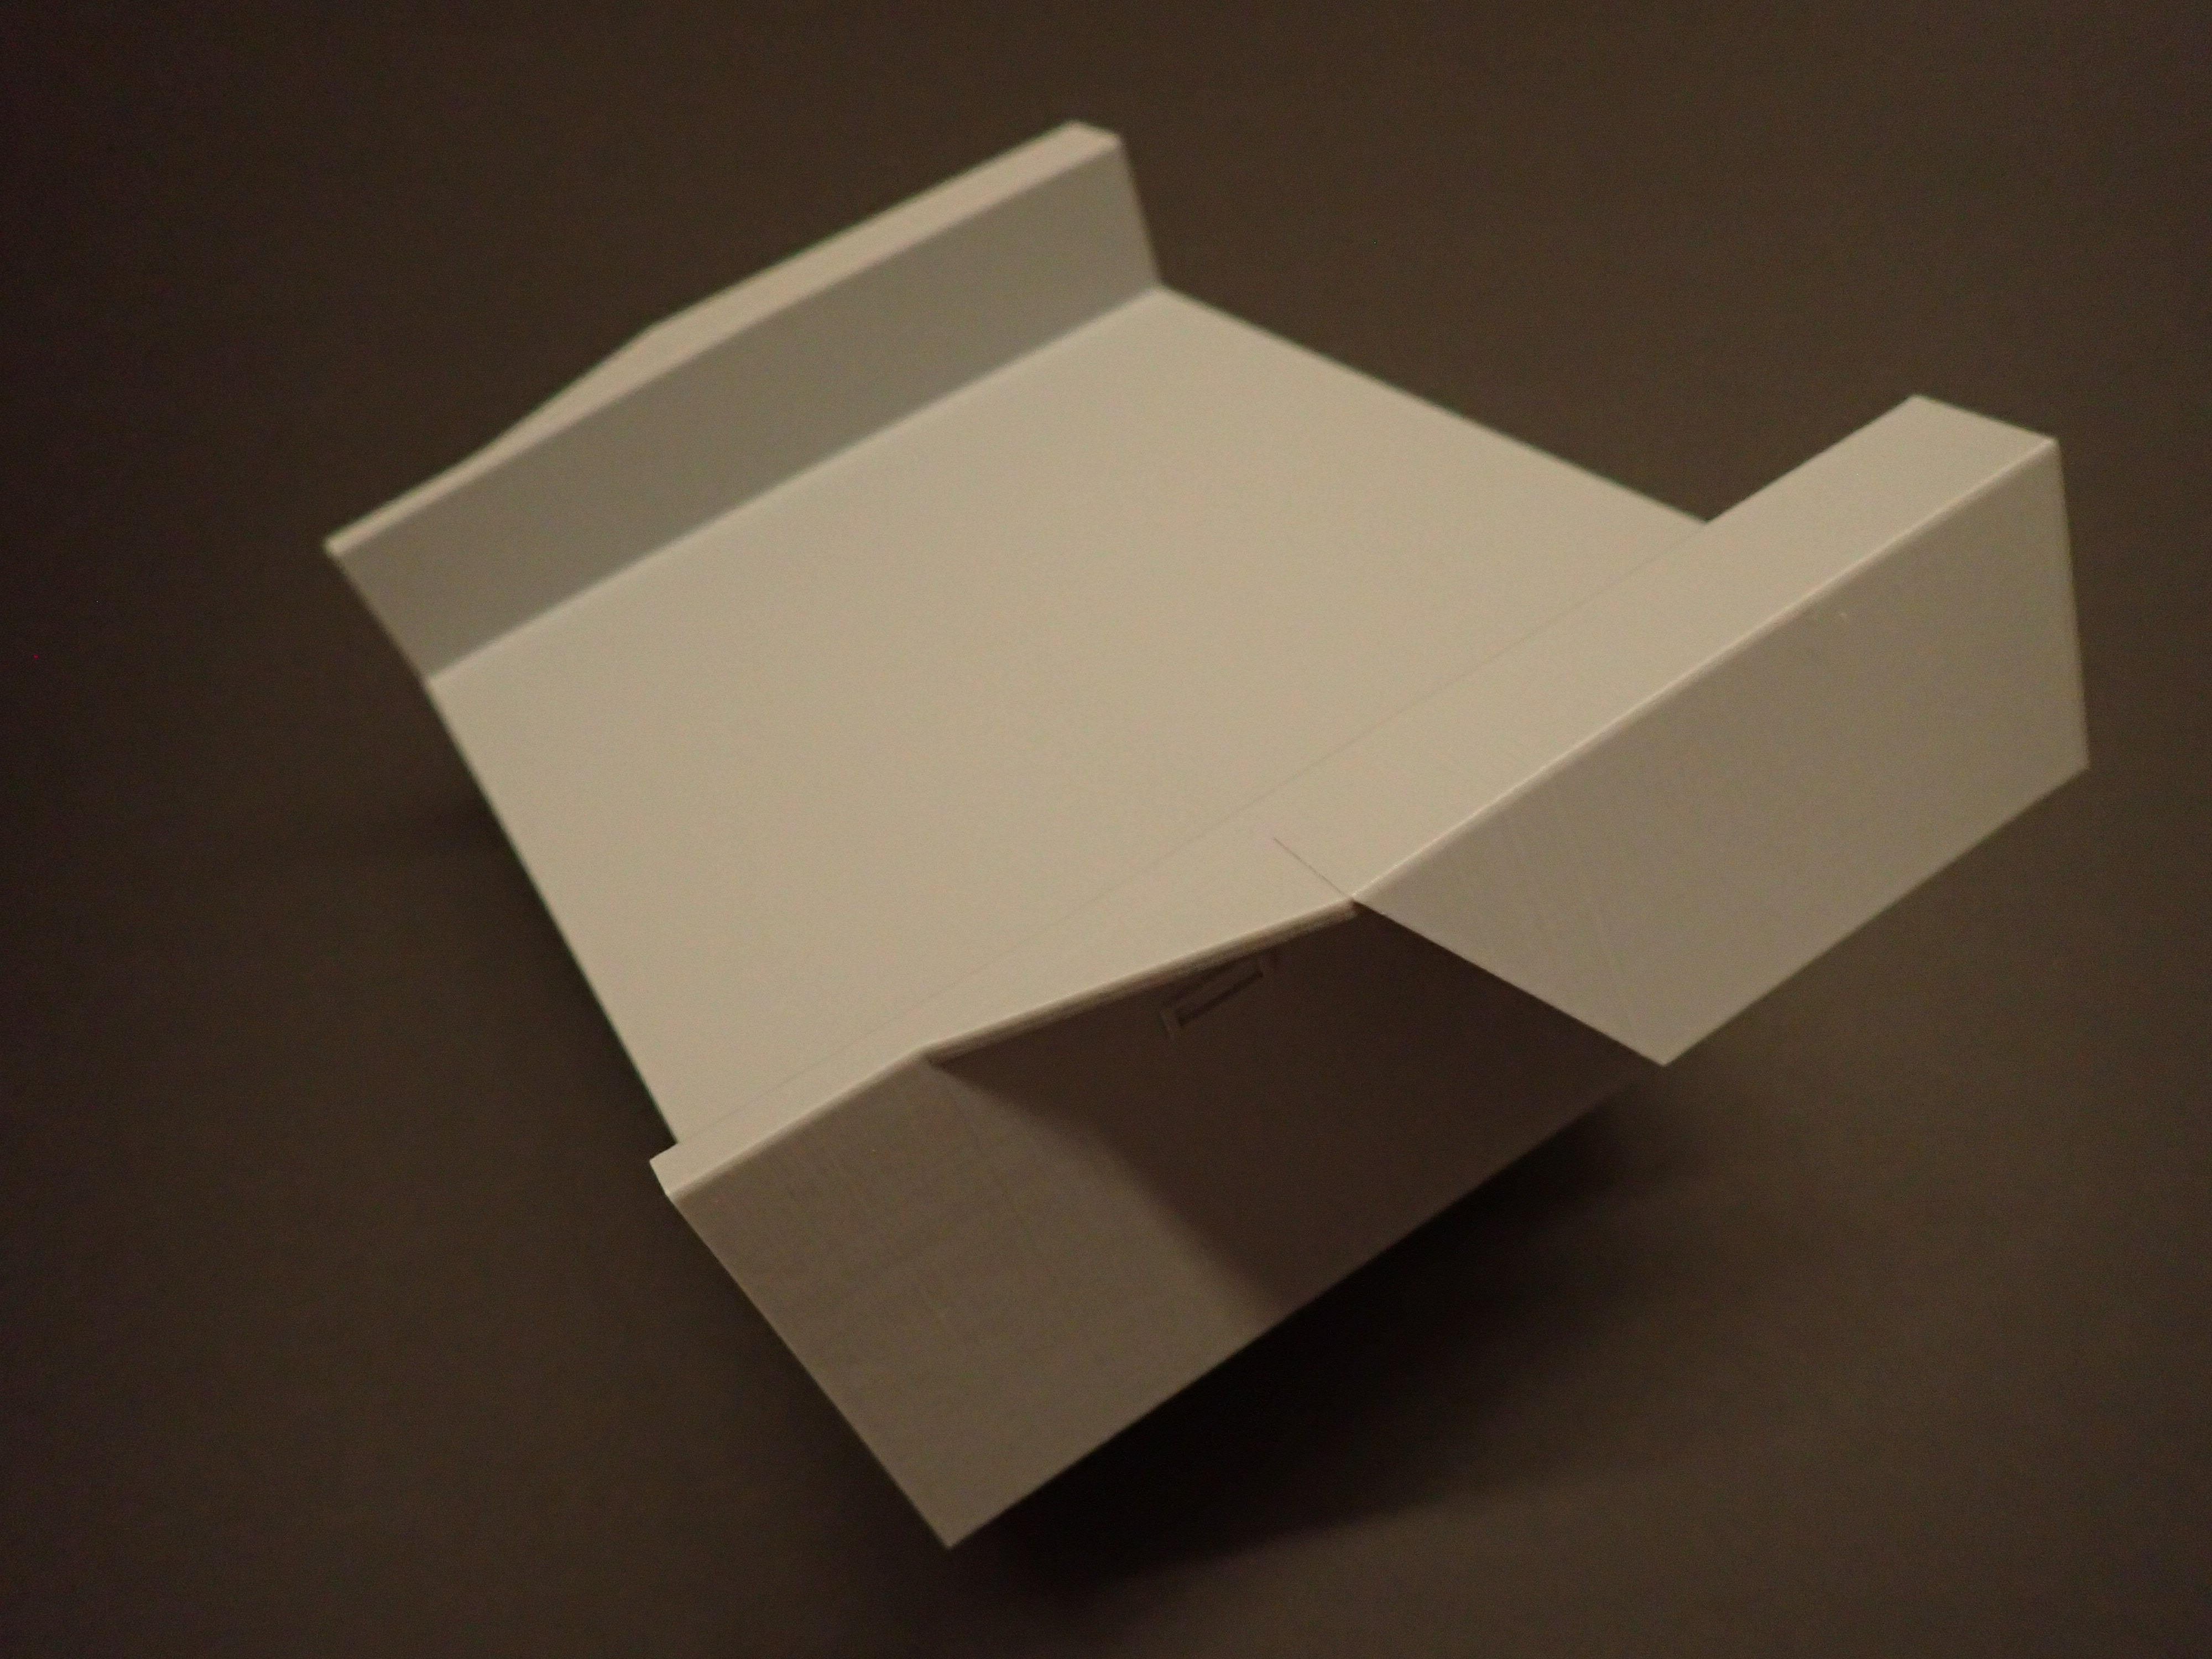
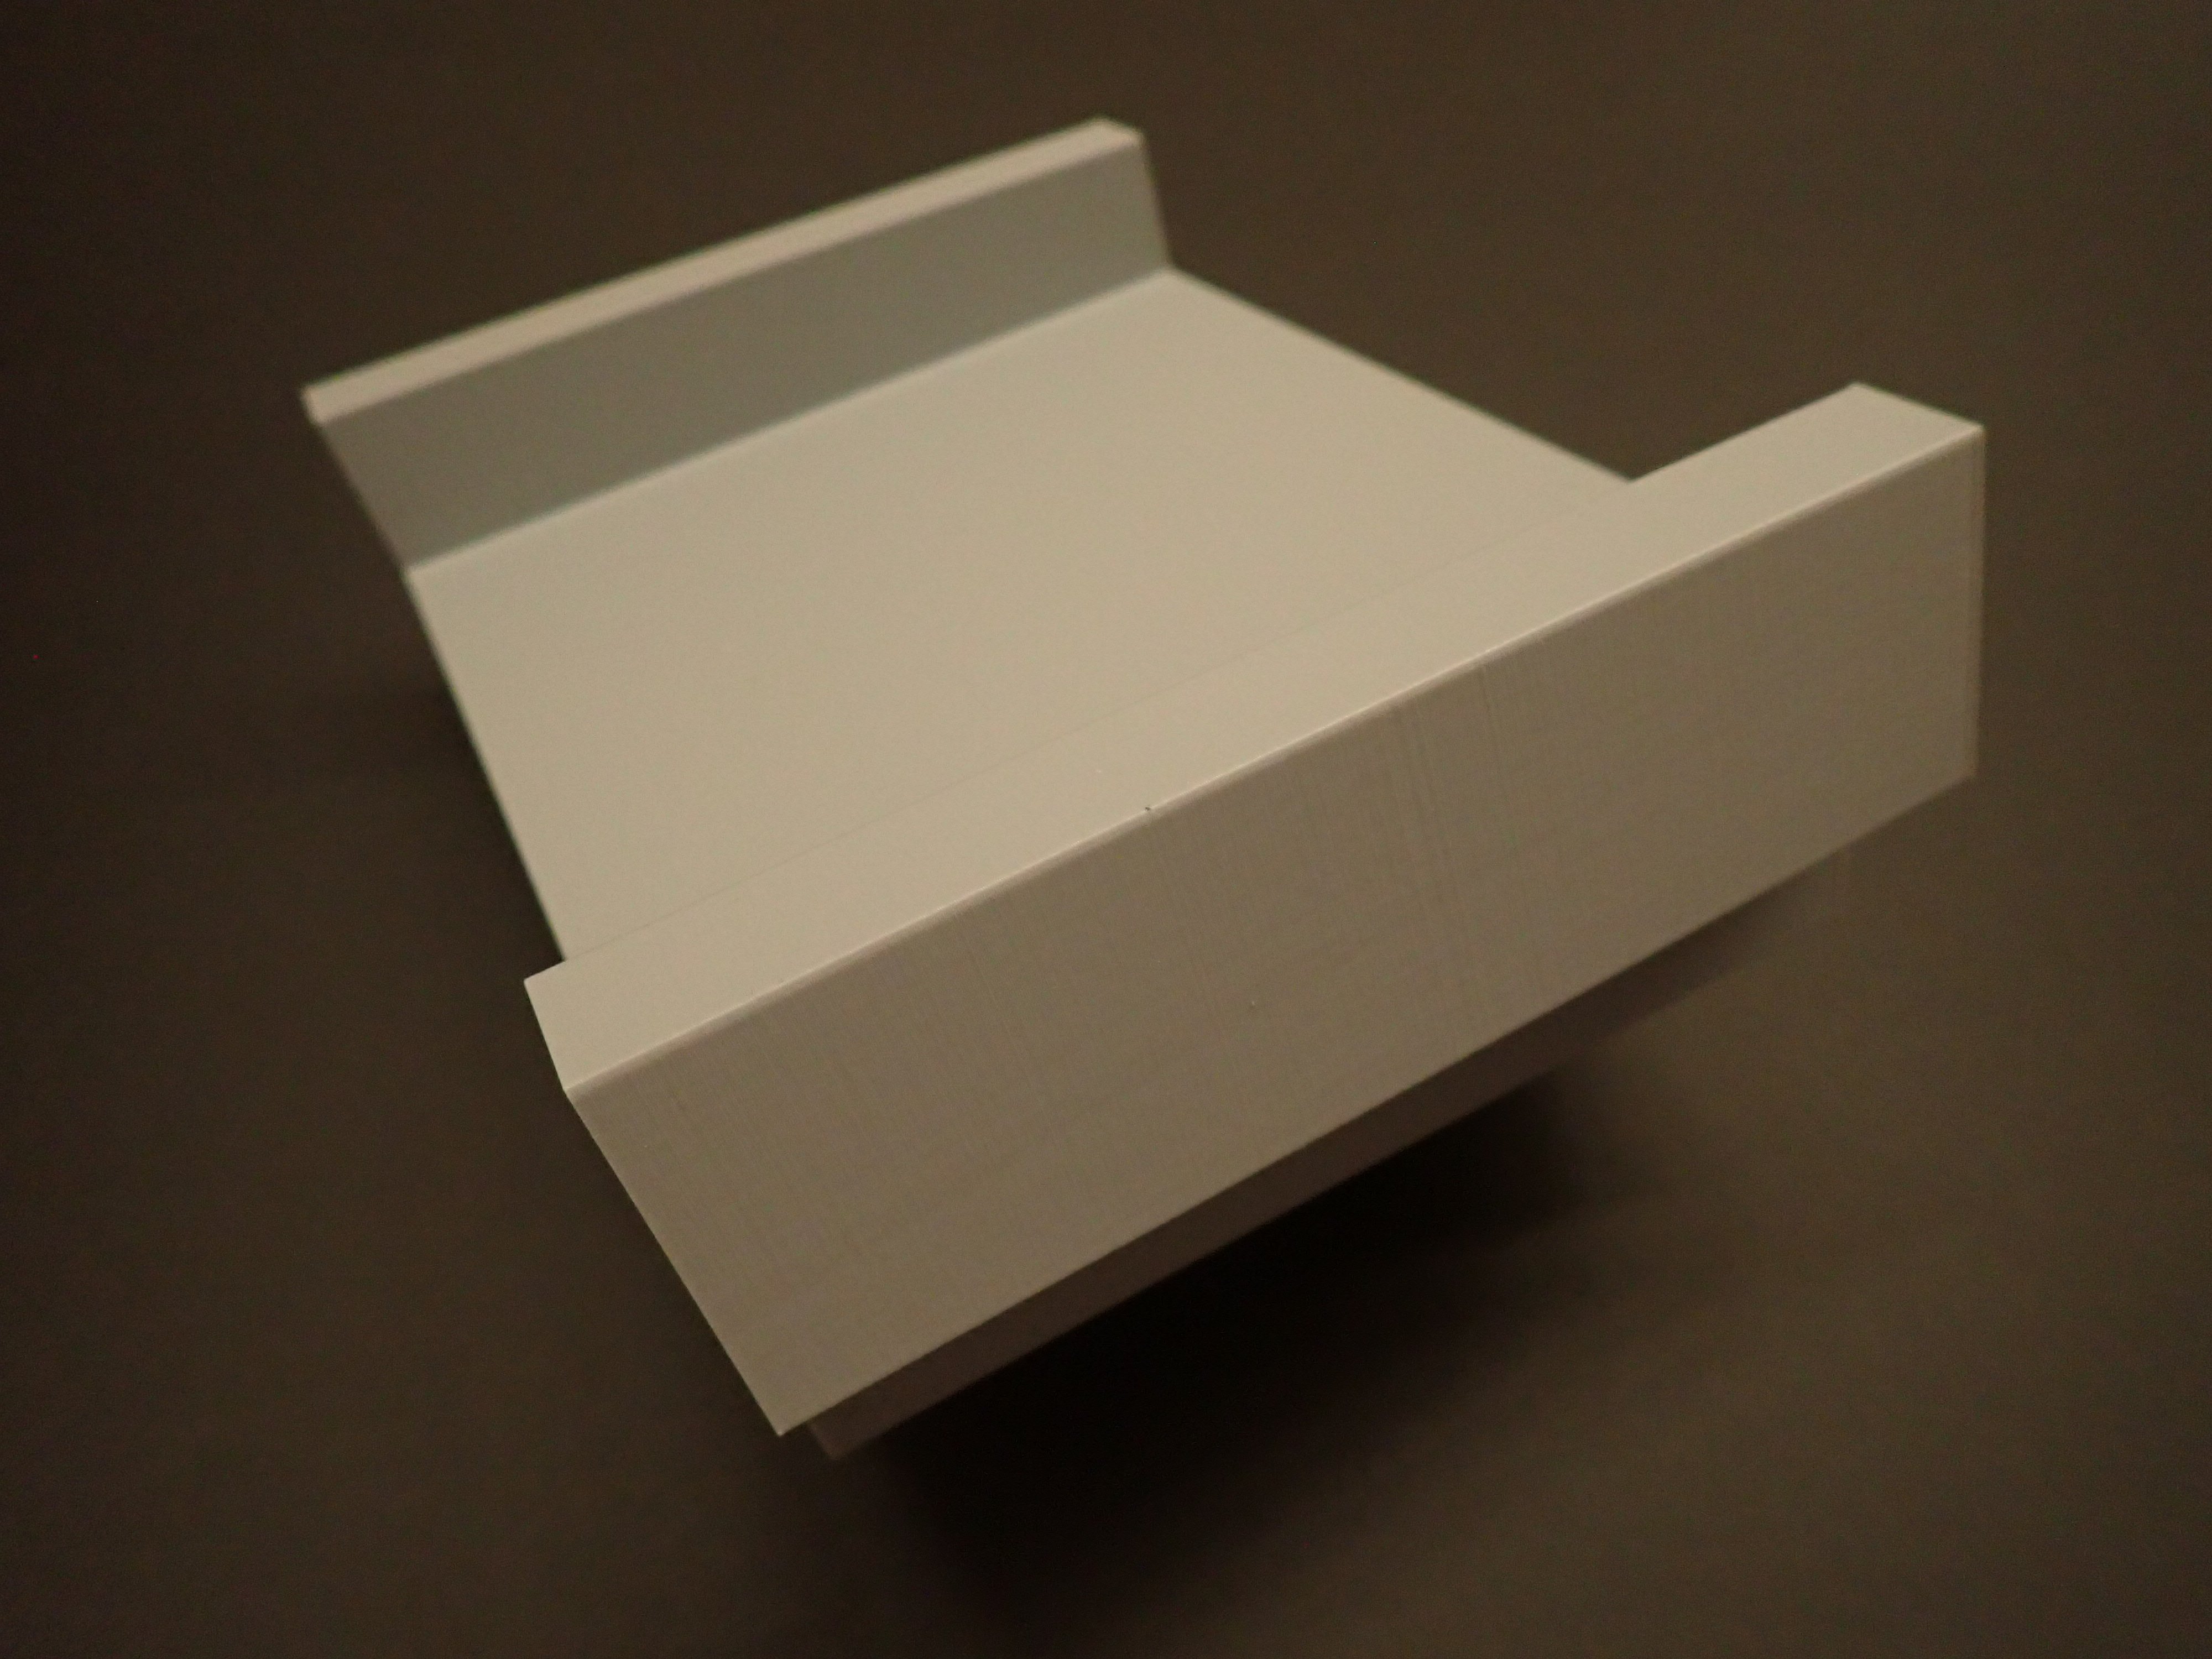
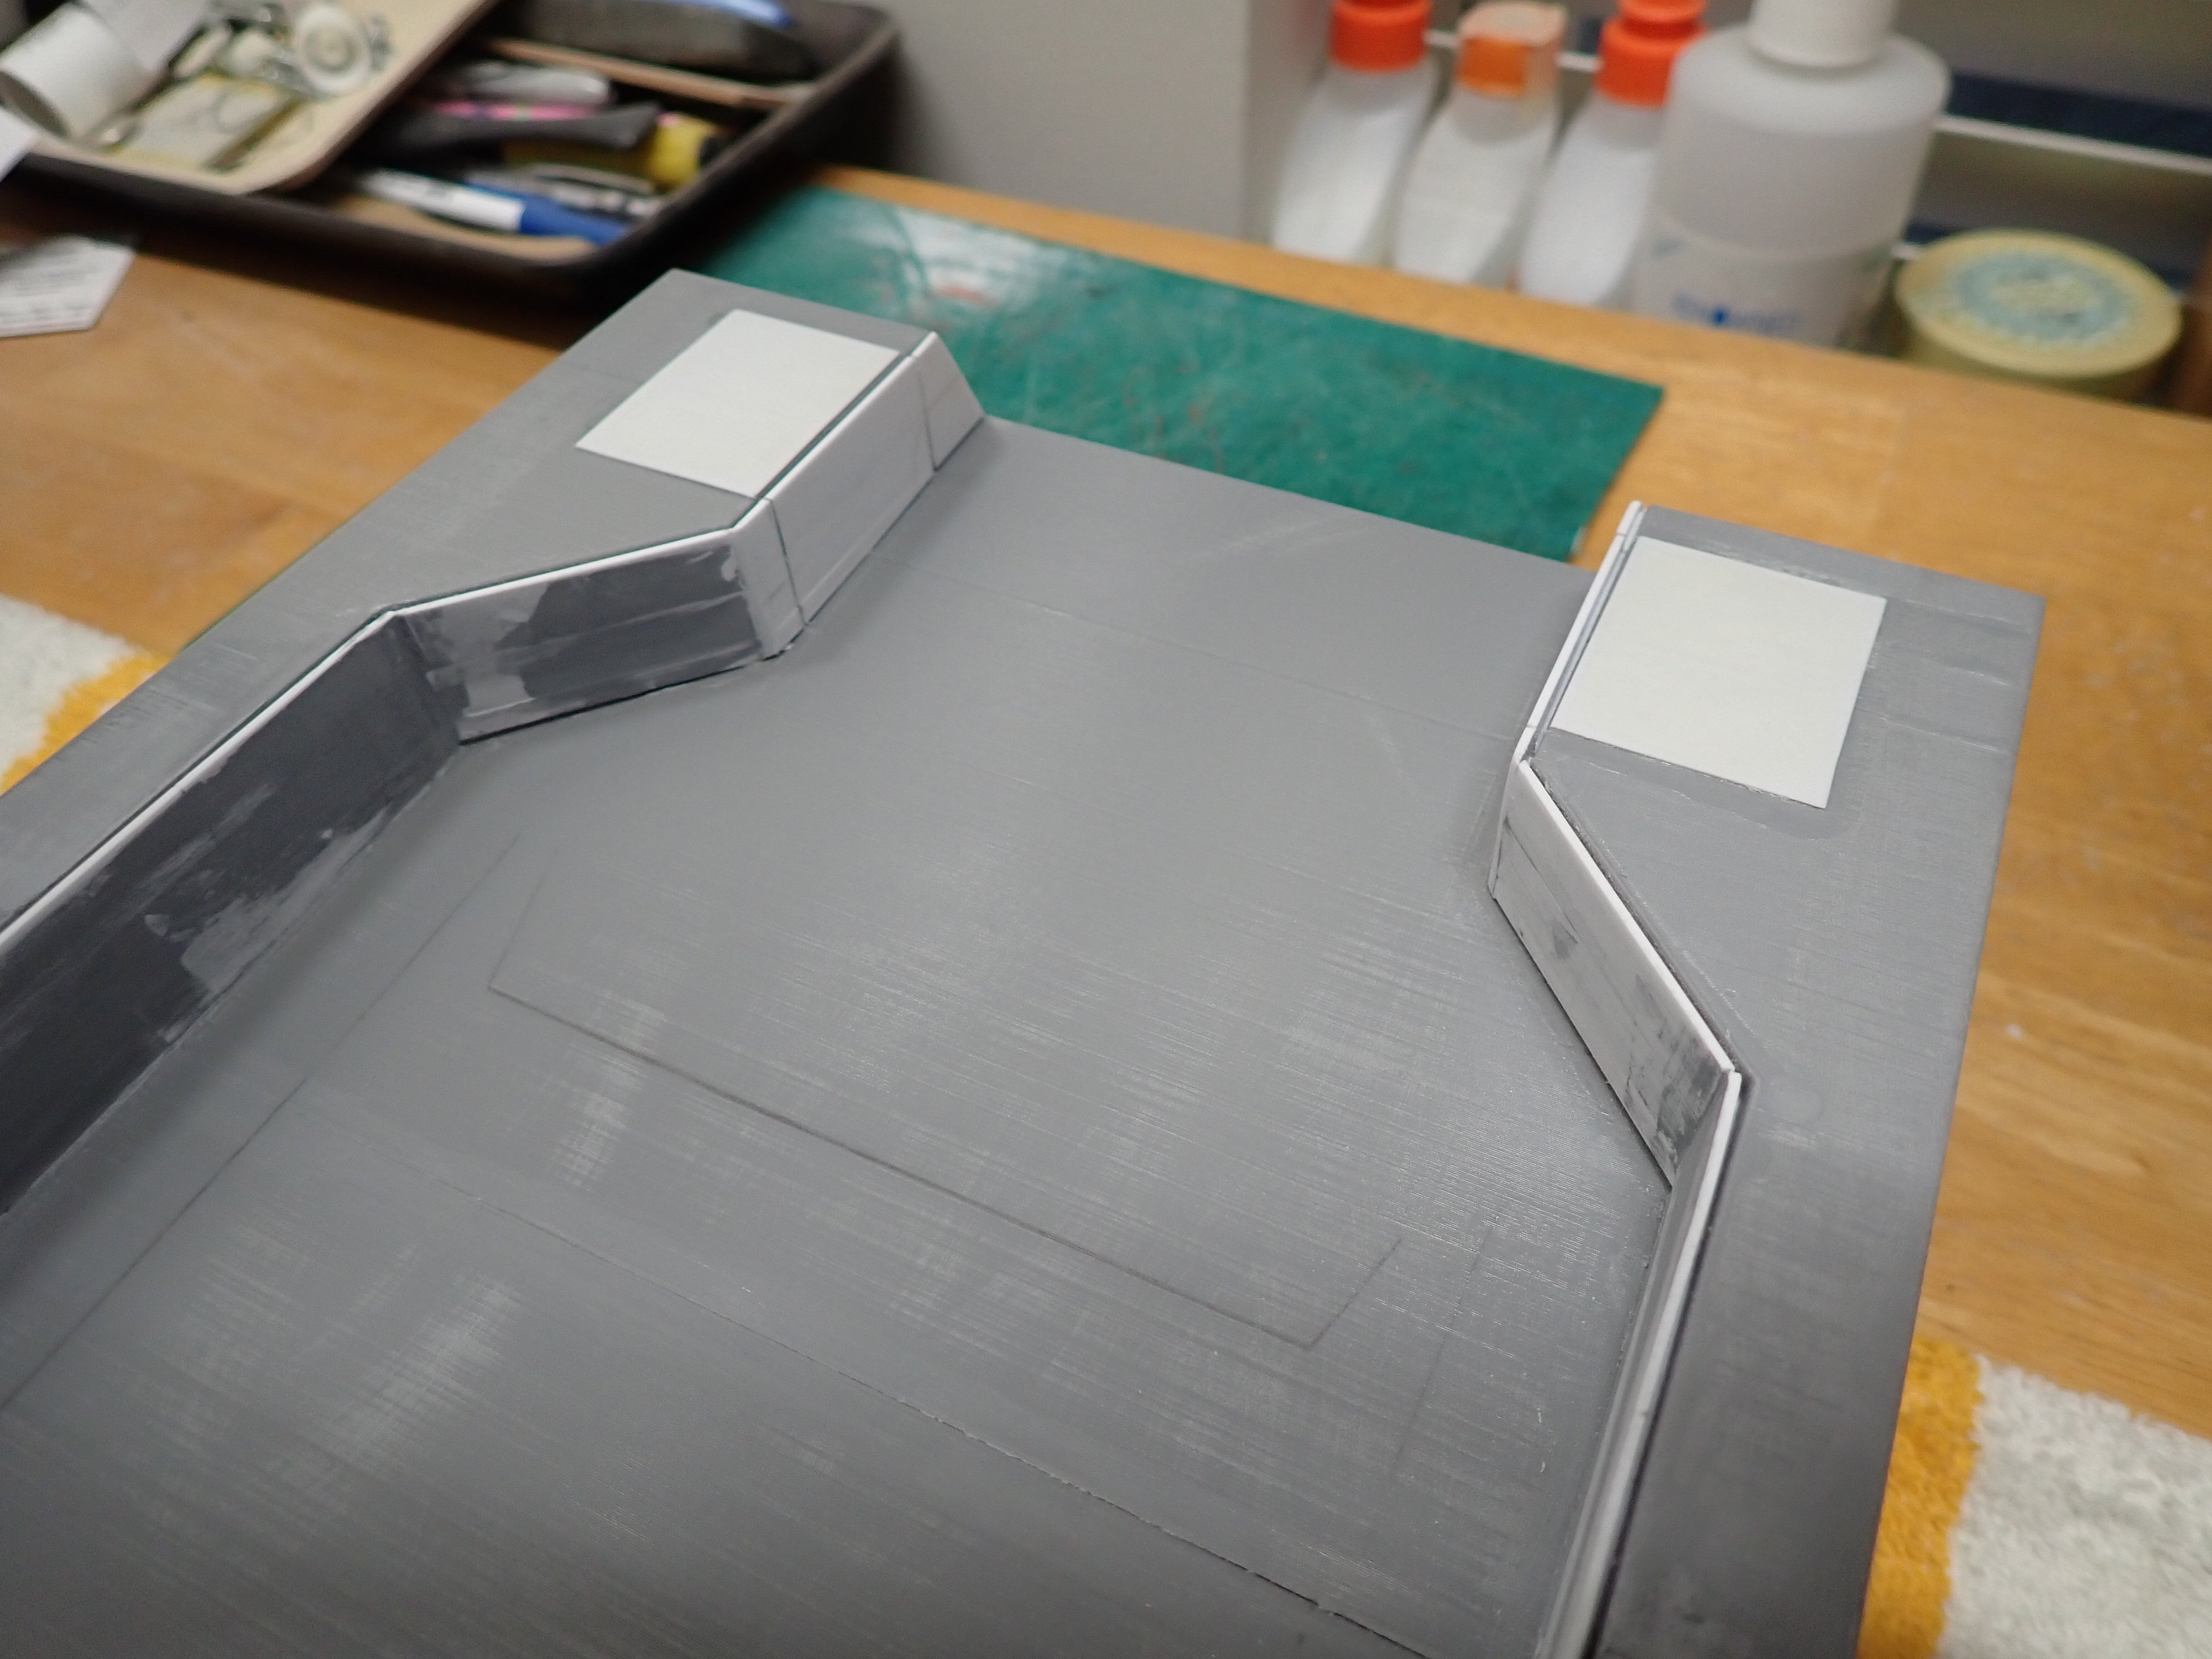
I am now working on the second module and after cutting a large opening in the middle, I have glued it to the bow: The very sharp and aggressive shape of the hull, can already be felt. To move at 60 knots on the water, you really need that. The third module is also prepared as the opening will protrude into it, as well (See below): Using Tinkercad (I am no expert in designing my printing parts), I created a long window that would fit and provide some transparency, as the prototype is equipped: For the first time, I am using PETG filament (versus the PLA used to make the hull parts) in green translucent color. On the ENDER 3v2, the bed should be heated at 85 C and the nozzle at 220 C for a decent result. Printing speed is reduced to 50% to allow for a good adhesion with the build plate. PLA uses 60 C and 200 C respectively. Yves


-
You are correct Javelin, and I have corrected my original post to $4,000 per hour in kerosene. I feel better and can now envision longer trips...:-) Yves
-
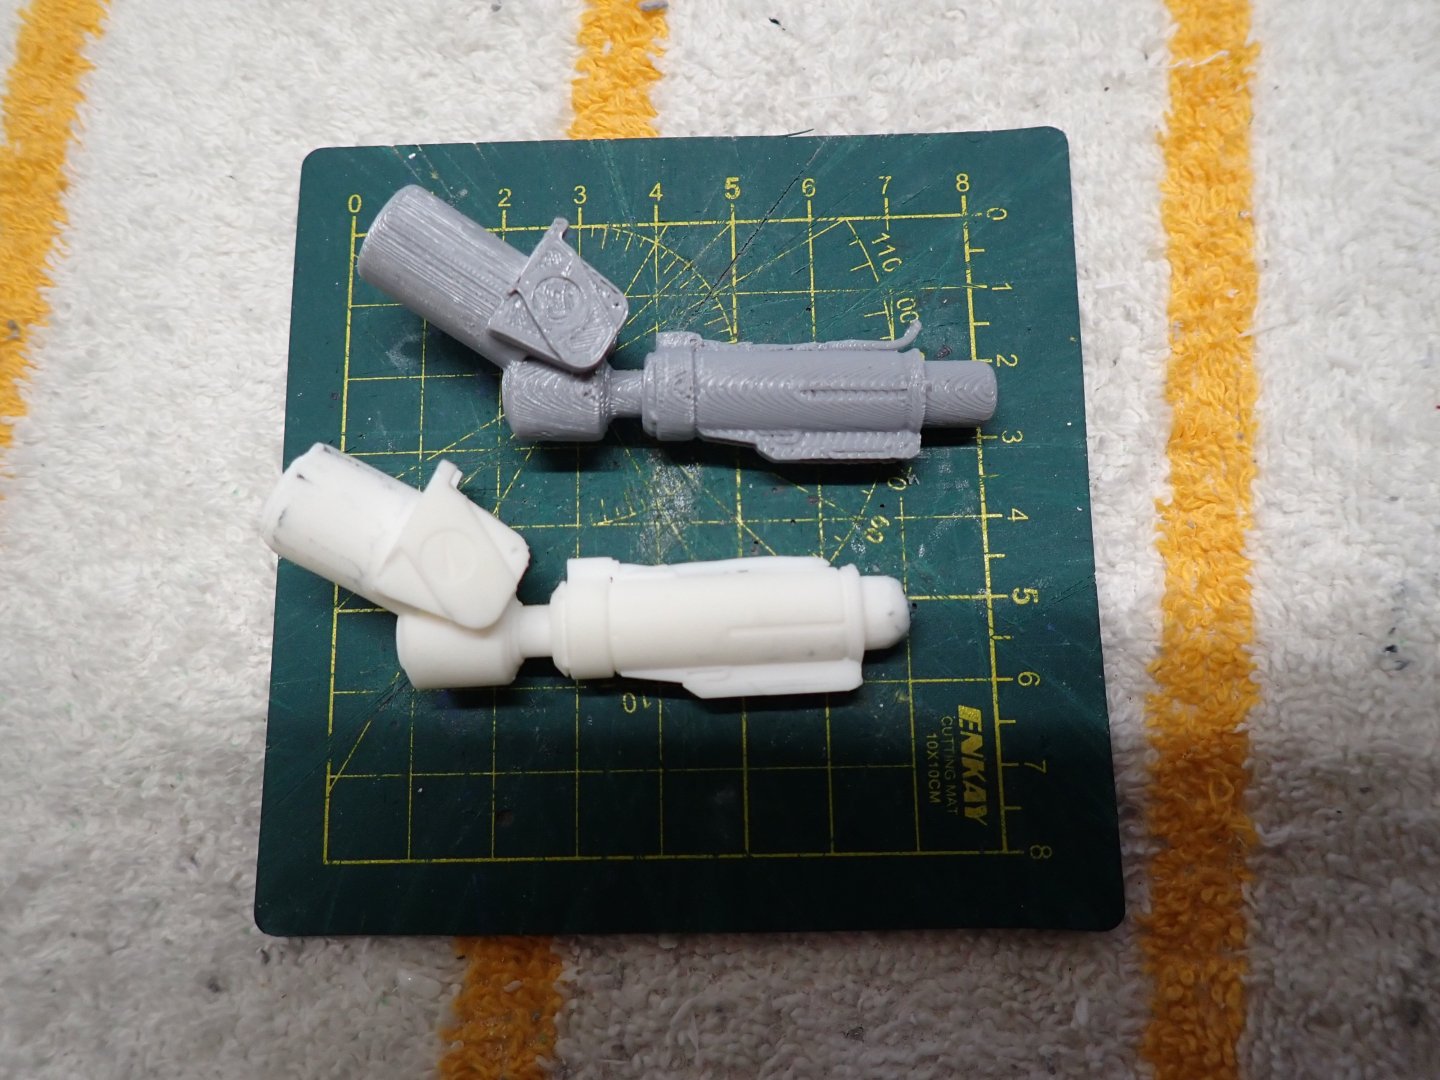
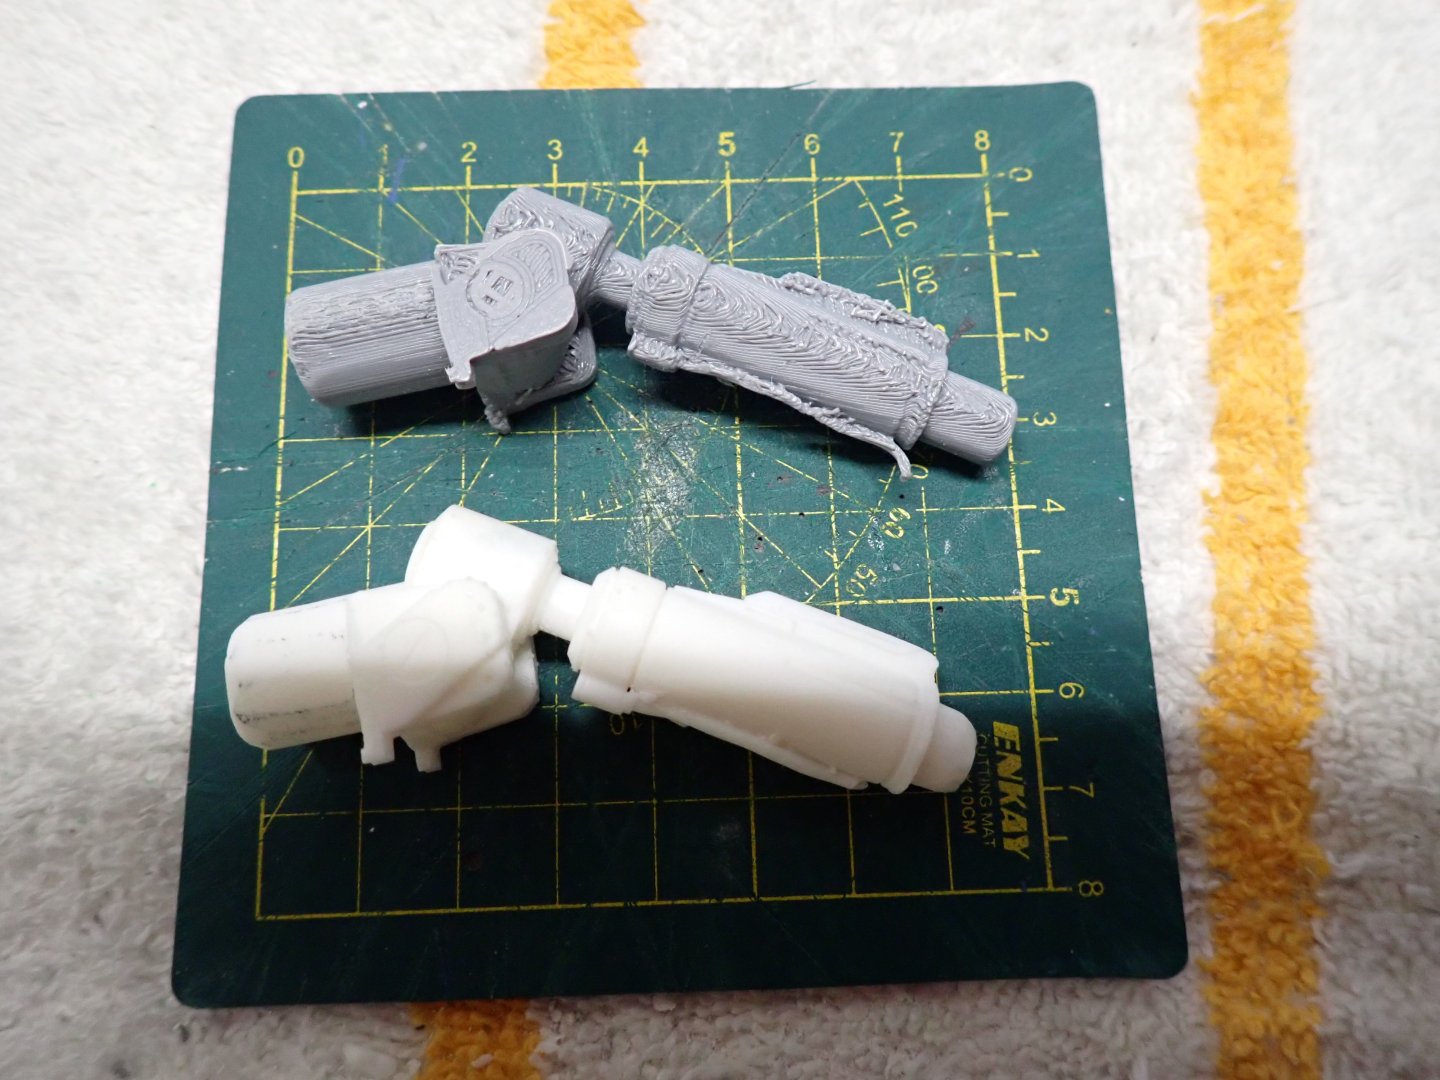
I started printing some resin parts and I am extremely pleased by the easiness of the printing process (not the cleaning 😞 ) and the quality of the results. For example, you can see below a filament and resin prints of the same part: This side of the parts (above) would be acceptable after placing some putty and a lot of sanding. But the other side (below) is horrible due to the supports that are required when printing with filaments (at least with my old printer). Resin is definitely the way to go for small and complex parts. Yves
-
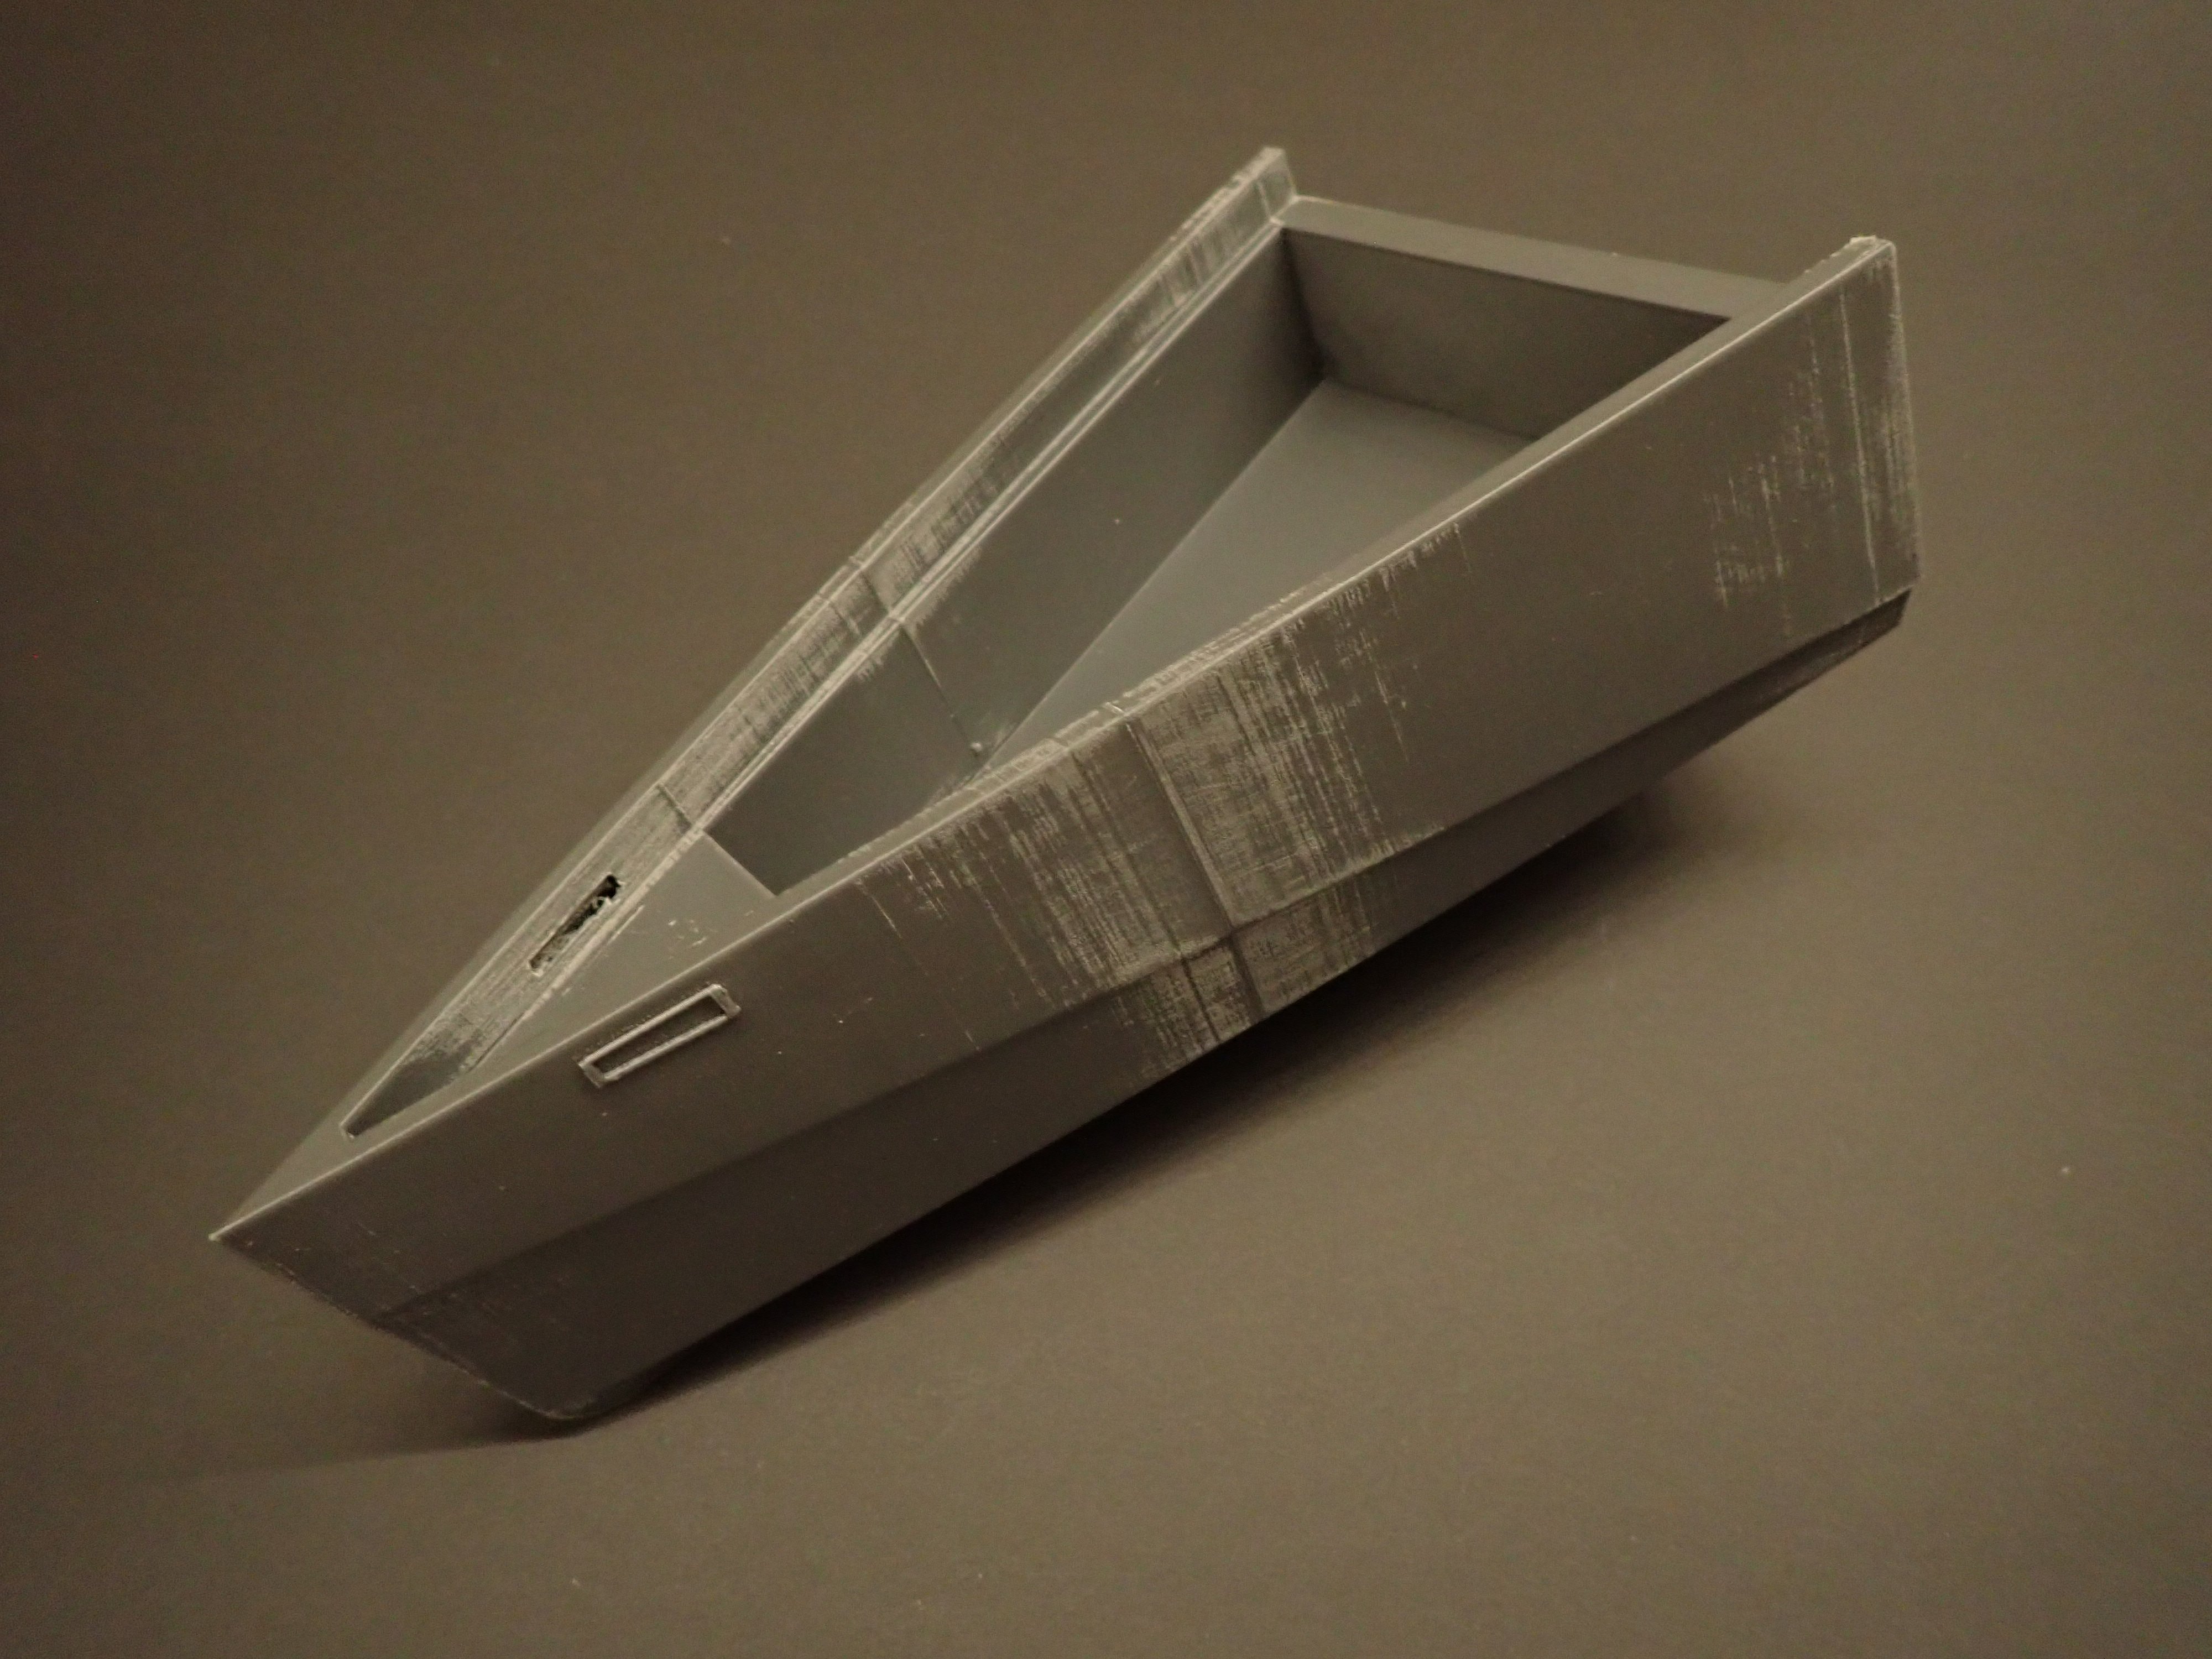
I am trying to work on one hull module at a time. It simplifies the operations and allow me to be more comfortable, since the fully assembled hull is quite long and wide. The bow module houses a tender which is not correct in the provided CGTrader STL set of files. The 118 uses an inflatable tender with a solid base for the wheel and the seats. The length of the original tender is 4.50 meters. A small crane located in the bow, allows the extraction of the tender from inside the hull, all the way to the water. The reverse is also happening. The main deck on the bow is lifting up to allow the extraction of the tender, thanks to 3 hydraulic lifts. The video below (left bottom image) provides an animation of the tender extraction. We will refer to that short video to show some of the very advanced features of that vessel. My implementation will be much simpler and I will just install the tender inside and provide a magnetic lifting of the bow deck, to allow the display of the tender (and perhaps the crane). Yves


-
I will be showing plenty of pictures of the inside and the engine room. It is unique !!! Yves
-
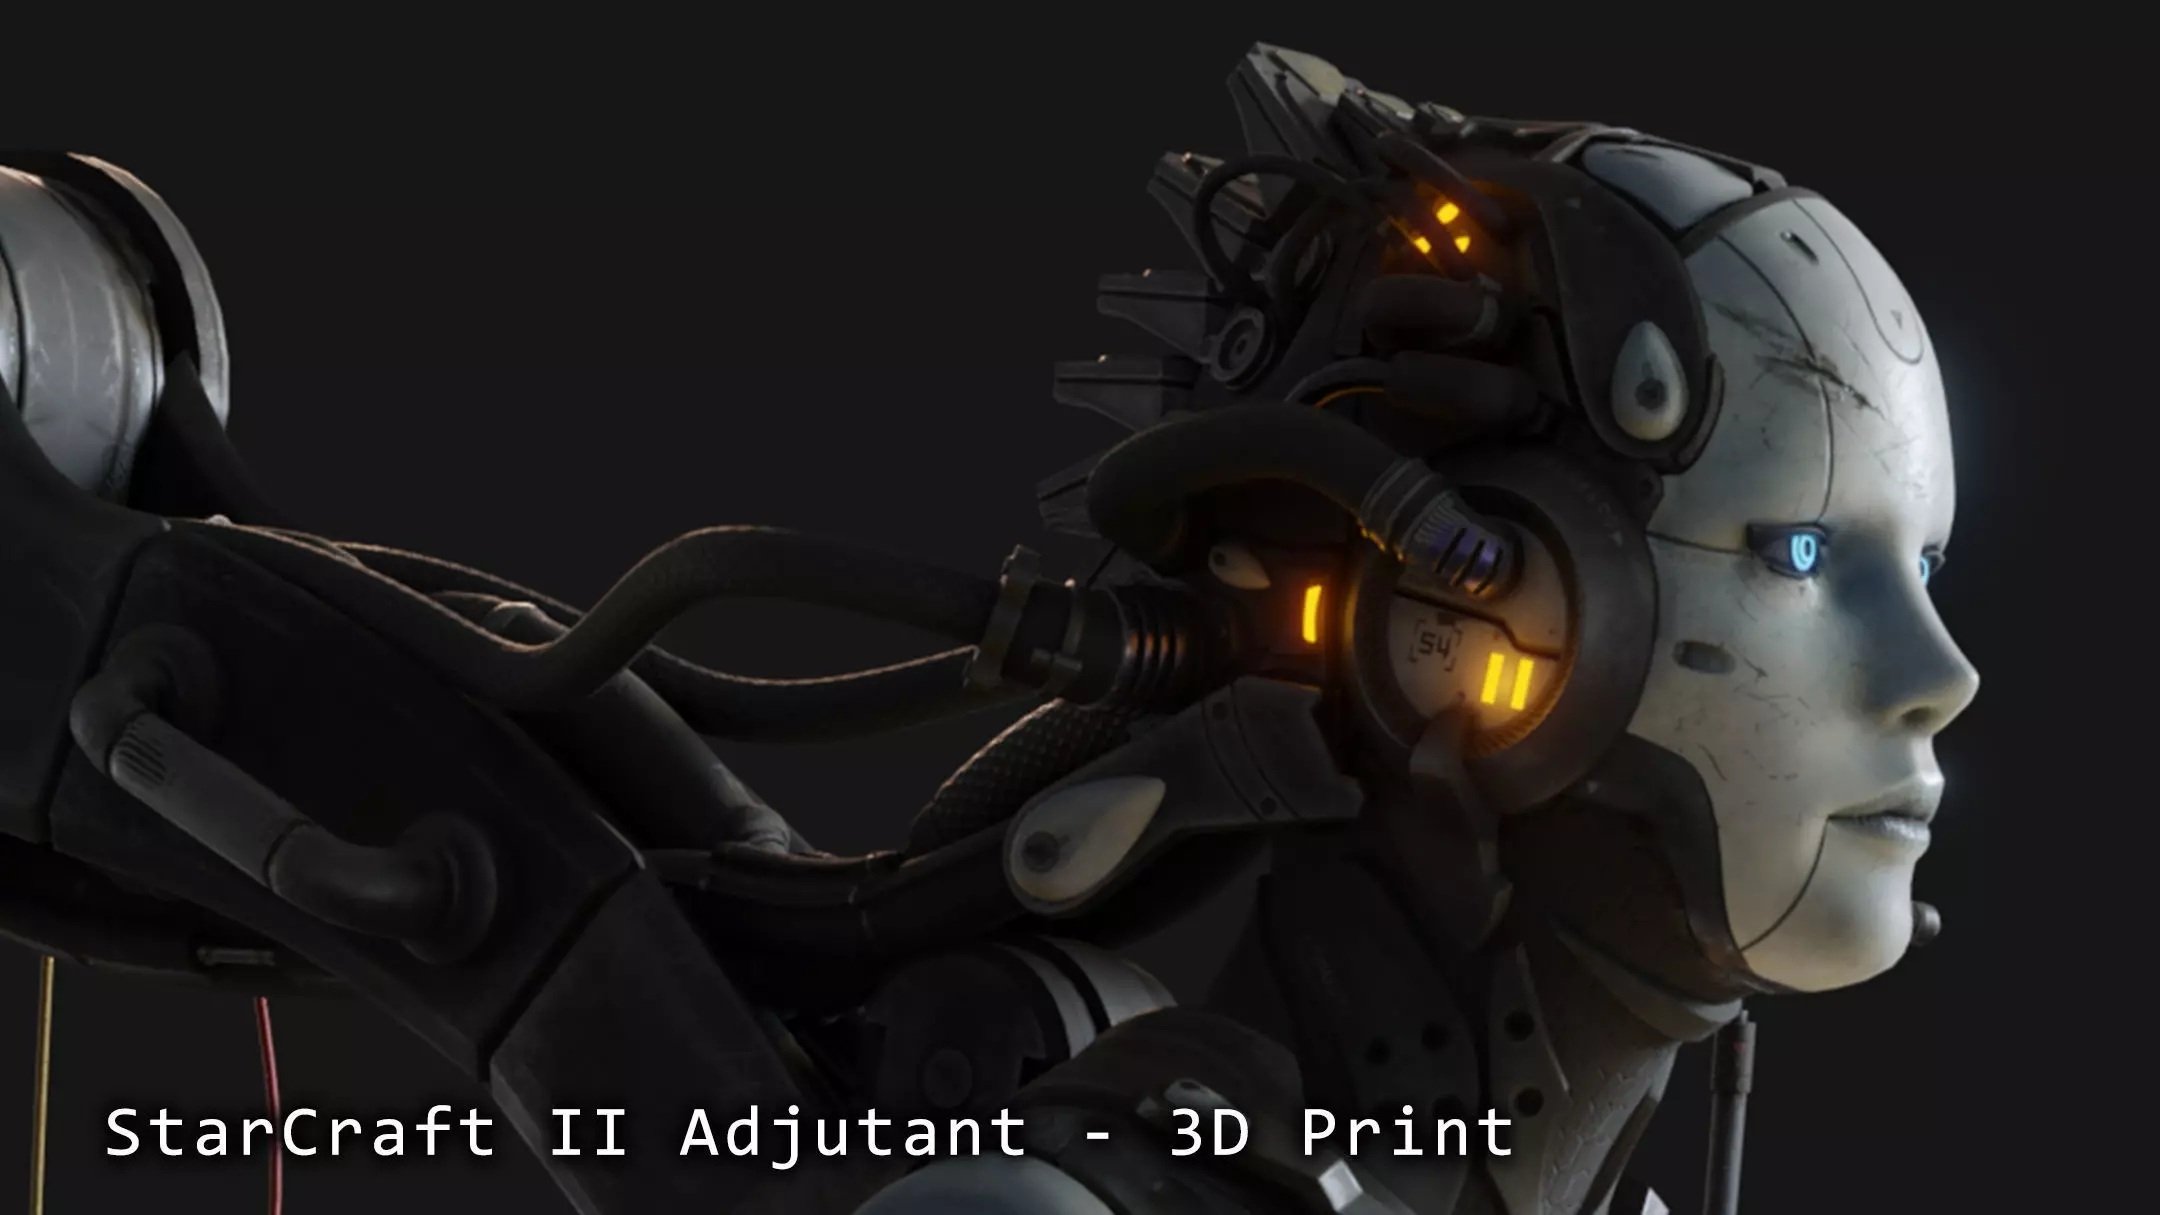
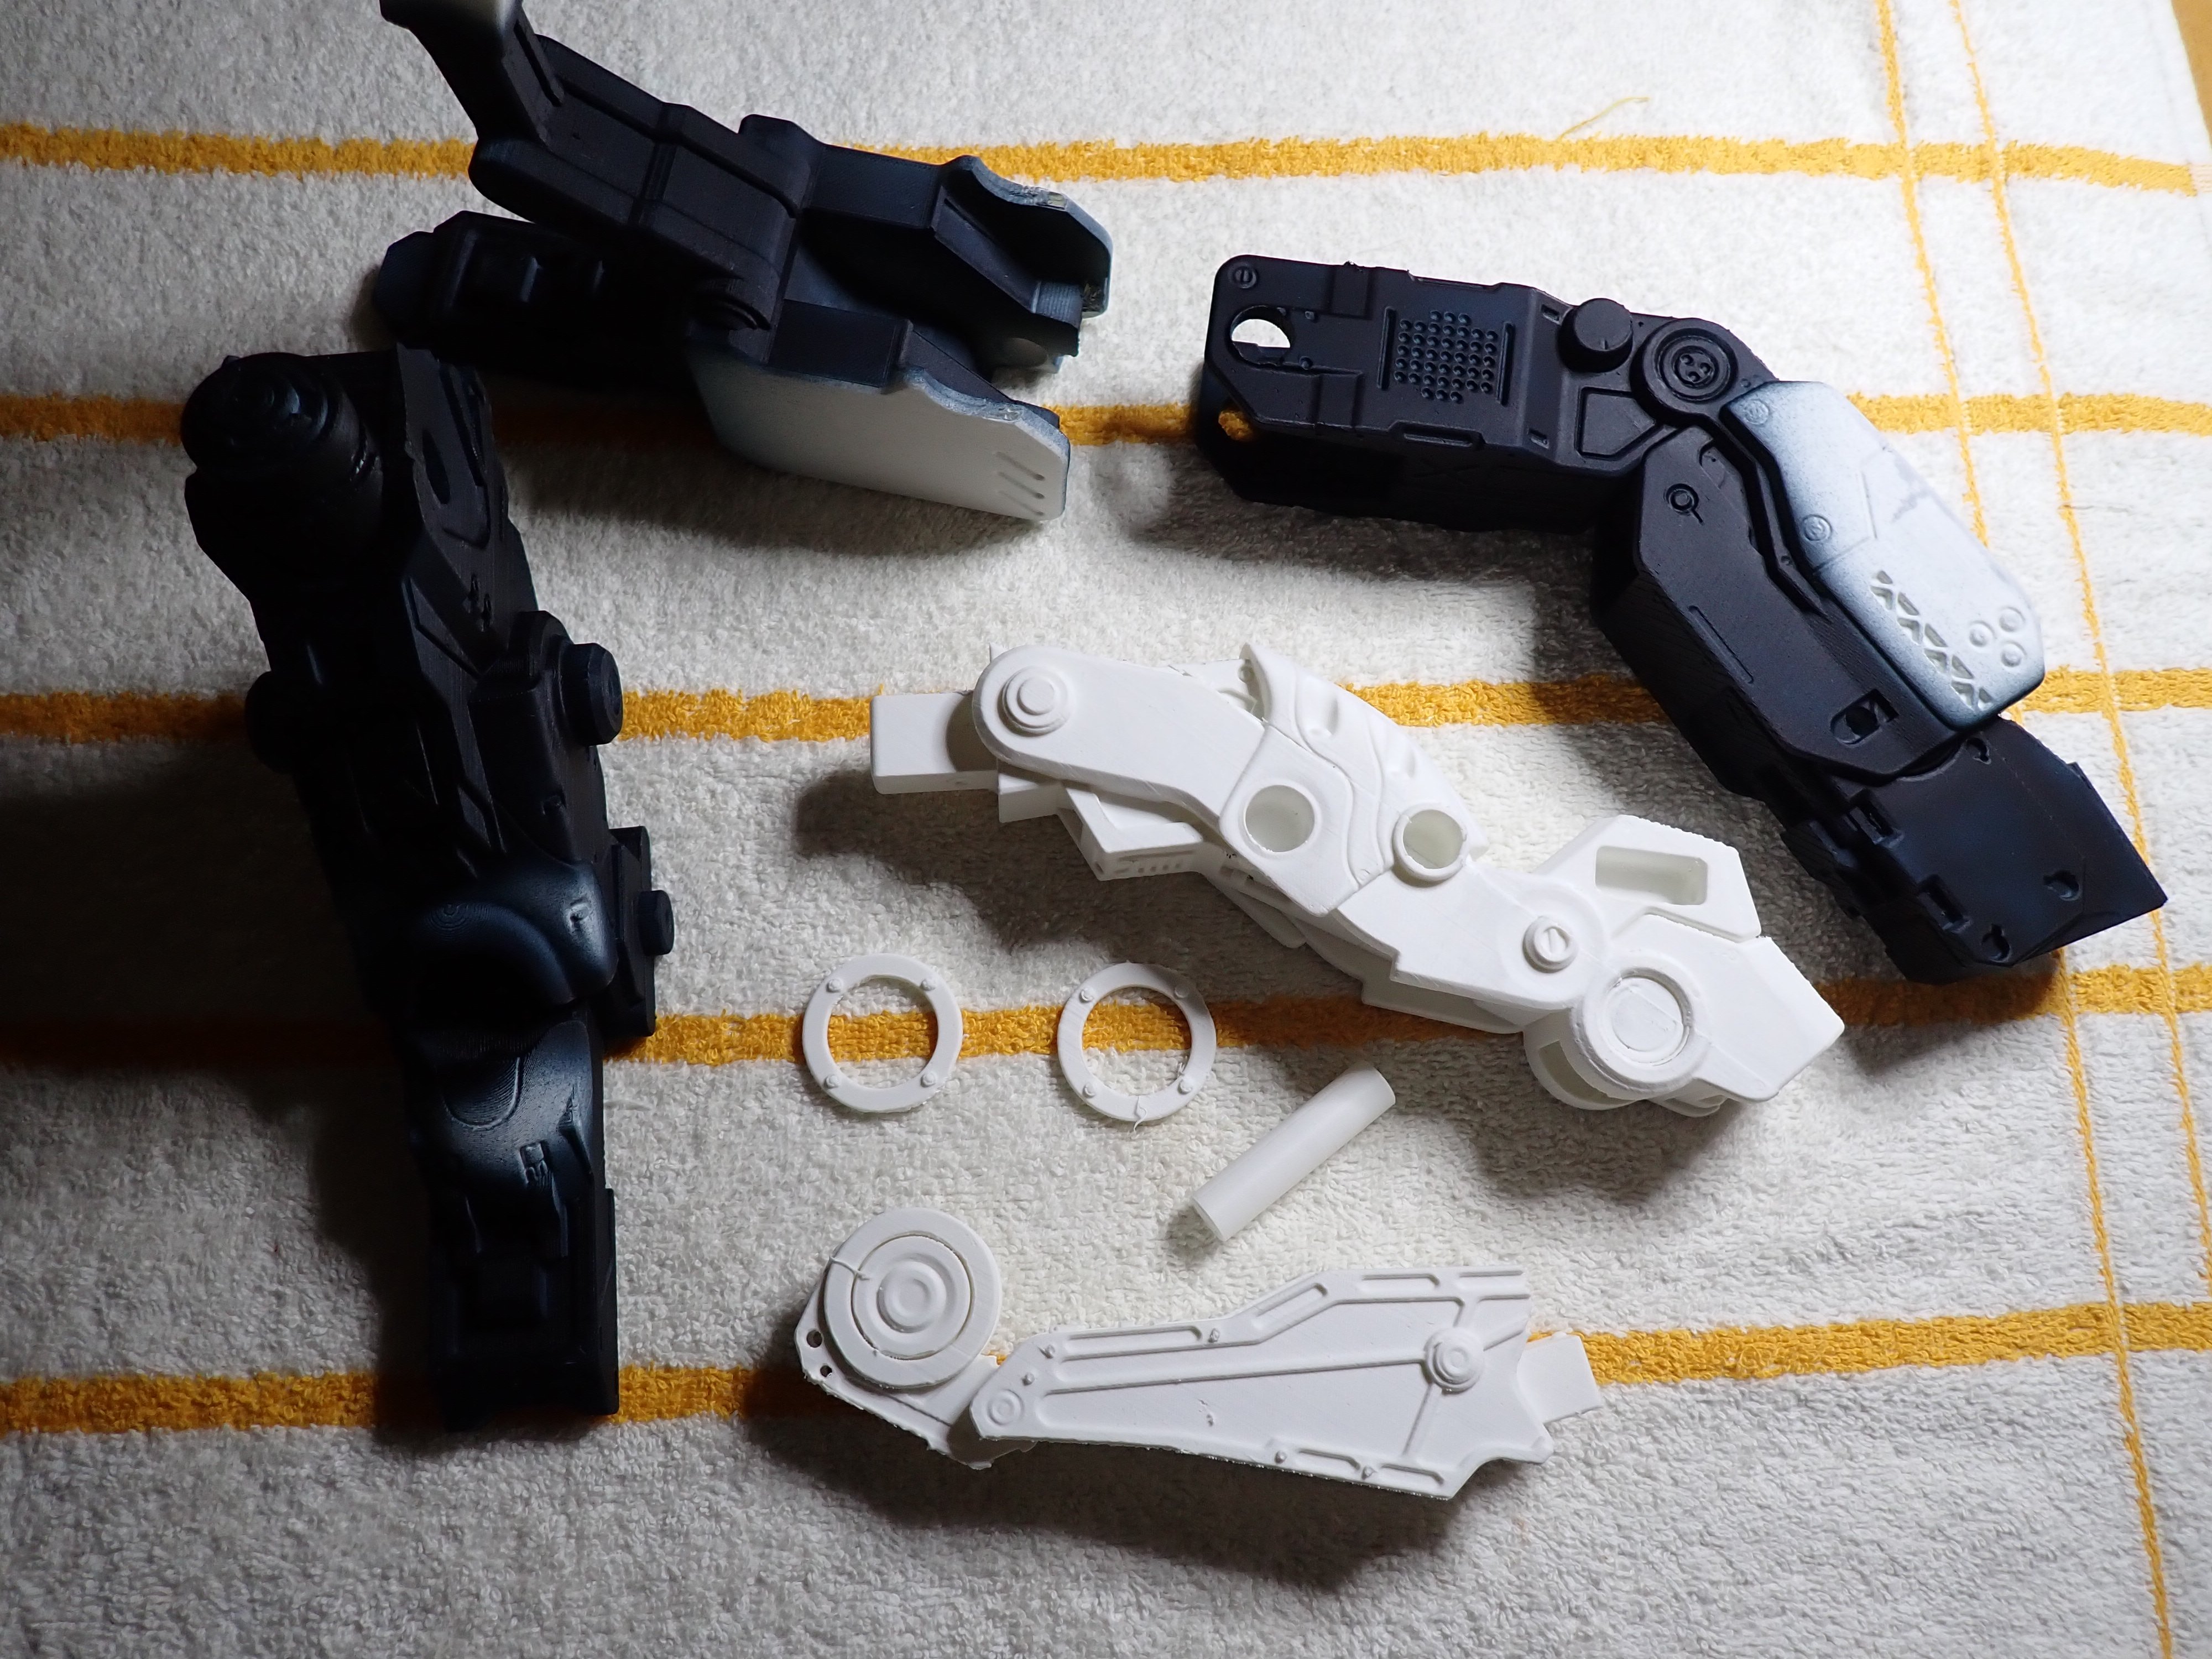
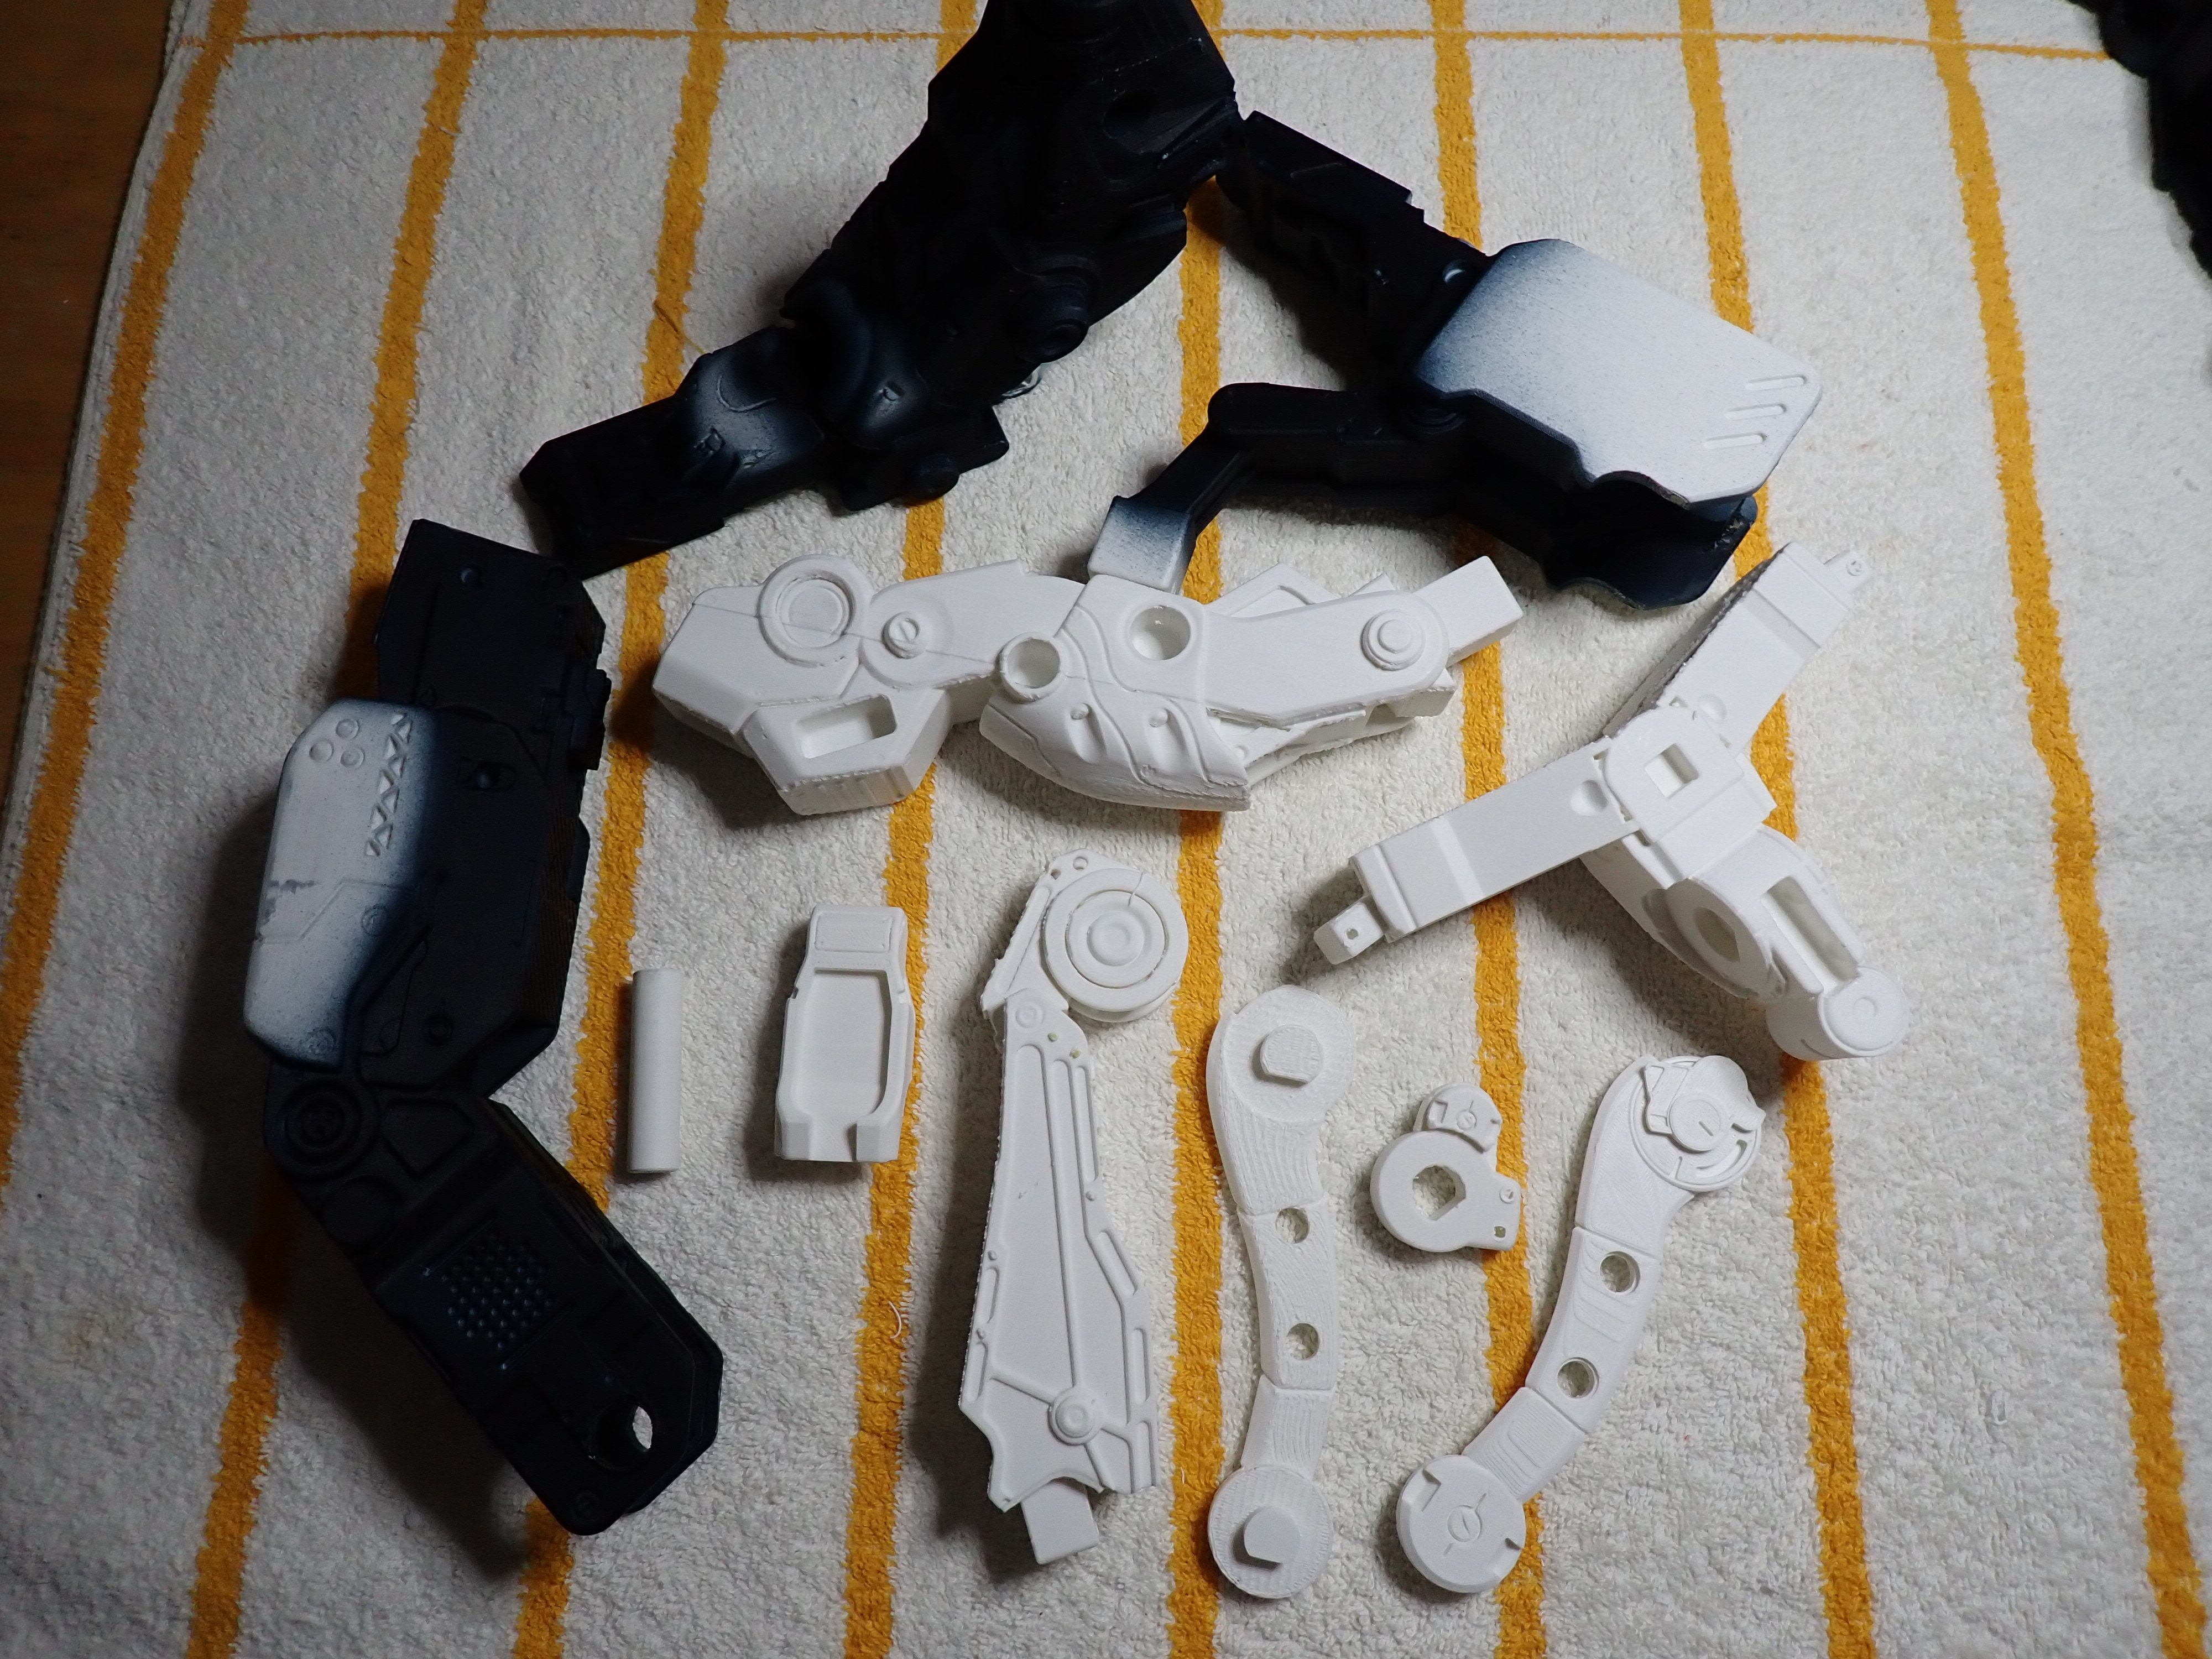
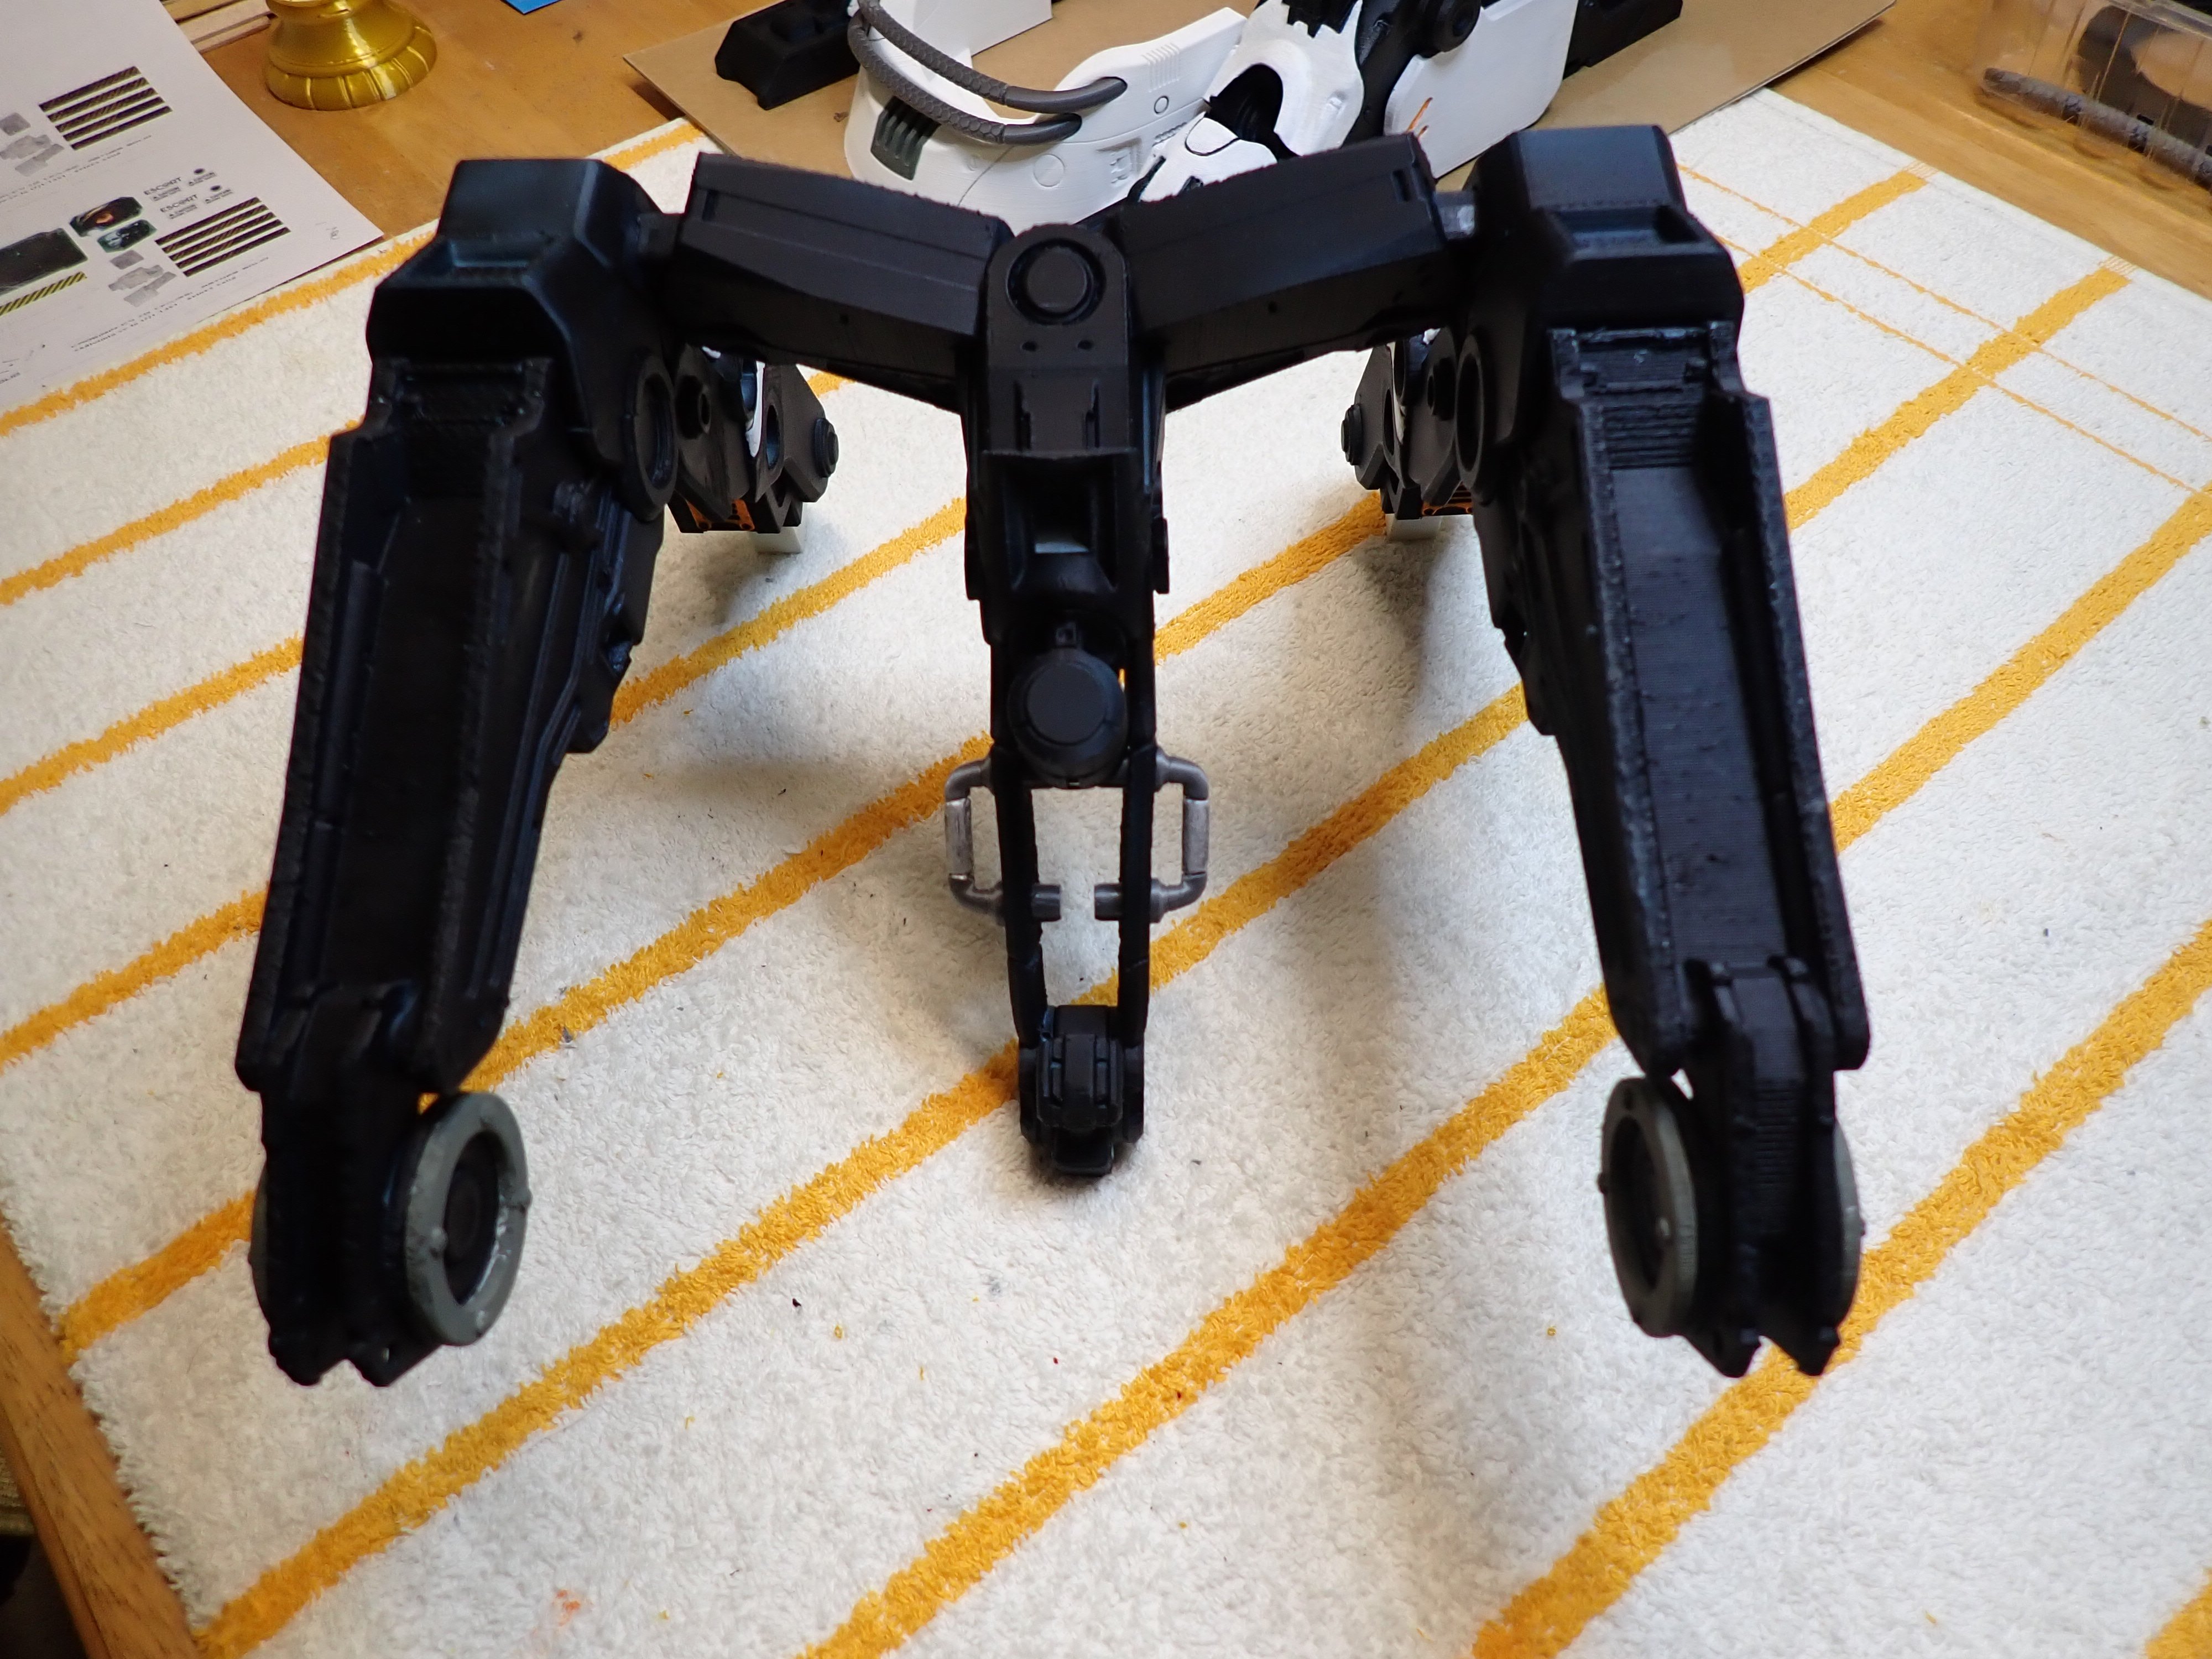
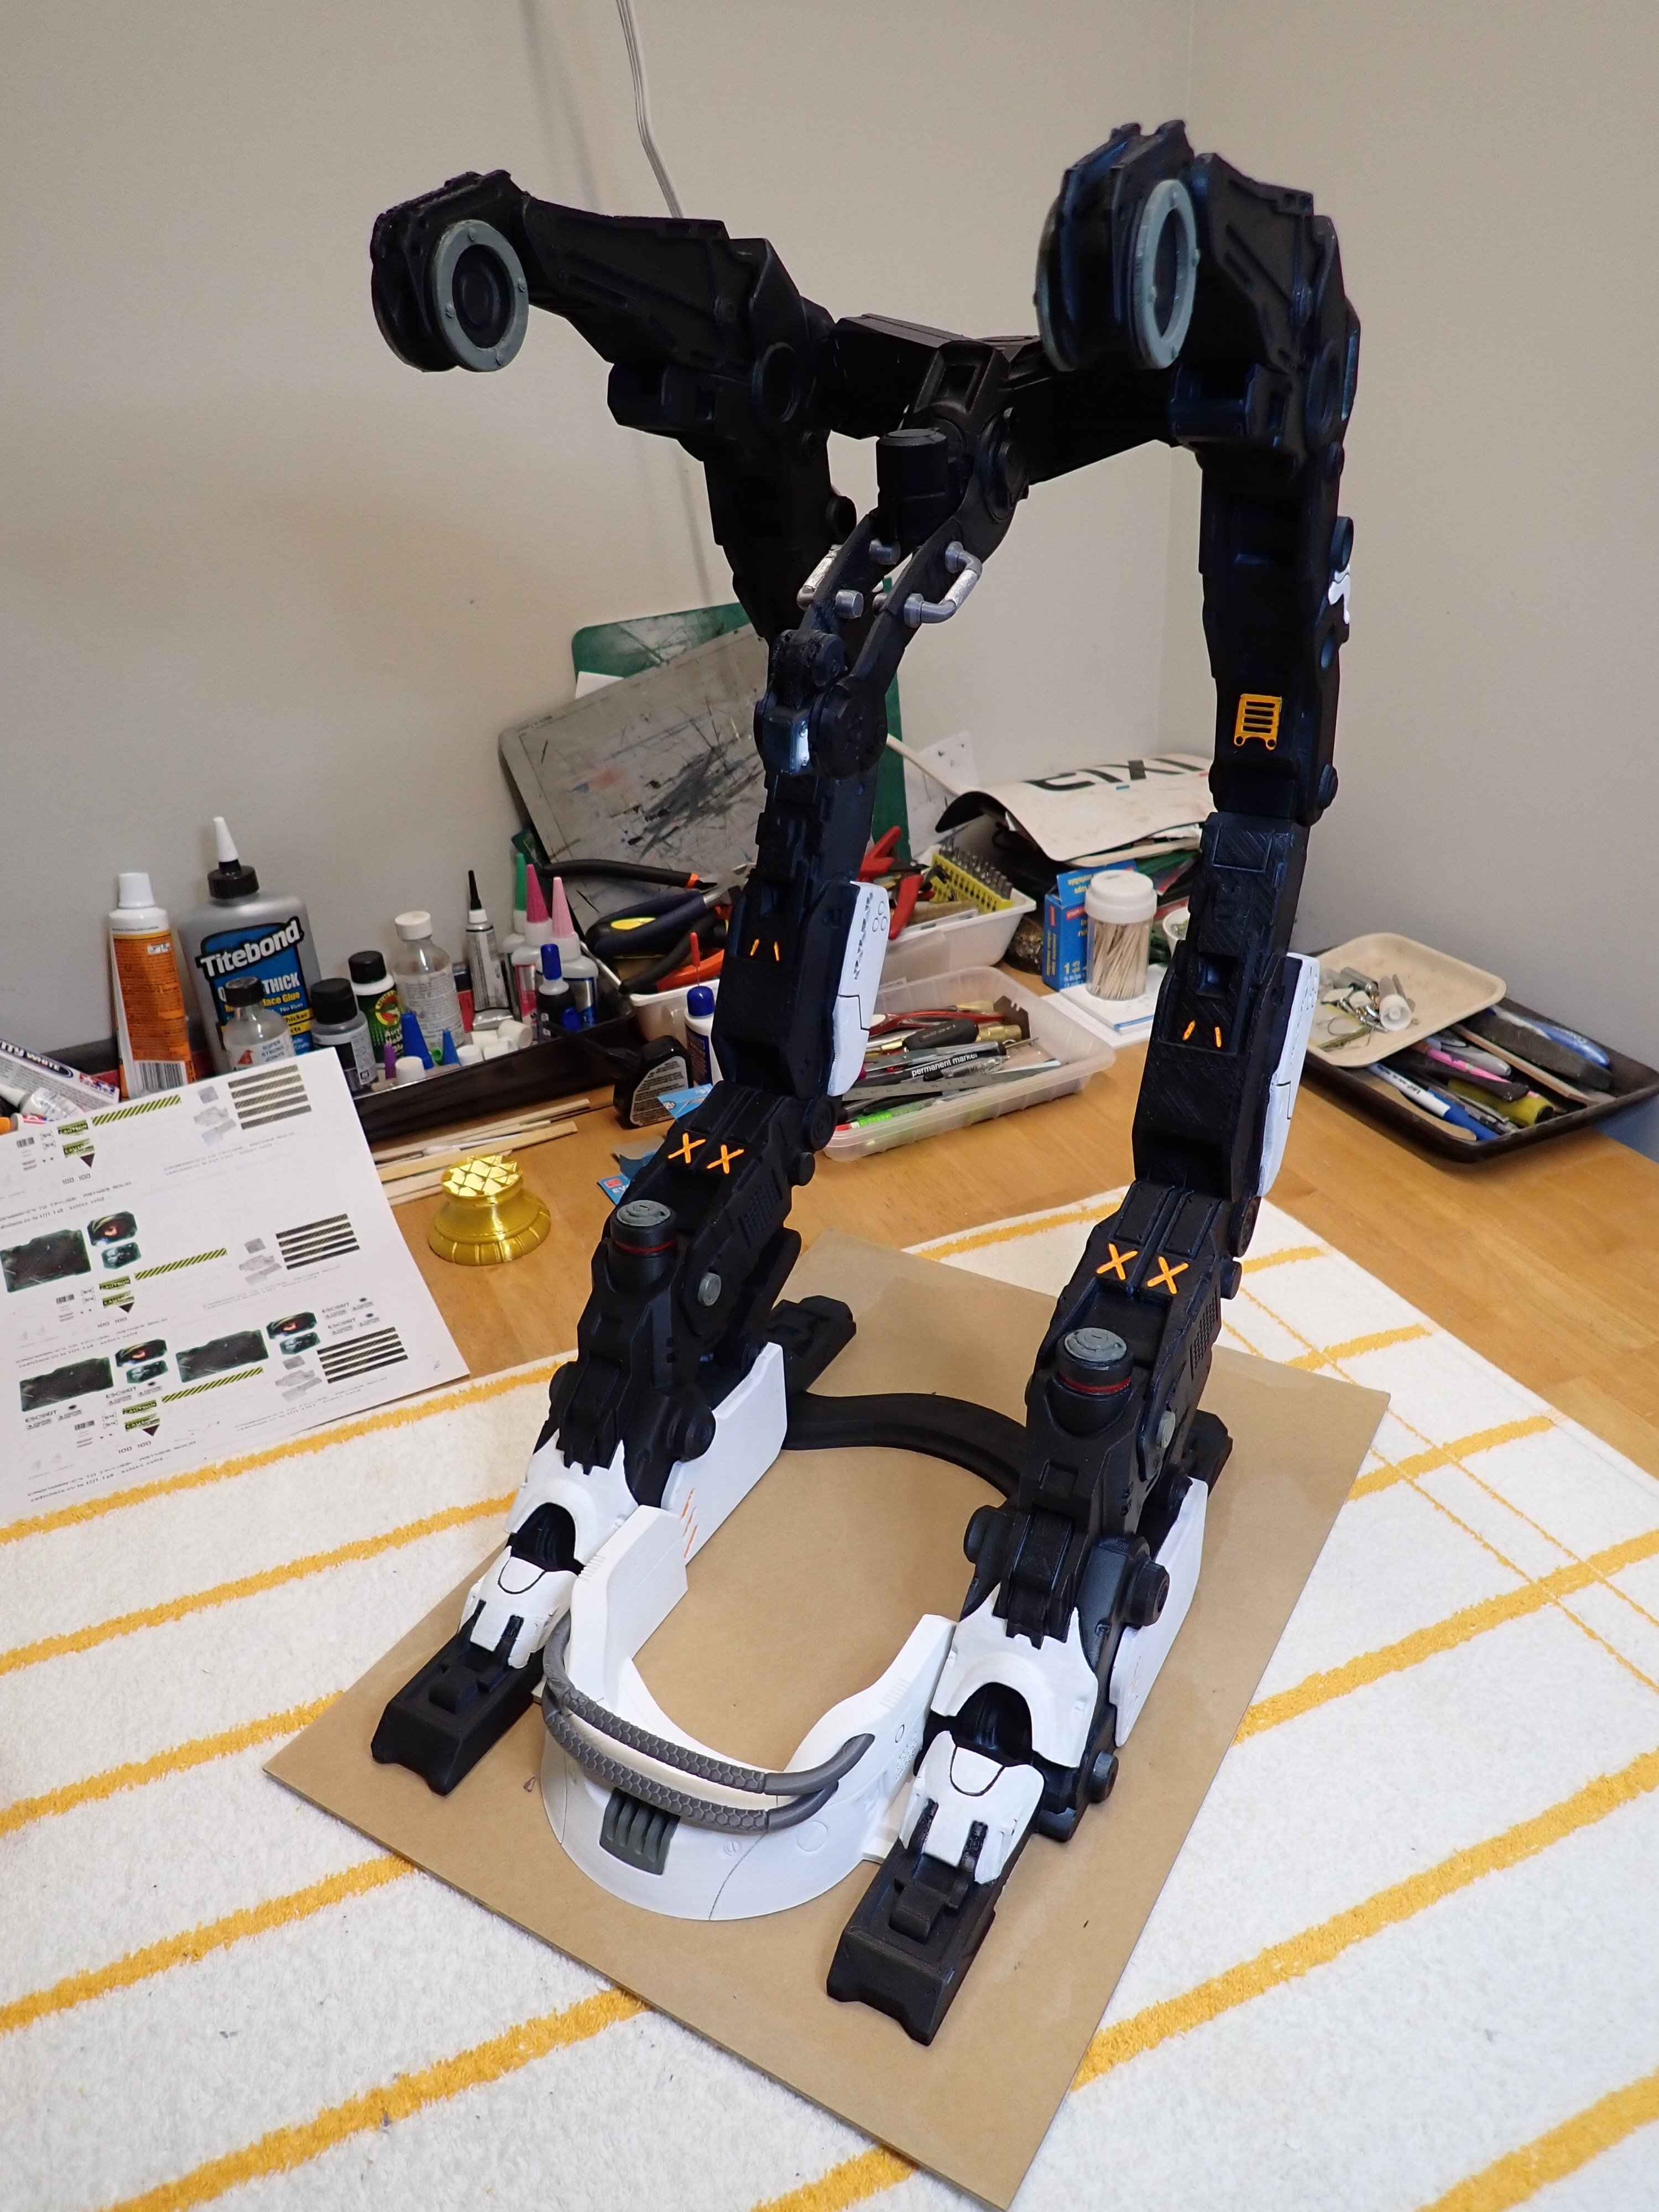
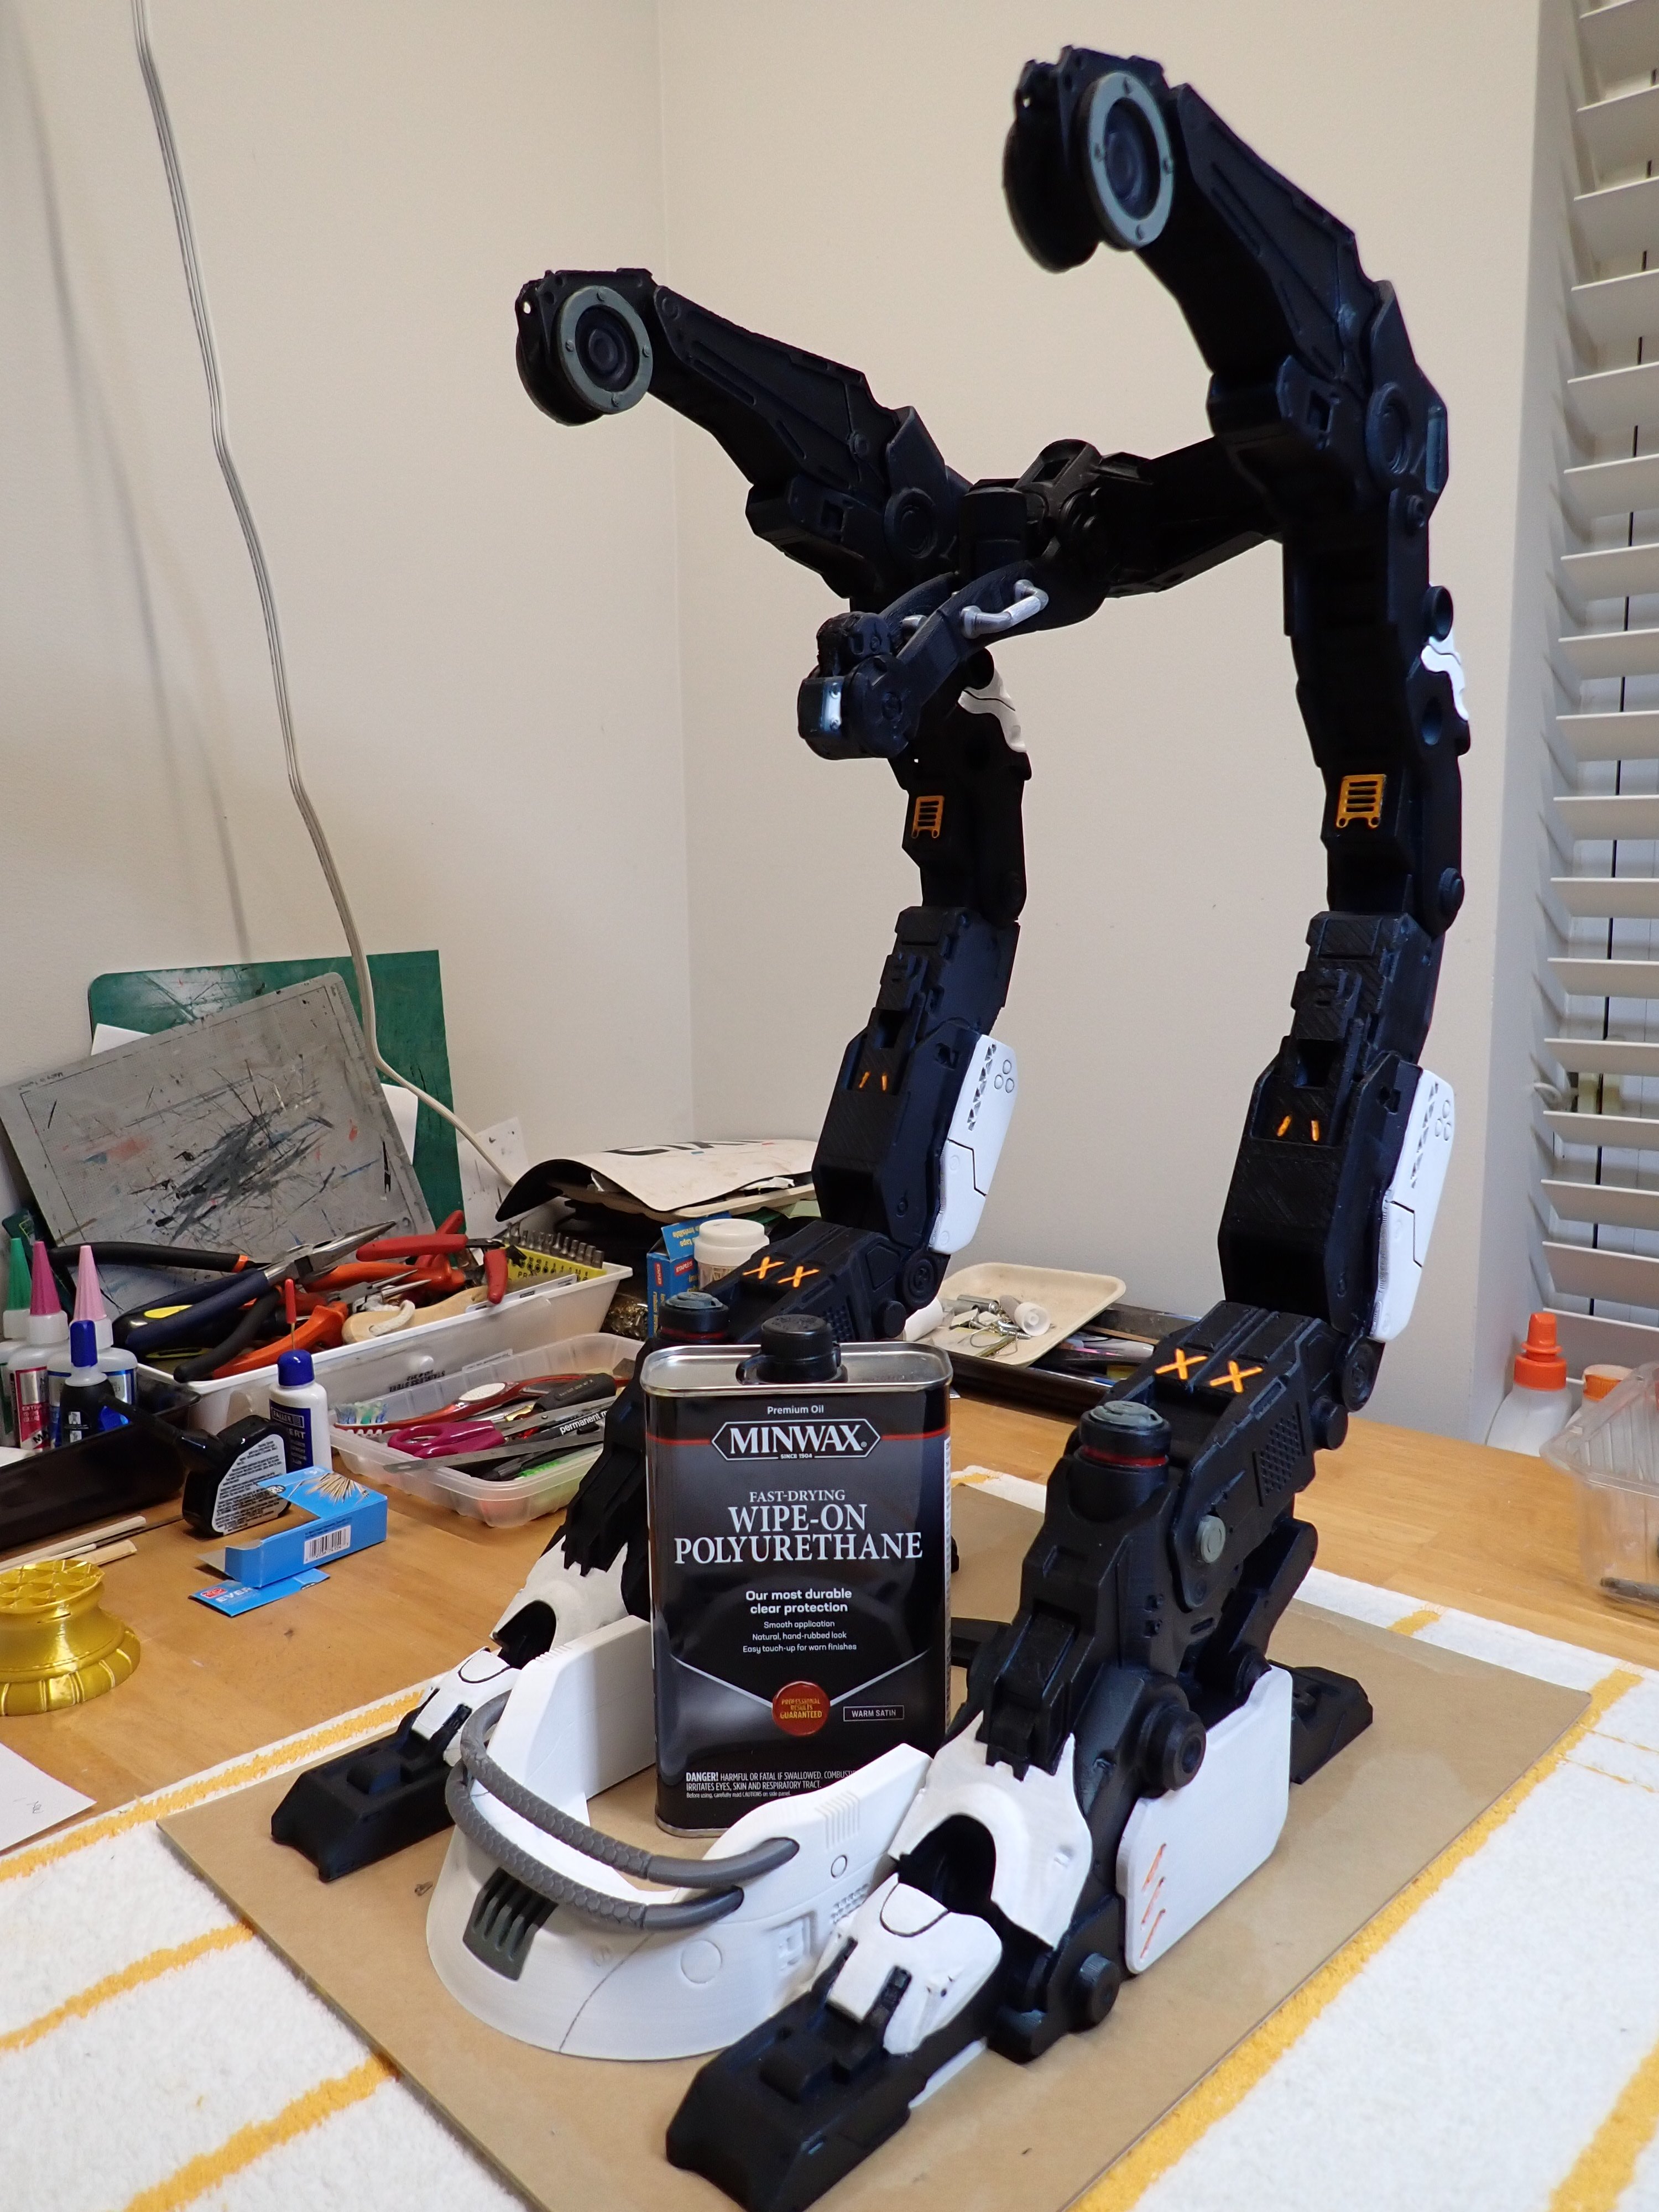
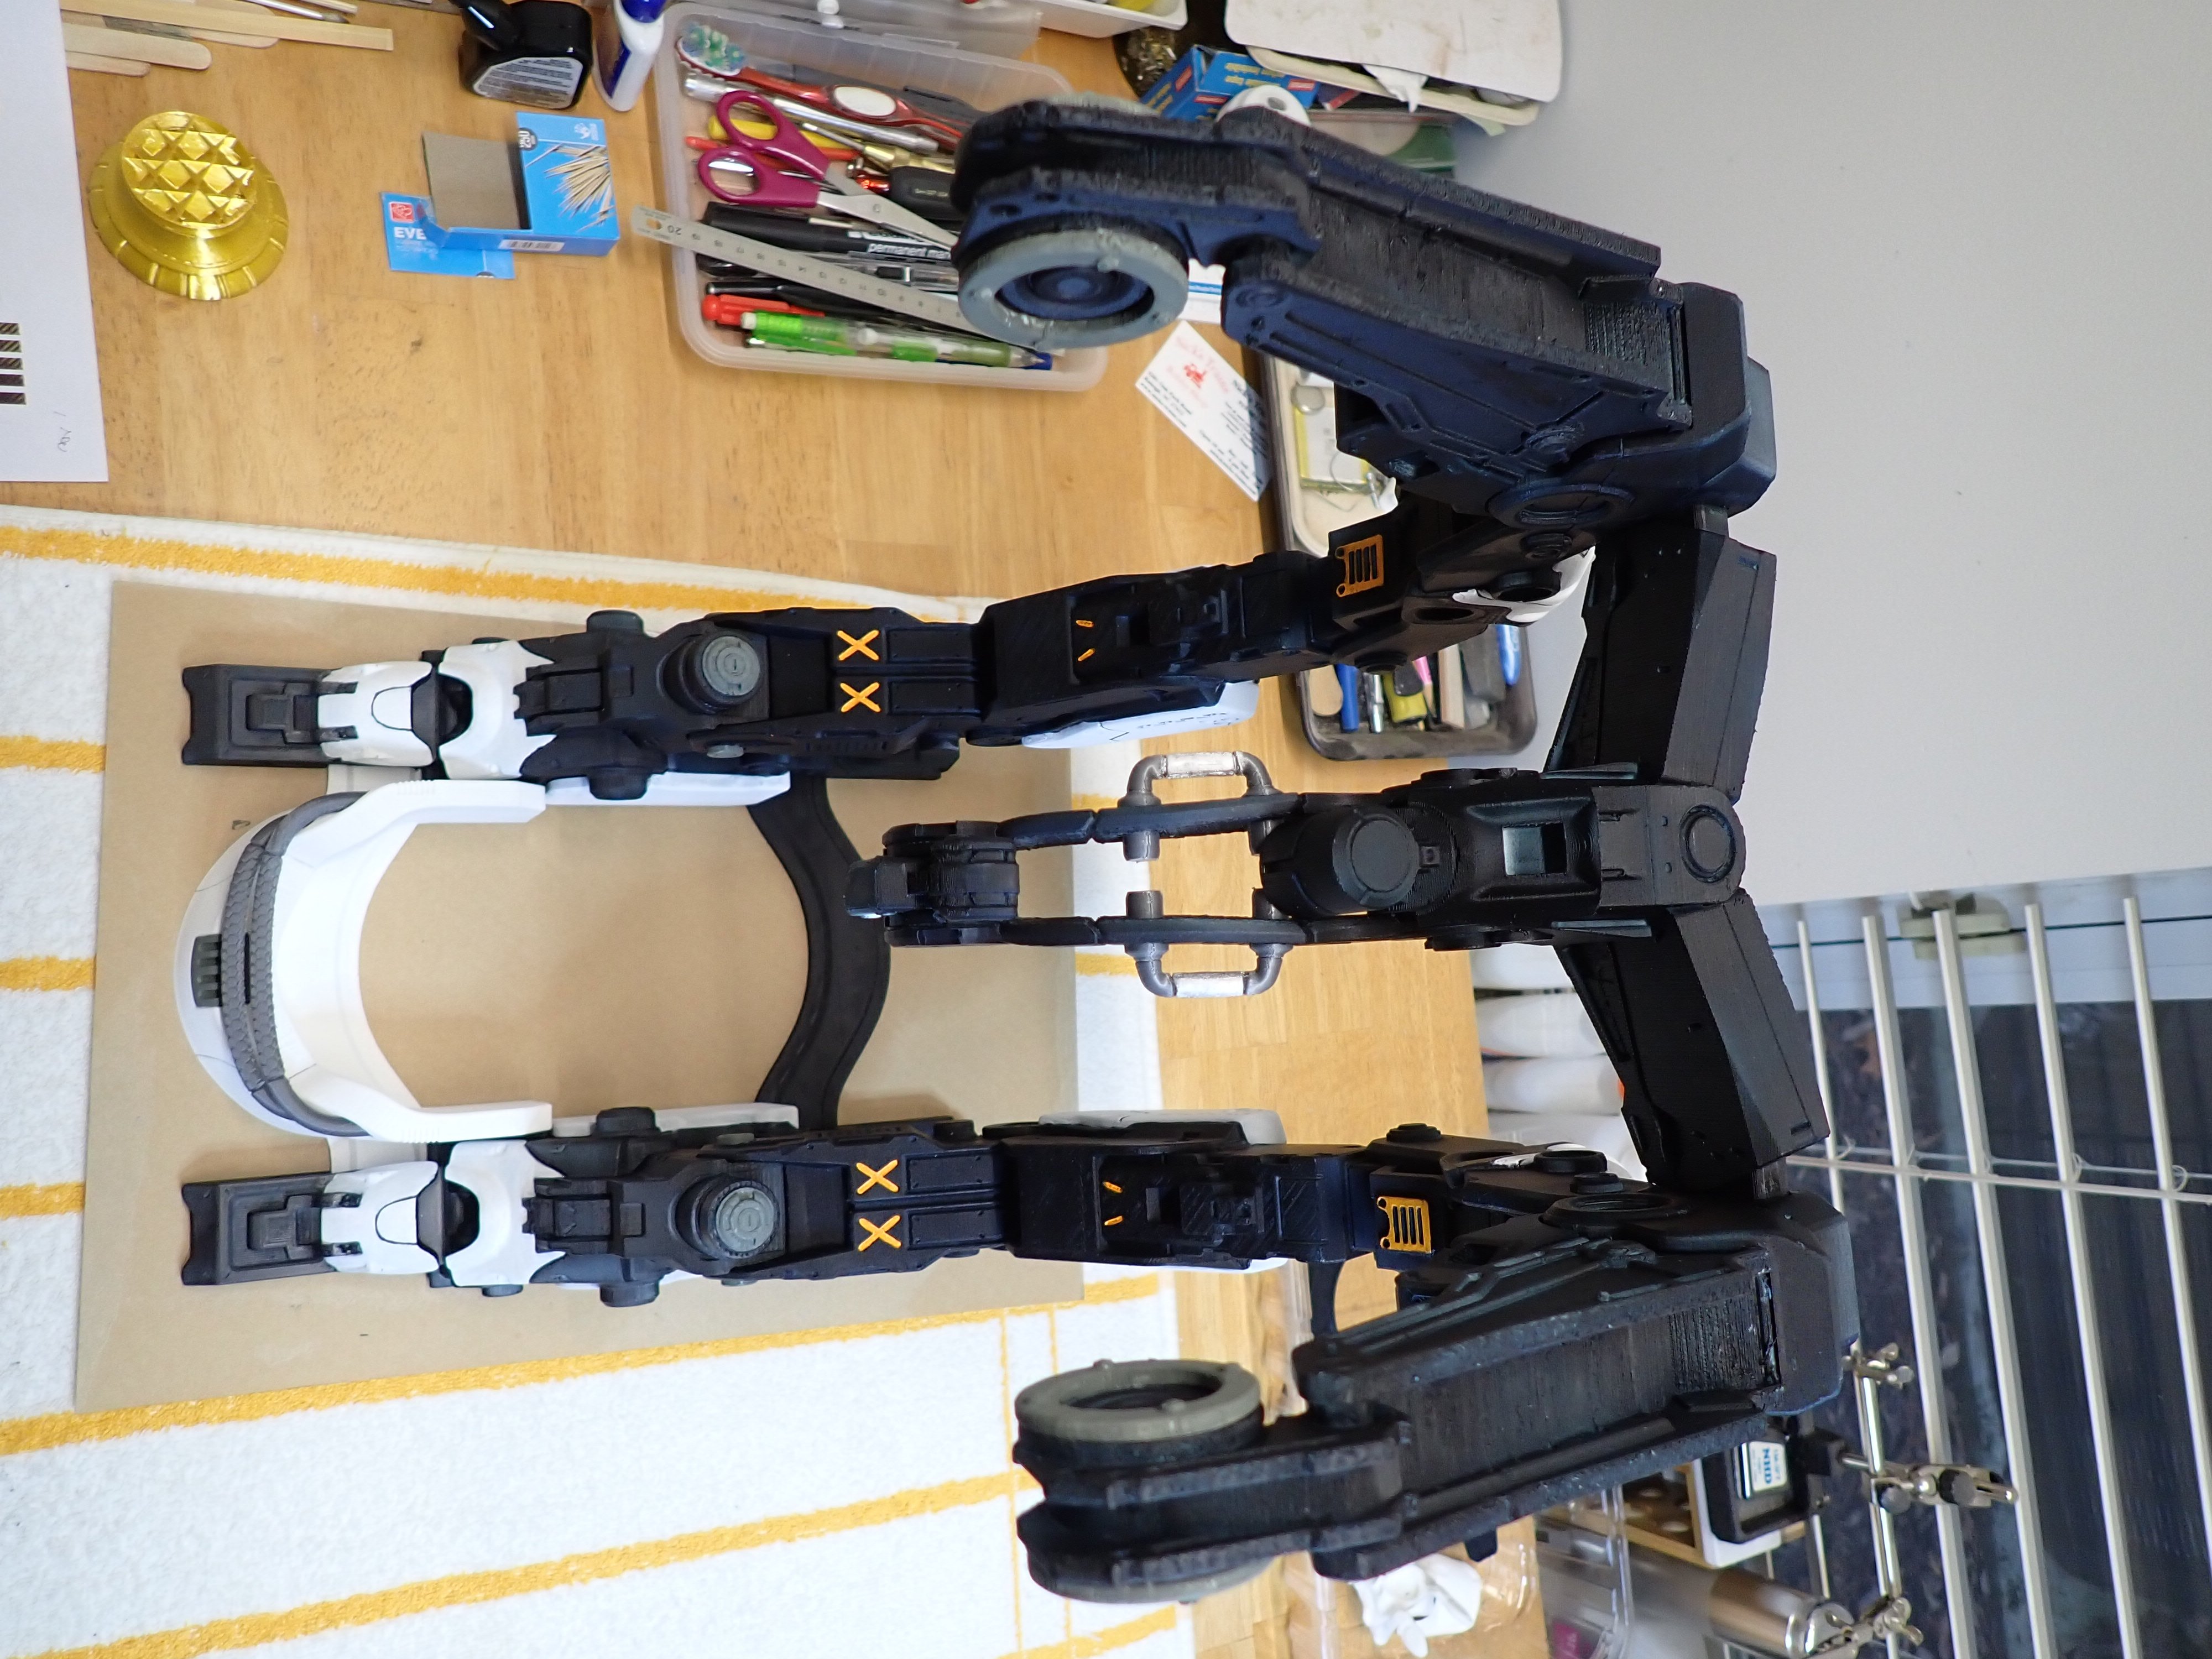
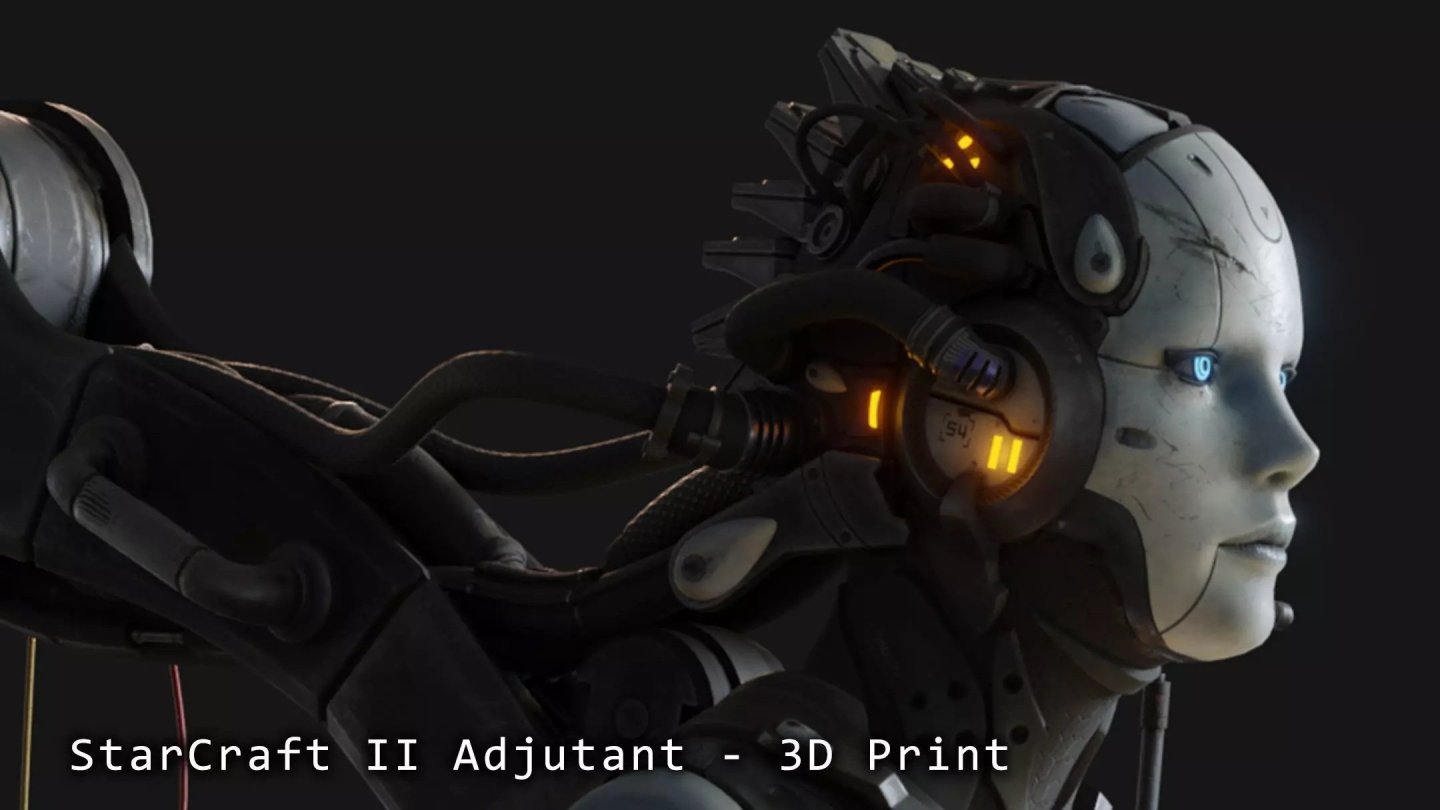
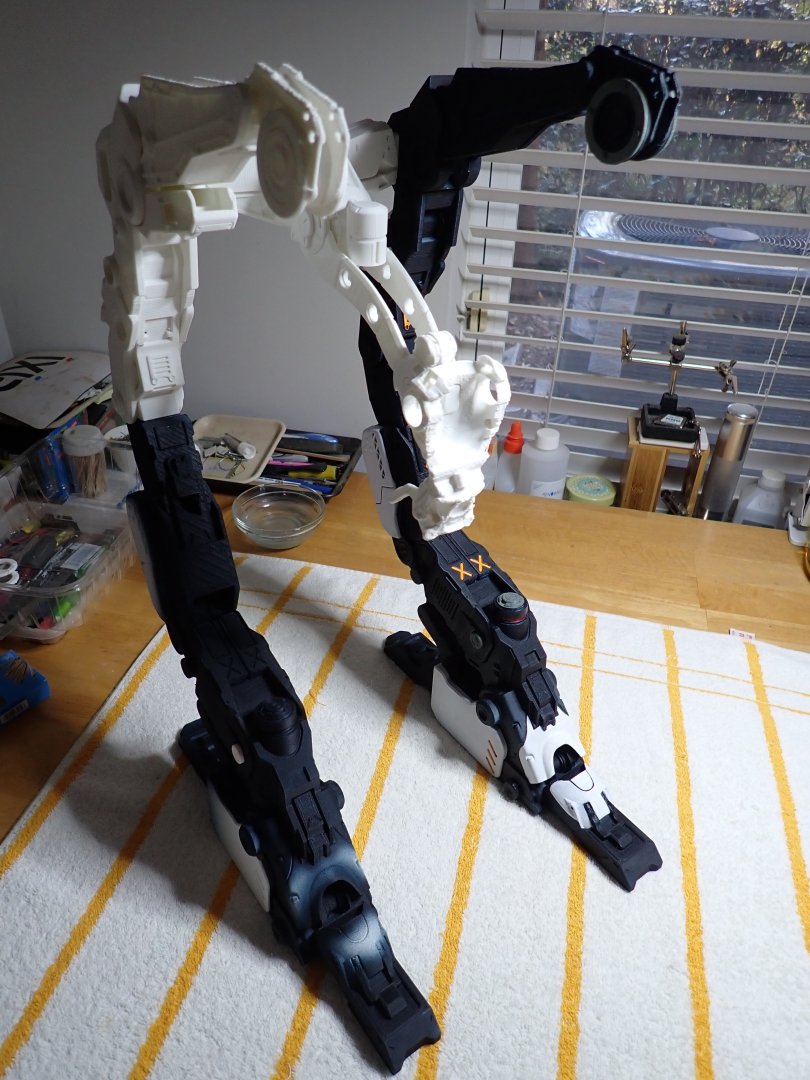
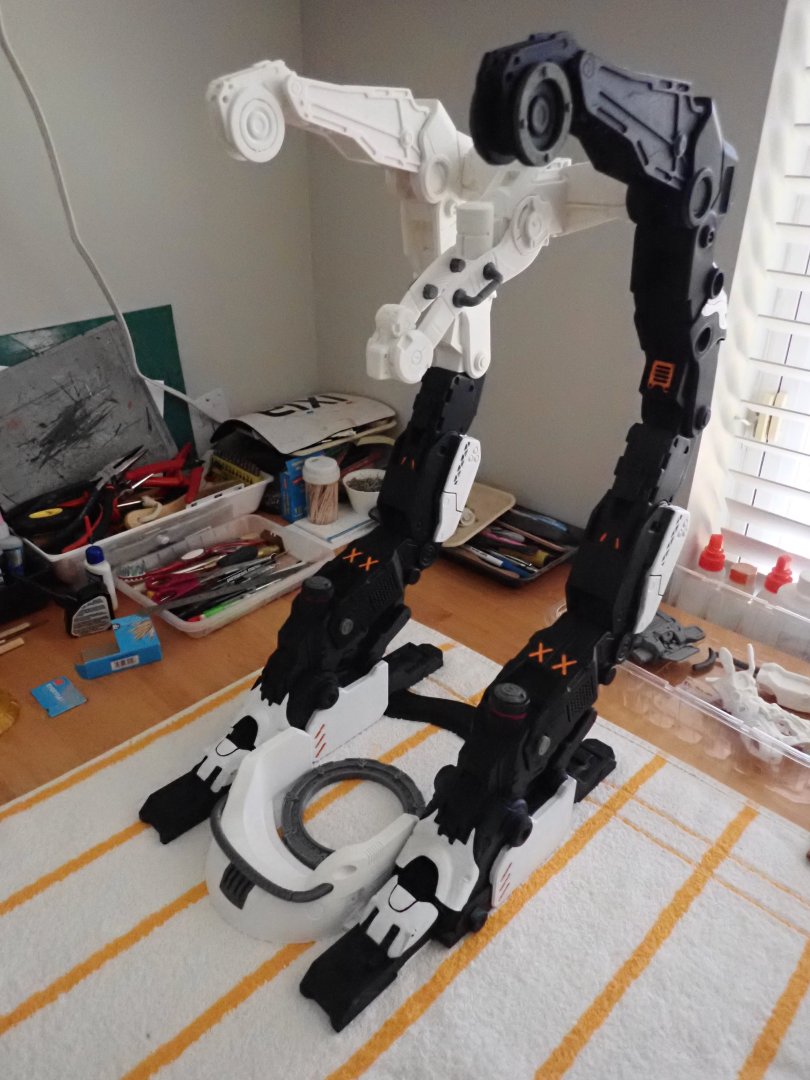
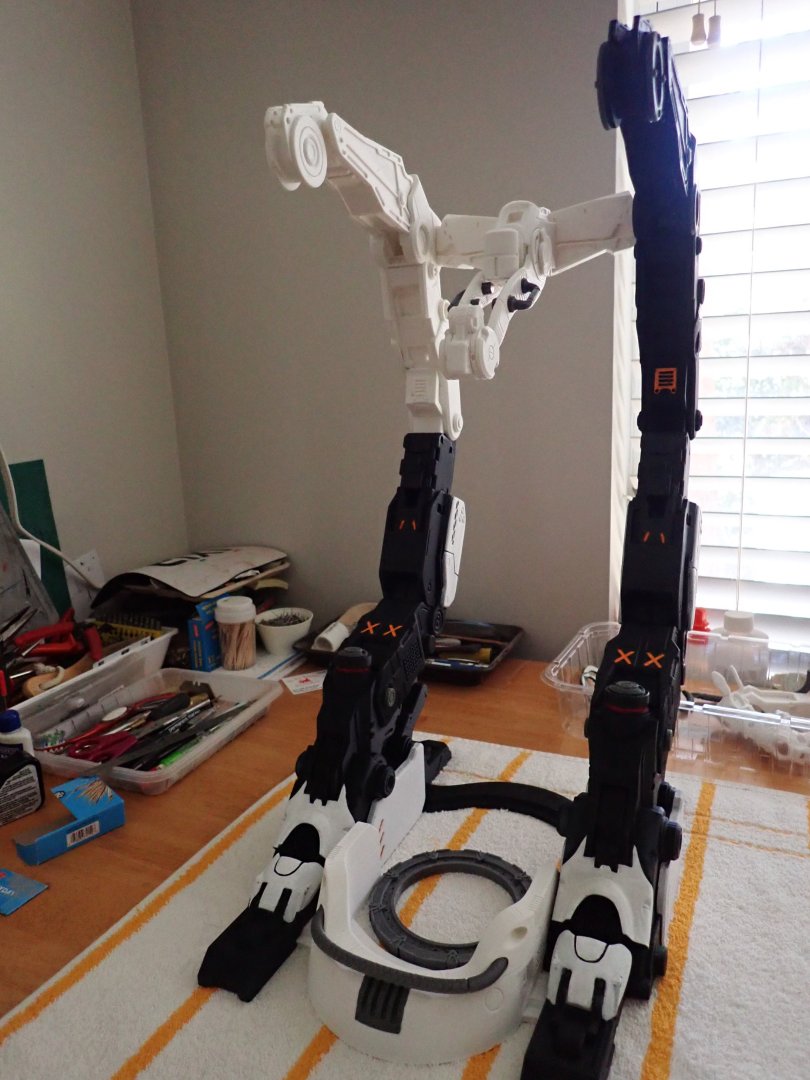
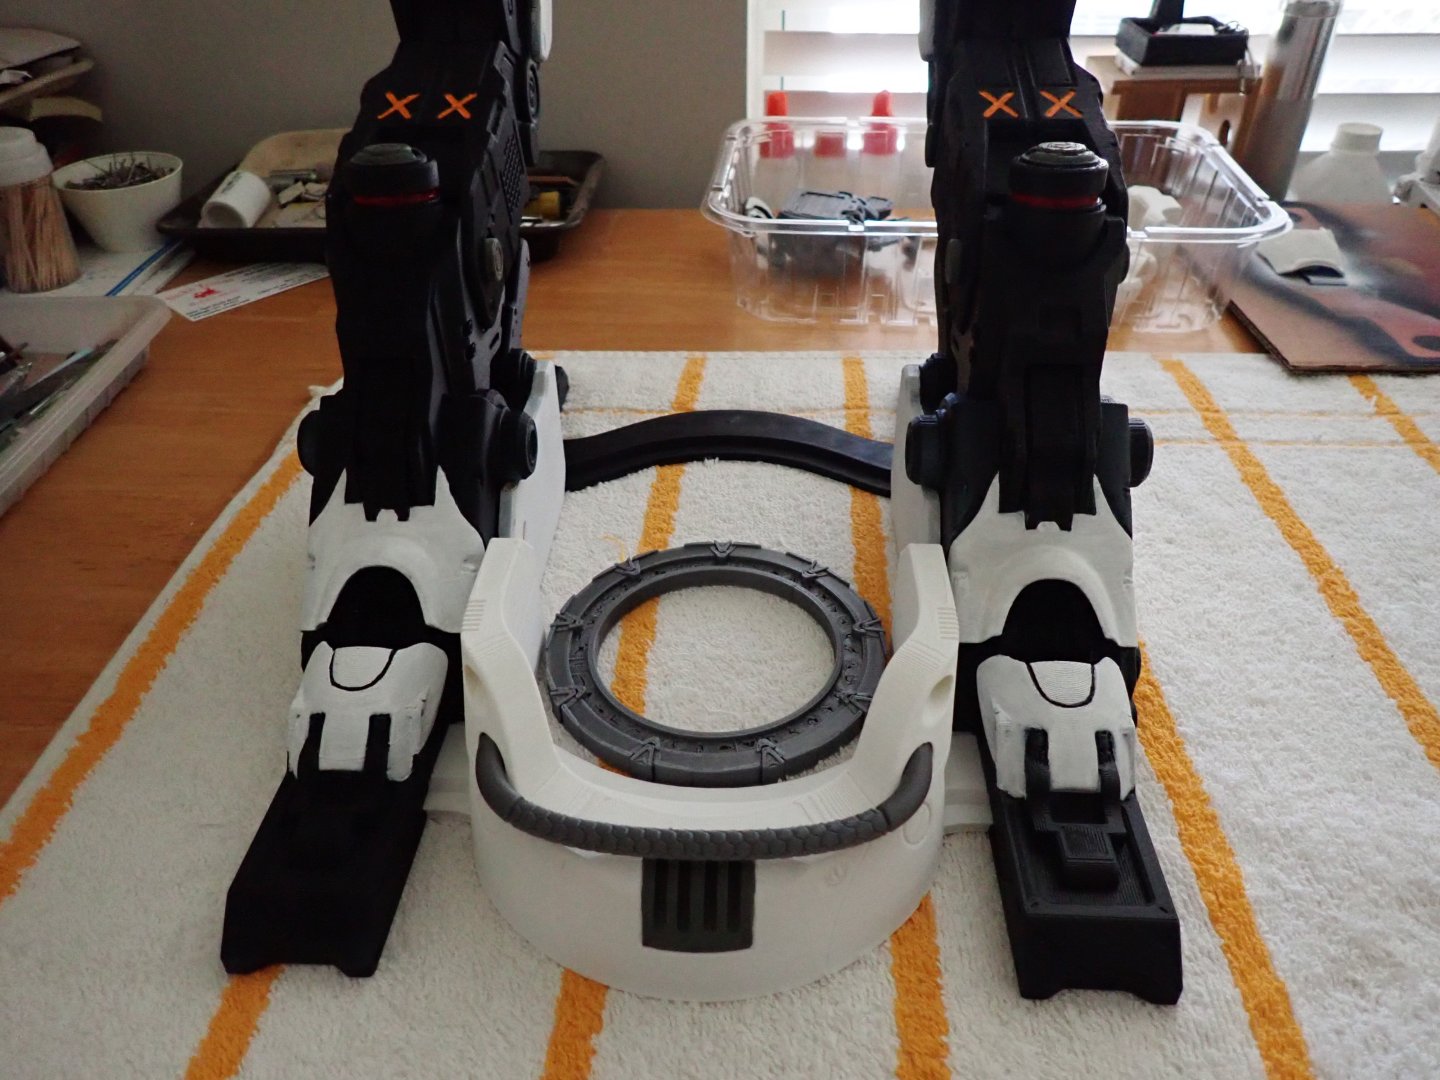
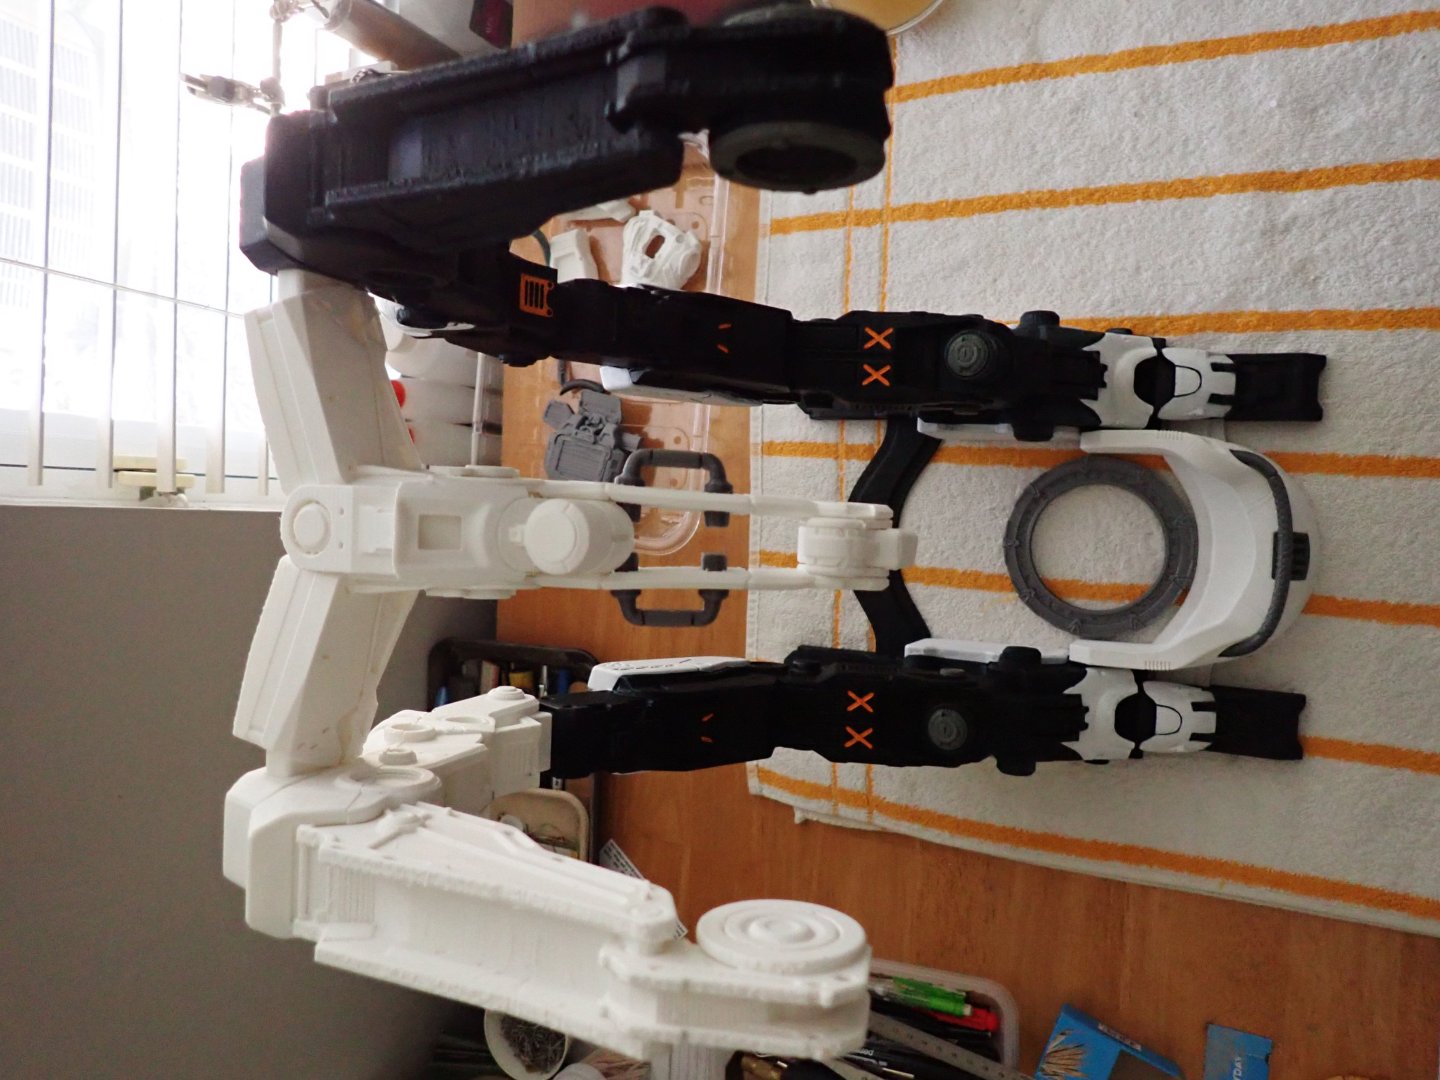
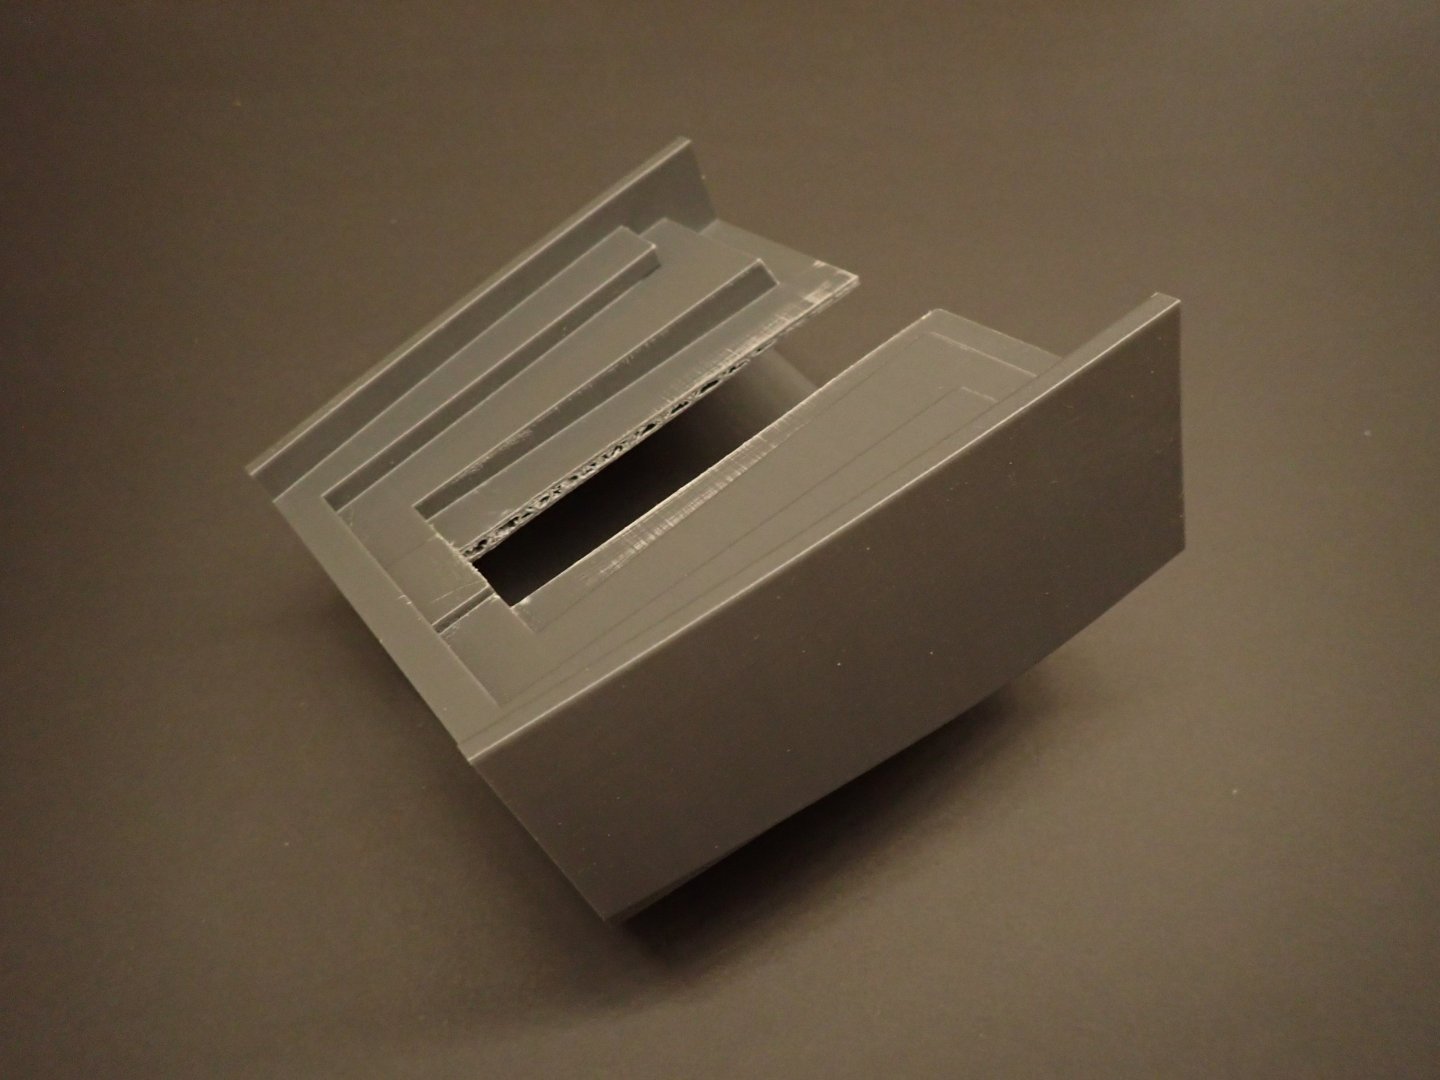
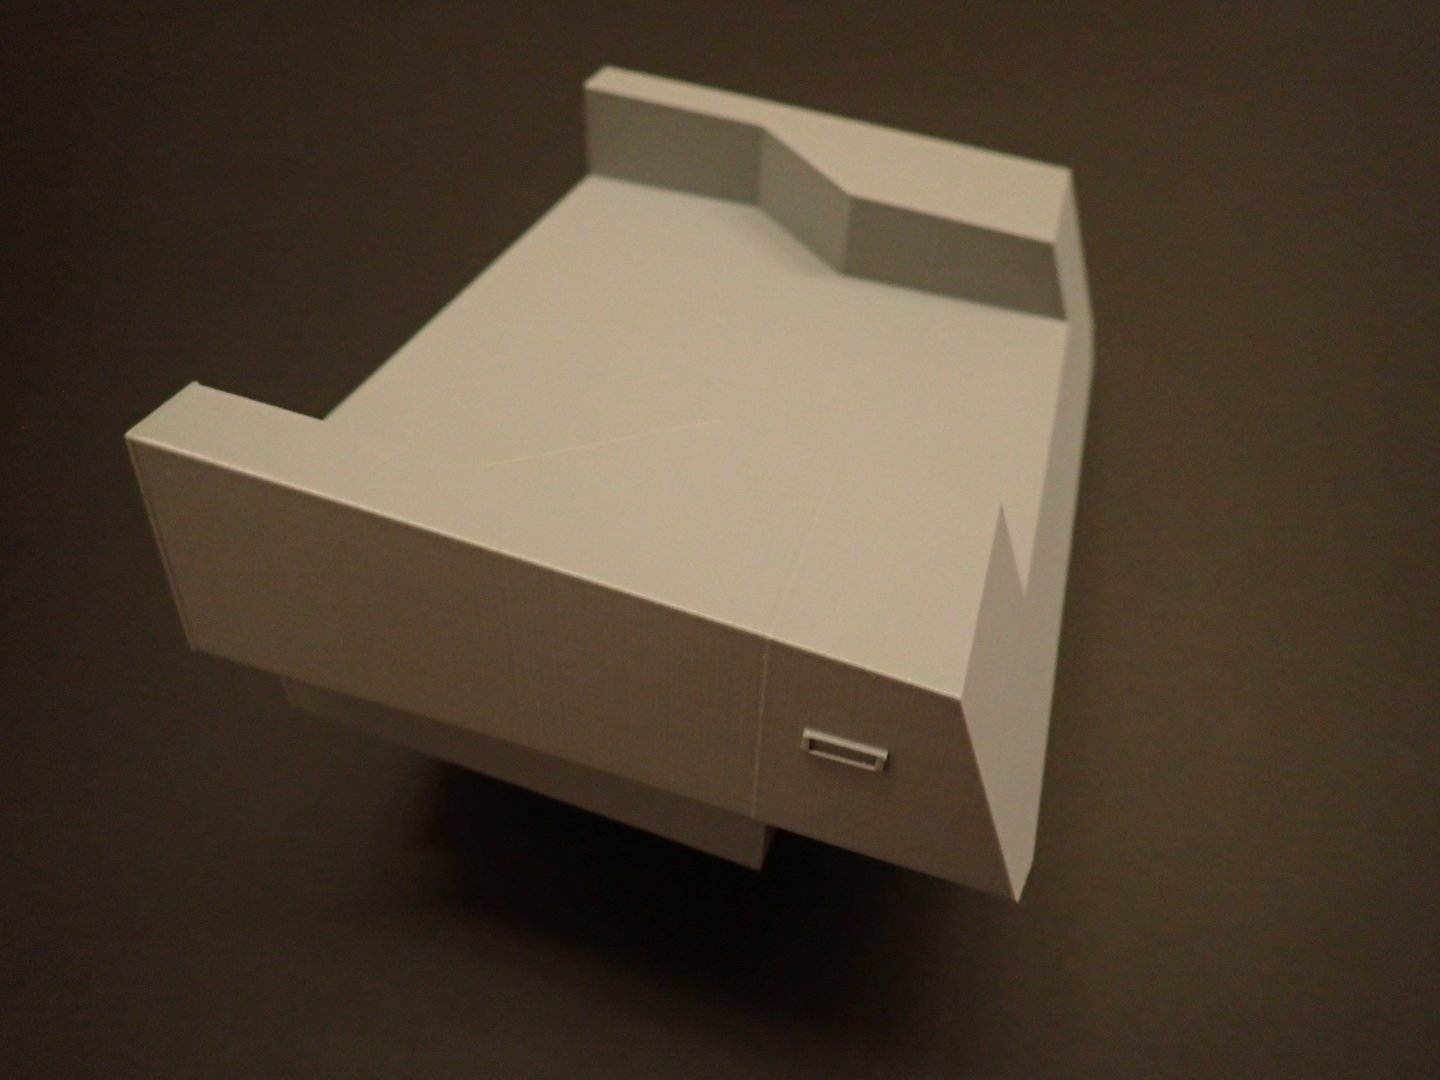
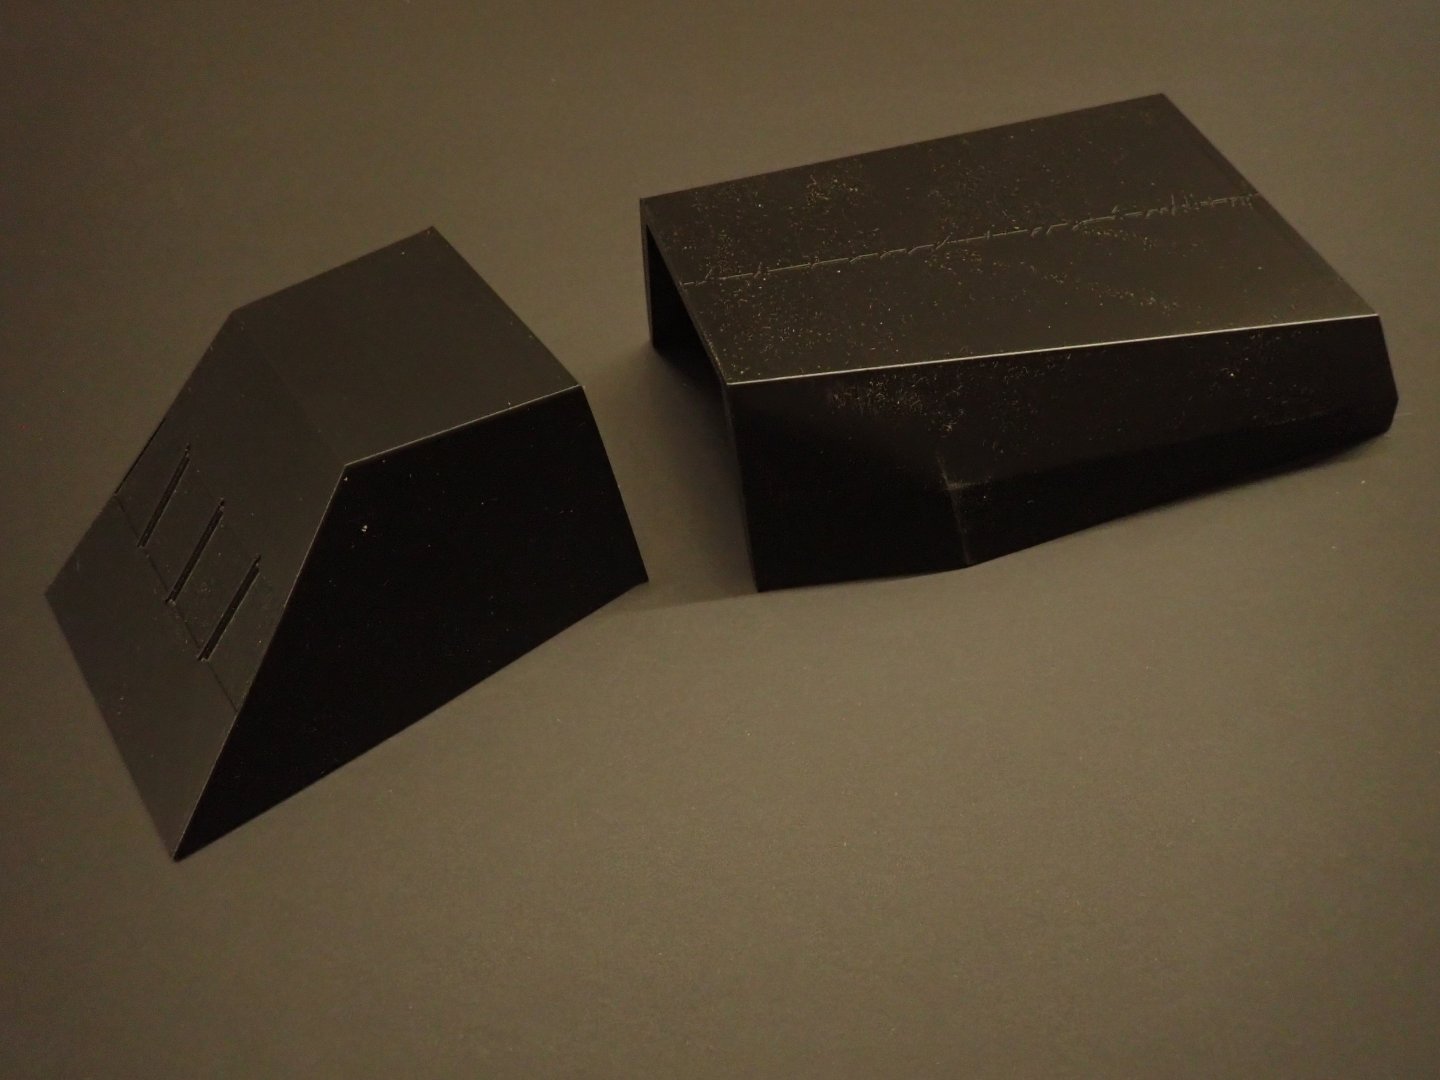
Another crazy project that I have always admired: the Starcraft Adjutant Artificial Intelligence from the video game Starcraft. I have never played the game and never will, but I find this creature interesting. It is basically some kind of very powerful artificial intelligence capable of predicting and strategizing events. The original model is located on CGTrader and is a real masterpiece. The designer spent an enormous amount of time creating a very large number of parts and making sure they fit perfectly, requiring very little glue or filing. The AI creature is ominous in itself, but the "Hangar" or structure to hold it, is almost nightmarish in its conception. One may wonder why such a large structure and so many pipes are necessary to hold a thinking head computer.... But the whole interest of the model resides there. For me, the challenge was printing large parts with filaments and small parts with resin, which I have never used before. The learning curve is quite steep but that is what makes it interesting. The "Hangar" is pretty much entirely printed with filament and the hoses, tubes and AI will be printed in resin, for ultimate details. The original kit comes in the scale of 1/5th and makes it for something quite large. I decided to reduce it to 1/6th which is a standard scale for resin figures of girls and other famous and fiction characters. Each part is reduced to 85% of its original size for Filament and 89% for Resin. Yes, I am finding out that resin shrinks and parts printed at 85% are too small to match their equivalent printed in filament. A lot to learn and adjust..... Above are all the parts required to build one side of the "Hangar". The hangar is starting to be erected: All the parts are sprayed with a mix of Tamiya acrylic Royal Blue and Matte Black. The white is the flat white from Tamiya. In the picture above, you can see the back of the AI creature attached to its holder. I printed a "Stargate" circle for the base, where all the hoses and wires will go, but I may change that. I do not think it matches the cybernetic look of the entity. Upper side of the "Hangar". I will keep that large bundles, disconnected from the legs, for as long as I can. The two following pictures are giving you an idea of the humongous size of that structure: As I mentioned, I recently acquired a resin printer, an Elegoo Saturn 4 16K and its washing/curing station. Elegoo was having a special deal for the Black Friday and I decided to jump on the crazy bandwagon of resin printing (which so far is working like a champ). On the picture above, you can see three attempts I did for printing the back of the AI creature: On the right is a resin print at 85%. In the middle is a filament print at 85% and to the left if a resin print at 90% of the original size. I think the sweet spot is at 89%. Yves


-
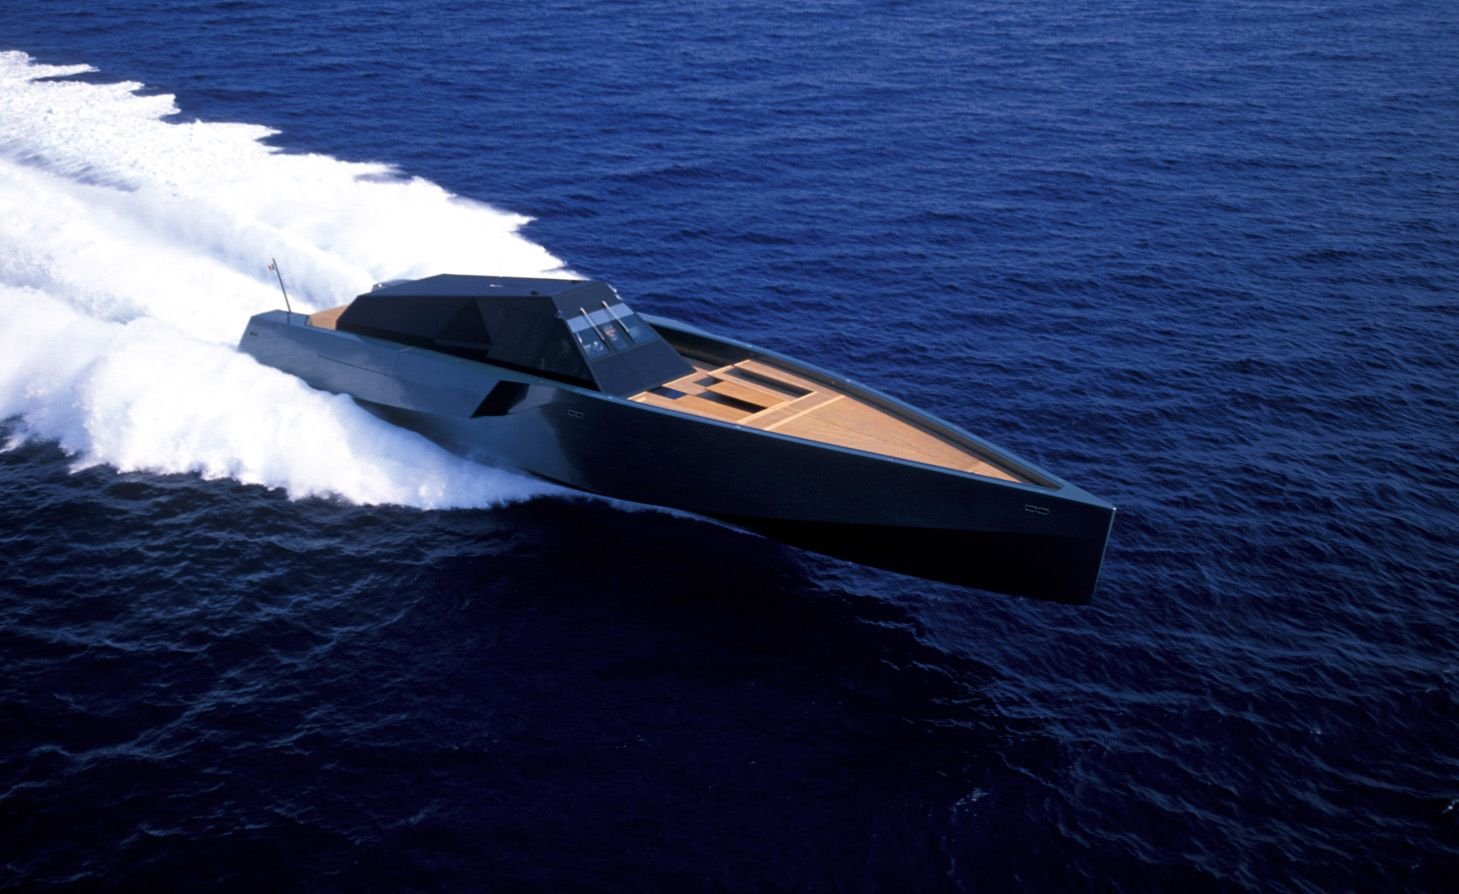
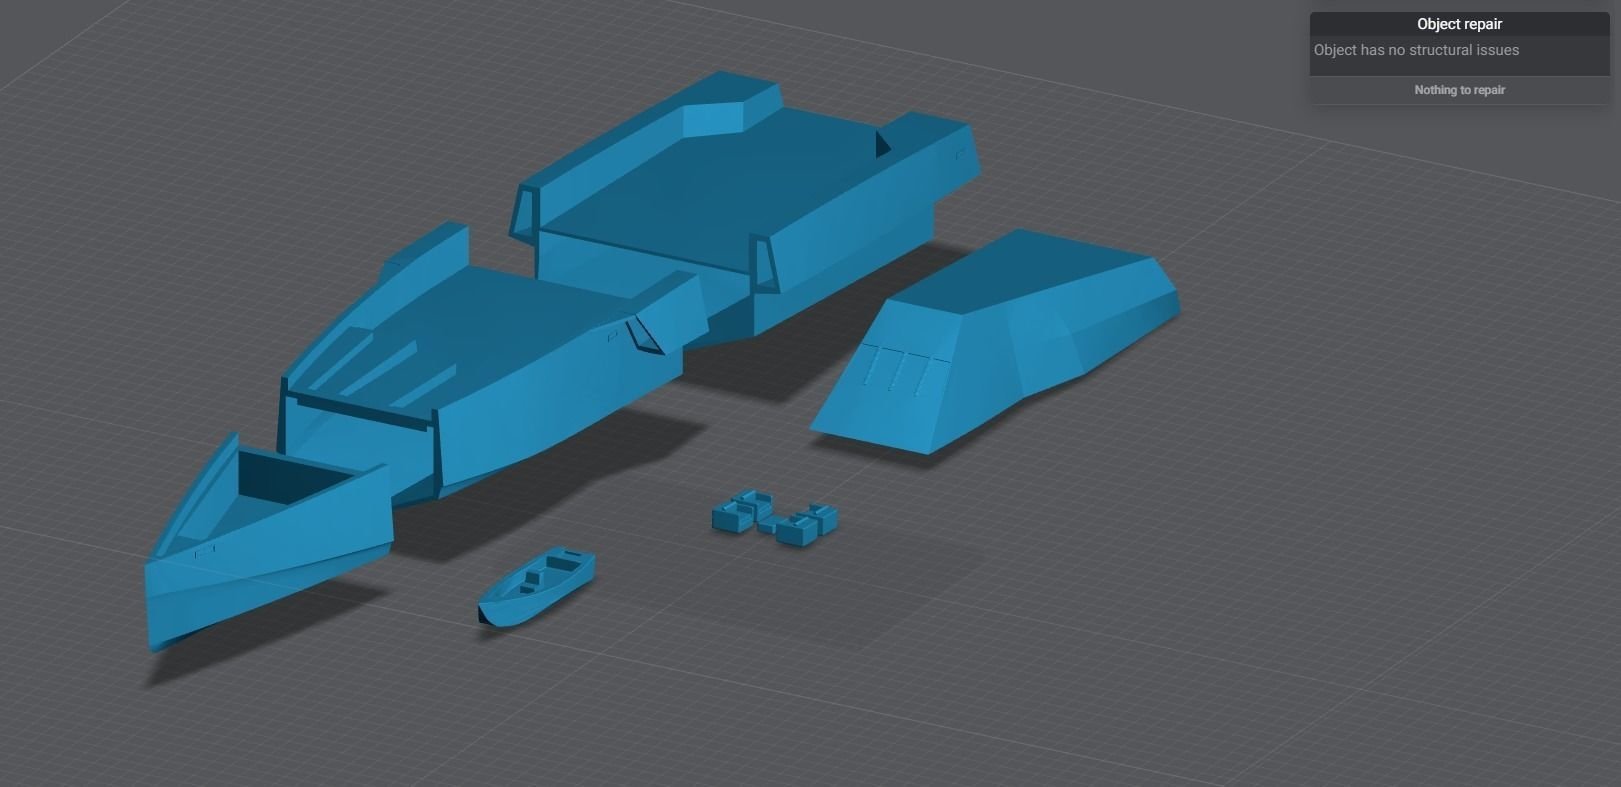
Folks, I will be presenting (and hopefully finishing...) a project that I have been working on for quite a long time. The model is a replica in the scale of 1/48th of the famous super-yacht WALLY POWER 118, first introduced to the public at large, in the movie "The Island" covering the delicate subject of Human cloning, for organs harvesting. The 118 (36 meters) was designed by Luca Bassani, a very innovative architect and designer who made his wealth by owning an electrical equipment company on the northern part of Italy, near Genoa. Luca created many vessels including sail yachts that are years ahead of their competition in term of design and features. The picture below shows Luca resting on the bow of the 118: My favorite sail boat created by Luca Bassani/Wally, is the 100 foot WALLY CENTO Tango mega yacht that you can admire on the following video: Of course, all these "toys" are for the Elite and call for millions of dollars. The 118 Wally Power retailed for $33 million when it came out. It is to my knowledge, the fastest yacht on seas, capable of 60 Knots (70 MPH / 100 KM/H) using a triple Rolls Royce turbines producing more than 16,000 HP. At that speed, you have to account for about $4,000 fuel cost per hour of cruising. The amount of technology installed on that yacht is absolutely phenomenal and the following video demonstrates some of the features. Everything is designed to make your life on board, easy and elegant. No model exists of the 118, even though some south east Asian modelers are offering some very realistic models on Da-Bay. I decided to contact the Wally office in Monaco for some drawings of the 118 but never got any answer as can be expected. I then patrolled some French and Italian scale model boats forums and found some clues and leads of what can be done. I will come back to one of the leads, in Germany. Finally, I went on the 3D printing forums and found a decent replica of the 118 designed at the scale of 1/60, ready to print (STL files). As you will see, it is a very crude representation and does require a lot of modifications to turn it into a decent model, which I hope to attain. The model can be found on CGTrader at: https://www.cgtrader.com/3d-print-models/miniatures/vehicles/wallypower-scale-model I purchased that model and started printing at 1/48th scale (increasing the size of the model on my Slicer). The original model was offered in 3 parts for the hull and one part for the cabin plus a tender which has nothing to do with the original Wally tender, and some lounge chairs: Because the parts would not fit on my Creality Ender 3V2, I had to use Meshmixer to cut them and print smaller parts: The second part (from the bow), did not have the opening used to provide some light on the lower decks, I had to cut it as you can see on the picture. Overall, it is a very crude model and will need a ton of modifications to turn it into something decent or even close to what the South East Asian modelers are producing. I will be showing some progress, but it will be slow, unlike the 118 on the Mediterranean sea. Yves


-
We haven't seen the hull in a while, but I believe it requires another coat of clear 🙂 Just kidding of course. I would not touch it at that stage. Yves
-
You have a nice collection of models in your living room. Yves
- 38 replies
-
- 1
-

-
- Pillsbury
- Clemson-class
- (and 1 more)
-
You truly are a magician when it comes to building all these parts. This is amazing and I am grateful for the documentation and step by step description. Yves
-
Interesting project. 1/12 is a great scale for cars and bikes. Yves
-
Fantastic. And thank you for detailing all the "secret" recipes for painting 🙂 Yves
-
I love the sub-board that you are using to display the hull: very nice rendition of the water. Yves


.jpg.93005950d00366b73f7eb6420d3cce37.jpg)