HOLIDAY DONATION DRIVE - SUPPORT MSW - DO YOUR PART TO KEEP THIS GREAT FORUM GOING!
×


yvesvidal
-
Posts
3,585 -
Joined
-
Last visited
Content Type
Profiles
Forums
Gallery
Events
Everything posted by yvesvidal
-
 Glad to see you back on this beautiful model. Yves
 -
James, I read your description of the kit, in detail. I have to say that CAF Models improved immensely their instructions and approach to building their kits. These instructions make sense, are clearly detailed in English (and not in Chinese) and they are providing you with pictures, which is a first in the History of CAF Models !!! The acrylic jigs are also a great addition. After building two of their earlier kits (HMS Bellona and Le Requin), I can tell you that their original instructions and directions were not that great....and you had to spend a lot of time, just wondering and trying to find a solution to the assembly. Yves
-
I am not sure, but it would make a lot of sense to have them there. Will you be posting some pictures of your fantastic model? Yves
-
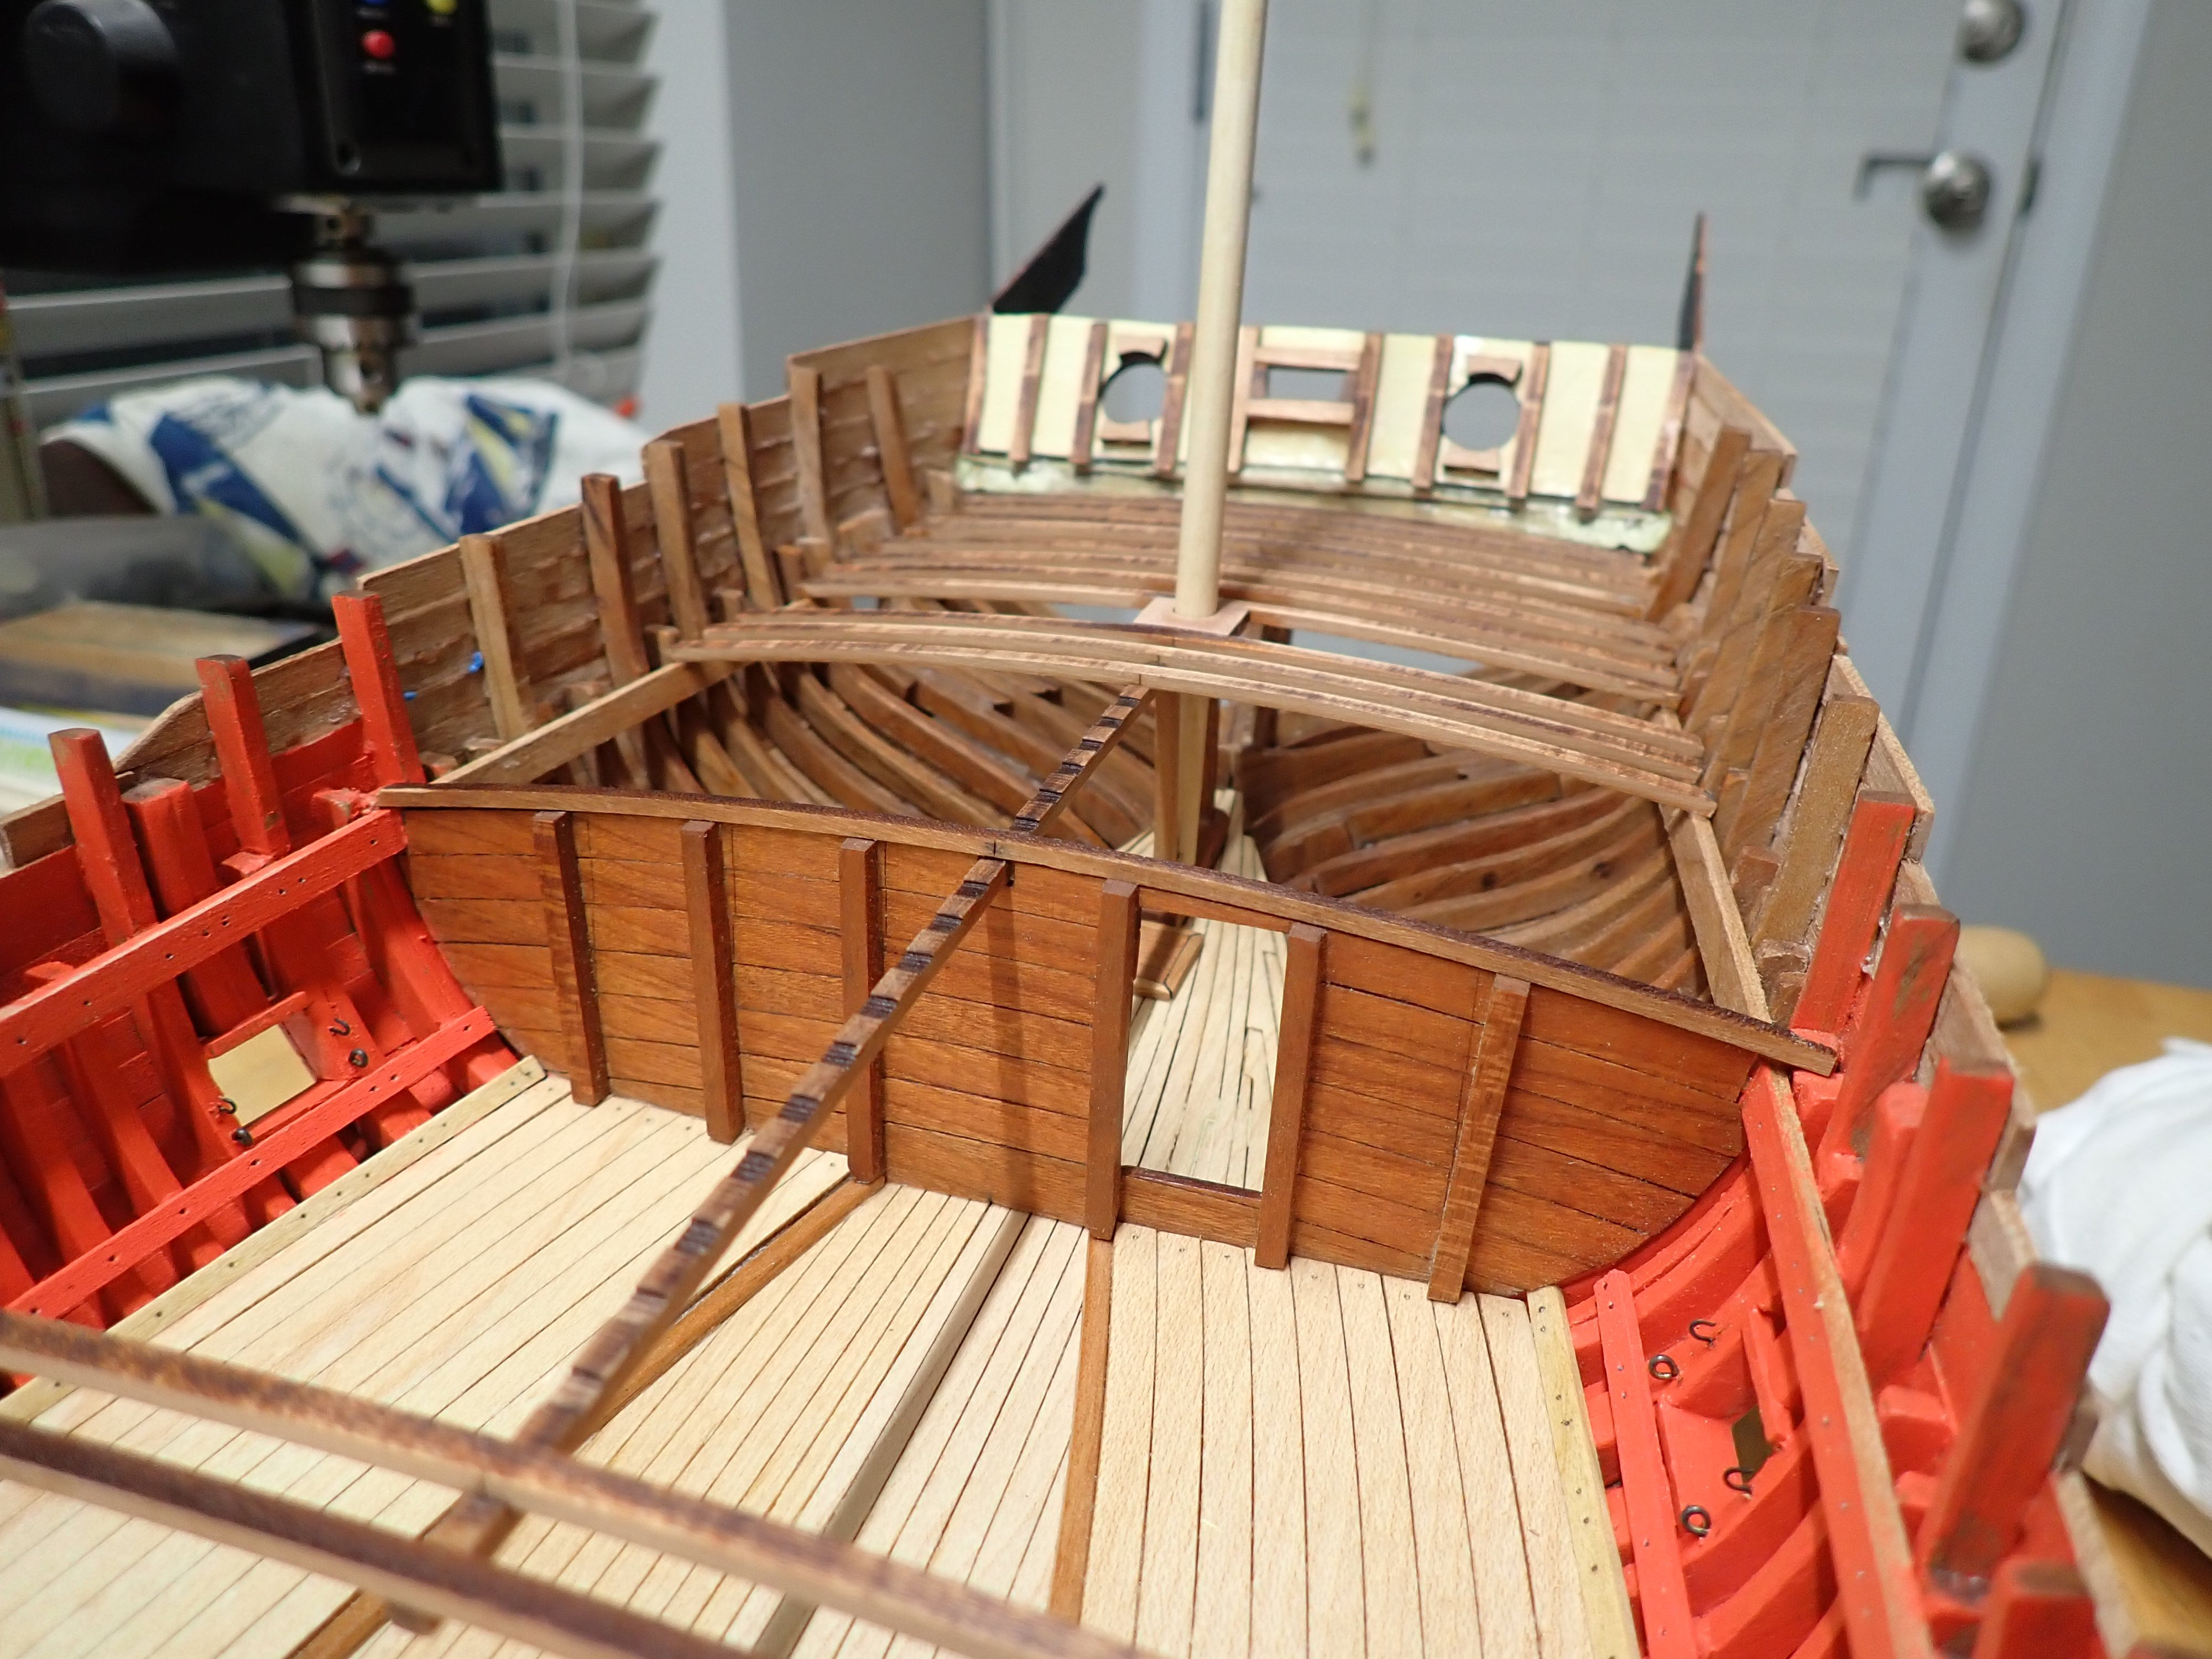
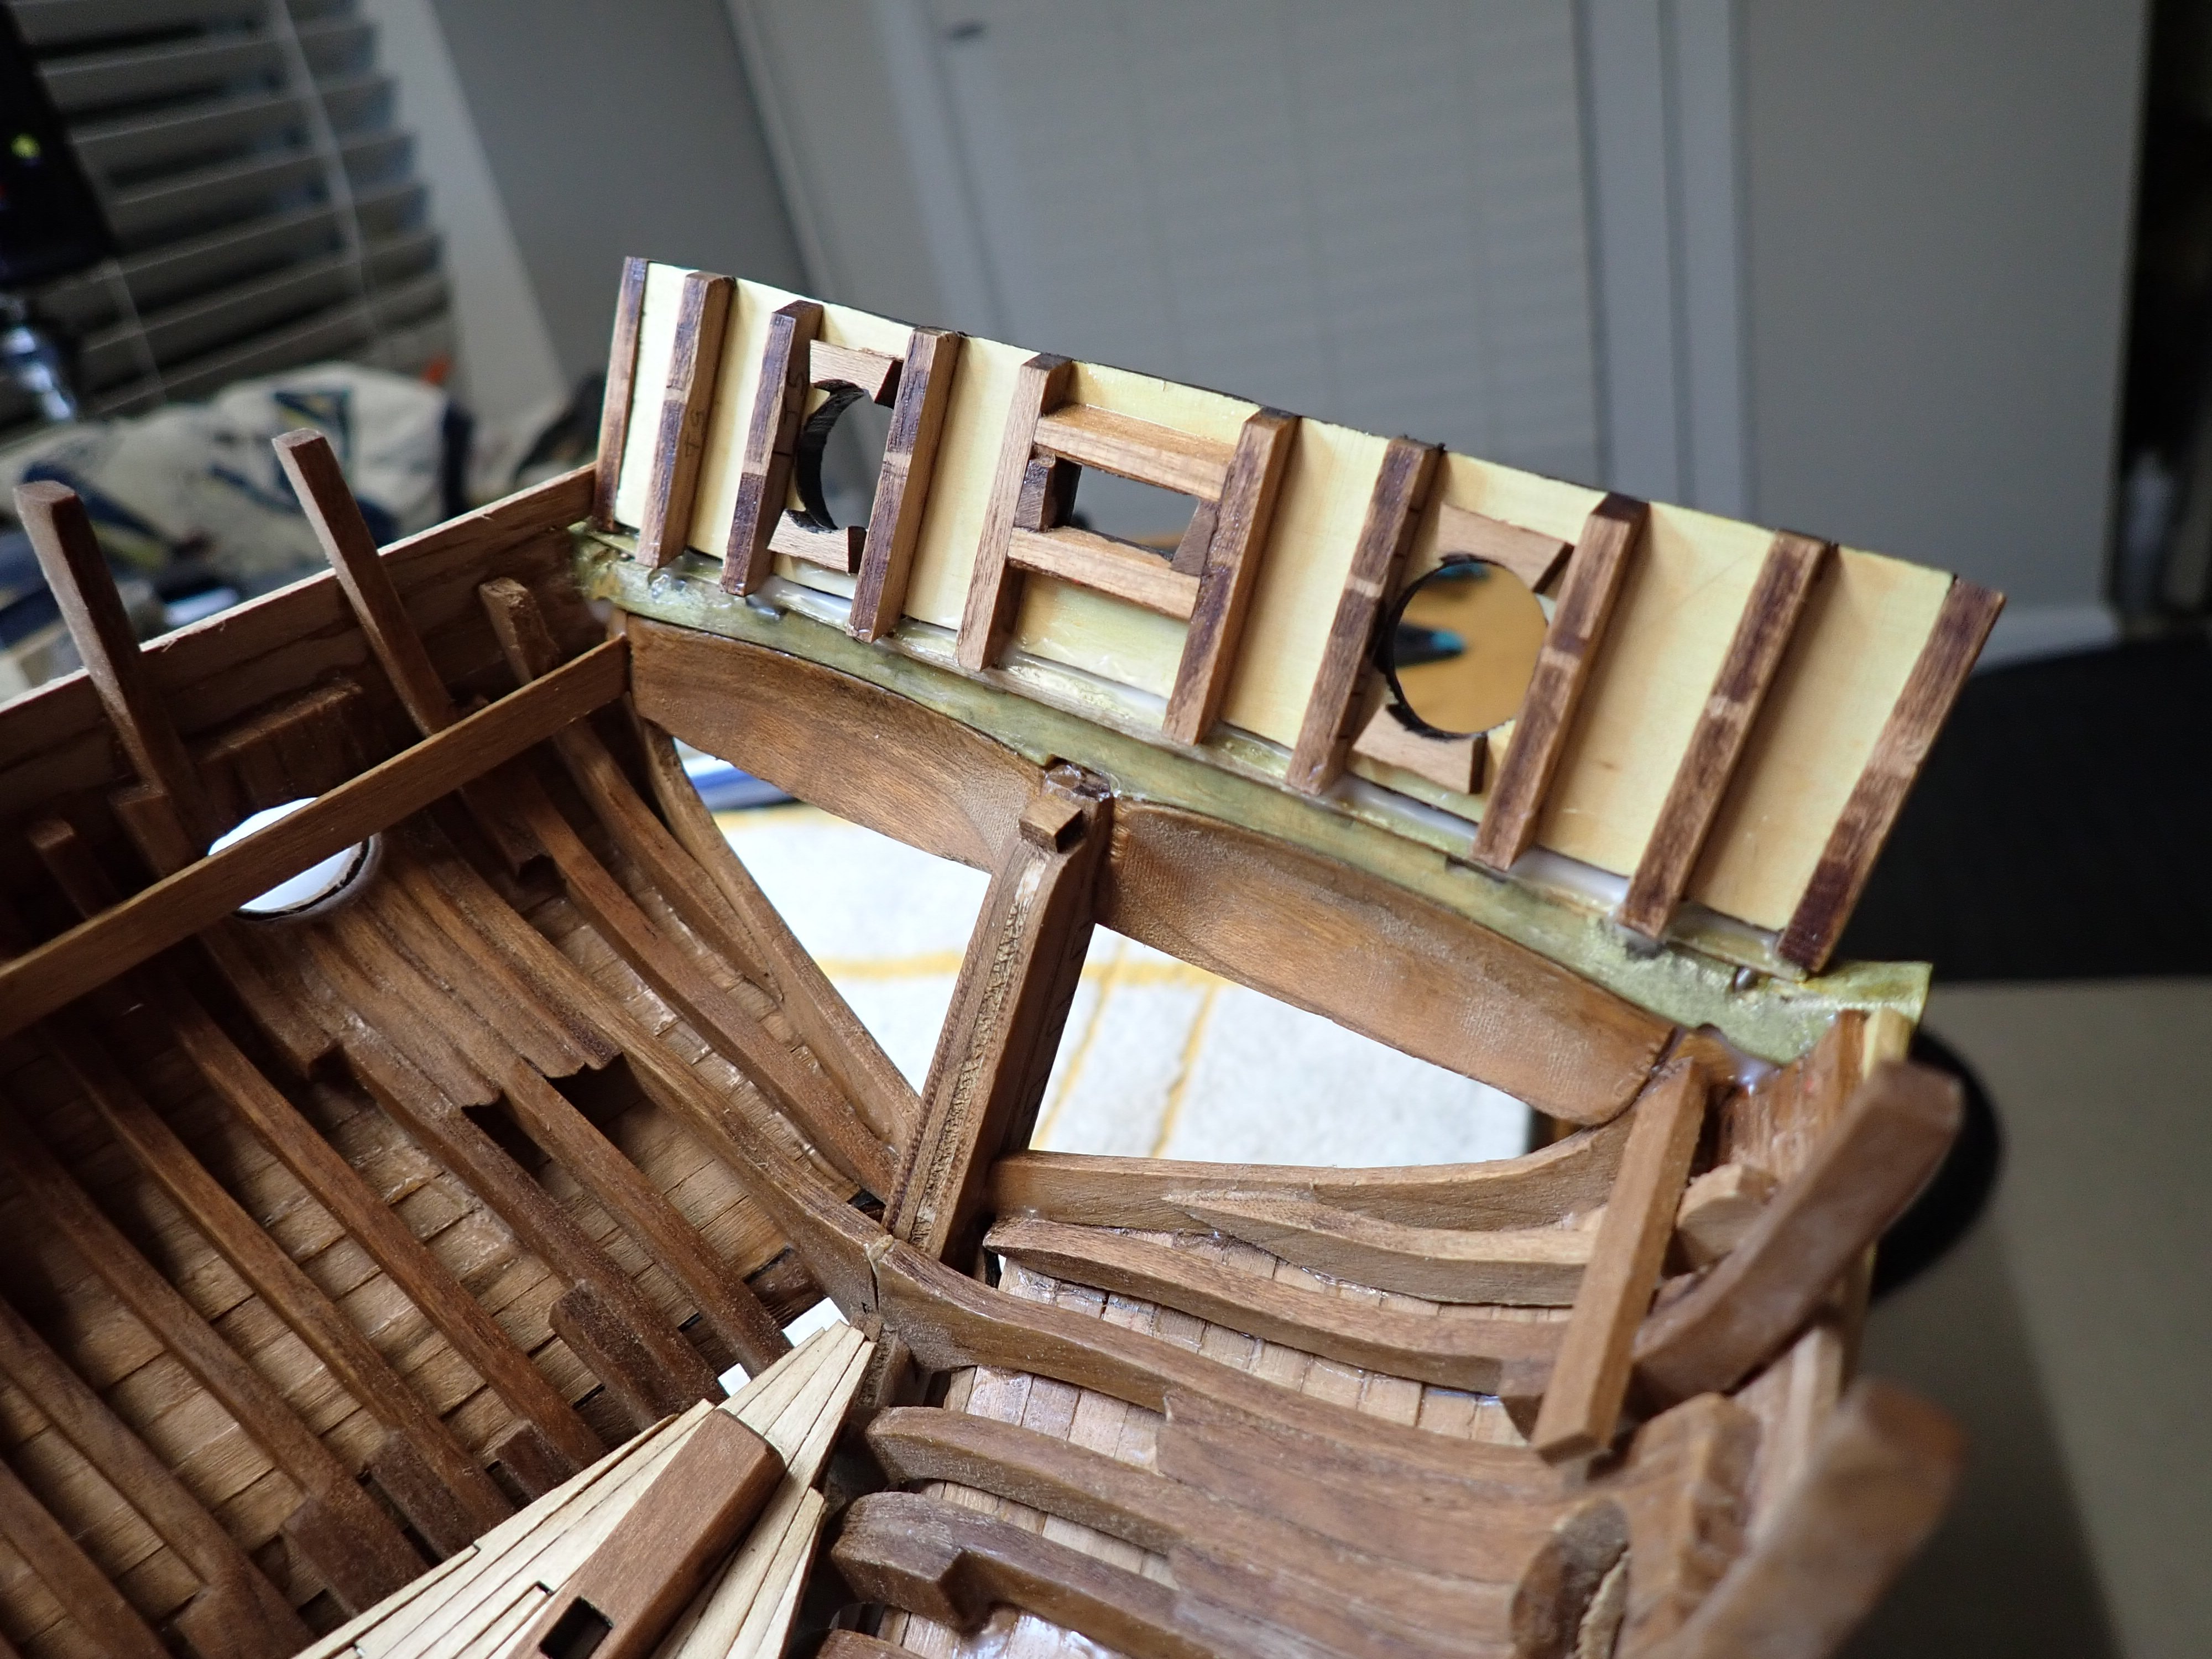
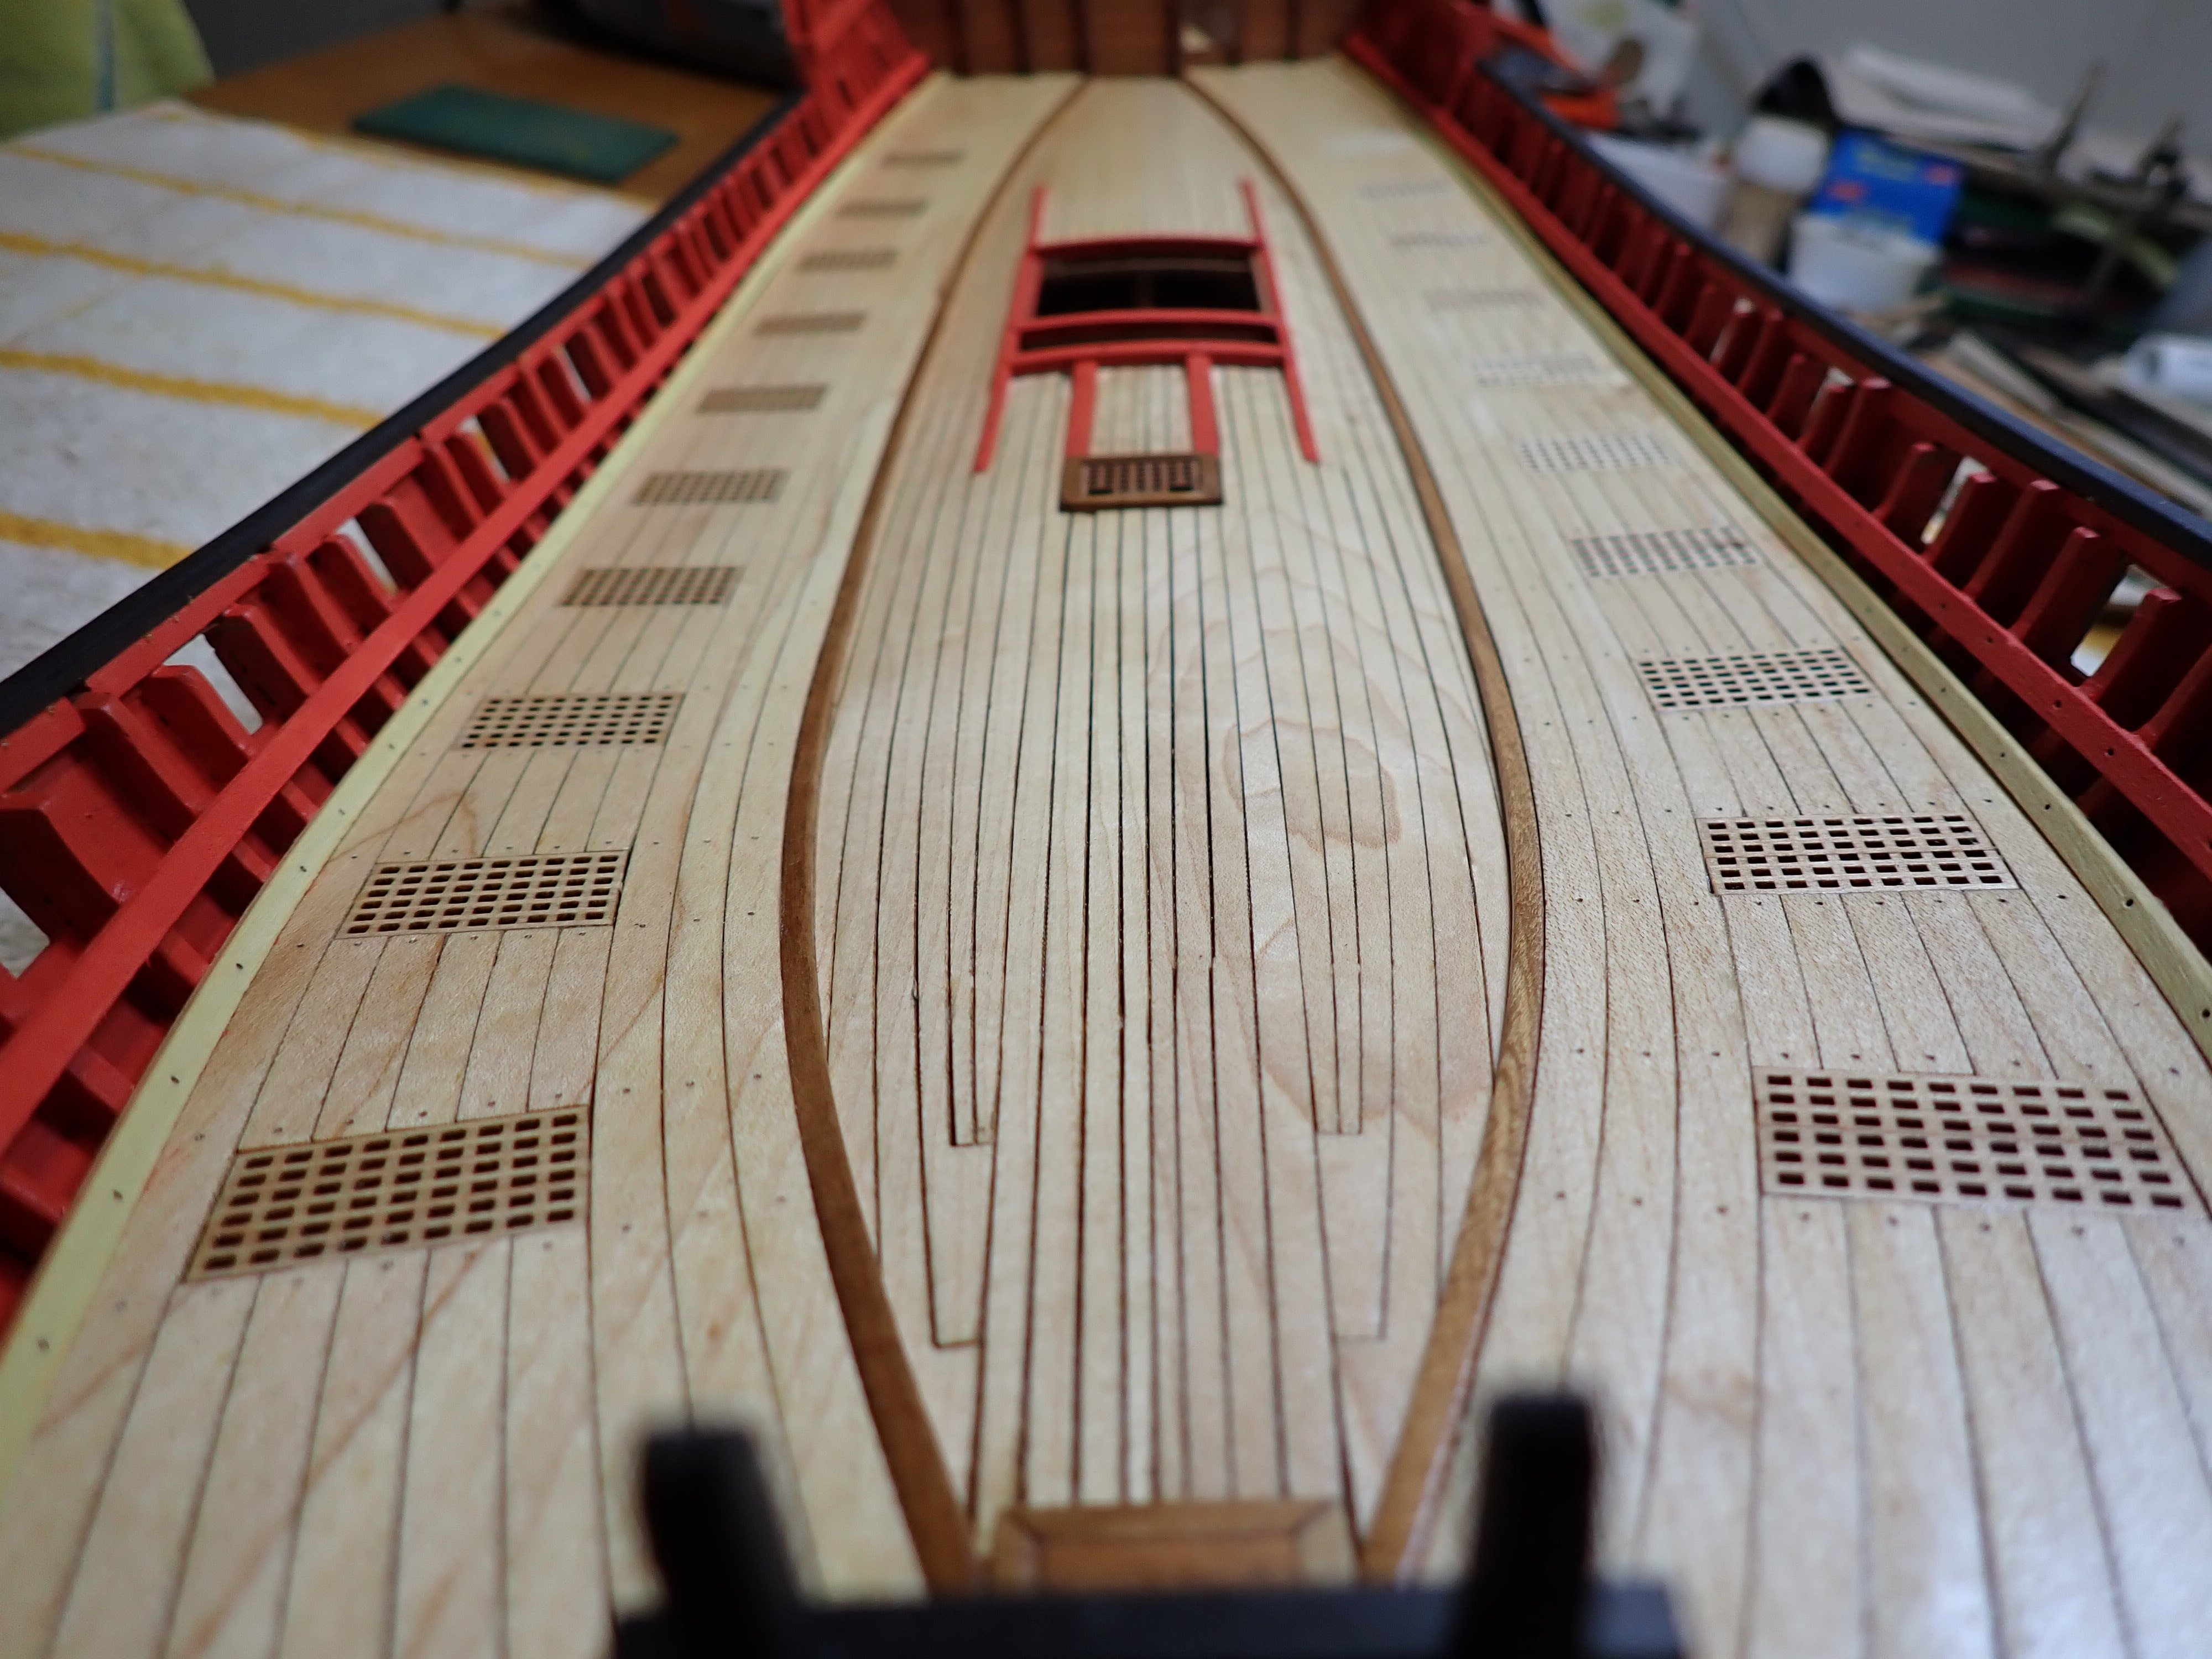
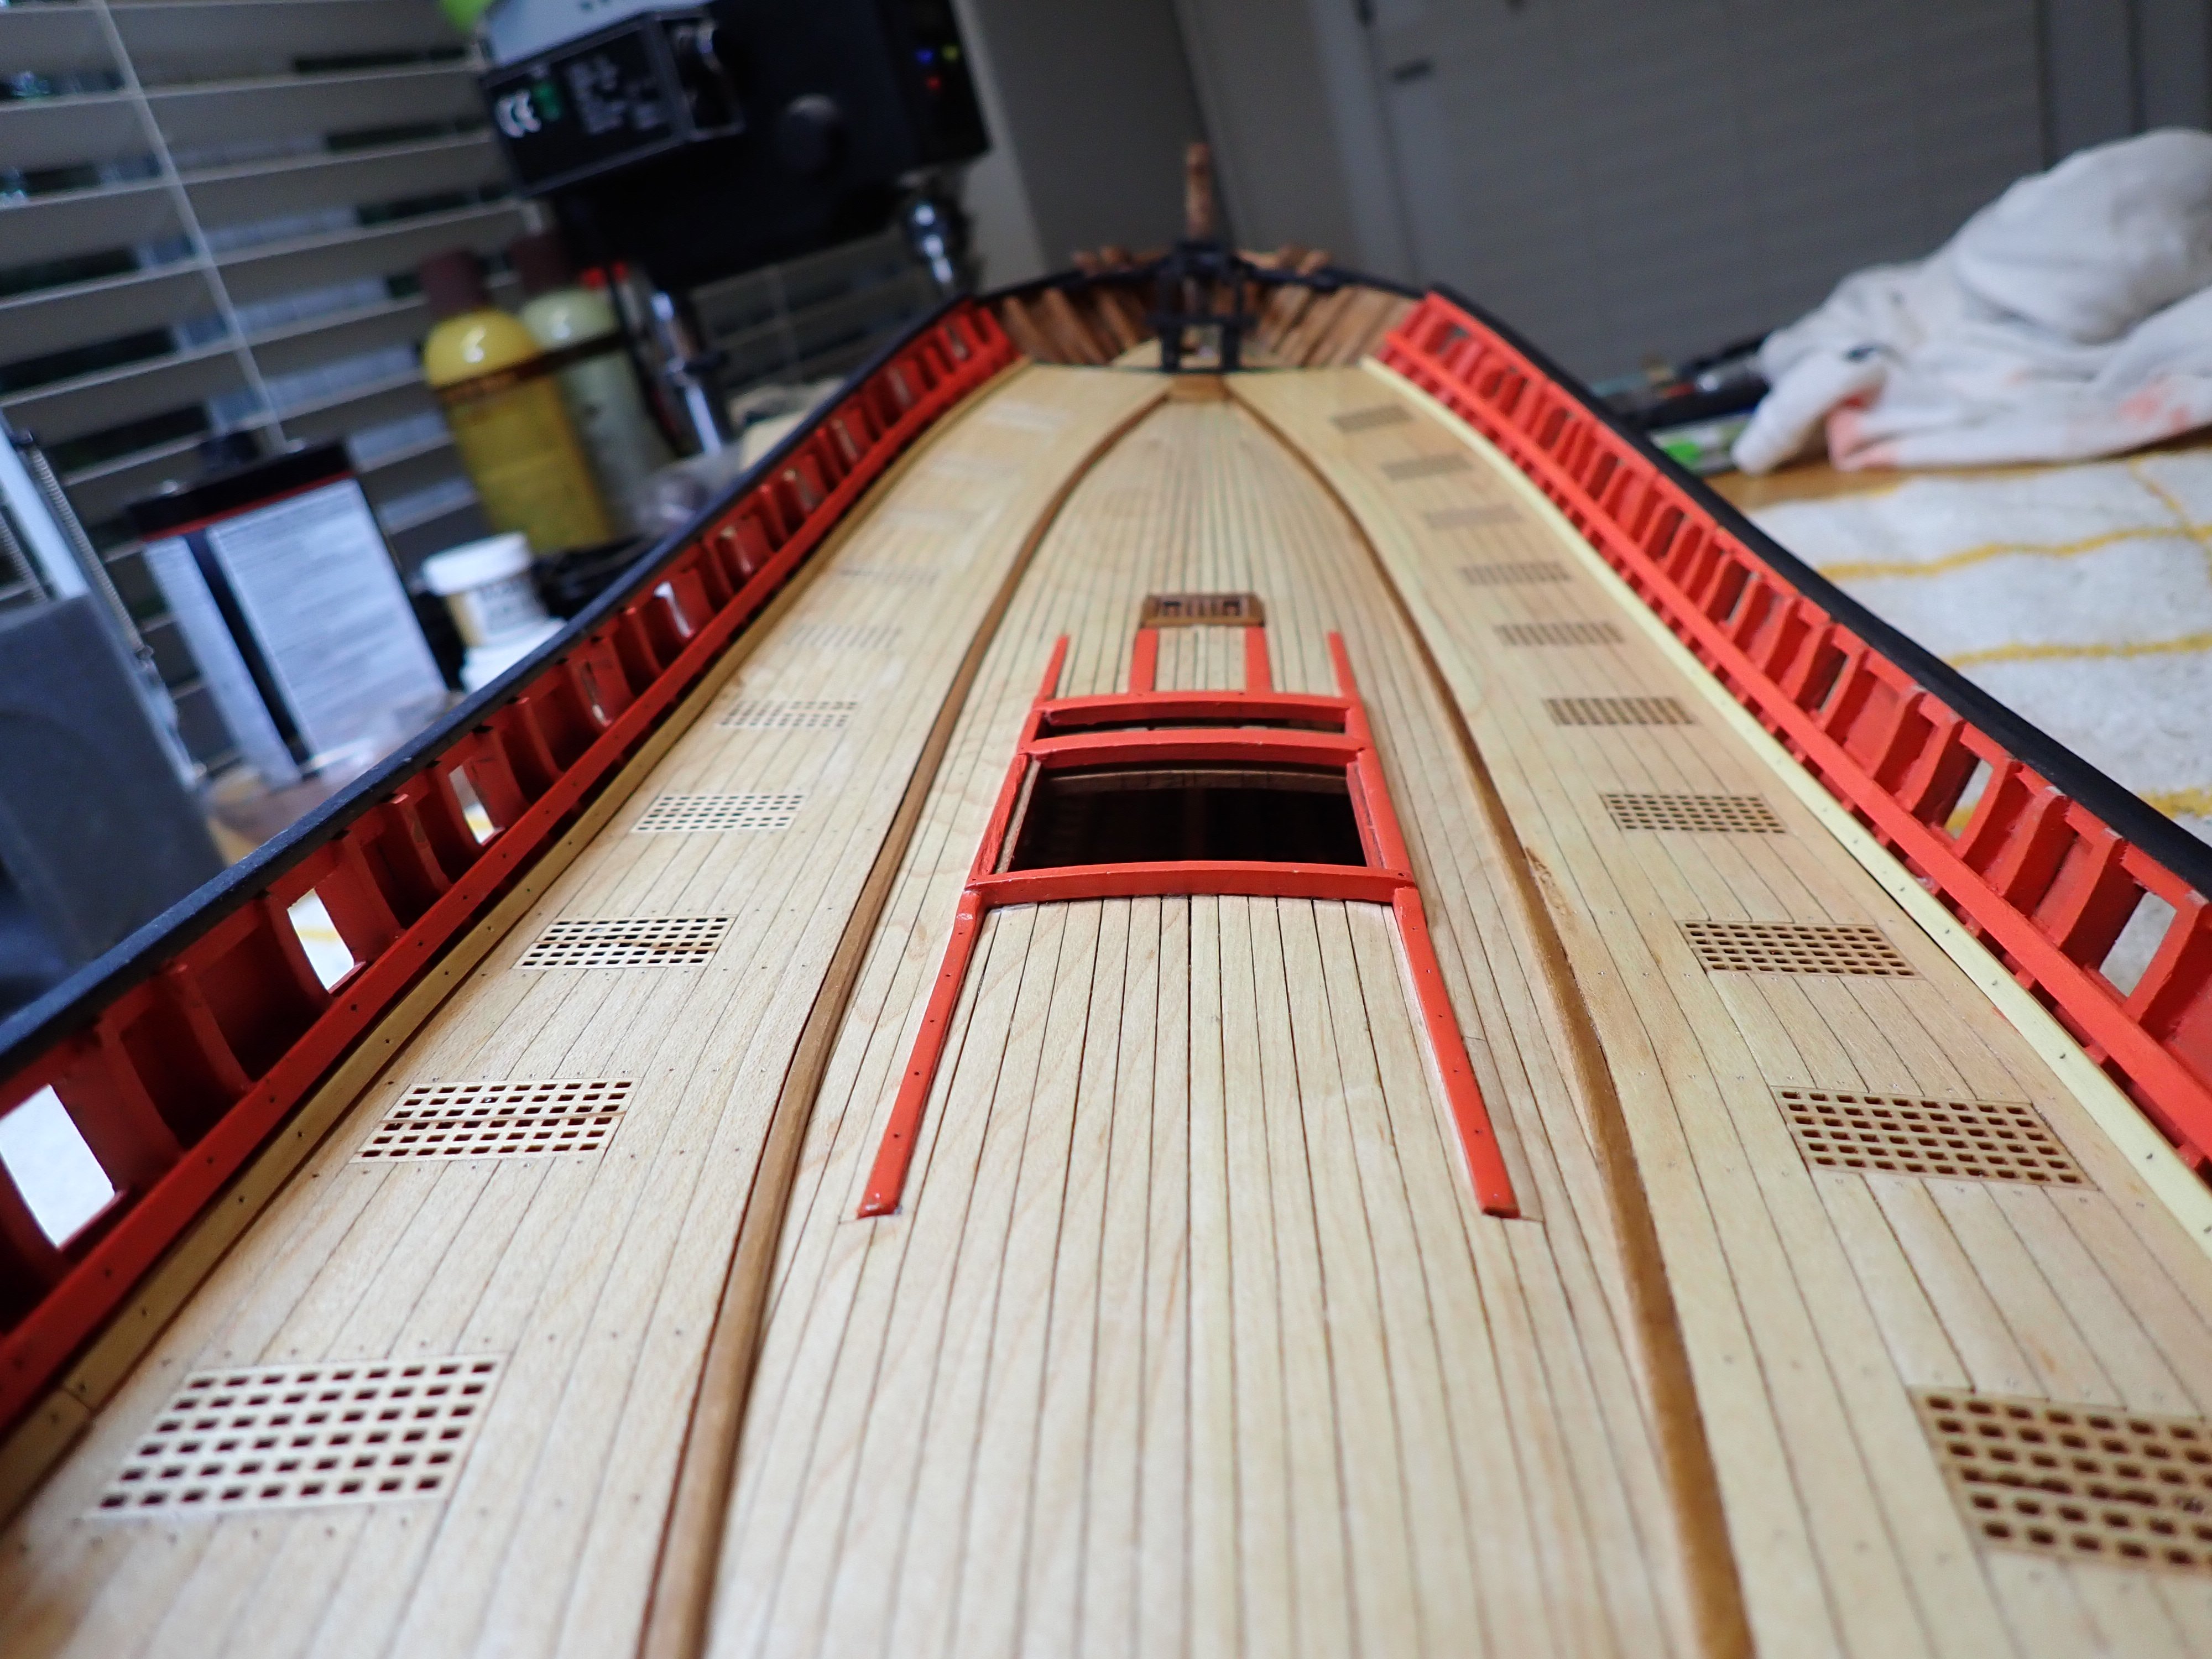
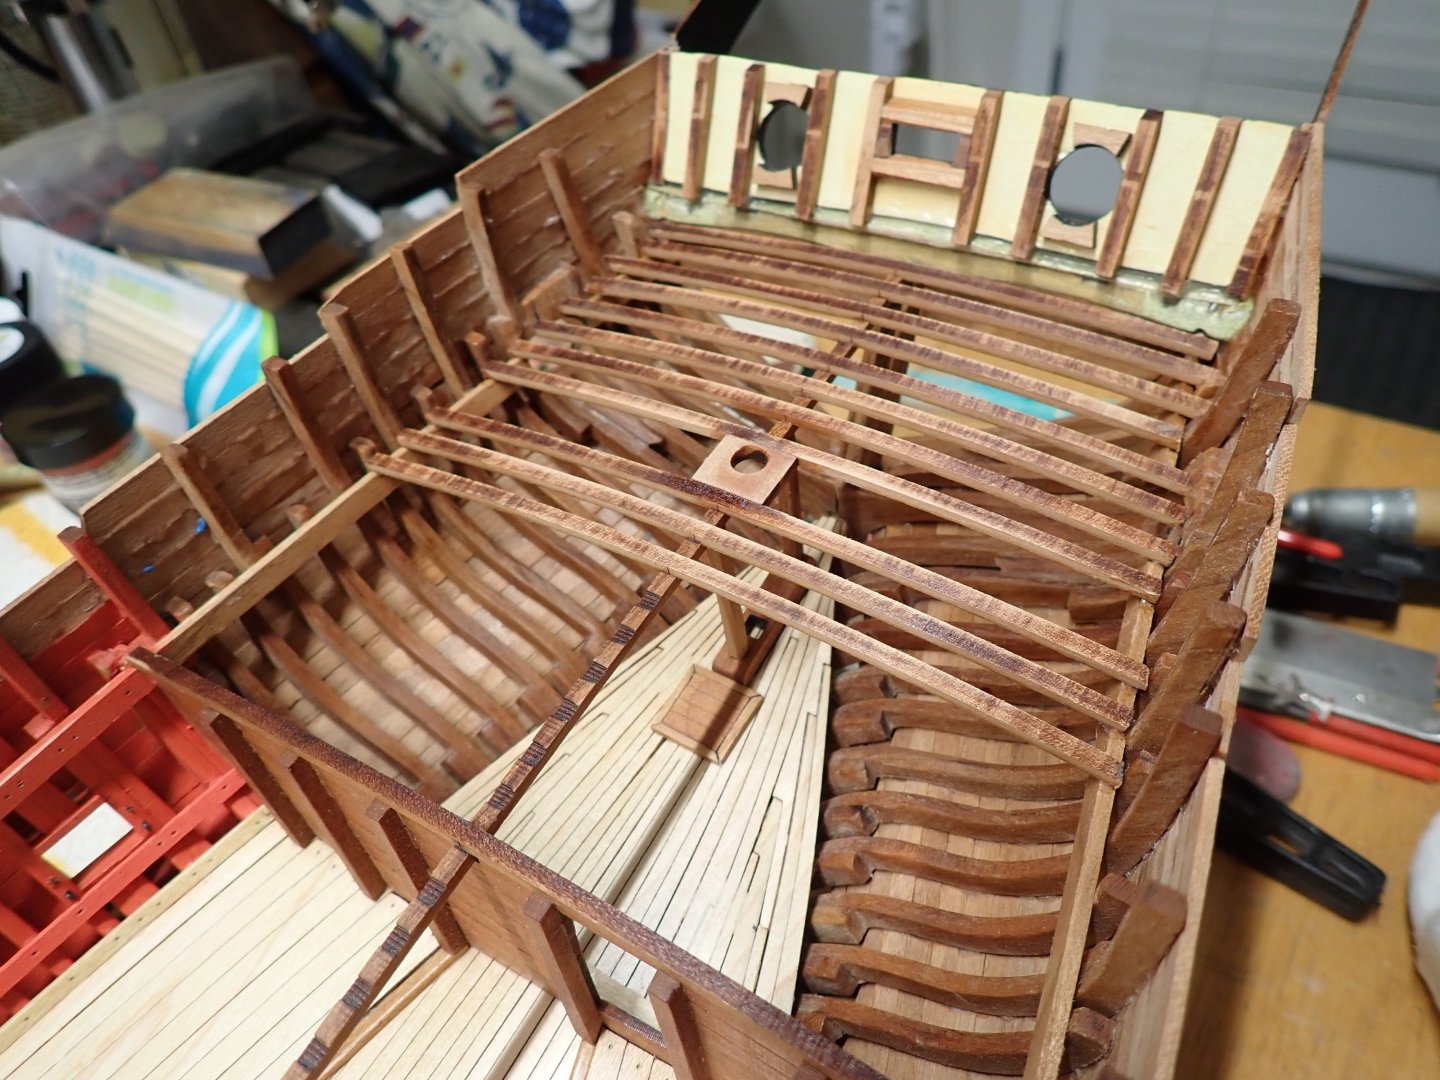
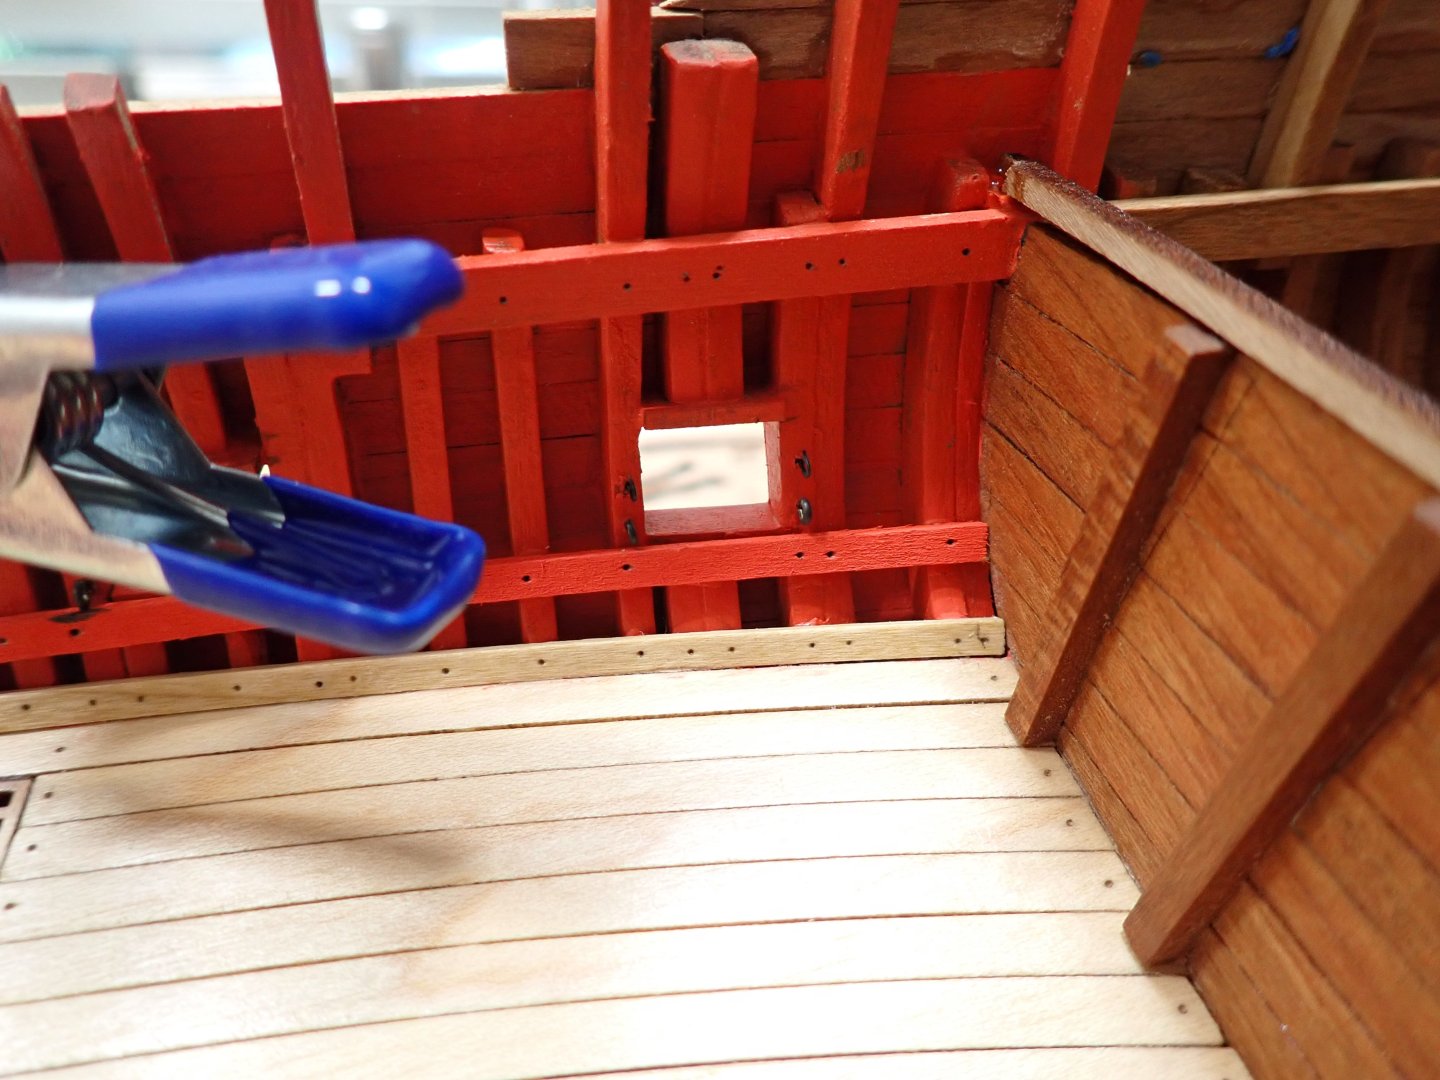
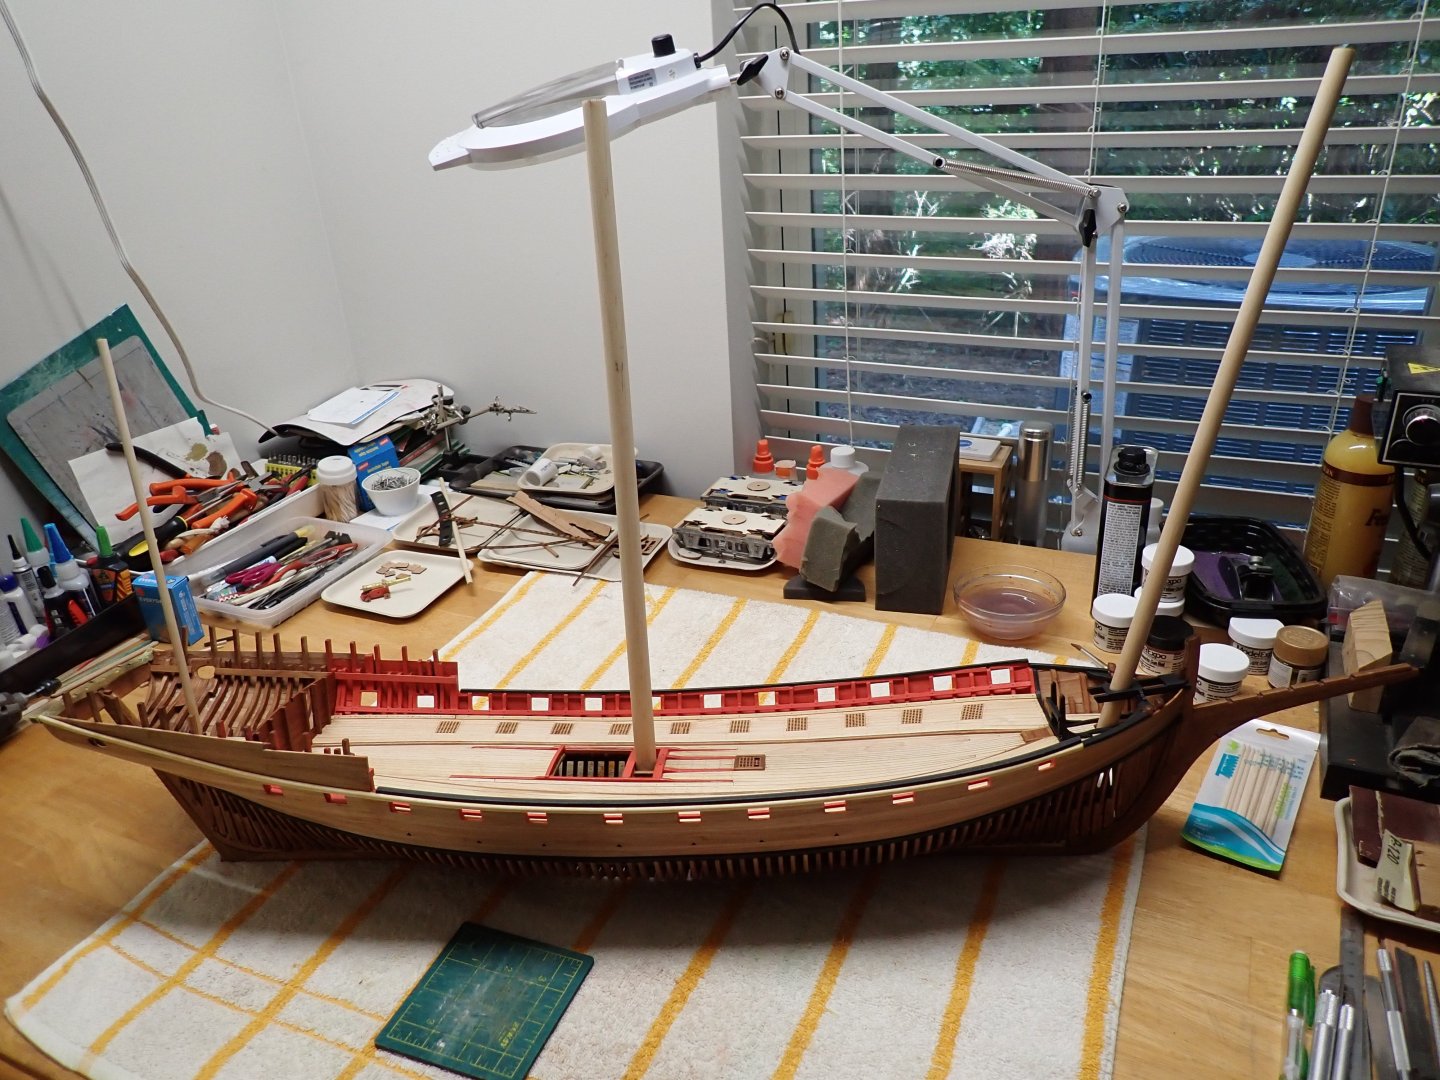
Moving on with the installation of the beams supporting the quarter deck. The guide holding and aligning the mizzen mast has been installed. I also added a couple of poles underneath to make it sturdier. Now, I have to finish the door, glue it to the cabin wall and complete the assembly of the beams, at least up to the wall of the cabin: Below, you can see the extra support. Once the deck is in place, it will be quite solid, but you never know.... Yves


- 185 replies
-
- 12
-

-
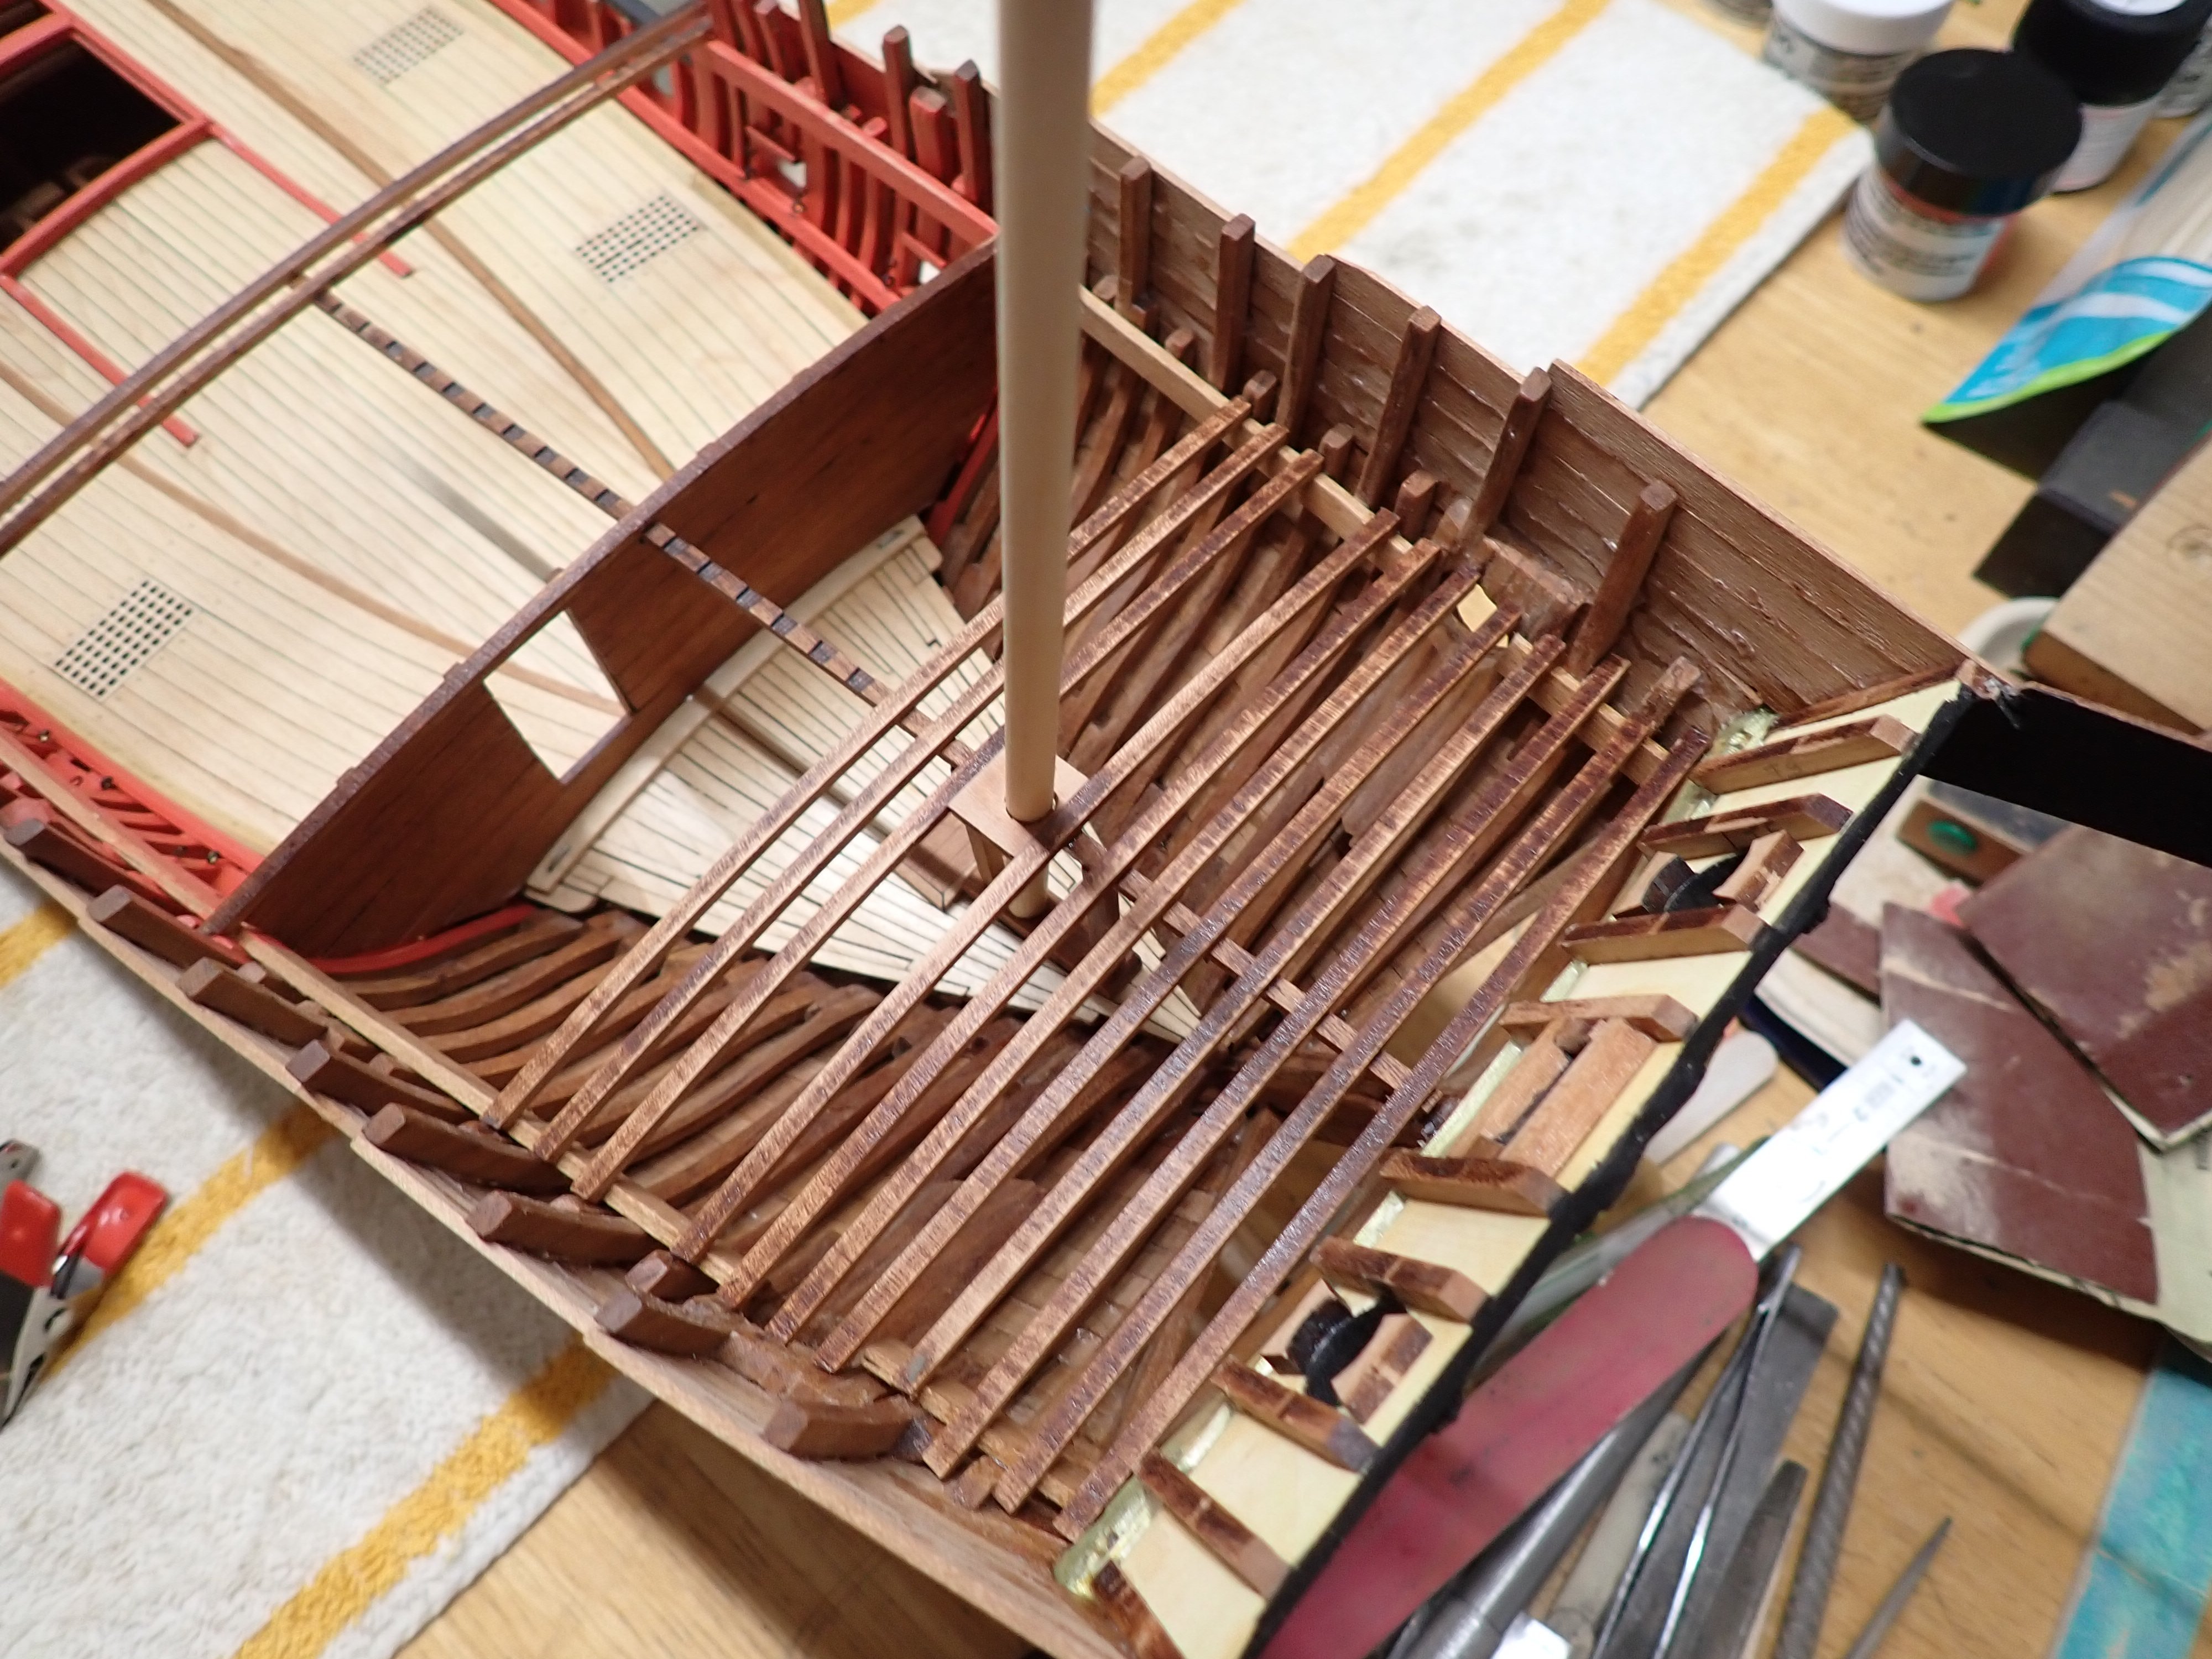
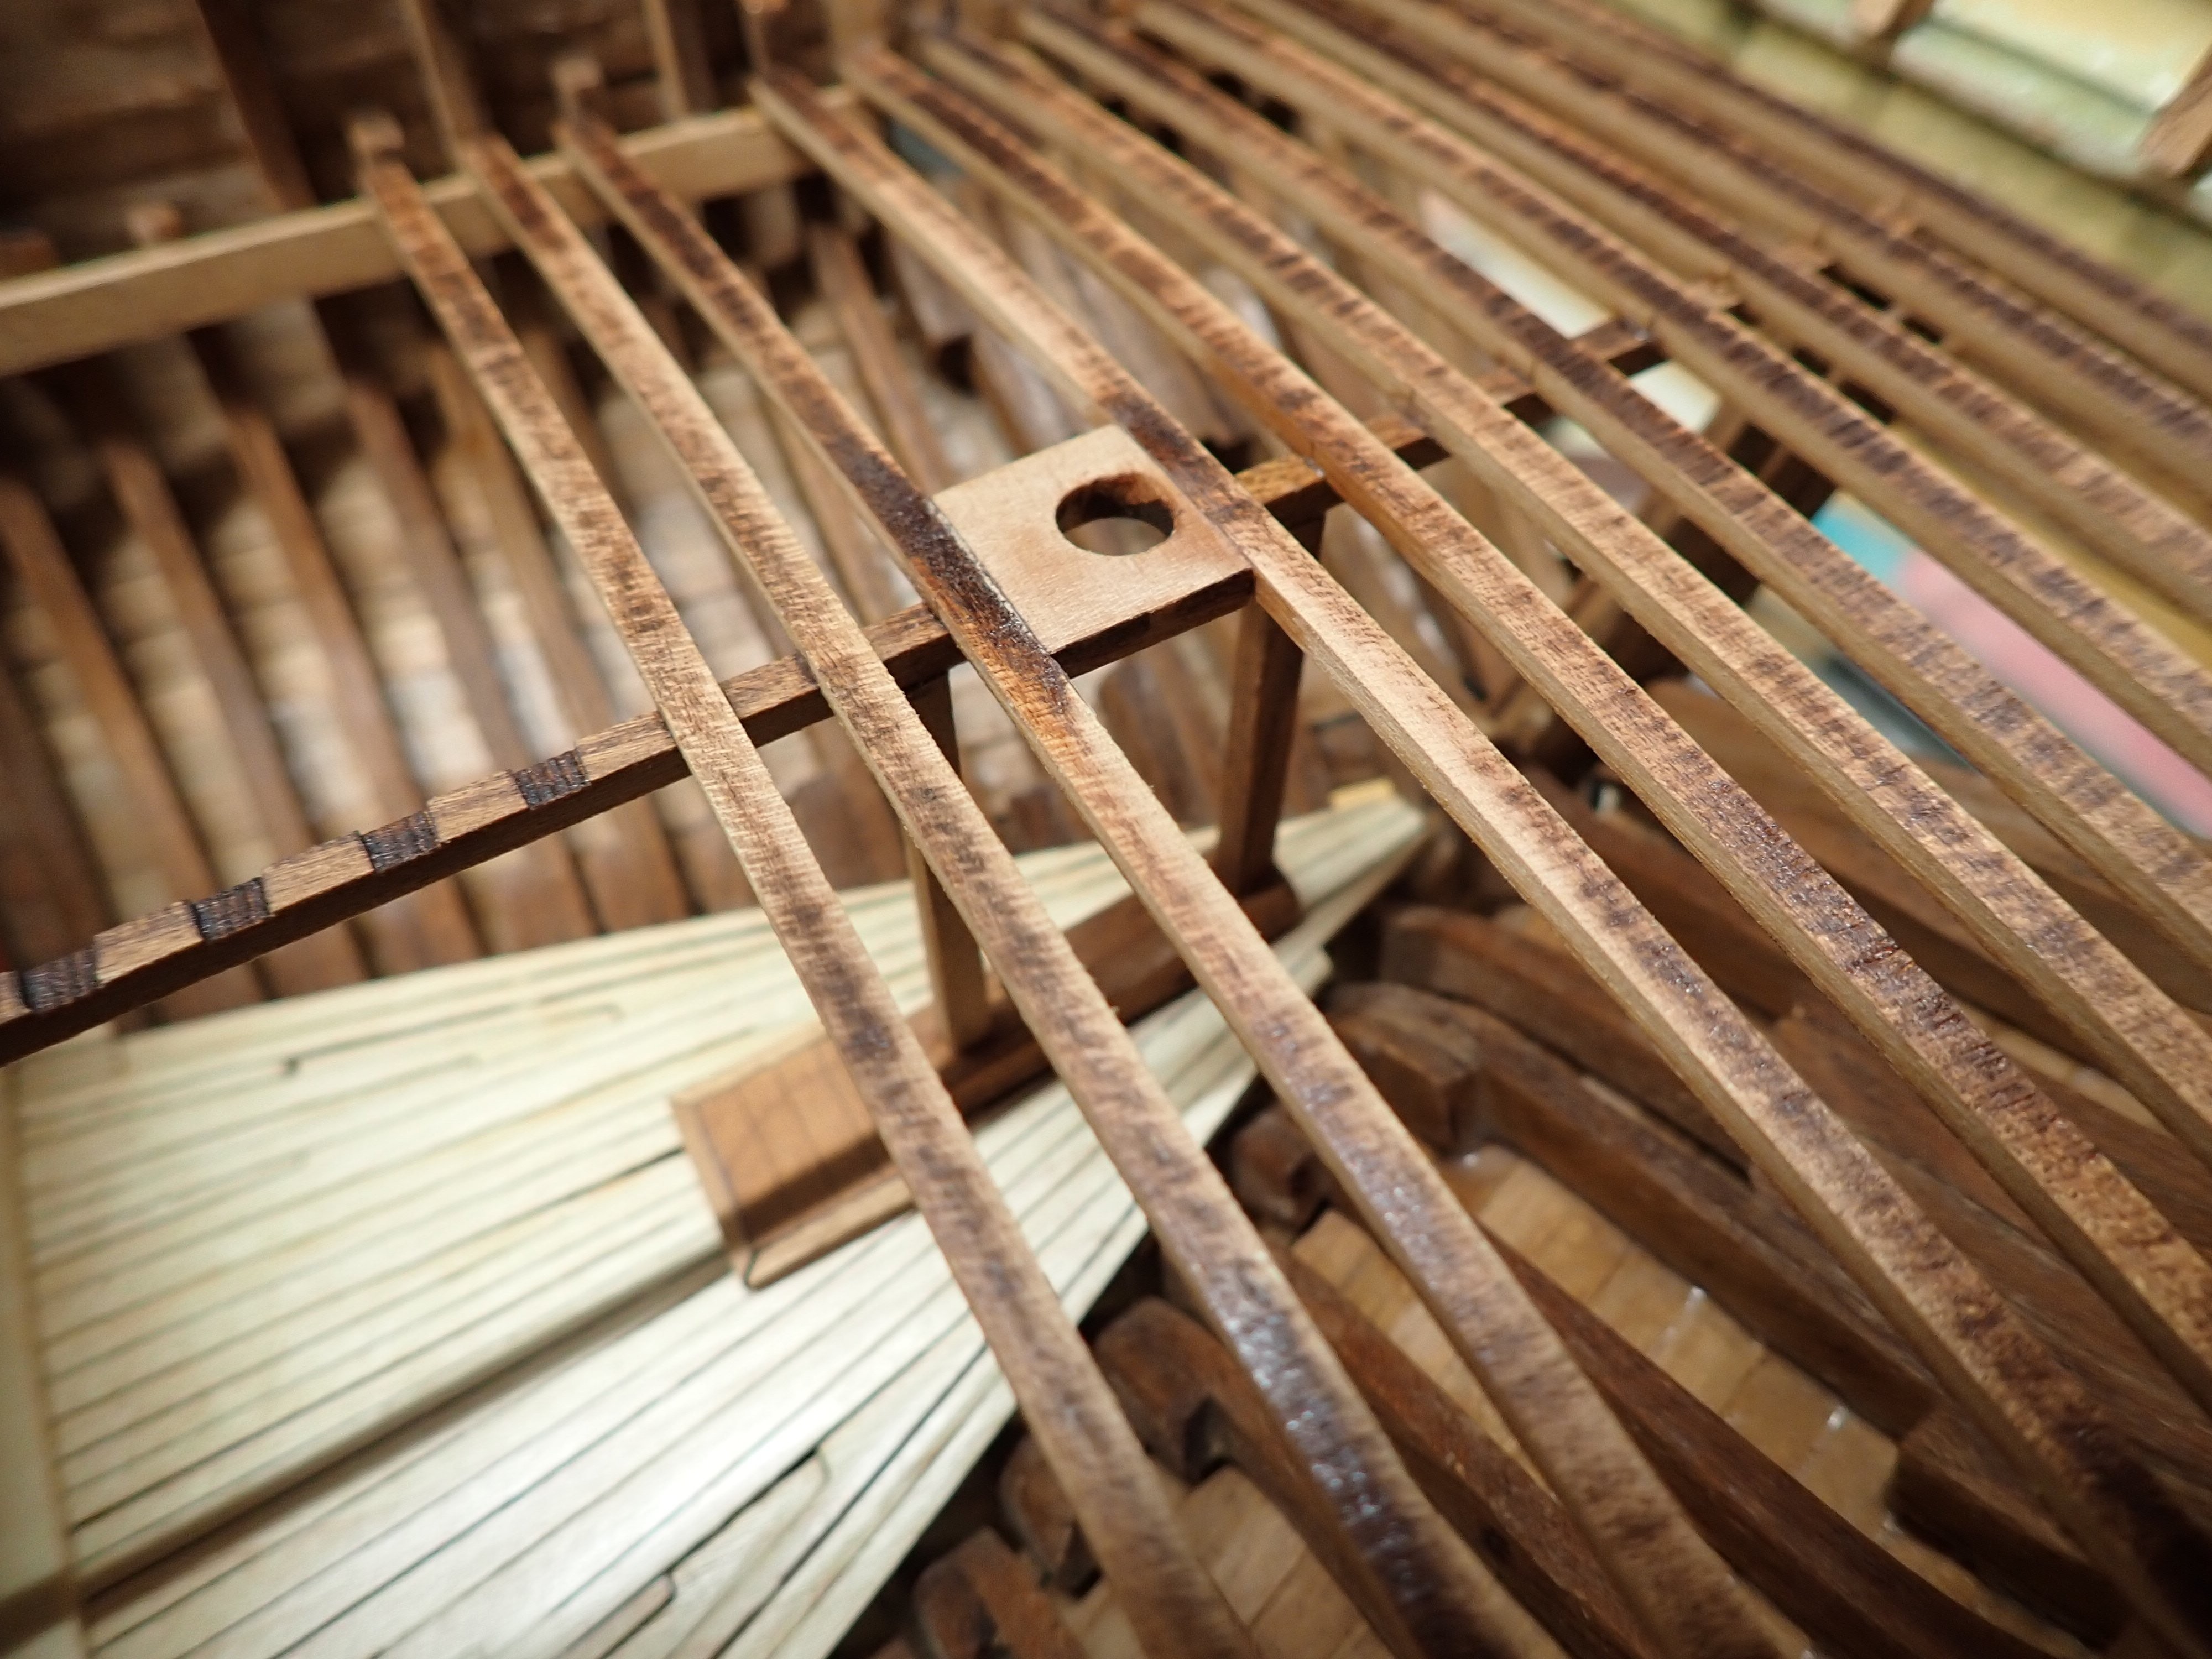
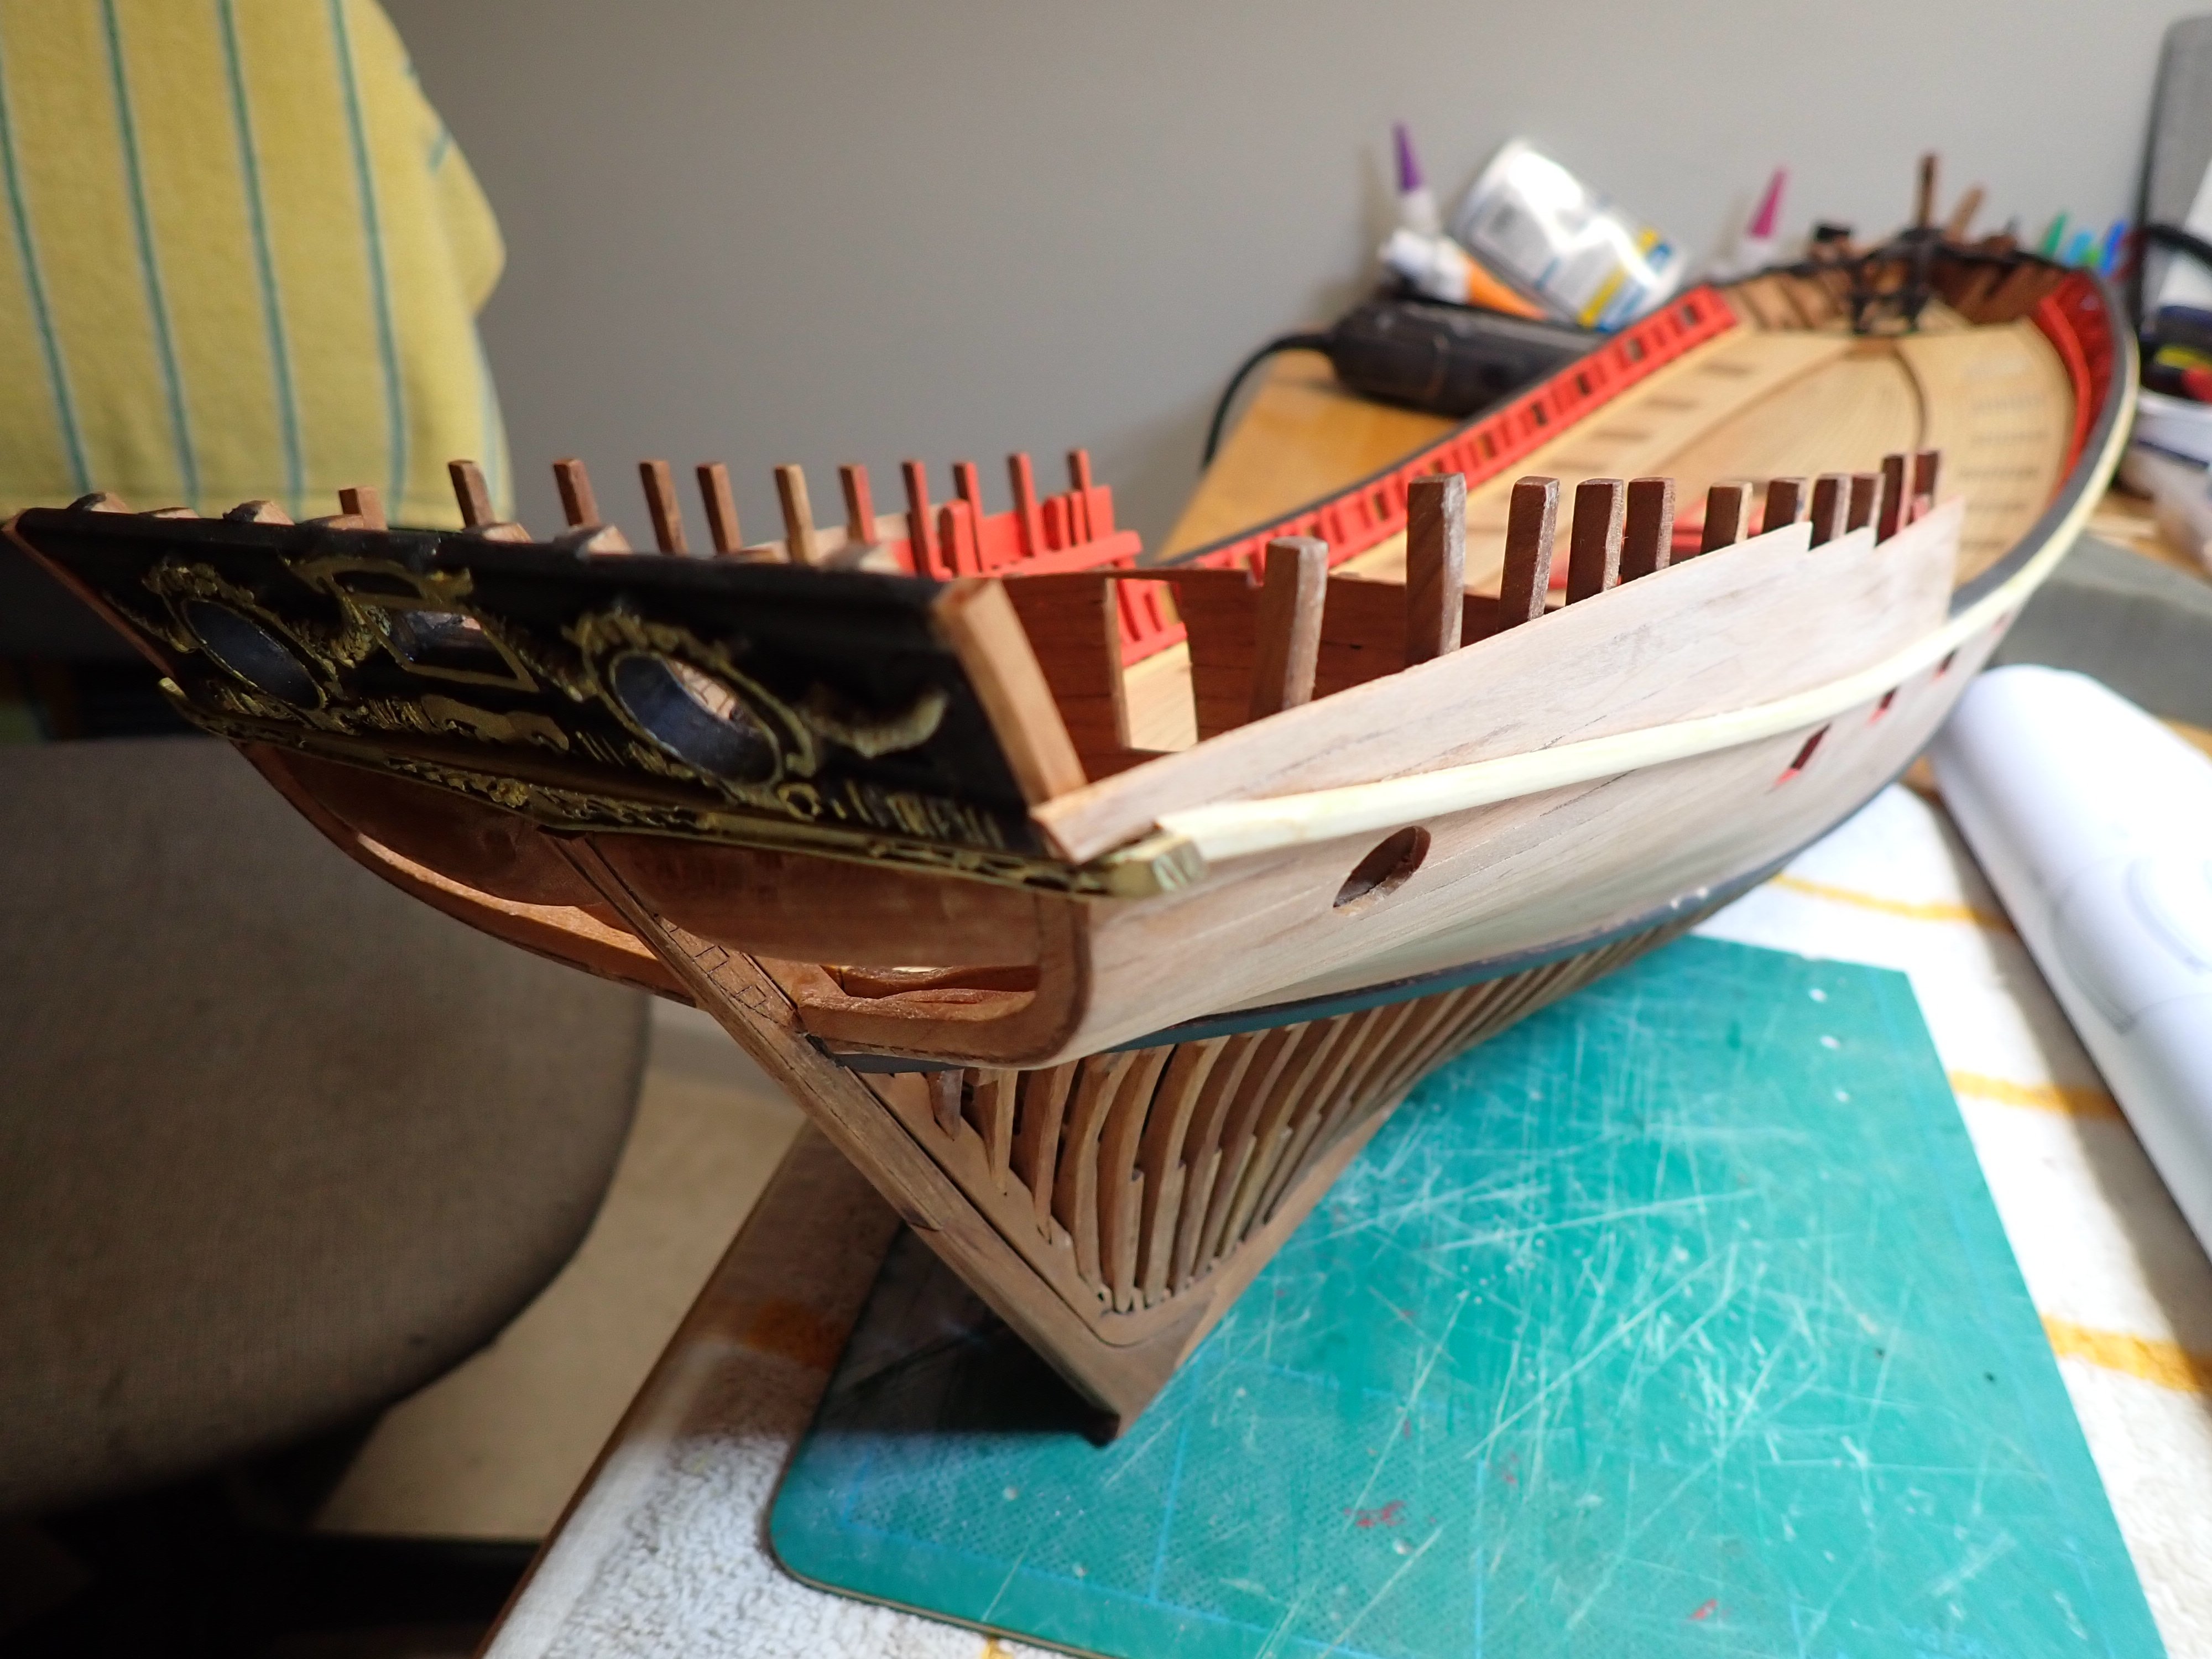
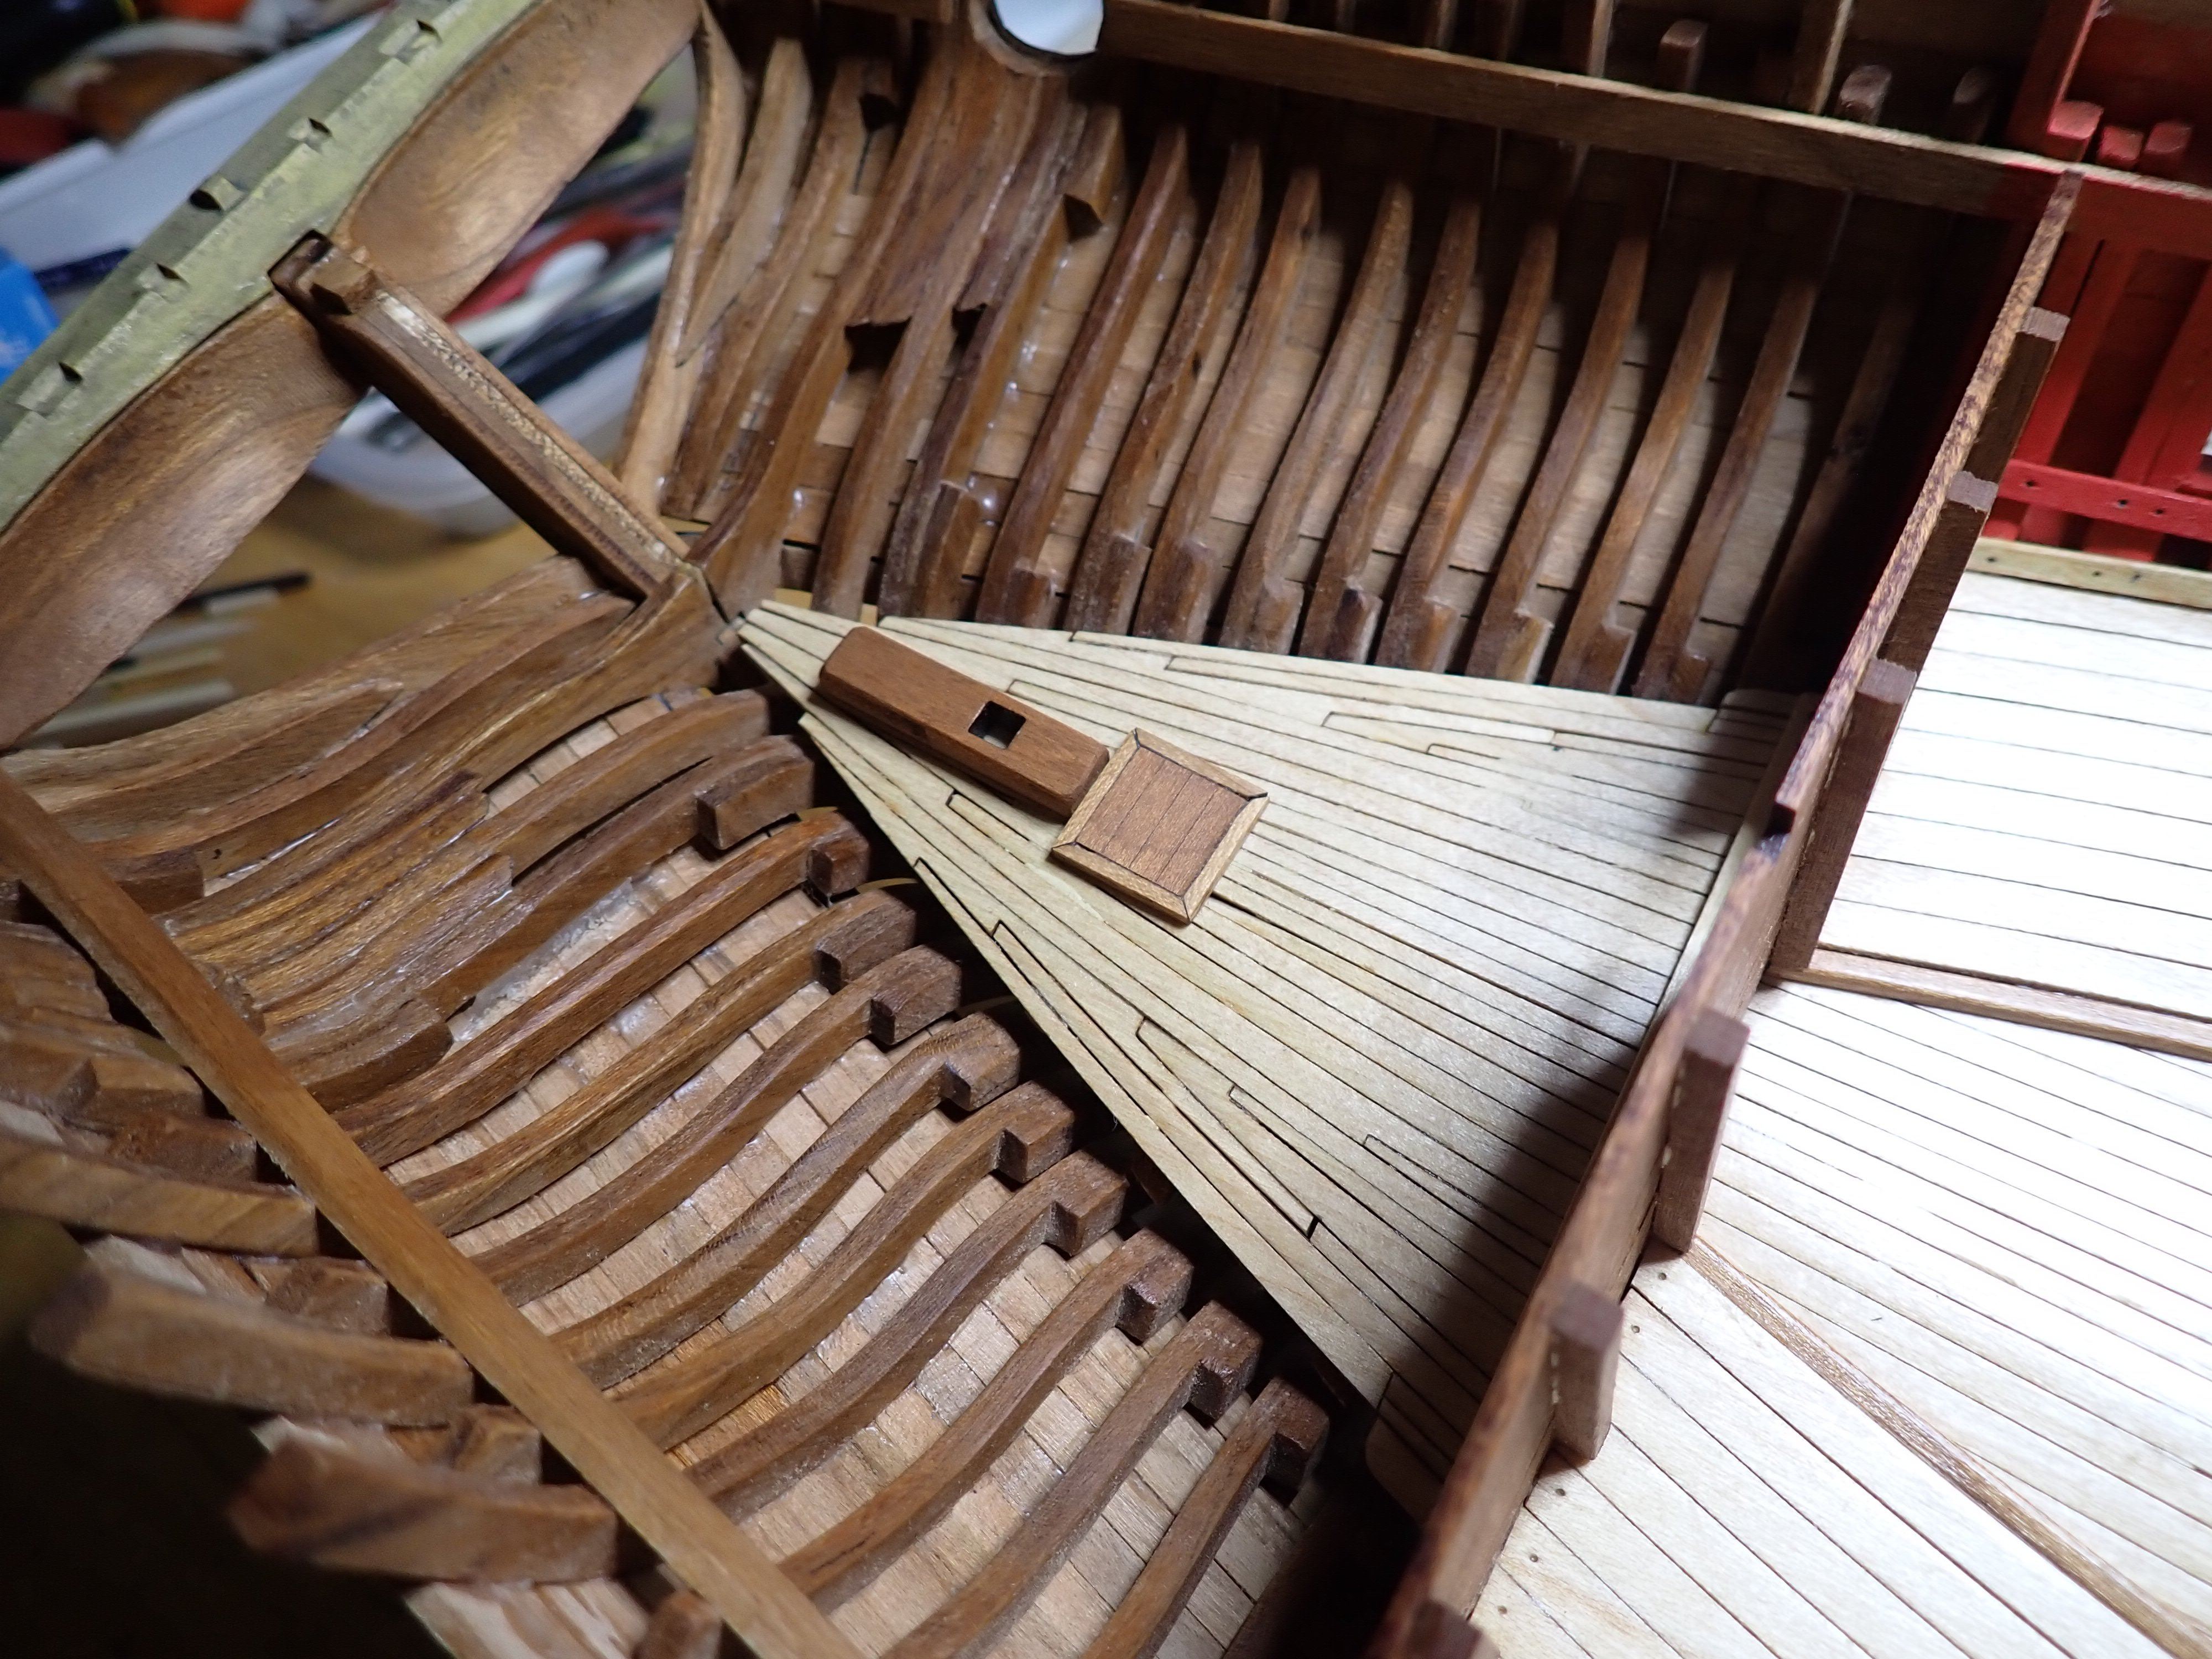
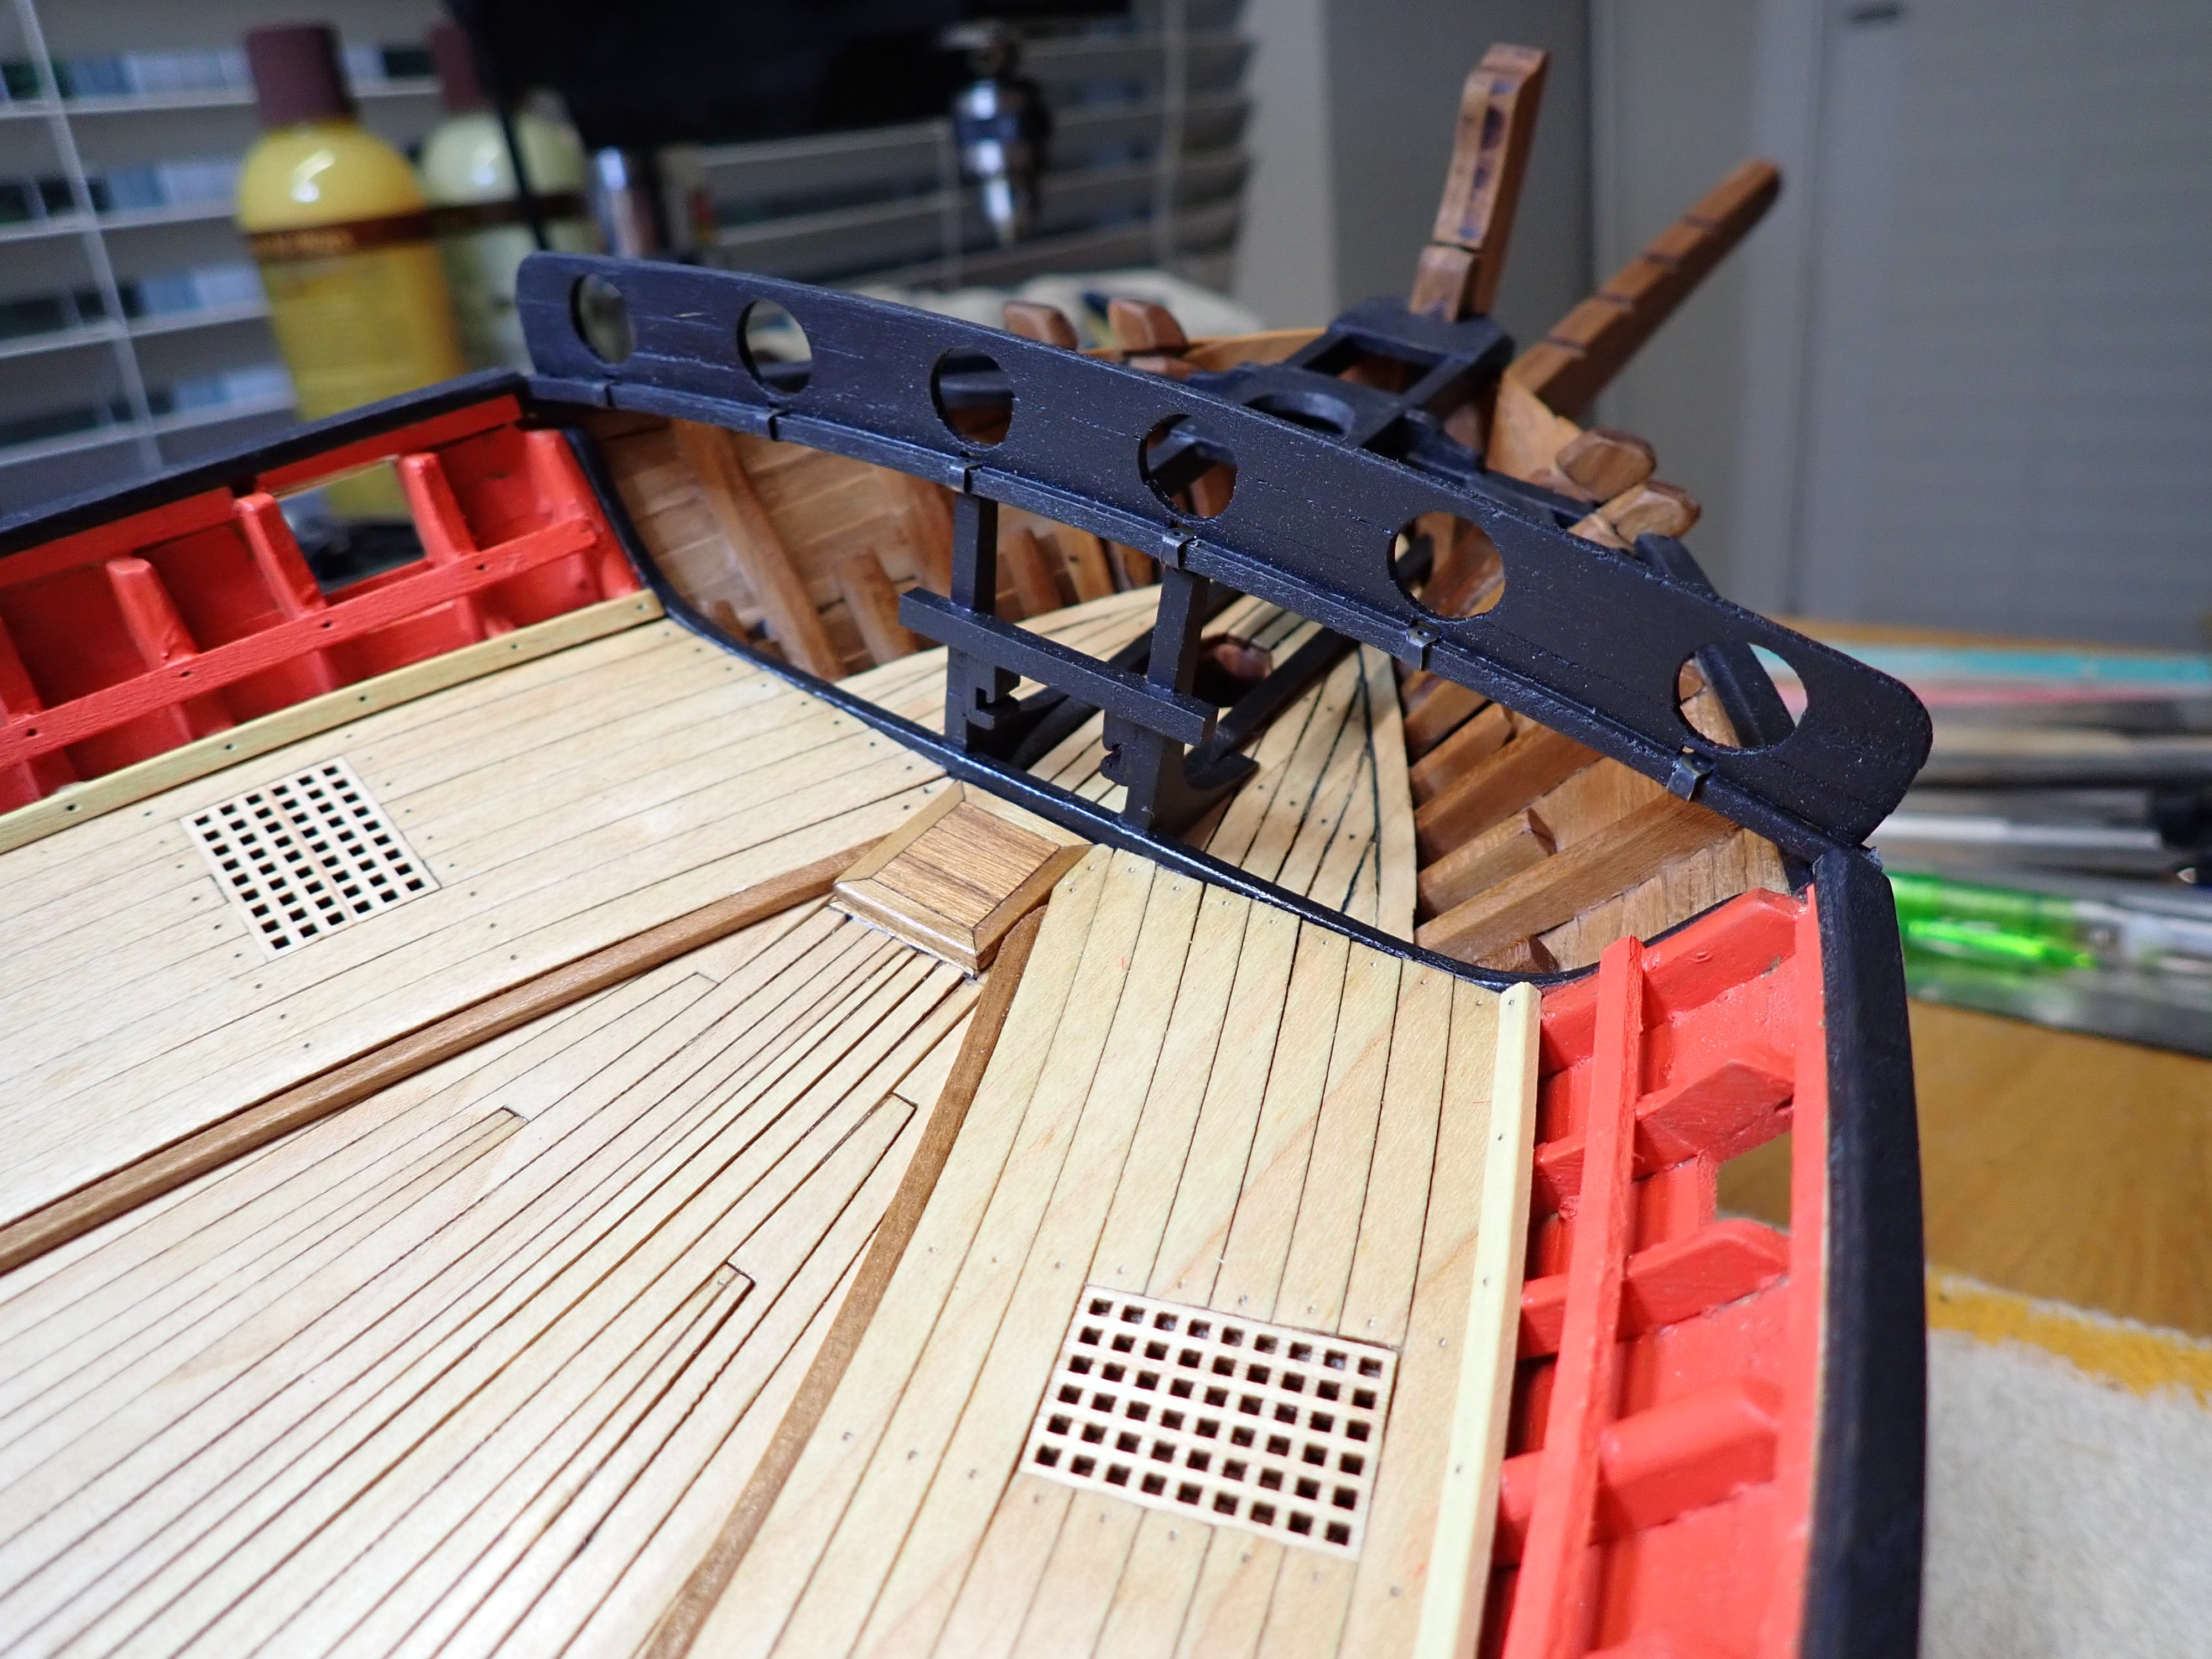
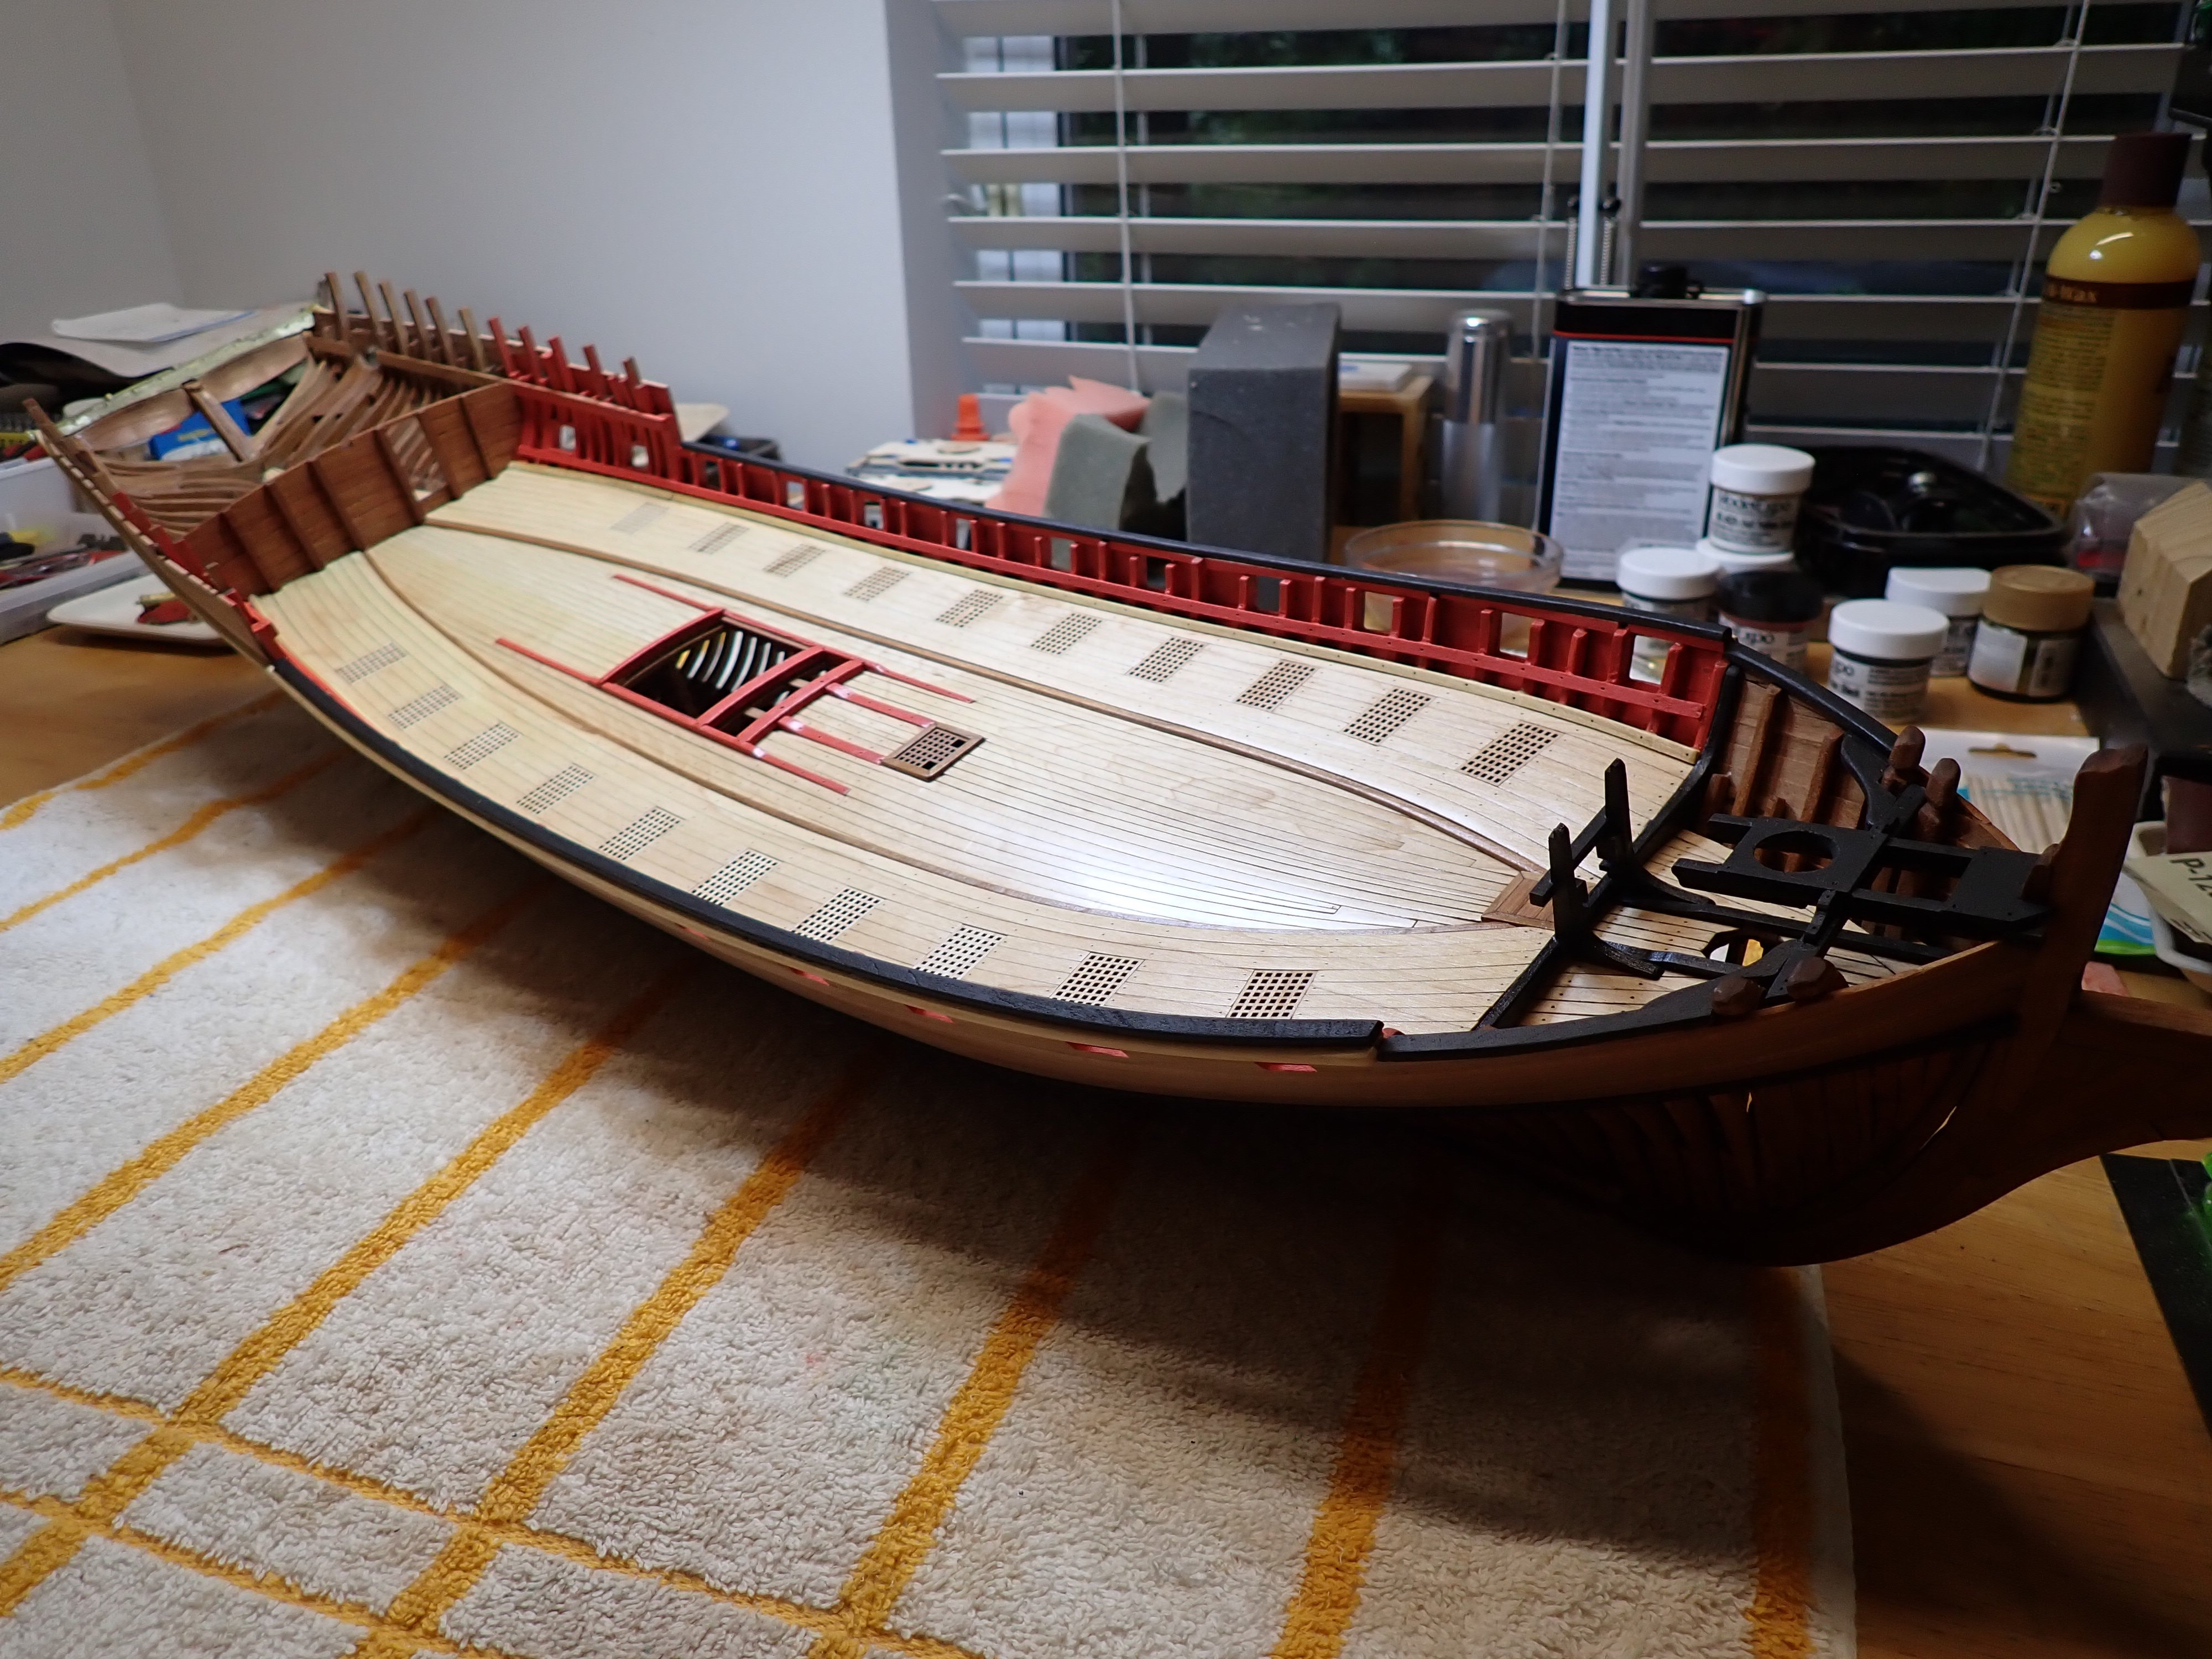
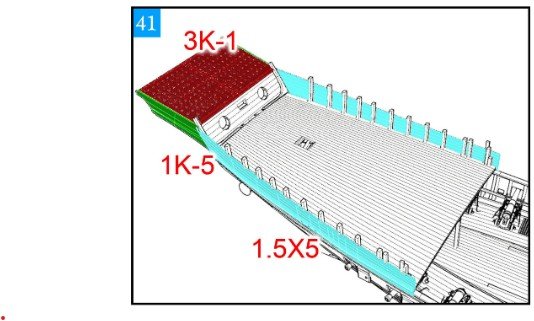
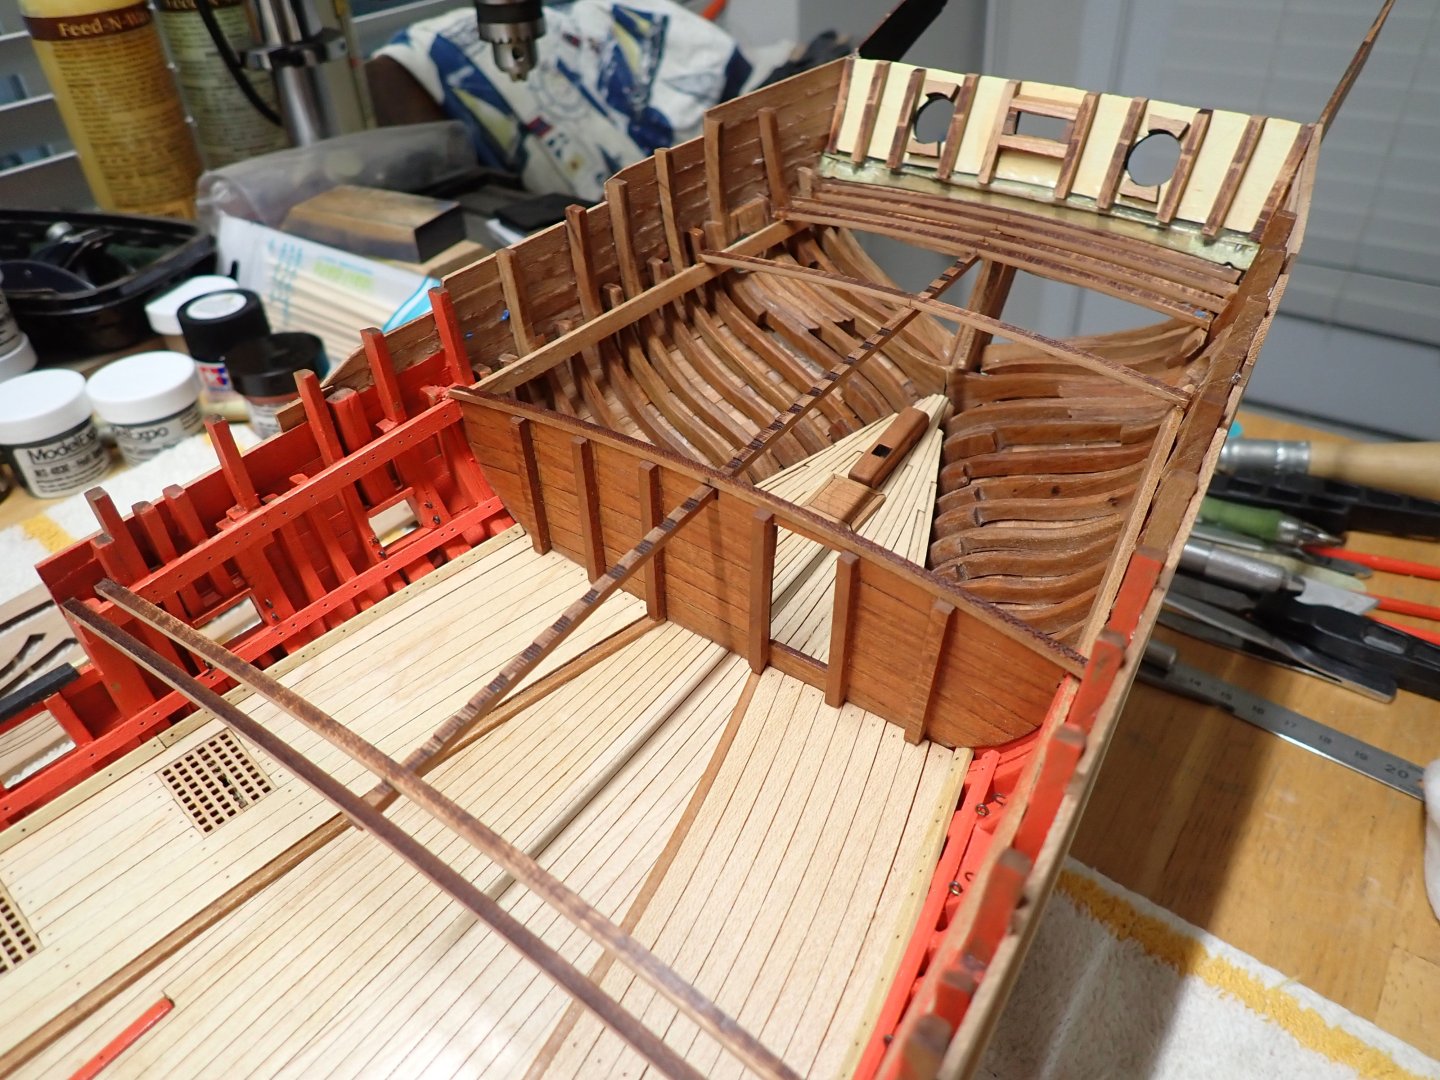
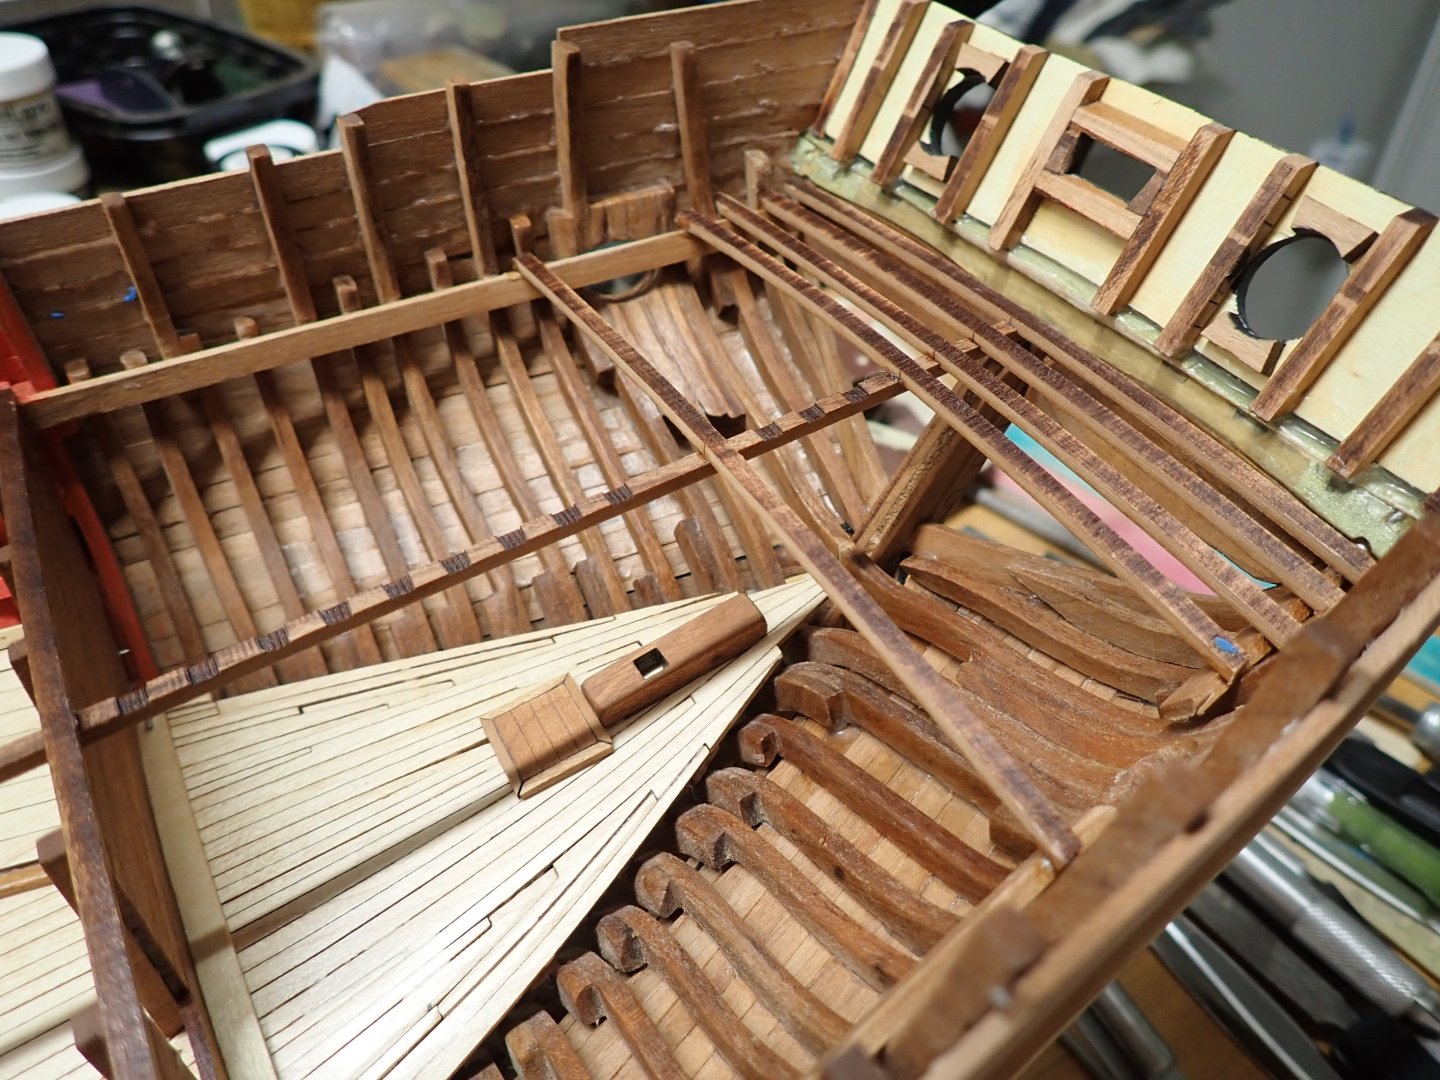
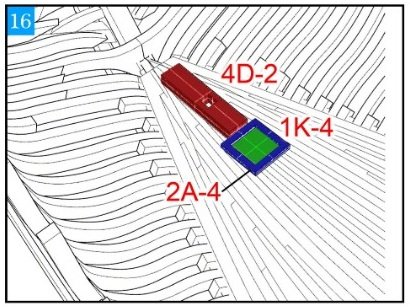
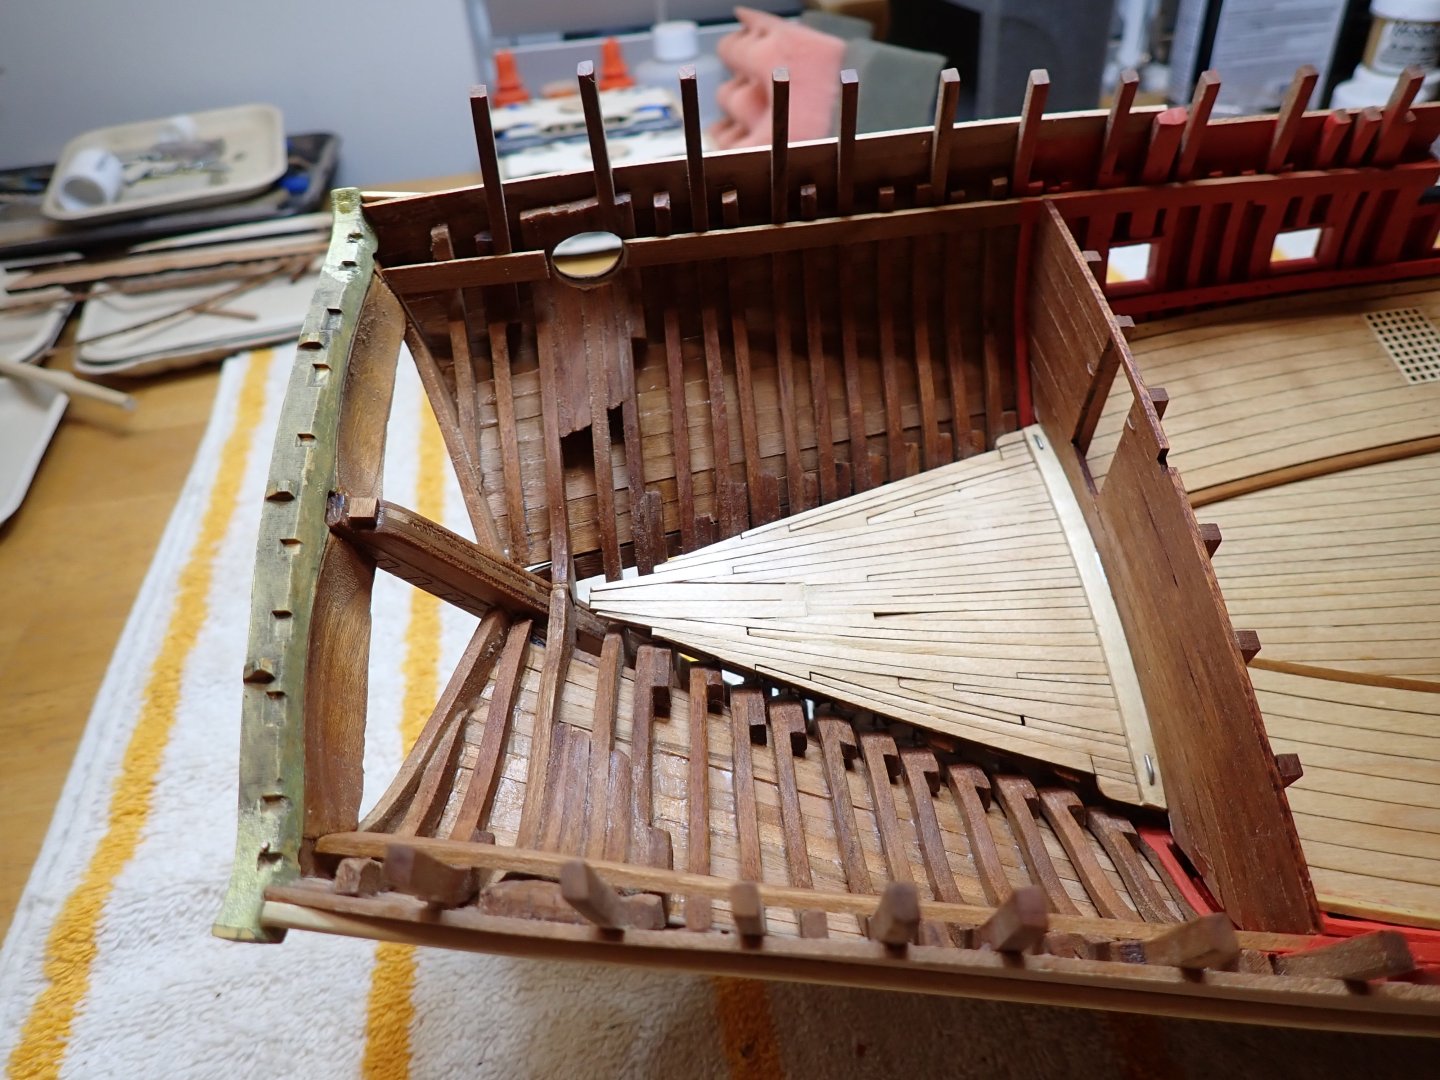
I am still progressing without following the official instructions, just going along with what makes the most sense for me. After installing the stern panel, I managed to glue the side extensions of the hull: All this is still very fragile and will require a lot of care to avoid breaking them. The large wooden grid on top will help re-enforce but cannot be installed until I built the planking on the stern from the inside deck. And before doing that, I have to build the quarter deck and its planking. The following drawings will give you a better idea of what I am trying to do and how it needs to happen: Of course, before completing the quarter deck planking the door of the cabin and the guns must be installed, on the gun deck. Therefore, the various hooks are set in the frames: Yves


- 185 replies
-
- 11
-
-
Caldercraft Kits are among the best. Excellent choice. Yves
- 49 replies
-
- 2
-
-
- Brannaren
- Caldercraft
- (and 1 more)
-
Great stuff. Very clever. Yves
-
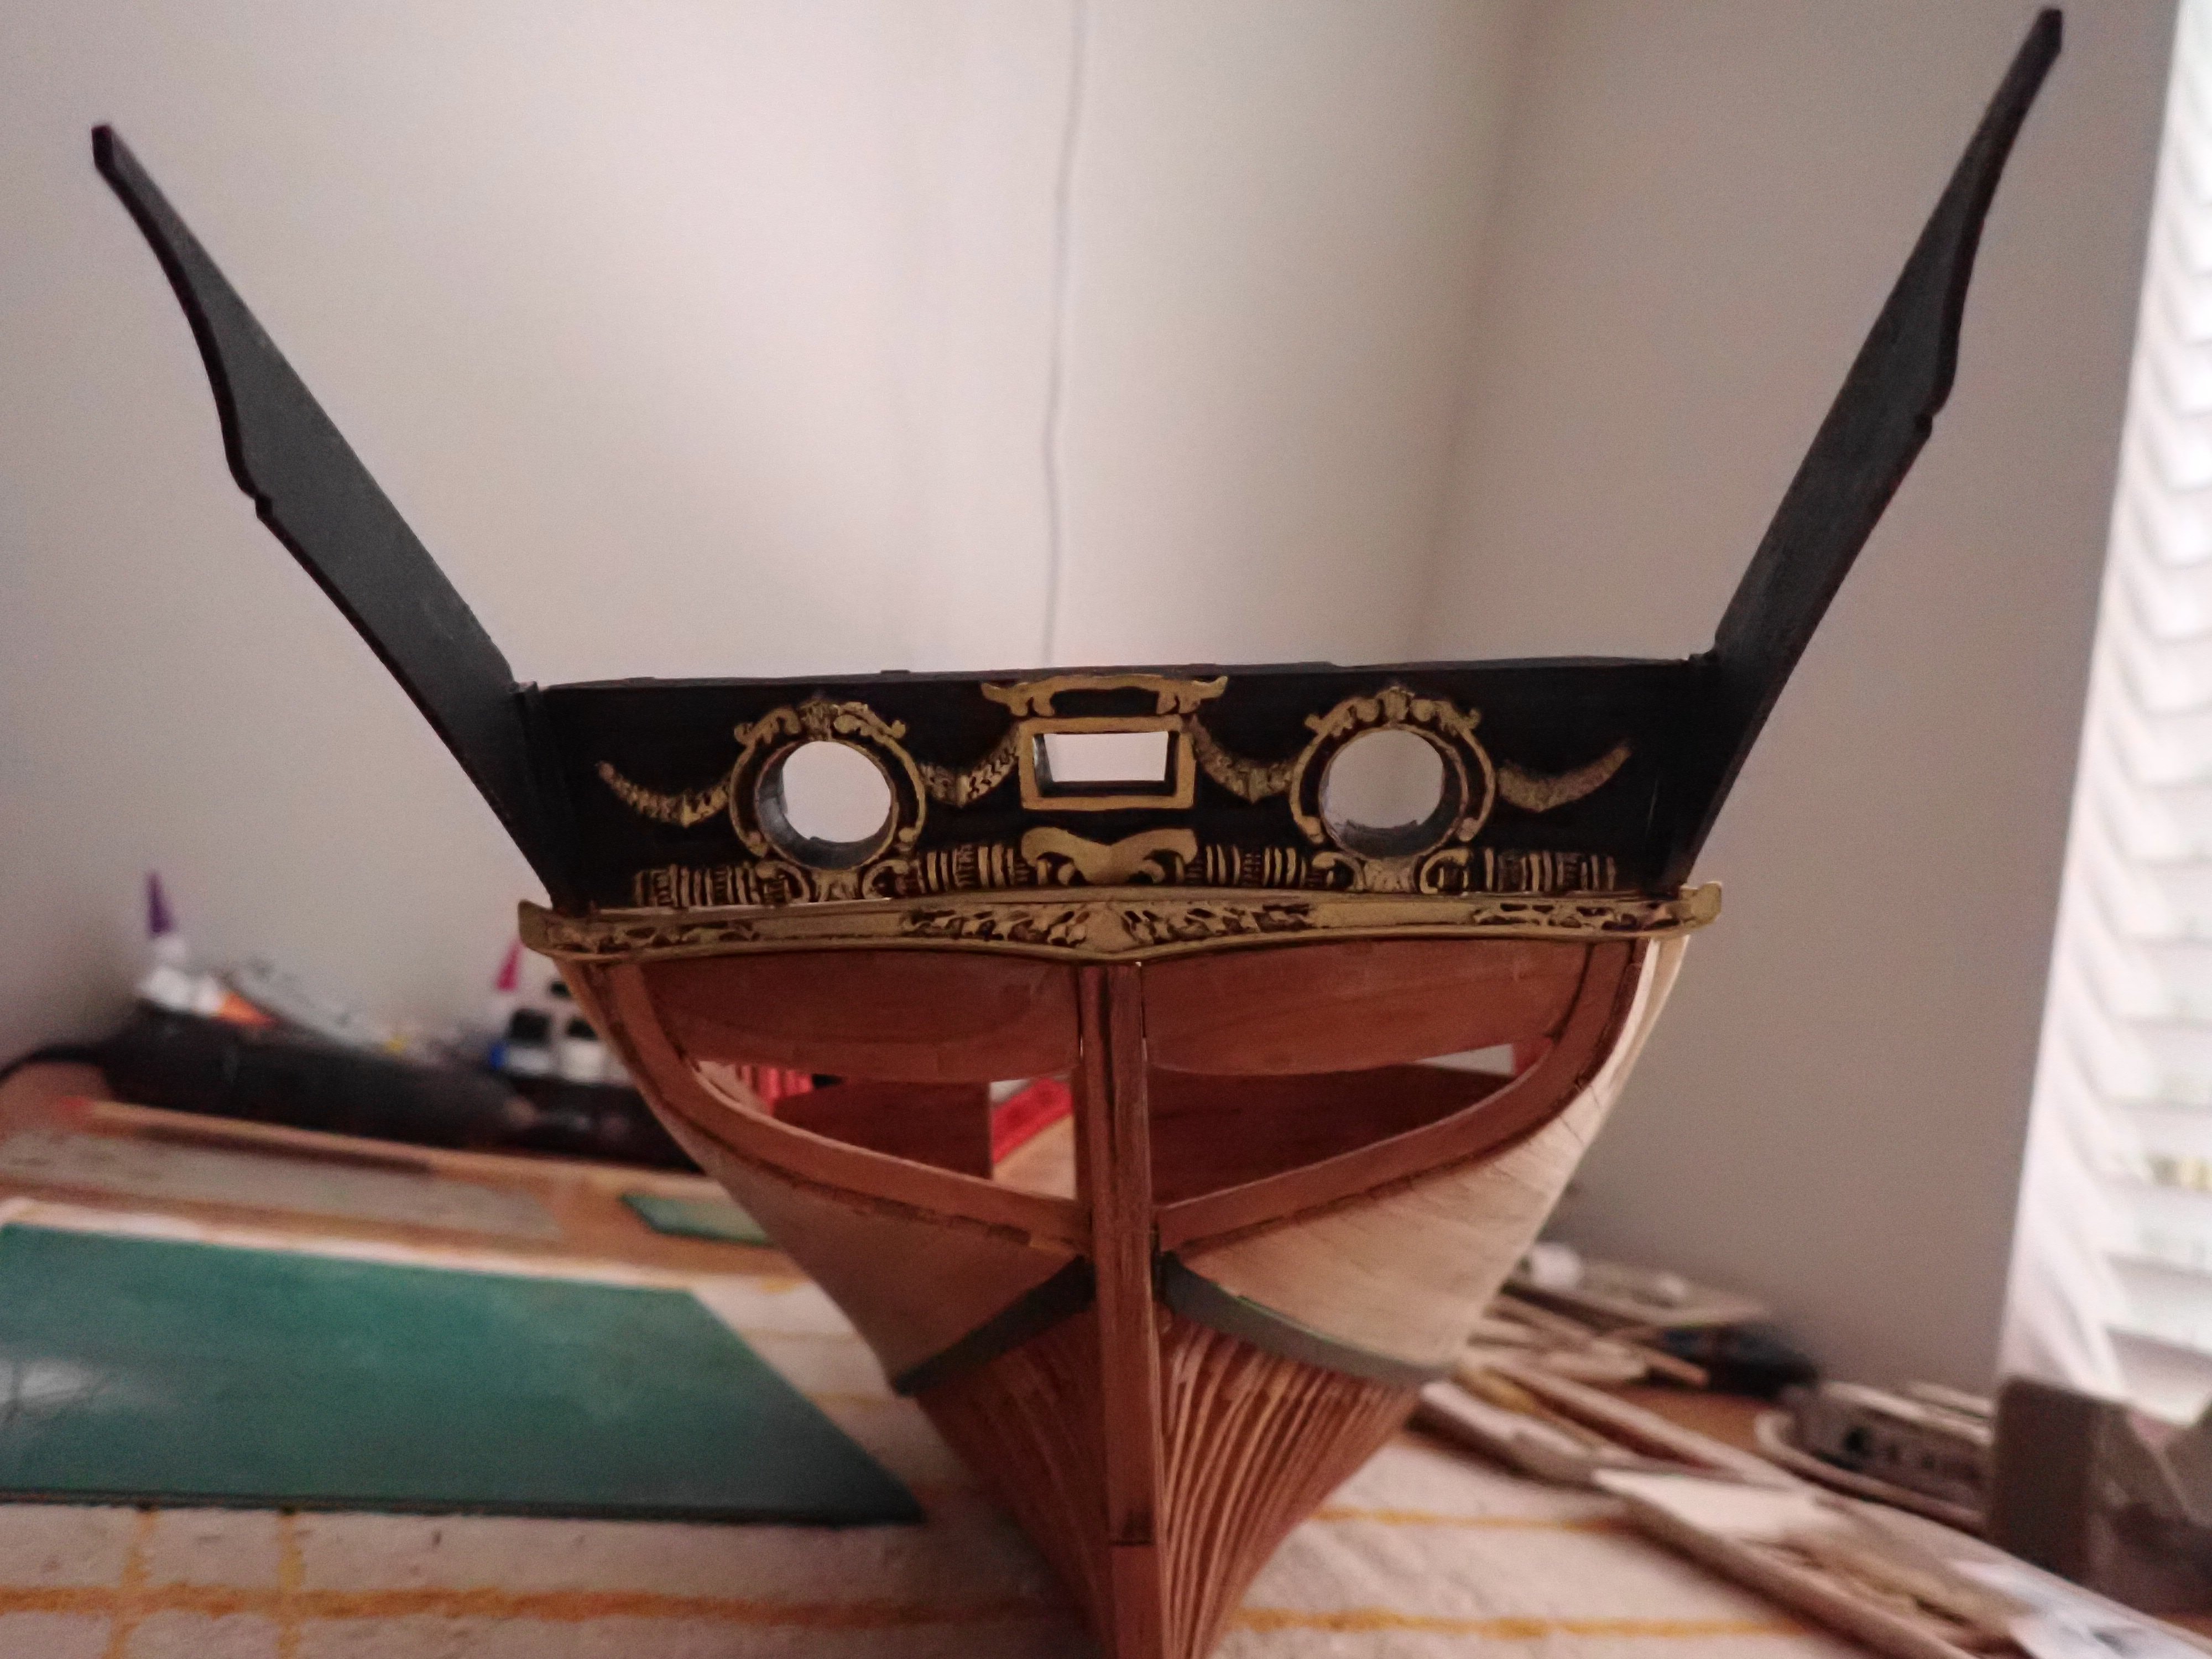
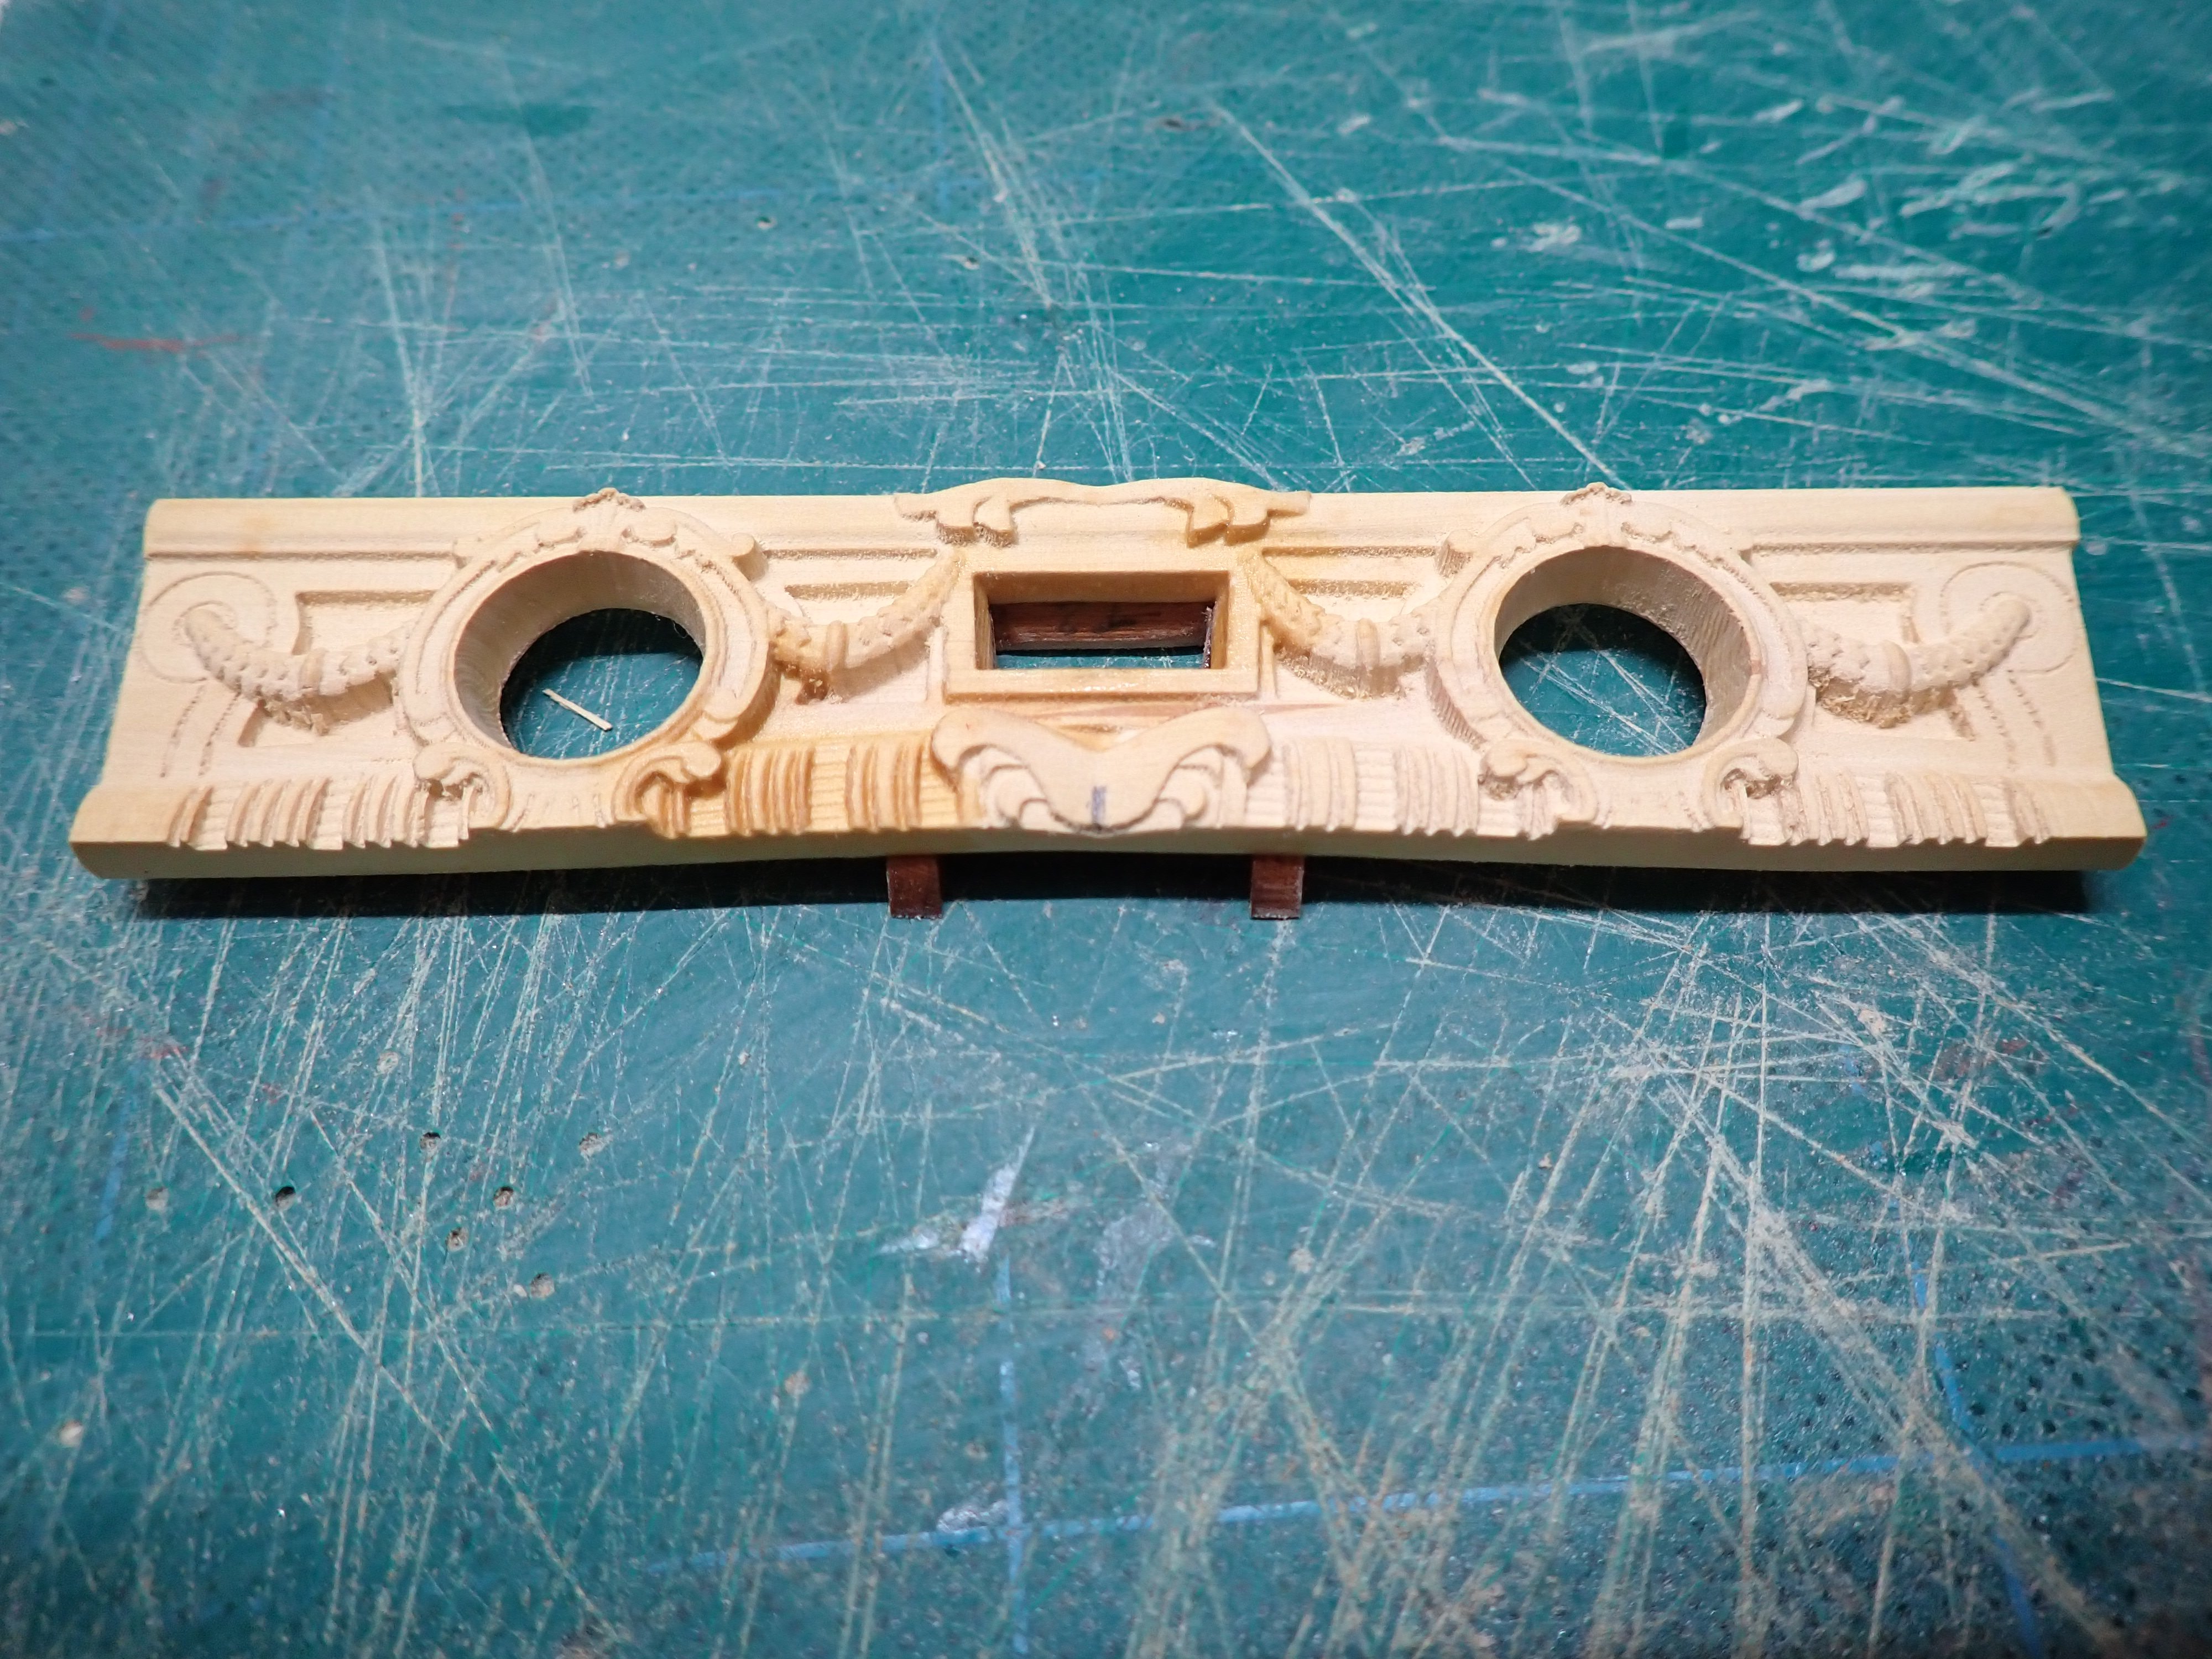
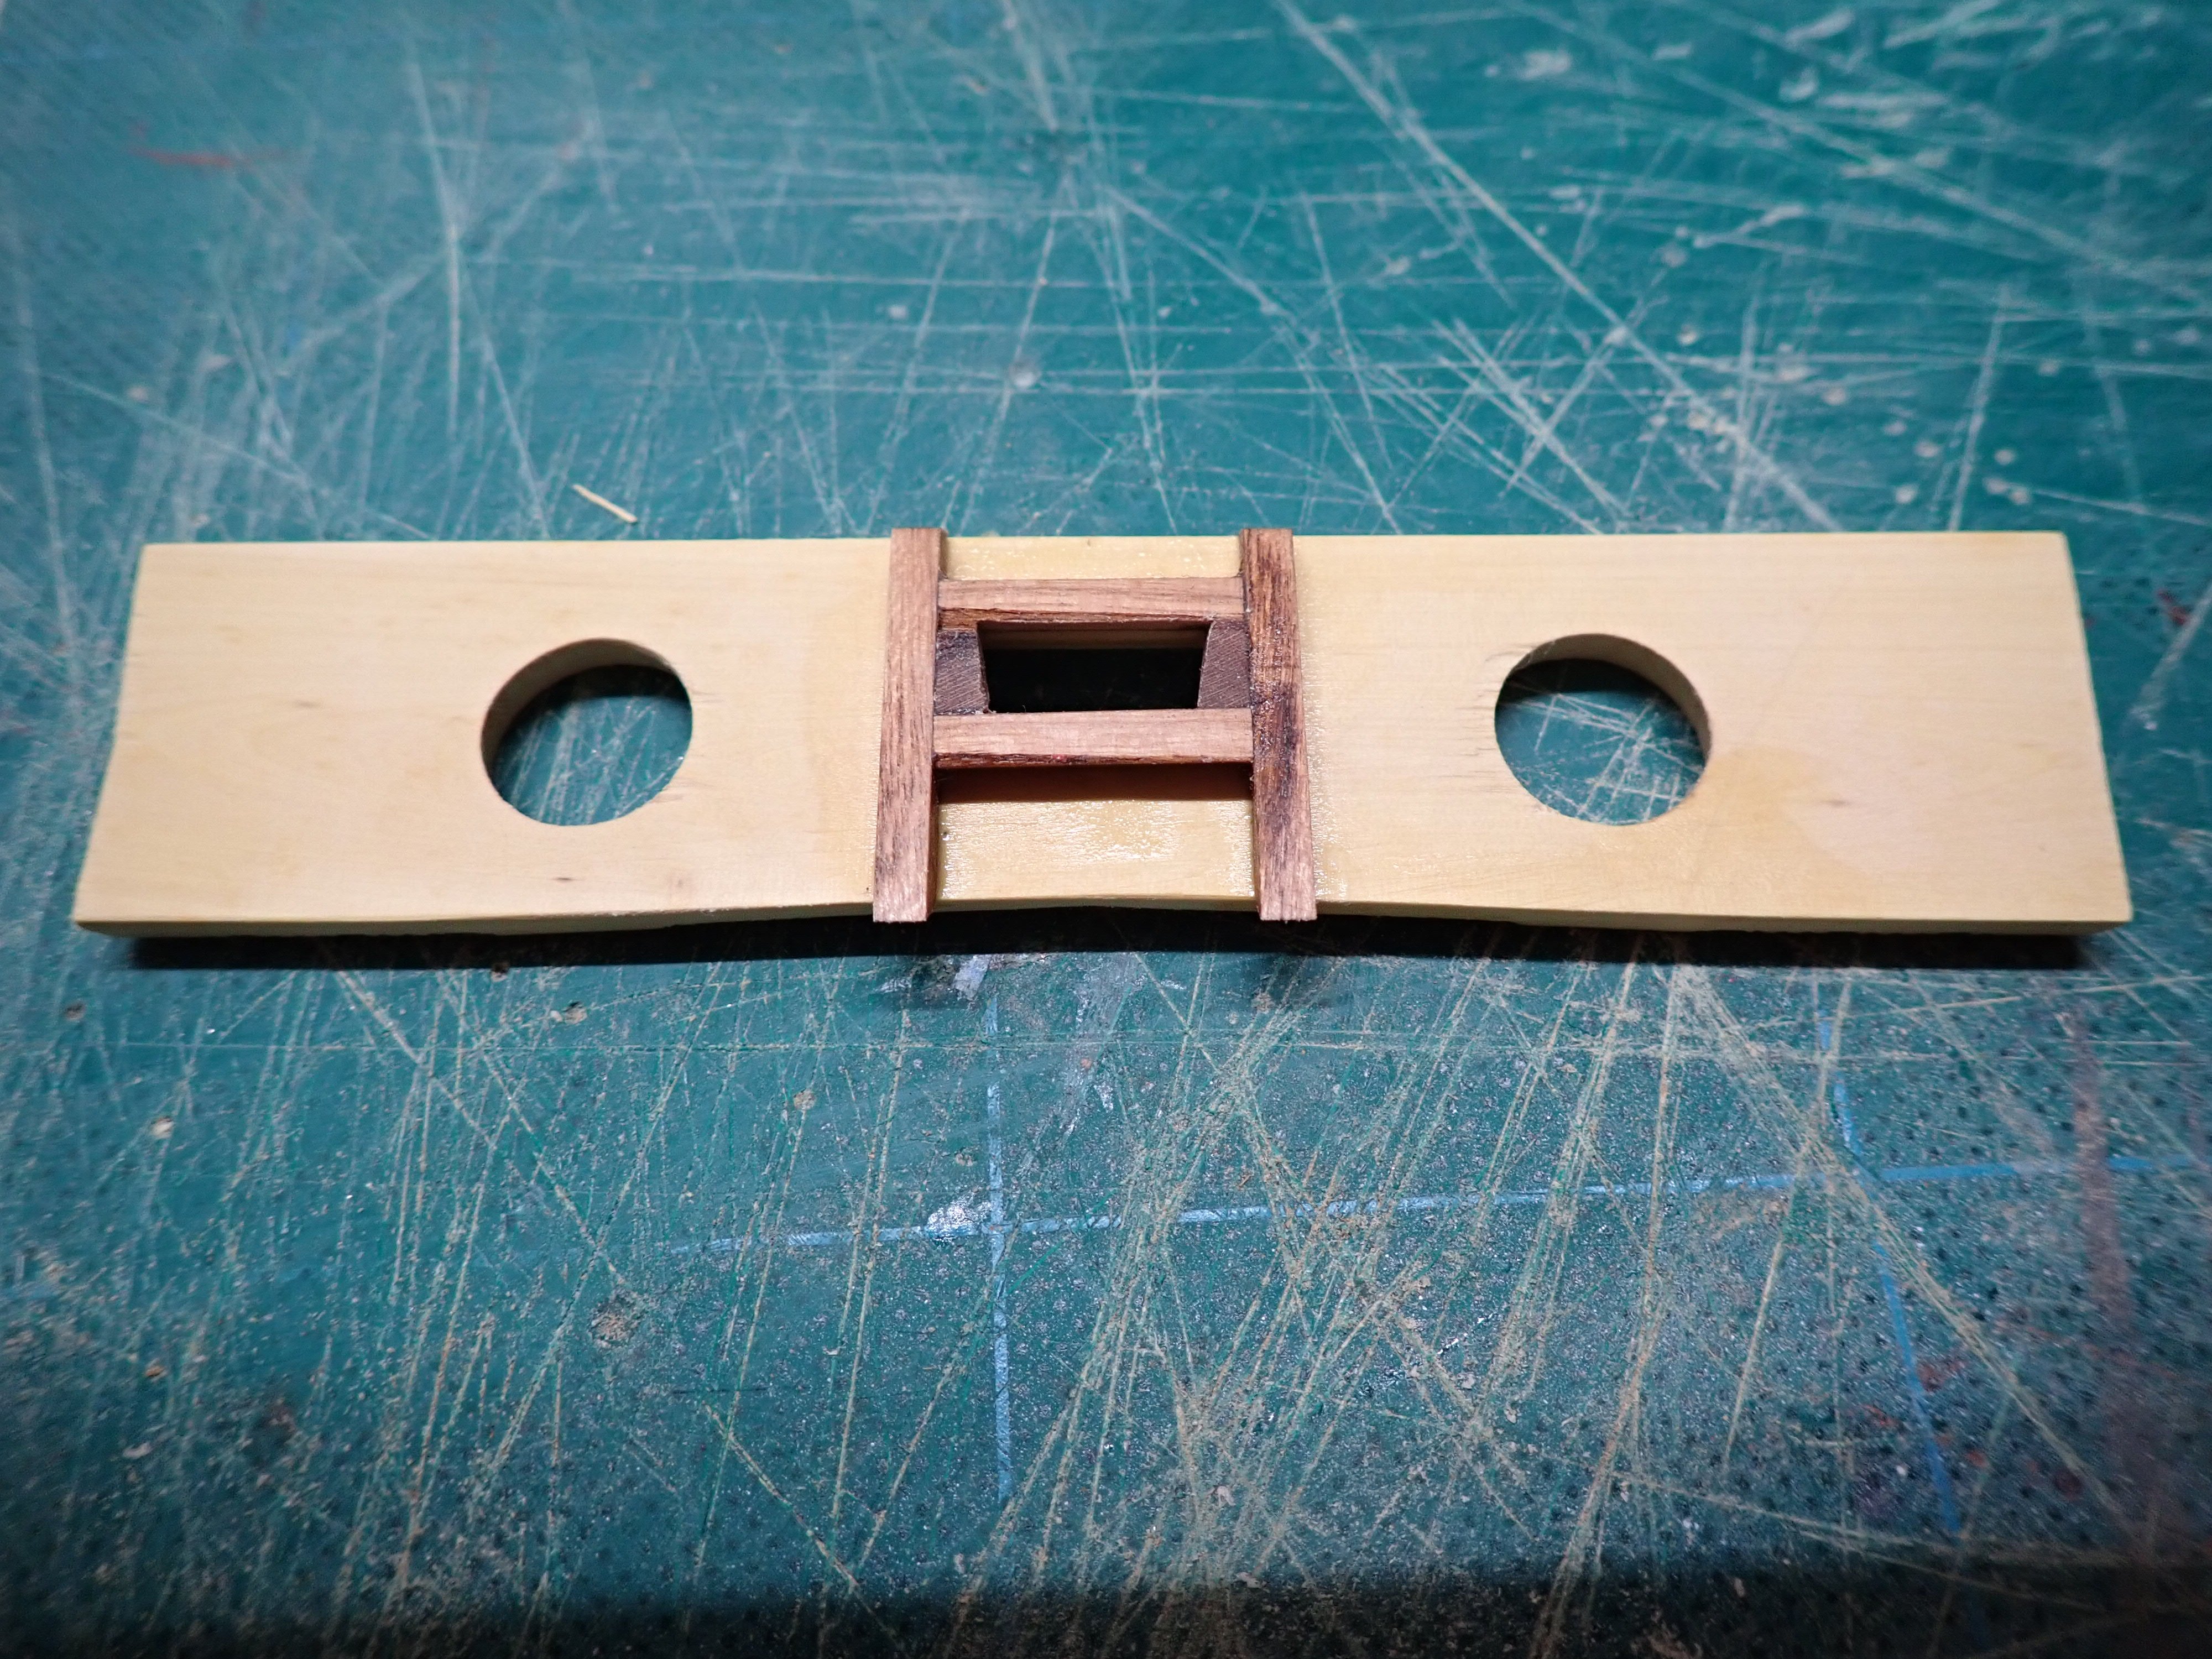
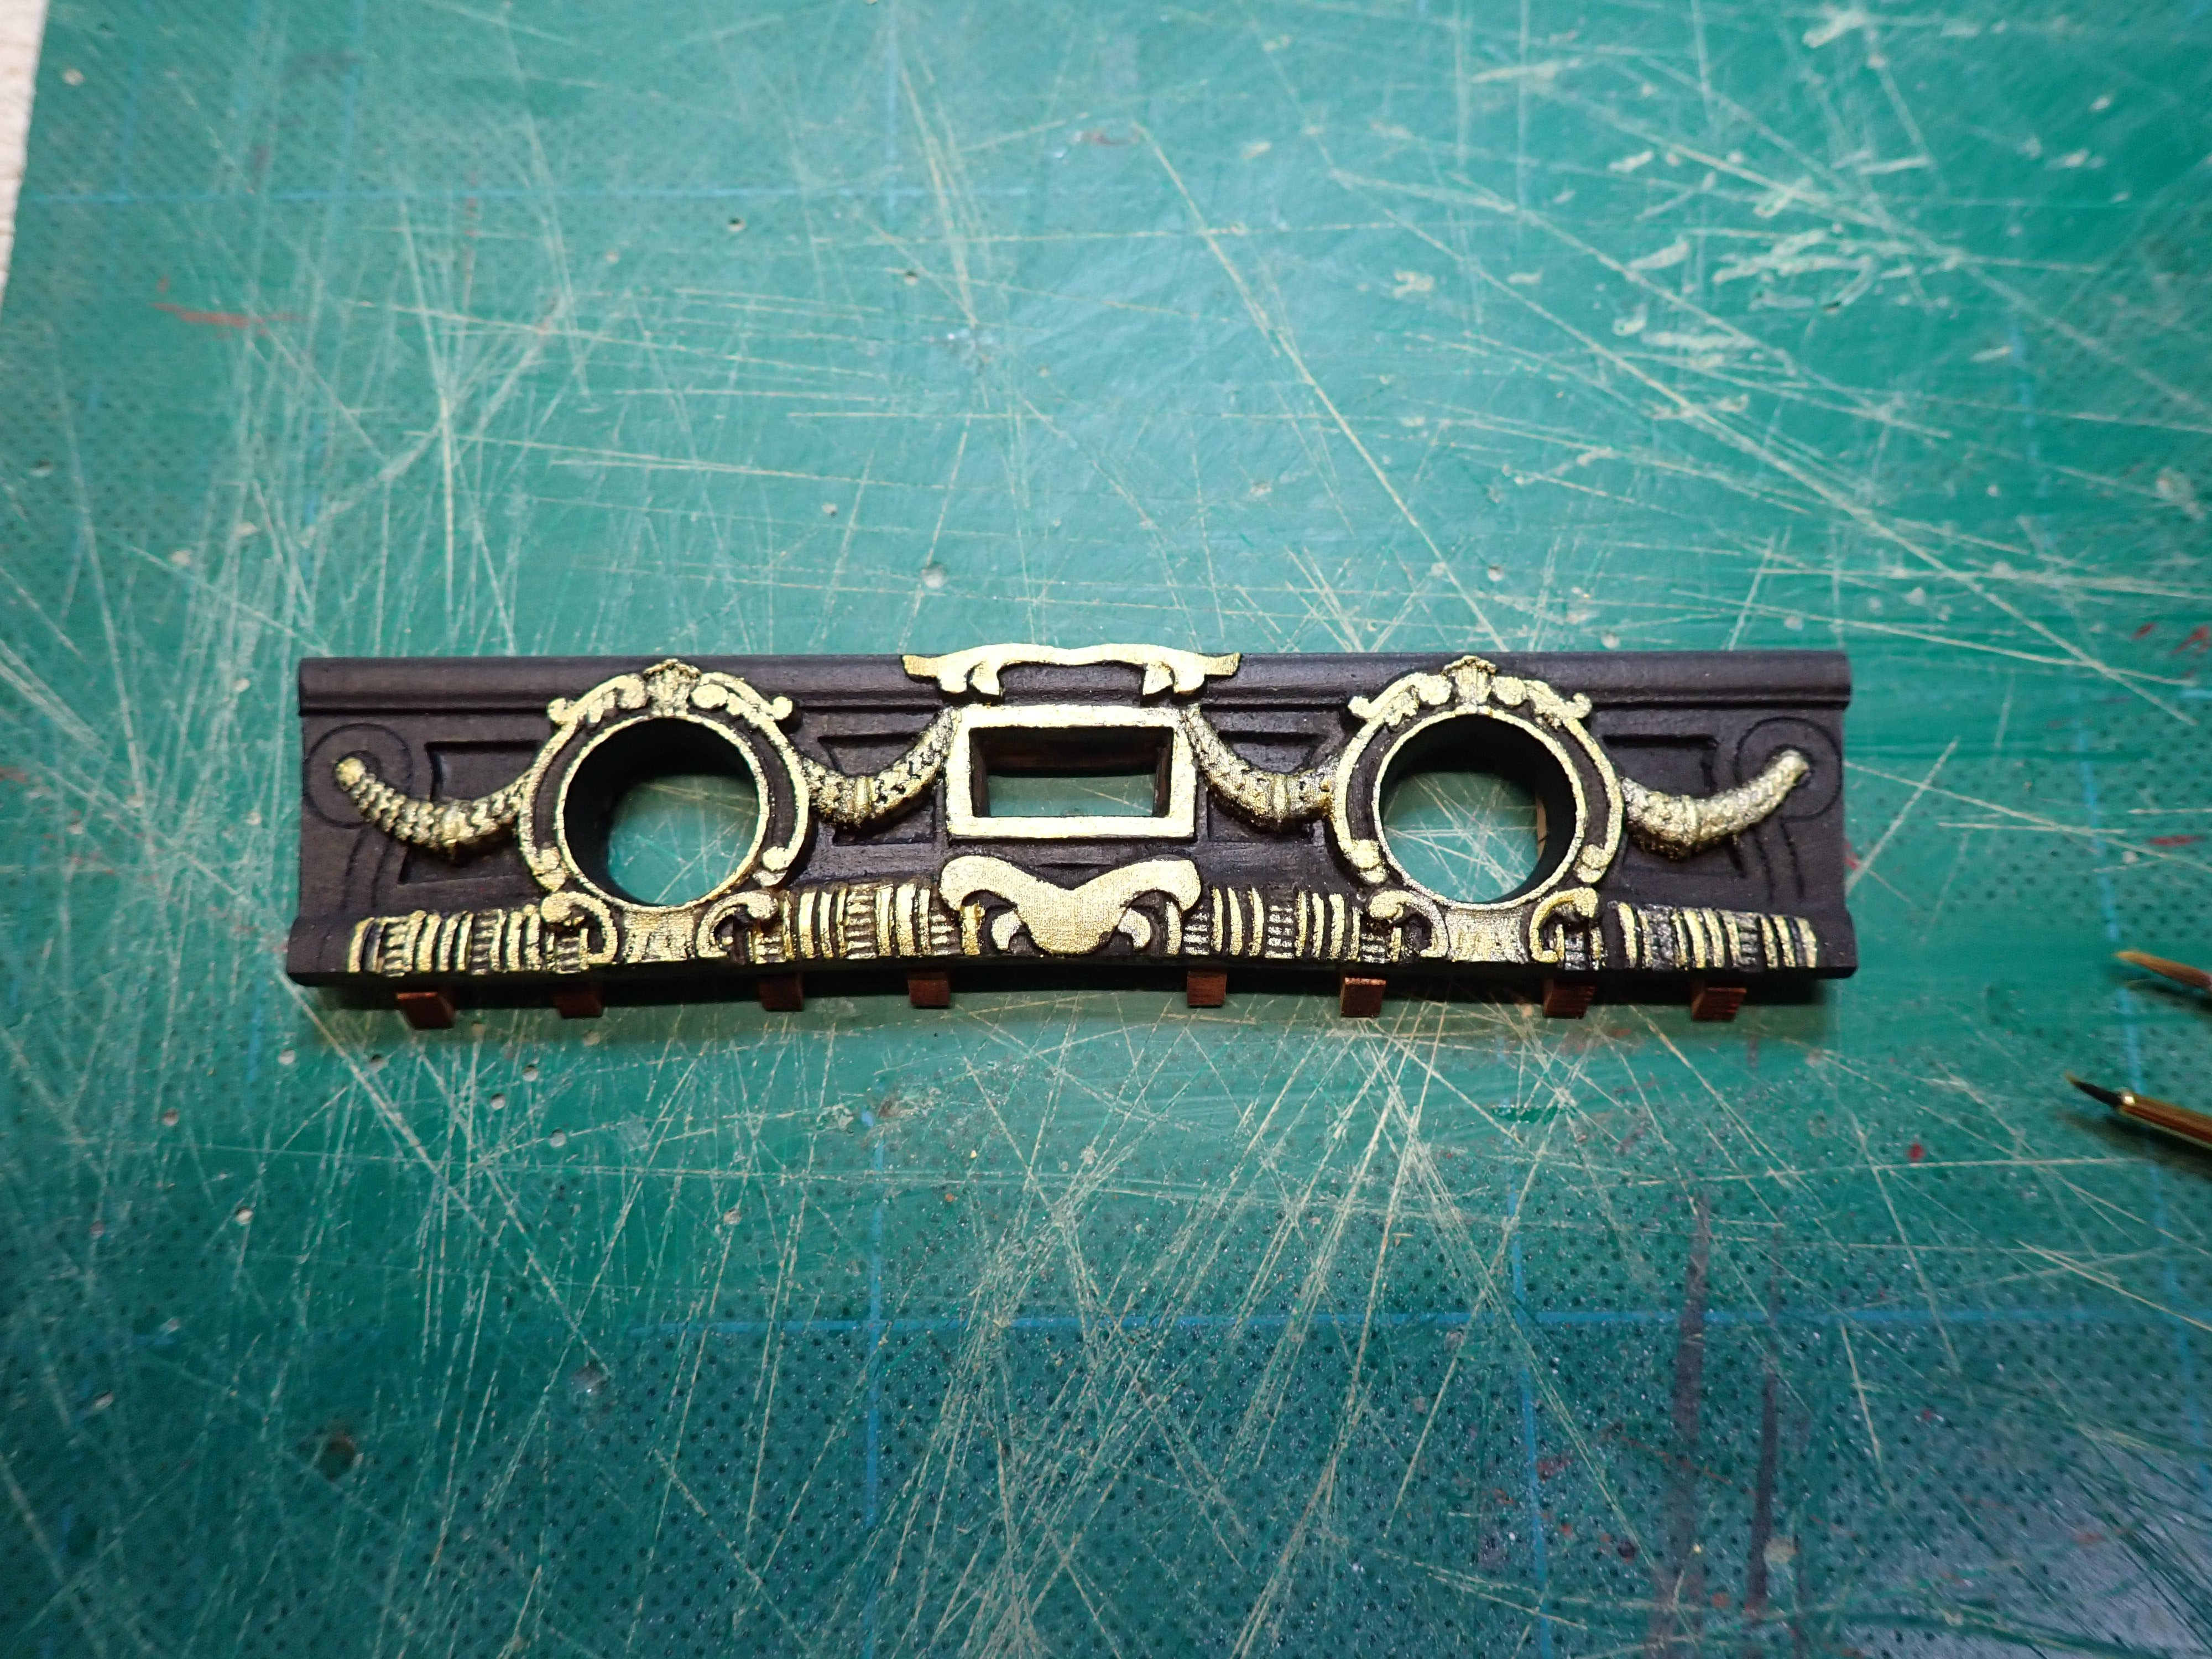
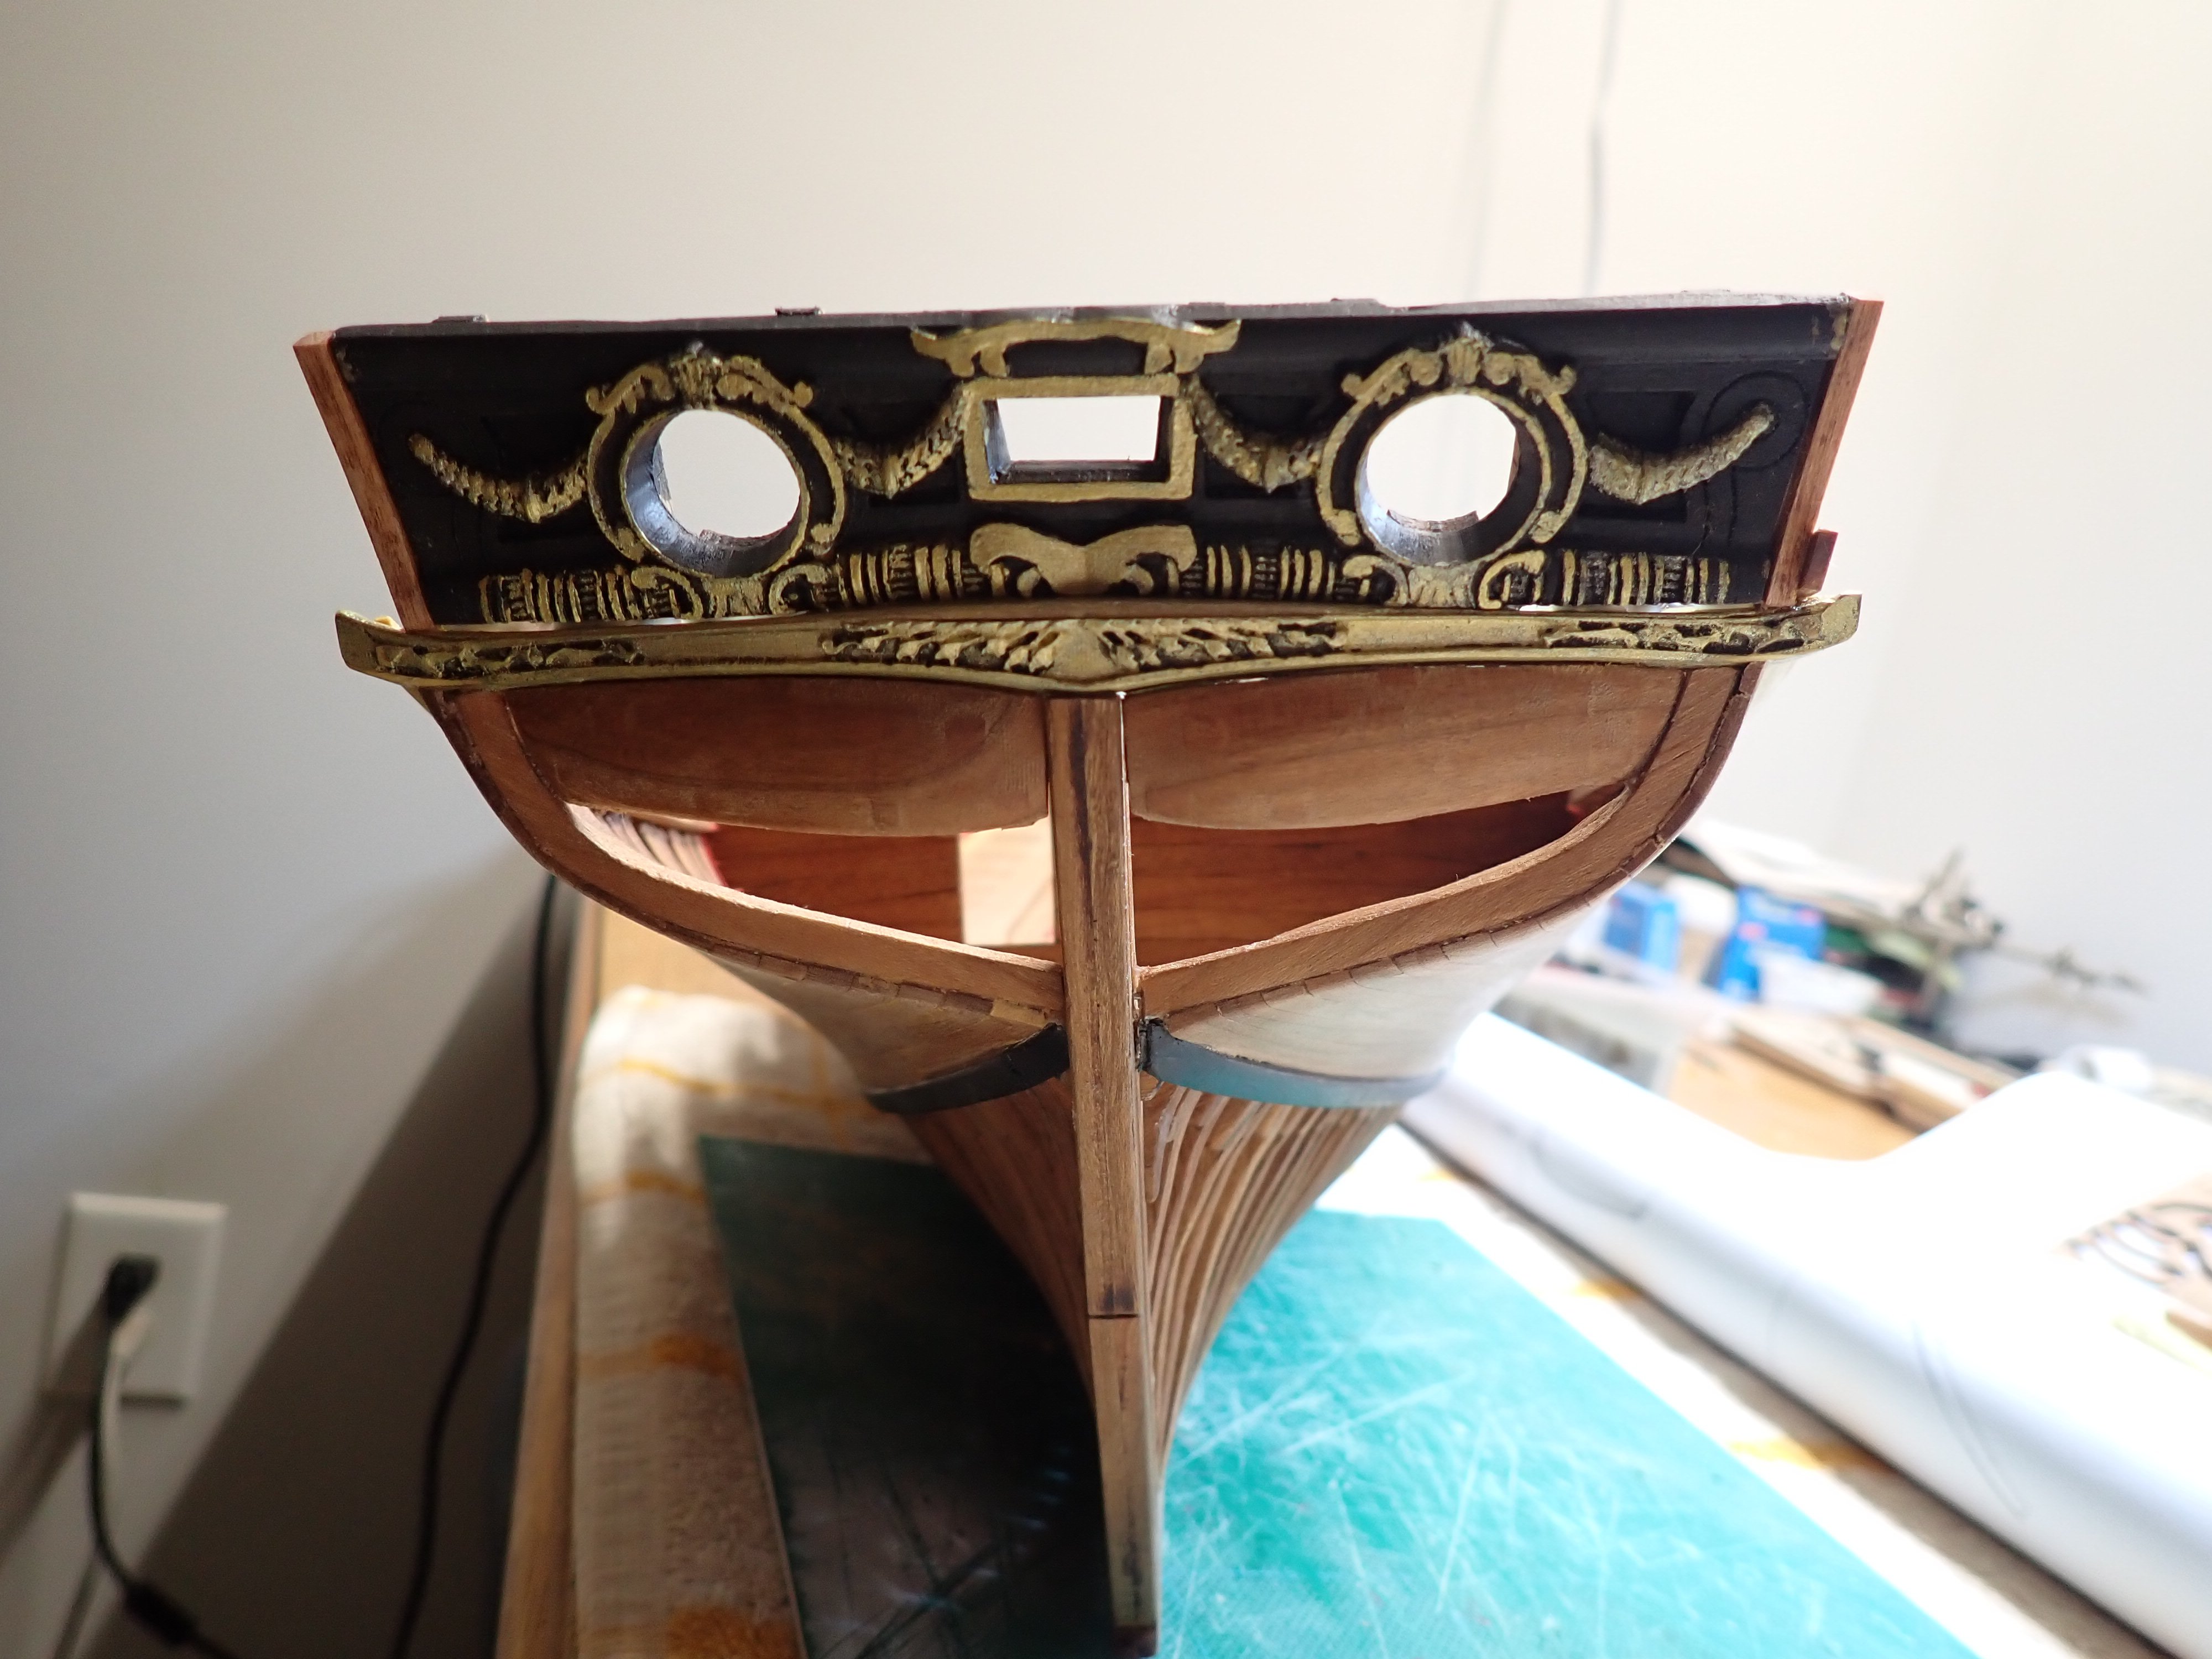
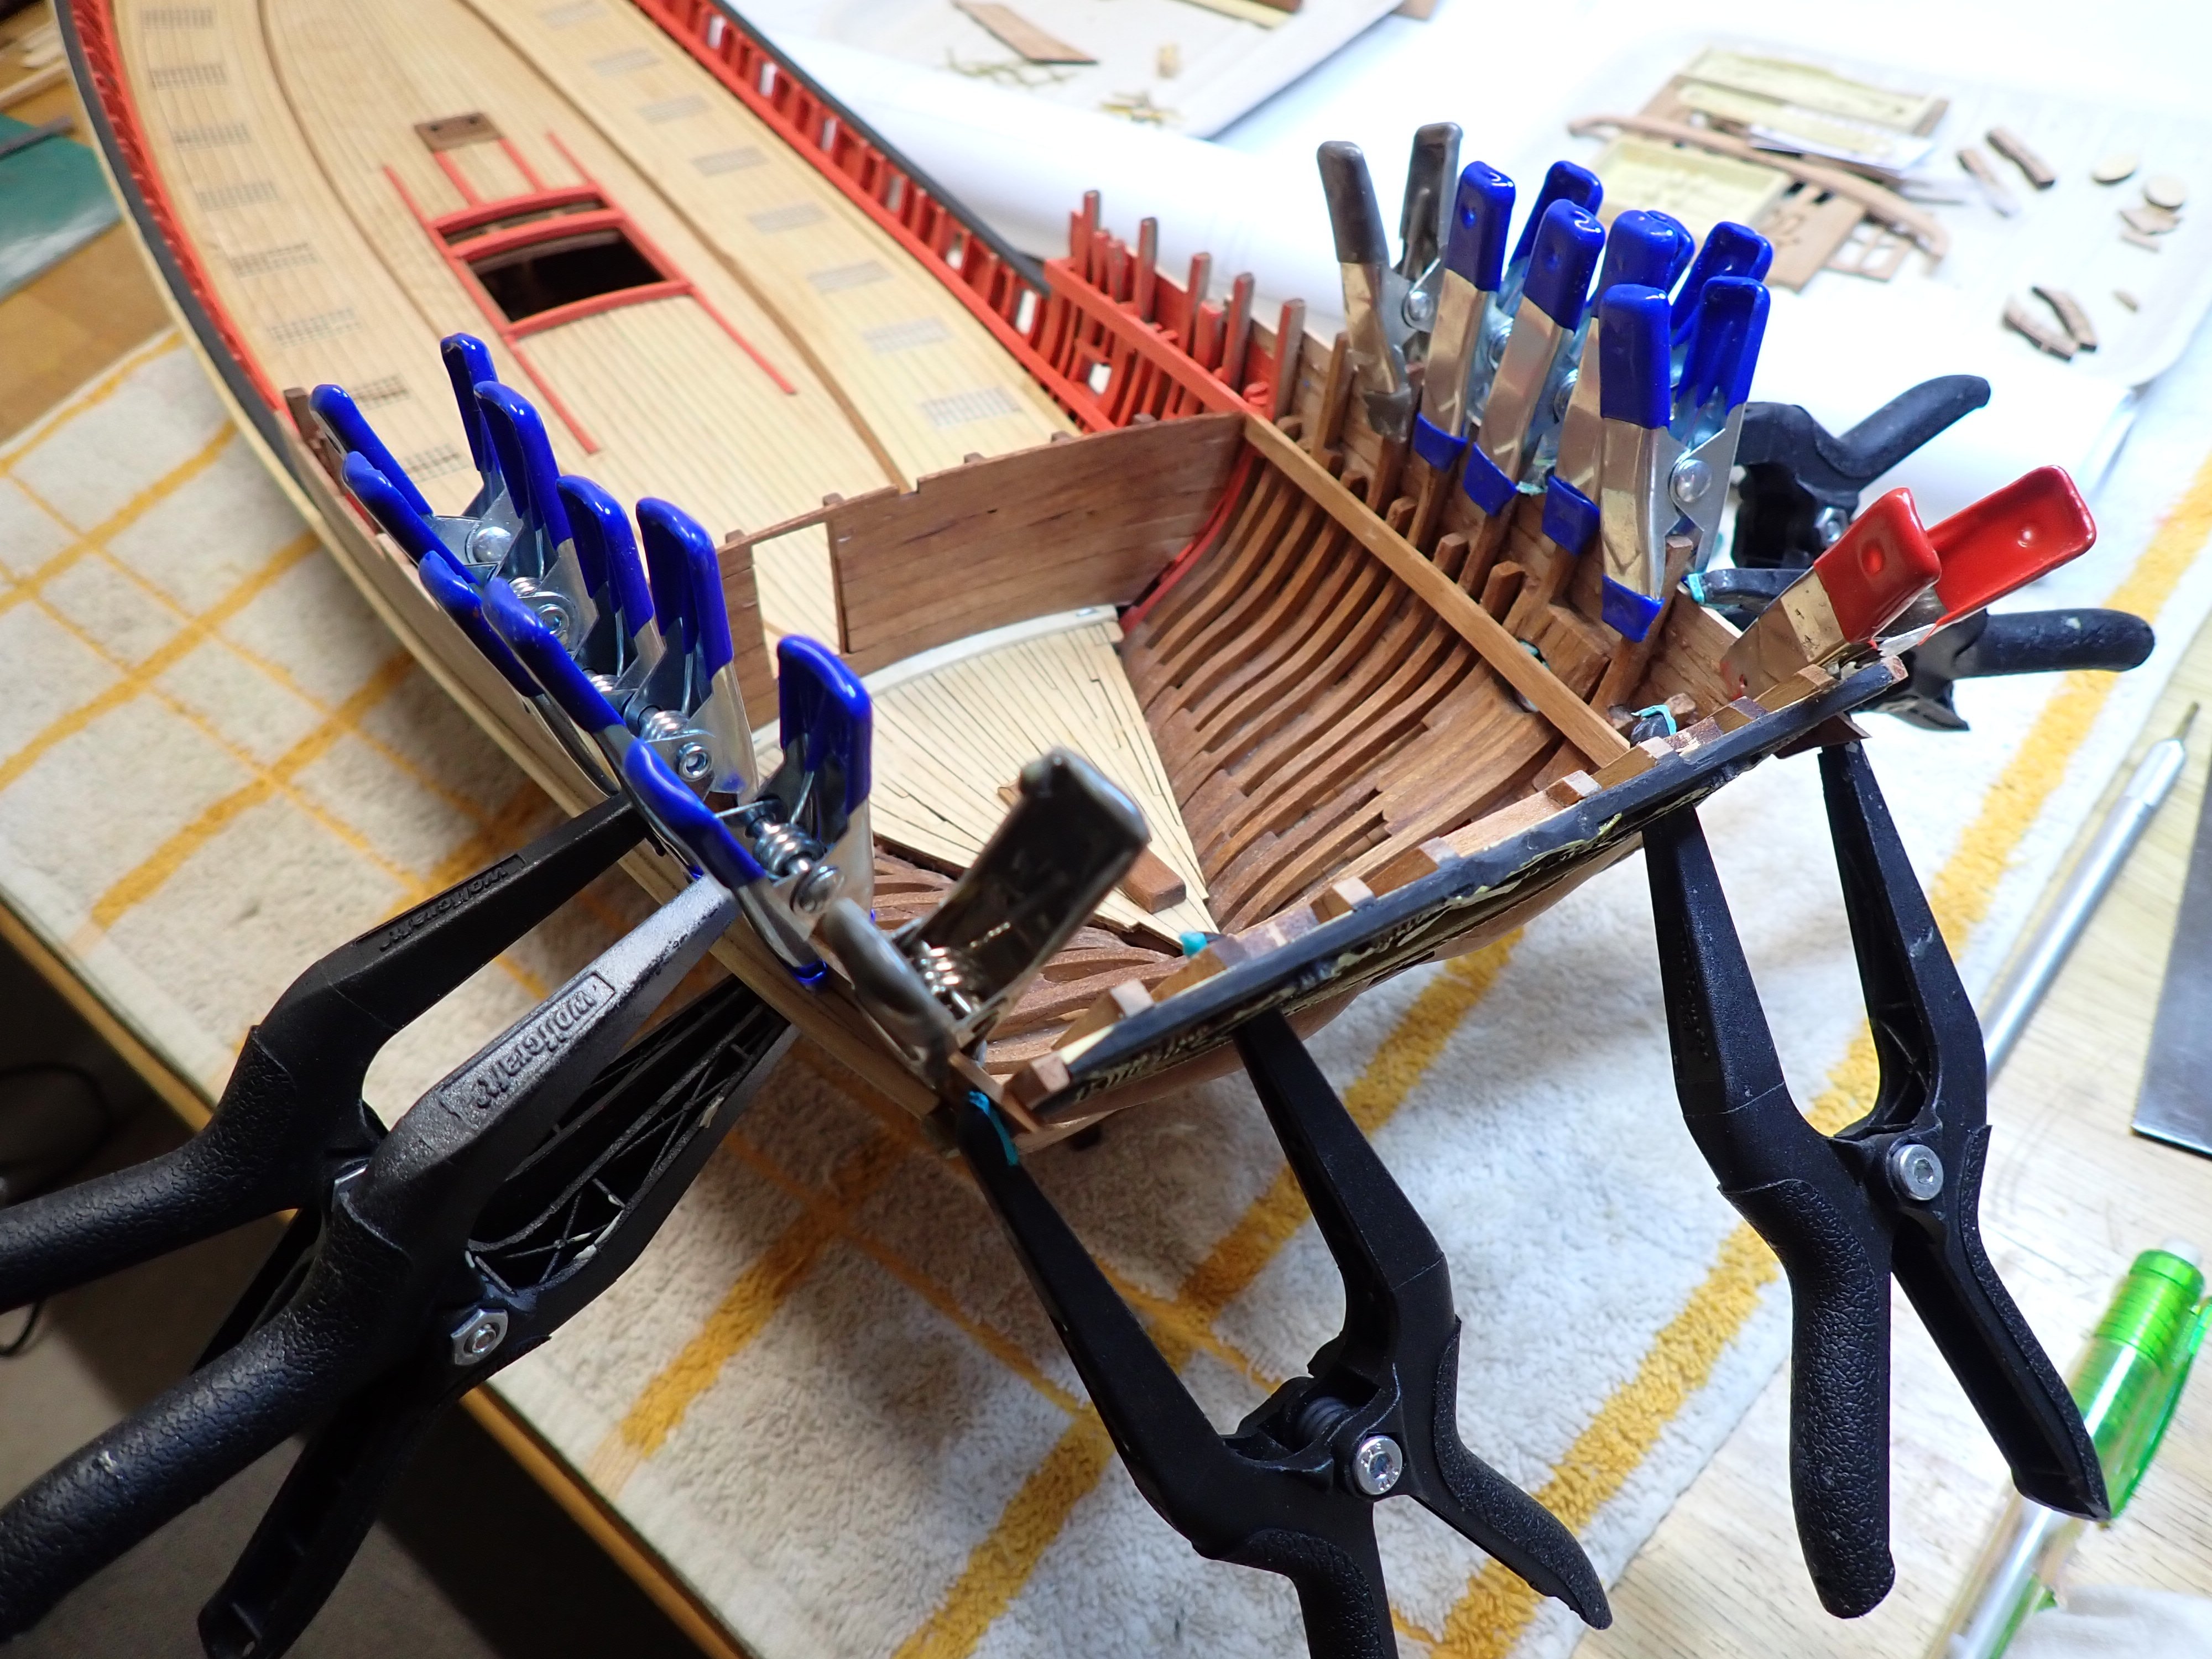
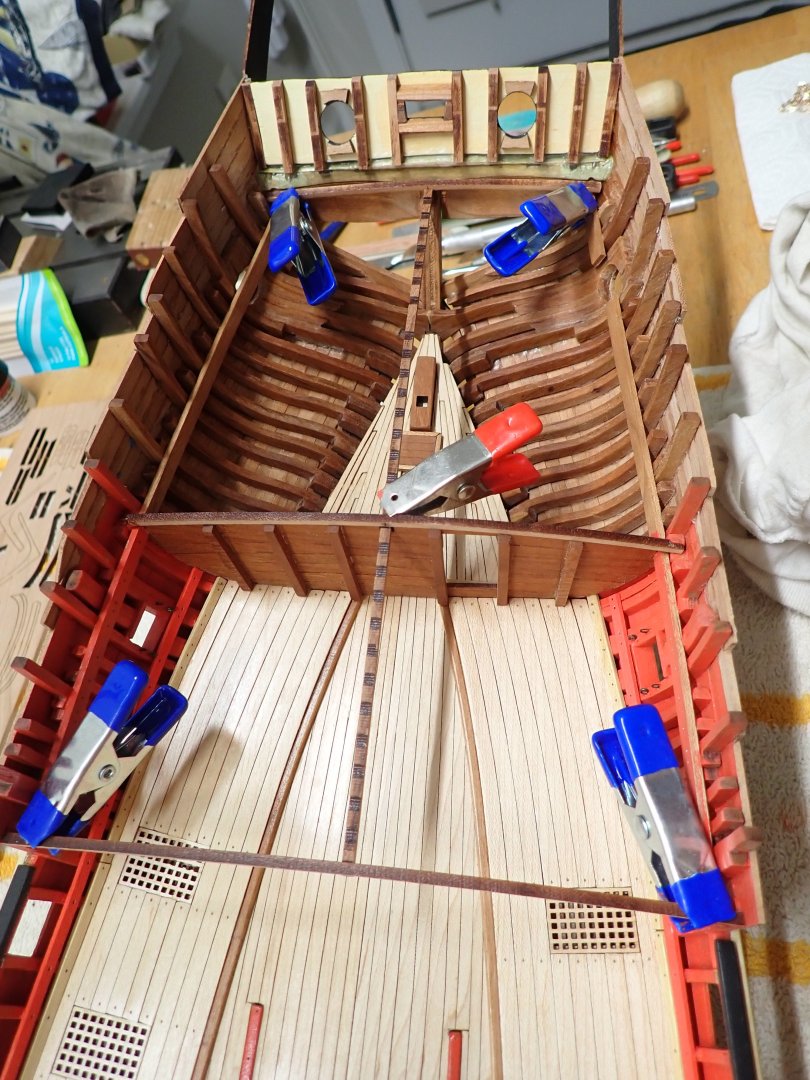
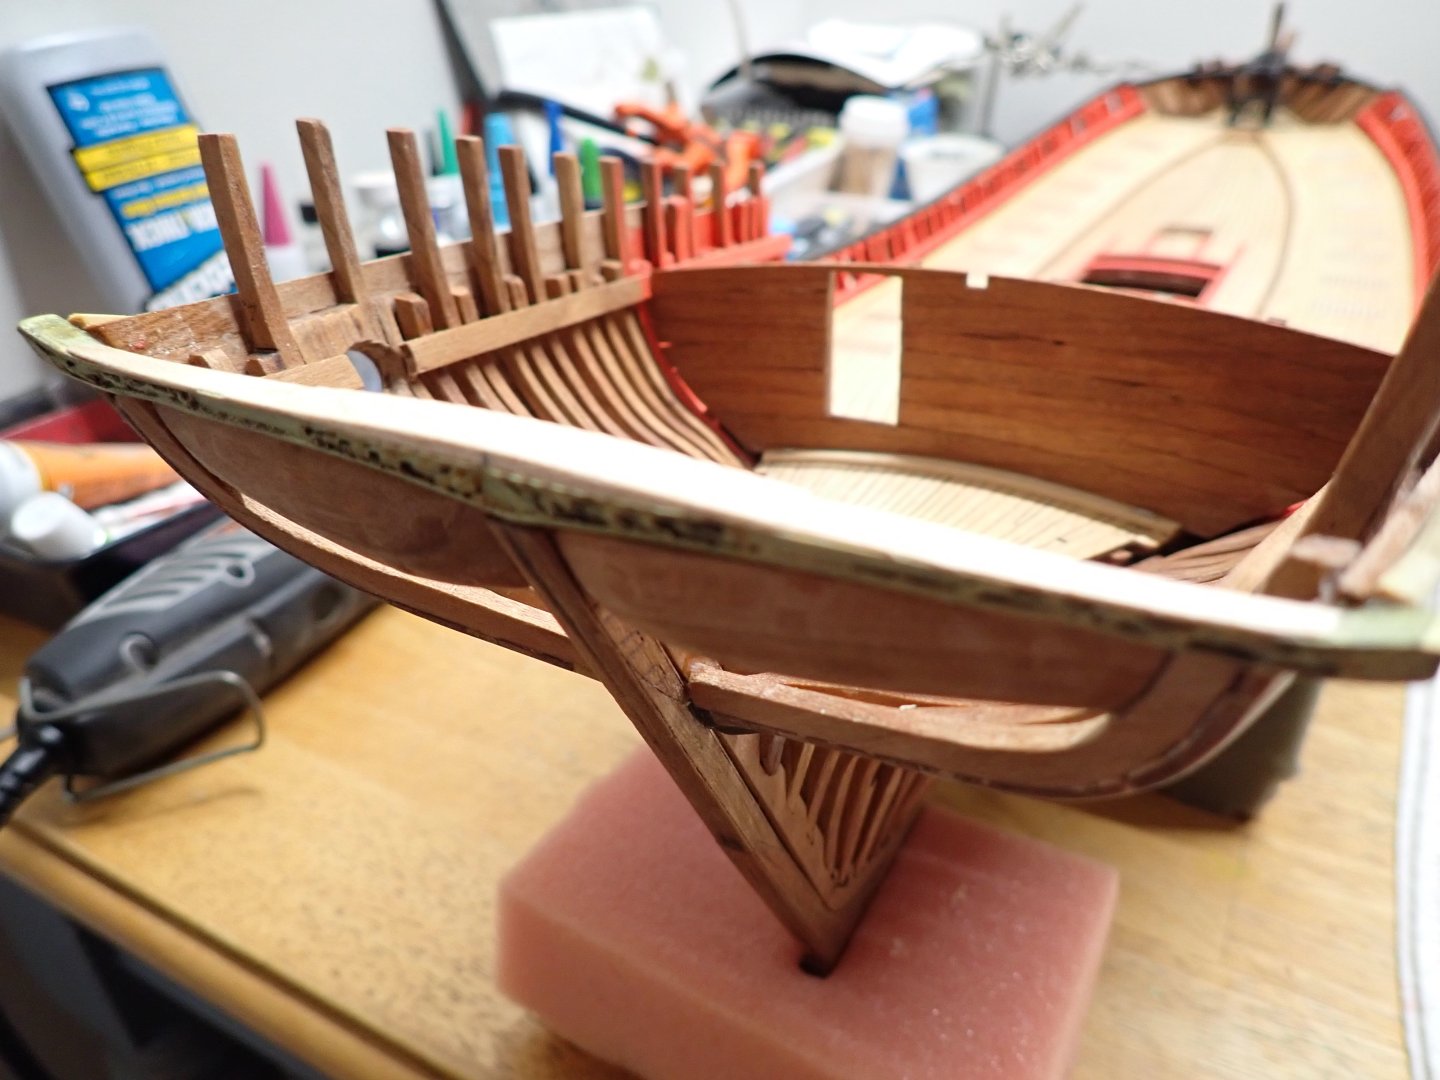
The following is not properly described in the User/Assembly manual and as such, I am not posting any pictures of the CAF Models instructions. It is a very delicate (in my opinion) phase as the parts are really not fitting well together. The first thing I did was to build some kind of support for the stern bulkhead: This was done with multiple layers of 0.8 mm planks, I had left from the Bellona. Some curvature is done to accommodate the stern panel. Despite all this preparation work, it still does not fit precisely. The stern panel is made of boxwood (I think...) carved with a CNC machine. The carving is delicate and actually well done. The next steps consist in gluing the various parts that will define and stabilize that panel on the stern. Again, this is my way of approaching that task and there may be better and more intelligent way of doing it. Above, you can see the rectangular opening, used for the tiller. Below, the stern panel is painted in black and dry brushed (delicately) with Tamiya gold leaf color: The panel is then glued as well as possible, keeping the alignment of the rudder and keel. I have to say that the Monograph by Boudriot came handy as the CAF instructions and plans are very quiet on this subject. You can see on the left and right side, some light peeking through. Once the quarter deck and the rear veranda are in place, not much will be visible. This assembly is still very fragile and it is important to continue building the planking of the upper part of the hull: I have been agonizing before that task for a while, and even though it is not perfect, I am glad it is behind. There are more challenges coming, so stay tuned. Yves


- 185 replies
-
- 17
-
-
Mark, you did a fantastic job with these paintings. It looks terrific and I know how satisfying it feels when you get to that point of your Bellona build. Yves
-
Me too. That kit was fantastic to build and later on operate on the water. Yves
-
Now, I understand why you went with a full planking of the hull. I suffered with the 72 guns of the HMS Bellona and I understand perfectly your position with 96 guns or more. That ship was a monster, similar to the modern Cruise ships that are haunting the Caribbean and Mediterranean seas. Yves
-
With so many screws, these cabins are not going anywhere. 🙂 Yves
-
The way this kit is designed is very similar to the CAF Model kit of the 1/48th HMS Bellona, that I completed a few months ago. The major difference is that in the CAF model kit, you have to assemble every single frame by using the plan. The result is that it is not as precise and perfect as this kit is, since all frames are pre-cut in the Portland Scale Ship kit. The plus for CAF, is that the frames are made of sherry tree wood which makes it more precious in a certain way. Otherwise, the keel and the core of the hull are very similar. The support or cradle for the hull is nicer in your kit. CAF Model has never been very good at providing decent support for their model. Yves
-
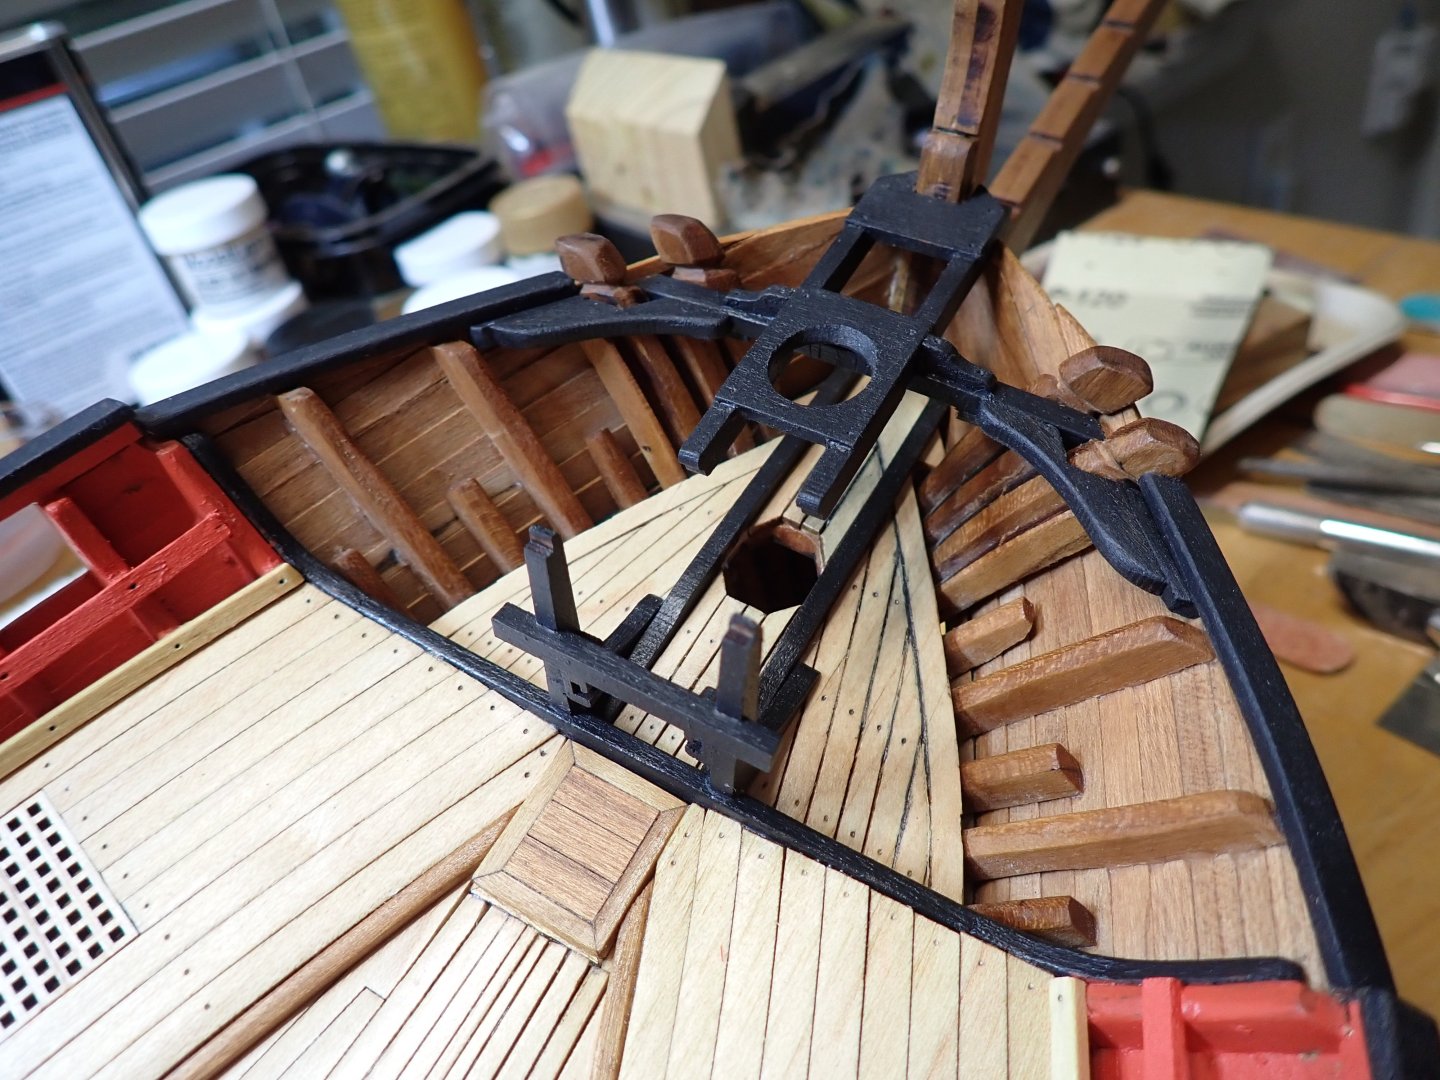
The masts: 20 degrees inclination for the front mast, 10 degrees for the mizzen mast. Yves

- 185 replies
-
- 14
-
-
Not much to show but big progress in term of advancement for the rest of the build, with the correct placement and inclination of the mizzen mast. The mast stands at 10 degrees behind the vertical. I will try to post a picture of all three masts erected to give a sense of that "latina" rigging. Yves

-
I like your approach. It is a lot of work, but the result will be fantastic compared to the original printed deck. Plus, it is kind of fun to do some real decking.... Yves
- 35 replies
-
- 3
-

-
-
- Britannia
- Mountfleet Models
- (and 1 more)
-
Thank you Rob. You may not have the courage to do a wooden ship model, but I will not have the courage to put together an Hiro Factory model the way you do it for all these beautiful automobiles. I am glad that we can admire and appreciate each other master-pieces in different domains. Yves
-
Very interesting build and large model. Can you tell us a little bit more about the brand that produces this kit? YVes
-
I can't believe it would be so long !!! 72 meters. I thought that vessel was sized more discretely. It definitely looks like an hybrid between a submarine and a ship. Yves
-
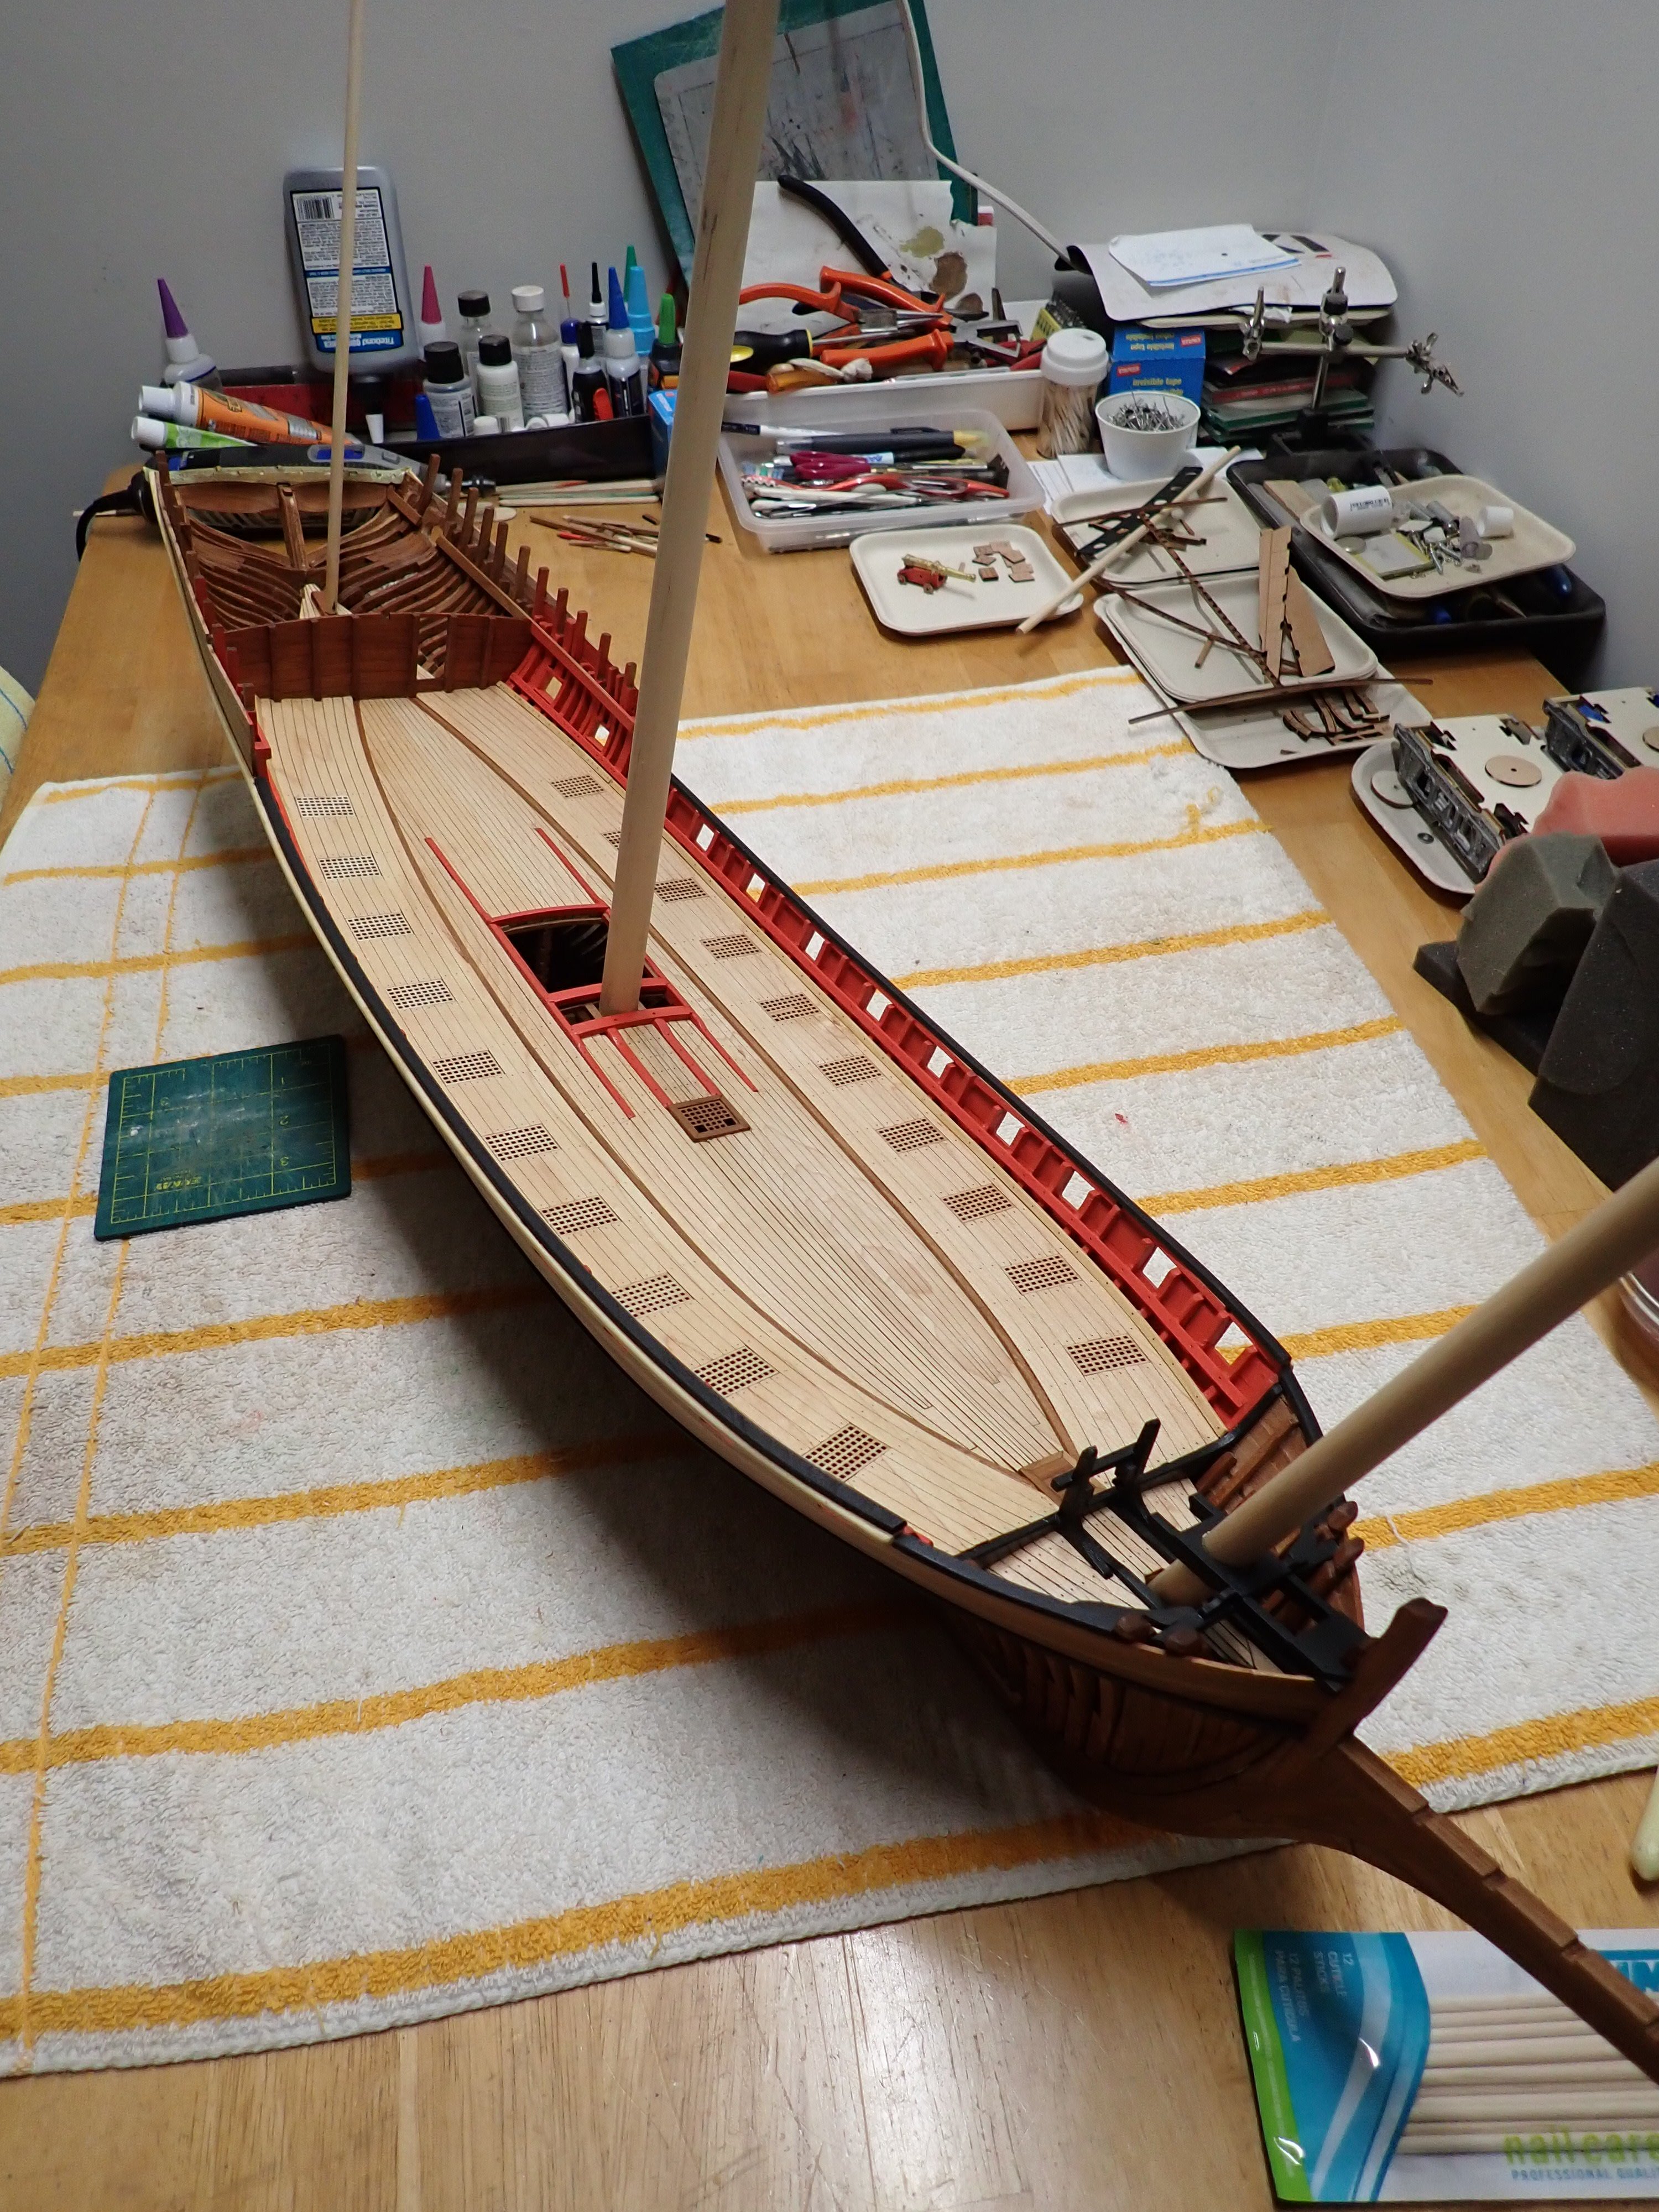
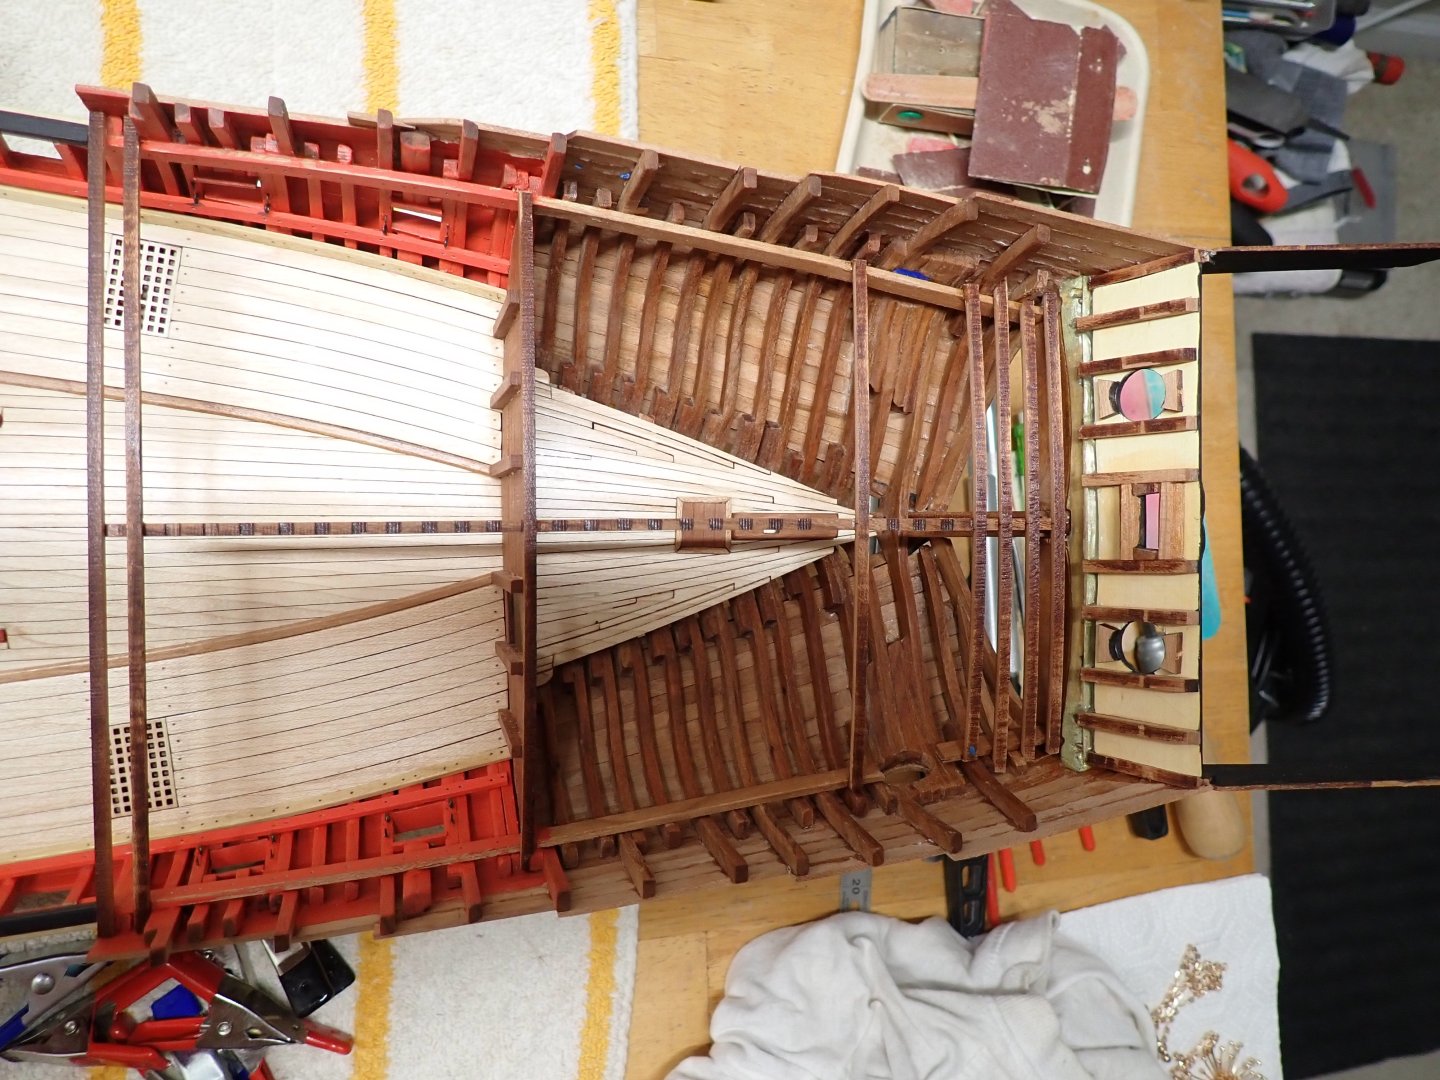
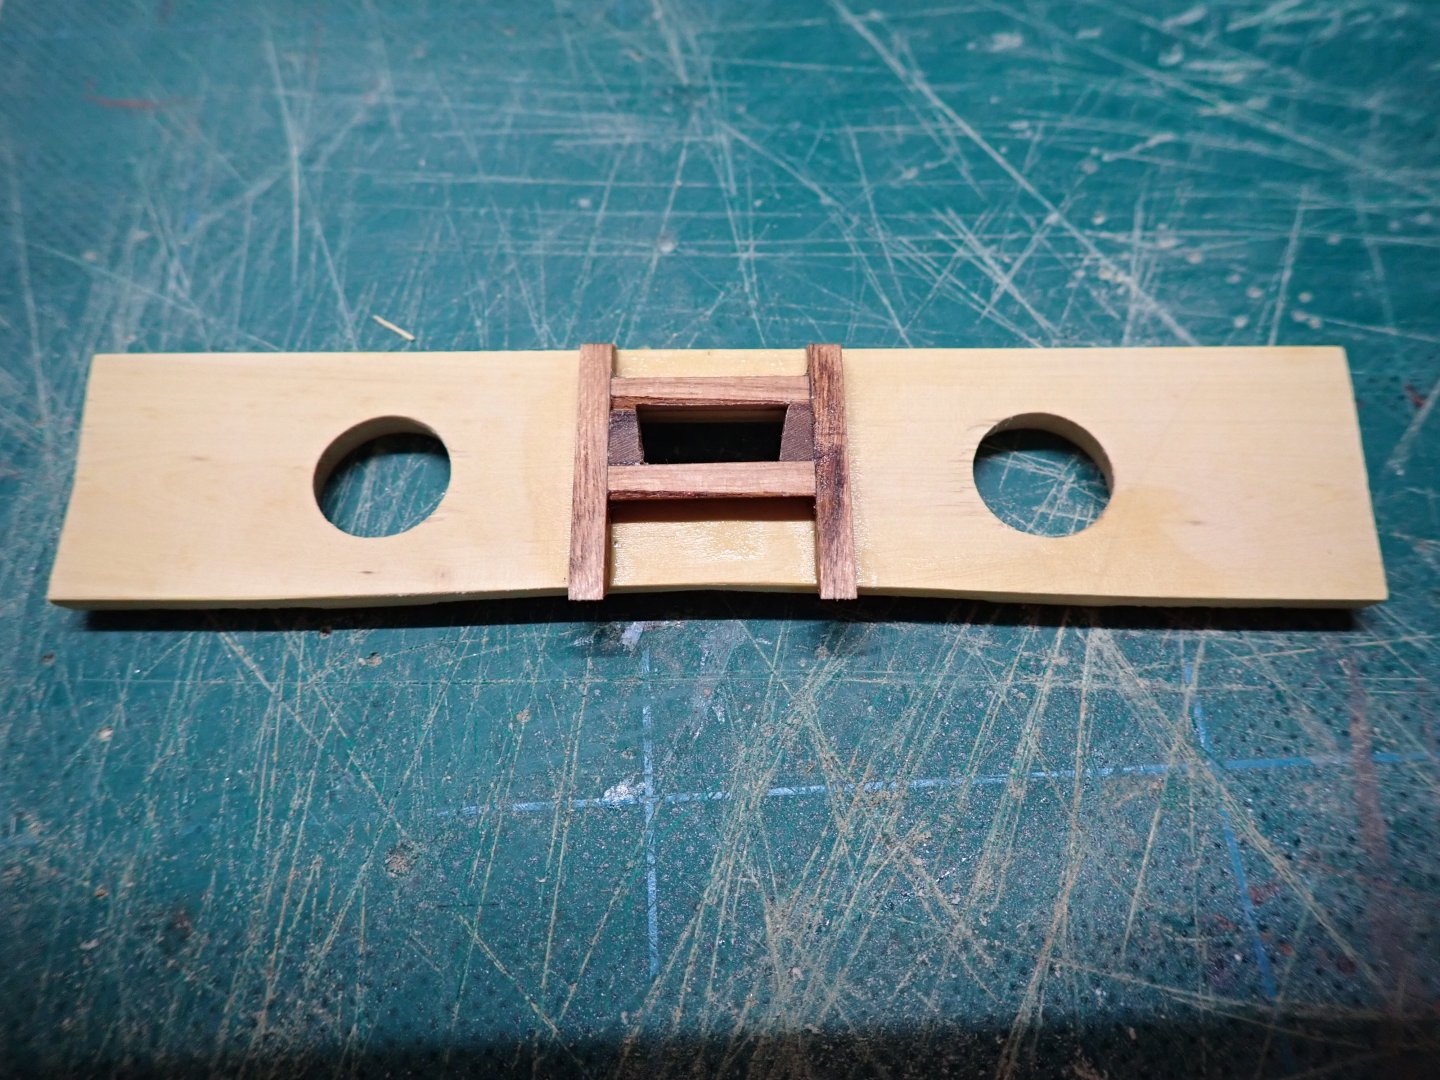
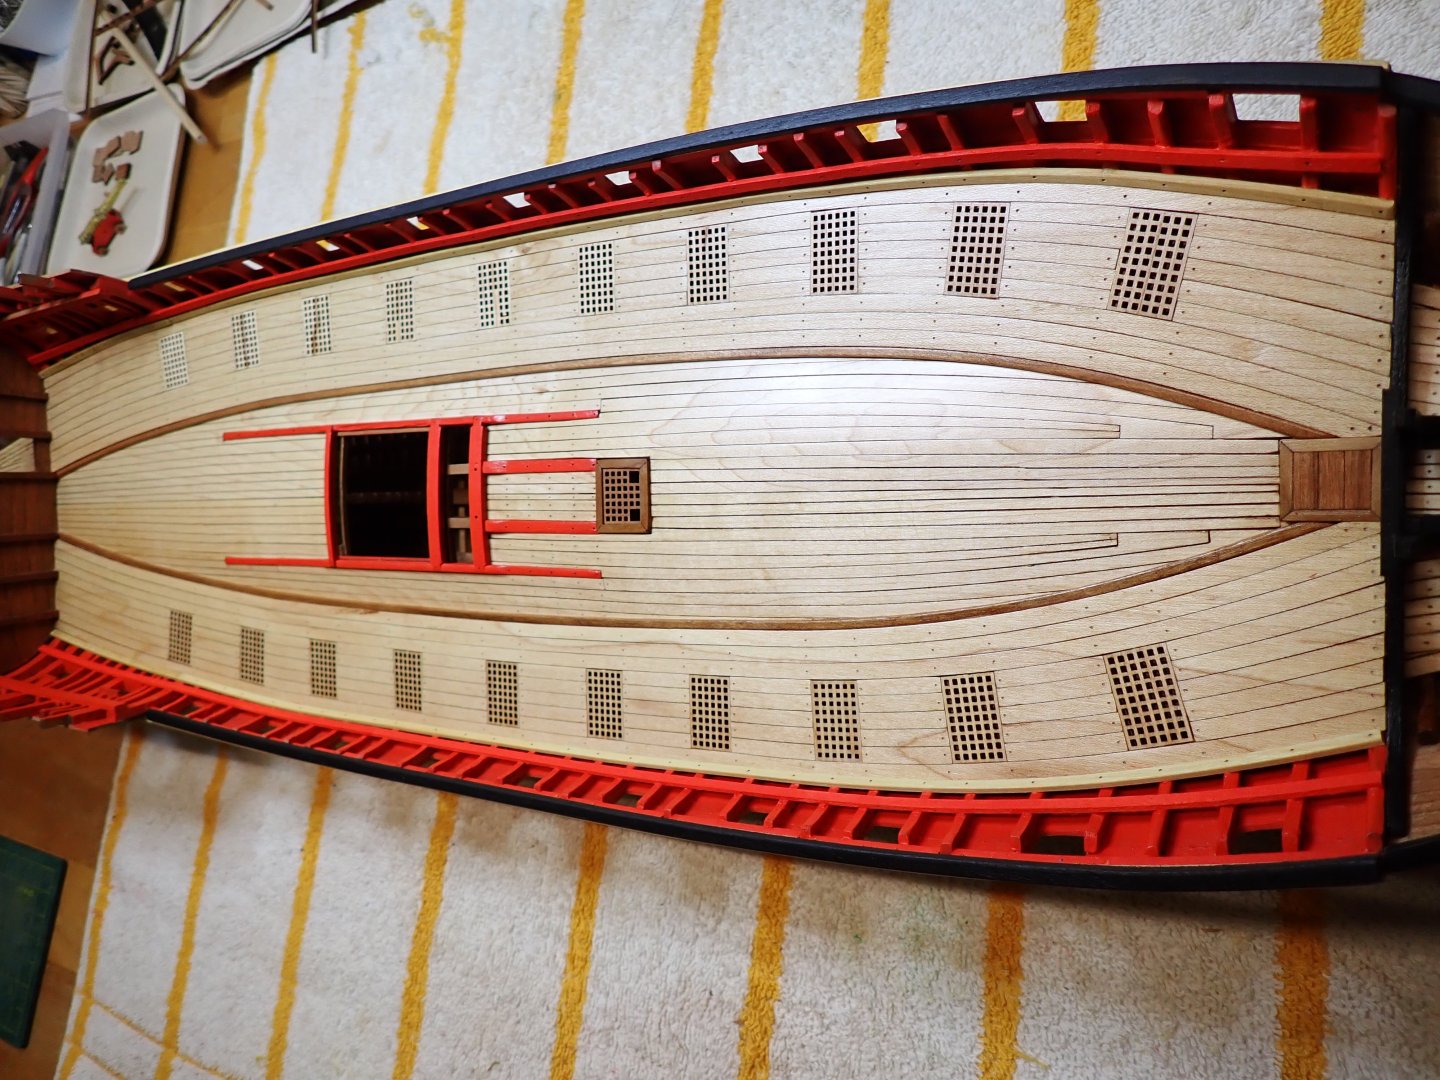
The main deck is pretty much completed, at the exception of the hooks required to rig the guns. The support of the front mast has been completed on both sides: a rather unusual piece of equipment on a period ship... I am not attaching the front shield yet, as I think it is too fragile and prone to breaking. This is what it will look like: I really need to concentrate on the stern at this stage. I have been procrastinating it, but the mizzen mast and the stern extension are calling for my attention: An overall view of the model, as it stands today: Yves


- 185 replies
-
- 18
-
-
It all depends how the finished model will be presented. Since it is a waterline model, it may fit in a sea diorama and as such, will need to be painted to look more realistic. Otherwise, it could stay as bare wood. Since the wood seems to be basswood, I would at least do some Wipe on Poly applications, to protect it. Yves
-
Just amazing. These exhaust pipes seem to come out of an Alien Movie. Yves
-
Very interesting and so unusual model. Definitely worth realizing. Please post pictures of the 3D parts before assembly if you have them. It is always fun to look at them before and after assembly. Which scale are you shooting for? Oh, and the traditional question: are the parts (STL files) available from you, for a modicum? Yves
-
Why not paint it soft white? British ships had a lot of the cabin walls, painted in soft white with blue frames. Yves
-
CaptainMac, I have the same kit in my stash and will follow with a lot of interests, your progress. Yes, the Chaperon by Model Shipways is definitely the most realistic kit proposed on the market as the Occre and other Spanish kits are offering woods which do not match what was used to build these paddle boats, in the USA. There are a few excellent realizations of the Chaperon on that forum, and I invite you to look into them for ideas and inspirations. Yves
- 23 replies
-
- 2
-
-
- sternwheeler
- Chaperon
- (and 3 more)