MORE HANDBOOKS ARE ON THEIR WAY! We will let you know when they get here.
×


yvesvidal
-
Posts
3,550 -
Joined
-
Last visited
Content Type
Profiles
Forums
Gallery
Events
Everything posted by yvesvidal
-
 Beautifully done Ras. I like the white board in the background.....it really helps when you install riggings and tie knots. Yves
 -
Alan, Where is the spool holder installed on your printer? Did you place it as much as possible to the left top? Do you have the small brass eyelet guiding the filament into the feeder? I just cannot explain why the filament would snap like this, coming out of a fresh and new spool. Unfortunately, this printer does not detect the lack of filament, as other and more sophisticated printers do. I wish they could retrofit this nice and important feature in the Ender-3. Yves
- 460 replies
-
- 6
-

-
- Finished
- Flower-class
- (and 1 more)
-
Veszett, I do not believe you can easily print stanchions for multiple reasons: 1-You have to design them as they are not provided in the kit. So, you need to go in Sketchup or Blender and create a stanchion model 2-Printing a small cylindrical shape is delicate and does not work very well, if you do not use support. 3-The resiliency and solidity of the printed PLA is way too fragile and brittle for such small stanchions. That is why I ordered some brass stanchions and I am waiting for them. I am not planning to weather the Corvette. I really suck at weathering. Instead, I will be presenting a freshly painted and renovated ship. Thank you for the compliments about the wooden deck. I like it a lot, too. It brings a nice contrast to this mountain of plastic/PLA. Yves
- 321 replies
-
- 7
-
-
- Finished
- Flower-class
- (and 1 more)
-
Beautiful barrels !! Will you fill them up with some red wine? Yves
-
Alan, I am so happy you are making good progress with the hull. All the other parts, with perhaps an exception with the stack, are easier to print. Especially the decks and cabins. That little cat is cute...is that the one provided with the printer? Yves
- 460 replies
-
- 5
-
-
- Finished
- Flower-class
- (and 1 more)
-
The texture is perfect for people who like to build "distressed" models, as most Corvettes are usually represented. The material is perfect and very conducive to rusty streaks and other imperfections. Yves
- 321 replies
-
- 5
-
-
- Finished
- Flower-class
- (and 1 more)
-
Craig, No, only the major components are provided to give an overall appearance of Modified Flower Class Corvette. There is plenty of room for Photo Etched sets and finely detailed resin sets, especially at this large scale. The kit provides a foundation to build a decent model, but details are coming short, unfortunately. One of the things I do to add a few more details, is to resize certain "provided" components. Before slicing, you can increase or decrease the size and shape by playing on the 3 axis independently. I am also adding some details with styrene strips and tubes. When I see what is available for the Matchbox/Revell Corvette, it makes me drool with envy..... However, in that scale, you have to shop in different directions. For instance, I am desperate about finding 20 mm high stanchions with two holes. If I was in Europe, Amati and Billing Boats offer these at a reasonable cost. In the US, I do not know where to go.....and I need a lot of them. HELP !!!!! Yves
- 321 replies
-
- 6
-
-
- Finished
- Flower-class
- (and 1 more)
-
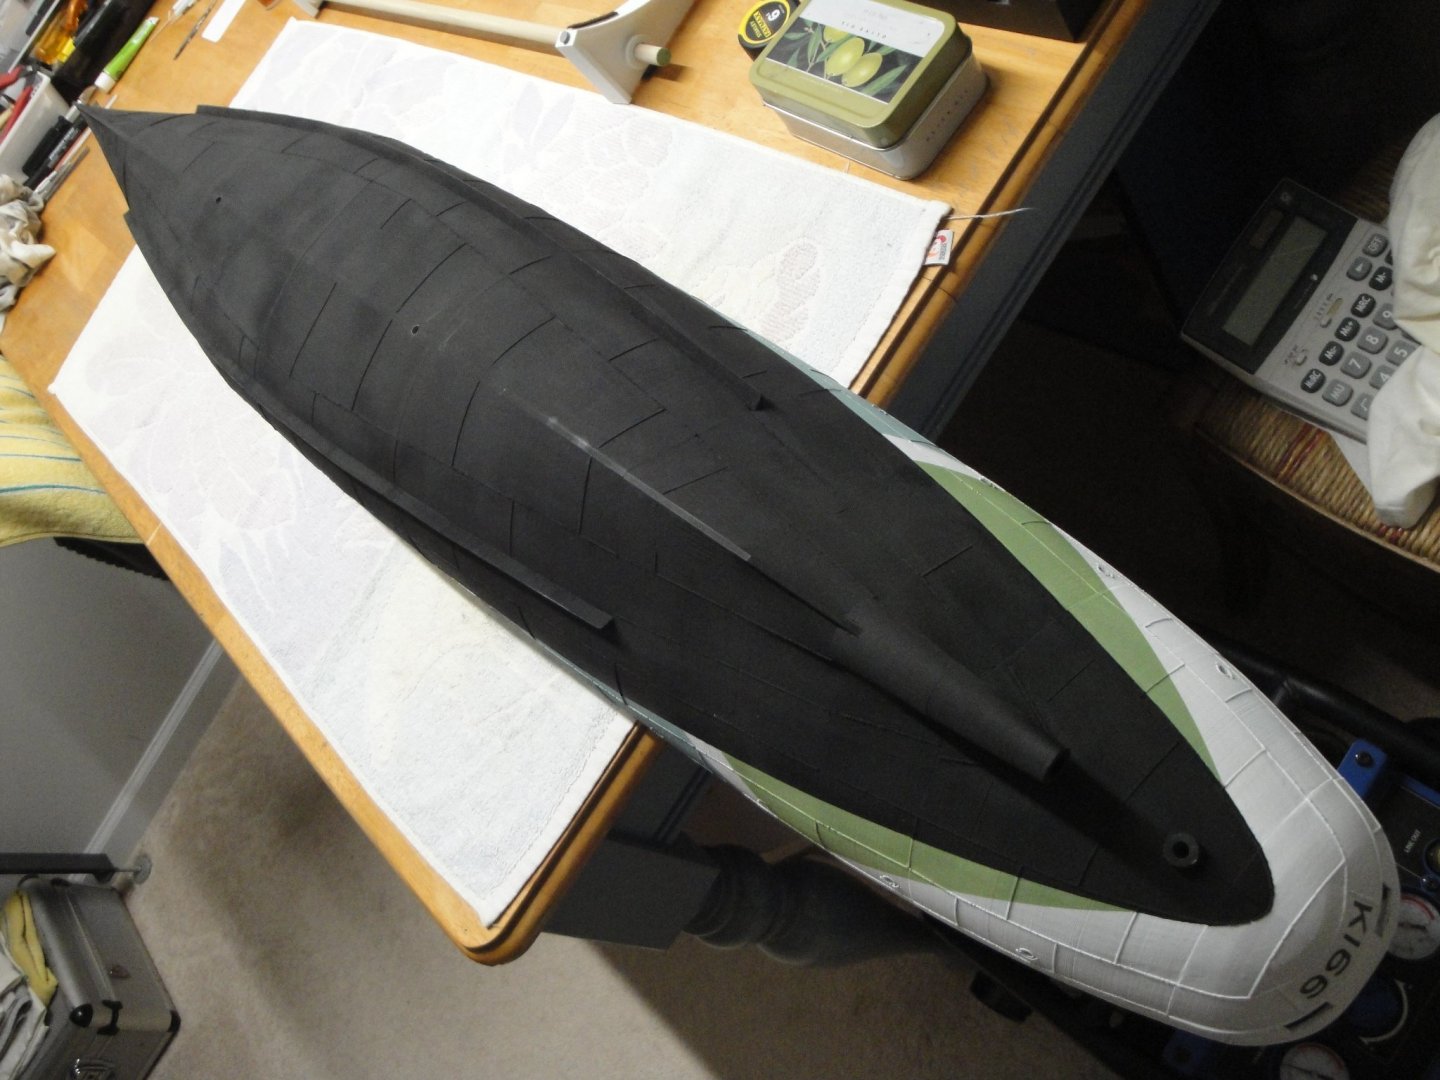
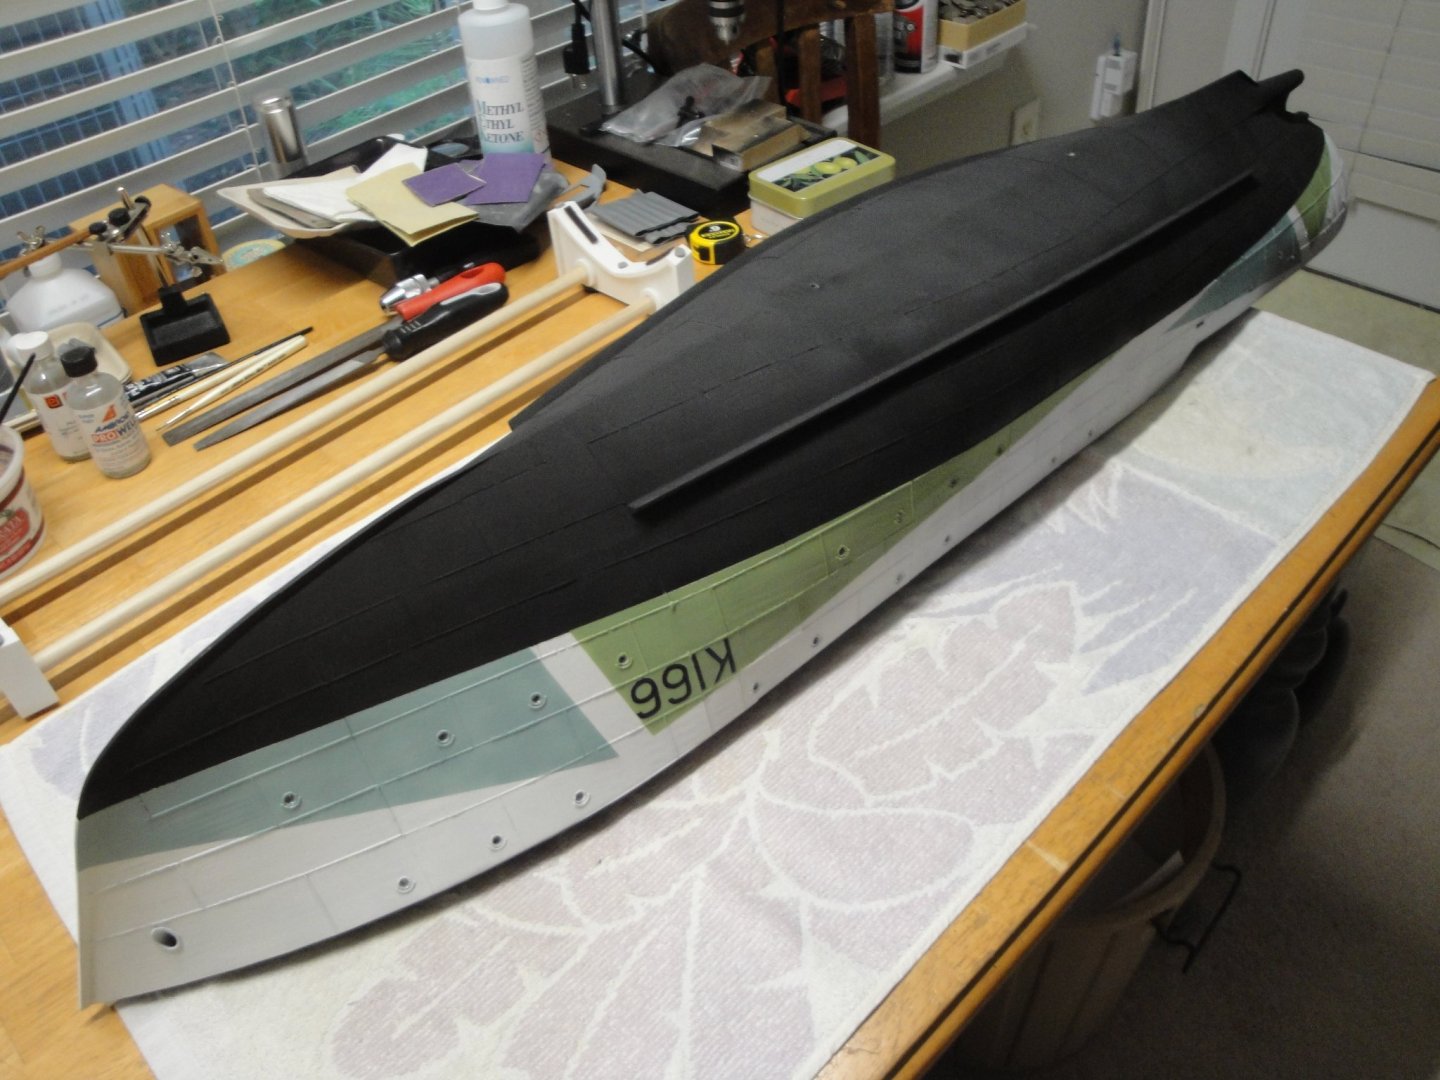
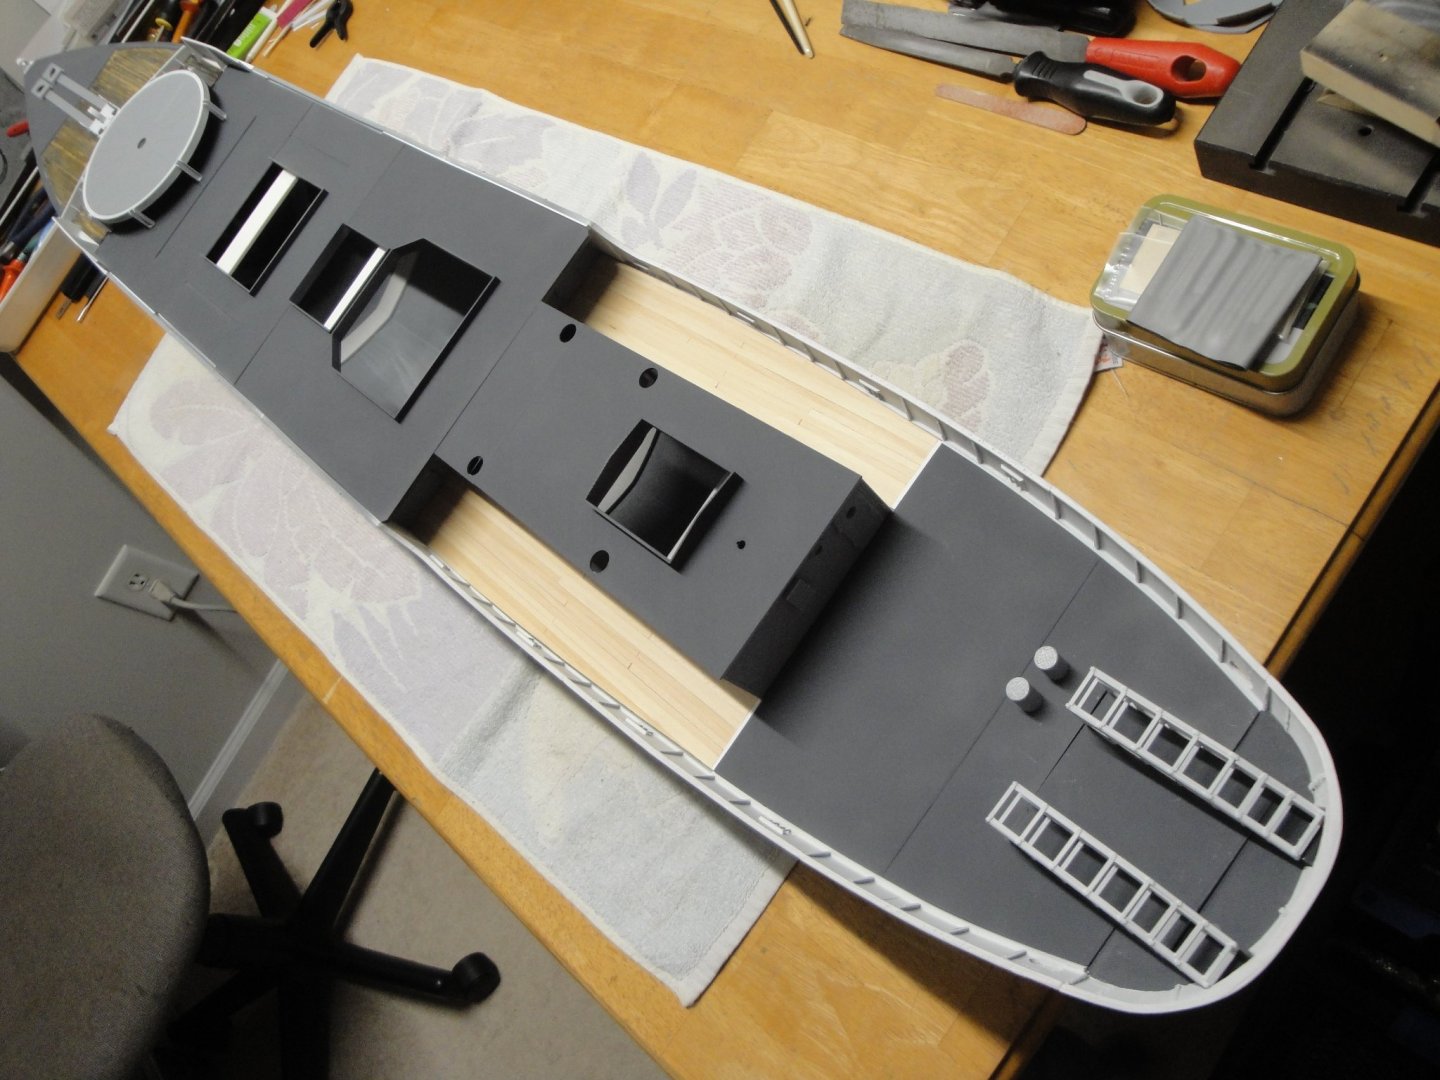
Quick update: the Hull is now finished !!! Portholes have been filed and markings added. I am just missing the measuring ladders and will probably go with the decals recommended by an earlier post. I need to work on a display board, to present the model and protect it, at the same time. Yves
- 321 replies
-
- 18
-
-
- Finished
- Flower-class
- (and 1 more)
-
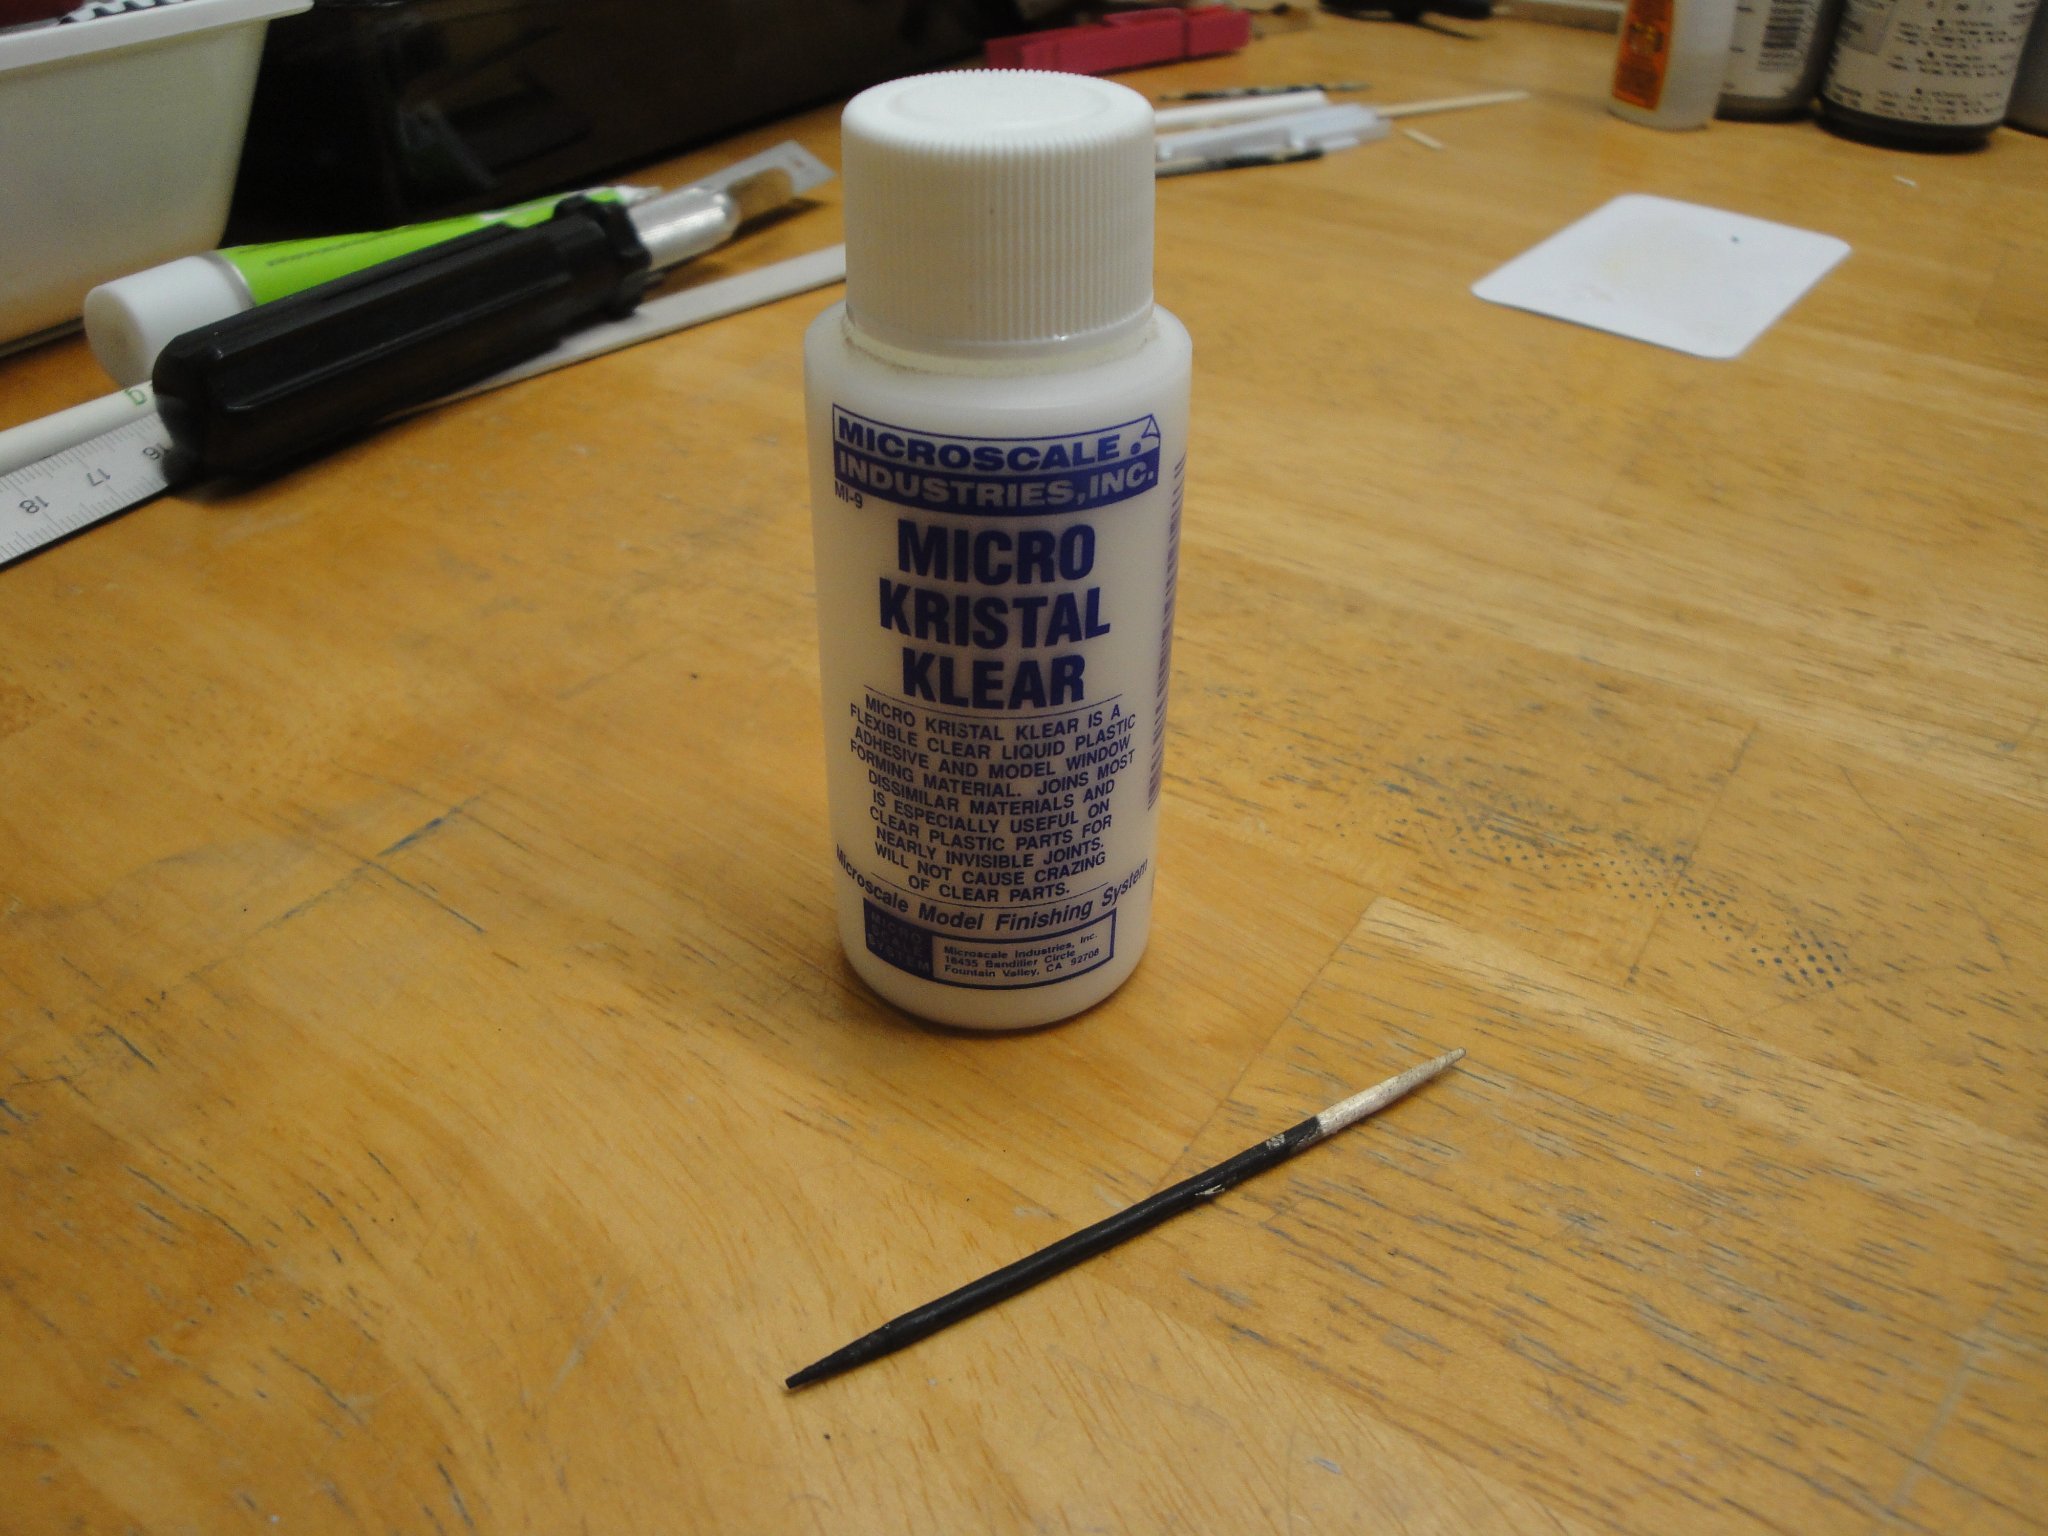
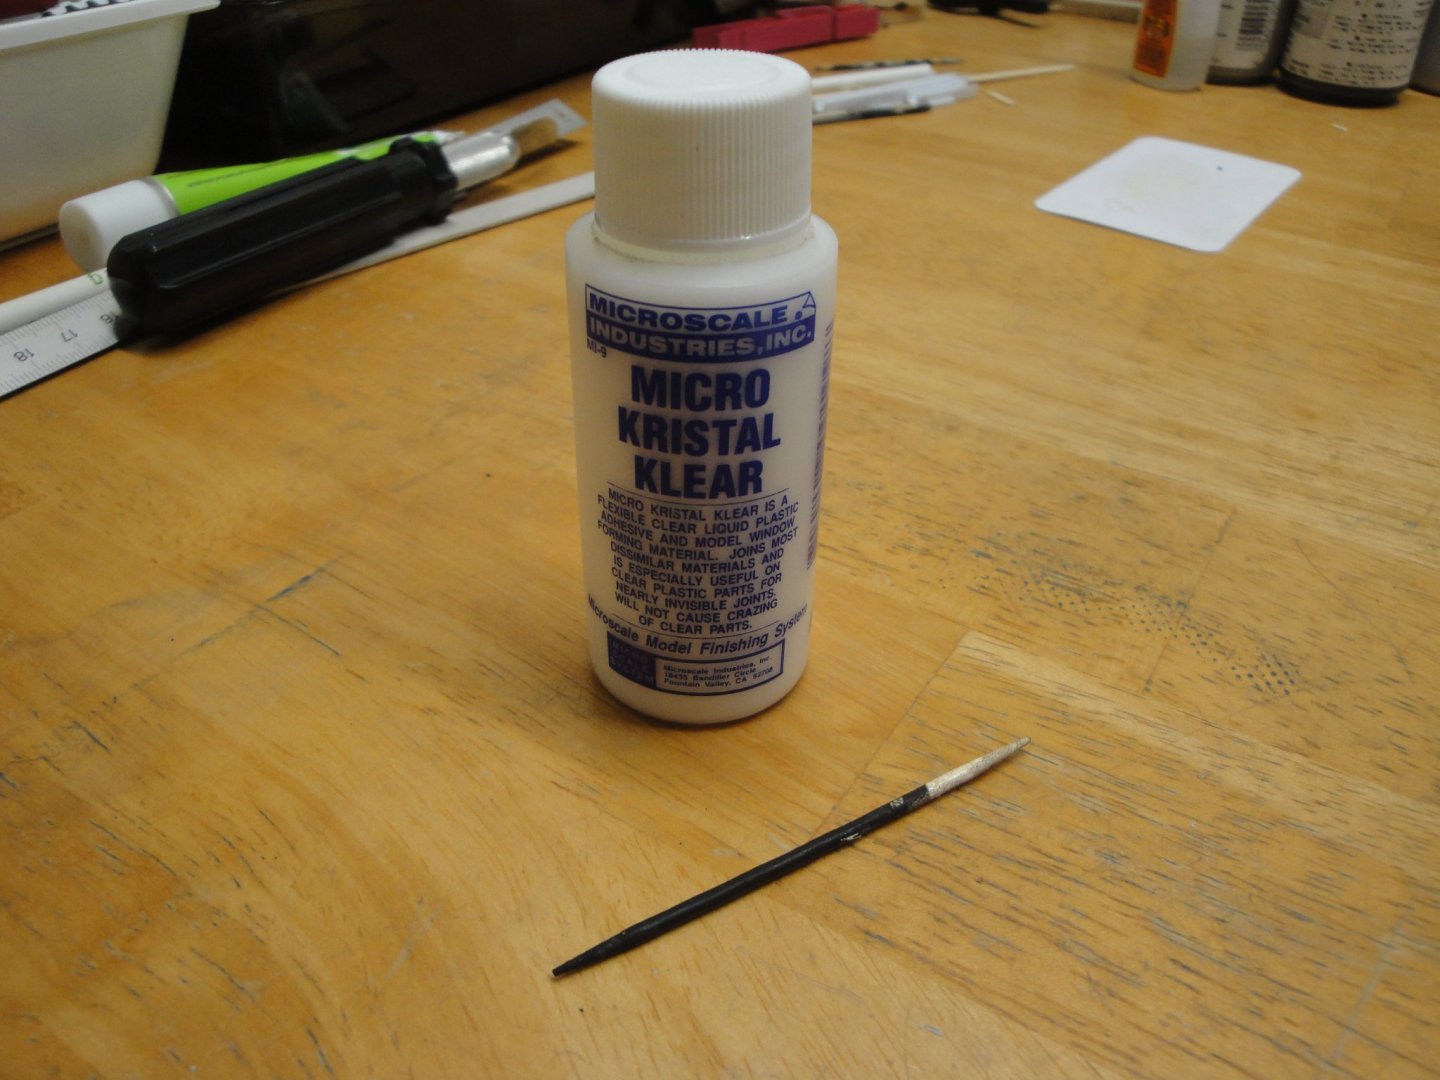
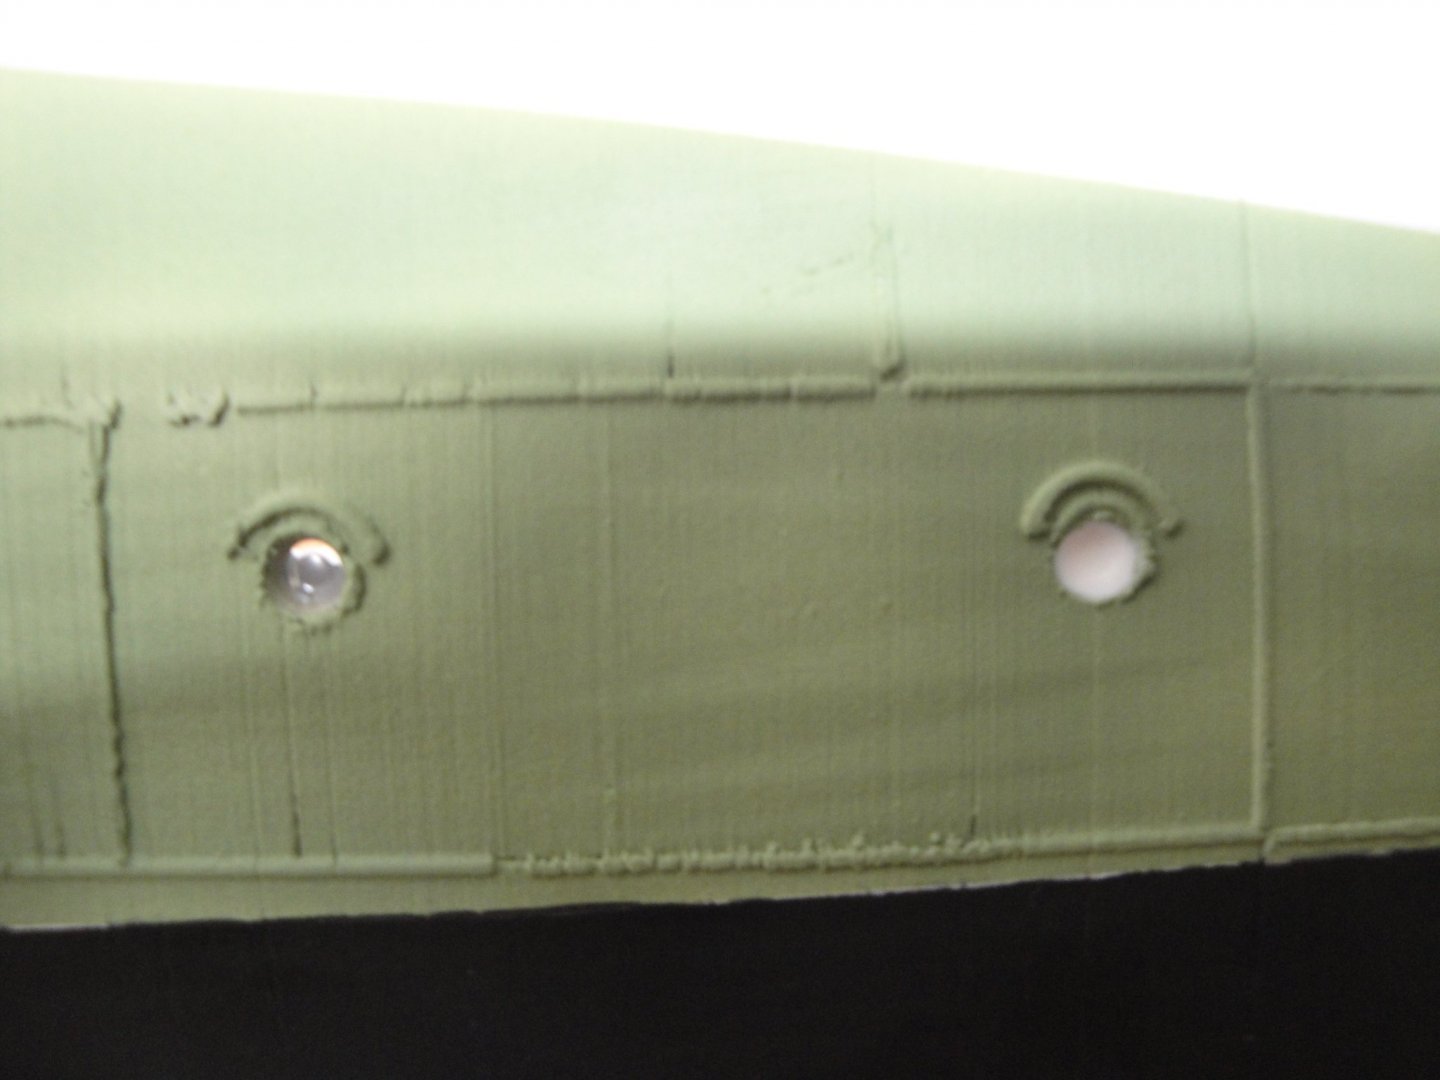
A quick update on the portholes and hull. As mentioned before, when the hull is printed, the portholes are solid since the kit is created for RC usage and navigation. In my case, I drilled all the ports with a 4.5 mm bit. Now has come the time to fill them up. I am using an almost magical chemical, that has the capability to fill up a hole up to 6 mm diameter with a white goo that turns crystal clear after a few hours. You also need a tooth pick and with a rotation of the hands, you create a ring of the goo, inside the portholes. Below you can see one that has dried and one porthole that was just filled up: Because the hull is very thick, I used a second application of that magic goo, after the first application dried. It filled up quite well the holes and looks a lot like the heavy glass used on the real ship. Finally, for the decals, I went with one of the suggestions and printed the decals on thin paper sheets, carefully cut them, soaked them in PVA diluted with water and applied them carefully to the hull. A little sponging on top and voila.... It is not too bad overall. Yves
- 321 replies
-
- 15
-
-
- Finished
- Flower-class
- (and 1 more)
-
Beautiful job on the barrels. Yes, that is a lot of work but these details are important. By the way, I am glad to see that you are back working on The Coureur !! Yves
-
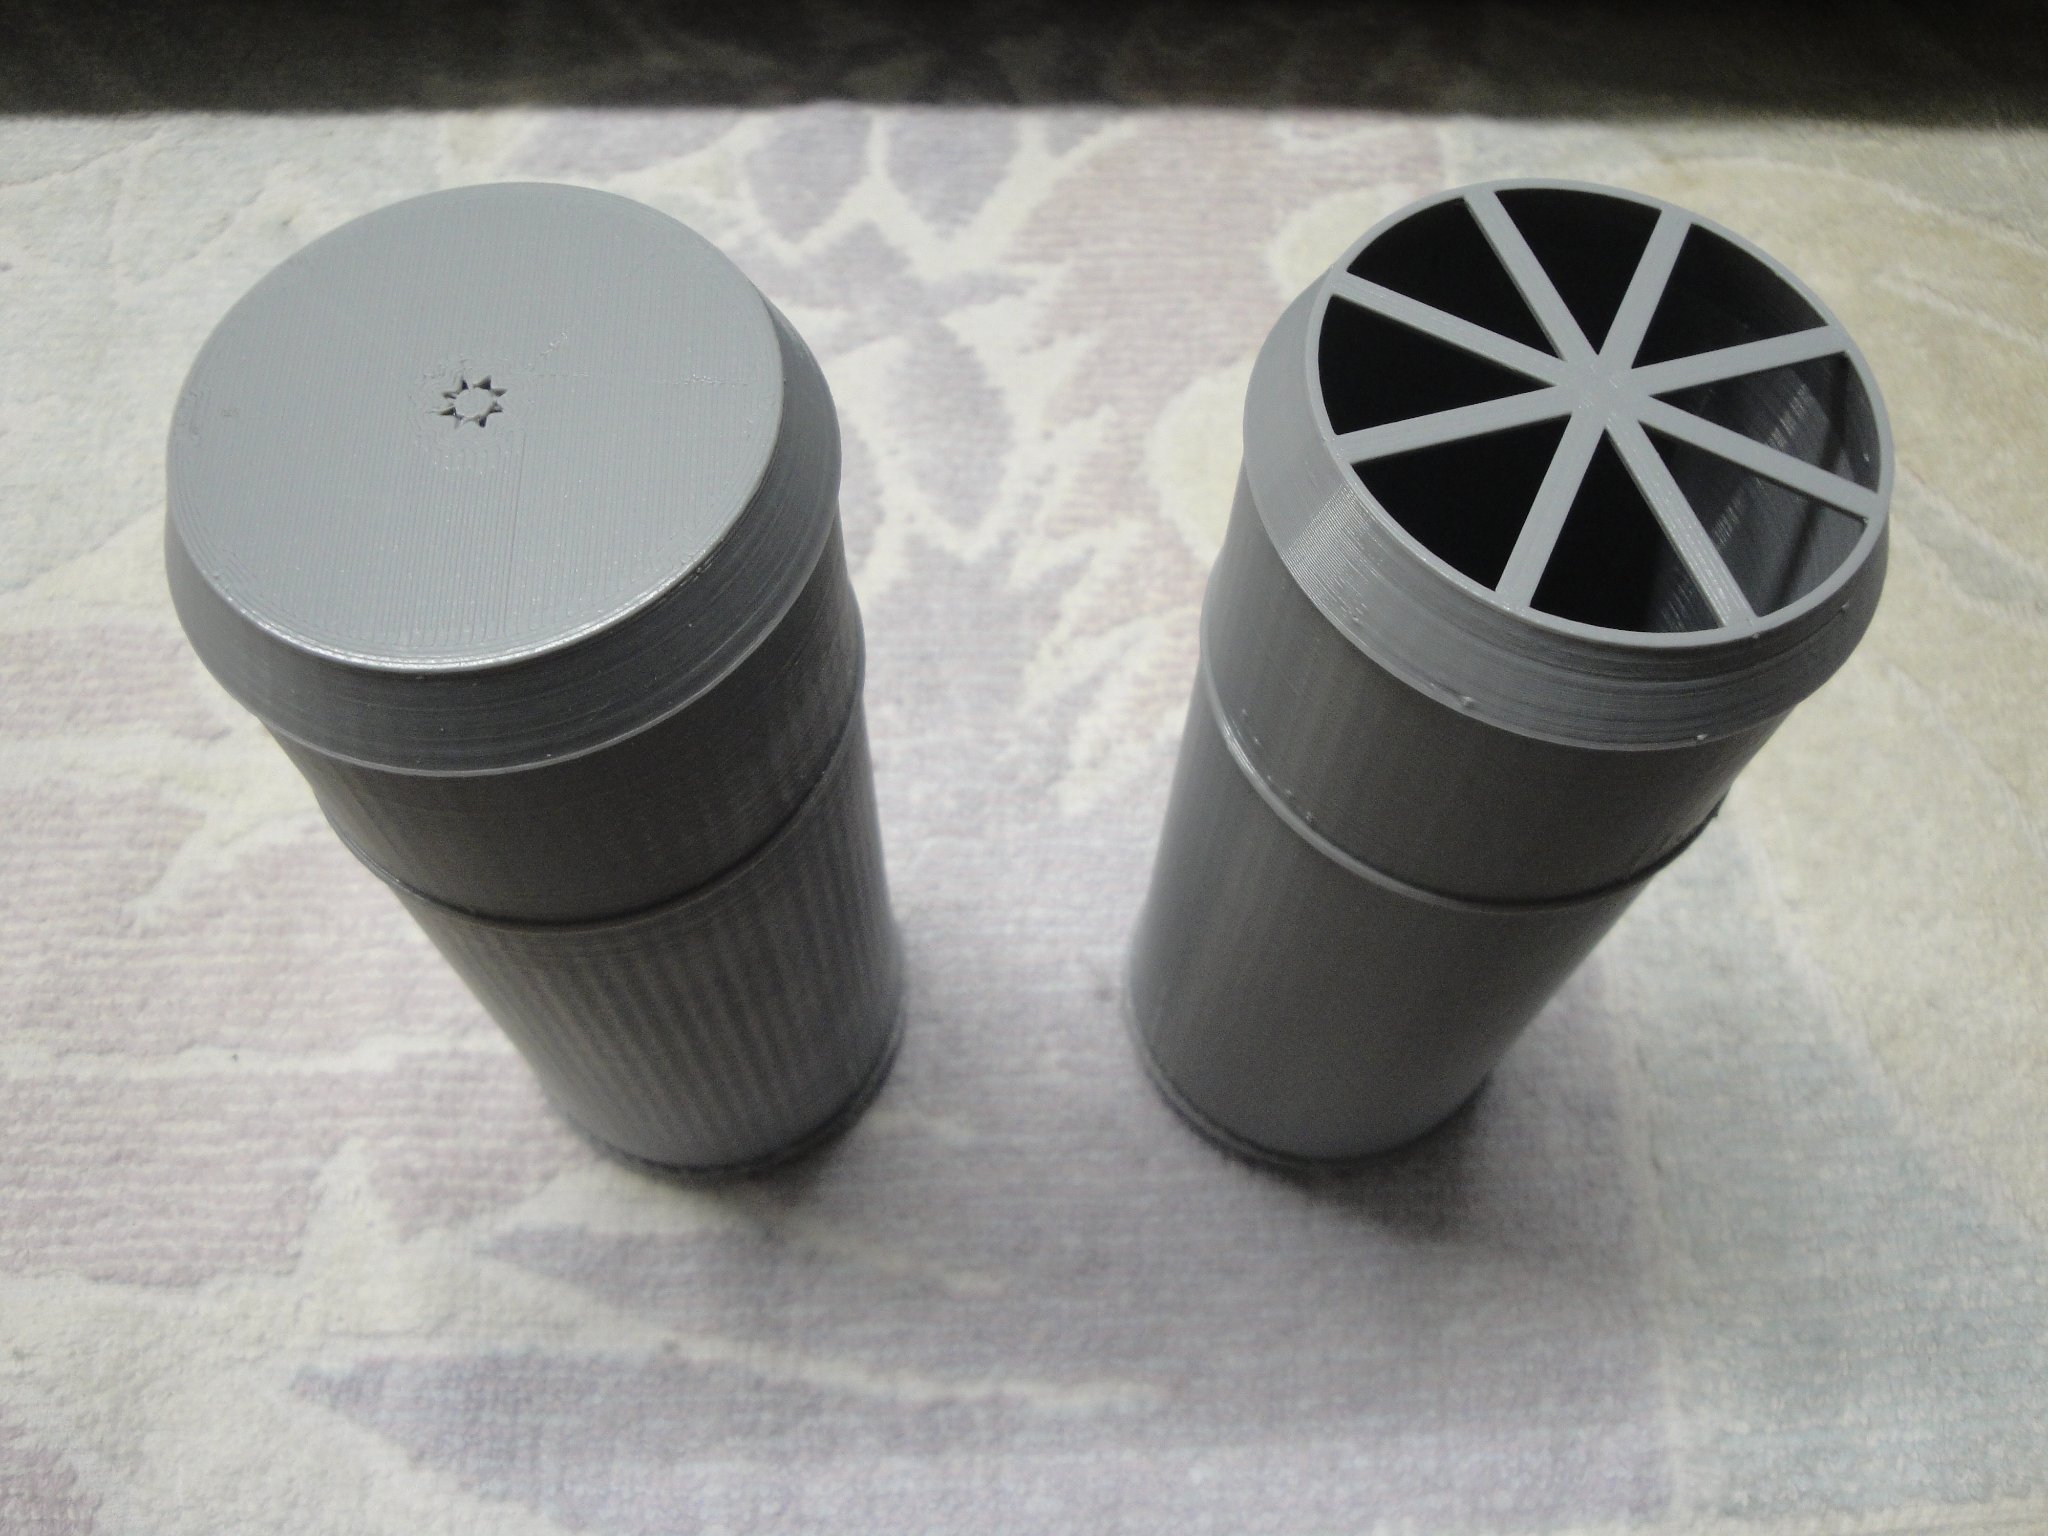
Also, the designer of the kit had a mistake in the stack files. I noticed him and he quickly sent an update that you should be able to download (or he may have already embedded it into the complete list of software). If you do not see it, just request it from Benjamin. On the right side is the corrected stack. Yves

- 460 replies
-
- 6
-
-
- Finished
- Flower-class
- (and 1 more)
-
Alan, I wonder if your bed is getting to the right temperature (60 degrees). If you have access to one of these remote thermometer (they use them to "welcome" you at the doctor office), you may want to check the temperature of the bed in various locations. A drop in temperature will cause the print to unstick. Did you get another glass bed? Yves
- 460 replies
-
- 6
-
-
- Finished
- Flower-class
- (and 1 more)
-
Allan, make sure that the rollers of the Y axis (Main axis protruding in the front) are tight. There is a way to adjust them. Without the rubber rollers tight the bed can rock and move and will never be flat/horizontal. Yves
- 460 replies
-
- 4
-
-
- Finished
- Flower-class
- (and 1 more)
-
For the portholes, I am going to try building the glass using that special chemical (name escapes me for now) from Microsol. As far as the temperature goes, the model is static and will not sit in the back of a car, for hours in the sun.... But yes, you are right, PLA may start loosing its shape at temperatures where we would all be dead anyway (60 degrees is when the cells of your flesh turn like egg whites on a frying pan). So I am not too concerned. Yves
- 321 replies
-
- 5
-
-
- Finished
- Flower-class
- (and 1 more)
-
Okay, you need some kind of psychological help, but I do have a lot of empathy for you ☺️ Yves
-
Lovely kit, very well designed with a gorgeous ship at the end. I will be watching your progress, Derek. Yves
- 345 replies
-
- 1
-

-
- Duchess Of Kingston
- Vanguard Models
- (and 1 more)
-
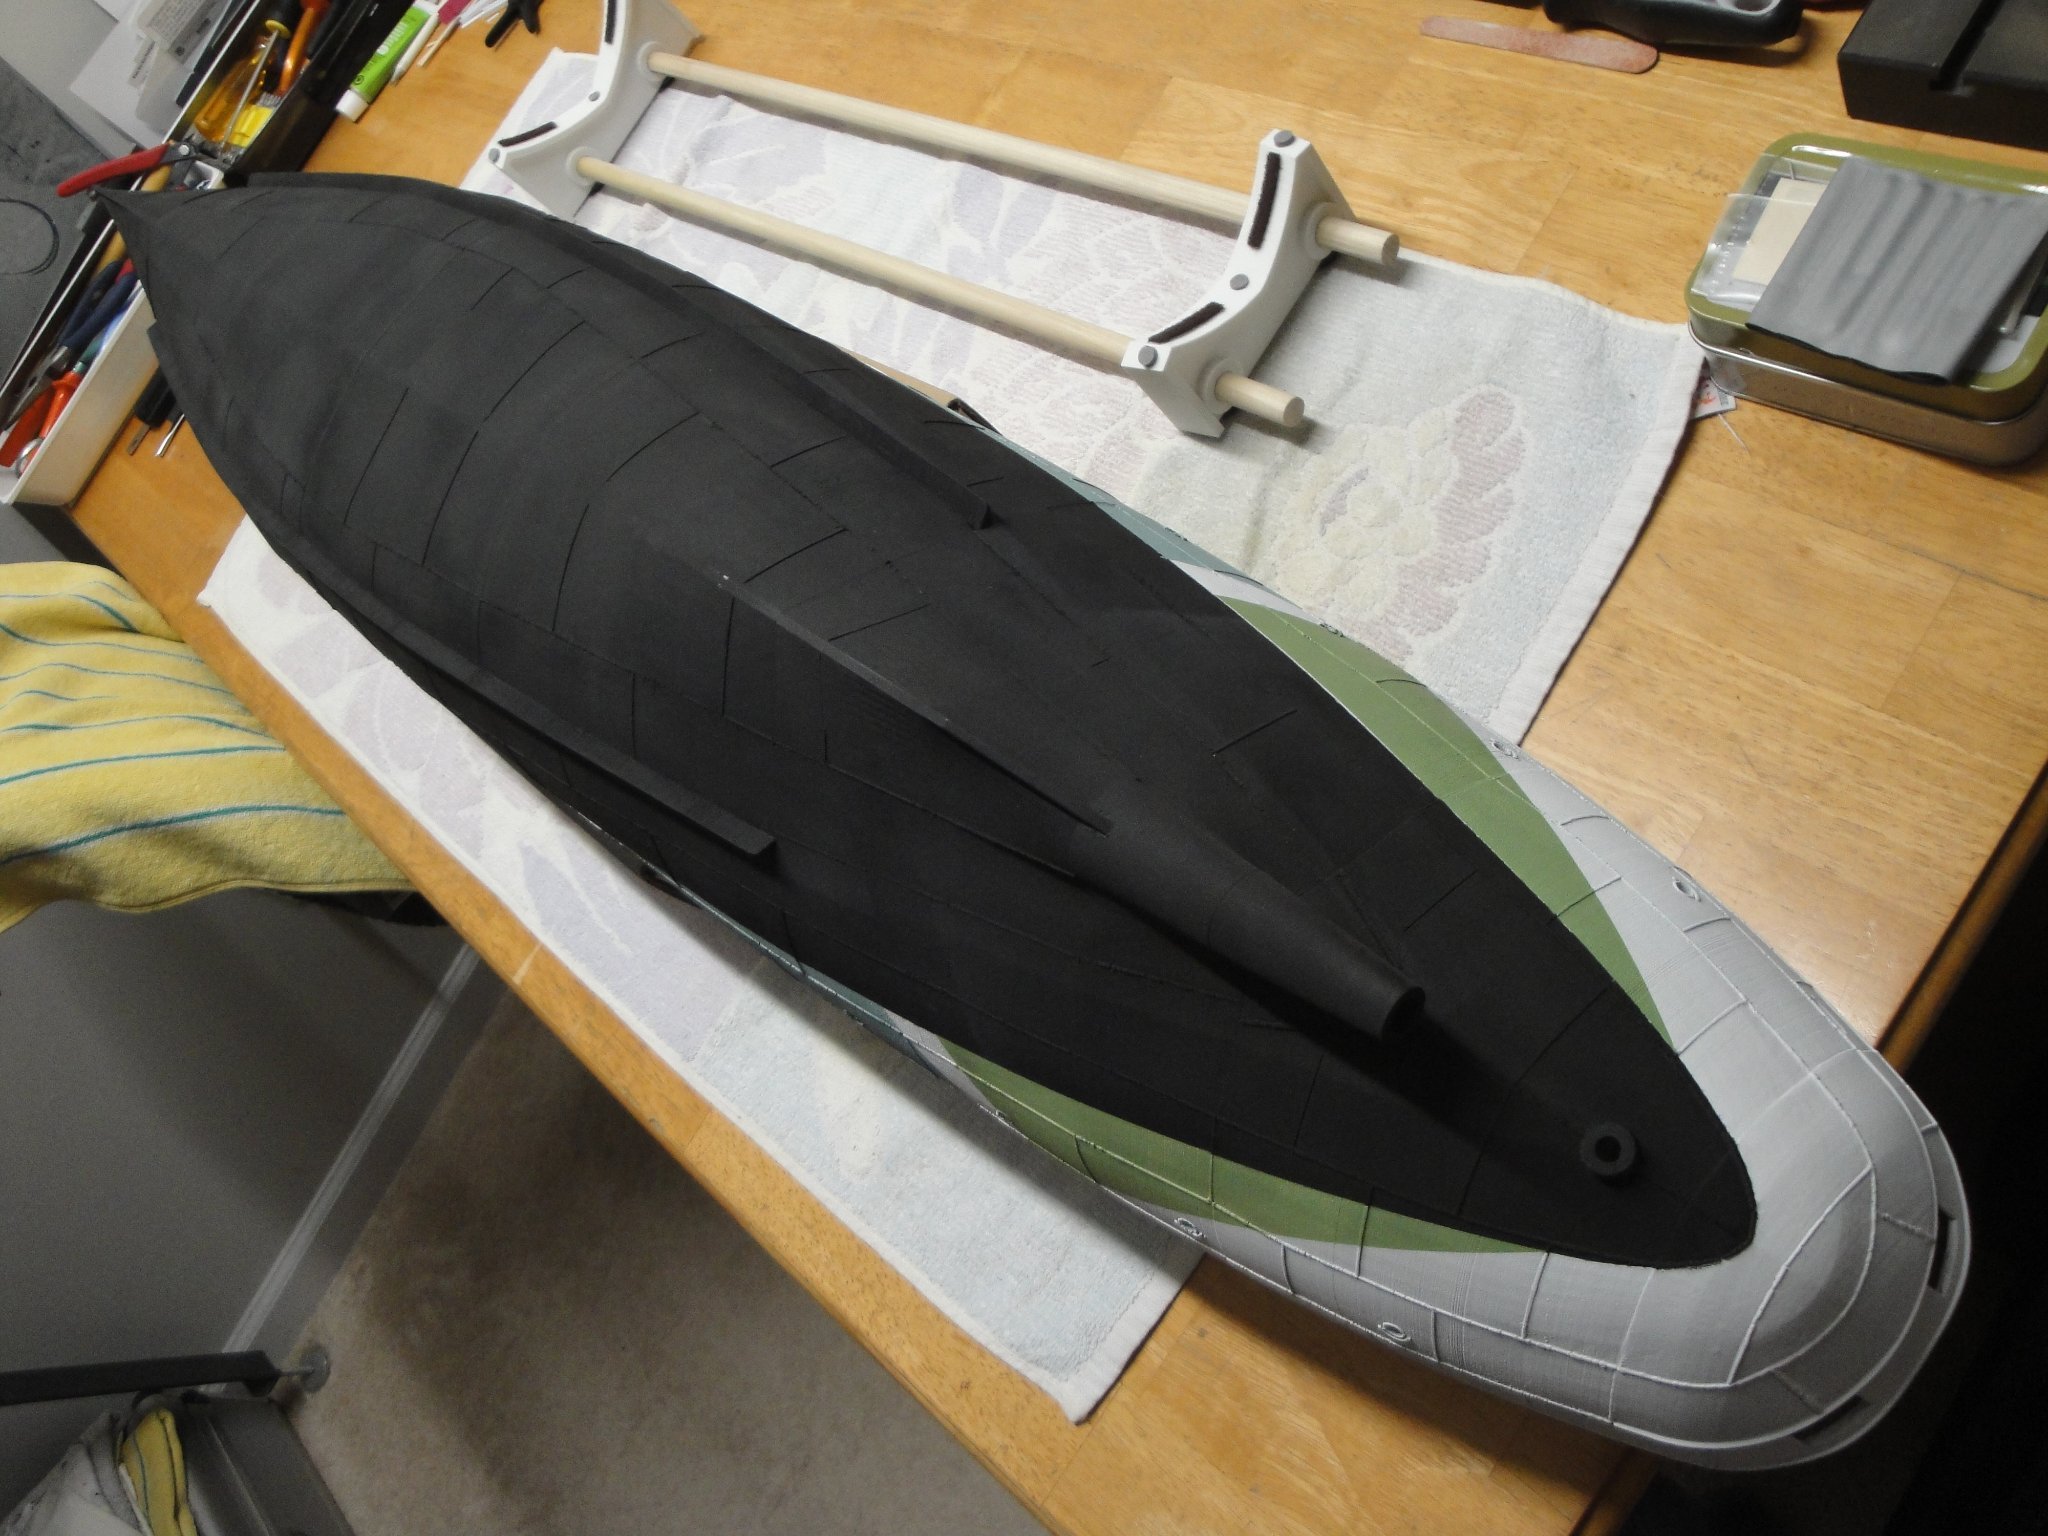
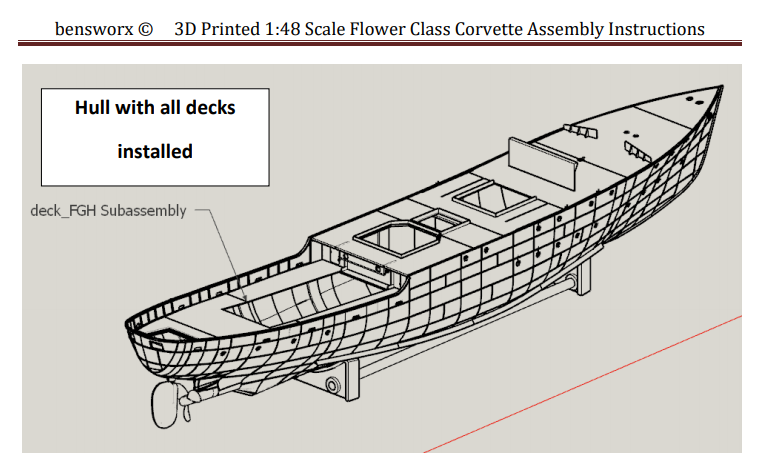
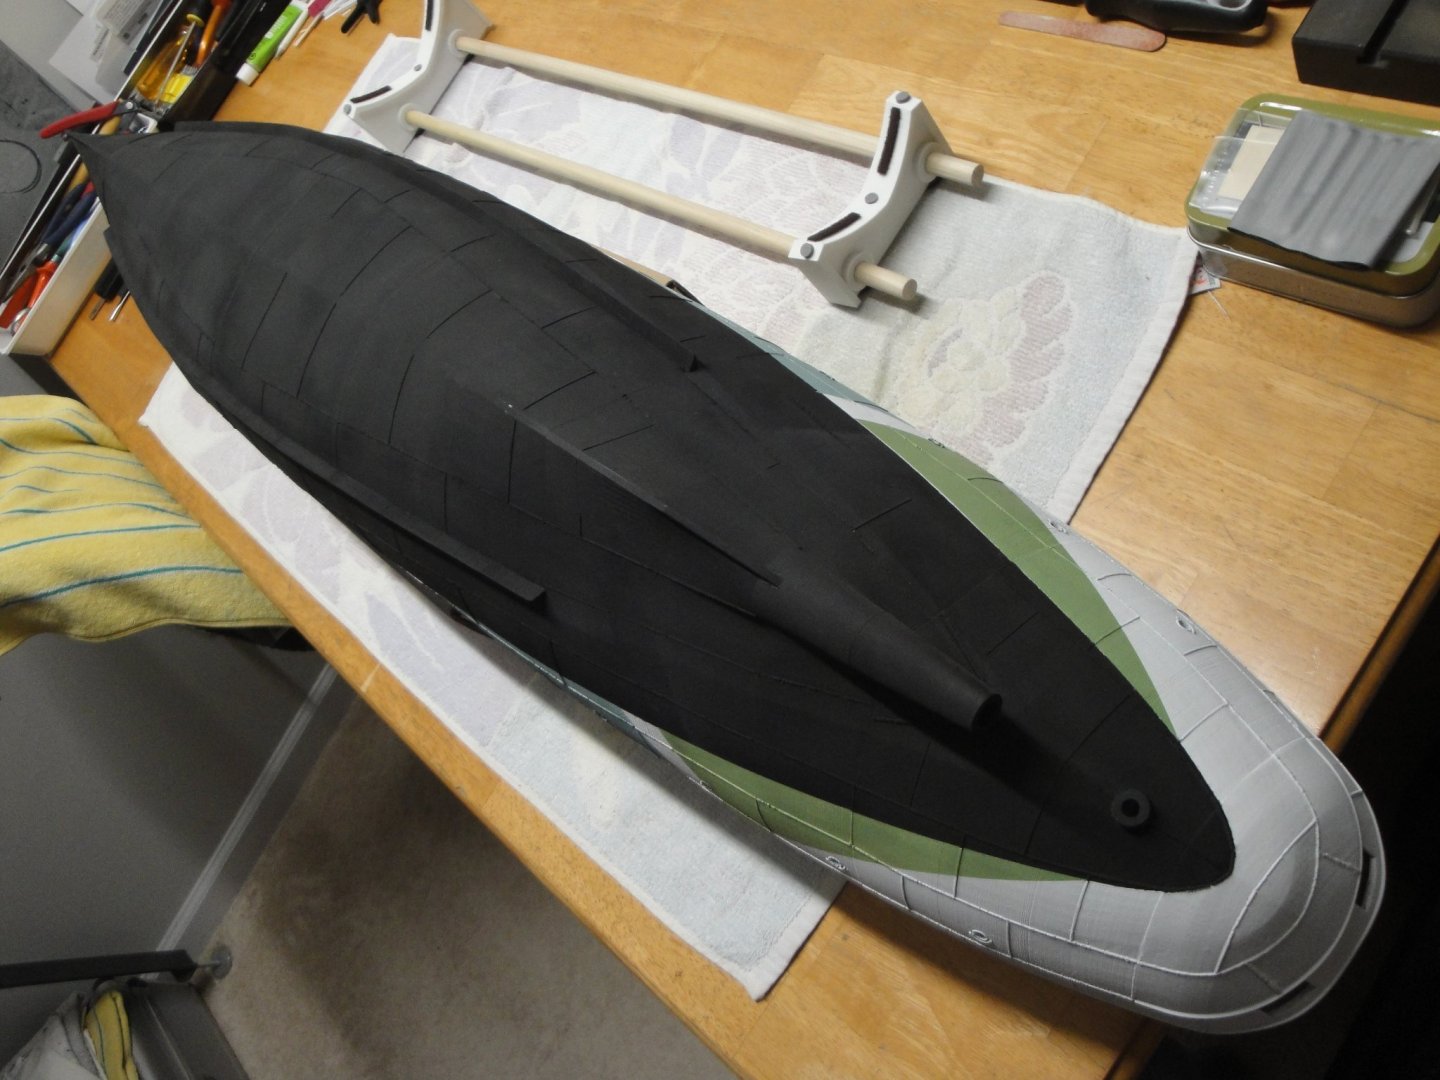
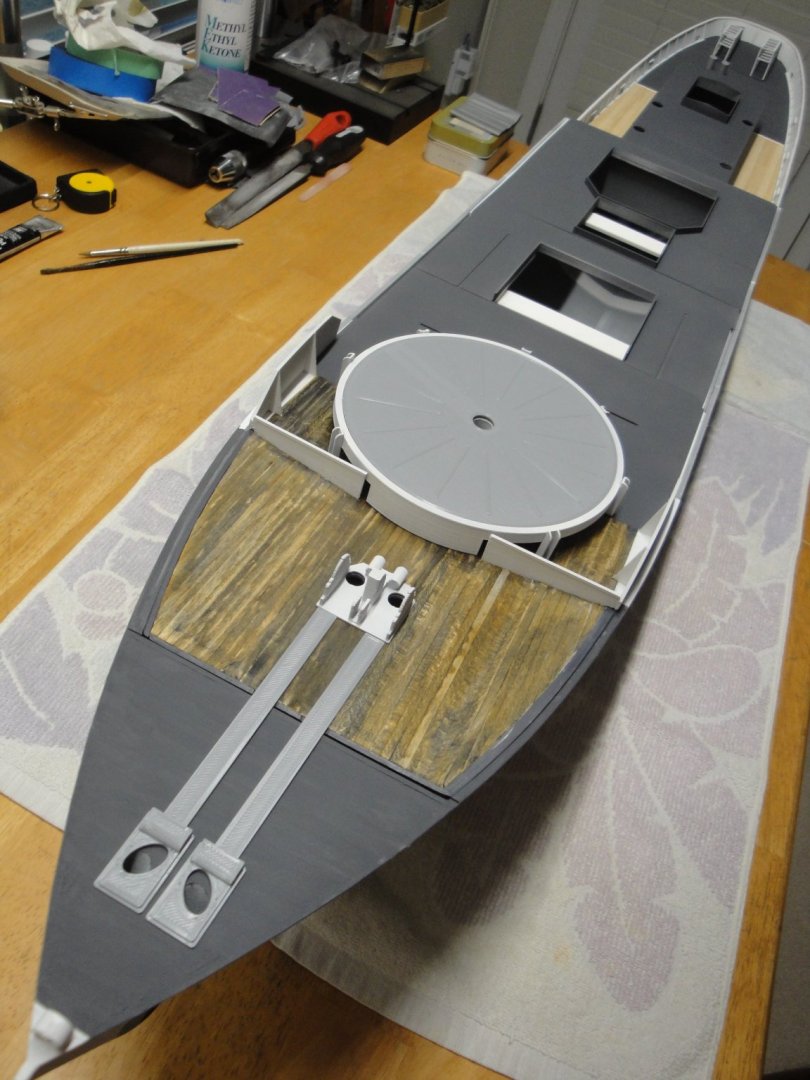
I agree with you: 3D printing material is very tough and the welding with MEK, may not withstand the impact of a 3 feet high fall. But then again, it is not really designed for that. I have used CA to position the hull sections and then MEK, which takes a long time and lots of liquid to insure a strong bond. So far, I am quite happy and hope to not drop it.... So, at this stage, we have finished the hull (still some details to paint) and all decks have been printed and positioned on top of the hull, with numerous strips for shimming and precise positioning. I still have to print the propeller and assemble the rudder, to call it completed. Yves
- 321 replies
-
- 10
-
-
- Finished
- Flower-class
- (and 1 more)
-
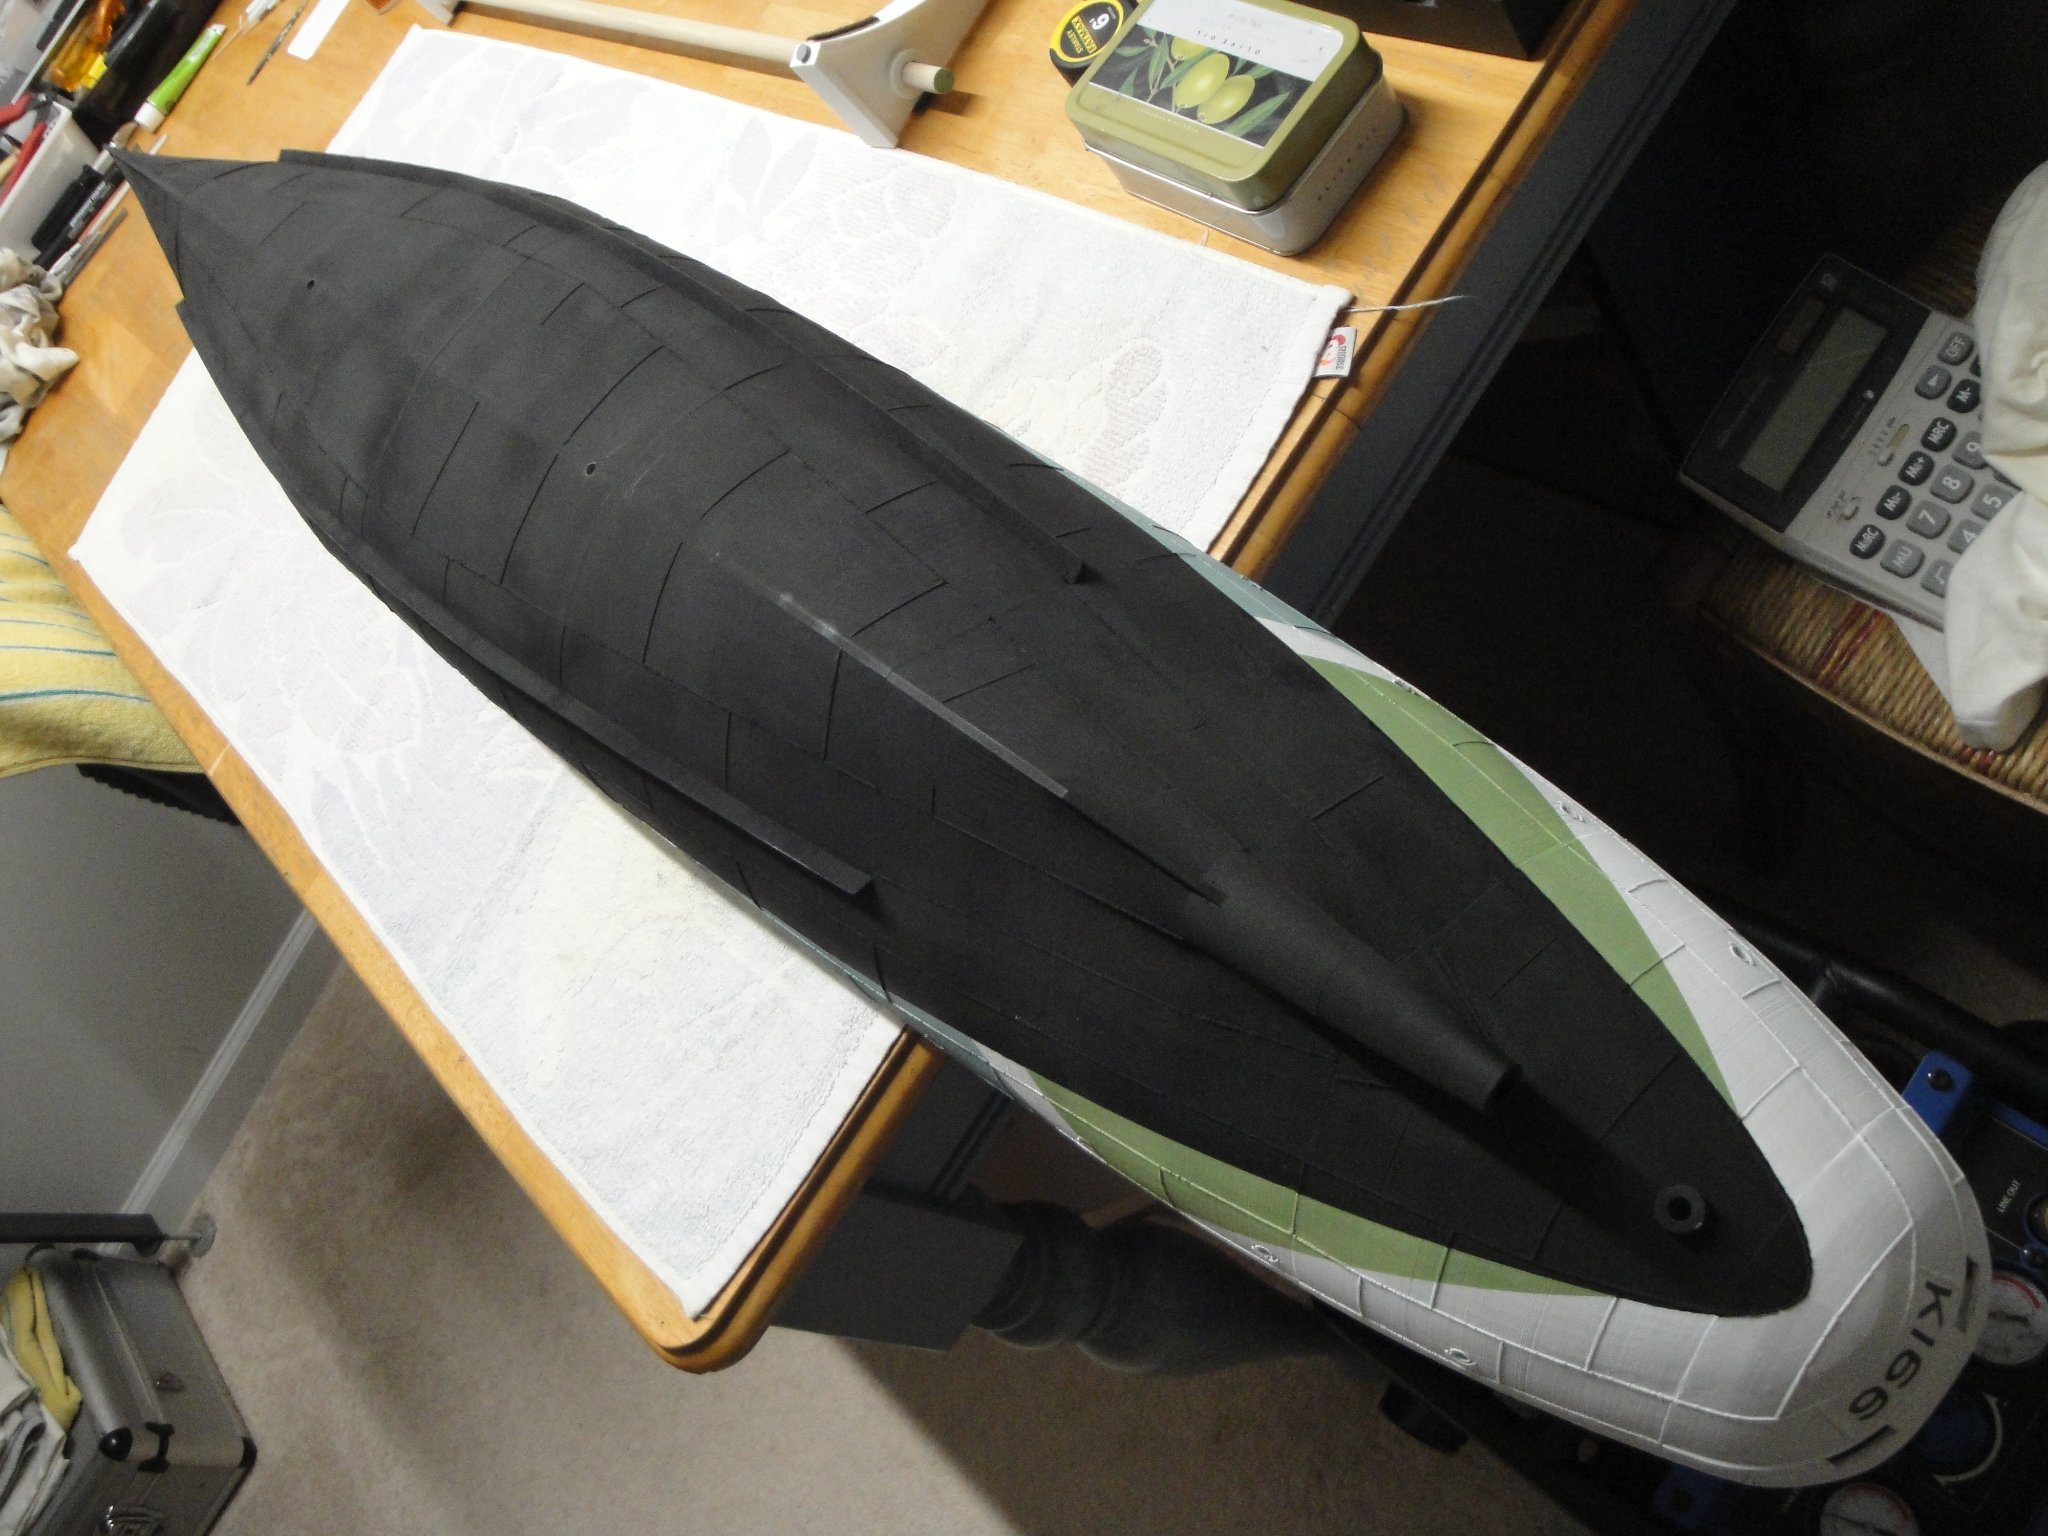
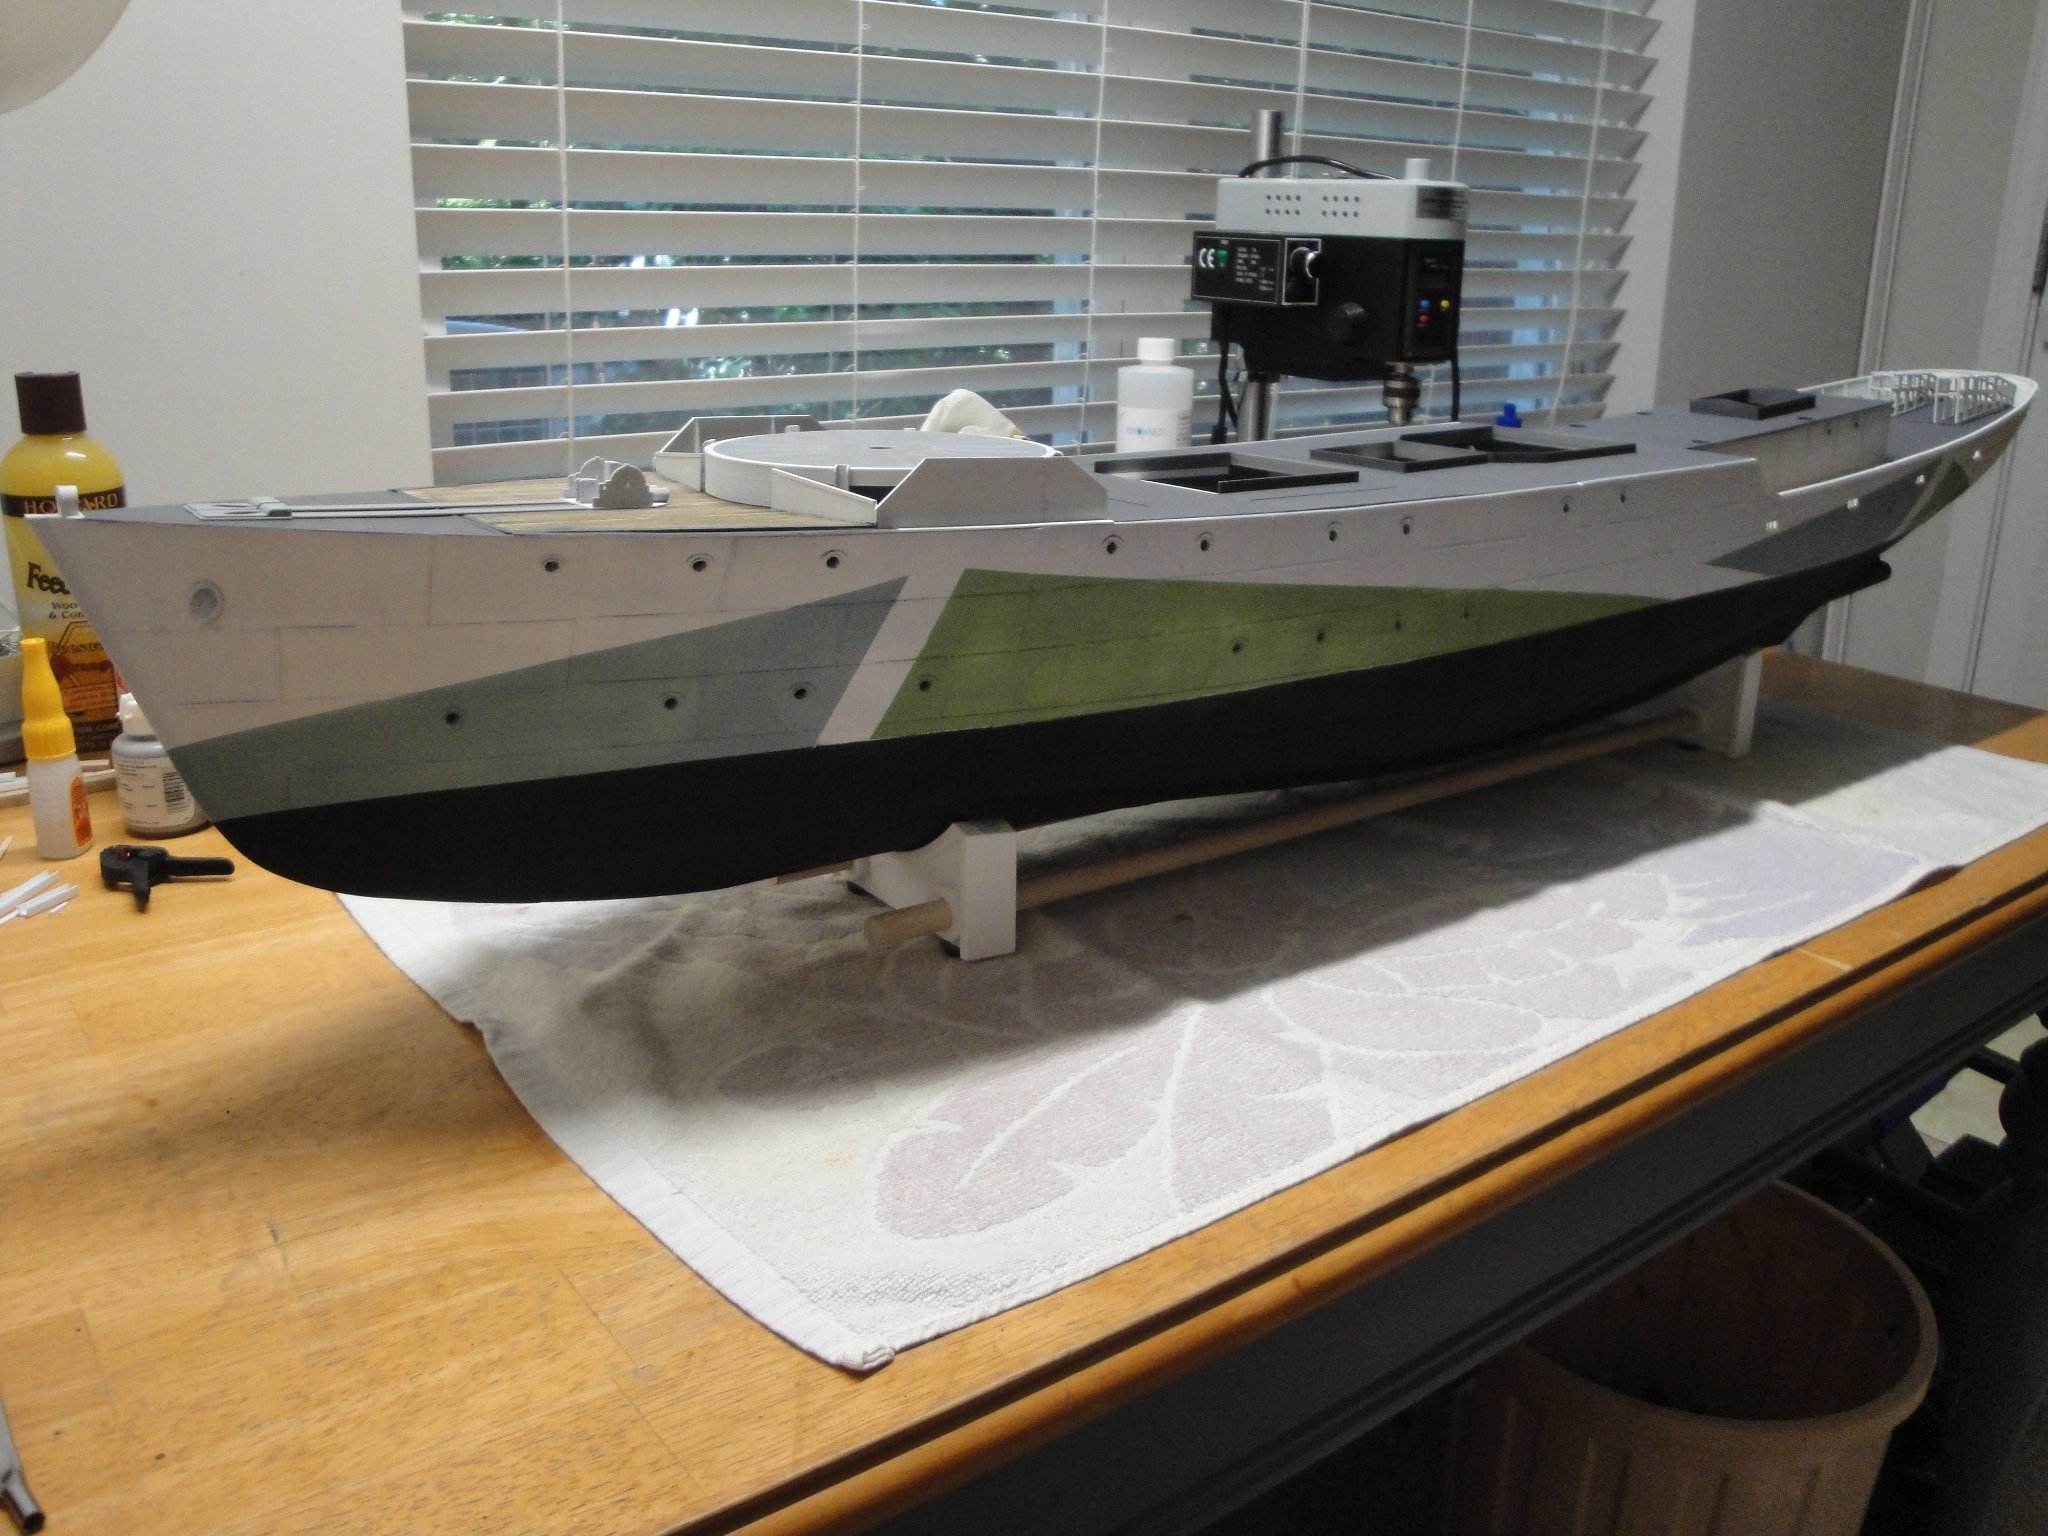
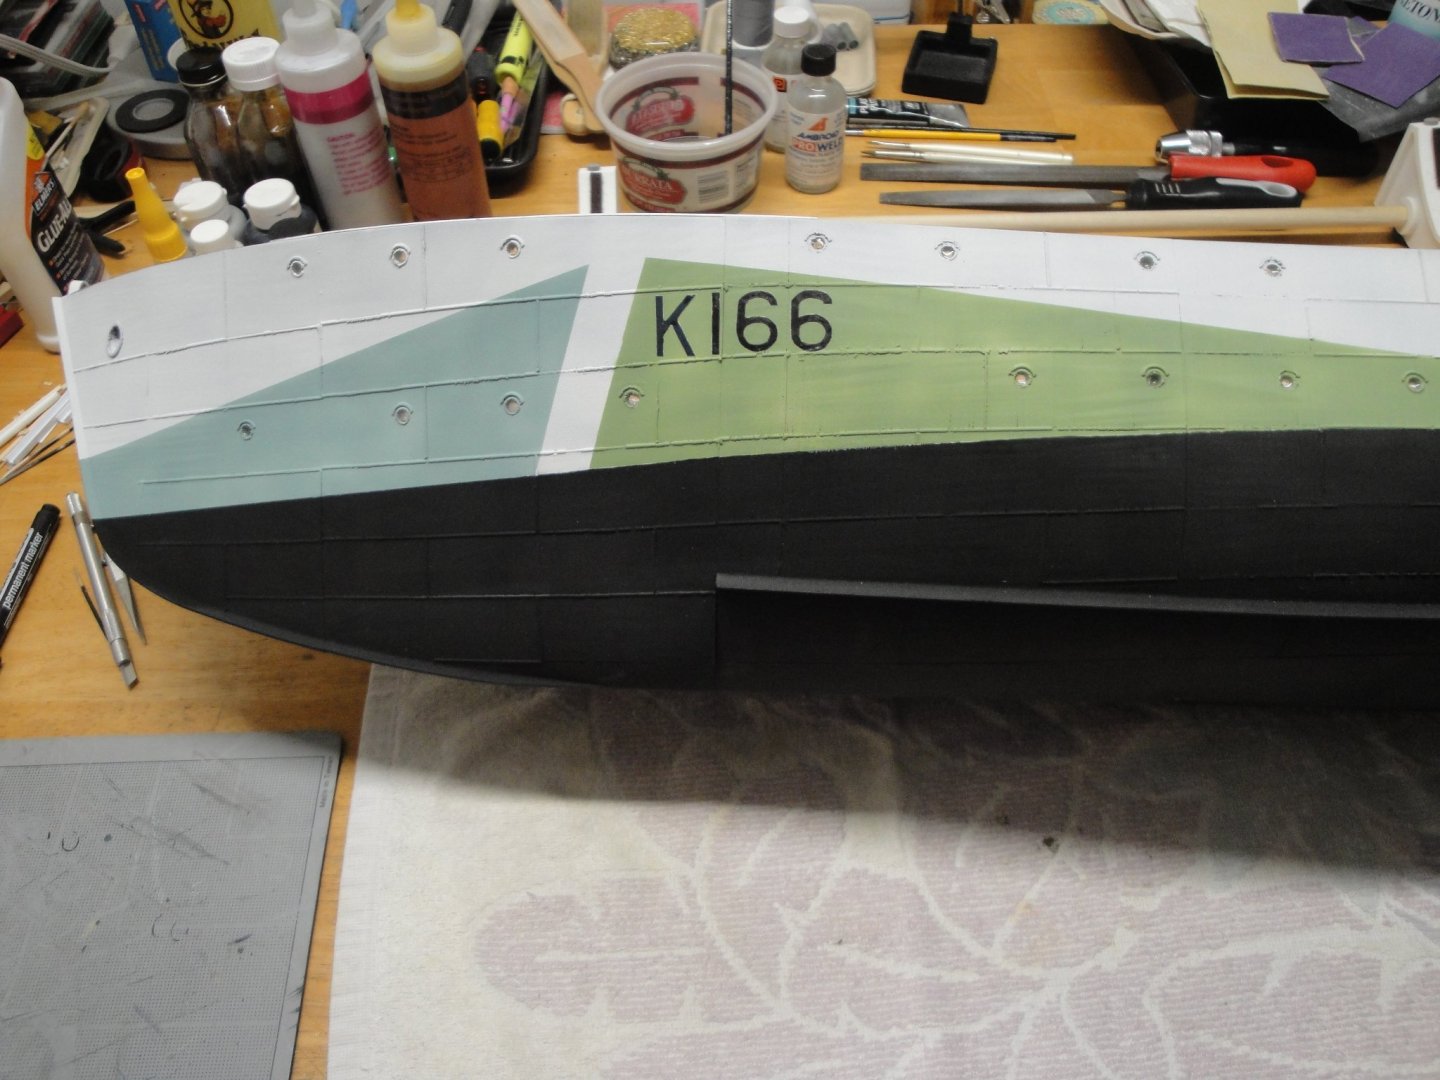
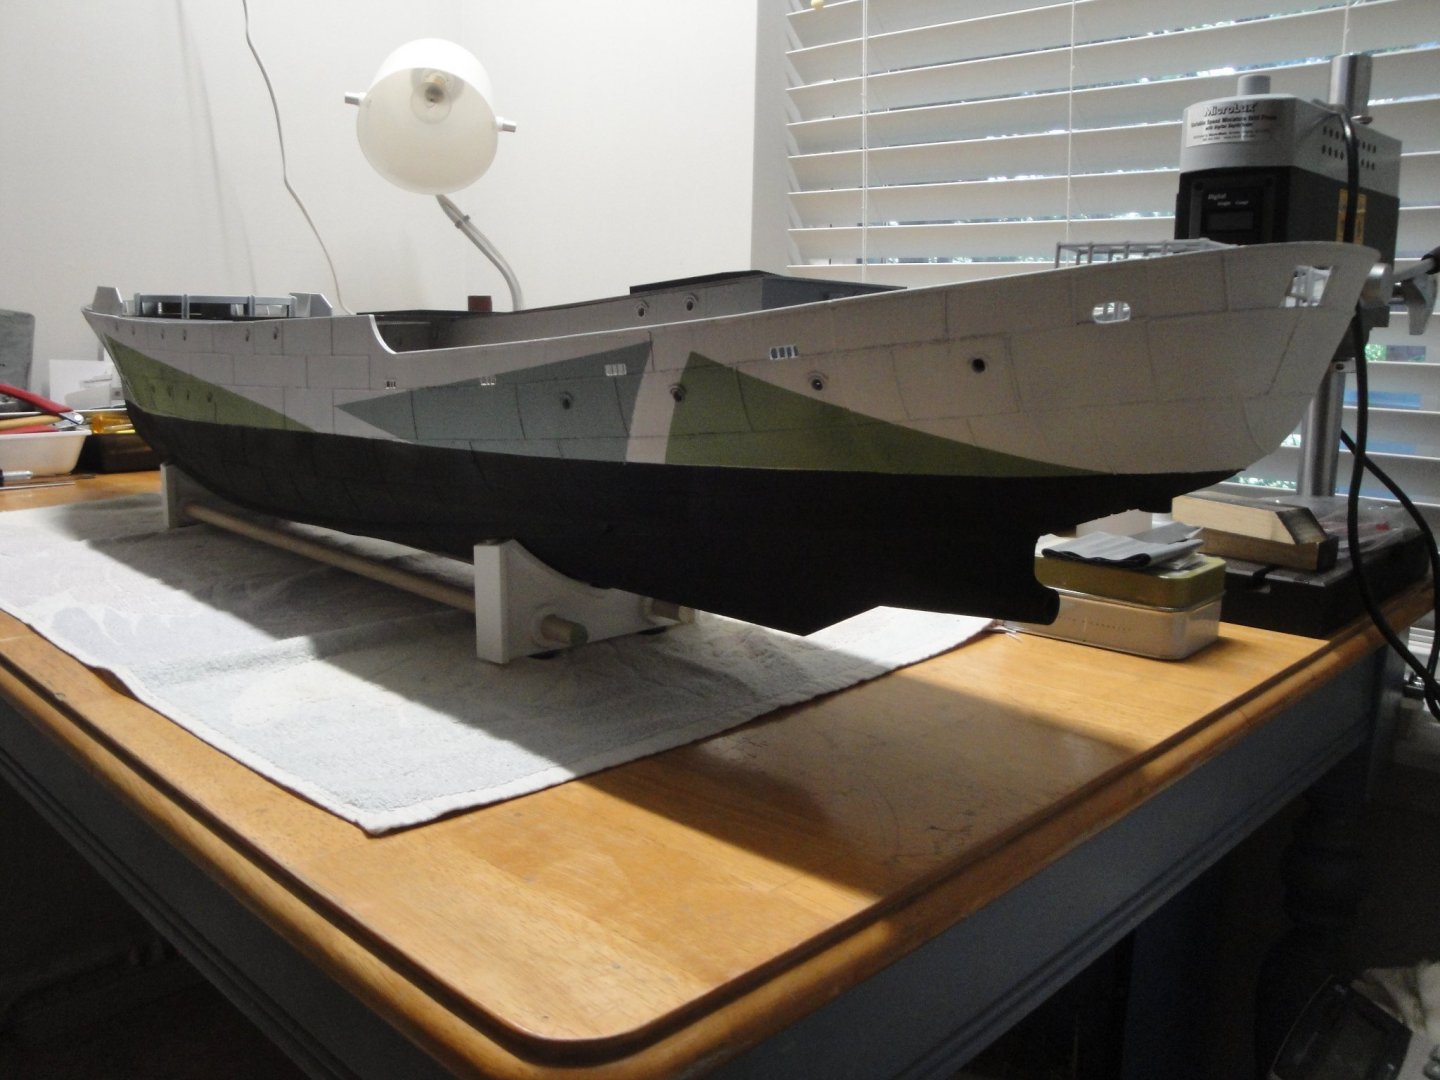
Posting some progress. The hull is almost completely painted. Everyone will have recognized the patterns of the HMCS Snowberry: When painting that large hull, you need to use a lot of paints. The black is an entire Tamiya Flat Black XF-1 can of 23 ml. An entire can of XF-2 white 23 ml went also into painting the white part. Blue is Tamiya Light Blue and green is a mix of XF-2 and XF-5 Green. It is starting to come along and it is nice to display some details on the decks. My problem now is how to create the markings on the Hull: "K166" and the measuring ladders at the stern and bow. Decals is not an option because the surface is not flat enough. Perhaps, masking or pre-cutting with a mask machine (unfortunately I do not own one). I am not feeling good enough to do it with my free hand. Nothing is glued yet. Just resting on the hull. Yves

- 321 replies
-
- 17
-
-
- Finished
- Flower-class
- (and 1 more)
-
Alright, I have come now to a point where I need to take a decision about the specific Corvette I want to model. As indicated, the kit provides for a Generic Modified Corvette (Long forecastle), designed for Radio Control and navigation. Many Corvettes were built, modified and retro-fitted during their short lives and choices are multiple and varied. I am not going to improvise and will try to stay within the Corvette Classics, for multiple reasons: - The colors - The availability of pictures and plans - The relative "neutrality" of the Builder Country, during WWII - The name and what it evokes. I am sure you all have guessed, what it will be. Yves

- 321 replies
-
- 8
-
-

-
- Finished
- Flower-class
- (and 1 more)
-
That is exactly what I did: Once you have the right levelling, I have not touched it since the first printed part. Yves
- 460 replies
-
- 7
-
-
- Finished
- Flower-class
- (and 1 more)
-
Herman, I suspect that the kit designer did not bother with re-creating a perfect and precise model. His goal was to offer a Radio Controlled Corvette, that would look from a distance, as a decent generic Corvette. Instead, he used welding lines to delineate the various panels on the hull since Corvette used both Rivets and Welding for the hull assembly. I think that sometimes, rivets tend to distract from the overall appearance of a model, and can be over emphasized. A rivet in the scale of 1/48 or 1/72 is not bigger than the tip of a small nail. Yves
-
Way to go Captain Hook !!! Yves