yvesvidal
-
Posts
3,634 -
Joined
-
Last visited
Content Type
Profiles
Forums
Gallery
Events
Everything posted by yvesvidal
-
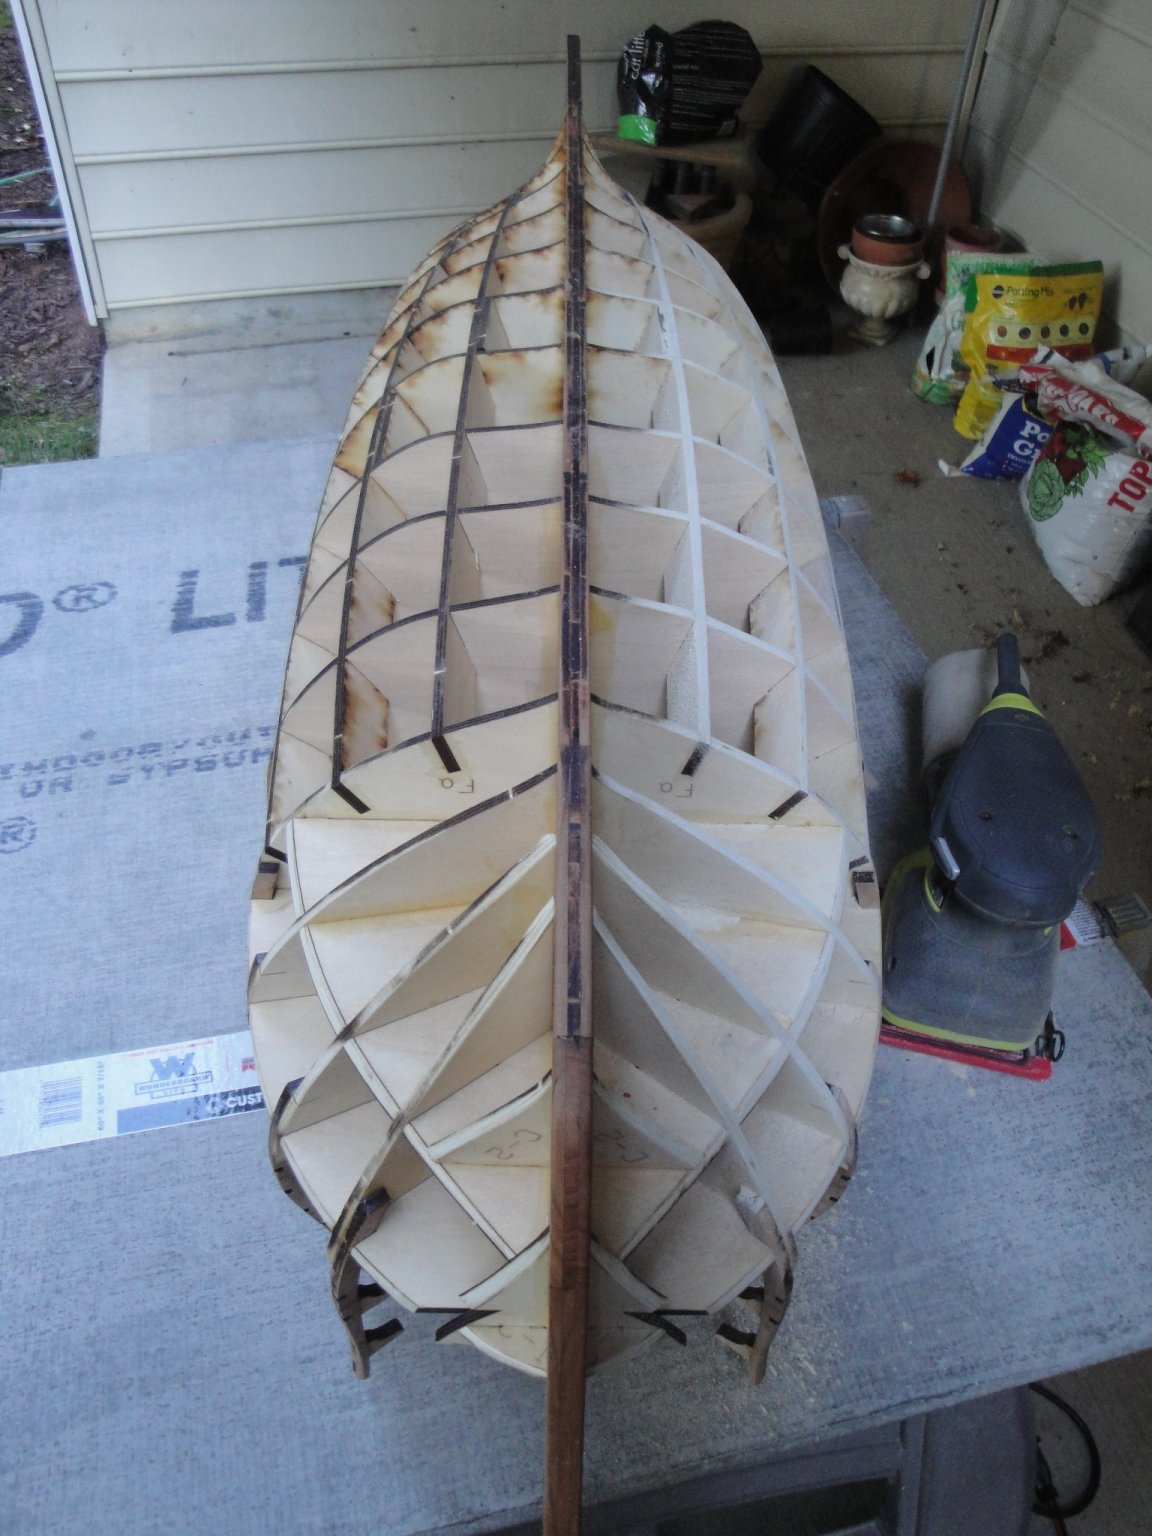
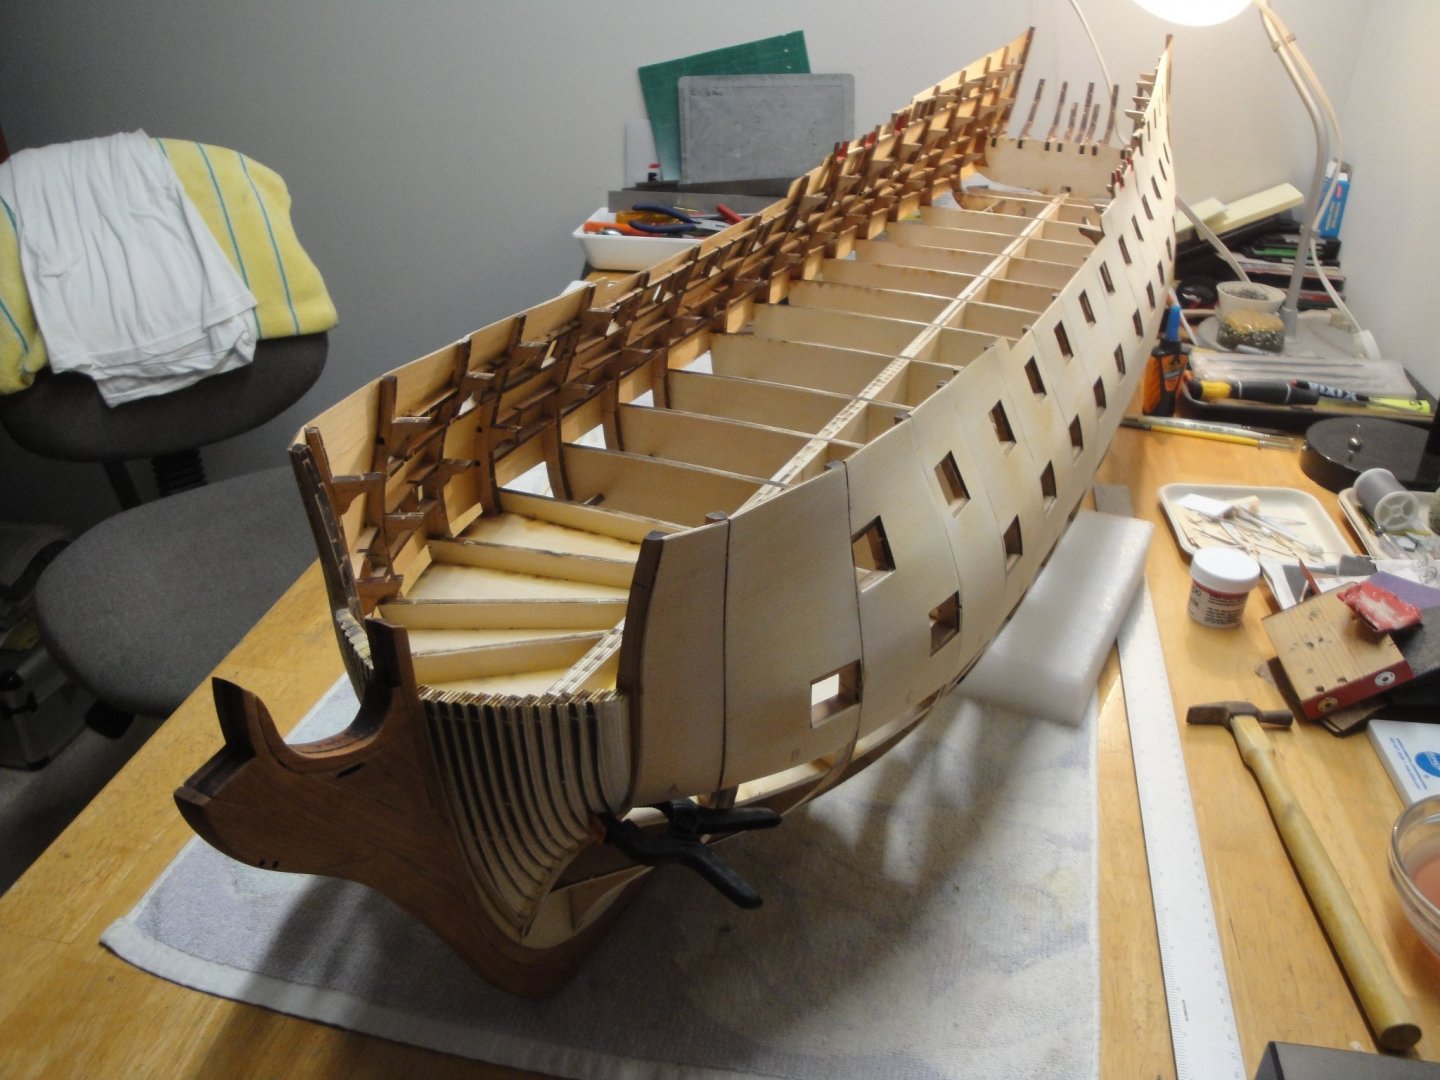
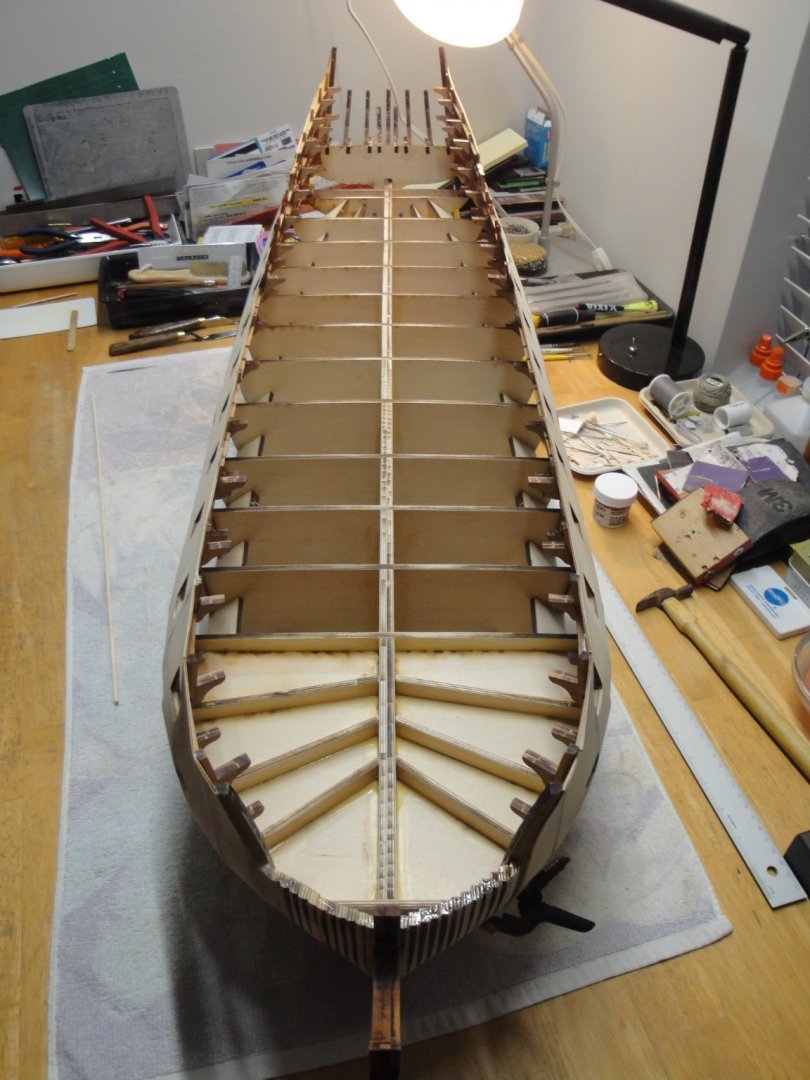
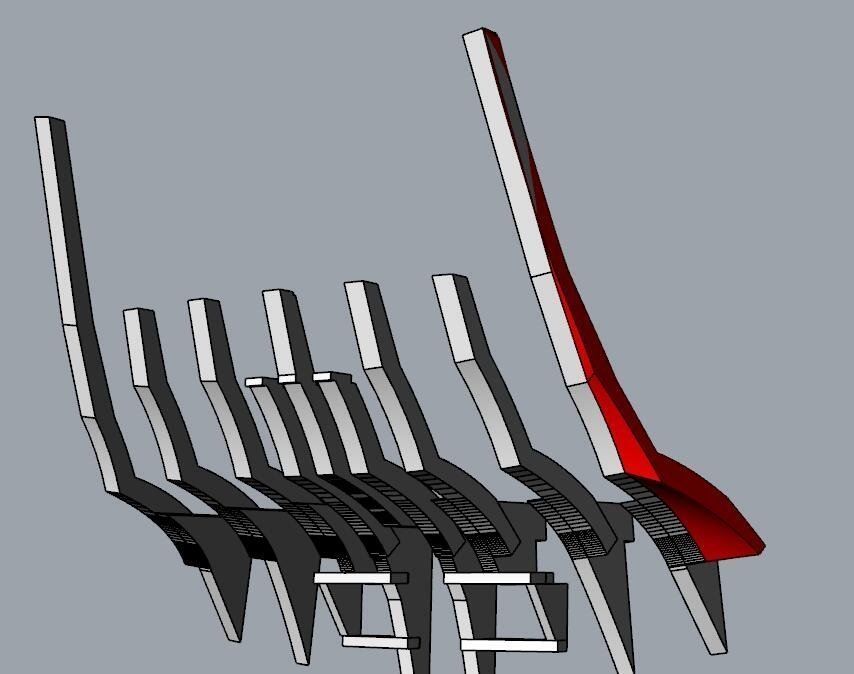
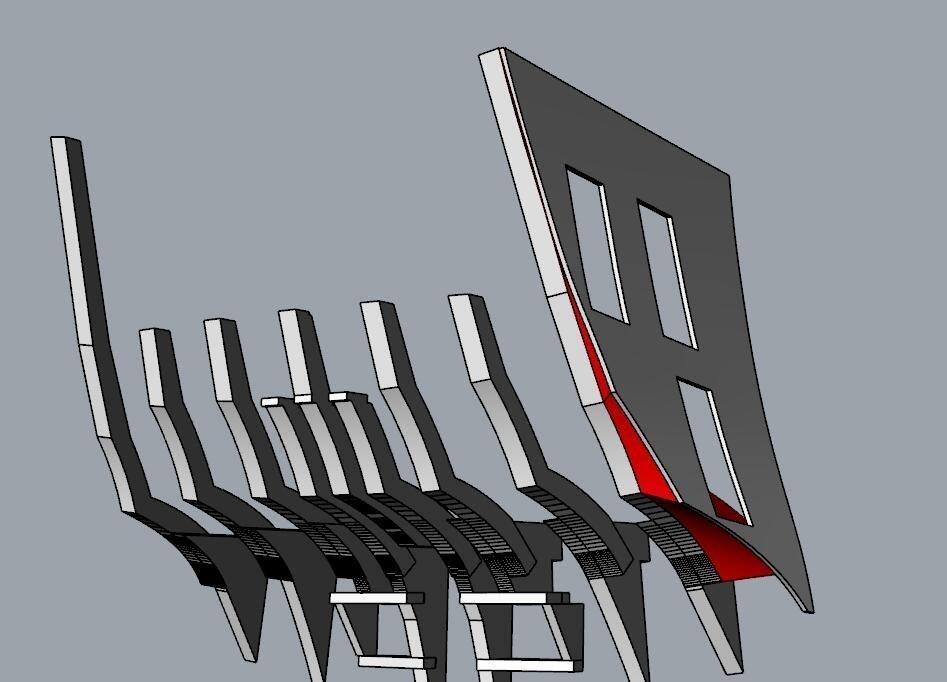
 SESSION #1 is OVER !!!!!!!! So, Session #1 is officially over and Session #2 has been started as indicated by the following excerpts of the IKEA style instructions: A few views to show you the overall beast! Impressive and massive: As a conclusion for Session #1, I would say the following: CAF should provide the parts that allow you to verify the correct spacing between the top of the futtocks. These parts are only available with Session 3 and 4 and this is way too late in the hull construction process. Other manufacturers like ZHL or Model Shipways provides bulkeads or futtocks with a removable middle sections. Once assembled and glued, you cut the top and voila.... On such a kit, this lack of help is not acceptable (even the spacing between futtocks is not indicated on the plan, in a clear way). When building a Framed model (POF), a full jig is provided allowing you to assemble the hull without major mistakes. Here, it feels at times like flying a plane in the dark without IFR instrumentation. The Stern should not be assembled until you have Session #2 in your possession. I suppose this is a trick to force you into purchasing the additional sessions. Wood is of very good quality and a pleasure to work with. The cuts are very precise, well done and parts are very easy to detach from the sheets. I wish the stand (to hold the hull) would be offered in Session #1 and not in Session #4..... Instructions need a lot of improvements...... a lot!!!! Overall I am very pleased with this kit and would recommend it even to beginners (like me). It does not require any special tools besides sandpaper, files and X-Acto tools. So, let's move on with Session #2..... the planking and the Gun deck !!! Yves
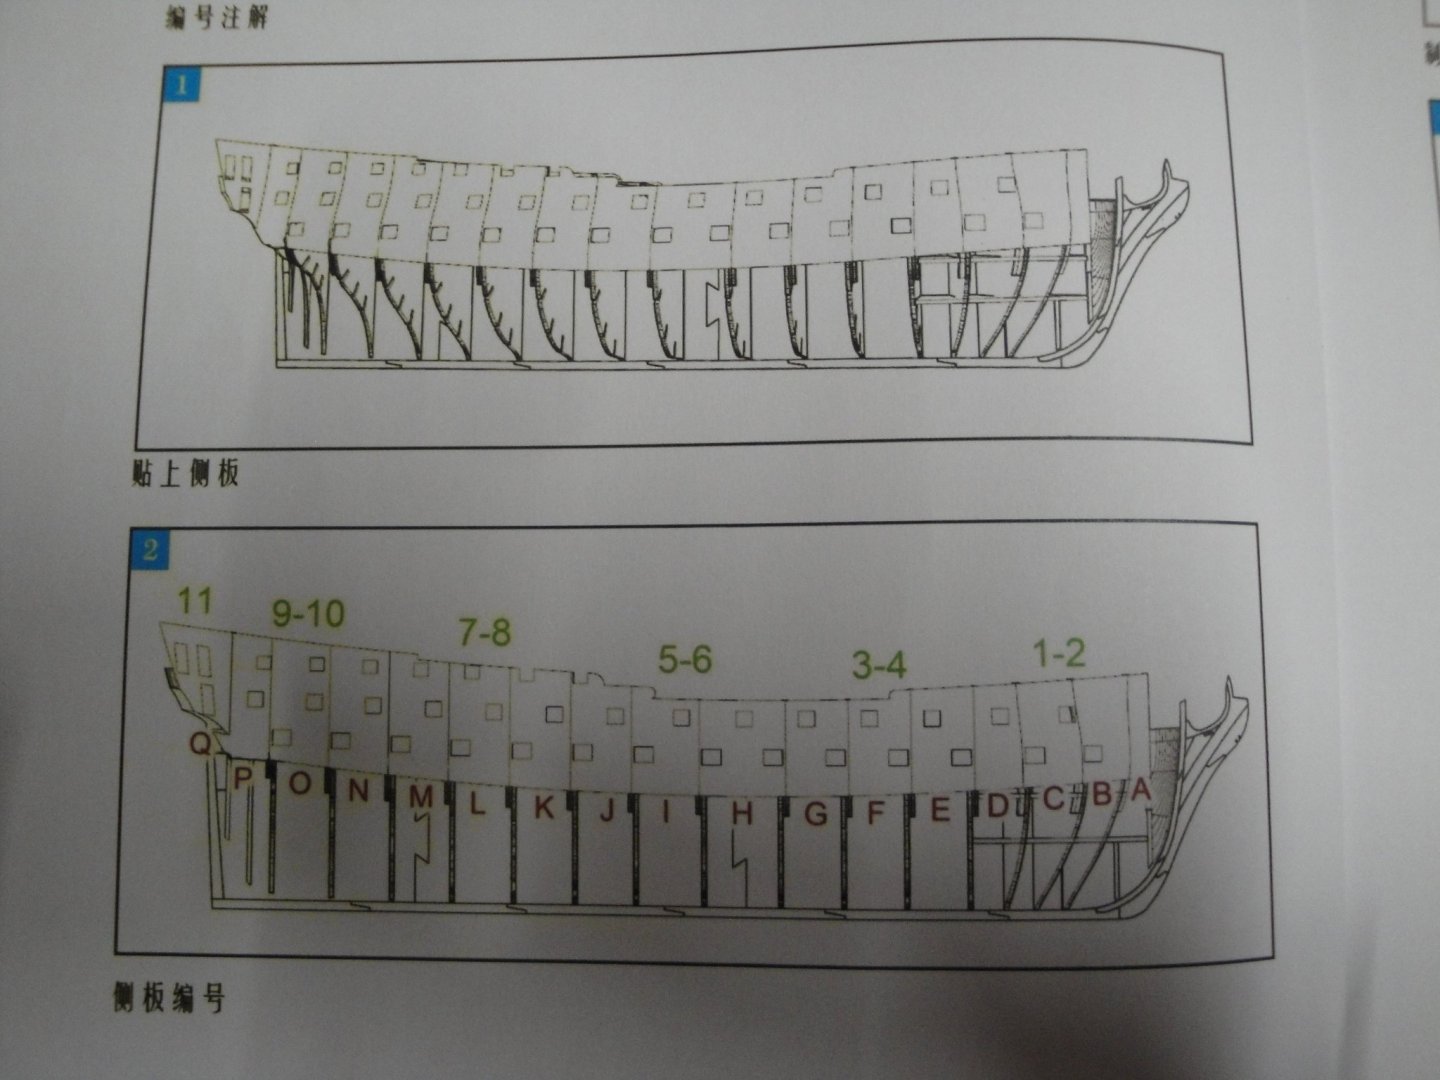
- 507 replies
-
- 14
-

-
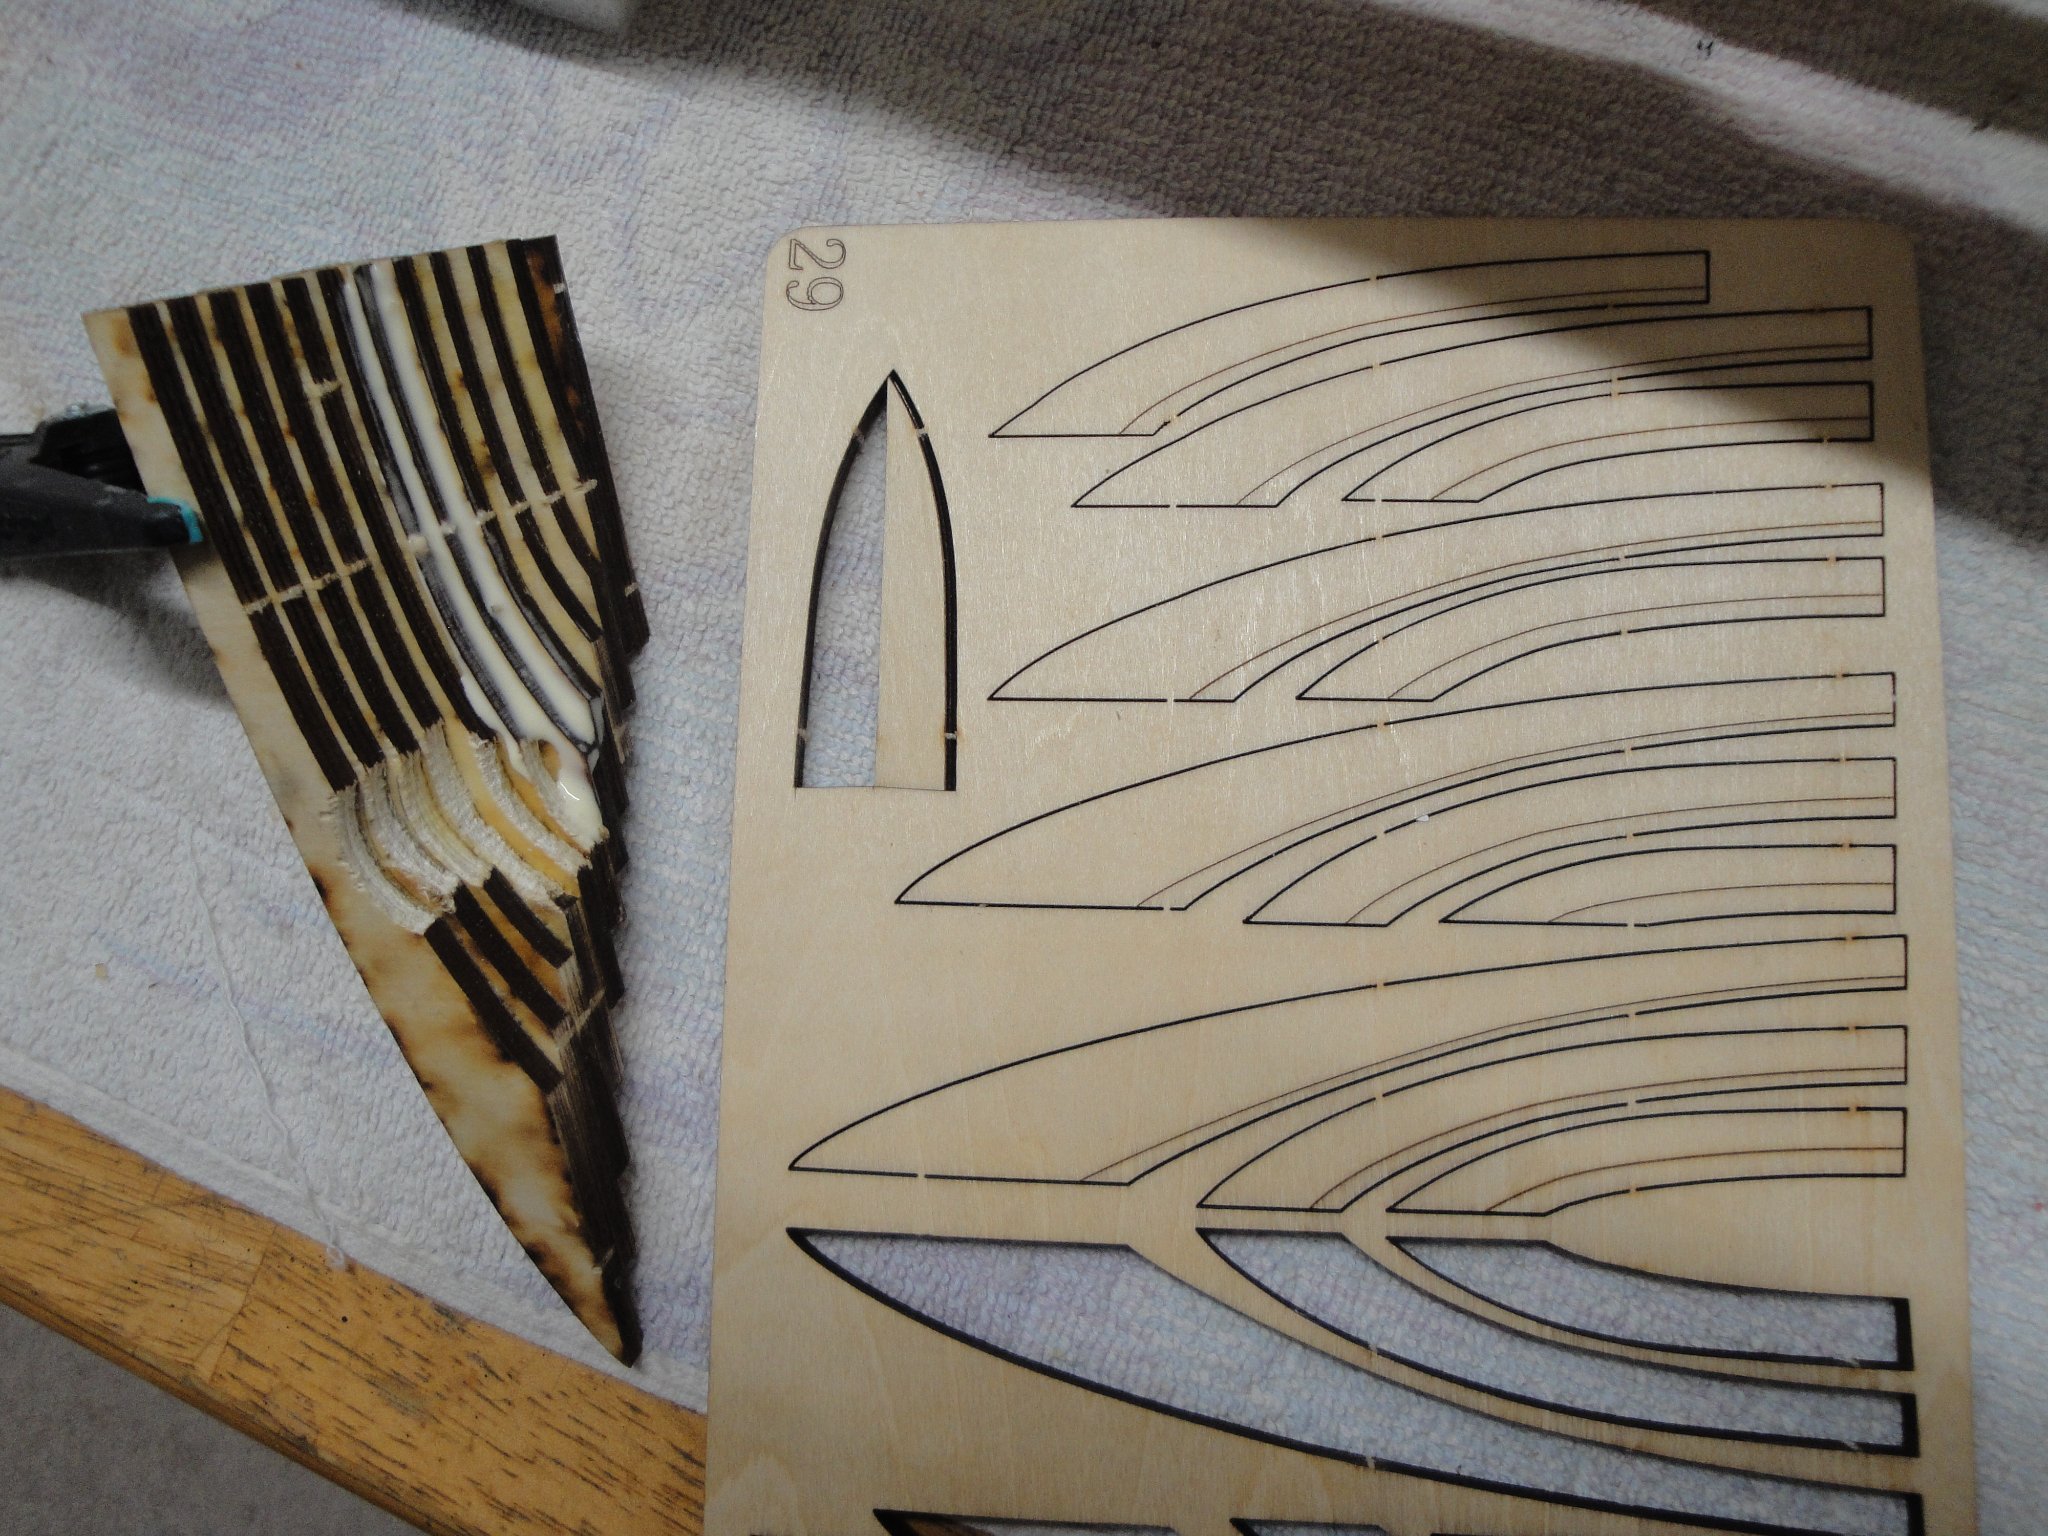
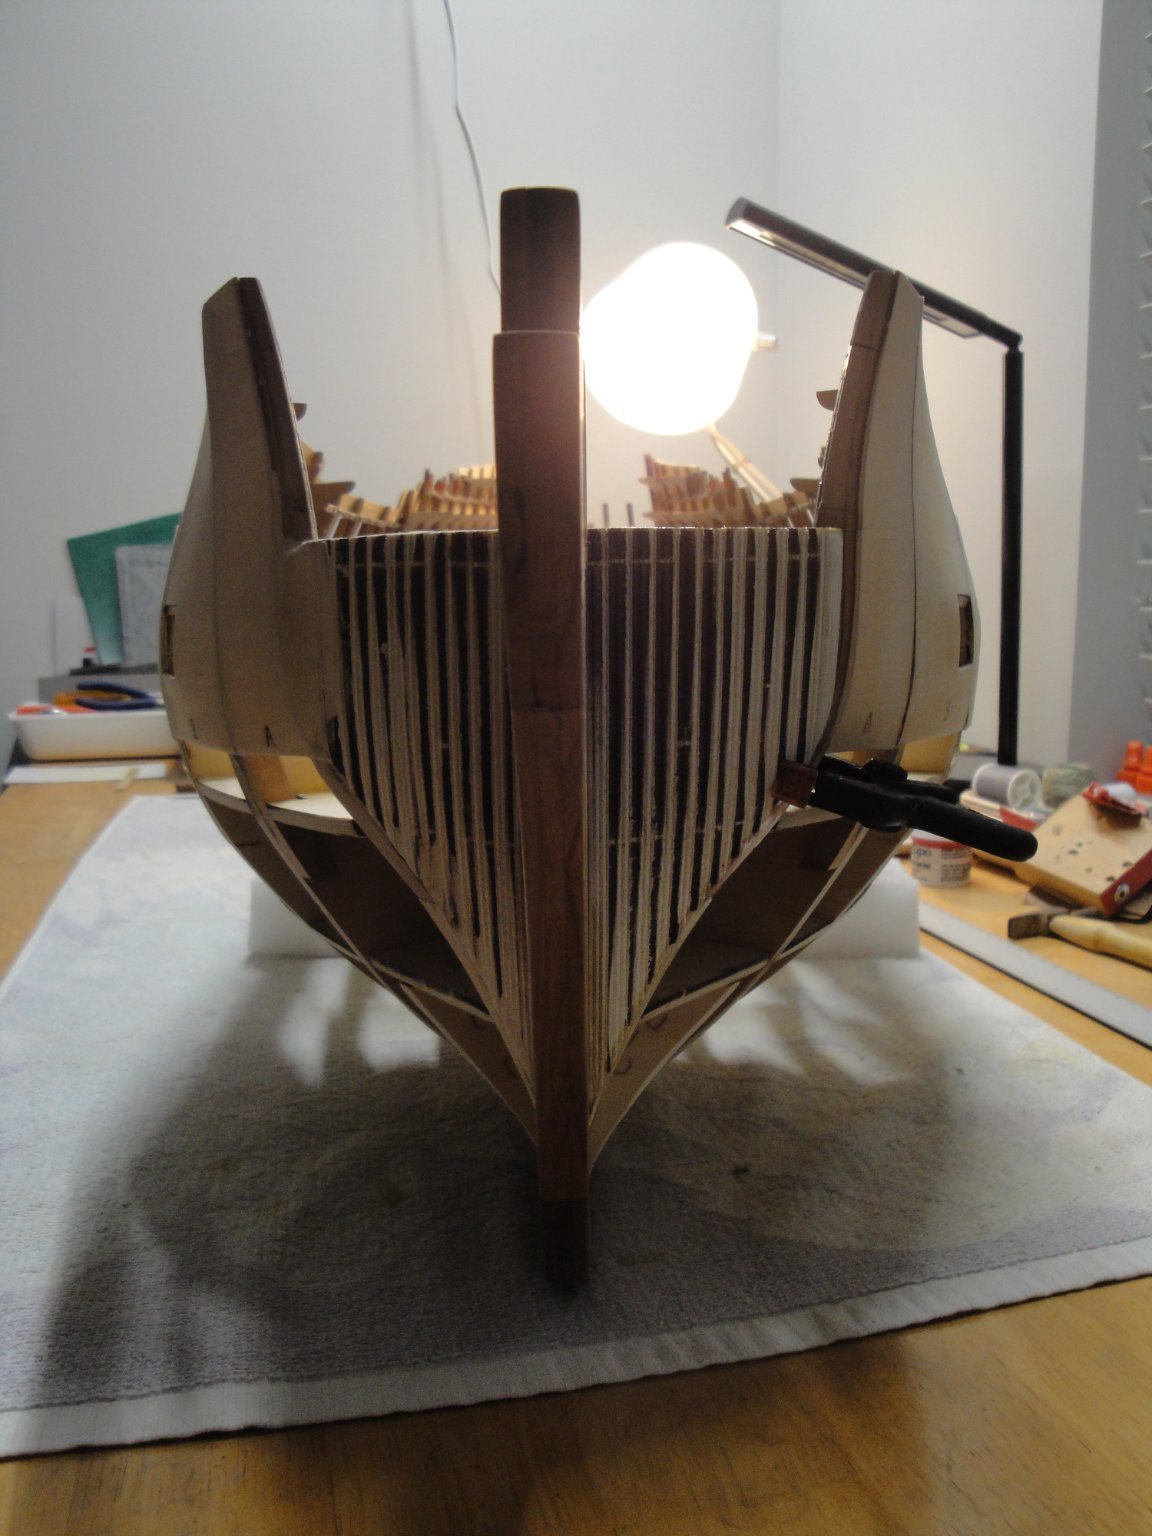
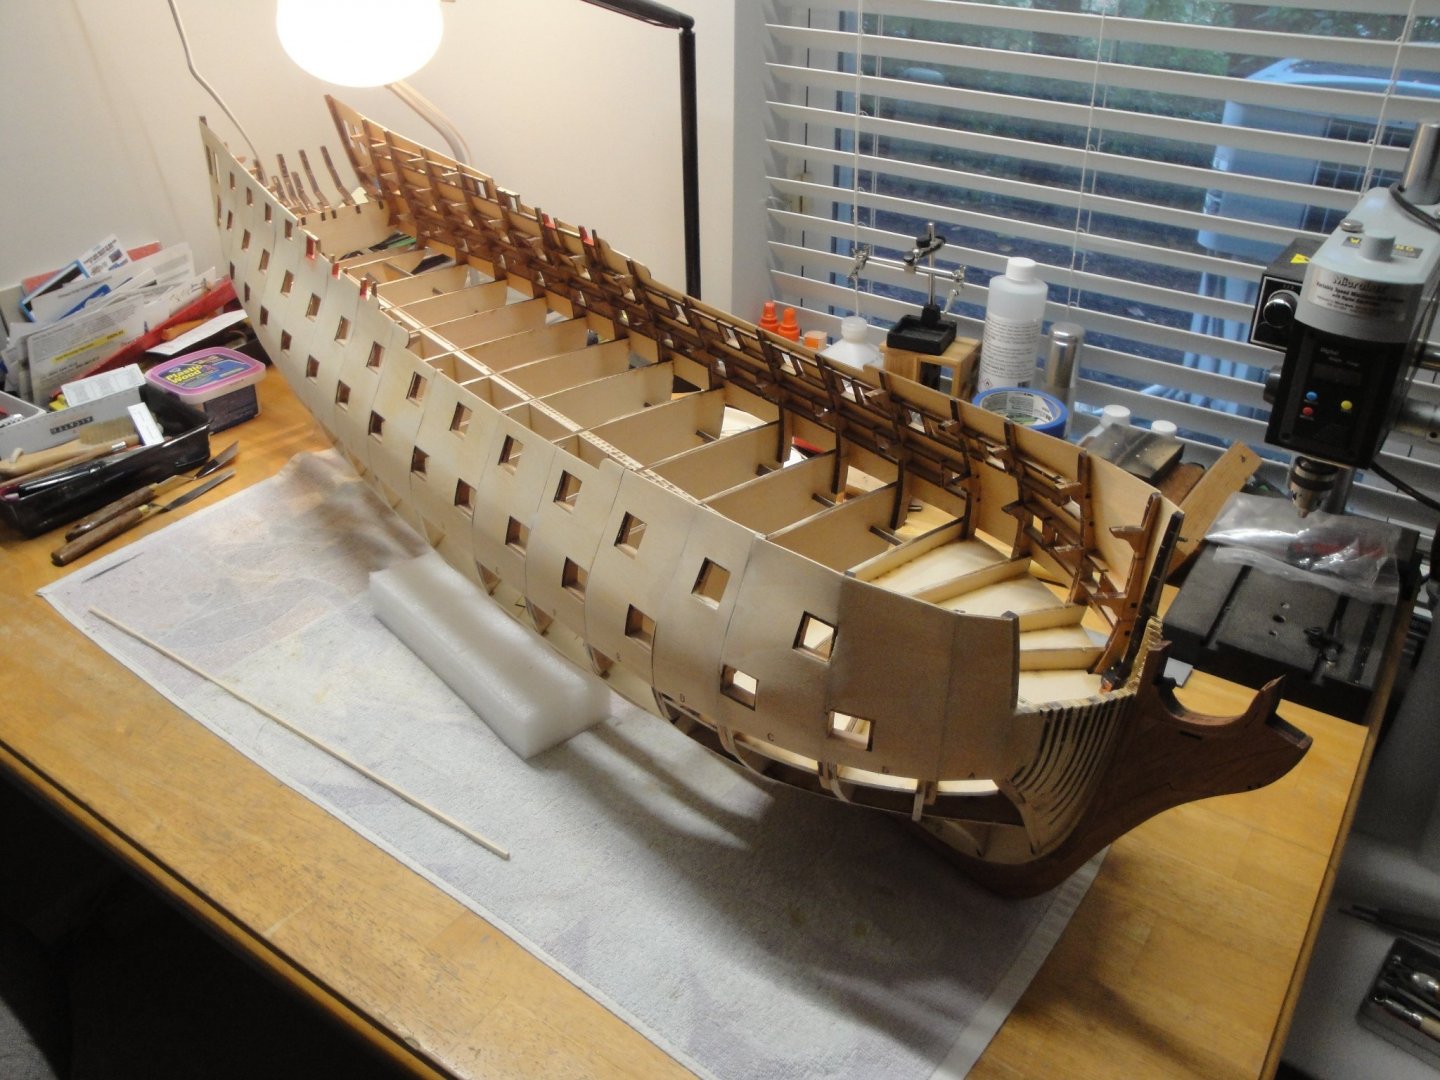
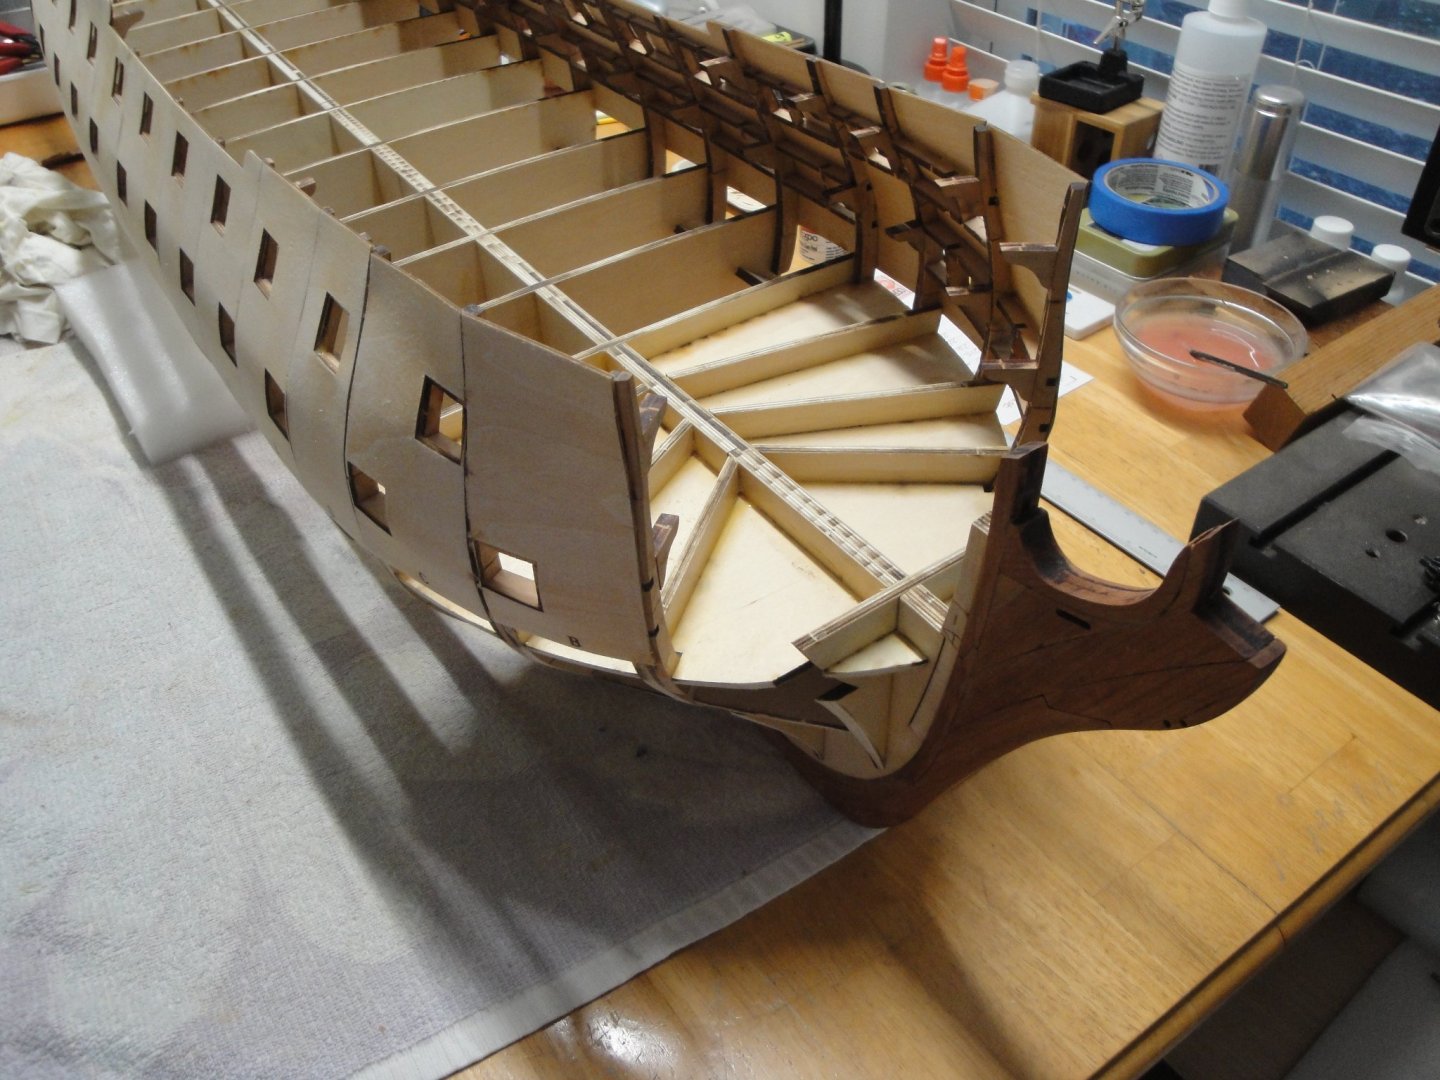
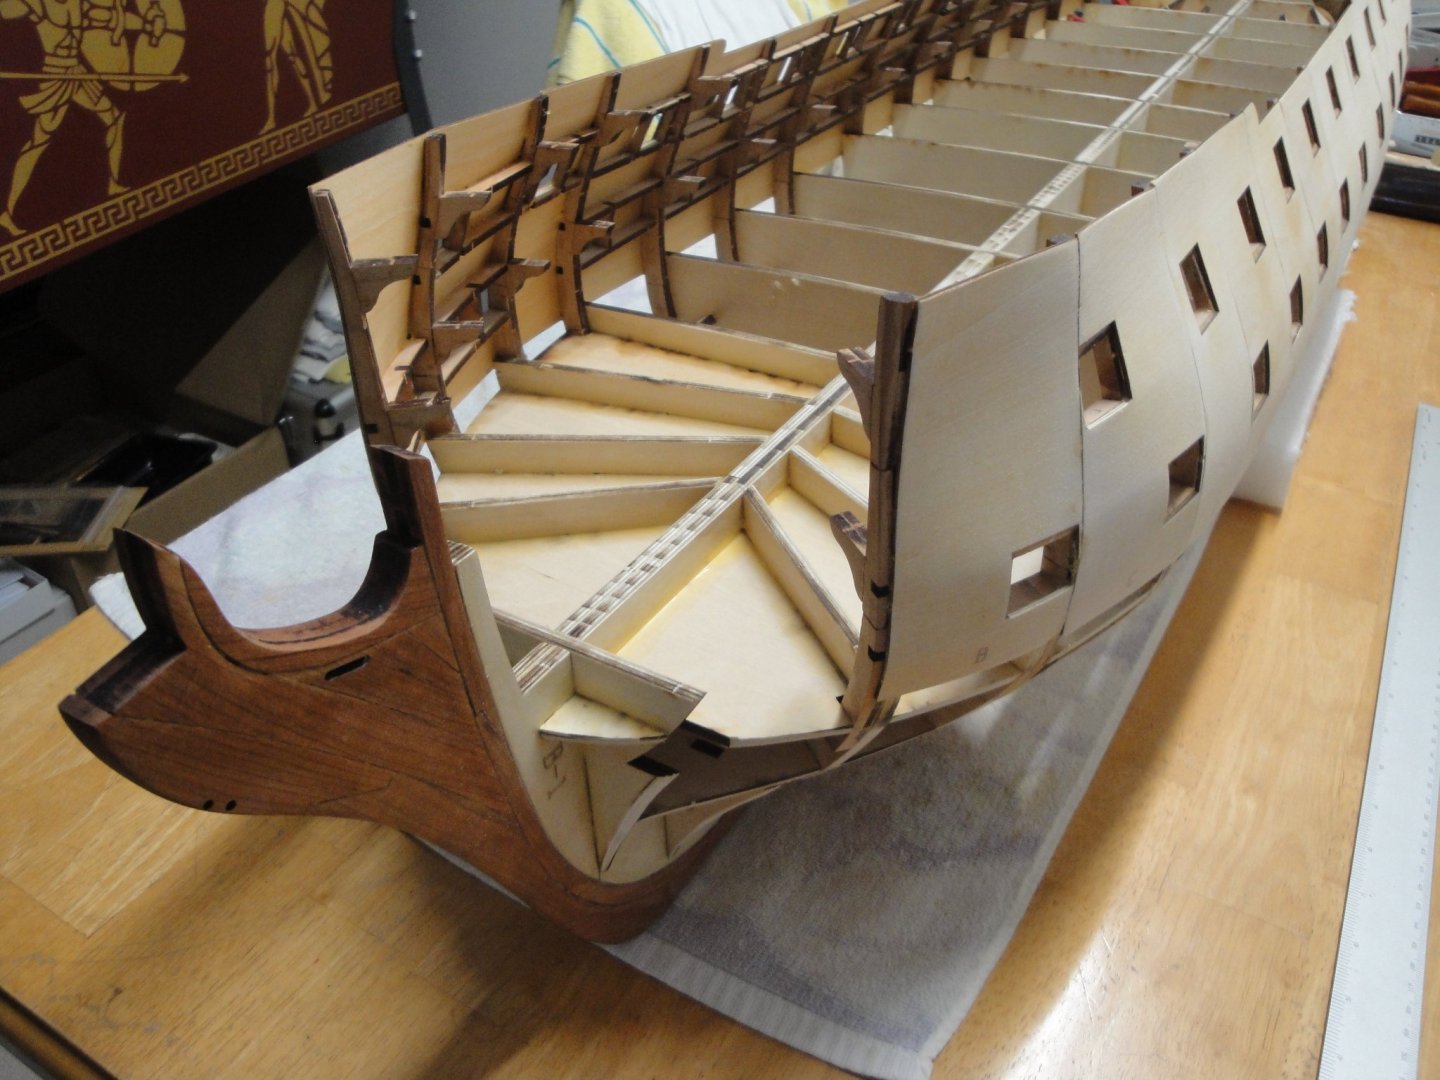
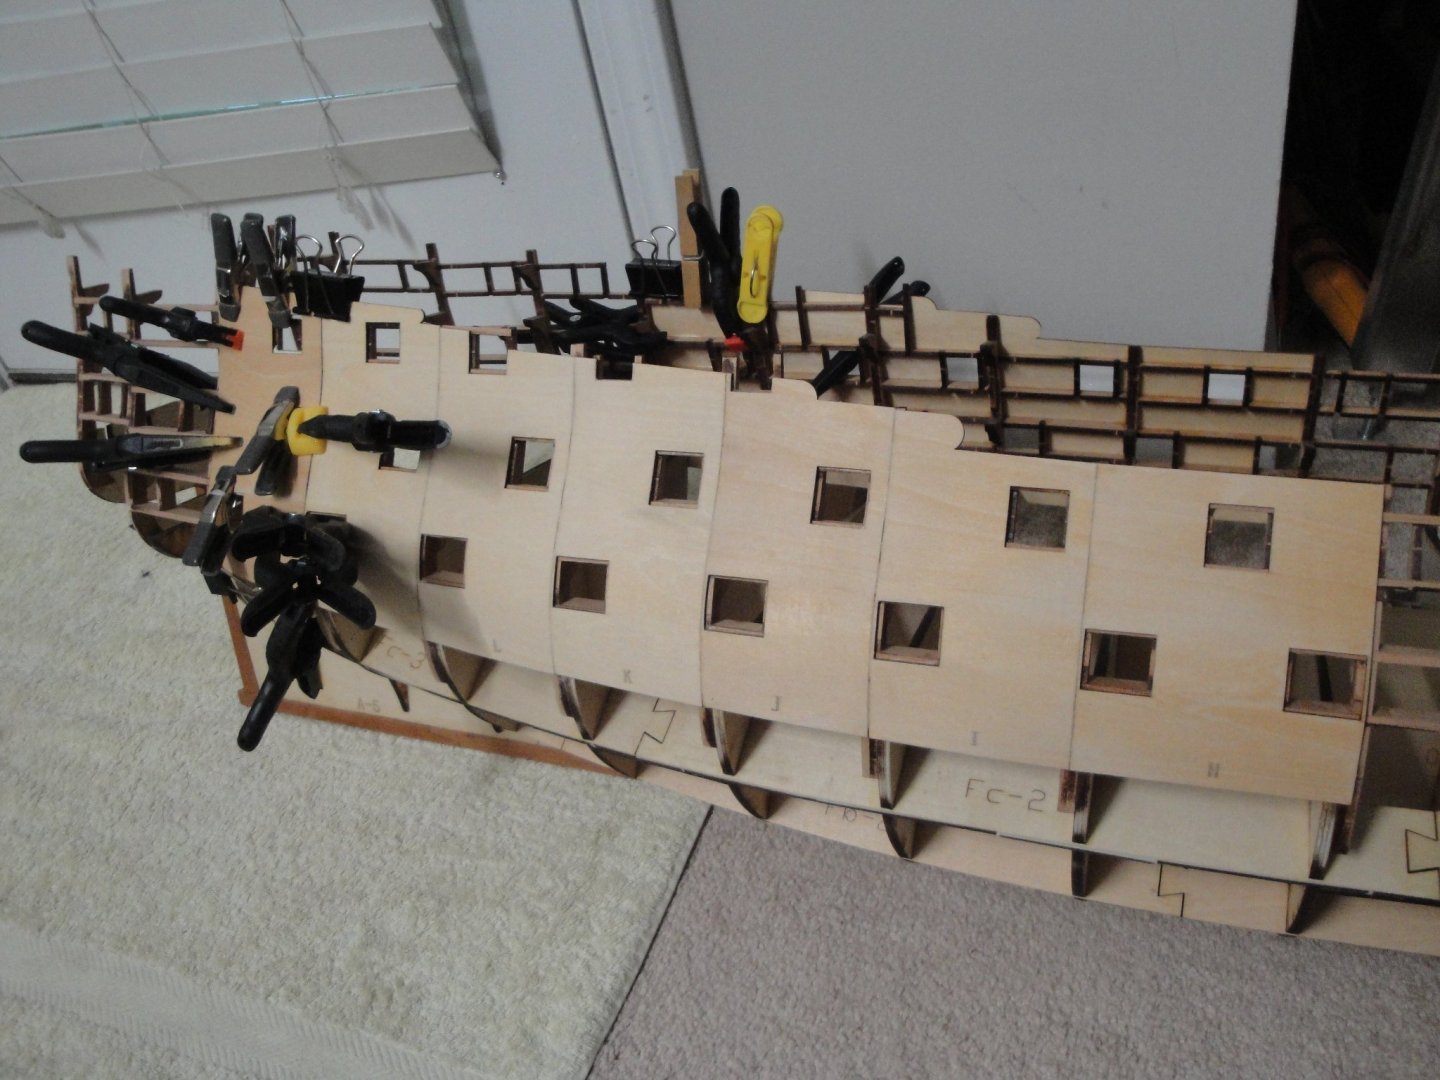
I finished the installation of the shell panels at the bow. This was done after re-positioning the futtocks for bulkheads 4 and 3. Dimensions (spacing between the top of the futtocks) are now as indicated on the 3D drawings provided by Tom (see previous posts). I still have to glue the futtocks related to the first Bulkhead and place the last panels (A): Above, just remove the two small triangular shaped parts at the very front of the bow. They serve no purpose and are a hindrance when shaping the front bow shells. Gluing Panels A, B and C required soaking the wood in warm water, to make it more compliant. The curves are intense and creating them with flat two-dimensional pieces is not exactly ideal. I probably will have to use some wood putty to "fair" the angles. The front parts still have to be built: a sandwich of 12 layers of 5 mm plywood, glued and filed to shape: For the starboard side, I tried to follow the instructions and grind the inside, which is a waste of time and energy. On top of that, it make the parts more fragile. Instead, I removed the tiny triangular pieces at the very front of the bow, and installed directly the assembly. Much easier and more solid. Each round shape for the bow, is glued with Epoxy two components glue. Yves


- 507 replies
-
- 12
-
-
John, you are a sail master. What a beautiful work. Yves
- 127 replies
-
- 1
-

-
- Bowdoin
- Arctic Exploration
- (and 3 more)
-
Looking really good Herb. I see that you got the end bulkheads from Otto. Great stuff that adds a lot of realism (and logic) to the kit. Yves
-
That is a very good ratio. You are definitely an expert, with those microscopic bits. Yves
-
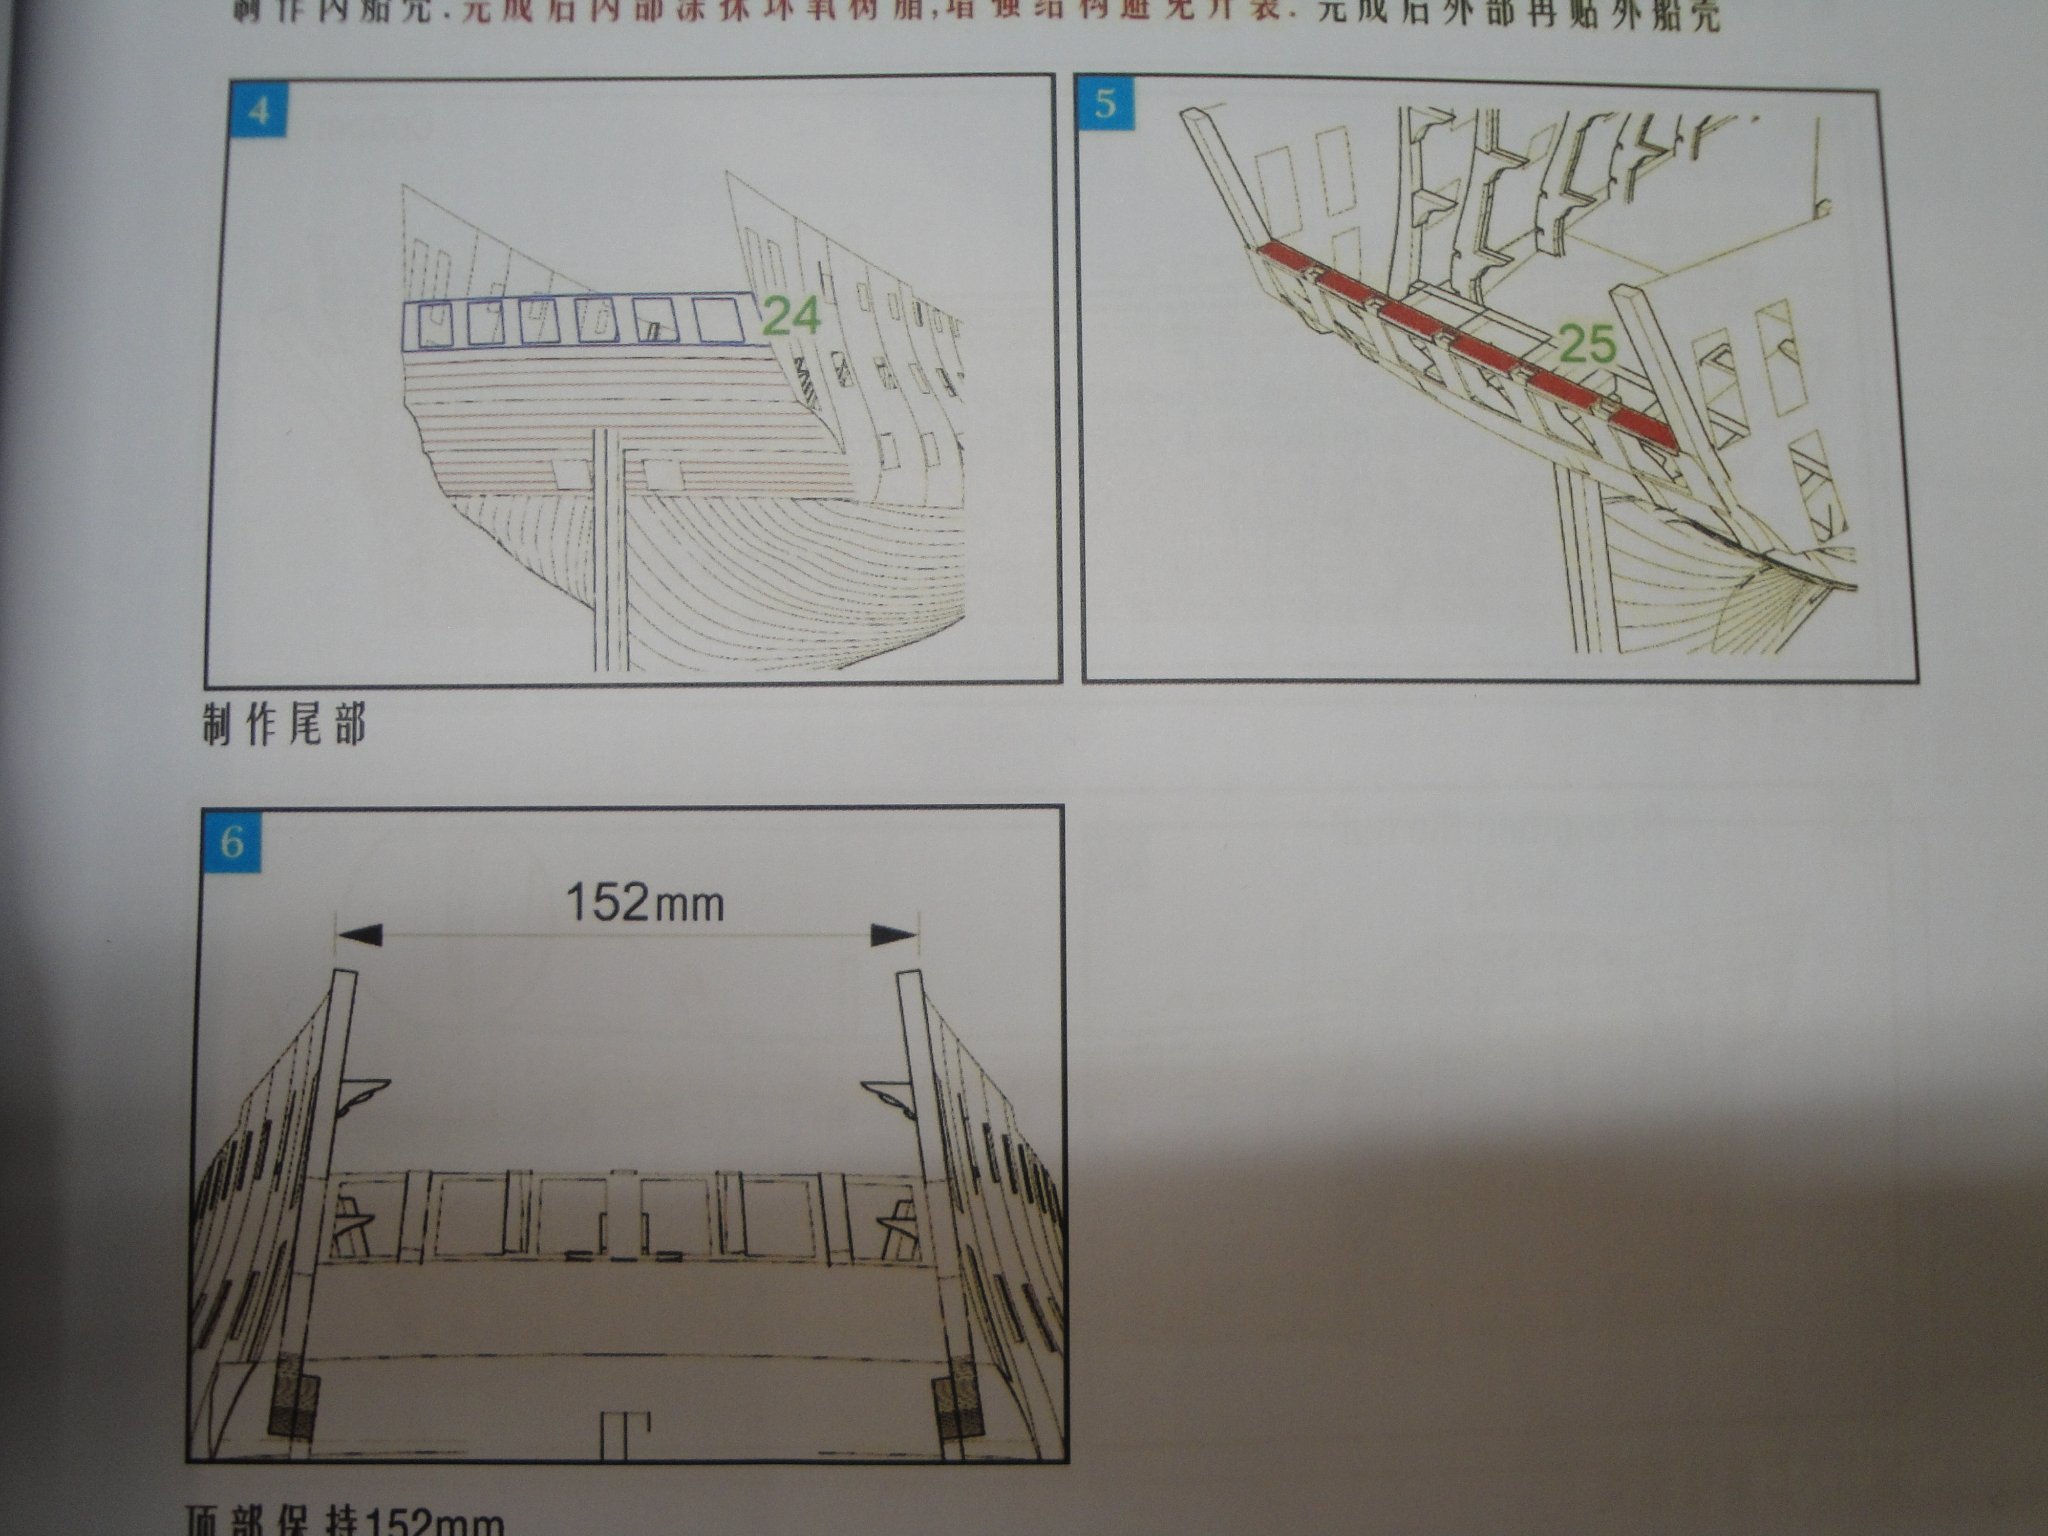
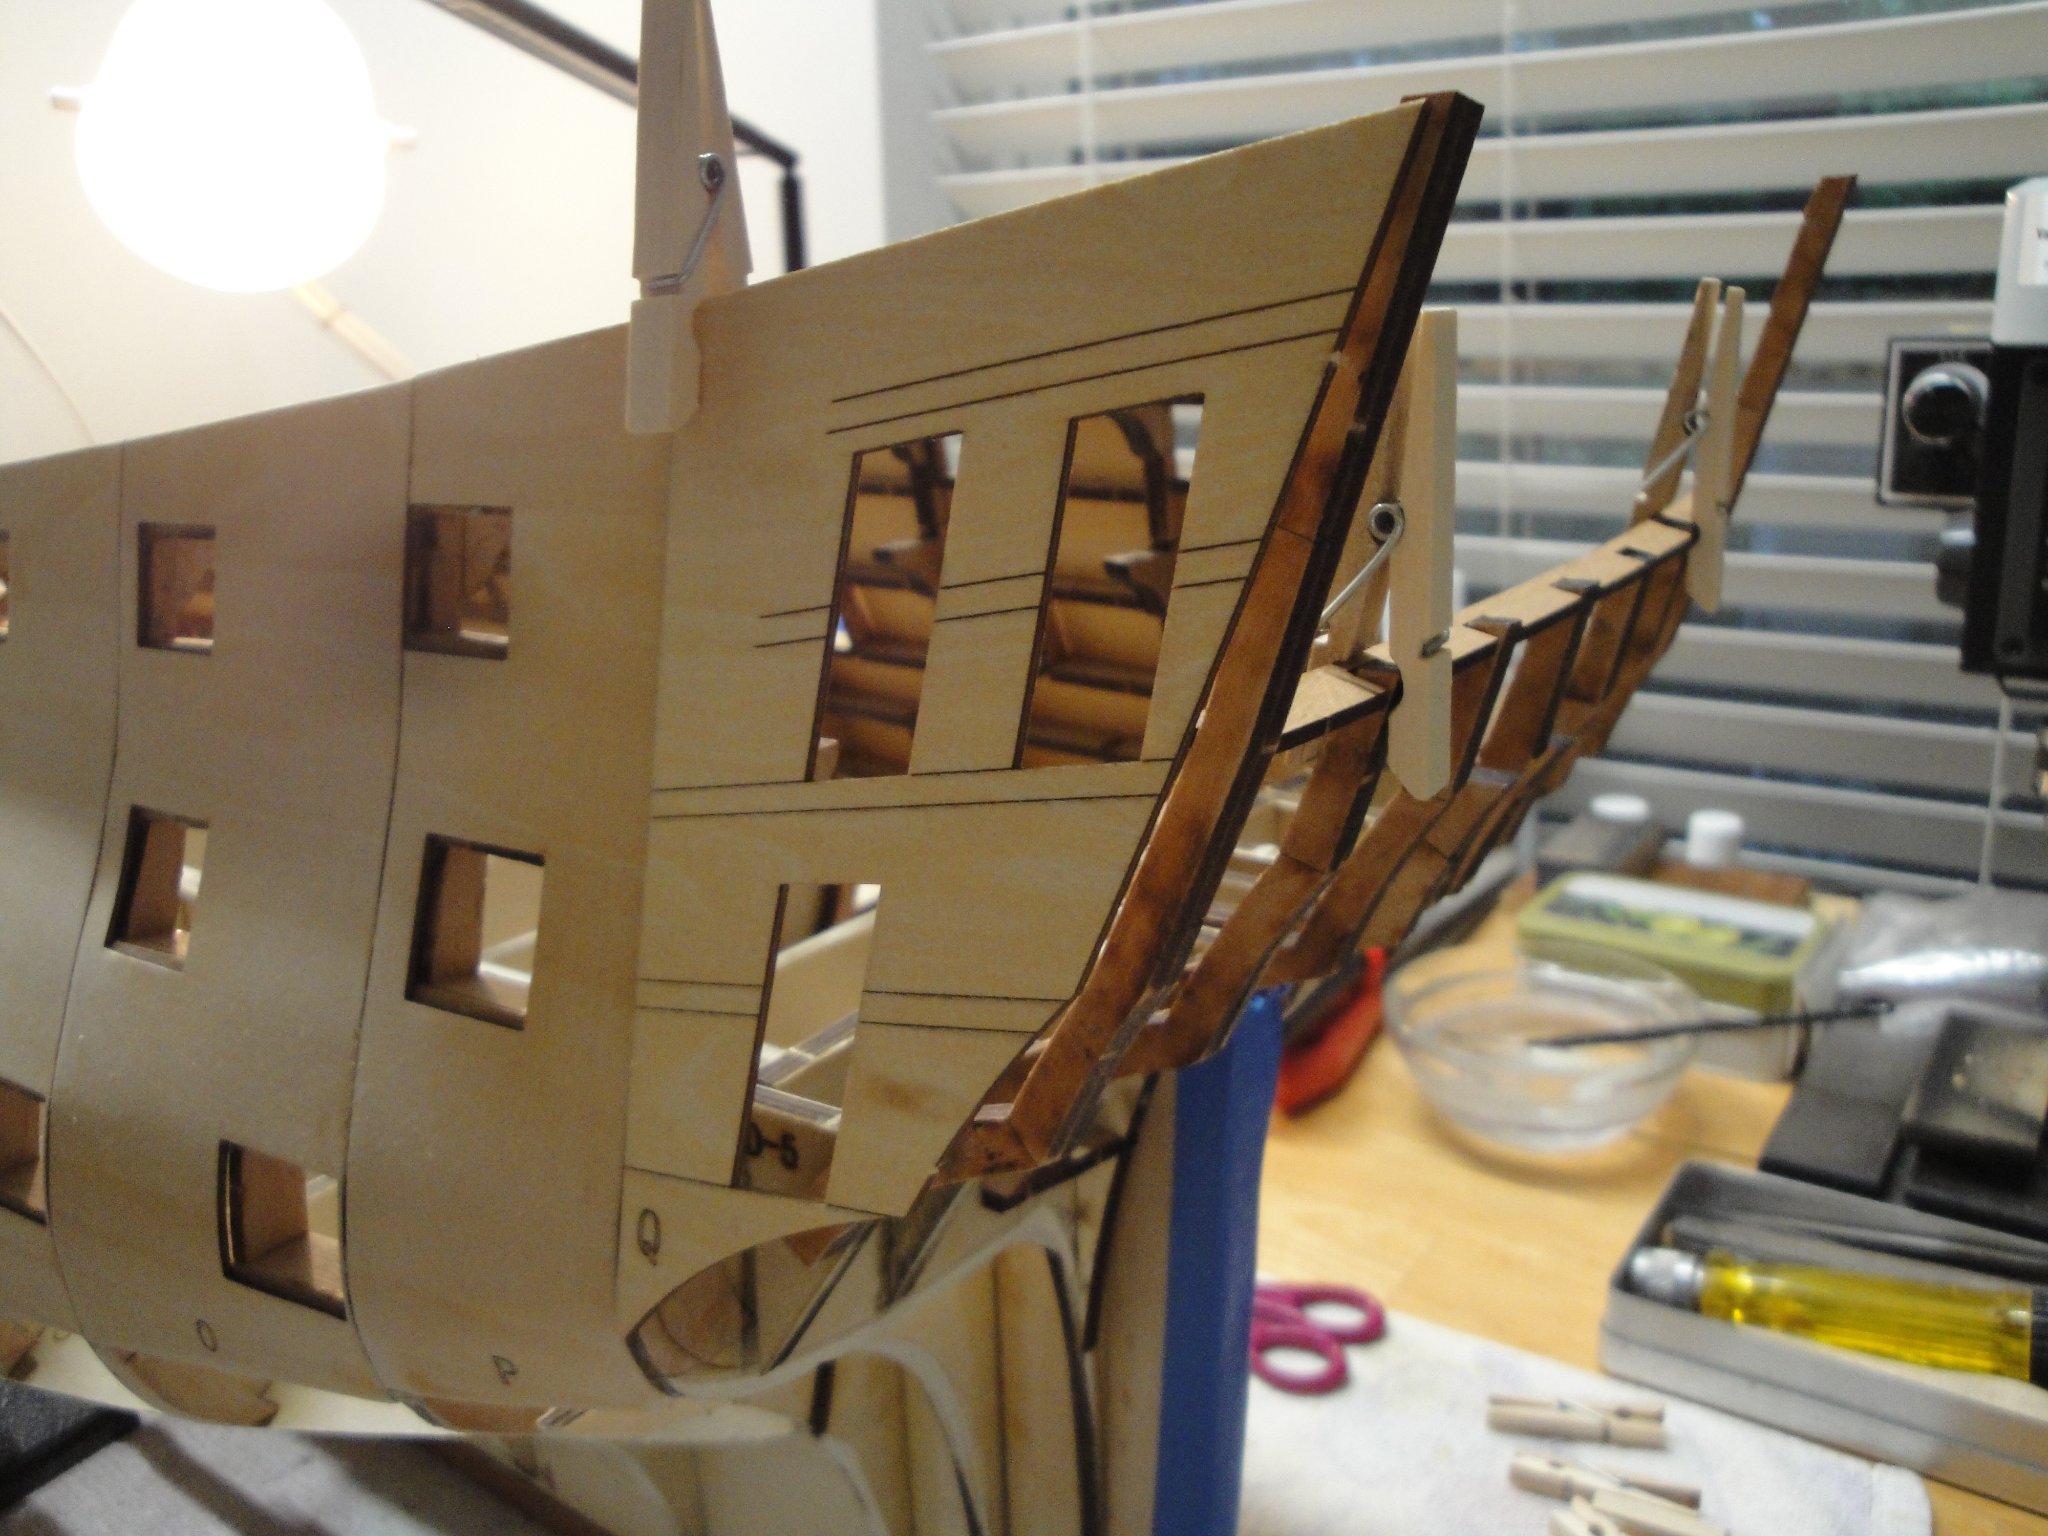
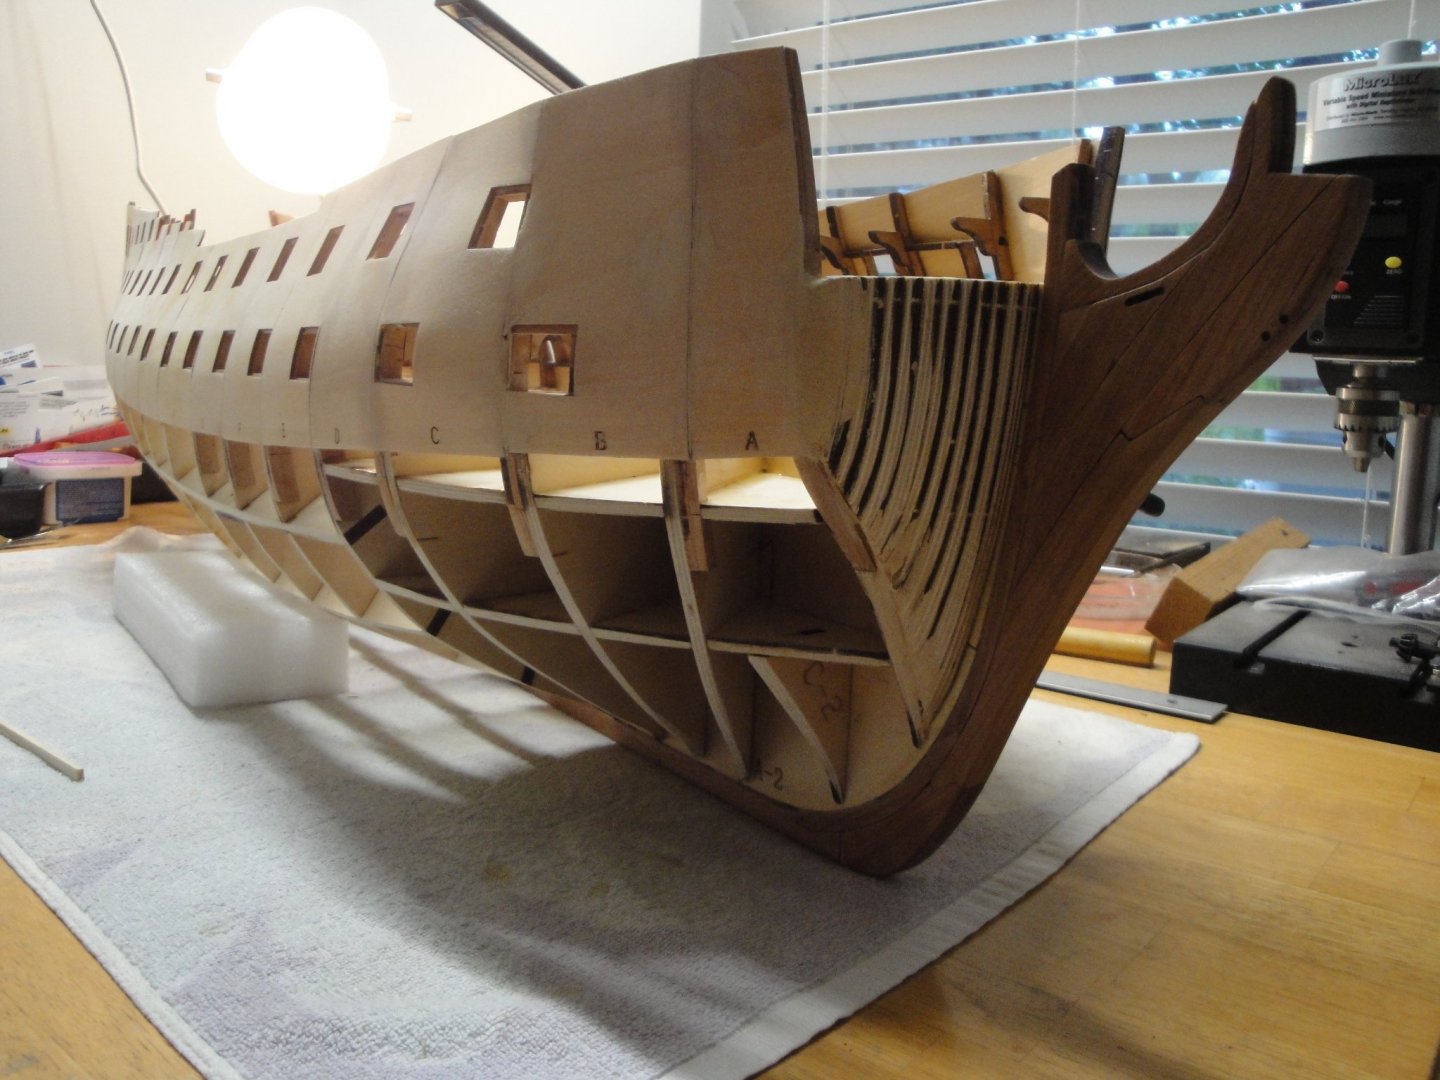
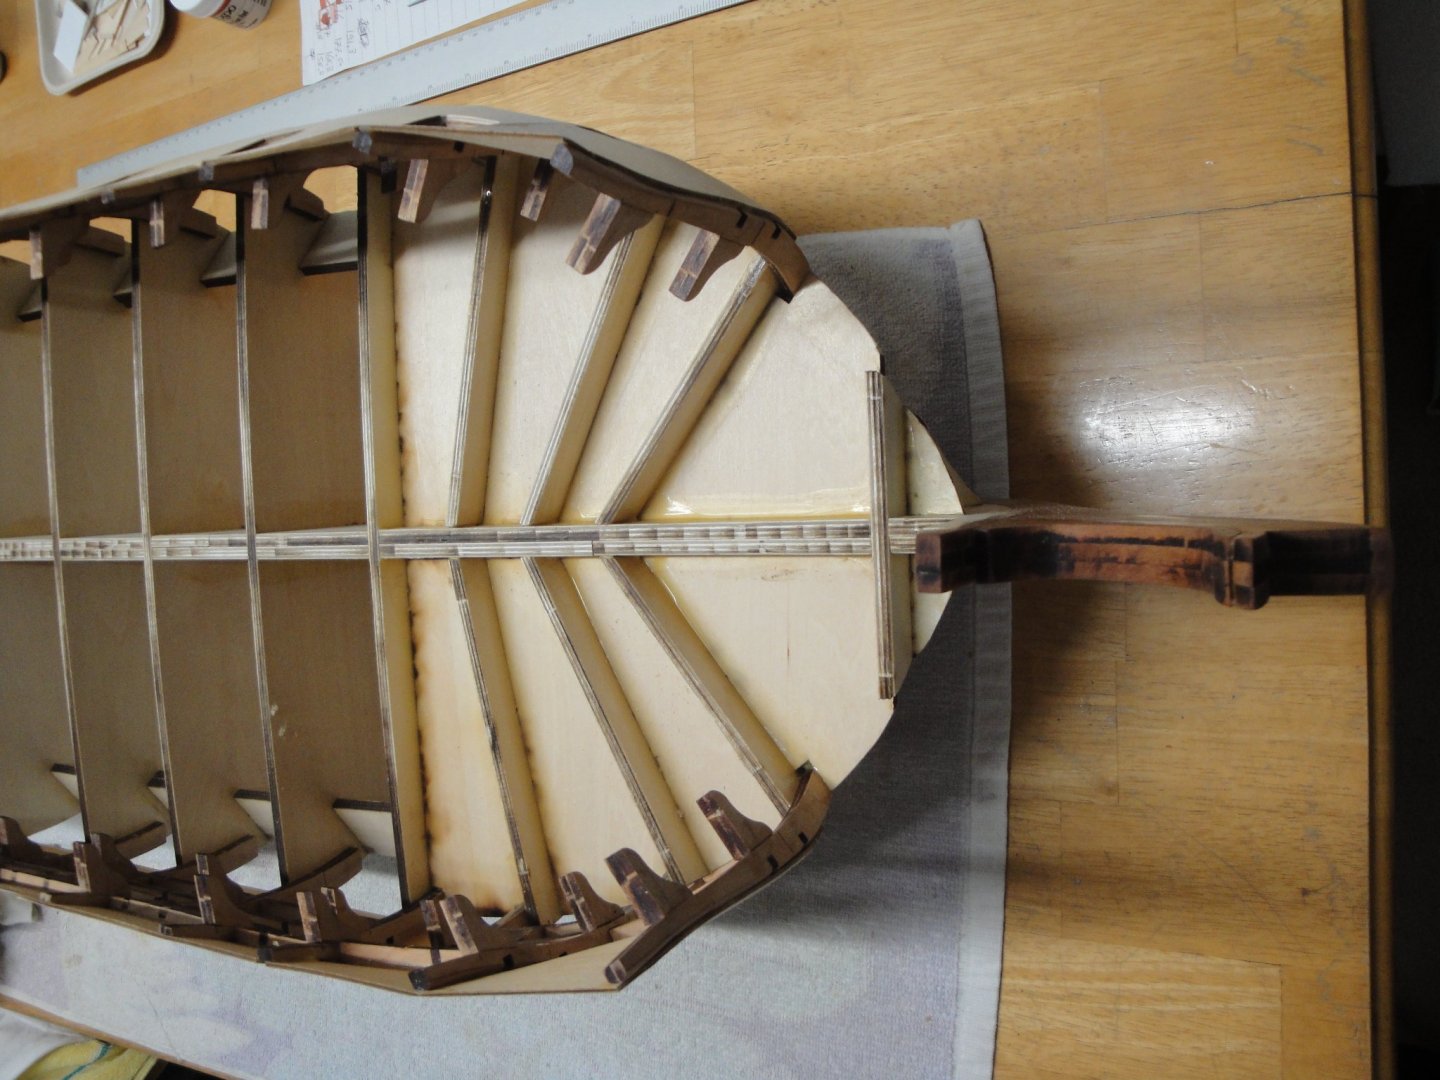
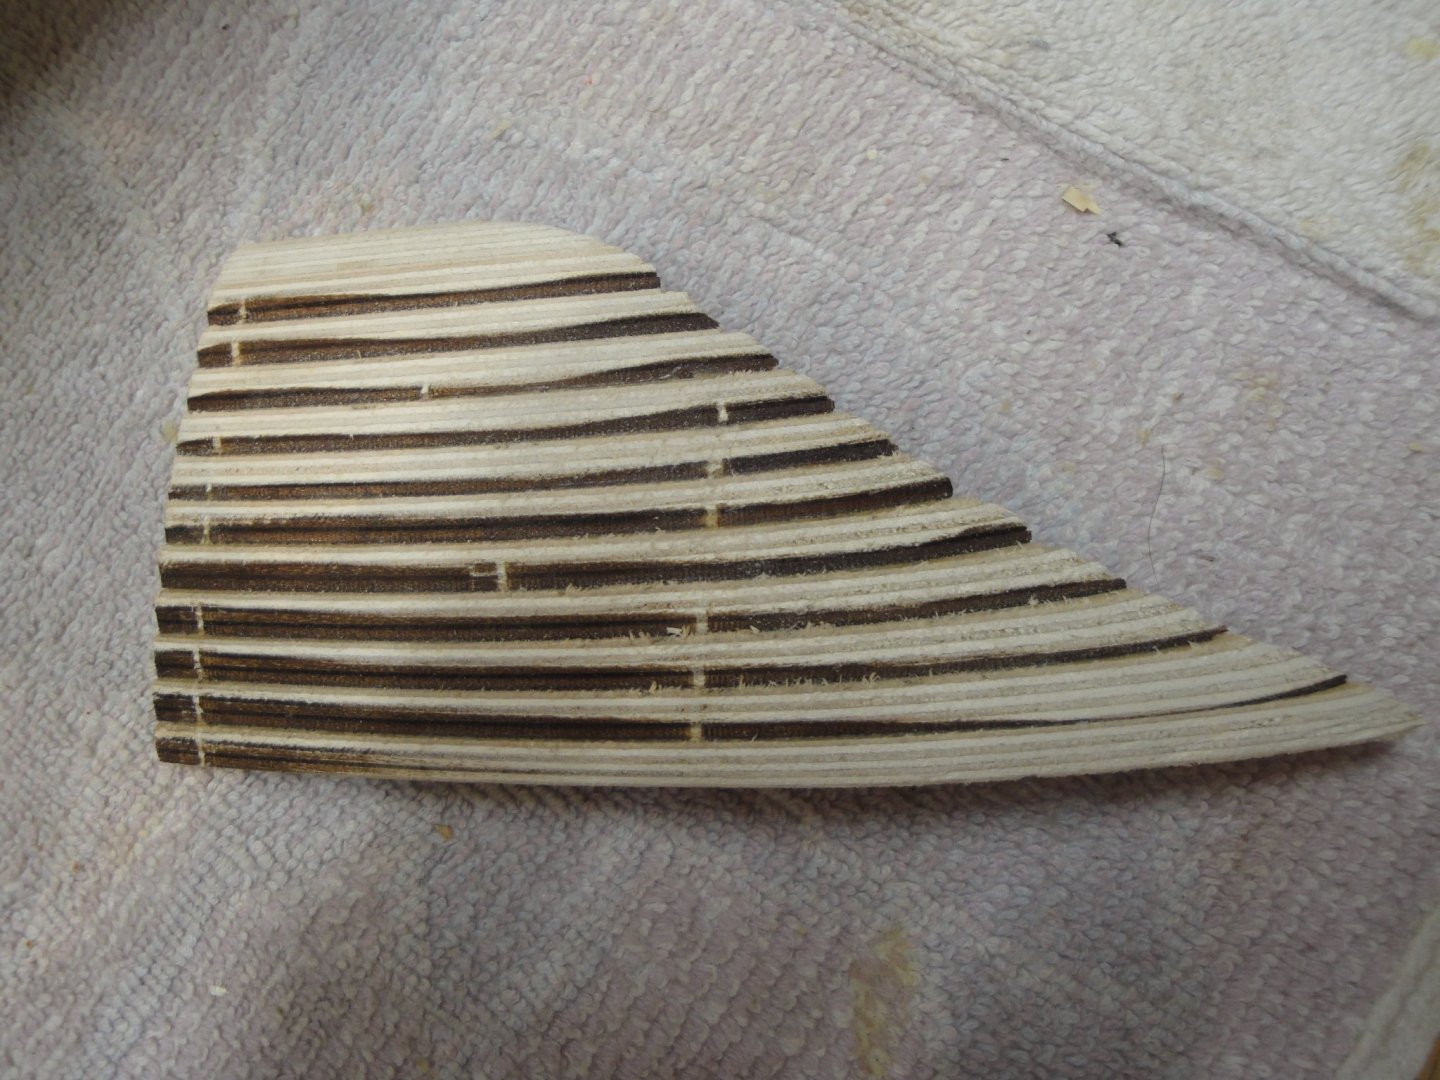
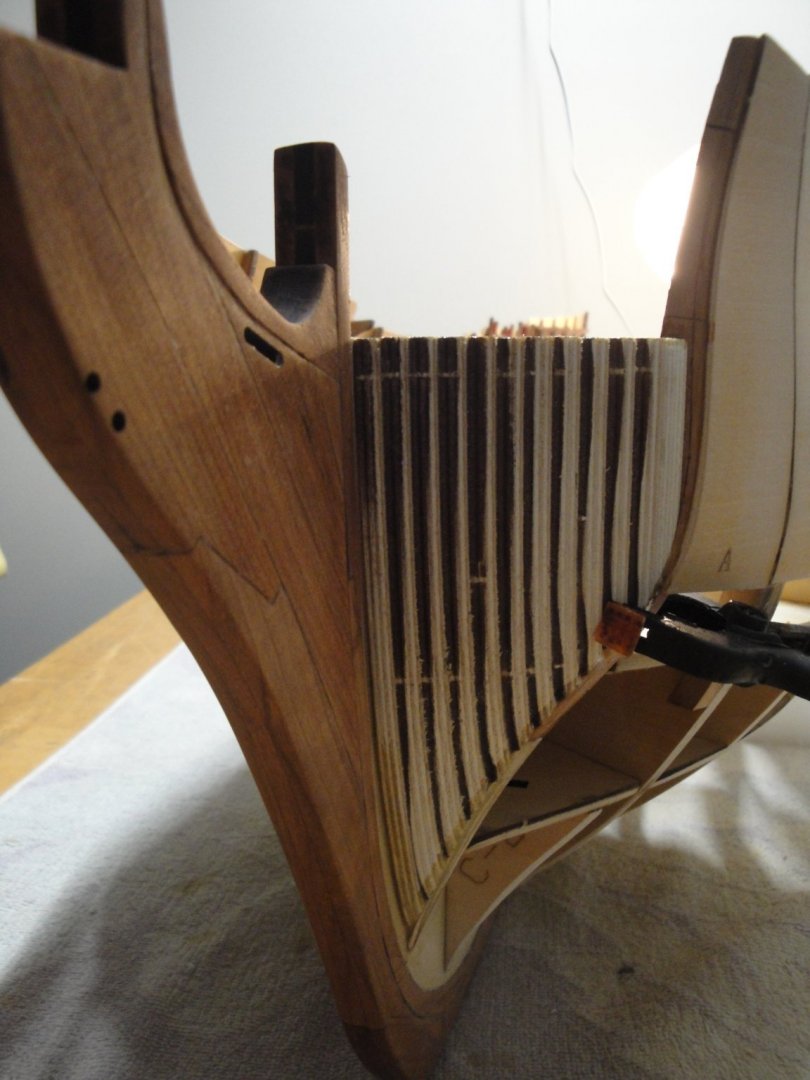
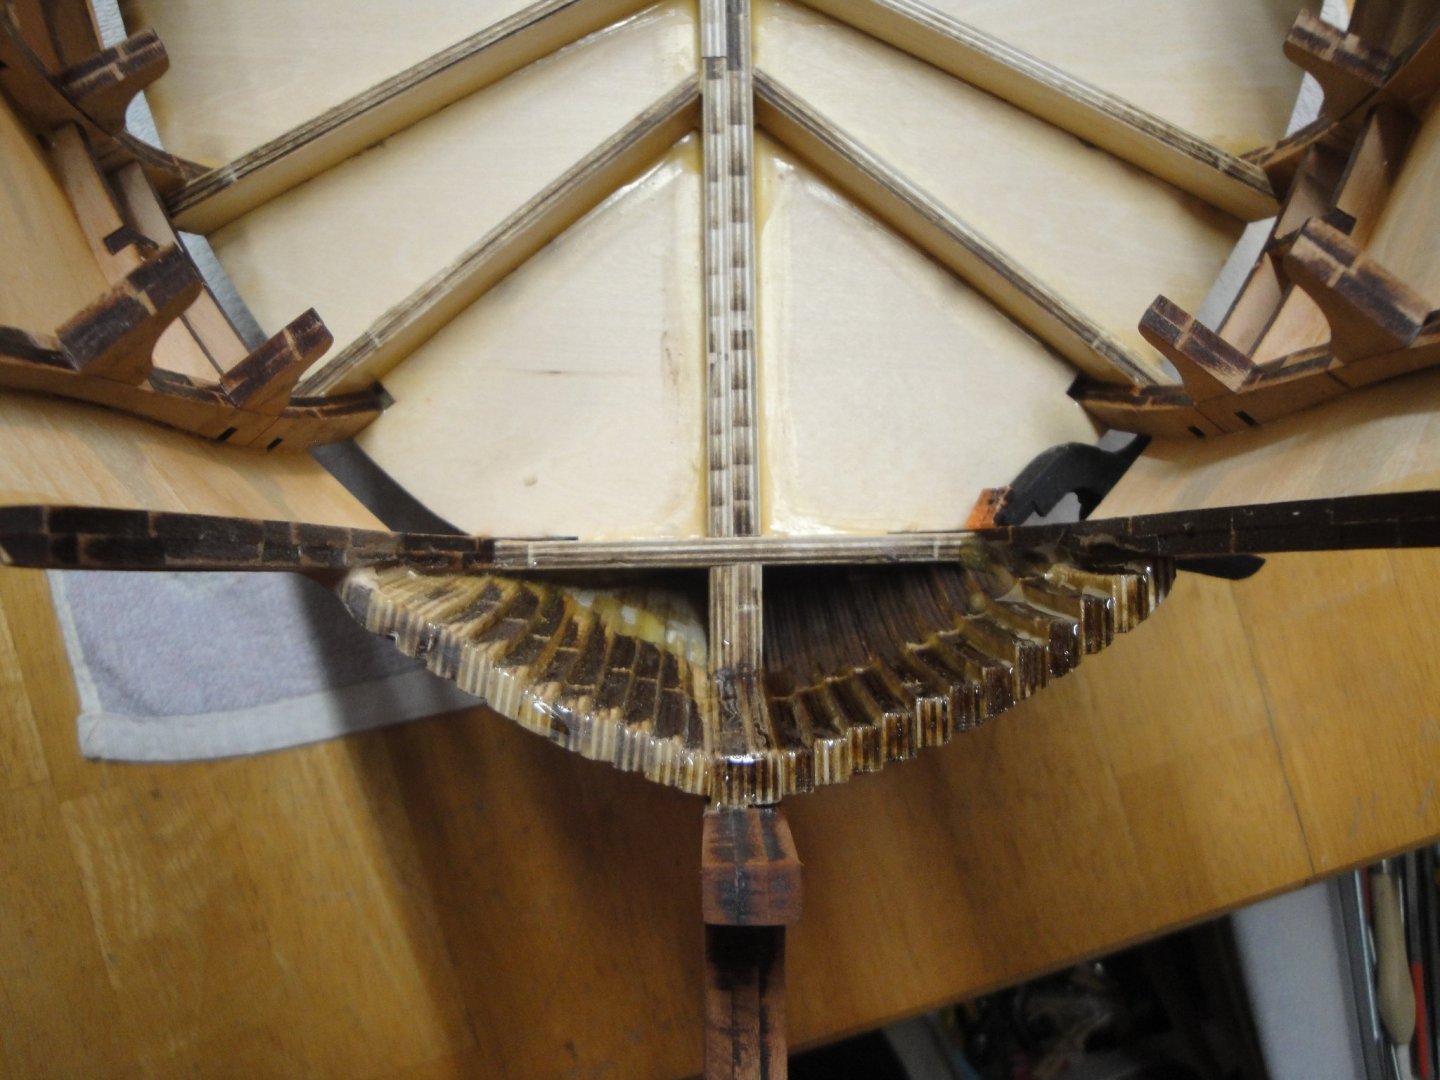
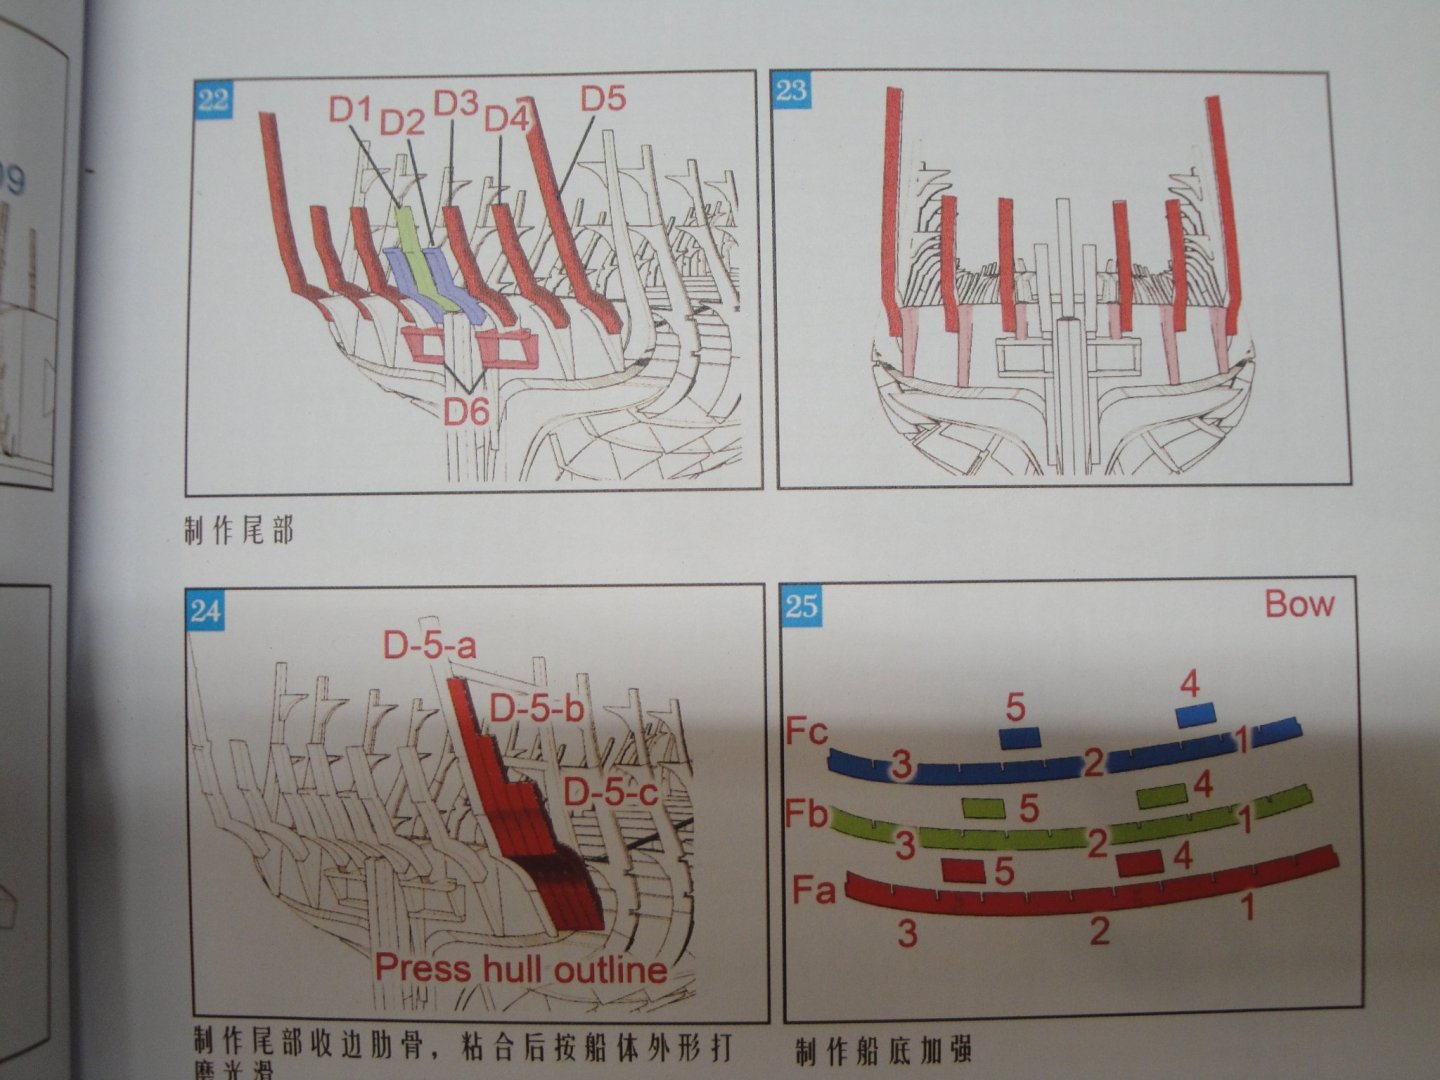
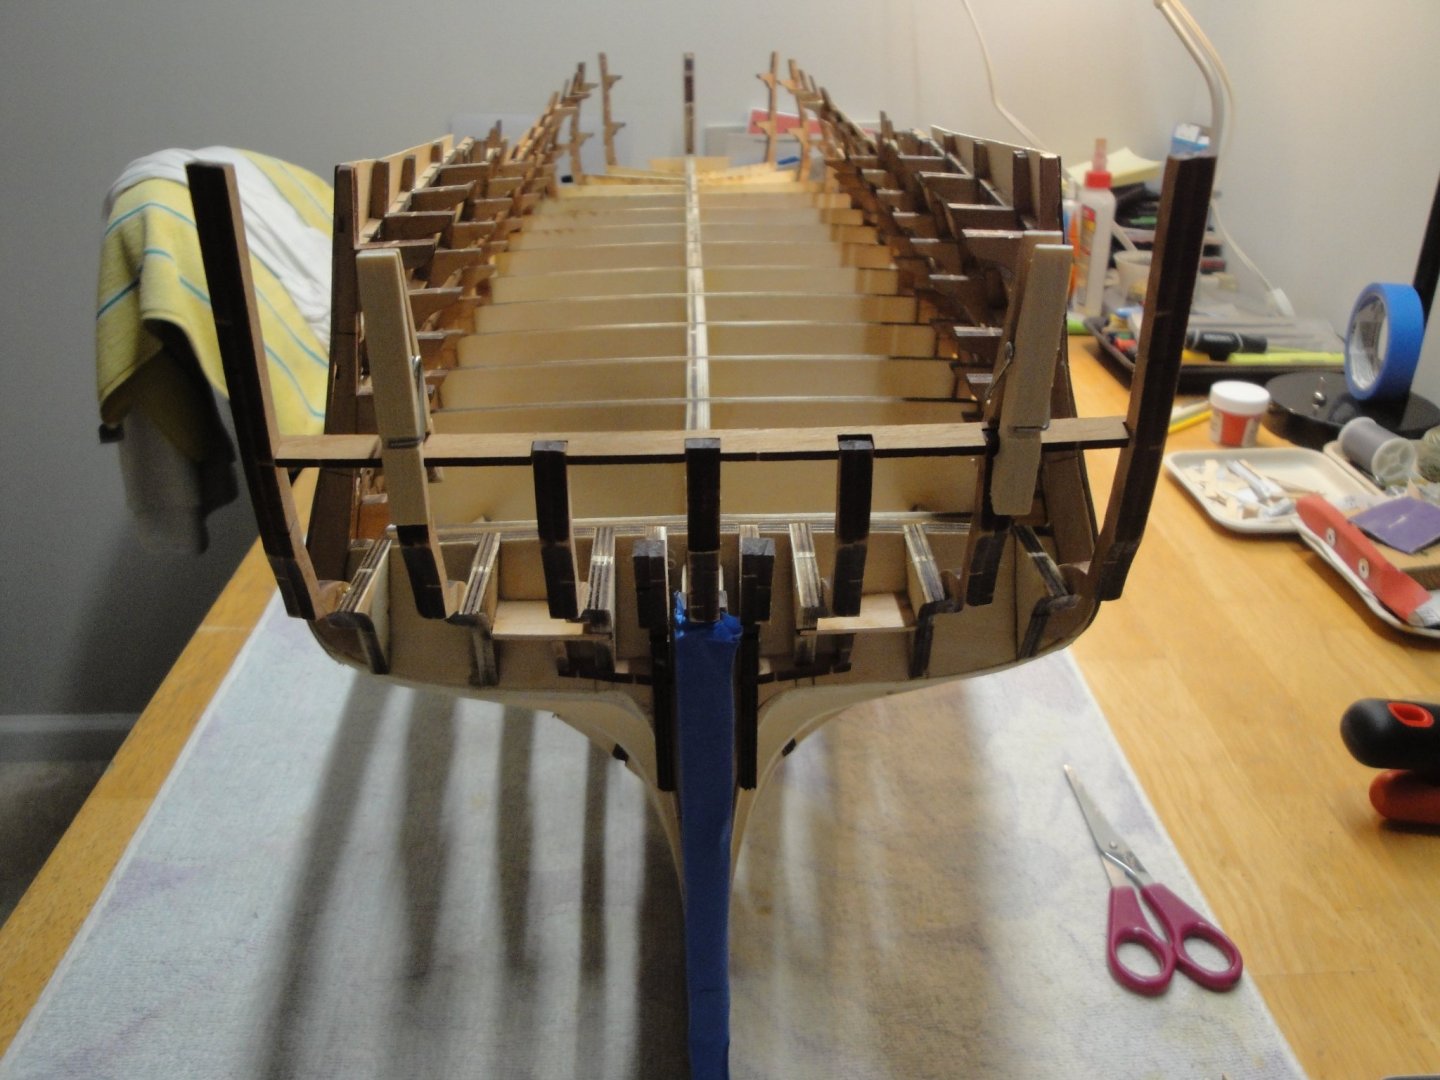
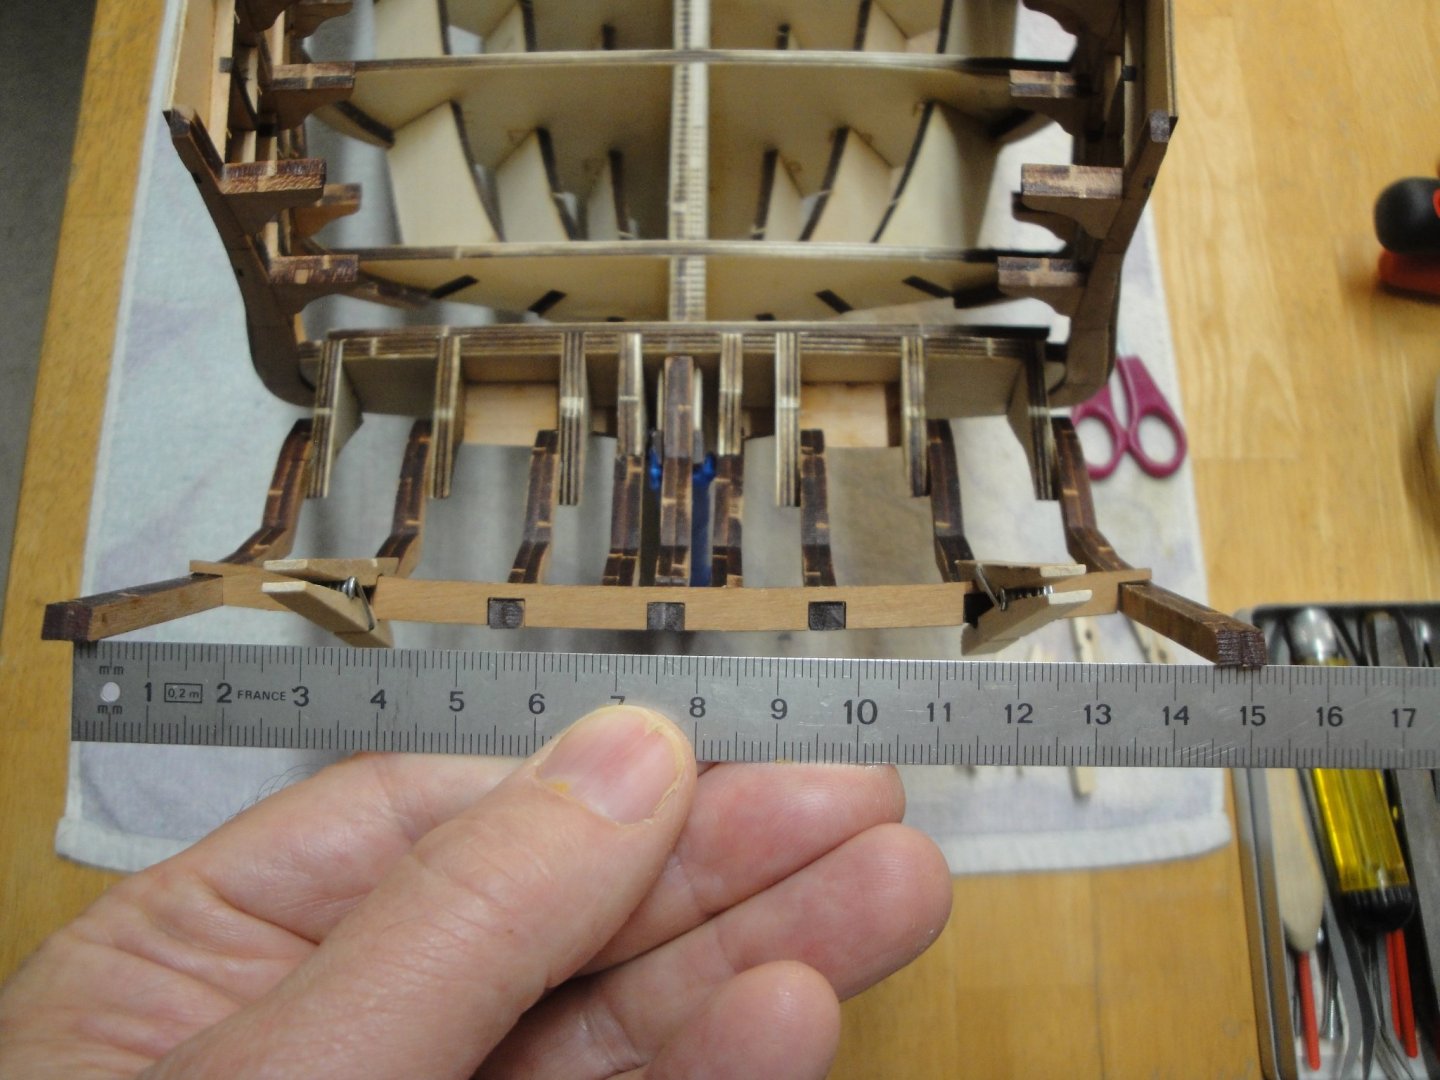
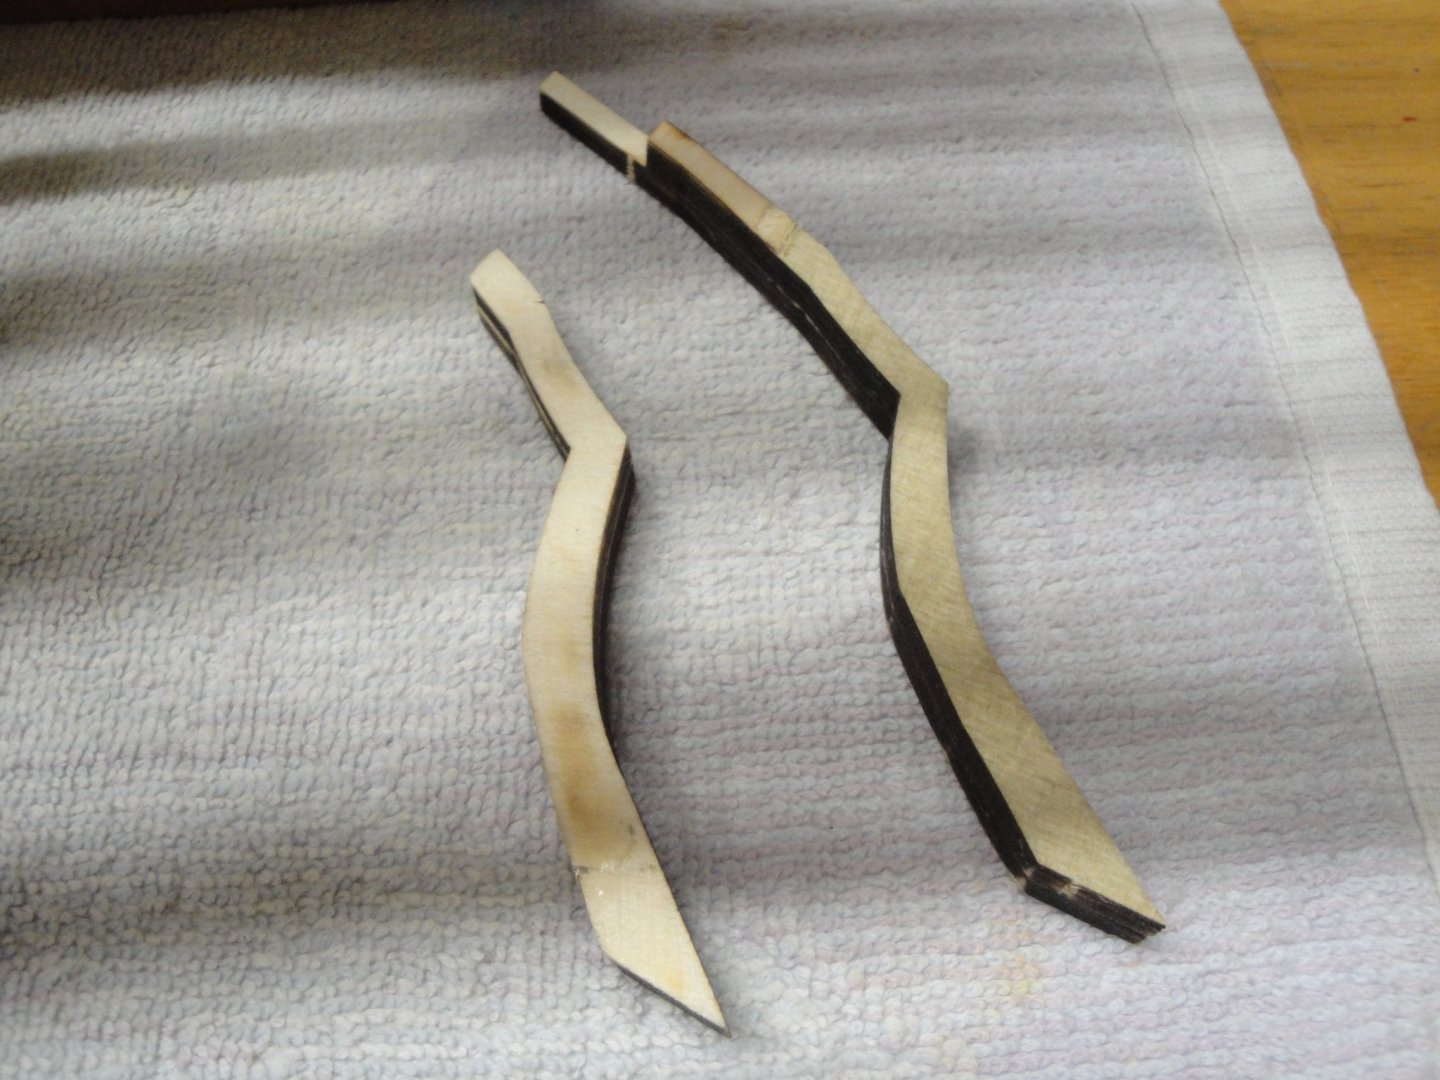
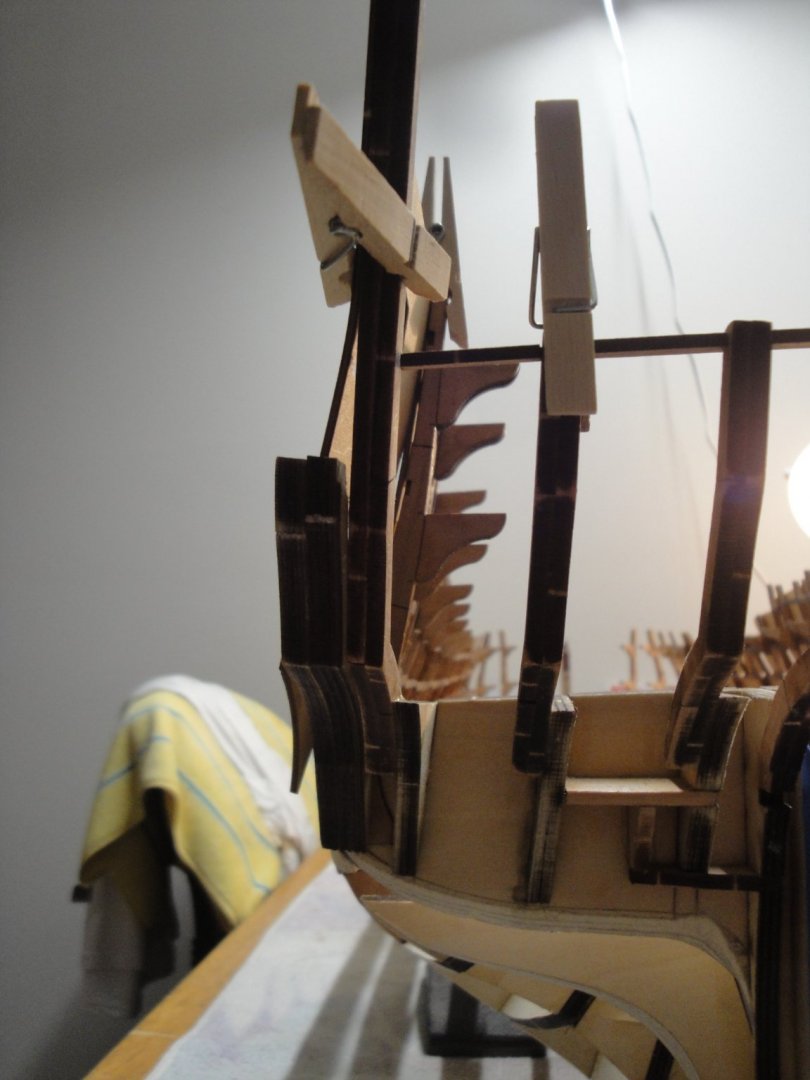
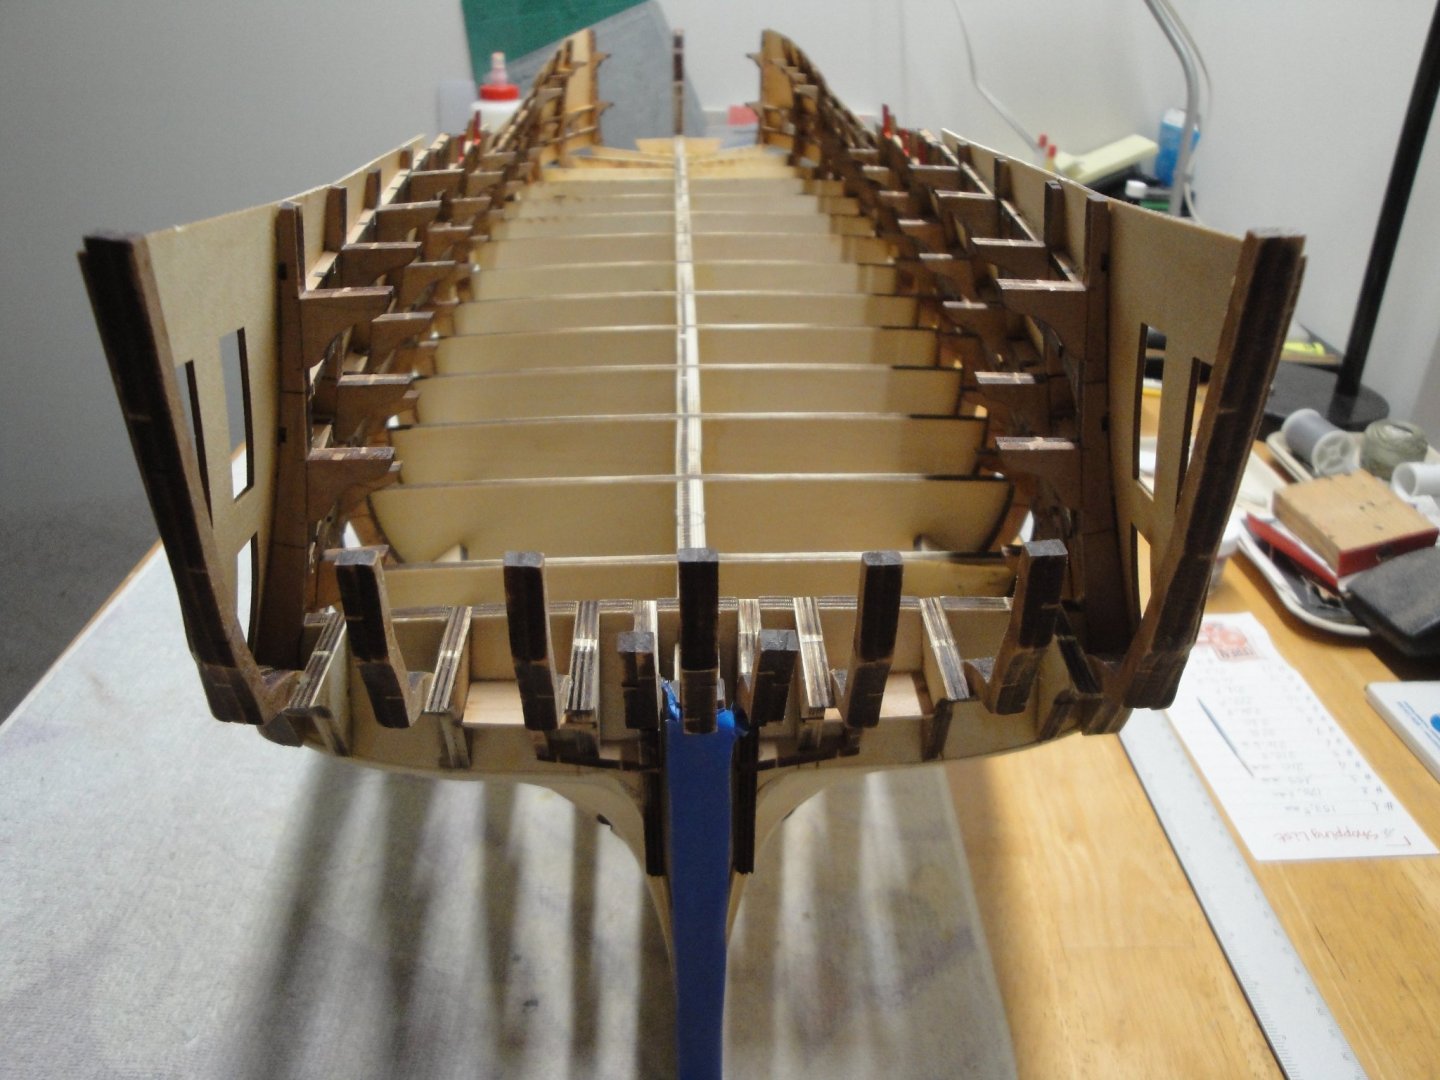
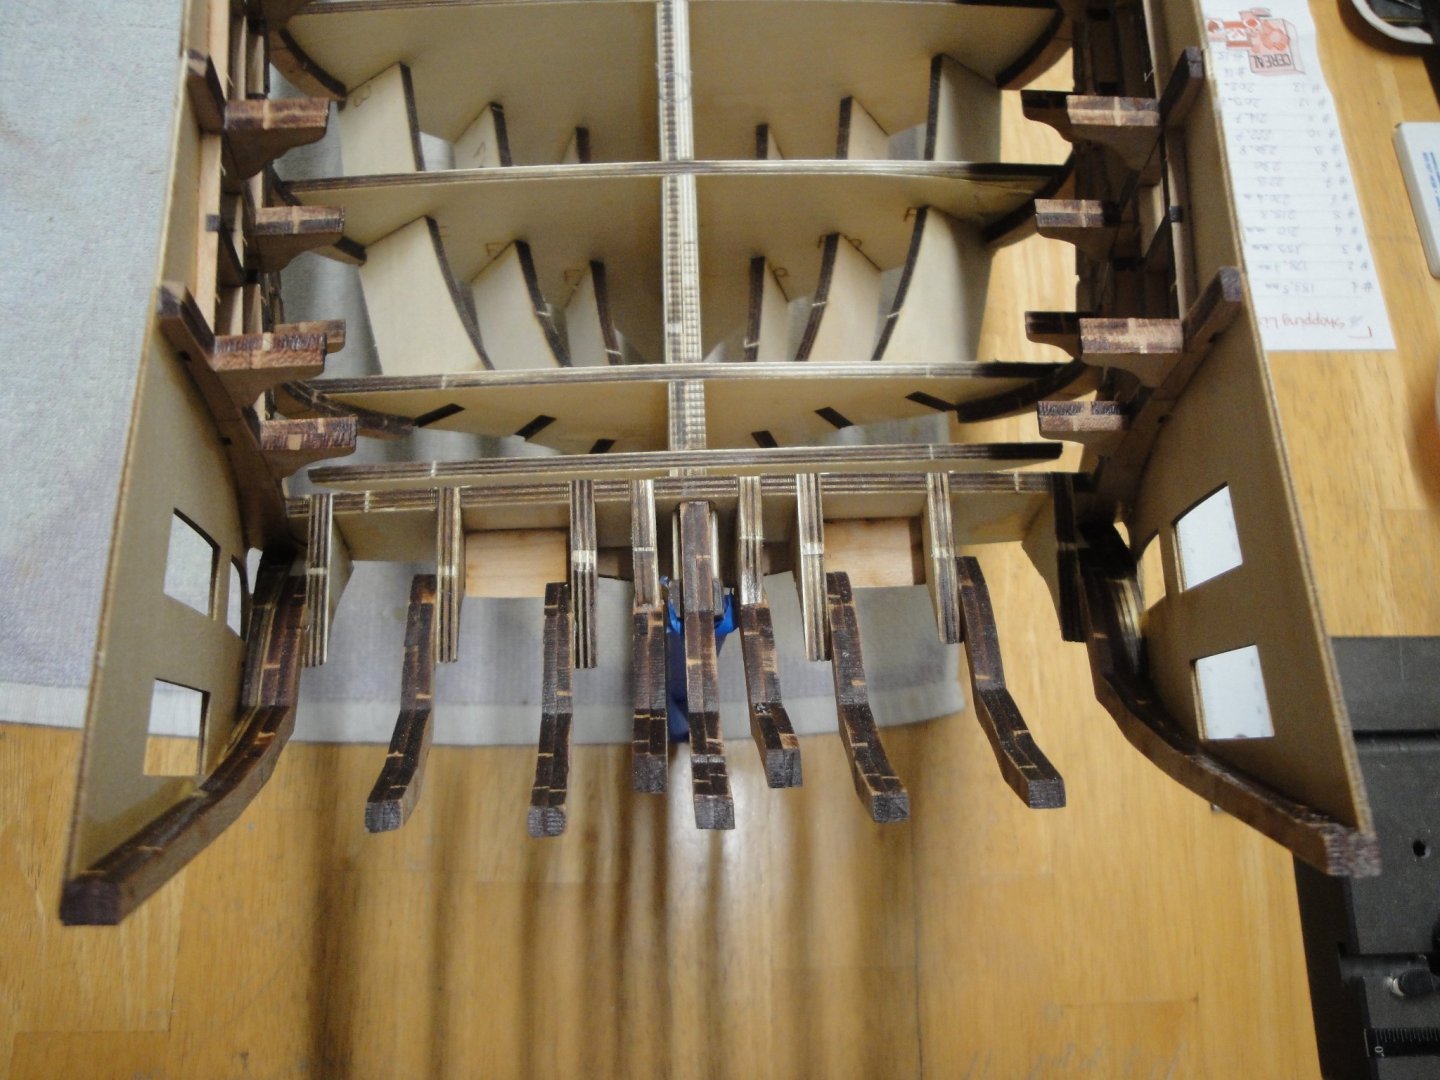
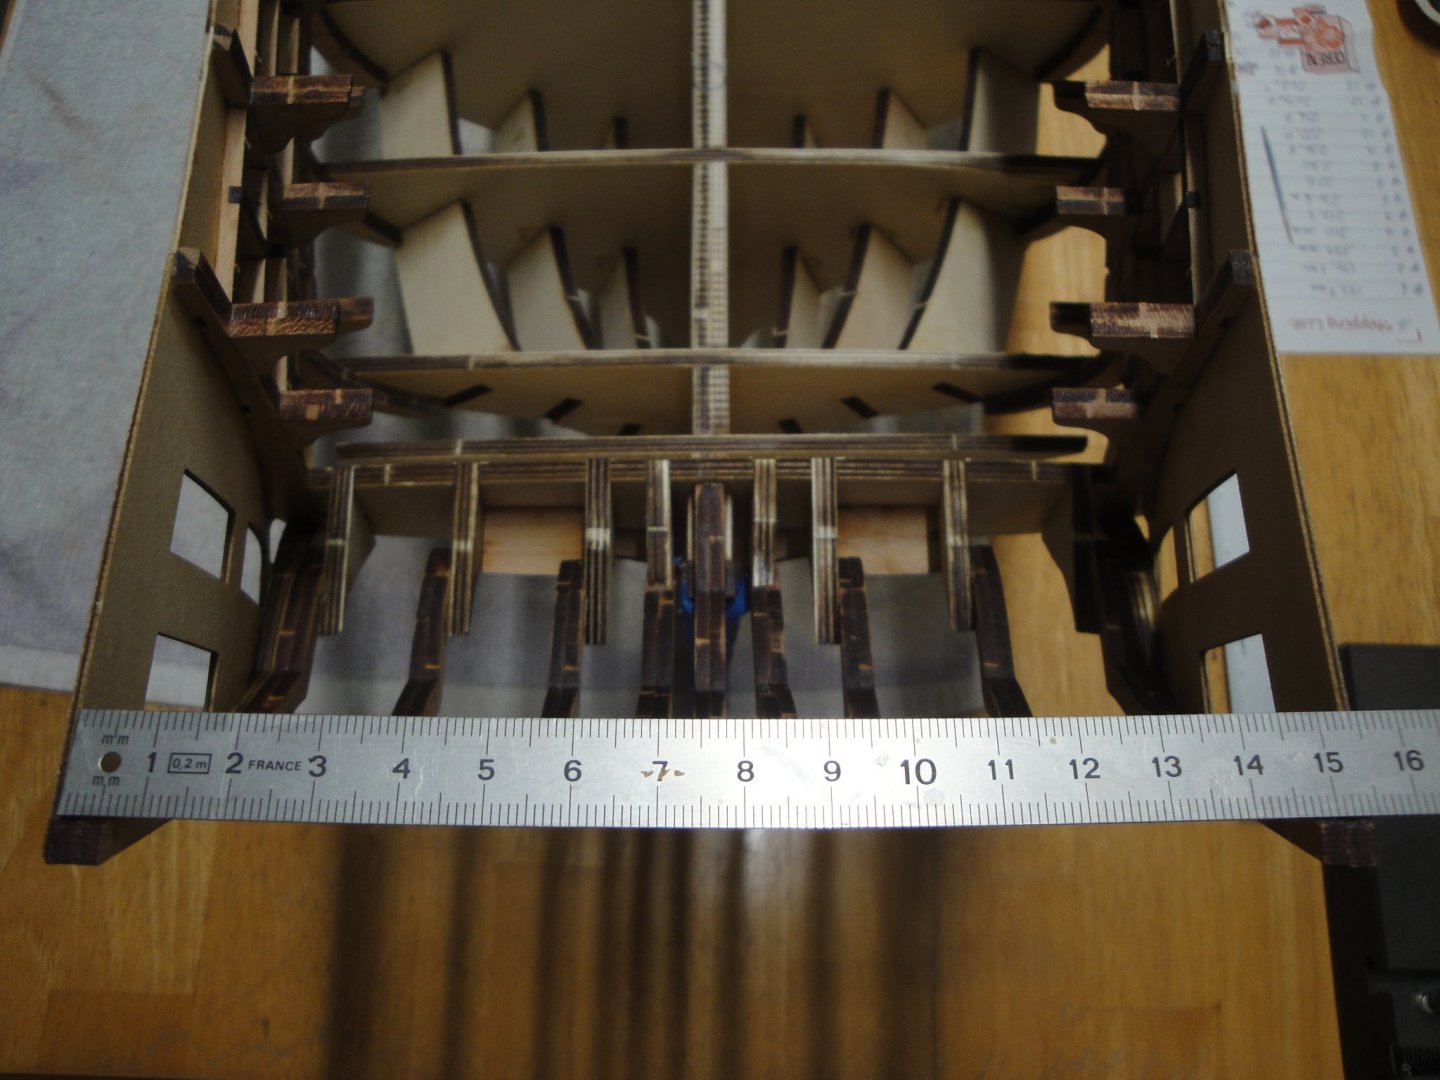
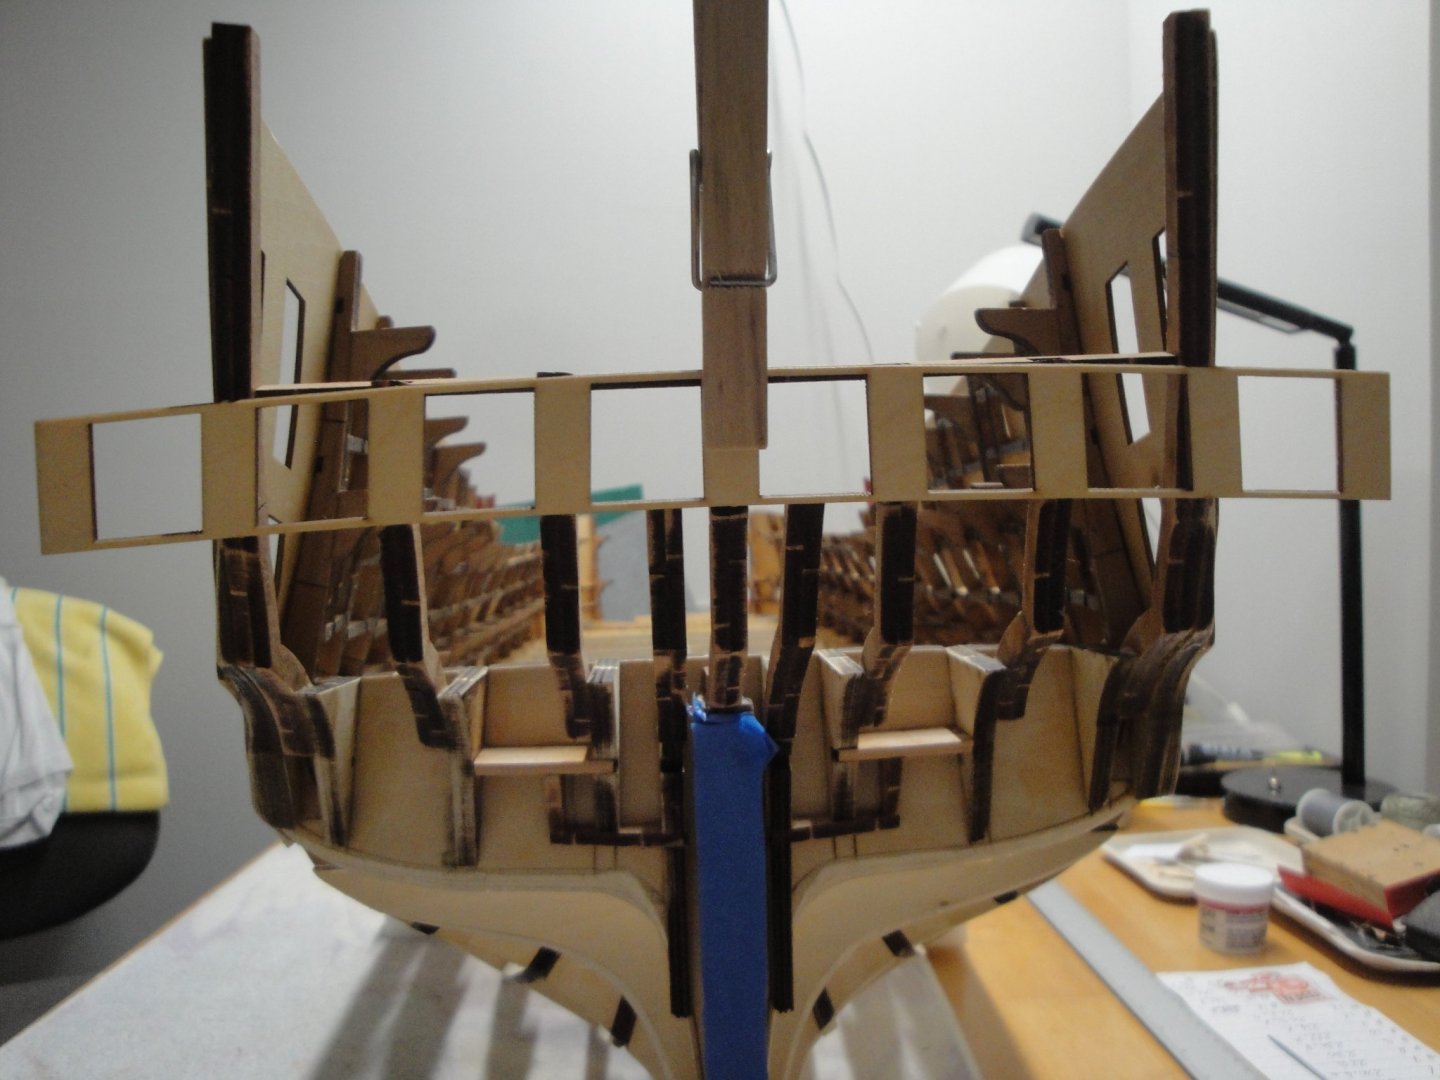
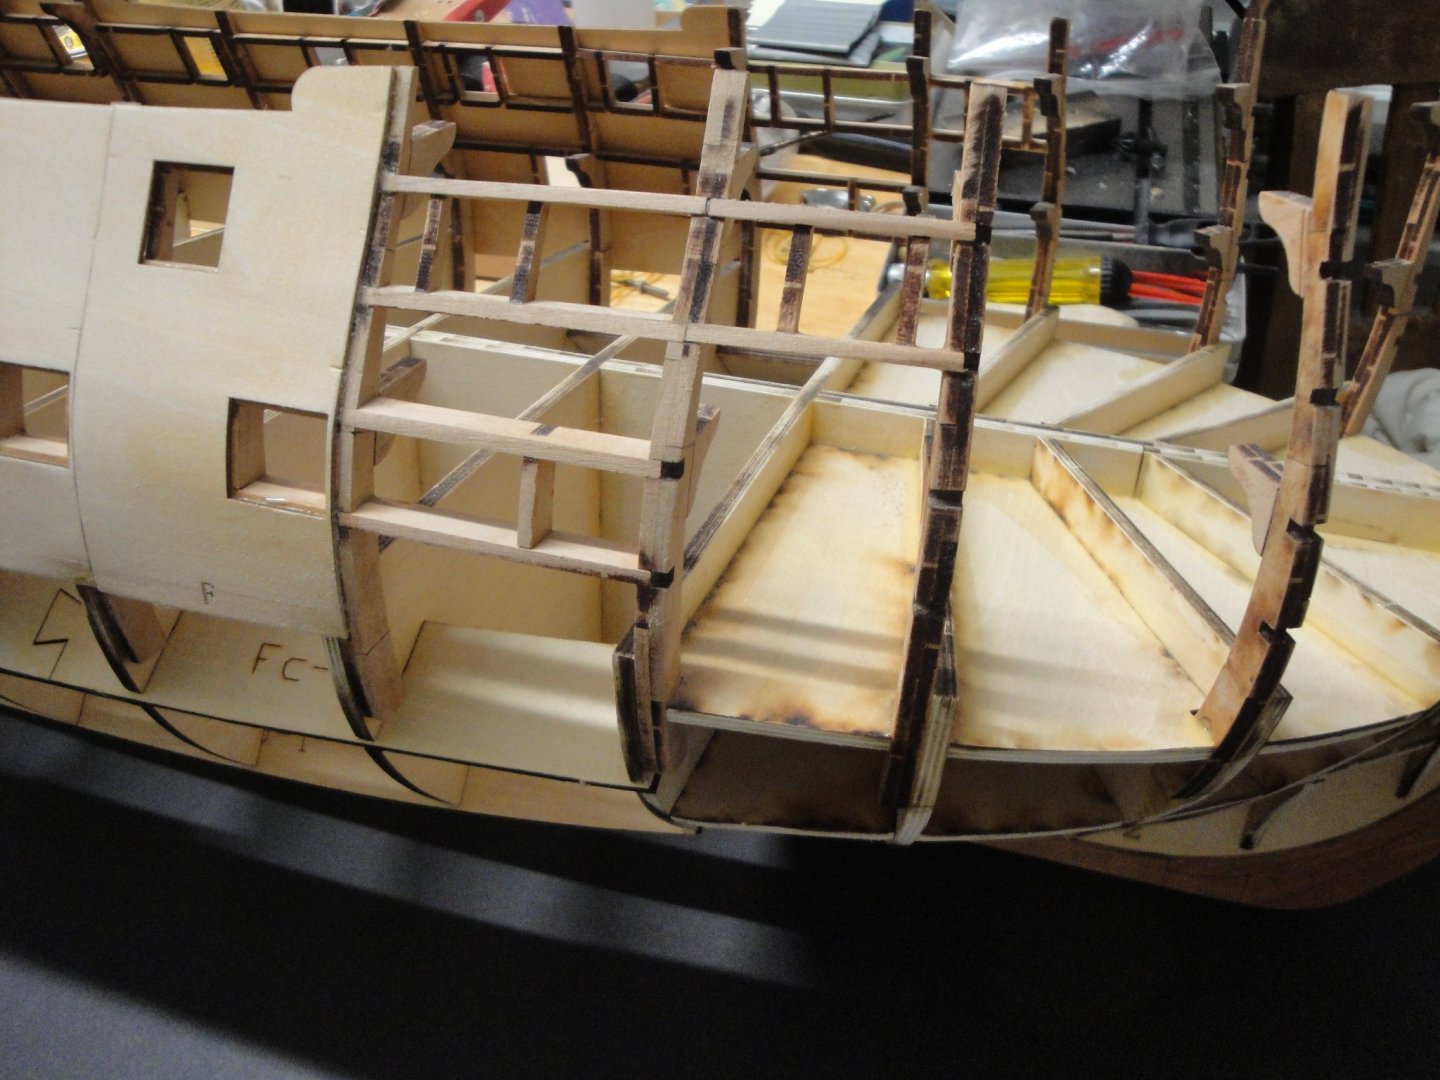
A few issues have been solved with CAF Bellona. One of them (and not the least) is the Stern. At the end of Session #1, the following is proposed: There is not enough material and information to really make it a success. My approach has been the following: Using Picture 22, I only glued D1 to D4 on each side. That was done after fairing the hull, to avoid breaking the delicate parts. The sandwich suggested in Picture 24 is not really necessary and as we will see only the two D-5-c parts are necessary. But this is left aside for now as D5 has not been glued to the transom. With only the Session #1 kit, you cannot and should not go any further. I was so much in the dark that I asked for help to Tom. He provided me with these two CAD drawings that shed so much light on my problem: With Session #2, an interesting piece of information is revealed: Part #25 is key and will help you build the correct alignment for the left and right D5 parts as well as provide that crucial 152 mm width, which is essential when building all the magnificence of the stern. In the picture below, you can see how Part 25 is coming to save us: A little verification of the distance: Yes, it is very close. At that stage, I glued the two shells "Q" on each side. D5 parts are still floating and have not been secured to the transom. Once Q is properly glued and aligned with the rest of the hull, the parts D5 and D-5-C will be shaped to fit. Above you can see D-5-A and D-5-B on the right and the two D-5-c parts glued together on the left. I did not need the parts on the right. D-5-C assembly is filed down to almost nothing to fill in the gap between the D5 futtock and the shell Q: as you can see below, there is still plenty to remove.... Finally, when the sandwich D-5-C have been reduced to a sliver, it can be glued to D5, which can be in turn glued to the transom, using the shell Q as a guide for proper alignment. The gluing is done with part 25 in place, to make sure that everything is perfectly lined up. Finally, we come to that: Above, D1 (the center futtock) will be removed as I intend to make the rudder movable. D1 is in the way, and its only purpose is to make sure that you have a central reference. Once part 25 is glued, it will not be really necessary. Yes, the Sacro-saint dimension of 152 mm is there: We finally come to a point where we are starting to have a decent stern: I hope these explanations will be useful to some readers. This is definitely not a Vanguard Model with a documentation done by James H. We are trailblazing here.... Next, the stem.... Yves


- 507 replies
-
- 16
-
-

-
This sequence of assembly is incredible. I wish most kit manufacturers would come close to what you are describing, in their instructions....or lack of. It is amazing to see the ship being born, one level at a time and it feels like you could create kits at different scales very easily out of your 3D study. Keep up this fantastic work. Yves
- 454 replies
-
- 4
-
-
- Union Steamship Company
- Stepcraft 840
- (and 3 more)
-
Superb work. Each phase is getting exciting and building the interior will be the highlight of that model. Then, you will have to find some motive powers to go with it.... Yves
-
Obviously, he loves torturing himself, and the Yamato is the perfect device for that 🙂 It will be a long agony..... Yves
-
Rod, Another Calder Craft model taken to exquisite completion. Congratulations on this realistic tug and thank you for sharing the build with us. Yves
- 50 replies
-
- 2
-
-
- Marie Felling
- tug
- (and 3 more)
-
Superb model Craig. You need to create a new wooden display to present this model. It deserves it. Yves
- 174 replies
-
- 6
-
-
- prinz eugen
- trumpeter
- (and 2 more)
-
The real ship is 57 meters high from the flotation line to the top of the main mast. At 1/48th scale, it makes for 1.16 meter high. Yves
-
That is correct Kevin. There is nothing planned for the masting. The mast will rest on the main spine and the kit provides wooden rings and various strengthening parts if you decide to install them. This is an admiralty kit first of all. I intend if I ever get there, to install the bowsprit. Masts? I will plan for them and make sure that the anchoring is solid, if I ever get to that part of the ship. It is an enormous kit and there is so much to assemble: the full 74 guns in themselves are a daunting task. Yves
-
Mike, Yes the kit comes with the 74 guns, 28 big caliber, 28 mid-caliber and the rest made of small guns. All carriages are there too. Yves
-
Patrick, Thank you for your encouragements and praises. Yes, it is not exactly an easy model and a few things have to be ironed out. The kit is evolving and CAF Model is fixing things on the fly, always improving their kits. As a matter of fact, I am corresponding regularly with Tom (CAF Model in China) and he is helping me along the process to build this model successfully. There are no Build Log of the CAF Bellona on the WEB and I feel at times, like a pioneer. I am currently working on the Stern and hope to be able to present my recommendations in a few days. The instructions are a little bit weak, to say the least, and reminds me of the IKEA assembly guide for their furniture. It is simply not enough for a kit of that caliber. This is not a Vanguard kit, for certain. Yves
-
Can I hire you to plank my Bellona? You did a spectacular job and unless you do my ship 😉 I will use your precious advices for Bellona. Yves
- 345 replies
-
- 3
-
-

-
- Duchess Of Kingston
- Vanguard Models
- (and 1 more)
-
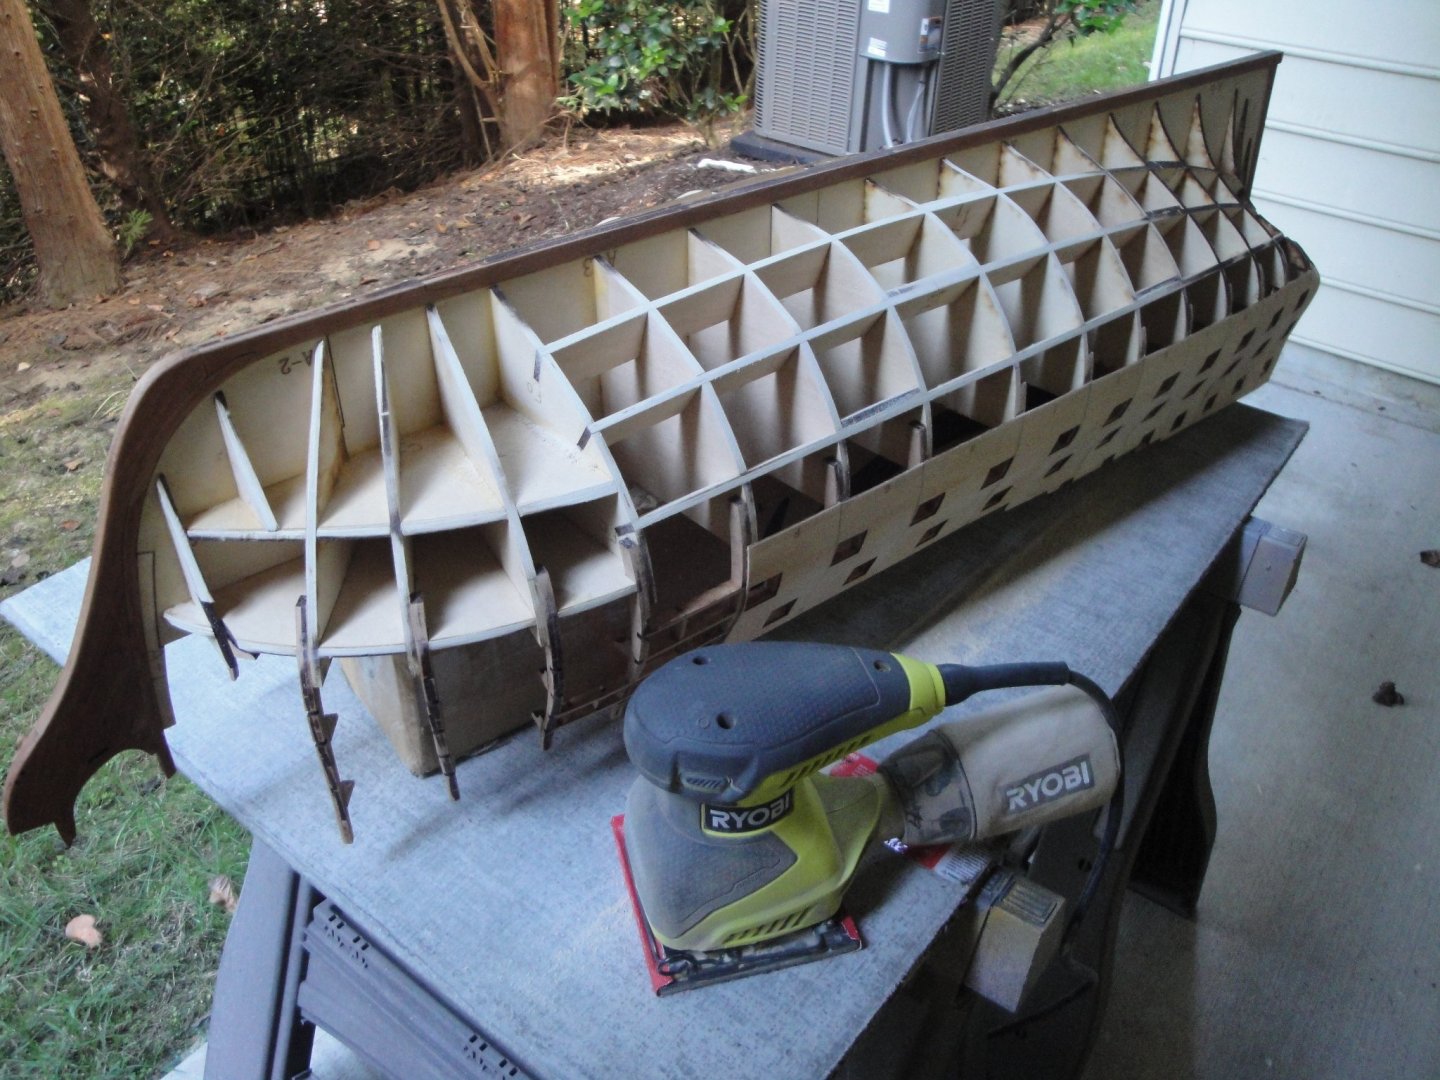
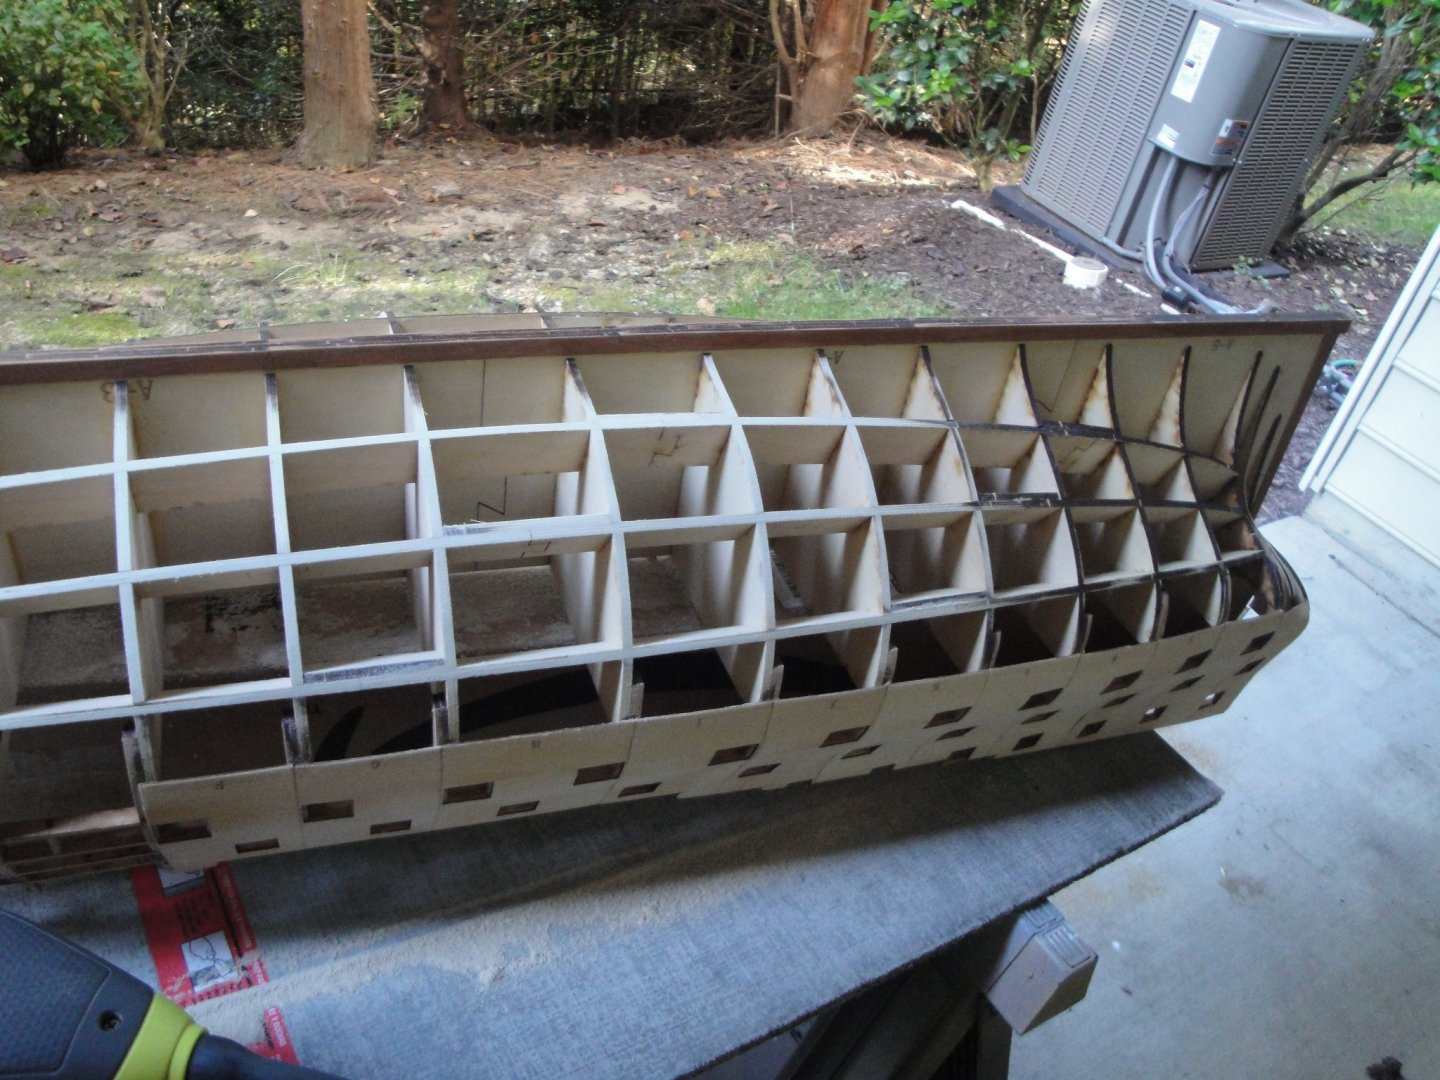
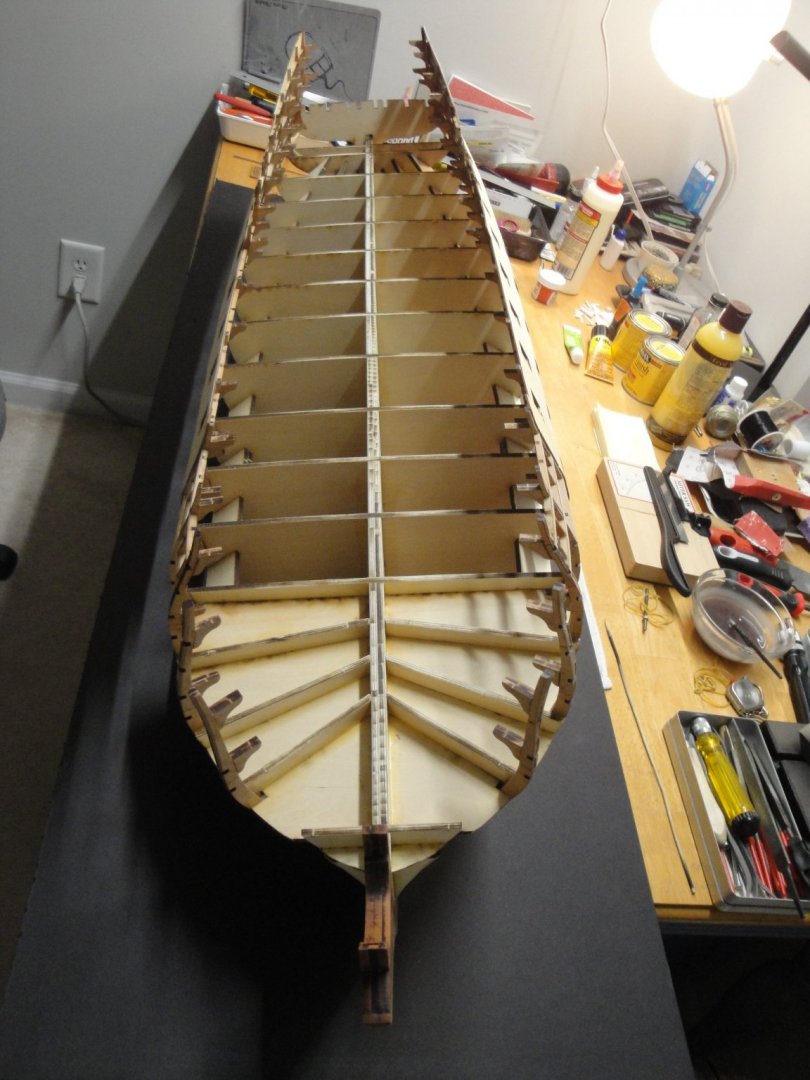
I know I am going to shock a few members, but I started sanding the bottom of the hull with an electric sander and 60 grit paper: Honestly, unless you want to exhaust yourself and loose your arms, that is the only way to do it. We are dealing with very good 5 plies plywood, almost marine quality and it is quite hard to sand. This is not the basswood found in Model Shipways kit (nothing wrong with their kits, by the way). After one hour on each side, I am getting a smoother hull: Below you can see one side almost done and the other side still untouched. I will finish the stern by hand and more delicately. WOW, I did produce an enormous amount of dust and this is the kid of work that needs to be done outside. With the hull mostly sanded and smooth, I can now address the stern which is the most exciting part on such vessels. Yves

- 507 replies
-
- 21
-
-
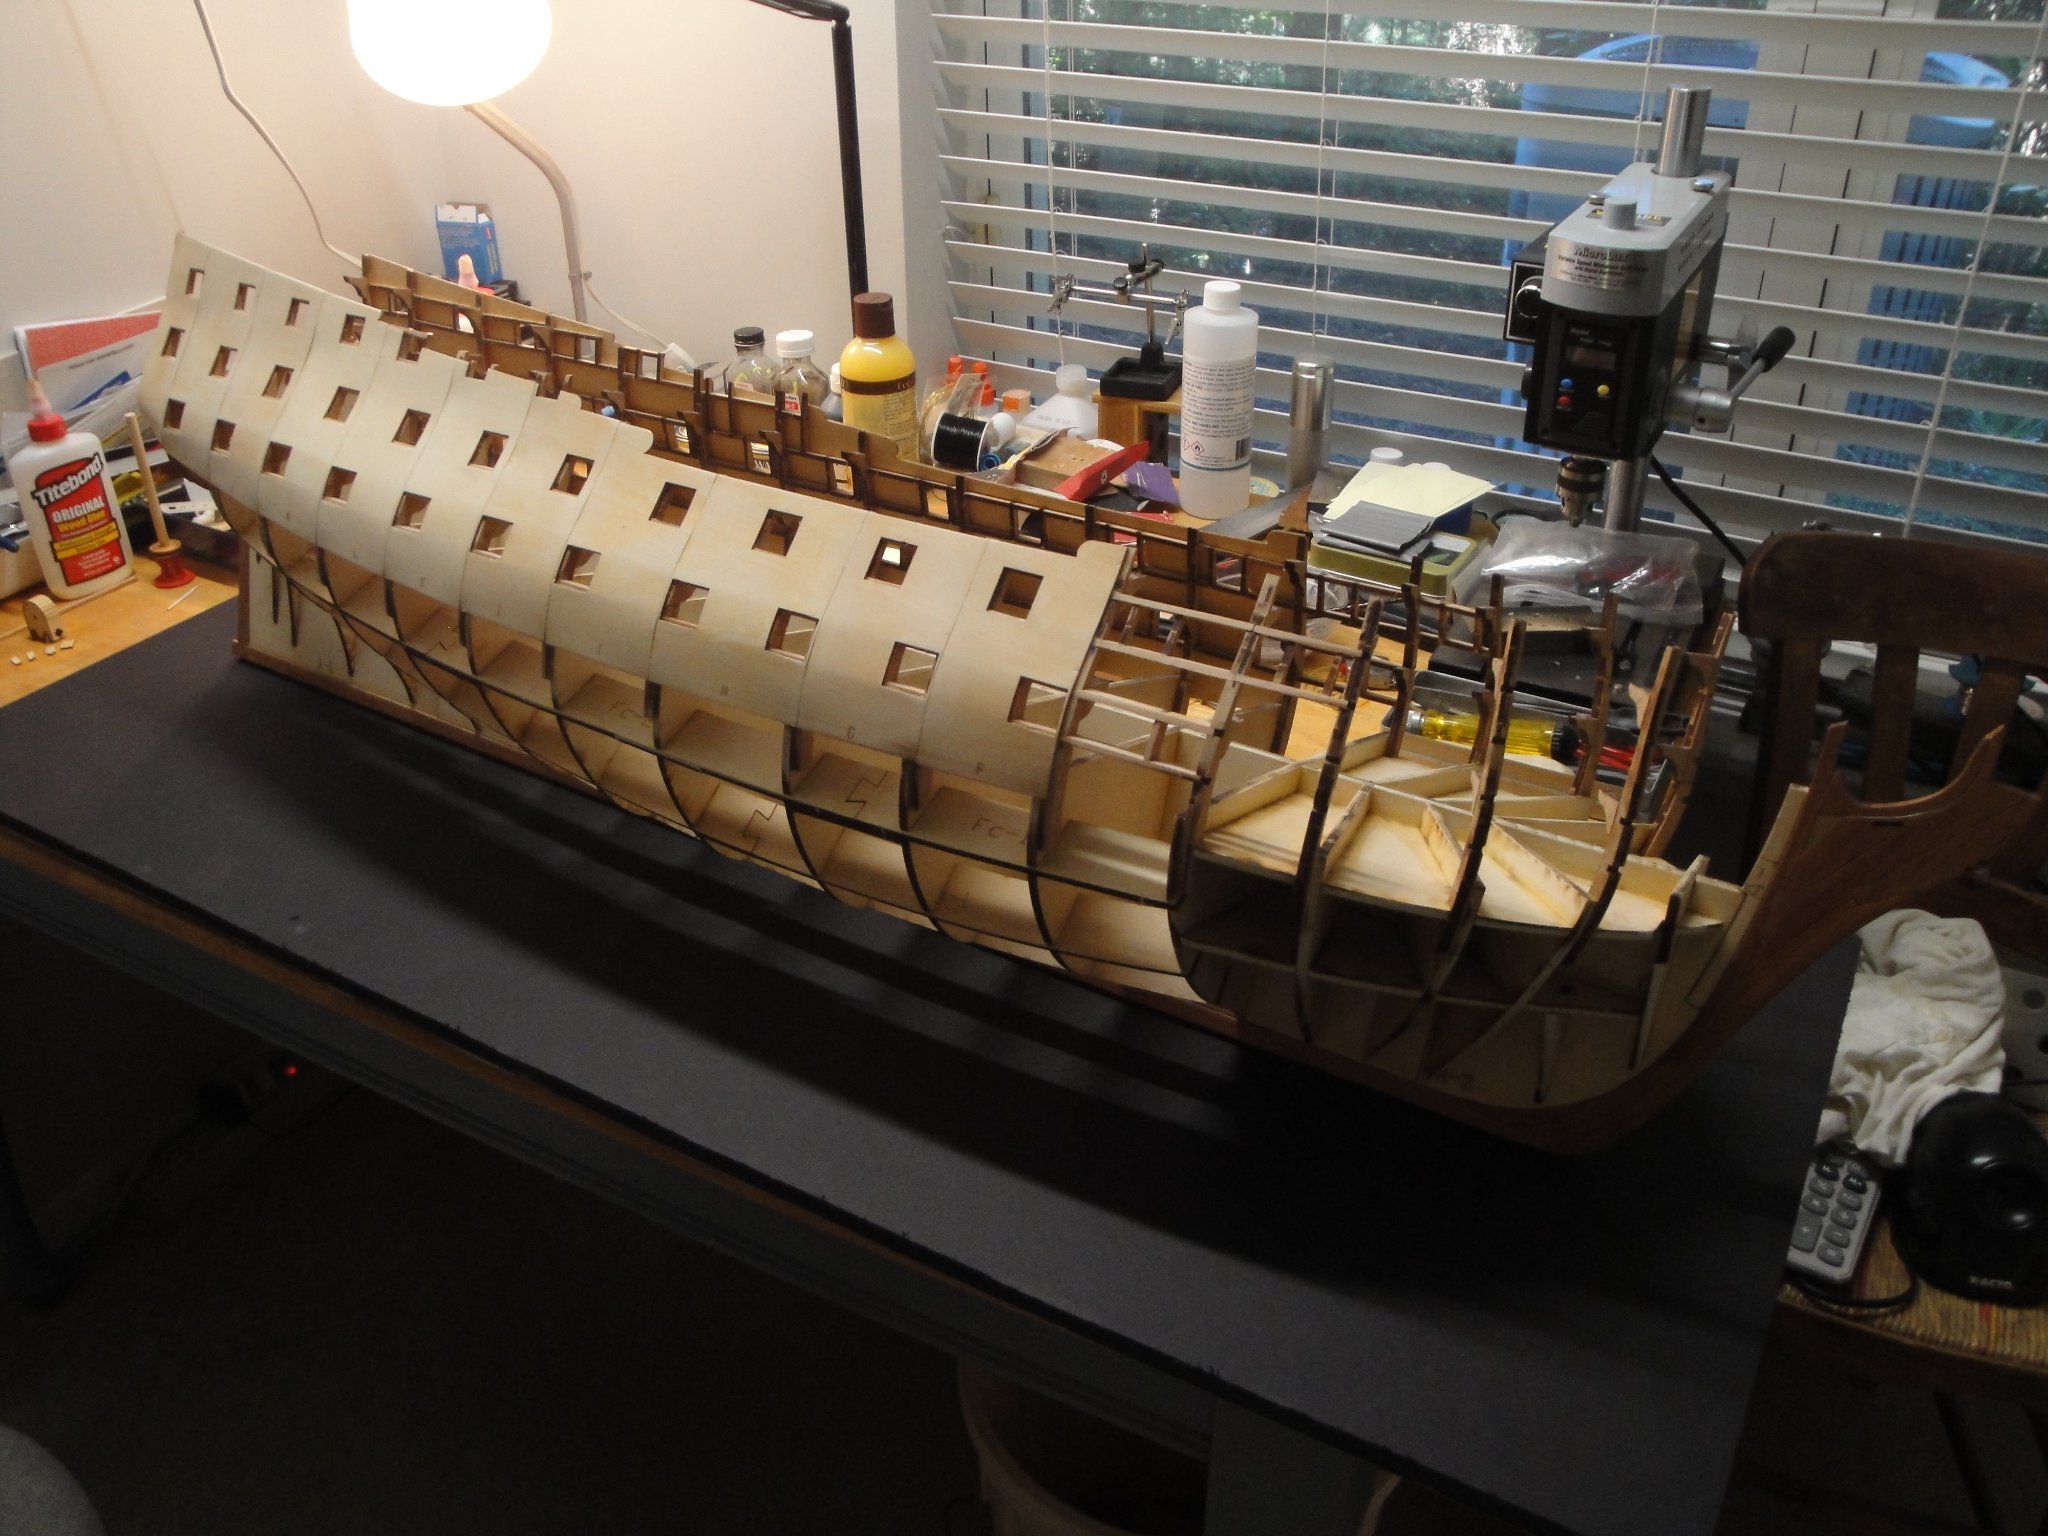
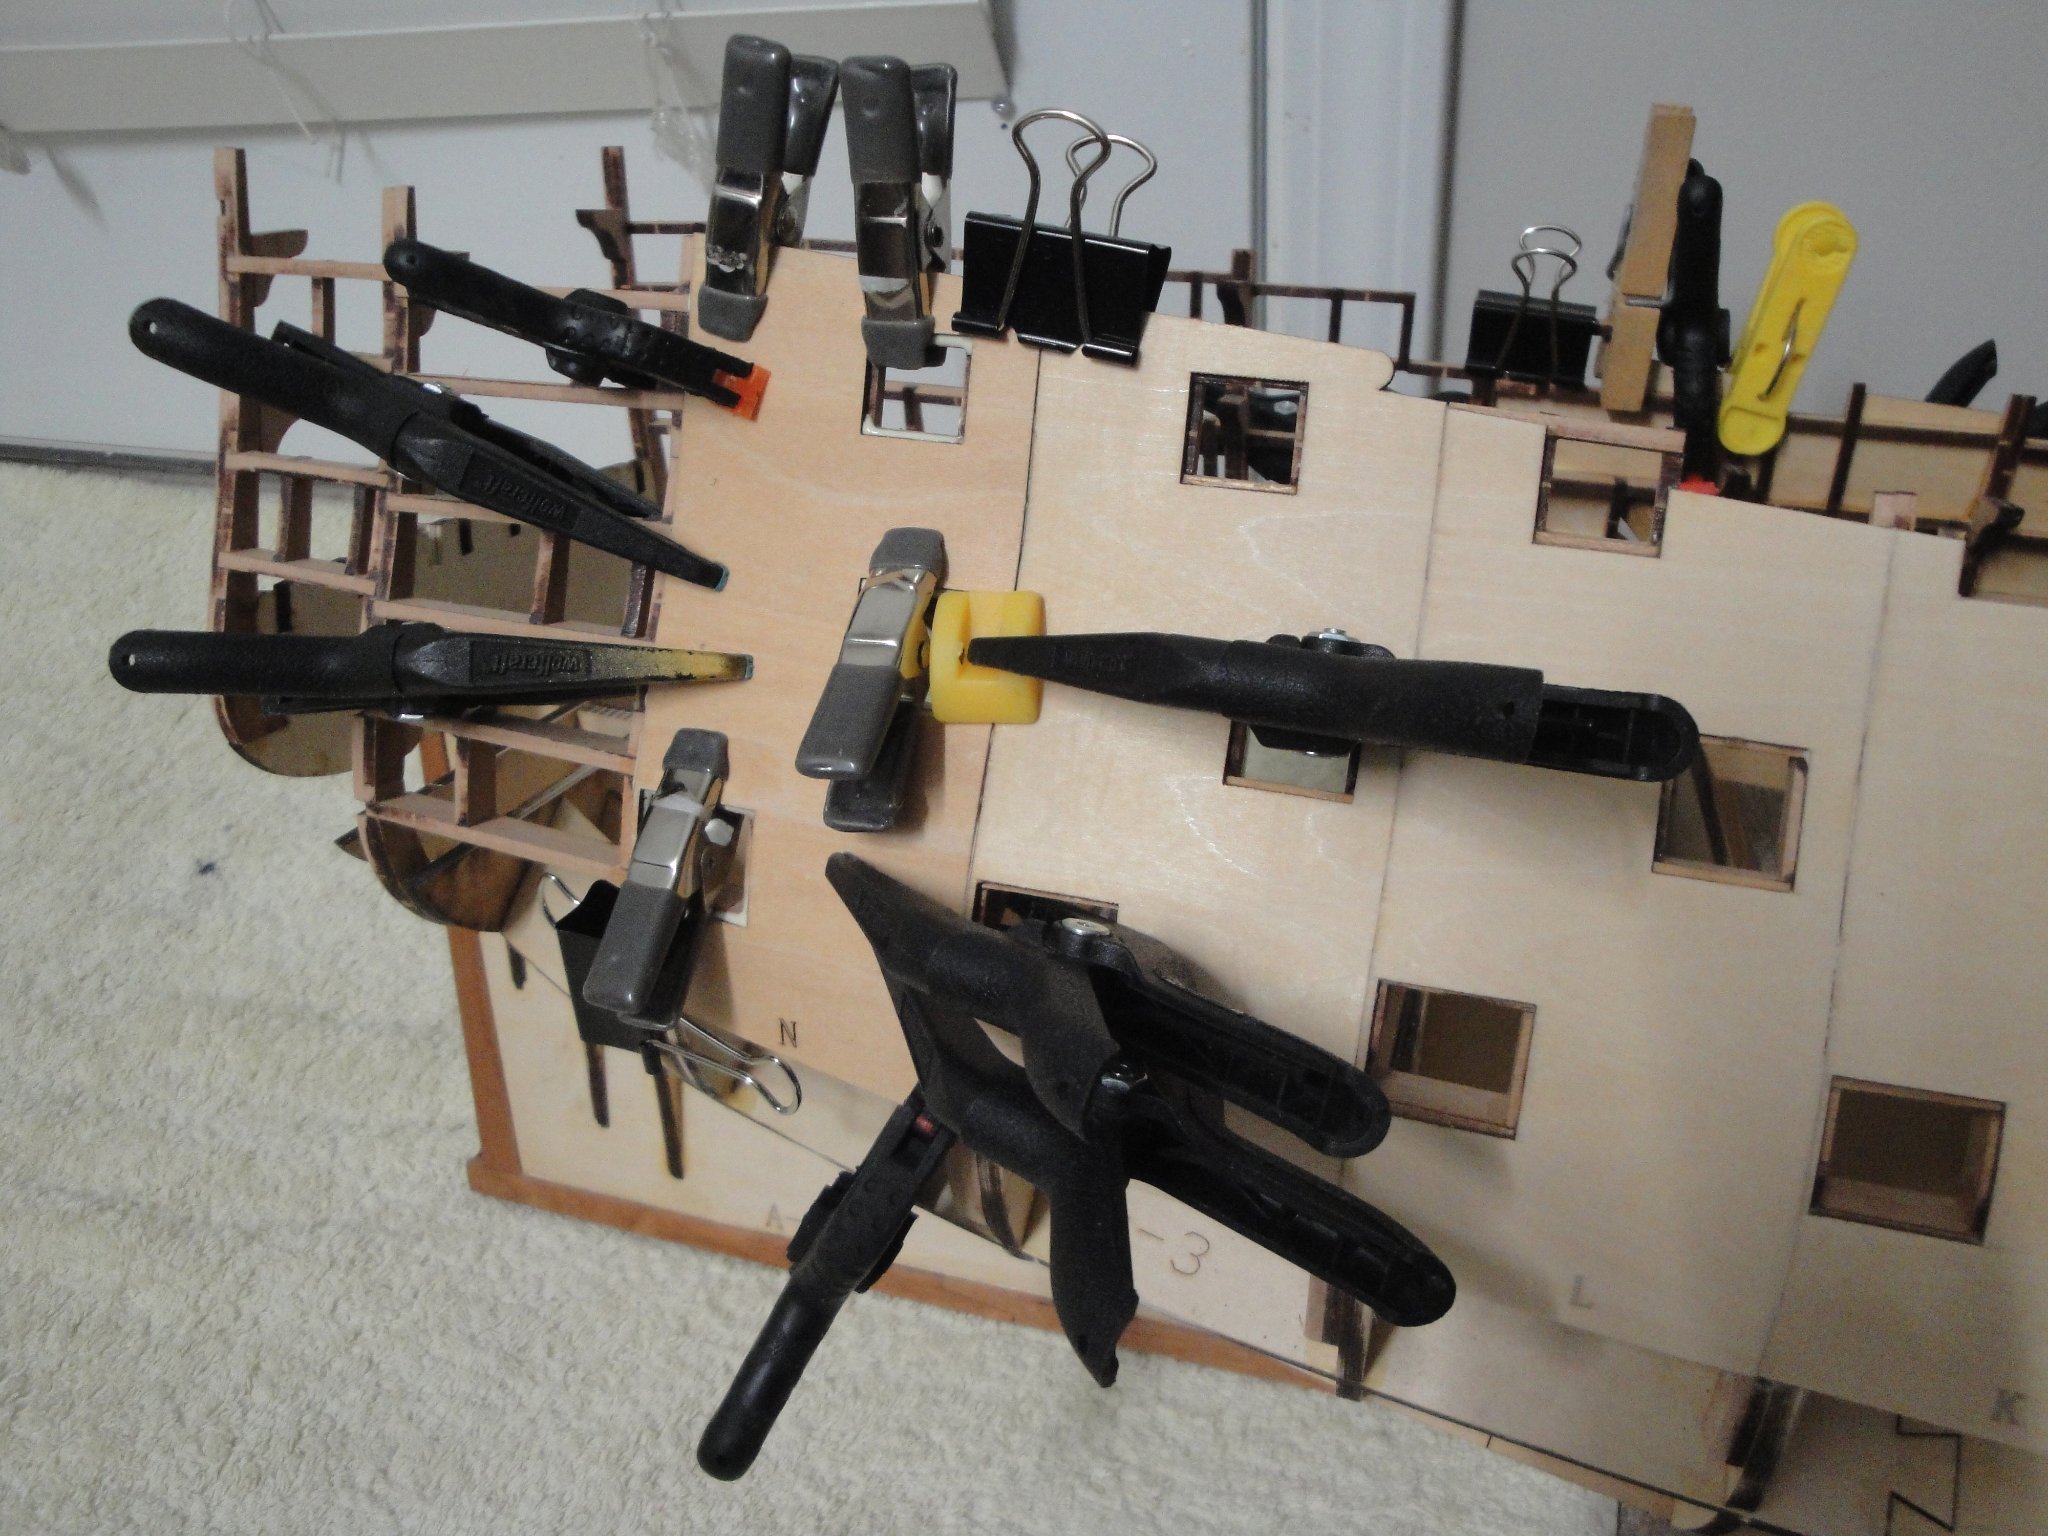
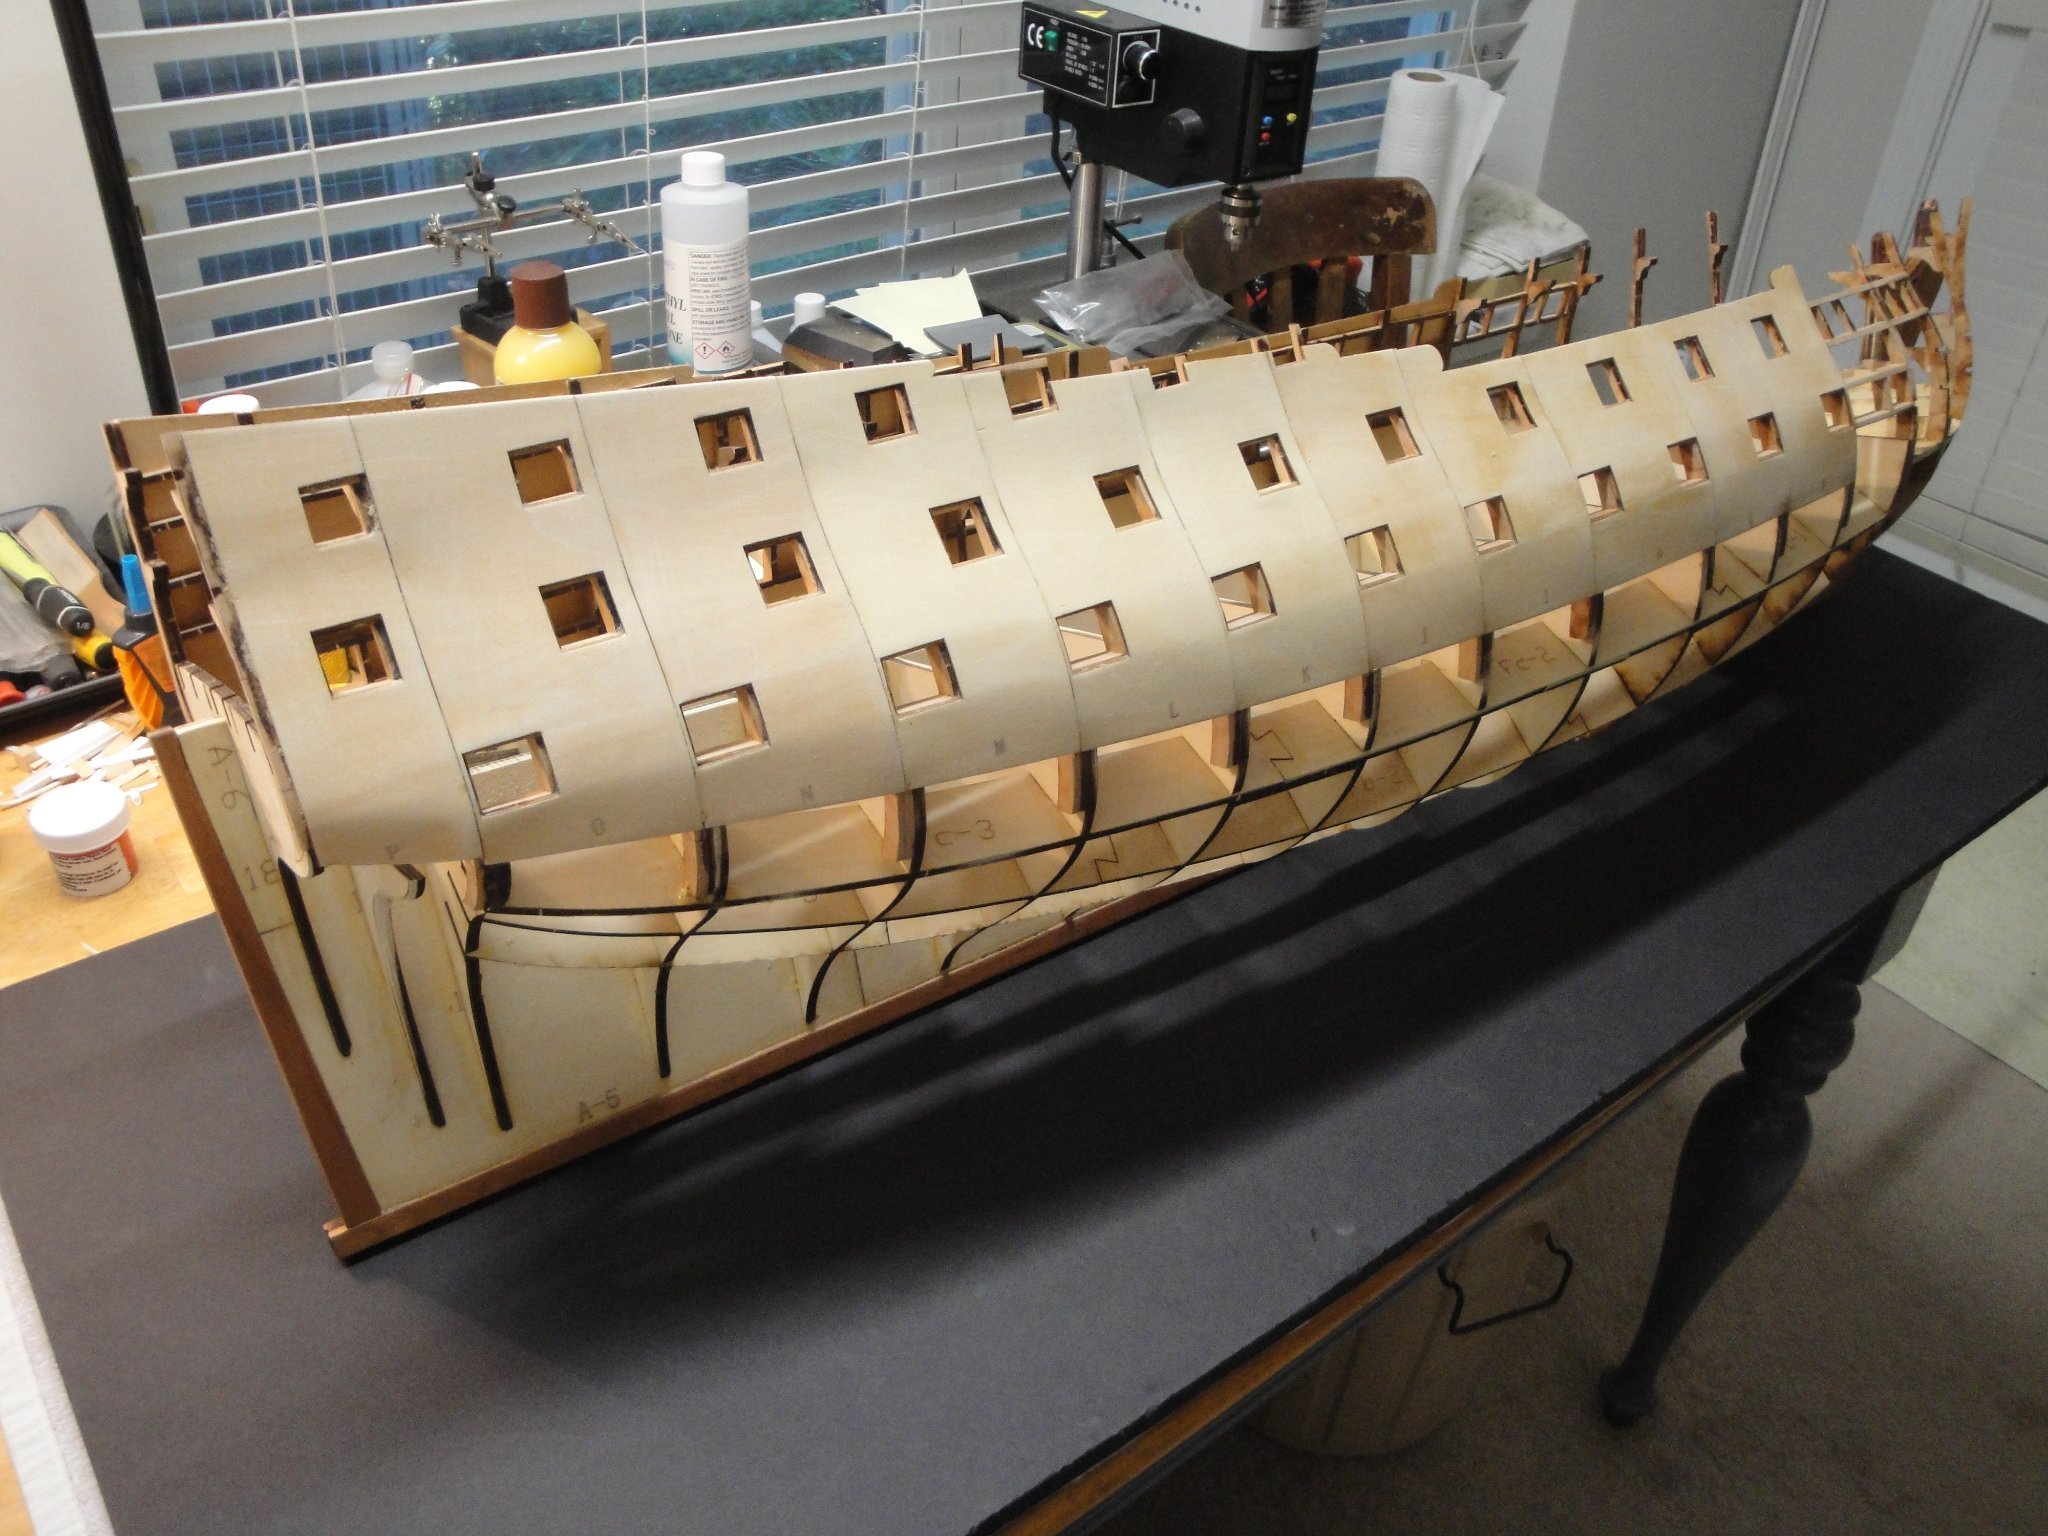
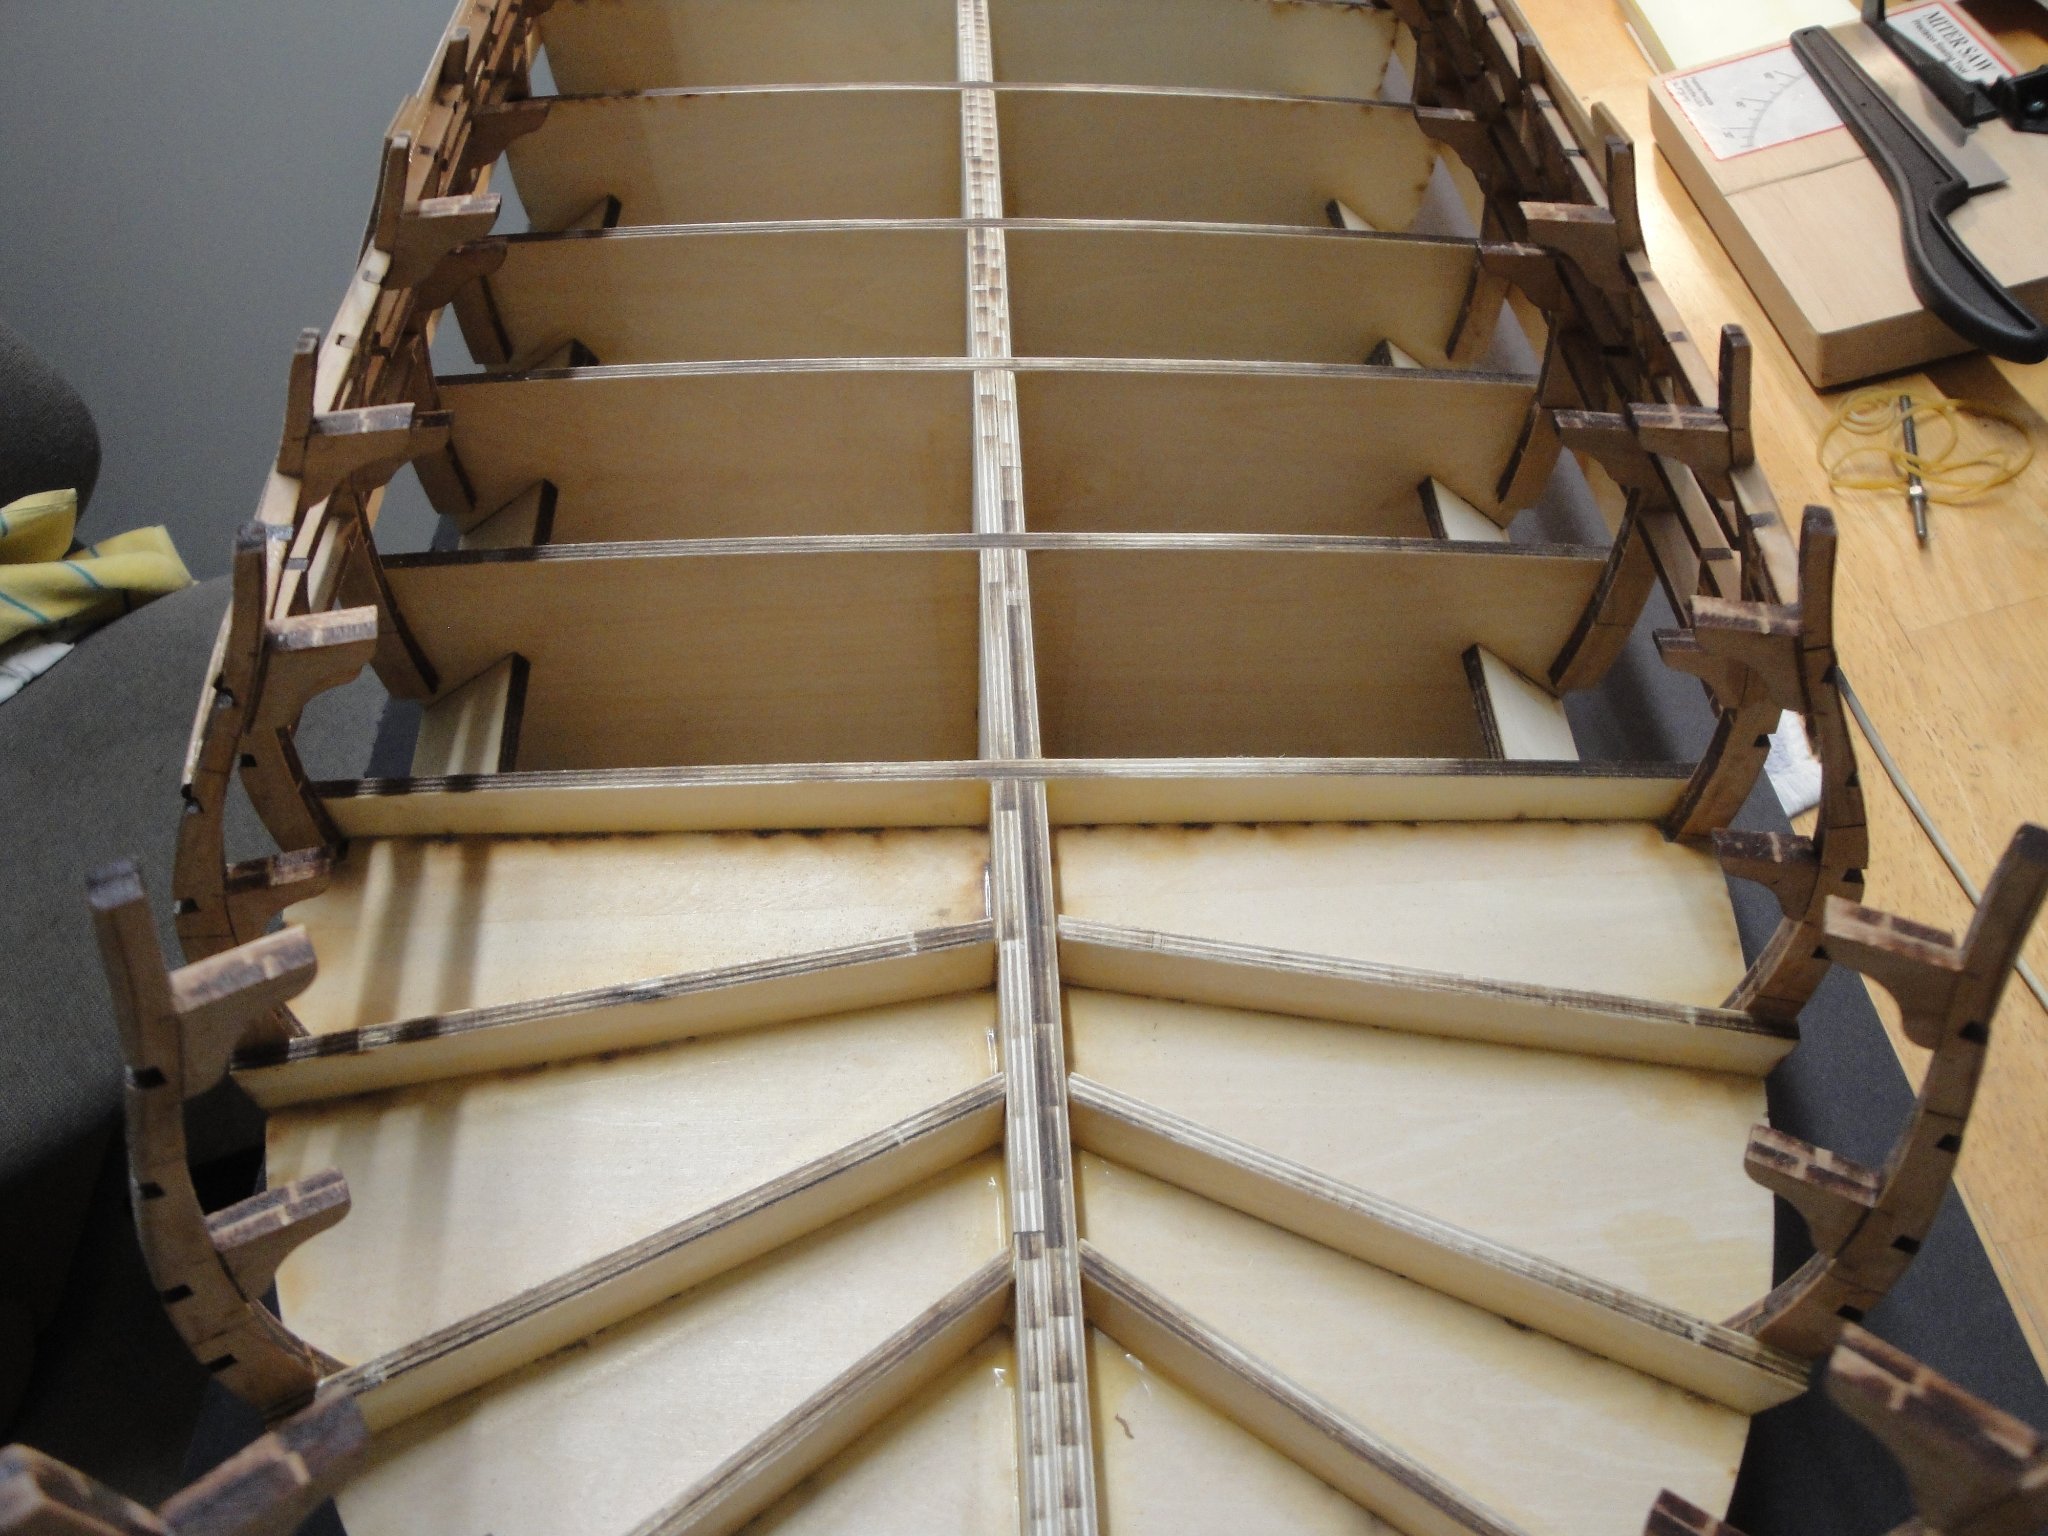
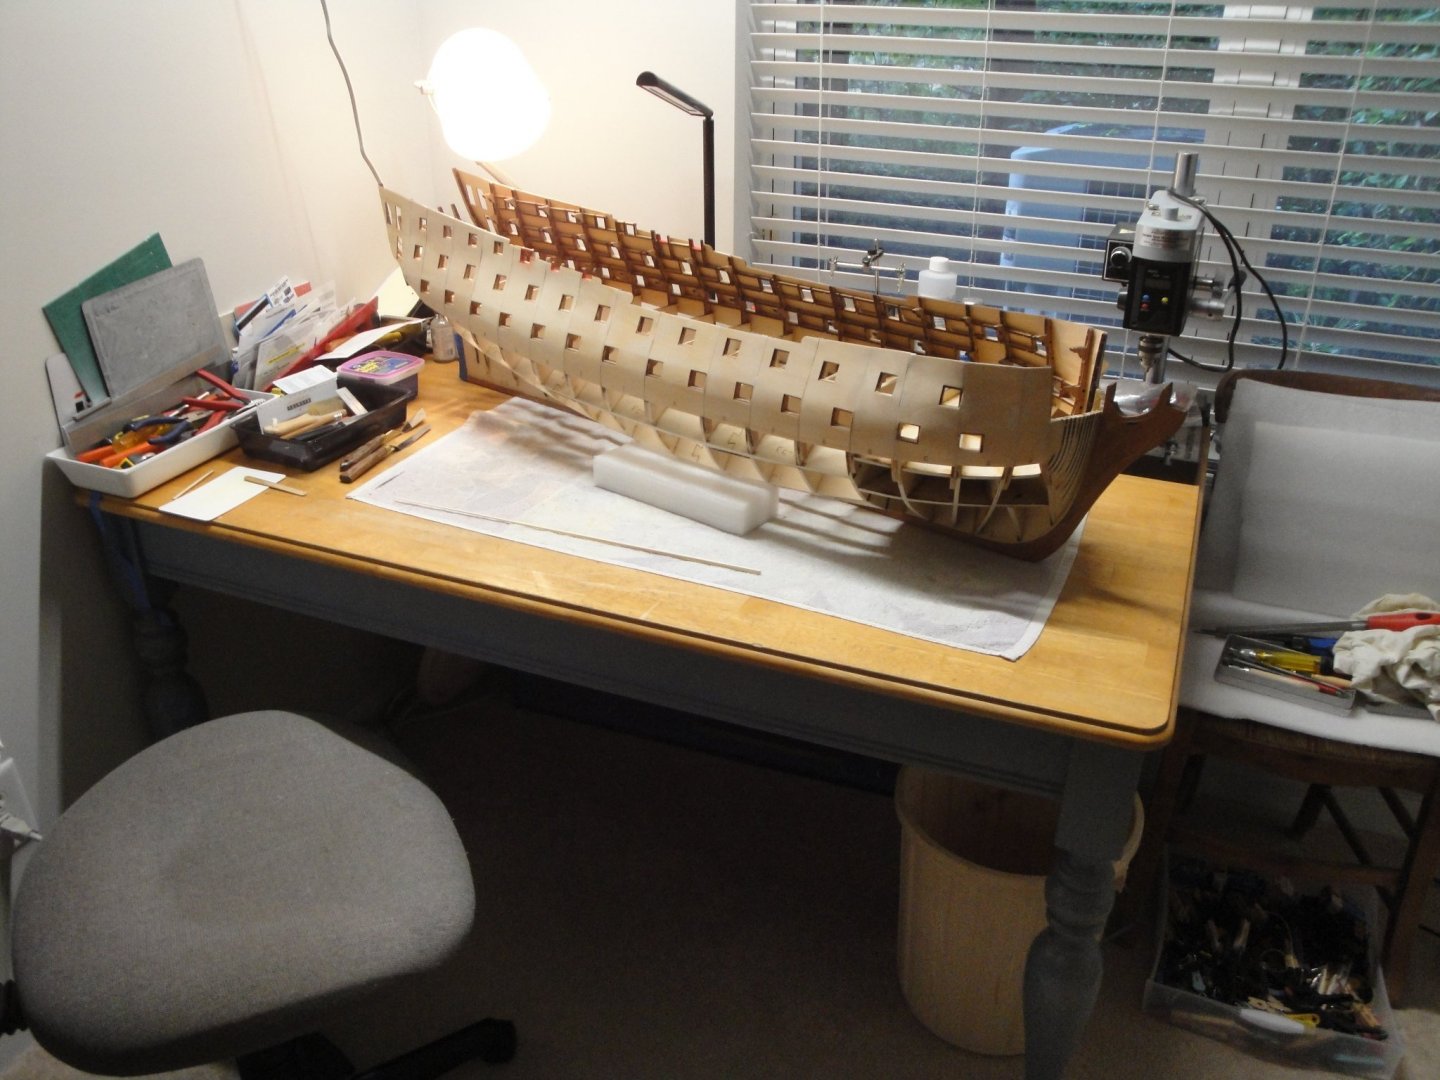
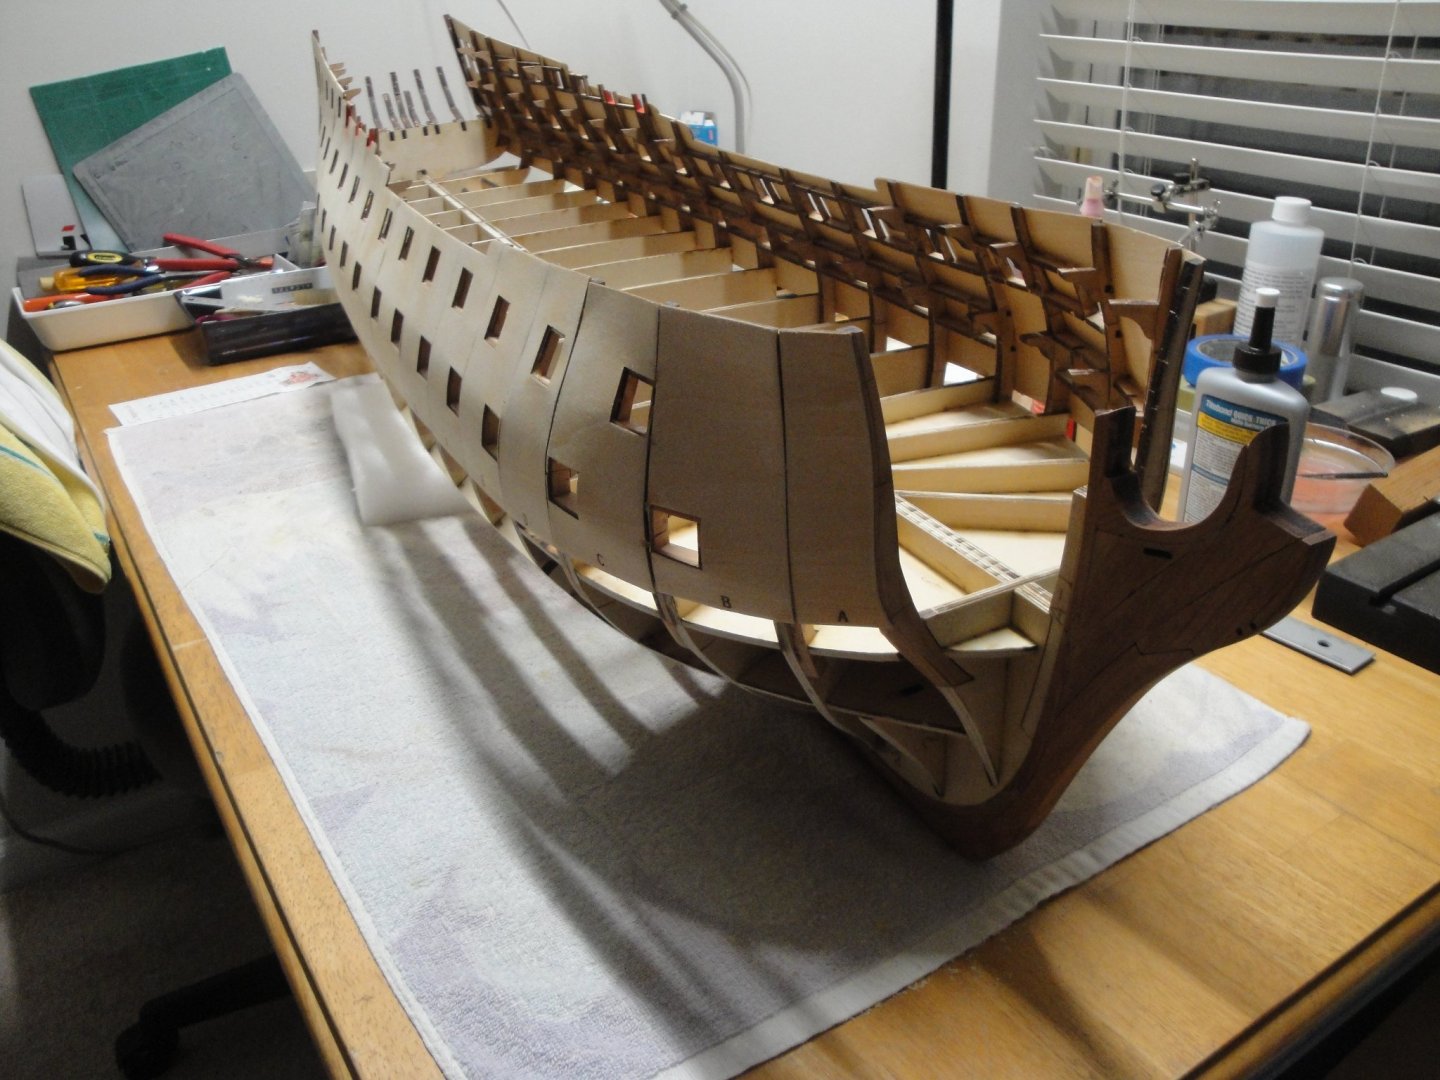
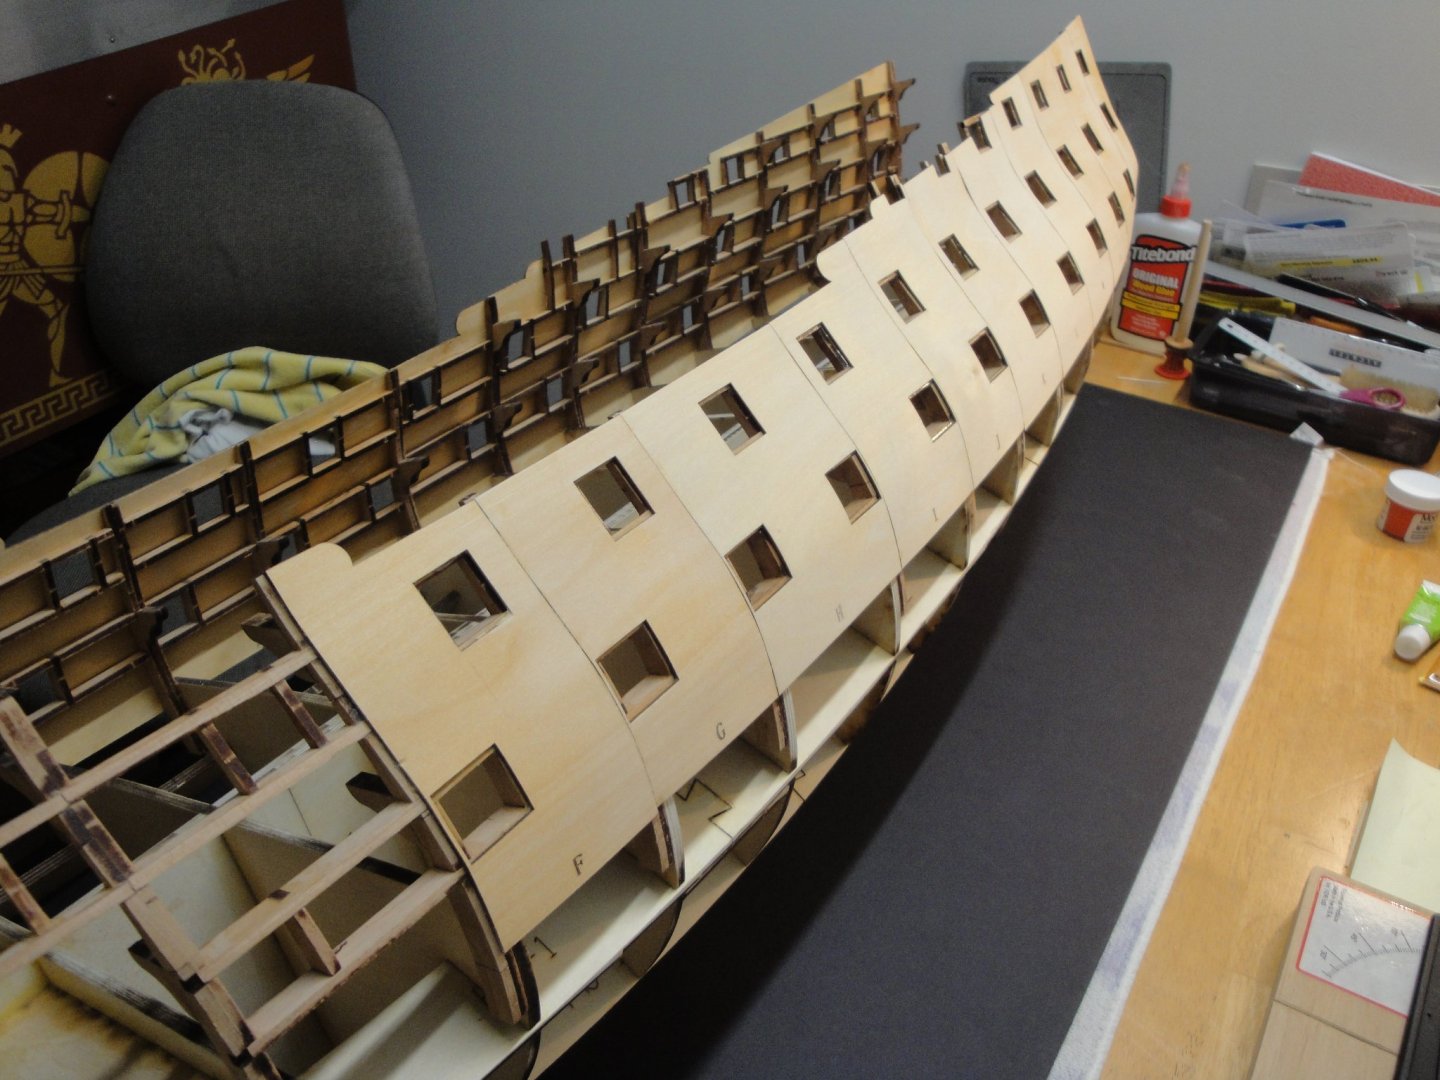
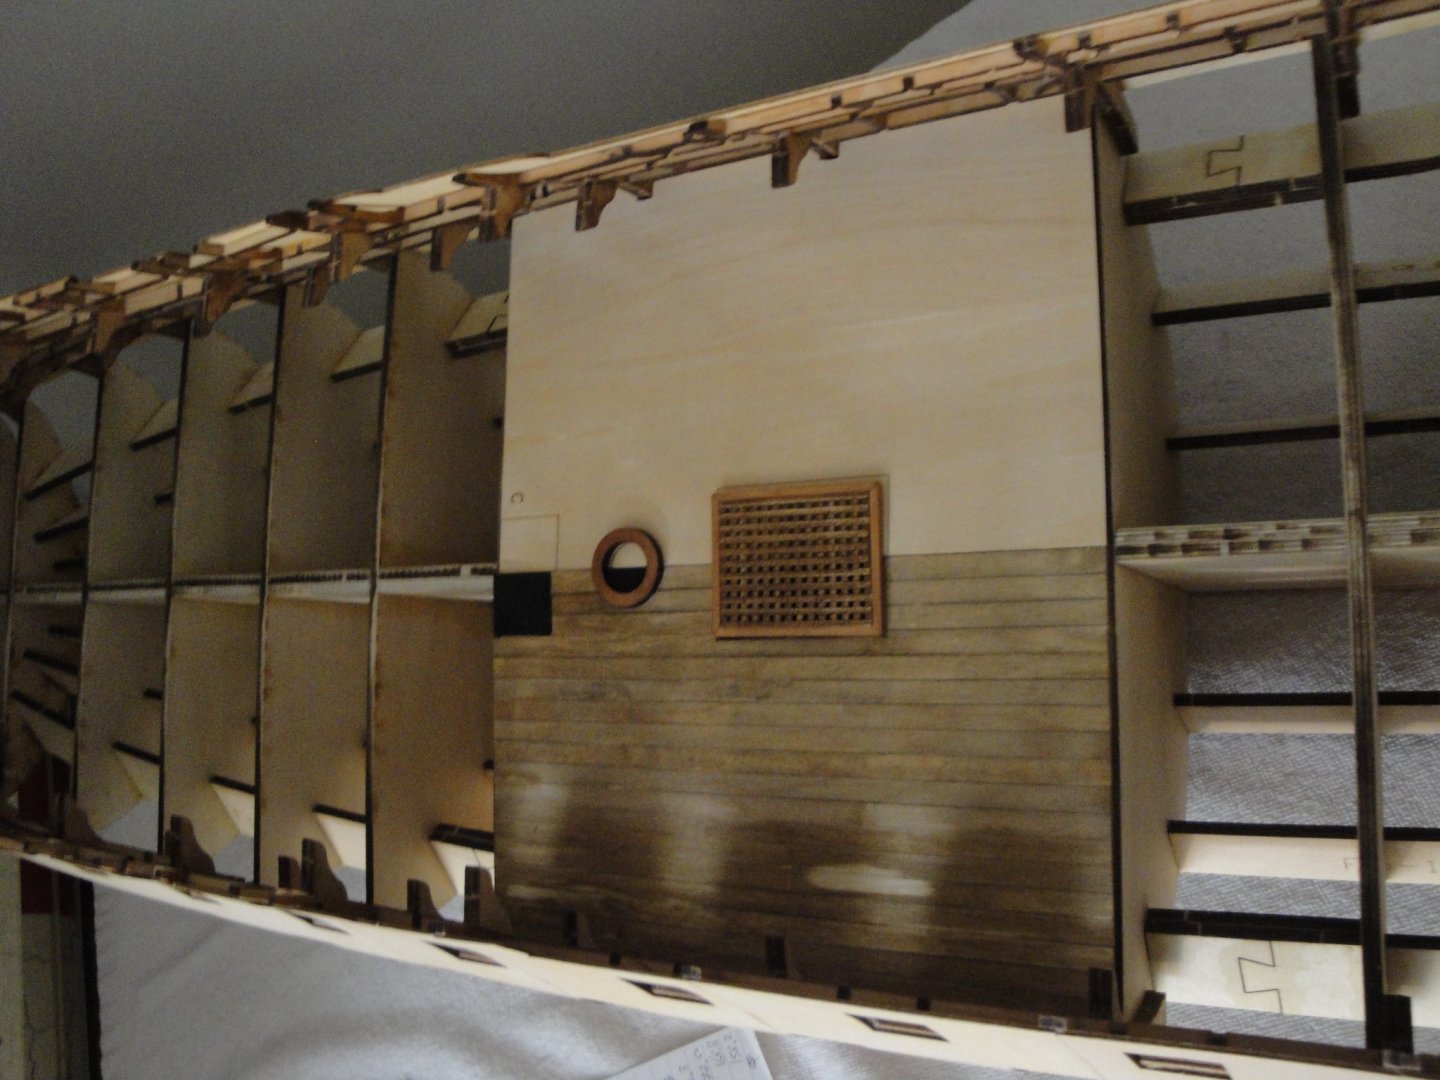
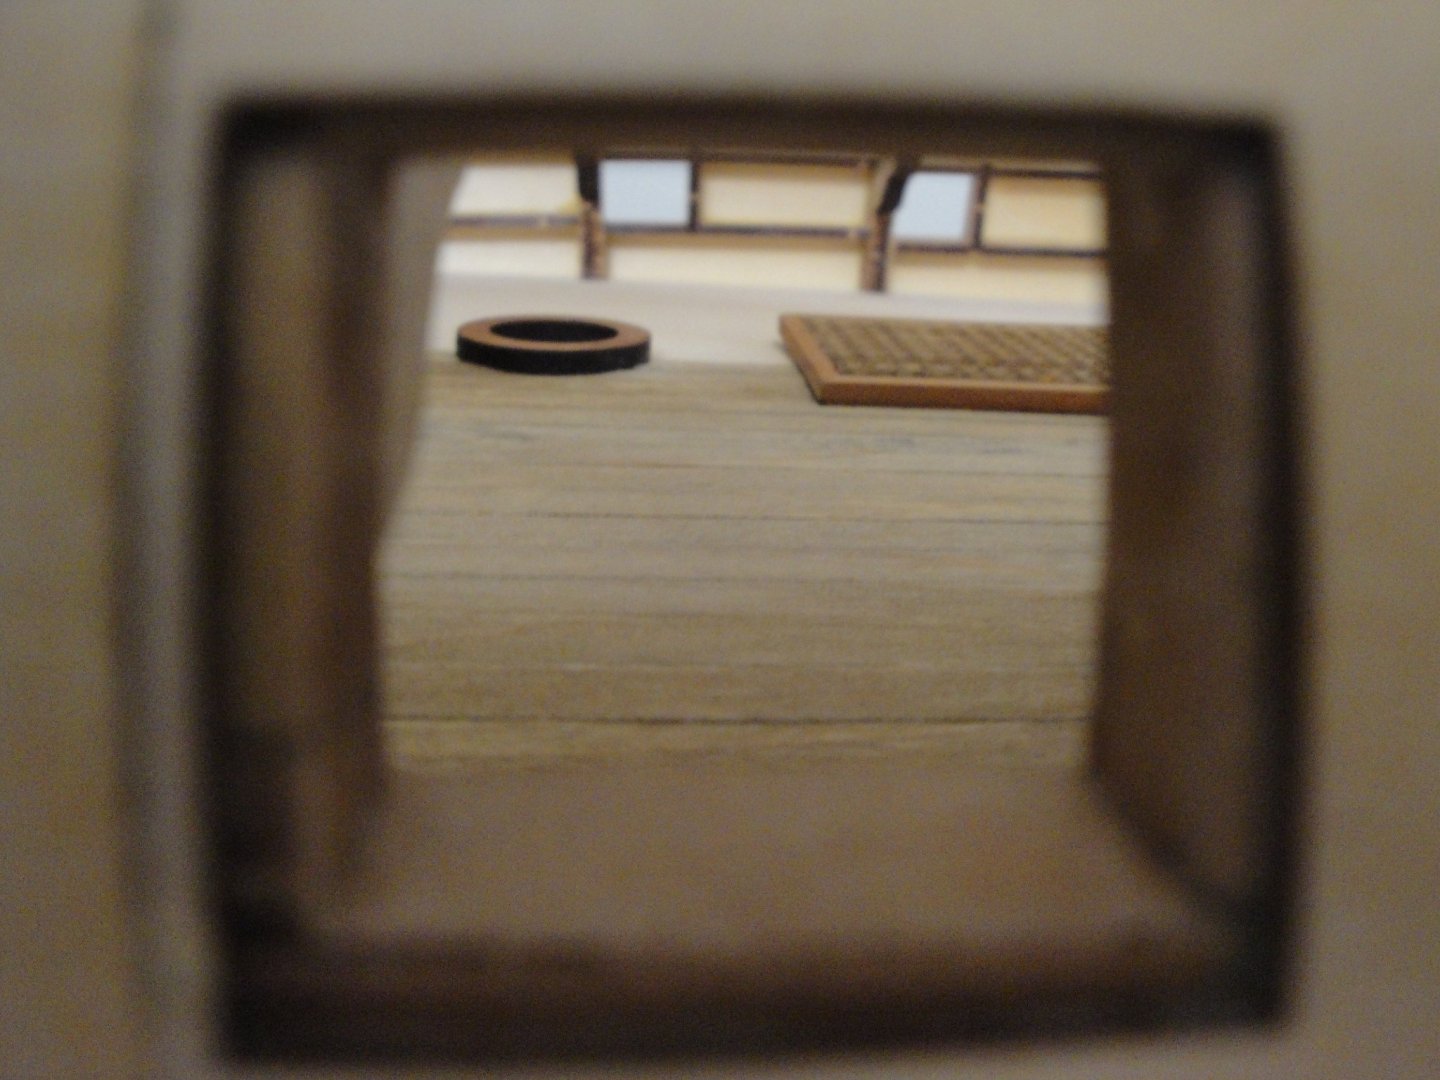
A quick update, as I am moving on with Session #2 - Session #1 remaining unfinished for the time being (Stem and Stern). Using the thin plywood (1.5 mm) provided in Session #2, the shell is build around the vessel, in preparation for the planking and the wales: Each plate takes about 4 to 5 hours to fully dry, using Titebond glue. The hour-glass shape of the hull requires a lot of fasteners to marry the shape of the futtocks: The overall result is rather pleasant with a very smooth hull sides. There may be a couple of places where some putty will be needed to compensate for a low spot, but overall, the precision of the cuts and quality of the wood is amazing, on such large vessel. The Stem is still in waiting mode as I need to most likely deconstruct Futtocks #4 and reposition them to get a smoother flow of the hull: Futtock #4 is the dark frame which has not been sanded yet (see above). You may be able to see that frame #4 is too narrow (see above). This is really my only complaint about Session #1 in this kit: the lack of guidance and proper alignment of the frames at the top of the futtocks. How will the Forecastle deck fit (session #3) if these frames are not properly spaced ? Below is an overall view: For a change of pace, I have decided to start working on the main gun deck. It is made up of 10 large halves, built with a very nice plywood of 2 mm. The gun deck is part of Session #2 and most of it will be entirely covered by the Upper deck, Quarter Deck and Forecastle deck on top. Planking is done for fun and there is no need to stagger the planks since nothing will be visible through the ports occupied by the muzzle of 32 pounds gun. Planking is done with Maple of 0.4 mm thick. The difference in color comes from the fact that the left planks were recently stained and the wood has not had the time to absorb the color. The ring is the base for the main mast. Around the mast will be located four bilge pumps. In situ, below: Not much can be seen.... Yves


- 507 replies
-
- 17
-
-
-
The so called "prototype build" is turning into a very nice model !! Yves
-
That is a gorgeous boat Ryland. I just got the same kit from Model Shipways and plan to place it on the deck of the Bellona, if I ever get there one day.... Yves
-
Building scale ship models is a school of patience. You spend more time waiting for parts than building the model itself.... Yves
- 127 replies
-
- 3
-
-
-
- Bowdoin
- Arctic Exploration
- (and 3 more)
-
What an ambitious project. It is amazing and you are mastering all techniques in this build: 3D scale modelling, large model building, mechanical, electrical and artistic. I will follow your build with a lot of interest. Yves
- 454 replies
-
- 1
-
-
- Union Steamship Company
- Stepcraft 840
- (and 3 more)
-
What a beautiful interior.... Very realistic. You need a cat and a few rats, in there... 🙂 Yves