yvesvidal
-
Posts
3,634 -
Joined
-
Last visited
Content Type
Profiles
Forums
Gallery
Events
Everything posted by yvesvidal
-
 Okay, you need some kind of psychological help, but I do have a lot of empathy for you ☺️ Yves
 -
Lovely kit, very well designed with a gorgeous ship at the end. I will be watching your progress, Derek. Yves
- 345 replies
-
- 1
-

-
- Duchess Of Kingston
- Vanguard Models
- (and 1 more)
-
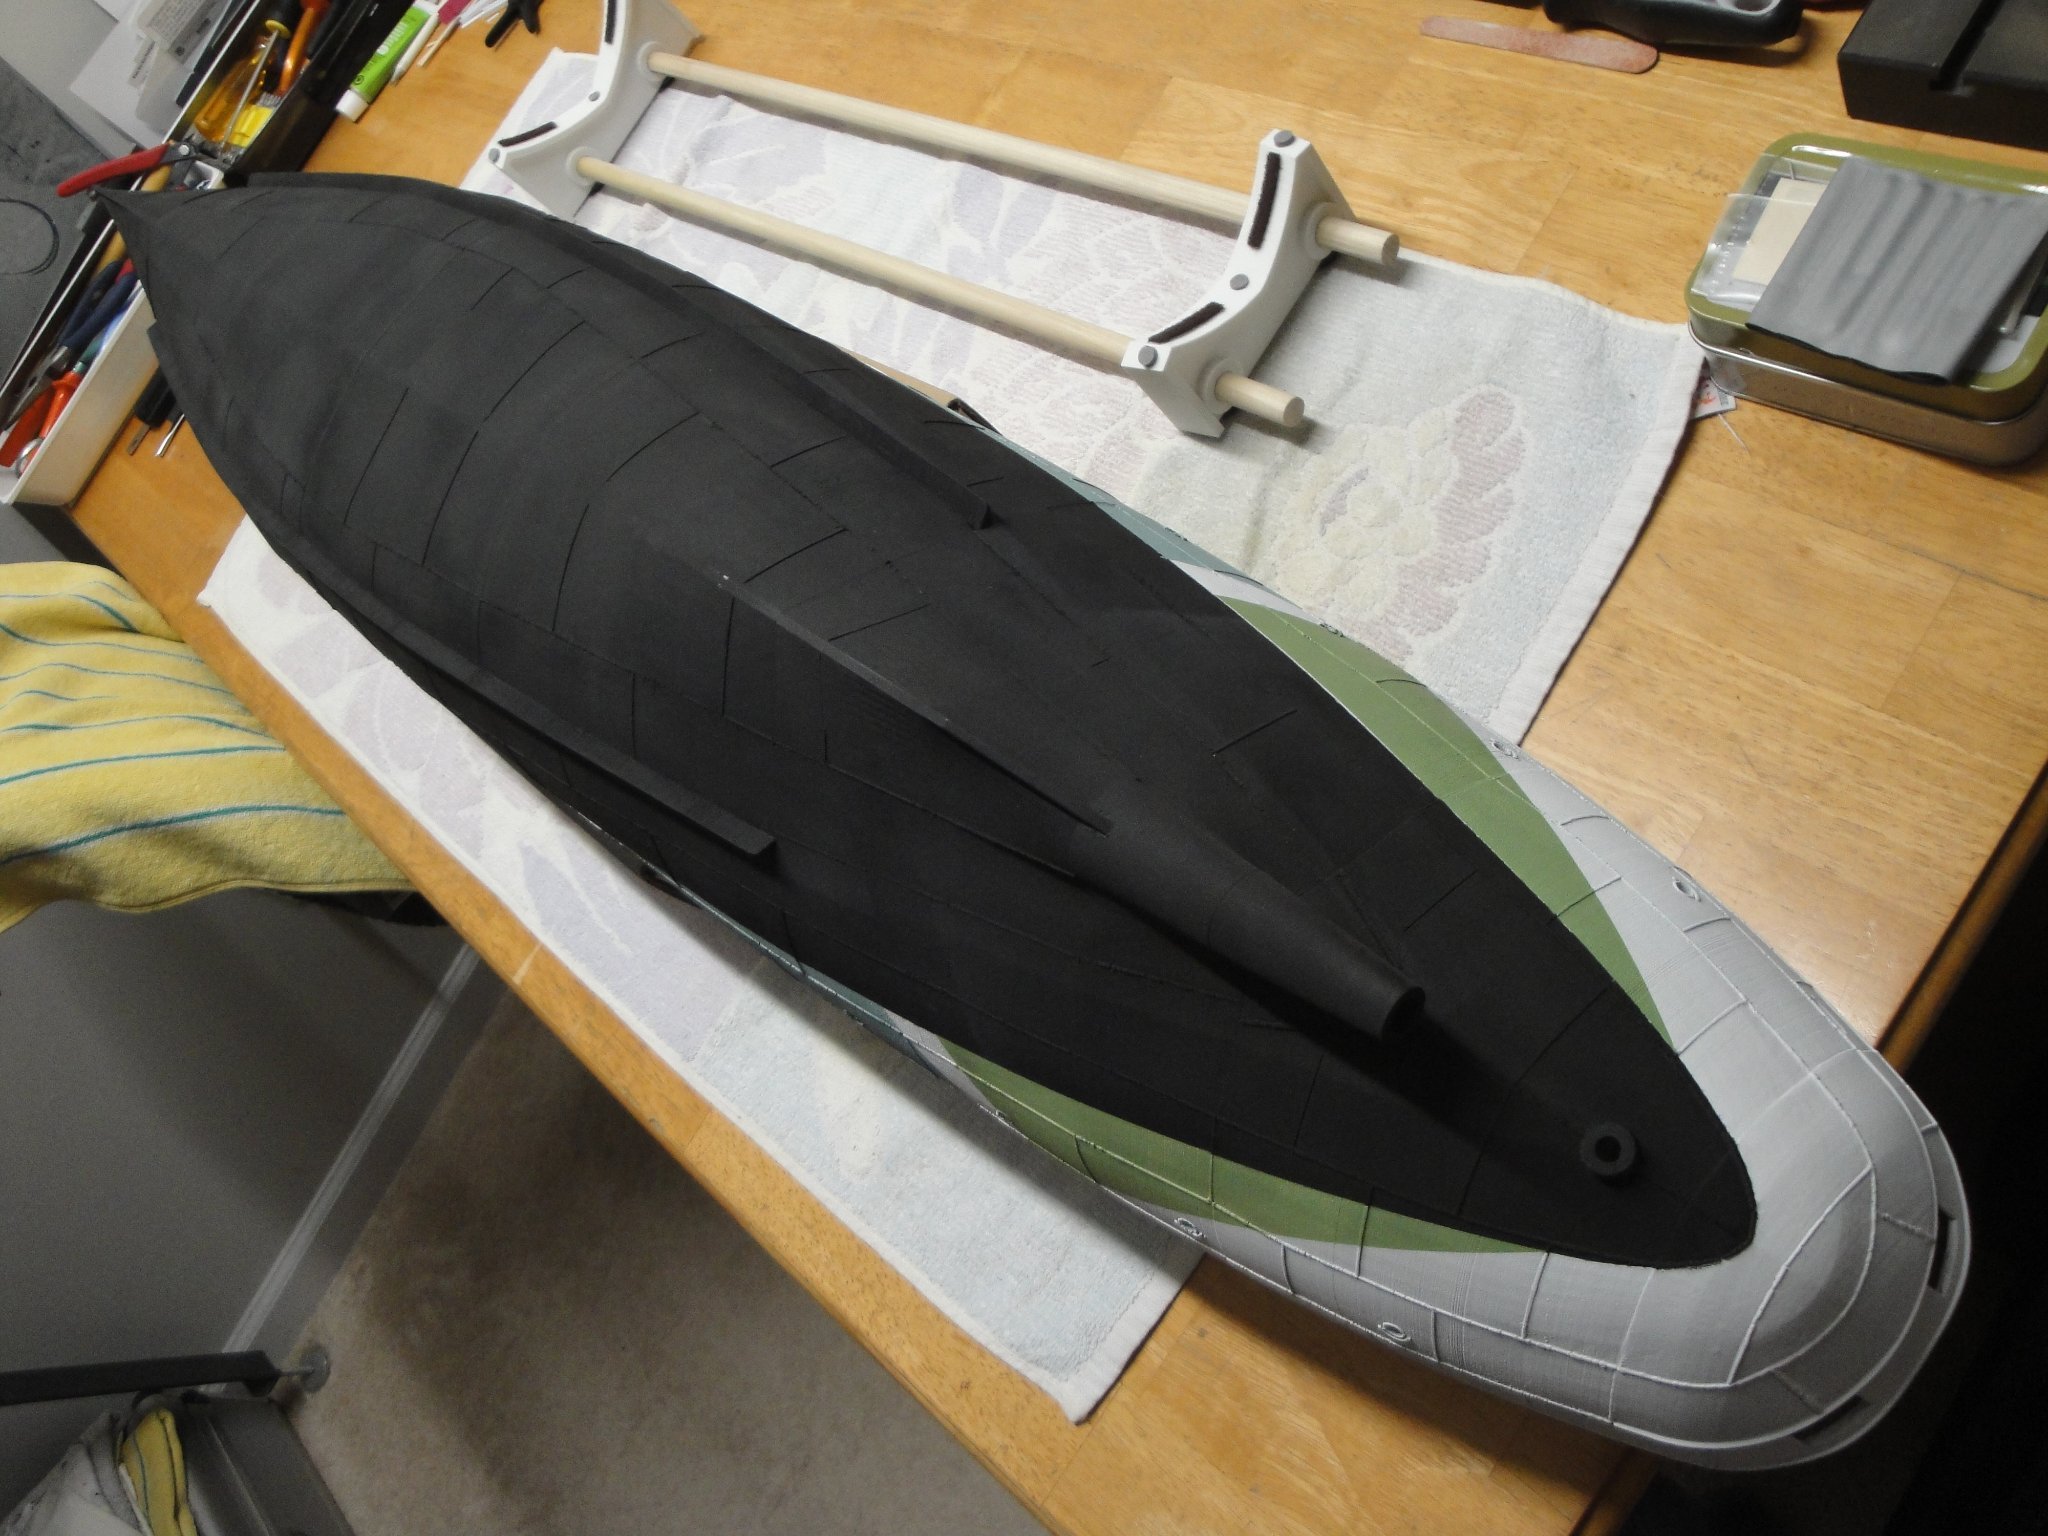
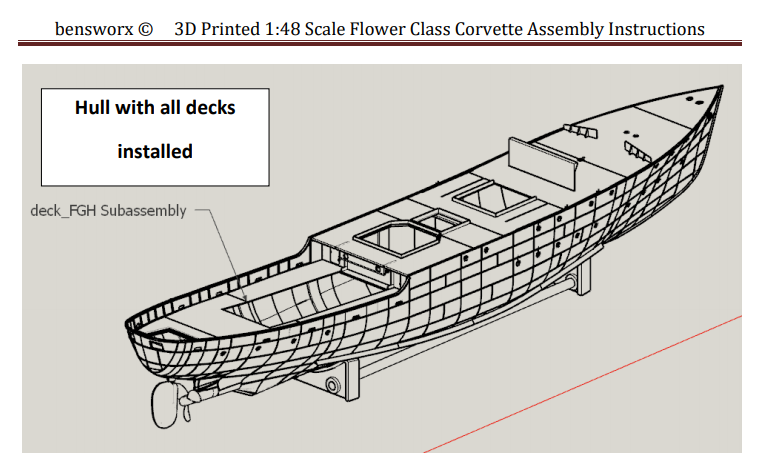
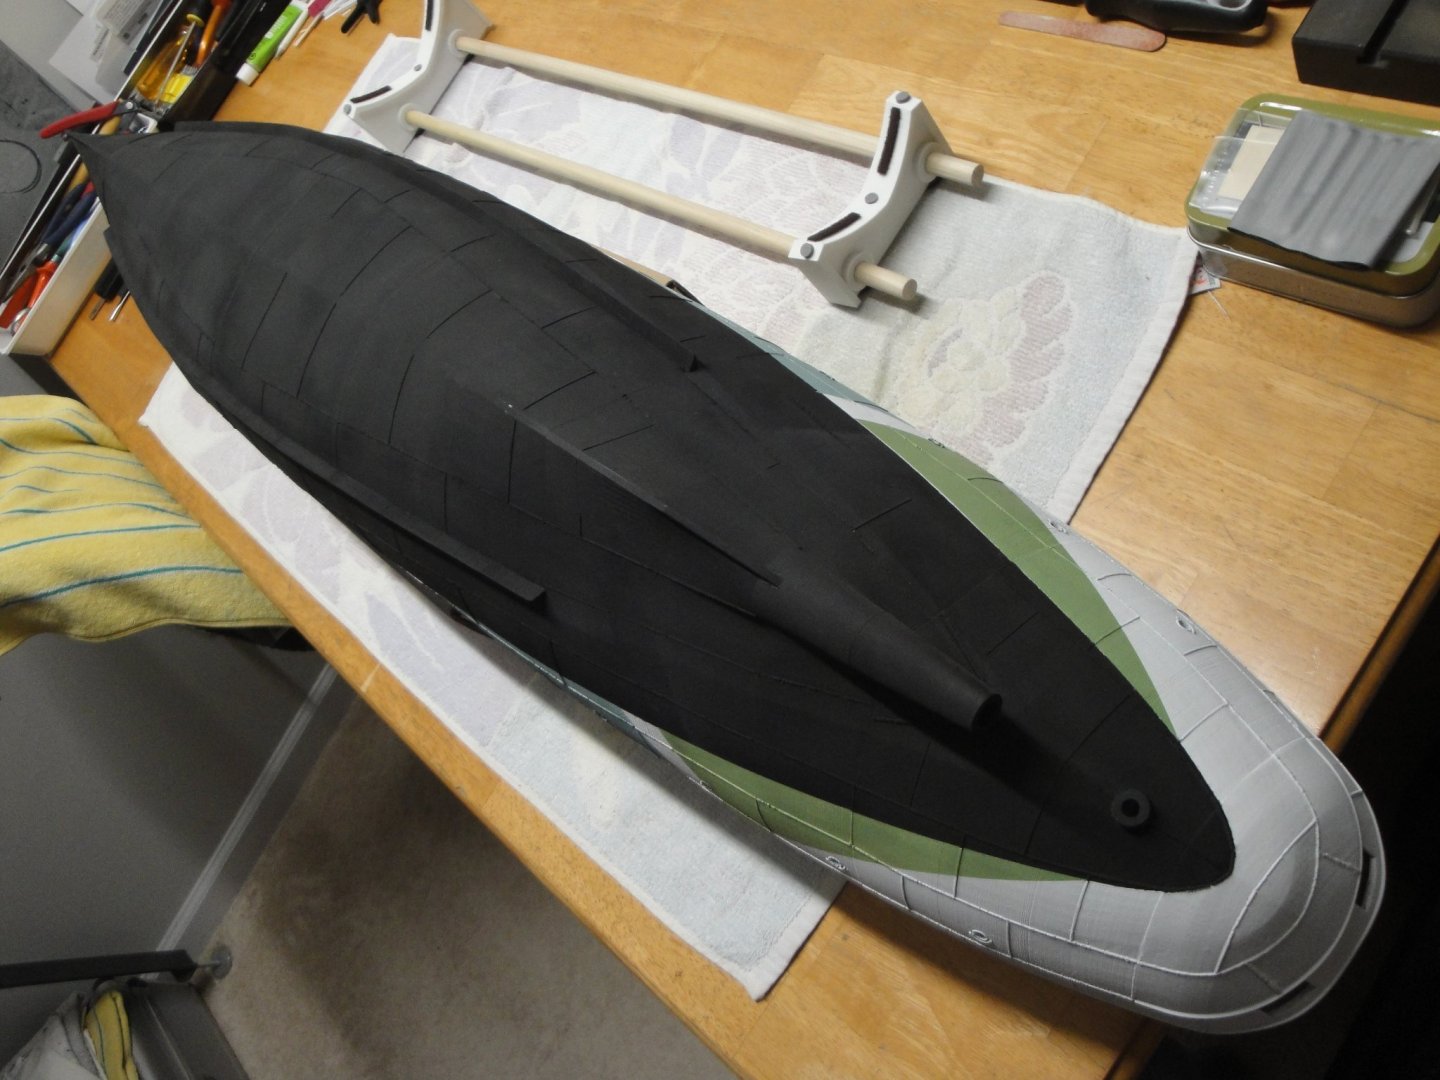
I agree with you: 3D printing material is very tough and the welding with MEK, may not withstand the impact of a 3 feet high fall. But then again, it is not really designed for that. I have used CA to position the hull sections and then MEK, which takes a long time and lots of liquid to insure a strong bond. So far, I am quite happy and hope to not drop it.... So, at this stage, we have finished the hull (still some details to paint) and all decks have been printed and positioned on top of the hull, with numerous strips for shimming and precise positioning. I still have to print the propeller and assemble the rudder, to call it completed. Yves
- 321 replies
-
- 10
-

-
- Finished
- Flower-class
- (and 1 more)
-
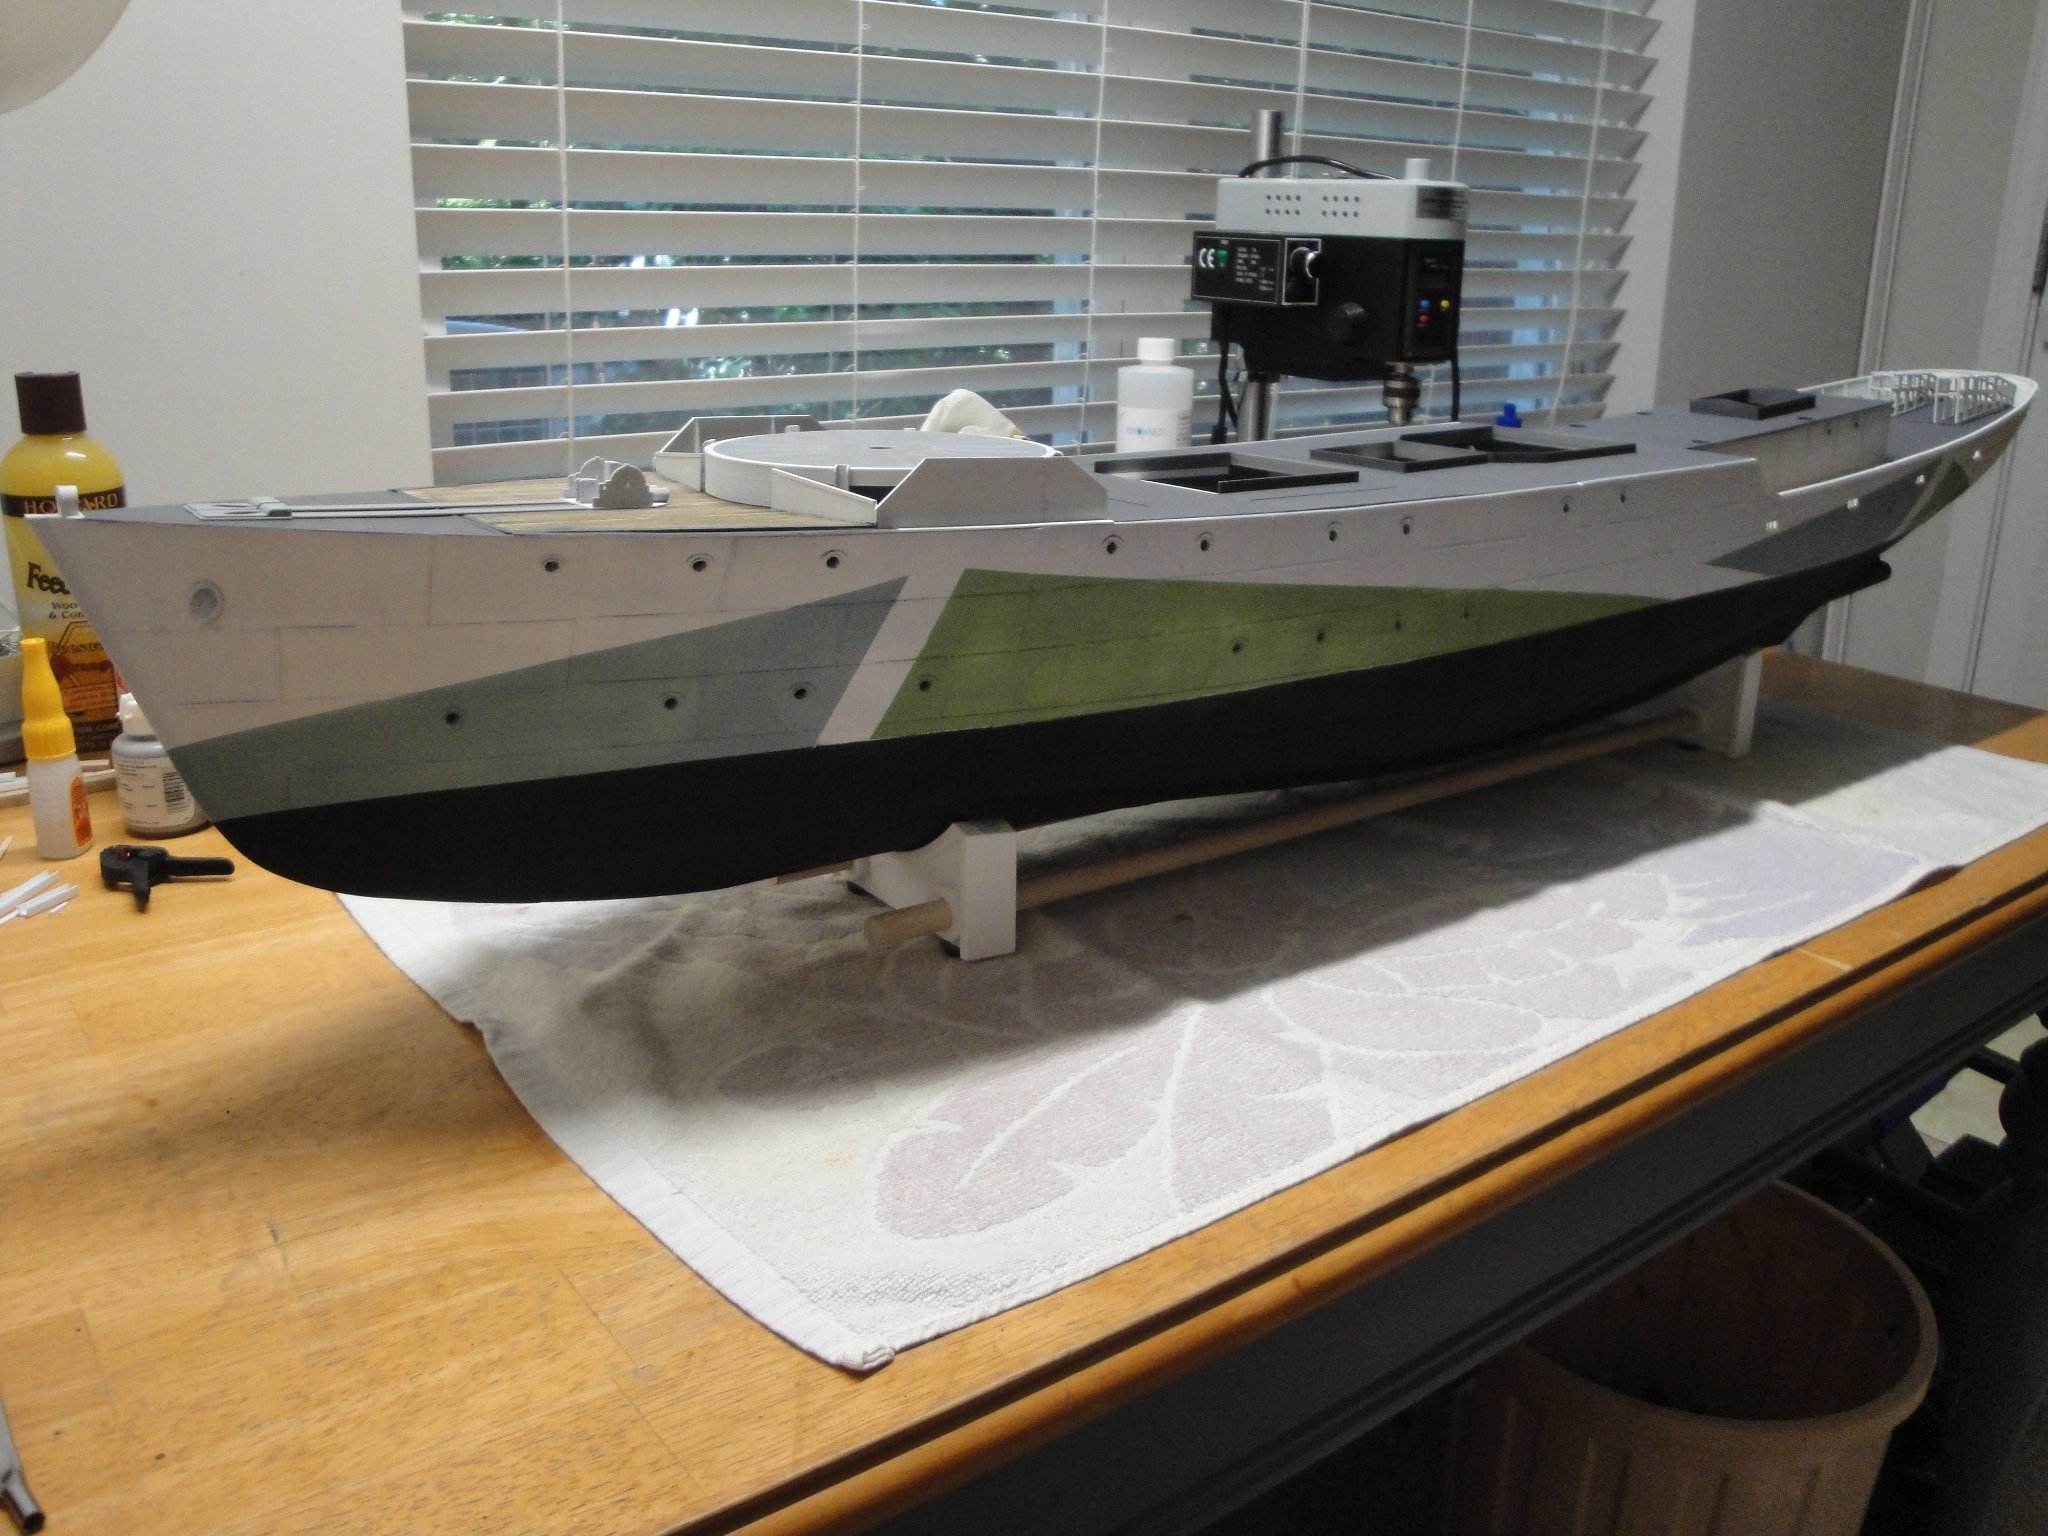
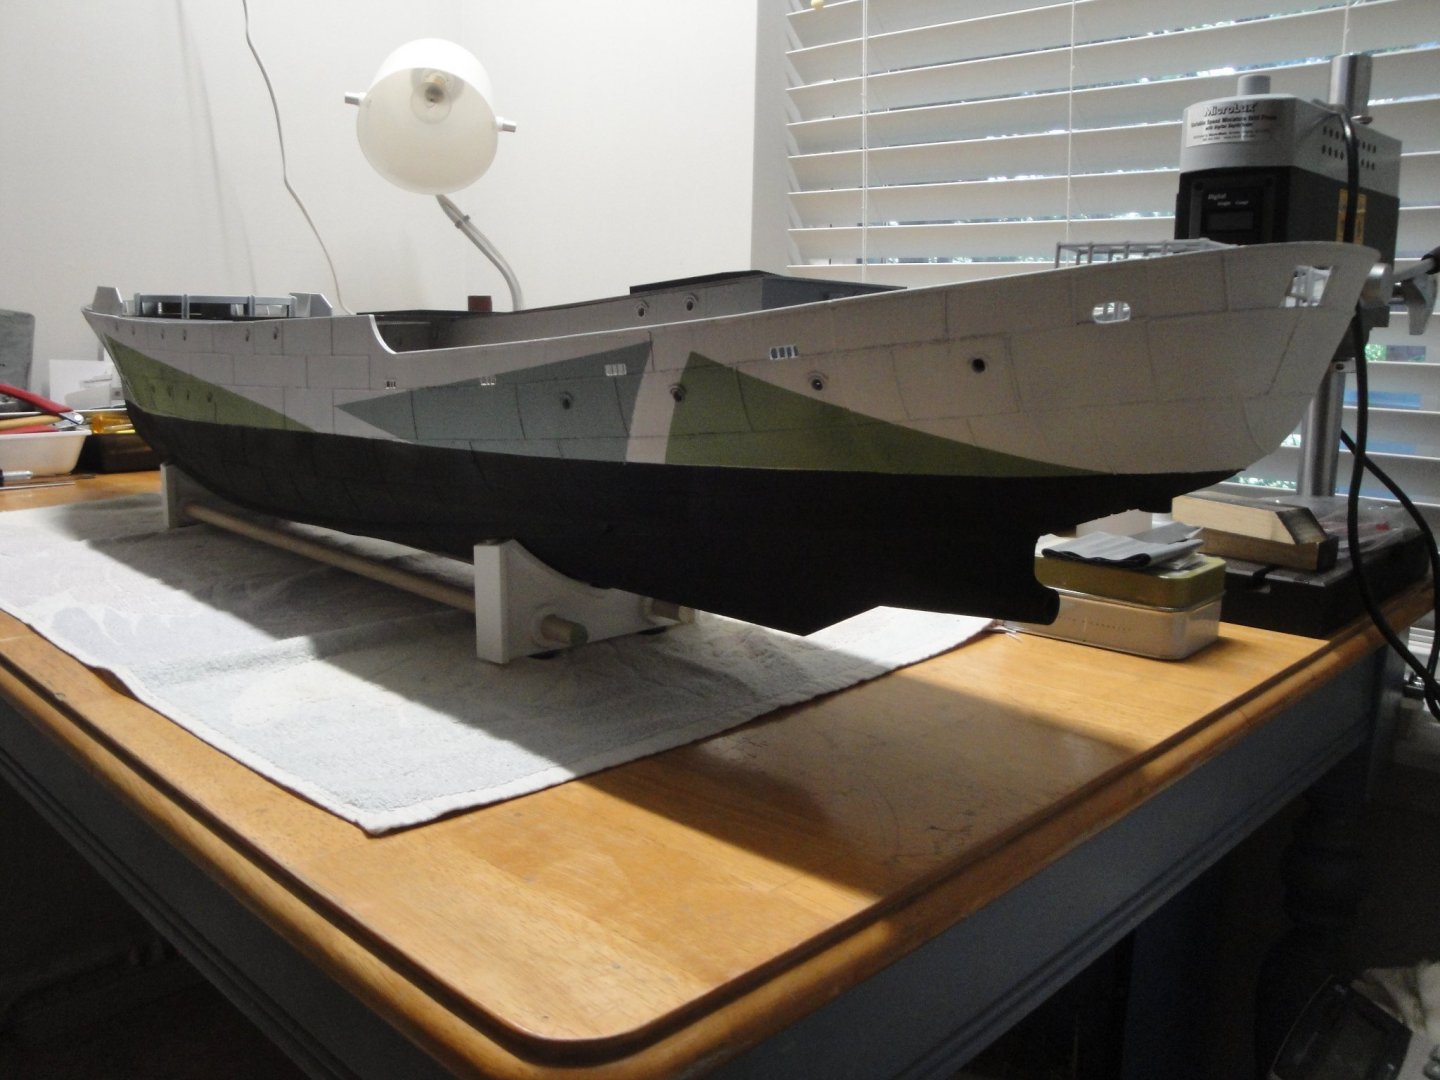
Posting some progress. The hull is almost completely painted. Everyone will have recognized the patterns of the HMCS Snowberry: When painting that large hull, you need to use a lot of paints. The black is an entire Tamiya Flat Black XF-1 can of 23 ml. An entire can of XF-2 white 23 ml went also into painting the white part. Blue is Tamiya Light Blue and green is a mix of XF-2 and XF-5 Green. It is starting to come along and it is nice to display some details on the decks. My problem now is how to create the markings on the Hull: "K166" and the measuring ladders at the stern and bow. Decals is not an option because the surface is not flat enough. Perhaps, masking or pre-cutting with a mask machine (unfortunately I do not own one). I am not feeling good enough to do it with my free hand. Nothing is glued yet. Just resting on the hull. Yves

- 321 replies
-
- 17
-
-
- Finished
- Flower-class
- (and 1 more)
-
Alright, I have come now to a point where I need to take a decision about the specific Corvette I want to model. As indicated, the kit provides for a Generic Modified Corvette (Long forecastle), designed for Radio Control and navigation. Many Corvettes were built, modified and retro-fitted during their short lives and choices are multiple and varied. I am not going to improvise and will try to stay within the Corvette Classics, for multiple reasons: - The colors - The availability of pictures and plans - The relative "neutrality" of the Builder Country, during WWII - The name and what it evokes. I am sure you all have guessed, what it will be. Yves

- 321 replies
-
- 8
-
-

-
- Finished
- Flower-class
- (and 1 more)
-
That is exactly what I did: Once you have the right levelling, I have not touched it since the first printed part. Yves
- 460 replies
-
- 7
-
-
- Finished
- Flower-class
- (and 1 more)
-
Herman, I suspect that the kit designer did not bother with re-creating a perfect and precise model. His goal was to offer a Radio Controlled Corvette, that would look from a distance, as a decent generic Corvette. Instead, he used welding lines to delineate the various panels on the hull since Corvette used both Rivets and Welding for the hull assembly. I think that sometimes, rivets tend to distract from the overall appearance of a model, and can be over emphasized. A rivet in the scale of 1/48 or 1/72 is not bigger than the tip of a small nail. Yves
-
Way to go Captain Hook !!! Yves
-
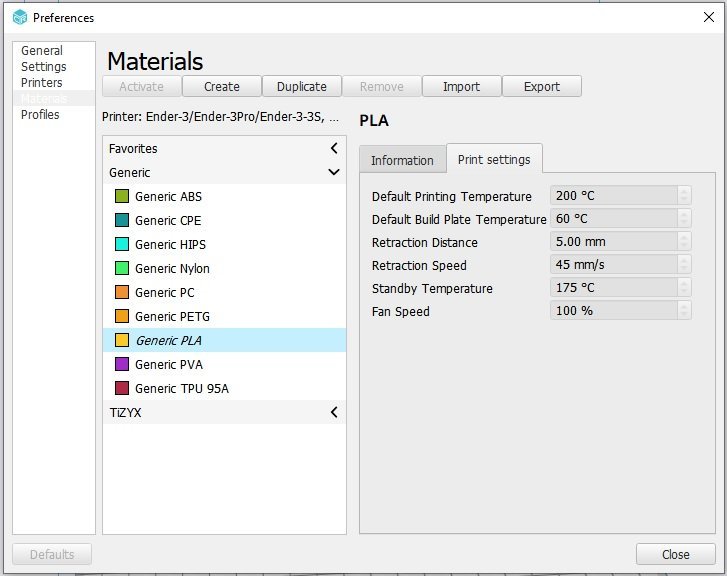
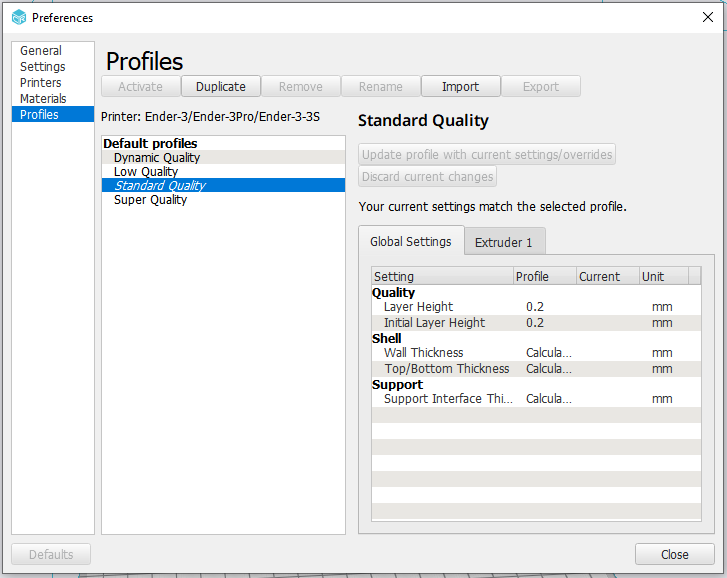
Alan, Just in case that may provide you with some info, here are the profiles I am using: Have you tried printing a section of deck? How about HULL #9 T (top) ? Yves
- 460 replies
-
- 6
-
-
- Finished
- Flower-class
- (and 1 more)
-
Beautiful. On my model, the quality of the printed parts is much more crude and plain. Yves
-
Very interesting chassis. "Modern" pick-up trucks are not that far ahead of that coach.... 😉 Yves
- 150 replies
-
- 10
-
-
Alan, I ran into the same issue. My first download was on WIN 7 and it did not work. After installing it on WIN 10, it went fine. Yves
- 321 replies
-
- 6
-
-
- Finished
- Flower-class
- (and 1 more)
-
Wonderful Alan, I think you are now on good tracks. Do not touch the leveling wheels anymore, if you are happy with their settings. Consumption: - One spool gave me sections 1,2,3,7,8,9B and 9T. - Another spool gave me sections 4,5,6 - There was some spare on both. - I think the kit can be entirely printed with 3 spools ($69). You may need a little extra for the brims and it is not even sure. Yves
- 460 replies
-
- 6
-
-
- Finished
- Flower-class
- (and 1 more)
-
Lancia Assunta by maurino
yvesvidal replied to maurino's topic in - Build logs for subjects built 1901 - Present Day
Great sewing skills. Yves -
Andreas, I am really sorry to hear about your disappointment with this kit. I hope you will find the strength and motivation to resurrect it. I am also concerned by the quality as you are describing it, as I wanted to procure two of their kits that I find absolutely magnificent: The Bellona (1/48) and the Chebec (1/48). The first one is plank on bulkheads (traditional), whereas the second one if POF. After reading your comments, I am not sure I want to spend twice $1200-1400 for these kits. This is really disappointing and I hope the CAF support group is able to do something for you. Yves
-
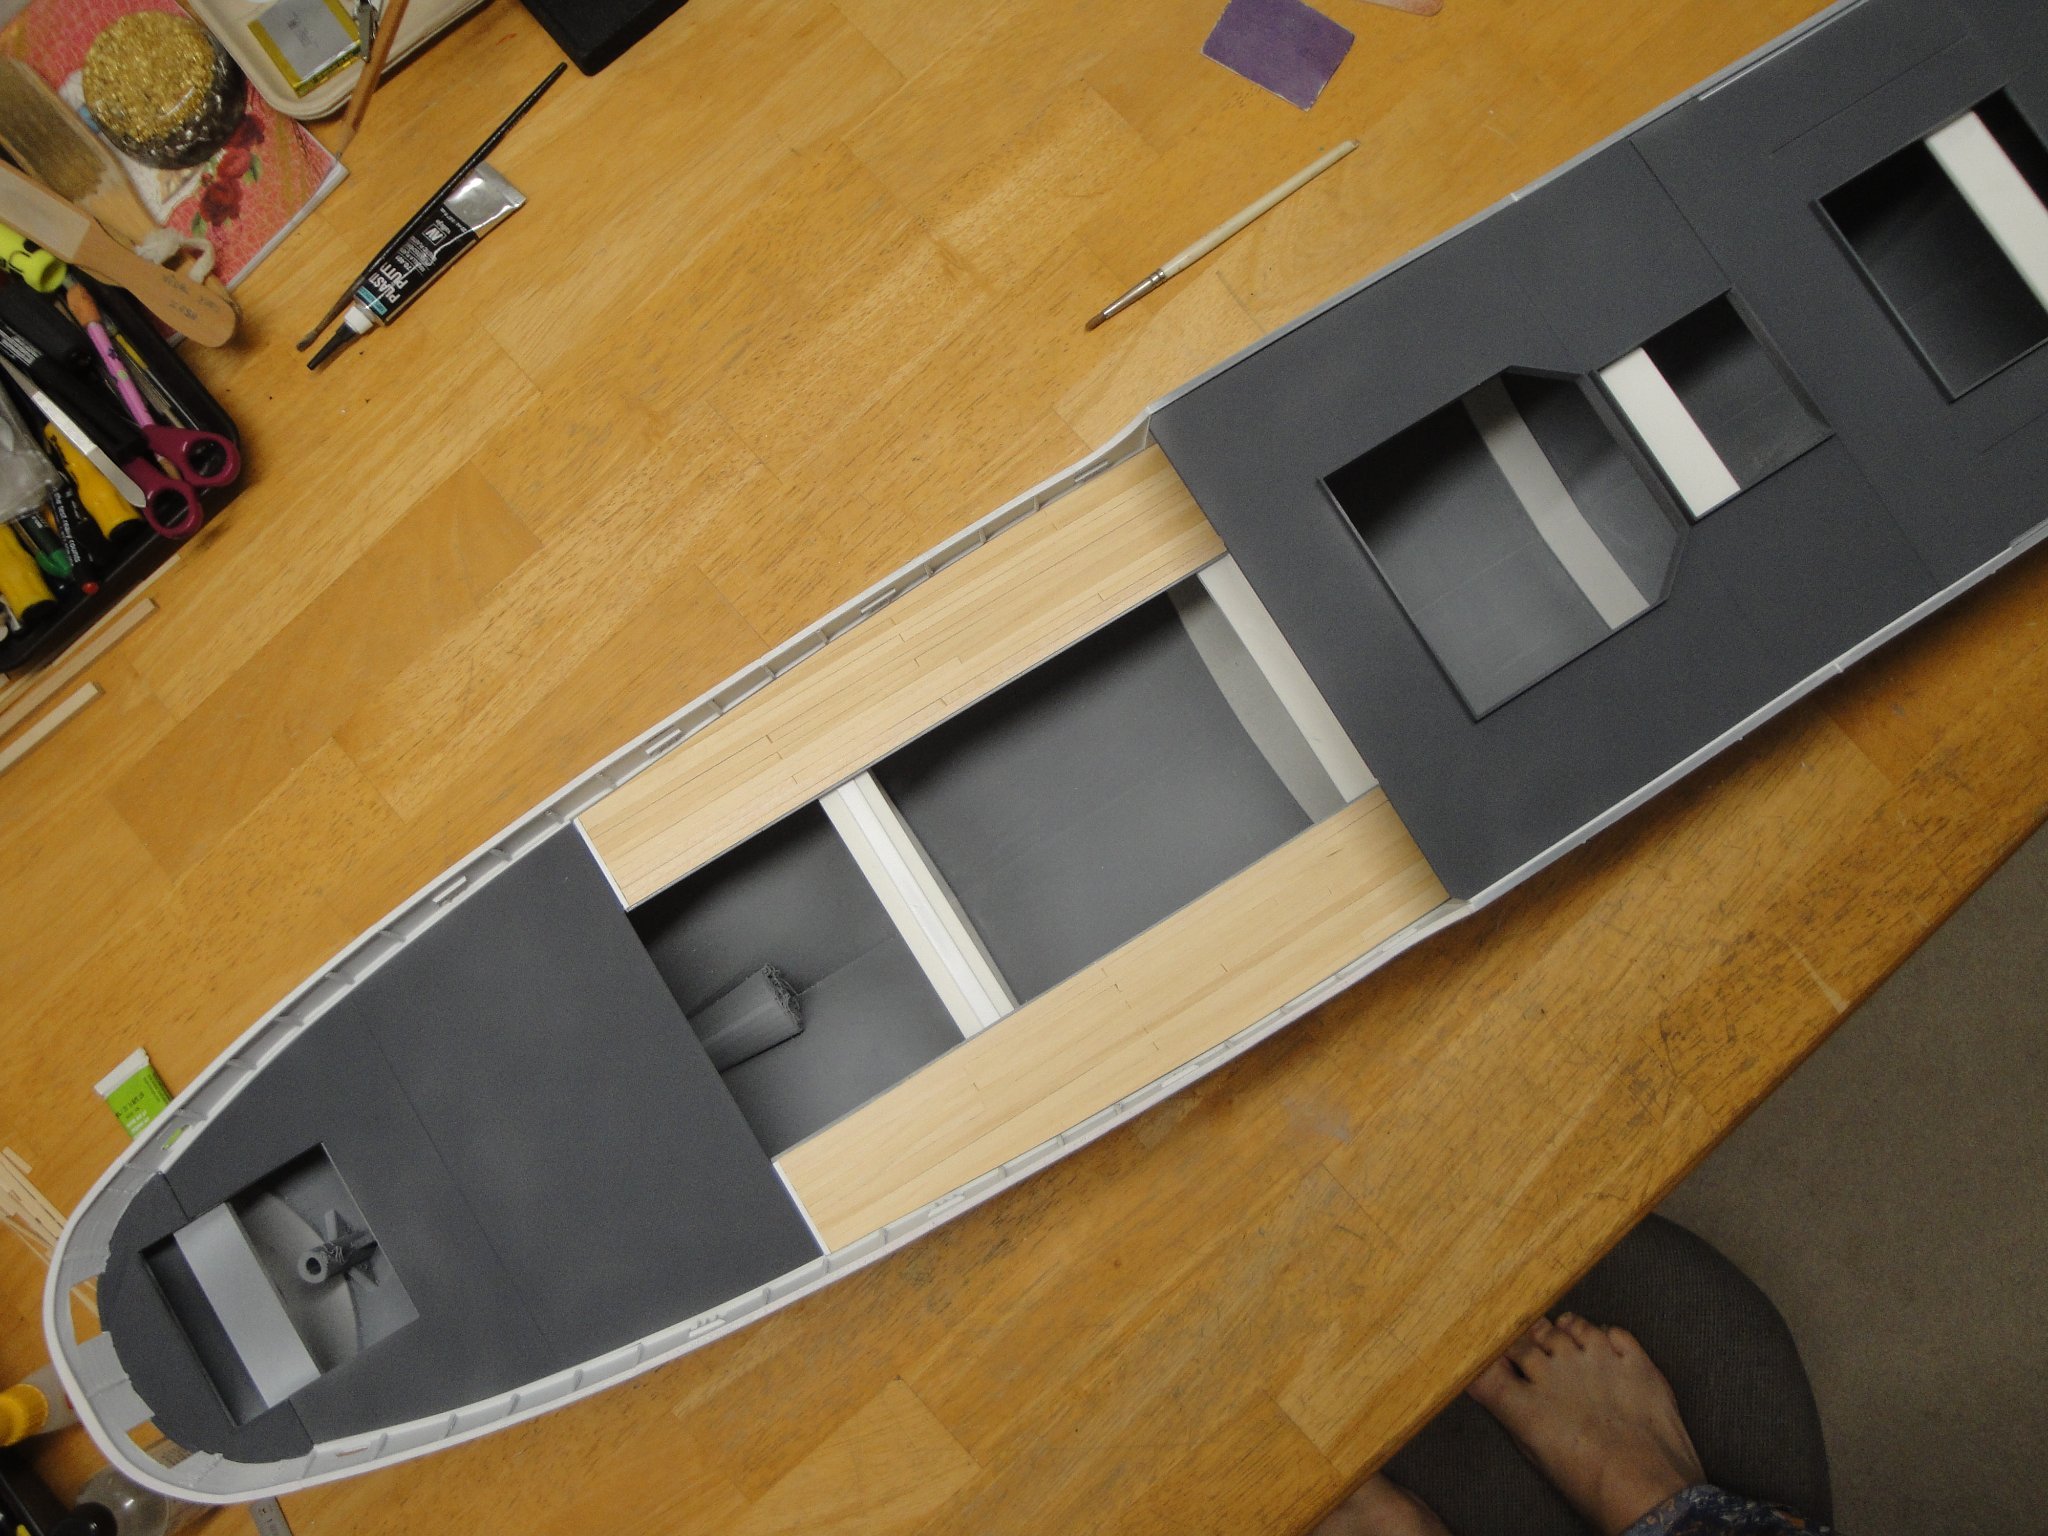
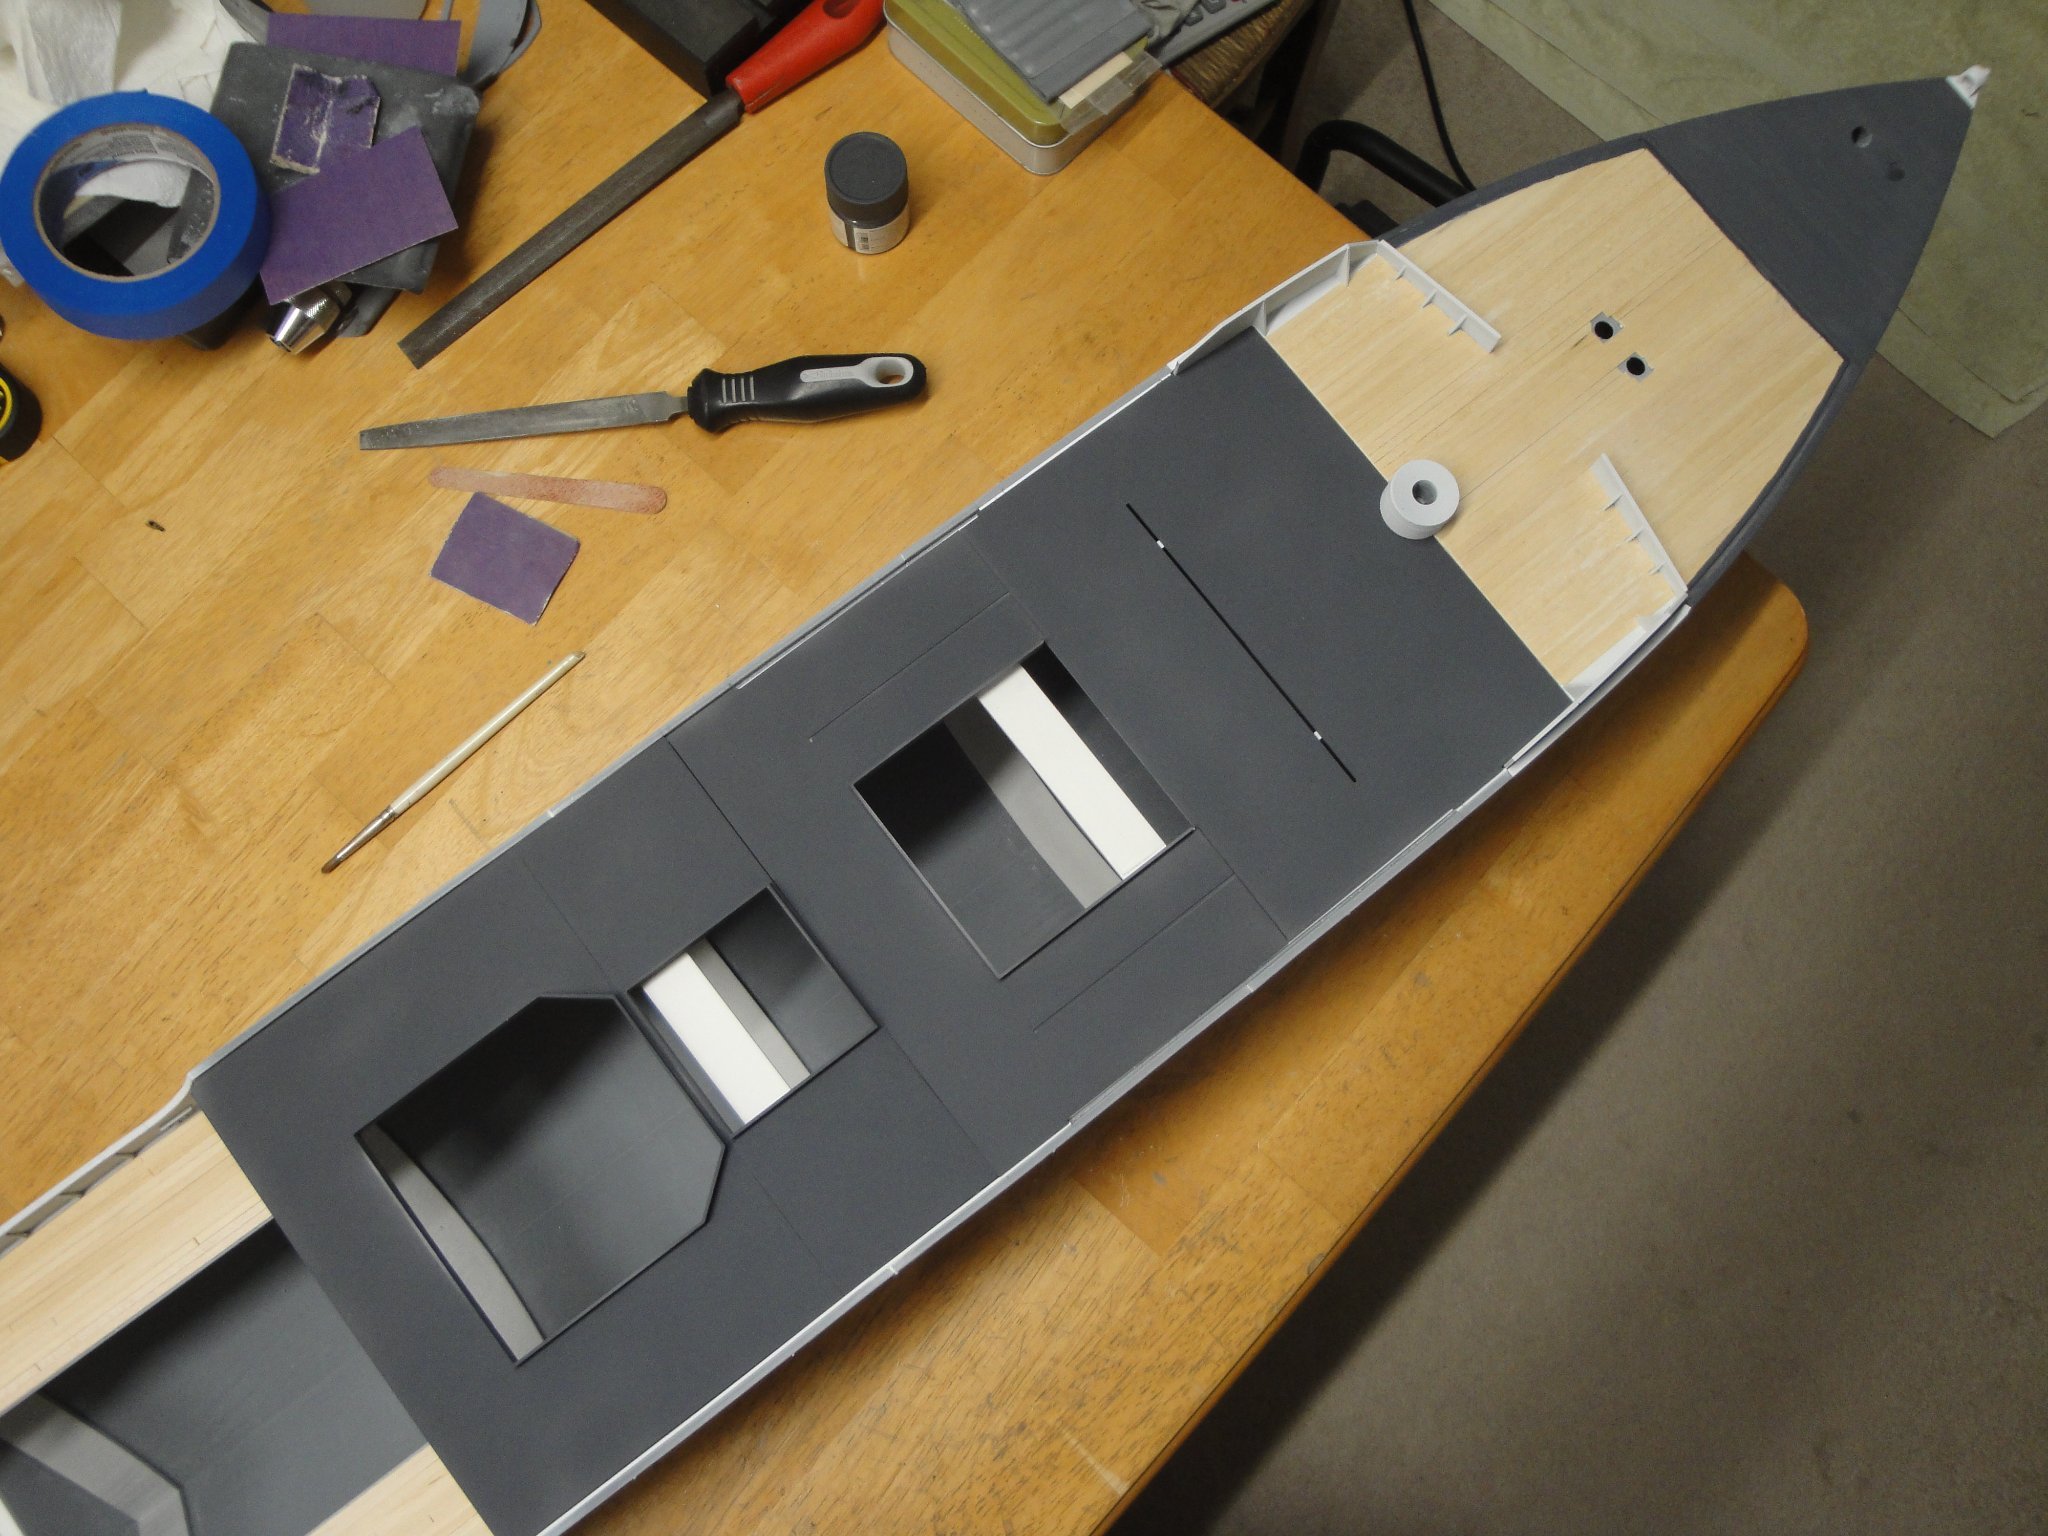
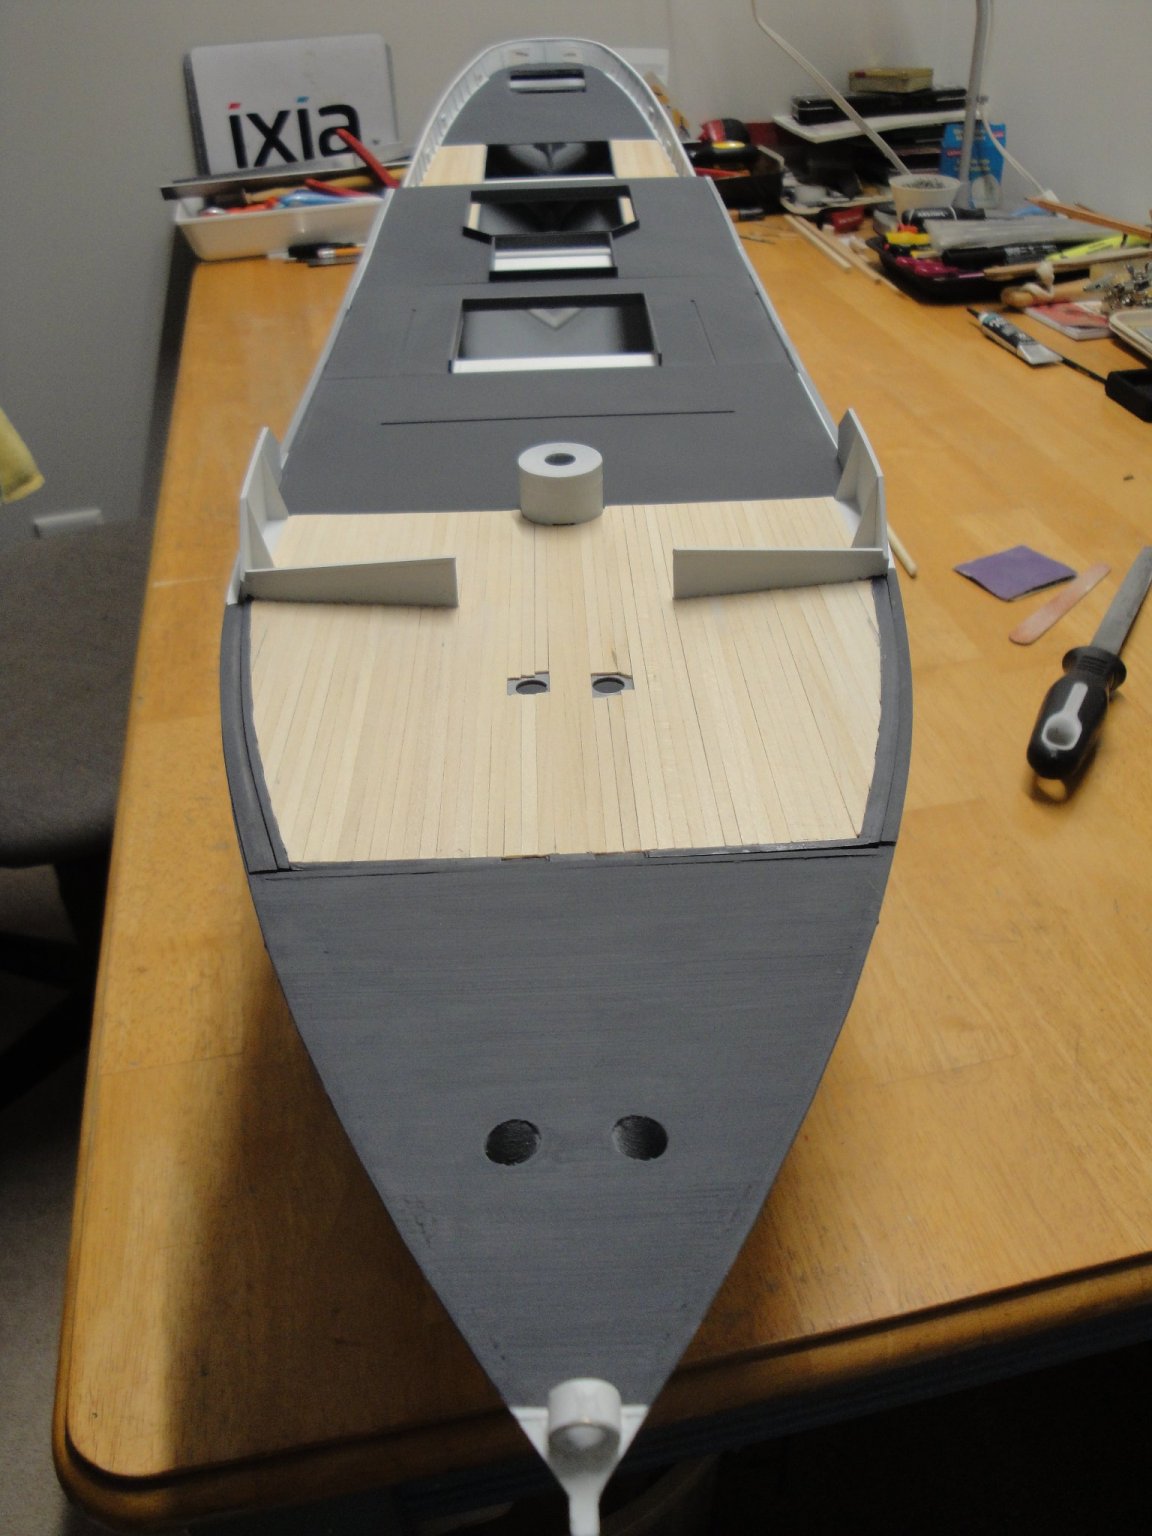
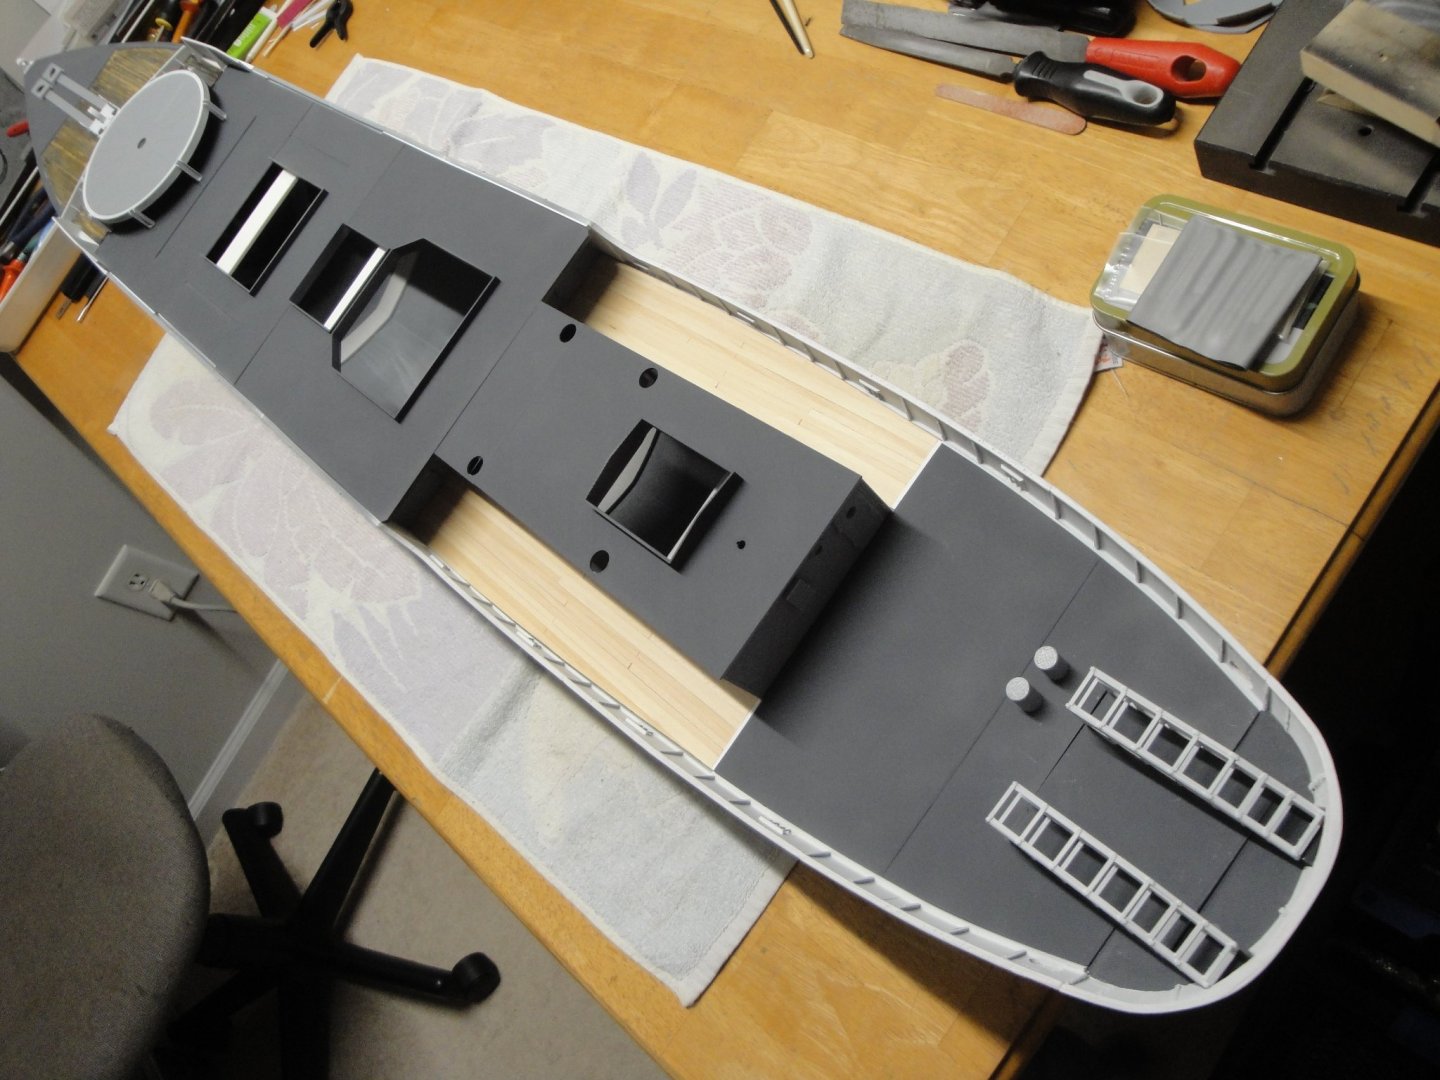
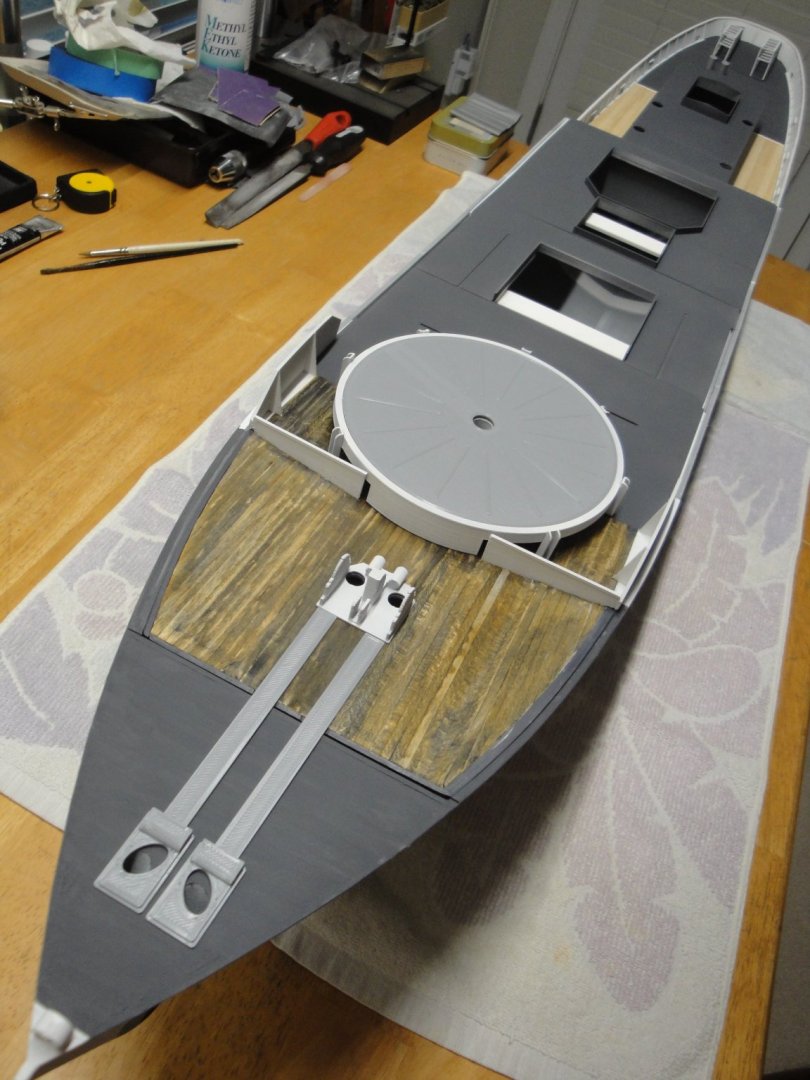
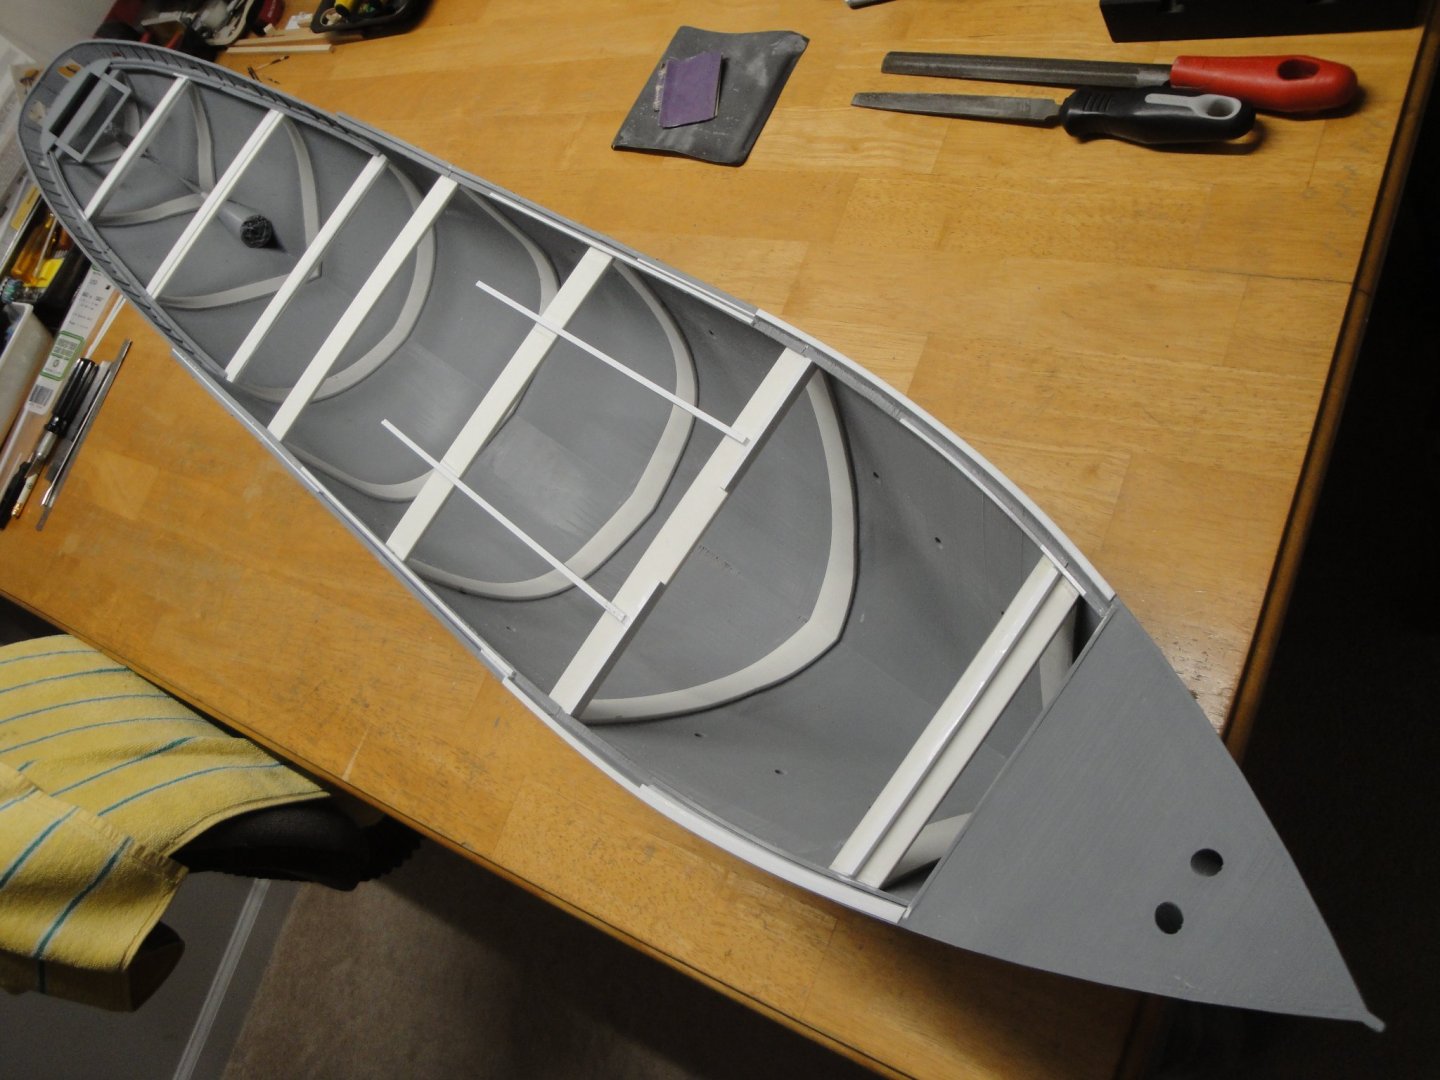
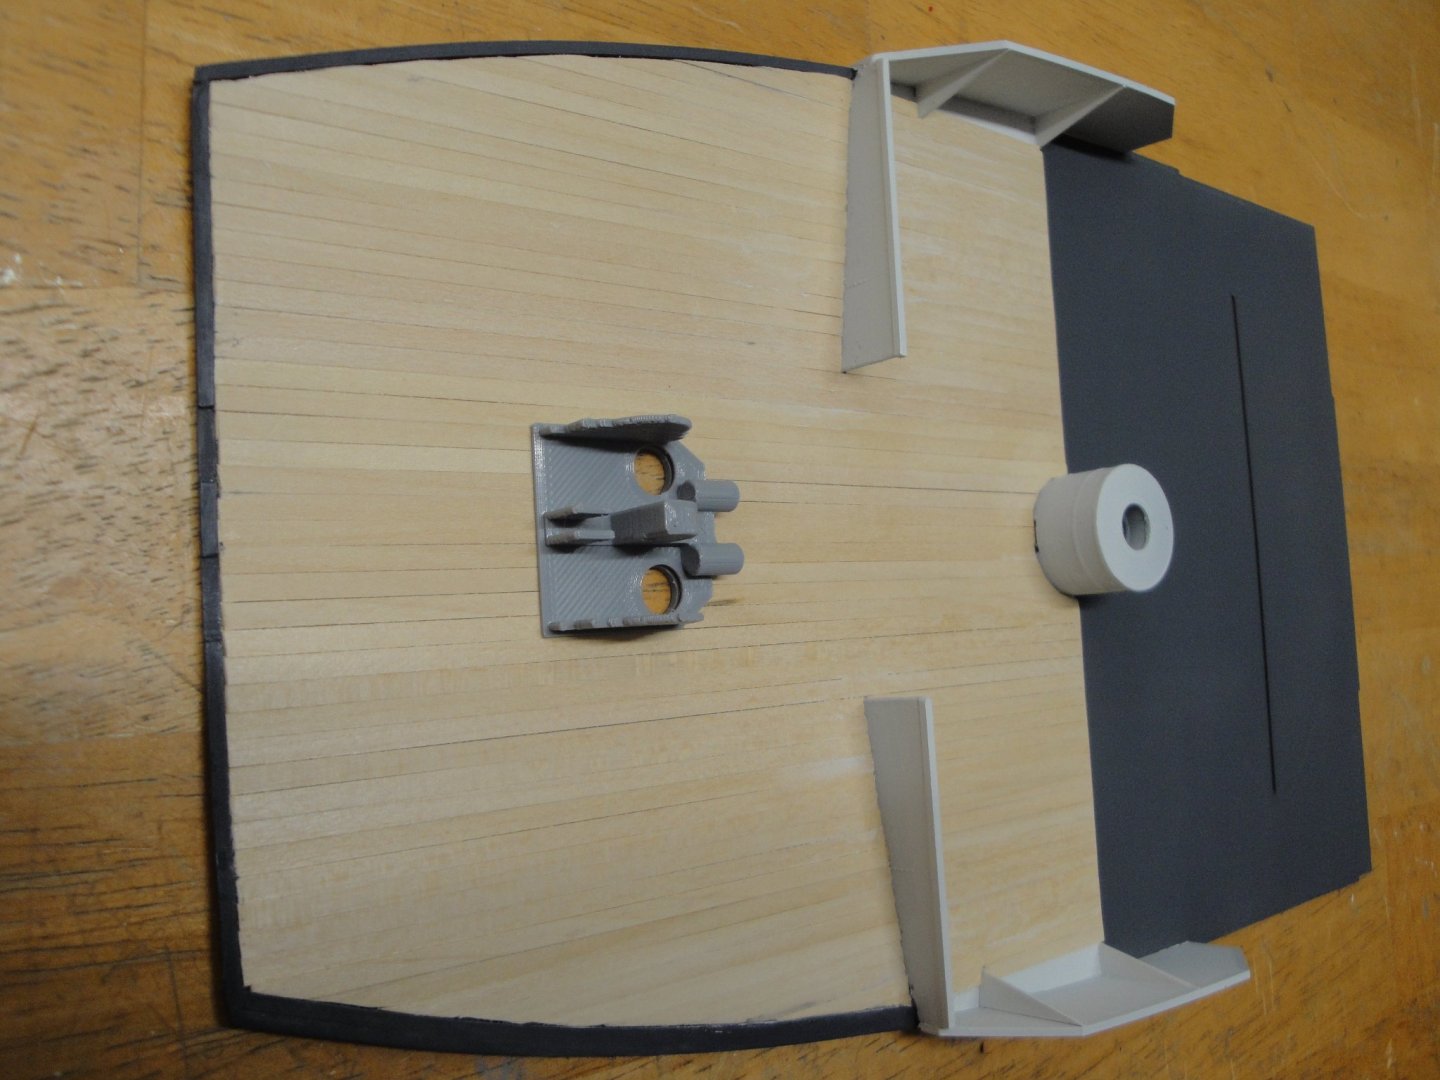
All the decks are fitting perfectly, where I want them to be, and this is what it takes in terms of styrene strips to get to the expected results: With this "calibration", the transition from planked wood decks and metal decks is smooth and nobody will stumble, during some action. Yves
- 321 replies
-
- 10
-
-
- Finished
- Flower-class
- (and 1 more)
-
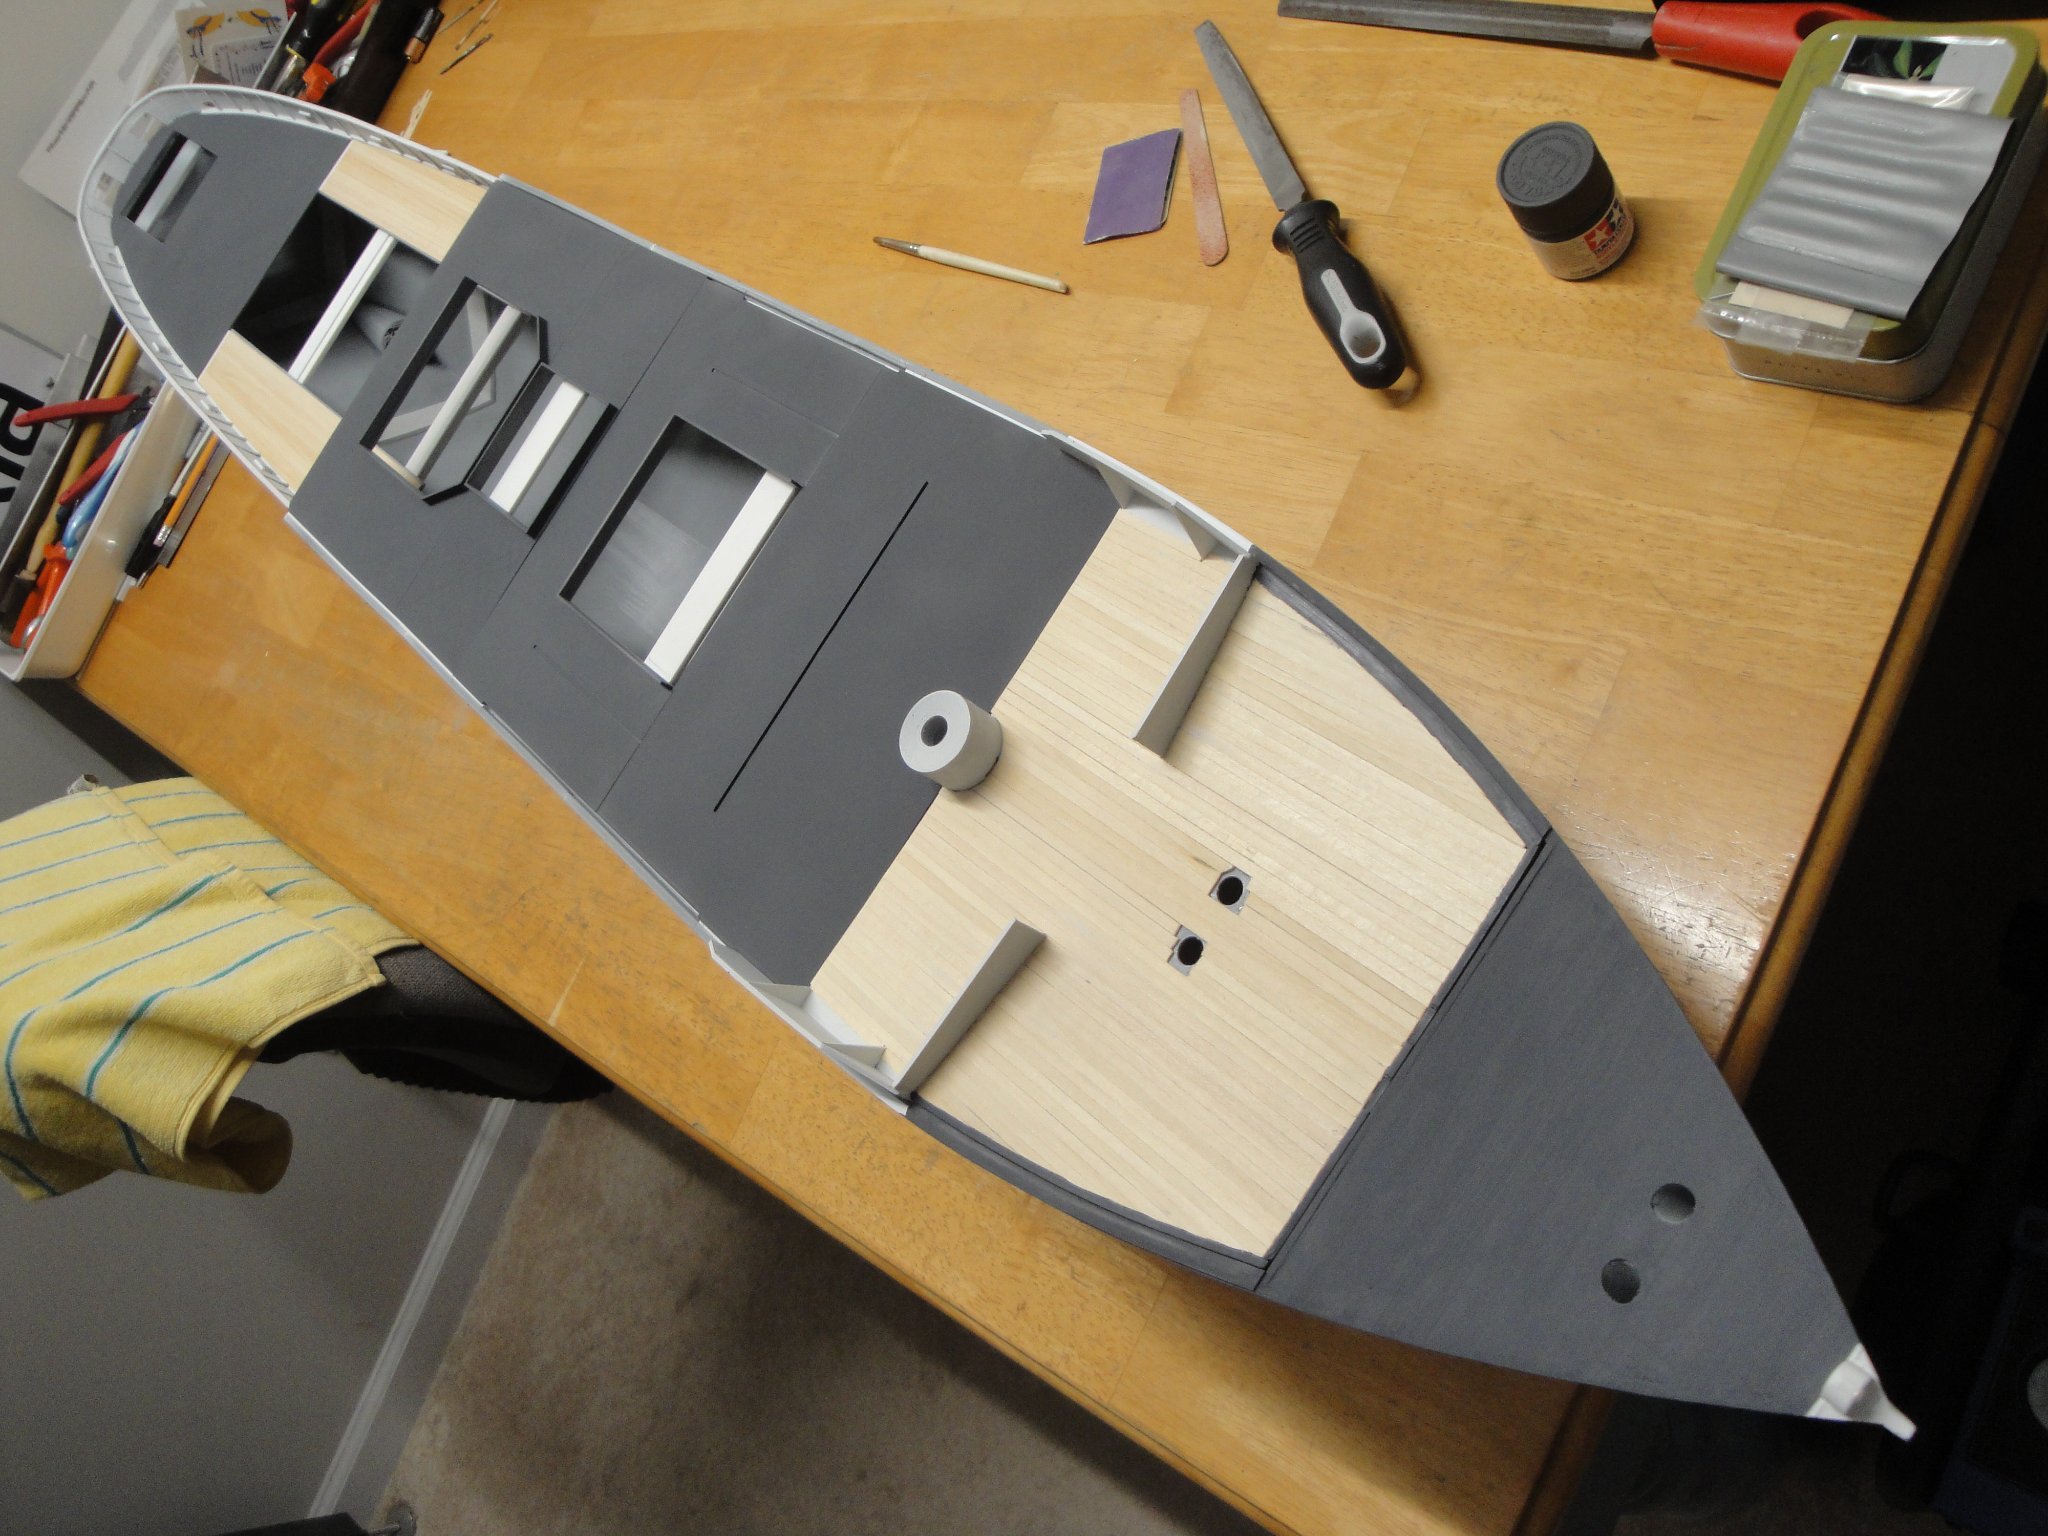
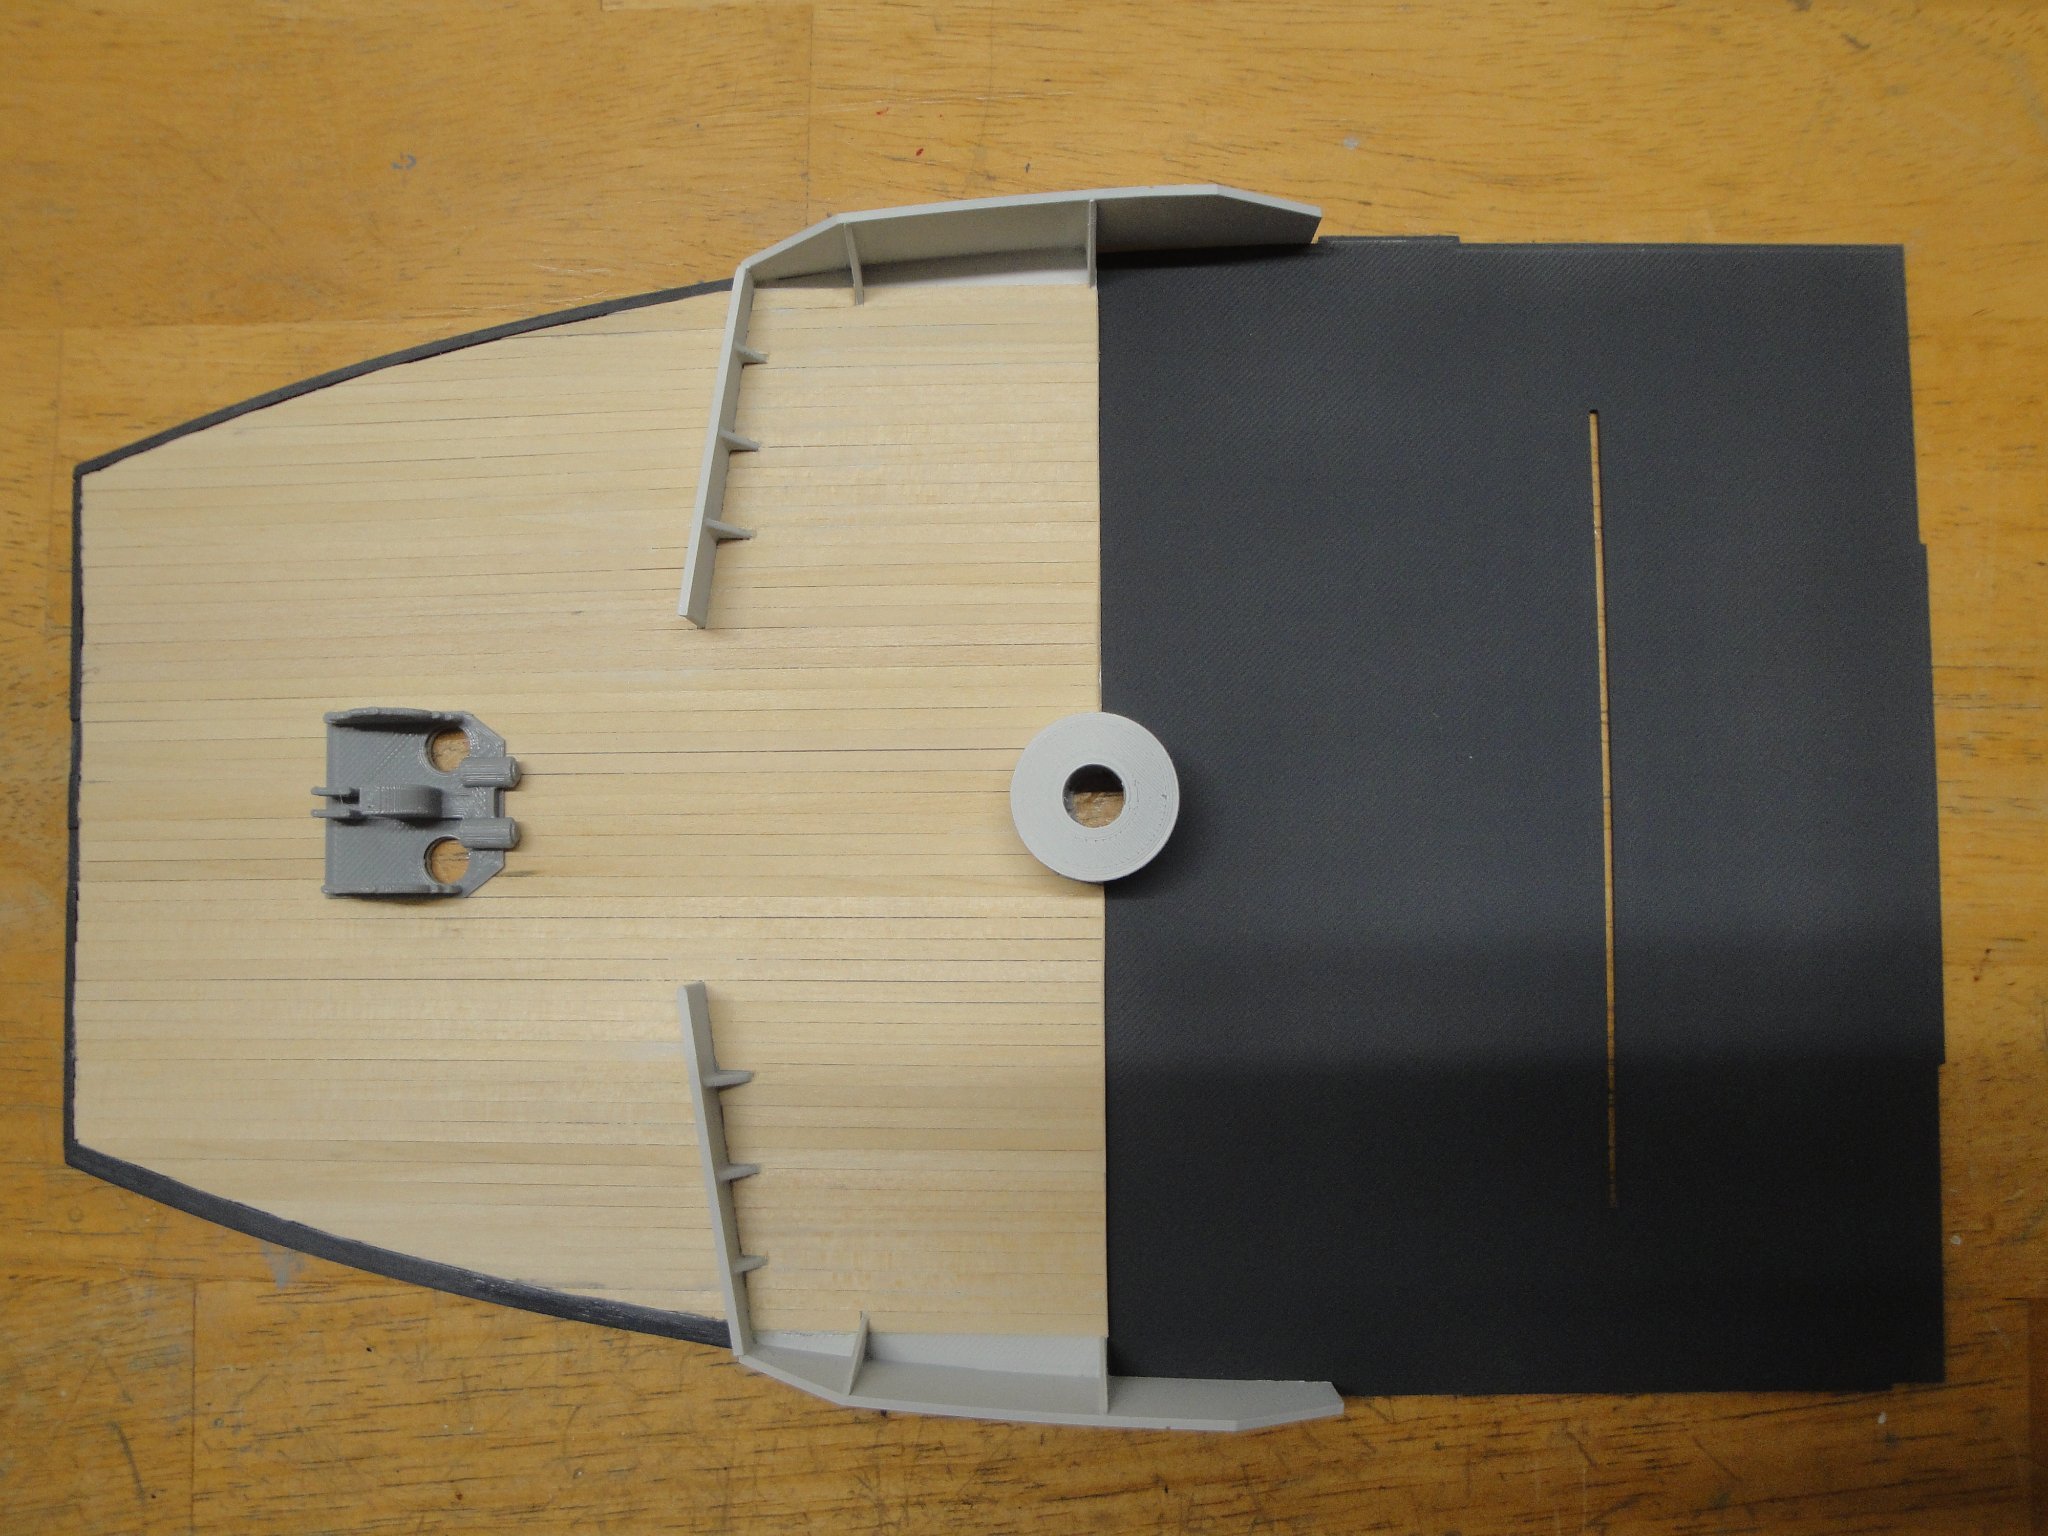
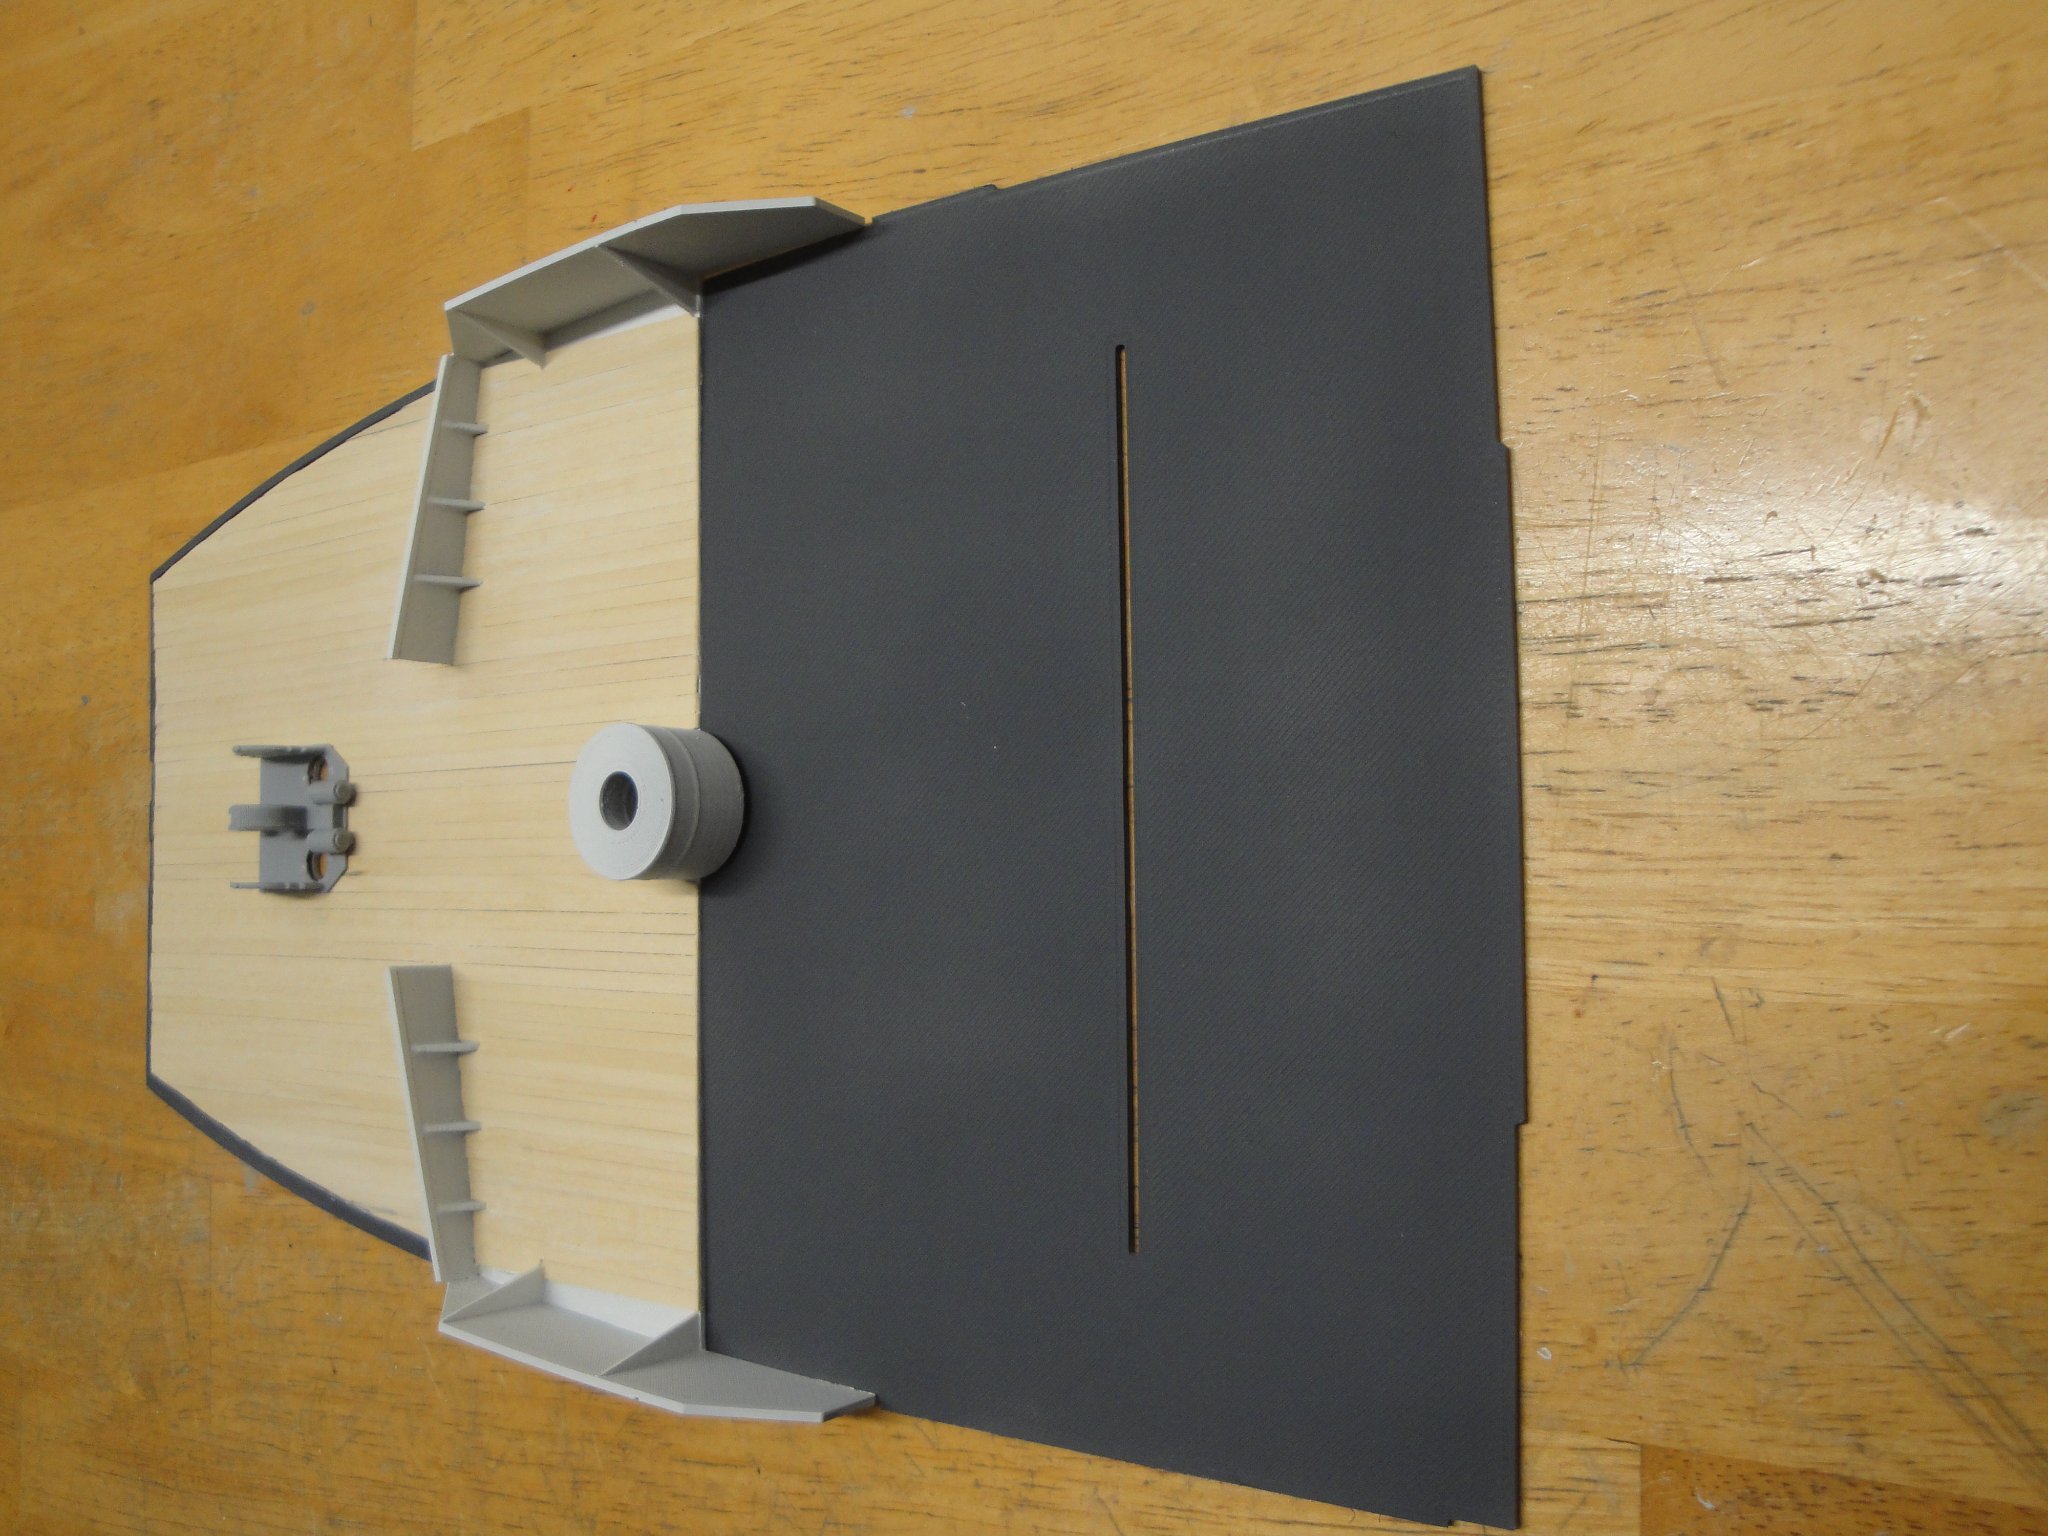
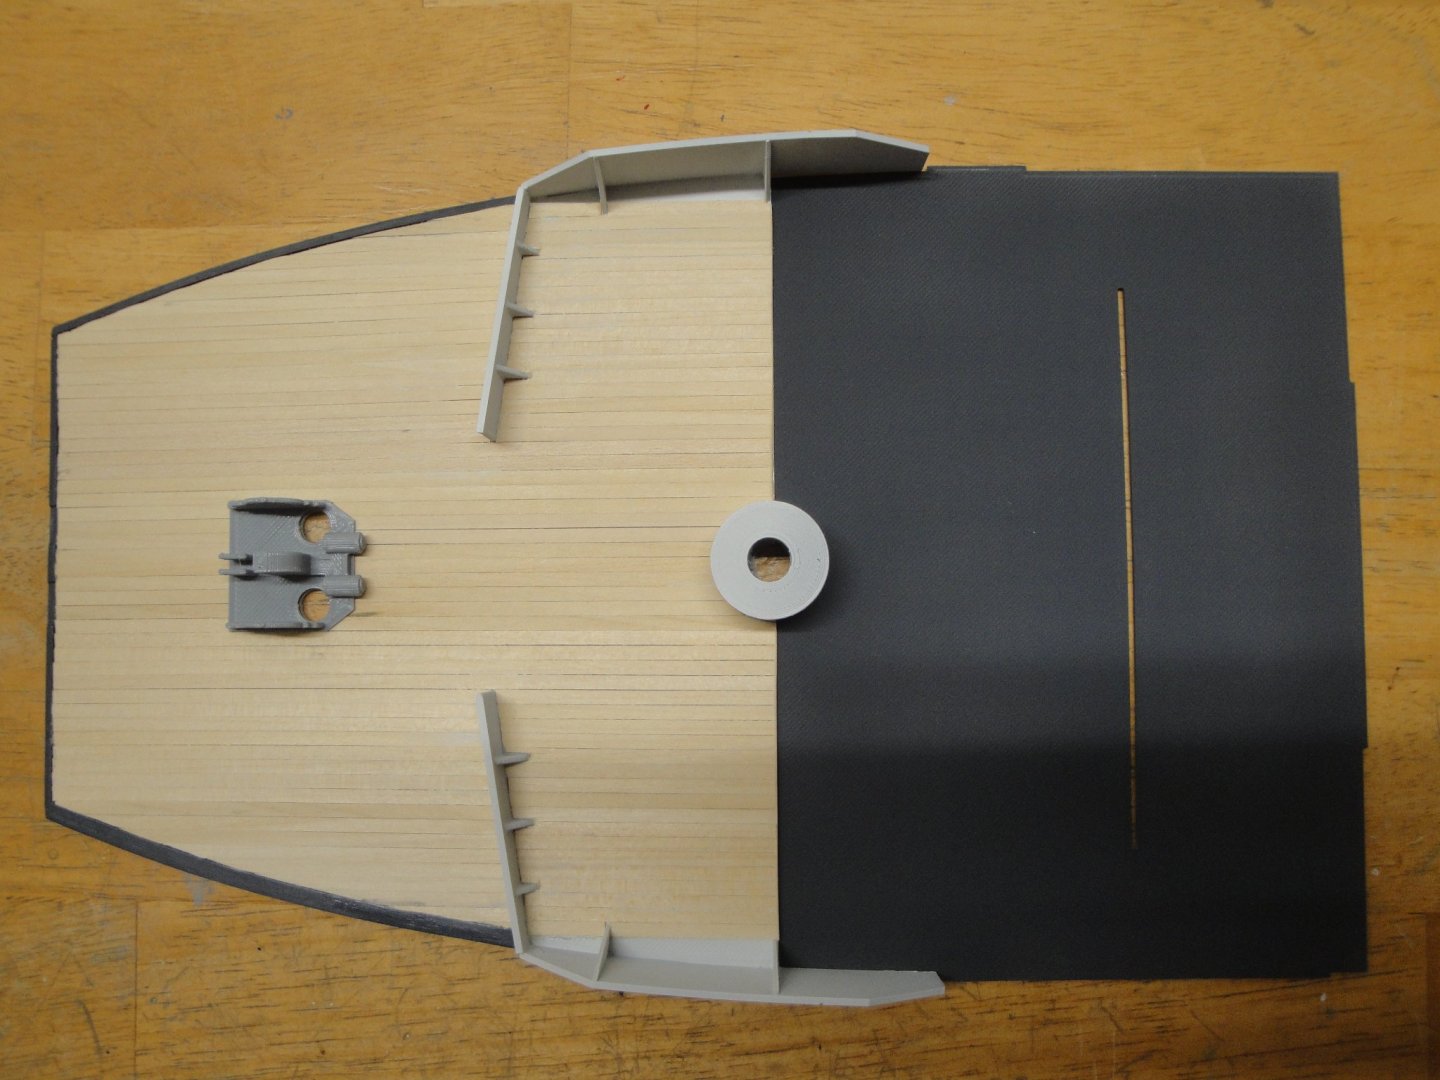
A little change of pace with some wood planking. It is always nice to go back to the softness and smoothness of basswood wood. The planking is done with Model Shipways 1/32 x 1/8 strips, carefully cut and fit around the bow breaker. The second deck (Deck #B) is painted with Tamiya Dark Grey. The "wave shield" is painted with Tamiya Flat White with 60 drops of light gray and 20 drops of IJN gray. Strange recipe, but I like it.... From the color of the breakwater, one can derive easily which Corvette I will be trying to model.... Yves

- 321 replies
-
- 11
-
-
- Finished
- Flower-class
- (and 1 more)
-
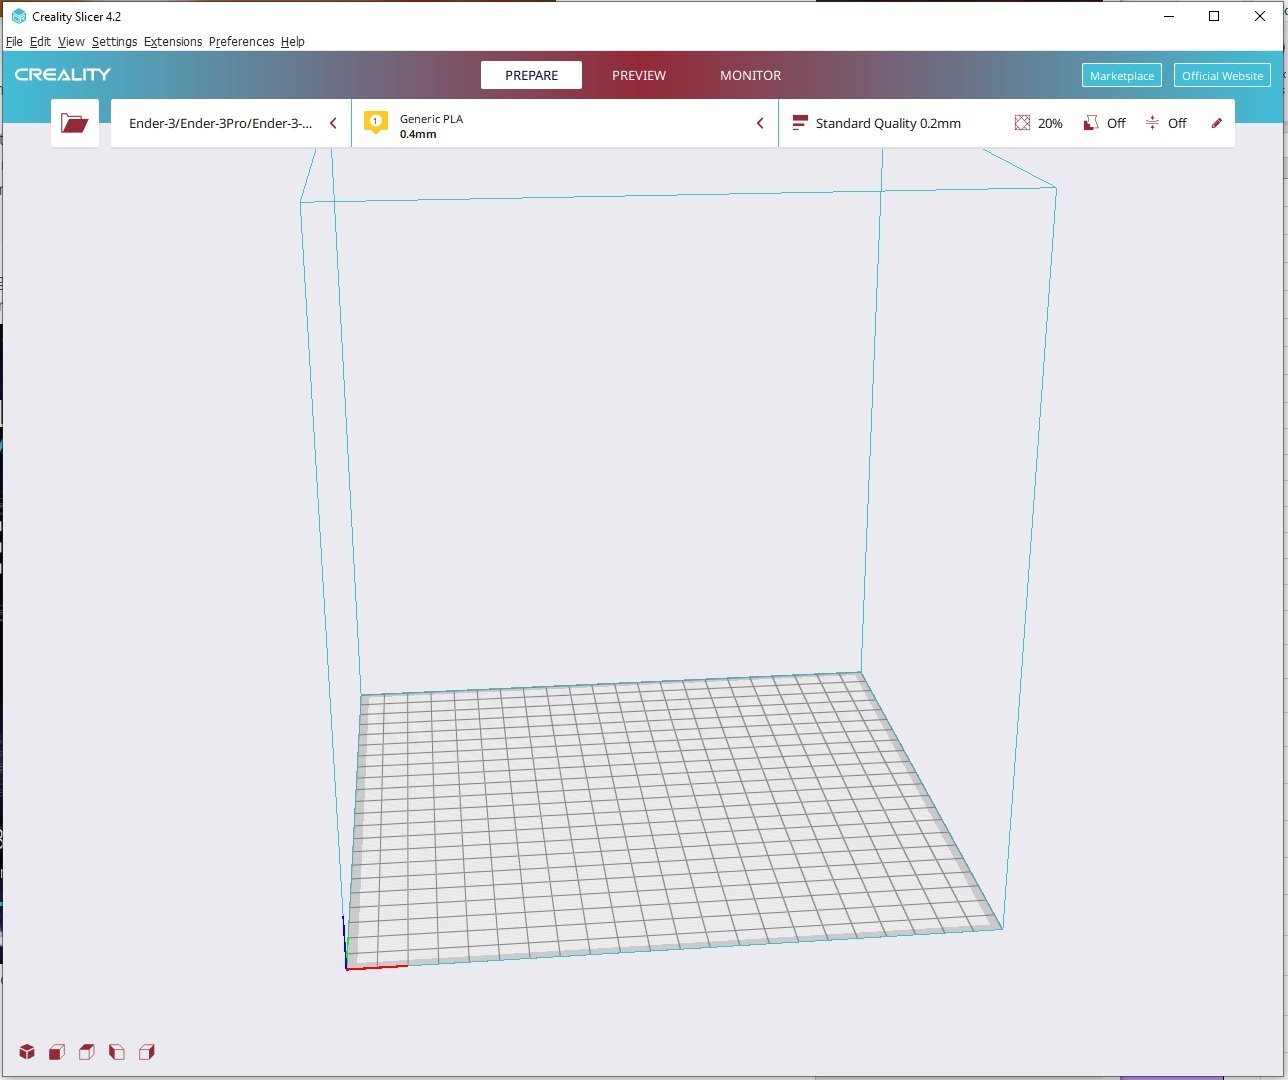
Alan, I had no software issues importing whichever file. Note that I am using the CURA program that came with the Creality machine, not the base CURA that you can download for free: Not sure if it makes any differences. Also, the Profile is set for ENDER-3, but I am sure you have that already. Yves
- 321 replies
-
- 6
-
-
-
- Finished
- Flower-class
- (and 1 more)
-
Alan, I am pleased to see that you started this Build Log and went full ahead with the building of this 3D printed model. I am also sad that you ran into so many frustrations with this printer. My first attempt was with the QIDI IMate S printer which was a pure disaster at $500. It printed for exactly 1 hour and 30 minutes and stopped forever, feeding the filament. This unit was quickly returned to Amazon and I went with the Creality Ender-3 V2. After the initial debacle (QIDI), the little Ender-3 was a breath of fresh air. I suspect, I may have been lucky as I have not touched the levelling since day one. Have you tried printing a piece of deck? That should stick very well to your bed. Yves
- 460 replies
-
- 6
-
-
- Finished
- Flower-class
- (and 1 more)
-
Super skeleton. Great job. Yves
-
Very nice results. One done, 8 more to go ..... 🙂 Yves
- 321 replies
-
- 6
-

-
-
- Finished
- Flower-class
- (and 1 more)