


flyer
-
Posts
1,004 -
Joined
-
Last visited
Content Type
Profiles
Forums
Gallery
Events
Posts posted by flyer
-
-
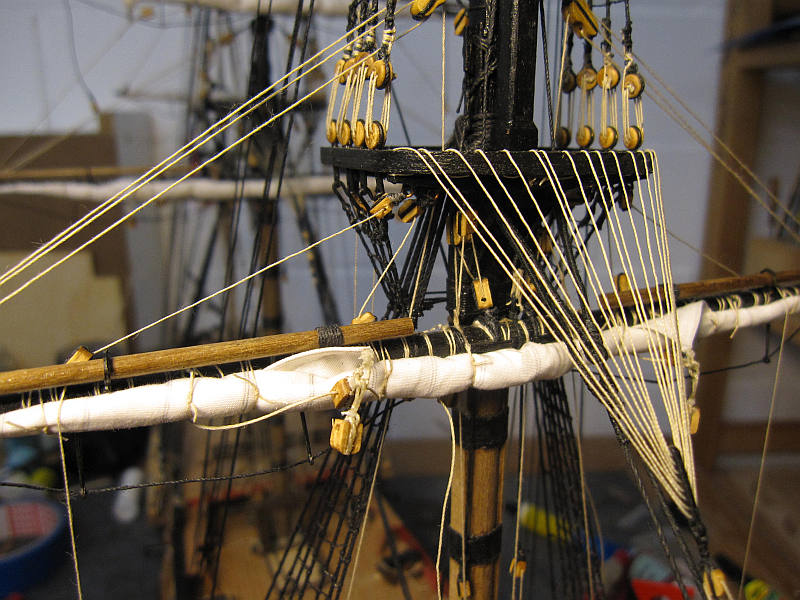
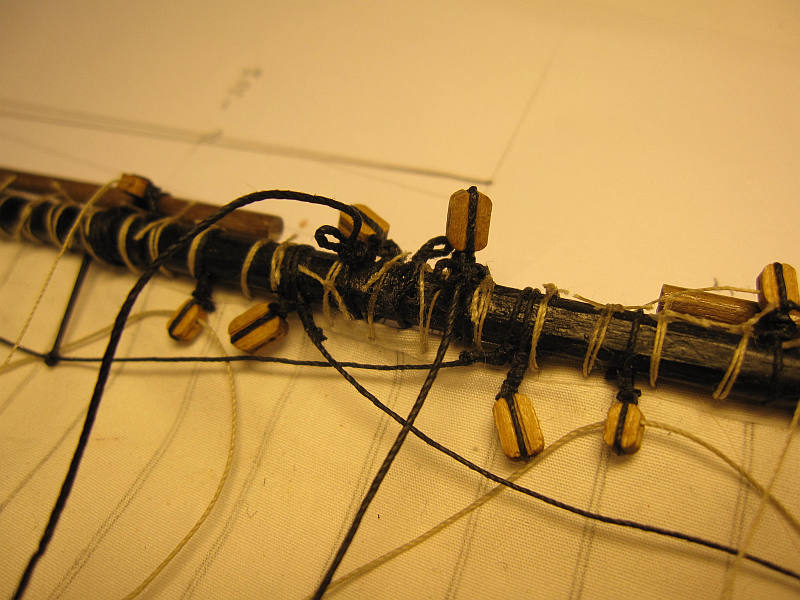
After installing the sling and the lifts the next task were the buntlines.
I had only one end of them attached to the foot of the sail. The loose end was now thread through the block on the yard, the dedicated blocks under the top, through the upper of two single blocks stropped together head by head (similar to a shoe block) and back to the top and yard. This arrangement with the ‘shoe block’ is according Lees. A line leads to the lower part of the shoe block, hanging under the yard but close to the deck, with both ends belayed according the plans on the forecastle rails. I used a short end just fixed with a rolling hitch and a long end with a coil of line for working the whole arrangement.
The lose end of the buntline - after threading it through its block on the yard - was brought below the furled sail and then discreetly fixed around the yard as the correct fixing to the foot of the sail was impossible now. This should be overlooked.
The last line was the clue line. It was installed according to the kits plans.
Sheets and braces of the lower yards will be among the last things to be fixed as they will hinder the access to the deck too much otherwise.
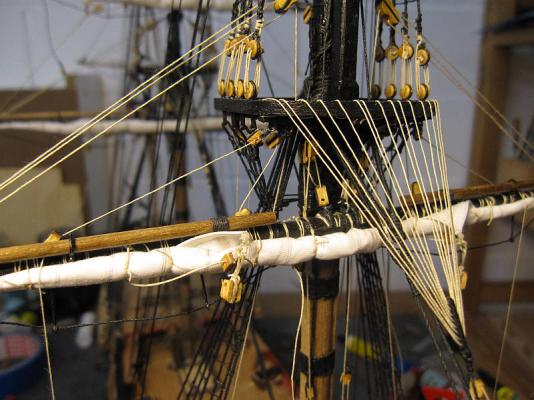
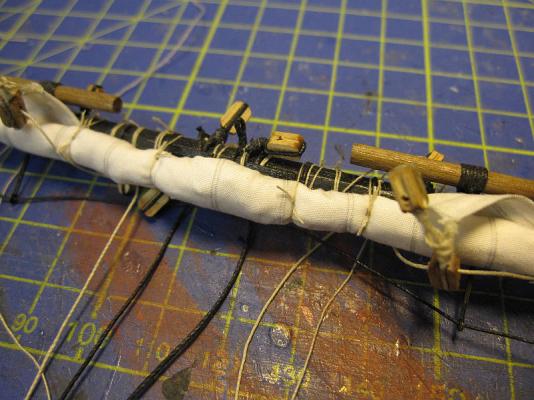
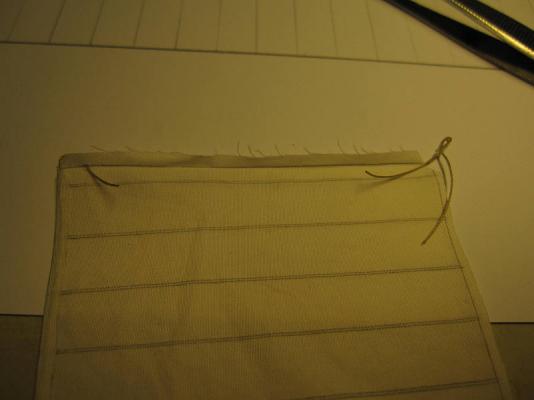
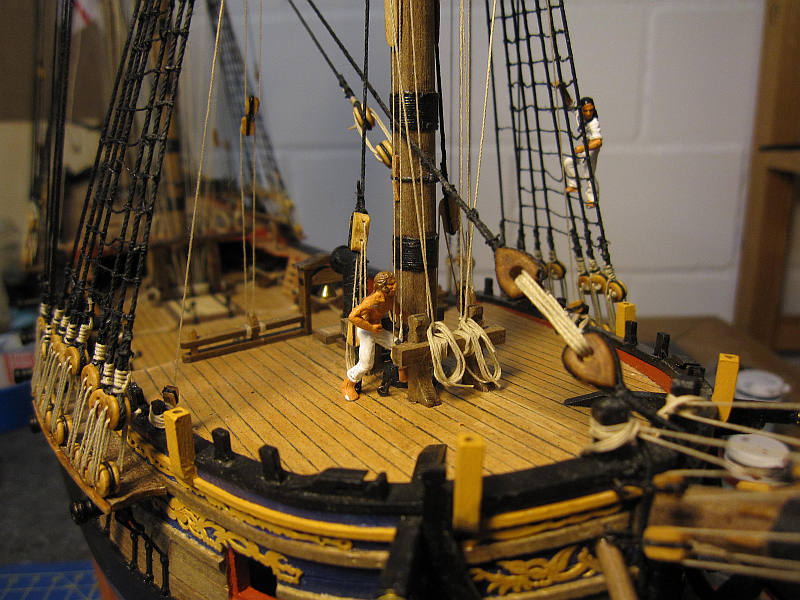
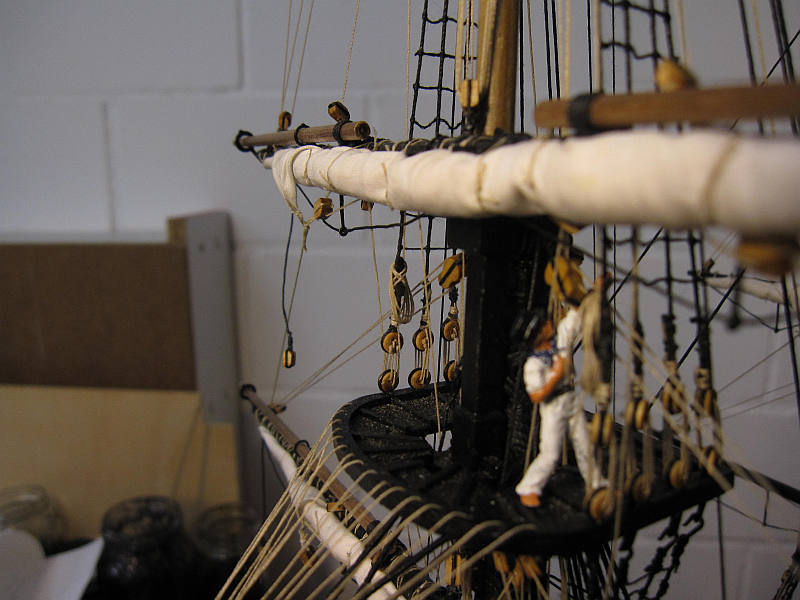
Sling and lifts installed, the loose end of the double buntline still hangs over the sail.
The black clip holds the free end of the buntline, while the red in the middle ground hangs on the lower of the two blocks stropped together.
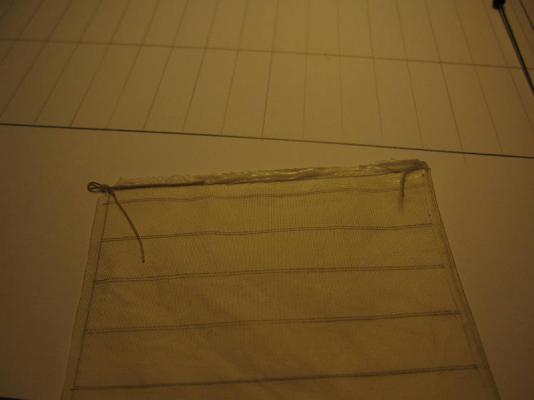
The incorrectly fixed end of the buntline.
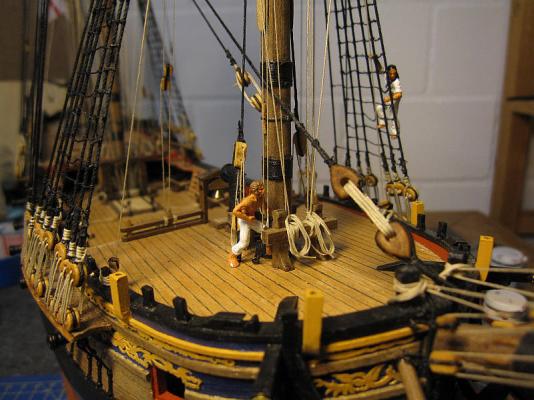
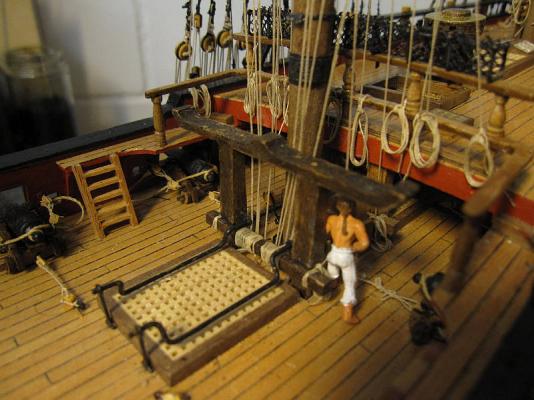
Clue lines belayed on the bitts

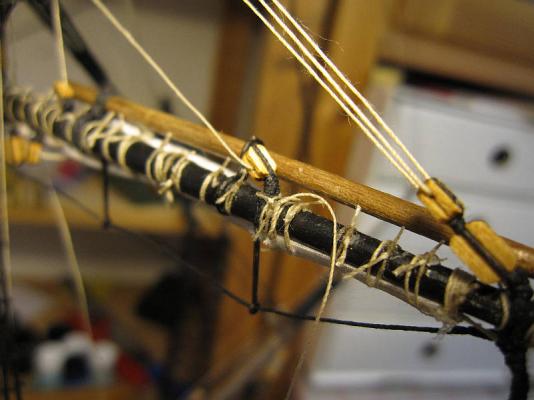
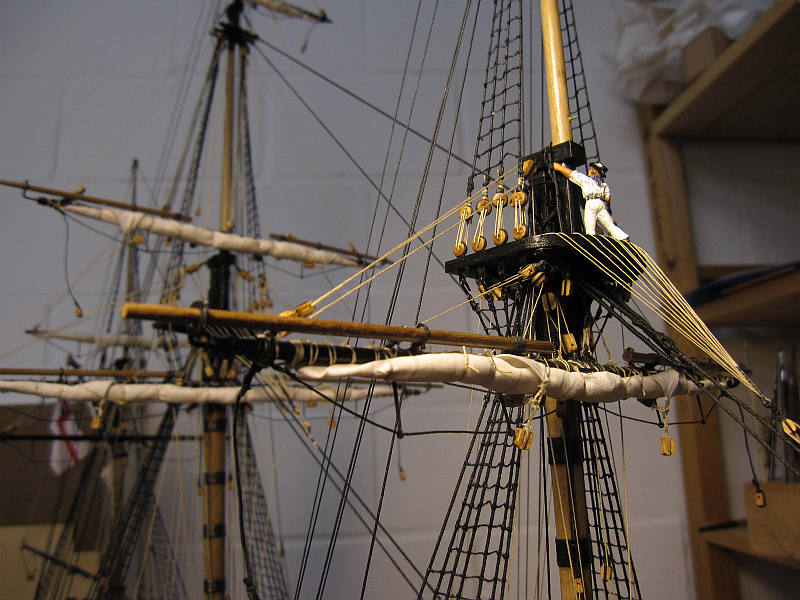
Some adjustment of the sling is done
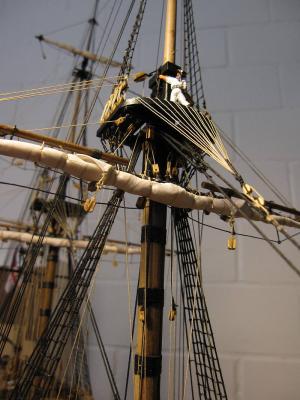
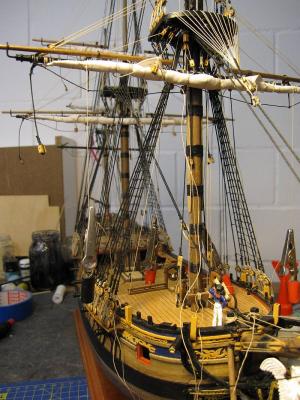
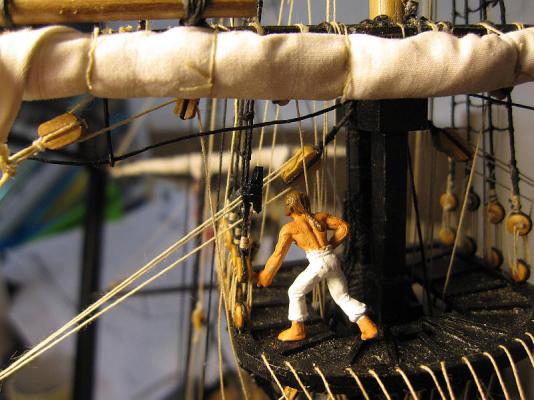
Scary work without safety line
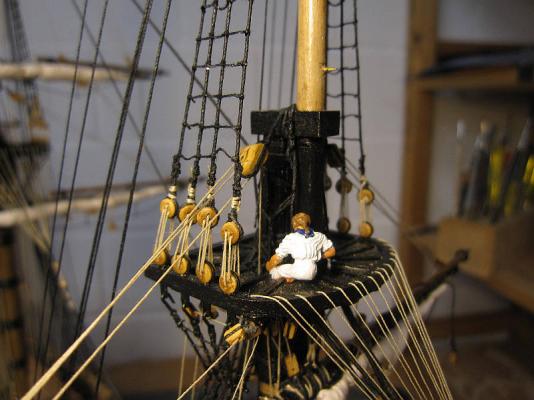
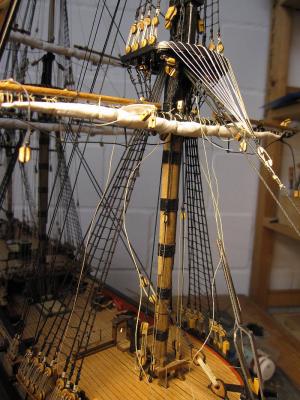
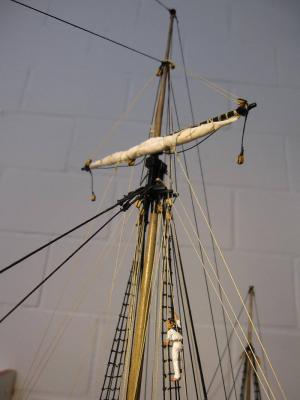
The fore top starts to look businesslike.
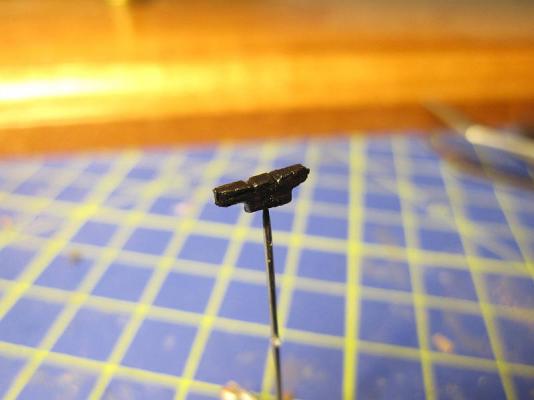
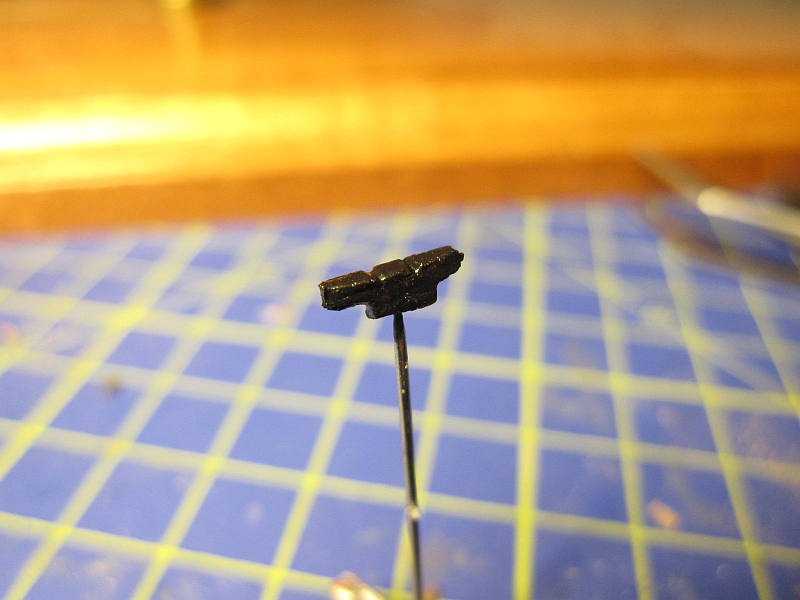
That pin above the cap waits for the next task: Fore topsail yard with sail.
- MEDDO, Landlubber Mike, Mirabell61 and 7 others
-
 10
10
-
Hi at-least-able-seaman Mike
Yes, improving the understanding of what you build is one point. And it never ceases to astonish me how they could sail such a complicated machine and even more often with success than failure.
Steven Maturin, I feel with you and all other landlubbers!

Have you seen what astonishing things others do with their guns or their boats? Adding a little fabric seems comparatively easy.
Take care
Peter
-
-
Thank you B.E.
Sometimes holding the camera somehow between all those lines while hoping not to tear one and trying to force to focus it on the part you wish to show while illuminating the model with all sorts of old leftover desk lamps and pushing the trigger blindly several times produces surprisingly satisfying results.
Cheers
Peter
-
Hi Martin
Nice compliment.Thank you.
And yes, I try to follow the original way with the furling – except that I don’t try it balancing on a flimsy yard with 30m of empty space below and no safety lines attached. It seems the logical way and produces quite acceptable results with a reasonable effort.
Cheers
Peter
-
Hi Alistair
Thank you for your compliment.
Yesss! And all that masting and rigging work will suddenly have a raison d’être.
Take care
Peter
-
Hi Michael
After admiring your work silently for some time I have to say it once again: Brilliant.
Your example really tempts me to build the Vasa a second time.
Cheers
Peter
-
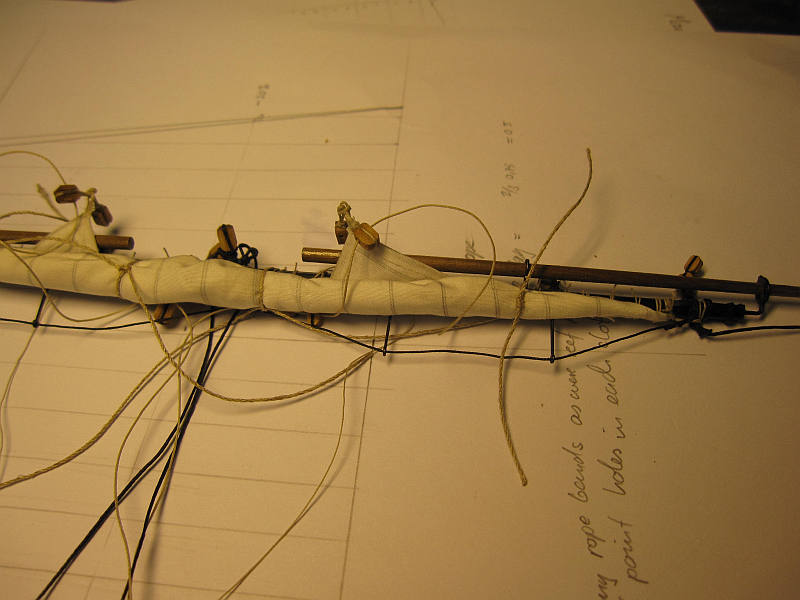
Now I furled the sail by first pulling it up with the buntlines over the front while leaving the two edges protruding. Then it was rolled up – again over the front of the sail – with the help of clumsy fingers, pincers and censured language and provisionally held with a few strings.
Provisionally furled and bound with a few strings
At length the sail could definitely be bound. Working again from the ends to the middle I tried to tighten the sail even more to create a roll as small as possible. By working towards the middle I tried to get a visible bulk there. Dampening the sail carefully where the gaskets became to hold it helps. While furling you have to check constantly the correct run of the attached lines. A few gaskets will nevertheless have to be tied twice because something is always overlooked.
Sail furled
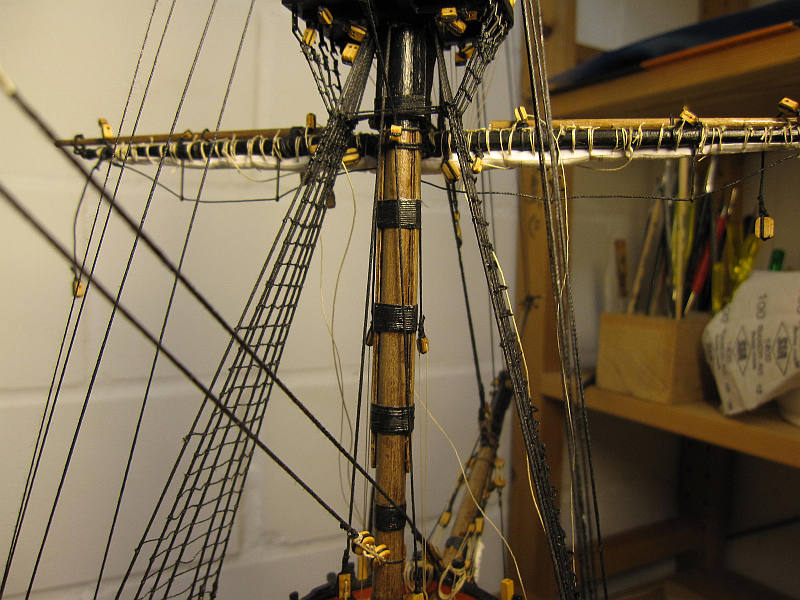
Now the yard was brought to the mast and fixed there first with the parrel ropes. Blocks were spliced into the ends of those and a simple tackle set up with a block on a ringbolt beside the mast.

Parrel ropes and their tackles on both sides of the mast
-
After a longer brake for some gardening, hiking, holydays on Mallorca
 and even some genuine work (flying) I found finally some time to spend with the little helpers in my wharf.
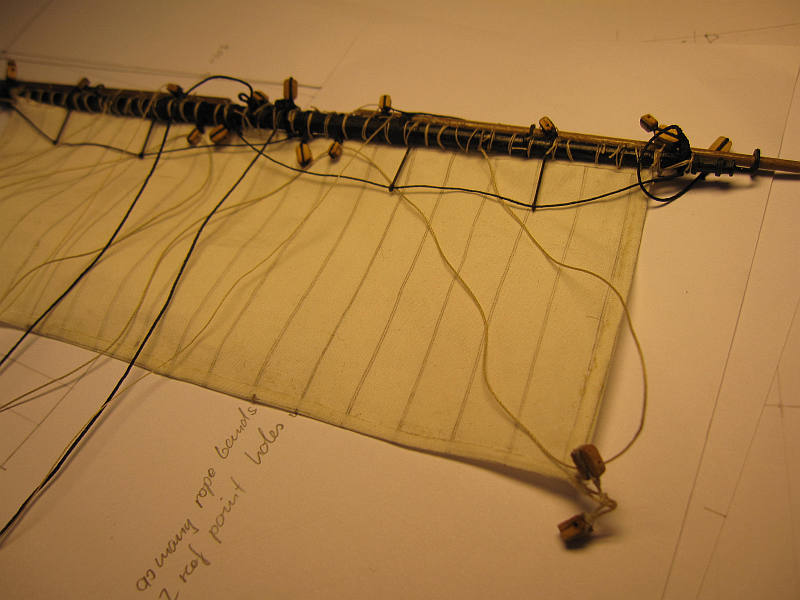
The sail was bound to the yard. I tried to do it as close as possible to the description in Lees’ book. It is repetitive work again but much, much faster done than ratlines.
Sail at the yard
Now all the lines had to be attached to sail and yard. Again only one end per side of the double buntline could be fixed as it leads trough several blocks before returning to the foot of the sail. It can only be finished after fixing the yard to the mast. This time I even thought of attaching the parrel ropes before furling the sail – much easier that way.
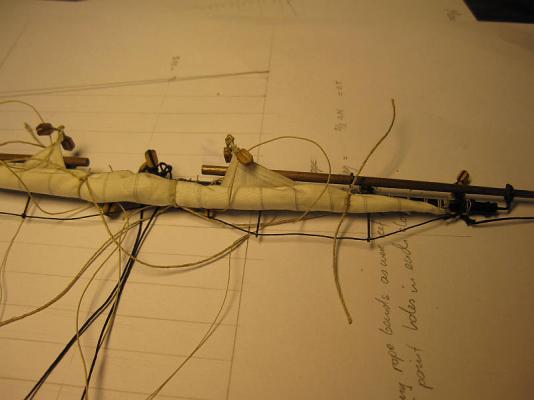
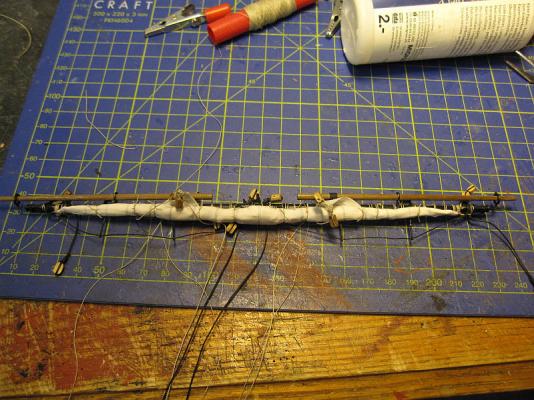
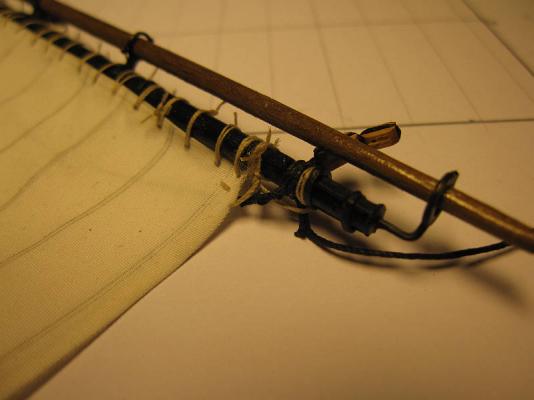
All the lines, including parrel ropes attached
The sling was also prepared and its parts fixed to the yard respective masthead.

Parrel ropes and sling on the yard

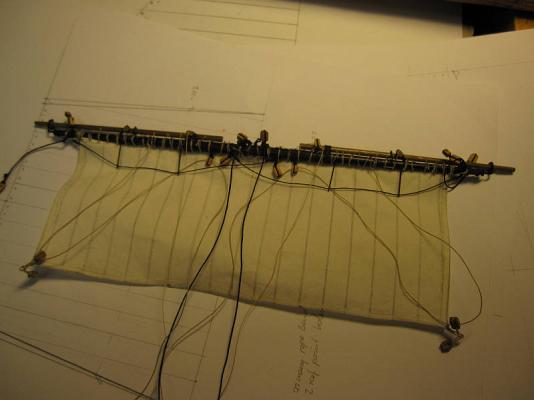
Sling lying on the sail

Ready to furl
- Mirabell61, Martin W, riverboat and 2 others
-
5
-
Hallo Nils
While catching up on your fantastic build I noticed your remark about eyesight being limiting when working on small details.
My simple solution is wearing a second cheap standard pair of reading glasses (correction e.g. 2.5) over (or below) my normal glasses. The corrections of the two pairs add up and while the depth of focus may be a bit shallow you move your super eyesight freely where you need it without cumbersome magnifying lenses. Of course my 4-eyed look
is a source of amusement for my family but here the end justifies the means. (Uups – now I introduced Machiavelli into ship modeling. Anyhow this is certainly a better place for him to be than in politics or – heaven forbid – banking.)Take care
Peter
- Mirabell61 and dgbot
-
2
-
Thank you, Alistair
 :blush:
 Yes Nils, I’m very glad to have him. Just think of all the work I had to do myself otherwise…
Martin, you are right, of course. The Captain Jack appearing occasionally in my pictures is blond haired (not grizzled yet) and a regular sea officer but sometimes one fails to ignore that other likeable ruffian.
Thank you all for the comments and the likes.
Peter
- Martin W and Mirabell61
-
2
-
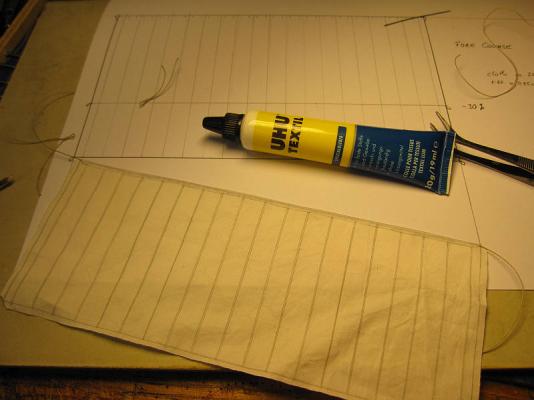
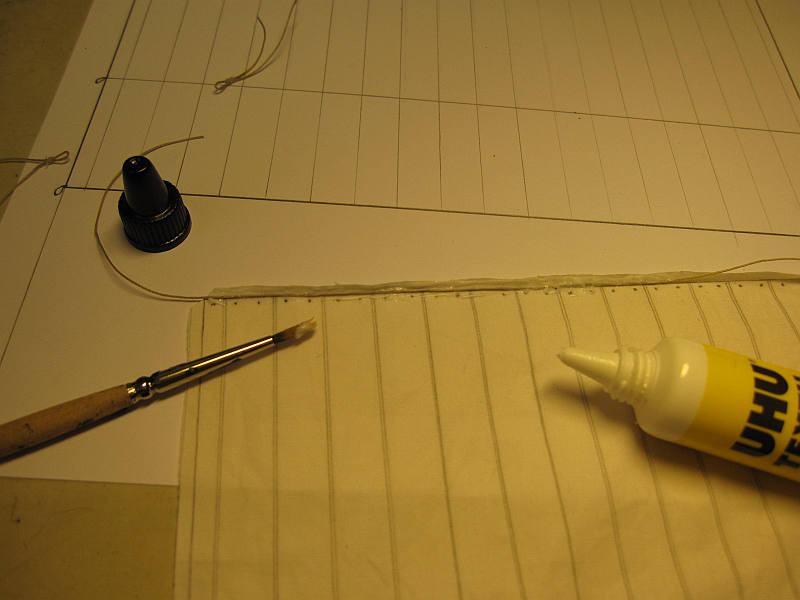
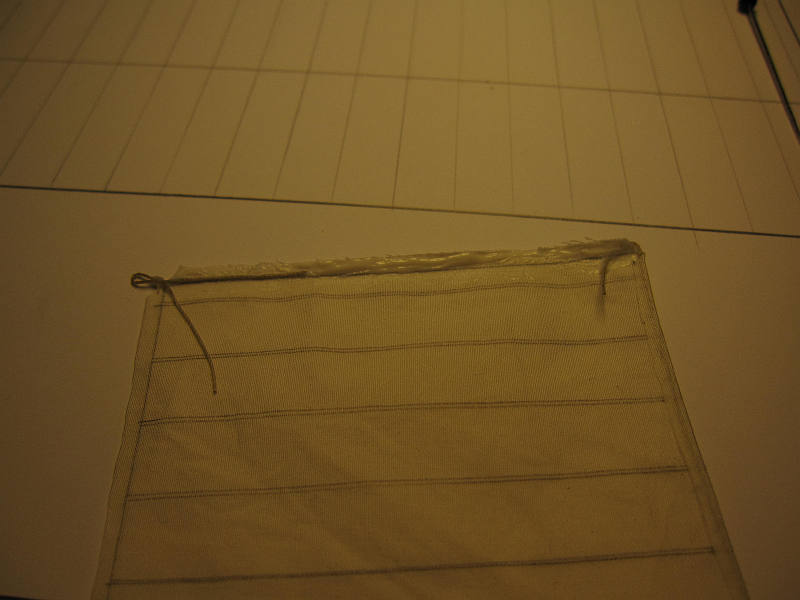
Now the hem with the boltrope inside was glued.
To lessen the bulk of the furled sails the rope was only included where visible: along the top edge and the two lower corners.
The holes for the robands were made with a large pin and finally the whole glue fixed with a hot iron.
According to the manufacturers information this should make the glued parts washable but in fact it’s only marginally water-resistant. Furling the sail would be easier when the fabric is damp but I have to be careful when applying water in order not to dissolve the hem.
Boltrope parts for the top edge and the lower corners were prepared
Top edge being glued...
...and finished
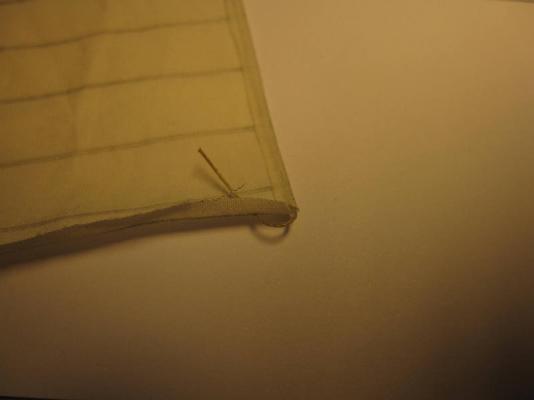
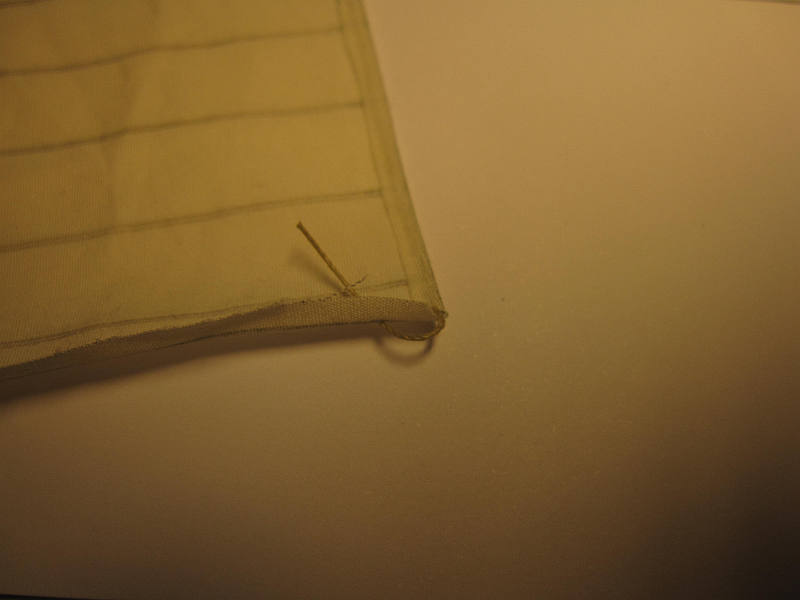
To form the head cringle the top boltrope is pushed back into the side hem through a hole
Preparing one side
Gluing it
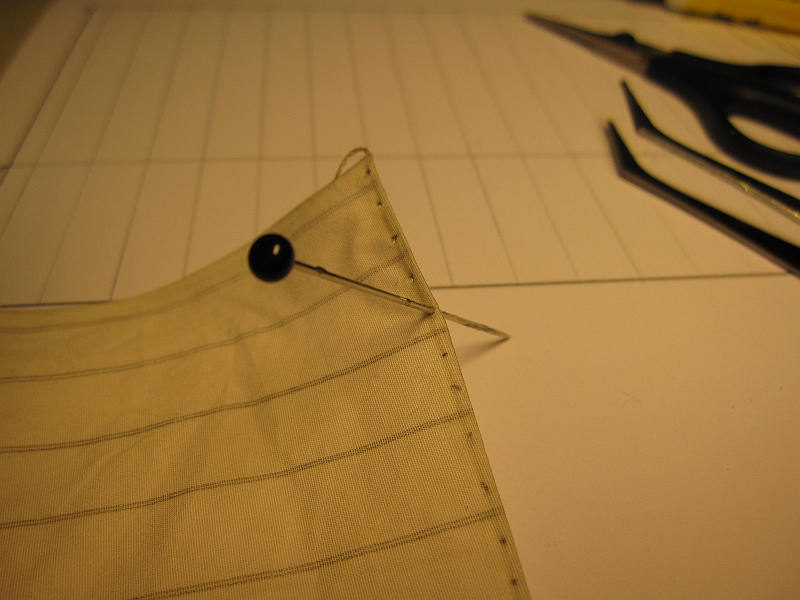
Pushing holes for the robands (2 per cloth)
The sail maker is closely checking the finished sail
-
Me too, B.E., me too. Still it looks a bit hazy and things are hard to see in that great distance. But I will stubbornly continue like the one and only CAPTAIN Jack Sparrow: Towards the horizon and beyond…
Cheers
Peter
-
Hallo Nils
Yes, I think we all like those … swans. A noble cloud of sails sure must be a glorious sight, but Danny certainly is right as well.
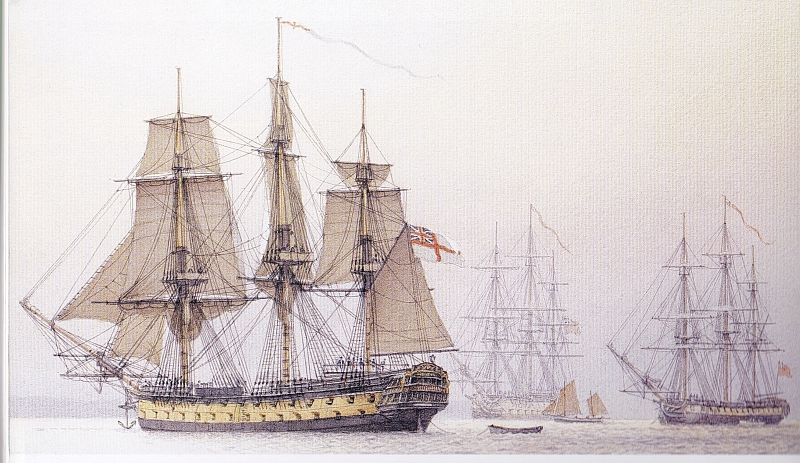
A possible solution could be to set not all of the sails, the swan not blustering all of its feathers, so to speak. Depending on the situation you decide to show your Pegasus in, there are almost unlimited combinations of sails set, hauled up or furled possible. You just have to choose one, where you have a good view of the decks and still a pleasantly balanced arrangement of sails. An example could be that picture (from Peeter Goodwins The Ships of Trafalgar) showing Thunderer hove to.
I’m looking forward to your solution of that tricky problem.

Cheers
Peter

- WackoWolf, mtaylor, Elmer Cornish and 4 others
-
7
-
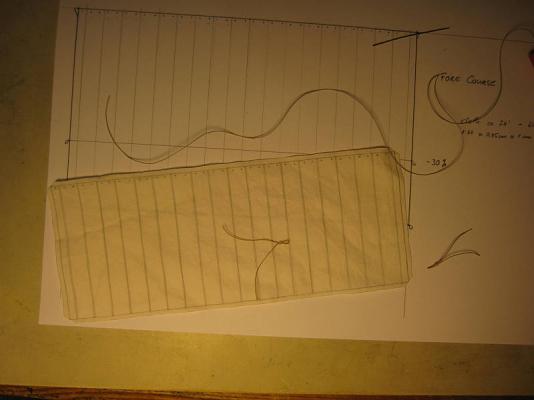
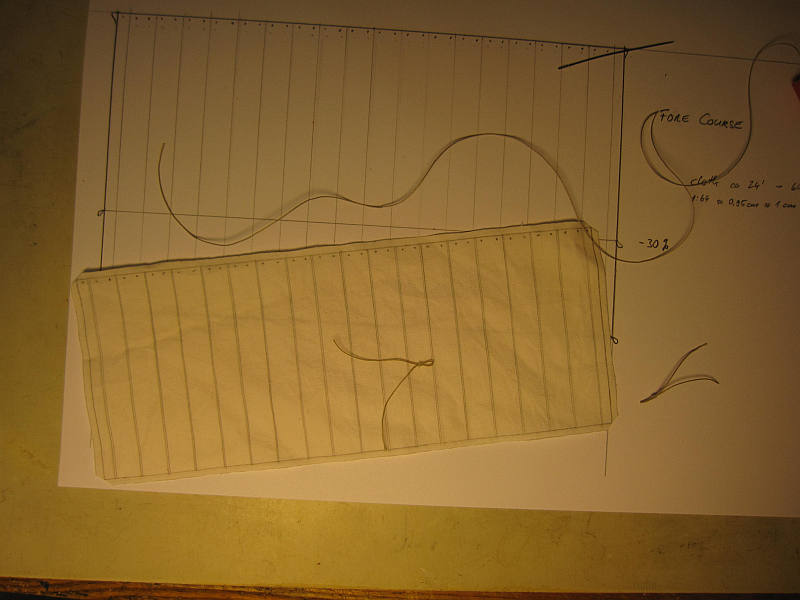
Next step is the making of the fore course and its attachment to the yard. It will then be fixed on its mast.
I will show the making of the sail step by step and hope to convince one or two fellow builders that sail making is manageable with a moderate effort.
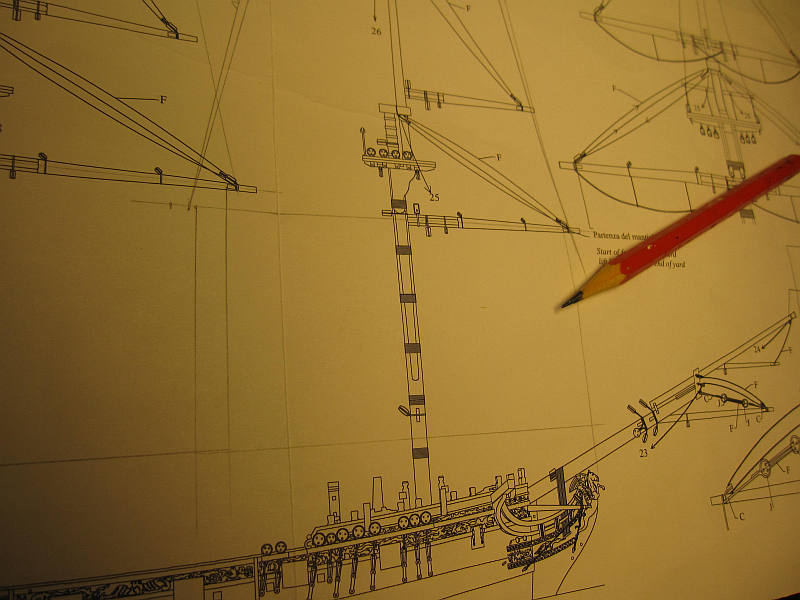
First step is to find out the dimensions of the sail. I took a suitable plan sheet where all the masts and yards were shown. Usually the yards are shown in full frontal view and therefore the sails can be drawn directly into the plan.
For the head of the sail a parallel to the yard is drawn at the position where it would be with sails set.
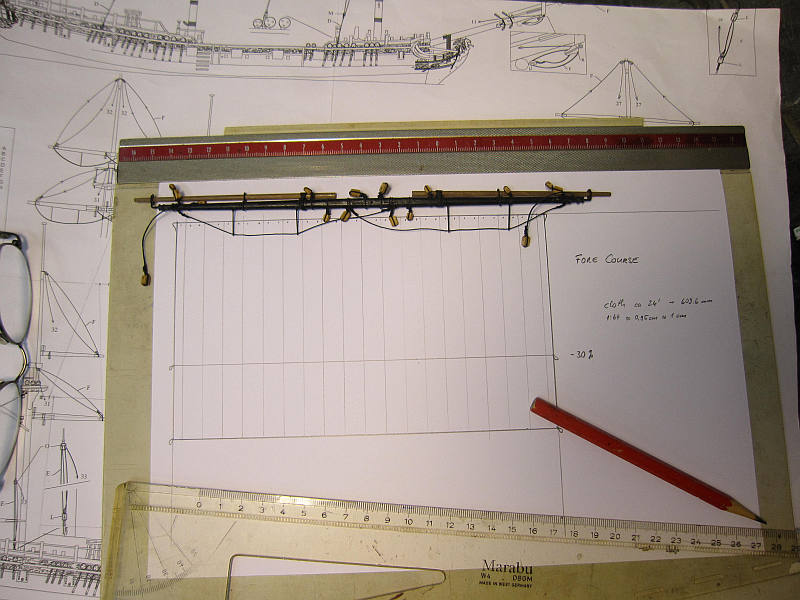
The depth of the sail can now be found. The width could also be taken out of the plan but it must be checked with the actual yard.
At the head it must be a little less than the distance between the yard arm cleats. The width at the foot is the width between the cleats of the yard below. The foot of the main course is 2 clothes wider than the head. The fore course has parallel sides. The width of one cloth is between 24 and 30 inches. I took 10 mm which corresponds to about 25 inches.
All those and a lot more details can be found in James Lees’ The Masting And Rigging of English Ships of War.
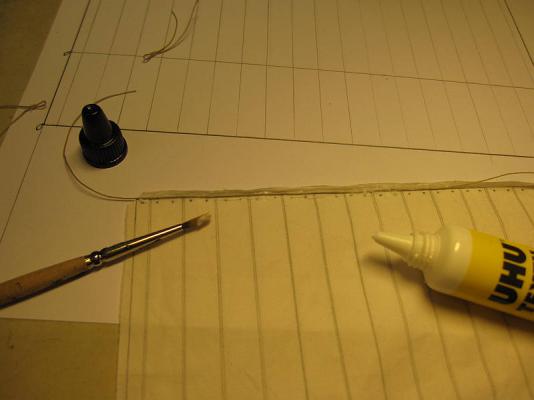
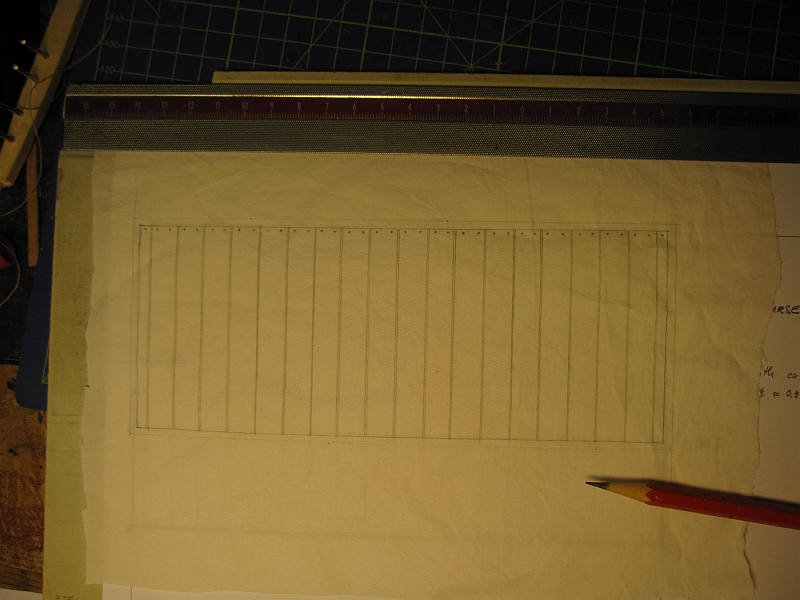
My sails are simplified because in furled conditions hardly any details are visible. The seams are pencilled on (on both sides) and no linings or bands are shown. The boltrope is not sewn onto the edge of the sail but glued into the hem – in this scale the difference is hardly visible and the result beats any of my clumsy attempts to sew a rope onto the edge. Also the foot of the sail is straight – no curve is necessary.
Finally the size of the sail is reduced by 30...40% to produce less bulk on the yard.
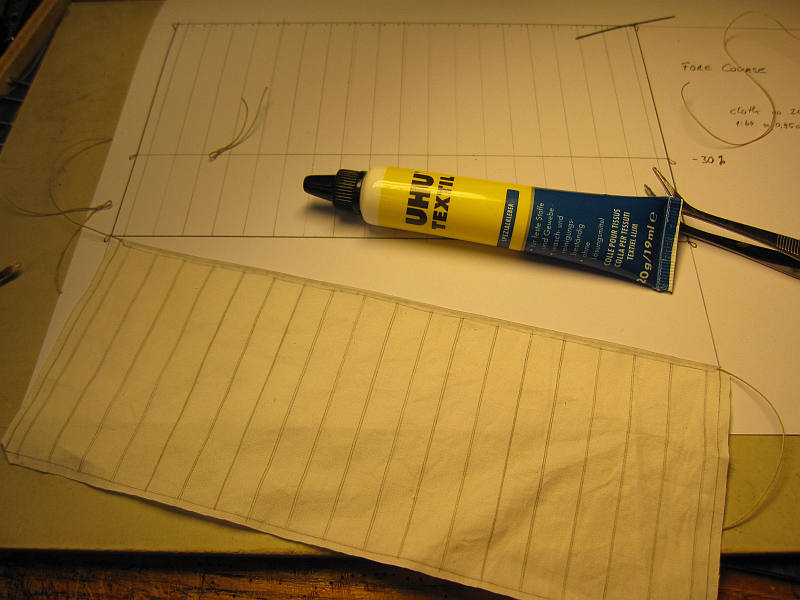
For the hem I ad about 2,5 mm around the sail. This is rather wide but some extra width is needed to fix the boltrope inside the hem.
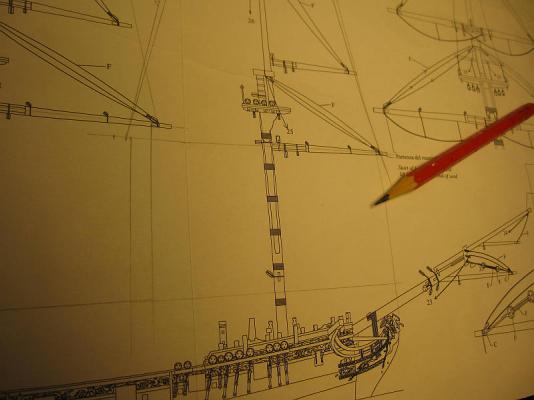
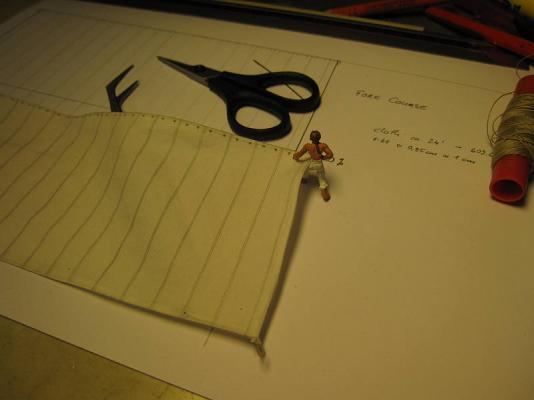
Sails pencilled into a plan sheet
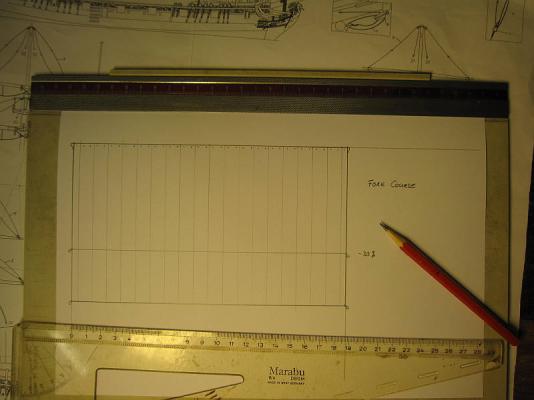
Sail drawn
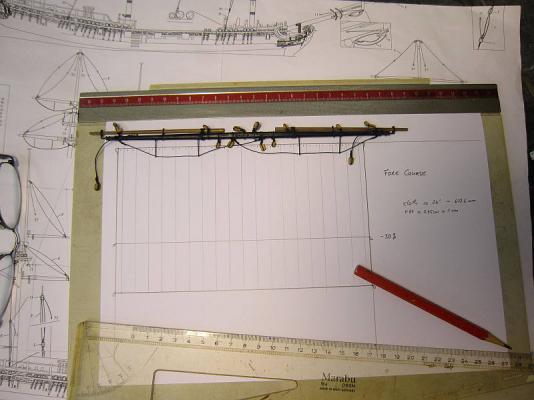
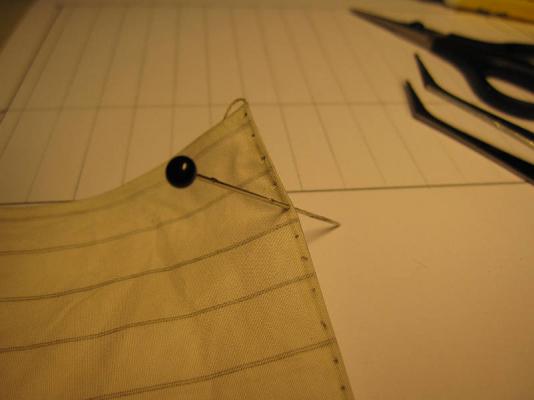
Check with the finished yard(s)

Sail pencilled onto the fabric (both sides!)
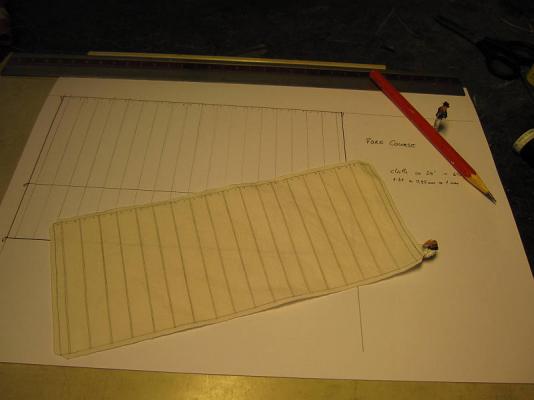
The sailmaker has the sail ready for hem and boltrope
-
-
Hallo Nils
Once again I just had an (imaginary) stroll through your amazing Pegasus. Wonderful!
By the way – what are your plans for the rigging? None, plain or with sails?
Keep up the good work.
Cheers
Peter
-
The sail, with the necessary lines attached, was now furled, the yard fixed to the mast as in the other examples and the different lines belayed.
While verifying the various belaying points with Lees help I found that contrary to the plans the cluelines should be belayed in the lower top. I decided to use shroud cleats for this. Those offered by Caldercraft seemed a bit large and therefore I made them from some leftover ply wood. To further harden them for their task I soaked them in CA glue before painting them black. They were then fixed with glue and some fine line on the inner side of the foremost shrouds.
As before lower sheets and the braces are left off. They will be installed only when all other work along the centreline of the deck has been finished.
Shroud cleat
Cleat fixed to the shroud

Cleat with clueline belayed
Topgallant yard in place
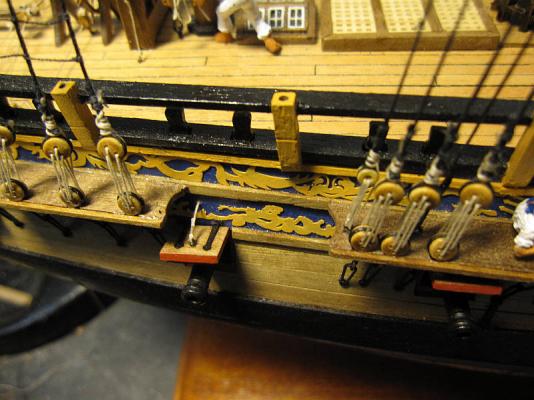
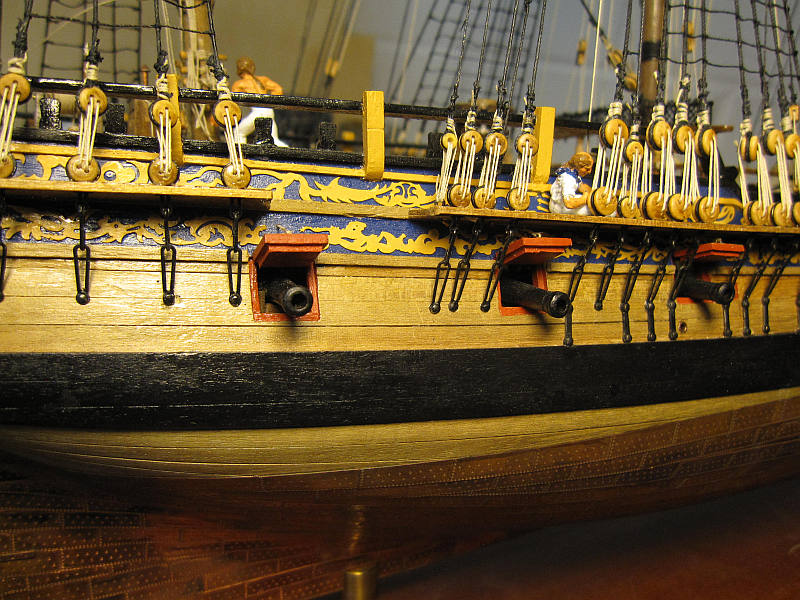
Bitts and rail are almost full
-
Hallo Nils
Great improvement of that stern!
That stove is coming along nicely. You have a talent to make the essence of things visible with simple means. Your stove started the same way as my own clumsy attempt. Then you add just a few things – a band with rivets here, a few lids there – and suddenly your stove looks real. Great!
Cheers
Peter
-
Hi Frank
Thank you!
Hi Timmo
Thanks again. It is rather easy to make the sails the way I do. I will show the different steps during the making of one of the next sails. And in my opinion they really add to the beauty of the ship – they are the icing on the cake. Ok that’s another crooked comparison. Some (American) cakes just clobber you over the head with the icing while on the other hand the world’s best chocolate cake (yes, made by my wife) needs no icing at all.
Cheers
Peter
-
While the sail maker was busily stitching that topgallant sail the carpenter’s crew made some gun port lids 2.0. In the version 1.0 the inner layer was missing. This part fits into the frame in the gun port and brings the strength of the lid up to that of the ships side.
The size of the topgallant sail was reduced by 30%, the sail bent to its yard and the unfurled sail provisionally placed on the mast.
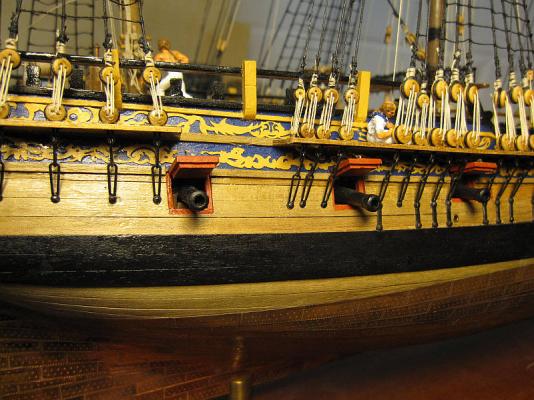
First 3 gunport lids 2.0
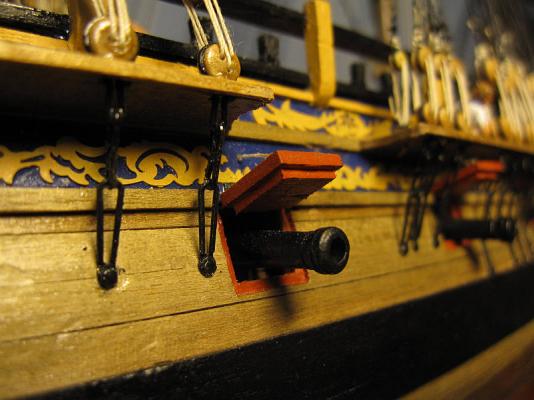
The eyebolts for the lid’s tackle are some leftovers from Granado

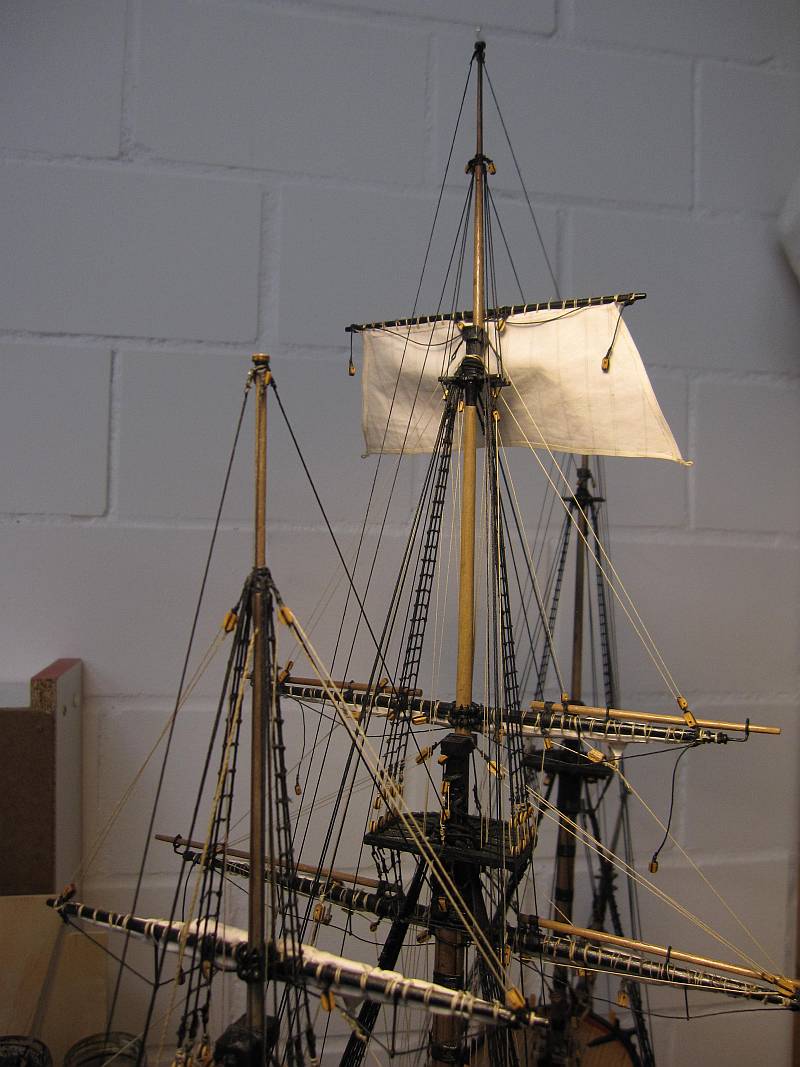
Main topgallant sail not furled yet
- Landlubber Mike, Mirabell61, Timmo and 4 others
-
7
-
Hi Timmo
Just rechecked my Granado and you are right: Those elbow/knee pieces are a bit flimsy. However they shouldn’t have to hold much pull from the shrouds. The resulting force on the channels should be directed broadside on through the channels into the ships side; provided the chain plates have a little play and are allowed to find their own balanced position. The said pieces then should only take a little strain when setting up or resetting the shrouds. At least that’s what I still understand from my design lectures– but be warned: My structure work was occasionally a source of wonder for the professor.
I was also thinking about that sweep port problem and believe Jason is right. Nobody will notice it – except you.
About that beer: In my opinion it’s already hard enough to have to drink it upside down. You shouldn’t aggravate the situation with syrupy consistencies. Try to get hold of a Swiss beer. No chocolate in there – we successfully sell that separately.

Cheers (!)
Peter
-
Well, Martin, this is a rather philosophical question. If everybody’s imagination is running in the same direction, doesn’t that make it real?
Be it as it may, I once saw a T-shirt. On the front was printed: I’M OVER 40
And on the back you could read: Over the top
Going downhill
Picking up speed
It looks like that: the older you are, the faster you are. See it positively! When passing eighty you will be able to finish one ratline in 1/10 second or could start your formula one career and show all the Alonsos, Hamiltons and Rosbergs your taillights.
Be good
Peter
-
@Mike
:blush: I always liked that Unicorn. (Corels Dolphyn was my first build). I’m happy to watch the development of a fine model.
@Martin
Years are going by ever faster lately, I find. You’ll be there very soon.
@Frank
It’s nice to hear from you. But I must protest: my crew is very crisp and proper – oh, you mean this ironical.

Take care
Peter


HMS Pegasus by flyer - FINISHED - Victory Models
in - Kit build logs for subjects built from 1751 - 1800
Posted
Hallo Nils
Thank you.
And yes, I would like to see fully rigged sails done that way as well. That’s why I’m thinking of a small kit as a next project but with fully rigged sails. At the moment CC’s HMC Sherbourne is the favorite but Pickle or even Badger are not completely out of the race yet.
Cheers
Peter