


bogeygolpher
-
Posts
107 -
Joined
-
Last visited
Content Type
Profiles
Forums
Gallery
Events
Posts posted by bogeygolpher
-
-
Bob,
If I were to build it again I would apply the clear windows in each area as a continuous sheet rather than individual panes. I hope that makes sense to you.
It should result in a much neater appearance. I also used Holloway House Quick Shine on the window panes to prevent fogging from the super glue I used.
I'm confident you will enjoy the build.
Paul
- mtaylor, Egilman, popeye the sailor and 2 others
-
 5
5
-
Michael,
I'm not sure if there was a parts list. I would go to the OCCRE web site San Francisco cable car. OcCre model tramways and use the contact button. They have been very responsive to my questions in the past.
It is an excellent model, I hope you will enjoy it.
Paul
-
I really think it is a personal decision. I never did glue the masts, I felt as if I needed some flexibility when applying the rigging. Once the rigging is secured the mast was never going to move if I did the rigging correctly. As to what was done on real ships, I have no idea.
Paul
- Ryland Craze and mtaylor
-
2
-
-
The golf courses in North Carolina are considered essential businesses, according to the Governor, so they are open. Of course there are a bunch of new distancing rules in place at my course, including one player per riding cart.
Allan, you have provided me with yet another option, thank you. Hit them straight and far.
Building this kit is a one time endeavor for me, I don't belong working in this scale with my tired old eyes.
I was so excited to find the kit I did not pay attention to the scale, lesson learned.
Paul
-
-
I am building a paper model of the USCG Eagle scale 1:250 and want to purchase wooden blocks for the rigging but have no idea what size to buy.
The smallest I have seen advertised is 2mm long, would that look okay?
Any suggestions are welcome.
-
Hobby acrylics (no specific brand) from Walmart. Keep mixing colors until you get a match you are happy with. If I remember correctly the maroon color is the only one that needs to be matched.
- popeye the sailor, Egilman, mtaylor and 1 other
-
4
-
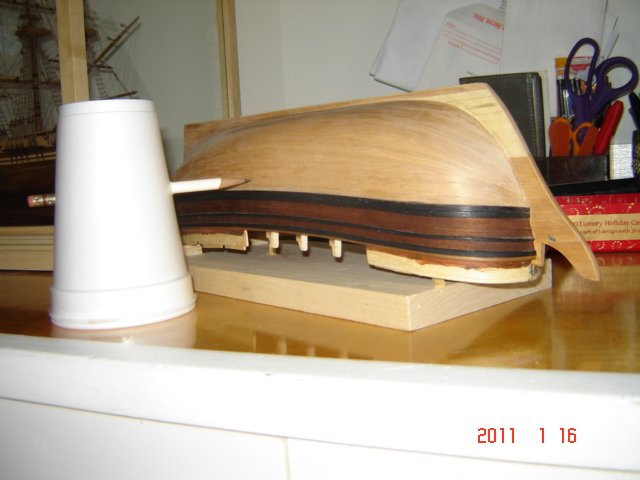
This is what I used. I placed supports under the top rail where necessary to make sure the keel was level with the work surface. I determined where the water line was by taking measurements off the plans. I marked that spot on the hull then transferred the mark to the cup in situ and drove the pencil through the cup and ran it around the hull.
Because you are printing three colors on the hull I suggest you estimate where the middle of the Black will be then paint the yellow and white close to that line. Then using whatever means you choose, mark the actual upper and lower lines for the black section. Mask over the yellow paint to where the upper black line is and the white to where the lower black line is. Now using clear lacquer apply a thin coat to the edges of the masking tape where the black paint will be. This seals the edge and ensures no paint will get under the masking tape. Now paint the black portion and before the paint dries completely, carefully remove the masking tape. You should now have nice crisp lines on the hull.
-
Messis,
I completely agree with wefalks engineering point. However, keep in mind this model, in all probability, is going to be static and certainly not subjected to the same strains and stresses of a working ship.
If you are building this on commission for display in a museum then you need to make it as accurate as possible and spare no expenses. If you are building it to display in your living room who, other than you, will know if any part is completely accurate? Either way, this is a model and it is in fact a representation and also because of scale it is nearly impossible to construct it exactly the same as a real ship would be built.
In the end, this is your ship and your build. I suggest you do what you feel comfortable with. Try to enjoy the hobby and don't let it overwhelm you.
- mtaylor, thibaultron, Canute and 1 other
-
4
-
If you are unsure about the CA holding the blocks in place use 5 minute epoxy instead. Once cured the mast would break before the block would come loose. However, as I said previously I have built 7 ships and have not had a block secured with thick CA come loose. I have had the brass wire break because I had wound it too tight.
The photo gives me the impression that this is a metal mast which probably meant the blocks were somehow bolted on to the mast in real life. Very difficult to simulate in scale and there probably would have been no wrapping involved.
- mtaylor and thibaultron
-
2
-
Christos,
It is indeed my pleasure to be able to pass on the lessons I have learned from members of this site as well as those based on my personal experience.
Enjoy the hobby.
Happy Holidays to you.
- thibaultron and Canute
-
2
-
I drilled holes in the mast as well as on the chainplates that allowed little or no slop room ( I wanted to force the twisted brass wire into the holes). After trimming the wire, I filled the holes with thick CA then positioned the blocks in them and allowed the CA to dry for 24 hours. I never had one detach later.
-
-
I have two custom activity streams. One was set up when the conversion took place a while back. I subsequently have created another custom activity stream that removed some of the topics I had in the old one. When I log in the old activity stream shows up and I would prefer the new one show up instead under the search bar.
I thought if I could delete the old one the new one would show up instead but I do not know how to delete the old one. Any suggestions?
Thanks,
Paul
-
Another alternative is to use either auto pin striping tape or tapes available from chartpak in the width you want. I used chartpak tape for the waterline on the Bluenose II that I built 35 years ago and it still looks as good as the day it was put on. I used clear lacquer to coat the tape once installed.
As is typical, I responded half way through a thought and assumed you would know where I was. Let me make myself clear on this. I did not paint a waterline, I used tape instead of paint for the waterline.
.JPG.2a6f779a338a50b8ce7771565d87f637.JPG)
- Canute and thibaultron
-
2
-
-
In support of Dan's answer. My son made a 12 hour driving trip from North Carolina to New Jersey with 2 ship models in the back of a Mustang. One was on the back seat secured by seatbelts and the other was on the back seat floor surrounded by pillows all around to prevent any movement.
Some other important points. The models were secured to stands with screws into the hulls. Further, the stands were also secured to the bases of their display cases with screws. There was absolutely no damage at all.
Paul
-
I think your CA might be old (it will go bad) or you are putting too much into the joint, or the temperature was too cold. Less is more when using CA. I have put CA on the tips of every plank I have ever installed installed using PVA everywhere else on the plank with great success and not had to use any pins (nails) or clamps. Of course I did over bend the planks as well as use the electric plank bender directly on the joint to set the glue faster.
Enjoy, it is always a learning experience.
Paul
-
-
-
From "Ship Modeling Simplified" by Frank Mastini, page 77, "Before we step the masts. we'll attach all the necessary rigging".
That is exactly what I have done for the 9 ships I have built and cannot imagine doing it any other way. I tie the blocks and lines onto the yards, then put the yards onto the masts and install as many lines as are possible, labeling them and letting them hang loose. Agreed, it looks a mess when the masts are finally stepped however I am convinced it is a lot easier to do as much as is possible off the ship rather than after the masts are in place.
Paul
-
Gregory,
Great cheap idea! Thanks for sharing.
- thibaultron, mtaylor, Canute and 1 other
-
4
-

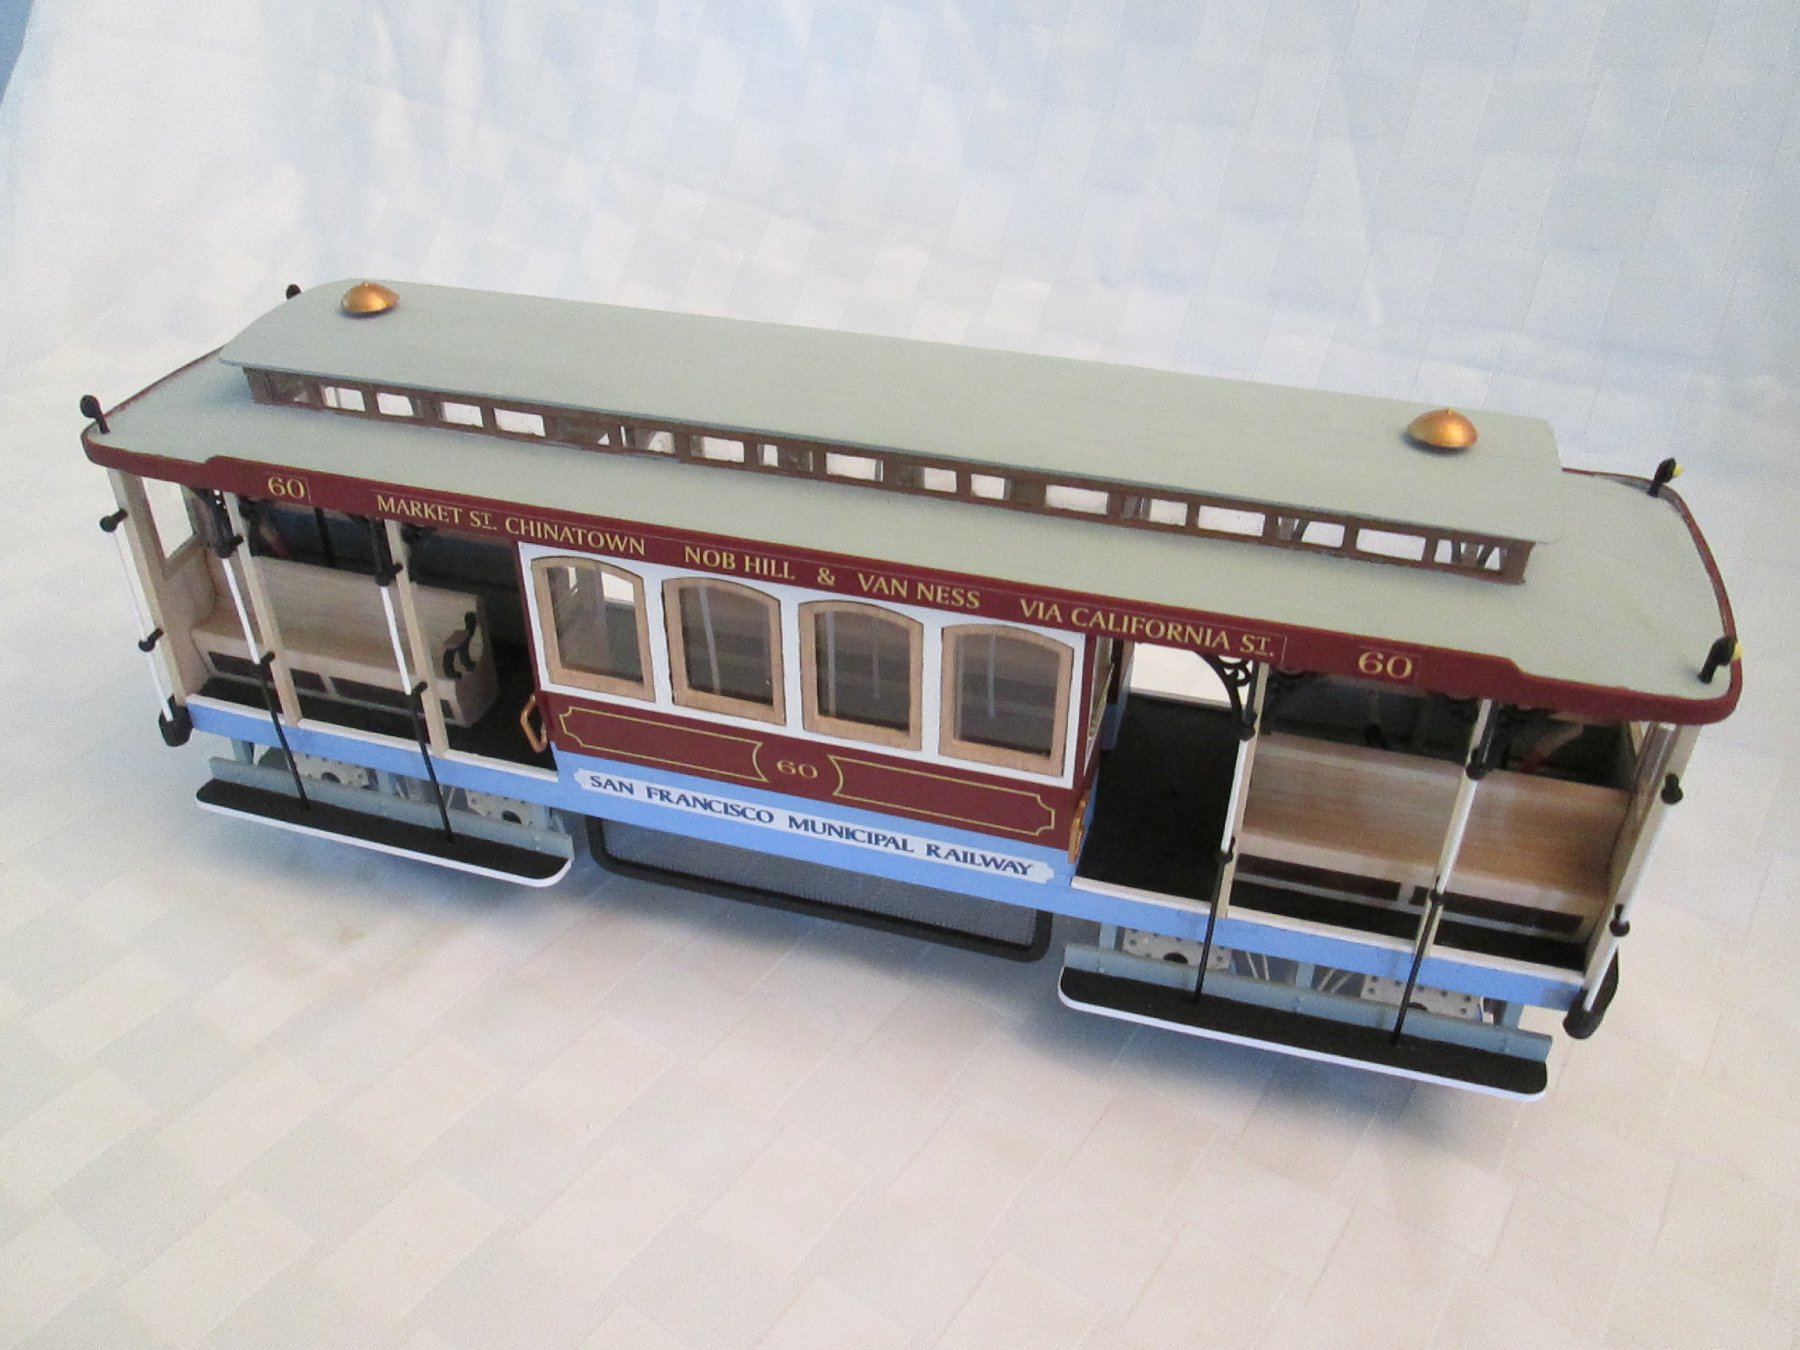
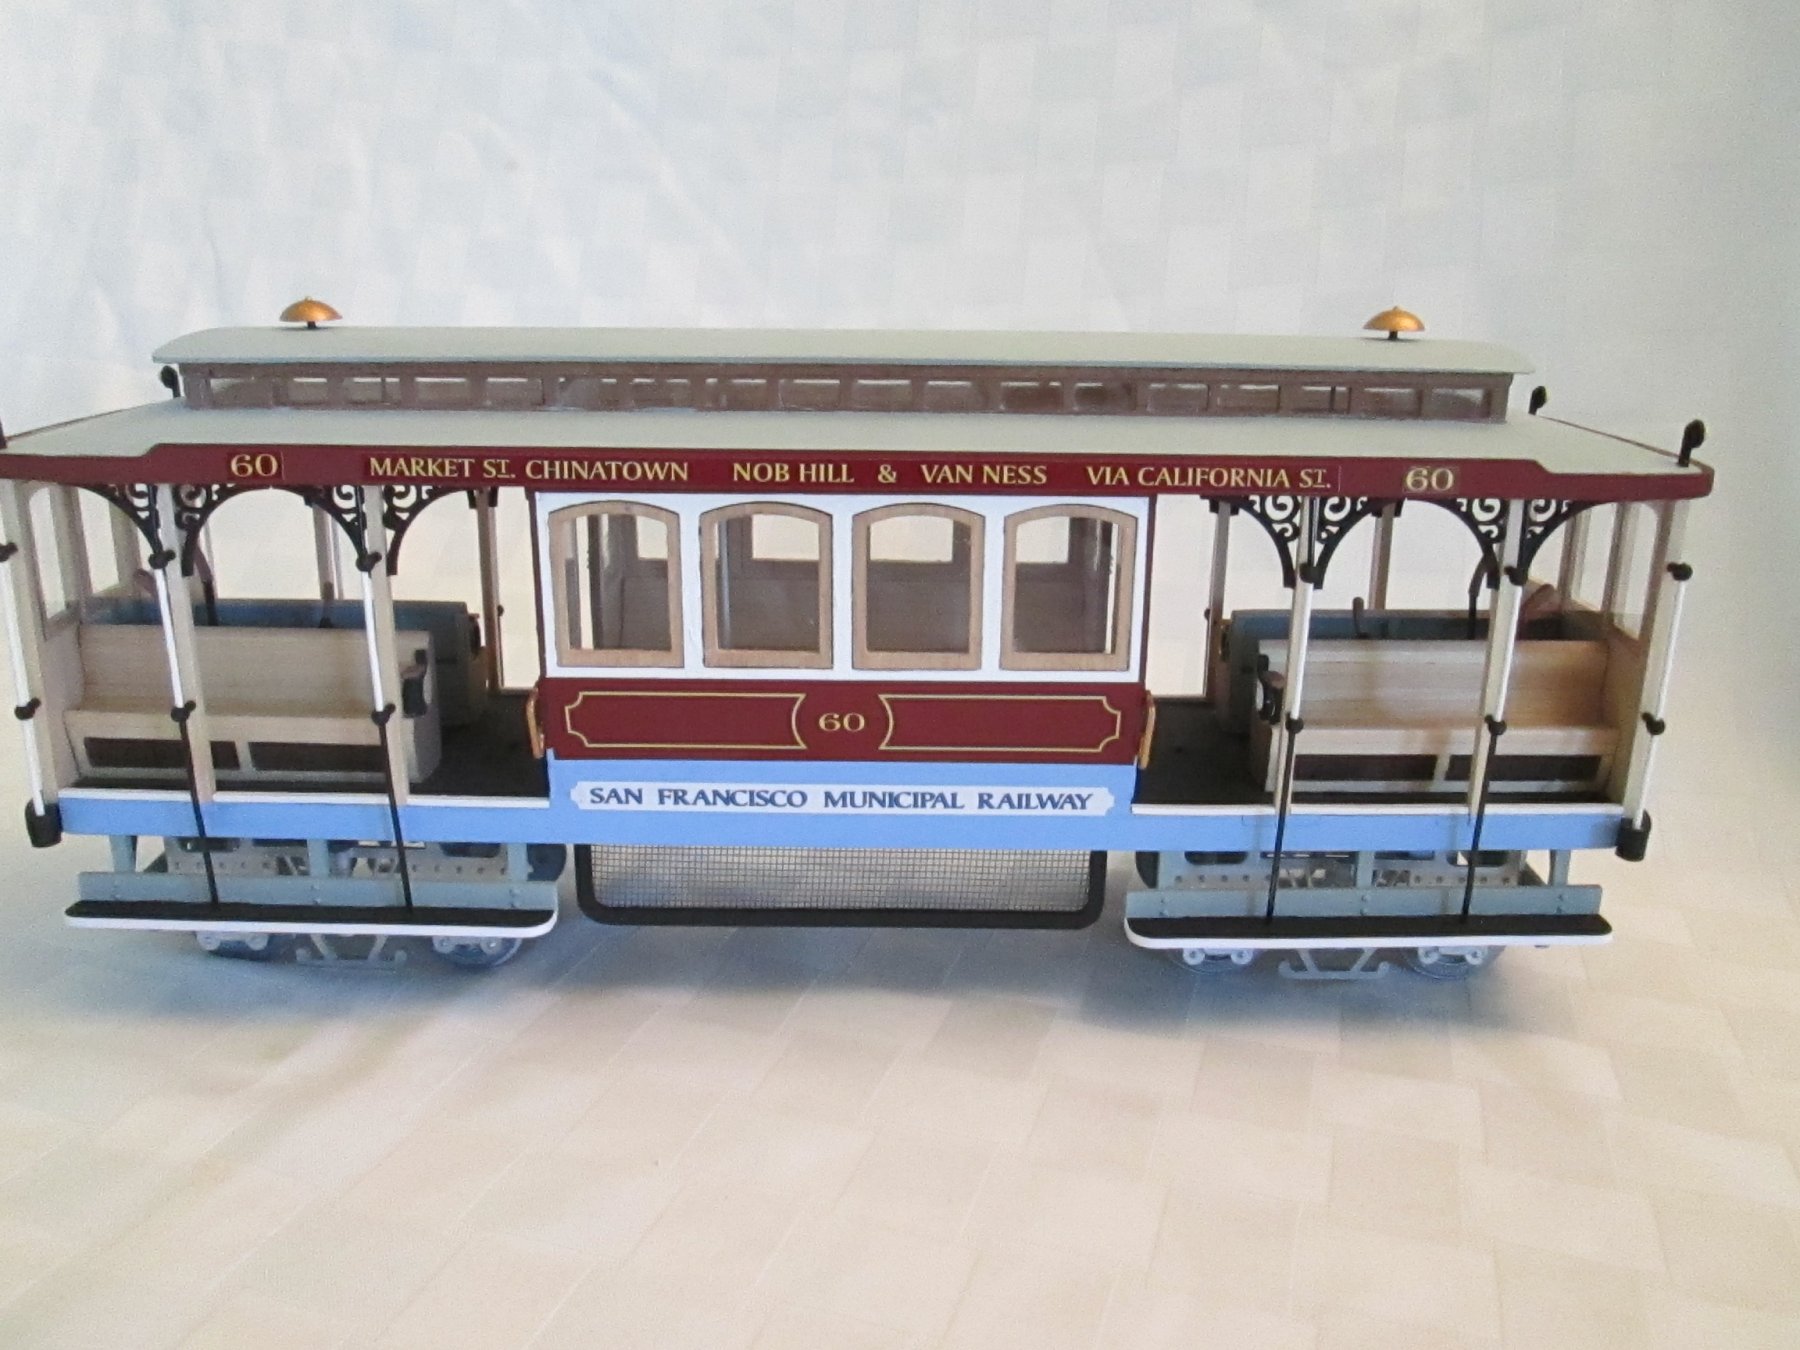

OcCre San Francisco Cable Car by bogeygolpher
in Completed non-ship models
Posted
Bob,
Be patient, the masking/painting will take time. Be especially careful with the windows, it is easy to get glue on them, so use a minimum amount of glue and if possible use a single sheet of plastic for windows that are contiguous.
I hope you will enjoy building it, I did. I do not usually keep the models I build but this is the exception. It resides in an acrylic display case on a shelf I installed specifically for it above my computer desk.