-
Posts
6,421 -
Joined
-
Last visited
Content Type
Profiles
Forums
Gallery
Events
Posts posted by wefalck
-
-
The problem of getting a sleek surface in contact with the 'former' (balloon etc.) only arises when you soak the fabric with the stiffening agent. There is really no need for this.
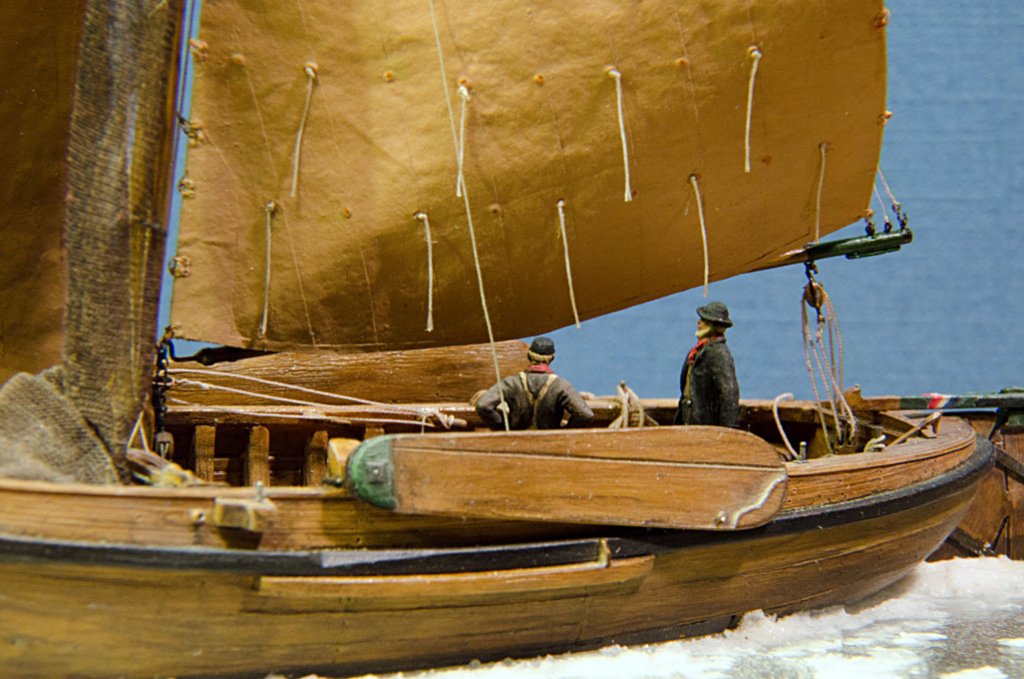
Otherwise, you can also suspend the fabric on its four respectively three corners, e.g. by pushpins driven at an oblique angle into a board, and apply the stiffening agent then. I did make sails from single pieces of model-aircraft silk ('silk-span') in this way, by soaking it lightly in poster-paint (today I would use acrylics). This closes the open weave of the fabric, while still keeping it flexible and as the material is hanging through while wet, you get the slightly billowing effect. Such sails are not translucent, however.
-
-
For depicting a ship/boat in a particular state, it is always useful to make up a (mental) story board. So I would ask myself questions, such as what would happen to the equipment when out at sea, what needs to be maintained/mended in between chases, what is 'personal' equipment and what belongs to the boat, how quickly would the boat need to be ready, is the ship pictured cruising the hunting grounds or on its way out/during return etc. So, during the outward and return-trips the boats would be probably empty and all equipment stored safely to avoid loss in heavy weather. If one believes Melville, harpoons were sort of 'personal' equipment and carefully maintained by its owner/user.
-
Probably to thick. Try to find stainless steel or bronze wire of 0.3 mm diameter. Brass or copper may work, but coudl be too soft.
- mtaylor and thibaultron
-
 2
2
-
Exactly ! Depending on how much you inflate it, you can adjust the roundness.
- thibaultron and mtaylor
-
 2
2
-
Some people use air-baloons as formers. One has to check first, whether the choosen varnish doesn't eat the baloon though.
A completely different technique is to hide a stiff wire in the bolt-rope of the leeches and feet of the sails.
- thibaultron, jud and mtaylor
-
 3
3
-
In principle yes. However, I would refreain from using such organic materials that are prone to microbial attack, commonly called mould. Other people seem to have used diluted PVA glue or, in my case, sanding filler. Matt acrylic varnish could be another option.
- jud, mtaylor, thibaultron and 1 other
-
 4
4
-
Which ones ? To the best of my knowledge the respective red and yellow pigments have been phased out a long time ago, at least in the EU. The paints may have retained 'Cadmium' in their name though. Nothing really to worry about - a day out in a city gives you more exposure to nasty things ...
- Canute, mtaylor, thibaultron and 1 other
-
 4
4
-
Good point about water-based paints/sealers and steel wool. Some people use magnets to pick up the wire residues. There is also aluminium wool apparently, but I don't have come across a source for it yet.
Apart from the steel wool, I also use razor-blades as scrapers after applying sanding sealers, which gives a nice smooth finish too. It only works on flat surfaces though.
- Canute and thibaultron
-
 2
2
-
No, shellac is a solution in alcohol: https://en.wikipedia.org/wiki/Shellac
The solvent-based filler I was talking about earlier is usually in fact a 'filled' nitrocellulose varnish.
- Canute and thibaultron
-
 2
2
-
What kind of varnish are you talking about, acrylic-based ?
Even water-based acrylics may give off fumes, as they often contain some alcoohol. I believe there are also water-based acrylic sanding fillers. You may have to experiment with the wood you are working with. Something I haven't tried on wood myself, but that may give reasonably good penetration are pure acrylic emulsions, without pigment and and fillers. You can buy these in art-materials shops as primers. It may be also possible to dilute them with alcohol to further enhance the wood penetration, but this requires some experimentation.
- thibaultron and Canute
-
 2
2
-
Acrylic paints are water-based and will raise the wood-grain. So one would need to sand it again afterwards. Assuming that you are talking about a fully covering, opaque layer of paint, I would prepare the wood with a good solvent-based sanding filler, sand/scrape it smooth, and then apply the paint.
Solvent-based fillers are to be prefered over water-based (acrylic) fillers, because they penetrate the wood better.
- Canute, Jaxboat and thibaultron
-
 3
3
-
-
As I have used this technique on virtually all my models made over the last couple of decades, I may be allowed a couple of comments
 :
:
Not sure what scale you are working in, but 'bond' paper seems to be rather heavy even though it would be a good quality of paper. I would rather go for something as thin as possible.
If I wanted to stich-on the bolt-rope (I never worked in scale, where this would be possible physically), I would use the thinnest fly-tying yarn I could get holds of (something like 18/0 and perhaps even split it).
The reef-points are actually held in place by stiched-on crown-splices on both sides of the sail. These can be simulated by two figure-of-eight- or over-hand-knots that are pulled very close to the sail.
Not sure, whether 'dafi' presented his technique (already) in this Forum, but for his 1:96 scale HMS VICTORY he developed a three-layer technique using self-adhesive tapes as used by book-restorers to (almost) invisibly patch up ripped pages. Strips of that paper-tape are pasted from both sides onto a backing of very fine silk weave ('silk-span') to create the effect of the sail-panels. This composite can be crumbled and creased to give a realistic cloth effect and when stitching-on the bolt-rope the silk-weave prevents the edges from ripping out. Interesting technique, but I have not yet used it myself.
- FrankWouts, CaptainSteve, mtaylor and 7 others
-
 10
10
-
Do you mean deck-houses by 'deck-furniture' ?
Deck-houses were normally built using carpentry 'tongue-and-feather' techniques, which make caulking unnecessary. This building technique is possible, because the differential movement of the parts is limited, so that no seams will open. Decks could be laid in the same way, but it is not (normally) done, because it would make it virtually impossible to replace single planks without ripping out the whole deck. This is not an issue for deck-houses.
- roach101761, WackoWolf and mtaylor
-
 3
3
-
I have a box full of them in all sizes and shapes. However, as I am working a lot with steel, I have always some swarf and filings flying around that seems to collect on these magnets ...

- mtaylor, Nirvana, thibaultron and 4 others
-
 7
7
-
"The message seems to be that, if one is attempting to model a ship of this period, it shouldn't look too tidy."
This opens another can of worms ... shoddy workmanship of the modeller vs. representing shoddy workmanship on the prototype. One has to work carefully untidy ...

- Seventynet, BANYAN, John Garnish and 4 others
-
 7
7
-
We tend to think too much in terms of (building) rules, regulations and standards - because they have become so prevalent and institutionalised since the early 19th century. We also tend to think that any material could be 'ordered' at any time. However, wood is a natural material with limited supplies of the qualities and dimensions the builders may have wanted. So in practice, they may have had to make do with whatever was available in a particular yard. (Hard)wood supplies tend to follow an annual cycle, with wood being cut during the winter, transported to the rivers for rafting during the high-waters in spring. You couldn't just place an order for a particular kind of timber, when you ran out of it ...
So one should expect a lot of variations dictated by these boundary conditions.
-
Excellent wood-work !
For those, who read French, there is a nice and comprehensive article on the 'cure molles' by Patrice Descencière in NEPTUNIA No. 264: http://www.aamm.fr/boutique/index.php?main_page=product_info&cPath=67&products_id=428
-
Indeed, one cannot generalise (easily) from individual ships. However, our physical evidence across the centuries is rather limited, we have to use what we have. Comparing 16th century and early 19th century practices may also be problematic. Production techniques for planks were different, as was timber availability.
I didn't read up on CHEERFUL, but where did Chuck get this 'real' planking expansion from ? I gather it is reconstructed ? From which sources ?
-
Interesting reading, thanks for the link. This actually opens another front, namely whether we talk about shell-first or frames-first construction, or a hybrid of both. It seems that in fact the latter has been quite wide-spread in Northern European shipbuilding and the dhows of East Africa also belong into this category, as the first few planks are put into place before the inside timbers are errected. Shell-first construction would require horizontal scarfs with backing pieces in order to make a continuous plank. This would typically avoided, if at all possible, for garboard and floor-planks in smaller vessels.
However, we slowly deviate from the original question. This should actually be rephrased in the sense that planks were taken as long as available. If shorter ones had to be used, then in areas of the hull of less structural importance, i.e. in general higher up.
-
I gather the question of butt-joints or scarfs depends on how close the frames are spaced and how wide the frames are. If you have double-frames, just a few centimetres apart, you can put a butt-joint just between them without fear that the hull-movement would open the joint or a spike too close to the plank end would split it. If you have wider spaced frames - in my example above they are about 30 to 40 cm apart, you have to make the seam longer and more in line with the run of the planing, i.e. make a scarf, in order to accomodate differential movements of the planks without allowing gaping seams. The scarfs are placed with both ends on frames and no doubling behind is used, at least on Zanzibar. The frames would be too narrow to drive two spikes through next to each other and at a distance that would be safe for the plank ends. Butt-joint would be structurally unsound in this case.
It all is a question of the size of the available materials vs. the size of the boat/ship.
- mtaylor, jud and thibaultron
-
 3
3
-
I should add to the above that the joints between hull-planks would be scarfed, not butted as on the deck. This requires extra length.
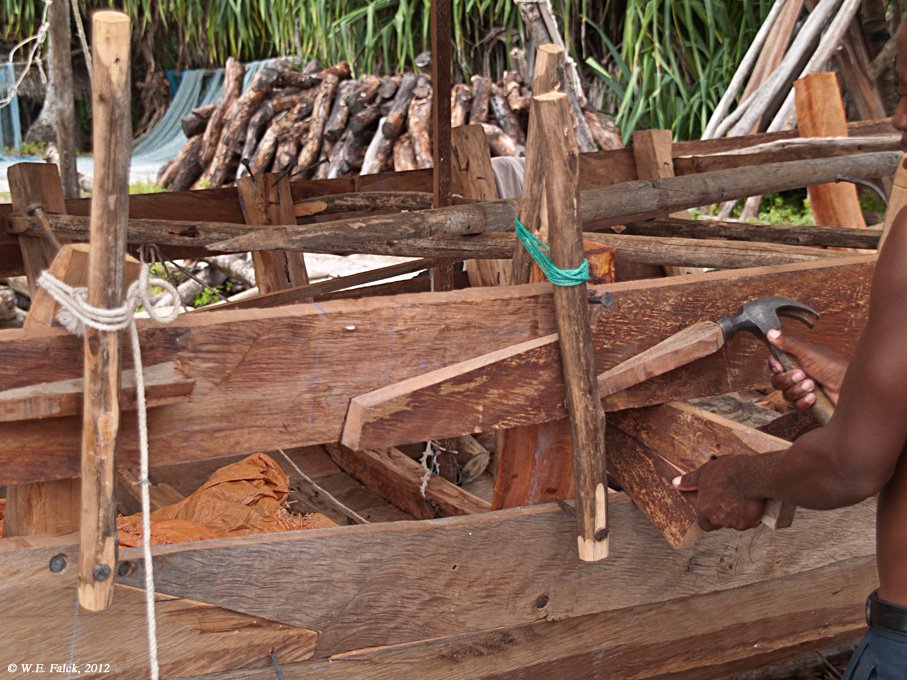
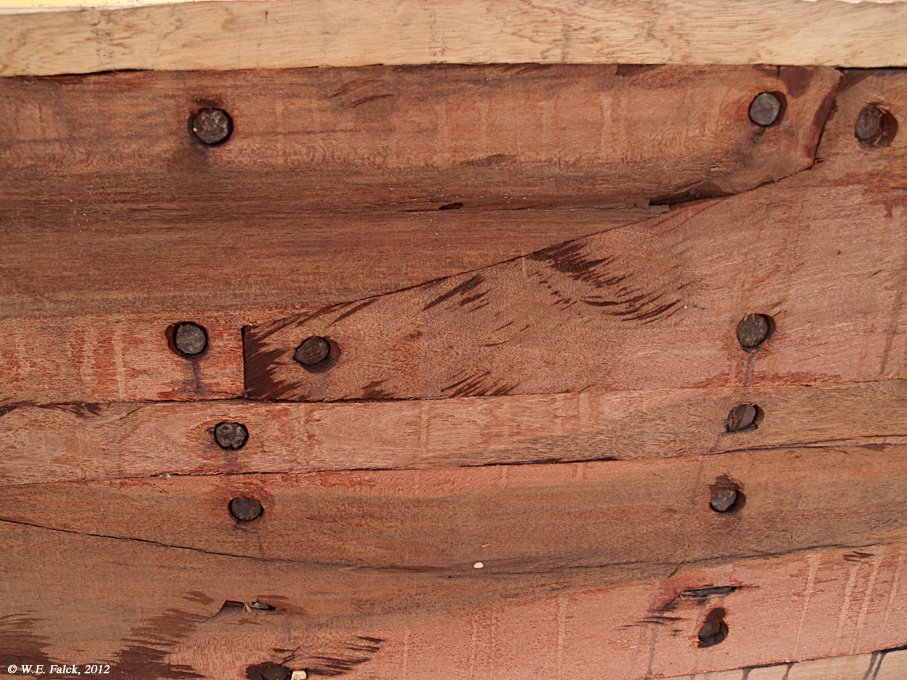
Below you can see two images of modern-day dhow-building on Zanzibar. Certainly not the most sophisticated builders, but it illustrates nicely how it was done for centuries:
Fitting the scarf between two frames:

The faired and smoothed scarf:

More details here: http://www.maritima-et-mechanika.org/maritime/tanzania/tanzania.html
- Seventynet, druxey, Dubz and 4 others
-
 7
7
-
Wooden ships don't have 'structural' bulkheads. In wooden ships bulkheads are only more or less temporary, relatively light-weight constructions to keep e.g. loads or stores in their place. The idea of bulkheads as structural parts may arise in shipmodellers, as often the model hull is constructed around solid bulkheads - this has nothing to do with a real ship.
I think a plank has to cross at least thread (double) frames in order to be properly framed. If it crosses only two frames wave action or the like can push the plank inwards with the ends rising and the caulking falling out. However, such short planks would generally be avoided, if at all possible.


Starch on sails
in Masting, rigging and sails
Posted
I gather the alum was used, like sodium silicate, rather as a flame-retardant on theatrical fabrics than to stiffen them ?
I really wonder, whether this is a good use of epoxi-resin. Of course you end up with a sort of fabric-reinforced resin shell, but it seems a bit messy in comparison to using one or the other type of varnish.