


wefalck
-
Posts
6,651 -
Joined
-
Last visited
Content Type
Profiles
Forums
Gallery
Events
Everything posted by wefalck
-
 Personally, I would shy away from oil on models. In case of decks, I would use a nitrocellulose-based sanding filler (not the acrylic-based ones). Depending on the wood, one or two coats will be sufficient. Don't apply to liberally and rub down with finest (0000) steel-wool. Dedust carefully and perhaps use a magnet to catch any swarf from the steel-wool. Such a treatment will not change the apearance of the wood significantly - decks on ships were never treated, as it would make them slippery and unsafe. In principle, one should not rely on glue alone for fastening, unless for larger surfaces. Normally, such deck-fittings would actually not sit on the deck, but would be attached to structural elements of the hull and planking would go around them. As the items in question seem to be cast from white-metal, I would carefully drill pin-holes into their bottom, insert a short pin temporarly to help locating the corresponding hole on the deck, drill this hole and then insert pins of appropriate lengths. As the parts seem to be metal, using epoxi for glueing is good advice. Otherwise, the nail varnish (or better zapon varnish) also works, as it adheres well to metal (zapon varnish is traditionally used to protect silver-ware from tarnishing) and sheer-forces are taken up by the pins. Shellac either in flakes or as ready-made solution should be readily available in the UK. Not sure, whether this French brand is still available in those post-Brexit days, but Liberon does have shellac-solution.
 -
Lovely project and congratulations to have finished it (more or less) as a kind of 'Christmas present' ! I had followed the project with sort of one eye from time to time as I got interested in the Spanish boats in the last few years, being a frequent visitor to Valencia. 'Nuestra vela latina' is a book that has been on my list of a while, but haven't got around to get it yet. Isn't it written in Catalan, rather than Castellano ? I got a number of book on local Valencian boats (some of them written in Valenciano!). Otherwise, a more generic and classical source on the lateen rig is: VENCE, J. (1897): Construction & manœuvre des bateaux & embarcations à voilure latine.- 139 p., Paris (Augustin Challamel Editeur, reprint Editios Omega, Nice). However, the author draws mainly on experience from Southern France and Tunisia. Some years ago I wrote an article for the German LOGBUCH and French NEPTUNIA on lateen-rigged boats from the Albufera (a lagoon south of Valencia): https://www.maritima-et-mechanika.org/maritime/albufera/Boats-of-the-Albufera.html. There are also some further references to books/articles about Spanish boats at the bottom of that Web-page.
- 61 replies
-
- 1
-

-
- ancre
- Santa Caterina
- (and 1 more)
-
Apologies to all, who looked here in vain for new developments, but real life severely interfered with my workshop time and the zen mental state to carry out miniature work ... In the meantime, I wish all Forum Members a peaceful Christmas and a successful New Year 2024 !

- 935 replies
-
- 18
-
-

-
Without wanting to further dilute Valery's building-log with side-discussions, one also needs to precise the period and the prototype. Different rivetting techniques were used at different times and in different places around the ships. For instance, early iron-ships had rather visible rivet-heads as one can see on surviving examples. As confidence and material assessment technologies evolved, rivets and their heads became smaller. When steel was introduced, half-countersunk heads became possible in even relatively thin plates due to the high tensile strength of the materials involved. On war-ships and other types of ships were appearance was considered important, rivets were generally countersunk above the waterline, so that these showed smooth hulls. There is also the old scale discussion: can I leave off details that would not be visible at a 'normal' viewing distance? On the other hand, people may put their nose onto the model (or hopefully only on its glass-case) and then would see many more details. I think as long as they can be reproduced to scale, one could or should show details, such as rivetting, when appropriate for the prototype.
-
A pretty massive set, even though its 'only' narrow-gauge. I gather one needs mass and HPs to get through the drifts.
-
Nice progress, indeed! Out of curiosity: are you related to the painter Sorolla by any chance?
-
I am well aware of this method, but was always worried, that the edges of the putty may crumble. Automotive (spray) putty is quite strong on the surface, but it is actually a bit crumbly, so as to permit easy sanding. I gather, once painted the edges of the strakes become much stronger?
-
Moon-shine calvados could come in any kind of bottles 🫢 A year of 1938 in 1944 would make more sense for calvados than for cidre though, which is generally drunken young (and traditionally from bowls, rather than glasses).
-
Castrovejo would the keyword to watch out for re. eye surgery instruments. I think he was a Californian surgeon. I have various scissors, needle-holders and such.
-
If it’s Normandy, it should be cidre/cider, rather yhan wine / comes in champagne-type bottles. To my knowledge, there are no vinyards in Normandy. The bottle modelled would be a Burgundy bottle, long slender neck, as opposed to the short necks of the Bordeaux bottles.
-
Diamond files don't have a 'pitch'. They are like sandpaper, the diamond grains are randomly distributed. There are also diamond needlefiles, but the cheap ones seems to be too coarse for fine work. One has to look up and down ebay & Co. to see what is on the market (don't forget the 'nail art' department, where they sell the same abrasive strips as for modellers, but at half the price or less ...). It seems one can spend easily as much money on 'aftermarket' parts for kits, as for the kit in the first place, or even more.
-
I stopped 20th military modelling some 40+ years ago ... however, I understand that today Friul Modelismo makes metal tracks with individual links for many (most?) tank kits on the market. They seem to be preferred by 'serious' military modellers over the rubbery plastic one, because they sag prototype fashion. Just to mention ... Polystyrene does not work very well with normal steel files. I use diamond files (including cheap nail files of different sizes and coarseness). Back in 1941/42 the Brits in North Africa apparently were hunting down German 'jerry' (hence the name) can, because they were far supperior to the simple thin metal boxes that were used by the British Army then. In the German army they are still used and since WW2 a white cross indicates that they are used for water. Back in the days, when I drove a Citroën 2CV, I always carried one with me, effectively doubling its range.
-
Strange, but then pigment manufacturers sometimes have strange names for their products. I wonder what it is technically. Perhaps it is just ground-up natural titanium ore, rather than the refined product, see https://en.wikipedia.org/wiki/Titanium_dioxide, that is normally used and would apparently also have the code PW6.
-
What is this supposed to be? Titanium pigment is TiO2, i.e. titanium oxide, and that is a stark white. Being a inorganic chemical compound, there is nothing to bleach and it is absolutey lightfast.
-
I have simulated wire rope by twisting together strands of copper wire and then painting them in some dull silver colour. One can also get at a reasonable price silver wire down to 0.007 mm(!) diameter (which is used to bridge broken printed circuit connections in repairs, I believe). It is difficult, however, to twist more than two wire together evenly. For simulating rigging wire, it should not be twisted too tightly, as in real wire rope the angle of the strands is less than for fibre ropes. There is also some (expensive!) japanese fishing line in steel grey, which seems to be braided with four strands. I have not seen it in real life, but it may be worthwhile exploring: https://www.ebay.de/itm/284004752603?var=585466534836
-
A bit bizarre that someone in distant Mexico/USA should build a model of an 'Emspünte' ... Unfortunately, I would have only technology solutions for your anchor-problem, I would either solder the grapnel up from brass wire or perhaps making a design for laser-cutting from paper stiffened with varnish. Actually, if you can get hold of some wire, material doesn't matter too much, you could bend four 'fish-hooks', bundle and tie them with some threads and smear the whole assembly in white glue. I think the village blacksmith would have used a similar process to make the real thing, using rebar or whatever iron rod would have been available, bending them and welding them together, adding reenforcing sleeves to the shank.
-
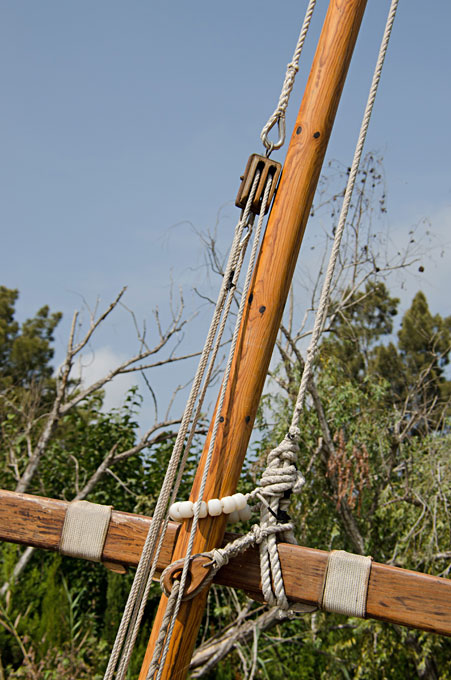
If you don't dare to take on splicing, you can also just make ring with an overhand-knot, put the block in and a pin for keeping the eye open at the other end. You then start the seizing with a series of half-hitches until you reached the desired length of the seizing. Then you pull on the loose ends of the strop to shorten it to the desired length. Fix the seizing with a dab of varnish or paint and trim the loose ends of the strop and the seizing respectively. On a real ship the stropping would have been done in situ, but on a model it would be better to do the stropping off the boat with the ring slipped over the traveller and only then to install the traveller.
-
Seizing Blocks With Alternate Half Hitch Knots
wefalck replied to Glenn-UK's topic in Masting, rigging and sails
Thanks for showing this in a video. I have used half-hitches actually ever since I got into this kind of ship-modelling. I don't use CA glue though, but rather fast-drying varnish, so that I can slip thing up tight against the block, if needed by just a drop of solvent. However, it seems to me that you are using a series of overhand-knots rather than half-hitches !? Of course, this works well.- 1 reply
-
- 1
-
-
You don't mention the scale, but it is possible to make simplified long-splices by pulling the ends through each other with the help of e.g. a hypodermic needle as marlin-spike. You then dab the splice in varnish and roll it between your fingers. Then you basically proceed with full-scale practice and tie the strop around the block and the ring on the traveller. The splice will disappear under the seizing.
-
Looking good! I gather the book on catalan lateen-rigged boat that you got, will give some more ideas on the specificities of that rig. One of these is that the parrel is a sort of rope with an eye at its end that goes around the mast and is fixed to the halliard. The purpose is to be able to loosen the parrel to allow a better adjustment of the antenna. Not sure though, whether this would be case on the more lugger-sail like sail of the canoa here. On the photo below from the Albufera near Valencia (Spain), the parrel is a pretty ugly affair, not quite ship-shape: Probably your photographs don't show such detail, but usually the rope that attaches the sail to the yard is not just wound around, but at each grommet there is a half-hitch - I don't have an image to hand that would show this. In that way, the sail has less a tendency of slipping along the yard or pulling out of shape.
-
HMCSS Victoria 1855 by BANYAN - 1:72
wefalck replied to BANYAN's topic in - Build logs for subjects built 1851 - 1900
Just wondered why 'Spring Chores', as we are heading now into the Christmas period - but of course, you guys down under are not only standing on your heads, but also got the calendar wrong Here it is mulled wine time, not cocktail time ...- 1,013 replies
-
- 6
-

-
-
- gun dispatch vessel
- victoria
- (and 2 more)
-
The Heritage and Education Centre ship model series
wefalck replied to tkay11's topic in Nautical/Naval History
Thanks for the links, have to look into this - just revisted the Sjöhistoriska Museet in Stockholm three weeks ago - one of the last of the maritime museums that really seems to appreciate its model collection.- 1 reply
-
- 7
-
-
The stakes become higher and higher and not only because it is the main topsail yard ... 😉
-
In Europe it were Norway (NorskHydro) and Switzerland (Alusuisse) that had been the main initial producers, due to their hydropower capacities.
-
Hope you don't need to repaint your models now - we were quite happy with the colour schemes of the woods etc. BTW, Gratulations to the successful surgery! I gather it is like getting new glasses: the brain has to readjust the images to the perceived realities.