wefalck
-
Posts
6,644 -
Joined
-
Last visited
Content Type
Profiles
Forums
Gallery
Events
Everything posted by wefalck
-
 ... and even, if he wasn't barefoot, leaning onto the ladder with the bare forearms isn't such a survival idea either 😲
 -
I am not an expert on the Vickers, but I think your photographs shows a tripod-mount as 'heavy' machine-gun for land-use. There, the tactical situation is different in the sense, that when you combat attcking infantry, you only need small changes in elevation, as the enemy is approaching or for spraying enemy positions at greater distance, you don't want to change your elevation once you are sure that you hit those positions. Hence the elevation screw. In naval combat situations, your own boat and that of an enemy are moving fast, hence you constantly have to adjust the elevation to keep the target under fire. I think naval light guns, including machine-guns had some sort of friction-brakes on the pivots and horizontal bearings. One sometimes sees little hand-levers with which these brakes can be adjusted or completely locked. These friction-bearings probaly are just split rings that can be pulled together with a screw that is operated by the hand-lever.
-
Sometimes mothers aren't any better: ma mother wanted to make some 'fruit flambée', heated them in a large copper pan that was kept for the purpose, poured the rhum over them and put a match onto it - pouff, it was suddently all flames and white smoke: she had forgotten to turn off the extraction fan, which had sucked in the flames, which in turn ignited the grease in the filter. She was lucky to realise quickly what had happened and switched the fan off, so that no big fire developed, ouff ... Another time, there was some banging heard in the house and my mother, who was in my sister's room reading stories to her shouted at me (by habit in such cases), what I was doing ... but it wasn't me, when I checked the kitchen it was full of white smoke and foul smell - she had forgotten that she put some eggs to boil before she went to my sick sister's room and in the meantime all the water had evaporated and the egss exploded. Decades later, when the kitchen was dismantled, we still found mummified egg in some corners behind the cupboard
-
There was also a 1953 franco-italian road-movie 'Le salaire de la peur' with Yves Montand and Peter van Eyck, where four guys were hired to drive two lorries with nitro-glycerin to be used to extinguish a burning oil-well into the South-American djungle ... one lorry makes it.
-
Interesting, I hadn't heard of this technique. There used to be a guy called Red Adair, I think; who was a specialist for putting out such fires using controlled blasts, which may work on a similar principle.
-
Yep, those jeweller's flush cutters are very useful to nip off things flush. Had one for decades. They are meant to nip off steel watch springs, so they are very hard and tough. I use a piece of card/paper behind the shrouds, on which the shrouds and the ratlines have been printed. This gives you a good guide to check that you didn't pull the shroud out of alignment and that the ratlines are correctly spaced.
-
I think one has to try for oneself with one's equipment. There are so many contradictory recommendations around, that one gets easily confused and discouraged ...
-
I happen to have an Adept No. 1 hand-shaper - but admittedly rarely use it ...
-
Did I mention, that I once tried to make gun-cotton? My father had a useful book, that told you everything about how to make explosives and how to test them ... perhaps I was lucky that it didn't work, because the cotton-wool I used was actually not cotton.
-
Brass chain can be first chemically blackened and then rubbed with graphite.
-
Very convincing results ... we became to expect this from you While looking at it, it occurred to me, that such industrial premises may have had wooden pavement, that is small blocks of hardwood, set end-grain up into a bed of sand with asphalt caulking. Some cities in the 19th century even experimented with such pavement to reduce the noise from cart-wheels. Would be fun to make, glueing stacks of battens together and then sawing slices from it ...
-
As I said, I never used any cleaning kits, but that may depend on your air-brush and how diligent you are with cleaning. Acrylics dry very fast, so as soon as you don't get an even spray pattern, you should rinse the air-brush and begin again. For rinsing, the air-brush needs to be taken apart as per instructions. Take care not to bend or dull the needle - I usually wipe it gently between the fingers. Careful re-insert it without poking it against any part of the mechanism. I gather they sell 'flow improvers' - this probably is some sort of surfactant adapted to the composition of the paint that will reduce the surface tension of it, which has two effects, it aids in forming very fine droplets and it facilitates the adherence to the paint on say plastic or metal surfaces.
-
Indeed, Vallejo's ranges of different paint formulations (for brushing or for air-brushing) do not have the same range of colours. It is, however, possible to thin their other paint formulations for air-brushing. In this case one should use their recommended thinner(s), as other thinners could break down the emulsions on which these paints are based. I only have a very small air-brush with a 1 cc reservoir and found this sufficient for my relatively small projects. A small reservoir prevents you from wasting paint. As the paint ducts are simple and as I wash out the air-brush immediately after use under running water, I never had the need to use any special cleaning fluids or devices. I don't use it very often, so it had stayed with me now for nearly 40 years ... On pre-thinned paints vs. paint-tubes: it is correct, that compared to the amount of pigment you get for your money, they are expensive. However, me personally, I prefer to pay a premium price and have something ready to use after some thorough shaking. I do not waste any paint in mixing vessels etc. as the bottles have nozzles or pipettes from which just a few drops of paint are transferred into the air-brush. The pre-thinned paints seem to have a suprisingly long shelf-life. Some bottles I had for more than 30 years and they still work.
-
The most primitive way would be to print the drawing on paper, cut the shape out and suspend it from several points at the edges from a thread, then draw a line in prolongation of the thread across the shape - where these lines intersect is the centre of gravity. This can be done for individual sails, whole sail plans, and longitudinal sections of the underwater-hull. There may also free-/share-ware computer-programs that do that from various graphics inputs. Some CAD-programs have such a function.
-
OK, I see. Perhaps, as a reality check, you could take the loftiest (relative to hull lenght) sail-plan in those archives and compare it to your reconstruction - this should give you the enveloppe in which to develop your sail-plan. If you work with average dimensions for each part and add these together, you may arrive at an overall too lofty plan. Another cross-check would be to graphically determine the centre of gravity of your sail-plan and compare this with that of other sail-plans. This then can also be compared to the centres of gravity of the hulls. This is what designers such as af Chapman would have done in order to see, whether hull and sail-plan balance.
-
Are you sure, you got the proportions right? I know that some of these later 18th century vessels had very lofty spar-plans, but here the mast appears to be rather tall. The packet would have required a large amount of balast to remain stable ...
-
There should be some 3D-printed studded-chains available in 12 links per inch ...
-
'Vallejo model air' mostly these days, but also the German brand Schmincke for basic colours. Vallejo has a huge range of colours (https://acrylicosvallejo.com/en/category/model-air-en/). They have colour charts on their (national) Web-sites, but as usual they are not terribly faithful in the colour reproduction for technical reasons. Vallejo branched out into modeller supplies from being a reputable Spanish manufacturer of artists' paints.
-
Standing water leaves white spots on shellac finishes - as most owners of antique furniture know ... However, dampening a tampon to pick up rotten stone or pumice (which is what is used in traditional shellac finishes) does not do any harm. Alternatively, one can use very fine steel-wool (0000), but has to take care to remove any 'swarf', as it may rust with time. This results in an almost matt finish that then can be polished with a dry cotton tampon to a nice satin sheen, if required.
-
Iron Mast Cap Orientations in Steam/Sailing Ships
wefalck replied to BANYAN's topic in Masting, rigging and sails
Finally, I had time to check my German early 20th century textbook: MIDDENDORF, F.L. (1903): Bemastung und Takelung der Schiffe.- 401 p., Kassel (reprint 1977 by Horst Hamecher). On p. 268 he states explicitly that "Mast-caps are perpendicular to the masts and spars (unlike the tops that are either parallel do the sheer or the waterline) ..." However, STEINHAUS, C.F. (1869): Die Construction und Bemastung der Segelschiffe.- 137 p., Hamburg (L. Friedrichsen & Co., reprint 1977 Horst Hamecher, Kassel). draws both variants, wooden and iron caps that are either perpendicular to the mast or very slightly inclinded, while tops are always at an angle to the mast. I think at the bottom line, perpendicular caps are the most likely variant and the easiest to fabricate by forging, but inclined ones would not be a problem either. -
Didn't pop in here for quite a while ... I am always impressed by your cutting/carving of styrene! How did you cut out and carve those corbels? Using a fret-saw? On the use of asphalt solutions etc.: I appreciate that the antique effect on wooden models is quite nice, because it penetrates well, but in the case of plastic models I think there are other ways to achieve a similar effect. I have used washes of very dilute burnt umber acrylics to good effect. Other people use oil paints, brushed on and then wiped off, so that it only stays in depressions. If the base is matt acrylics, this also partially penetrates into the acrylics, leaving a similar effect as on wood. Personally, I not so fond of oils because of their long setting times (which on the other hand facilitates their working - as long as you keep the model in the dark, you can continue working). In general, the fewer paint systems one mixes, the better ...
- 2,699 replies
-
- 6
-

-

-
- heller
- soleil royal
- (and 9 more)
-
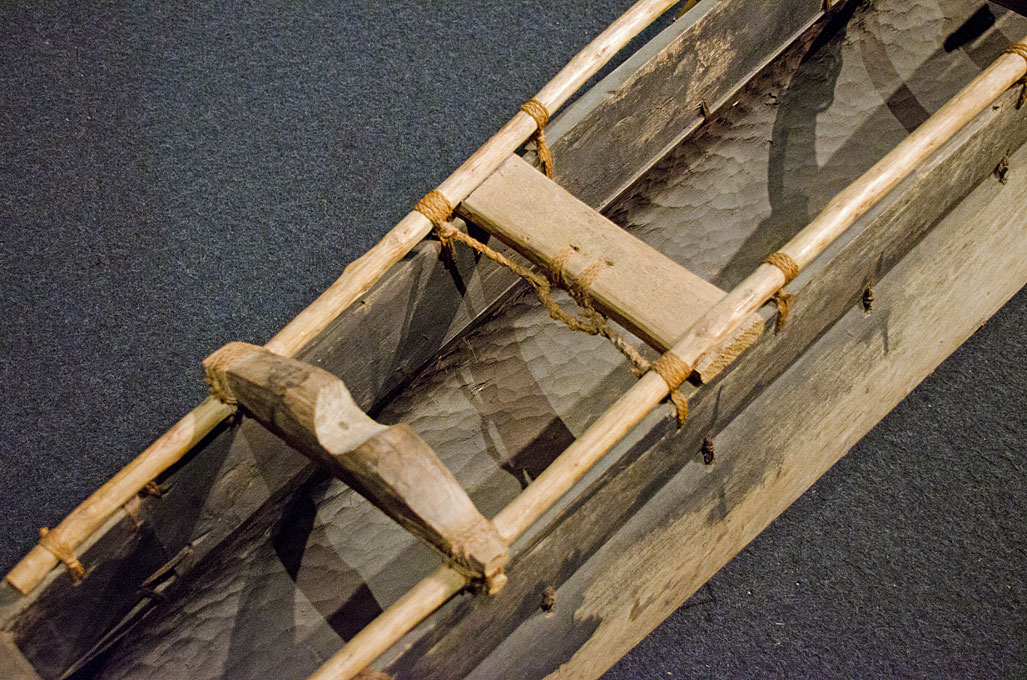
I wouldn't have asked, as I am quite familiar with this techniqe from indigenous craft in Arabia, East Africa, the Pazific and various other regions around the world. It often apears in regions, where good pieces of wood are scarce. Here a boat from Niutao (Ellice Islands) built around 1960 and now preserved in the Ethnological Museum in Berlin: One could also talk about skin-boats and I don't mean the kajaks of Greenland and Canada or the curraghs and corracles of the British isles. On some naval craft, such as torpedoboats, (deck-)space was at prime and hence foldable dinghies were used.
- 24 replies
-
- 1
-
-
- Small boats
- cutter
- (and 2 more)
-
Well, we all seem to suffer from more or less from the same problem: the narrative I hear from time to time goes "why don't you do something useful with your fancy tools, such as making jewellery?" While I am quite capable of repairing things around the house (and do it, given enough urgency and inconvenience ), I prefer the creative aspect of 'making' things over 'fixing' things ...
-
Somehow this e-book had escaped my attention so far - unexcusable ! I really love those pictures that combine models with a digital seascape and atmospheric effects.
-
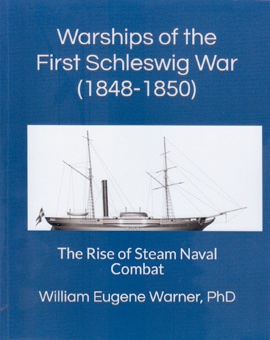
WARNER, W.E. (2022): Warships of the First Schleswig War (1848-1850): The Rise of Steam Naval Combat.- 209 p. (independently published through Amazon), ca. 32€. Since 1460 the Danish Kings ruled in personal union as dukes in Schleswig (as a fief of the Danish Crown) and Holstein (as a fief of the German Confederation). This constitutionally complicated situation was exacerbated by the fact that German and Danish populations were mixed in the north of Schleswig. The efforts of the government in Copenhagen to tie both duchies more directly to the crown in the mid-19th century led to counter-movements by the German population, which culminated in the first of three wars in 1848, the 1st Schleswig-Holstein War (known in Denmark as the ‘Three Years' War`). Since there are only a few works on the subject and these are usually kept rather short, such a 200-page book seemed a desirable addition. But even at first glance one can see that it was cobbled together rather hastily. There is at least one, if not several, typos on every page that should have been easy to spot when proof-reading, if not already with the spelling-checker in the word processor. A striking example is the legend on p. 13, in which Flensburg appears in Danish spelling once as Frensborg, twice as Flenborg and once each as Flesborg and Felsborg, sometimes in the same sentence ... In addition, there are incomplete and incoherent sentences on practically every page. Some paragraphs and whole chapters look like automatic translations from Danish or German. For significant stretches the text actually reads like German or Danish with English words. Speaking of 'Flensborg': it is not entirely understandable why the Danish spelling of the place names was predominantly used, even for Holstein areas, where this may have only appeared in official documents in Copenhagen. A Danish-German-English comparison table on page 202 indicates that for place names in the text predominantly the German version was used, which is de facto incorrect. It is also frustrating that the text and action maps do not always match, i.e. the text mentions places that are not marked on the maps, so you have to constantly consult an atlas to understand the text. Such a lack of formal care usually undermines any confidence in the reliability of content. The historical overview then indeed suggests that the author only deals very cursorily with the complex history of Schleswig-Holstein and has not developed a deeper understanding of the mixture of conflicting interests. However, I did not check the factual accuracy of the historical outline against the literature available to me. As a curiosity, Appendix 4 could be mentioned, in which the Danish Espignol is described, but a quick Internet search reveals that the author did not bother to really understand the function and arrangement of this volley gun. The title of the book suggests that it is about the warships used in this conflict and we are lucky that the Danish archives are quite rich on virtually every ship named in it, including various of those used by the German forces, as they were either of Danish origin or ended up in Danish hands. I would have expected to see this source material mentioned and perhaps referenced for easy look-up. Instead, the ships are only illustrated by way of drawings that presumably are based on an interpretation of this archival material and reproductions of some historical works of art that were often made decades after the event. Similarly, the armament of the ships used is discussed only briefly, with the exception of the espignols mentioned above, which also appear to have been used abord of Danish ships. Interesting is an appendix that discusses the housing in Copenhagen of PoWs and civilian detainees, including the seamen from German merchant ships taken as prizes or seized in harbours. Hulks of old navy ships were used for the purpose, as in the days of e.g. the Napoleonic Wars. The list of references in such works is always interesting to peruse, as it shows how thoroughly the author has consulted the contemporary and secondary literature. It is quite striking that little German literature was used. For example, there is a sub-heading for ‘official Danish sources’, but noting corresponding for German sources (which admittedly are more scanty due to war losses). One can easily see from that that the book was obviously hastily pieced together from various contributions in a Facebook forum (mentioned in the foreword) without having undergone a thorough editorial processing (NB, the author put proudly his PhD onto the front cover, but if it were his thesis, the supervisor would have turned it back to him after reading a couple of pages …). The final question: “Is it worth buying the book?” can be answered with a pretty clear ‘no’. The book has a lot of potential, but would need to be revised very thoroughly in terms of content and form.